


Luigi Luigi
-
Posts
14 -
Joined
-
Last visited
Content Type
Profiles
Forums
Gallery
Events
Posts posted by Luigi Luigi
-
-
-
-
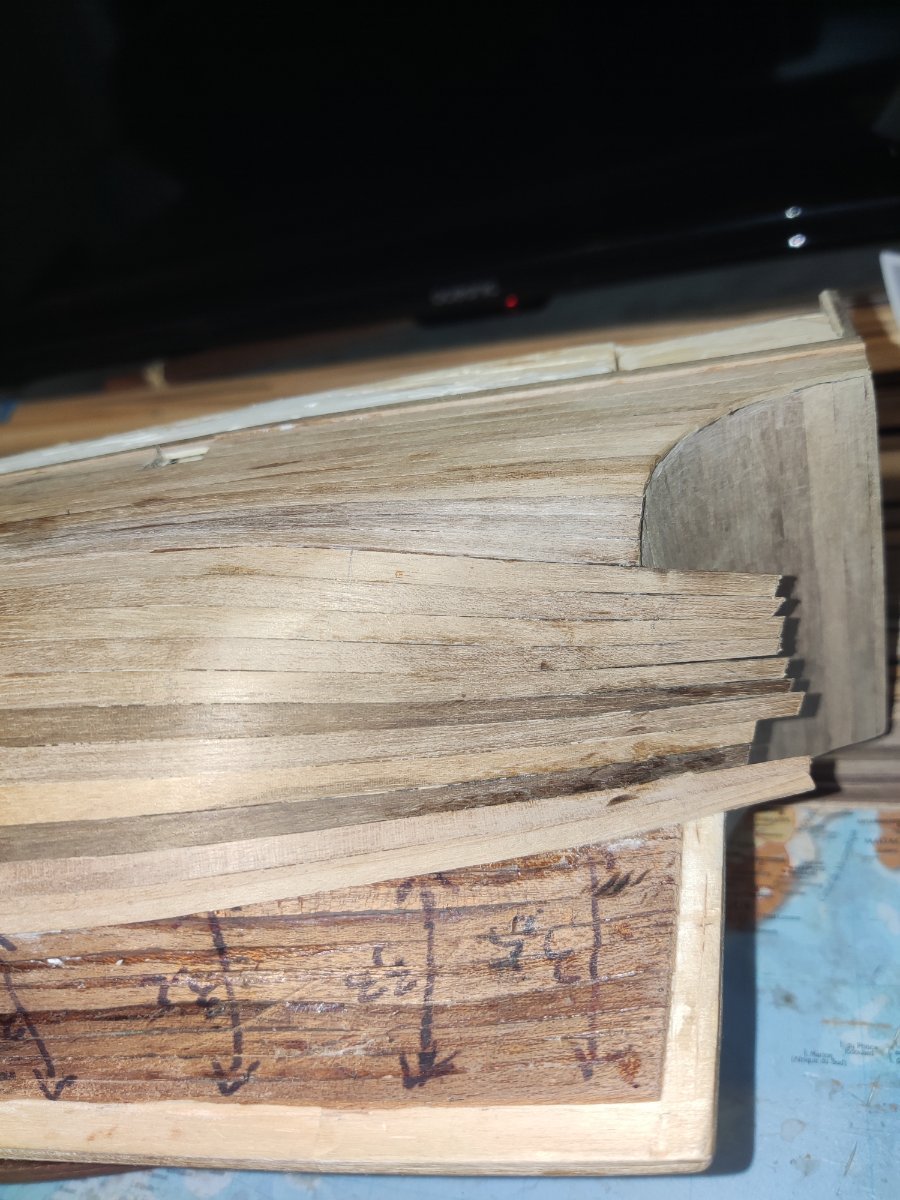
@Gregory, In the picture, we see first 1x4mm listels, then 3x3 listels (3 in a row) and finally 1x5mm listels all the way down.
-
Dear @Gregory I really appreciate the information you are asking me which shows that you really want to help me move forward in my thinking.
I think I have understood everything you are asking me, but I prefer to have your diagram so as not to tell you any nonsense.
In the meantime, here is the picture of the middle of the boat that you asked me for.
-
Ok so to summarize a bit. I do my planking using Chuck's method by tapering the listels and using the "planning fan" and frame marking. When I see that the curve becomes too pronounced as it is the case in my boat model, then I place a drop plank or a stealer.
I confirm that my model is 1:64 scale, so ideally the stealer should be placed at 35mm from the rabbet.
Is this correct?
-
I will send you a picture of the middle of my boat a little later.
However, do we agree that I should use drop planks or stealers on the bow and stern? If I refer to your photo of the Endeavour Allan.
So where should they be located? Above, below the waterline?
I understand that they are usually 7-8 inches from the rabbet on contemporary models.
But how would you proceed in my place?
I appreciate your help
Luigi
-
-
-
-
Hello,
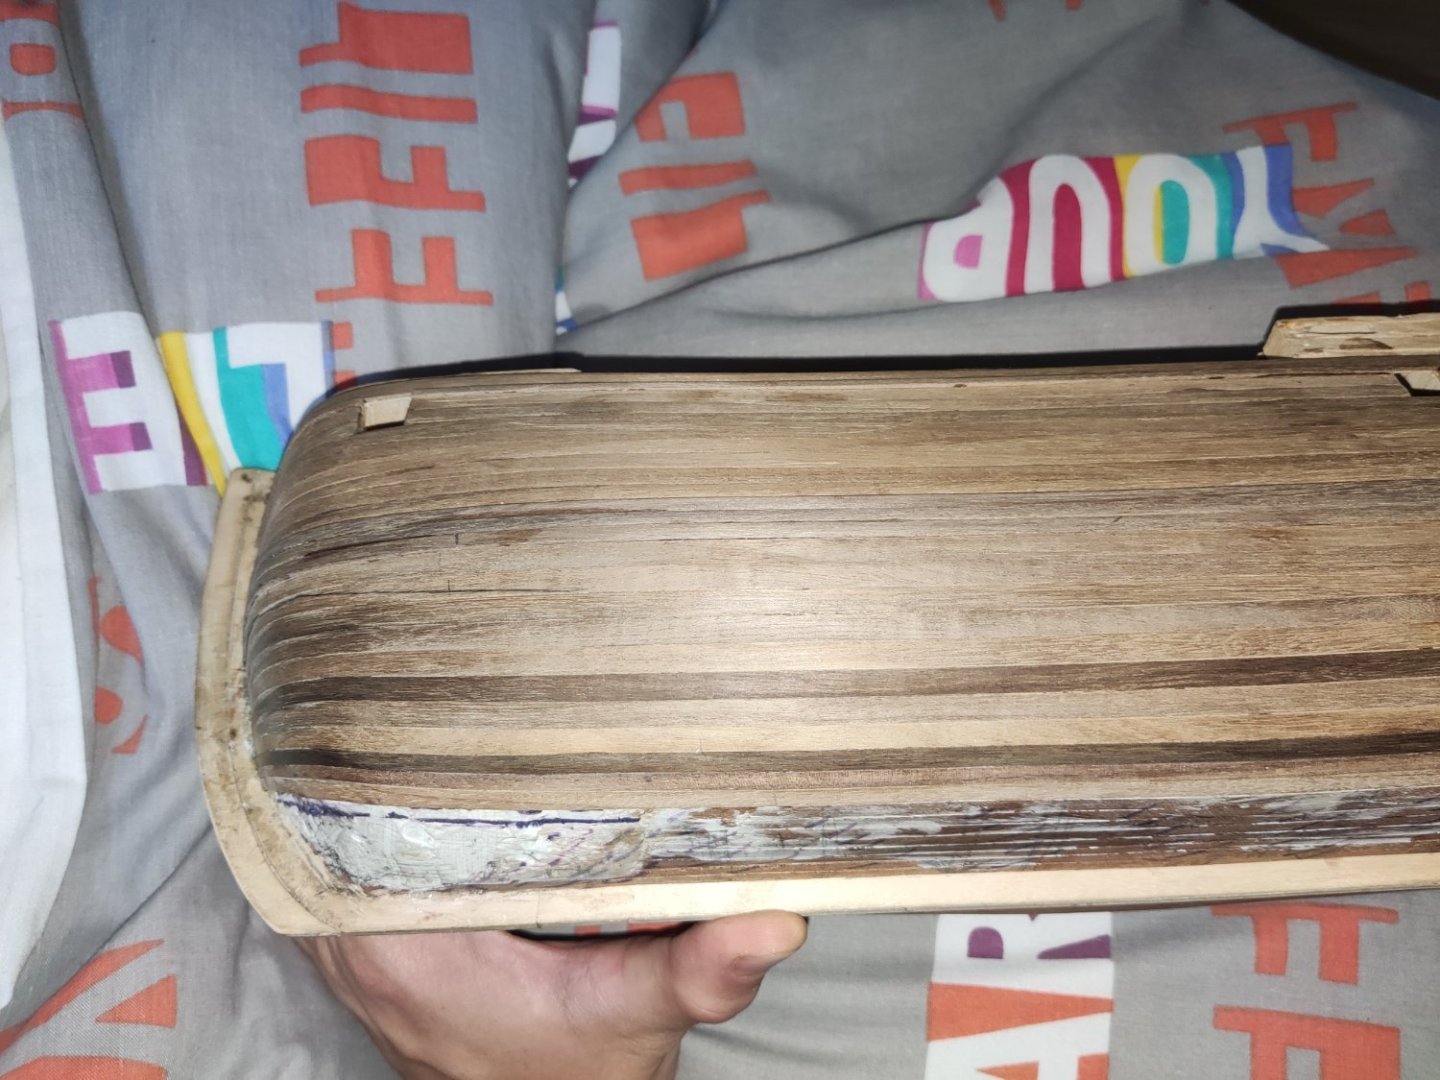
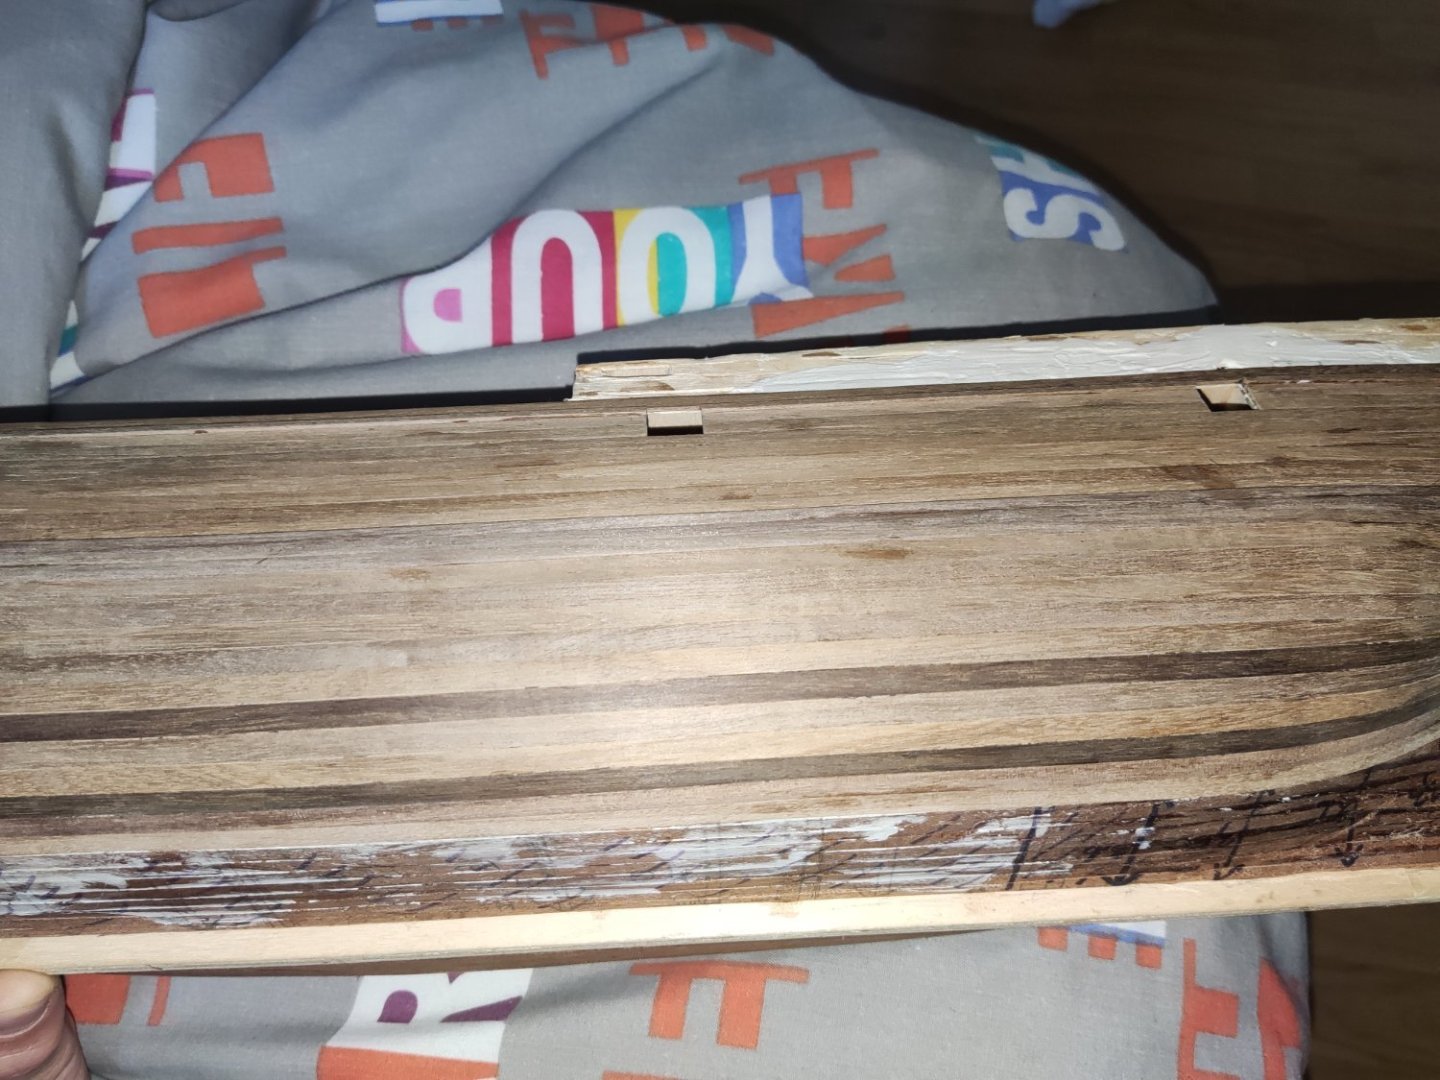
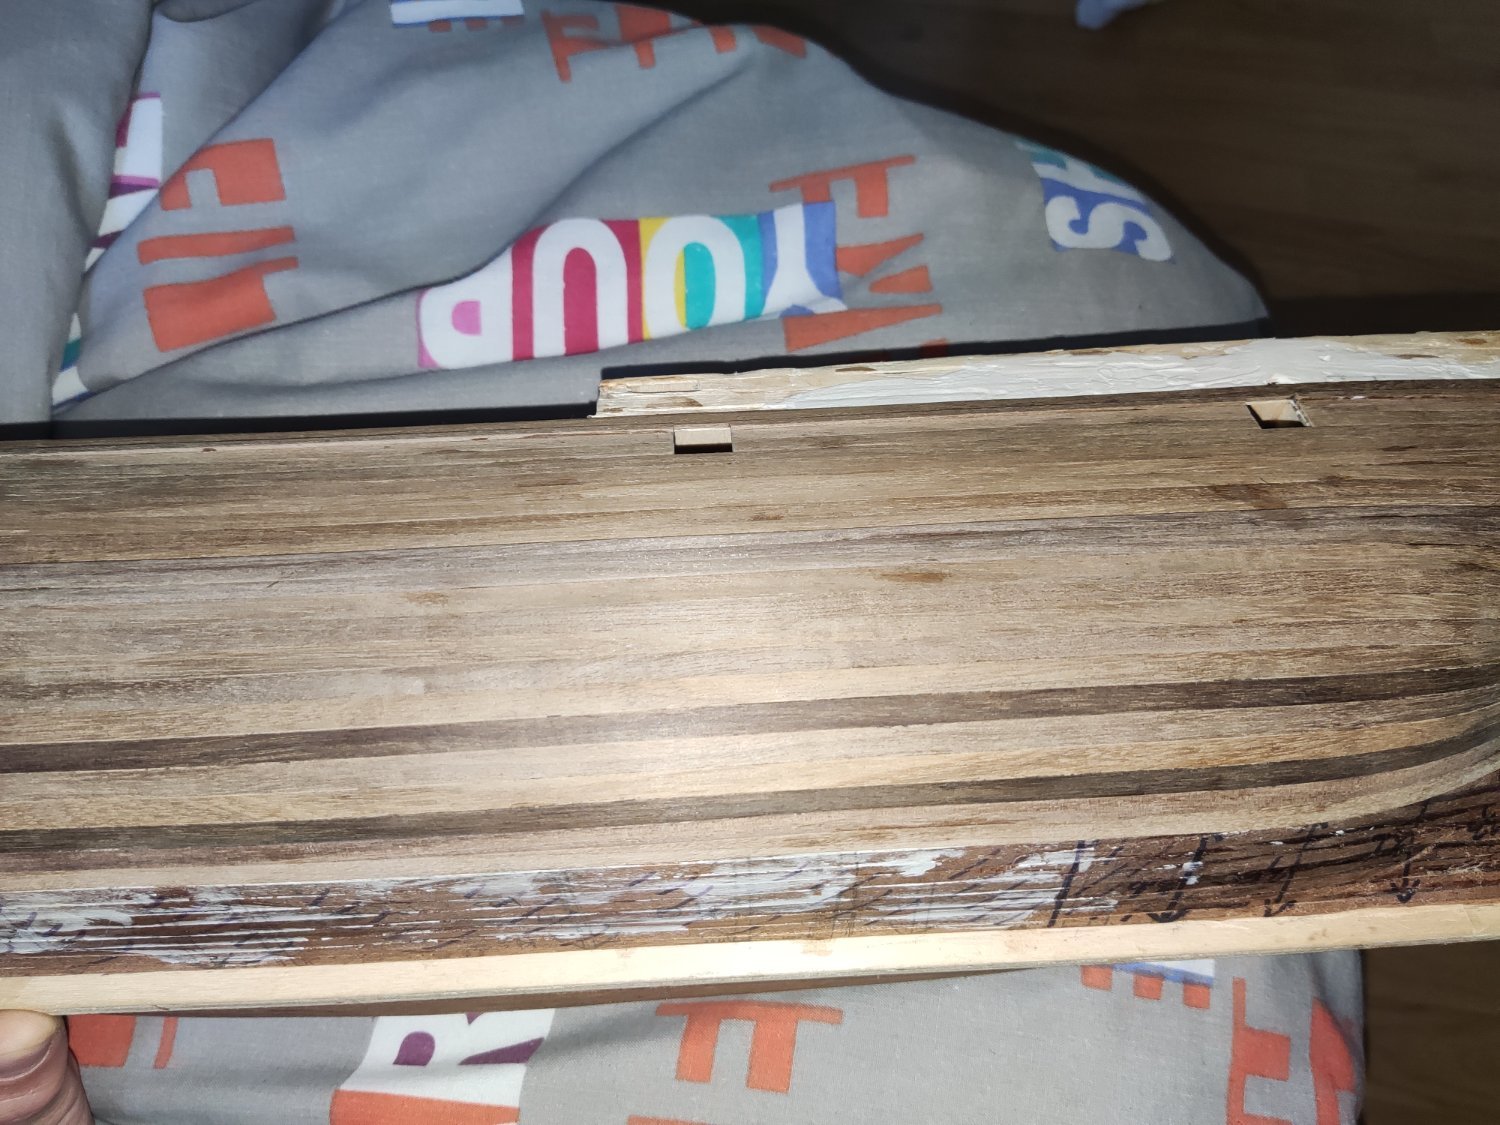
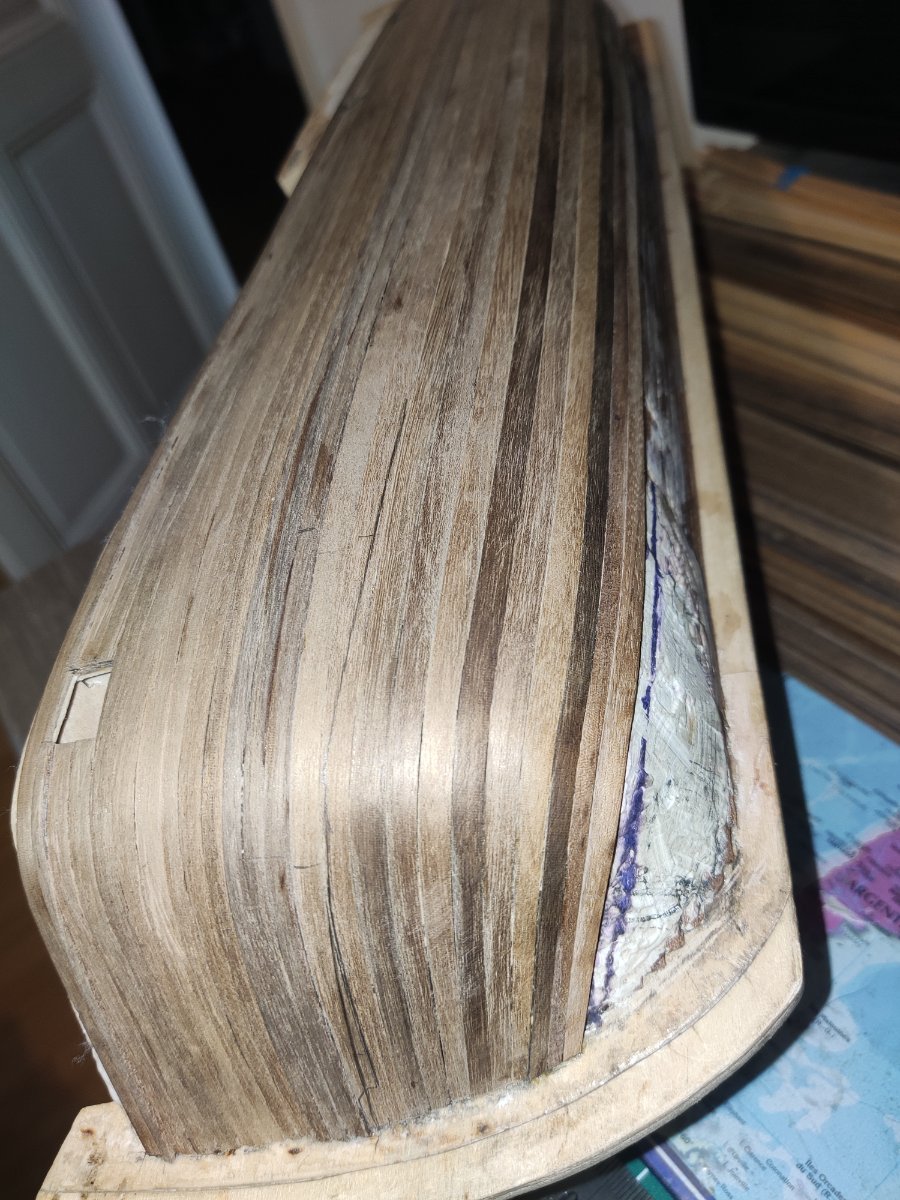
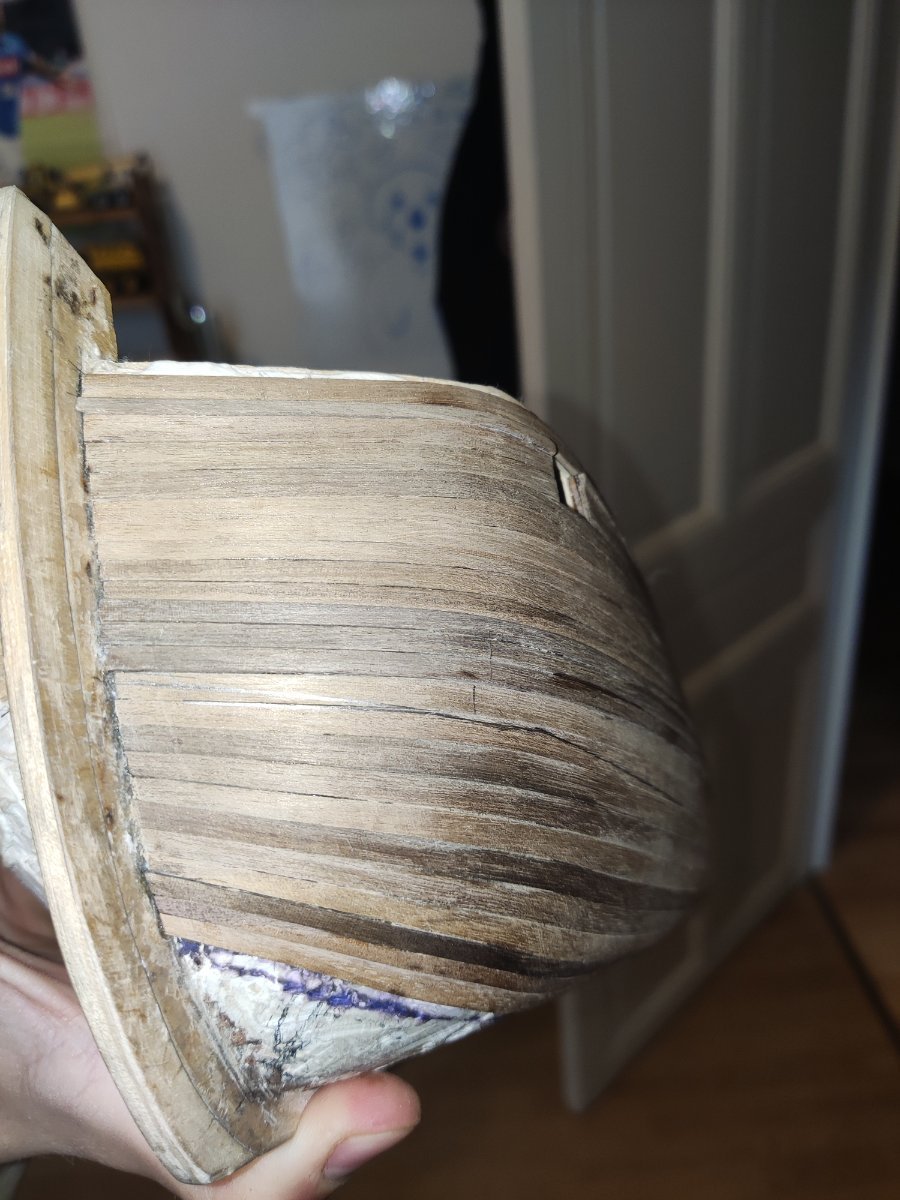
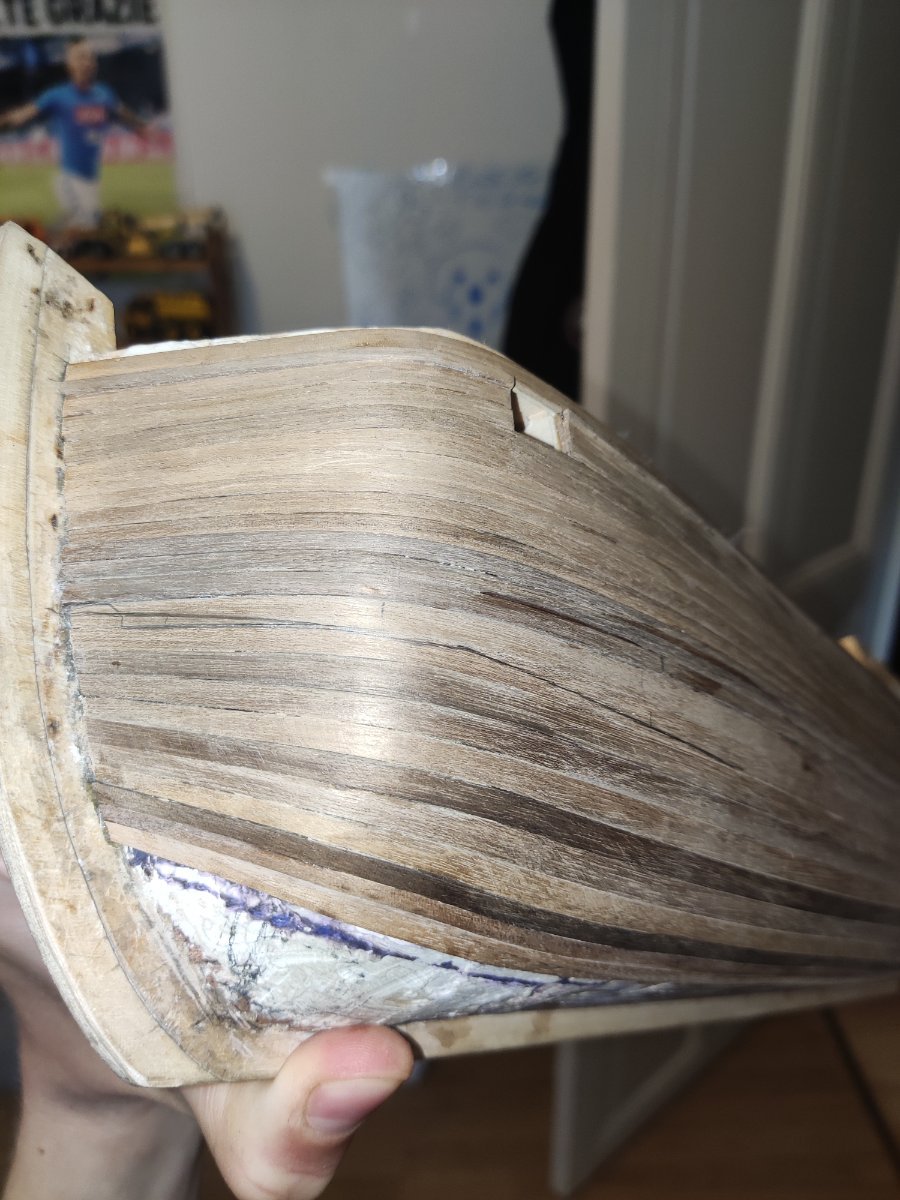
Here is a question I had about my boat model which represents a test but in no way the official model. It is the Endeavour "Brigantino Inglese a palo" from Corel. I am attaching below pictures of my second planking and I will explain here the problem I am facing (don't pay attention to the first planking and the wood filler...). I used Chuck's method with the measurements of the different frames to determine the number of listels per frame as well as the taper using the "planking fan". However, as I move through the planking, I am having difficulty bending the listels laterally as Chuck shows but the curvature is getting more and more severe and the listel is breaking (despite soaking in boiling water and ironing). Also, as you can see, the curvature is not pretty at all.
What could I have done to avoid this? Use stealer or half stealer (if Yes, when)? Use drop planks (if Yes, when)?
Or something else?
Please don't refer me to a document since I have already read them all. I would really like to understand through clear and detailed explanations from a good soul")
https://drive.google.com/file/d/1OnefW-PhEUiWDiQj98aee_ql8WgJLZ27/view?usp=share_link
https://drive.google.com/file/d/1yslLSOgi1FSacwssxxn0HZAPHftK50mr/view?usp=share_link
https://drive.google.com/file/d/1RS8uw1yZk8lCm2NTCsOs_w1Th7SuKakt/view?usp=share_link
https://drive.google.com/file/d/1F4nVaV-ZKHMeIKsB-yPOQW8AZBI_BVJv/view?usp=share_link
https://drive.google.com/file/d/1gZrg75H1pkIPzPiafs286ANxkKokwDhr/view?usp=share_link
Thank you very much for your help,
Luigi. -
Thank you very much to all of you for these clear and quick explanations !Honestly, I didn't imagine that such a site gathering so many passionnate modelists could exist... I am sooo happy, and thanks to all of you, so much less confused !!
- Thukydides, druxey, glbarlow and 3 others
-
 6
6
-
5 hours ago, mtaylor said:
Hi,
First of all, many thanks for your fast and clear answers. As I said on my previous message, I think I understood quite well Chuck’s technique for the folding and the planking lay, thanks to the videos and tutorials.
However, what I can’t understand are the following steps (based on this tutorial: https://thenrg.org/resources/Documents/articles/LiningOffYourHullPlankingTutorialAndFan.pdf)
- How do you know which ticks have to be put on the strip and on the frame (step 1 on the pdf)? How does Chuck know he needs 29 planks ont that specific case?
- Where do you have to place the strip according to the ticks? (step 2 on the pdf)
- Finally, how to use the planking fan? To what do the 7 marks on Chuck’s tape refer to? How to place the tape on the planking fan? (steps 3 and 4 on the pdf).
Thanks again for your answers! I really really want to understand this technique, it seems so great!!
Have a nice day,
Luigi
-
Hi,
My name is Luigi, and I’m a 17 years old modelling fan. I’ve been highly interested by Chuck Passaro’s planking technique that seems really great, and I spent much time trying to grasp it with the tutorials and PDFs, but I can’t really understand it in depth. Actually, I can’t understand the various steps and how to execute them according to the ship model. I’m not so worried about the lay of the planking, but I’m concerned about the previous steps, such as the marks, the planking fan, the tape…
I would be really grateful if Chuck Passaro or any other modelists were kind enough to explain the detailed technique to me in a simpler way.
Many thanks for your help,
Luigi

Question about Endeavour planking
in Building, Framing, Planking and plating a ships hull and deck
Posted
First of all, I really want to thank you for the time you spend to explain me in detail my misunderstandings with very clear diagrams and plans.
Now, I take advantage of your kindness to ask you other questions") I perfectly understood what I had to do on the spaces that remain to be covered on the model.
I perfectly understood what I had to do on the spaces that remain to be covered on the model.
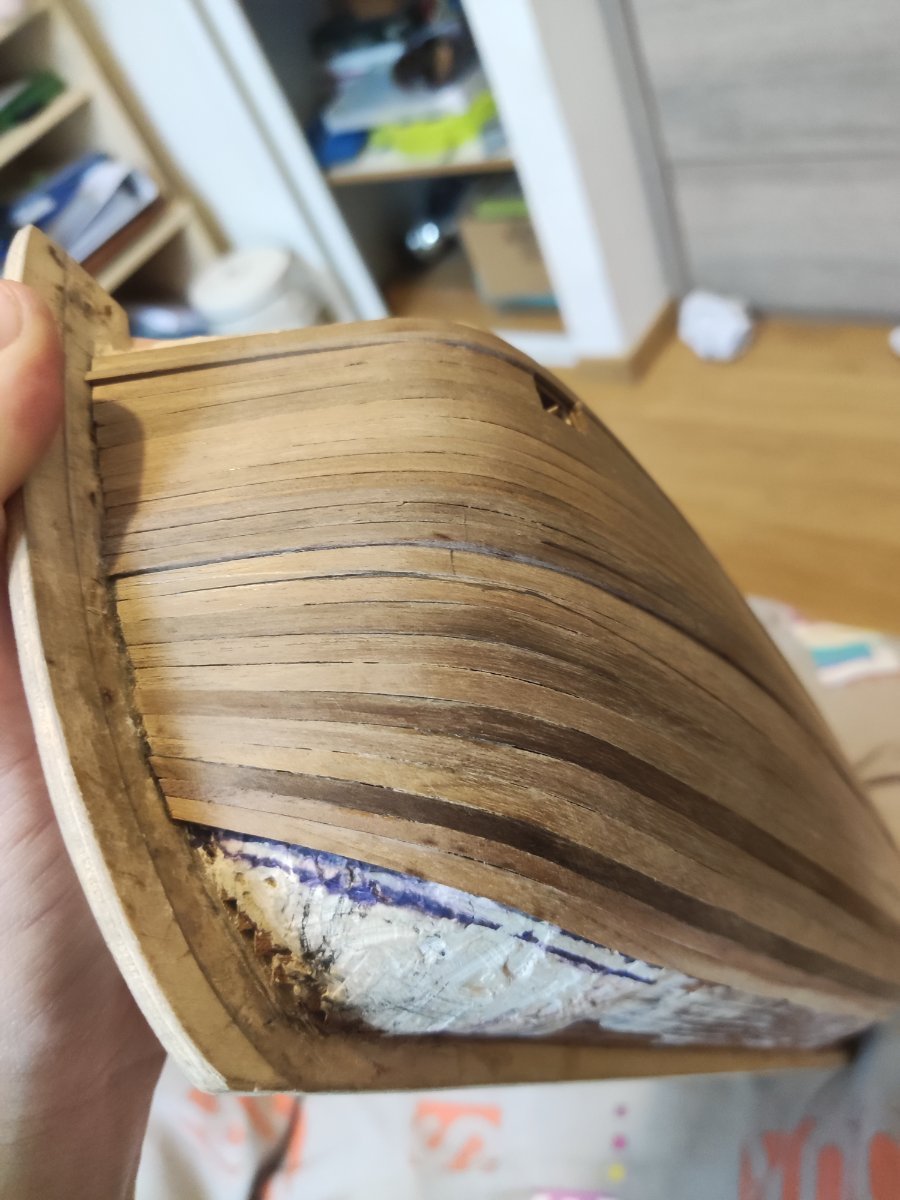
But if I take the planking a little higher. On the picture below, do you think that a drop plank is necessary at the red arrow to avoid what happens afterwards, i.e. that the listels take an excessive curvature?
Also, if I understand correctly what you are telling me, at the stern, the listels must keep their entire width, i.e. 5mm for aesthetic reasons. So on the whole area that I circled in red on the picture, the listels must keep their entire width, right? I will solve the problem of space with filler pieces or drop planks to make 2 listels in 1 ?