HOLIDAY DONATION DRIVE - SUPPORT MSW - DO YOUR PART TO KEEP THIS GREAT FORUM GOING! (Only 20 donations so far - C'mon guys!)
×


Lecrenb
-
Posts
262 -
Joined
-
Last visited
Content Type
Profiles
Forums
Gallery
Events
Everything posted by Lecrenb
-
 Hi Bill, and sorry about the delayed reply! NWSL is NorthWest Short Line, a hobby tool company geared towards model railroaders but their tools will of course work on any genre. Their riveter tool is a calibrated table, part number 51-4, that attaches to their small arbor press, part number 50-4. You tape your work to the table allowing it to advance a precise amount, per the pitch of your 'rivets'. With some practice you can draw pencil lines on your work and manually advance it to each 'rivet' location... this goes a lot faster than using the calibrated screw. I used this method for my Flower class corvette where I had over 10,000 rivets to emboss! The dies come in assorted sizes and you operate the press every time you want to emboss a rivet. My understanding is that NWSL has had patent issues and so this and other products in their tool line have been knocked off, so if to can no longer find it at NWSL try Micro Mark or others, and I have seen it come up on ebay.
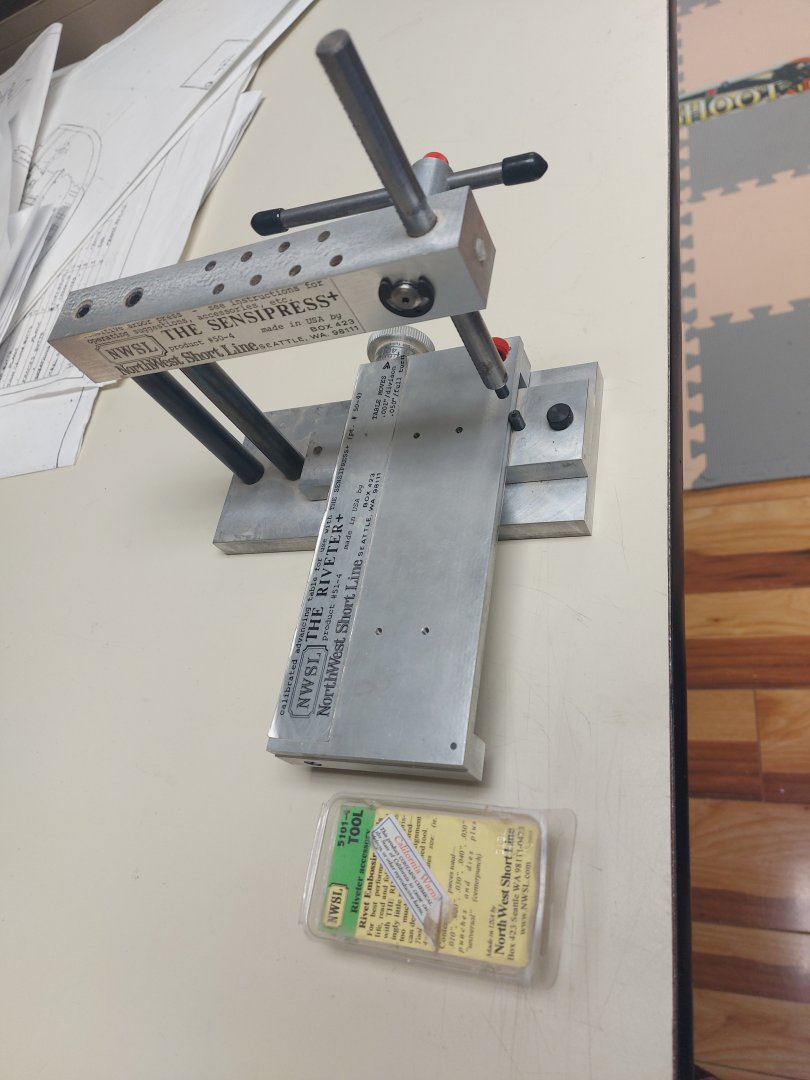
-
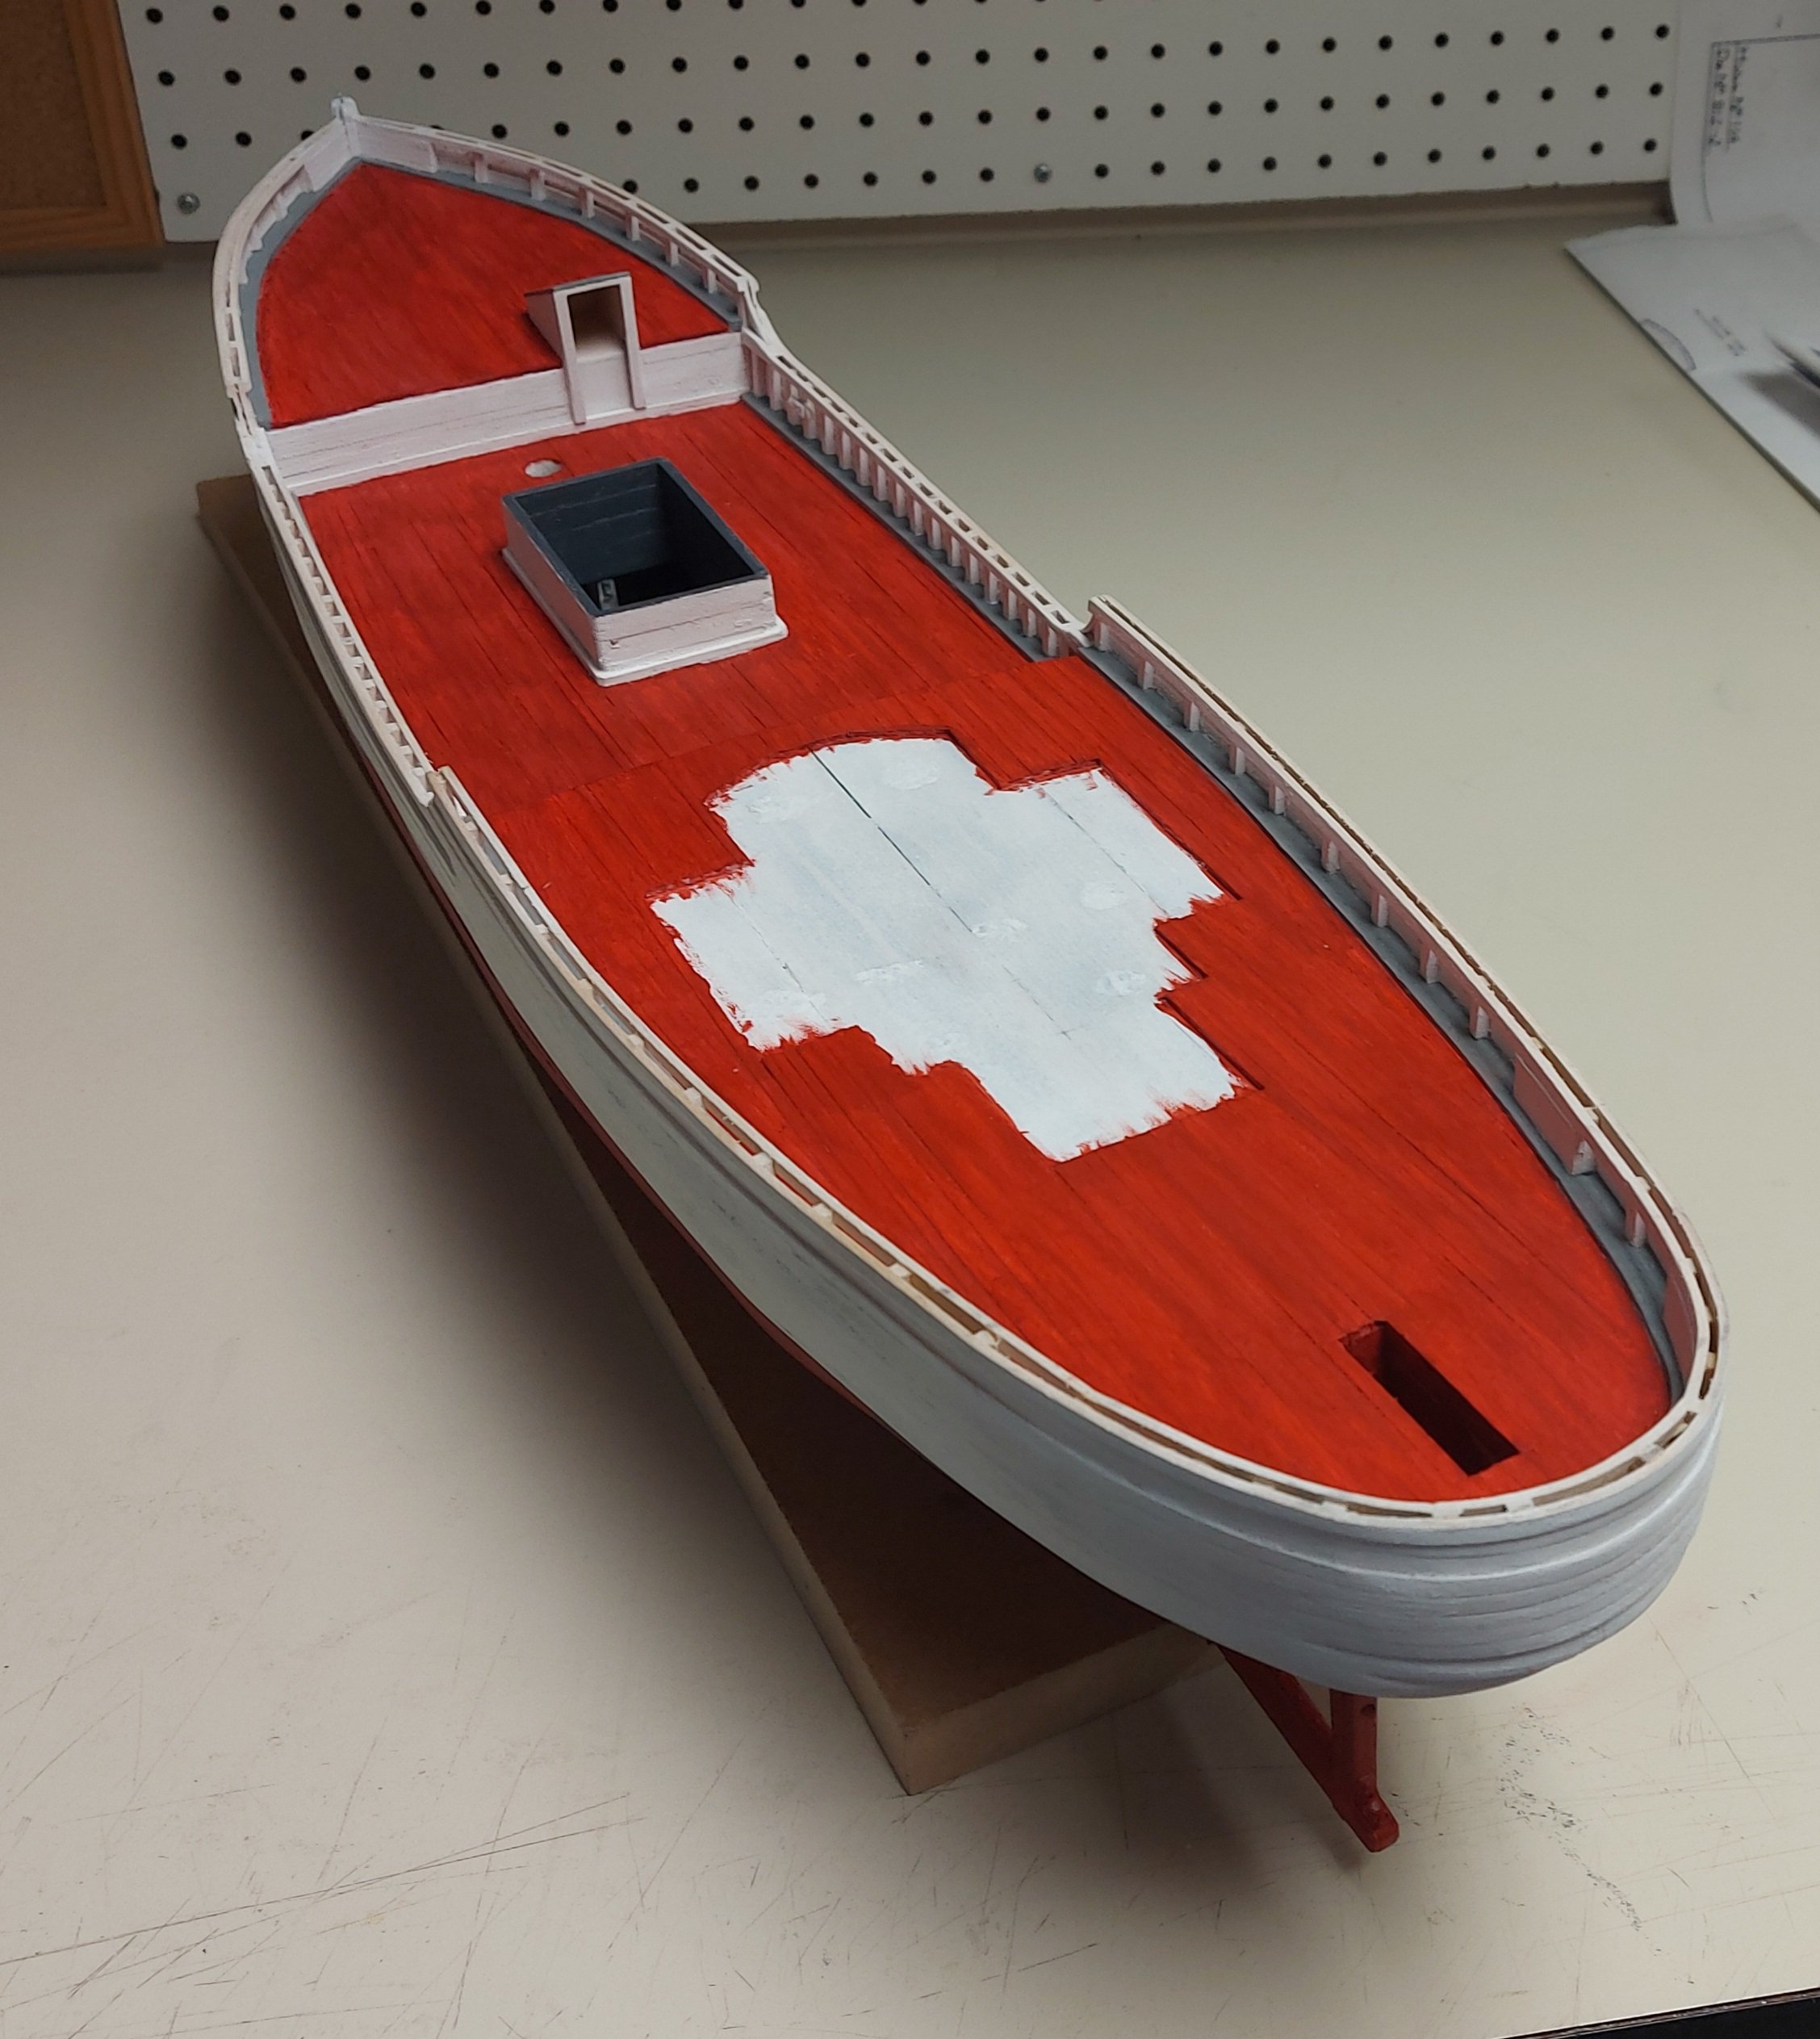
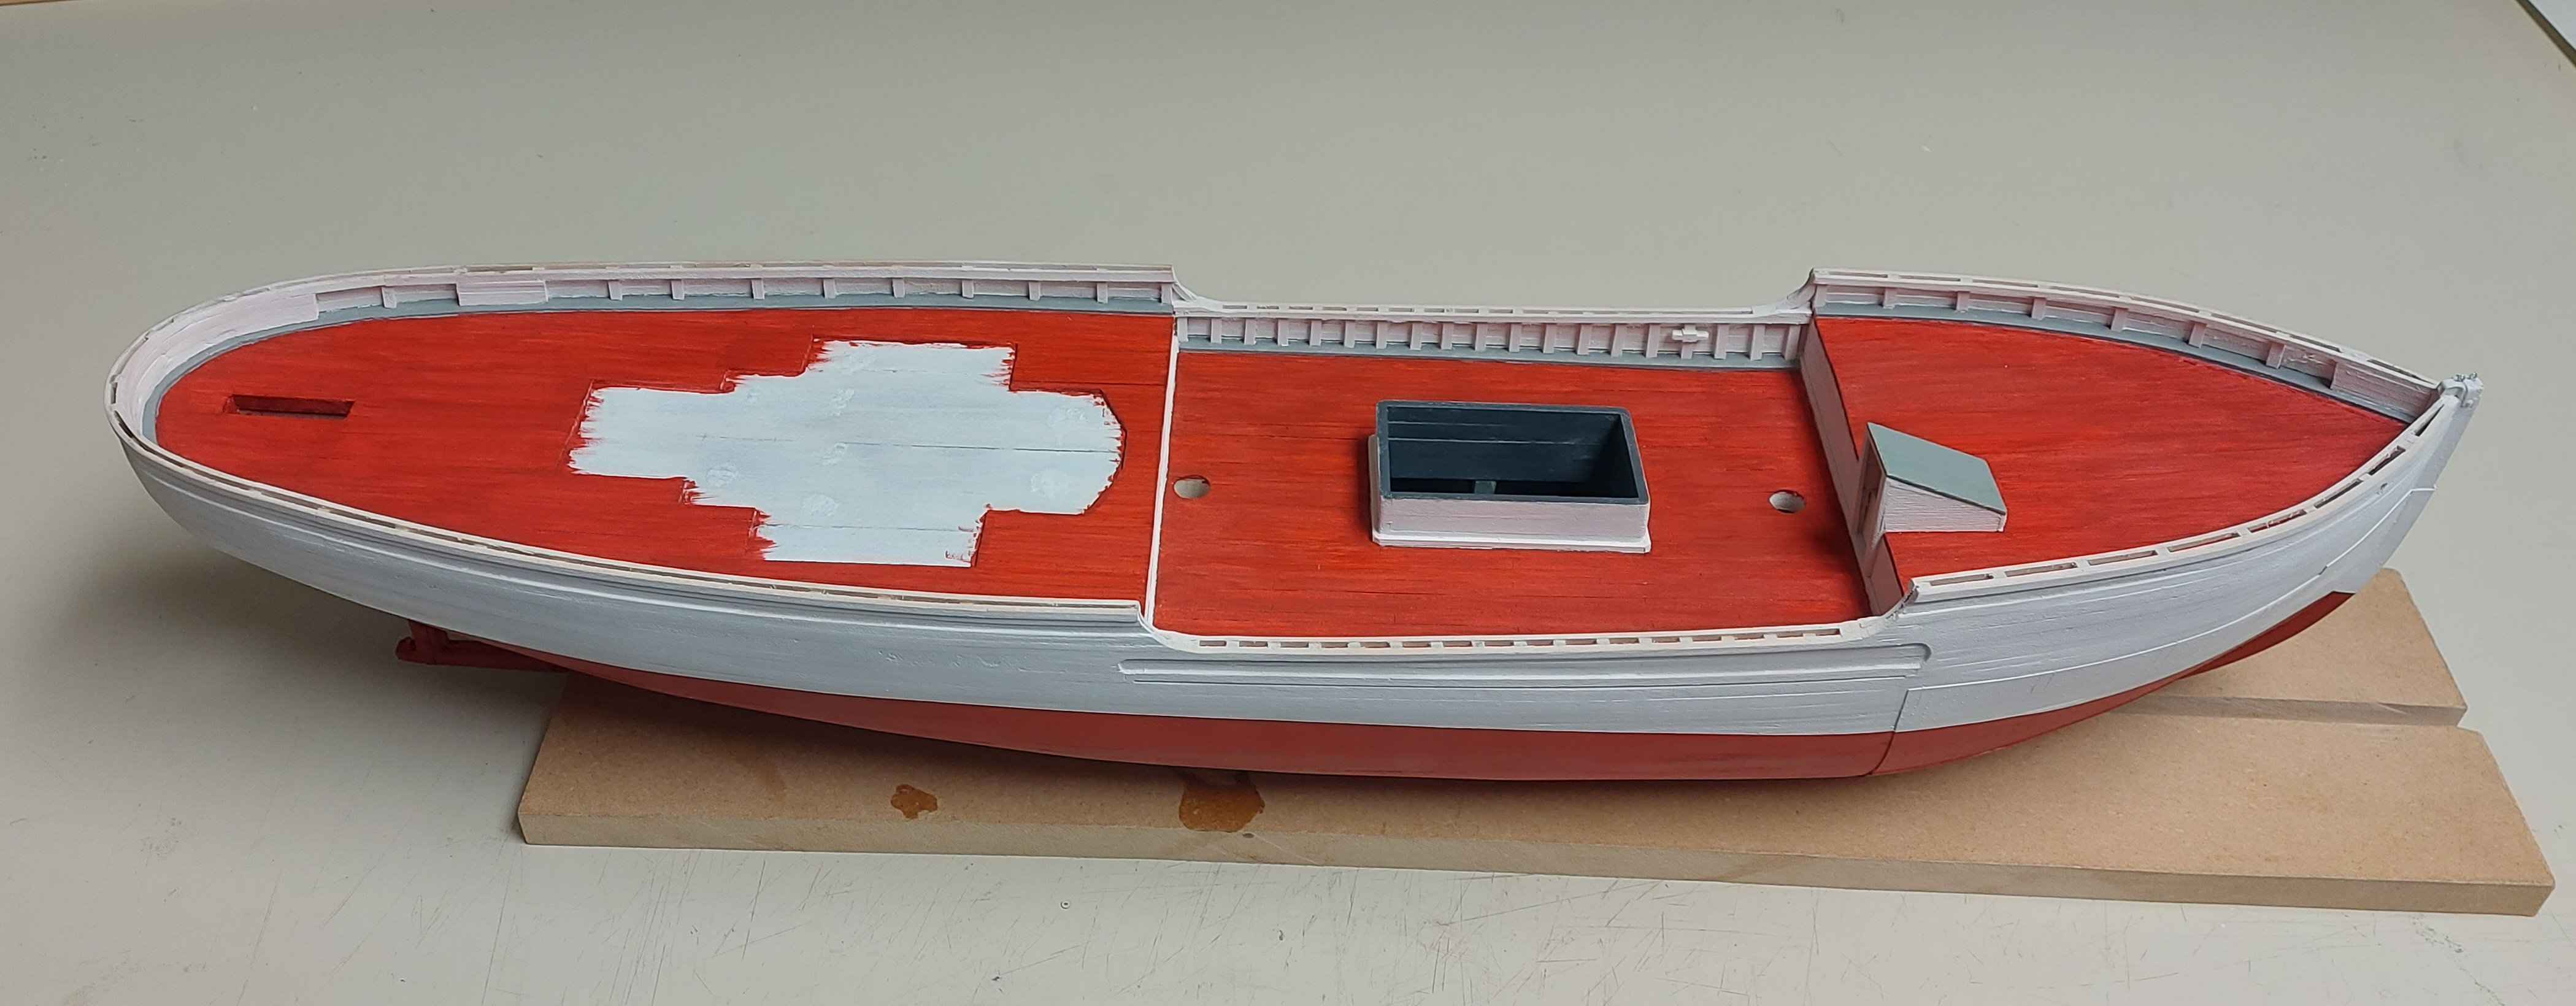
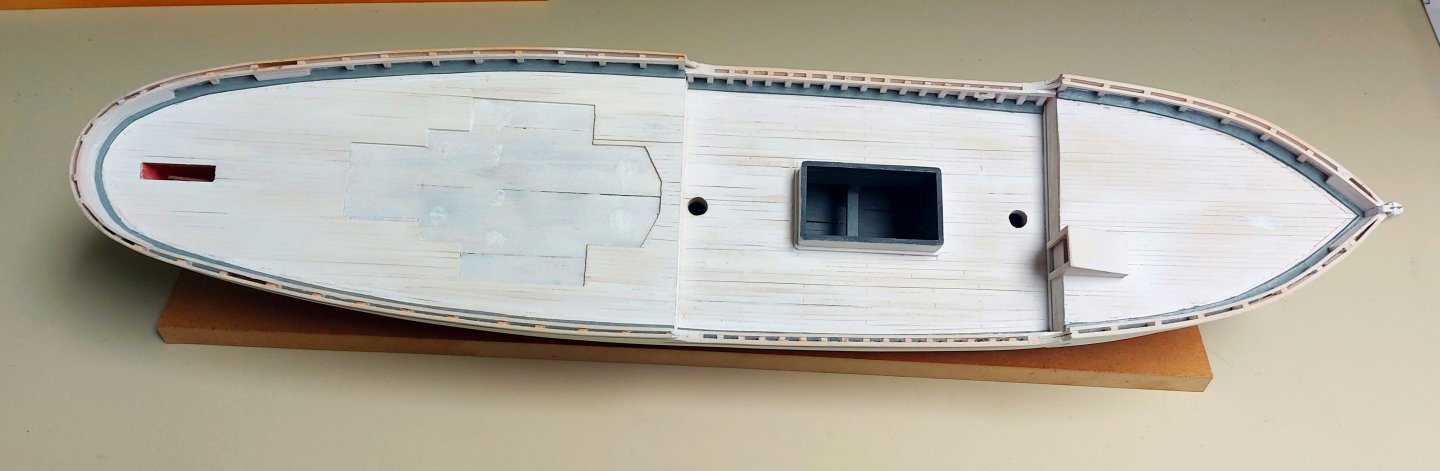
Got the rest of the hull painted, finished it up yesterday... First the waterways, on which I used Tamiya light sea gray. I brushed them on because the masking around the stanchions was going to be way more frustrating and fiddly than using my fine tip artist's brush! Once they were dry I painted the decks, one at a time. Using the red oxide mixture gave me a good colour match with the lower hull, but the Vallejo Air paints are pre-thinned for airbrushing so I put three brush coats onto each deck for coverage. The companion roof is painted canvas over wood... I mixed a couple of drops of green zinc chromate (what Tamiya calls 'cockpit green') into some of the light sea gray to get an off-gray colour that looks close to the real ship's roof. Thanks everyone for looking in, comments and critiques are always welcome!


- 368 replies
-
- 12
-

-
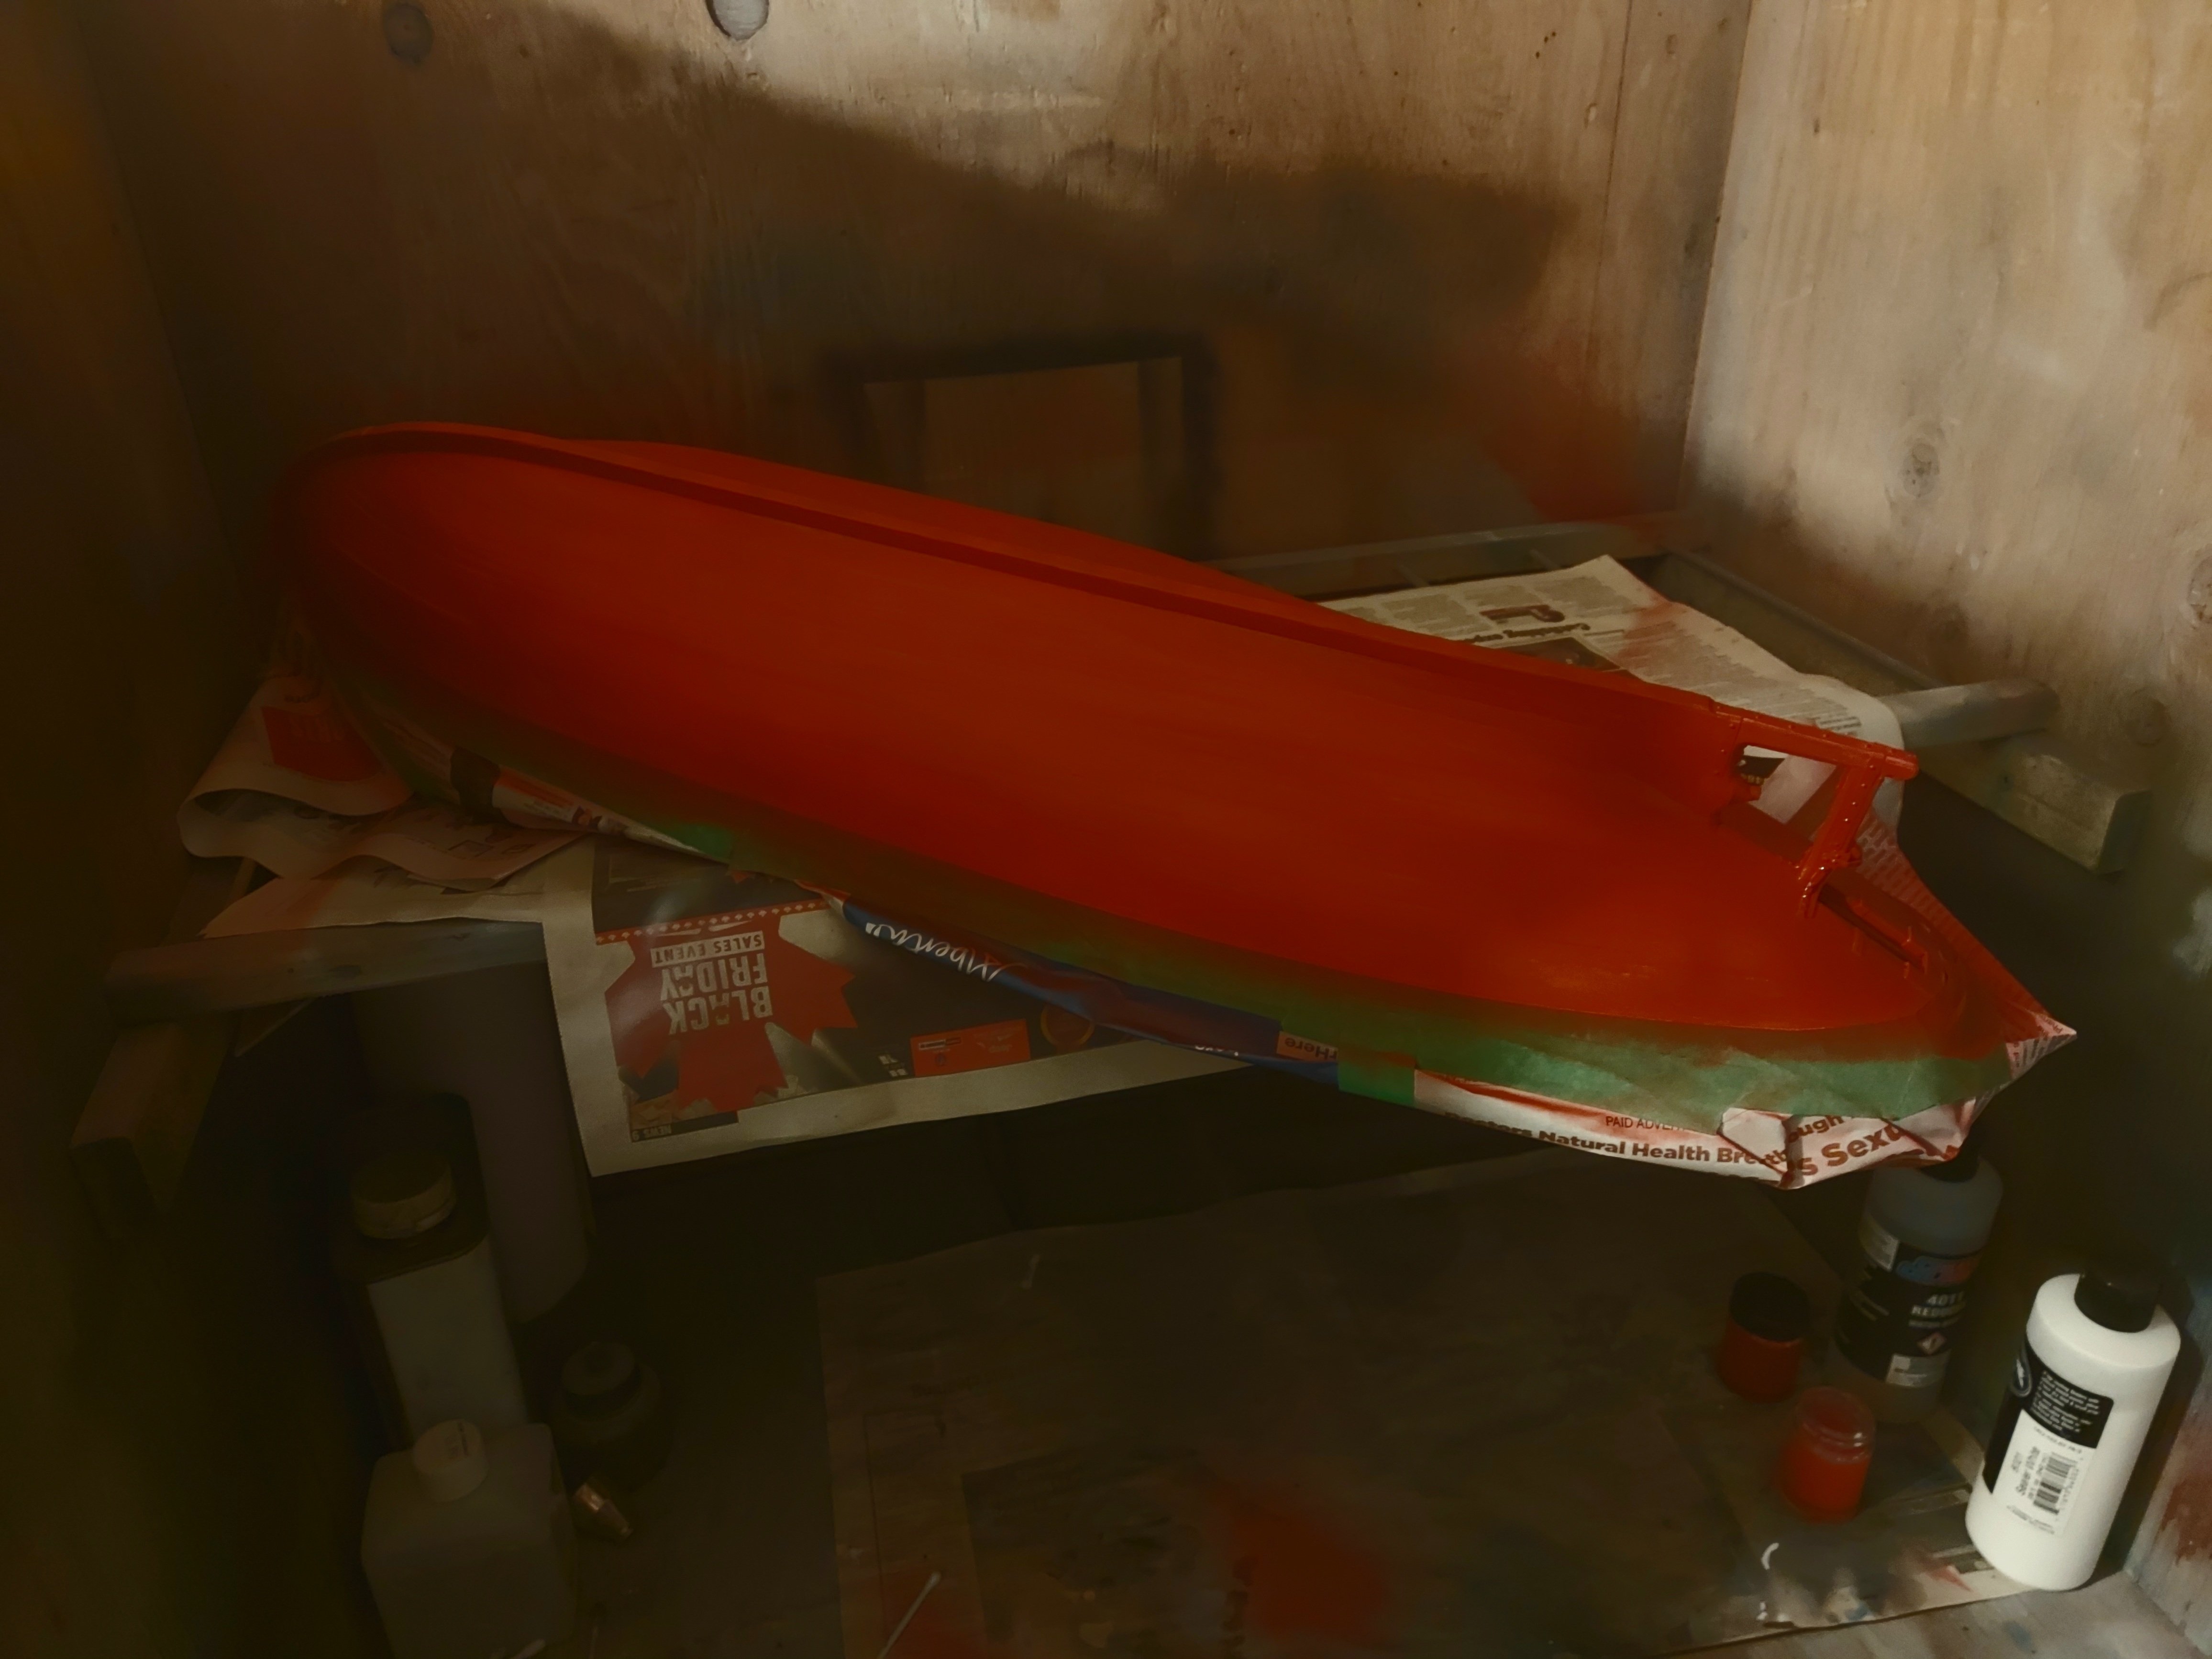
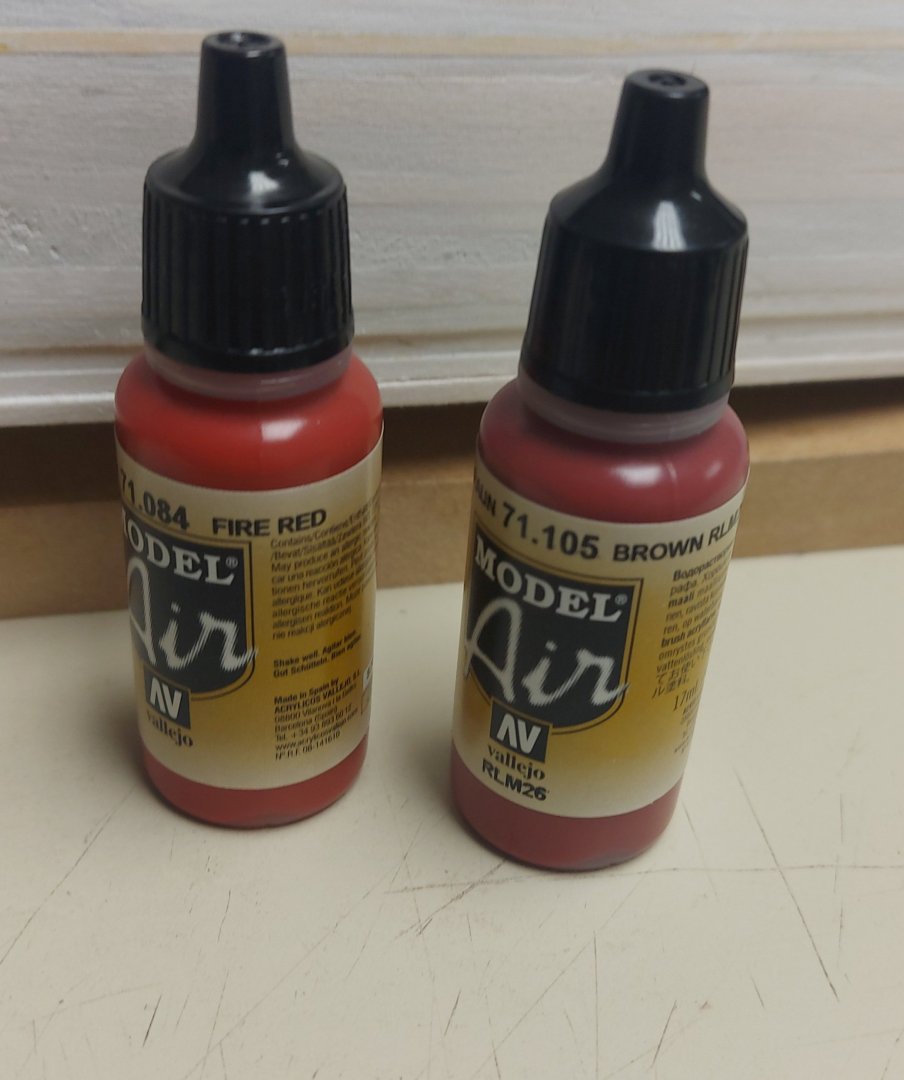
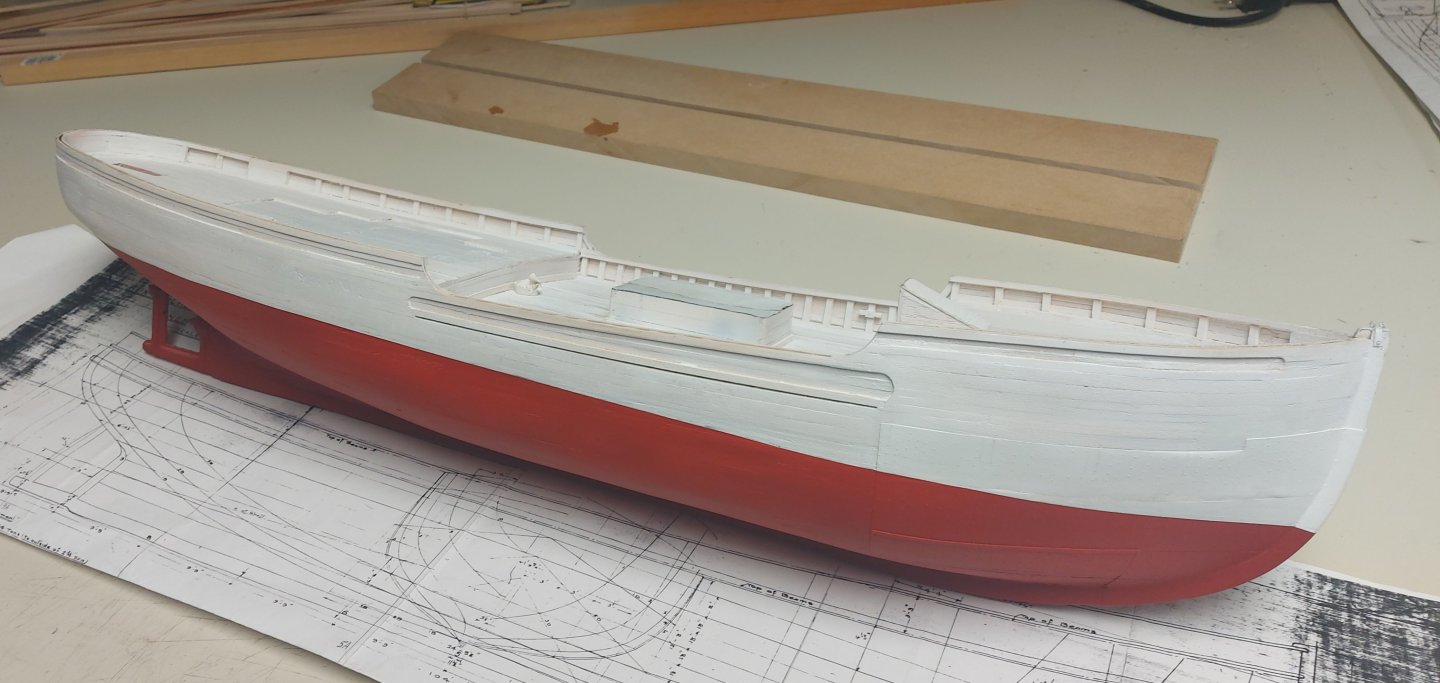
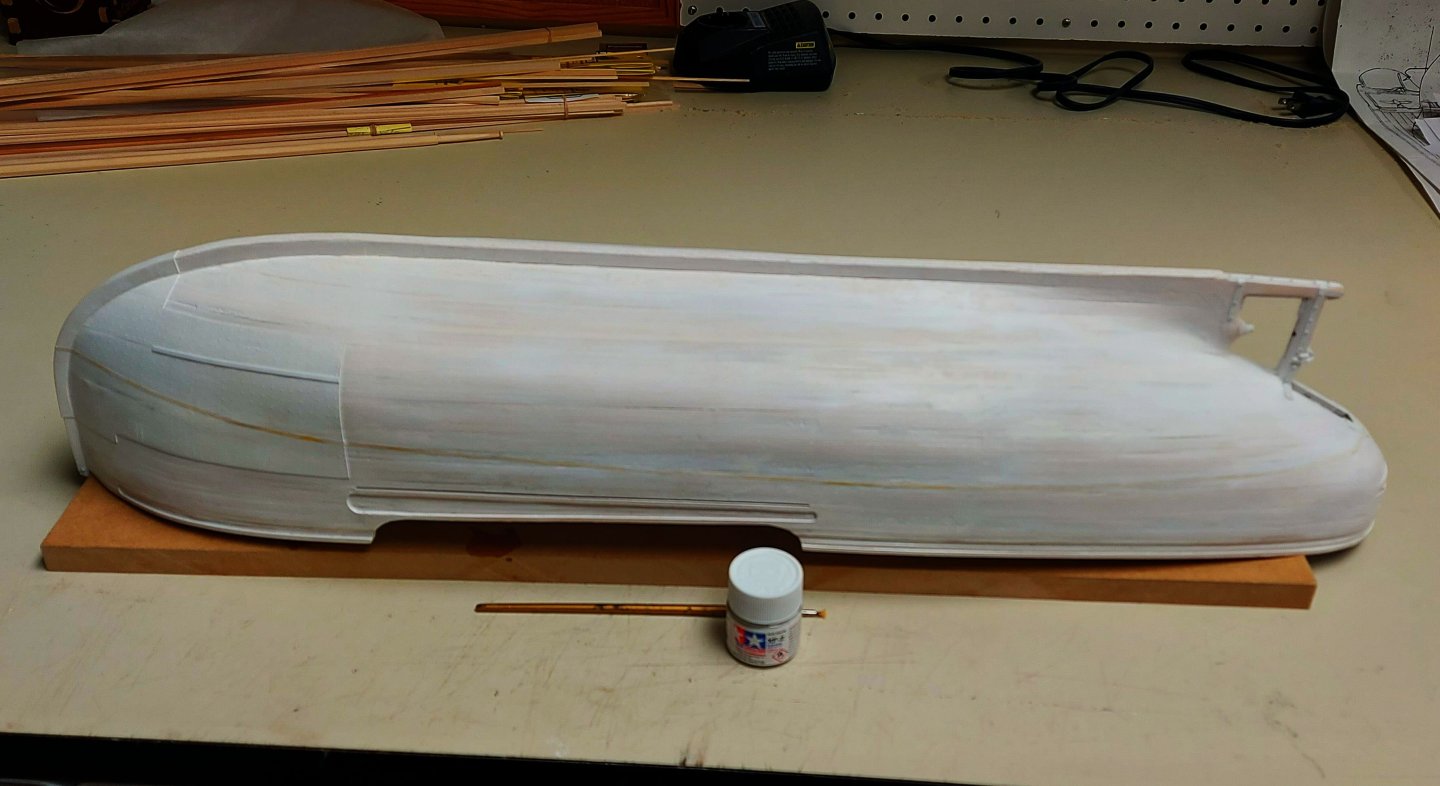
The main casting on my airbrush compressor cracked yesterday, so I took off the regulator and pitched the rest... couldn't save the motor because the frame was part of the casting... Good news I was able to bring my utility compressor from the garage into the basement where I have my spray booth and connect up the airbrush hose... now fingers crossed I don't need to inflate a tire any time soon! St. Roch's lower hull and decks are painted red oxide. Can't get the Tamiya rattle cans any more; the LHS says they can't be imported into Canada because of high VOC content... and there is no other hobby paint called Rex Oxide. I thought about automotive paint but didn't want to mix enamel with acrylics... so I cruised the LHS paint racks and found 71.084 Fire Red and 71.105 Brown in the Vallejo Model Air lineup. The sales guy very kindly let me take a drop from each to mix together in the store, resulting in a passable imitation of Red Oxide! Outstanding service from Hobby Wholesale and a great reason to shop local if you can! After all that and 25cm of snow last night and today I finally shot the lower hull!

- 368 replies
-
- 11
-
-
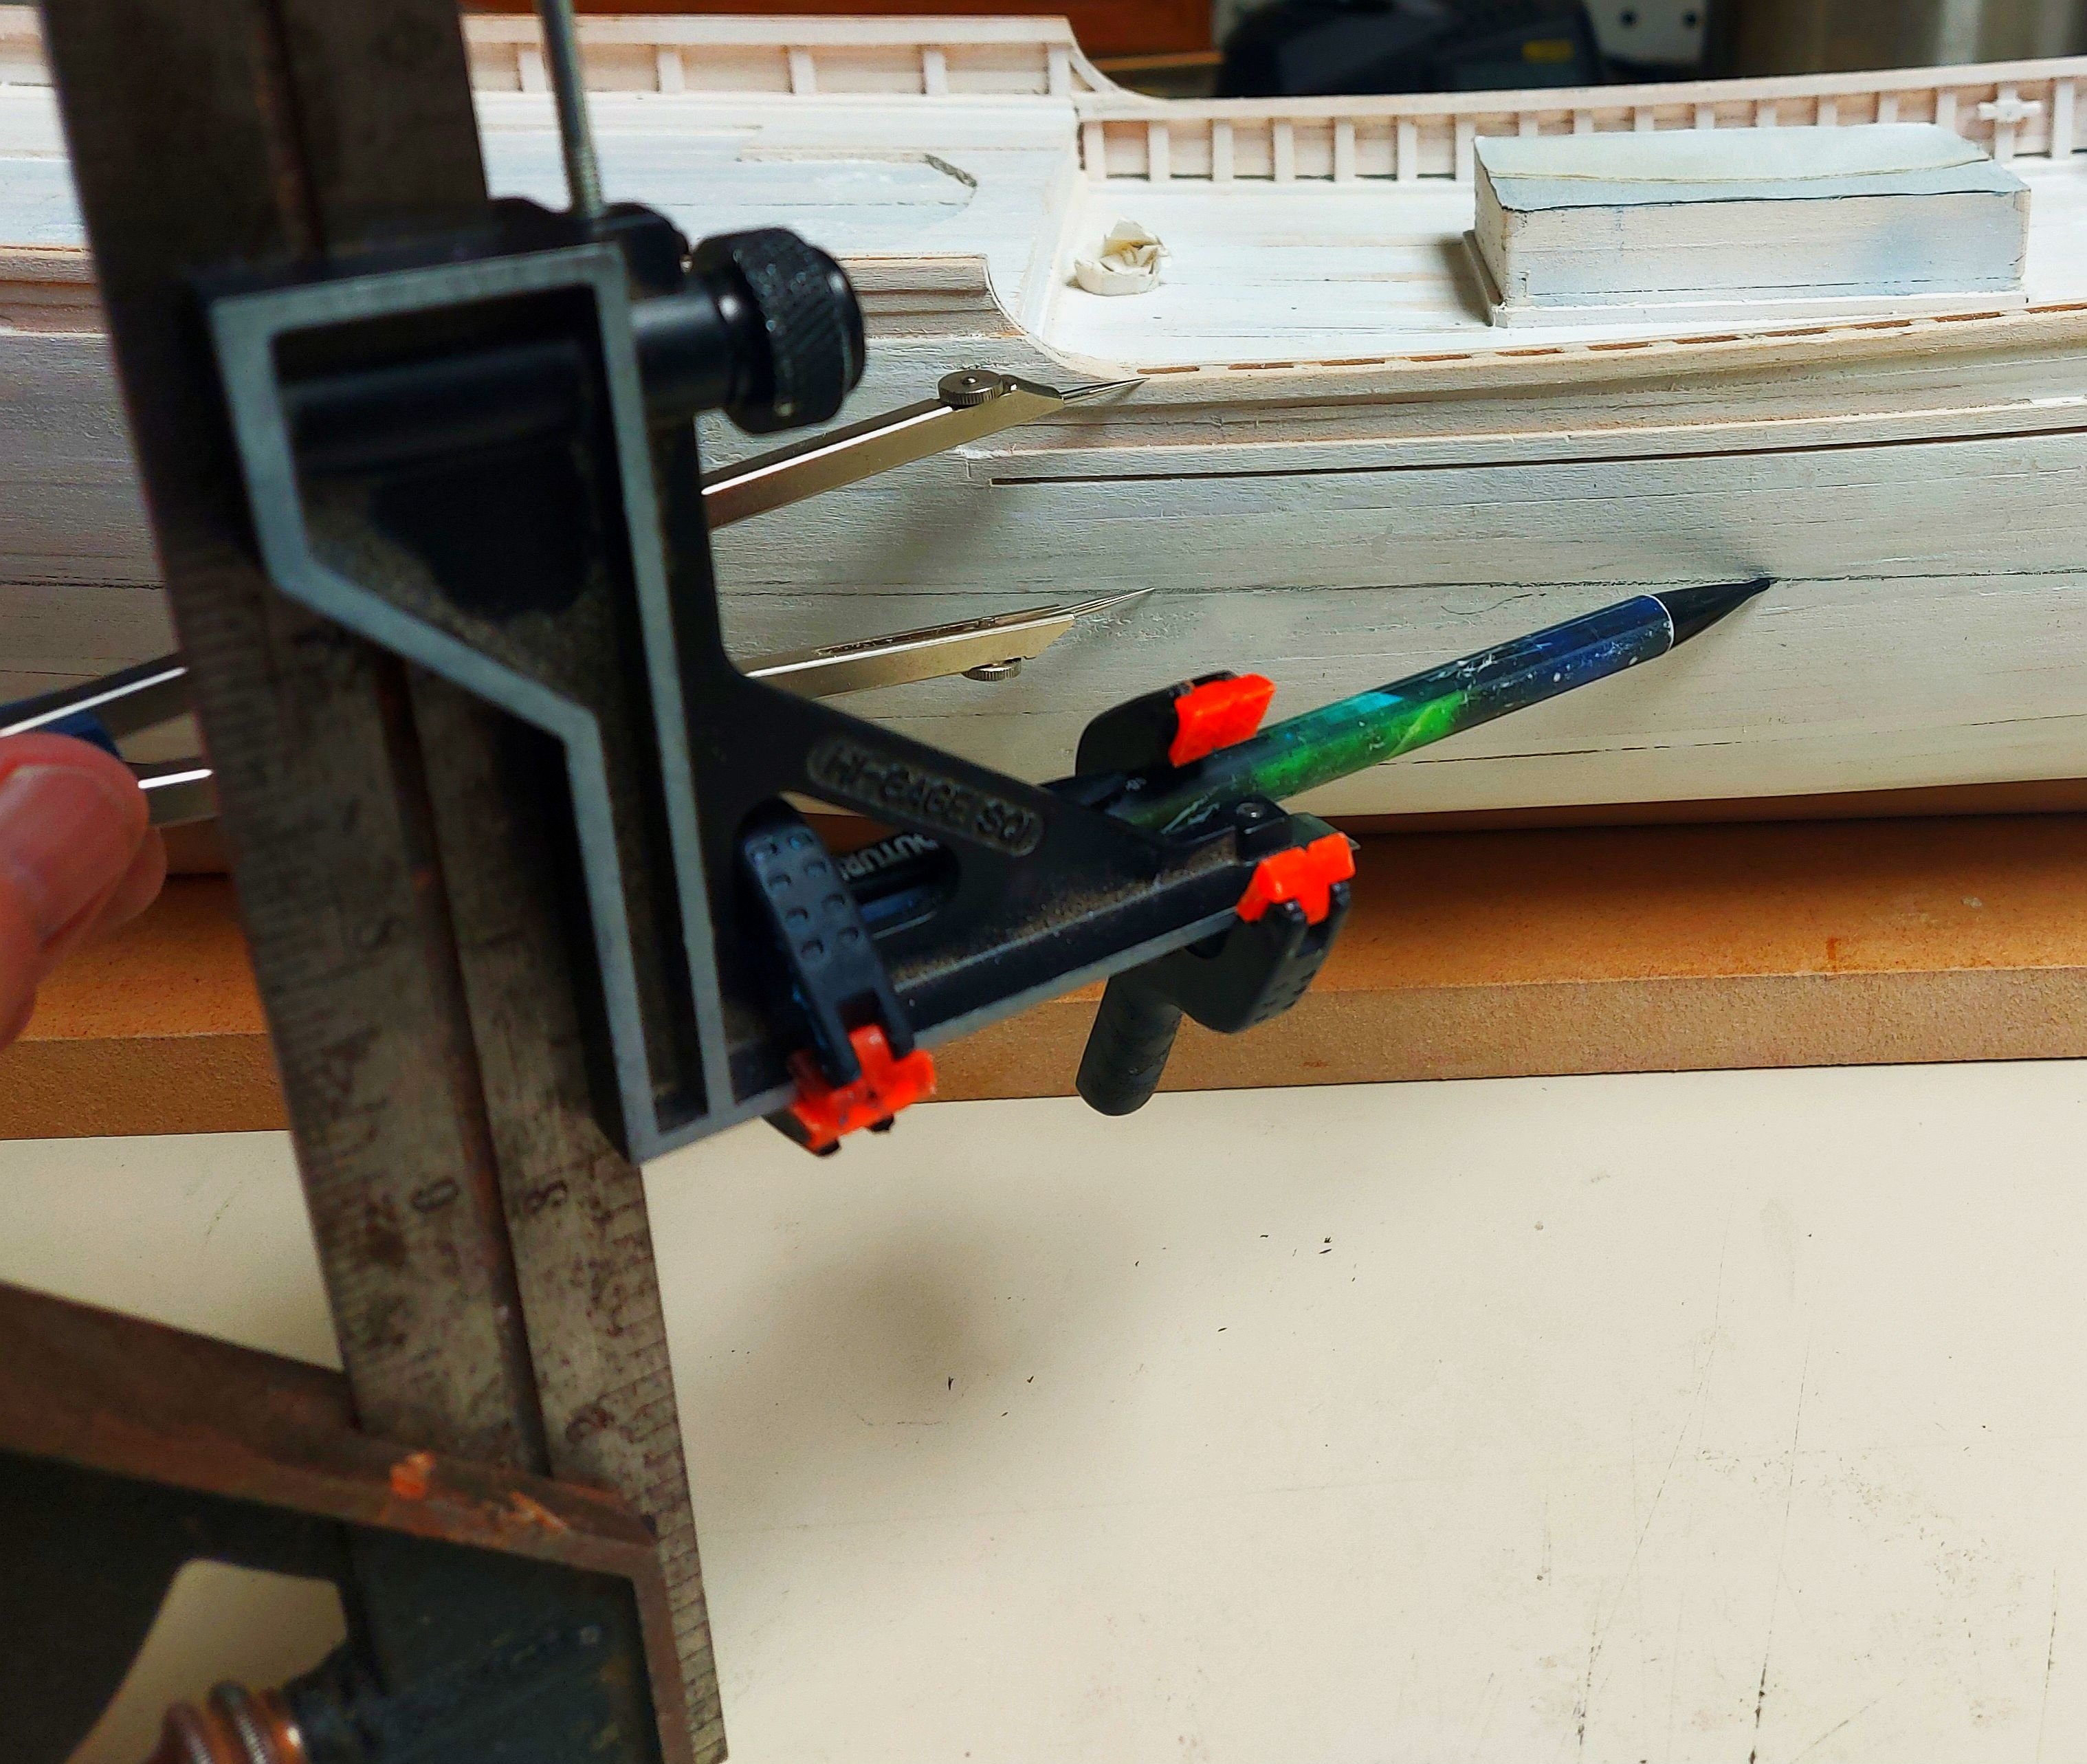
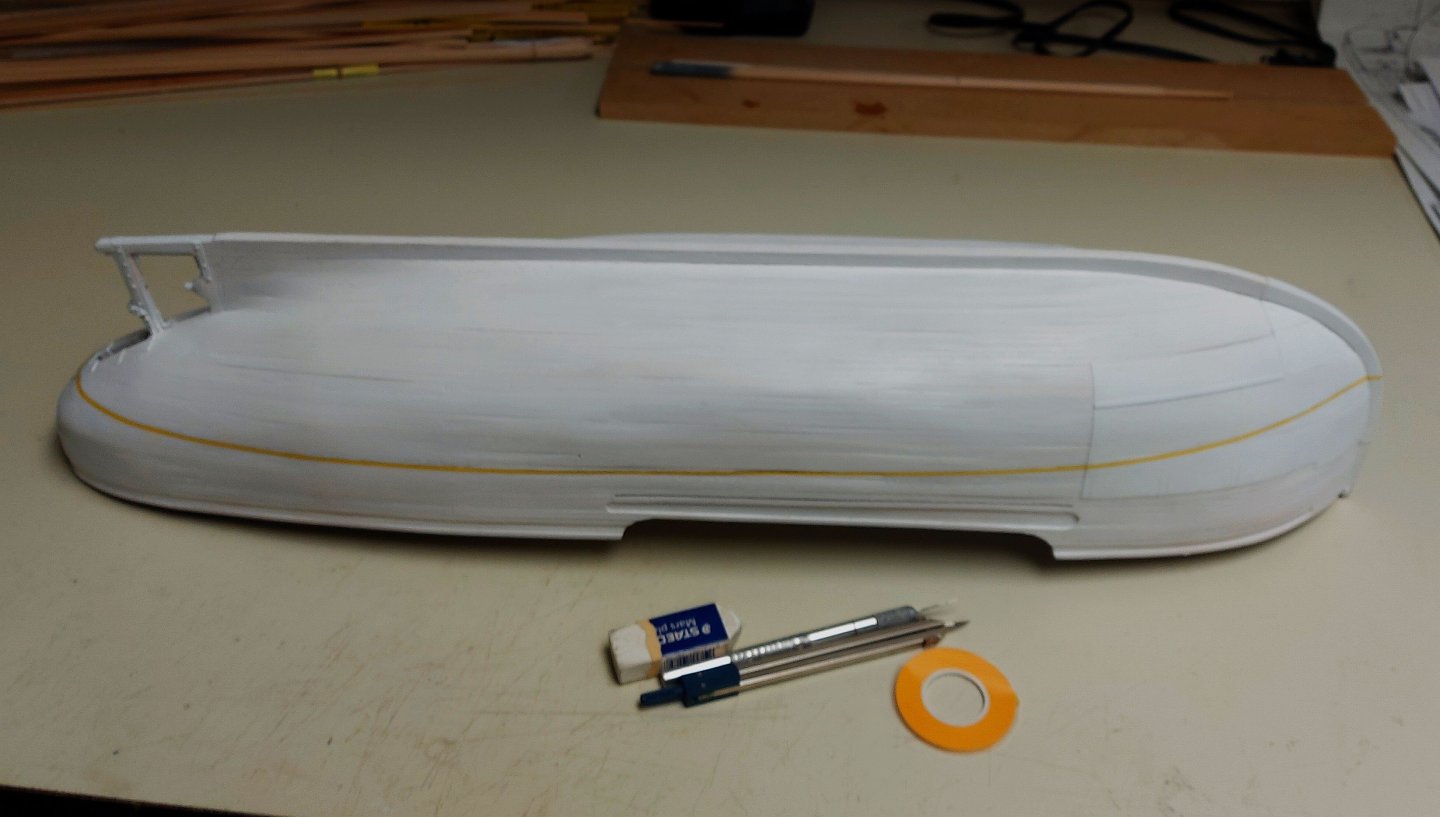
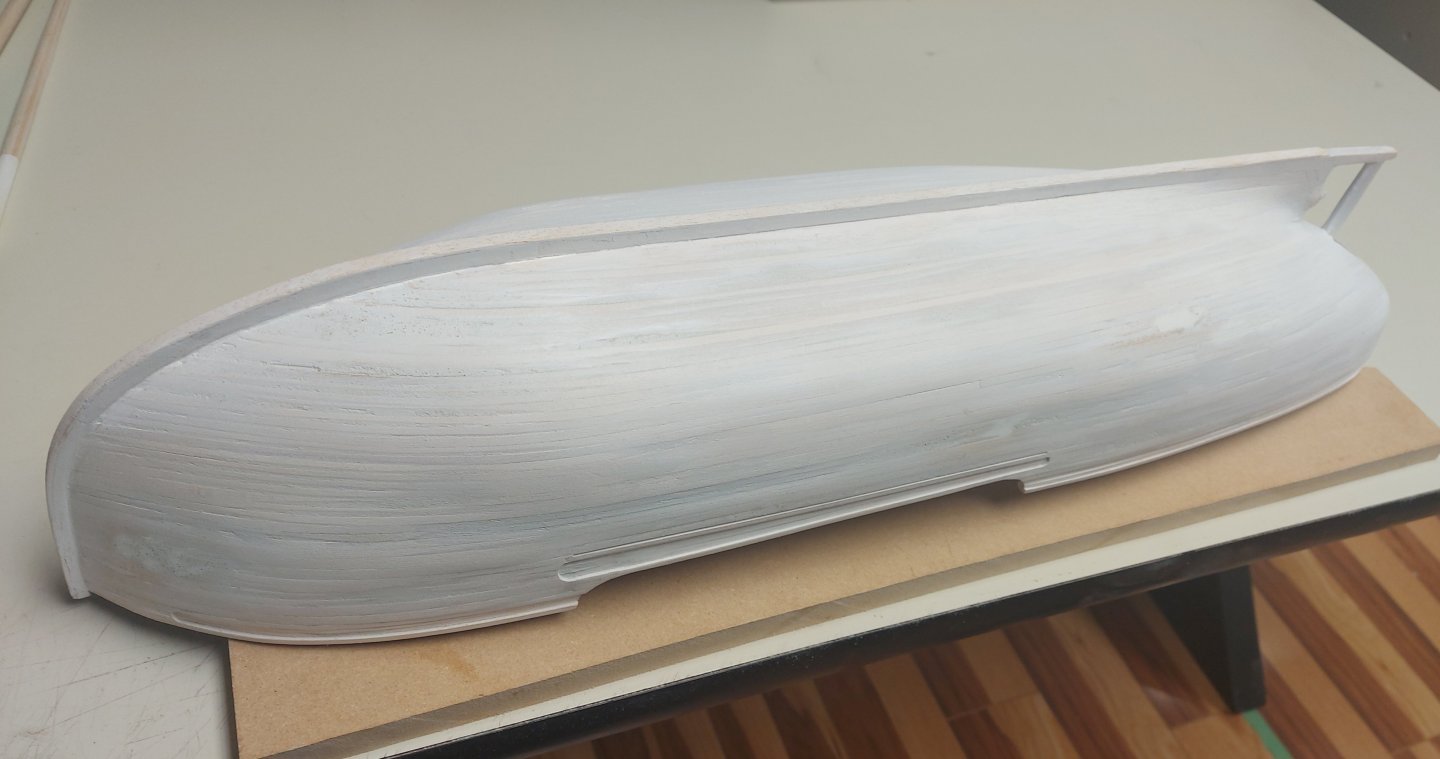
Today I got the waterline marked and ready for paint... St. Roch draws more water aft, so I took the rise of the keel off my lines drawing and then blocked the model onto my building board. I am using the actual painted waterline from the ship today and period photos, which appear to be a good match; I am not using the waterline as marked on the plans. After marking the waterline points at stem and stern, I rigged up my marking jig as seen in the pictures and set it to my bow mark. Happy day, it matches my stern mark! Then I made marks midships port and starboard with the jig, and blocked the ship until each side was the same distance measured from the top of the bulwarks. Now I dragged my jig around the hull, leaving an accurately marked pencil waterline. Next I carefully applied 2mm Tamiya masking tape, and burnished it down with my pencil eraser. This set the tape and also removed the penciled waterline. Last I sealed the lower hull edge of the tape with flat white paint. This will stop the red oxide lower hull colour from bleeding under the tape.


- 368 replies
-
- 10
-
-
Thank you very much Gary, yes it feels good to be working on the ship again! Thanks also to everyone who checked in to my posts! Regards, Bruce
-
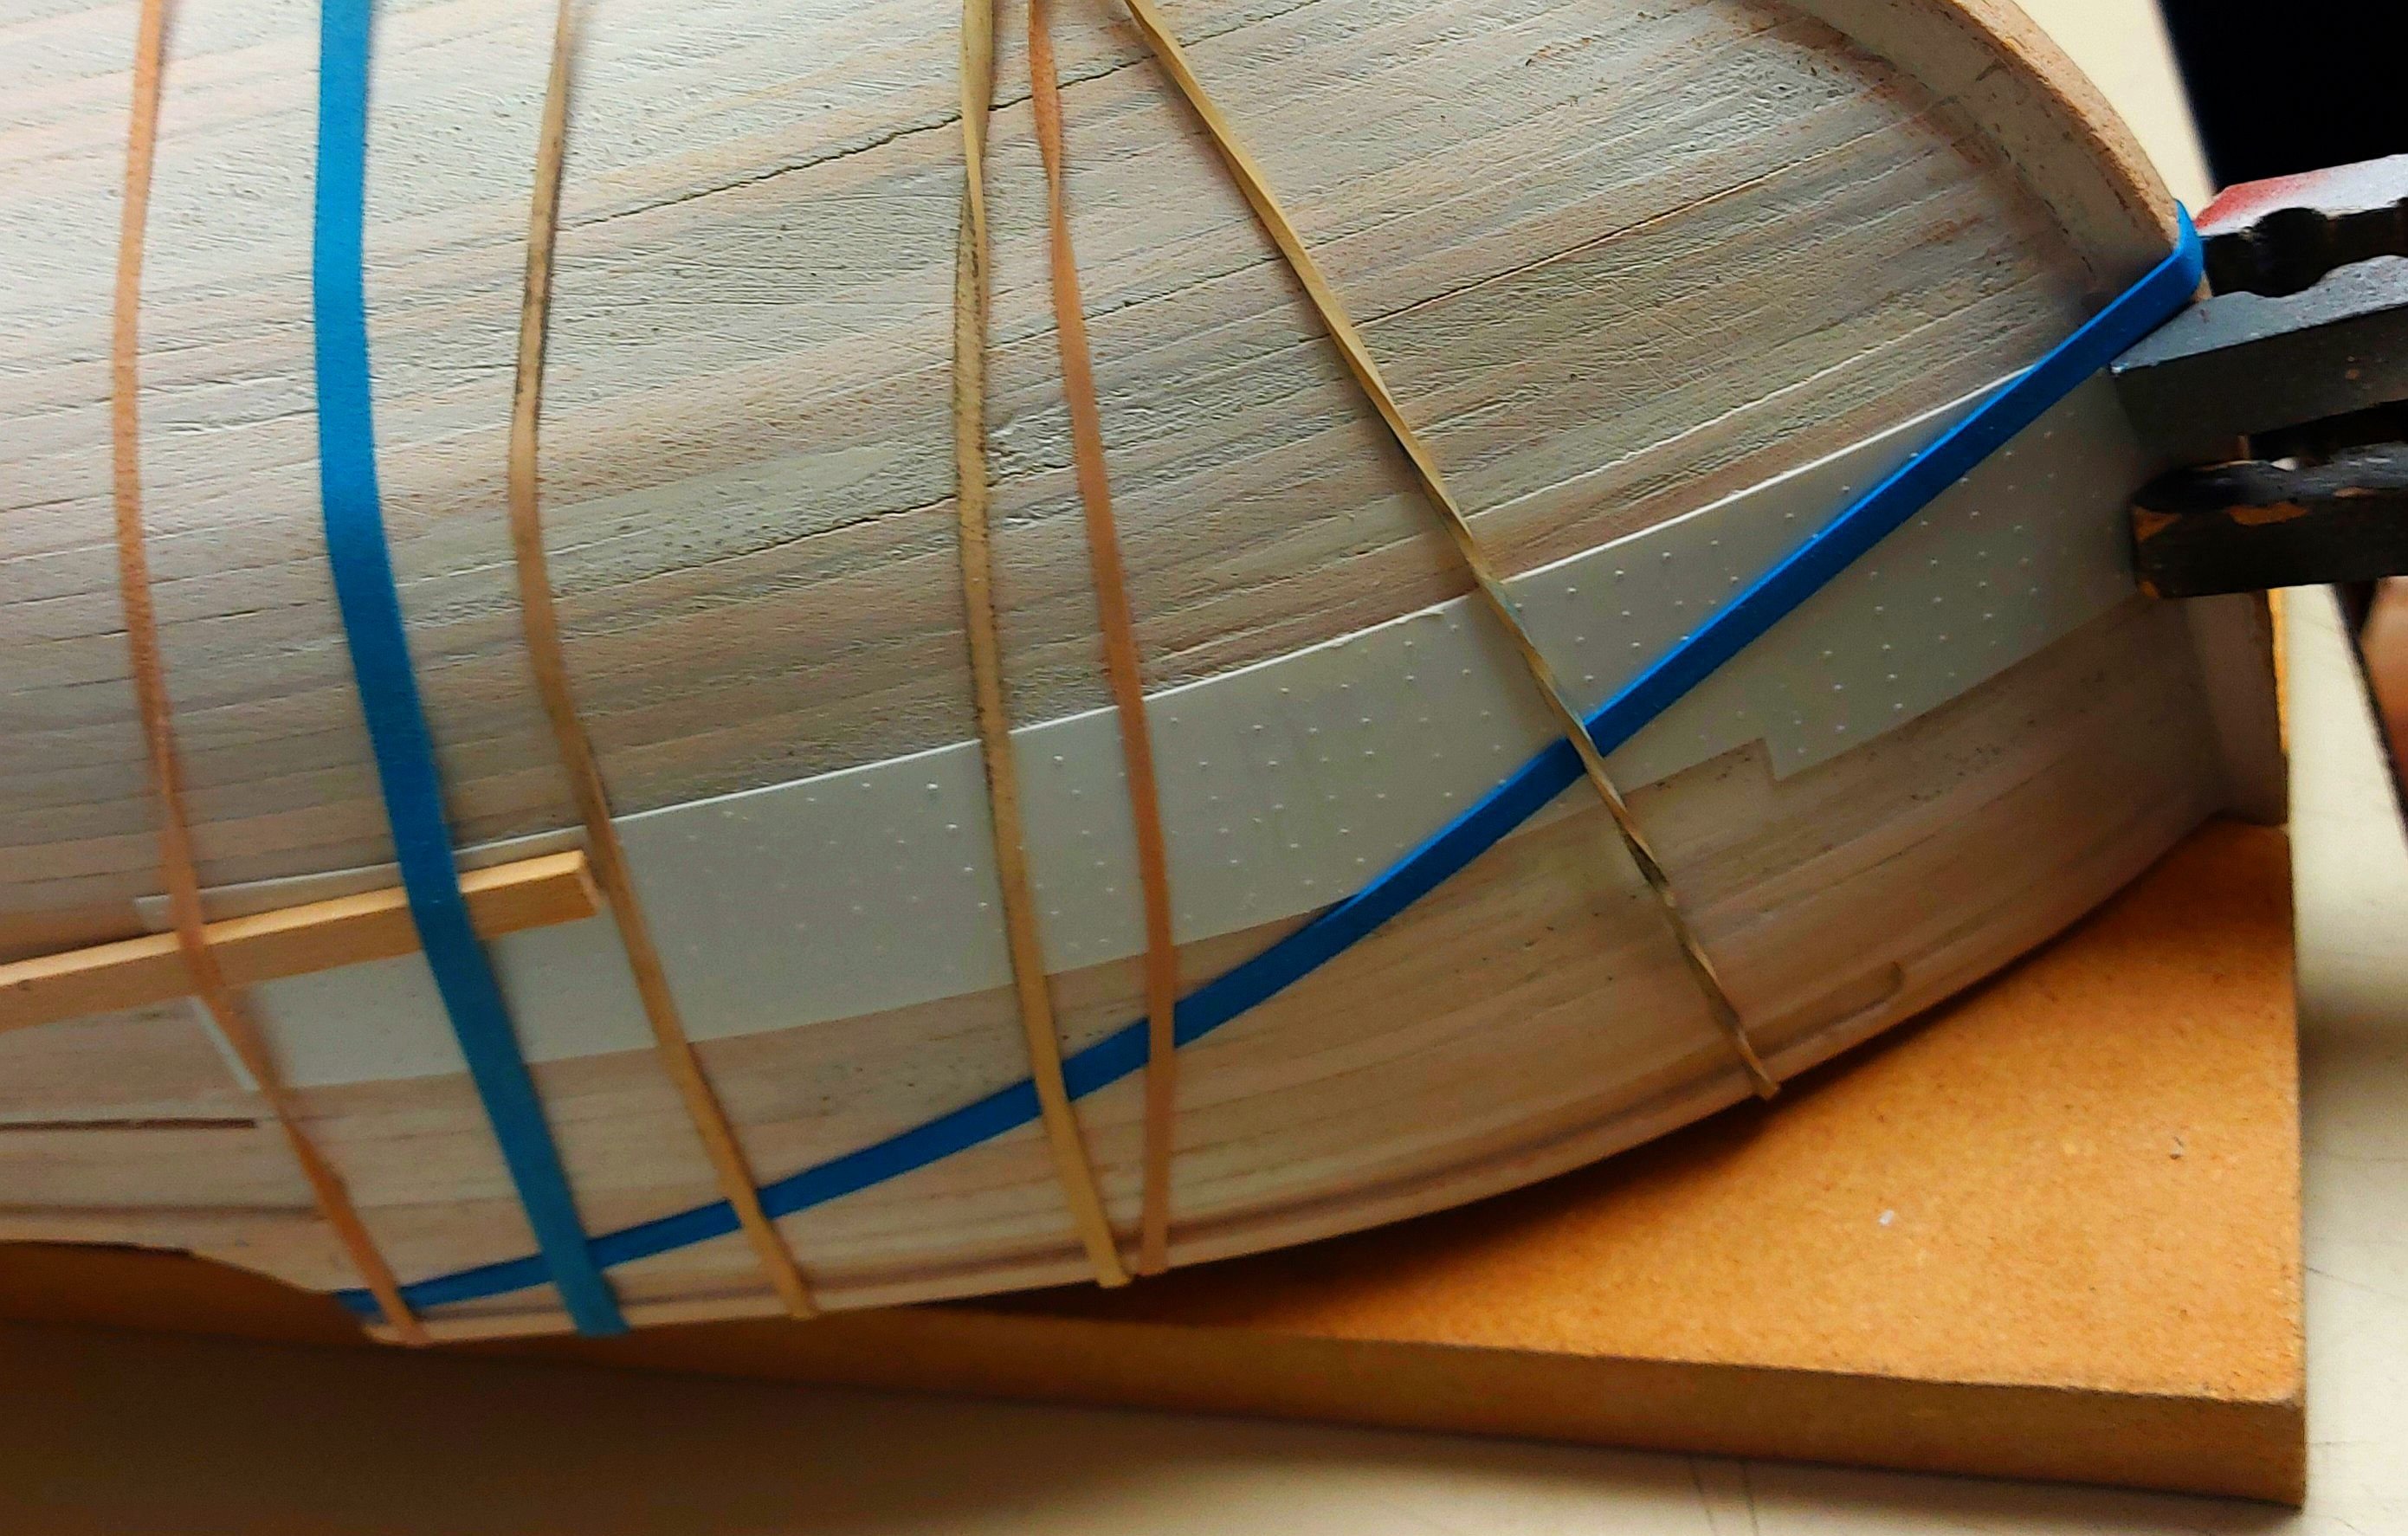
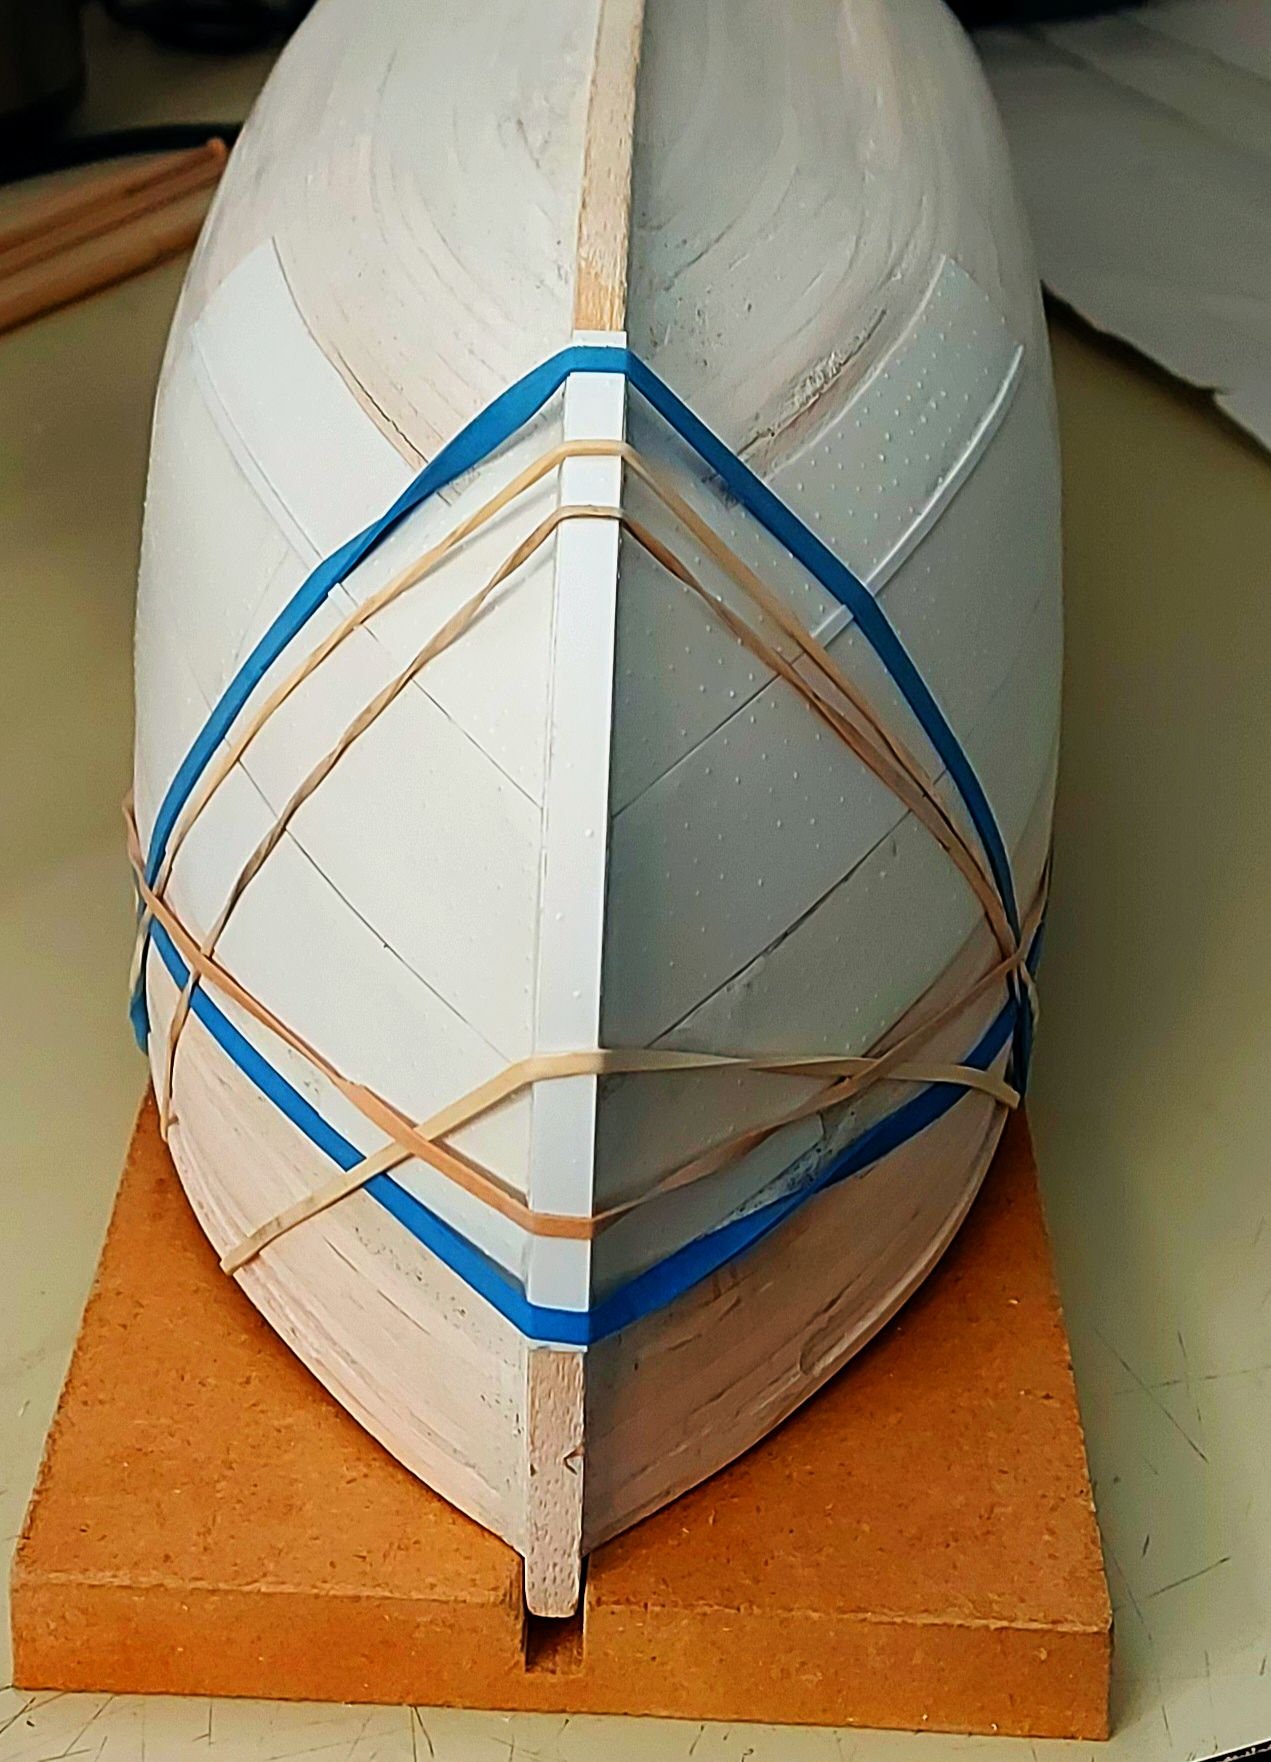
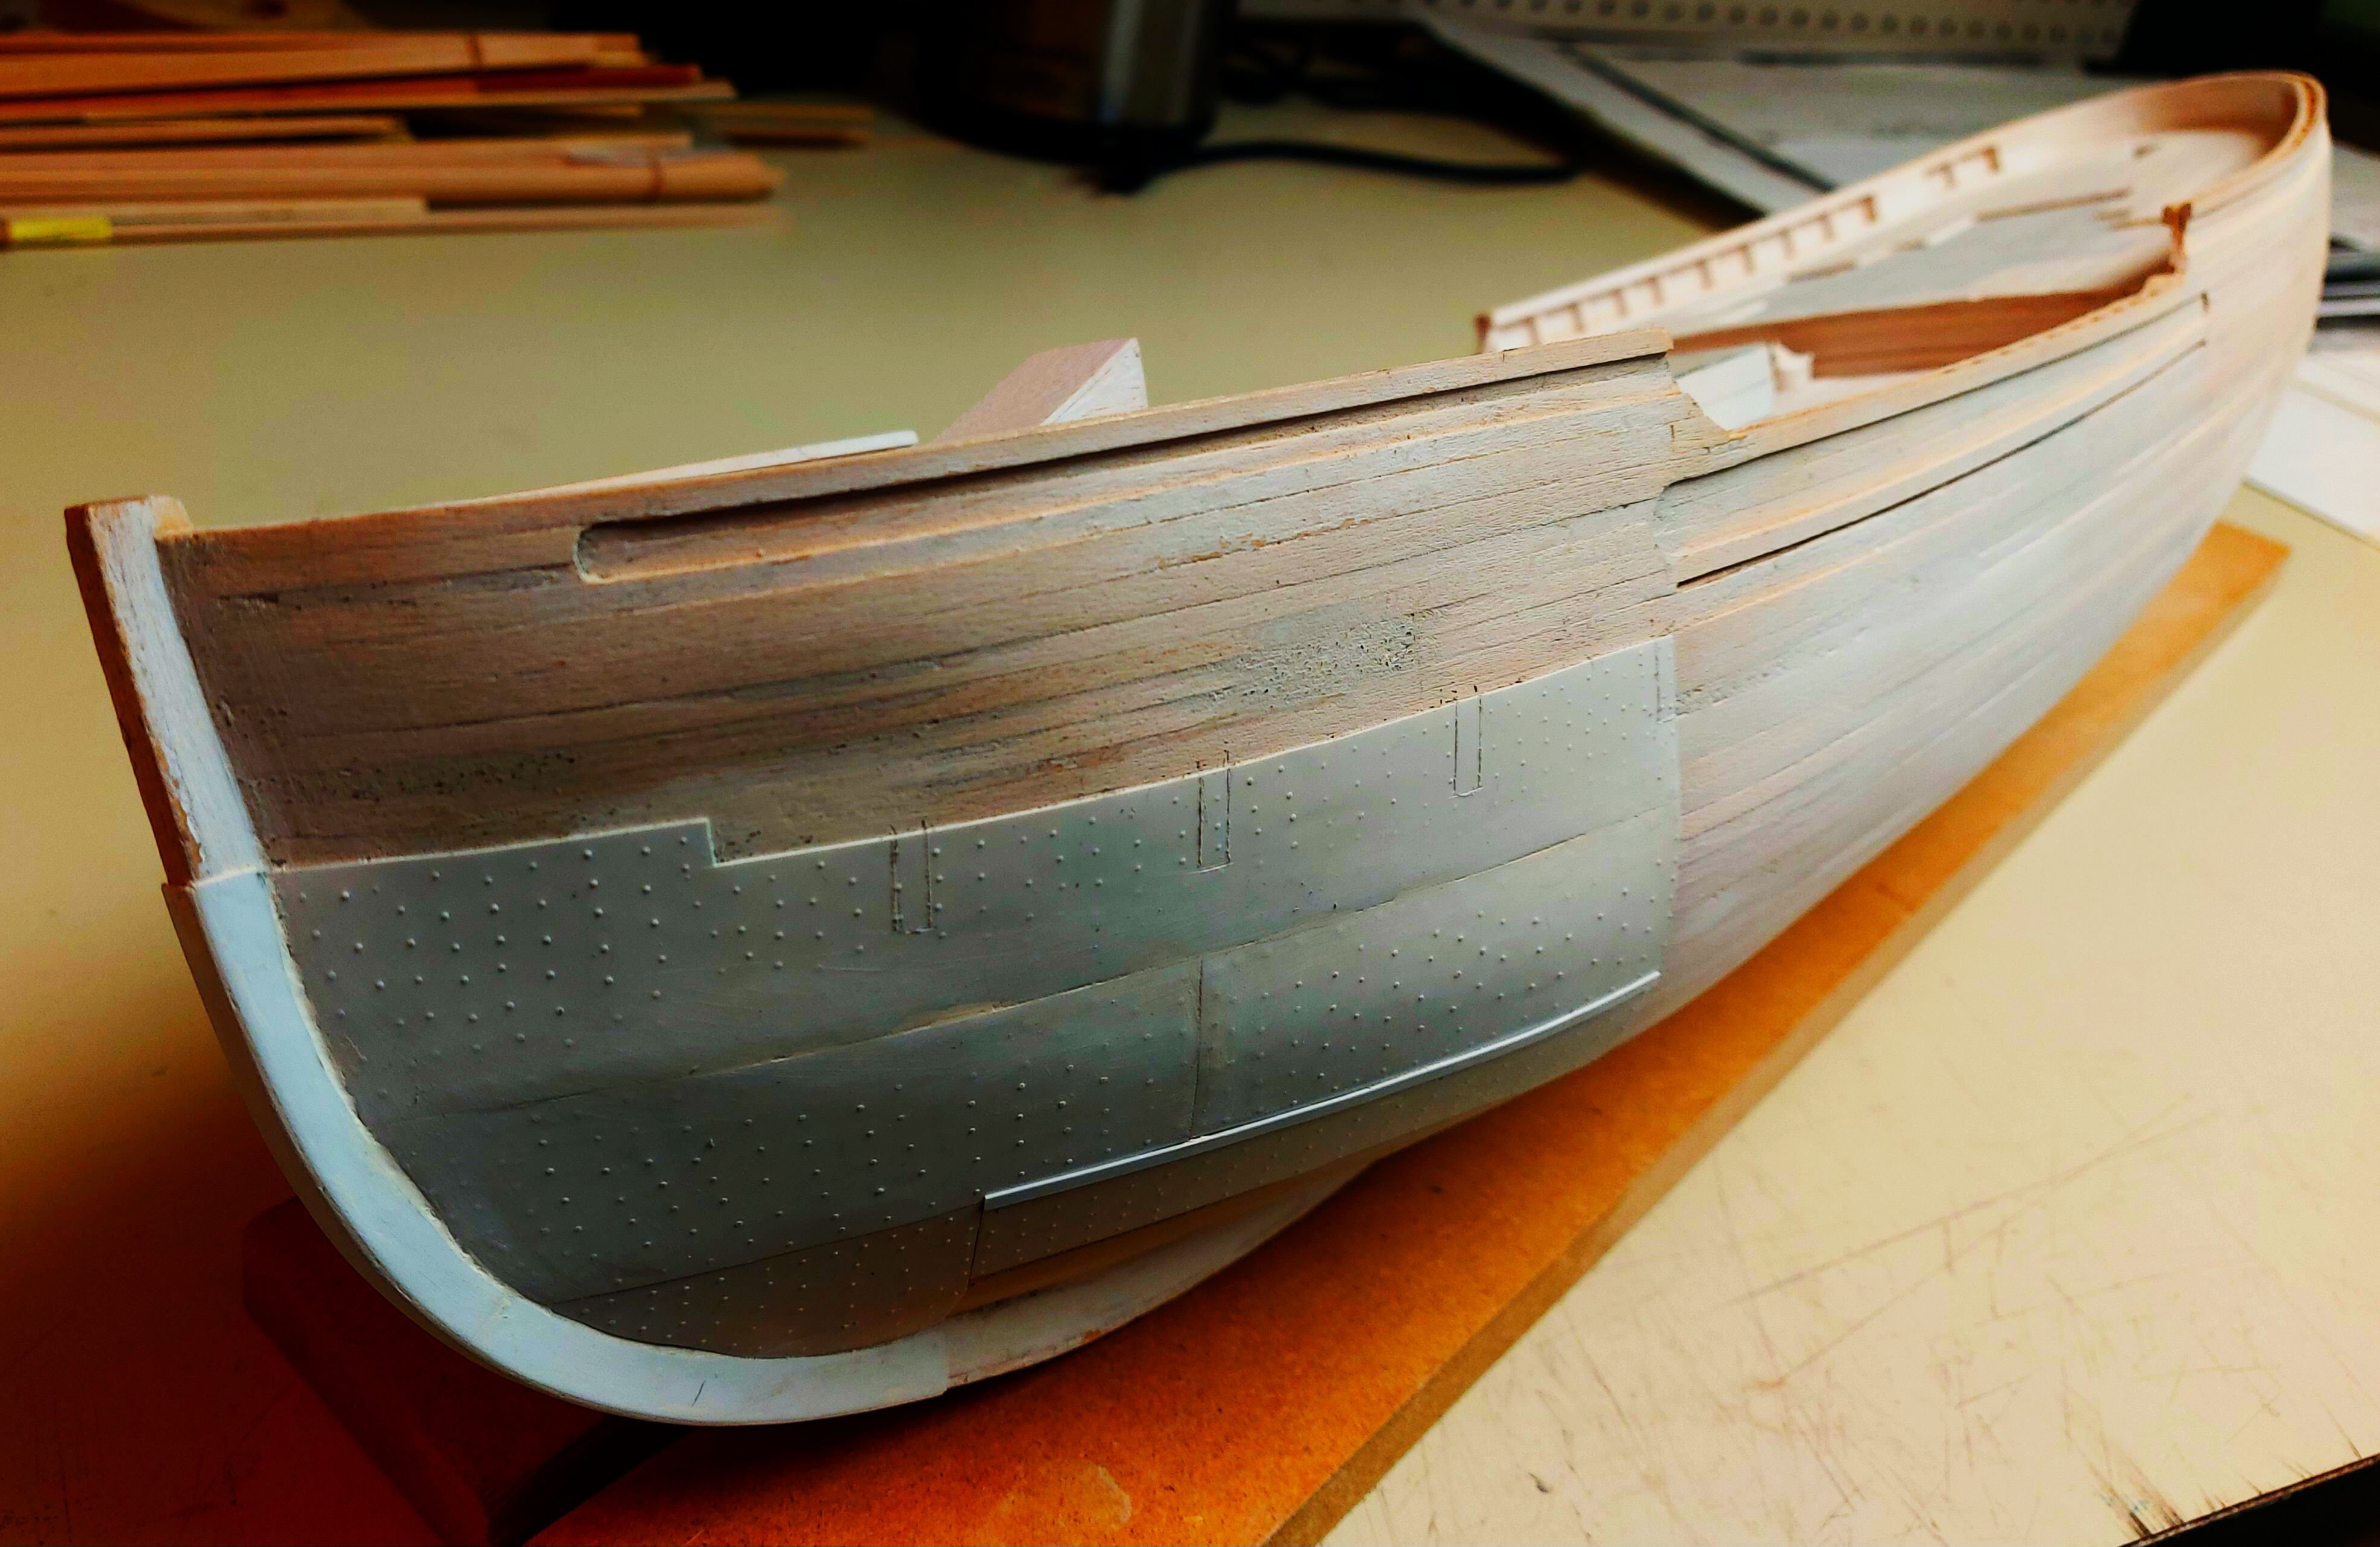
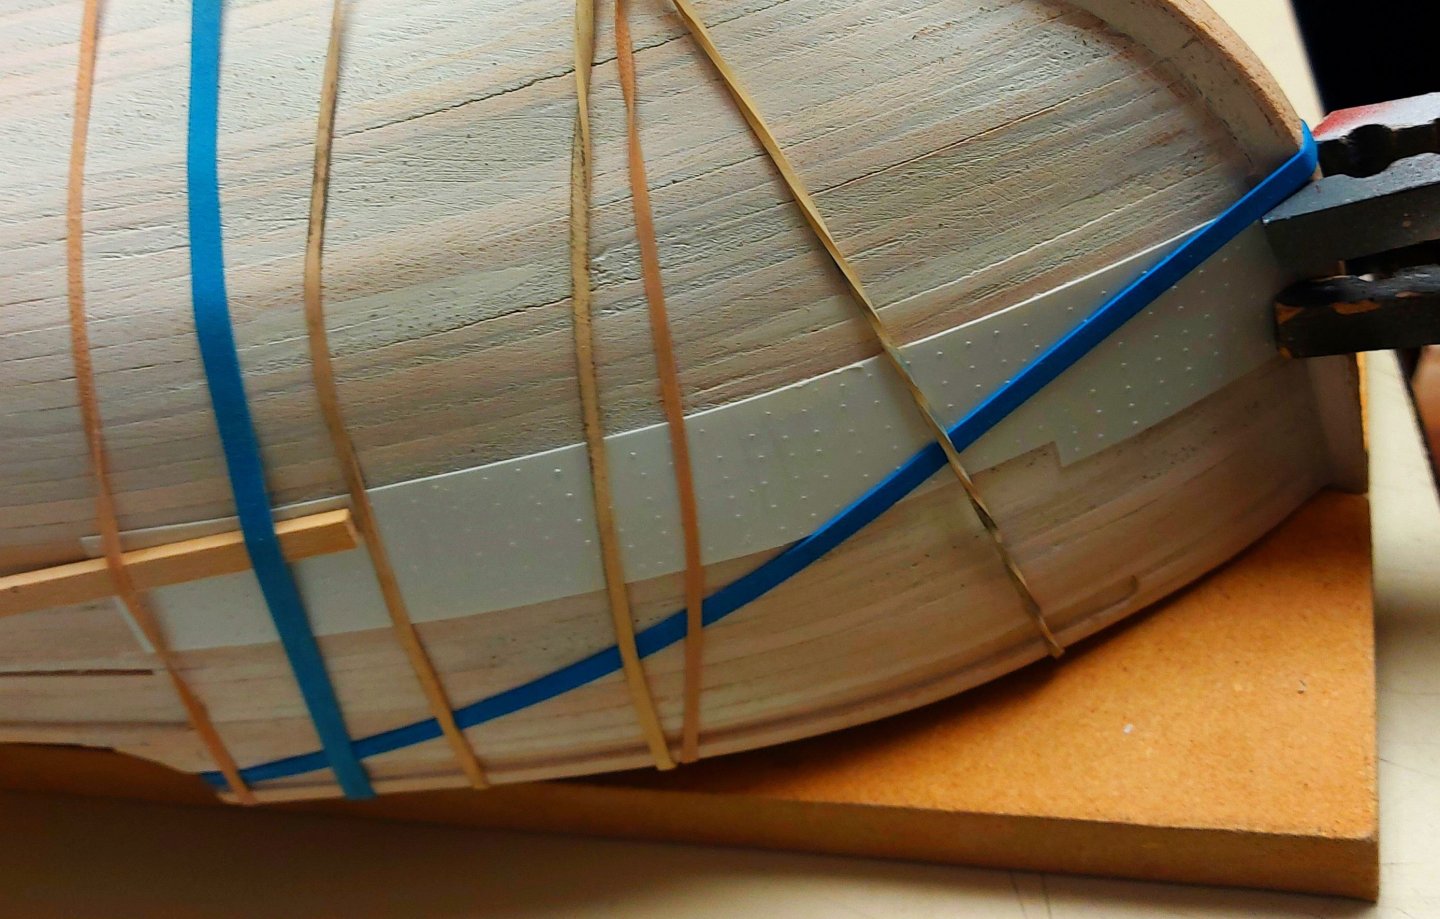
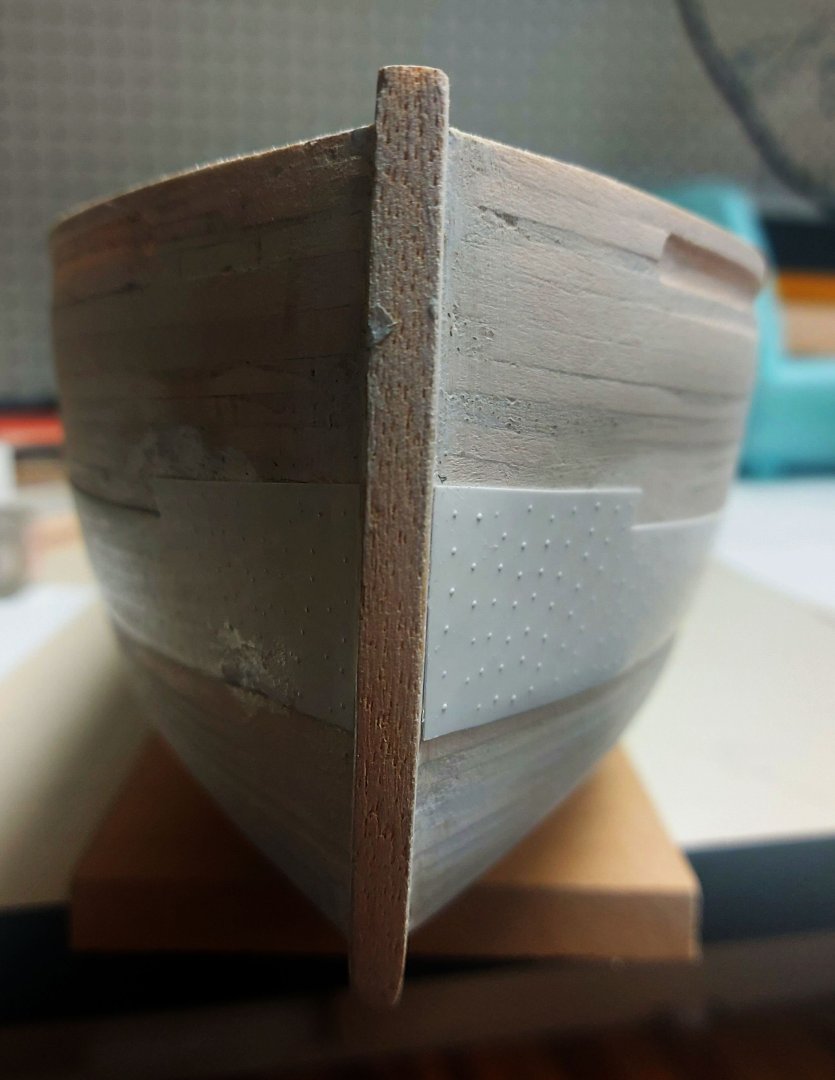
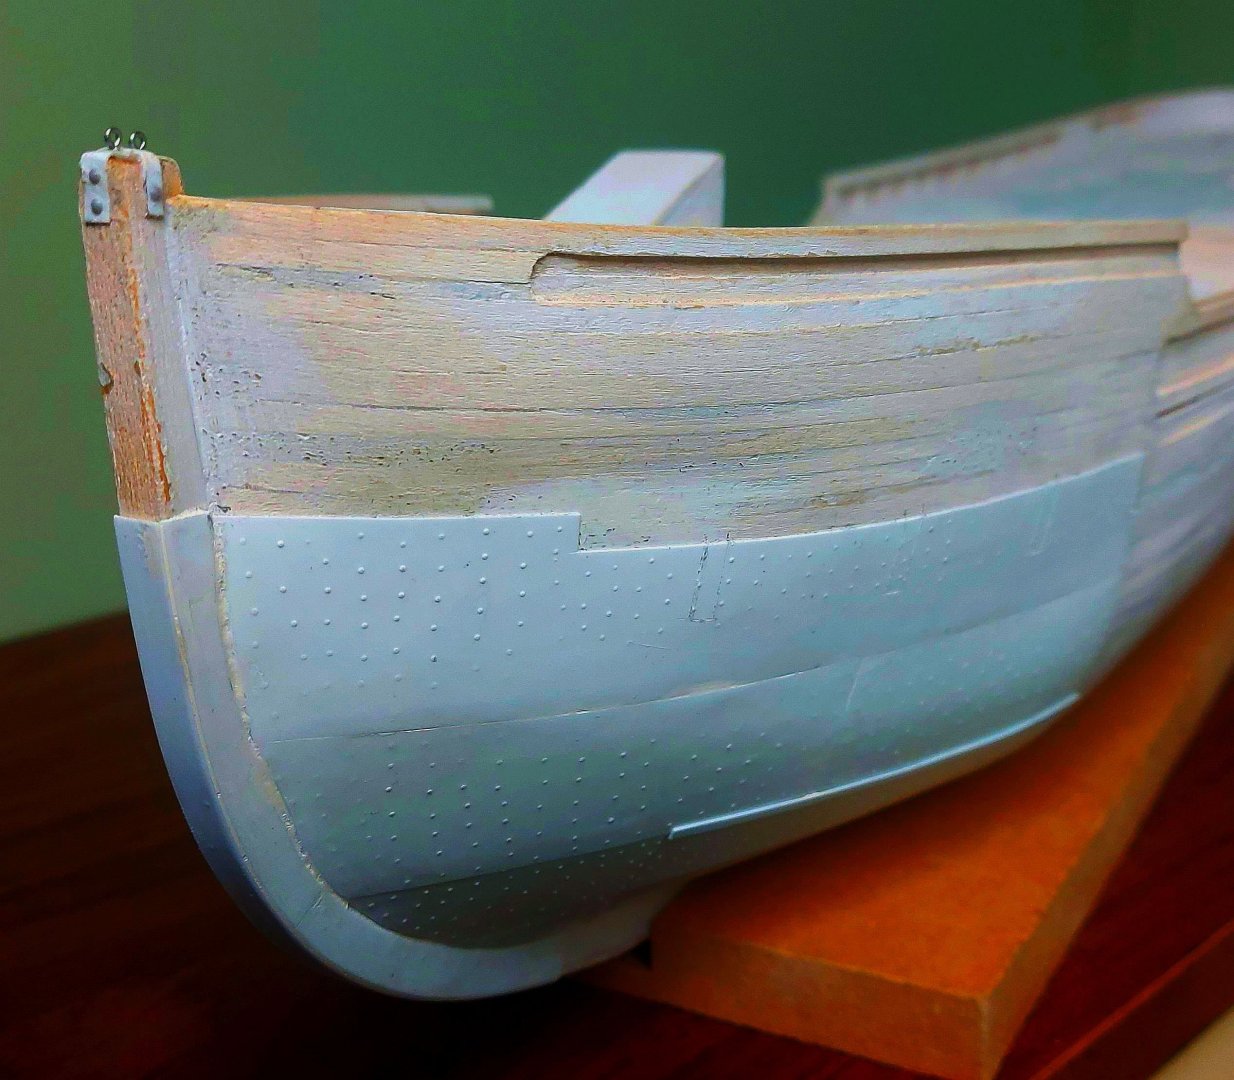
This update takes us to where my St. Roch model is today... I had to replicate the steel plates that were fitted around her bows. While not intended for icebreaking they were a valuable aid in moving through the Arctic pack ice. Unfortunately the plans do not show this feature, and the plating at the stem was modified in 1940. The only reference to them is a comment by captain Henry Larsen in his book "The Big Ship". He also refers to her original blunt cutwater that was almost a foot across! The original strakes are still on the ship so I scaled dimensions from photos, leaving off the heavier plates that were installed in 1940 and extending my model strakes to the bow. I am using .010 styrene sheet to replicate the strakes. I embossed the nail patterns with my NWSL Riveter tool. I used styrene cement to apply all the plastic fittings to the hull, not because it sticks well to wood, but because it softens the styrene and makes it conform easily to the hull shape. It also sticks very well to the applied primer/sealer! If it eventually lets go I will bring out the Gorilla Glue! The corbels that supported the rub rail were removed in 1930 and patches welded to the steel at their former locations. I used my scriber tool to etch them onto the plates. Finally I completed the steel work on the hull by fitting the cap and eyebolts to the top of the stem. She's finally ready to paint!


- 368 replies
-
- 12
-
-
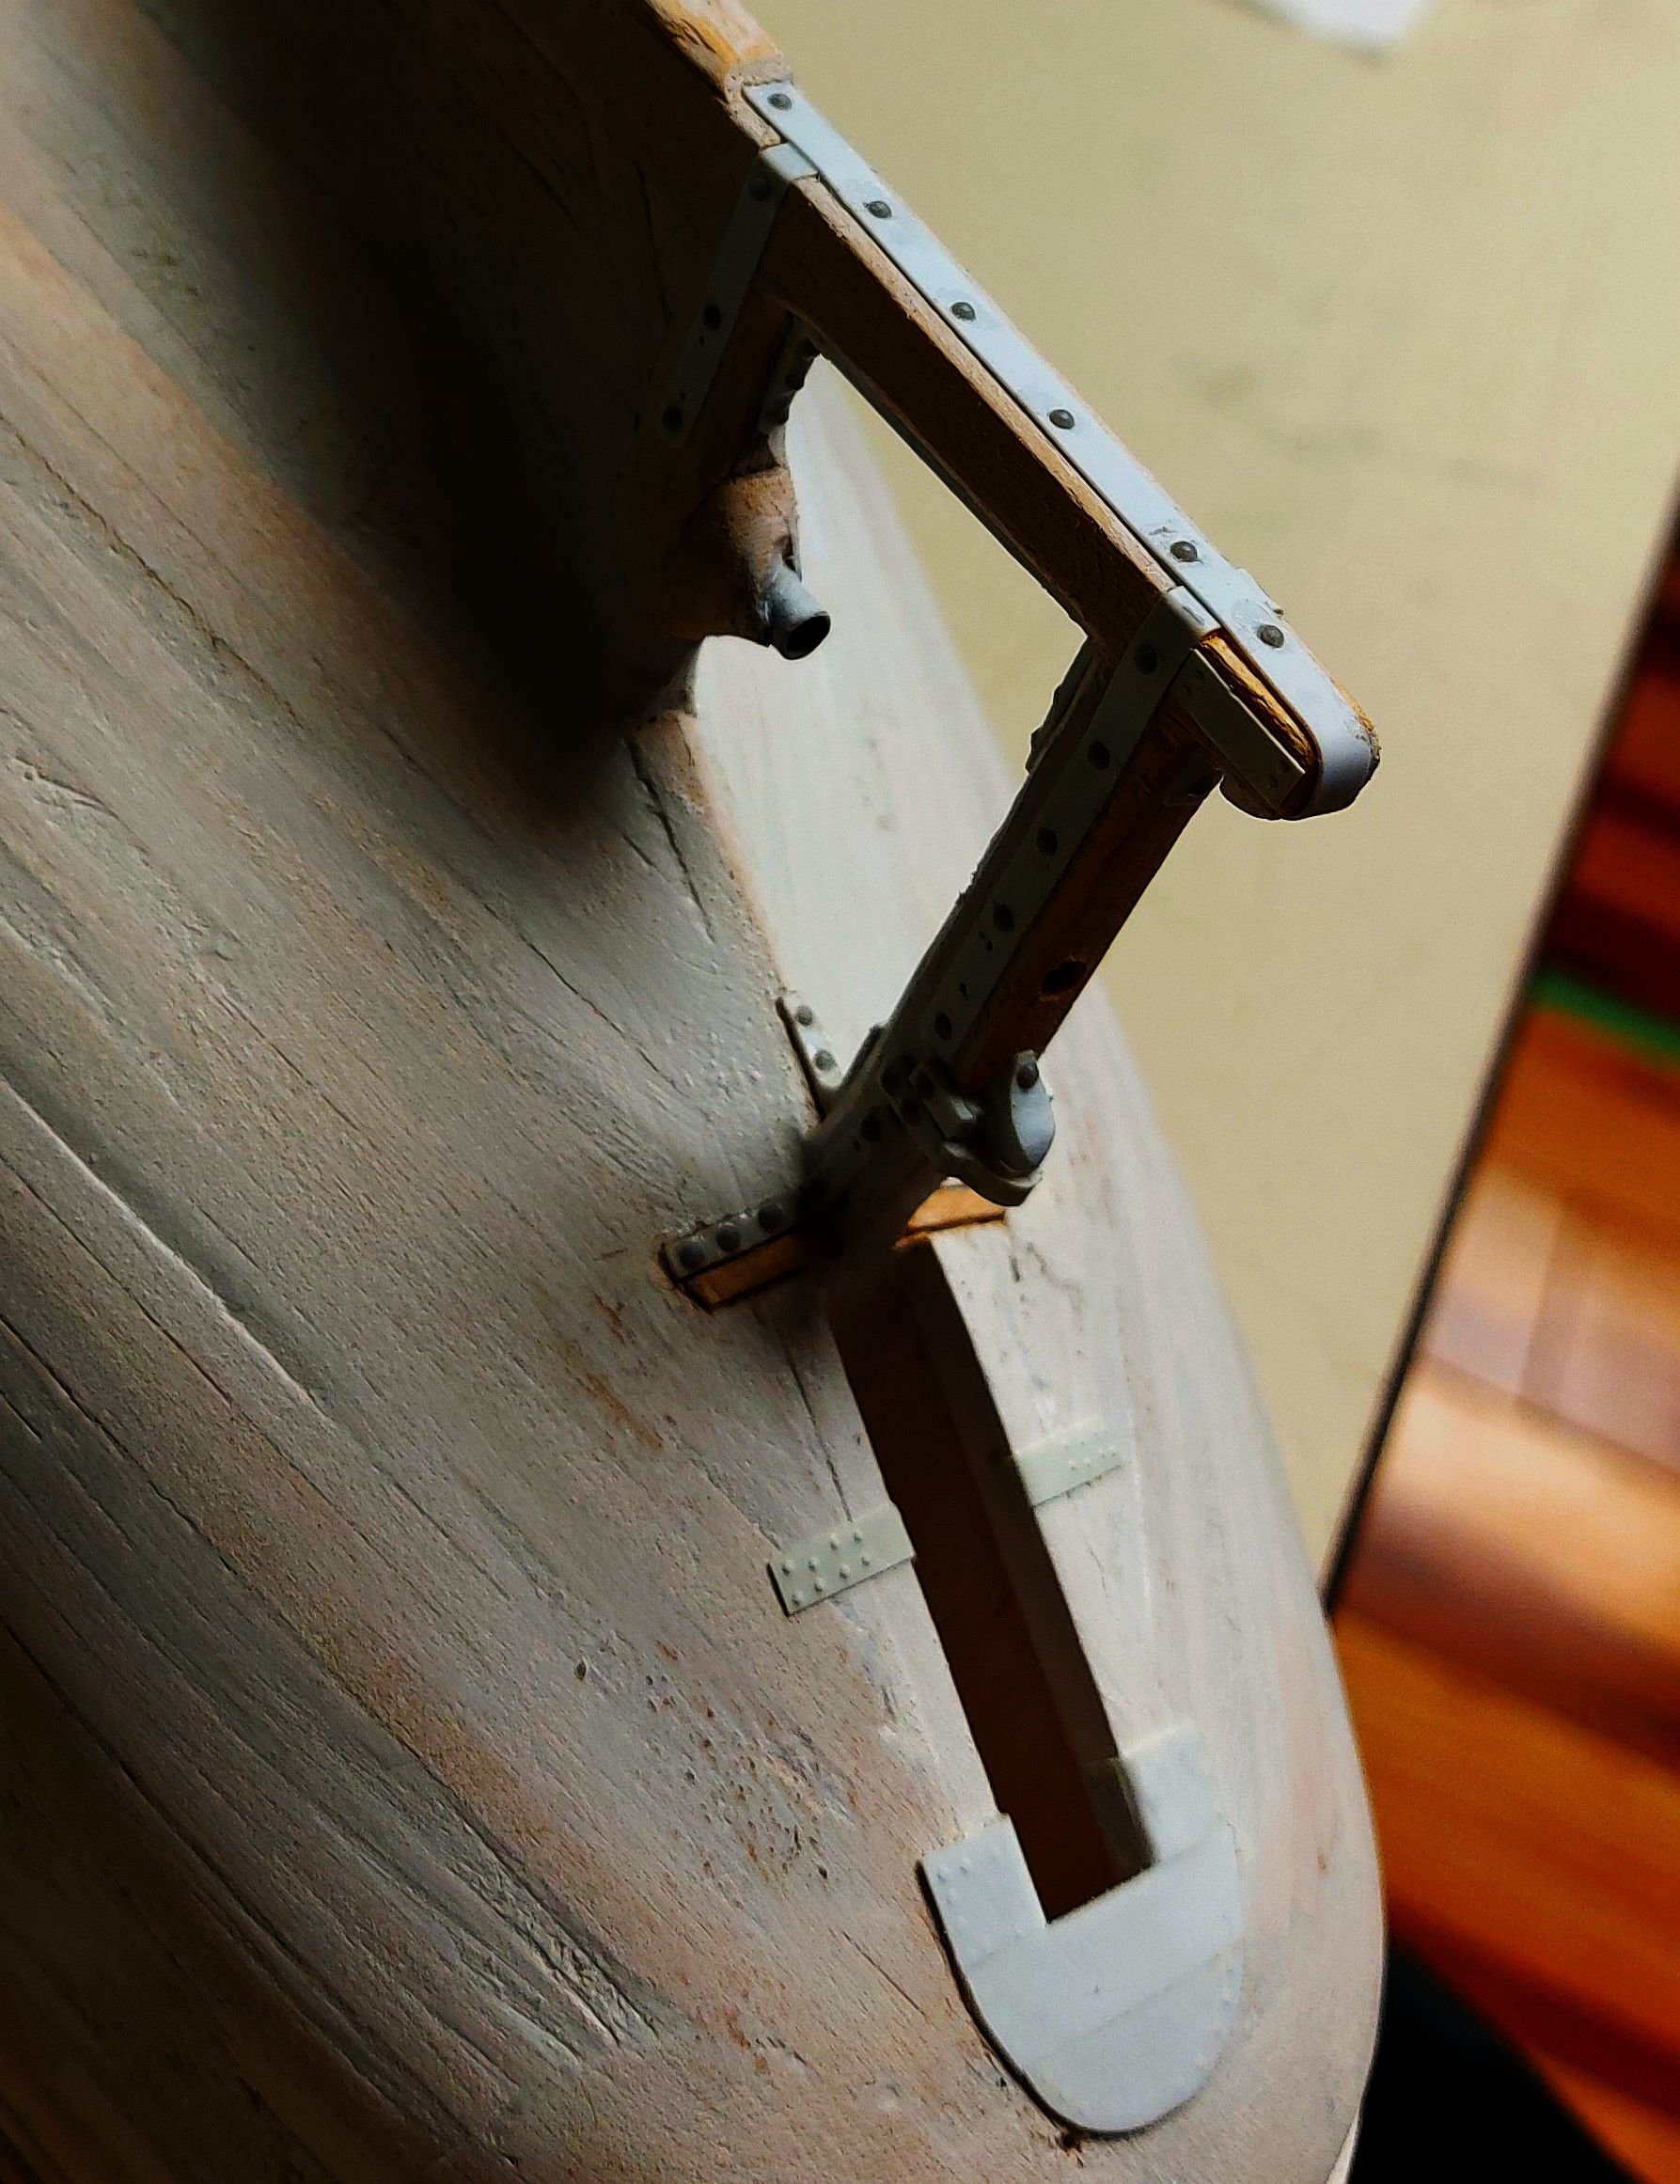
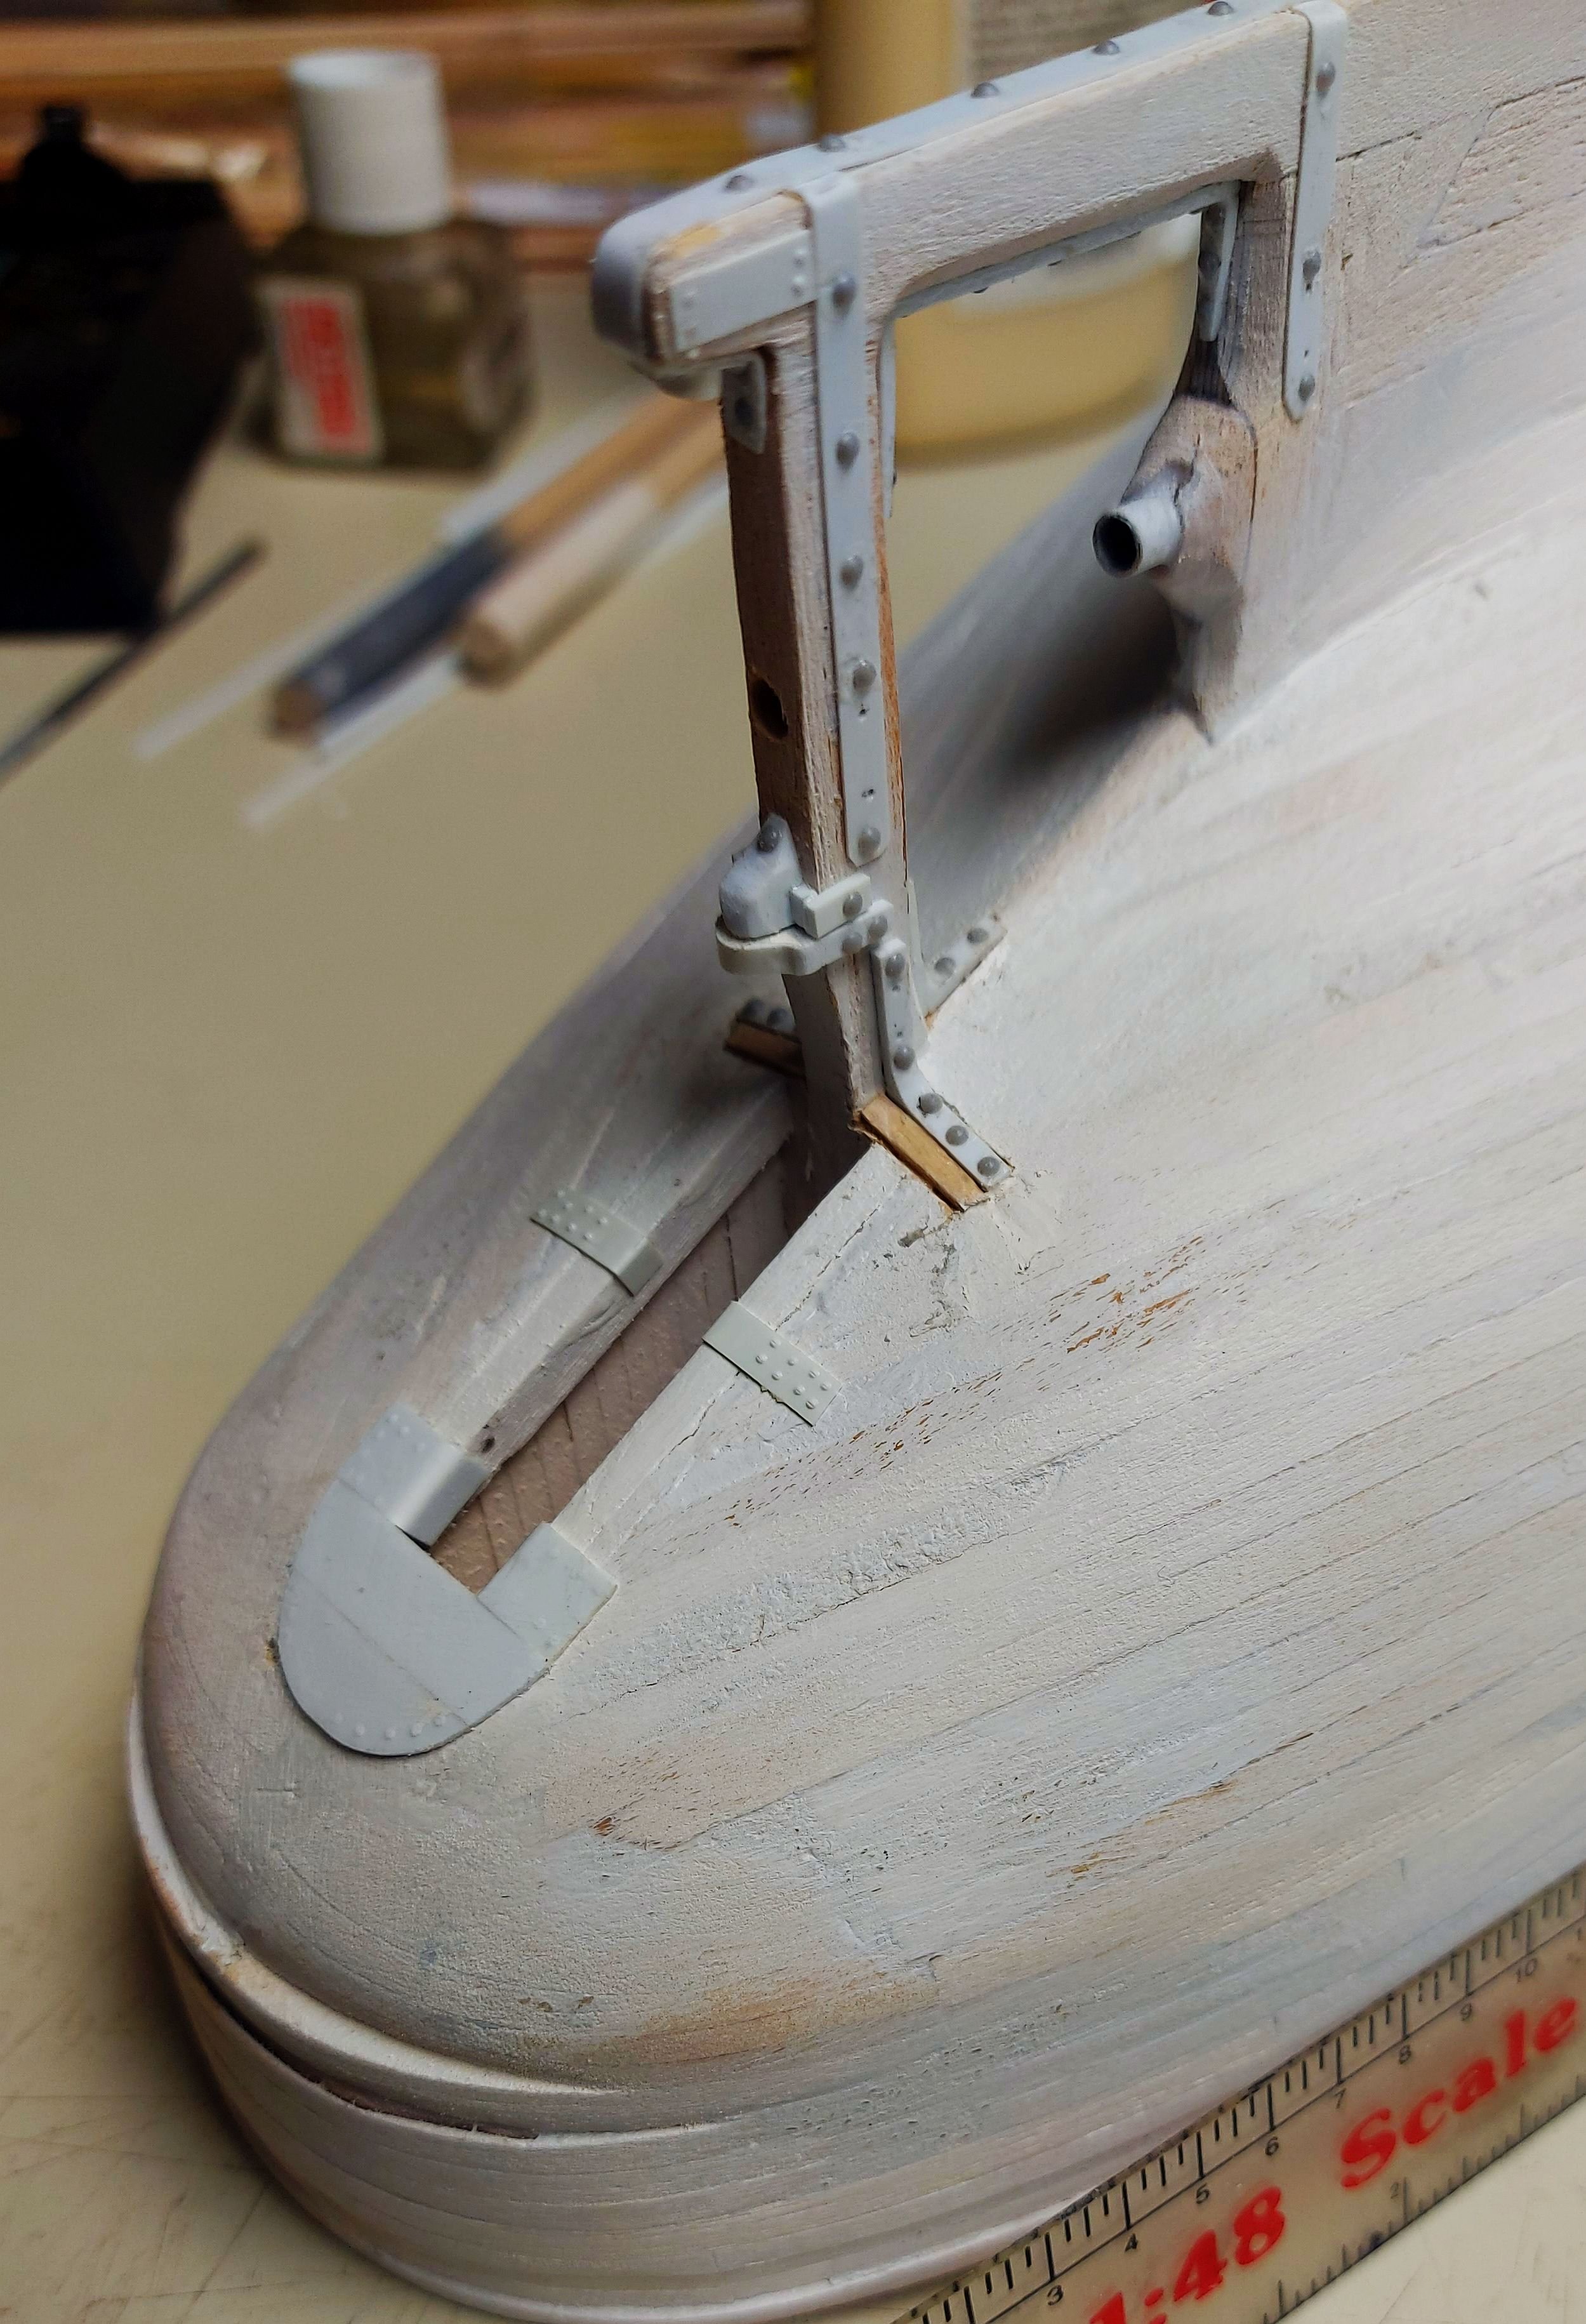
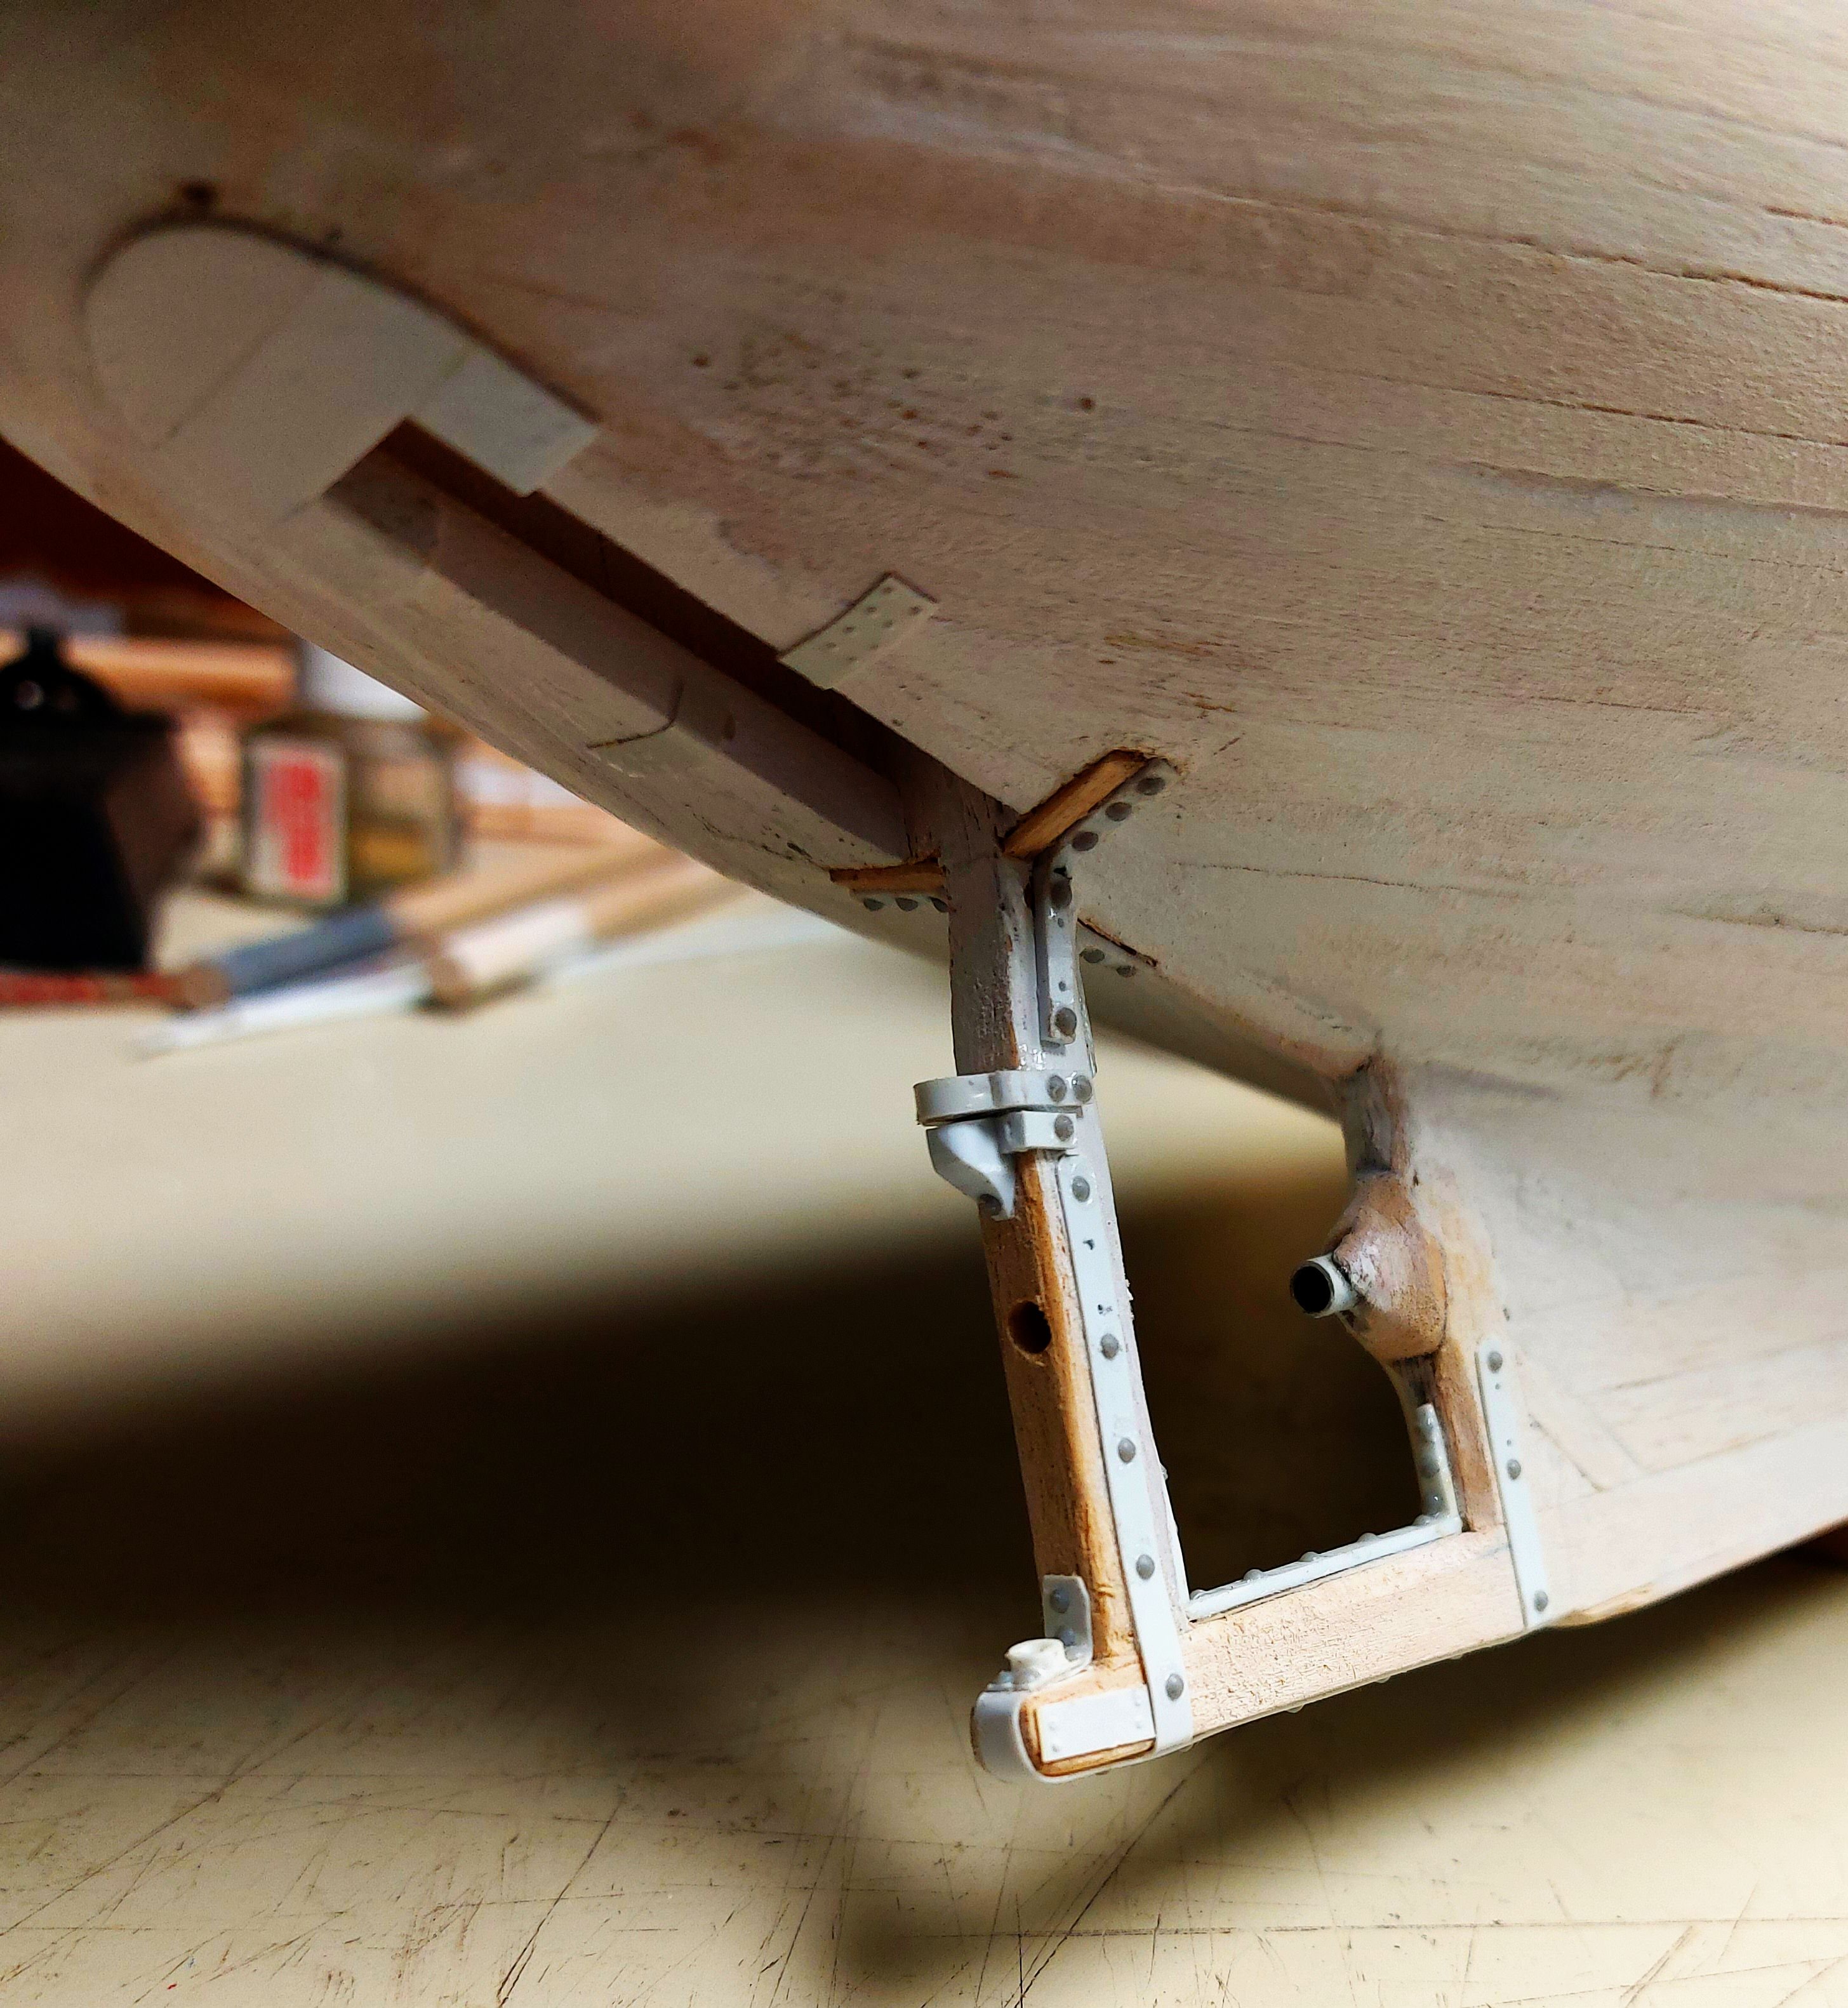
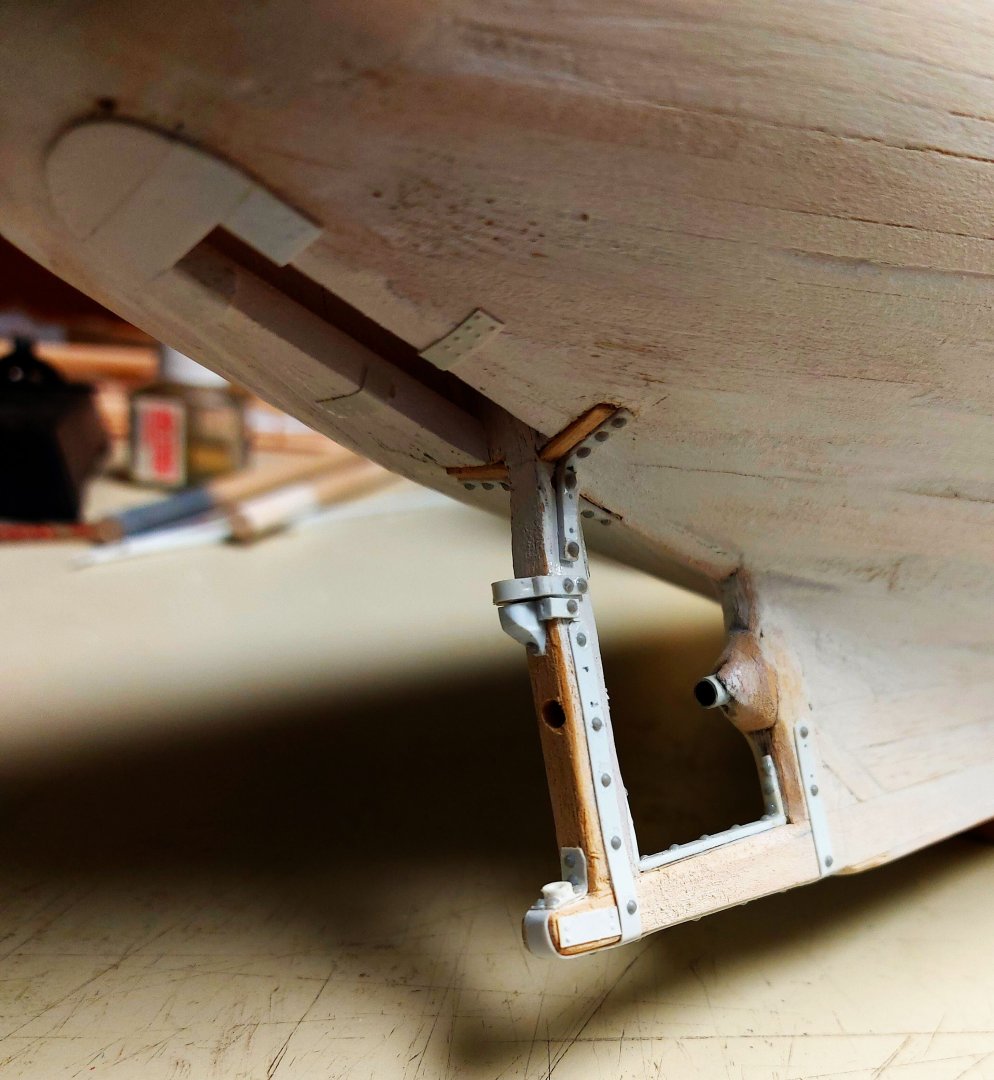
St. Roch had steel reinforcing straps and forgings around her stern members to strengthen and support the rudder post and keel extension. I took scale measurements from my copies of the original plans and made my parts from styrene strips of appropriate sizes. I also made the gudgeons from styrene, shaping them to match the plans as well as my photos of the stern. I used my NWSL Riveter tool to emboss fastener heads onto the styrene, for larger fasteners I used Tichy Train Group rivets that match well to the photos. The hole in the rudder post aligns with the propeller shaft, and was used to remove the propeller nut. The last photo is the stern area of the actual ship. There are holes in my model straps where zinc plates will be fitted after the lower hull is painted.


- 368 replies
-
- 11
-
-
Congratulations, I think your model turned out very well, and your enhancements and details have corrected many kit faults and elevated it to a high standard! Regards, Bruce
- 64 replies
-
- 1
-
-
- St. Roch
- Billing Boats
- (and 1 more)
-
Again, kudos to you for adding a representation of the steel plating at the bow, as well as the other details that you have picked up on! st. Roch's wooden fastenings were galvanized nails clenched over galvanized washers, so simulating nail heads on your steel would be a realistic way to model this. Regards, Bruce
-
I am also back at my workbench after a long hiatus, and am updating my St. Roch build log. Kudos to you for adding the rudder well, as it is a defining feature of St. Roch, and obviously one that BB did not include. In case you are unaware, the well allowed the rudder to be raised up onto the deck so it would be clear of damaging ice... also the reason a spare rudder was carried! Enjoy and regards, Bruce
-
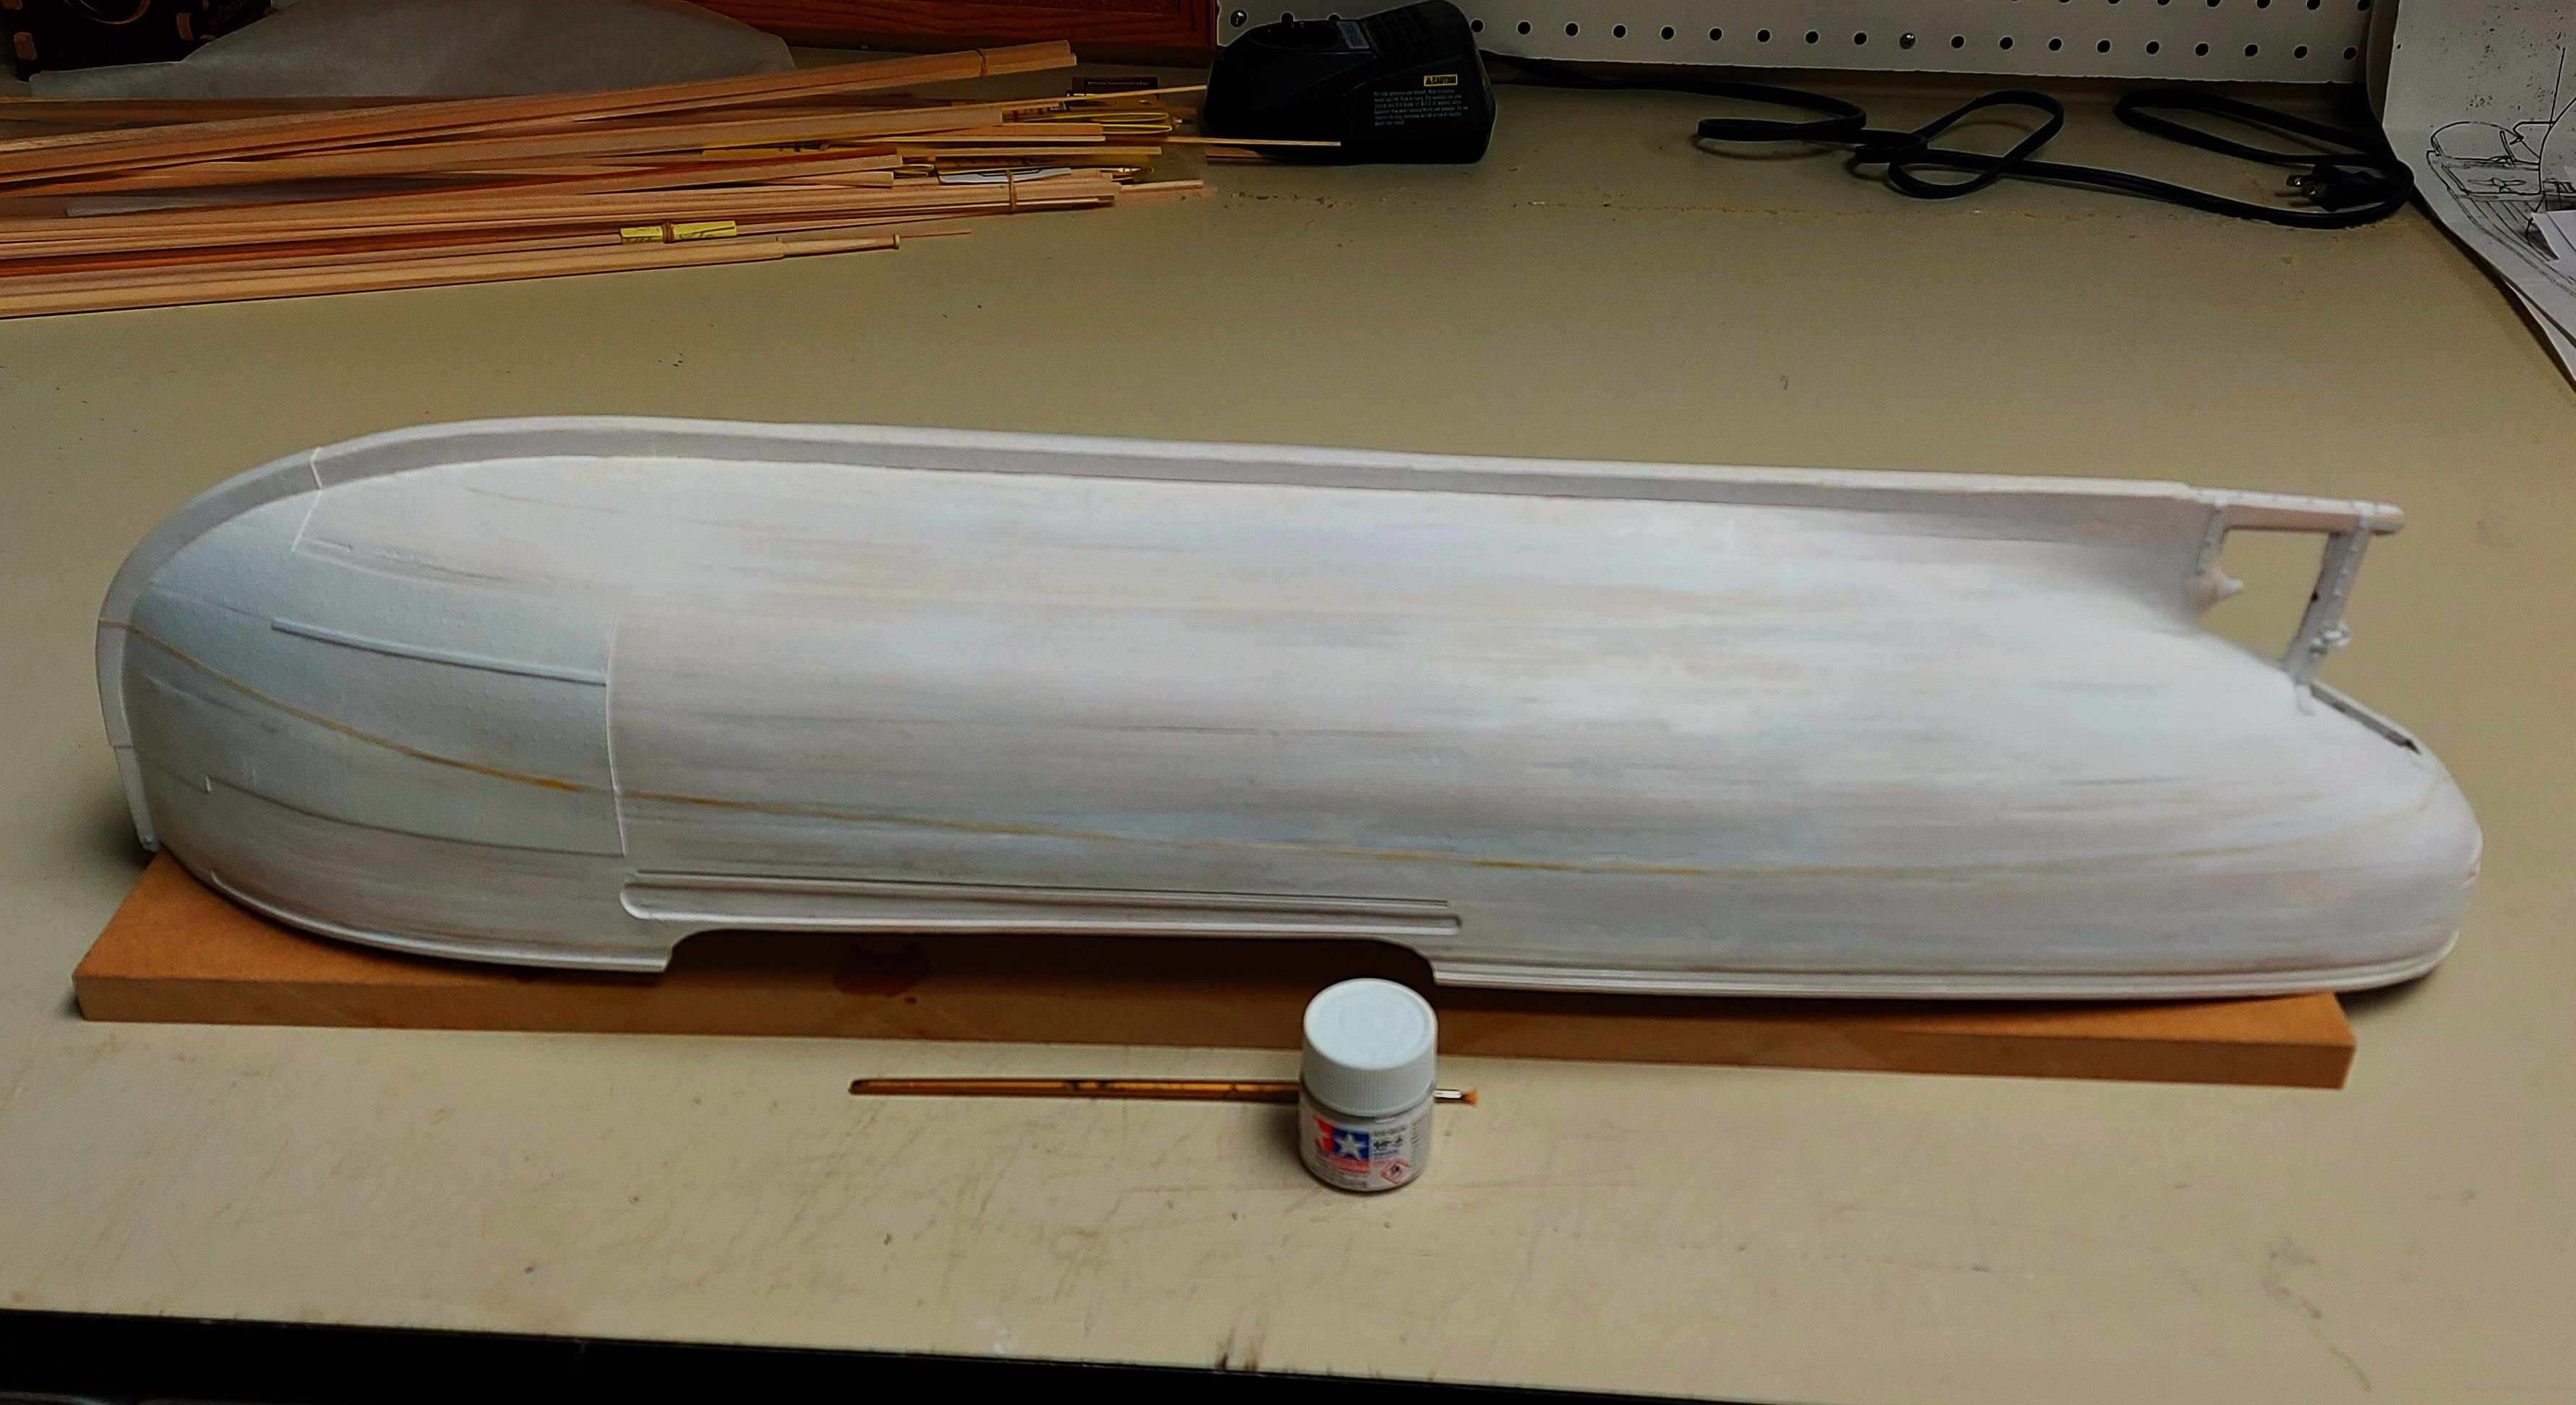
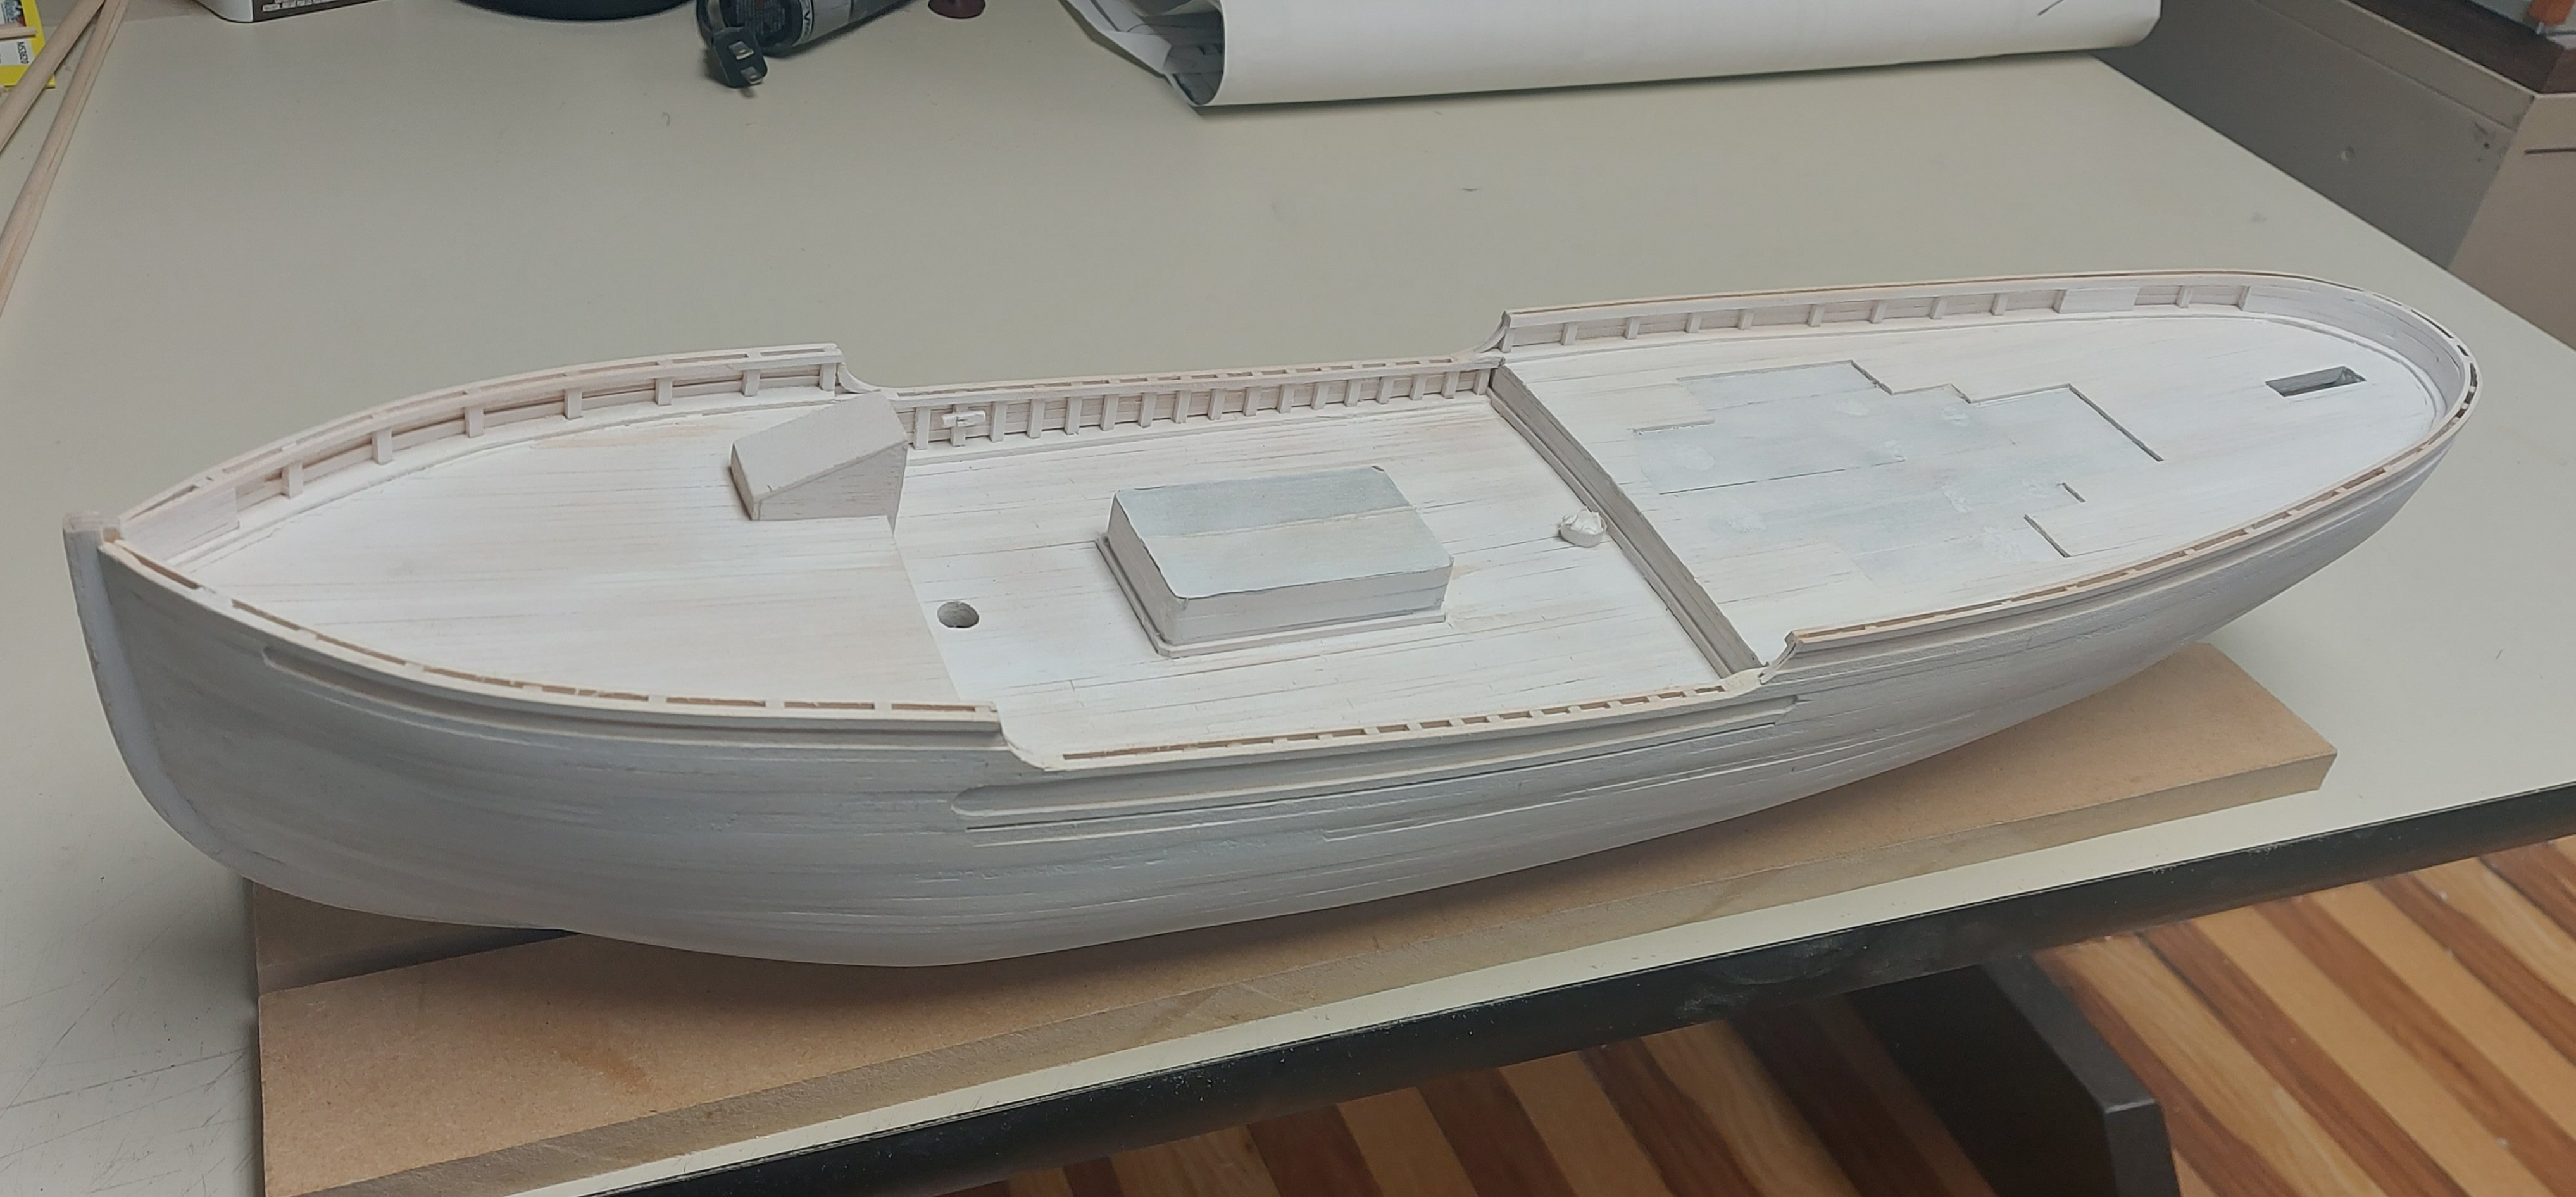
Once I had completed the poop deck planking I finished the poop bulwarks, including the interior planking around the stern and at the fairlead locations. There were also two large wooden chocks fastened to the inside of the bulwarks on the main deck that I carved from basswood, taking the shapes by eye from photos. I pinned them to the stanchion with styrene rod for strength. After a final gap filling where necessary, and sanding overall with 180 grit, it was off to the spray booth for 2 coats of primer sealer, sanded in between each coat and after. I made sure to mask the hatch and main mast openings so I would not get overspray into the hold. This work took me well into October. Next I have to make and install the steel reinforcements at bow and stern, then the ship will be ready for paint!


- 368 replies
-
- 12
-
-
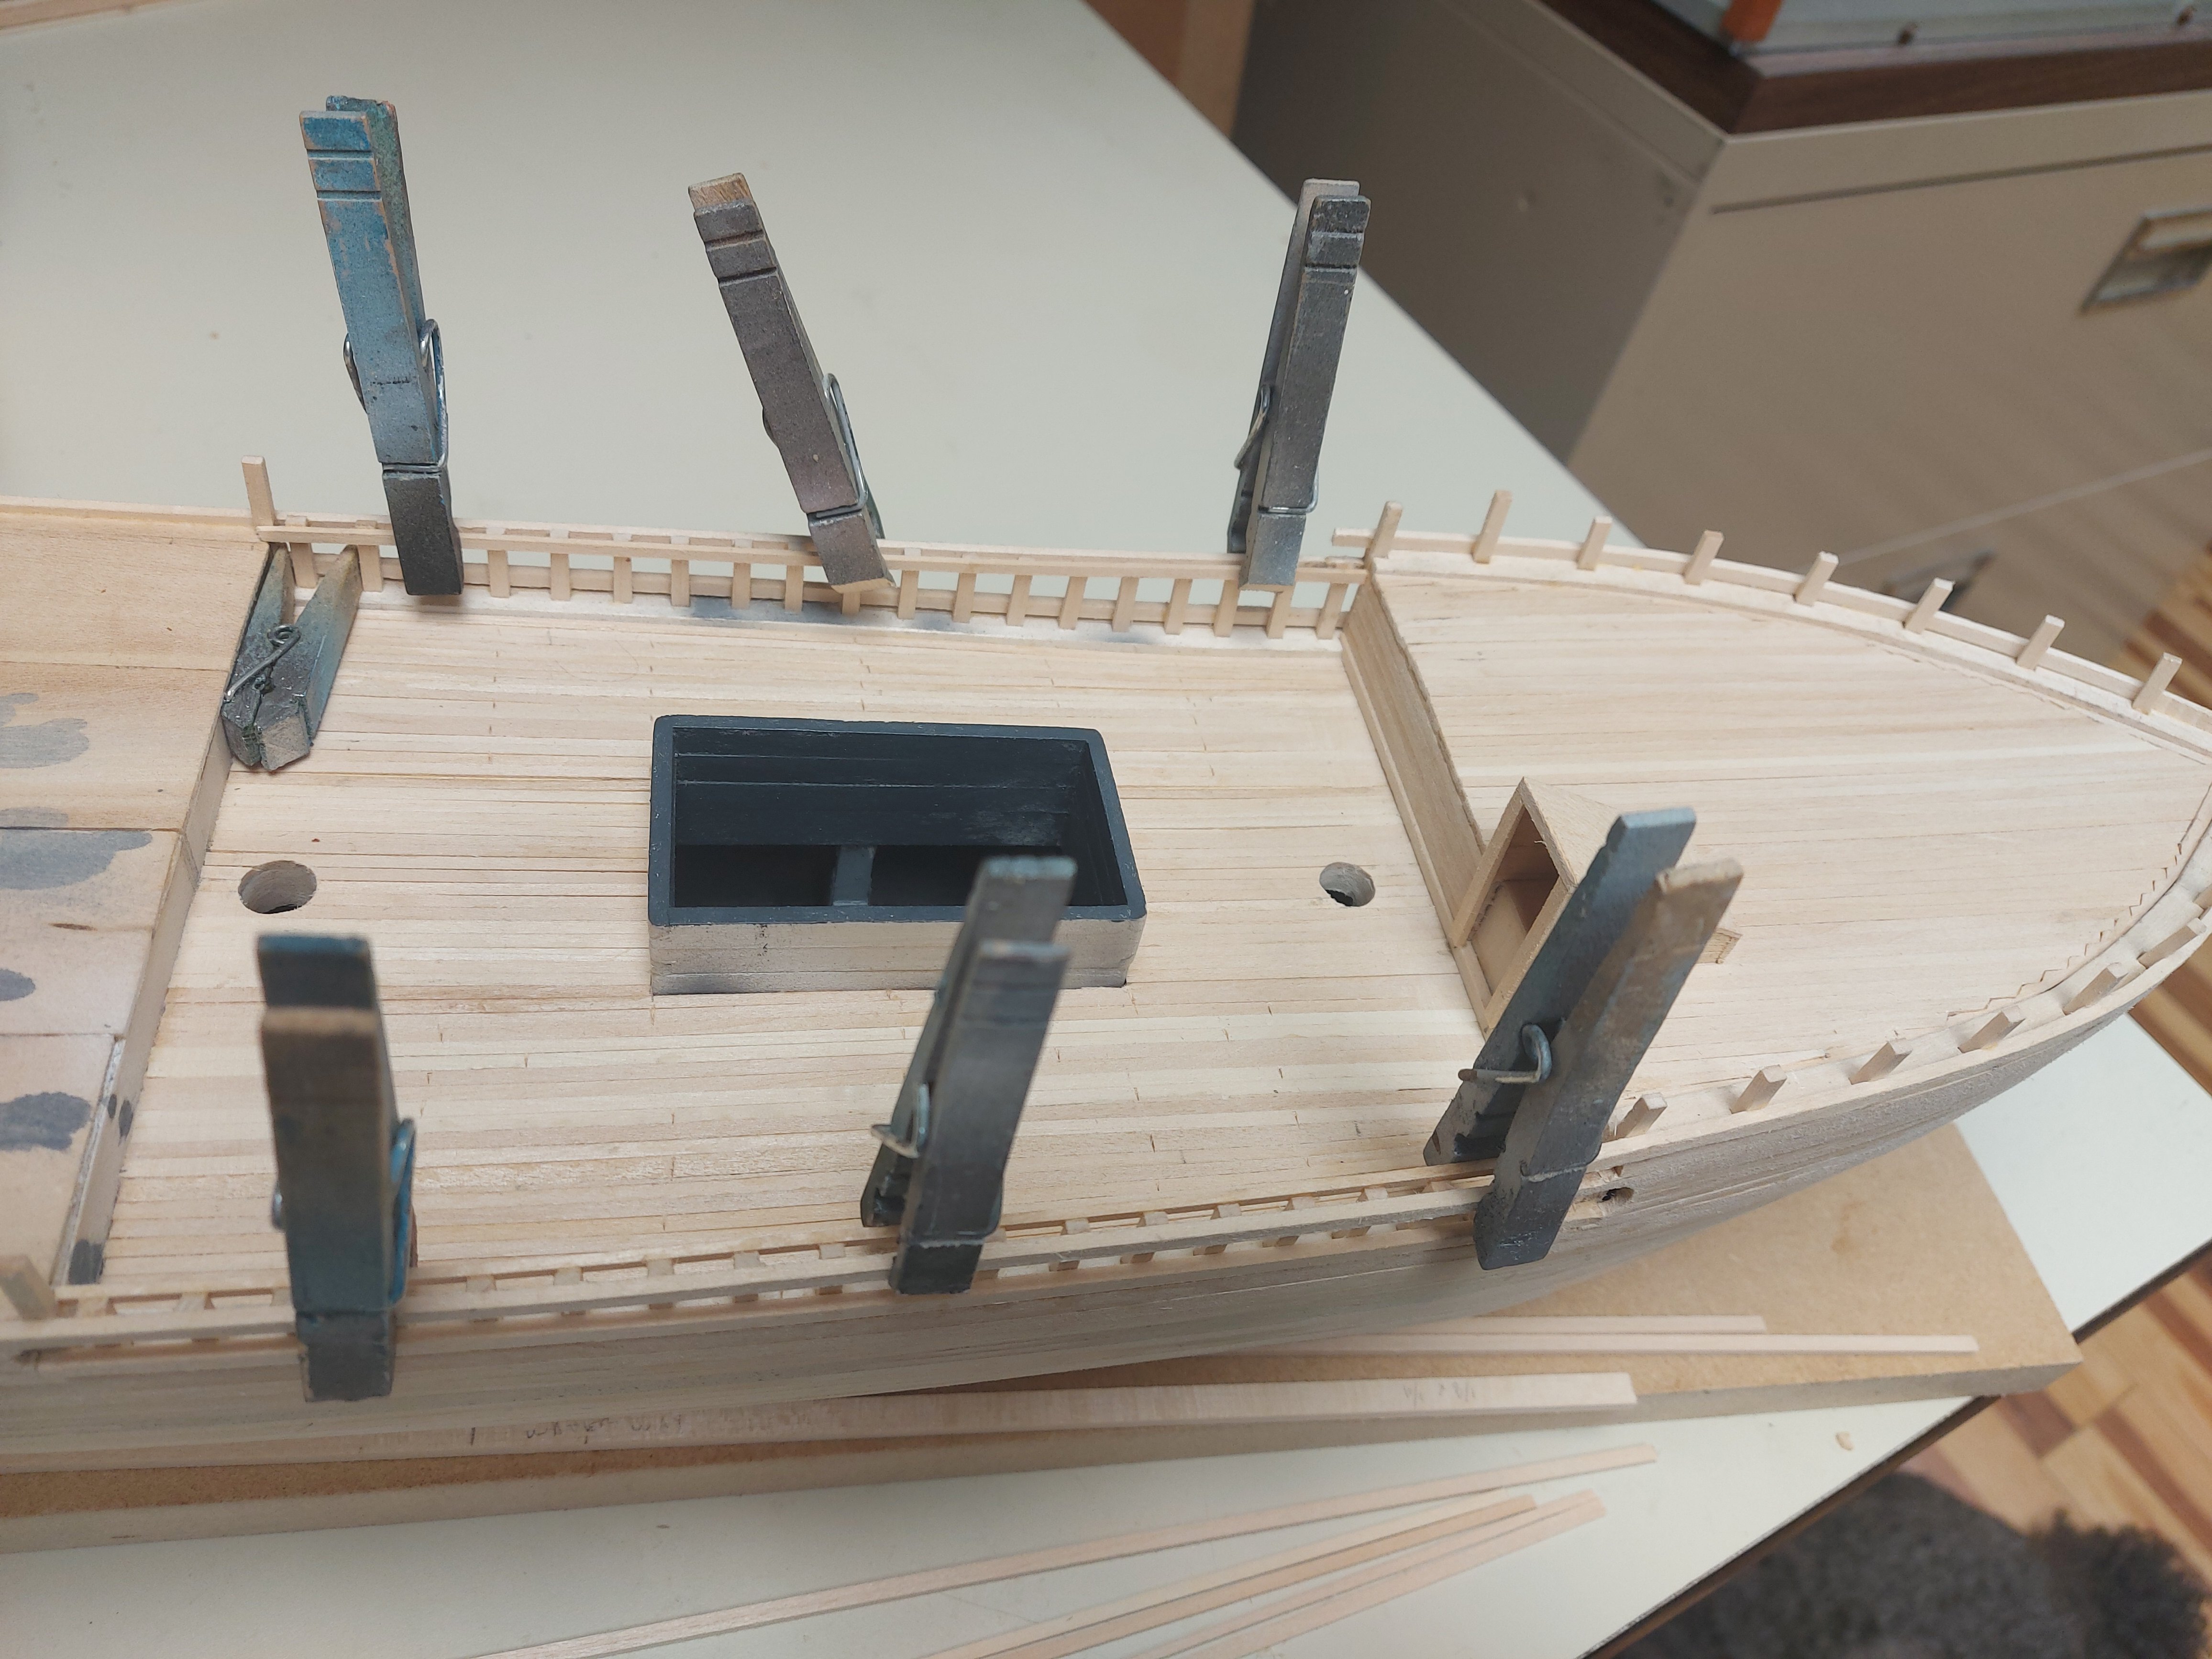
I was now able to begin the poop deck planking, using divides to ensure I started on center, and maintained equal spacing port and starboard. The lower picture shows the work up to the end of September '24.

-
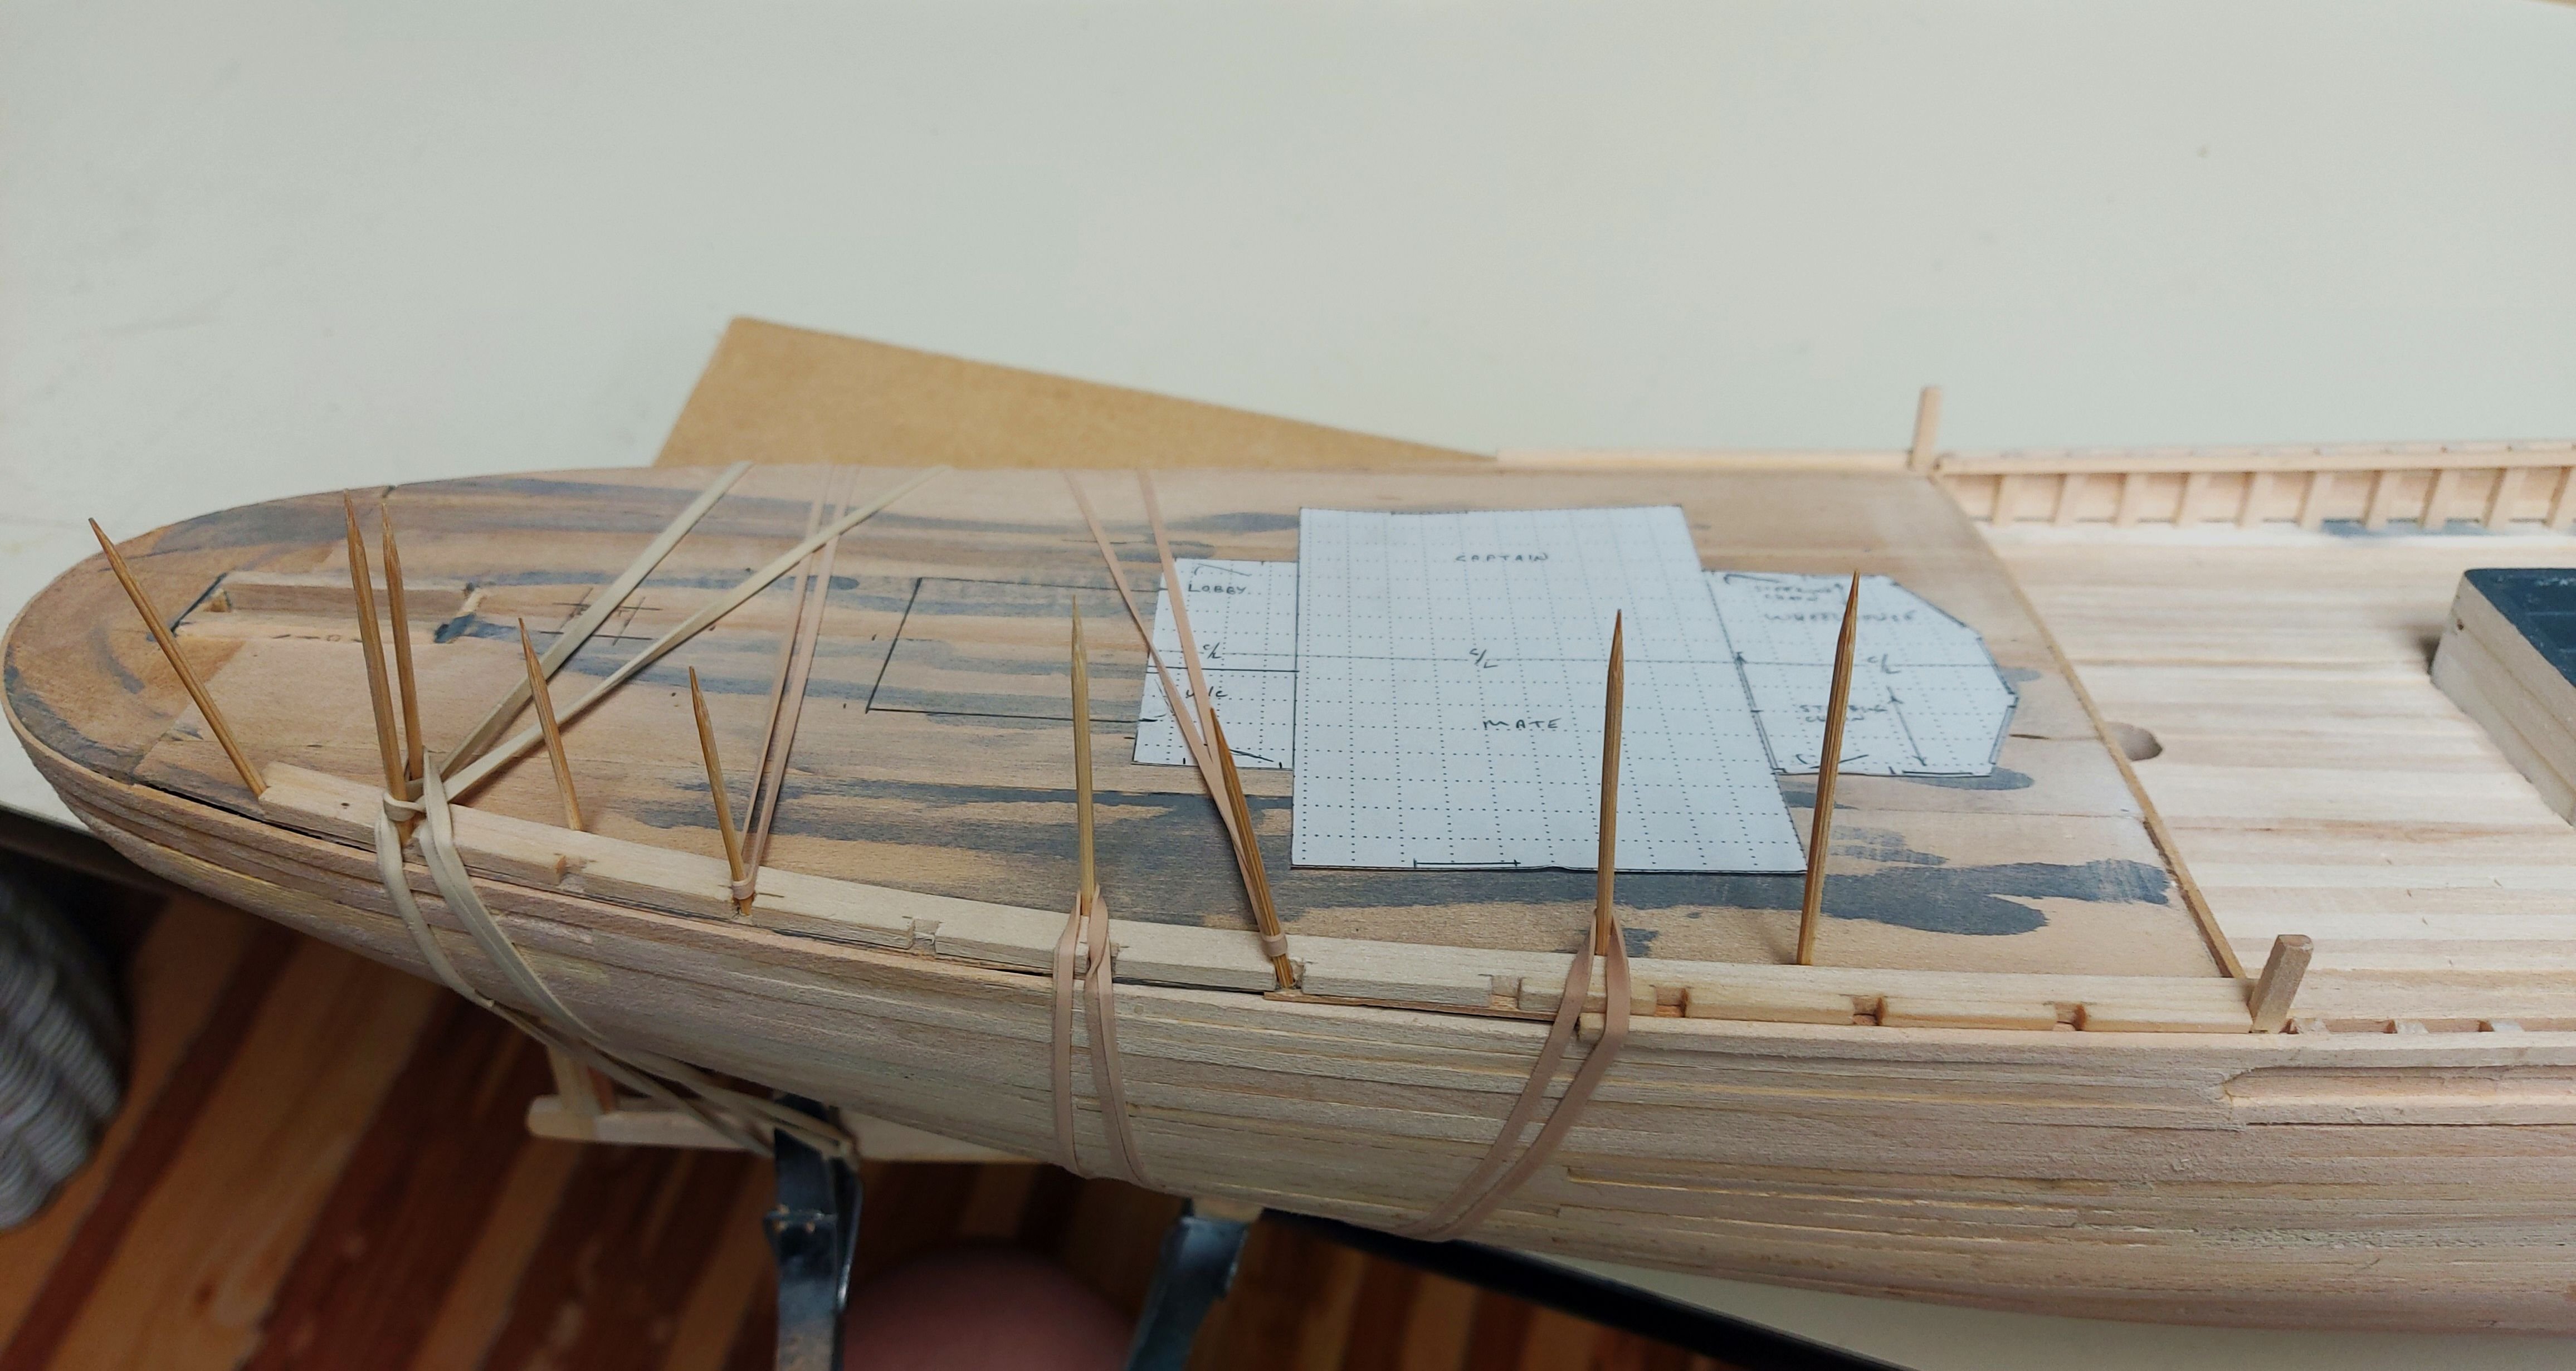
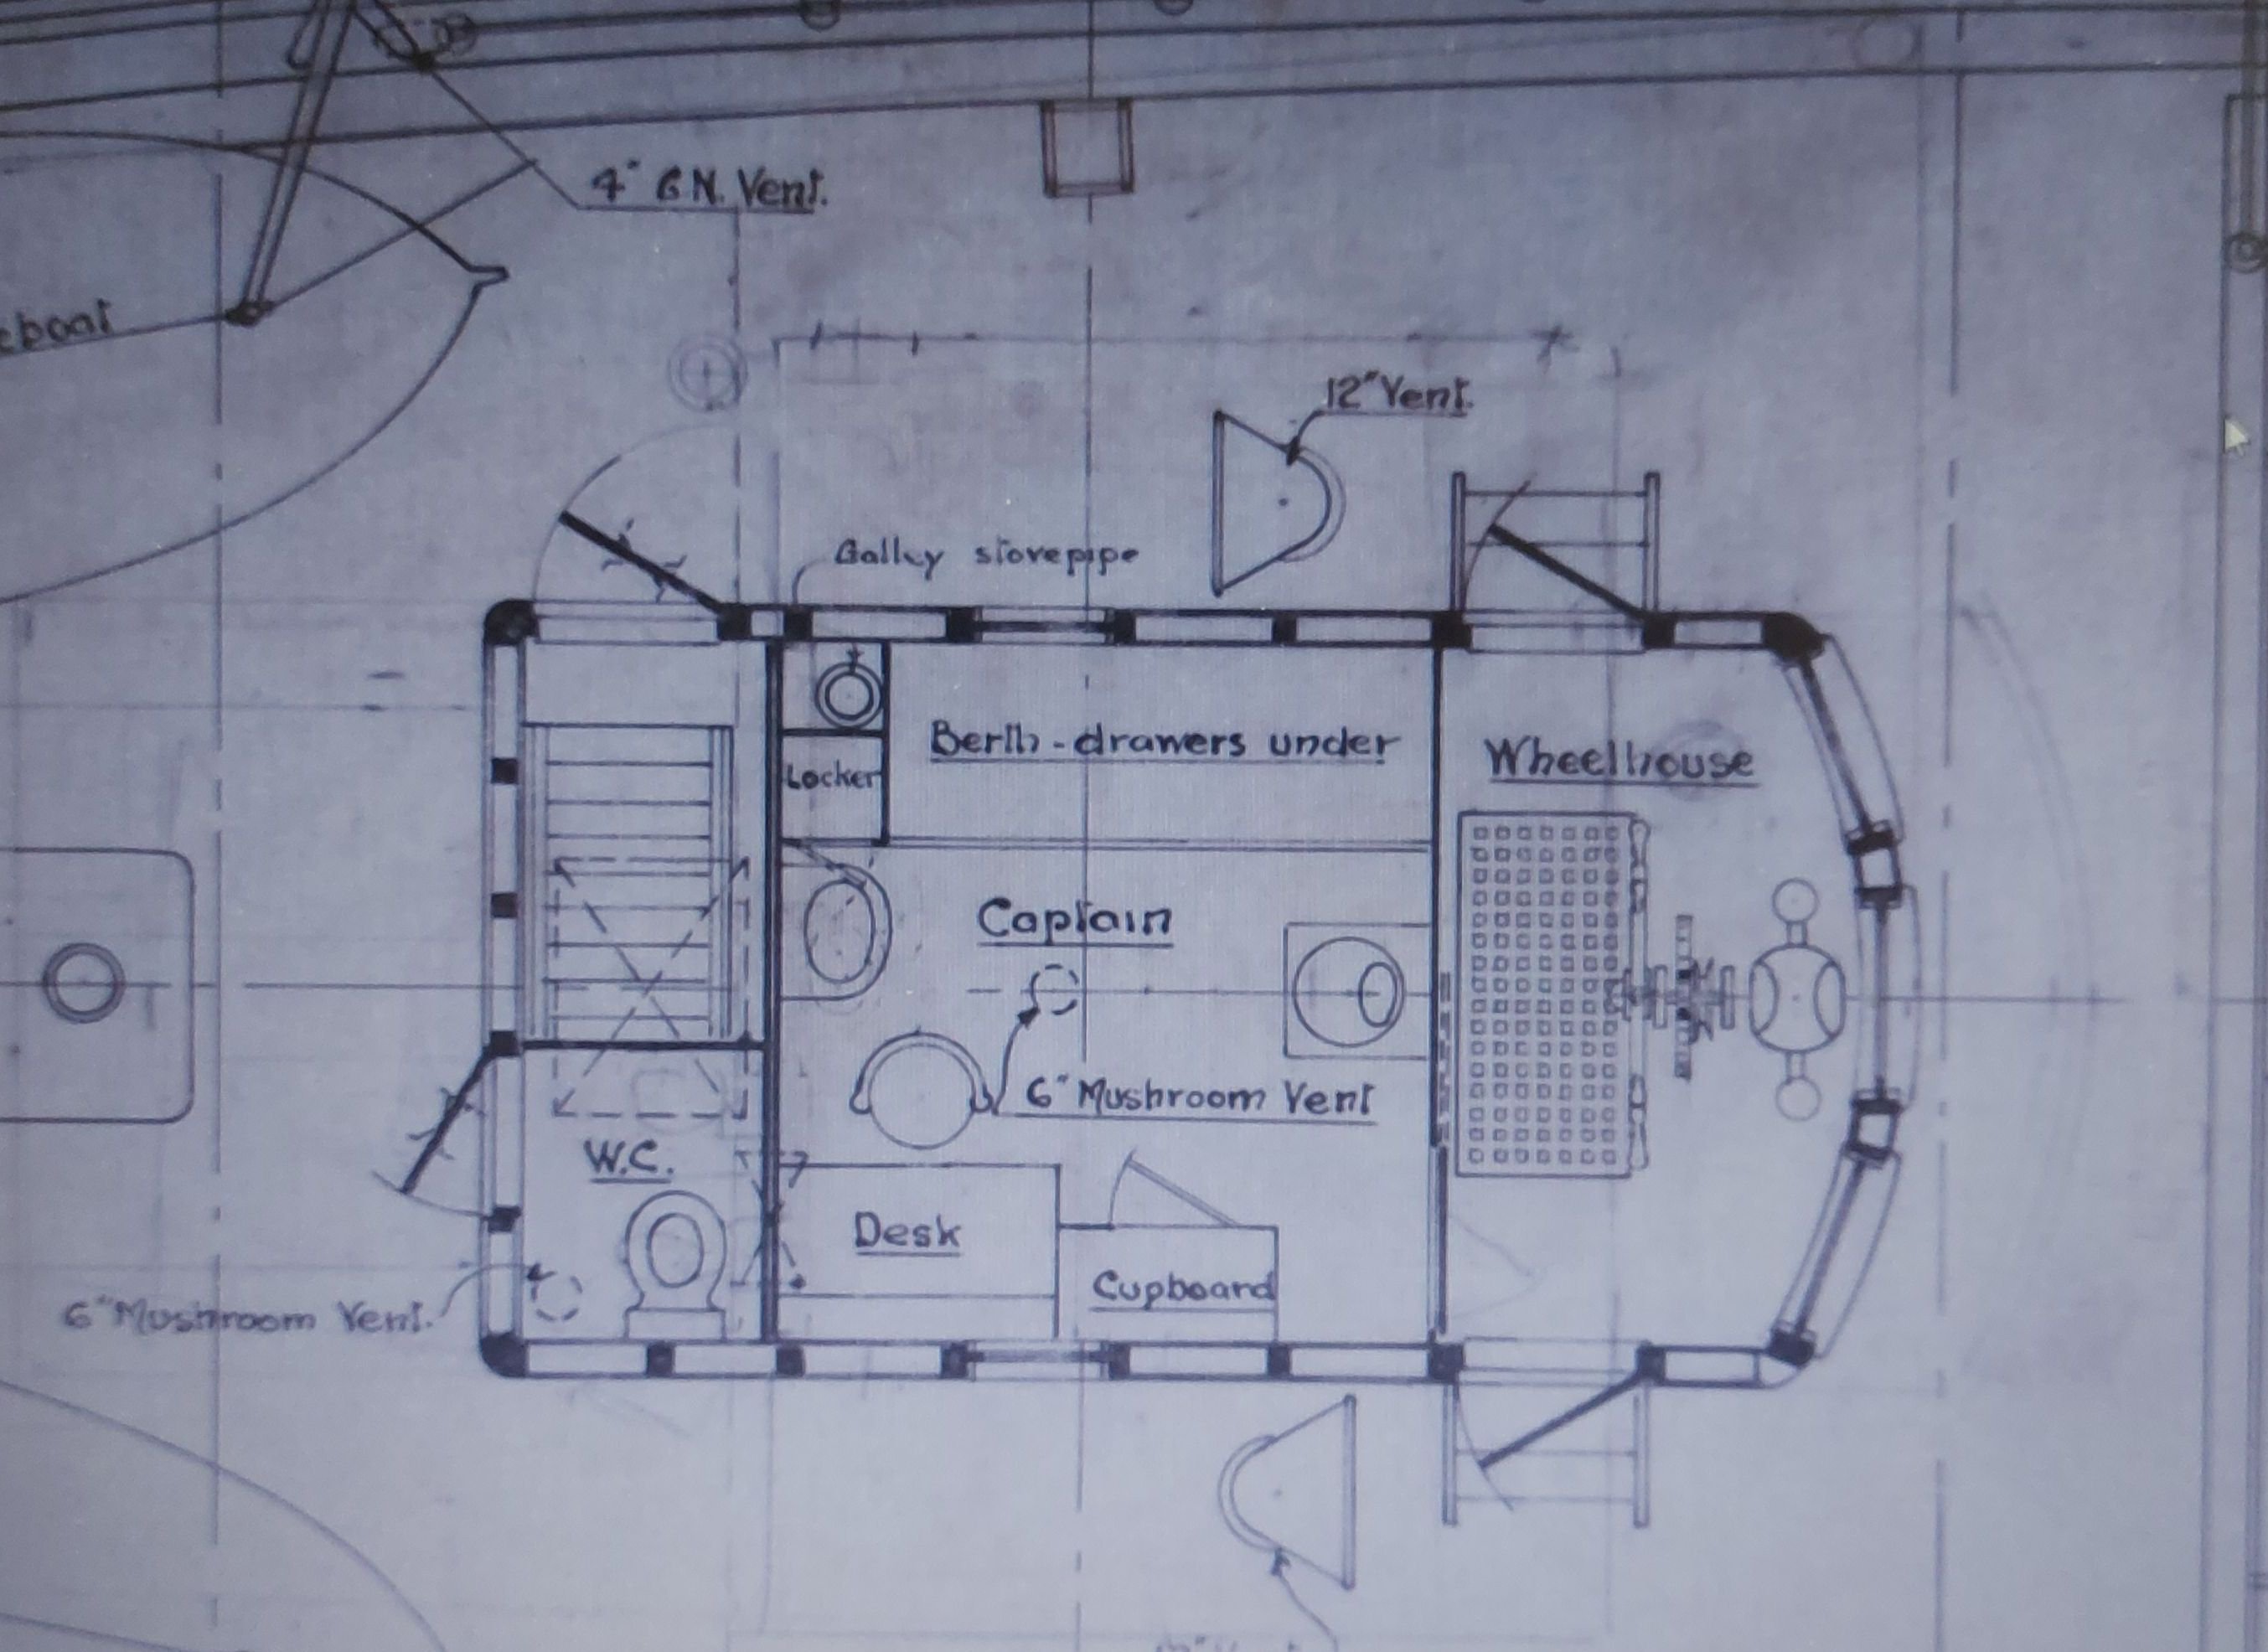
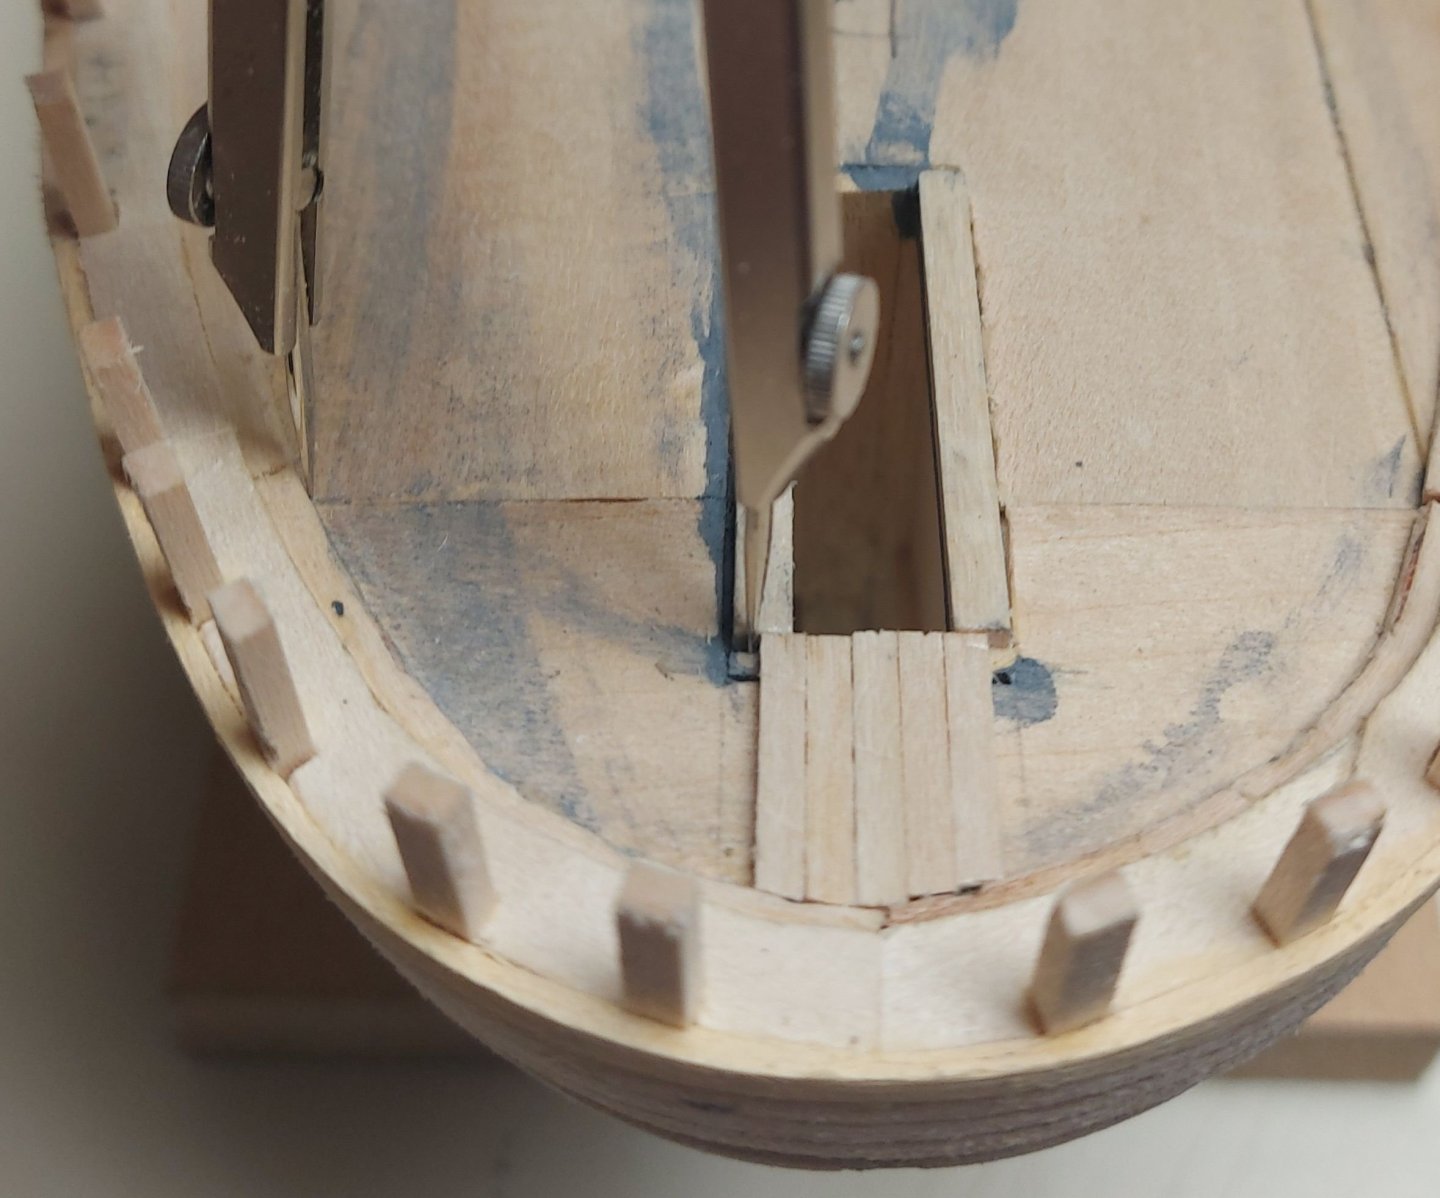
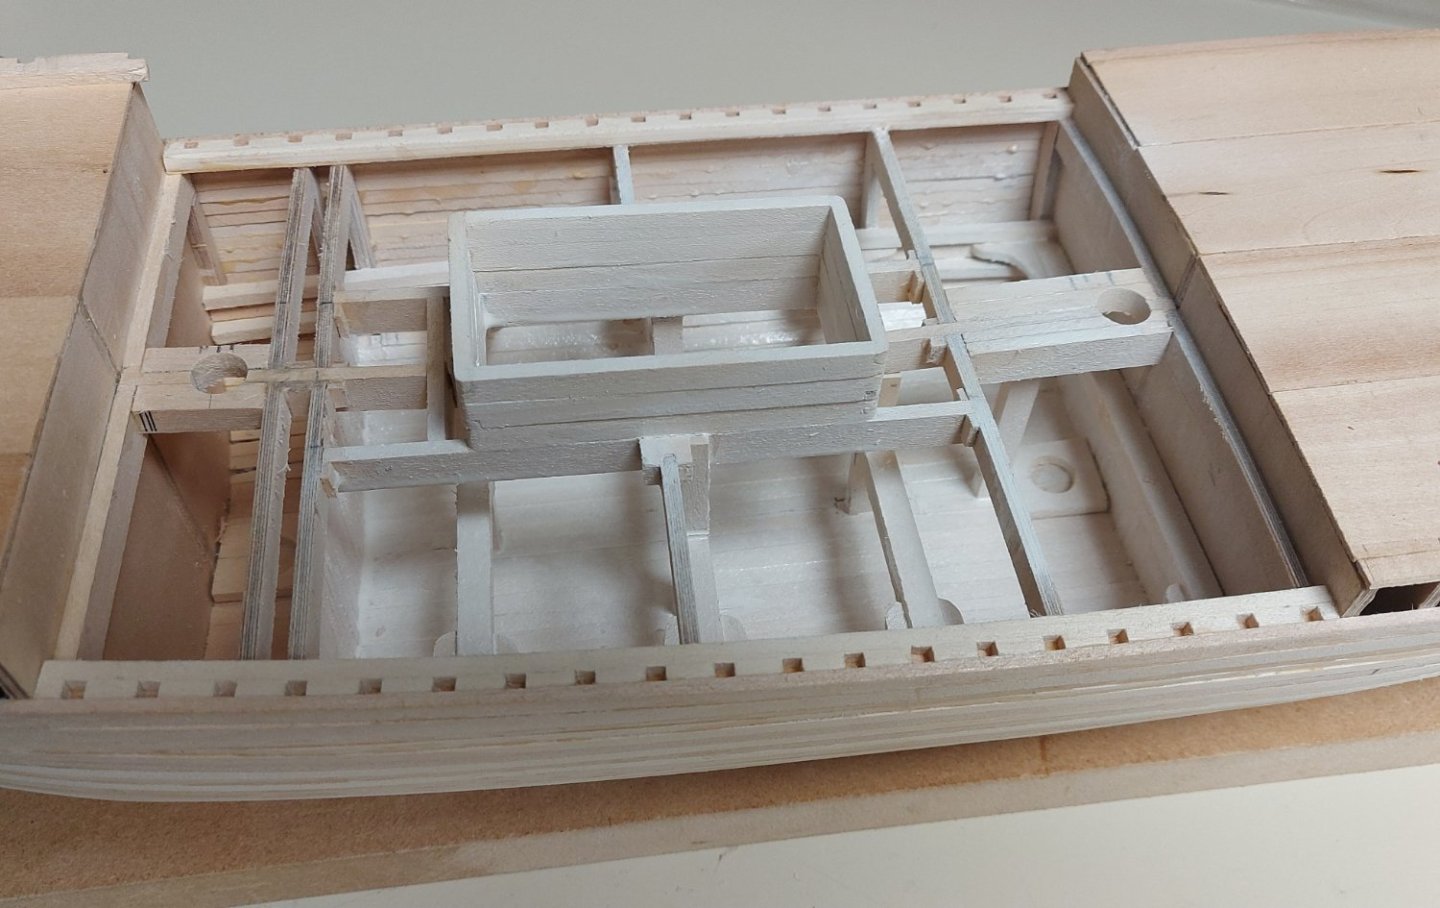
With the deck house size and location sorted out (I will deal with the wireless office shortly), I moved on to the waterway , stanchions, and stern planking... I drilled holes through the subdeck and used round toothpicks to block the waterway plank to the correct shape, and to hold it while the glue cured. I could not get the waterway to steam bend around the stern, so I cut and sanded four sections and fit them into place. Then came the stanchions and wale, the same method I used on the other decks. You can see the outline of the wireless office drawn on the deck at the back of the deckhouse. There were multiple sketches drawn onto the plan. I discarded smaller ones because the radio equipment of the day would not fit. I discarded larger ones because they interfered with the ship's boats, and these were not moved. Like Baby Bear's porridge, this outline was just right! Besides being the same size as the original space on the lower deck, scaling from photos matches the length of this extension at the back of the deckhouse.


-
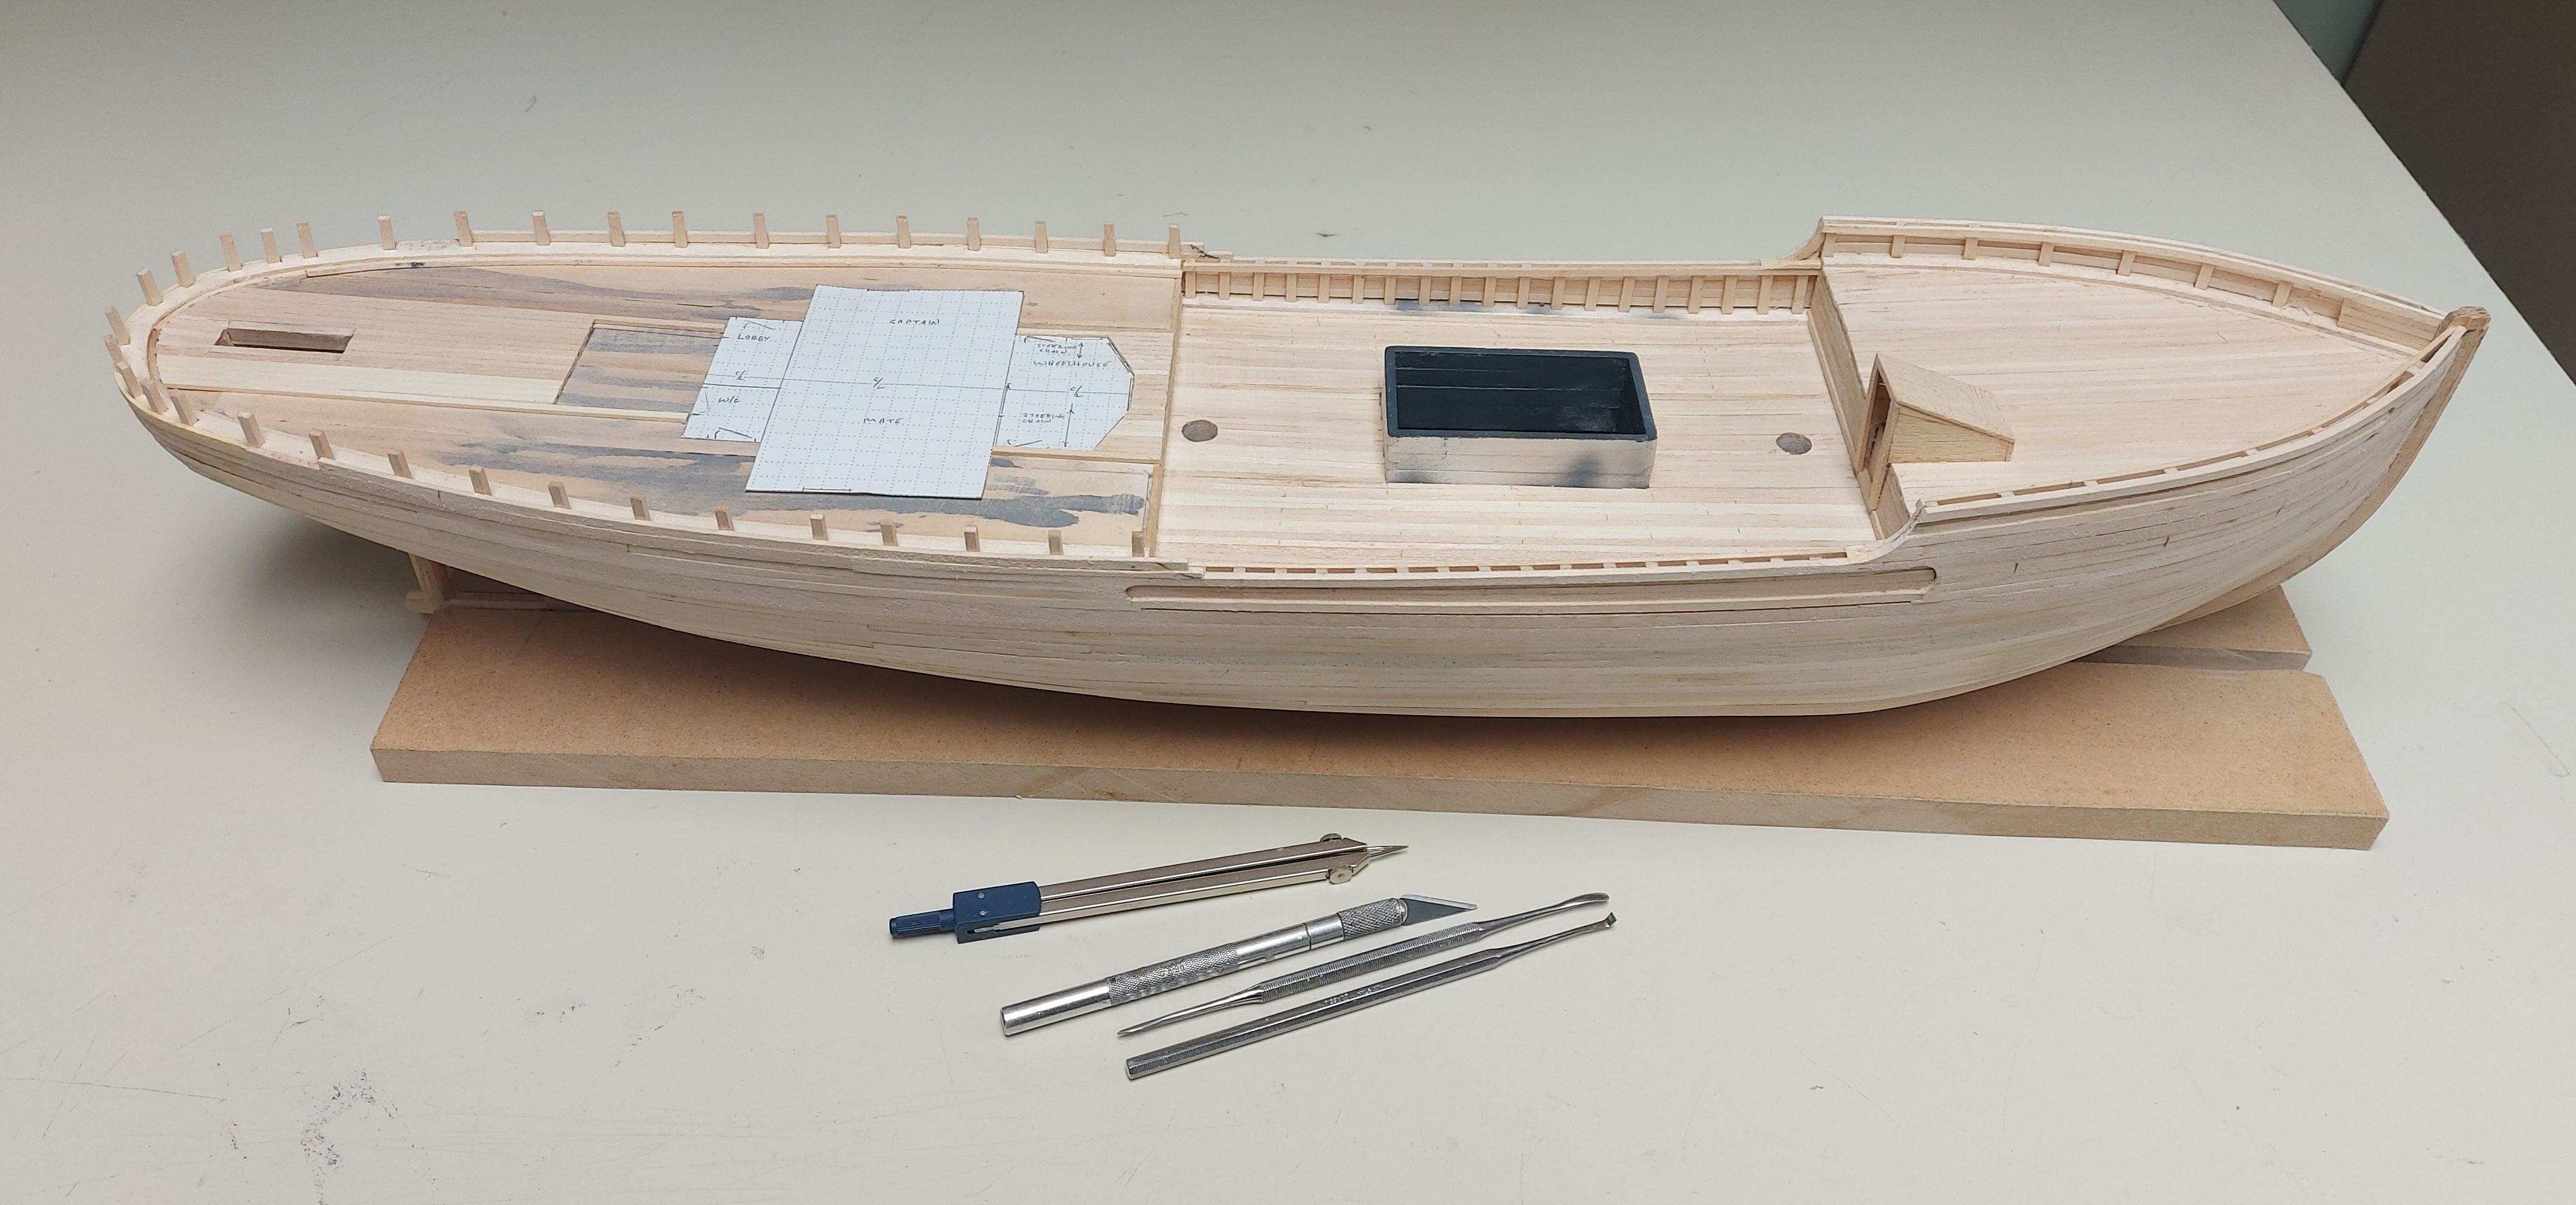
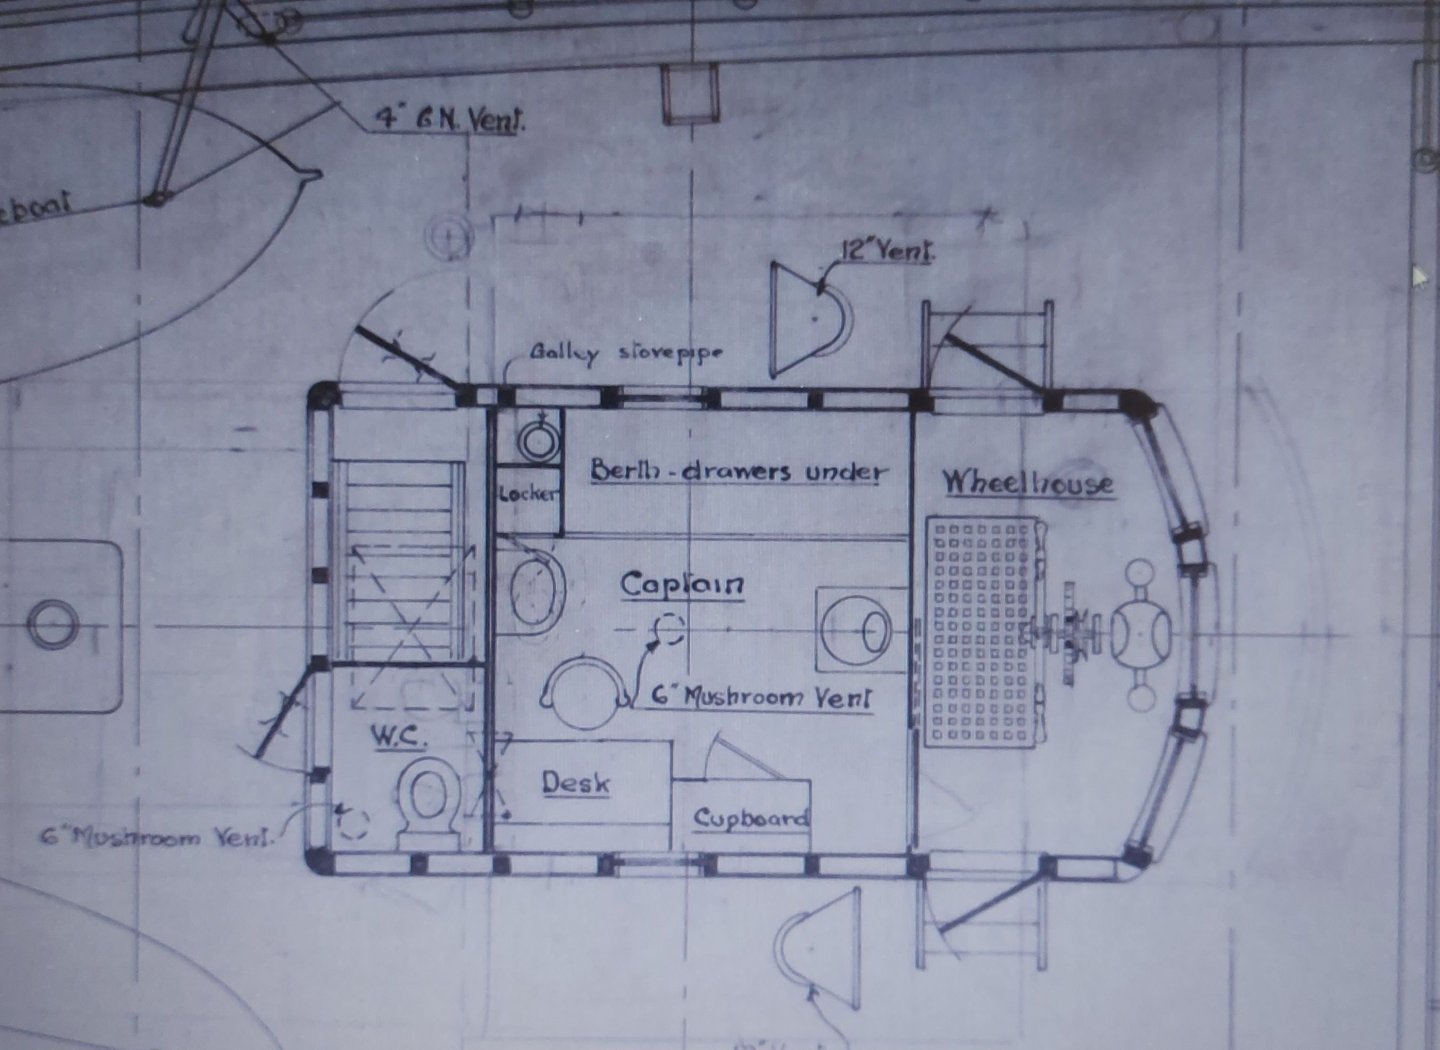
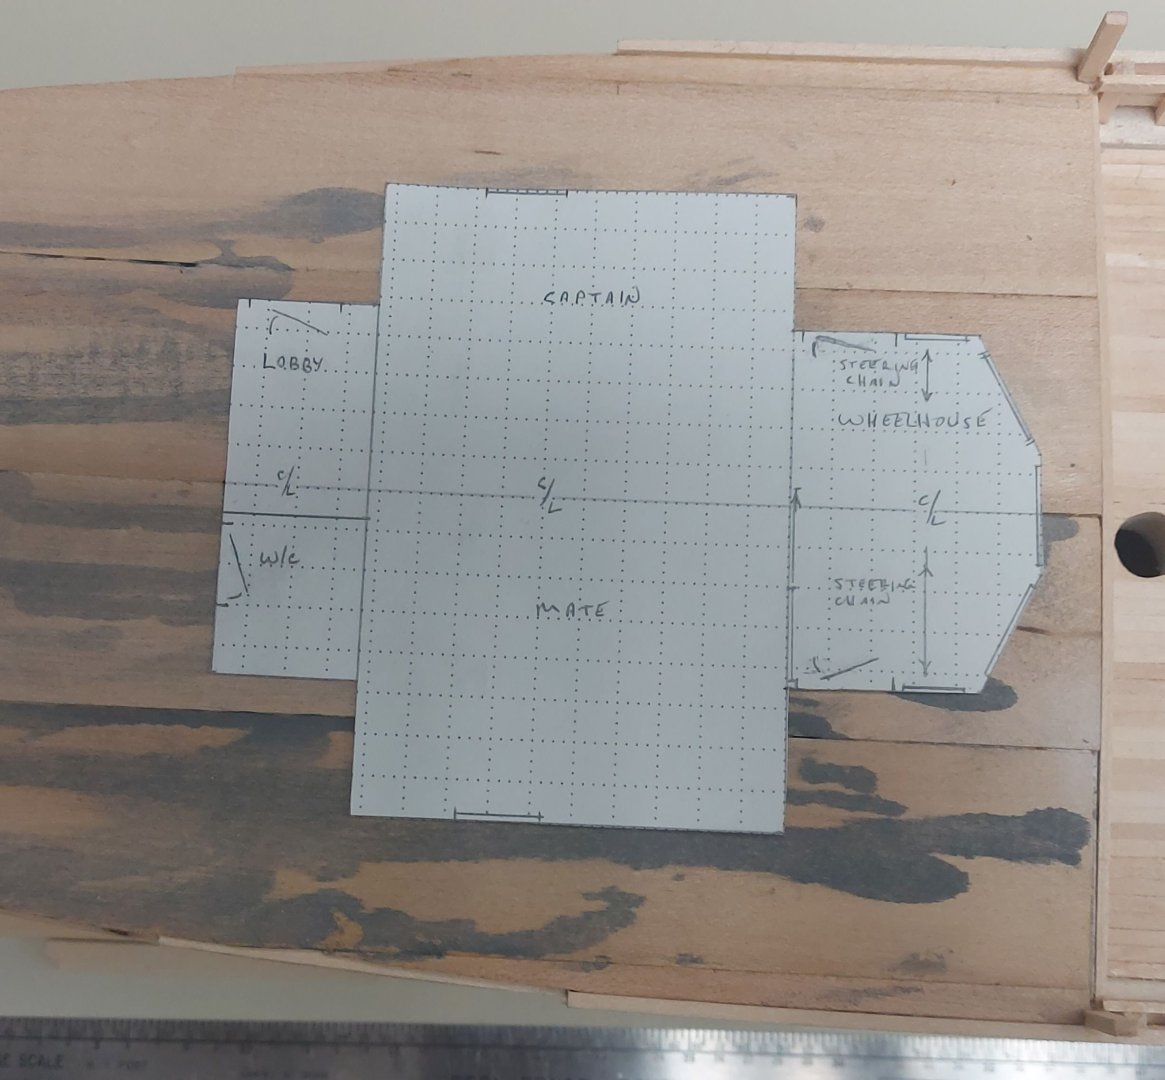
Before starting the poop deck planking I needed to determine the size and location of the deckhouse. When St. Roch returned to Vancouver from her maiden voyage the original house was leaking and badly warped after two years in the Arctic. It was to be replaced, but her captain, Henry Larsen, wanted a larger house. Besides the wheel house and captain's cabin, he wanted room to move the mate's cabin and the wireless office up from the lower deck. This larger deckhouse served St. Roch from 1930 to 1944, but no plans of it exist, and only partial photos. There is a hand drawn sketch on the original general arrangement drawing, presumably done by Larsen in 1930, outlining a larger deckhouse. It was common practice to work off sketches or on a handshake without preparing formal plans. Scaling from photographs matches the sketch on the plan, so this is what I will model. The pictures show the sketch on the original plan, note the wheel house moved forward and the larger cabin area. The lobby and head would not be changed. The pictures also show my scaled drawing applied to the poop deck. Yes, the gray paint was spilled from my airbrush cup when I painted the hold interior!
-
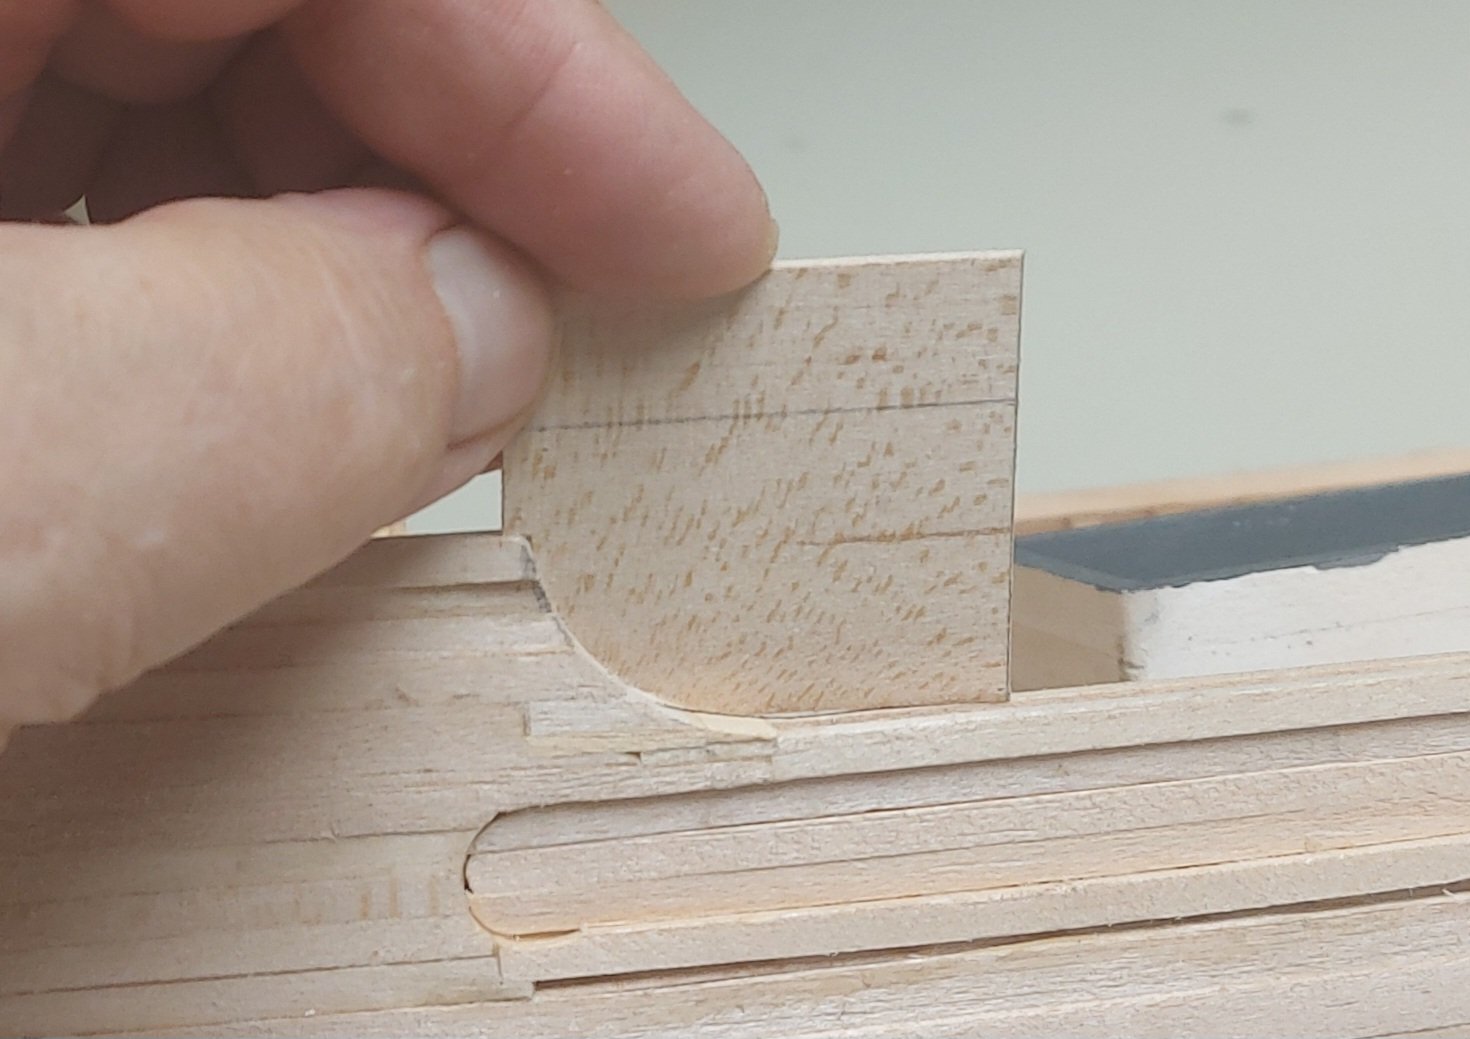
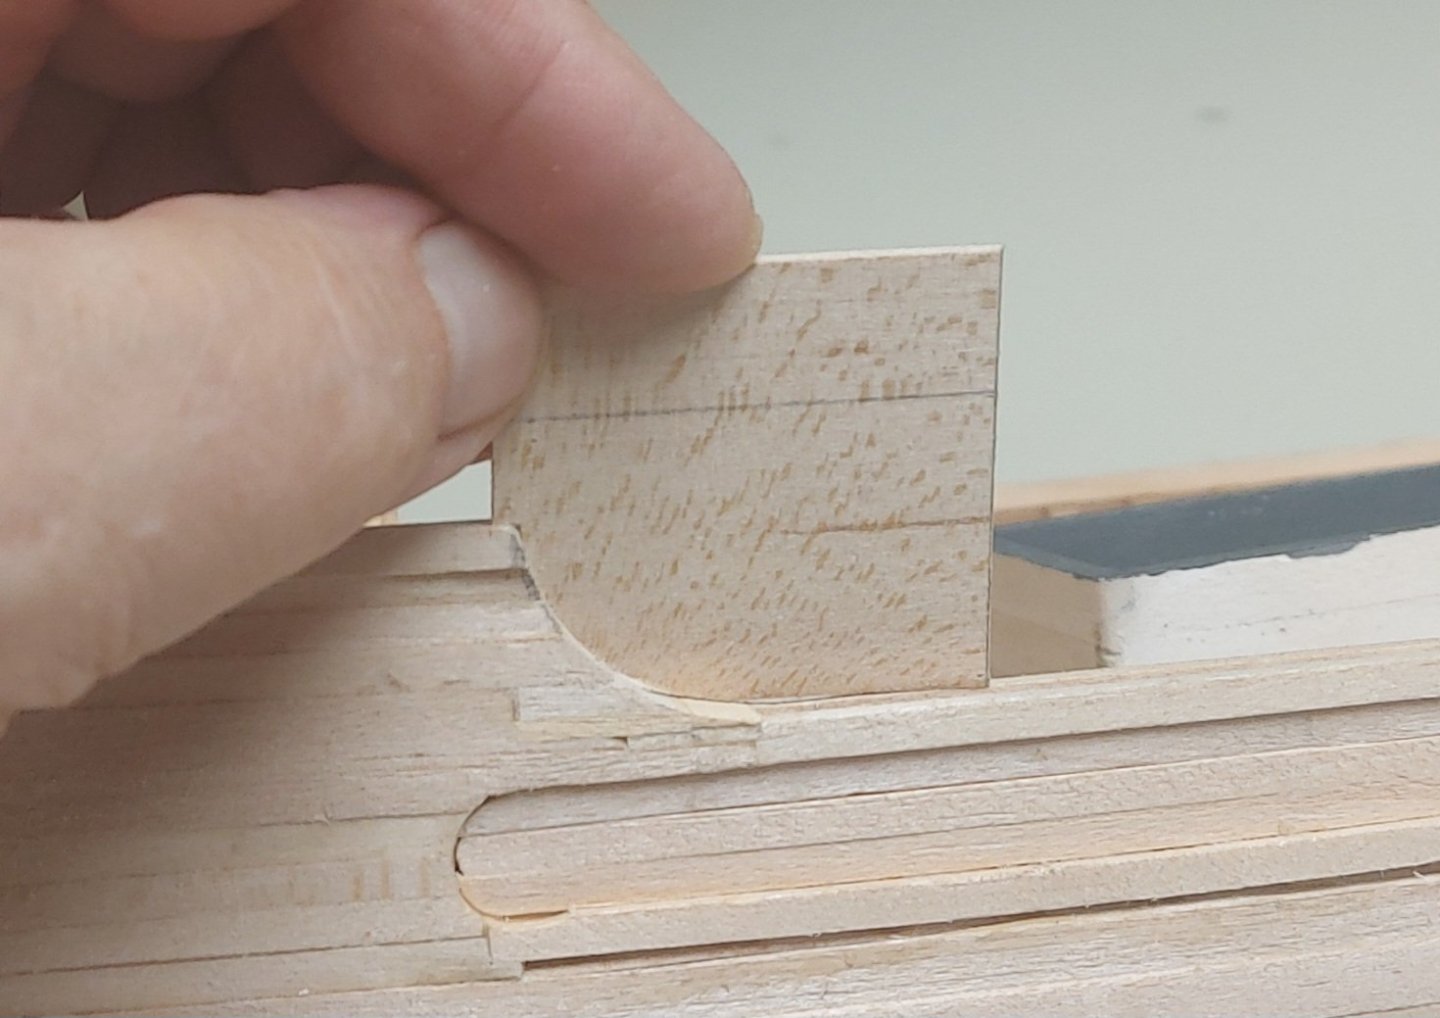
The bulwarks sweep neatly as they transition between the deck levels. I scaled this feature off my original plans and transferred the shape to a piece of scrap wood. This jig allowed me to create accurate and repeatable sweeps.
-
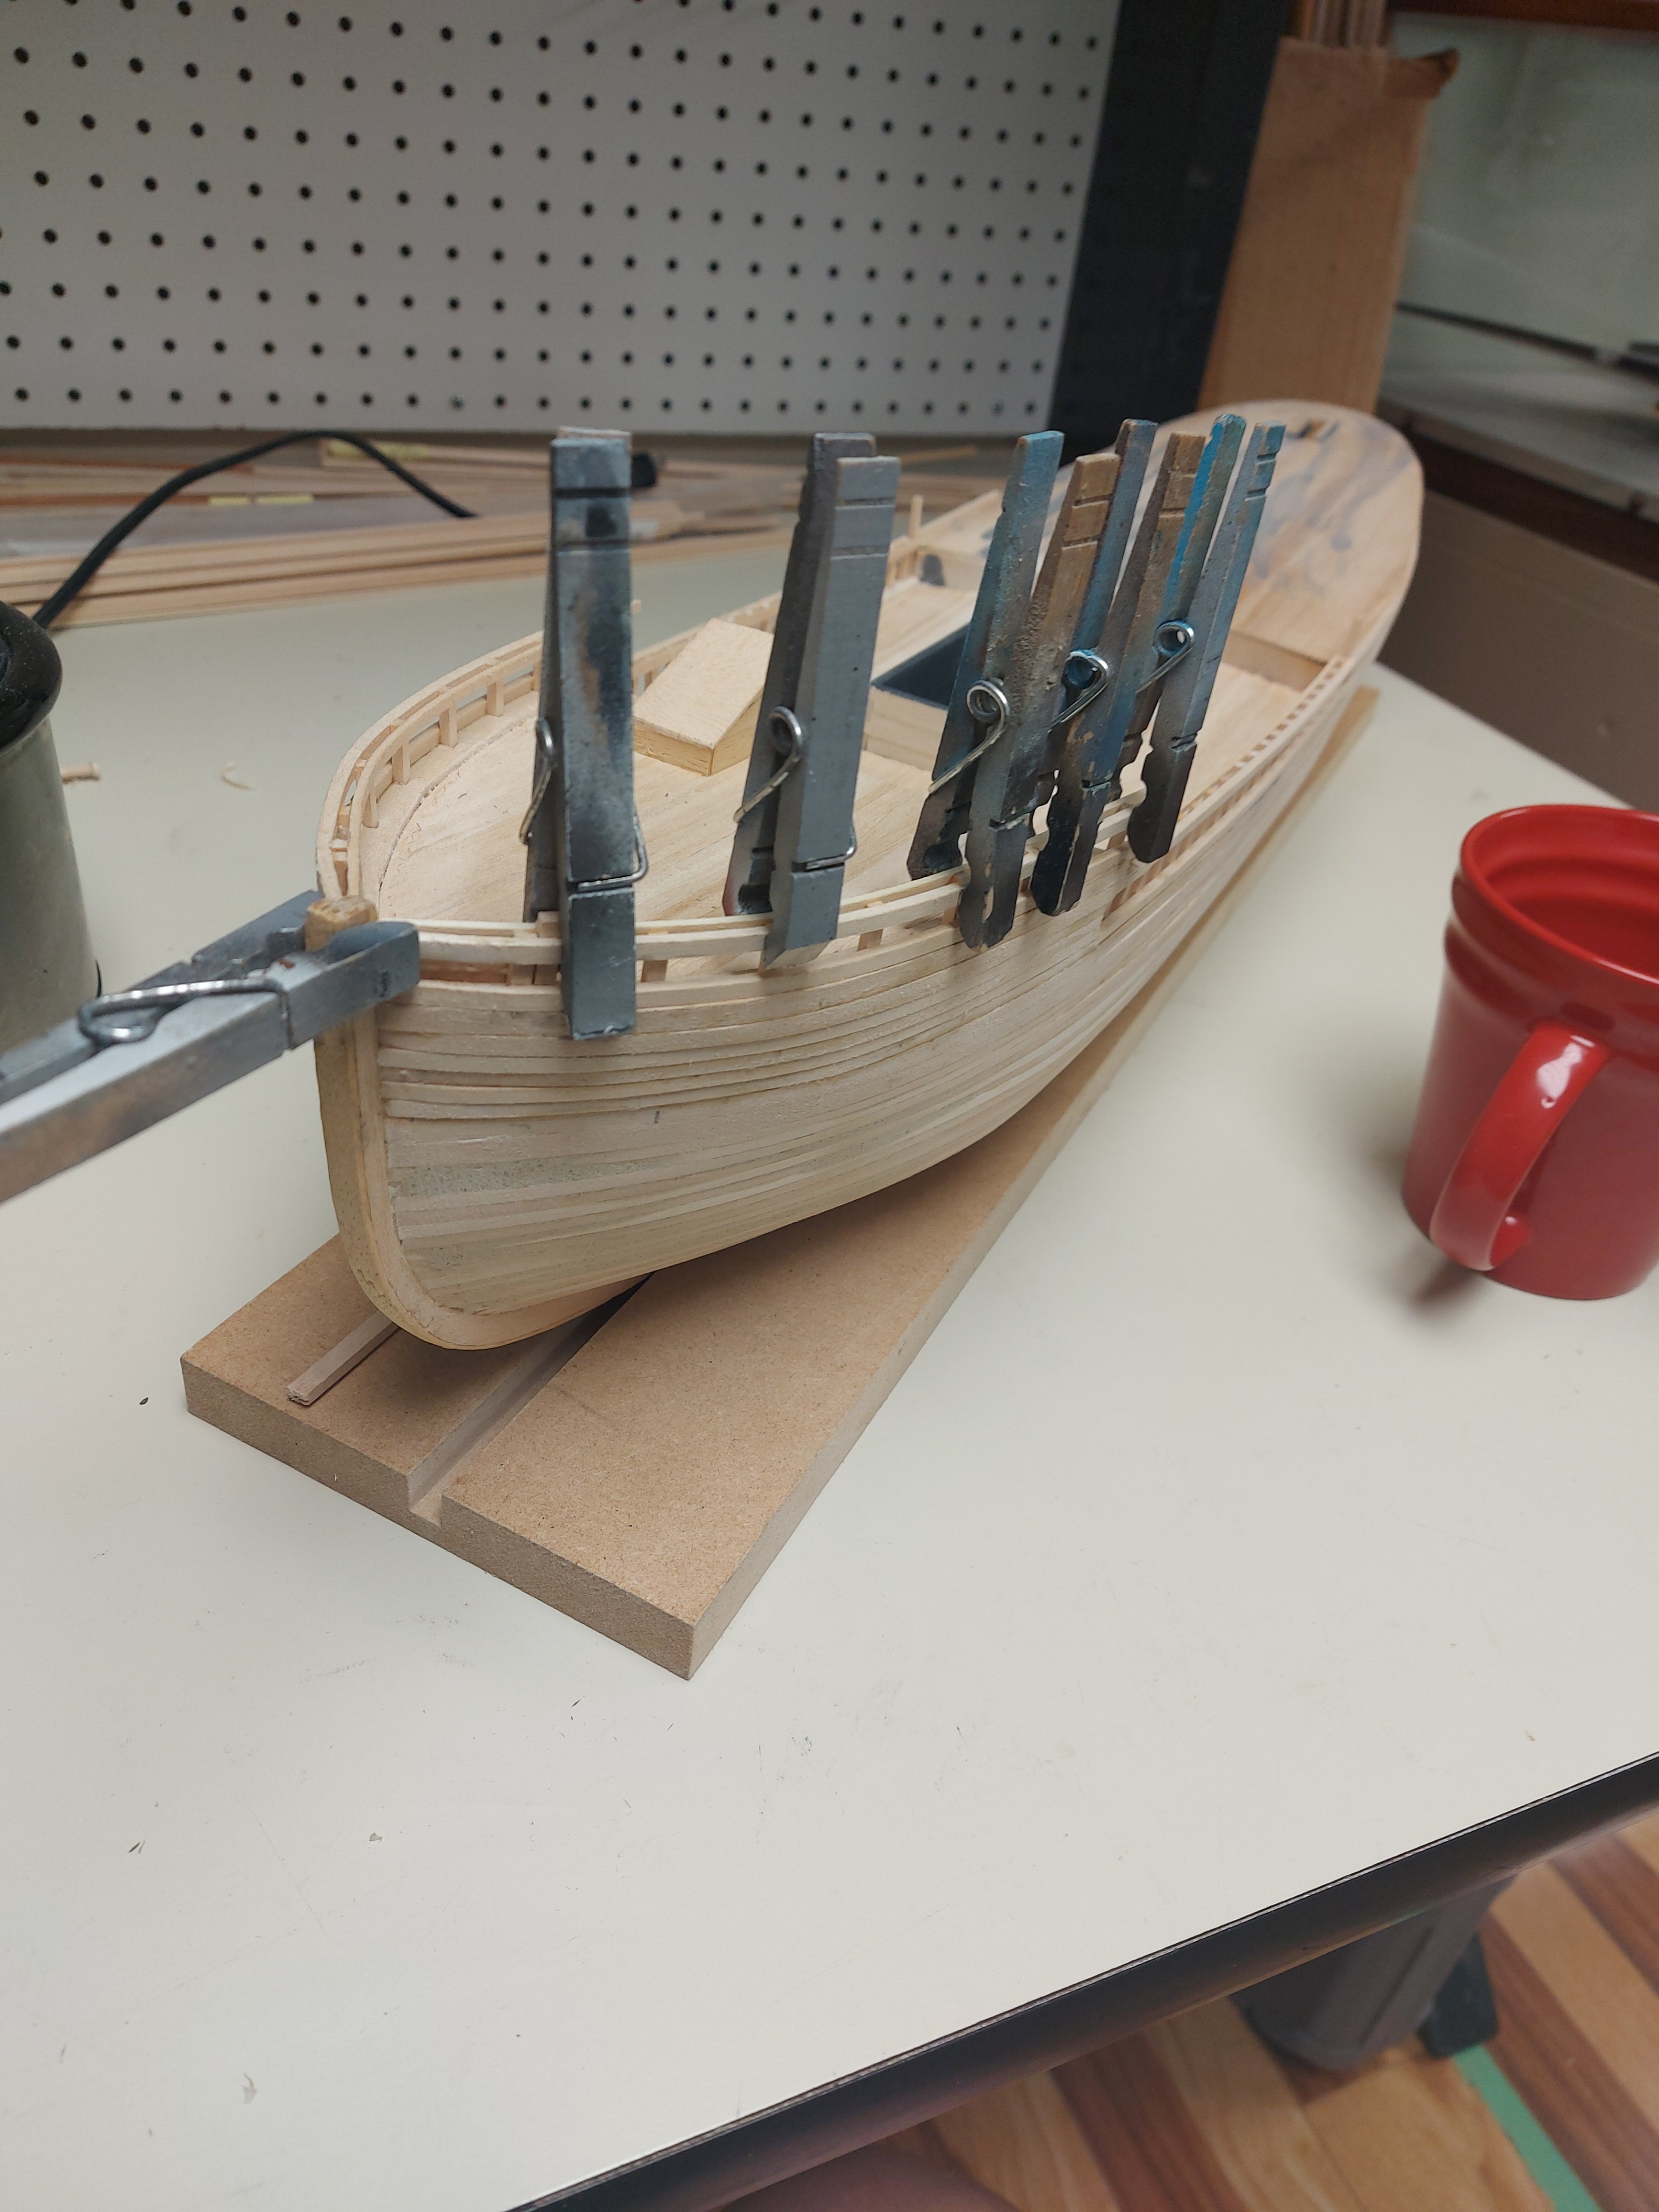
With the main and fore deck planking complete I moved on to setting the stanchions and planking the bulwarks. I used the same techniques as on my earlier planking. The caps between the upper and lower bulwark planks will be filled in with narrower strips, a feature found on the actual ship. I took note that the main deck bulwark lowers as you move aft. I made scarph joints to transition from the main to the fore bulwarks, and the rounded ends of the openings were scored with appropriately sized brad point bits, turned manually, then carved with my X-Acto knife.


- 368 replies
-
- 12
-
-
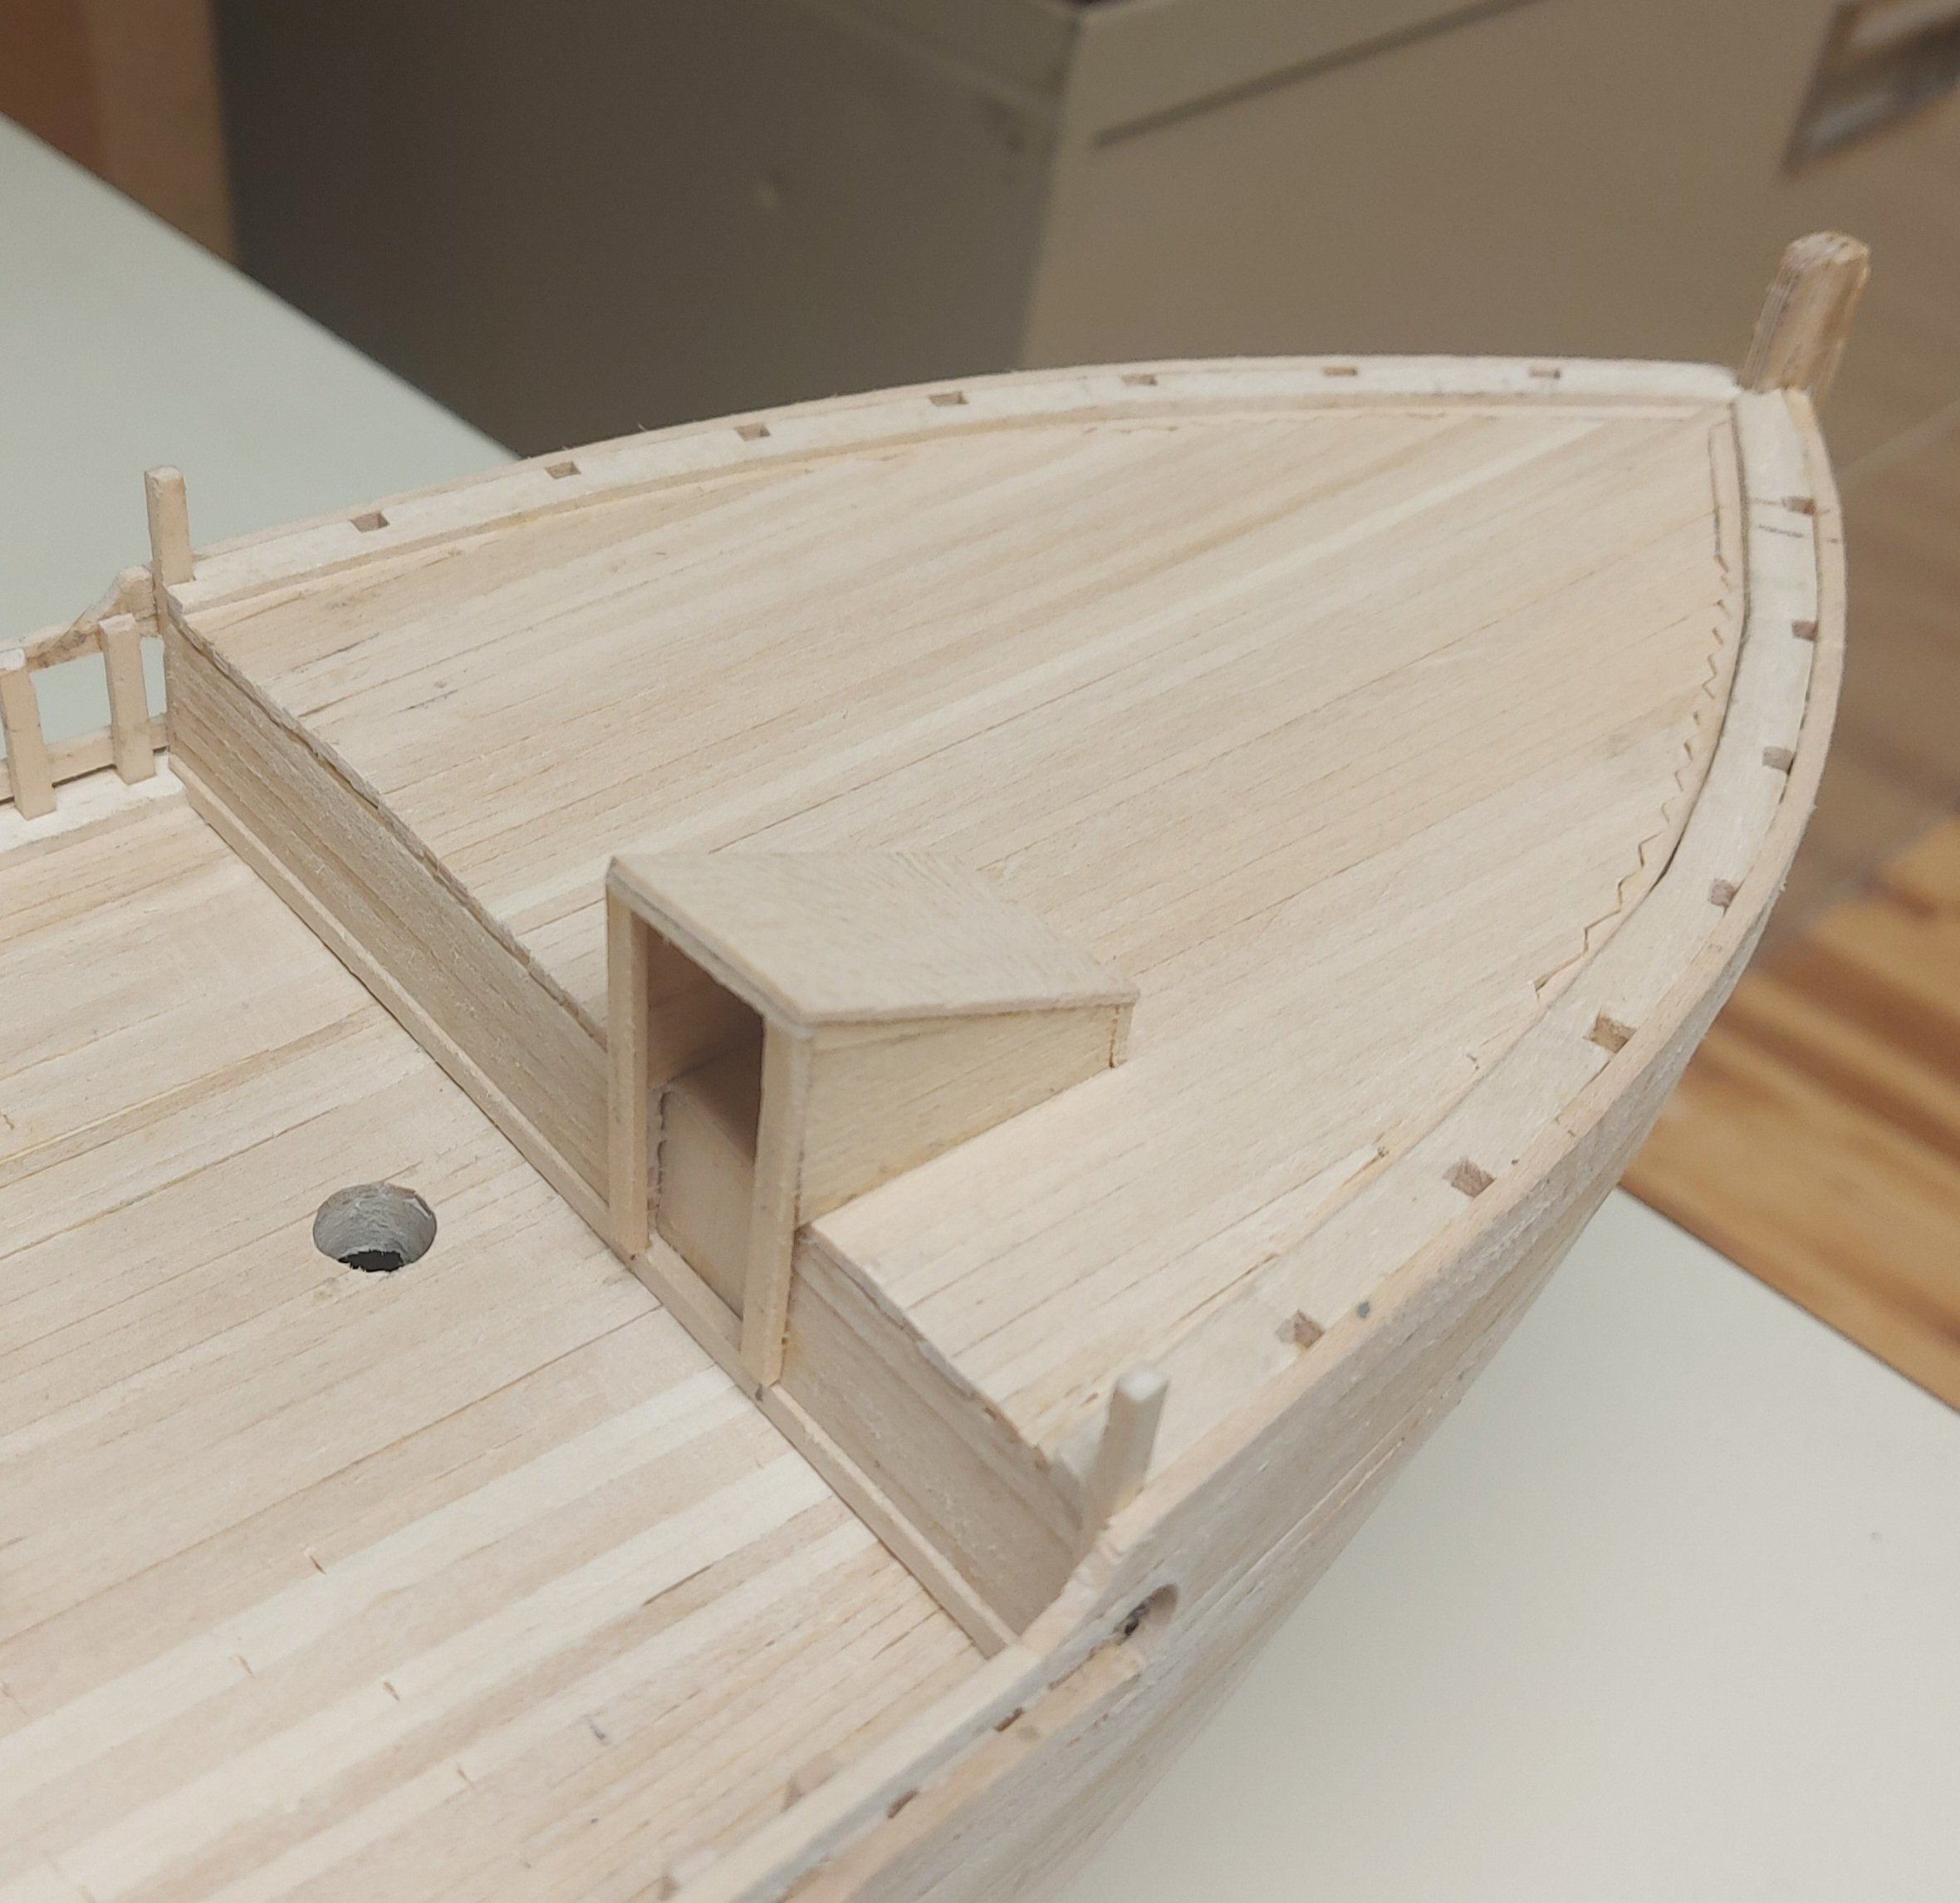
After the main deck was done I moved on to the foredeck, using the same techniques except I nibbed the planks into the edge plank. I left gaps for the companionway, not because they were strictly necessary, but because they allowed me to use up most of my plank off cuts! I made the companionway off the model to ensure it was built square, then attached it to the decks. The companionway sides are odd shapes, so I followed the actual ship's construction for accuracy. The top is painted canvas over the wood, so I used a basswood piece that I will later finish to look like canvas. The door will be closed...


- 368 replies
-
- 10
-
-
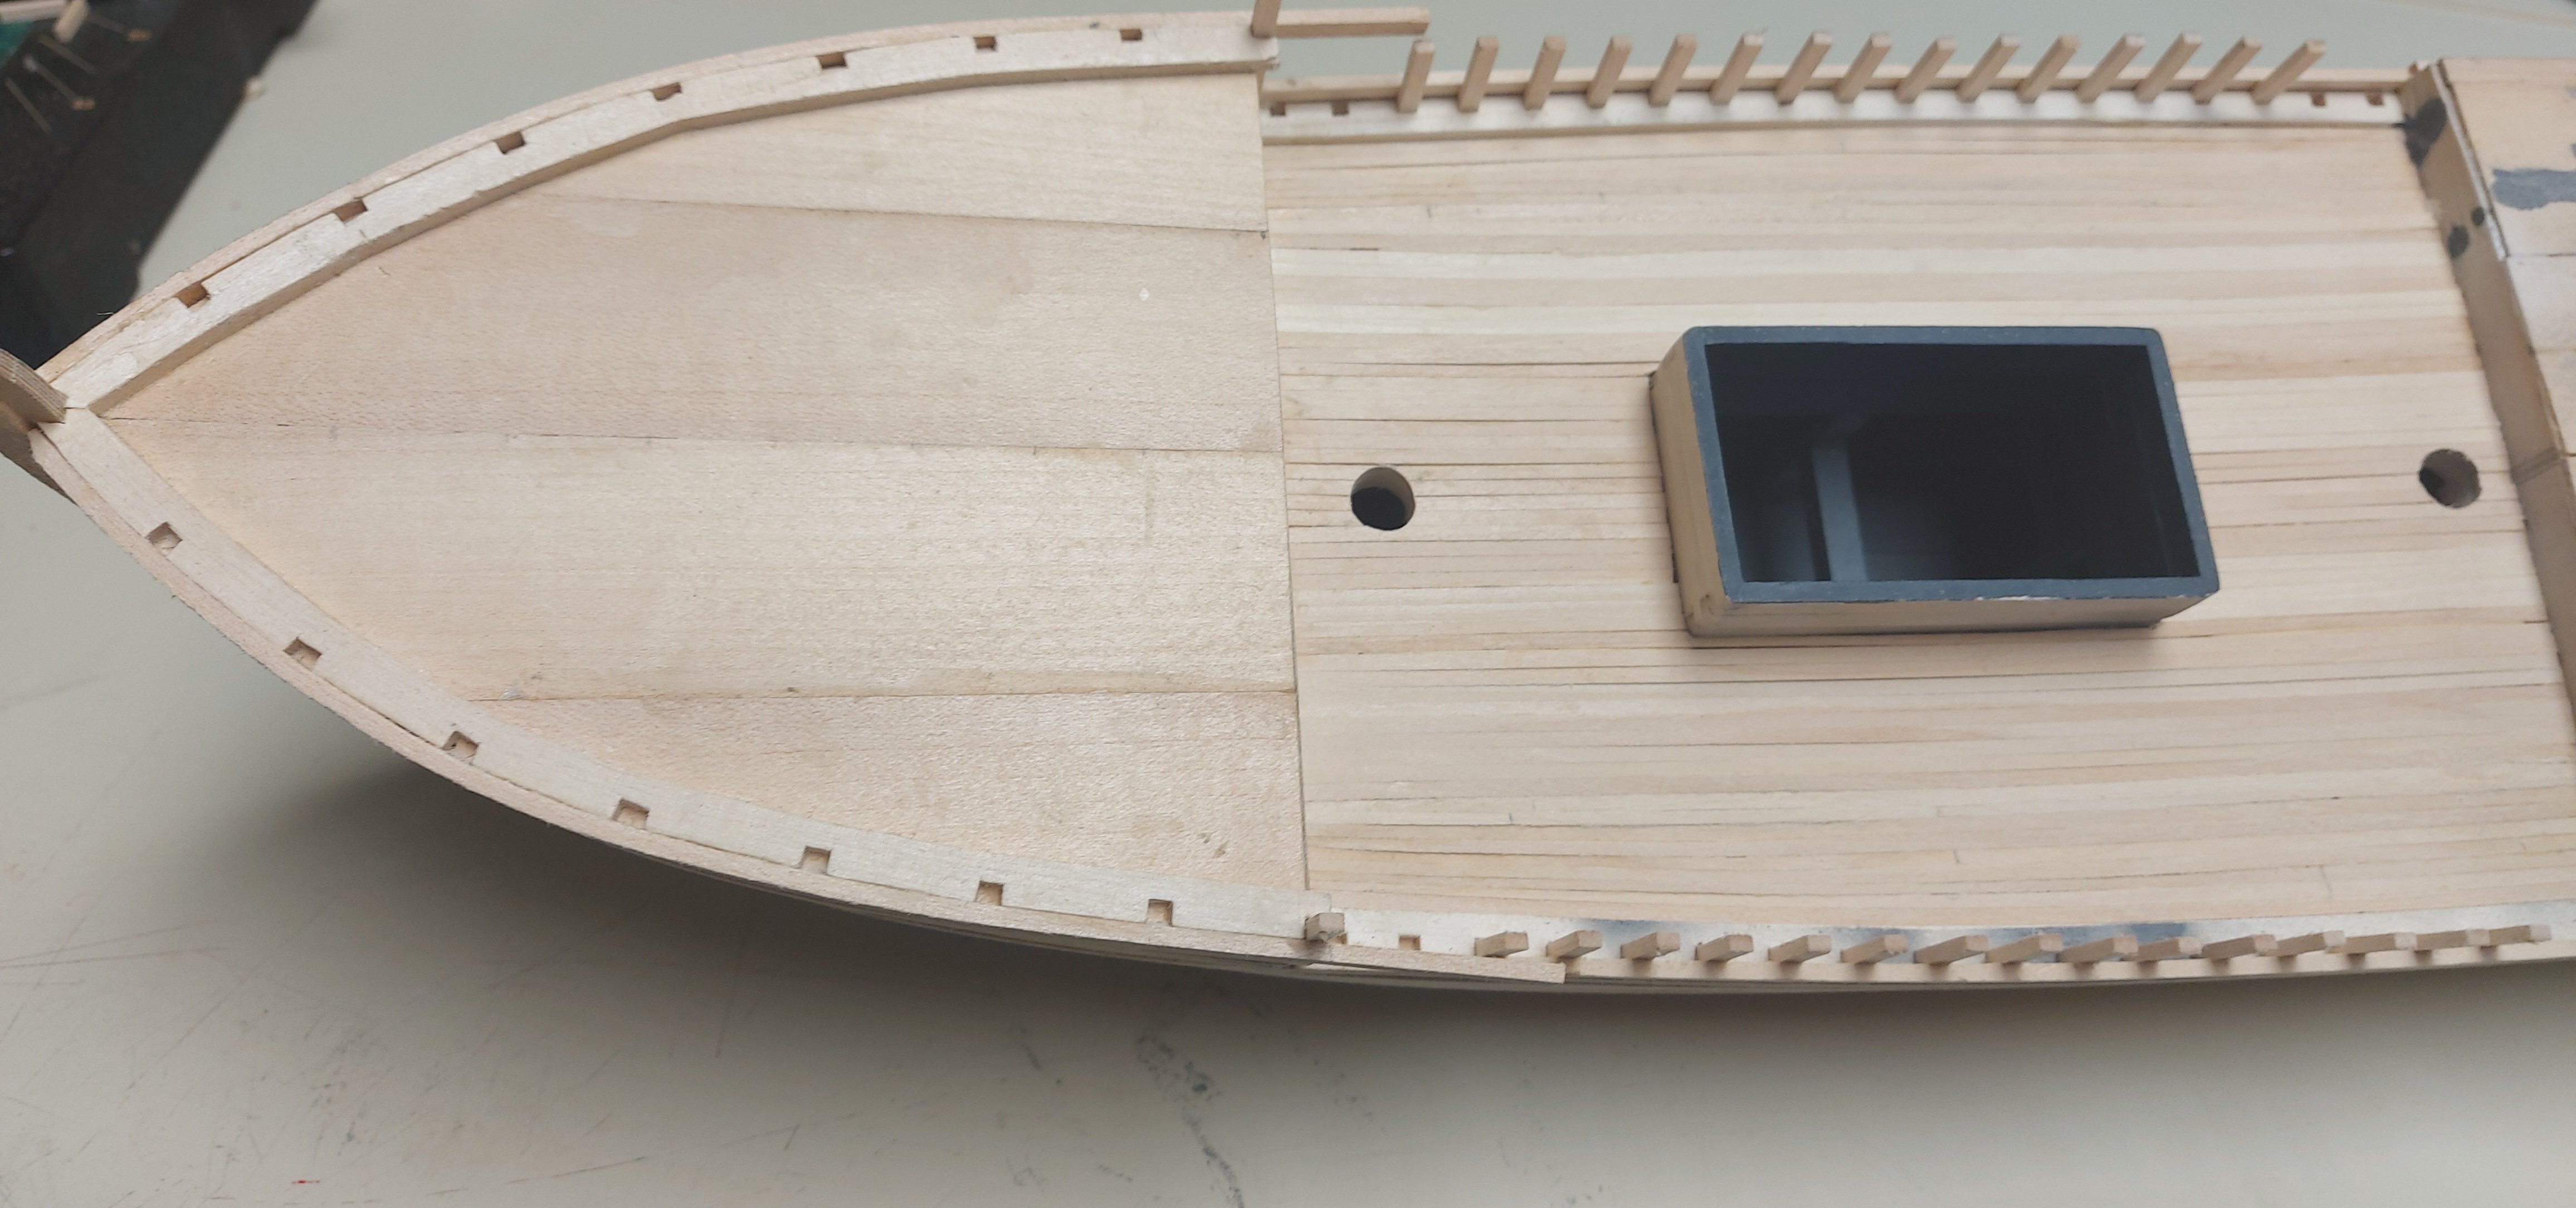
I resumed work by installing planking on the main deck... I worked from the centerline outboard, using dividers to check for equal spacing p & s, and reversed clothespins to ensure the new planks snugged up to those already laid. I also placed the wale up against the stanchions and waterway, the round toothpicks give me a fine adjustment of the scupper gap. The second photo shows the main deck complete. Once outboard of the hatch I started tapering the planks about 25% of their width, to allow them to fit fairly to the waterway as they moved outward. Finally I used a chisel point in my X-Acto handle to press plank edges into each run.


- 368 replies
-
- 11
-
-
Wow... another long hiatus on the model bench! My apologies once again to those who had been following my build... I actually lost my mojo for a while and put the hobbies aside. Then I needed to finish some model rr scenery to clear that off my bench. I have been working on St. Roch since August now, so I will update everyone to where I am today...
-
Thanks Mark... no masking at this point as the white is also the primer... and good thought on the empty hold. Regards, Bruce
-
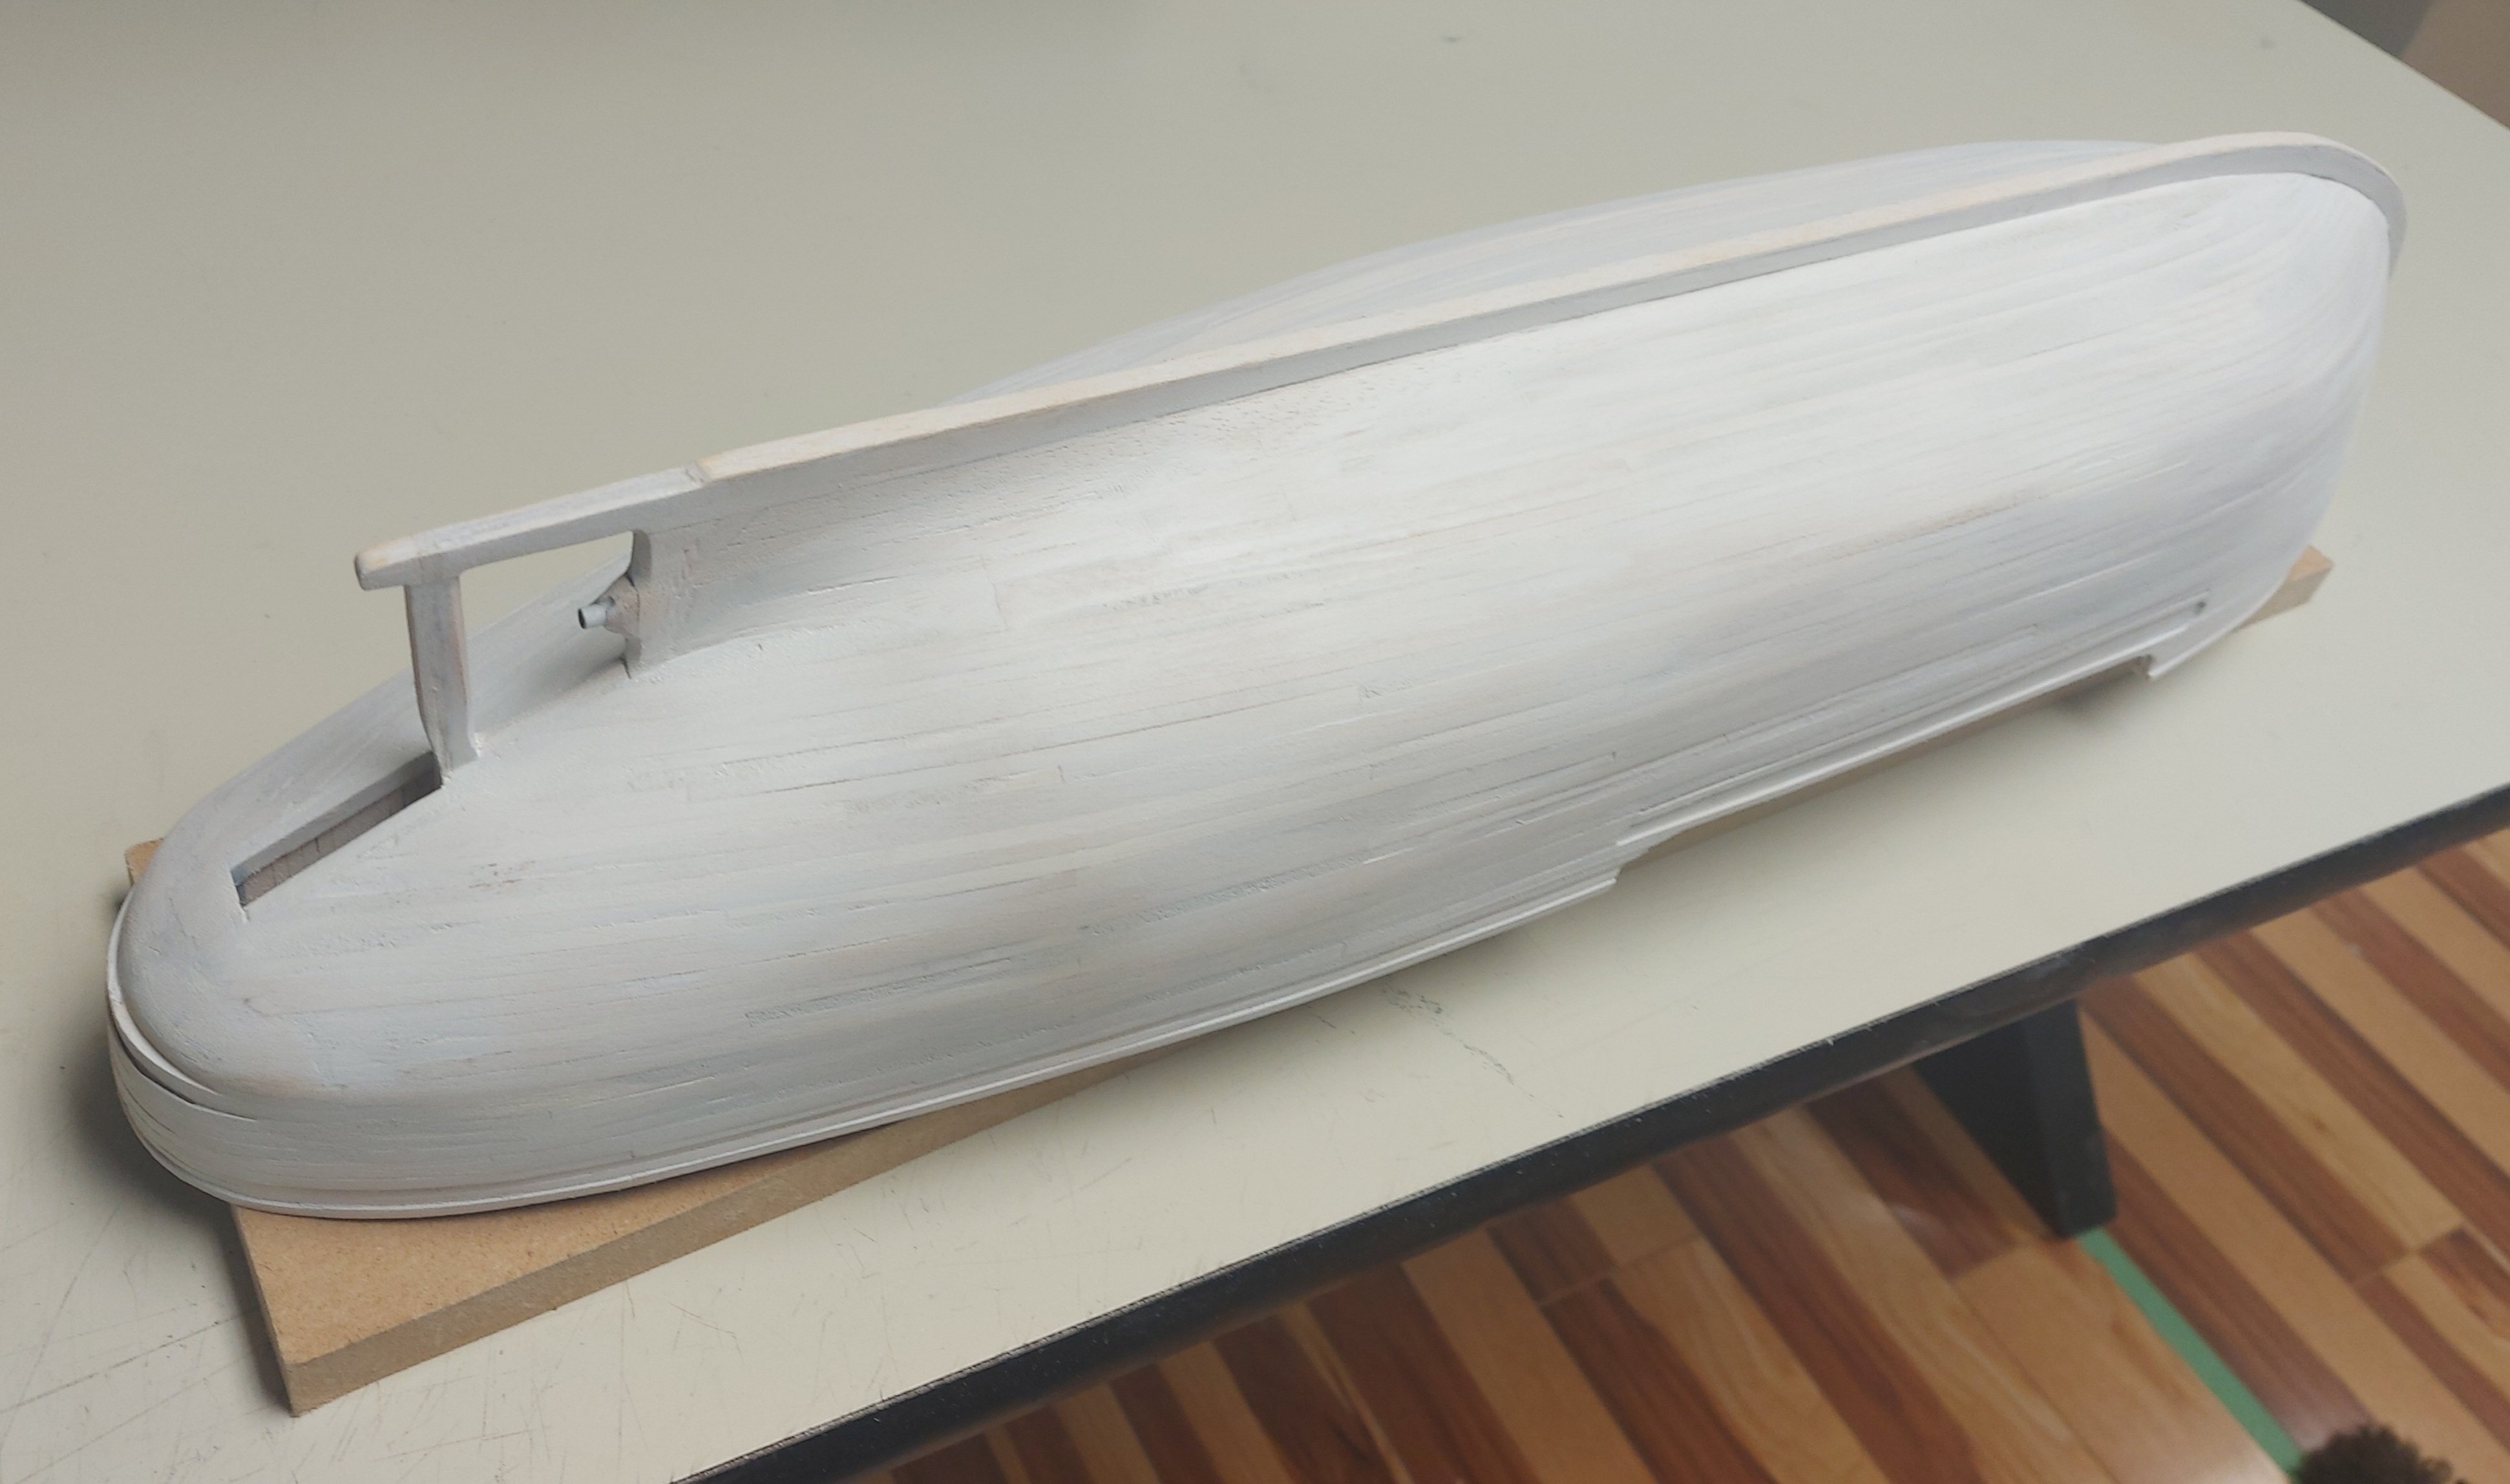
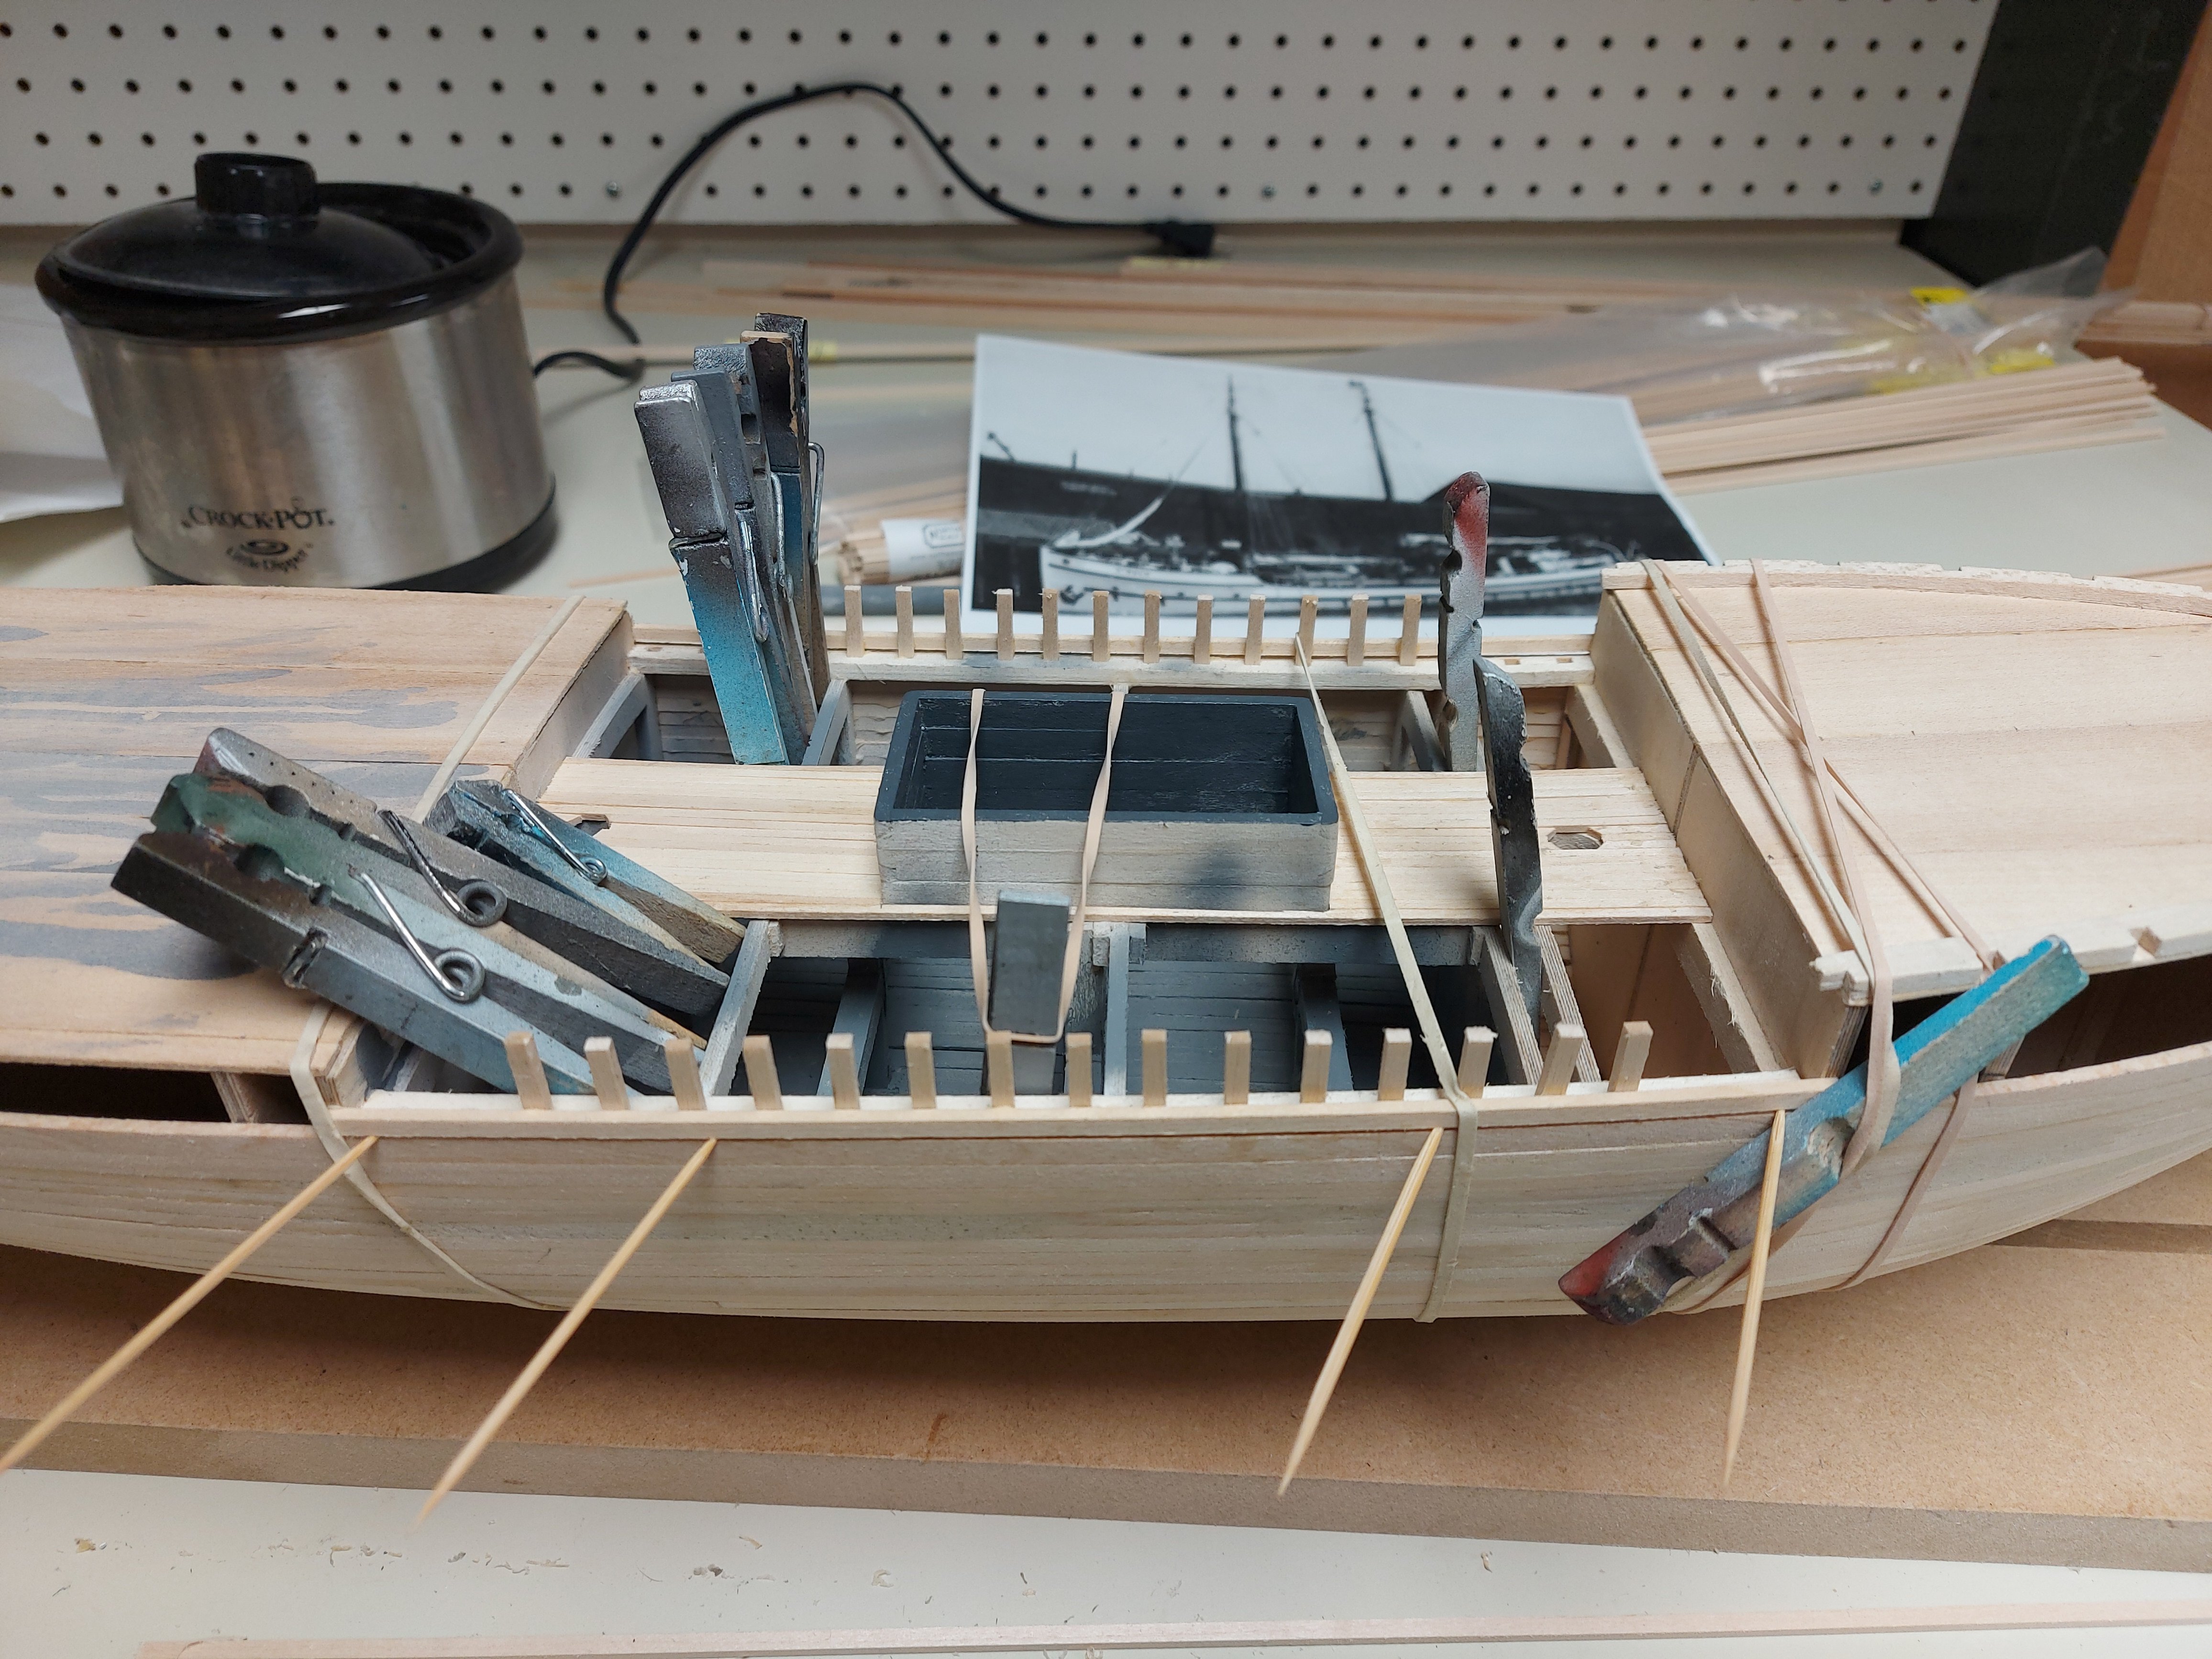
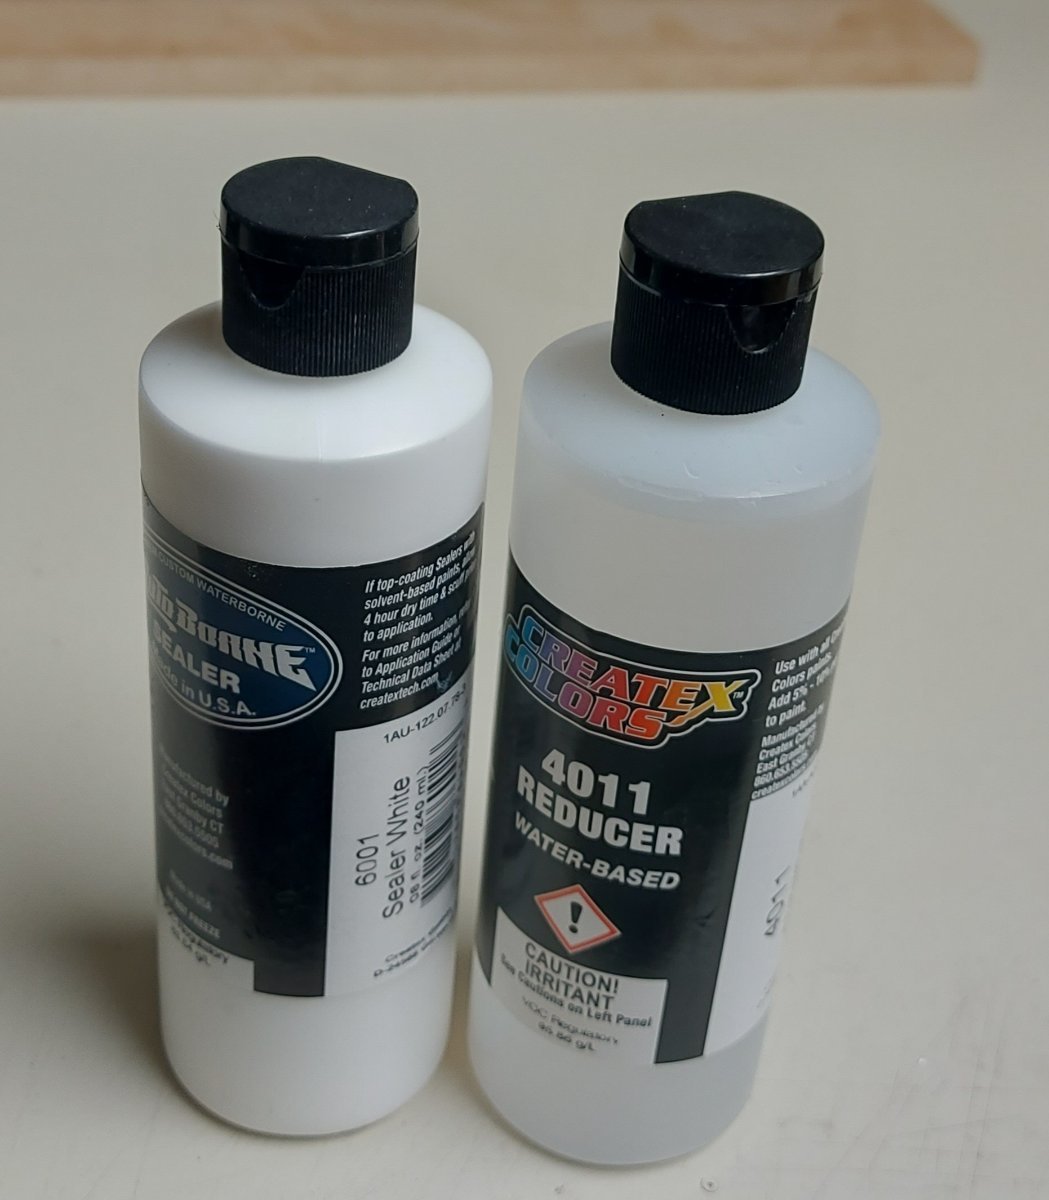
It has been a couple of weeks since my last progress report, we have been enjoying summer and family time, and I have gotten back to work on the model railroad, which will be dividing my hobby time at least for the next few months! I have applied the first coat of white primer - sealer on the inside of St. Roch's hold, using 'AutoBorne white sealer and Createx Colours thinner. These are not cheap, but they come in 8 ounce squeeze bottles, so they compare favourably by volume with other brands. It is only necessary to thin 10% then it sprays easily through the airbrush and cleans up easily when done. Speaking of airbrushes, I thought this was a good project on which to bring my old Badger 35 out of retirement! This single action sprayer was my first air brush, bought in 1976, and I used it until upgrading to a Badger 150 some years later. It remains a good brush for area spraying, and it did not disappoint as it made short work of fogging the hold interior! I will apply a second coat, then use my long handled, coarse bristle, brush to dry brush medium gray over the white, to give a good approximation of the actual hold's colour. The colours will be visible to anyone who looks down the hatch. I am unsure whether or not to place cargo in the hold... St. Roch usually carried coal over which were lumber then other supplies as required by the RCMP Arctic detachments, however I do not want to hide the posts and beams... Once I settle this question I will begin deck planking followed by the bulwarks and completion of the hull planks. Thanks for looking in, comments and thoughts on cargo are appreciated!

-
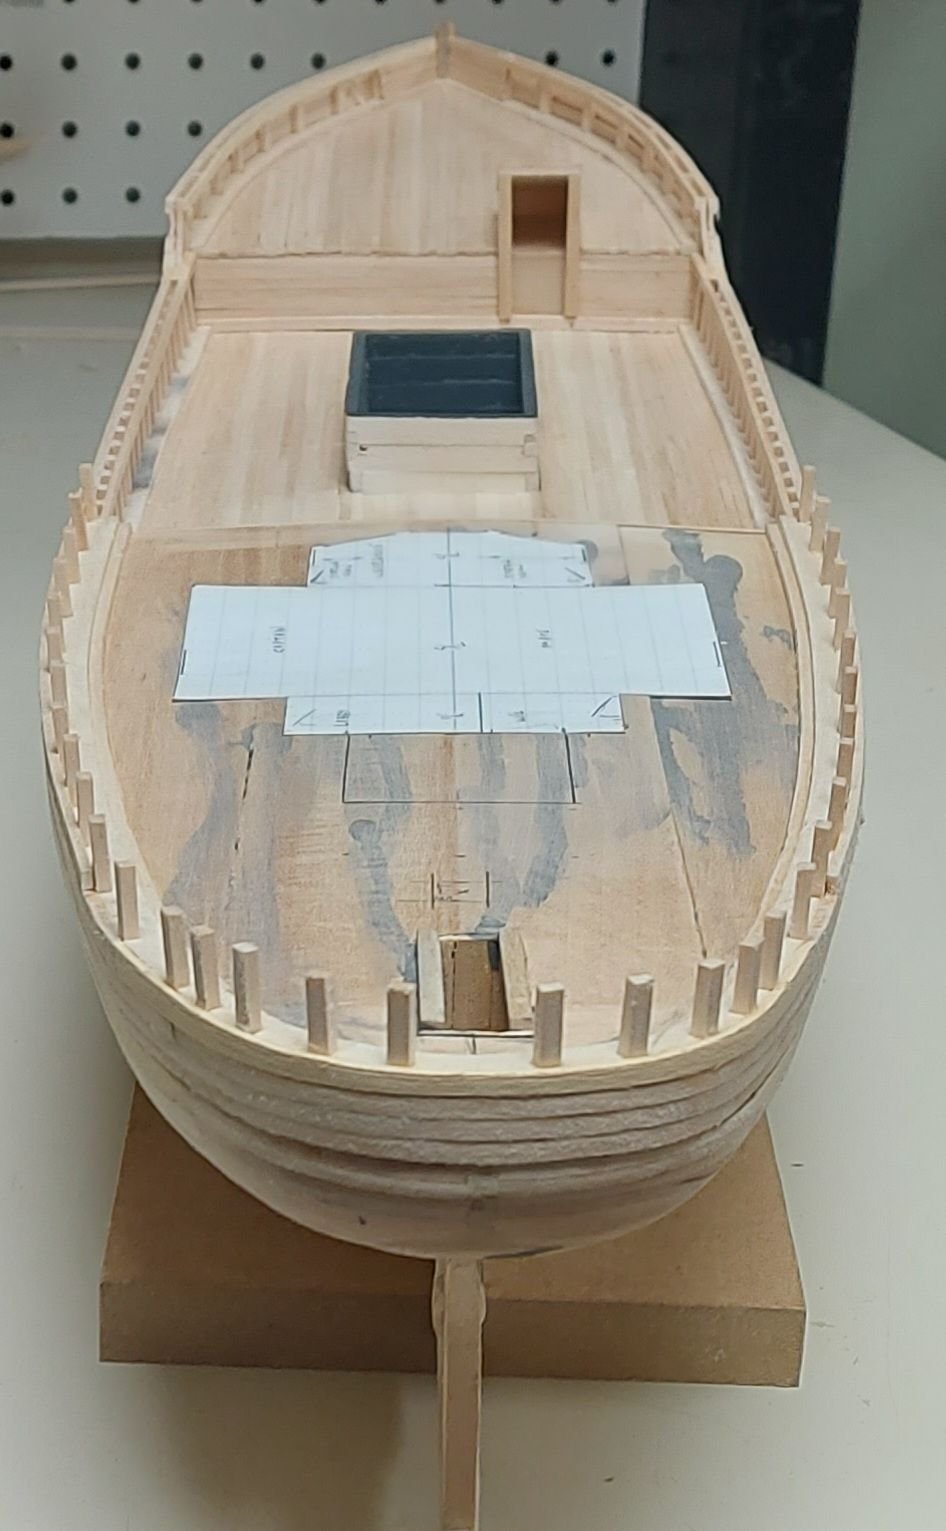
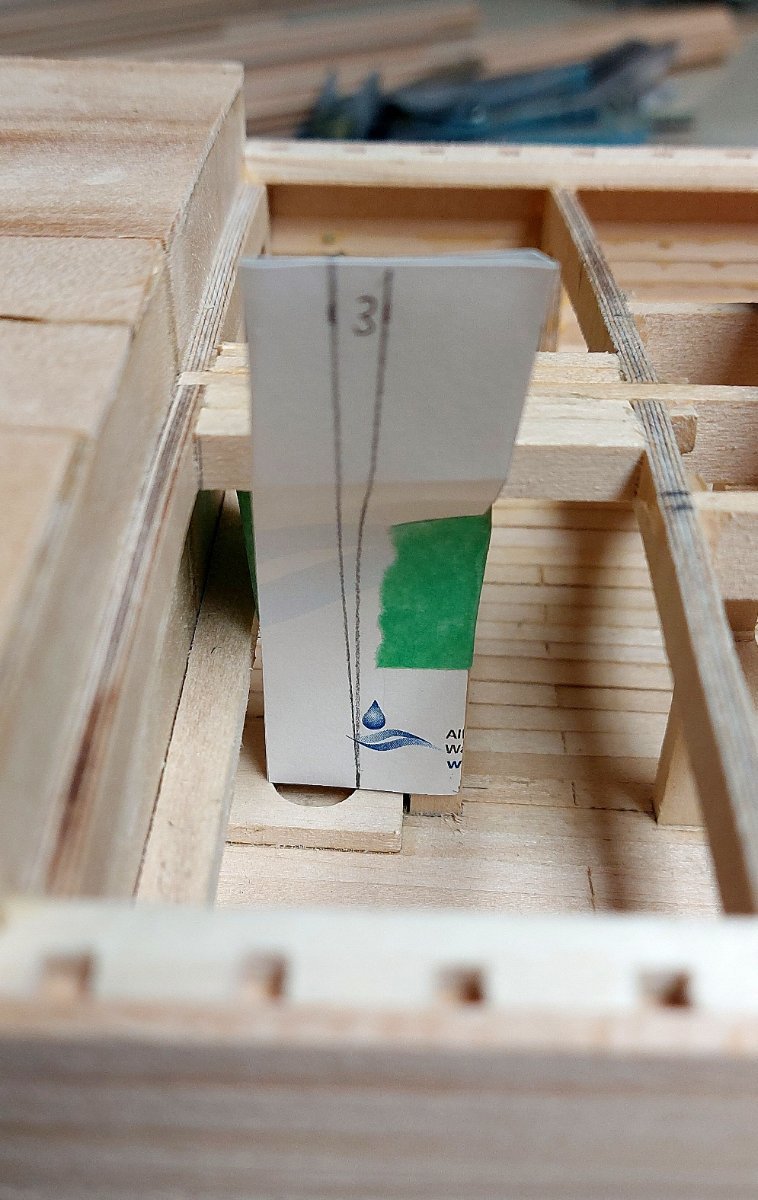
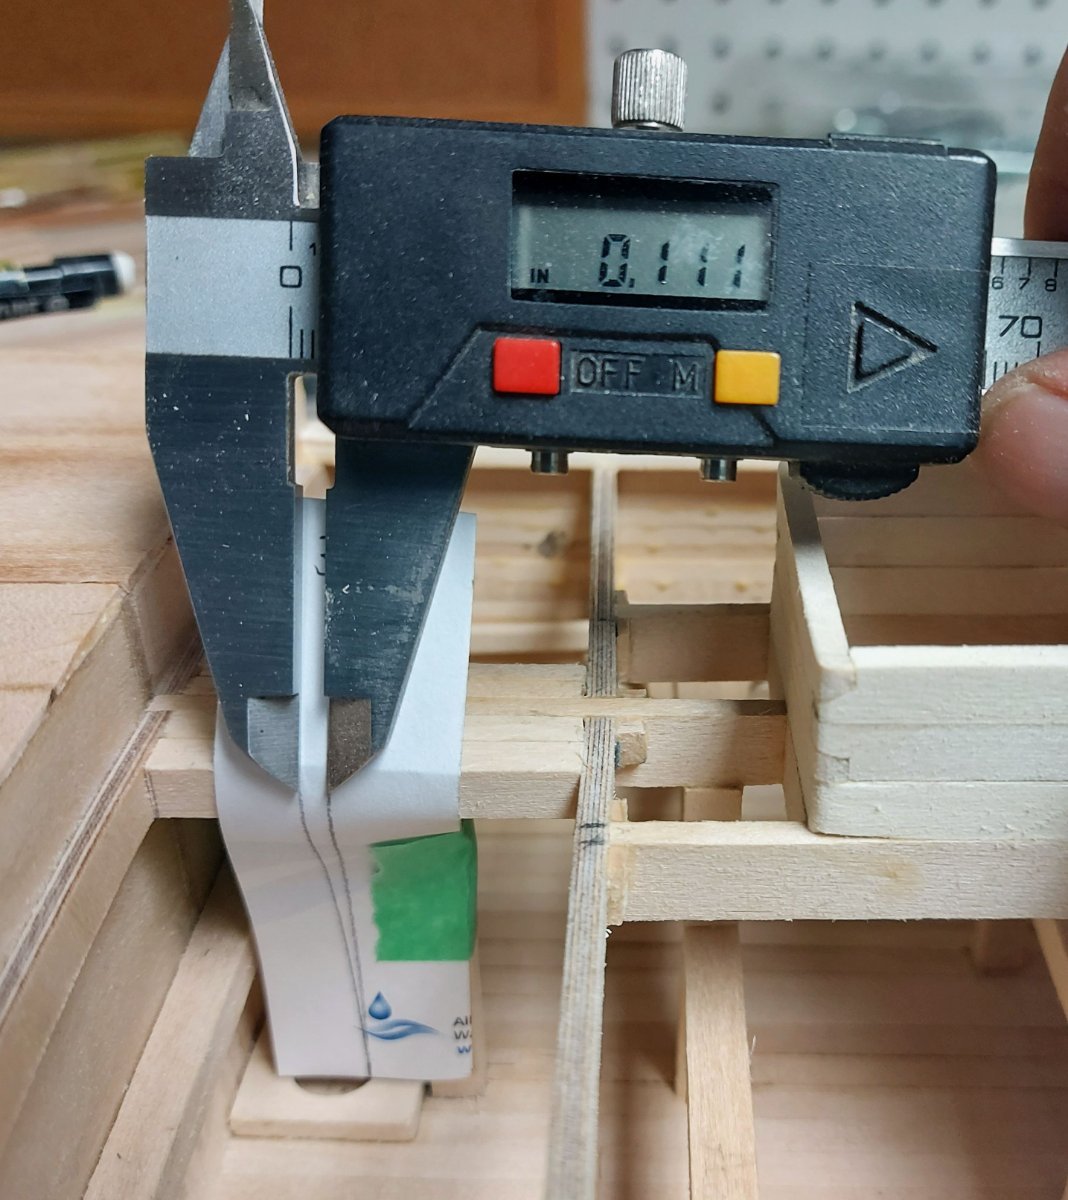
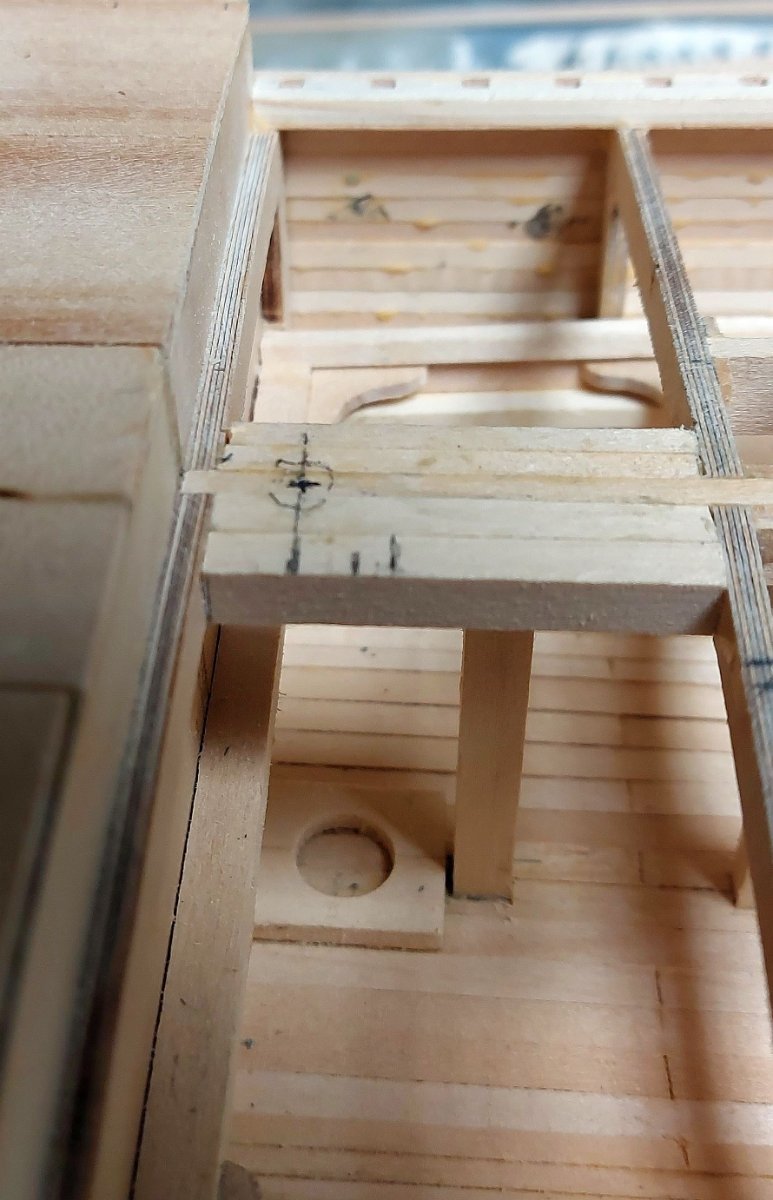
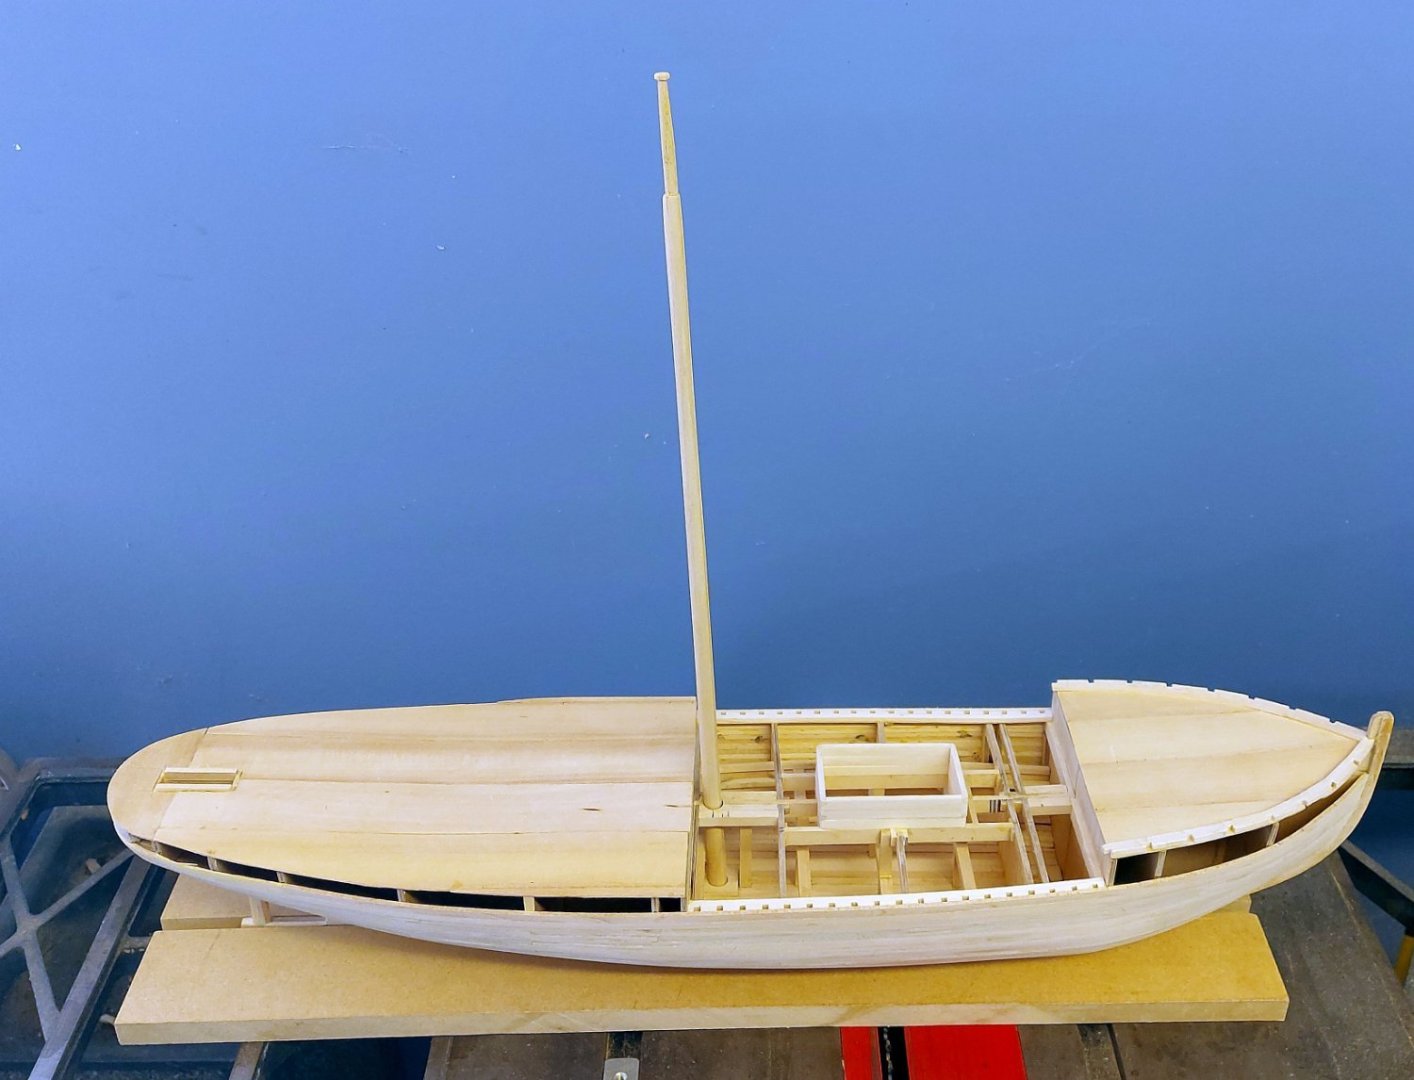
Now it is off to the drill press... remember to use a Forstner or brad point bit to avoid tearing the wood! The next photo shows the mainmast set onto the mast step, there is enough wiggle room to allow fine adjustments of the angles using wedges made from toothpicks. The procedure is repeated for the foremast... Setting the masts completes the work inside the hold... Now I can paint it, then start planking the deck and completing the bulwarks! Thanks for looking in, and your comments and critiques are appreciated!


- 368 replies
-
- 12
-