HOLIDAY DONATION DRIVE - SUPPORT MSW - DO YOUR PART TO KEEP THIS GREAT FORUM GOING! (Only 72 donations so far out of 49,000 members - Can we at least get 100? C'mon guys!)
×


SaltyNinja
-
Posts
76 -
Joined
-
Last visited
Content Type
Profiles
Forums
Gallery
Events
Everything posted by SaltyNinja
-
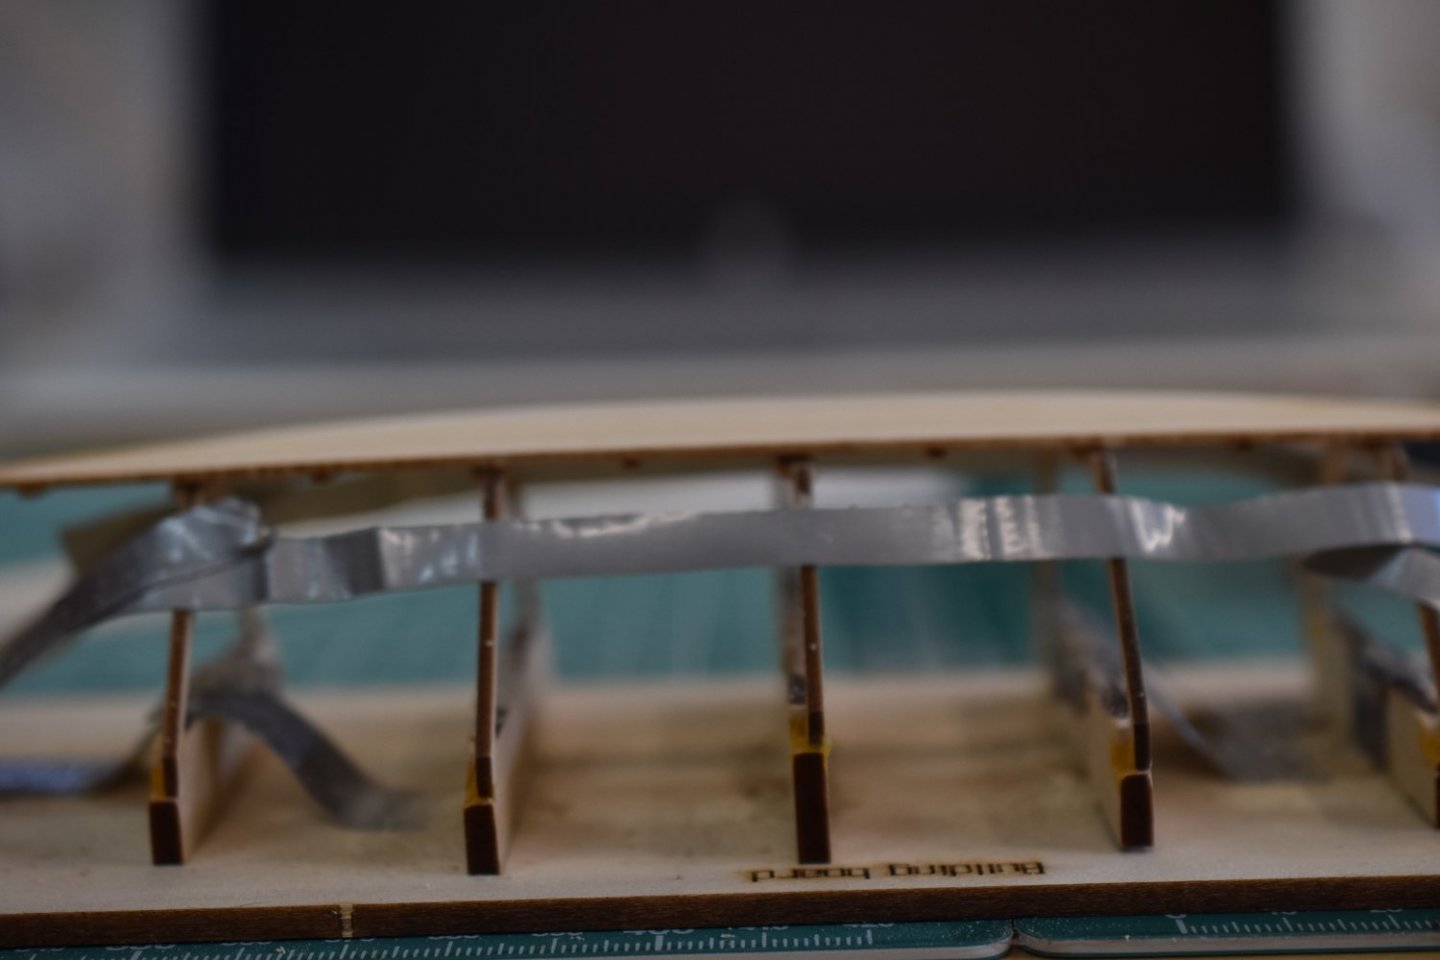
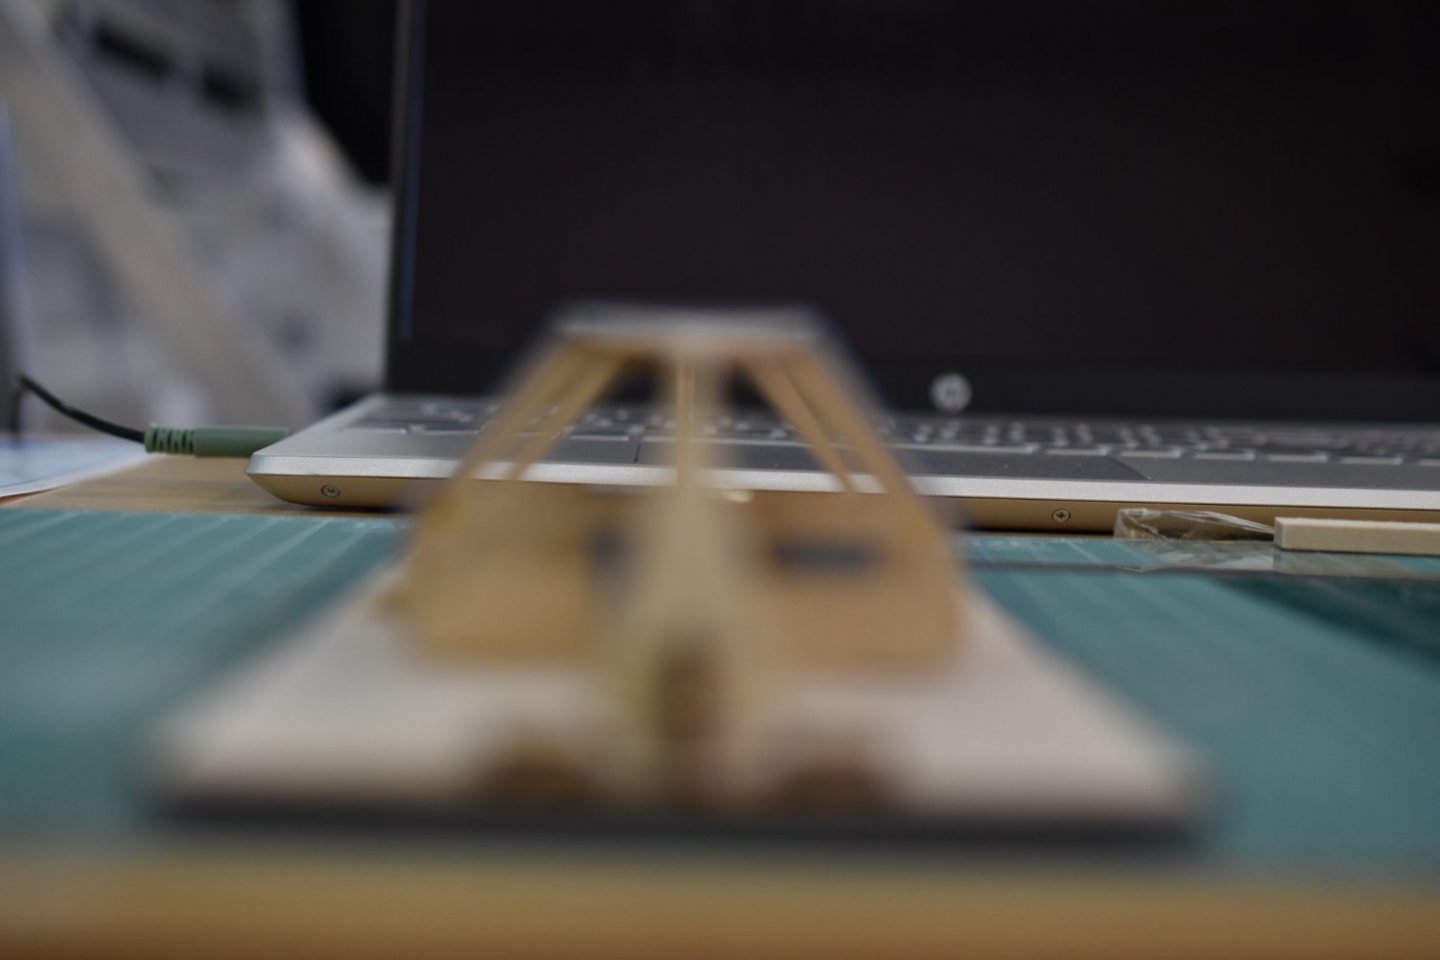
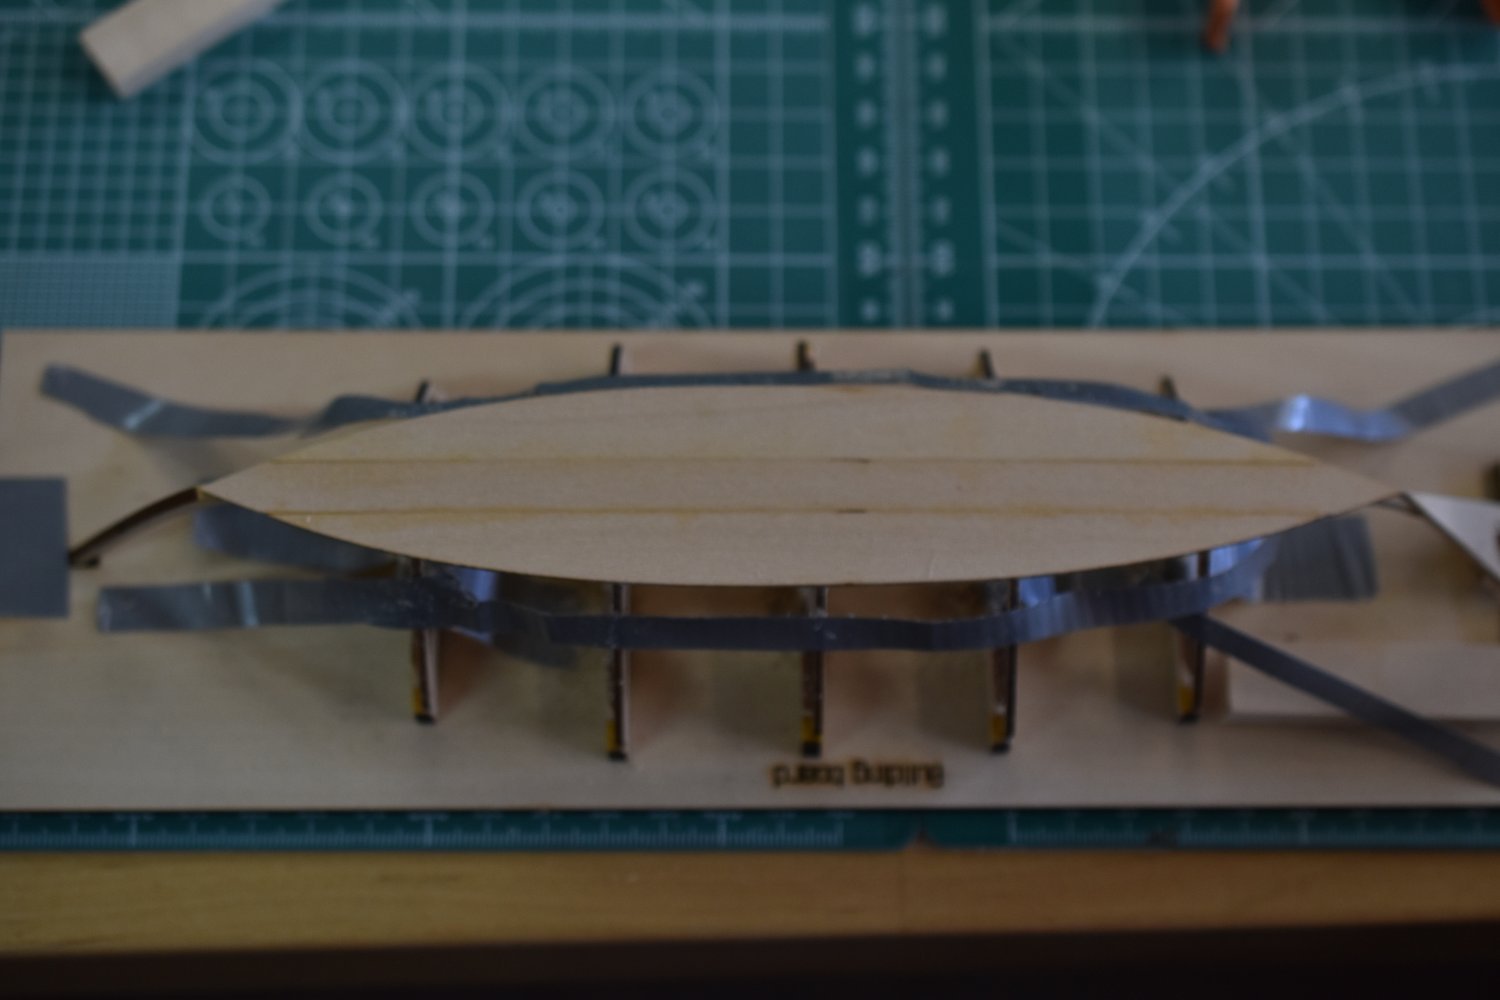
 Well I decided to flatten the bottom planks a bit more. I noted the problem back up there 👆 a few posts ago. I got it pretty well fixed previously, but was thinking that maybe I cold get it better now that the bottom plank assembly is glued to the frames. I lightly painted the bottom plank assembly on the bottom side with water and made some flattish boards to clamp across the planks athwartship (my new favorite word😁). I'll let it dry and check the result. I'm just using the info that is in the instructions and supplied by wylie captains of knowledge, such as my running partner druxey for trying to curve this wood nicely. Thanks again for the helps and intel. I'll see if it improves the bottom planks a bit more, I'm trying to get the very edges at the chine joint area to form up more accurately. I think I can get the sheer curve a tiny bit better too while I'm at it. We're going to set the fishing gear over here and see if we have any success.
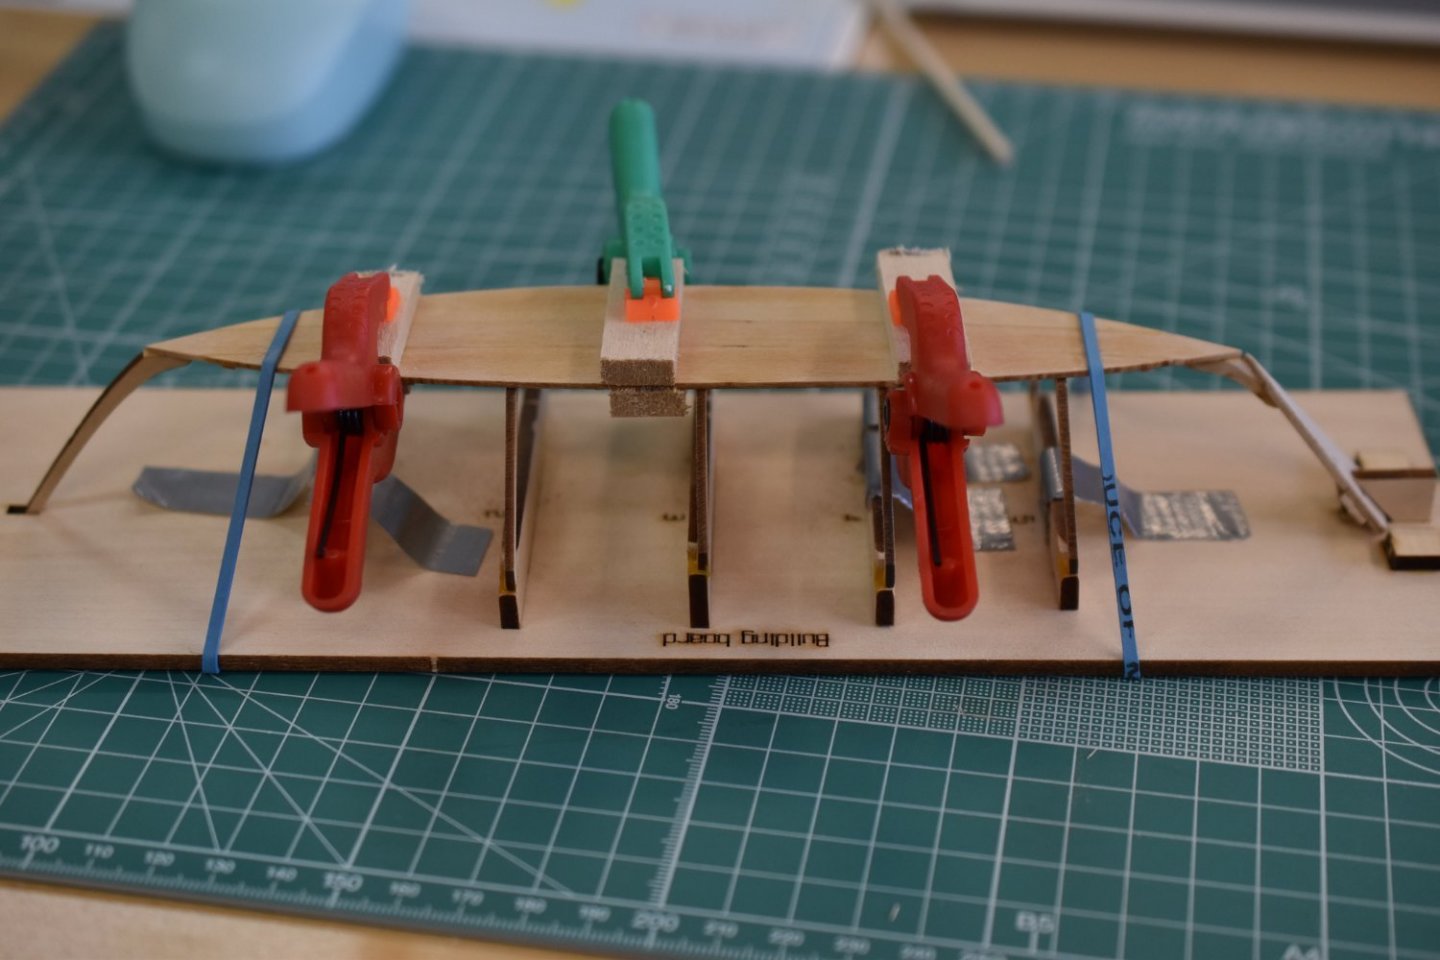
- 61 replies
-
- 1
-

-
- Lowell Grand Banks Dory
- Model Shipways
- (and 1 more)
-
Thanks drux! I did go transverse and it was stable enough, but I was thinking that the practice of attaching a batten would hold it more firmly. I tend to over think most things, however. 🤓
-
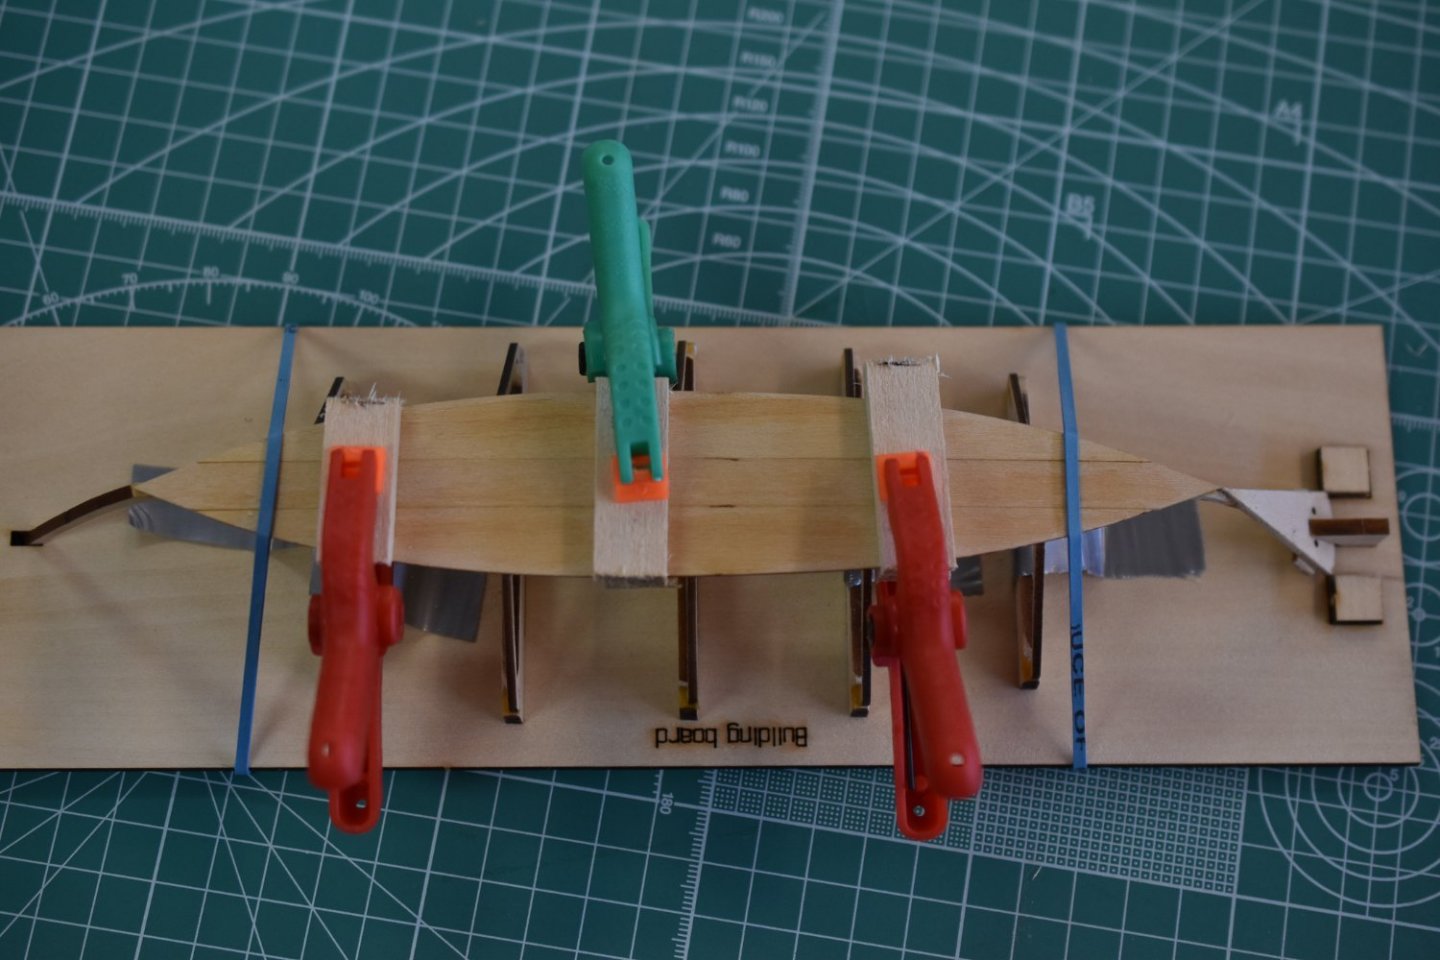
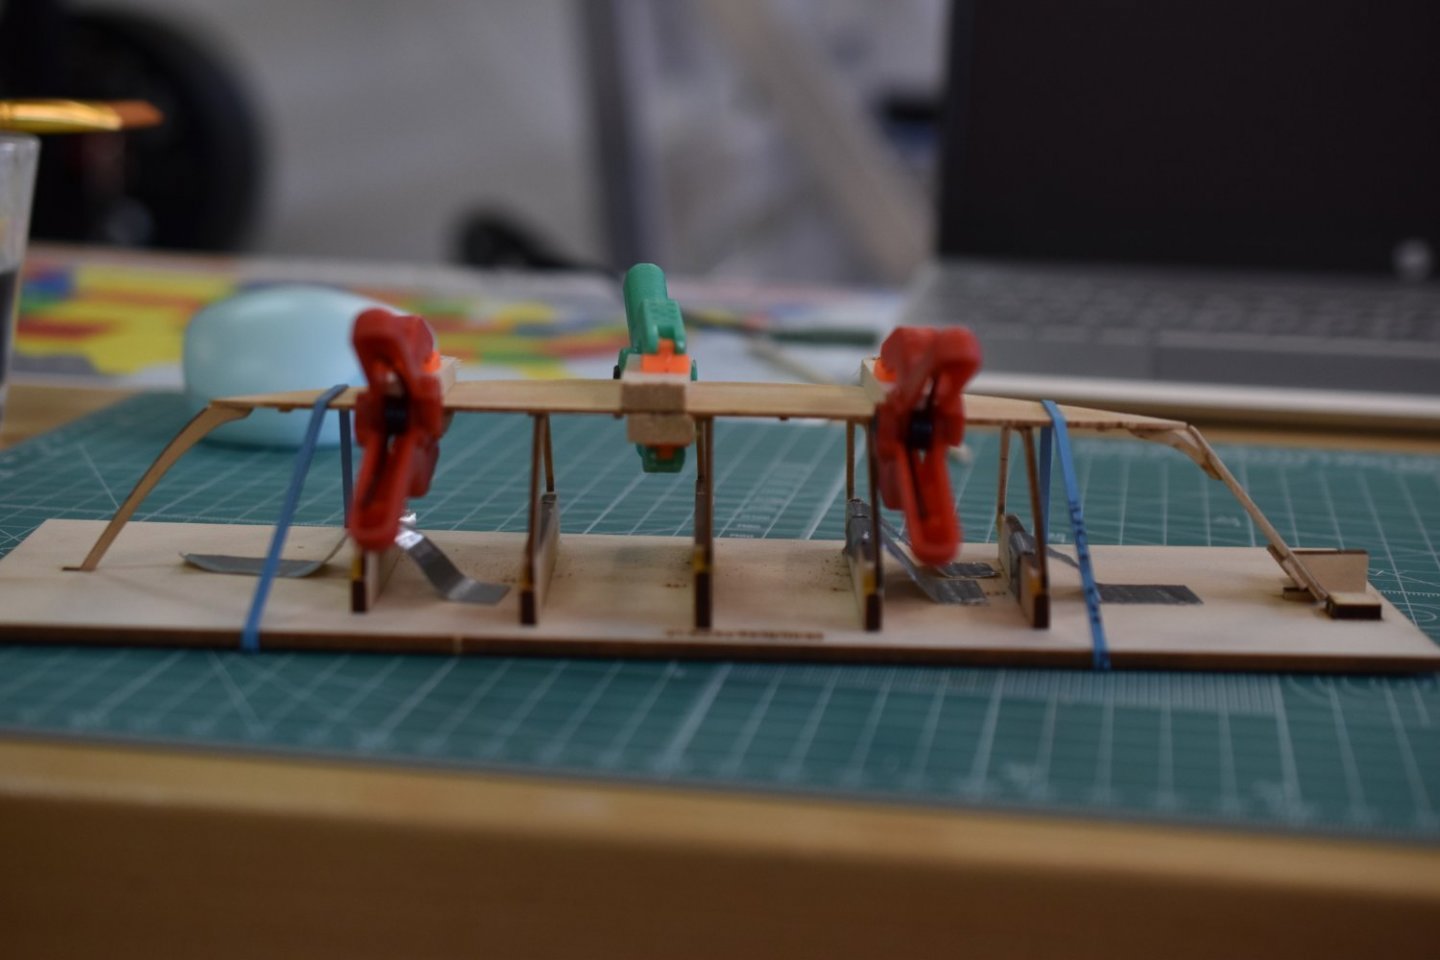
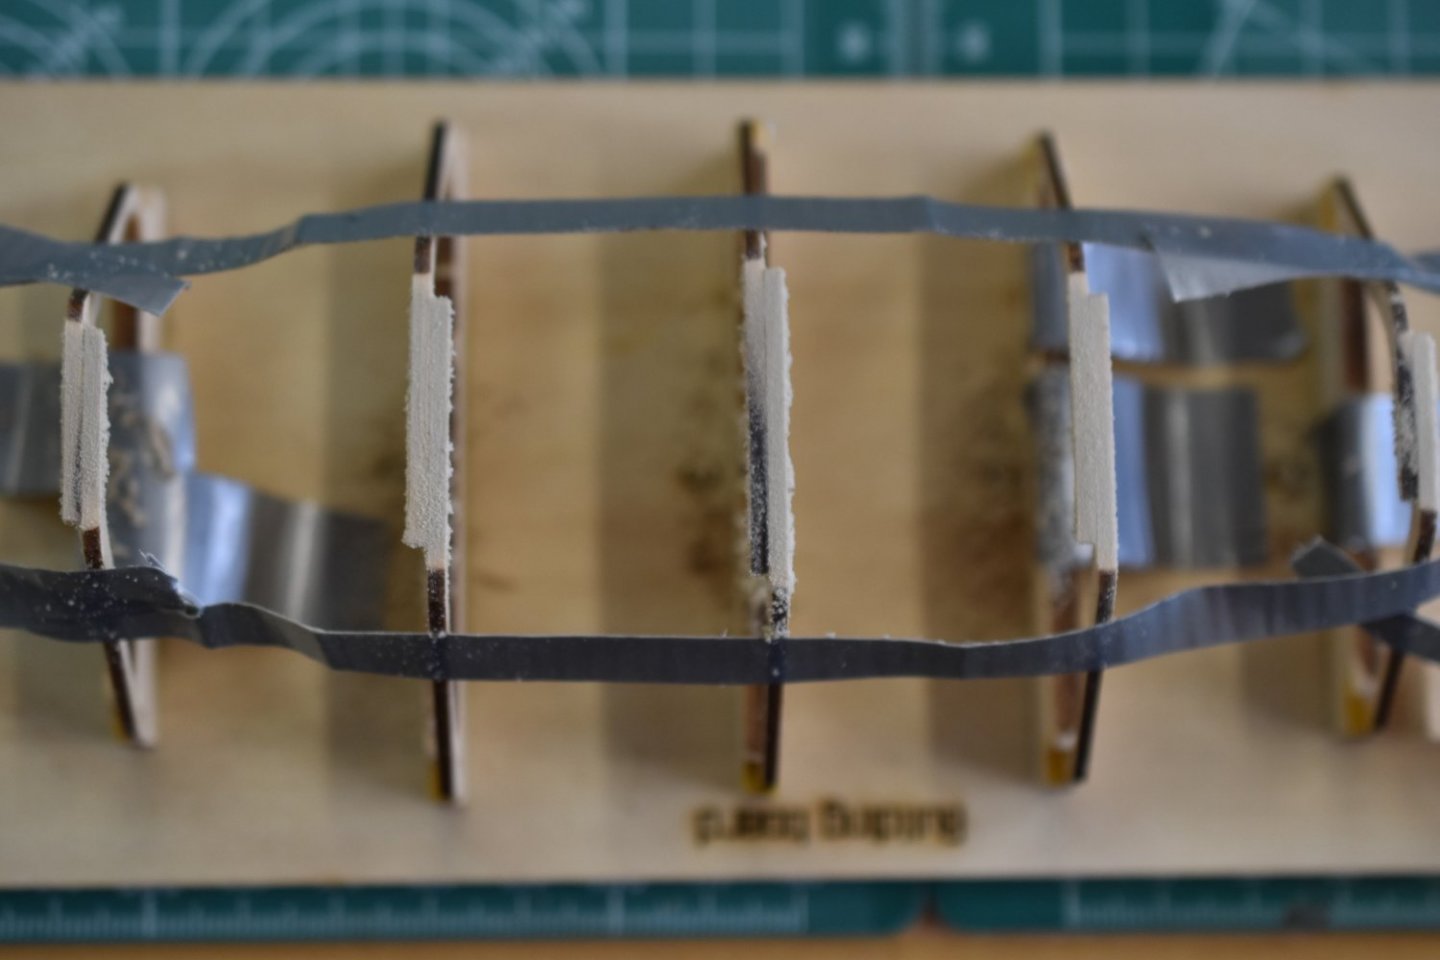
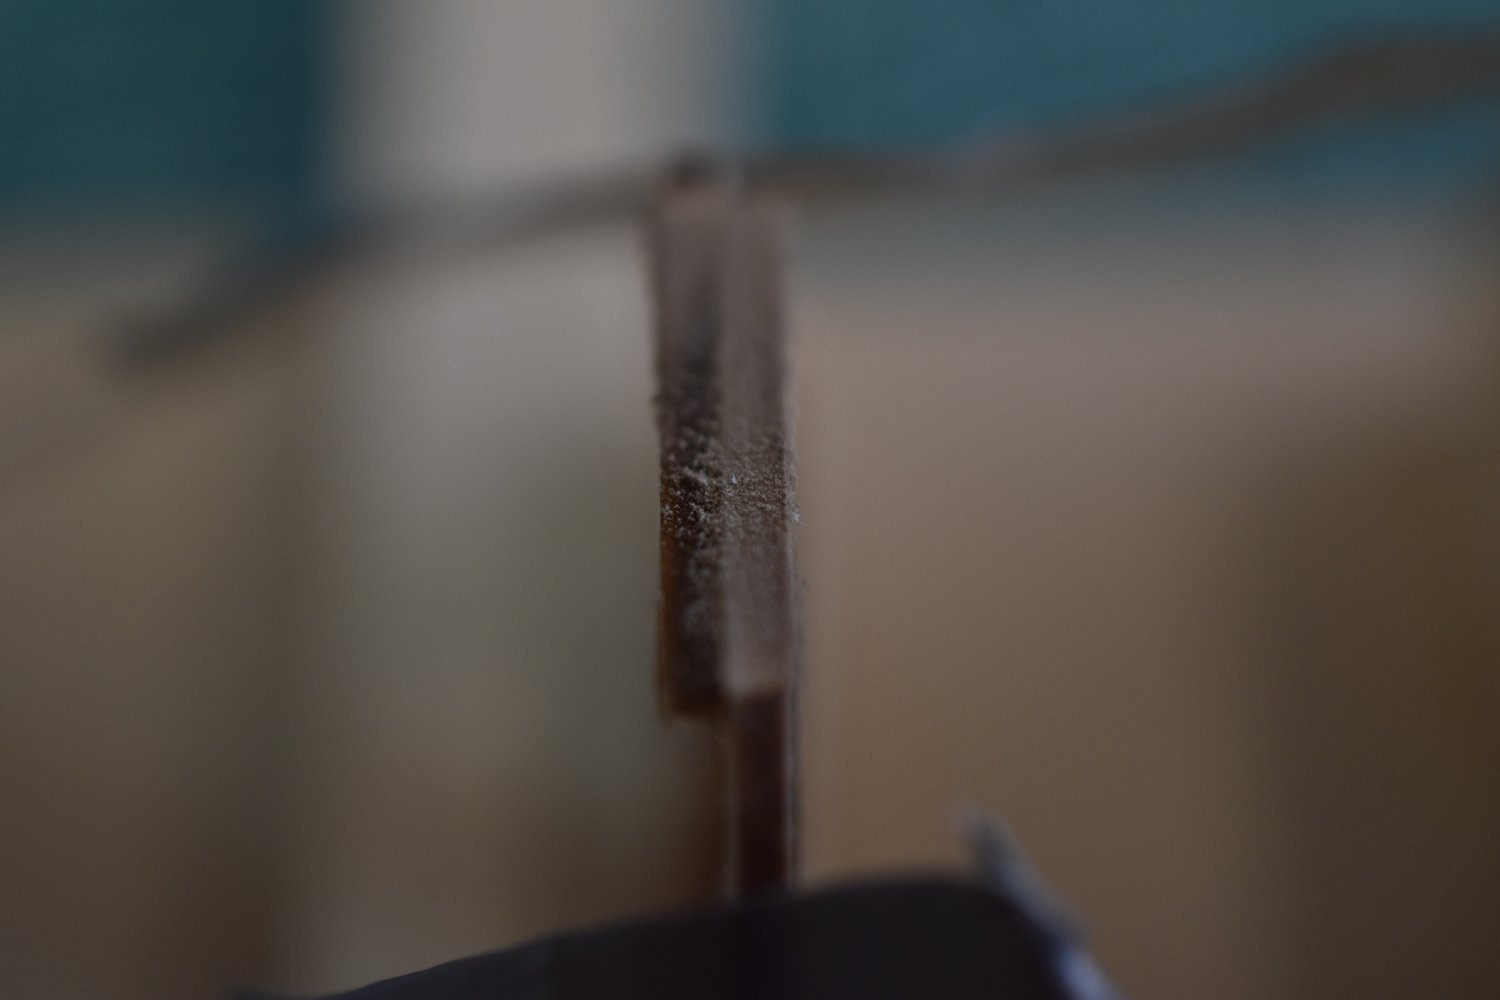
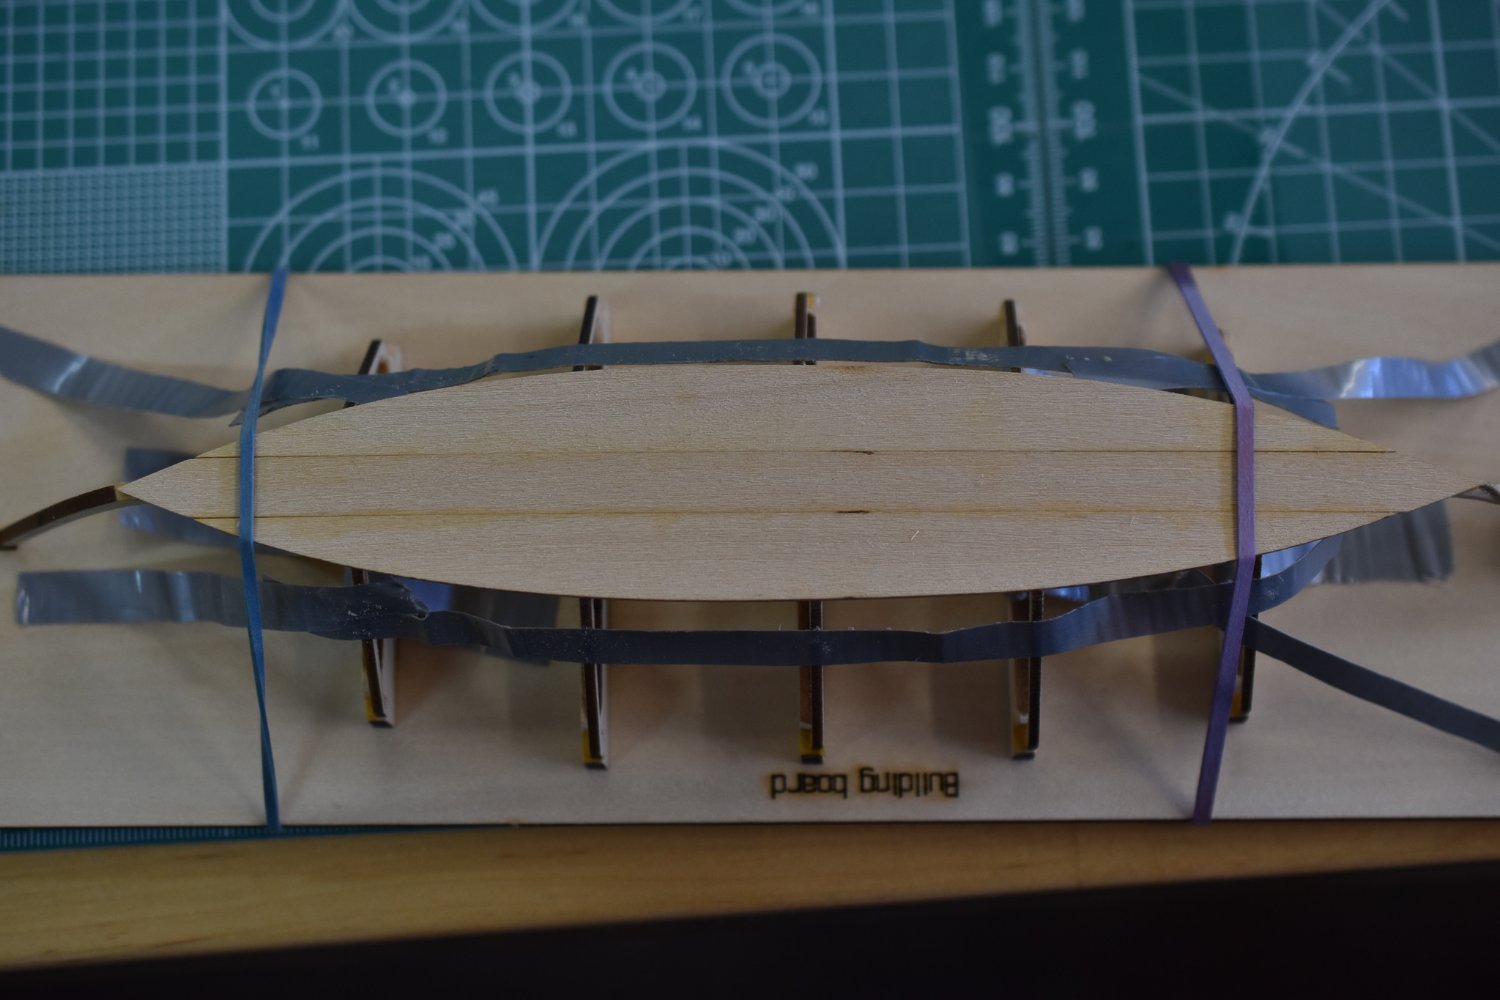
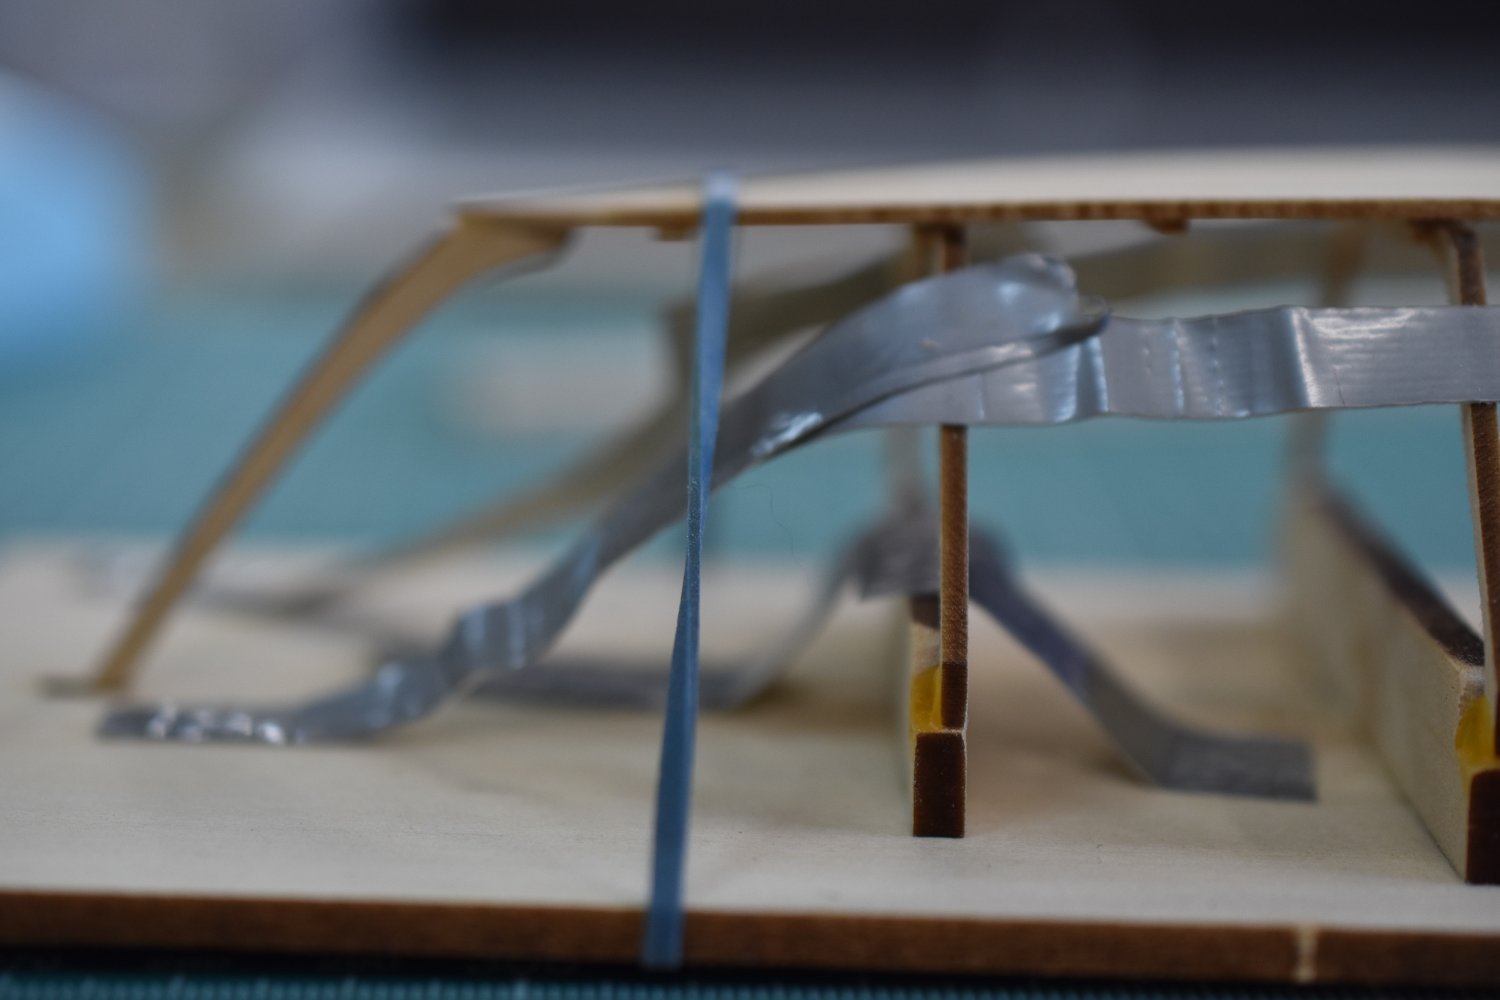
I made a new, flexible sanding stick and prepared to sand away. I sanded the frames athwartships, slowly and gently. The tape idea was a fail, as the frames flexed too much for them to be considered worth the time. I don't have any proper wood clamps so I used that vicegrip thing in the picture. I've got the frames sanded and ready to attach the bottom plank assembly. 👇 I then checked the bottom planks fitment to the frames. It seemed alright, so I made my plan of attack and tried to anticipate issues. I went ahead and attempted the assemblage with cold sweats. The instructions say to use a couple of rubber bands to hold the assembly when drying. Well, 10 rubber bands must be better then? Nope. My frames started shifting and slanting away from square and I tried to fix them before the glue dried. I couldn't get them to square up well, so I pondered my options before it was too late. I decided to remove all the rubber bands and try to align them again. When I removed the rubber bands I noticed that the frames returned to square, or close to it, without the rubber band pressure. I decided to just use the couple of rubber bands as suggested and checked it all again. It looked alright so I'll let it dry well now.


- 61 replies
-
- 3
-
-
- Lowell Grand Banks Dory
- Model Shipways
- (and 1 more)
-
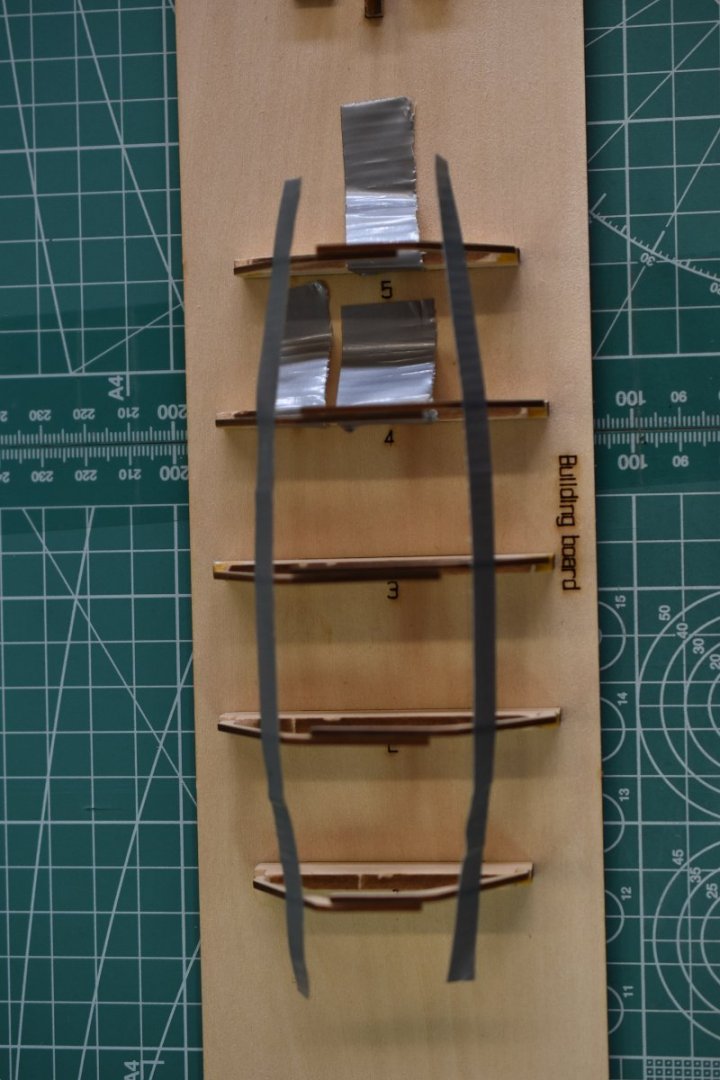
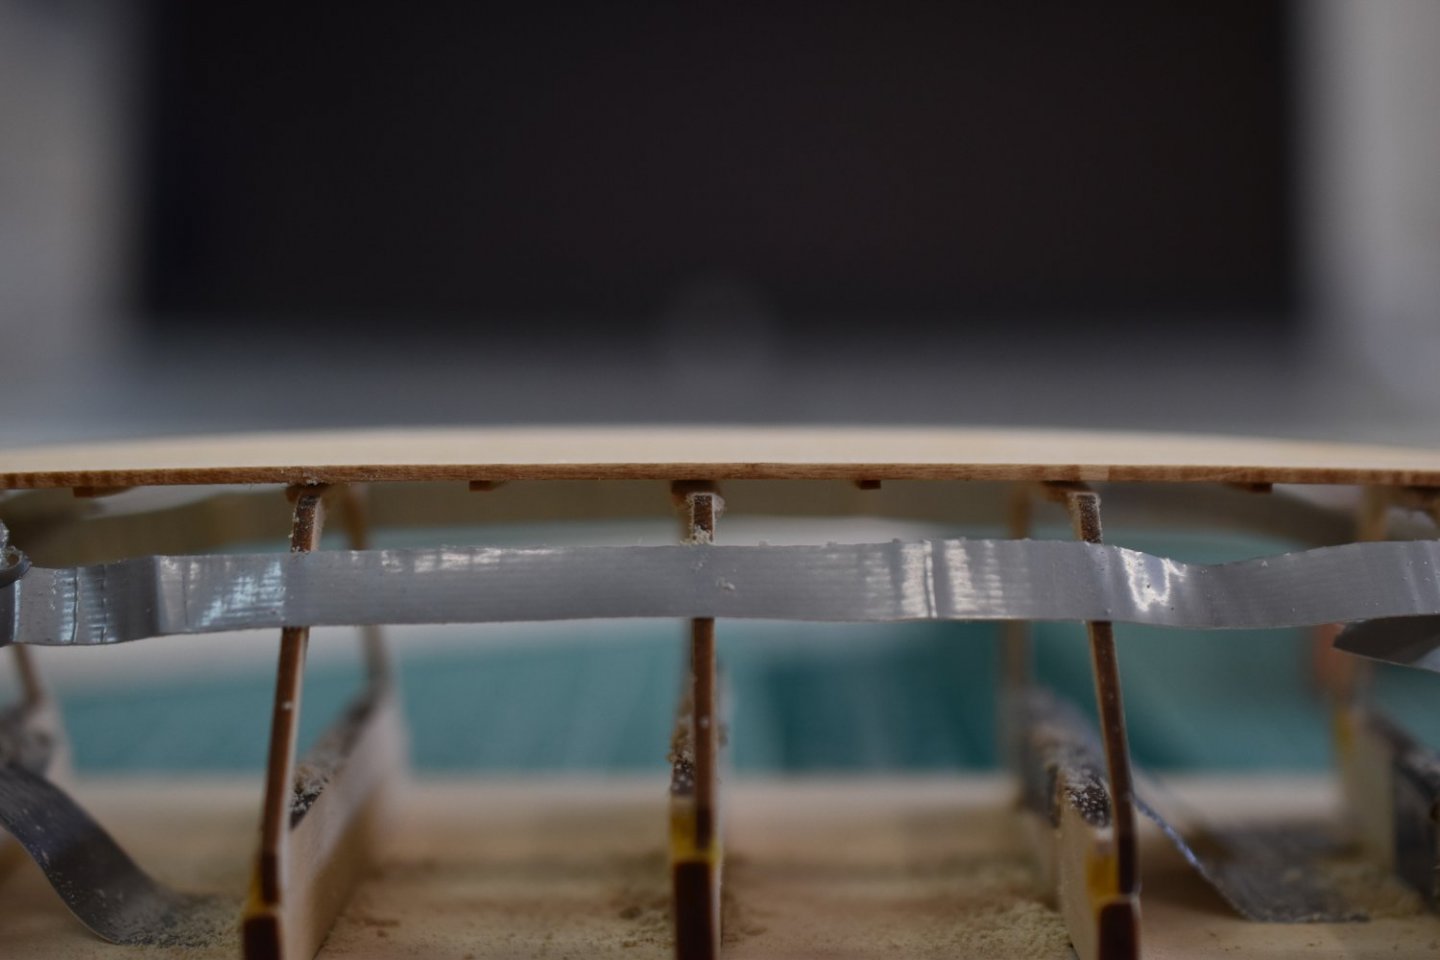
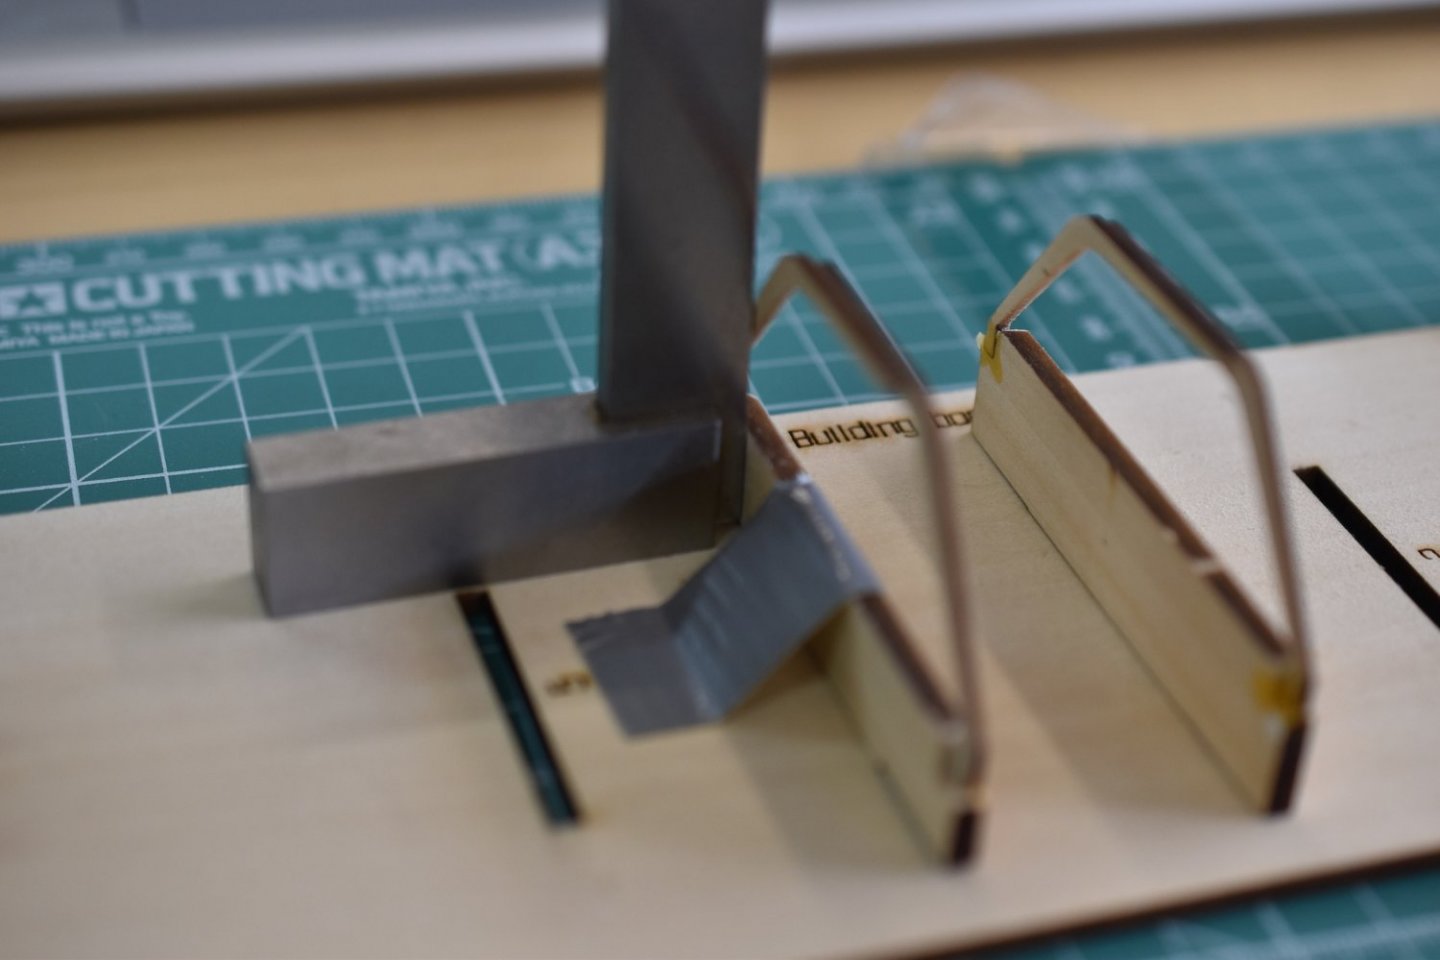
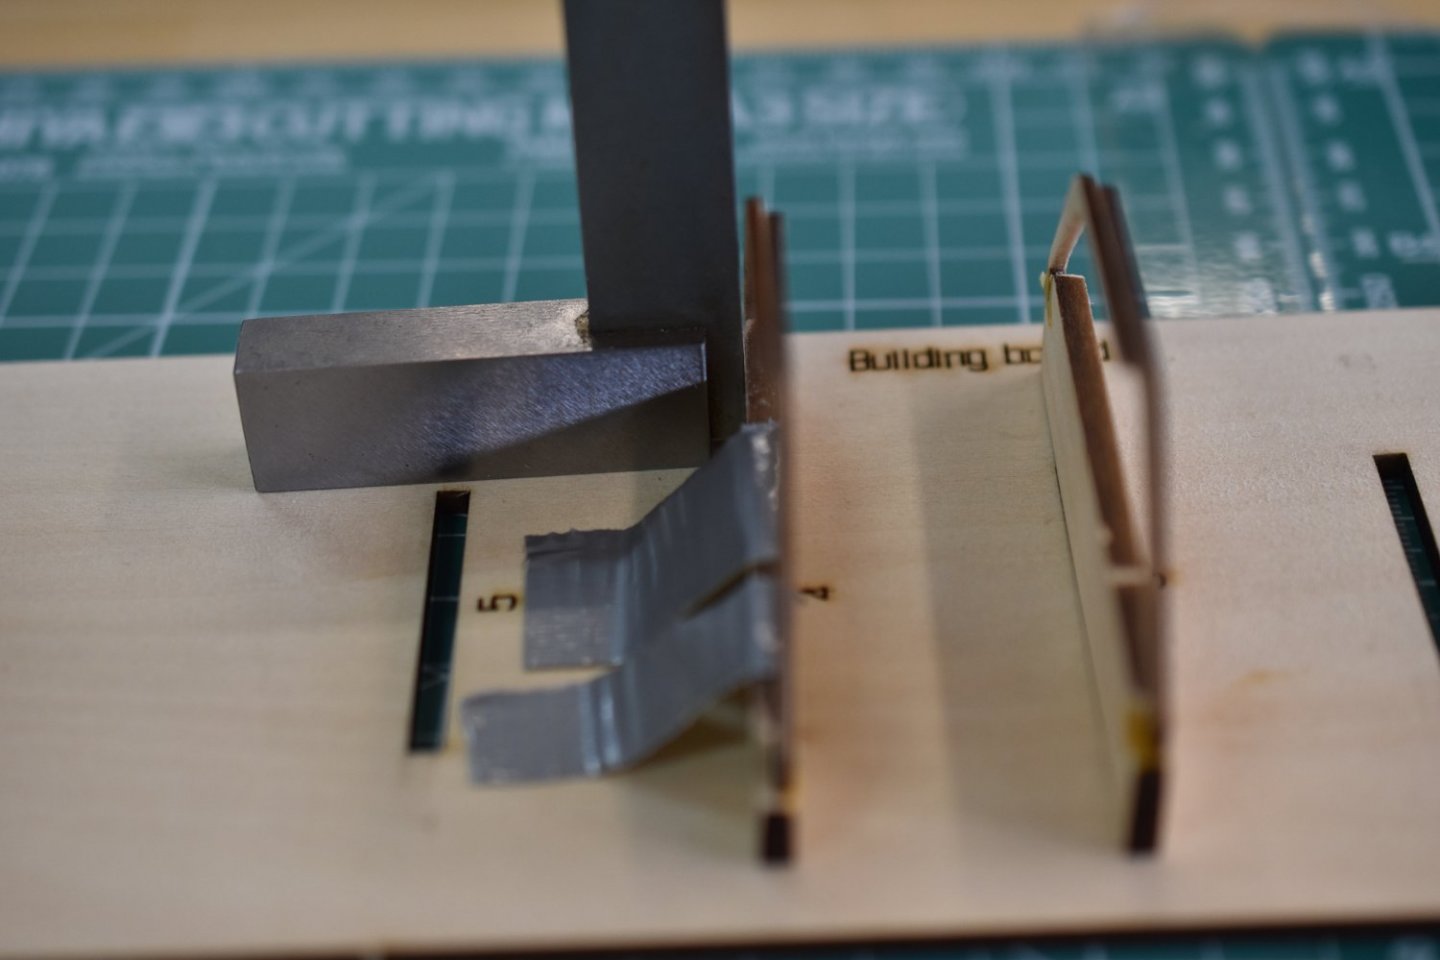
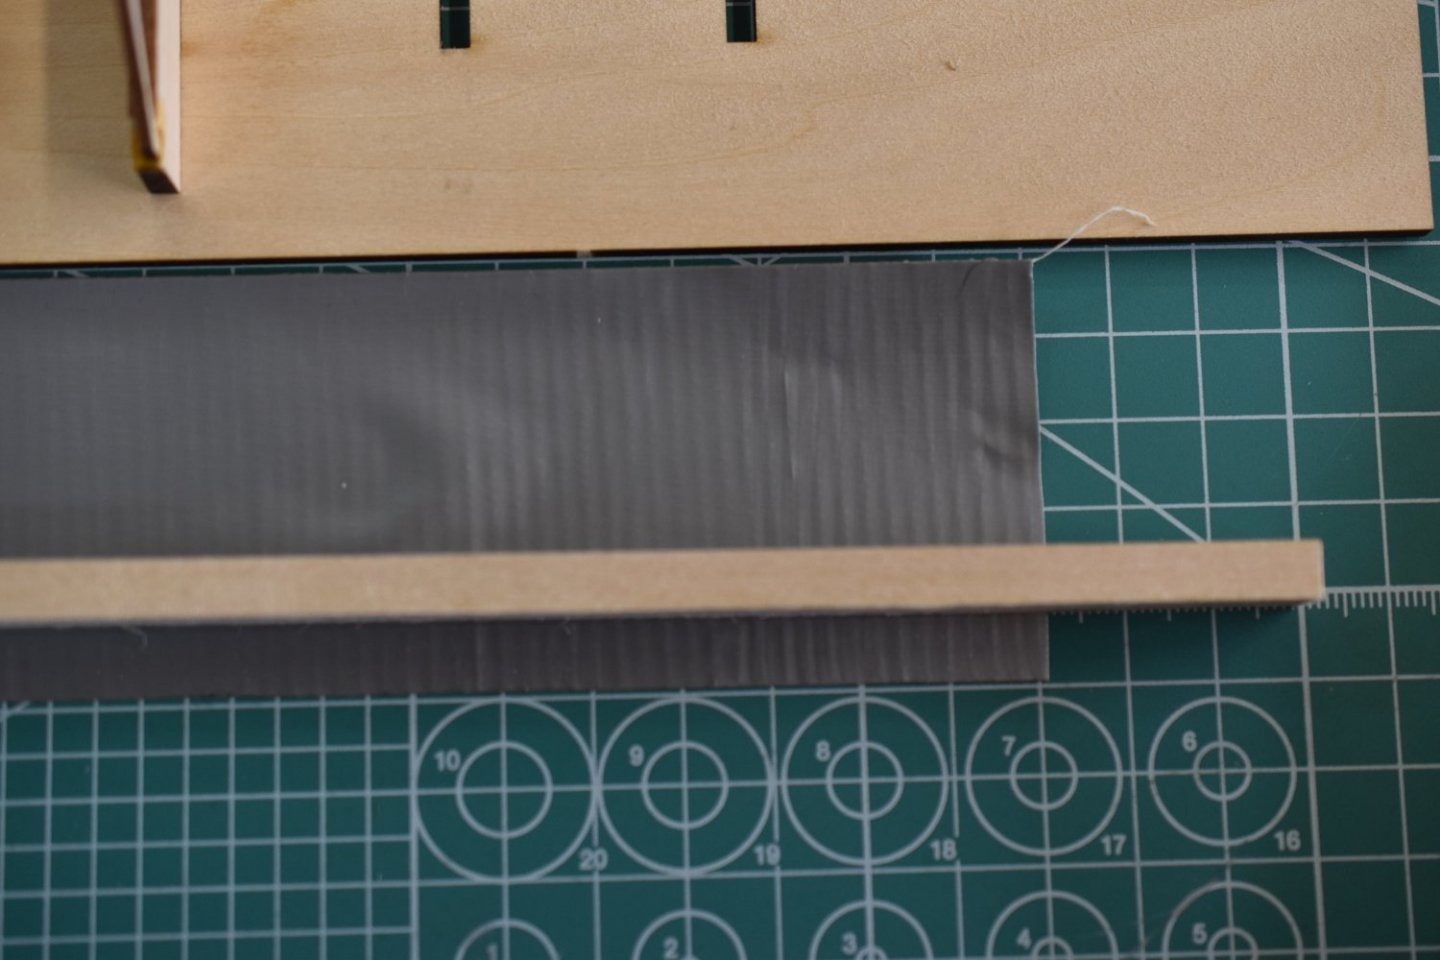
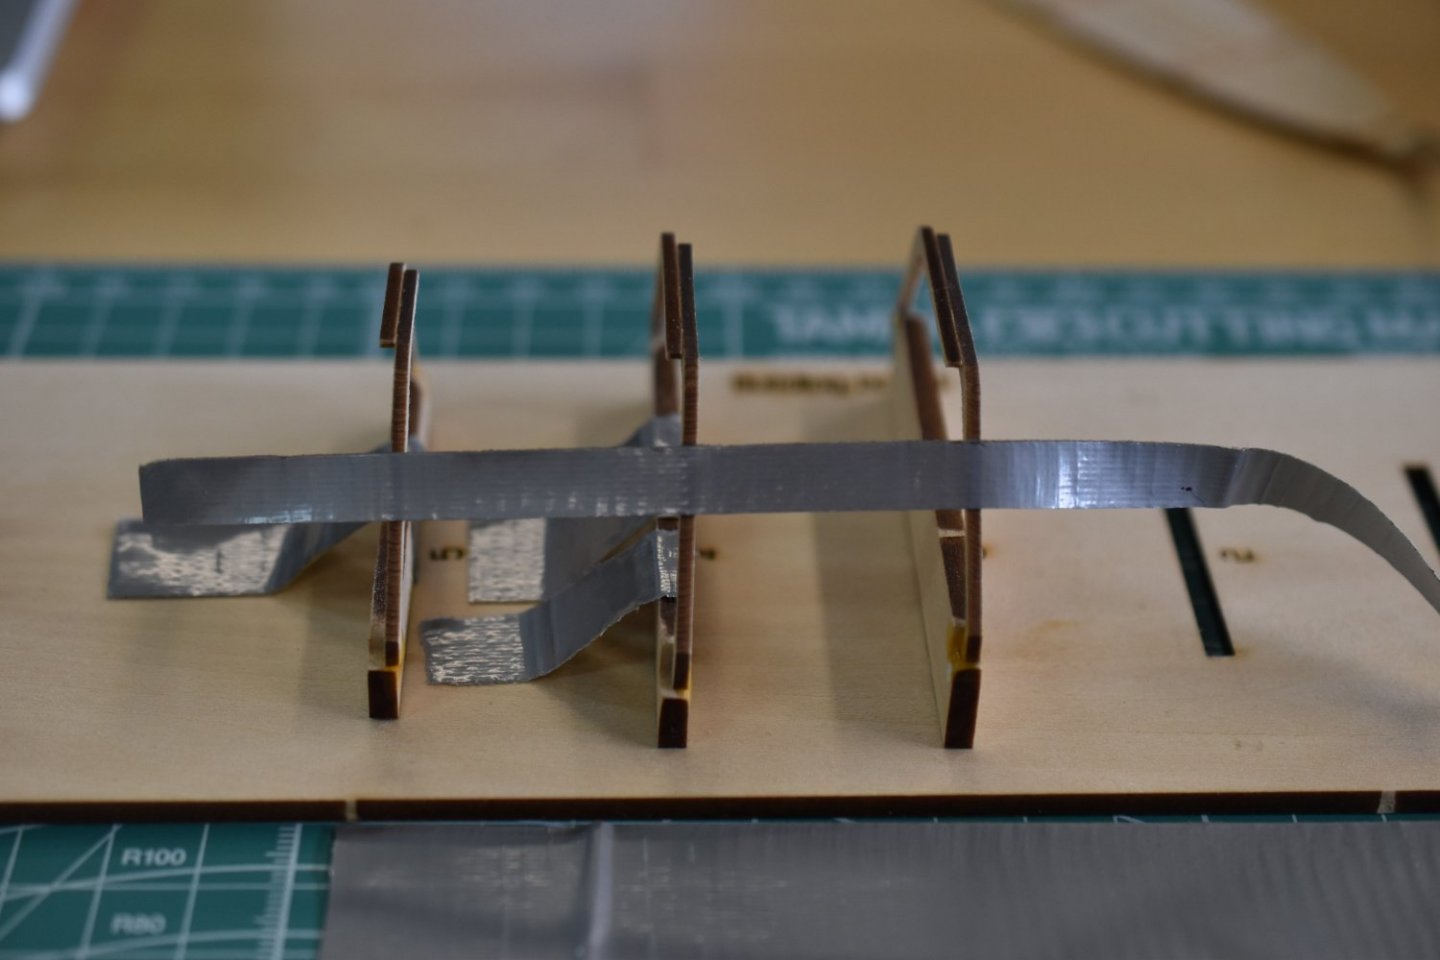
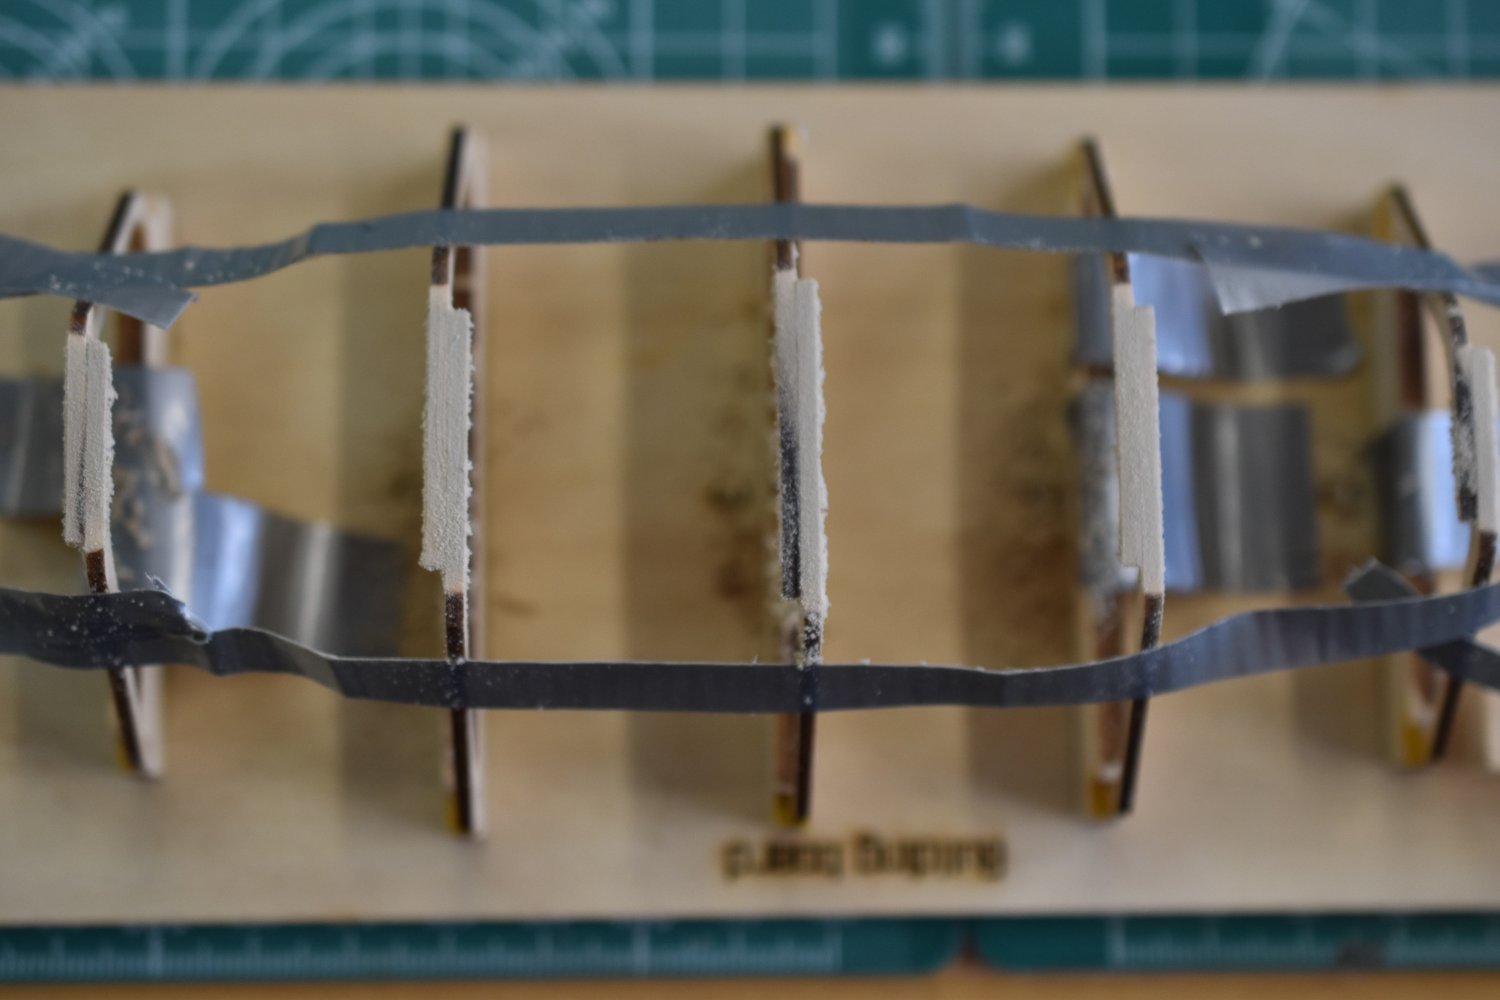
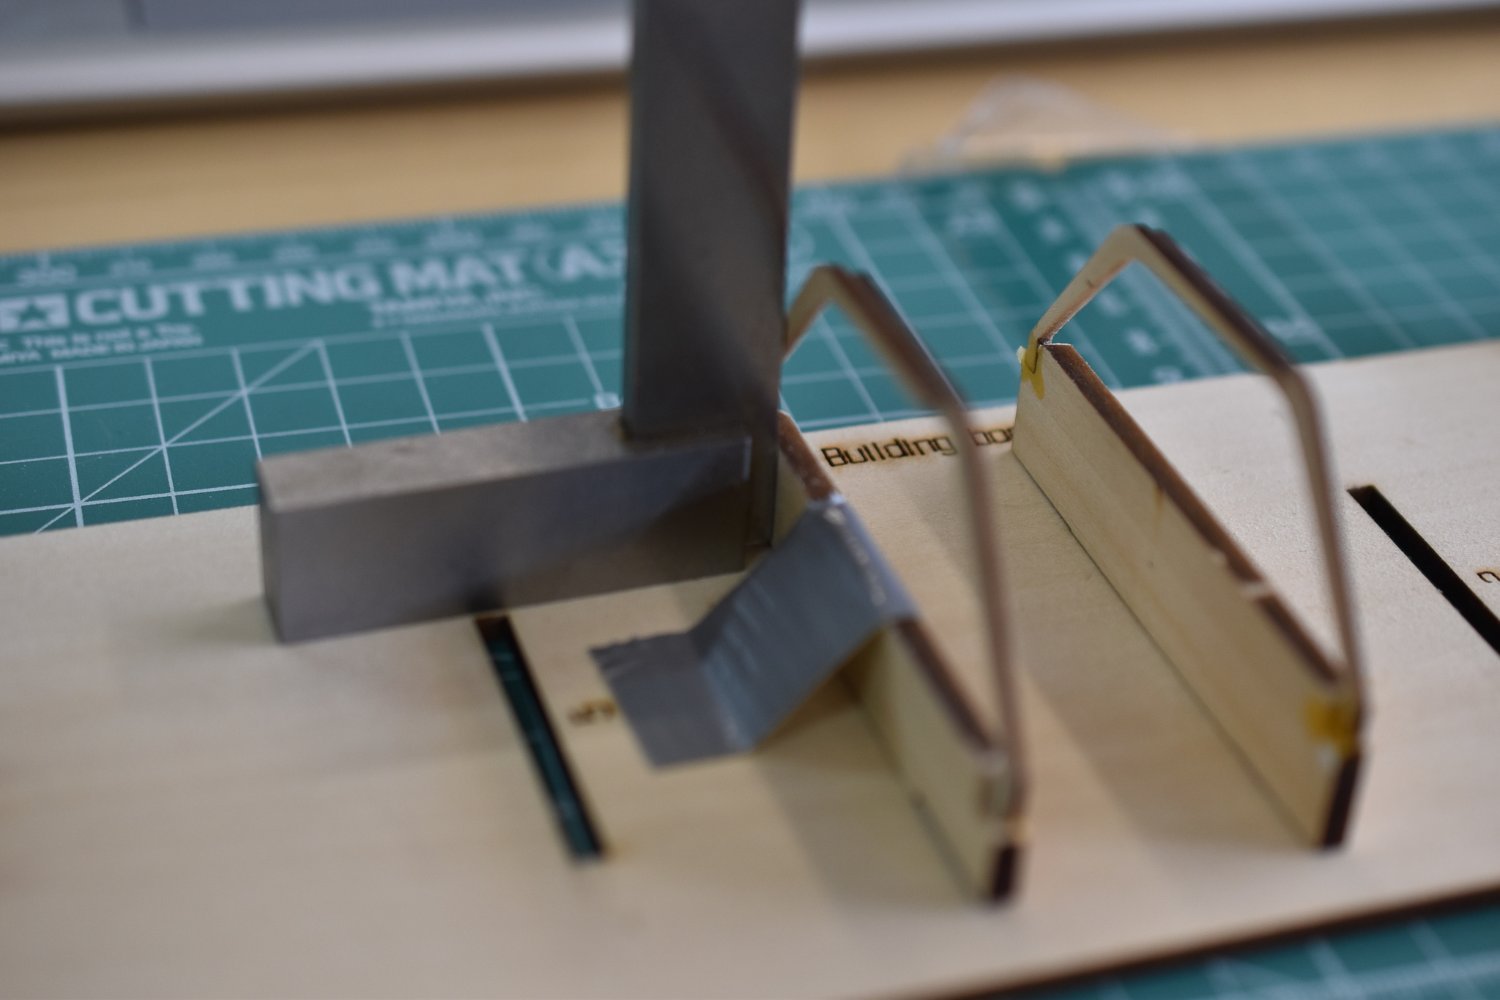
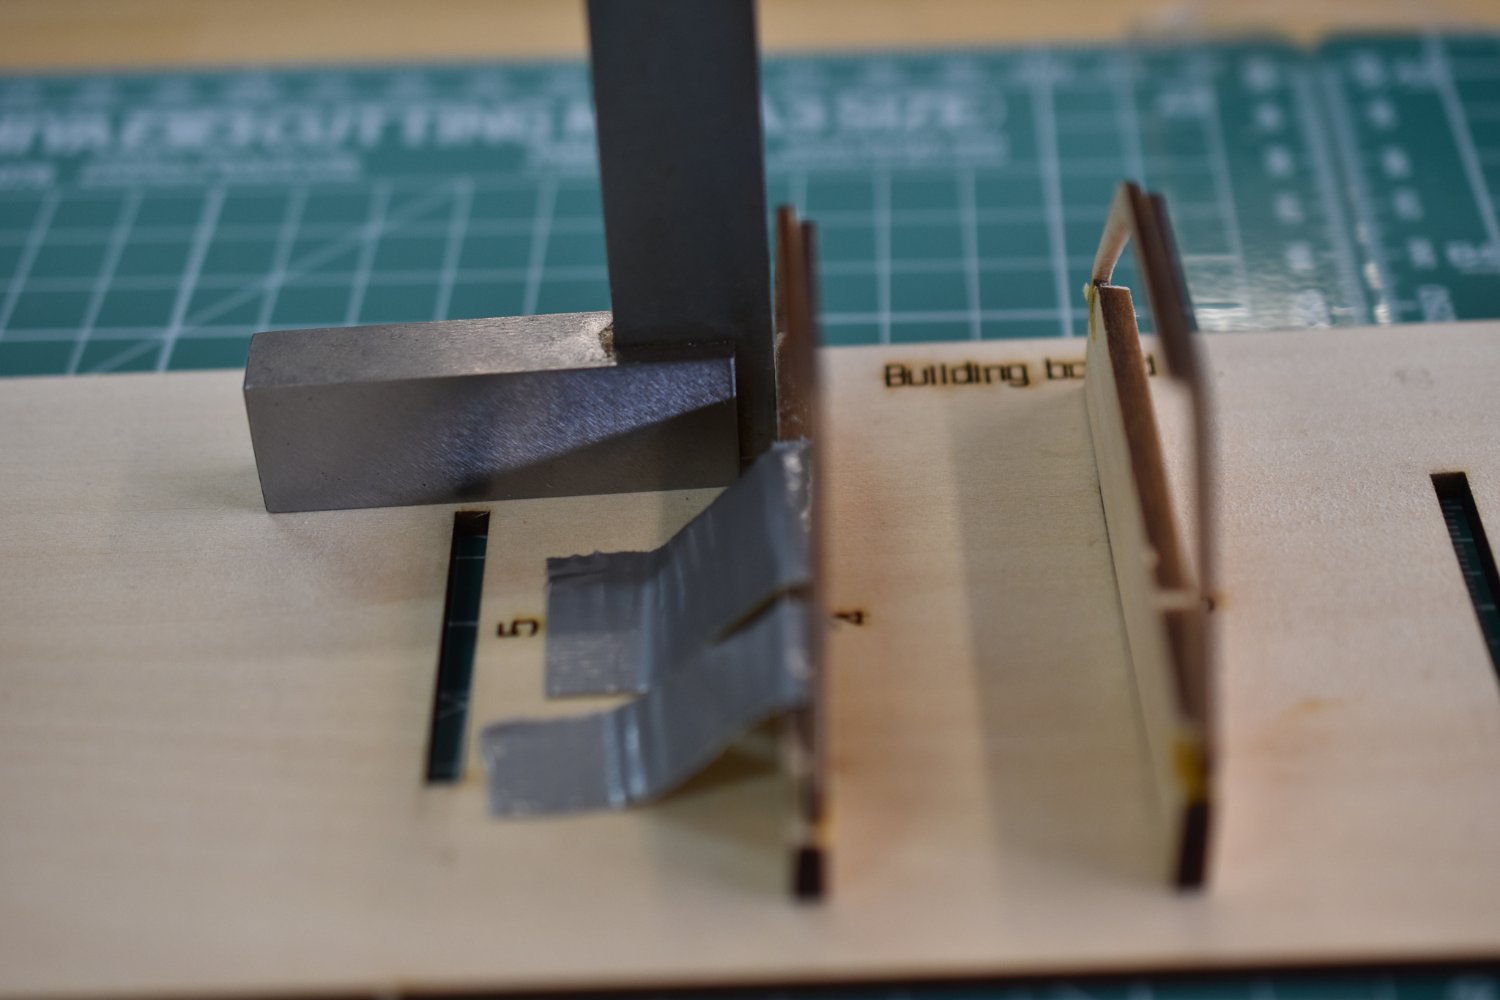
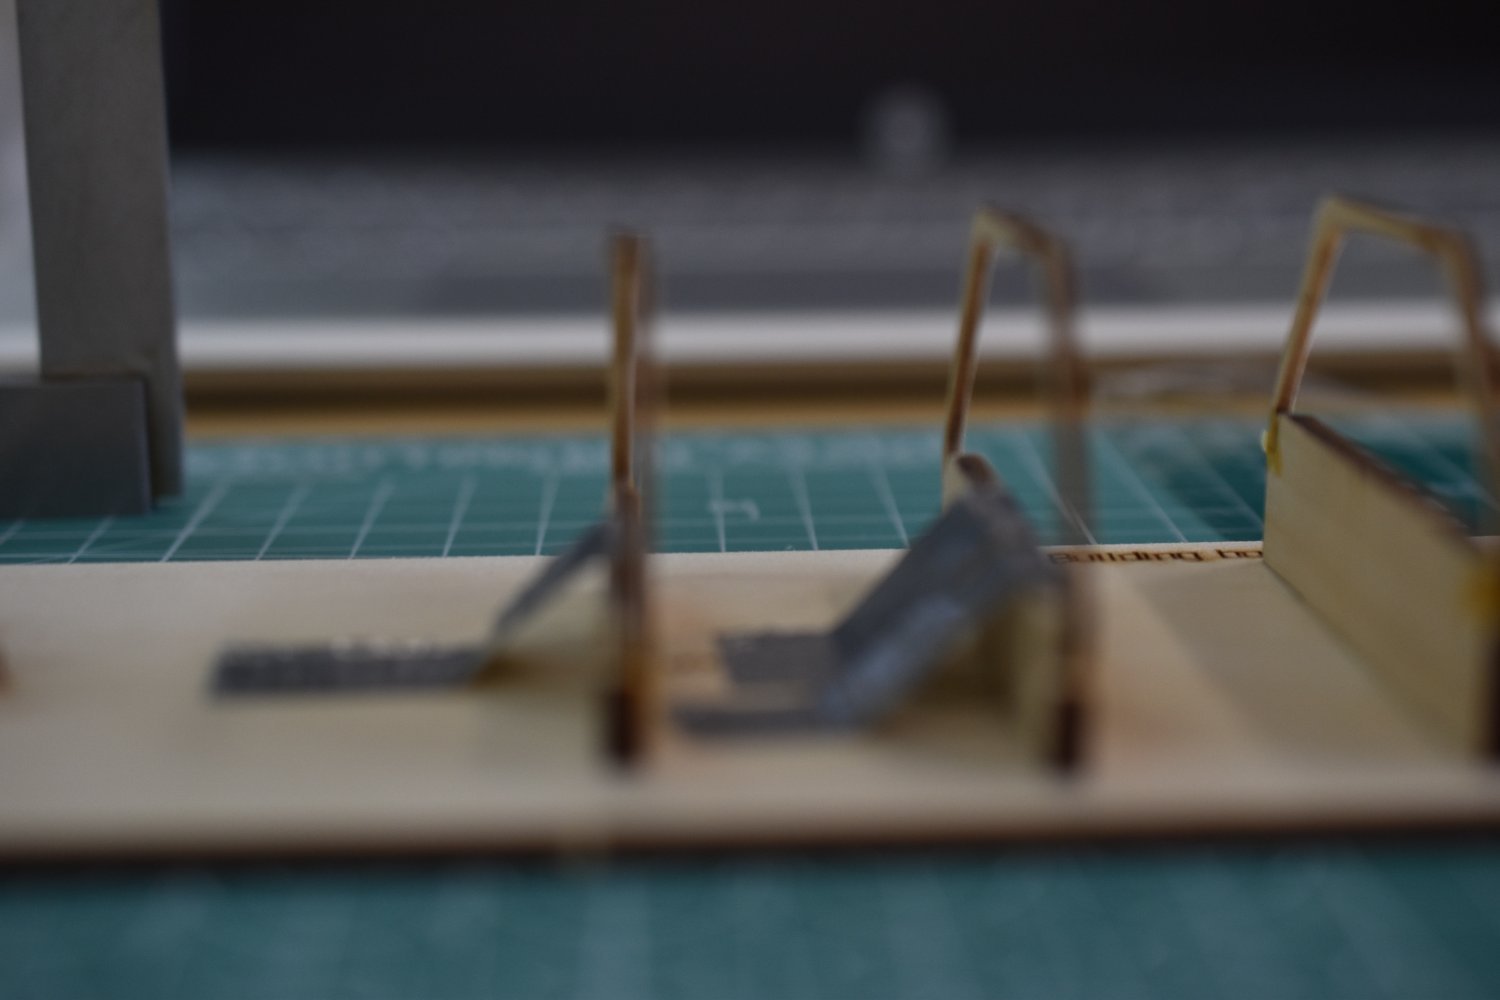
Well, here we are with some DropKick Murphys pirate tunes and some deep contemplation! I'm considering my next step, which I think is attaching the bottom planks to the frames. I decided to try and verify the frames squareness to the build board with my little square. I then thought about attaching a batten on each side to preserve the frame alignment more accurately. I considered different ways to steady the frames where the bottom planks are going to attach and decided against battens due to the removal and sanding that may end up being difficult. I then thought of using some 200MPH tape. I tested it at the base and it seemed to to help hold them closer to square, but the flexion at the bottom portion (mounting area) of the frames was still too much for my confidence. I had additionally, considered using blocks at the build base board to square the frames, but decided the tape would suffice and I would be able to cut it and prevent possible binding from the blocks upon removal. I then decided to run with the tape idea to hold the frames at the bottom area, in place of a more solid batten. This would facilitate easier removal and be a more simple solution. I'll see if it works out here today I think. 👀 I'll be putting the tape further up to the bottom than this photo suggests.


- 61 replies
-
- 2
-
-
- Lowell Grand Banks Dory
- Model Shipways
- (and 1 more)
-
Did you fill in the gap? What about making a piece to fill it in and gluing it in? I think I read somewhere about using glue and sawdust for filler. It's looking like nice progress anyway.👍
- 25 replies
-
- 1
-
-
- Mantua
- Trotamares
- (and 1 more)
-
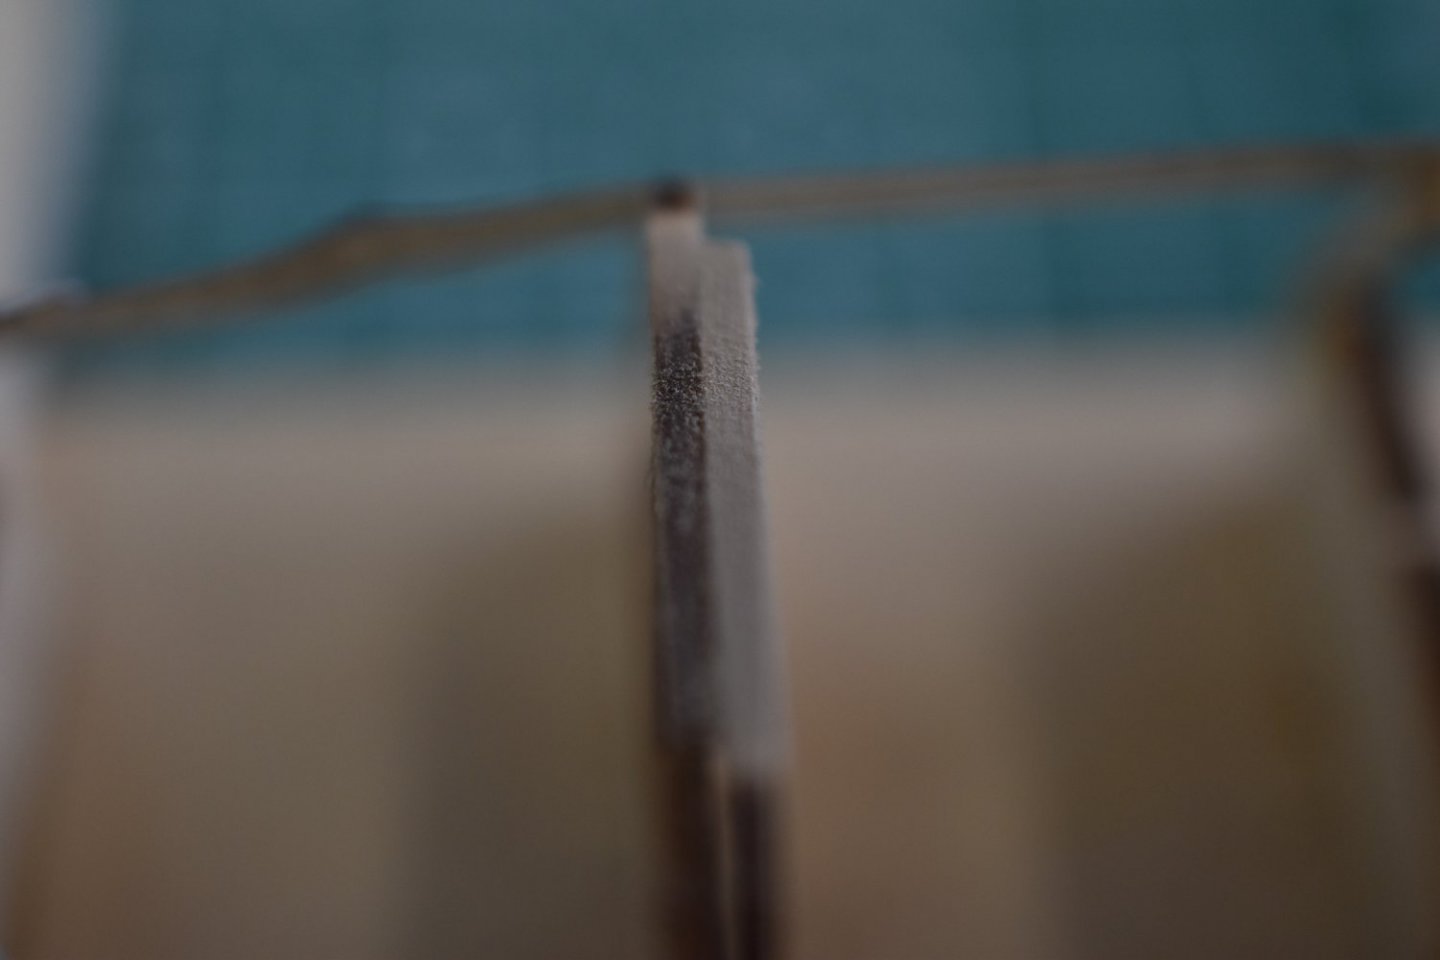
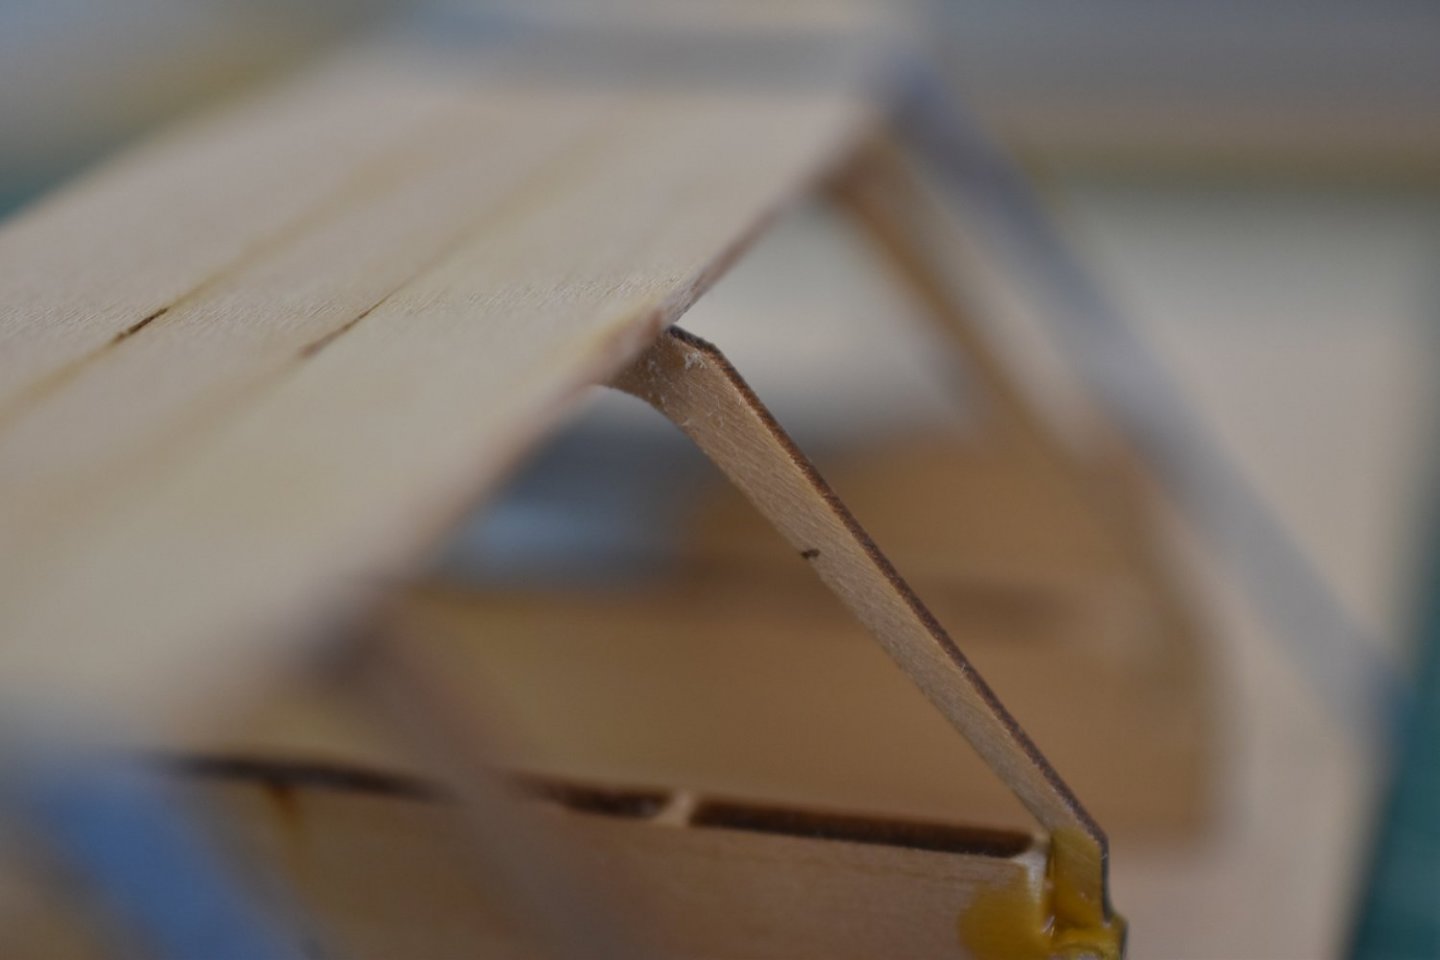
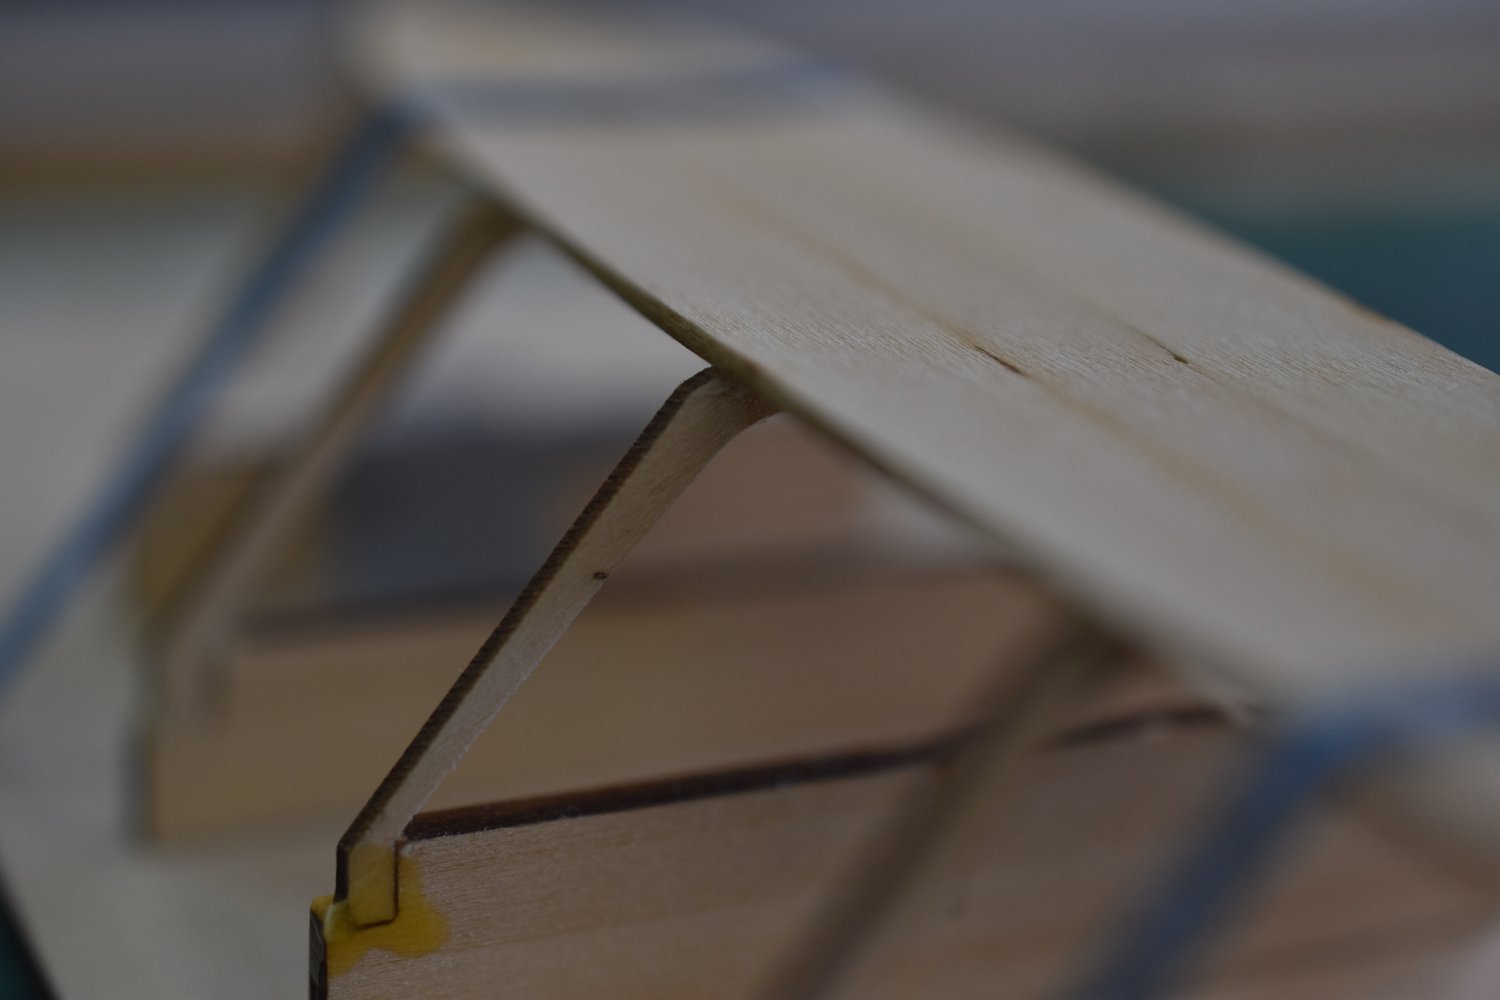
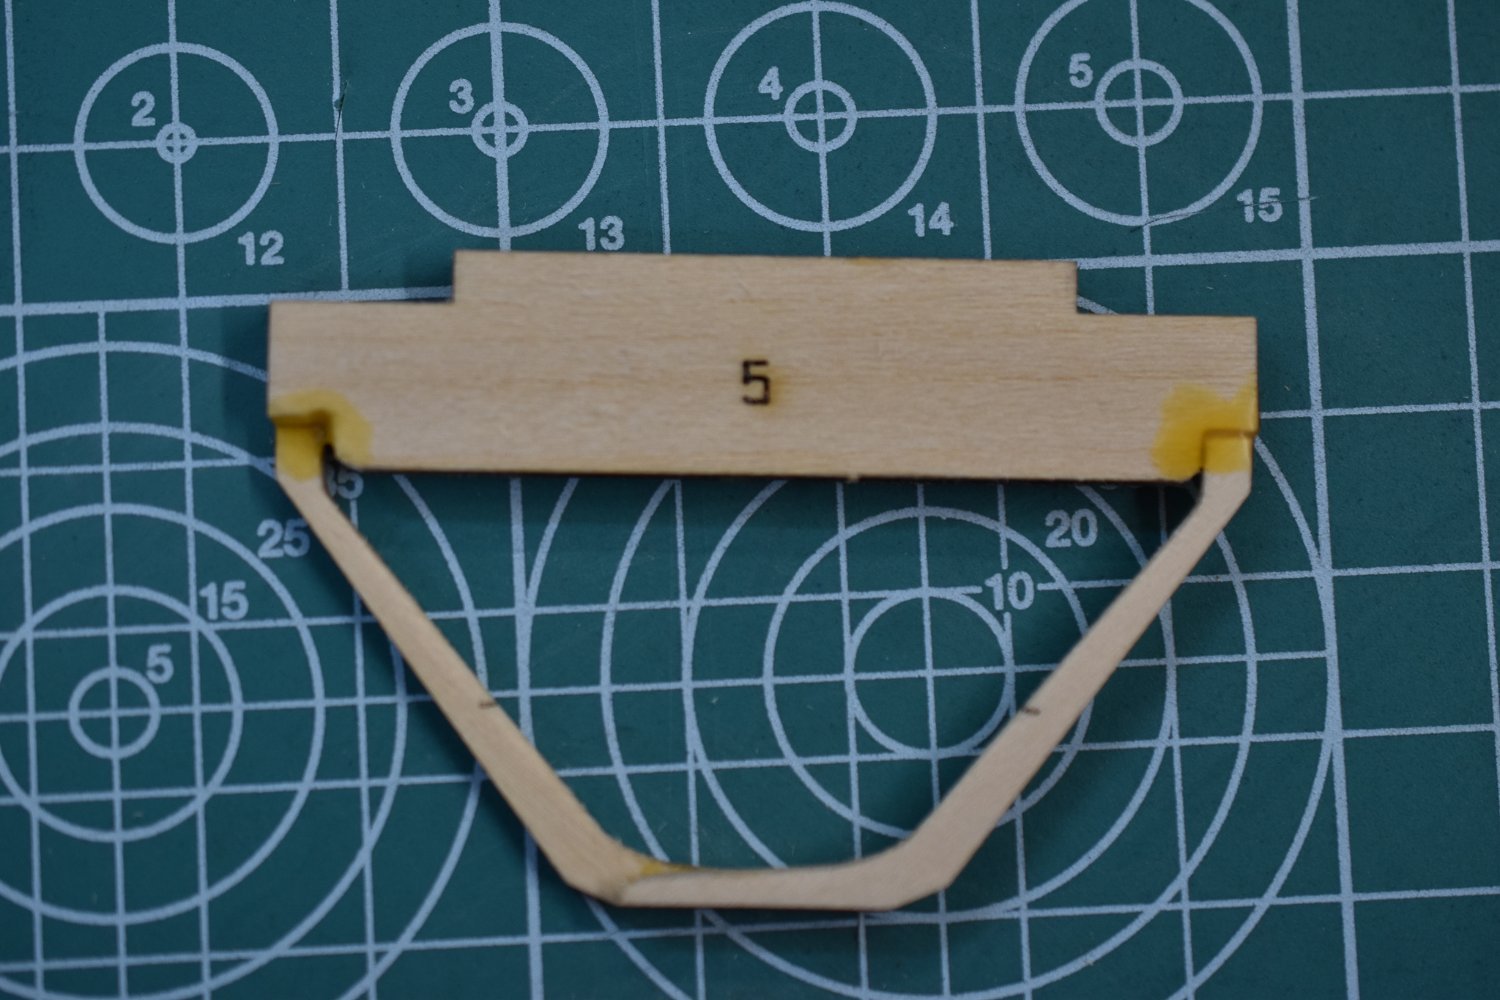
It was a long work day. I work in a hospital and the pandemic has worn me down after two years of it, but druxey inspired me to go out in the garage and try and correct the minor issue noted up there. 👆 Since I was out there I checked up on my frames that I had last left to dry. You can see that my frame joint isn't too fair and I've left myself with a bit of sanding. I tried to correct this when I was gluing them together, but I settled in the moment because I didn't have a plan or idea how to better deal with it.
- 61 replies
-
- 4
-
-
- Lowell Grand Banks Dory
- Model Shipways
- (and 1 more)
-
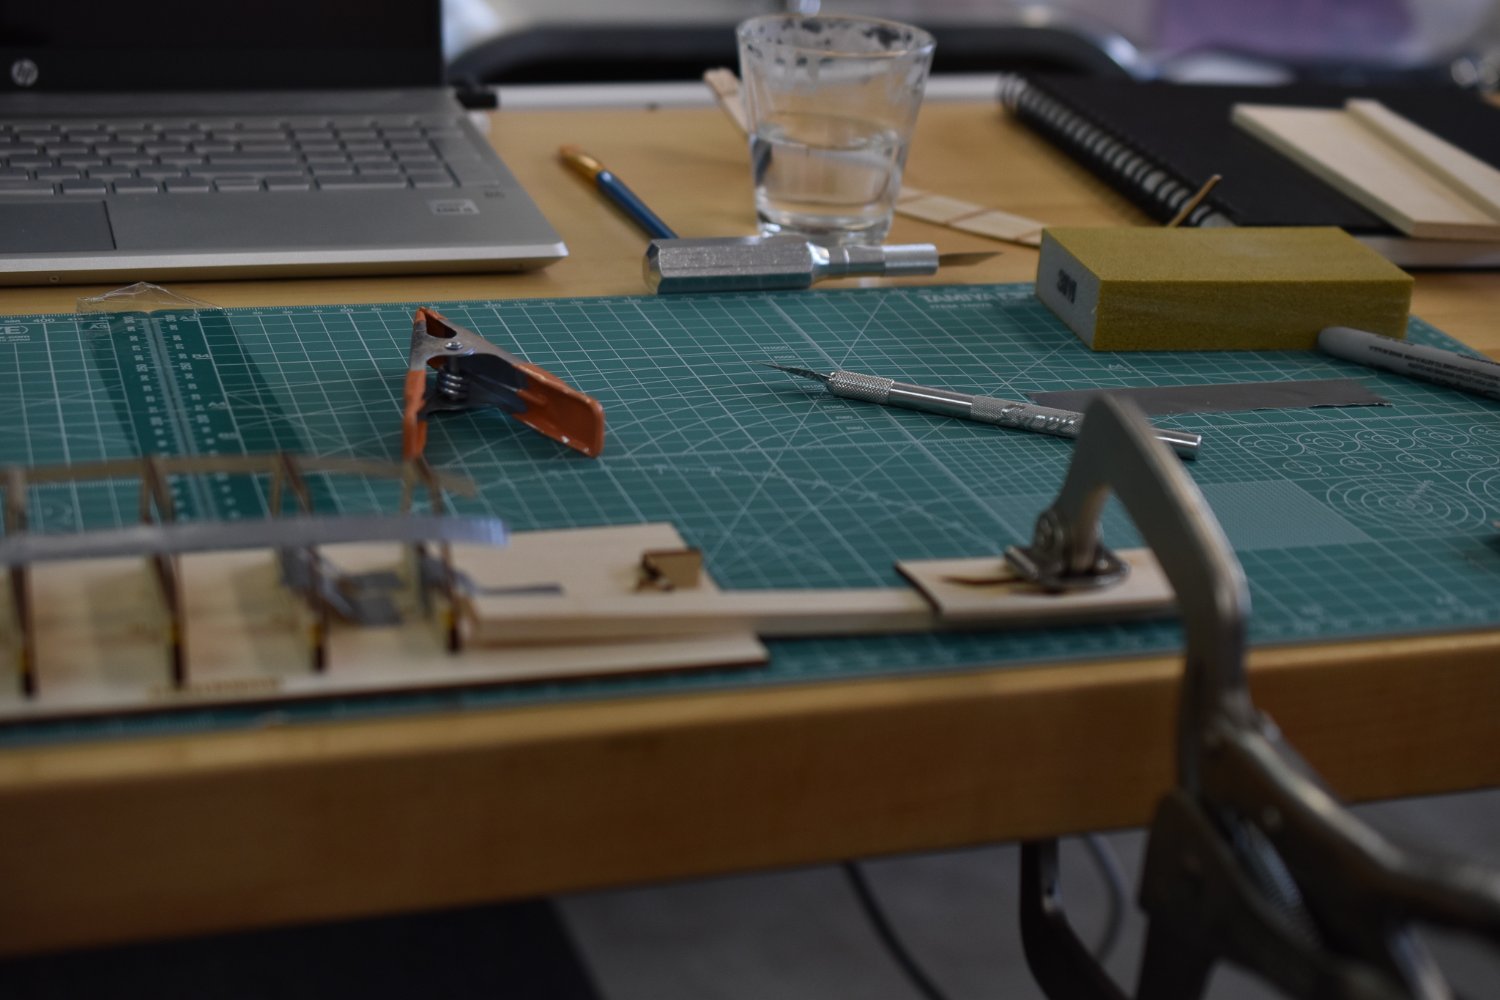
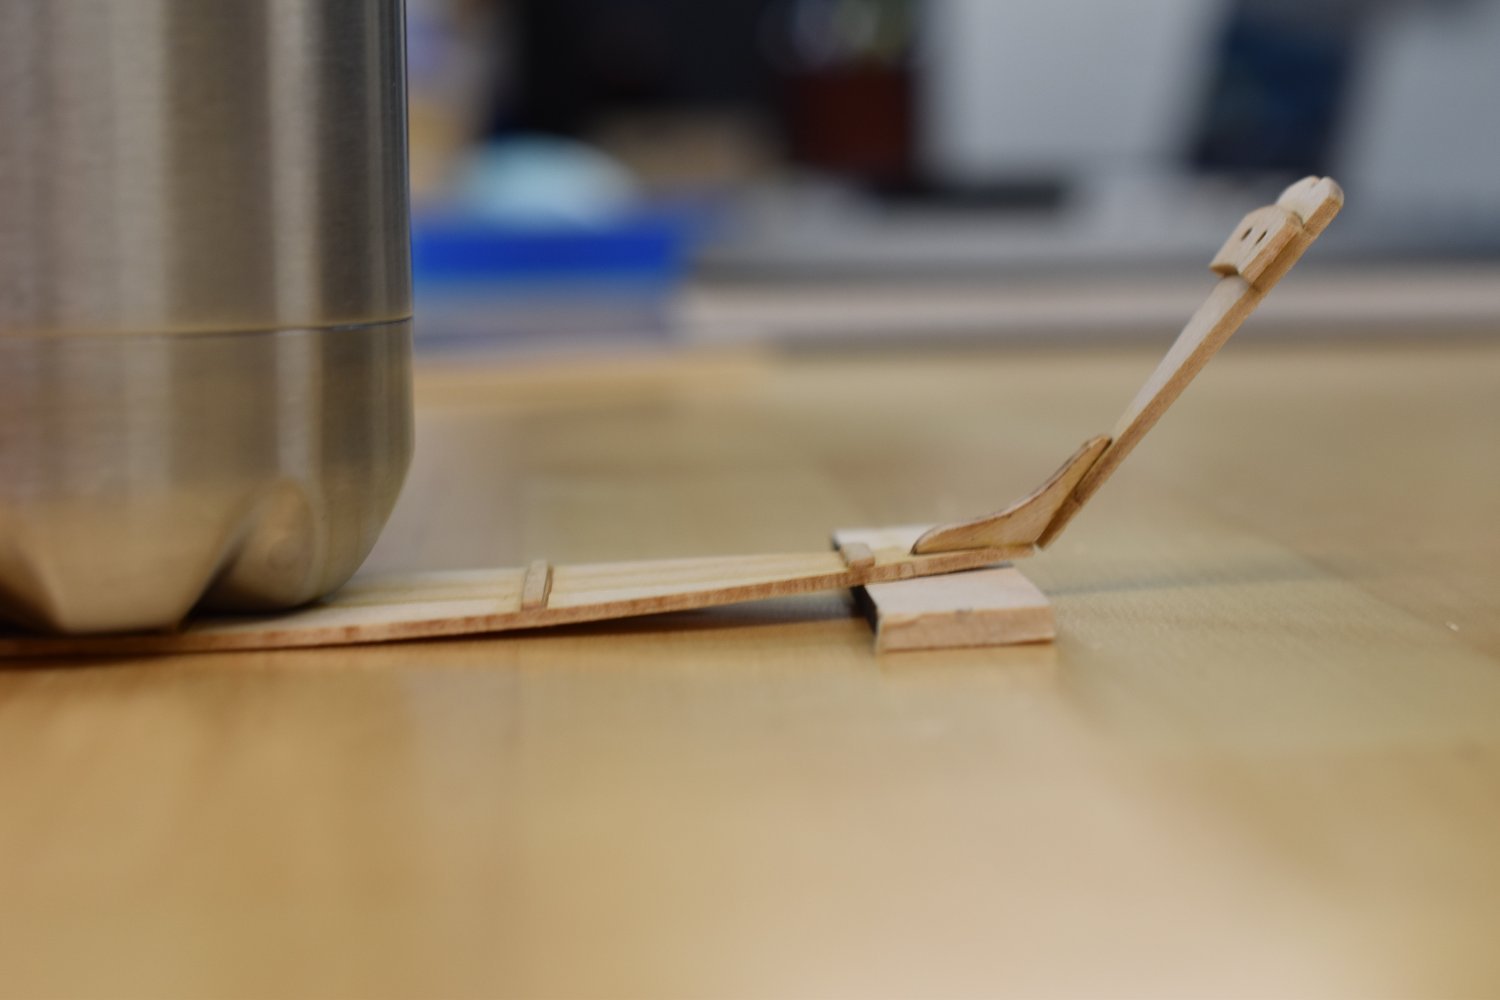
Thanks druxey, I appreciate your time and assistance! 🎸🤘 I painted some water onto the bottom of the "bottom planks", which is also the bottom of the boat. I only wet a length or section between the center two cleats and then clamped it. I'll let it sit until tomorrow evening and then check it out. I may need to do a bit more adjusting and clamping at that time. I sandwiched the boat planks between some strong clamps and some thick scrap bass wood I had bought previously.

- 61 replies
-
- 3
-
-
- Lowell Grand Banks Dory
- Model Shipways
- (and 1 more)
-
Well, I noticed an issue today with my bottom planks. They've warped convex athwartships. I think I'll try to wet the center plank from exterior side of the planking, but might just wait to see the next steps. Maybe the a little heat and pressure against the center center of the bottom planks when they're mounted up to the frames will pull them flat a bit. I don't want to ruin my bottom sheer.
.thumb.jpg.0f8e21c8ceb9e07fe1dea9b6dd57b7ea.jpg)
- 61 replies
-
- 2
-
-

-
- Lowell Grand Banks Dory
- Model Shipways
- (and 1 more)
-
Sounds great Clueless! Just take your time and do what you need to do to be content with what you do. If making an attempt is what brings you peace in your spare time, then it doesn't matter if it takes a thousand and one times! Keep on the keeping on and seek help when and if you need it. I'm on the same program as you over here, as I've got the entire shipwright series in my drawer, next to the NRG planking kit. I probably won't be finishing this little dory anytime soon, though, it takes me hours to complete the simplest steps. 🤣
- 61 replies
-
- 1
-
-
- Lowell Grand Banks Dory
- Model Shipways
- (and 1 more)
-
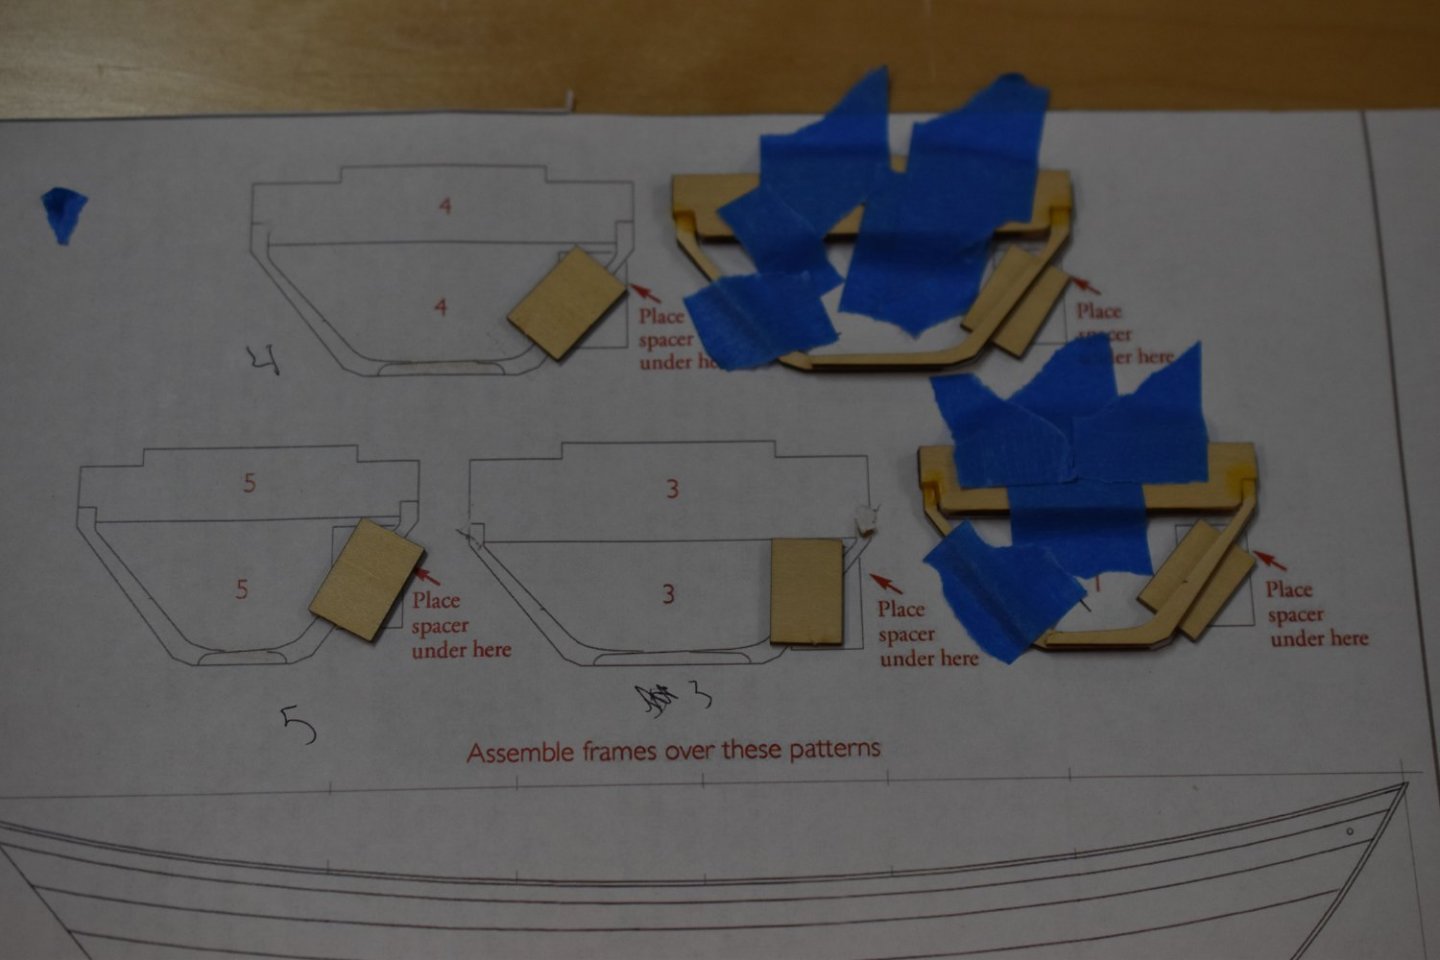
I'm going to start setting the frames up today. But first a little mood music and refreshment. Gotta stay off the rum because I'll never get off the dock. This isn't the first boat I've worked on. That there is my dad's dory and that's back close to the beginning of a long journey on the sea. Take note of the Sony Walkman and all the red lead bottom paint on my hands! 😆 👇 Maybe they caught some of these on the dories? The Italians call these Bocaccio. One more from my story and for getting to know the SaltyNinja. Looks like were going rock cod fishing. When I first started fishing with my dad I got sea sick every time for months. I loved it so much that I kept going until I overcame it. I would never go through that again, I'm such a wimp now! 🤓 Anyway, I started the framing steps and took a minute to look at it all before getting rolling. I started cutting from the back because the tabs are easier to cut there I think. I cut my pattern out of the directions book and taped it to my bench. I then fit all the pieces to the patters. I noticed areas that needed to be trimmed to fit the pattern more accurately. The frame holder part needed trimming at the two places where the frames get glued to it. I split the difference on the tab that goes into the holder board and then made the holder frame tab area more narrow on each side with a nice little square file. I also sanded and prepared the frame pieces and put a chamfer on the edges a tiny bit. The pictures above aren't showing it well, but when the one top tab was centered the side tabs, where the frames go, were too wide so I made them fit better and put a chamfer on the corner so the frames would have more room to be properly placed. When I had all the pieces trimmed and sanded I laid them out and decided to glue the spacer to the paper pattern with this stuff 👇 As you can see I taped the mold piece to the pattern in addition to gluing the square spacer on. I didn't use tape on the spacer because the tape would put the frame into all kind of kilter. I glued the spacer inboard too, for more secure base and purchase for the frame. Check it out 😅 I was a little better about keeping my work space clean with a vacuum, but don't suck those small parts up like I almost did! I finished with final placement of the two frames and glued them. I placed the small weighted square I have on top to apply some gentle pressure. I didn't see too much glue running out of the seems, so I didn't brush the excess off. I'm going to repeat this process for the other frames next as it seemed to work out well enough.
.thumb.jpg.e2c3826713dab714413823c47a21f4c4.jpg)
.thumb.jpg.189b735434ba530d93af449dd408b6a1.jpg)


.thumb.jpg.1884880309a14b7790bdbdad73ff1669.jpg)
.thumb.jpg.72d1402e81773283accc5854b658ec84.jpg)
.thumb.jpg.9532be4dc7b5e8ad2d7e149757ccd15b.jpg)
.thumb.jpg.4a499f9e817612003a45e712d60c6148.jpg)
.thumb.jpg.81266d467998cd63135ac93b7378689b.jpg)
.thumb.jpg.00e277ac97c08b76ccc9068d8bead1e1.jpg)
.thumb.jpg.5ba6163752f6e2d66e1f5ac91064e224.jpg)
.thumb.jpg.6527460c9d6b99613ef318d85a32735b.jpg)
.thumb.jpg.042ab7e28600428f4c078111cdad043a.jpg)
.thumb.jpg.a3ed94cfbe44dfa8b0ccf1effa19fdf4.jpg)
.thumb.jpg.e631db4886acdad52287ade3340436dd.jpg)
.thumb.jpg.462037ae70e09354eae71a11fda599fd.jpg)
.thumb.jpg.7a76a89b63ea00a4113e3fbb5d0499fc.jpg)
.thumb.jpg.5f577ca57e6c17fe7fce7eacc7d5a53e.jpg)
.thumb.jpg.faefbde608e7acf6d8acdf454ee605e7.jpg)
.thumb.jpg.db05b2031eb616c949f60c94a1f56c40.jpg)
.thumb.jpg.3a91b83a2f11a6ea69254cb00ecaad5f.jpg)
.thumb.jpg.7bdb4c12b77ef6004cafe7b558189a38.jpg)
.thumb.jpg.9c0faa4c2202df94f2877e773f21f6be.jpg)
.thumb.jpg.dbe8efb72199b69f06ecce469f51f4dd.jpg)
- 61 replies
-
- 3
-
-
- Lowell Grand Banks Dory
- Model Shipways
- (and 1 more)
-
Thanks Mark! 🤘
-
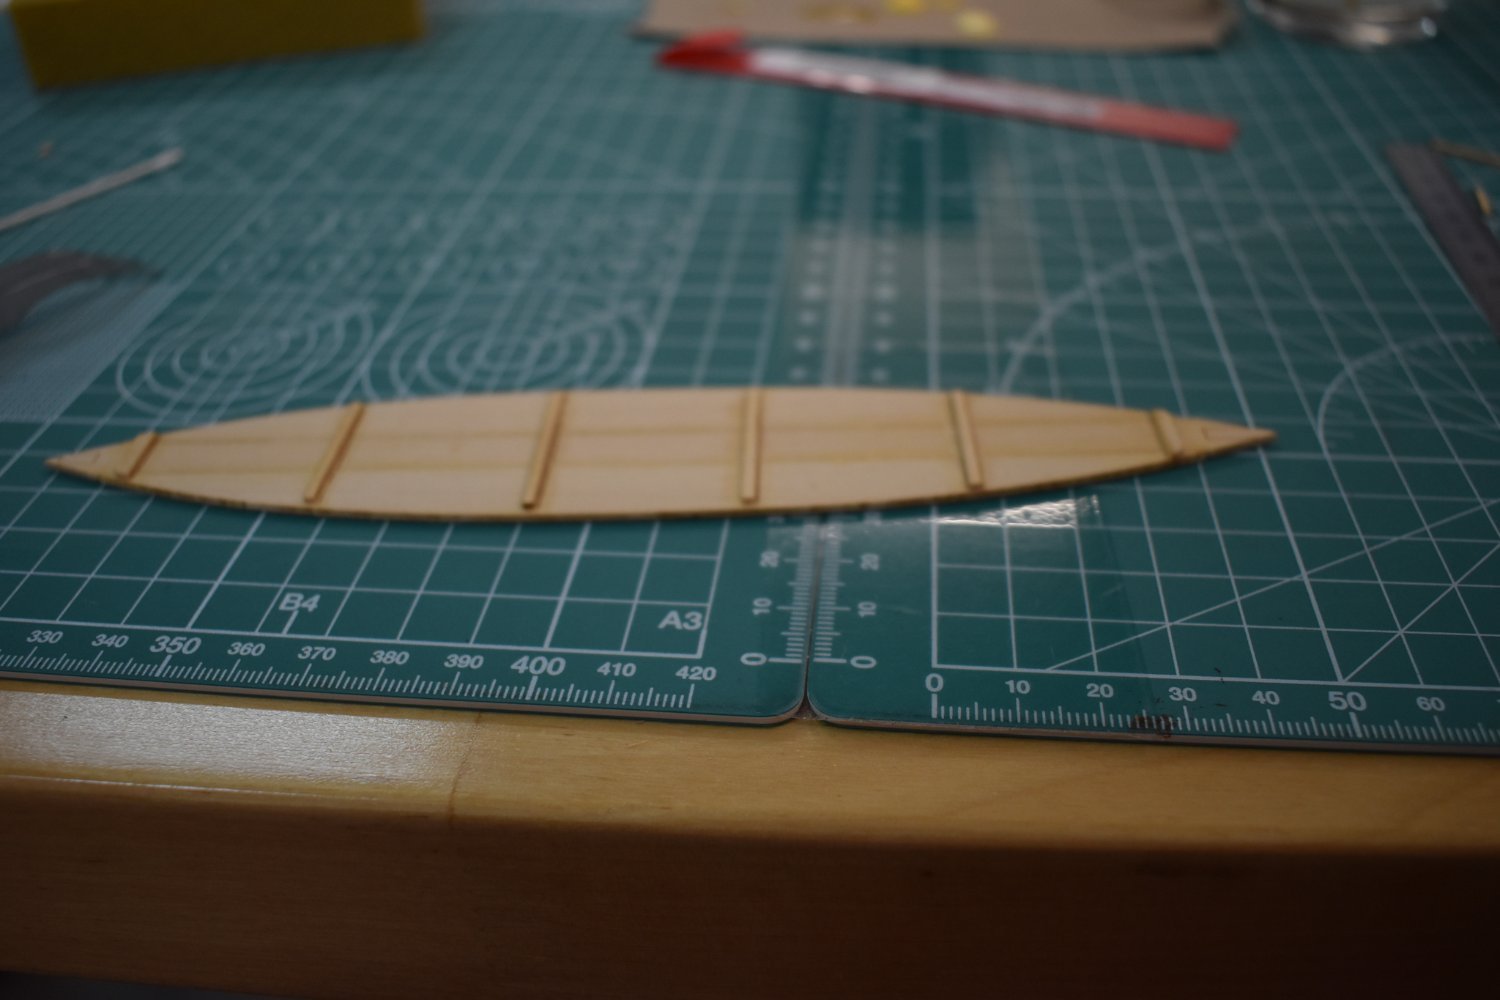
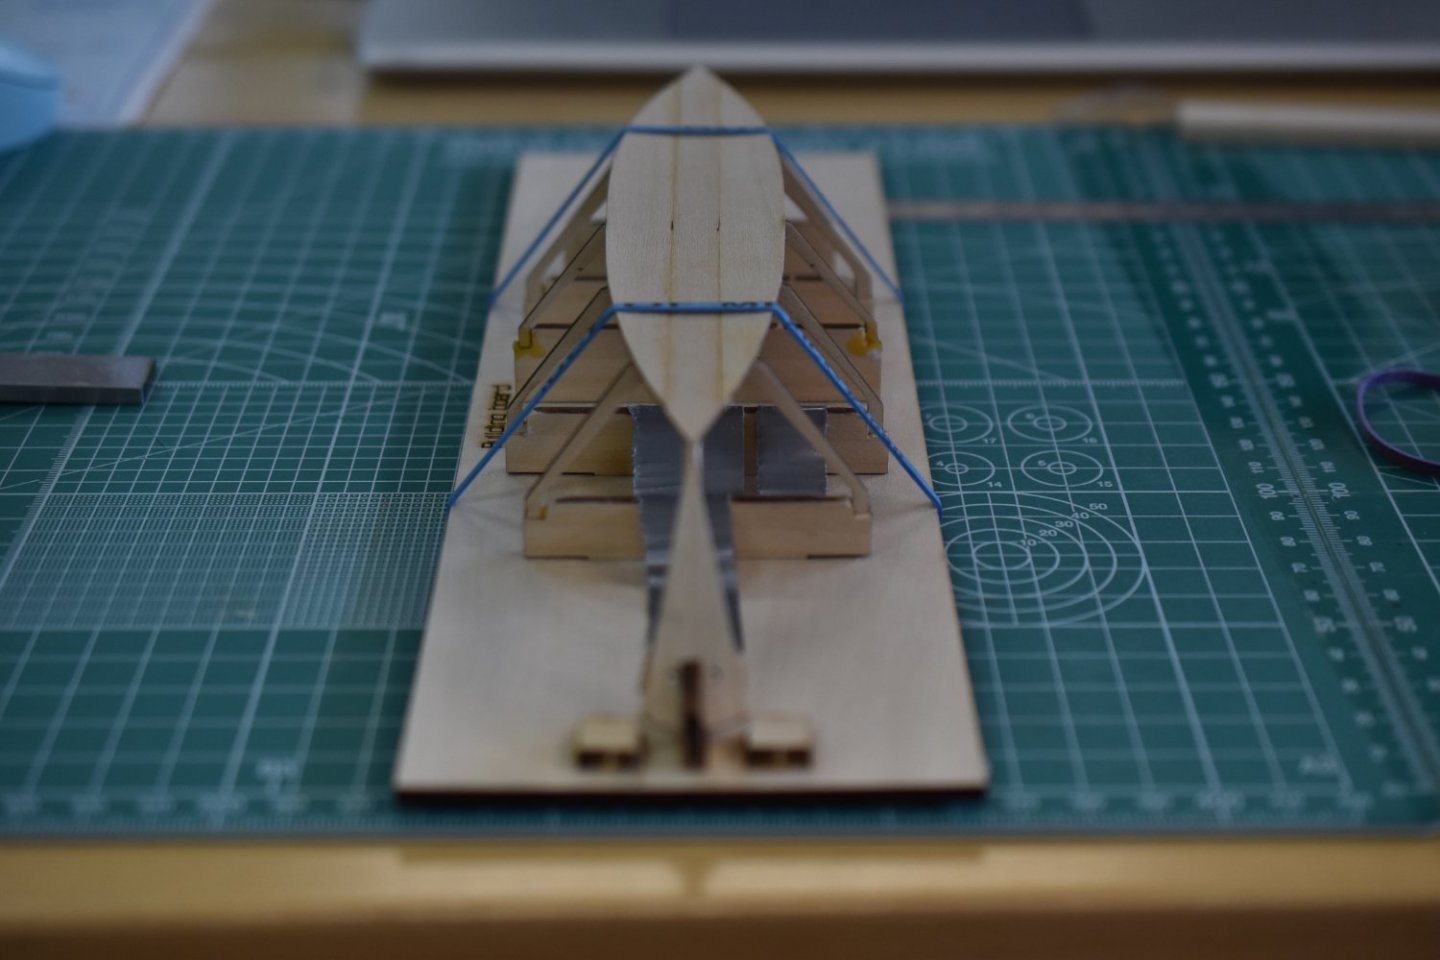
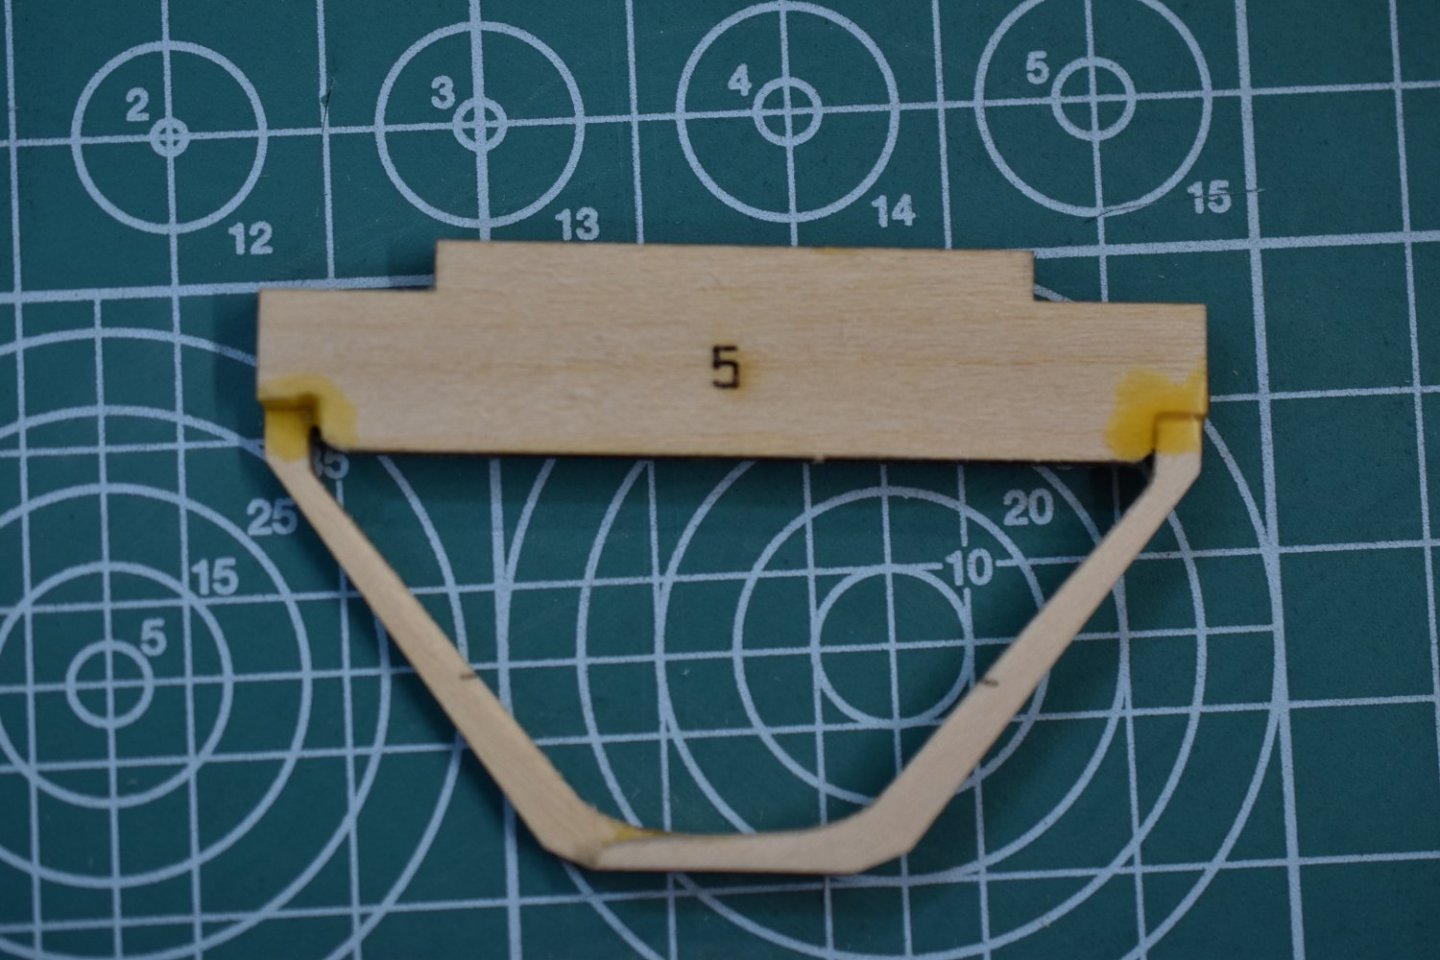
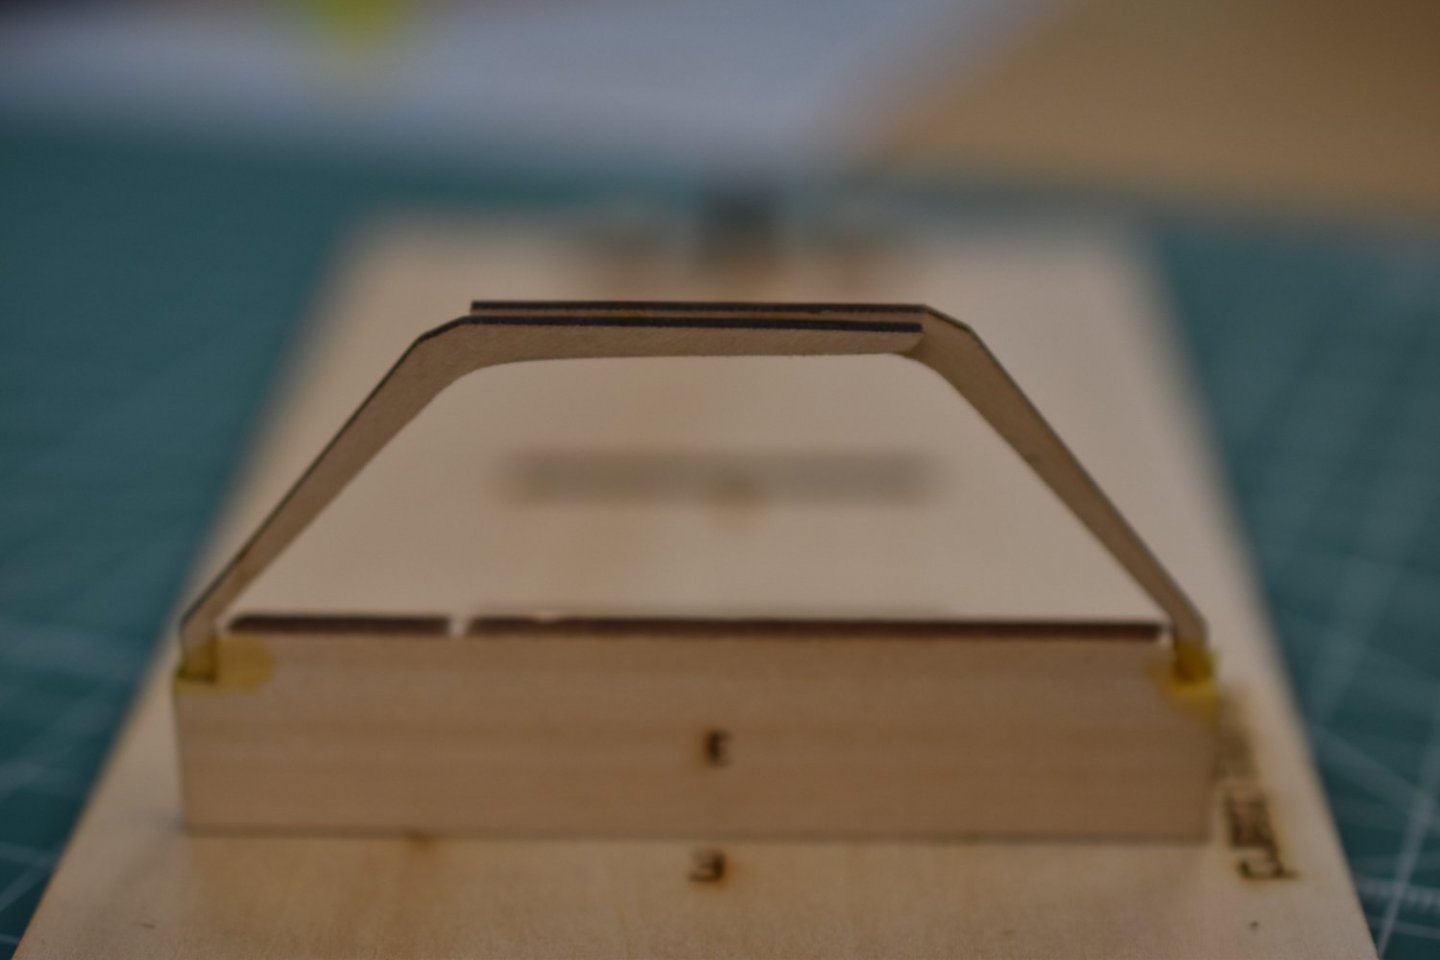
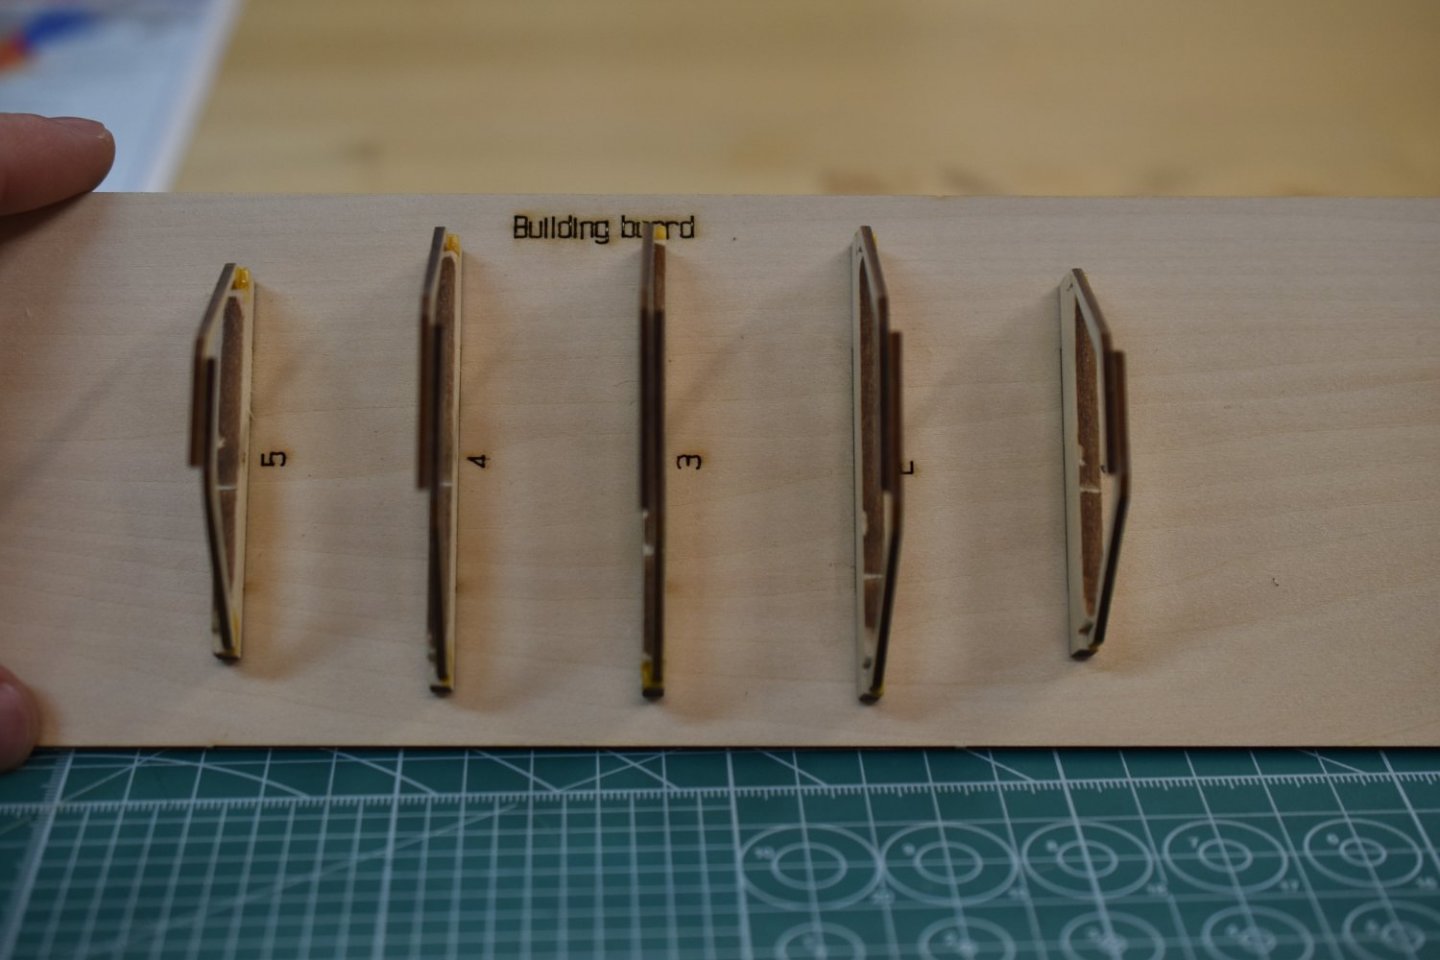
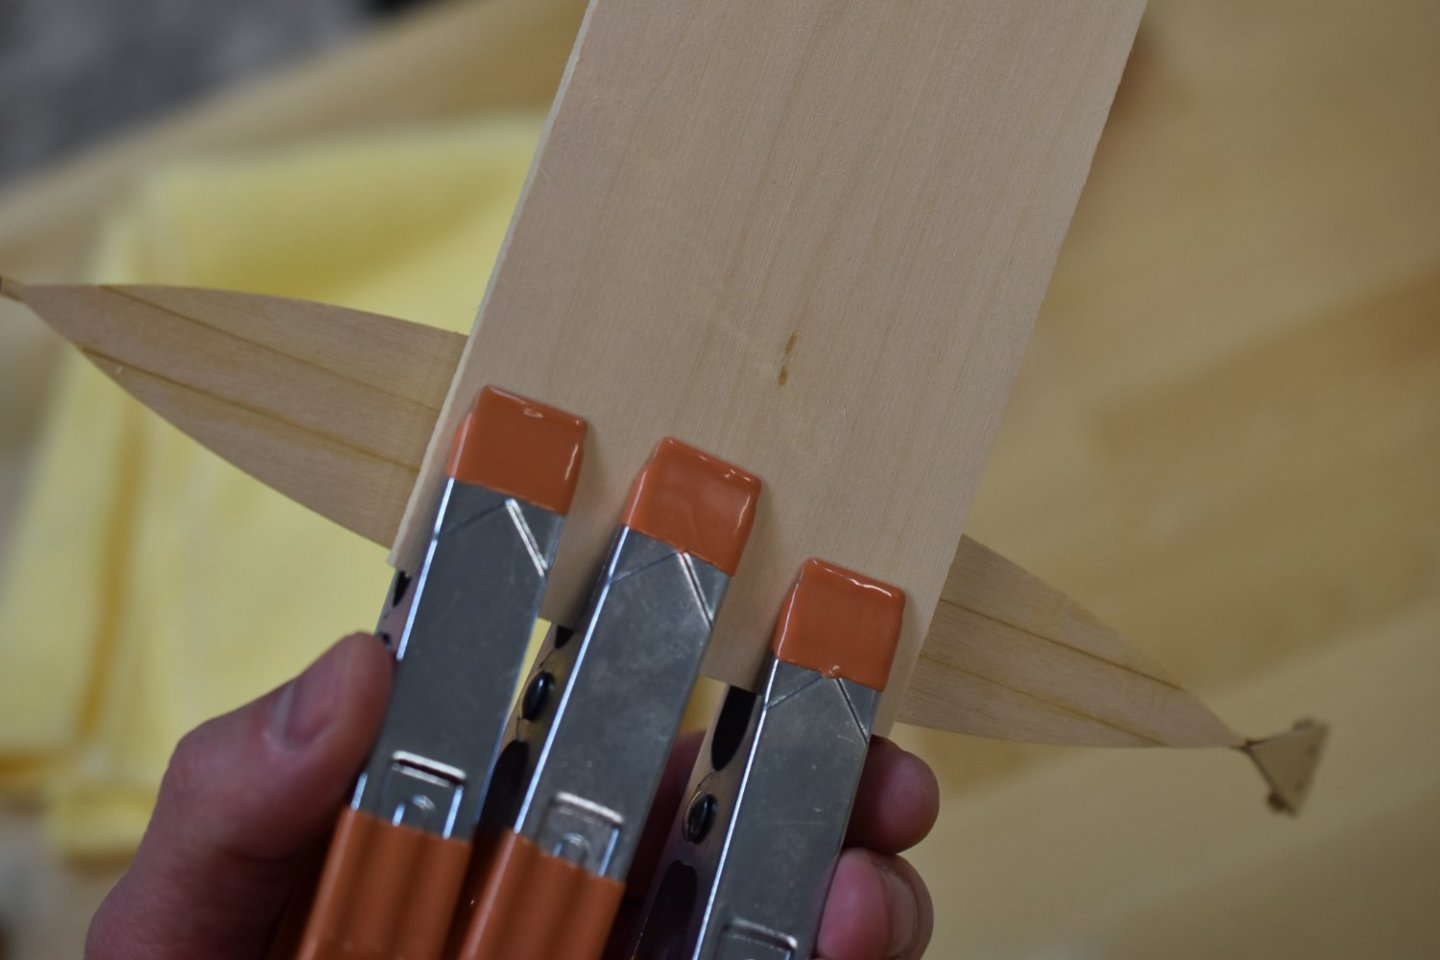
I have completed the bending/forming of the bottom planks. The little pieces of wood are 1/8 inch scrap from the kit. 👆 I painted some water on the bottom as instructed and placed the weight onto the planks. 👇 The result after drying overnight appears to be alright I think, but I don't remember how much bend per foot it was supposed to be?


.thumb.jpg.afb2538dfcbee6bab9a1a1cf5f6d25c0.jpg)

.thumb.jpg.fce12f1e3e850fd0b6c82e161ce84caf.jpg)
.thumb.jpg.d8e53da3b0220325cba8cf9f7ba22d3d.jpg)
.thumb.jpg.82d213e4a28f0ed7086016913f4ac263.jpg)
- 61 replies
-
- 5
-
-
- Lowell Grand Banks Dory
- Model Shipways
- (and 1 more)
-
Thanks Clueless, I got the square off Amazon. I think it was $15. The toothpicks is a good idea! 👍 Thank you for taking a look druxey! I think I don't mind spending the time on this because it gets my mind out of work.👏
- 61 replies
-
- 1
-
-
- Lowell Grand Banks Dory
- Model Shipways
- (and 1 more)
-
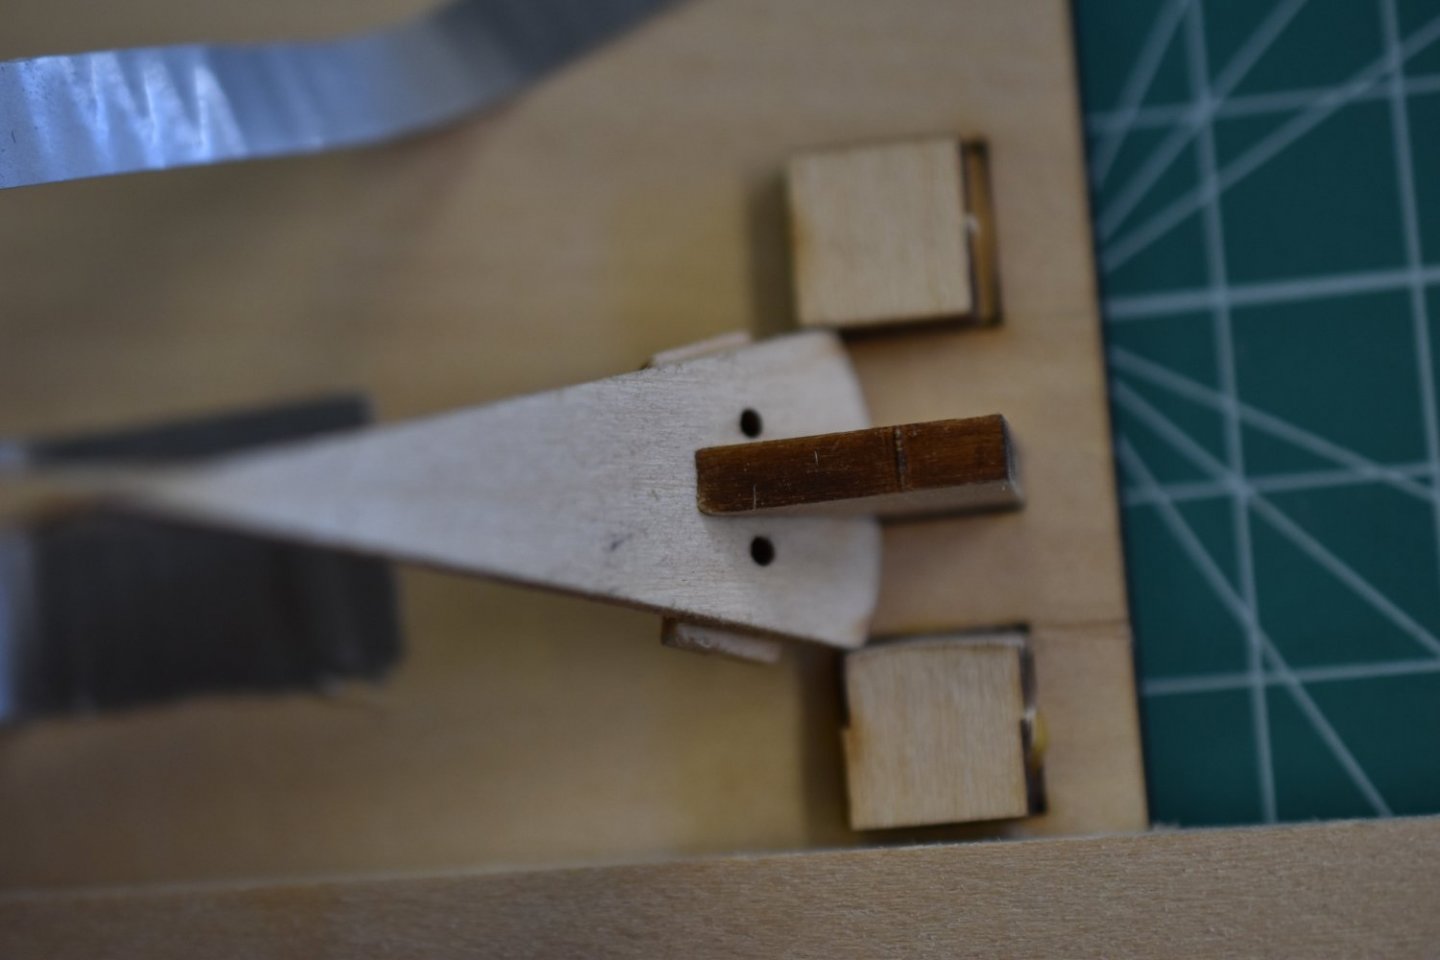
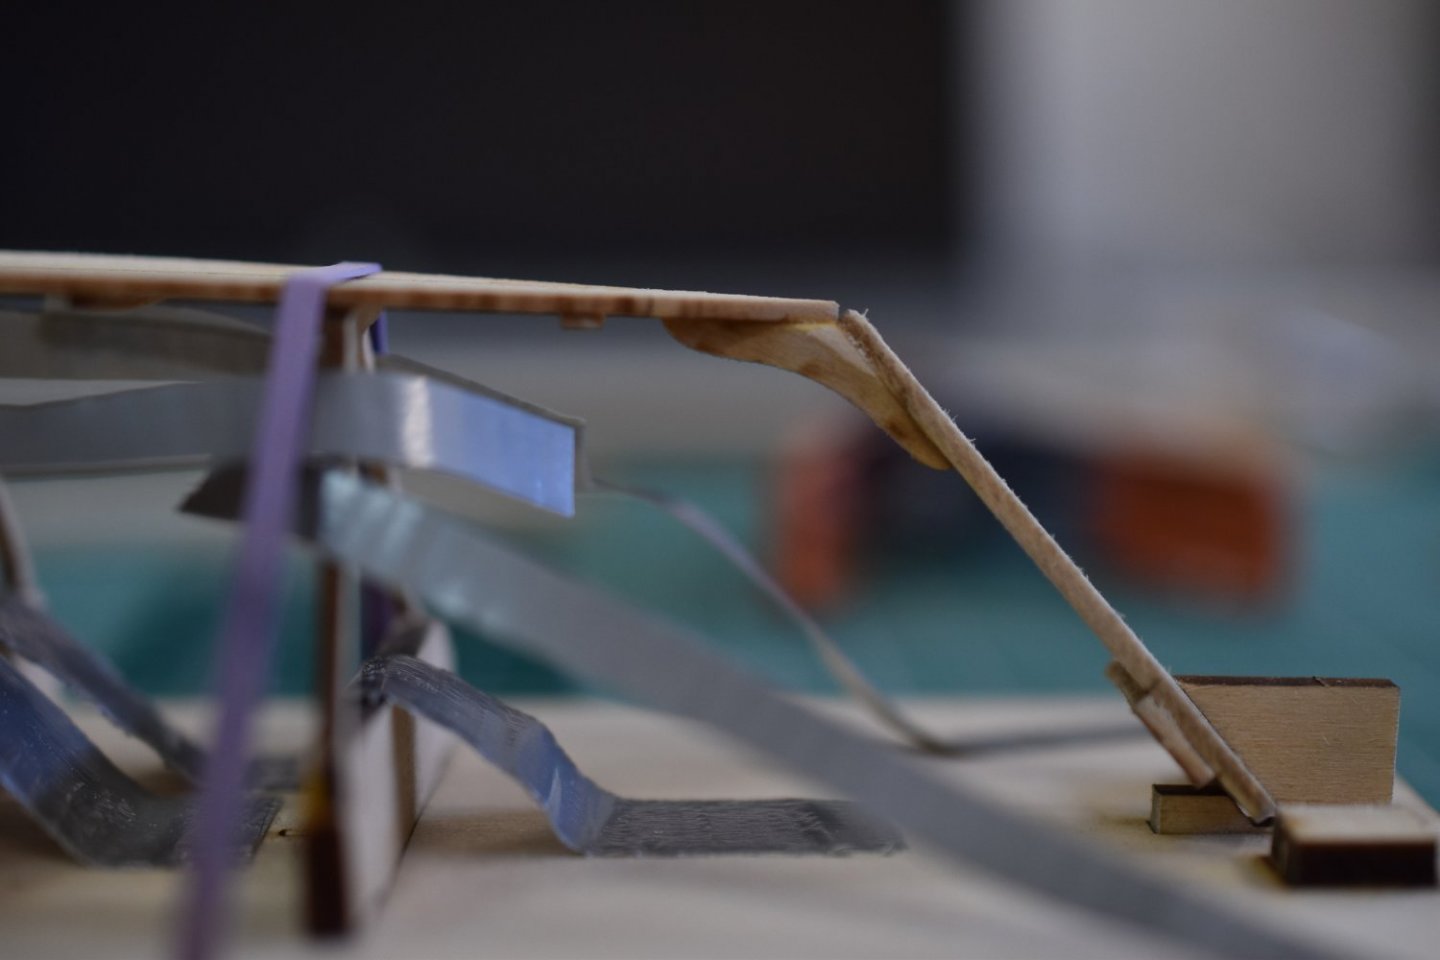
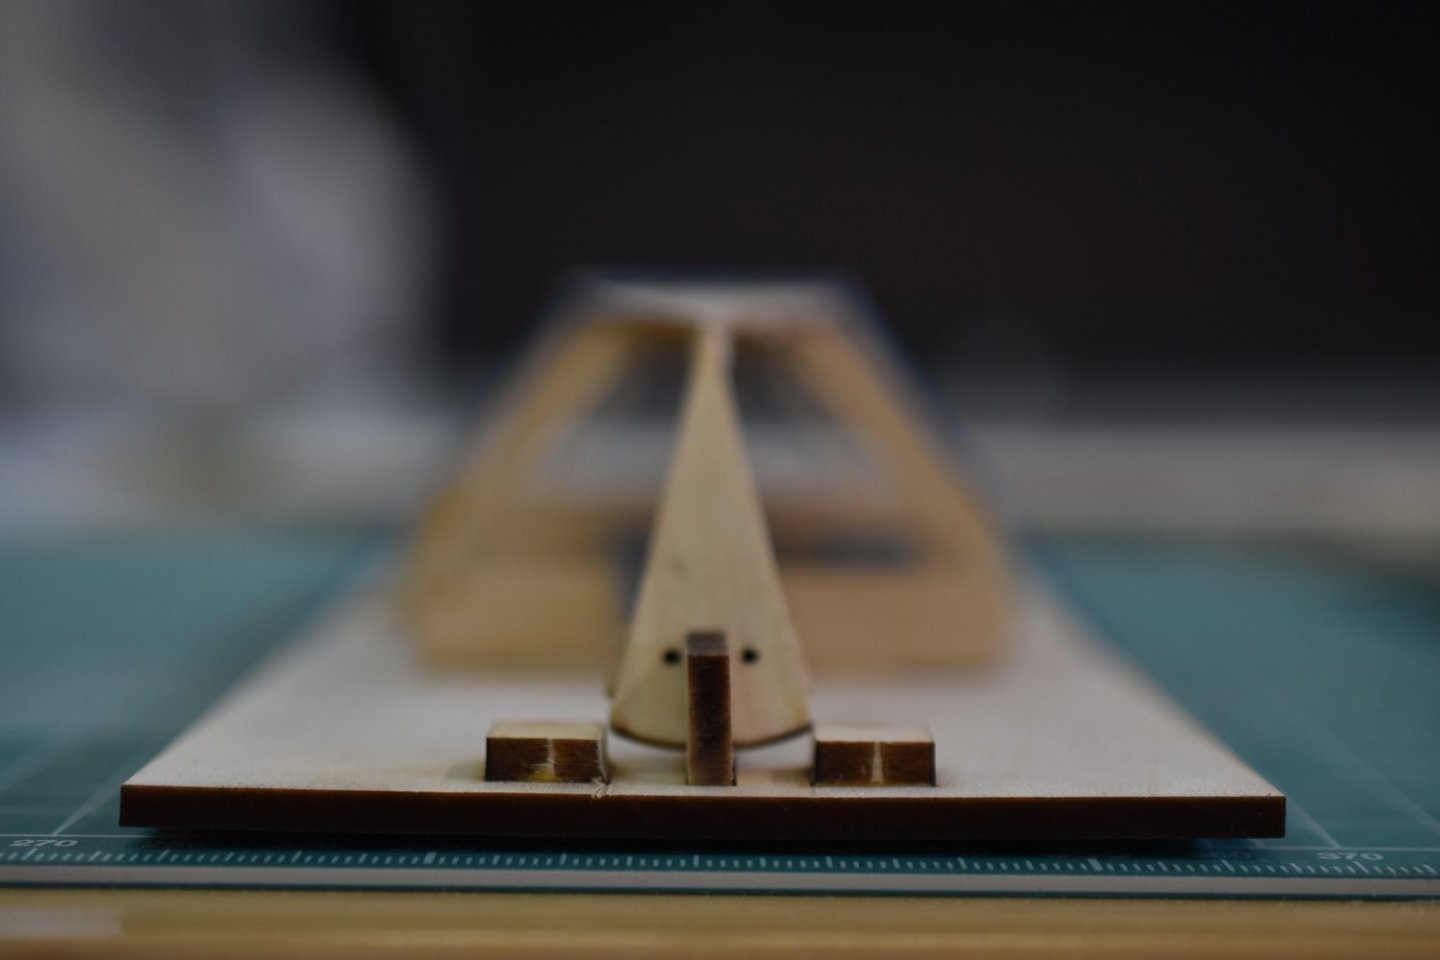
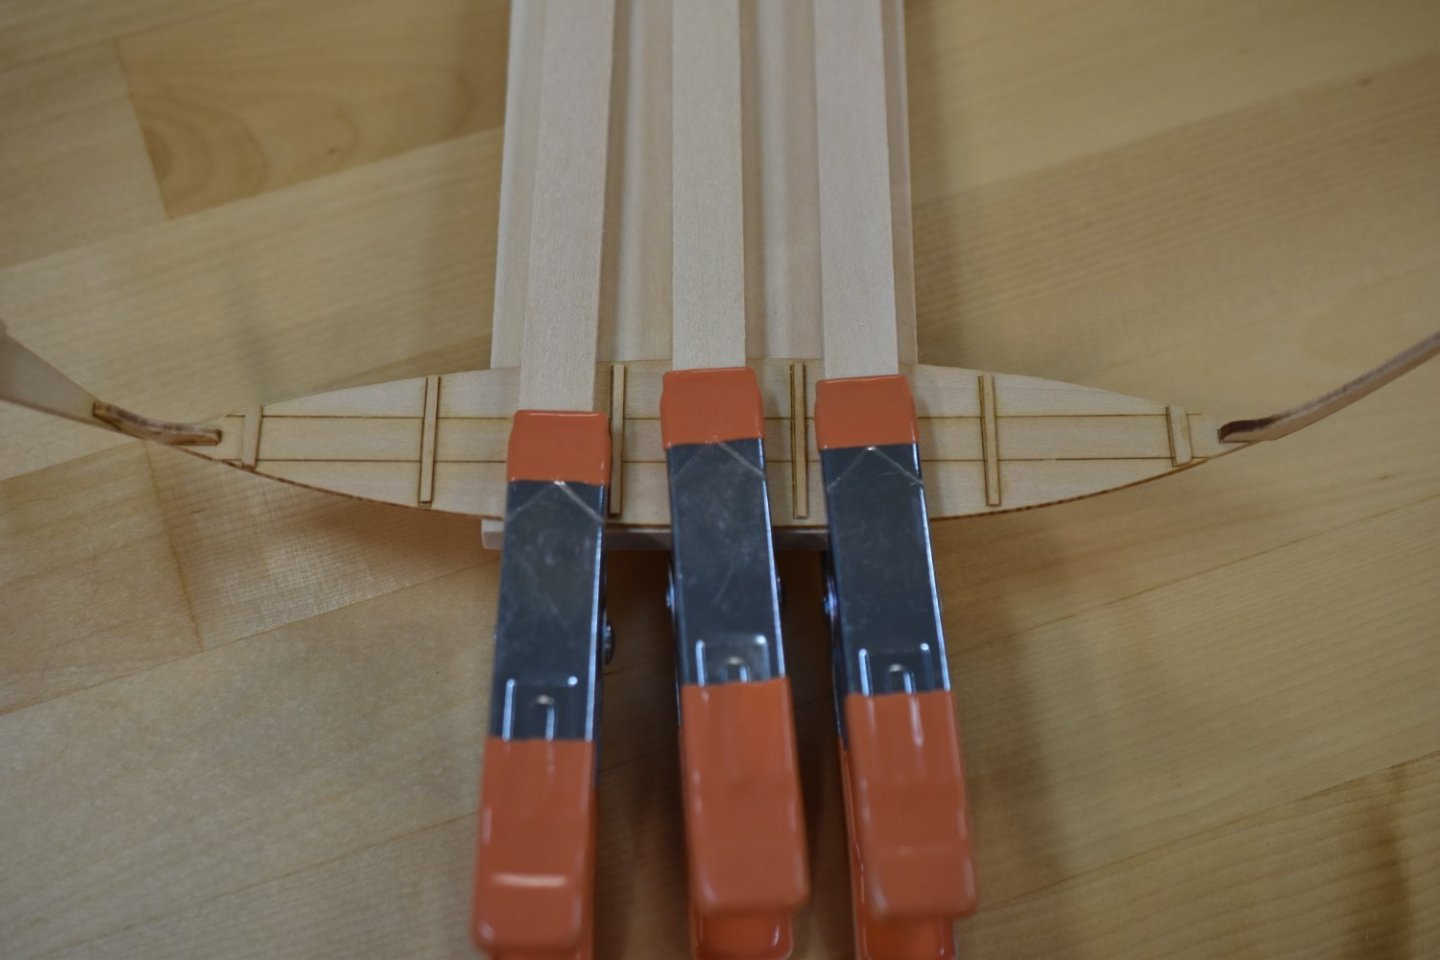
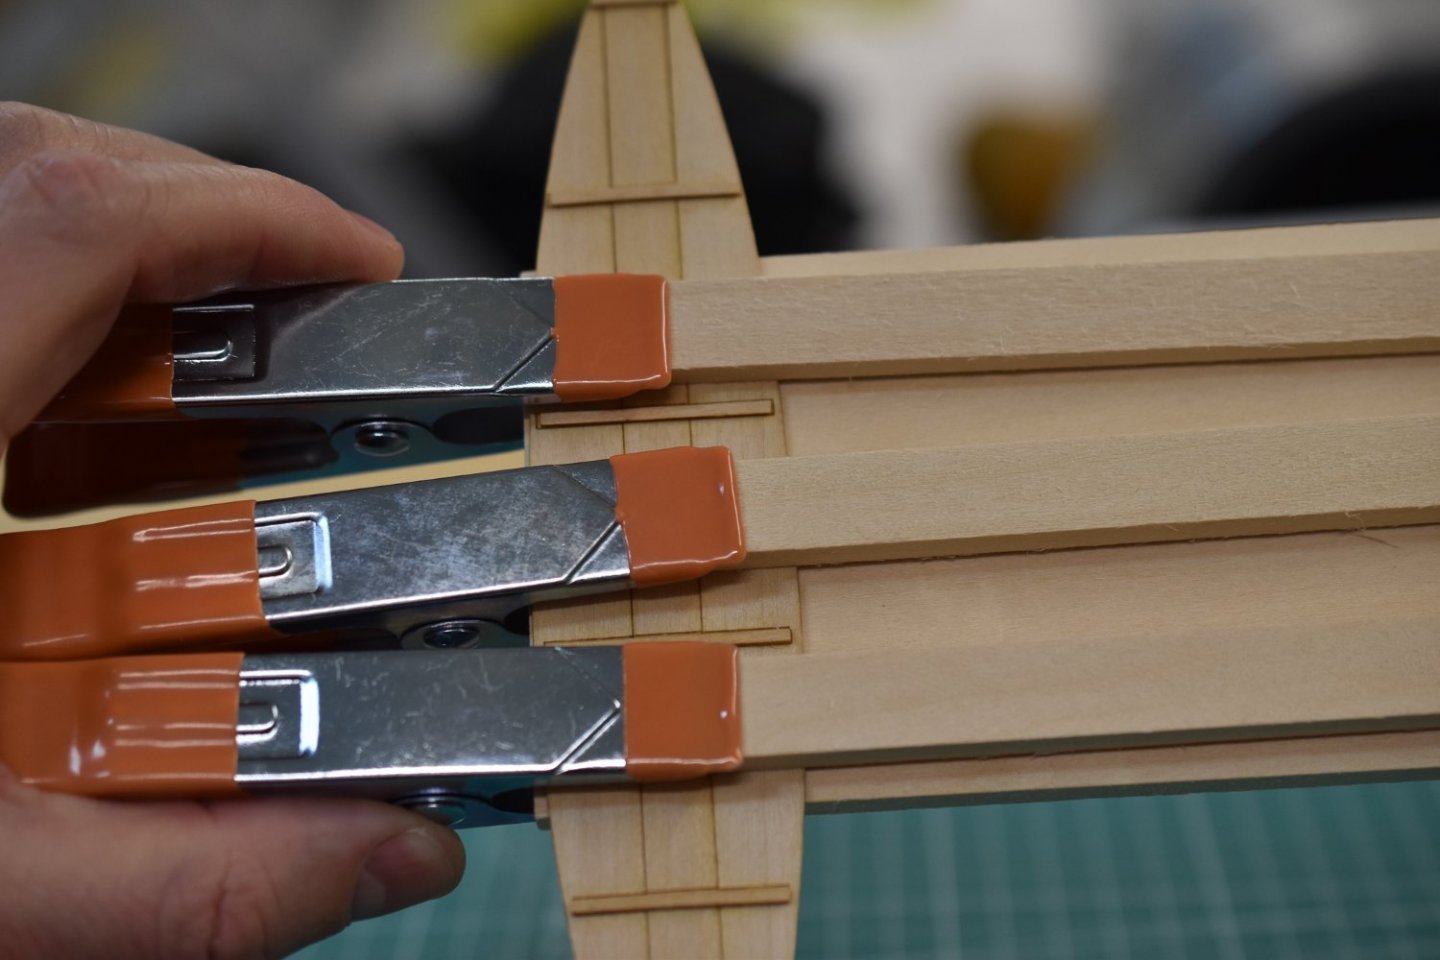
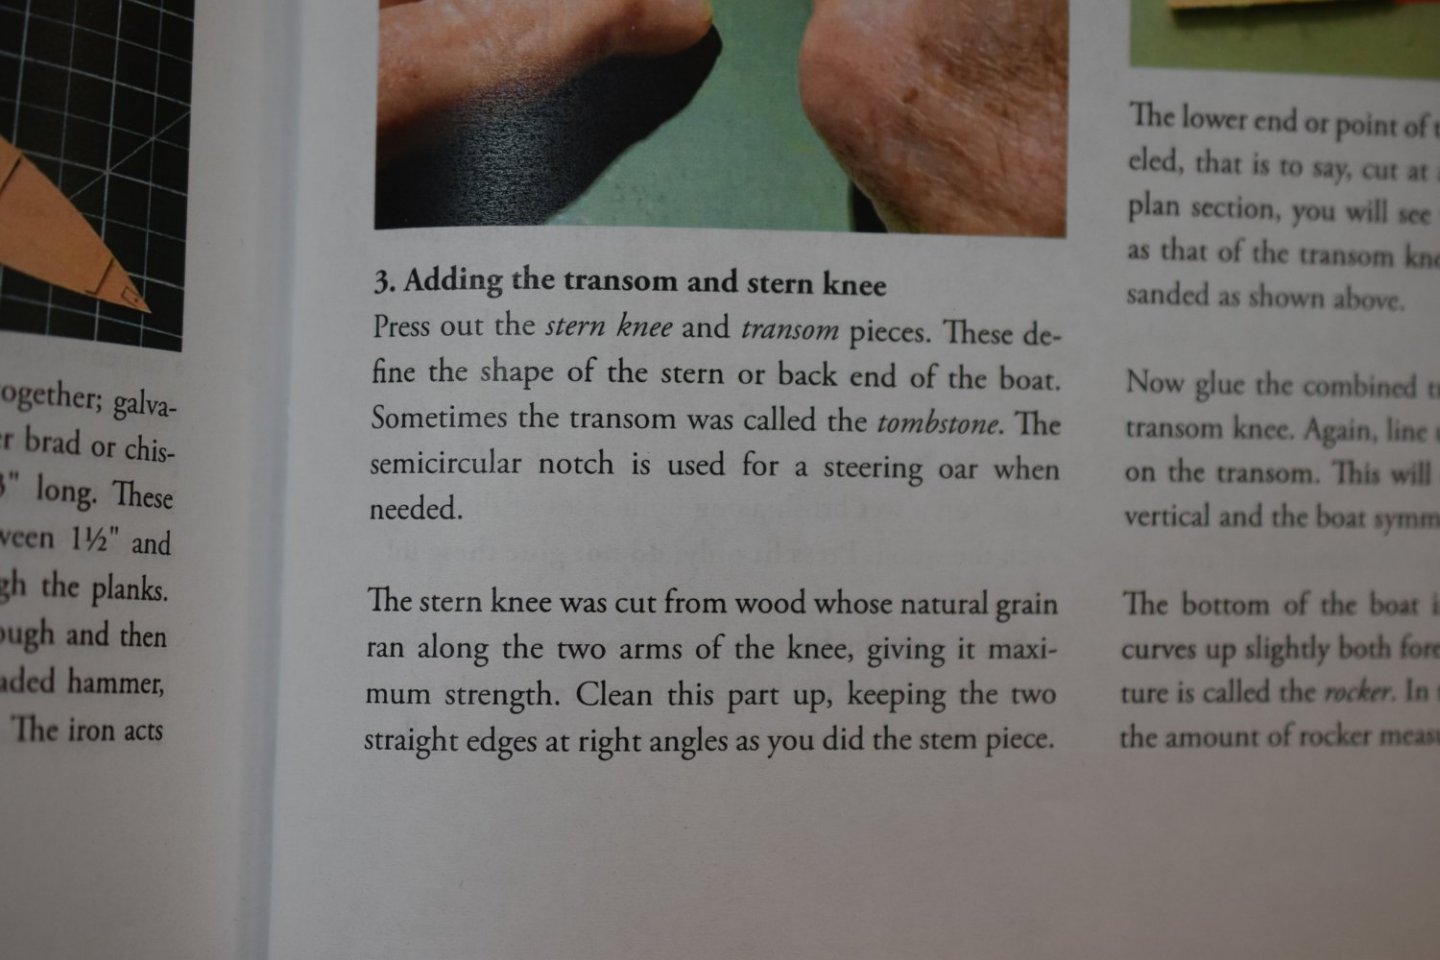
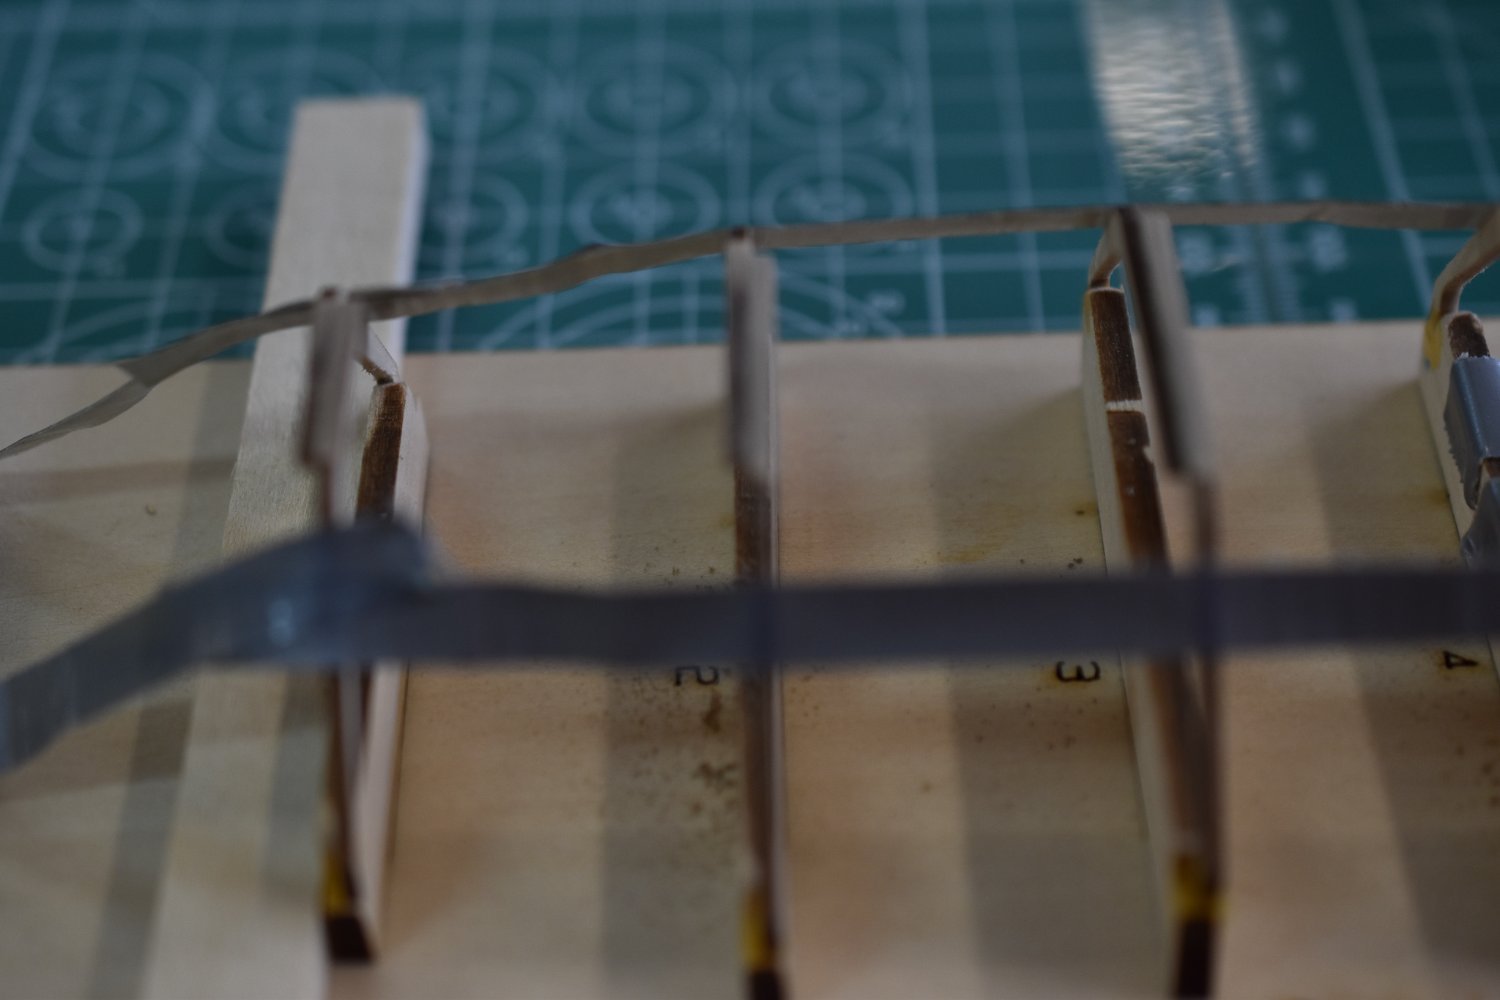
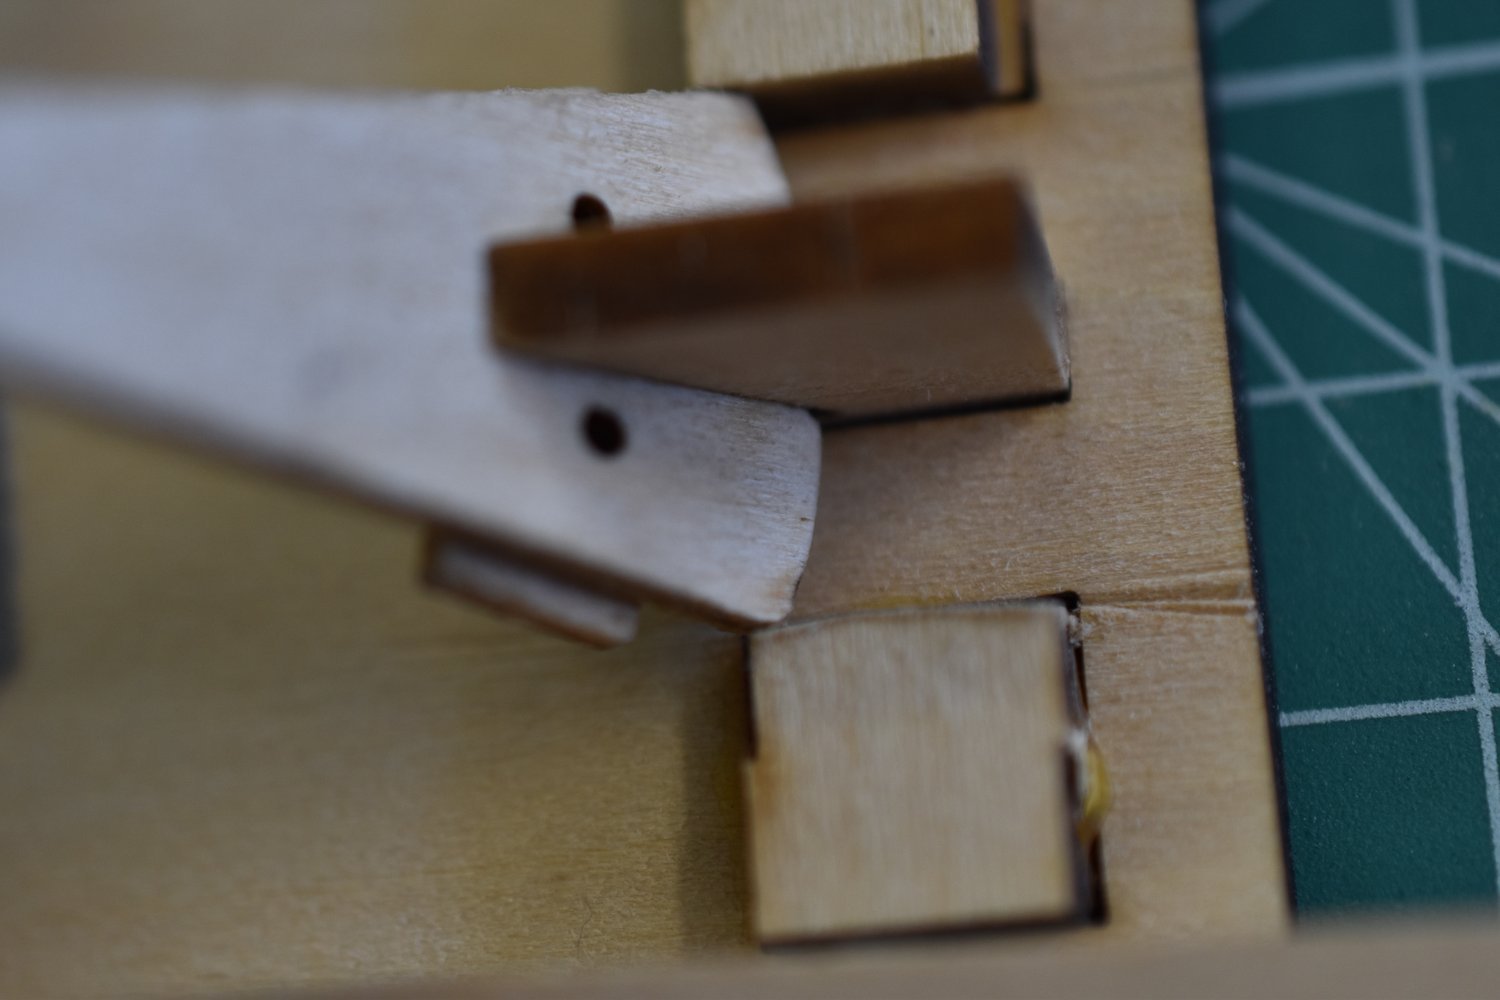
My finished bottom planks have a small misalignment that I'll be sanding more fair at some point soon. But for now, I'll be moving onto step 2 and 3. I pulled the parts for the next two steps and prepared them. I used the #11 Excel blade cutter this time, rather than the wider bladed chisel type that I used before. This was due to the smaller parts with tighter clearance for the blade. I know...genius! I also used the back of the blade to scrape the tabs off before sanding. It saves a bit of sanding time. I read that in one of those books up there 👆, or maybe it was in the directions? I then made up a sanding stick from this stuff... The sanding stick came out alright, so I ended up using it a bit on the flats of the parts in preparation to be fitted. I sanded the bottom of the stem and stern knee pieces at a 90 degree angle as the directions state. I found it easier to move the square and sanding stick as opposed to moving the parts against the sanding stick and square. I found that way to be more reliable for me. However, I figured this out after I took these photos. That finish there 👆 is not complete, as you can see. That is the bow stem piece. When I was done with the sanding on it, it sat well and square on the mounting area at the bow of the bottom planking. The stern knee was a different matter and it didn't come out too well. I sanded it at a crooked angle other than a nice 90 degrees, so it sat cockeyed. Yeah, the directions warn a person, but that tiny little piece felt square! I don't have a picture, but it took some fussing to get compensated upon the fixing of it to the transom and stern mounting area of the bottom planks. I prepared the stern cleat and transom by using sanding with a small piece of 220 grit in my fingers and I used a half round diamond file to clean up the slot on the transom where a steering oar would sit. Check it out 👇 I used a couple pins to hold the transom and stern cleat holes in alignment as I glued them. The pins didn't fit real tight, but they worked well enough. I then checked the alignment on dry fits with the bow stem piece and it's mounting area on the bottom planks. I then checked the stern knee to the transom alignment. I decided to glue the stern knee to the transom 👆 before chamfering the compound angles that the stern knee needs to keep the hull planking fair. I wasn't sure if this would work, but it allowed me to better see how much material needed to be removed. the directions have you sand the area and chamfer before gluing. I used the diamond file to chamfer the stern knee 👇 It seemed to work out alright. 👆 Next I mounted the bow stem and transom/knee assembly. I had an issue, as previously stated, with the stern knee not being a true 90 degrees at the mounting point. I compensated and used the square tool to keep it plumb as the glue dried. The following photos show the stem and transom mounted. I used the lines on the cutting mat to eyeball alignments as I went. 👇
.thumb.jpg.c449ab0f925cfec62a909250a4204829.jpg)
.thumb.jpg.c27ba8af58d00b58809f5d3cd514fc74.jpg)
.thumb.jpg.bd9364cea01574a980ad157836325f69.jpg)
.thumb.jpg.e155ef132464d65398571146b8ce388e.jpg)
.thumb.jpg.8517c5f3bca83fccd916d77018d8c5f8.jpg)
.thumb.jpg.cbb0872b84464a687a2ff6b742765d5f.jpg)
.thumb.jpg.c84acd3548628d796286bb63b2bb1d73.jpg)
.thumb.jpg.5a8b3590e41f8ac89ac39d0904713d32.jpg)
.thumb.jpg.c1c06698a139ef7083bf6a310adf8032.jpg)
.thumb.jpg.be8efd9c719ef59b8136c9240e39f15a.jpg)
.thumb.jpg.c68030e9e80c32e1351a3e34c03f6aa6.jpg)
.thumb.jpg.d1d780547a858975ed8bcc9601c332c6.jpg)
.thumb.jpg.eaf1f994cd26219d3c2528be89240152.jpg)
.thumb.jpg.eaaa45d7c1d2b62eab242b290bed5fe3.jpg)
.thumb.jpg.f4c0573b27b6e199046ecc53c2c91dc7.jpg)
.thumb.jpg.0bb34ed20949d7ad2256646c834b8126.jpg)
.thumb.jpg.743b09d5f7223bd27e71eaf7070dbcdb.jpg)
.thumb.jpg.e930ef6124e8546023f66d5e08699387.jpg)
.thumb.jpg.b4ae67c98001fe8bc220c9e14ebc7559.jpg)
.thumb.jpg.808d366ade640f1399fd61a49fe12035.jpg)
.thumb.jpg.0fad050fc6a2912d4152fb51f83375f5.jpg)
.thumb.jpg.845d452594c1803de21f6f711d98c380.jpg)
.thumb.jpg.cc530fc3c474af26e189cfede2b5625f.jpg)
.thumb.jpg.026376d4e7bf2f2935f839fbbfe5ab05.jpg)
.thumb.jpg.044e98681df533379a00aa2fe04a3c86.jpg)
.thumb.jpg.2bdcfcdaeb13748848b36874bdf9c07d.jpg)
.thumb.jpg.8adb668a39b1e0db6bc699ee18ec9c4d.jpg)
.thumb.jpg.25a15596265ed4ae6a73ac72f3d18e5a.jpg)
.thumb.jpg.00405427a835ffb17cebf0e436549763.jpg)
.thumb.jpg.2976e3b9ec58017a544b76fc05c2a7a9.jpg)
.thumb.jpg.f61d770754f10bdea03a8272aaf66feb.jpg)
.thumb.jpg.6c140b24a5edcdb1f8d7ca175b270f43.jpg)
.thumb.jpg.a2c0a16ac9c4c3069df39a535f262c8a.jpg)
.thumb.jpg.85af7b9d8d371026e124ce4c612e6d9b.jpg)
.thumb.jpg.76fe35be33e83dc97fd41b3876eb9b0f.jpg)
.thumb.jpg.6072327f33dceb8636da4159d325d6df.jpg)
.thumb.jpg.a590129498bb575e18ef0bec2f7a4ea7.jpg)
.thumb.jpg.f3e93a8b0cbe4da8faa106cb37bb10eb.jpg)
.thumb.jpg.2d9a7fe8fe28da1545954ec432bed223.jpg)
.thumb.jpg.37410700ca72957ae5c0fdc58754b711.jpg)
.thumb.jpg.3b08d5c038c41d47db90c159a9521034.jpg)
.thumb.jpg.ef0bf8f9167870b2809d3da0a993fb45.jpg)
- 61 replies
-
- 6
-
-
- Lowell Grand Banks Dory
- Model Shipways
- (and 1 more)
-
I sincerely hope you see calmer seas and smoother sailing soon over there 👉. I'm going to paint the inside and outside hull the "Yellow Ochre" and the trim the "Dark Sea Green", as I'm not too adventurous. I'm fortunate if I retain a single idea from an entire book.😆 Recording the build log takes some extra time with the writing and photos, but I think it's adding to the fun of trying to put this dingy together!
-
Thanks for the encouragements and supports! Yeah, I read all that so far and still don't know how to actually saw a piece of wood. 🤓 I will be working the next few days, so probably won't get back to the build barn for a couple days.
-
Looking good. I'll be watching these logs as you go. There's another one of the MBLS right up there 👆 I just started the shipwright series dory over there👉
-
I checked my parts, like all professionals do! One sheet had a few parts detached by rough shipping, but nothing was broken. I'm proud of myself for spending the time to check the parts. I'm easily confused, so I put the loose parts in a baggy with the sheet they came off of. 😁 Thanks to Miroslava for making and packing this kit for me. I think I have a new friend! Every boat builder gotta have them tools. These here are what I start my shop with and the toilet paper is for the tears: With any luck I won't need this one: Following the instructions I removed the bottom planks and sanded the edges, checked fit, and decided how I would align them. When I lined up the lines for the cleats the bow and stern edges weren't really lined up well. I decided where to line the bottom planks up and sanded the nubs and char off the edges. It's said that the char can prevent a good gluing surface, but I didn't get too crazy sanding I don't think. I then removed the cleats and prepared them to be installed. I sanded them, althogh I found it difficult to hold them without a small hobby vice or some other implement. I used tweezers. I put a chamfer on them as well, but didn't remove all the char because they will be painted. I found some soft wood in a couple of the cleats: I made a couple new cleats from extra wood that was harder. I then started spilling the glue all over. After all, it wouldn't be fun without a mess. I glued the bottom planks together by applying glue to the edges. Once put together, I brushed the excess glue away with a watered down paint brush. I then attached the cleats to their locations and, once again, brushed the excess glue away. To be continued...
.thumb.jpg.3db0ce0c281342e2f0751902df3aa8d7.jpg)
.thumb.jpg.cb2840ed1119b59681d31693fbab64c9.jpg)
.thumb.jpg.30230a9156be5511397630506f406c42.jpg)
.thumb.jpg.d4bd83600482f715f95f942095195df8.jpg)
.thumb.jpg.d5b5eed5894b341beb53d592fc88cea9.jpg)
.thumb.jpg.400efdafc2d76fbd02fd8d02f3291f31.jpg)
.thumb.jpg.567870348127fd070283437c17184afc.jpg)
.thumb.jpg.957da15deb9fe2b53718920162e73c2e.jpg)
.thumb.jpg.52407530d0744505c95af8b75aa9cf34.jpg)
.thumb.jpg.e2559c1c102cff199f186df43f7d4de4.jpg)
.thumb.jpg.1107cb1dba3893e45bfabcaed93d8ae4.jpg)
.thumb.jpg.9a1dffc9ded03b4fdd7591ce36ecee4e.jpg)
.thumb.jpg.5bf01aa31fa1f8ee58d038bbf23c08b5.jpg)
.thumb.jpg.ed210e7a44895af227fbdd4868888803.jpg)
.thumb.jpg.69ede560222122f00341fe938ff62f78.jpg)
.thumb.jpg.652fa13a0a6ec6842aa89f899bbe046b.jpg)
.thumb.jpg.10dd7d9aee8b794cc61705f14d01eeca.jpg)
.thumb.jpg.95009761c19b6018a23860465b425d00.jpg)
.thumb.jpg.777ca4414667d3dd3b175d3fbf5053db.jpg)
.thumb.jpg.9a4261b17c3ecf05285f7c172ea6d4a7.jpg)
.thumb.jpg.aa12b3d32240dc131f41757aec4316be.jpg)
- 61 replies
-
- 6
-
-
- Lowell Grand Banks Dory
- Model Shipways
- (and 1 more)
-
Well, after reading a few books: And the instructions: I thought I'd better get started spilling glue and sawing my fingers. I want to learn to build model fishing boats from scratch and this here, well it's the start! I hope I can handle level number 1. 😅 I'm going to keep a build log: And will always invite a few friends over to play some music as I create magic 🤘
.thumb.jpg.470a6f0e05f5b72bdf3b3f3e81bc18a6.jpg)
.thumb.jpg.2db2ba32ce003a78978cbe594729932e.jpg)
.thumb.jpg.9b8b429c7774b909fd641bb32bb1bc35.jpg)
.thumb.jpg.85fca6bbe641e98473ffd93515921dd5.jpg)
.thumb.jpg.278db2daeec72daf2105562d16aa1dde.jpg)
.thumb.jpg.c6947e5f1d1d1275b4f863958481195a.jpg)
.thumb.jpg.c8eef4c4b3b56458c34a16ddf137a4b4.jpg)
.thumb.jpg.946cd6bd07116f2b3da17da9cfc28f8f.jpg)
.thumb.jpg.42f971fad9a7b4004948a4c48502d685.jpg)
.thumb.jpg.94be63b090fa422a5e5ed995ed419ab5.jpg)
- 61 replies
-
- 4
-
-
- Lowell Grand Banks Dory
- Model Shipways
- (and 1 more)
-
uploading pictures
SaltyNinja replied to David56's topic in Using the MSW forum - **NO MODELING CONTENT IN THIS SUB-FORUM**
test
-
Pacific West Coast. NorCal to Alaska. Probably take me 5 years to get ready, but I would like to start with a salmon troller 42 foot or so. I have a few fish boat books, specifically: Drawing on Our History: Fishing Vessels of the Pacific Northwest and Alaska (Cole, 2013) Beautiful book Legacy in Wood (Wahl, 2008) is the story of Wahl built boats from Prince Rupert, B.C. Norwegian boat builder and family that followed for 3 generations. Fishing Boats of the World (Chapelle et al., 1955) Haven't read yet. Appears to be a wealth of information Whale Ships and Whaling (Church, 1938) A lot of old photos and good information about the whaling process The American Fishing Schooners (Chapelle, 1973) haven't read yet I agree and if you have any book suggestions please shoot them my way. Edwin Monk has a book that I'll probably end up getting. It's called Modern Boat Building (Monk, 1973).
-
Thank you for the thoughtful input and further reading suggestions. I sent for a used copy of "The Anatomy of Nelson's Navy", as I swim another few strokes into what as yet to me is deep waters. In my journey, Davis and Underhill are my first steps into deeper understanding. I had not been thinking in terms of what era they covered, but the fact has been rove to. I am encouraged by the progress that I am procuring through their books. I'm one of the Green Men on board and still finding my station. I am charting in my mind the prize that may be had by each fulfilled duty onboard. I hold fast to your assessment that their techniques can be transferable to which may be my final port of call. I'm plotting a similar course apparently; beating to! I'll check into Curti. I think I'm trying to learn what I can from a historical perspective, but as my destination appears over the horizon I don't want to drift too far off the course. I don't know where too far lies today, but I imagine the currents can be quite strong and the pull difficult to resist. I think I can say that my goal is to balance a base of knowledge with what I think will end up being an attempt to scratch build early to mid 20th century wood fishing craft. Thank you to all for the travelled experience and input!
-
I wonder if you could just make a knee (?) or brace to place adjacent to the break in the frame. If you want it to be as new, then you would want to replace the frame I suppose, but you could do a repair and model it as such. These were well used and abused fishing boats and repairs surely happened I would think? I'm starting mine today. I'm afraid to start, but I've got to. I'll probably end up doing it twice, but hopefully not.
-
Ok learned navigators of the nautical deep, and you pirates hanging in the yet loose bight who want to poke the establishment, I have a question. After reading "The Ship Model Builder's Assistant" by Charles G Davis, I started reading, simultaneously, "The Built-Up Ship Model" by Davis and "Plank-On-Frame Models and Scale Masting & Rigging Volume I" By Harold A Underhill. While reading the two later books, I decided to stop with the Underhill book until I complete "The Built-Up Ship Model" by Davis. The two books, being similar, were causing me a bit of confusion keeping who said what straight in my small mind. This led me to the question: Davis and Underhill seem to be well loved masters, but what are their similarities and differences in teaching, methods, and style? Are they both disciples of a single historical grand master?
-
It's looking good! I'm going to order this kit series as well and give it a shot. I'll follow your progress and try to see if I can do as well as you are FlyingSub.


.jpg.d885ffa4f5b9faf9ff095d73ef619566.jpg)
.jpg.fc5f1289556375cf0cbb5e6d2eb04020.jpg)
.jpg.305a95c53bd92be434e3f8dd6cbcd783.jpg)

.jpg.3d3d025de466e0ea980e19a4e9566c71.jpg)
.jpg.f6efc54bd78201295ecfb4024fb81805.jpg)
.jpg.16507a37d7f964d4ba8acb2210c02697.jpg)
.jpg.98ae2768d294c1fc888003b4ddba5409.jpg)
.jpg.c028d28738f204e13a46a46645cfef63.jpg)
.jpg.ad4723b753e3a1ad2d9abf5e3ae3fcd4.jpg)
.jpg.9e52a2b69e7f303809ff1e5fe5f421b8.jpg)
.jpg.f138b9dfb6bc5068410d2622fb75bad2.jpg)
.jpg.7e153cf80715d6e10d07266c5deacabf.jpg)
.jpg.fe2d6cecd8862382cc1d0625b0011785.jpg)
.jpg.0ef2431907e50557109fff43c10eb7f3.jpg)
.jpg.1b4870bc0f637c182c7022b0fb96ebb3.jpg)
.jpg.eb935a2afb6d480e6f5cb5d0828af6f1.jpg)
.jpg.a7e841ed36e9d562bda80a0457b742d0.jpg)
.jpg.43e10c644a0af6be29a77f4874493425.jpg)
.jpg.ad1323f9b219dd51c6c78ec03ab36e4c.jpg)
.jpg.b802cb02d9a1097cefccb267092e29ac.jpg)
.jpg.fdf064802db9415139f1ff0e8ca3bf13.jpg)
.jpg.64a8fb71c6112f40130254a9fafb8e6e.jpg)
.jpg.53a4c9a983871acd37affd59822e7e5f.jpg)

.jpg.a42aa83d3f7ac1d2cb2c88610b687b88.jpg)
.jpg.7ed5721efb64187872ac2cd5a4954863.jpg)
.jpg.aa50fe0b47c9b2004748600e819e4b79.jpg)
.jpg.6c4aca461381f3bebfa1801be03bc68f.jpg)
.jpg.f92fa434f6779d66a218b95b7e2d5042.jpg)
.jpg.c48ee10bd1e4dfb5c356304e091dff8e.jpg)

.jpg.a74486b993612a2f262e5776b94bf9b9.jpg)
.jpg.f3c2103d1f92092788c8152211bcf886.jpg)
.jpg.462cbafd2564581fa3aafcb3749eb32f.jpg)
.jpg.312a04505a1f70765449d5514ceac812.jpg)
.jpg.4d486b1df69c2ac3d159ac2b2a2f2cae.jpg)
.jpg.912f8865f90159e2f0ed57ffe82909ee.jpg)
.jpg.e0842ed0ae1467174cb018883227c28e.jpg)
.jpg.66840e683486fe88f8730359337271d5.jpg)
.jpg.e081254cdf5b32626bda42a19b9166d3.jpg)
.jpg.bf1883dbcb0233f32ed190d5ac2e33ea.jpg)
.jpg.65023eafda678a36c683b9498388069c.jpg)
.jpg.072df76f0e933049df4abb7f754b69c7.jpg)
.jpg.b6edb0a21ed5199f9cc3efcde27df15f.jpg)
.jpg.69426cc11690a80012aa192968001c63.jpg)
.jpg.32b22364d18cb2de485888dca4b744d5.jpg)
.jpg.6c2975e752e972451a2fe94f5626df93.jpg)
.jpg.b9062be9480abc8b01ee0edcca3f3fba.jpg)
.jpg.06e211237d8d78c58eed46edc4ca1e3b.jpg)
.jpg.ff381ed414d3ebb0001ad8c95677fddc.jpg)
.jpg.22a804482202bc4039f8aac30f2967e1.jpg)
.jpg.4796bc261362baf1bf44e6ec7a7a983e.jpg)
.jpg.4c2dc73d7ae89c849f76f8780a601de4.jpg)
.jpg.43f78305184b5b19e1c97405fd846182.jpg)
.jpg.d48a7f82b040f1982c3eb5f2d4ed783b.jpg)
.jpg.f1b1140abd97d7d5f74630420de9e8bb.jpg)
.jpg.44997c097cba1629599032b1e247102c.jpg)
.jpg.2bd75082b0542c342d0e5305e81b2c75.jpg)
.jpg.716c124909ca4dd96e758ffd34f28c25.jpg)
.jpg.052d55875b8f69522079f1cf94186641.jpg)
.jpg.c5e97a08360c861c169c6abe5effb585.jpg)
.jpg.11a0aabb1d323f62a1b280002123e76f.jpg)
.jpg.6e8b611c2de324184eda3c258059cf6e.jpg)
.jpg.6da80ecbe947fa578eccd3a63f5dcb64.jpg)
.jpg.51f27e9ba0d4e848659b6b419eec7bdb.jpg)
.jpg.29b1a5f9a9f1918c435b71549f8f5d11.jpg)
.jpg.44974399717897c47532aa59787bbaa9.jpg)
.jpg.a38f5f49491a9e204407cee59182d759.jpg)
.jpg.bdaae1a8e4bb86e4d1f34d0d871f7c90.jpg)
.jpg.592594cc22494bc5ff12f979b7a8e934.jpg)
.jpg.71782449f07fceb84c0a86ce40ccee9b.jpg)
.jpg.e3c7788709c3e421c072faa4346e9f18.jpg)
.jpg.b9602efb9fd48c2b659db09afbfd1961.jpg)
.jpg.d294b2b6fa058784509a560fbf8c09be.jpg)
.jpg.f2f736951239a766e17ff5f7d98a2b0f.jpg)
.jpg.e191cc1e41745f65dcc61ad121366b8c.jpg)
.jpg.fb2aed933ee465febe0640ebdaebefa7.jpg)
.jpg.e6b57f41526c79e2d8b8d86b87e50c60.jpg)
.jpg.0102296523123841ab2998c796b37366.jpg)
.jpg.c636872927ec5d17cdddb6d12276609f.jpg)
.jpg.68e7763168e918f3957a1a97e3d5afca.jpg)
.jpg.fde26608e199fc1def30e5b8fcd978b6.jpg)
.jpg.91a014583de1e2140a58cdd320843f8e.jpg)
.jpg.ceb6d82ac3c8bf12917e56a4cca52237.jpg)
.jpg.2c6eac882973a3146cfdbd0f44250863.jpg)
.jpg.0ffc153495be08ea370c193c6075ba1d.jpg)
.jpg.fdcf0a623bbb3b2ea6563d793dd82a04.jpg)
.jpg.e66e8a85ab14f1fec054d364becc68a7.jpg)
.jpg.d58524fa35788b89a60496e5b61e24a5.jpg)
.jpg.d3590a0f076b0666fe57ce52f44d56ec.jpg)
.jpg.bb6b41cb9e20728fbffdf527b42ccb05.jpg)
.jpg.e0df49c0eafef76ffb42df7501261be4.jpg)
.jpg.4c12e31d805e8b12af82870c7fe550ec.jpg)
.jpg.716c6c8e1d8e304edd357ab26152860e.jpg)
.jpg.55fce3a6f4abb2654e8beb73aaa075f8.jpg)
.jpg.788f2988d2e6531edd43af371e503135.jpg)
.jpg.394087c41d5eb3934dd3efa91ec440a4.jpg)
.jpg.502eec78ce6d886788766f4c2af8c3e5.jpg)
.jpg.669fcdc2363ca0eebb319a08d852f0b1.jpg)
.jpg.bc0e90c377d238071fbf110534b64ab4.jpg)
.jpg.f8ea3e2c600a05eca94b7dad6dd0abc4.jpg)
.jpg.85abe68e49166d10f226ad426ed93b0c.jpg)