
Grey
-
Posts
39 -
Joined
-
Last visited
Content Type
Profiles
Forums
Gallery
Events
Everything posted by Grey
-
 Oof, nearly a month. Progress has been made, I swear! But the best laid plans of mice and men often go awry. I am on the road for work unexpectedly, with not a real firm end date in sight. I nary had time to pack good books, so I peruse as time allows and lament my down time. Am hopeful to reach friendly waters at the close of this month. Cheers, and be well! Grey
 -
Thanks for the reply and time it took to tell me. I appreciate it! I will look up more about it. Thanks again!
- 492 replies
-
- 2
-

-
- vanguard models
- alert
- (and 1 more)
-
I feel your sentiment in regards to planking...however: It's the craftsman's eye that is belittling you--as you know where the imperfections lie. I do not see it, and it looks fantastic. Interested in your paint tray. Paper in a bit of water? I assume this keeps the paint "alive" longer? Apologies for my ignorance--but am interested in learning more of your techniques.
- 492 replies
-
- 2
-

-
- vanguard models
- alert
- (and 1 more)
-
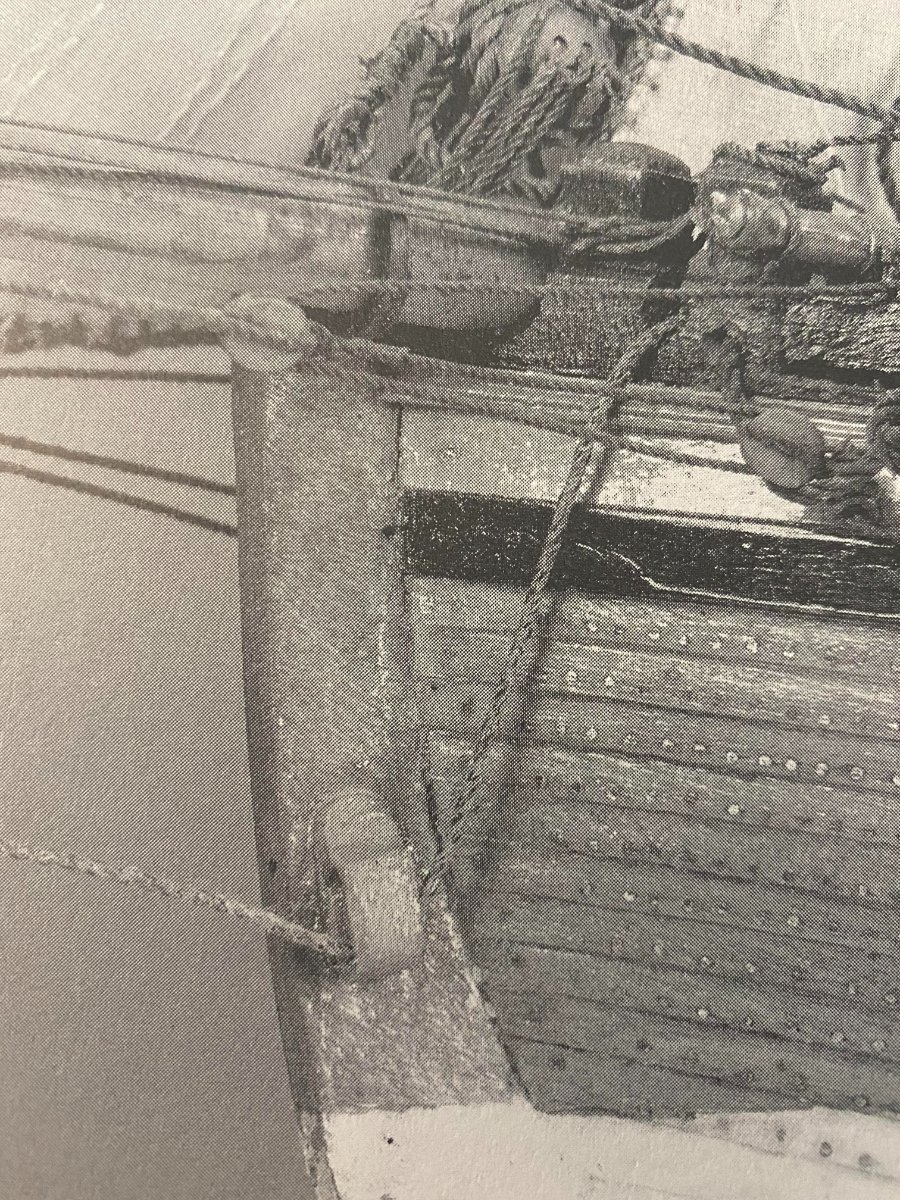
I concur with @Gregorythat I cannot find anything in the AOTS drawings that would lead me to believe something belongs there. The model photographed is the "Hawke" which, if memory serves is what the author chose to photograph as the closest representative model to the "Alert". I am absolutely open to correction if that isn't the case, but I thought this photograph may be helpful to allay your concerns.

- 492 replies
-
- 2
-
-
- vanguard models
- alert
- (and 1 more)
-
Aspiring work, as always Sir Loving seeing her come together under your care. I'm trying to solve how to blatantly steal your fish build with my current tools. 🤣 Cheers, Grey
- 206 replies
-
- 1
-
-
- Vanguard Models
- Brixham trawler
- (and 2 more)
-
Nothing photographic or fantastic to report...due to weather (too cold in the basement!), and pets behaving badly (vet visit!), I can say however: The suggestion to use Gorilla CA Gel has been perfect for me. Easy to control/apply, and a stock of toothpicks has made smearing and fastening easy. This comes with the usual beginner caveat: But the last two planks placed on Nisha's hull were my best ever. Work on deck fixtures was slow to middling. I need to figure out if it's my glasses/magnification lens/nervousness/or if I just check WebMD right now, and get all my answers but: There is a certain range of distance and: size of part(s) that seems to trigger a shake in specifically my left-hand. I am left-handed, so a lot of the finer motor skills reside there. I have no noticeable twitch or other activities that seem to bring this on. Any guesses? Suggestions? Could be I just need to steady an elbow or wrist on a work surface...but it's quite obviously irritating putting together the ladder for Nisha's 1/64th scale fishermen...
-
Ohhhhhhh, Bro.... That's preeeeeeeetttty. Well done. Lovely.
- 492 replies
-
- 7
-
-
-

-
- vanguard models
- alert
- (and 1 more)
-
Oof. Don't I know it Andrew...ugh. It is what truly makes me nervous about the photo etch stuff. If I muck that up...whelp. That's that. But, I suppose there is also learning in that as well. I've got an old partially-started kit a friend gave me that I can cannibalize to practice destroying some things. Will be time well-spent if my current track record is any indicator. I've resolved to leave Nisha sit for tonight. Fortunately: I have plenty of catching up to do with March, and I can always study the manual some more to get my fix. The Gorilla should arrive tomorrow with some map pins. I recall having some early modeling success w/ them, but I feel one must be pretty careful to not "rock" the plank. But: as all have mentioned, a more careful fit should help alleviate even that issue. I could always sneak down there though and have a go at some of the deck details... 😁
-
Thanks all for your replies and encouragement. I'm keeping the delivery fellow pretty busy the last couple weeks... I'll try the Gorilla CA. Hopefully you don't need the strength of a Gorilla to get it to come out as I am finding with the Starbond. @Nipper one of the reasons I skipped Alert for now--was exactly for the planking. I need better technique and skills before taking that plunge. Definitely the shaping/fitting is one of the skills I need to improve. I spent about 20-30 mins getting a plank just right and caught it on my sleeve and snapped it in two. That was frustrating, but lesson learned to go slower, and treat each piece like a full sized piece of finish carpentry. Just mindset! Thanks again for all the replies, it was needed to move beyond the destruction of that finely honed plank🤣 -Grey
-
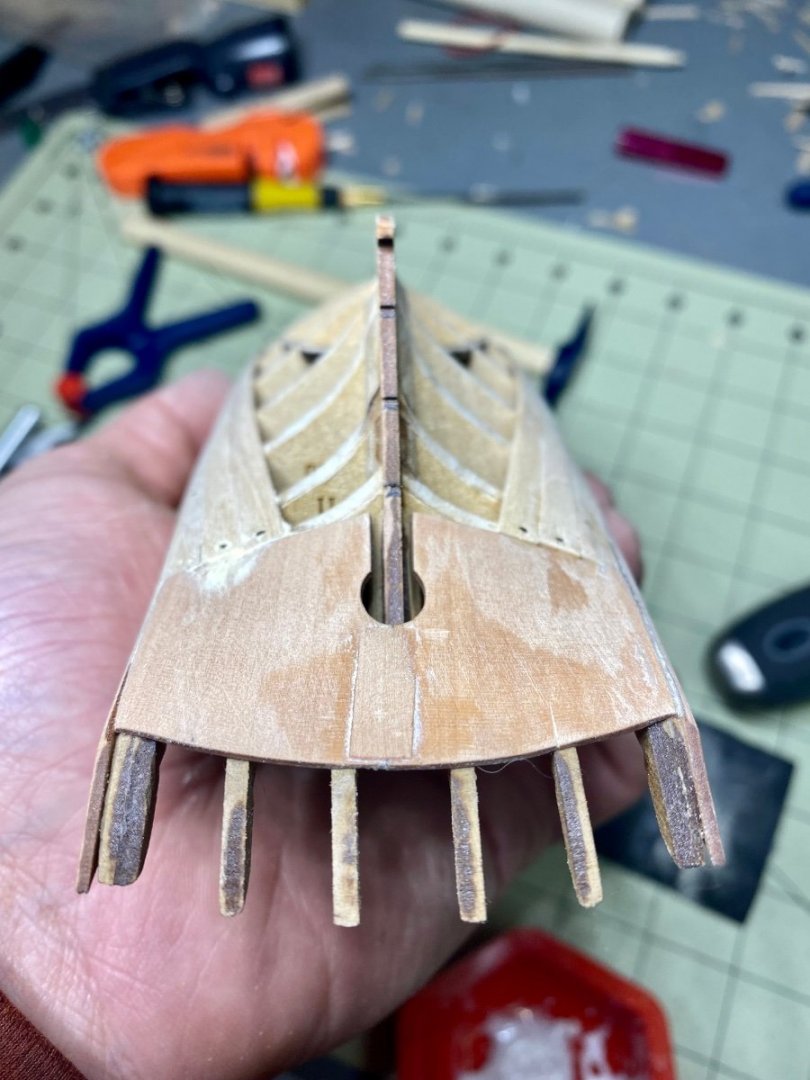
Definitely making way… I am struggling a bit on the 2nd layer of planking. I just haven’t found a method that works real well for me yet. Little too much guess work for my tastes-and I fumble around with the CA a bit. Need to find a better way to apply. Still enjoying the process, even if I need to remind myself that frustration is part of learning. 🥲 Thanks for stopping in! Cheers, Grey
-
Tip to newbies, as myself: Watch your clamping adding part #38! I split my “sub-bulwark?” with a misplaced clamp. It’ll be ok I’m sure…but just do what you can to miss it. It took no time at all. The stress of not making a hideous mess of our kit designers ideas…sheesh…at some point, we’re even, yes?
-
@Nipper Thank you! Some planks were obviously more difficult than others, and it took me a little while to fully understand both tapering, and the edge-bevel to get a better fit. Rudimentary of course...but I am a life-long learner by doing, so despite actual heaps of information out there, it takes doing for me to get some things to click. I would love to give you a timely alert to the kit that has arrived with Nisha's sails...but alas: I am unable to do the conversion to zulu time in my head... @michael mott Thank you kindly for stopping in. Rank amateur build here--and doing my best to learn and improve technique while having a self-imposed responsibility to do her justice. Thank you again!
-
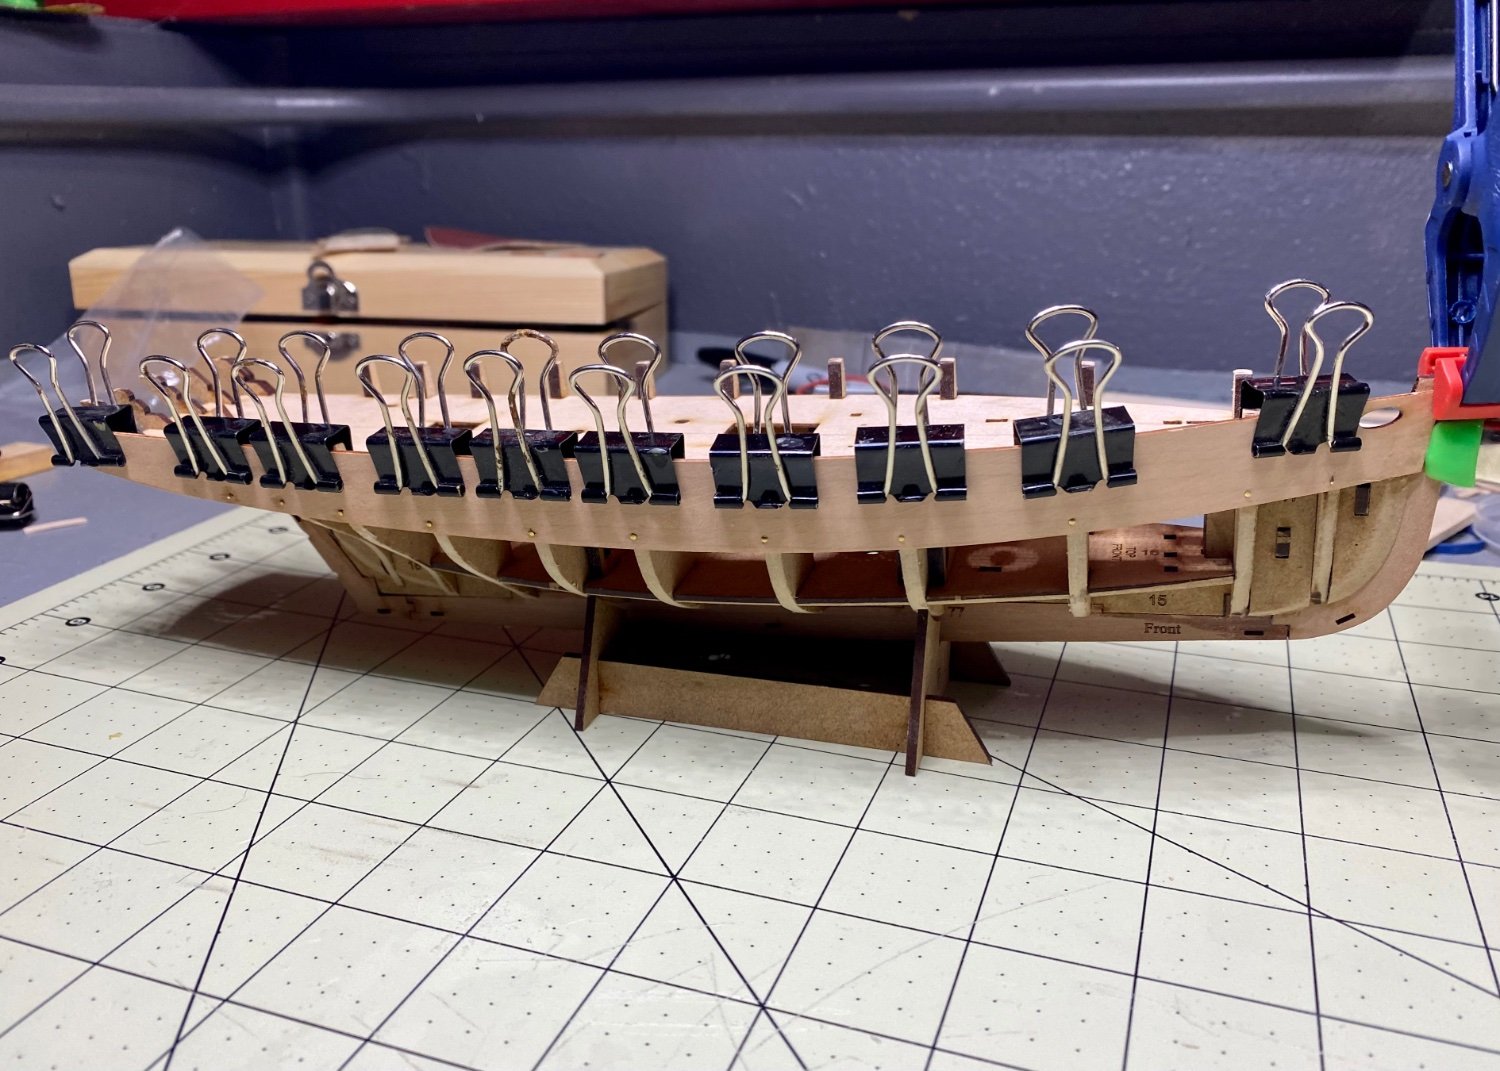
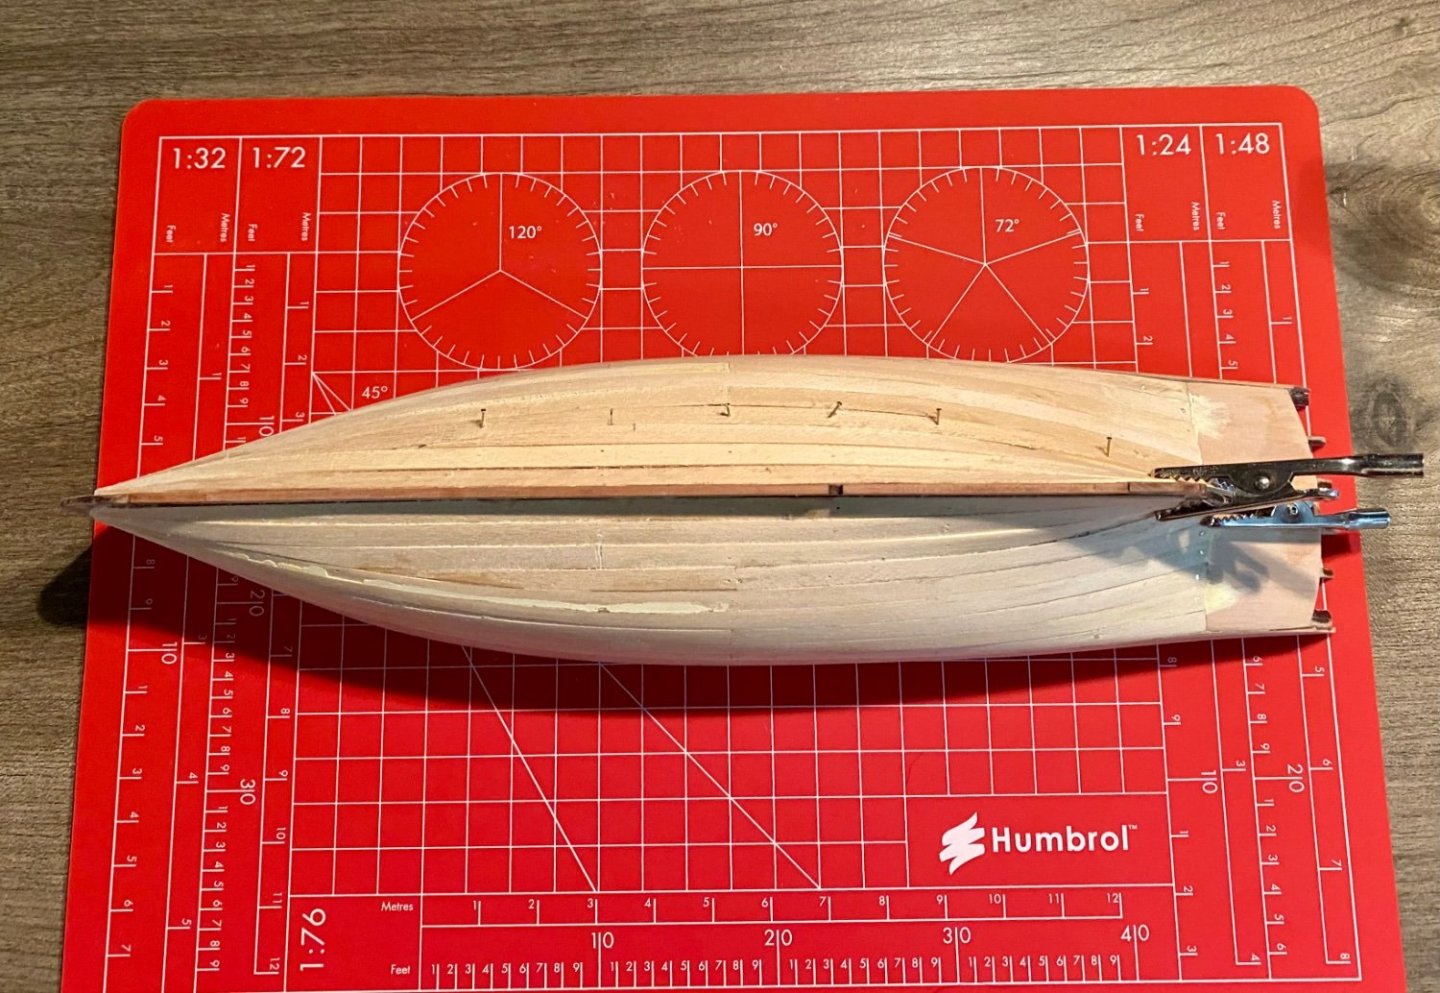
1st planking complete. My Nisha and I definitely aren’t going to win any modeling contracts on our first go, but the experience was worth it. The wording in the manual suggests there’s more than one way to skin a hull—so I definitely was working on it anticipating needing cleaner work on the next go. Been reading, YouTubing, and reading some more on techniques/best practices for best results. This is premature: but it’s almost a shame I’m learning on this kit, since it’s such a beautiful little craft. Perhaps with more experience I can revisit her and display them side by side. 🤣 I am lucky to work for whom I do, as an unexpected little performance bonus has bolstered the coffers to kit out my little shop. Having the right tools for the job does make a difference. Somehow—a kit that shall remain nameless fell into my shopping basket when Nisha’ s sails were ordered…weird. 😁 Cheers All, Grey
-
Not a lot of build progress on Nisha today, as I've been scratching my head a bit at planking, and doing my best to avoid the typical pitfalls of the amateur. Having the manual available in a .pdf is fantastic for the ability to zoom in and use the photographs to see the parts and pieces, and how they go together. Admittedly, I've been in the warmer confines of upstairs thoroughly enjoying perusing a copy of Edgar J. March's "Sailing Trawlers" which I was able to find reasonably priced at a used bookseller. I come to this book on the from the fascinating build log and fellow Nisha builder @AJohnson. In that: we own the same kit, and I look at his log with an eye bent to the aspirational. For me: one of the unintended, yet obvious segues in building a model ship is learning about them, the people that made their livings on them, built them, and so forth. Absolutely fascinating stuff. One small anecdote I loved: The shipbuilding firm of J.W. & A. Upham built Nisha and their blacksmith, Elliott, came to the firm at at the age of 11 (I was picking my nose, and putting forks in electrical sockets at 11) and worked there, never missing a day for the next 65 to 66 years. Upon his retirement, the firm paid his wages until he passed. Perhaps the Wife would give me the same deal once Nisha is finished?
-
She's lovely, Andrew What a great result. You do her great service. Loving to see this come together, and great inspiration. Thank you!
- 206 replies
-
- 3
-
-
-
- Vanguard Models
- Brixham trawler
- (and 2 more)
-
Experience is not on my side in the slips, but I do have construction/wood working experience both professionally and for the Fun’s. I will reflect what others have said, and add my own twist: build something you like. Be it visually pleasing, historically interesting to you, or some other personal connection/interest. I feel it will help keep you motivated to progress while in the building doldrums, and help you visualize the final result. It will also lend background to the inevitable stories and questions you will be asked about your proudly displayed model. I am currently working through a Vanguard Models build—and to my admittedly: inexperienced hands and eyes; comparing it side by side with a Model Shipways and OcCre kit—there is no comparison. The Vanguard kit is superior to both. If nothing else for the detailed manual. The information and techniques gleaned from a careful reader are worth the kit price in and of itself. Cheers! And Welcome! ☺️
-
🤩 Thank you for stopping by! My comment about the brass pins had nothing to do with their quality, and everything to do with the quality of my workmanship. There is nothing about this kit that indicates anything but an eye for detail, quality, and ease of building. My frustrations are that of a novice--but the kit is gentle, and teaching me to be patient, take my time--however: I will admit having to go over the introduction in the manual about treating each stage as a separate project. As a former utility lineman--my idea of fine hardware is a 1/2" galvanized staple. Loving my Nisha. It's trying me--but the result will be worth it. 😃 Cheers, Grey
-
Nipper! I hope to get to a level to build Alert someday. The Vanguard kits are incredible. Top quality. I just hope to at least pull off a semblance of a decent build. Thank you so much for stopping in. I really appreciate it. Progress is being made! Cheers, Grey
-
Soul crushingly slow…but! I have a sort of routine down for planking. It is not as cool/fast/easy/fun as the videos, tutorials I’ve watched would make it seem. Ok—it is fun. When you get it to work. The key is: keep trying until it works. Don’t force it. Scrap the bad piece. Fit it until it is THE plank. This is a complete noob/beginner build, so carry on if you got this. But, to my Fellows: this can be done. It is slow (right now) but it speeds up, and you absolutely get better at it. Fairing the bulkheads/frames is a massive component—so don’t skimp. Do it longer than you think you should. And also: take heart. It is worth it. And feels GOOOOOD. The brass pins are the actual finickyest, most terrible POS hardware you’ll ever encounter…but work a system, and keep going. Eventually it makes sense. Like any construction task: make sure you have the right tools for the job. This will never compete for most beautiful Nisha, but it will always be MY Nisha. Cheers, Grey

-
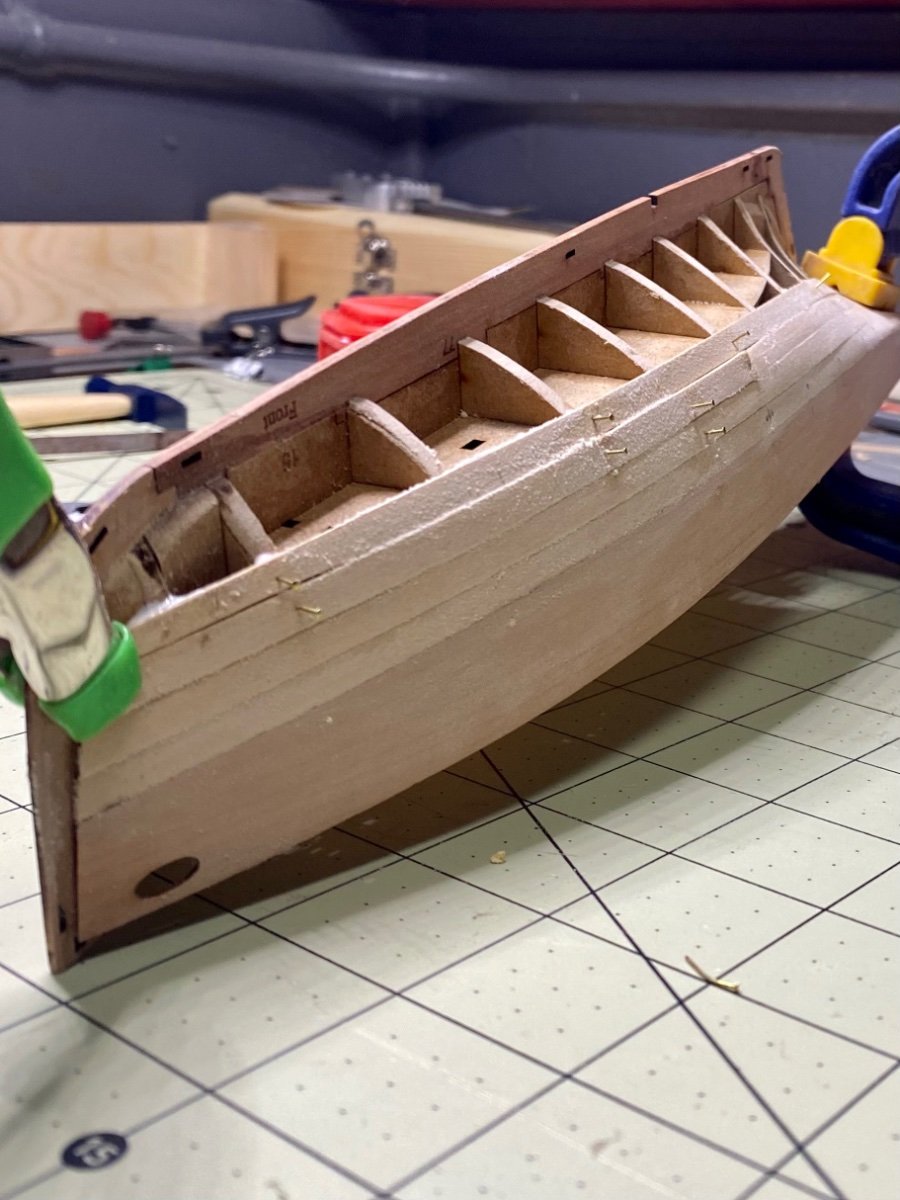
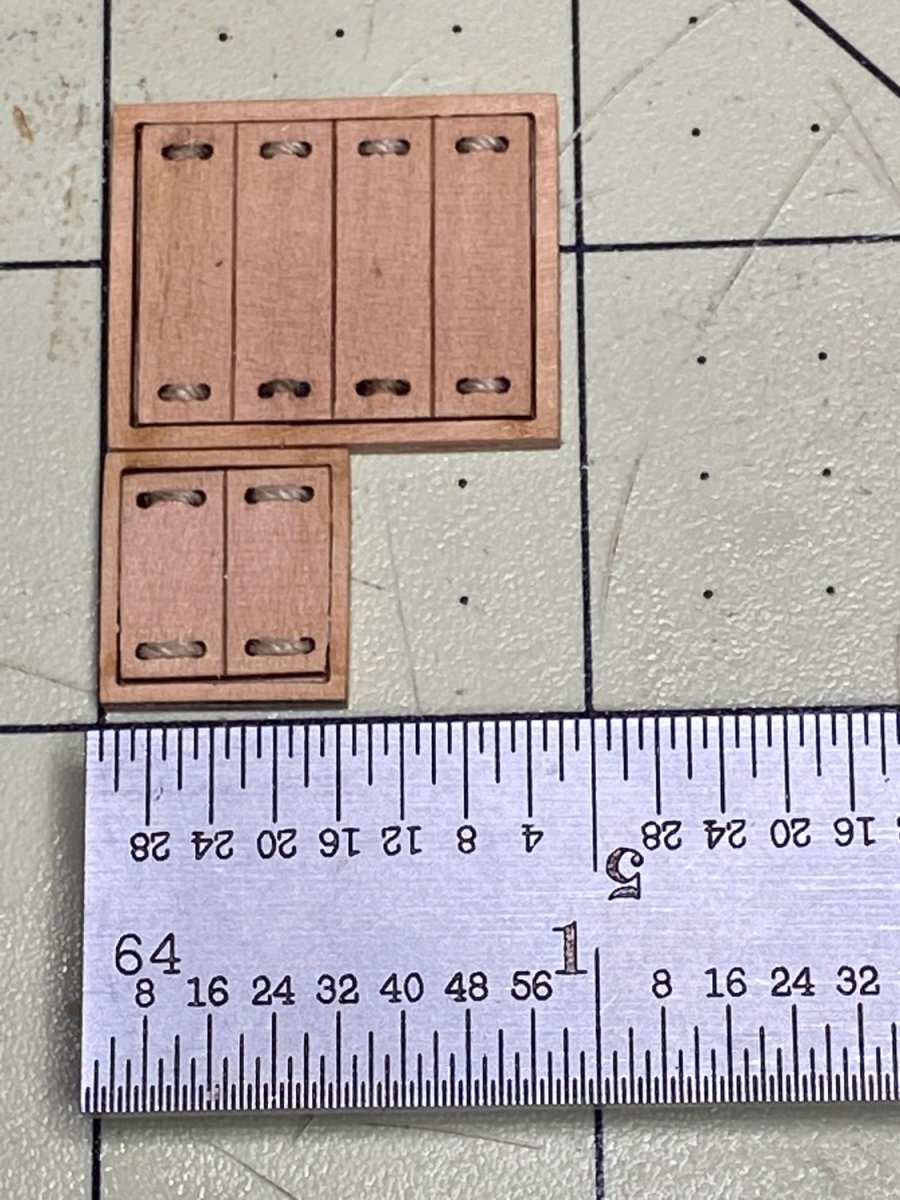
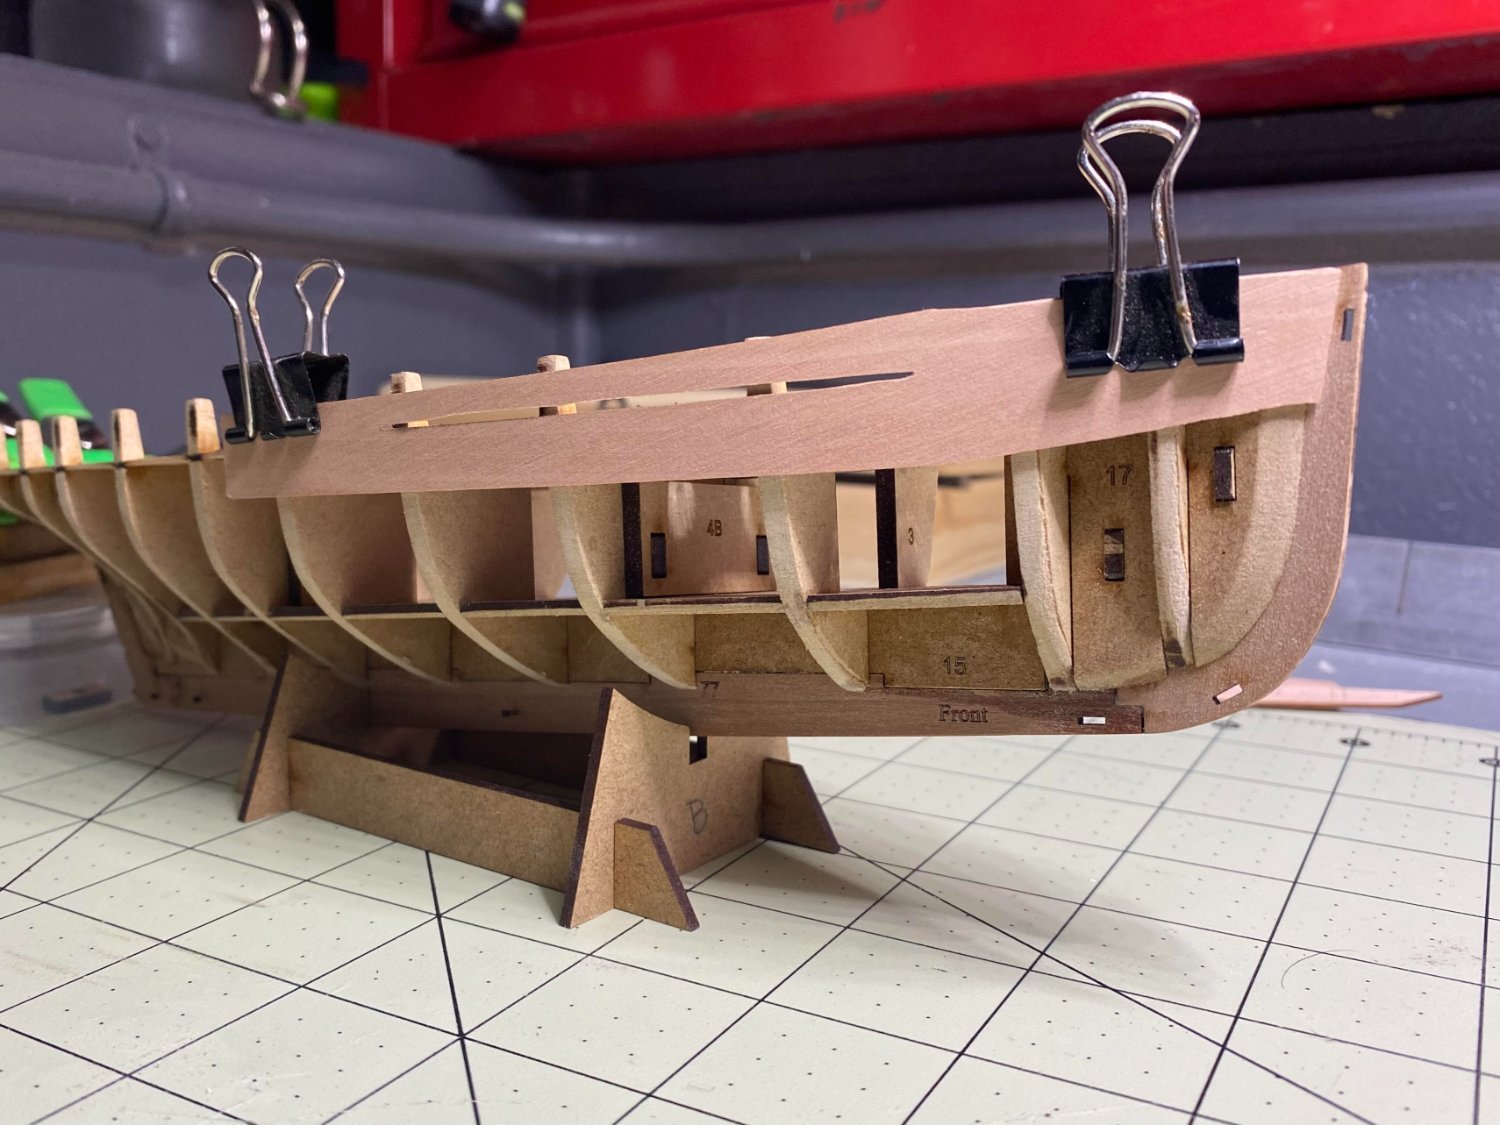
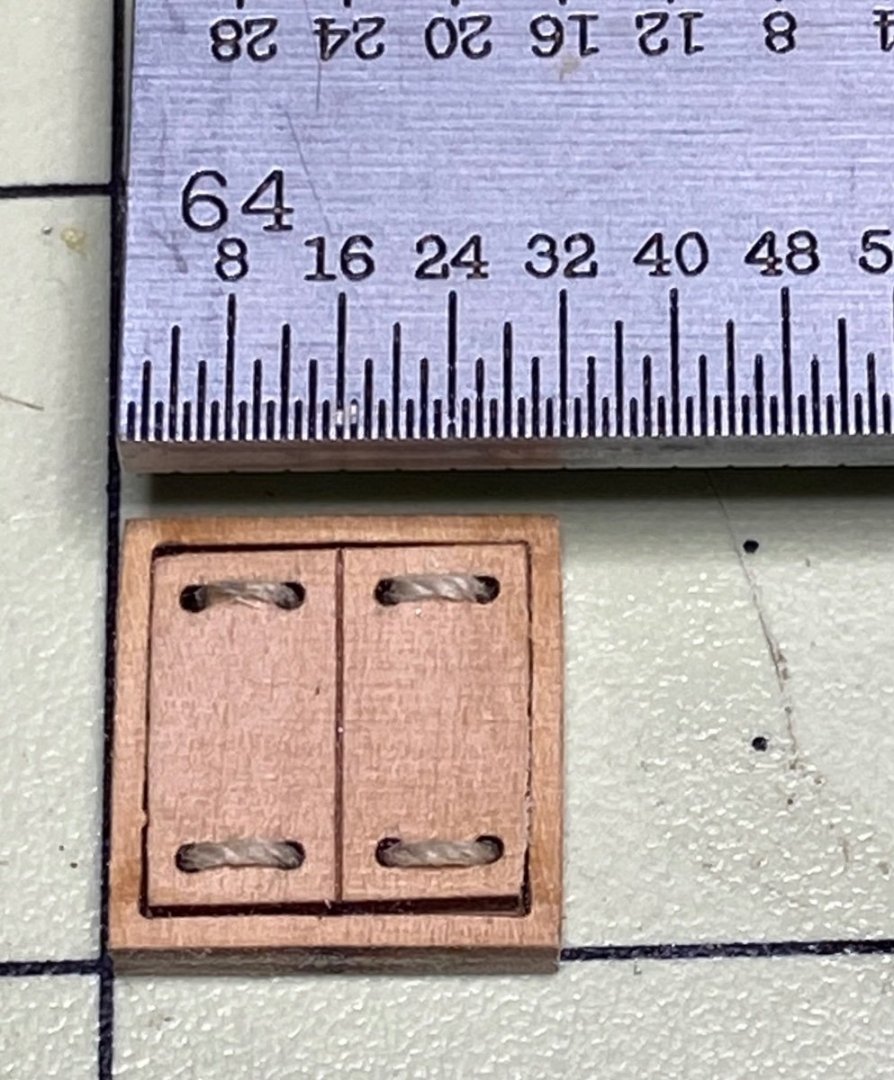
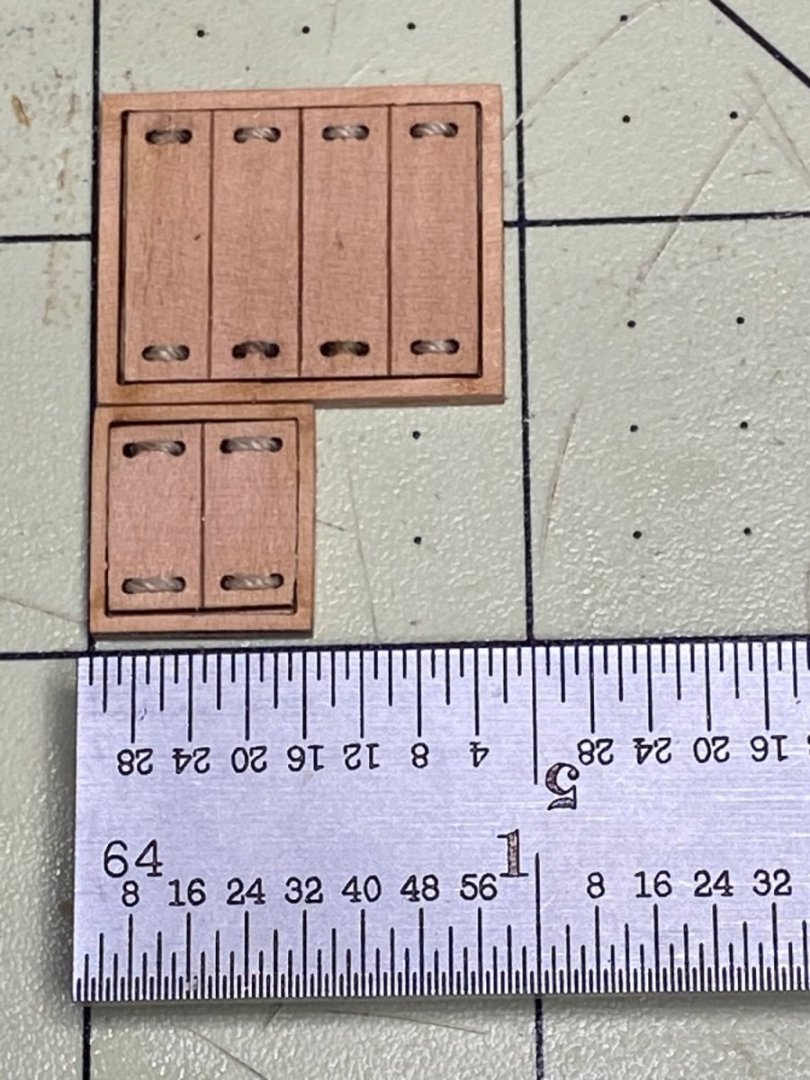
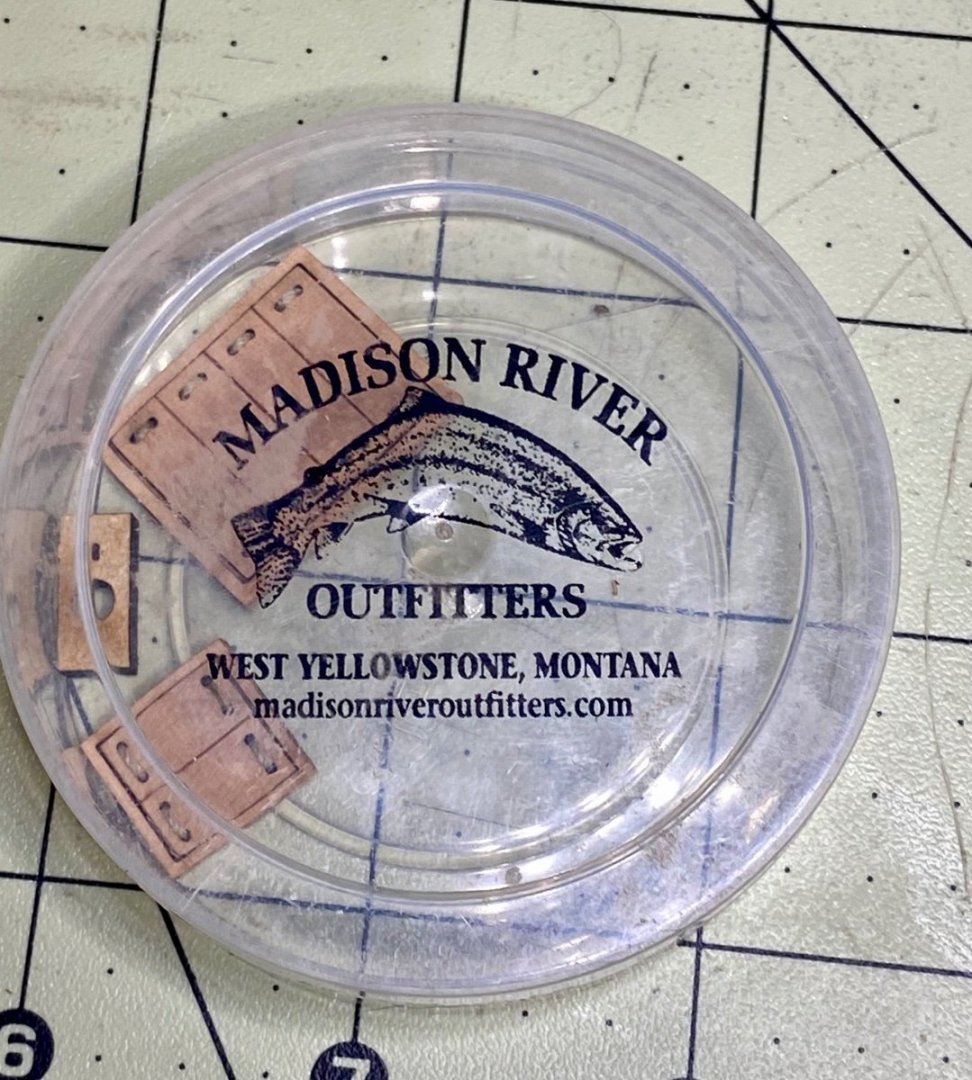
Bulwarks have been achieved. Sans scuppers. This time. I’ve begun planking…and need to remind myself it’s a process, and not a race. I just want that “Whole Hull” dopamine. I do not have a great sequence of construction for the brass pins. I think it’s a matter of the wrong tool(s) for the job. The small driver the manual suggested has not arrived, so we wait. Adaption is the hallmark of the versatile modeler…but in my case: the Nisha is my kit to build solid fundamentals. While waiting on bulwarks to set, and the one course of planking I muddled through…I did work on hatches. Again: a matter of wrong tool/component. I am unhappy with the discoloration on the thread from over application of a thin CA. Medium was most likely the play here, and a dab will do ya. Will likely revisit this, now that I have a better feel for working the thread. One bonus of another Hobby of attaching tiny things to lines: multitudes of small cases to protect finished/pending parts. Cheers, Grey

-
Andrew: Thank you so much for your thoughtful replies. Here, and there! I realized after posting my rather rambling question on your log that it was much more suited here... After sleeping on it, I think the way forward is to build the kit as intended, and perhaps have my fun with any additional flavor and enhancements in the form of deck clutter/items. I think this way I can move forward on building and completing a finished model, rather than make a mistake to work through/be discouraged over. This doesn't mean I won't try to make scuppers on a mockup...but I'm not willing to risk the kit bulwarks and not have material and tools to attempt a scratch build of them. Scratch building is far, far, far away in my future. I think fundamentals and completion will better serve me as it concerns the Nisha. Having spent some time reviewing the manual with a little dose of Mastini's book, I think this is the way forward. Your idea of "structural" bulwark stanchions/timberheads definitely has merit though...🤔
-
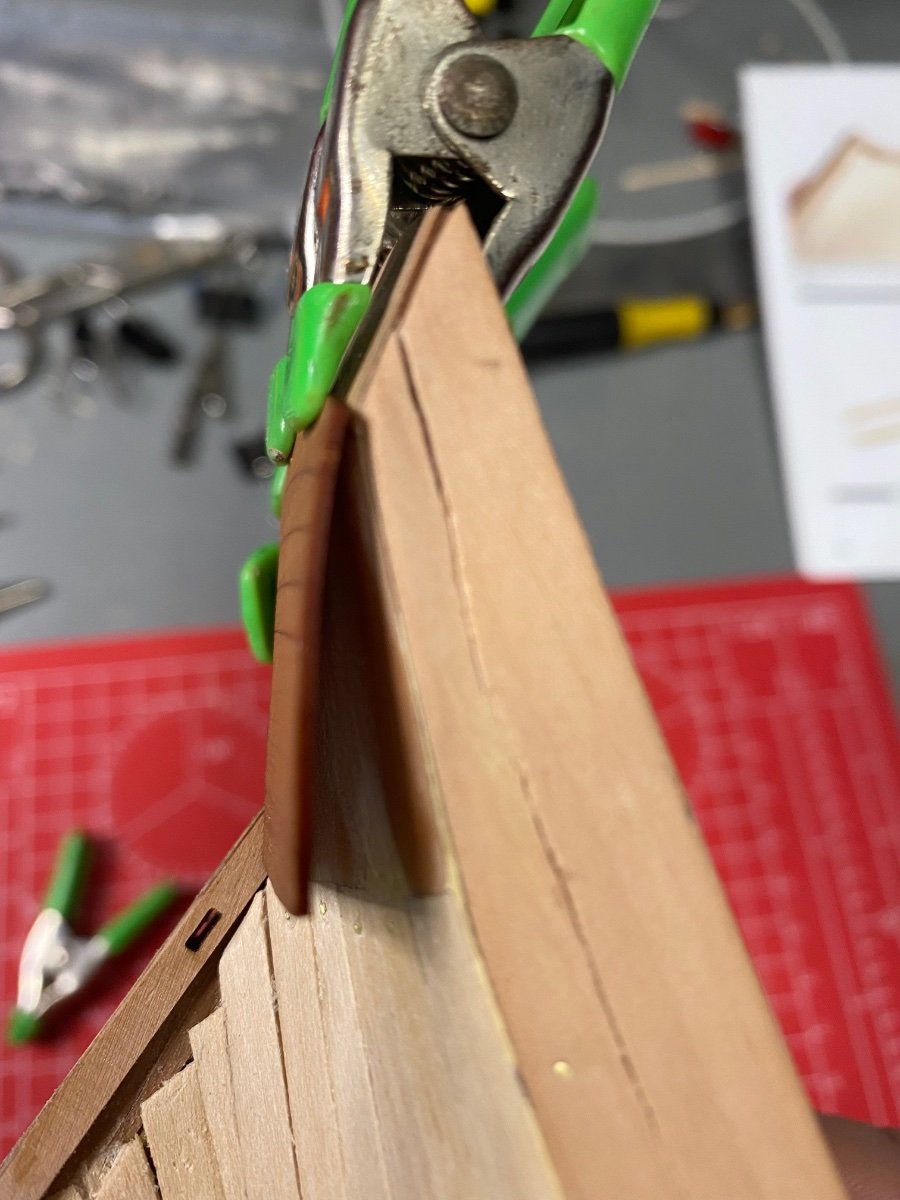
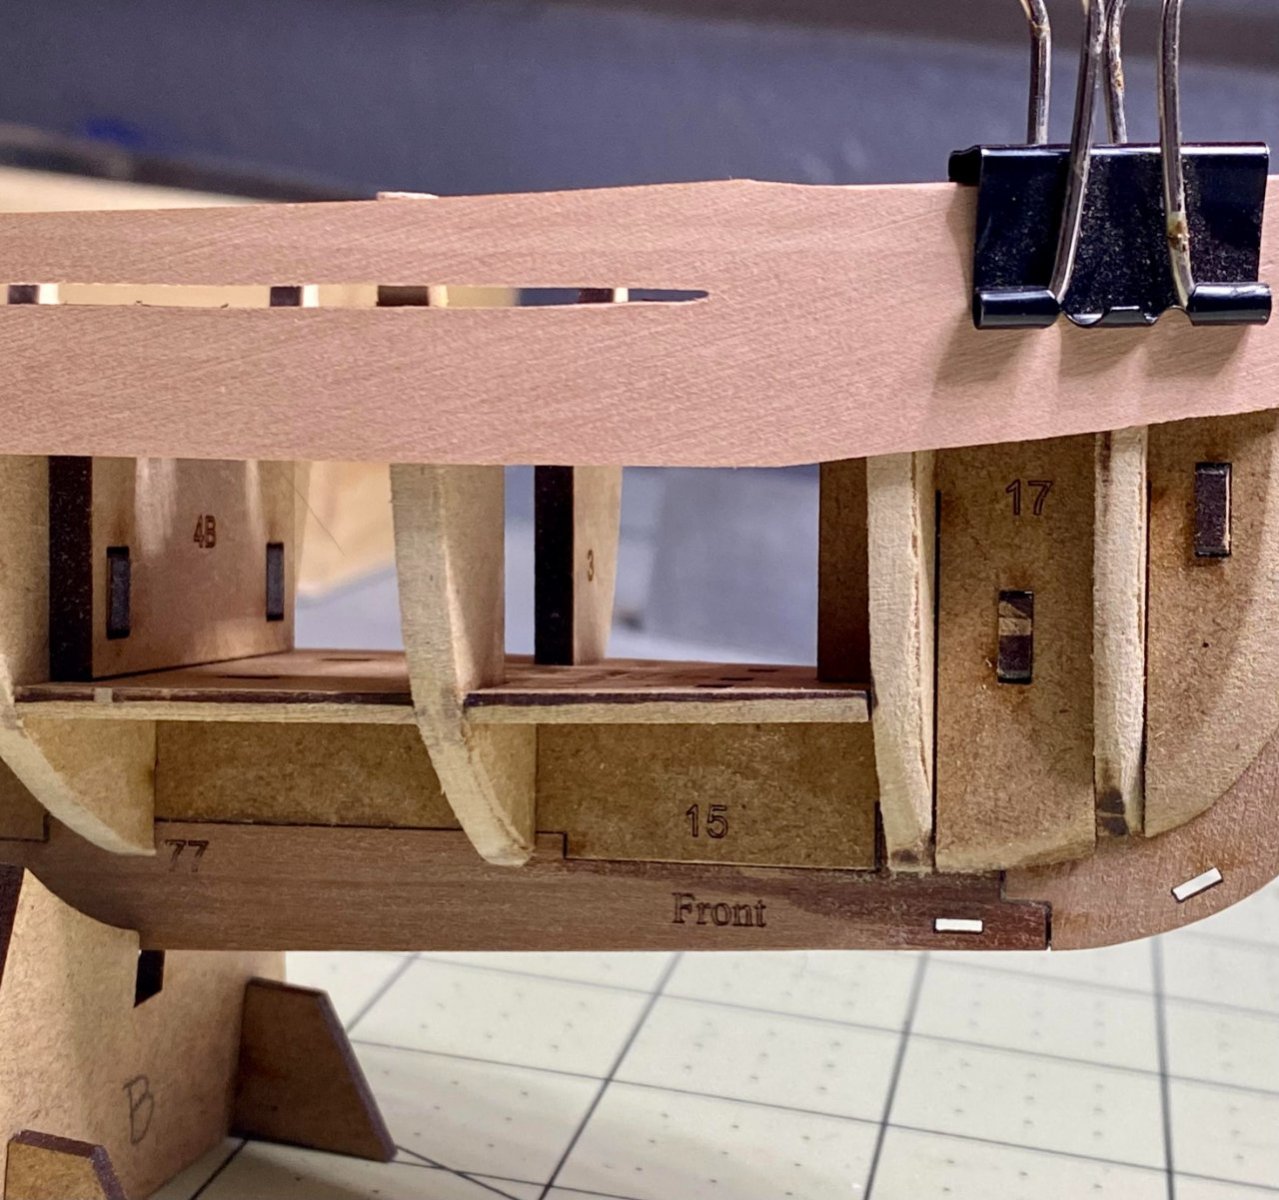
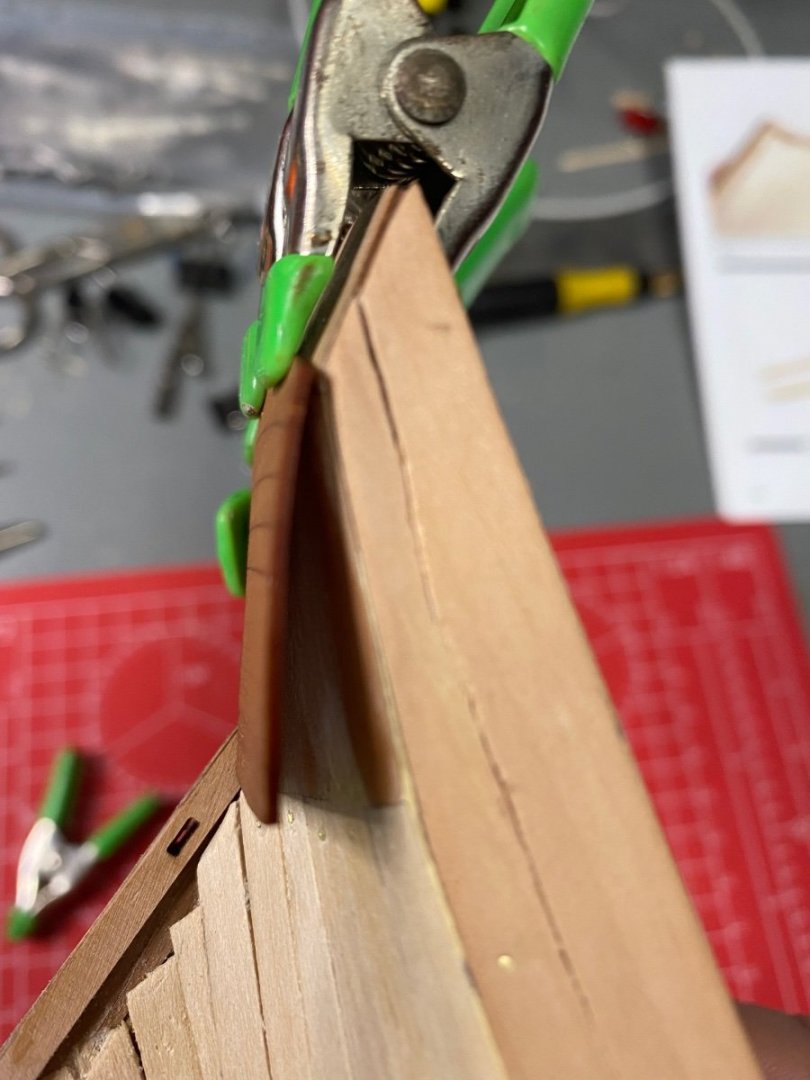
Using the excess of 1mm pear, I fashioned a crude facsimile of the right bulwark. Using a #11 blade and a straight edge, I marked the lower most engraved line to simulate the where the bulwark is to be placed on the upper temporary bulkheads. I used this line to attempt a mock-up/practice run on if I want to follow @AJohnson's neat idea of adding scuppers. (It really looks good on his build, and I think it visually interesting) Using my Dremel, and a 60 grit sanding wheel/disc--the results are here. A seriously gnarly cut, and despite the kerf of the sanding disc being minute, I just don't think the control is there to make a cut this small with any degree of accuracy, with my current tools. The Dremel was stationary, so the cut was attempted free-hand. Sketchy, and it just felt too close to being out of control. A plunge cut with a table saw could potentially work...but of course there would be work to do on the back side due to the radius?radii?circumference? of the blade. Also the kerf of the blade would need to be taken into account. I may try an idea or two I've got kicking around with hand tools, but my experience and inclination thus far is to leave it be--despite my attraction to the detail. I can see possibly making a sort of jig in order to be able to use a flexible razor saw...but again: Will have to play around with mock-ups and get very steady, and achieve a great result before putting tools to the actual kit bulwark. Something to mull over--and part of the fun! Cheers, Grey


-
I am very near decision time on adding the scuppers or not. I think I possess the patience to pull it off, but I think I need to look ahead a bit more at if the full length scuppers make sense as you said: to not compromise the bulwark/kit integrity. Do you stand firm in your decision to not go full length? I mean zero disrespect to the quite obviously talented designer, but in looking at both your Pilgrim photo, and your painted model photos...I find myself thinking that the addition of the scuppers really help the model "pop" and look sharp. As to scaling...I will have to take myself to to some self-schooling and peruse some more. Unfortunately, I do not have a copy handy of Marsh's book to study Nisha a bit more--as I don't want to straight rip you off either. 🤣 I do wonder though...if attempting to stay near scale would diminish the visual effect? Arrrgghh. I would be most appreciative of your thoughts, if any on this topic. Imagine...designing a beautiful kit to have a rank amateur like myself ponder making this move...Art is pain.
- 206 replies
-
- 2
-
-
- Vanguard Models
- Brixham trawler
- (and 2 more)
-
Following this...I love the lines of this ship. Always been appealing to me, and happy to see you come back to ship modeling. I had quite a long break myself, but have never built anything this complicated, or with as much skill. Your attention to detail on the coppering hooked me. Holy smokes...what was once a kit to develop skills for--now seems like a fever dream. 🤣 Look forward to seeing her come together! Thanks for sharing!
-
Wow. Gross. I didn't realize how insidious the Blue Heeler hair is. Well...perhaps it's for the best. Since their hair is indestructible, it may as well be glued and sanded into the Nisha. Will give it strength. *This is not a tested method, nor does it appear in the manual. Kit-bashing, naturally