HOLIDAY DONATION DRIVE - SUPPORT MSW - DO YOUR PART TO KEEP THIS GREAT FORUM GOING! (Only 36 donations so far out of 49,000 members - C'mon guys!)
×


Grey
-
Posts
39 -
Joined
-
Last visited
Content Type
Profiles
Forums
Gallery
Events
Everything posted by Grey
-
 Behold! This is what happens when you drop the starboard stern corner of your model on concrete. Repairs (after crying) were completed by cutting small “sisters” to give more purchase for the glue/clamps needed to complete repairs. She may yet sail
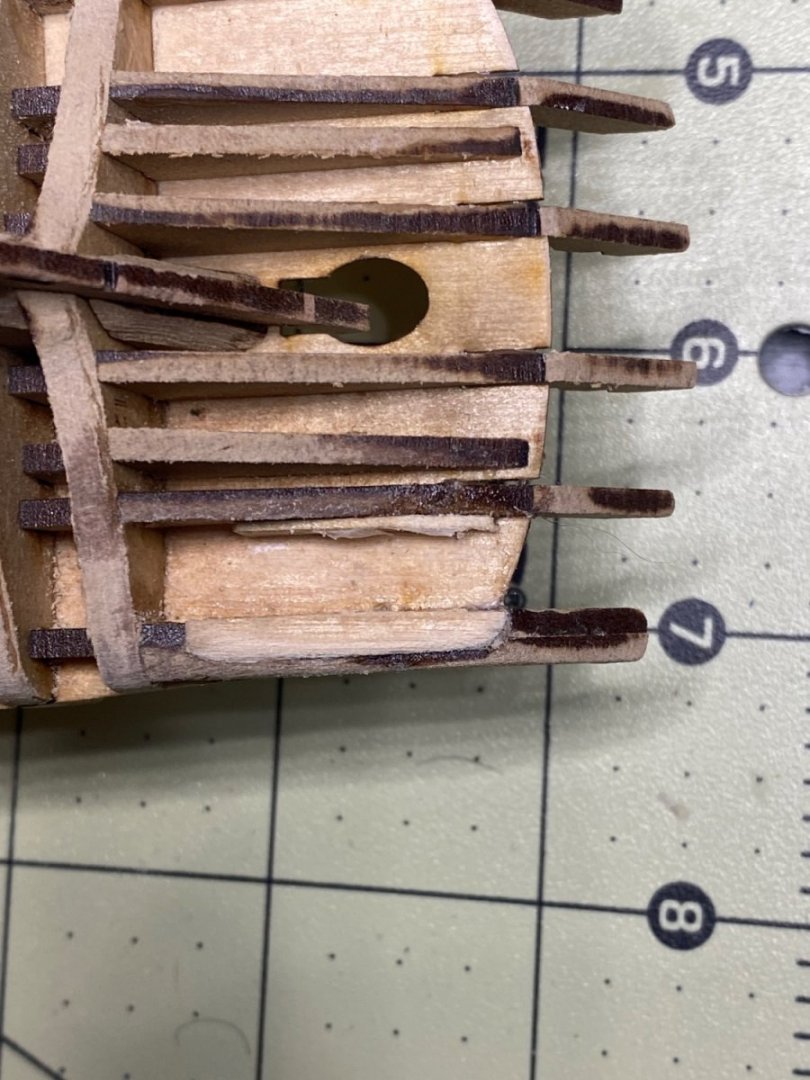
-
Just you wait, Sir I have plenty of things to report/repair next update.
-
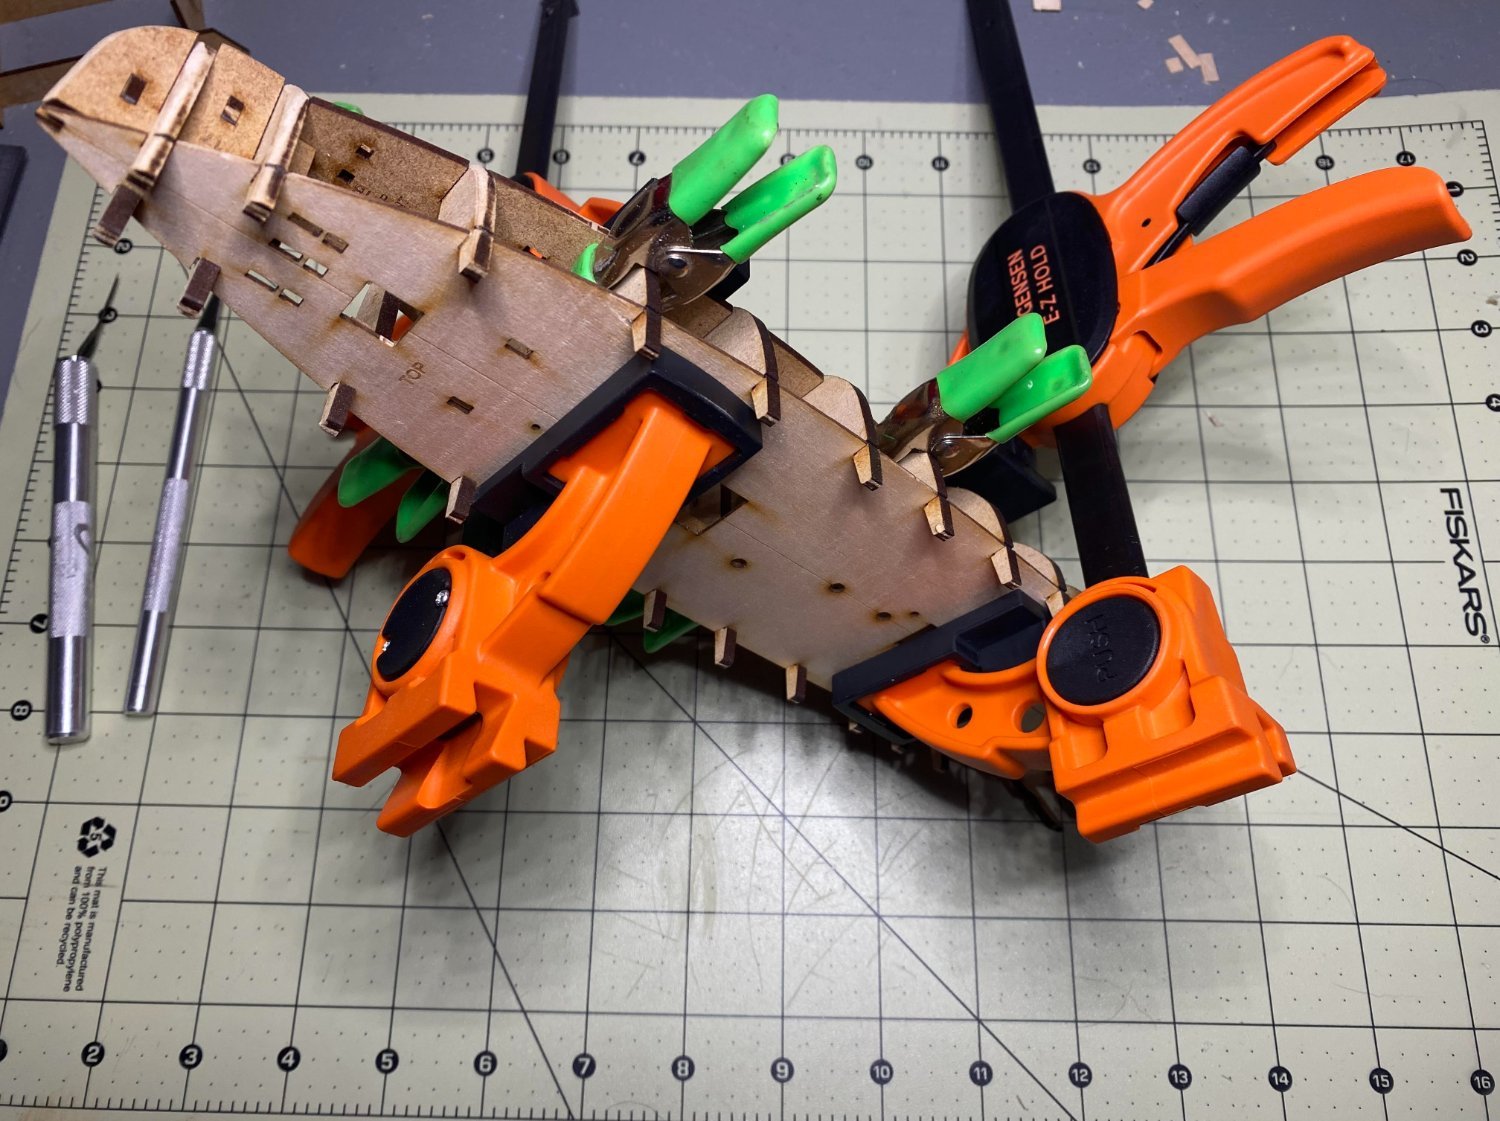
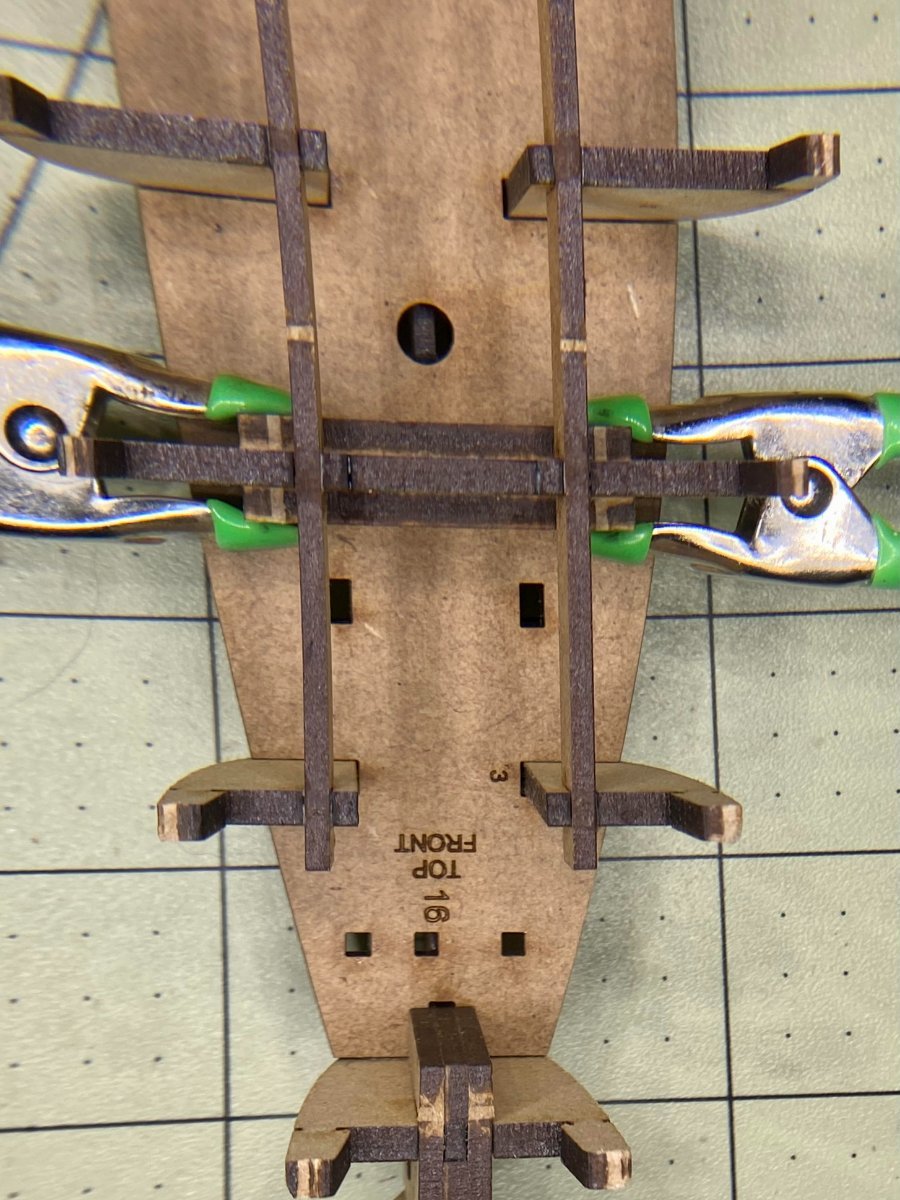
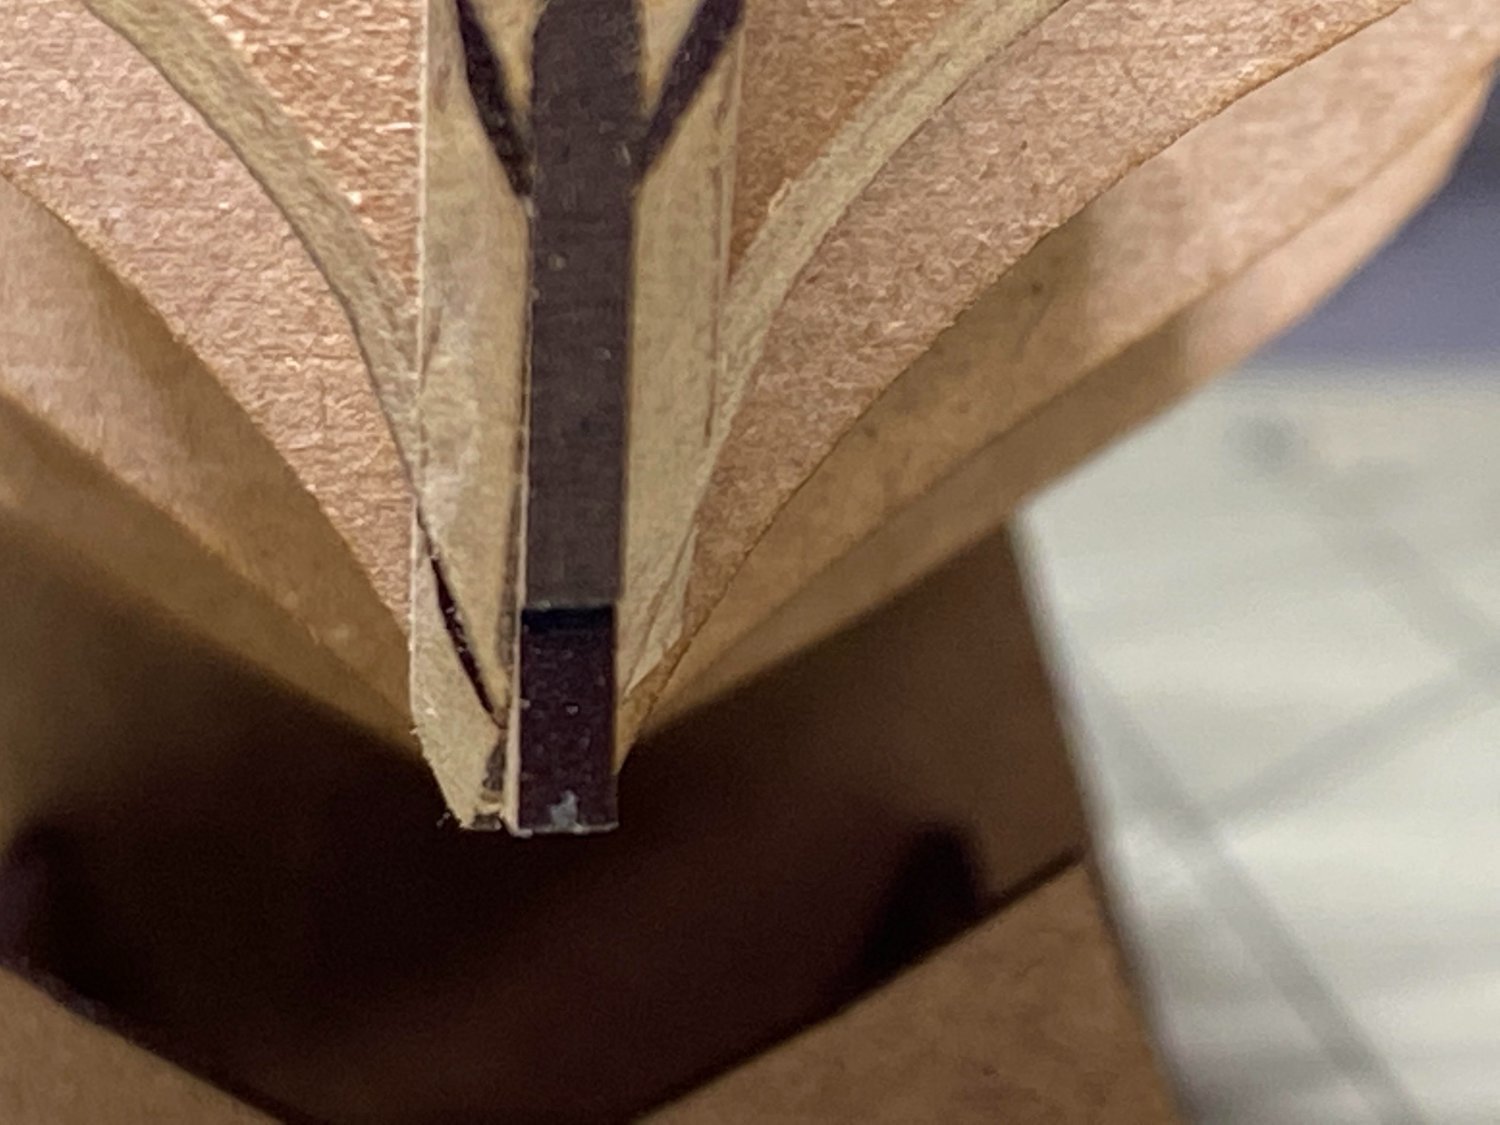
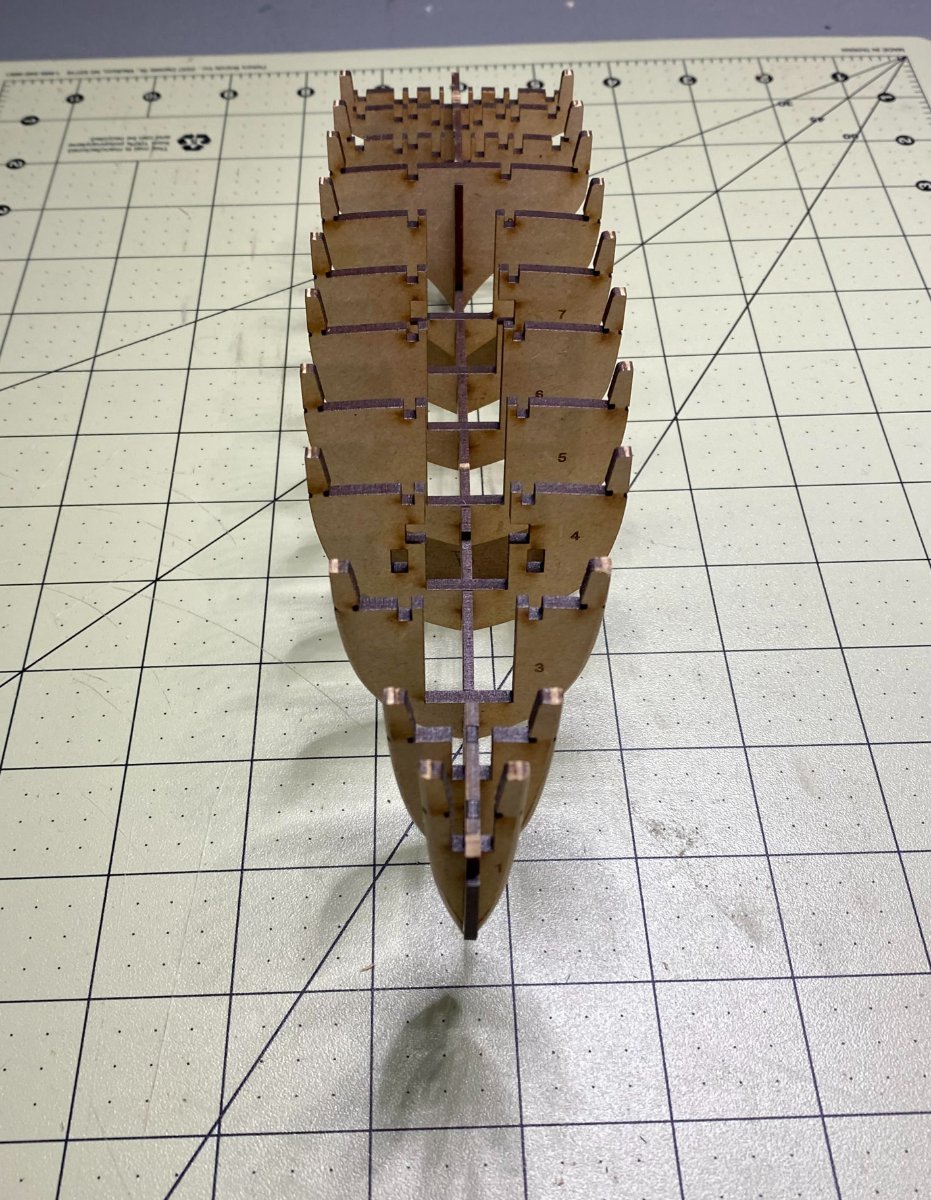
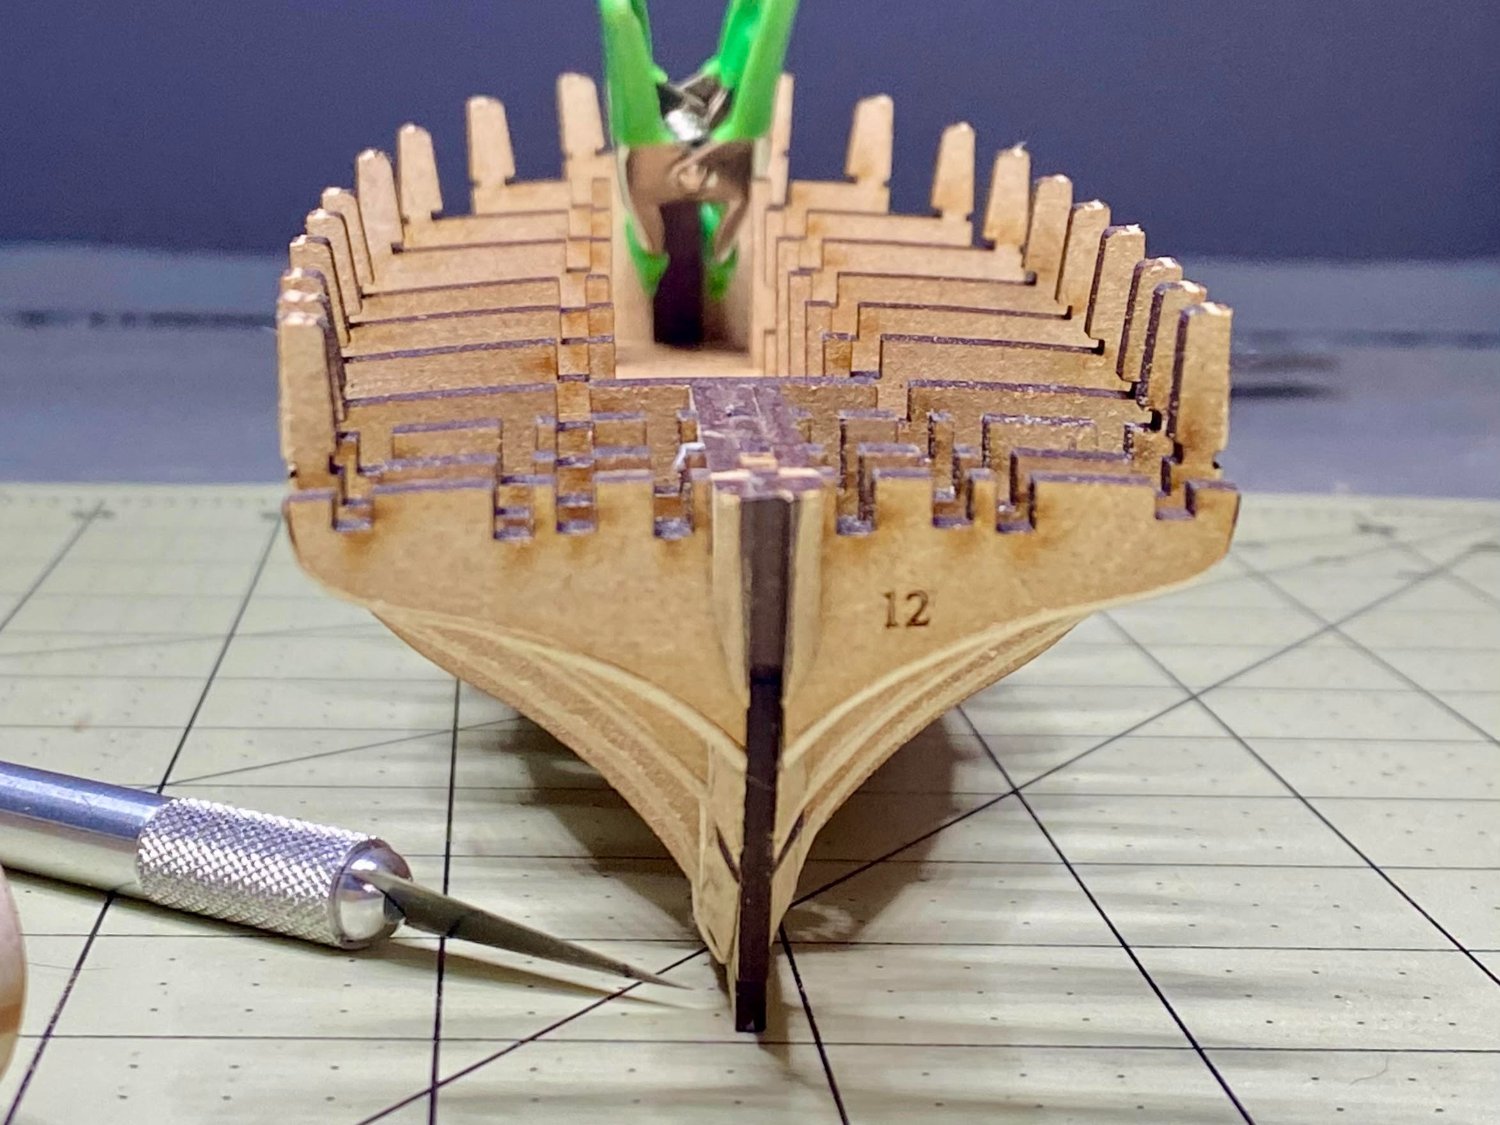
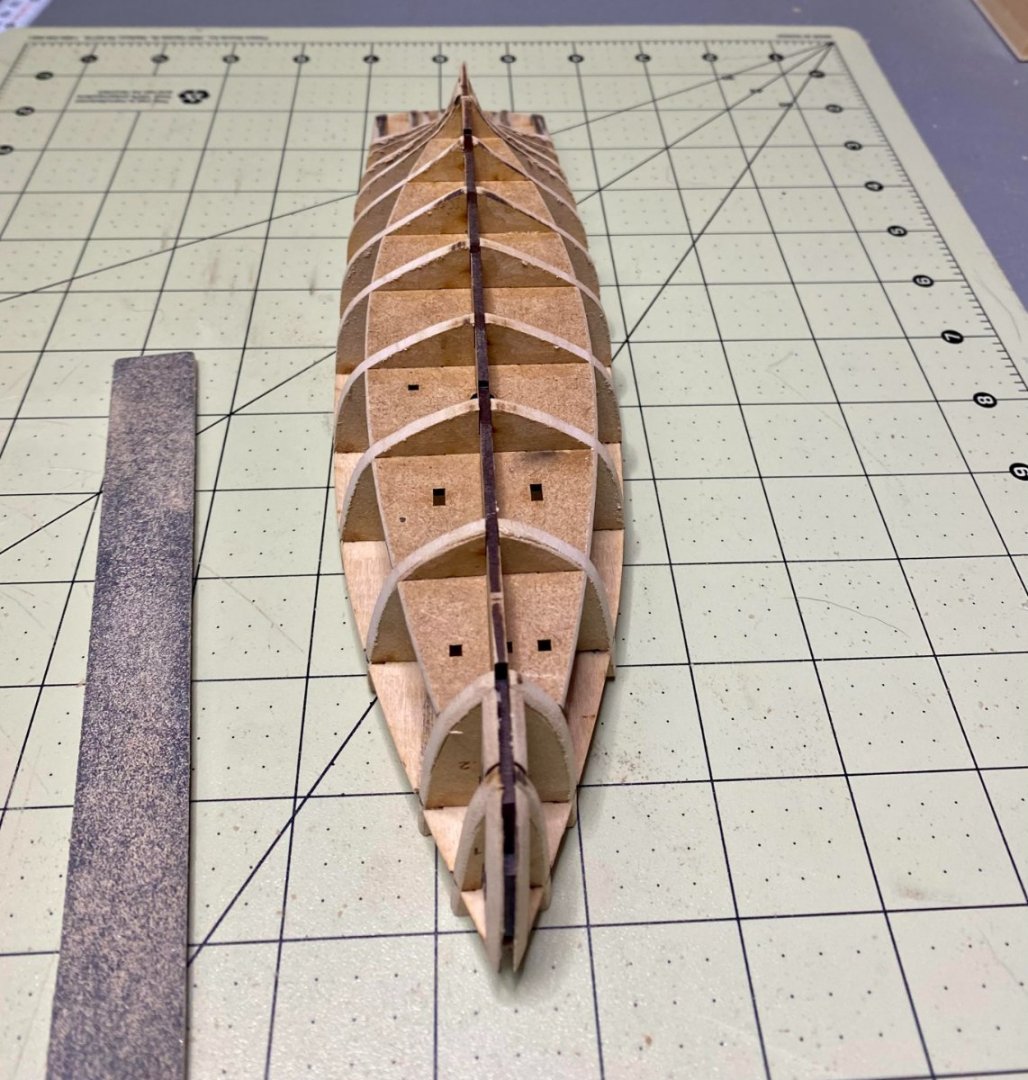
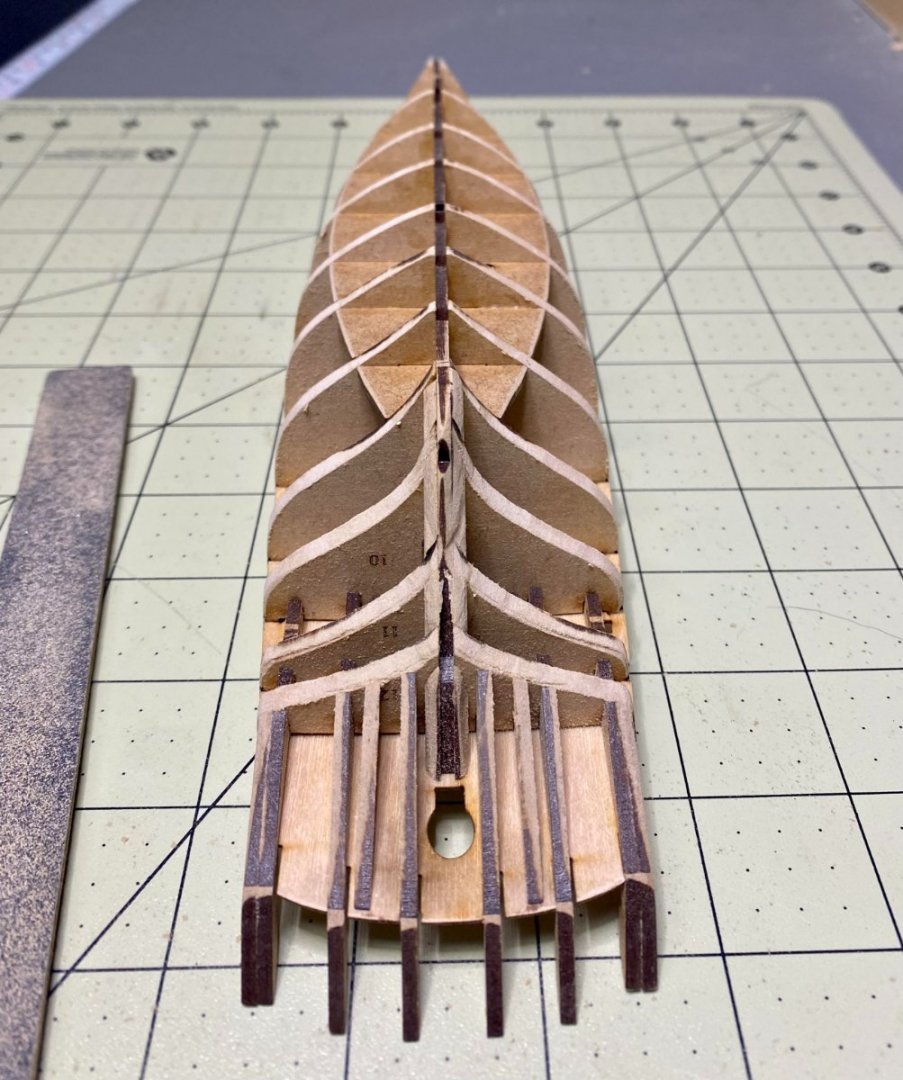
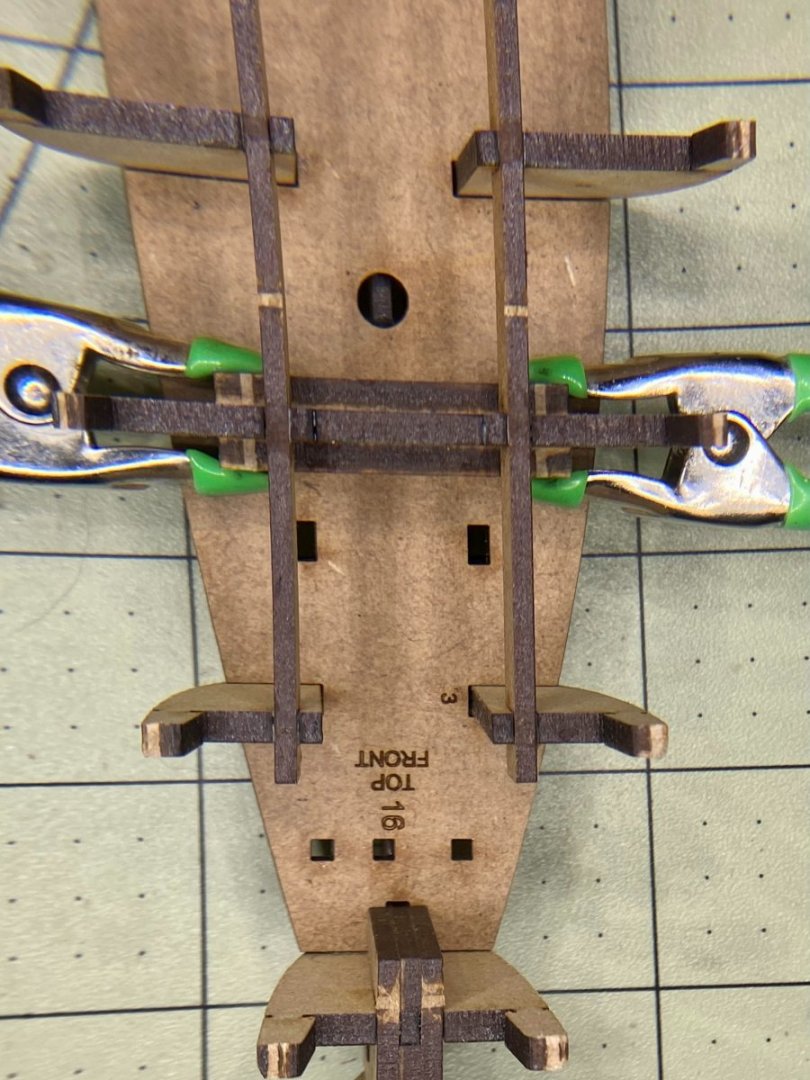
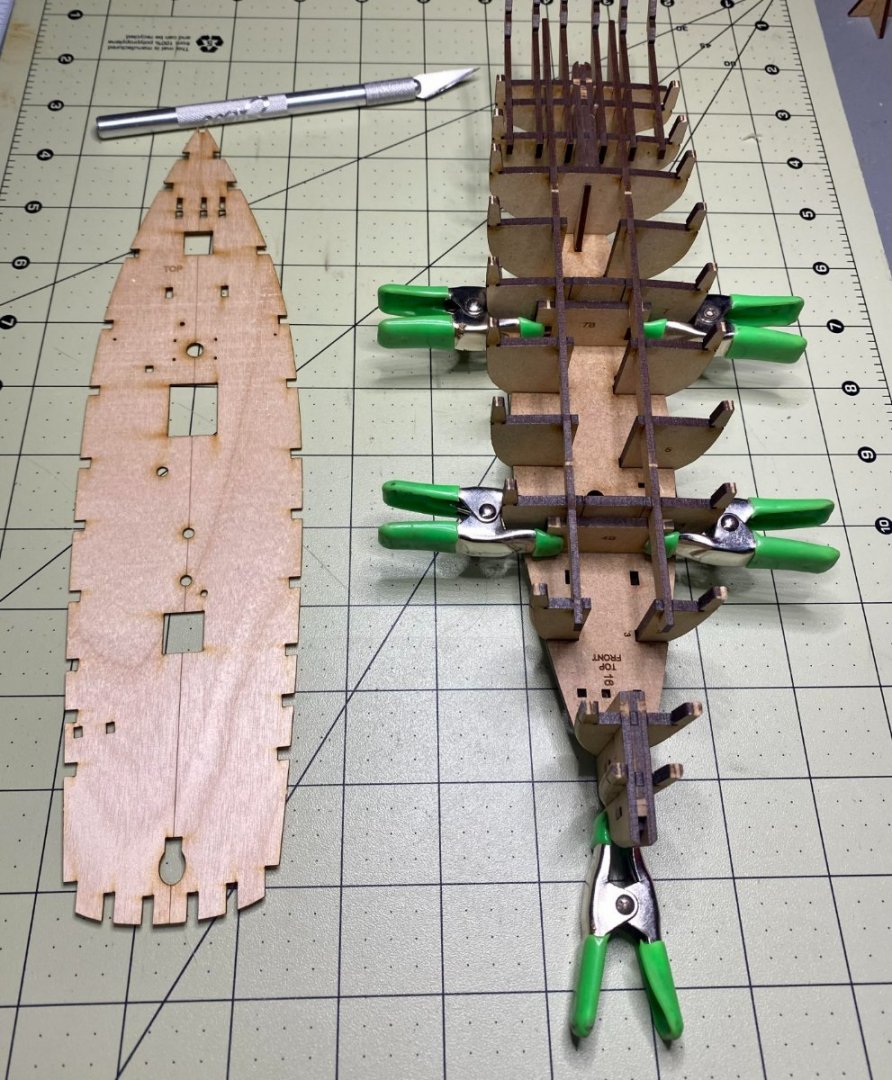
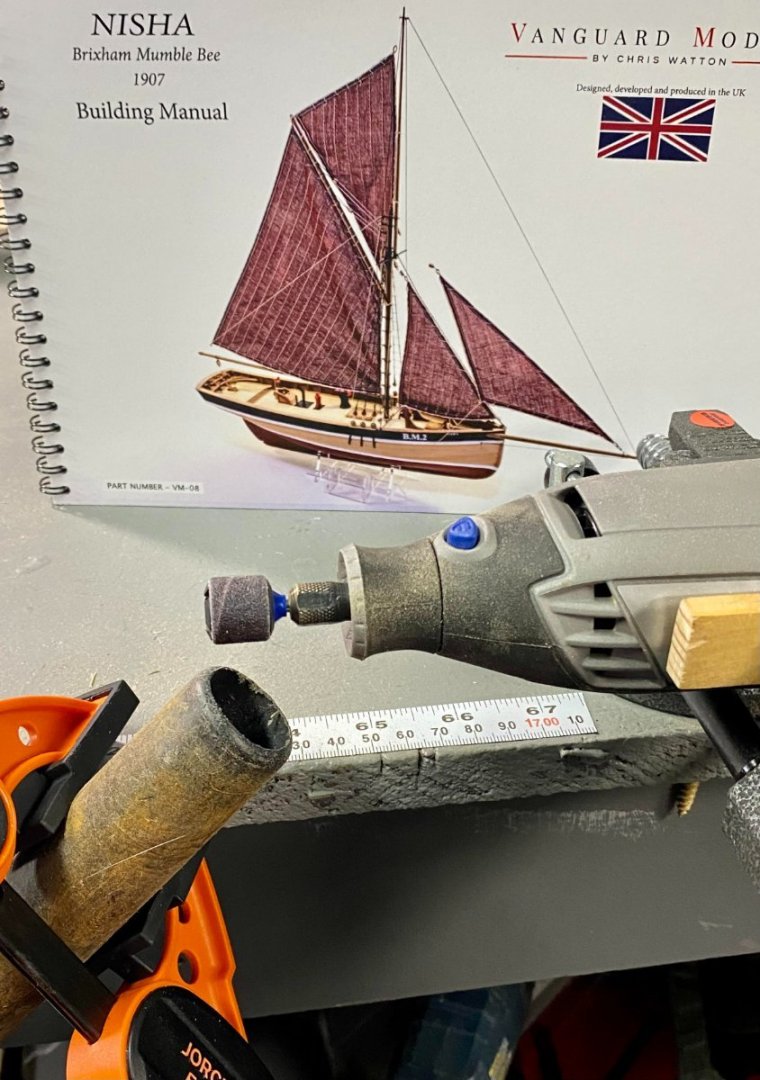
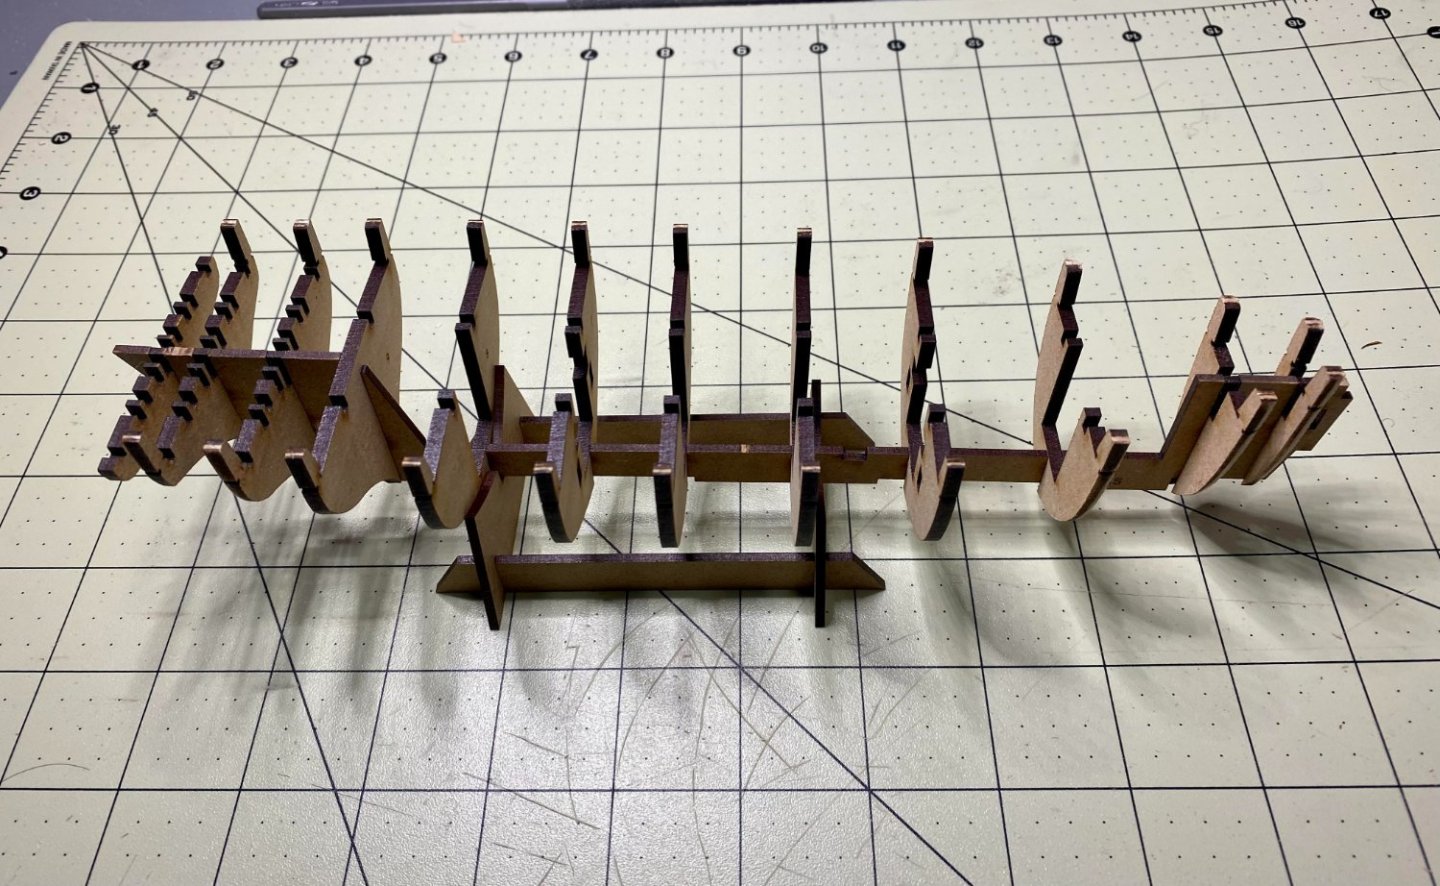
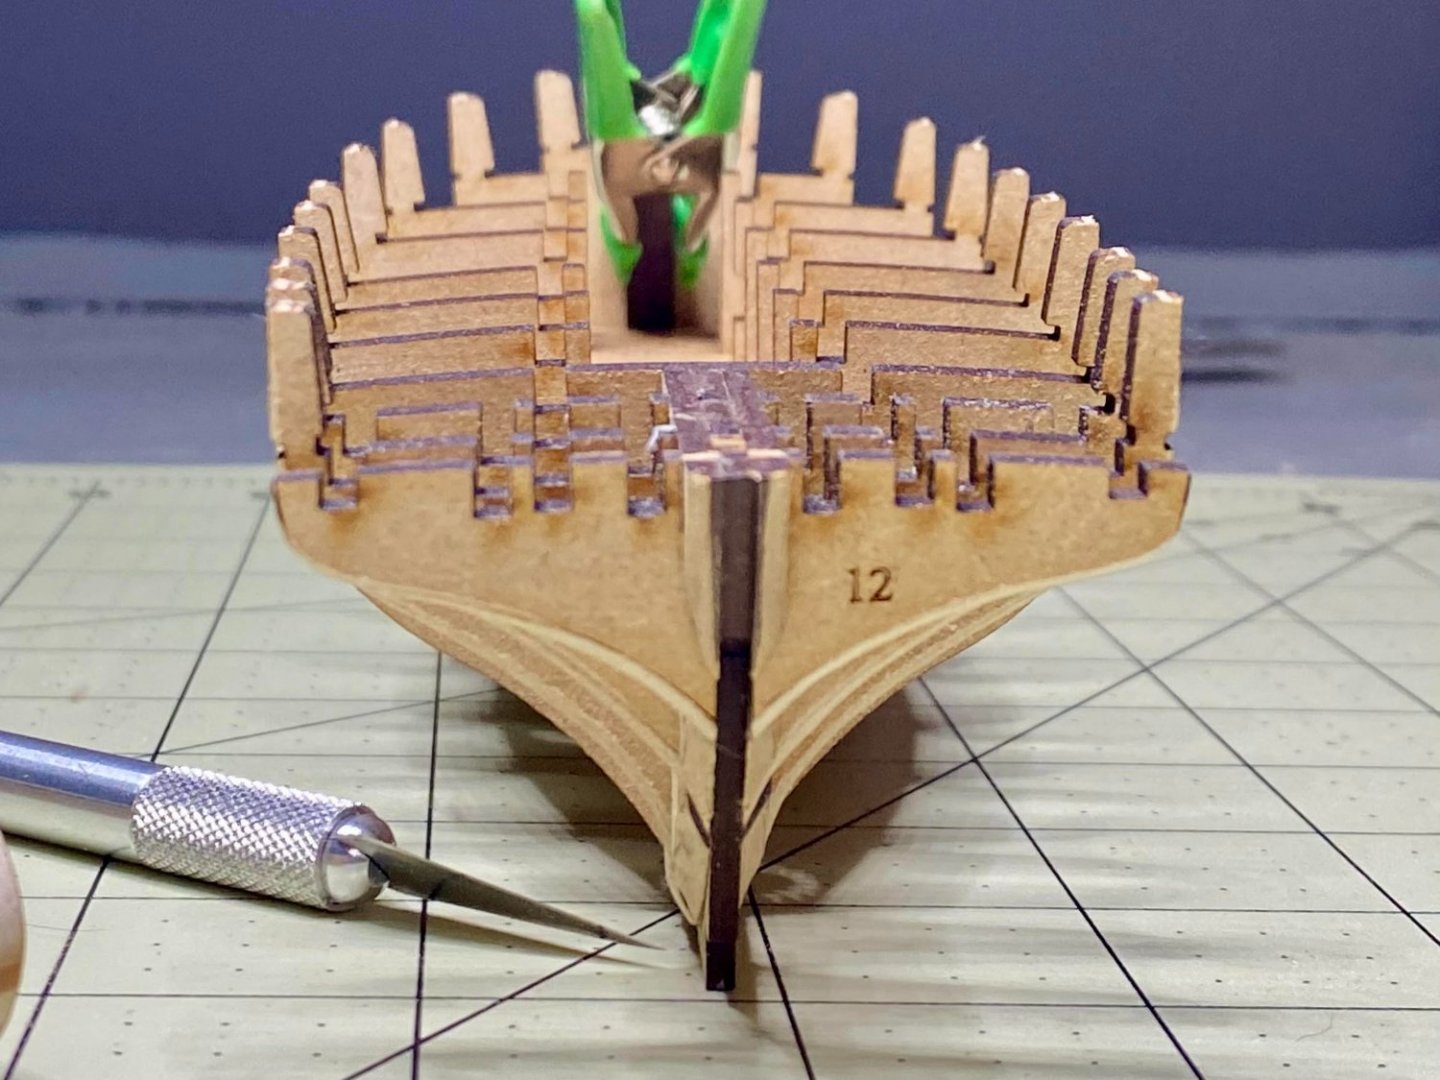
I hope this finds you all well...I know that after today some quiet time with Nisha and an audiobook was about the best medicine I could find. Parts "4" and Parts "7" are shown clamped here. The clamp on the bow is for balance. After day 2 on this kit, I am very happy with the quality, and a long sniff of the box contents is all the aromatherapy one needs. I am not a large human being, and have hands relatively in proportion--but the pegs, of which I think are for strength, and to avoid amateurish misplacement of the frame parts that make up "4" and "7" were difficult to get in. My solution was a needlenose pliers. Holding them square, I was able to insert them with minimal fussing around. The added perceived challenge was: I had applied diluted wood glue, and felt myself firmly on the clock. All is well that ends well, and they were put in place, clamped with the little green guys, and the return to my work (so I can buy modeling stuff) was inevitable. I should have paid more attention, and listened to the experiences of others concerning the sub-deck. The frames are slotted to receive it both port and starboard, planing out at the top of the false keel (I think this is good terminology), and their top edge. The quality of material, measurements, and cutting of this kit are exact enough that the error isn't in the material--but rather mine. A small cant or misalignment of the frames (which if memory serves...are not glued yet?) will render this operation difficult. Like the manual says: double check your alignment if it seems like you cannot flex the plywood enough to seat where it belongs. Do however, take good care at the bow as that is where I nearly snapped it off. If you look at the photo immediately above, to the left of the orange clamp closest to the bow--you can see where I had a bit of a "blow out" and tore some fibers of the top layer of the sub-deck. A little chisel work to "let it in" solved it...but you shouldn't need to do that if you are smarter, and more careful than me. The clamps on the sub-deck were very lightly snugged, just to put my mind at ease more than anything. First go at fairing the hull. The manufacturer of the industrial sized emery board in the manual is the way to go. I was very impressed with the size, and grit of the coarse option. You can get multiple digits on it in order to feel the frames through the tool, and for me: "feel" is important. I still have work to do fairing, but I feel it very important to mention the following: DO wear a mask. We're all used to it by now, and without thinking I took a call this afternoon and instead of sitting at the computer, picked up the Nisha and lightly started the fairing. The MDF is nasty stuff, and of course the work you will be doing is fine particles. Naturally, I ended up with a runny nose and panic muting my phone while on the call during the onset of uncontrollable sneezing. I spent a lot of years in the field before coming into the office, and "know the type". Safety gear isn't always on our checklist of Things That Make Me Look Macho. Forget it. Just put on the mask I know you have somewhere, and save yourself the weepy eyes, runny nose, and sneezing like a lunatic. It's even in the manual--no exceptions. I didn't even let the cowdogs in the shop during sanding--and they'll eat anything. Oh--I was right about the sails. I can't build this without them. Sorry Mr. Watton, another shipment headed to the US Midwest 🤡 Cheers All--Be Well, Grey

-
I absolutely LOVE these! 🤣 I am currently obsessing over the photo of the Pilgrim, and wondering if I can pull off the scuppers with the same good looking result you have. I am going to remain patient. And enjoy the process of getting to that point. I should have listened to yourself, and Mr. Watton on flexing the sub-deck...as I have a small bit of micro chisel work to attend to... I cannot wait to see your Nisha plucking those wily Cocktail Stick fish from the deeps!
- 206 replies
-
- 3
-

-

-
- Vanguard Models
- Brixham trawler
- (and 2 more)
-
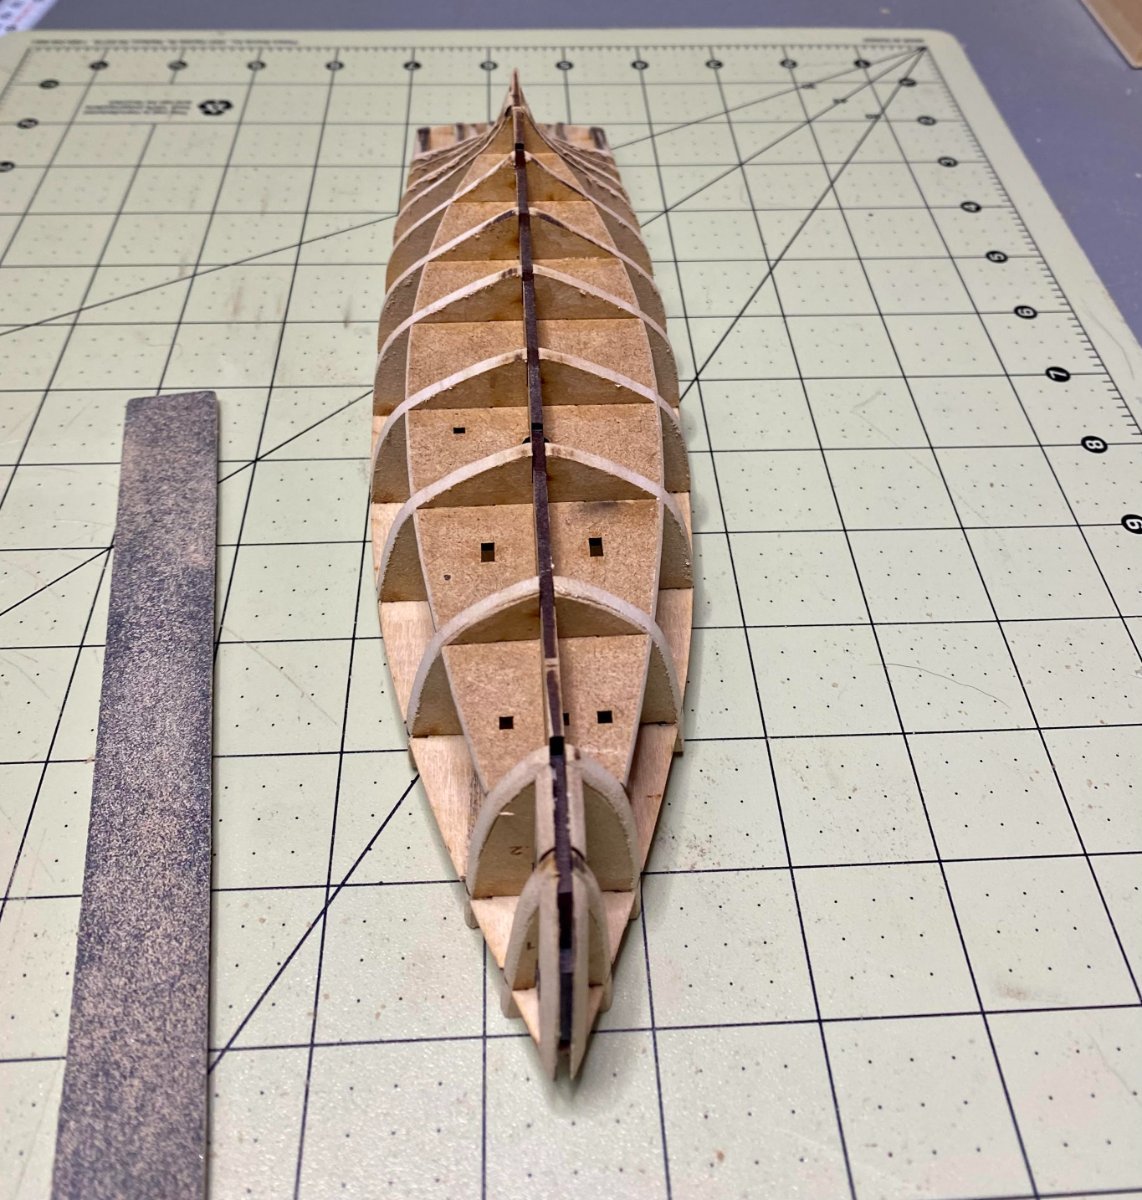
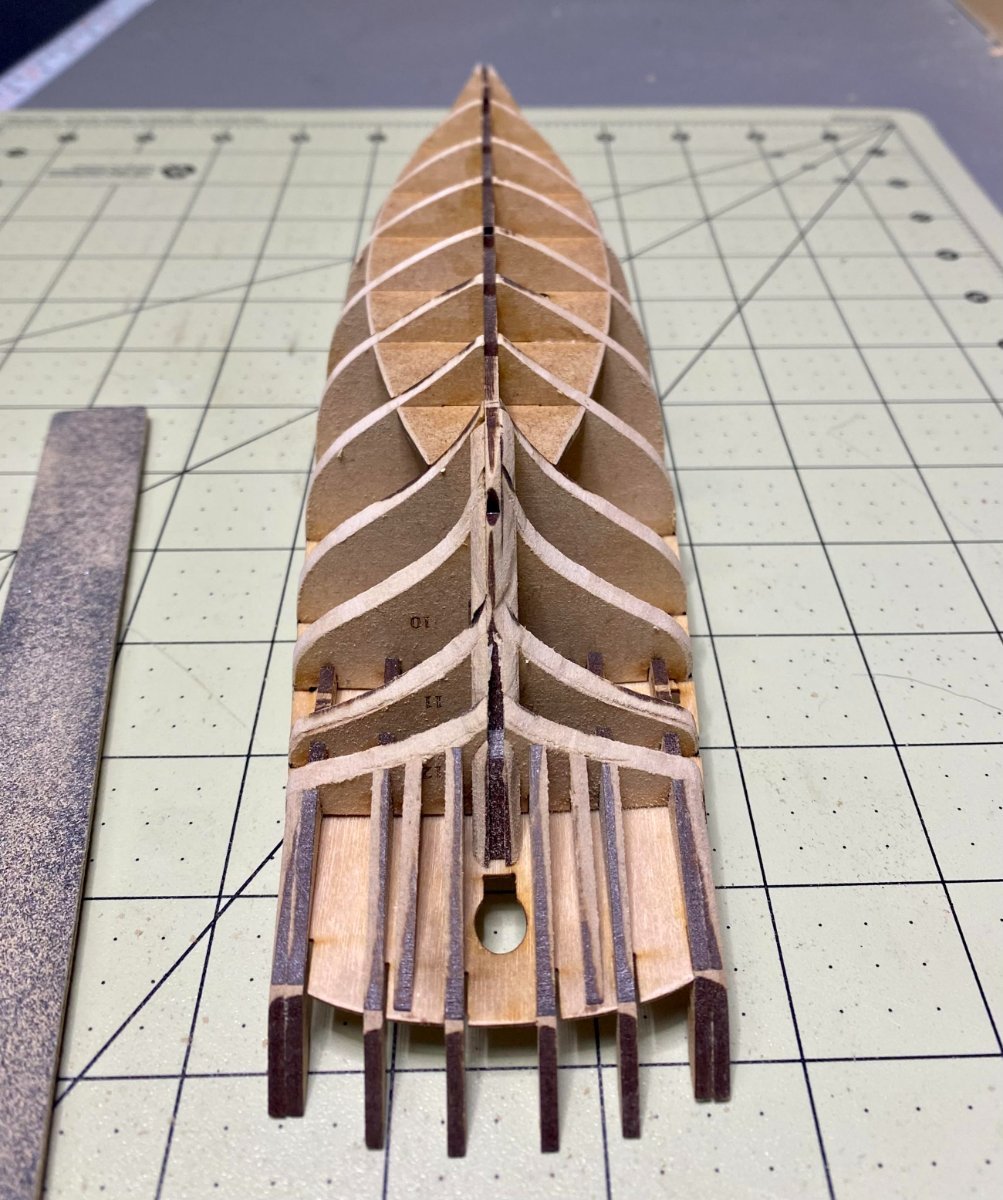
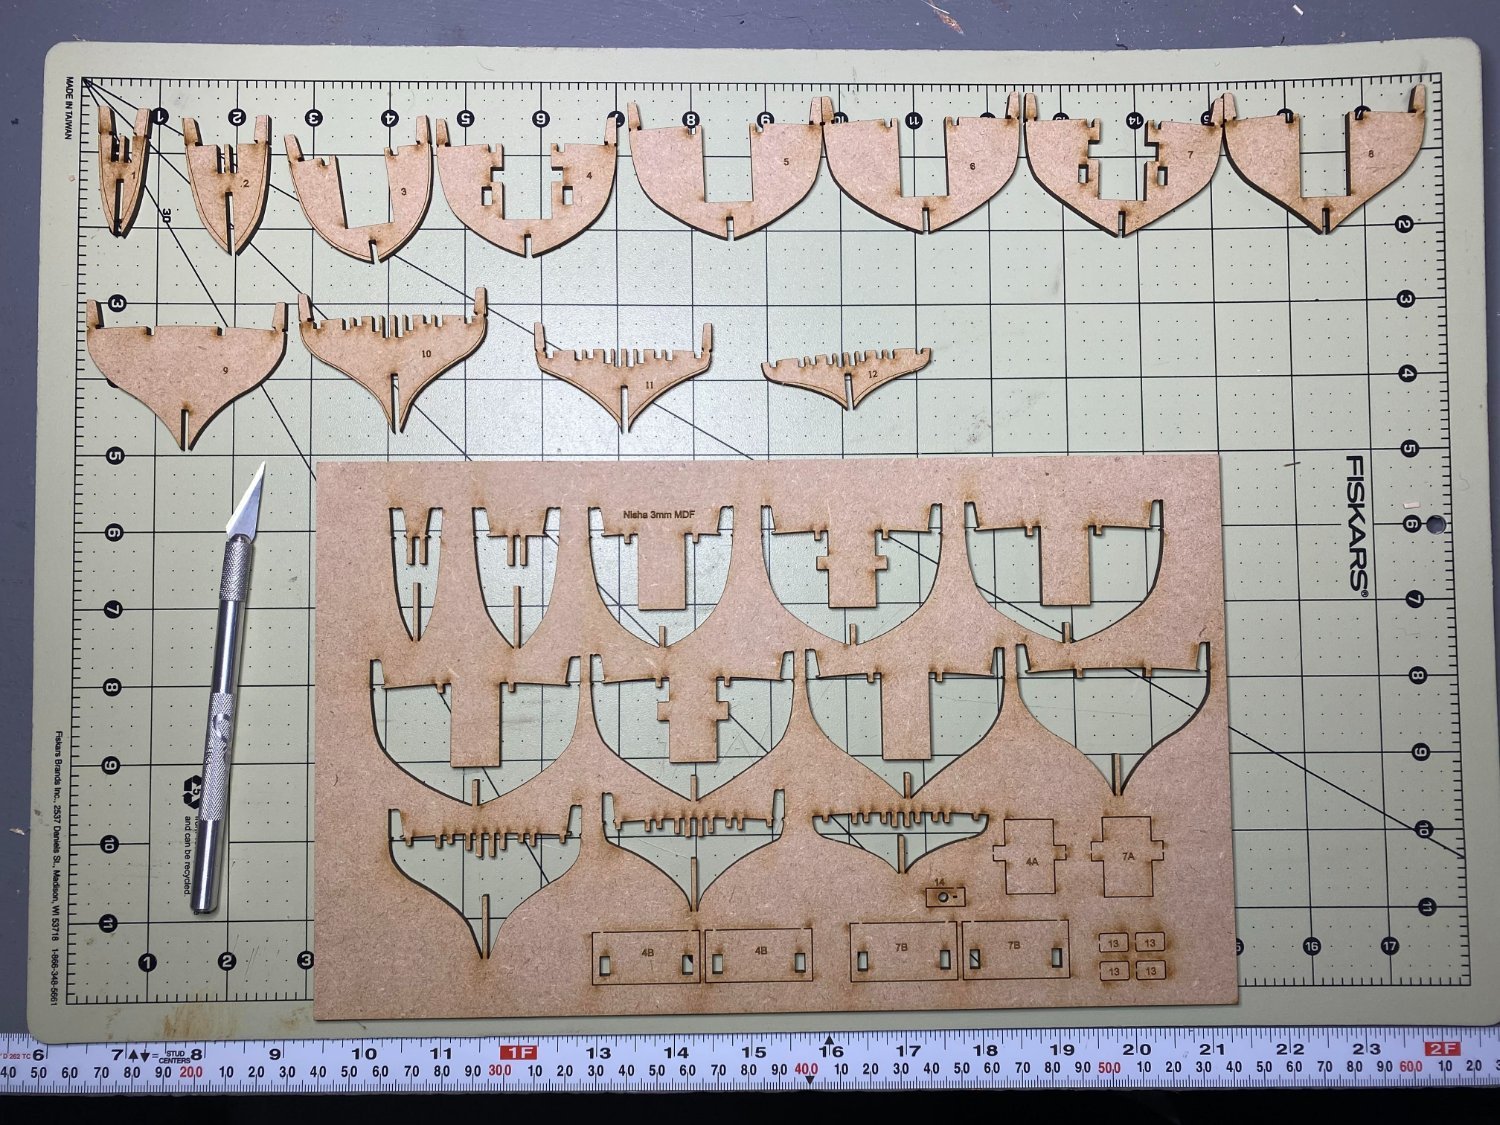
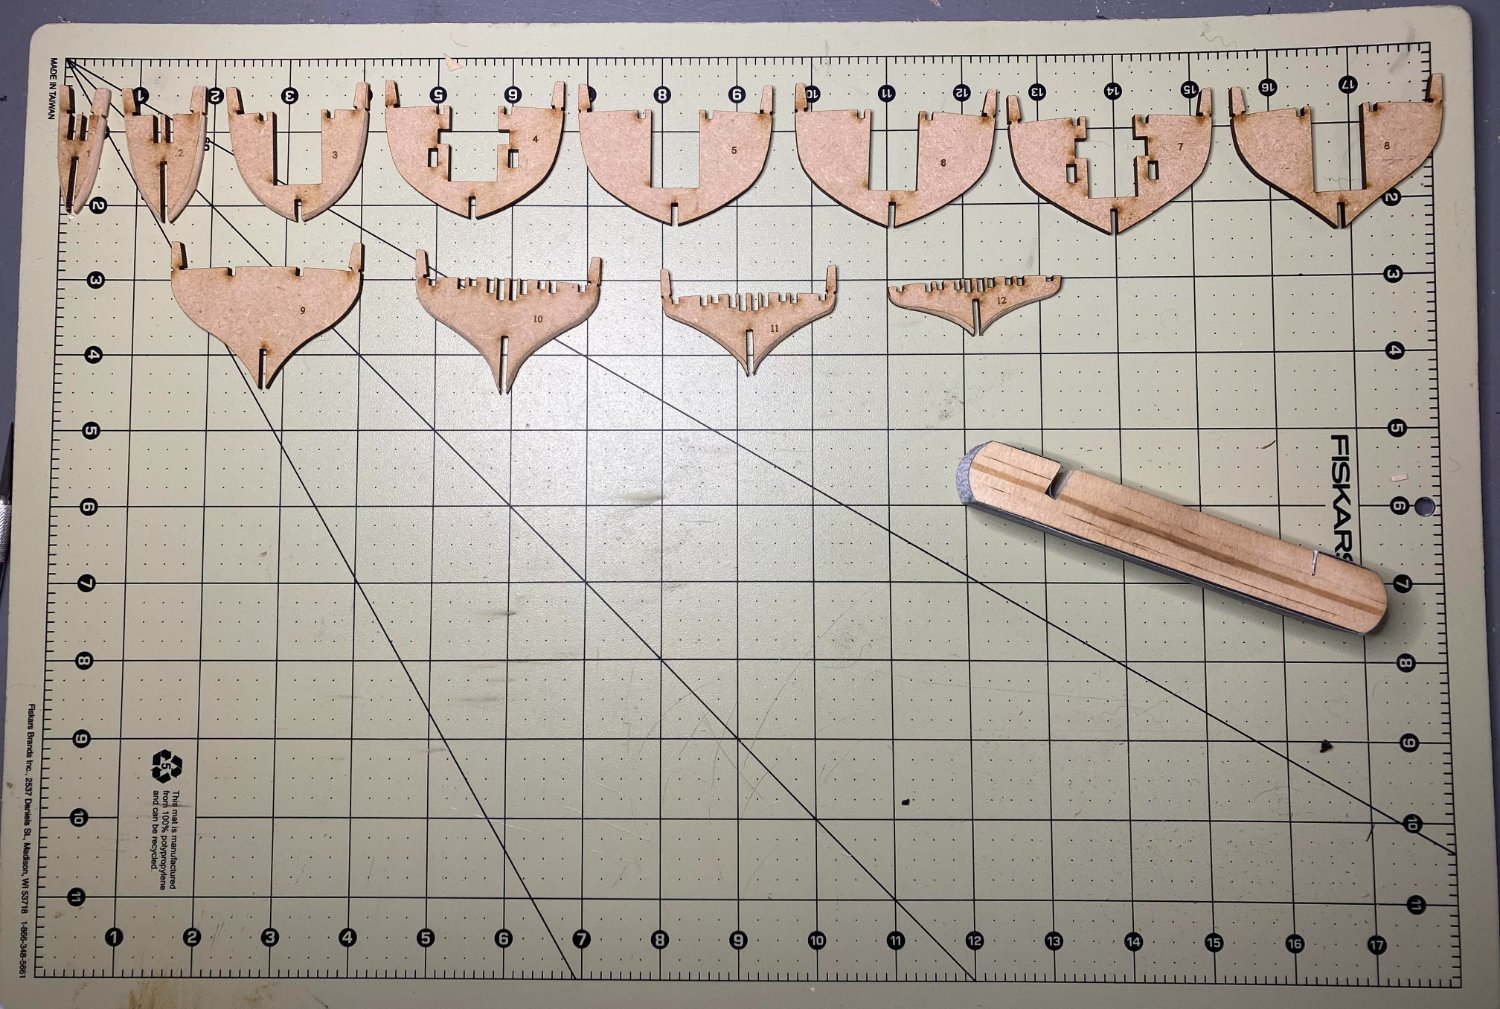
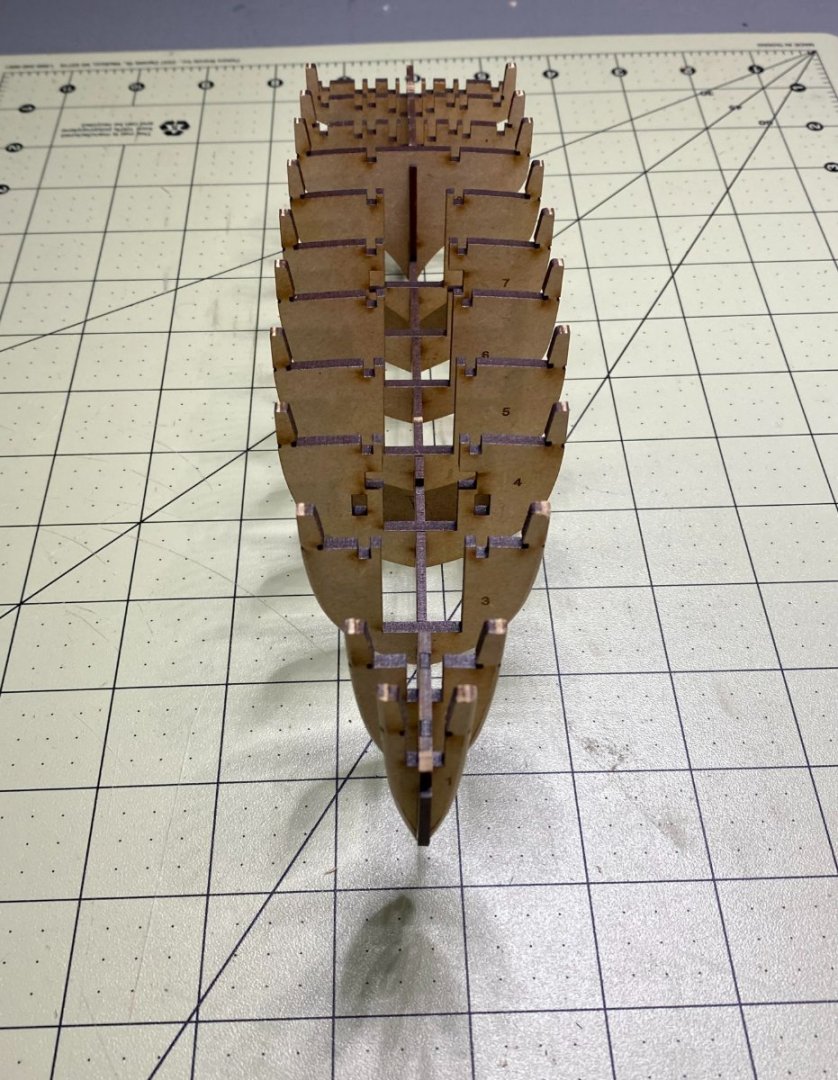
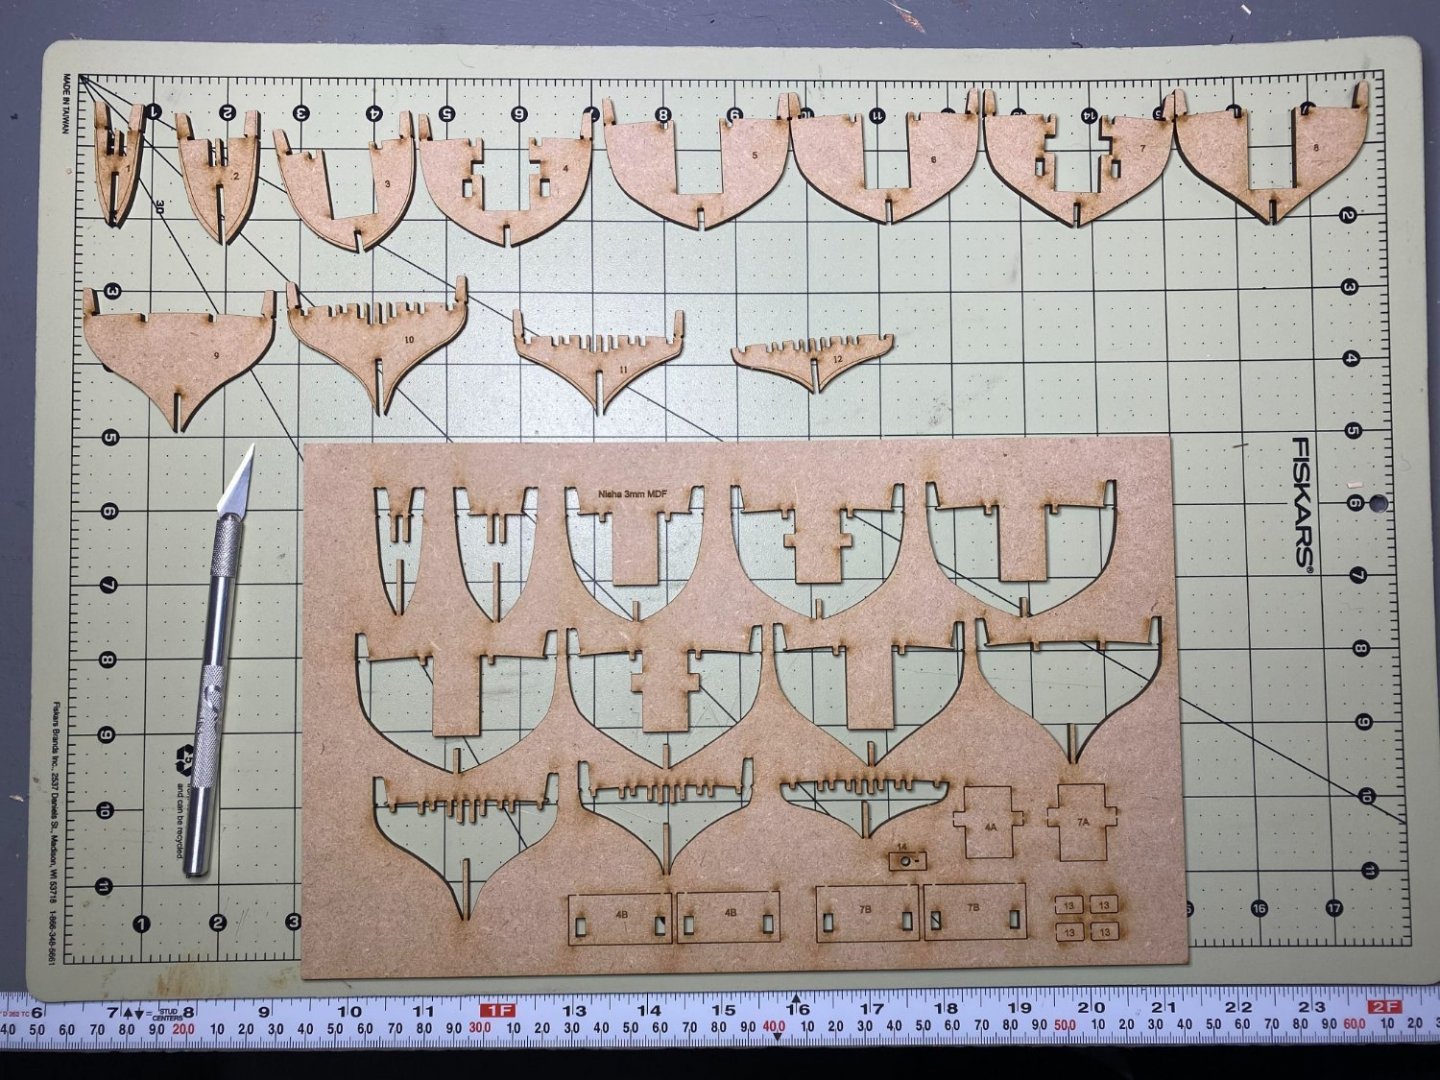
Absolutely couldn't help myself...and the moment dogs were walked, fed, and satiated with fetch in the frigid back yard...to the basement we went: Parts cut out very nicely, and to the untrained hand and eye, seem well cut. The manual said to use a Dremel at a recommended speed of 8000rpm and follow the extremely beginner friendly bevel line(s). This works great--with the caveat that less is more, and slow is smooth. After the initial shock of seeing so much material get removed, I changed to a finer grit sanding drum, and dropped the speed. I am not an 8000rpm Dremel user as of yet. We will soon find out why. Dry fit the frames, as per the instructions--which are photographed and explained extremely well. It may be the parts in the kit have been updated since the manual was published, as there appeared to either be a typo, or a part eliminated/added as the cradle #'s were not the same. Very minor issue, and even I figured it out. The rest of you will have no trouble. The discerning eye will see where in a fit of overconfidence, part "18" was gouged to the point that it will not plane out with it's mate along the stern? stem? rudder-ish area. I resolve to learn and speak properly to the parts of the Nisha. Lastly: sometimes a little bit of creativity gets the job done. No tools were harmed in the making of this photo. Photographers ego notwithstanding. Cheers, Grey


-
Thank you for the insight Allan! I have read good things about Mr. Antscherl's kits. Years back, I had a modicum of success with a Midwest? I believe it was...kit for a small lobster dinghy that lived on my bookshelf until claimed by a young nephew. Hoping to take some of that experience, and a decade or so of what is purportedly more patience into a Nisha build.
-
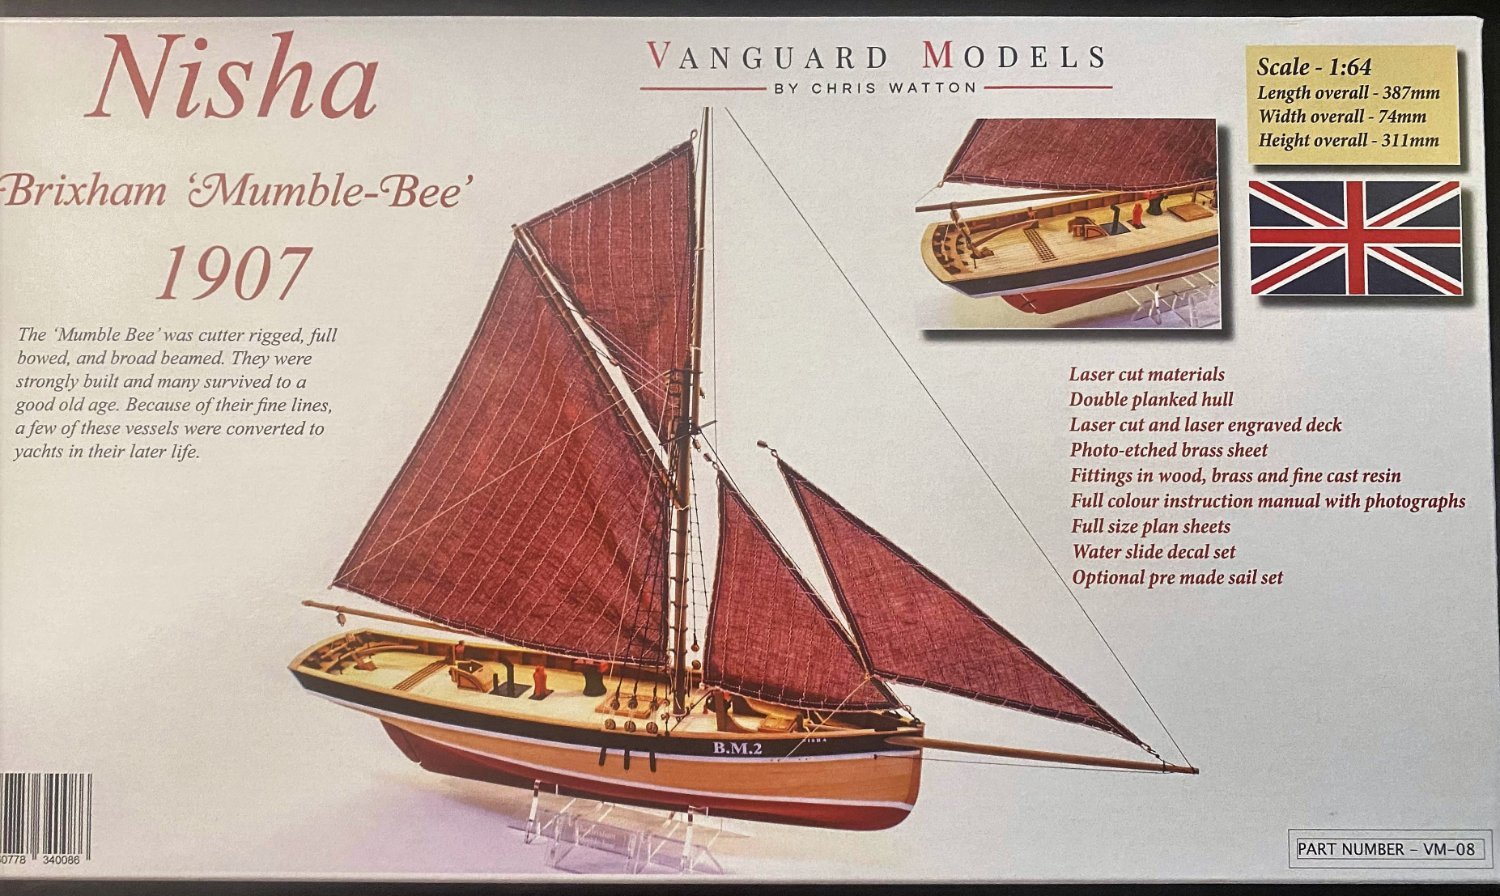
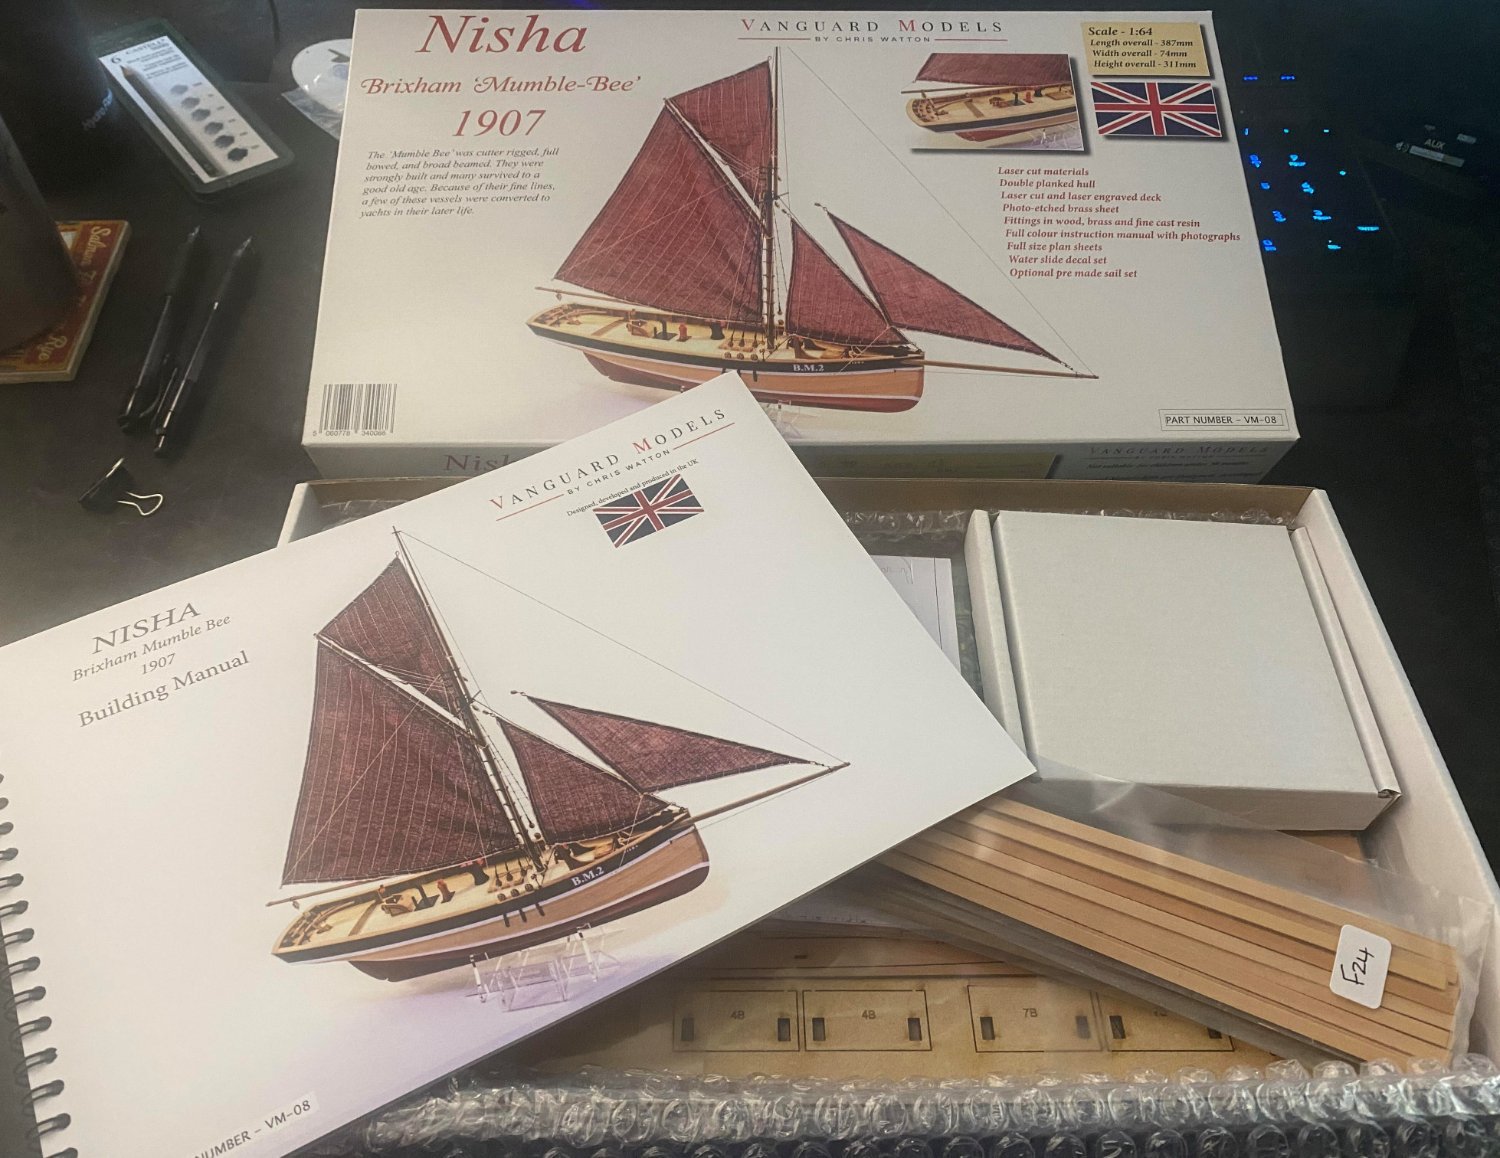
I will not delve into the unboxing too deeply, as maddeningly: The UPS delivery arrived, and I, with two meetings in my workday to go. Others have unboxed this and given their impressions with much more practiced and skilled eyes than I am capable of. @James Hand @AJohnson are two build logs that I have spent (all non-working hours, of course) time reviewing to hopefully, have some of their ability and insights find their way into my attempt at this gorgeous kit. I ordered this kit on Sunday, and it is early afternoon on Wednesday and the Nisha made it's way to me in the current deep freeze in the Midwest US. Incredible speed, really. The box was well protected in a solid outer cardboard box/covering that was well sealed. My initial impressions are that I have made a good choice, as the quality of the manual, plans, and box contents are apparent. Every part and piece is sealed in a labeled bag that was covered top, bottom and sides with a layer of bubble wrap. I have to admit a bit of surprise as to the diminutive size of her for a beginner kit--despite knowing the dimensions prior to ordering. I can also tell you that in my excitement and haste to get Nisha headed my way, I made a mistake not ordering the sails with her. I can tell already I will want to add that to this build in order to work on my sail-making skills. More pointedly: my lack thereof. Very excited to give this kit from Vanguard my level best. It is a well put together kit of a beautiful little working craft, which is pleasing to the eye in photos alone. Having it 'come to life' on my work bench will only enhance it's beauty in my eyes. Work/chores cannot end soon enough. Cheers, Grey


-
Thank you! Following your log 😃 I am hoping it's not too small...my sausage fingers will muck that up in no time...
-
Thank you one and all! I really appreciate it, and from my perusal of soooo many topics: not surprising in the least. You all have a kind, helpful, and knowledgeable community. I am beyond excited that I shall soon be in receipt of the Nisha from Vanguard, and look forward to starting a build log. I know that it will be critical in keeping me on the straight and narrow as I attempt to do justice to that beautiful little kit. Cheers!
-
I am definitely drawn to working boats--and as I spent time in Wales in college, I chose the Vanguard kit: Nisha. It's on it's way! I will most definitely start a build log, and I'm looking forward, and encouraged by the reviews of the quality of Vanguard's kit. The manual that I've been reading--seems definitely geared toward something I can feasibly accomplish with satisfactory results. I feel I messed up, and was too eager to get it on its way, and didn't get the sails. I may regret that--or choose to get the coming before I get too far. Very excited to get started. UPS is claiming a crazy fast time to my door from England...but we shall see. In the meantime, I'm cautiously labeling and cleaning up Endurance parts. 😃
-
Was a lot of fun to share the build w/ my nephew when and how we could from afar. The scale and detail is really impressive.
-
Thank you both for the kind welcome. Allan: I’ve been reading for days, and have yet to discover even the tip of this collective iceberg of knowledge. It’s fascinating. I have a couple of Occre kits, one was a gift, the other pure impulse/hubris. Even as an “entry” kit, it is currently out of my skill set’s reach. I am looking at perhaps a Vanguard kit, as reading through the manual of the ‘Nisha’ it is certainly one of the more beginner friendly manuals I have seen. In the meantime I am happily reading, absorbing, refining my shop, and enjoying others’ work
-
HakeZou, Lovely work on this. I have perused this log quite a bit, and have a hearty appreciation for your candor where your experience was challenged. I am squarely in that boat, but likely a boat much farther back than yours. I have this kit waiting, and have identified places where I will reference this log in order to avoid pitfalls, as well as enhance the model where my in-experience will allow. It may be a bit optimistic for me to think I can tackle it now, but your can-do attitude to work through problems and challenges is inspiring. I also appreciate the various links and historical information as this expedition and ship has, like you, fascinated me from an early age. You're cheating with your profession and historian's tenacity 😃 A lovely finished Endurance, and thank you so much for sharing your own expedition with her.
-
Hello! Thank you all for contributing to this absolute treasure trove of information. Perusing the forum with the myriad builds, techniques, skill, and charm is near enough to be a hobby in and of itself. I come back to attempting ship modeling after at least 12 years. Life has a way of happening, and there have been quite a few location changes due to both myself and my wife's careers. But! I think we have finally landed somewhere reasonably permanent. My interest has never waned in most things nautical, and a Zoom/Skype distance build of the LEGO Titanic (of all things) with my nephew this year has been the proverbial straw--and the space in the basement needed to be cleaned up. The shipyard is humble, but is still above what my skill level can accommodate. I find myself drawn to working vessels (whalers, fishing, tugs, etc.) for reasons unknown to me, but apparently not my eye. That's more than enough for now I think--my time is much better spent learning and reading from the incredible build logs and other information here. Thank you again, and I look forward to seeing more from all of you--and eventually: sharing some of my own. Cheers, Grey