
Valkyrja68
-
Posts
67 -
Joined
-
Last visited
Content Type
Profiles
Forums
Gallery
Events
Everything posted by Valkyrja68
-
I'll also add this wonderful and kind of funny email from Larry Ward of USSCMSG who confirms that I am the captain and may do as I see fit 😂👍🏽: Hi Adrienne, You have delved into a fascinating and confusing subject about which scant information is available, i.e. what did early frigates look like? And since all serious model builders are hyper about details, you have plenty of company. As to the colors used on USN sailing ships, in the first place the color scheme was determined by the Captain. And each Captain had his own preference, And each ship had several different Captains. And there were hundreds of ships, large and small. So, there are a thousand different possibilities. Which infers no matter what you decide, your chances of being correct are very positive in as much as there must have been at least one Captain who agreed with you. So, you as the builder are right, and no one can say you are wrong. Black hull, White gun stripe, Brown hull, Ochre gun stripe, whatever you like, you are the Captain. Prehistoric Ochre was a favorite color of the early cave men who used it to decorate their caves. Lord Nelson wasn't that old, but Ochre was also his favorite color, for his ship, the HMS Victory, which was painted Black hull and Ochre gun stripes. Soon all the British ships were painted the same as Nelson's ship because the Captains wanted to emulate their boss. (Good career move kind of thing). In the beginning the Constitution sometimes used the same scheme, depending on the Captain's preferences. But so as not to be confused with a British ship, the White gun strip became the most popular color for the gun stripe. It used to drive the constructors nuts, but the Captains preference also ruled the number and size of the guns aboard the Constitution. And the design features were also subject to what the Captain wanted, For instance sometimes the waist was open and with another Captain it was closed.
- 35 replies
-
- 4
-

-
- Constitution
- Revell
- (and 1 more)
-
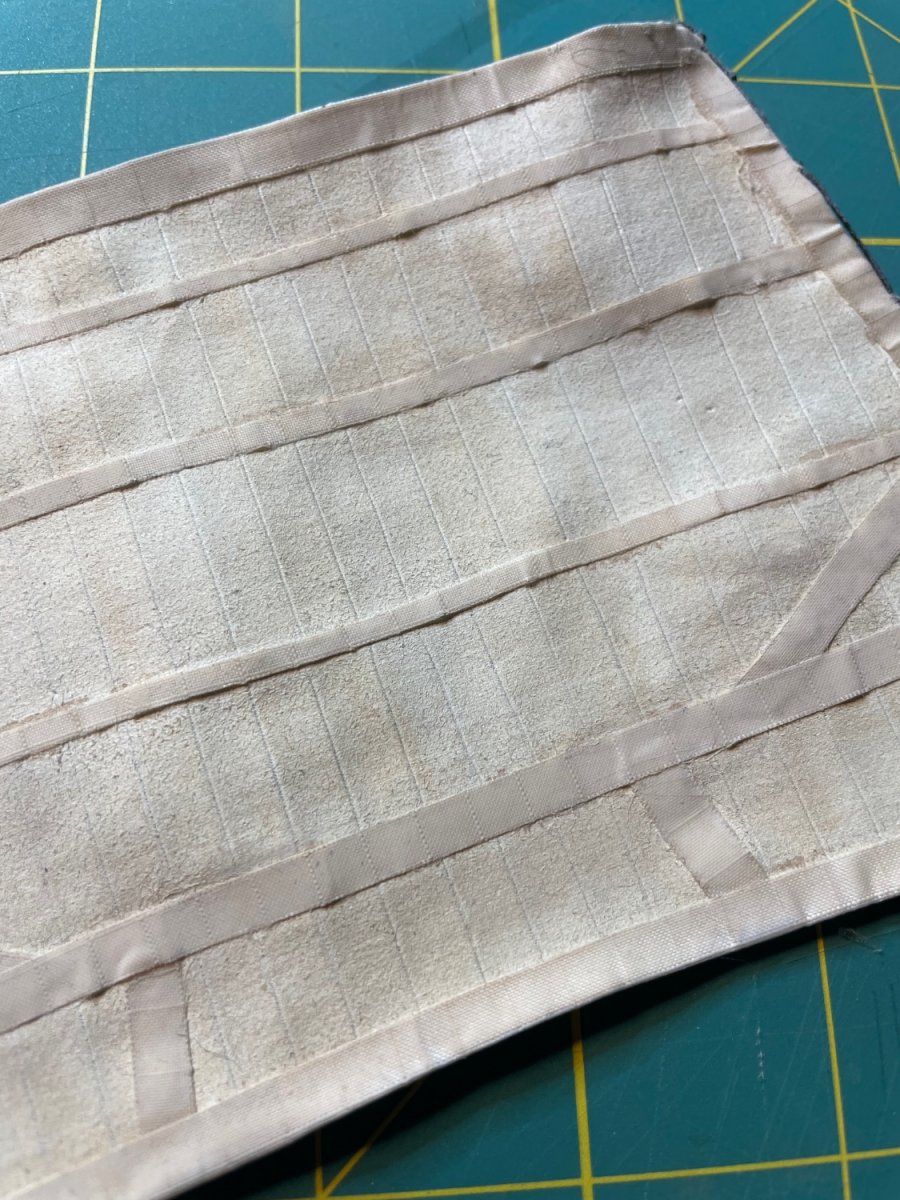
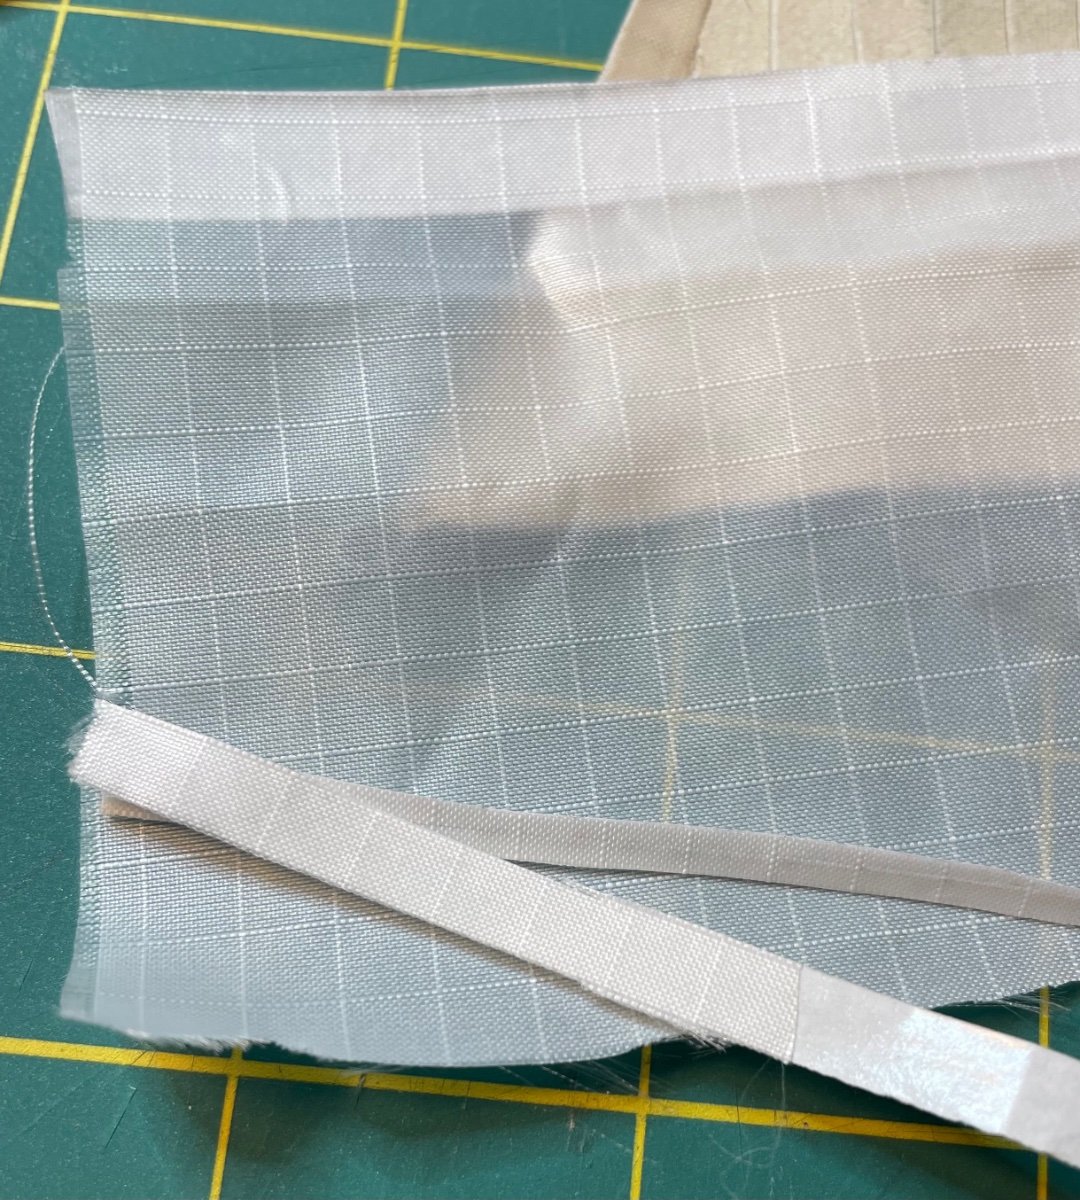
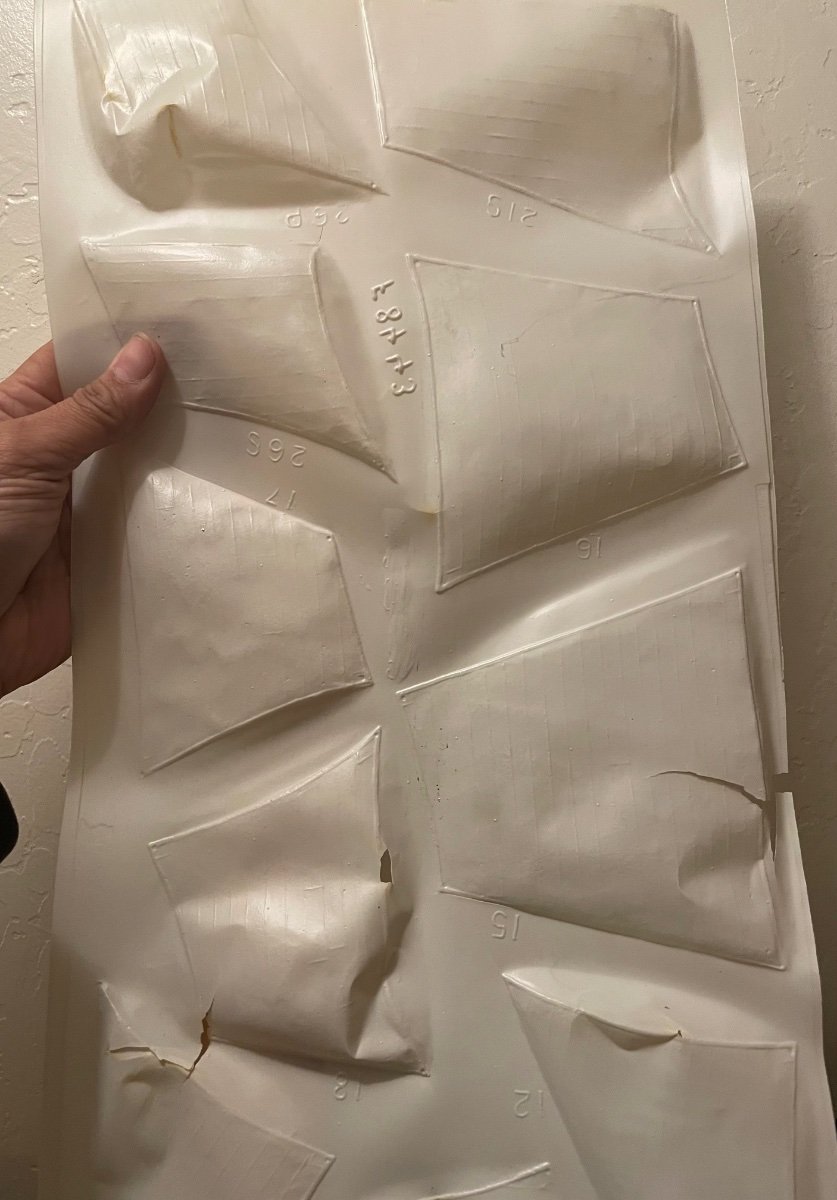
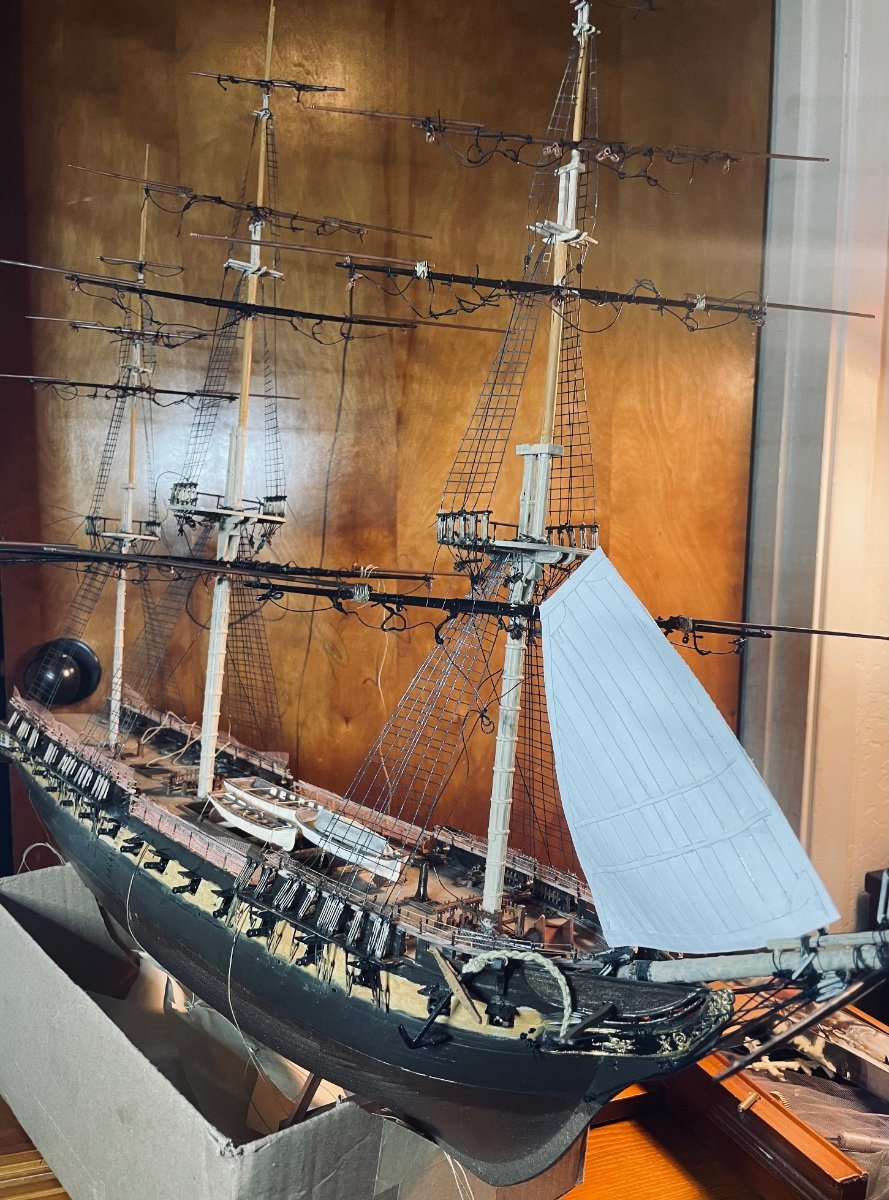
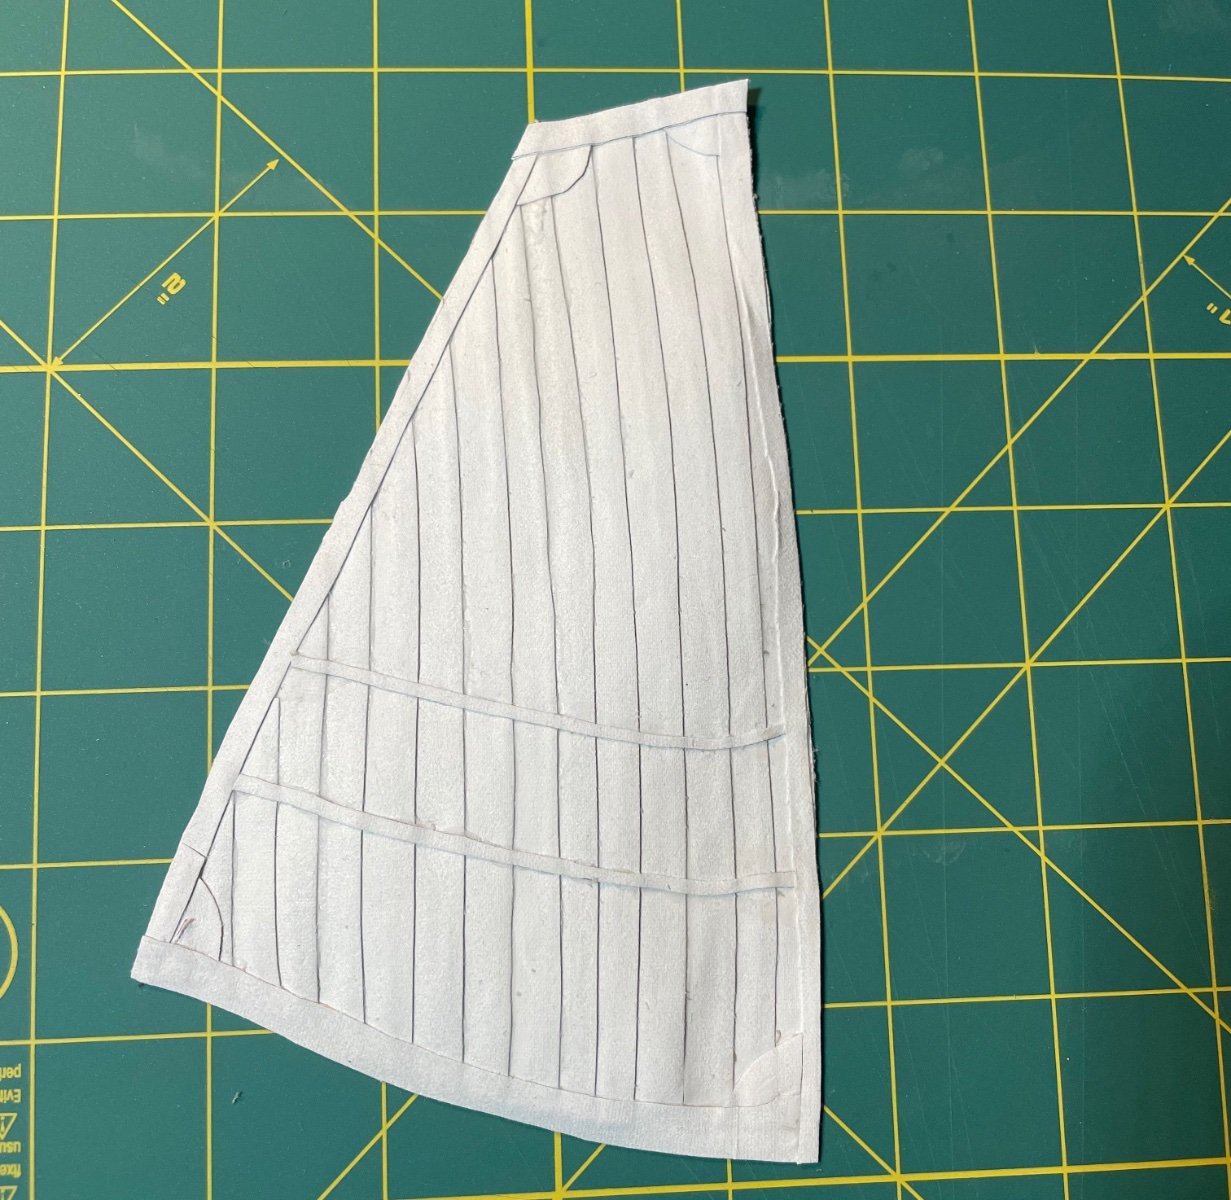
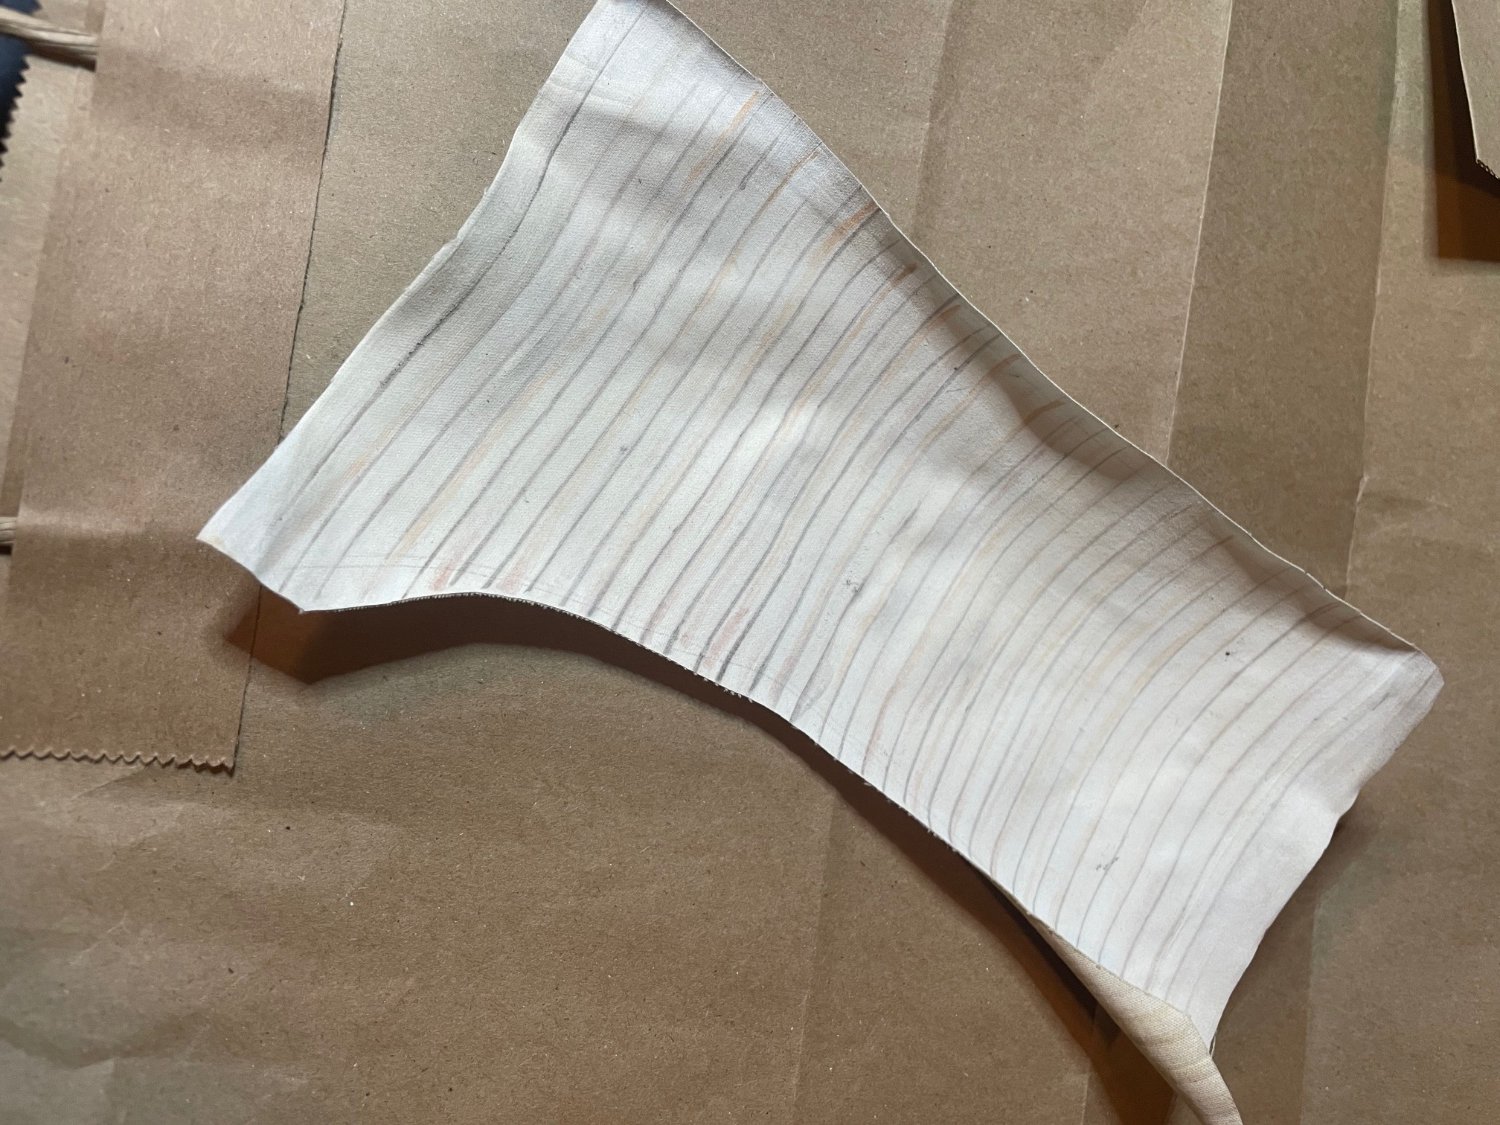
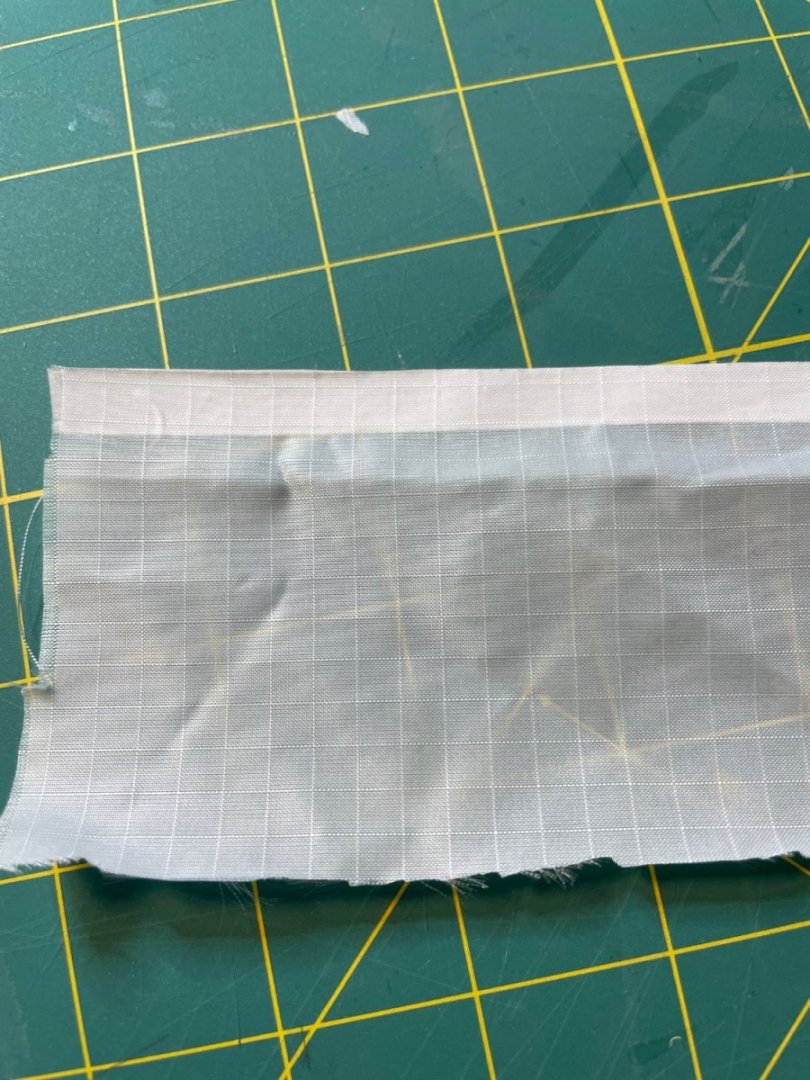
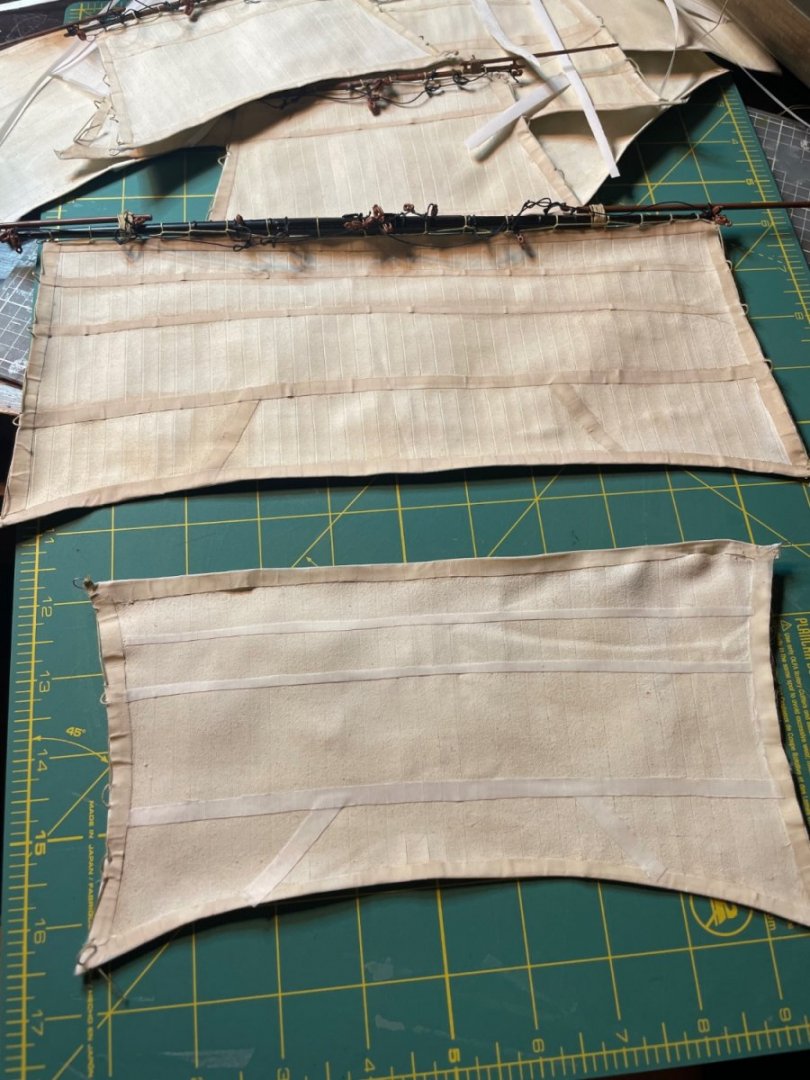
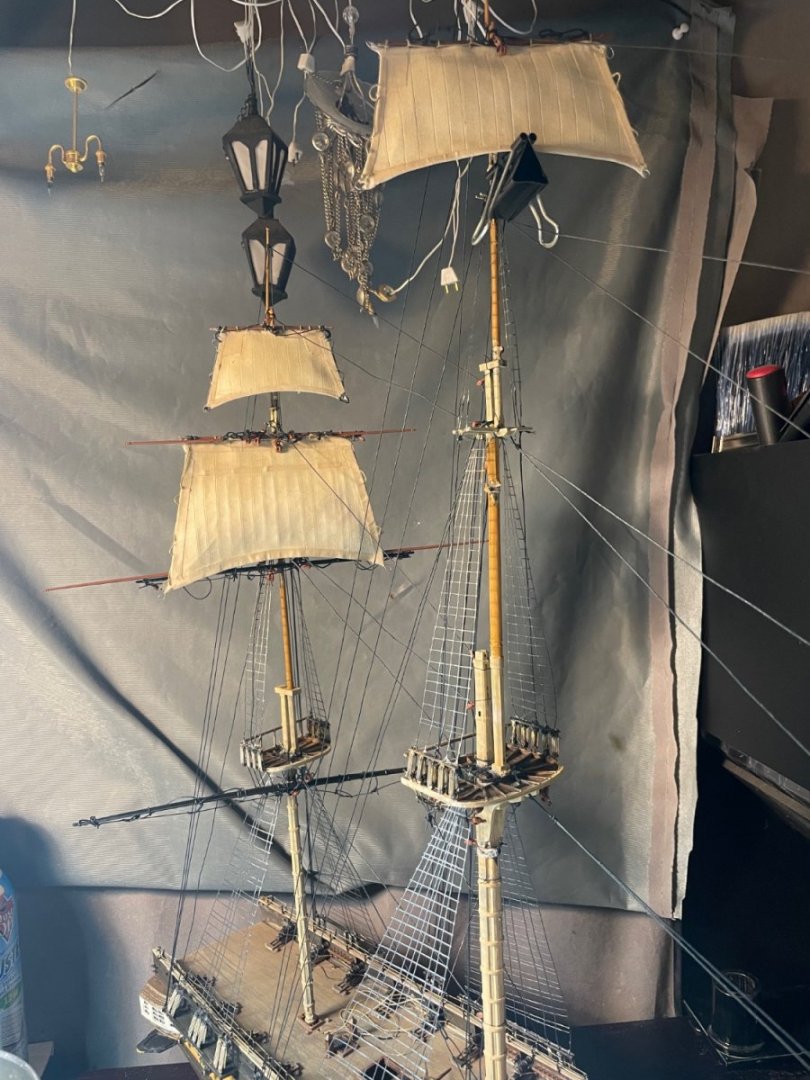
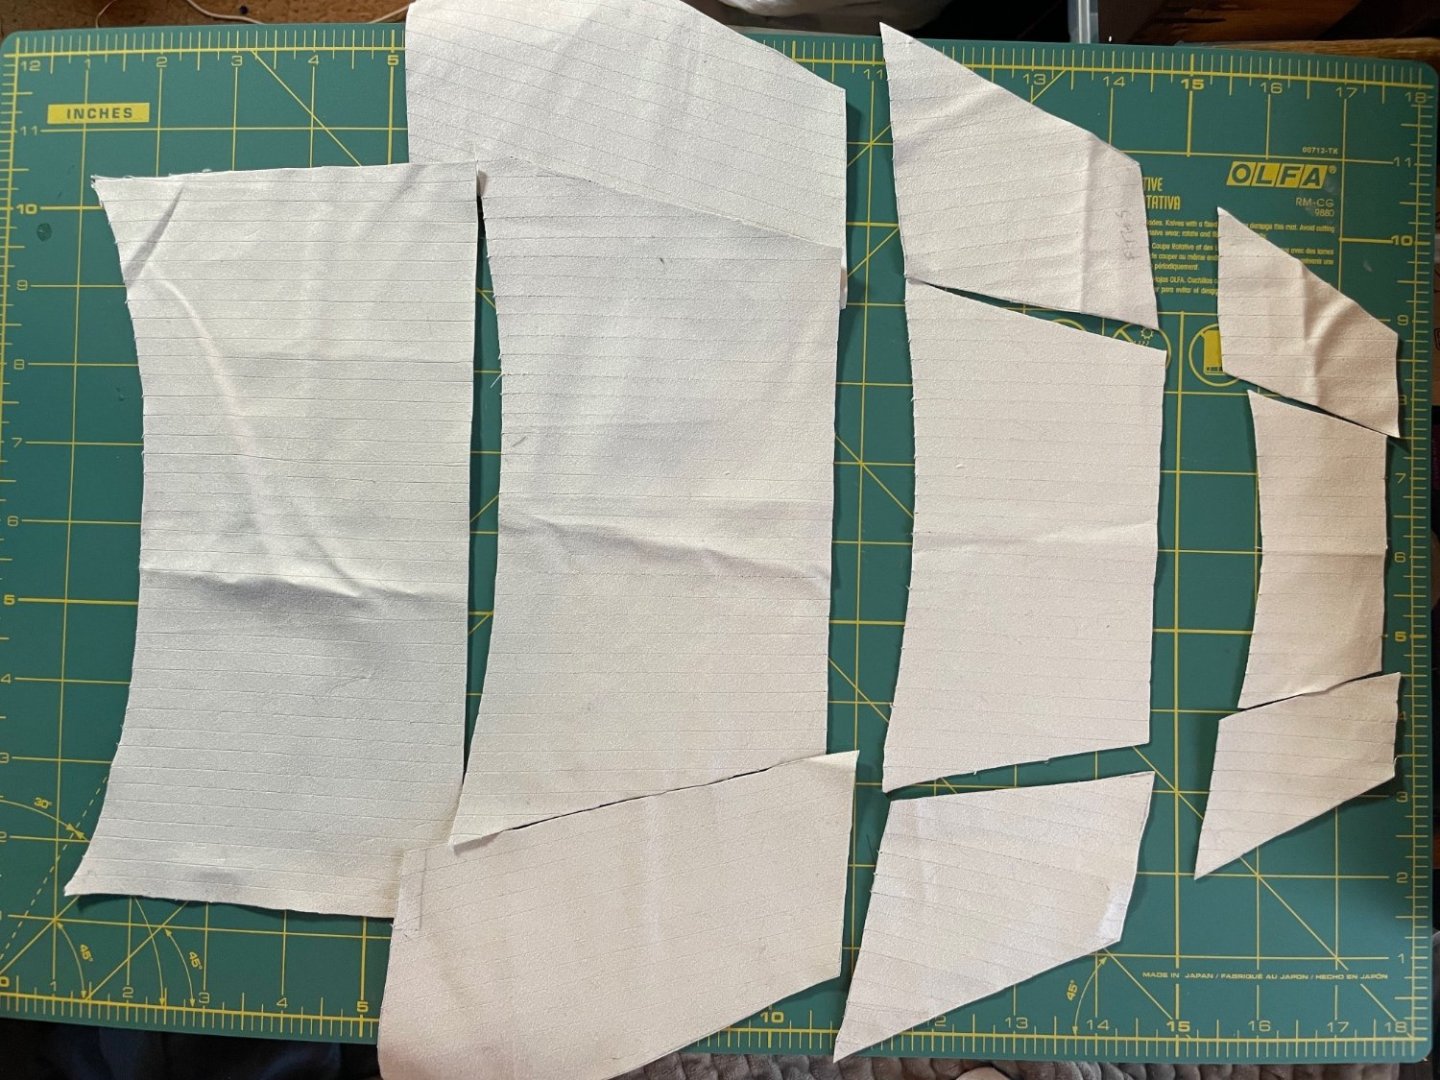
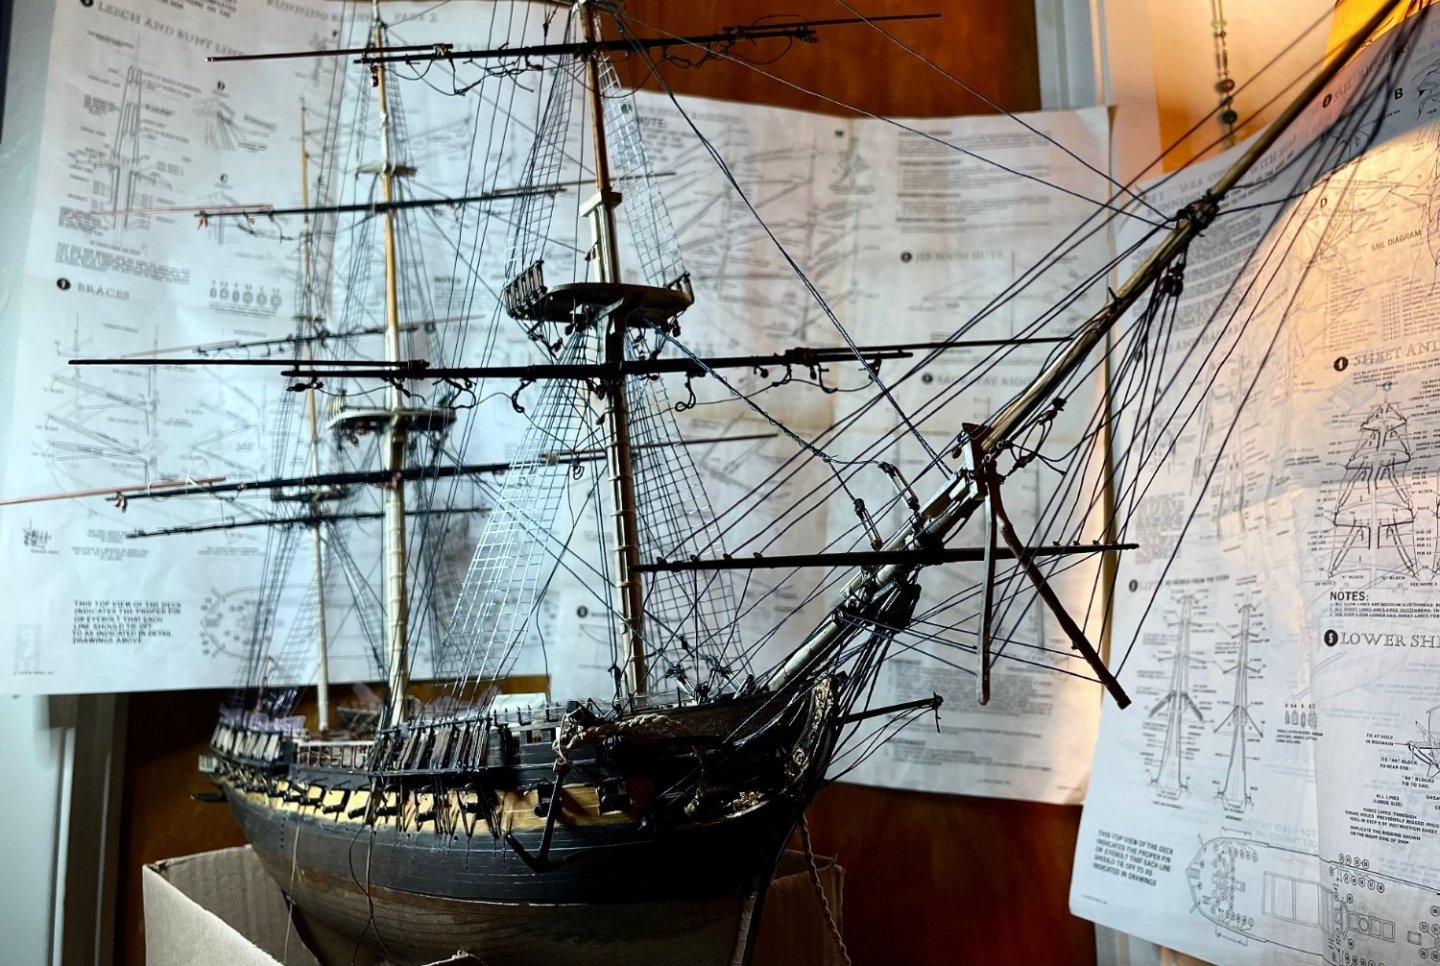
Captains log: After cutting my sails and scoring my "seam lines" I found the same blackout material too thick to look natural as tabling and reef bands, so I opted for my sheer ripstop material. Glue was inadequate, messy and affected my paint so I used strong archival double sided tape and cut my strips from that. Then I used rabbit skin glue to stiffen and shape my sails. Below, the ripstop with two strips of double sided tape. This also made it possible to avoid shredding and cut very precise small strips. It was then necessary to paint them separately as they were very white. The addition of rabbit skin glue was a wise choice if I do say so, the sails hold shape and can be reshaped well. The only downside was it affected my double stick tape creating a ripple I dislike. In the future I will add the reefing and tabling after as in the above photo. Here is the beginning of the final haul to port, which has taken me enormous amounts of time and figuring as I navigate how to best approach attaching and rigging the full sails. An invaluable resource to me in doing this is The Young Sea Officer's Sheet Anchor; Or, A Key to the Leading of Rigging, and to Practical Seamanship. A free Google book written in 1853, surprisingly easy to follow, and chock full of nautical skill.


- 35 replies
-
- 5
-
-
- Constitution
- Revell
- (and 1 more)
-
@ah100m Very nice!
-
DMC Cotton
Valkyrja68 replied to Wacom's topic in Rope Making/Ropewalks's Discussions about Rope Making
Anchor is a comparable thread Also try Cosmo from Japan and Aurifloss. -
So for those of you who make sails, how do you tackle the cringles and clews? I thought to just leave loops of thread out as I'm gluing/threading and reinforcing but I'm struggling with look vs scale as always. Do you use thin wire? Waxed thread? Superglued thread for stiffness? Do you go all the way around your sails? Or does the scale not necessitate having them visible at all? Any Suggestions and examples appreciated. My USS Constitution is 1/96. Thanks!
-
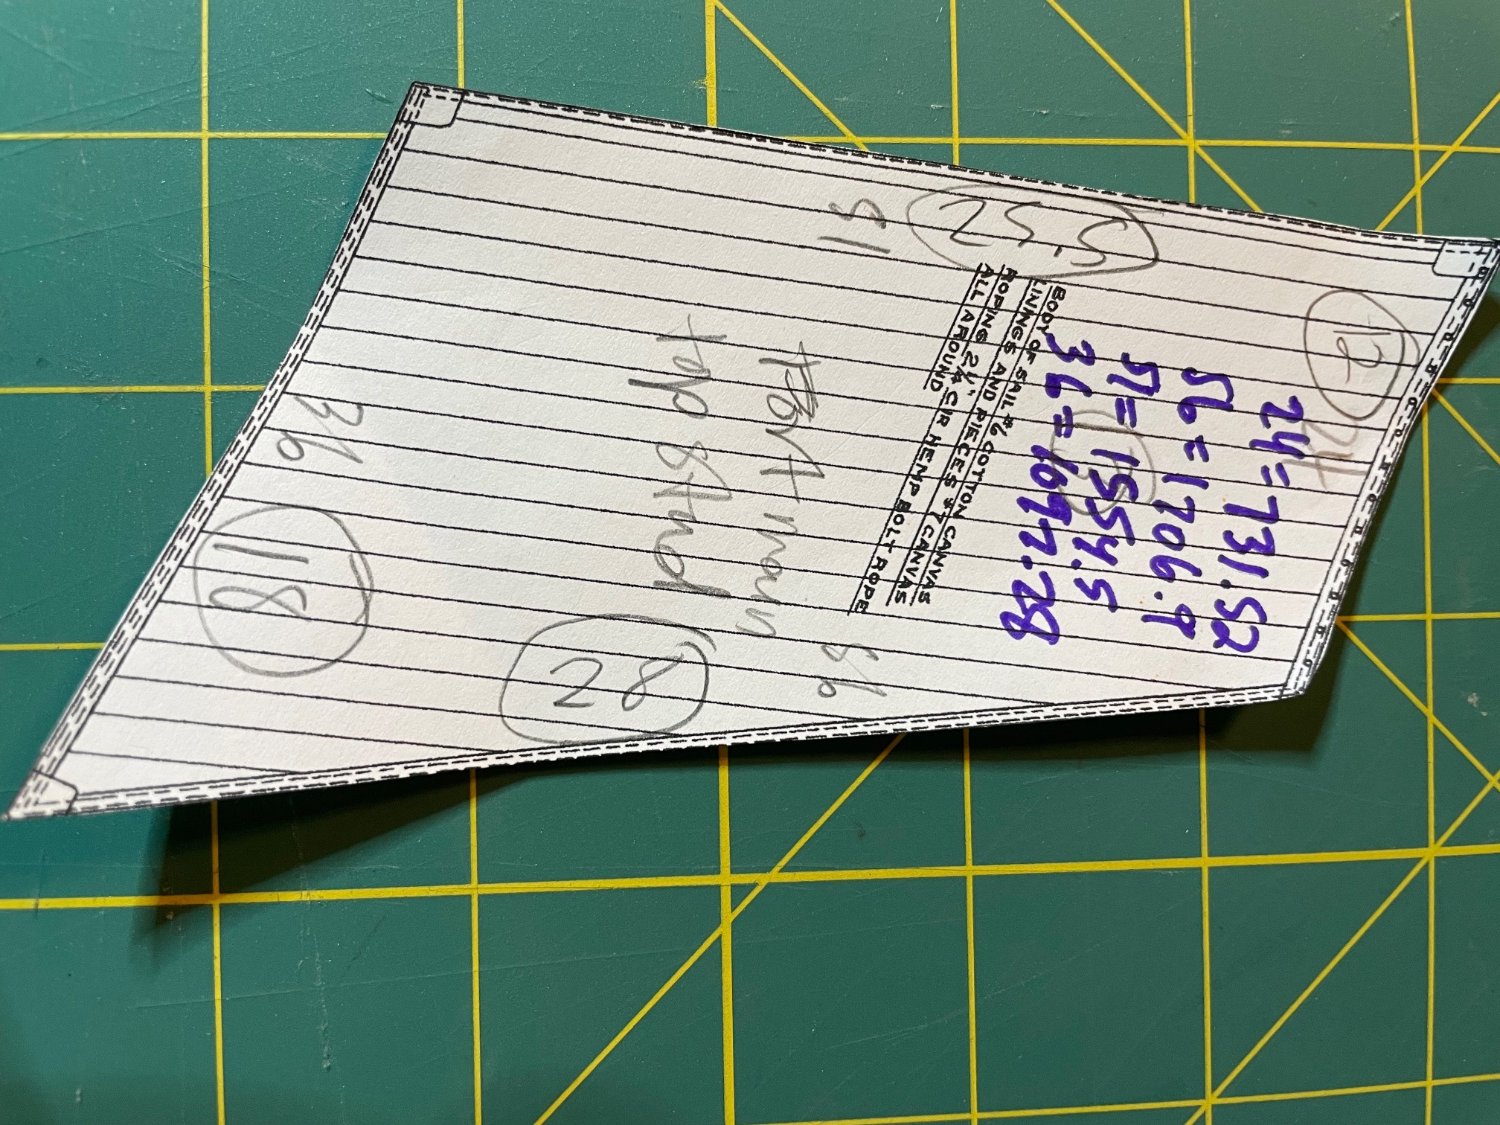
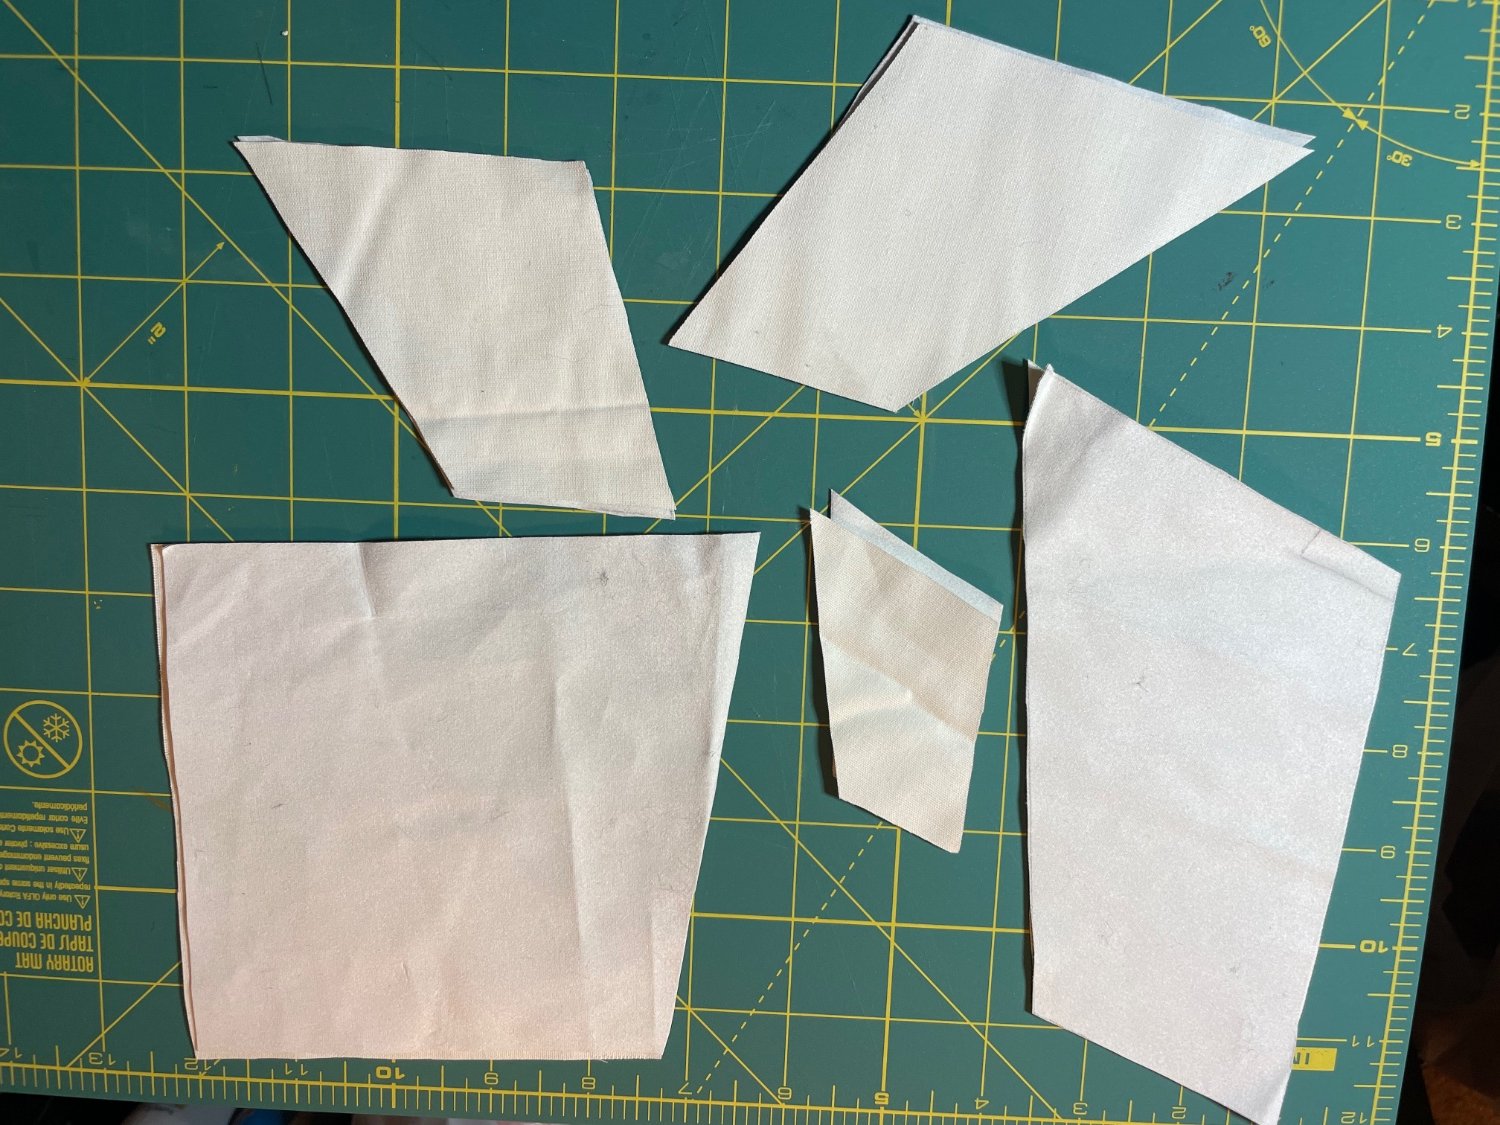
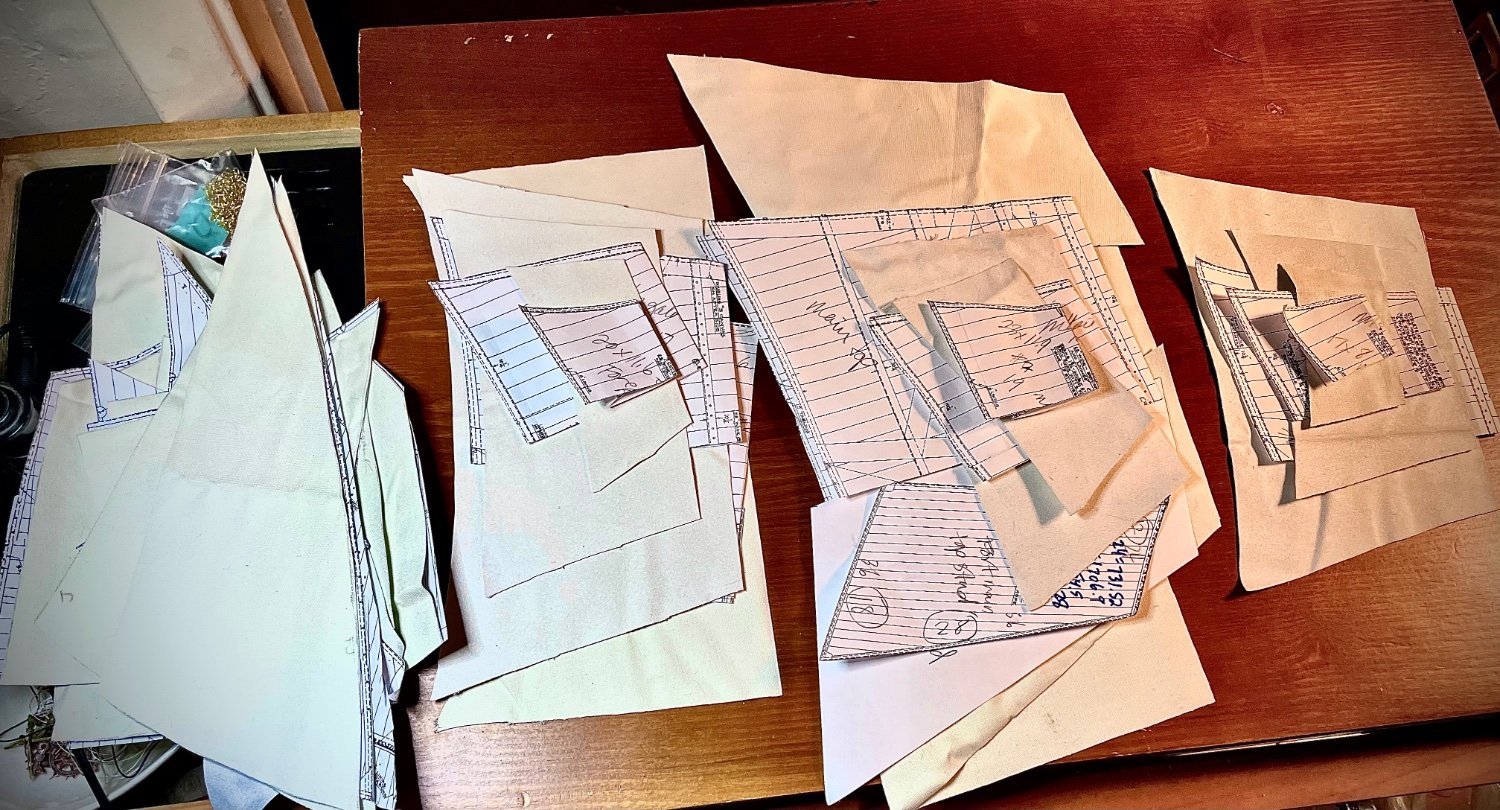
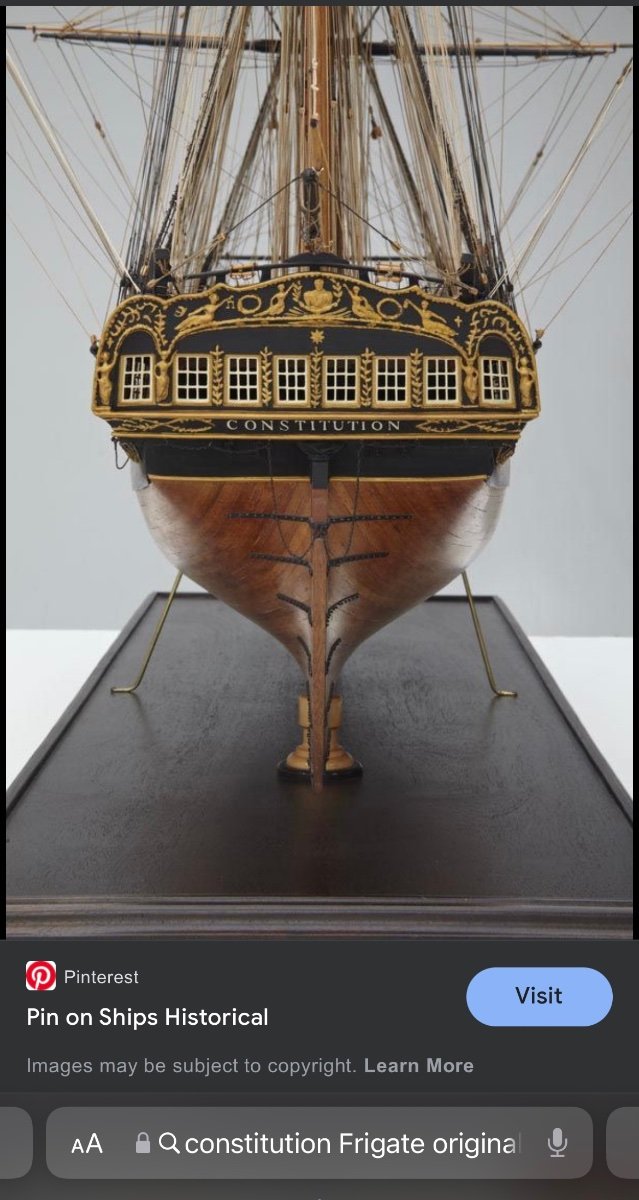
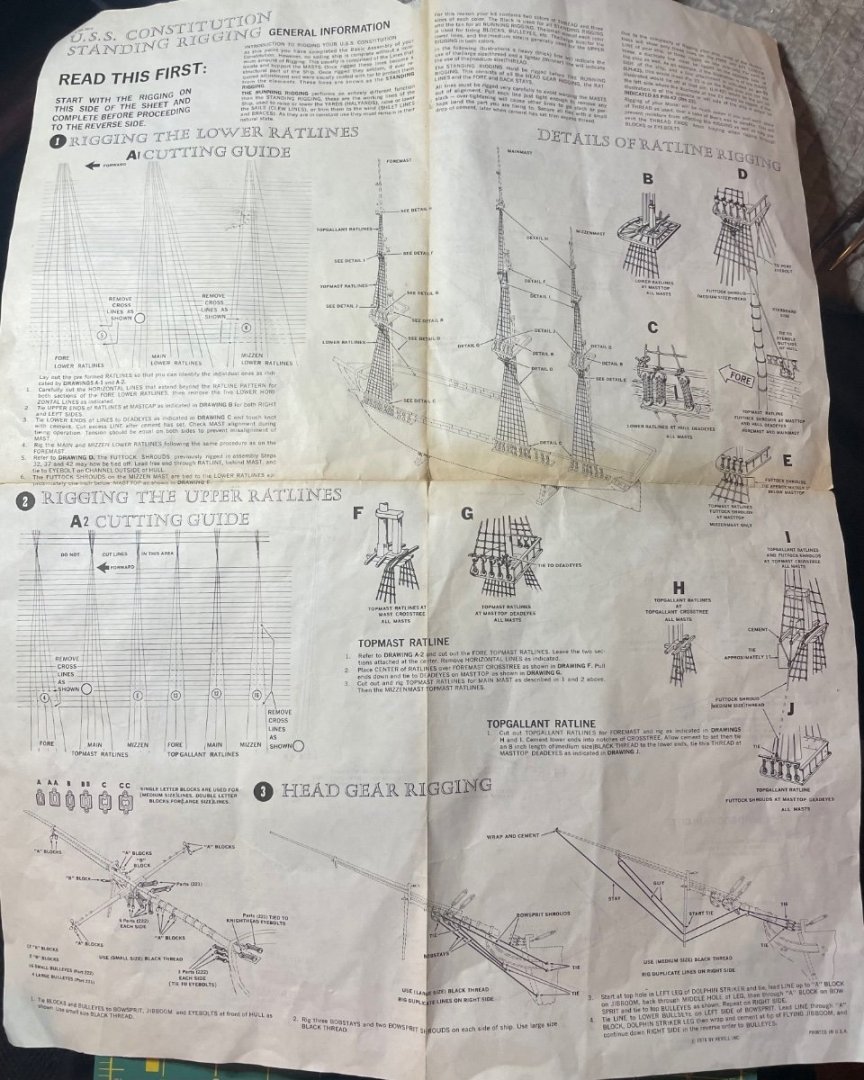
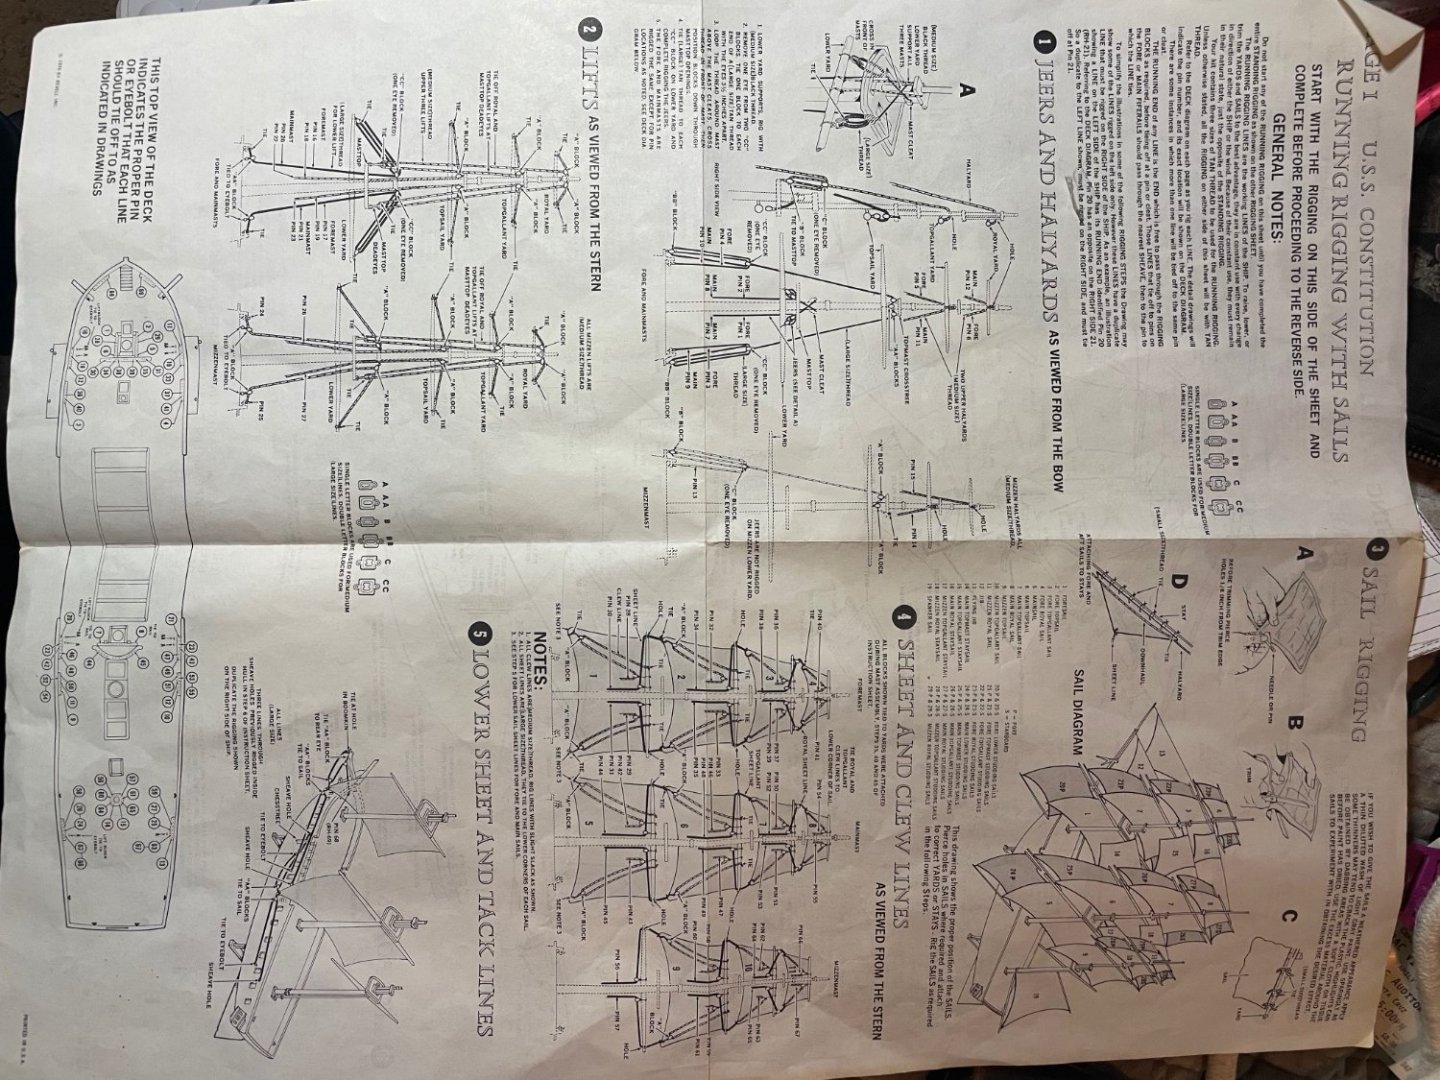
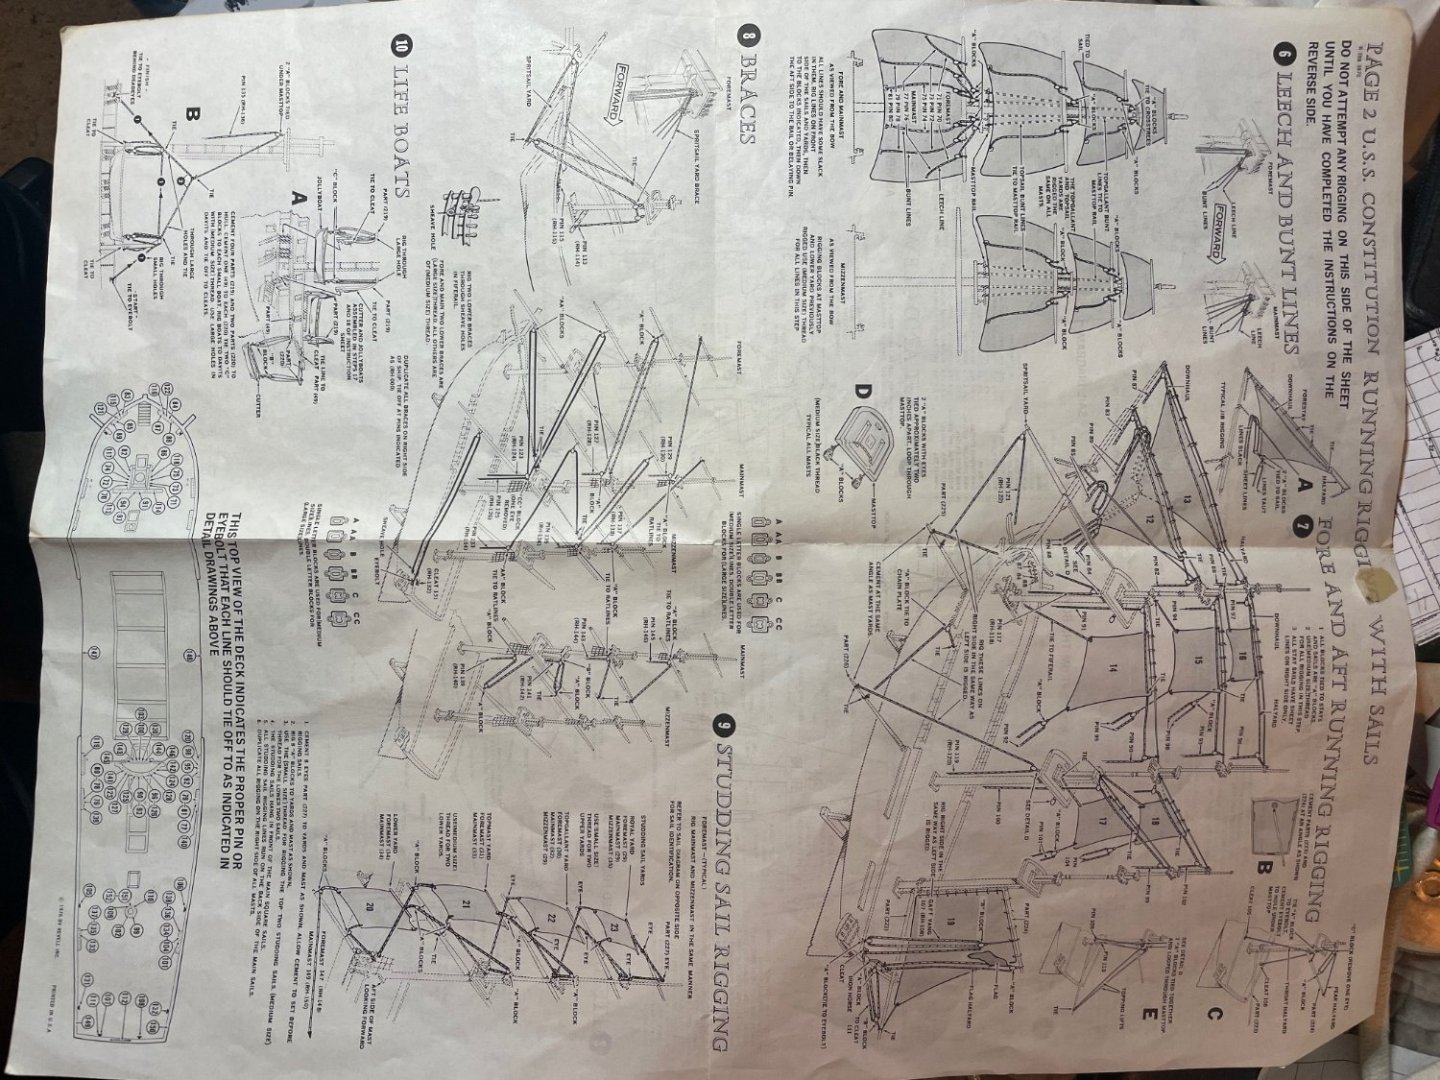
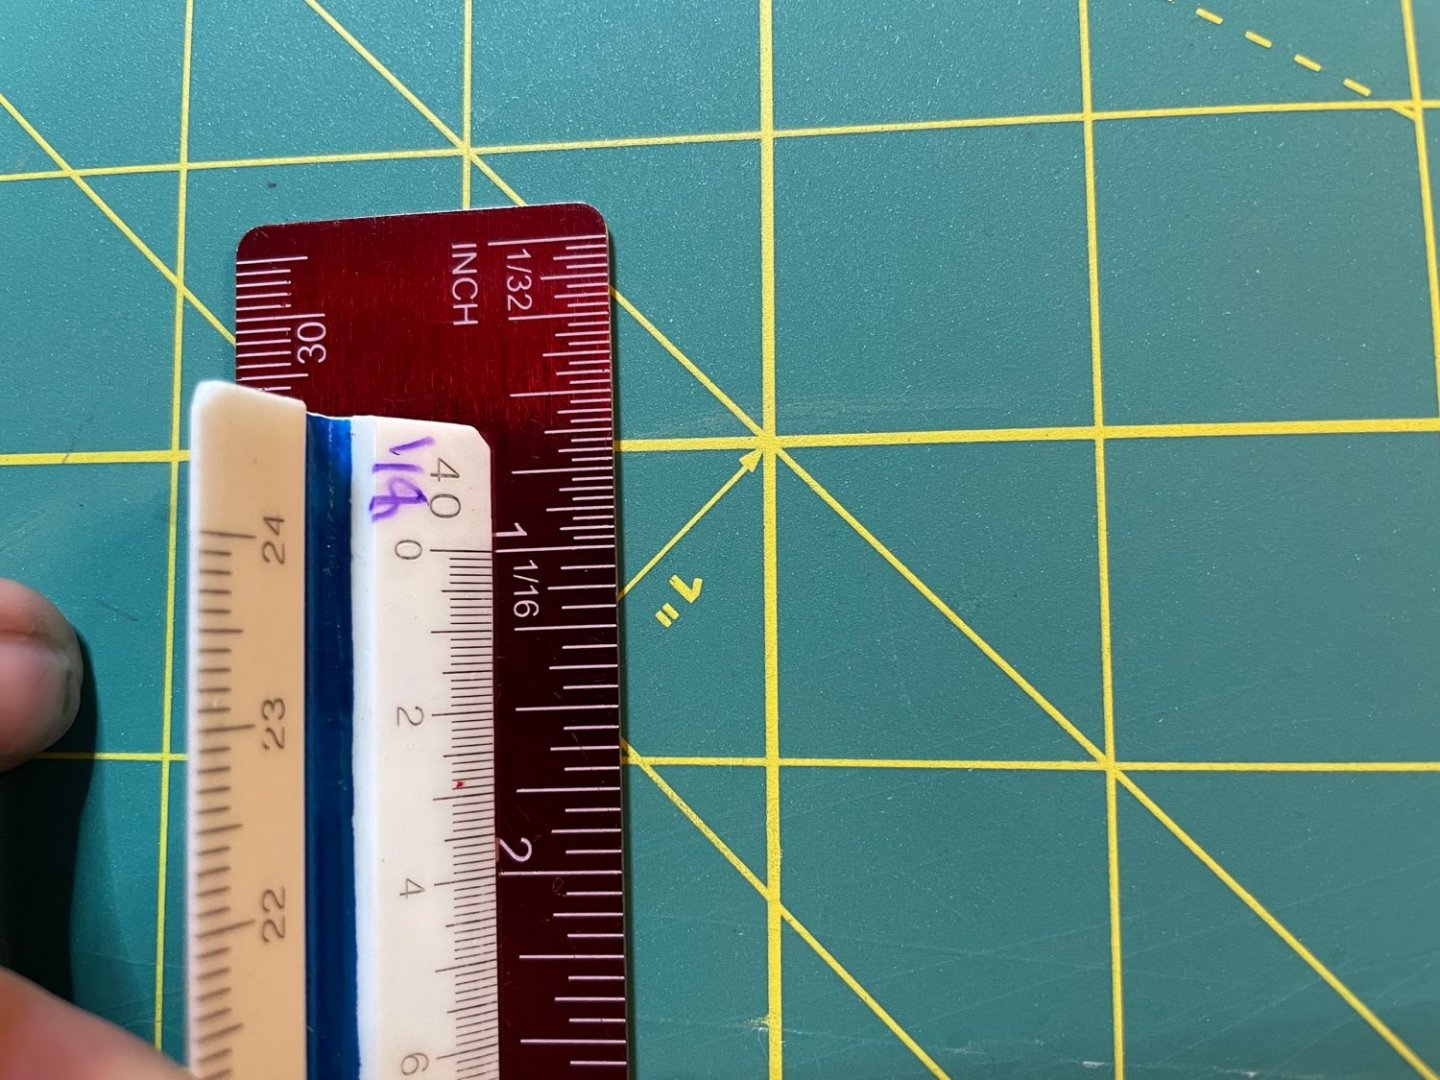
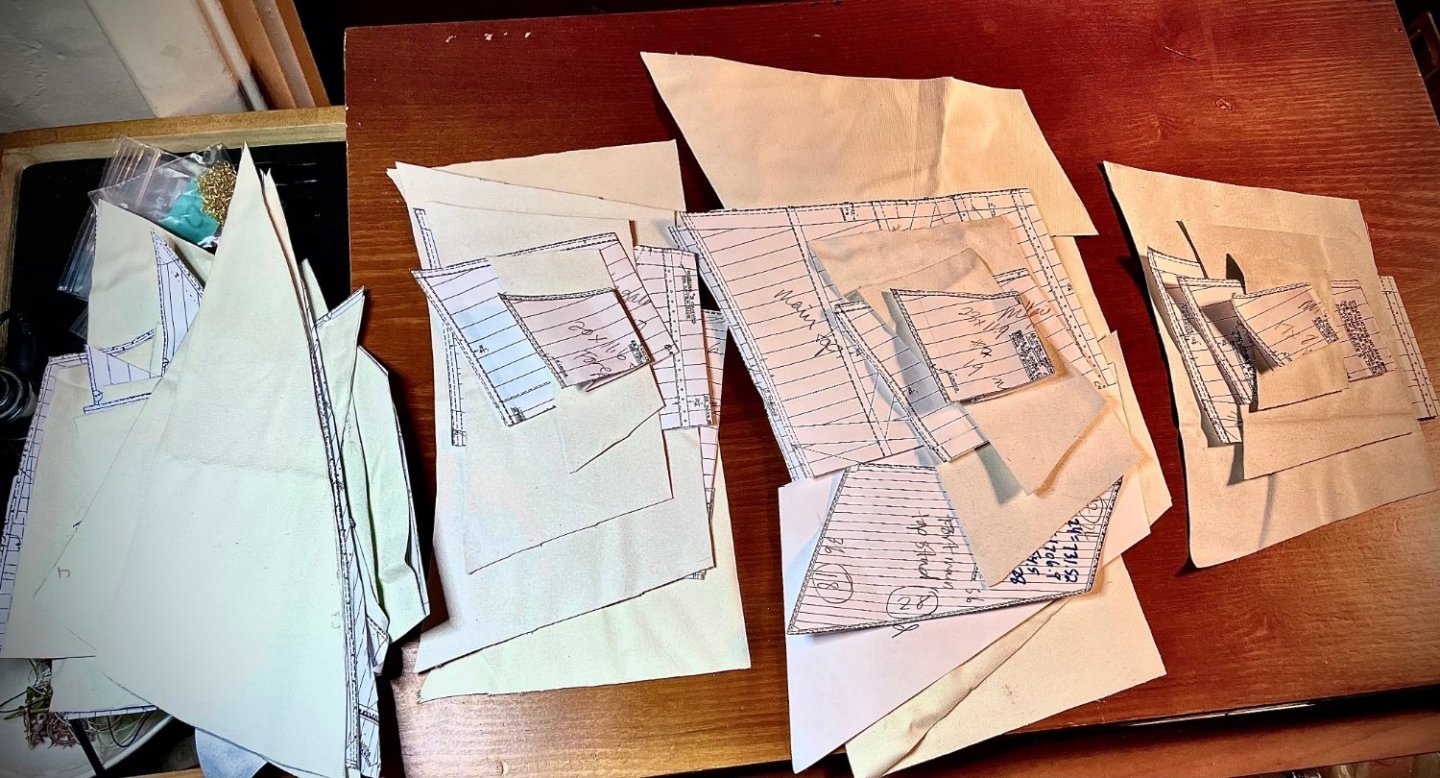
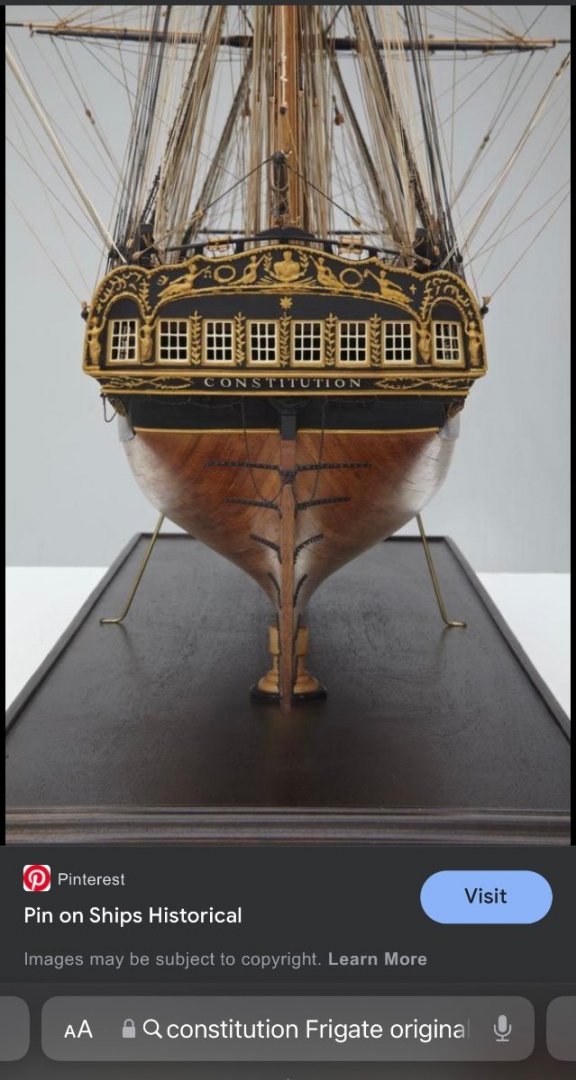
Captains Log: Although I'm at peace with cheating on the rigging and the generally poorly attempts thusfar, I cannot do so with the sails. Indeed one does not work without the other, but in Valkyrja's model ship world no one is losing sleep over the lack of proper knots. But a ship without sails is just ridiculous. I think I'd rather see burlap sack sails than none at all....But let's hope it doesn't come to that. I've decided on what I feel to be a happy medium between realism and scale, a trade-off for my aesthetic, and I'm going to be implementing some (perhaps) unconventional techniques so that I can achieve this. I'm also going to repeat some of what I've already said but I want all my sources together. So I started with the 1976 Revell Model Kit, which although plastic, I find to be very fine in detail and realism, something I don't see ever in today's age. The rigging was brutal so don't look too close, but I'm going to pull the "it's my first model ship build" card. I don't know what I was thinking but I ended up putting the upper masts at the wrong location and have since amended that. The Revell Kit comes with these plastic sheet sails that I scoffed at in distaste, but as I have now researched and experimented till my eyes bled, I can easily say I understand why they went that route...someone obviously had the foresight to want at least a few of their models completed... I still don't like them, and after all the blood sweat and tears that went into that stupid rigging, how could I not give her the sails she deserves? I am using the 1927 restoration sail plans by the Boston Navy Yard and generously offered for our use by the U.S.S. Constitution Museum, who also provided most of the information I was looking for under Modeler Resources. The plans differ slightly from the Revell Kit, but are more accurate for the look I wanted to represent. Much invaluable help can be found in sail details, verbiage and actual use provided by the Historic Naval Ships Association textbook of seamanship manual, it's very much worth the read. I printed the sail plans not thinking of printer scale and had to rescale all the templates, which may seem like more work than necessary (and it was), but I found it a good revisit of scaling math. In the interest of humor I will admit that I was extremely rusty and originally converted all the measurements to metric before I decided to use an engineers ruler....like I said...unnecessary work- here's a snap of my hot mess that makes sense probably to myself only. I used an engineers ruler because I hate fractions and it provides much more precision than a standard ruler (architects rulers are, I believe, what most real modelers use). The fabric I decided on after all my experiments was the Blackout canvas. It's true that it's heavier than scale and true to form, doesn't allow for any light, but I really liked the look and way it stretches and holds form. If anyone decides to try it out remember to mirror your studding sails as blackout fabric is canvas on one side and flat on the other. The added benefit given by the nature of its construction, allowed me to score the seam lines instead of painting or sewing them on. I'm at another decision point on whether I want to add any color, My Constitution has organically (or maybe subliminally) ended up as she was upon maiden launch, I'll be adding the Hercules figurehead and original rendition of the Greco-Roman gallery decoration. I've had a hell of a time finding an actual reliable rendering of these. But after painstakingly searching and sifting through The National Maritime Historical Society magazine archives, I'm using the Hercules as envisioned here and here as my "inspiration" lol. I could not find anything on the gallery aside from this ONE rendering which I find perfect, but I have no idea who posted it as there is no alluding to the maker or what their source was...so mysterious. I also debating whether I want/need anything on the sails. In her beginning her sails would not have been so weathered as I've seen in other models but I may add some light weathering/shading for depth and realism. It's also unnecessary to do anything other than stretch the fabric to form it, but I can't believe that will withstand gravity for very long, and the non canvas side is very slightly "flocked" which I fear will end up looking fuzzy after manipulating it. So the next decision is what to treat it with. I'm really leaning toward "RSG" or rabbit skin glue, since I won't be fully painting them with acrylic. RSG if you are unfamiliar is an archival glue that back in the old old days sculptors used in part to make "compo" or composition ornament for decorative picture frames, and was the standard ingredient in traditional gesso for priming and sizing painters canvases. I am an oil painter and past conservator, so I have it (it's really cheap), and it's amazing stuff, with all kinds of uses. When used as a size, it's transparent, sealed, and tightens and stiffens fabric. Adjusting the ratio of water, adjusts the temperament and strength. Nevermind, I'm totally using it lol.


- 35 replies
-
- 4
-
-
- Constitution
- Revell
- (and 1 more)
-
Posting video
Valkyrja68 replied to Valkyrja68's topic in How to use the MSW forum - **NO MODELING CONTENT**
If any of you would like to see the greatest sailing video of all time- or revisit, here it is -
I guarantee if you have not seen this, it will be the best thing you've ever watched on YouTube. https://youtu.be/ZLzBDhilDL0
-
- 4
-

-
-

-
- Nautical history
- sailing a tall ship
- (and 3 more)
-
Posting video
Valkyrja68 replied to Valkyrja68's topic in How to use the MSW forum - **NO MODELING CONTENT**
-
Hello all, Is it possible to post a video to the forum? I am inquiring in advance to decide whether it would be better to post or link a video to my build log, or rather keep it in picture form. That being said, on a different topic-is there a place to leave a link to a historical sailing video our members may find interesting, or is it best to keep content strictly to our own builds? thank you!
-
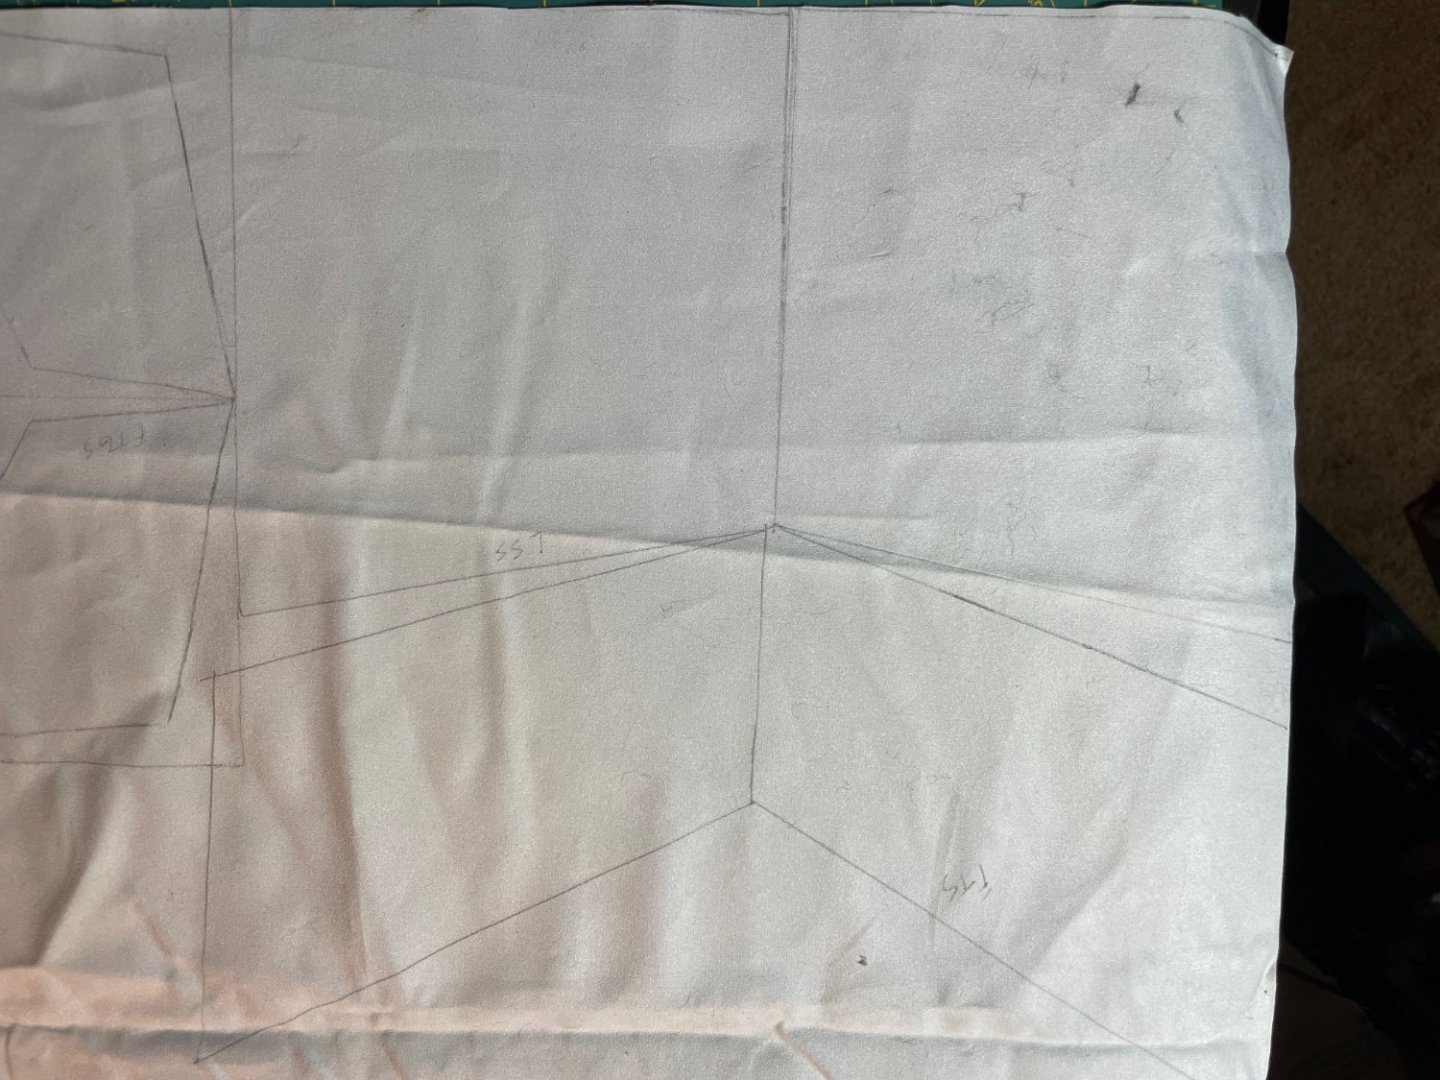
Captains Log: Note to future self: Self, remember how you decided to make your own sails and found the earliest blueprints then didn't use PPPPPP? Lest you have forgotten, you didn't bother to check the scale of your prints and then had to manually convert all the original measurements of each 46 sails to metric (hopefully you've learned how to read a ruler, or we've finally come to our senses and moved to metric) then had to redraw and cut the templates so you could then cut out each sail twice? Don't make that mistake again dummy.
- 35 replies
-
- 4
-
-
- Constitution
- Revell
- (and 1 more)
-
I don't feel that strongly about it, I would potentially buy sails in the future, or other accoutrements that I needed, but I also like reusing and repurposing items instead of consuming when I do not need to. No if I was doing this for sale say or as some sort of profession I may want to be a little bit more discerning, but it's really just for fun. I do appreciate that link and I believe other people will certainly appreciate it. The only real hard stance I have on anything, is that there is not only one way to do something lol!!
- 35 replies
-
- 1
-
-
- Constitution
- Revell
- (and 1 more)
-
Well I agree with you of course! I was testing a method Cathead uses with bond paper- a considerably lighter material and with considerably better results lol! I just wanted to see how it would work with fabric, the fabric that I'm using is far too thick for this application but some of the other fabrics would work fairly well for it I believe.
- 35 replies
-
- 1
-
-
- Constitution
- Revell
- (and 1 more)
-
@lmagnaCool thanks! That first post/picture looks like the hammocks would fall right out 😂 but the gist is there. I have seen that person/company's sails before, they are very well done. I'd have to say as nice as they are made they aren't very time appropriate though. Back then the sails were made of either flax or hemp and would have been a sort of canvasy brown and rather opaque. I'm not so much into buying things as I prefer to make them, even if they aren't as good. I'm not a historical buff or anything, more of a casual hobbyist. But it's an excellent link to leave here as other people may not want to go through all that entails making your own. I, myself, prefer to make things as difficult for myself as possible...it's kind of my thing. Haha
- 35 replies
-
- 2
-
-
- Constitution
- Revell
- (and 1 more)
-
What do you think, does it work? Hahahaha I had to....

- 35 replies
-
- 3
-
-
- Constitution
- Revell
- (and 1 more)
-
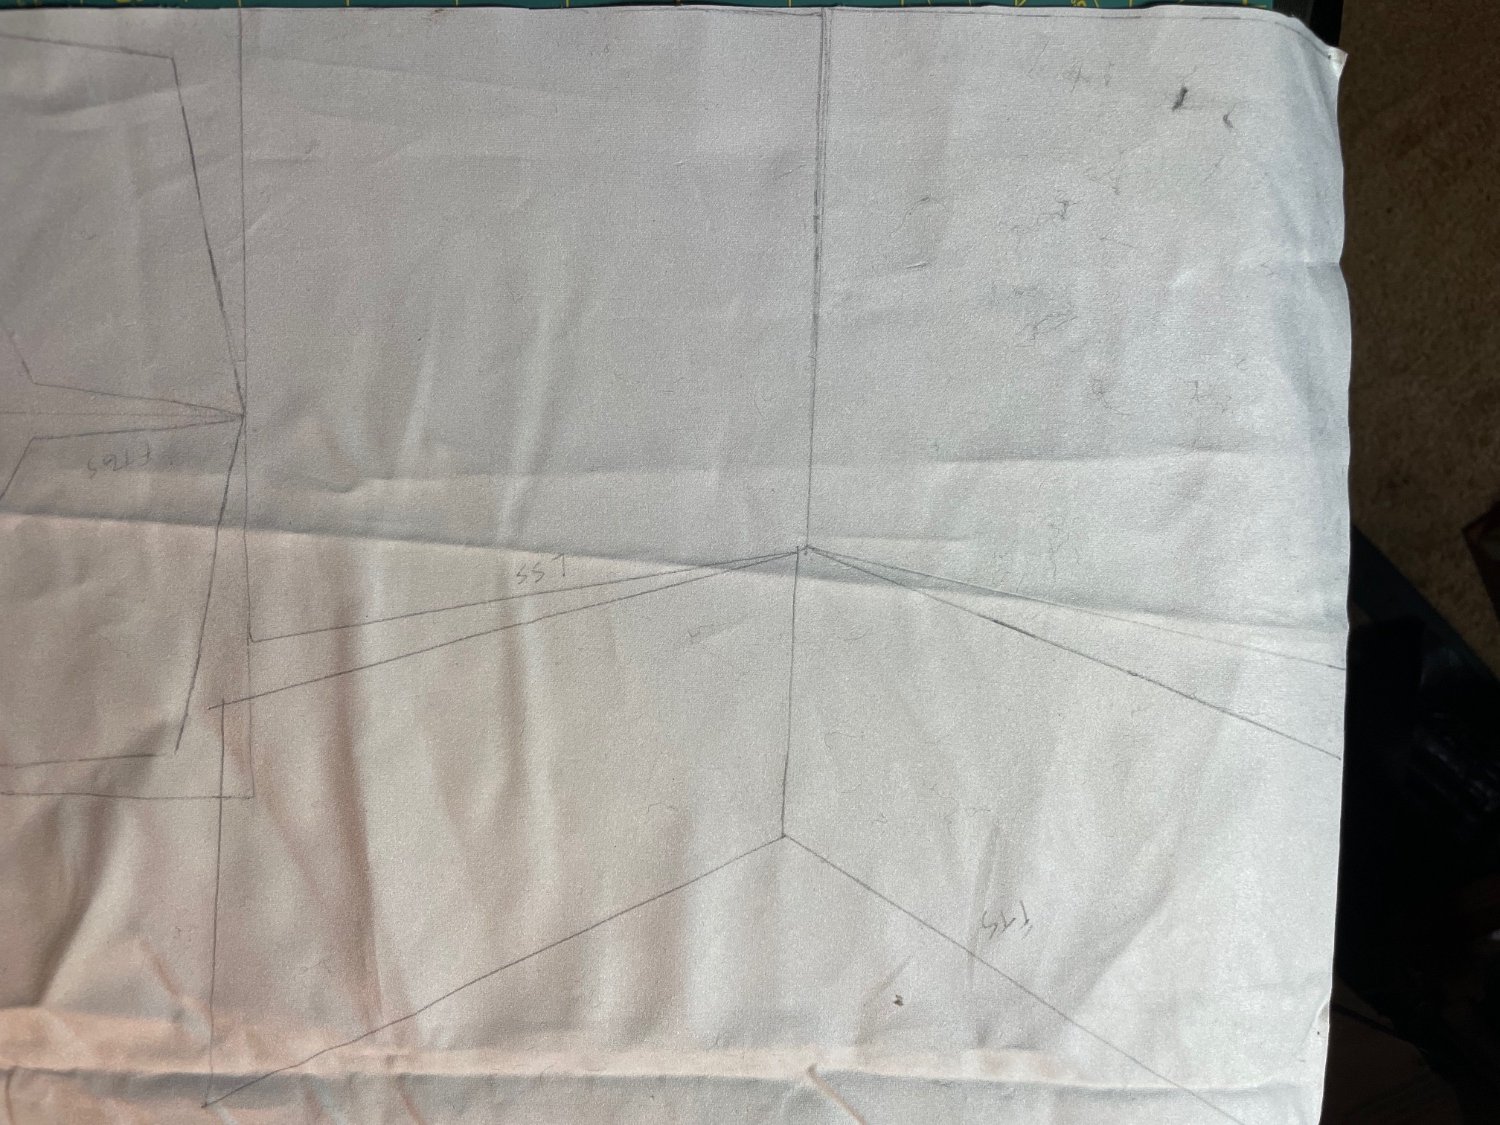
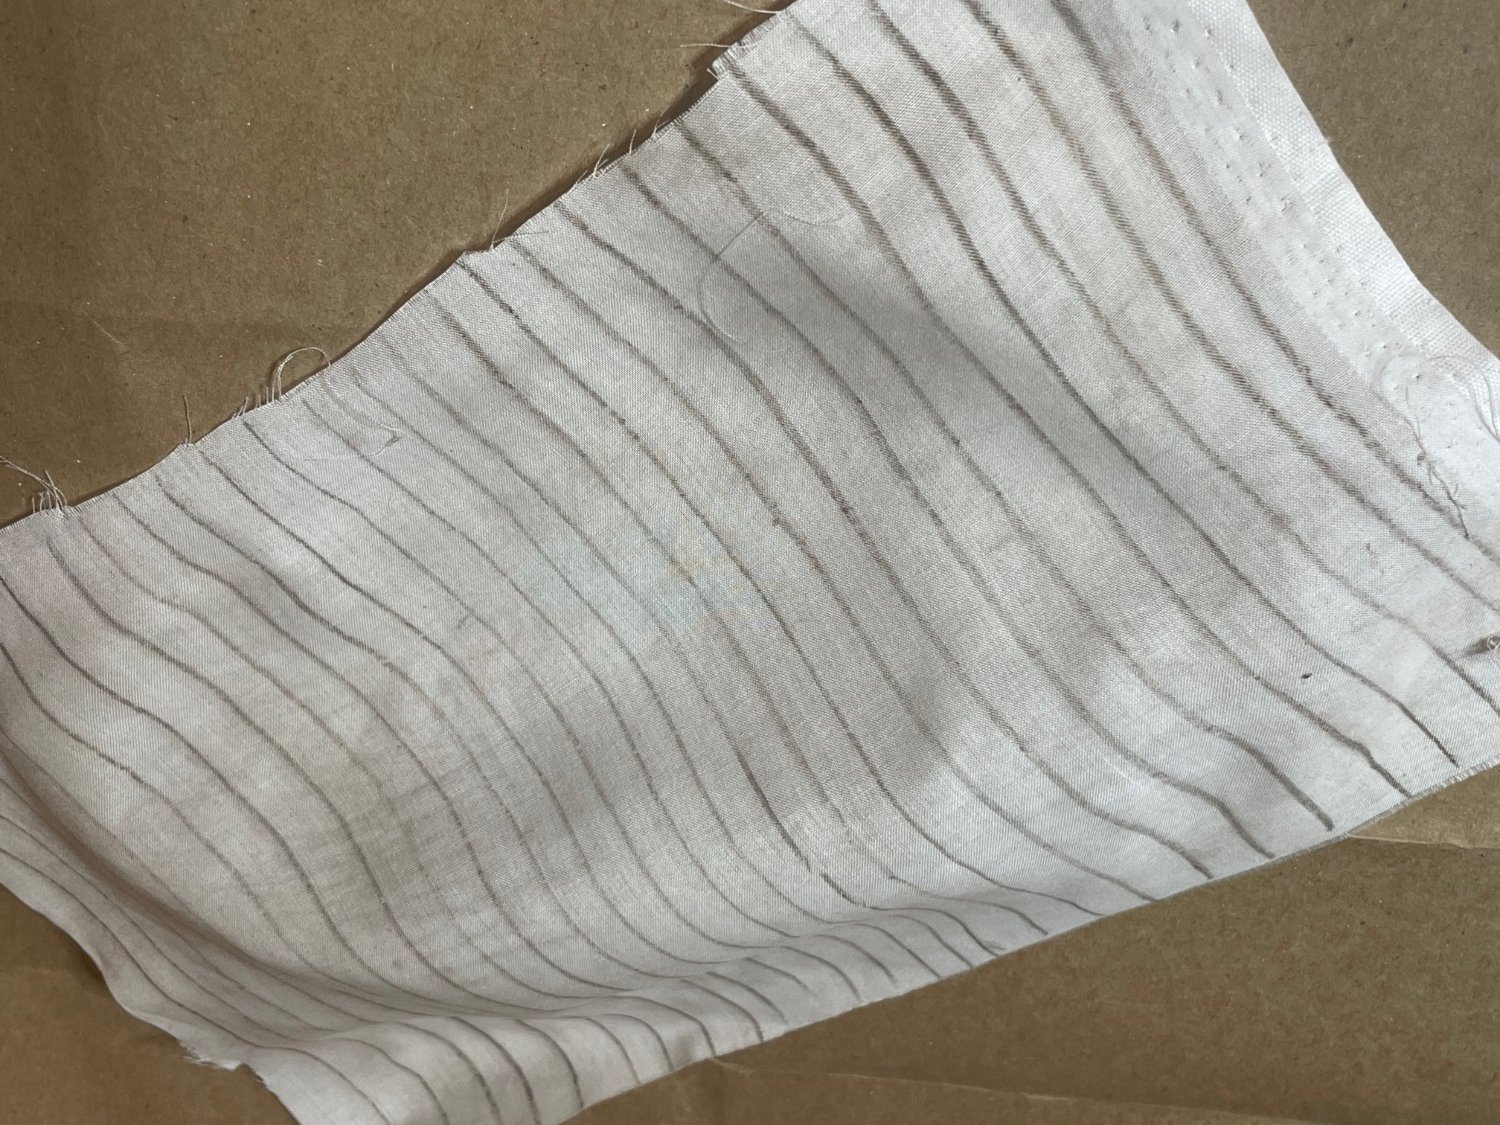
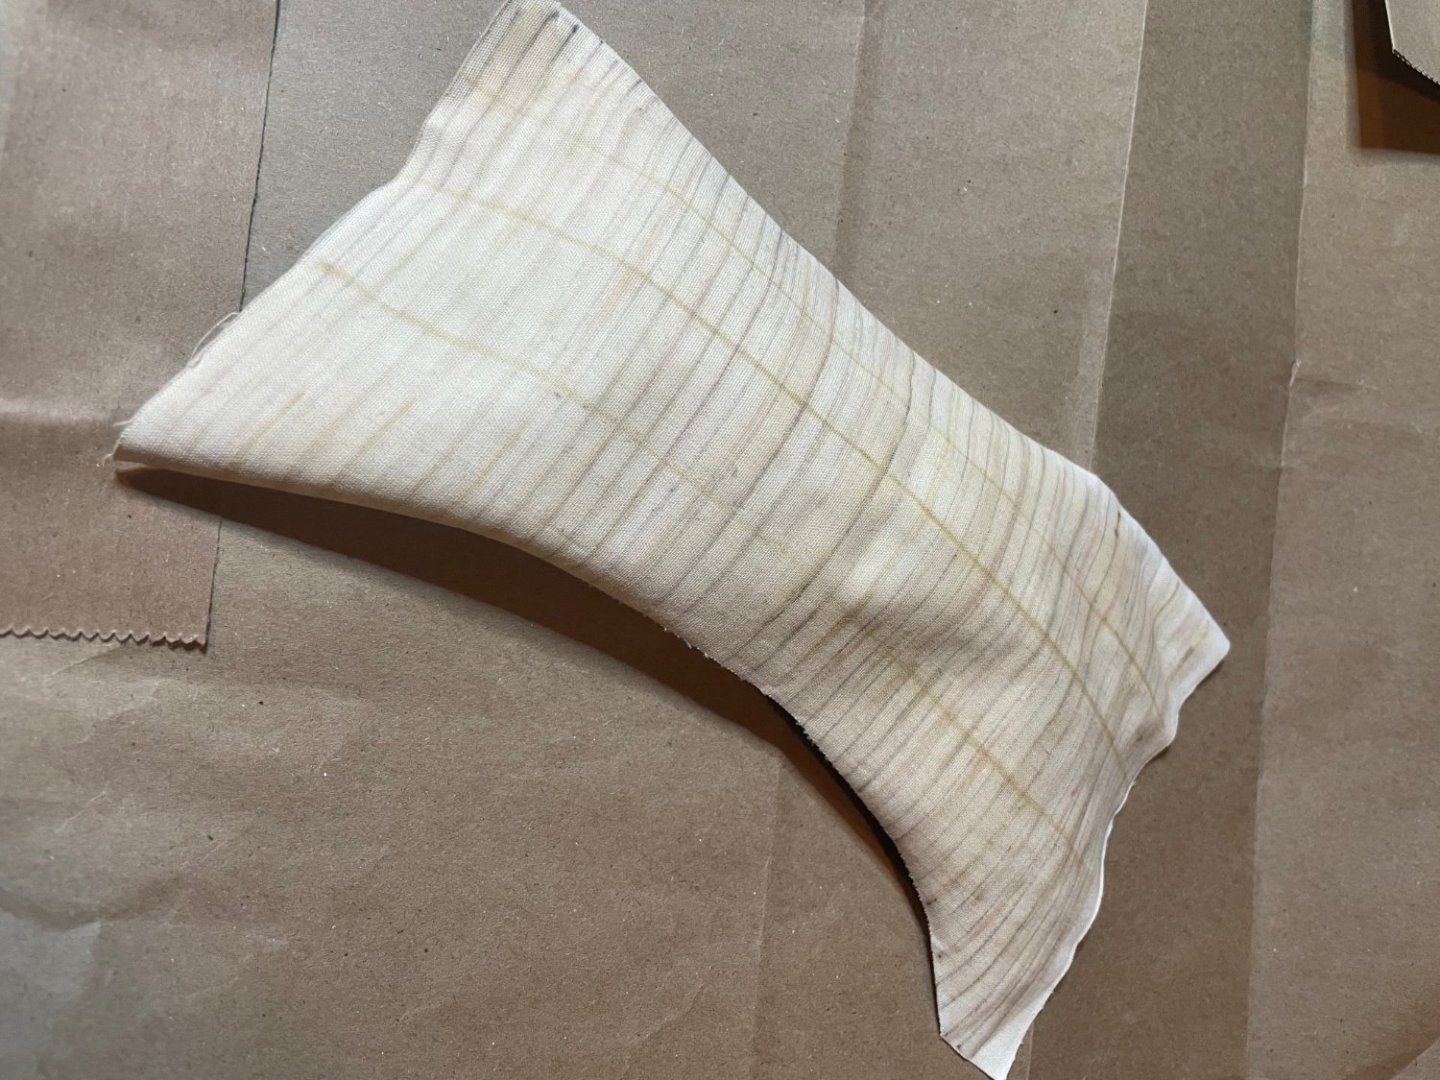
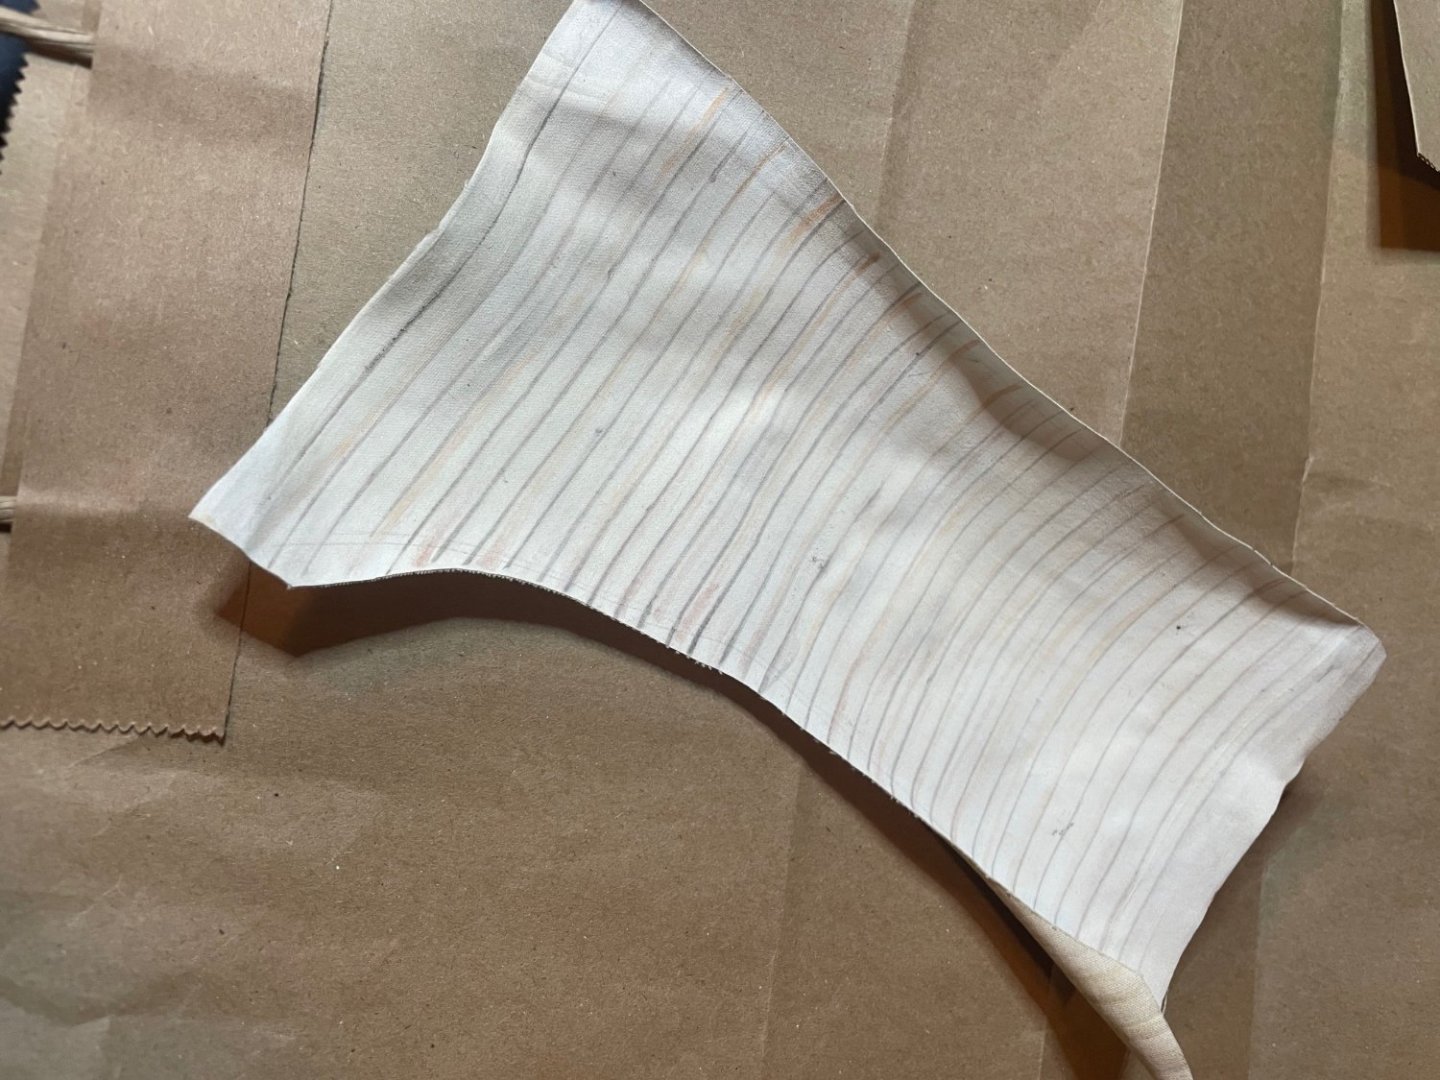
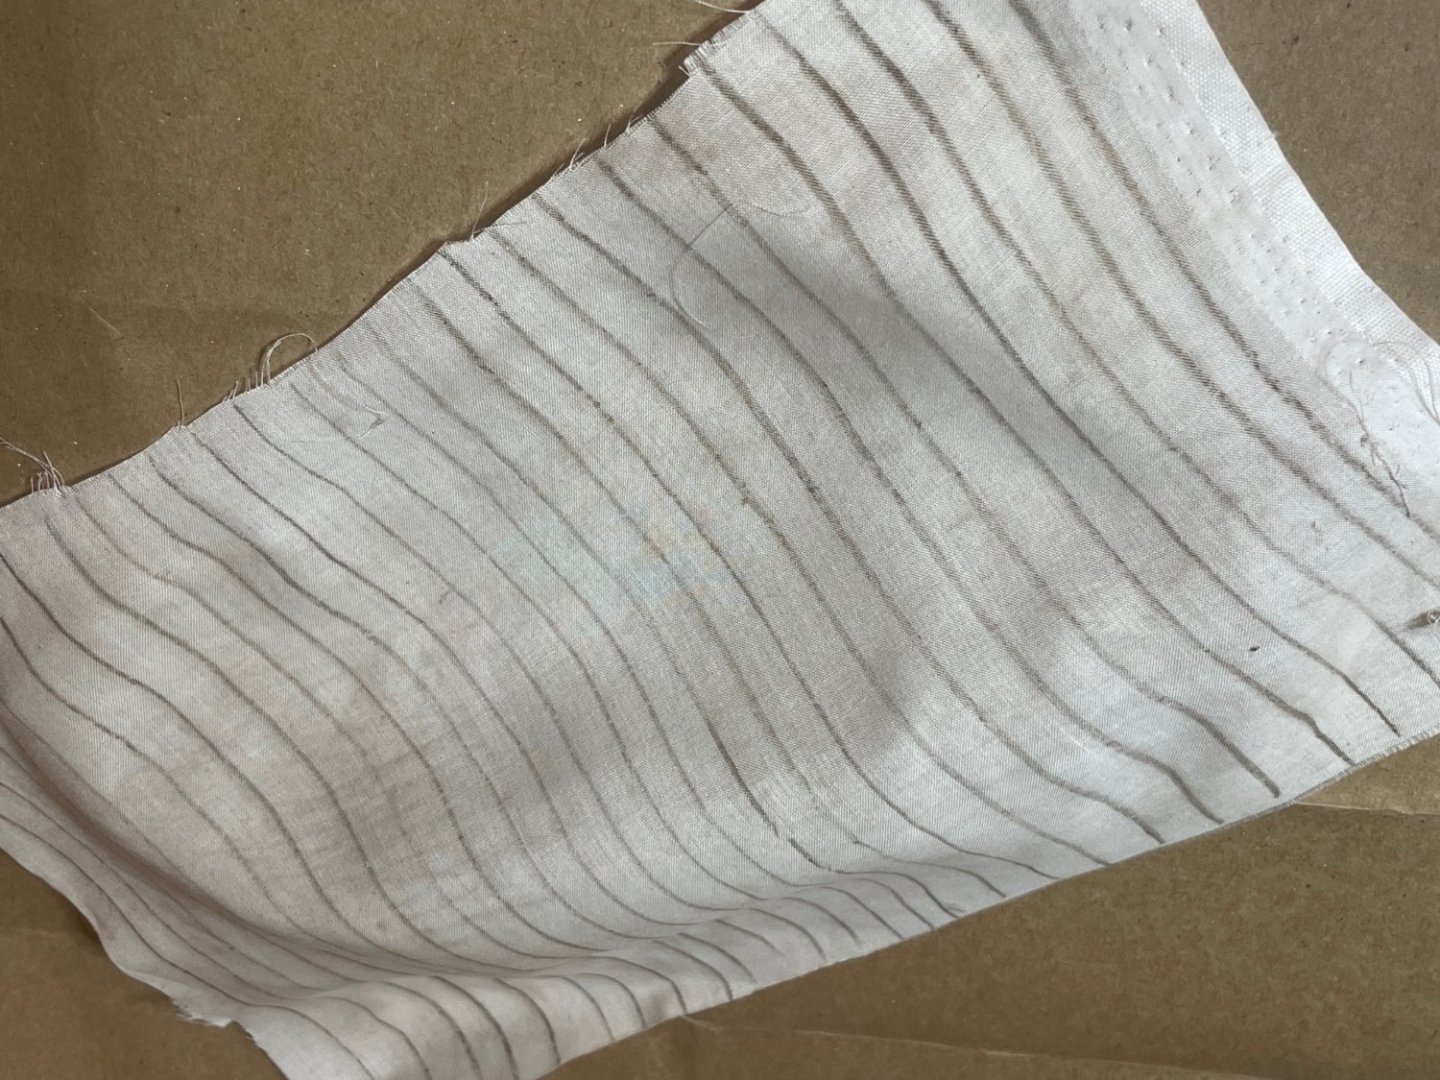
Using Cathead's technique, I quickly tested it using the blackout fabric I prefer. I have to say I am seriously surprised it worked as well as it did with fabric as opposed to the bond paper he uses. When I say quickly I mean quickly,I just eyeballed my fabric and I did not do any measurements or use a ruler- the idea was to see how it would apply to fabric not to actually use the finished piece. BUT I think I will be using this for my model. Thank you! Notes: For best results as Cathead intended- •Use a brand new razor and a metal guide or ruler instead of scissors unless you have a seamstress's precision. Fabric is not so forgiving and has a tendency to bunch. You can pull the fabric if it's misbehaving but you must pull very straight or you end up with a curve. •Fabric can be tricky when cutting because it likes to follow the weave, it's wise to use a self-healing mat so that you get a clean line. I use OLFA (from $4.00 to a lot more) but any will do. •Your measurements for the strips should be just slightly larger than what you want the scale to be, as they overlap, but too large will make the back a mess. •As in the tutorial overshoot your model outline and cut it out after you have glued your strips. This will enable you to lay straight lines and offers forgiveness for strips that may not be exact. • Should be obvious but I forgot haha so Lay your reef lines before your reinforcement seams. •I used Fiebings leathercraft cement because I have it and it works quick and well, white wood glue would also work but avoid tinted glues and fabric glues (which suck). Super glue will obviously stiffen the fabric to a rock hard state which mayyyy be beneficial to get the shape you want depending on fabric but probably not. Also I didn't tint it, so I don't know how it would turn out but it may be wise to dye your fabric before cutting and gluing as glue can resist pigment. •Lastly if you fabric is not wonderfully moldable like mine 😎 You can gently pull the edge seam into a slight curve as it's being glued (in this case the foot or luff) to create a billowing effect. (As the stretch in the weave relaxed it will pull the fabric with it.)

- 35 replies
-
- 4
-
-
- Constitution
- Revell
- (and 1 more)
-
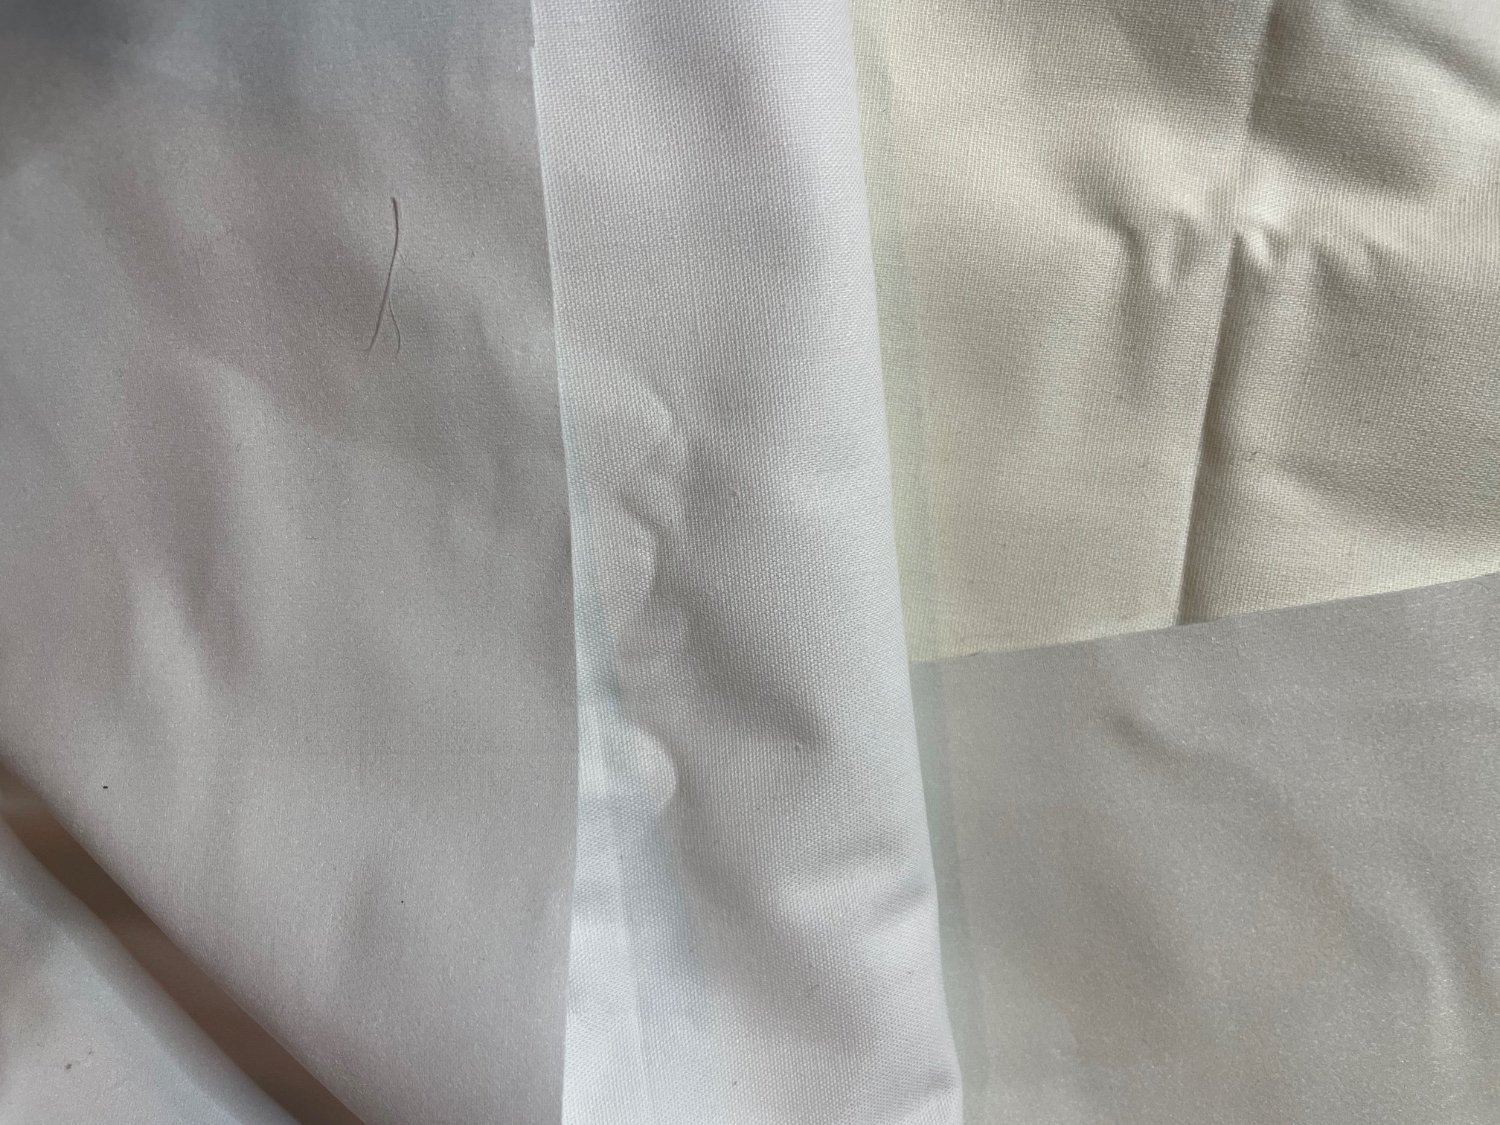
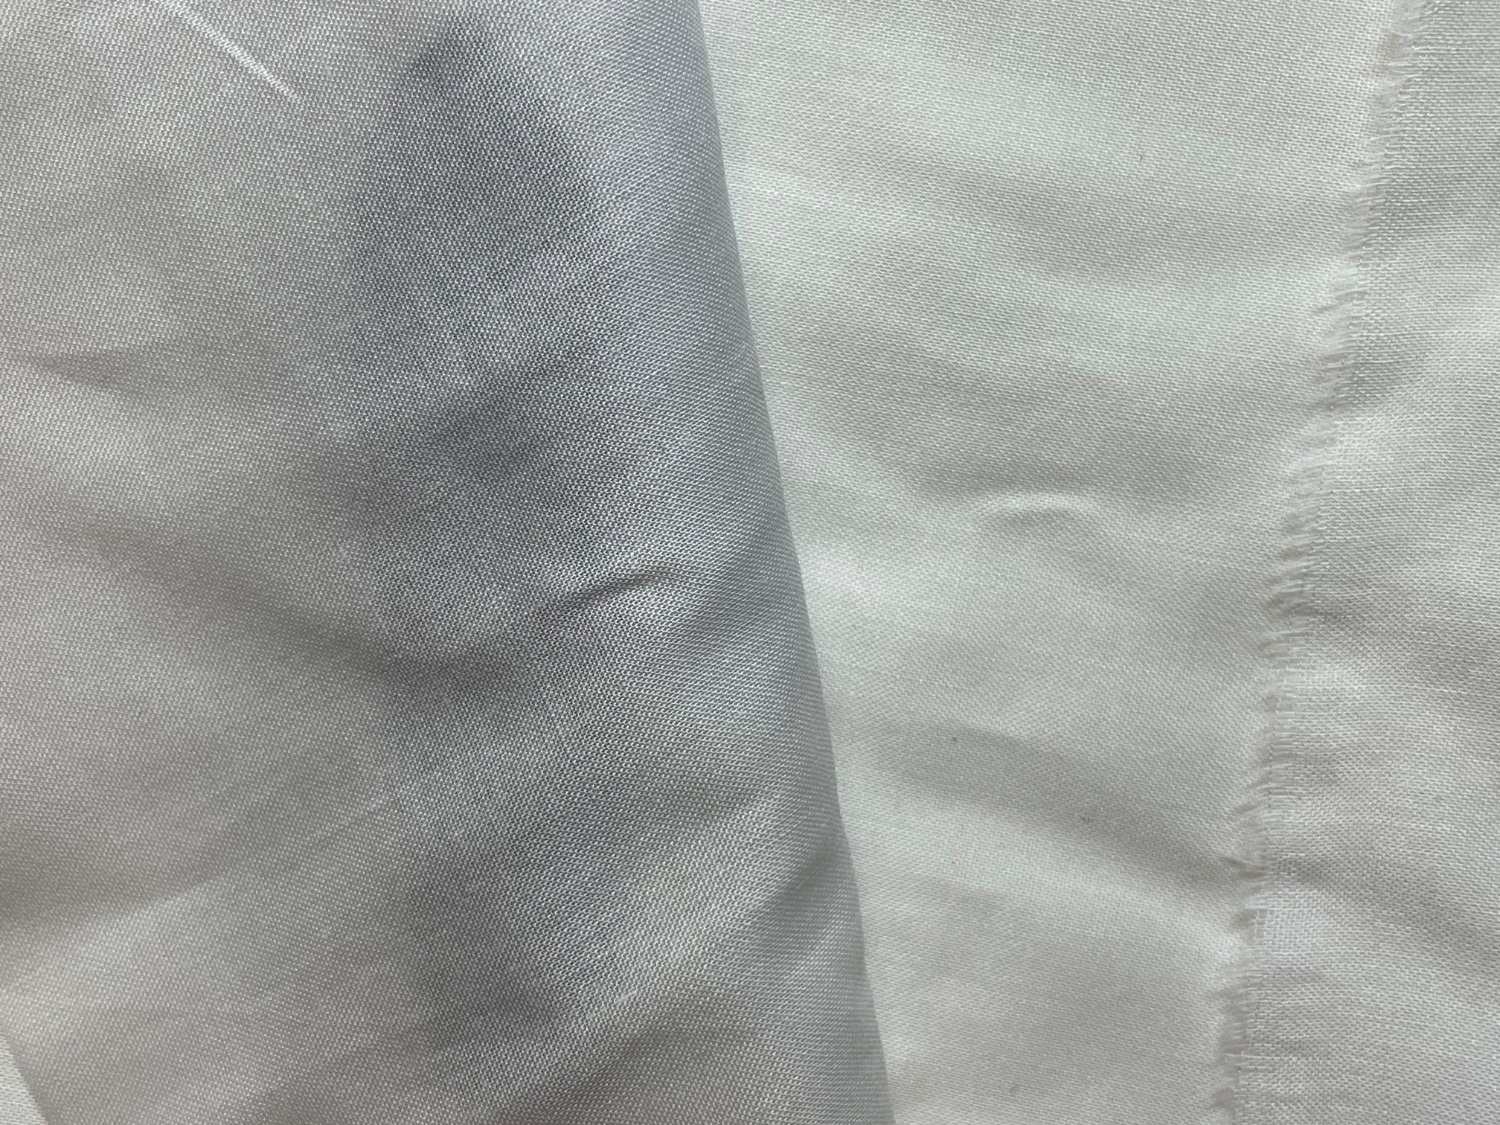
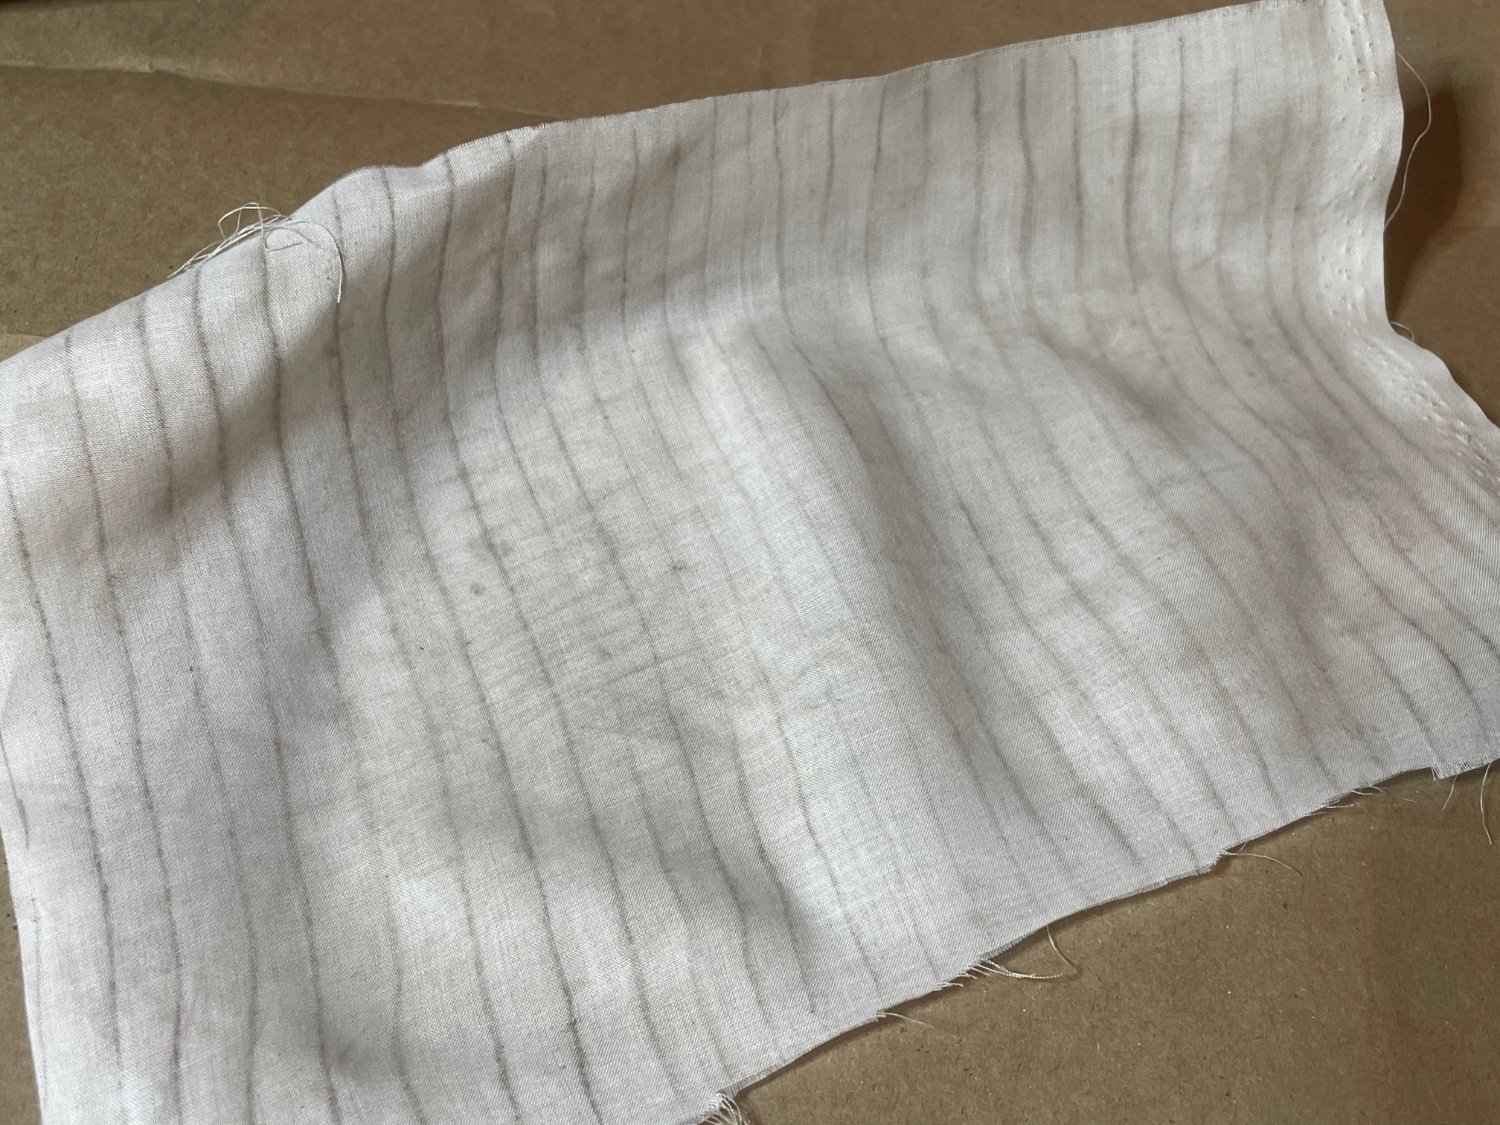
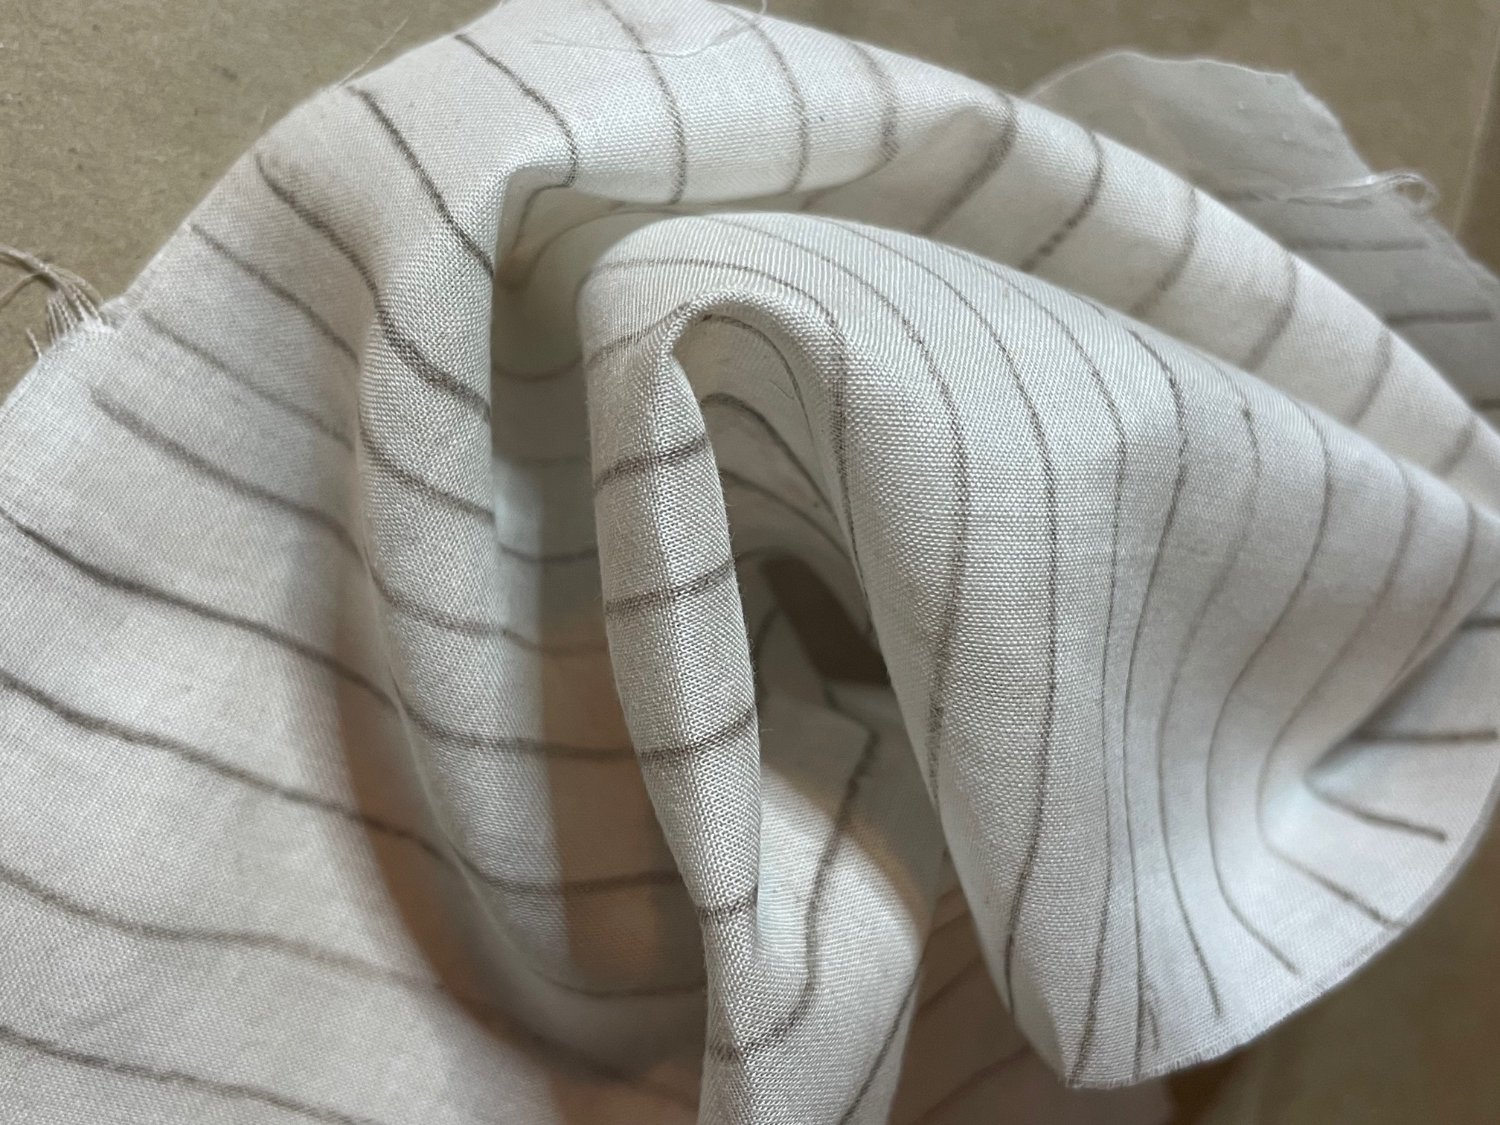
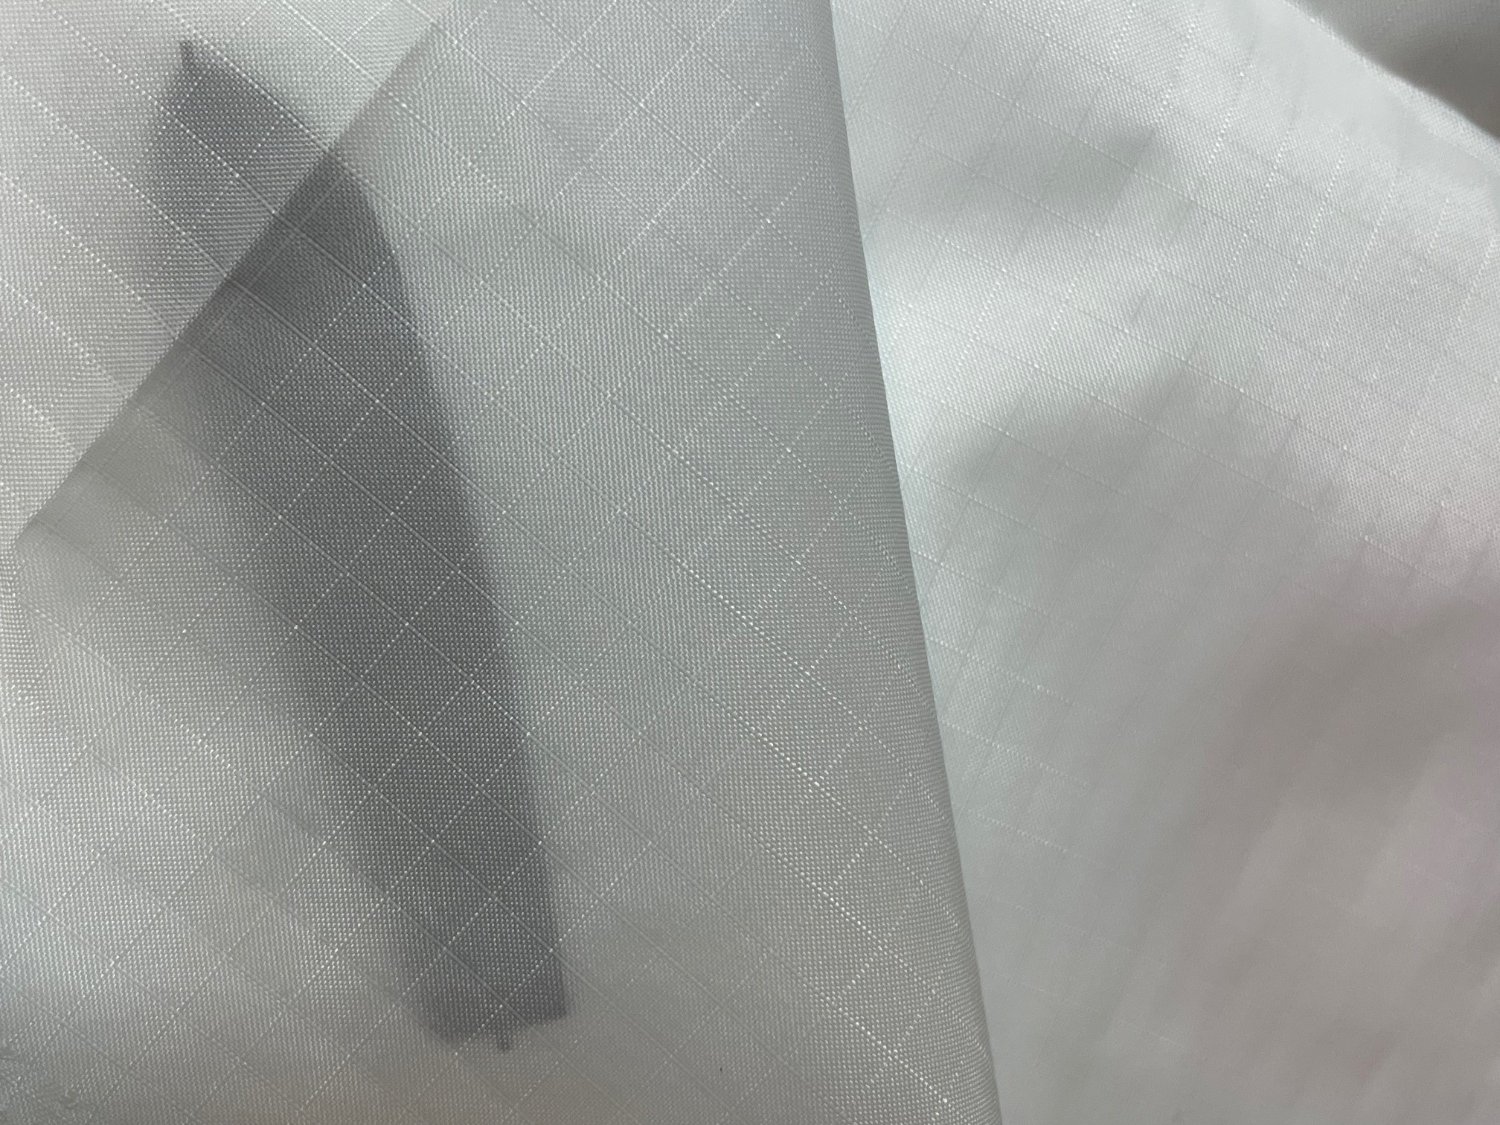
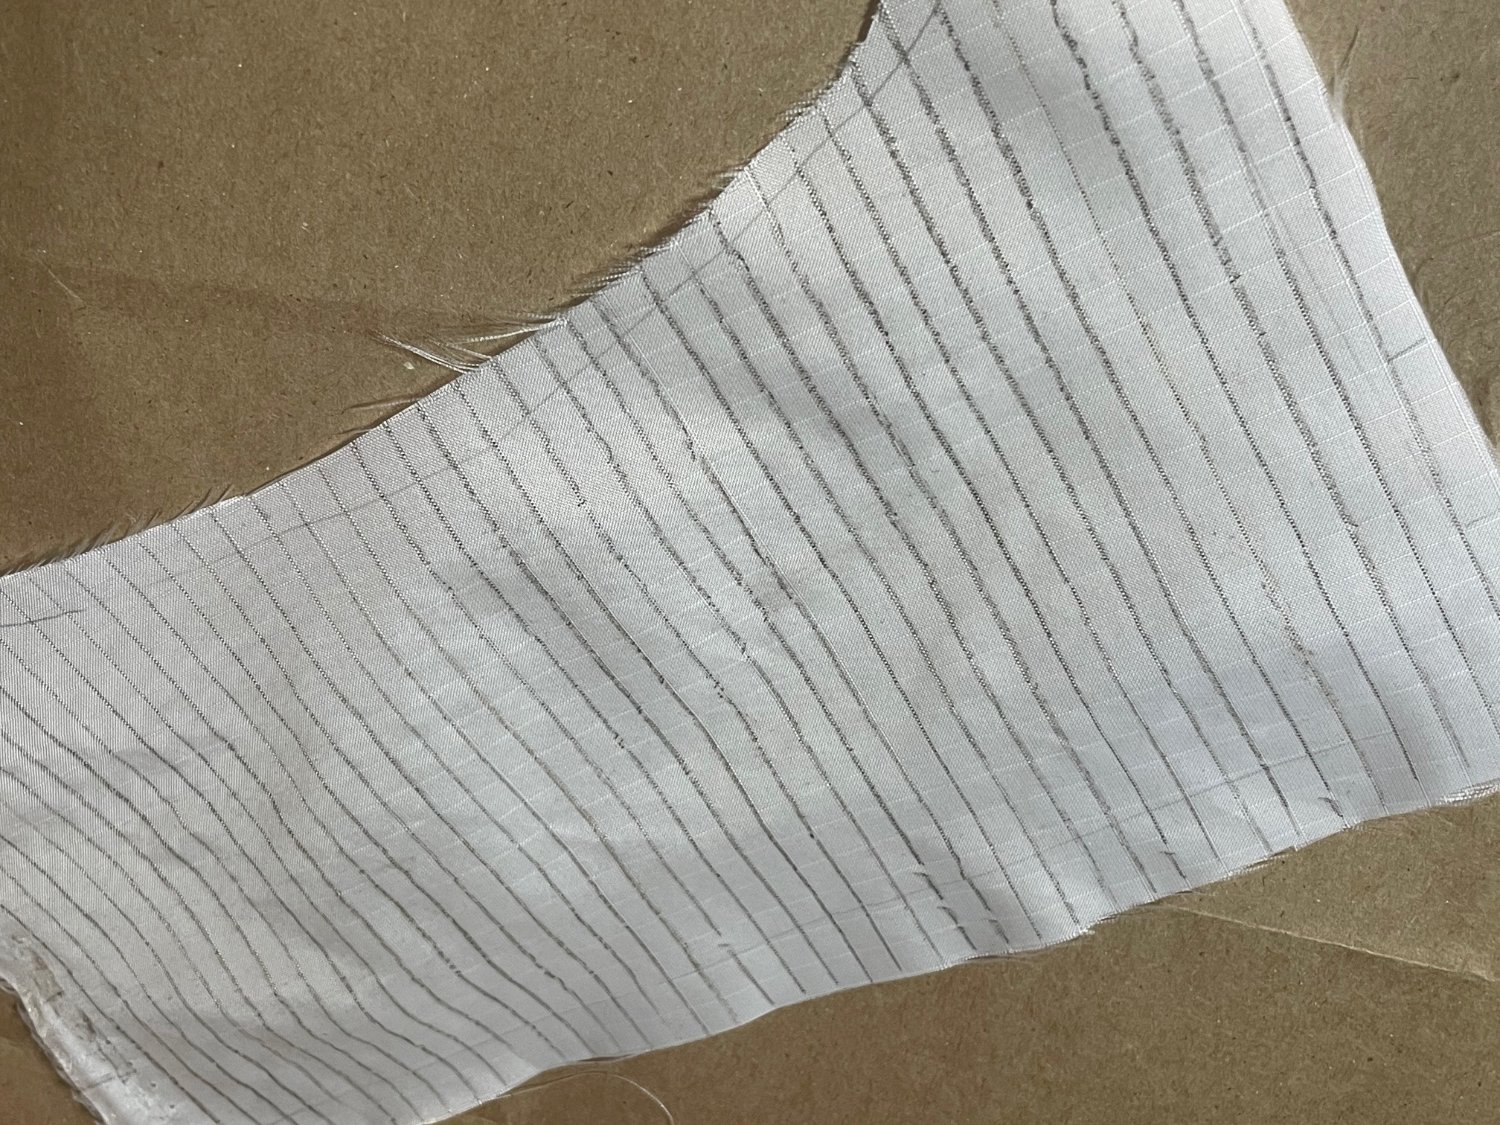
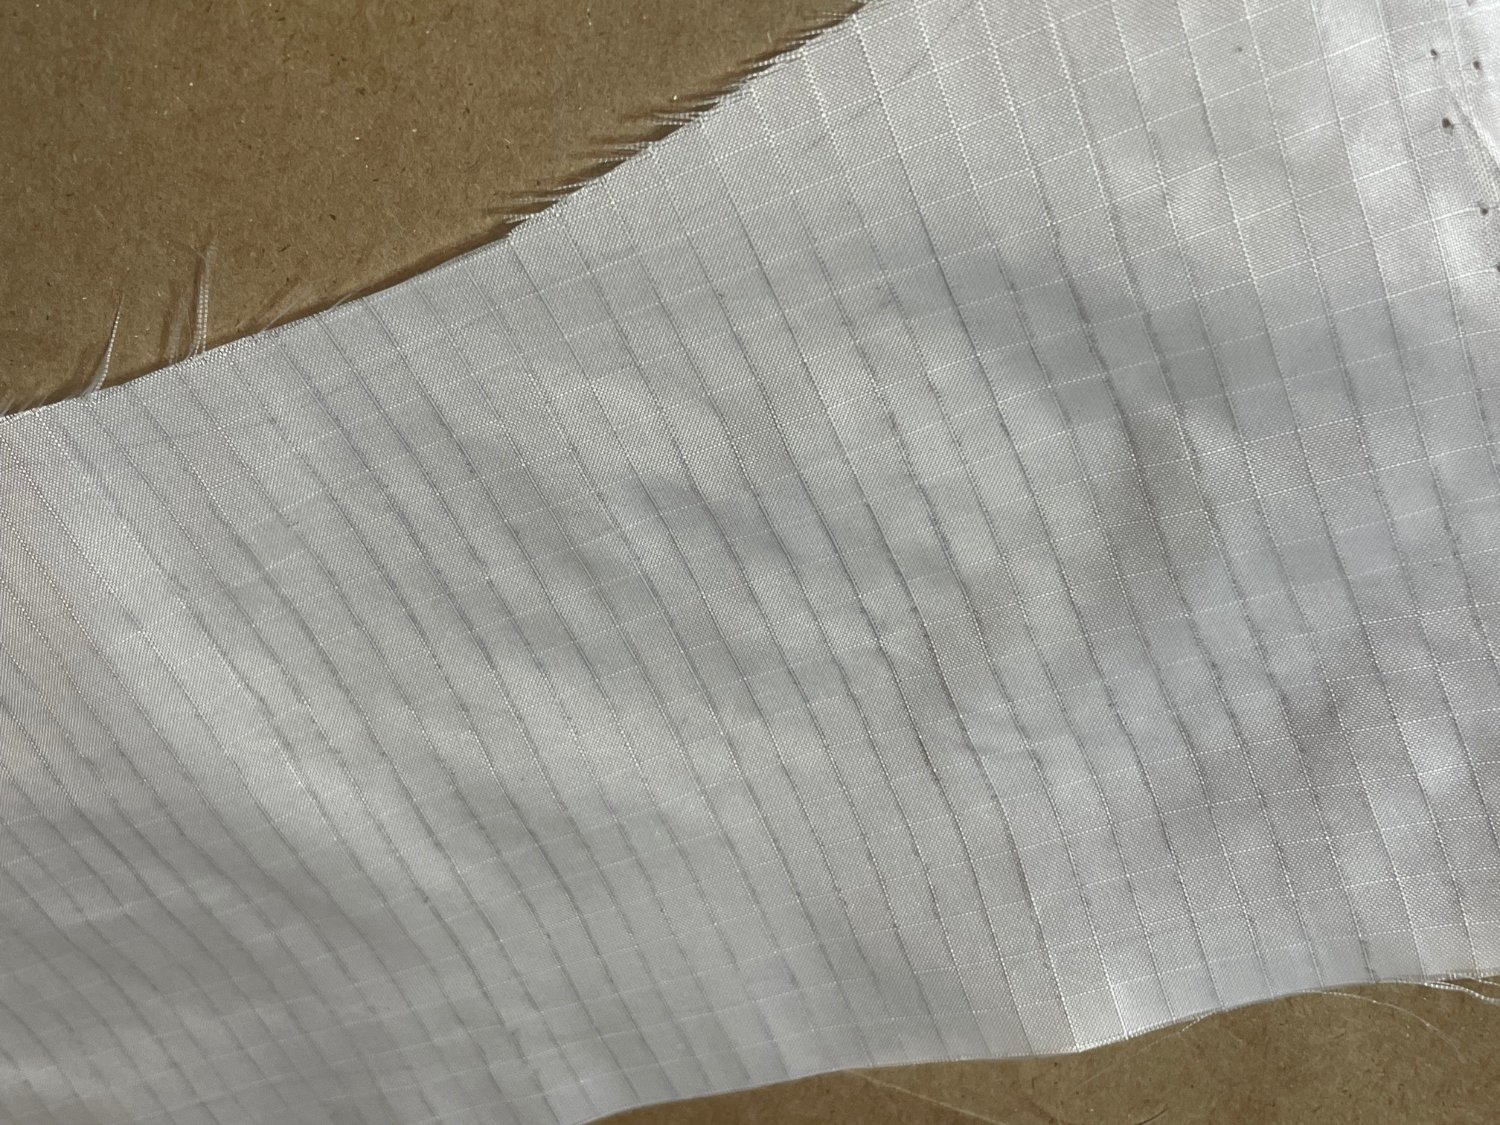
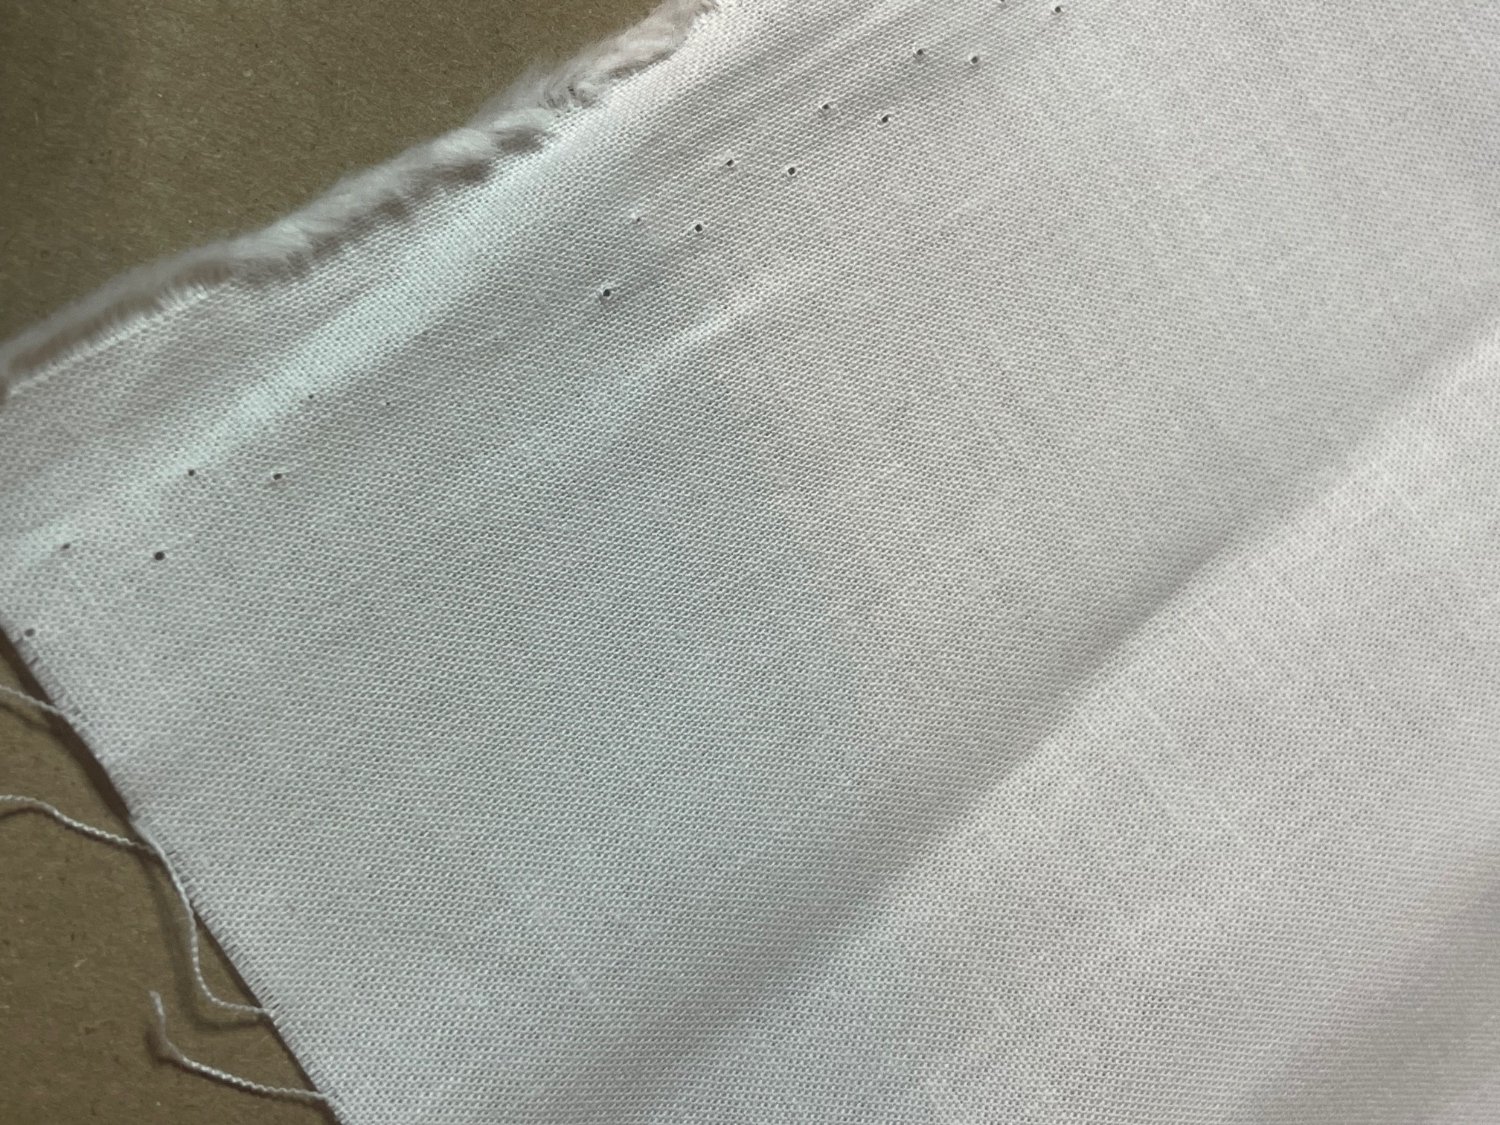
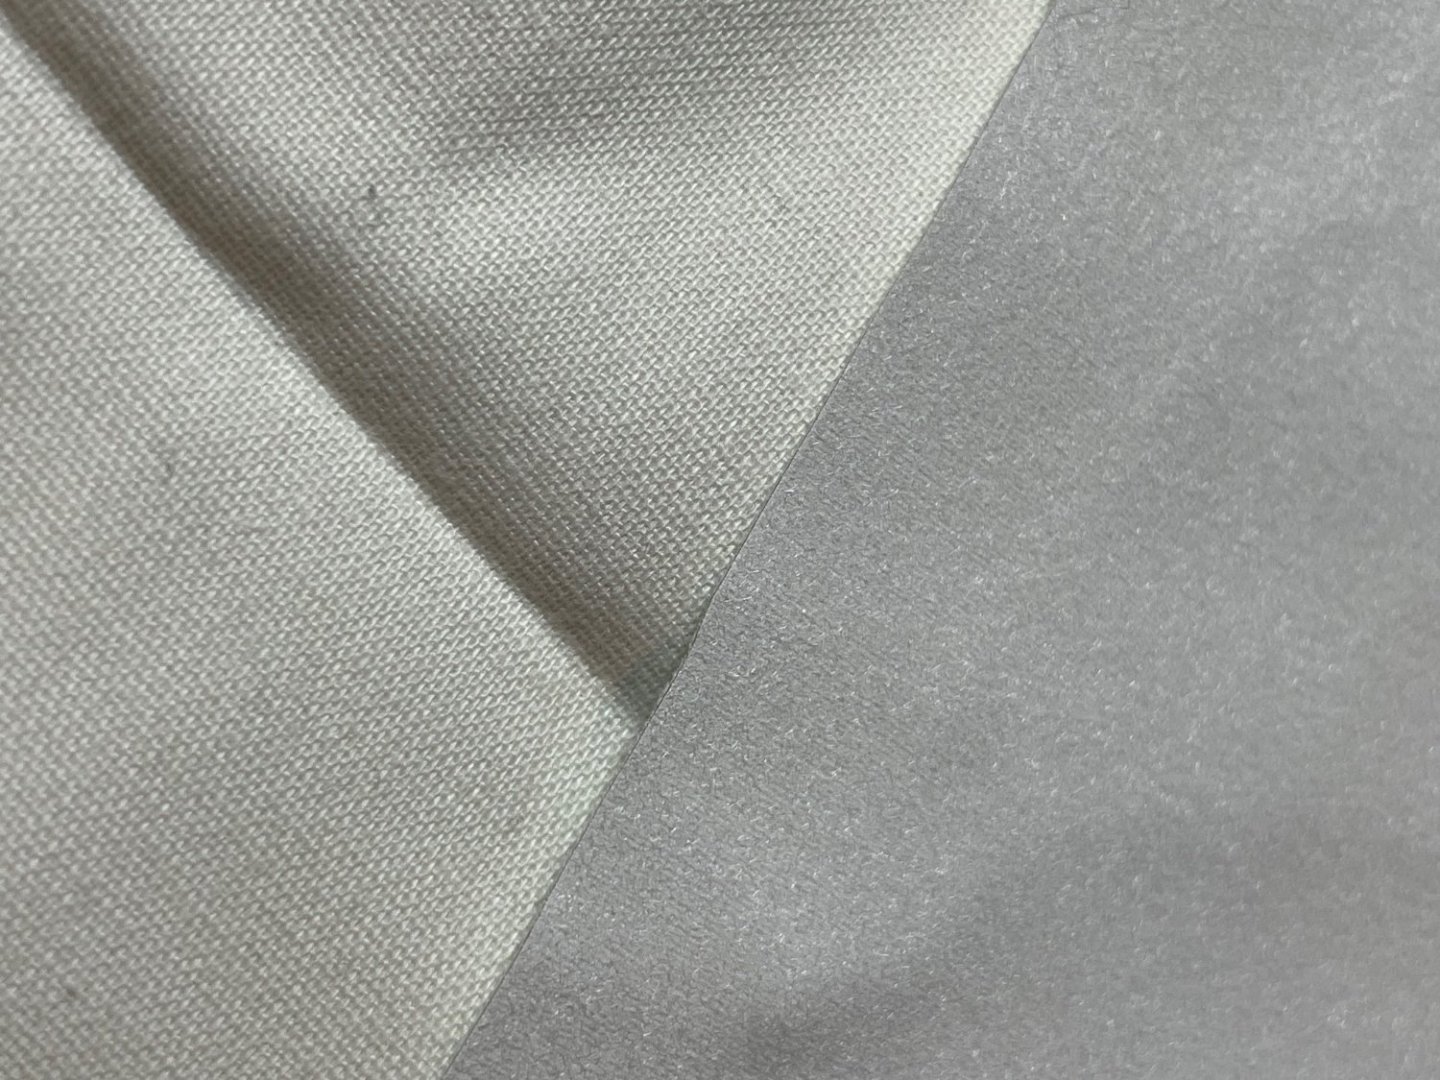
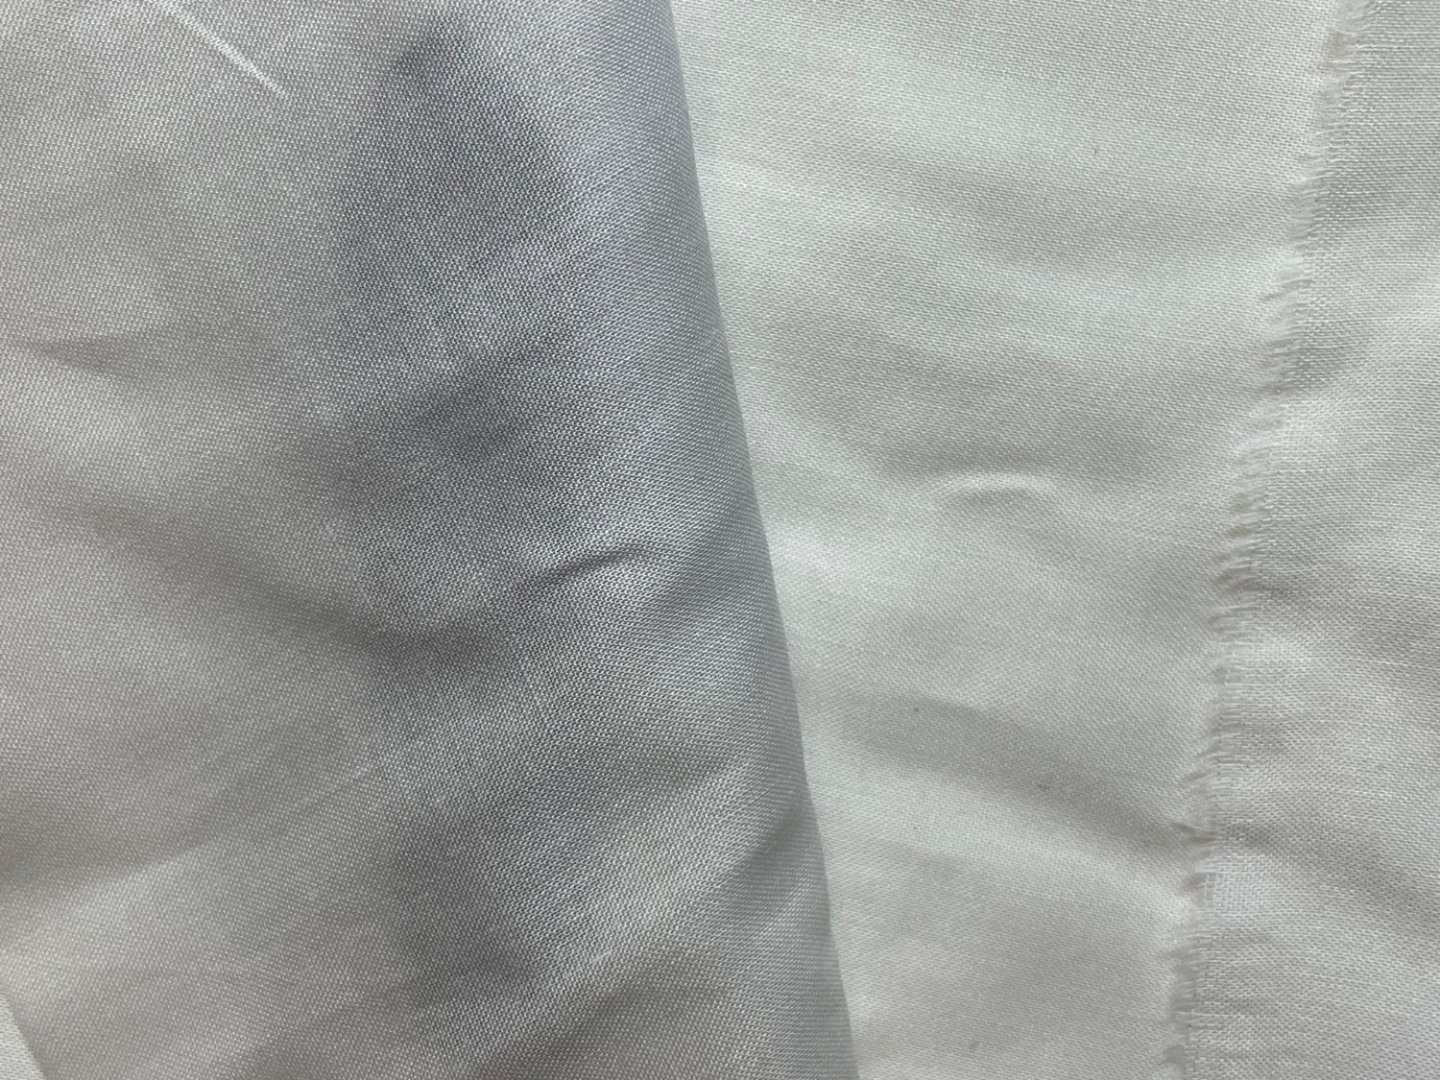
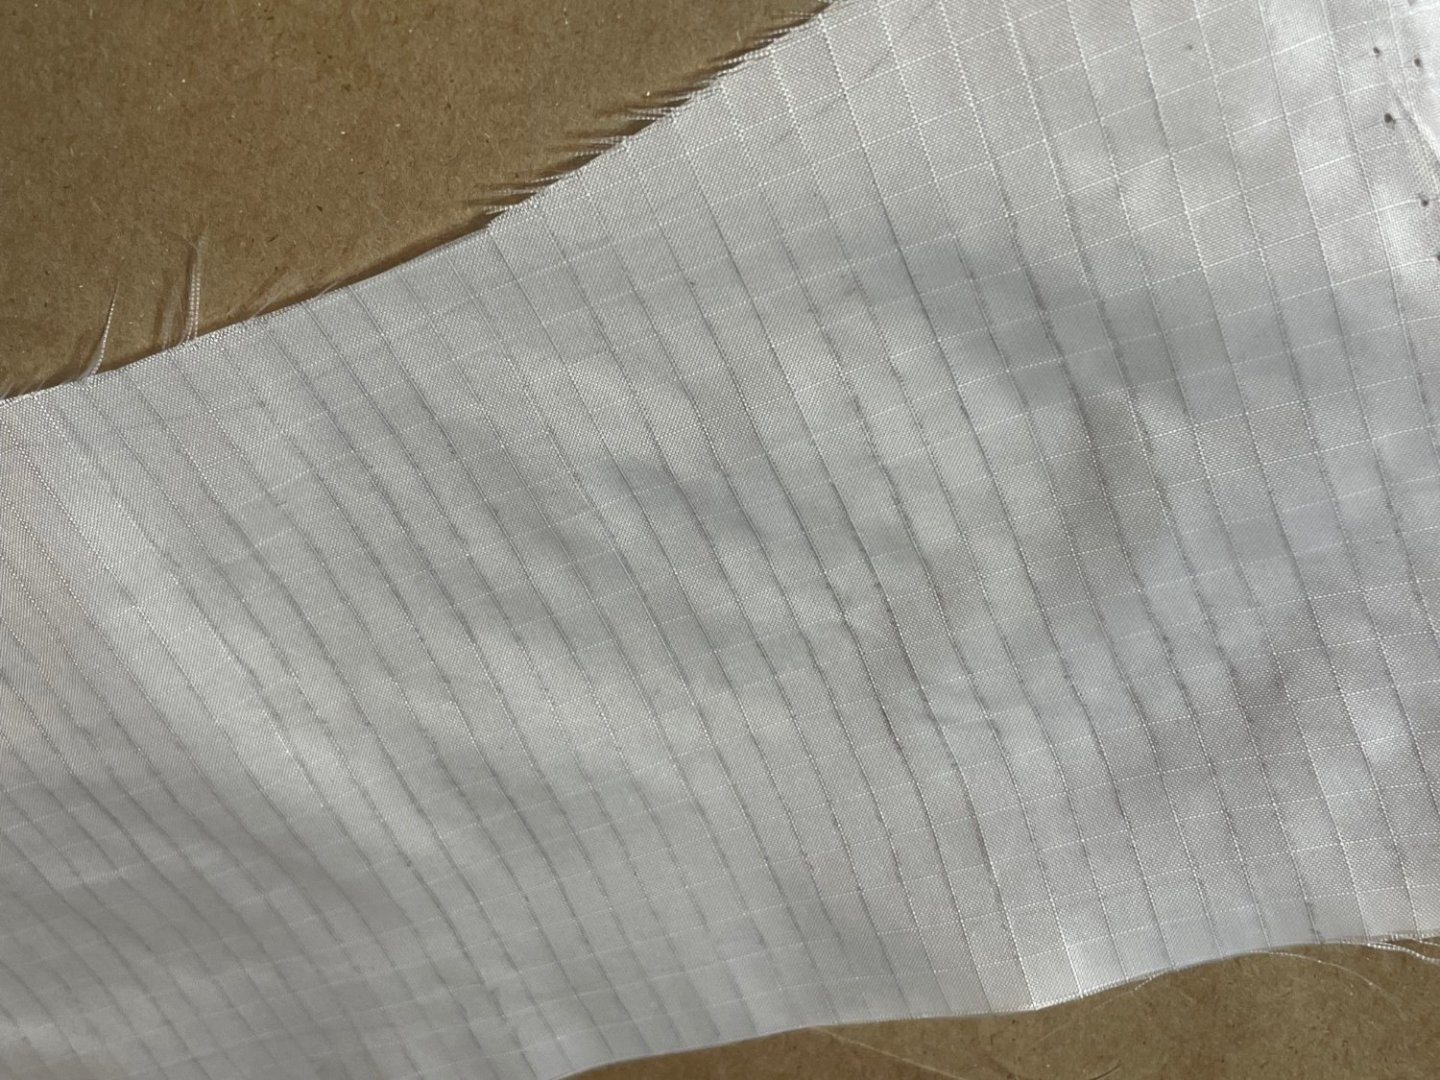
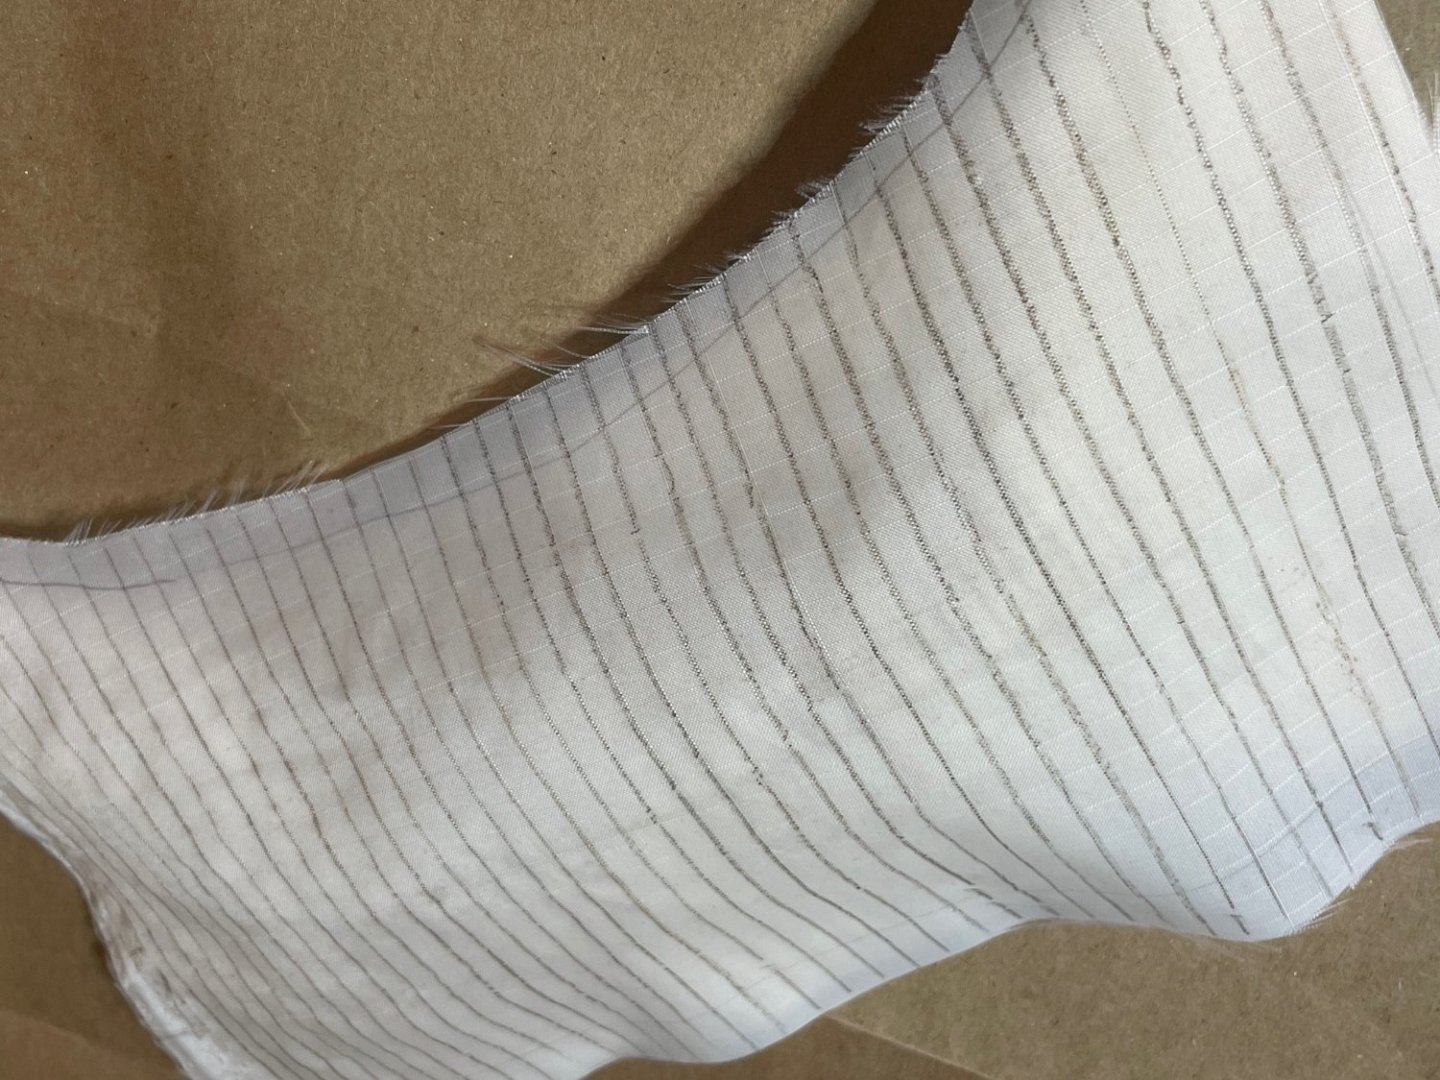
This next batch of fabric trials are my top picks for use on this specific model. I am also doing my own trials on lines/seams acceptability of mediums- so please ignore how terrible they may look in this experimenting stage and focus on the temperament of the fabric lol. (I am testing the use of archival pen, aquarelle water color pencil, and plain acrylic for this. When I've exhausted my ideas and formed a decision I will be posting my steps. I also am now going to include @Cathead's technique to see if that will work and can be altered for fabric) I'm not going to bother documenting that process as he already has it very succinct- only adjustment I may make.So.... Edit: That little dark thing in some of the pictures is one of the constitution boats I put under the fabric to show sheerness. FYI BATISTE: A woven cotton or linen that is fine, silky smooth, and mostly sheer. It is often confused with LAWN which will be next. I found the weave agreeable and the elastic stretch of the fine weave enables you to shape it as it dries. Thin enough to furl but may be too sheer for realistic raised sails. LAWN: a cotton fine woven shirting material, that's not quite as fine a weave as batiste, but comes in many variations of sheer and opaqueness. I don't think the weave is fine enough for this purpose and it doesn't have the malleable characteristics batiste has-but as a fairly stiff (for weight) fabric may be really good for reinforcement areas. BLACKOUT FABRIC: as the name suggests is a light blocking opaque material in varying thicknesses, it is made by layering foam on one side of fabric or in higher quality-sandwiching black fabric between white fabric and foam backing. This was my favorite for open sails. The weave is hardly discernible on the fabric side and nonexistent on the foam side, the fabric I have is very lightweight (similar to lawn) and is extremely good at shaping and holding shape. As you can see from my color testing the fabric side absorbs pigment very well and the foam side not as much. I think this would create a good effect of weather worn-ness with correct even application. I especially like that the edges don't fray and it shapes really well! The downside is that the weight is probably too heavy for furled sails- that being said if you halved your material I think it would definitely look more realistic as it is just really malleable. I have two tones and I chose to experiment on the white one, but I'll probably use the off-white. I'm really leaning towards it. RIPSTOP: A plain weave of primarily nylon but sometimes polyester or other fibers with thick reinforcement threads woven into the fabric in a crosshatch pattern that resists, you guessed it- rips. It is most commonly recognized as tarp, tent, and modern sail material which is why it gets somewhat confusing. Nylon was originally manufactured to replace silk and DuPont advertised their new "ripstop" weaving technique for use in the fashion industry- it didn't take, but outdoor enthusiasts and military loved it due to its light weight, resistance to sunlight and exposure, and of course durability. Modern sails use nylon ripstop for spinnakers and yacht sails and the ripstop weave is used for almost all sails of different materials. History lesson over let's get back to it. I love the texture because it kind of mimics the seam lines of large sails...kind of. I fear if dyed though it would extenuate both the horizontal as well as vertical lines making it look silly, it's also very sheer and resistant to molding so it's a no go for me- but may be useful for modern yacht models? I still think it looks ok un-dyed and the problem of shape was solved by layering it over batiste...but I was just playing at this point. All in the name of research! Haha Now for the long haul of actually making the sails. I have to print the patterns off the USS Constitution museums website found here and then add all the details, so yeah... a lot ahead, but I had to take a break from rigging. I thought I was almost finished but nay, barely even half 😑😂 Do you ever stop and say "What the hell did I get myself into?!" I do, and then I say "Whelp, finish what you start lady."


- 35 replies
-
- 3
-
-
- Constitution
- Revell
- (and 1 more)
-
Hey Thanks! And I think I'm actually capable of answering your question haha! So I am kind of like that weird old lady who has all kinds of hobbies and side jobs.. two of which are sewing and painting. Matte medium (let's just assume liquitex for ease of availability and clarity to those searching- but any brand should work the same) is a medium used with acrylic paints in this case, to dull the shininess and even the consistency in different pigments. And should work just fine as far as application on almost all fabrics aside from treated cases. But I would say with varying effect depending on treatment-you would assumedly have better results if applied in conjunction with acrylic paint as both are a type of polymer, on its own it would work well on synthetic fabric but probably not have much effect on natural fabrics.
-
A method for making panelled sails using paper
Valkyrja68 replied to Cathead's topic in Masting, rigging and sails
This is truly beautiful and well done, thank you for sharing your secrets!- 49 replies
-
- 3
-
-
- sails
- sail panels
- (and 1 more)
-
@CatheadMe likey!! Thank you for adding that here, it's pro- not only for my benefit but also having this in one place, I wonder if there is already a thread specifically on this topic we could add to? I wouldn't want someone bogged with all the long windedness I will be doing on this build log. Too lazy to look right now but I may venture that later. I definitely prefer the 'look' of paper sails I think that they look realistic if not a bit dry, but I am adverse to using paper due to its non archival nature. I'd rather a slightly out of scale model than it moldering away. That's just a personal preference being in art conservation (I've seen some terrible tragedies of all sorts).
- 35 replies
-
- 1
-
-
- Constitution
- Revell
- (and 1 more)
-
@wefalck One more thing and this is the primary reason I'm adverse to paper- Although it meets the scale requirements how do you feel about the archival quality of using Silkspan/Esaki? Being in art conservation I have a deep aversion to paper as the methods to preserve it are extensive, expensive, and generally inadequate. Once paper has started to degrade there is almost nothing that can be done. But that is not my specialty and I have no first hand experiences.
-
@wefalck That's a good process you have there. I do listen to advice and I know that silkspan is the preferred choice by experienced modelers, but I cannot EVER seem to let things be simple. I feel like I need to experiment for the tactile and visual experience of it, and I suppose to know what materials I like best for future builds. I will post the results here as you suggested once I've finished my fabric choices. I feel as if I may already have a winner in mind, using your technique. Thank you.
-
I have started documentation and included my notes, you can see it here . The idea was to include non-traditional fabric options that may or may not work depending on build. I am proficient at sewing and used to work for a sailmaker and marine canvas shop, but that isn't helping me here lol. We shall see. My current build is kind of the test platform for my next build which I hope I will have the experience to accomplish on a higher level.
-
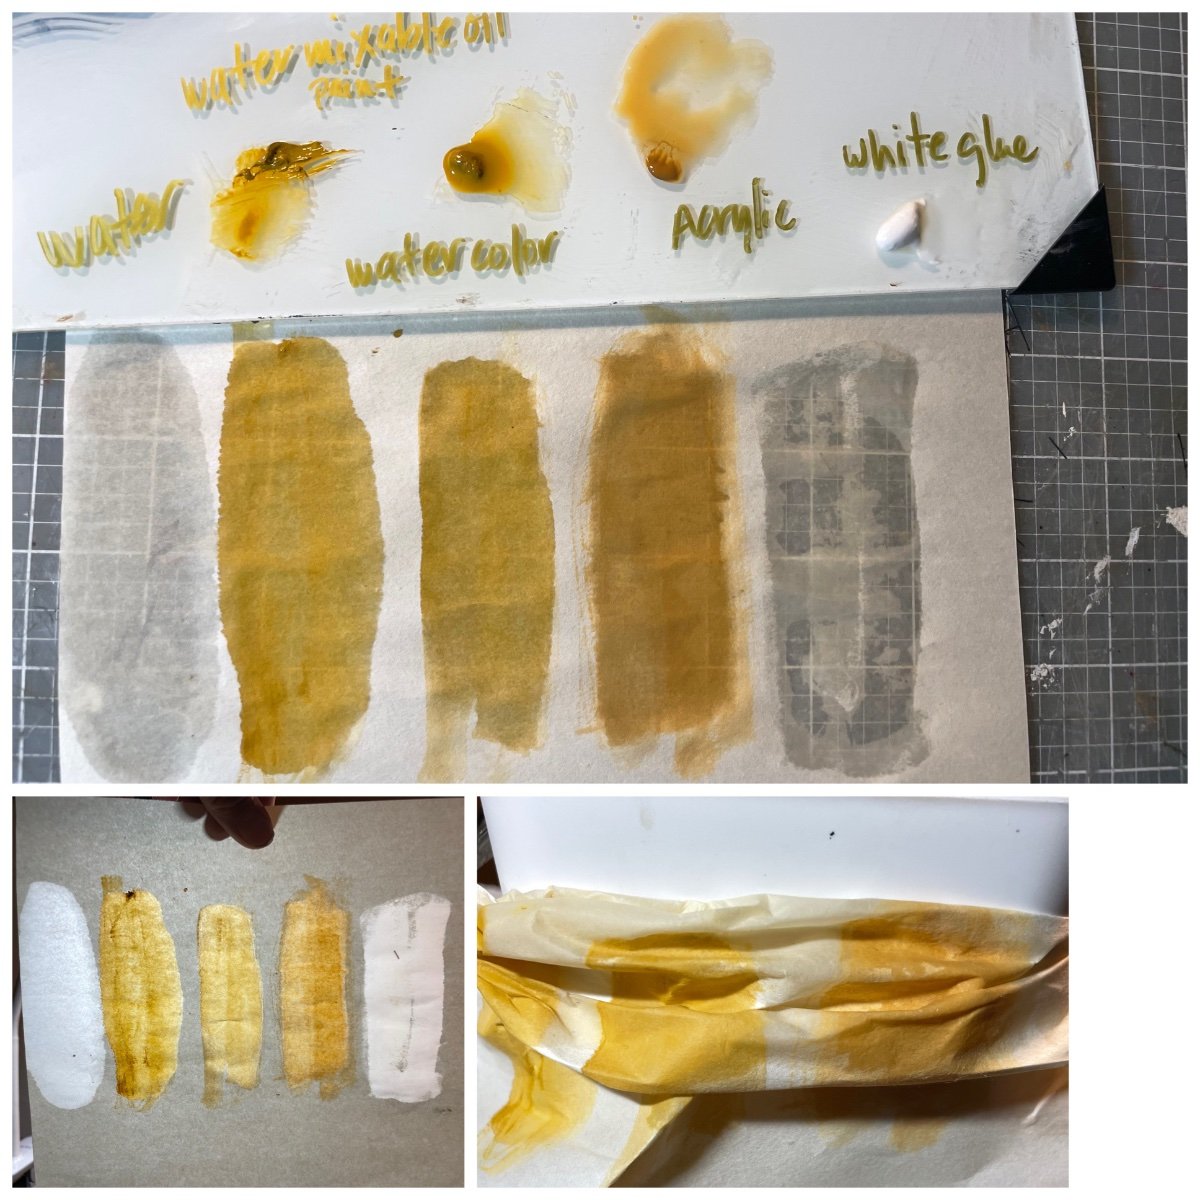
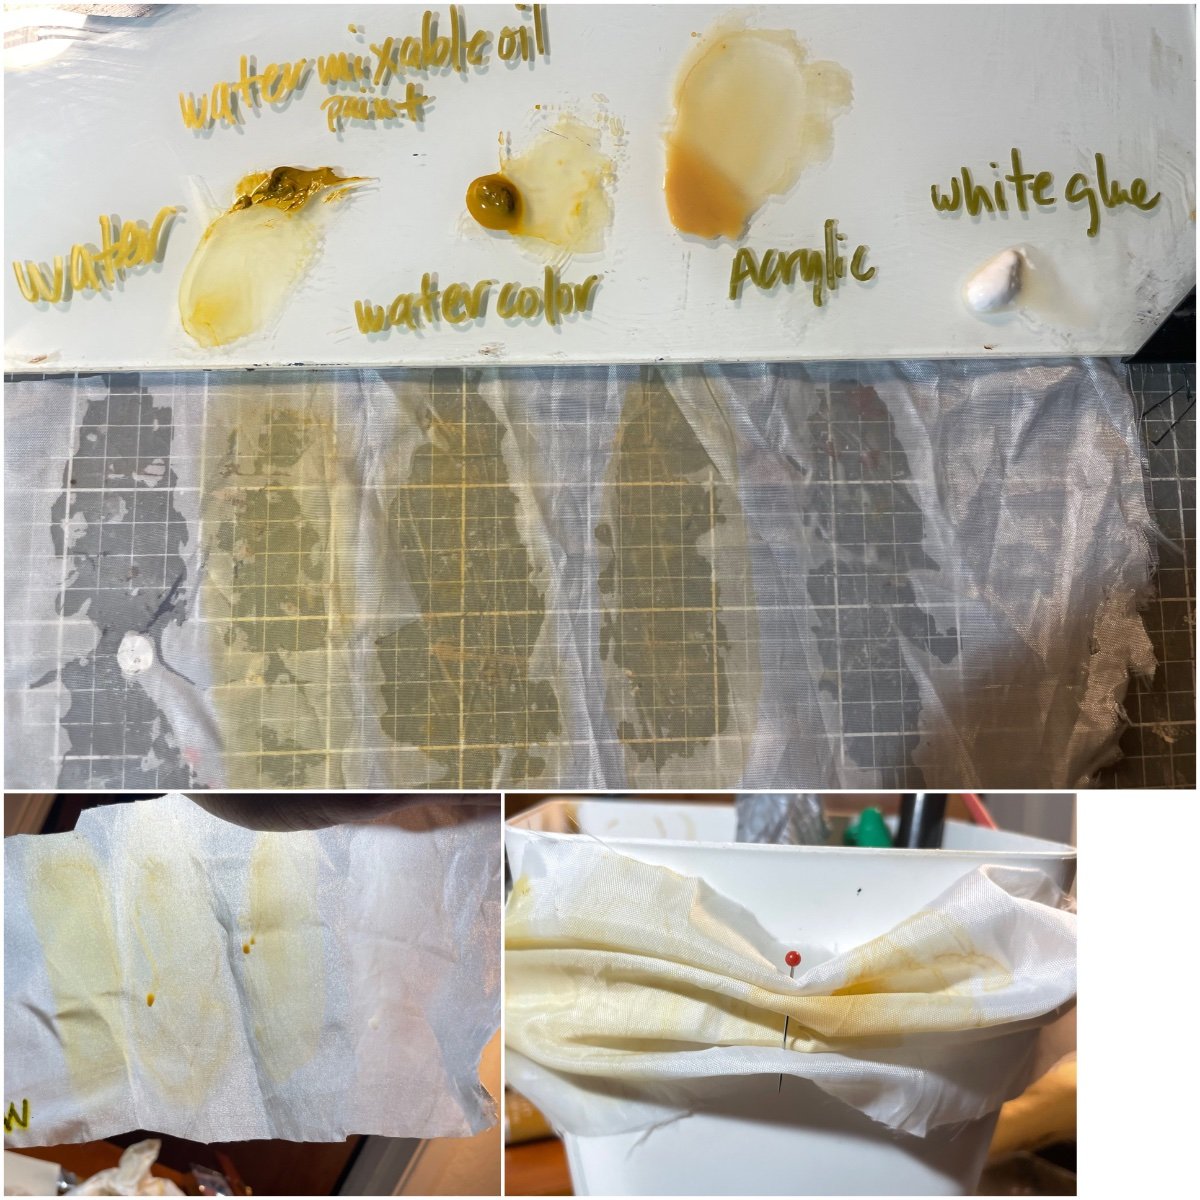
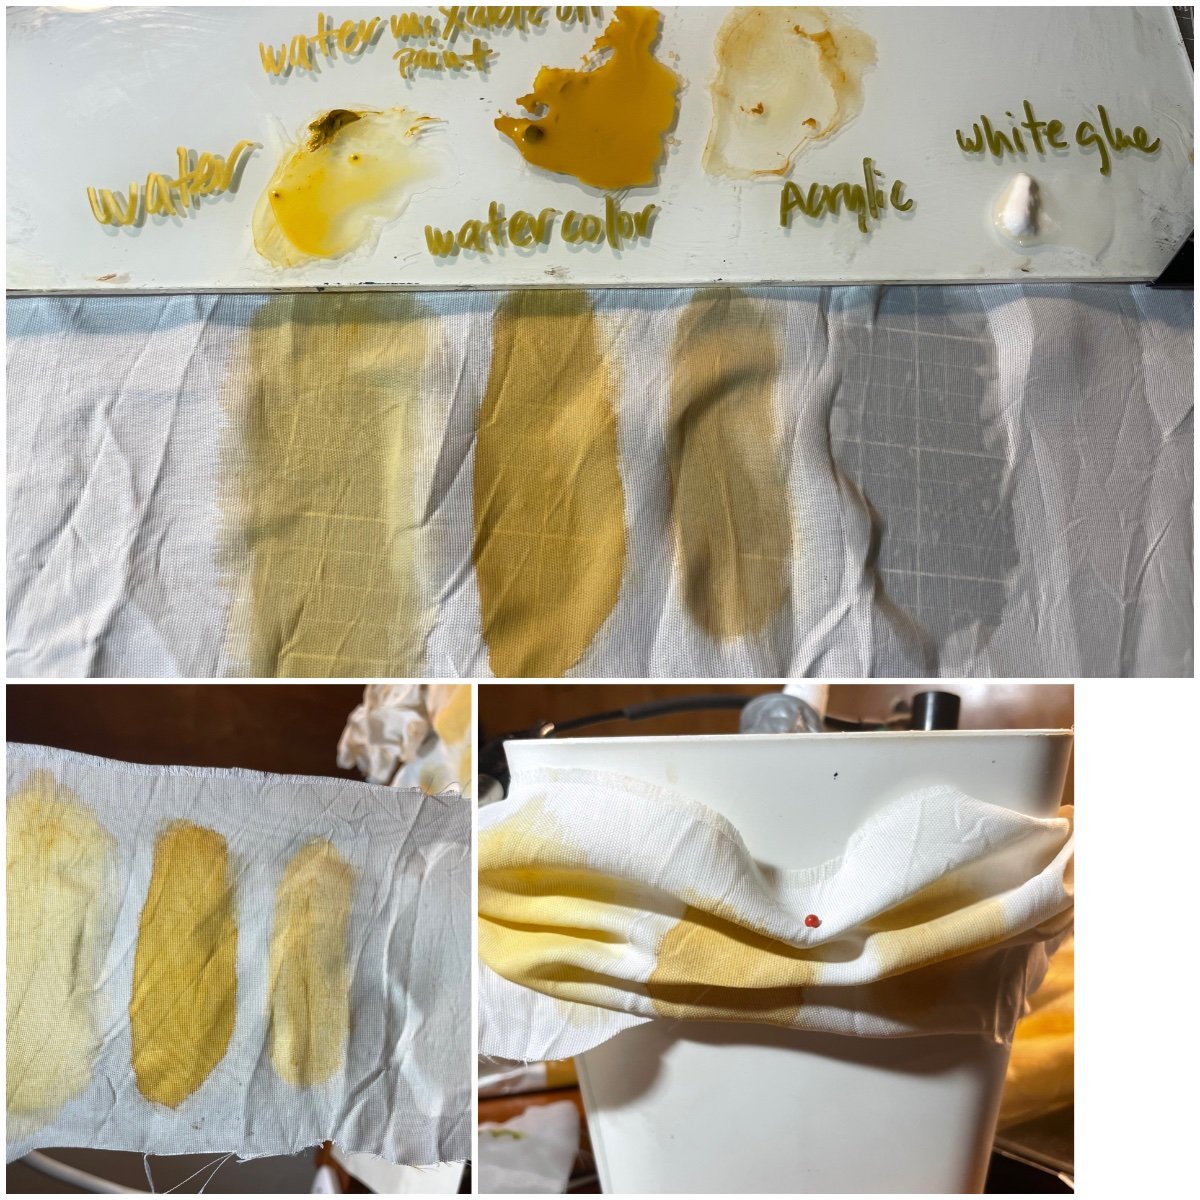
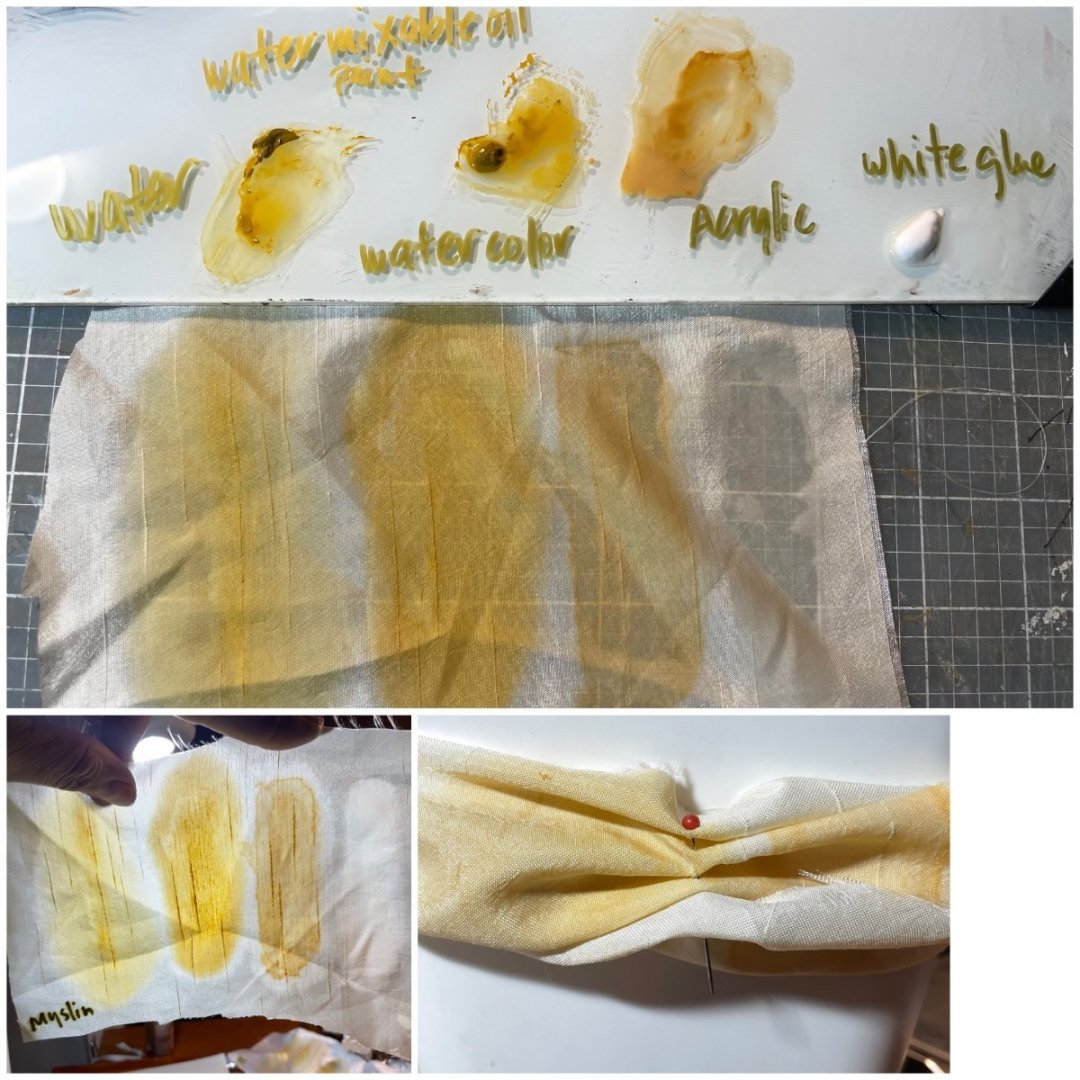
The beginning of sail trials, some could work, some are ok but not scale appropriate, but for posterity and visual accounting I thought I'd include them all, my best fabric choices will follow. This first batch was a test of paint mediums and workability. I tried water; water mixable oil paint; watercolor; acrylic, and plain white glue. All in ochre. TENSHI: Japanese Tempura Paper. Very strong and absorbent, can take both oil and water without tearing and works well wet, does not iron well and left creases, which may be less a problem if treating the entire piece. It takes color a little 'too' well and would do better with much less pigment. MUSLIN: Cotton fabric in varying weights. I liked the unique patterning and sheer fabric but it's a bit too springy and would be hard to manipulate.Takes color very well without obvious rings and darkening. The weave is also too visible. NYLON SLIP: A synthetic material with no stretch and an appearance like modern nylon ripstop. This would be great for modern yachts and mimics the look and feel of ripstop. Not so easy to work with and doesn't take color well. Very tight weave that is barely noticeable. ACRYLIC SLIP: A lightweight polymer fabric. This was my least favorite due to the weave but it takes color surprisingly well and creates nice folds. Very hard to get wrinkles out which could be a pro or a con... I'll be back with additions of Lawn, Ripstop, Blackout, and Batiste. Stay tuned.


- 35 replies
-
- 4
-
-
- Constitution
- Revell
- (and 1 more)