HOLIDAY DONATION DRIVE - SUPPORT MSW - DO YOUR PART TO KEEP THIS GREAT FORUM GOING! (Only 20 donations so far - C'mon guys!)
×


JGoff
-
Posts
59 -
Joined
-
Last visited
Content Type
Profiles
Forums
Gallery
Events
Everything posted by JGoff
-
Thank you, Glenn, and I appreciate the advice.
-
Thanks Thukydides! We shall see where the journey leads! Much to figure out and see what plans or logs I can utilize for scratching some of these parts.
- 83 replies
-
- 2
-

-
- Lady Nelson
- Amati
- (and 2 more)
-
Thank you for the compliment. I have not really considered leaving the hull natural, but I may now give it a think.
-
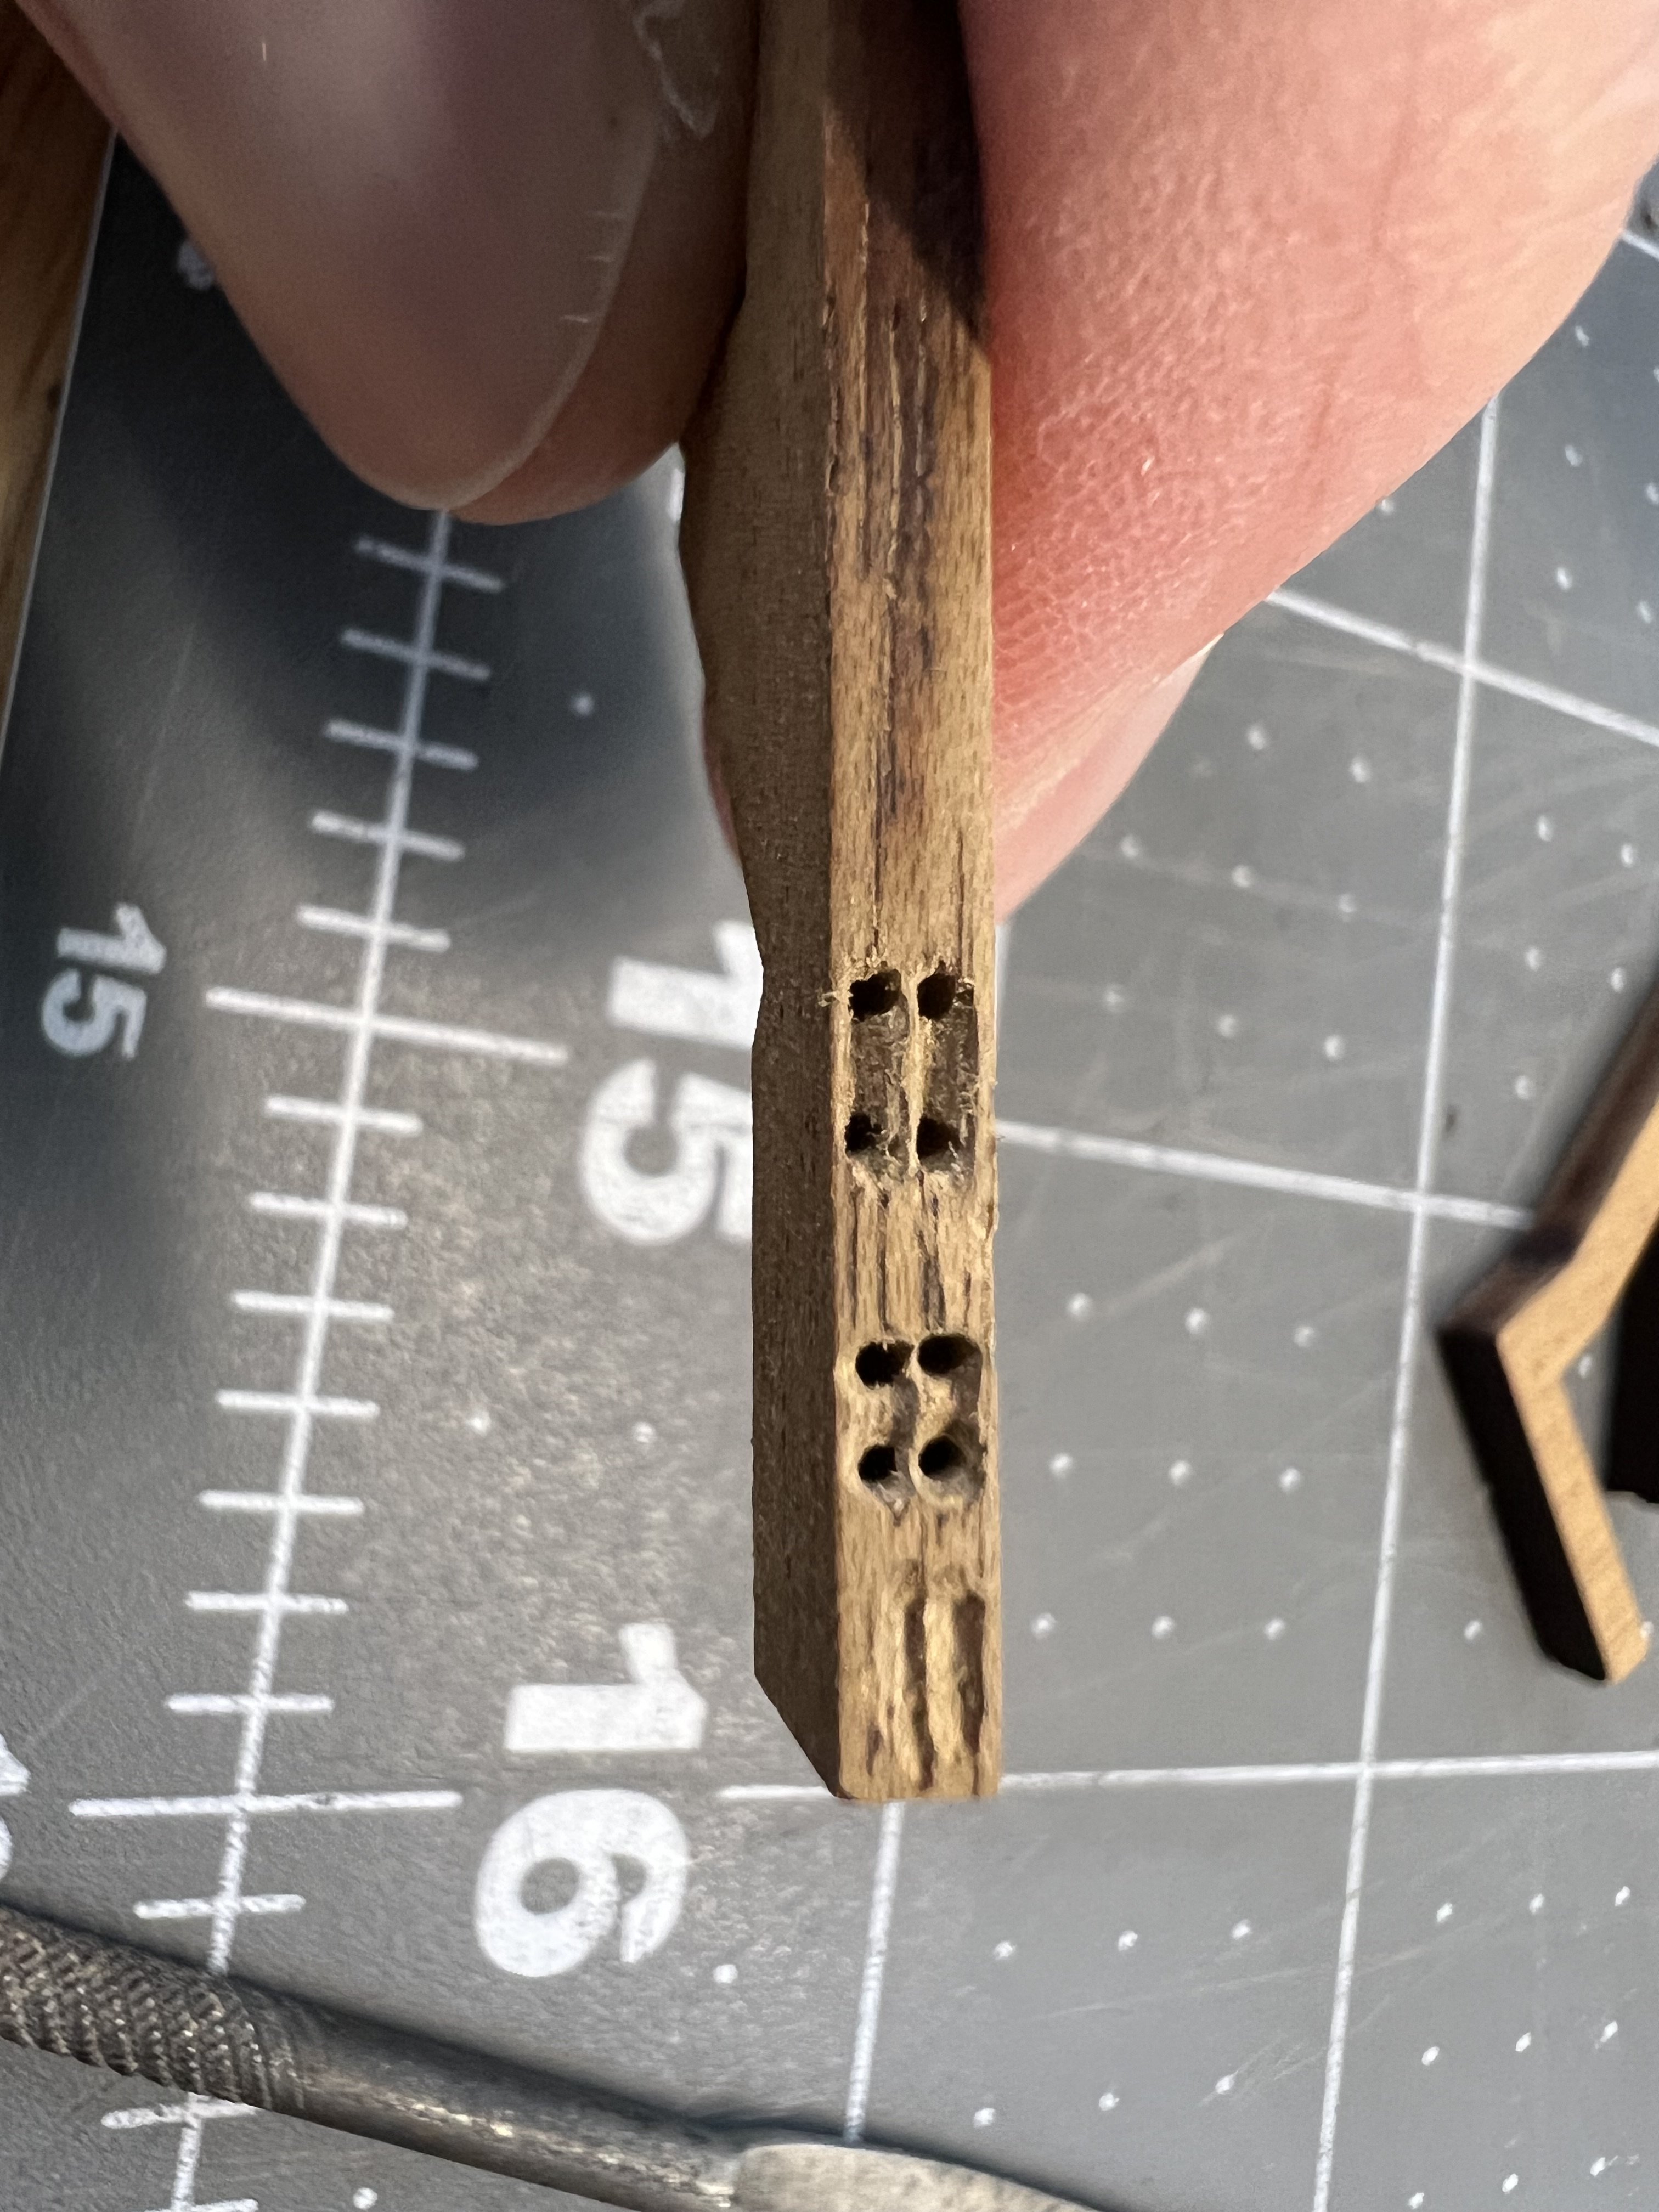
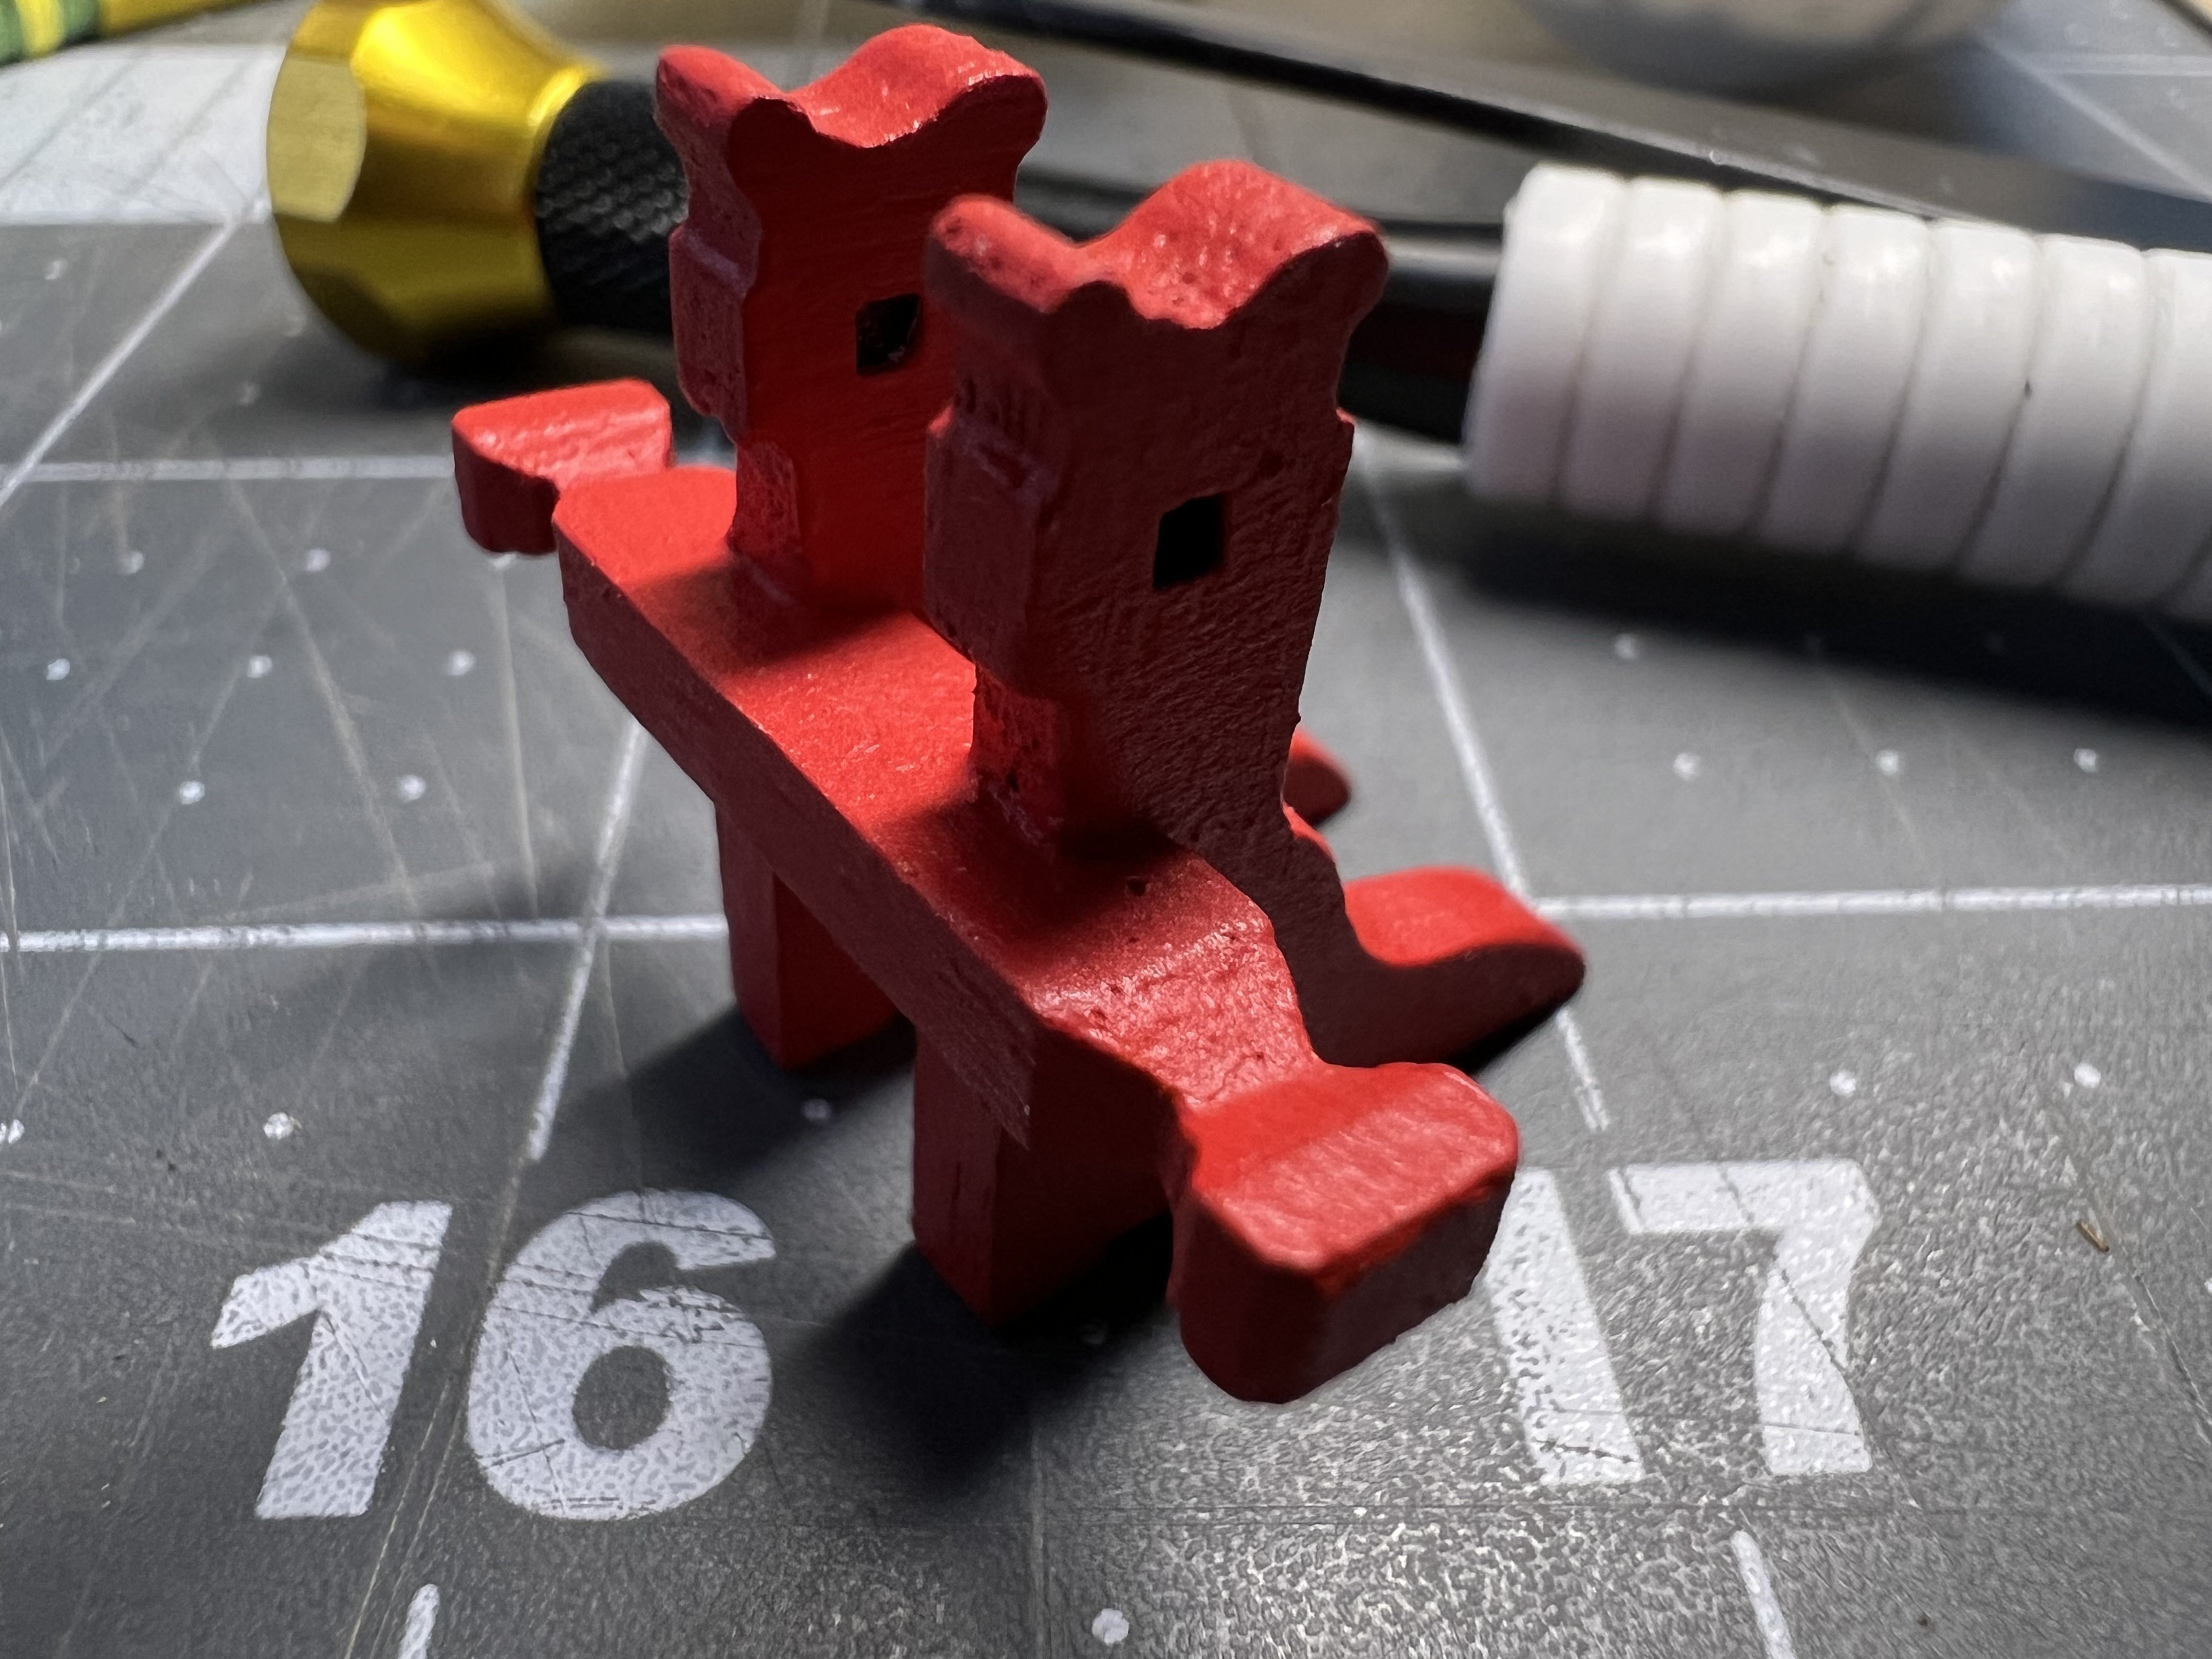
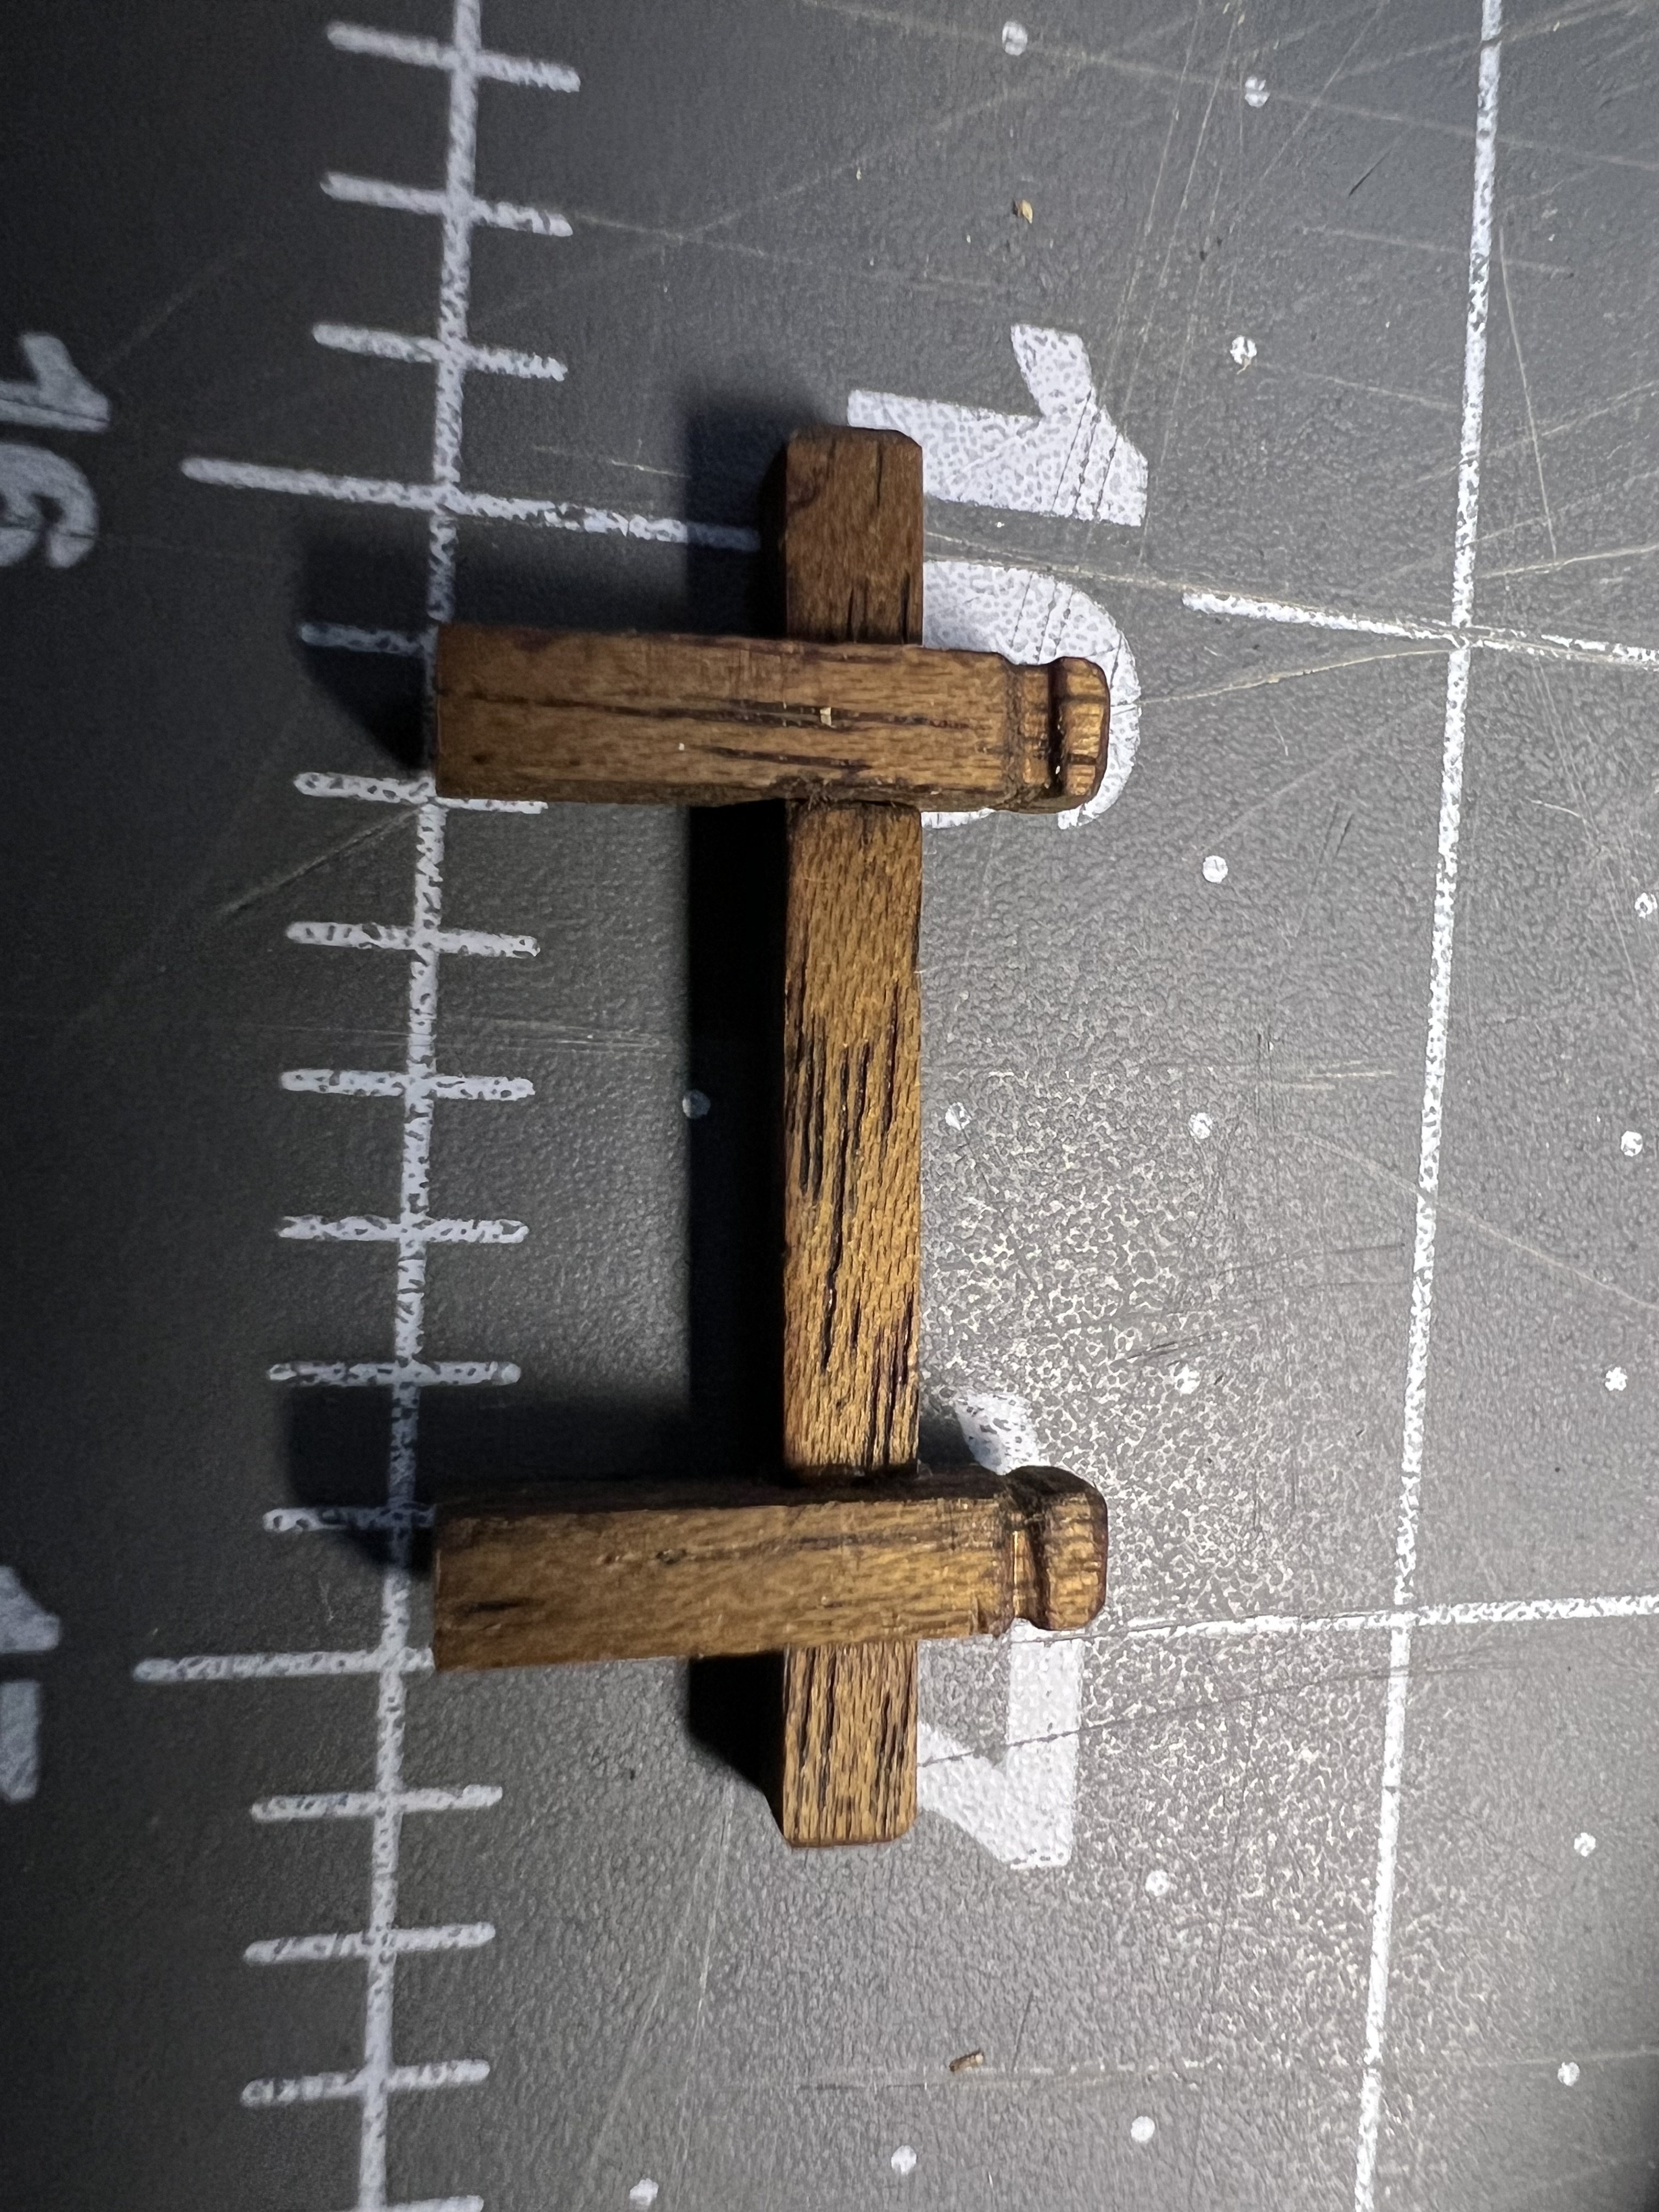
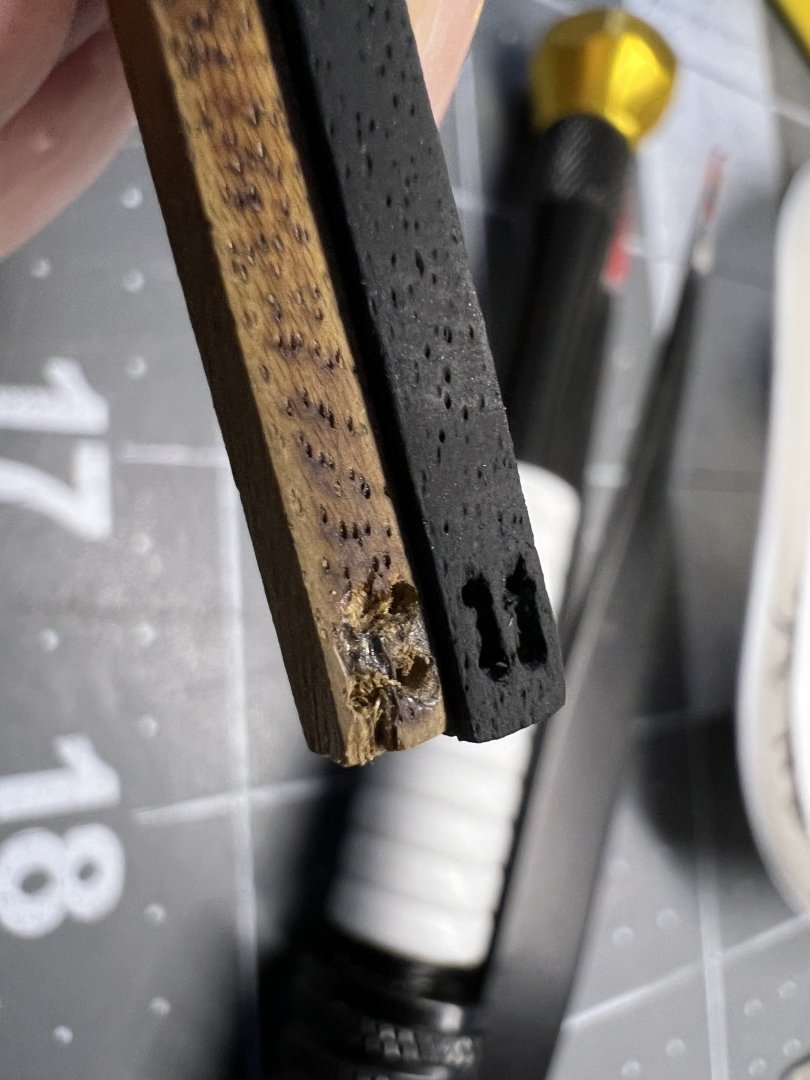
I took some time to try and figure out how to do make the slots on the cathead. With a 3mm wide piece of kit supplied walnut, it was difficult to properly set my drill bit without splitting the wood. I had the idea then to create a shallow channel with the dremel on a low setting which worked beautifully on a scrap piece of walnut. I tried a few different times until I was able to have satisfactory results which you can see here. I then set to the task of working on the actual cat heads and the first went well, but on the second one…not so much. The wood practically disintegrated. As a result, I find myself at a crossroads. My goal with this ship, in part, was to work out of the box while making a few improvements. I wanted to get a basic handle on some of the fundamentals, planking and rigging. Since moving on to the deck furniture, I lost a post for the piece that is placed at the foot of the mast, so I had to make another one. That turned out ok. For the bowsprit support, I did some general shaping of the ends and lowered the support to accommodate the bowsprit. And for the most part, I’ve been happy to attempt to modify a few pieces. In this build process, my thoughts have gradually shifted into making a few more improvements. I’m considering taking the plunge and ordering the new blocks from Chuck and line from Ropes of Scale. I ordered some 3lber cannons from Chris Watton, as well. At this point I’m wondering if maybe I should order some wood sheets, maybe boxwood or cherry, and just scratch build the deck furniture, including the windlass. I’m not sure yet how I’ll proceed, but it may be good to go ahead and order some wood. While I wait I can start working on the cannons to keep the project moving. Thanks all for dropping by. The likes are appreciated.


- 83 replies
-
- 7
-
-
- Lady Nelson
- Amati
- (and 2 more)
-
Congratulations on the completion of your build! Your log is a great gift to the community, and I will look forward to your next one!
- 562 replies
-
- 3
-

-
-
- vanguard models
- alert
- (and 2 more)
-
Thank you for taking the time to check out my log, Dr. Per, and I appreciate the kind words. That’s a beautiful little build you have and good to see that the brass rods provide good stability!
- 83 replies
-
- 1
-
-
- Lady Nelson
- Amati
- (and 2 more)
-
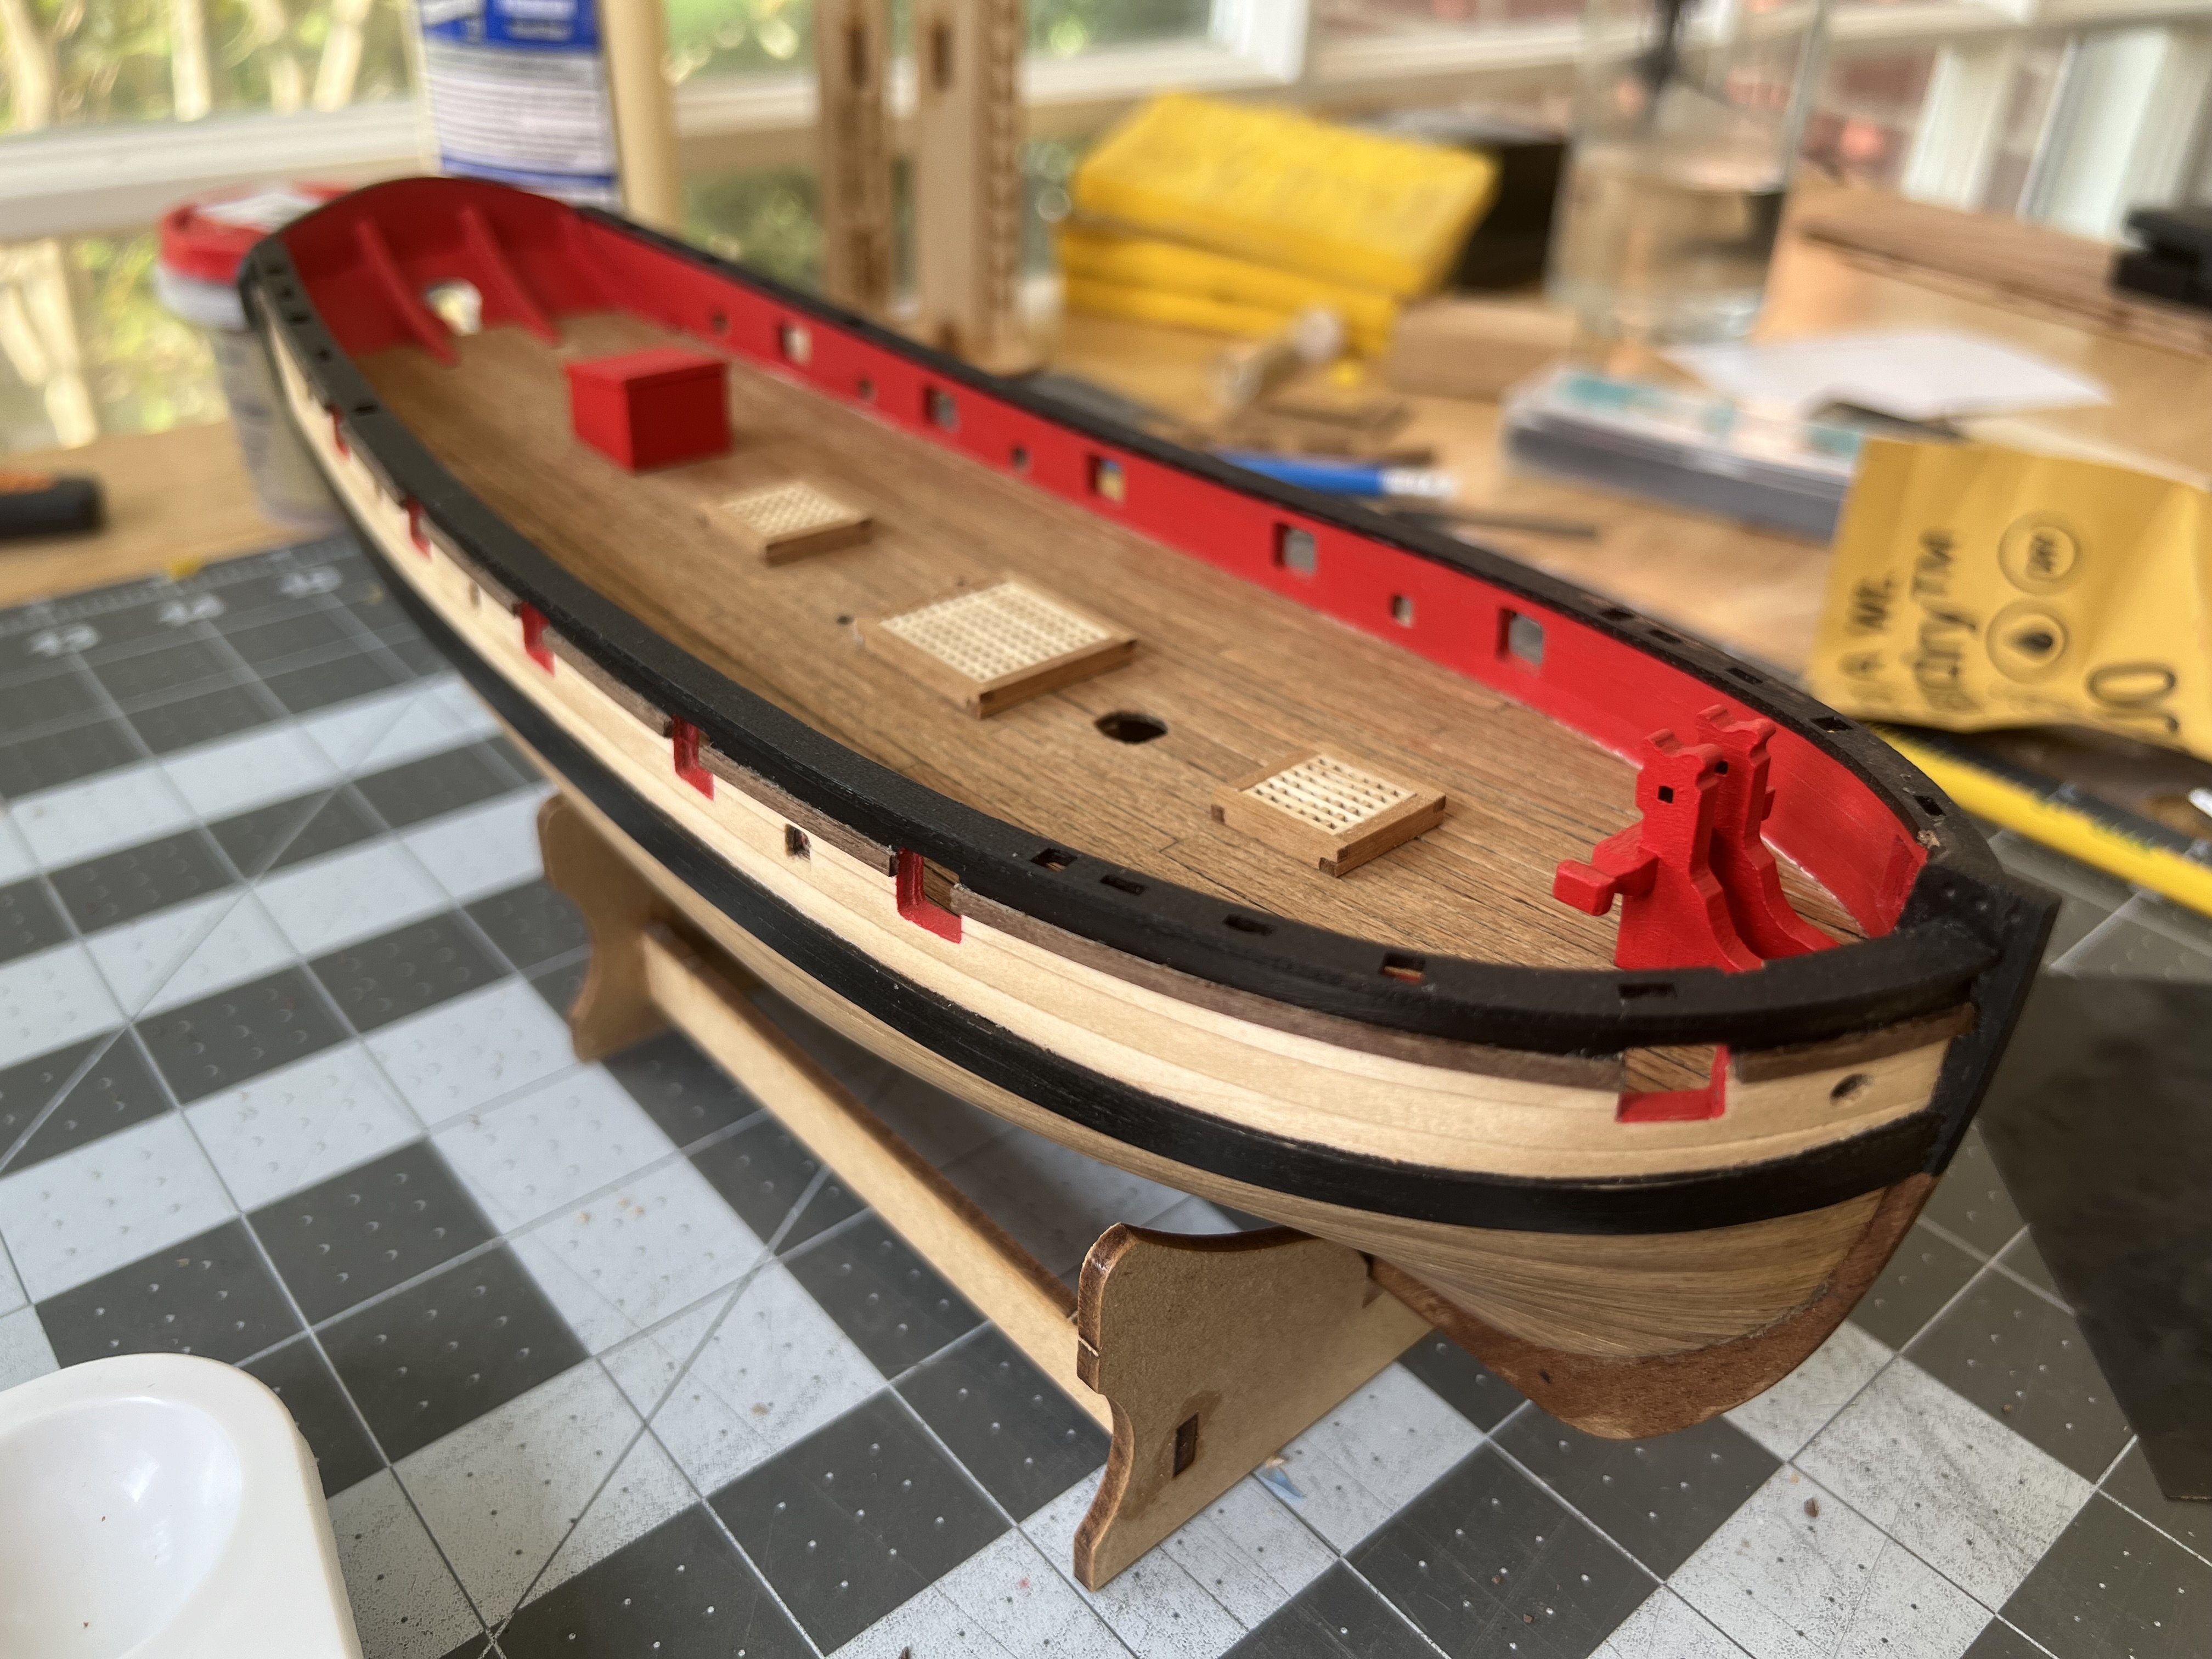
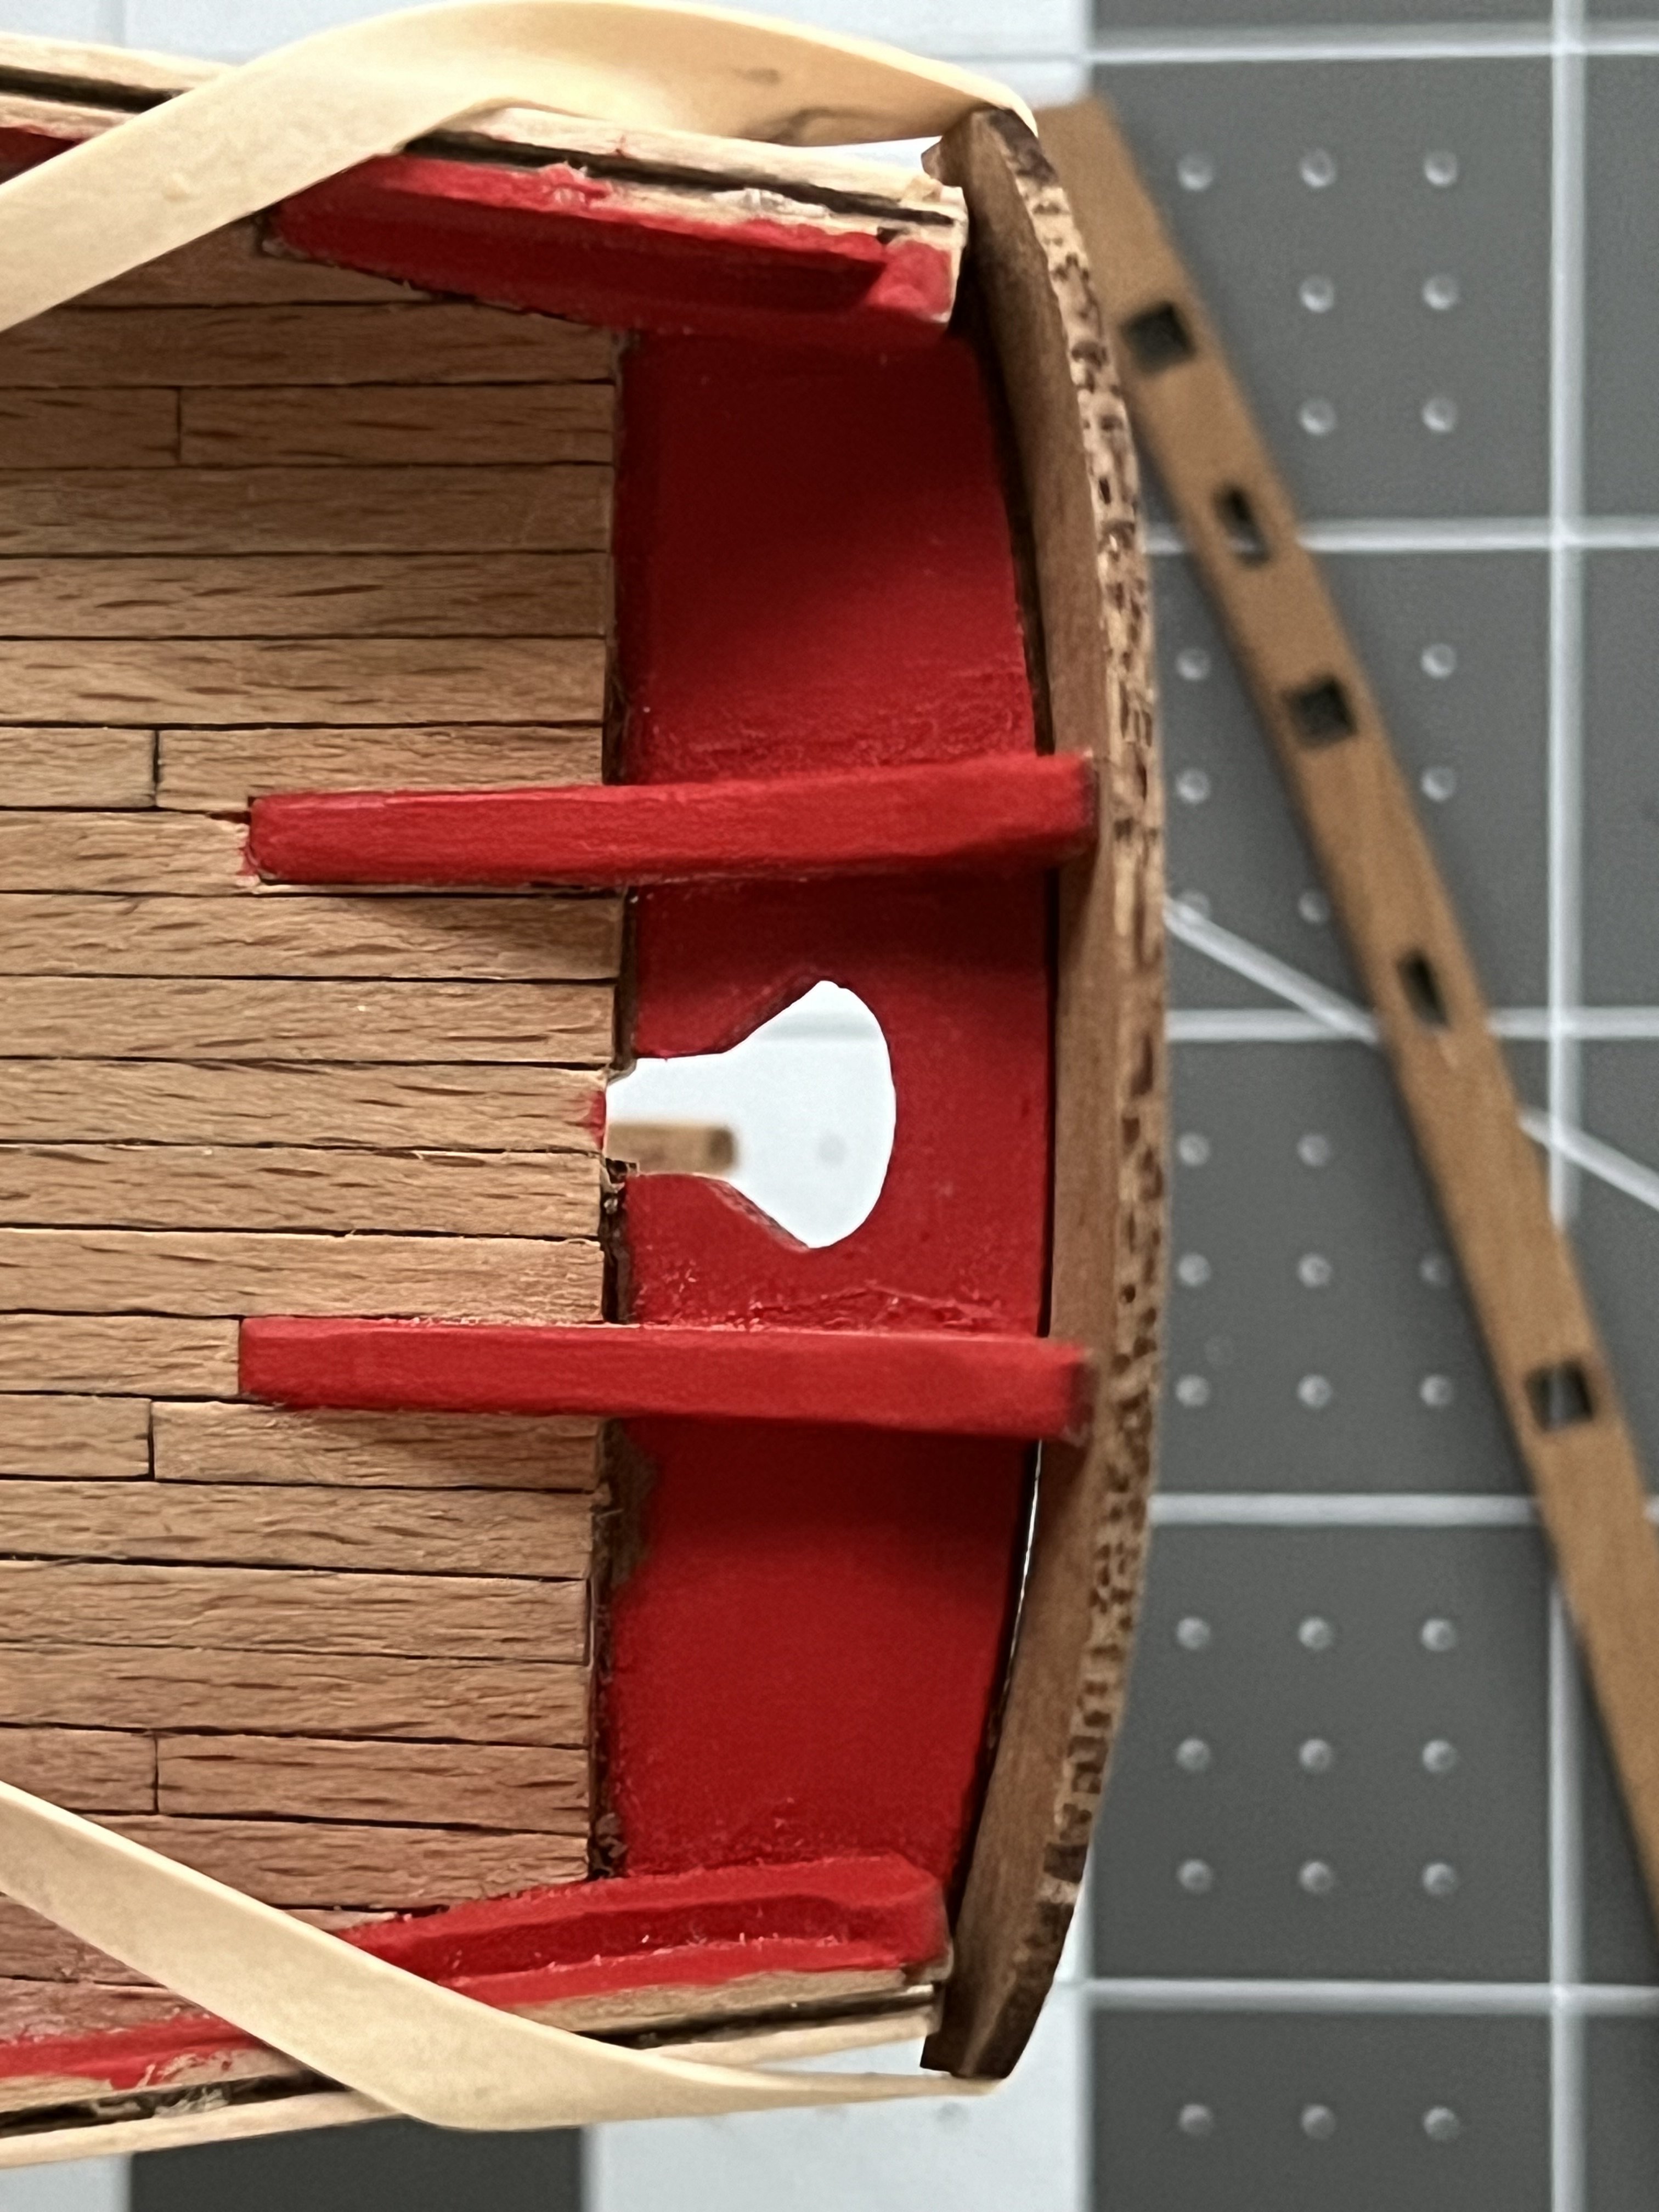
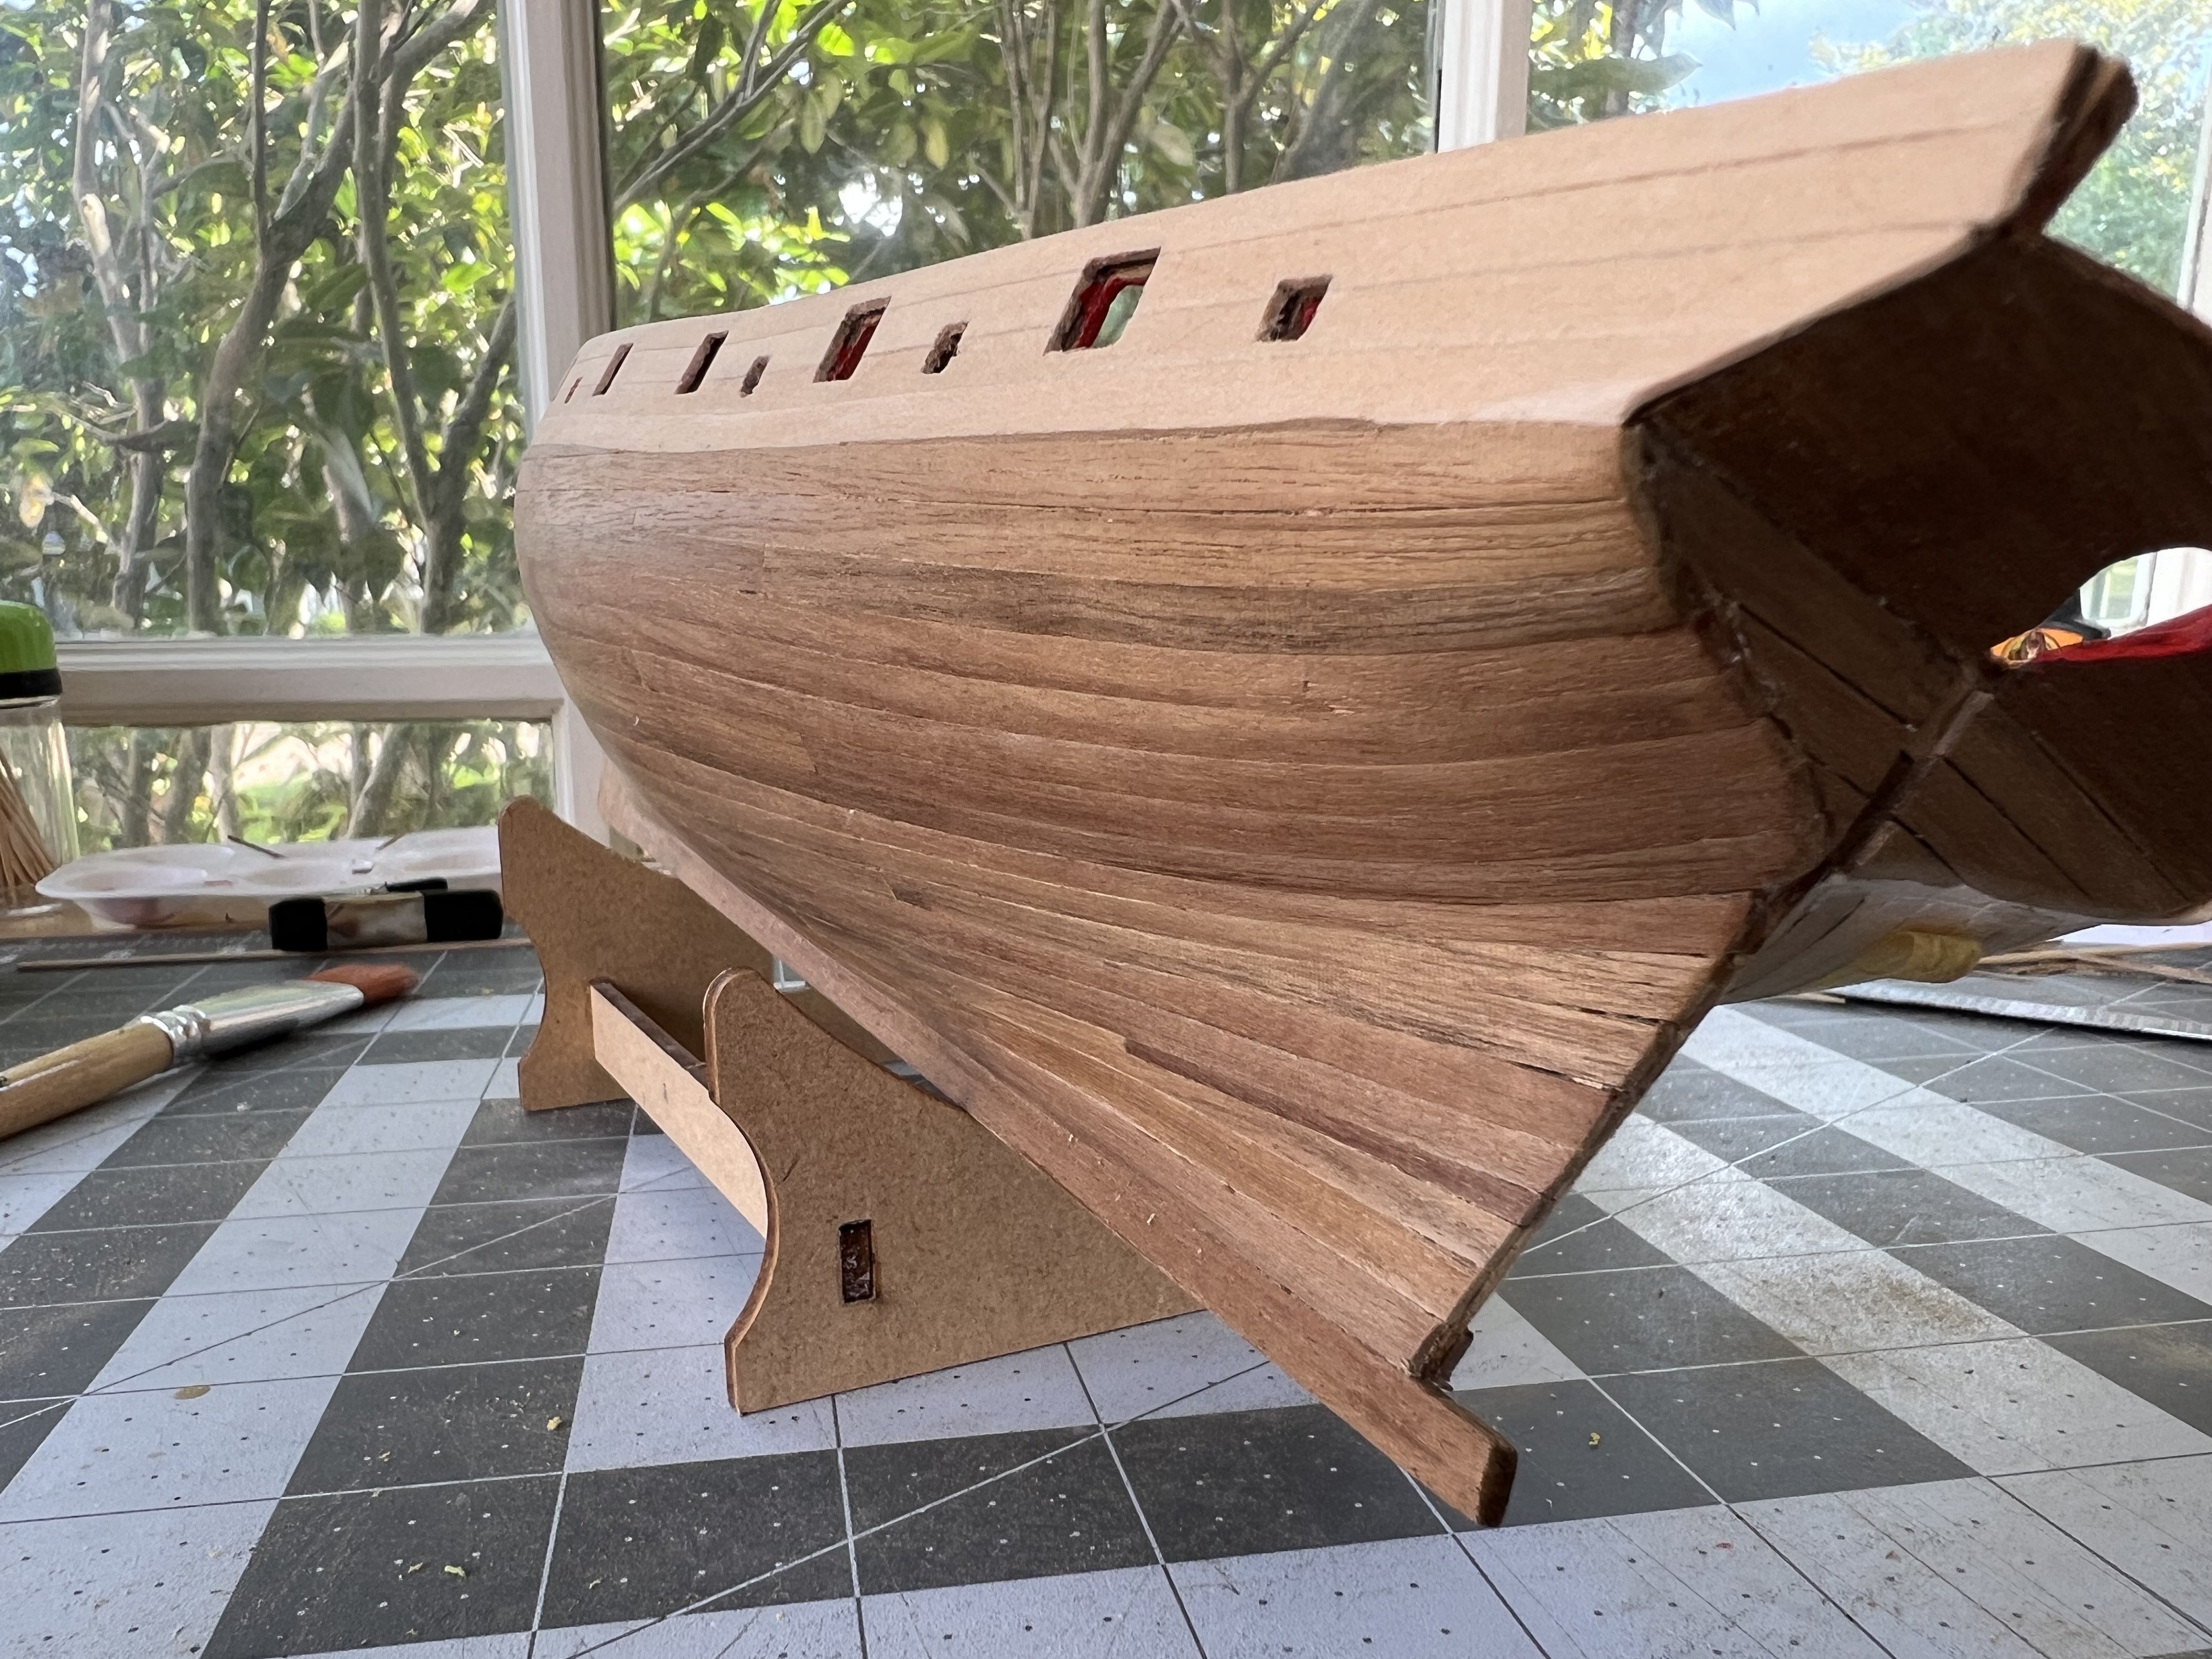
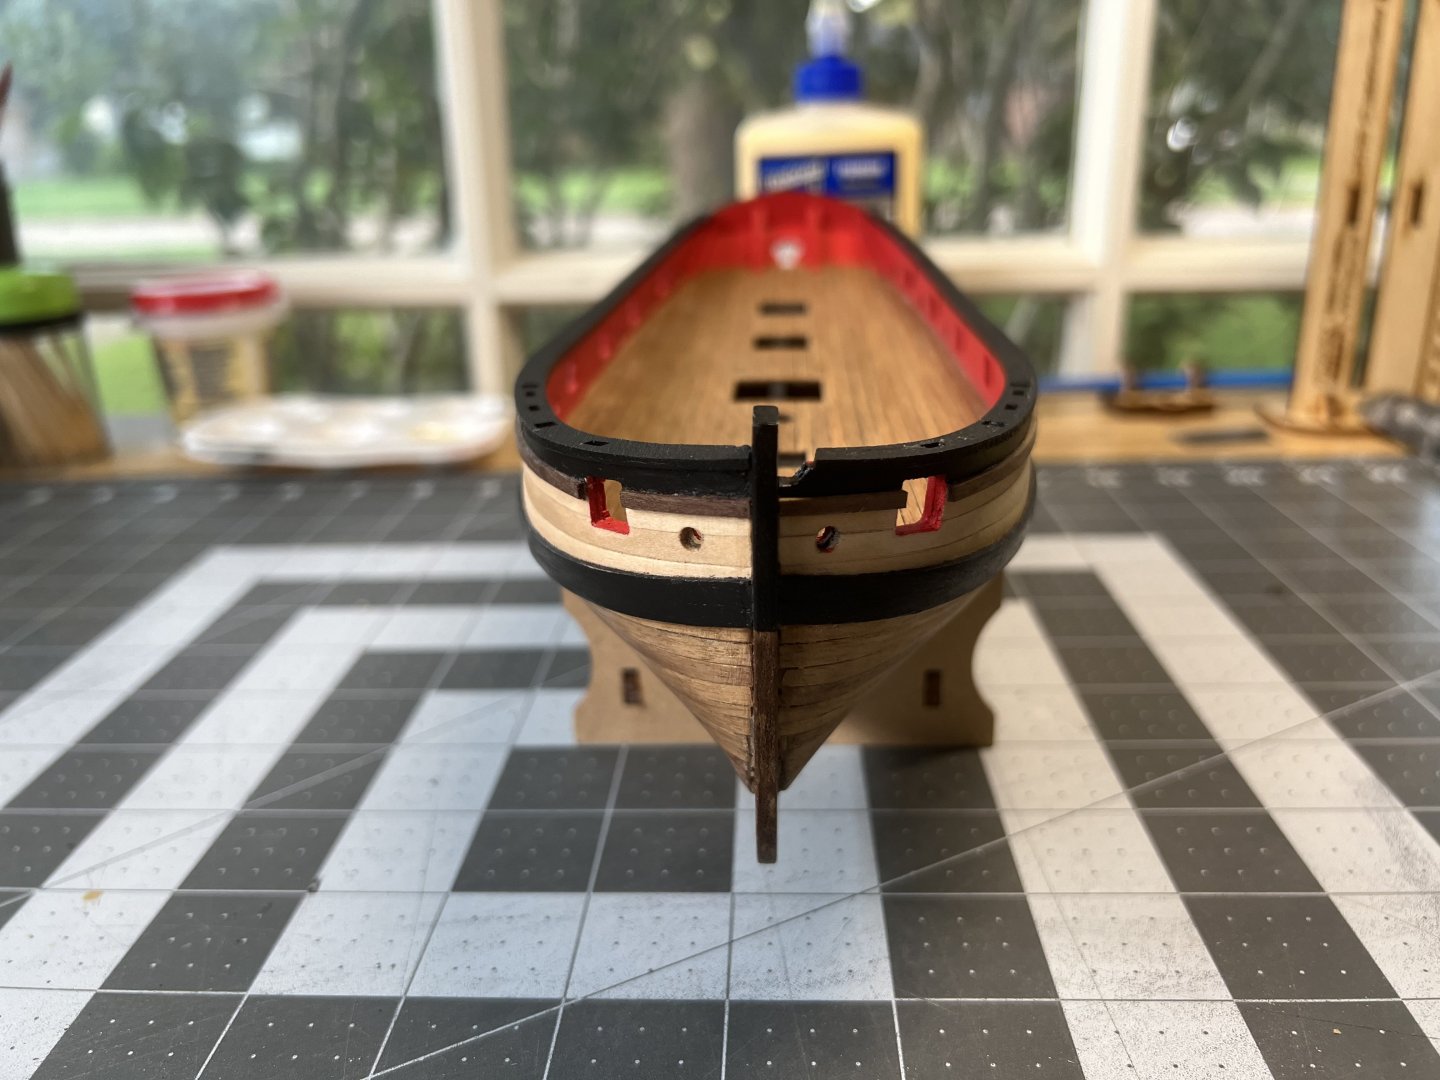
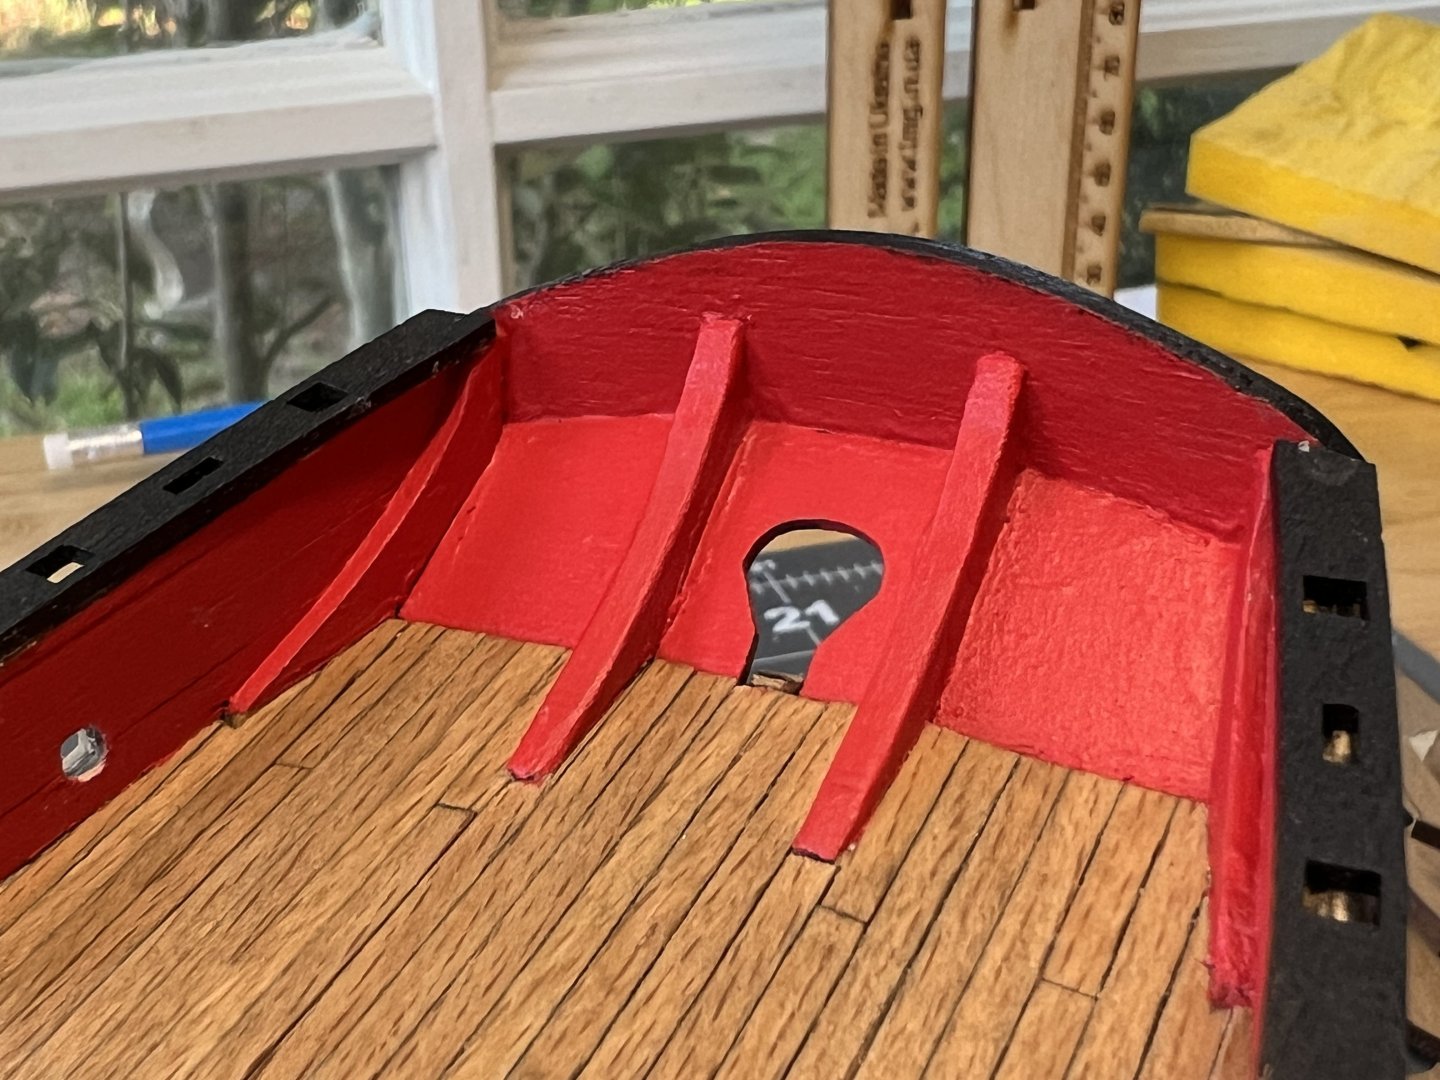
I was able to get the stern fascia worked out after sanding as much as would comfort would allow and am pleased with the result. The sanding did result in a slight more upright stern fascia than what angle of the counter frames seemed to suggest. No fuss in adding the main and upper wale, and I have added two coats of WOP to the basswood. The first coat I did with an old t-shirt, and it caught some red paint on the gunport causing it to smear a little. I used my handy xacto #11 to scrape it out, lightly sanded and added the second coat. I’m debating on whether or not to paint all white below the main wale or just below the waterline as the plans call for. Finally, I have started fiddling with deck fittings, and as noted on other logs, the bowsprit support is situated too high, so I have taken it down a notch. I need to plug the hole for the peg and drill another one. Before I mount anything, I am working out how to mount to the base and have purchased some 2mm brass rod. I may post more on that later. A little more fiddling to do with the deck fittings but my next significant effort will be to start blackening the brass parts. There are an abundant of posts and discussions on this, but have settled on attempting this method from Greg (Hebert - I think): As always, thanks for dropping by.

- 83 replies
-
- 7
-
-
- Lady Nelson
- Amati
- (and 2 more)
-
Do you have some photos so we can see the issue? For planking, I use CA glue. I bevel the back lower edge of the plank with sand paper a little to try and get a tight fit between planks. I also edge bend my planks, which you can see a tutorial here. You might also look into the NRG Half Hull Project. This provides a good foundation for learning how to plank. As for tools, sounds like you have all you need. If your first layer of planking with the lime wood is springing, you may have not bent your planks sufficiently or you may have not faired enough. I would pull the plank and do it again, set it with CA glue. I’m on my first build too so maybe some of the more experienced may have better insight. As for a rabbet, I would not sweat it. I did not really do one on mine. I’m sure it would have been better/easier if I had, particularly with fitting at the bow. If you haven’t started a build log, start one. I was reticent in doing one but it is good to keep track of your progress, learn from your mistakes, receive feedback from the community, and maybe it will even be a source for future Lady Nelson builders. I think it is fair to say that everyone here looks forward to your success and enjoyment of the hobby.
-
Count me in, as well.
-
I am considering doing the same with mine considering viewing some early models from NMM.
- 34 replies
-
- 3
-
-
- lady nelson
- amati
- (and 1 more)
-
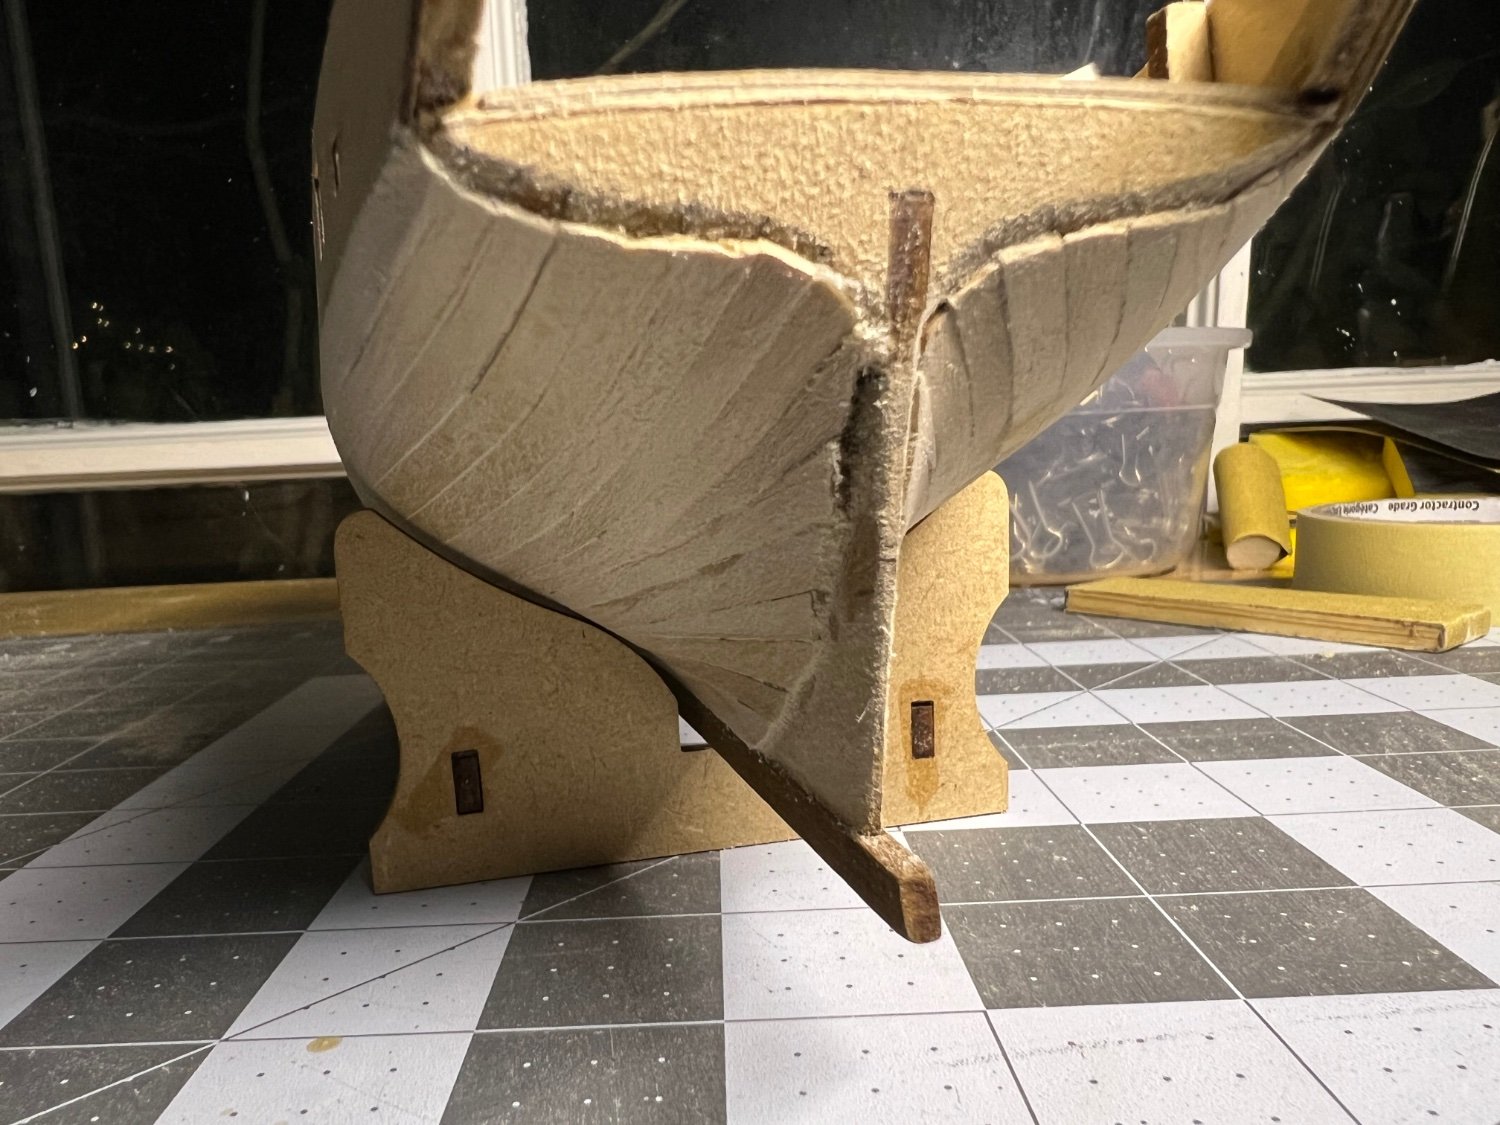
Thanks for the encouragement Thukydides. Watching your build, I see the value of redoing and improving. I do have a question. Looking for some insight on whether I made a mistake and what I might do to make this work correctly. The stern fascia does not sit flush against the outer stern counter frames leaving a considerable gap. So to correct this, it seems that I’ll either need to add some wood to extend the counter frame or to sand a considerable amount to bring everything together. When I add the capping rail, it does not extend all the way either. So I can only think I may not have installed the outer counter frame correctly.

- 83 replies
-
- 4
-
-
- Lady Nelson
- Amati
- (and 2 more)
-
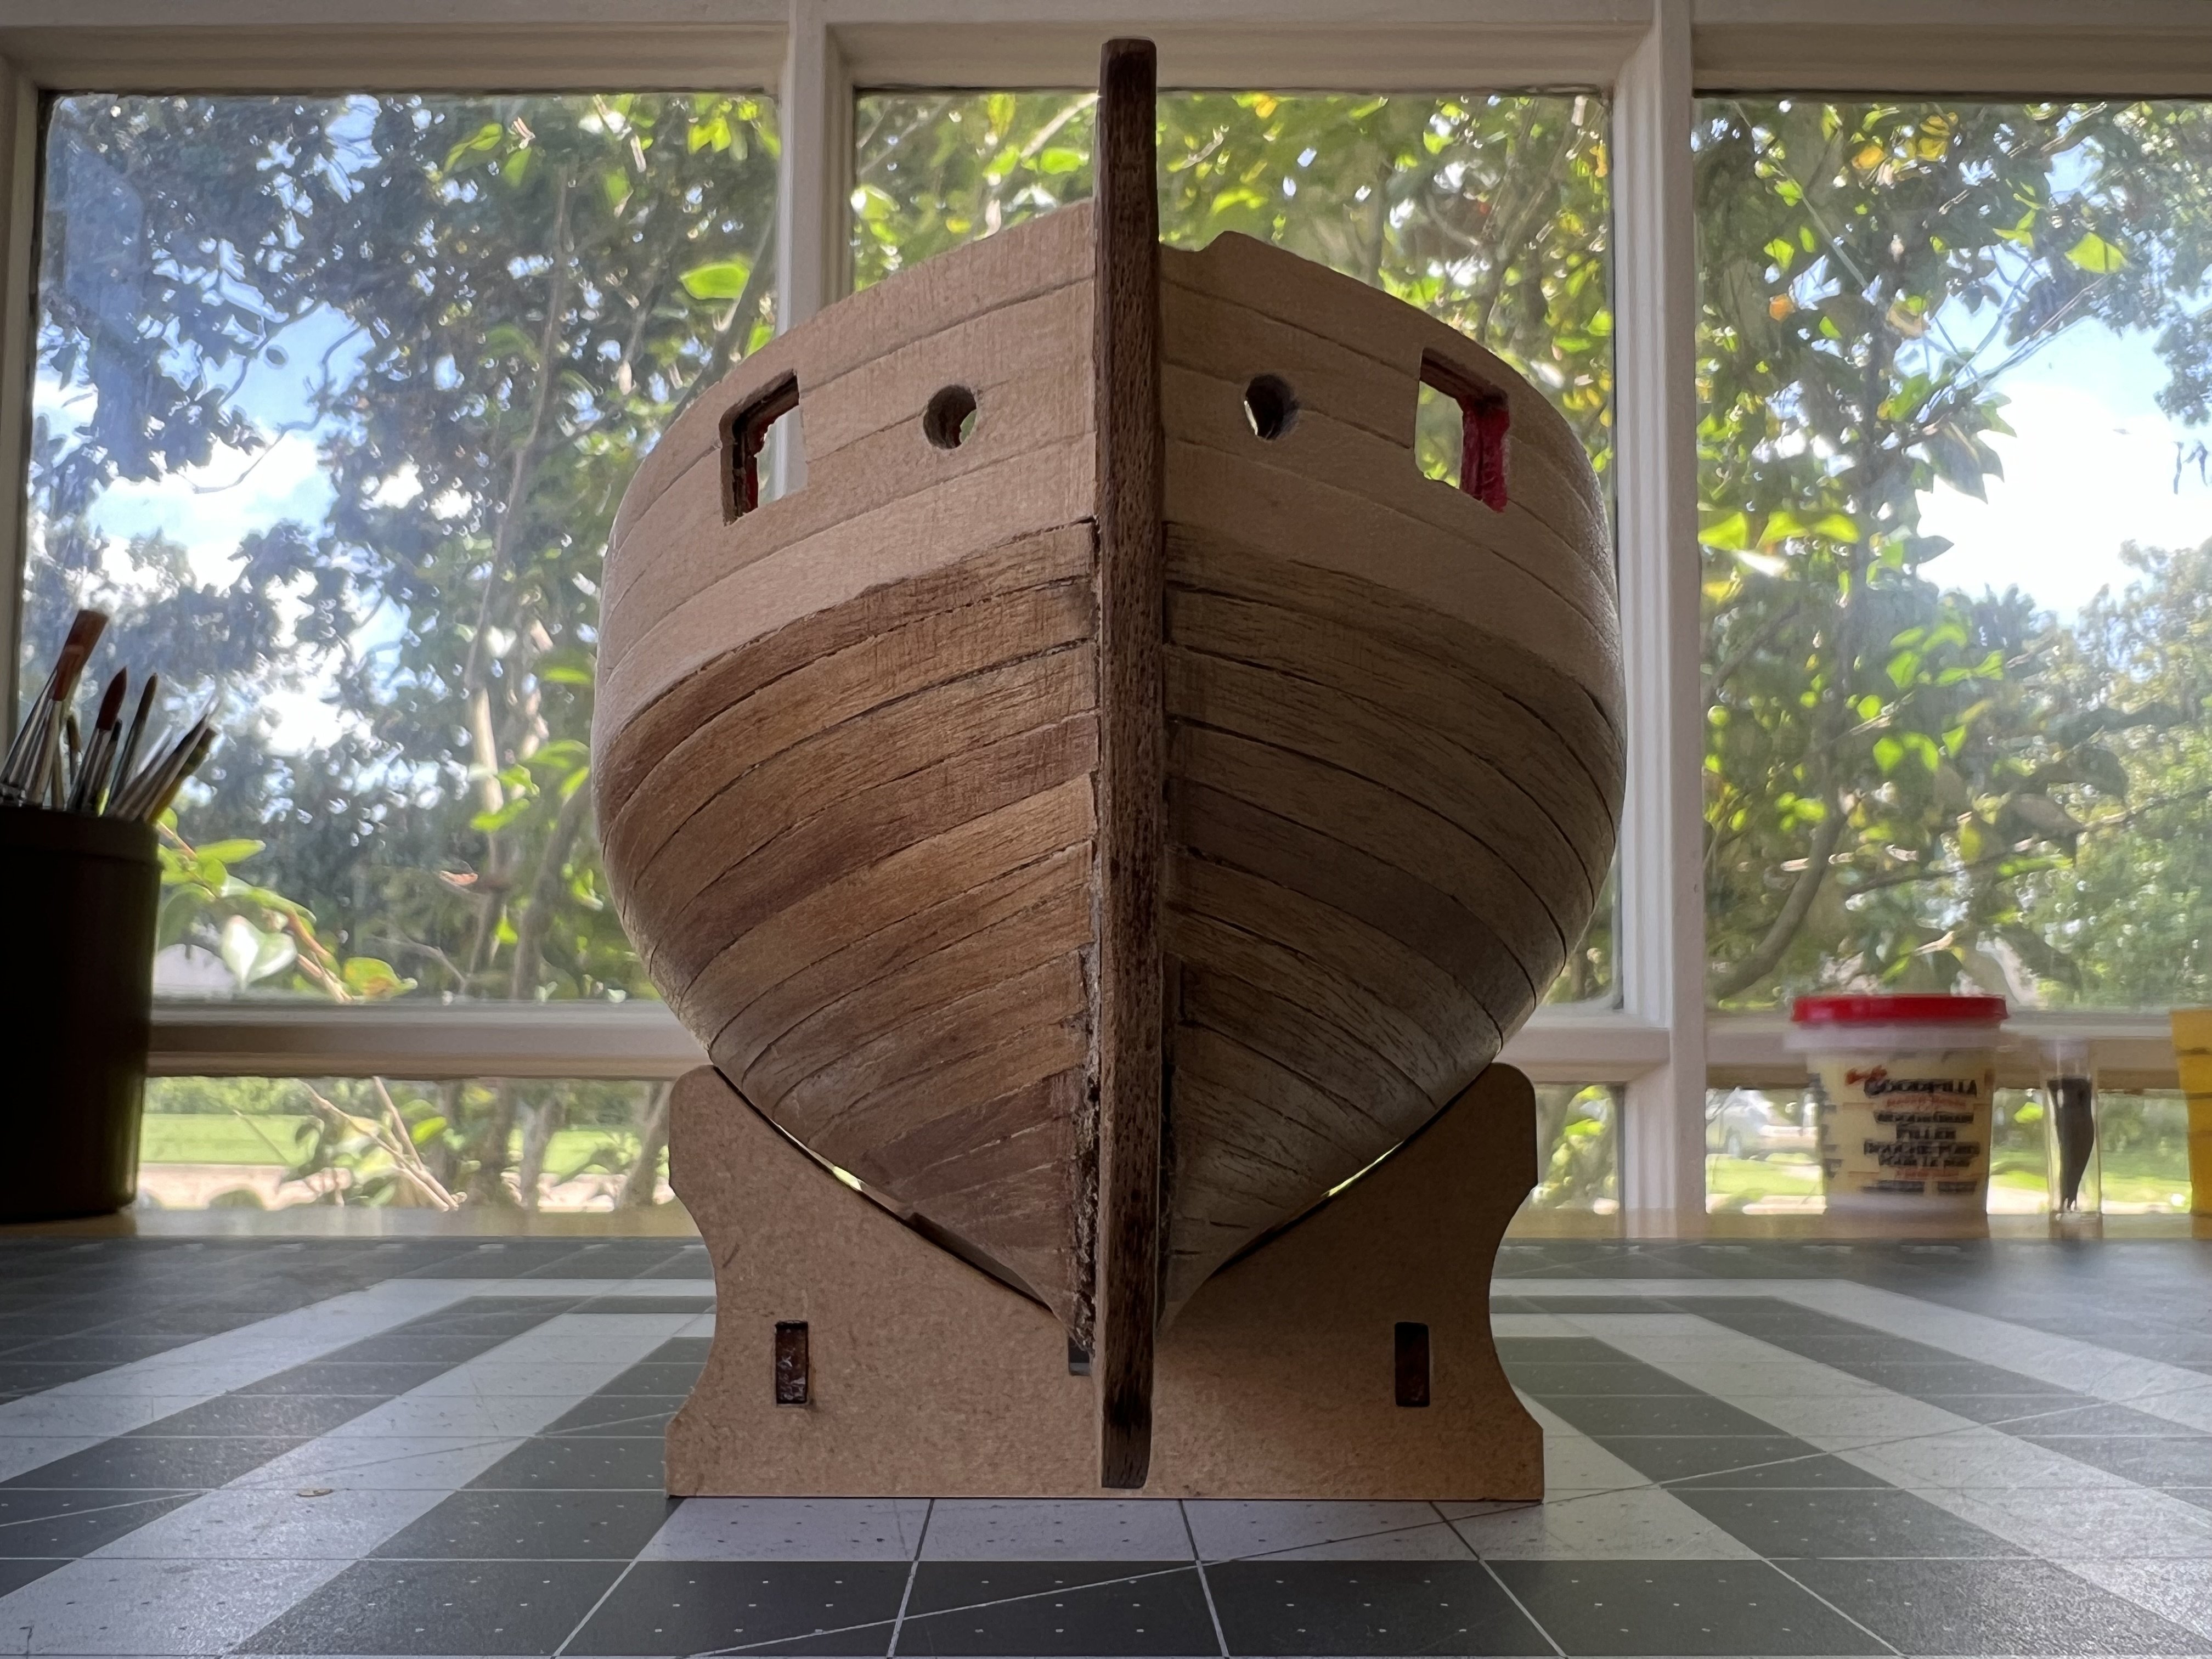
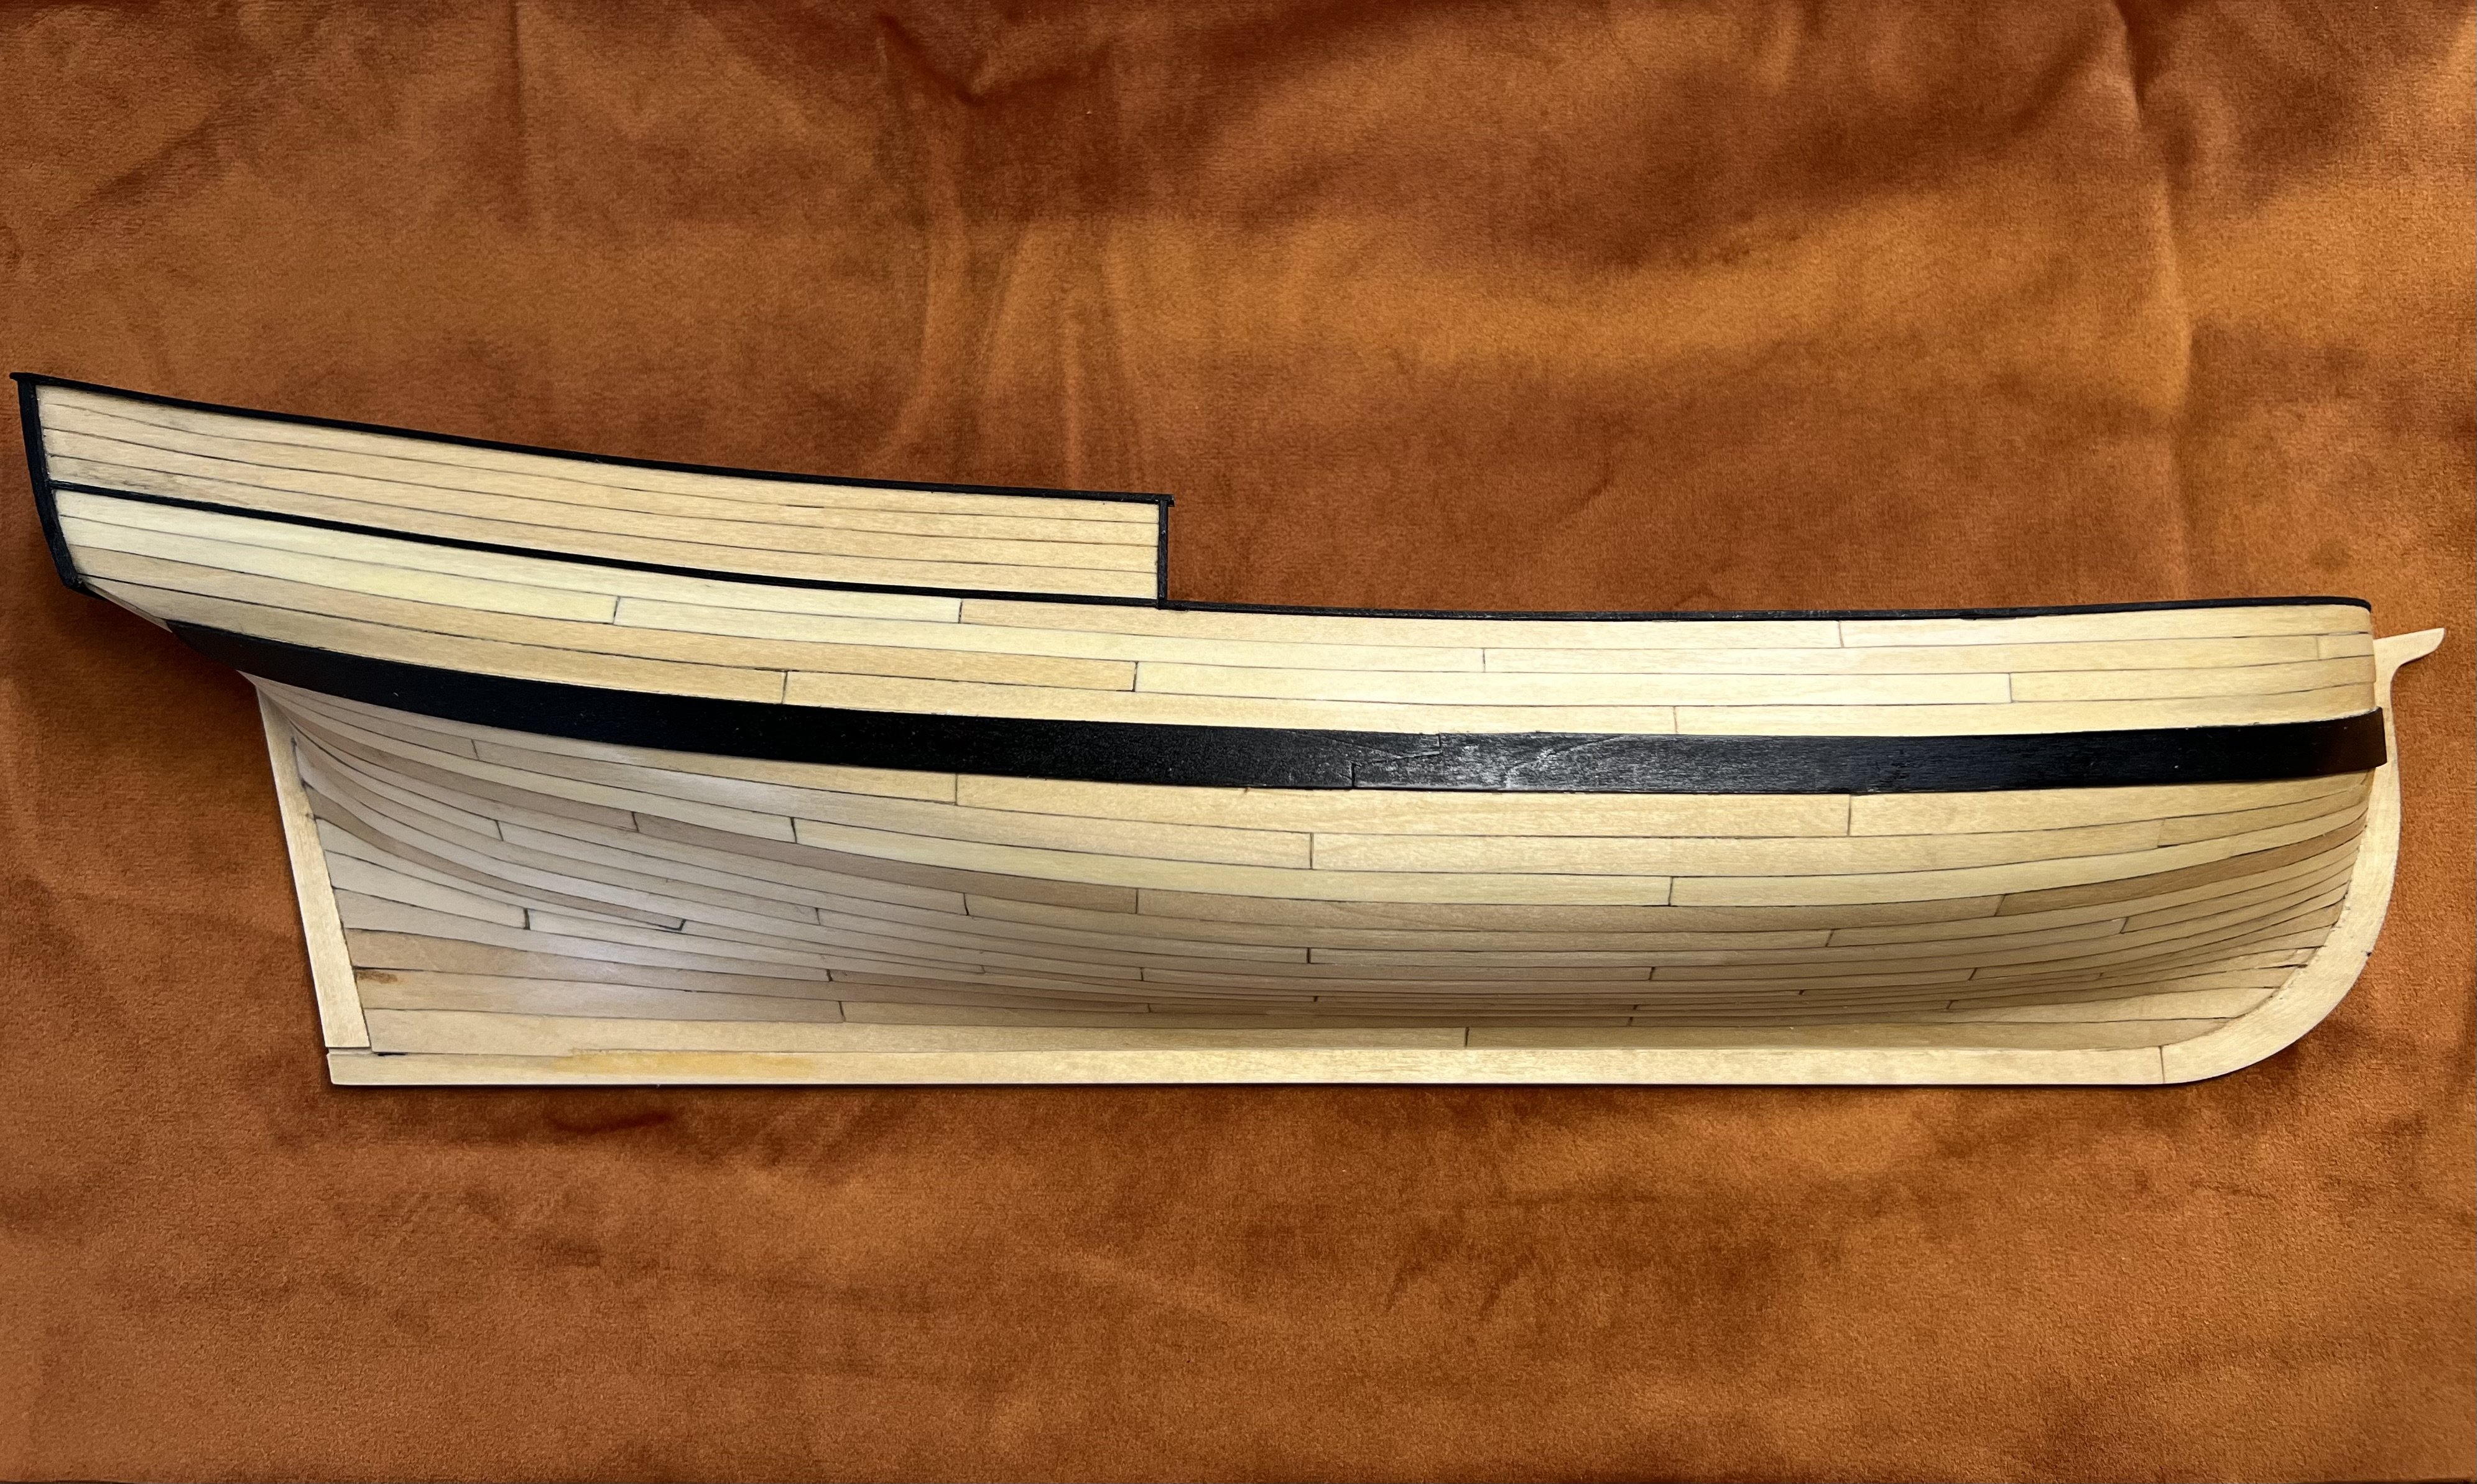
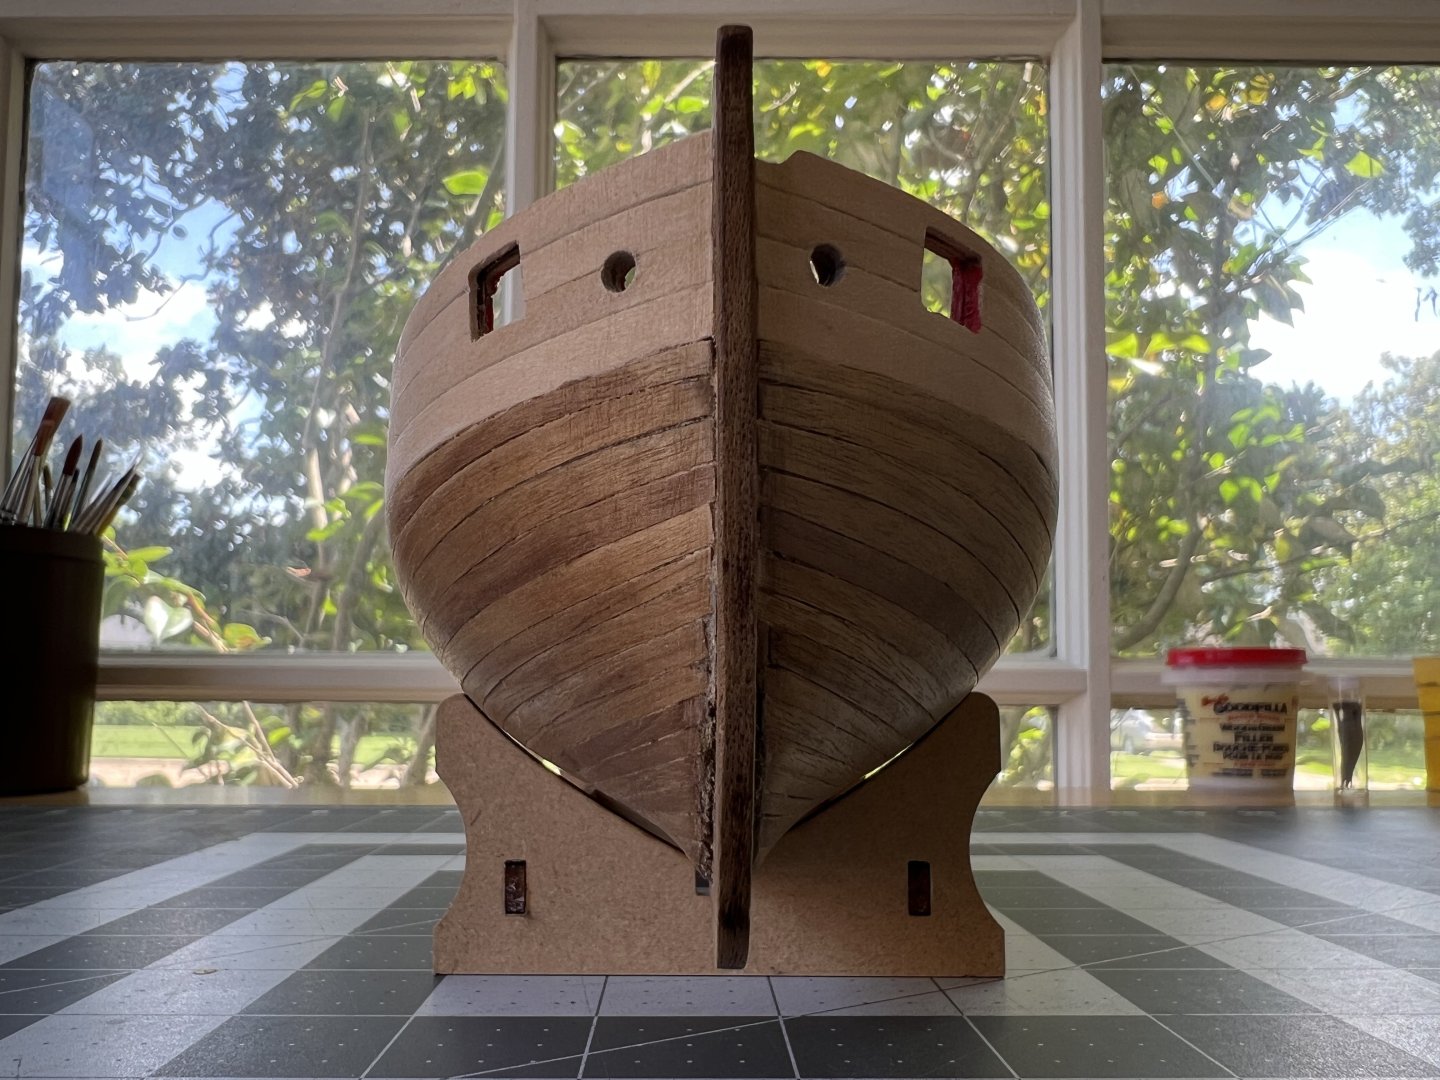
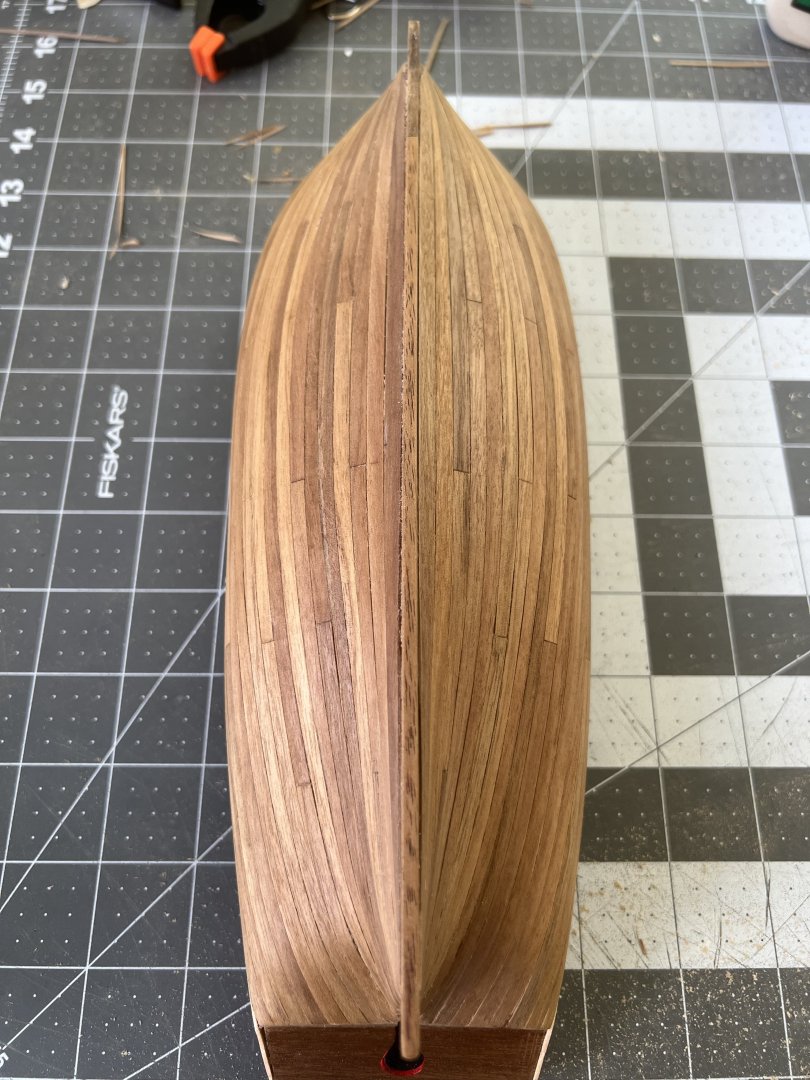
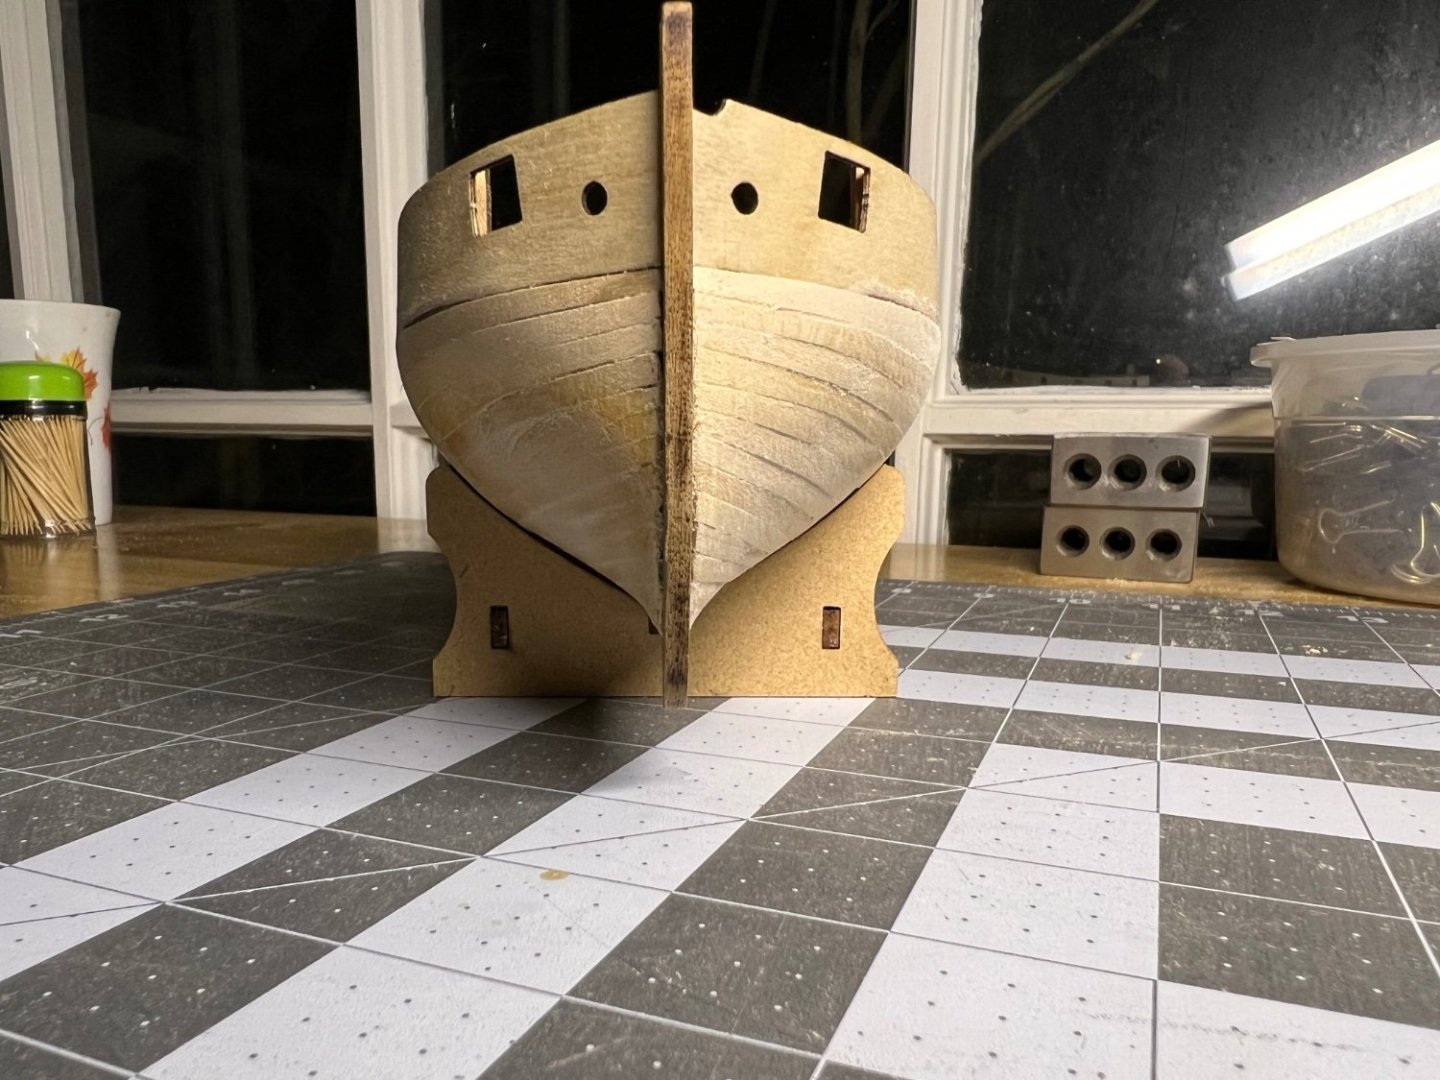
I have completed the planking! After sanding and a coat of WOP, there are a few things I need to tidy up. I’m not sure how to address the planks at the bow. It is not very clean and would have benefitted from a rabbet, which I did not do two years ago when I first started. A few things to note with the planking. I’m impatient, and it shows. While my planking bands did a good job establishing the run of the planks, I did not take the additional time to measure out the distance between each, which resulted in different width planks for each band. The second thing was that within each band, while I did have tick marks using the planking fan, I was not very scrupulous in making sure my measurement with the compass translated to an accurate cut on the plank. I think perhaps the source of my impatience may be with this particular build, as it has been a two year project with a long interlude in between before picking it back up. Planking was an early hurdle for me, nearly tanked the build, but the NRG planking project really helped to clear that. So while it is not the best planking, it is a relief to be able to move forward with other aspects of the build. And finally I should mention that I find the process of planking somewhat enjoyable at times. After a busy workday, it offers a good cleanse of the mental palette as it offers a singular point of focus. I think with my next build, it will be important to dedicate time to improving my planking skills.

- 83 replies
-
- 8
-
-
- Lady Nelson
- Amati
- (and 2 more)
-
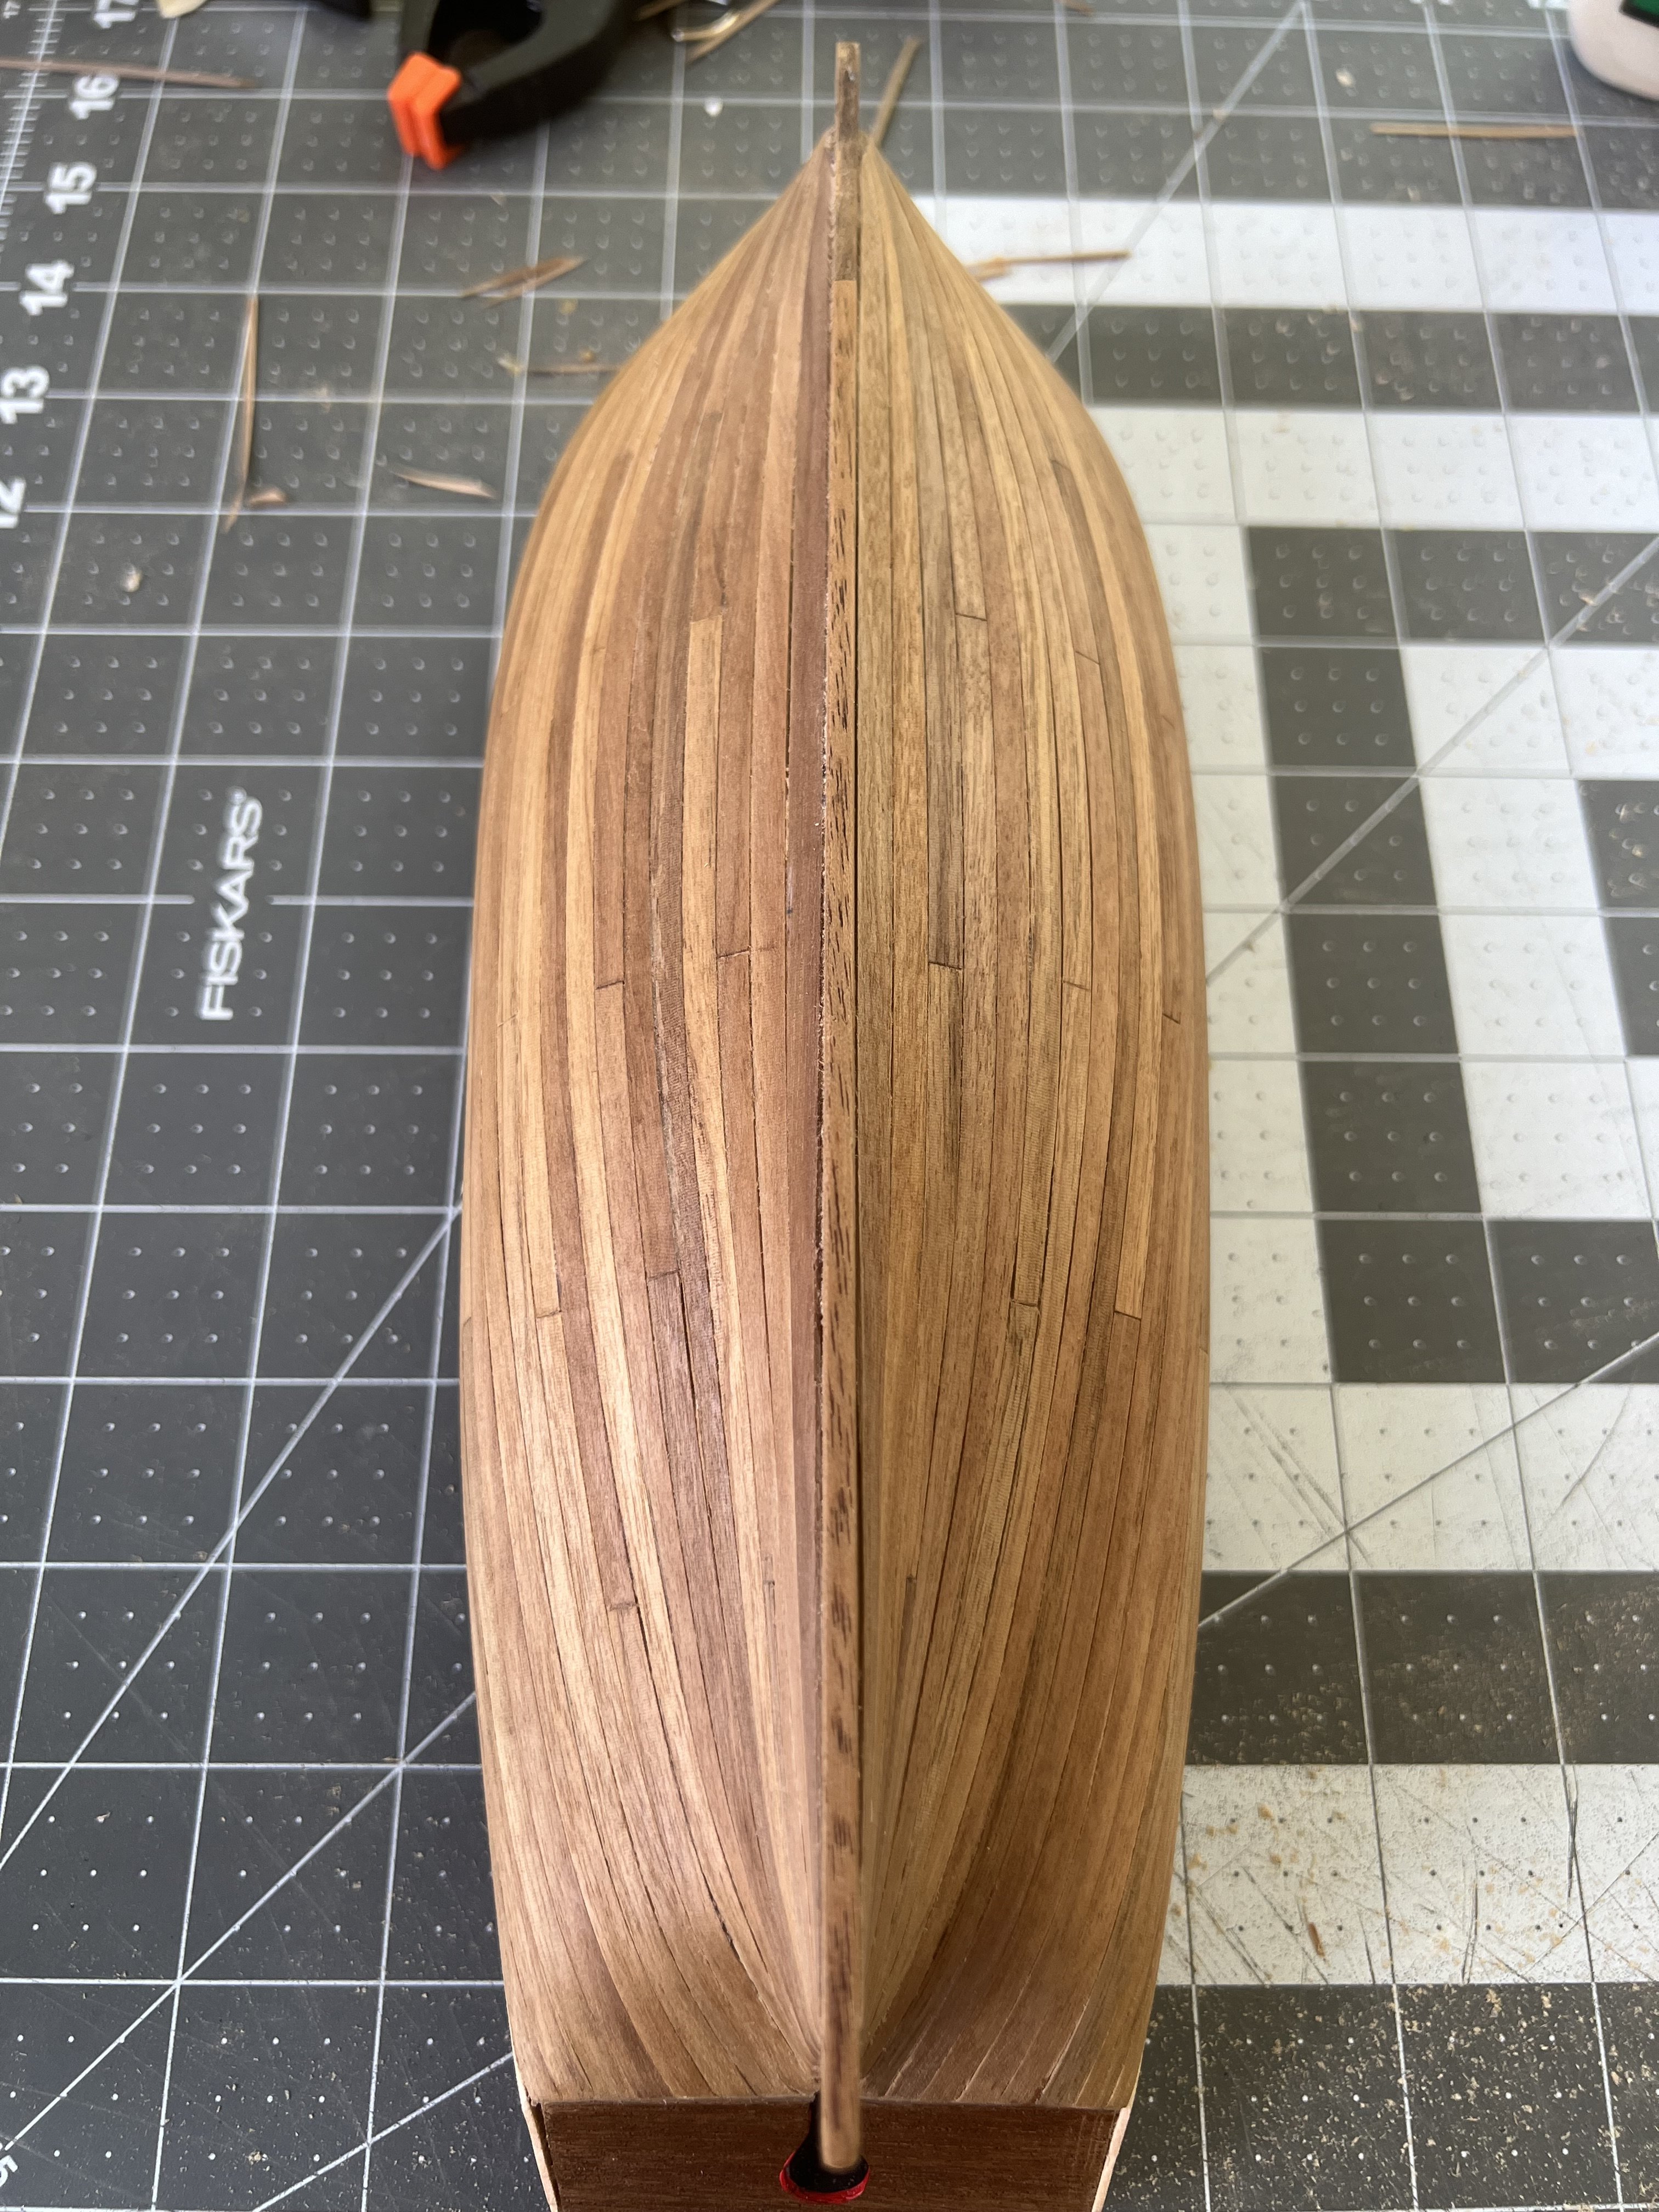
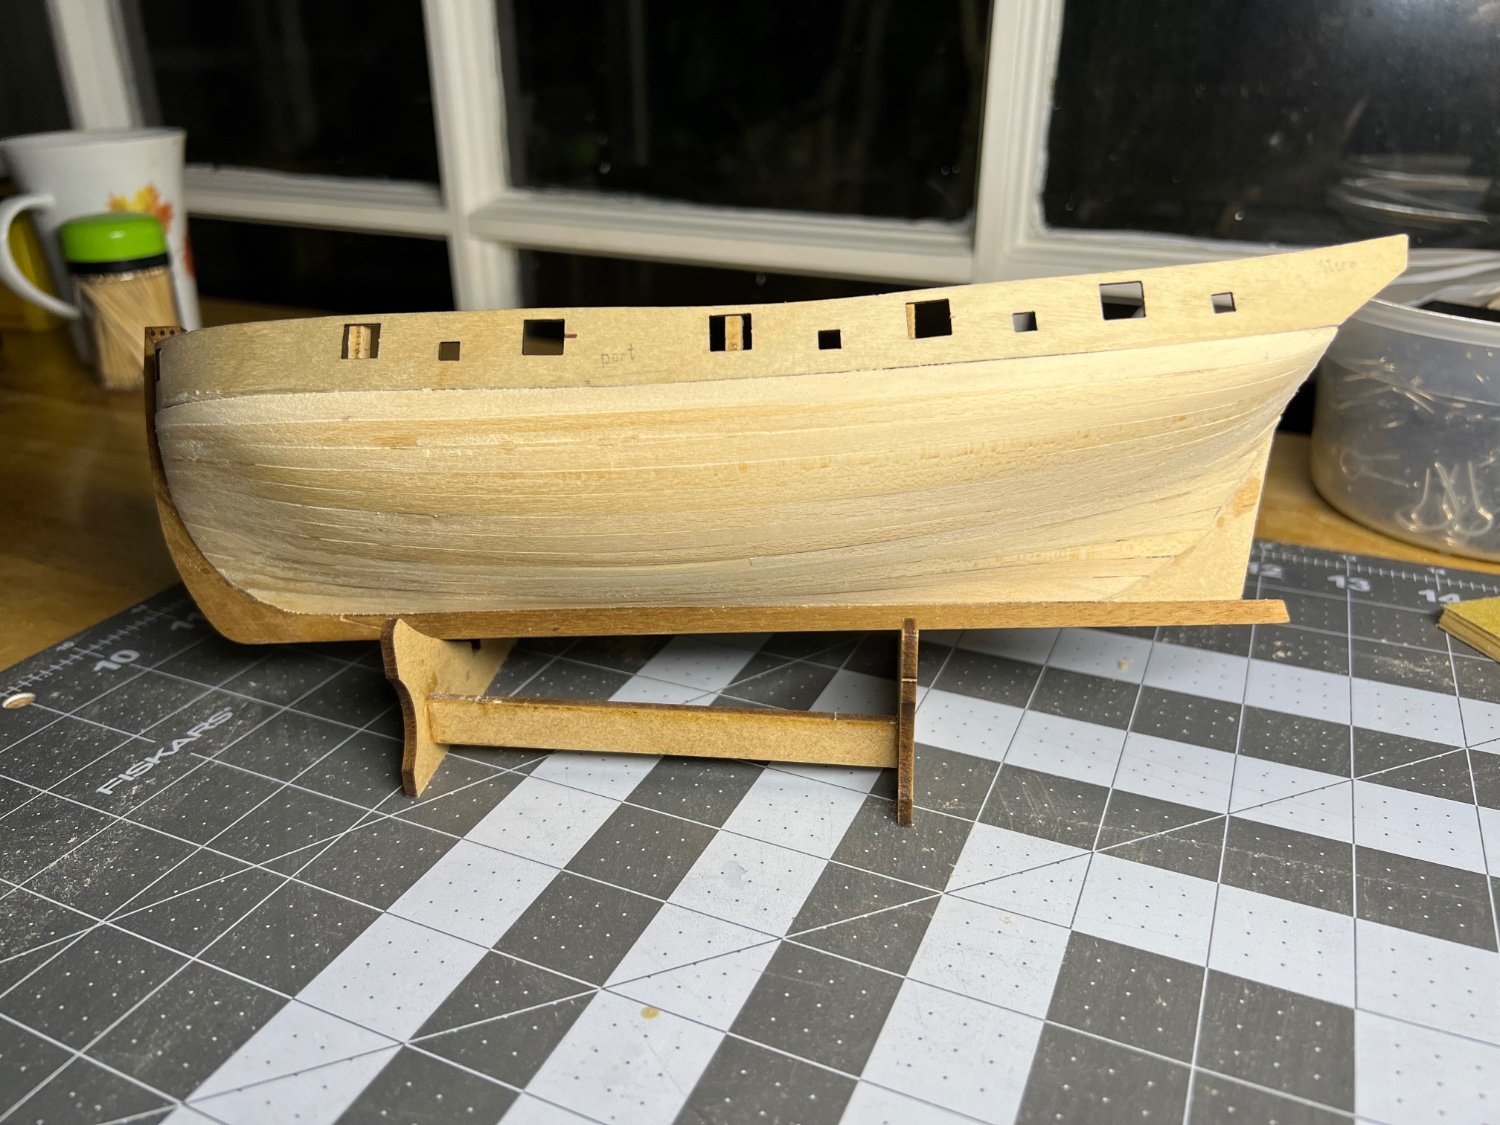
Just a brief update since a lot of time has passed since my last post. I have completed the port side planking.

- 83 replies
-
- 6
-
-
- Lady Nelson
- Amati
- (and 2 more)
-
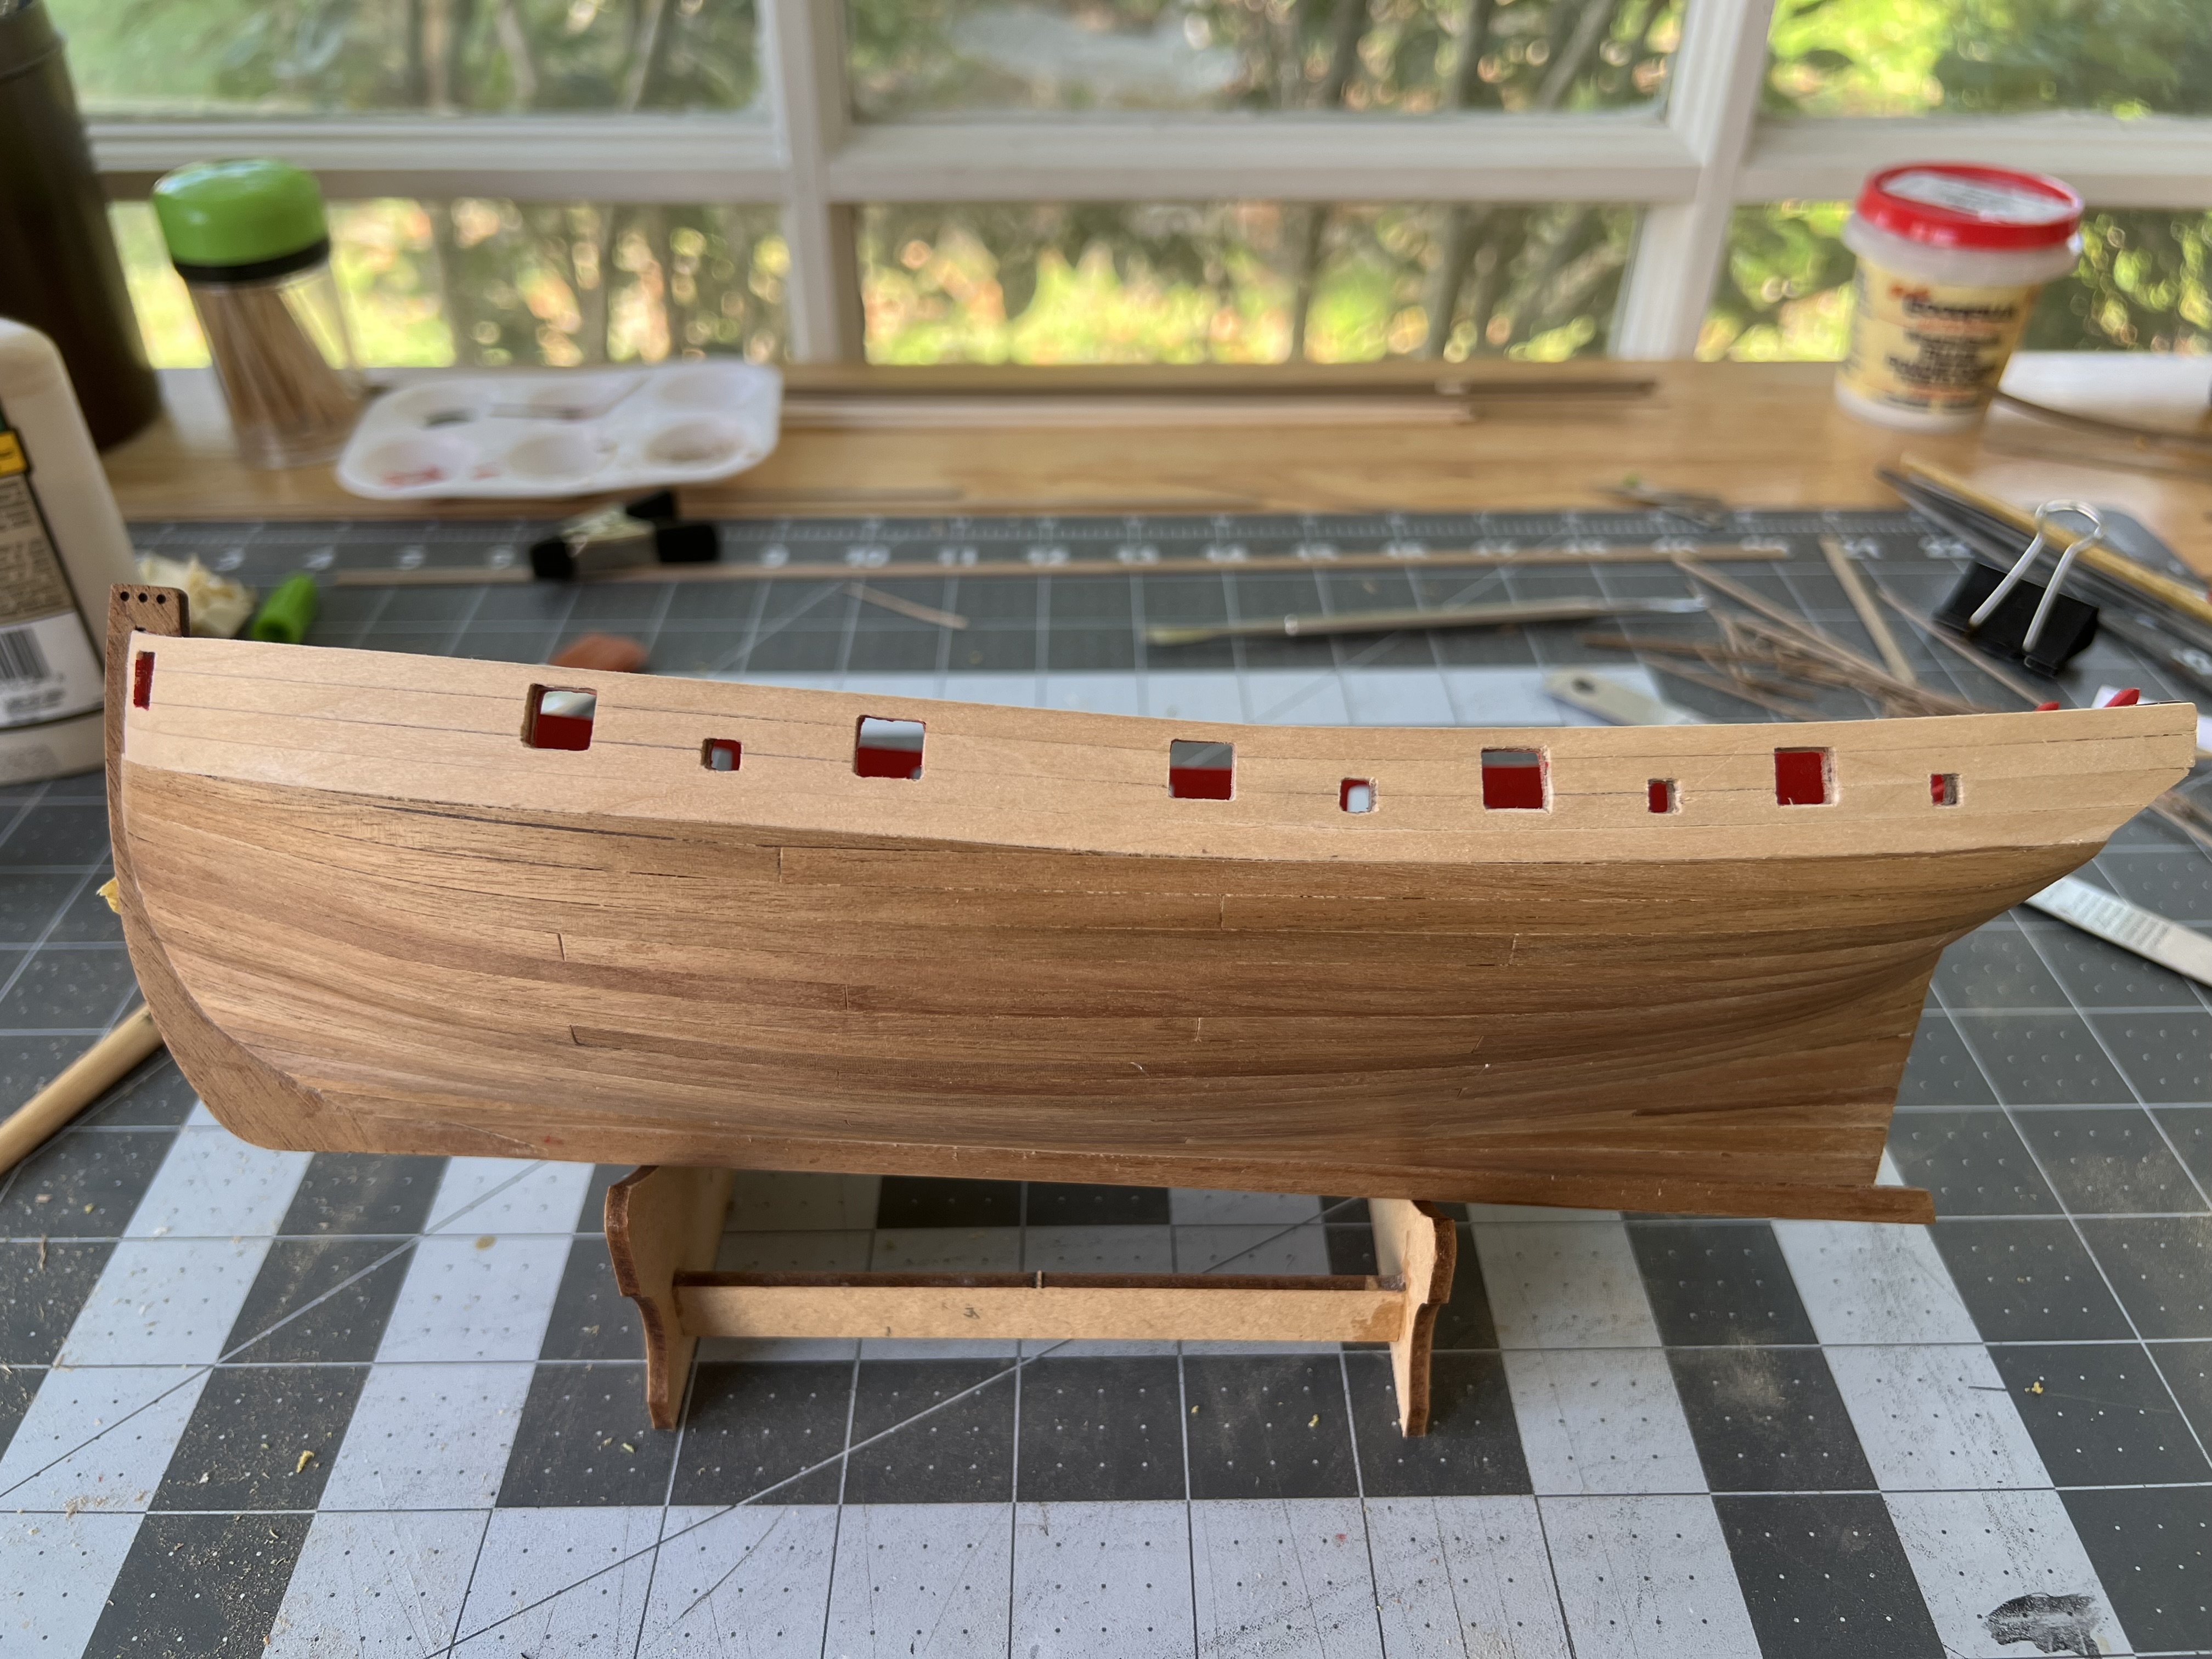
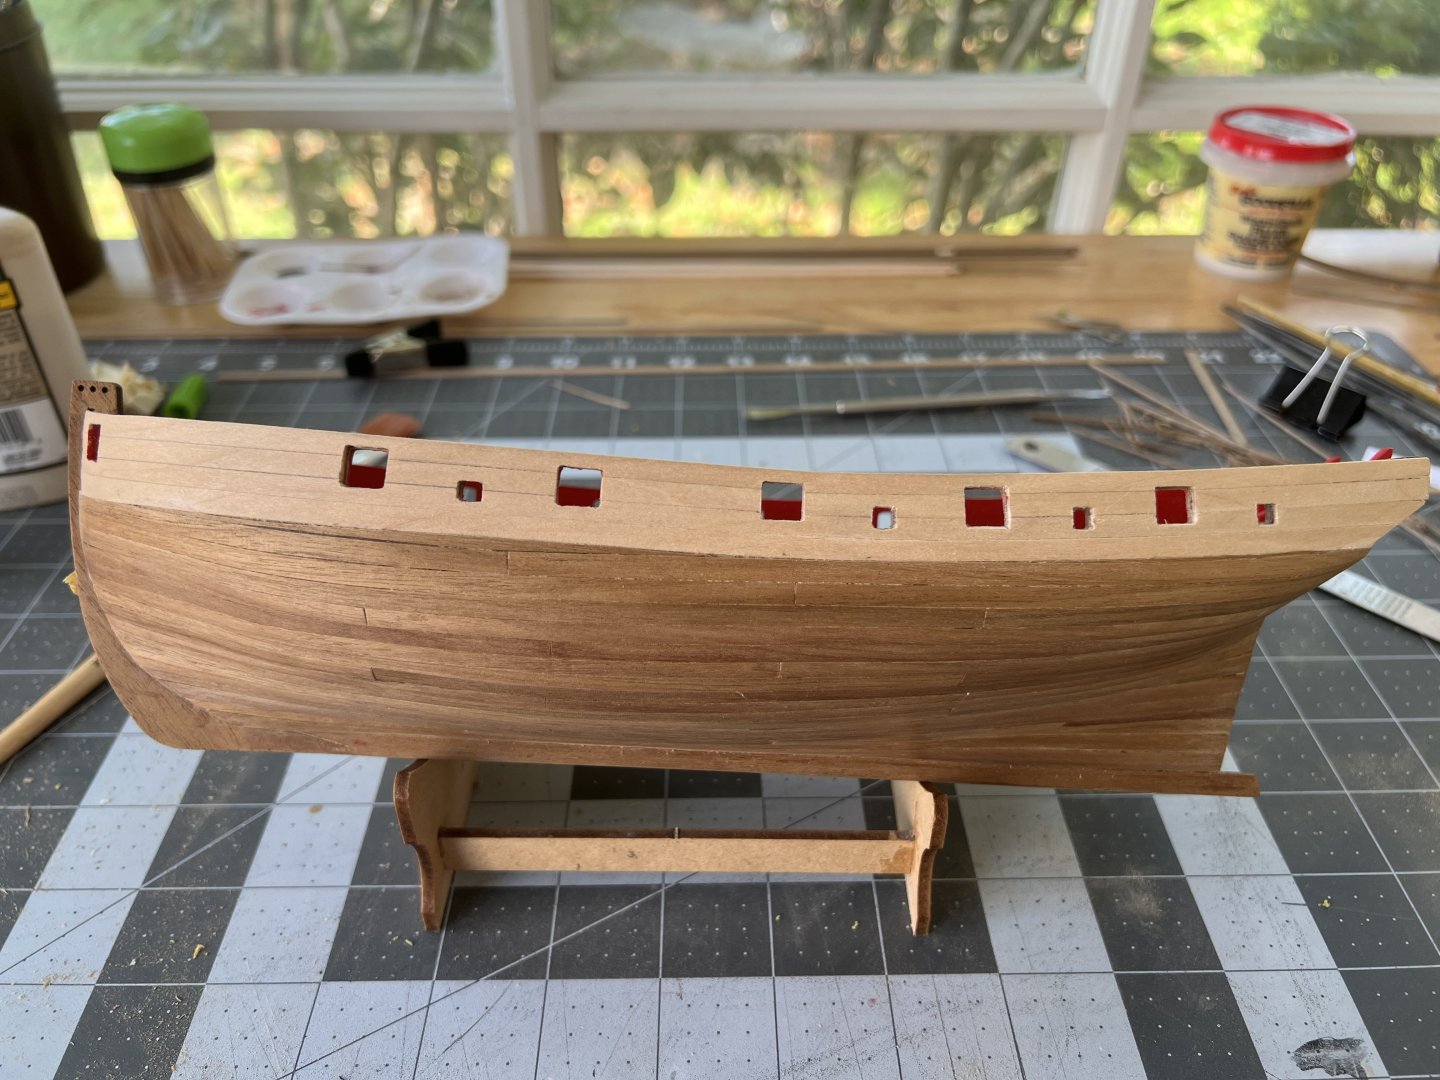
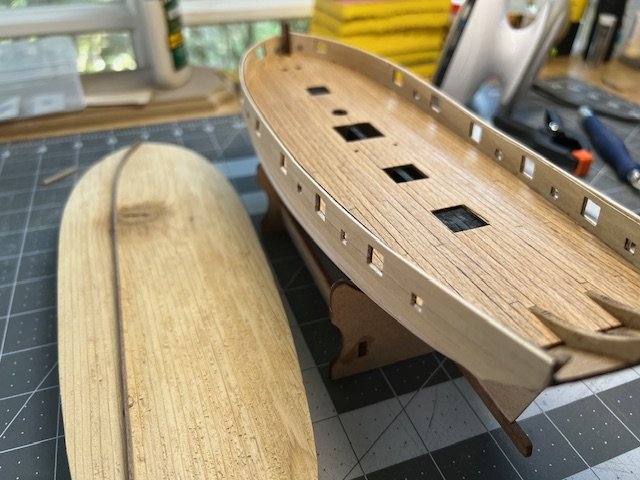
I have planked above the wales with some remaining basswood I had from the Half-Hull Project. It is probably not ideal compared to boxwood or Alaskan Yellow Cedar, but I like the yellow-ish color when it has a few coats of WOP. For the remaining planking, I'll use the kit supplied walnut. I did like the contrast that I noted in glbarlow's Lady Nelson, and that is the effect I am going for here. Dealing with the gunports was more challenging than I had expected, and had I planned a little better, I would have marked the gunports and such to precut before applying the planks. Since that it was not what I did, I made some cuts with #11 blade and did a lot of filing. Once I had the planking completed above the wales, I decided to take a break on the hull and move on to planking the deck. I have agonized over whether or not I would do a proper deck planking with waterways, tapering and joggling of the planks. In the end, however, I decided to simply go with a 4-butt shift using a 6B graphite pencil to simulate the caulking. I think for a future builds, I will go through the extra work and make some purchases of higher quality wood. With the kit supplied deck planking, I had to do a lot of sanding to smooth out the edges. I do not know if this typical. Perhaps with .6mm thick plank, the cuts are not so clean in production? At any rate, sanded and marked, I completed the planking with Minwax "weathered oak". The picture makes it appear darker than it is, and it probably too dark for my liking now that the work is done. Overall, I am pleased with the result but also look forward to future improvements. Planking the inner-bulwarks is proving to be a bit of a challenge. I am using the jig that I made for bending the bulwark strips, as well as a bit of water and a travel iron to form the plank. However, the plank is still proving a little difficult to set, which makes me think that I made need to compensate a bit more and exaggerate the bend some water and my fingers to set it. I think for now, though, I am going to go back to the hull and finish the 2nd planking. Thanks for tuning in and for the likes.
- 83 replies
-
- 8
-
-
- Lady Nelson
- Amati
- (and 2 more)
-
Welcome aboard! I’m working on Lady Nelson right now, as well. I’ll pull up a chair.
- 3 replies
-
- 1
-
-
- Lady Nelson
- Amati
- (and 2 more)
-
I concur with Allan. Your work and attention is exceptional.
- 562 replies
-
- 7
-
-
-
- vanguard models
- alert
- (and 2 more)
-
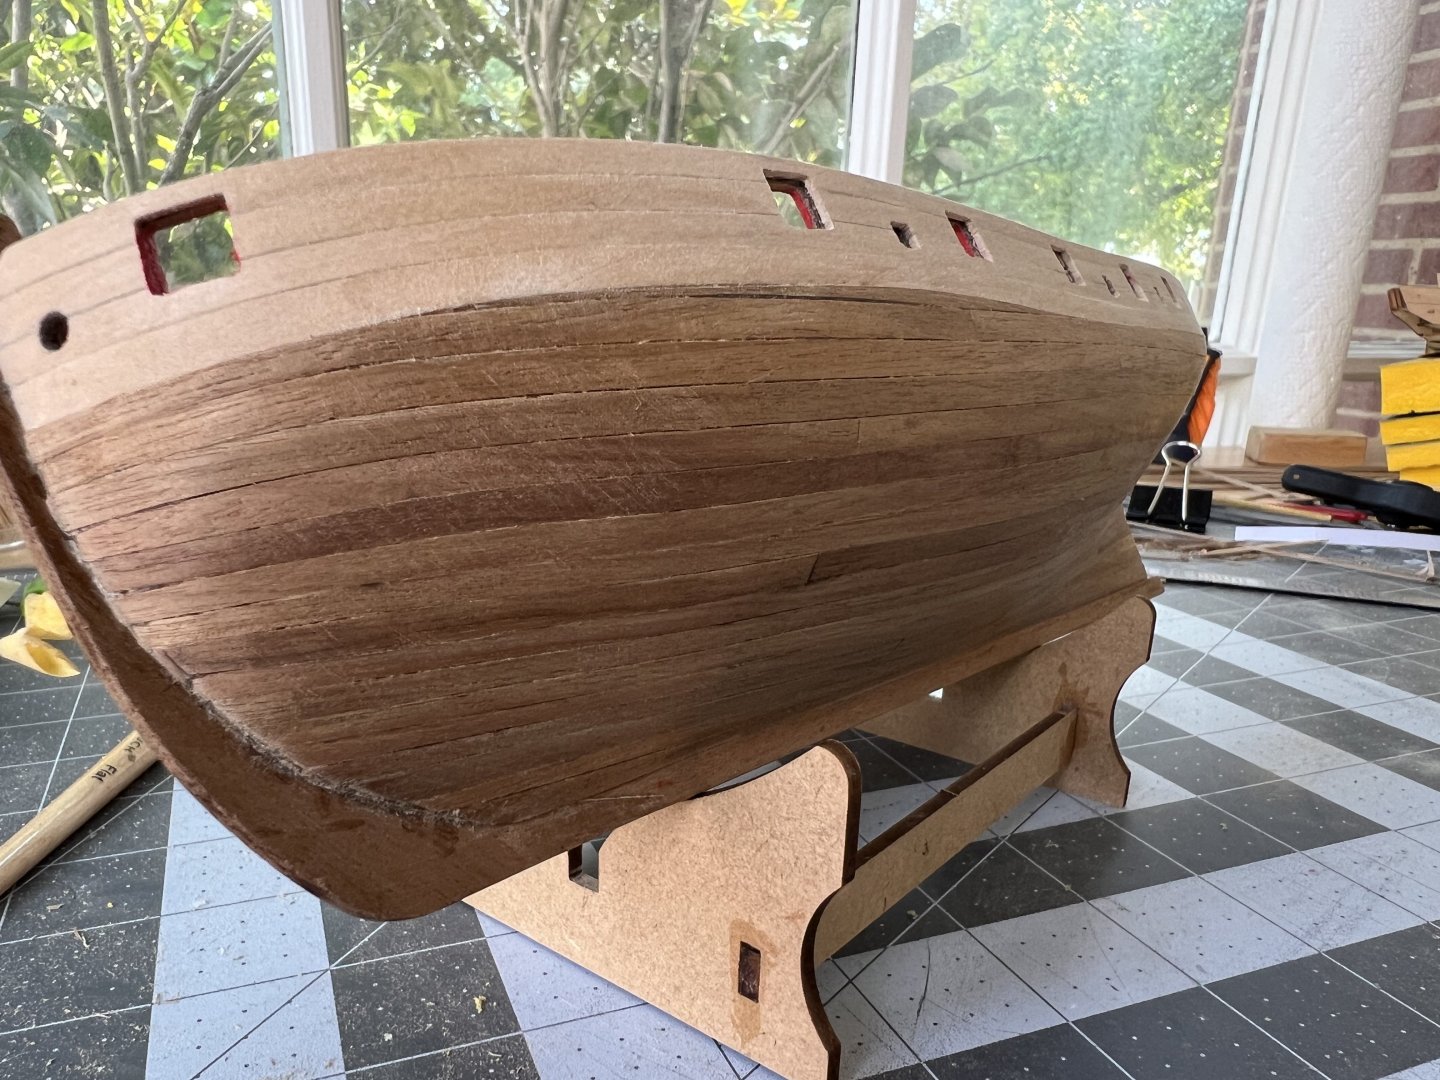
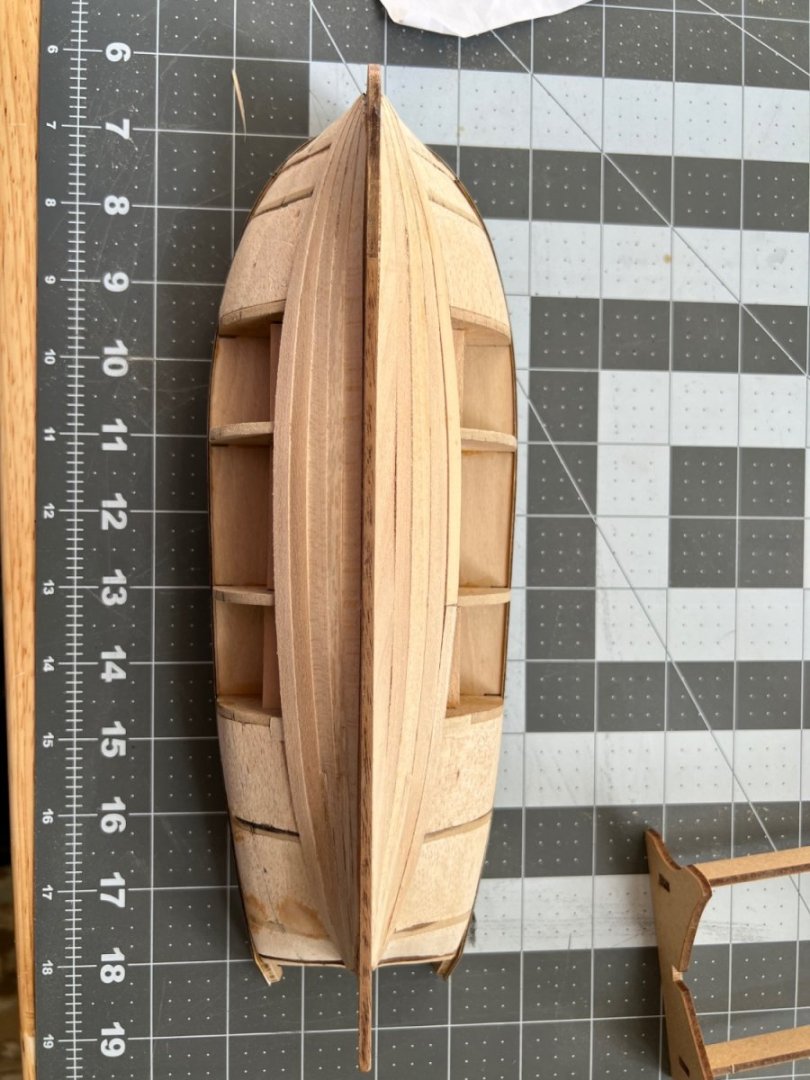
I have finished the first planking and have done some sanding. There were some difficulties at the bow and stern areas that betrayed my fairing job. I had to do a little more sanding and shem some bulkheads will definitely need some filler. I started using minwax wood filler on the starboard side, and I’m not sure if is the best filler for the job? It tends to be very flaky but this may not matter much? At any rate, I just received some goodfillas neutral filler so I’ll use that on the port side and compare. Here are some photos after some sanding.


- 83 replies
-
- 7
-
-
- Lady Nelson
- Amati
- (and 2 more)
-
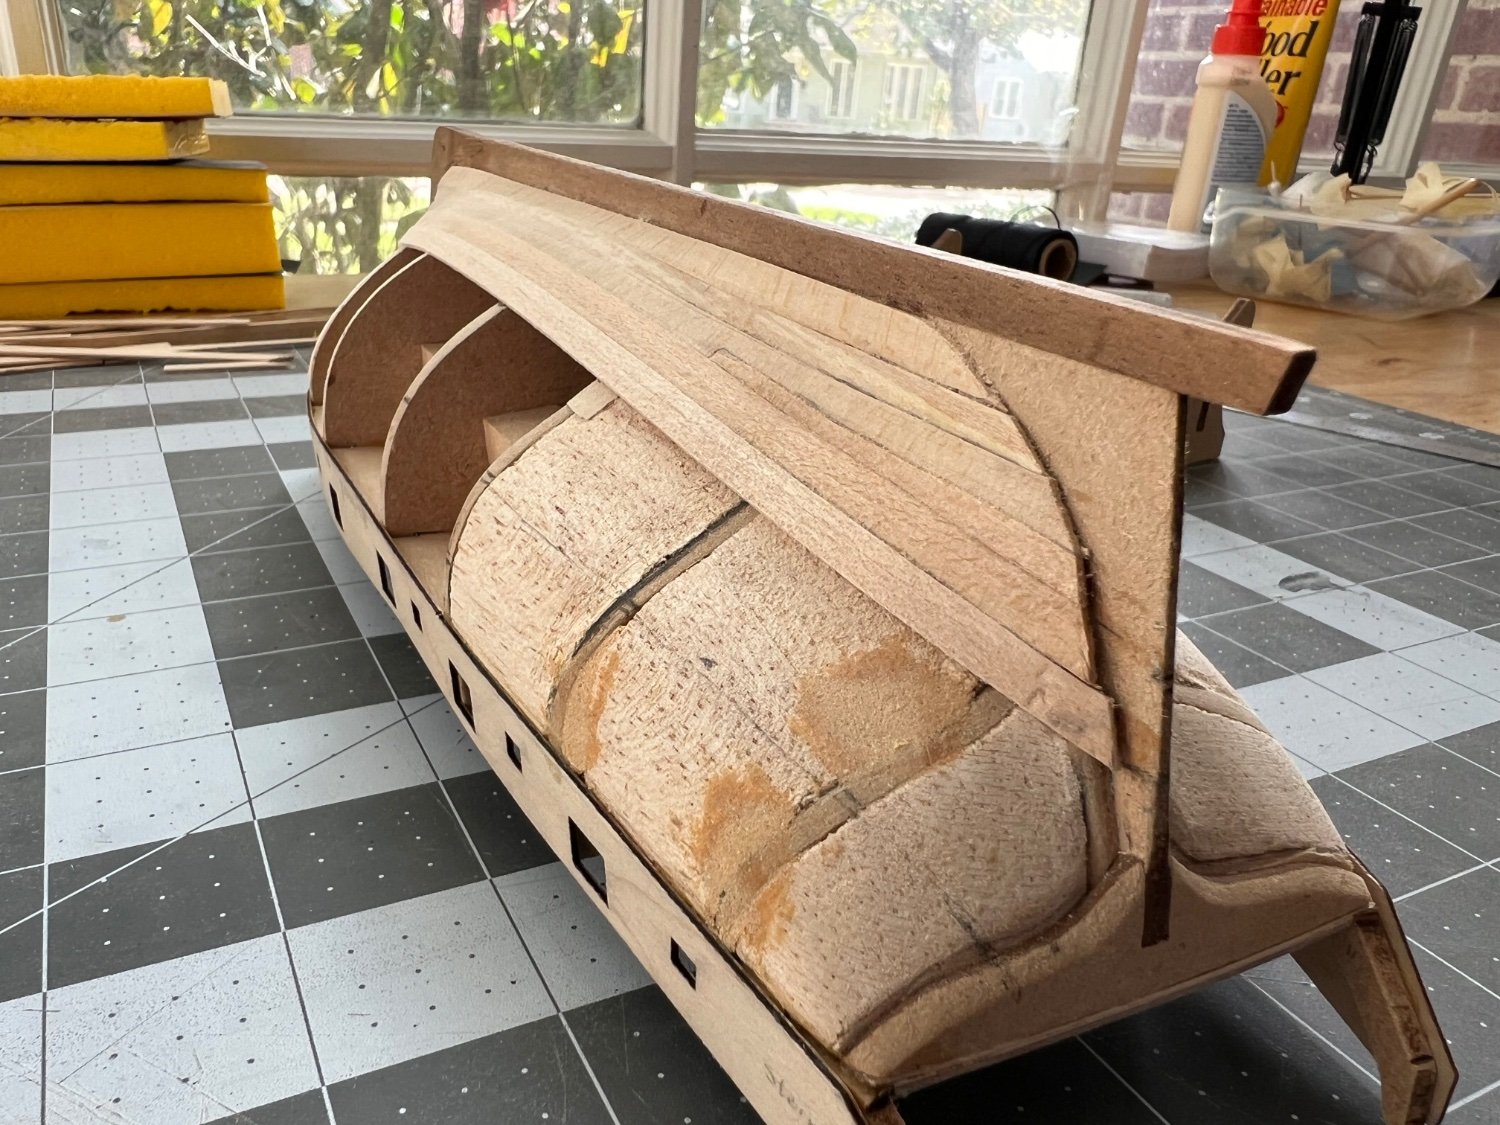
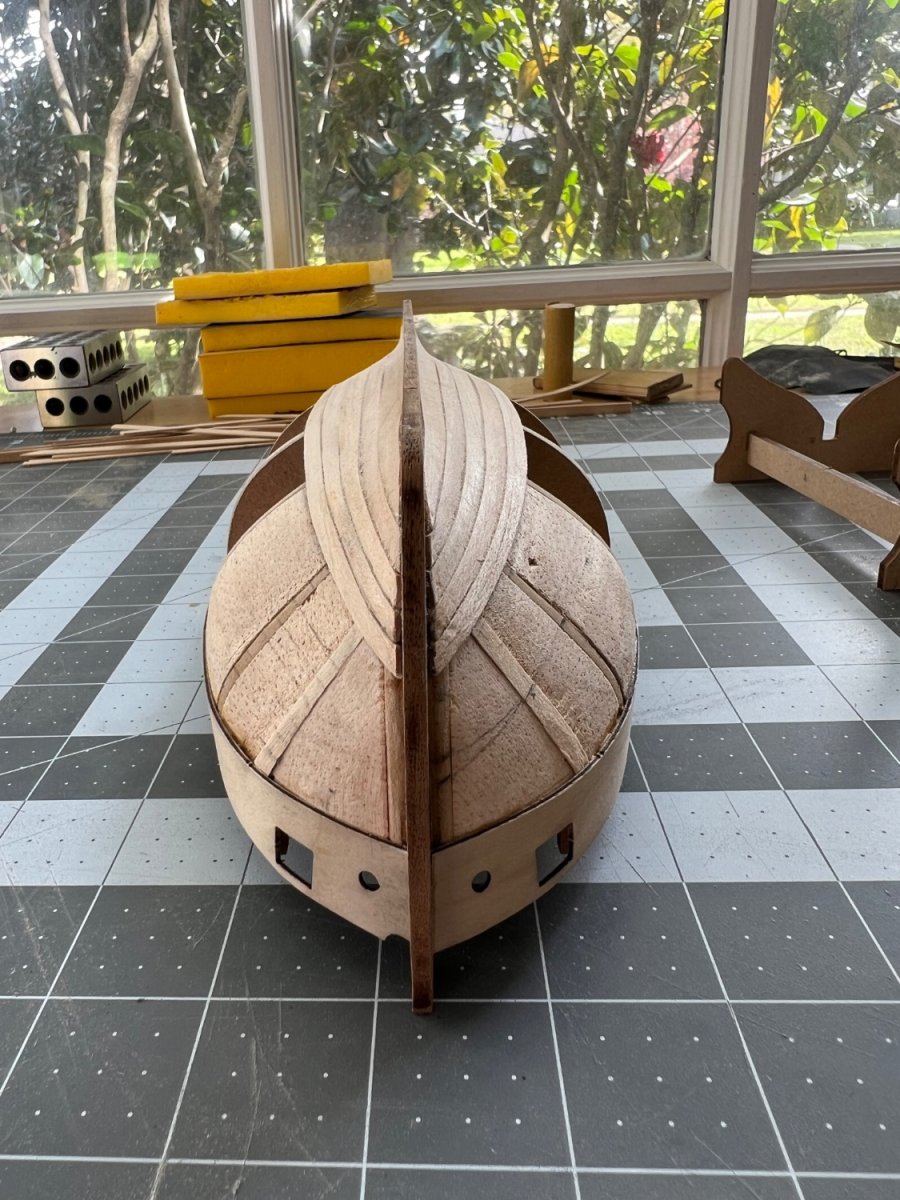
It is hard to believe it has been 2 years since my last post here, although I have certainly not been absent. I put Lady Nelson on hold and decided to work on the Half-Hull Planking Project which was enormously helpful in getting over the planking hurdle I was having. There is much that can be improved, so we shall see I can continue to improve my planking skills with Lady Nelson. Understanding that this is the 1st planking, I am not overly concerned with attempting excellence for the first layer, simply dabbing a little water on the areas of the planking where I will edge bend them and gently bending the planks using my fingers which has so far been sufficient to the task. I am just building a base for my second planking. Here are the results so far with the first band.


- 83 replies
-
- 4
-
-
- Lady Nelson
- Amati
- (and 2 more)
-
Hey John, thanks for your taking time to respond. I haven’t yet installed the bulwarks, and so I thought to install the frames so that when I do install the bulwarks, I can attach those properly. I may not be naming those pieces correctly. I’ve started to come around to this. I believe that I have faired the frames sufficiently, and really the best way to understand the process is to see the result for what it is supposed to accomplish and just start planking…once I get those bulwarks taken care of. I’ll take care of that this evening and start moving forward on the planking. One thing about the planking is that when I take a test plank and lay it across three bulkheads, everything lays properly. When I add a fourth bulkhead to the mix and hold the plank at either end, I start to see some gaps until I lay more fingers down on the plank. Everything seems ready to go and then I might overthink the issue. So I am just gonna have to start, and I’ll check out those posts you sent me. Thanks for the advice, Allan. I hadn’t thought to check out those drawings. And I’ll be double planking so my thought was that the first planking would extend to the bearding line and the second planking to the stern post rabbet? Otherwise I might end up sanding the most of stern down to accommodate the thickness of both layers of planking to be flush with the stern post, yes? I haven’t yet done much reading on the bearding line and rabbet, but it’s on the list of things I need to study. Thanks Kirby! It has definitely had its share of frustrations thus far, but I do enjoy the process and seeing the little transformations. Plus, I’ve been finding myself reading more about the period and naval warfare, which - along with Aubrey - supplies some motivation.
- 83 replies
-
- 4
-
-
- Lady Nelson
- Amati
- (and 2 more)
-
Thanks drjeckl! I actually recall your post perusing through some of the build logs when I first started, and I appreciate you taking the time to check out my log. I believe there were only 8 of those short/partial videos on the Amati website, and when I checked the model shipyard website, I could purchase a DVD set for $60 with the full instructional videos. Perhaps the fact that I no longer own a DVD player saved me from making the purchase. What was useful though for me was his explanation and demonstration of fairing, which I haven't really been able to find from casually searching for information on the fairing process here (which I'm still sort of stuck on). Yesterday, I set up a planking station and started trying out Chuck's method for bending planks (though I am not ready to start planking at the moment). I am going to have find some information on where the proper bend in the plank is supposed to be since I screwed that up twice, and evidently did not fully understand or implement Chuck's instruction properly. Now I did not do a taper on the first plank (which I was experimenting with a first plank as if I was ready to do it), since I had read somewhere that the first couple of planks did not require a taper on this model. So I either should have done a taper on the plank, or I most certainly created the bend in the wrong place. I recall @glbarlow posting that somewhere in response to another log, but haven't found it again yet. It might be prudent to start keeping a separate journal to record good information that I read, so I can remember the details! So for the moment, I continue fairing. It seems that every time I leave the LN for a moment thinking that the fairing is done, I come back to it and realize there are some spots that need more work. I did want to feel a little visual movement forward, so I went ahead and glued the outside stern counter frames which seem to need a little sanding to conform fully to the hull and allow for the bulwark to have a tight fit towards the stern.
- 83 replies
-
- 6
-
-
- Lady Nelson
- Amati
- (and 2 more)
-
Your Lady Nelson is coming along quite nicely, Dave! I’ve been enjoying watching your progress.
- 362 replies
-
- 2
-
-
-
- Amati
- Lady Nelson
- (and 2 more)
-
I came across this series of videos on the LN while browsing the Amati website. In particular, the fourth video demonstrates the fairing process. It seems helpful for visualizing the fairing process.
- 83 replies
-
- 1
-
-
- Lady Nelson
- Amati
- (and 2 more)
-
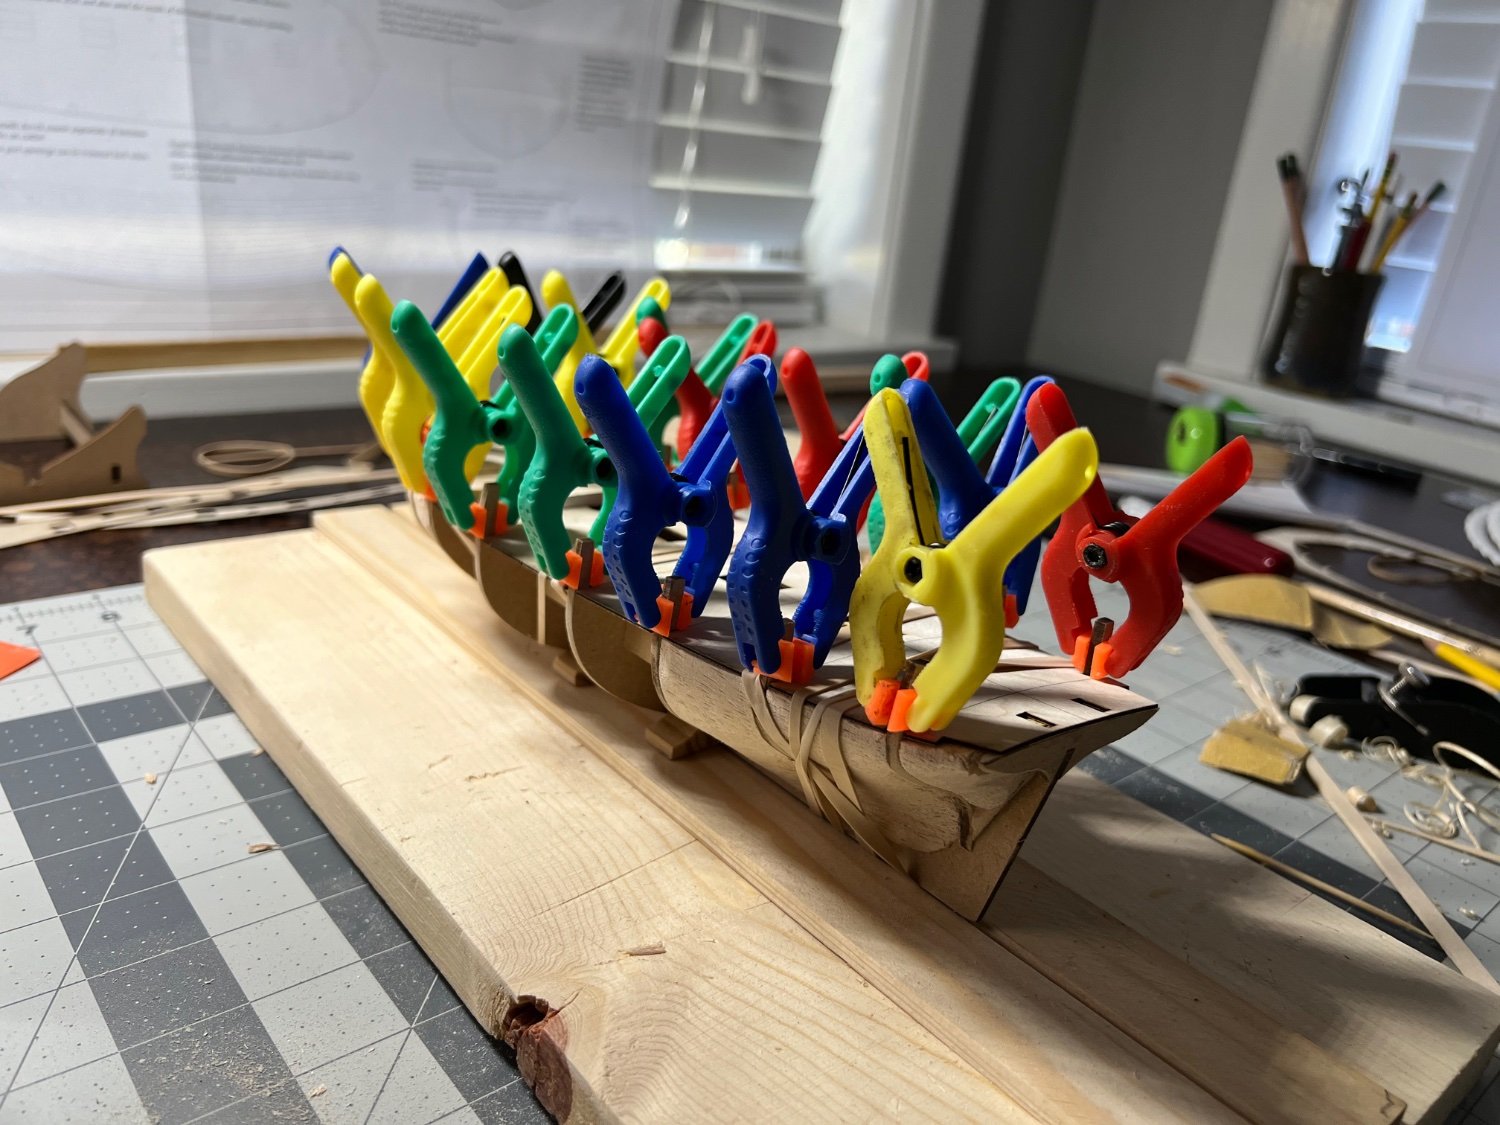
I don’t know if I should have paid more attention to the grain of the balsa, but it has been a heck of a time getting it shaved/sanded down. In the process, I suppose there has been a good deal of hull fairing in the fore and aft bulkheads (did I use that terminology correctly) After sanding and filing the top, I was able to get the false deck installed. I would feel remiss if I did not include the necessary photo of the clamp army holding down the deck. I did get my Stanley plane in and you may can see on the right of the photo the results of me playing around with it on a balsa strip. I haven’t used it yet on the LN, but I’ll expect that I will need it when I get to the masts. There are a few points about fairing the hull that I have questions about. I’ll be posting some more photos soon, and hopefully my apprehension about this process might be alleviated.

- 83 replies
-
- 6
-
-
- Lady Nelson
- Amati
- (and 2 more)
-
Yes…I’m still working on getting everything sanded. Was able to get them cut out and shaped this weekend. Still much more work to do to finish that before I can move forward.
- 83 replies
-
- 2
-
-
- Lady Nelson
- Amati
- (and 2 more)
-
Indeed. Every problem with planking that I have seen, seems to be traced back to a problem with fairing the hull.
- 83 replies
-
- 1
-
-
- Lady Nelson
- Amati
- (and 2 more)