
Mark m
-
Posts
47 -
Joined
-
Last visited
Content Type
Profiles
Forums
Gallery
Events
Everything posted by Mark m
-
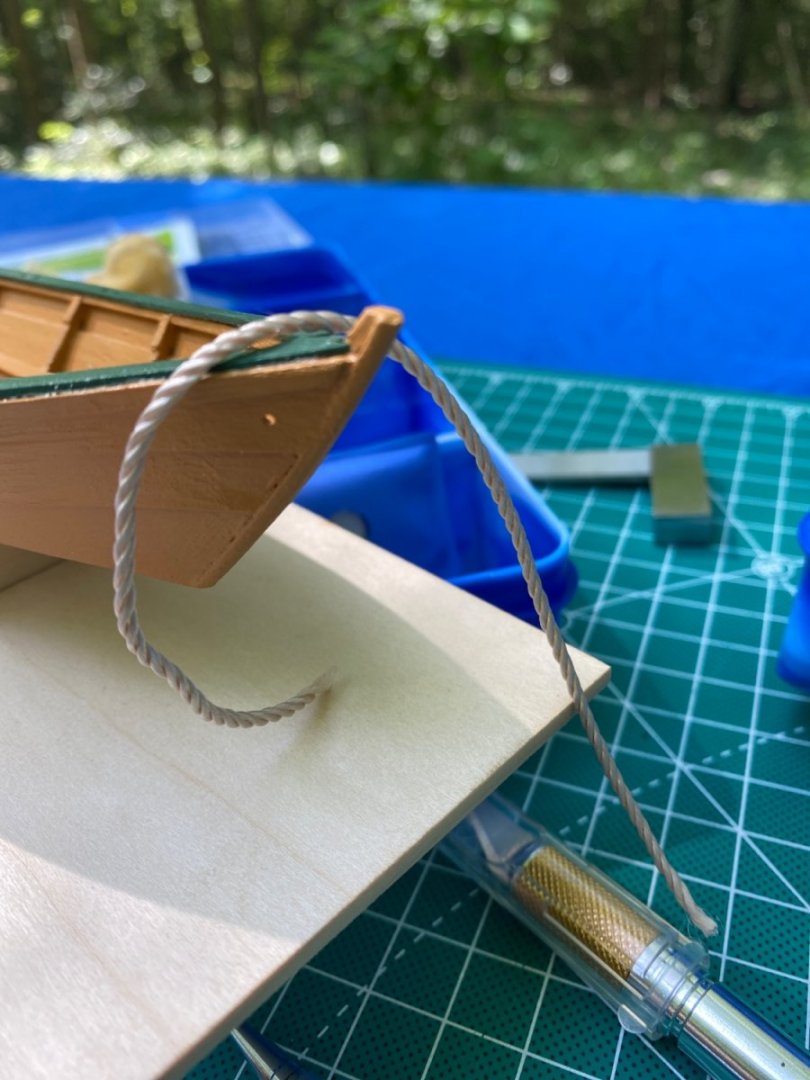
I’m getting close to finishing my first build: the Model Shipways Banks Dory. One of the last steps is the beckets. The rope supplied with the kit is 2 mm beige jewelry nylon, which is roughly 2 scale inches (1:24) in diameter. The pre-drilled holes are about 1 mm diameter. 2 inches seems like a very thick rope for lifting a small boat. Question: Should I drill the holes out or get thinner rope? Or is there another option?
-
I had a similar problem, which I attribute to over-enthusiastic clamping. I think if you wet the inside in that area it will swell and straighten. But I’m no expert. You can also unglue using alcohol and redo. Search the build logs for that kit. I’ve started one, and I found others helpful.
-
My First Kit Pick Ups.... Beginners Kit Recommendation?
Mark m replied to DeHammer's topic in Wood ship model kits
That set does not include the tools, paint or glue. Still an excellent price, but just be aware. I’ll add my vote for those kits. I’m almost done with the Dory and have started the Pram. Good instructions - almost a tutorial. -
Fully rigged wood ship models look fairly fragile. How do you protect them when you need to transport a partial or fully complete model?
-
I really appreciate the feedback and discussion. I tried a simple sanding task with the Dremel and it worked pretty well. I wanted to try the flex shaft with the smaller head unit, but it seems to be seized up after years of non-use.
-
What do you use the Proxxon for?
-
I have owned and used a Dremel rotary tool for small projects. I started building wooden model ships a few months ago, and was expecting to have to use the Dremel. So far, I haven’t found a use for it. In these forums, I’ve only seen it used as a substitute for a lathe. I am tempted to use it to cut rabbets, but am concerned it might move too fast on thin wood. What else are people using one for?
-
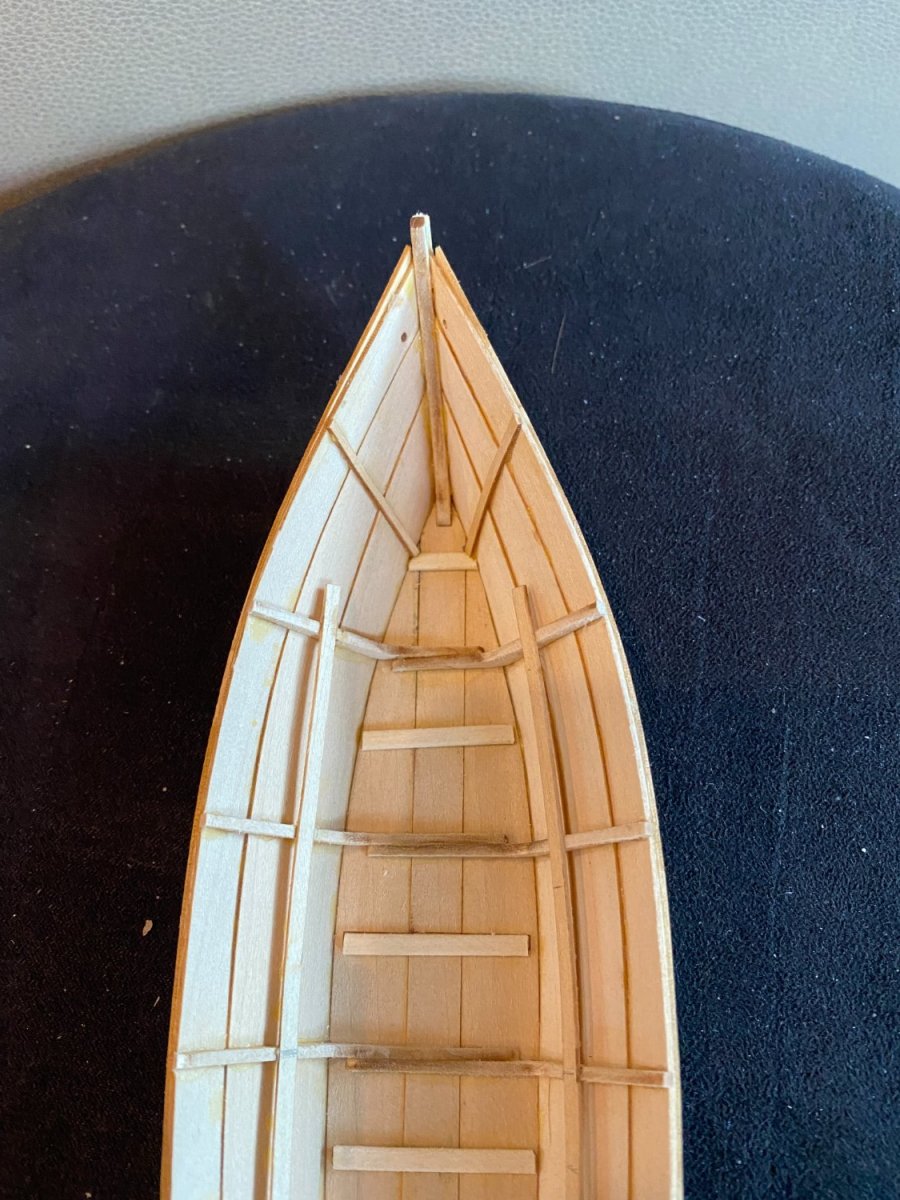
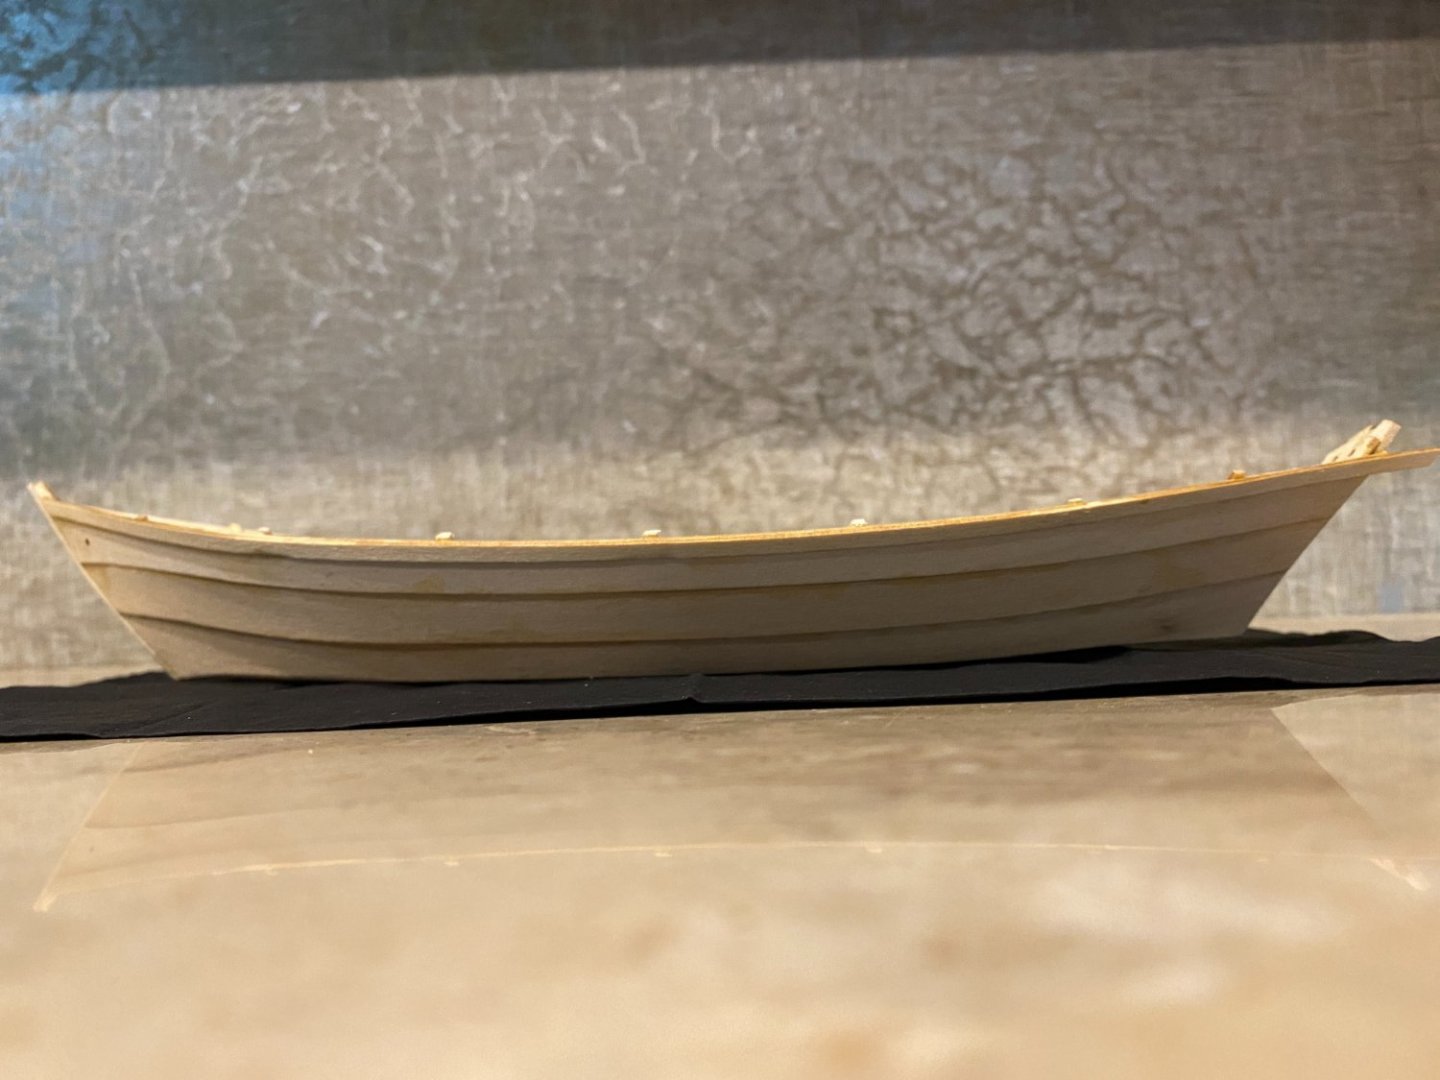
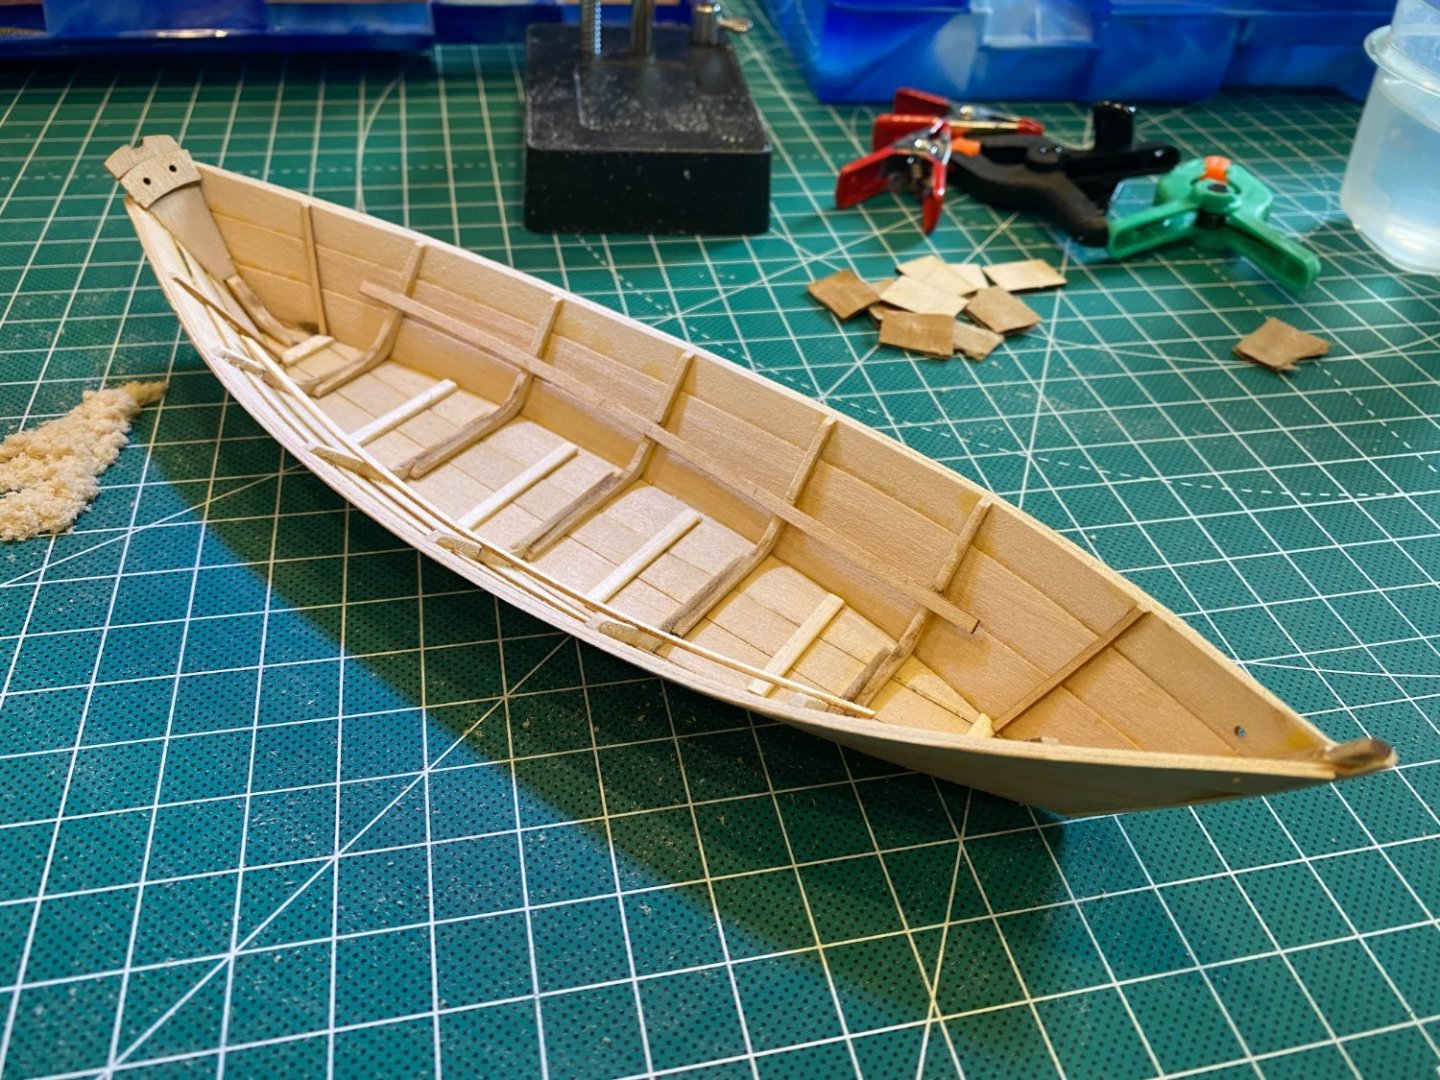
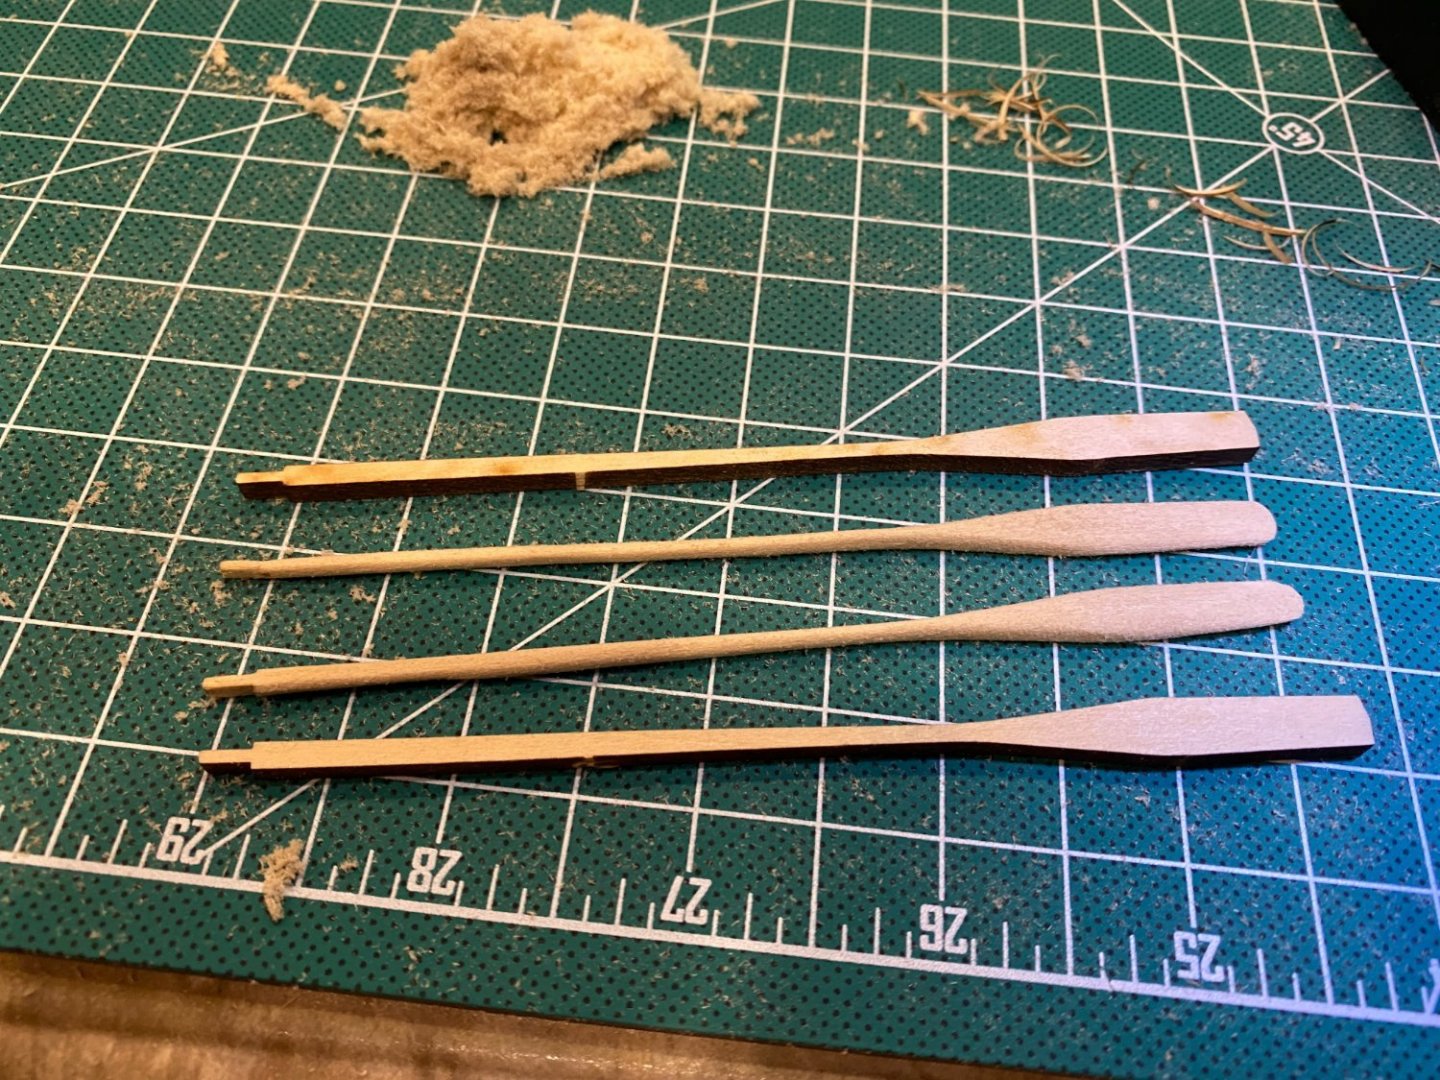
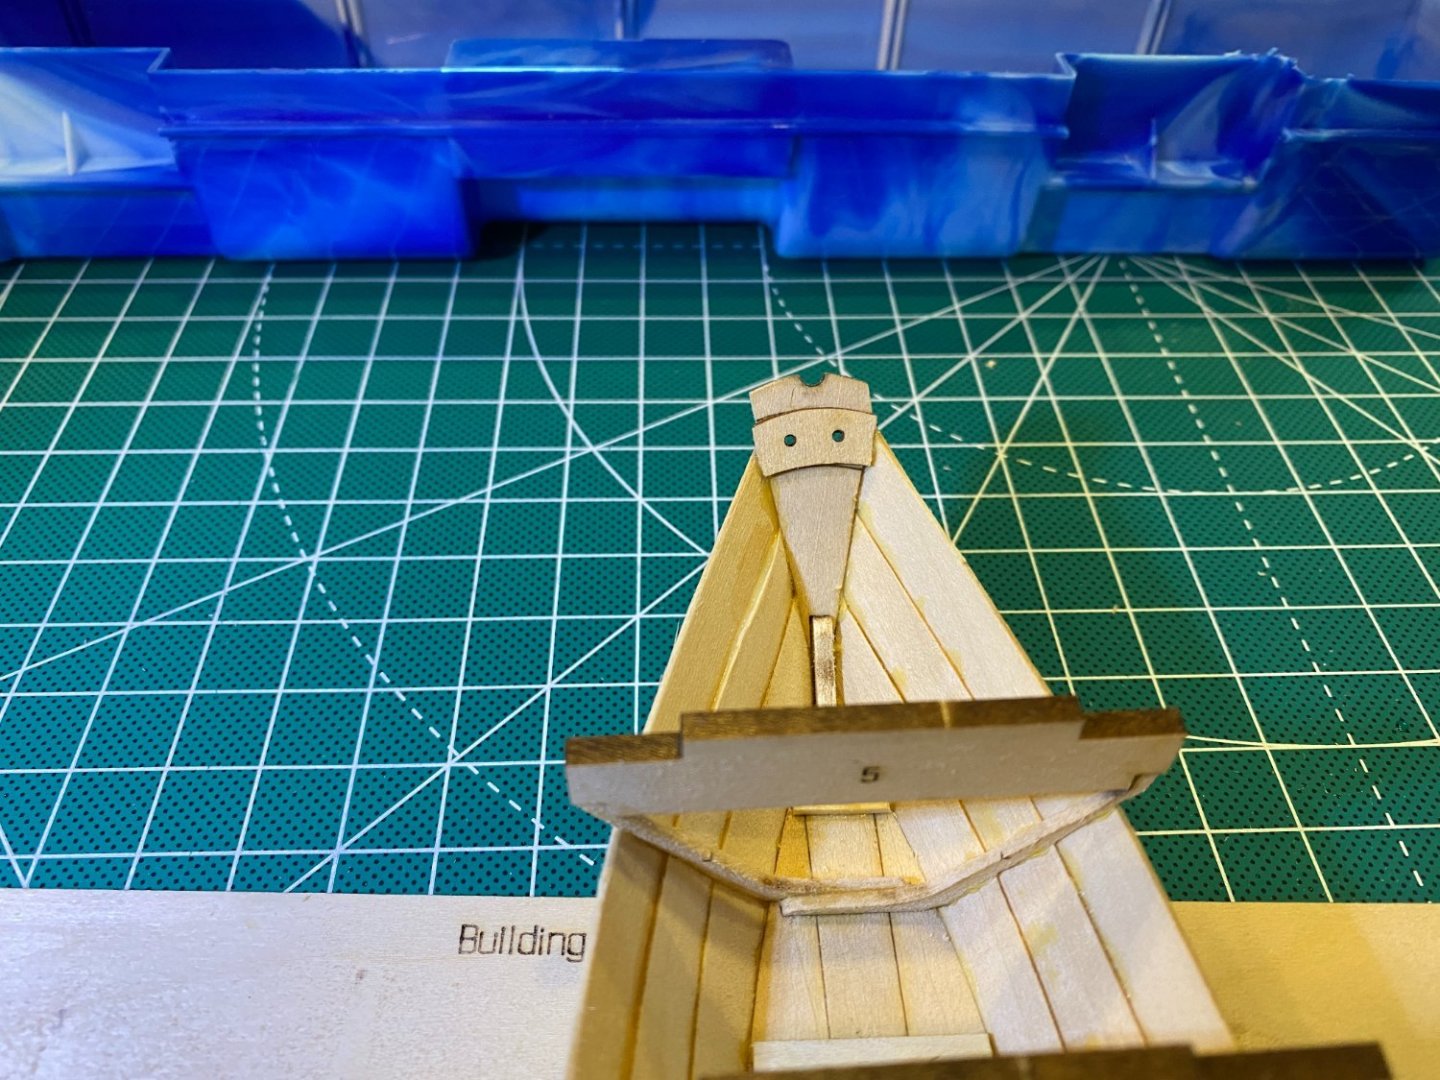
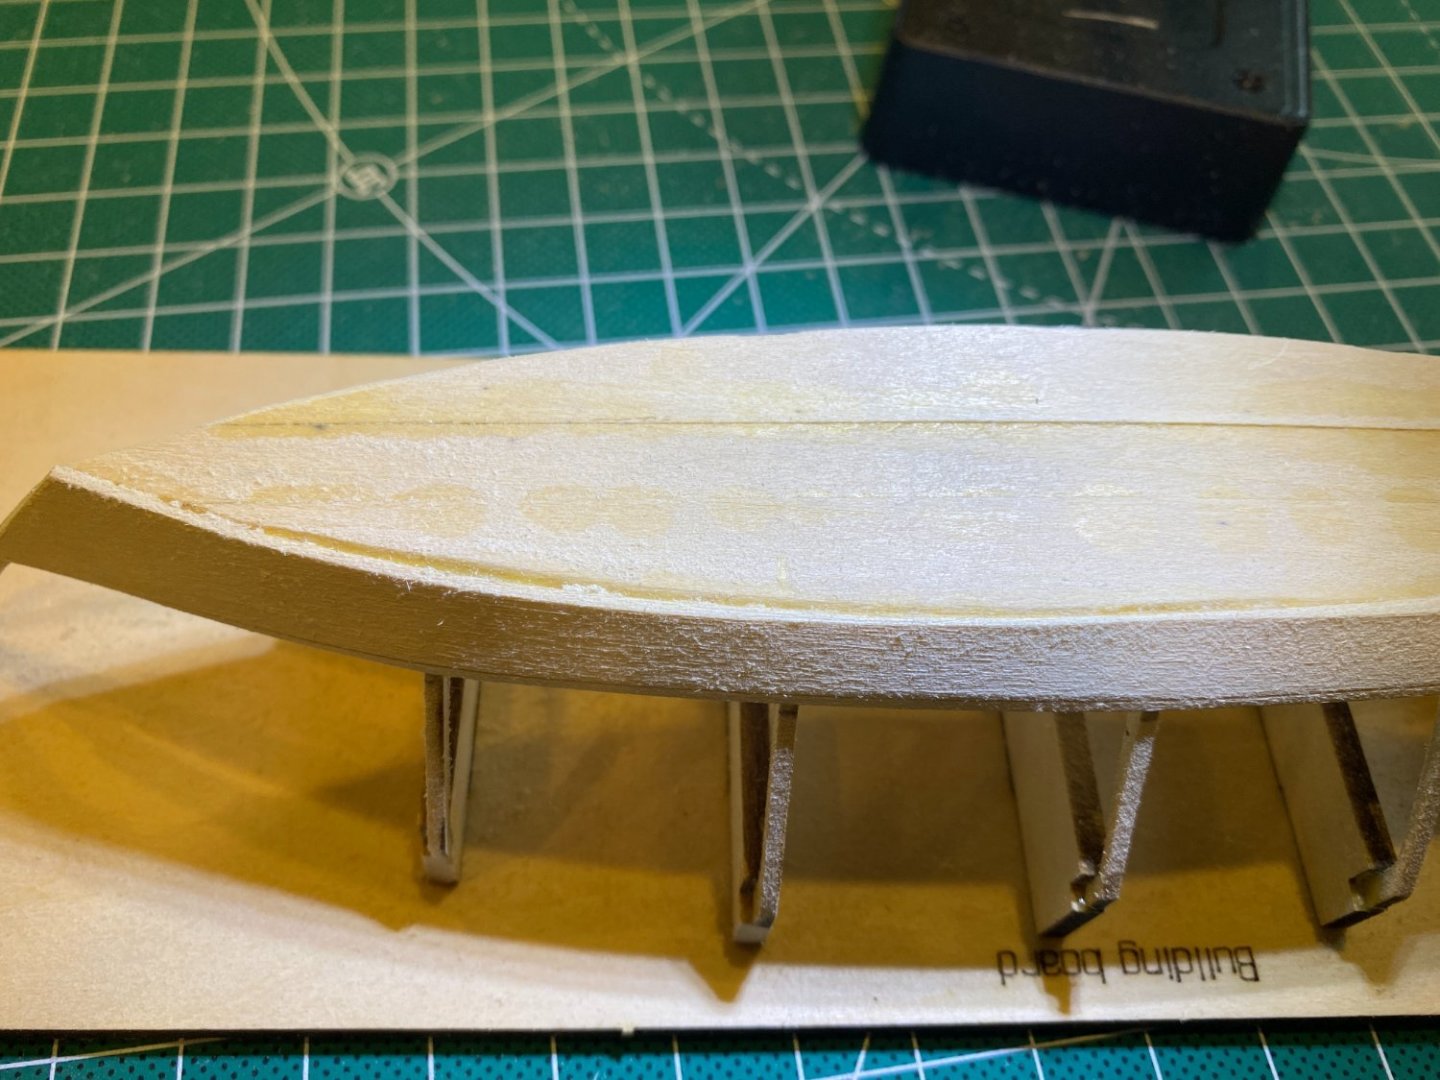
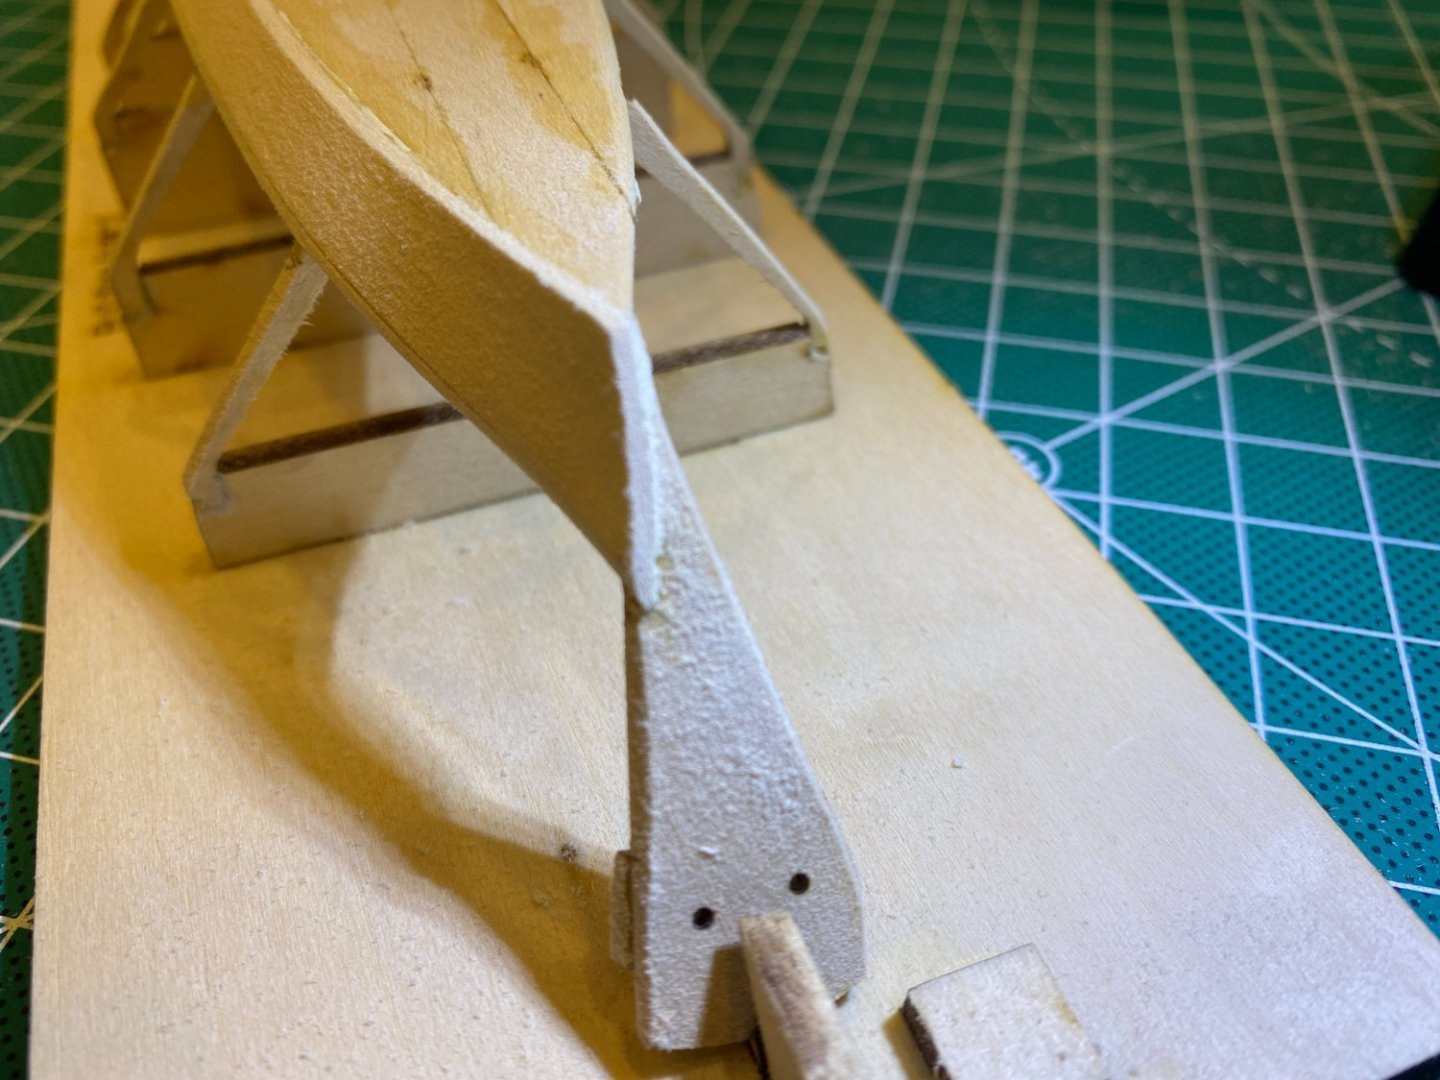
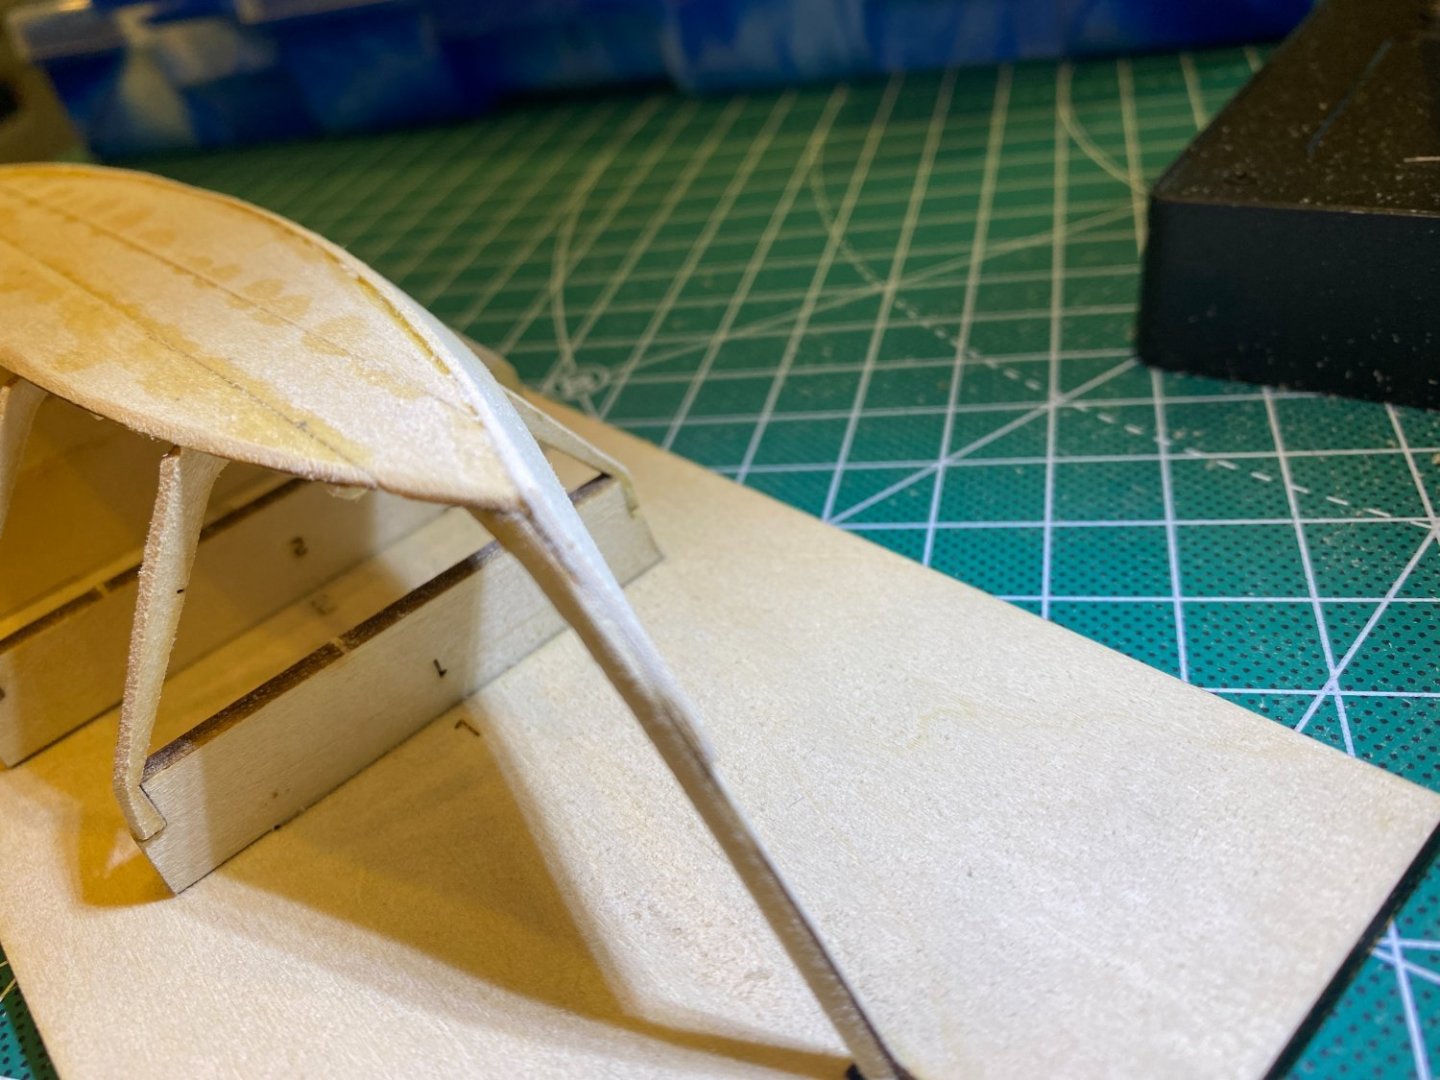
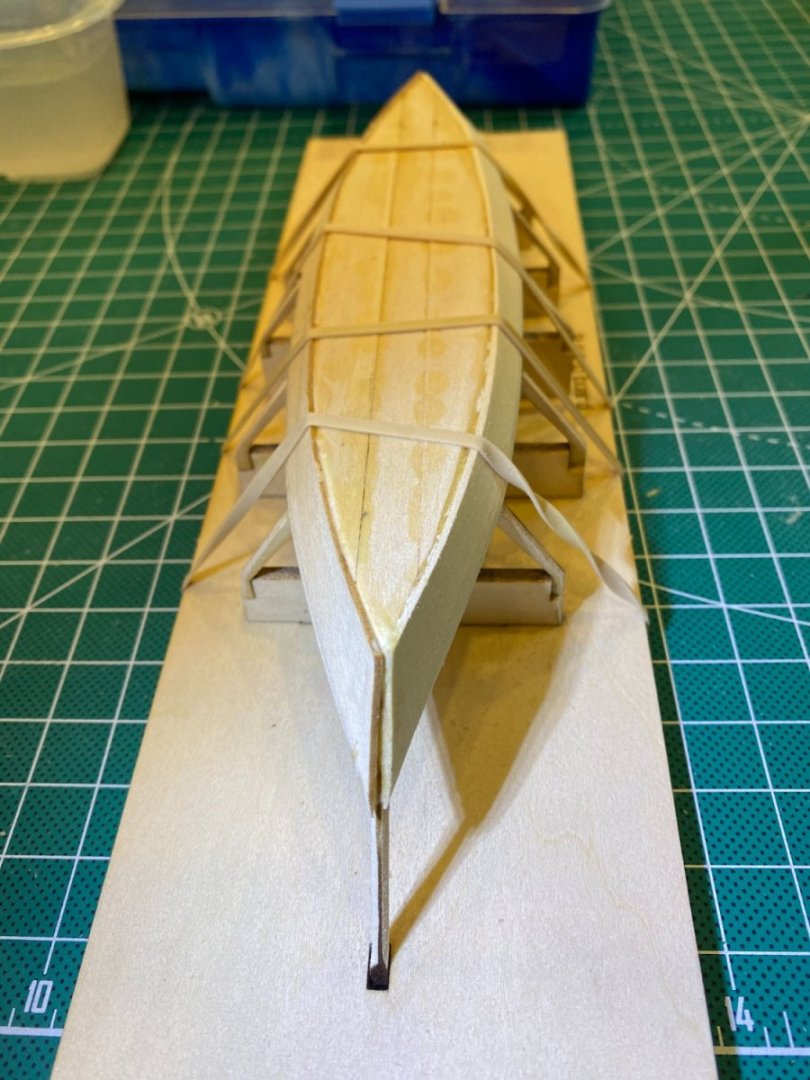
Dory Build Log Part 5 Last steps before painting There are a few other steps detailed in the kit instructions before painting. Side cleats, Bands, Gunwales, etc. Before cutting off the tops of the frames, I noticed that the sides are also slightly unsymmetrical. Not quite as bad as at the stern, but not quite right. Still not clear how to get better at this part. I glued on the bands, and they sit high from the sheer plank at the bow. In addition, the boat bottom is supposed to be slightly curved toward both the bow and stern. Mine comes up quite nicely, but at the bow it seems to drop back down again. Can anyone comment if the drop at the bottom is the cause of the bands sitting high? Or any other tips about the cause of either of these issues? Continued following the instructions, until my next hiccup. After I glued in the seat risers, I noticed that something was seriously wrong. They were really high at both ends, and low in the middle. At first, I was convinced that my previous errors had compounded to such a degree that my boat was the wrong shape altogether. I went to bed contemplating buying another copy of this kit and starting again. By morning, I had convinced myself that I had put them on upside down. This was a good lesson in understanding 3D geometry, specifically why straight planks have to be curved downward to end up flat on the side of the ship. So – time to learn how to unglue using alcohol. The ungluing was easier than I expected it to be. I painted the alcohol on pretty liberally, let it soak a bit and gently pried the risers off. Put them back on and was relieved to they were the right height now. Although I thought I had measured them correctly, I noticed later that I had offset them, so that one is longer at the stern and the other at the bow. Possibly I didn’t account for the way the frames are constructed (port side of frame further forward than starboard side), and that when I switched them over, I should have remeasured the centers. I didn’t try to fix this, although it would have been fairly easy to trim them back. I also have a fairly large gap between the broad and sheer planks on one side near the stern. Lesson learned – clamp more carefully! Got it all sanded down and added the optional frame head irons and the breast hook. I was waiting for an opportunity to paint, so I used the time to make the oars. I won’t say I did a great job, but the fourth oar looks a lot better than the first! Next step is painting.


- 15 replies
-
- 8
-

-
- Model Shipways
- Shipwright Series
- (and 2 more)
-
What's a good kit for learning rigging?
Mark m replied to Mark m's topic in Masting, rigging and sails
Thanks, especially for the suggestion on scale. -
What's a good kit for learning rigging?
Mark m replied to Mark m's topic in Masting, rigging and sails
As a follow-up to this topic on learning more advanced rigging: I see that Corel has some relatively inexpensive ($100) solid-hull kits such as "Corel SM104 HMS Bounty - Solid Carved Wood Hull Kit" that appear to have fairly complex rigging. What would I be losing out on if I used one of these as a learning exercise for rigging? Thanks! -
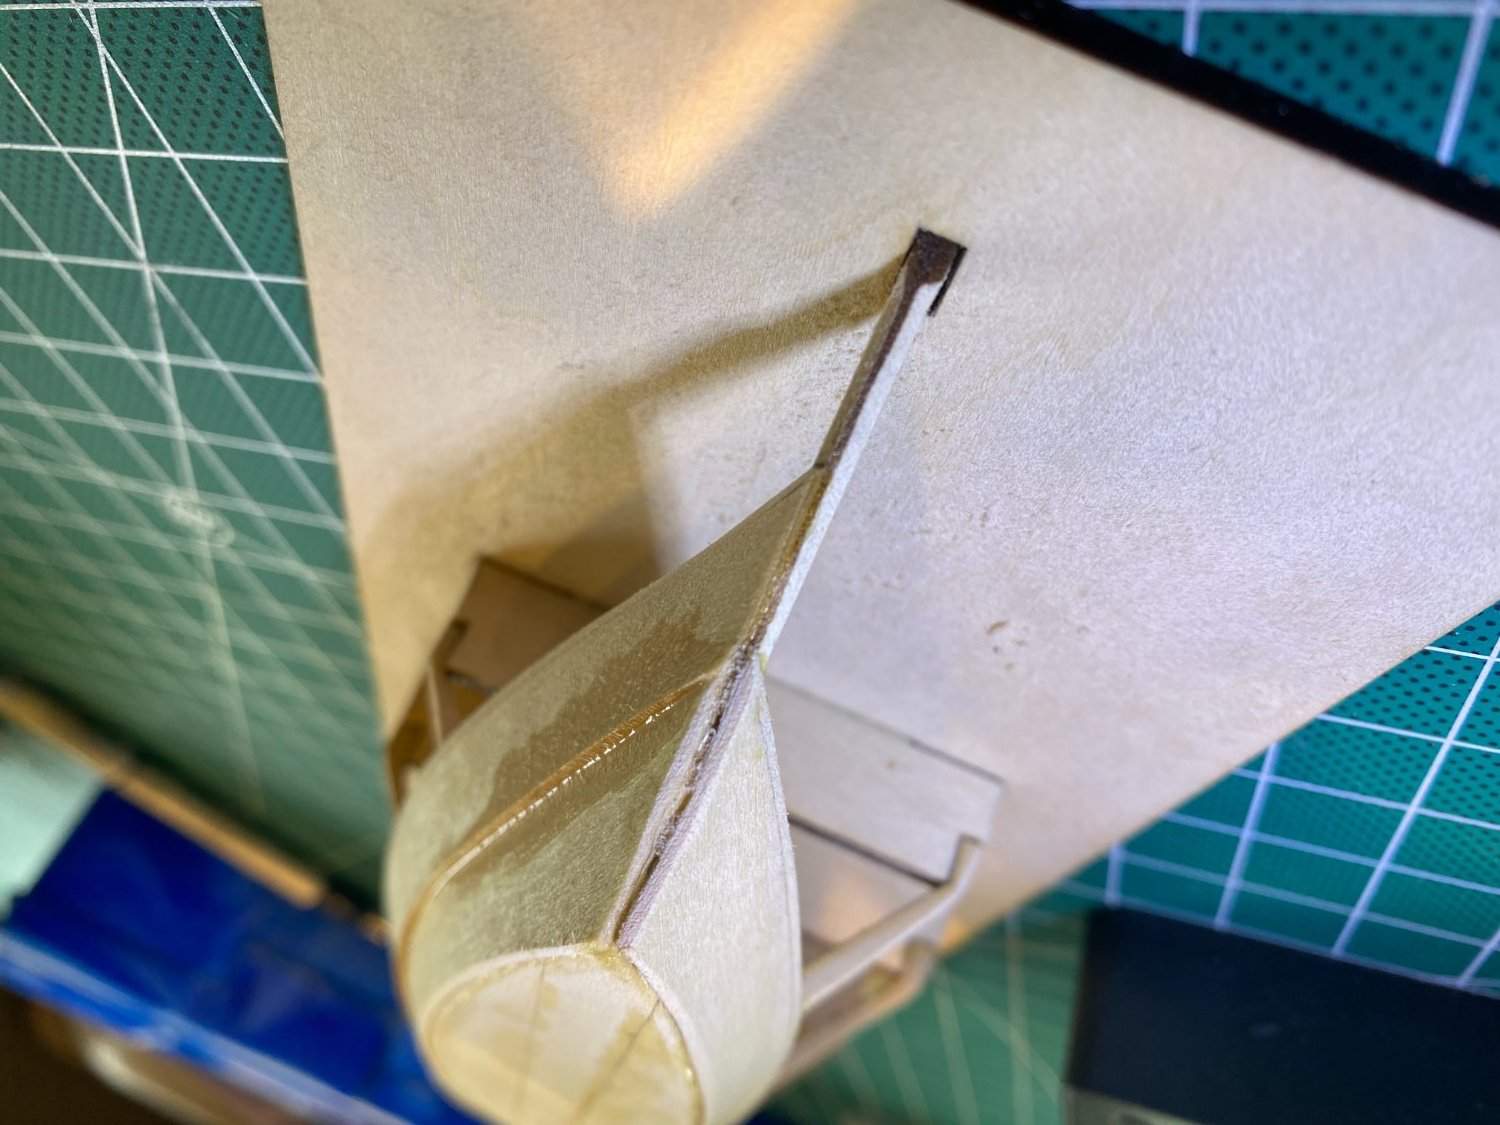
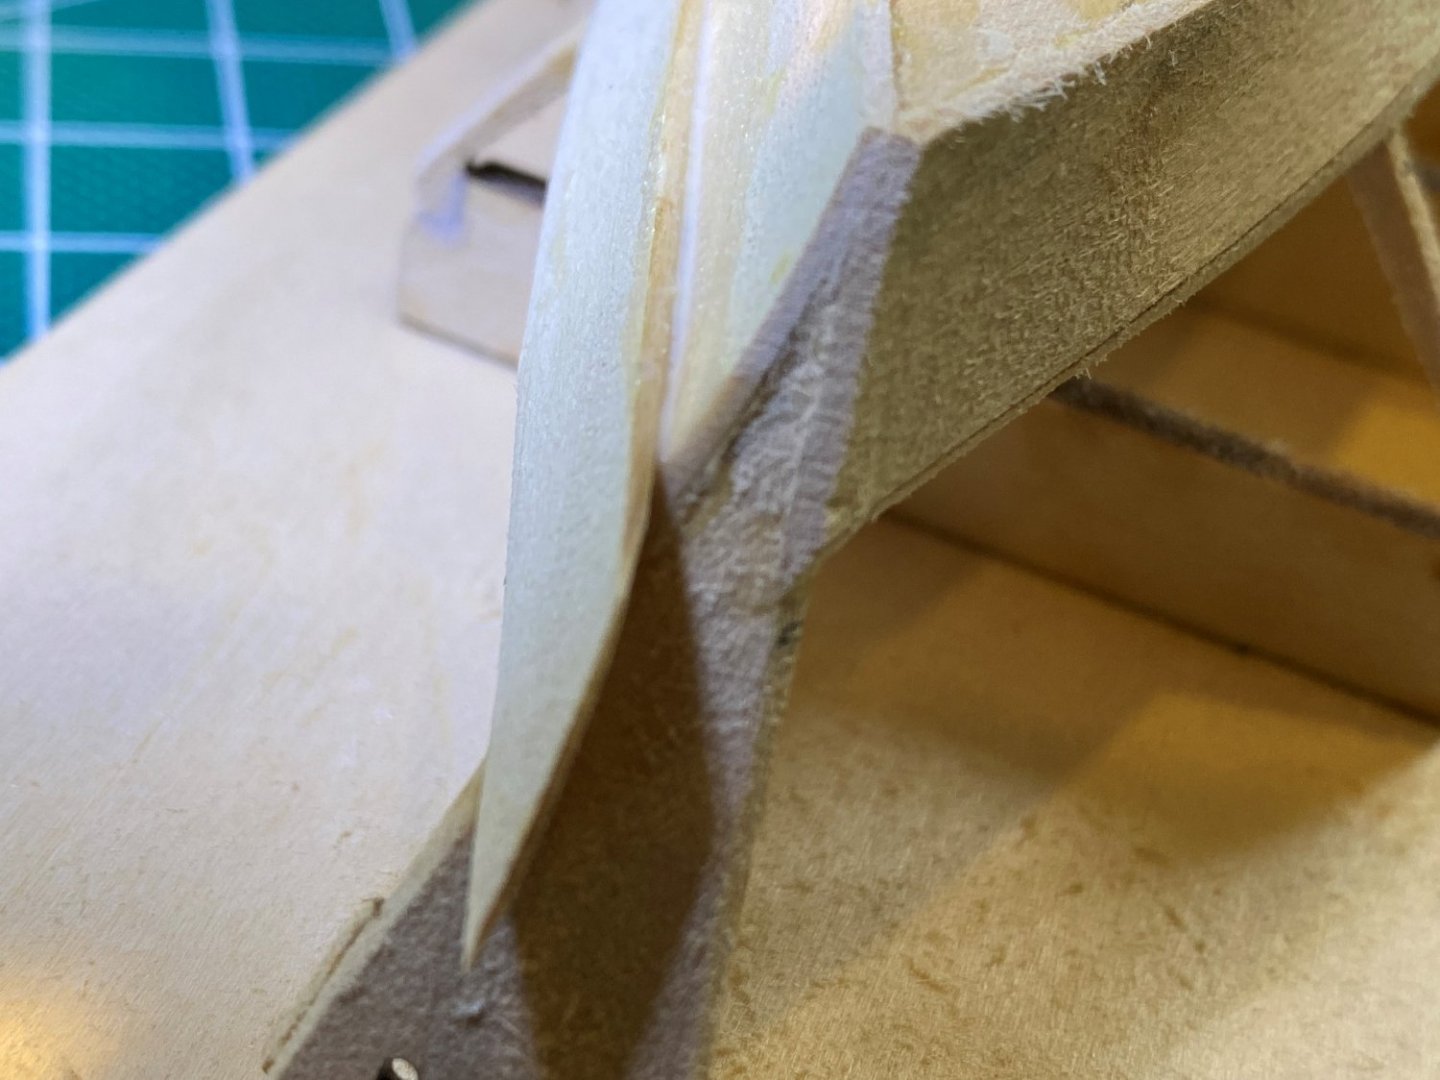
Dory Build Log Part 4 The remaining planks The broad and sheer strakes are beveled, bent and attached similarly to the garboards. When I went to trim the broad plank, I realized that my rolling bevel had missed the target. I had beveled it following the instructions, but hadn’t factored in the need to trim the board after it was glued down. As a result, my beautiful rolling bevel was trimmed off! There is also a gap between the garboard and the broad plank. As best I can tell, this is caused by the indented garboard mentioned in my previous update. I filled it with dilute glue and hope to paint it over when the time comes. Having learned my rolling bevel lesson on the first broad plank, I did a better job on the other side. The photo of the stern shows the difference. The bow seemed quite ugly, but I took solace in the fact that the false stem will hide that. The next four pictures show some creative clamping then the two sides of the boat. And finally, the lack of symmetry at the stern transom. I don’t know how I managed to get so far off. I can see that the port side (right side in this picture) planks come at least a couple of millimeters higher than the starboard side. I guess I should have measured and marked the side of the transom to position the planks correctly. Any other tips on how to prevent this?


- 15 replies
-
- 7
-
-
- Model Shipways
- Shipwright Series
- (and 2 more)
-
What's a good kit for learning rigging?
Mark m replied to Mark m's topic in Masting, rigging and sails
Thanks for all the tips. I have been learning so much by combing through the massive amount of information on these forums. It's like drinking from a firehose! -
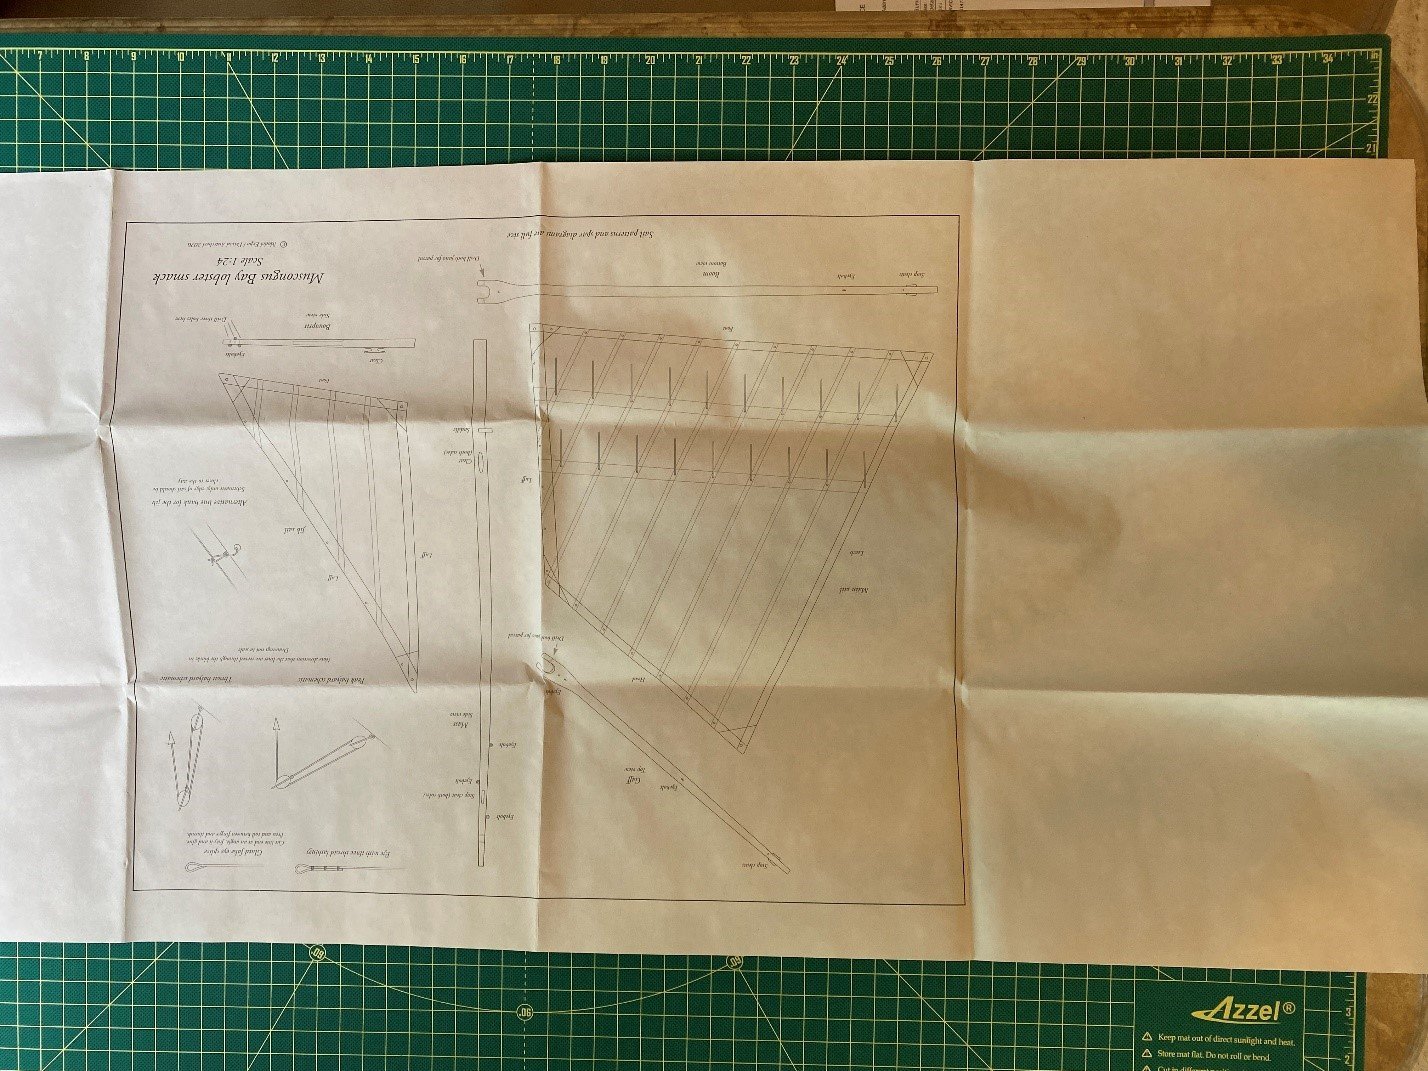
I have almost completed the Model Shipways Dory, and am starting their Norwegian Pram. My third kit will be their Muscongus Bay Lobster Smack. I'm thinking of getting the NRG half-hull to advance my planking skills. The Pram and Lobster Smack seem to have fairly simple rigging compared to the more advanced kits. What would be a good next kit to improve my rigging skills?
-
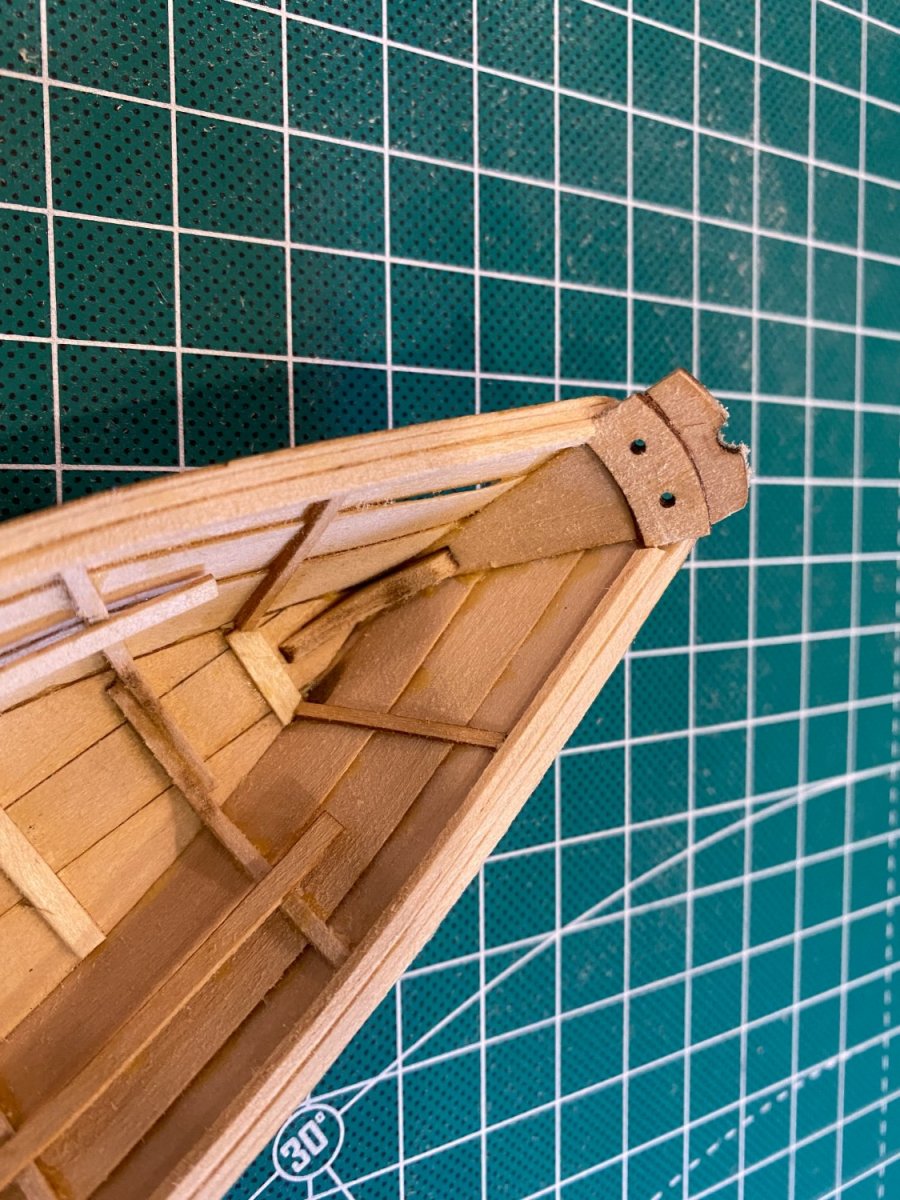
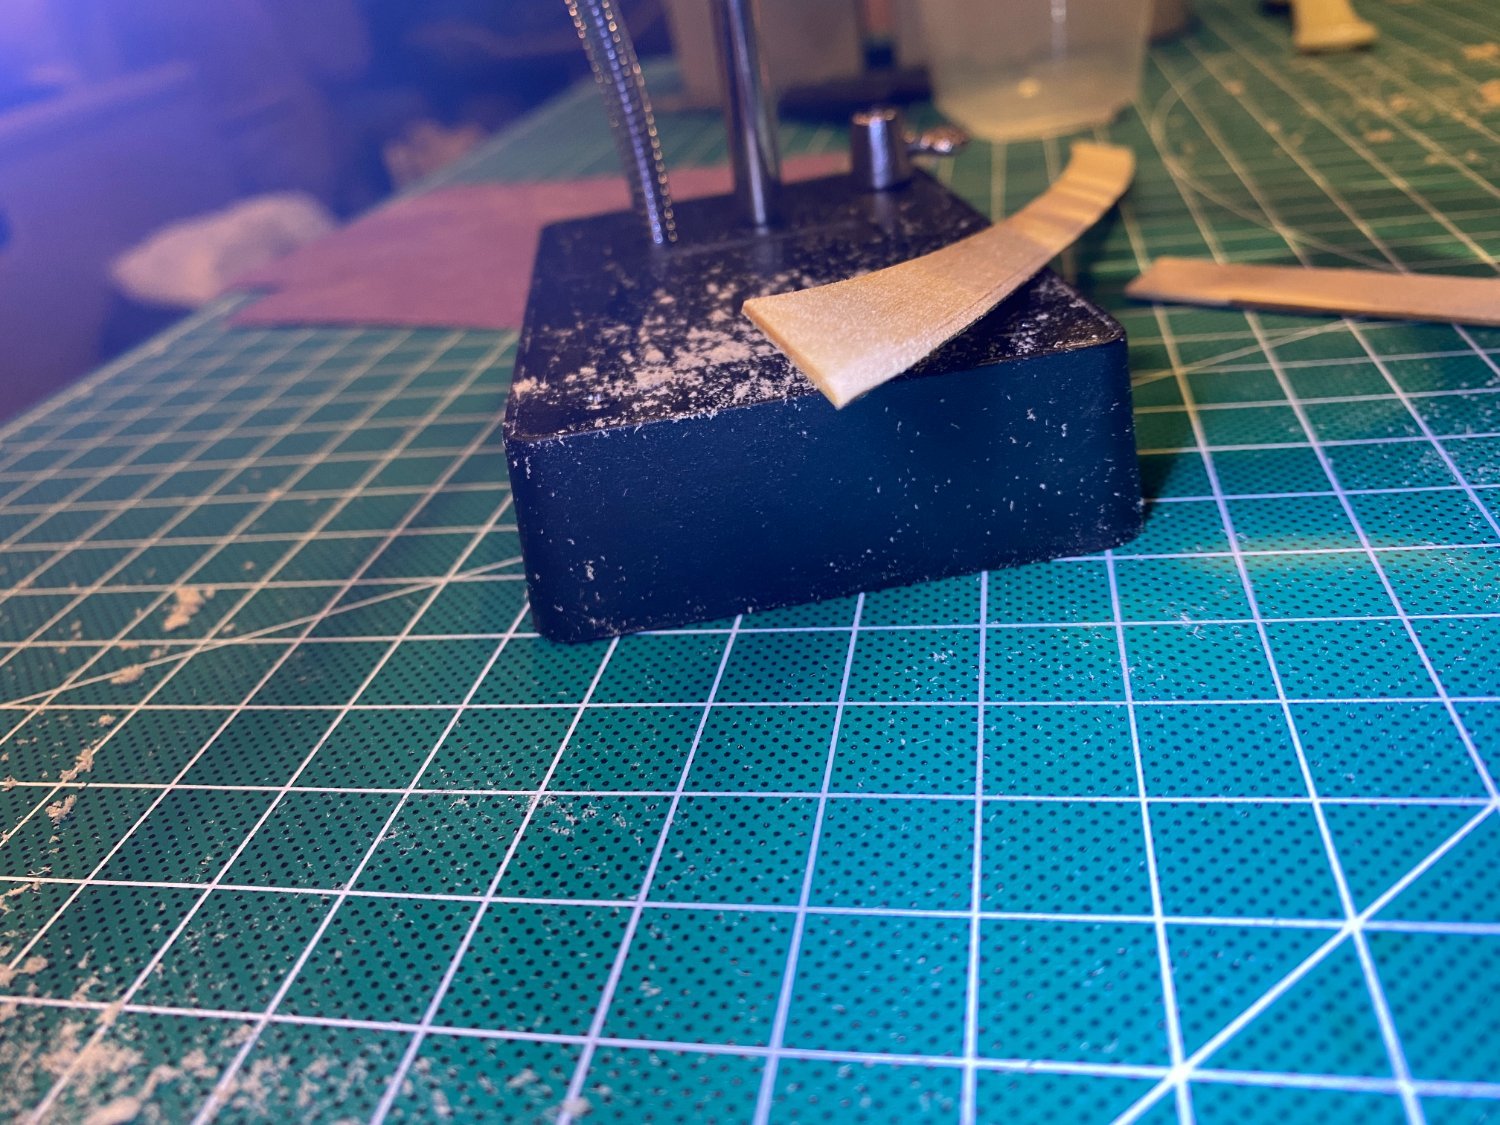
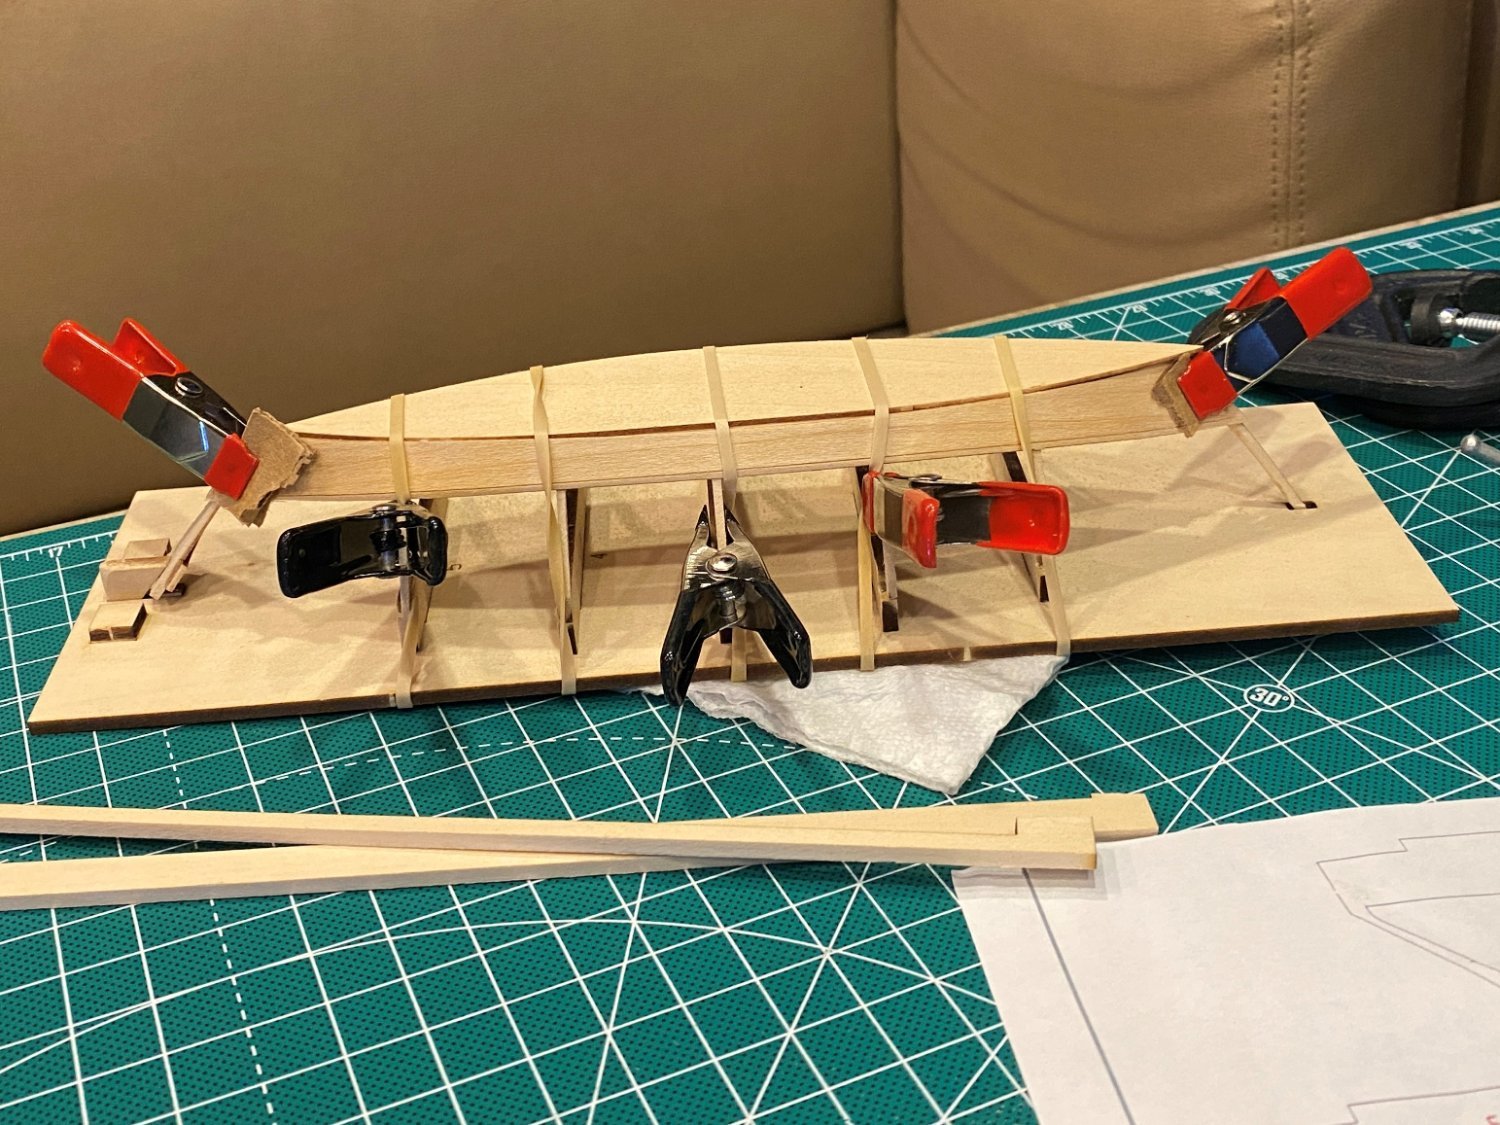
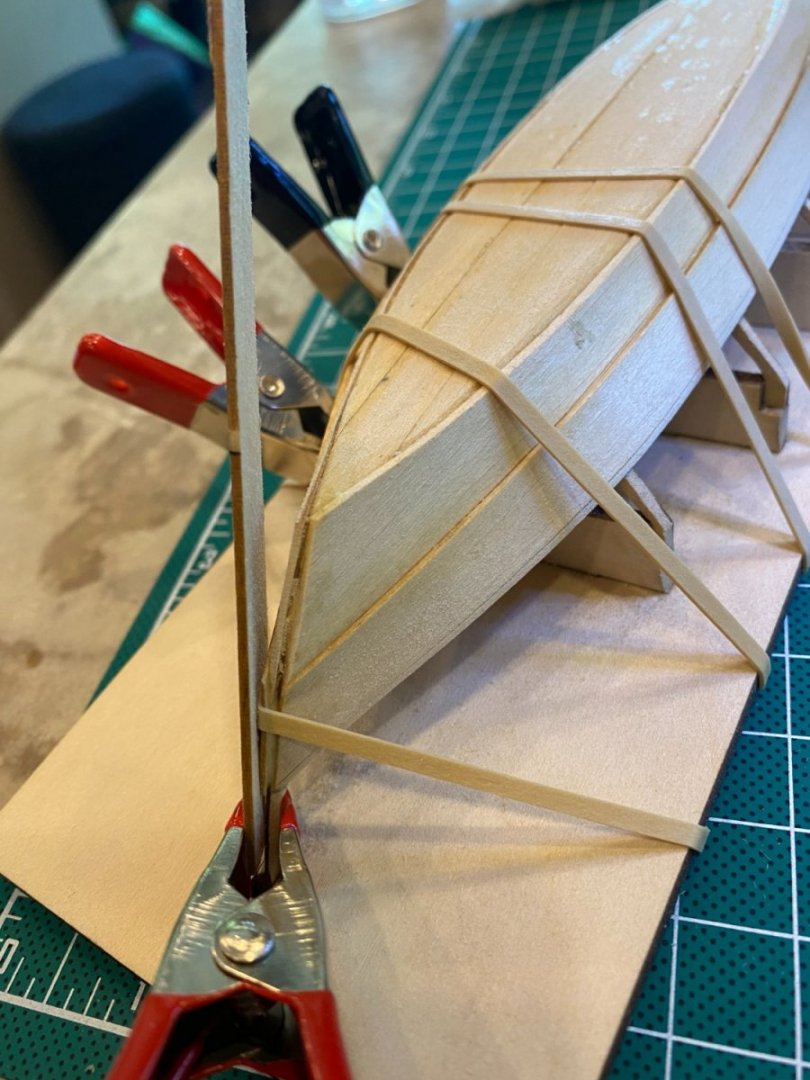
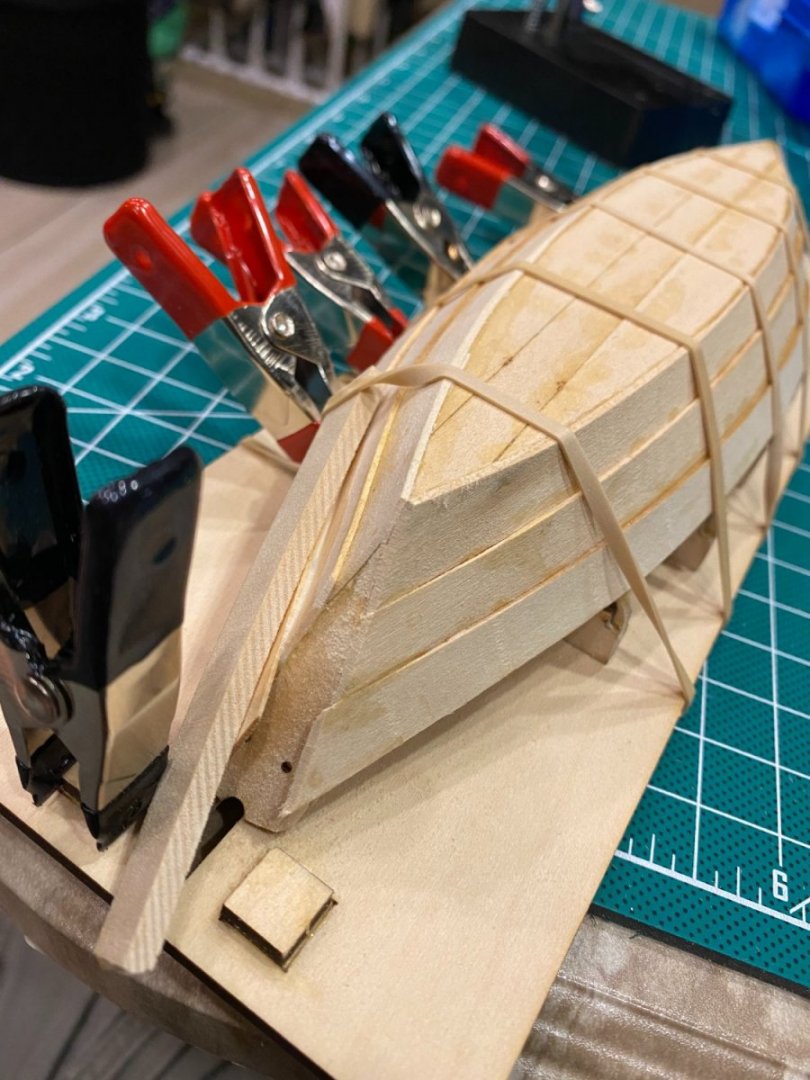
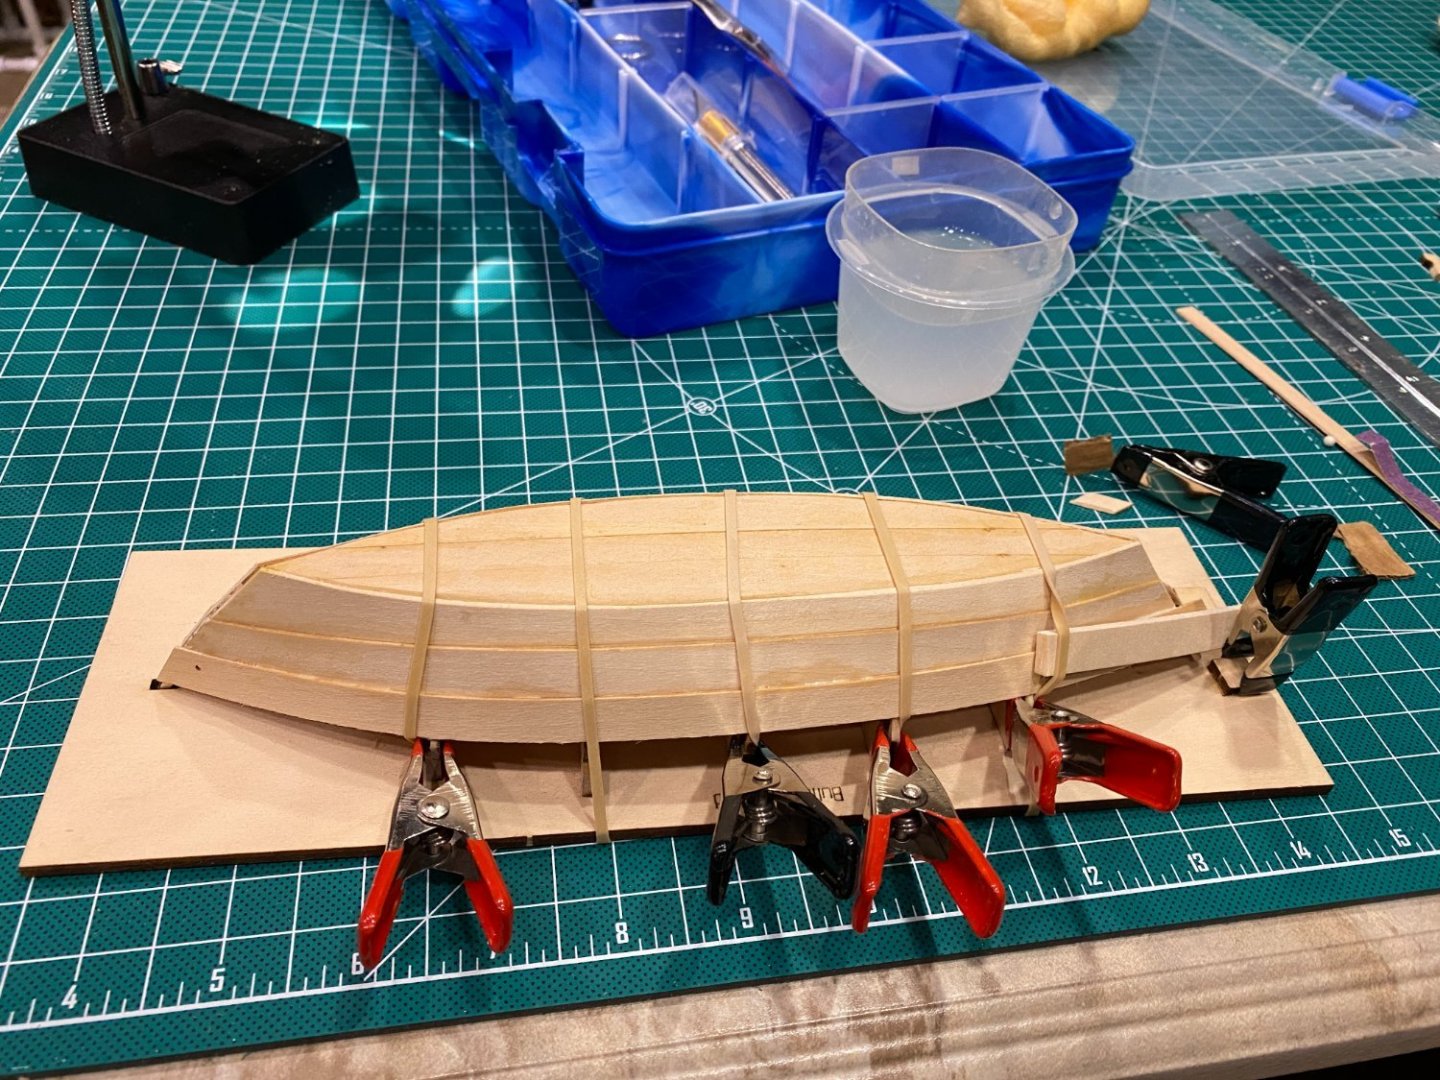
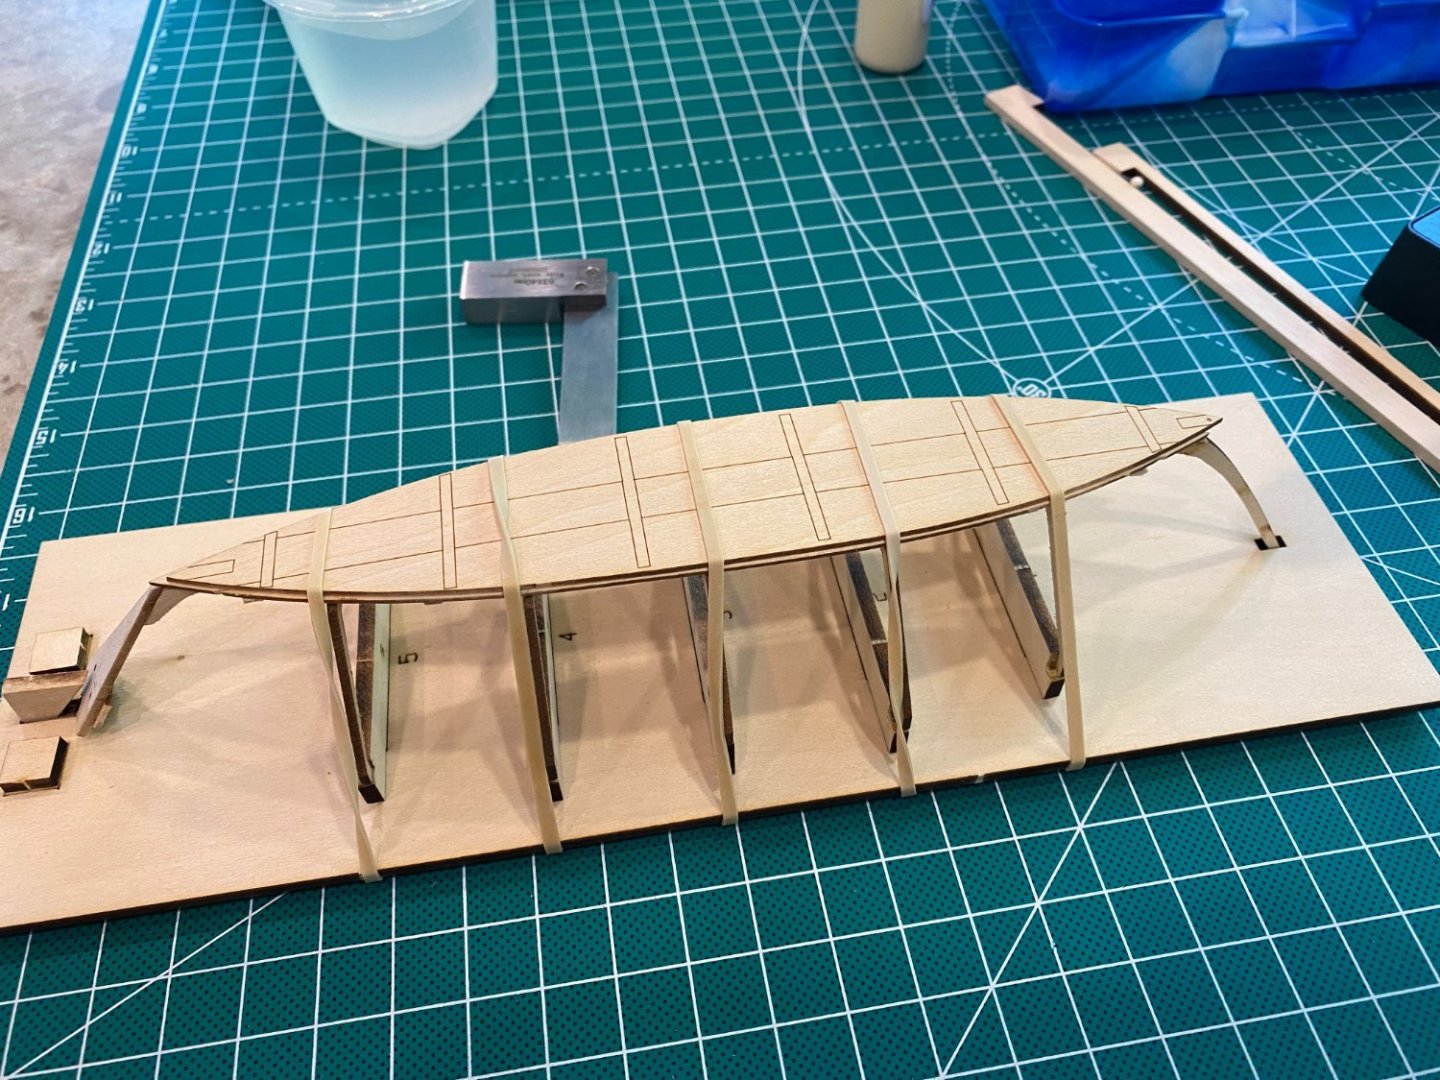
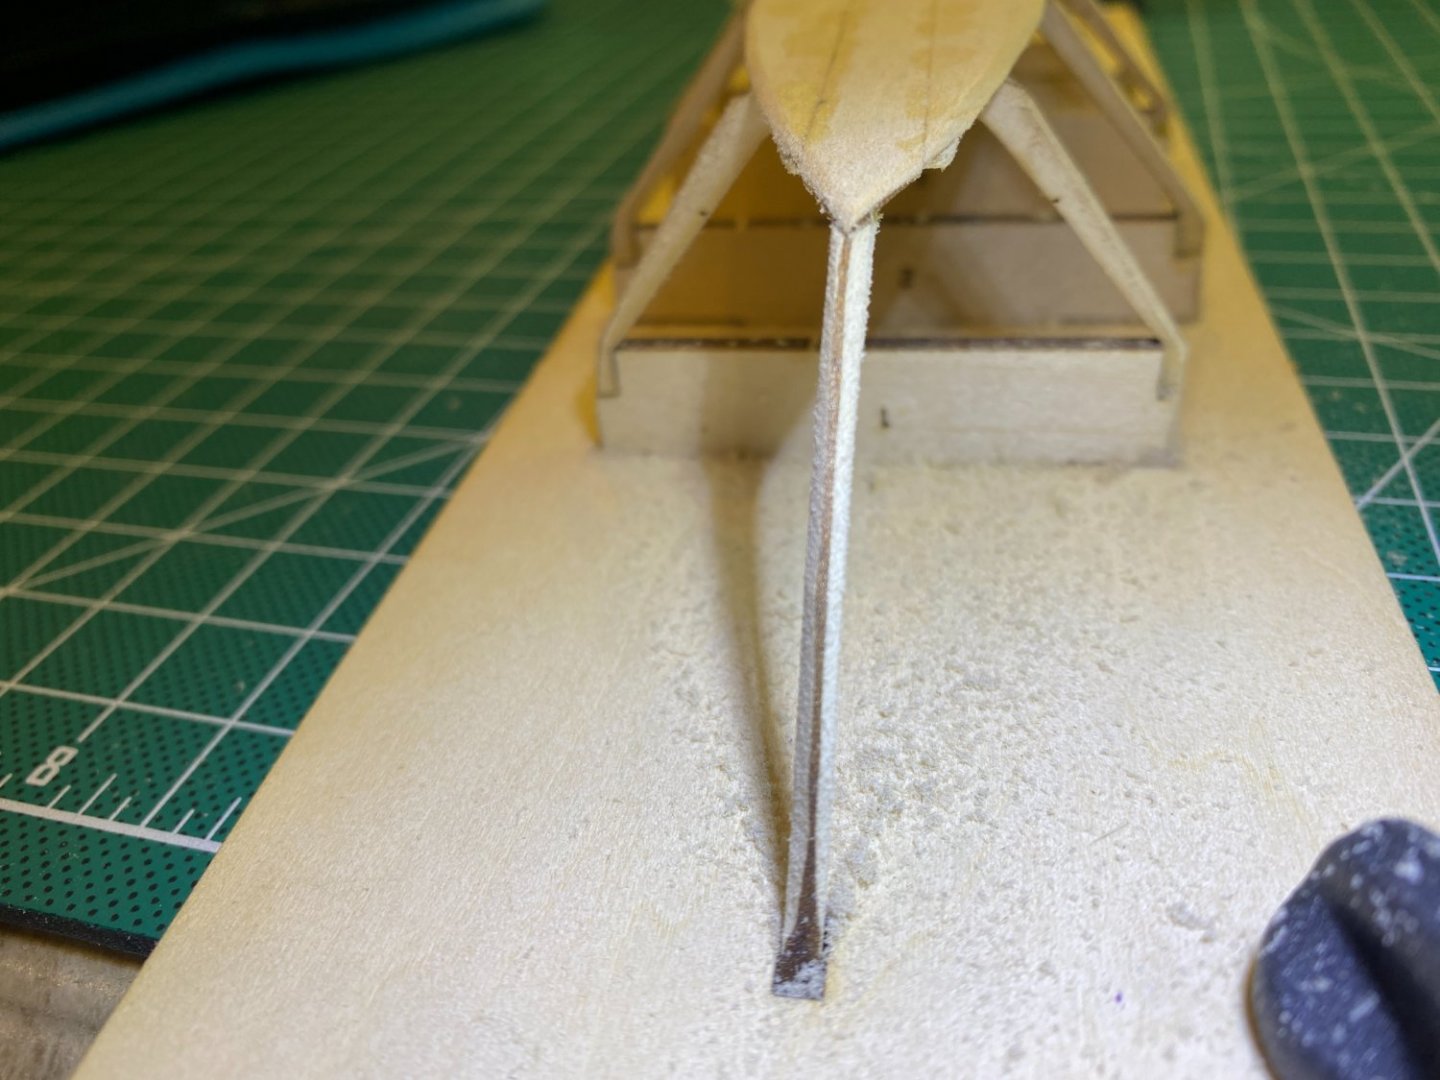
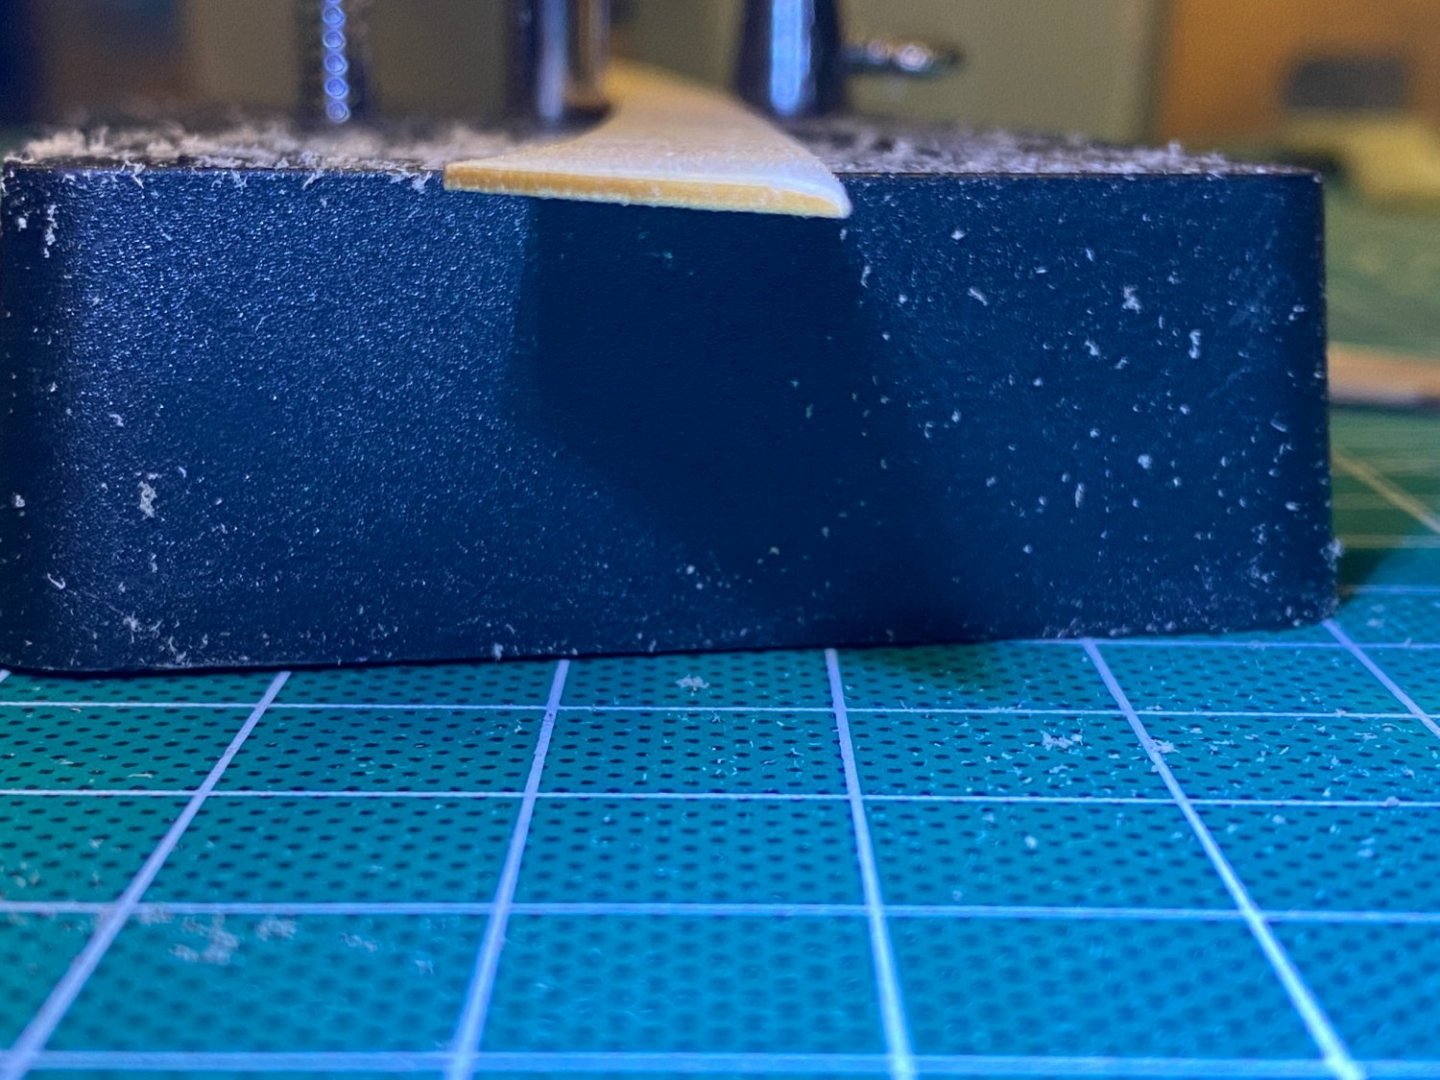
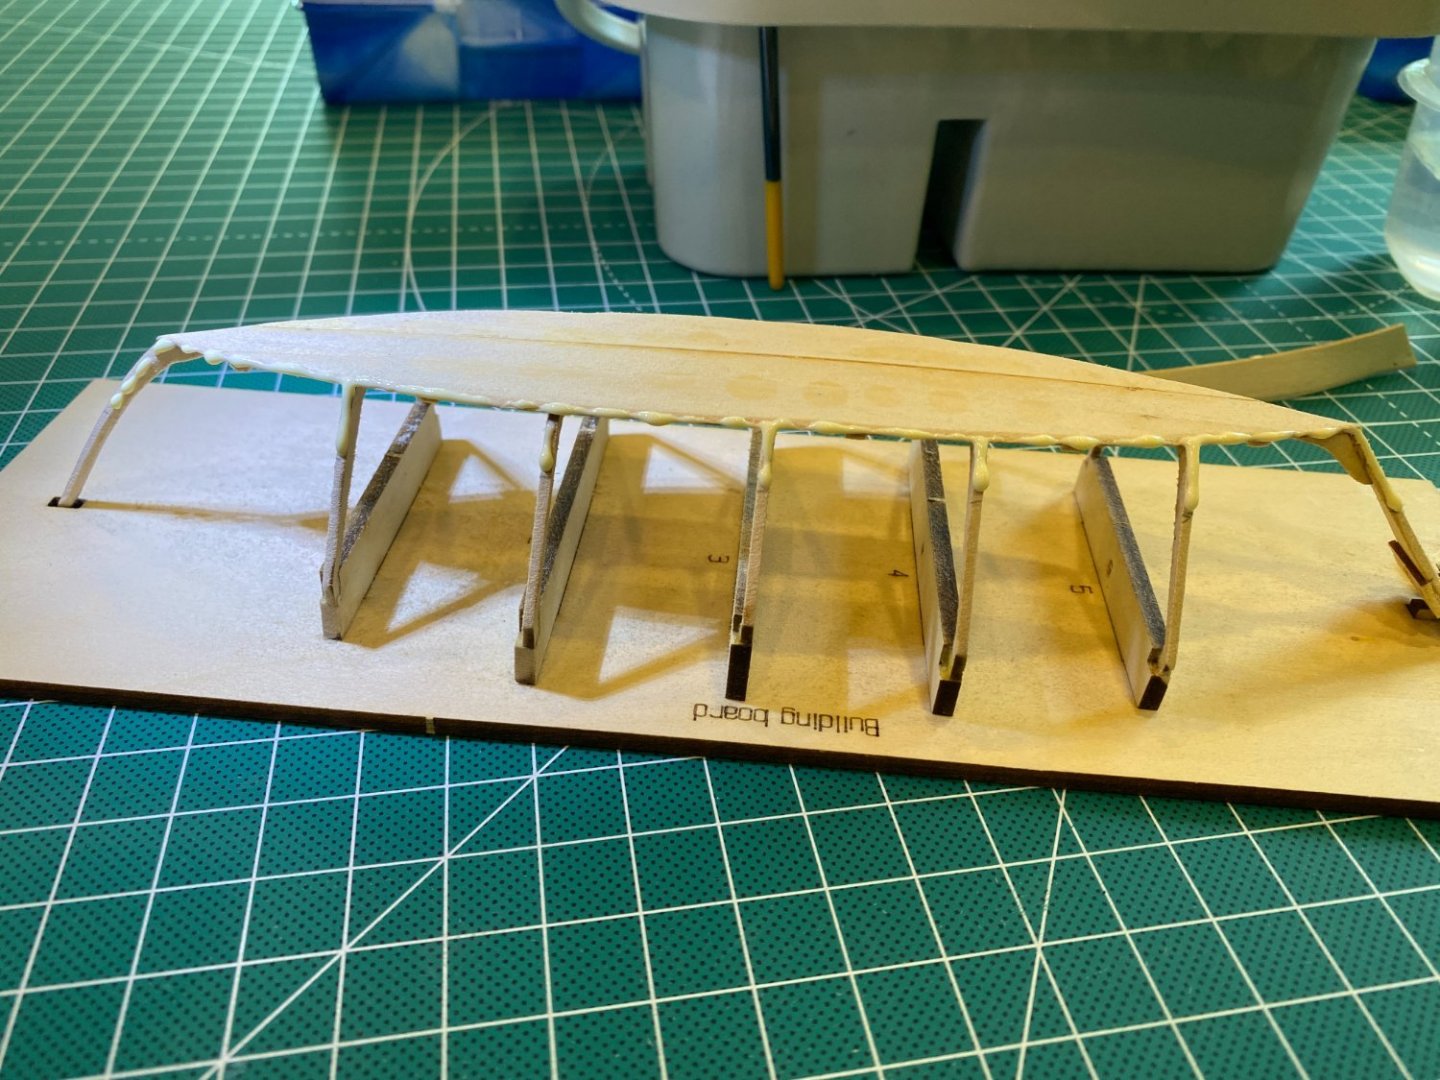
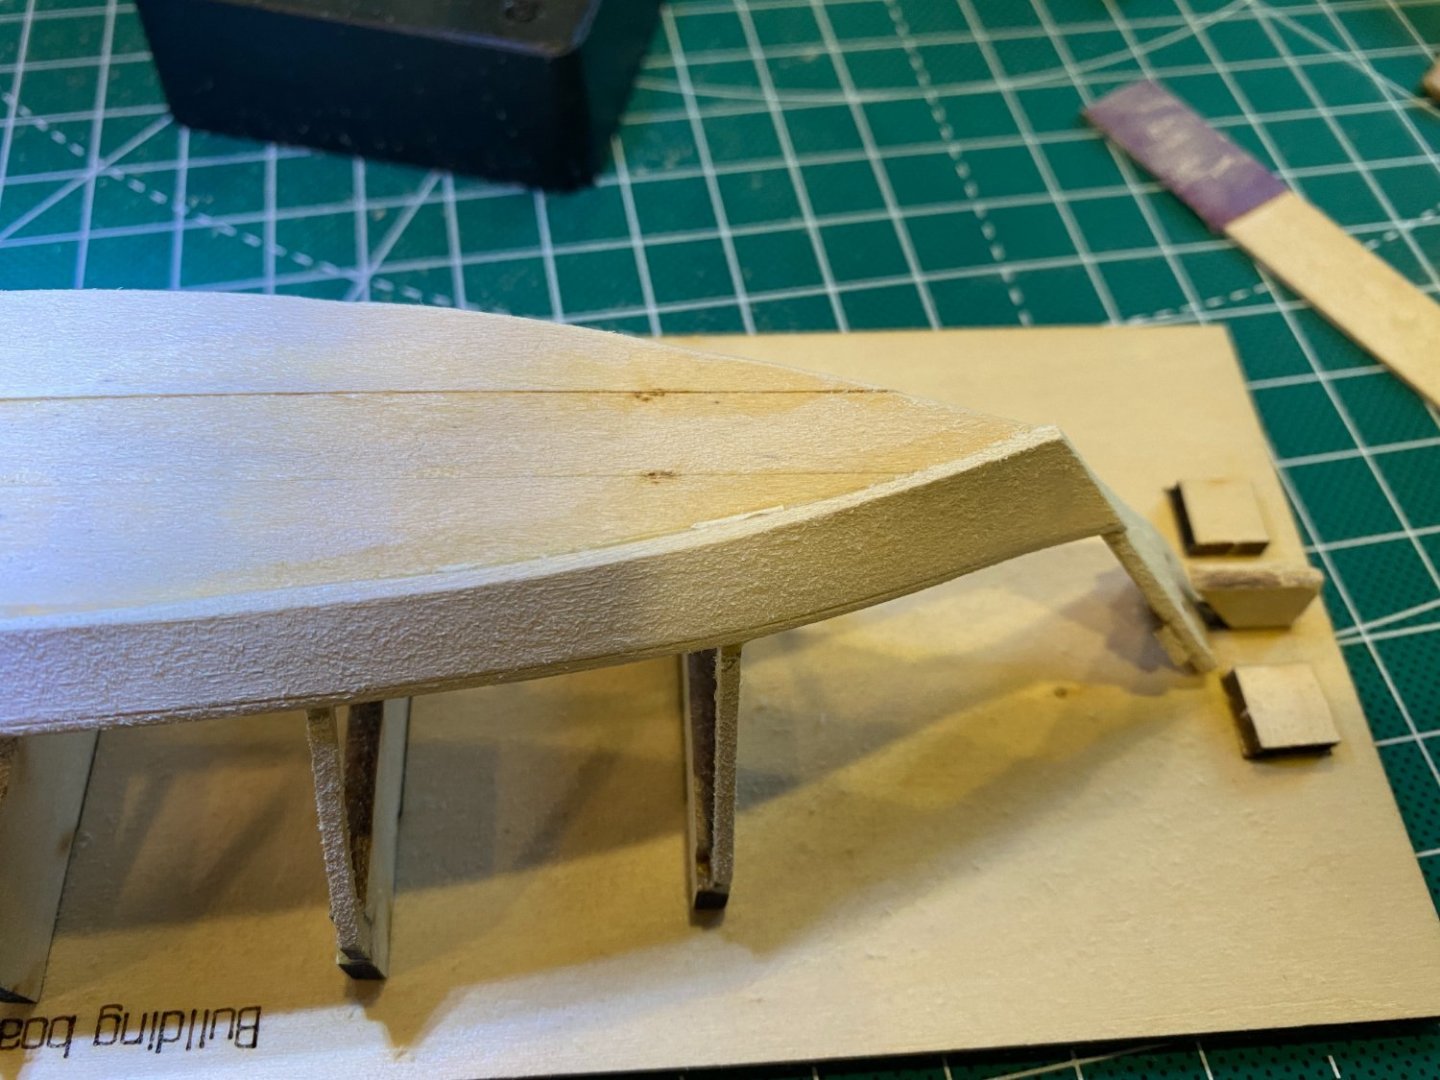
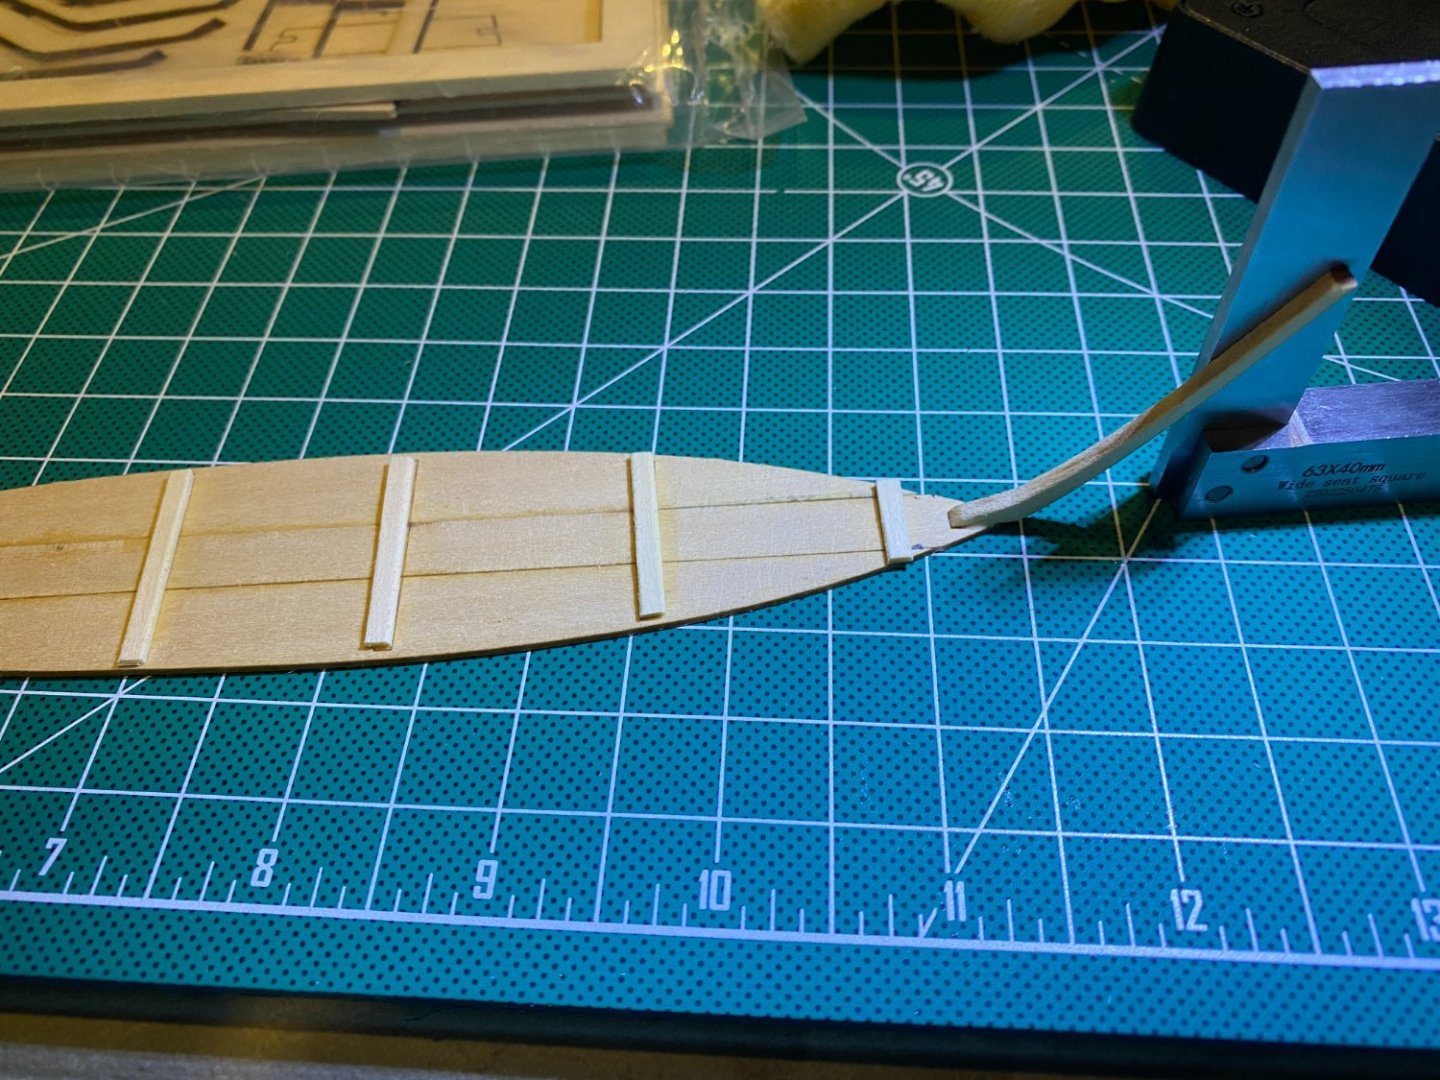
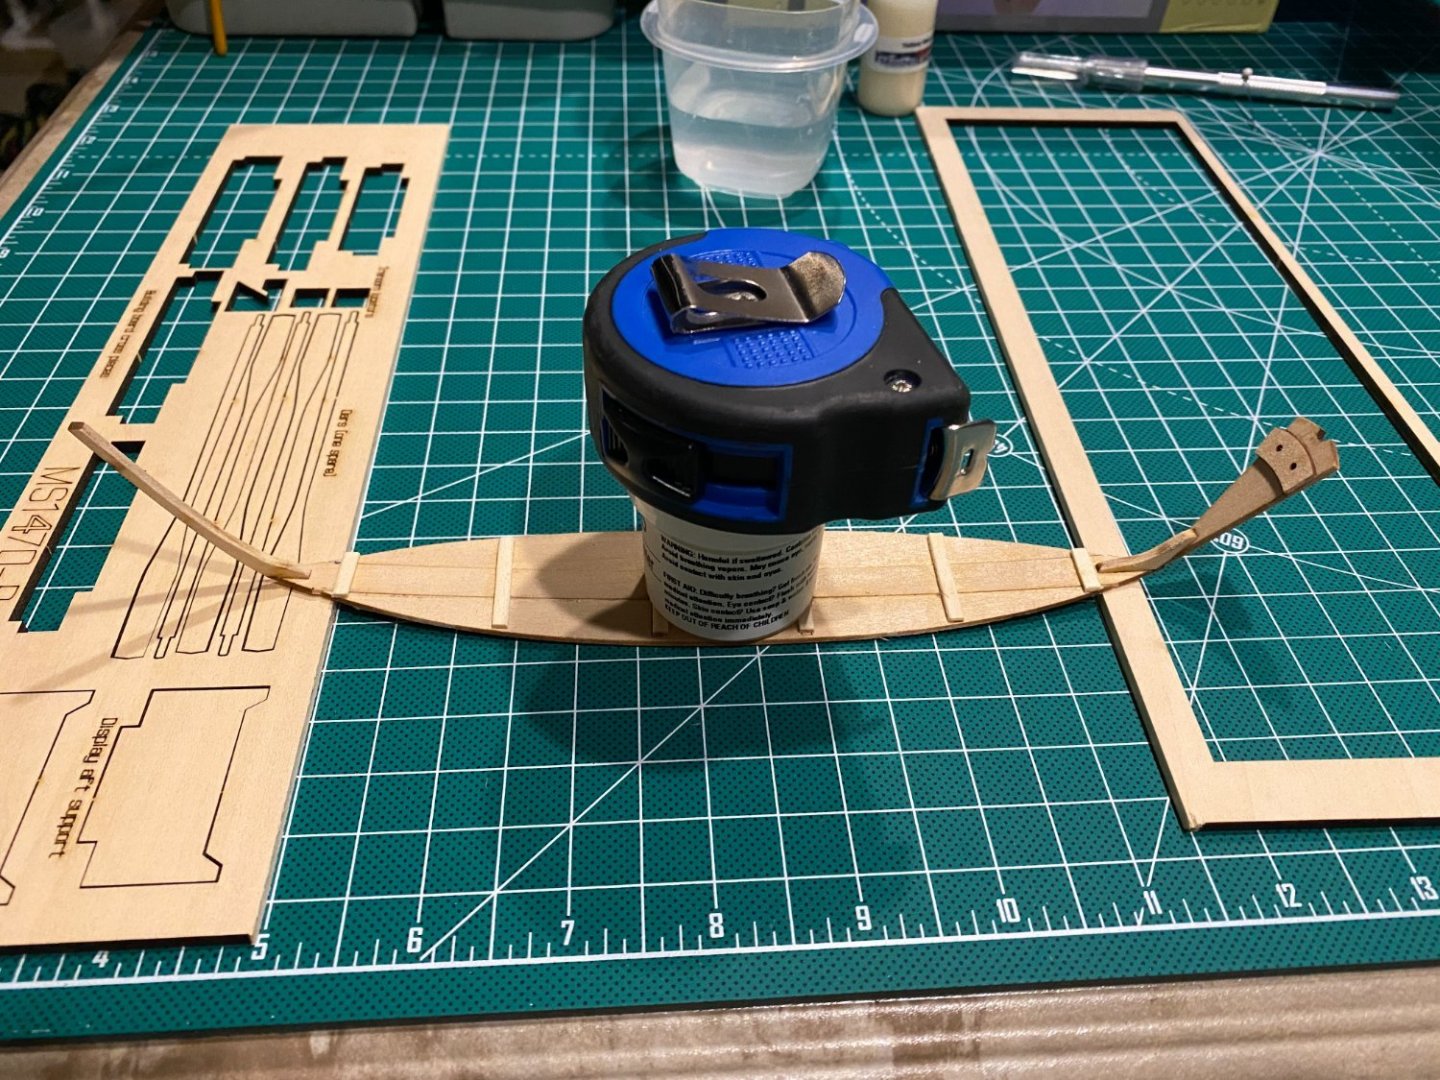
Dory Build Log Part 3 Bottom and Garboard to Frames The next step was to assemble the frames in the building board, bevel them to accommodate the curve in the bottom and attach the bottom assembly. The instructions were easy to follow, other than the fact that the stern transom didn’t fit firmly into the holder, and the blocks glues onto the board to keep it square were too far back. In hindsight, I should have checked before I glued those squares down. The kit provides a spare single-piece bottom, which I didn’t need. I used it to support the rubber bands holding the bottom to the frames when I glued them. A handy custom-made clamp! The instructions for beveling the frames for the garboards were also fairly straightforward, and the char was a handy indicator of the stem beveling. I also had the (bad) idea to bevel the bottom, which is not required. As a result, it is slightly too small and rounded where it shouldn’t be. The upper edges of the garboards have to be beveled as well, to fit with the next plank. The first part was obvious, but it took me a while to understand the purpose of the rolling bevels at the ends, and hence to figure out which way to bevel it. The final step before gluing down the garboards is to bend them to fit. I considered various plank-bending options, but finally decided to simply follow the instructions and use hot water. I poured hot water into one slot in a tackle box (my toolbox) and soaked one plank for 5 minutes. I then clamped it to the frames and let it dry. That worked well and I used the same method for the rest of the kit. It’s a slow process though, because I could only do one at a time, so 6 planks took two days – one to dry into shape on the frames and one for glue to dry before I did the next one. I’ve come up with a better way to do multiple planks at one time and not depend on the frames to form them – based on some jigs and other posts on the Model Ship World forums. Once both were glued, I noticed that both garboards (but especially the starboard side) were a little twisted at the stern, which I attribute to the clamps being too tight. I also noticed that I had been over-aggressive in sanding the transom on the port side. I made up for that later by doing the same on the other side!


- 15 replies
-
- 5
-
-
- Model Shipways
- Shipwright Series
- (and 2 more)
-
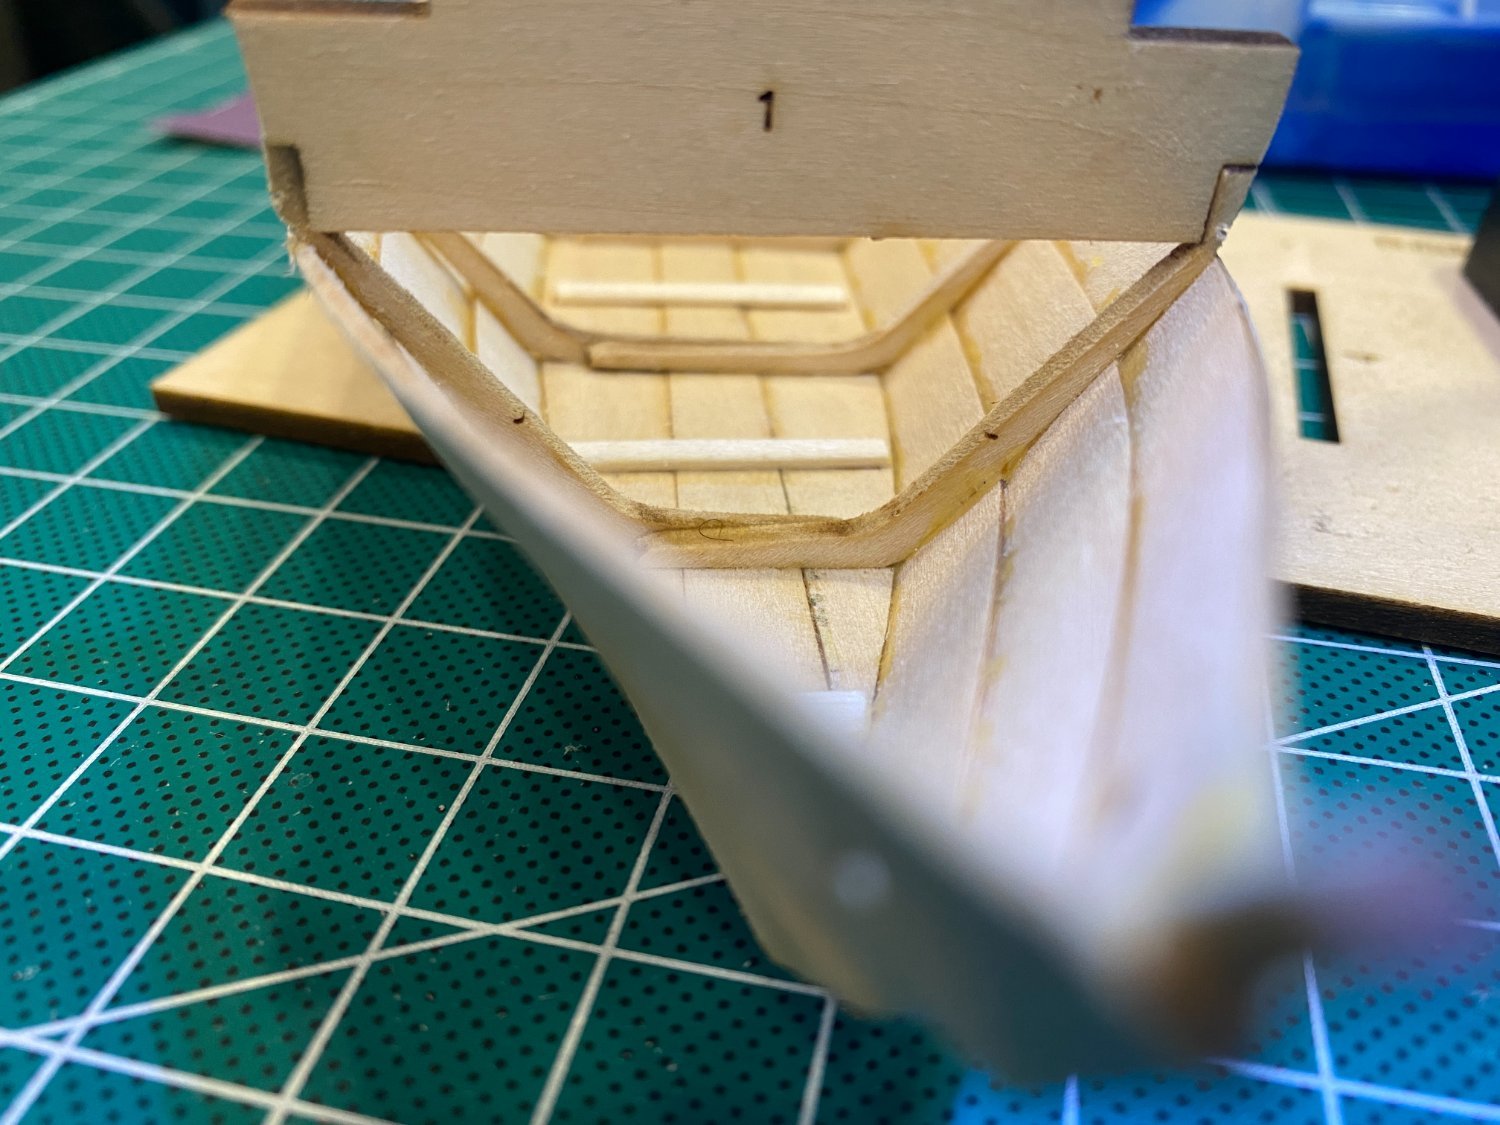
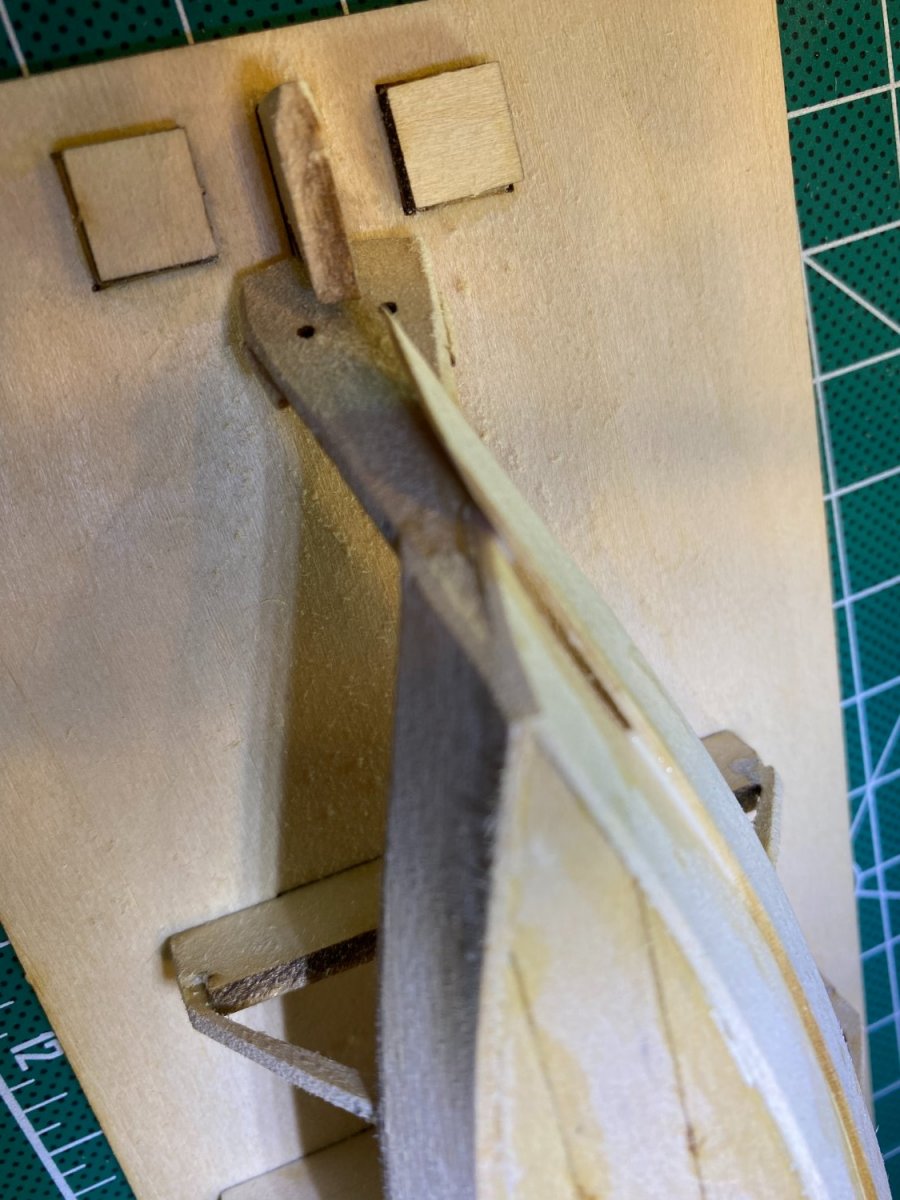
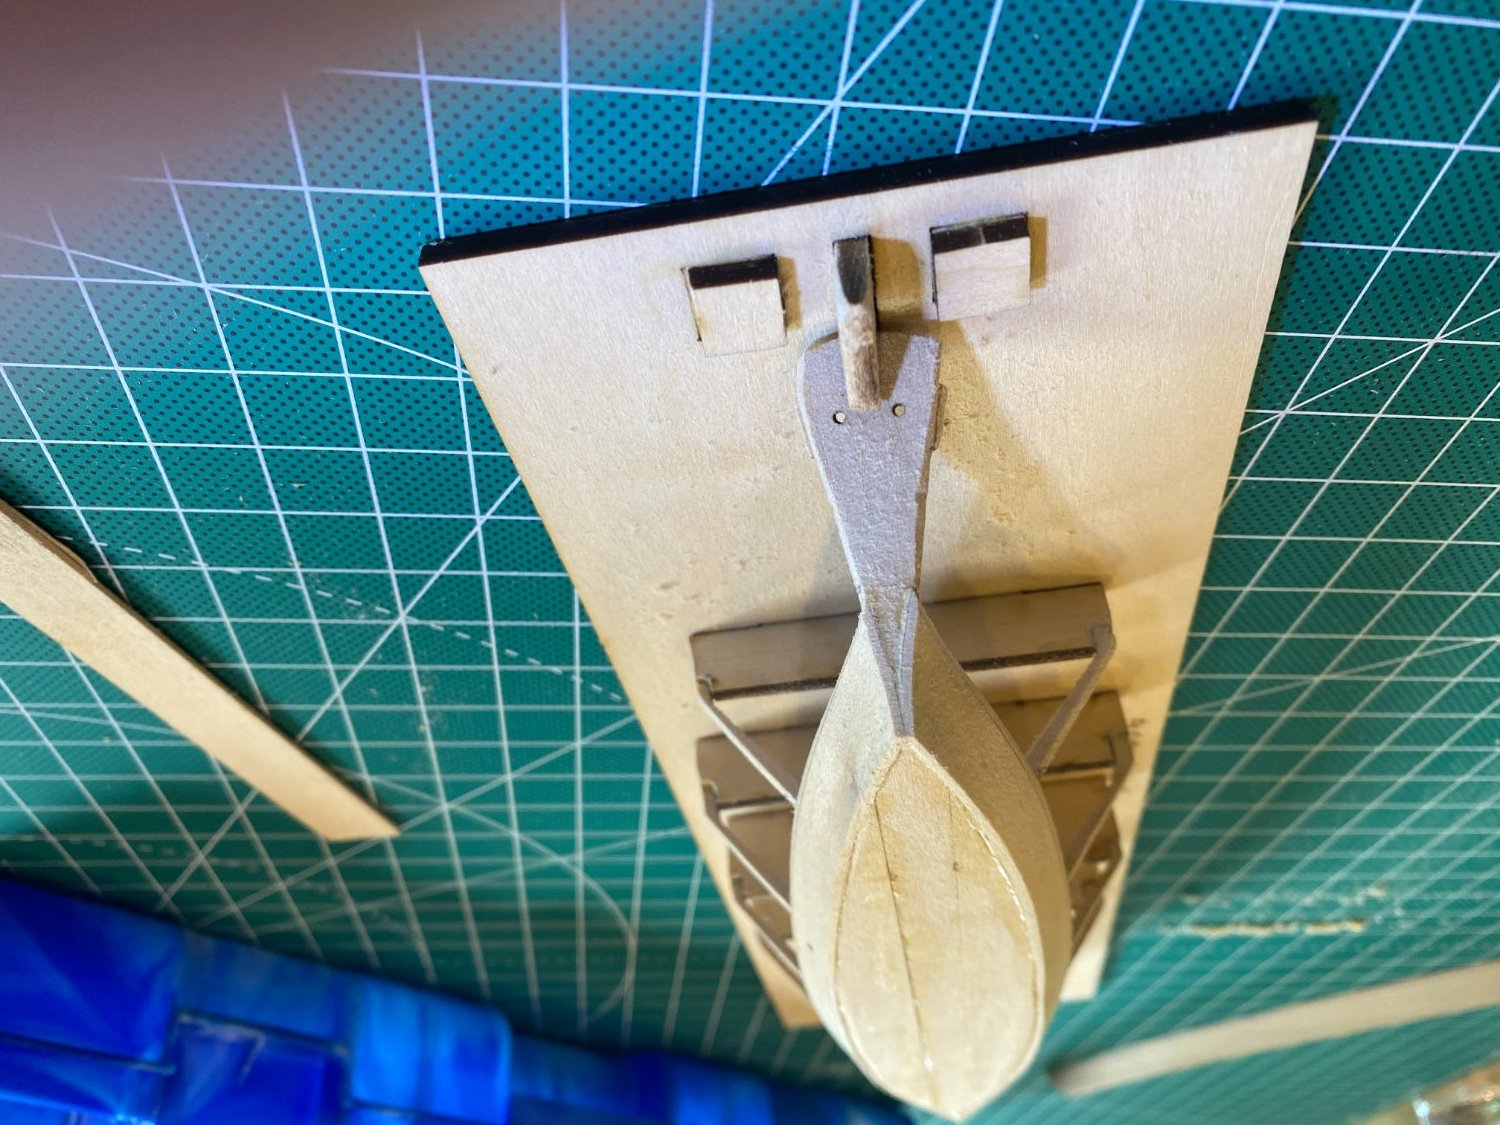
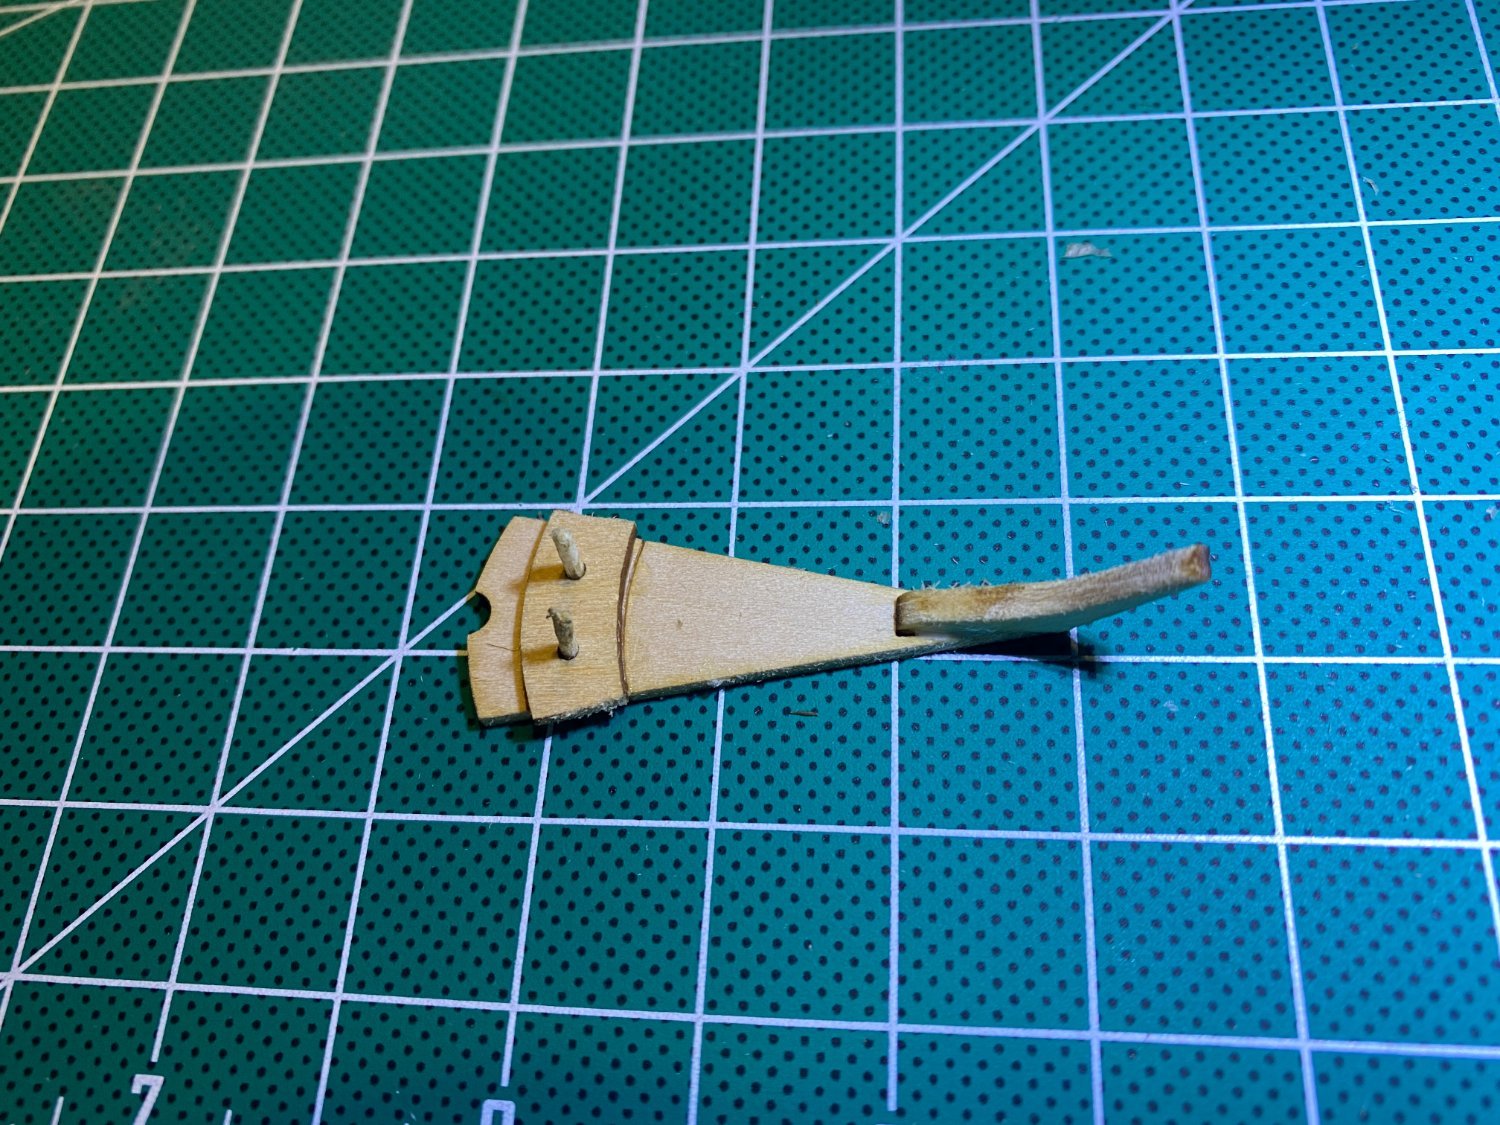
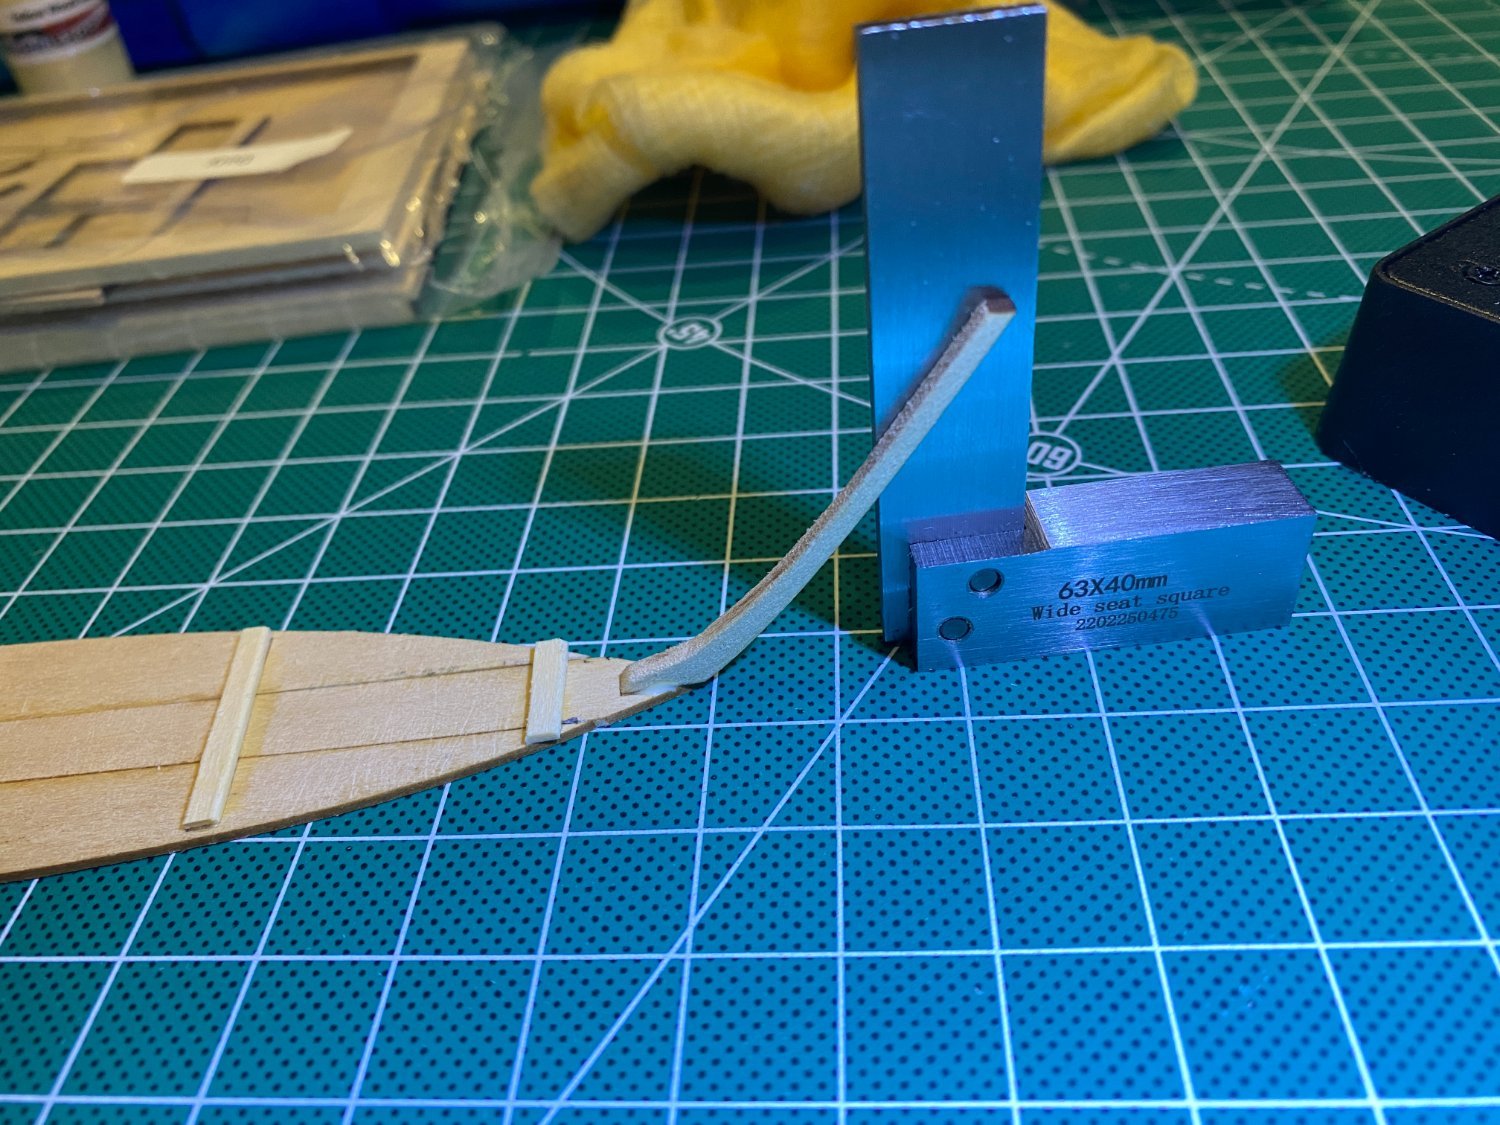
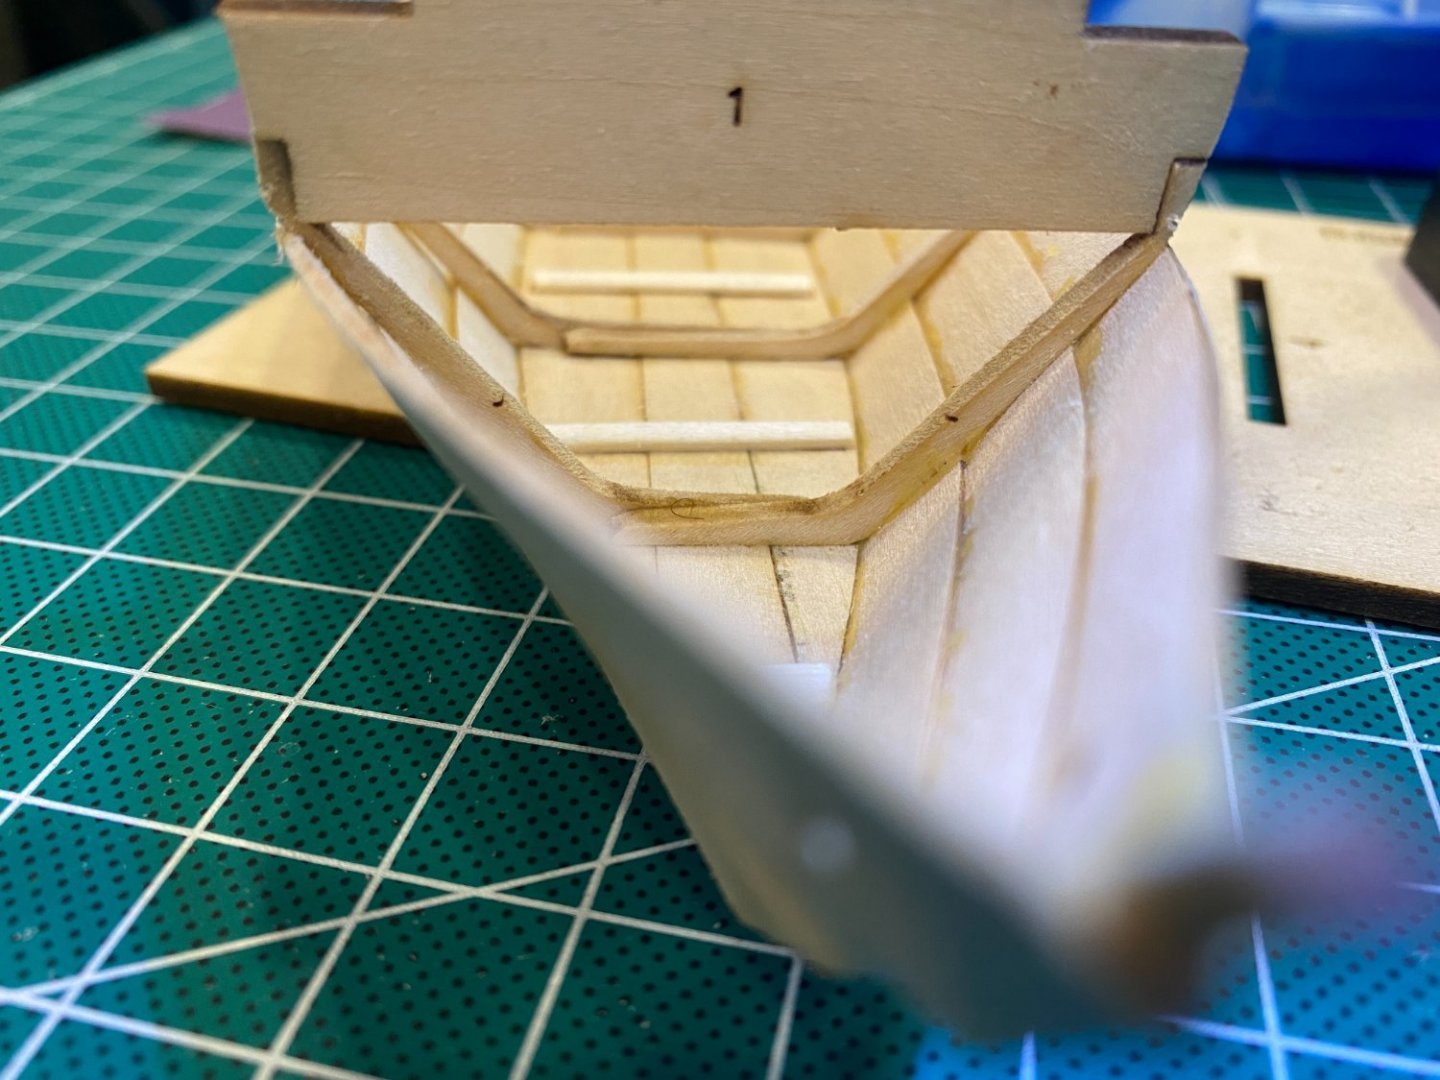
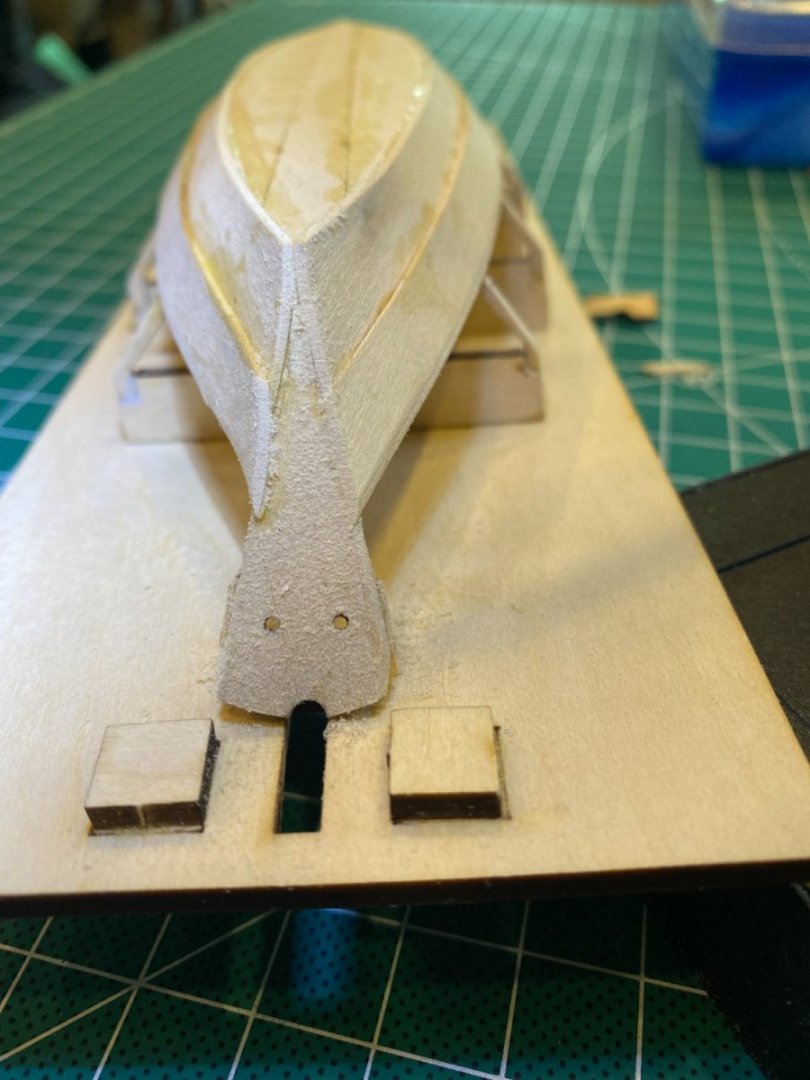
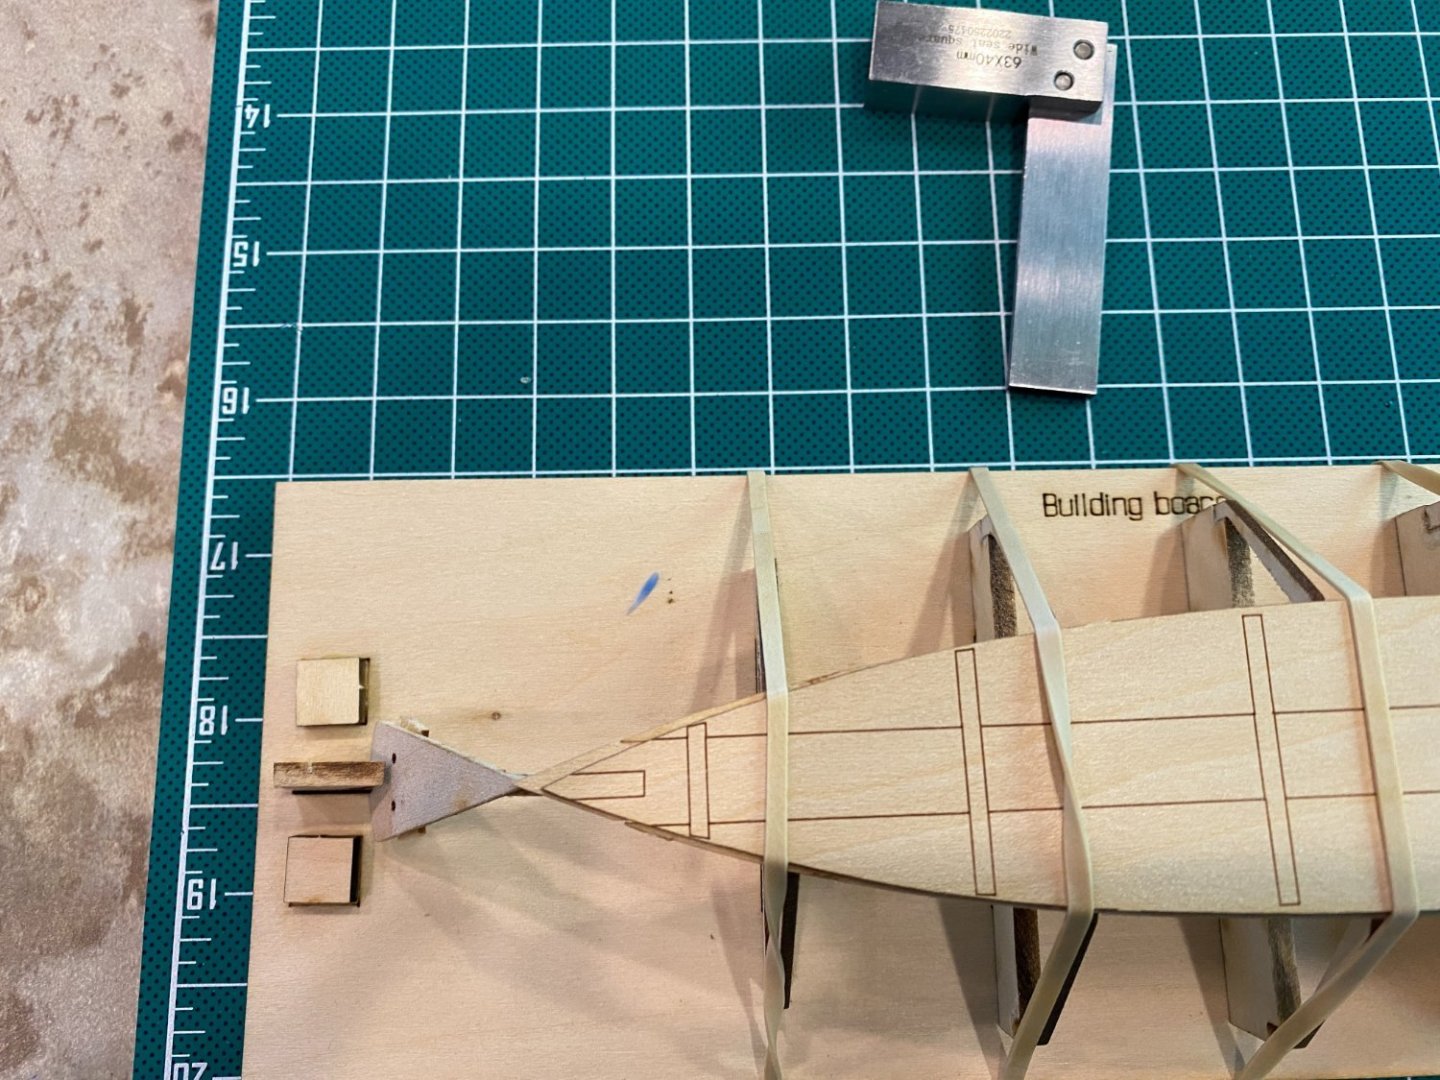
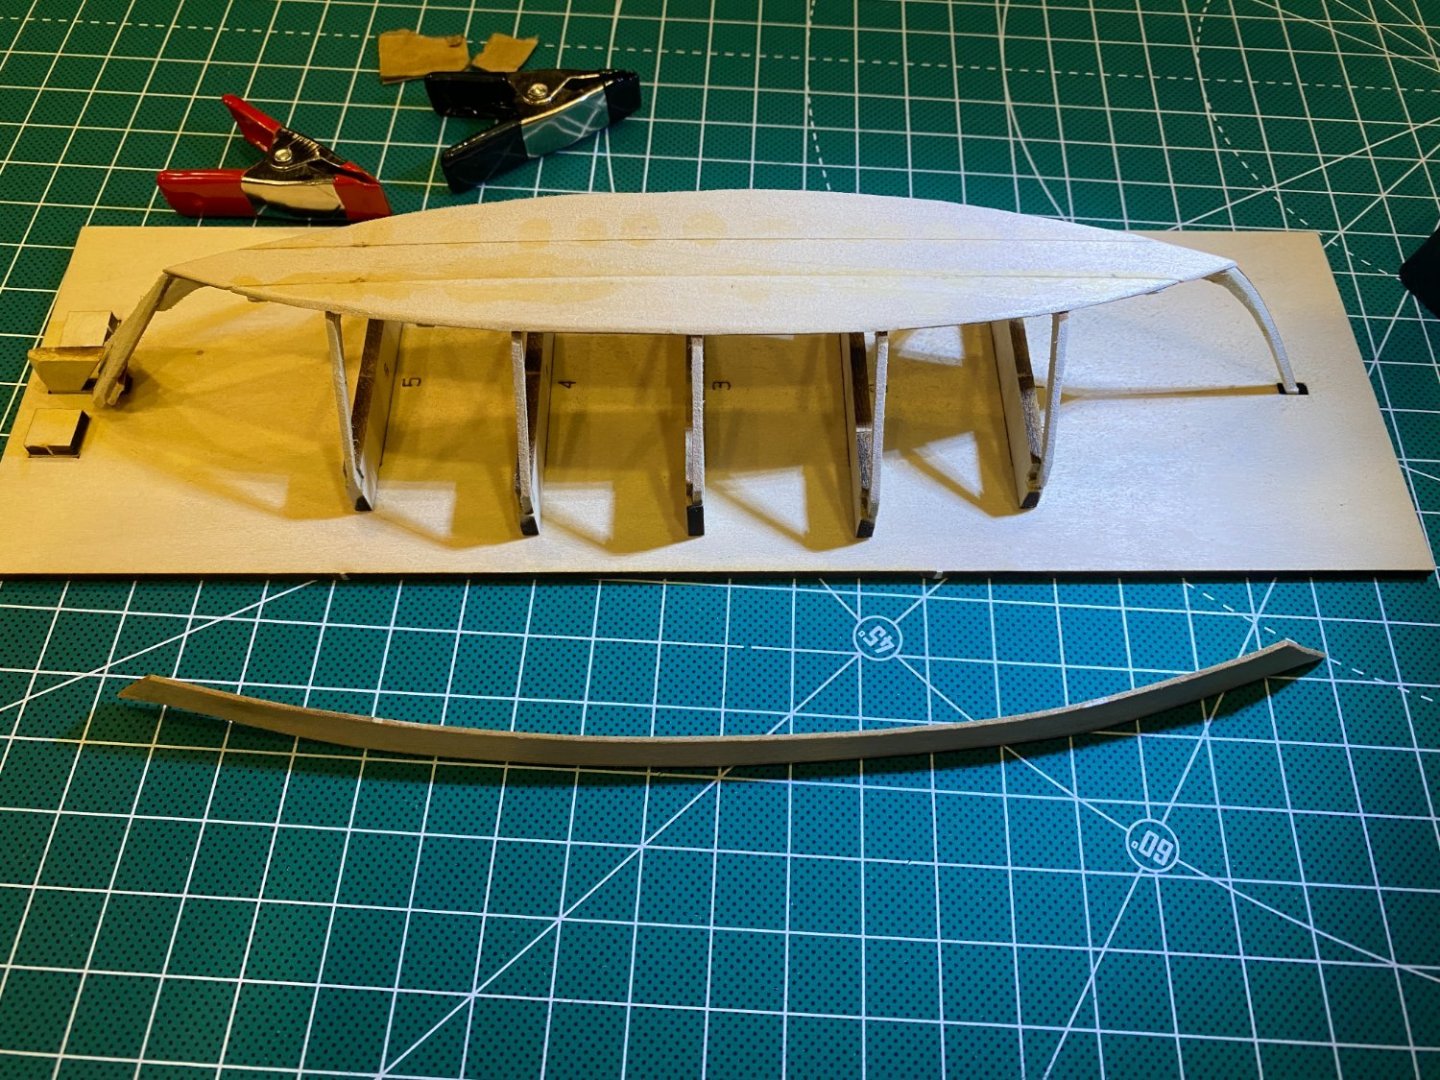
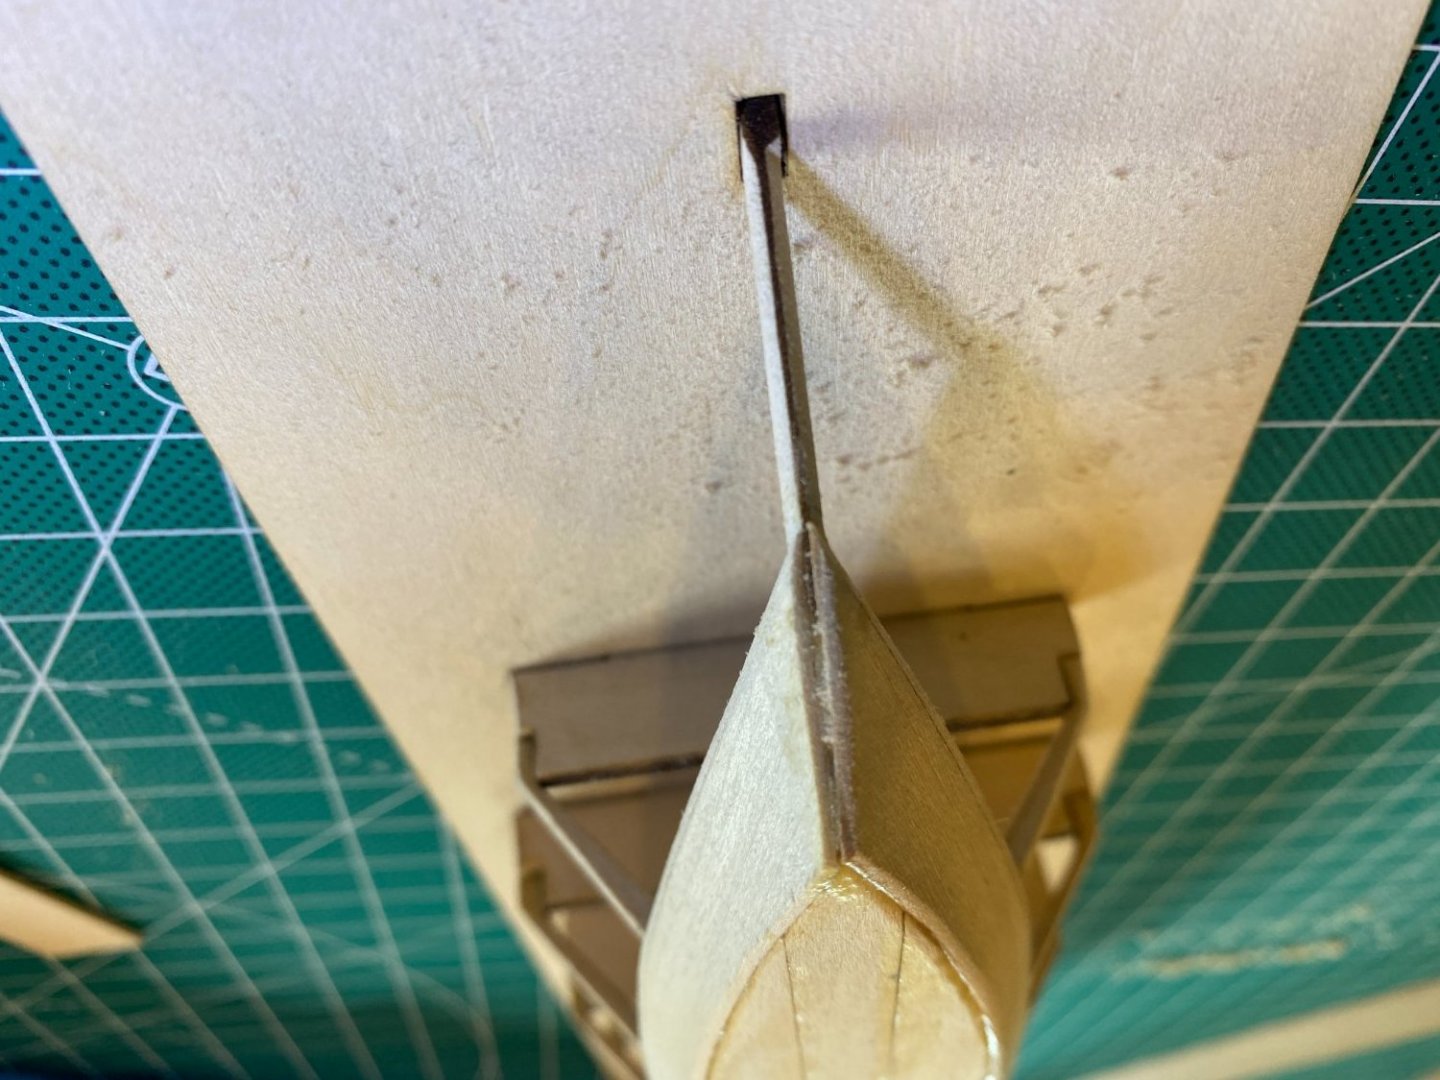
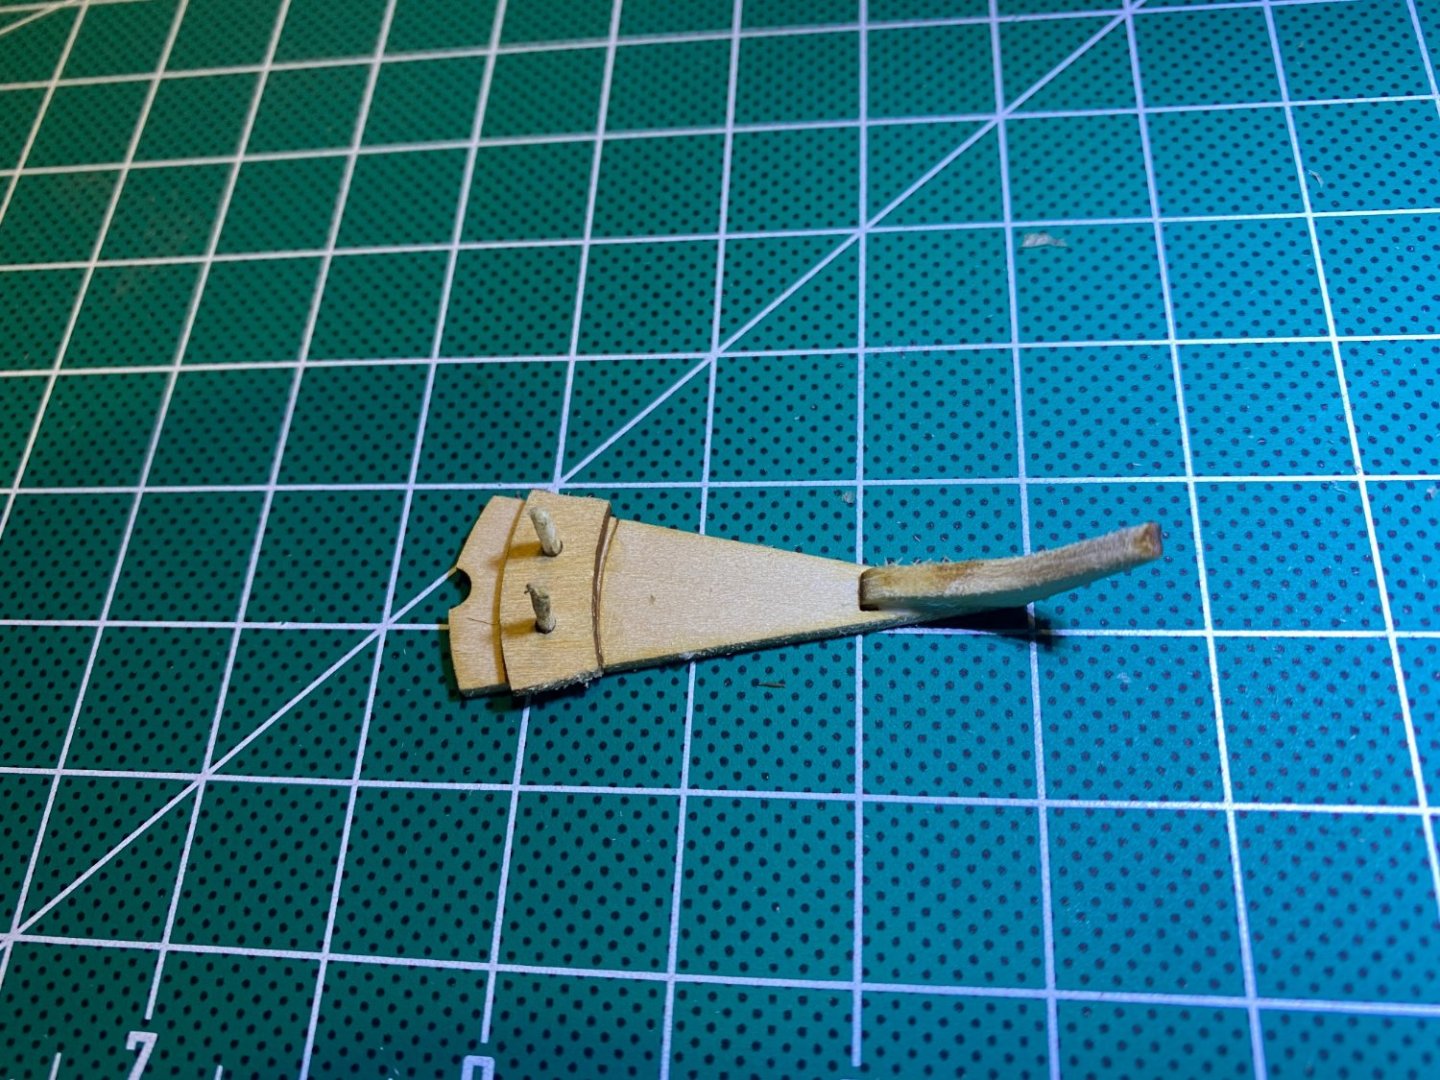
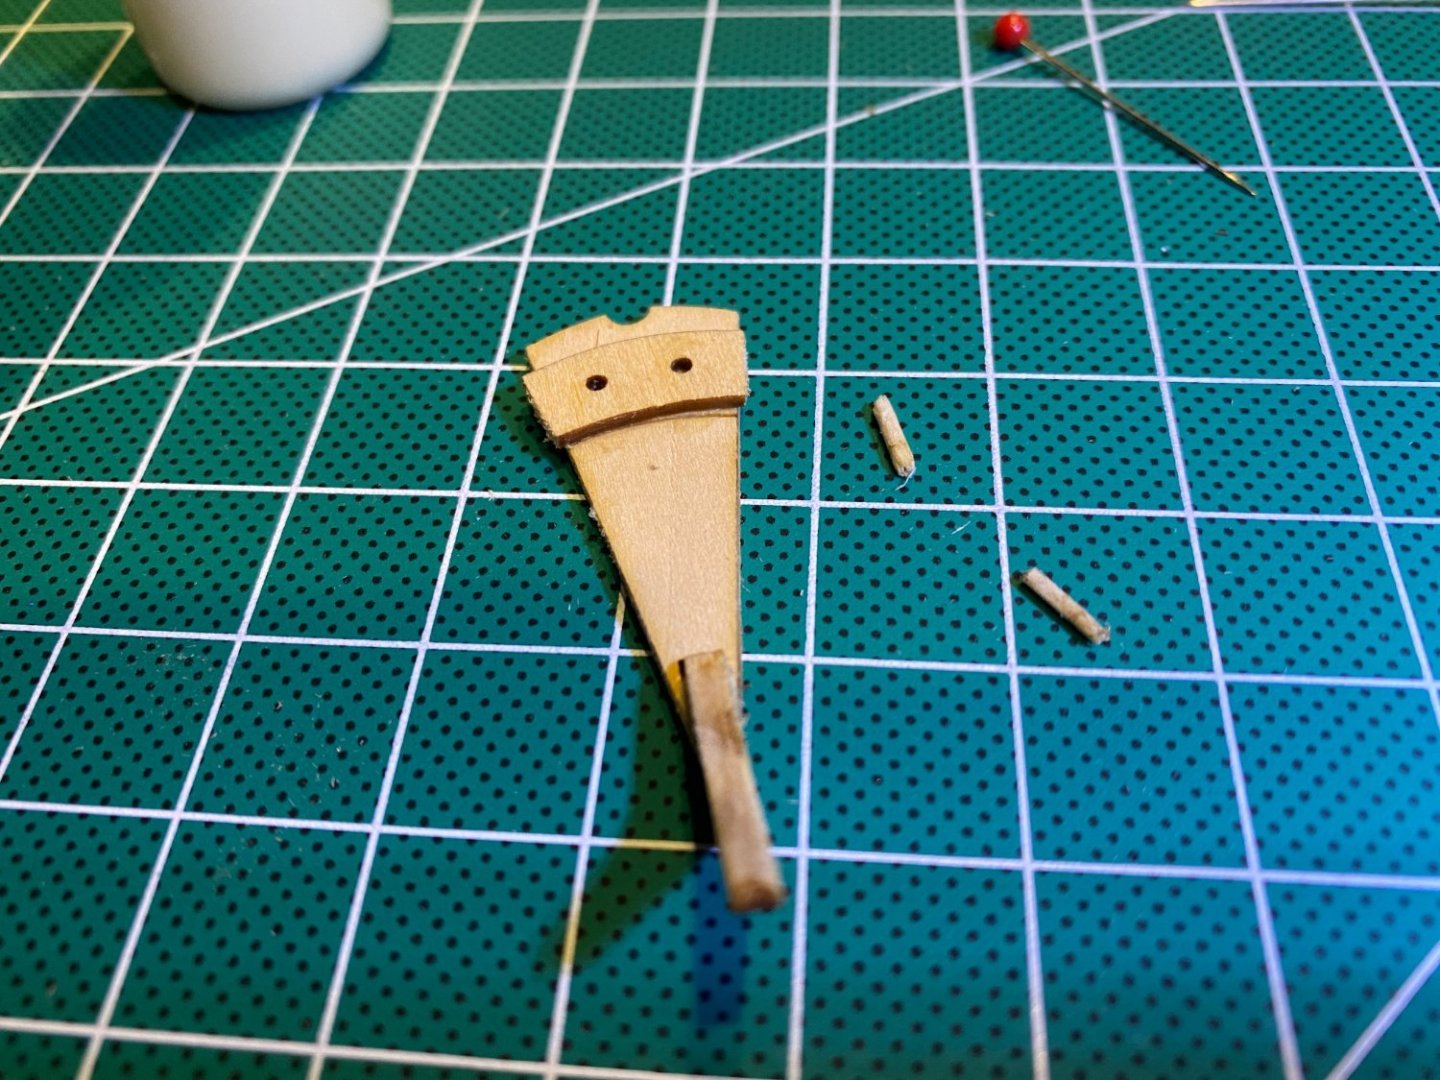
Dory Build Log Part 2 Stem, Transom and Bending the Bottom I built up the transom and stern knee next. The instructions warn the builder to ensure that the holes in the transom and stern cleat align. I accomplished that by using a little scrap wood through the holes. It appears that the cleat doesn’t quite line up with the transom now – the picture shows the mark sticking out from under the cleat on one side. I don’t know whether I should have lined up with the template or the holes. Although I took care to keep the bottom of the knee at 90 degrees, the picture seems to show that it’s not aligned on the transom itself. Once the glue dried I glued the assembly to the bottom. I can’t tell if the misaligned knee has made the boat unsymmetric, nor if I glued the transom to the bottom correctly. I read in John Gardner’s Dory Book that in real boats they put a pin at the bottom of the stem and measure back to the top of the transom on each side to ensure symmetry. Wish I’d read that before I built the boat! Any other tips on how to better maintain symmetry at the back of the boat? I also cleaned up the stem and glued it to the bottom. I’m getting use to the idea that the glue grabs and trusting the assembly to stay upright. Checking with a square, the stem seems to have remained vertical. I didn’t feel very confident that the transom and stem were positioned correctly on the bottom. Later in the assembly, I started to feel like one or both of them should stick out a little more from the bottom, so now the boat is slightly shorter than it should be. Finally, I followed the instructions to bend the bottom by wetting it, placing the two ends of the boat on 1/8 thick wood, and weighting the center.

- 15 replies
-
- 3
-
-
- Model Shipways
- Shipwright Series
- (and 2 more)
-
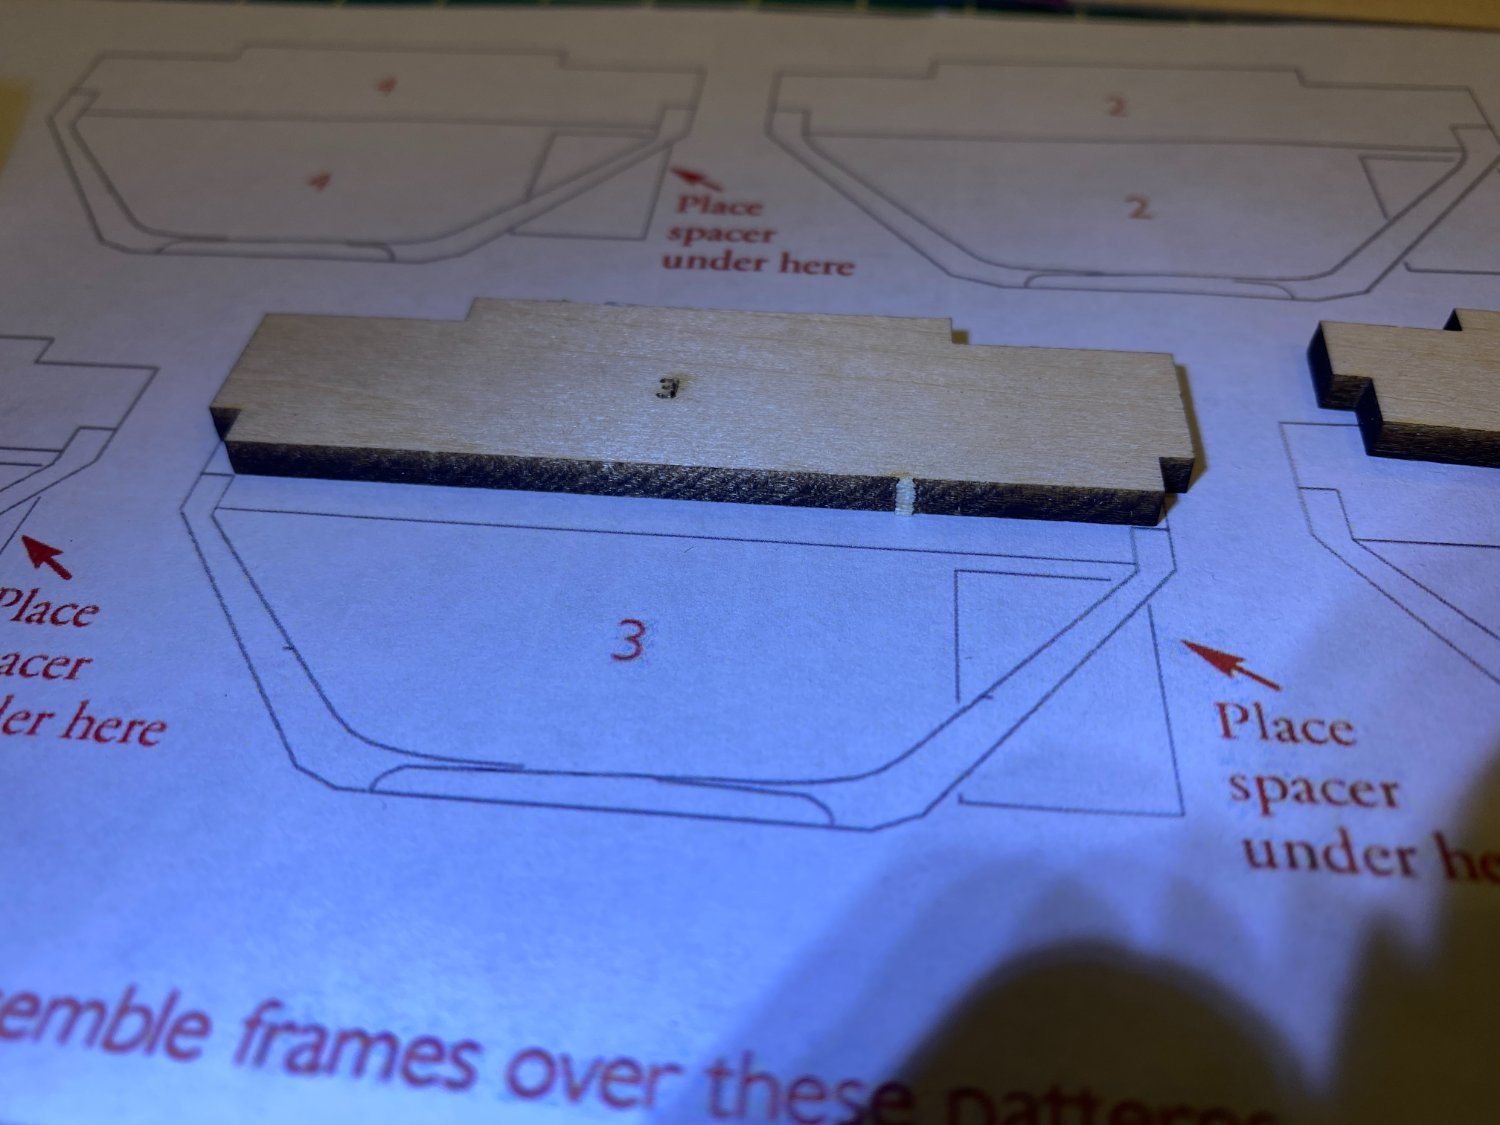
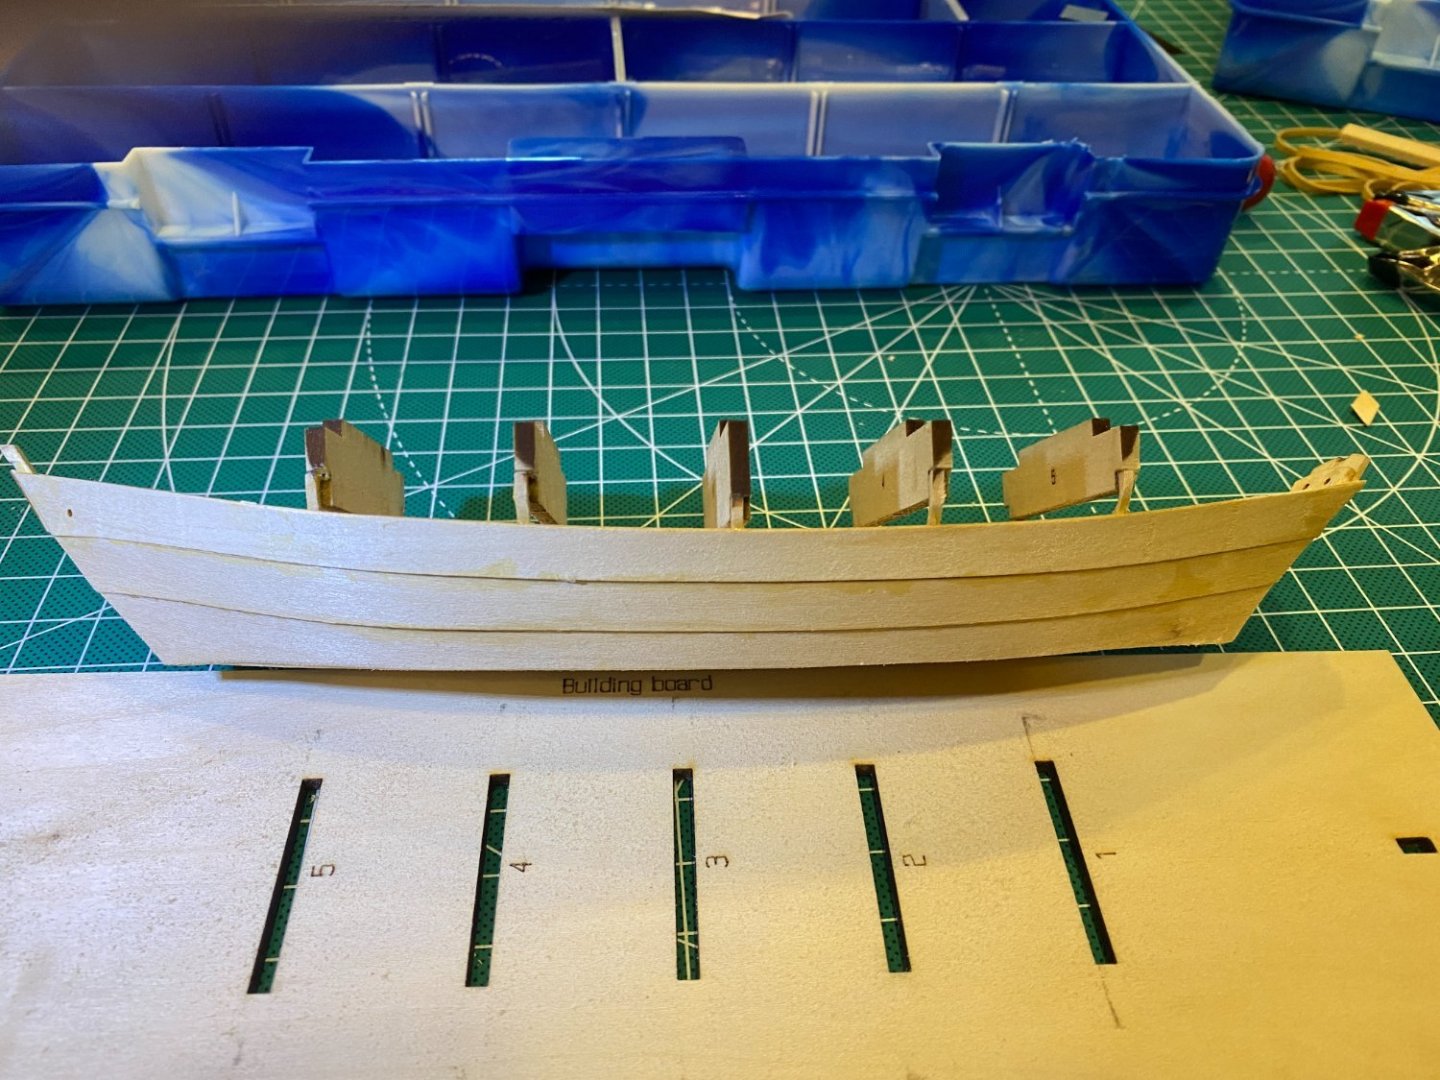
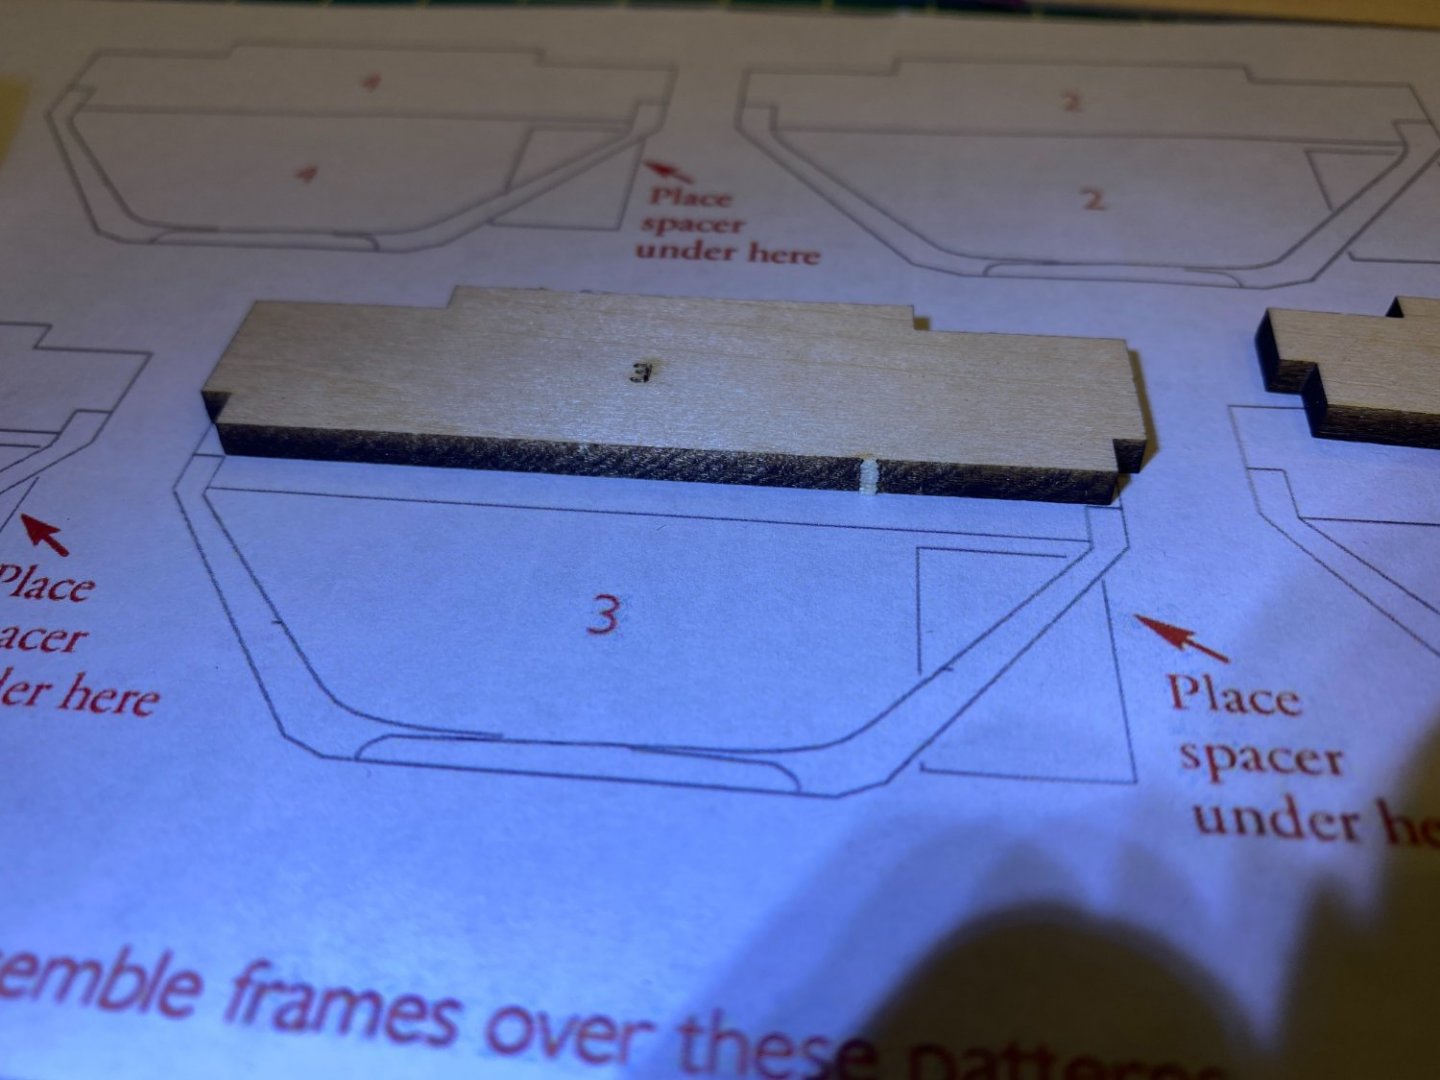
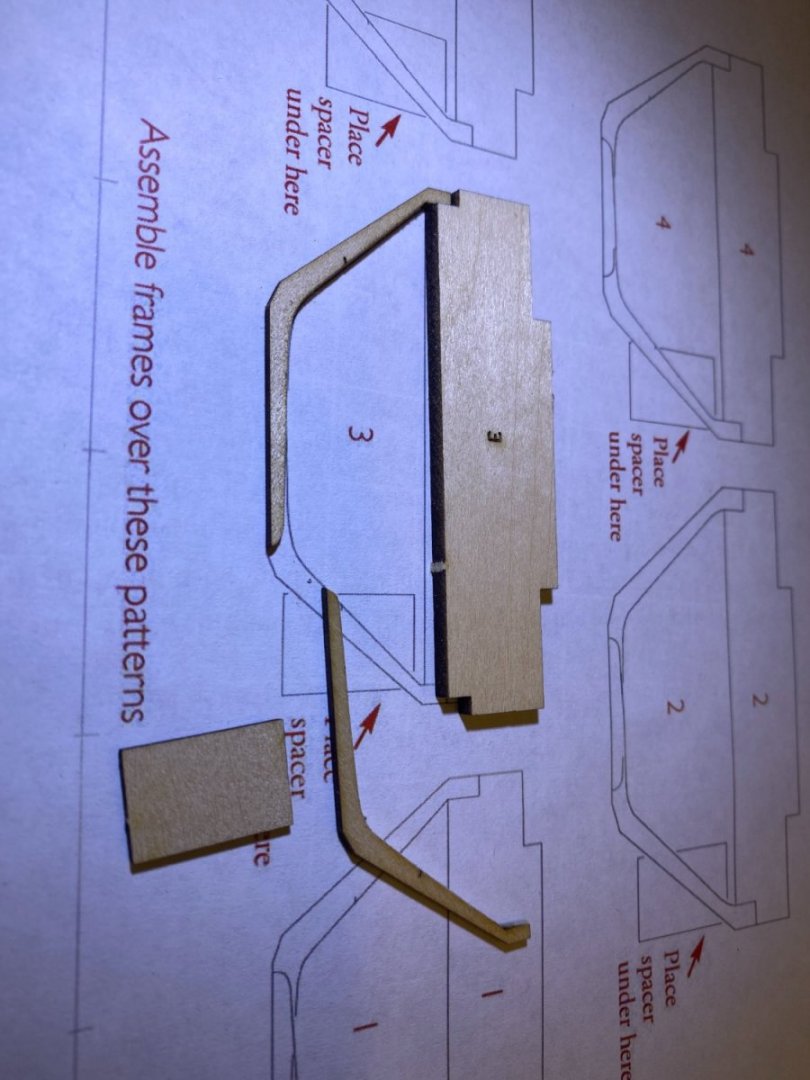
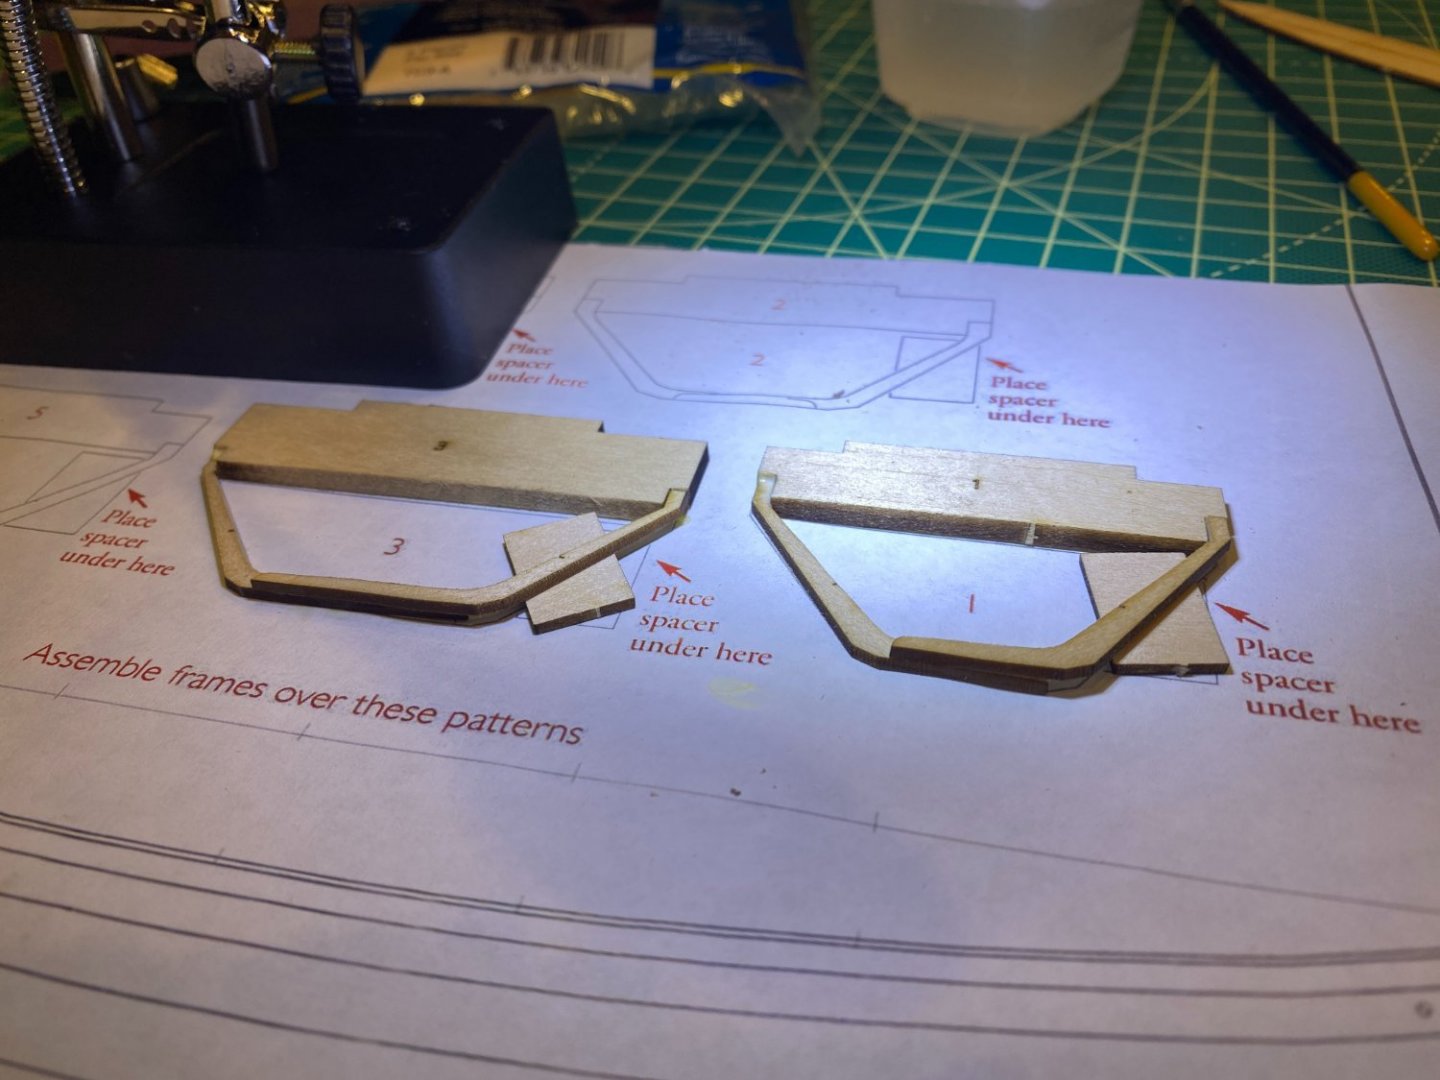
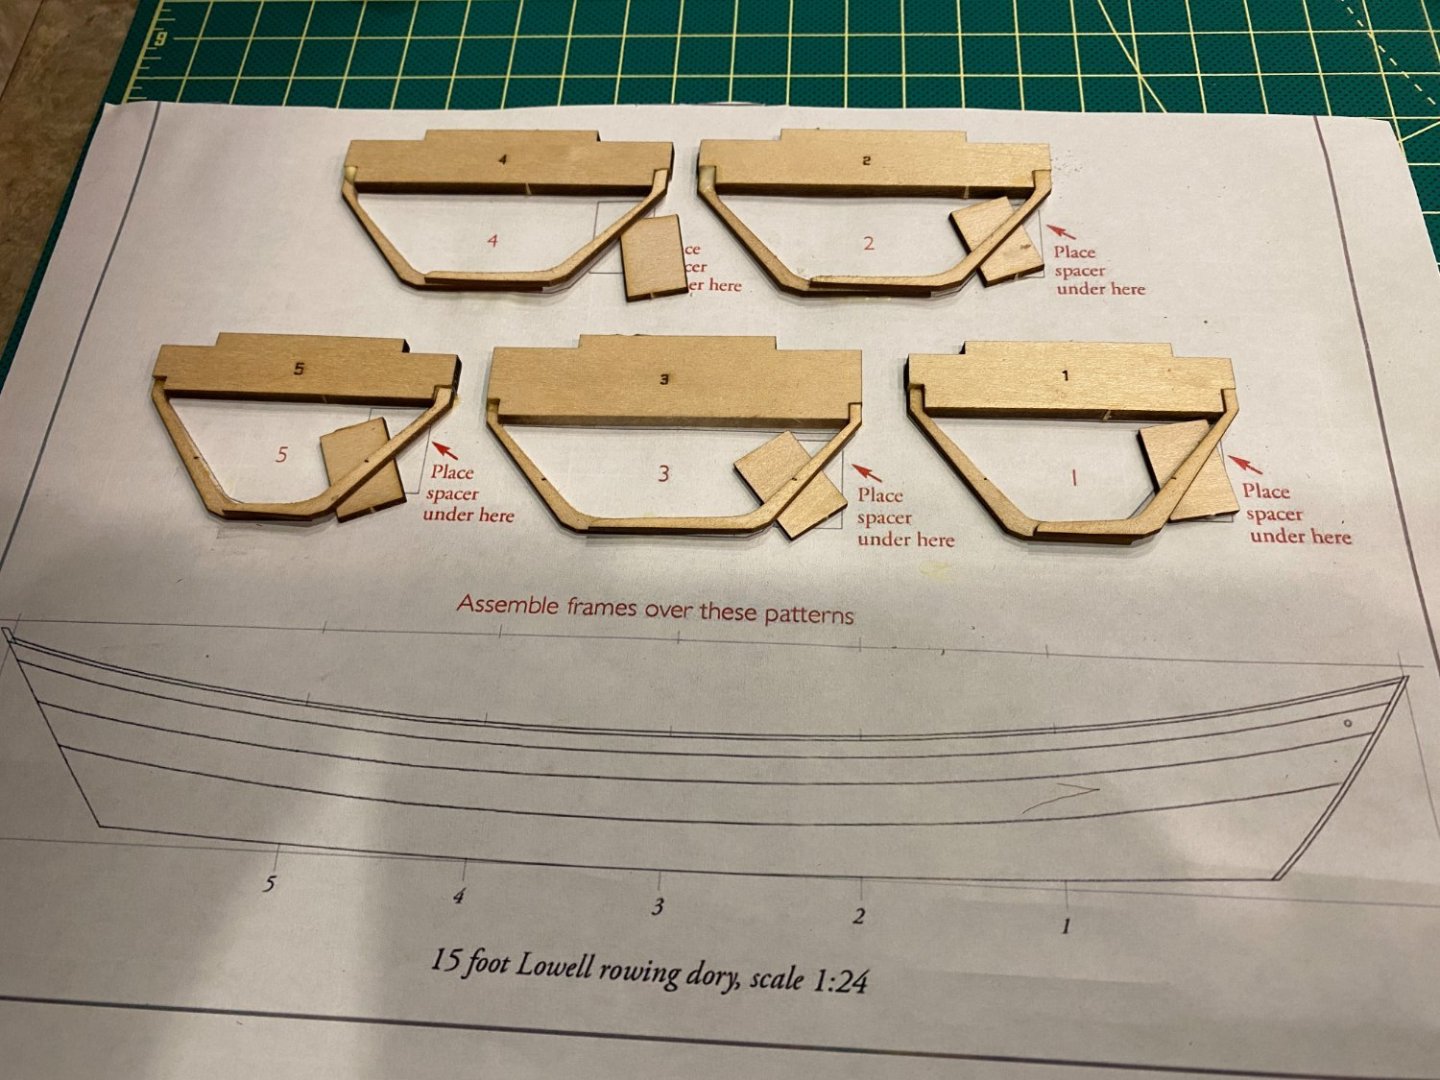
I am new to ship models, and haven’t built any models in 40 years. My goal with this build is to learn/relearn basic skills. The instructions in this kit appear quite complete, and I am doing my best to fellow them. I’m also only buying tools beyond those in the kit as needed – which is a challenge because I love tools, and especially toolsets. Others have posted build logs for this kit, and I am not going to reinvent the wheel. I’ll skim through the parts that went well, and go into more detail where things went wrong or got confusing. The first step is to assemble the boat bottom. It’s just three pre-cut boards, glued together, which seemed pretty straightforward. The kit includes a single-board bottom in case the first step goes awry. I didn’t use it, except for protections during clamping. The next step is the frames. There are 5, and patterns are provided to build those. I immediately ran in to an issue, i.e., the template is not the same size as the provided parts. I made the best match I could – see pictures. I also had some difficulty keeping the bottoms of the frames aligned, and I know the frames are not quite right. Some closed up a little too much on bottom and some too wide. Further along in the build, I had trouble getting the pre-cut strakes aligned properly, which I suspect is caused by this error. I have heard (and now proved to myself!) that errors compound. Any tips on getting the frame construction right will be appreciated. Mostly how to overlay the two sides to ensure the result is level and symmetric. More to come ...
- 15 replies
-
- 6
-
-
- Model Shipways
- Shipwright Series
- (and 2 more)
-
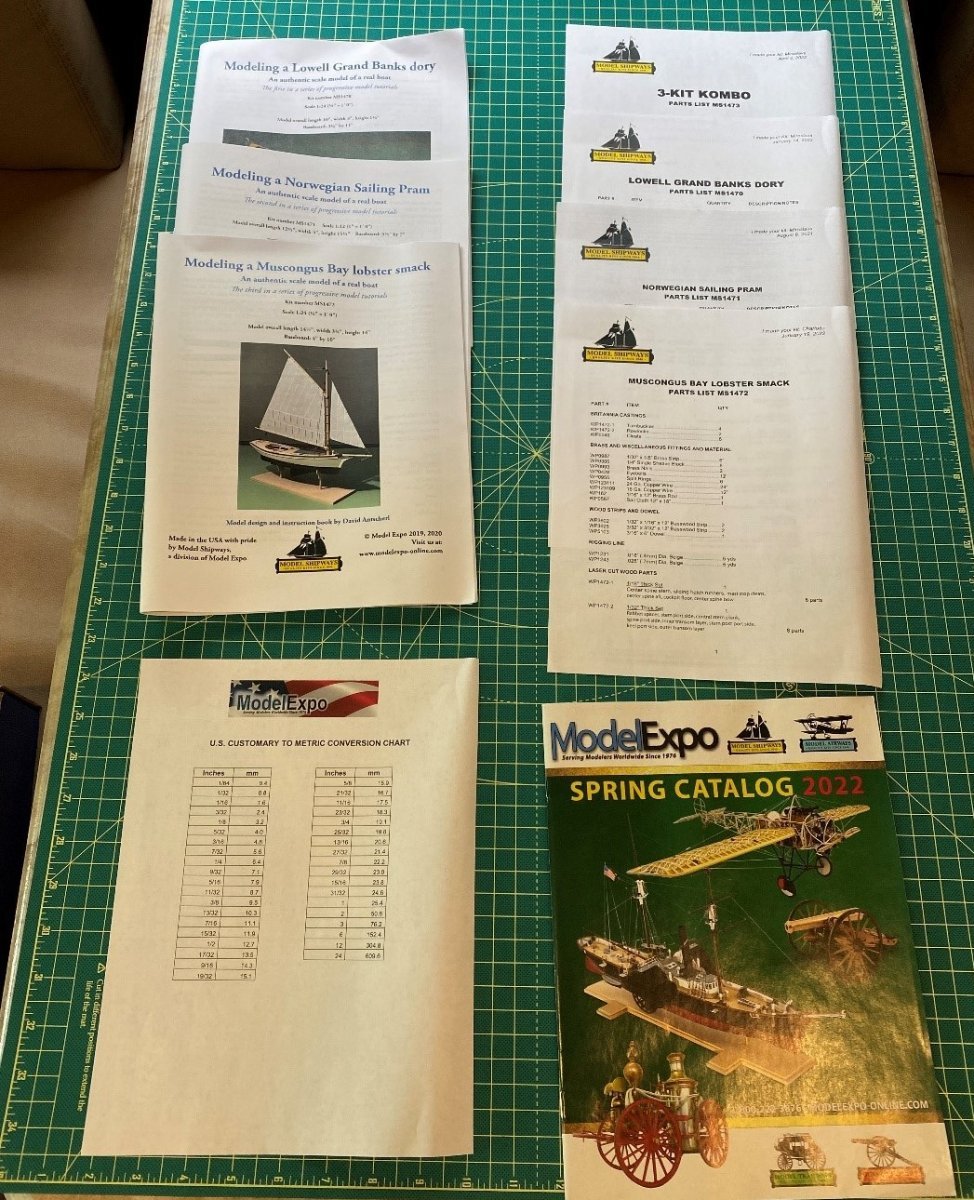
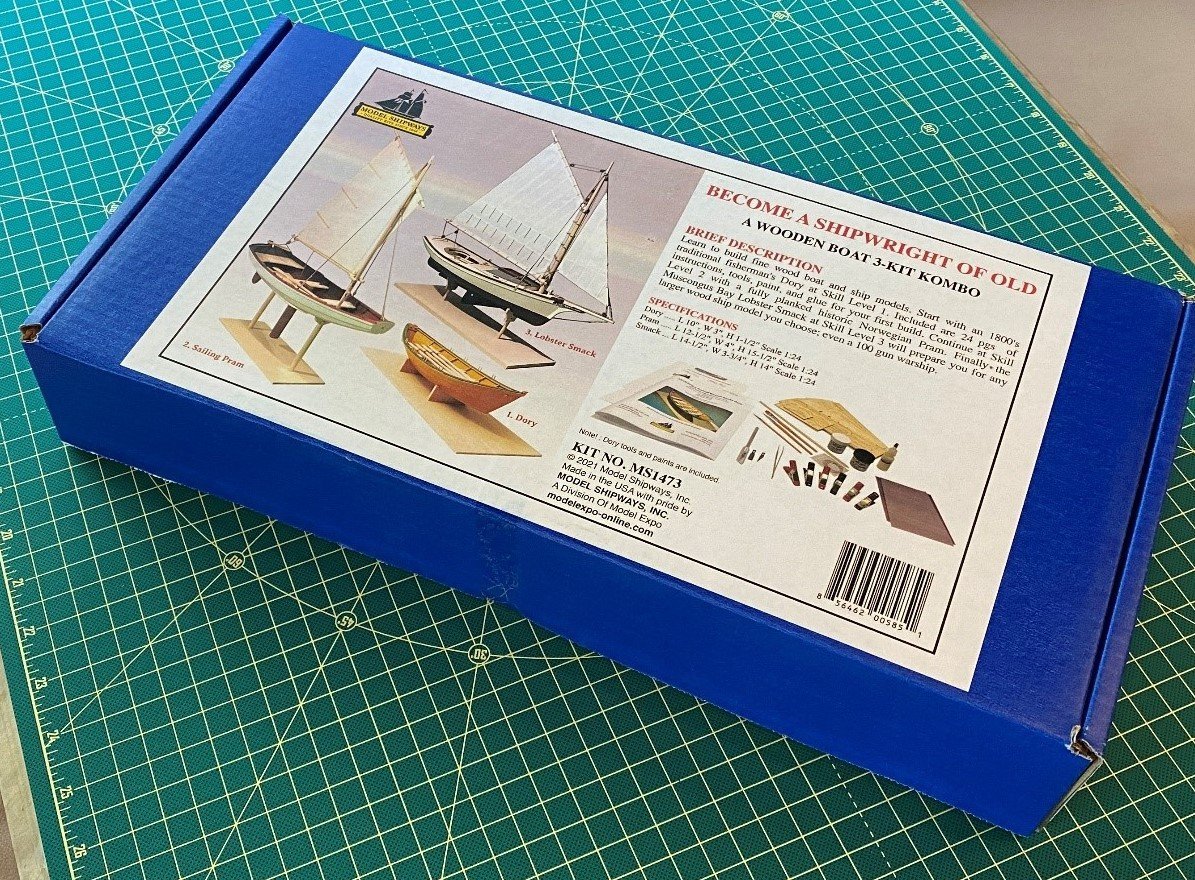
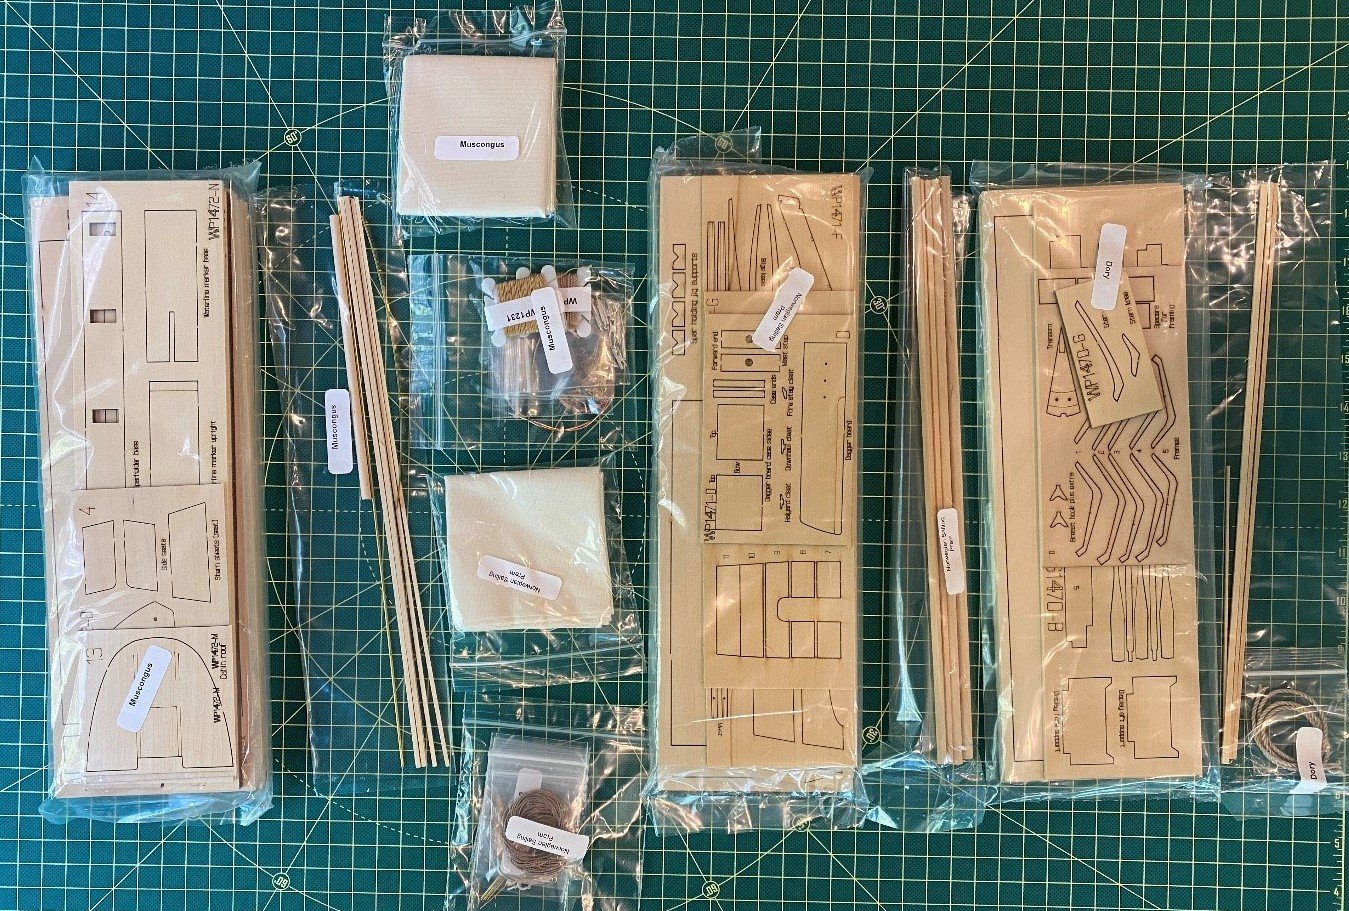
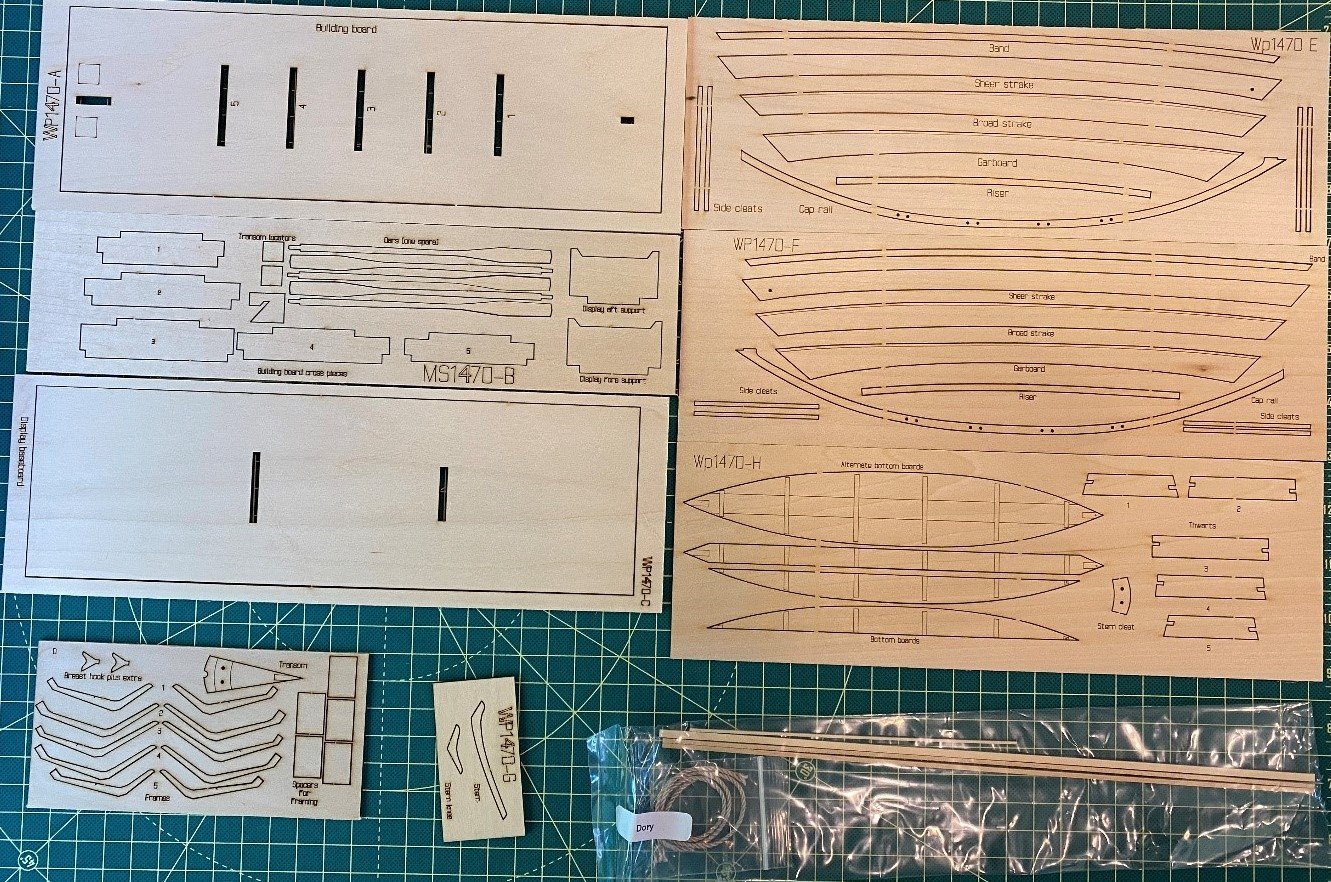
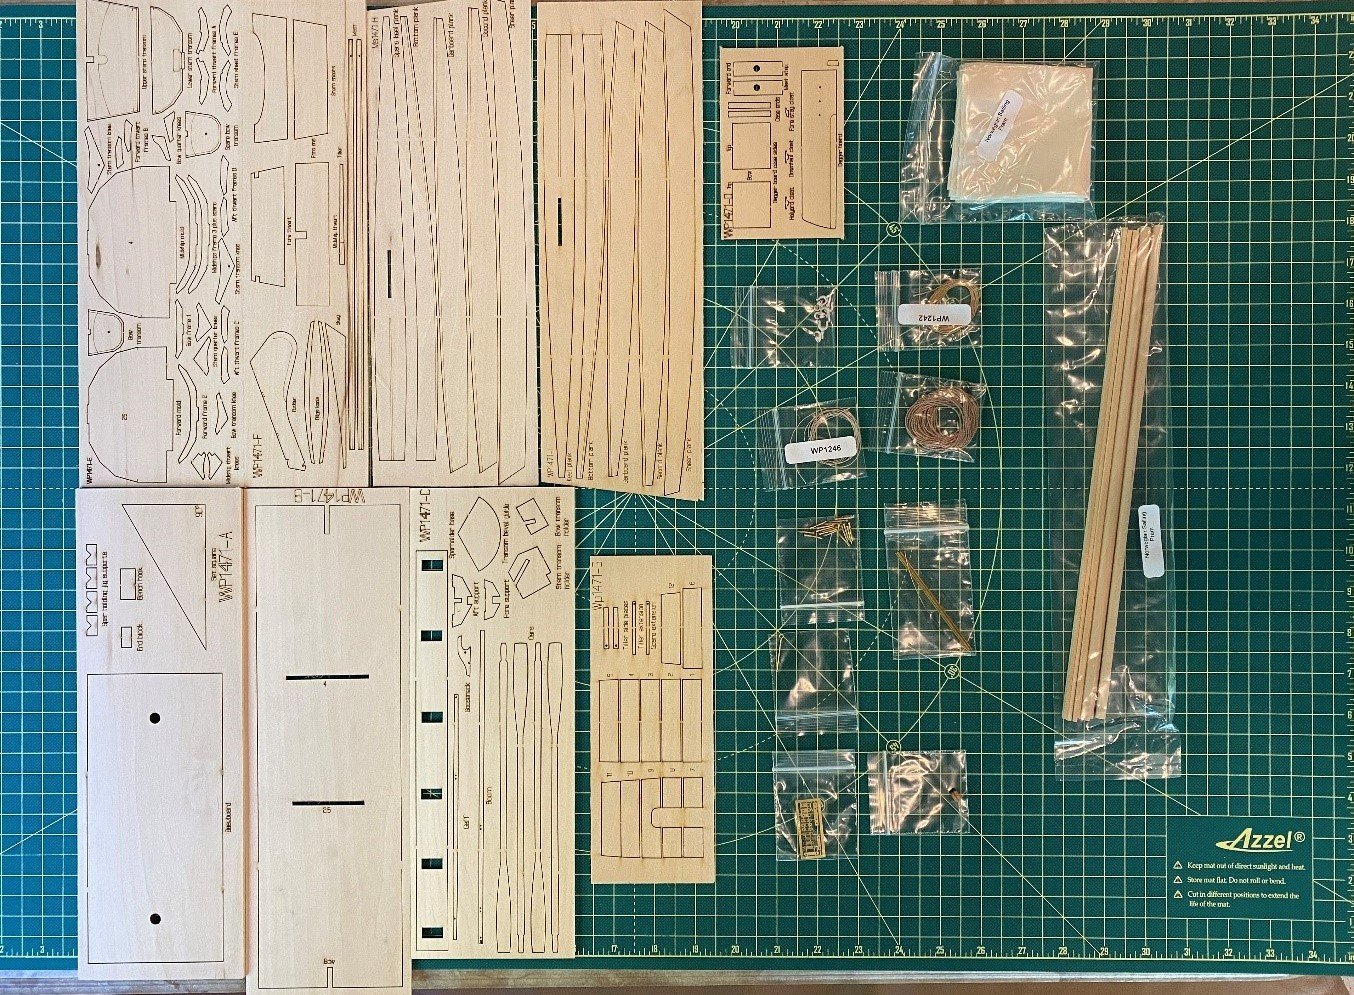
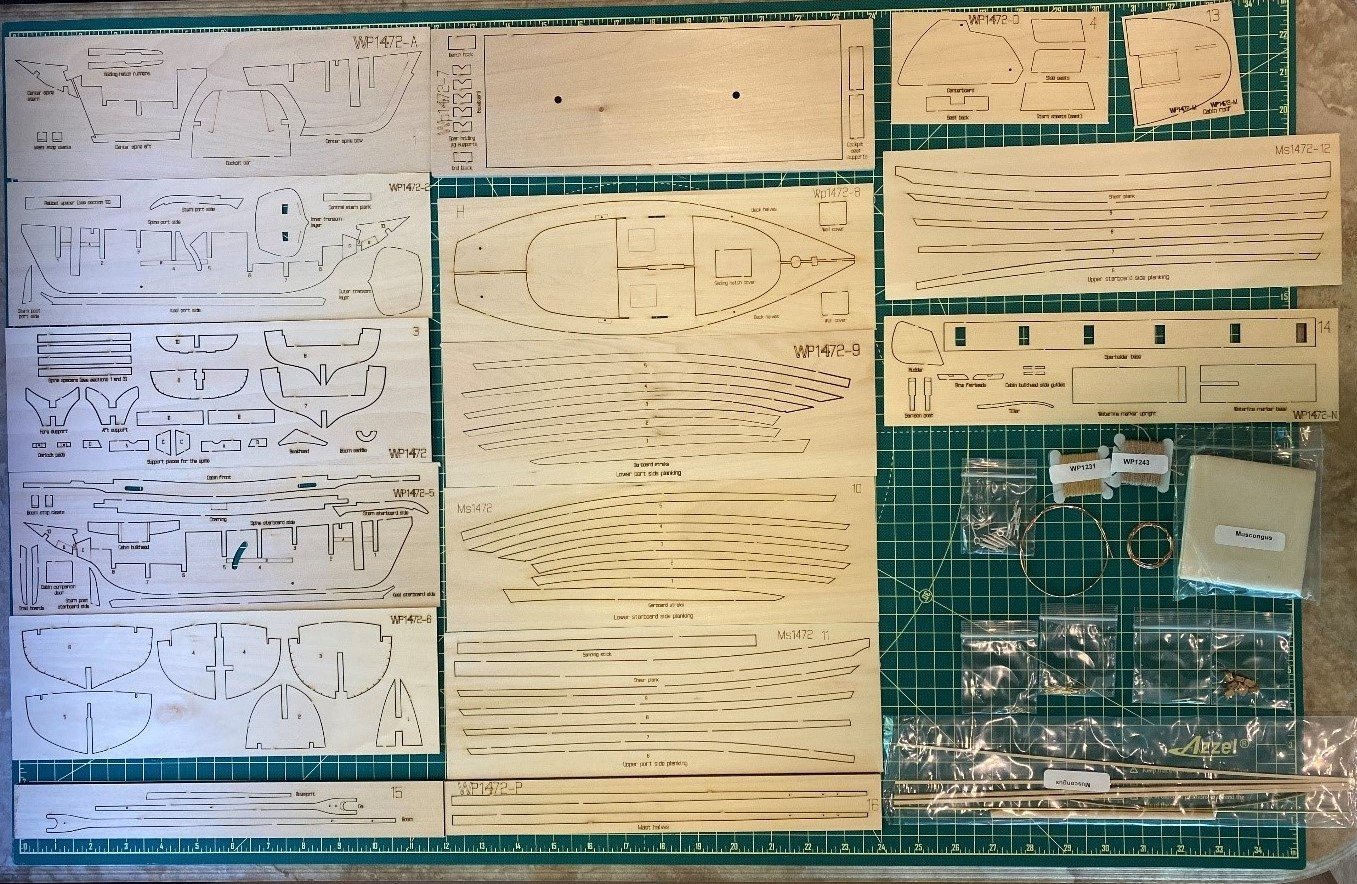
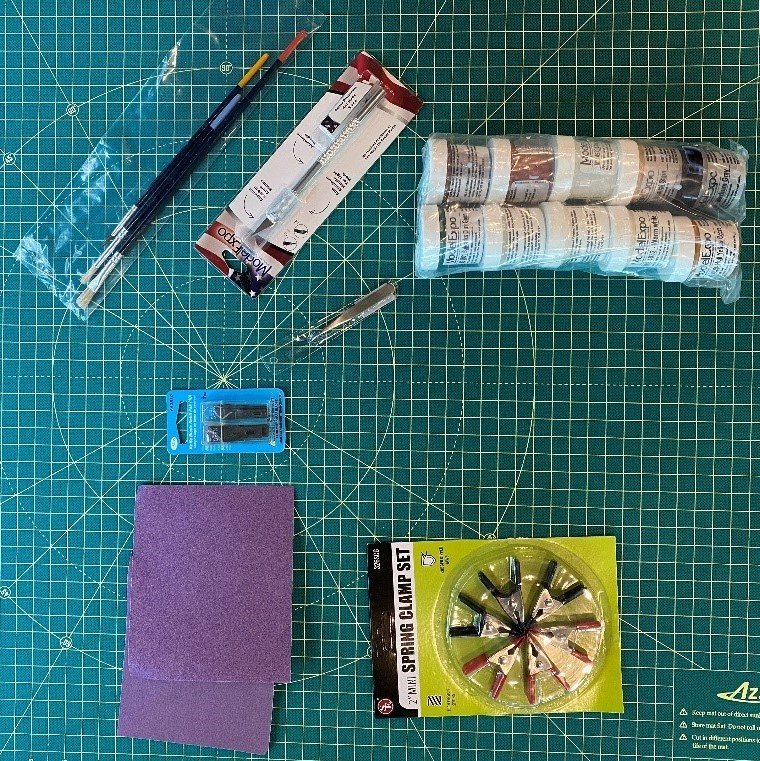
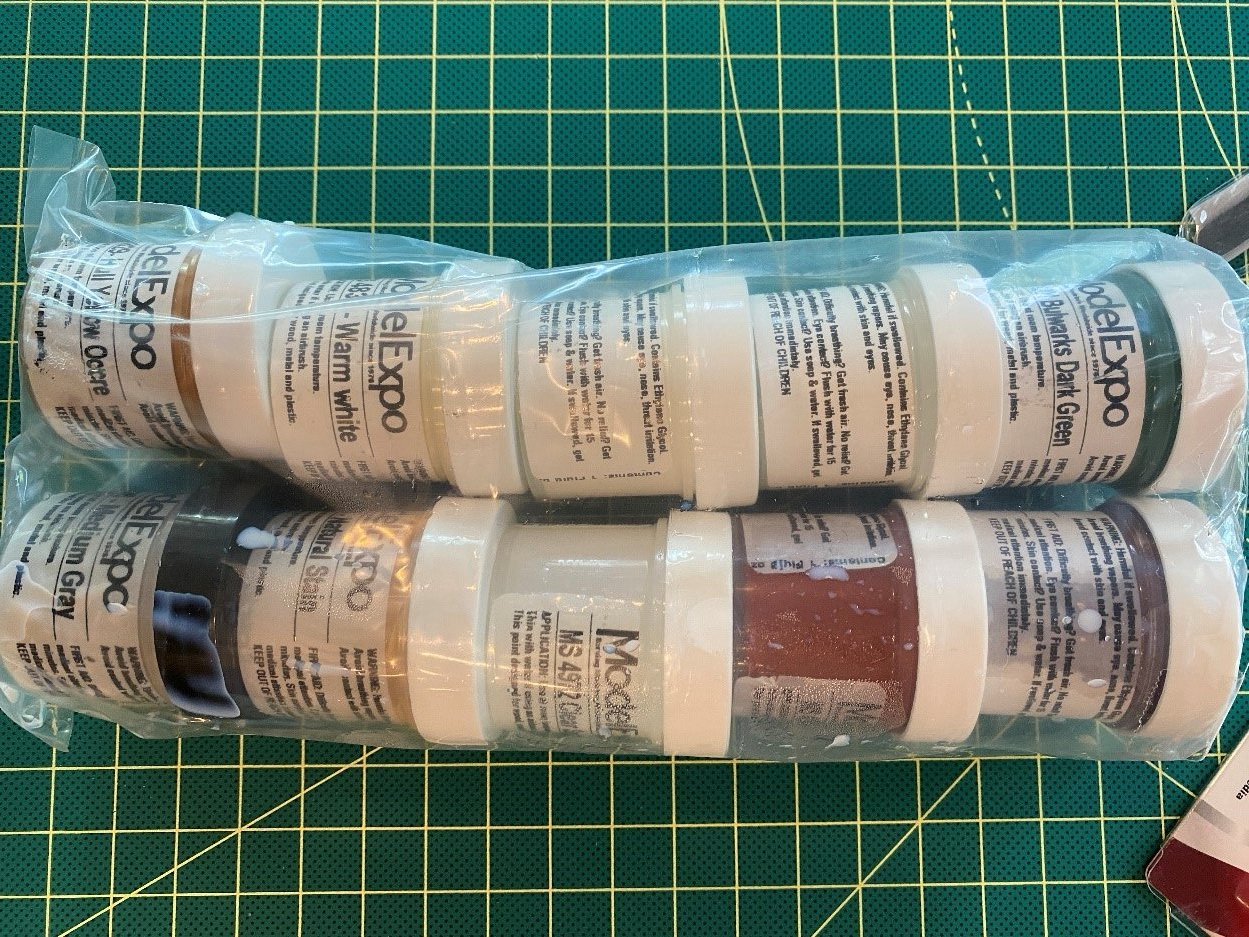
I have come back to model-building after a 40-year hiatus, and was looking for a kit for my first model ship. After some research, including good advice in the Model Ship World forums, I picked the Model Shipways “Become a Shipwright of Old” kit. Initially, I was going to get the Lowell Dory kit, but decided to get the 3-boat kit to develop my skills progressively. This kit seems to have a few advantages for a beginner: 1. It is a progressive series of builds. 2. The instructions are geared to a beginner. (Model Shipways has the instructions posted online, and I downloaded them before I purchased.) 3. It’s relatively inexpensive ($169 for three boats, less on one of Model Expo’s frequent sales). Others have reviewed this kit, so I am giving the impressions of a newbie, rather than a practiced eye. The three-boat kit comes with most of the tools needed to build the first boat. It also includes paint for all three boats. This is not clear in their advertising, which initially made me think I only got paint for the first boat. If you buy the kits separately, paint for the last two is not included. There is a lower-priced kit for the first boat, which does not include tools or paint. I ordered late on a Saturday night, and the kit was delivered from Florida to Georgia on Friday, quicker than I expected. My initial impression of the kit is that it was well-packed in a sturdy box, and the box for the kit itself is sturdy too. Opening the box, the individual boat parts are well-packaged. Not being familiar with boat kits, I was surprised to find so much material in one box. Somehow, I imagined that a kit took up more space. I found no missing or damaged parts when I checked each of the three sets of parts for damage, and against the parts lists for completeness. The individual wood-sheets are well-labeled and it should be easy to find parts as they’re needed. One of the paints had leaked slightly, but the paints are well-packaged in a sealed bag and didn’t damage anything else. The wood sheets all seem to be well-cut. The tools seem reasonable, although some of the blades don’t fit the provided knife. Looks like a good excuse to buy another tool! The printed instructions seem reasonably detailed, and there is a nice section at the end of the book for each ship, listing and describing the tools needed. They include a metric-imperial conversion sheet. All instructions seem to be in imperial units, so I assume this is for the benefit of non-American users. The pictures show the entire contents of the box immediately after I opened the box. I am happy with this kit, and consider it a good choice for someone such as myself. I have started building the first boat. I’ve taken pictures, and will start a build log soon.


-
Lurked for a few weeks. Here's my intro
Mark m replied to Mark m's topic in New member Introductions
The site has been great so far. Helped me pick this kit, for one thing. Much as I love books, sadly no room (weight) for a library. I look for electronic versions wherever I can. -
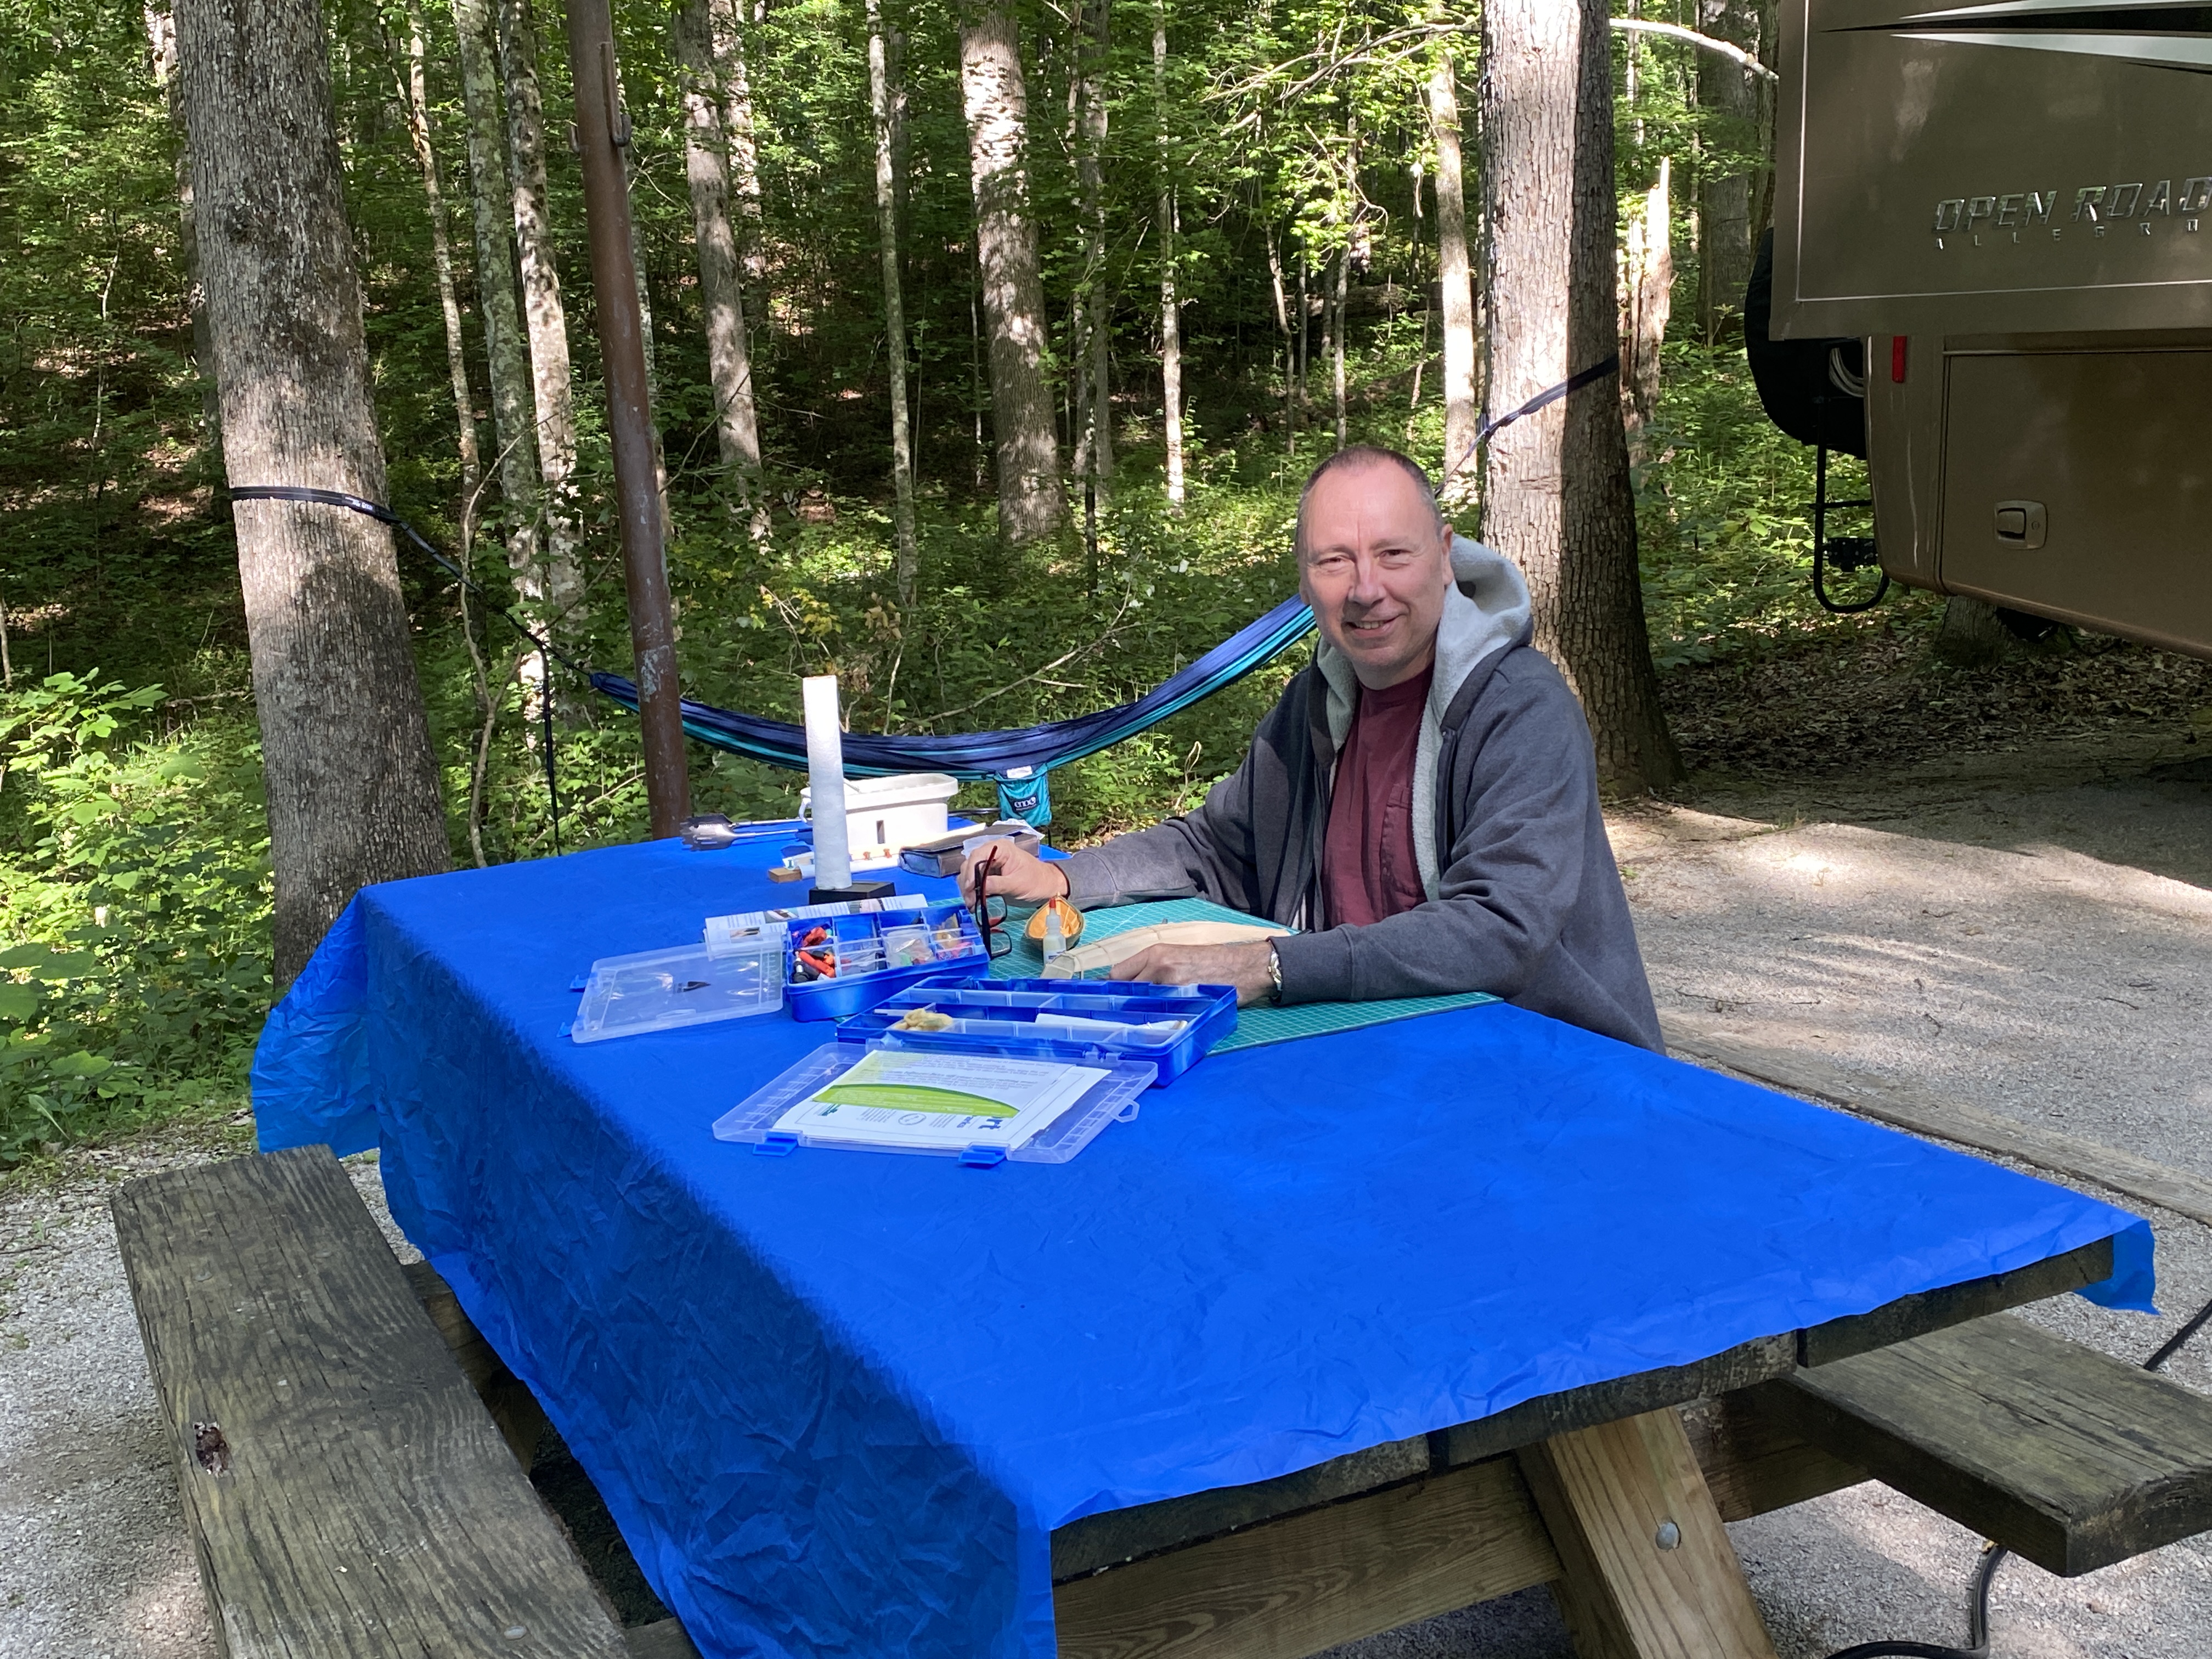
It's been around 40 years since I last built a model. Had a pretty good model railroad layout, built and flew control-line and RC planes (balsa, dope, etc.) and many plastic planes. Also built some bigger furniture in the last few years. Recently started living full-time in a motorcoach running around the US, moving every week or two. Decided to get back into model-building because it will satisfy my interest in "building stuff", etc., and can be done in a relatively small space. I have purchased the Model Shipways 3-boat wooden kit so I won't be tempted to take on a "real" ship until I've learned/relearned the techniques. Started the Dory and having a great time. Will start a build log shortly.
- 14 replies
-
- 14
-