Johngr
-
Posts
136 -
Joined
-
Last visited
Content Type
Profiles
Forums
Gallery
Events
Everything posted by Johngr
-
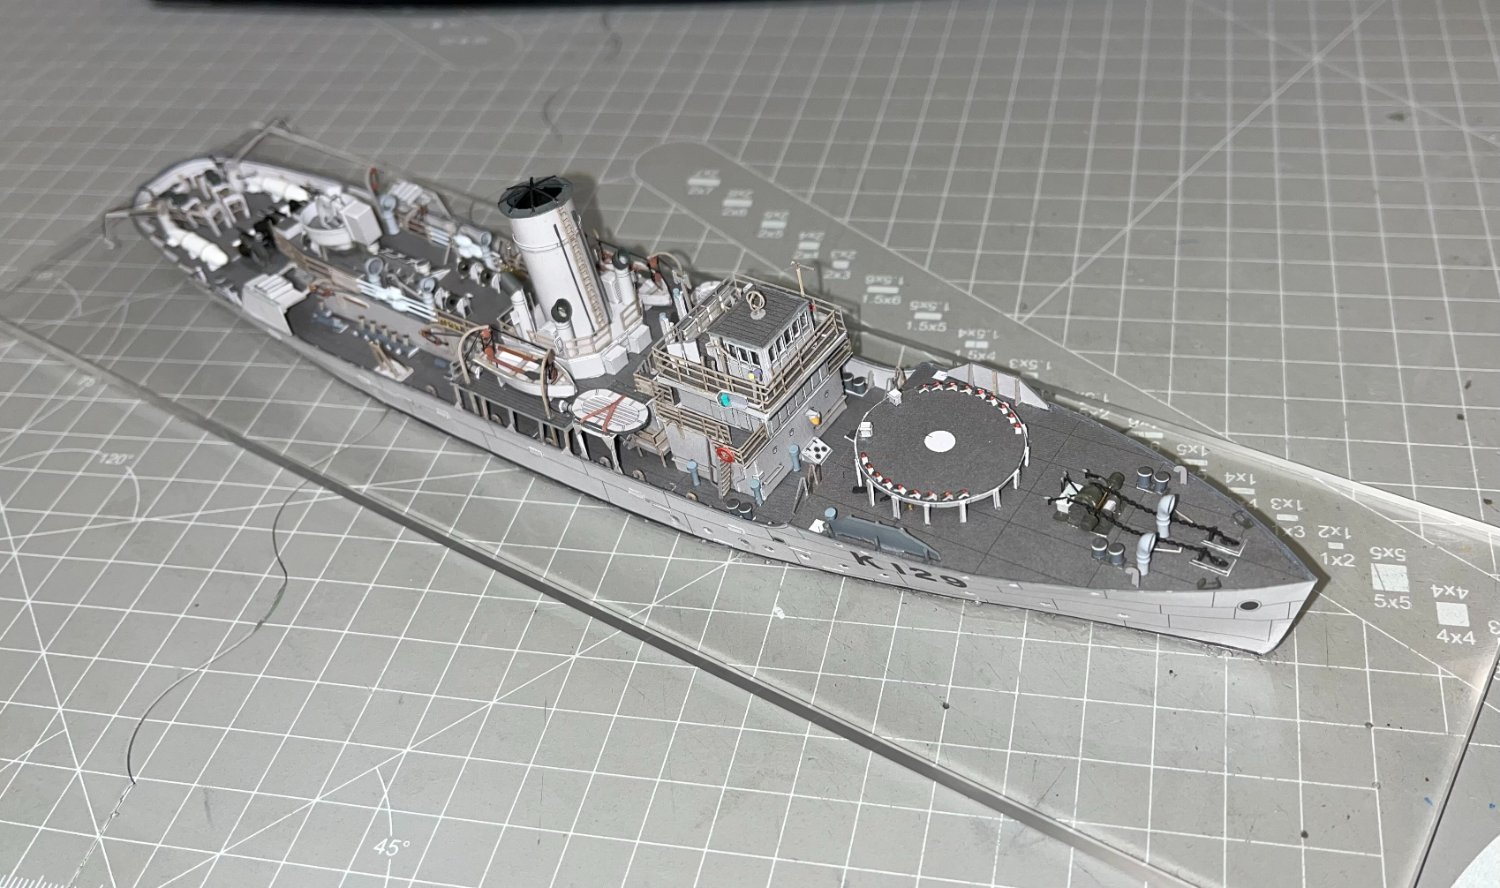
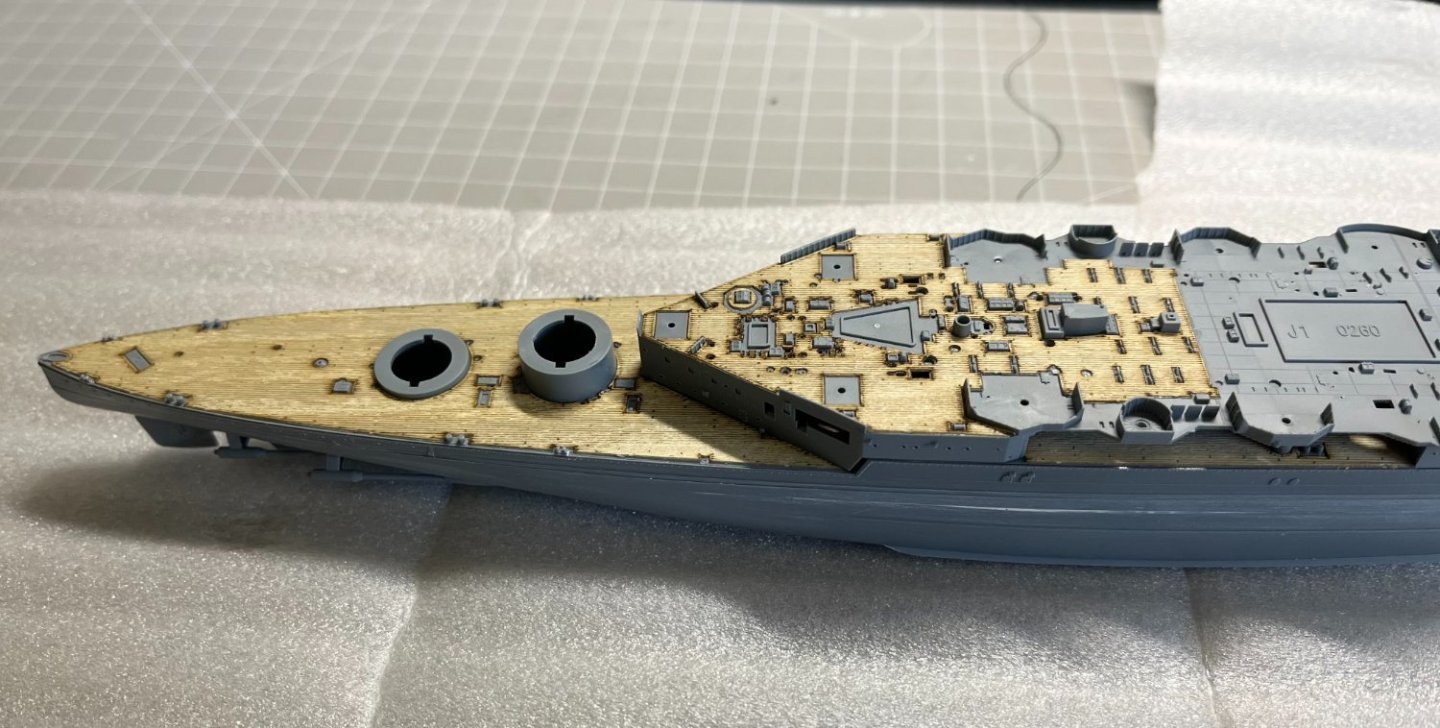
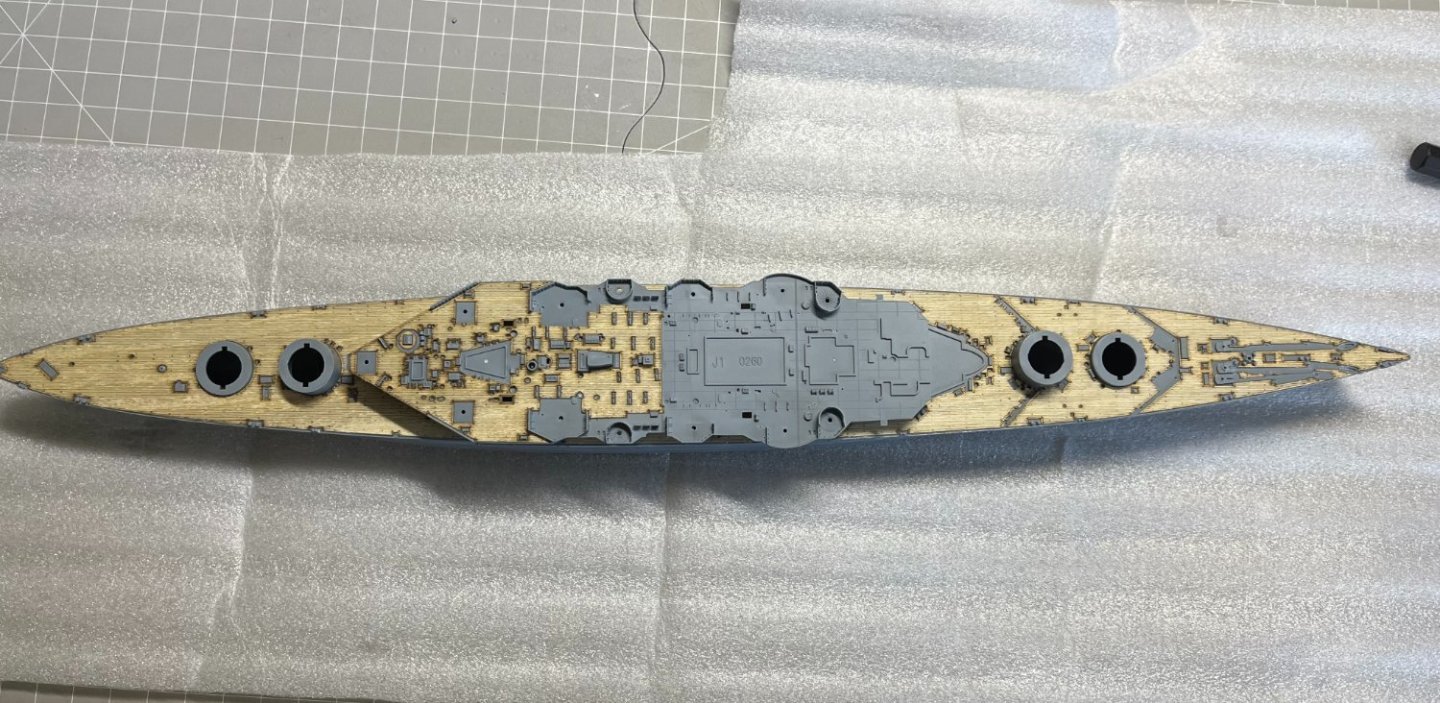
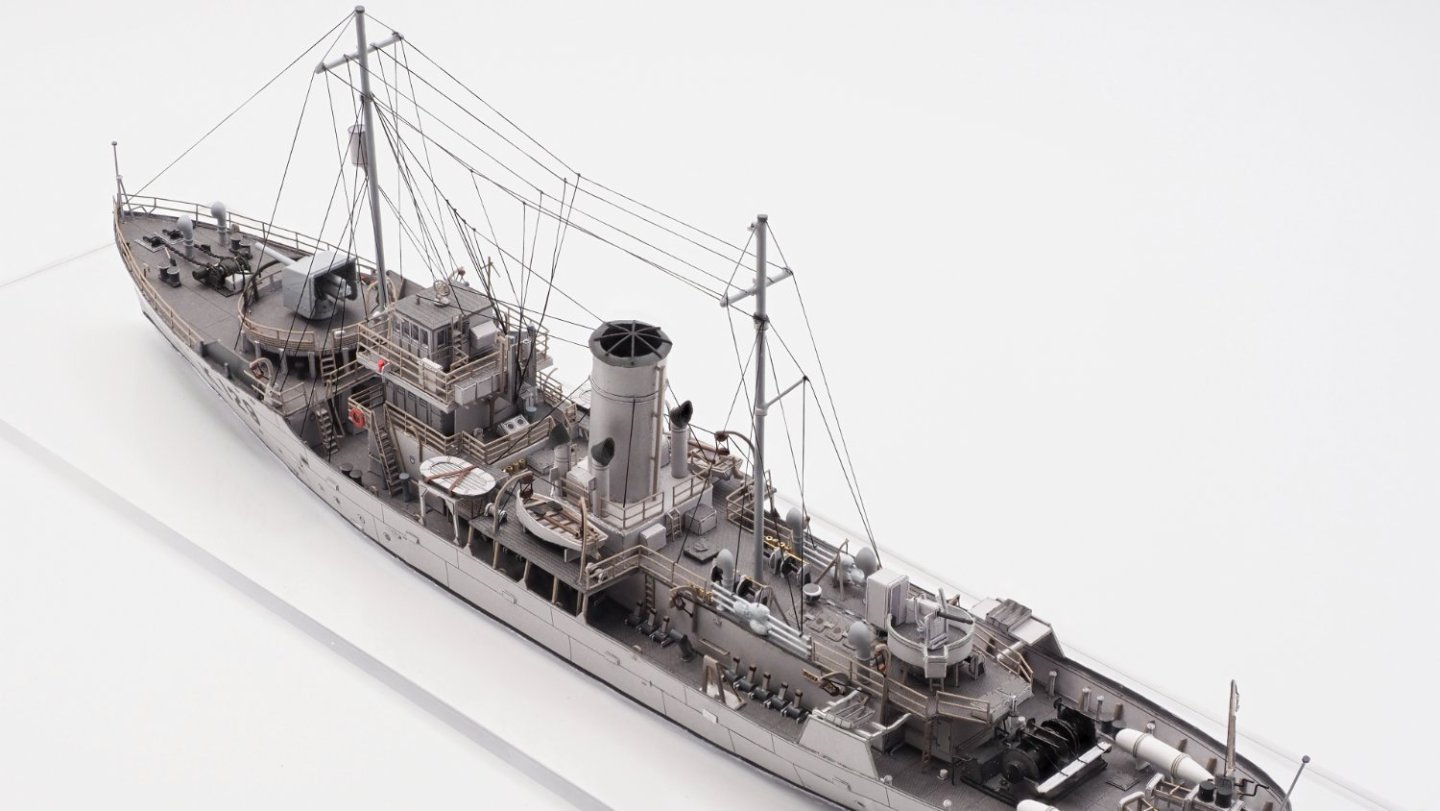
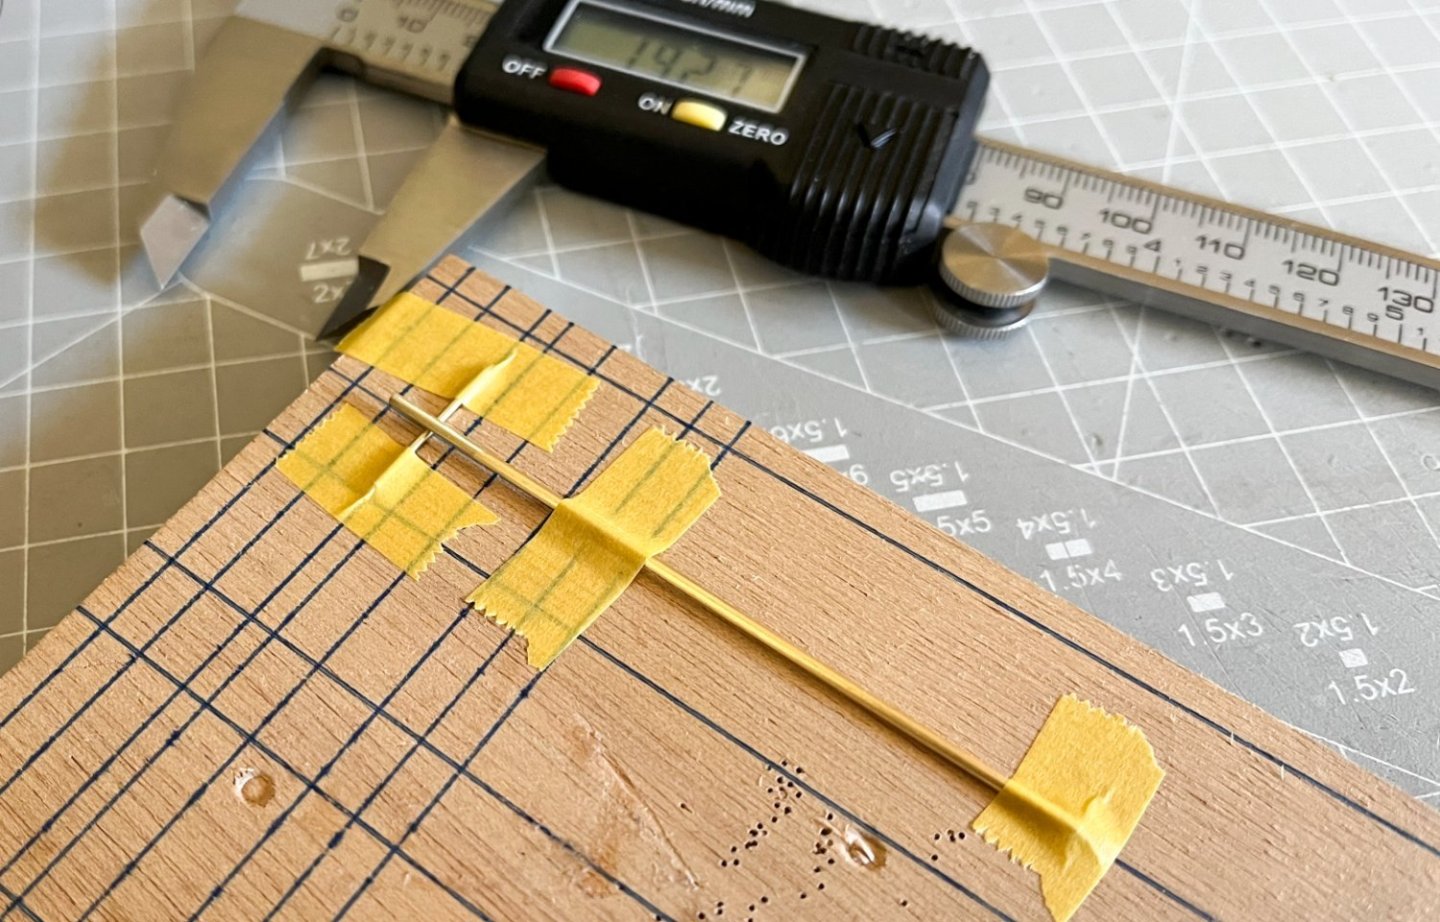
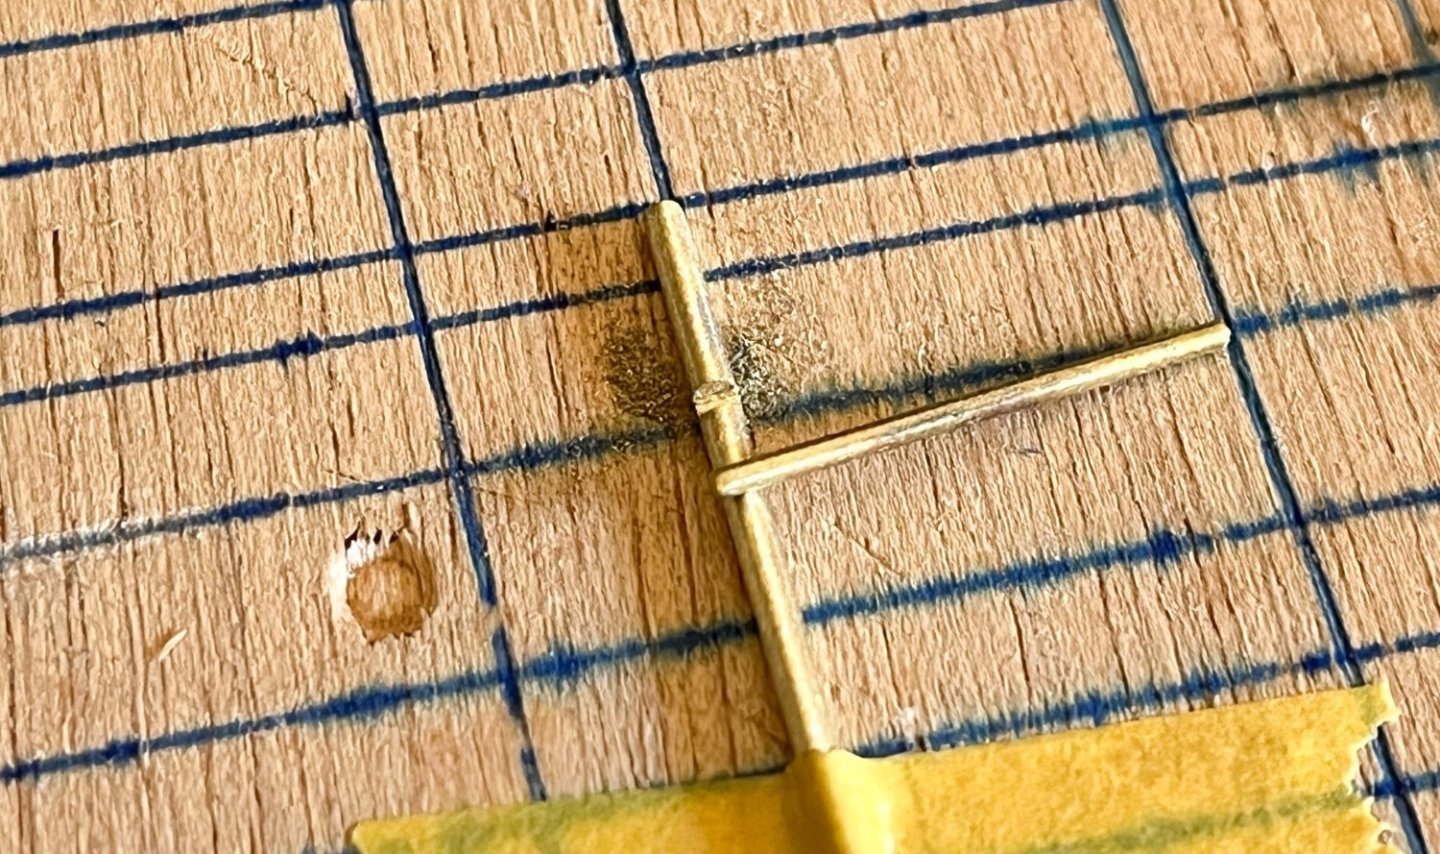
 On top of the wooden deck I placed the masks provided in the kit but the real challenge was fitting the brass pieces some of which are less than 1mm.
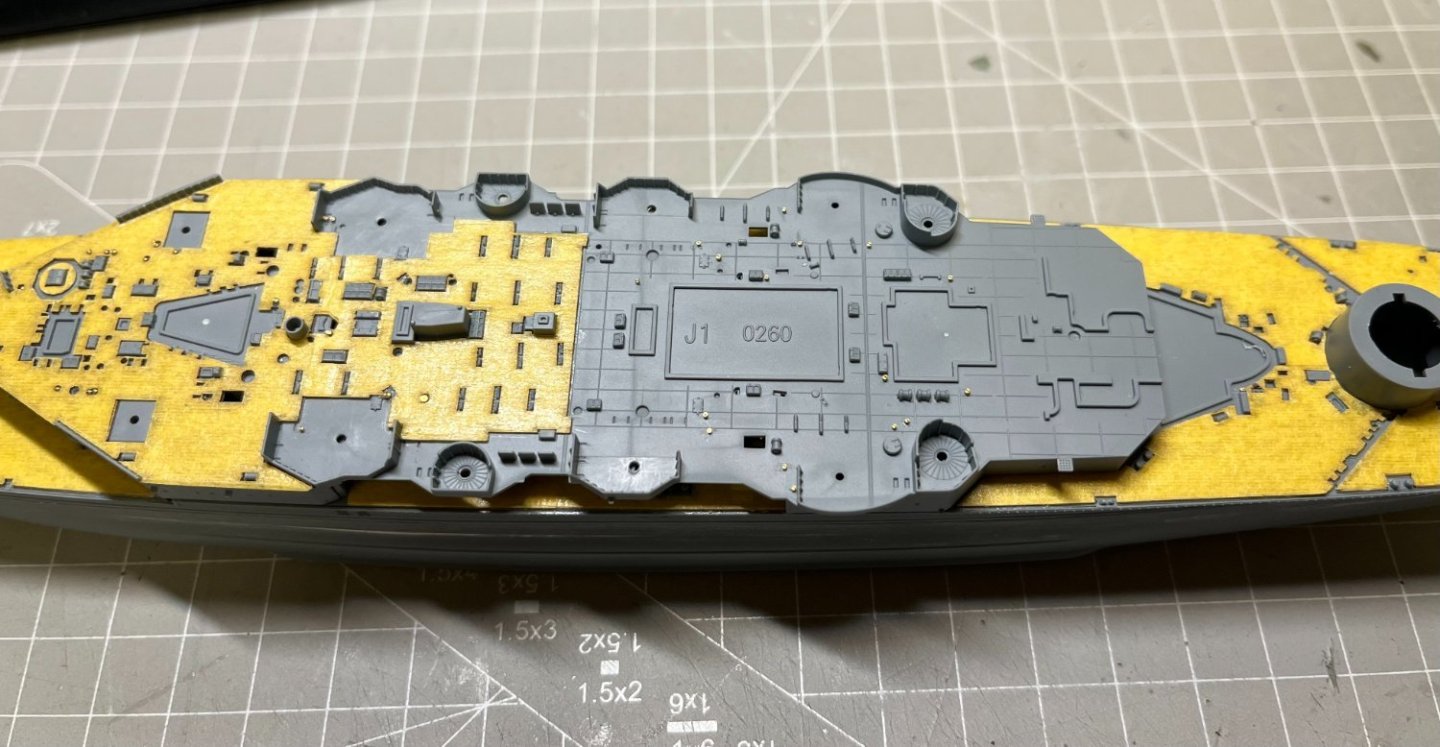
-
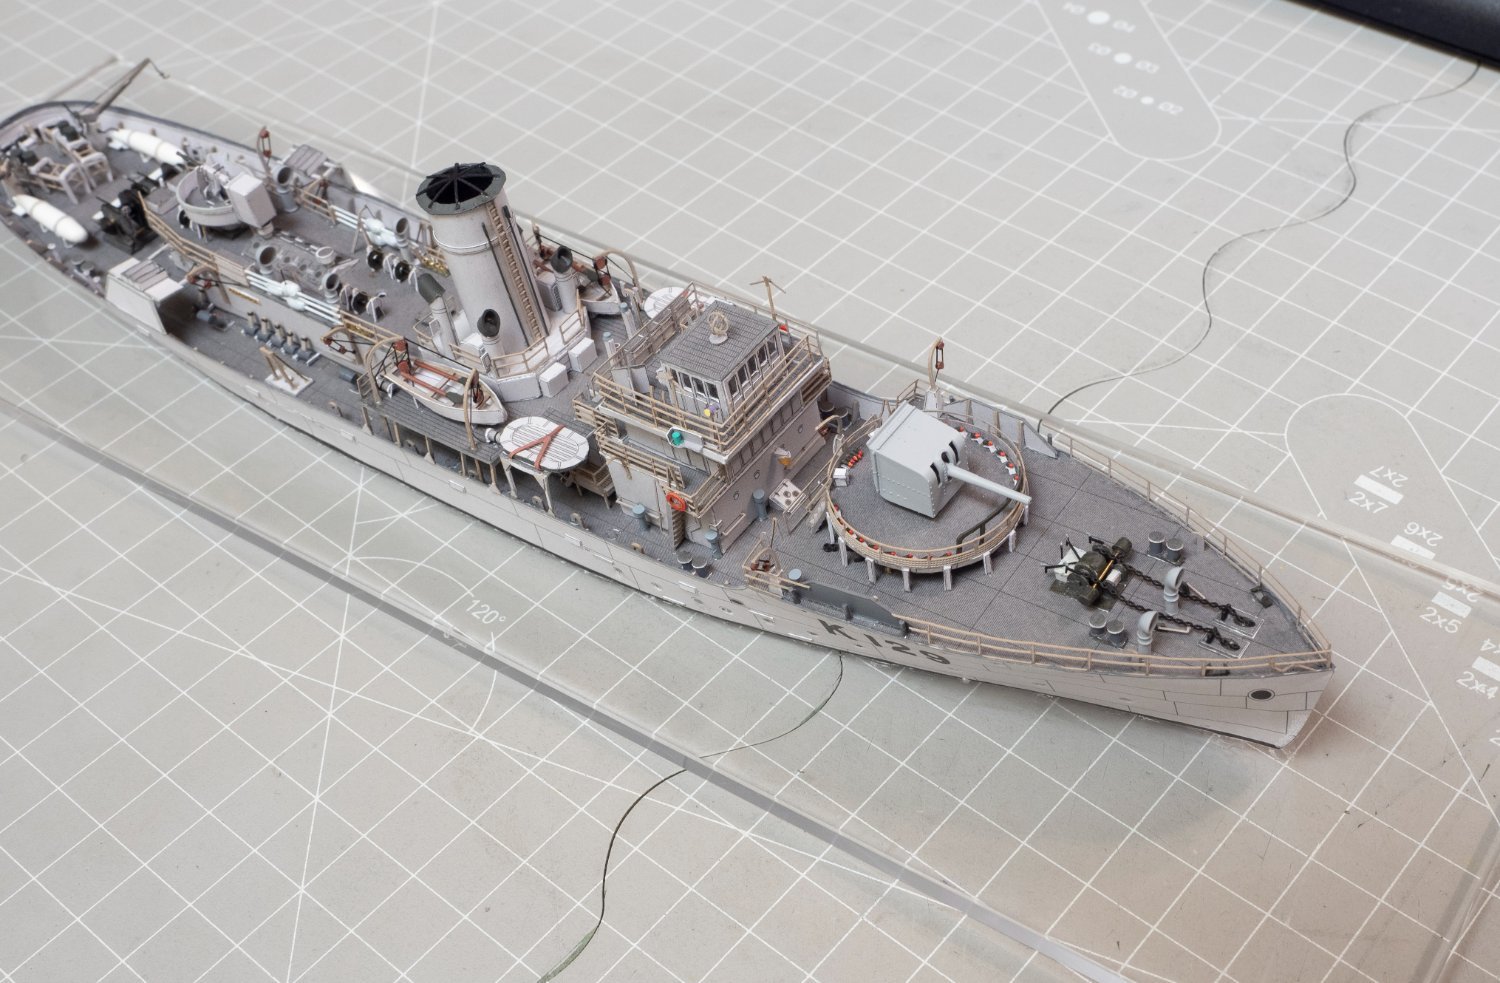
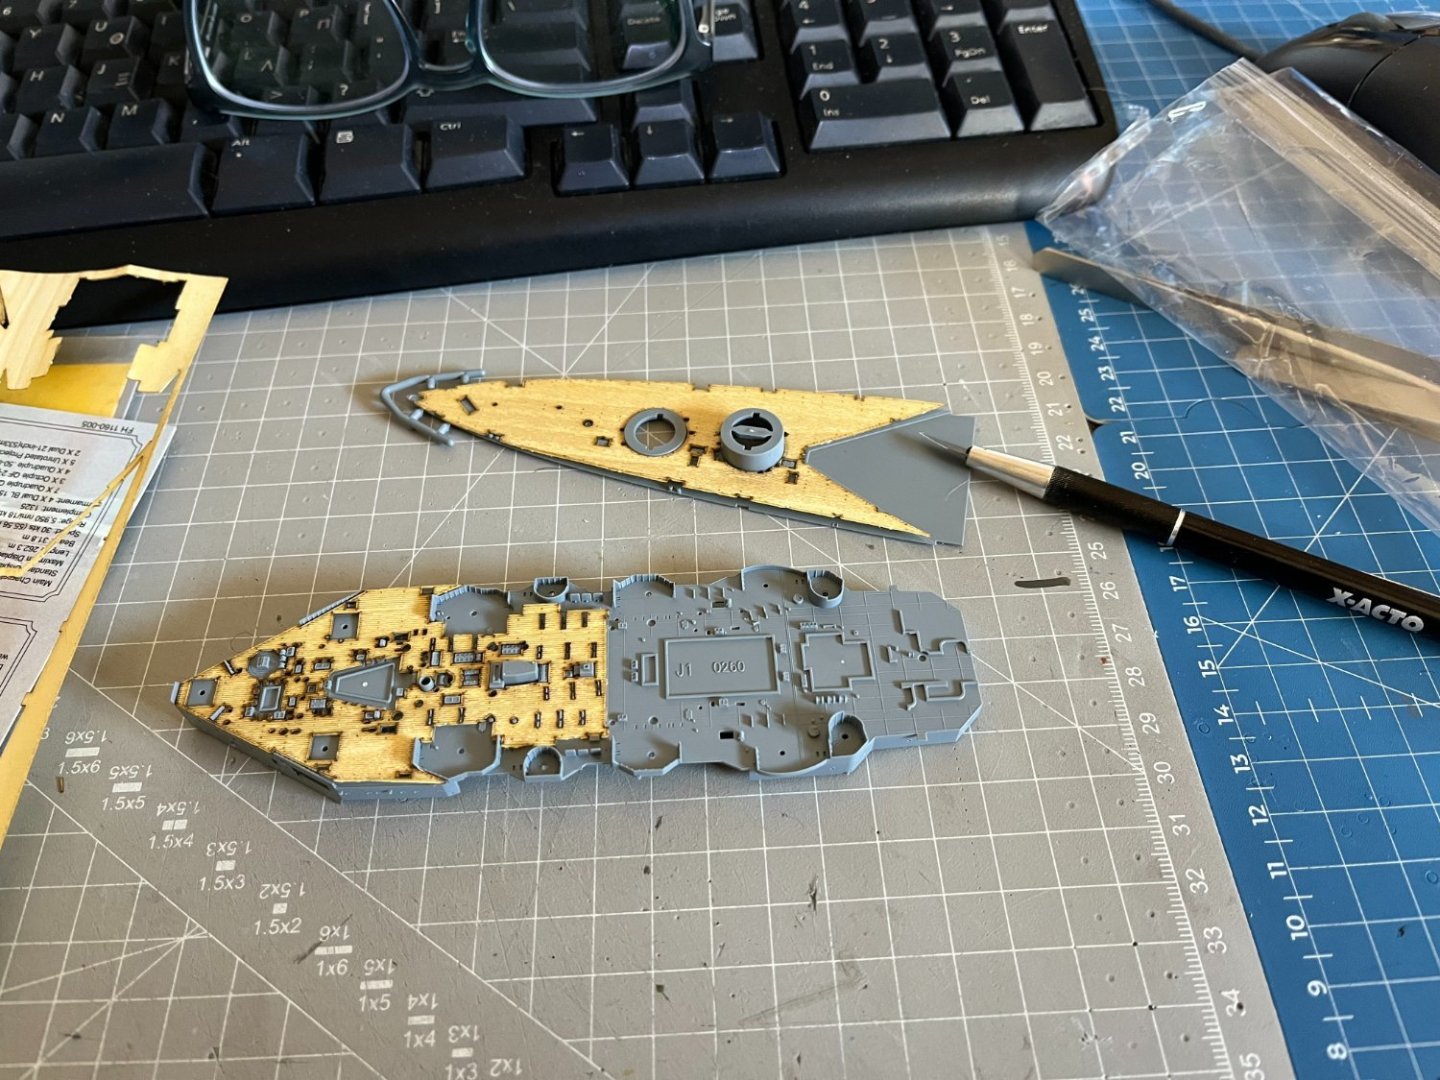
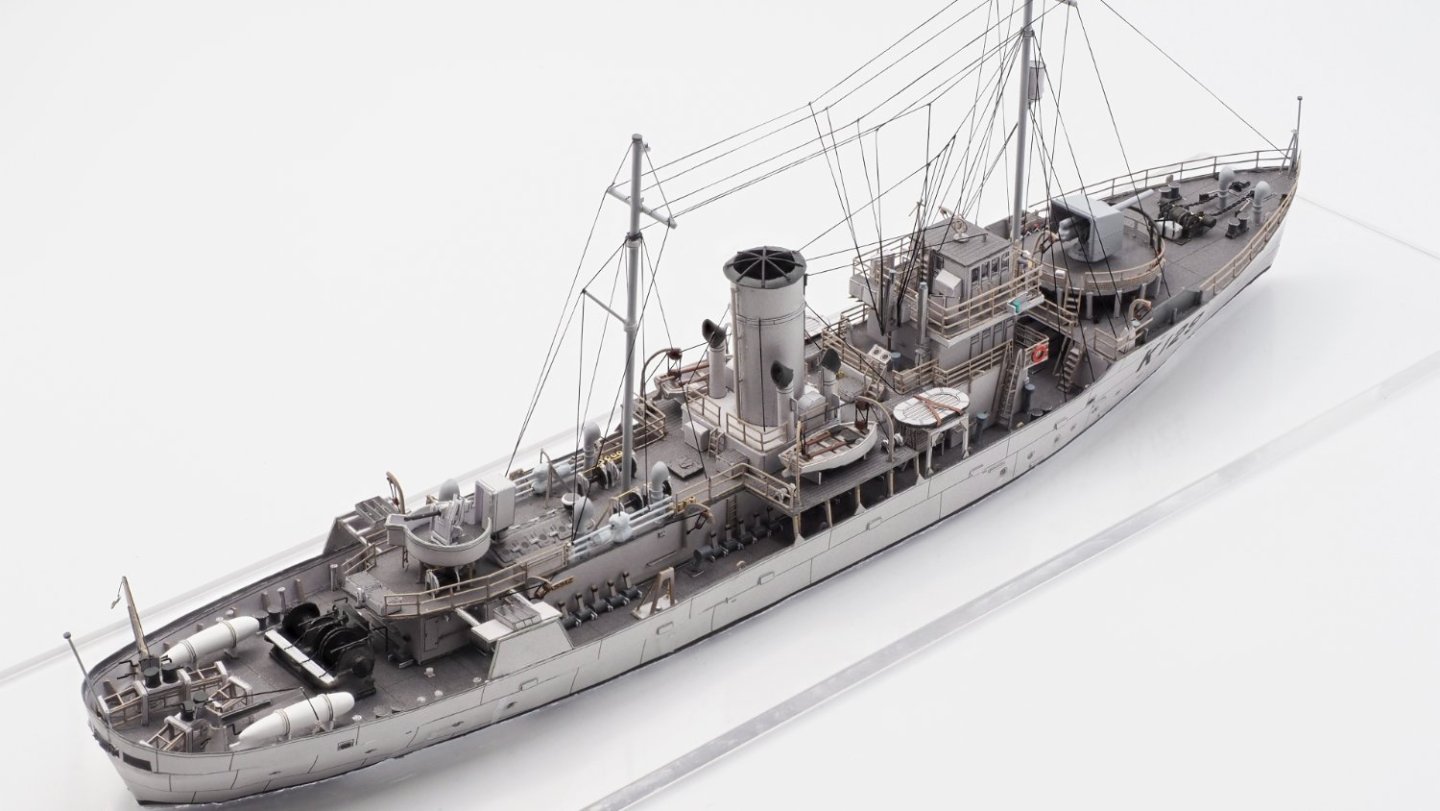
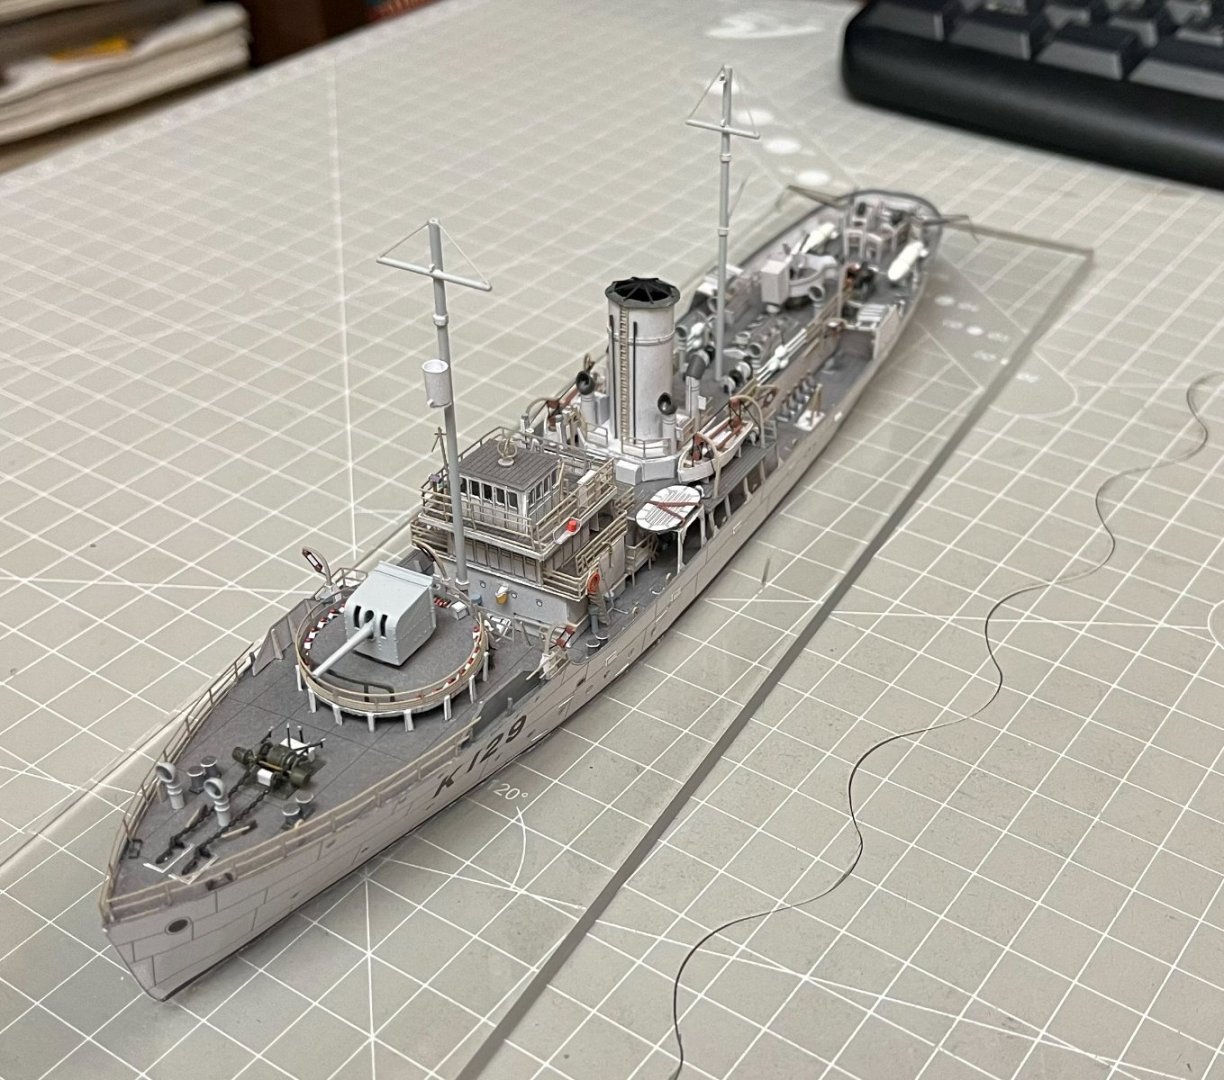
For now I installed the wooden decks by first applying a thin layer of PVA glue. I have to say they really add quite a bit to the whole look.

-
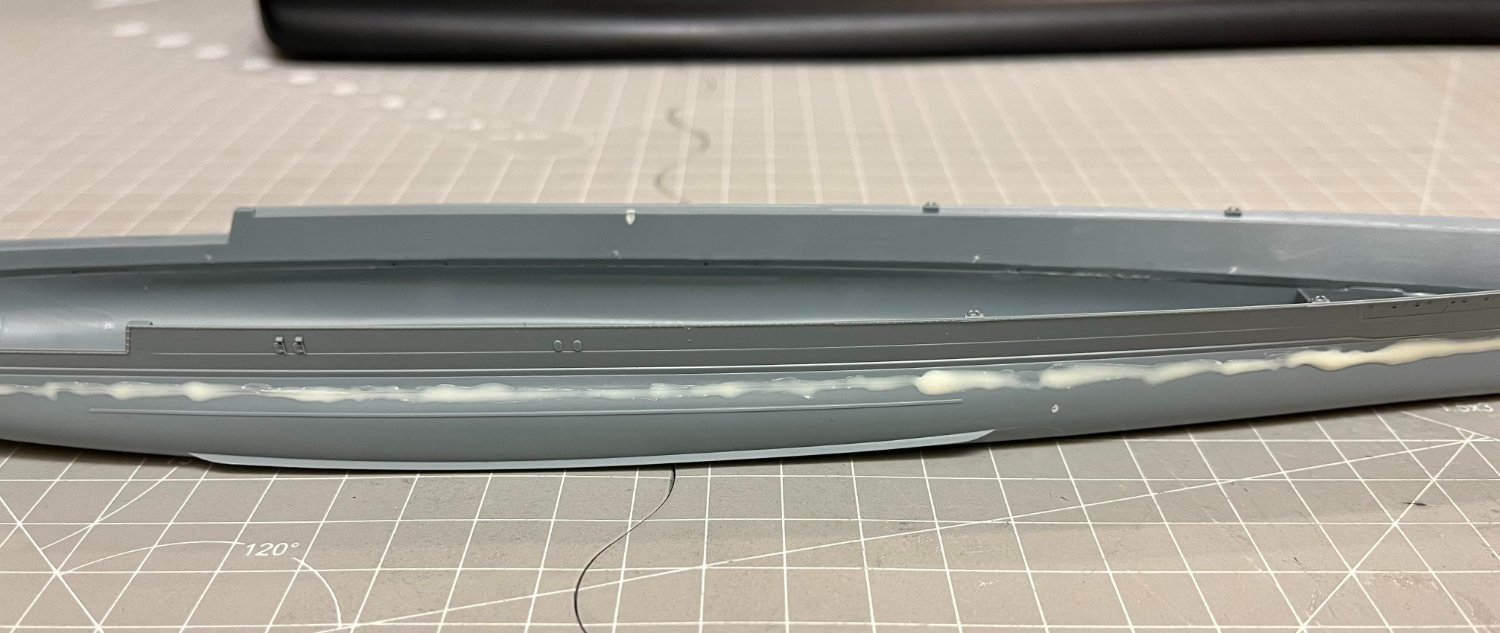
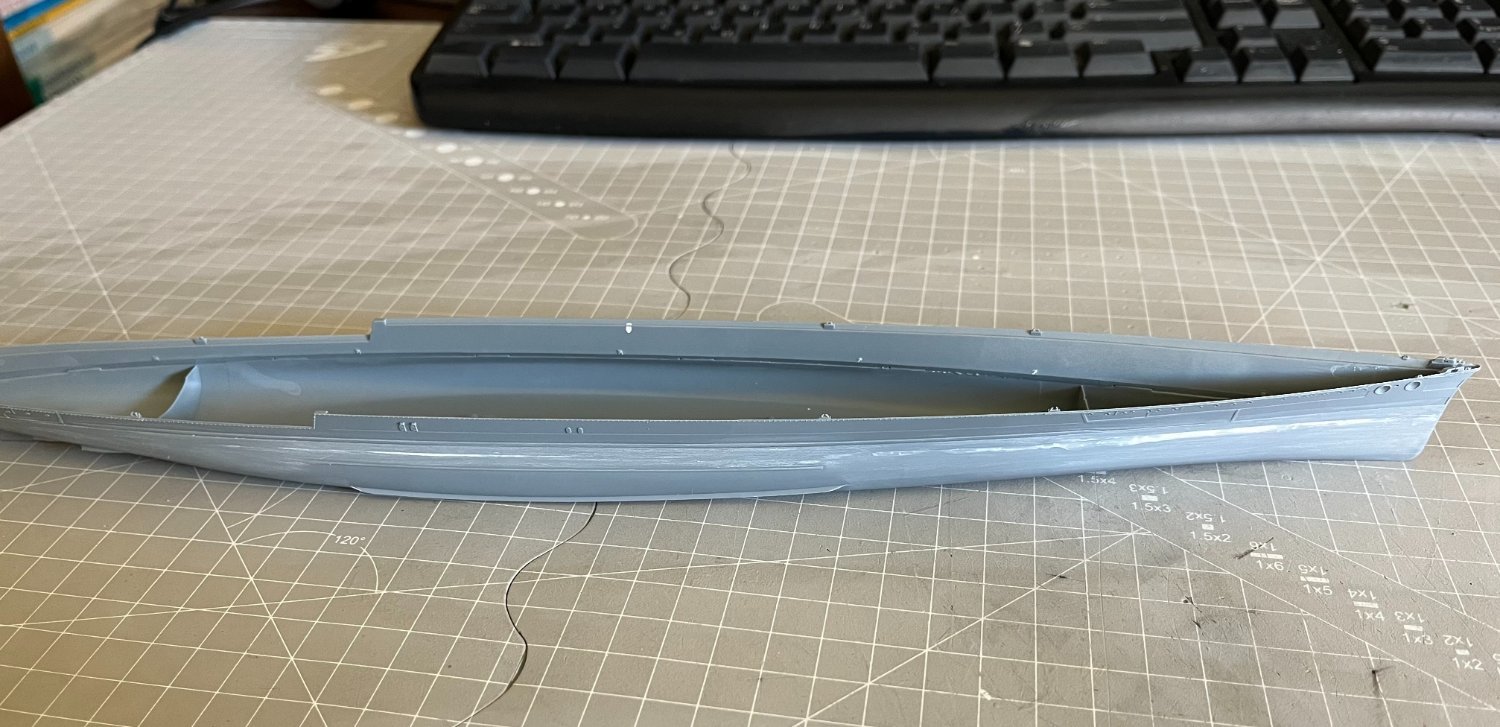
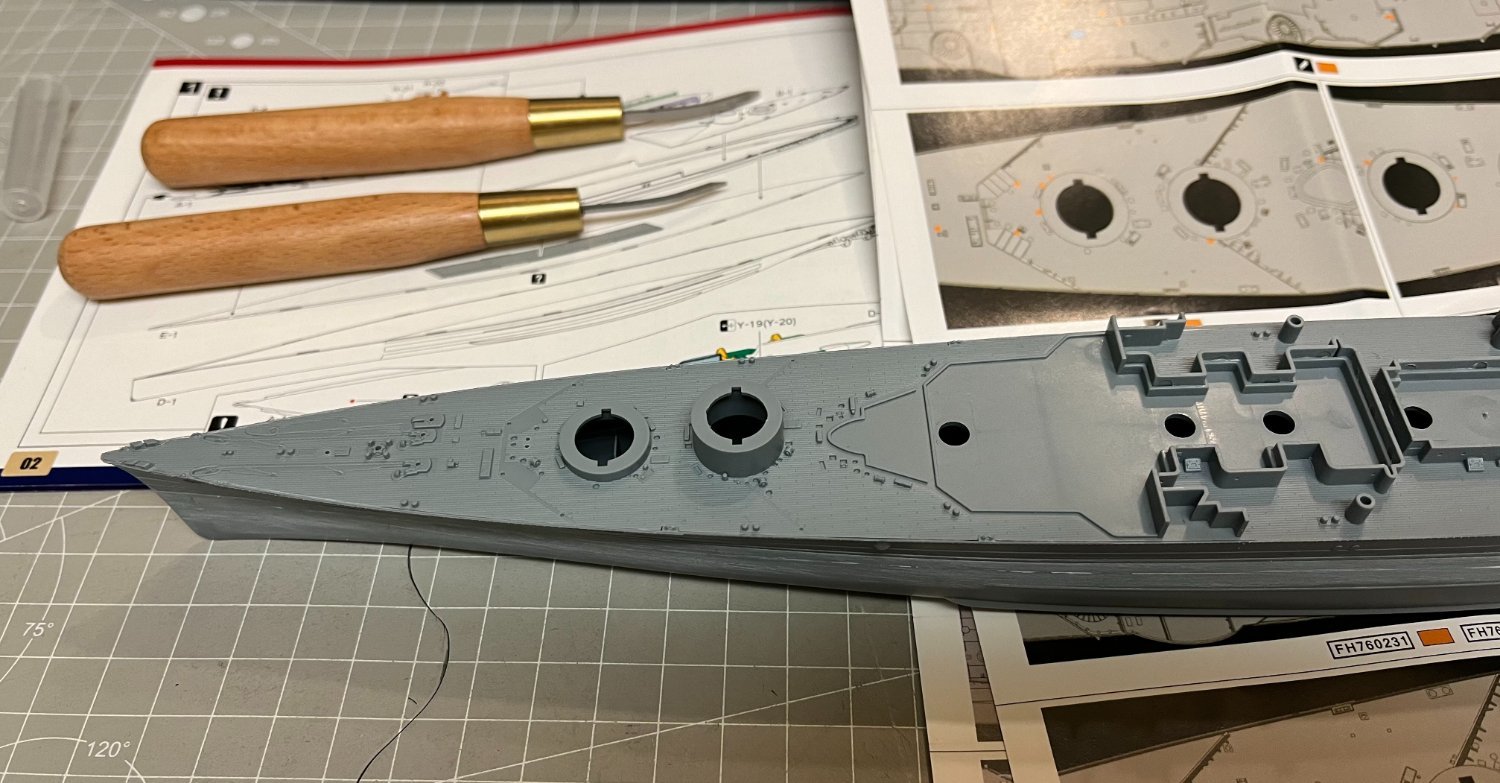
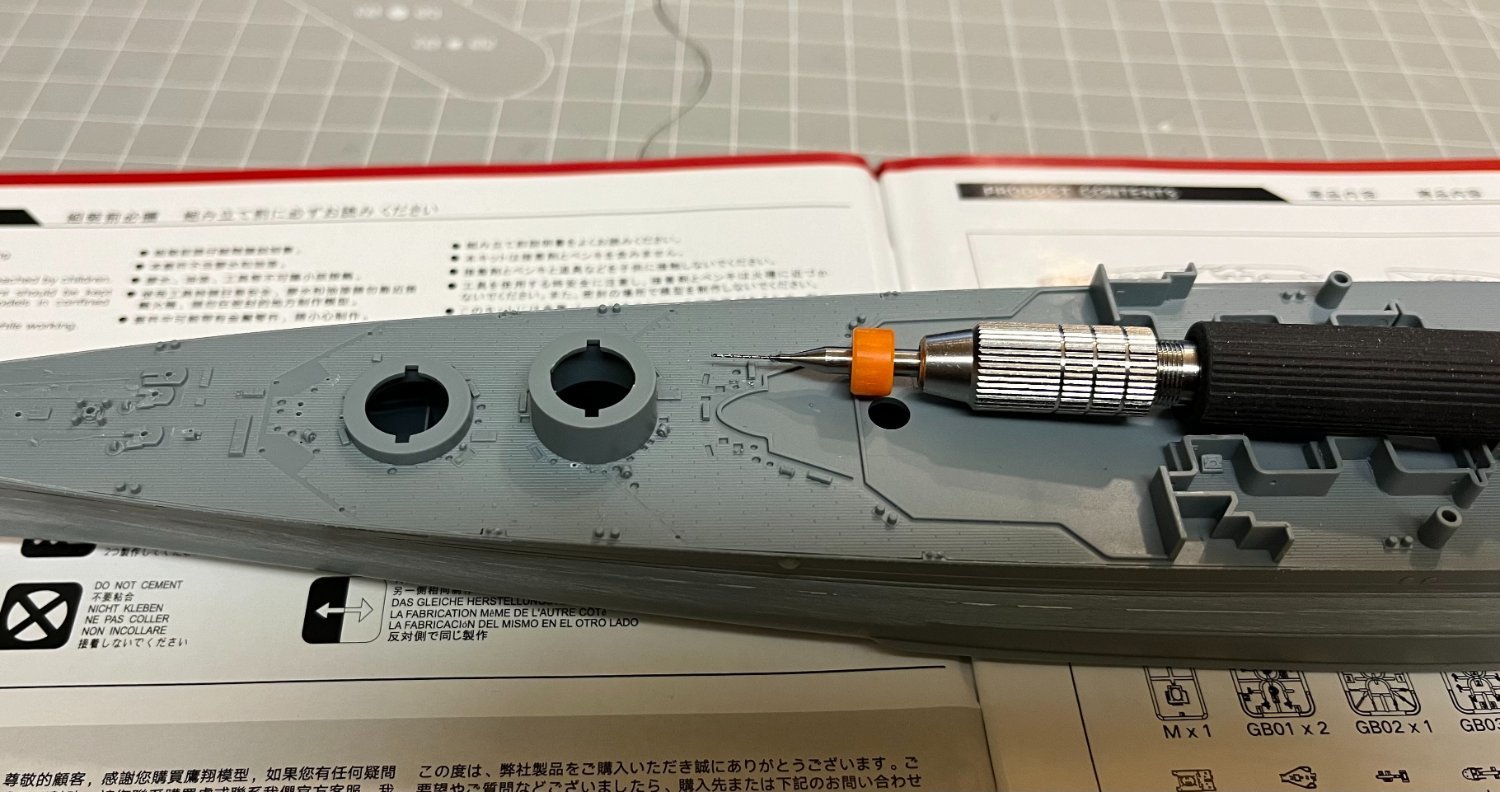
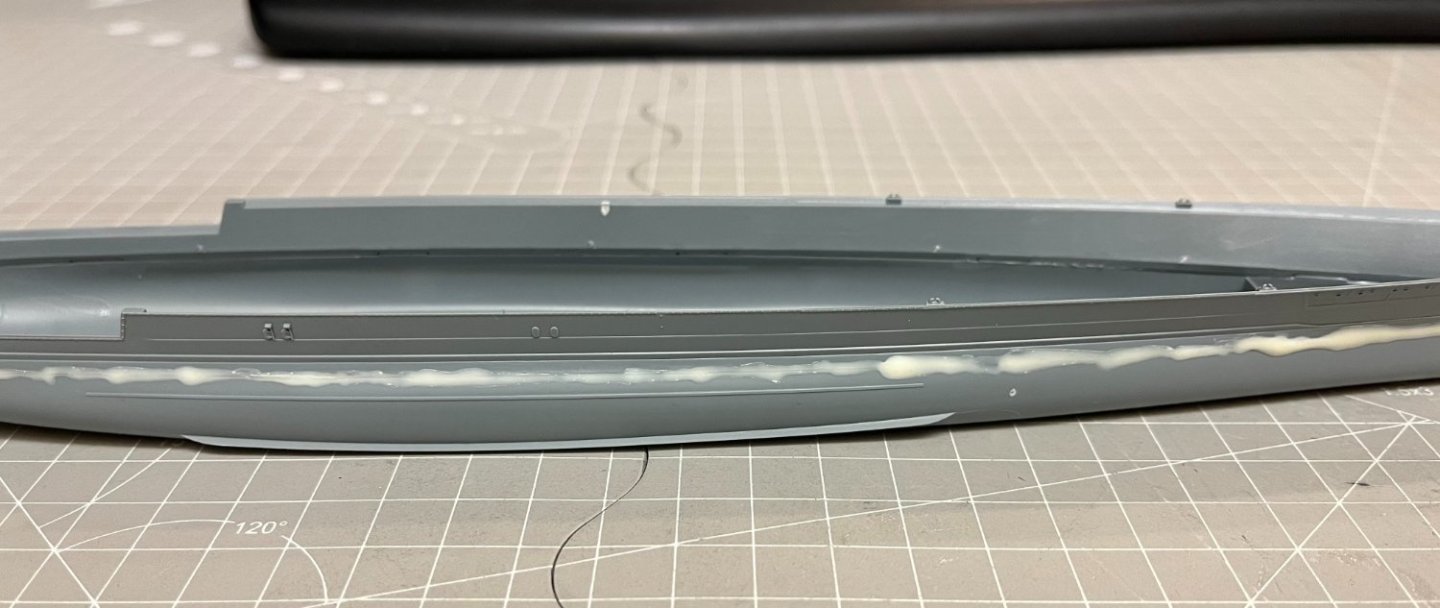
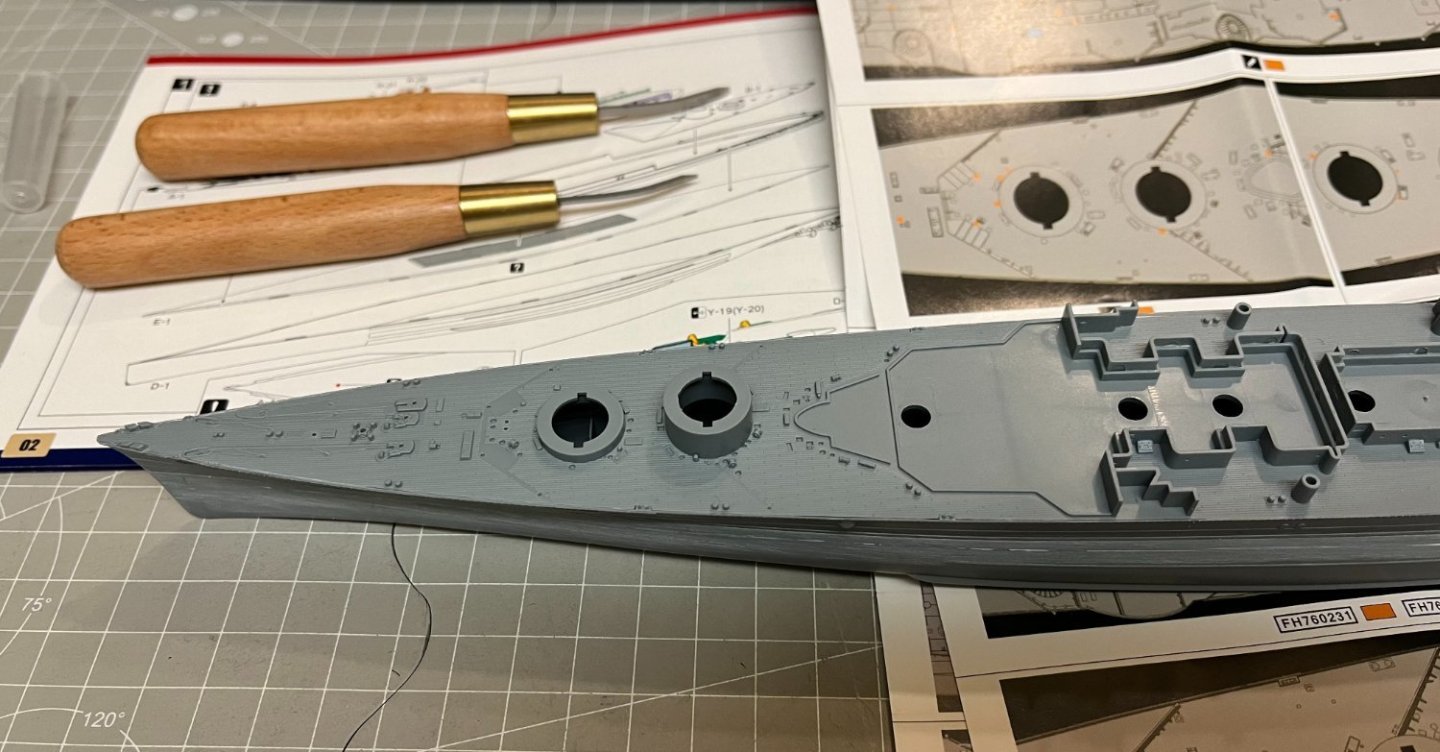
The journey has begun and I have the impression that this will be quite a long one. Initially the two parts of the hull were glued but especially on one side the application is not perfect, leaving a very small step. I used Mr.color dissolved putty and after letting it dry for a day I sanded it down. I have to admit that it was quite a difficult task as the surface along its entire length is not flat and in fact in a place where there is a small protrusion the surface is very small and does not allow easy access. Nevertheless, after enough rubbing with different grits, it seems that the result will probably be better than before. Surely this will be seen when the first layer of primer falls. The next step is to remove some surface details and open the corresponding holes once and later the supplied turned metal ones will be installed which are really excellent. That's all for now. Good night to all.


-
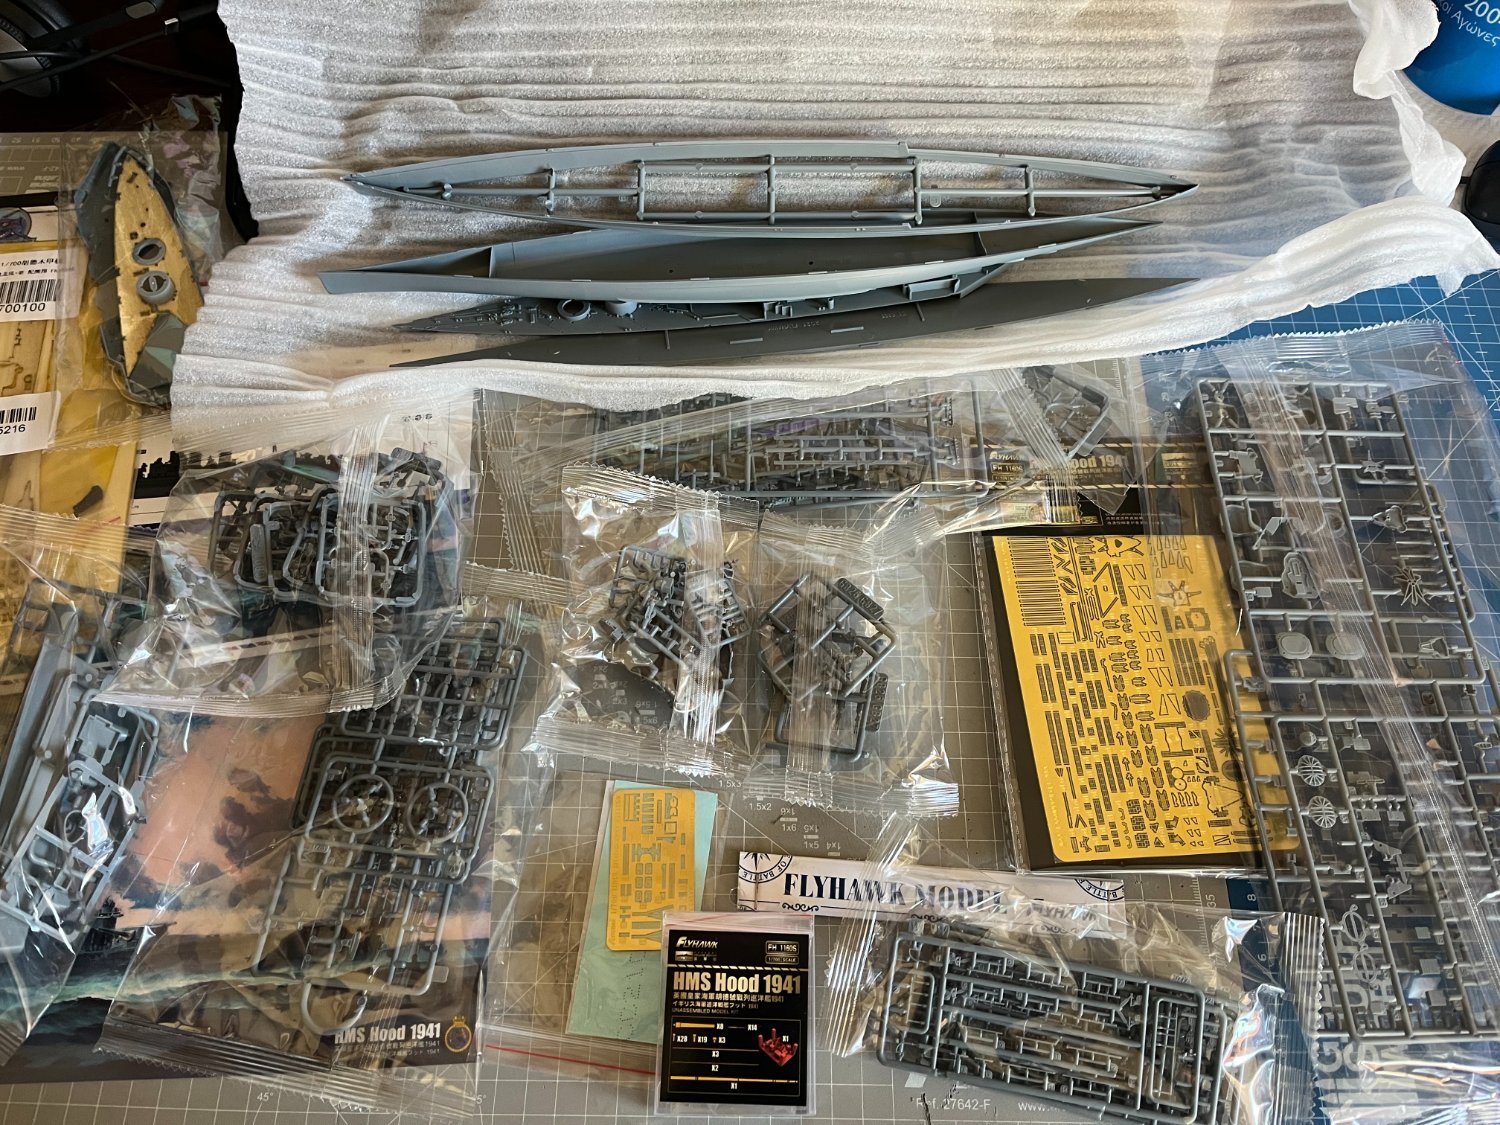
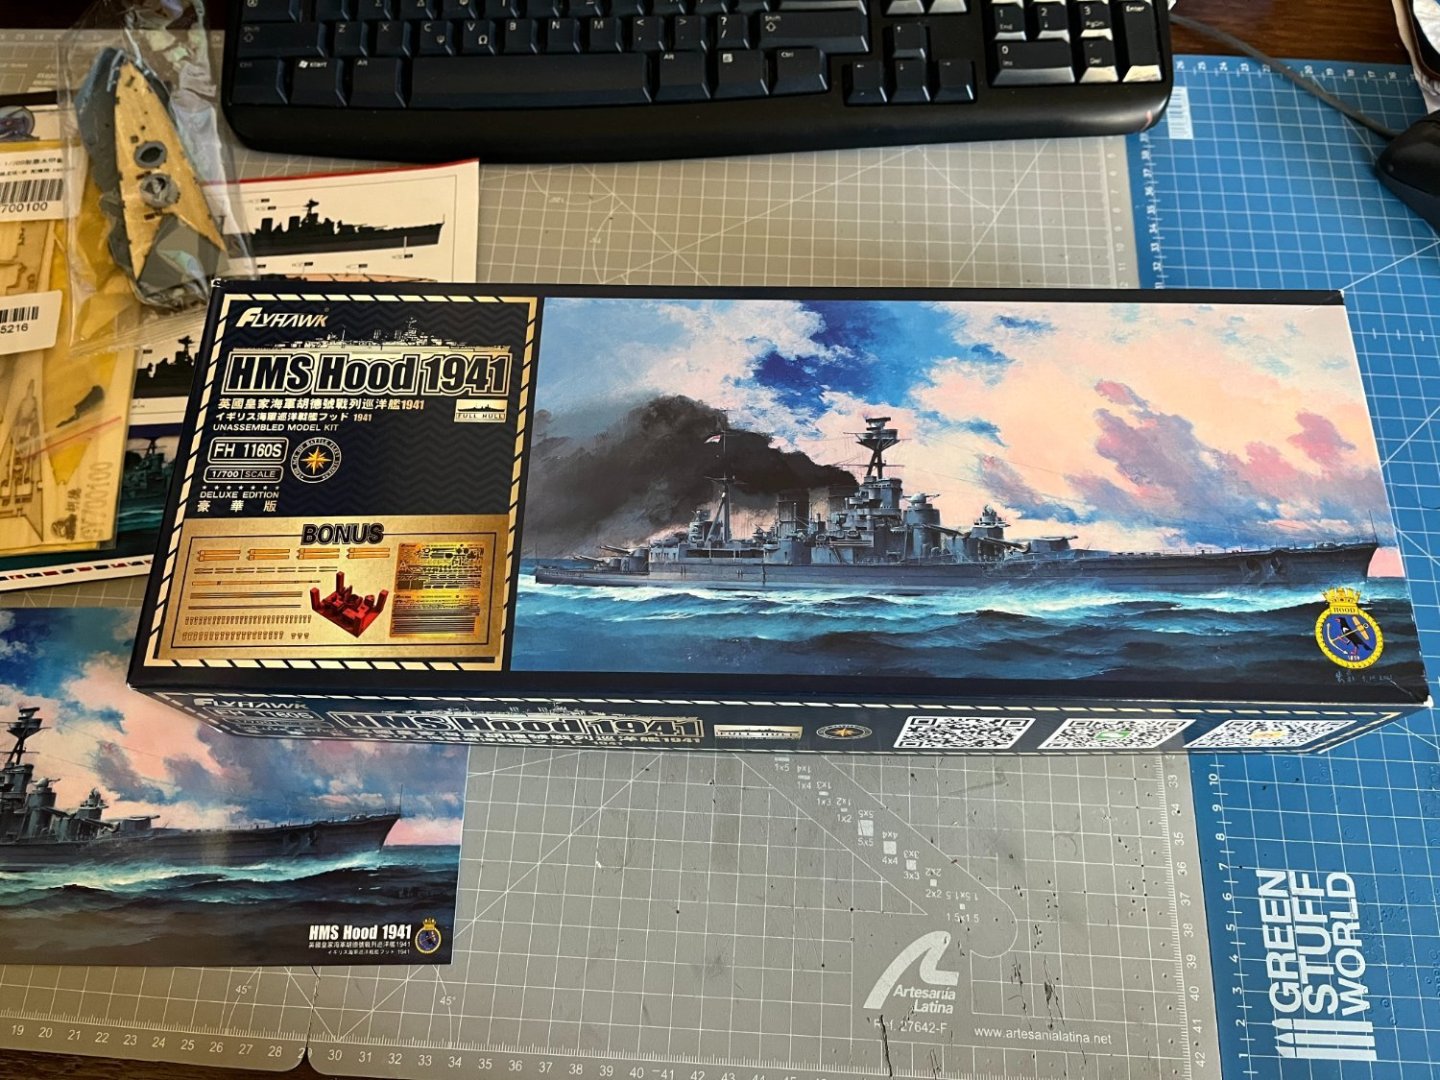
HMS Hood 1941 - FlyHawk - 1:700 After two paper models and since the weather was more suitable for painting, I started the HMS Hood. I also added a wooden Deck and masking Sheet kit at a very good price for more realism. The kit has a lot of small parts and seems to be very well detailed. First I tried the application of the wooden deck and it seems to be excellent.

-
Thank you Chris, yes you can share the link. I wasn't aware of the forum, and thanks for the info.
-
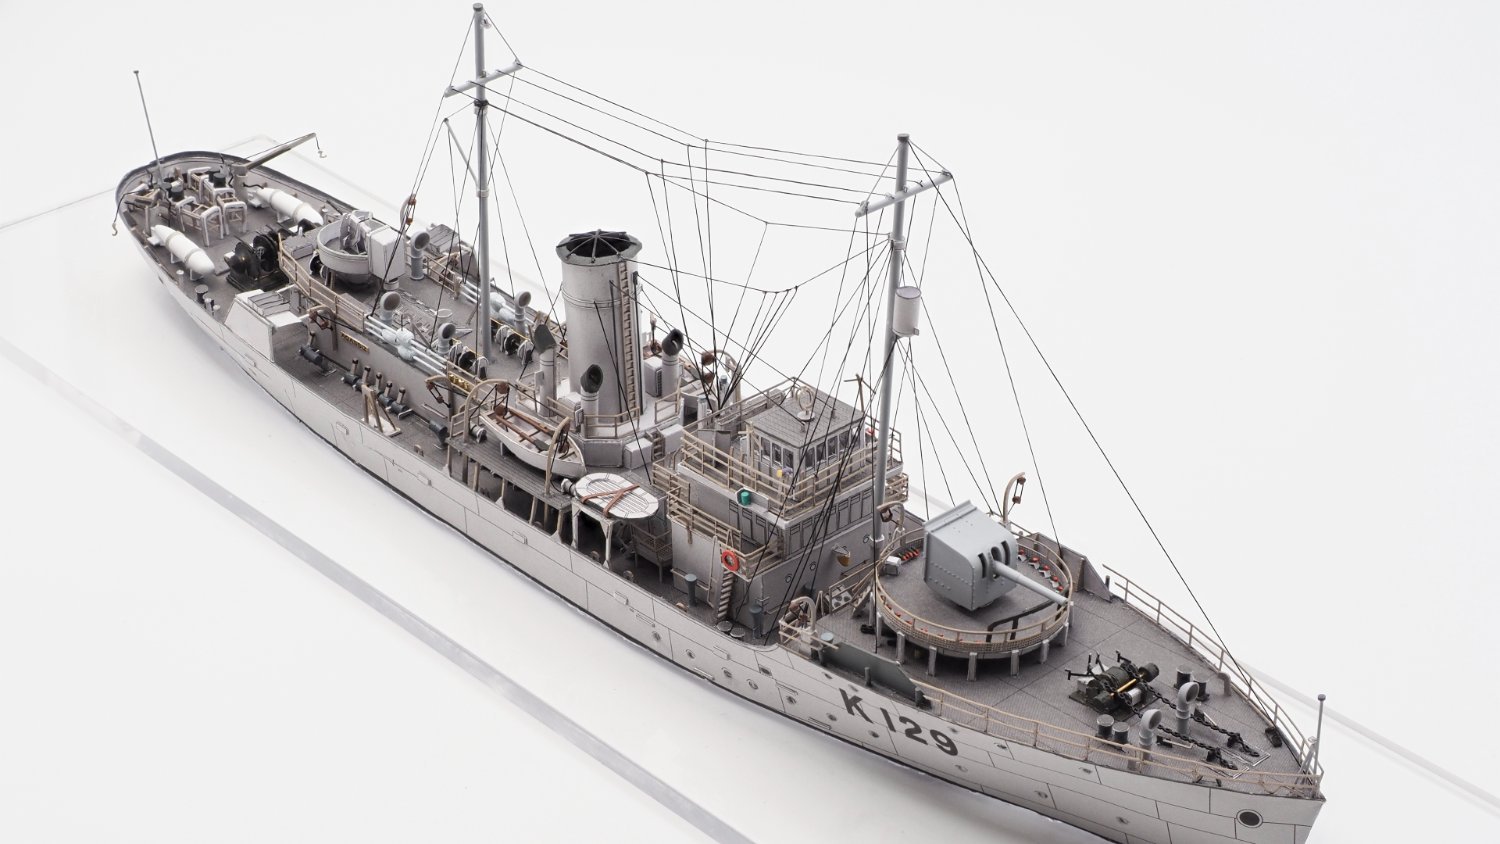
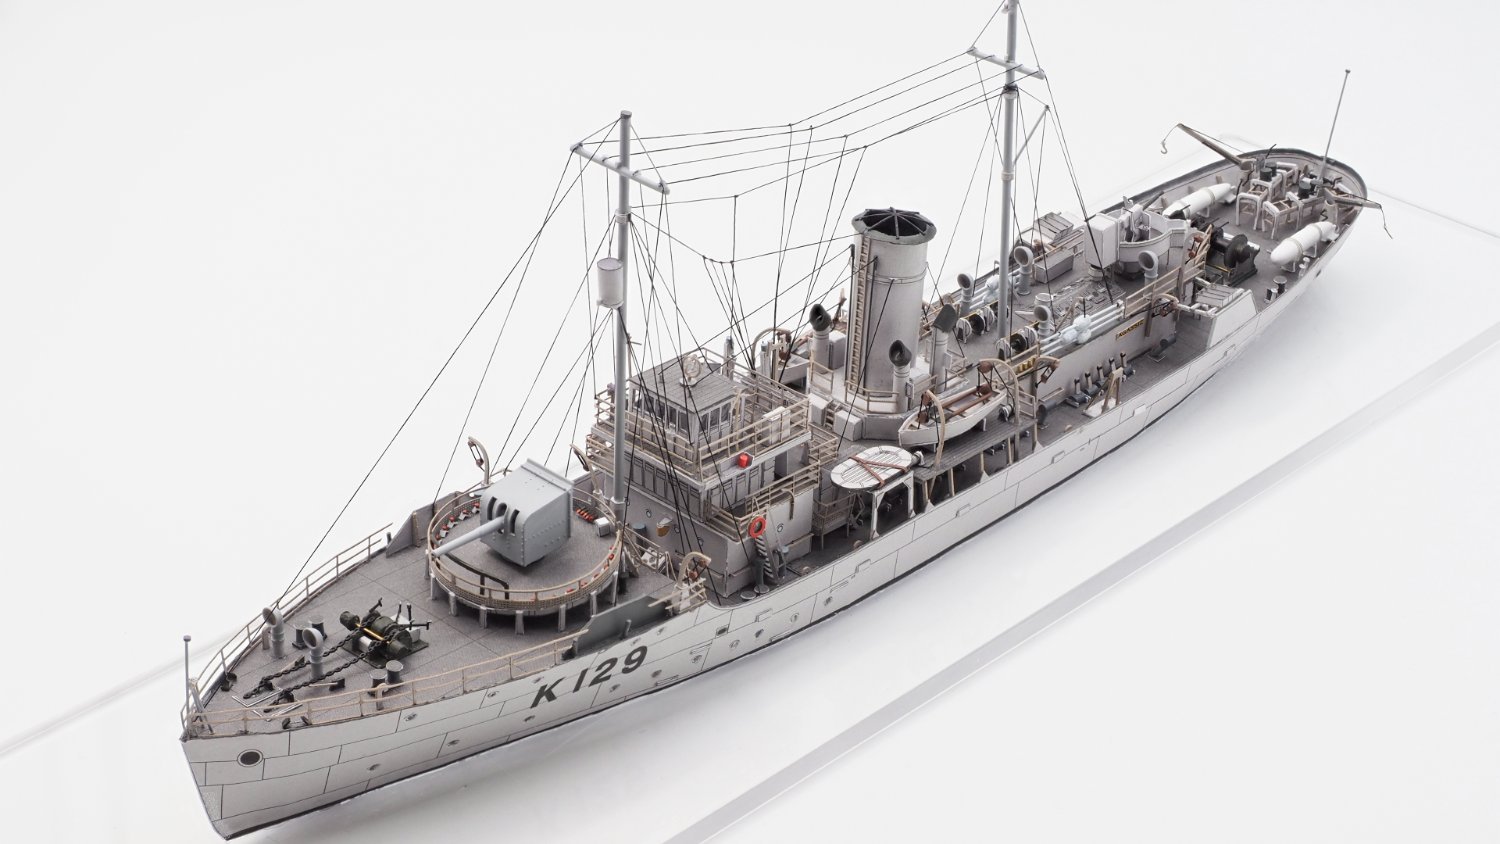
Finished! I was very pleased with this model and i want to thank you all for the company on this journey. Now I have to think about what will be next. Maybe someone in the 1/700 scale!
- 61 replies
-
- 12
-

-

-
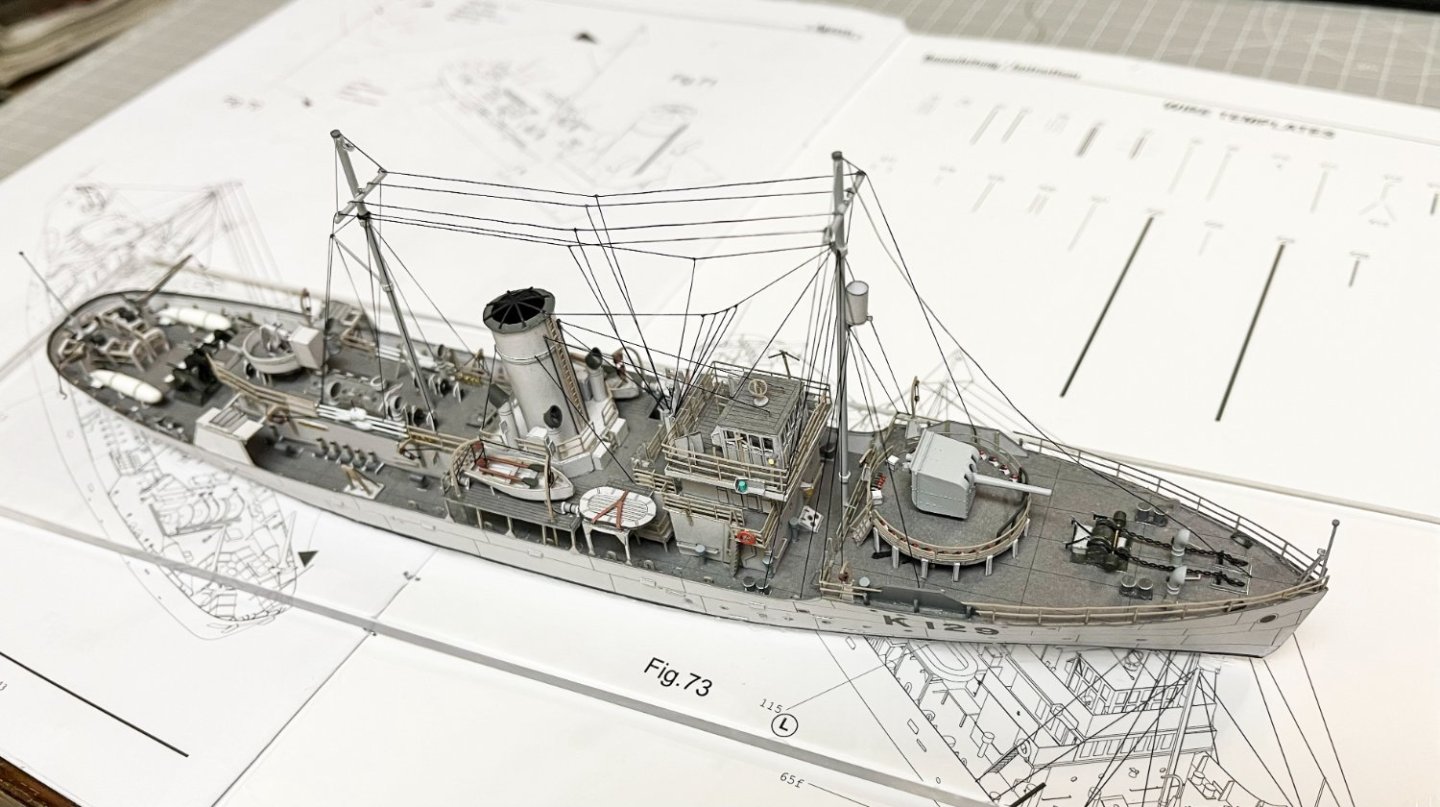
The initial placement has begun and coming to the end there were some final details and the installation of the bow rigging.
-
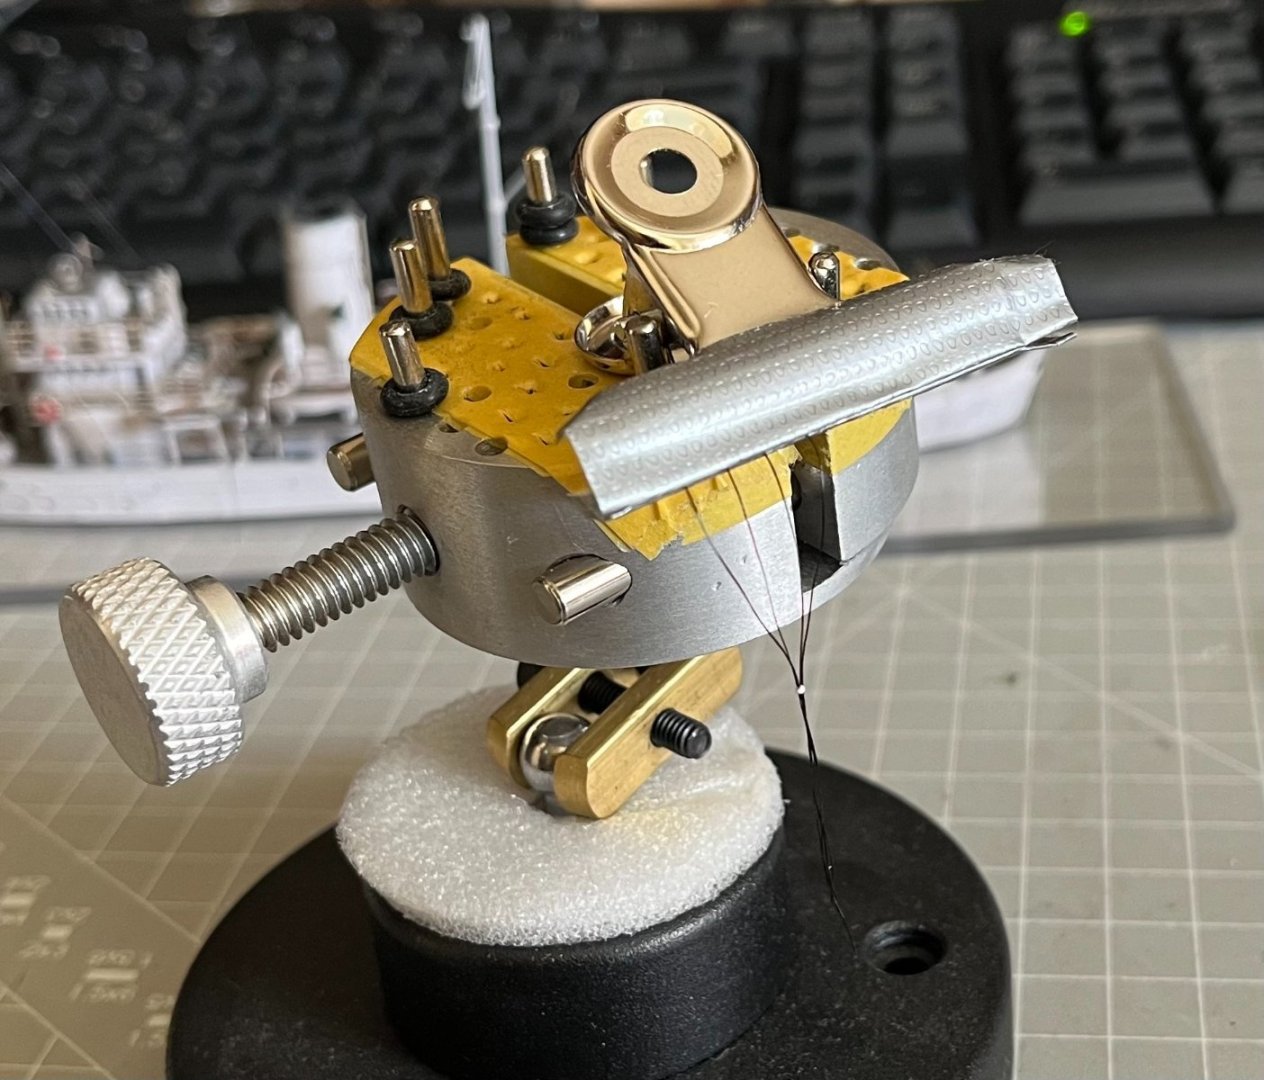
I found a relatively easy way to make multi-ended ropes. Of course, the difficulty remains in the final placement.
-
The first steps have been taken. Studying the relatively simple drawings in the instructions, it seems that it will probably be relatively easy!
-
I have it too and it is indeed a very good kit. One of the next kits I will build for sure.
-
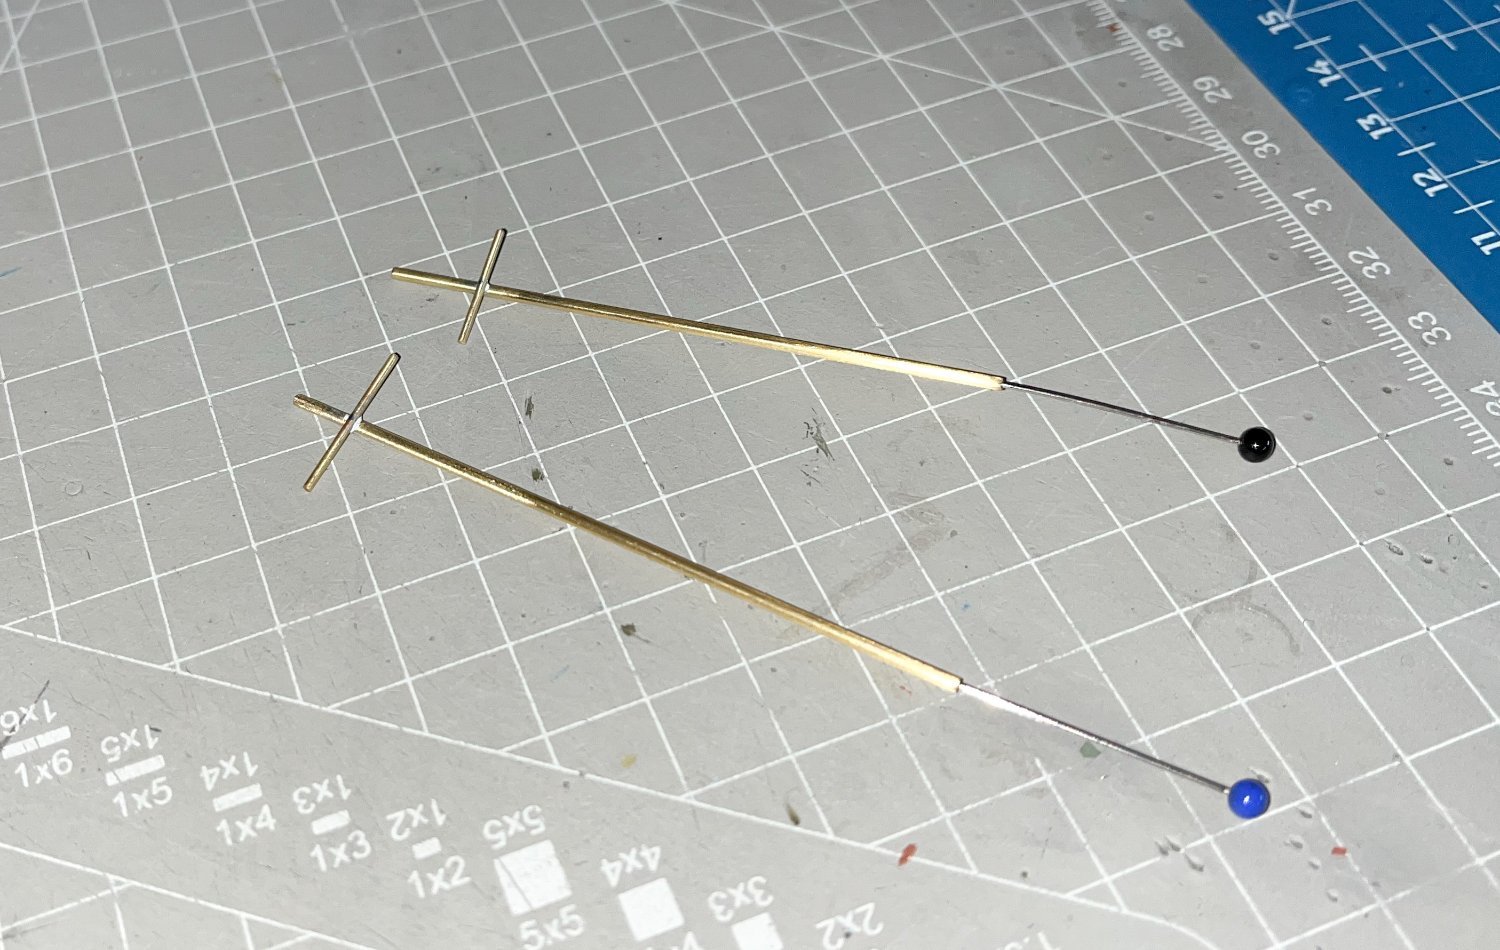
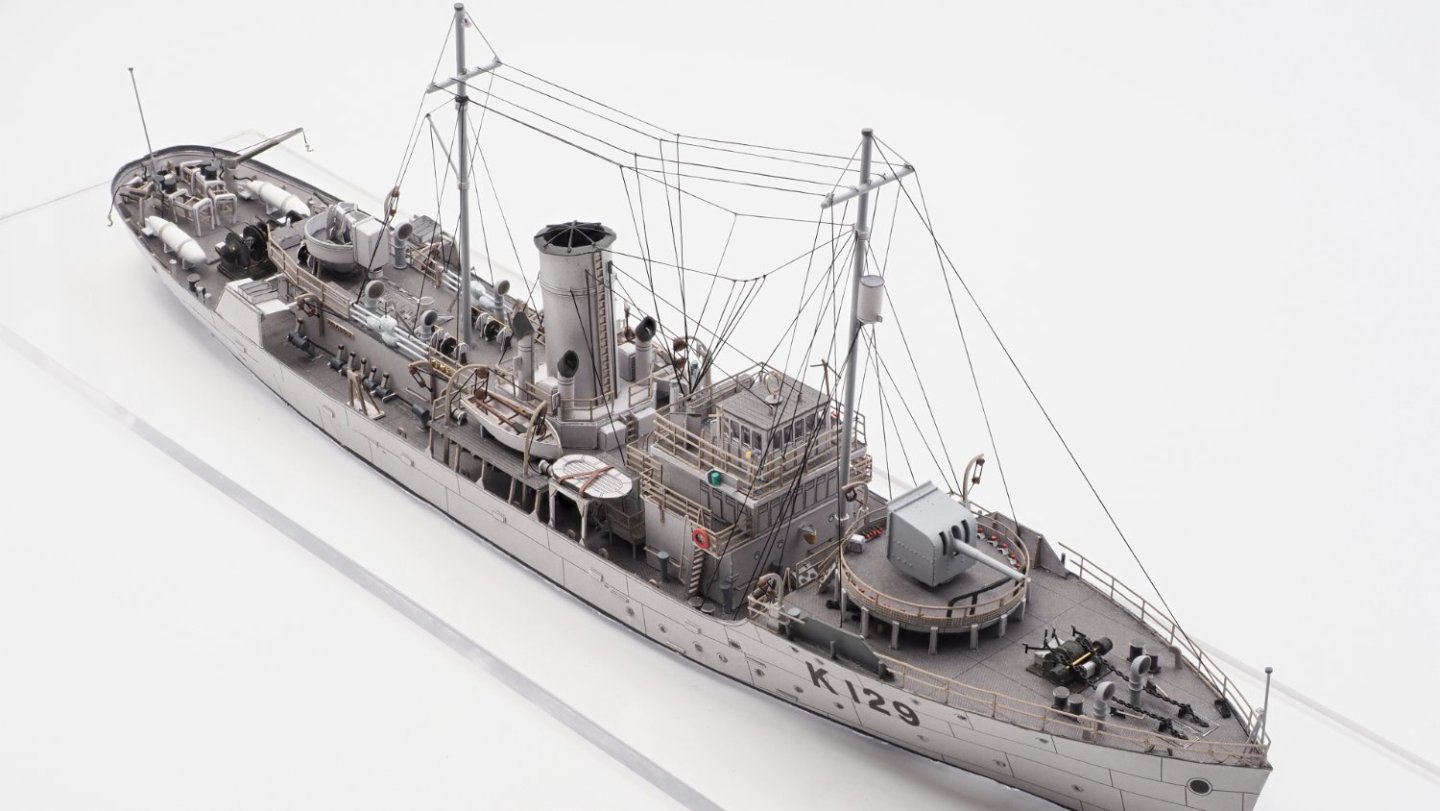
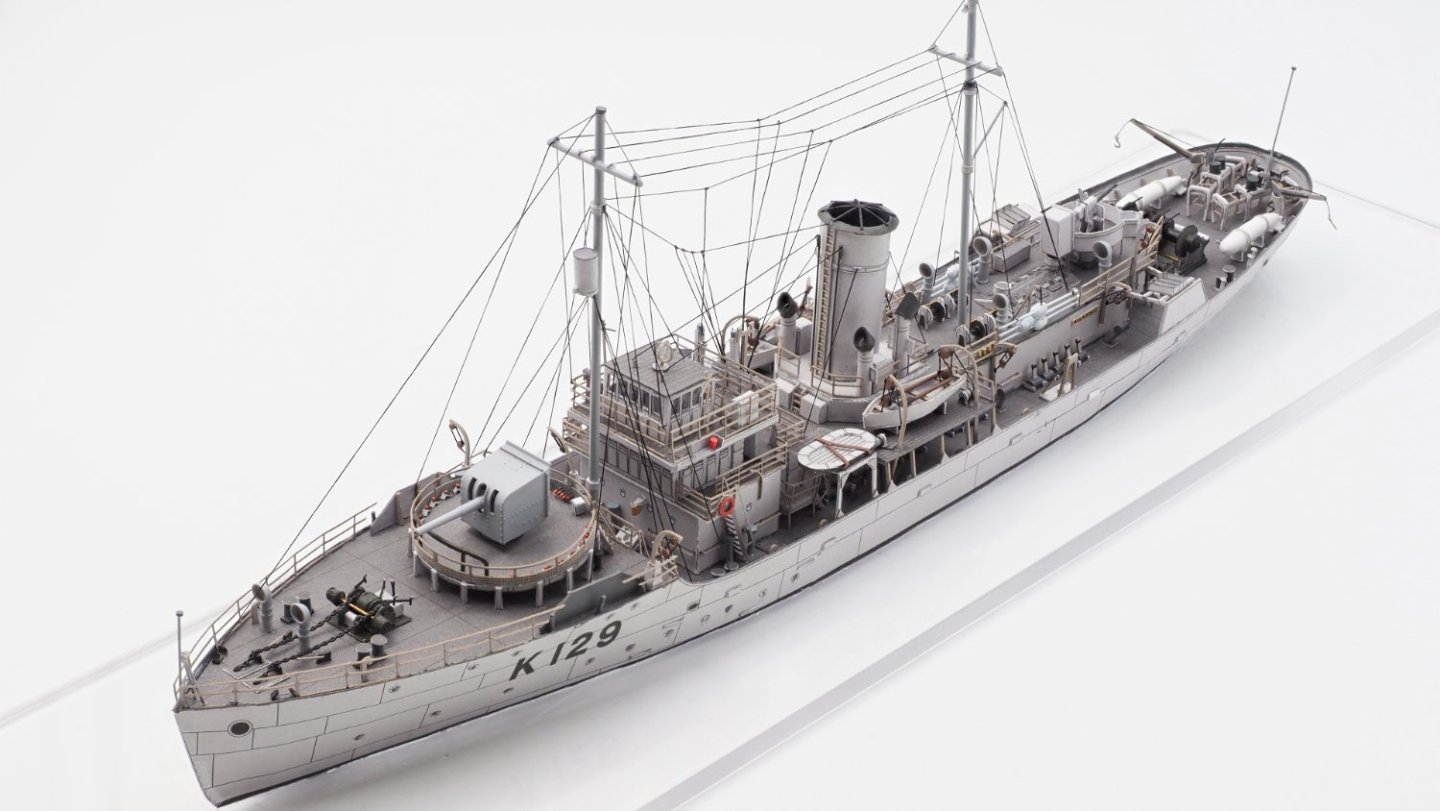
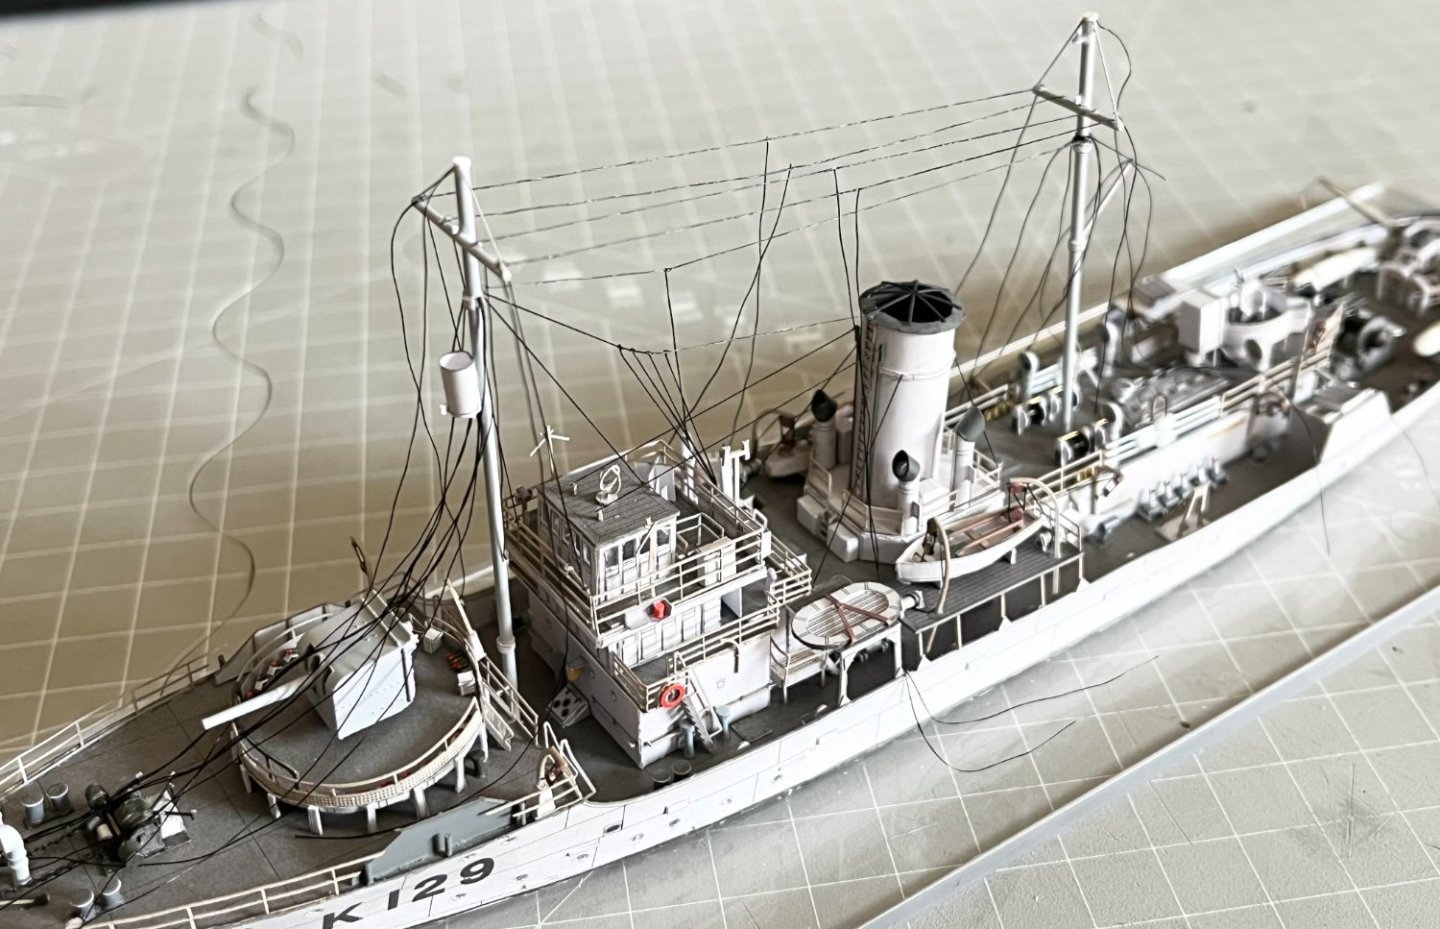
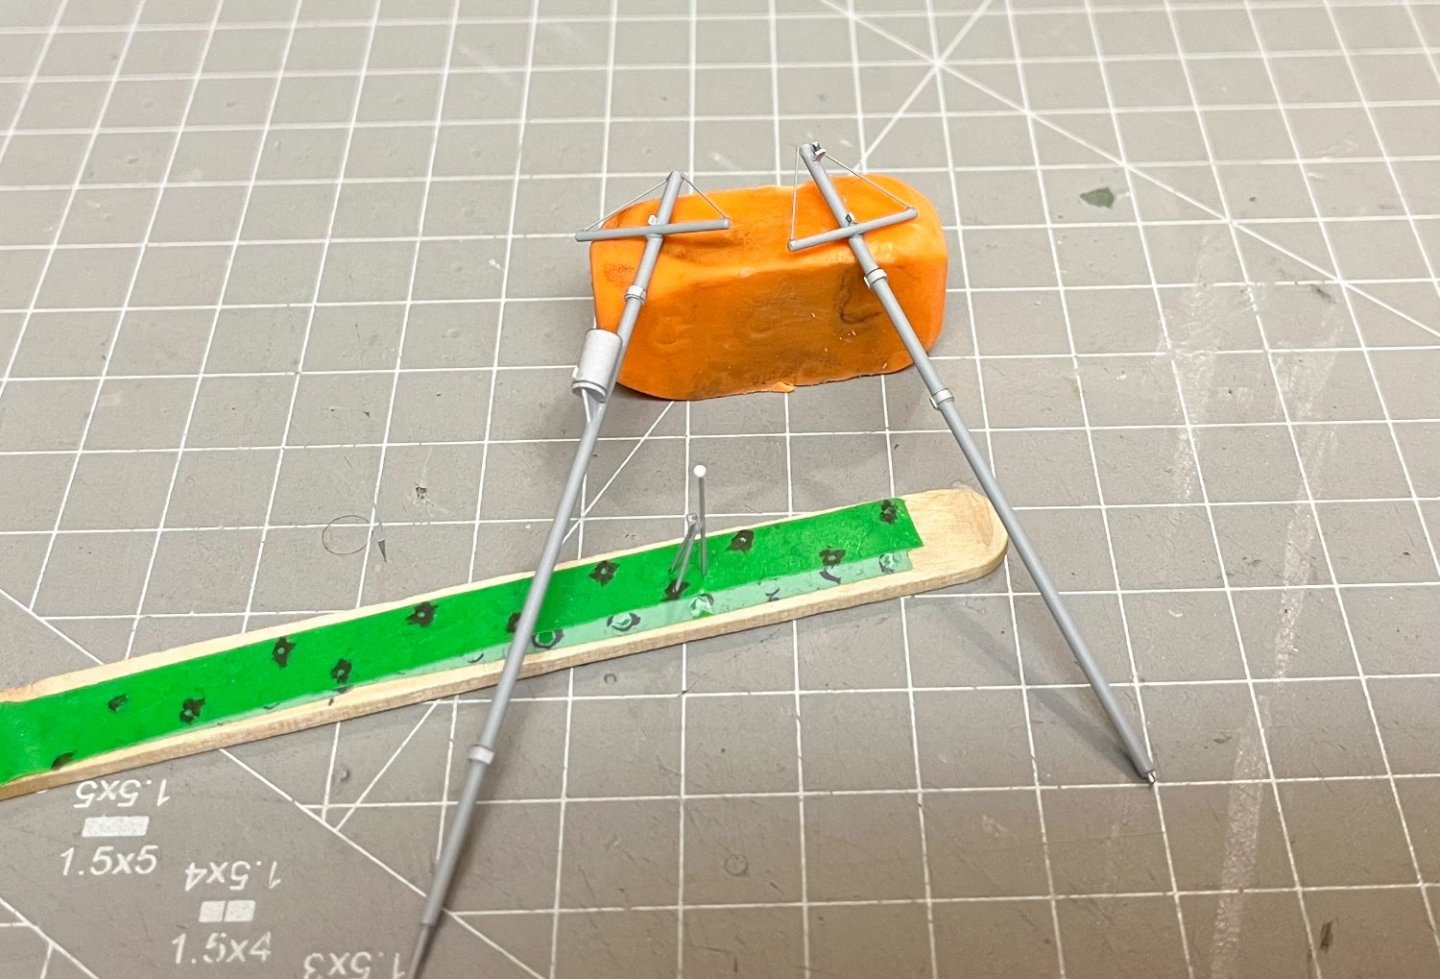
I initially tried to solder the masts but due to my soldering iron malfunctioning I ended up soldering them with CA after cutting a notch in the mainmast to fit the horizontals better. The complete masts ready and placed on board

-
I am thinking for my next project to start the 1/700 SMS Emden but the instructions don't include rigging!. I am wonder why. 😀
-
You're probably right, the word fun might not be the most appropriate, but it's certainly included in the process! 😀
-
The most part of the bow is complete. Next the most difficult and fun part of assembly , masts and rigging!

-
The base for main gun, ammo and other parts placed. and before that, test fitting the main gun.

- 61 replies
-
- 10
-
-
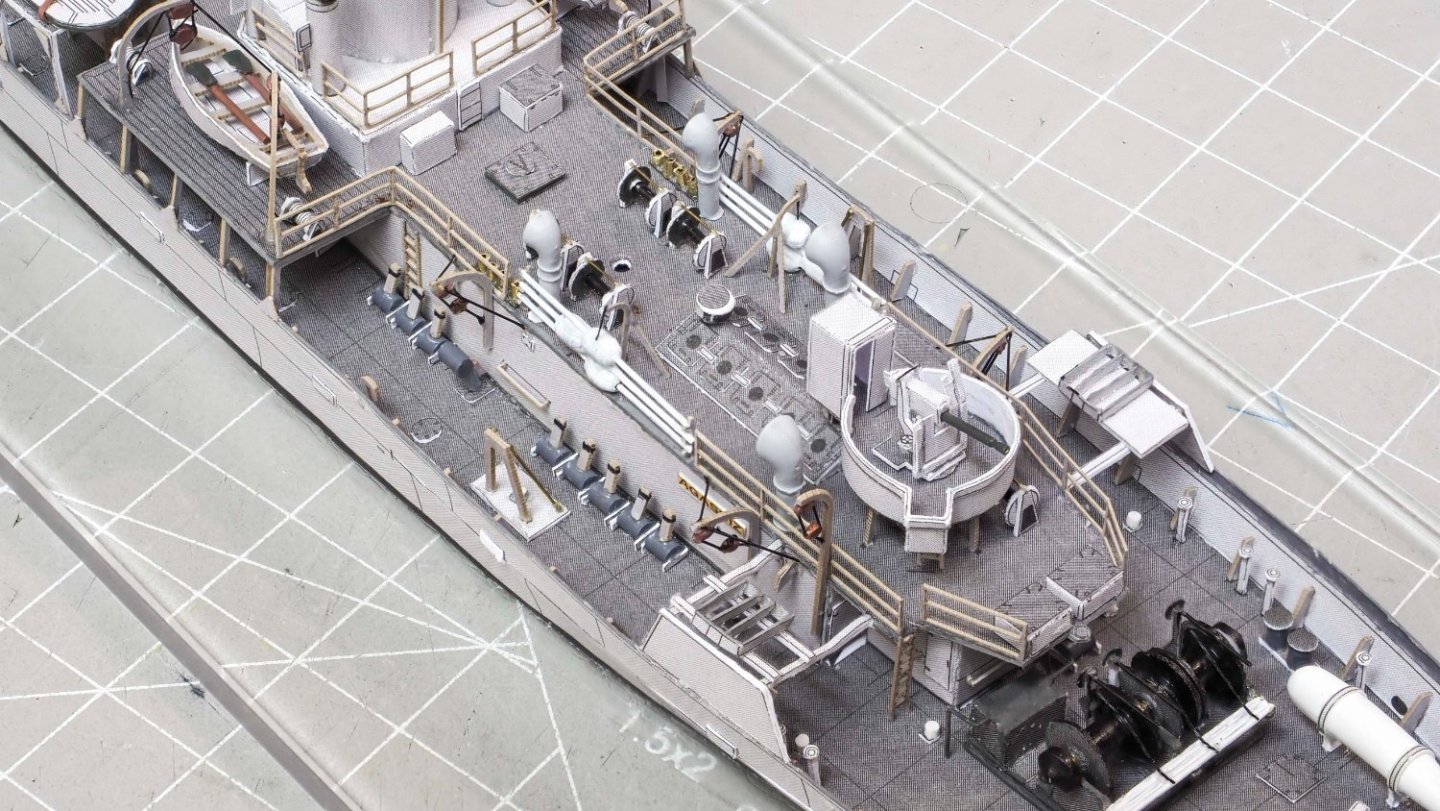
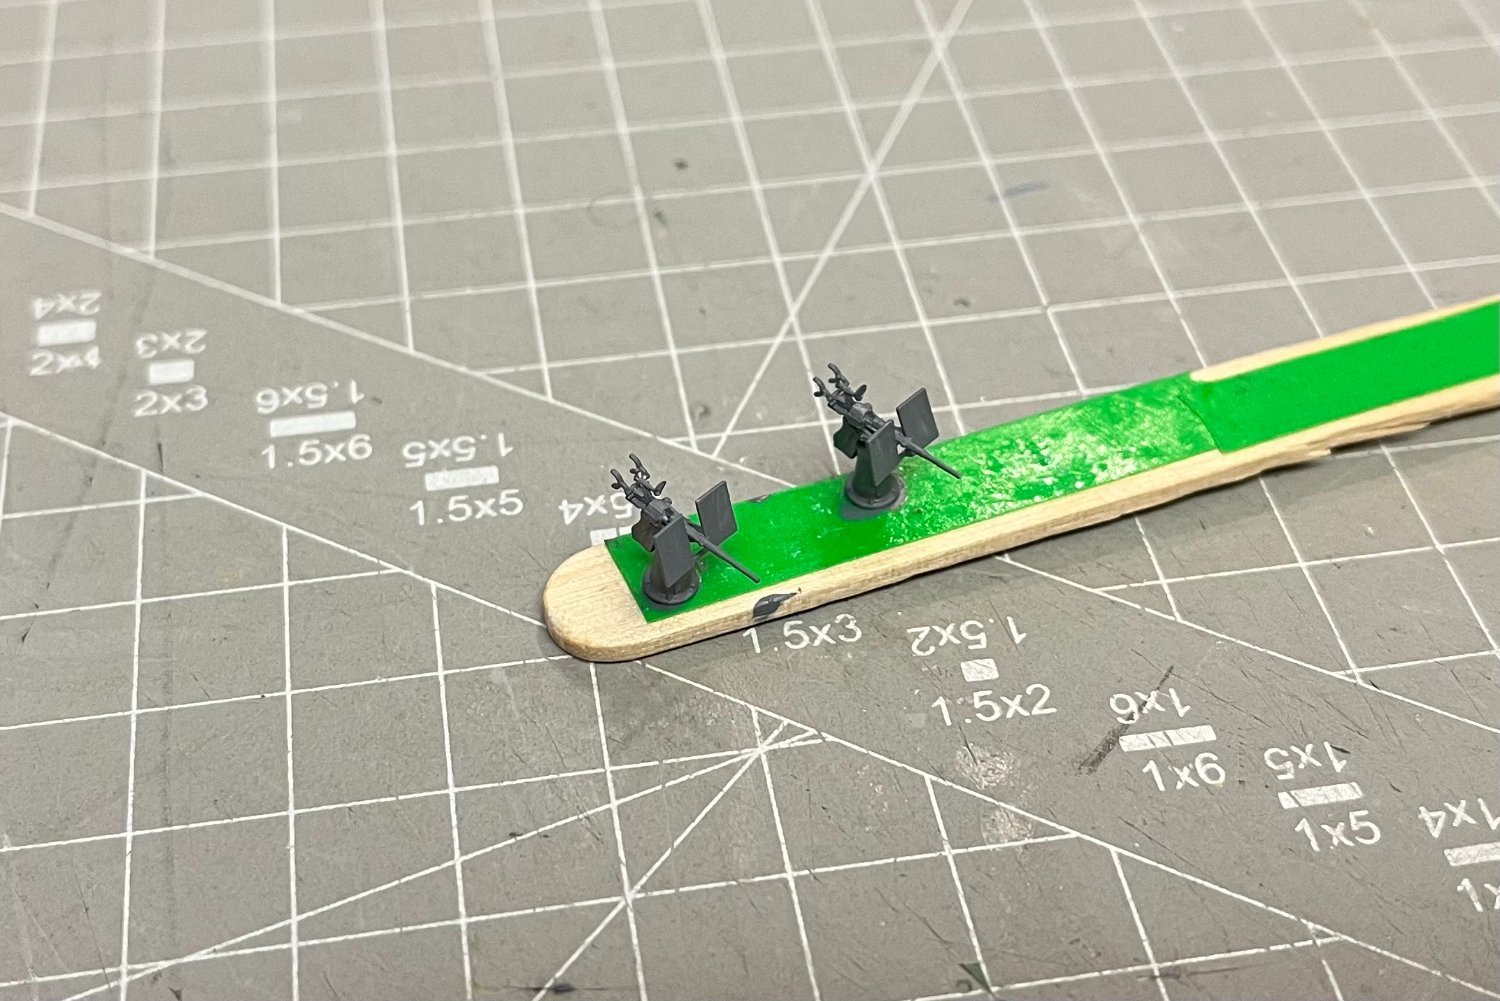
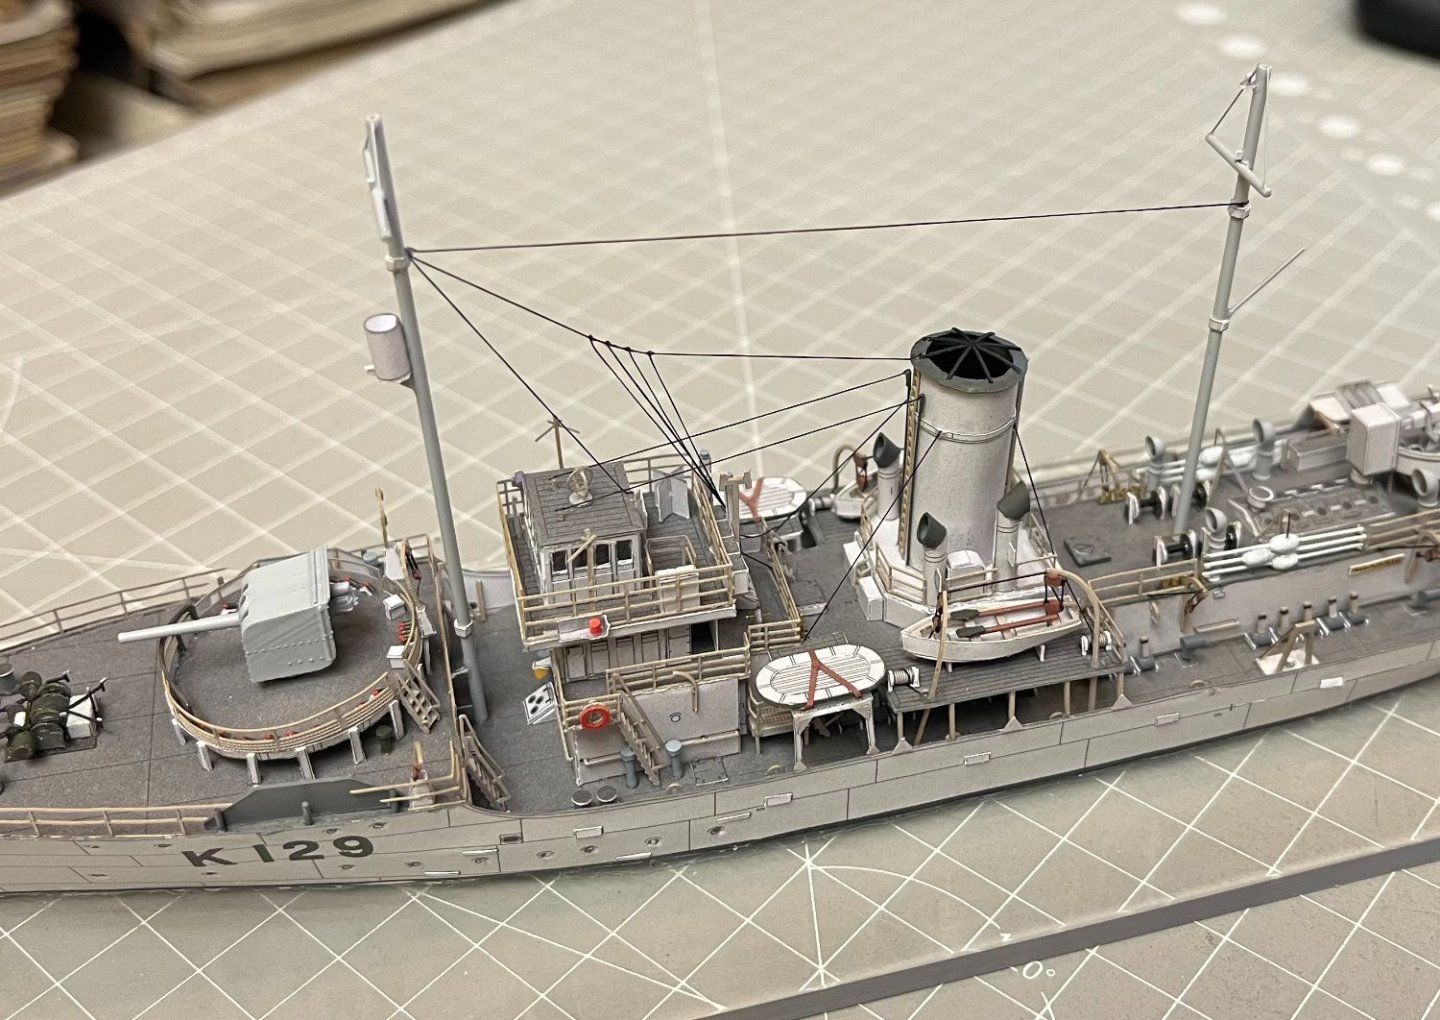
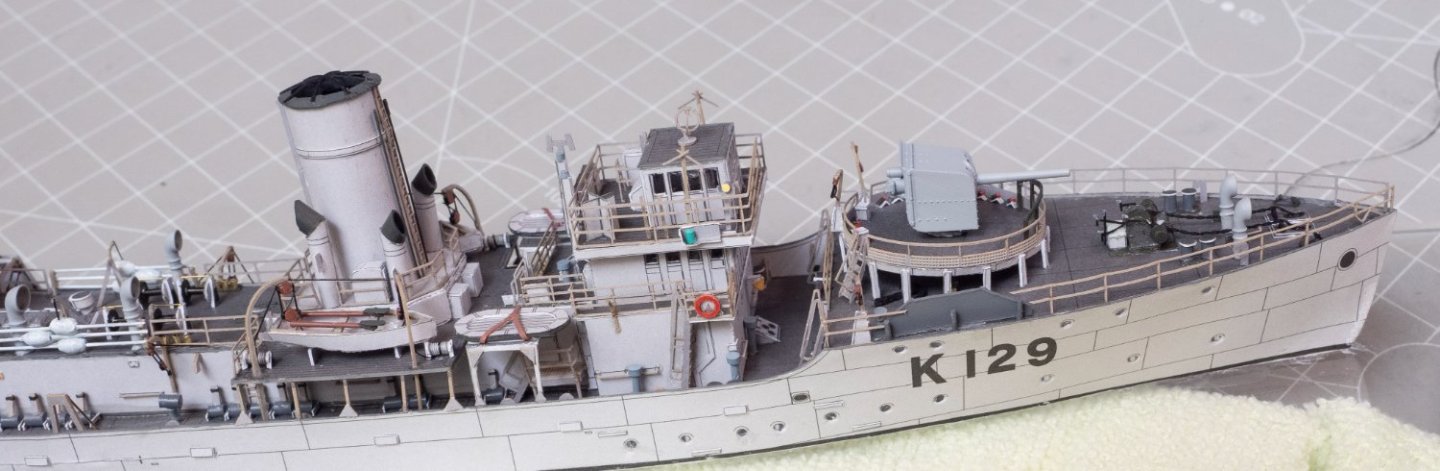
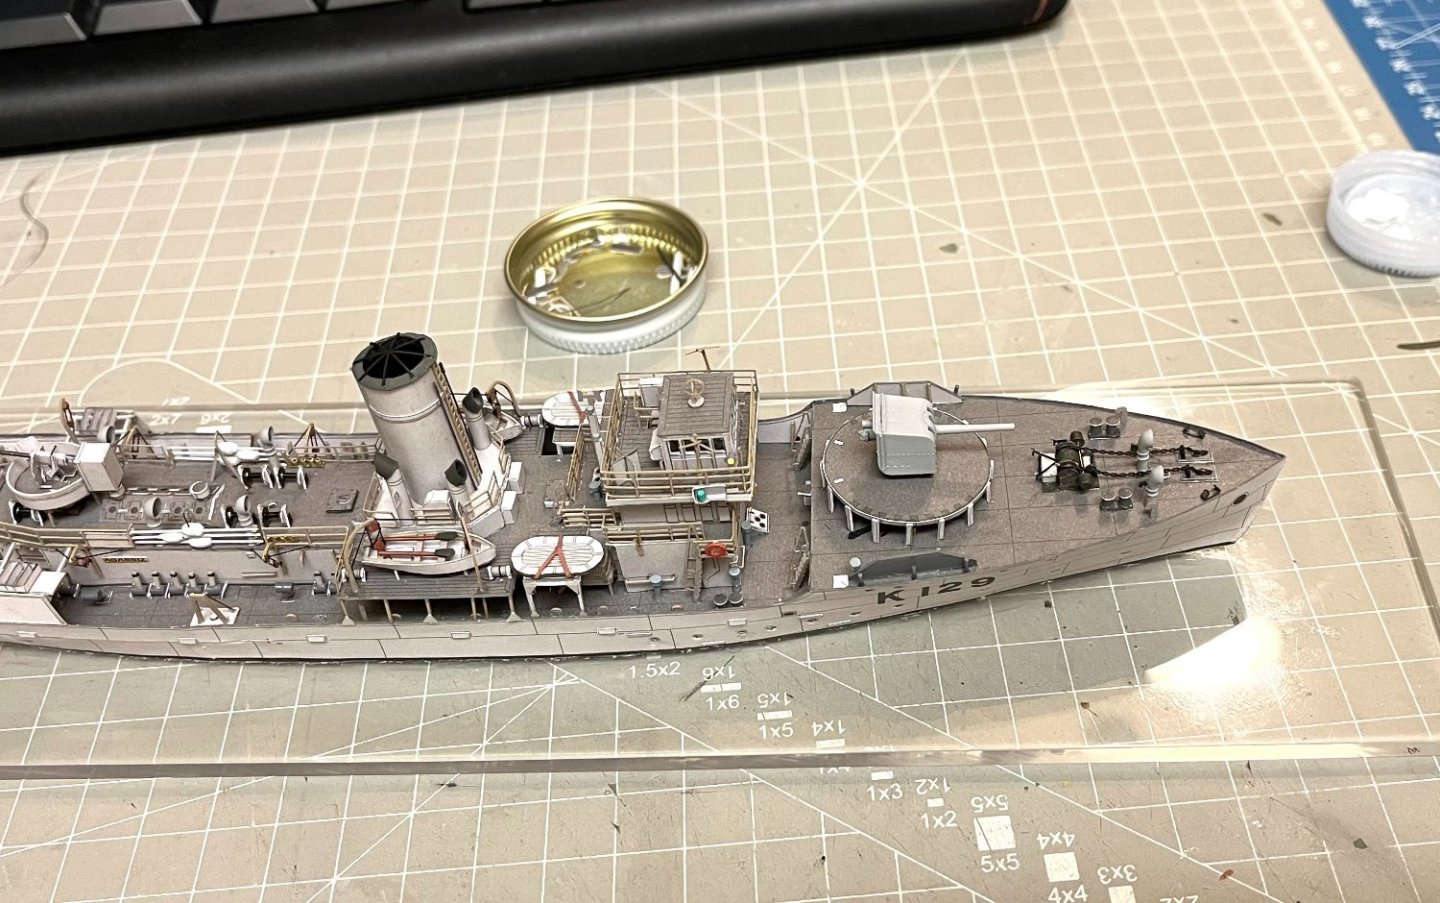
Today cranes and other equipment added next to 2pdr Gun. Many other parts need to prepared as two single-mounted .303 Vickers machine guns or Browning 0.5-calibre machine guns for anti-aircraft defence and two twin-mounted .303 Lewis machine guns . I have to decide if I will place them and how I will build them..