Johngr
-
Posts
94 -
Joined
-
Last visited
-
 Canute reacted to a post in a topic:
HMS Hood 1941 by Johngr - FlyHawk - 1:700 - PLASTIC
Canute reacted to a post in a topic:
HMS Hood 1941 by Johngr - FlyHawk - 1:700 - PLASTIC
-
yvesvidal reacted to a post in a topic:
HMS Hood 1941 by Johngr - FlyHawk - 1:700 - PLASTIC
-
mtaylor reacted to a post in a topic:
HMS Hood 1941 by Johngr - FlyHawk - 1:700 - PLASTIC
-
mtaylor reacted to a post in a topic:
HMS Hood 1941 by Johngr - FlyHawk - 1:700 - PLASTIC
-
mtaylor reacted to a post in a topic:
HMS Hood 1941 by Johngr - FlyHawk - 1:700 - PLASTIC
-
Landlubber Mike reacted to a post in a topic:
HMS Hood 1941 by Johngr - FlyHawk - 1:700 - PLASTIC
-
Landlubber Mike reacted to a post in a topic:
HMS Hood 1941 by Johngr - FlyHawk - 1:700 - PLASTIC
-
Landlubber Mike reacted to a post in a topic:
HMS Hood 1941 by Johngr - FlyHawk - 1:700 - PLASTIC
-
Landlubber Mike reacted to a post in a topic:
HMS Hood 1941 by Johngr - FlyHawk - 1:700 - PLASTIC
-
Landlubber Mike reacted to a post in a topic:
HMS Hood 1941 by Johngr - FlyHawk - 1:700 - PLASTIC
-
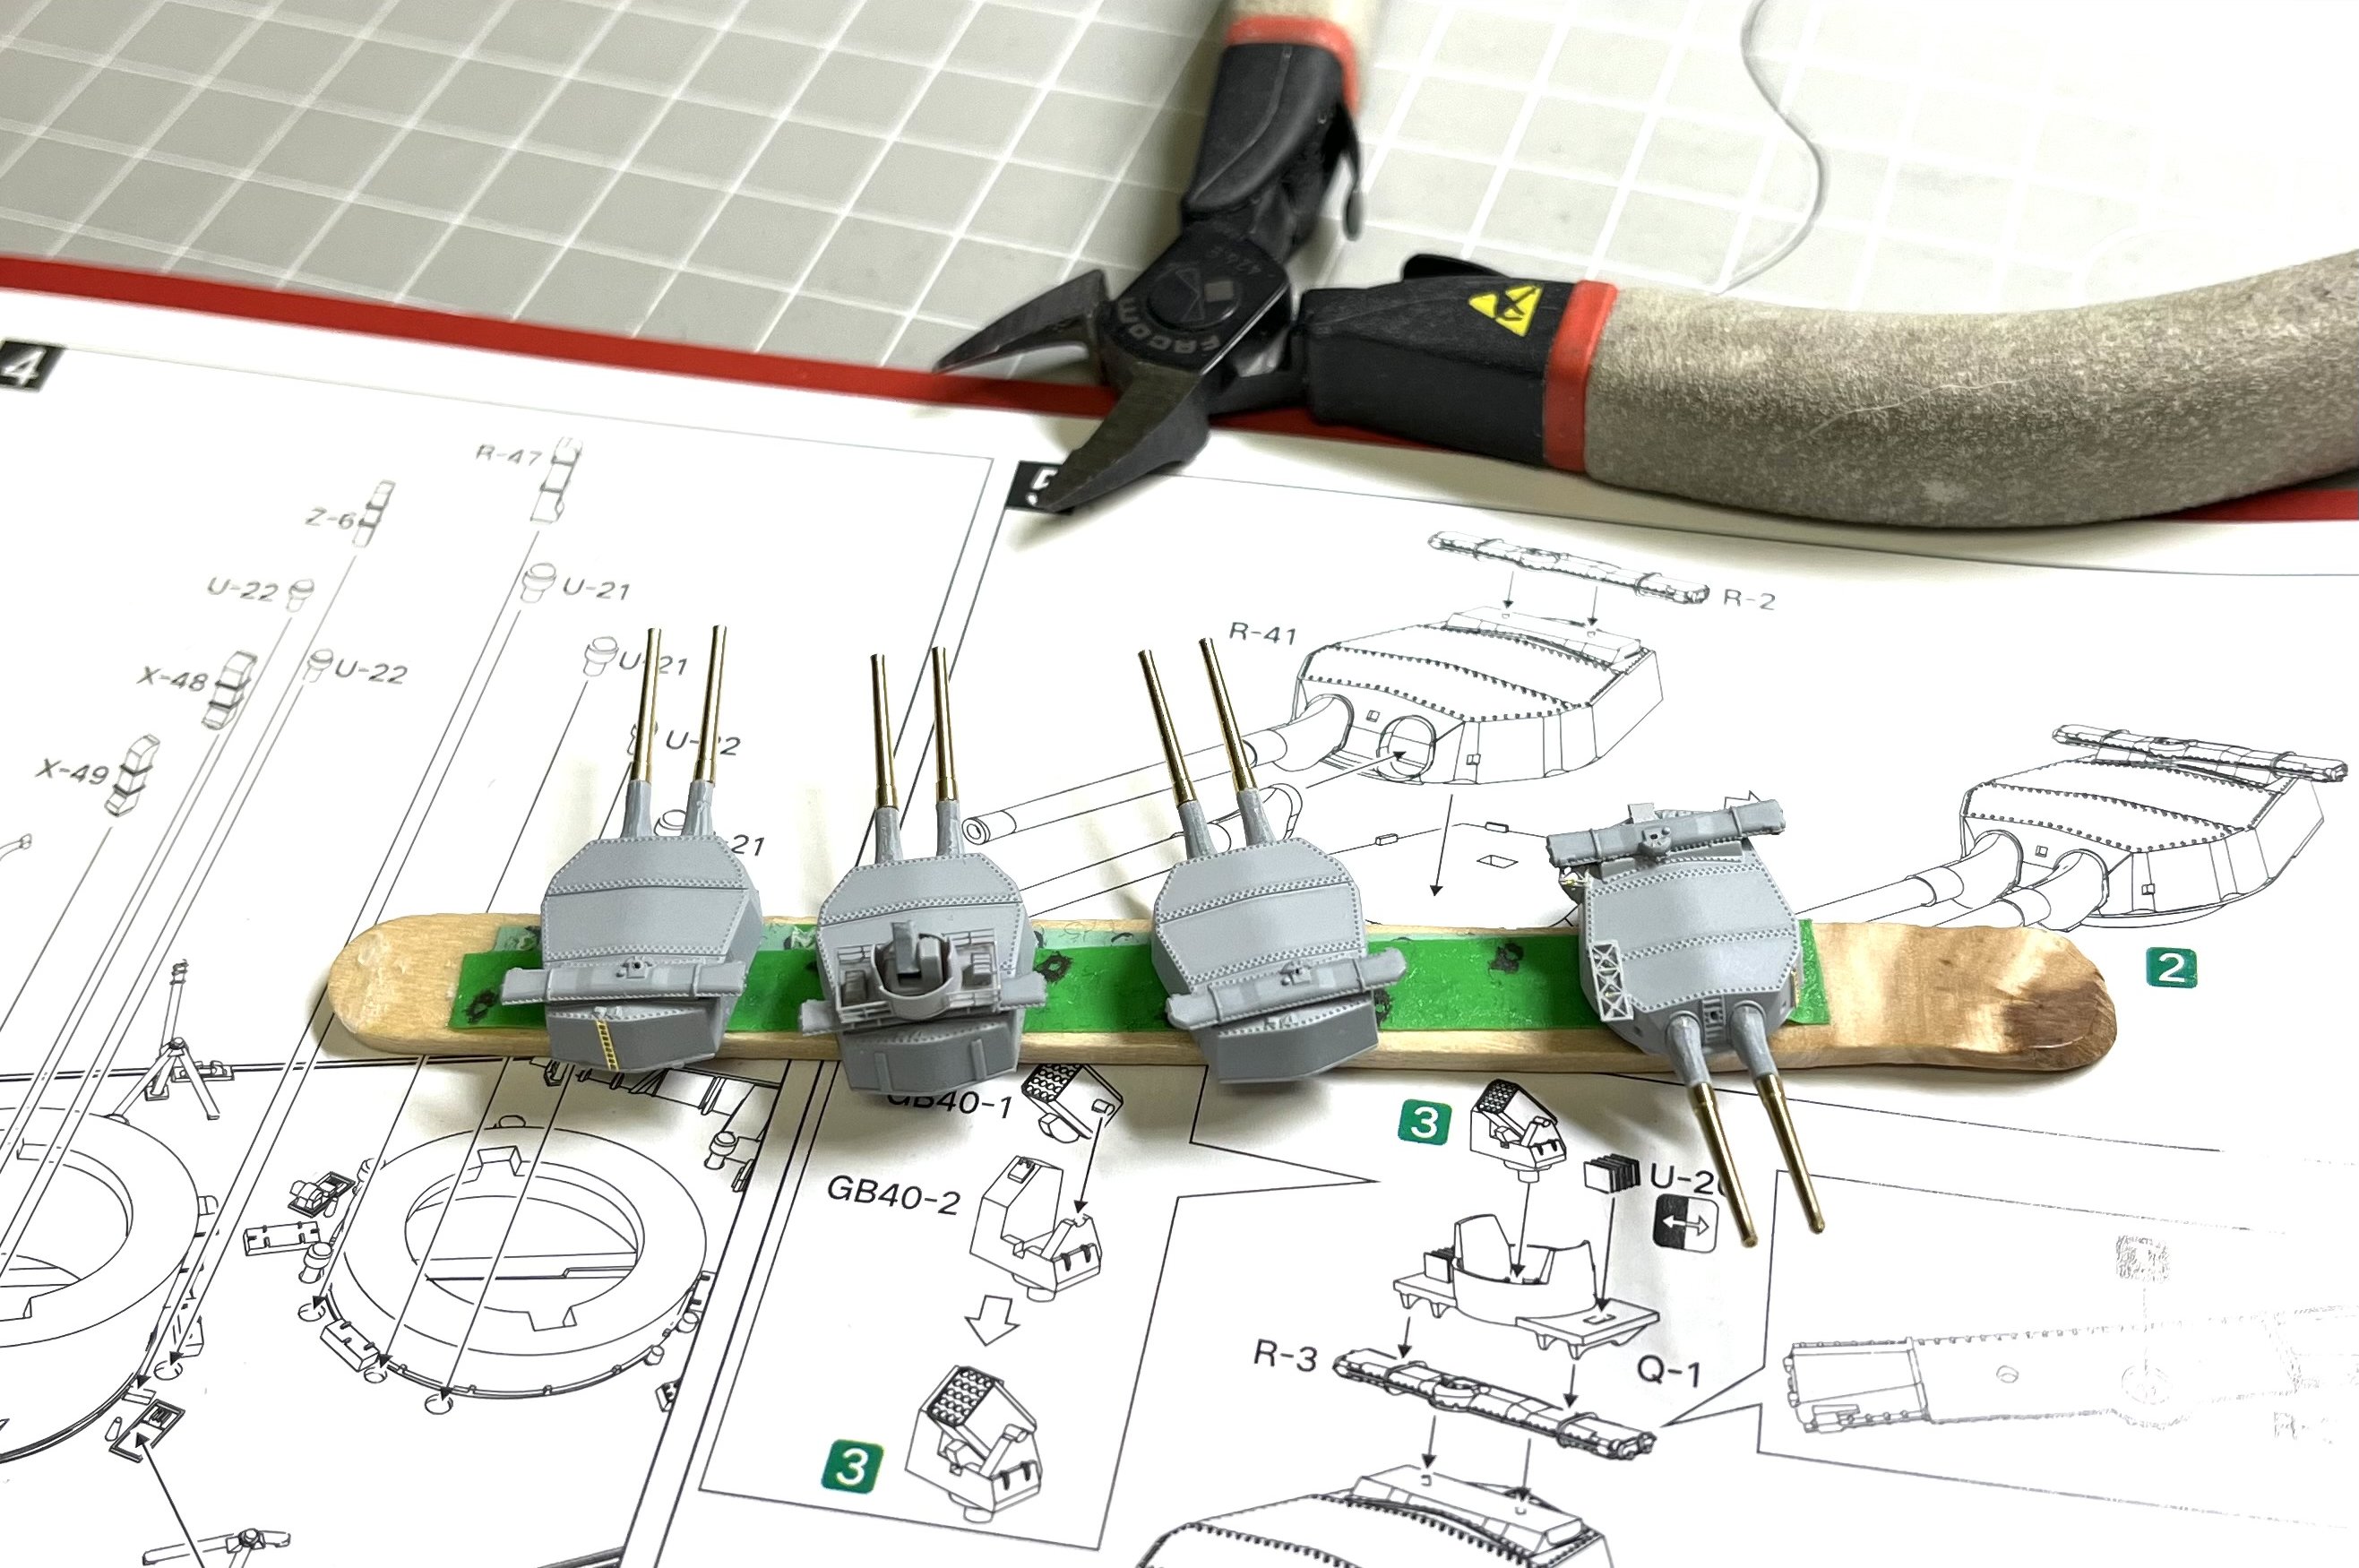
 I implemented a very simple technique after much experimentation. First I applied a very light layer of color using colored pencils. Here I used AK weathering pencils 10016 & 10017. Then I removed most of the color with an eraser.
 -
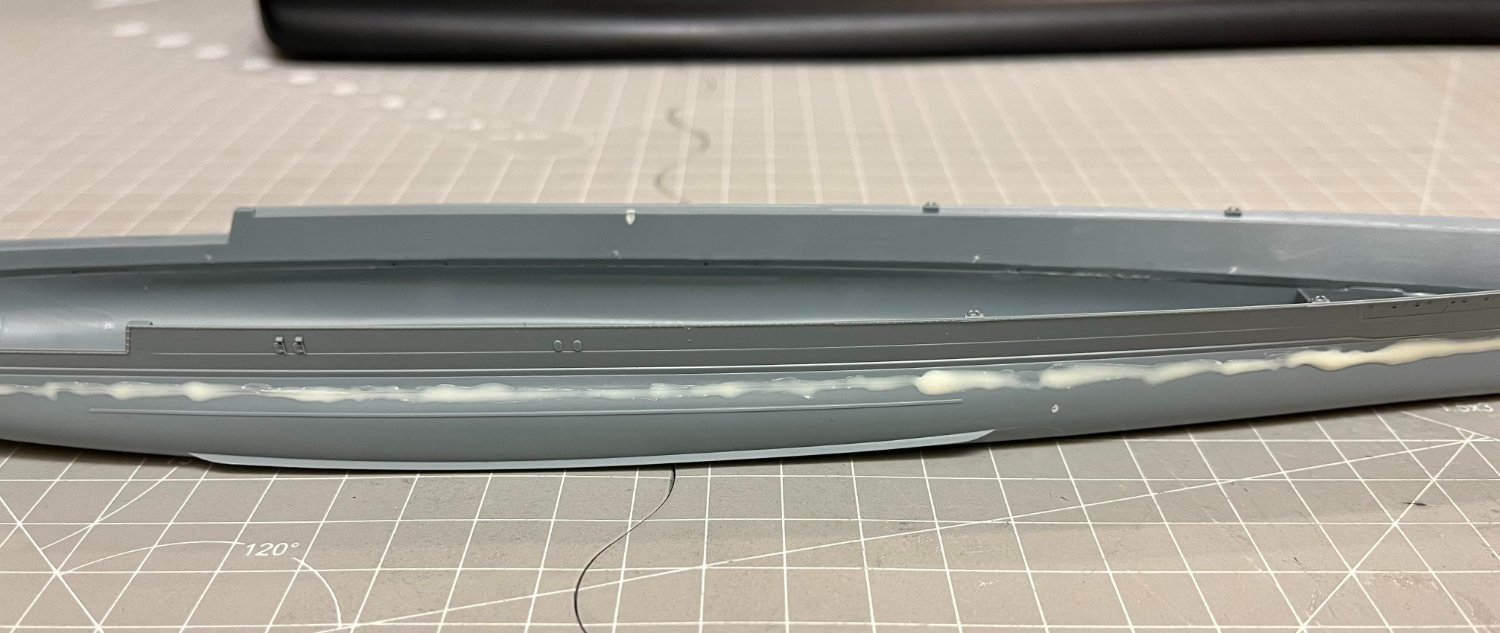
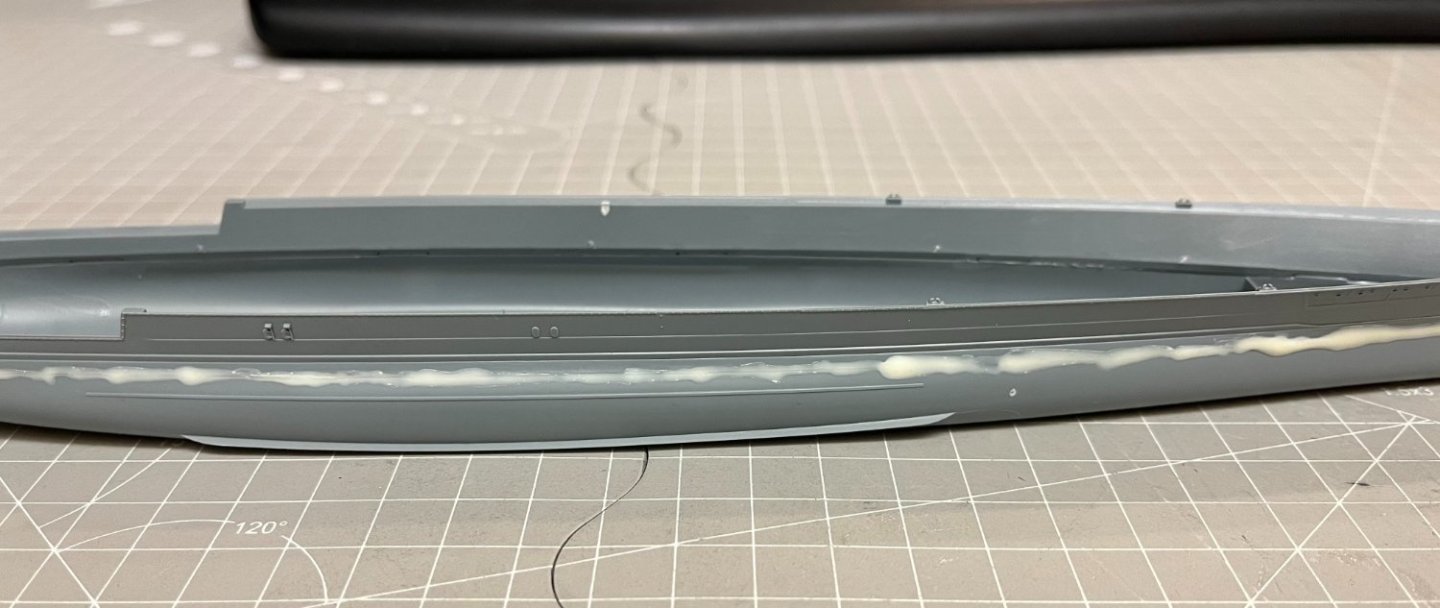
Yes of course I took it out, but I saw that the glue on the edges was not strong enough for that and I put the PVA. Unfortunately, probably my fault, the glue was not strong enough and I fixed it with super glue.
-
Johngr changed their profile photo
-
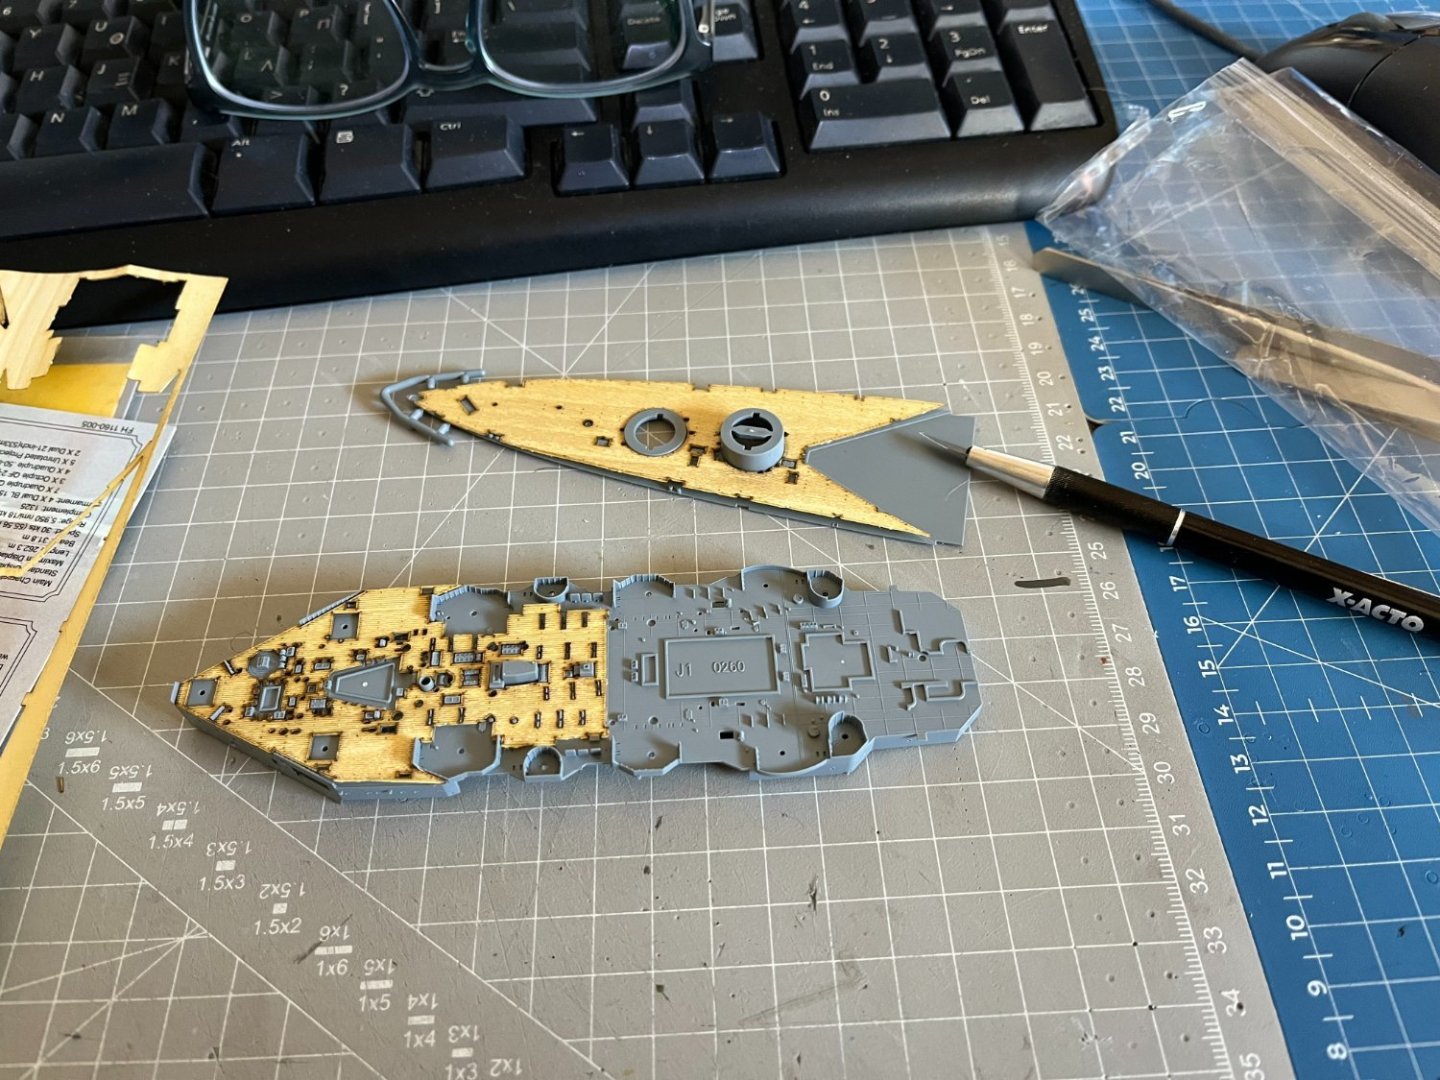
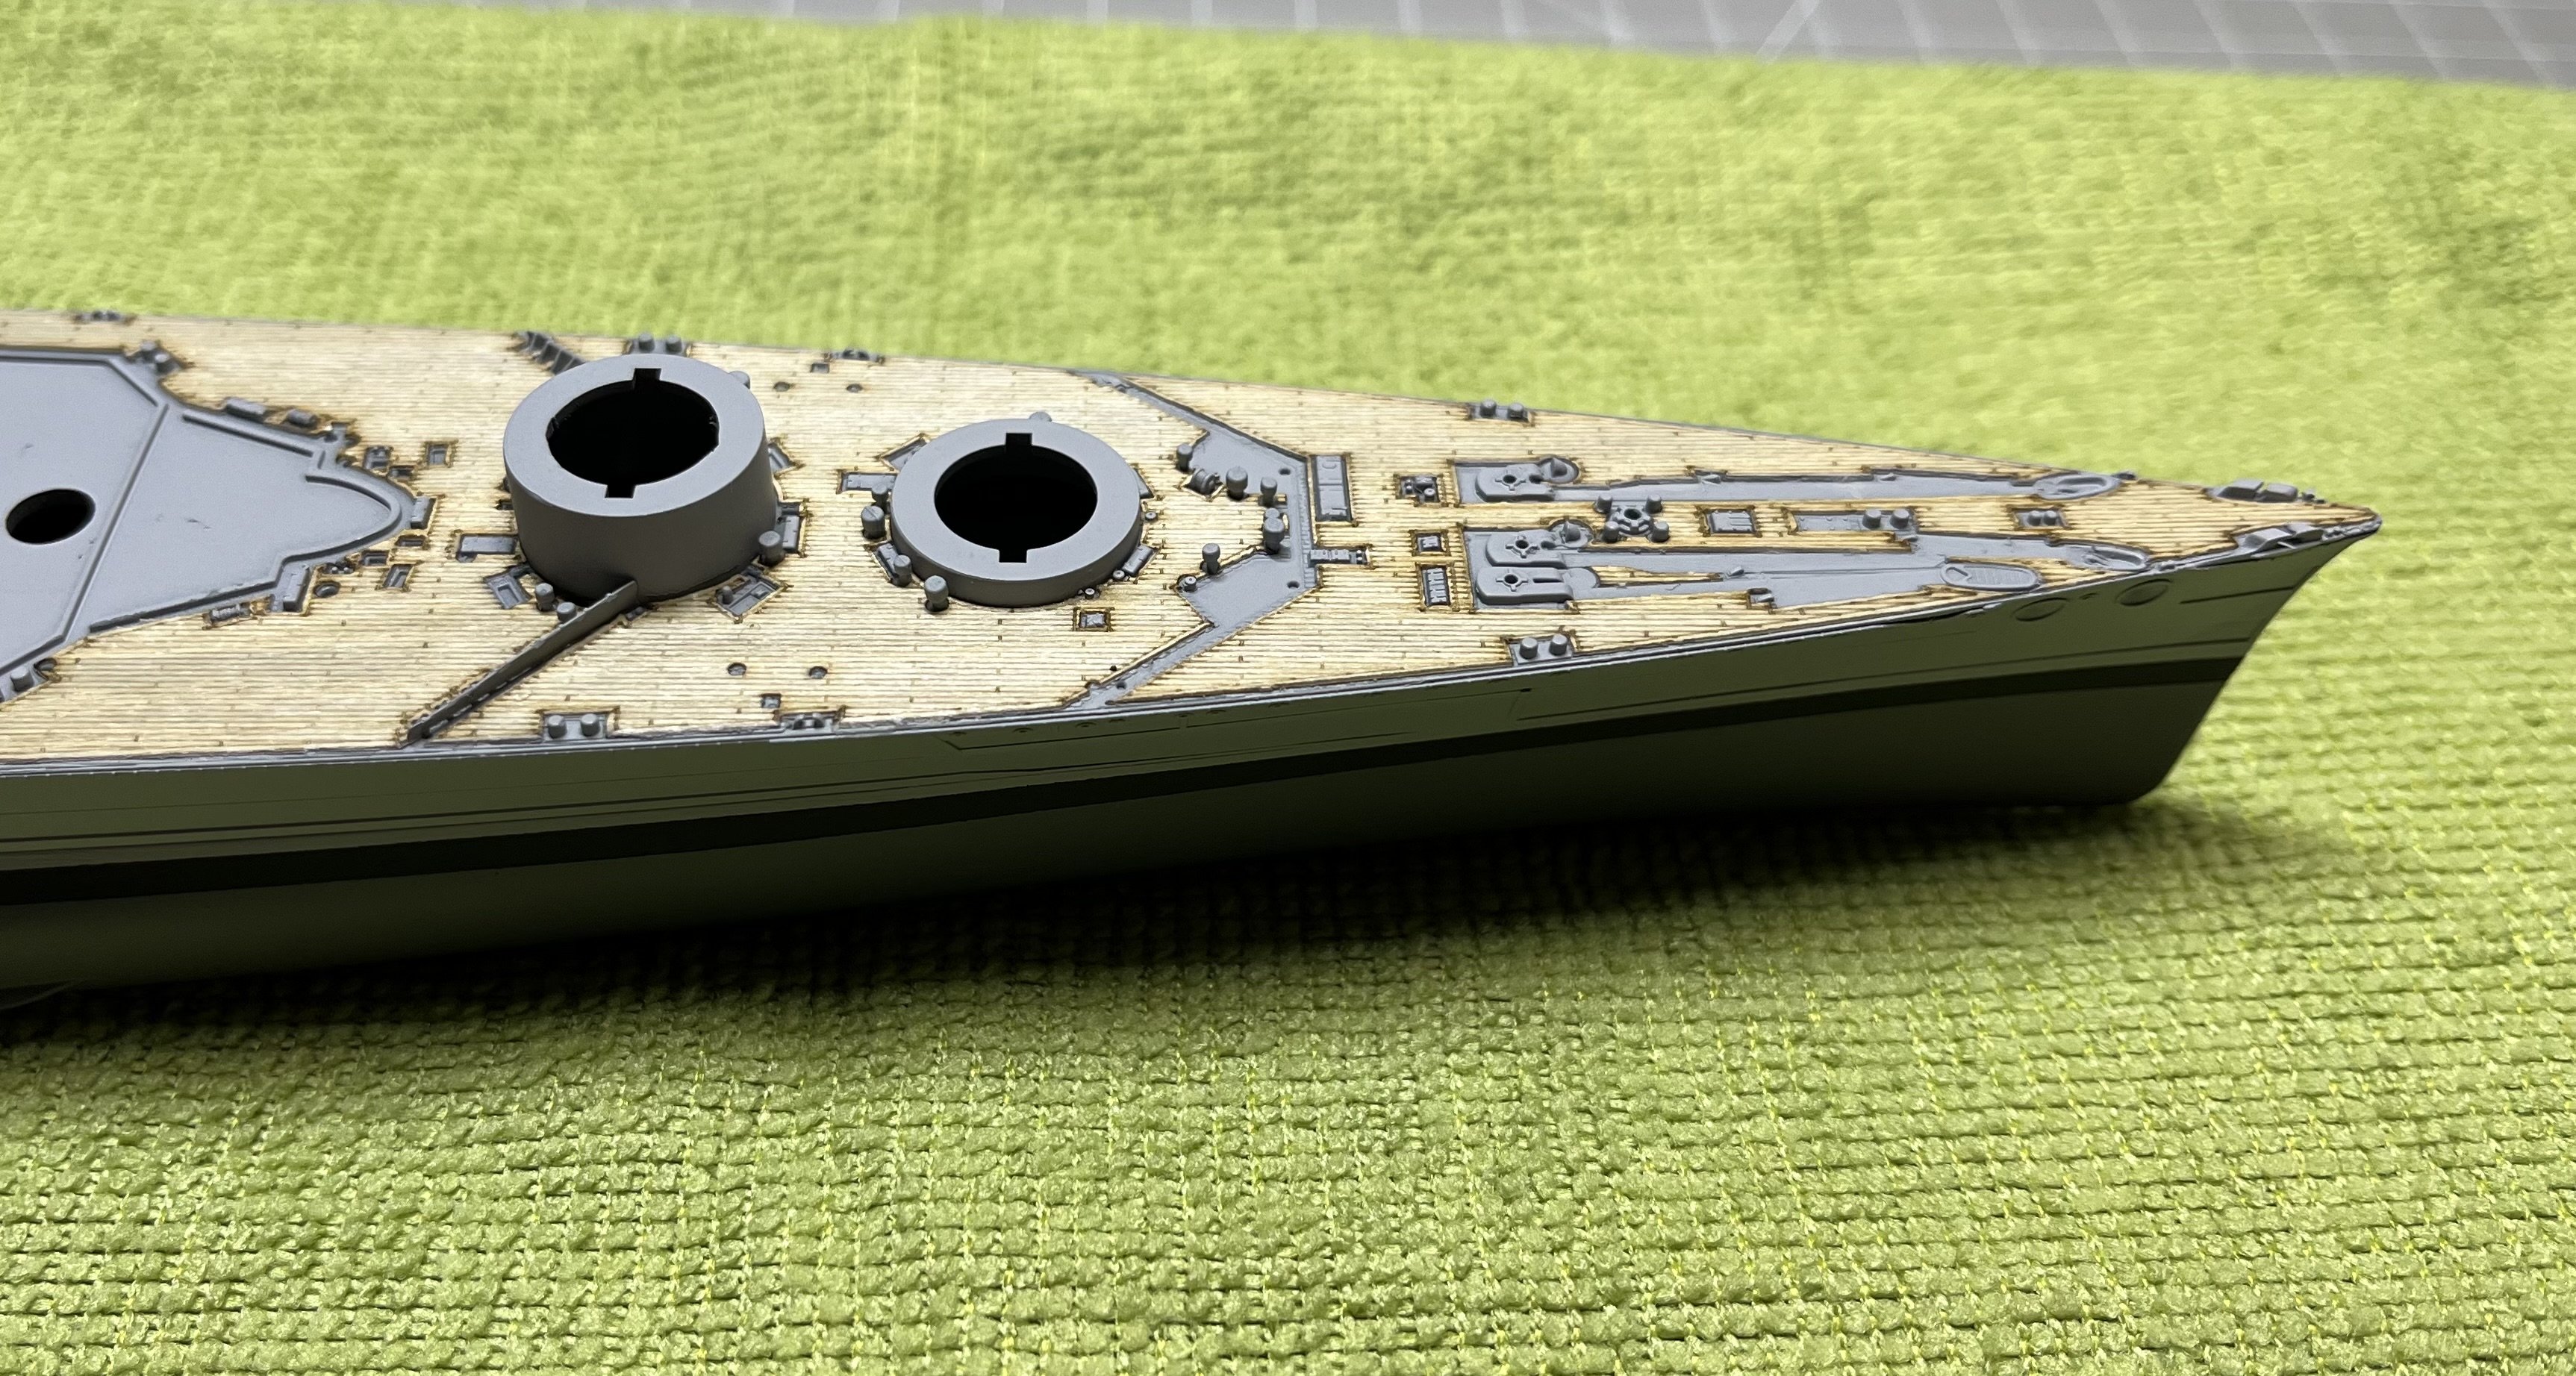
Too many very small items to be placed on the deck. The process will take some time but I have to say that the wooden deck is very nice even though in many places I had loosened it and had to re-glue it with super glue. It seems that the first gluing I did with the PVA glue did not have the result I expected. Maybe they needed more.
-
No significant progress these days. Masking the hull took a considerable amount of time and the paint had to dry completely for the next layers.

-
Johngr reacted to a post in a topic:
Admiral Nakhimov 1885 by Captain Slog – Dom Bumagi - 1:200 - CARD
-
Johngr reacted to a post in a topic:
Admiral Nakhimov 1885 by Captain Slog – Dom Bumagi - 1:200 - CARD
-
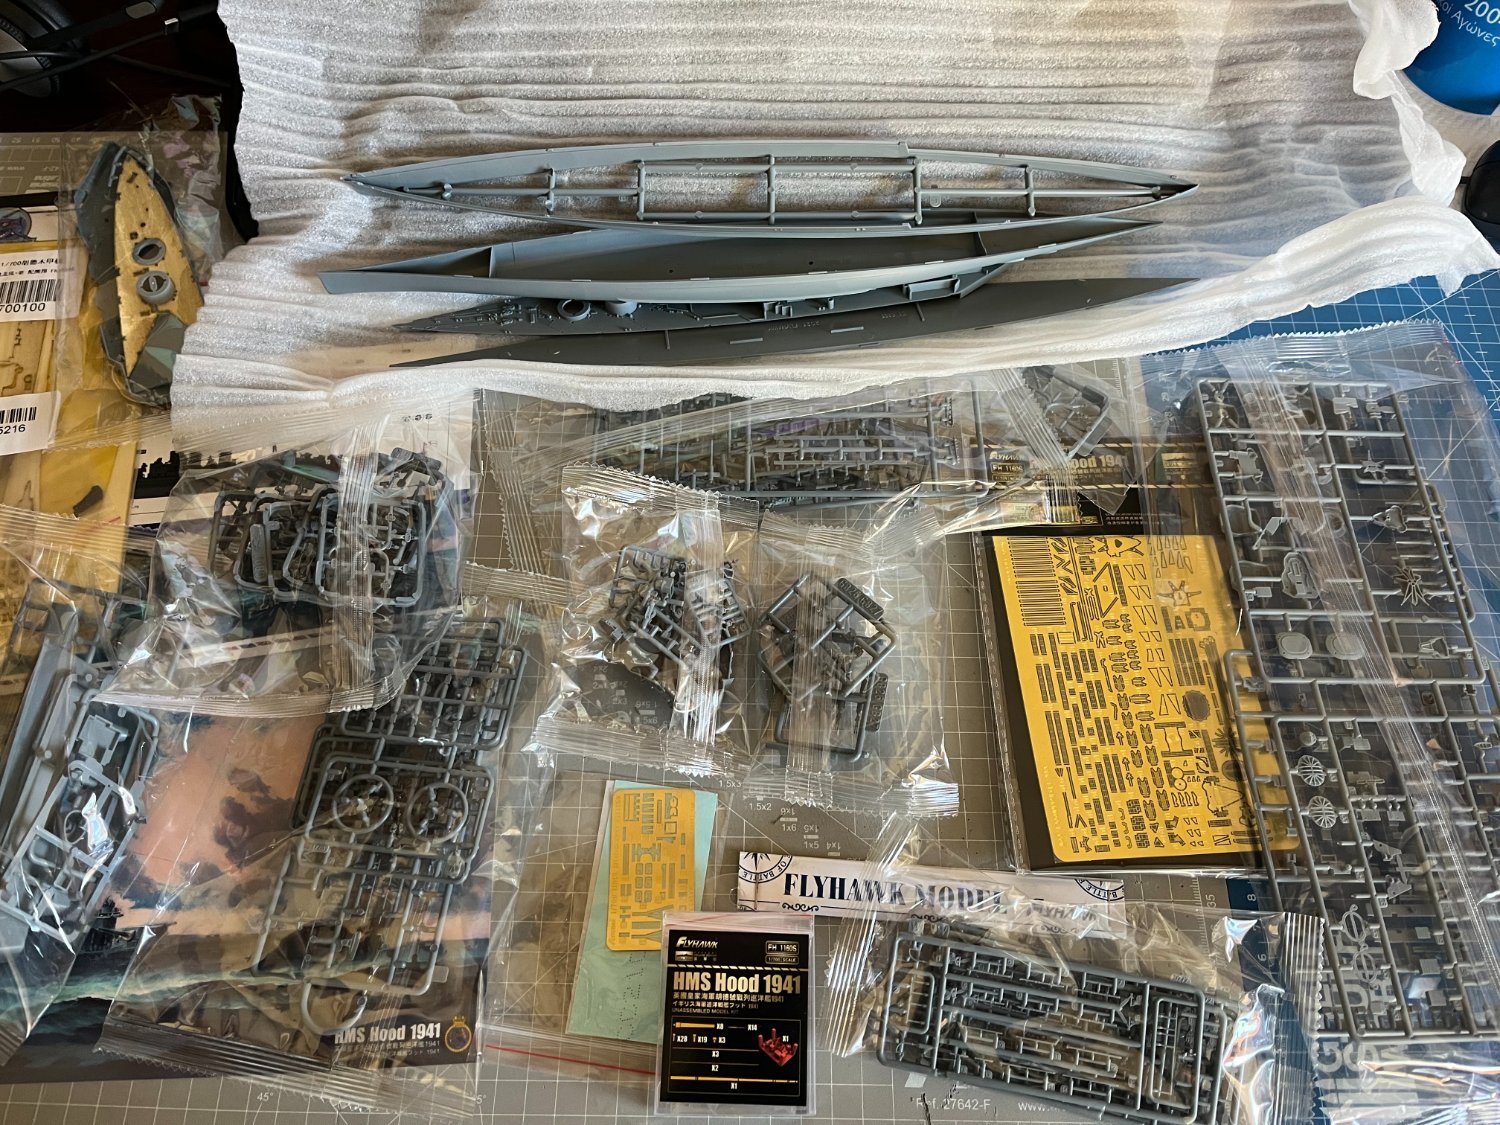
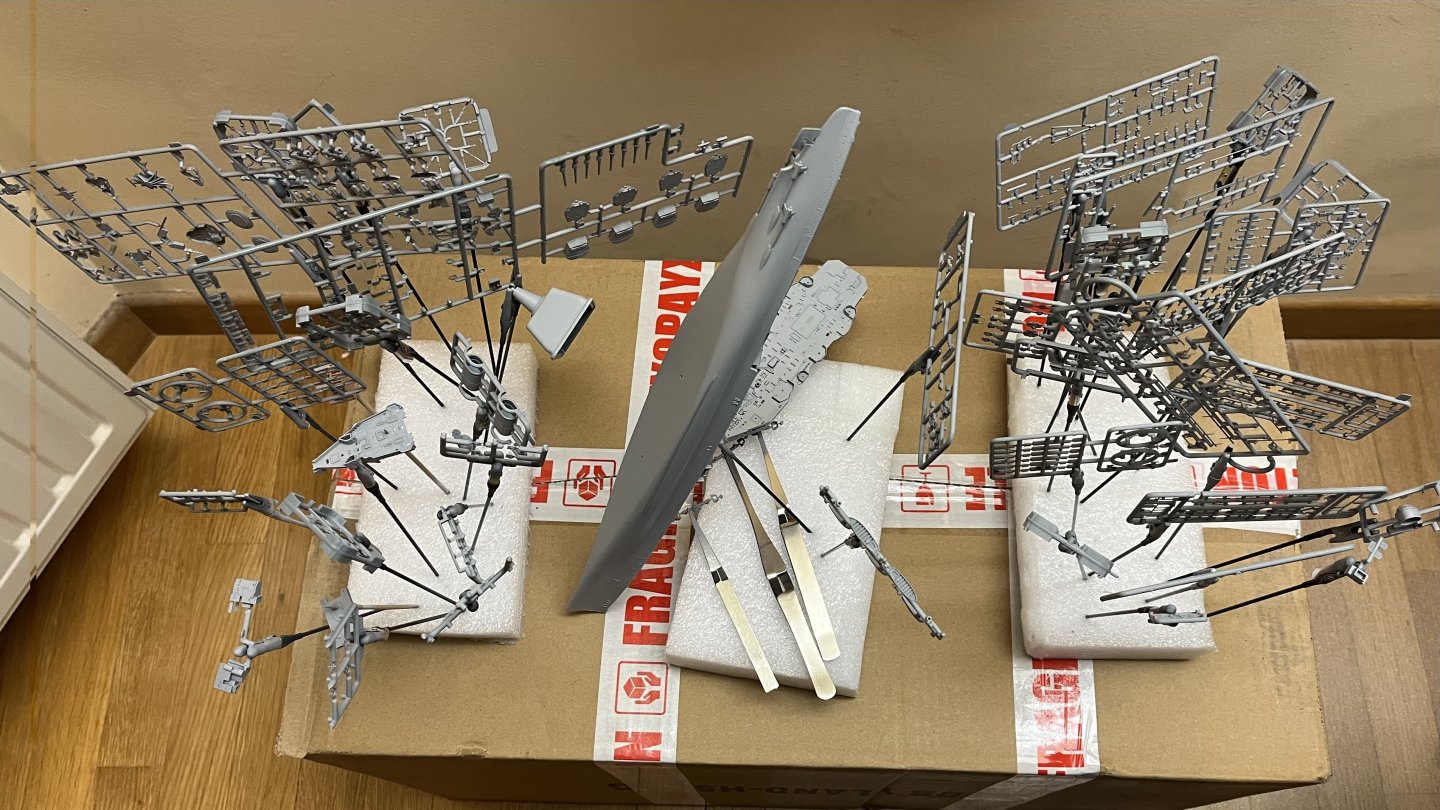
Too many sprues to prime!! It took almost the entire bottle of Mr. surfacer 1500. I must note that the detail in this kit is excellent.!
-
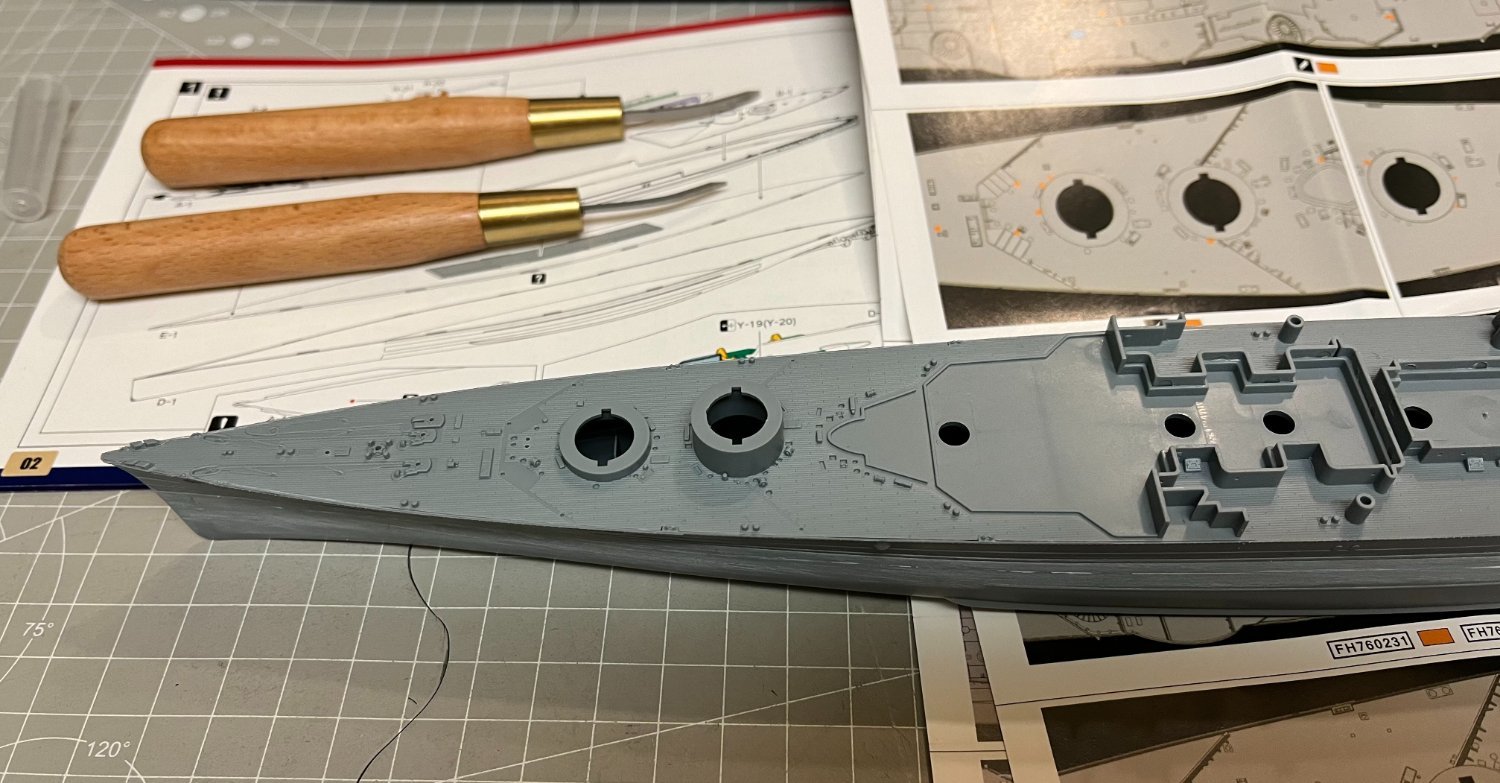
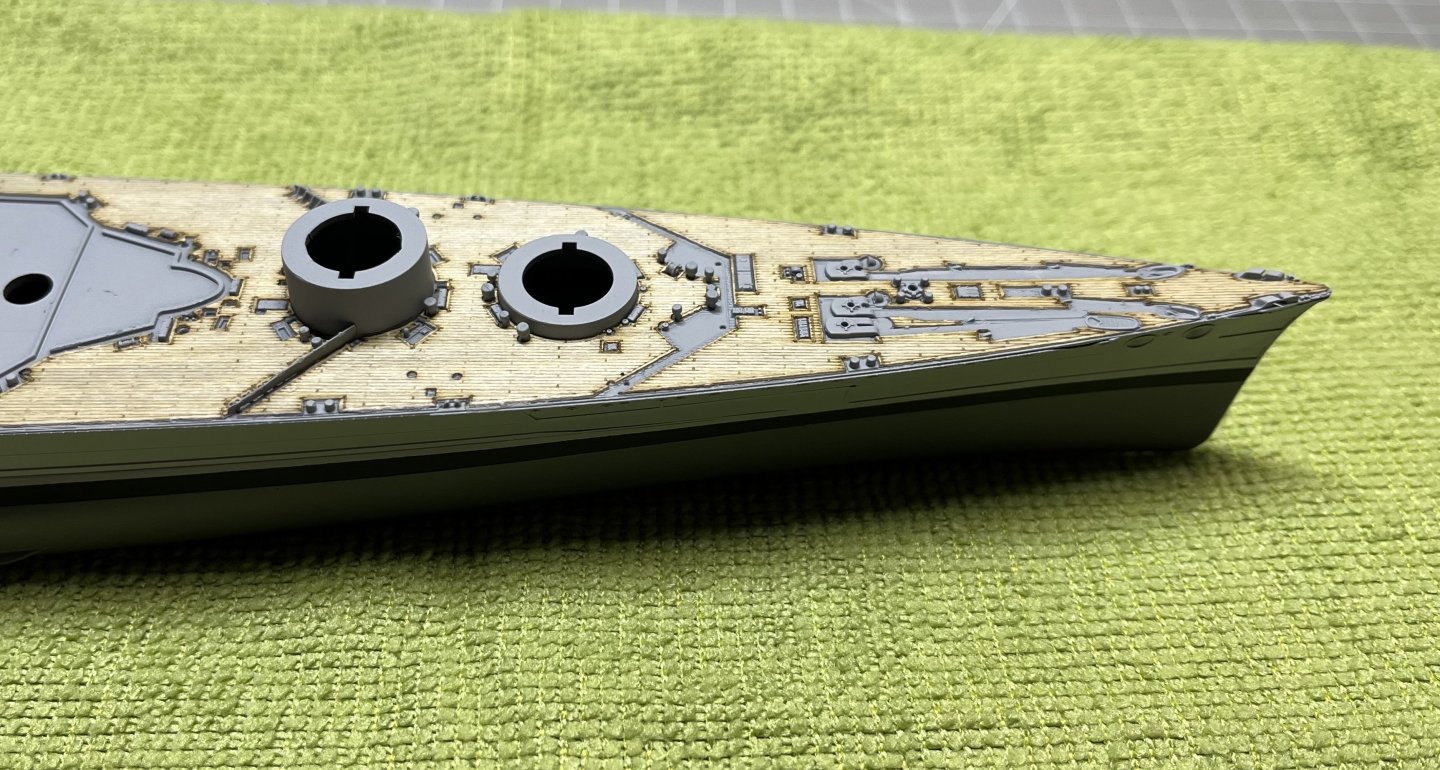
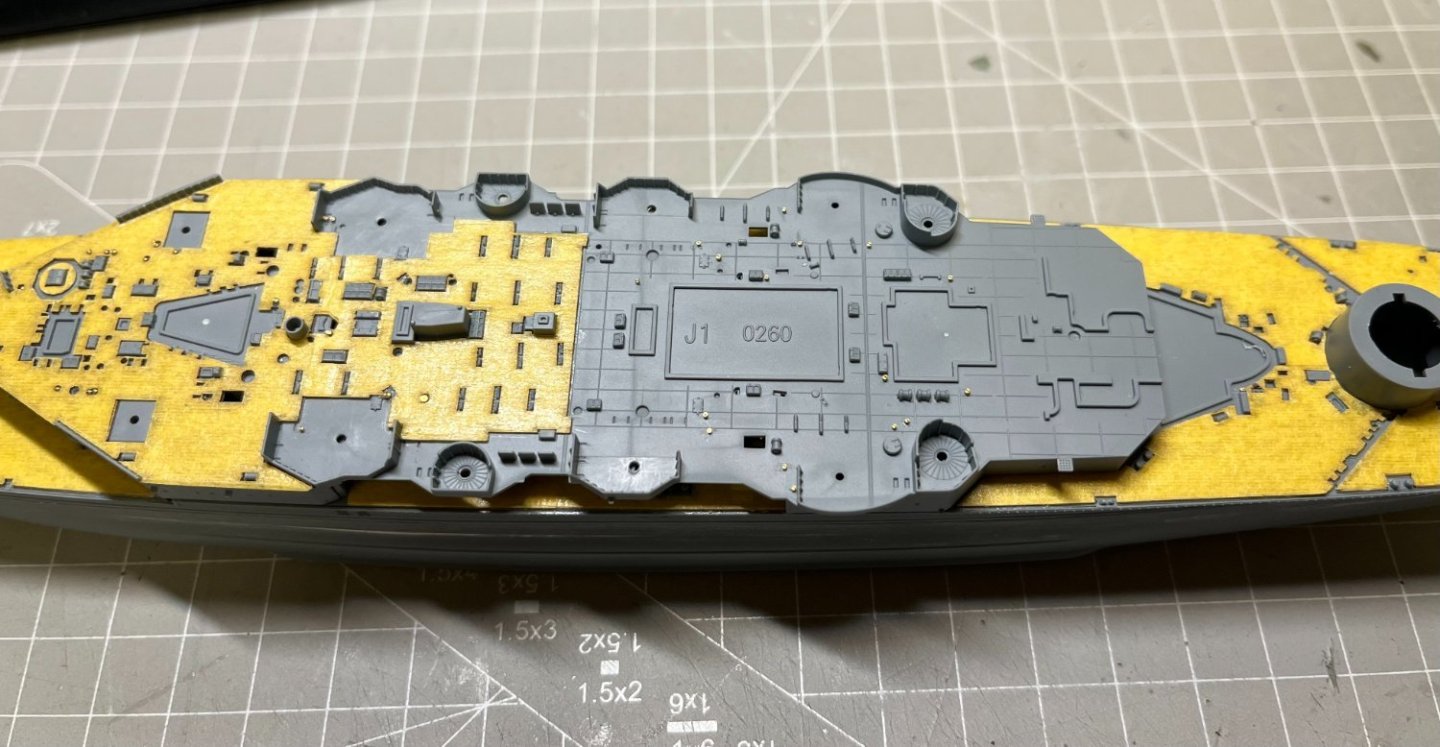
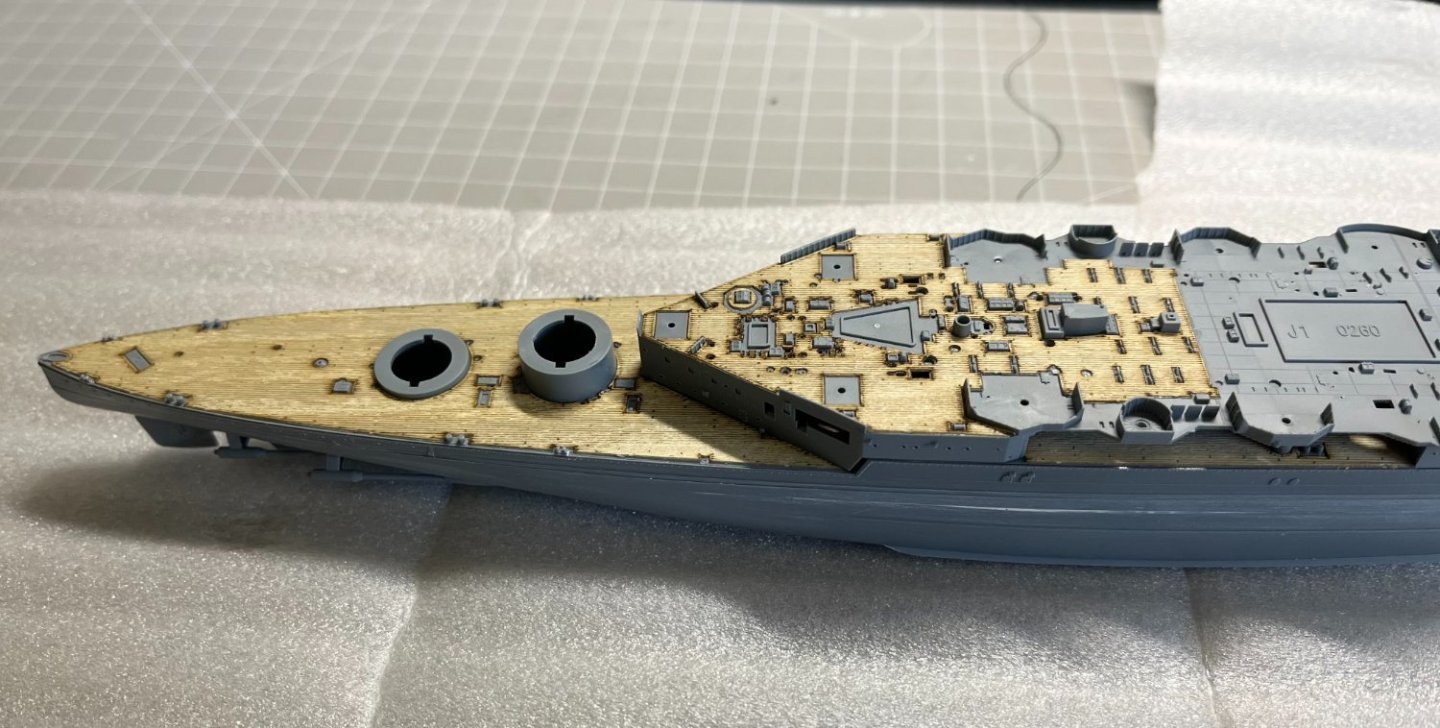
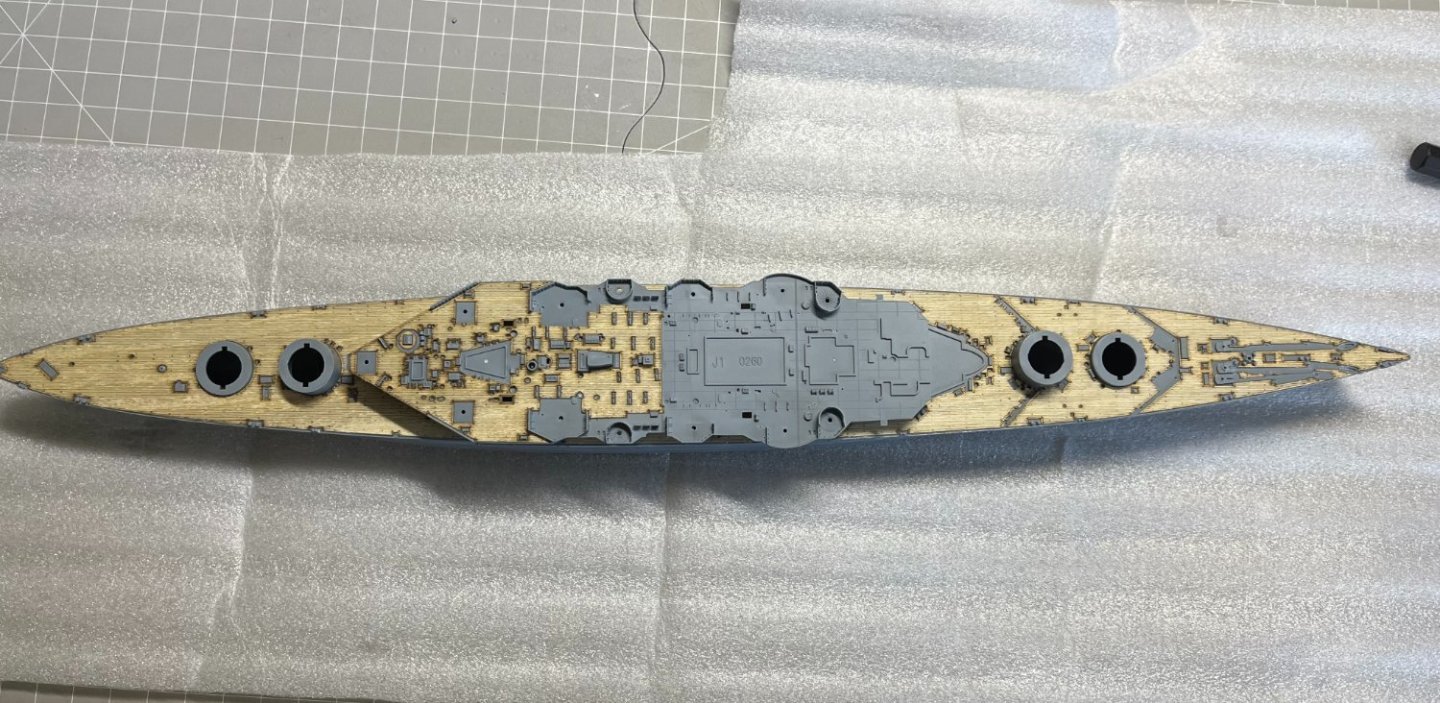
On top of the wooden deck I placed the masks provided in the kit but the real challenge was fitting the brass pieces some of which are less than 1mm.
-
For now I installed the wooden decks by first applying a thin layer of PVA glue. I have to say they really add quite a bit to the whole look.

-
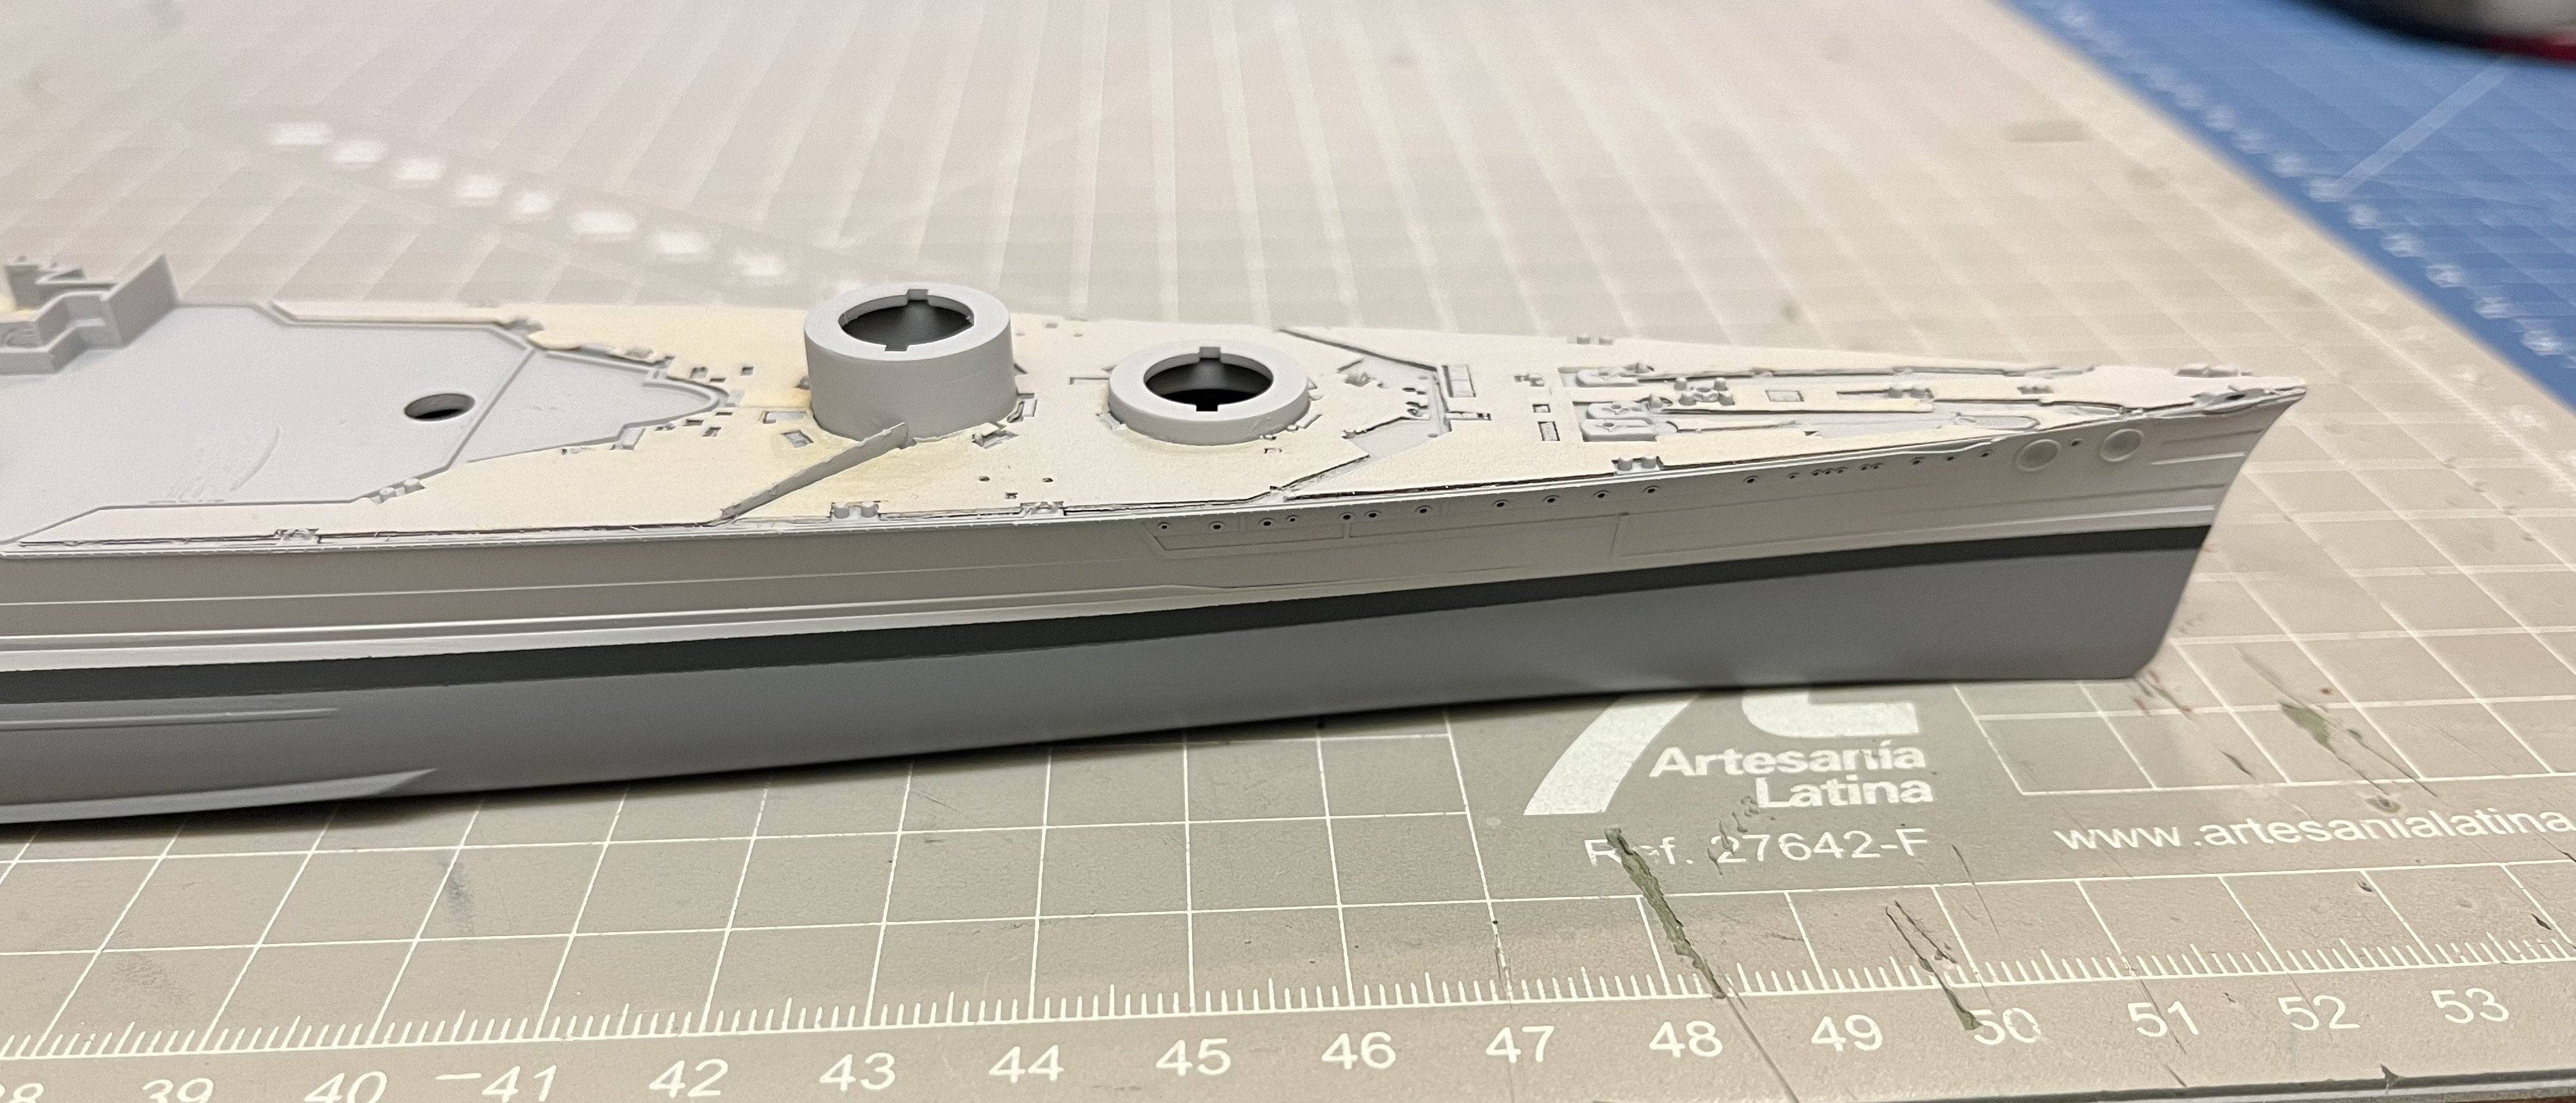
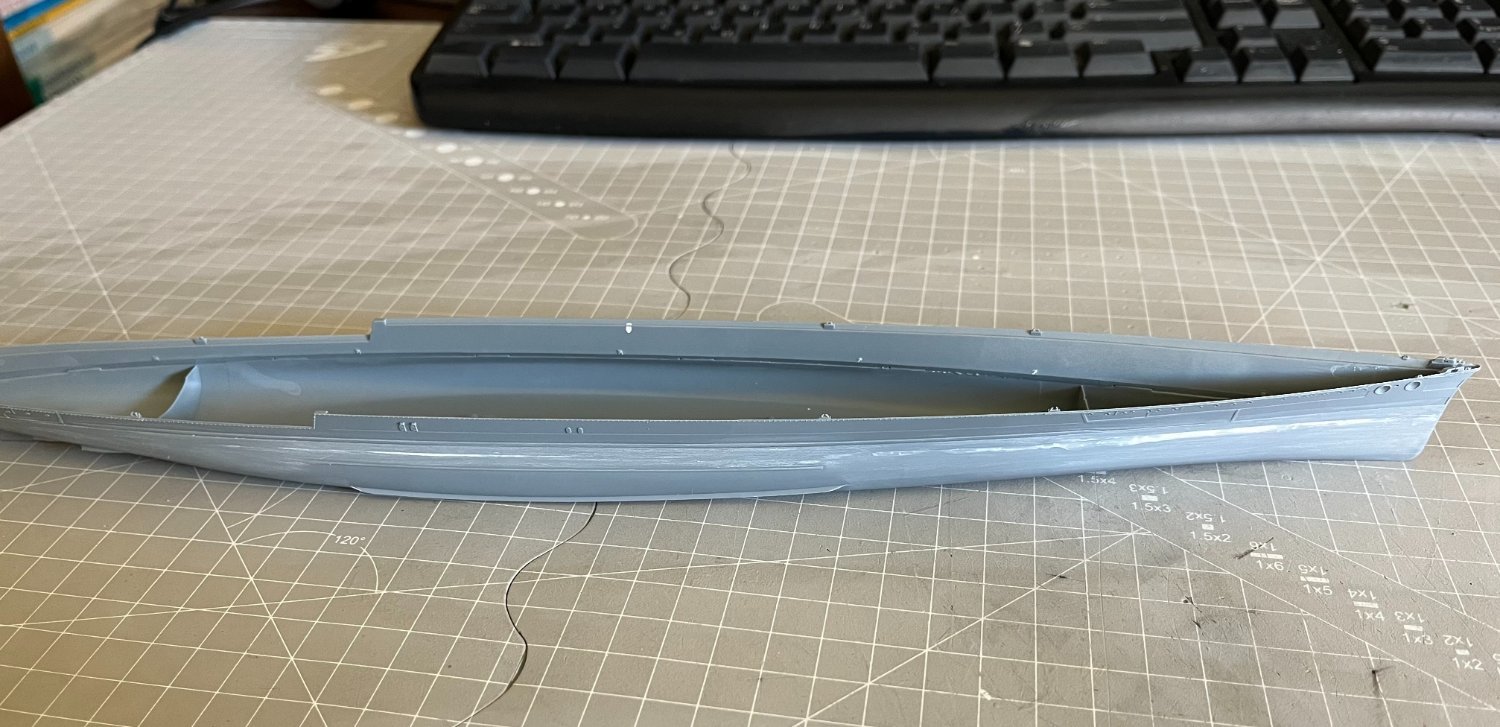
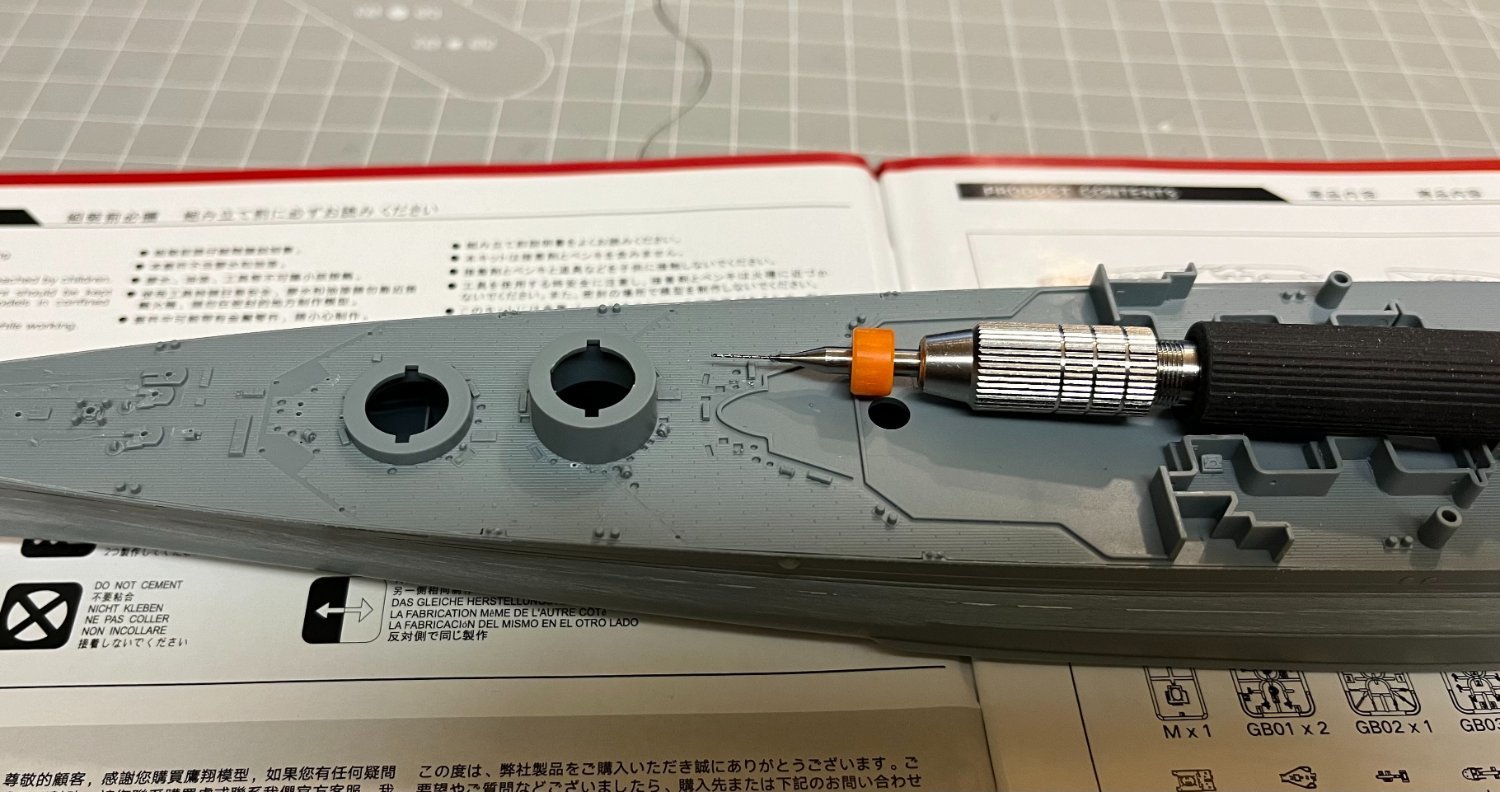
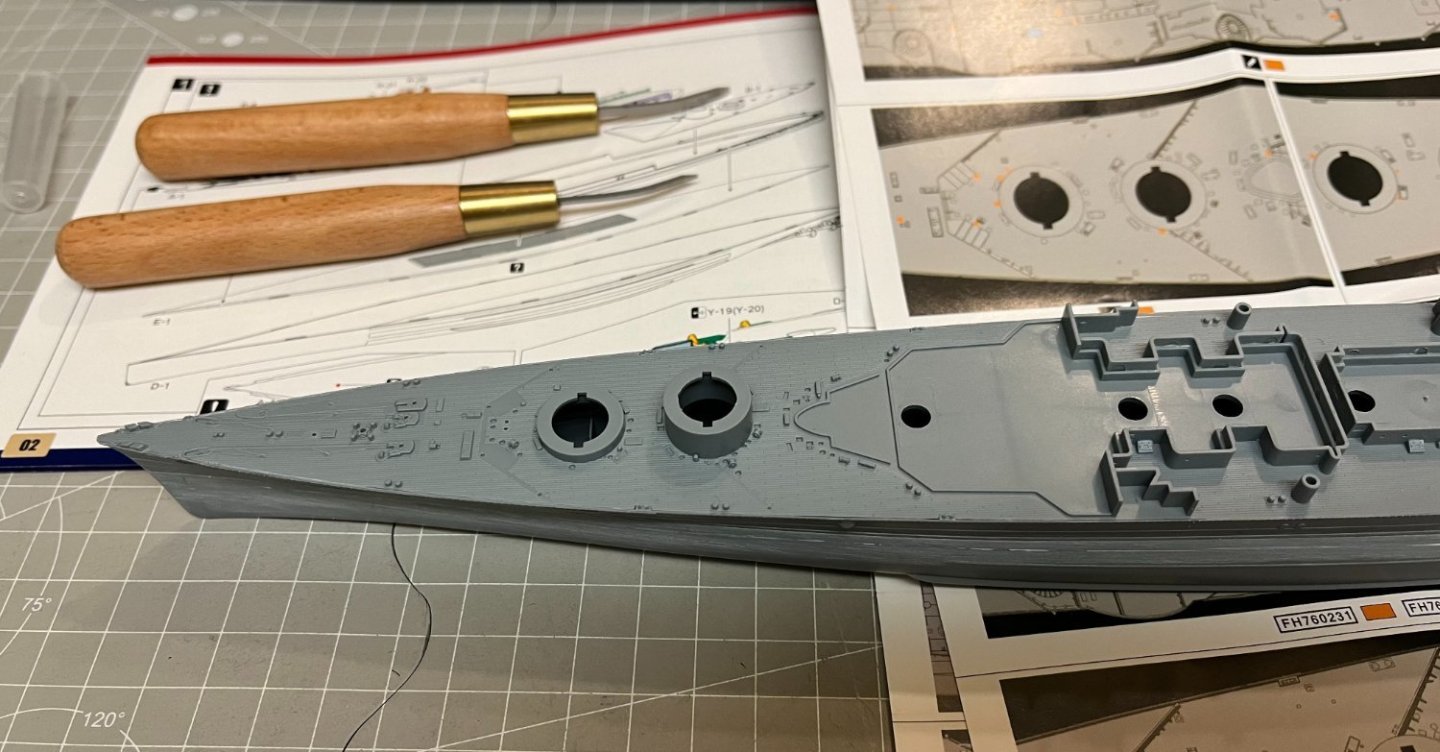
The journey has begun and I have the impression that this will be quite a long one. Initially the two parts of the hull were glued but especially on one side the application is not perfect, leaving a very small step. I used Mr.color dissolved putty and after letting it dry for a day I sanded it down. I have to admit that it was quite a difficult task as the surface along its entire length is not flat and in fact in a place where there is a small protrusion the surface is very small and does not allow easy access. Nevertheless, after enough rubbing with different grits, it seems that the result will probably be better than before. Surely this will be seen when the first layer of primer falls. The next step is to remove some surface details and open the corresponding holes once and later the supplied turned metal ones will be installed which are really excellent. That's all for now. Good night to all.


-
Johngr reacted to a post in a topic:
HMS Hood 1941 by Johngr - FlyHawk - 1:700 - PLASTIC
-
Johngr reacted to a post in a topic:
HMS Hood 1941 by Johngr - FlyHawk - 1:700 - PLASTIC
-
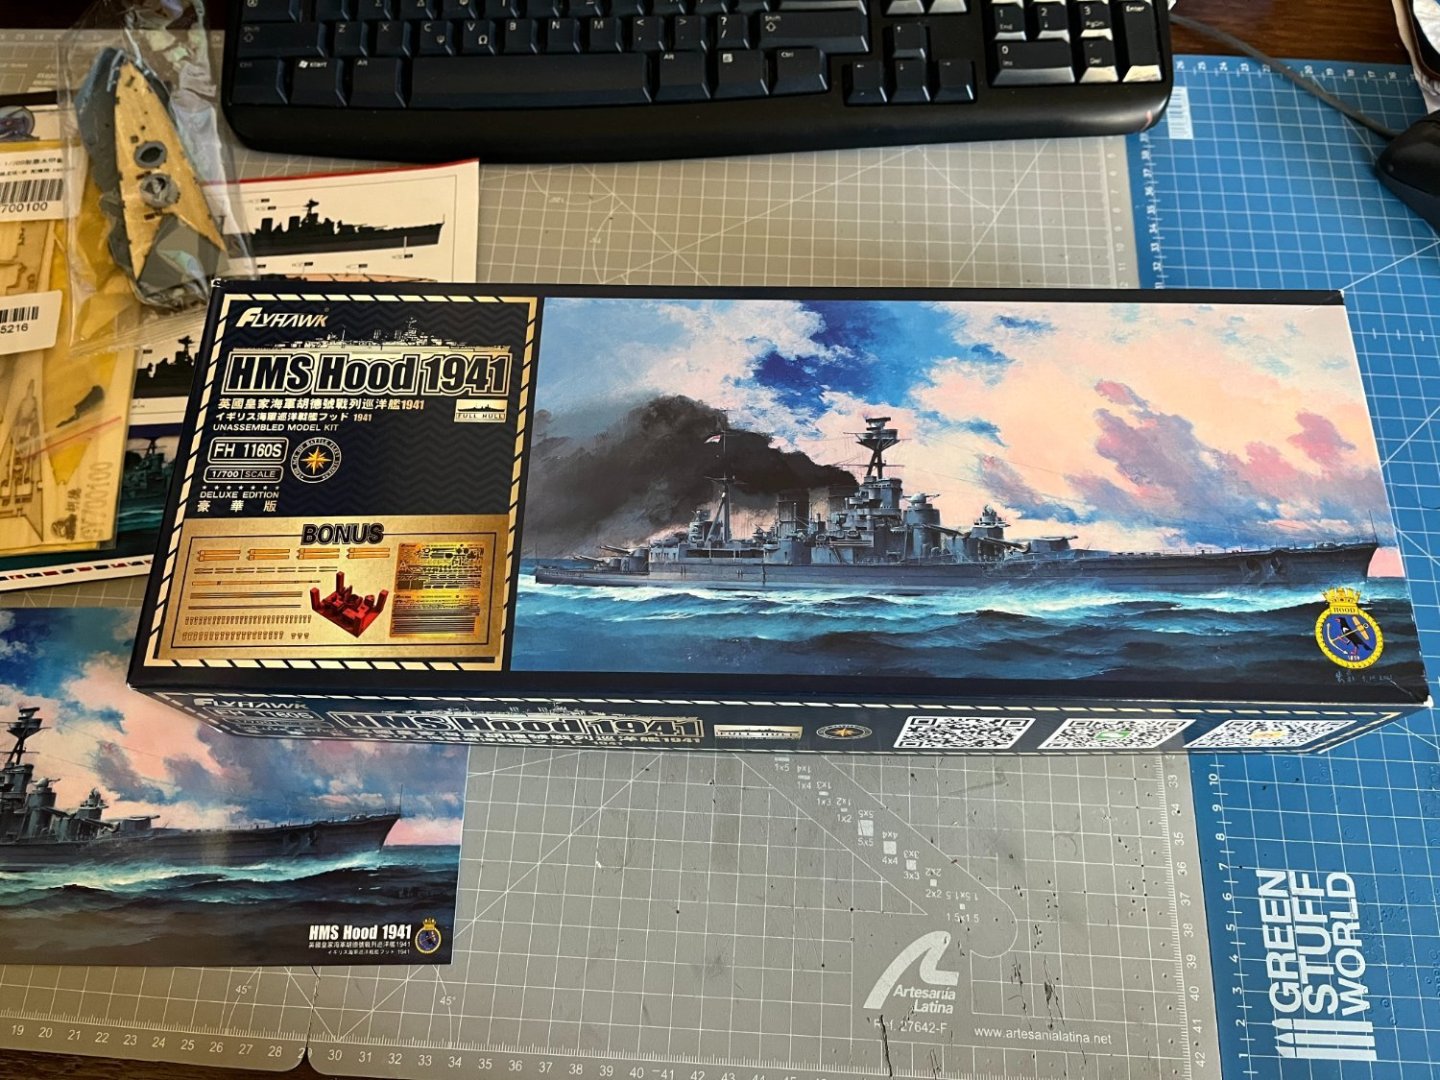
HMS Hood 1941 - FlyHawk - 1:700 After two paper models and since the weather was more suitable for painting, I started the HMS Hood. I also added a wooden Deck and masking Sheet kit at a very good price for more realism. The kit has a lot of small parts and seems to be very well detailed. First I tried the application of the wooden deck and it seems to be excellent.