DONATION DRIVE - SUPPORT MSW - DO YOUR PART TO KEEP THIS GREAT FORUM GOING!
×


Geordy Aidan
-
Posts
16 -
Joined
-
Last visited
-
 SiriusVoyager reacted to a post in a topic:
HMS Beagle by Geordy Aidan - OcCre - 1:60 scale
SiriusVoyager reacted to a post in a topic:
HMS Beagle by Geordy Aidan - OcCre - 1:60 scale
-
brunnels reacted to a post in a topic:
HMS Beagle by Geordy Aidan - OcCre - 1:60 scale
-
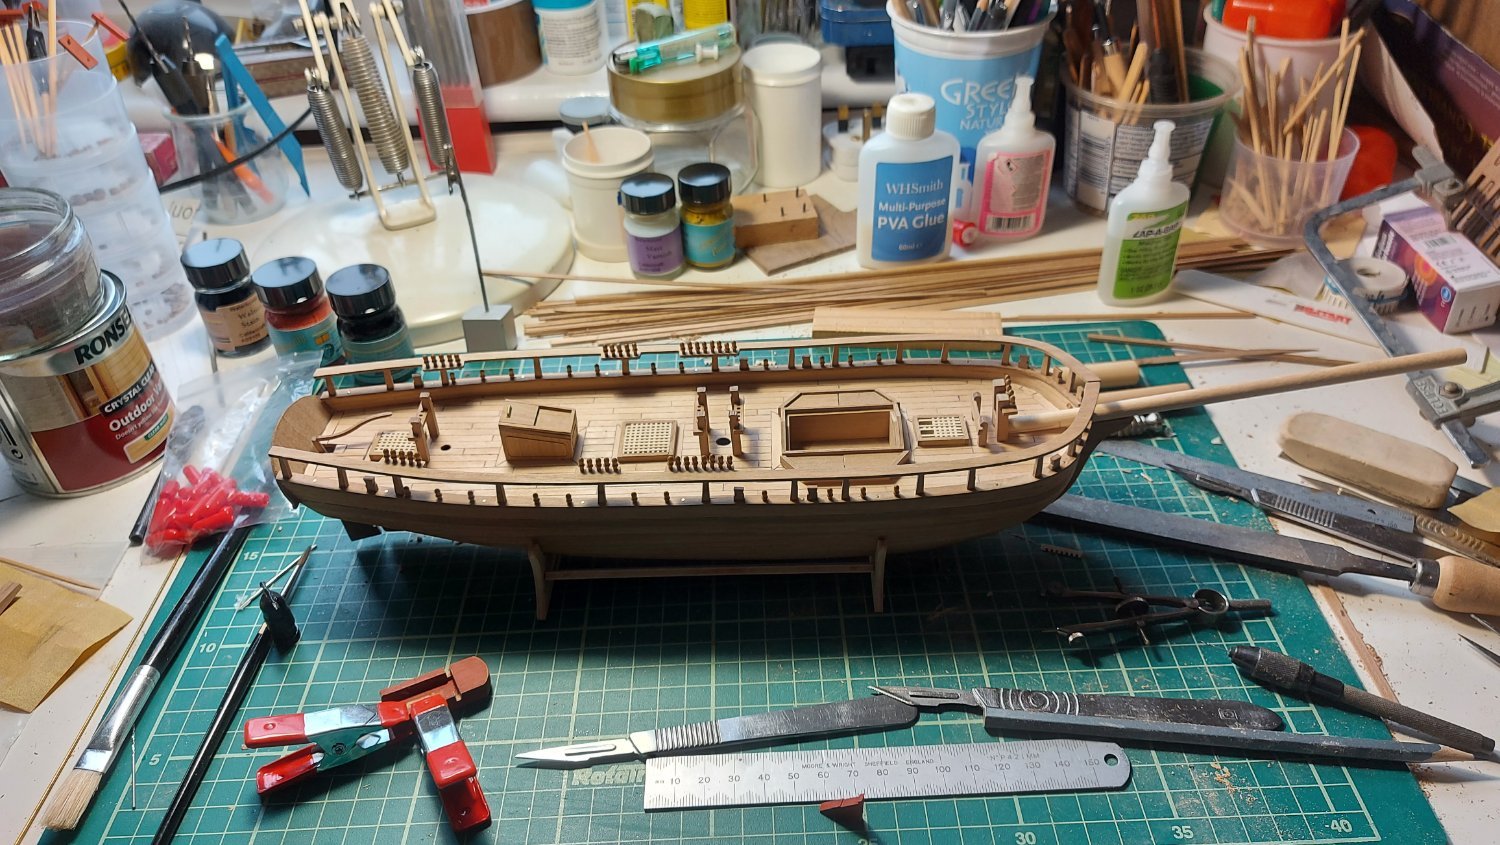
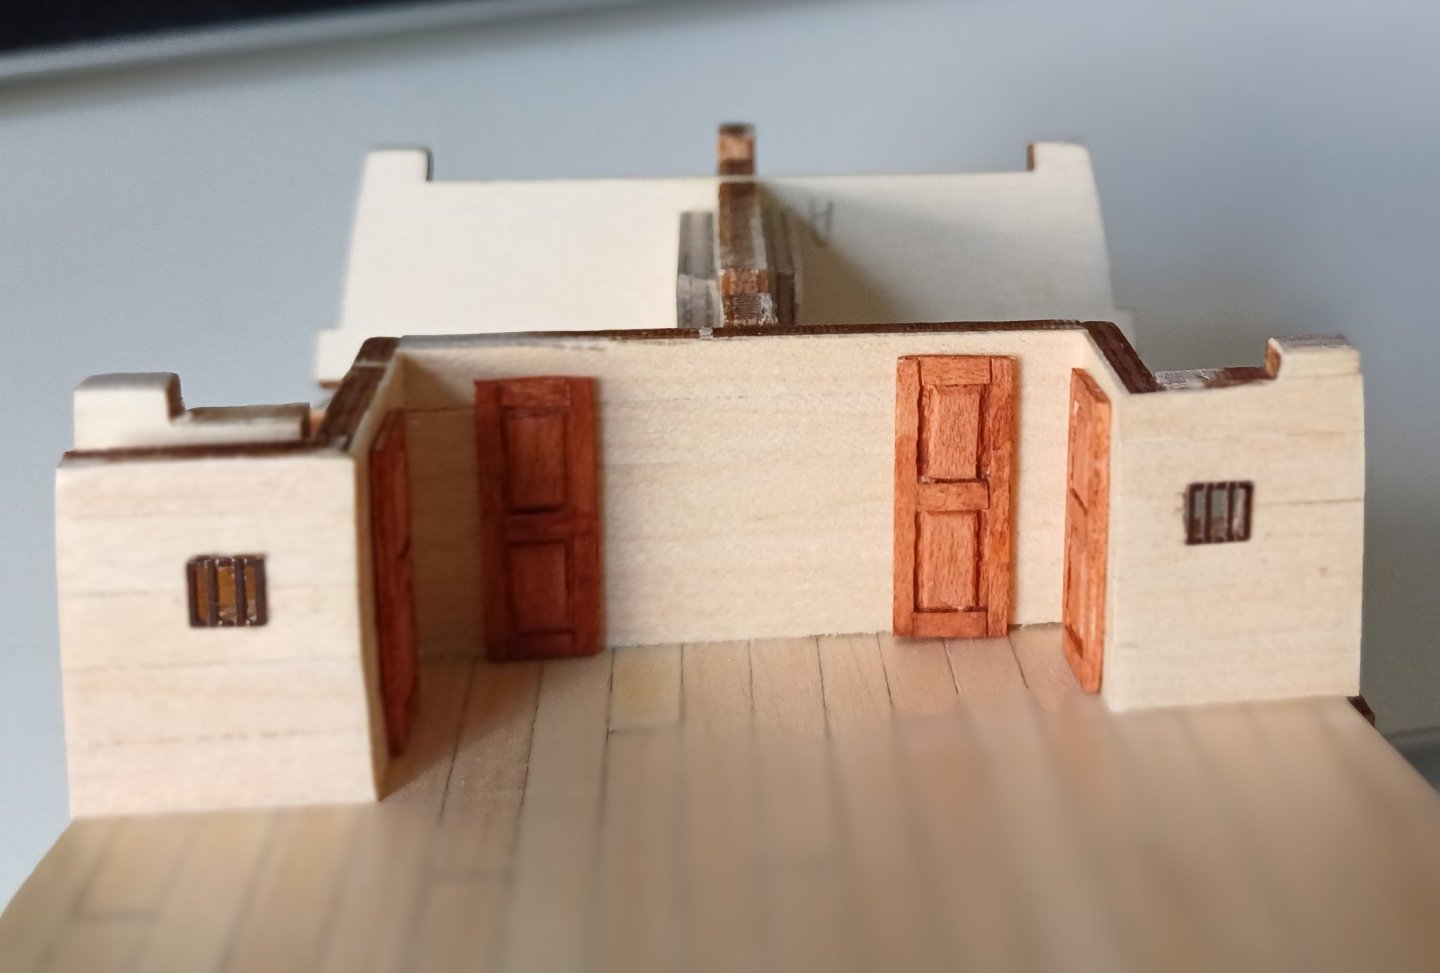
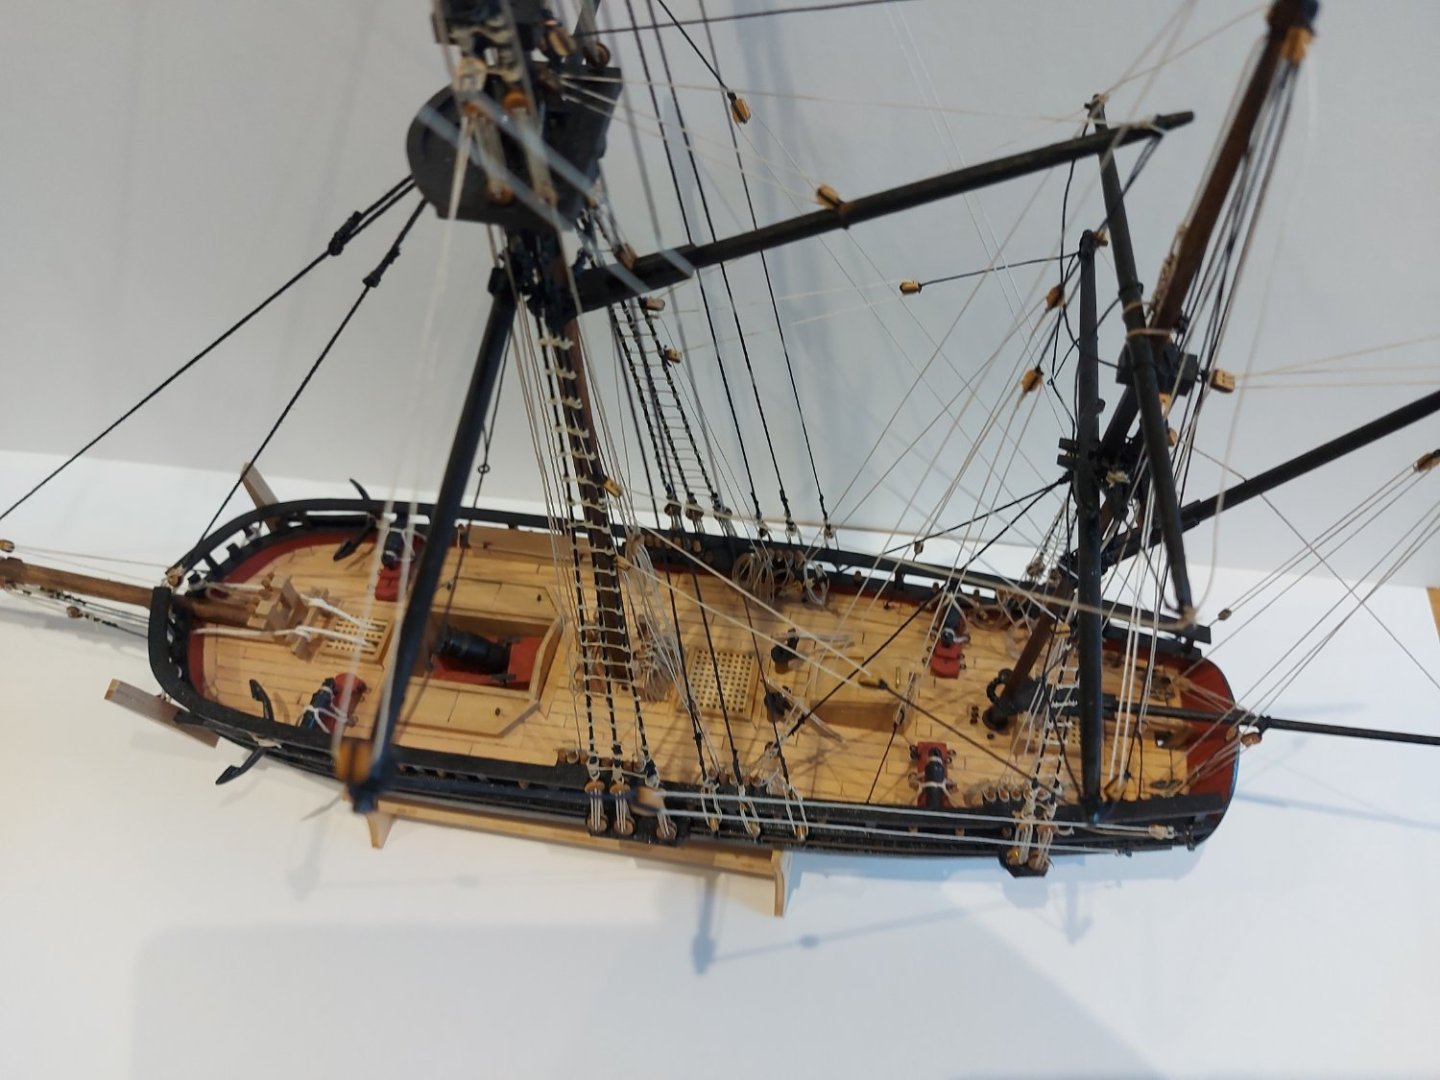
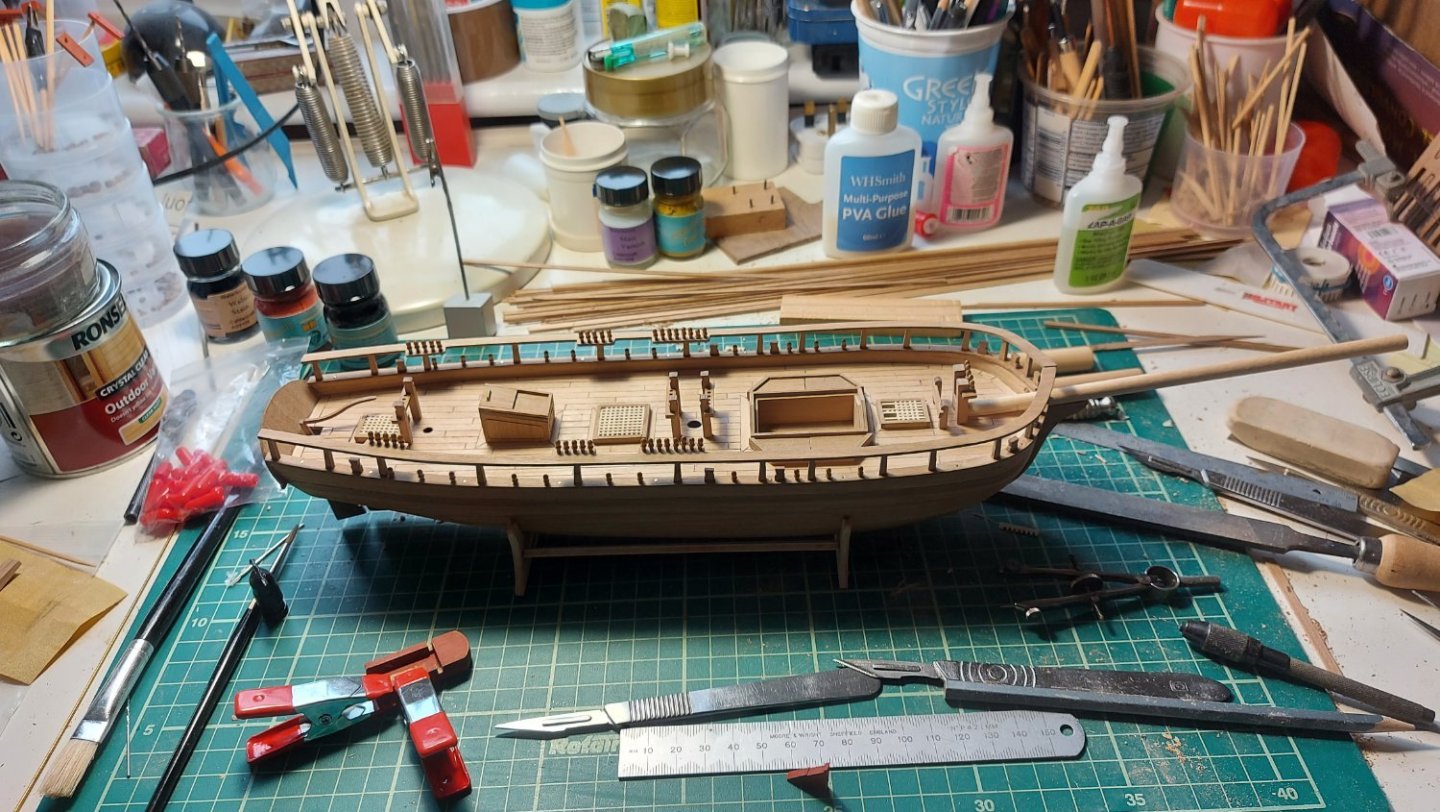
Doors and windows are now in place. I have also glued the poop deck and the deck of the forecastle in place.
-
Snug Harbor Johnny reacted to a post in a topic:
HMS Beagle by Geordy Aidan - OcCre - 1:60 scale
-
ccoyle reacted to a post in a topic:
HMS Beagle by Geordy Aidan - OcCre - 1:60 scale
-
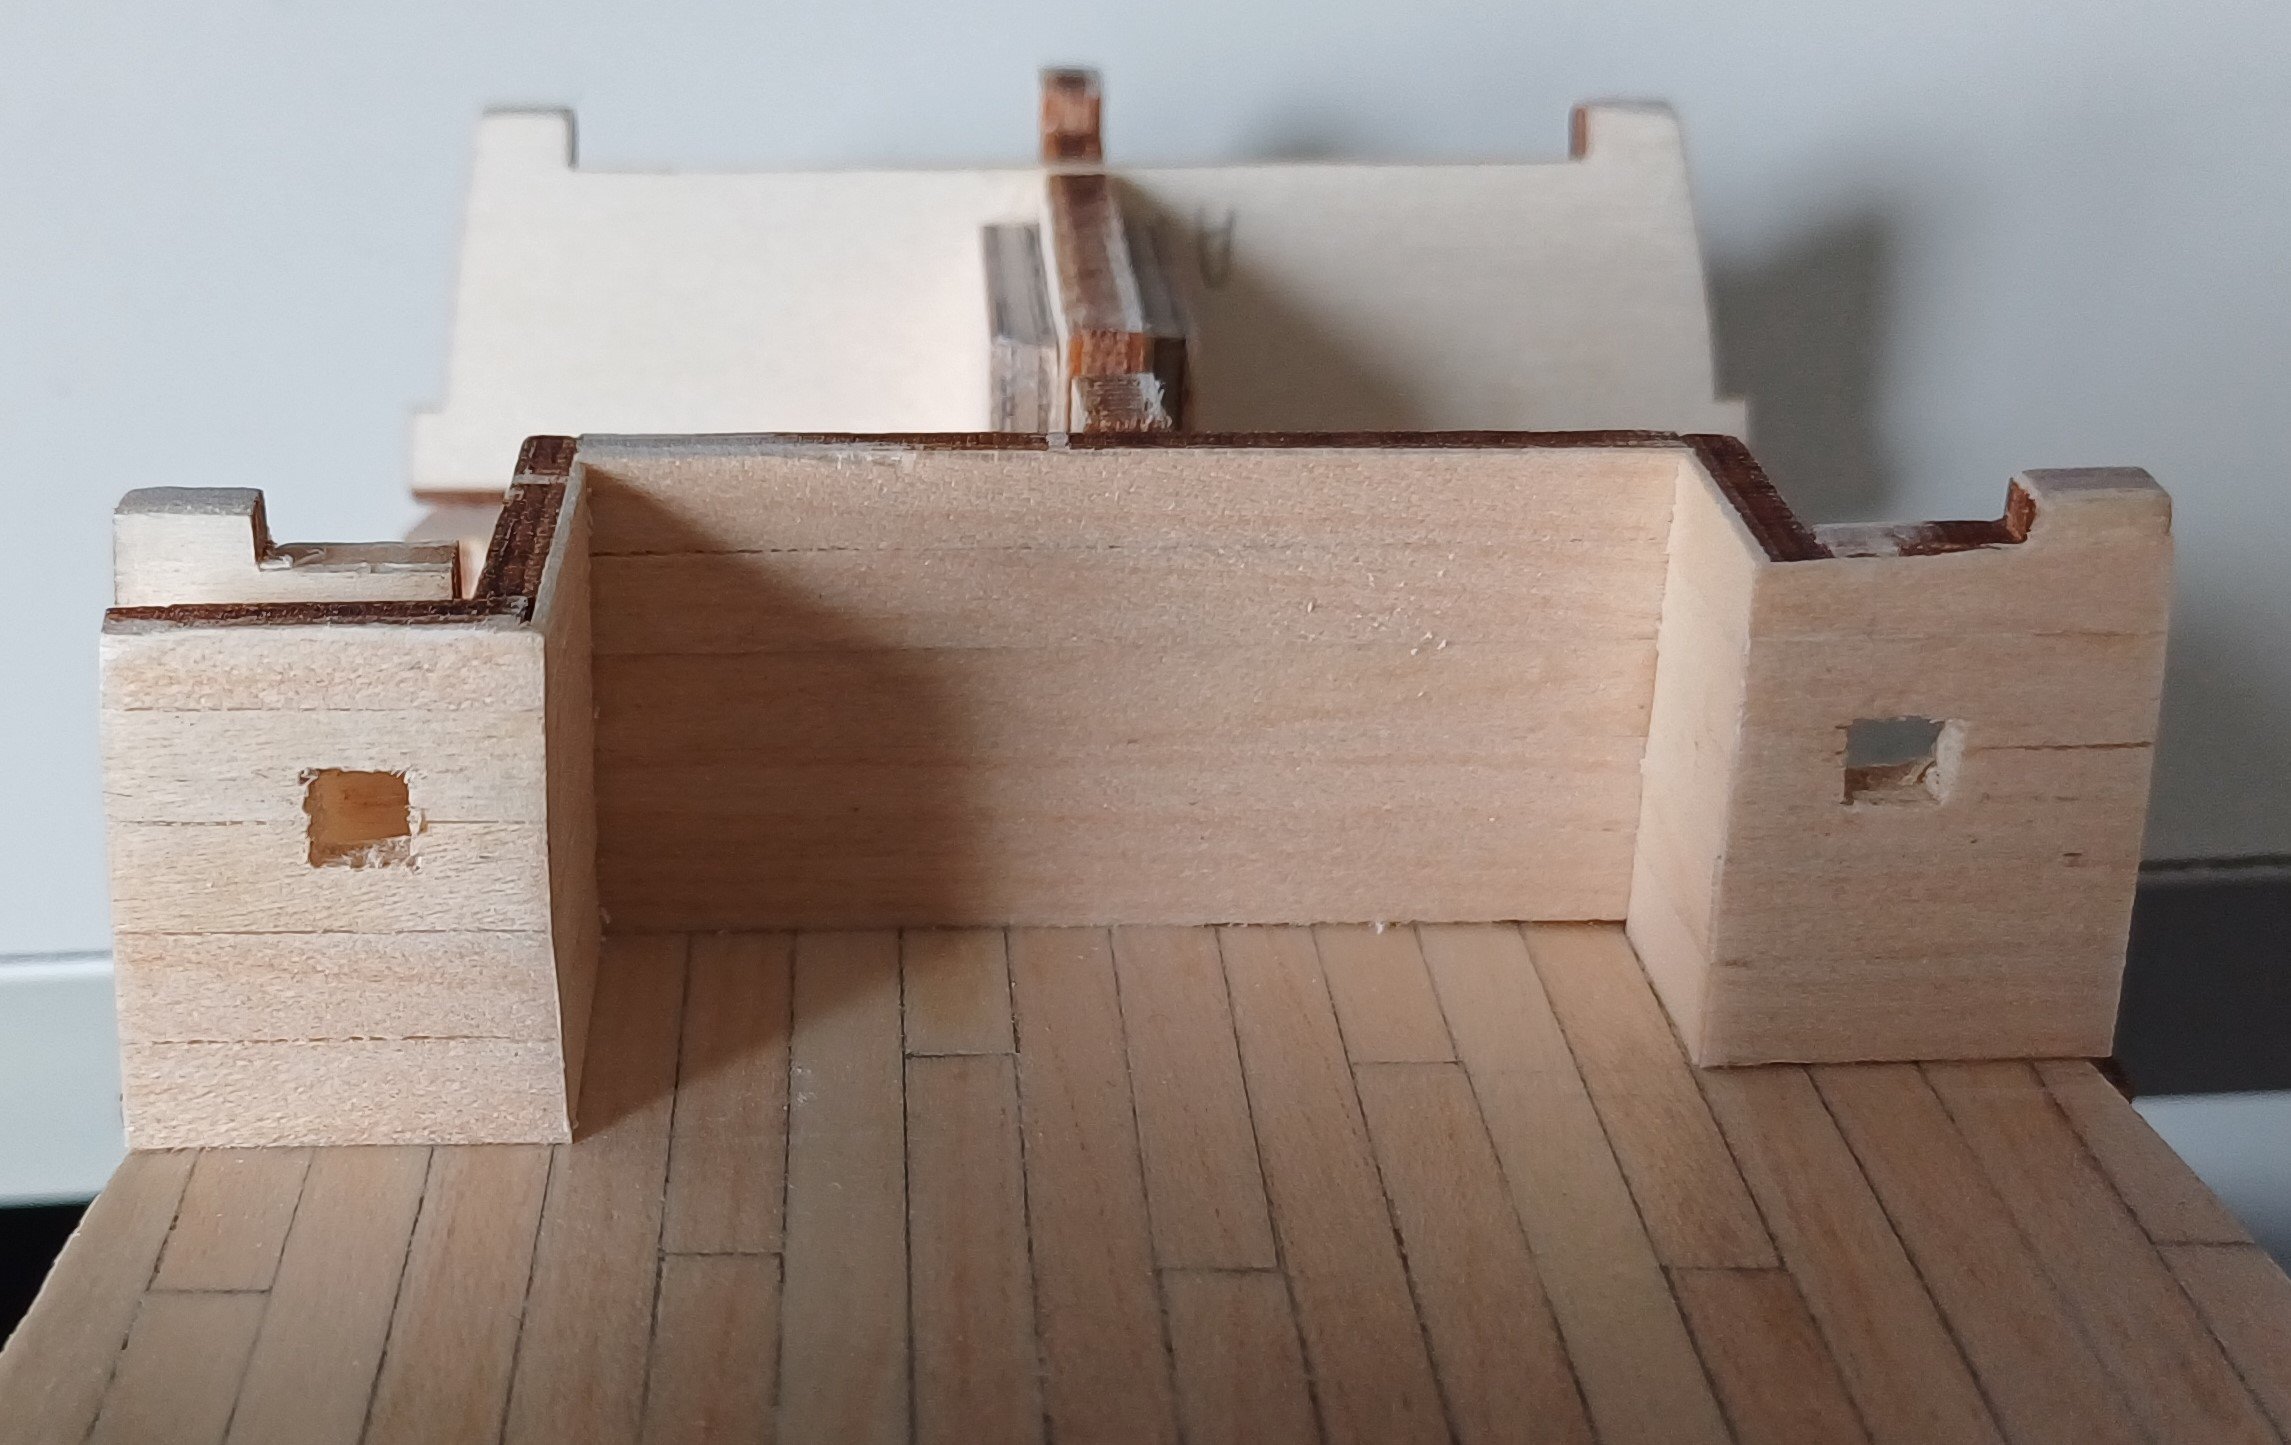
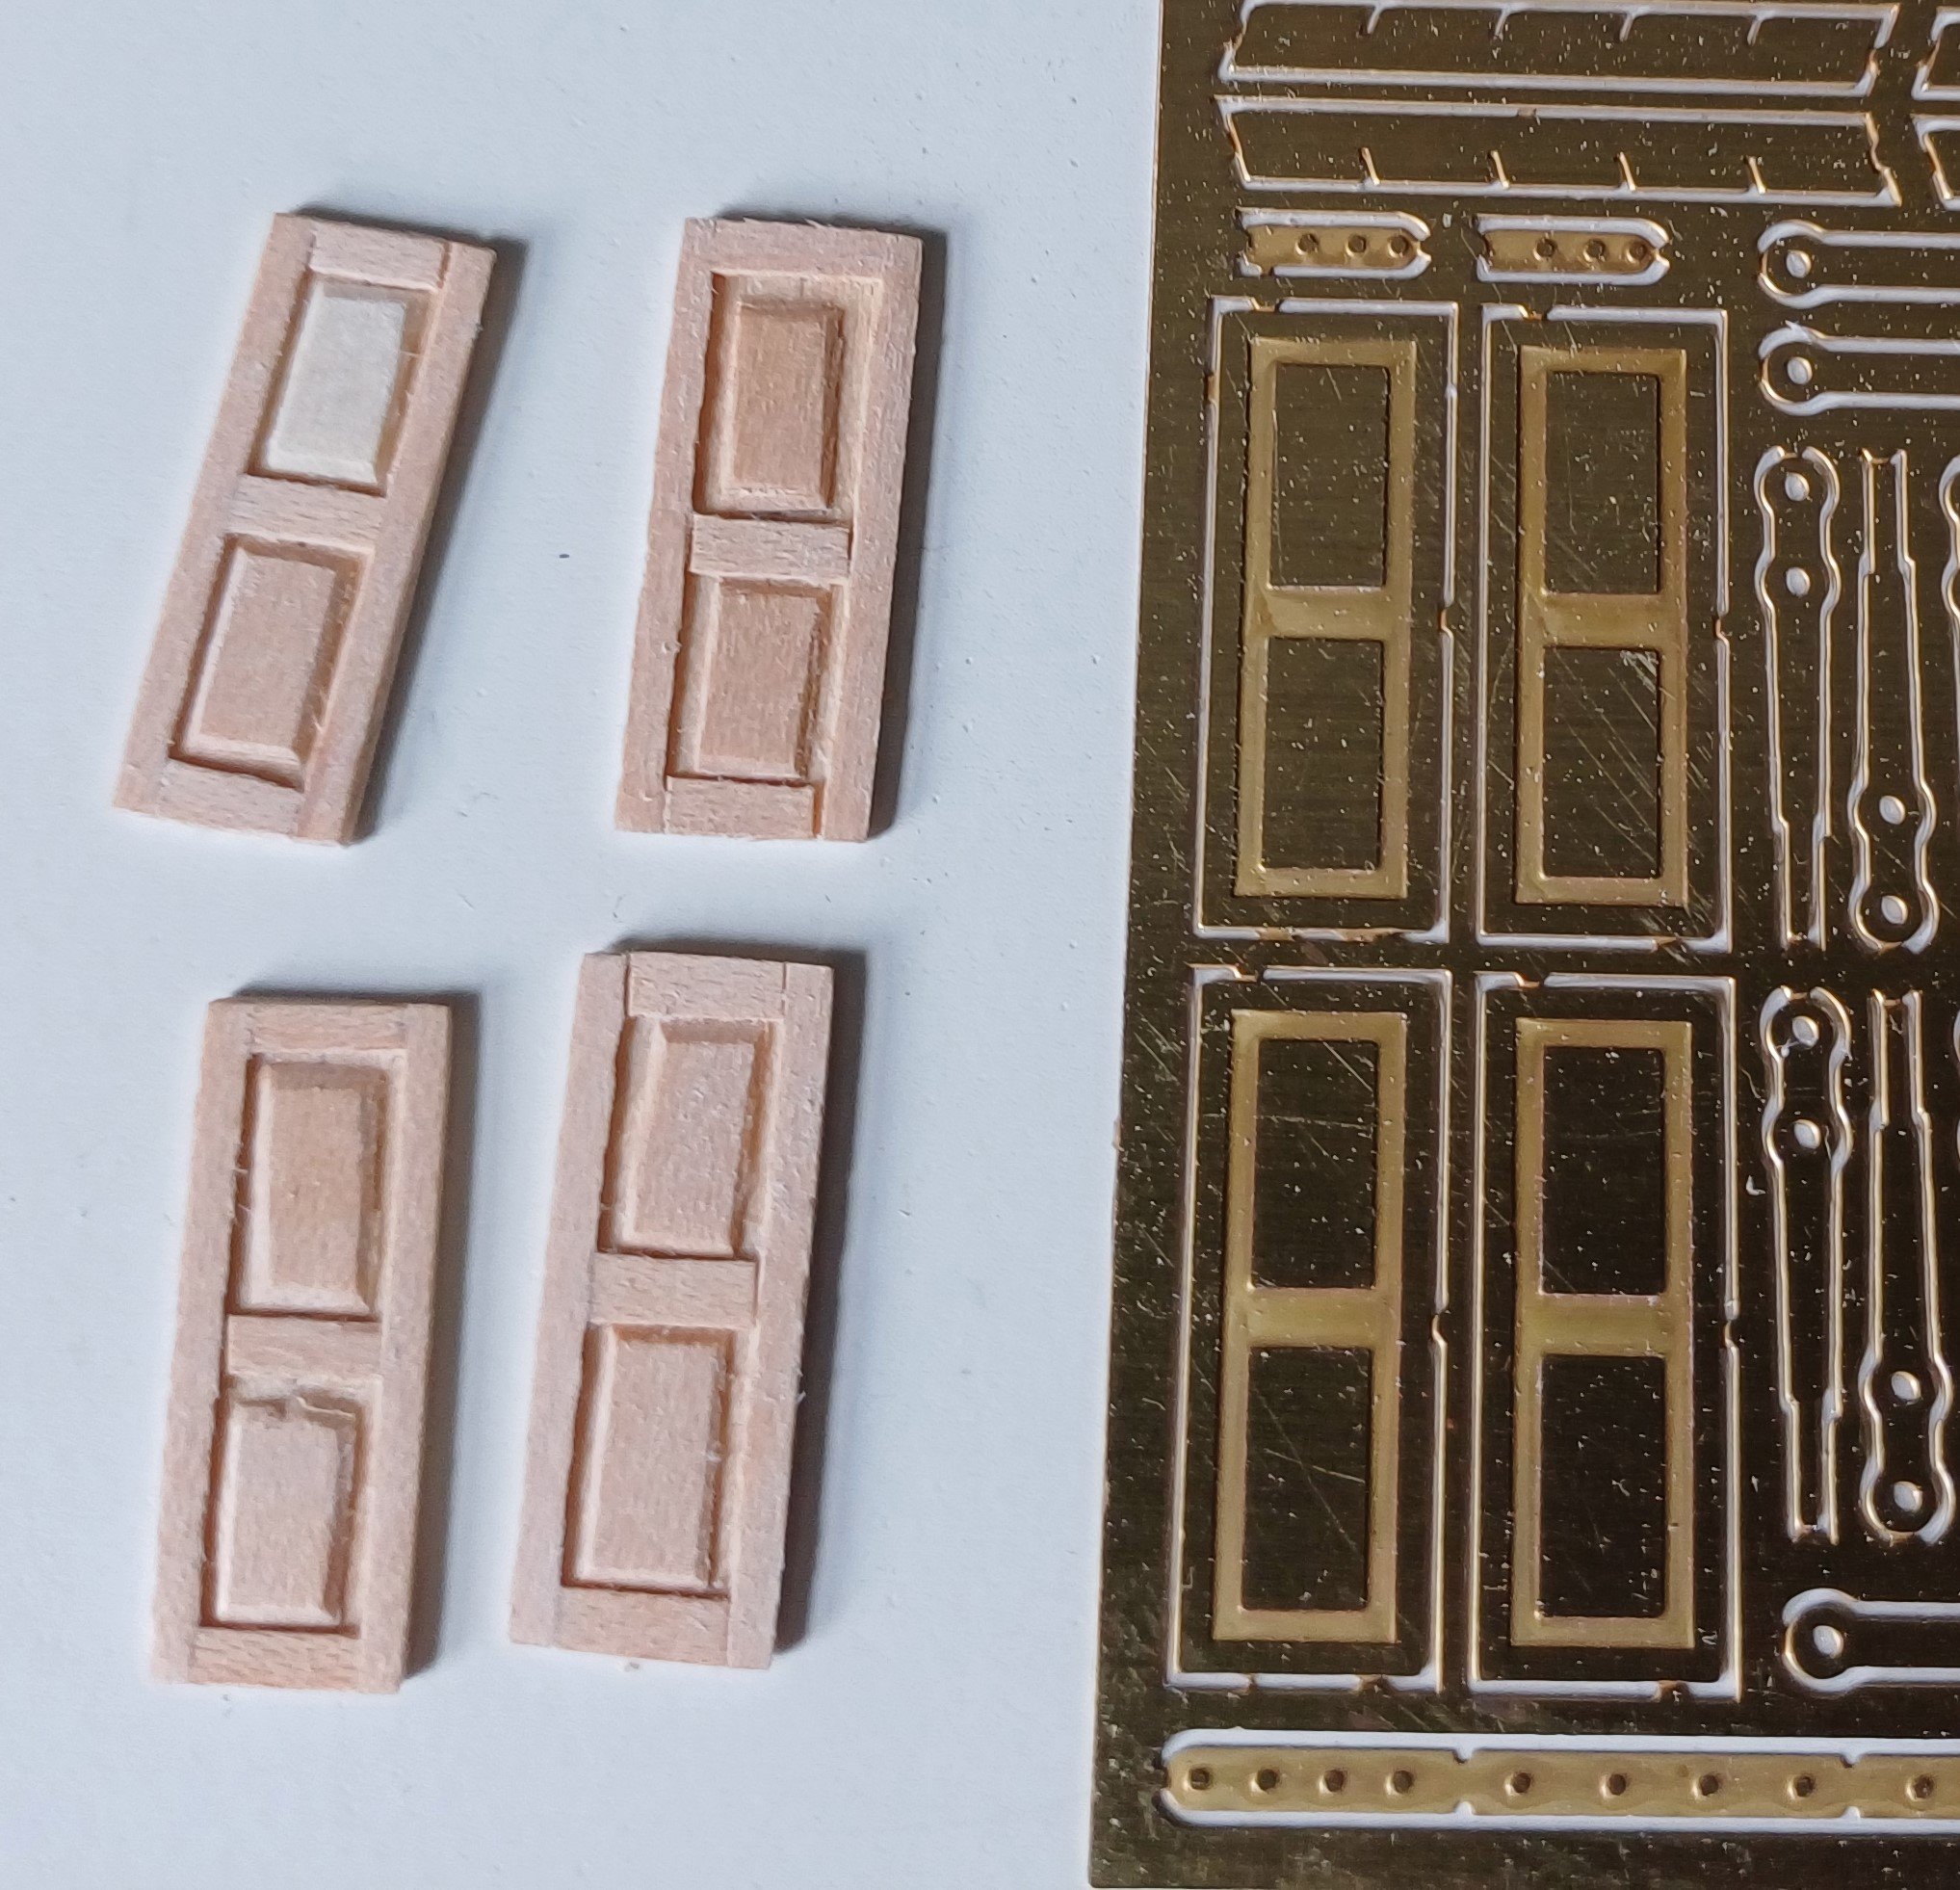
I have now put the structures that support the fore and stern castles in place. I decided to open the windows up and then looked at the doors. I have to say that I do not like the etched brass doors so I decided to make some of my own. They don't look too bad the next question is what colour should they be? I suppose that is anyone guess really.


-
I have seen the posts on the method that you suggest and it looks like they go through lots of toothpicks 🙂
-
Scottish Guy reacted to a post in a topic:
HMS Beagle by Geordy Aidan - OcCre - 1:60 scale
-
DonSangria reacted to a post in a topic:
HMS Beagle by Geordy Aidan - OcCre - 1:60 scale
-
I have now glued and clamped the main deck in place. You can see the blocks that I have fixed to the stem and stern which will be shaped to support the first planking at the bearding line as well as the bow.

-
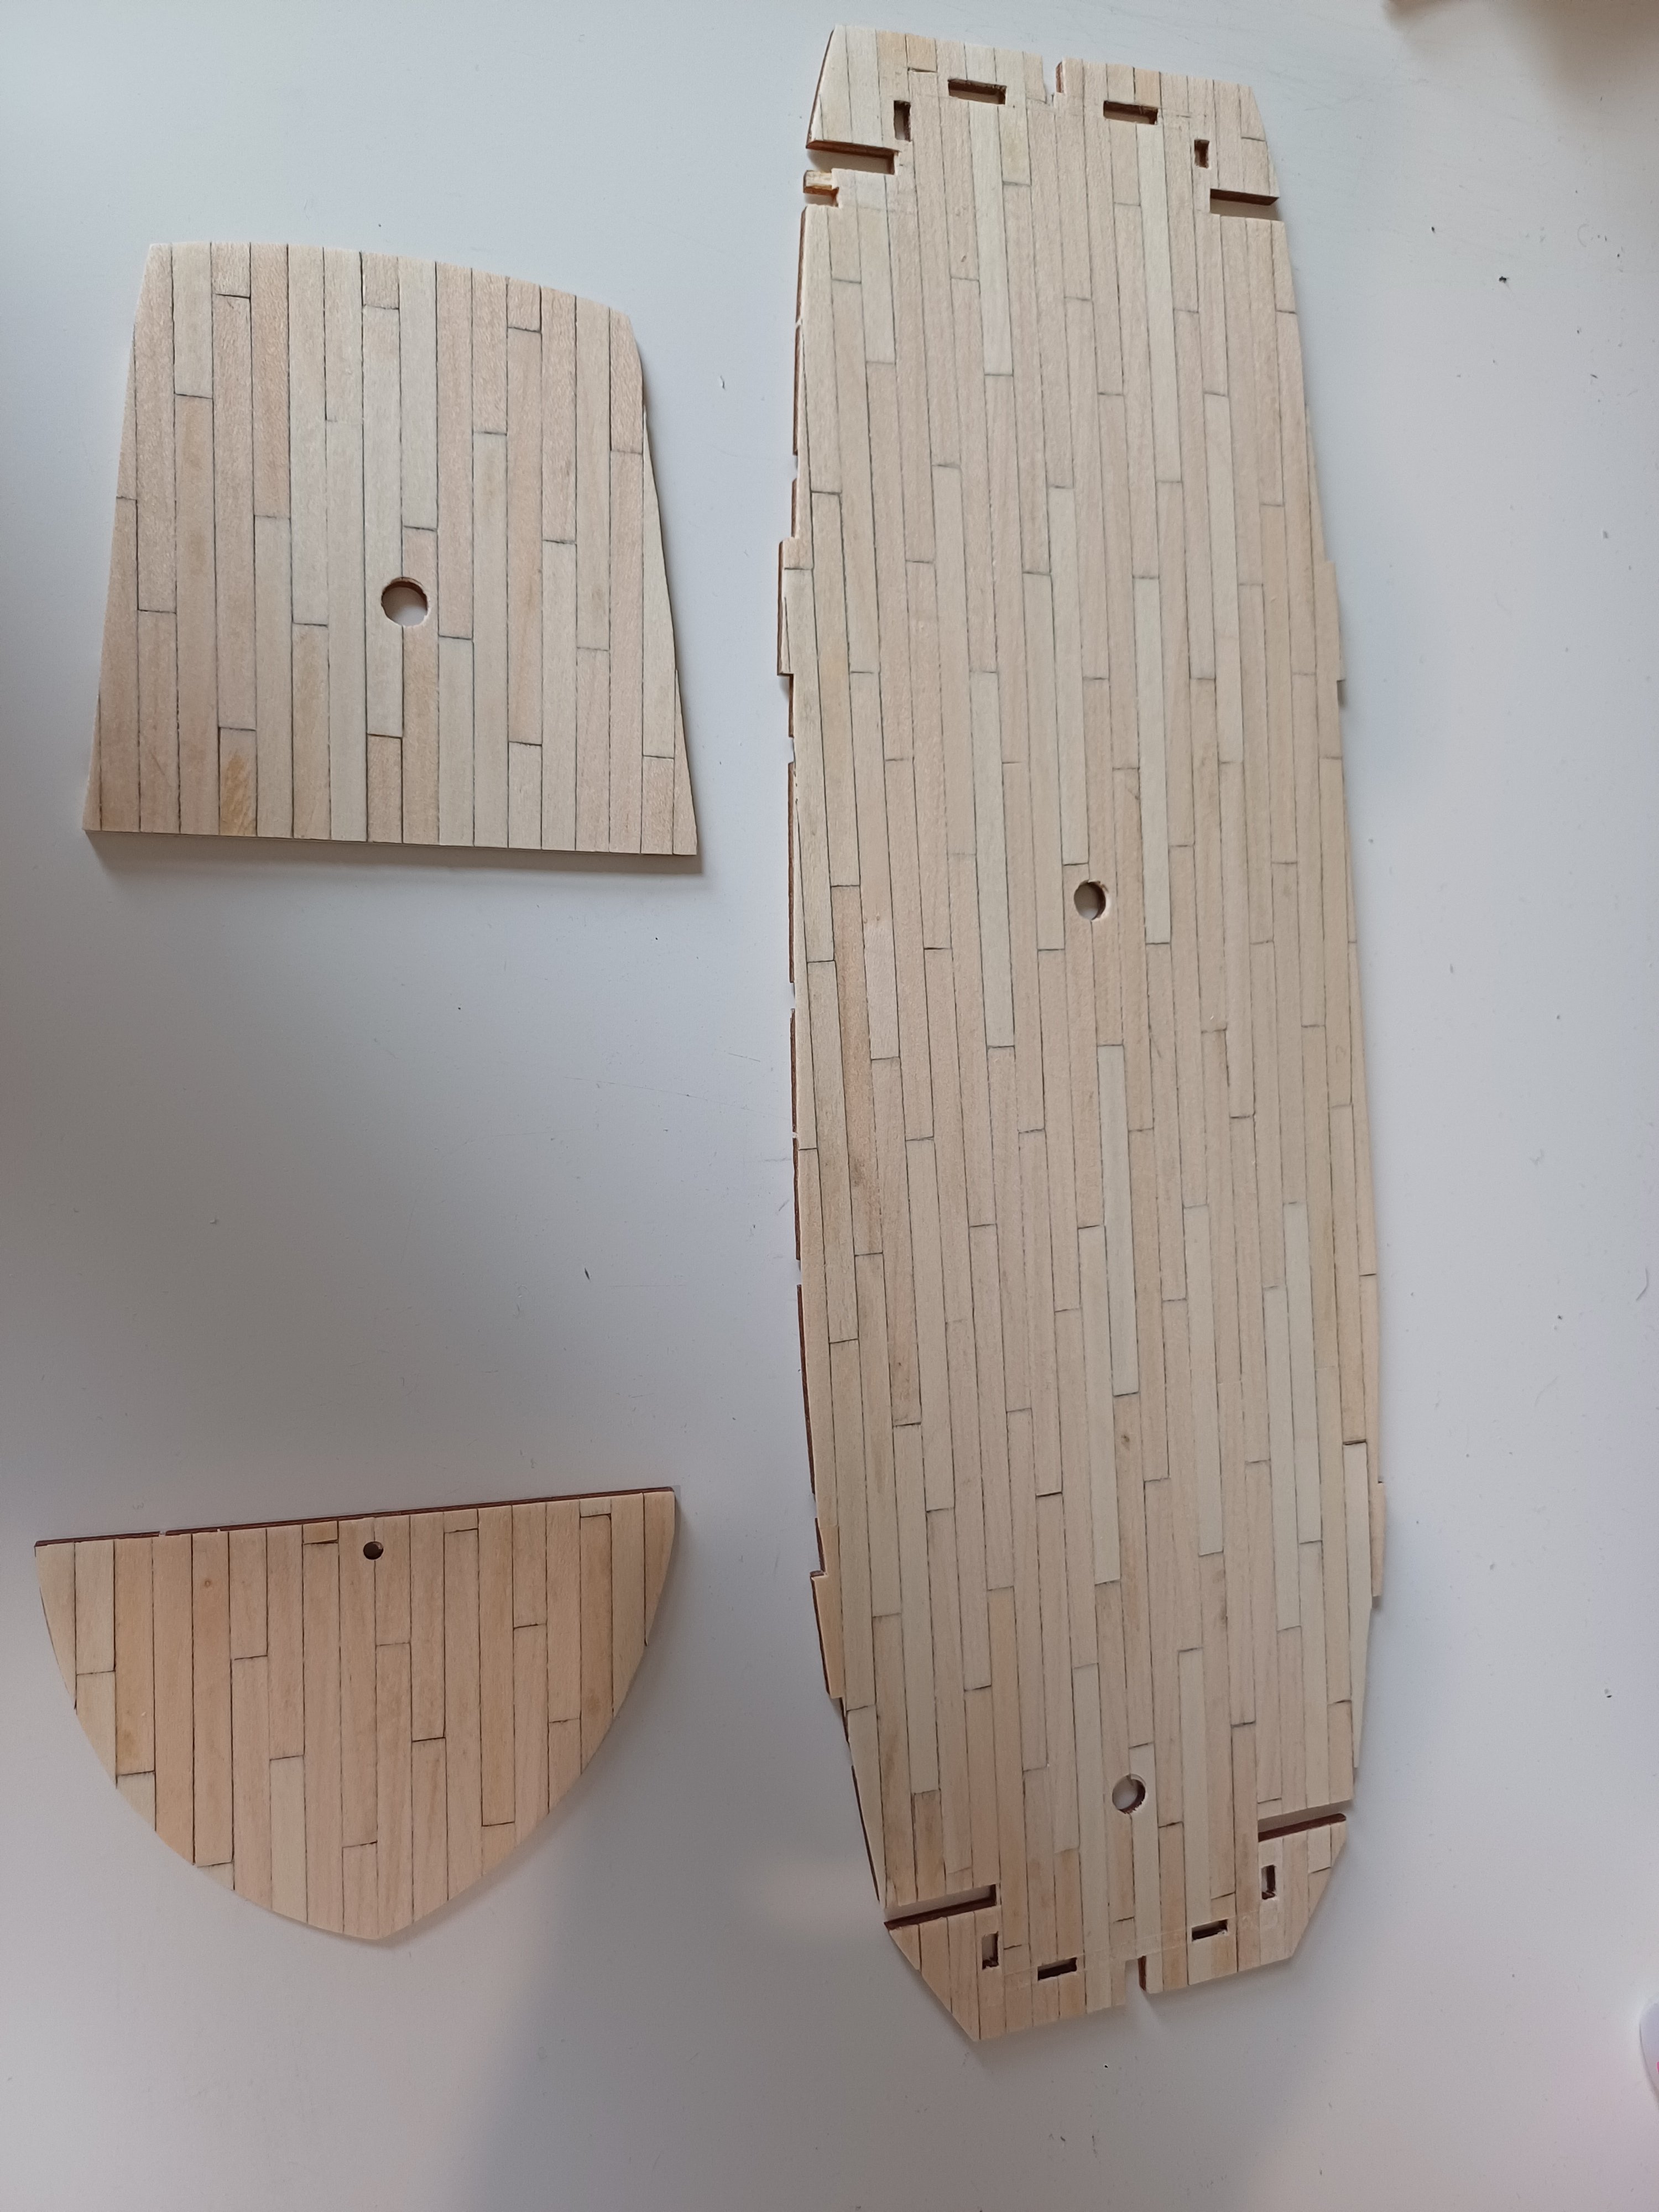
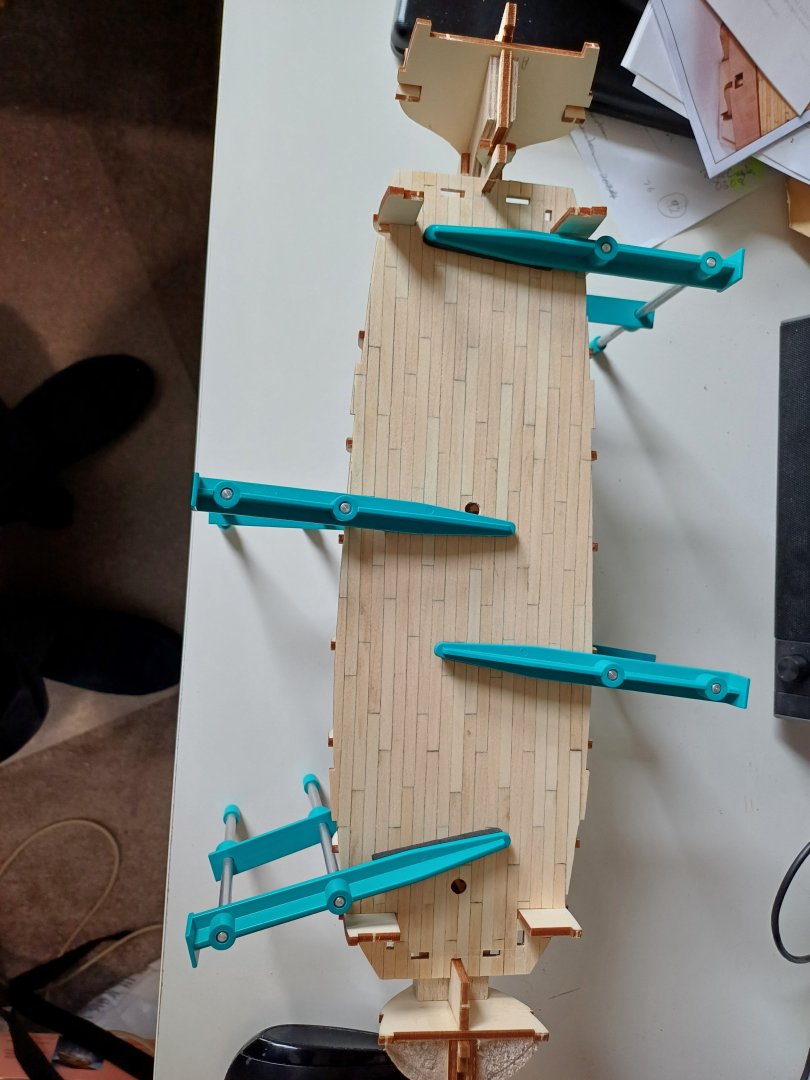
All of the 60mm strips are now in place an I have given it a couple of coats of varnish to protect the surface. I did mask the areas where the bulwarks will be glued across the deck. The big question is do I show the treenails in the deck. My thinking at the moment is no because I feel at this scale they would not be seen as they are so small. What do others think?

-
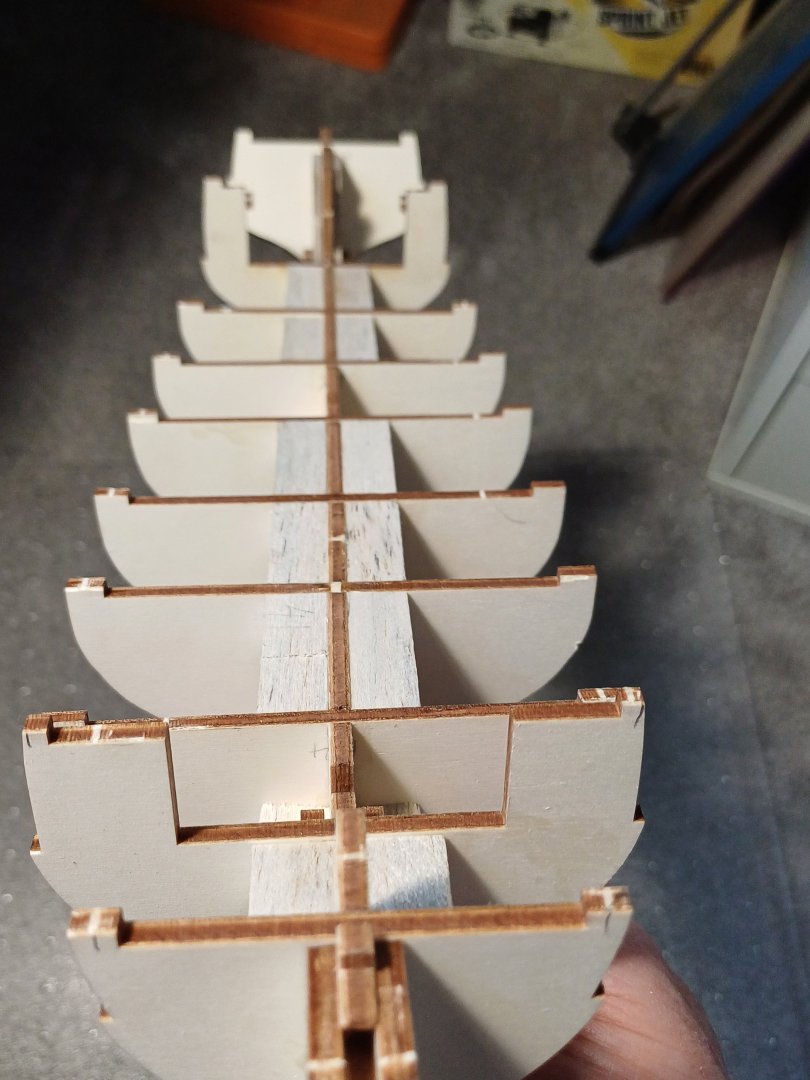
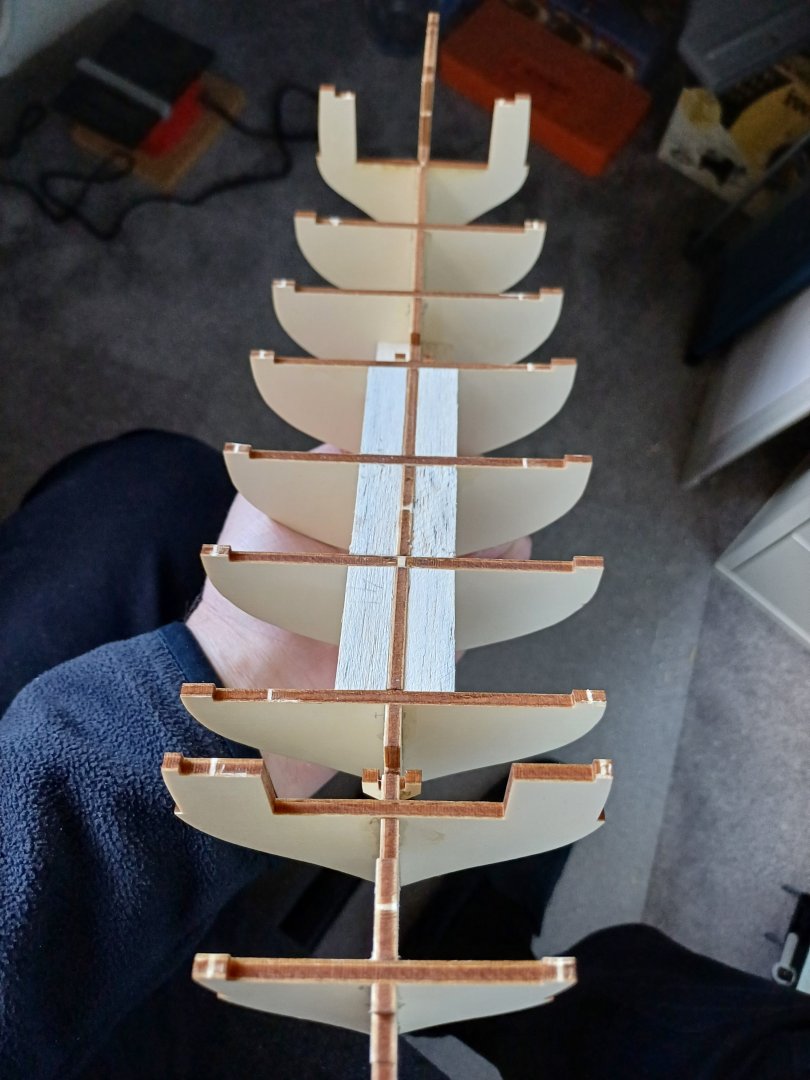
I have now fitted stiffeners as well as some blocks at the bow and the keel now looks straight. I decided to do a 4 but shift pattern for the planking and cut the planking into 60mm strips and used a 5B pencil to blacken one edge of the planks. I will fix the planks in place with PVA. I will post photos once the glue has dried.
-
Thanks for the advice. Having spent nearly a week on fitting the frames and stiffeners along the length of the false keel I don't feel that I have anything to loose by pushing ahead. If it does not work then I will contact them in which case I would need all of the pieces from A1 to A18. I will let you know how it goes. I do think that we modelers would be better served if OcCre used a 5 ply with all of the laminates being the same thickness something like the 3mm ply used on some of the the Caldercraft Models.
-
ccoyle reacted to a post in a topic:
HMS Beagle by Geordy Aidan - OcCre - 1:60 scale
-
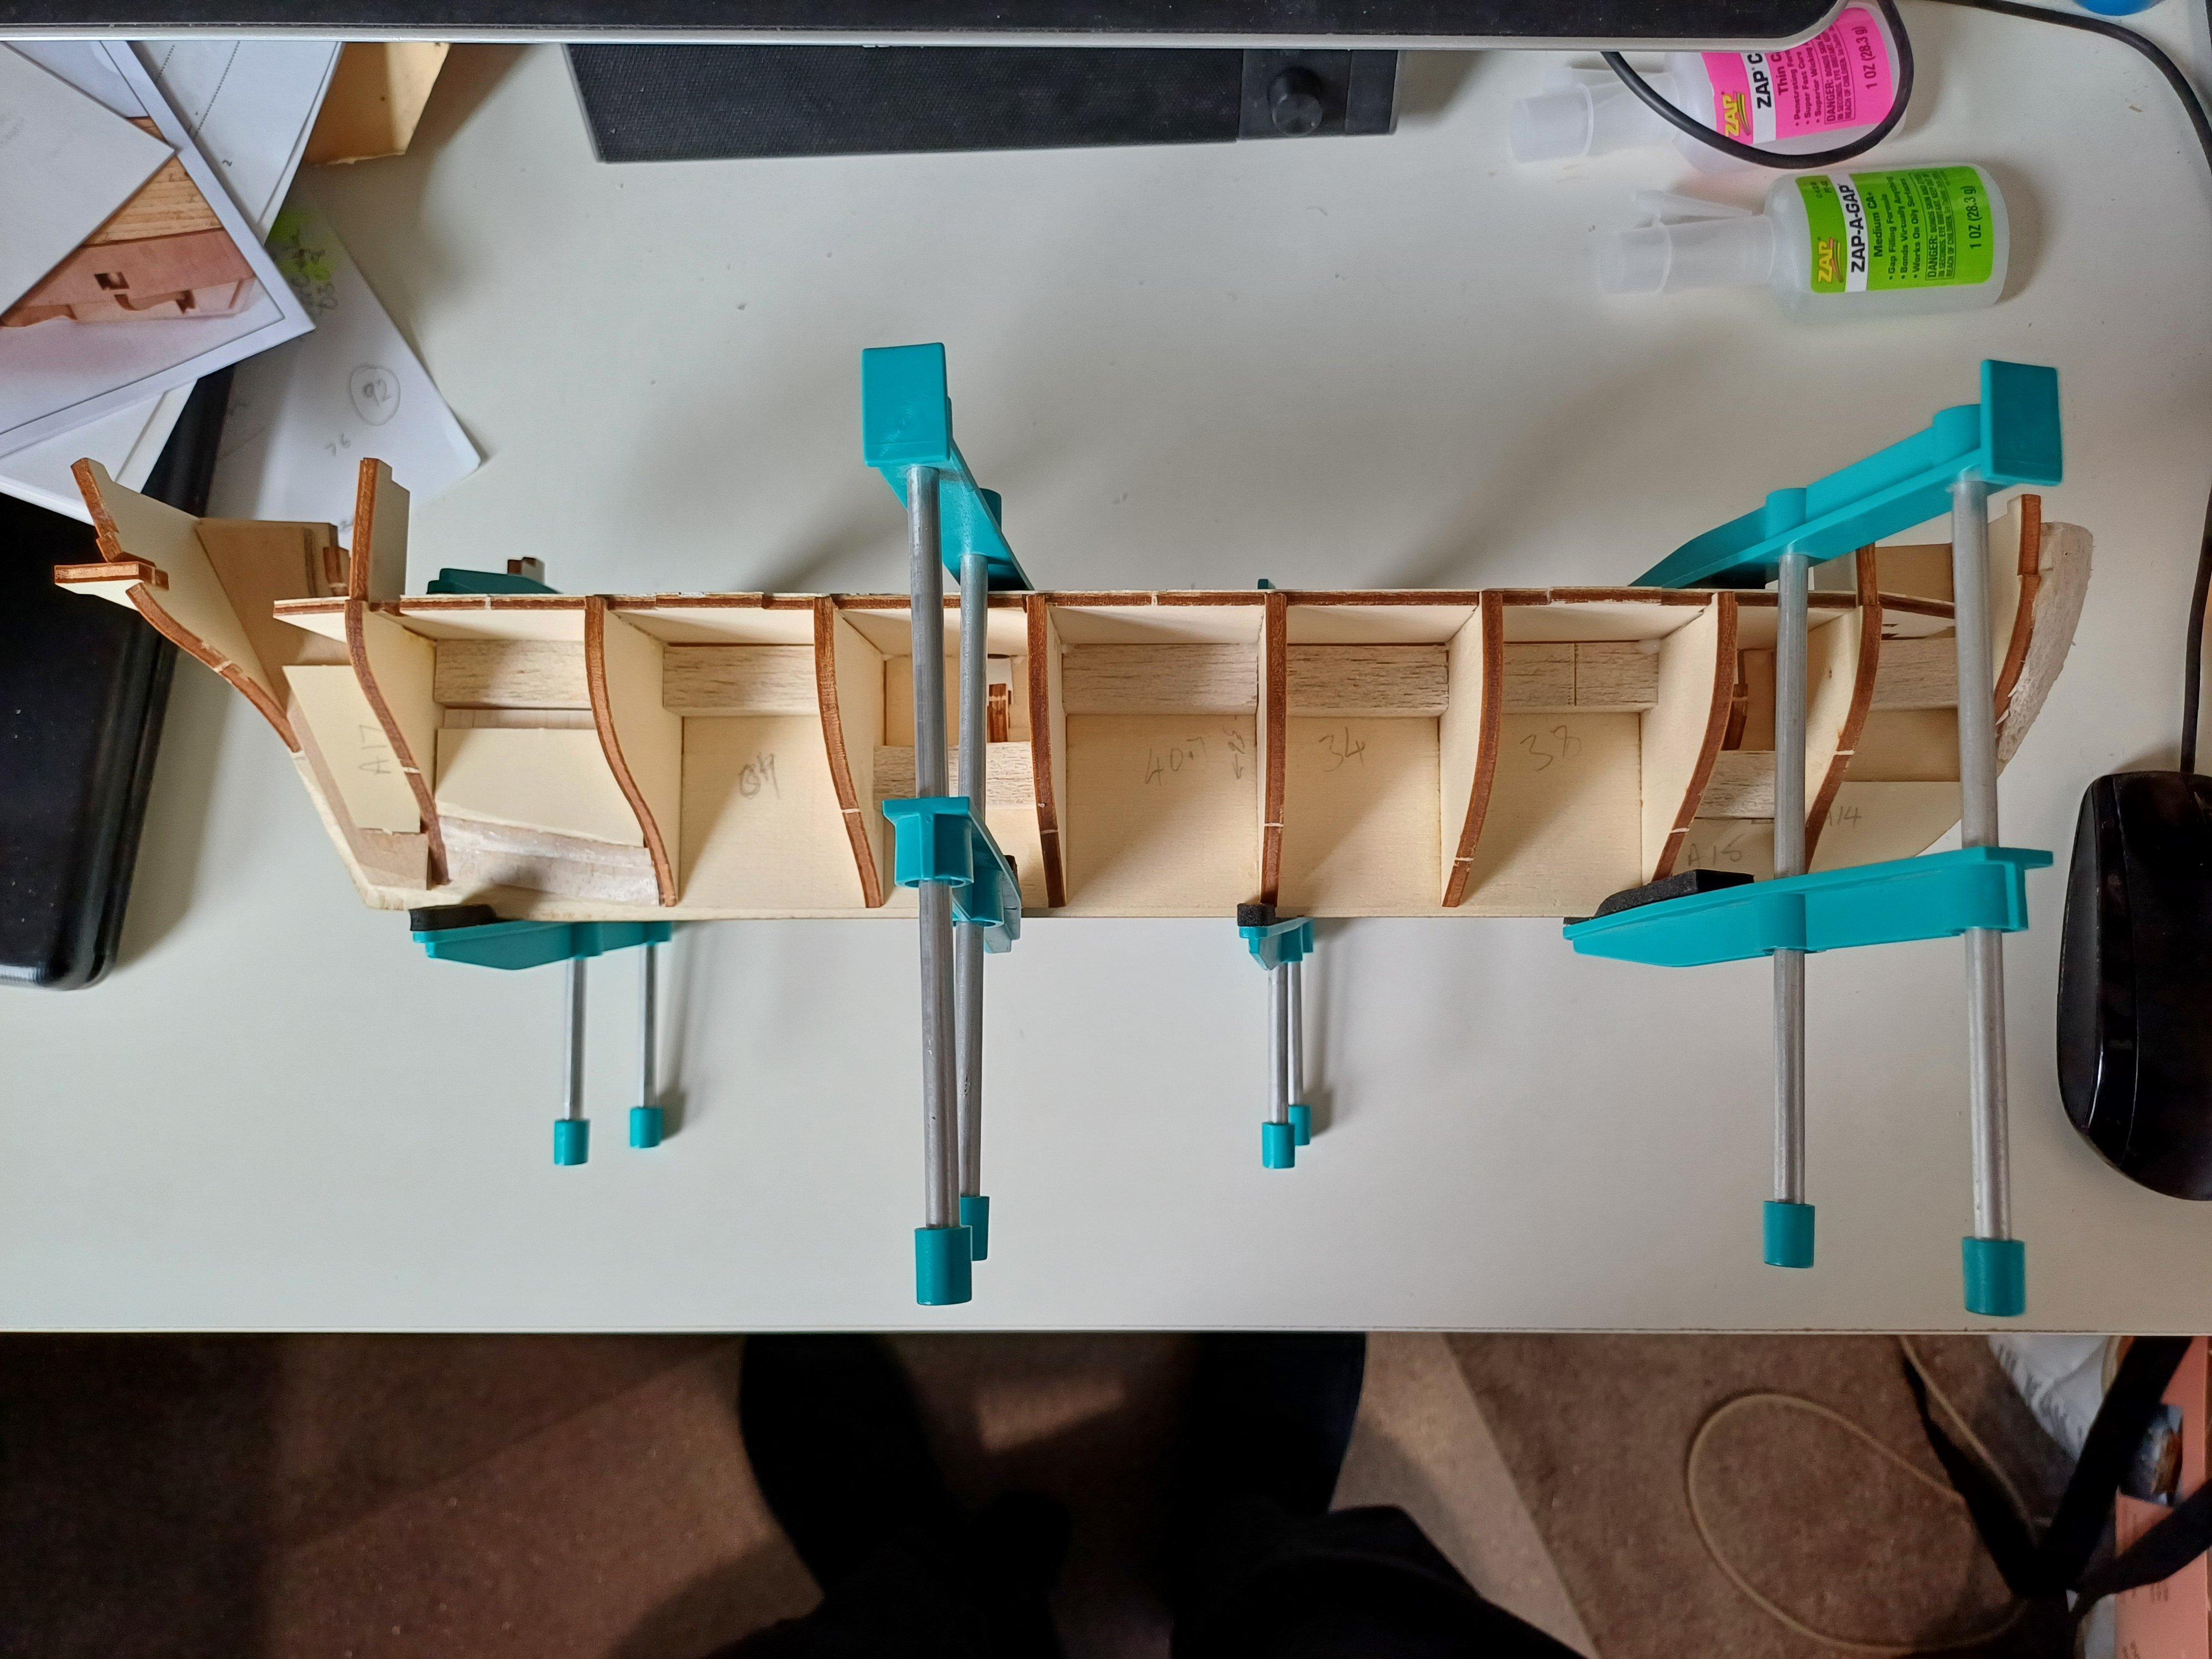
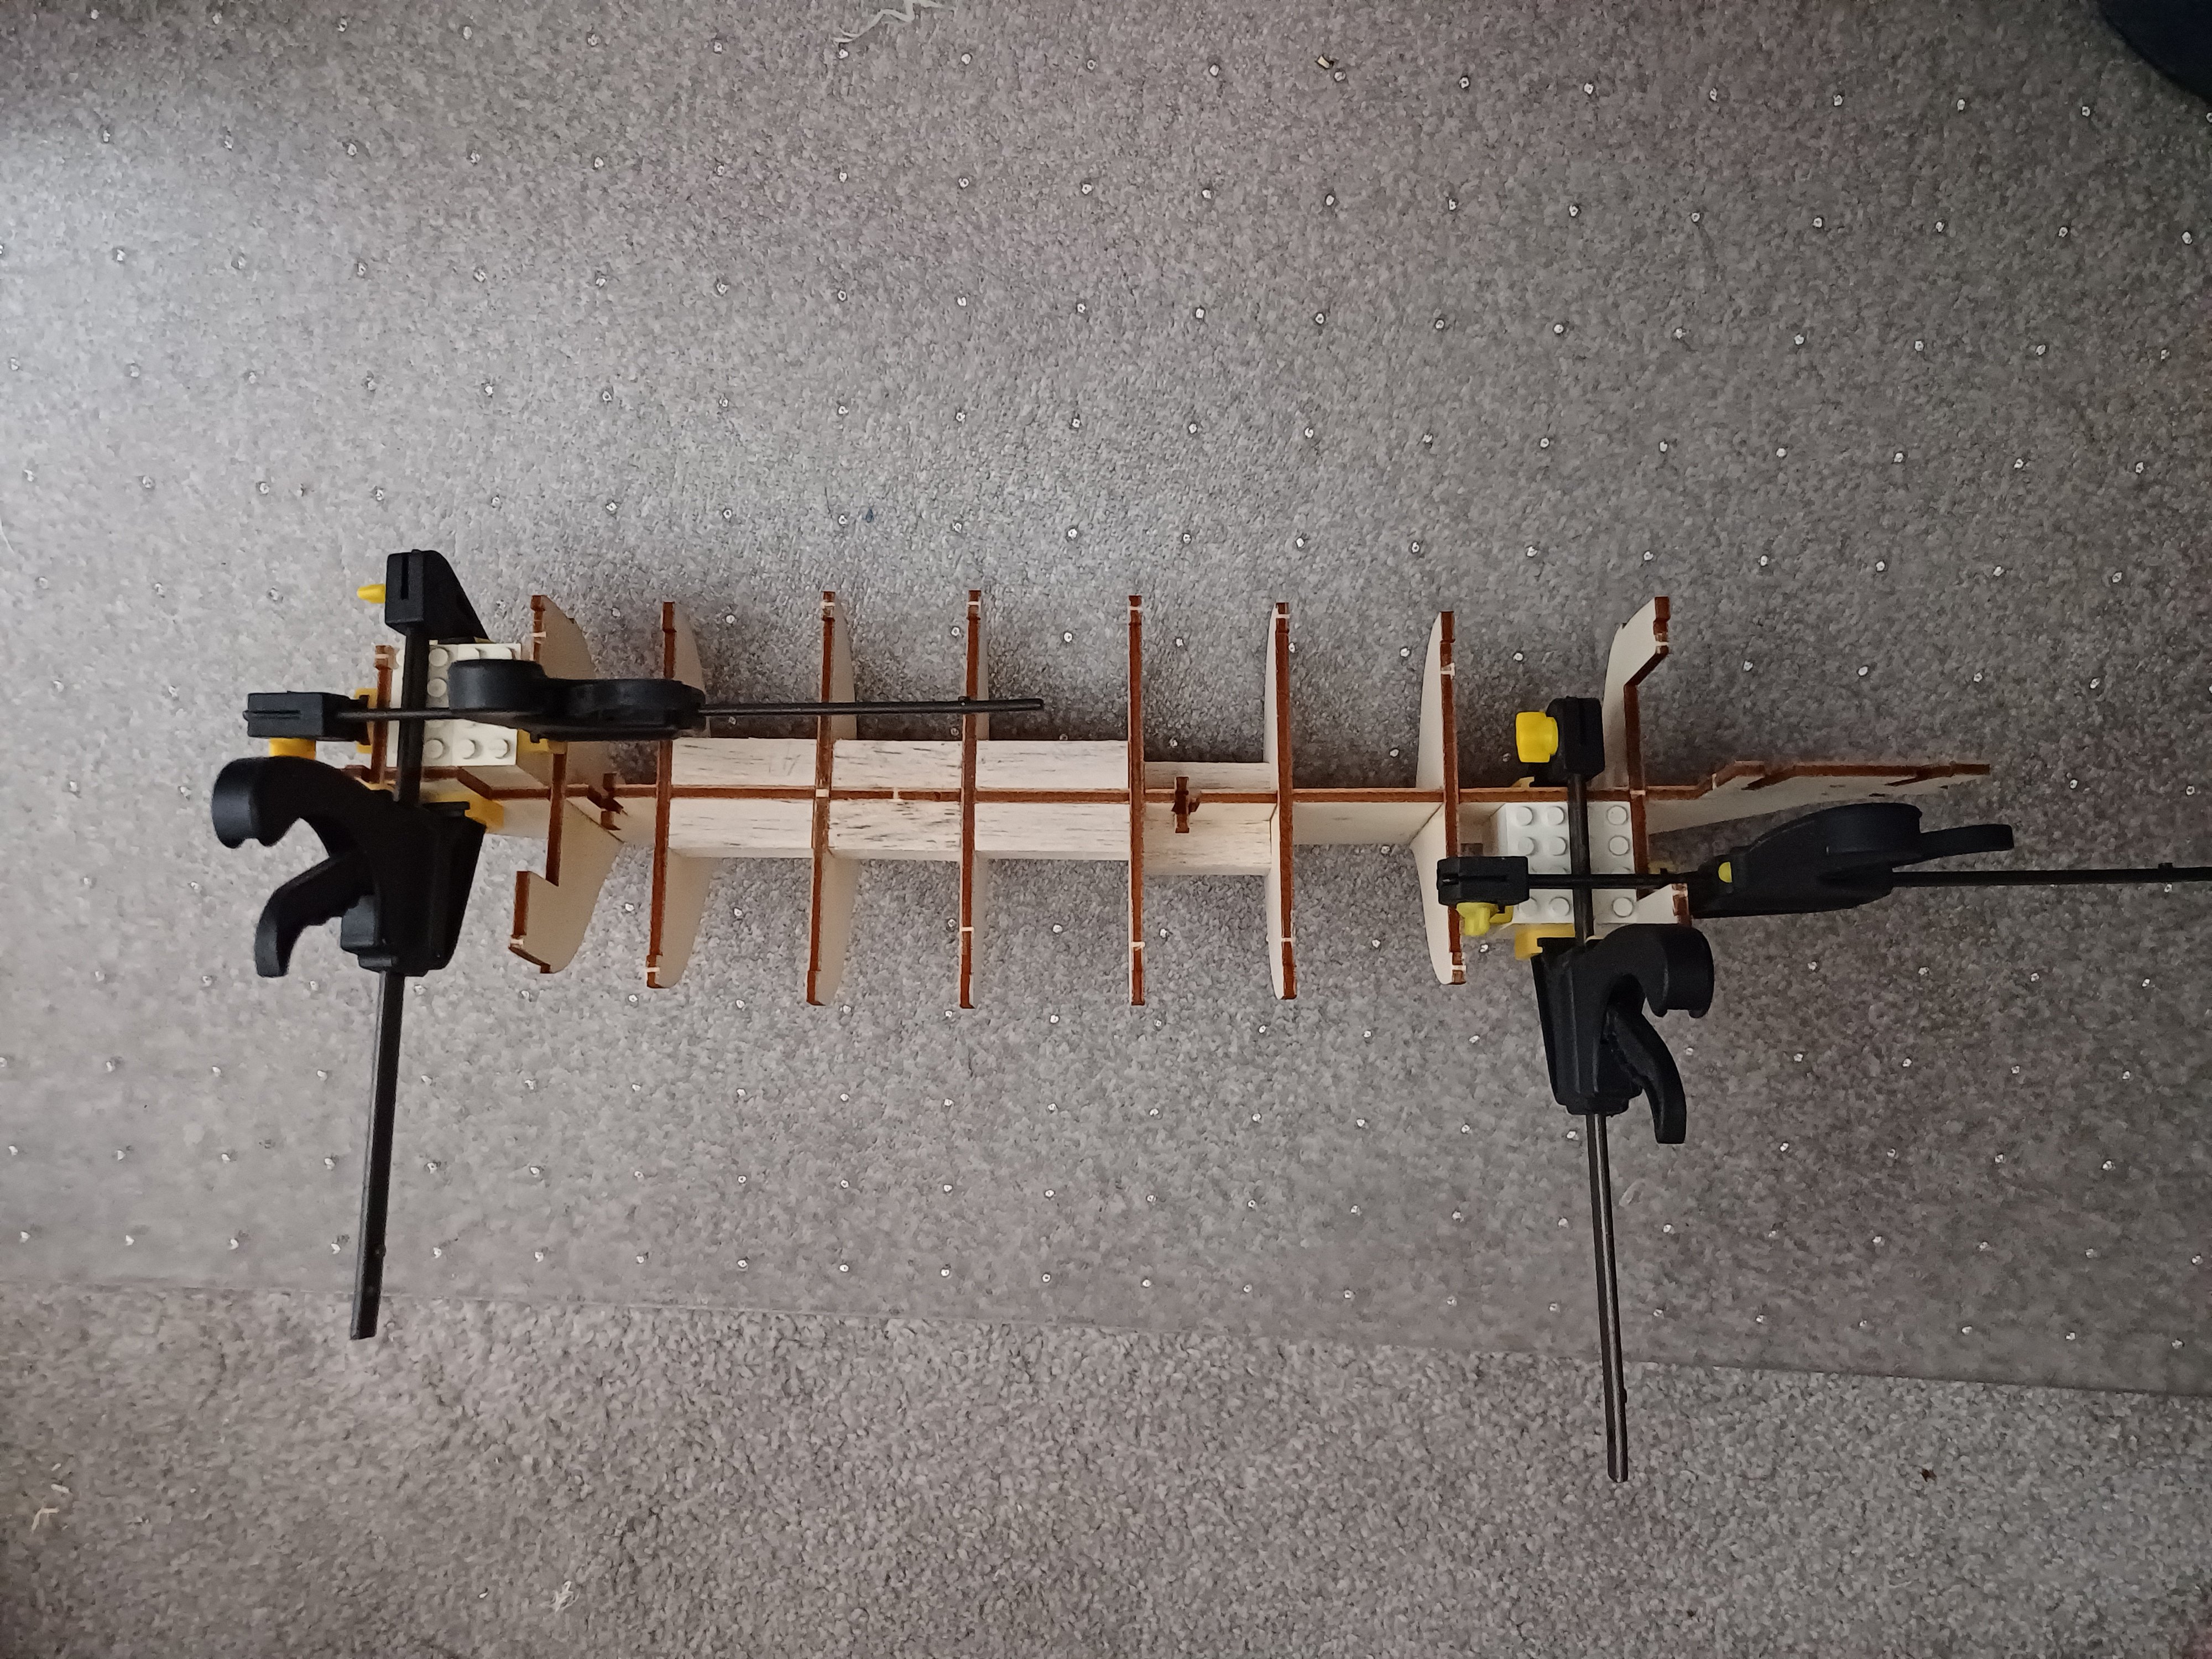
Having put a a model of HMS Supply to one side because I was constantly being asked by the family how the Beagle was going. I opened the packaging and I have to say that whilst my initial reaction was this looks OK BUT on closer inspection I have discovered my first major problem The False Keel has a twist to it! That is not good especially as these models are not cheep. So I have soaked the false keel in boiling water then clamped it between two pieces of 20 mm MDF and left it to dry for three days. When I removed it it still has a warp towards the stem forward of frame 4 and a twist towards the stern aft of frame 10. I am attaching the frames and gluing them using Lego Blocks to hold them square and then adding stiffeners in at deck level. I will add larger blocks to fill in the voids forward of frame 4 and aft of frame 10.

-
ccoyle reacted to a post in a topic:
HMS Beagle by Geordy Aidan - OcCre - 1:60 scale
-
I was given this model by my family as both my wife and sister in law volunteer at Down House which is a few miles down the road. Down House was the family home of Charles Darwin for 40 years and where he wrote "On the Origin of the Species" which was published in 1859.
-
Geowolf reacted to a post in a topic:
HM Mortar Vessel Convulsion by Geordy Aidan - FINISHED - Caldercraft - 1:64
-
Mr Whippy reacted to a post in a topic:
HM Mortar Vessel Convulsion by Geordy Aidan - FINISHED - Caldercraft - 1:64
-
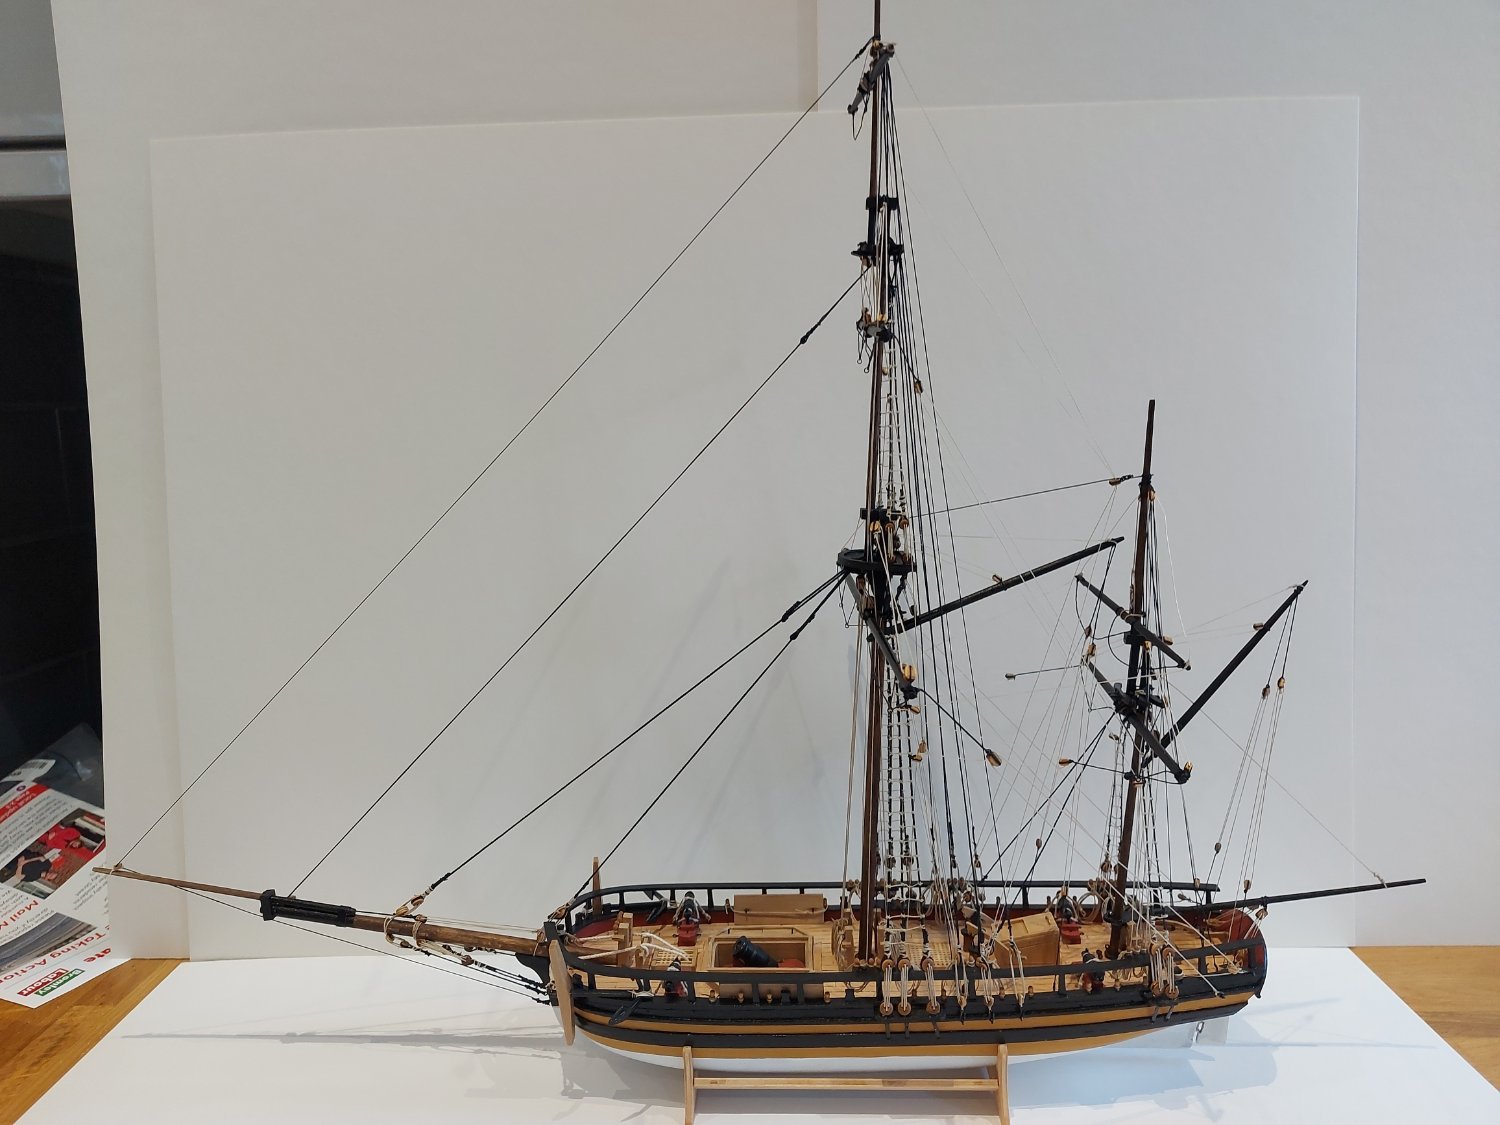
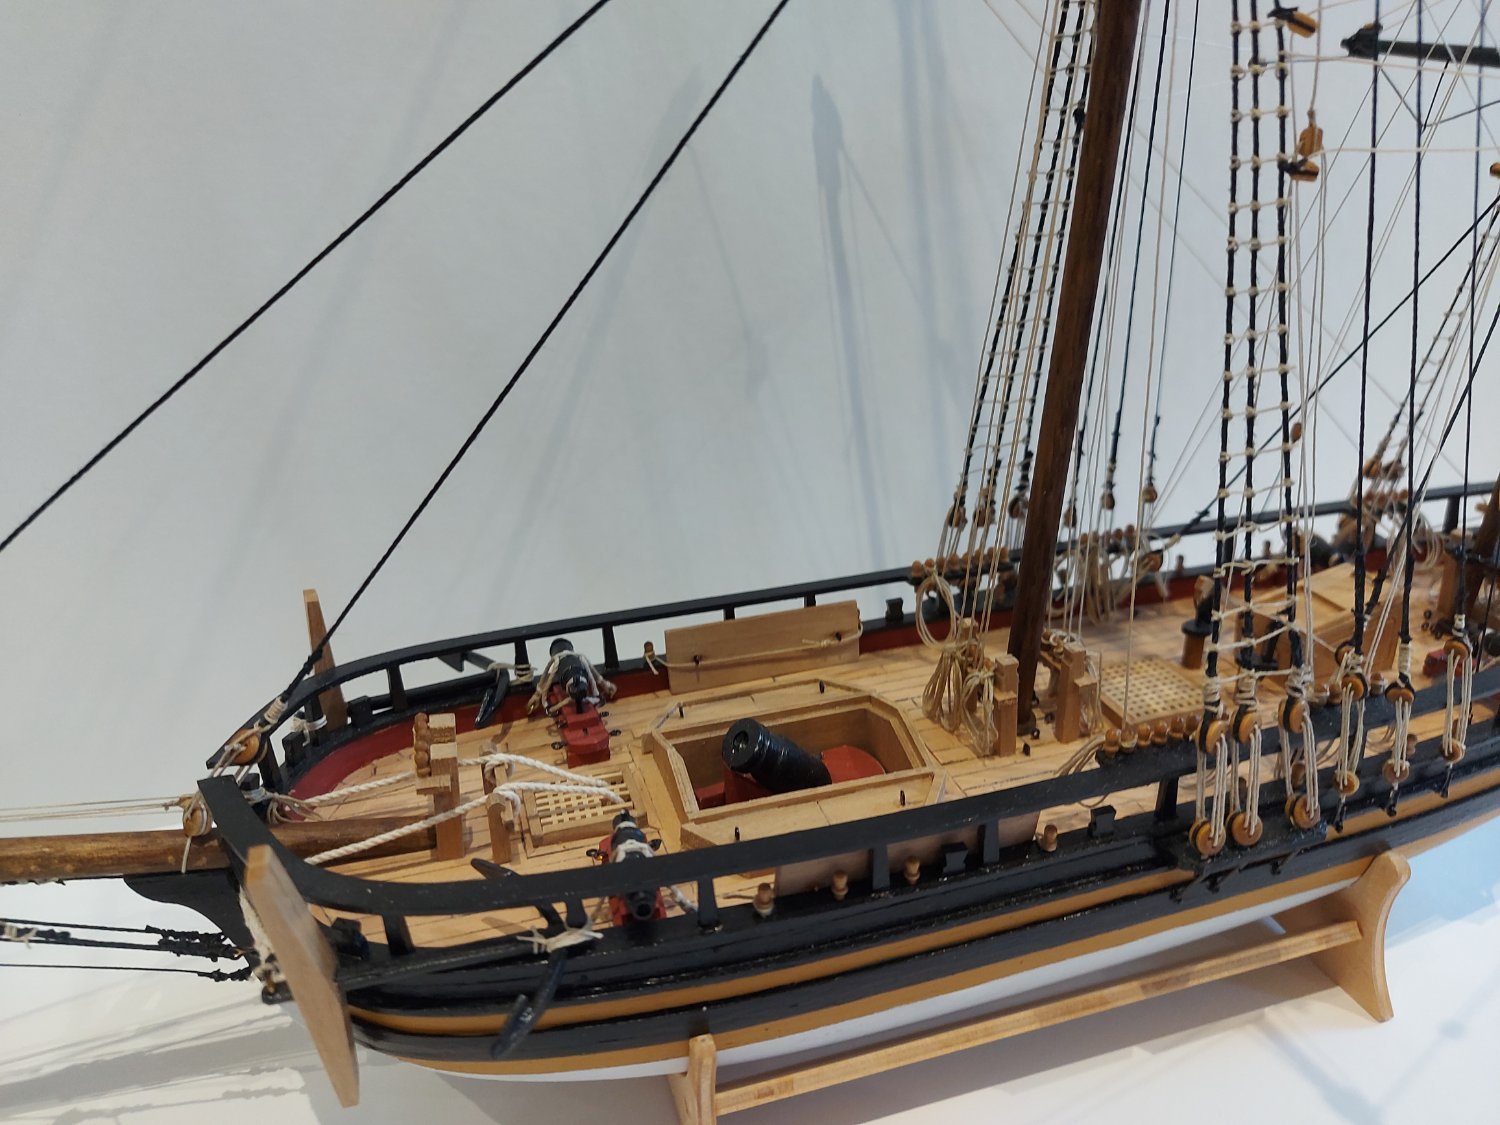
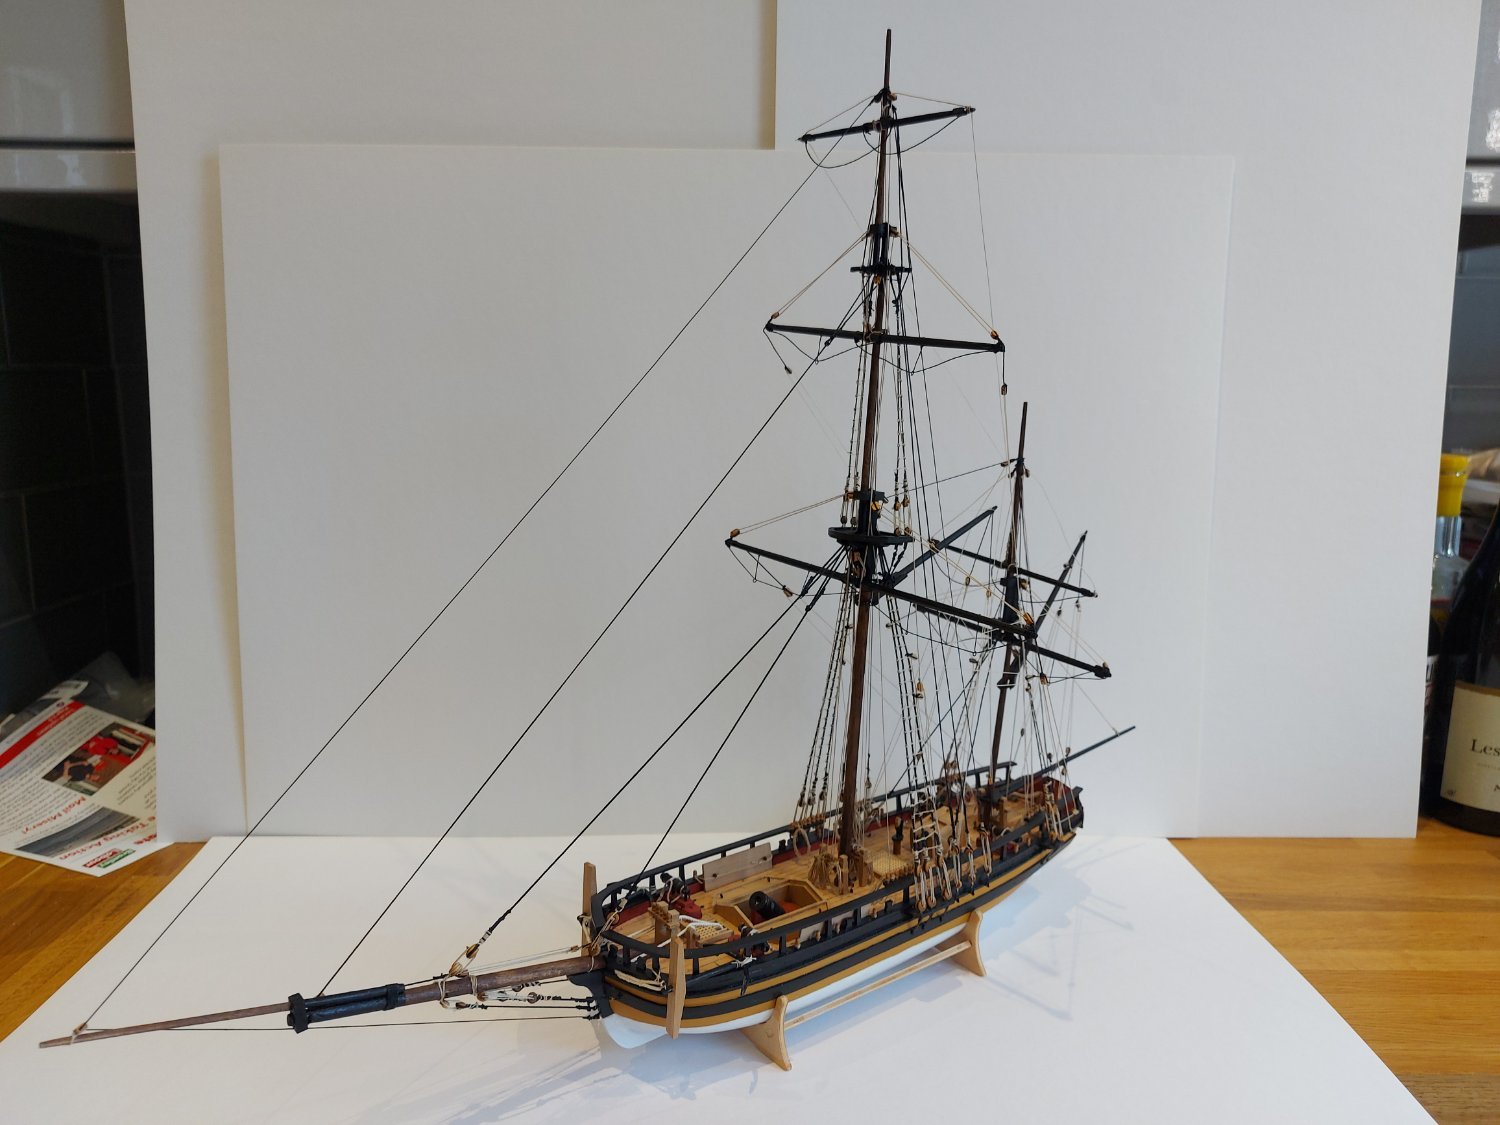
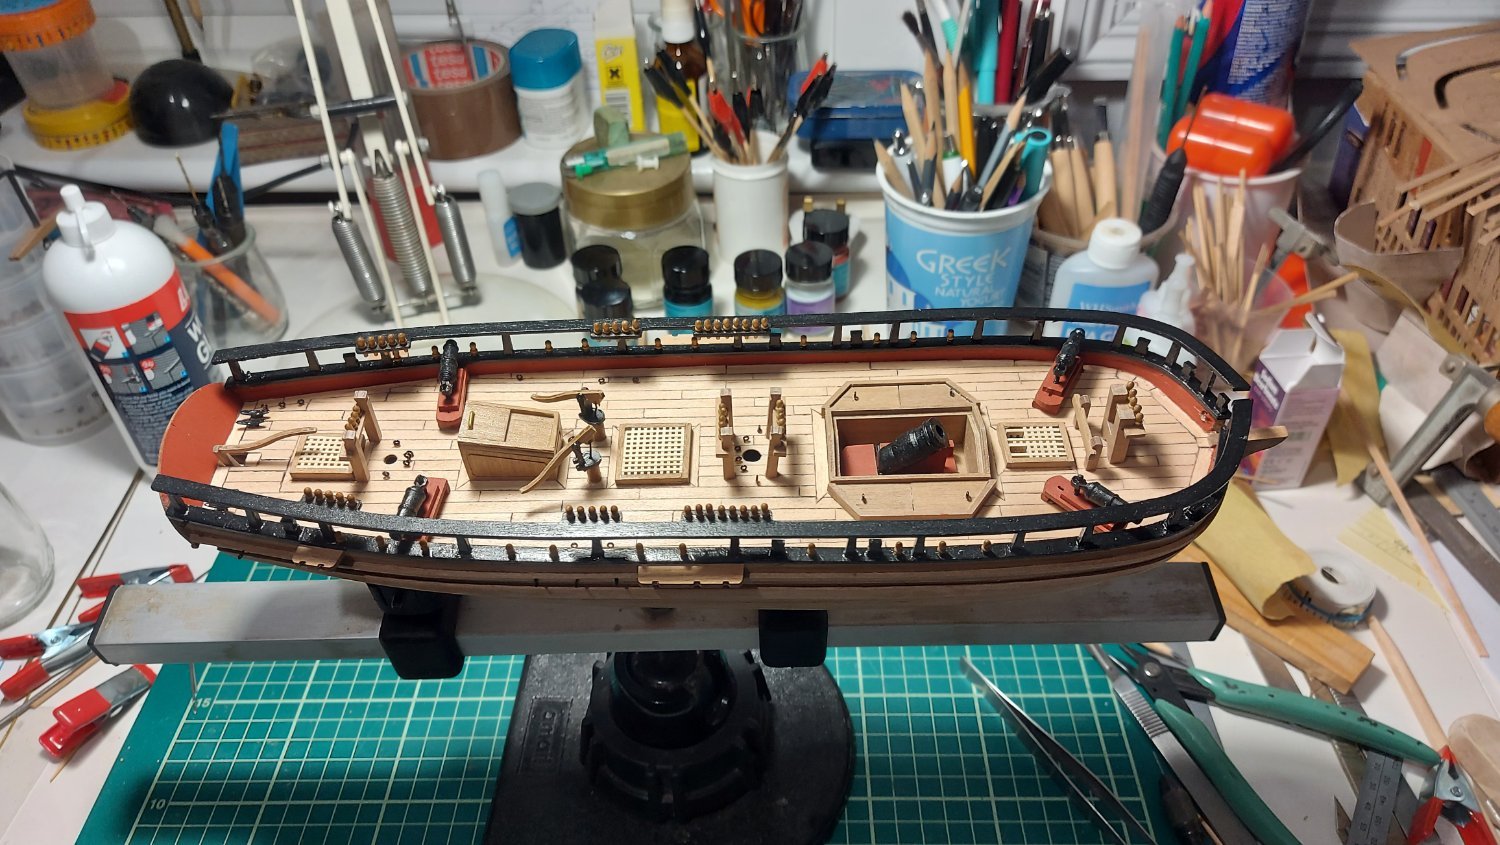
Thanks for your comment Chris. I think it is finished and have put it to one side for the moment. There are things like the covers for the mortar which I just lashed to the bulwarks. Where would they have been stored in action. I also did not rig any of the tackle for the carronades but did fit the breaching.
- 11 replies
-
- 2
-
-
- Convulsion
- Caldercraft
- (and 2 more)
-
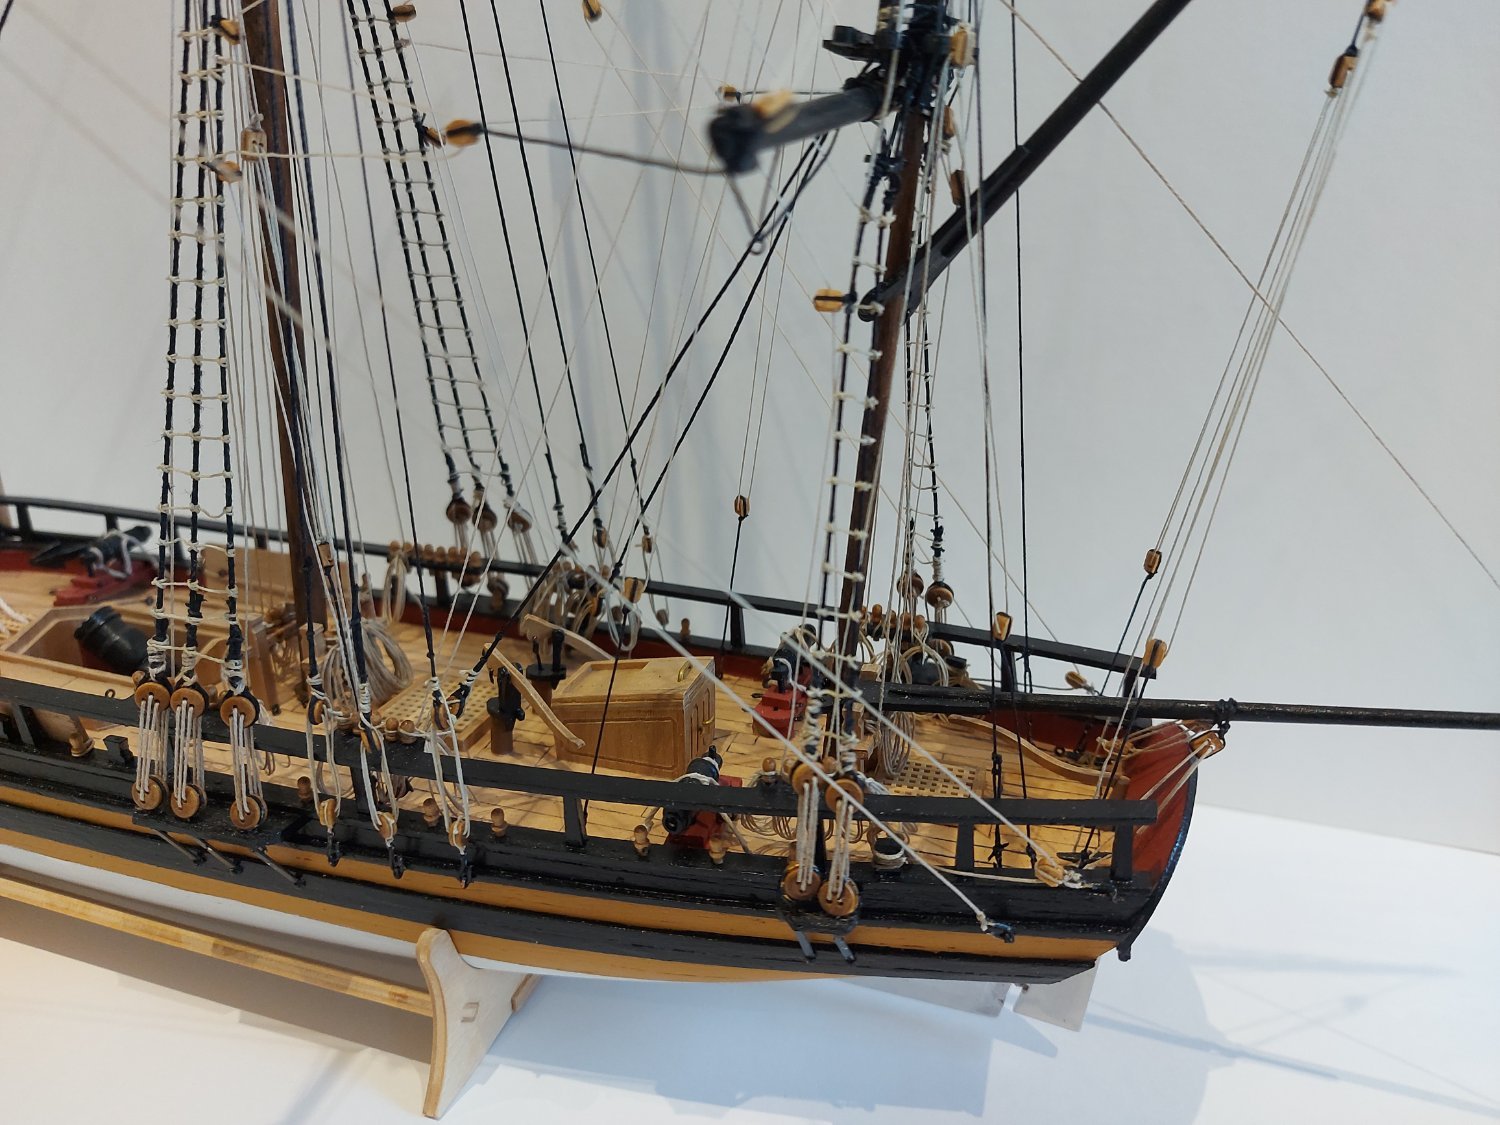
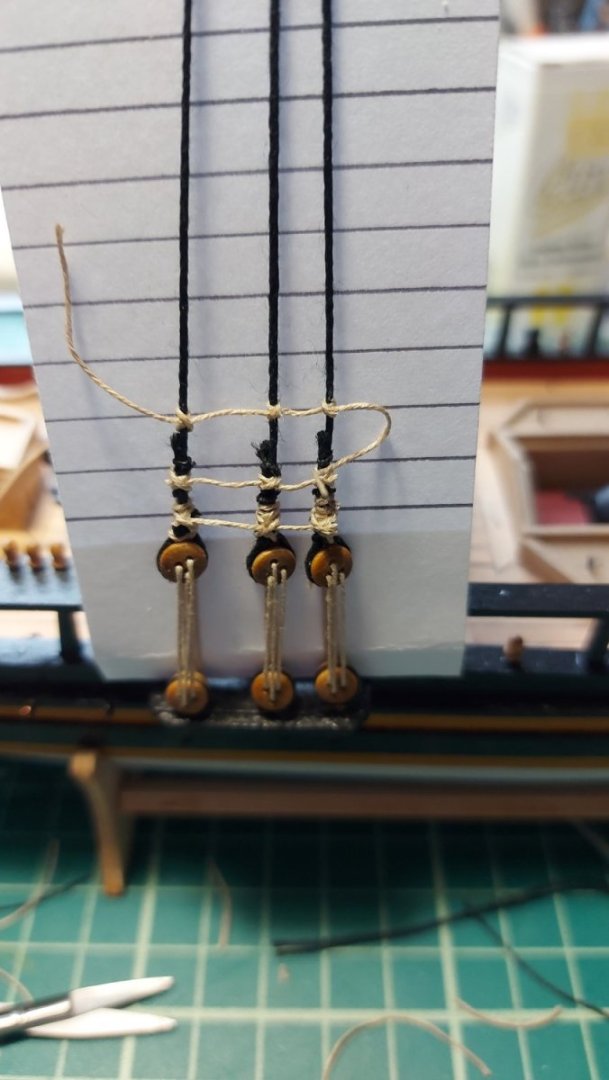
And now the running rigging. This was a little frustrating as there were blocks that I had to remove and re tie but I got there in the end.


- 11 replies
-
- 10
-
-
- Convulsion
- Caldercraft
- (and 2 more)
-
Masts stepped and standing rigging started. Lots of knots for the ratlines
- 11 replies
-
- 3
-
-
- Convulsion
- Caldercraft
- (and 2 more)
-
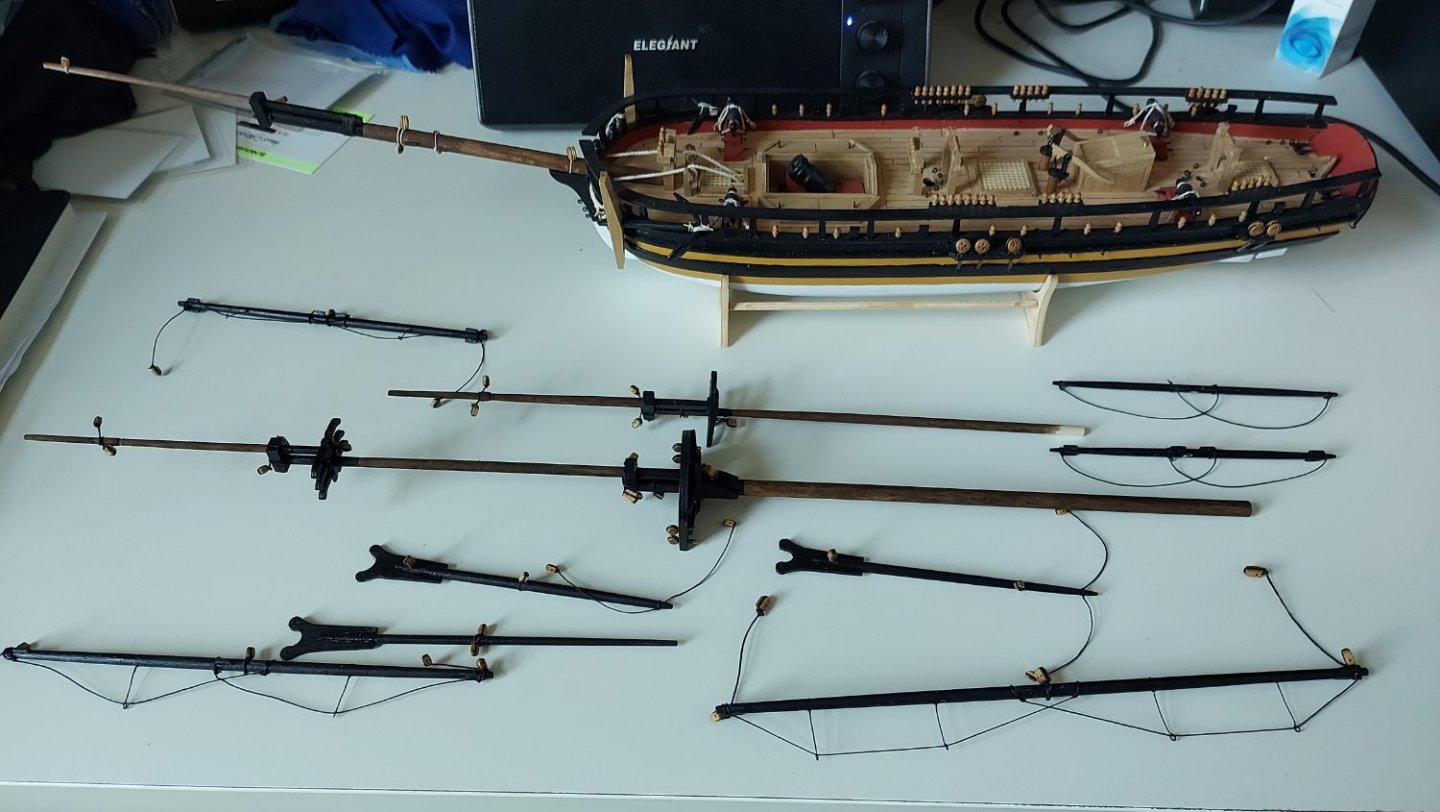
Bow sprite assembled and fitted. Masts and yards ready.
- 11 replies
-
- 2
-
-
- Convulsion
- Caldercraft
- (and 2 more)
-
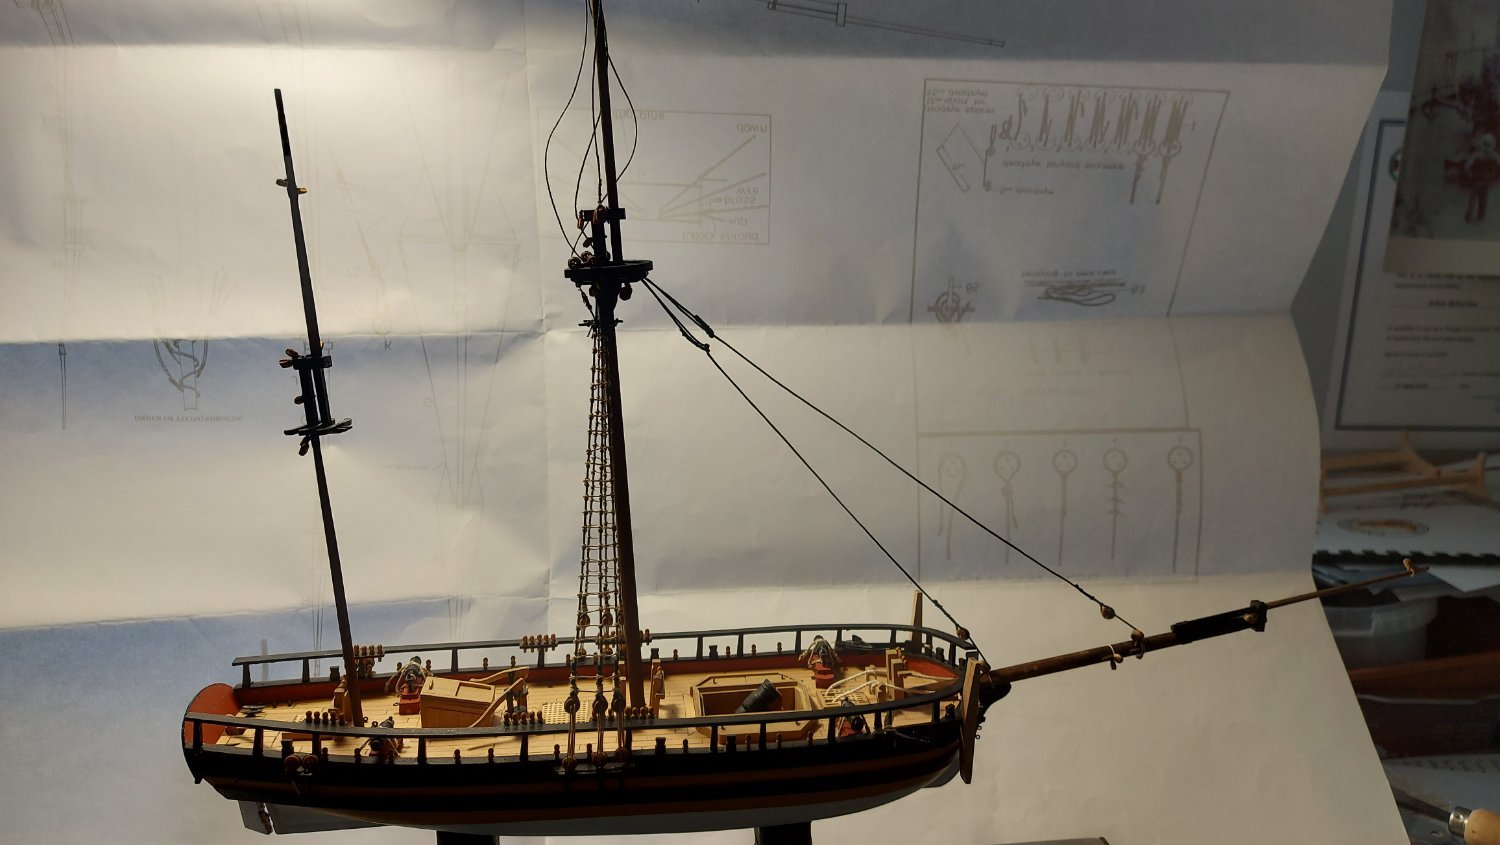
The next step fit the bulwark capping rail and and all of the deck fittings then test fit the bow sprite. Then a coat of paint.

- 11 replies
-
- 3
-
-
- Convulsion
- Caldercraft
- (and 2 more)