N80FTY
-
Posts
86 -
Joined
-
Last visited
Content Type
Profiles
Forums
Gallery
Events
Everything posted by N80FTY
-
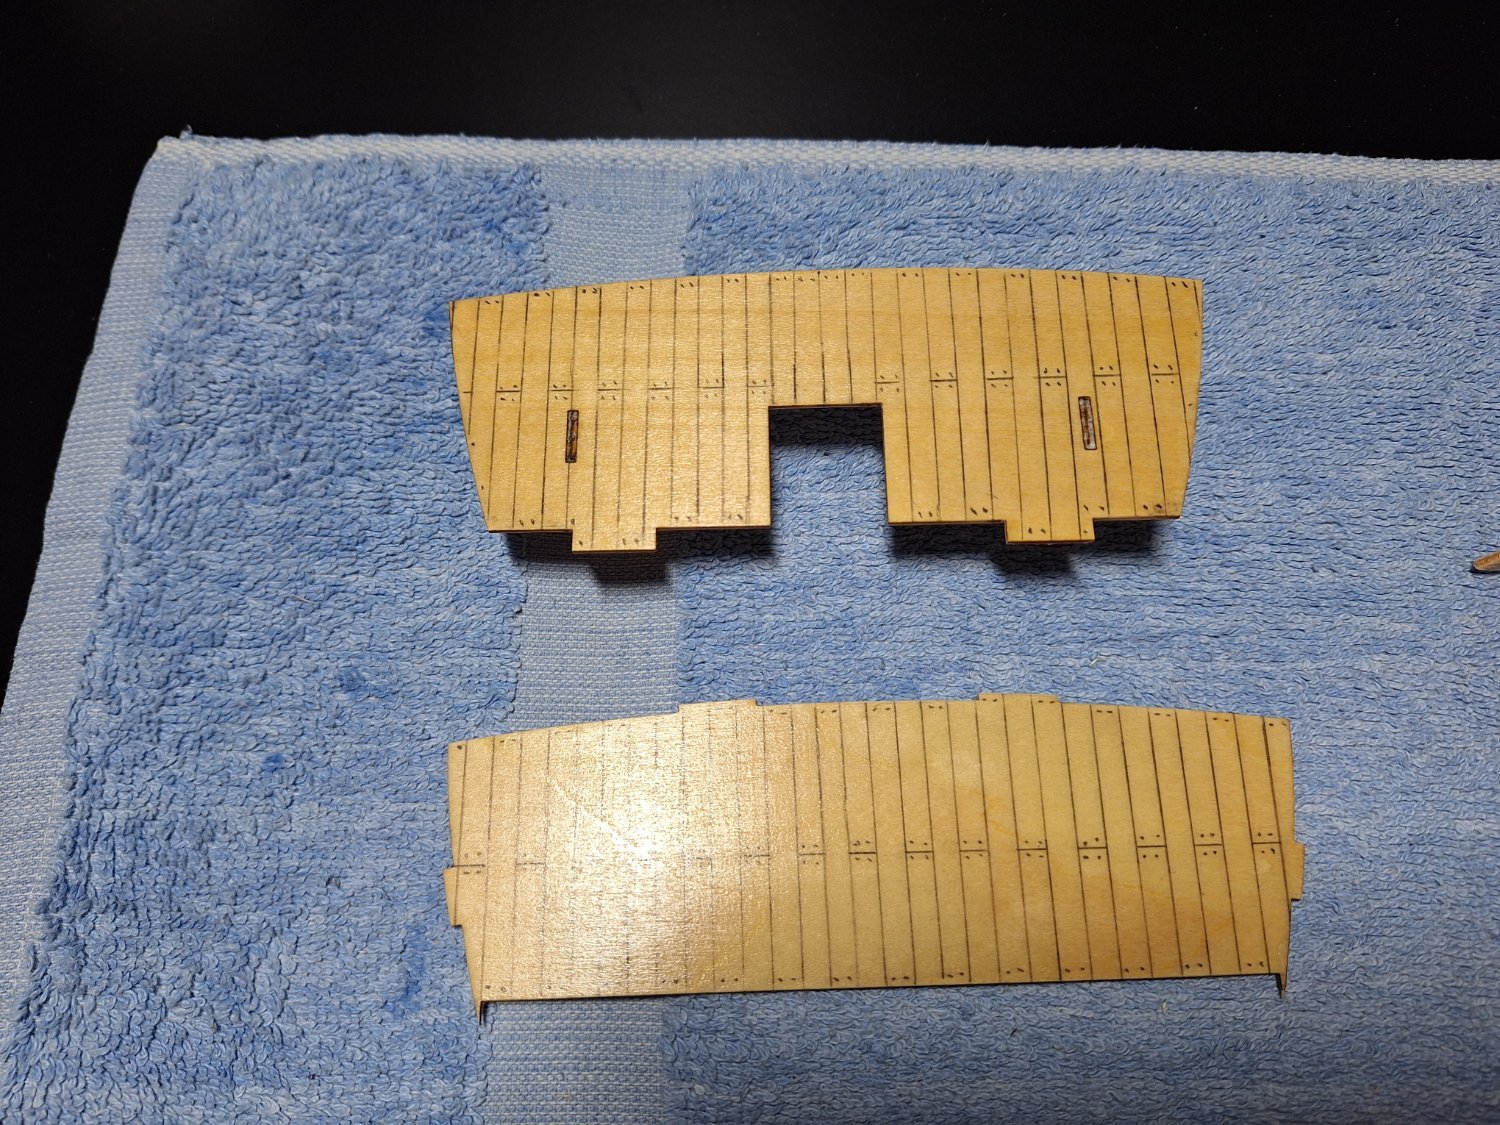
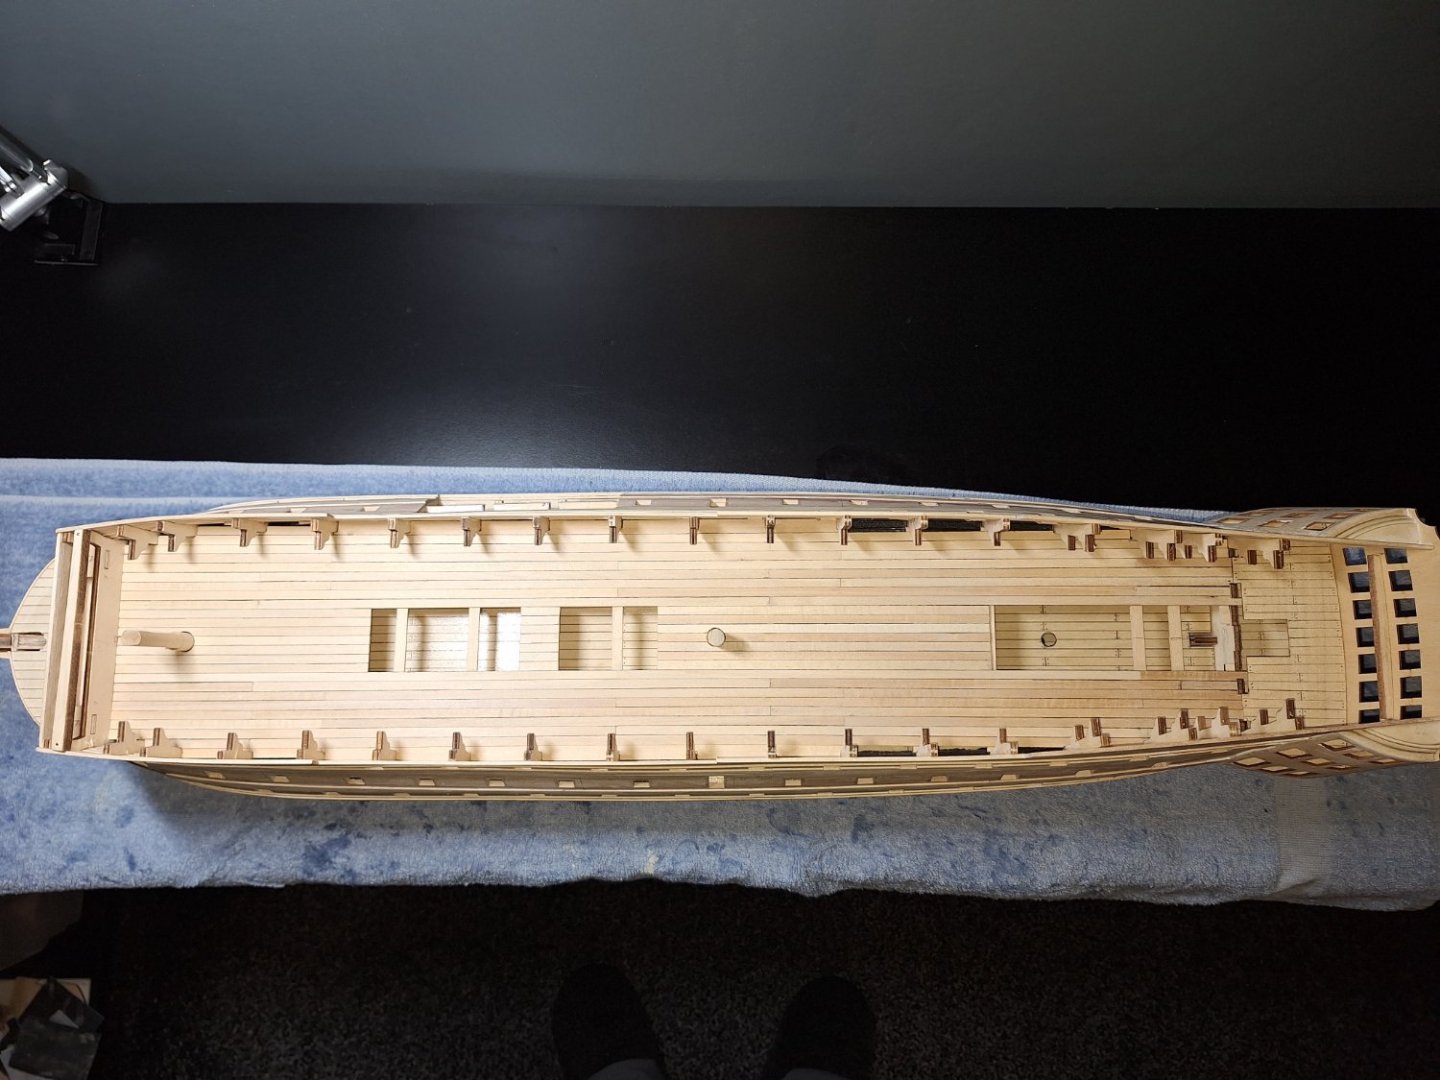
Just finished gluing the upper deck, I still need to put the fake joins in but i will do this when i clear matt varnish it.
- 33 replies
-
- 3
-

-
- Victory
- DeAgostini
- (and 1 more)
-
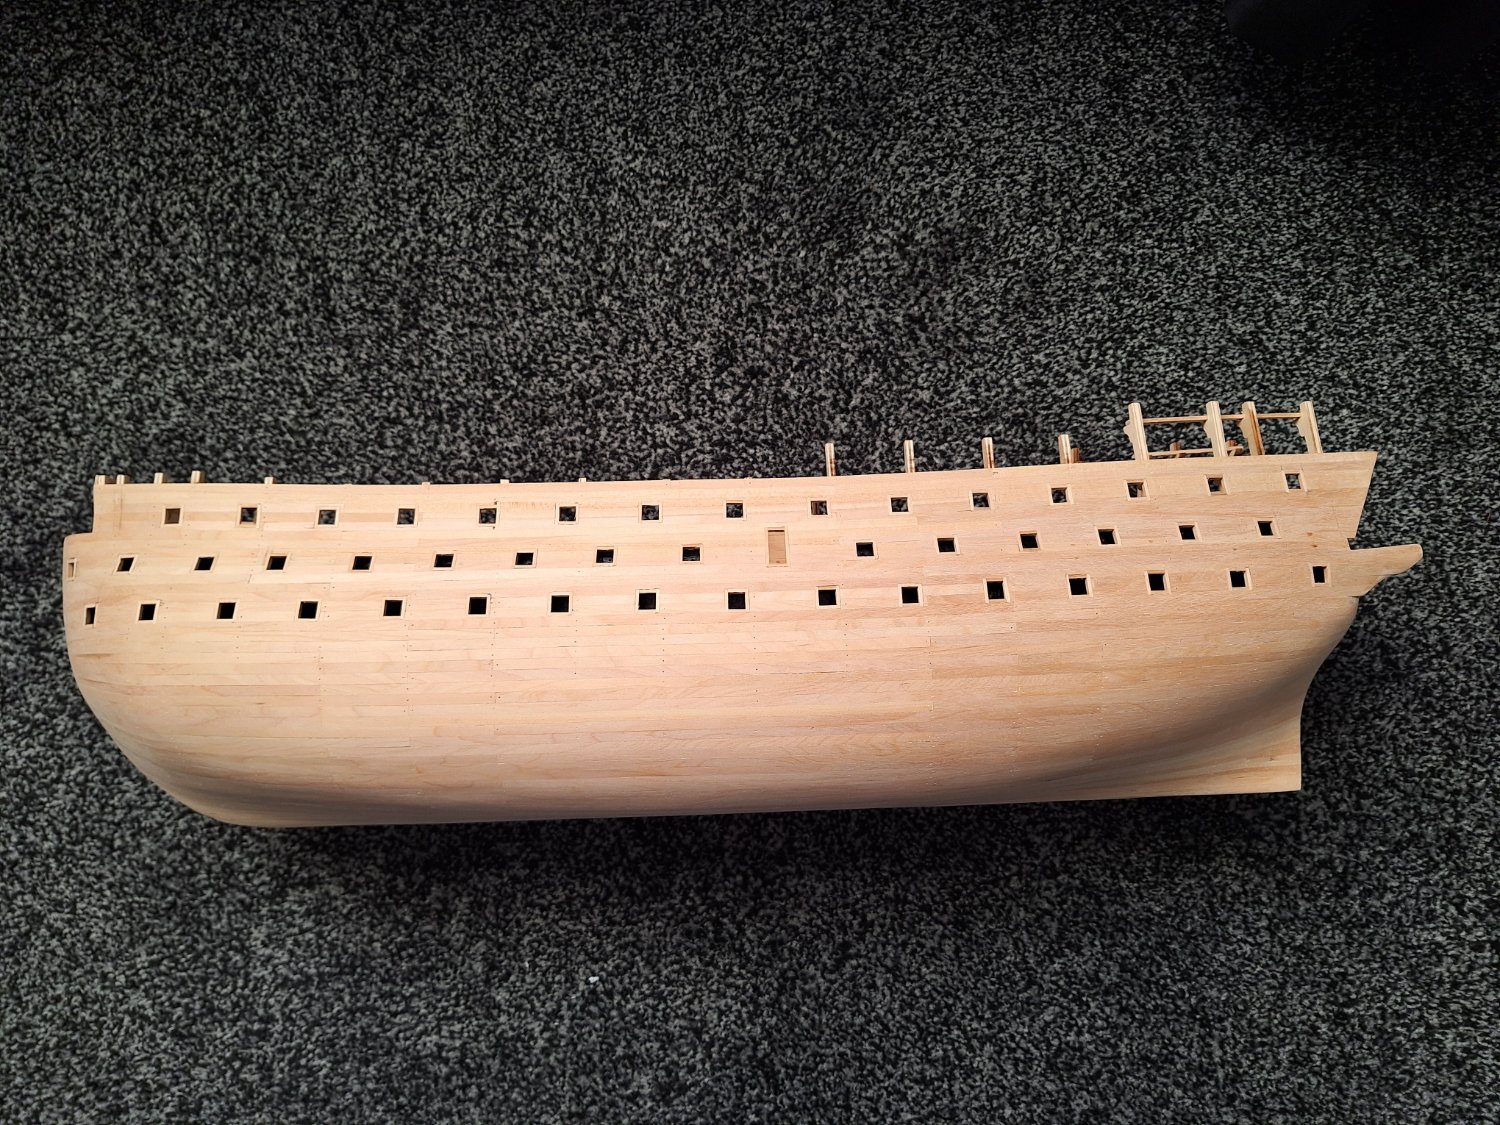
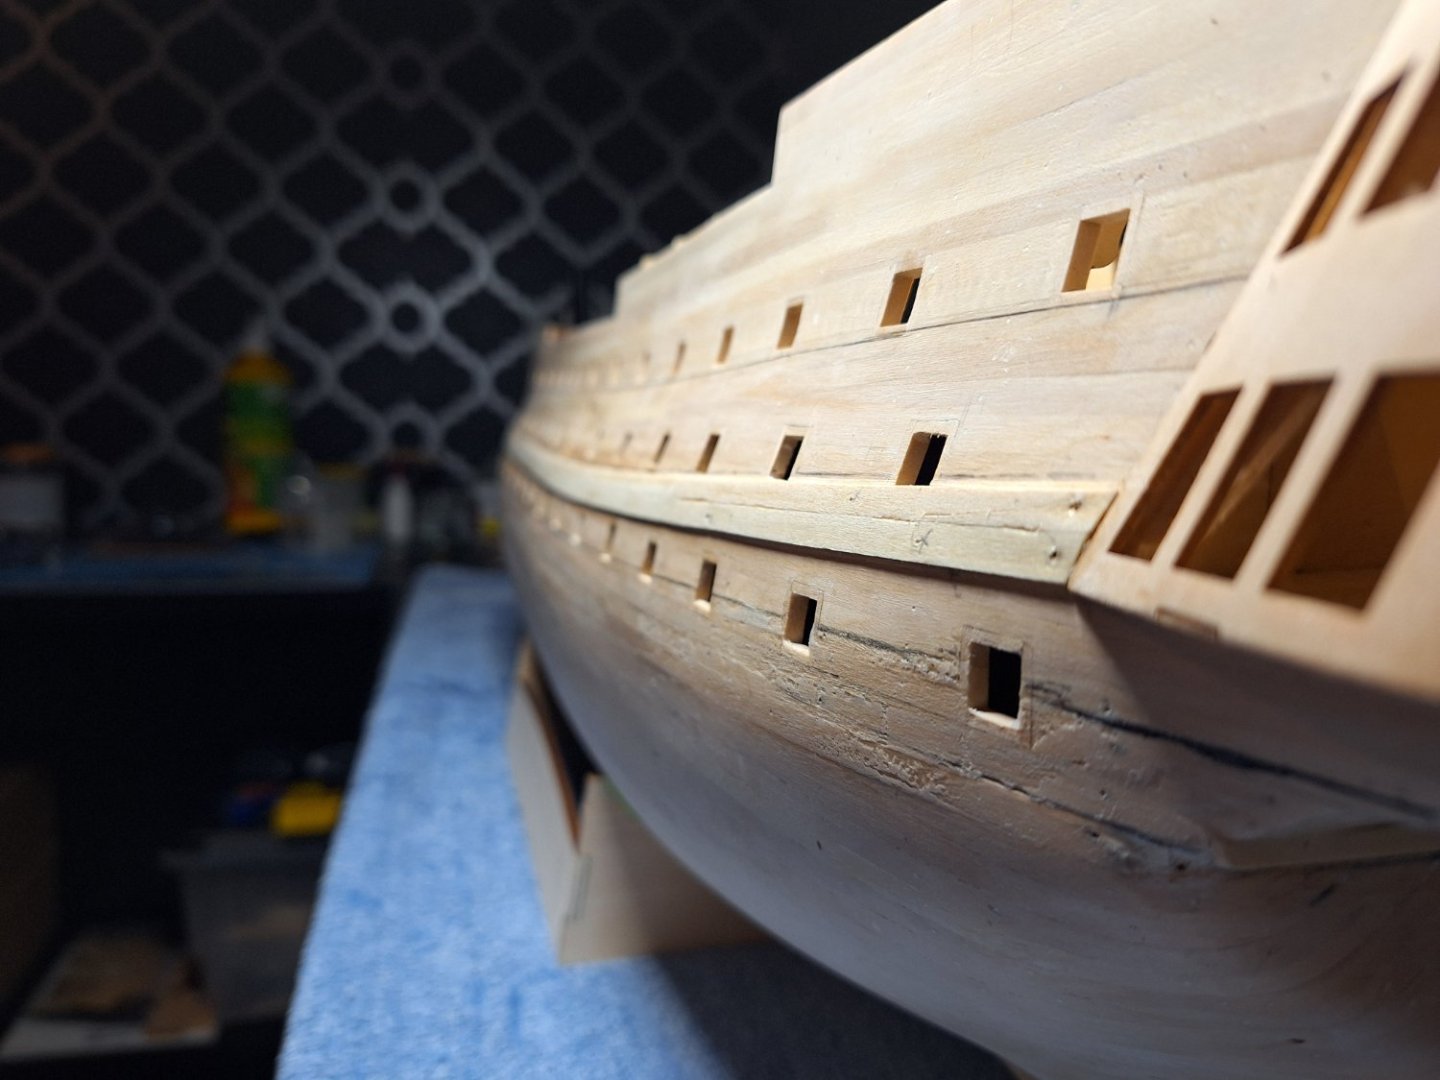
So After a tedious day, all gunports are now 8.9 - 9.2mm. I also redone 2 ports so they are in line.

- 33 replies
-
- 5
-
-
- Victory
- DeAgostini
- (and 1 more)
-
Hi Allan, The wales that came with this are 5x1mm for centre and top wales. The Bottom wales are 3x1mm for trim and 5x2mm for the wale. Not as clear as i thought but you can see the 1mm on the middle wale. Also once i sand it smooth it will educe the thickness slightly

- 33 replies
-
- 3
-
-
- Victory
- DeAgostini
- (and 1 more)
-
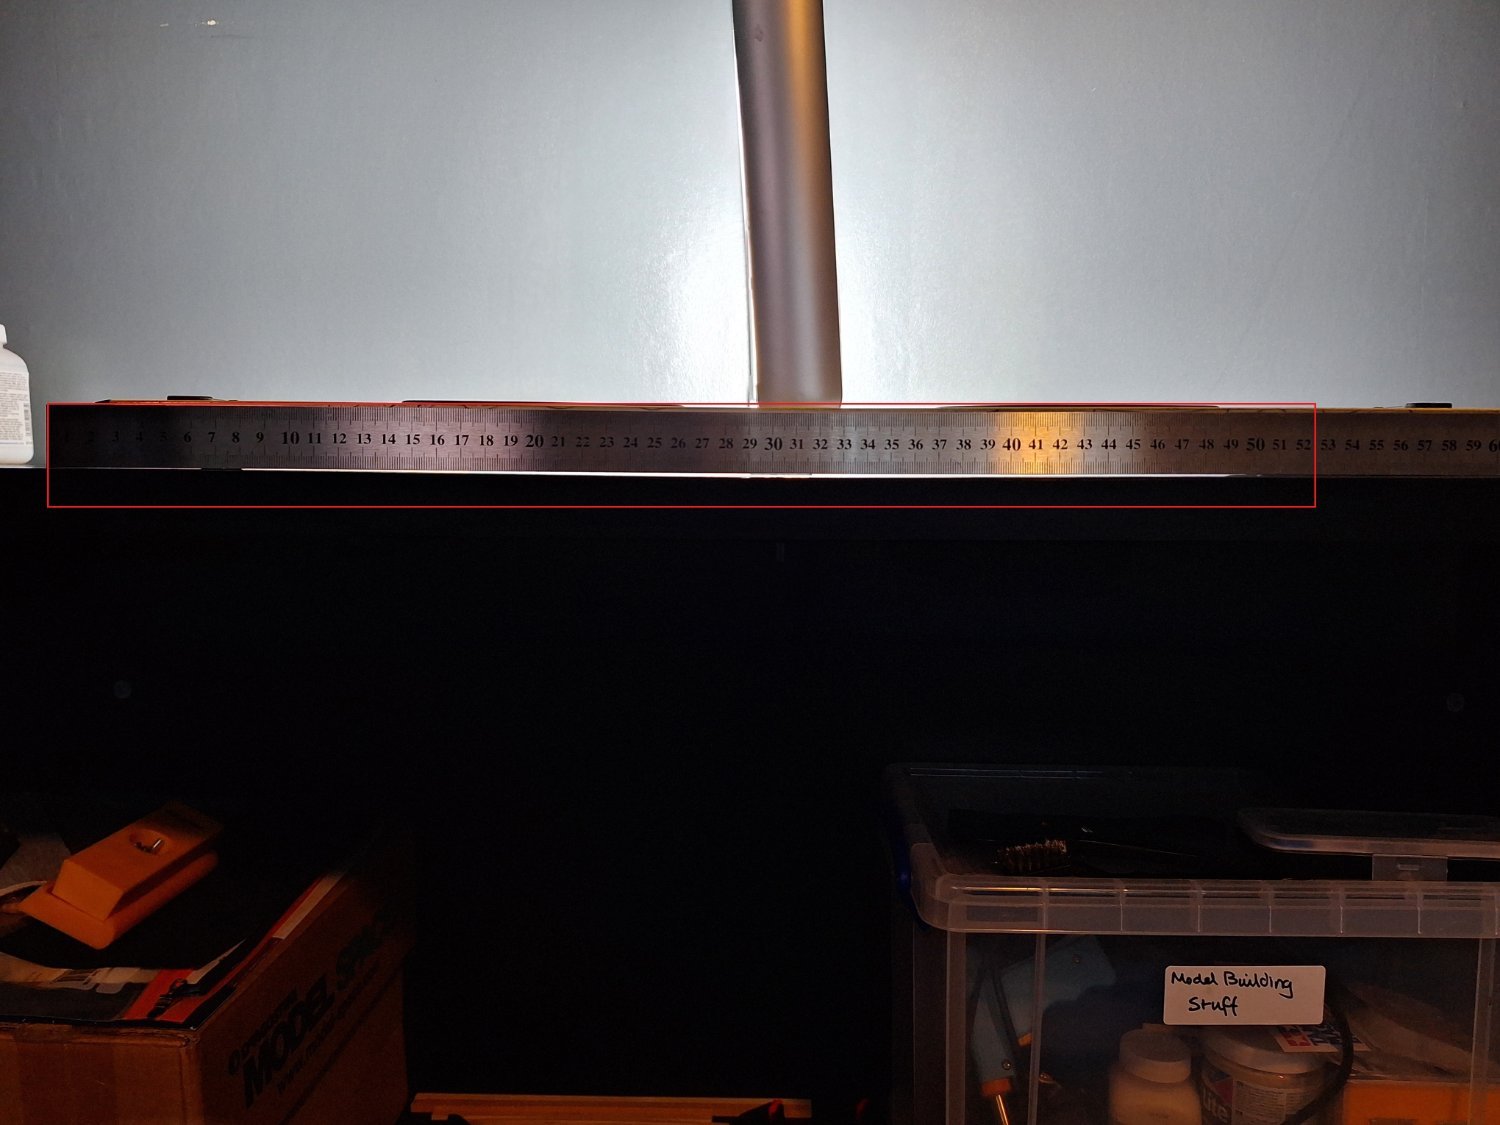
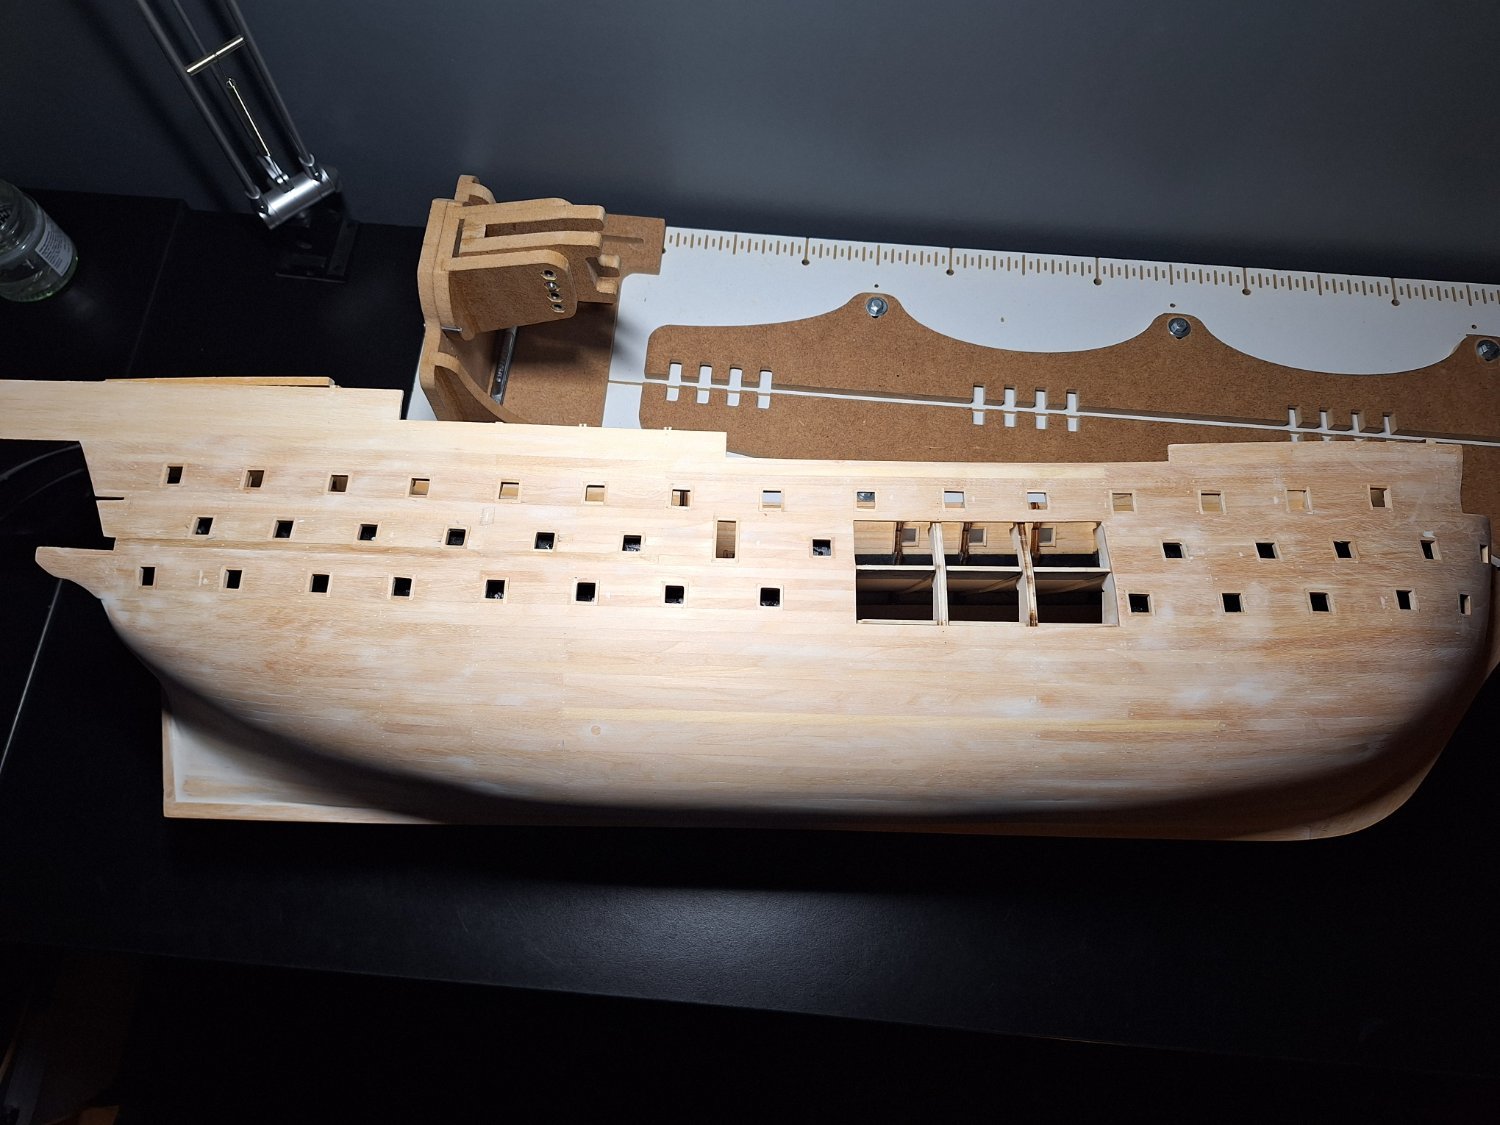
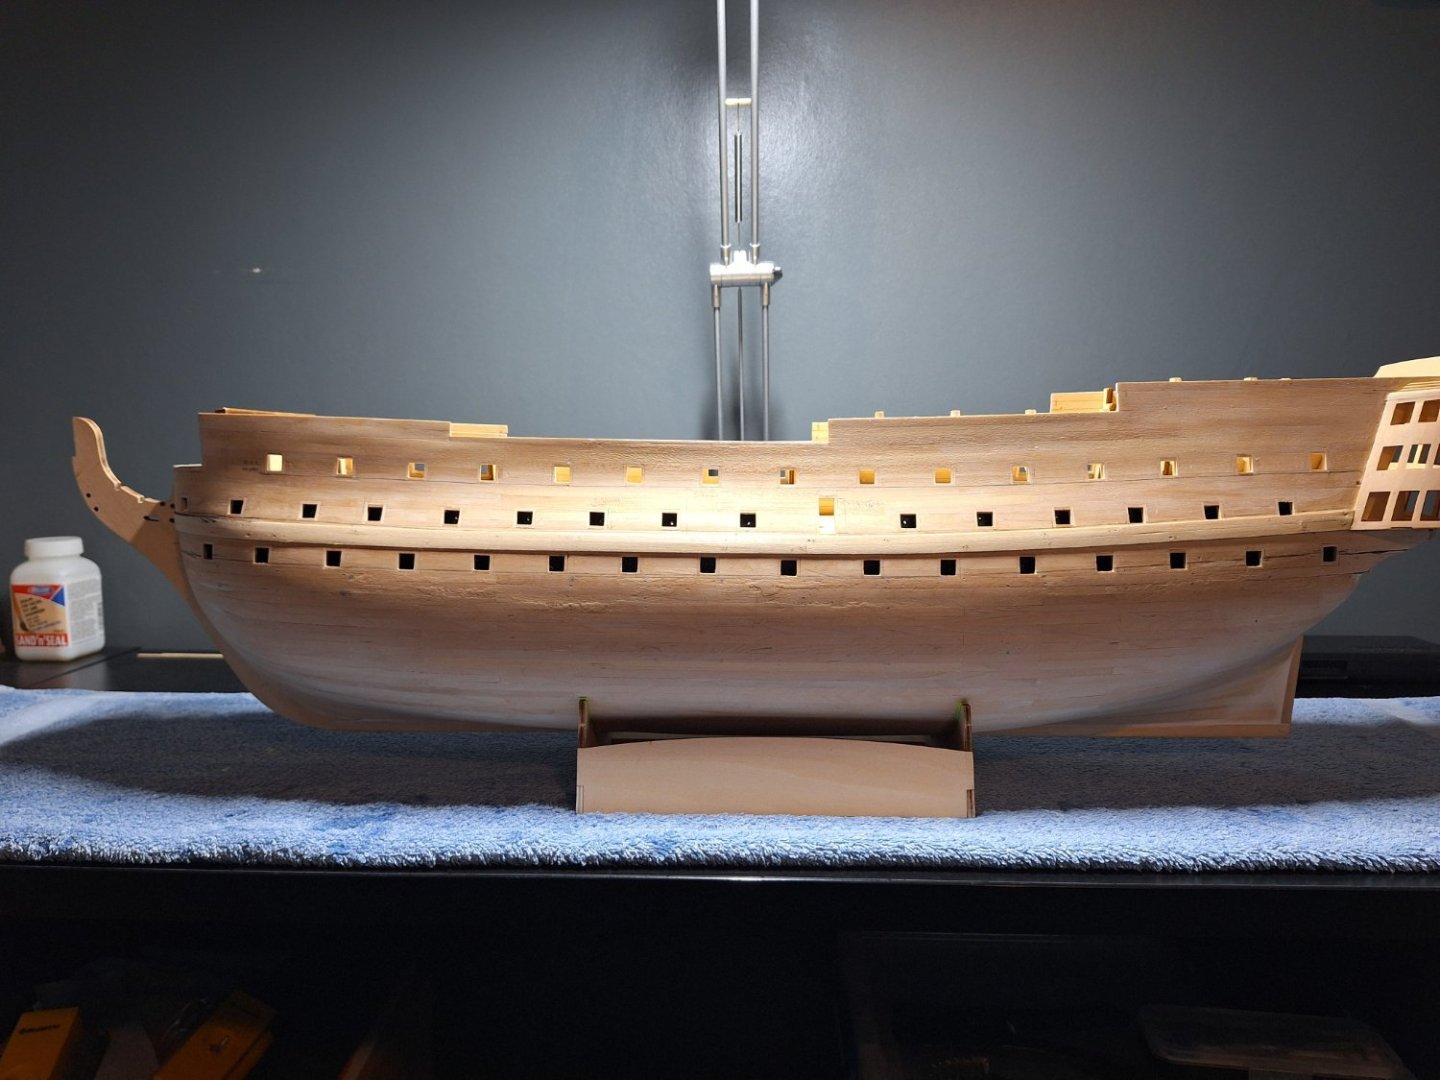
So after checking where the wale covers the last gunport, it looks like this is where the issue was. The internal overlap is now corrected and both have the same measurement. However there is still an issue. its got absaloutly nothing to do with the model. its the point of where im measuring from. Which i never thought about checking as its a 1" industrial work bench. i dont know if you can see it in the picture clearly so i got a straigt edge. What a numpty, (Scottish for idiot) So when rotating the model end to end this dip in the centre was projecting on the model. Not to worry too much though as i use my small portable table for measuring usually. Which is how i just found this issue. So outcome is simple. Dont forget to check your workstation is level, plum and dip/bow free.


- 33 replies
-
- 3
-
-
- Victory
- DeAgostini
- (and 1 more)
-
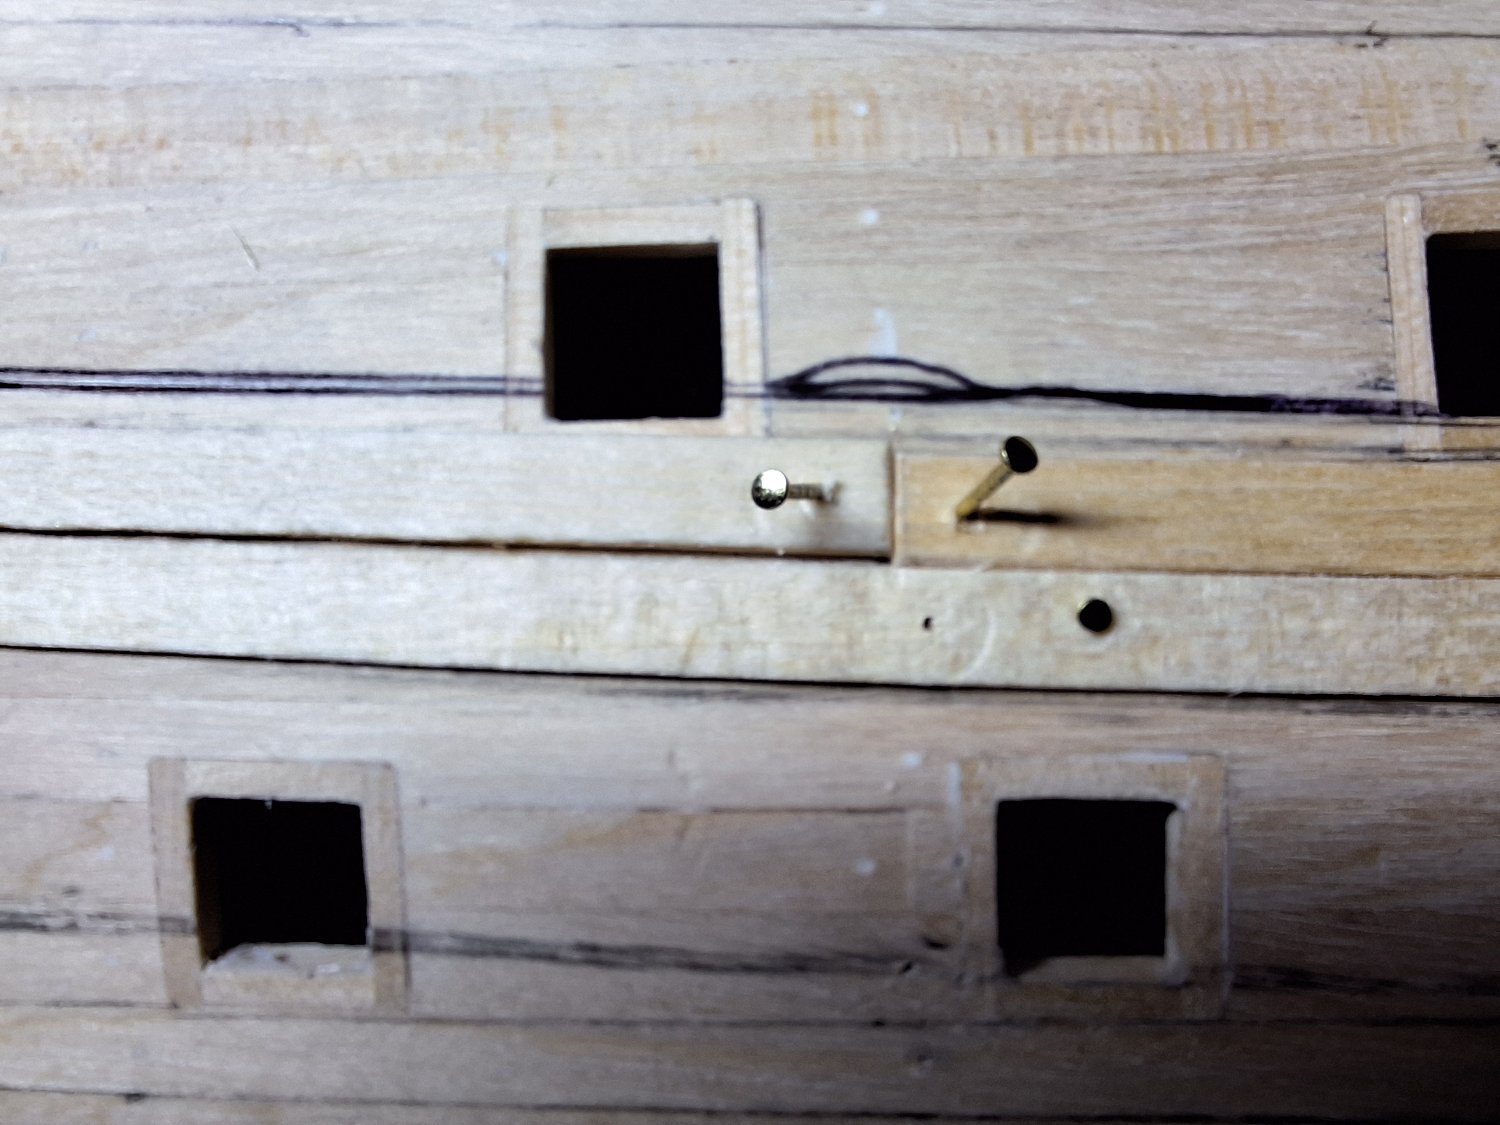
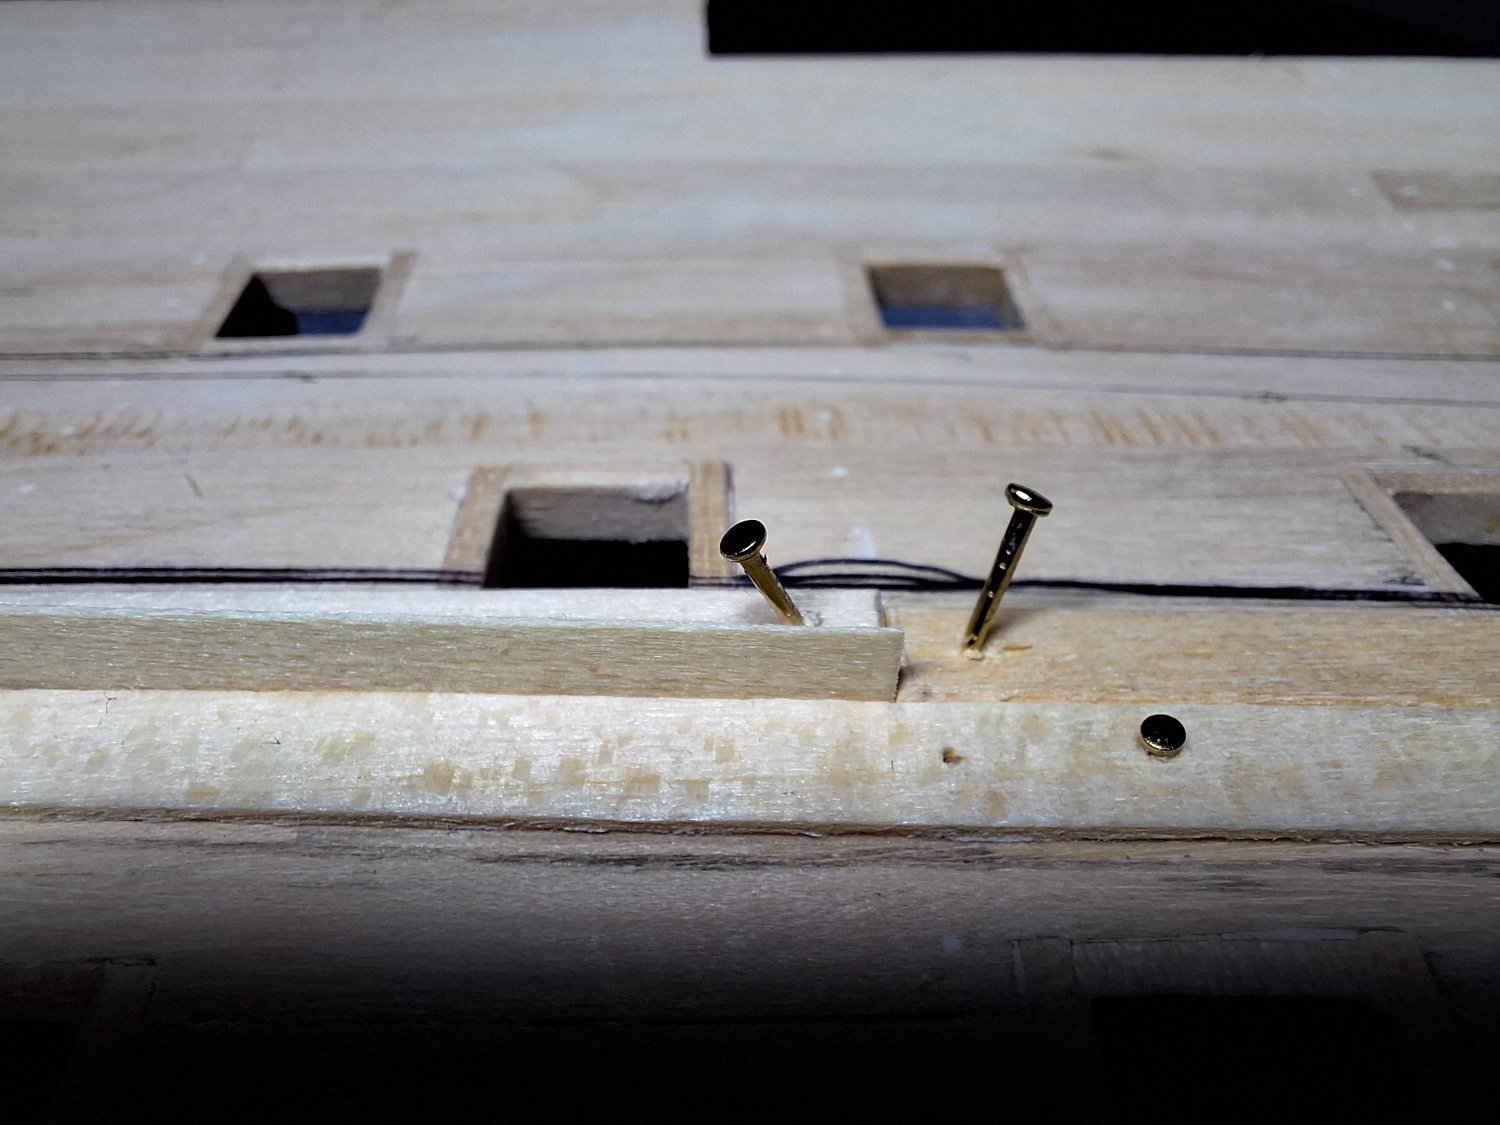
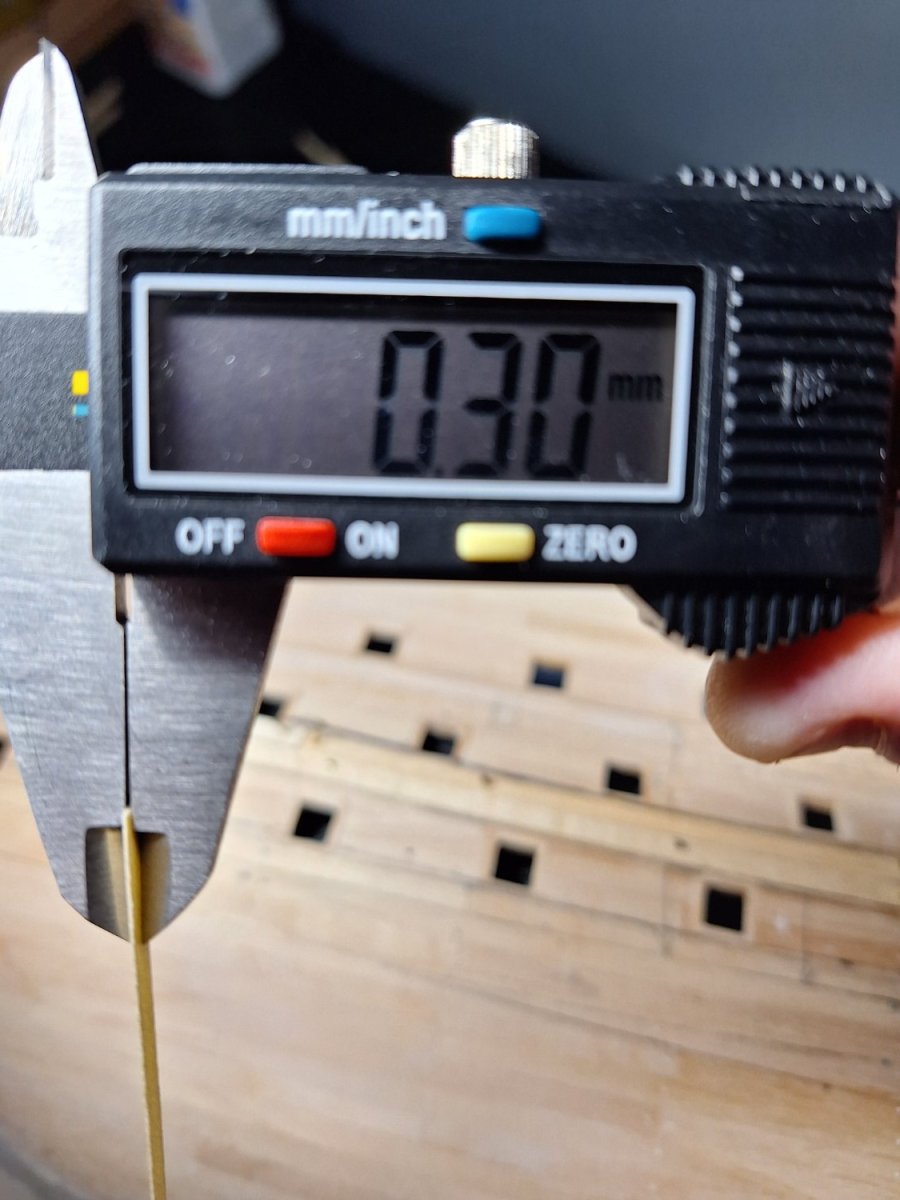
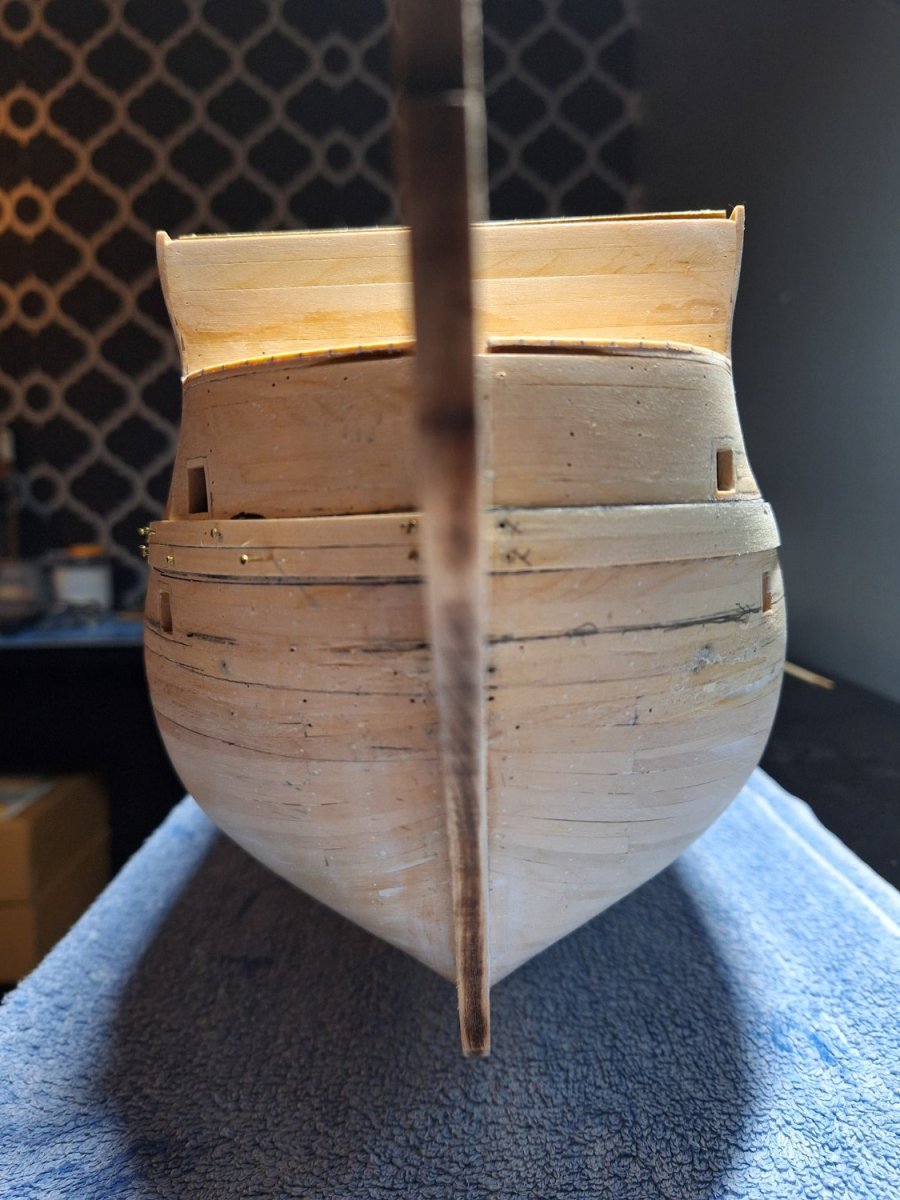
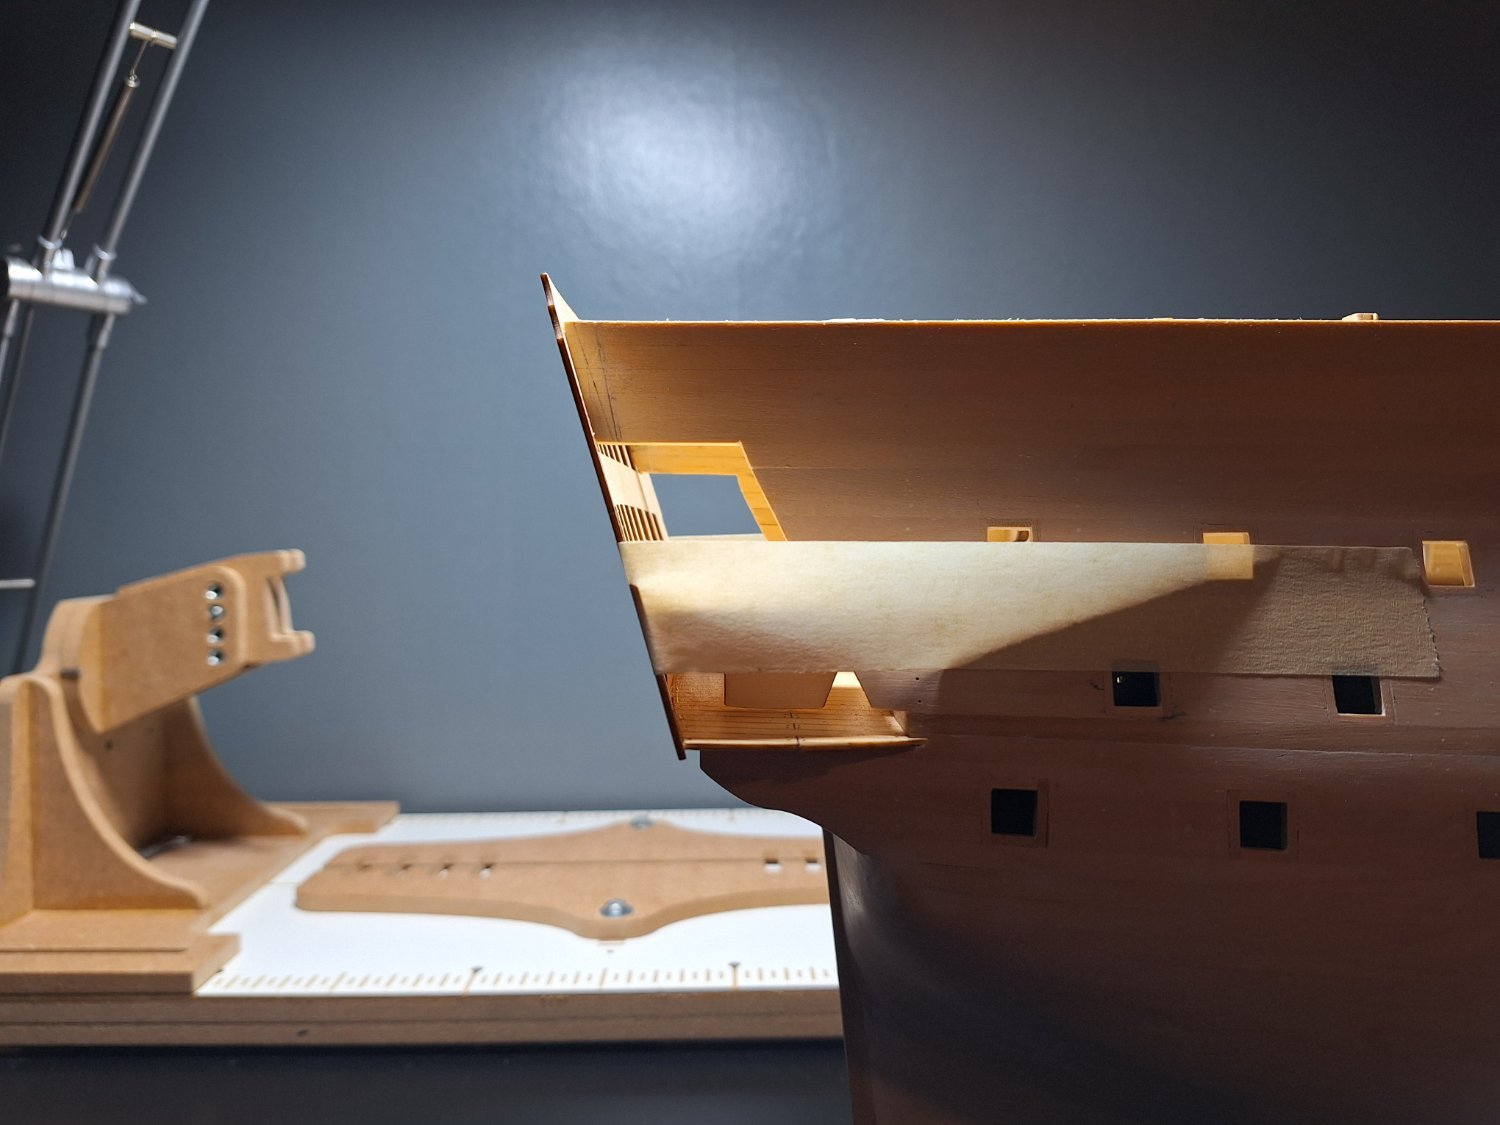
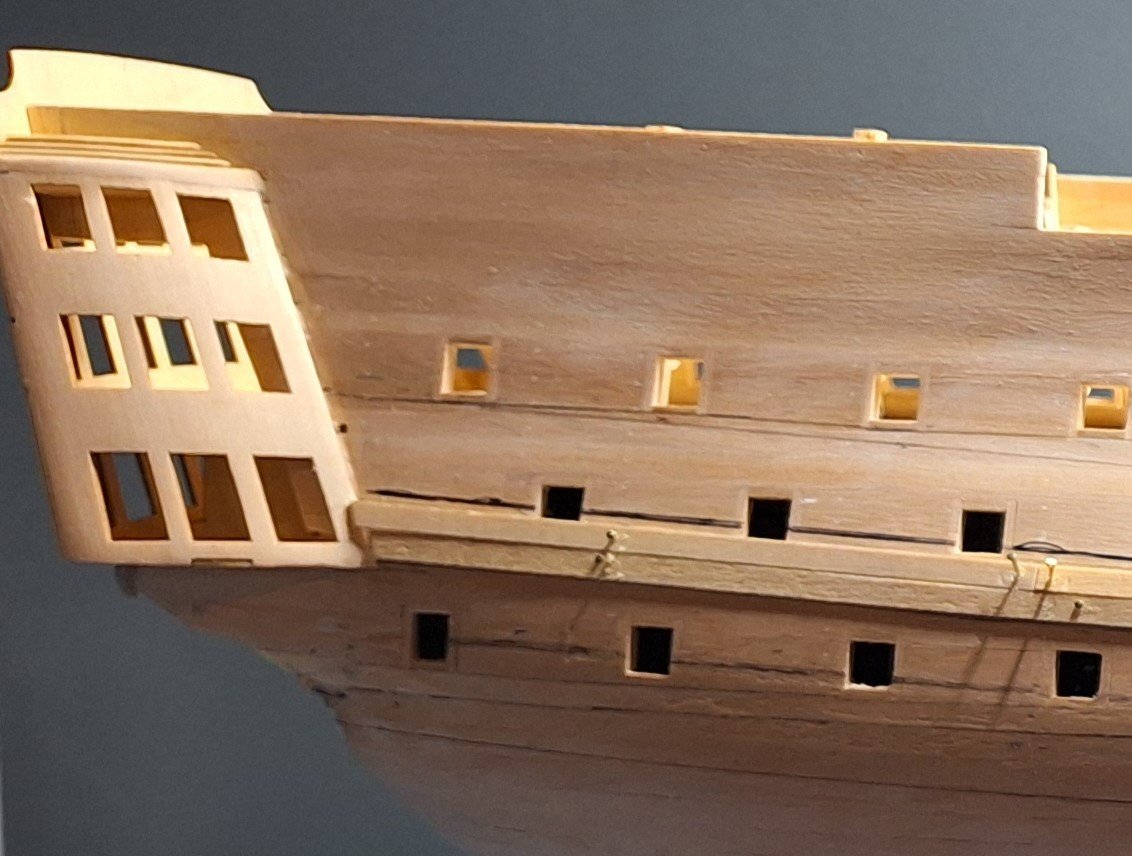
So, i have redone the middle wales after a troublesome weekend. There is a discrepancy of 0.3mm at the gallery end. I've added pictures to show this. My question here is do I just lower the starboard wale at the gallery to match, will this be noticeable or leave it as it is.
- 33 replies
-
- 4
-
-
- Victory
- DeAgostini
- (and 1 more)
-
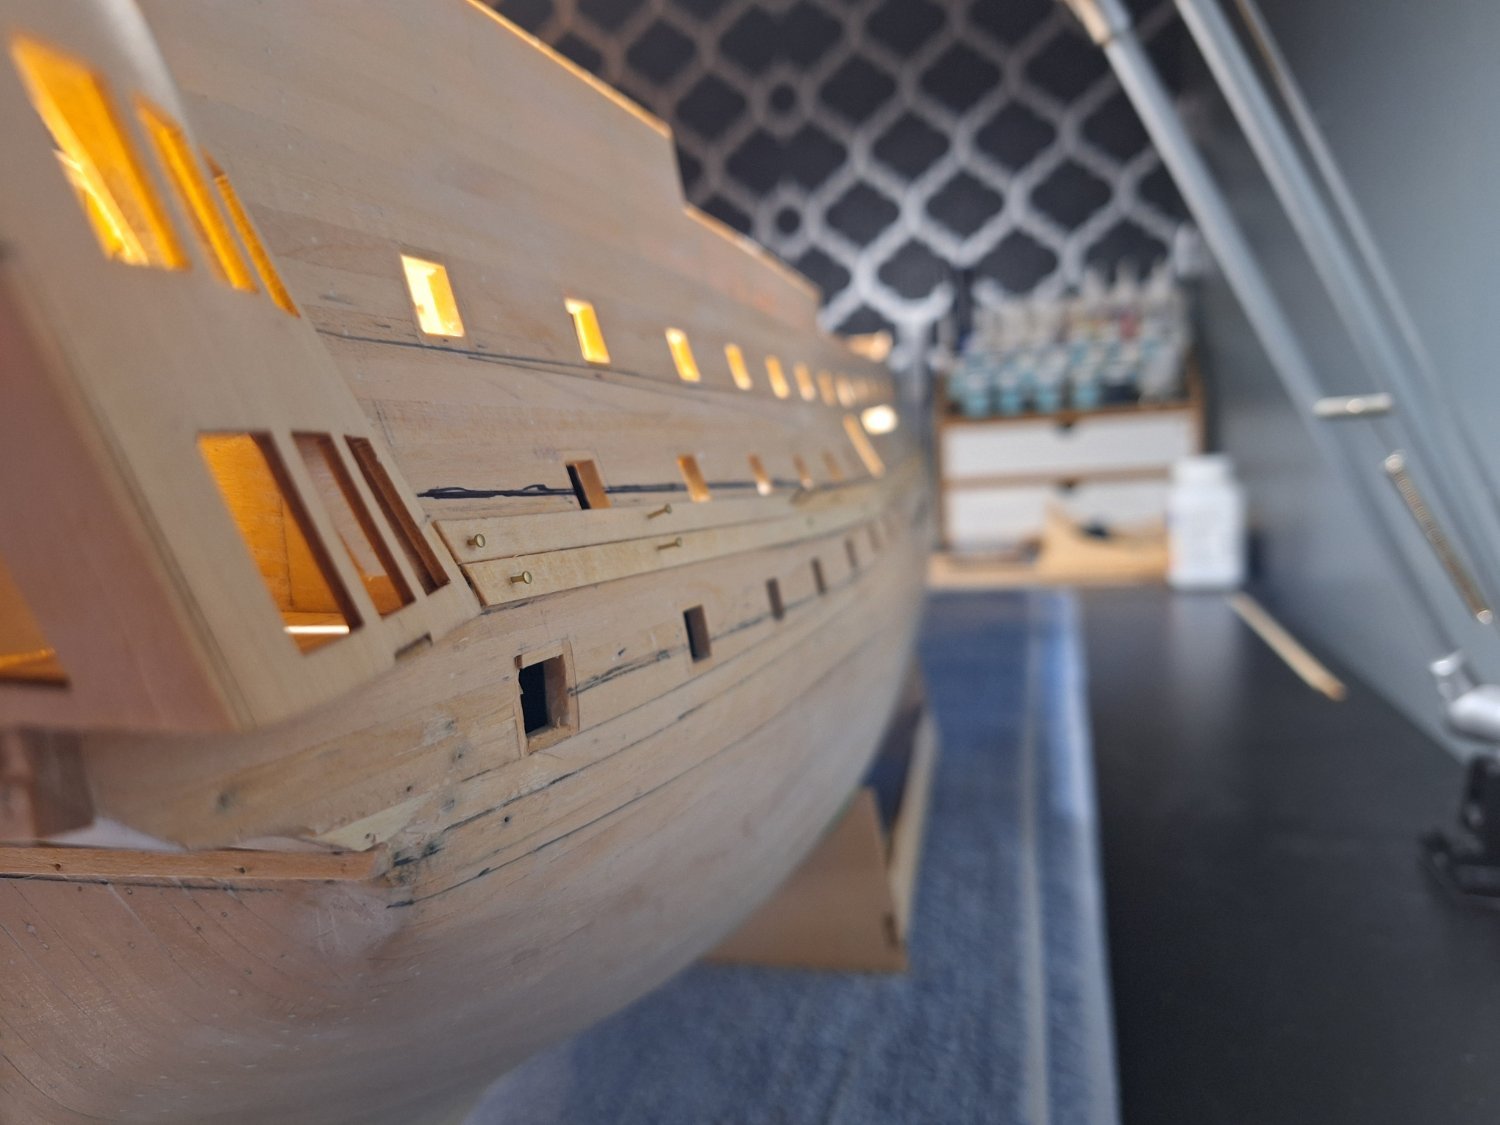
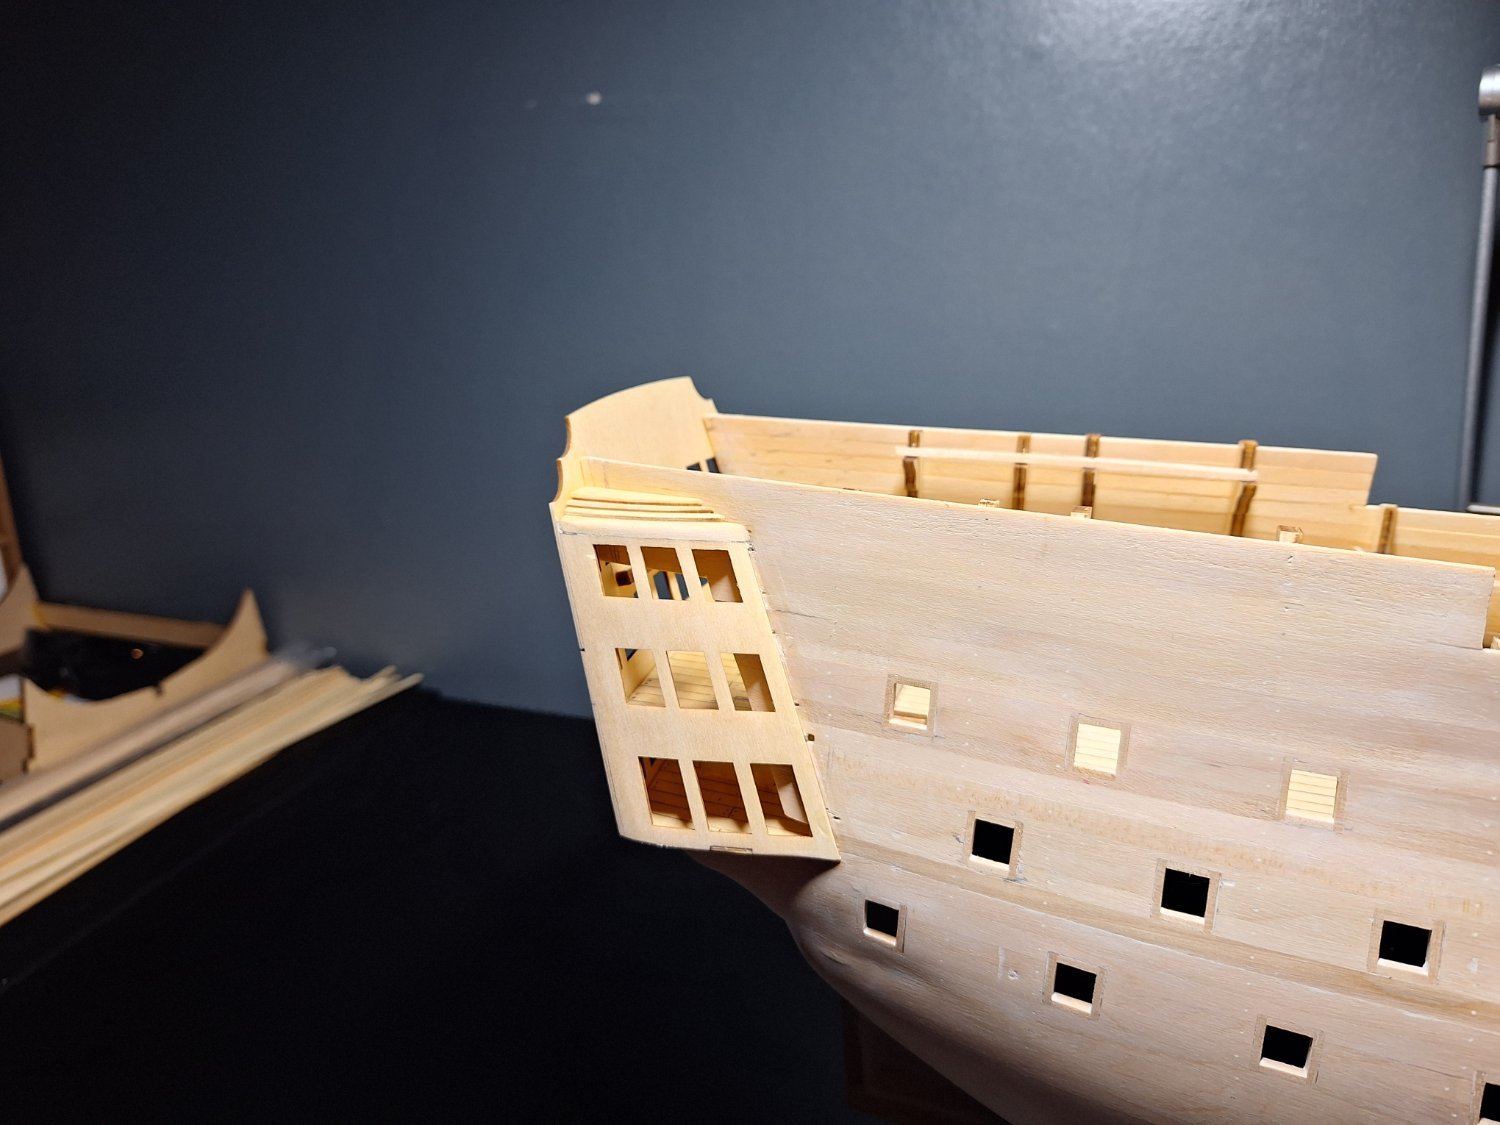
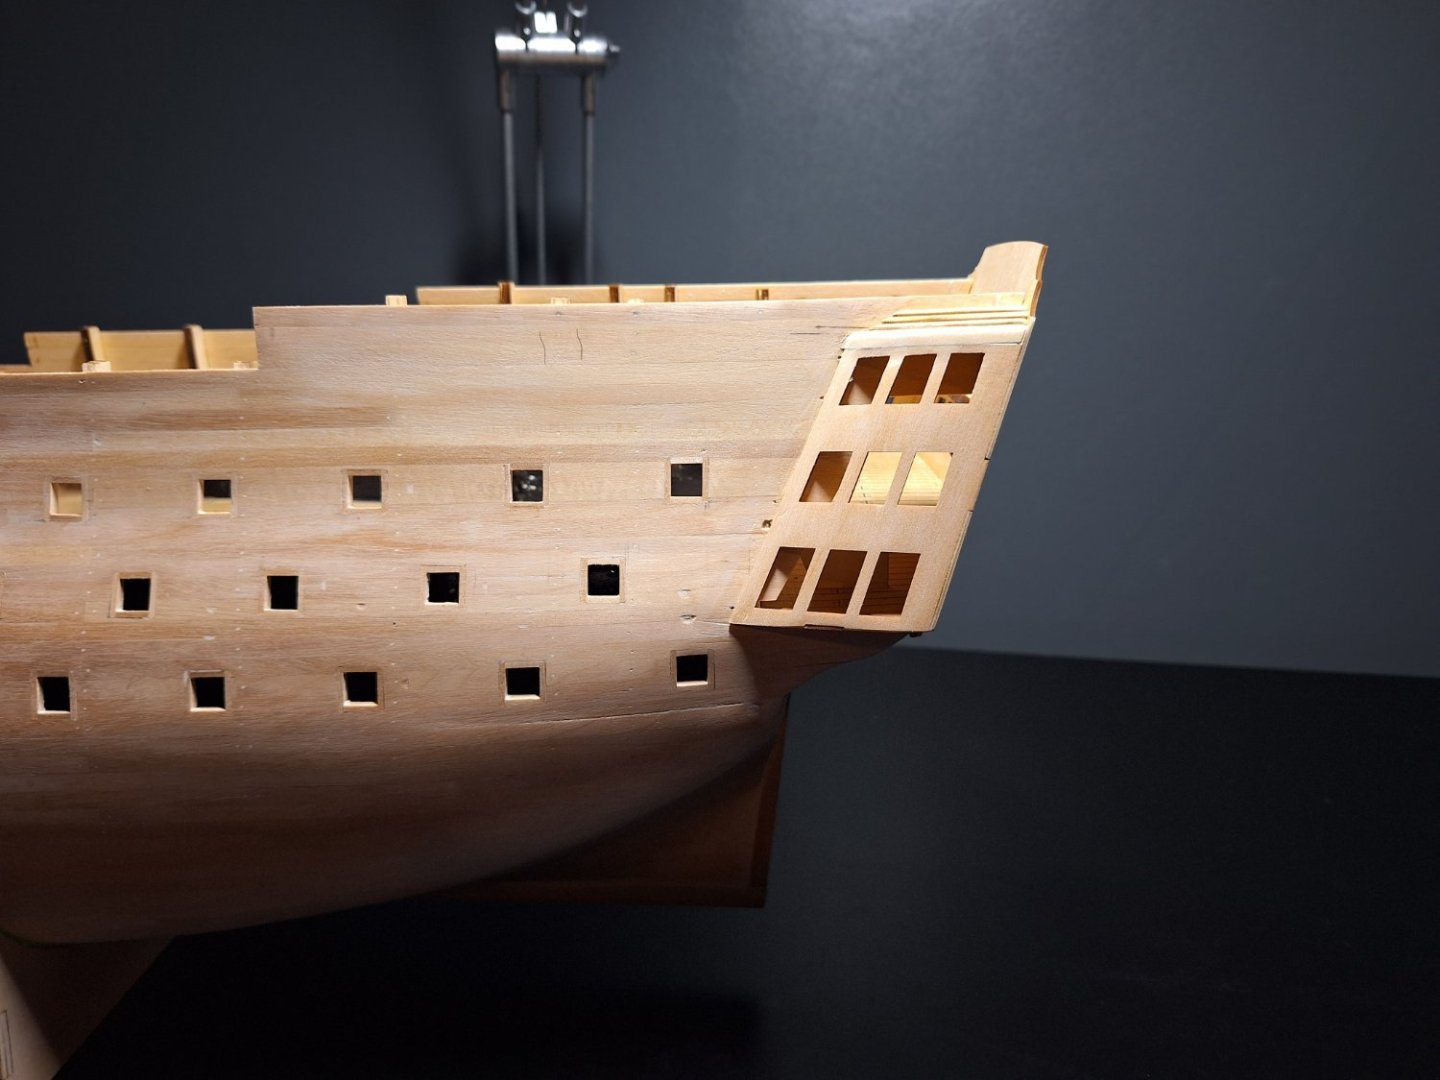
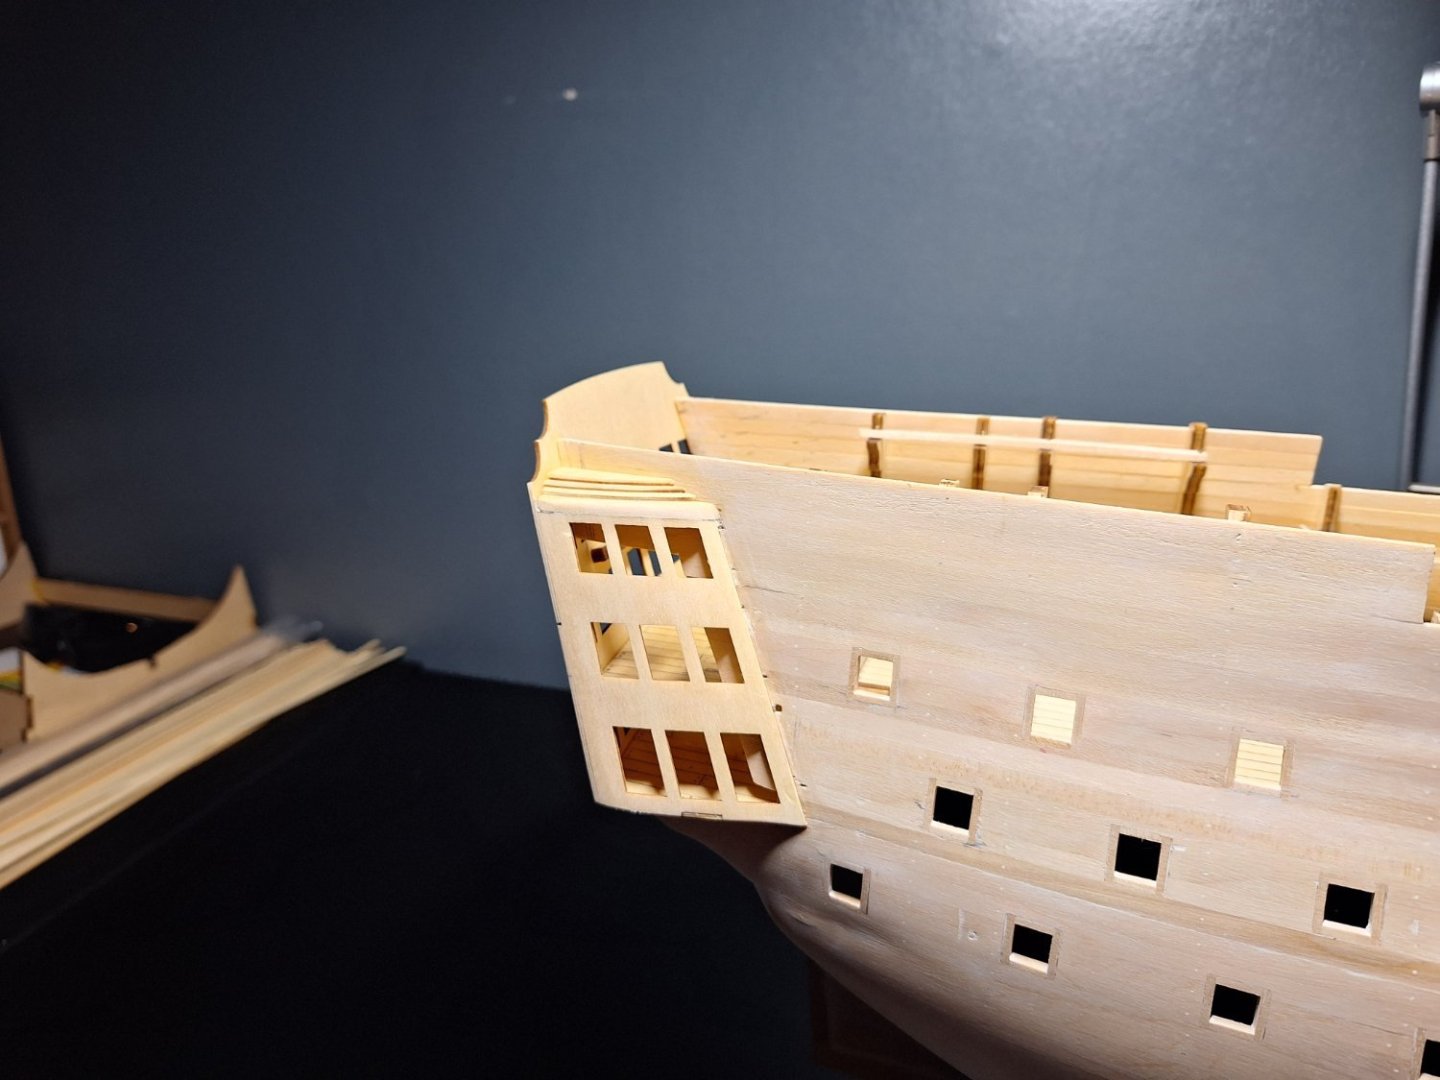
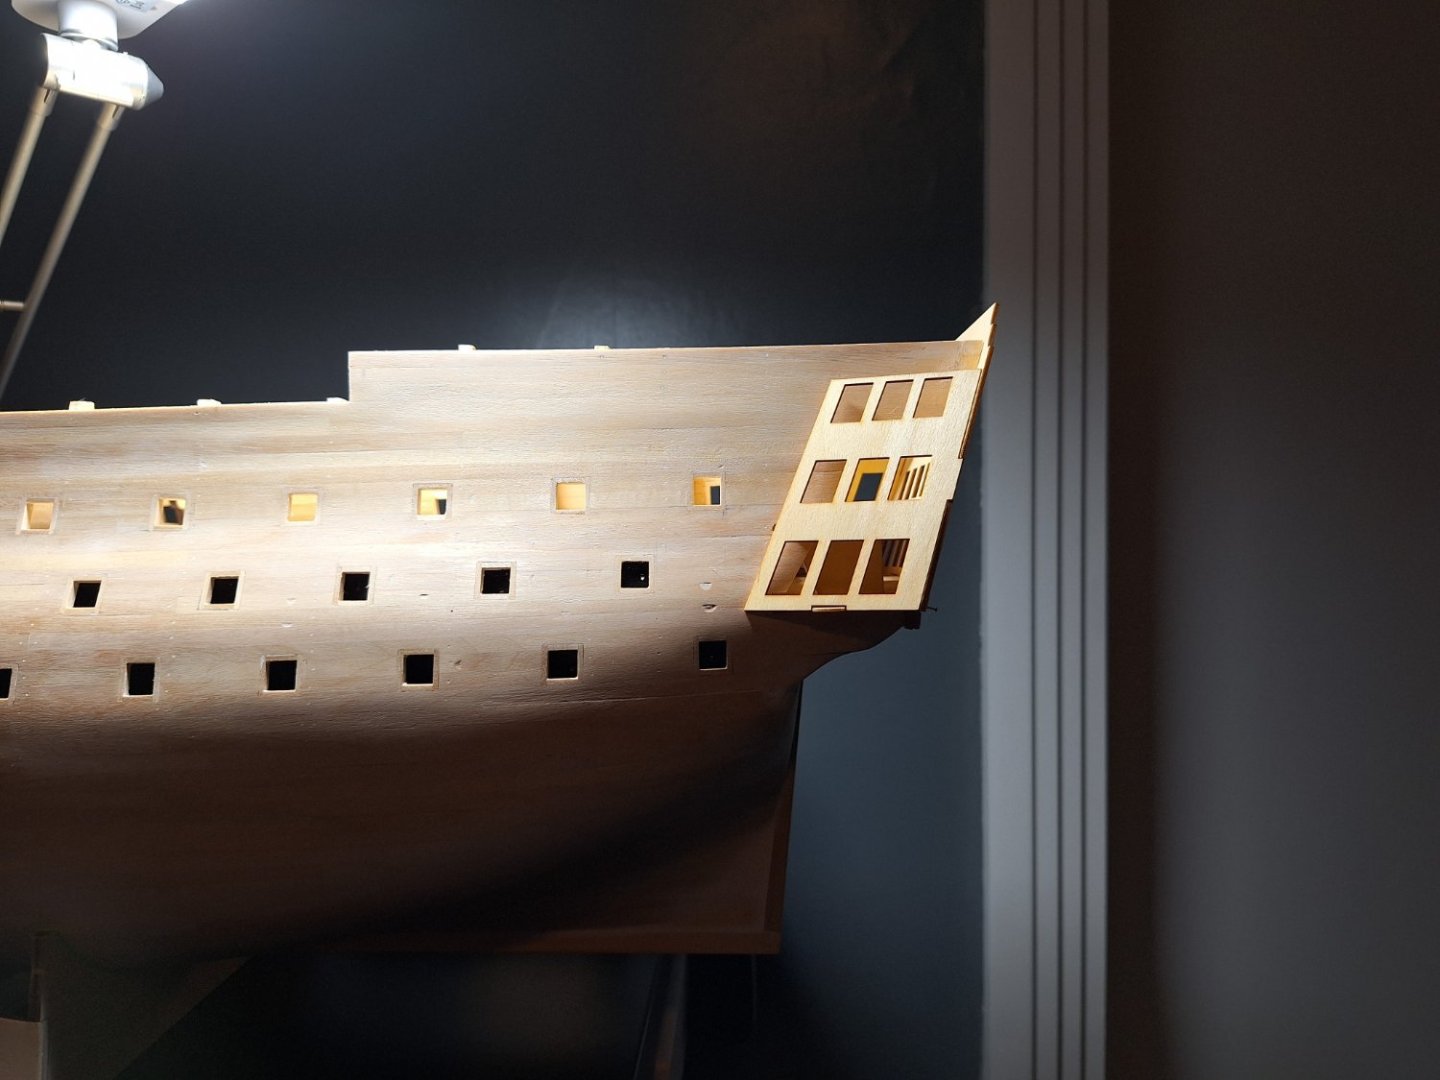
Added the gallery side windows. It needs a few touch ups where the window frames hit the hull. But this will likely get done after the whales are added.
- 33 replies
-
- 5
-
-
- Victory
- DeAgostini
- (and 1 more)
-
I've been on and off it for 8 months. This is all I've done so far. I need to really get the cannons, boats, anchors and so on done as well. But I want to do them as and when I get to a stage they are actually needed and get put in place permanently as I will end up losing them or damaging them.
- 33 replies
-
- 4
-
-
- Victory
- DeAgostini
- (and 1 more)
-
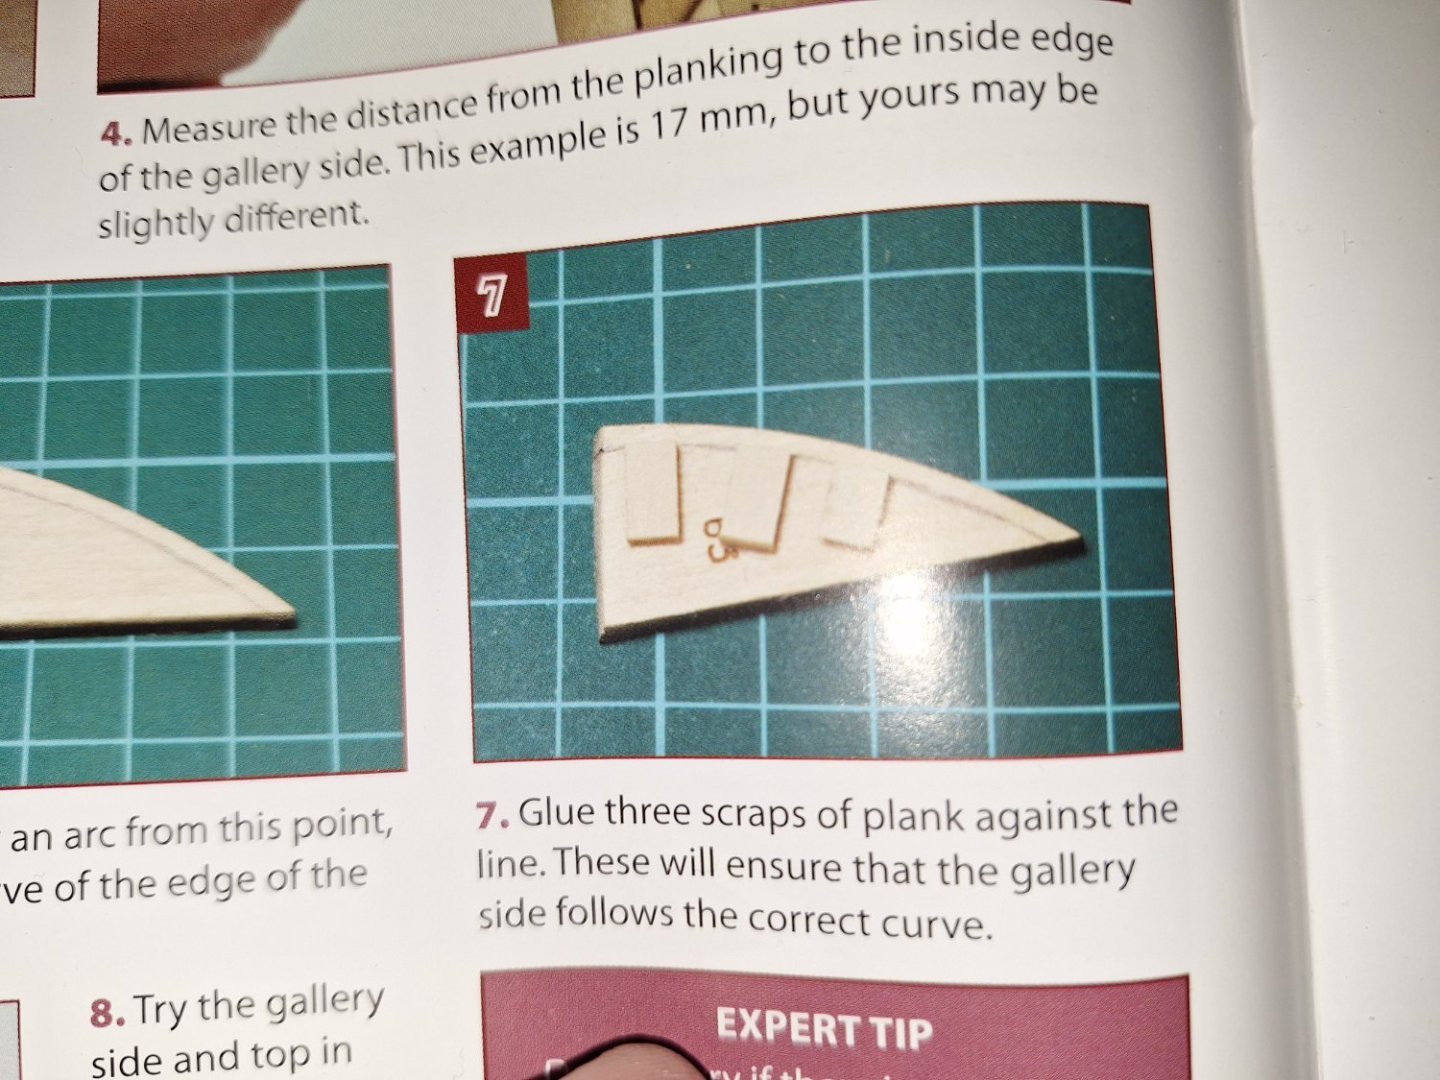
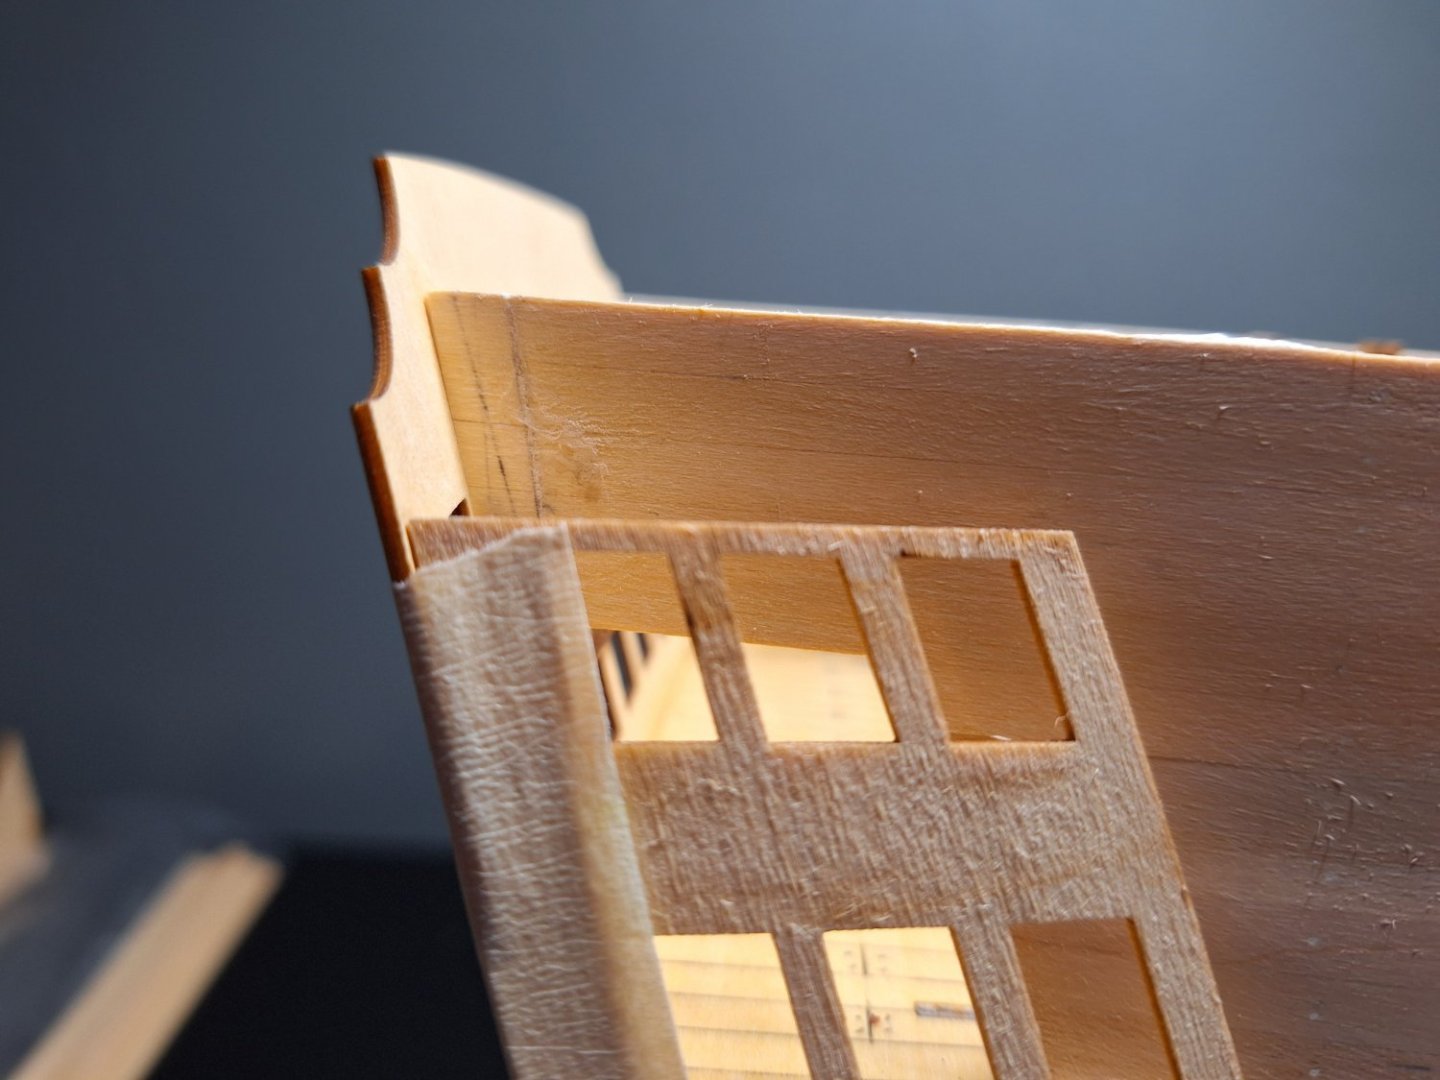
So the instruction state to use some old scraps, but I found this is visible through the window. So I used 1 mm ply I had and made it invisible. Pictures, Instructions, 1mm from window to the top of frame, my solution and dry fitted

- 33 replies
-
- 5
-
-
- Victory
- DeAgostini
- (and 1 more)
-
I would say yes definitely. What do you think. I couldn't have got it better if I tried.
- 33 replies
-
- 2
-
-
- Victory
- DeAgostini
- (and 1 more)
-
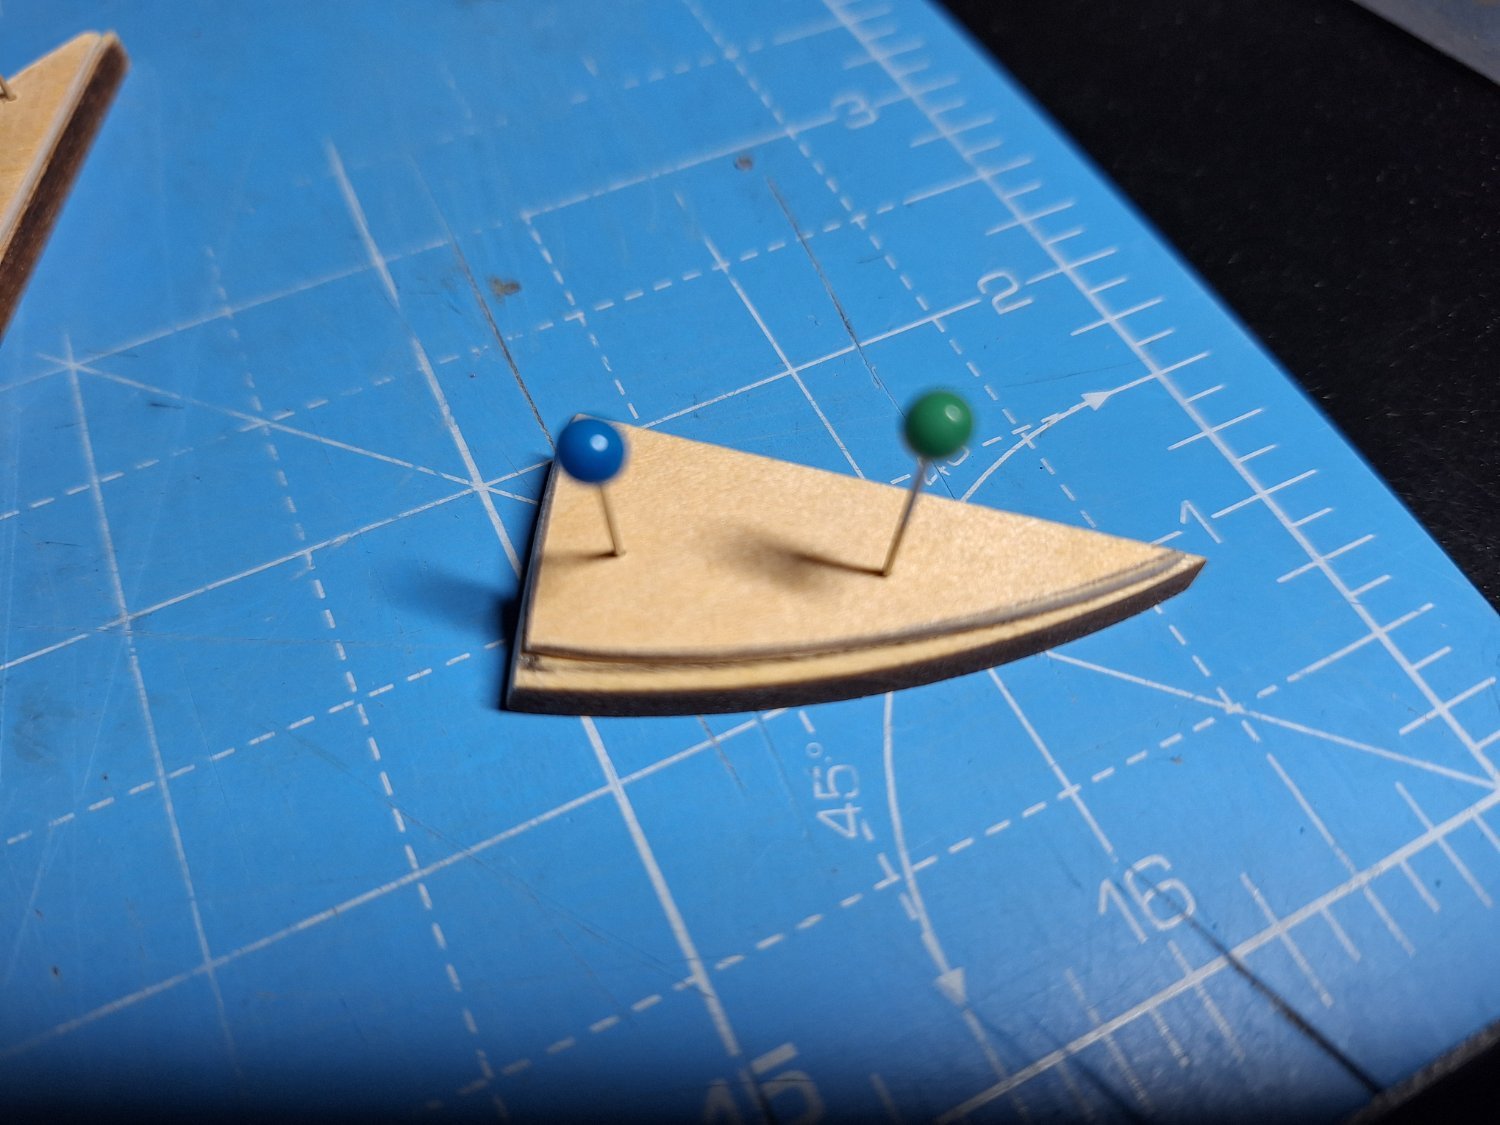
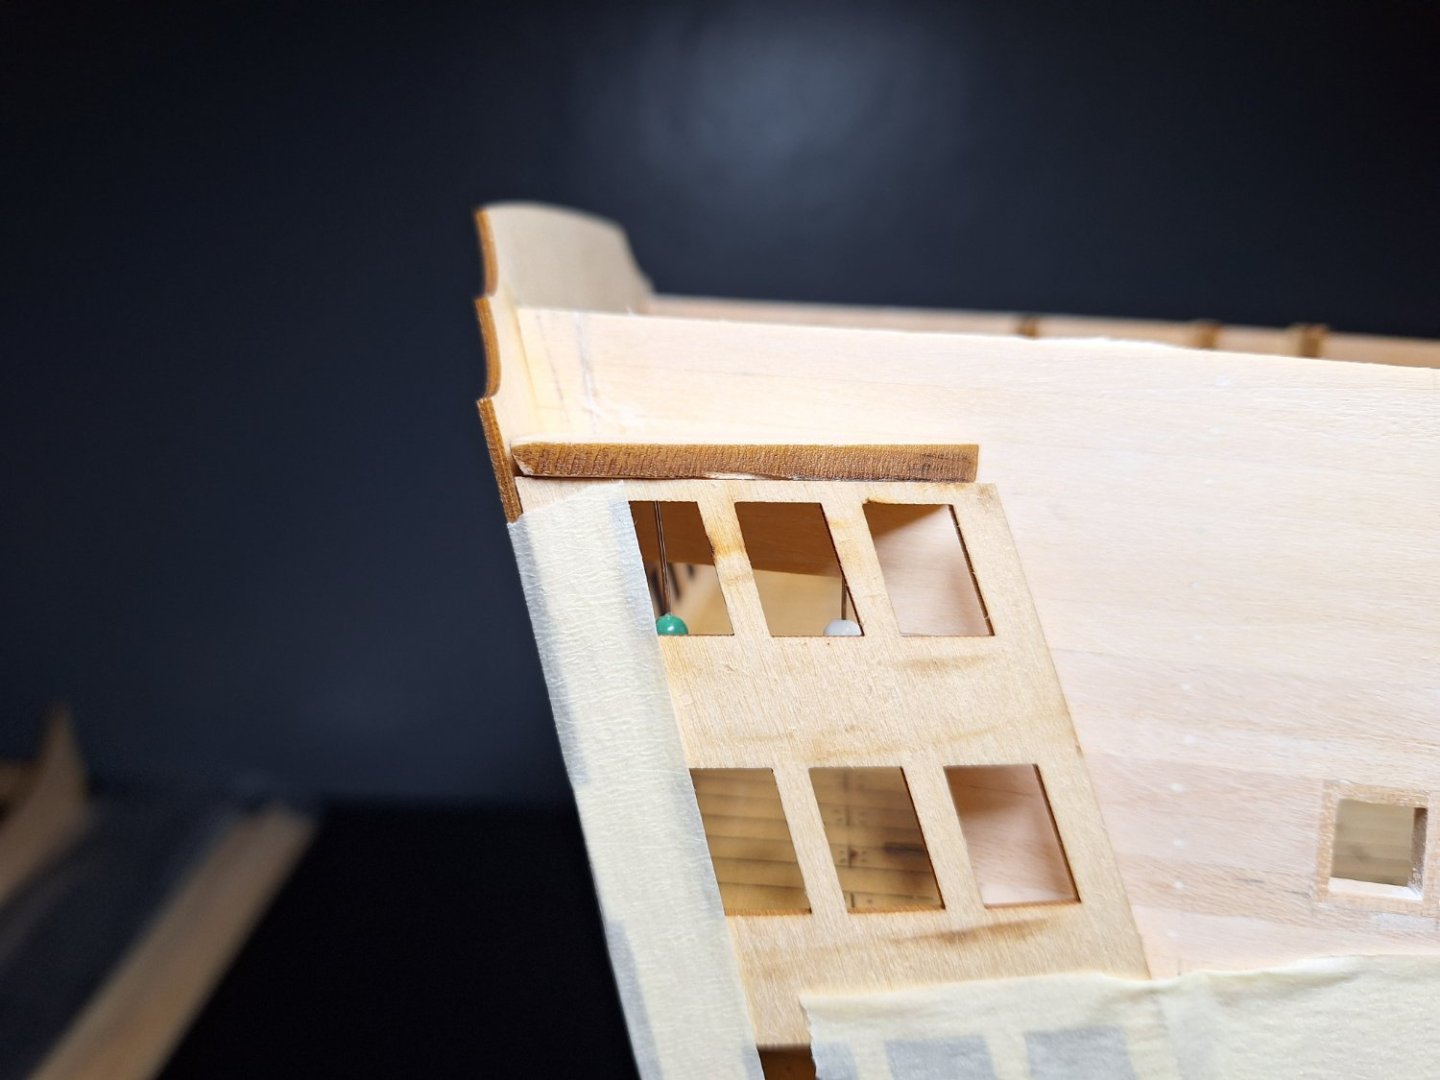
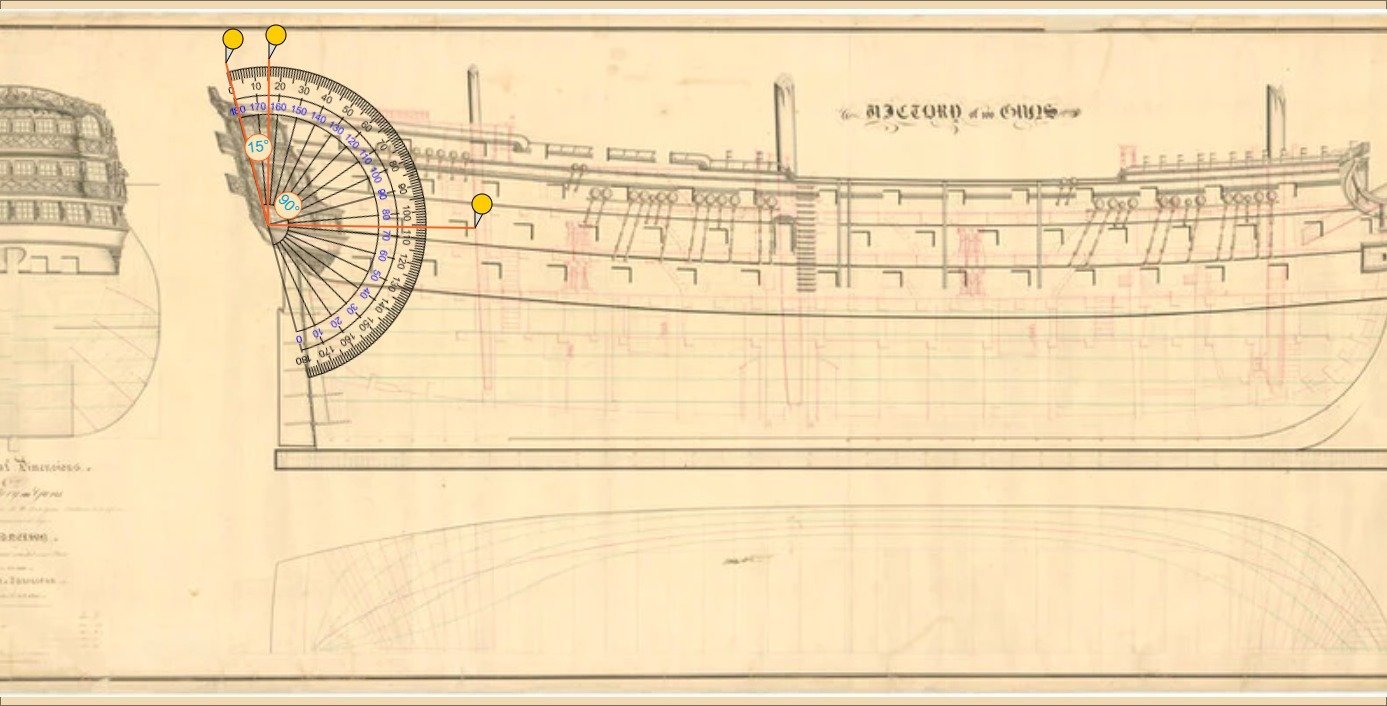
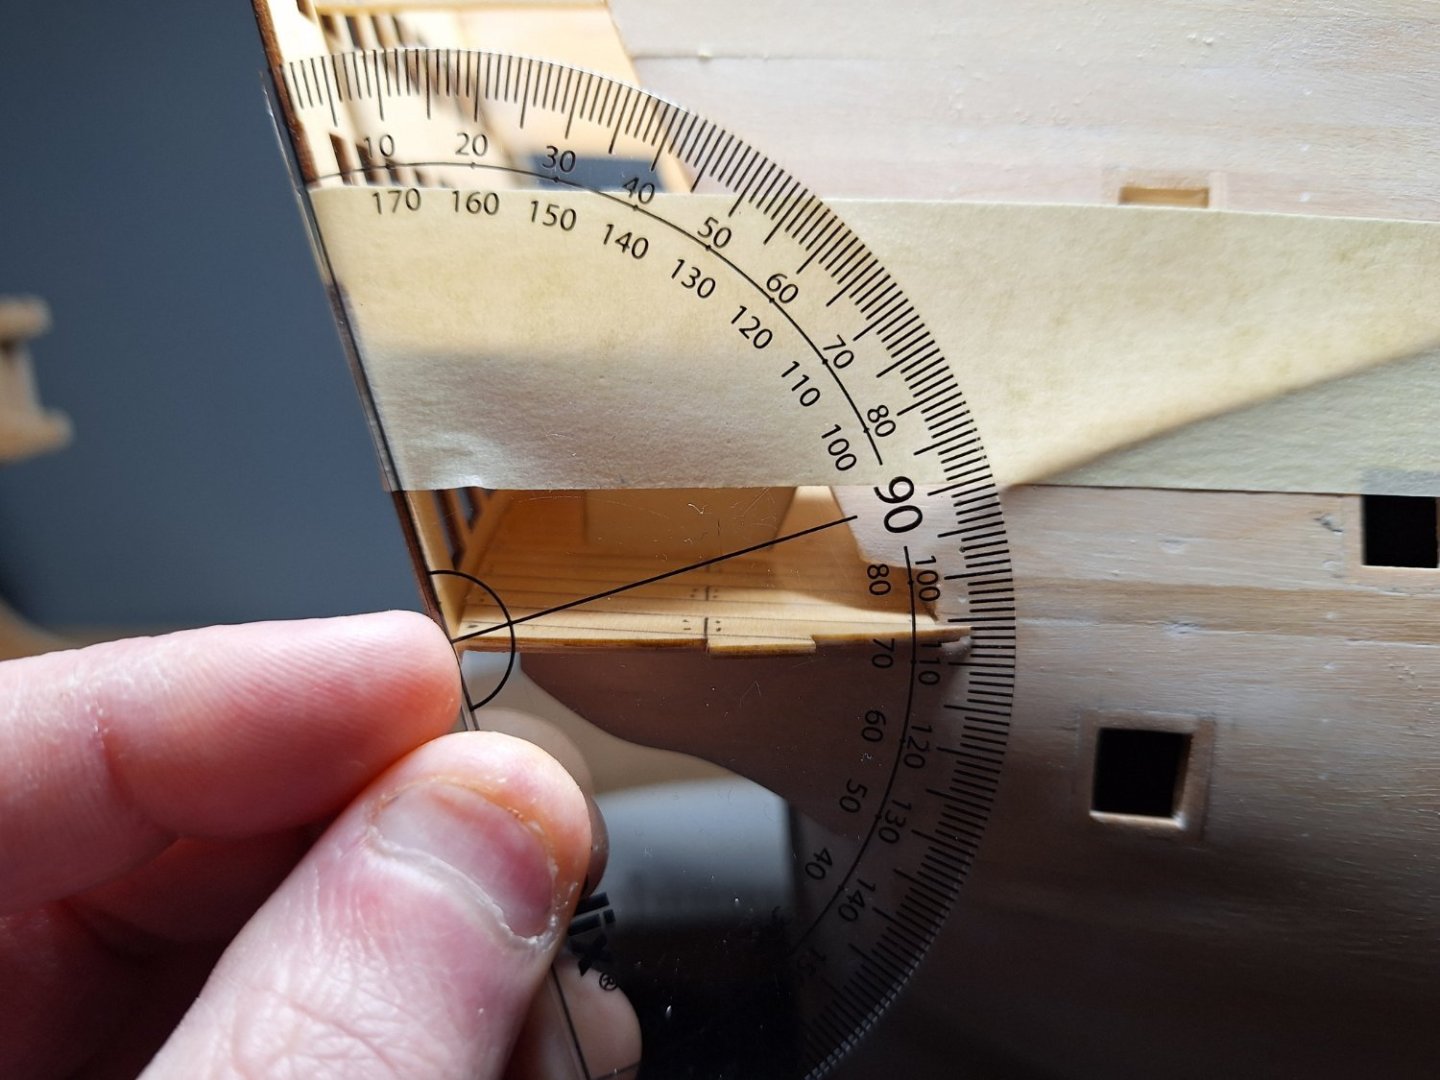
Before i go any further and mess things up, Can anyone tell me if the angle i have is ok. If not i can take the glue of now and reposition. I have it at 15 degrees of vertical at the moment. but i have seen some further back and some nearly vertical.

- 33 replies
-
- 2
-
-
- Victory
- DeAgostini
- (and 1 more)
-
what do you mean by final look, and is it not supposed to look new once built.
- 33 replies
-
- 1
-
-
- Victory
- DeAgostini
- (and 1 more)
-
This model only has this 2mm hull, so this is basically it. The hull will get copper tiles or if I cant get them ill use copper tape and simulate the tiles. I've seen the copper tape looks ok from pictures.
- 33 replies
-
- 1
-
-
- Victory
- DeAgostini
- (and 1 more)
-
drilling hole through wire
N80FTY replied to BETAQDAVE's topic in Metal Work, Soldering and Metal Fittings
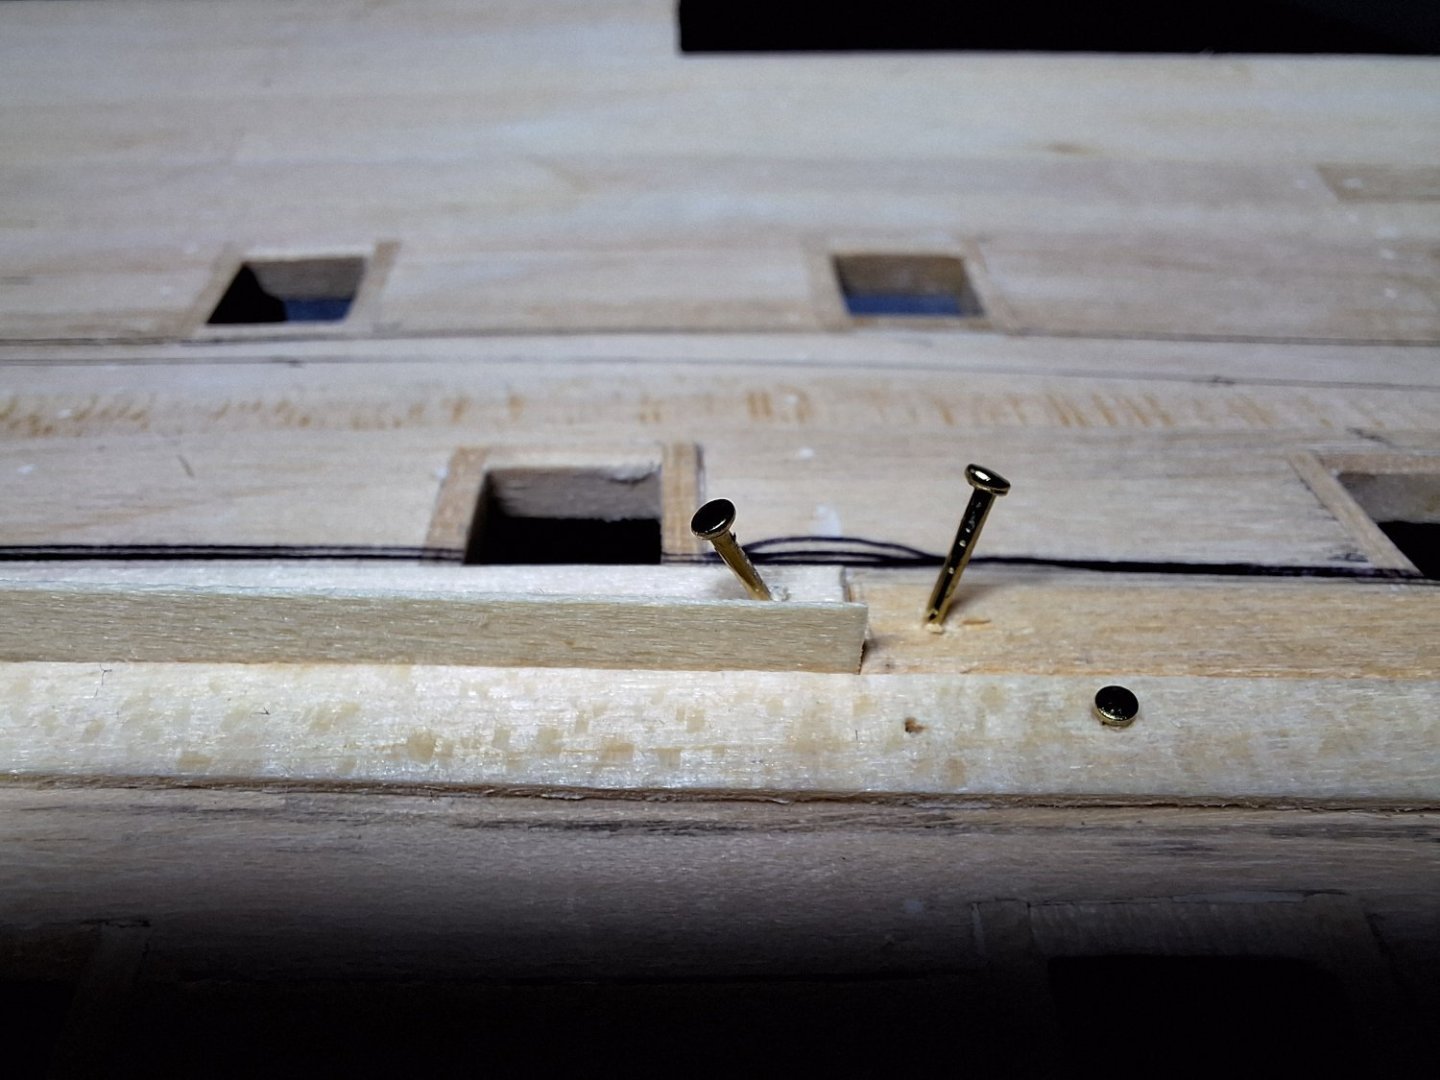
Hi Dave, The picture looks like its flat wire. But as you stated its round you can do this in 3 ways I've used in the past. 1, you can heat the brass and fatten it, Once flat drill out the hole to 0.60mm. Leave a wooden round dowel hand made to 0.60mm in the hole and reheat and reshape the brass back to a round. The wood will singe and shrink slightly leaving you around 0.54mm of a hole. 2, Do you have a mill. If so you want to run it around 6000rpm and peck at the piece you want to drill at. Think woody woodpecker but very very gently. If you can find a spade bit for brass it wood help a lot as it is a perfect V shape, so you will get the point exactly centre to the wire. Crazy idea, and I don't know exactly what you will use them for but you get brass needles, you can then solder them or melt them to the brass your needing used with. Hope this helps. Andrew -
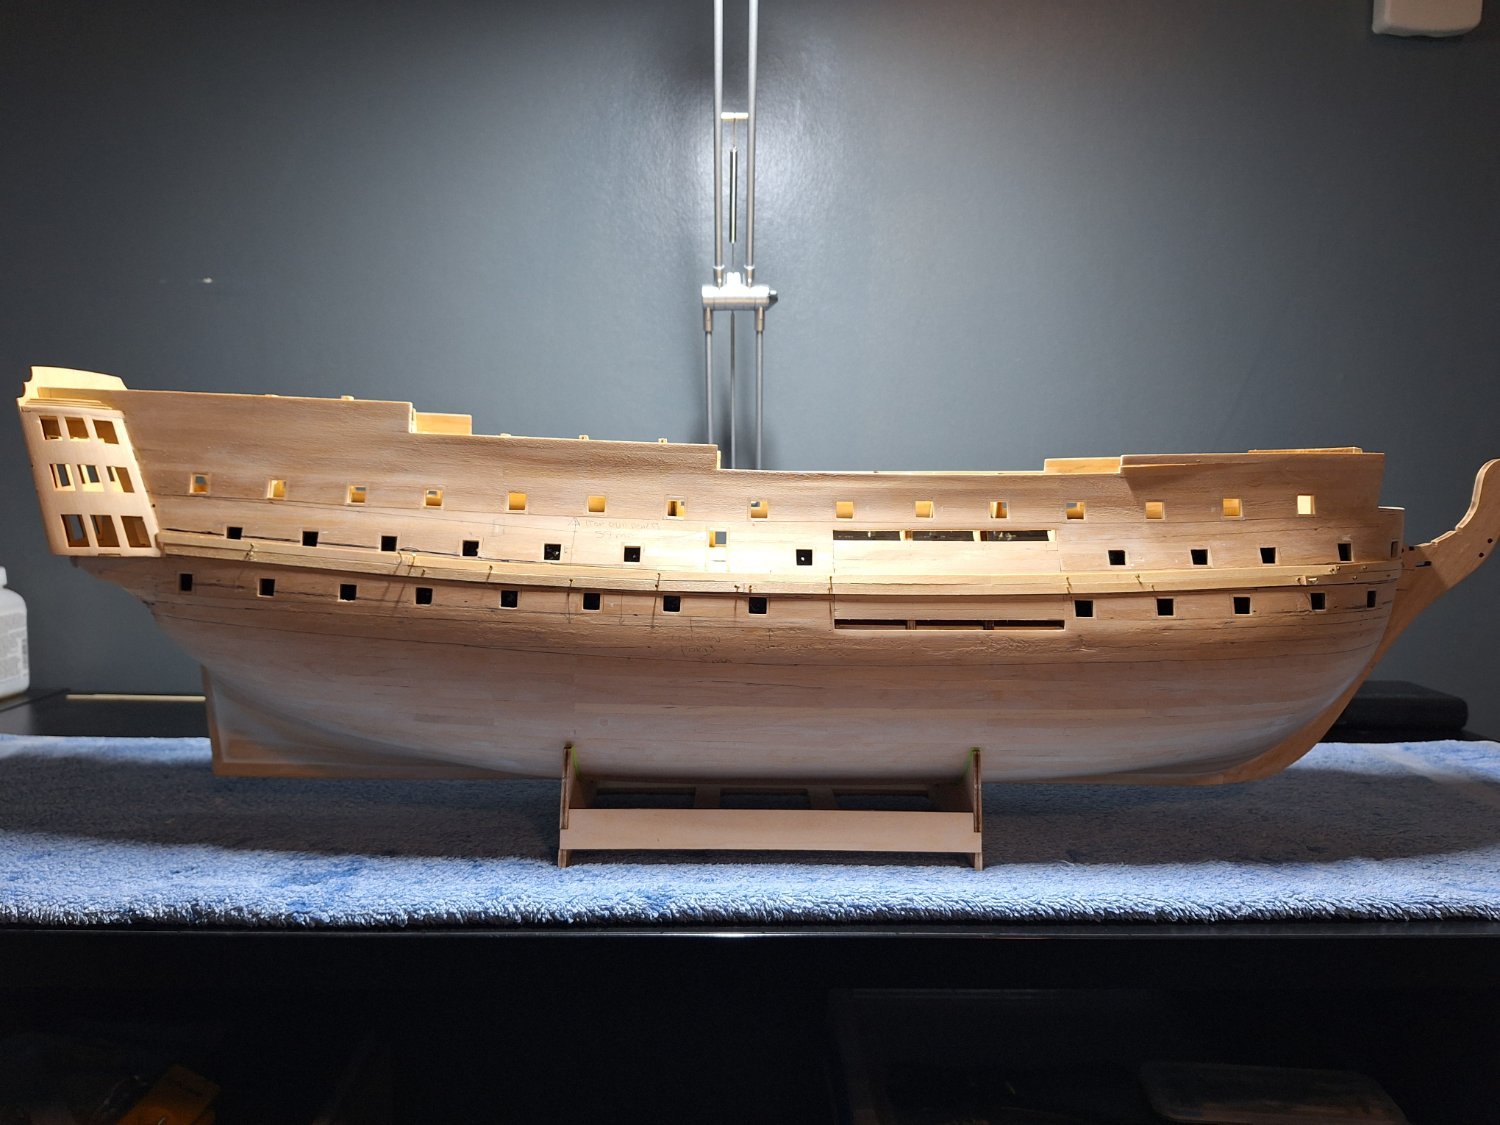
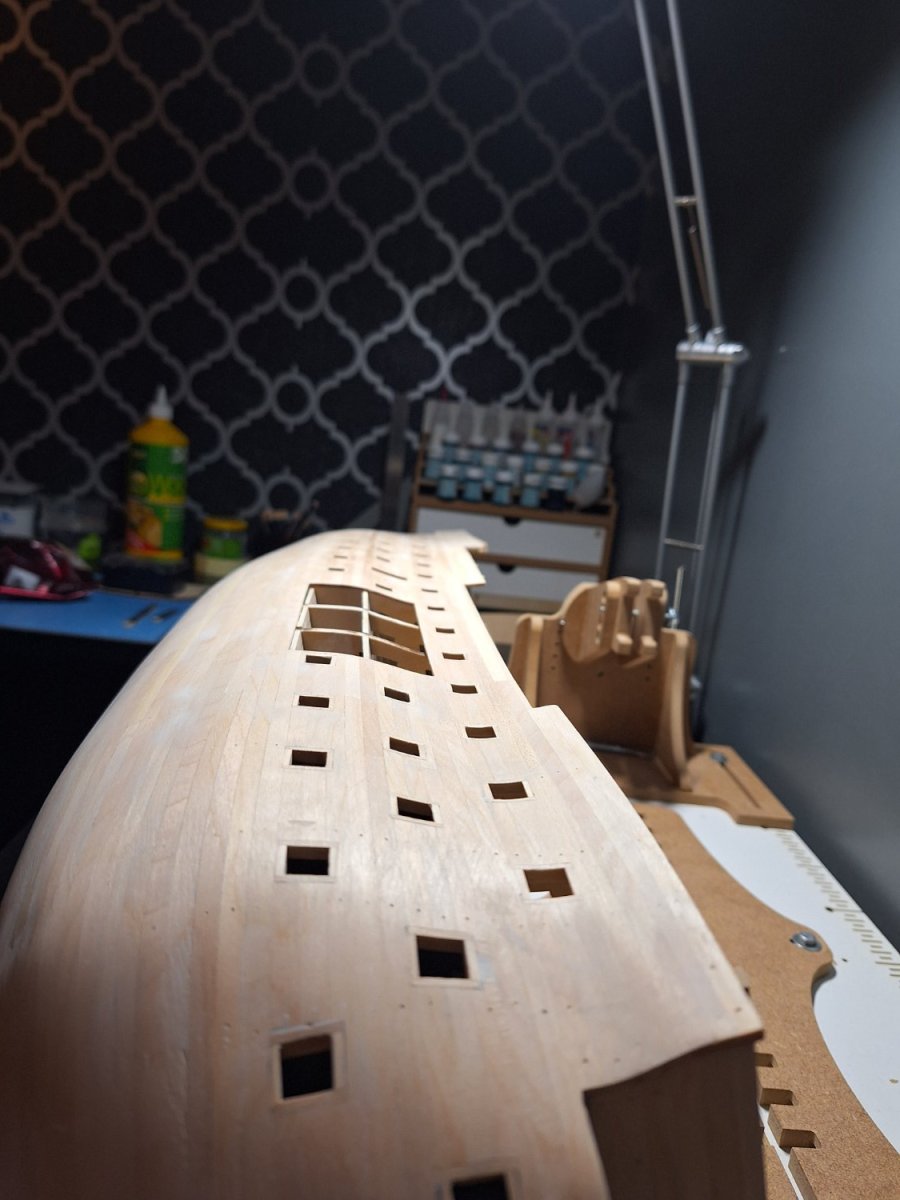
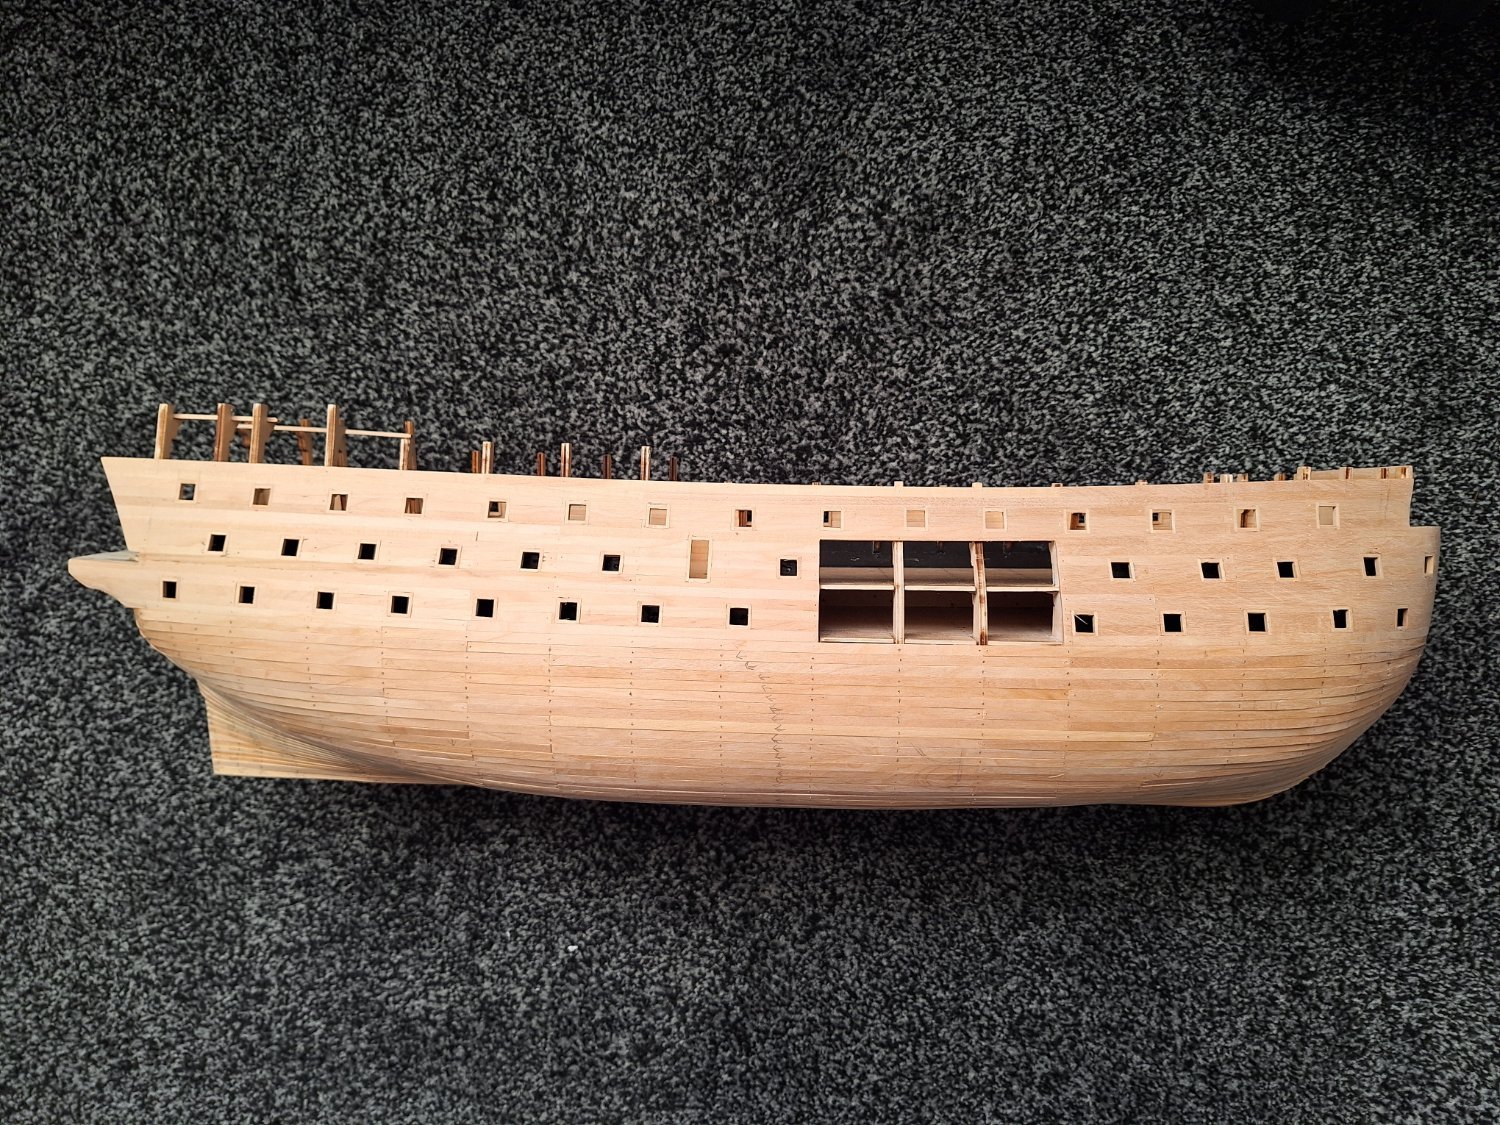
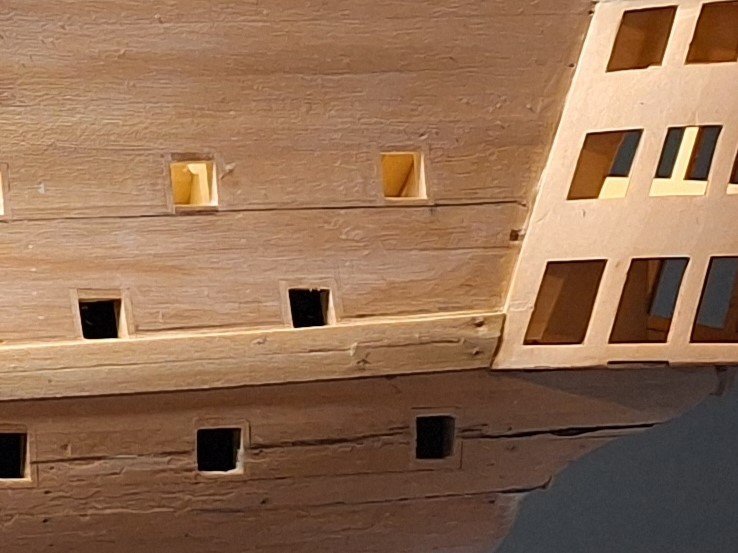
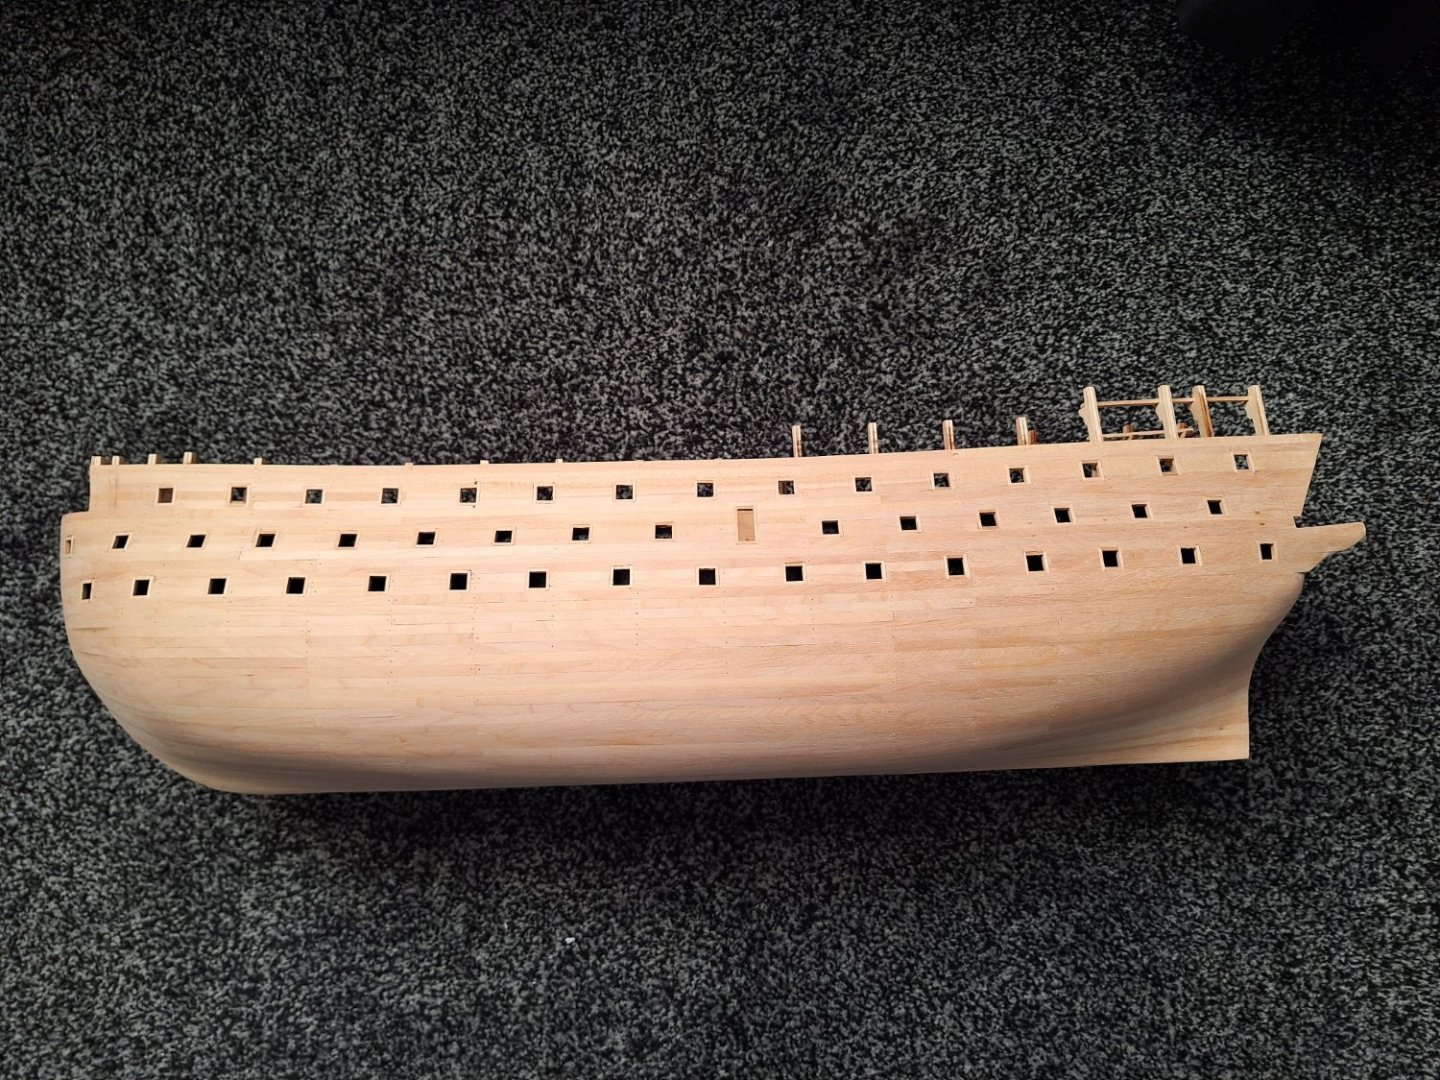
So After another productive day, Here is the model after filling it with model lite filler and giving it a 320 grit sanding. Also if you look at the Port side 2nd top gun port it is 1.3mm or 3/64" taller than the rest which are 8.9mm-9.2mm or 11/32"-23/64" square. So I will fix this with 0.4mm or 1/64" lime as I have this available. Question. Should i give it a 800 grit sand or should this be ok as it is,


- 33 replies
-
- 7
-
-
- Victory
- DeAgostini
- (and 1 more)
-
I went a bit over board last night. I'm not sure how visible the inside of the gallery is once built so i decided to do this just in case.
- 33 replies
-
- 4
-
-
- Victory
- DeAgostini
- (and 1 more)
-
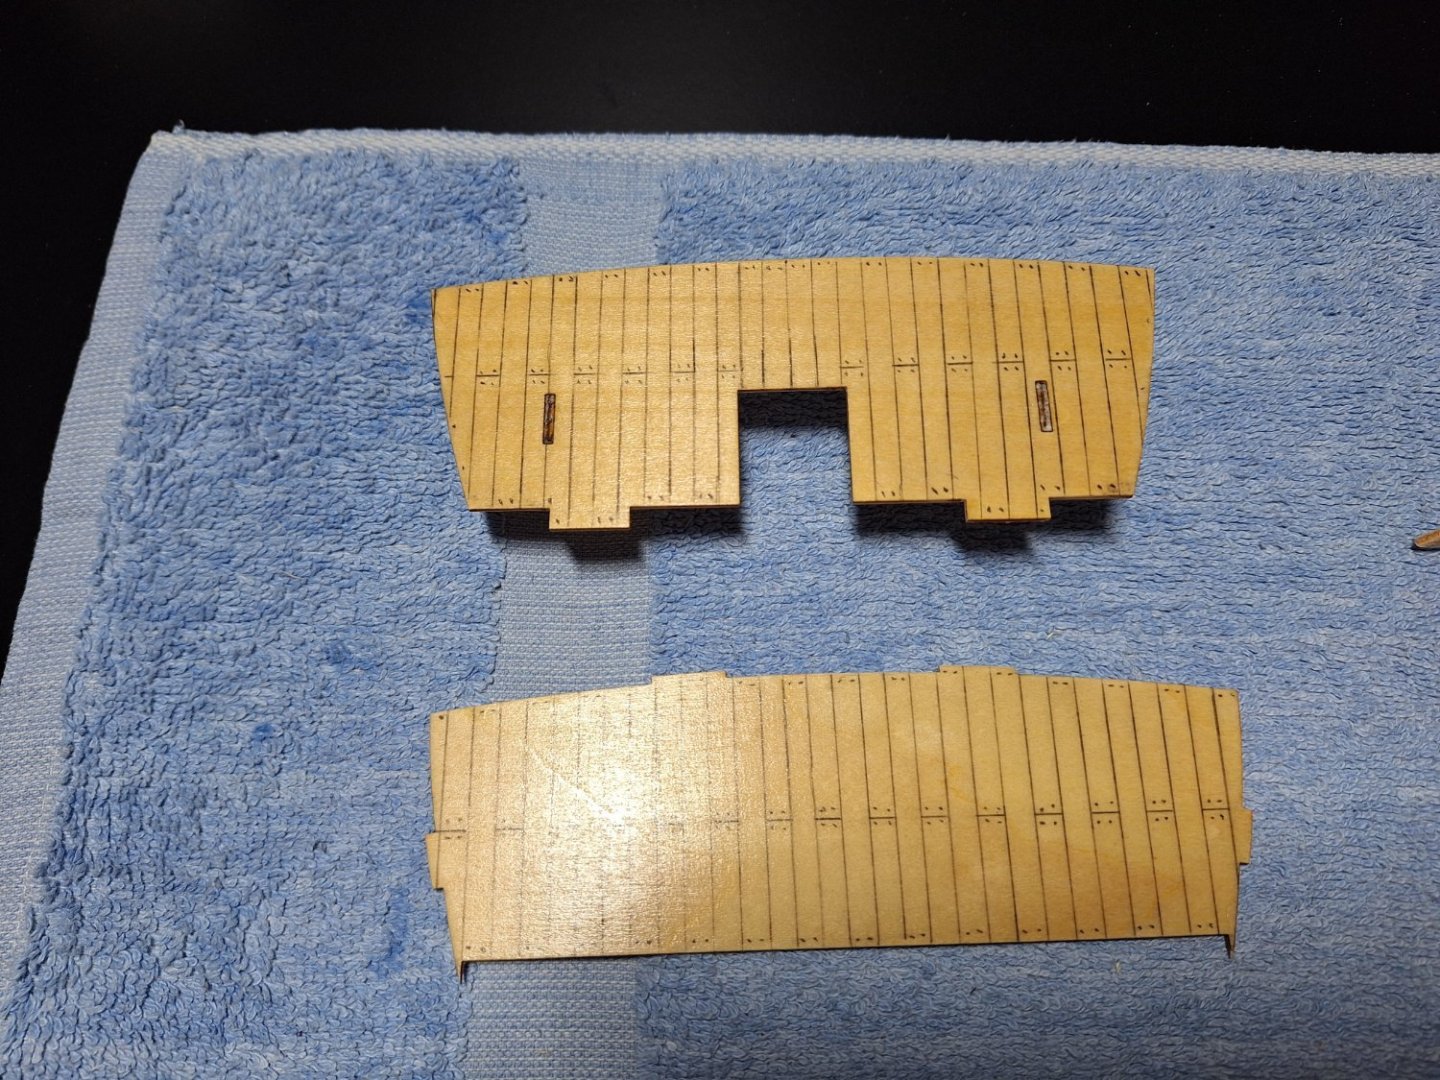
I cut the upper false deck slots so its ready after sanding just to be installed.

- 33 replies
-
- 4
-
-
- Victory
- DeAgostini
- (and 1 more)
-
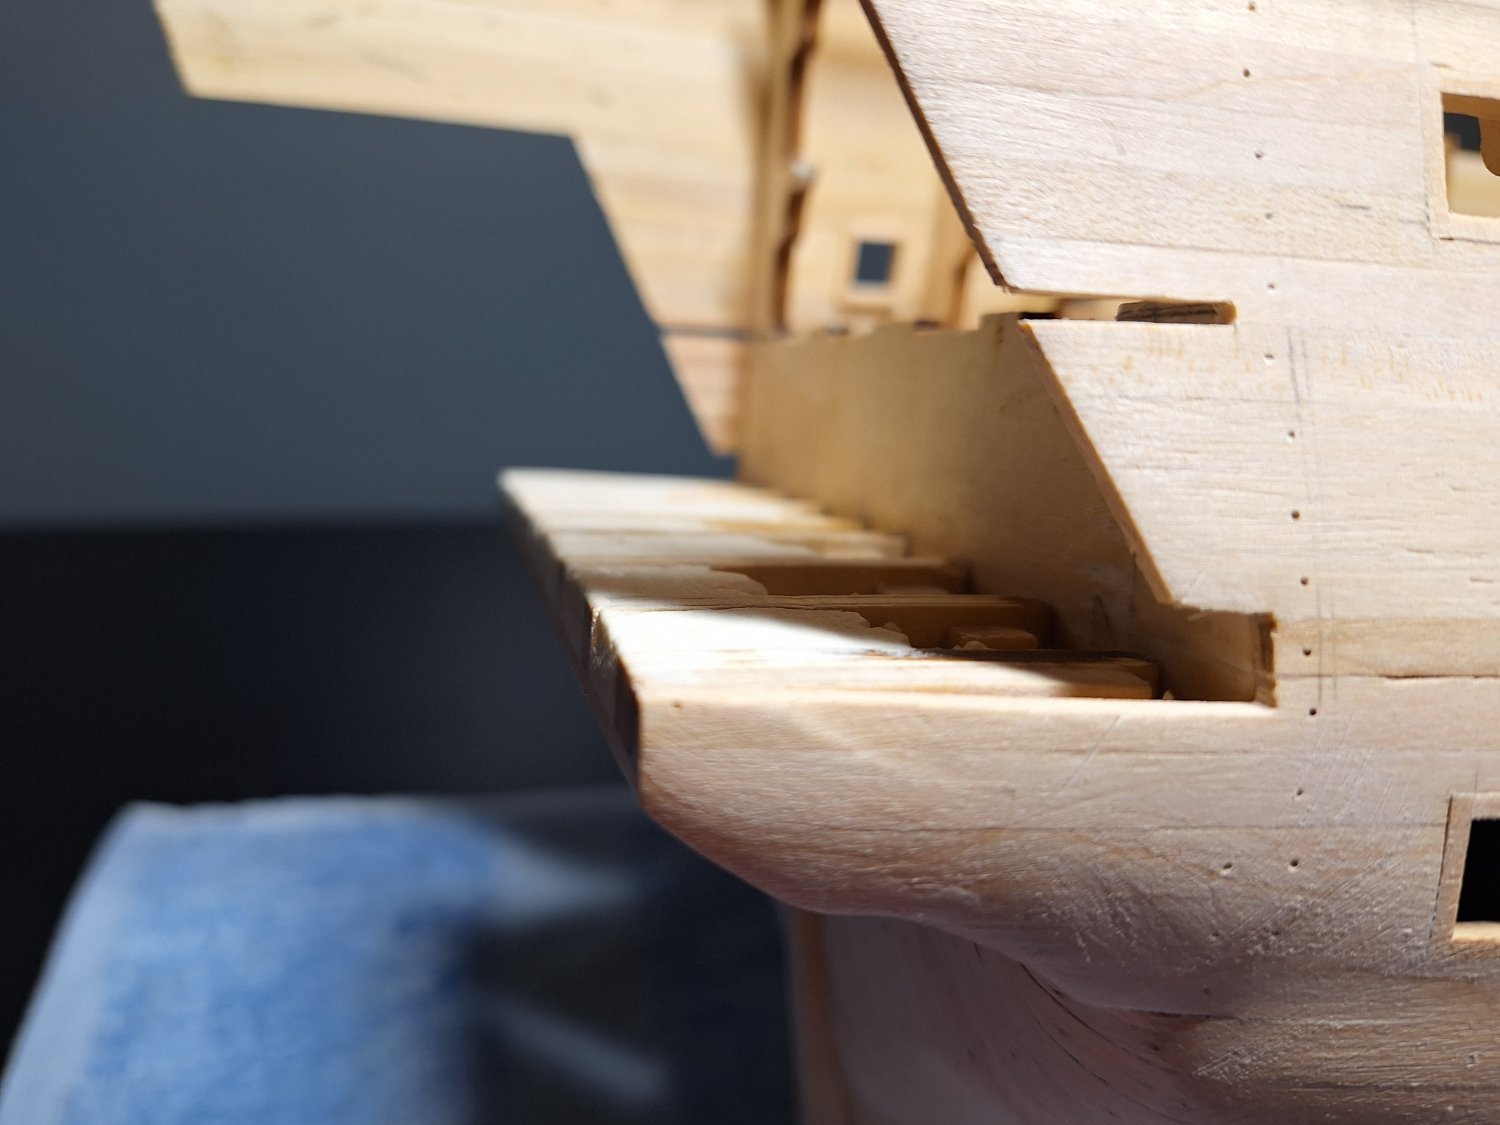
So the past few days i have added the keel, and the sides to the poop, quarter, waist, and forecastle deck. So next stage i will likely get it ready for sanding and then add the gallery to prevent it from getting damaged.

- 33 replies
-
- 3
-
-
- Victory
- DeAgostini
- (and 1 more)
-
For the Beginner Modeler
N80FTY replied to kgstakes's topic in Modeling tools and Workshop Equipment
Hey Allen, As a first time builder I've tried to do my model all by hand this far. (Until I get my 2nd model, Amati or Caldercraft HMS Victory) I've not used any electric power tools yet, apart from my plank bender for 2 bends near the gallery, which could have been done with hot water or in the old days a hot steam box and pegs in holes to get the angles needed. But I've only just built the hull so far. and my finger tips are nearly healed from the first sanding. lol. We are lucky this day and age with the advancements since 16-19th century. Until now I never really realised how much work goes into building a model. Tools I've used are, Swann scalpel, zona razor saw, small hammer, snips/side cutters, ruler, pin vice for marking and drilling, sand papers, wood glue, And most importantly a hell of a lot of information from all you guys on here. -
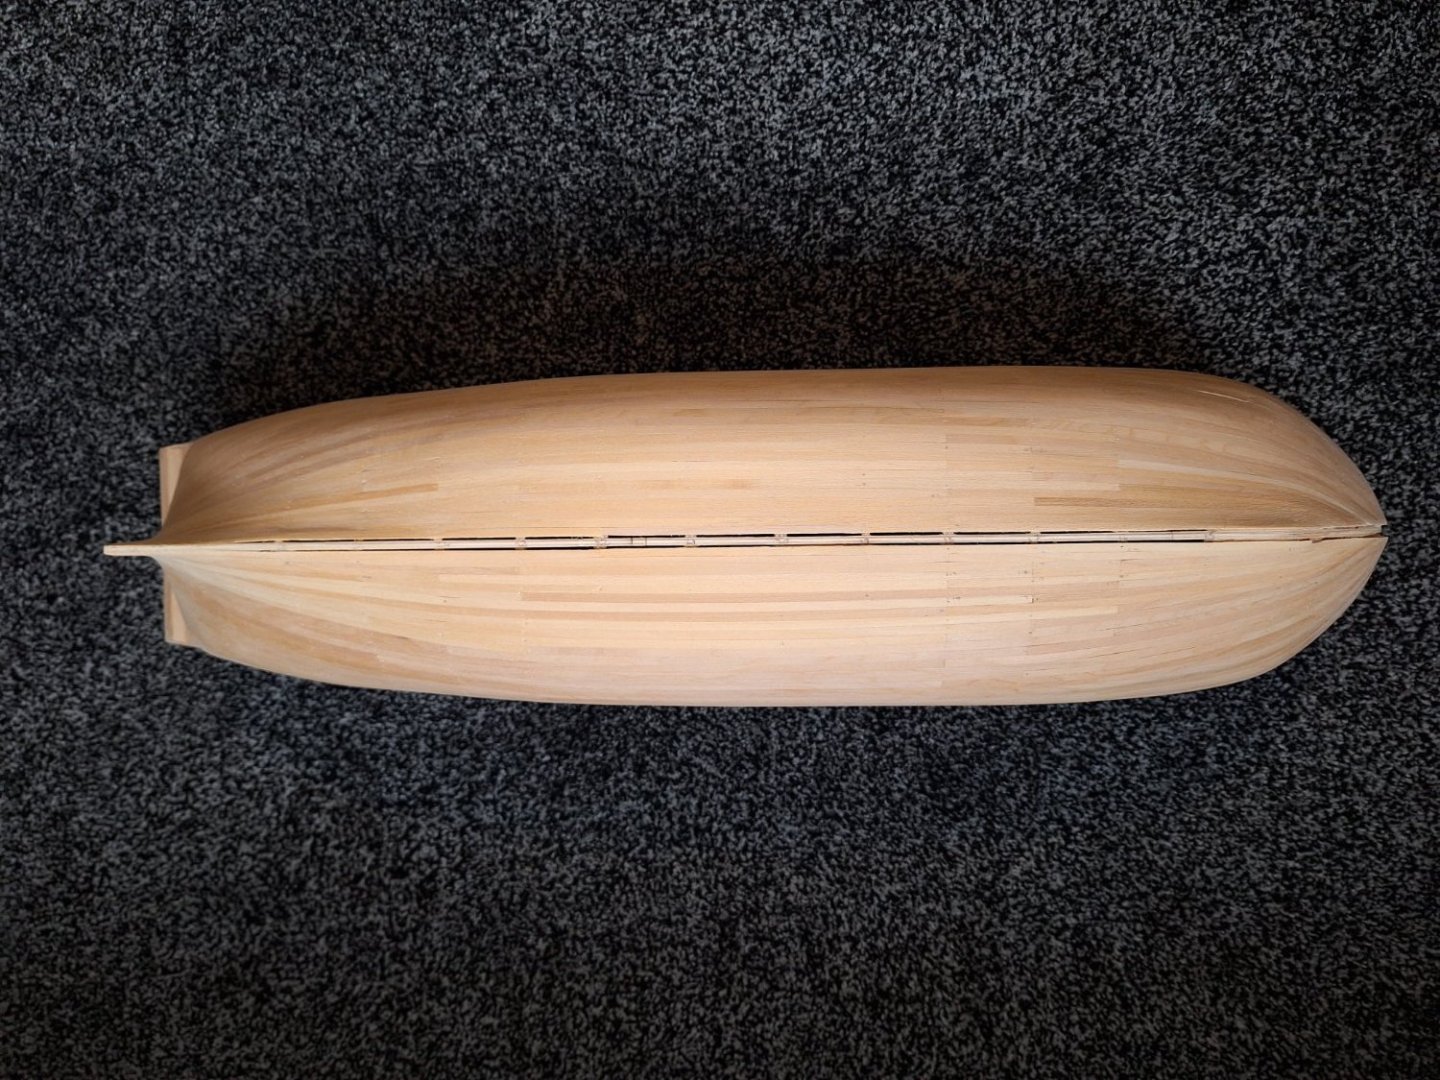
Relatively progressive morning, finished the first hand job on the hull at 60grit. Was thinking of 320 grit when its ready for the final sanding. Or should I go higher up to 800 grit.
- 33 replies
-
- 3
-
-
- Victory
- DeAgostini
- (and 1 more)
-
Thanks Chris. Its only been sanded with a 60grit so far to get rid of the main discrepancies. Once I've added the top planking, (poop, quarter deck, waist, forecastle) and fitted the keel and ill give it a proper sanding. I was thinking a 320 grit. Would this be good enough or should I go finer. It will be a fully painted version. With either proper copper tiles if I can still get them or 6mm - (1/4") copper tape Sorry forgot to say ill fill the small imperfections with Deluxe Model Lite Balsa, as I've read its pretty good and wont add too much weight to the model
- 33 replies
-
- 1
-
-
- Victory
- DeAgostini
- (and 1 more)
-
Hey Chris, Thank you it was a good read. Now I have no excuse for not being warned. I've nearly completed the hull on my (POF I think you call it) DeAgostini HMS Victory so I'm the unlucky 13th you forgot about I guess. LOL (Should change my name to "Unlucky Thirteenth" now.) But I will embarrass myself and admit. I did wait to join and post anything on here just in case I didn't or couldn't build it to start with.
-
I was looking at getting this. But as far as I know the Caldercraft is the most accurate from what I've read so far. As for the OcCre in my opinion seeing as the hull is open, they should have made it with all the decks and so on in it as its an open plan to view all the insides. I would have bought it then with no problems. It just looks half complete with just part of the hull complete. I am looking at the Amati too, but I'm not sure how accurate that will be or when it will be released.
-
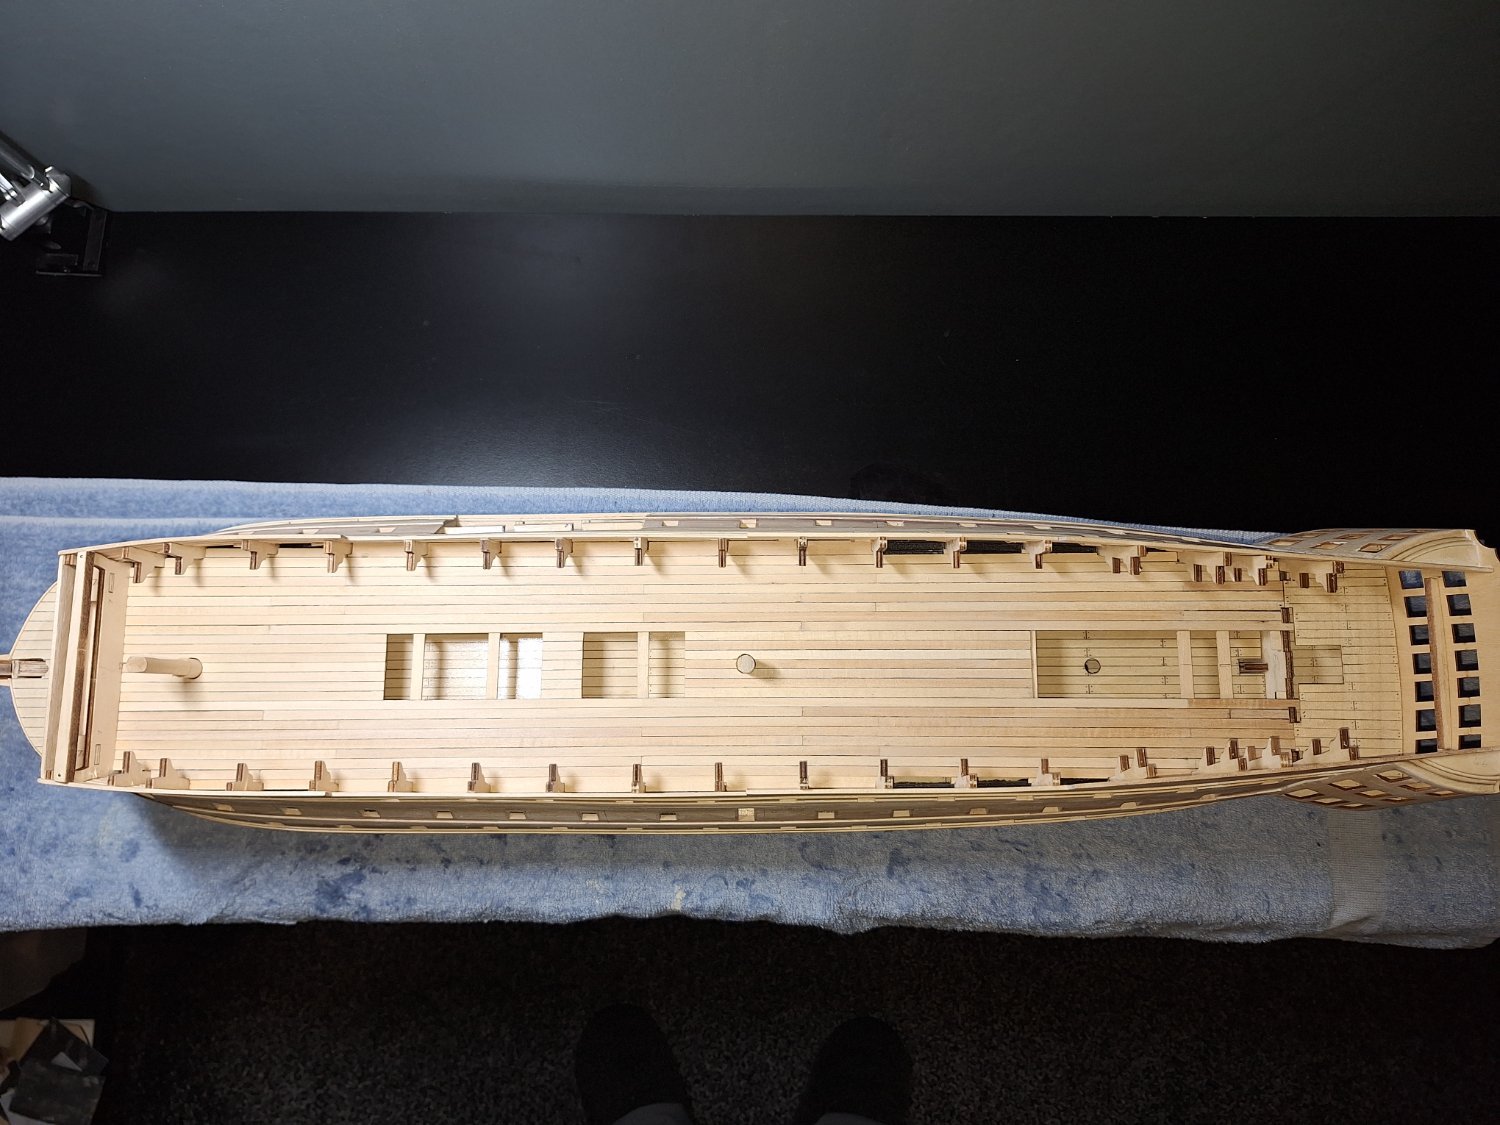
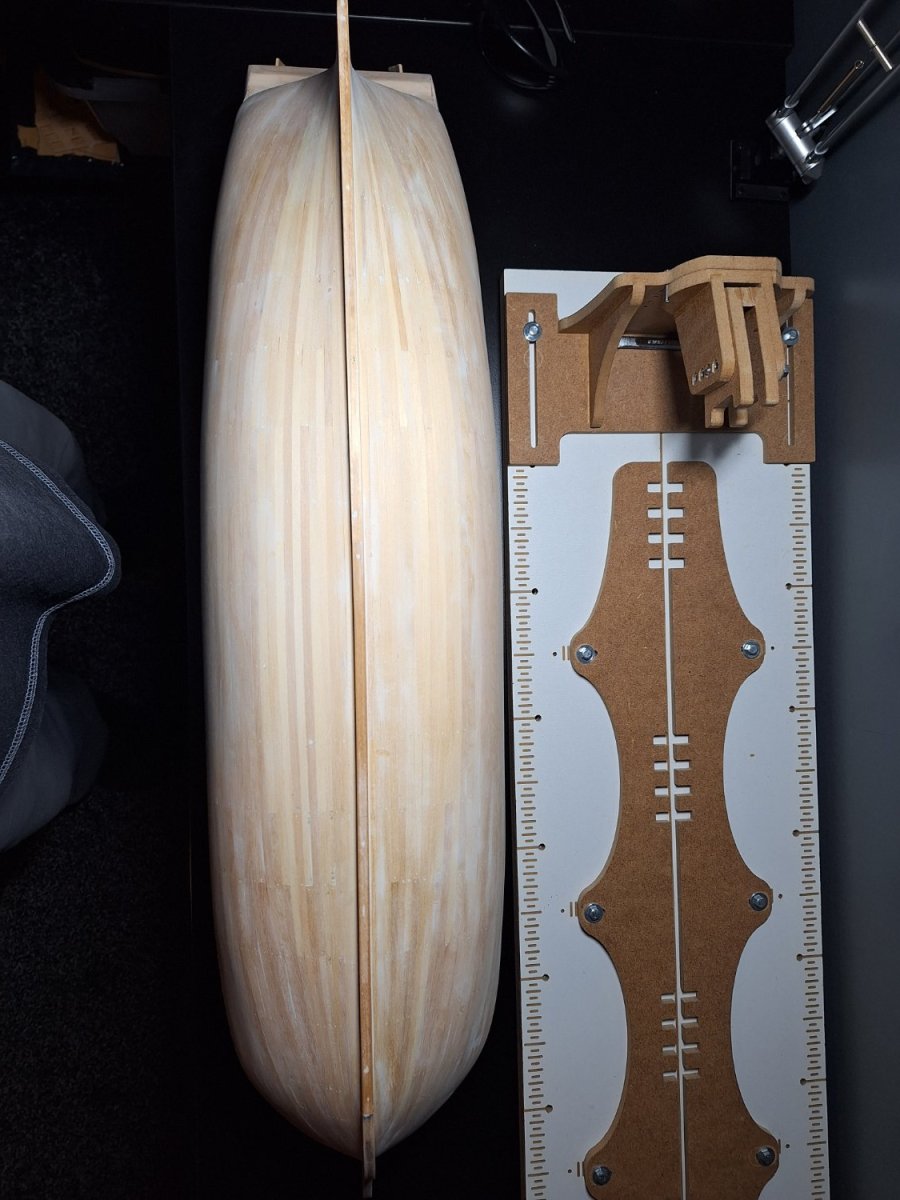
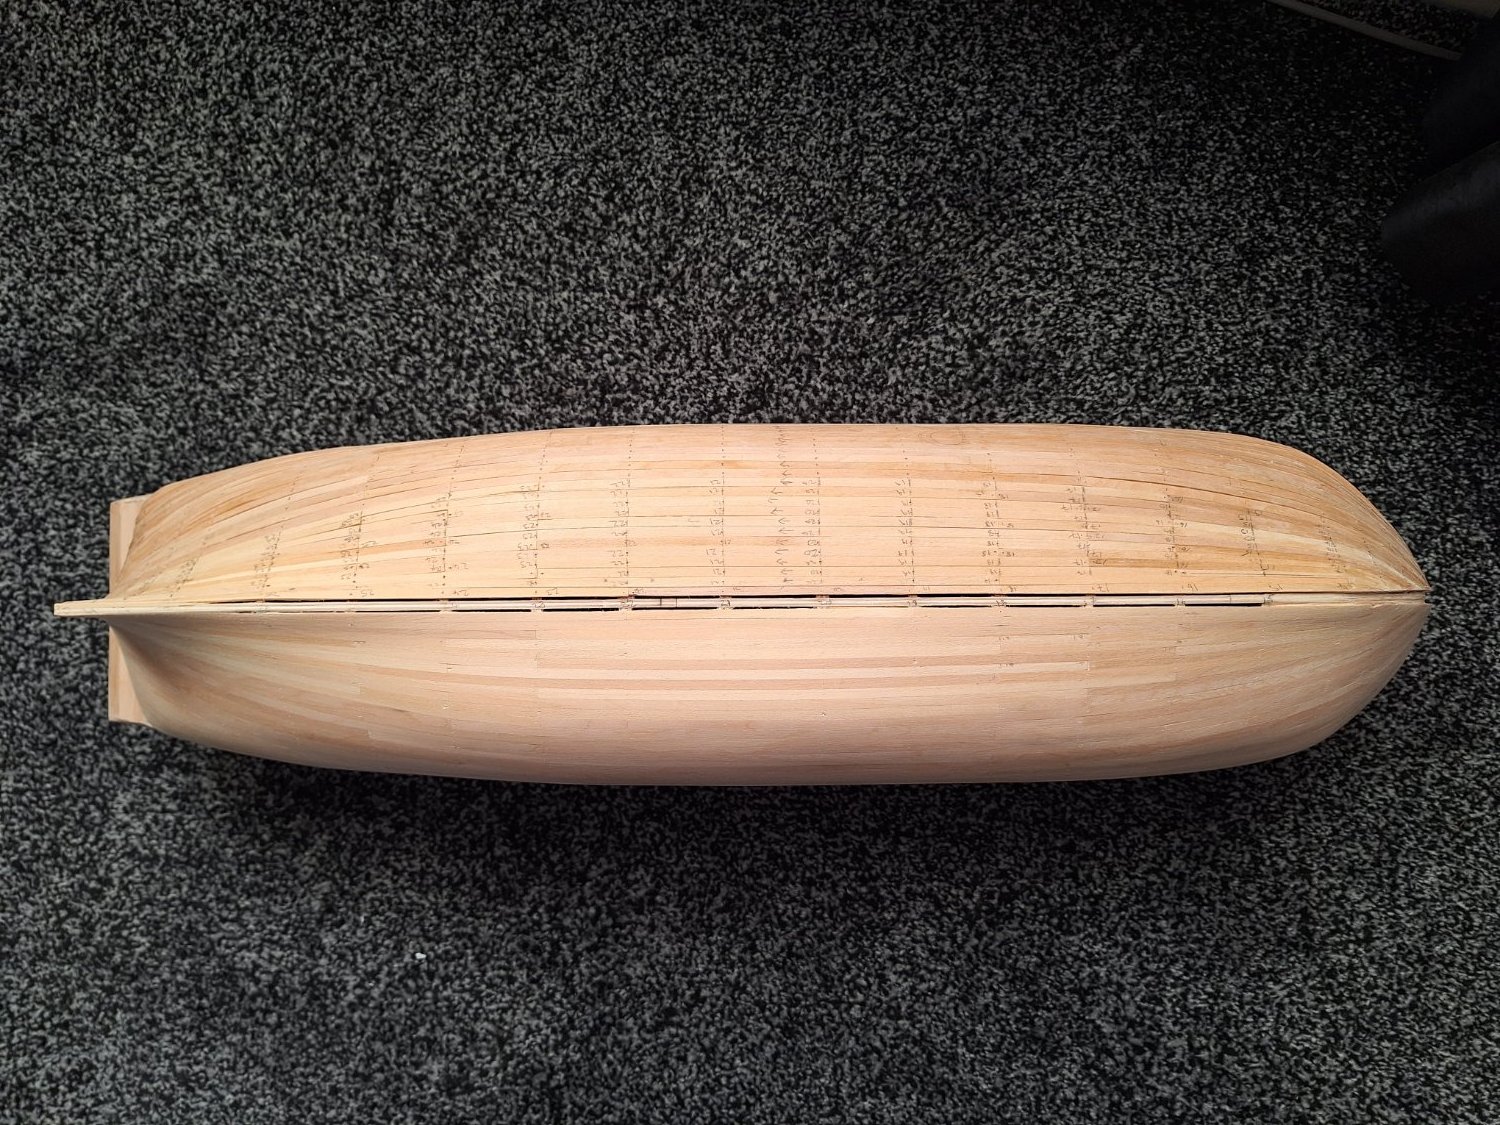
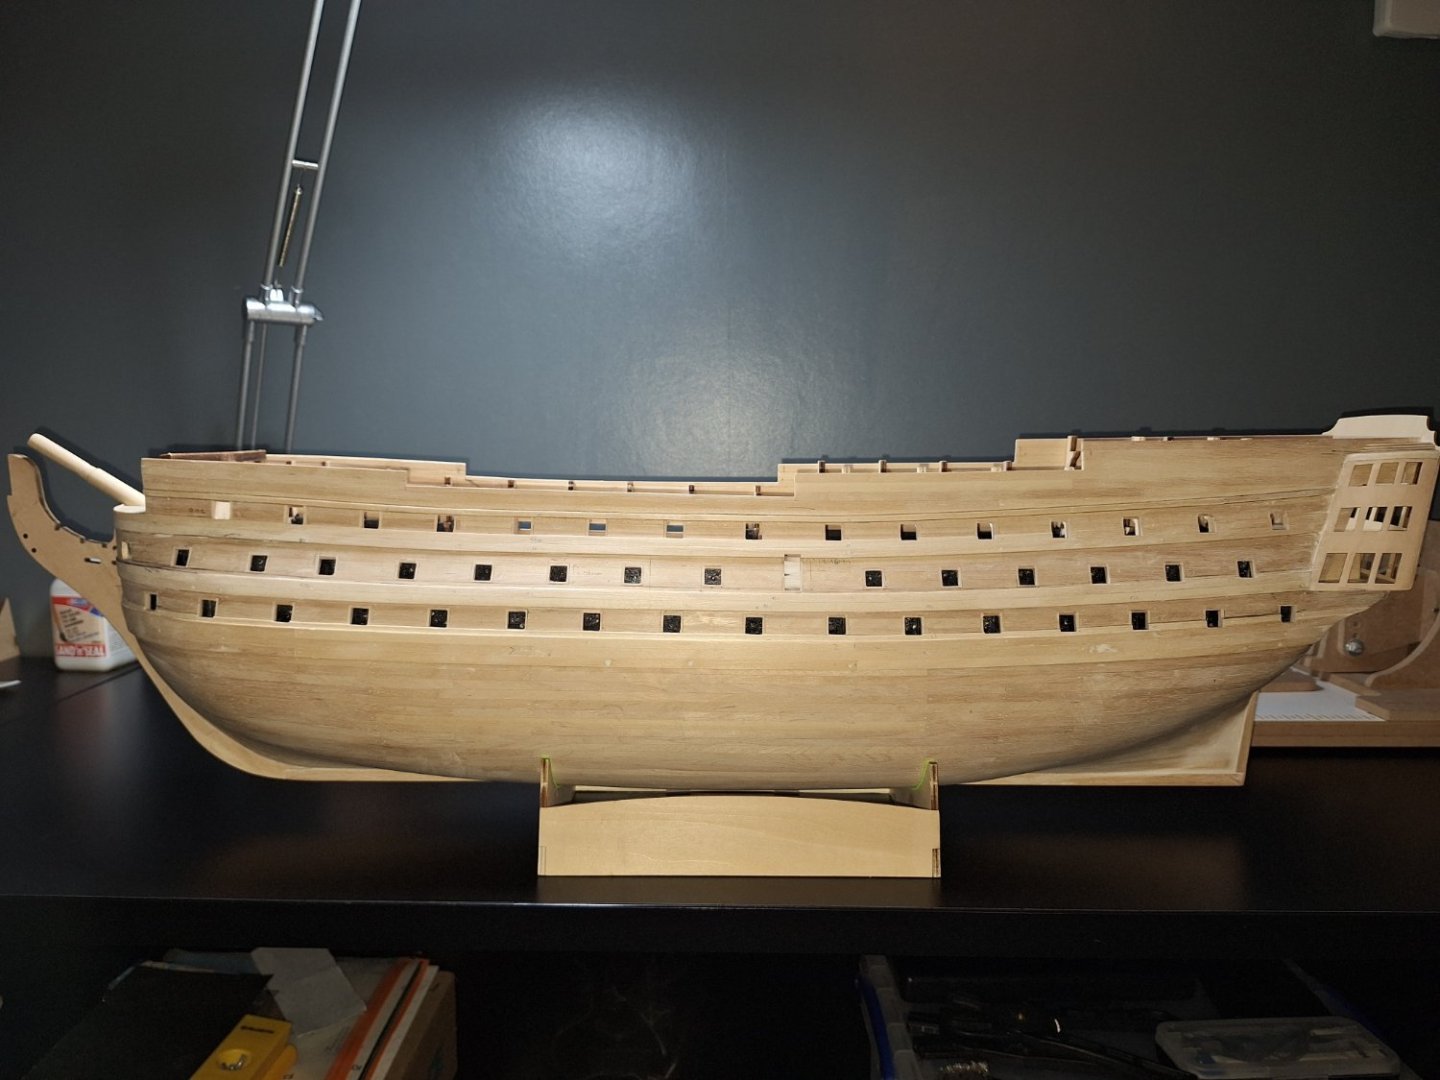
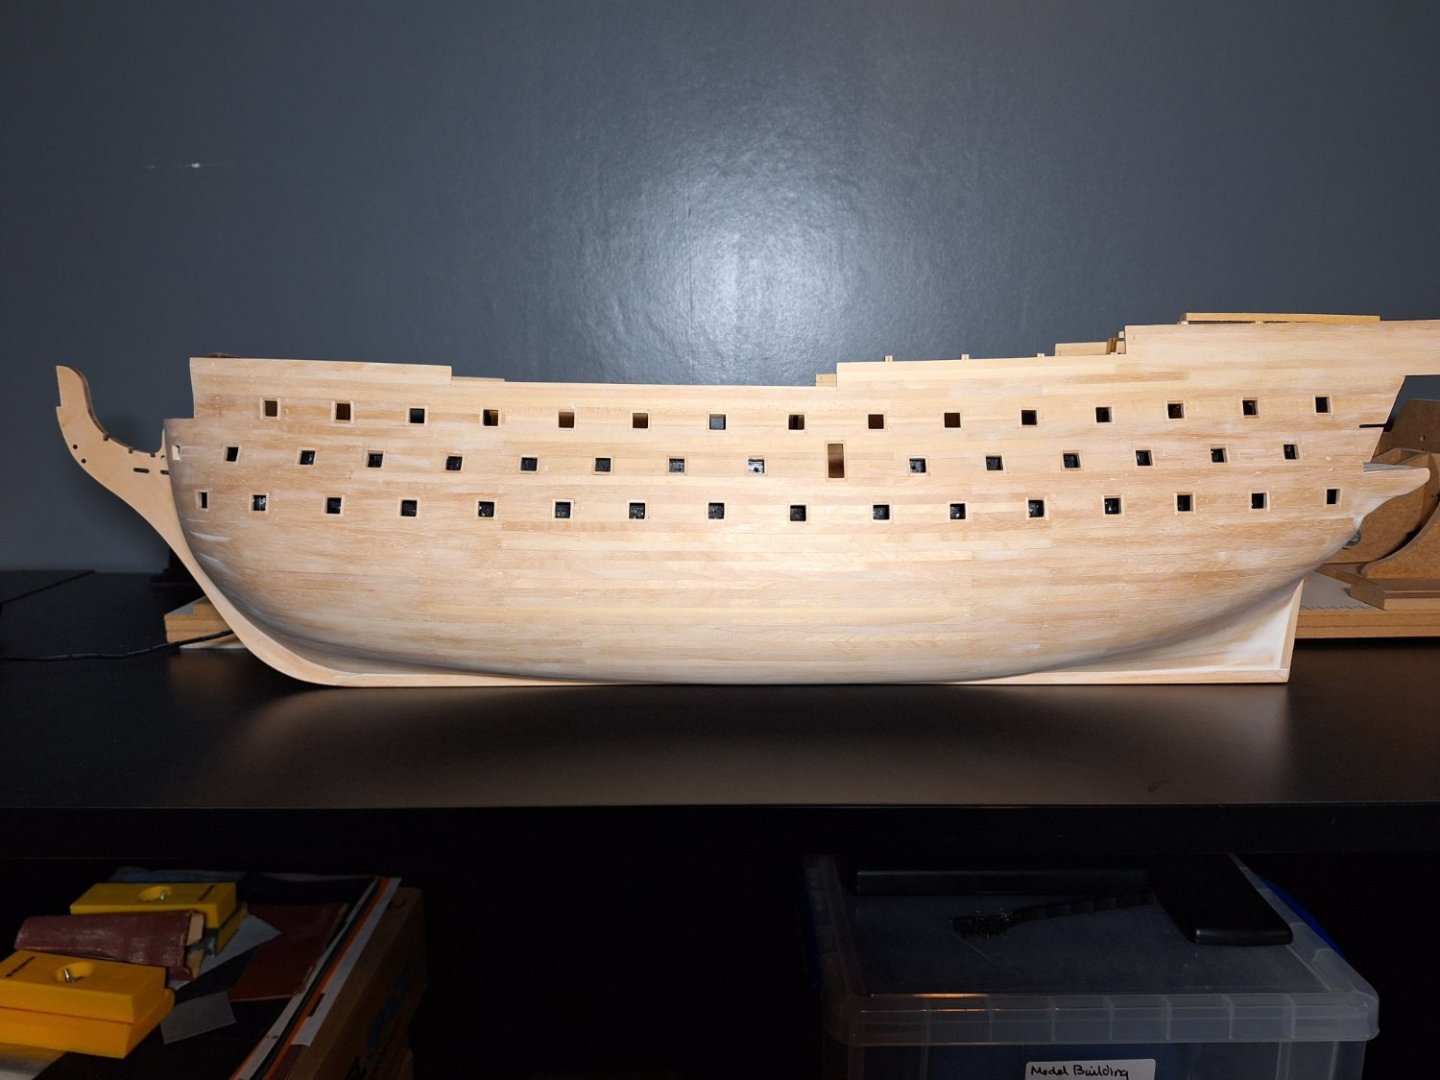
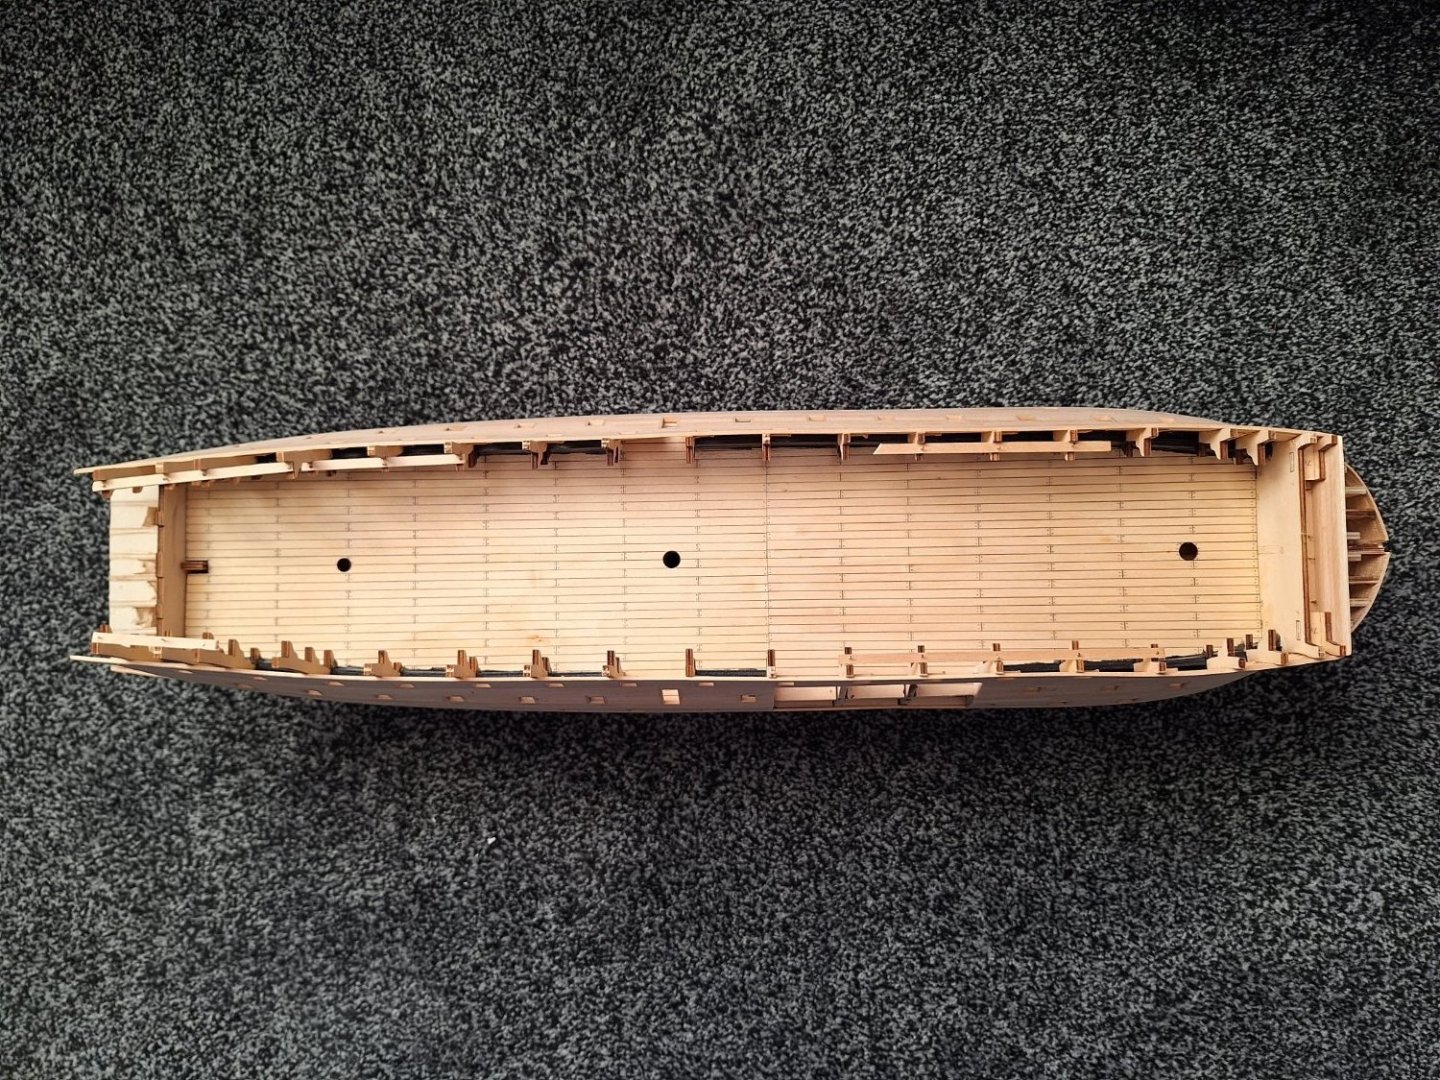
Hi All, This is my first build, I started it in April 2023. This is the stage it is at. Port side which has had its first sand 24/12/23. Not had any wood fillers applied yet so will need a touch up Starboard side that still needs its first sanding. Hull as you can see Port side has had its first sanding. Top View of middle deck which I stencilled all the floor rather than just a section.


- 33 replies
-
- 12
-
-
- Victory
- DeAgostini
- (and 1 more)
-
Thank you Chris Thank you Chris.
-
Hi Everyone, My name is Andrew. I'm building my first ship which is the, DeAgostini, HMS Victory. 1/84 Yes I know this is not really a beginner ship, but please bear with me and let me explain myself so you understand a bit more why. I have certain mental health issues, Depression, Personality disorder which leads to me not wanting to be here. So instead of constantly thinking on how and which way to leave this place, I decided to try model ship building and it takes my mind off due to the concentration needed. First off don't worry I've lived with this my whole life and have always found ways to deal with this. So NO sympathy please, Just browse help or question away like I'm an ordinary person. If I write something that is not correct or misunderstood please let me know and I will fix it or rephase it. I'm only here to enjoy myself and learn from others like I have done since April this year. Since April I have started building the DeAgostini, HMS Victory. 1/84, and I have turned to this website more often than I will like to admit. So thank you everyone who builds the HMS Victory. Caldercraft included as these are the ones I seem to come across more often. But the information, techniques and individuals input and methods are very similar and useful across all builds. This has helped me so much to the stage I am currently at. Specifically to John builds iconic military models, as his videos have also helped me out so much. Albeit he upset me this week when he showed the Caldercraft, HMS Victory. 1/72. So I am now currently trying to save up £1050 to buy the Caldercraft and will likely build both. DeAgostini due to the sails and Caldercraft for better detail and quality. The sails on the DeAgostini is one of the reason that made me go for it as well. I've never seen the Caldercraft with sails yet. (Only the rigging). Once I have the Caldercraft HMS Victory I will try to get both to the same stage and build them roughly to the same stages. Anyway, this was a little about me. Feel free to ask whatever you wish, Or give some input.