-
Posts
402 -
Joined
-
Last visited
About PvG Aussie
- Birthday 06/07/1956
Profile Information
-
Gender
Male
-
Location
Rockhampton, Qld, Australia
-
Interests
Family, modelling.
Recent Profile Visitors
-
Sorry Juan, the only pictures I have are in the postings above. Don't let the lines worry you. Just take one step at a time and you'll get through. Cheers, Peter.
- 12 replies
-
- Queen Annes Revenge
- Blackbeard
-
(and 2 more)
Tagged with:
-
I started from the stern and worked my way forward. Good luck. Peter
- 12 replies
-
- Queen Annes Revenge
- Blackbeard
-
(and 2 more)
Tagged with:
-
PvG Aussie changed their profile photo
-
After another 12 hours (Total 24hours) I HAVE FINISHED! Sorry for the lack of progress reports but things have been hectic on the home front. The detail has been phenomenal! (Ignore the lanterns. I'll straighten them later) It's been amazing to see how things fit together in order to come up with the final product. (439 pieces!) Final dimensions L19.5cm x W6.5cm x H16cm ok! 6.49" x 2.55" x 6.29" Build comments: Pieces are cut to perfection. It has been a clean and tidy build not having to worry about paint, glue or cutting. Instructions are confusing at times, especially with the rigging! I defy anyone to complete the build in the suggested 12 hours. All in all, a fun project with a great final outcome. Thanks to those who followed this short build. Cheers, Peter
- 12 replies
-
- Queen Annes Revenge
- Blackbeard
-
(and 2 more)
Tagged with:
-
After a break over Christmas and New Year and another 2.5 hours (Total 8.5) I have finished and joined all three decks. The detail is quite challenging but very rewarding. I then finished about 80% of the Port Side features! (It started out like this blank starboard side.) Then after a further four hours, it looks like this. (Total 12.5 hours) After joining the side to the decks, it looks like this. I'm amazed by the precision and expertise that has gone into this model. Pieces fit perfectly, and apart from sore fingers from bending tabs and pieces, it's very rewarding. Tomorrow I'll finish the port side and start on the starboard. Thanks for tuning in. Cheers,
- 12 replies
-
- Queen Annes Revenge
- Blackbeard
-
(and 2 more)
Tagged with:
-
A master at work! Well done, Glen, and thanks for the build as it shows us what is possible with skill and an imagination. Cheers,
- 185 replies
-
- Flying Dutchman
- Black pearl
-
(and 2 more)
Tagged with:
-
Hi Patrick, the scale is NOT indicated on the box or instructions so I think the model will be around 130mm and the original ship was 31.4m. Problem solved! Scale equals 1:241 say 1:250. 😁
- 12 replies
-
- Queen Annes Revenge
- Blackbeard
-
(and 2 more)
Tagged with:
-
AFTER ANOTHER 3 HOURS (Total 6 hours) Progress is made. What amazes me is the detail of this model. I've added what I think is going to be the quarterdeck, cannons, stairs, a larger boat with lashings, and more 'other' things. Thanks for your encouragement and 'likes'. Cheers, Peter
- 12 replies
-
- Queen Annes Revenge
- Blackbeard
-
(and 2 more)
Tagged with:
-
AFTER 3 HOURS Lots of tiny bits. The deck is 97mm/3.819" long. Pieces include a staircase, barrels, buckets, vents, boats, some 'other' things and more 'other' things. Tedious but quite rewarding. Cheers, Peter
- 12 replies
-
- Queen Annes Revenge
- Blackbeard
-
(and 2 more)
Tagged with:
-
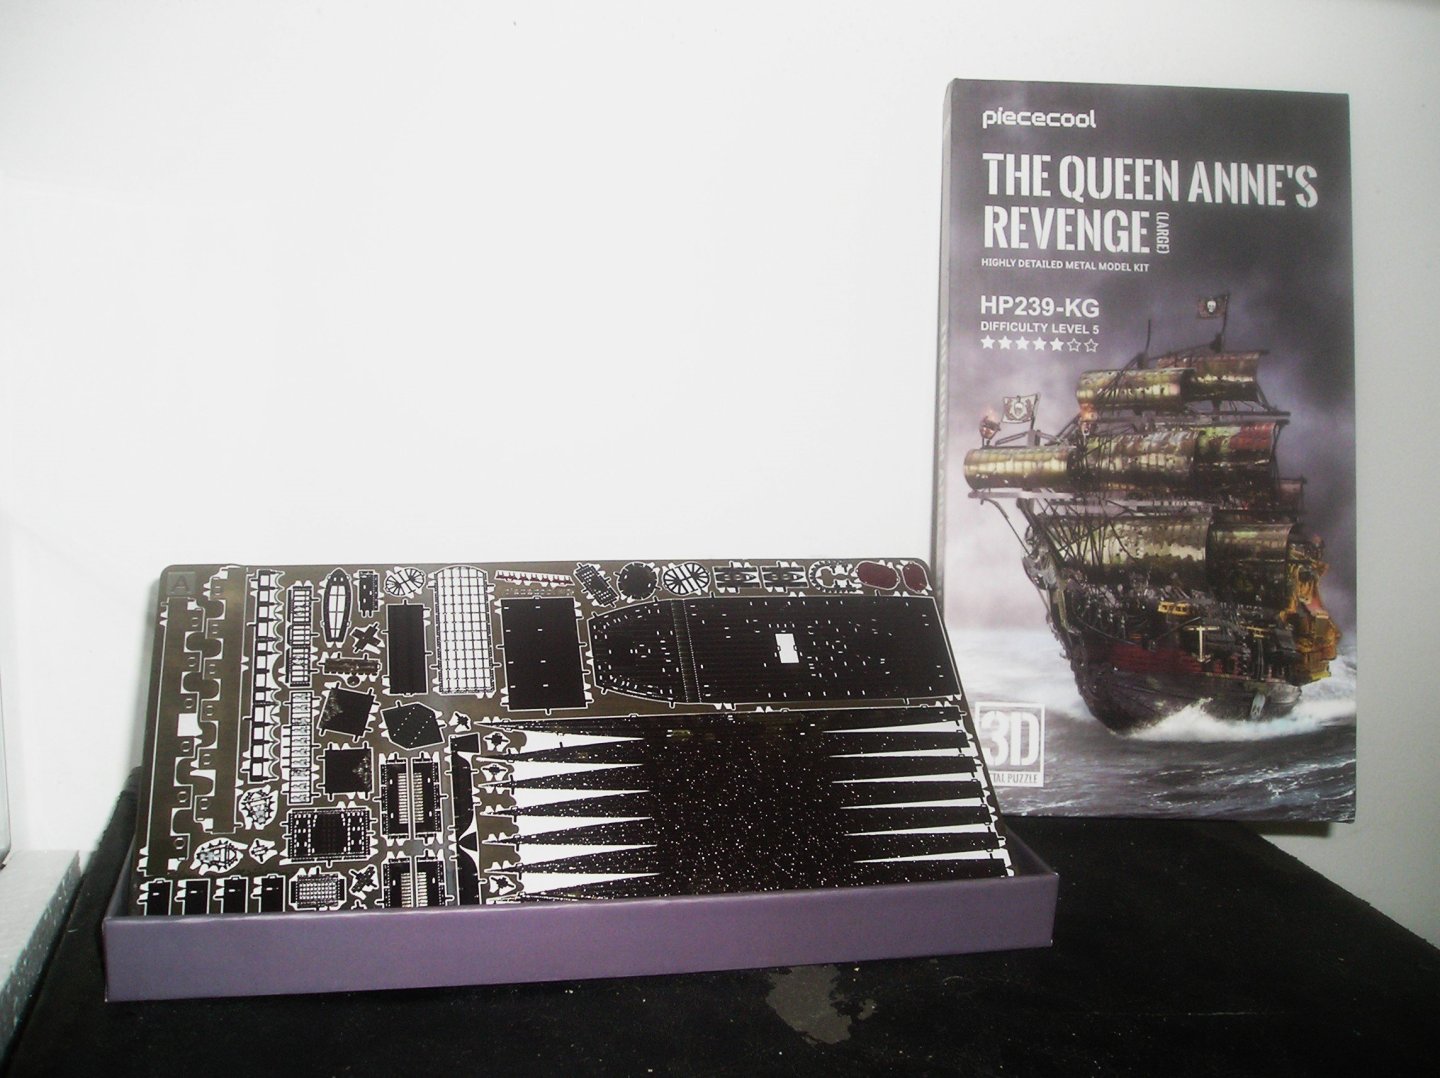
After finishing the USS Enterprise CV6 a month ago and not knowing what to do next, I decided to build something my admiral found on the internet. A metal, approx 1/100 scale, pirate ship. The box tells me it will only take twelve hours, so I will take my time and record the build for member's sake. According to Wikipedia, Queen Anne's Revenge was an early-18th-century ship, most famously used as a flagship by Edward Teach, better known by his nickname Blackbeard. The date and place of the ship's construction are uncertain,[3] and there is no record of its actions prior to 1710 when it was operating as a French privateer as La Concorde.[4][5] Surviving features of the ship's construction strongly suggest it was built by French shipwrights, based on differences in fastening patterns in the late 17th and early 18th centuries.[6][7] After several years of French service, both as a naval frigate and as a merchant vessel – much of that time as a slave ship- she was captured by Blackbeard in 1717. Blackbeard used the ship for less than a year,[8] but captured numerous prizes using her as his flagship. The kit arrived in a flat (10mm) 230X125mm box. It contains 439 pieces supplied in 8 sheets of PE. It has 86 very detailed stages of construction, clearly set out on paper. It requires no glue, paint or solder. The size of many of the pieces suggests it will be a challenge for anyone not having a magnifying glass light and a steady hand. Cheers, Peter
- 12 replies
-
- Queen Annes Revenge
- Blackbeard
-
(and 2 more)
Tagged with:
-
I remember my elder brothers making the cardboard model in the early 60's after we arrived on the Sibajak from Holland in 1959. Peter
- 8 replies
-
- passenger liner
- bottle
-
(and 2 more)
Tagged with:
-
All tasks completed. The leader flies. and the ship has a stand and plaque! The Enterprise is finished and ready to sail to the Emu Park Historical (Maritime) Museum. That's right. It's going straight to the coast to join an earlier boat. 'The German U-Boat SM U9' I'm very happy with the Enterprise and would like to sincerely thank those who have followed my progress. There is no greater honor than to be complimented by your peers! The Gallery images can be found here. The Admiral wants a few jobs to be done, so I may not be on deck for a while. 😎 Until then and happy modelling!
- 97 replies
-
- Enterprise
- Tamiya
-
(and 2 more)
Tagged with:
-
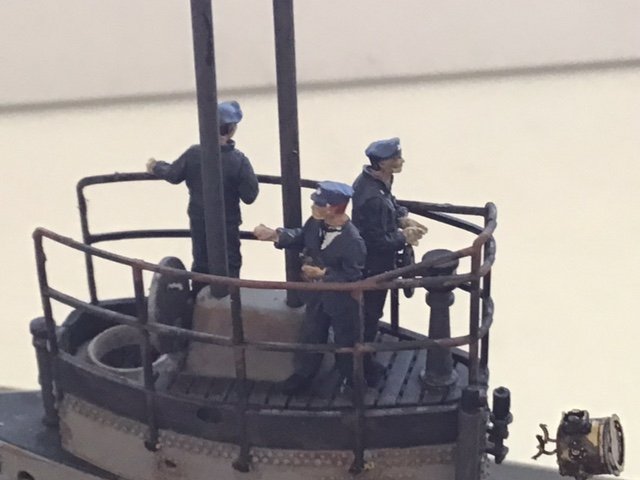
Ken, I'll have a go at fixing their uniform but seeing they are smaller than some 'nits' I've seen, I hope I don't make a mess. Thanks for the 'pick-up'. Cheers,
- 97 replies
-
- Enterprise
- Tamiya
-
(and 2 more)
Tagged with:
-
The crew boarded today! Considering that they are only 5mm/0.197" tall most went straight to work. Some pushed, while some loaded ordinance from the Bomb Elevator. (Note the pilots standing around waiting with their hands in their pockets) Some watched from the bridge, while others just lazed around on the deck, taking in the action. All in all, I think the Enterprize is looking very ship shape! Two jobs left: 1. Getting one plane to 'take-off', and 2. Paint and label the stand. (Build time to date is 355.5 hours) Thanks for the wonderful support from you great modellers. It means a lot! Cheers,
- 97 replies
-
- Enterprise
- Tamiya
-
(and 2 more)
Tagged with:
About us
Modelshipworld - Advancing Ship Modeling through Research
SSL Secured
Your security is important for us so this Website is SSL-Secured
NRG Mailing Address
Nautical Research Guild
237 South Lincoln Street
Westmont IL, 60559-1917
Model Ship World ® and the MSW logo are Registered Trademarks, and belong to the Nautical Research Guild (United States Patent and Trademark Office: No. 6,929,264 & No. 6,929,274, registered Dec. 20, 2022)
Helpful Links
About the NRG
If you enjoy building ship models that are historically accurate as well as beautiful, then The Nautical Research Guild (NRG) is just right for you.
The Guild is a non-profit educational organization whose mission is to “Advance Ship Modeling Through Research”. We provide support to our members in their efforts to raise the quality of their model ships.
The Nautical Research Guild has published our world-renowned quarterly magazine, The Nautical Research Journal, since 1955. The pages of the Journal are full of articles by accomplished ship modelers who show you how they create those exquisite details on their models, and by maritime historians who show you the correct details to build. The Journal is available in both print and digital editions. Go to the NRG web site (www.thenrg.org) to download a complimentary digital copy of the Journal. The NRG also publishes plan sets, books and compilations of back issues of the Journal and the former Ships in Scale and Model Ship Builder magazines.


