J Snyder
-
Posts
87 -
Joined
-
Last visited
Content Type
Profiles
Forums
Gallery
Events
Everything posted by J Snyder
-
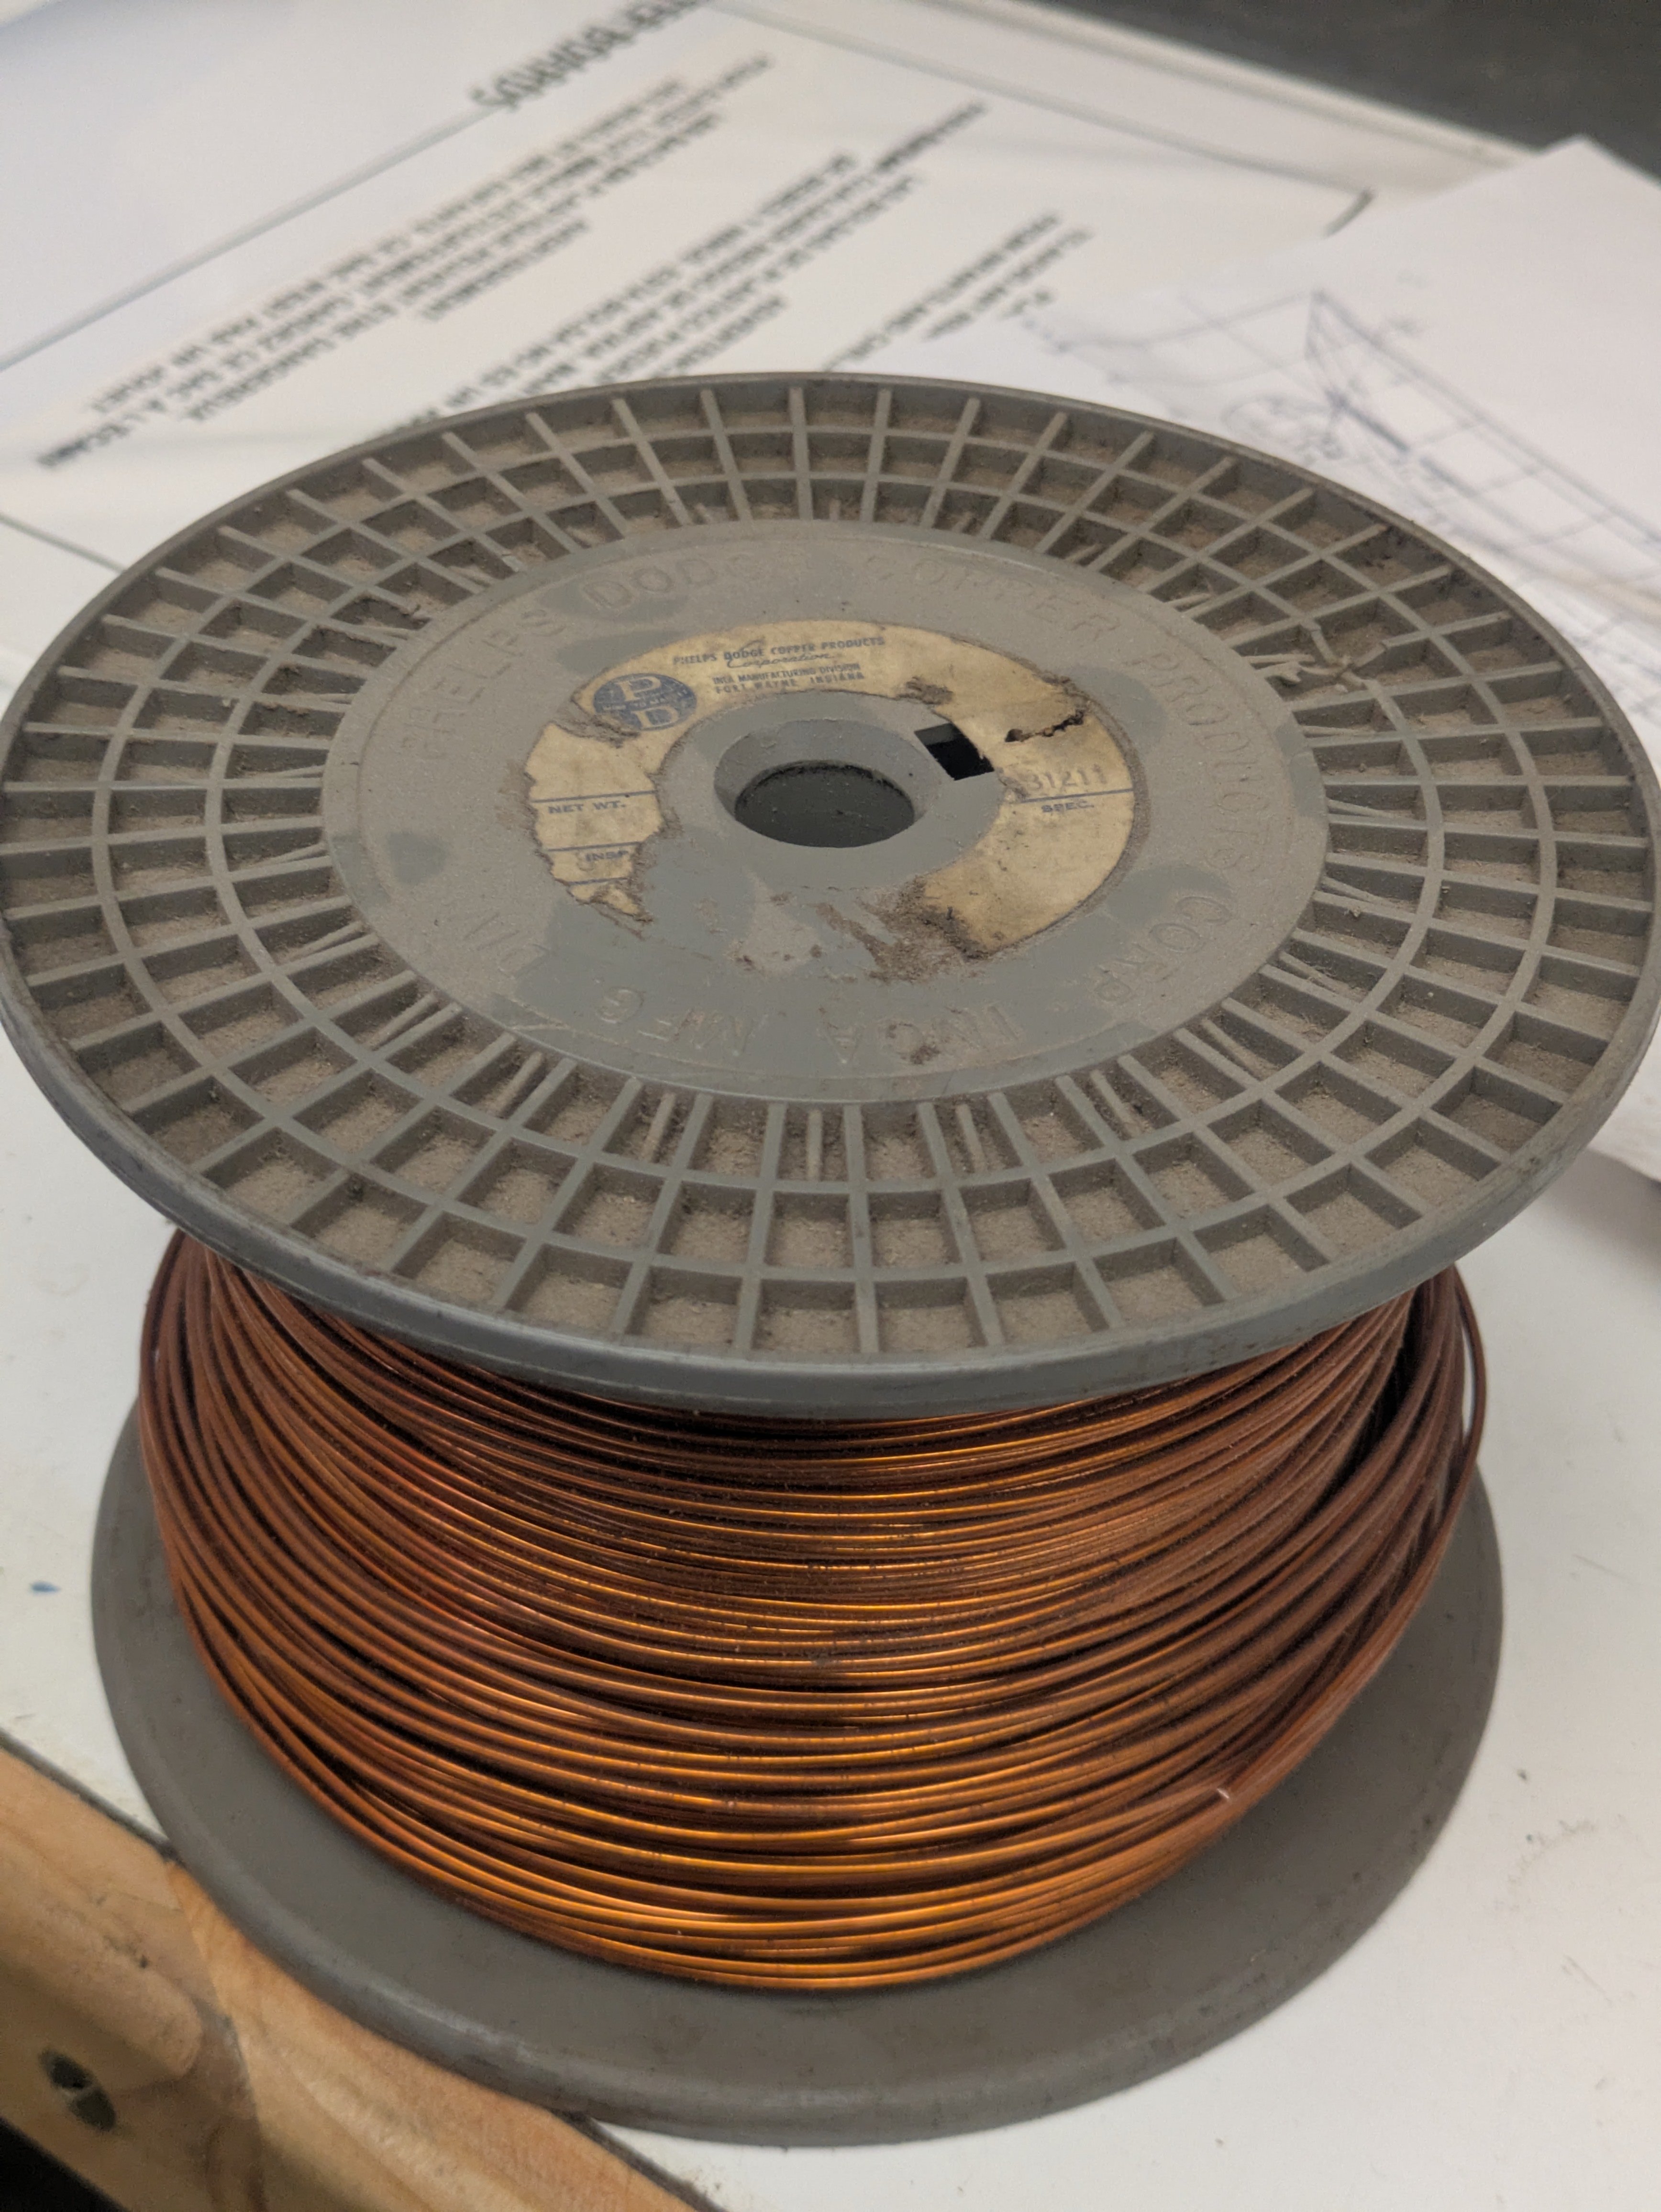
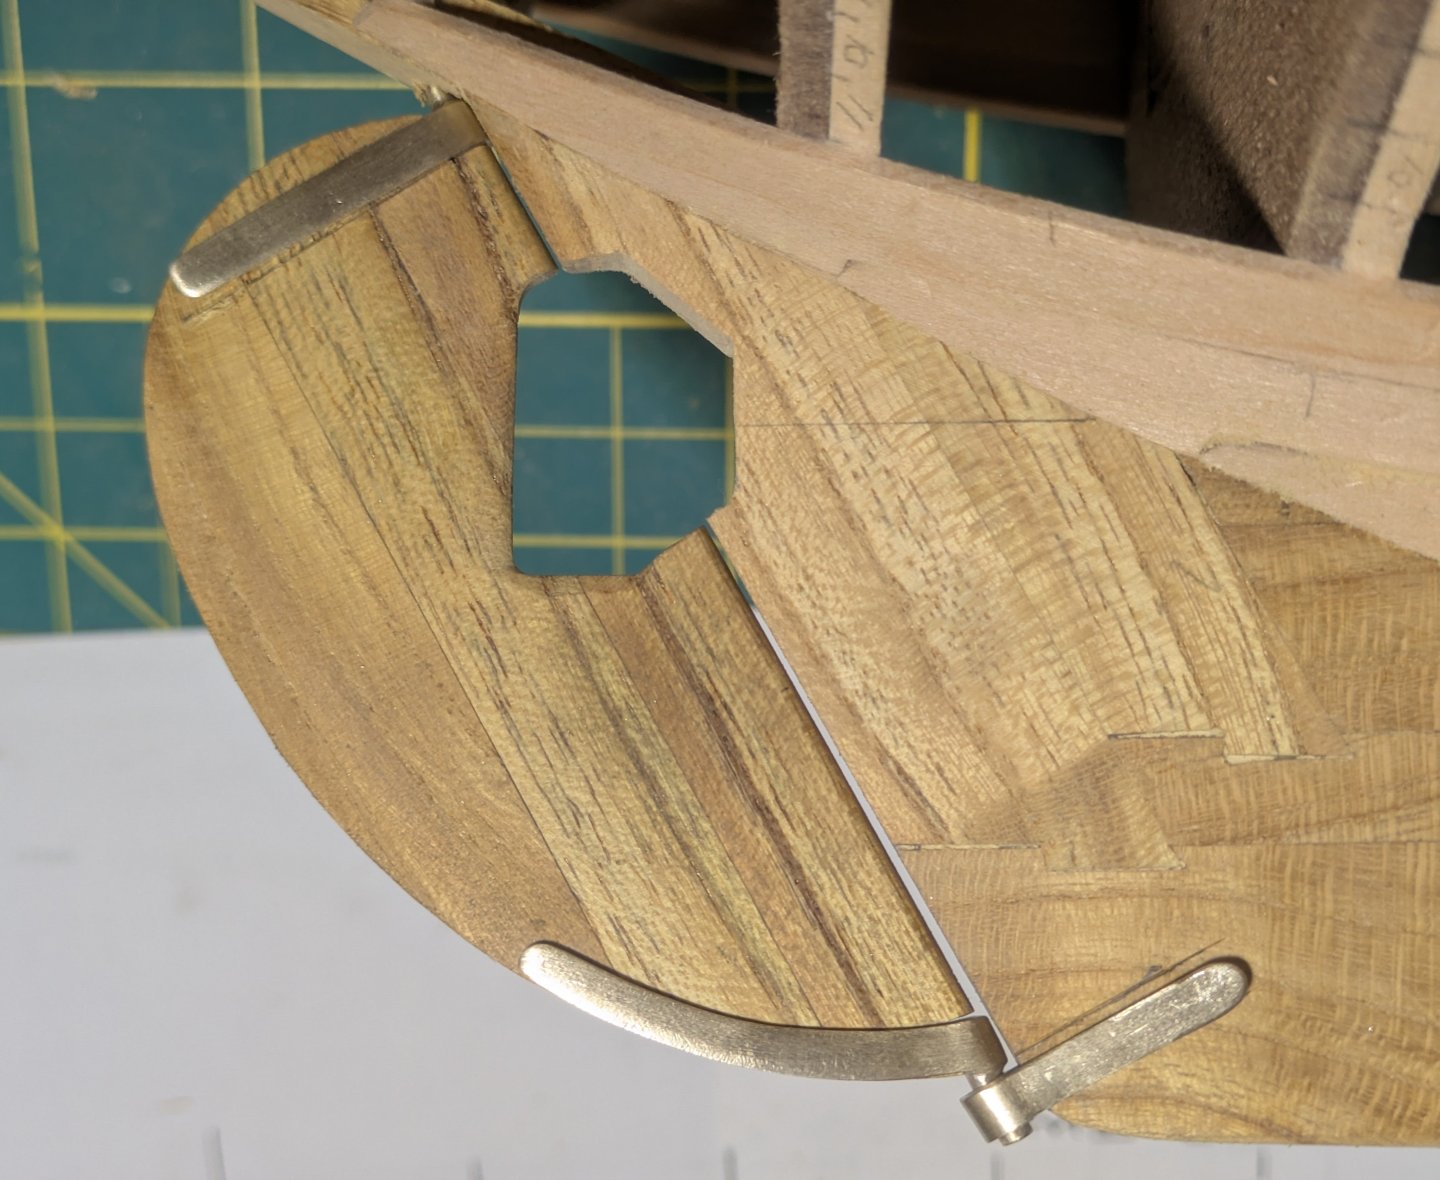
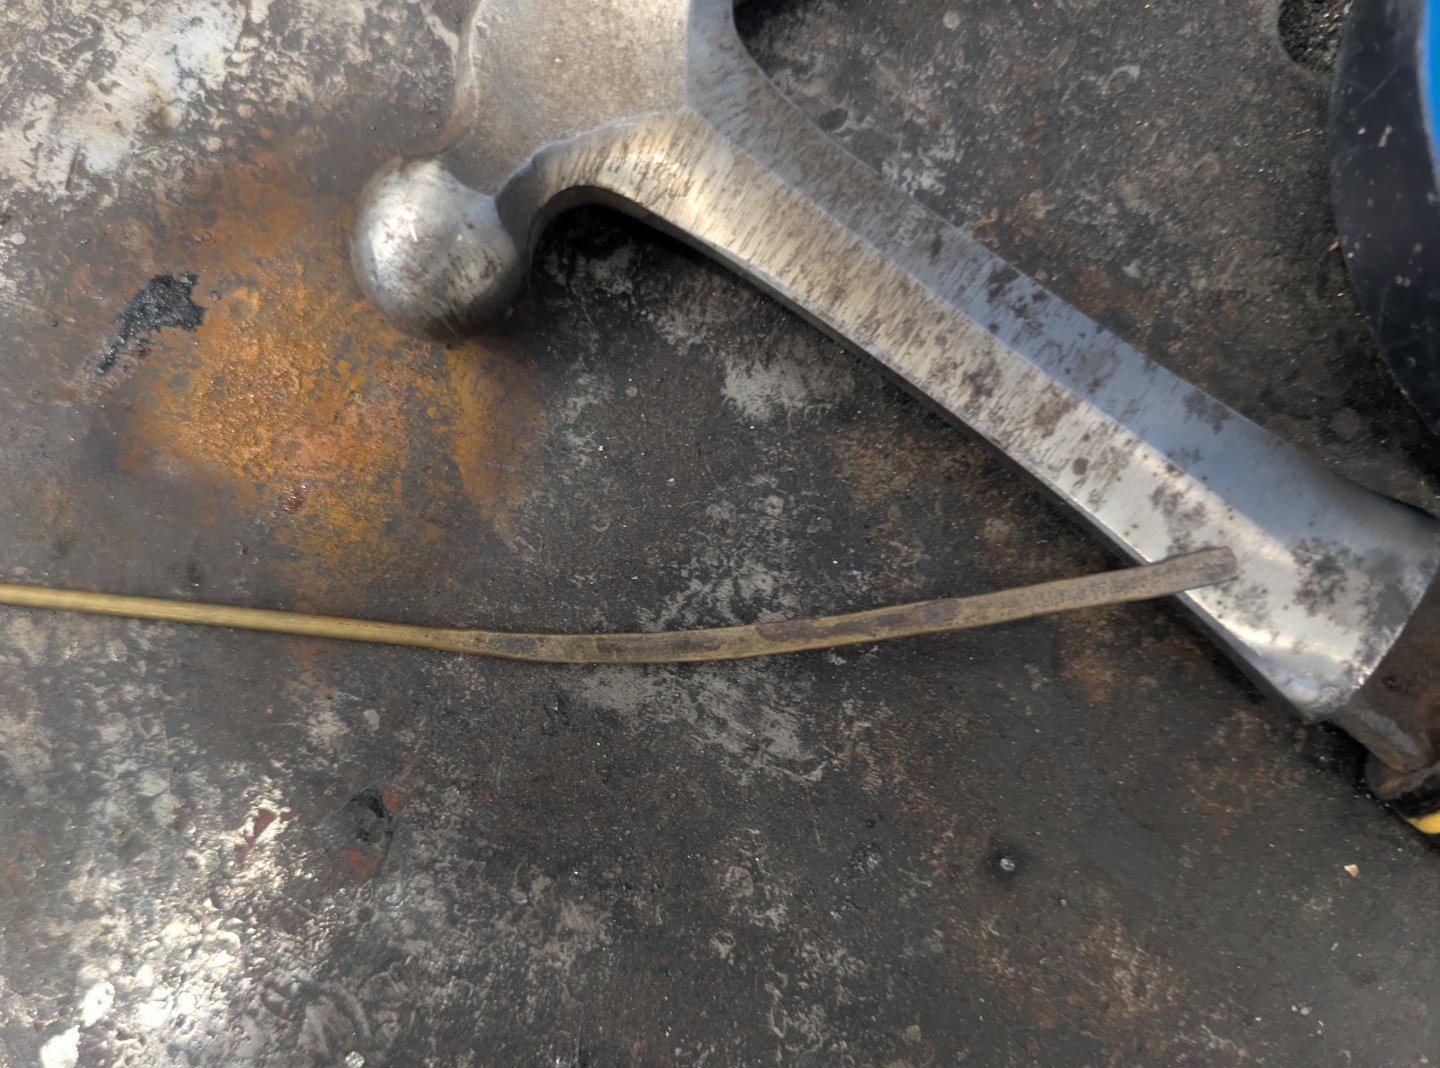
 I have a partial roll of 16 ga. coated copper wire pasted down from my HAM operator grandfather that I pulled through a draw plate to get it down to 18 ga. annealing as I went. Using the wire to fasten the straps to the rudder. I used a pin vise to hold the wire while I peened one end then cut and peened the other side. I'm going to wait to attach the strap on the keel till I am ready to finish the bottom.

- 38 replies
-
- 4
-

-
- William Atkin
- Sloop
- (and 1 more)
-
Help to assemble AMATI chain plate 4090/05
J Snyder replied to Johnny Mike's topic in Masting, rigging and sails
You could try annealing the brass? -
Help to assemble AMATI chain plate 4090/05
J Snyder replied to Johnny Mike's topic in Masting, rigging and sails
Just a thought from some one who has never done it. You may have to spread the chain plate ears a bit to get the deadeye bar though then squeeze the chain plate back together. -
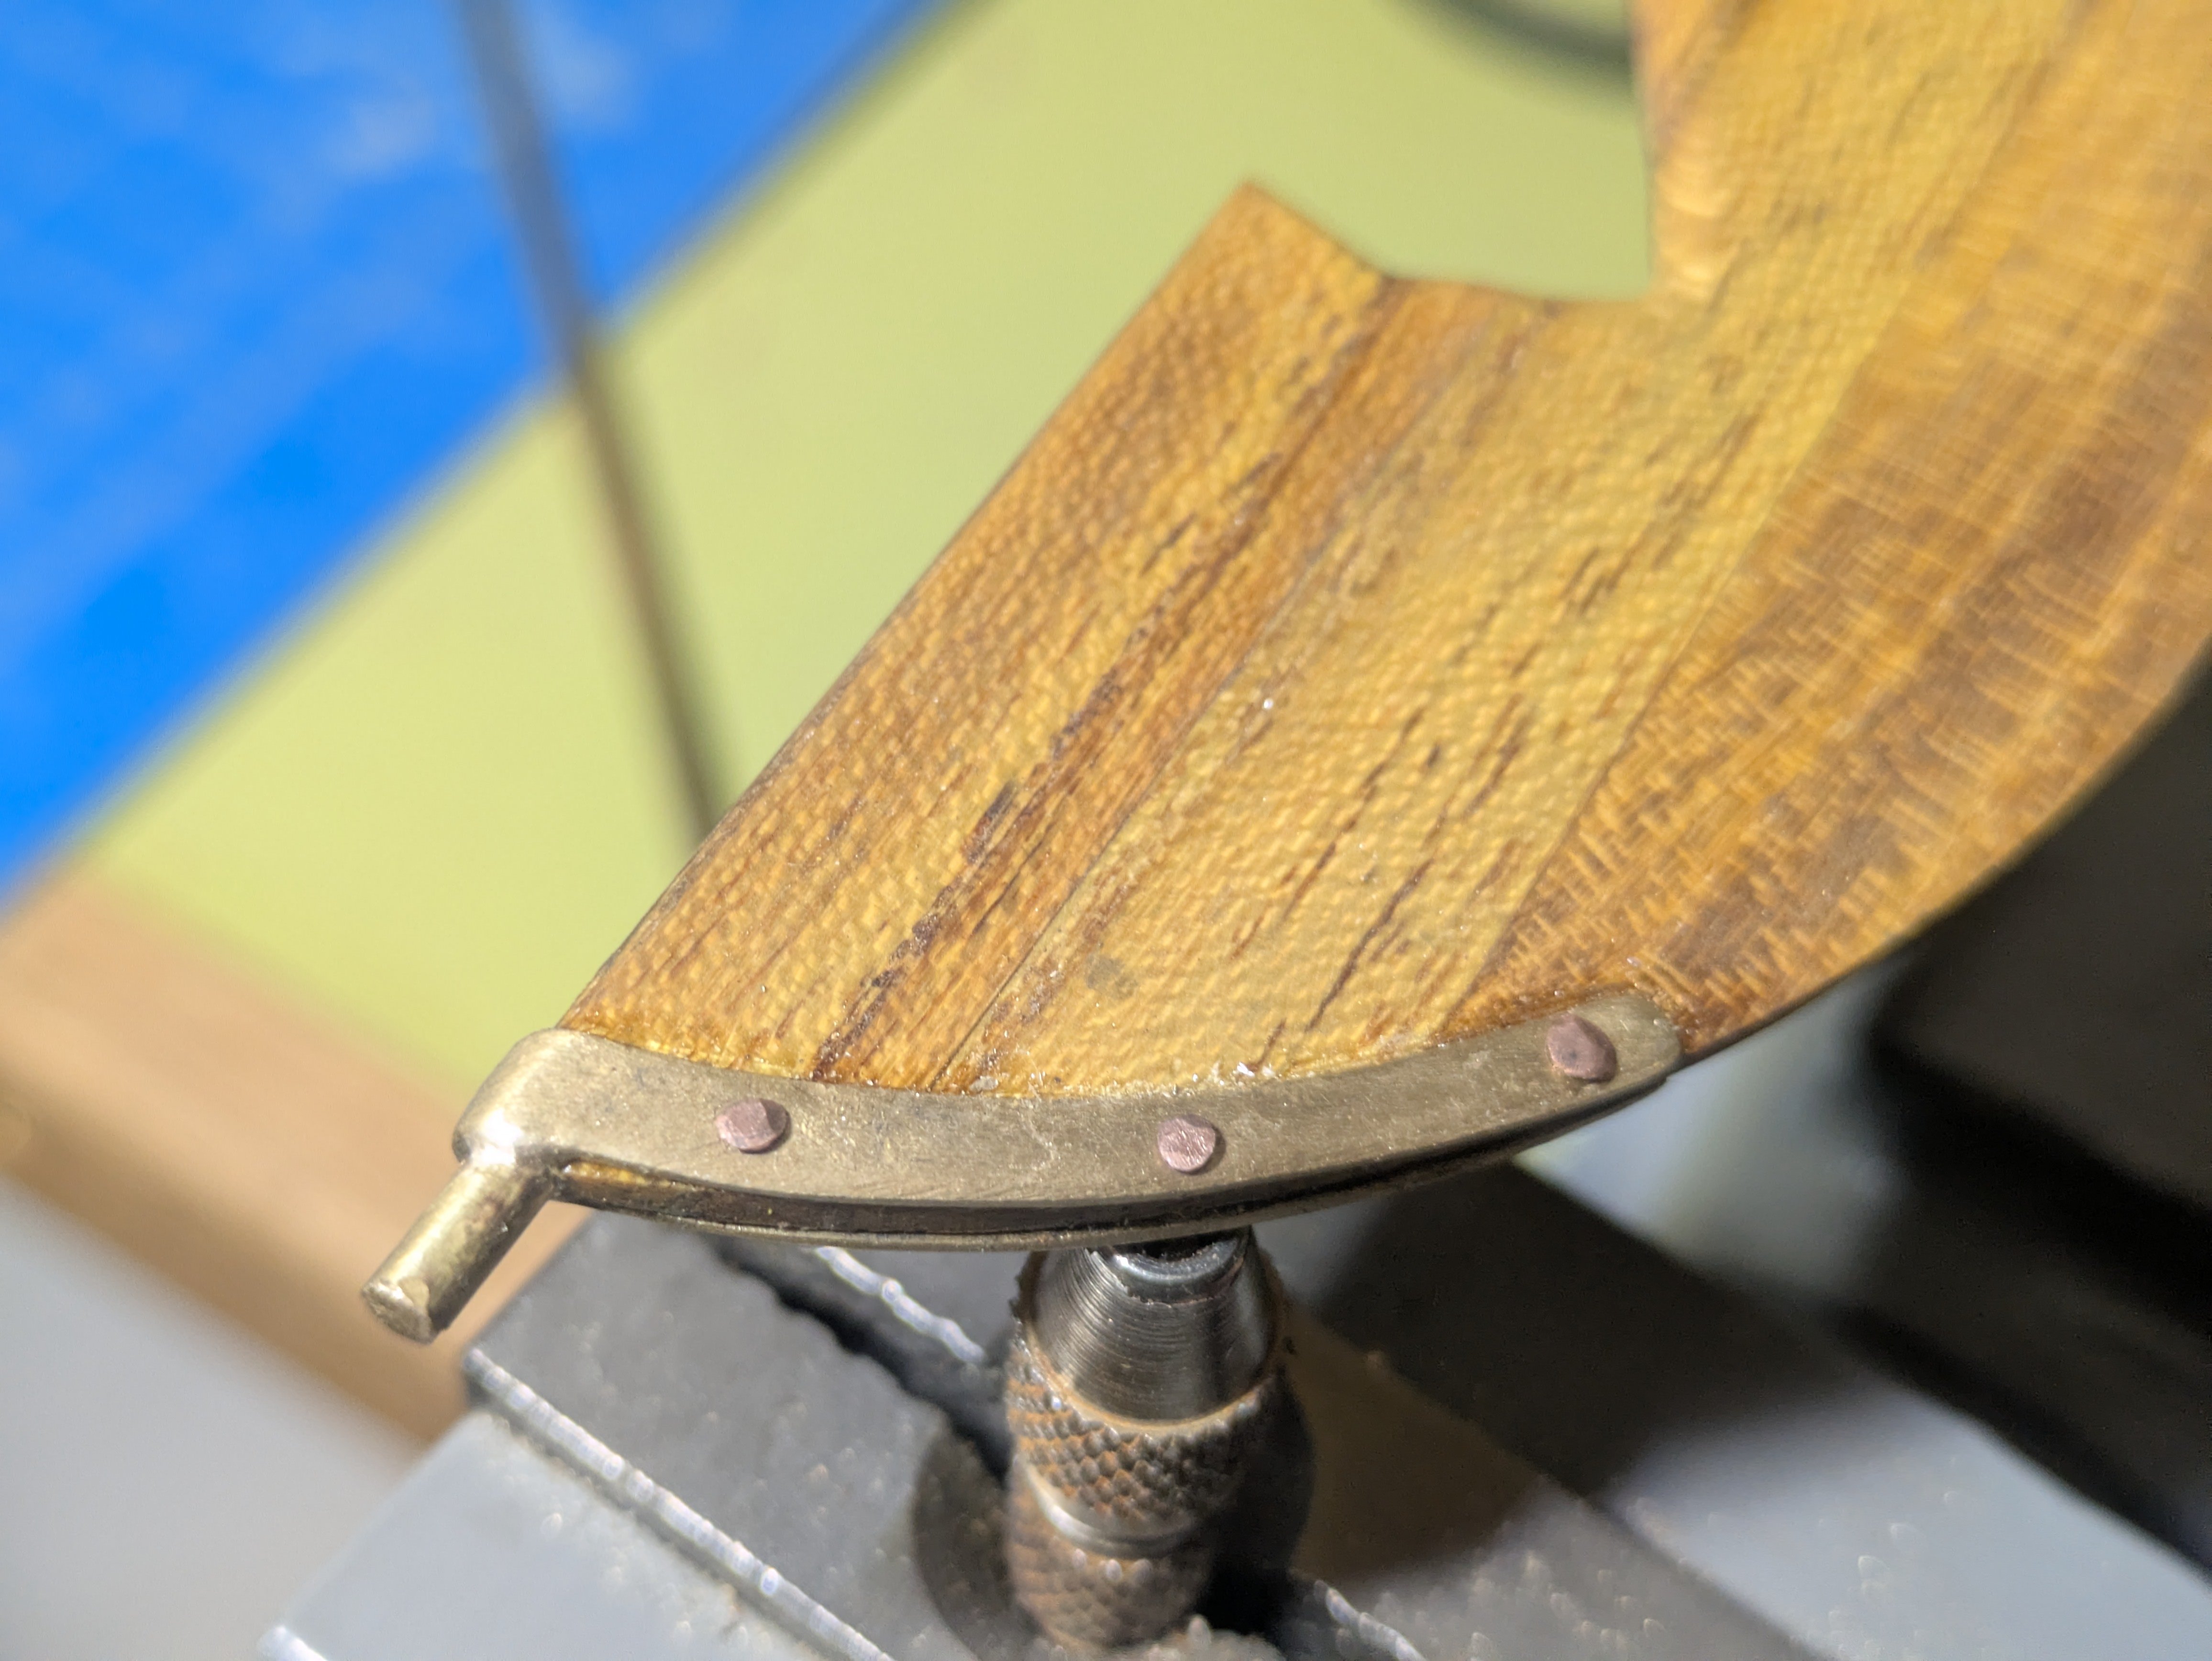
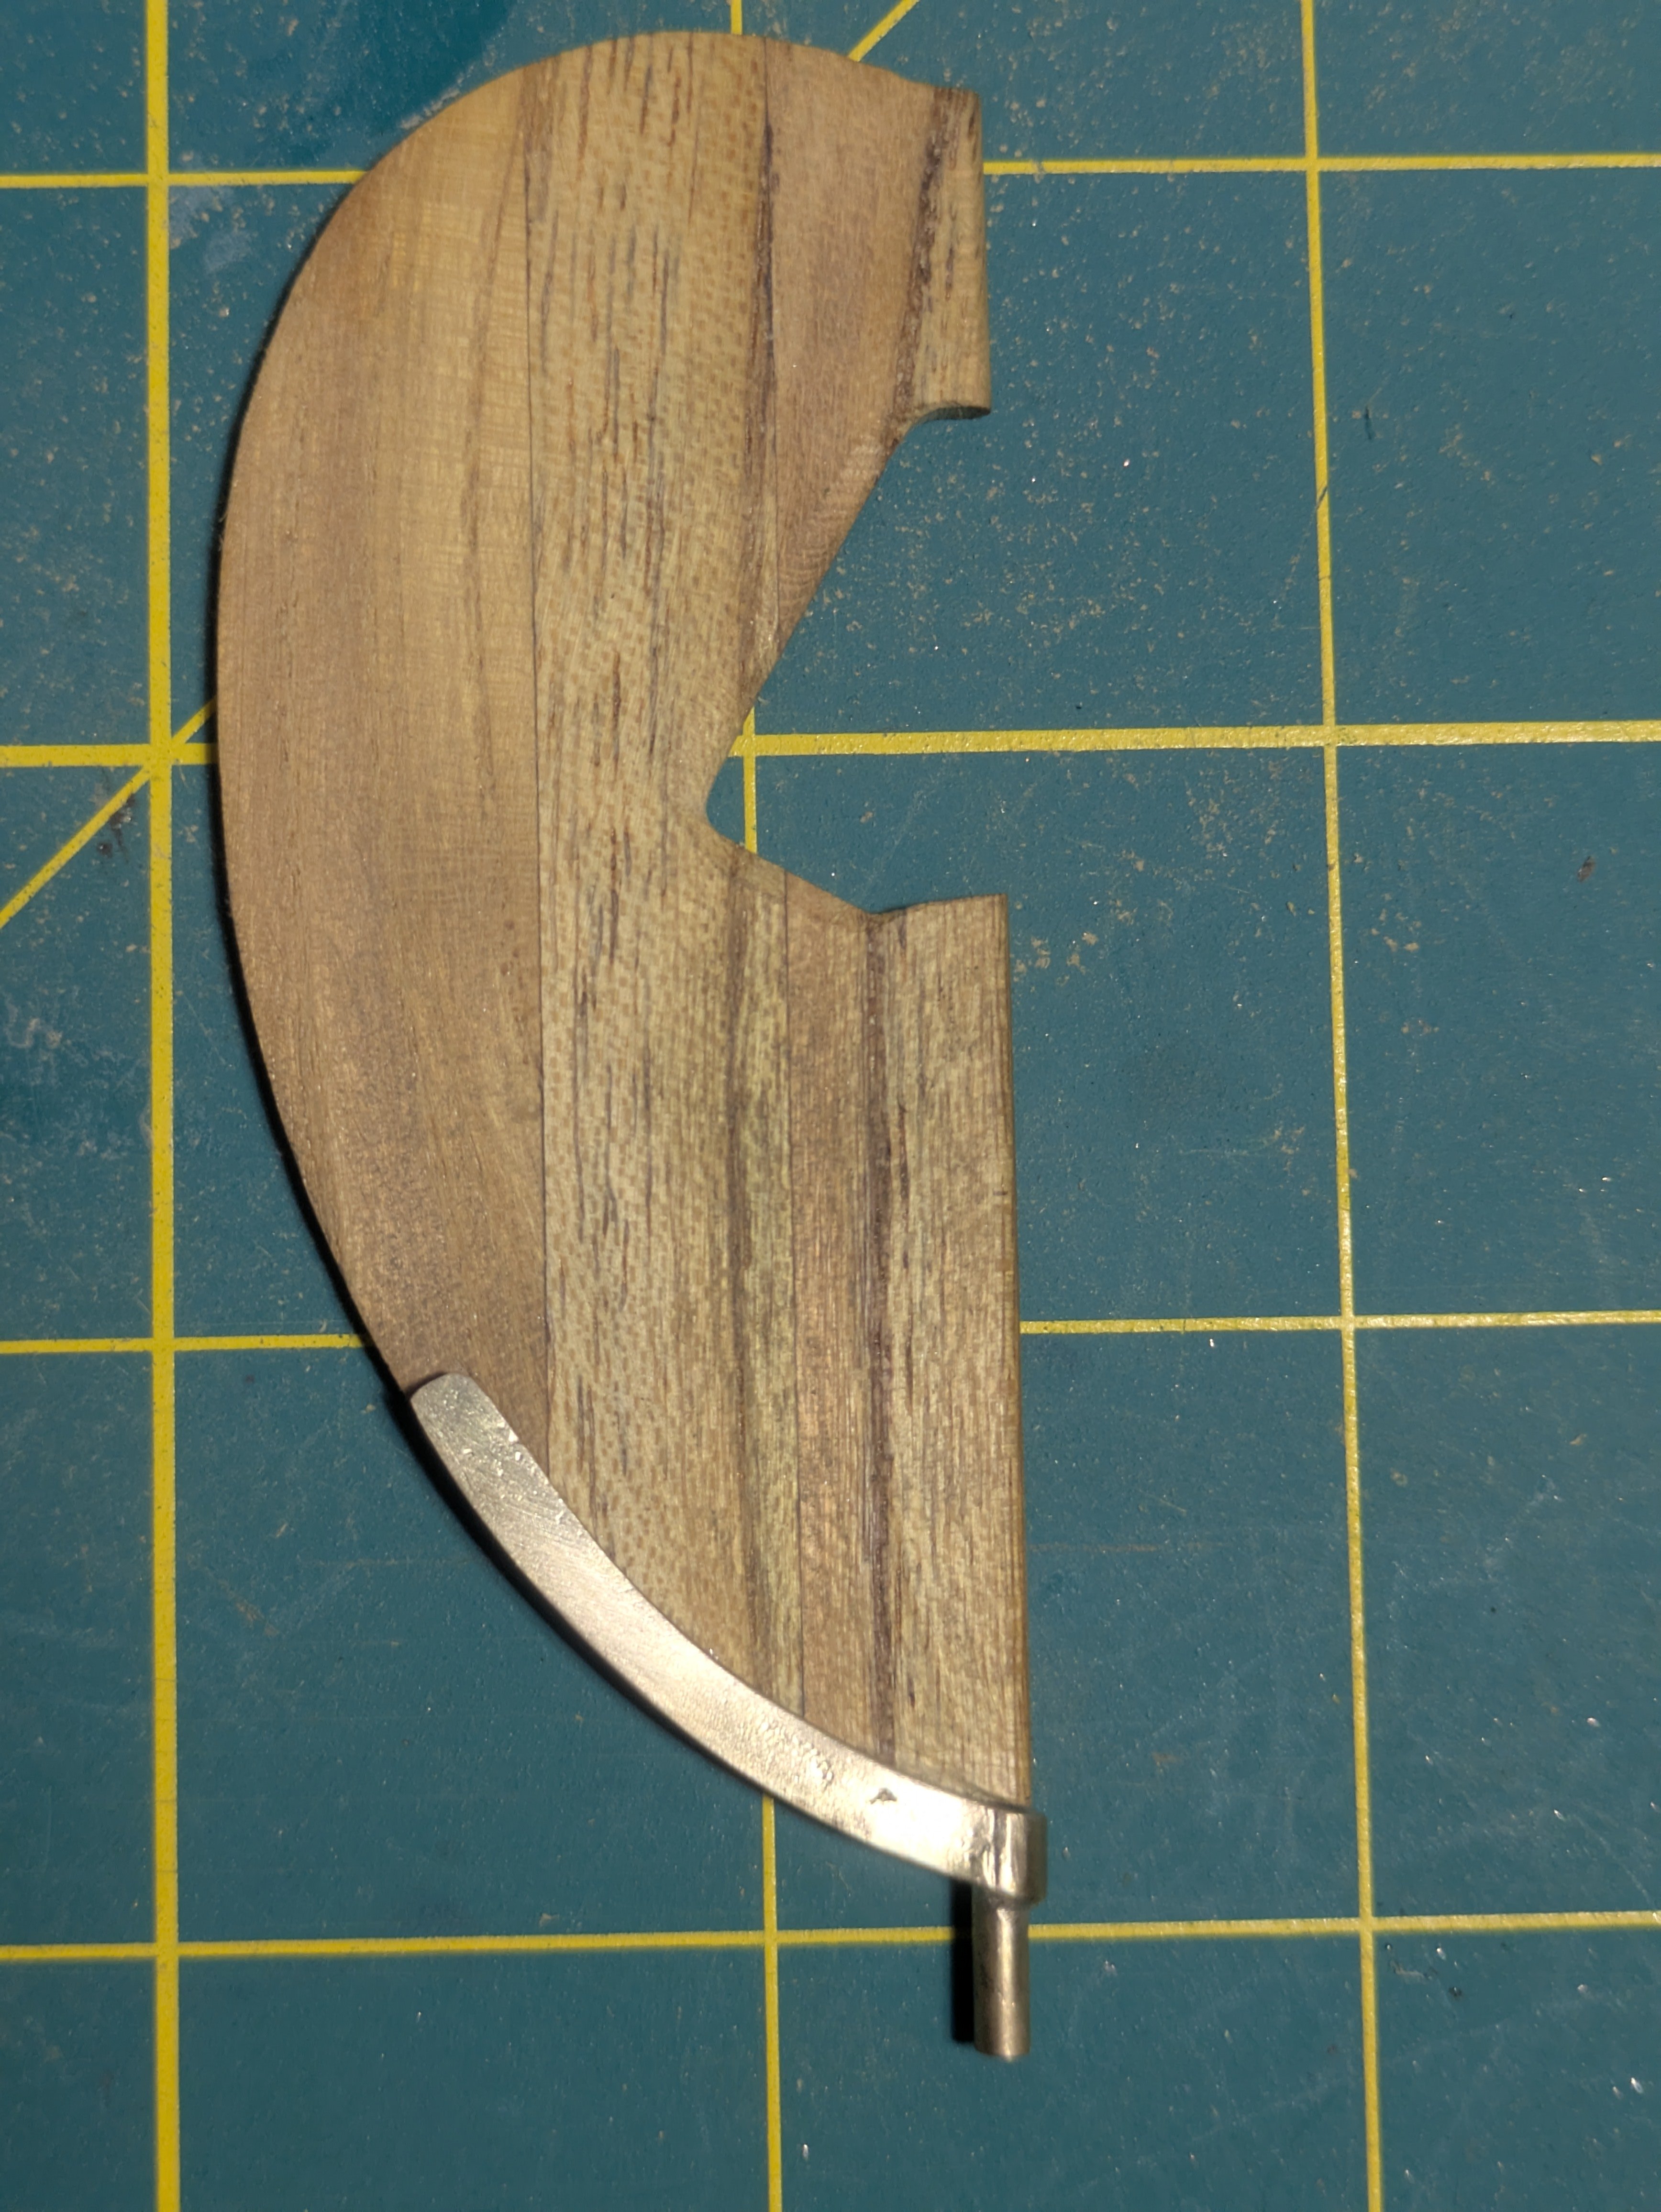
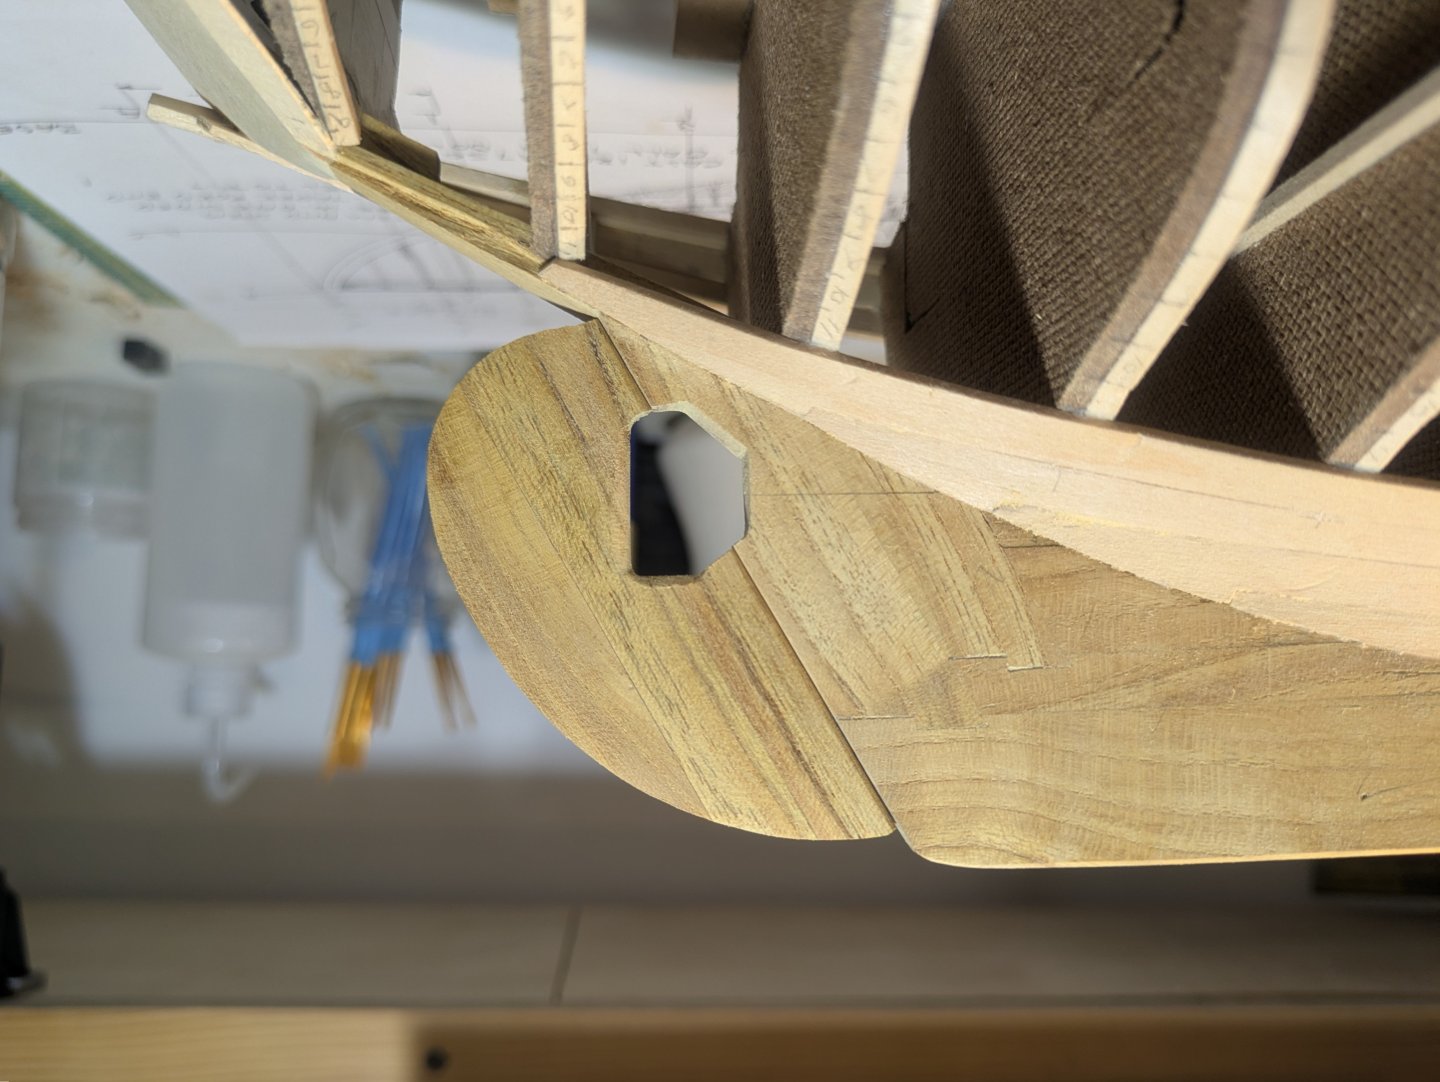
I got the straps finished. I didn't have a long drill of the correct size so I made one from the bronze welding rod it was hard enough to drill through the horn timber.
- 38 replies
-
- 3
-

-
-
- William Atkin
- Sloop
- (and 1 more)
-
Thanks, I got the bottom strap made. I'm not sure how I should fasten it. I'm thinking of drilling though and copper riveting with some epoxy. Any ideas?

- 38 replies
-
- 6
-
-
- William Atkin
- Sloop
- (and 1 more)
-
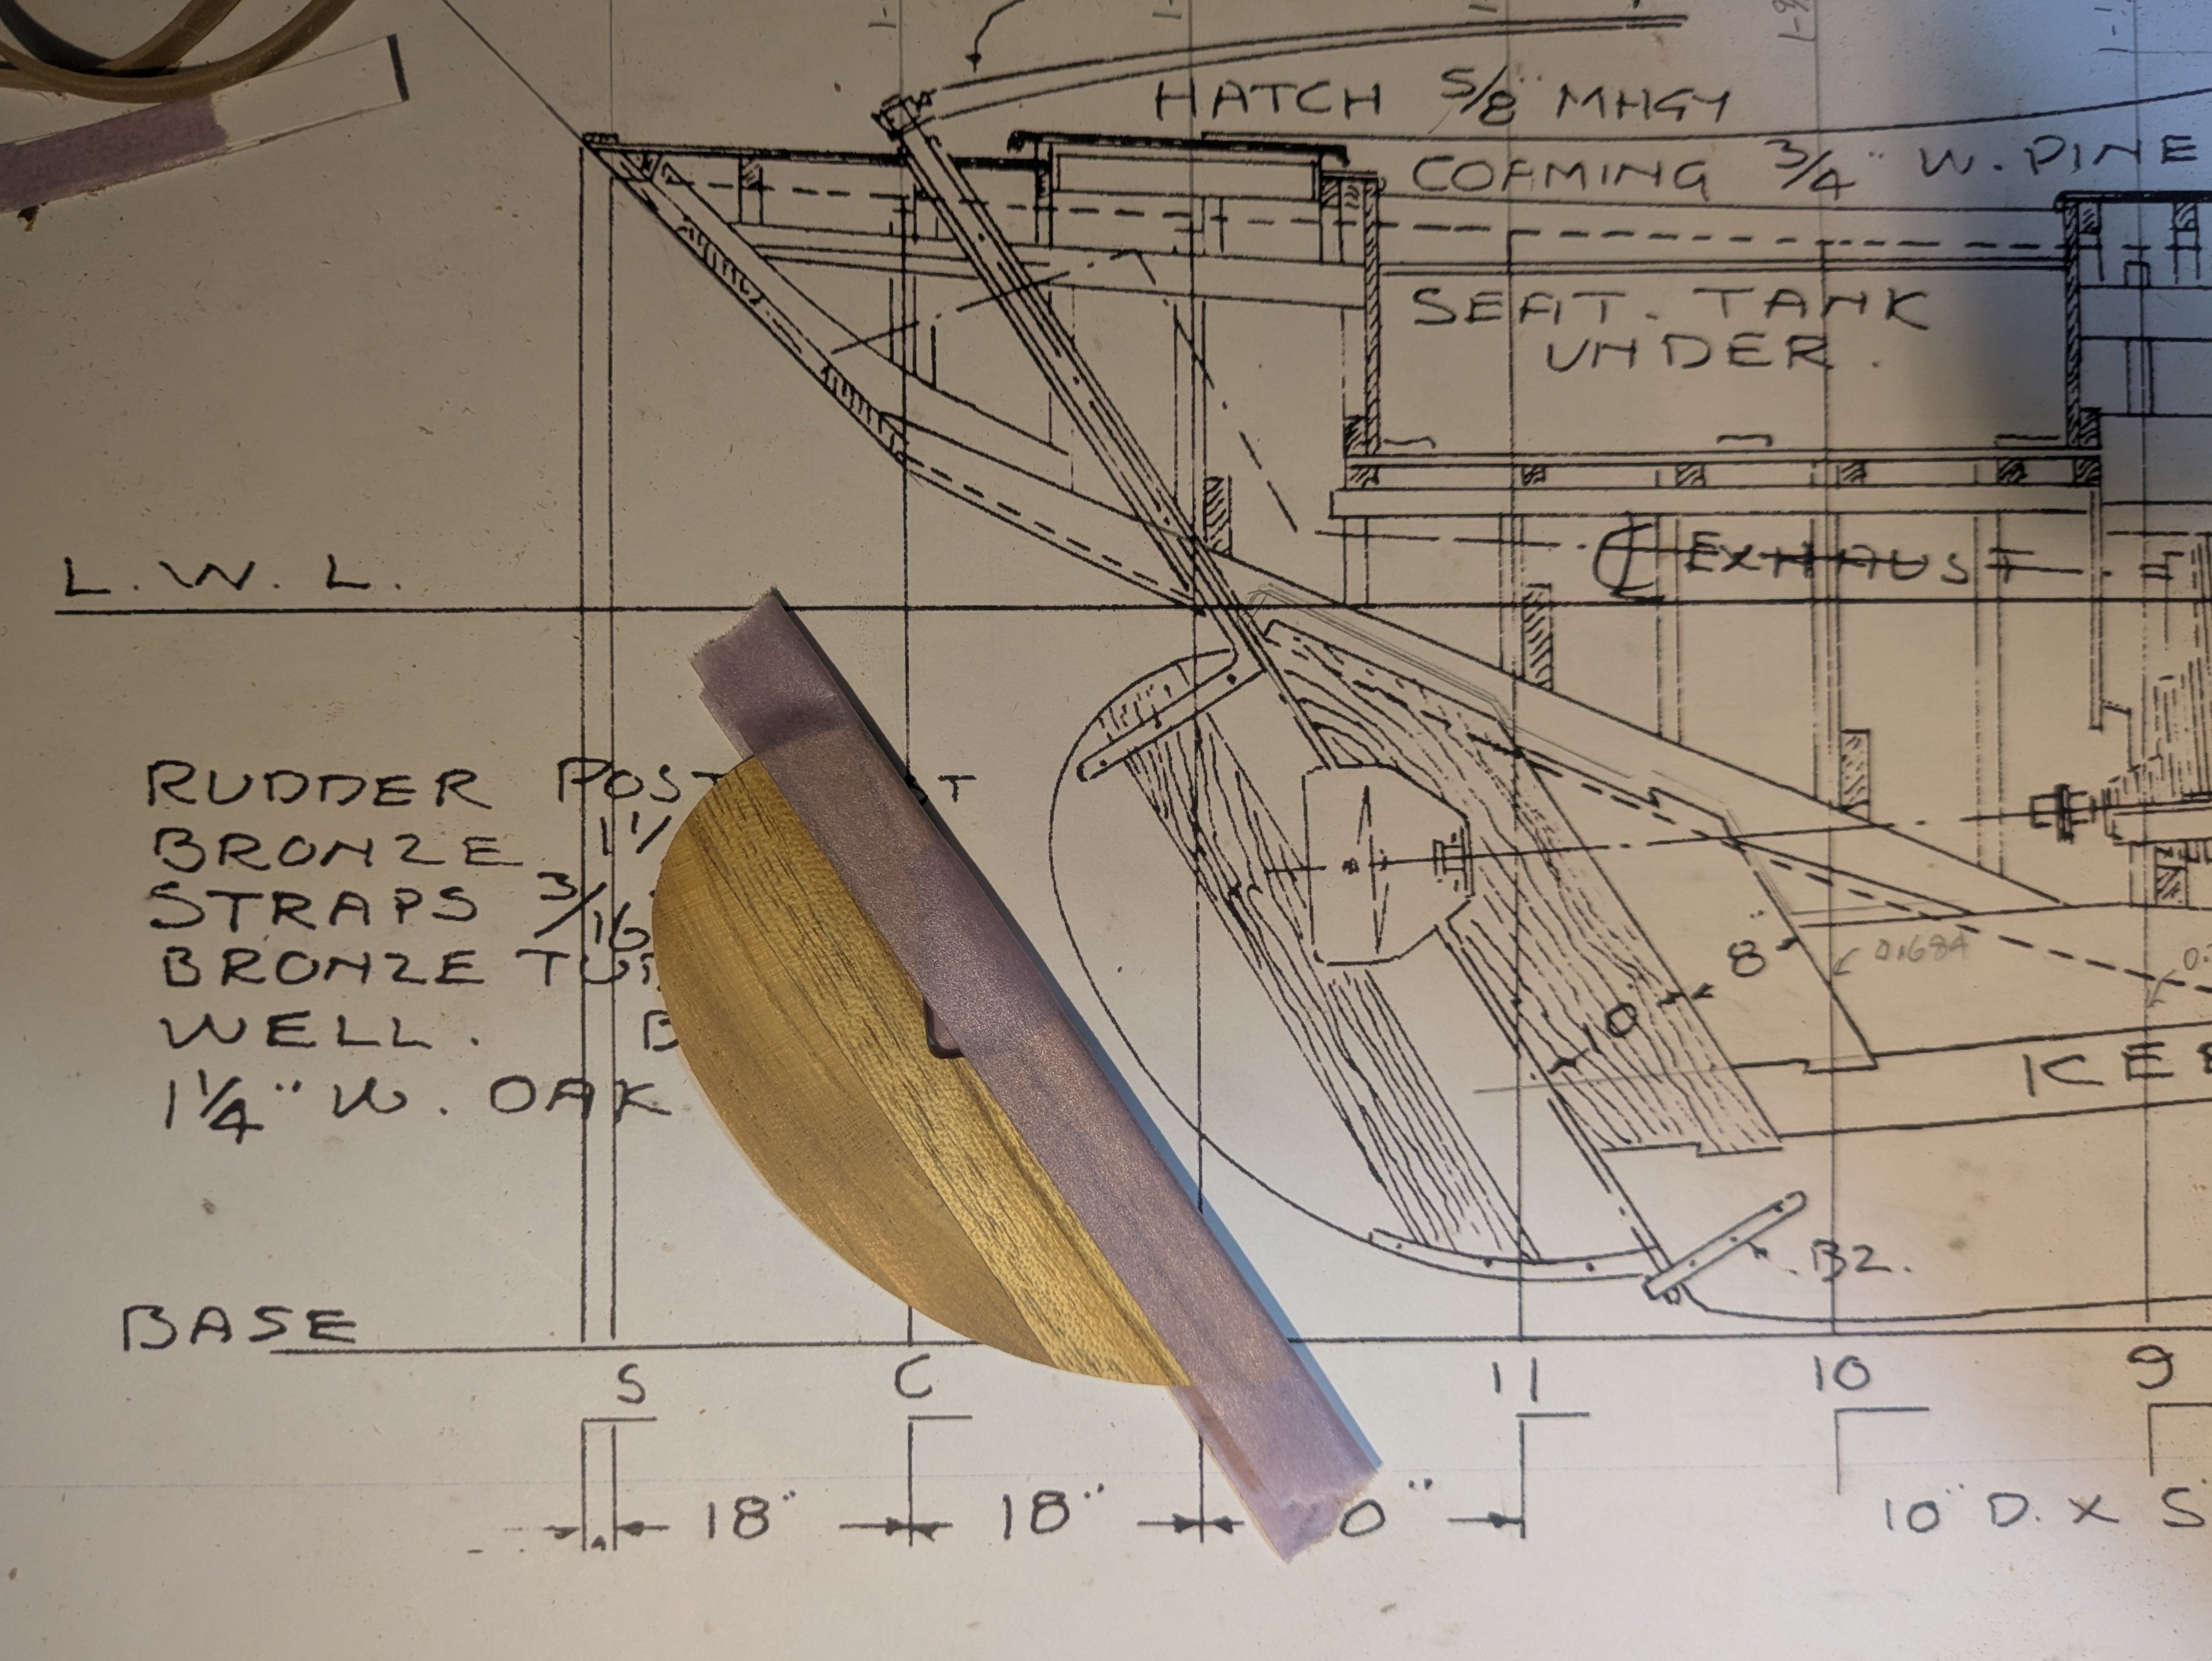
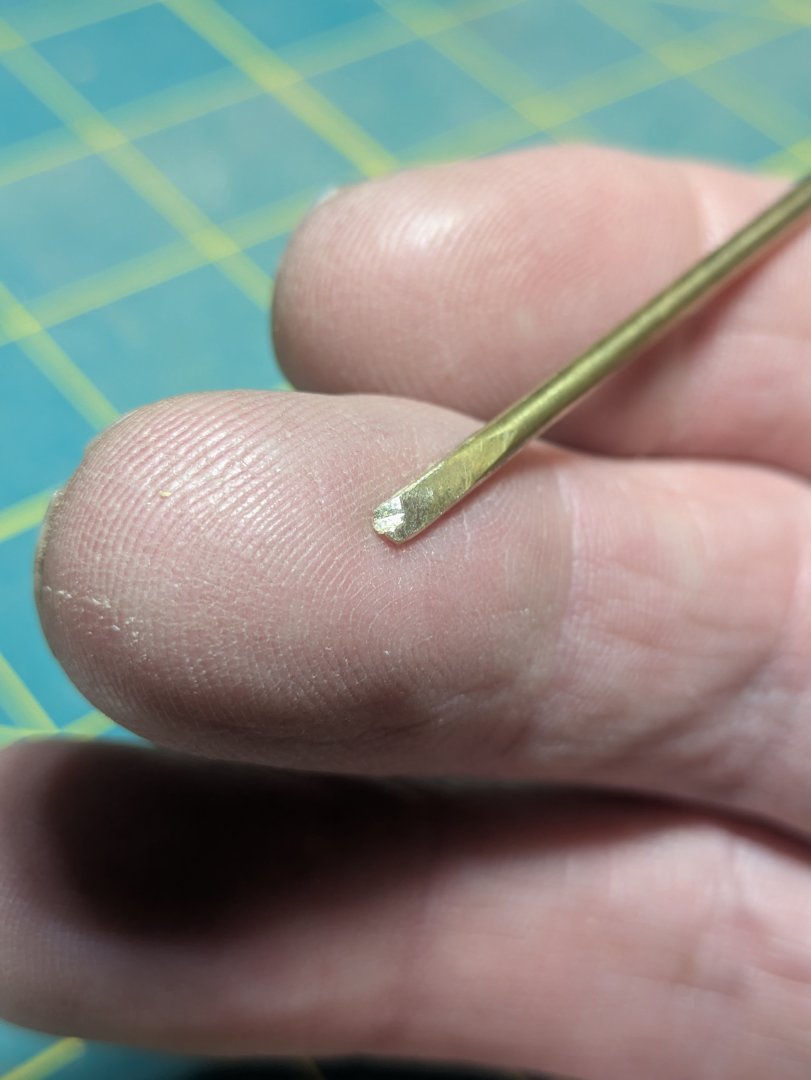
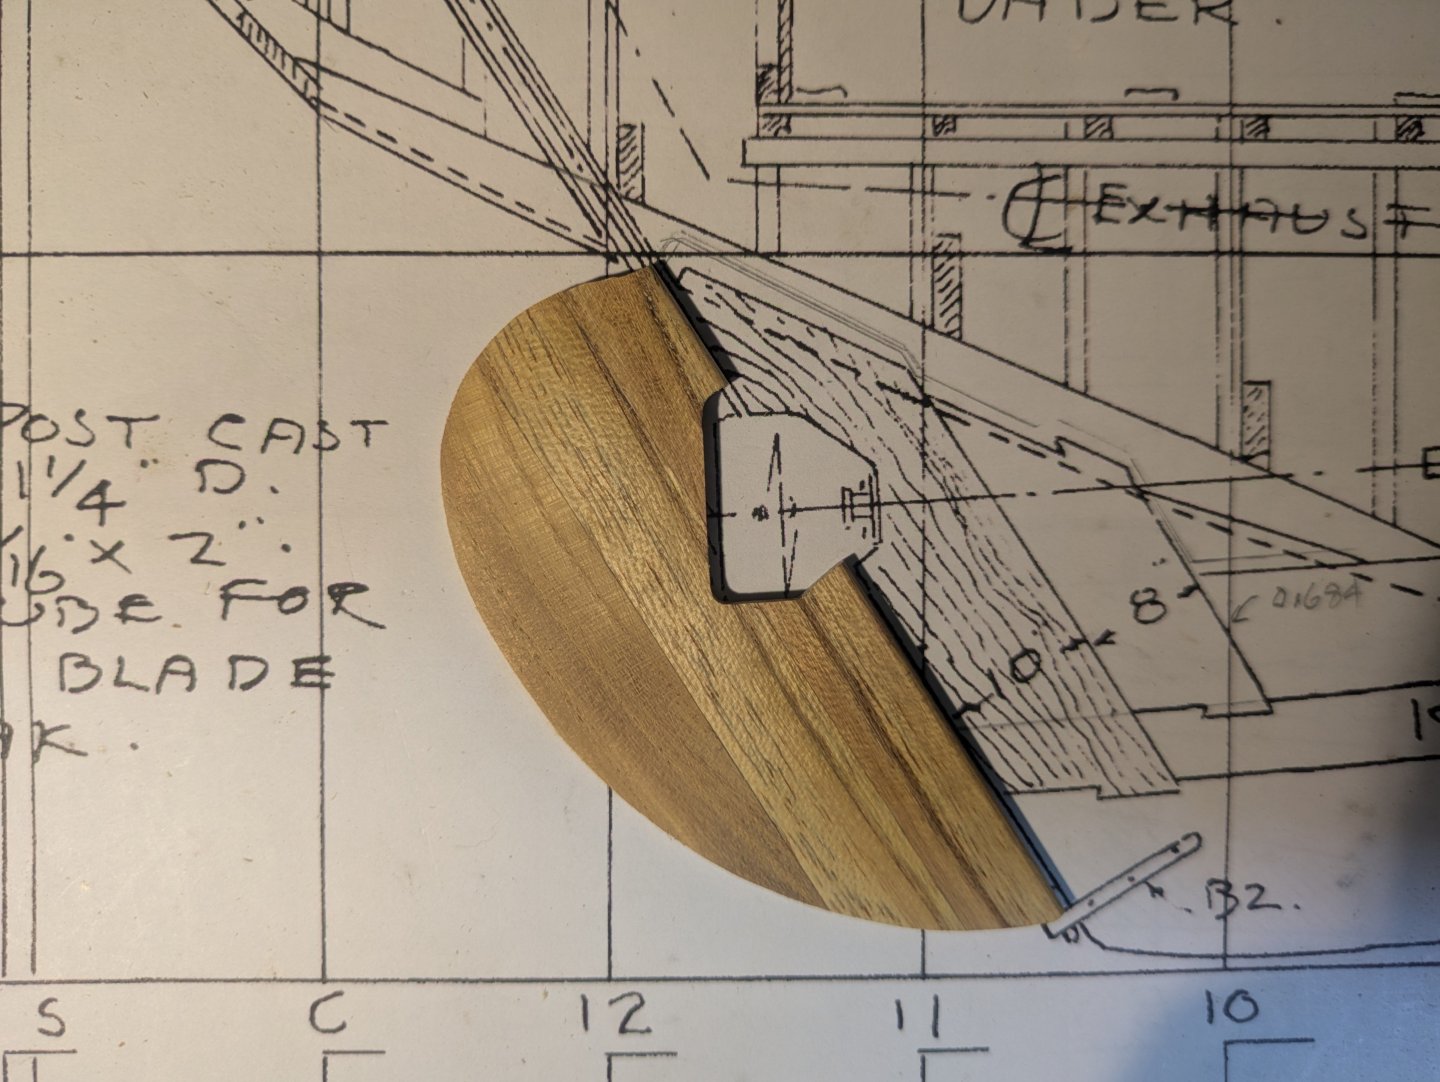
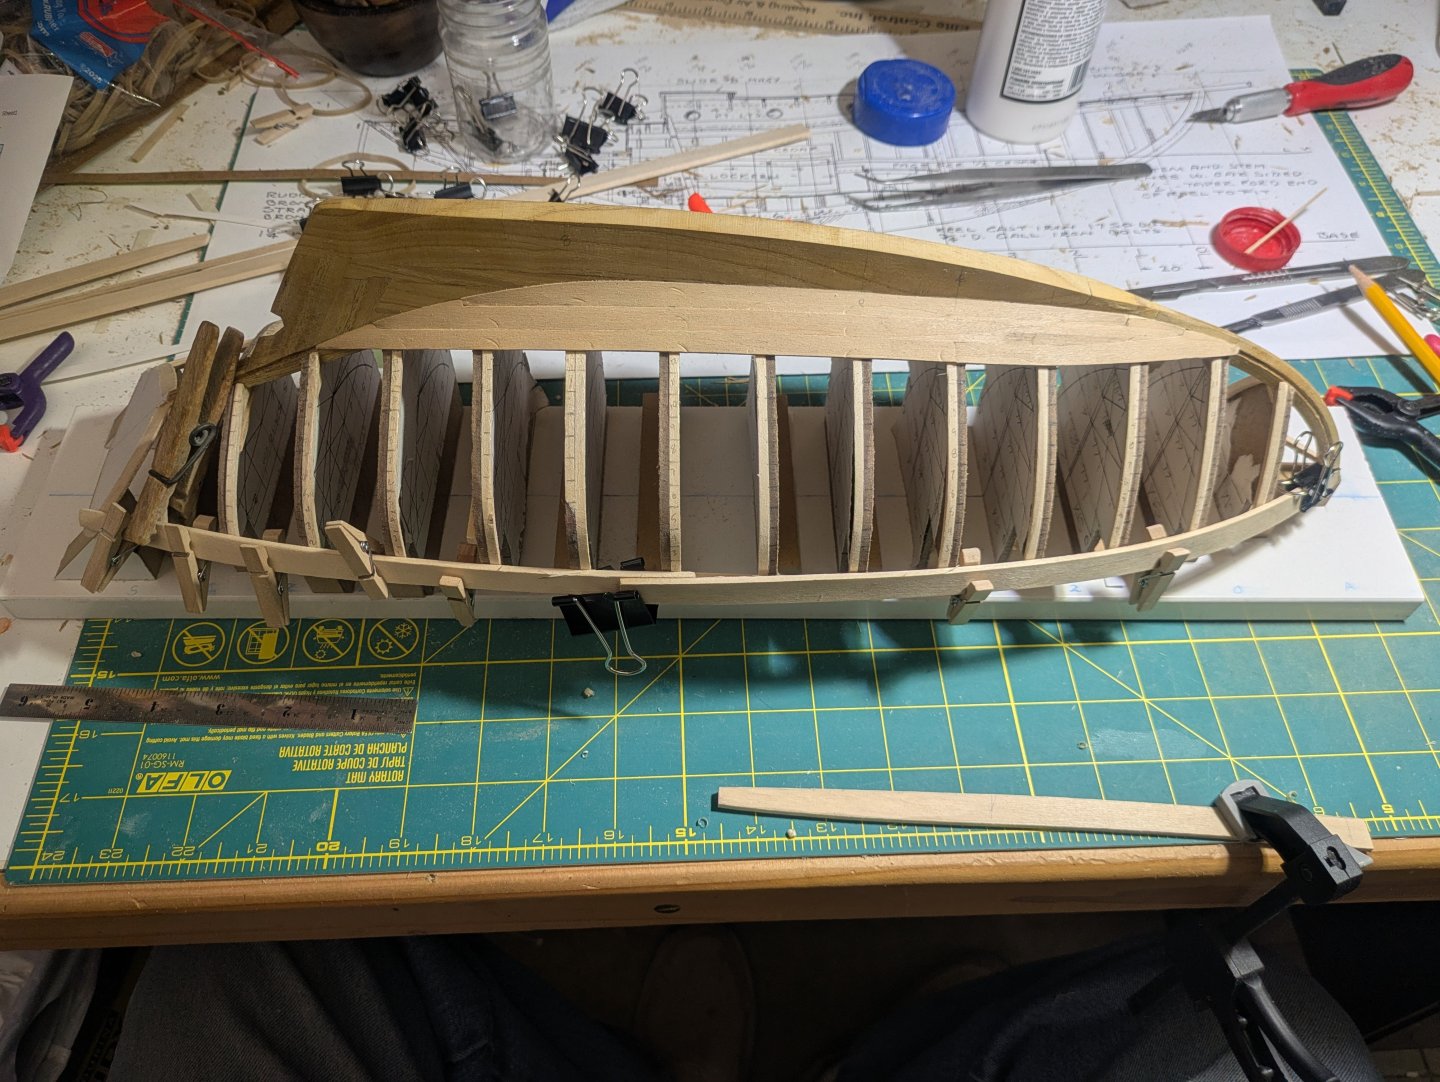
Until I get more 1/16" basswood the planking is on hold. I am working on the rudder. I cut three pieces of mulberry wood and staggered them in the hope that any warpage will be small. After gluing with epoxy and cutting to shape I taped the front to make sure not to sand that part. Then I sanded a taper to thin down the aft end and the prop opening. I don't have any thin brass so I flattened a 0.090 brazing rod for the rudder straps. To get it thin enough I had to anneal the rod 4 or 5 times.

- 38 replies
-
- 4
-
-
- William Atkin
- Sloop
- (and 1 more)
-
Yes Keith, online ordering is a gamble. During the lockdown at the start of the Covid pandemic the grocery stores started online ordering with pickup or delivery so we tried it. We gave it up after a while. The produce they picked out was terrible. I ordered some wood from Ocooch Hardwoods I'll see what I get. I would rather not be in town for the next few days. I did get a few more things done. You can really see the different color temp of the two lights I have.


- 38 replies
-
- 2
-
-
- William Atkin
- Sloop
- (and 1 more)
-
Well I just opened a box of wood from Amazon and instead of some 1/16" basswood they sent 1/16" plywood. So the planking is on hold for a few days till I get some plank material.
-
Thanks Jim, I can already see areas for improvement like dust extraction like Keith has. I got the shear strakes on so I should be able to install four planks at a time.
- 38 replies
-
- 1
-
-
- William Atkin
- Sloop
- (and 1 more)
-
I'm quite late to the party but I just wanted to tell you that I have liked that Launch design for 45 years when I first saw it in Chapelles book. Your model is an exceptional example beautifully made. Thank you.
-
Sorry, no it's not a lotus 7 but a semi replica from a book, not a kit. It is a Haynes Roadster. I just finished building it this year. The seating area is 4" wider then a real 7.
- 38 replies
-
- 1
-
-
- William Atkin
- Sloop
- (and 1 more)
-
They look like sleaves for plastic tubing for use with compression fittings.
-
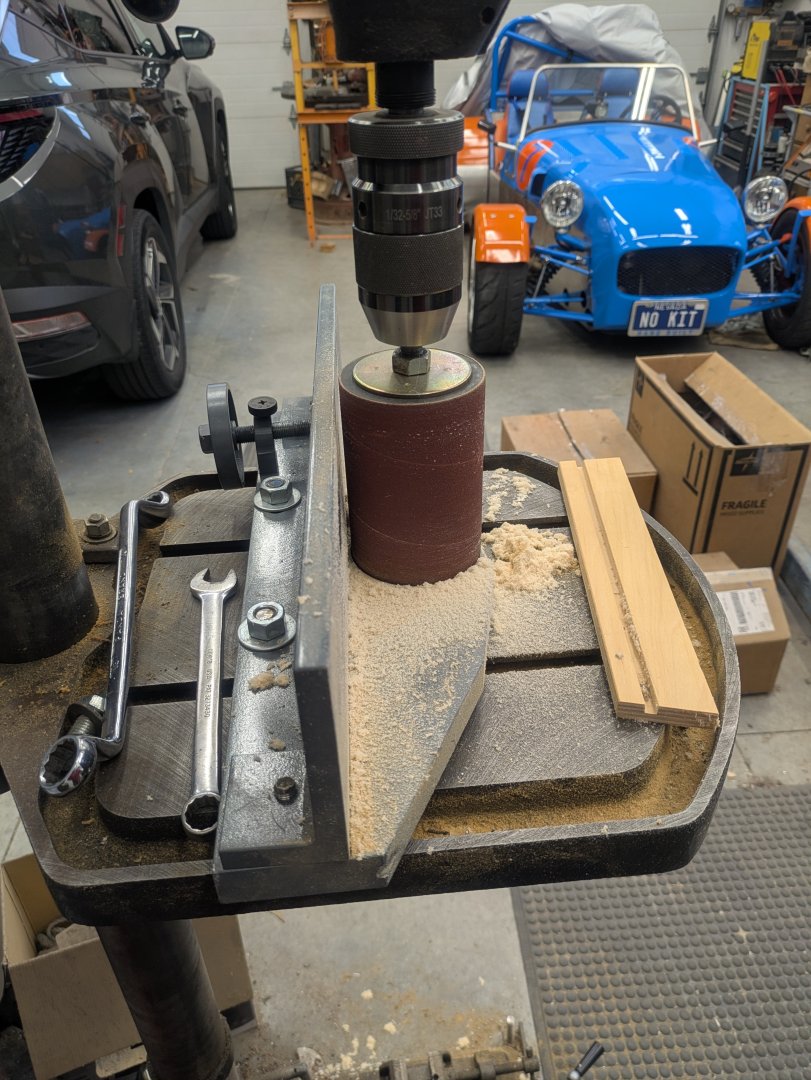
I thought I would show a picture of the DIY thickness sander I made. I got the sanding sleaves and drum from Amazon and I made the spindle on my lathe. To keep the drum running relatively smoothly I have the spindle mounted in the base on two small ball bearings. The base is a cut off section of a manhole cover I got from work. and the "table" is a piece of 1/2" (13mm) steel plate. both the base and table are milled flat and square.
-
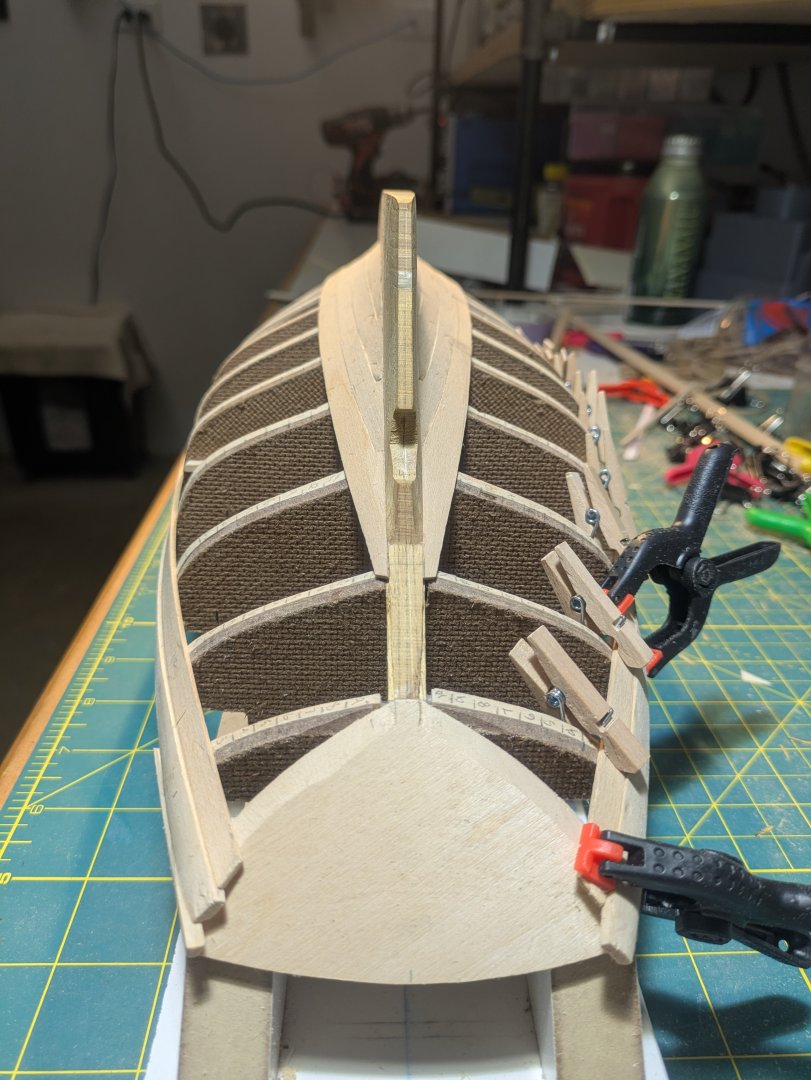
Jim, I think it will start to look like a boat soon. Keith, Yes but with only 15 planks per side I will need a few more boats and different shapes before I get good at it. I got two more from the garboard on and I am working on the sheer strake. I'm using 1/8" (3.2mm) stock for the sheer strake because there is a lot of curve at the stern for a nice width plank. The last two molds have a lot of curve at the top so I used a small gouge to cup the end of the planks and sanded the out side down to 3/32" (2.4mm) so the sheer will be a little thicker then the rest of the planking. I have been "steaming" or boiling the planks using a microwave. Then I dry them with a MonoKote heat sealing tool.

- 38 replies
-
- 3
-
-
- William Atkin
- Sloop
- (and 1 more)
-
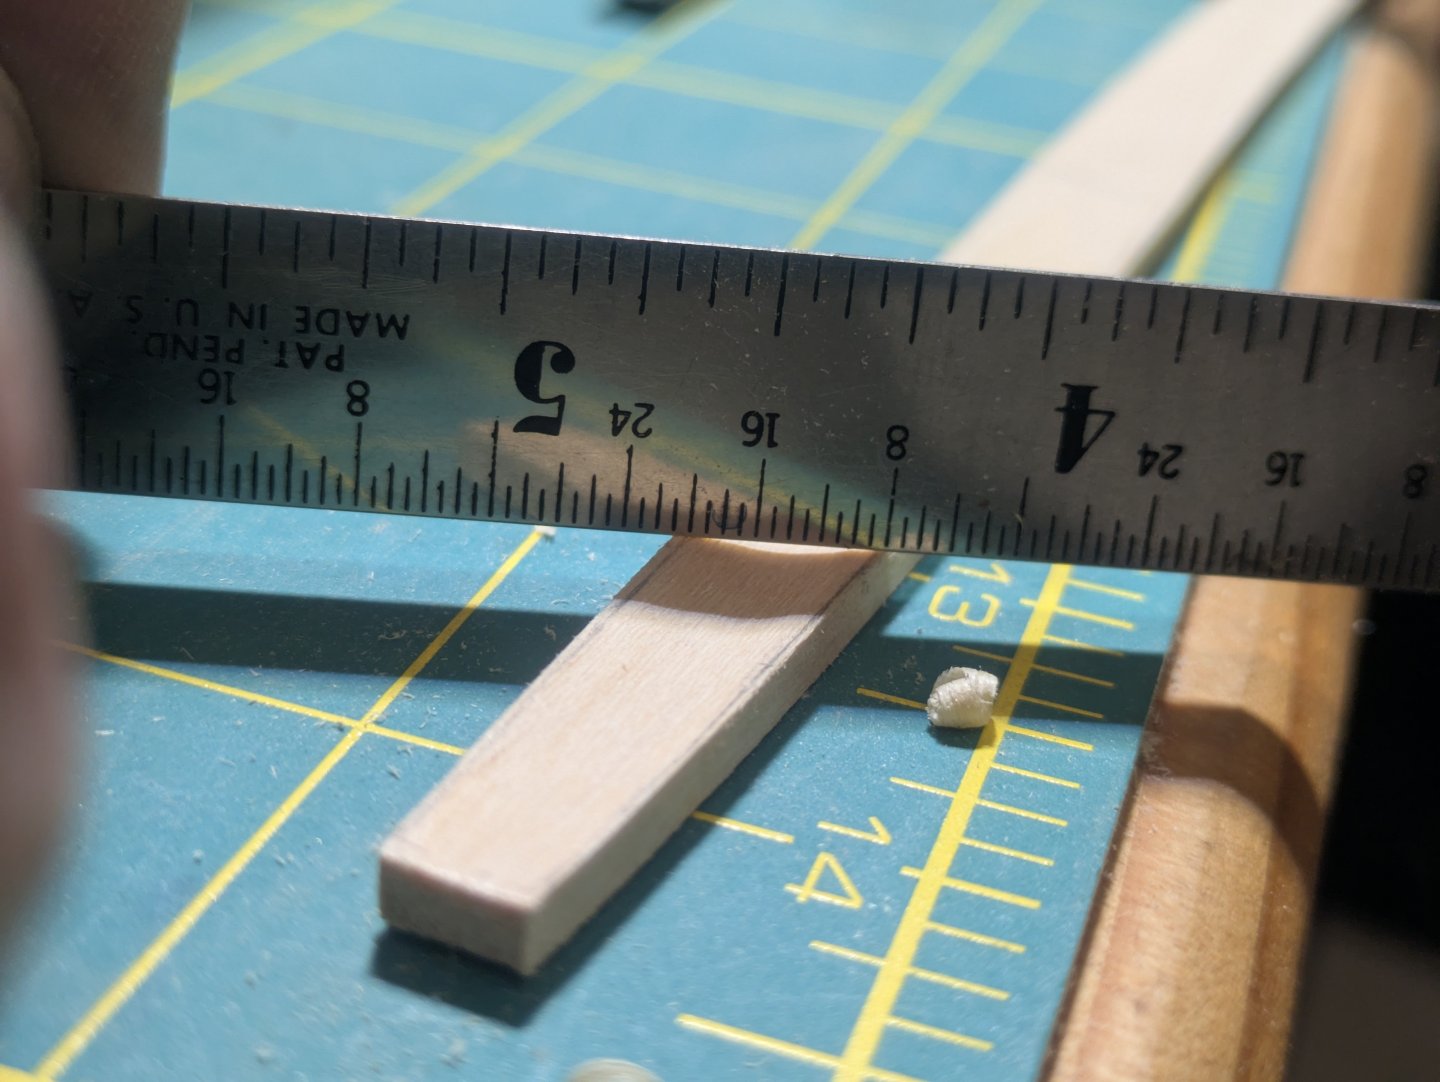
Slow start on the planking. I made a pattern for the garboard plank and to my surprise both sides are the same! Tomorrow put some twist and bend where needed and glue them down. The widest point on the garboard turned out to be 5-1/2 inch a far cry from the nearly 12 inch we used In the full size boat.

- 38 replies
-
- 3
-
-
- William Atkin
- Sloop
- (and 1 more)
-
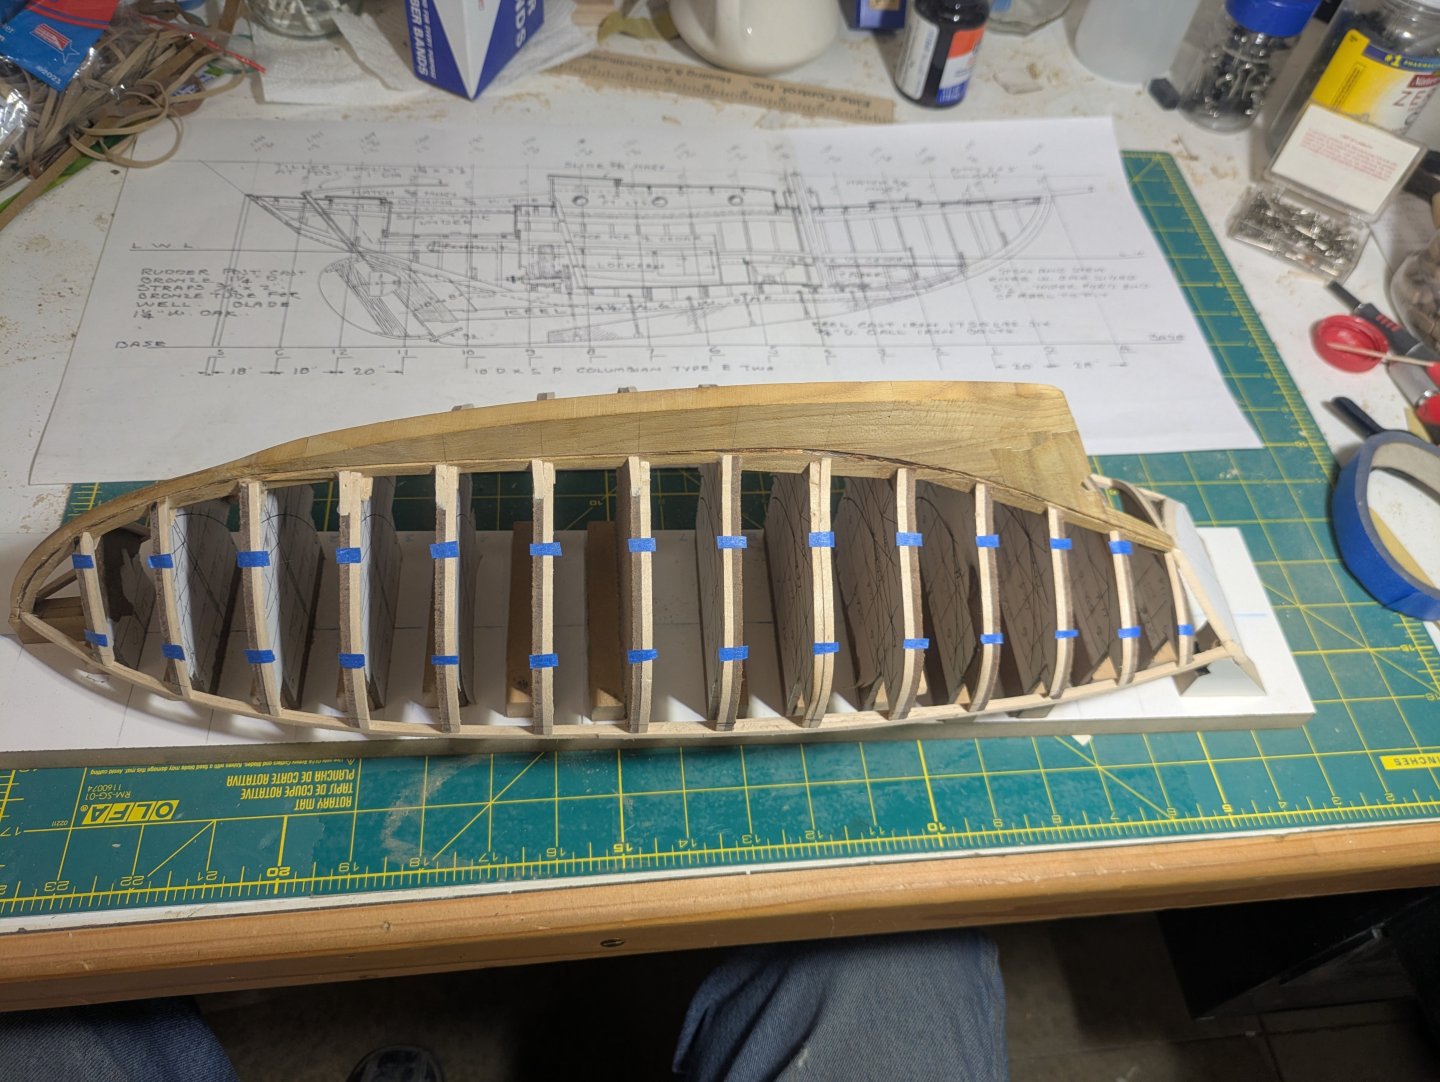
I got the plank layout finished. I started with laying a 1/2" wide batten to see how planks would lay naturally. But that would cause the planks to sweep up and end on the sheer so they will all have a curve to the keel at the bow and slightly at the stern. I know this is not unusual but I was surprised that much of the mid stations don't need any curves. When I start cutting the planks this will be seen.
- 38 replies
-
- 5
-
-
- William Atkin
- Sloop
- (and 1 more)
-
I need to correct something the wood I am using now is Basswood not Boxwood. I pick up a quantity from JoAnns going out of business sale. But of course most of it is not thin enough for the planking so I need to order more.
- 38 replies
-
- 1
-
-
- William Atkin
- Sloop
- (and 1 more)
-
Well, I got the low sections raised with some boxwood strips. and the fairing is good enough. Now comes the planking layout. On the full size boat we made the garboard from a full dimension 2" x 12" plank planed down and shaped to follow the curve of the molds. I will check and see if that makes sense in scale.
- 38 replies
-
- 2
-
-
- William Atkin
- Sloop
- (and 1 more)
-
There's a lot of ship and weight under water for stability when loaded. "Don't worry crew the load is wood and wood floats!" As for the trip south. In good weather the swells usually are from the northwest by west the perfect conditions for long slow rolls. Are 40 footer would roll over 30° some times. In bad weather going around the points we had very confused seas coming from all directions.
-
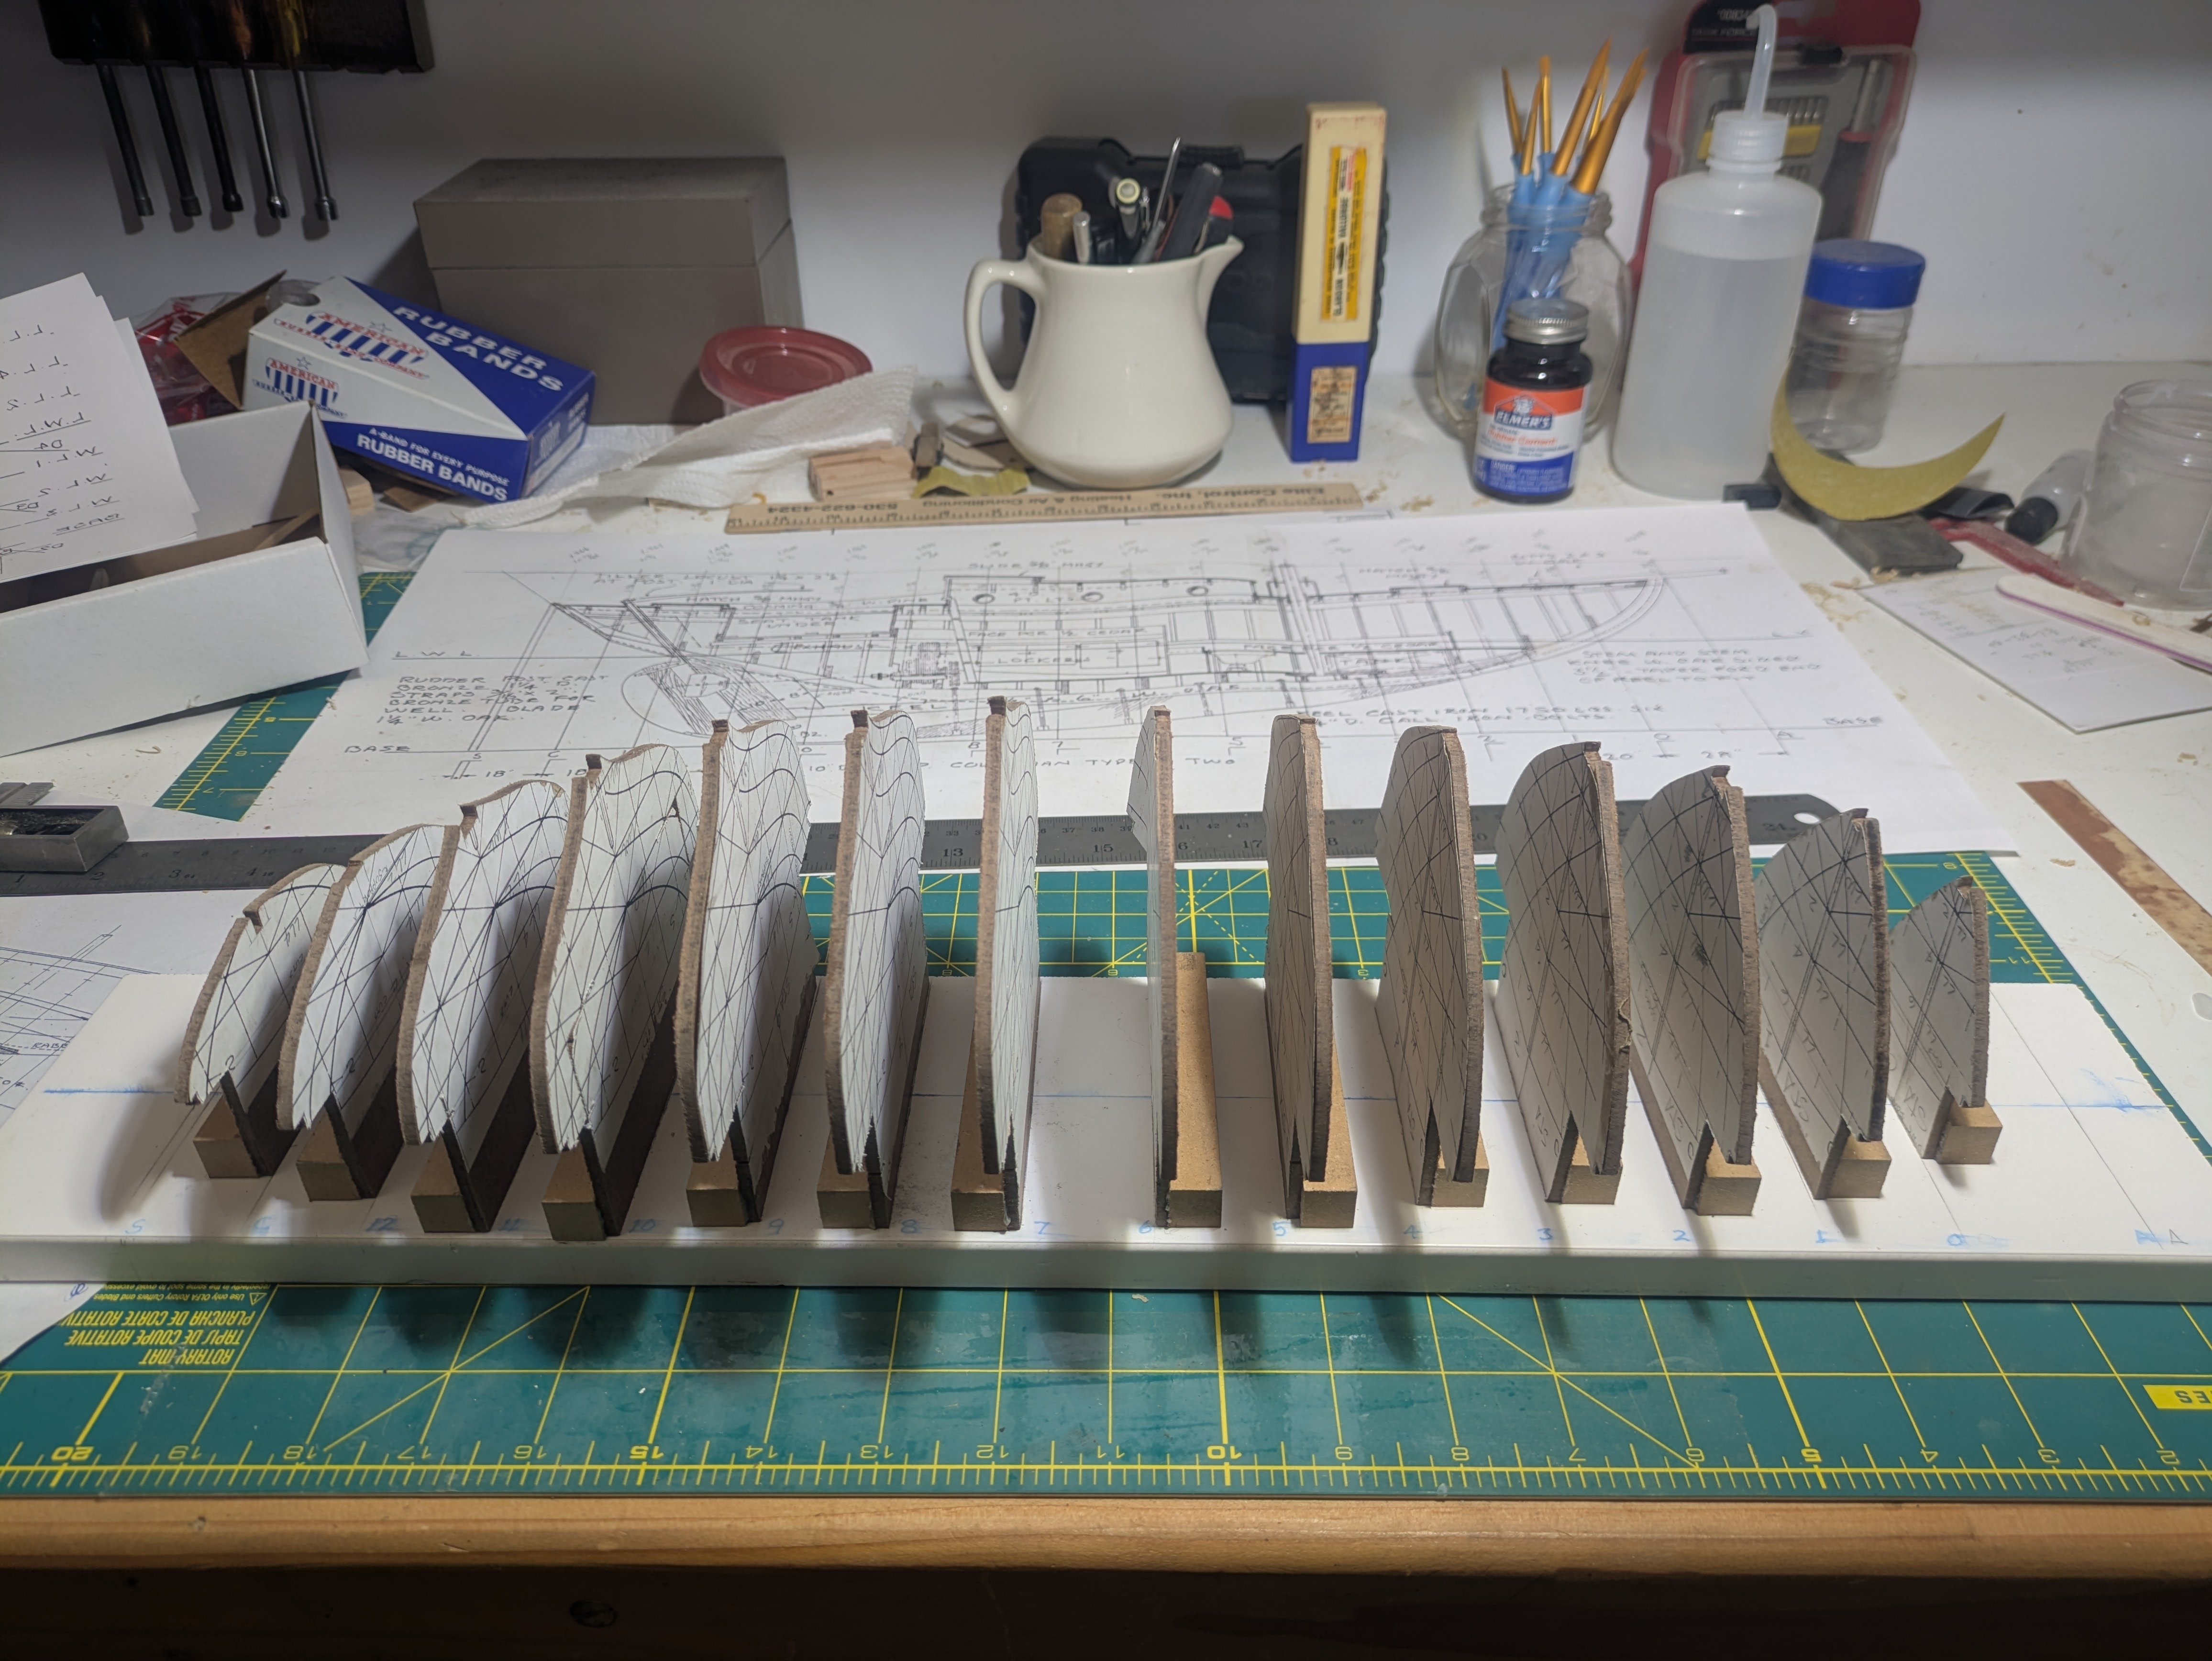
I haven't got much done on the model after starting to fair the molds I am disappointed in the section lines accuracy that I used to cut out the molds. Now, I know that the lines should always be drawn full size using the table of offsets and I attempted that in a couple of different CAD programs and I found quite a few problems with the table which left me puzzled (one or two off by one foot but many off by unusual amounts) so I went with the sections as drawn for this model. I should clarify the years ago when I joined the boat building class almost all the lines had all ready been laid down and faired on the loft floor so I didn't get to experience the frustration of deciding which point to disregard or where to fit the line for a fair curve. I just spent some time using the free version of DELFTship. After transferring the lines using the table into the program I used them as a guide to see where to disregard areas for fair lines and still get the shape and dimensions of the boat. And as typical of me much time was spent trying to do simple things like changing layer names. I don't think you can with the free version? If it is posable I could not find a way to do so! I got the hull looking "fair" so next time I can use the CAD file for the molds. I will get back to work on the existing model and fix the problematic areas.
- 38 replies
-
- 2
-
-
- William Atkin
- Sloop
- (and 1 more)
-
Paul, you do beautiful work. Even the unseen is well done. I look forward to the rest of the build. One question I have is as our building to the displacement water line are you planning on setting a load of lumber on deck? It would be a shame to cover that beautiful deck.
-
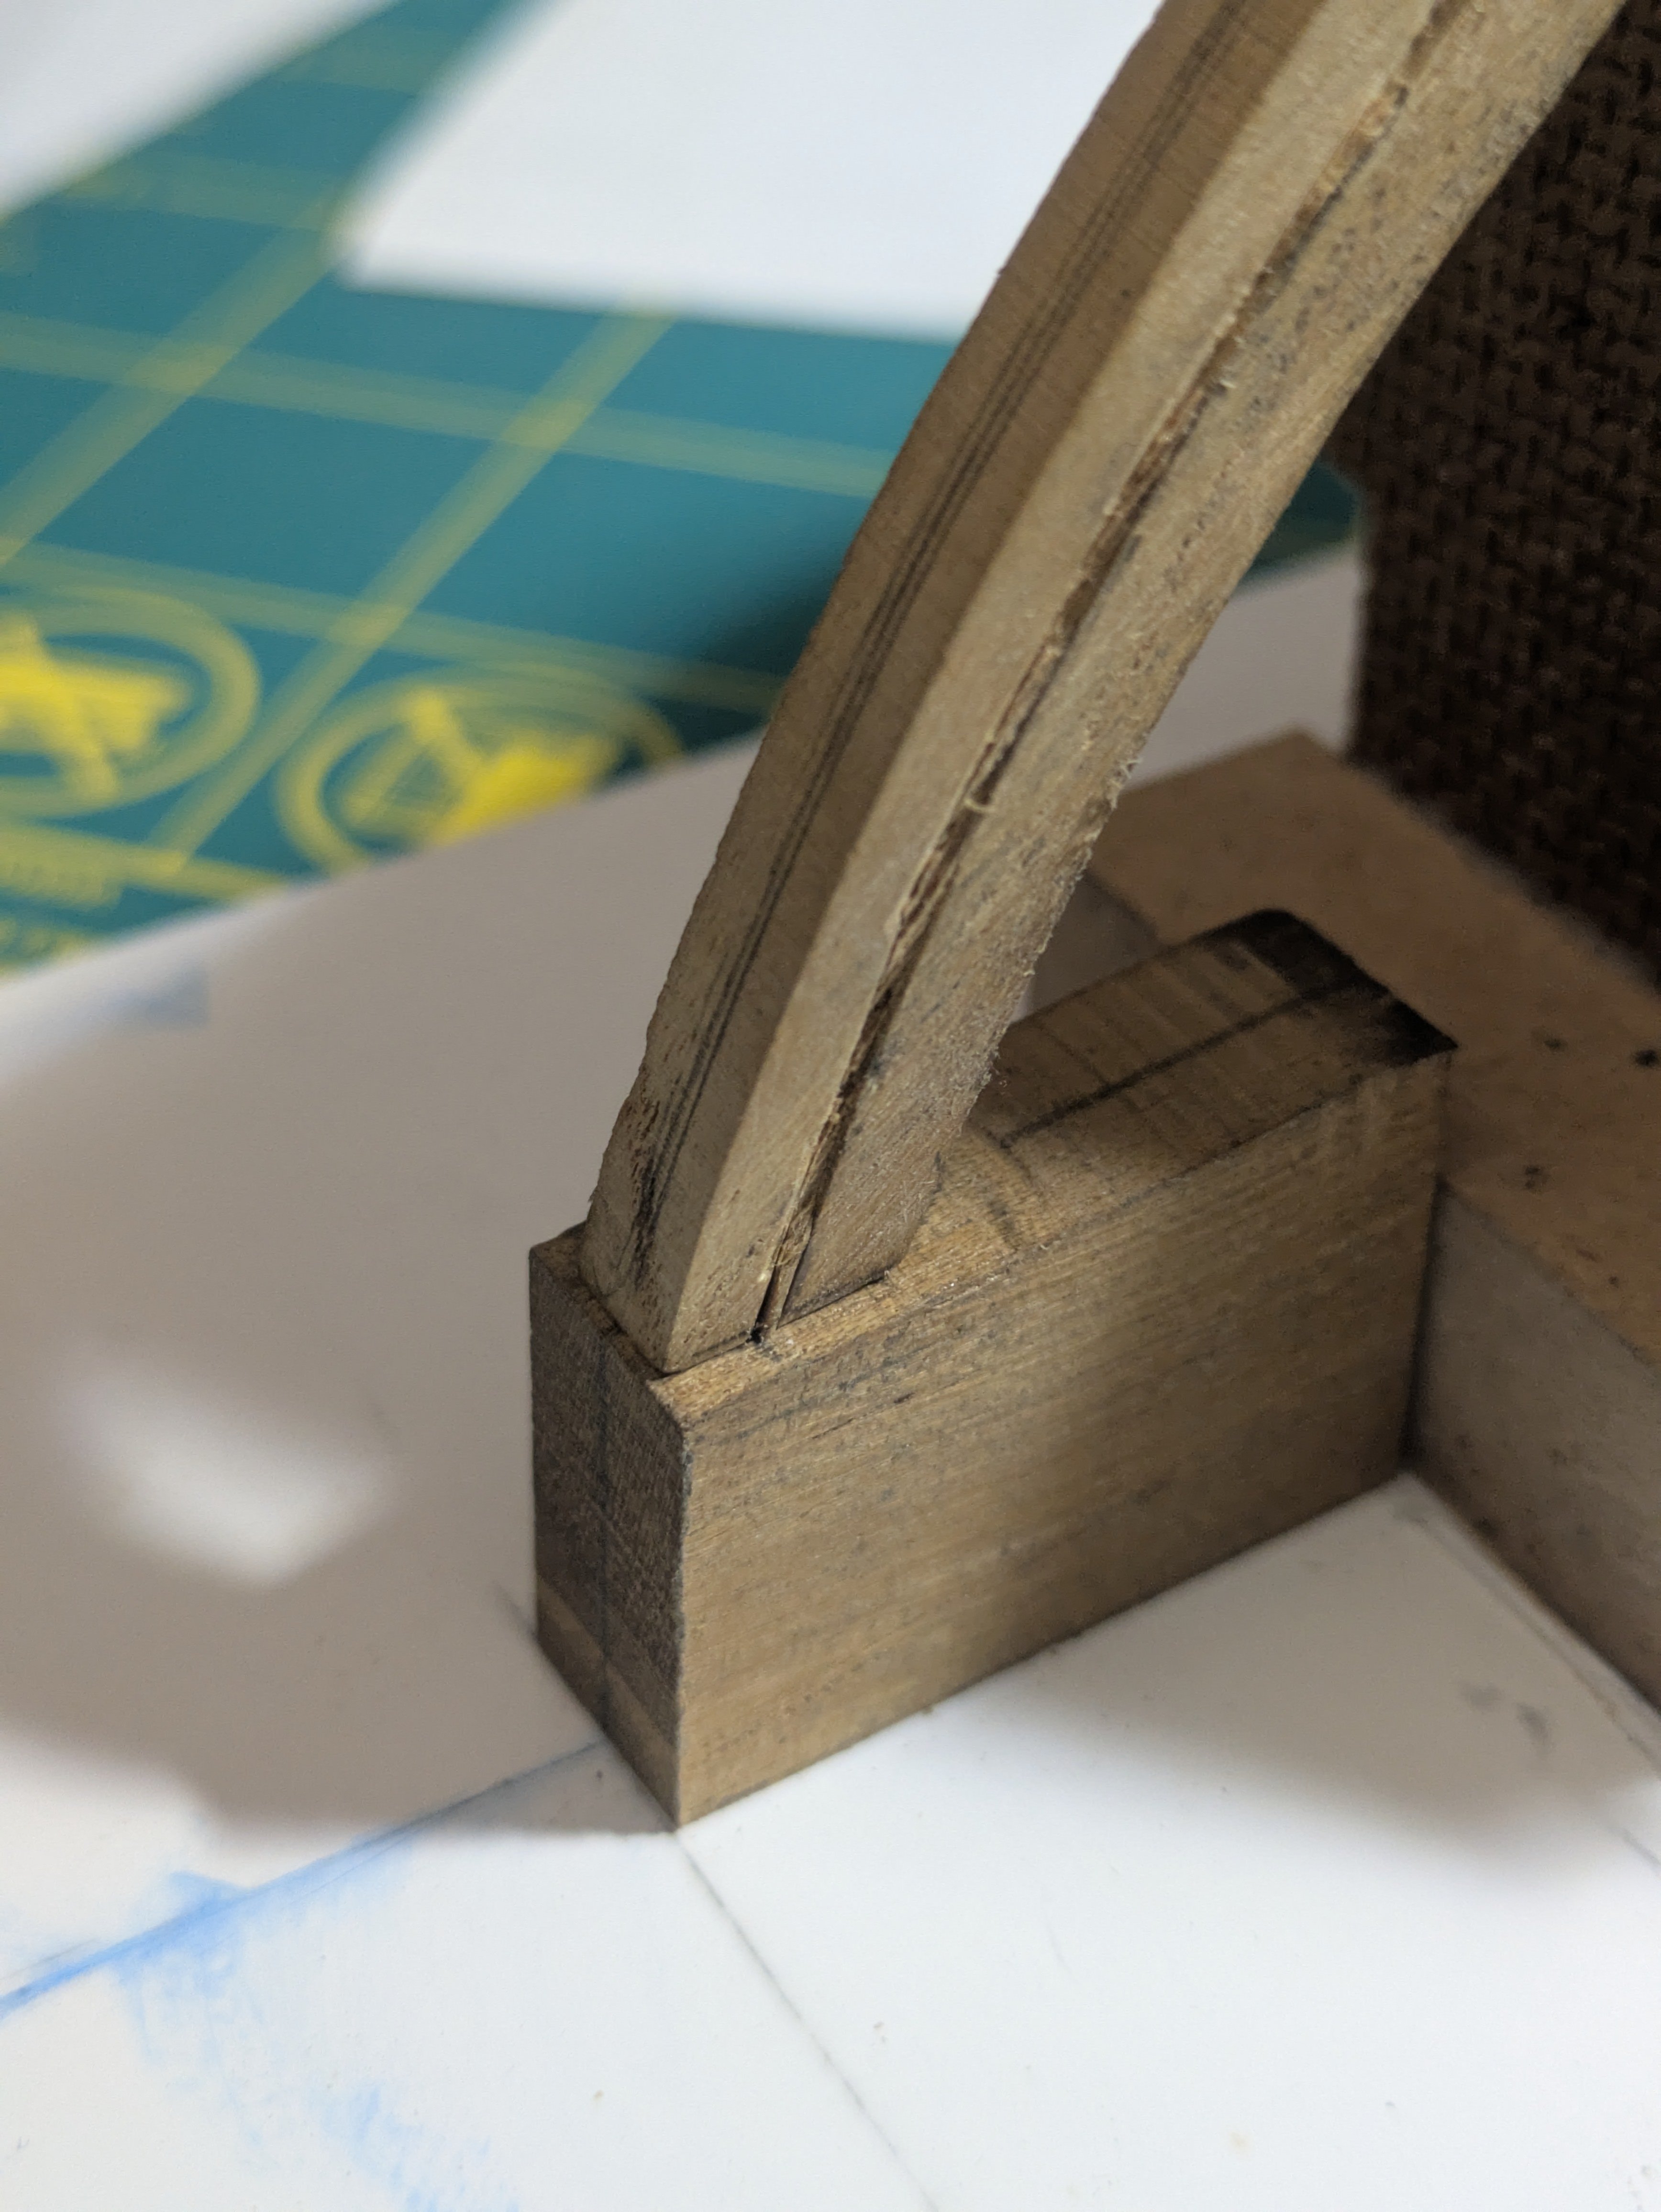
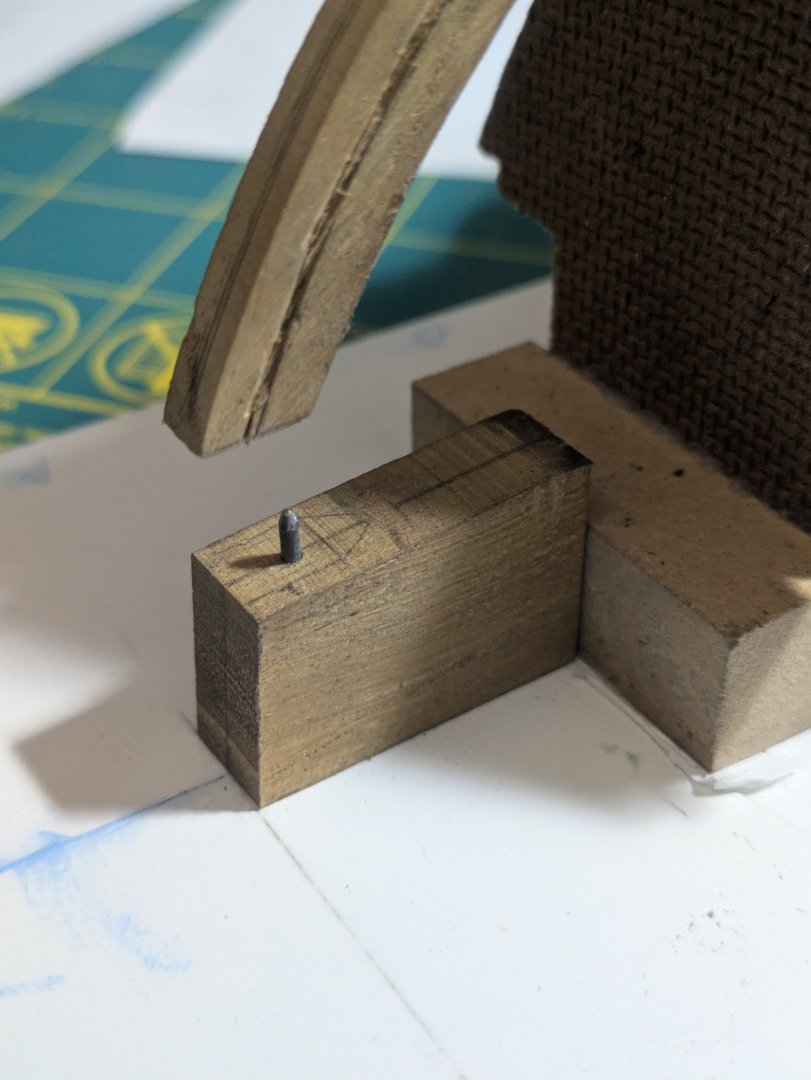
Because of not extending the stem I had to figure out a way of holding the top. So I cut a block and inserted a steel pin that fit into a hold drilled into the stem. Then I tapered the deadwood. Next up the transom.

- 38 replies
-
- 6
-
-
- William Atkin
- Sloop
- (and 1 more)
-
Yes, I got the prototype build method in my head and a lot of kit build photos so trying to blend them is a challenge. Like the keel assembly I cut out all the pieces like the prototype when I could have made it in one piece.
- 38 replies
-
- 2
-
-
- William Atkin
- Sloop
- (and 1 more)
-
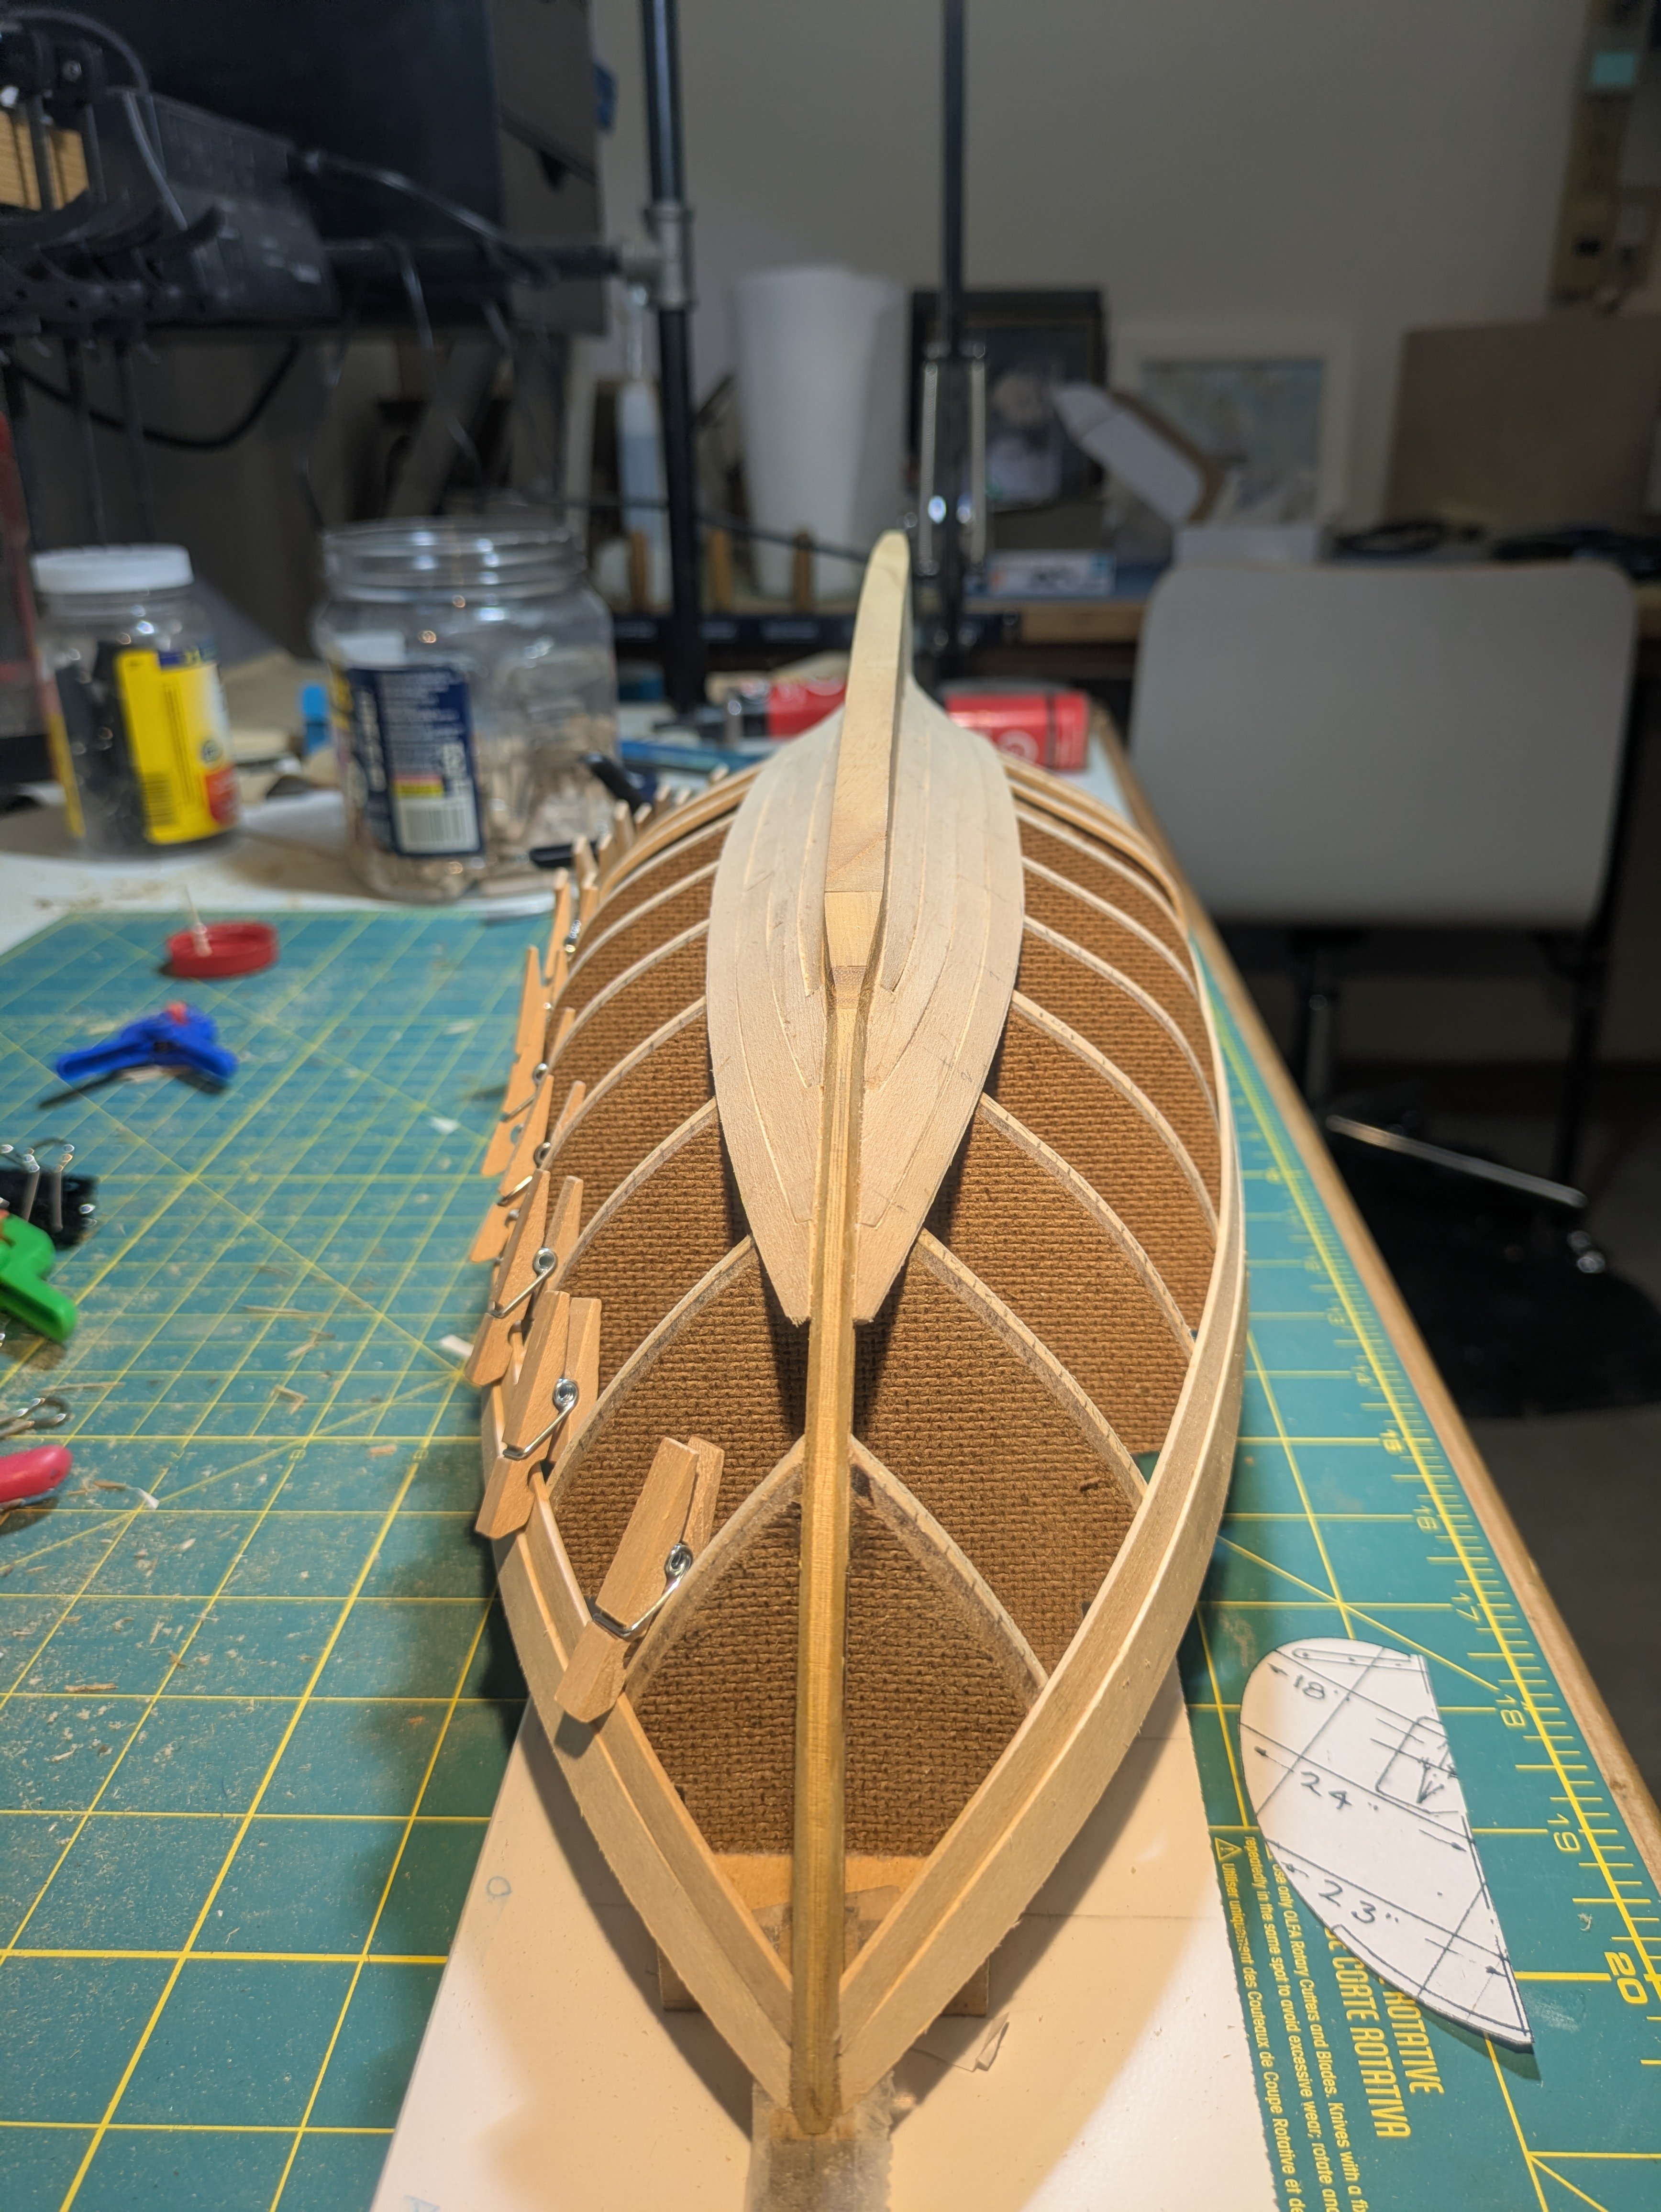
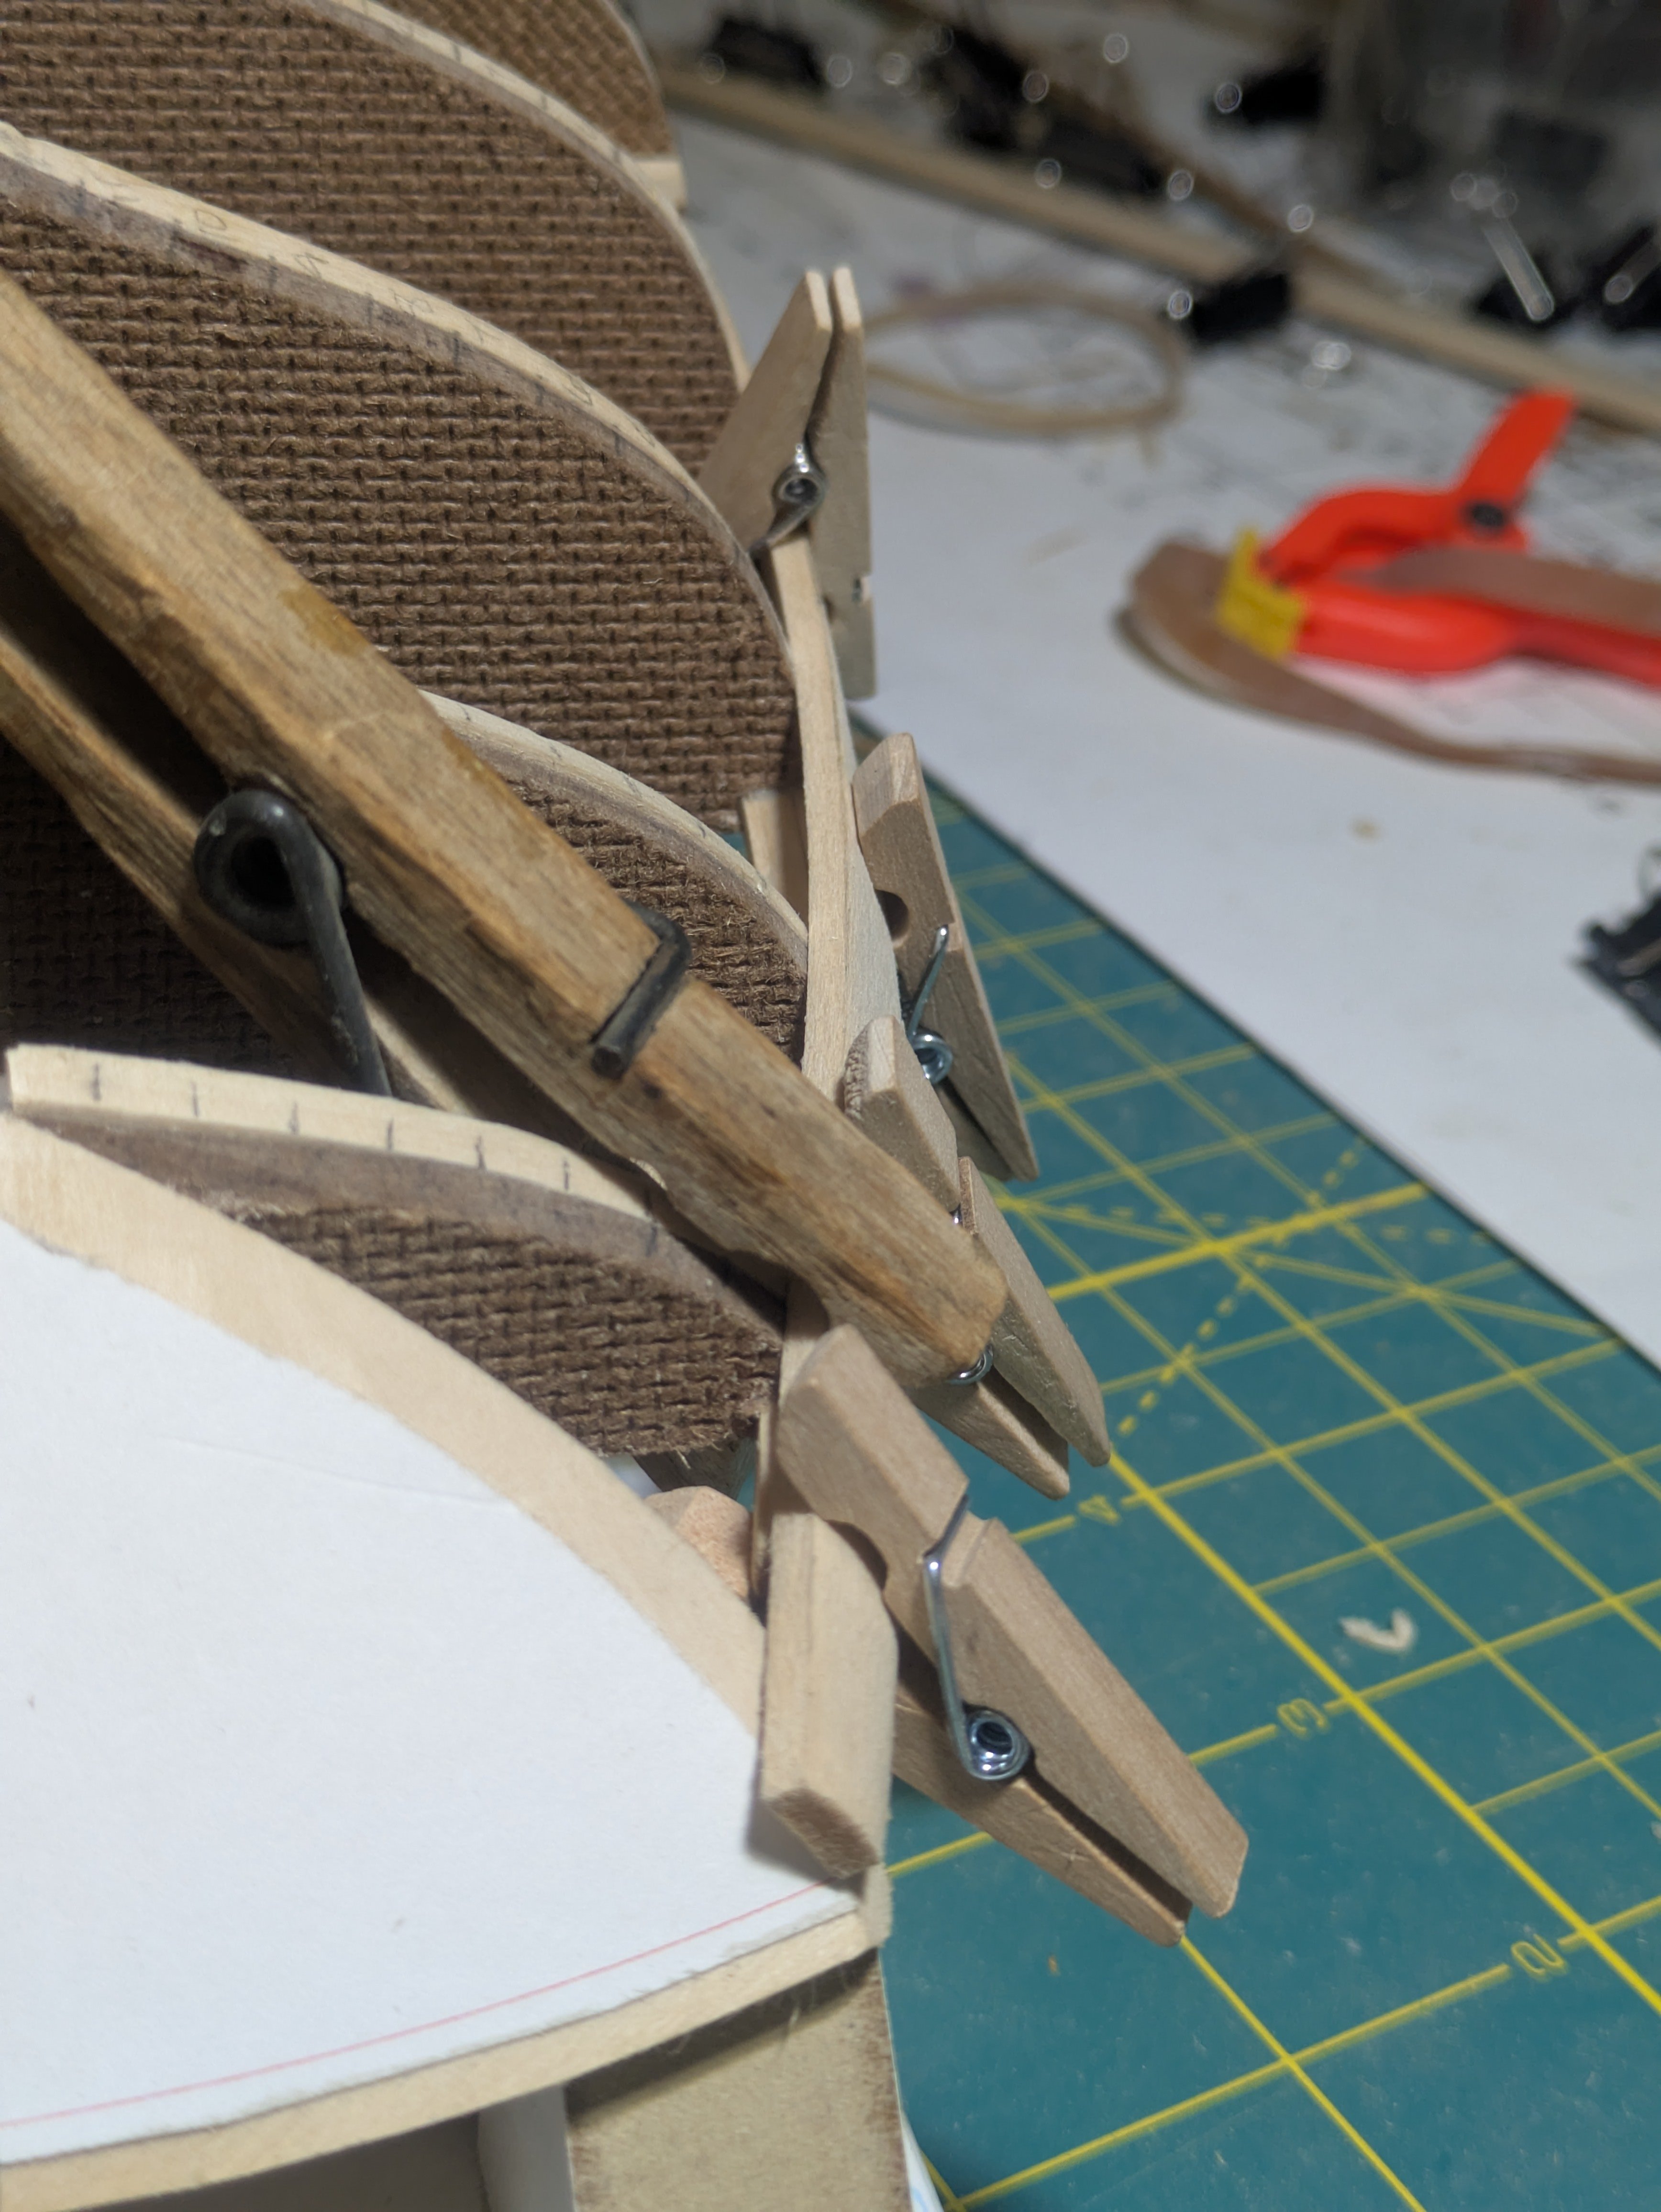
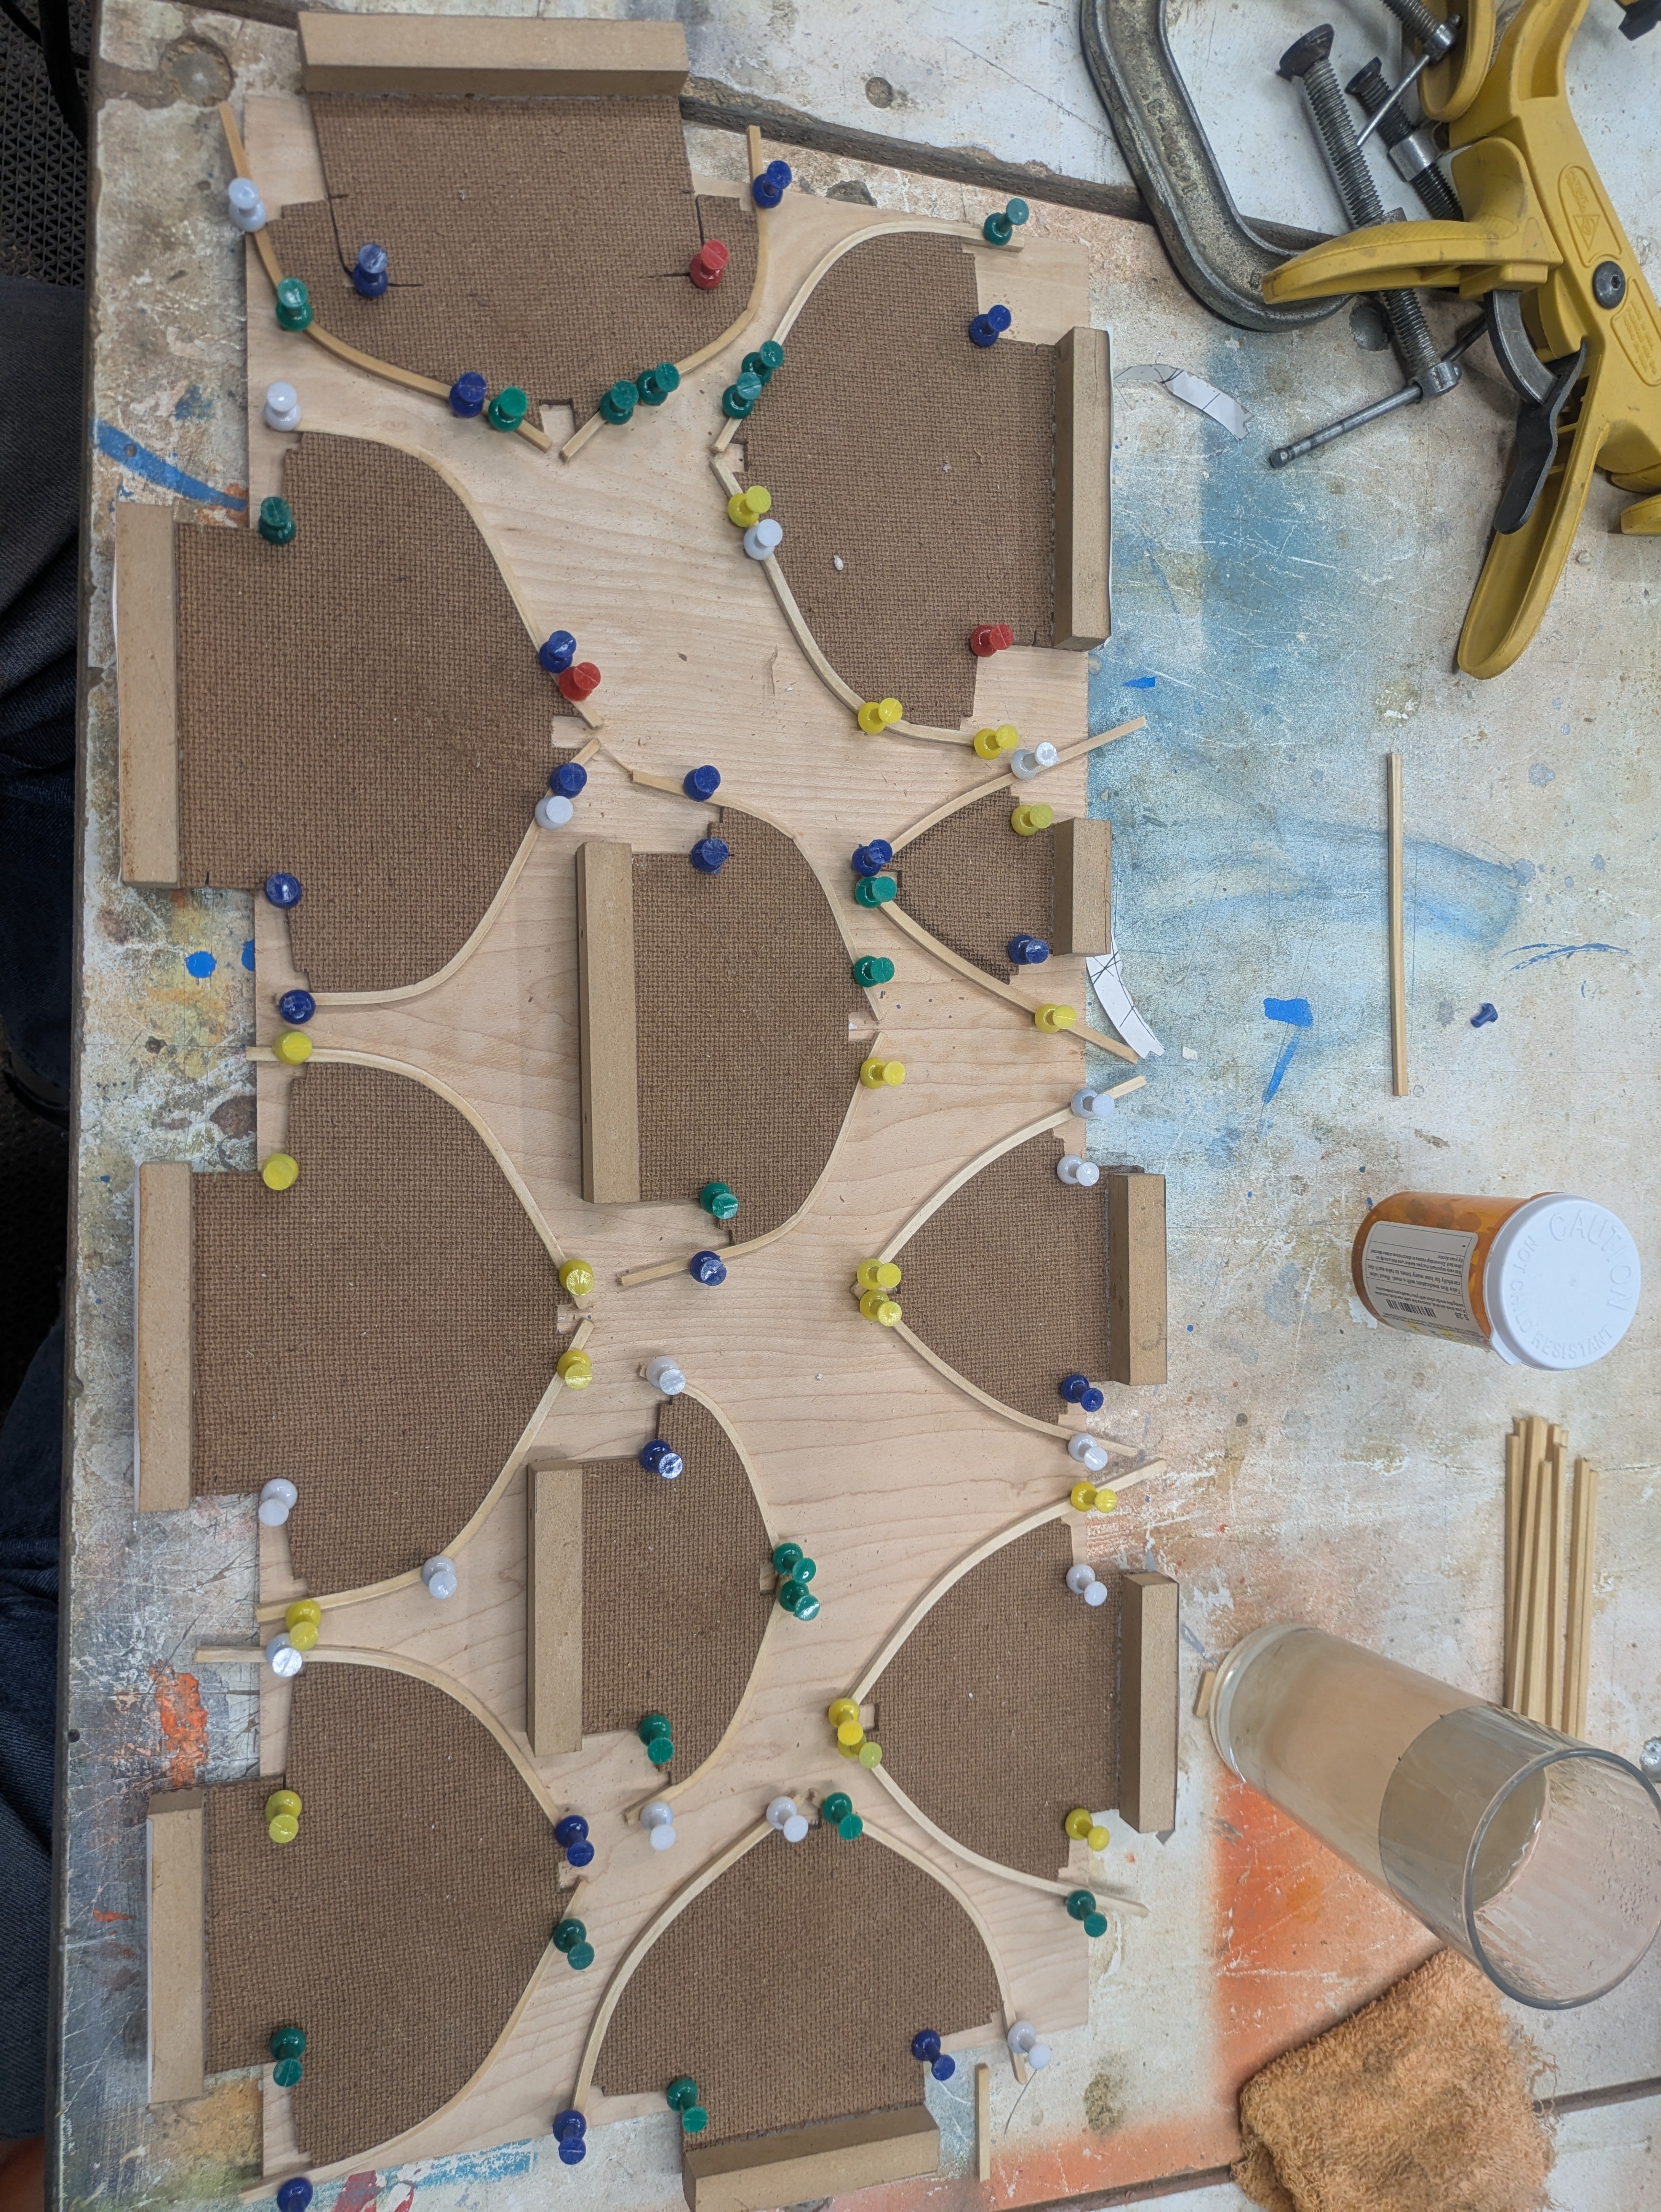
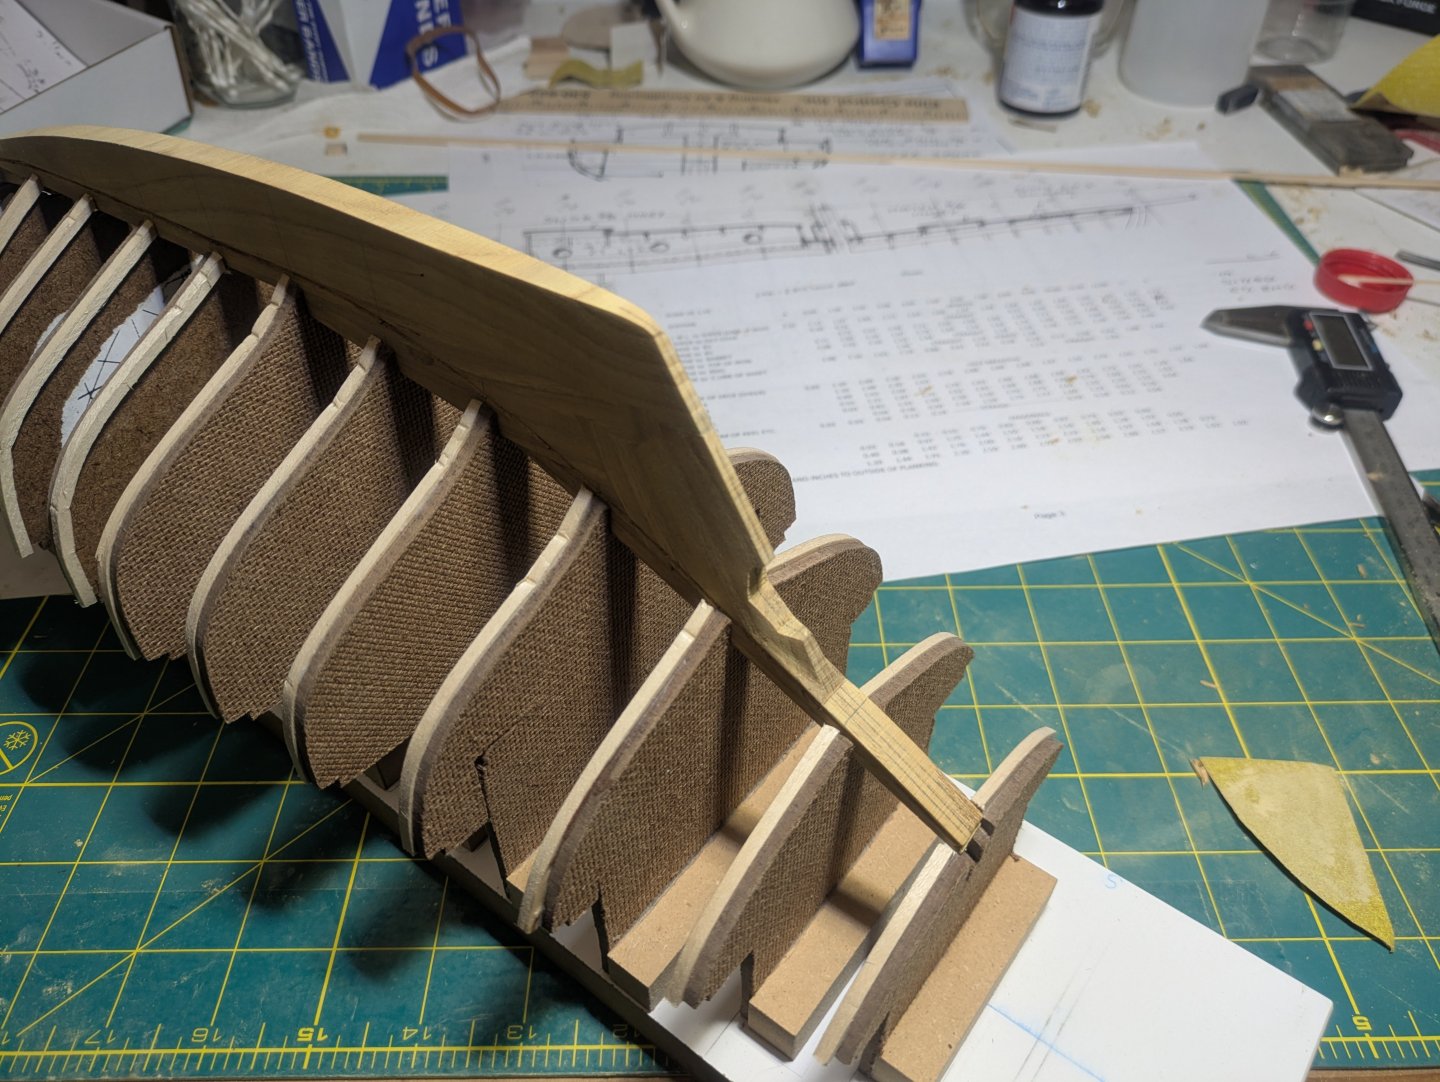
I tried to get the molds to stand vertical but carefully making them but I had to resort to shimming with a piece of paper under the back half of the mountings. I cut some basswood strips and and soaked them in a glass of water that I boiled in a microwave. I am forming the boxwood on the edge of the molds for added support for the planking.
- 38 replies
-
- 4
-
-
- William Atkin
- Sloop
- (and 1 more)
-
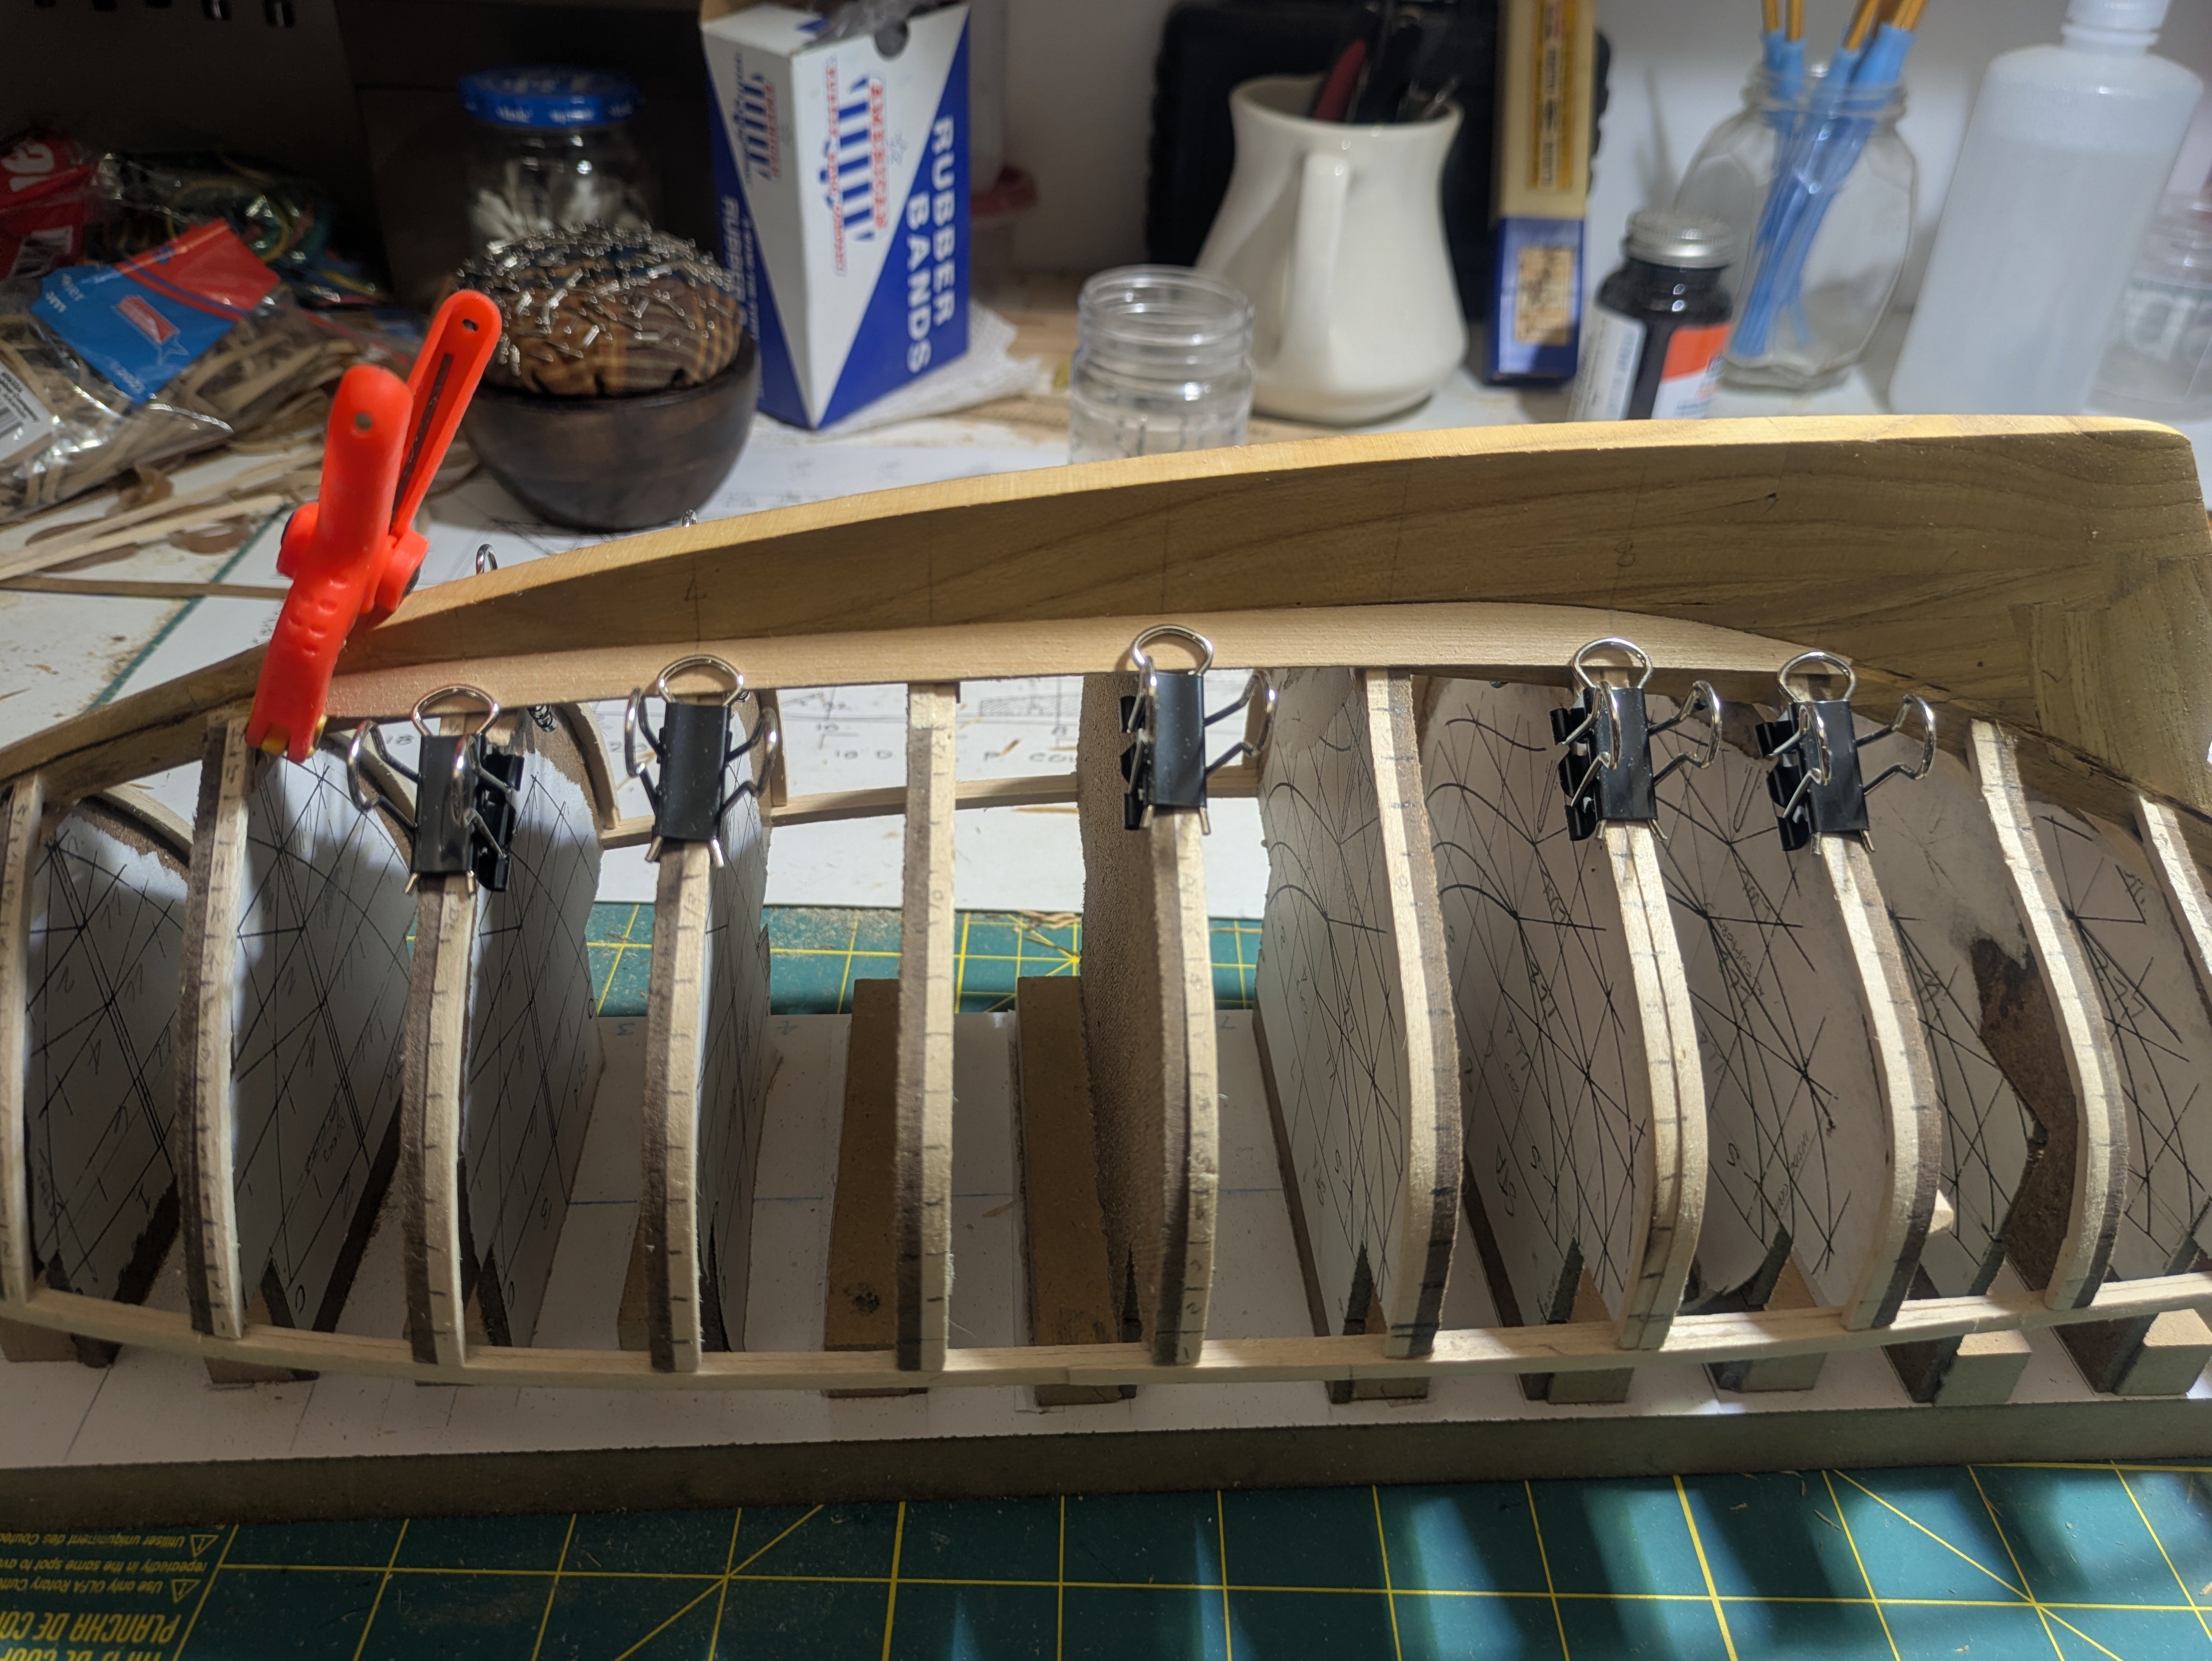
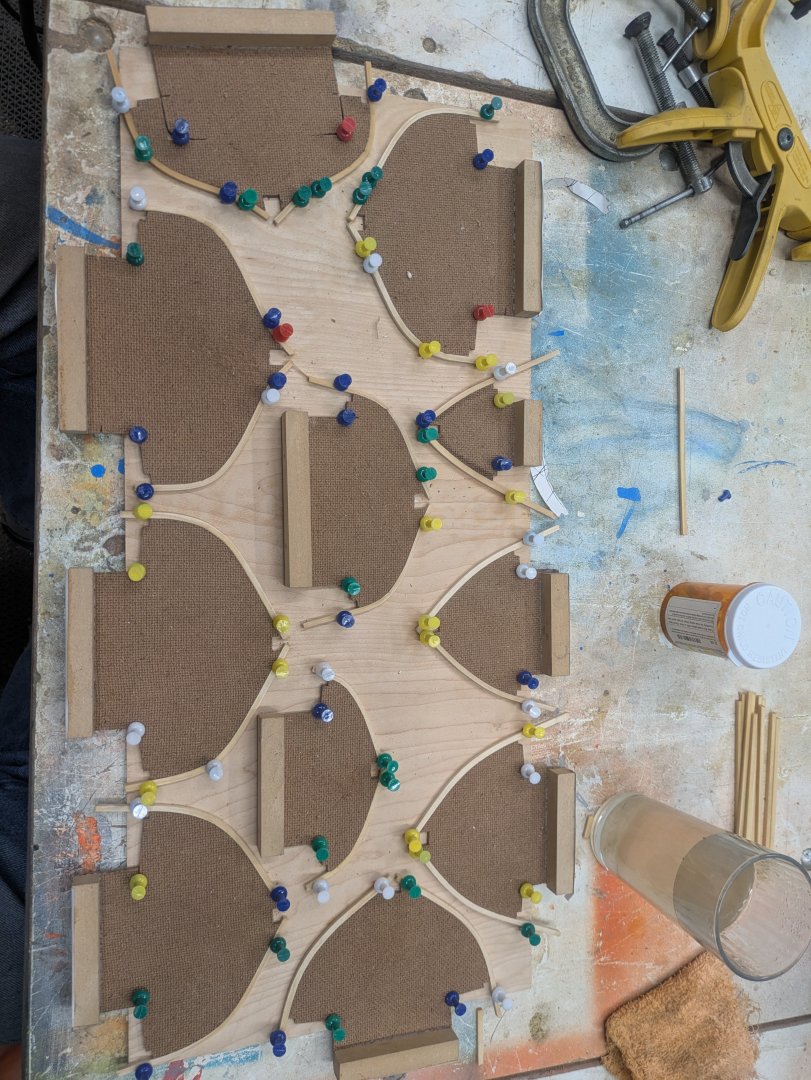
Well a lot of things to figure out. And I already regret using hardboard for the molds. That's what inexperience and a supply of hardboard gets you. I fastened the molds from the bottom of the building board so I can remove them individually. I'm thinking of adding frames to the edge of the molds to add to the gluing area.

- 38 replies
-
- 3
-
-
- William Atkin
- Sloop
- (and 1 more)