Jim M
-
Posts
165 -
Joined
-
Last visited
About Jim M

- Birthday 04/05/1968
-
 Admiral Rick reacted to a post in a topic:
Lady Eleanor by Jim M - FINISHED - Vanguard Models - 1:64
Admiral Rick reacted to a post in a topic:
Lady Eleanor by Jim M - FINISHED - Vanguard Models - 1:64
-
Admiral Rick reacted to a post in a topic:
Lady Eleanor by Jim M - FINISHED - Vanguard Models - 1:64
-
 Jim M reacted to a post in a topic:
Lady Eleanor by Jim M - FINISHED - Vanguard Models - 1:64
Jim M reacted to a post in a topic:
Lady Eleanor by Jim M - FINISHED - Vanguard Models - 1:64
-
Jim M reacted to a post in a topic:
Lady Eleanor by Jim M - FINISHED - Vanguard Models - 1:64
-
Jim M reacted to a post in a topic:
Lady Eleanor by Jim M - FINISHED - Vanguard Models - 1:64
-
Jim M reacted to a post in a topic:
Lady Eleanor by Jim M - FINISHED - Vanguard Models - 1:64
-
Jim M reacted to a post in a topic:
Lady Eleanor by Jim M - FINISHED - Vanguard Models - 1:64
-
ccoyle reacted to a post in a topic:
Lady Eleanor by Jim M - FINISHED - Vanguard Models - 1:64
-
Admiral Rick reacted to a post in a topic:
Lady Eleanor by Jim M - FINISHED - Vanguard Models - 1:64
-
SiriusVoyager reacted to a post in a topic:
Lady Eleanor by Jim M - FINISHED - Vanguard Models - 1:64
-
chris watton reacted to a post in a topic:
Lady Eleanor by Jim M - FINISHED - Vanguard Models - 1:64
-
palmerit reacted to a post in a topic:
Lady Eleanor by Jim M - FINISHED - Vanguard Models - 1:64
-
tmj reacted to a post in a topic:
Lady Eleanor by Jim M - FINISHED - Vanguard Models - 1:64
-
Knocklouder reacted to a post in a topic:
Lady Eleanor by Jim M - FINISHED - Vanguard Models - 1:64
-
TerryPat reacted to a post in a topic:
Lady Eleanor by Jim M - FINISHED - Vanguard Models - 1:64
-
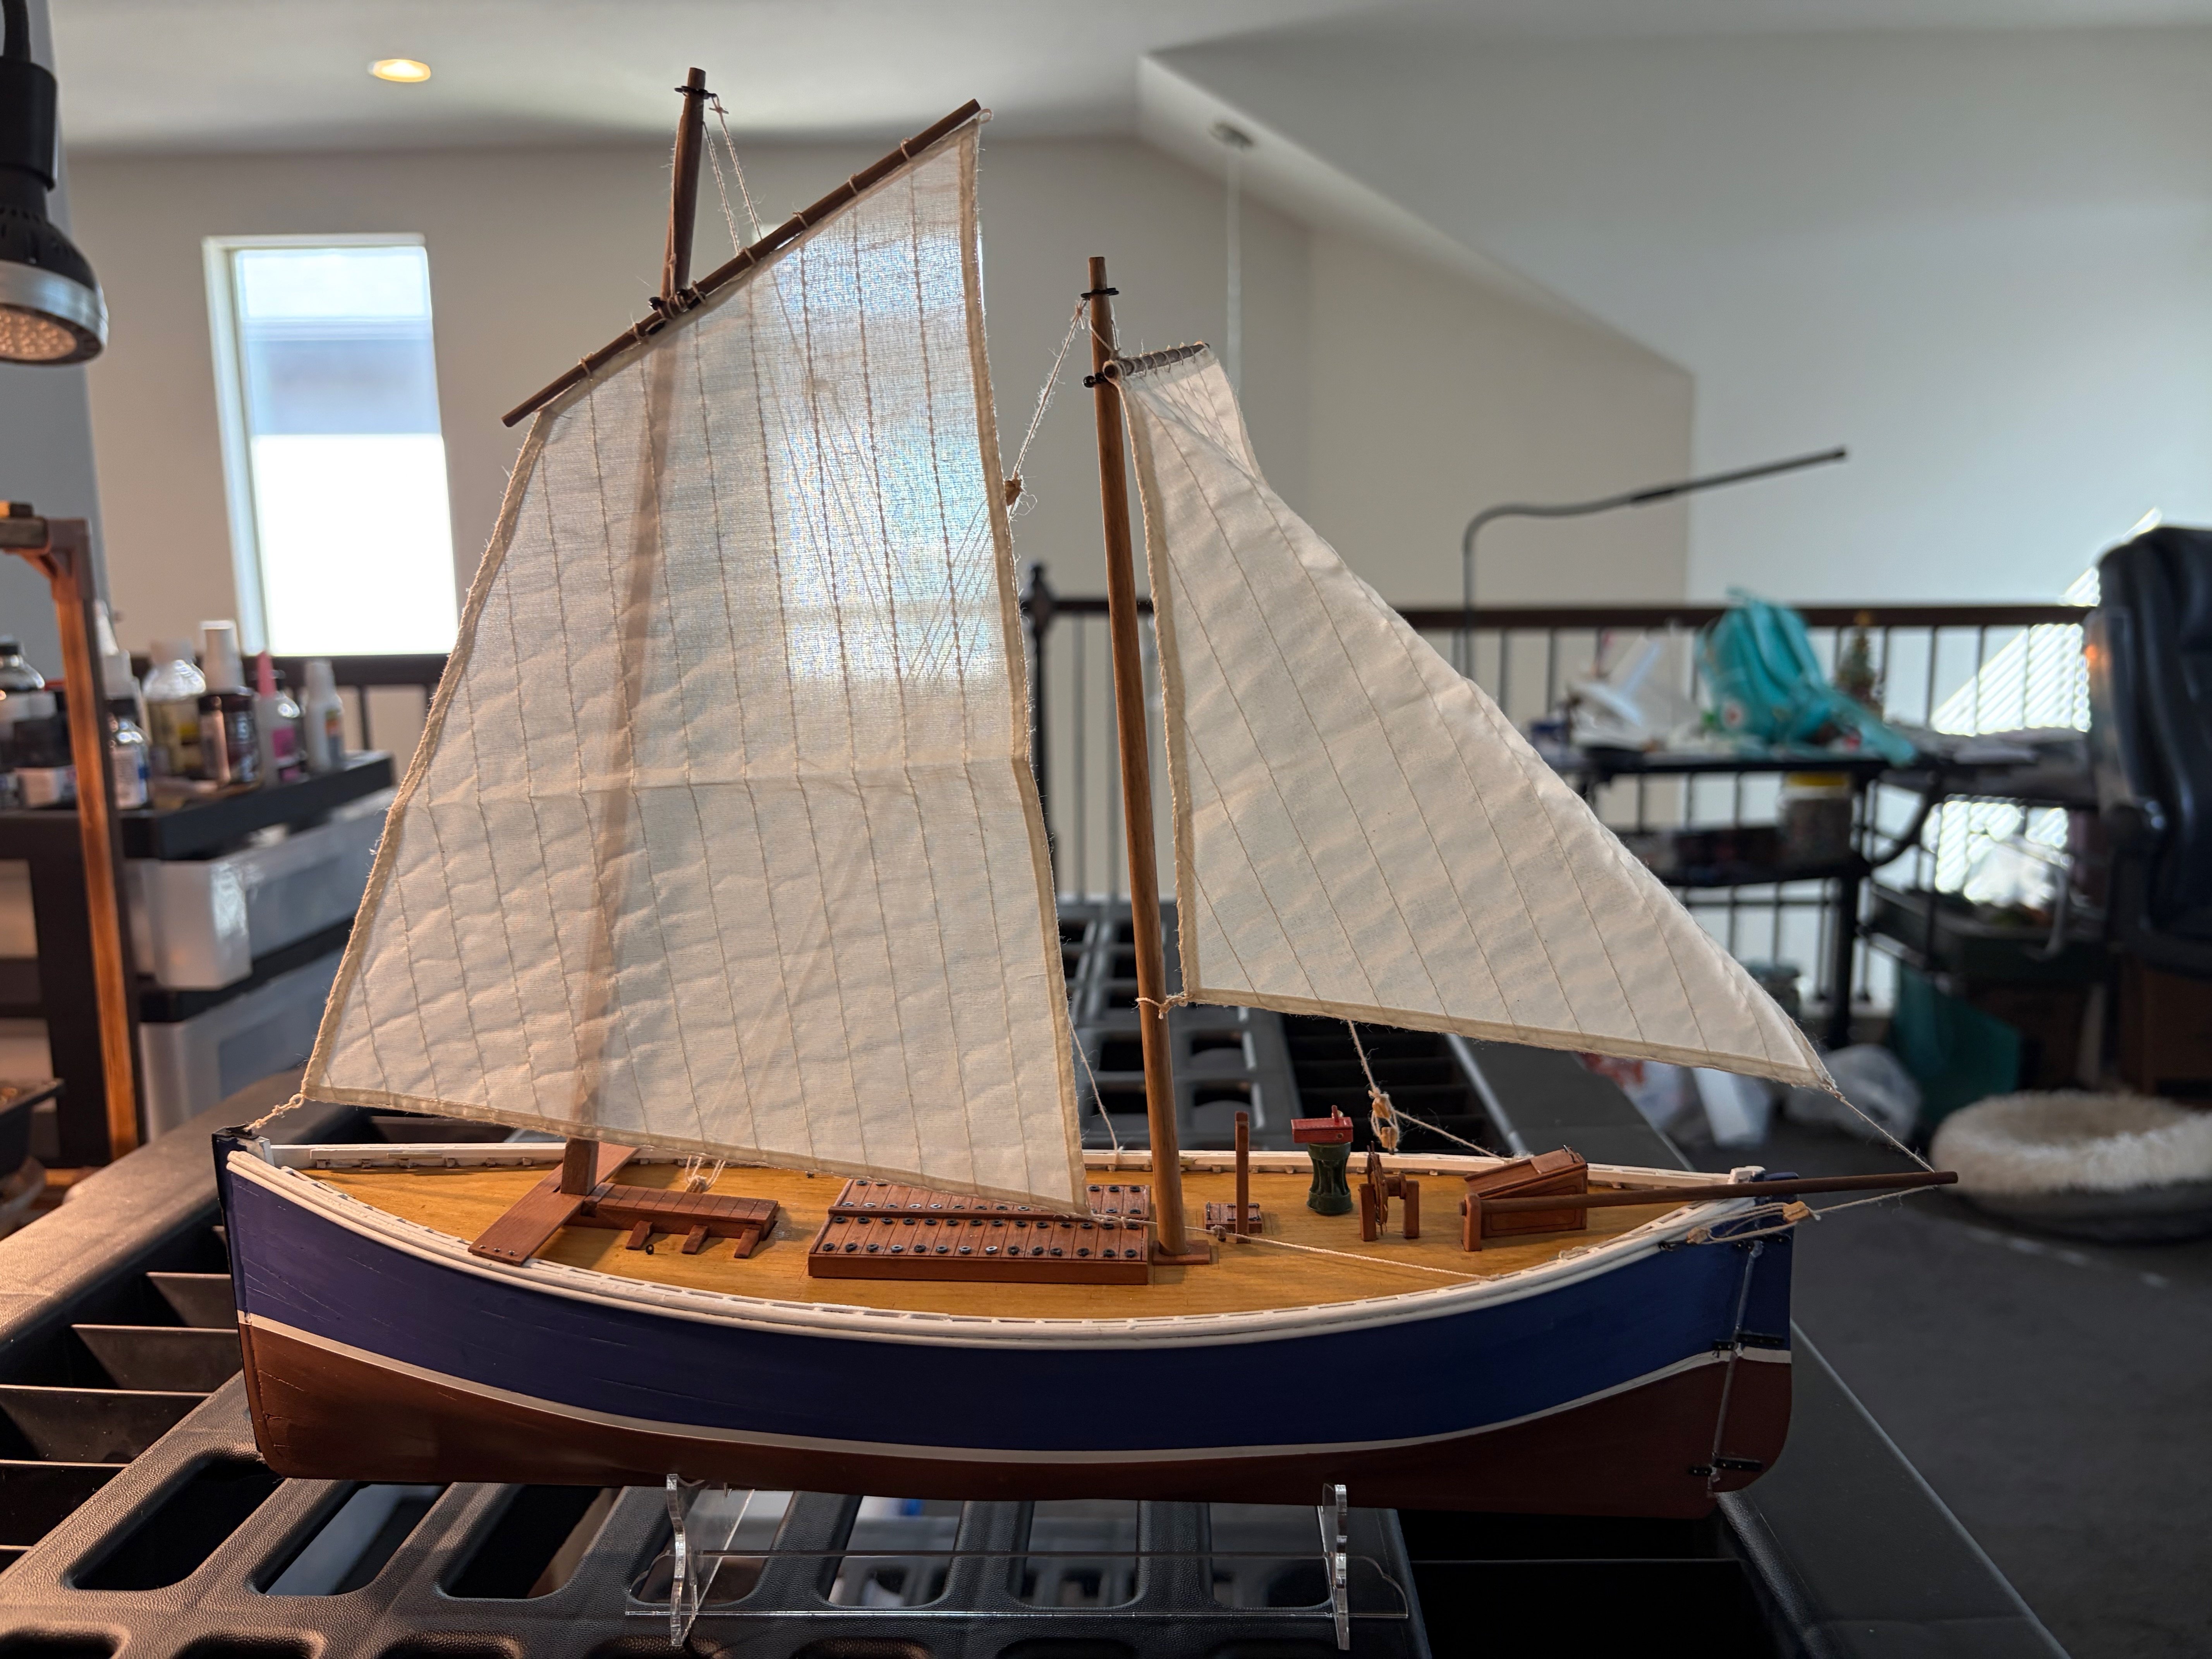
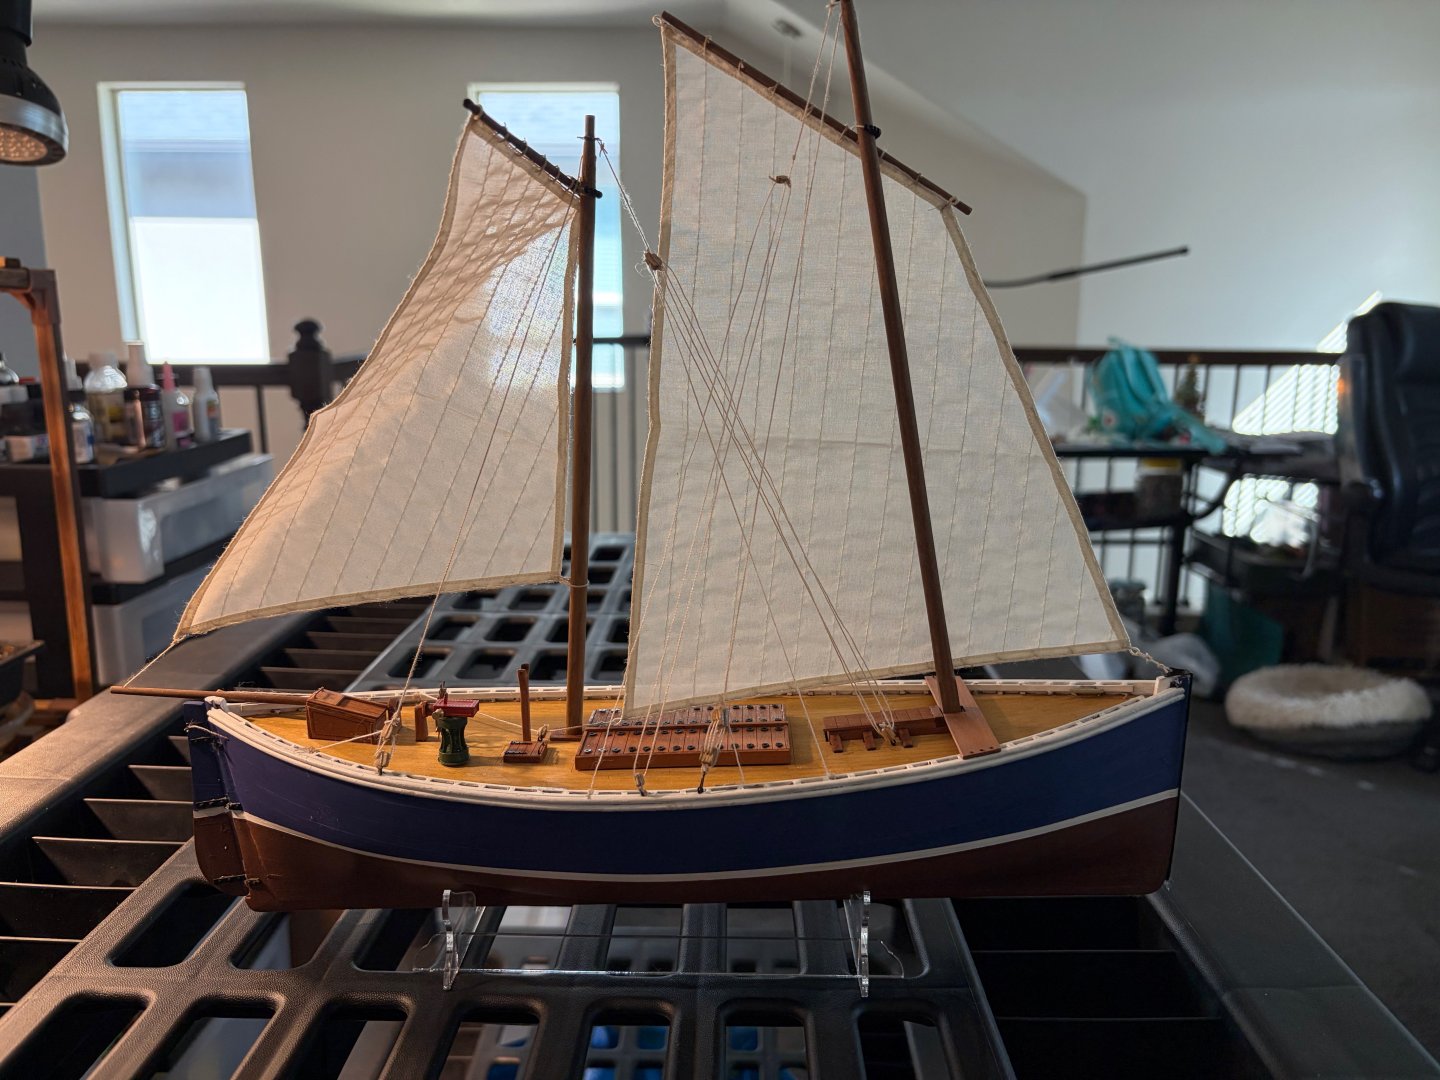
 Good afternoon, sorry for the tardy response, but last weekend was our ipms club show. With that in mind Lady Eleanor is now complete. I also won third place in the show for the Sailing group. The rigging was interesting, and a little confusing, but I did muddle through it. The area where I was confused was on when to tie a becket vs not. I also had to drill out the blocks with a 0.8mm drill to make sure the thread would go through it. Overall this is a great kit especially to a newcomer. The directions where clear, and @chris watton design make it enjoyable. Jim
- 27 replies
-
- 10
-
-
- fifie
- vanguard models
- (and 2 more)
-
Jim M reacted to a post in a topic:
Lady Eleanor by Jim M - FINISHED - Vanguard Models - 1:64
-
It's a good kit. This is an older kit that I ended up with. It has some challenges but it has been a source of a lot of entertainment. My next build will be the Sherborne once I am finished with this kit. I am hoping to be done by Thanksgiving.
- 27 replies
-
- 1
-
-
- fifie
- vanguard models
- (and 2 more)
-
Jim M reacted to a post in a topic:
Lady Eleanor by Jim M - FINISHED - Vanguard Models - 1:64
-
Jim M reacted to a post in a topic:
Lady Eleanor by Jim M - FINISHED - Vanguard Models - 1:64
-
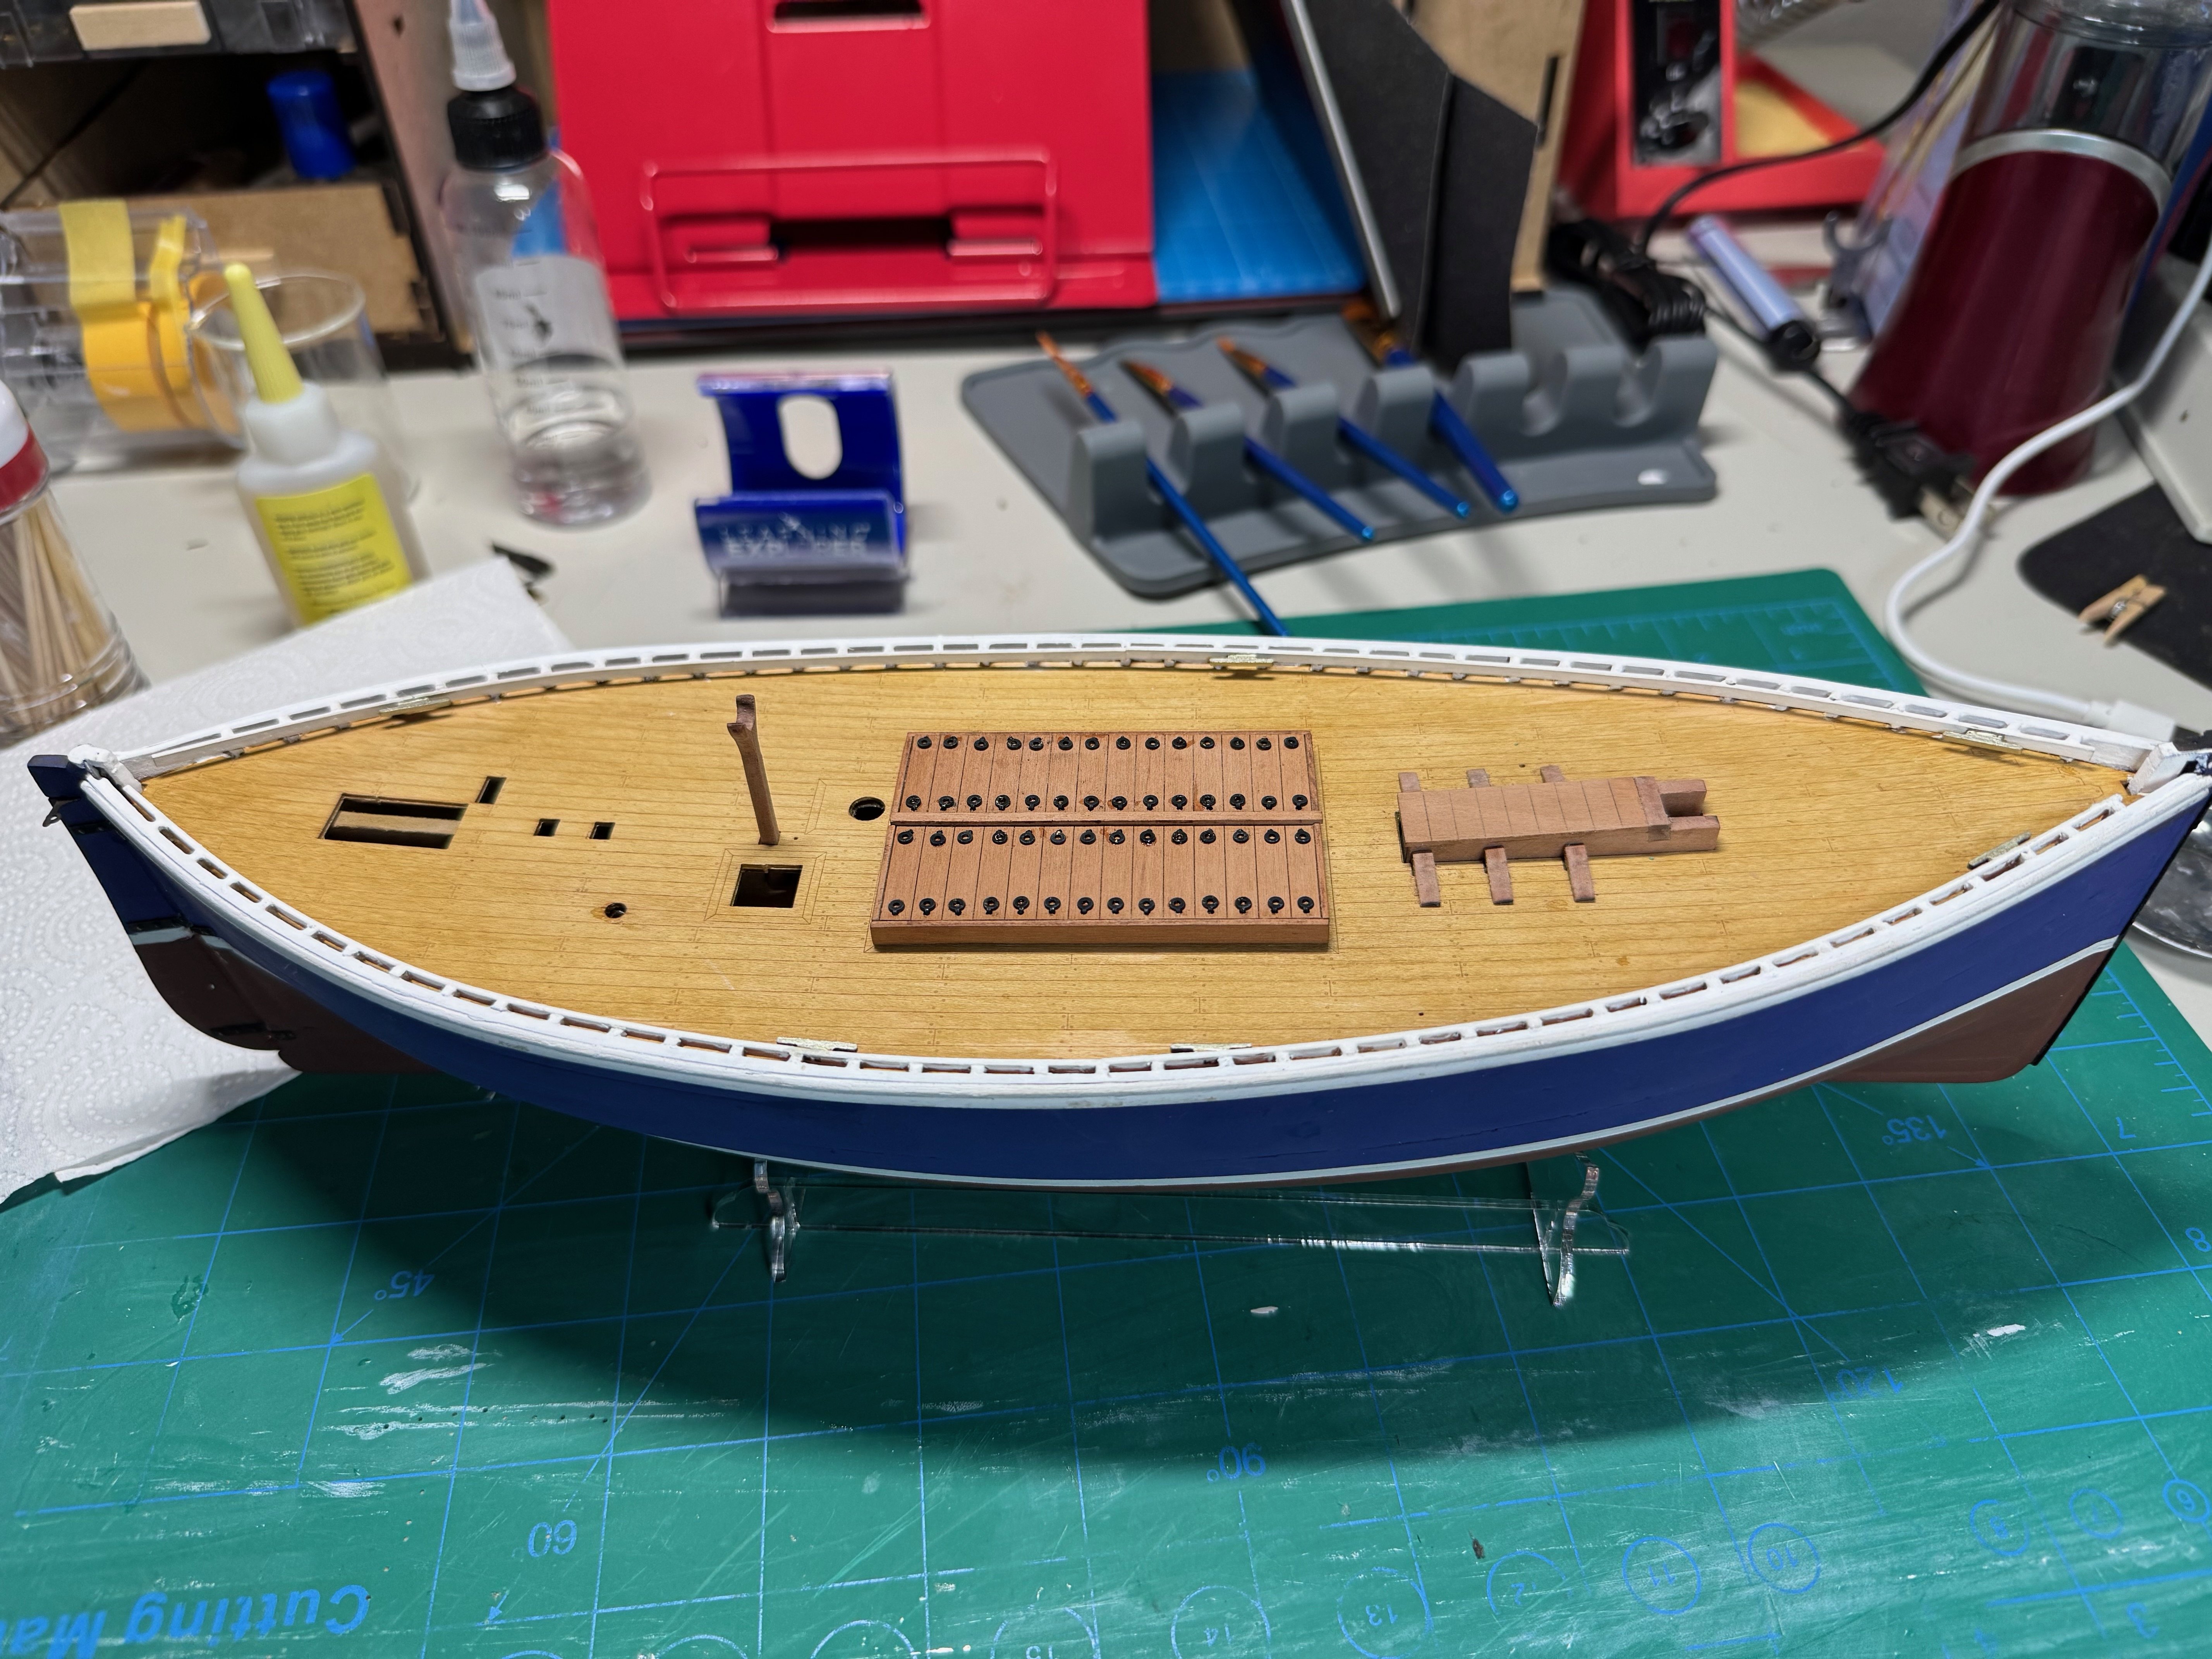
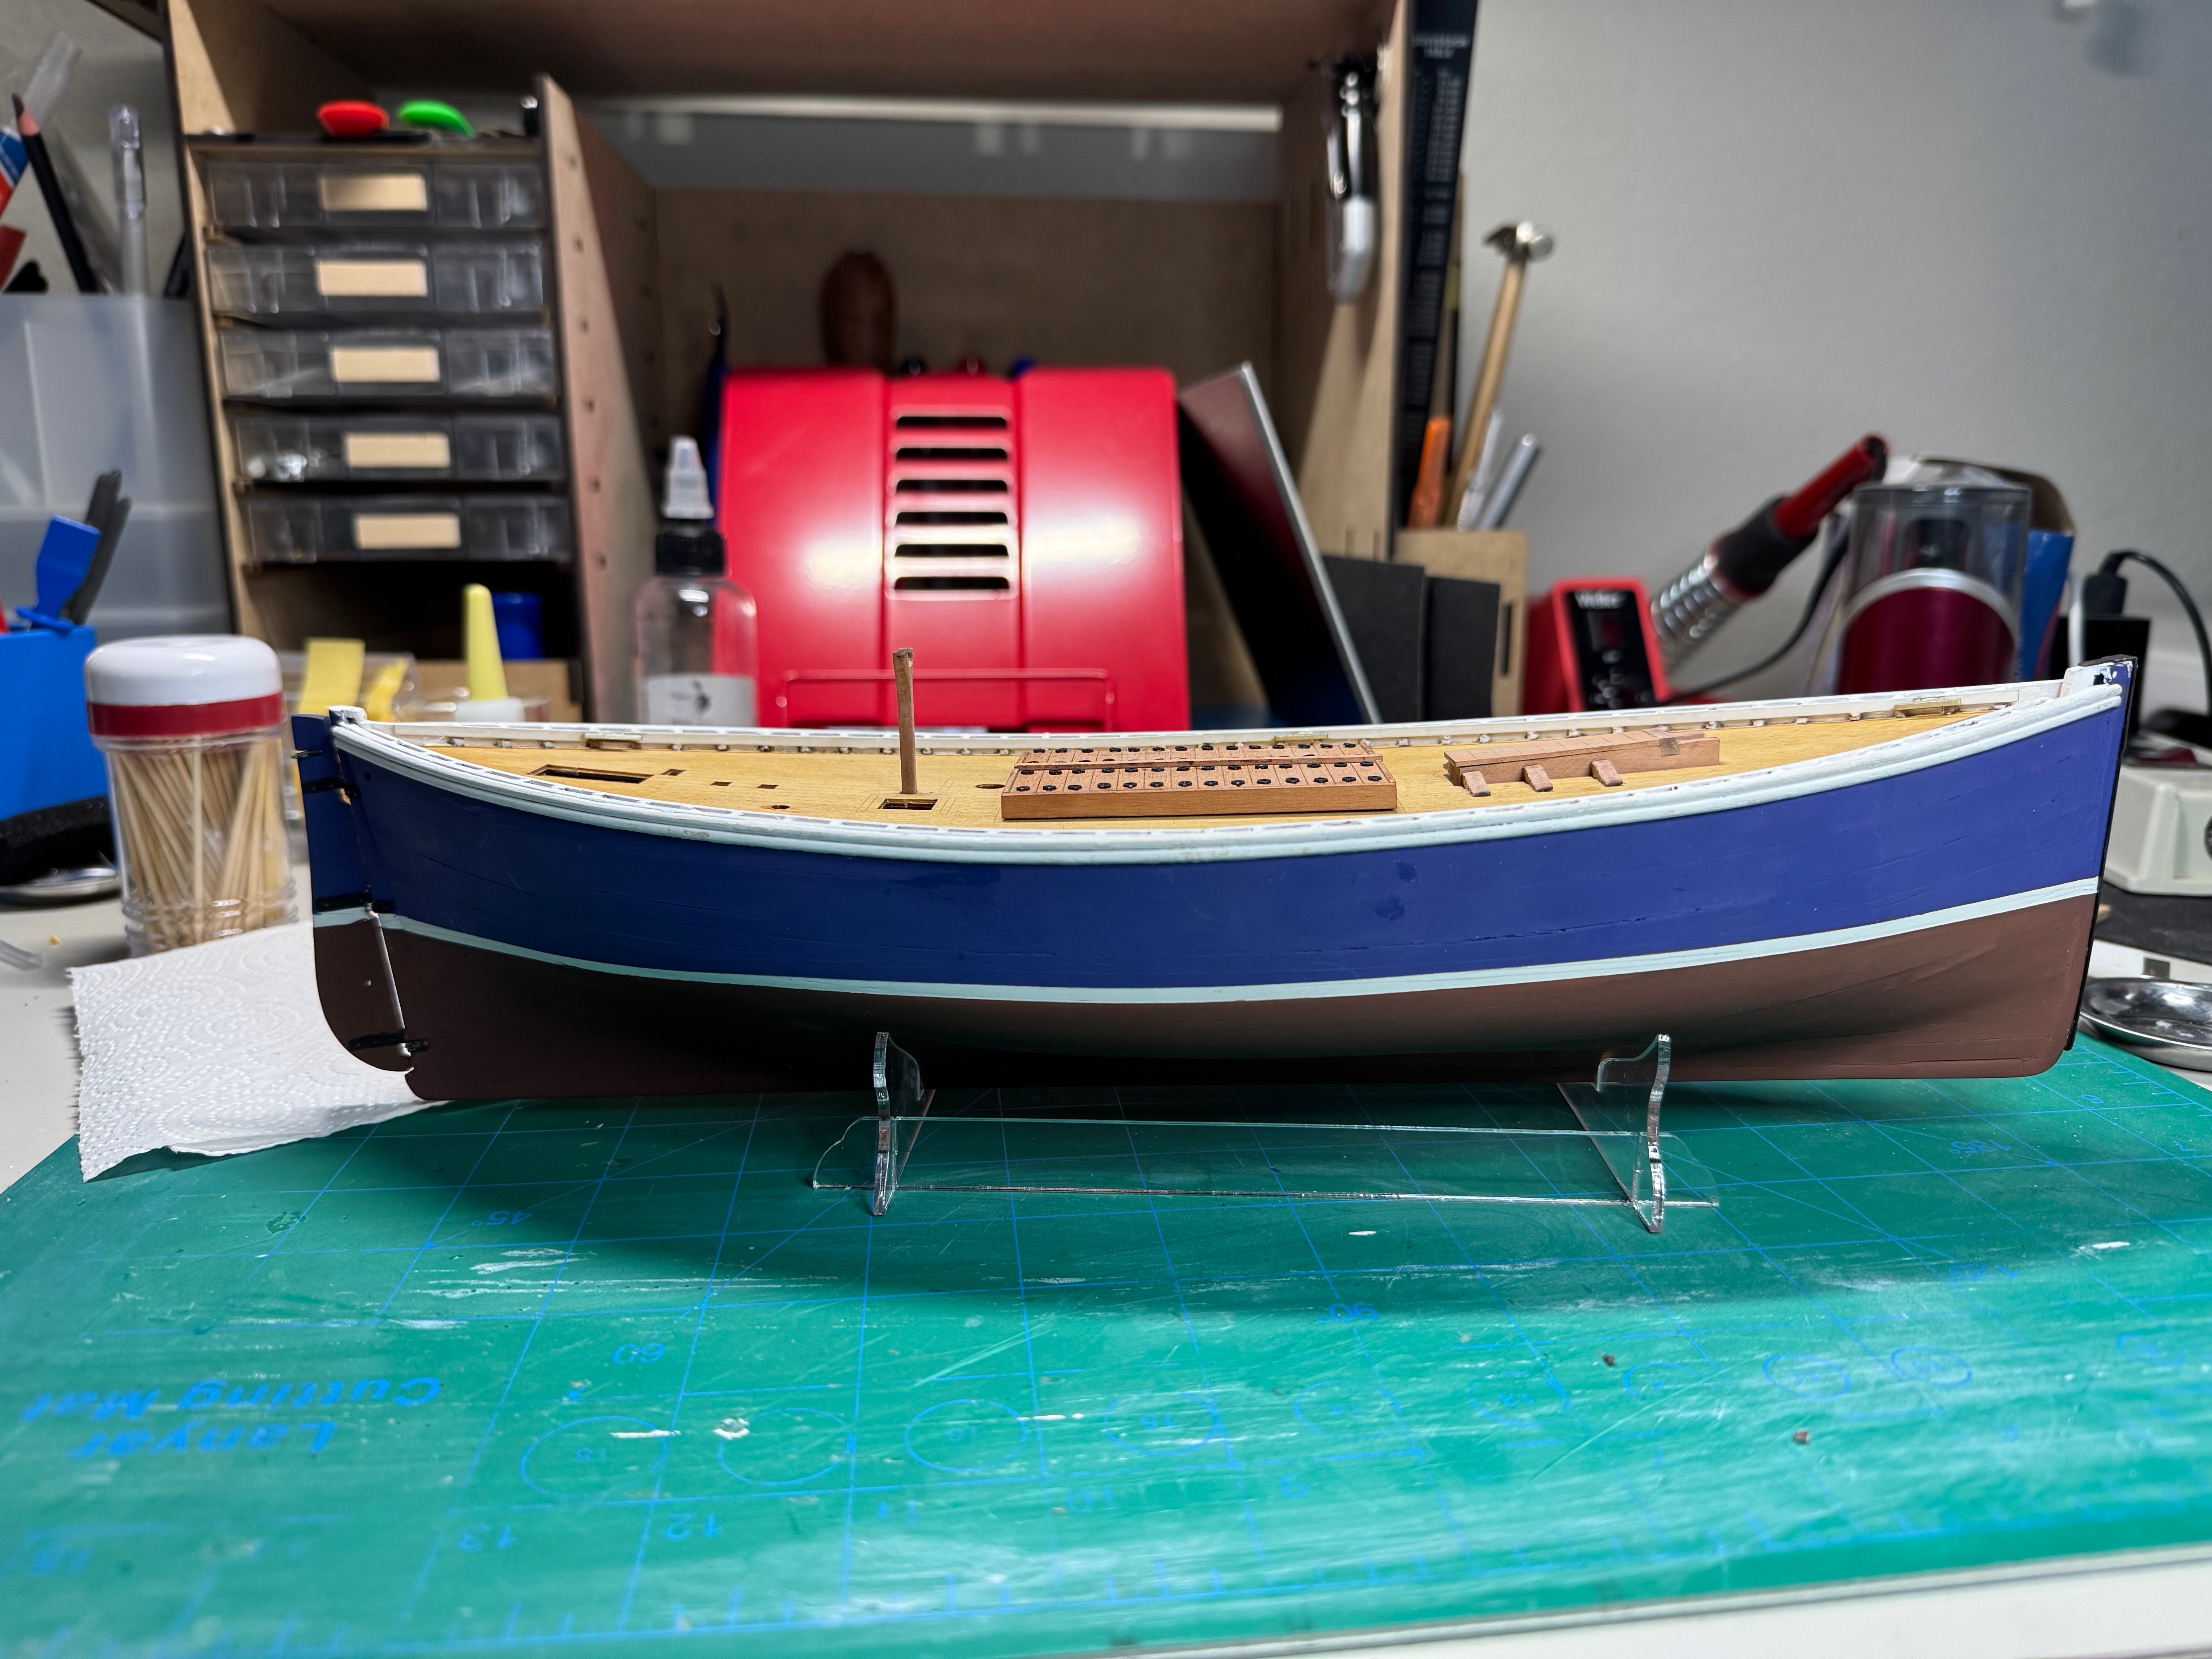
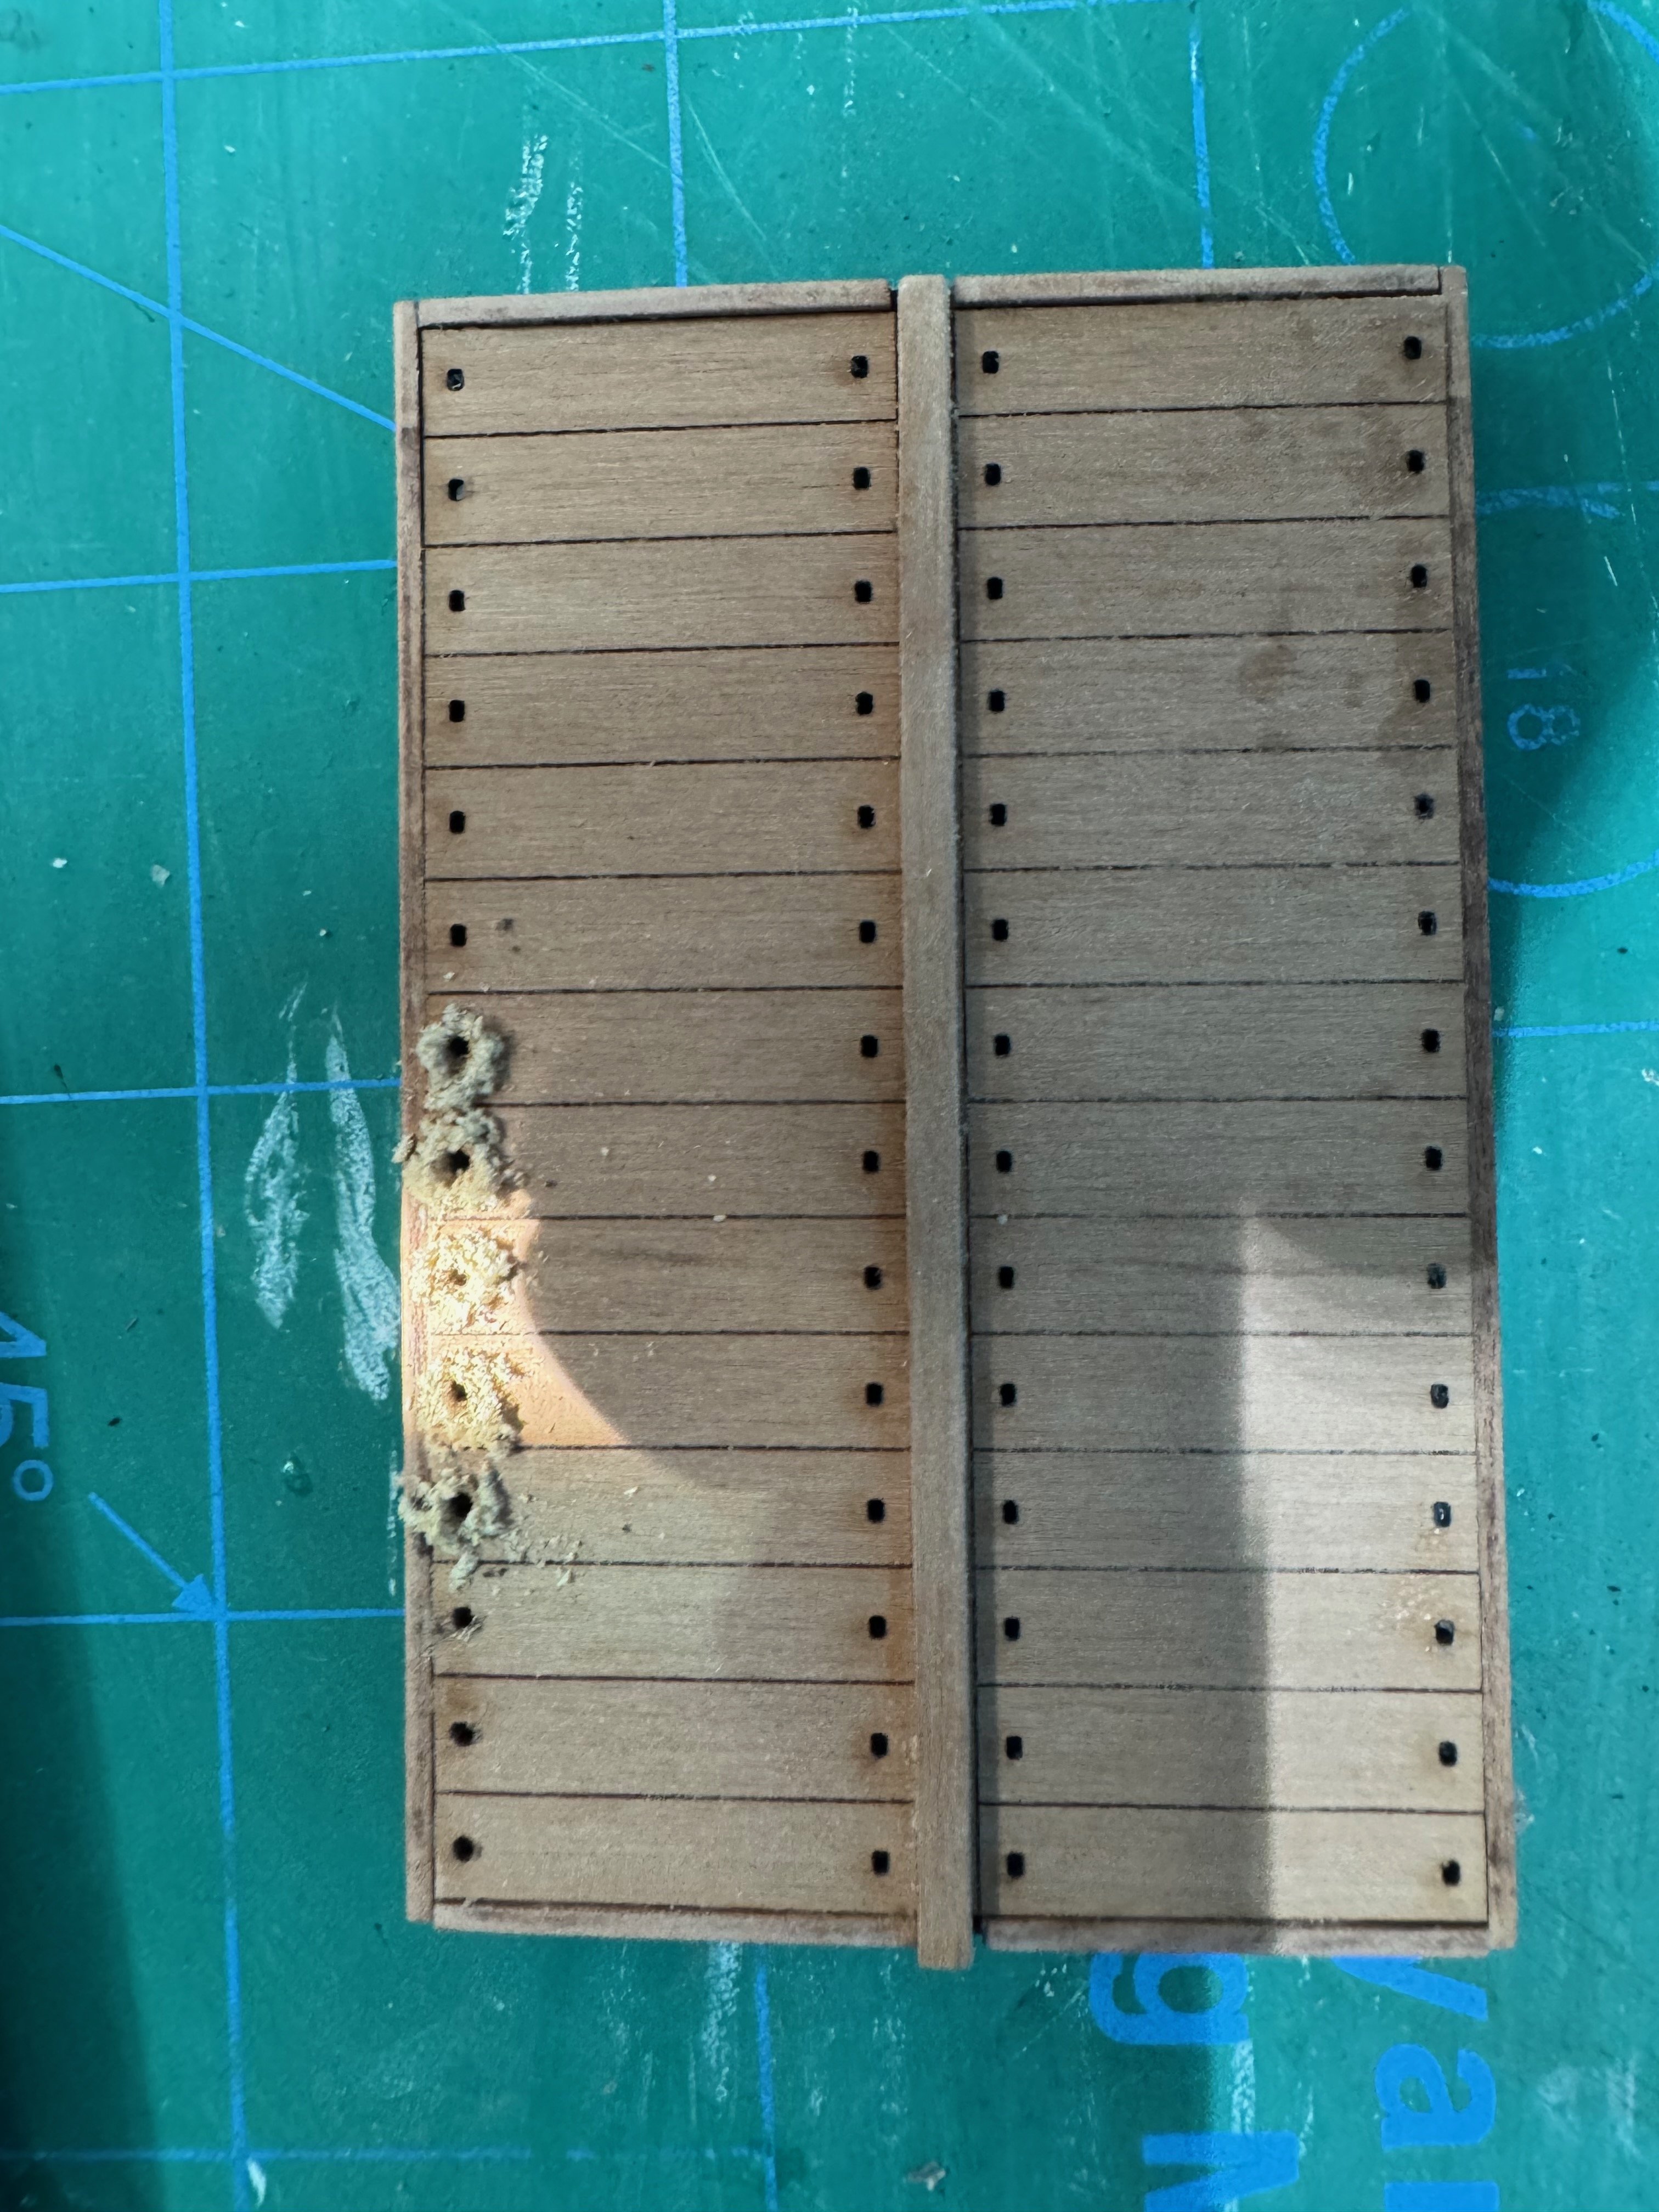
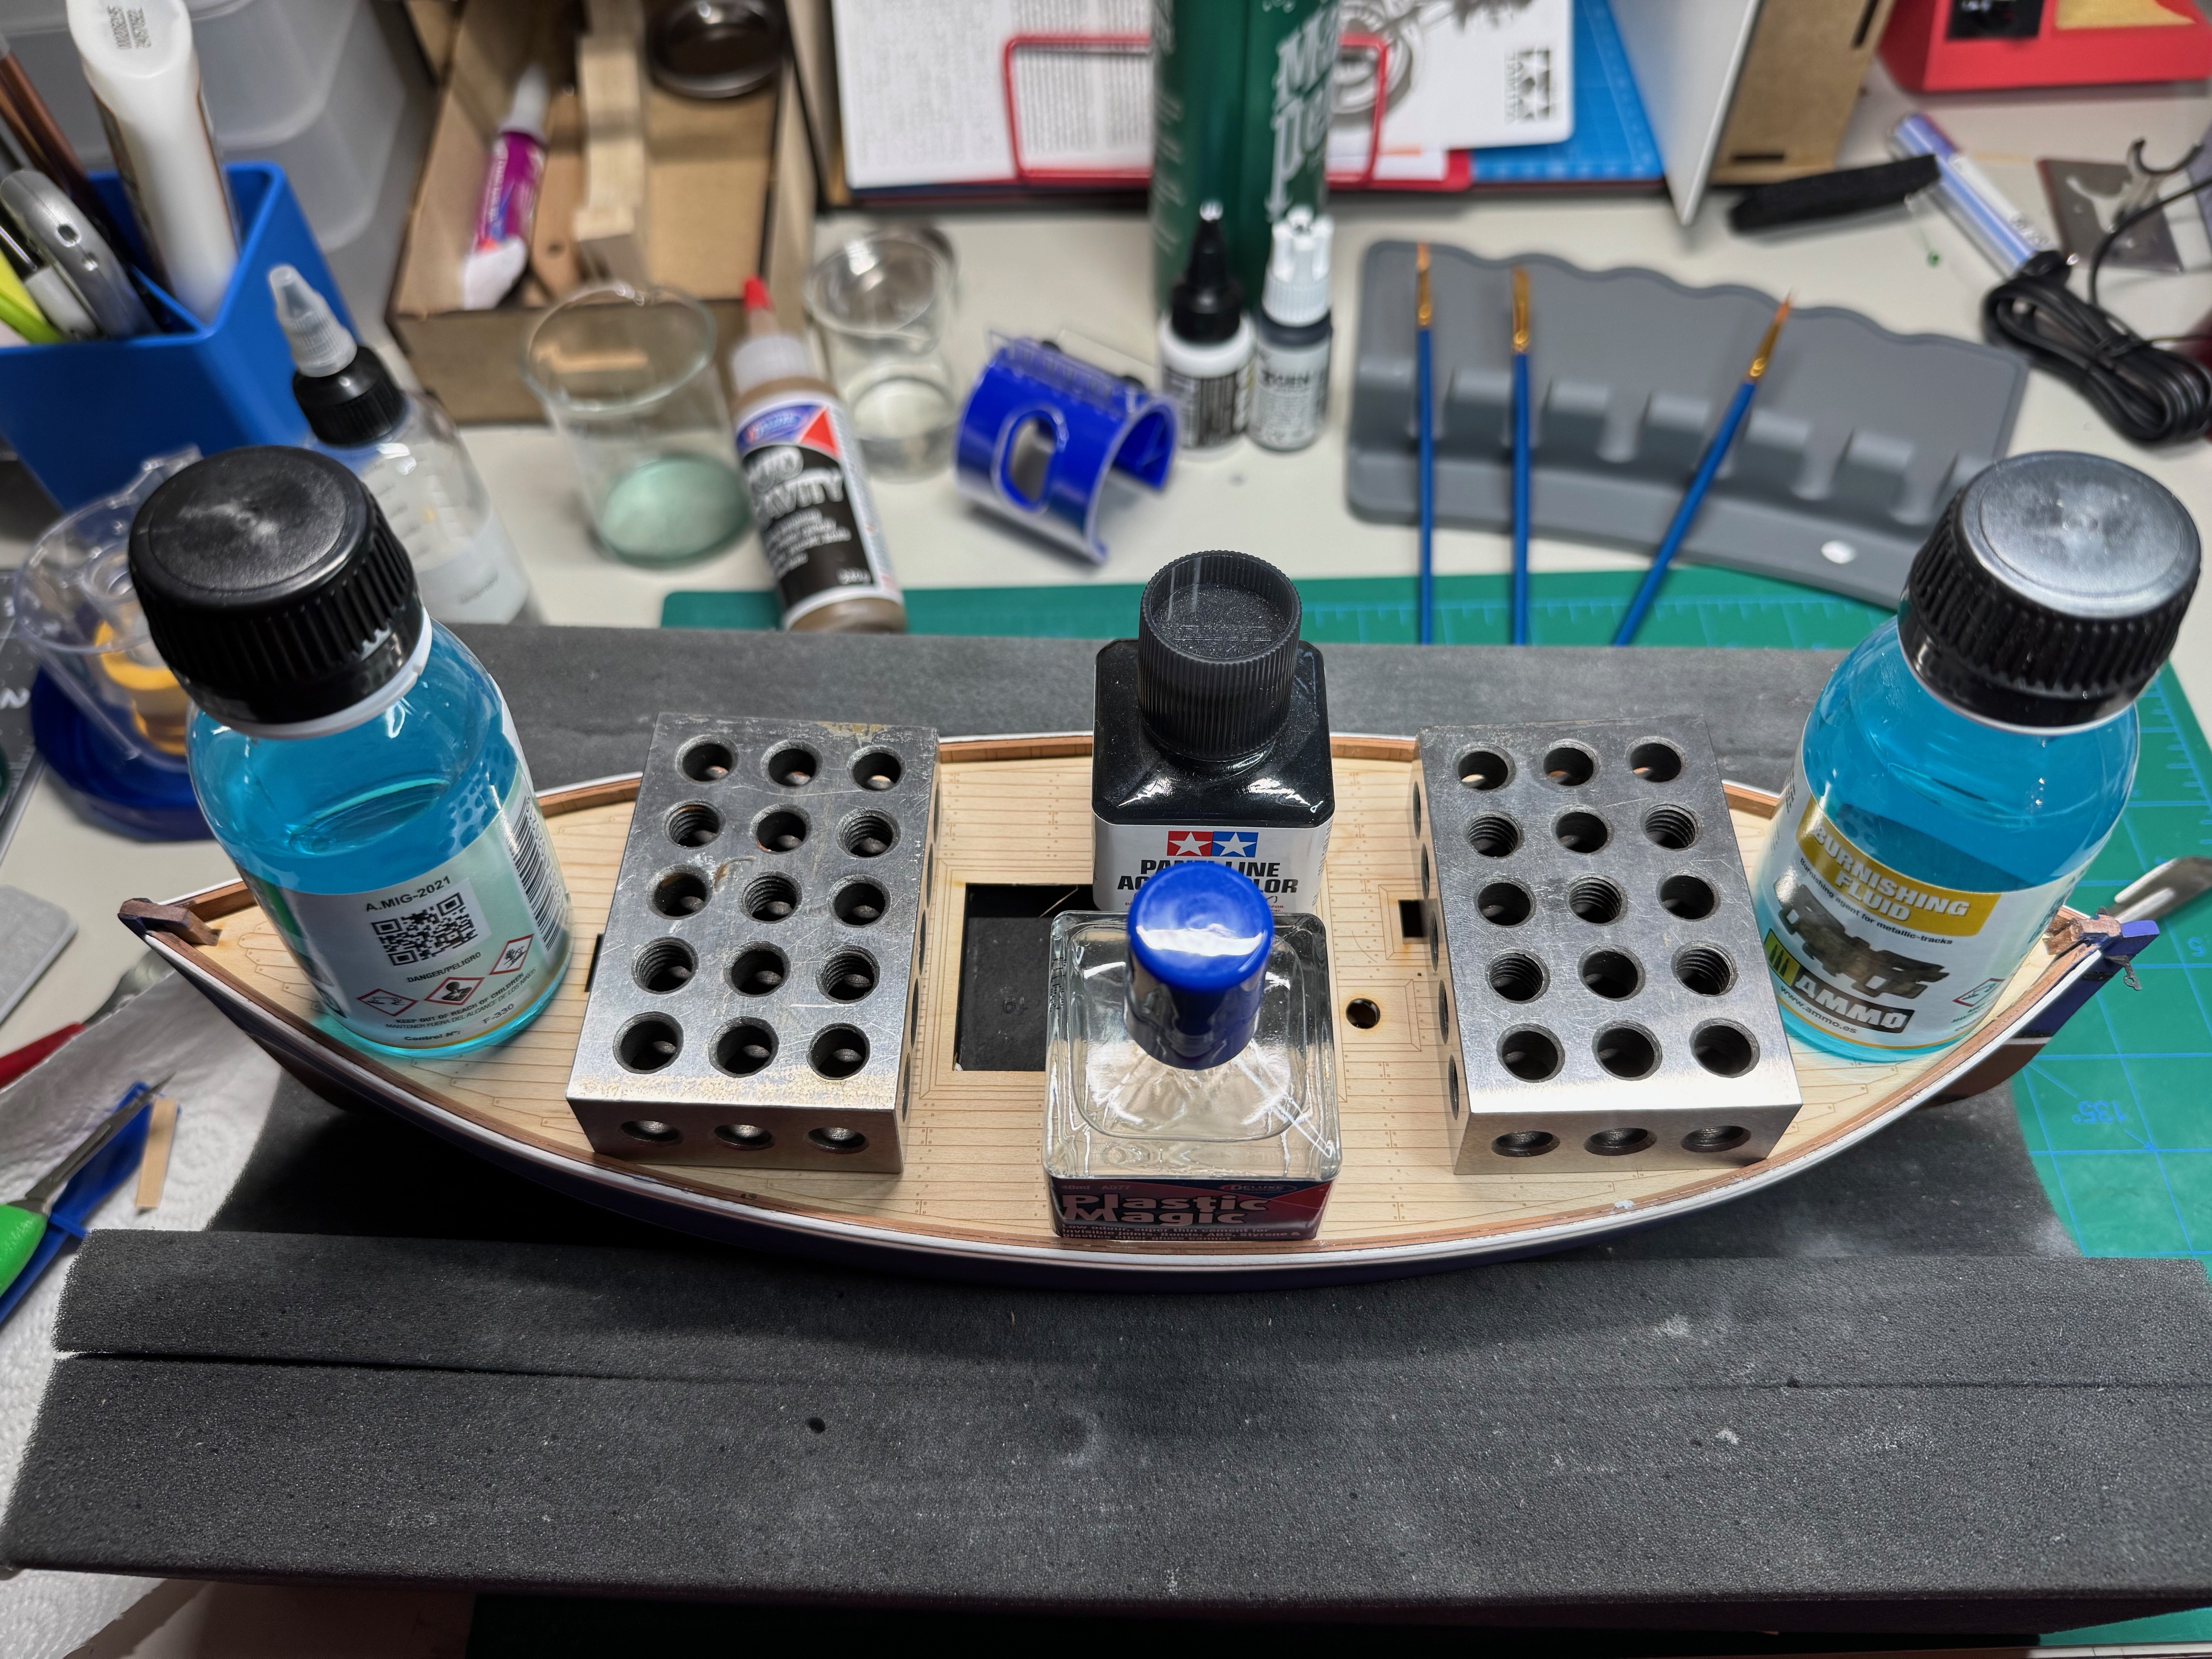
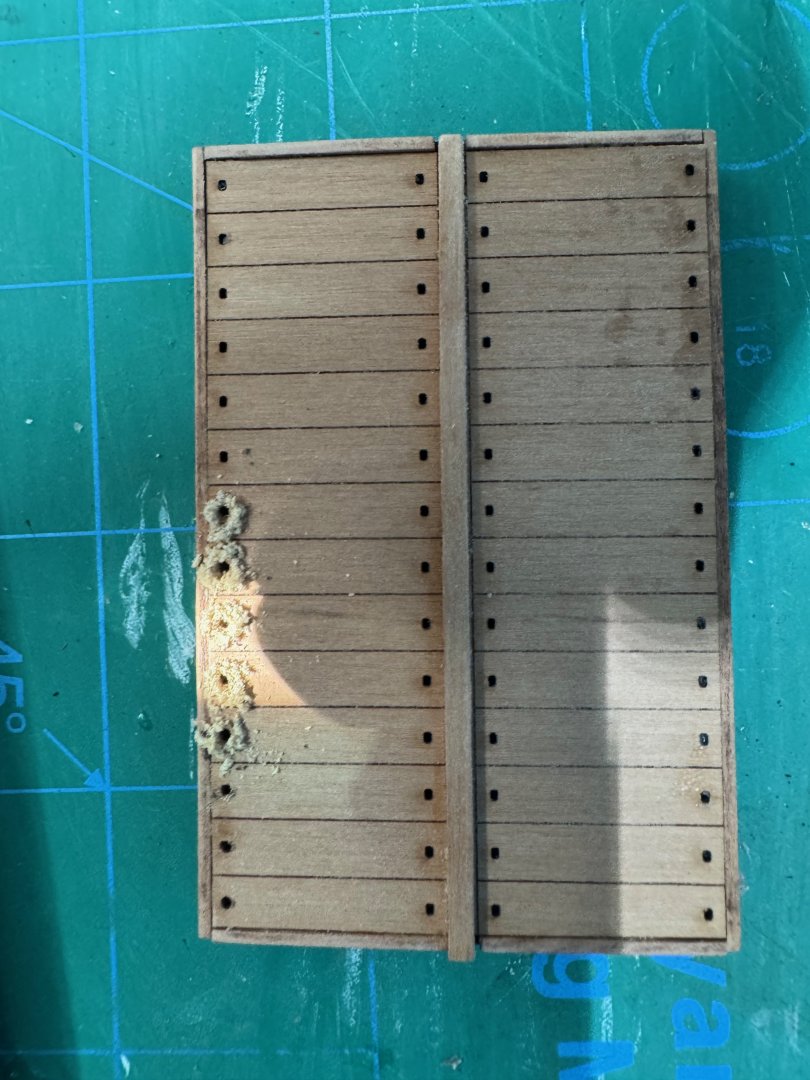
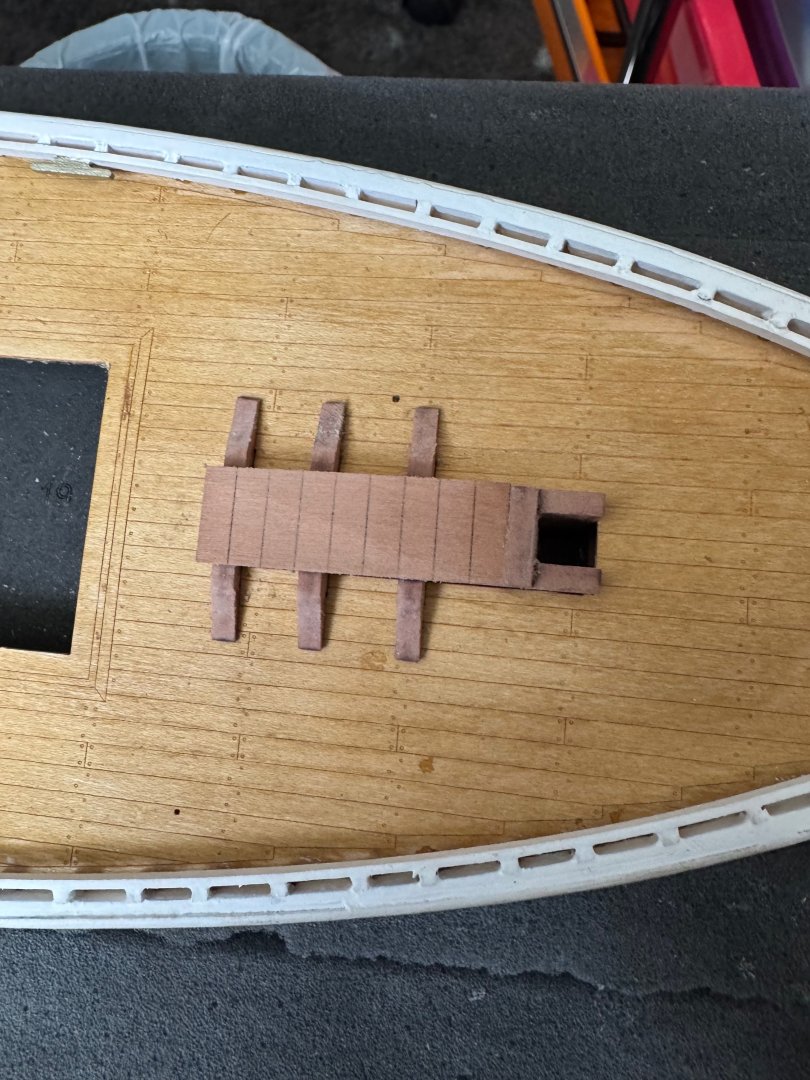
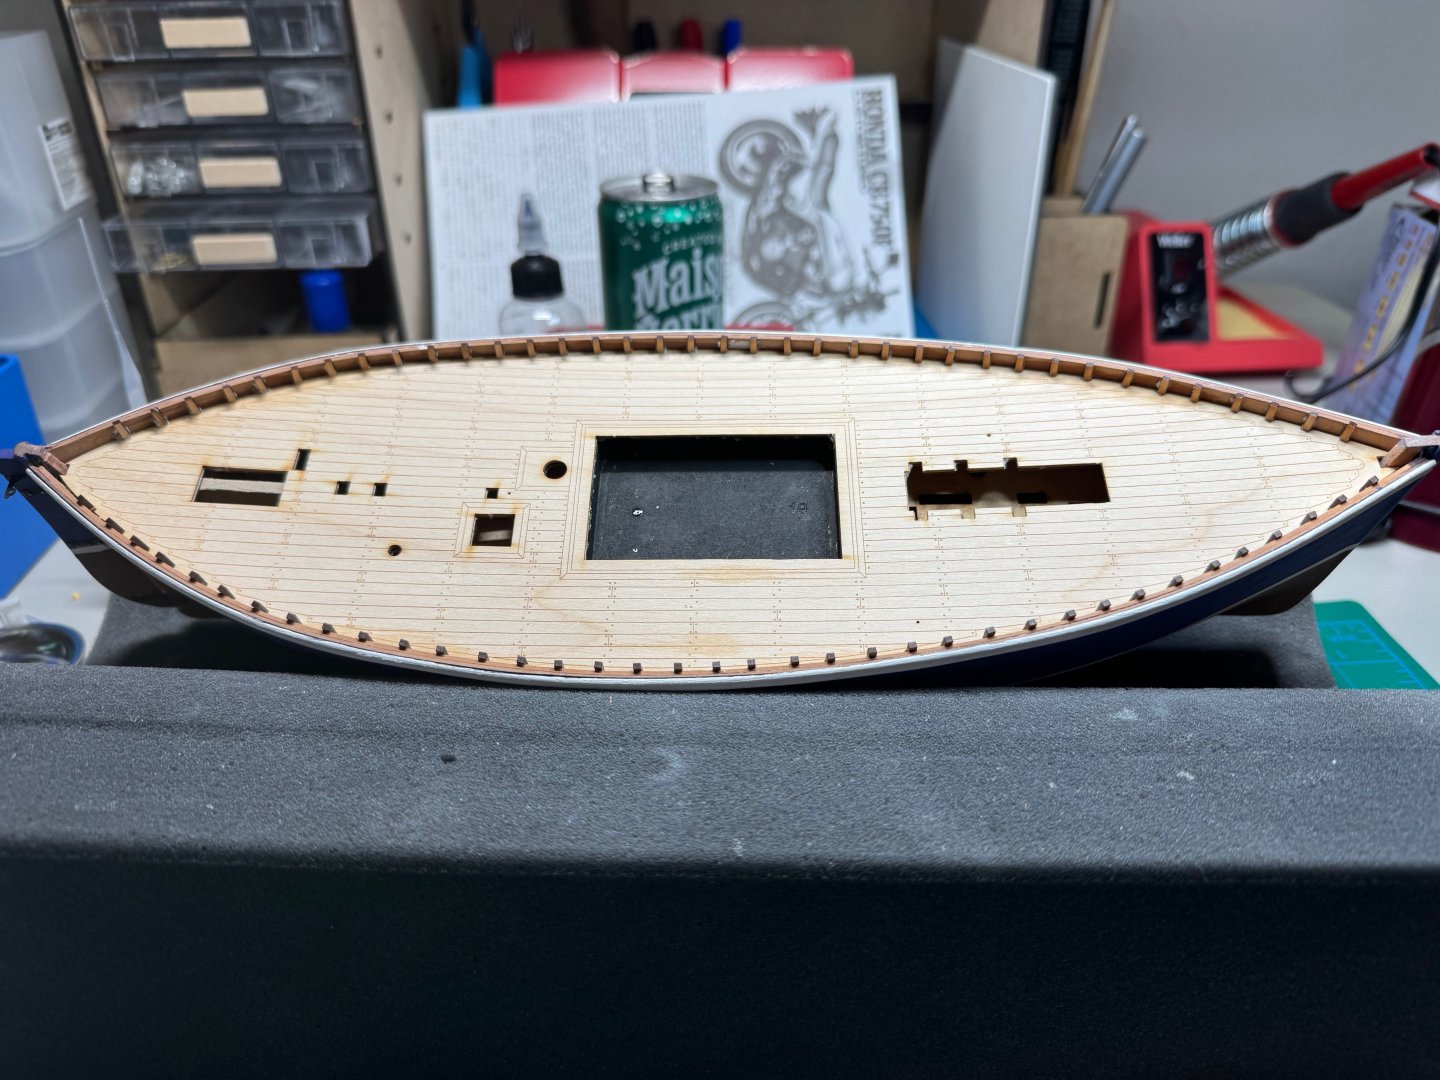
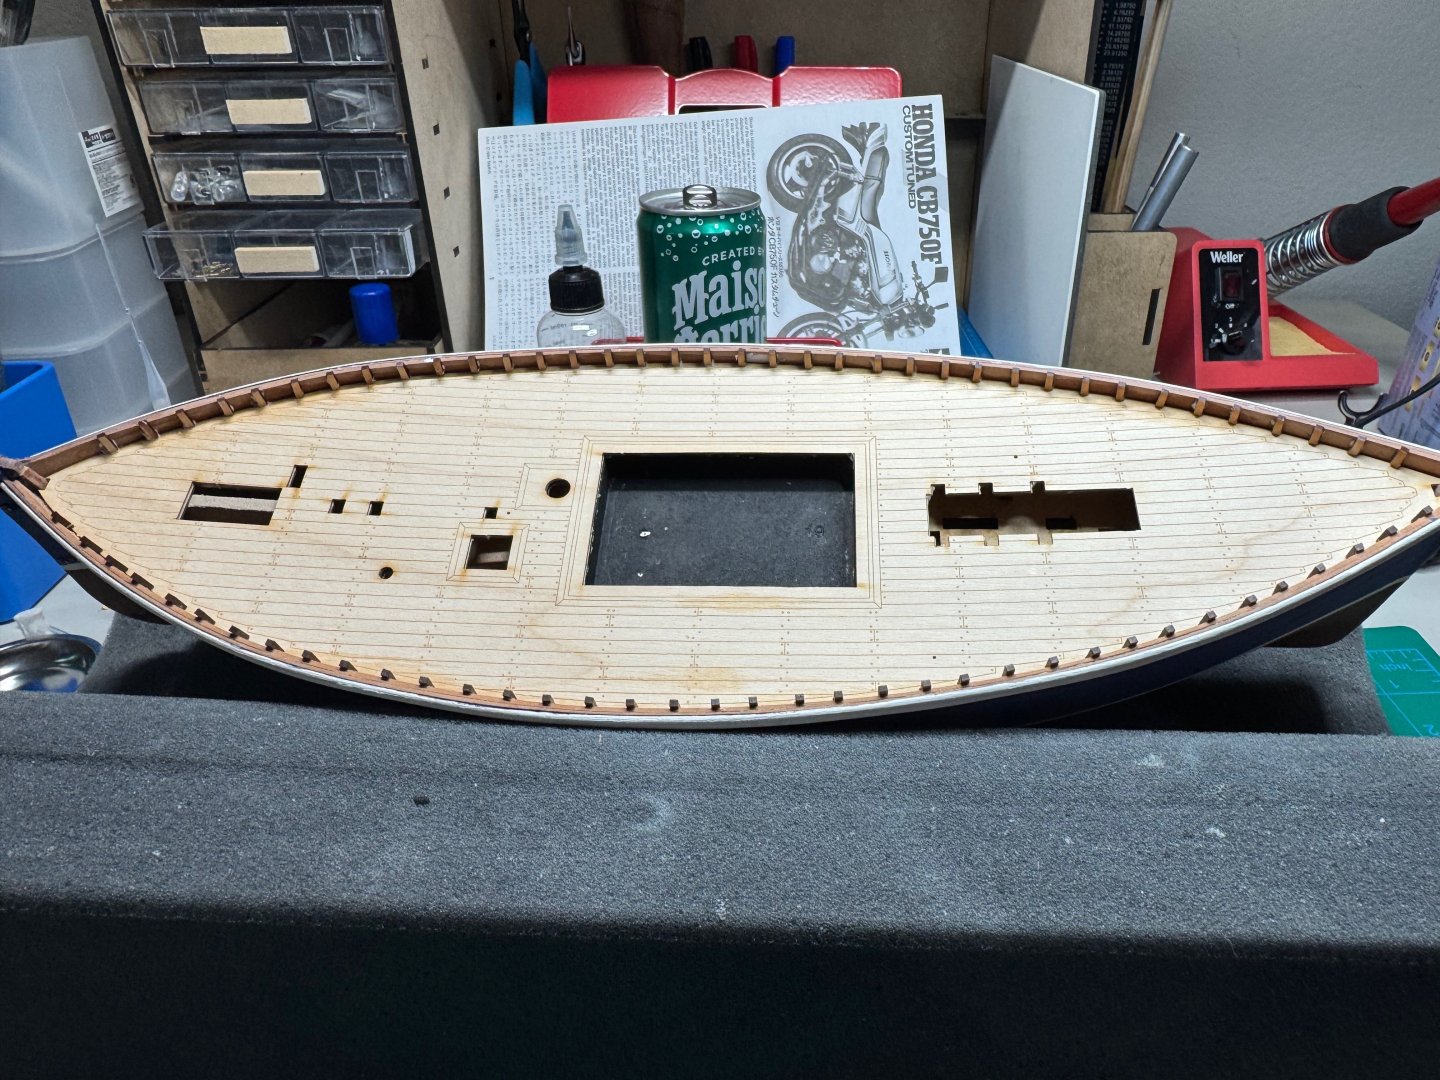
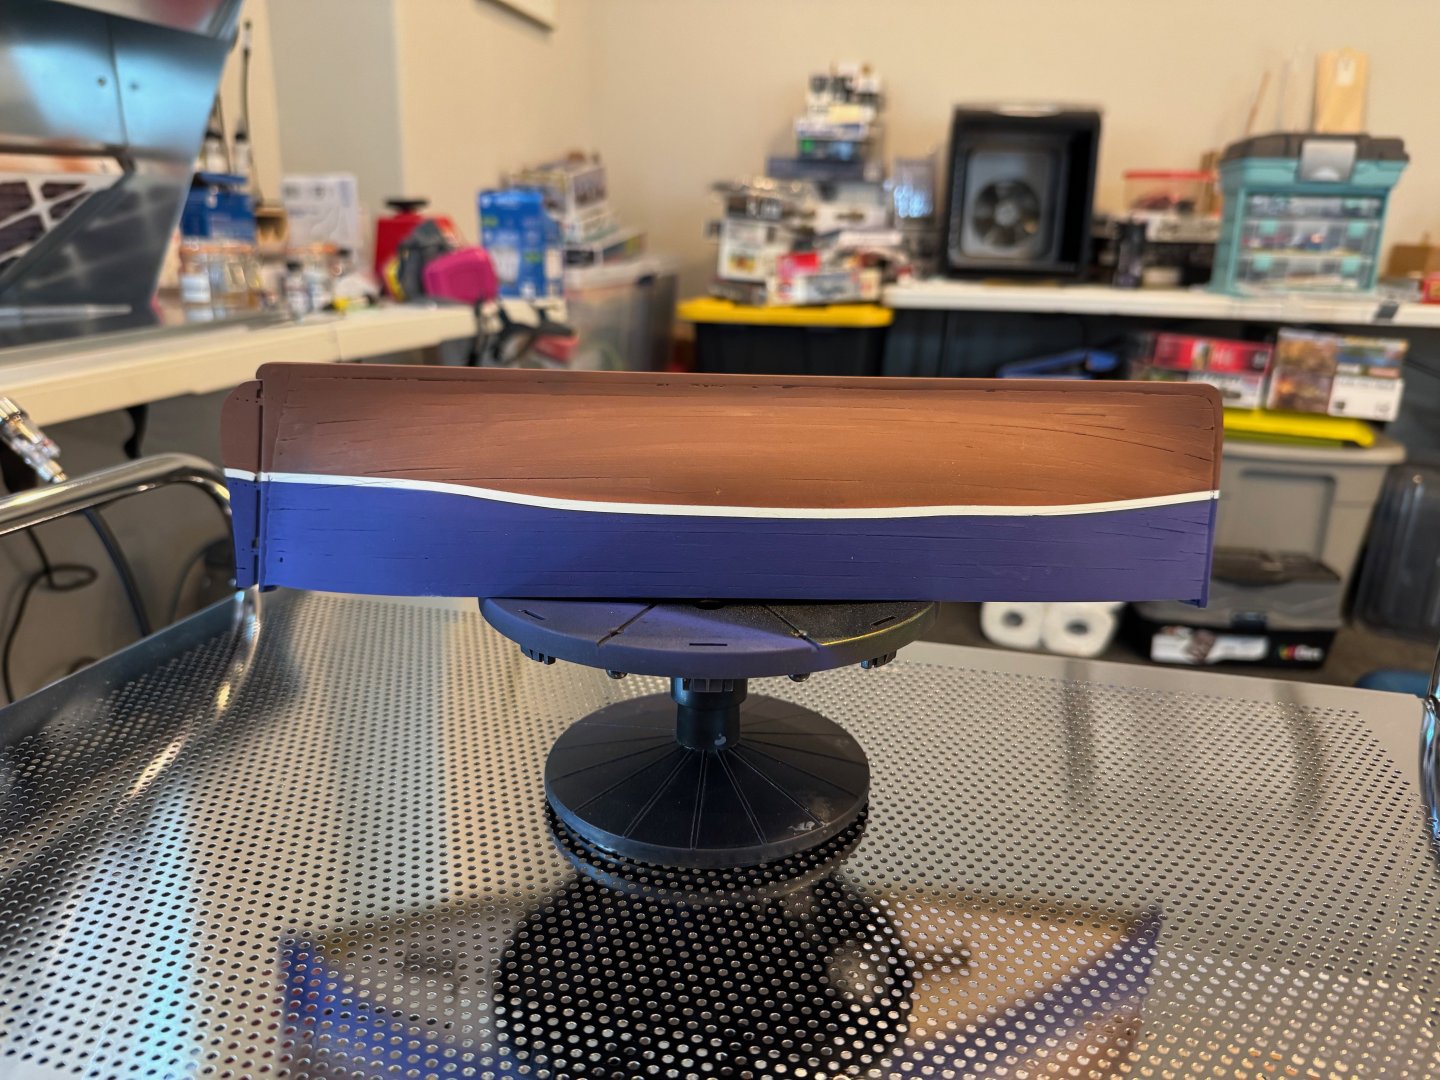
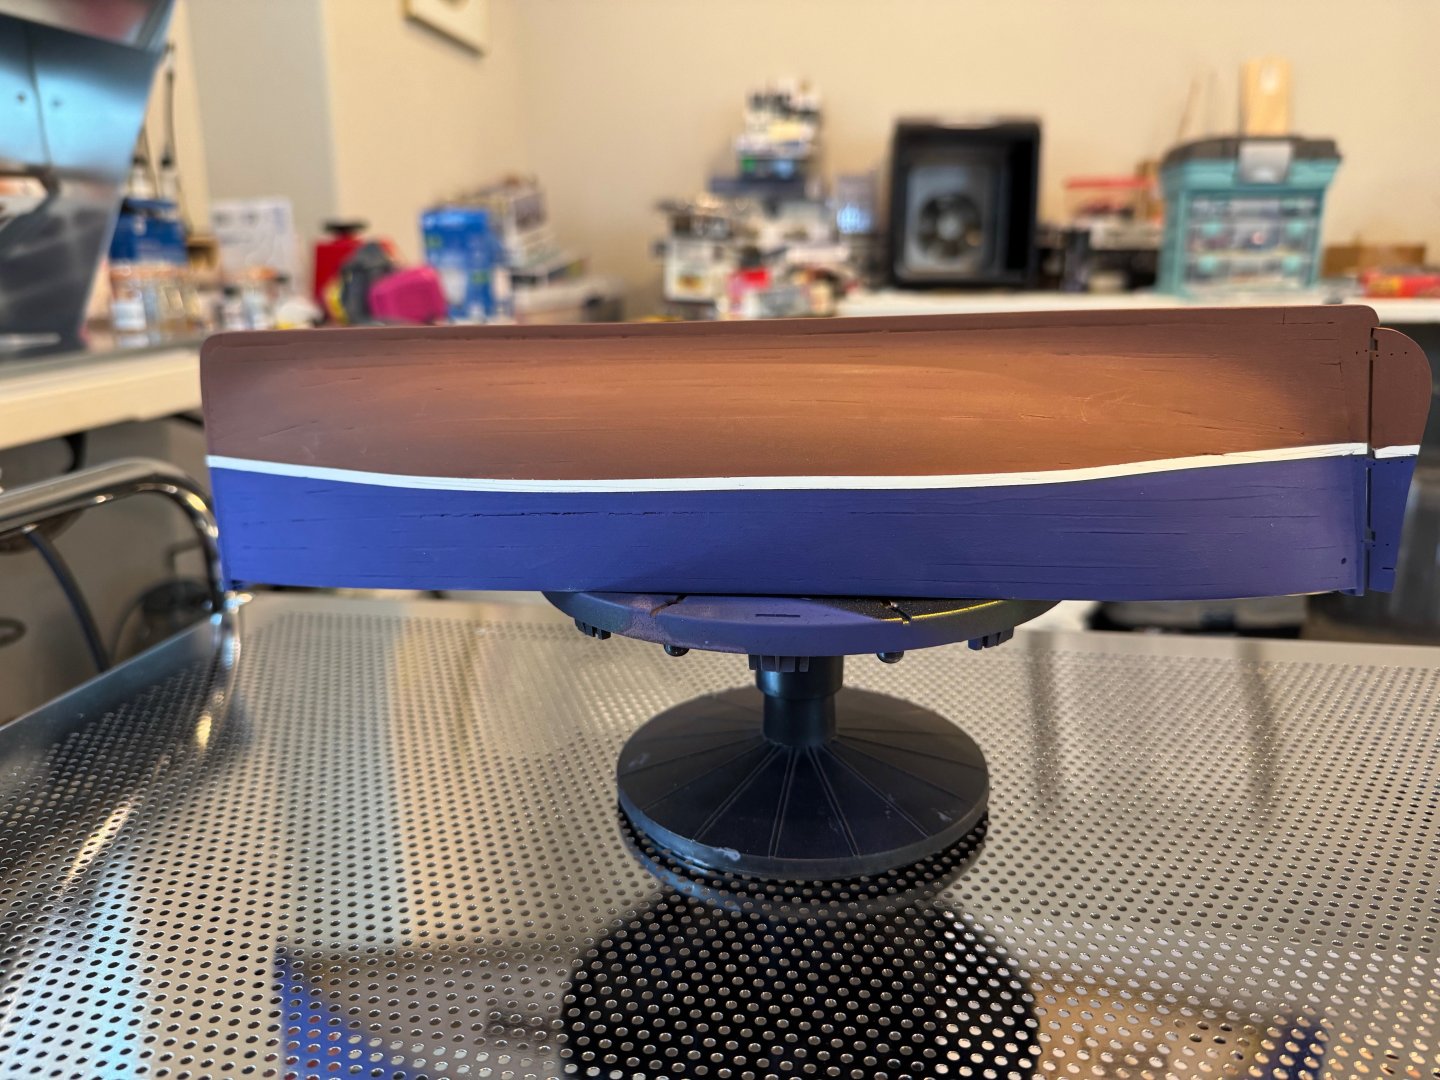
I apologize for the long abcense. Been very hectic over the summer but I have been making some progress on the LE. The hull is painted, and more or less completed including the photo etch. I decided not to add the 1x1 strips on the hull as it would make it to busy. I initially was planning on having them white to contrast the blue. I did paint the hull using Humbrol enamels. Never ever again. I am coming around to using acrylics for wood ships. Just much easier to work with. Requires a quick sand after the first coat to reduce the wood having fur. I do though still seal the wood with a light shellac prior to painting. I used burnishing fluid to darken the photo etch, and here I needed to be creative for the bow photo etch. Next I installed the deck. I think the deck looked nice. Had a couple places where the deck was not weighted down correctly so the PVA did not hold it. I fixed it buy using some medium CA. I then added the faux bulwarks, inner gunwale and cleats. I painted the gunwales white, and the cheats a mixture of brass, and metallic black. You also can see the staining of the deck. I used the Vereto Solutions Oak as the stain. Once the deck is complete I will add a shellac coat for protection, and to add some more yellow to deepen the oak. Next I added the fore mast station. Followed by the fish hatchery. This results in to my current state, which includes the mast holder. Jim


- 27 replies
-
- 6
-
-
- fifie
- vanguard models
- (and 2 more)
-
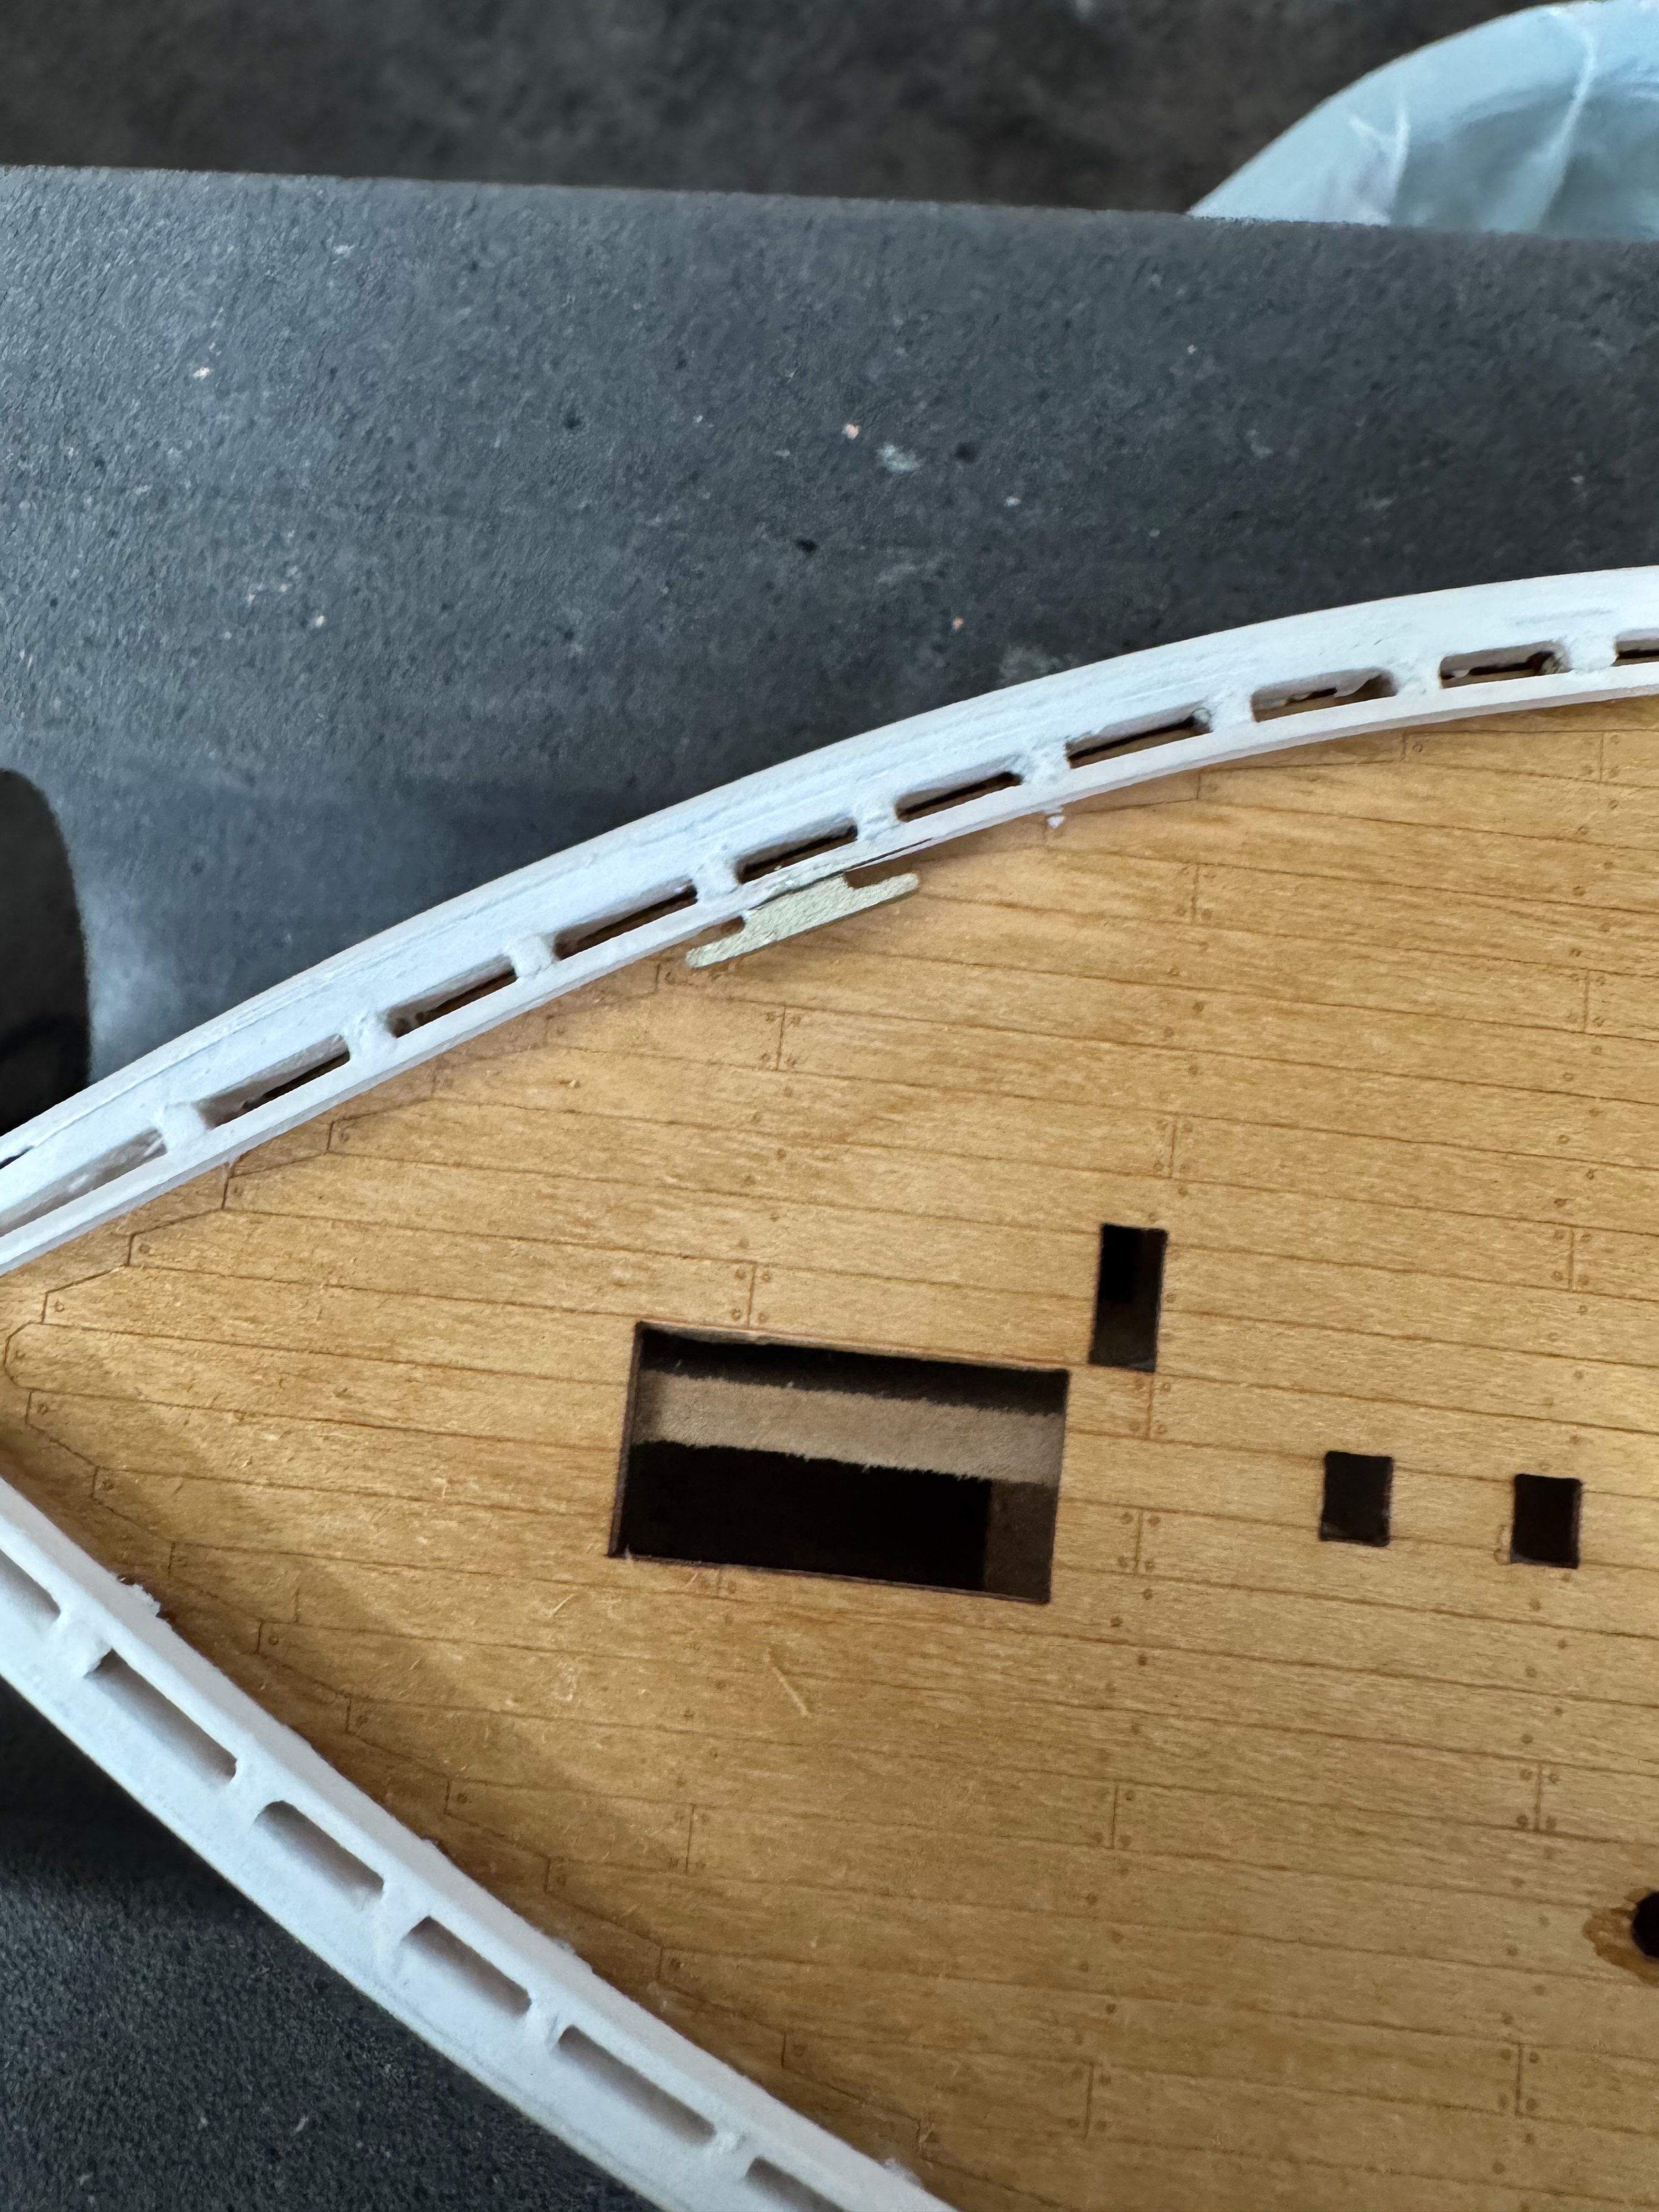
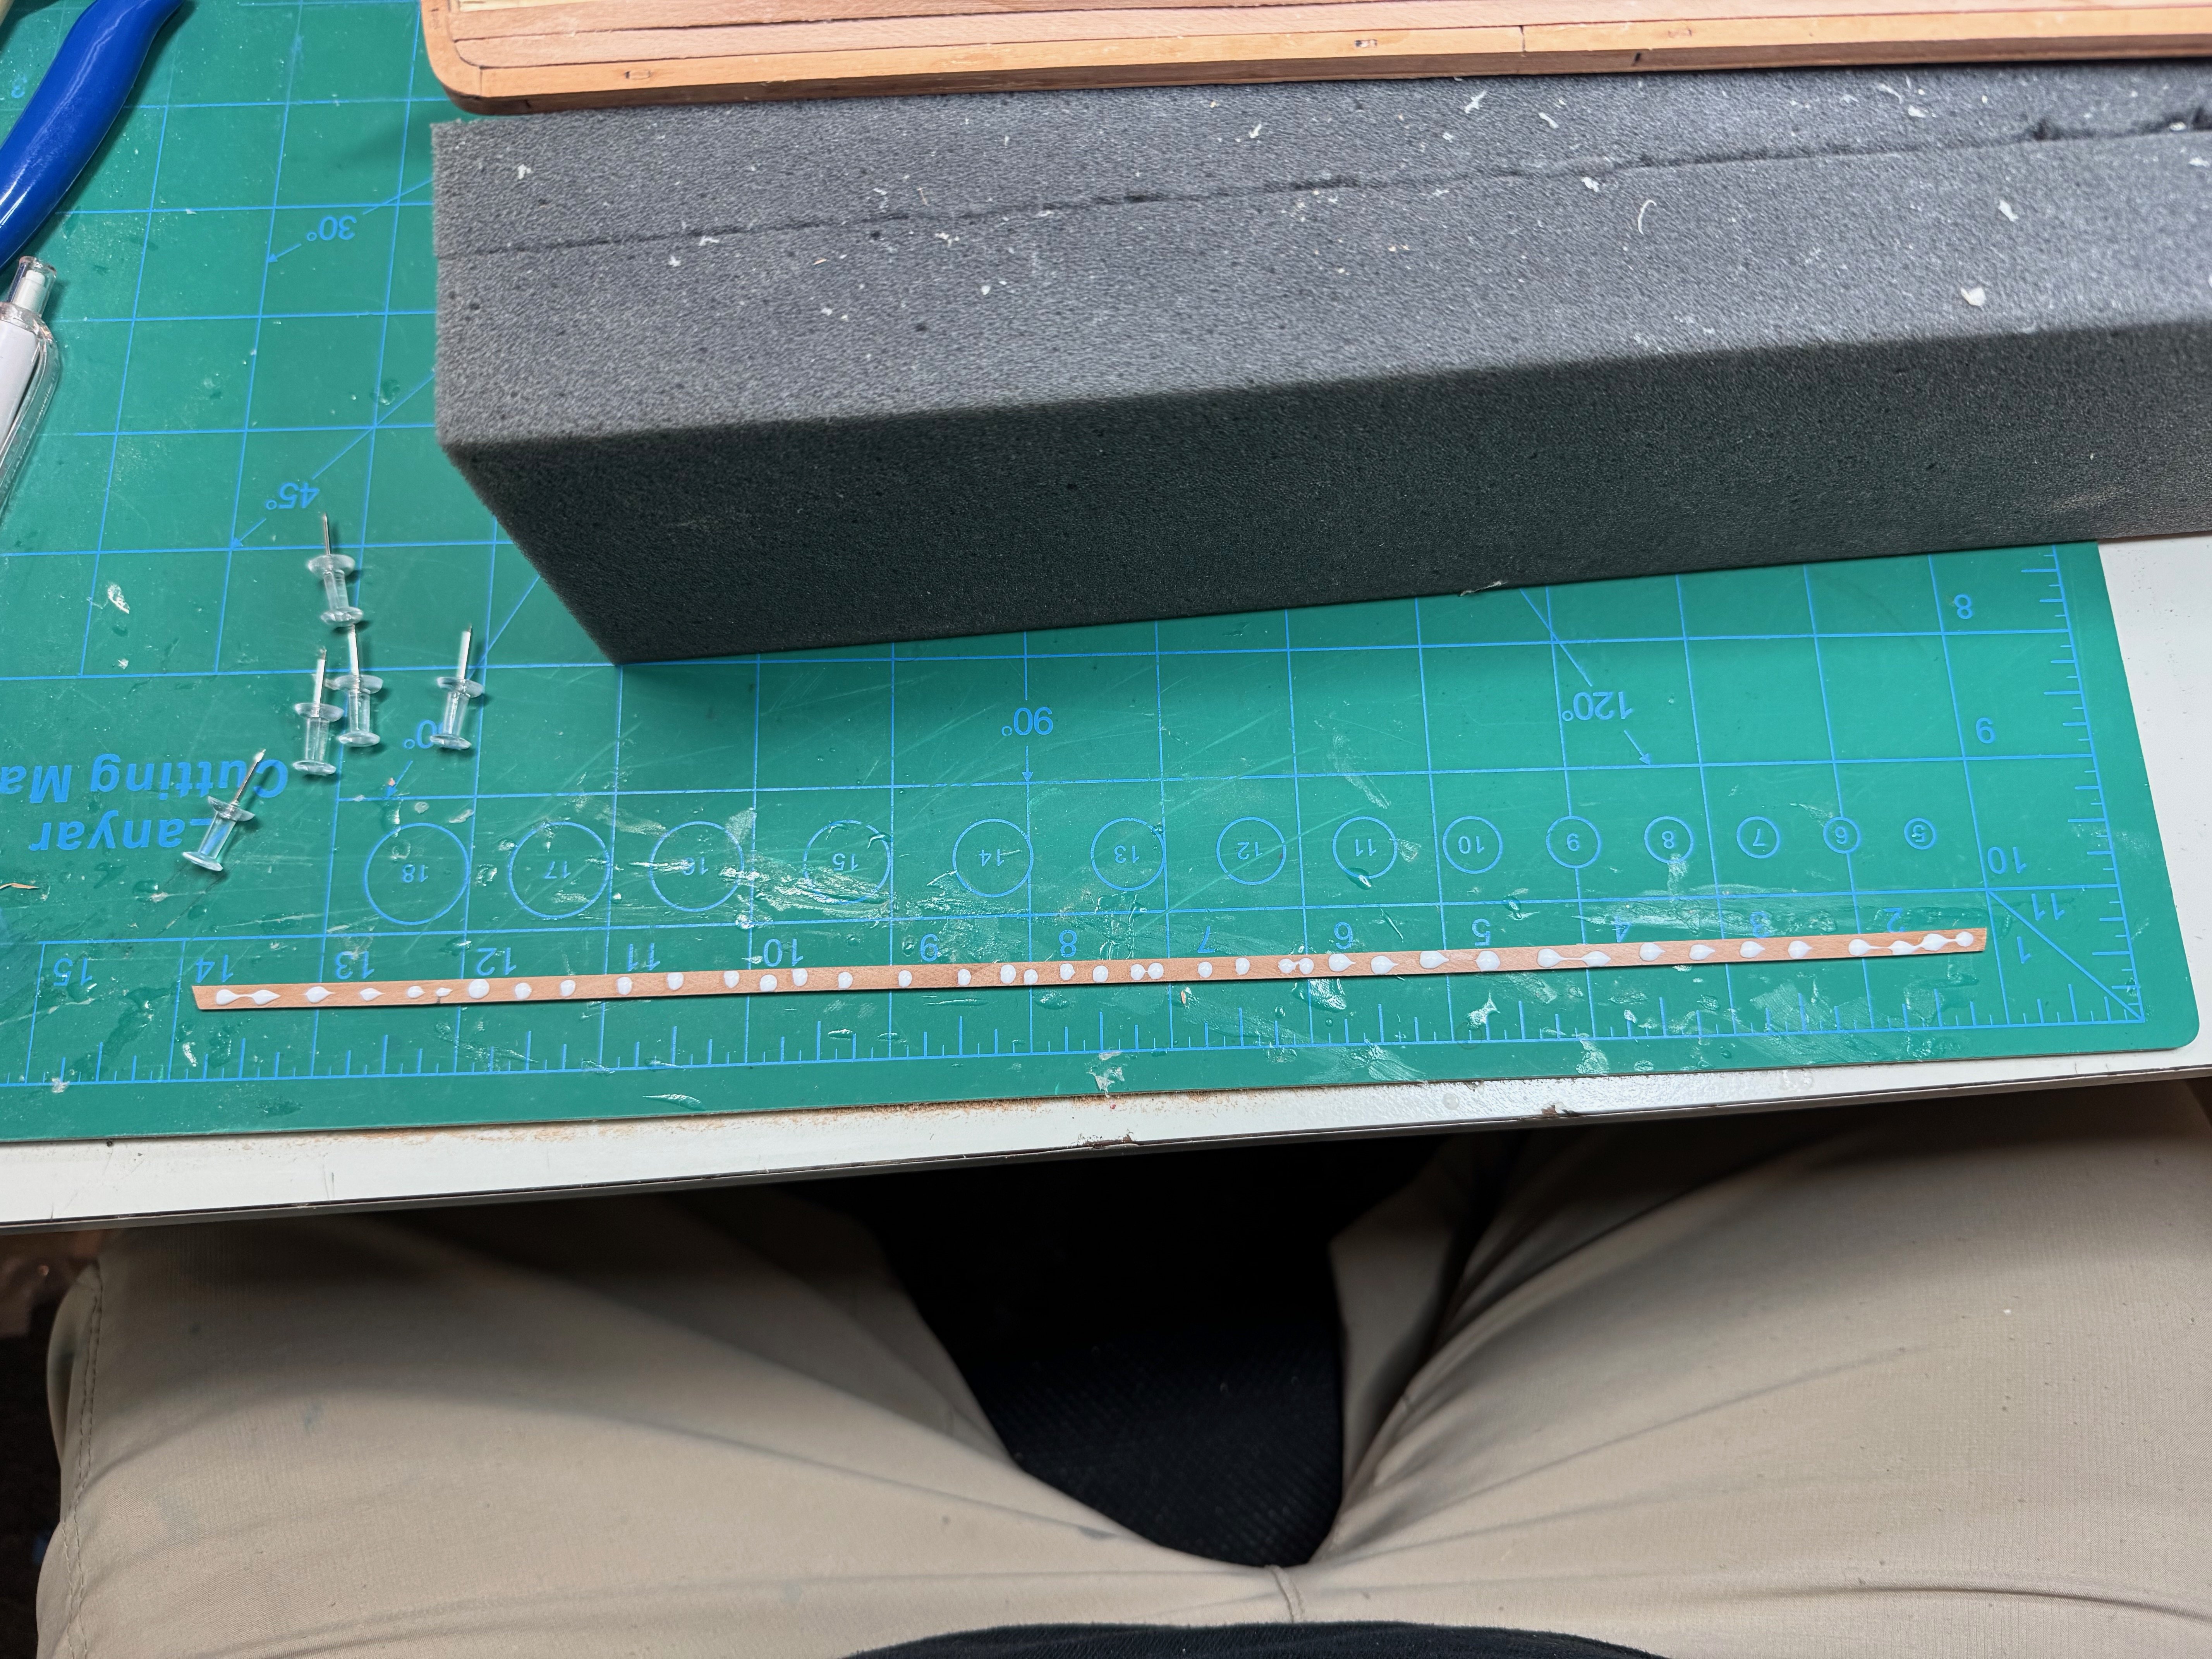
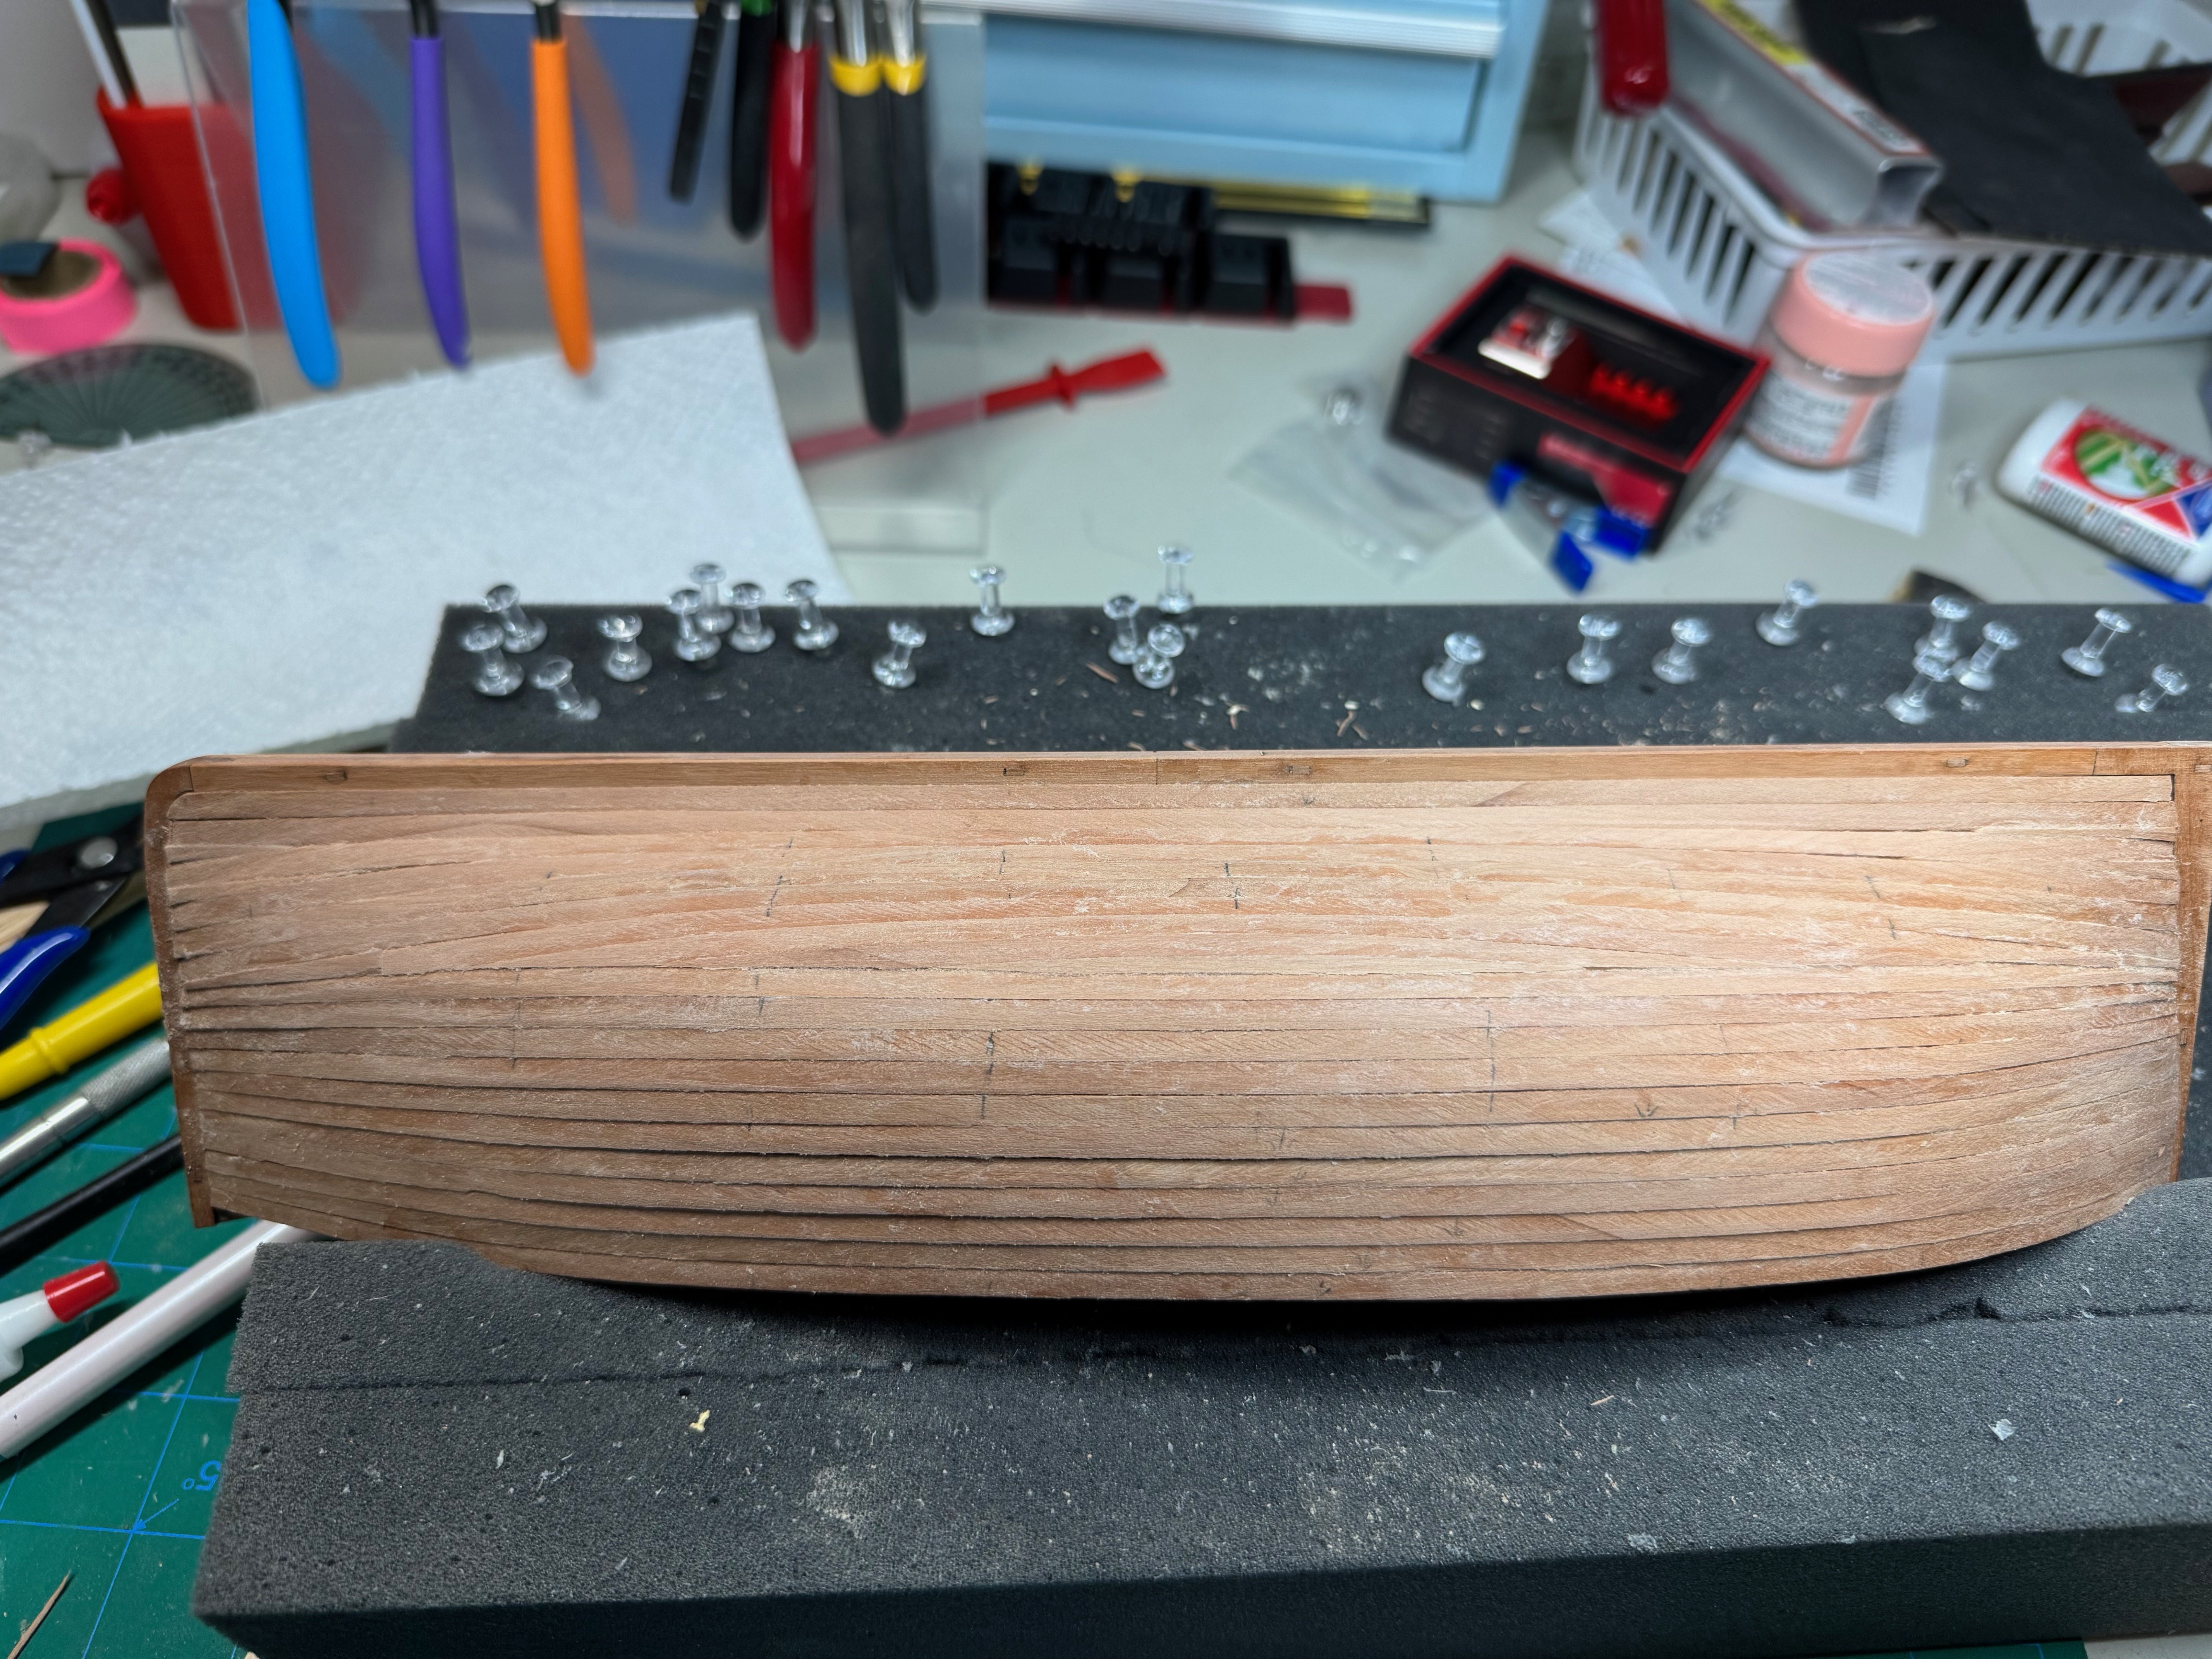
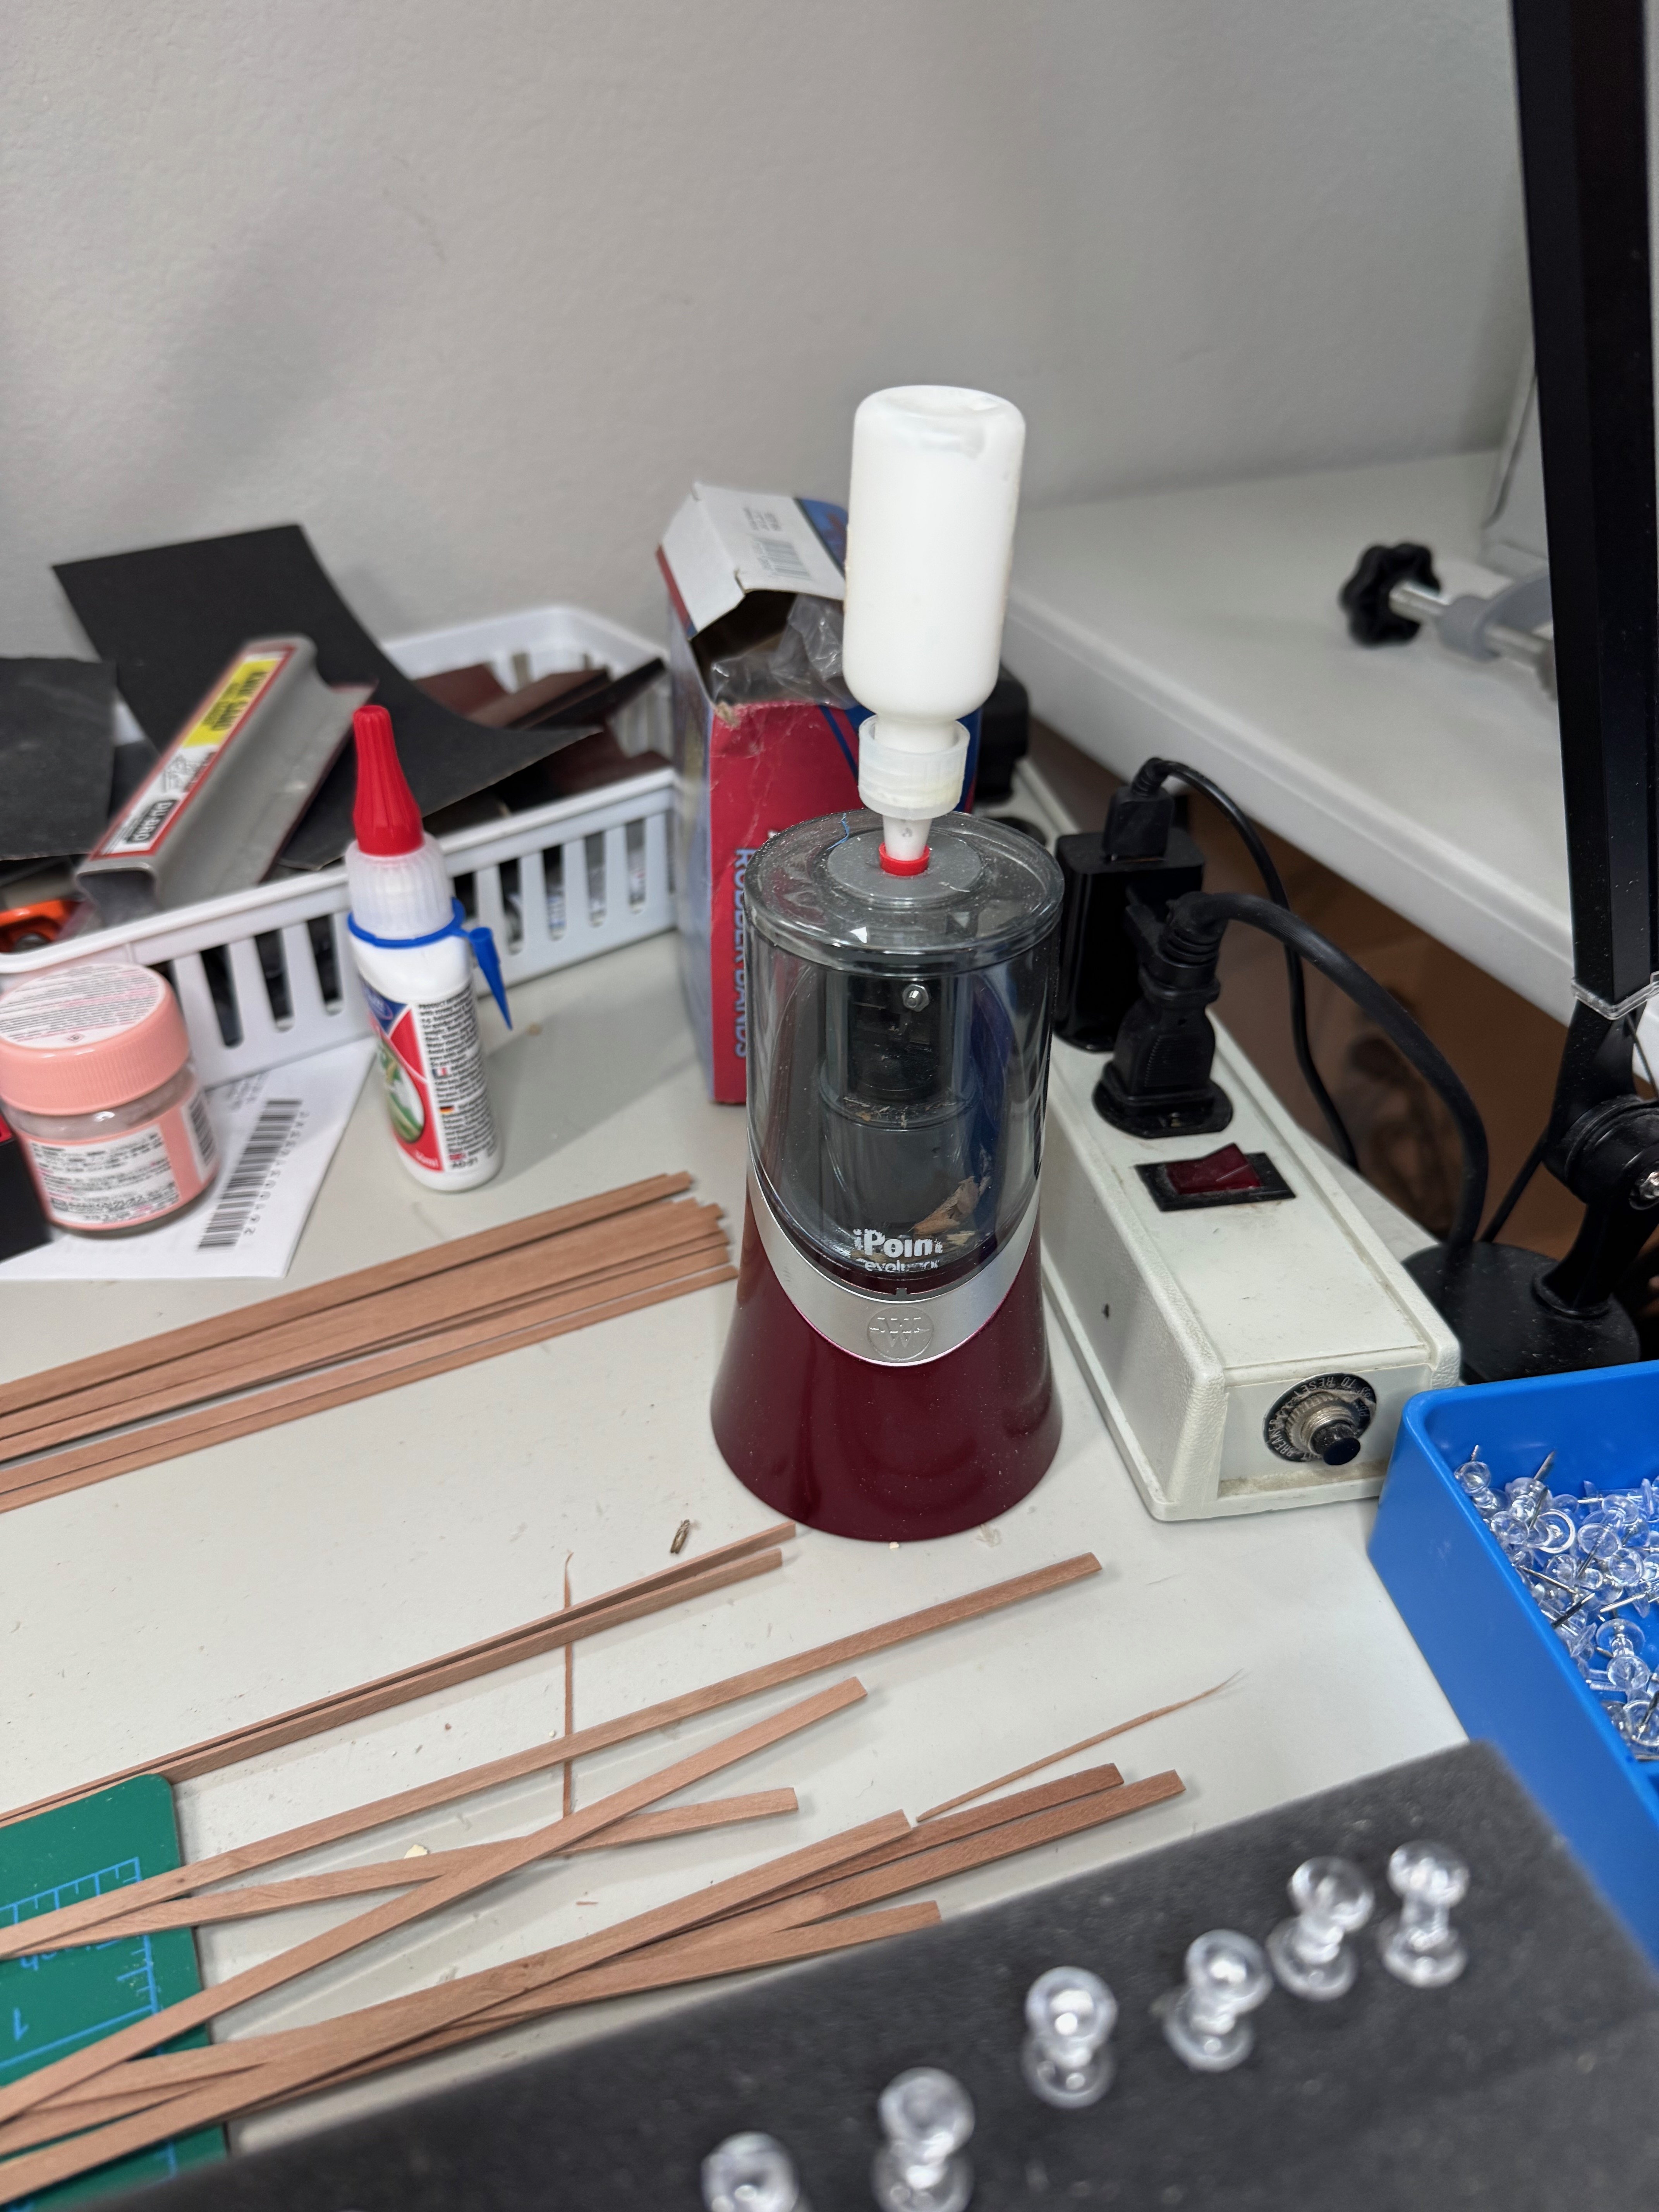
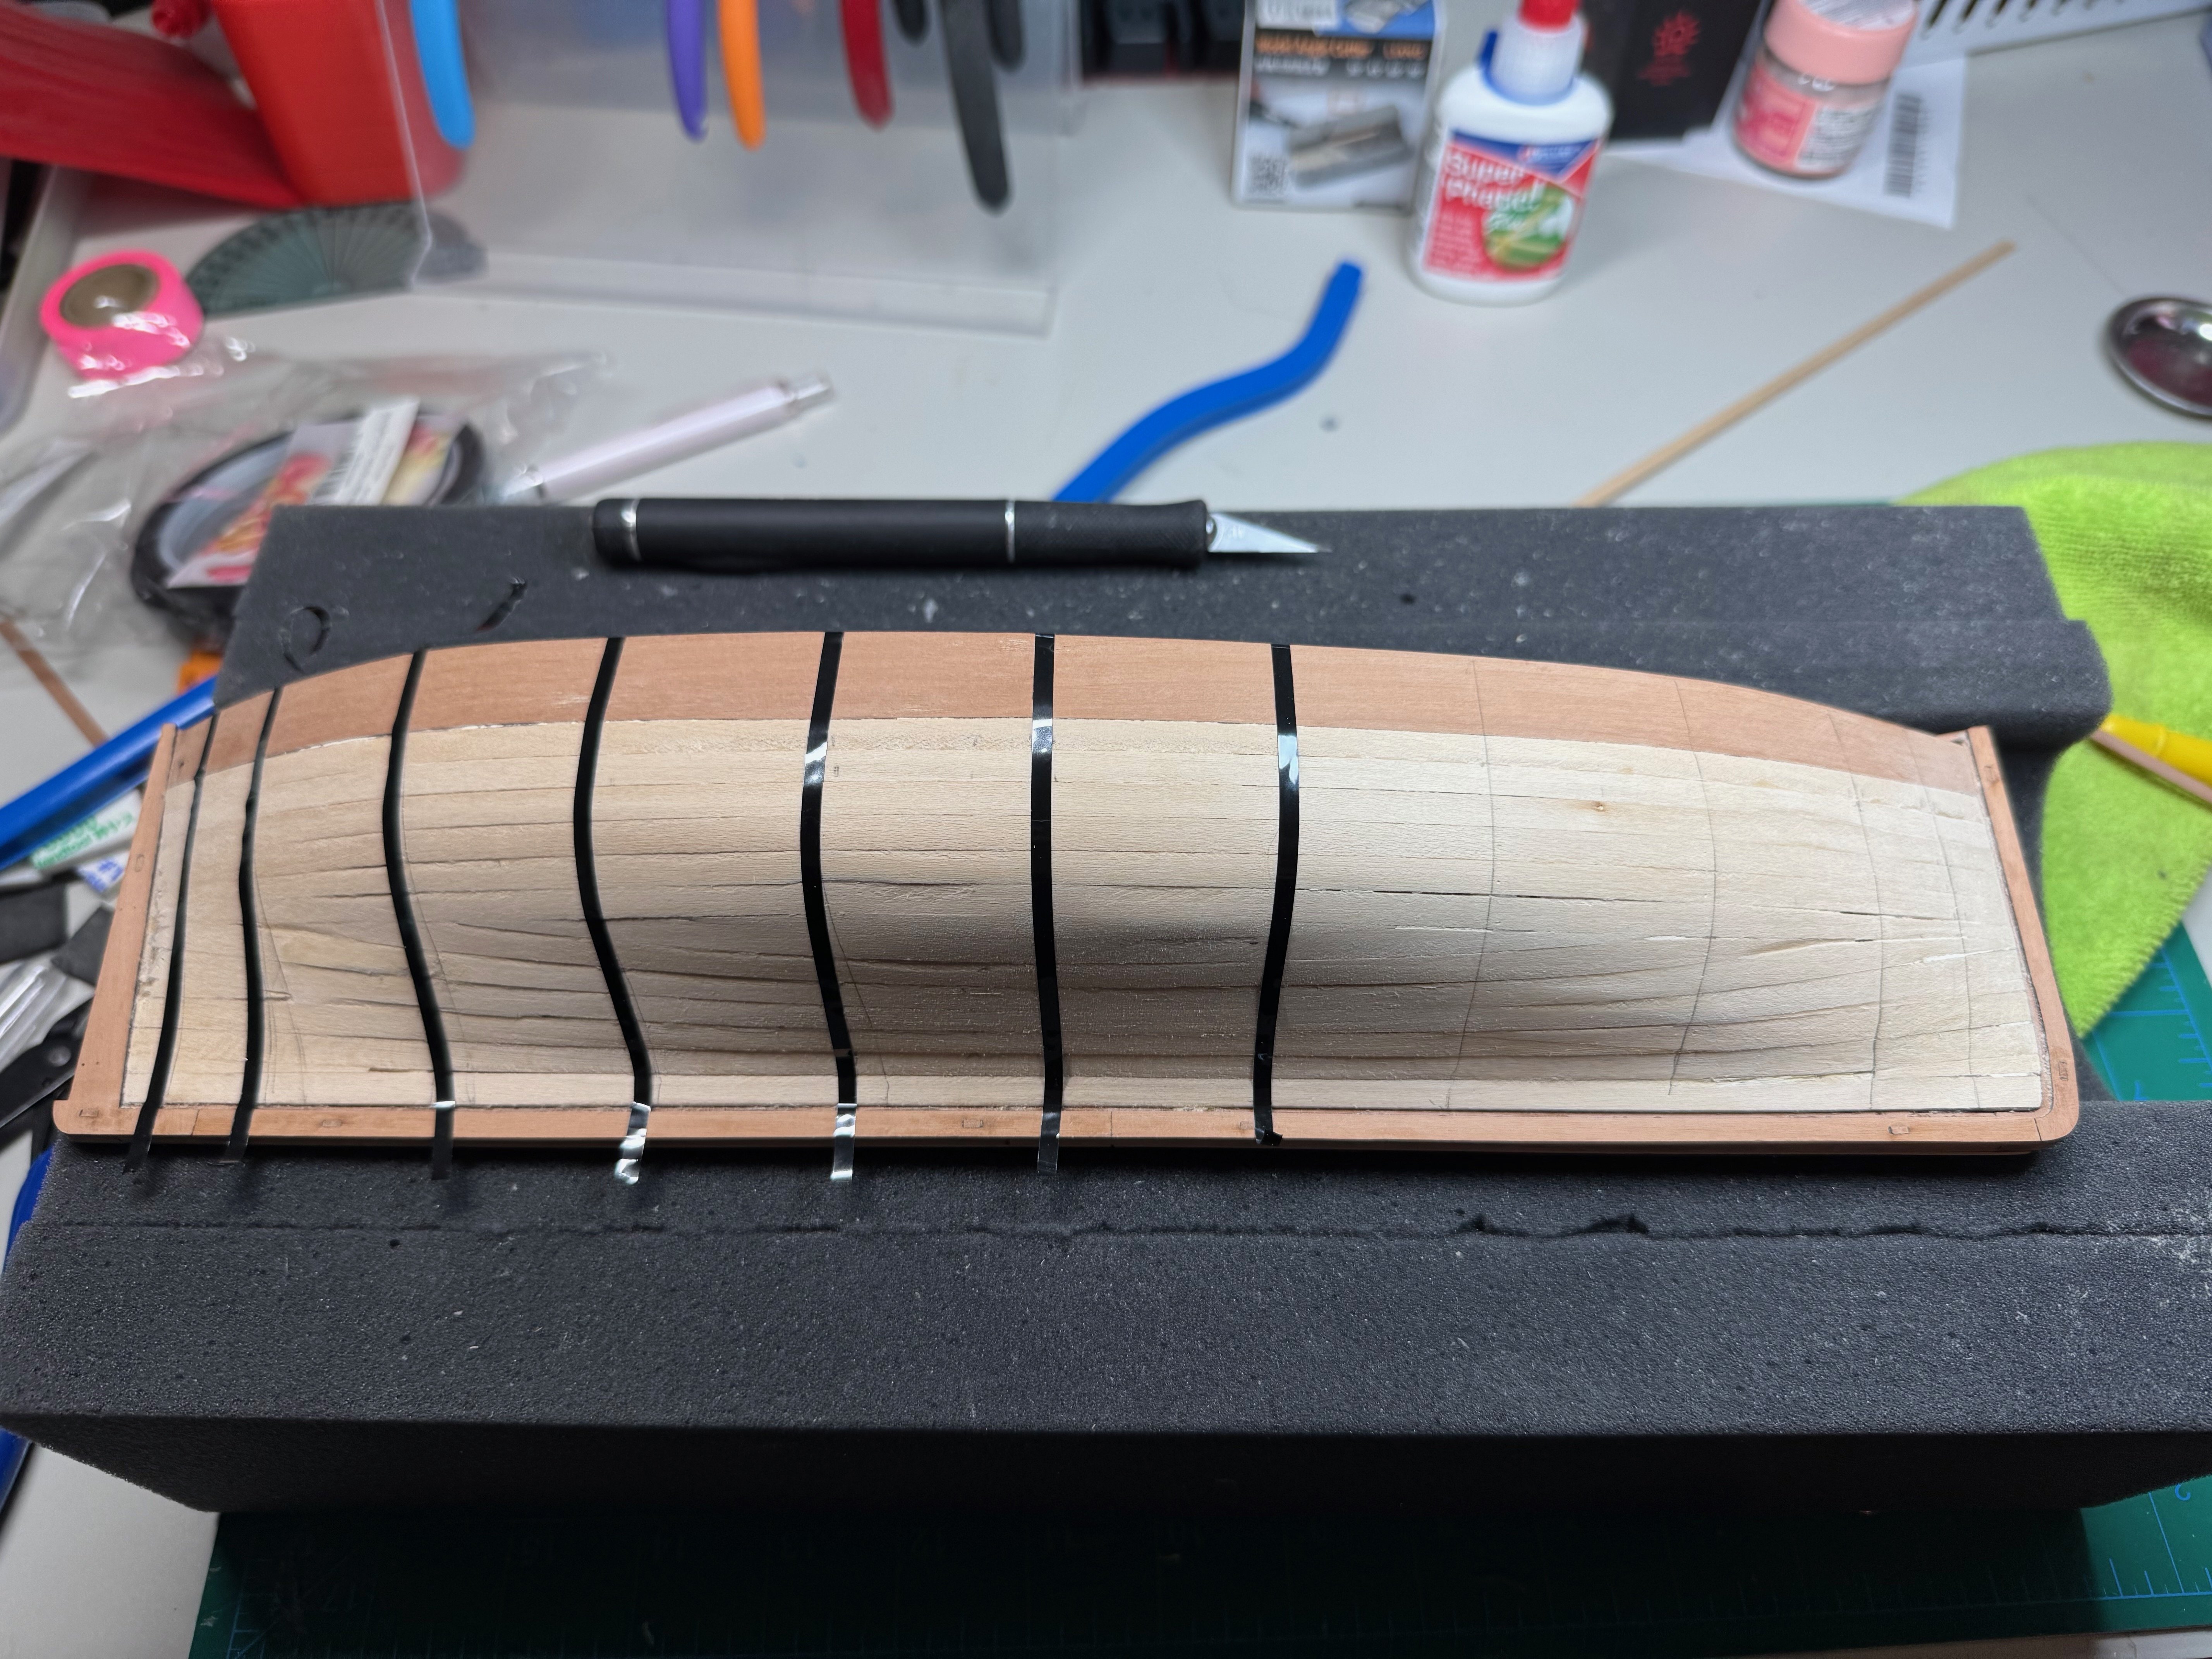
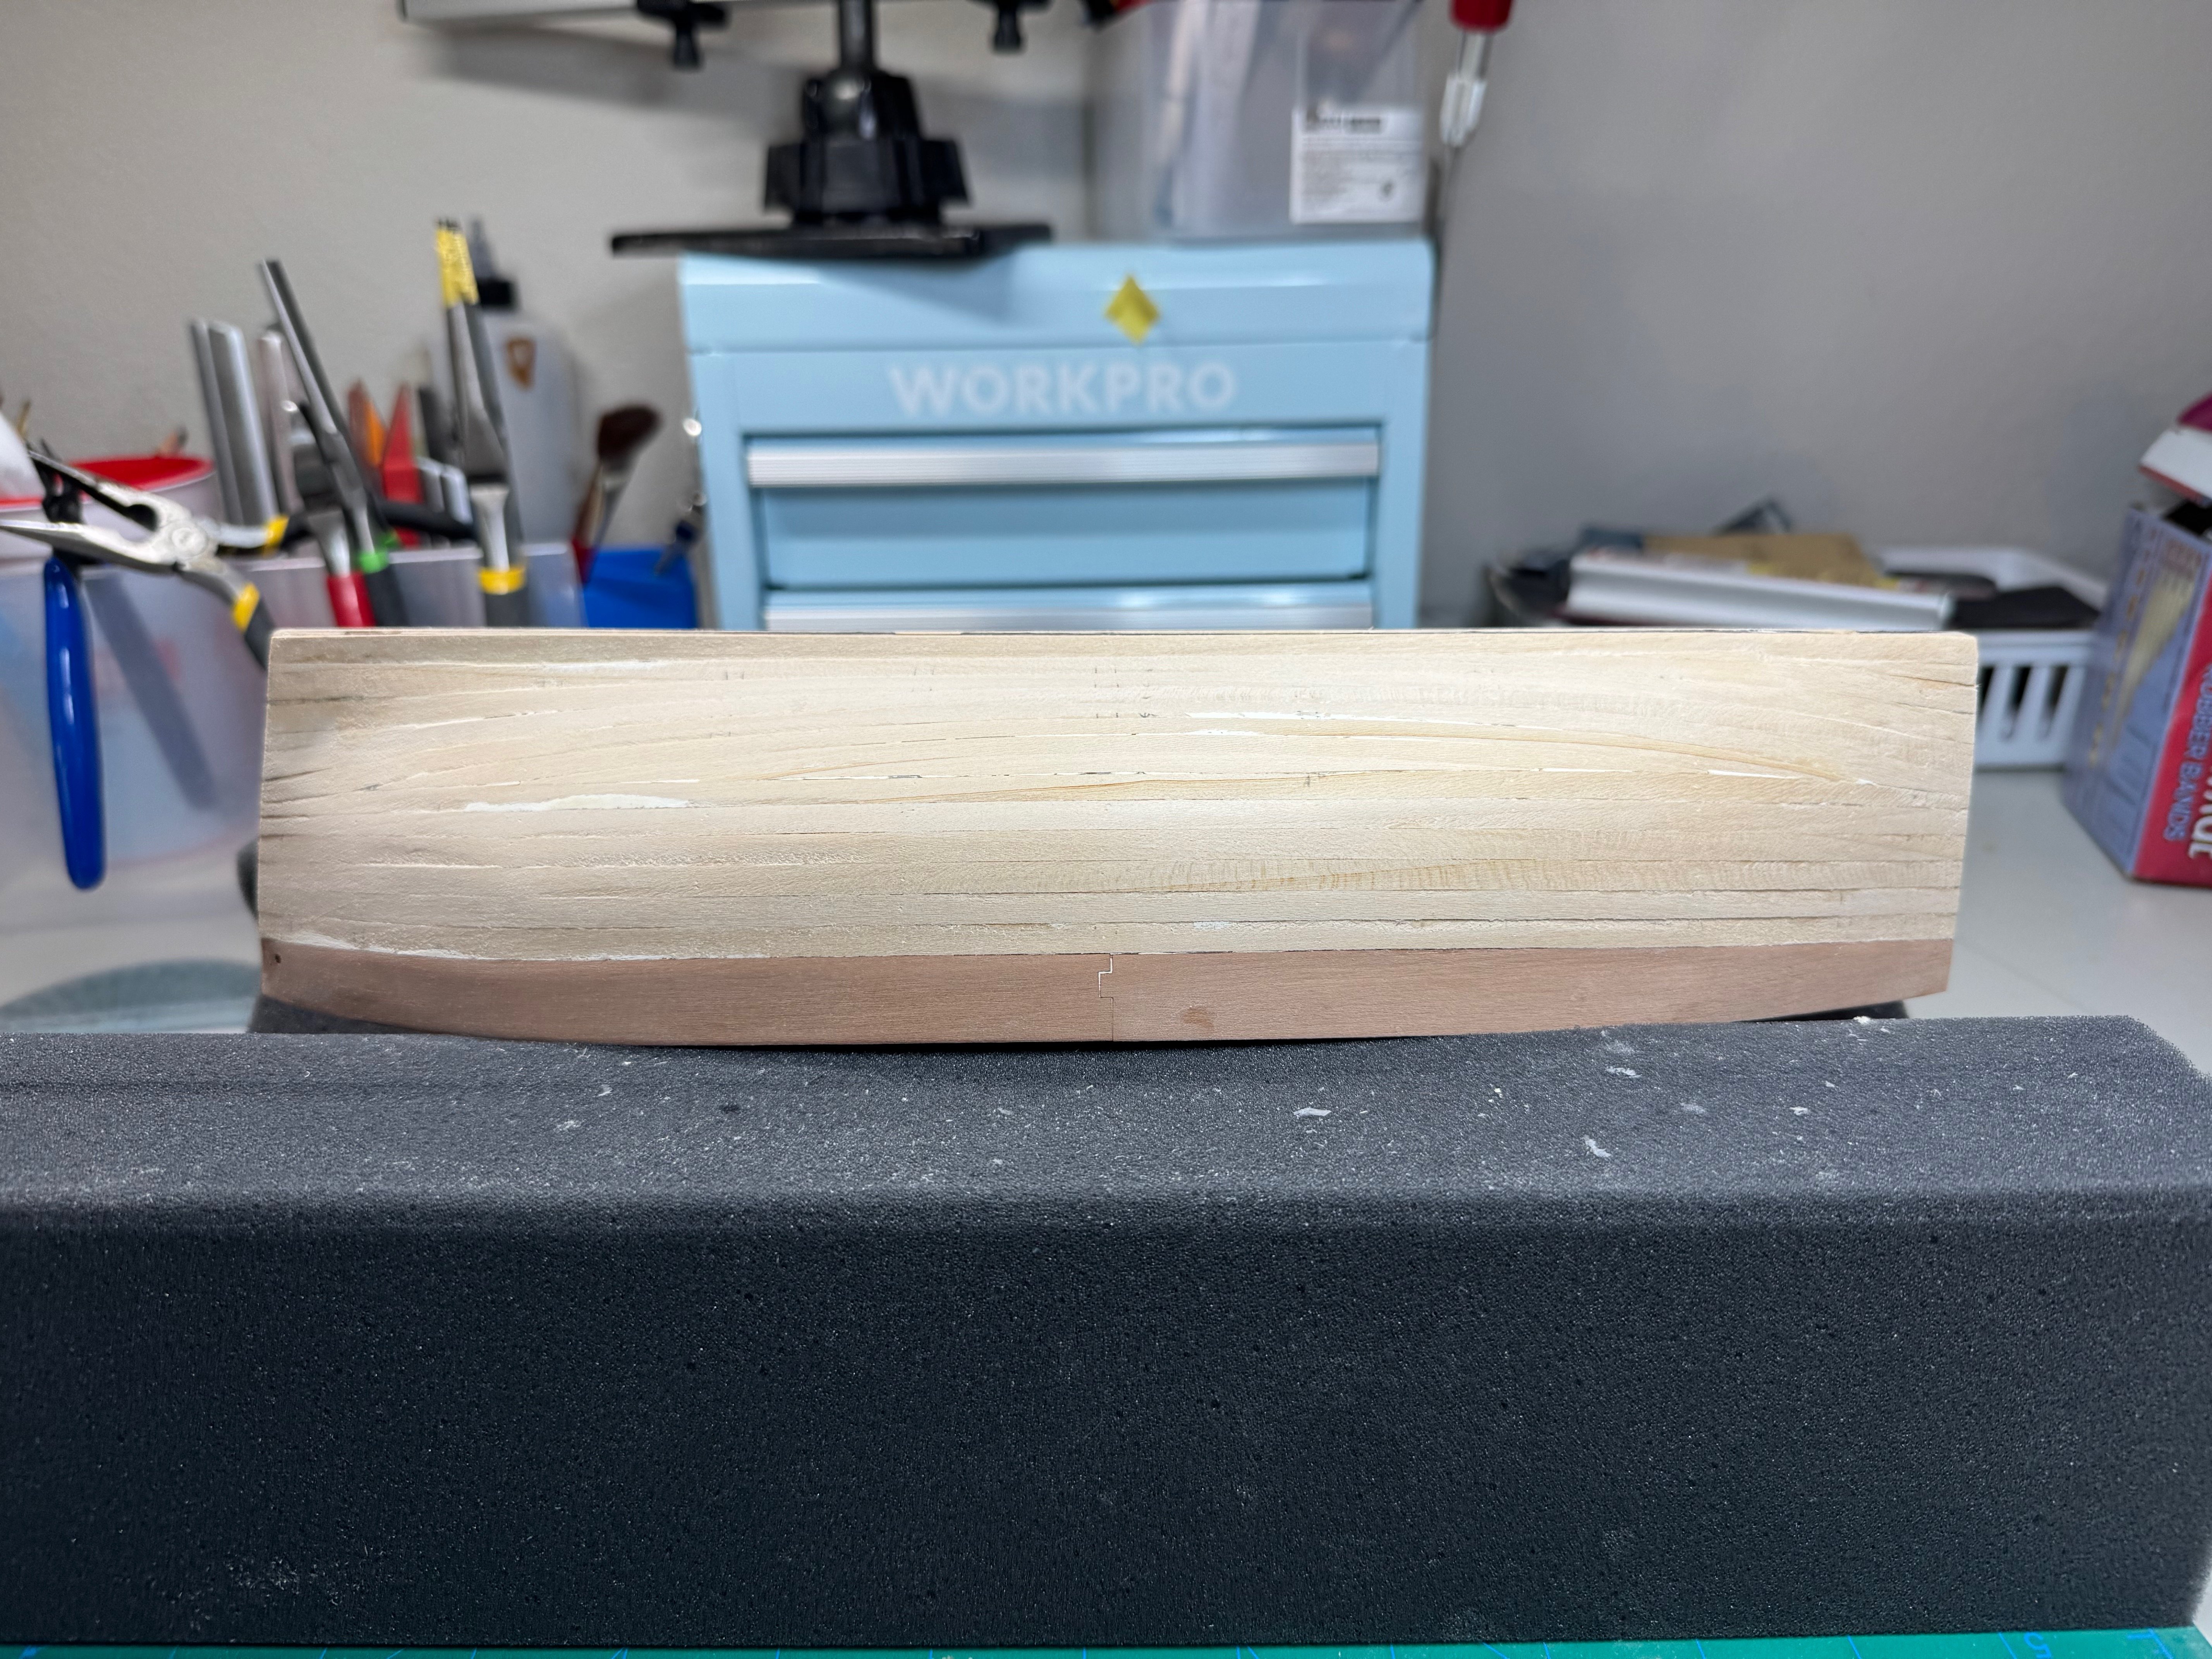
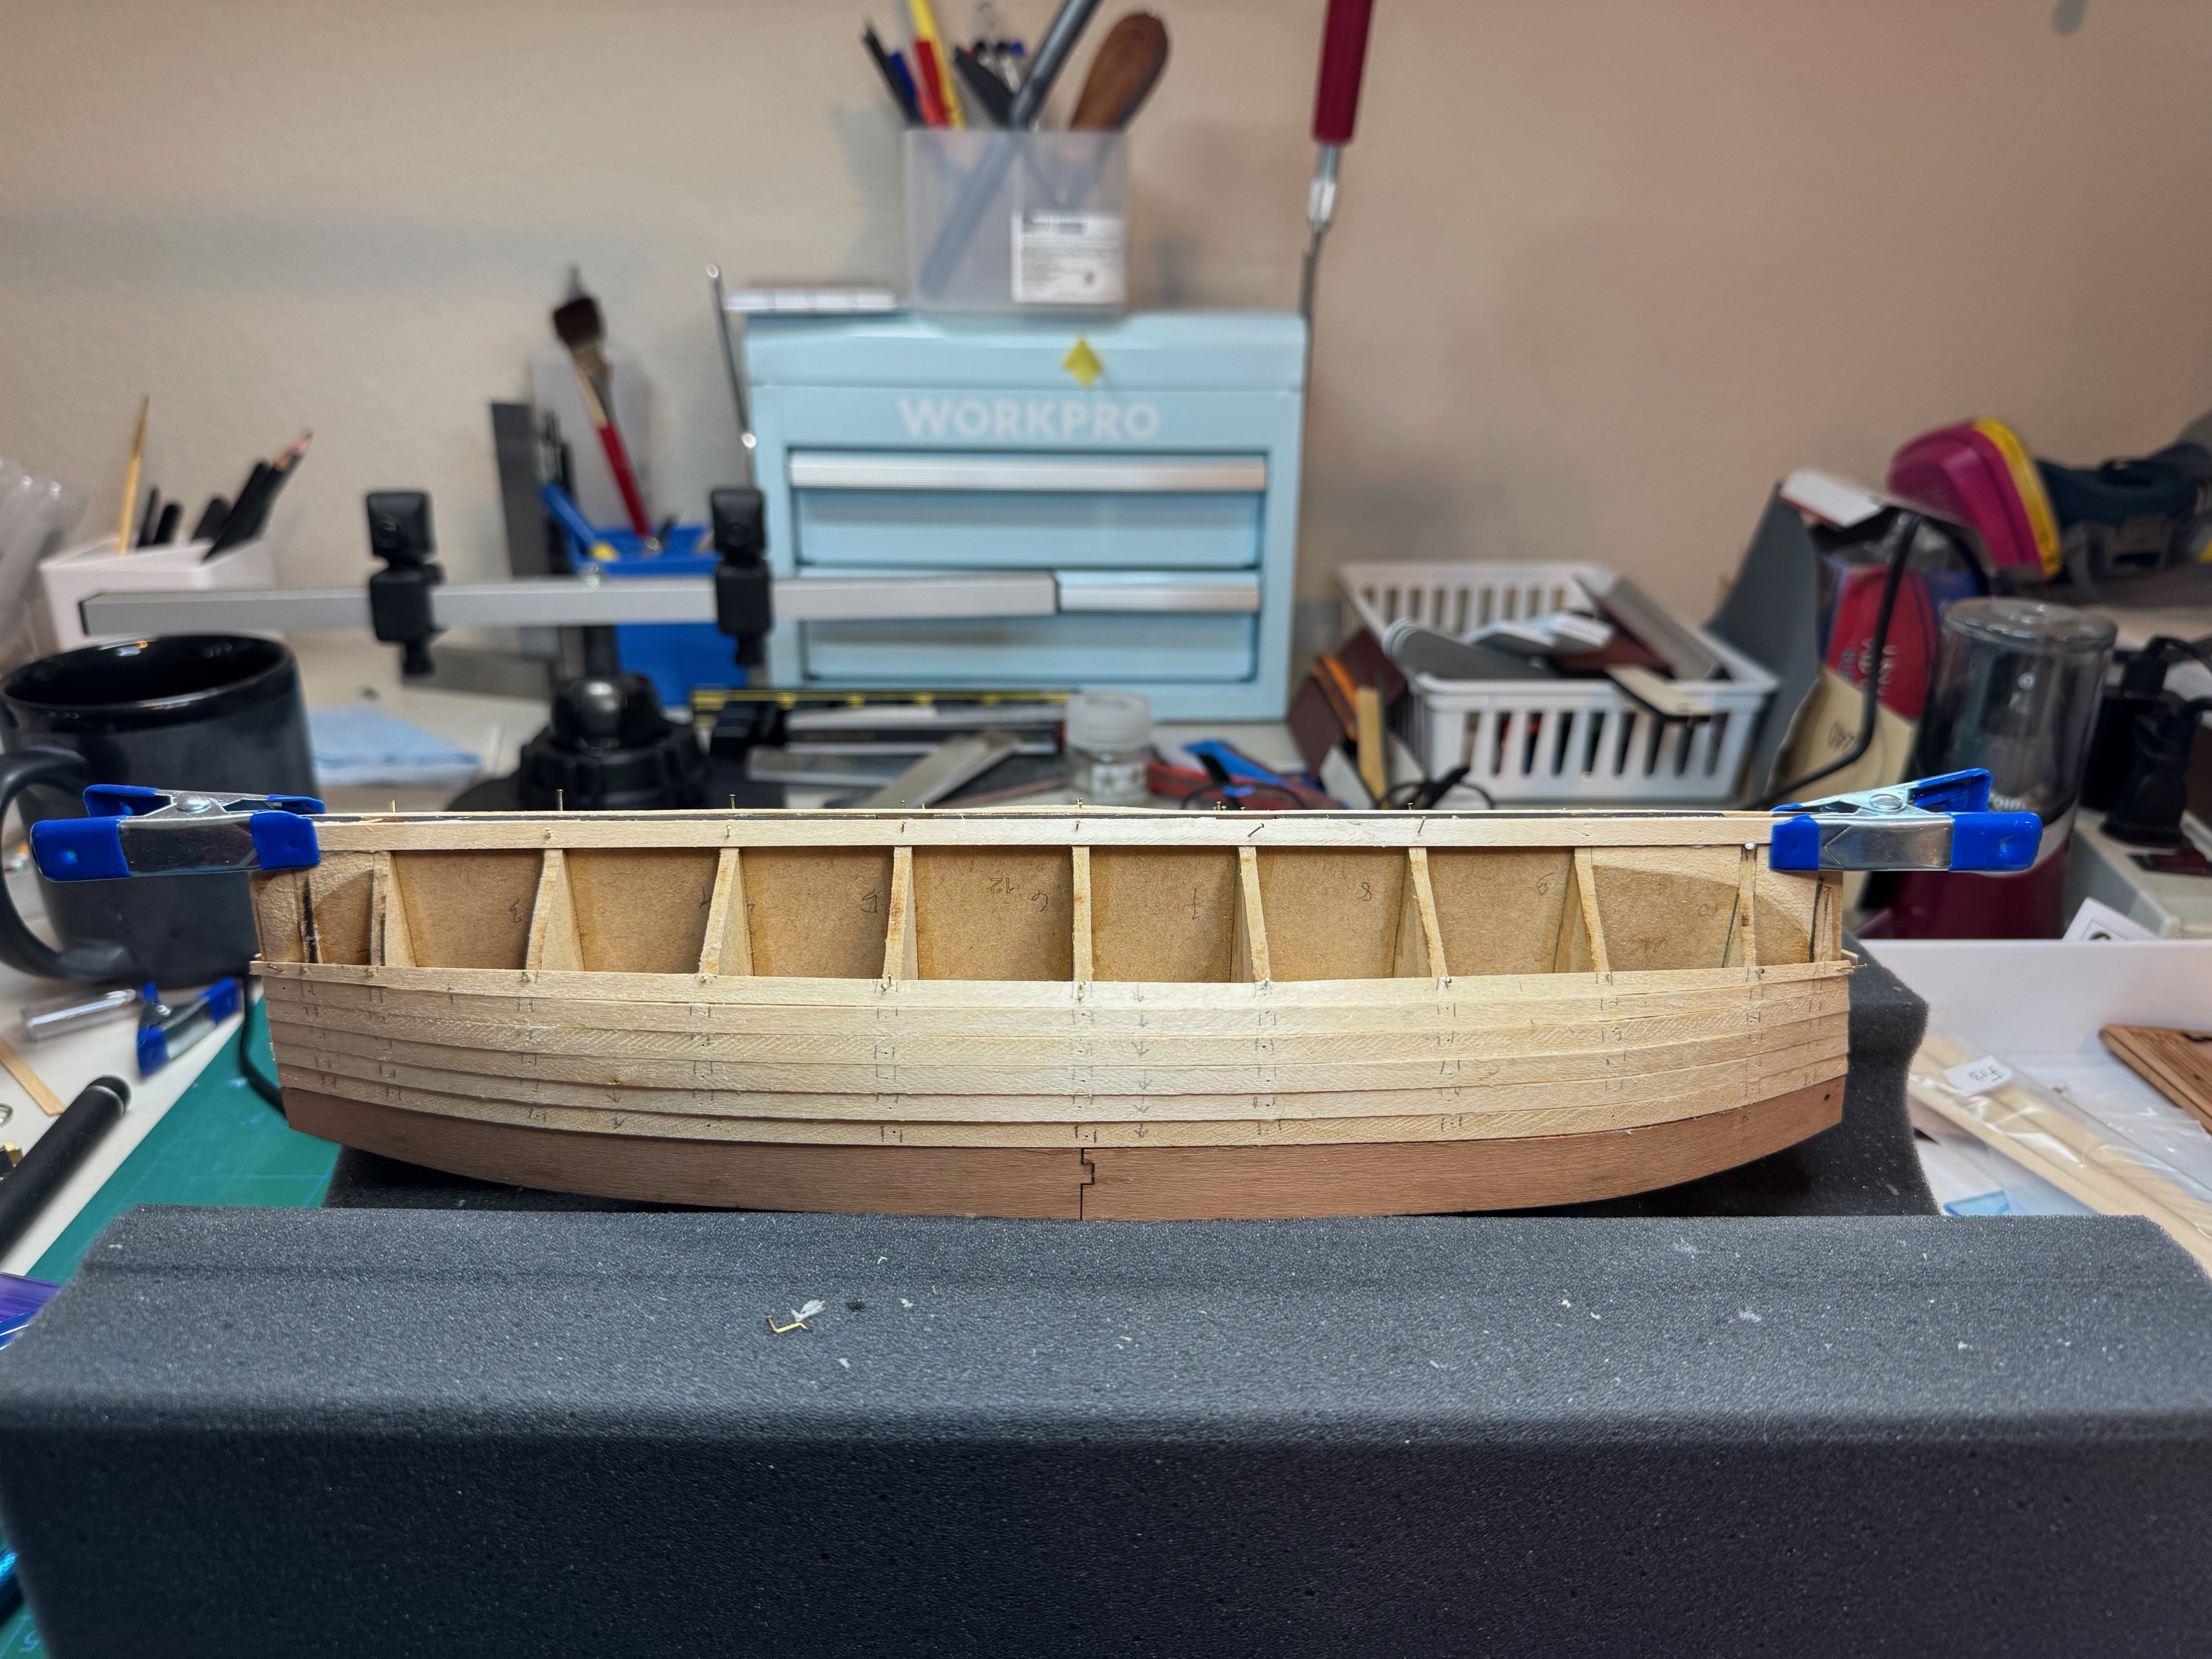
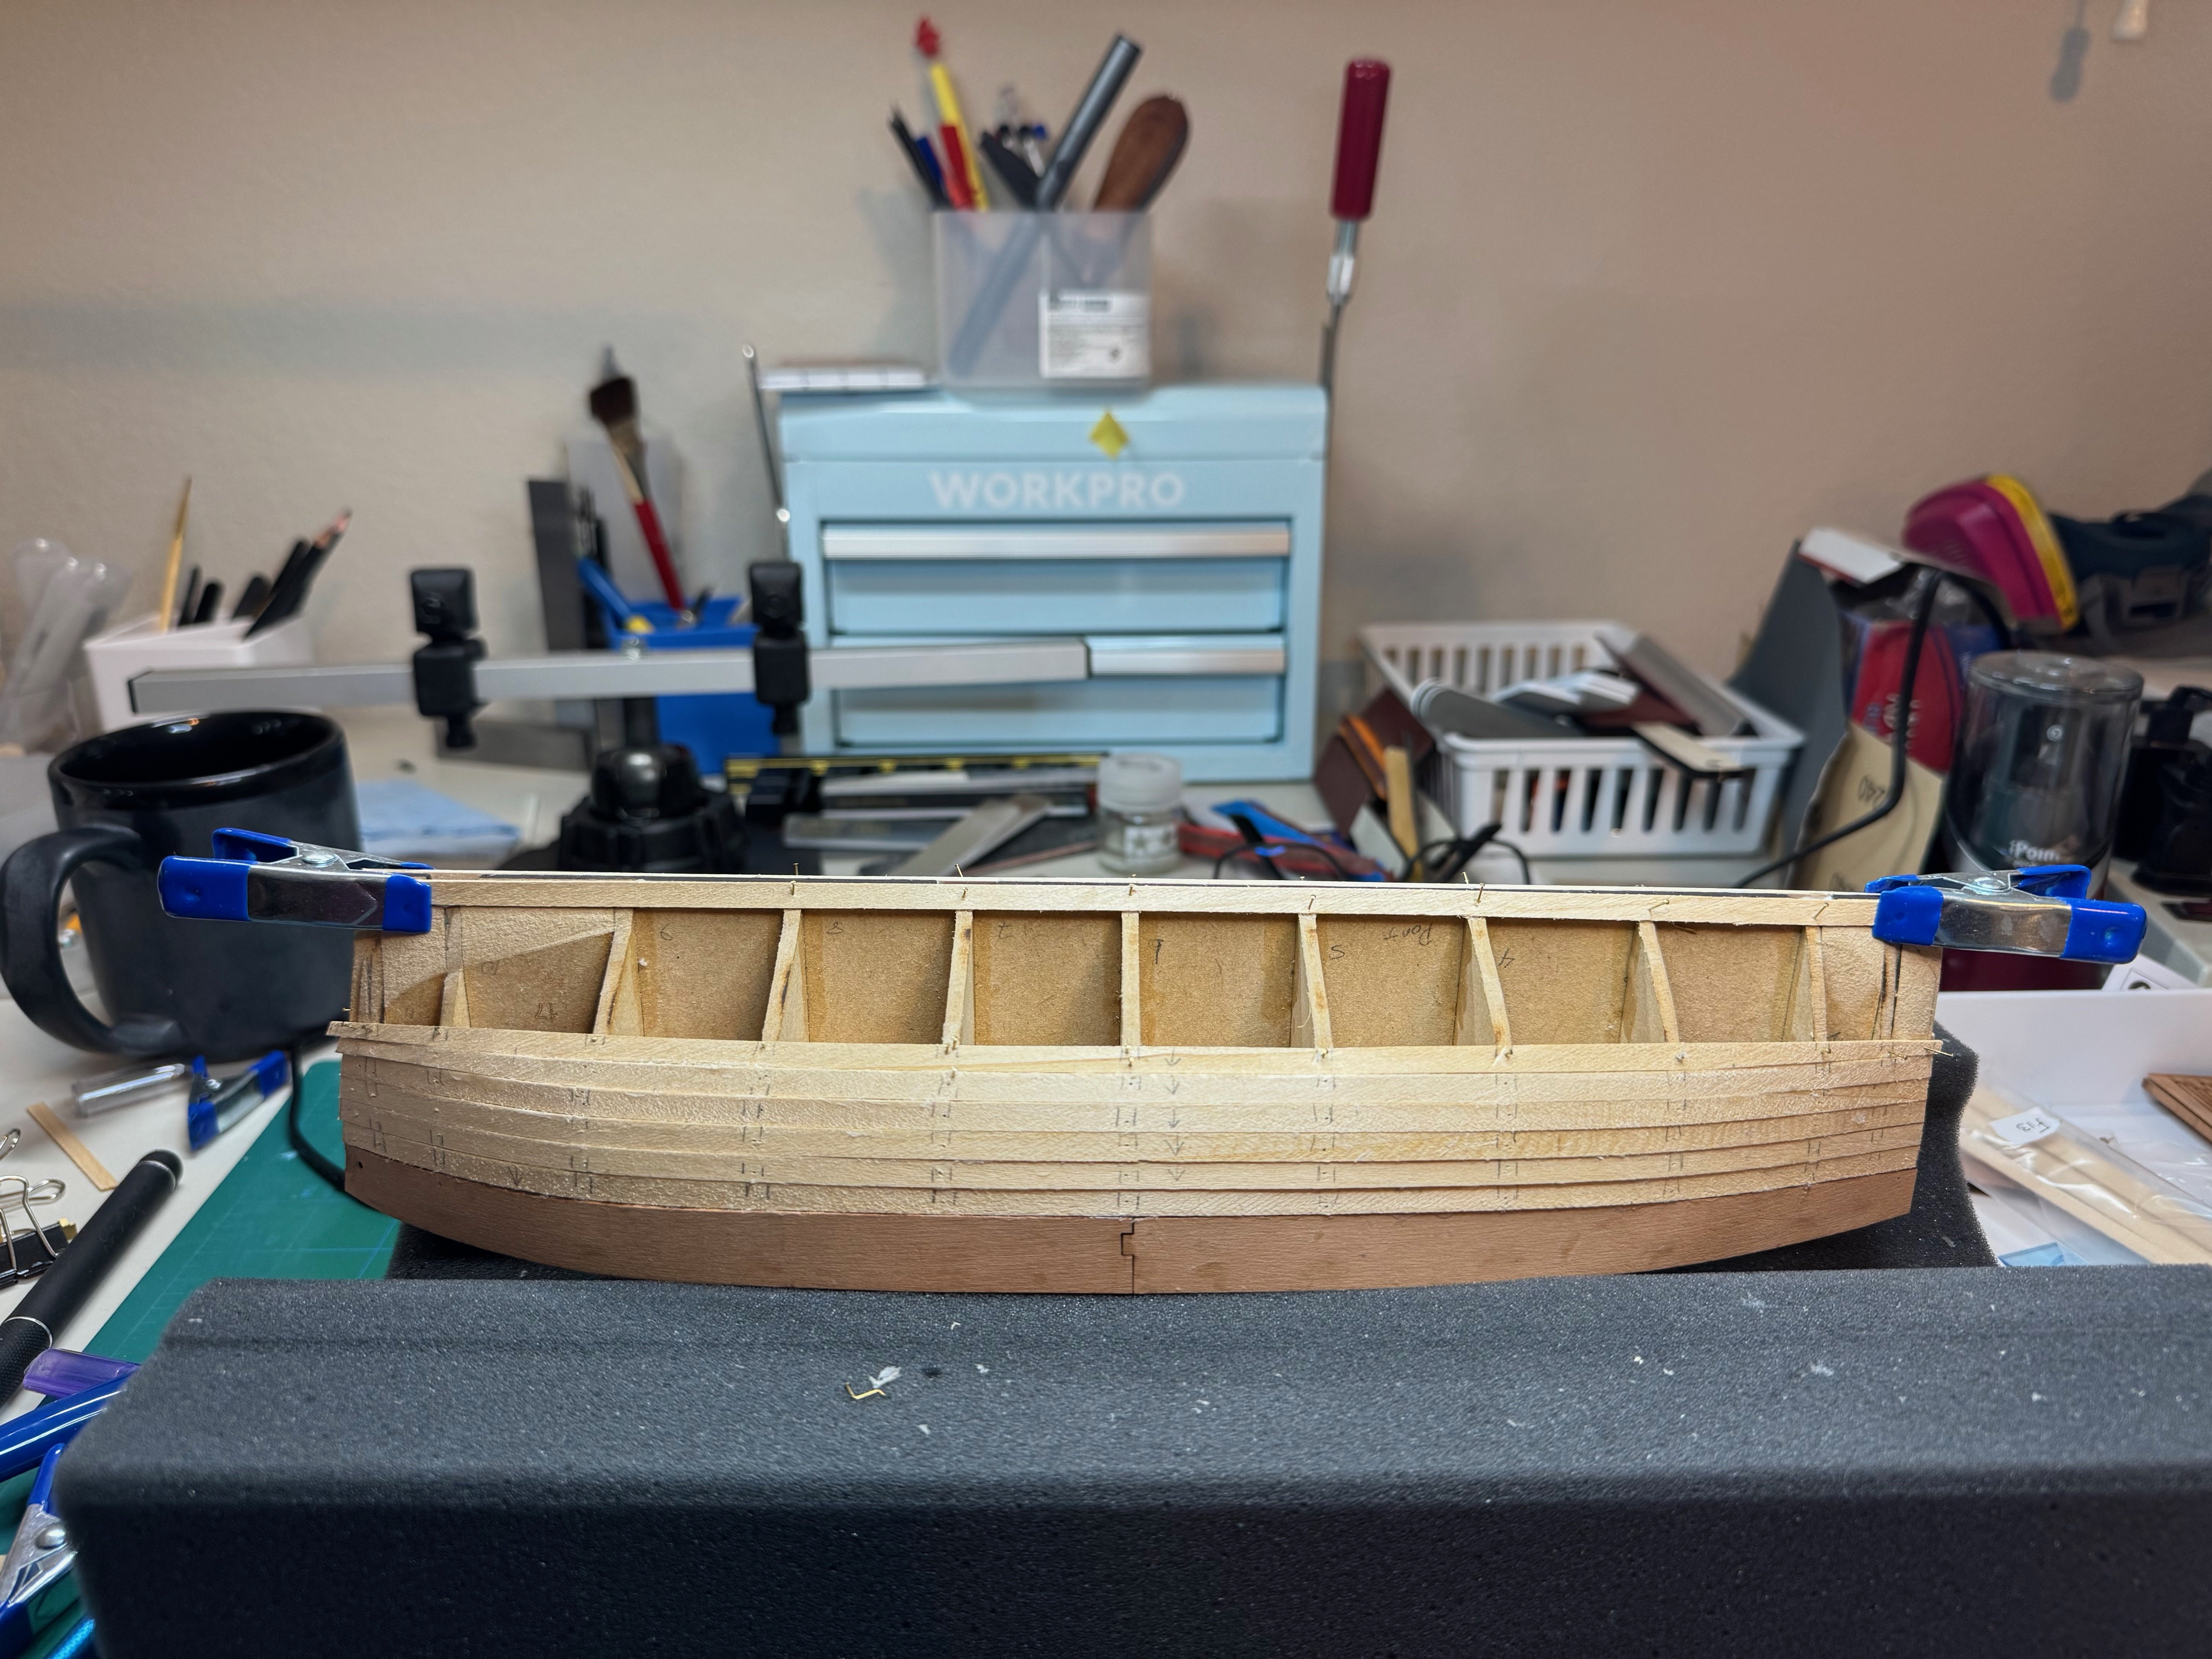
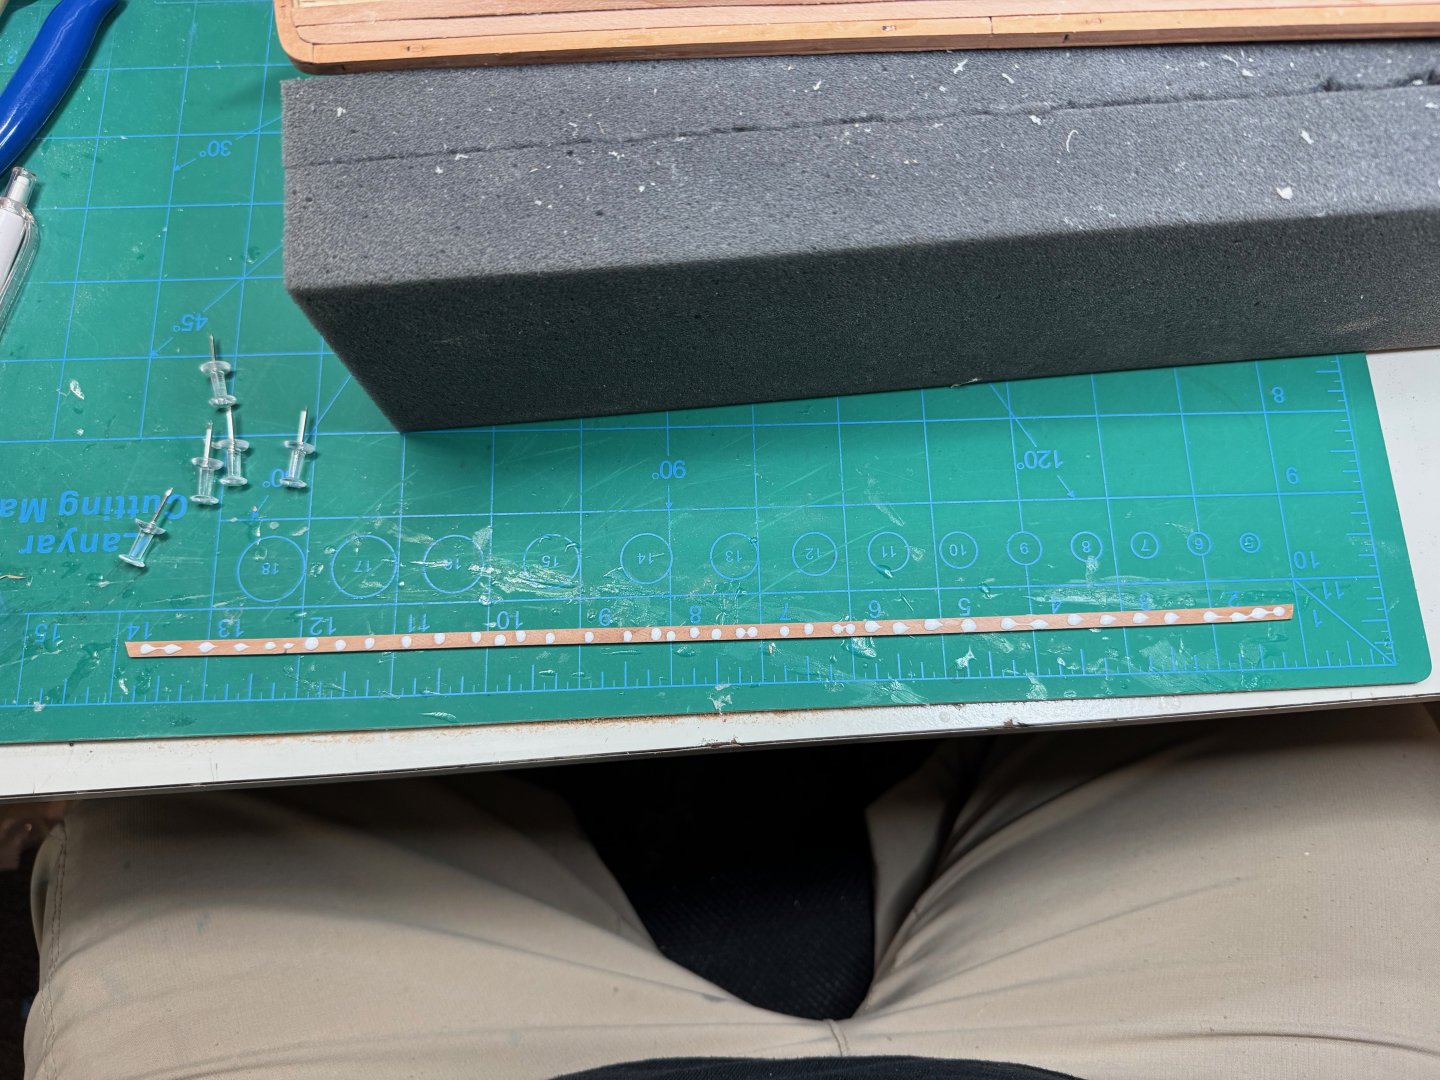
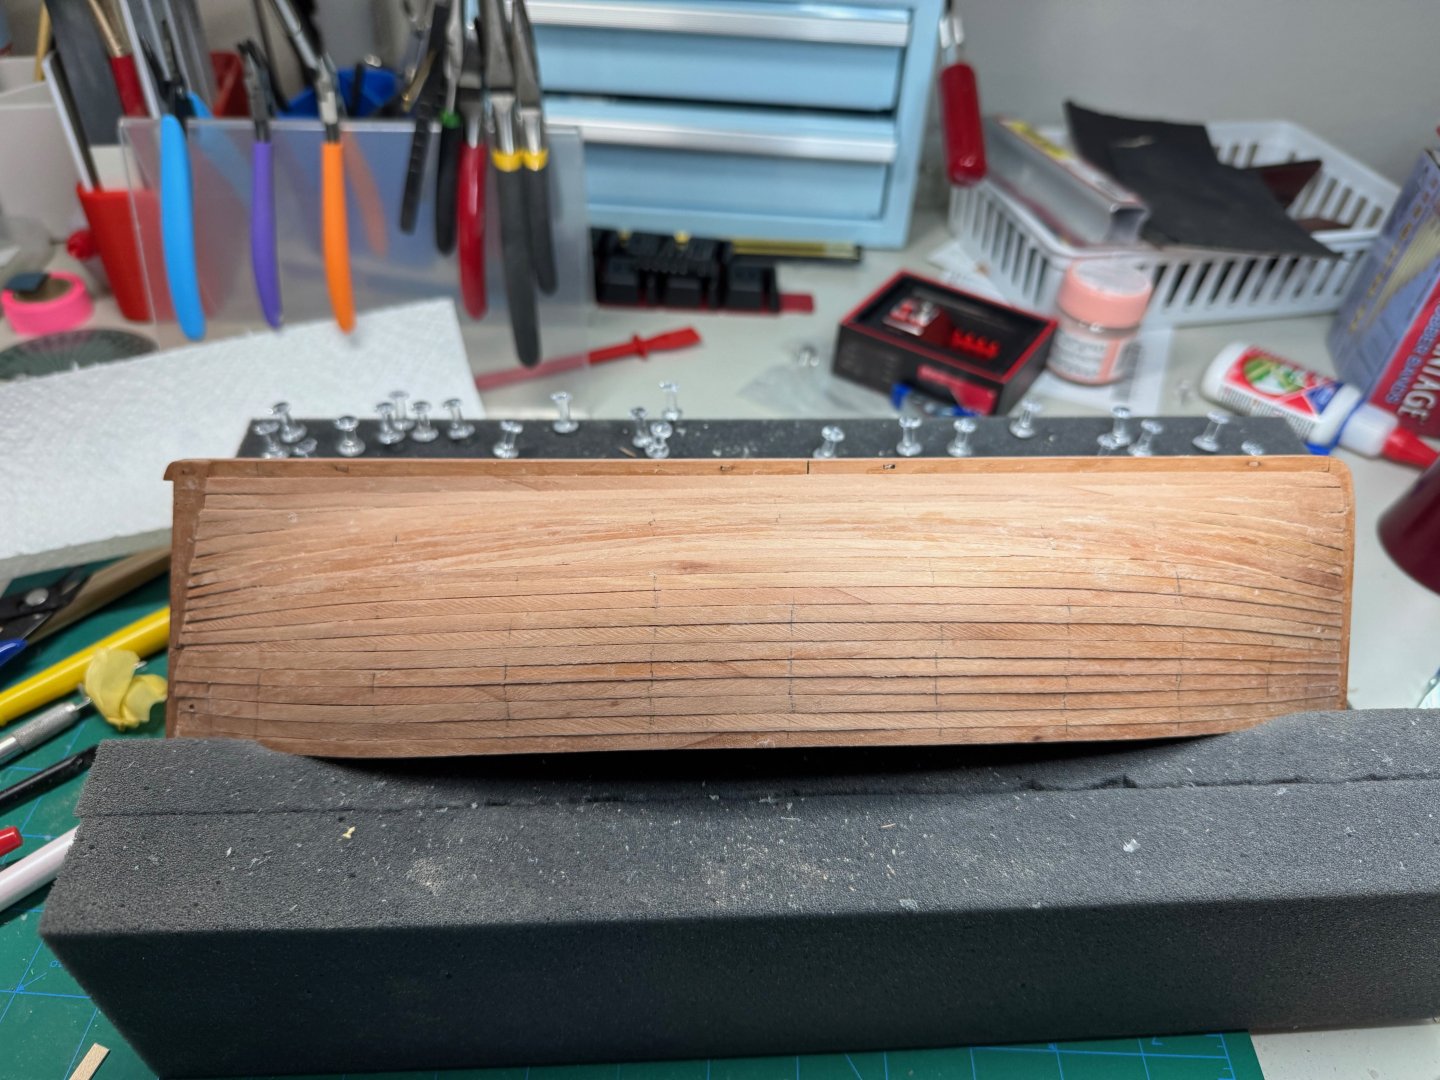
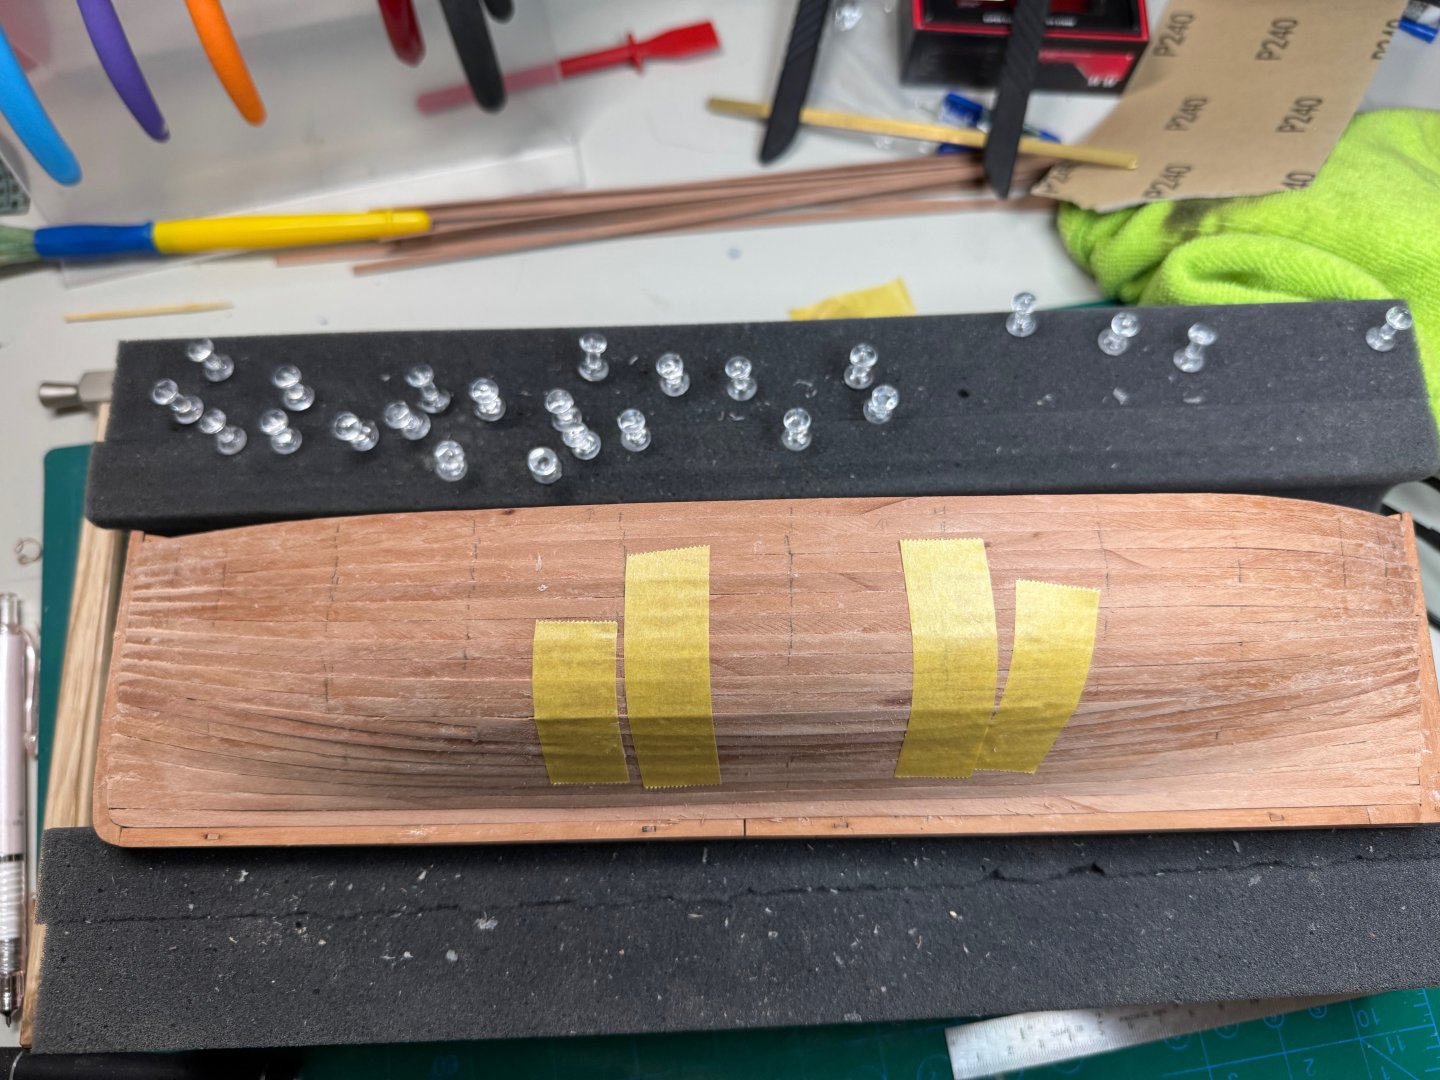
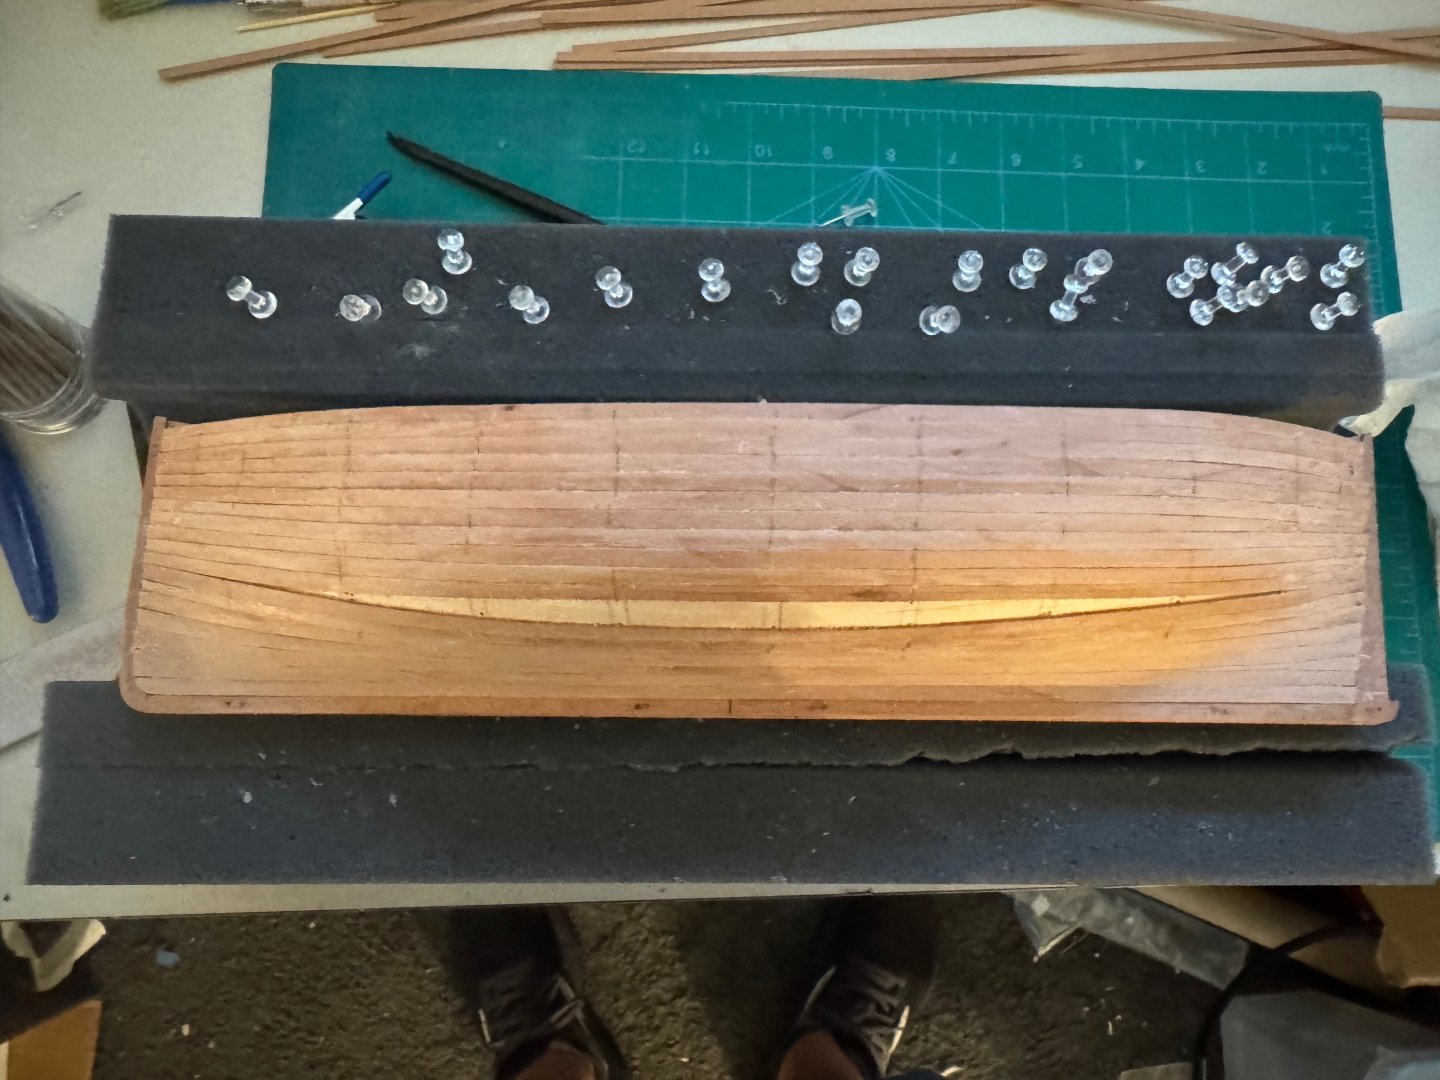
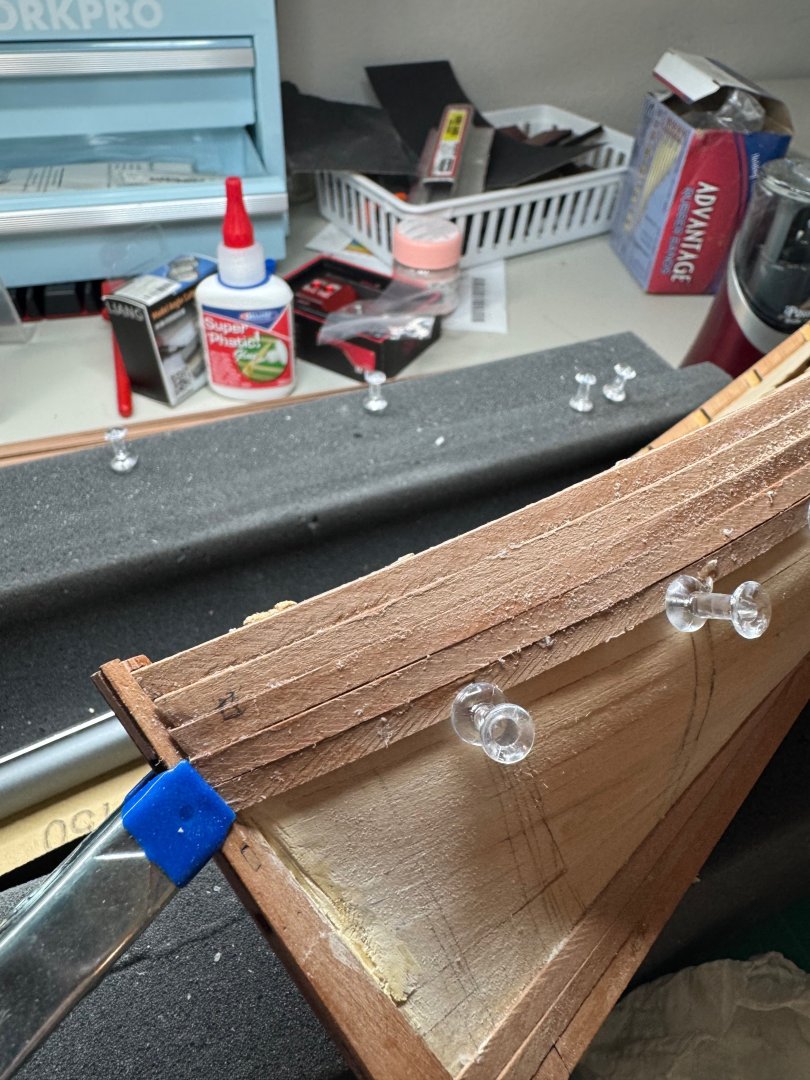
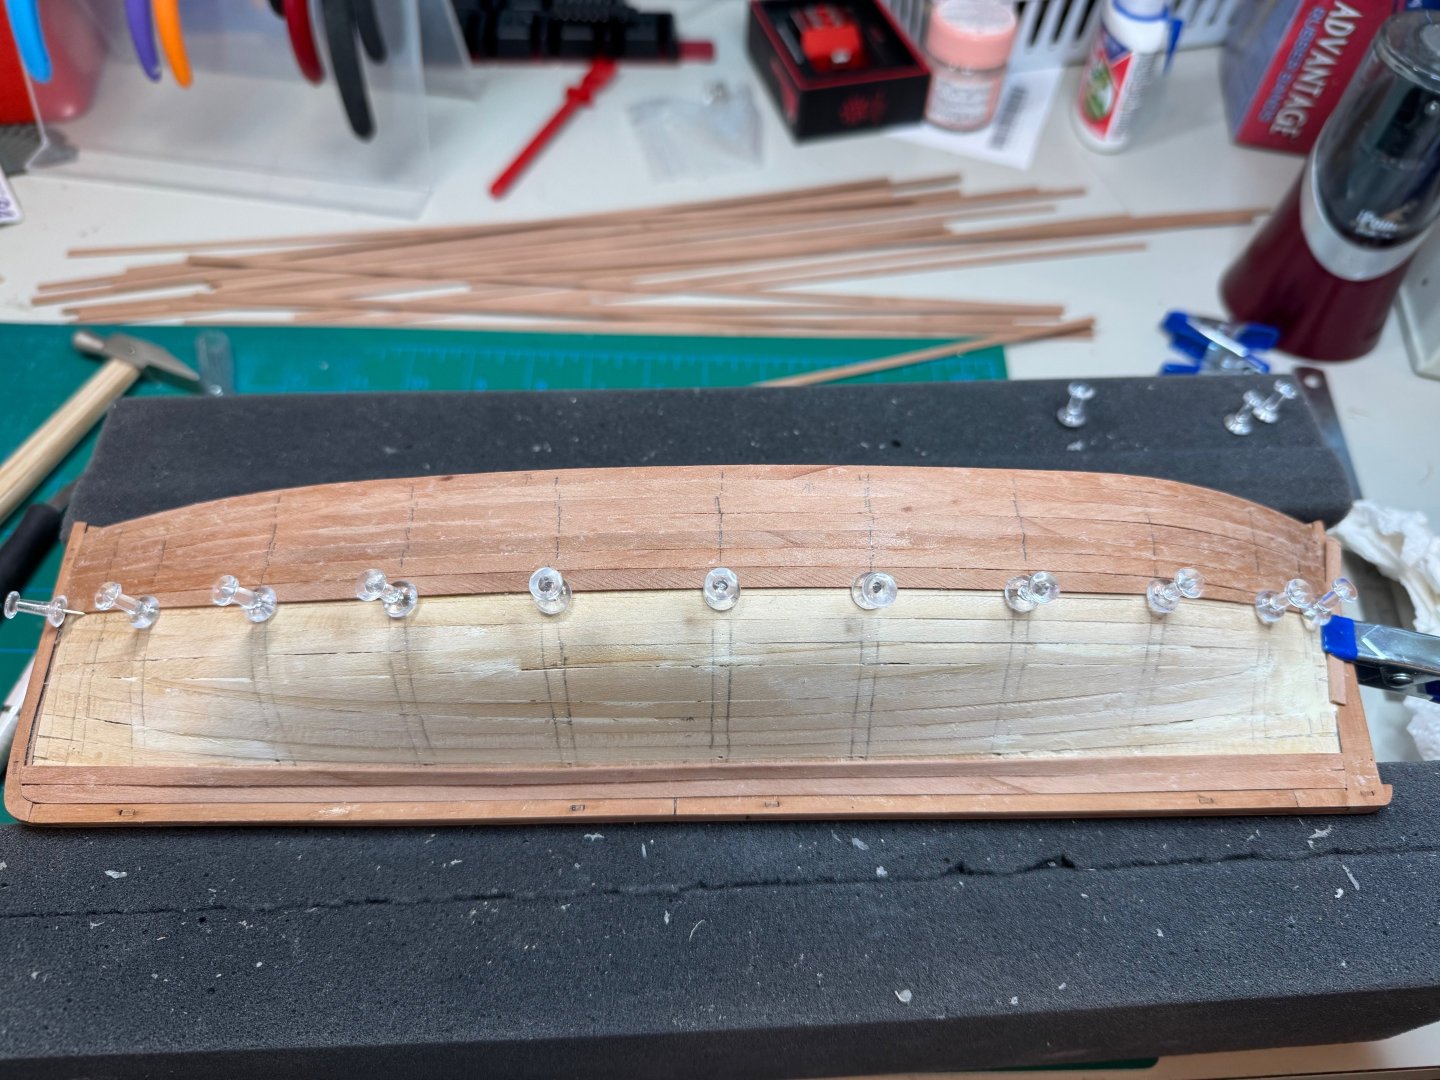
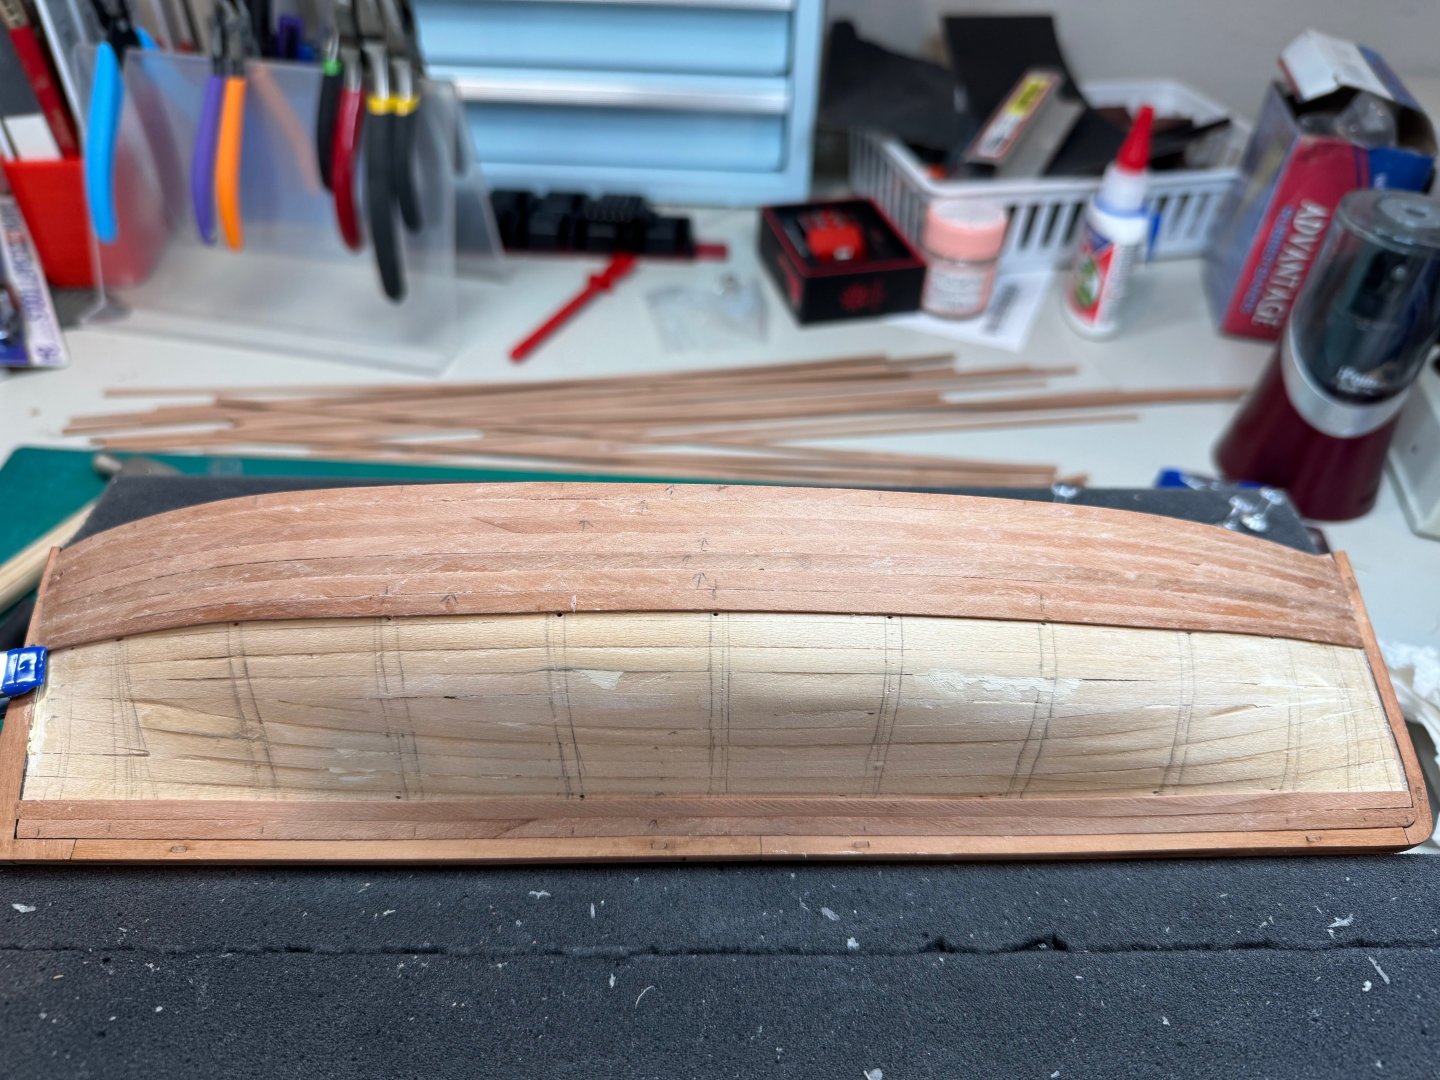
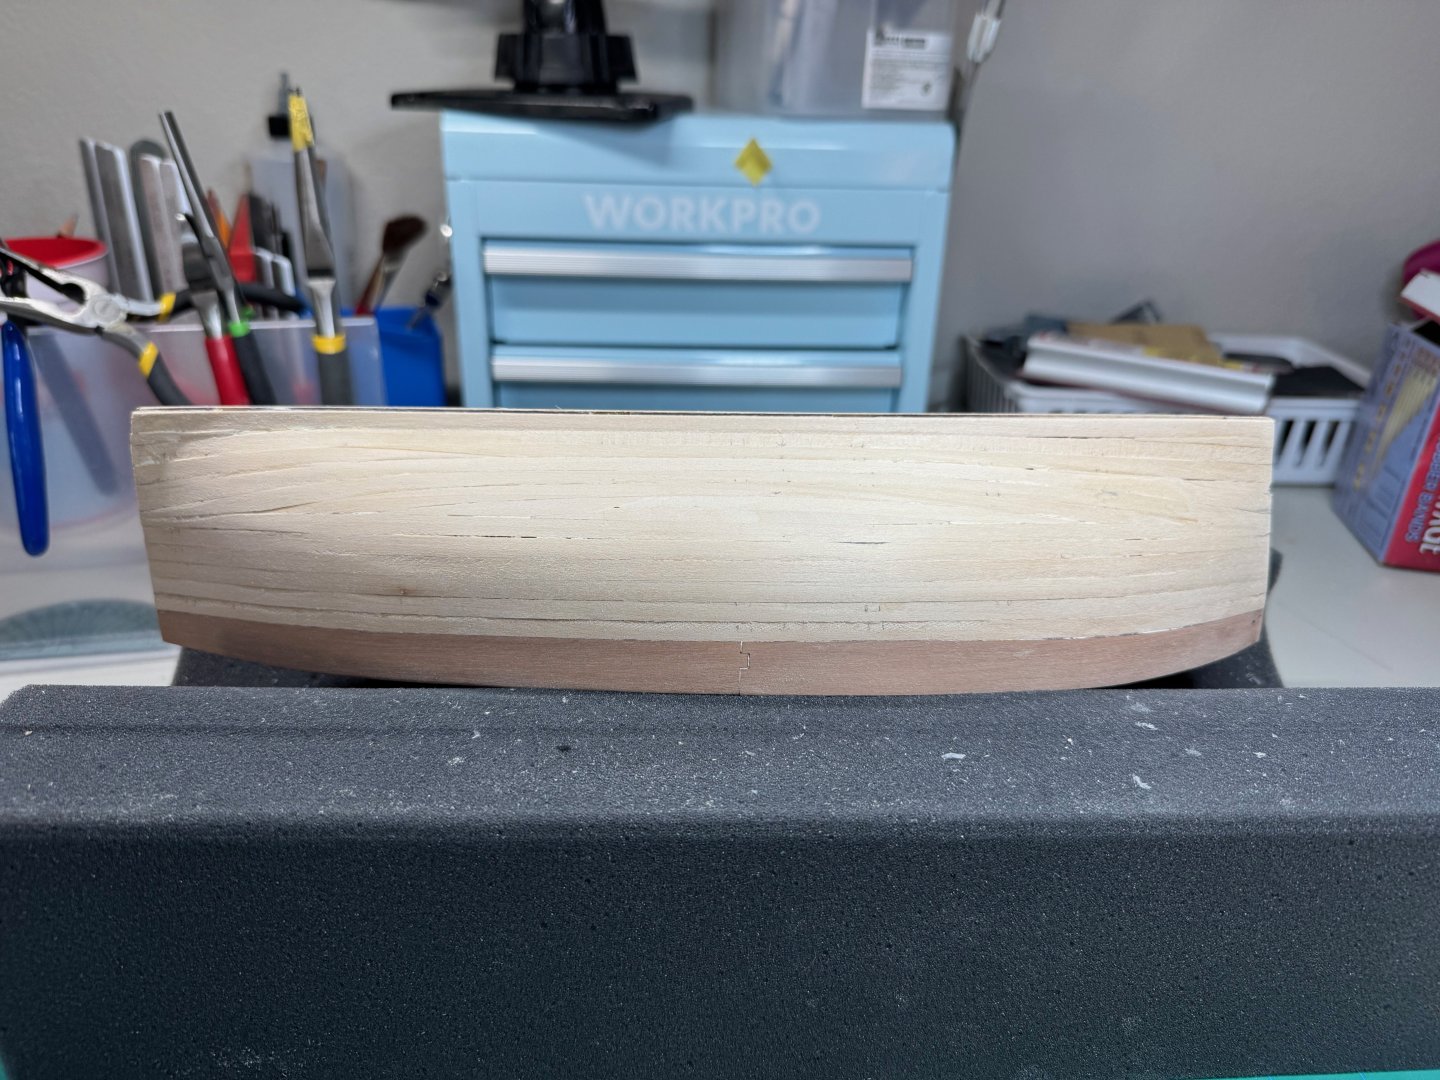
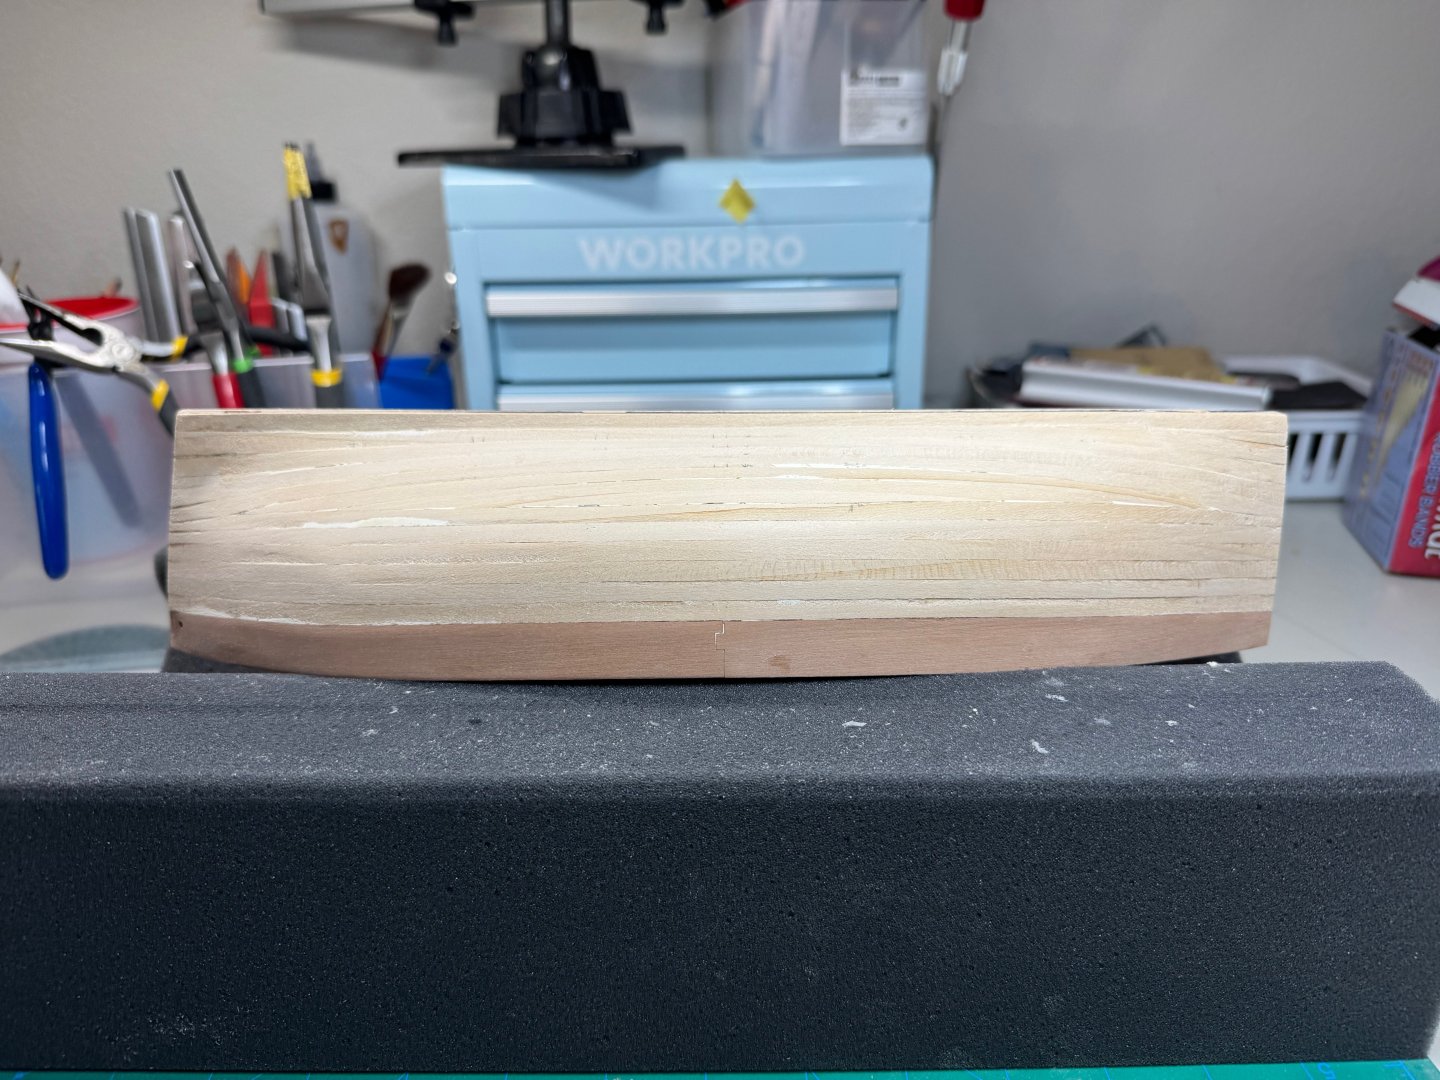
Good afternoon I have completed a milestone. Step 70 is now complete -- planking the hull. With my planking process I would will apply the glue to the plank. But I found it became more tedious that necessary. Instead I ended up running a bead close to the adjoining plank, and then use a toothpick to spread it out. I also ended up using push pins to apply pressure to the planks while the glue setup. From there I would sand along the join lightly to generate some dust to help fill in the gabs. I also found that I was able to from the top down and bottom up to speed it along. As a side note. I realized my glue fits in my pencil sharpener so I could keep it primed all the time. As I closed the gap I ended up using a template to fill in the last plank. I used tamyia tape to help hold down the final plank. I also sanded to improve the gaps. The finished product is as follows Next step is to add some filler, and let it cure over night. Then the sanding begins.


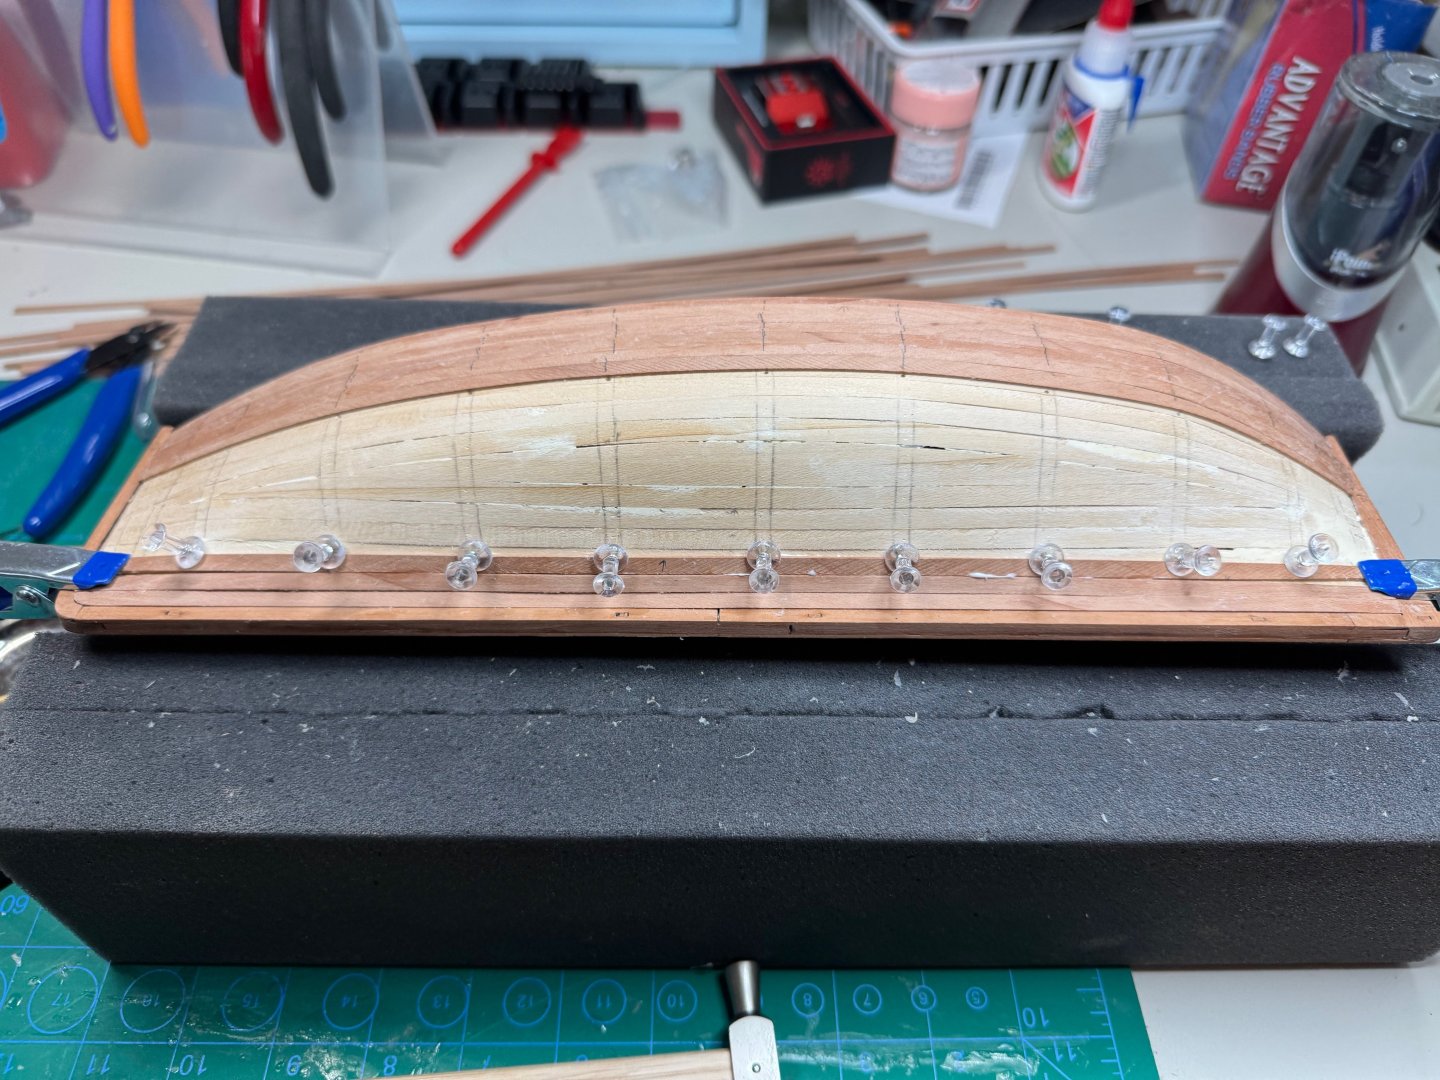
- 27 replies
-
- 3
-
-
- fifie
- vanguard models
- (and 2 more)
-
Jim M reacted to a post in a topic:
Lady Eleanor by Jim M - FINISHED - Vanguard Models - 1:64
-
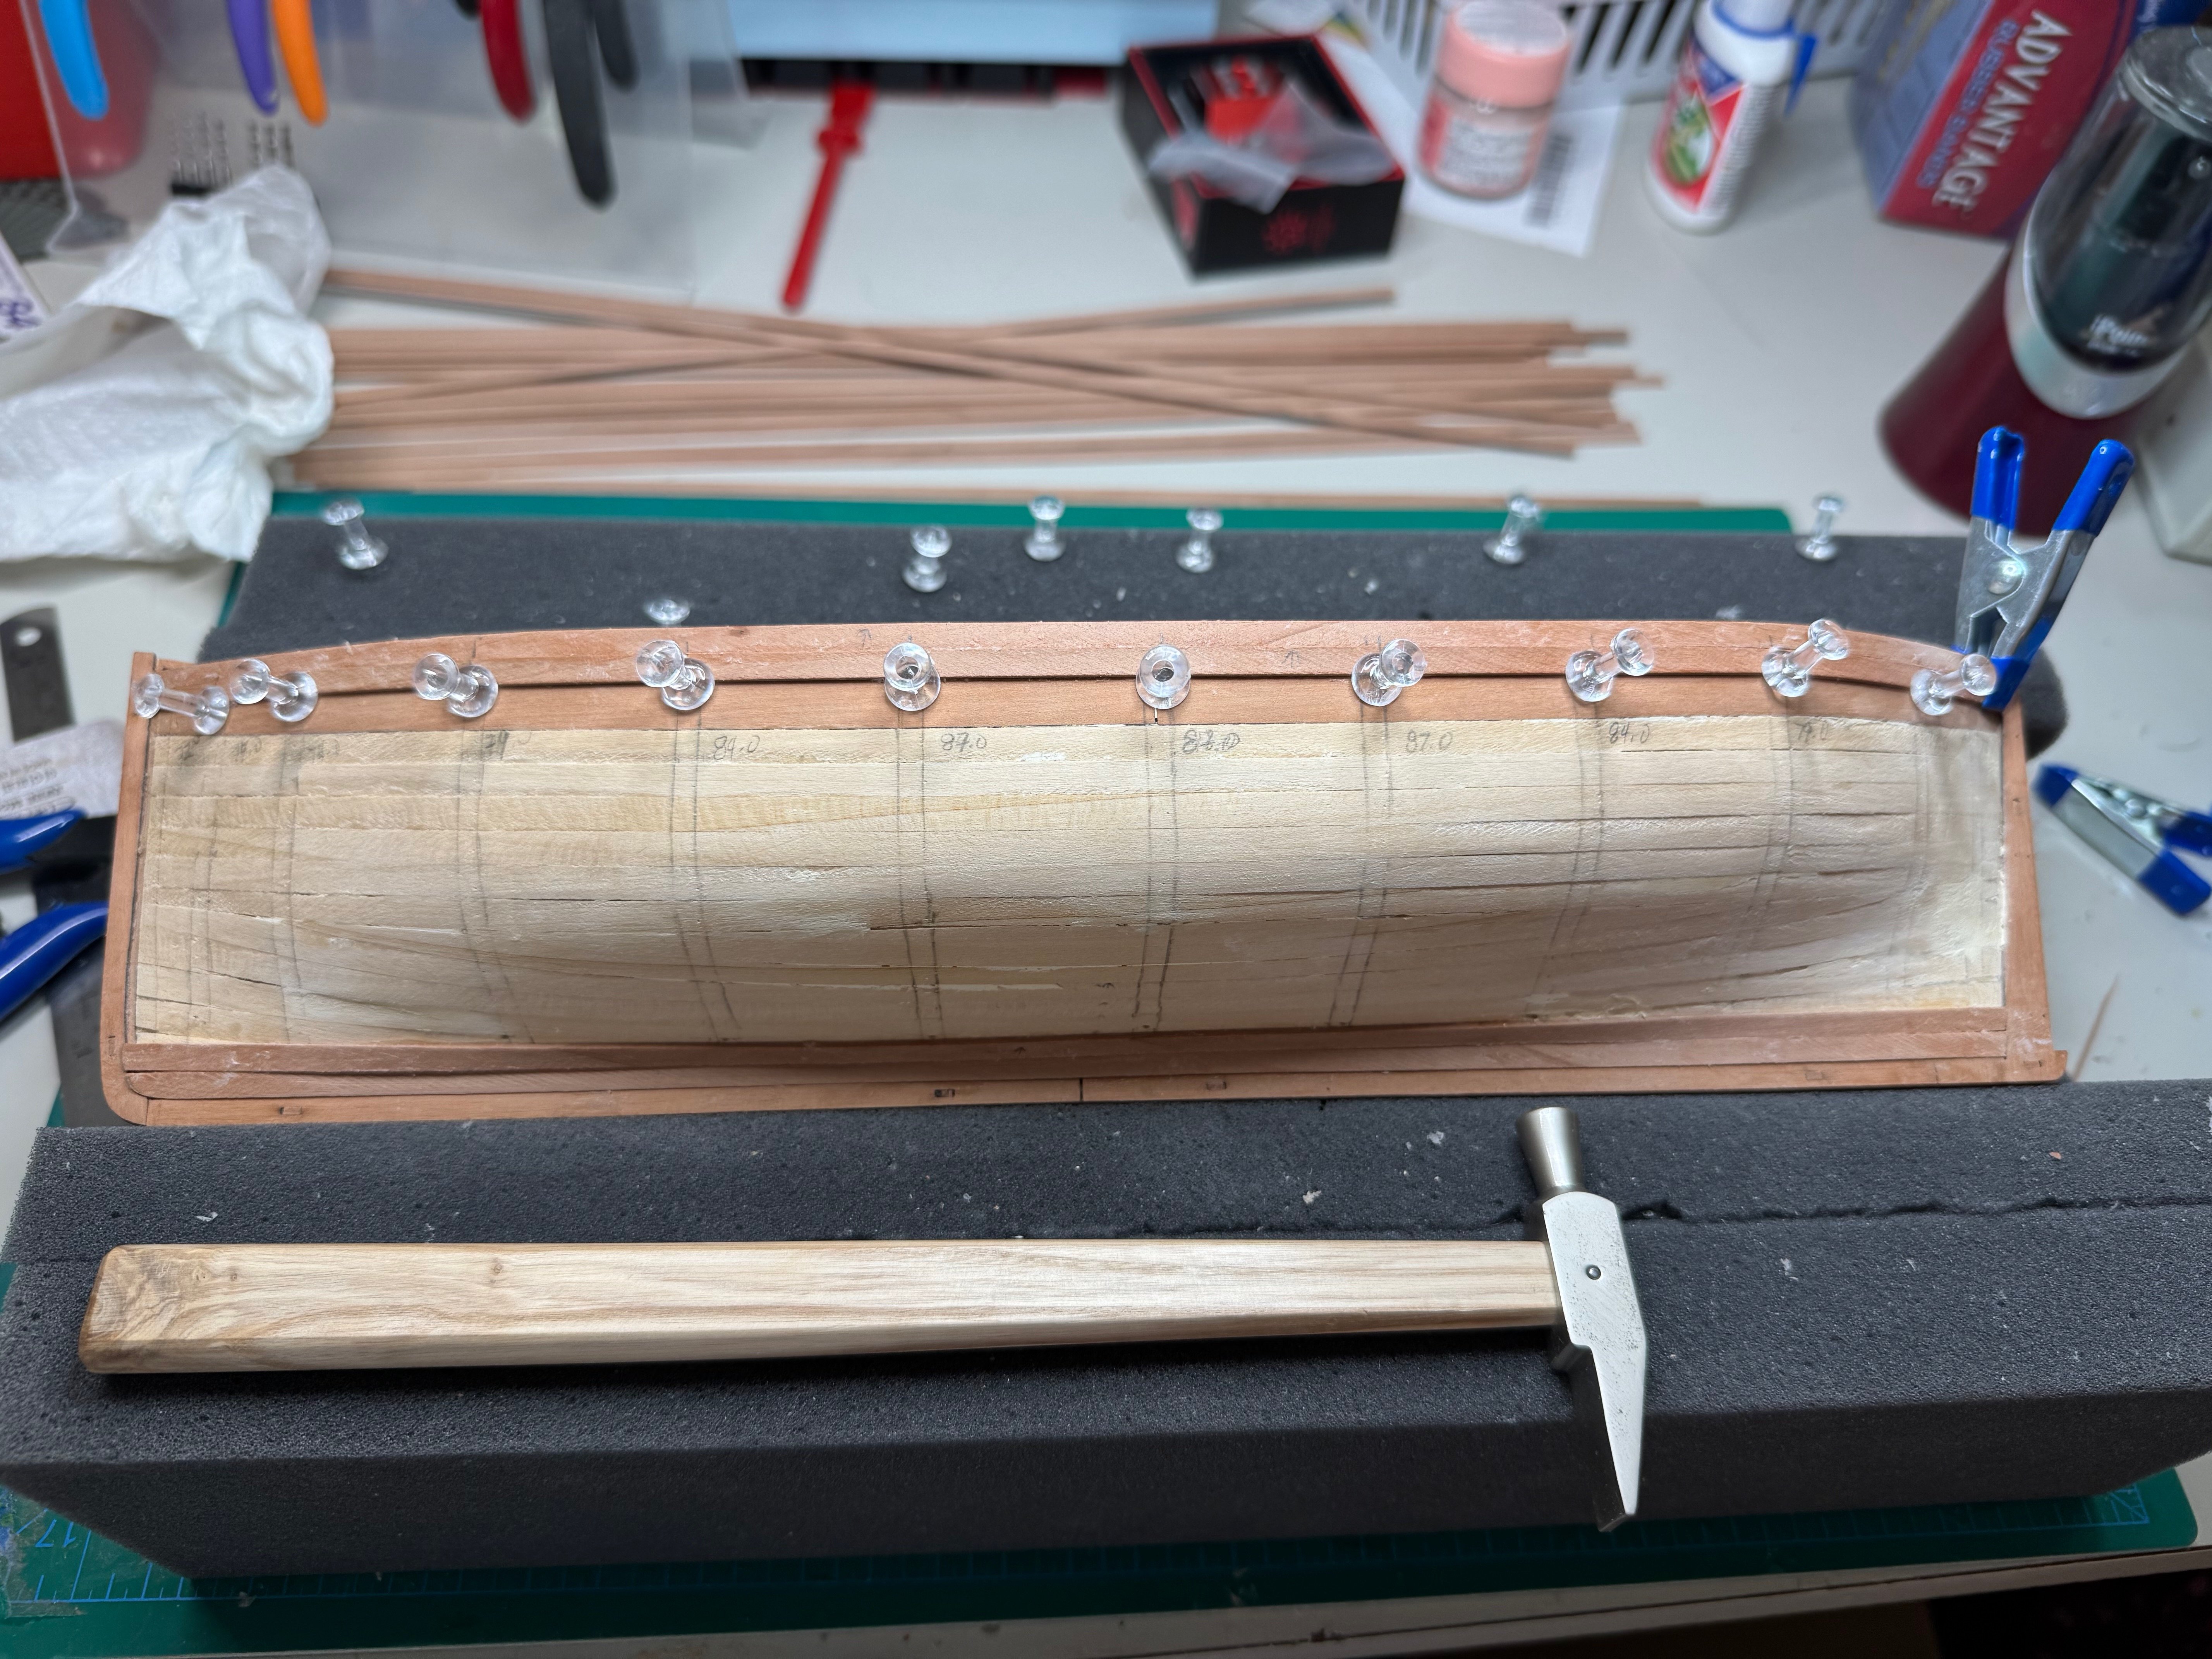
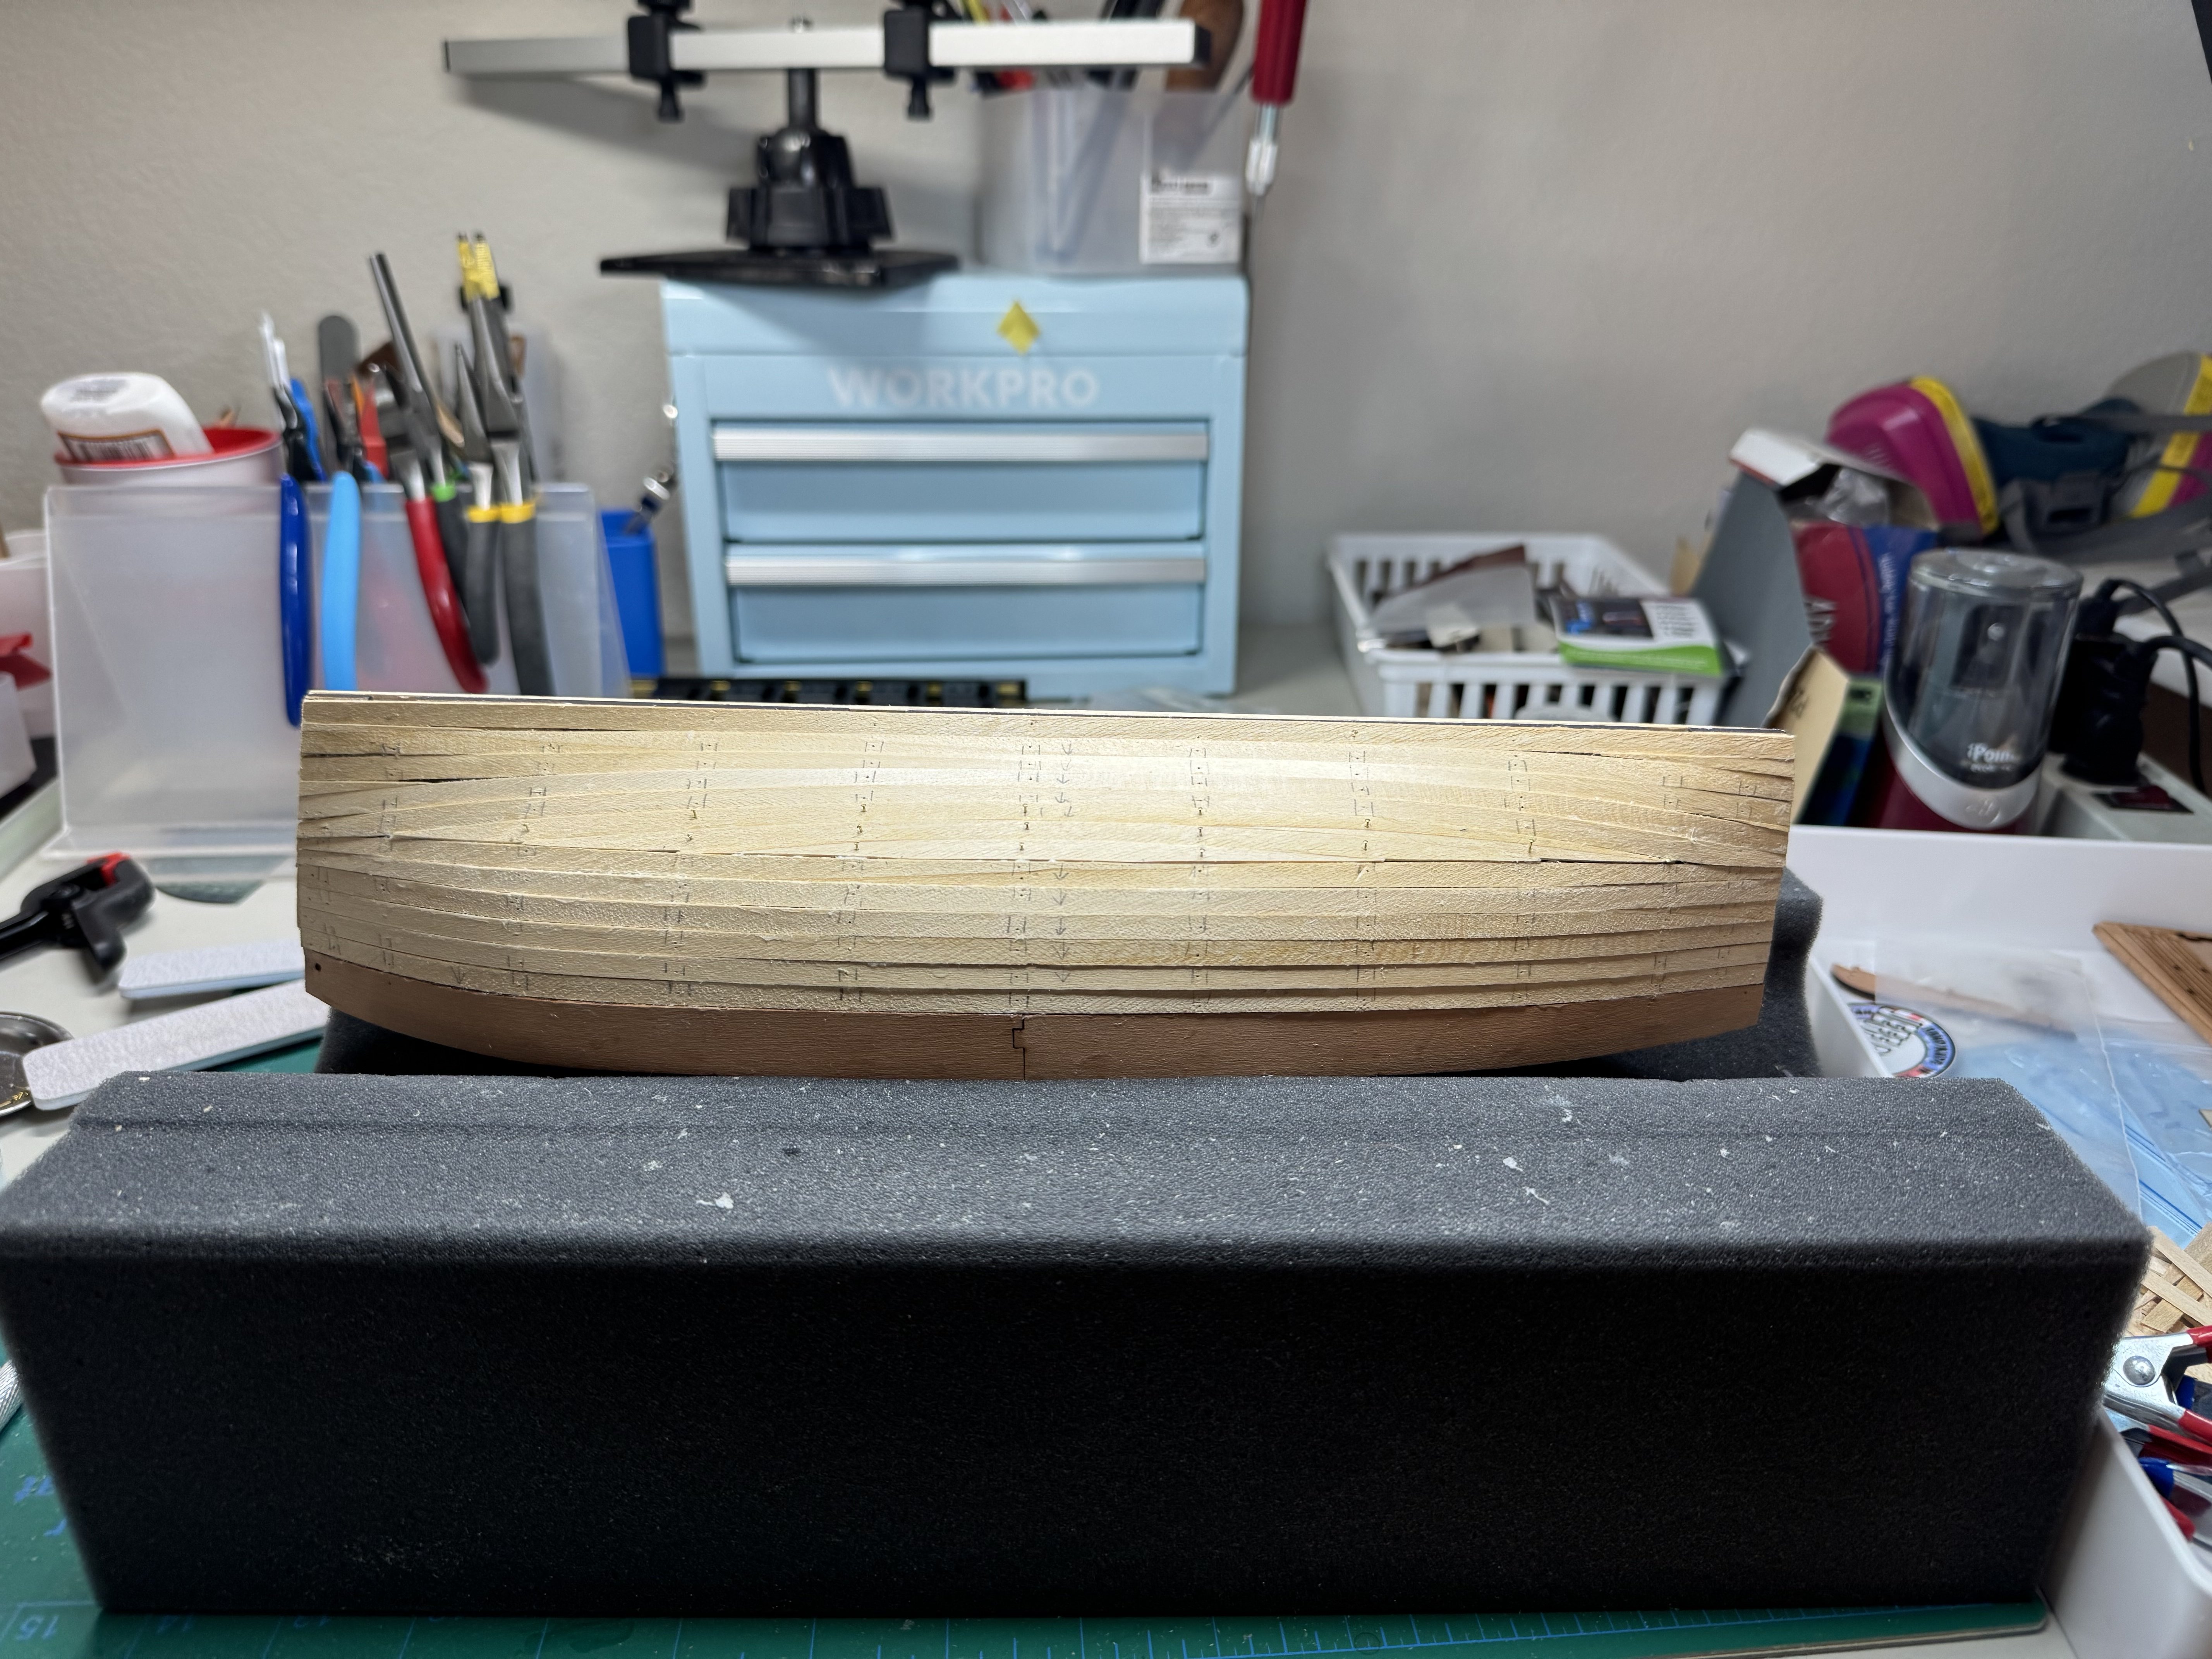
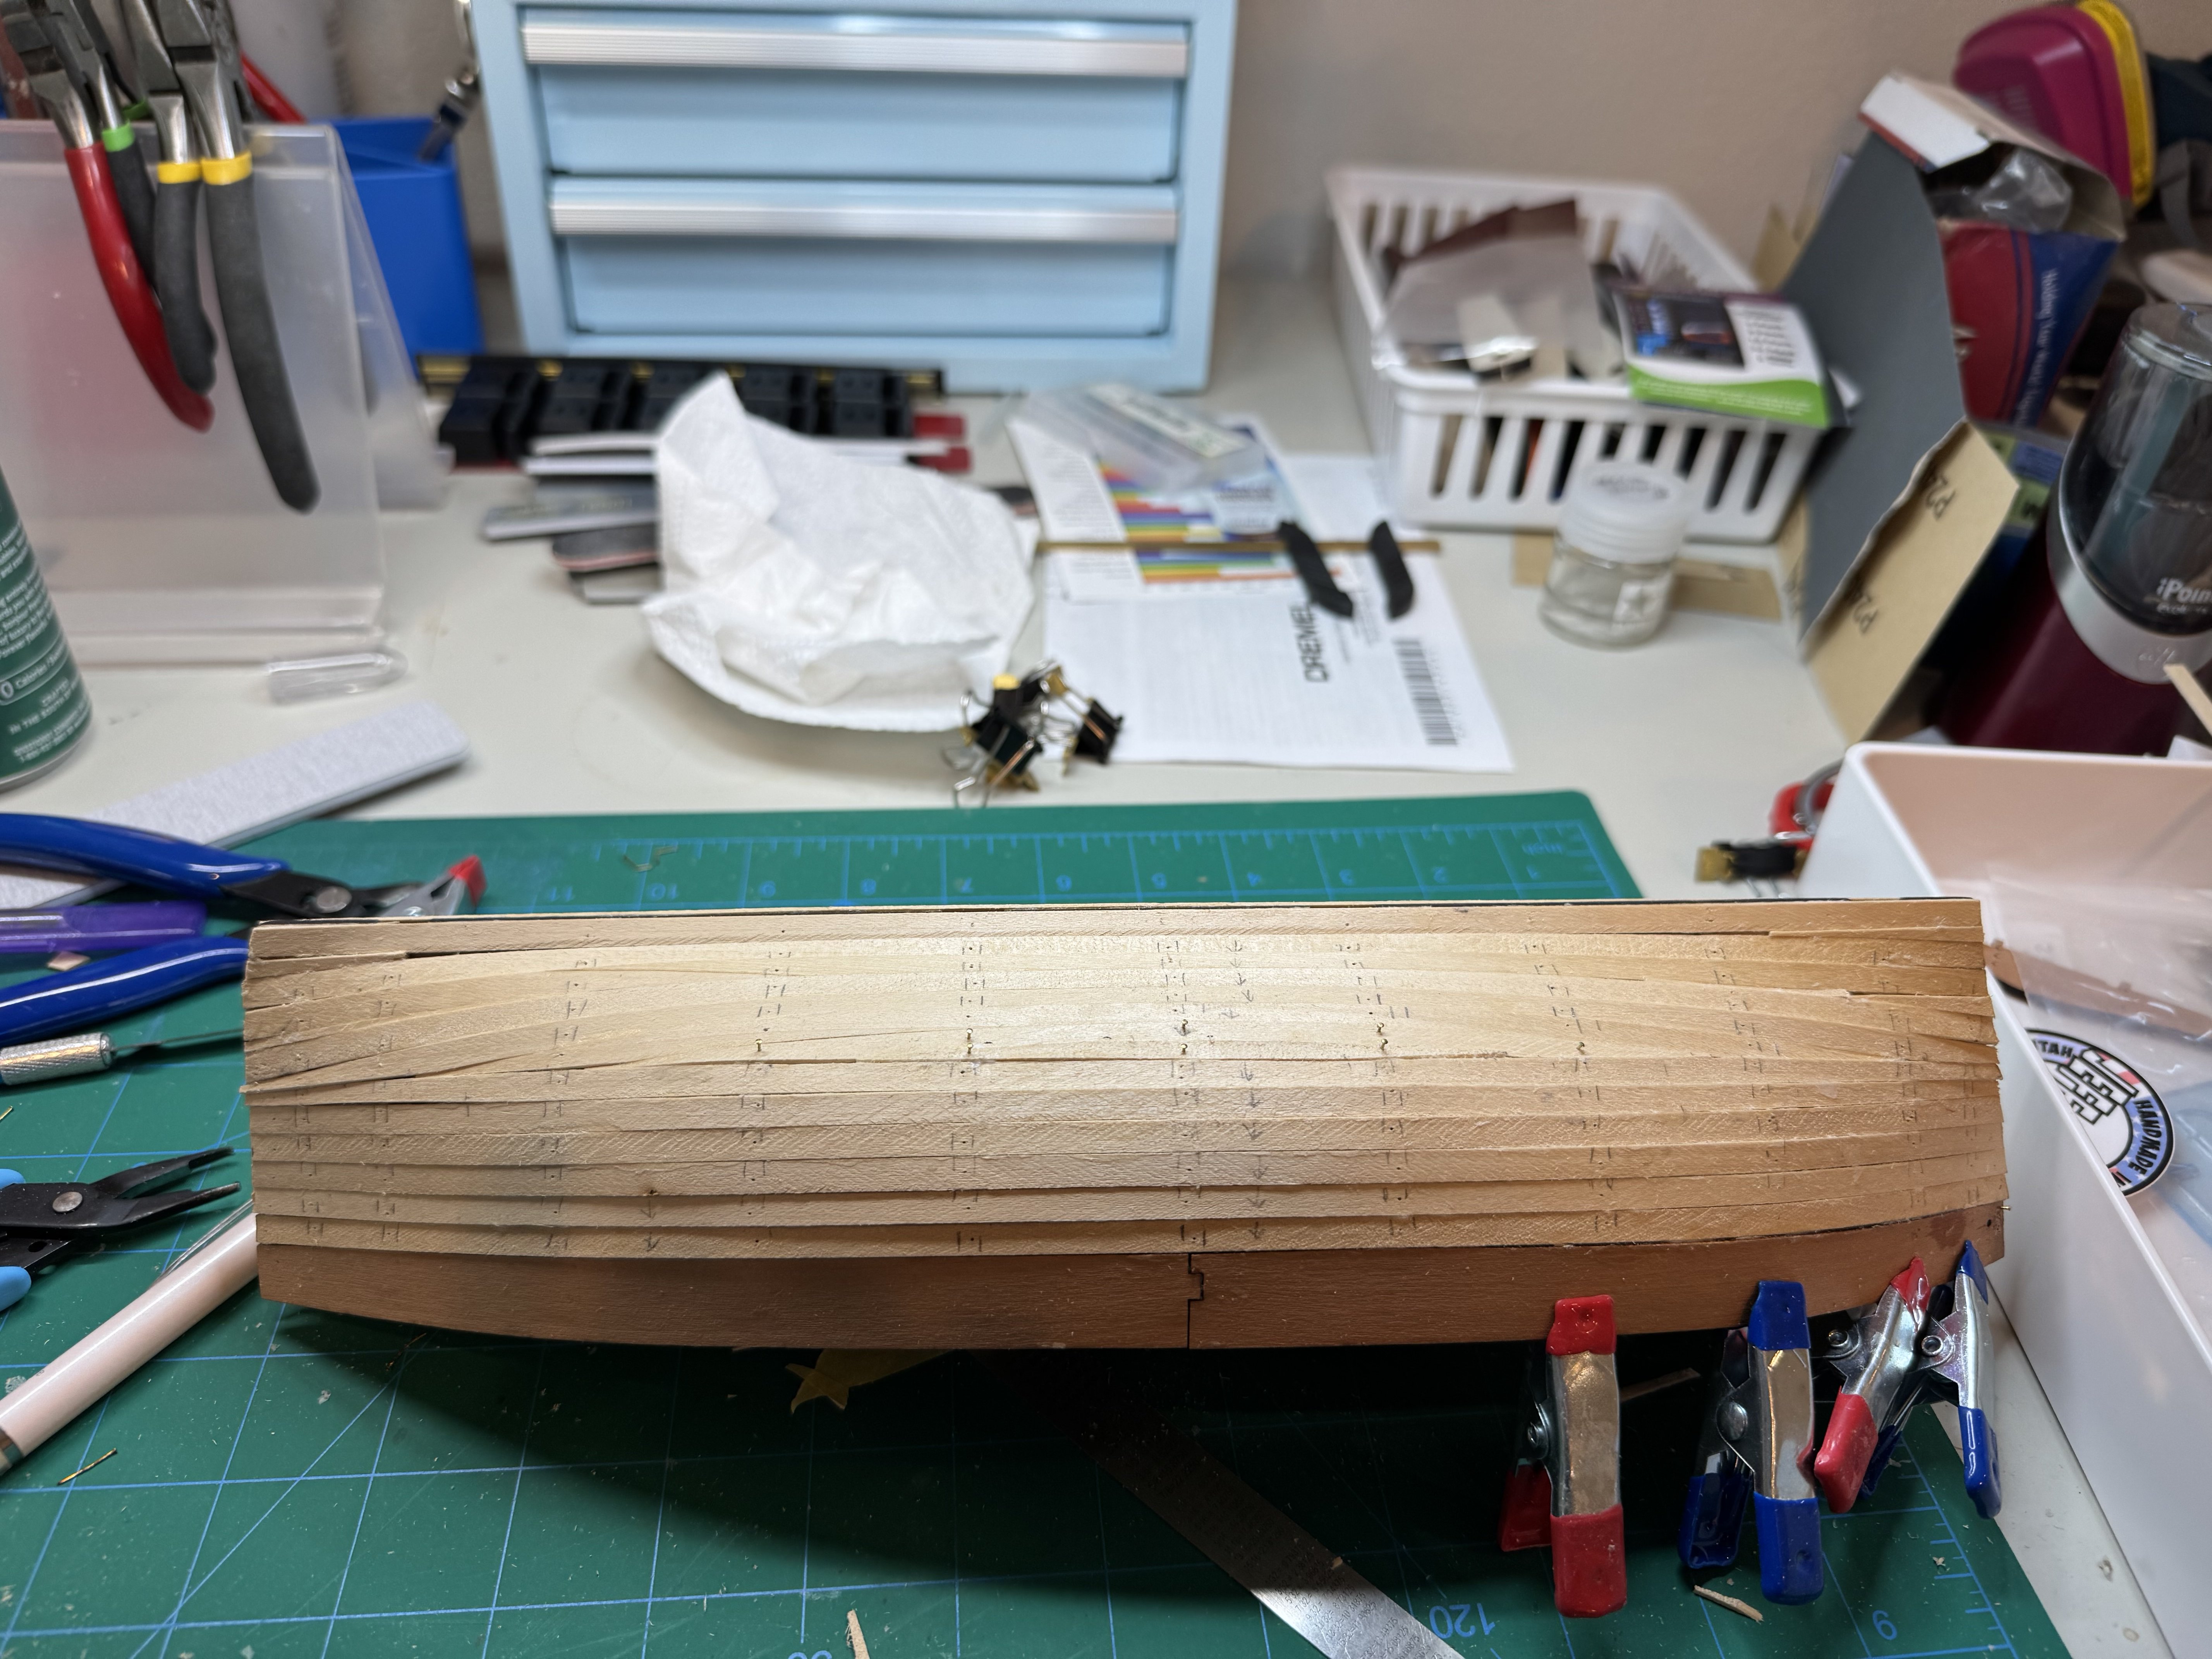
Good morning. I am progressing nicely with the second planking of Lady Eleanor. I did mark and drill the holes once I finished the planks. I used a 1 mm as a pilot then extended to the 2 mm bit. Starboard and port are complete to the same number of planks.


- 27 replies
-
- 5
-
-
- fifie
- vanguard models
- (and 2 more)
-
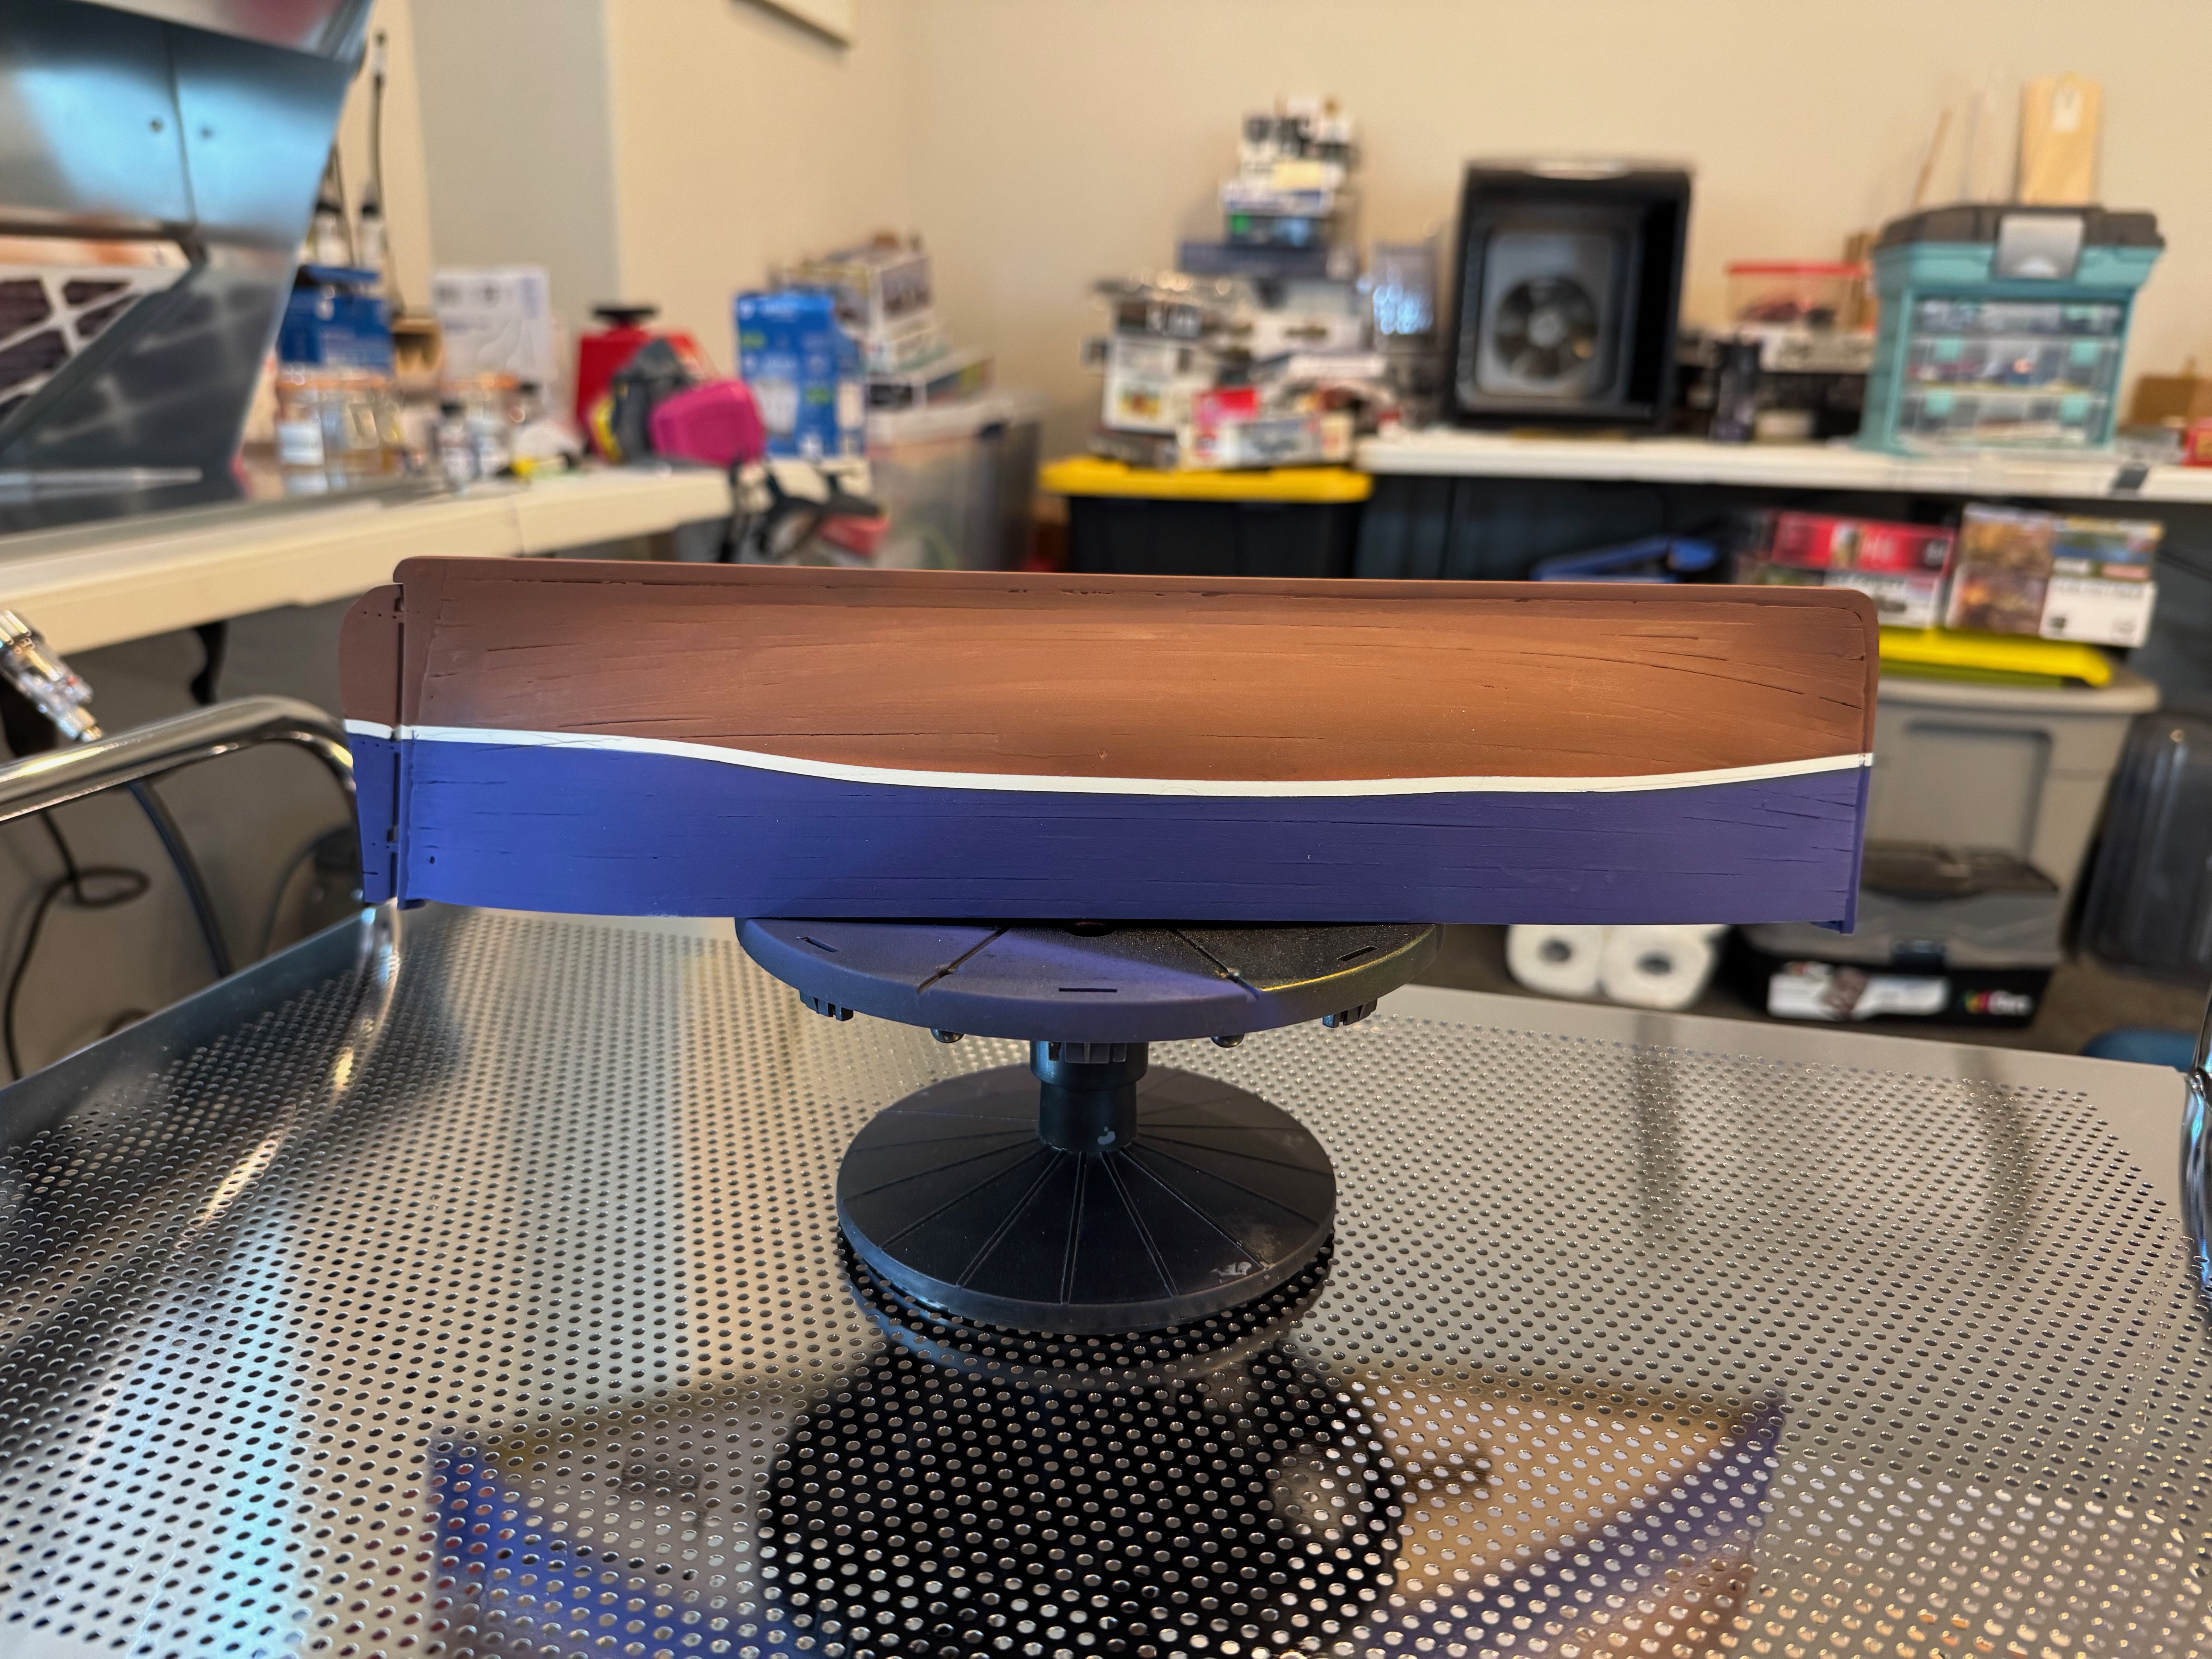
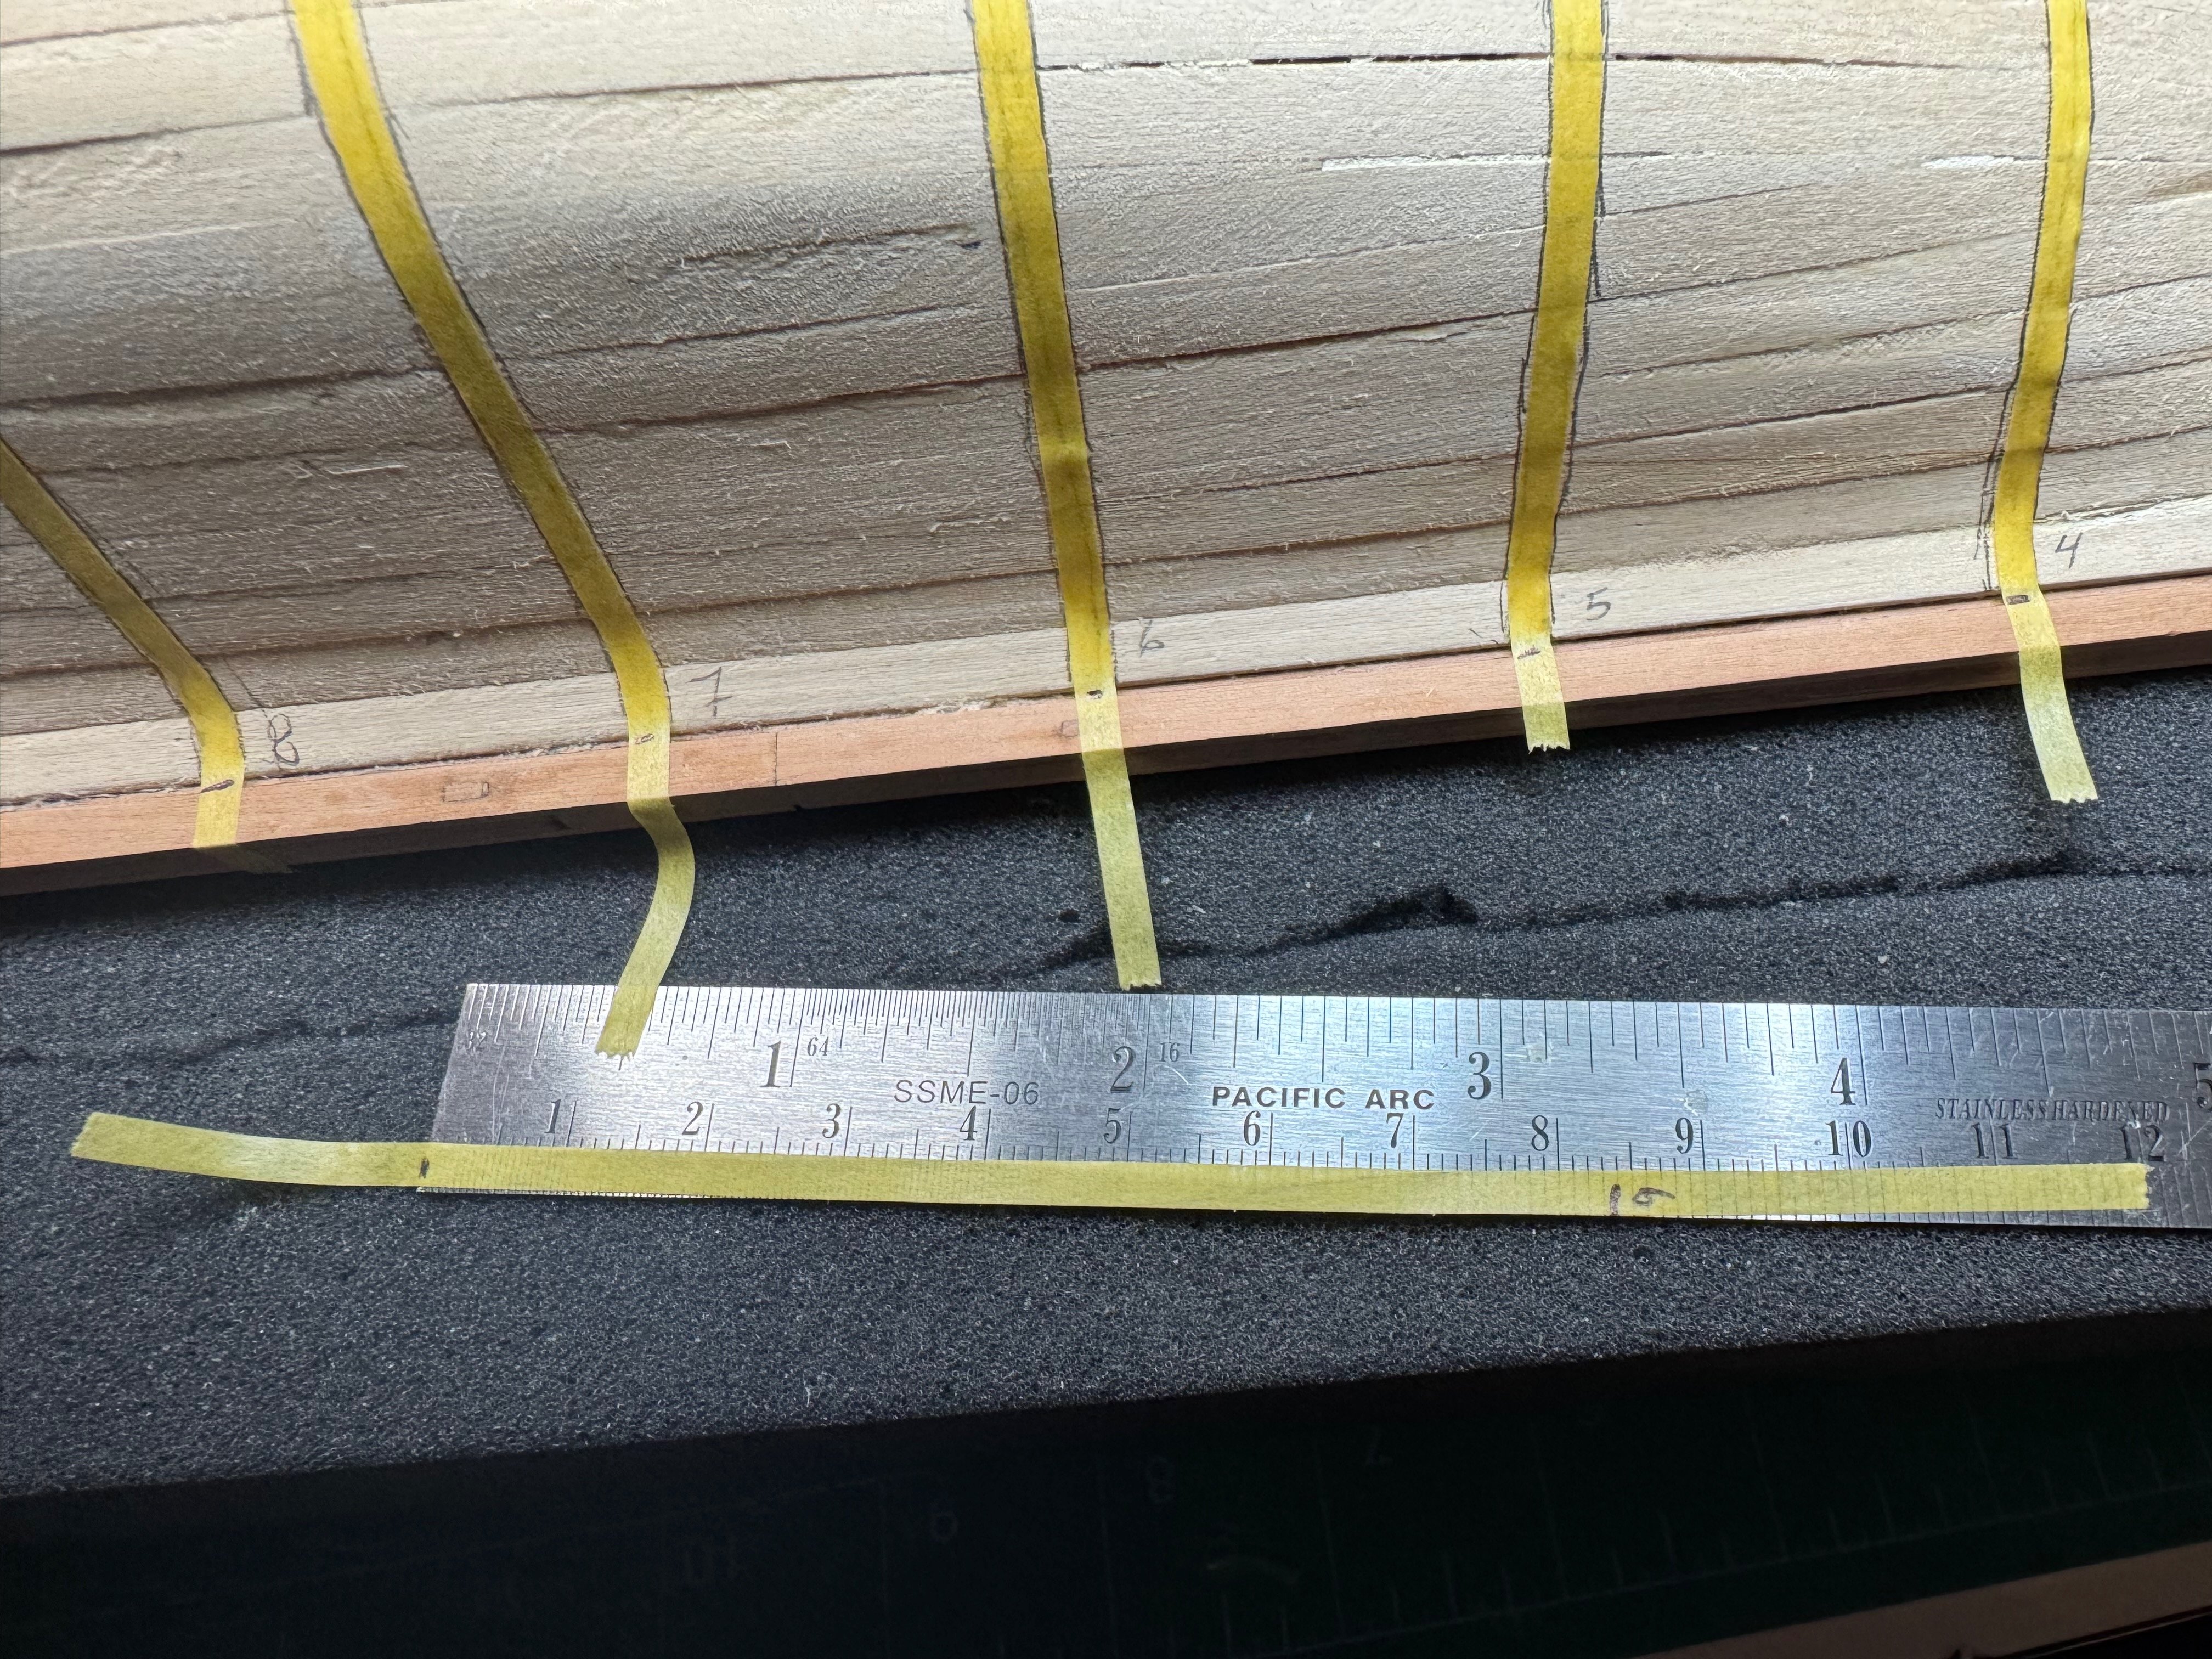
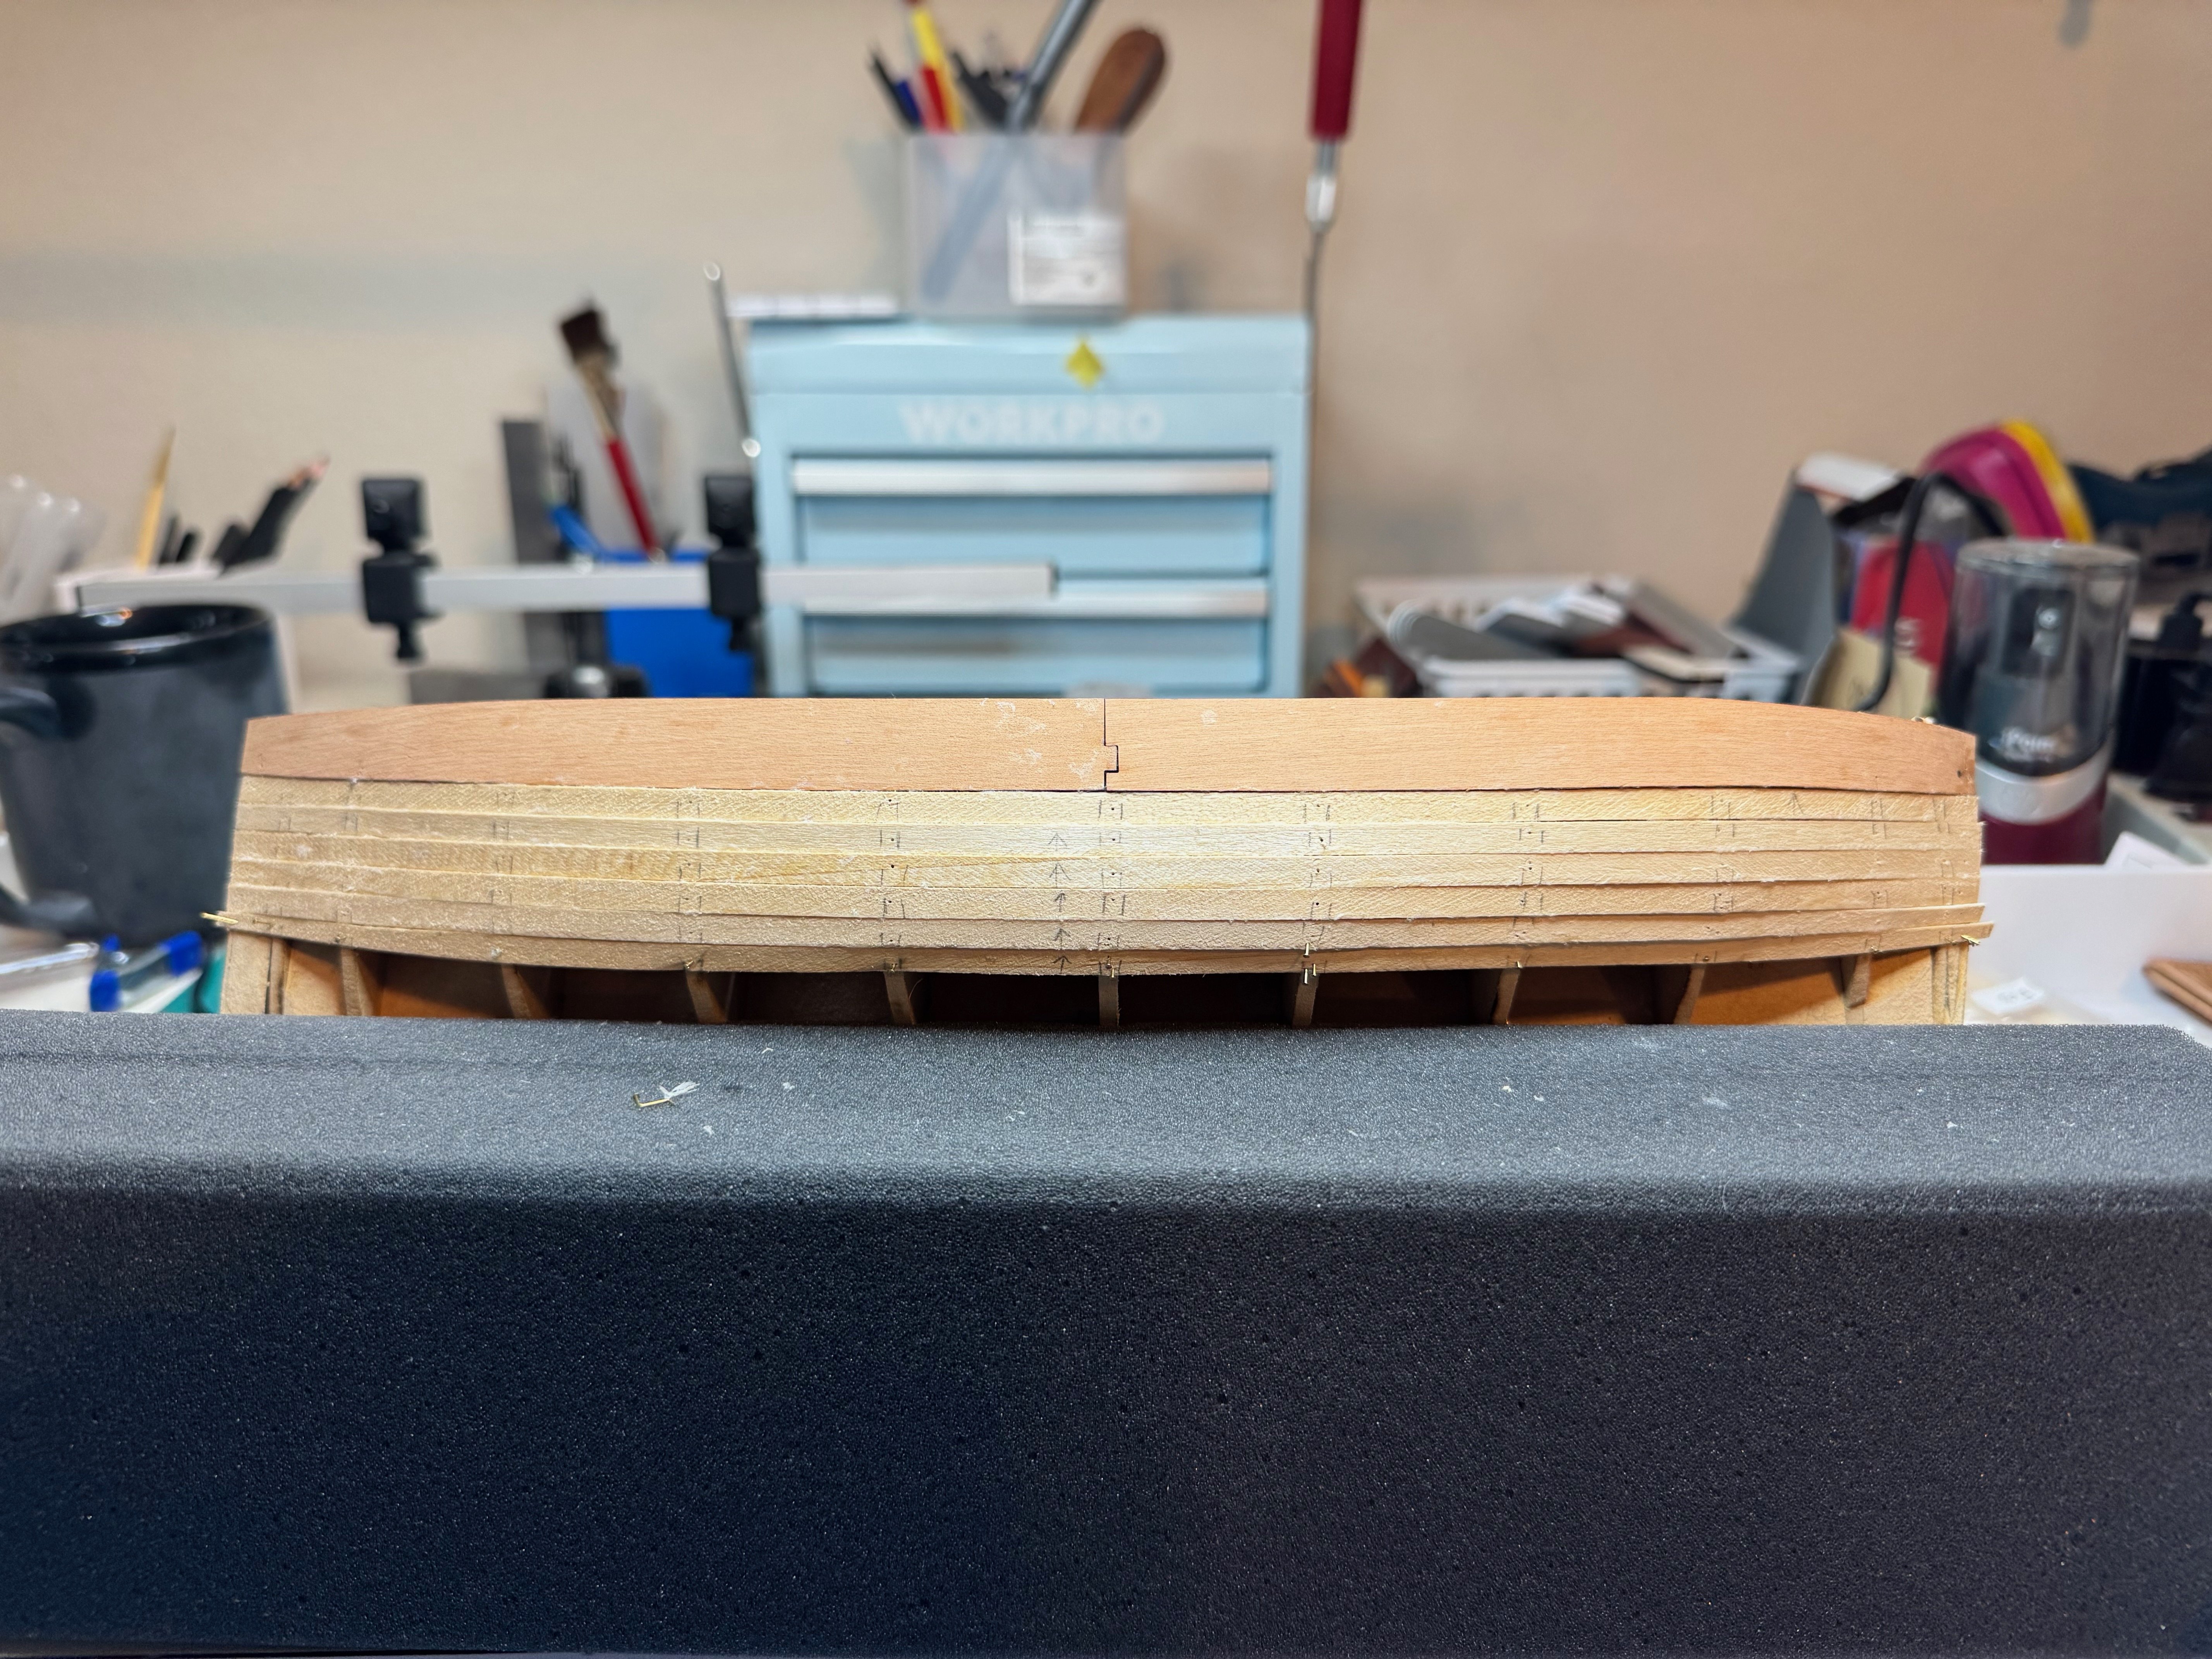
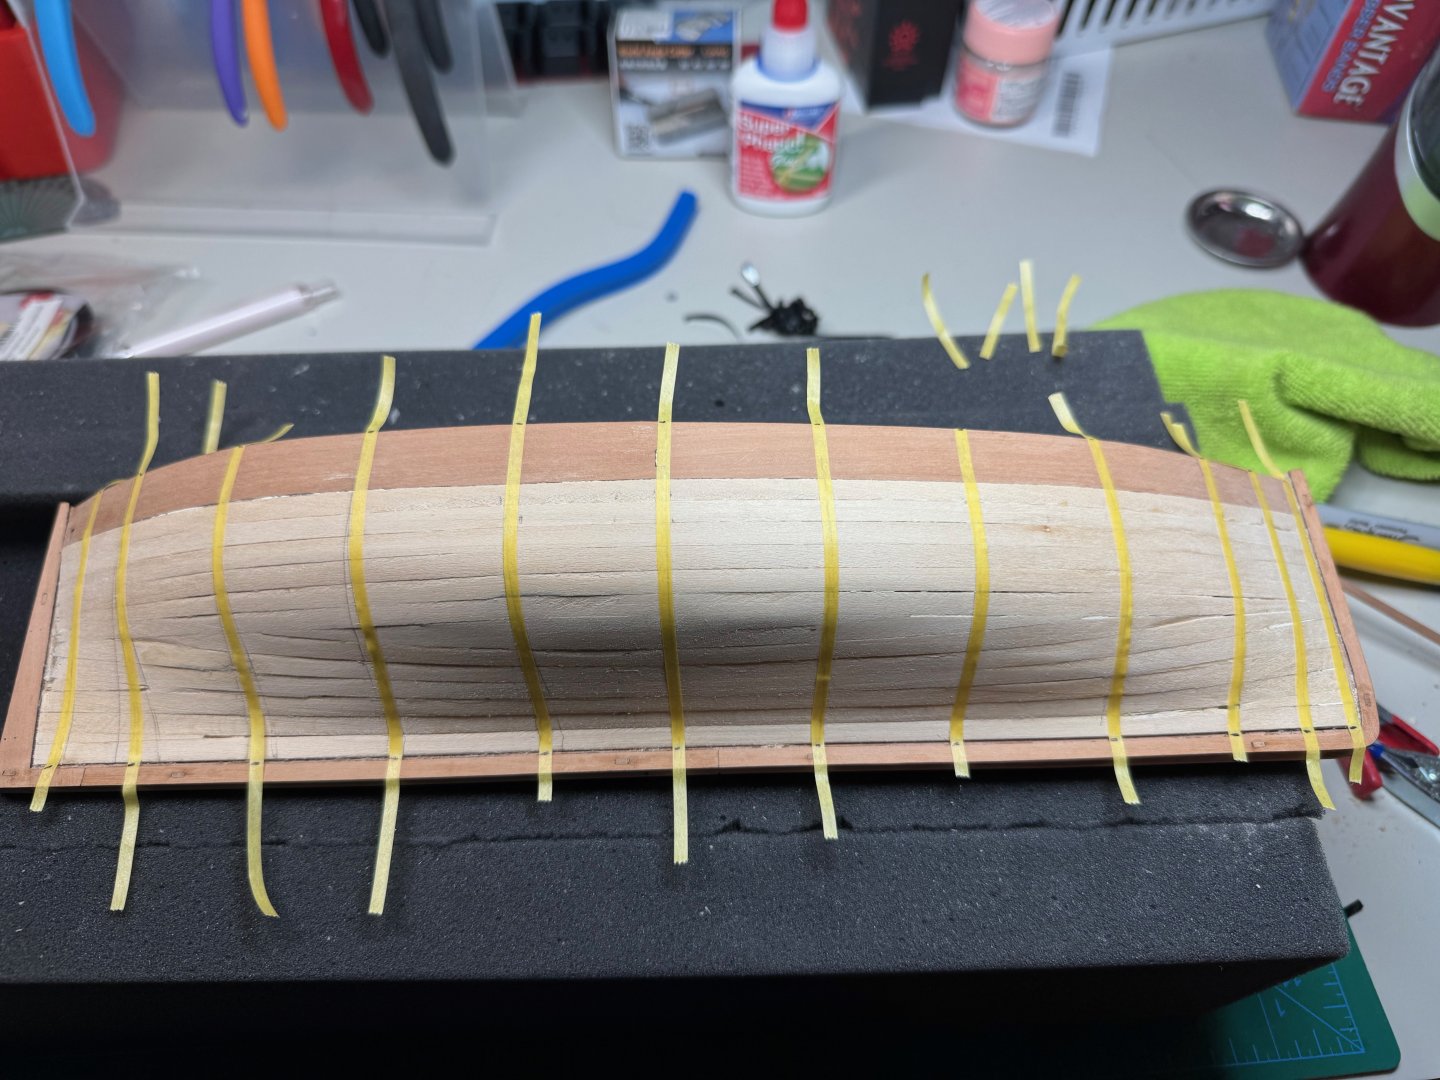
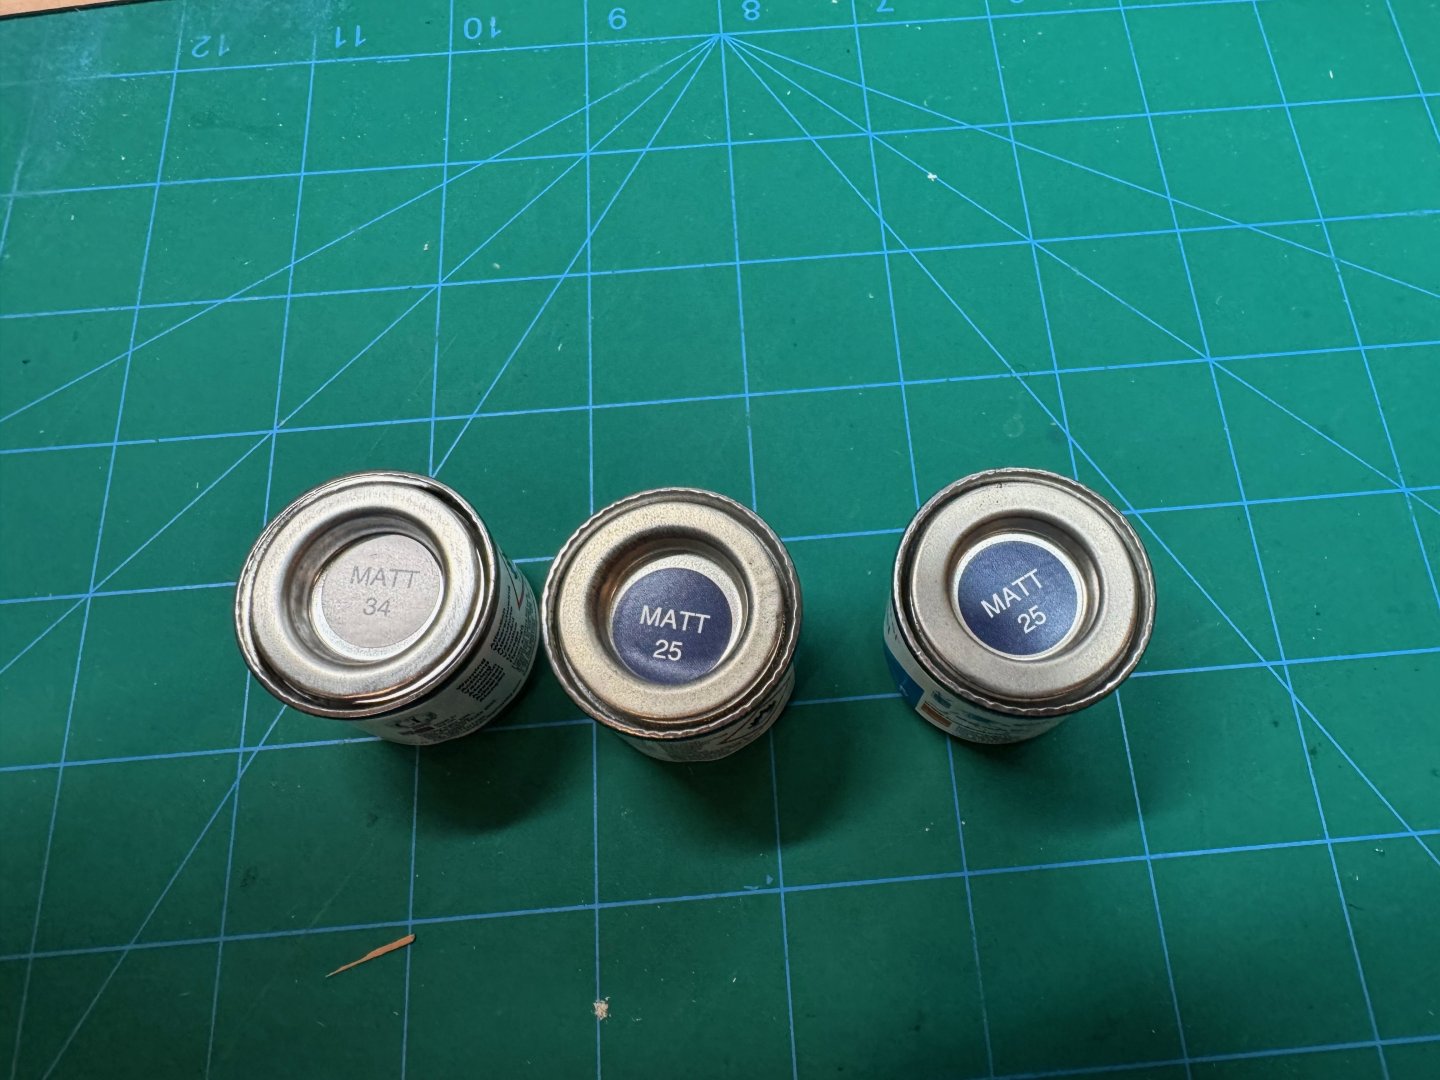
Finally I am now starting the planking process which is steps 64 - 72. First I wanted to make the bulk heads after my sanding so that I could create a planking fan. I initially started with chart tape. This did not go that well as I could not keep the tape down well enough to adjust. So I moved to 1 mm masking tape. Once I was satisfied with the placements, I think marked the top and bottom of the bulk heads. I was then able to take the measurement accordingly. I also drew lines that showed me where the bulk head should be. Next I created my planking fan. LE Planking Fan.xlsx Finally I was able to add the first two planks. One last thing I decided I am going to paint my hull and I wanted to bring some color to the model. So I am going to go with Blue and White to mimic the Scottish flag. Yes I know its not the right blue, but I am not going to mix it. So I purchased some Humbrol paints to try out. I will spray the pieces accordingly. I have decided to paint the inner bulwarks white, and the gunwales will be the blue. Other features will use the same pattern. If my planking is shoddy then I will paint the non red part in the blue.


- 27 replies
-
- 5
-
-
- fifie
- vanguard models
- (and 2 more)
-
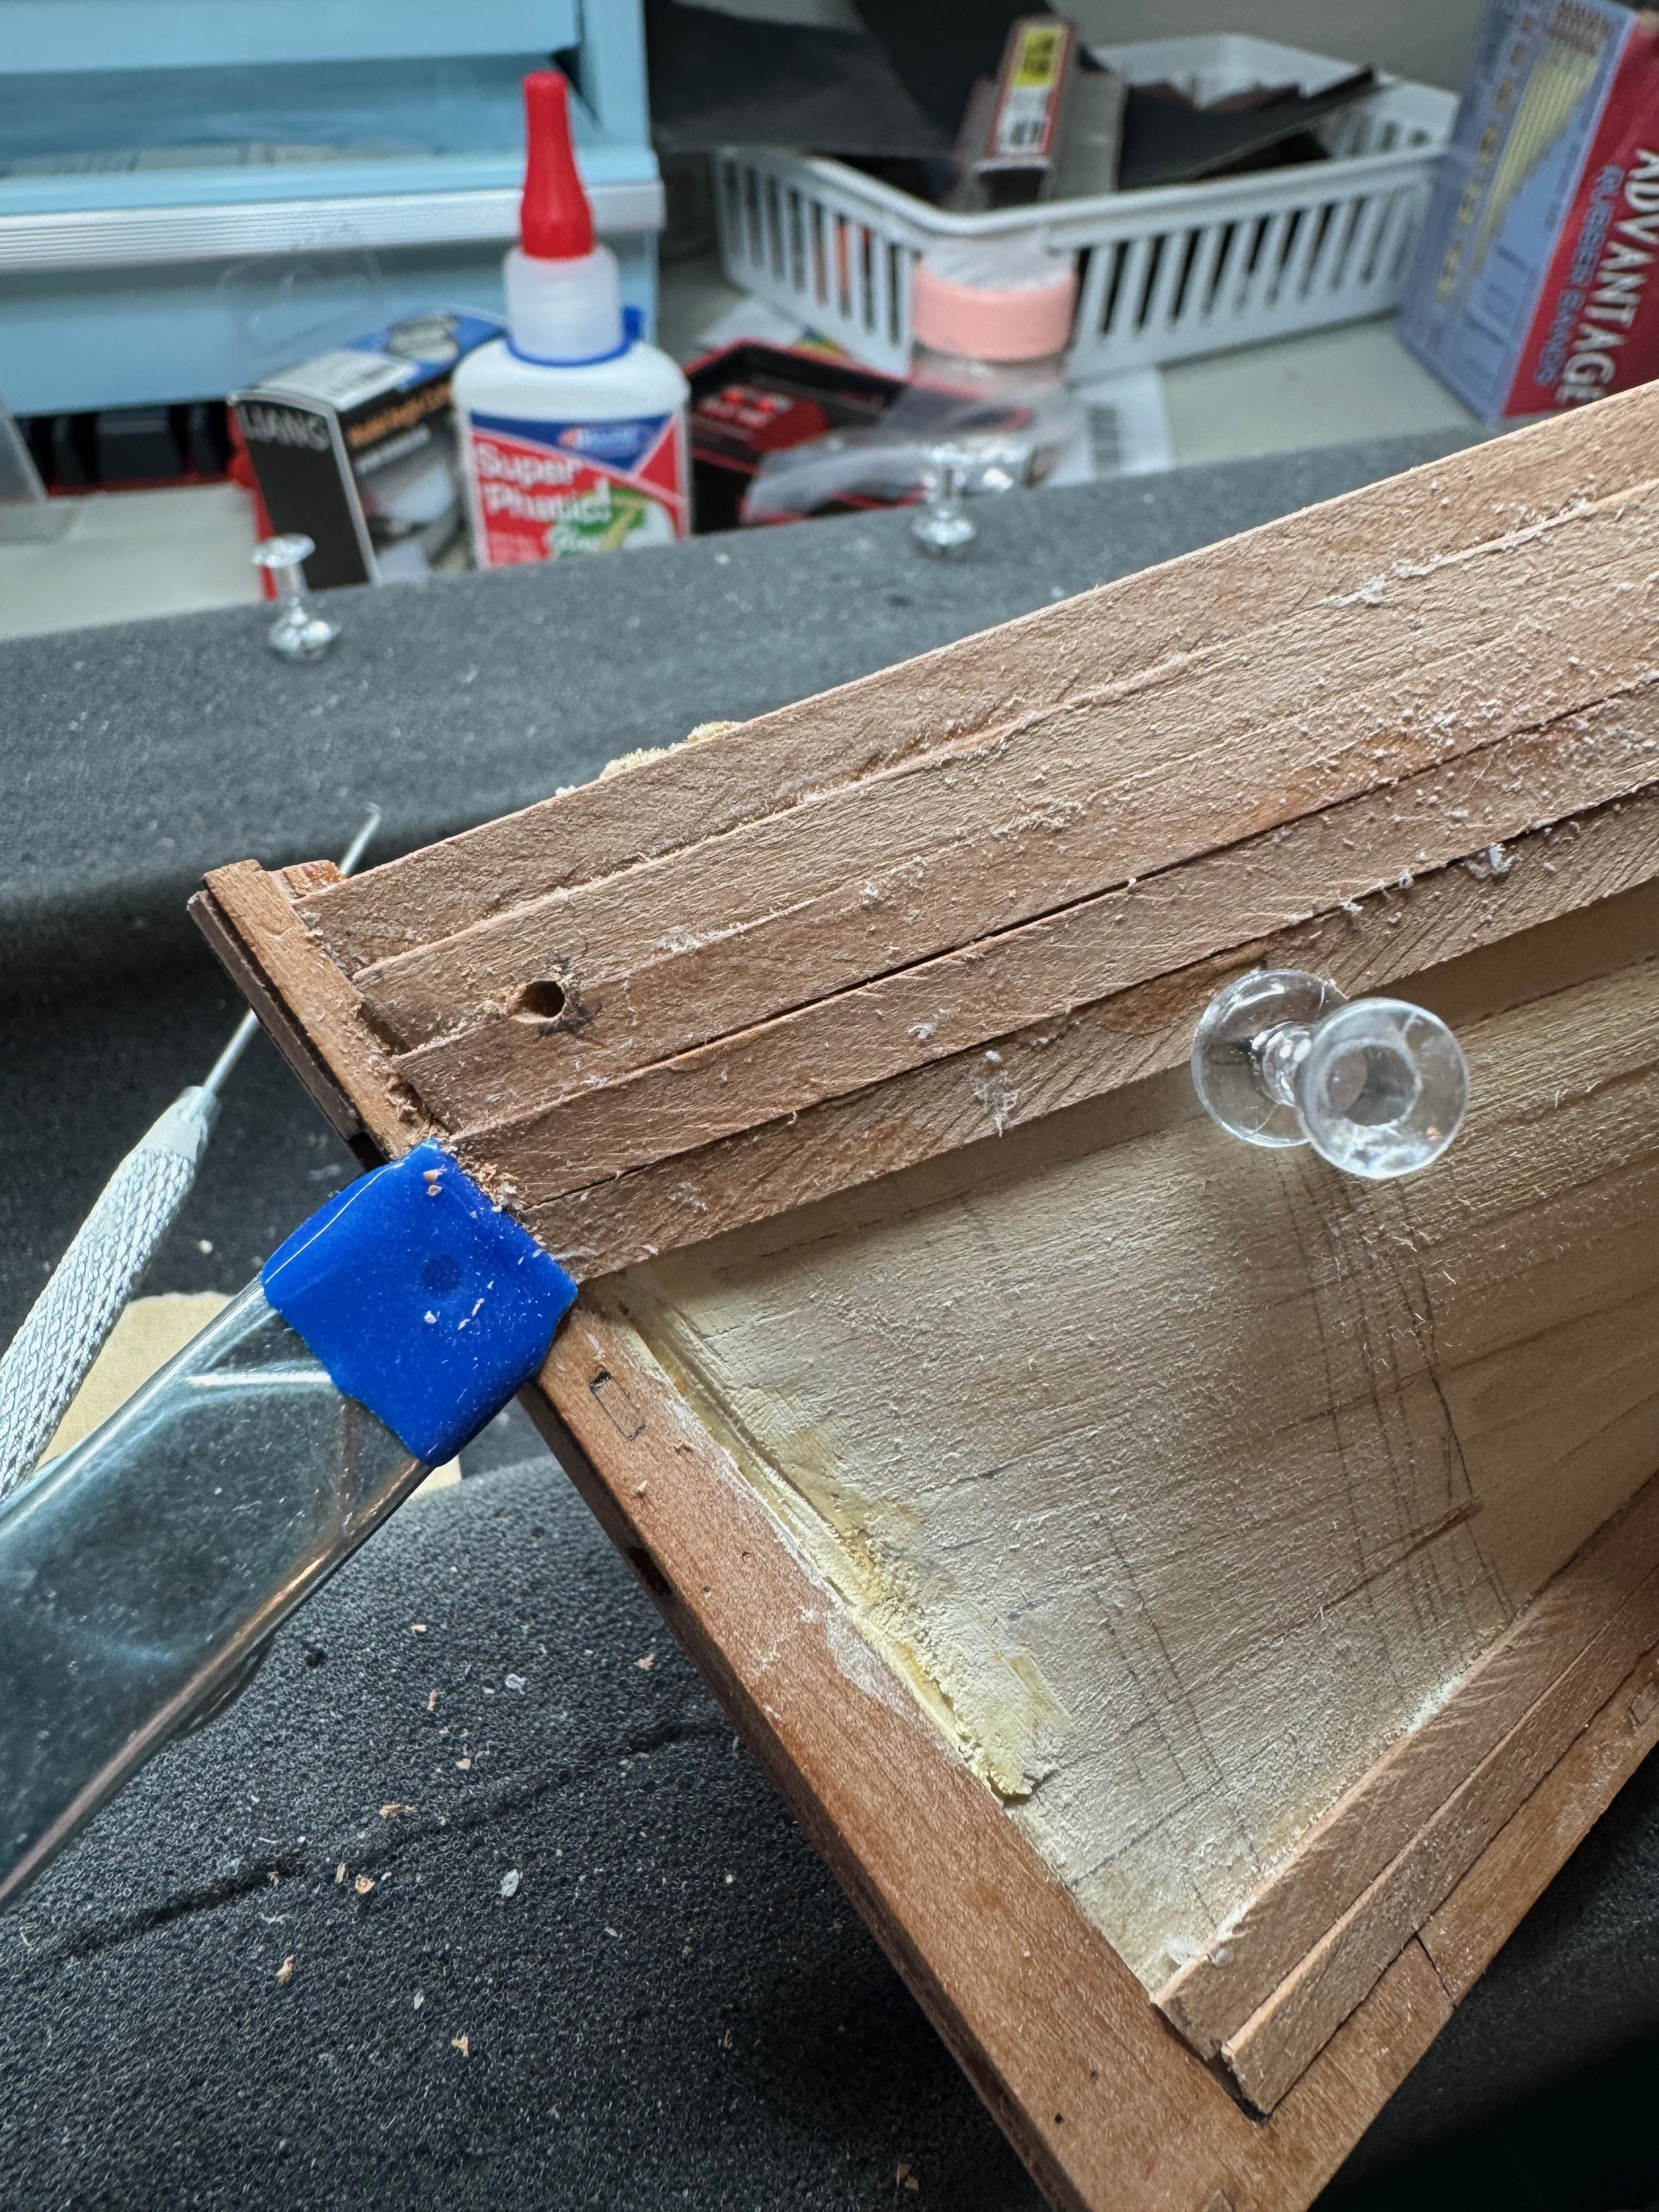
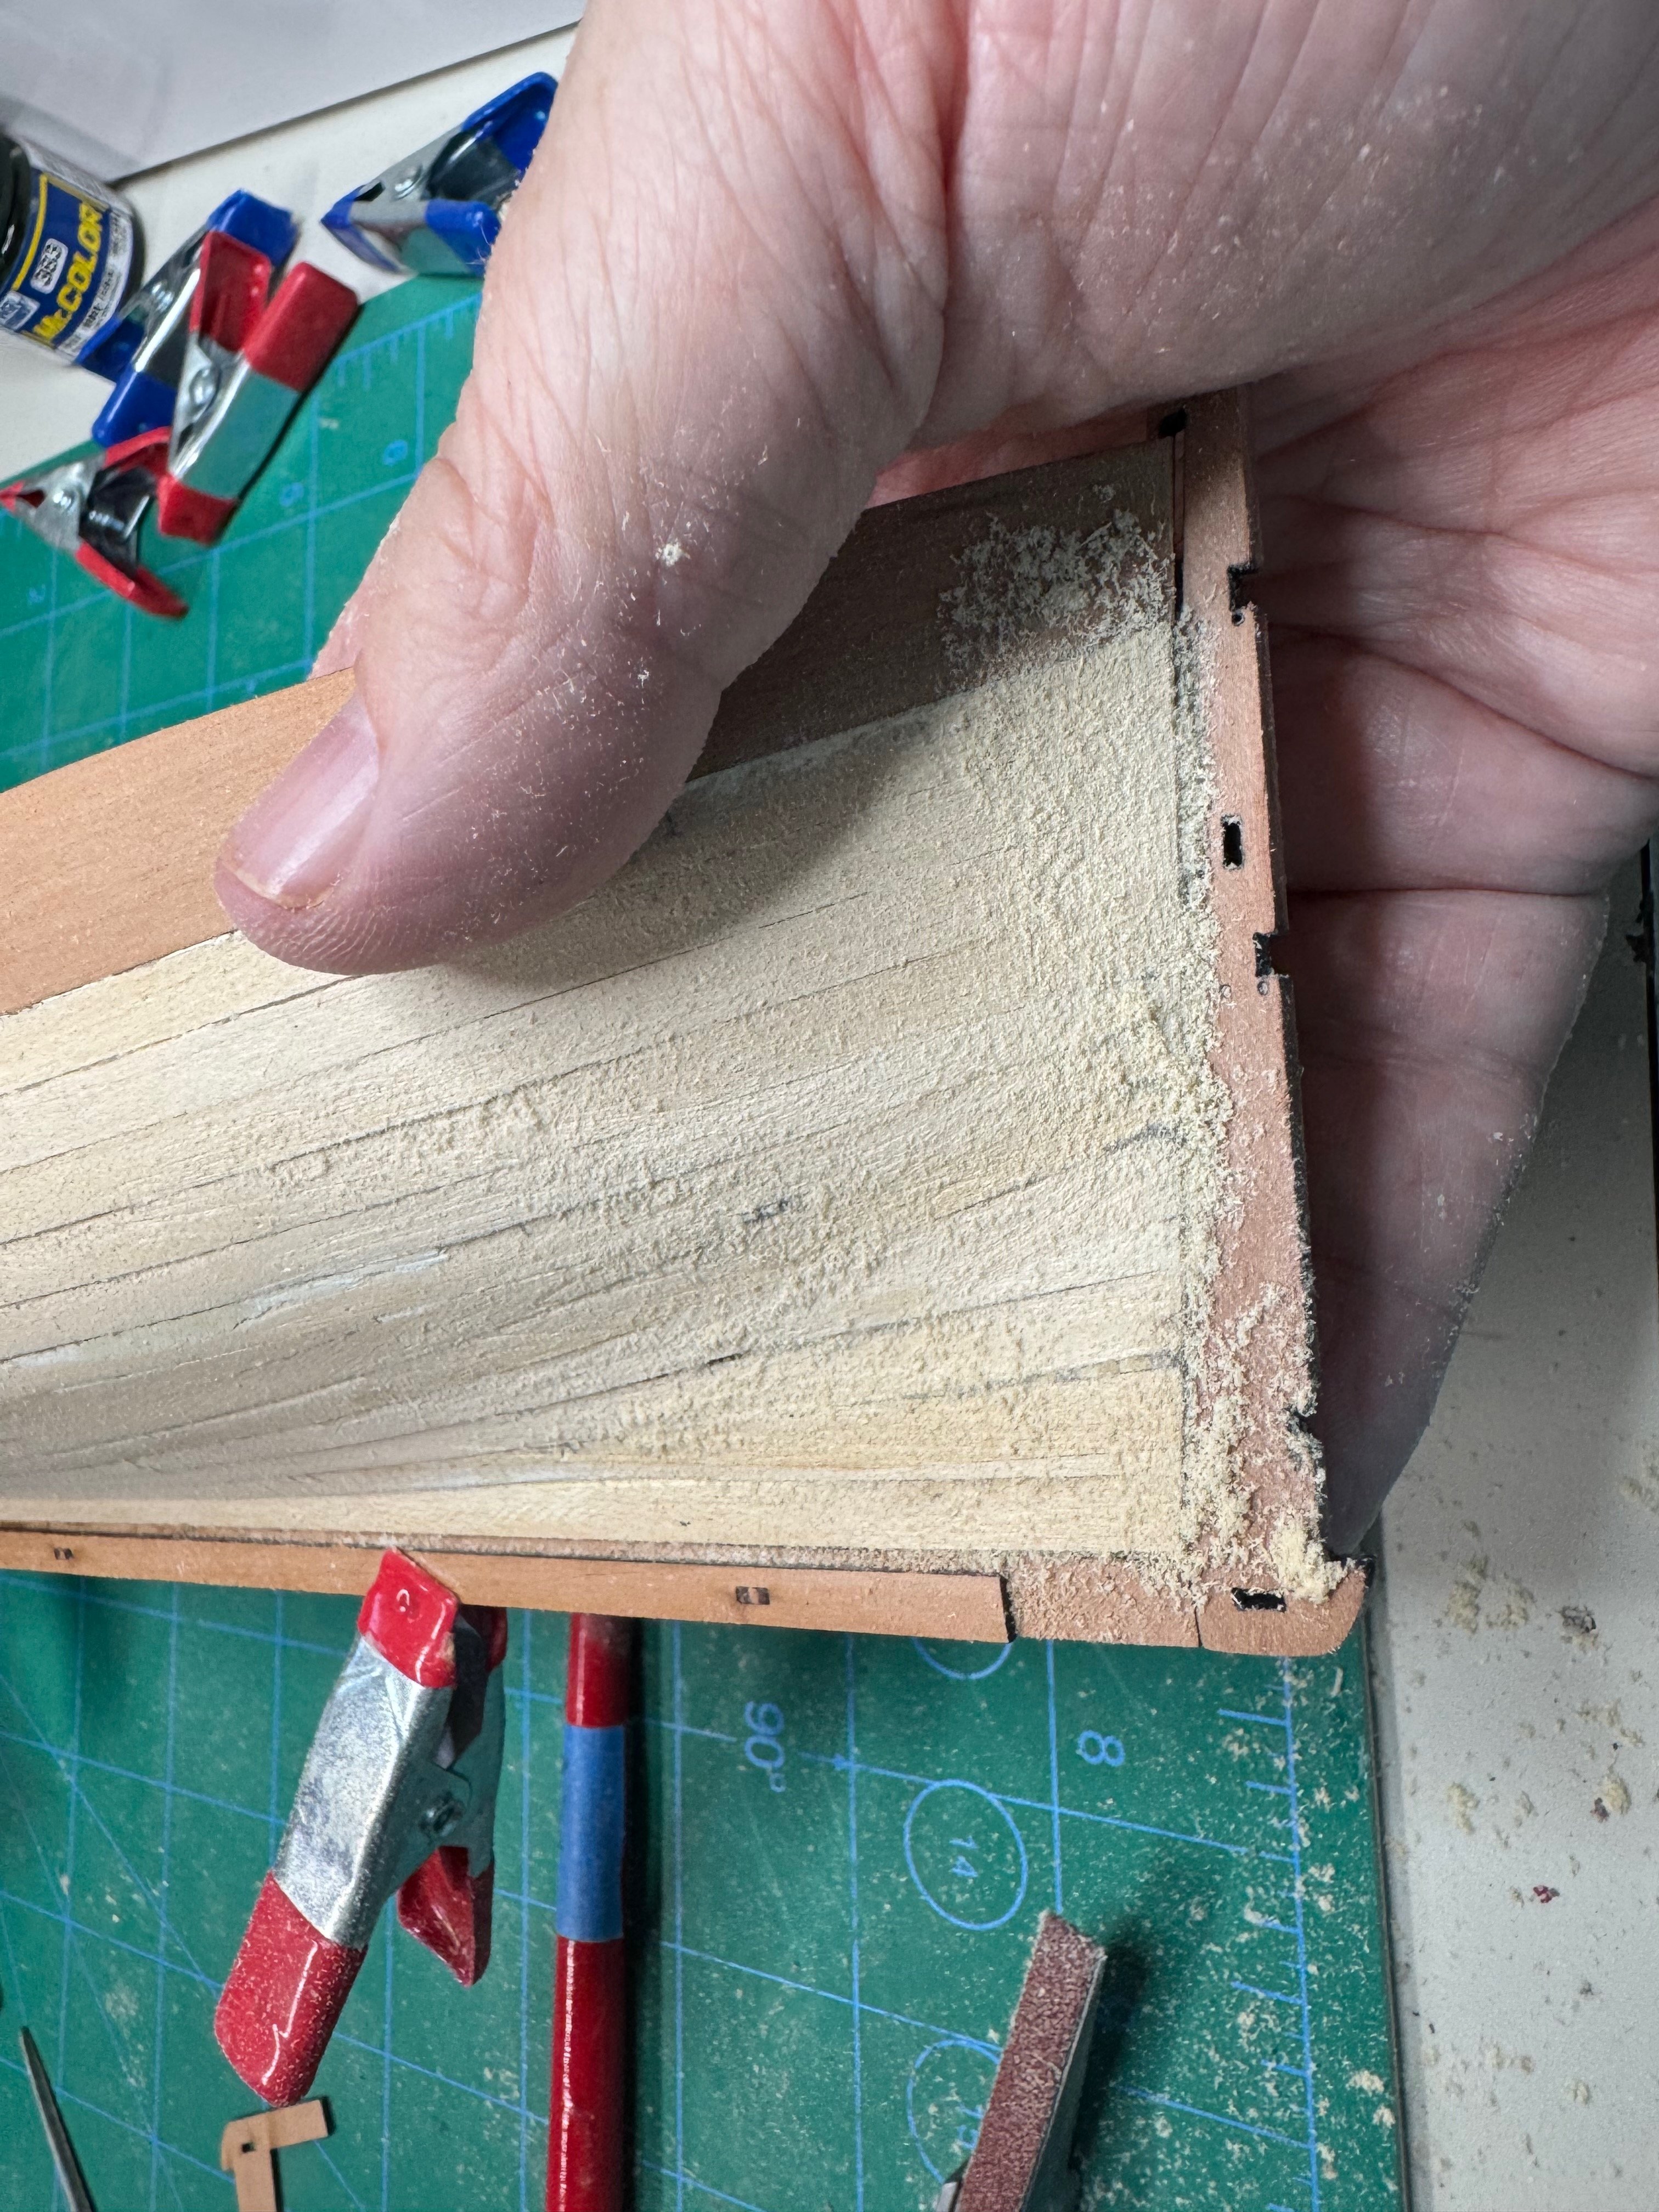
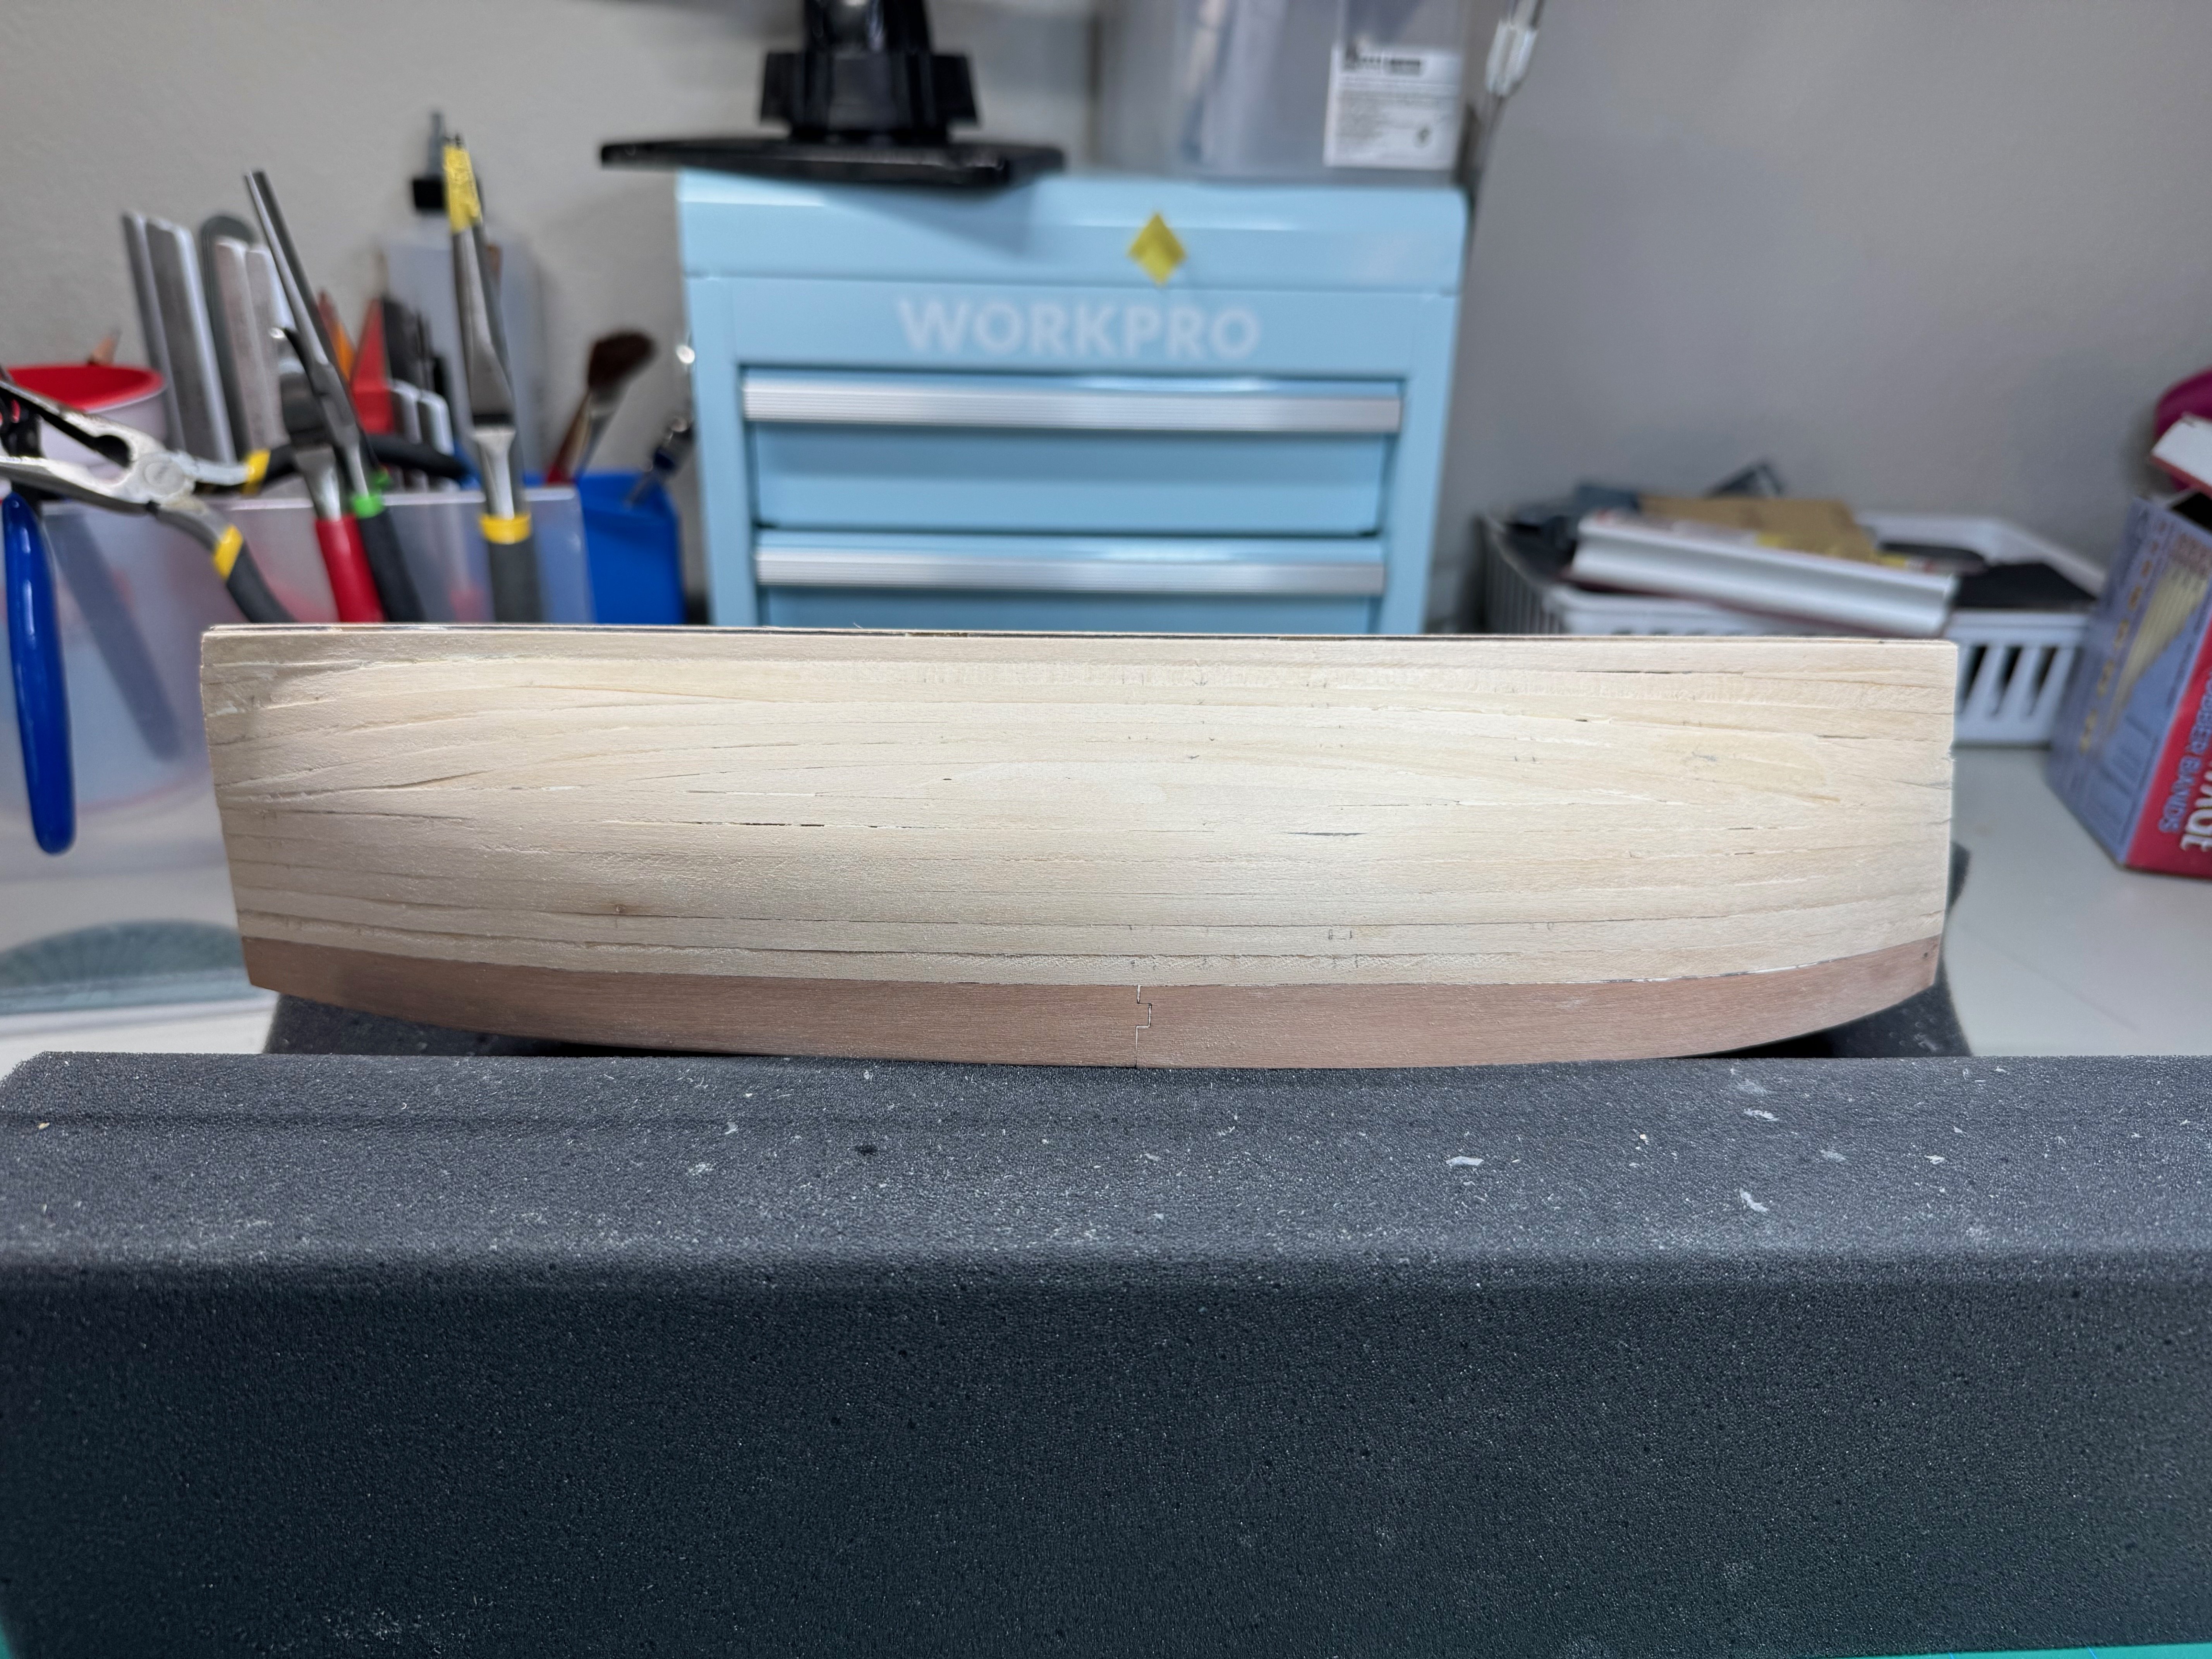
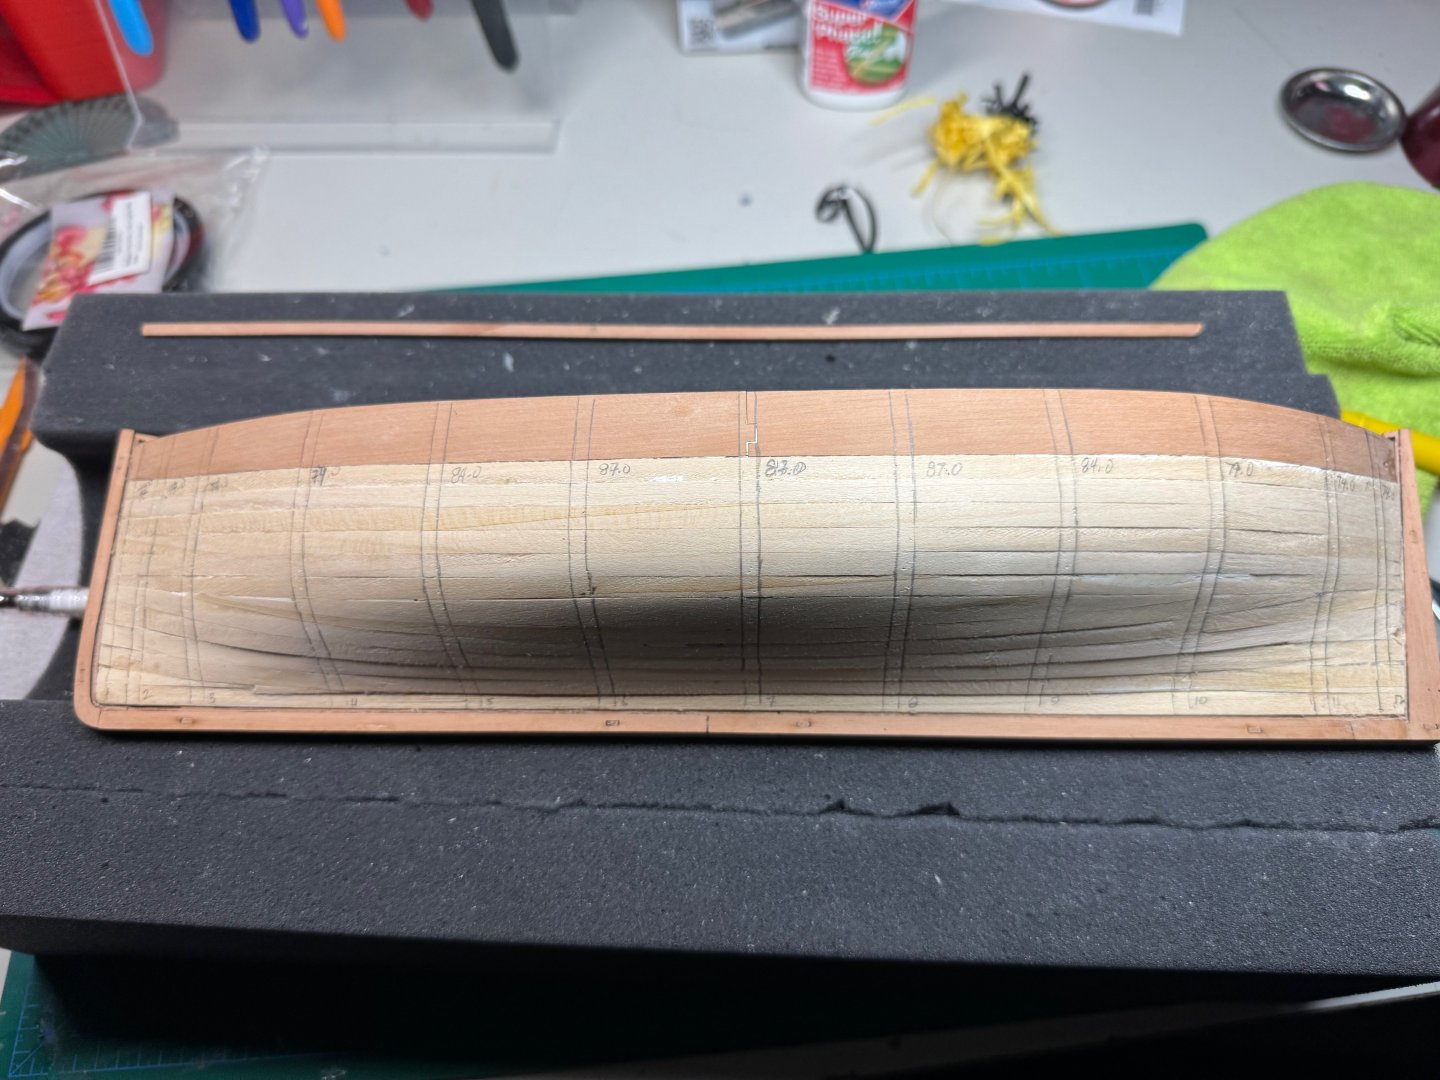
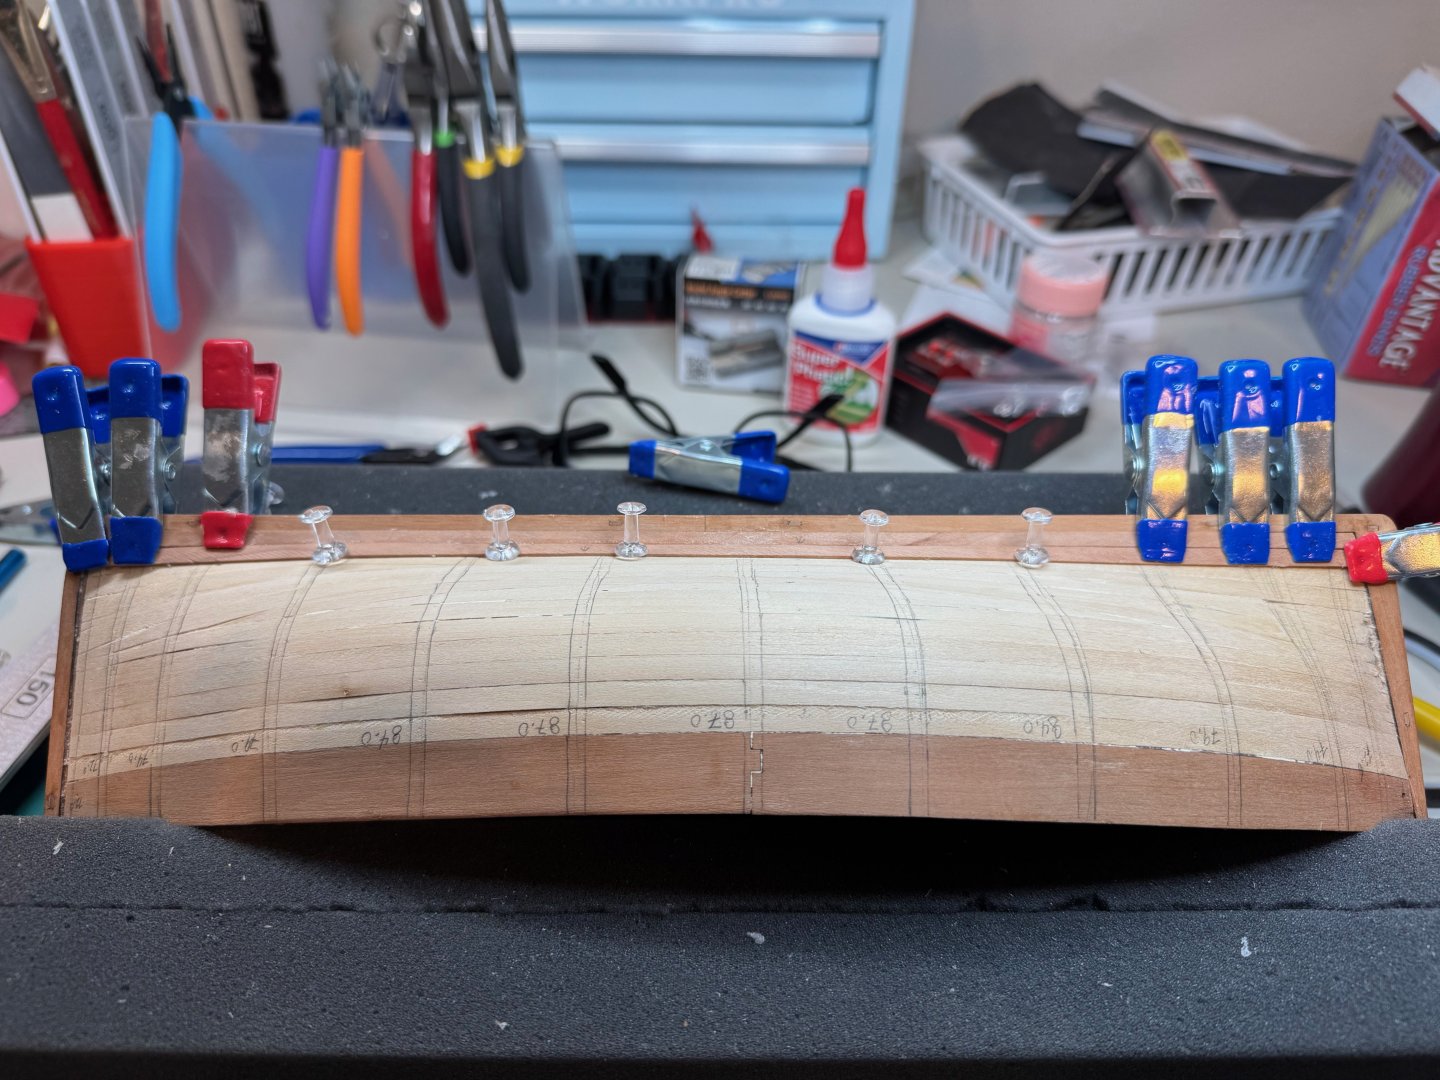
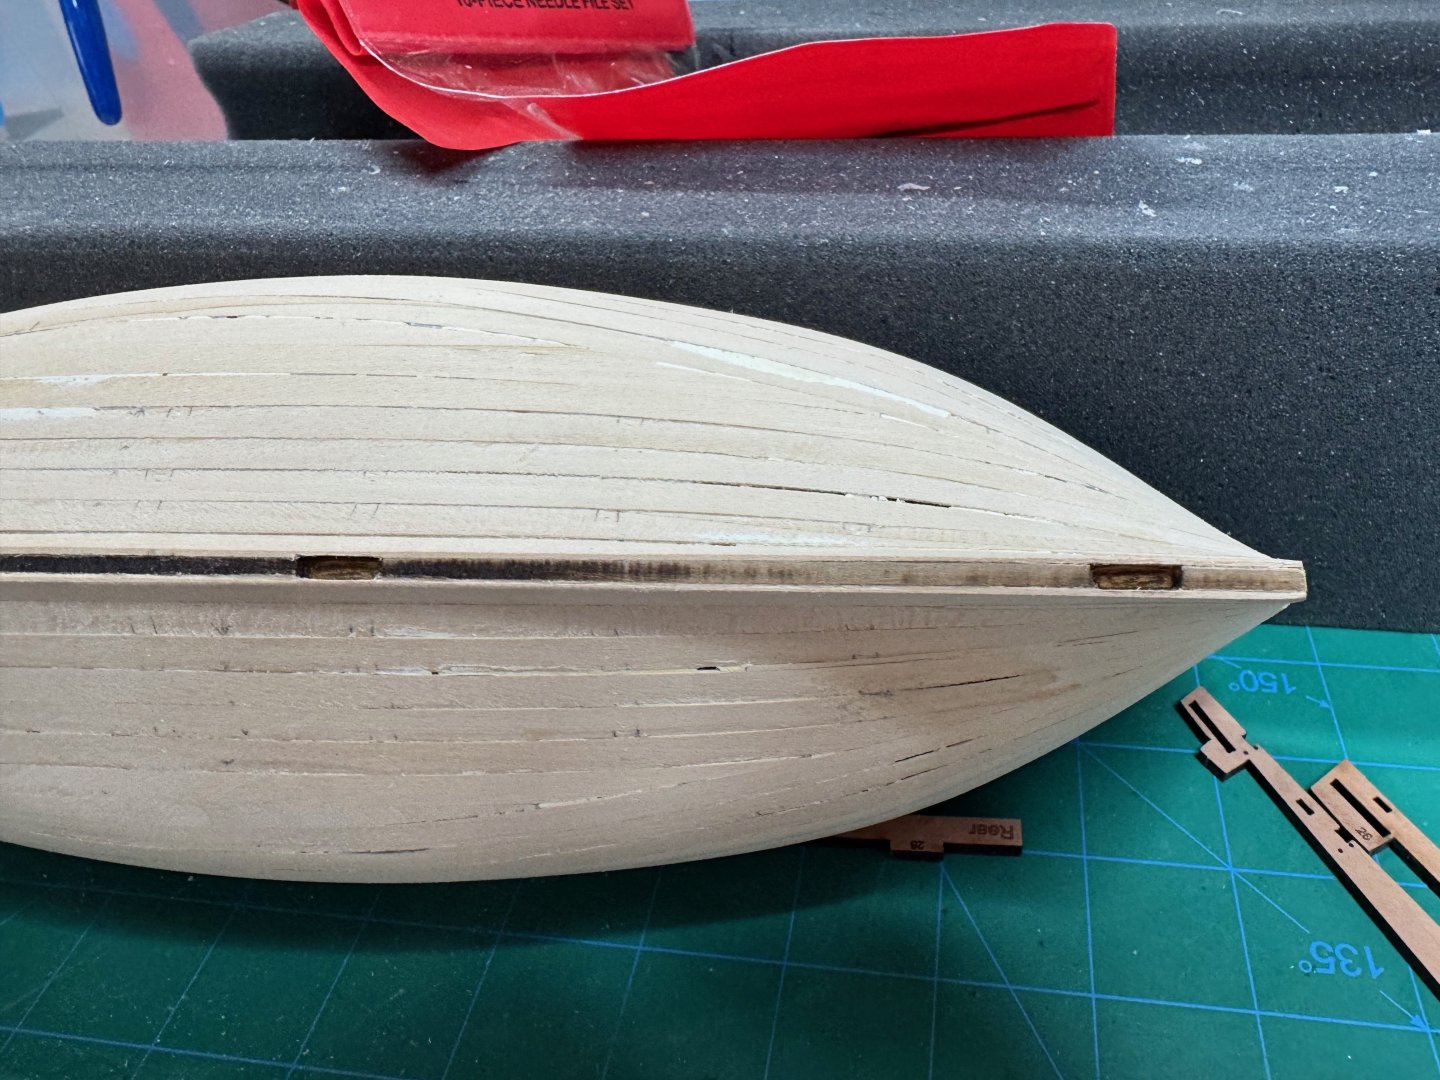
Next completed steps 56 - 63 which installs the rabbets. The tabs are a nice feature to in keeping the facades nicely aligned. I did notice the stern post rabbet is not deep enough. As you can tell I had to thin the planks even further at the stern so that I could get the second planking a little more even. Even though I did think the planks near the gunwales the planks would not insert into the rabbet. I ended up adjusting that by manually creating a rabbet along the stern post. Finally after all the trial and fitting. Just as I was putting glue on once of the rabbets for the bow, it broke... I ended up fixing it when I attached the post to the keel.

- 27 replies
-
- 1
-
-
- fifie
- vanguard models
- (and 2 more)
-
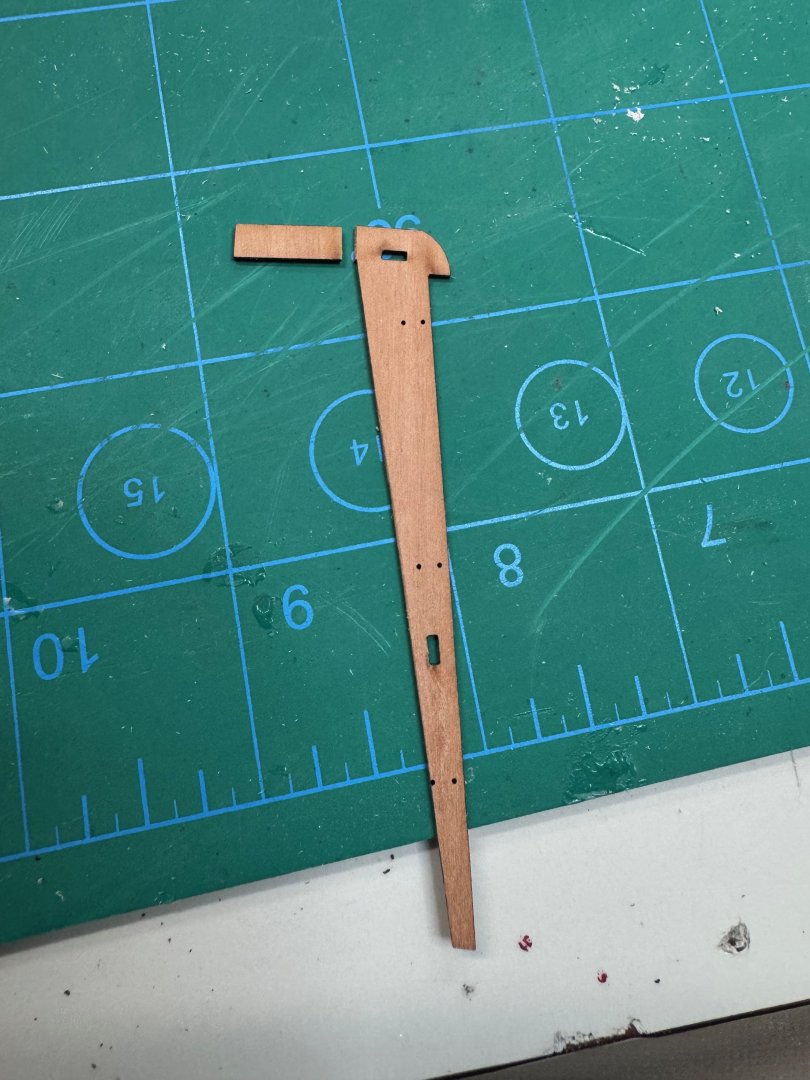
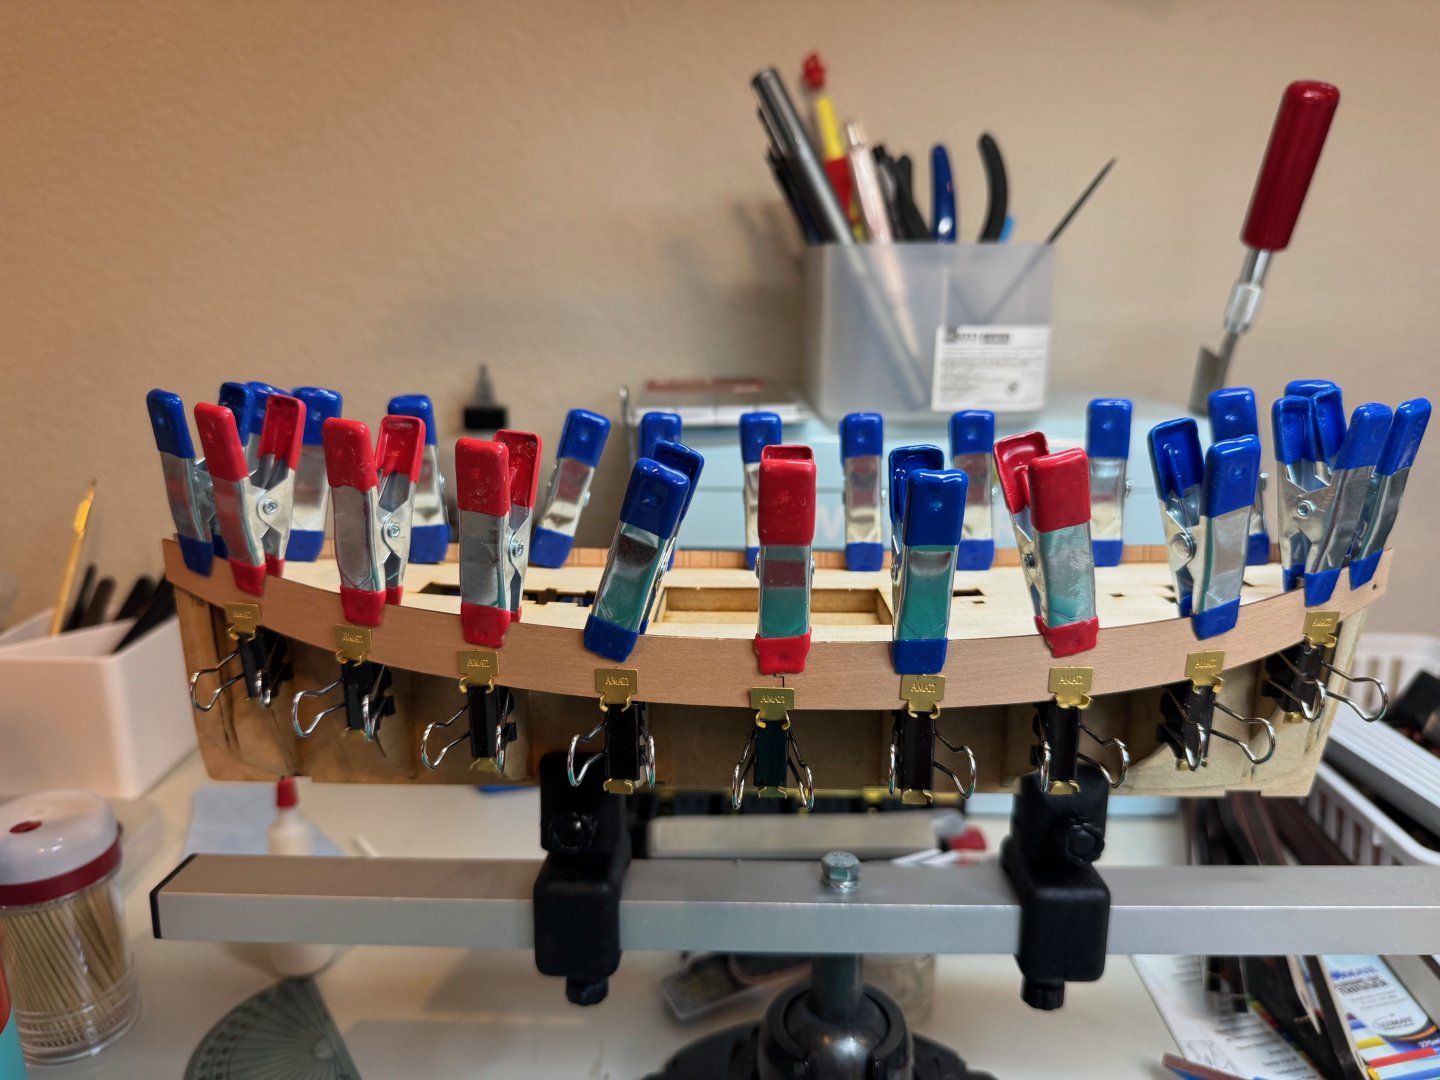
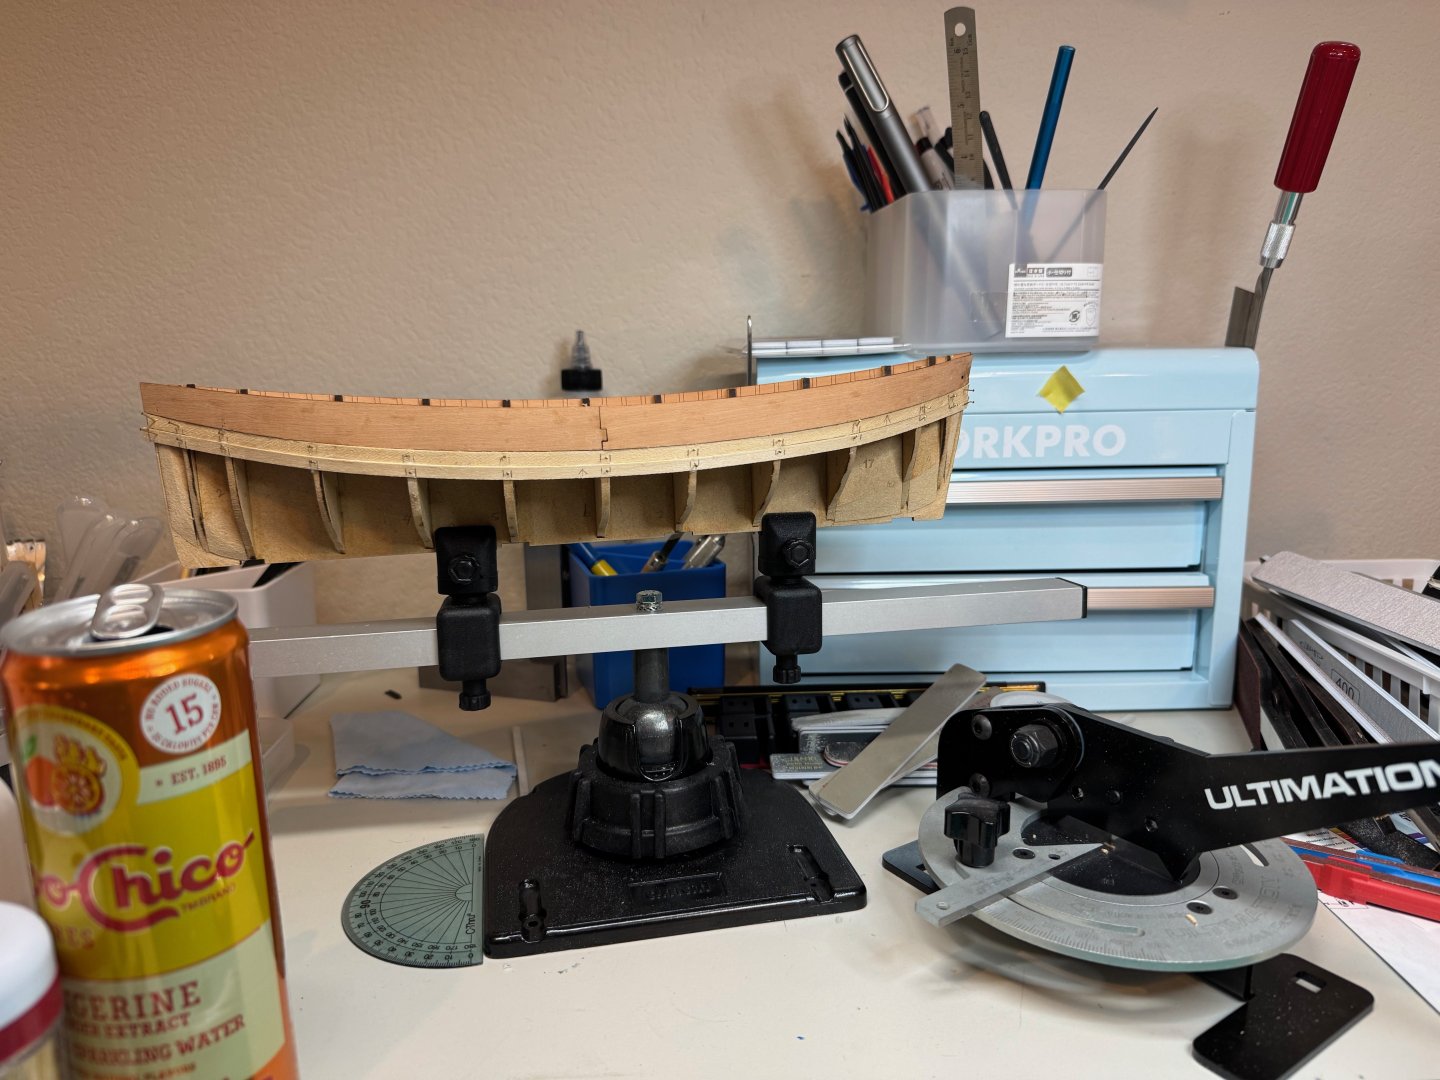
Steps 48 - 55 we add the stern post and keel. First I had to clean up the joints so that they keel would sit correctly. Then after some dry fitting I was able to glue in the stern post, and keel pieces, including the bow keel. Having the alignment clips is a brilliant idea. Thank you @chris watton. These clips made it easy to keep the pieces in place and even.

- 27 replies
-
- 1
-
-
- fifie
- vanguard models
- (and 2 more)
-
Good afternoon. A long awaited updated. As noted in my last post, I completed step 47. Step 48 is sanding of the first planking. I filled the gaps with some putty and then sanded up to 150 grit.
-
Thanks @JC1945. I am now entering the second planking phase but an update is coming here shortly.
-
Jim M reacted to a post in a topic:
Lady Eleanor by Jim M - FINISHED - Vanguard Models - 1:64
-
Good evening Today’s update: the first layer of planking is complete. Next step is to add filler and sand.


- 27 replies
-
- 3
-
-
- fifie
- vanguard models
- (and 2 more)
-
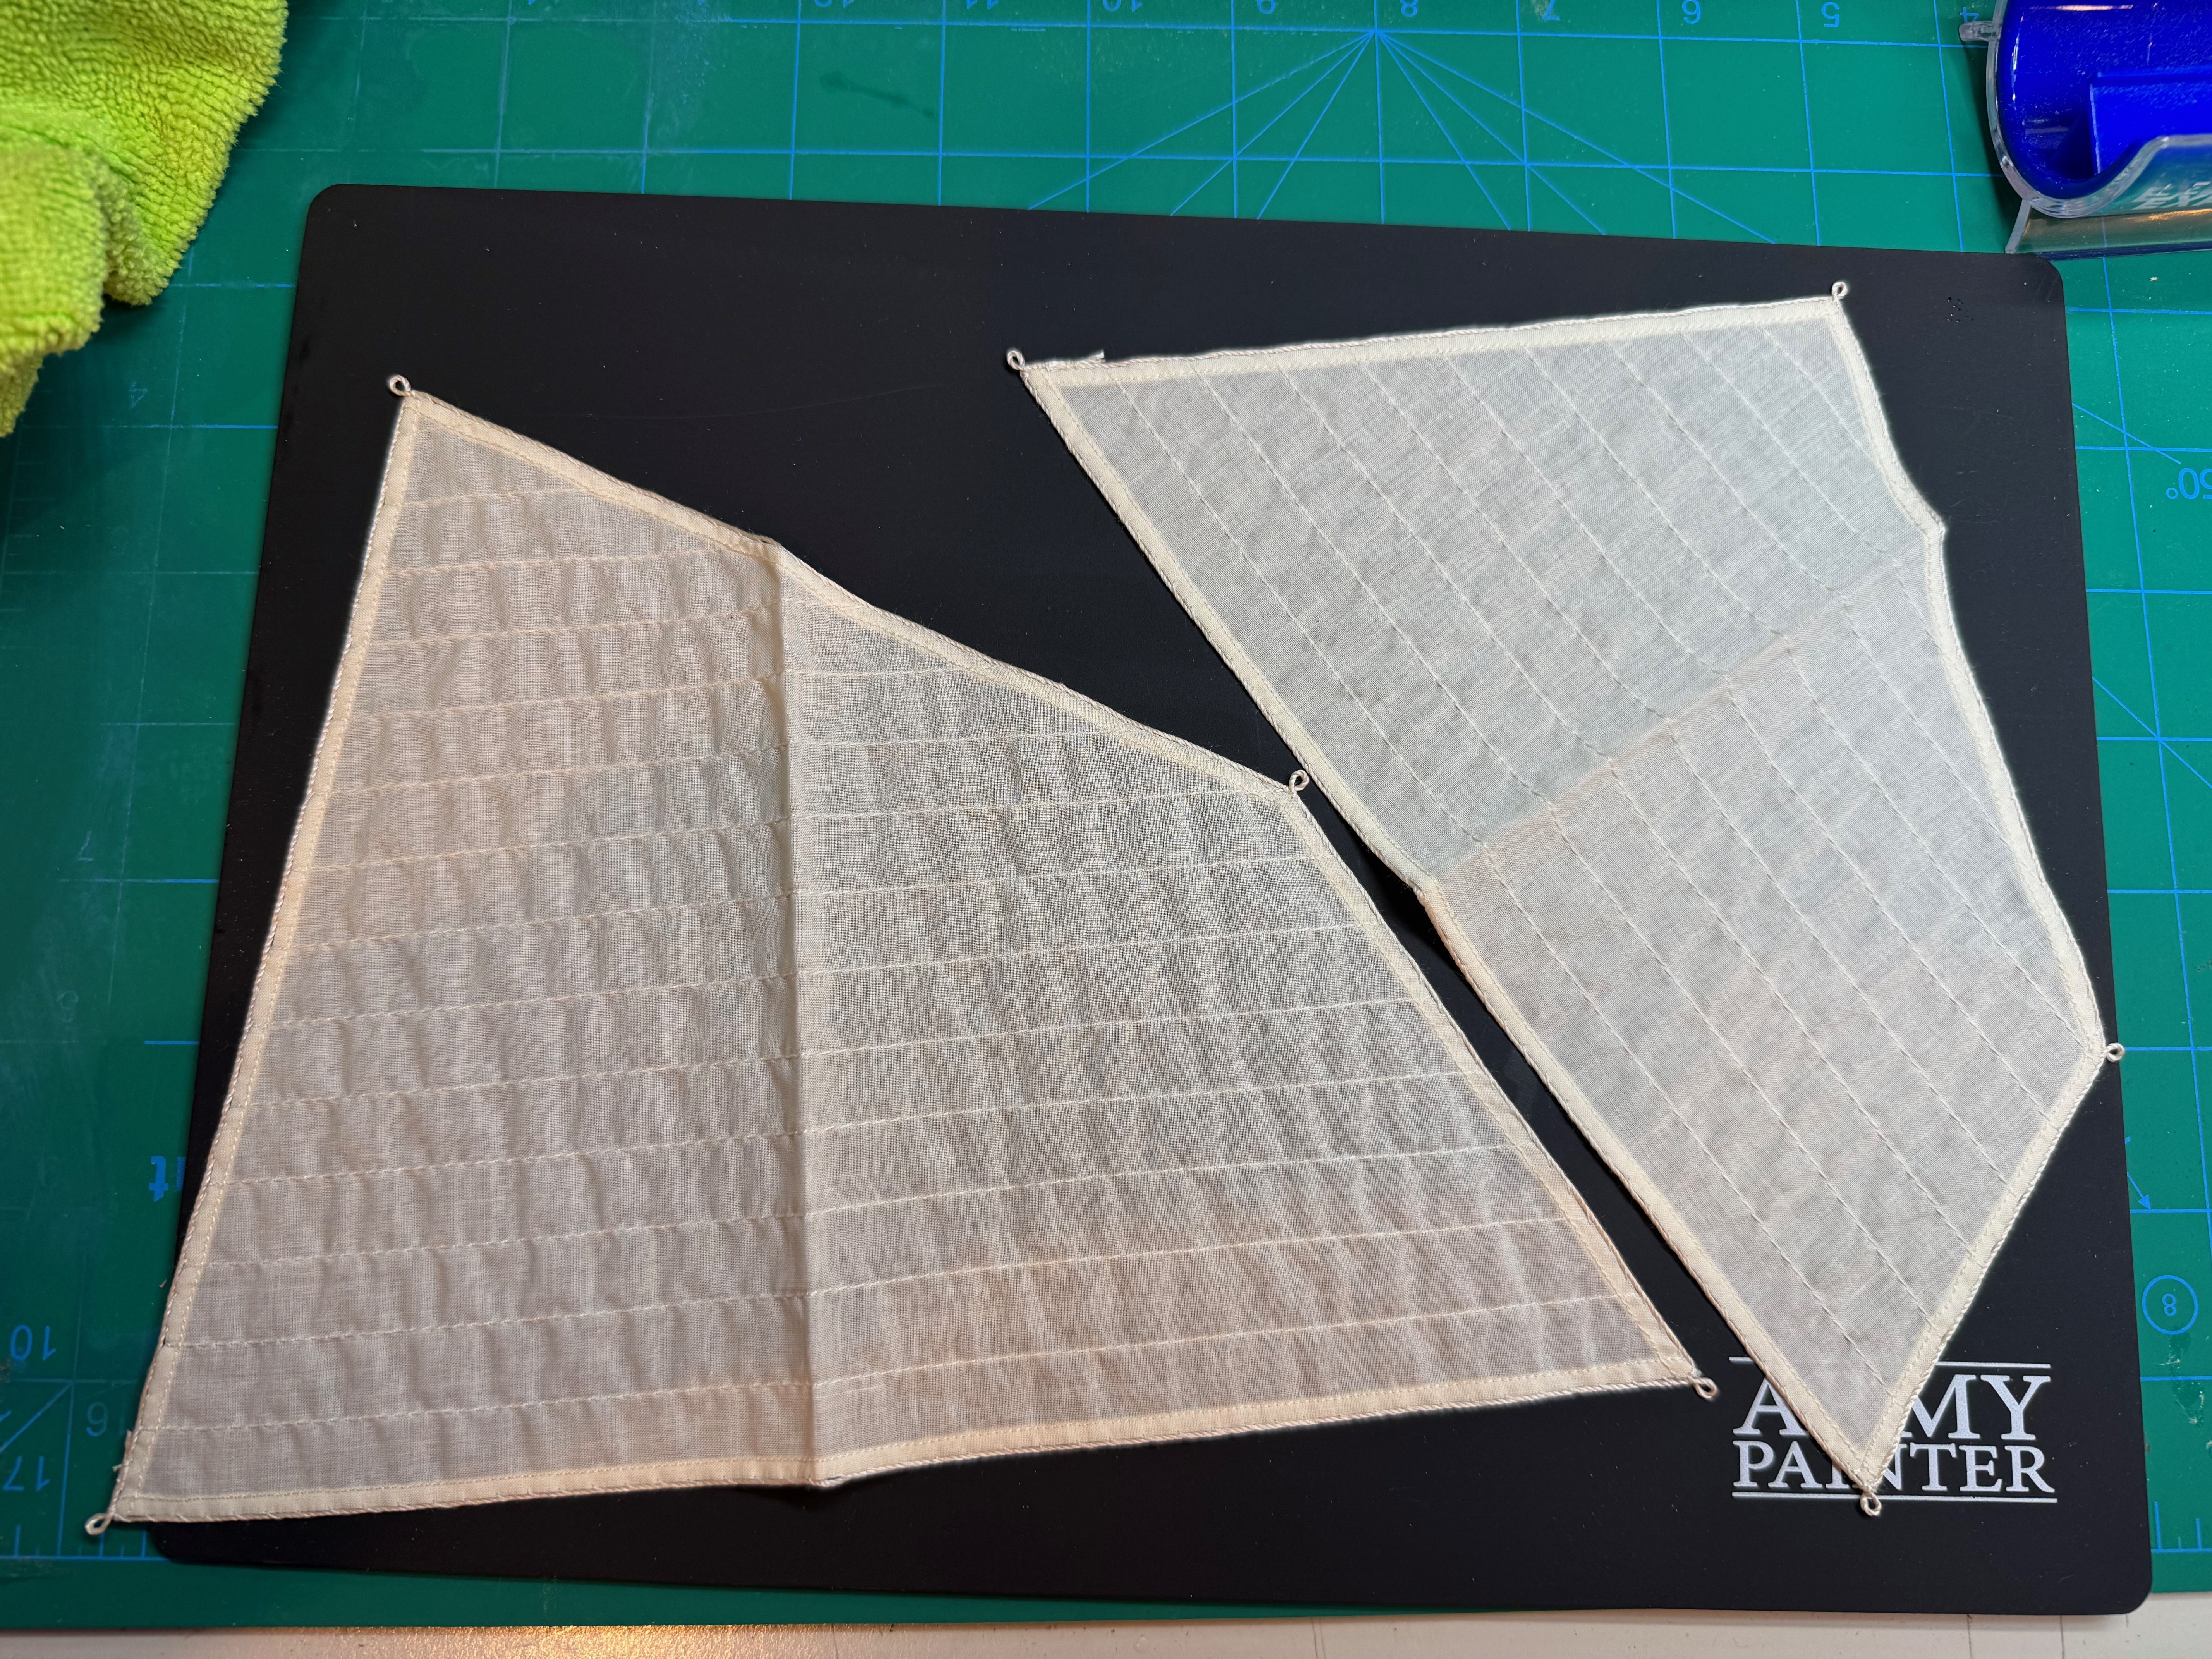
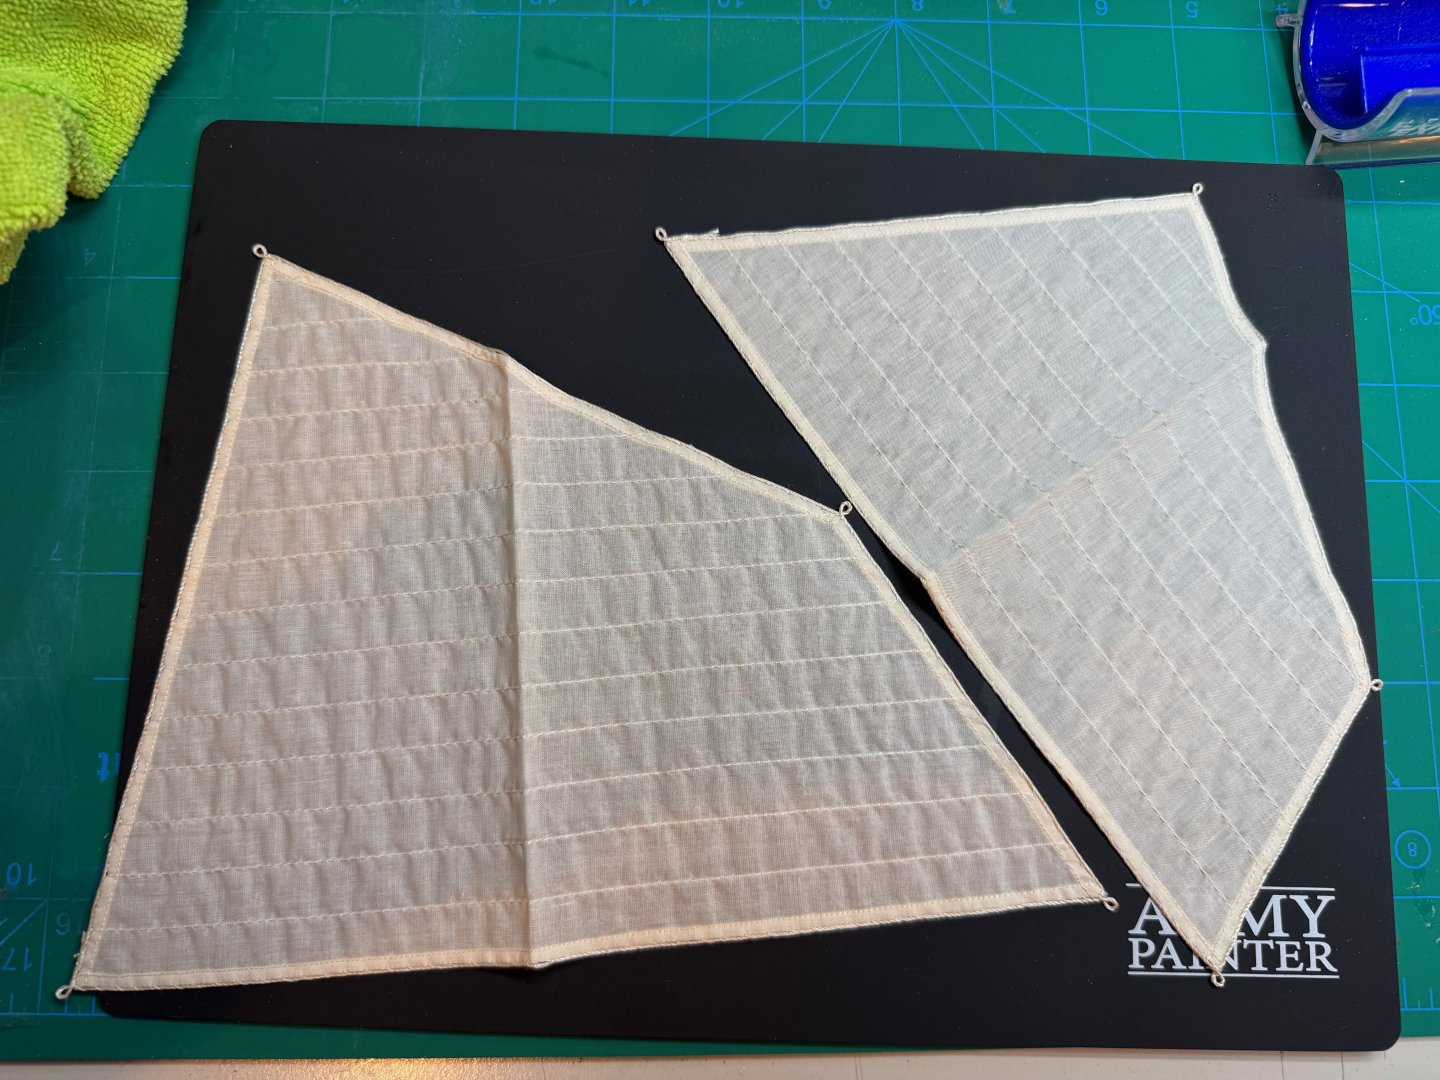
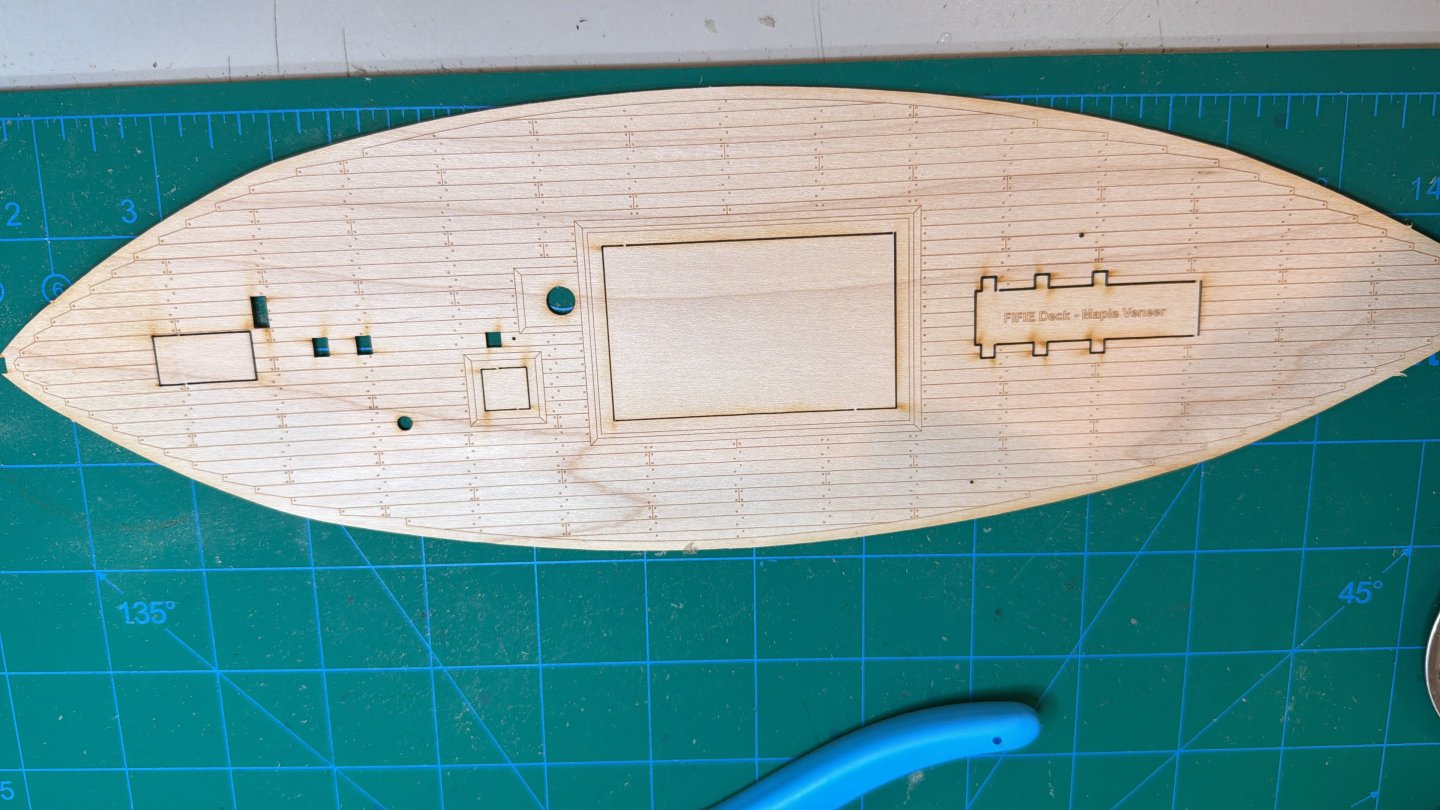
This week the premium sails arrived and they look really nice. Secondly, I understand now why I did not receive the sales in the kit as I was expecting. I found out that my kit is older stock that has not been produced since 2019 as I have the maple veneer for the deck. I did purchase it from Ages of Sail, so I probably will order directly from Vanguard directly.
- 27 replies
-
- 2
-
-
- fifie
- vanguard models
- (and 2 more)
-
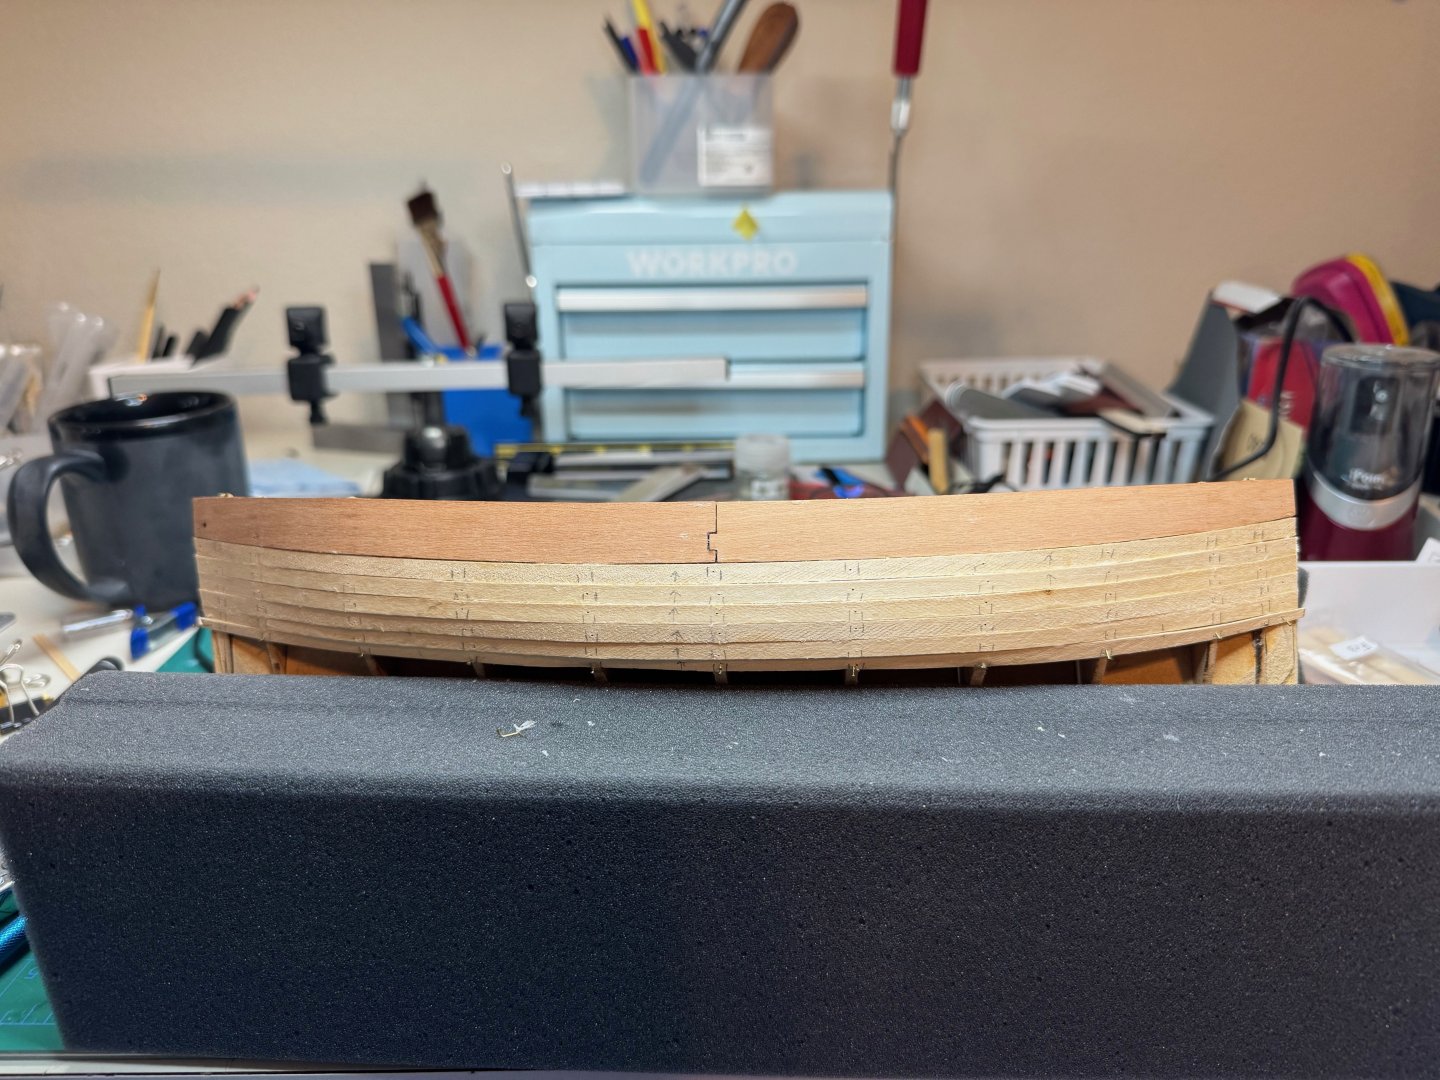
Good afternoon, I made some significant progress on Lady Eleanor this week. On Tuesday I soaked the bulwarks in warm water and pre-formed into their final resting place. Wednesday I then glued the bulwarks on in which step 37 is completed. Starting on Friday, I stated on the first layer of planking and I completed the first two rows below the bulkhead, step 39. Today, I was able to complete four more rows of planking, which completes step 42. Finally I ended the day with adding the garboard completing step 44.


- 27 replies
-
- 3
-
-
- fifie
- vanguard models
- (and 2 more)
-
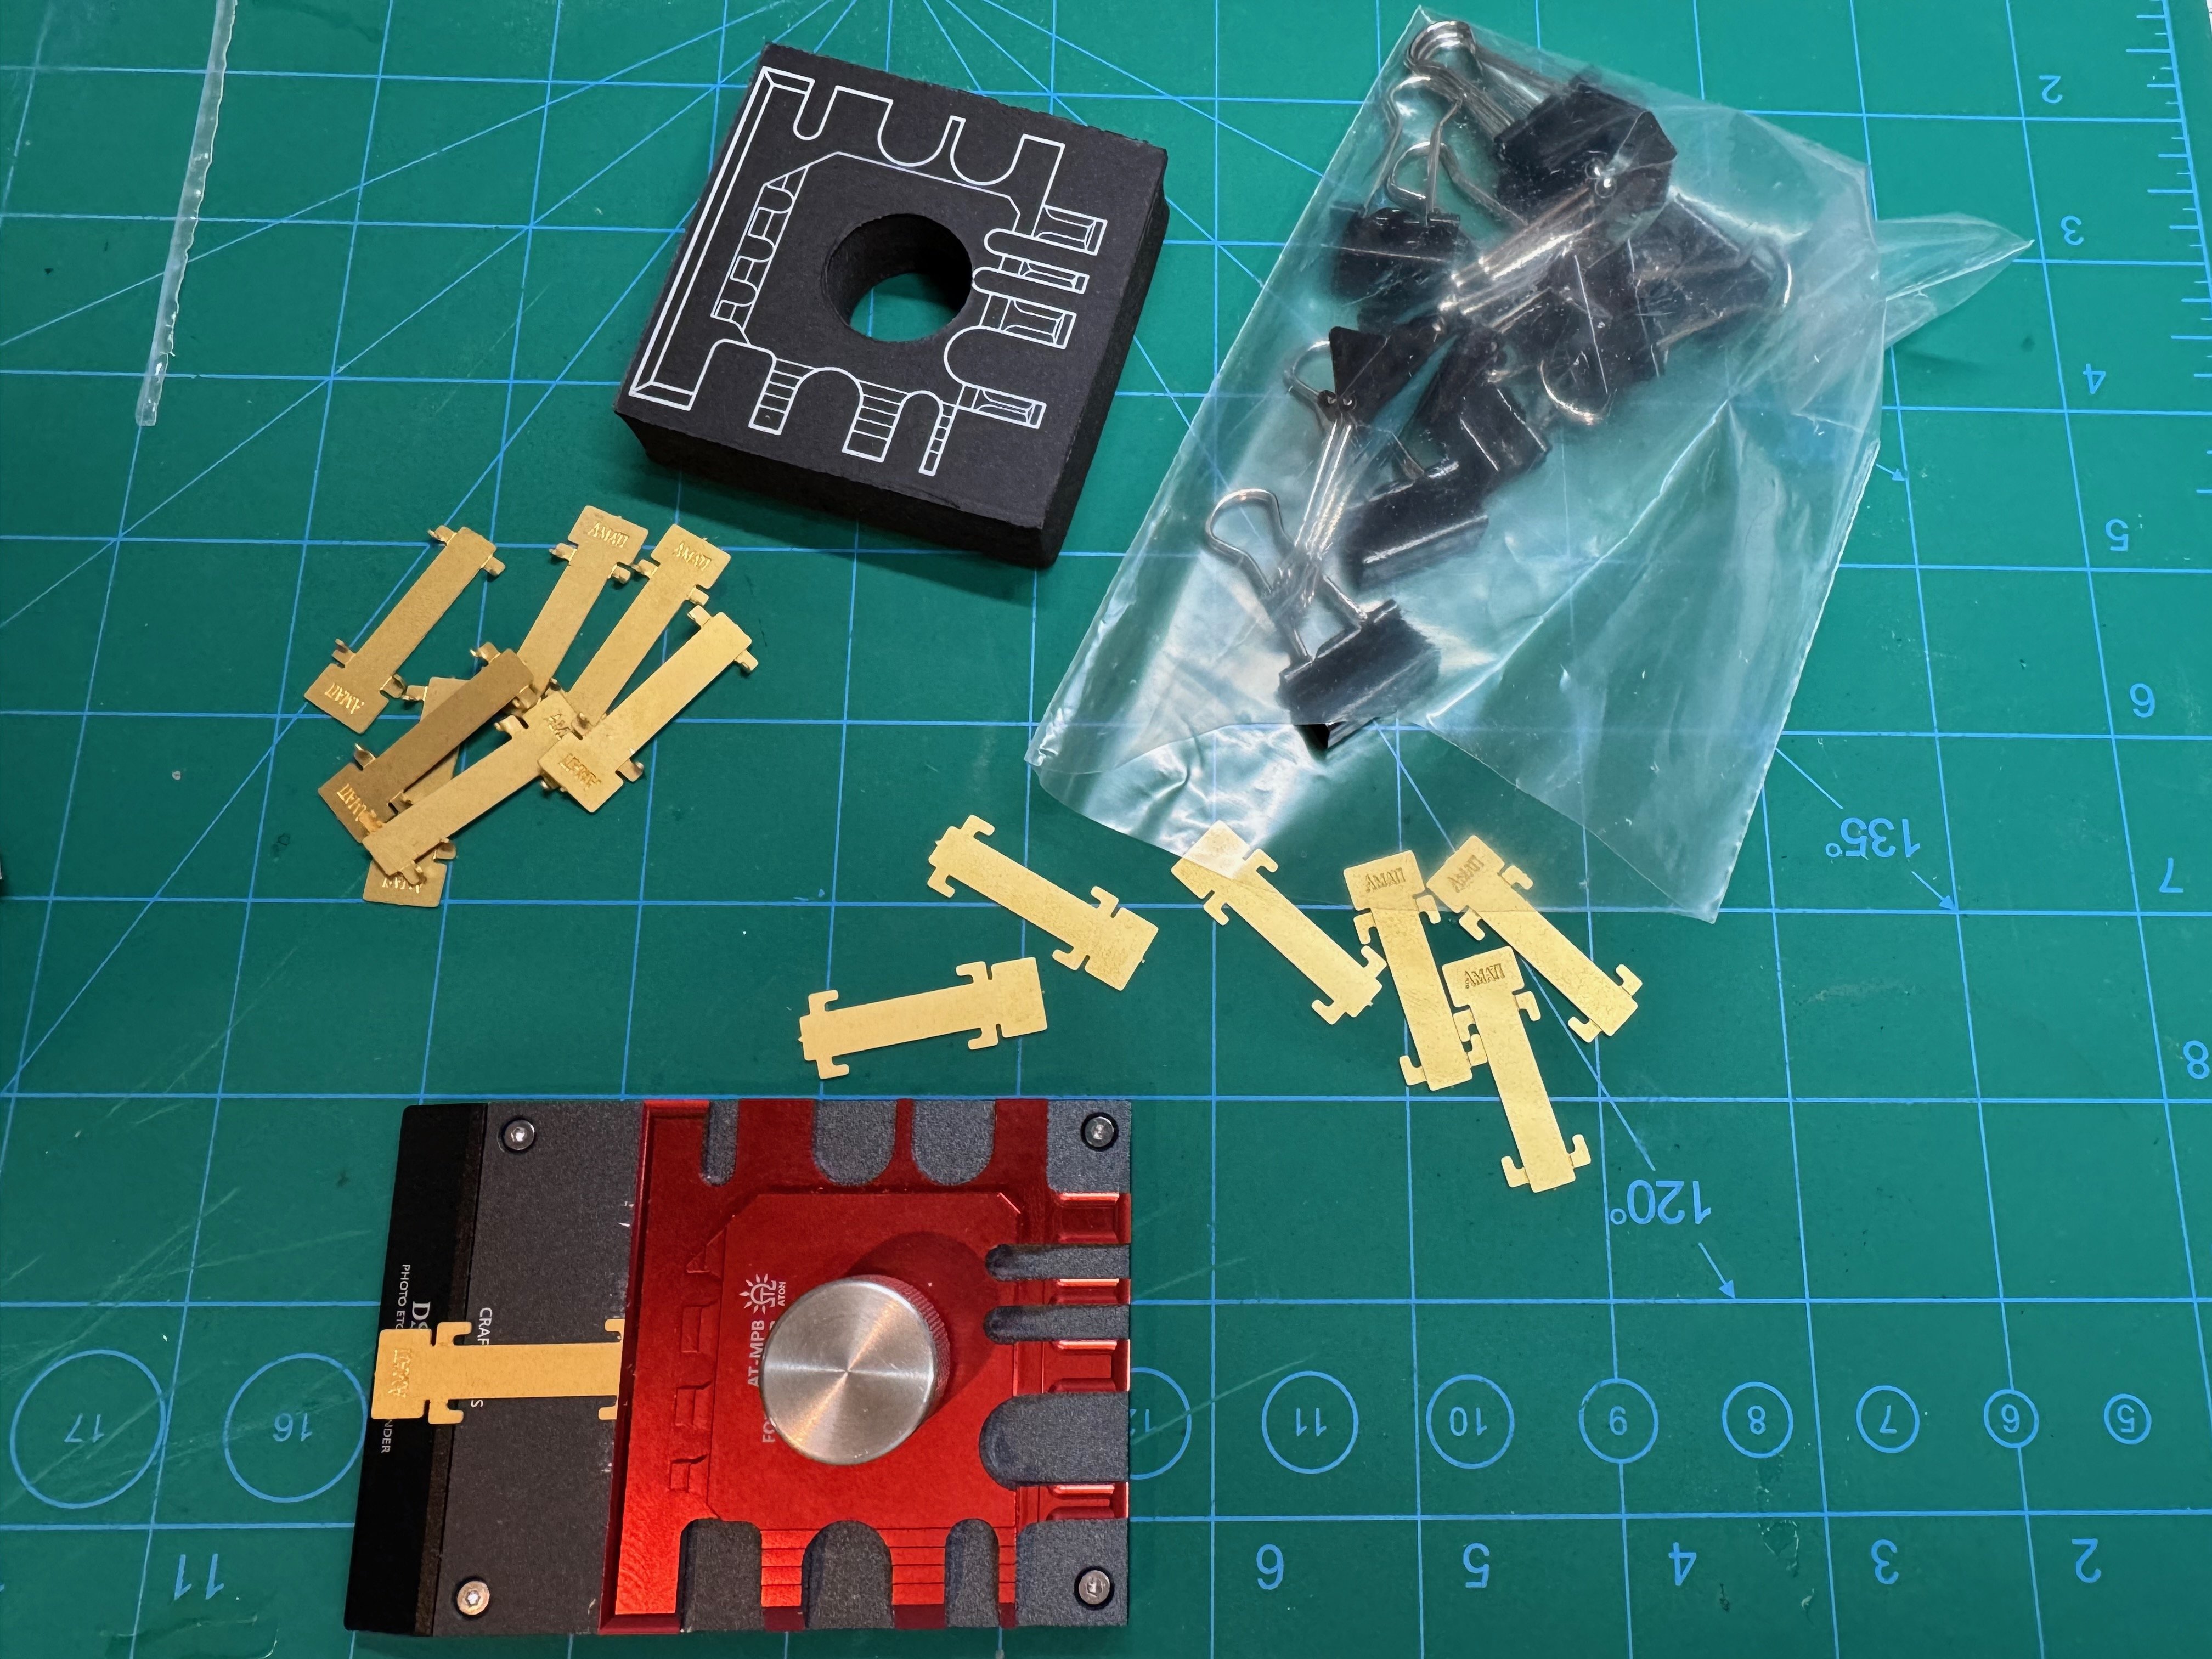
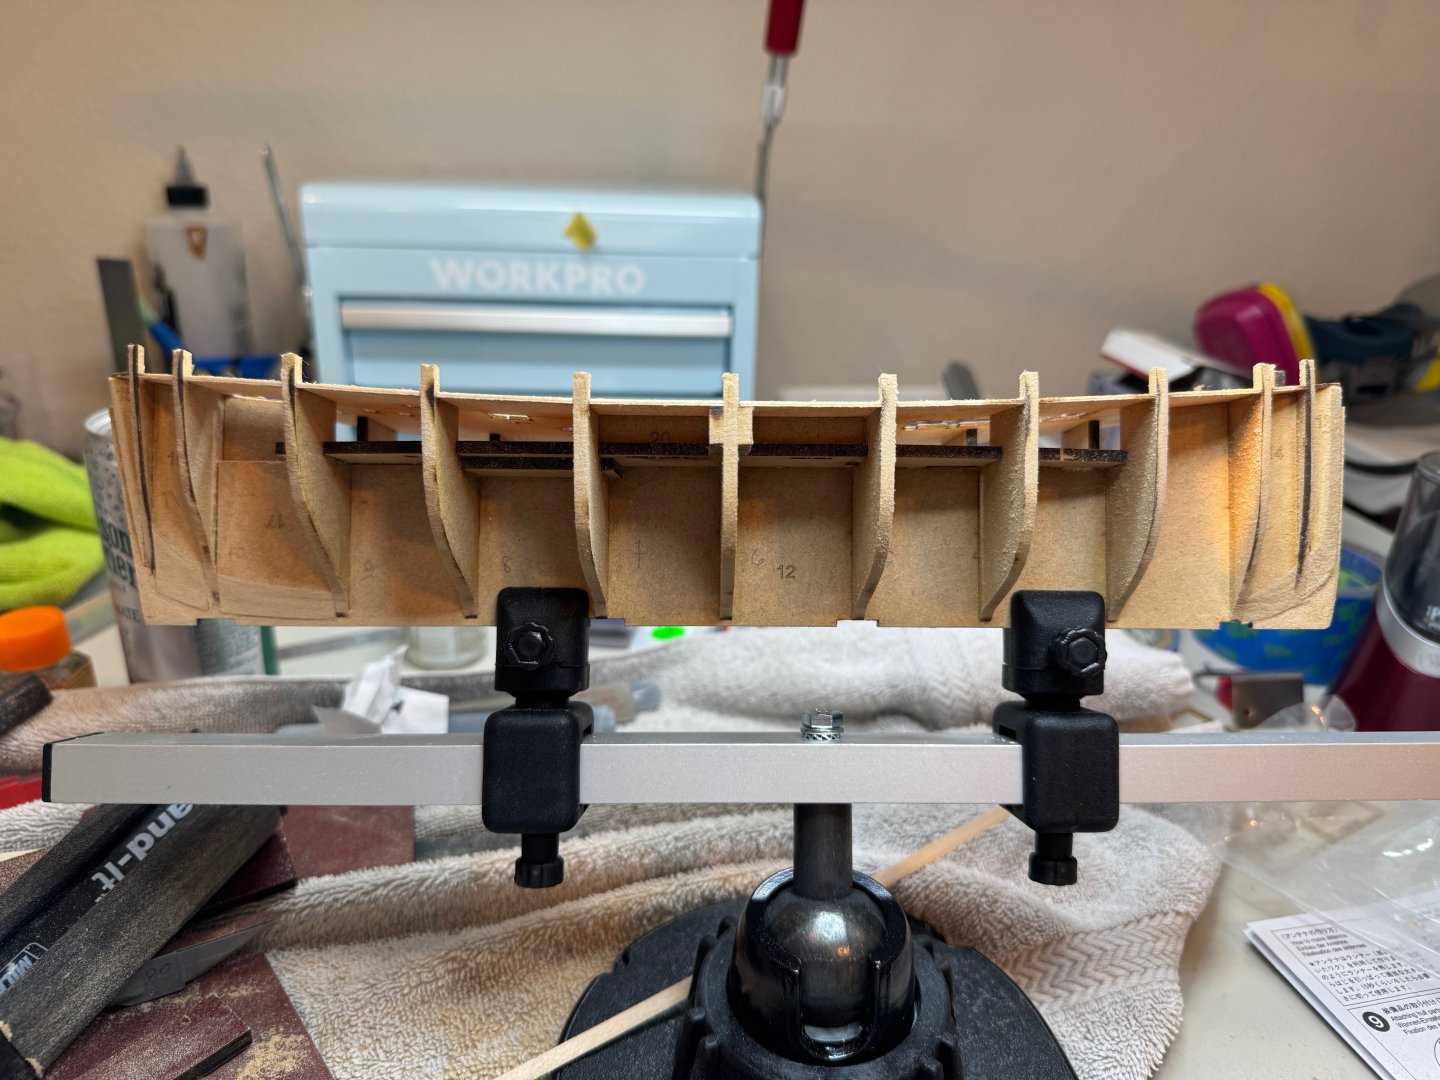
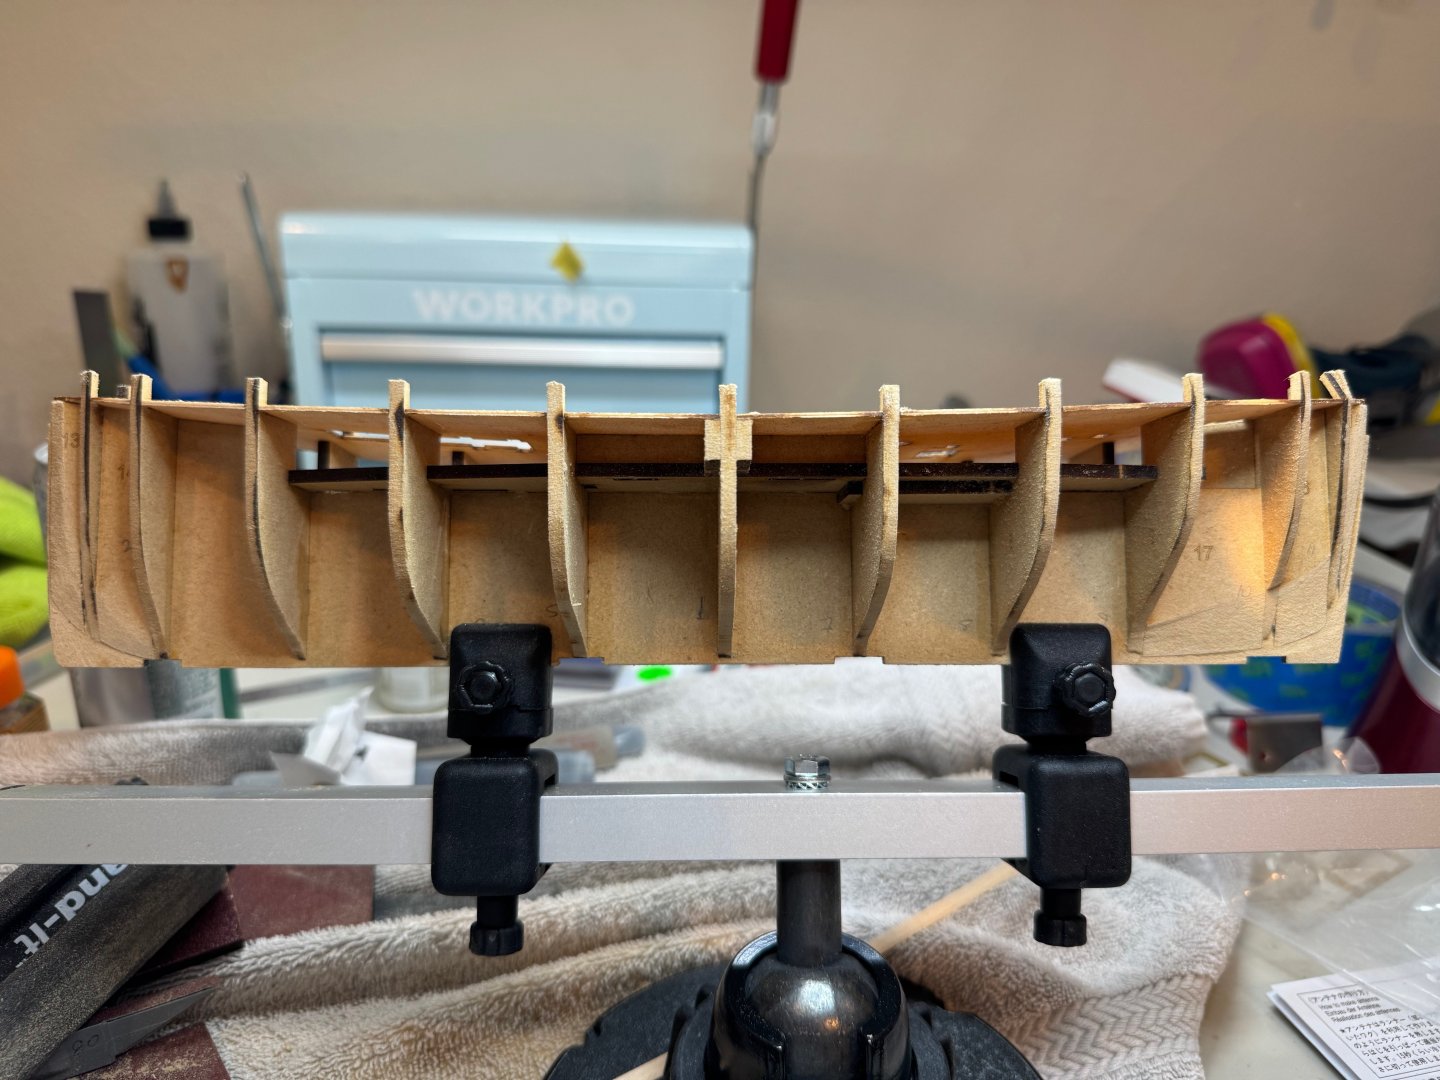
Good afternoon, some minor progress on the Lady Eleanor today. I completed steps 28-31. This includes gluing the deck down, supports for the bulwarks, and fairing the hull. Finally I started to make some clamps for planking.

- 27 replies
-
- 2
-
-
- fifie
- vanguard models
- (and 2 more)