ForbiddenShrimp
-
Posts
10 -
Joined
-
Last visited
About ForbiddenShrimp

- Birthday June 20
-
 robert952 reacted to a post in a topic:
Lowell Grand Banks dory by ForbiddenShrimp - FINISHED - Model Shipways - 1:24 - first build
robert952 reacted to a post in a topic:
Lowell Grand Banks dory by ForbiddenShrimp - FINISHED - Model Shipways - 1:24 - first build
-
robert952 reacted to a post in a topic:
Lowell Grand Banks dory by ForbiddenShrimp - FINISHED - Model Shipways - 1:24 - first build
-
PvG Aussie reacted to a post in a topic:
Lowell Grand Banks dory by ForbiddenShrimp - FINISHED - Model Shipways - 1:24 - first build
-
 ForbiddenShrimp reacted to a post in a topic:
Lowell Grand Banks dory by ForbiddenShrimp - FINISHED - Model Shipways - 1:24 - first build
ForbiddenShrimp reacted to a post in a topic:
Lowell Grand Banks dory by ForbiddenShrimp - FINISHED - Model Shipways - 1:24 - first build
-
ccoyle reacted to a post in a topic:
Lowell Grand Banks dory by ForbiddenShrimp - FINISHED - Model Shipways - 1:24 - first build
-
 JacquesCousteau reacted to a post in a topic:
Lowell Grand Banks dory by ForbiddenShrimp - FINISHED - Model Shipways - 1:24 - first build
JacquesCousteau reacted to a post in a topic:
Lowell Grand Banks dory by ForbiddenShrimp - FINISHED - Model Shipways - 1:24 - first build
-
Desertanimal reacted to a post in a topic:
Lowell Grand Banks dory by ForbiddenShrimp - FINISHED - Model Shipways - 1:24 - first build
-
 Thank you! I can't wait to start the next ship in the series and get better step by step!
- 12 replies
-
- 1
-
-
- Lowell Grand Banks Dory
- first build
- (and 1 more)
-
ForbiddenShrimp reacted to a post in a topic:
Lowell Grand Banks dory by ForbiddenShrimp - FINISHED - Model Shipways - 1:24 - first build
-
druxey reacted to a post in a topic:
Lowell Grand Banks dory by ForbiddenShrimp - FINISHED - Model Shipways - 1:24 - first build
-
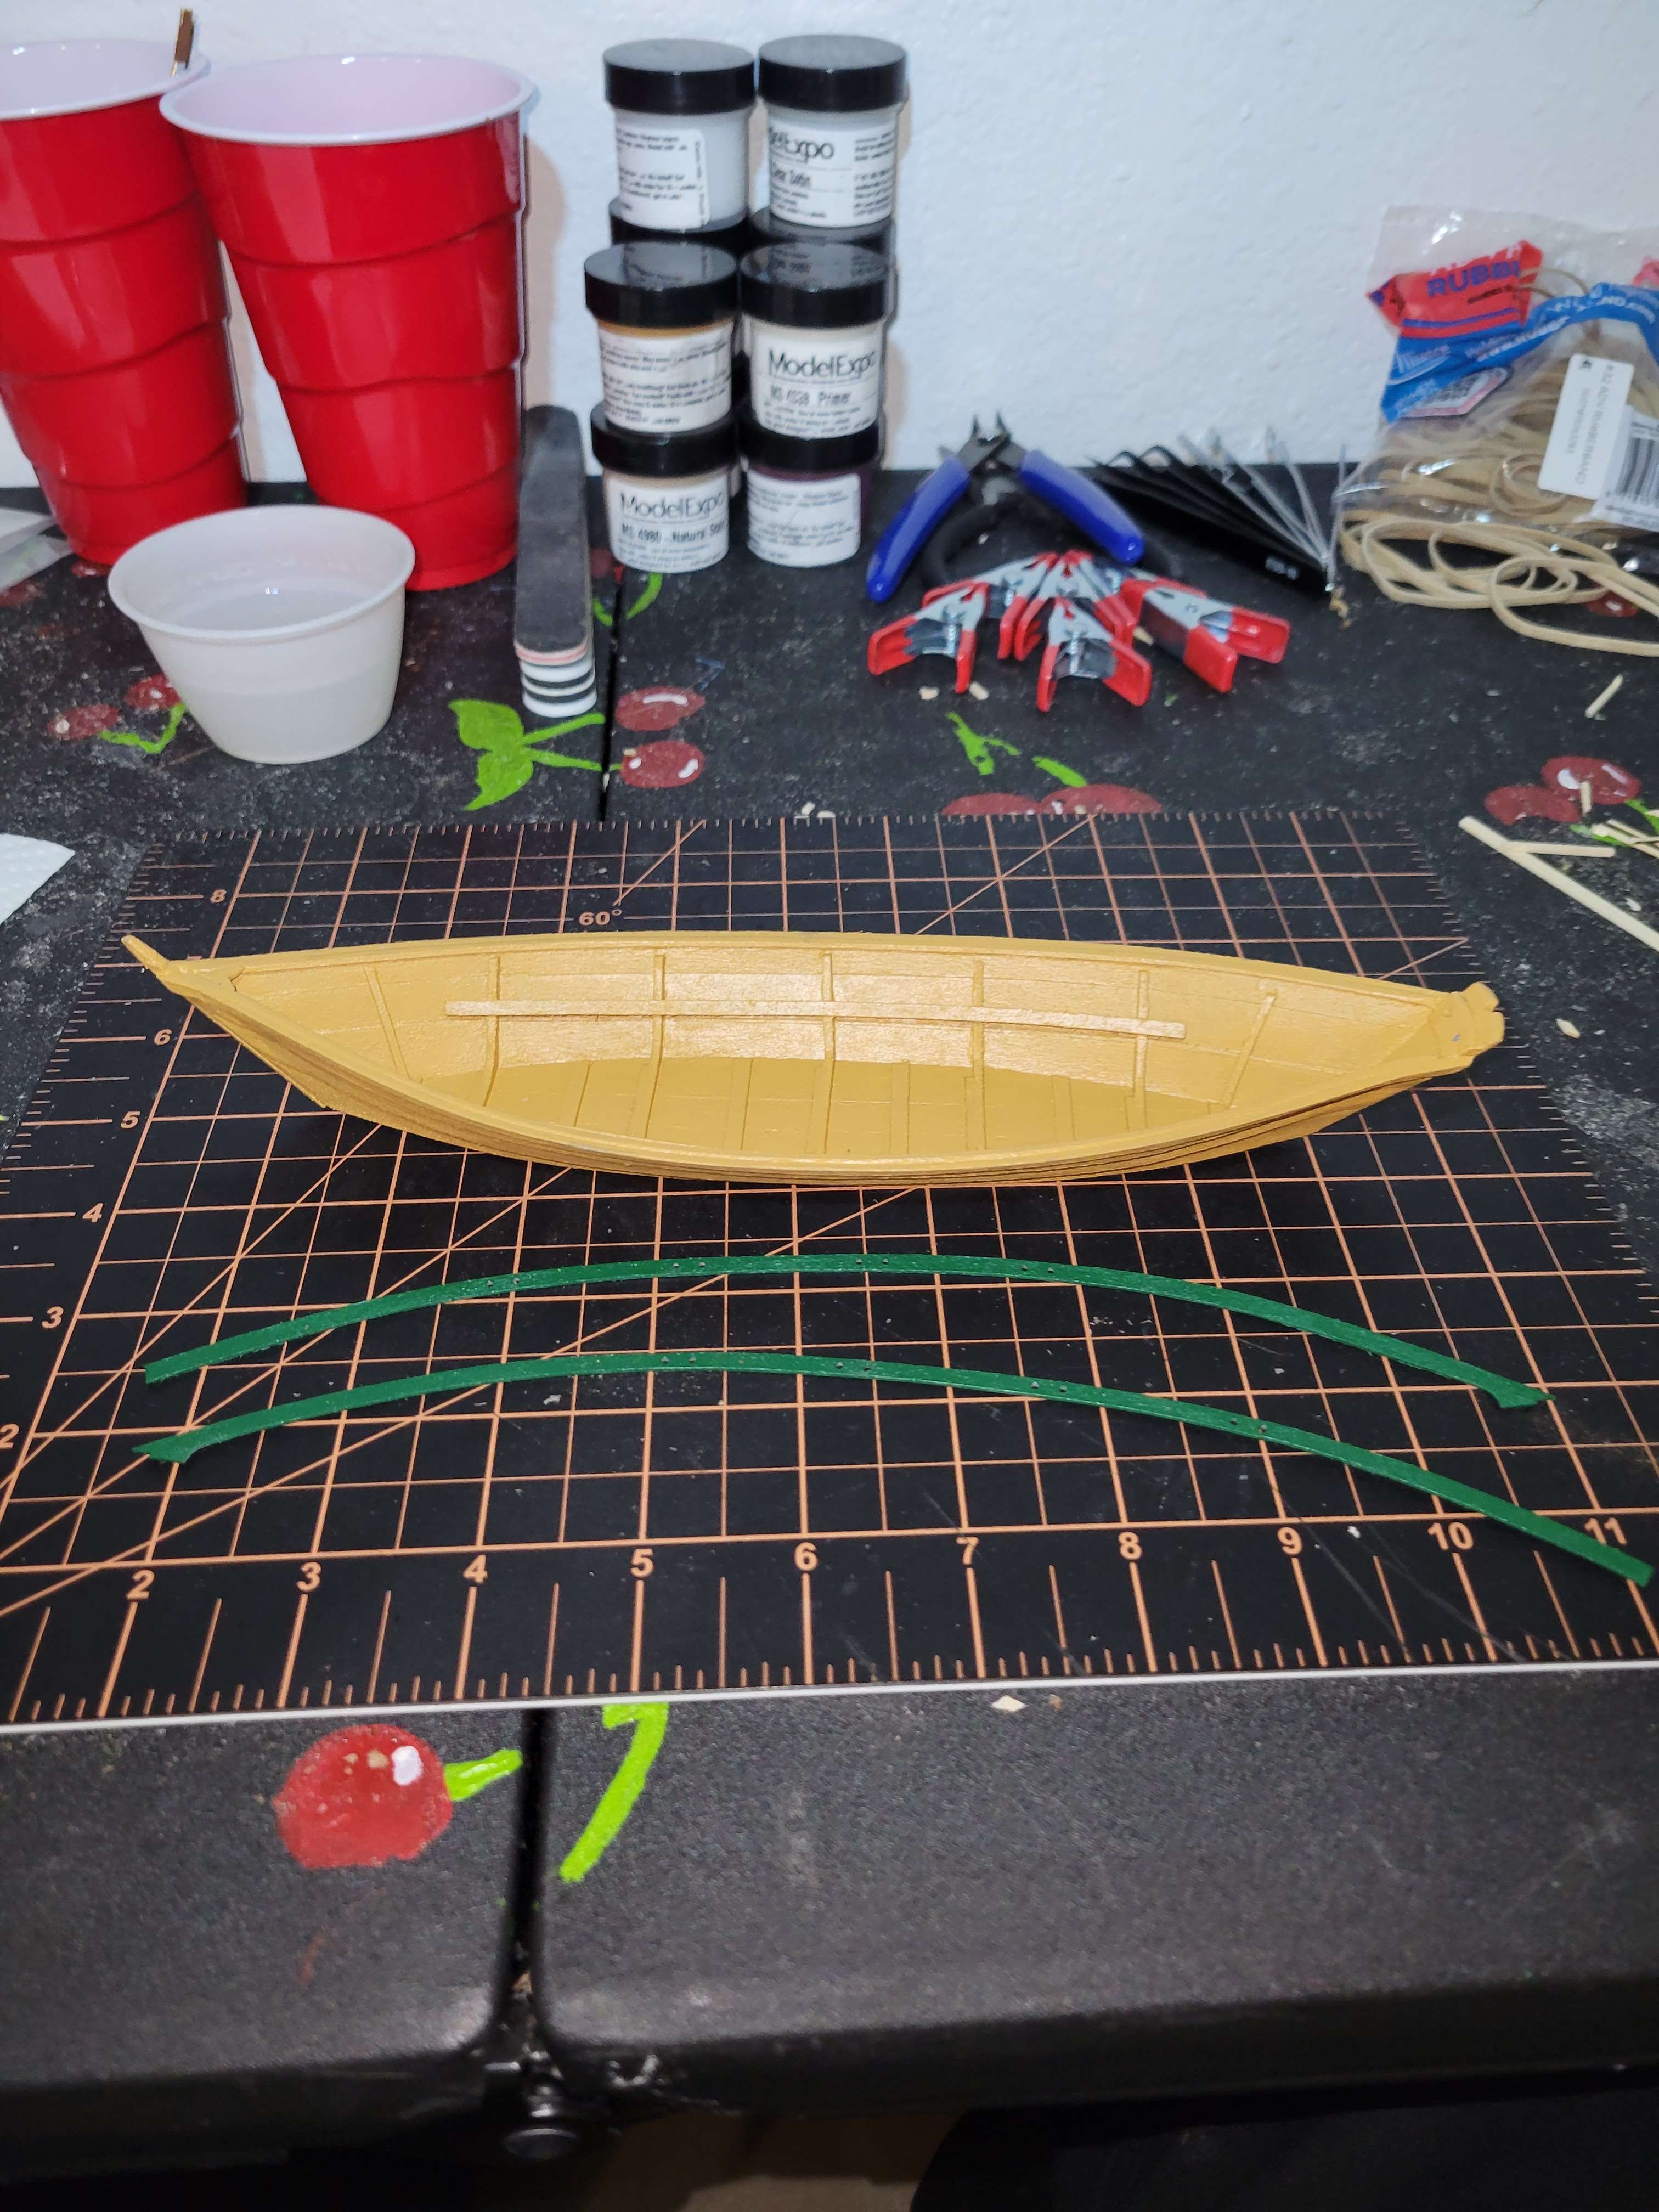
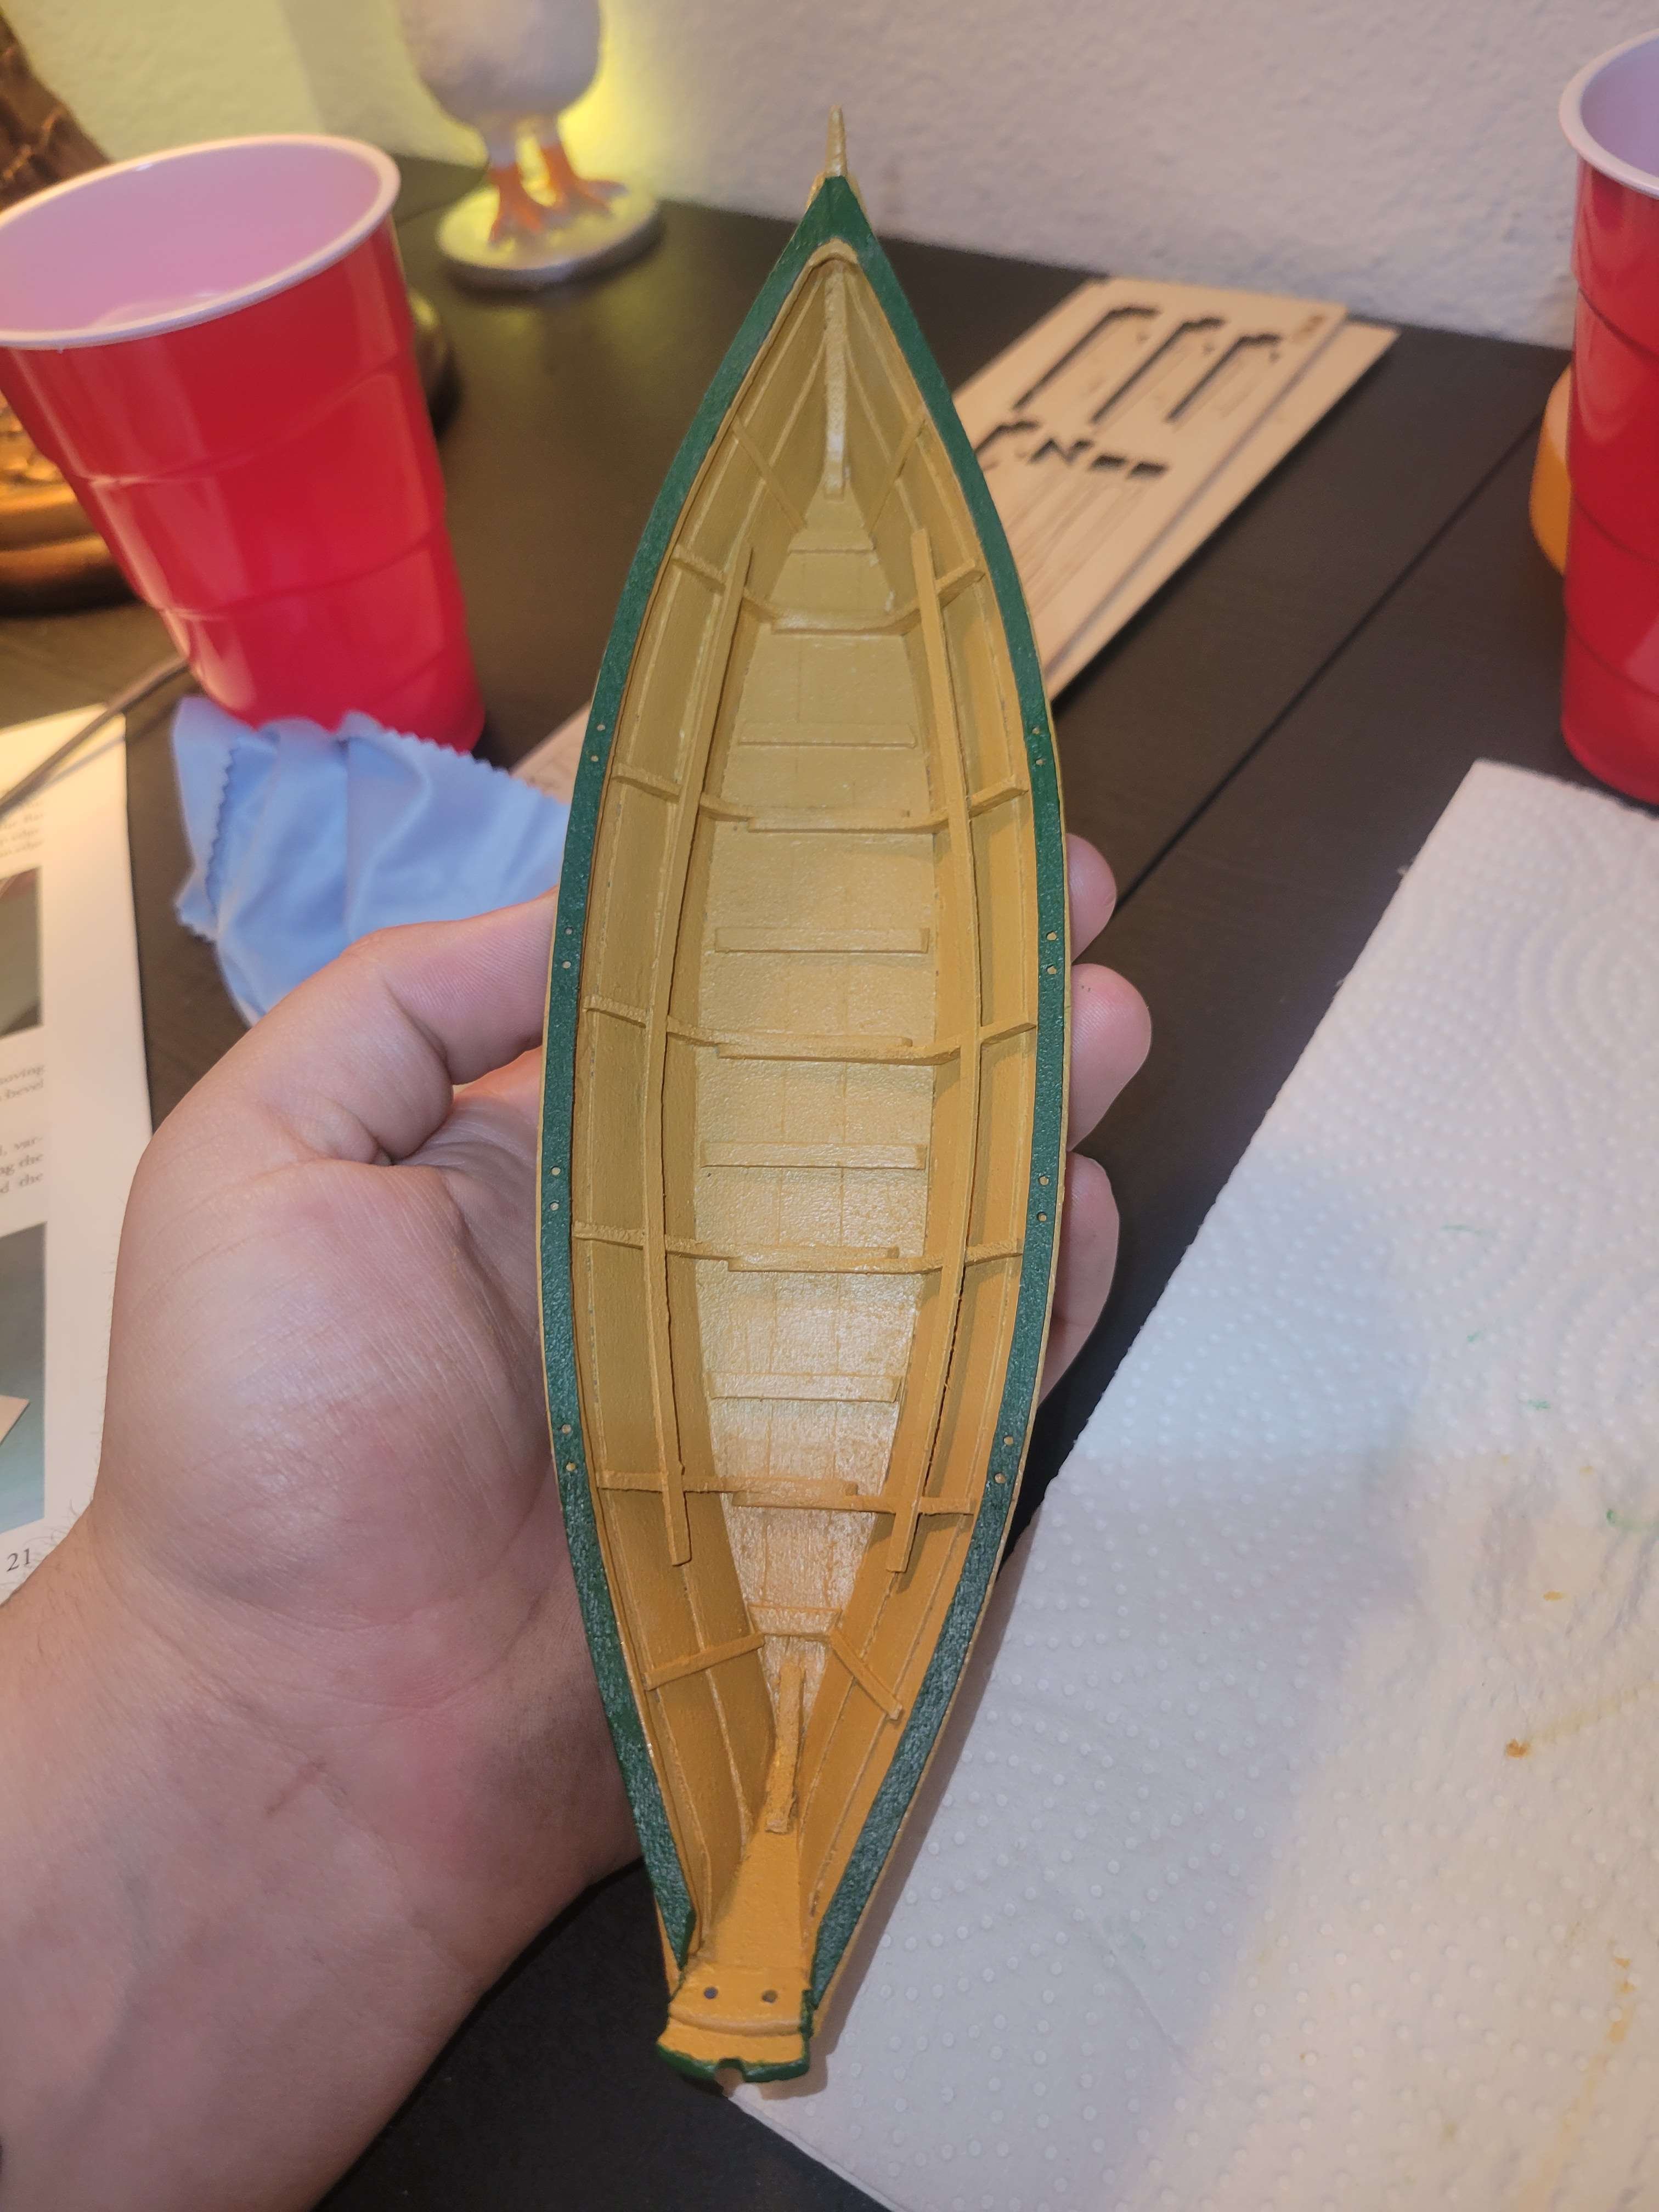
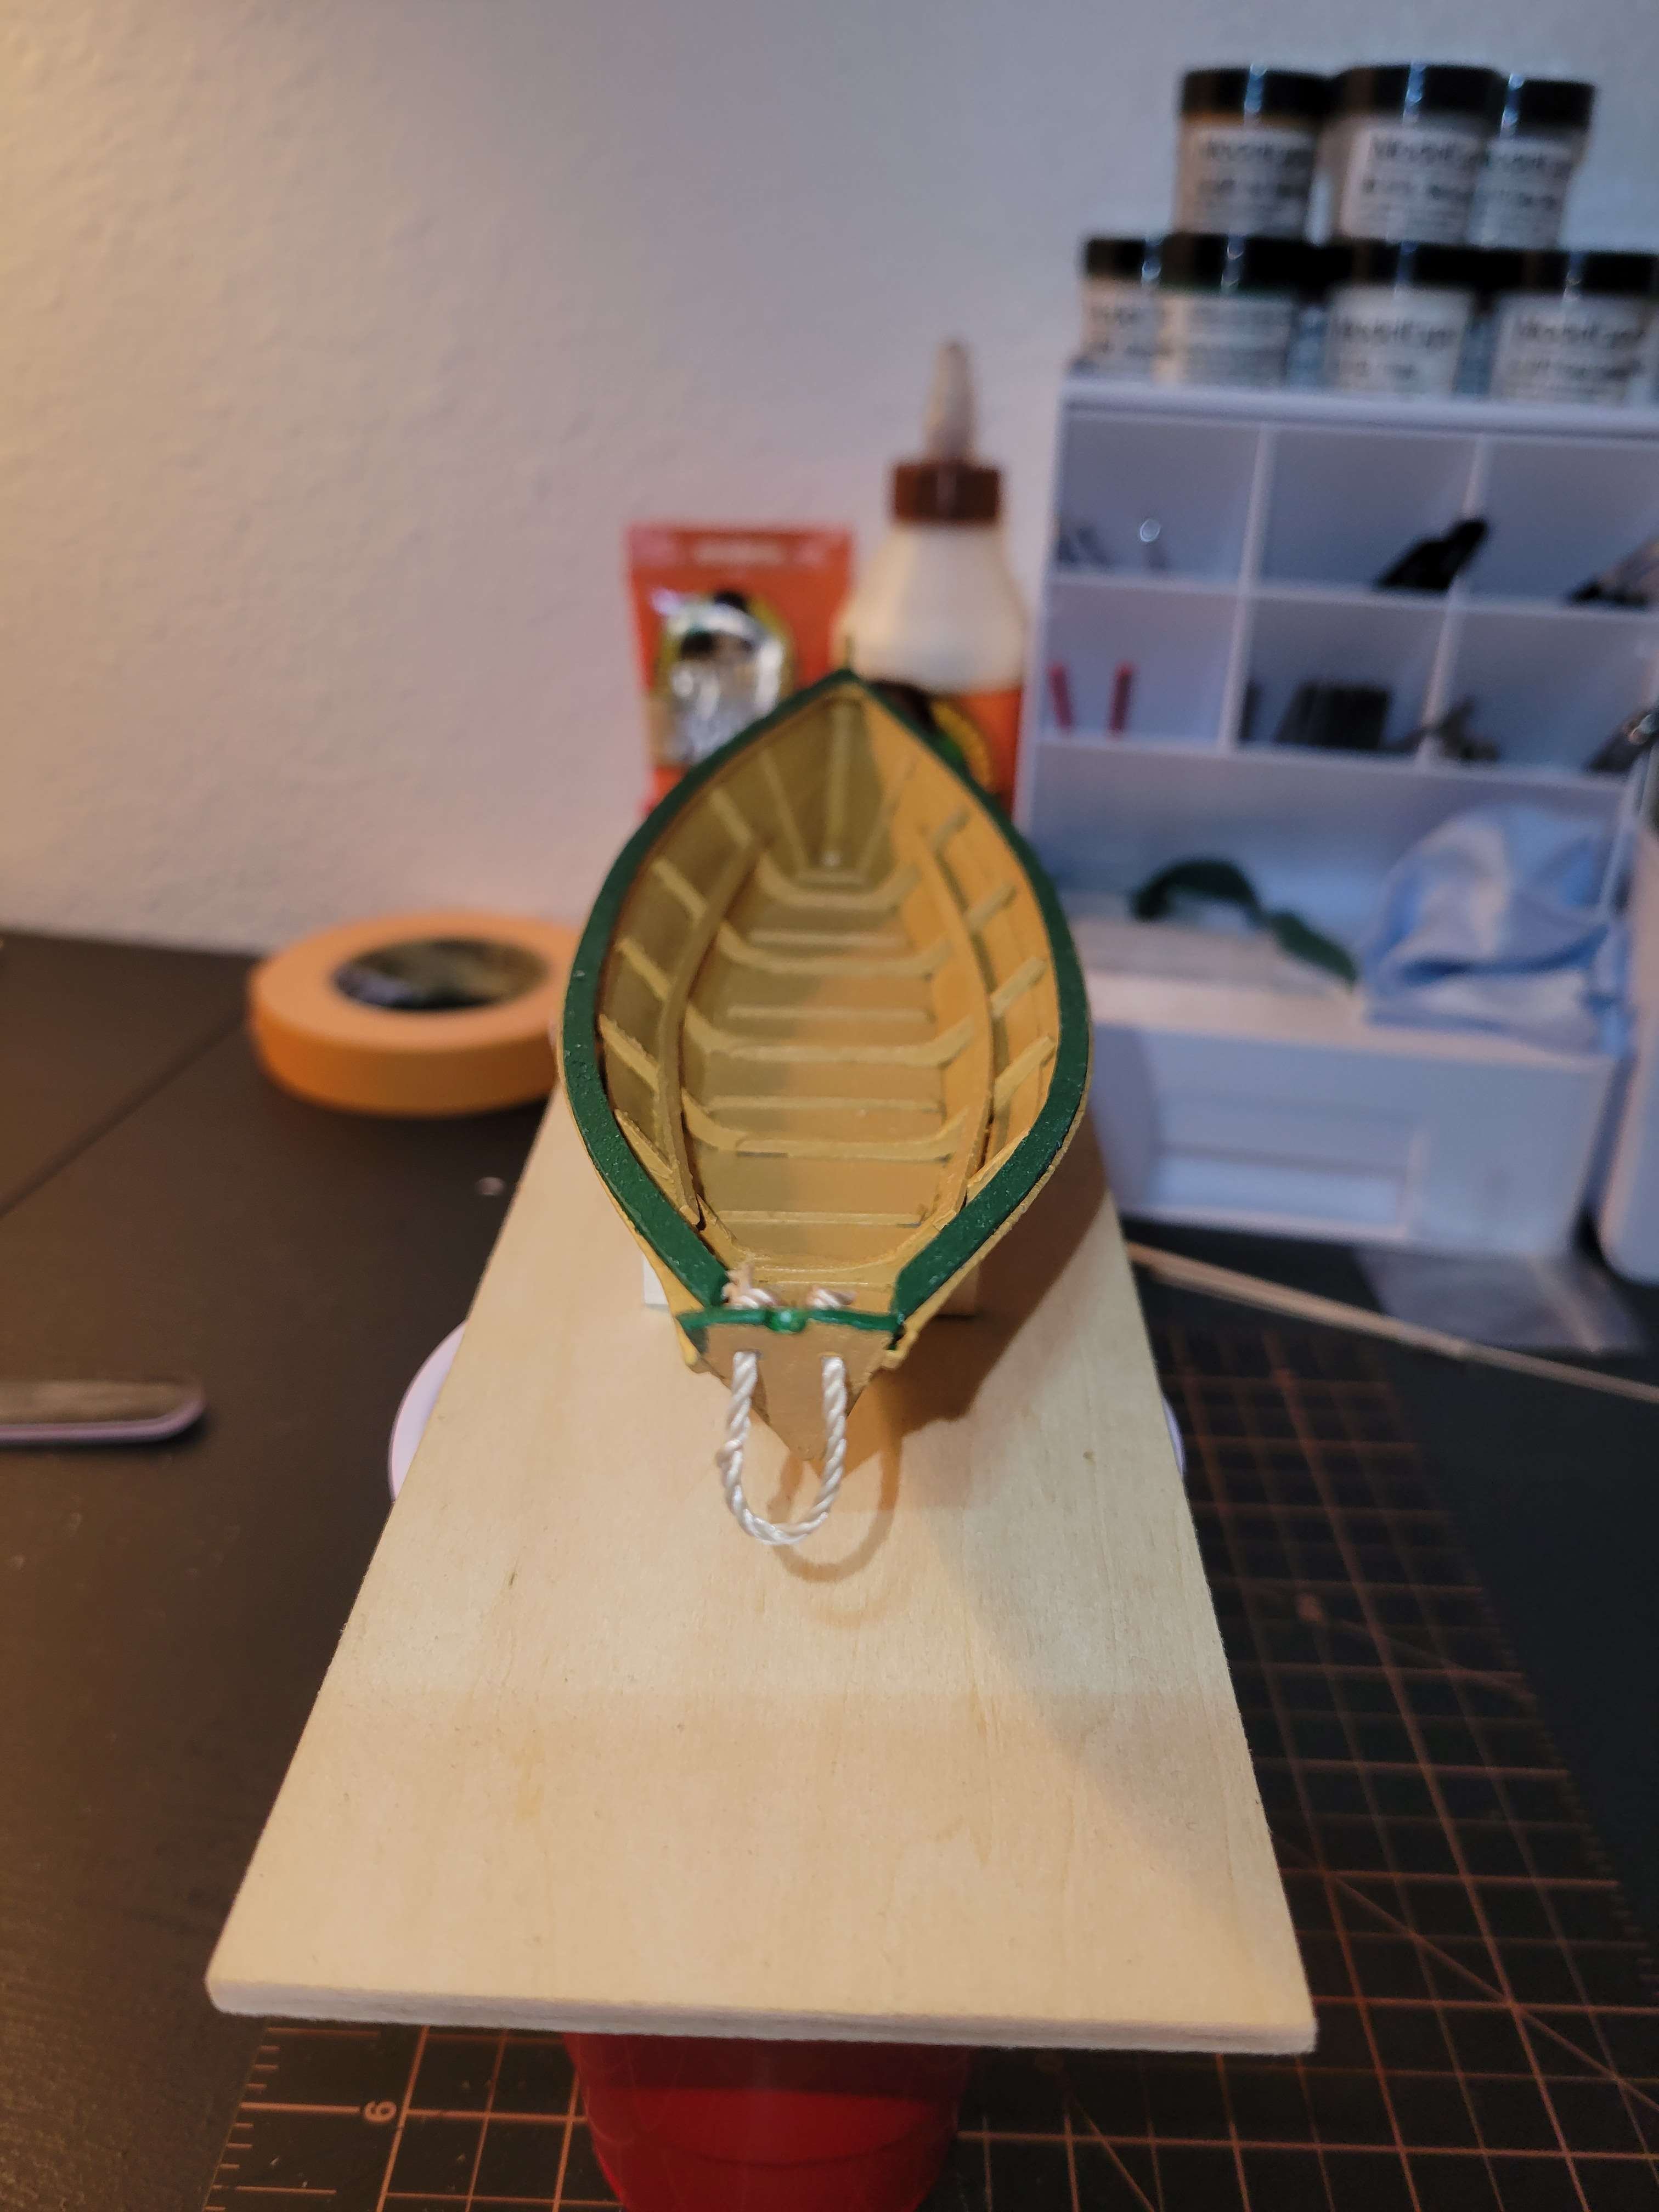
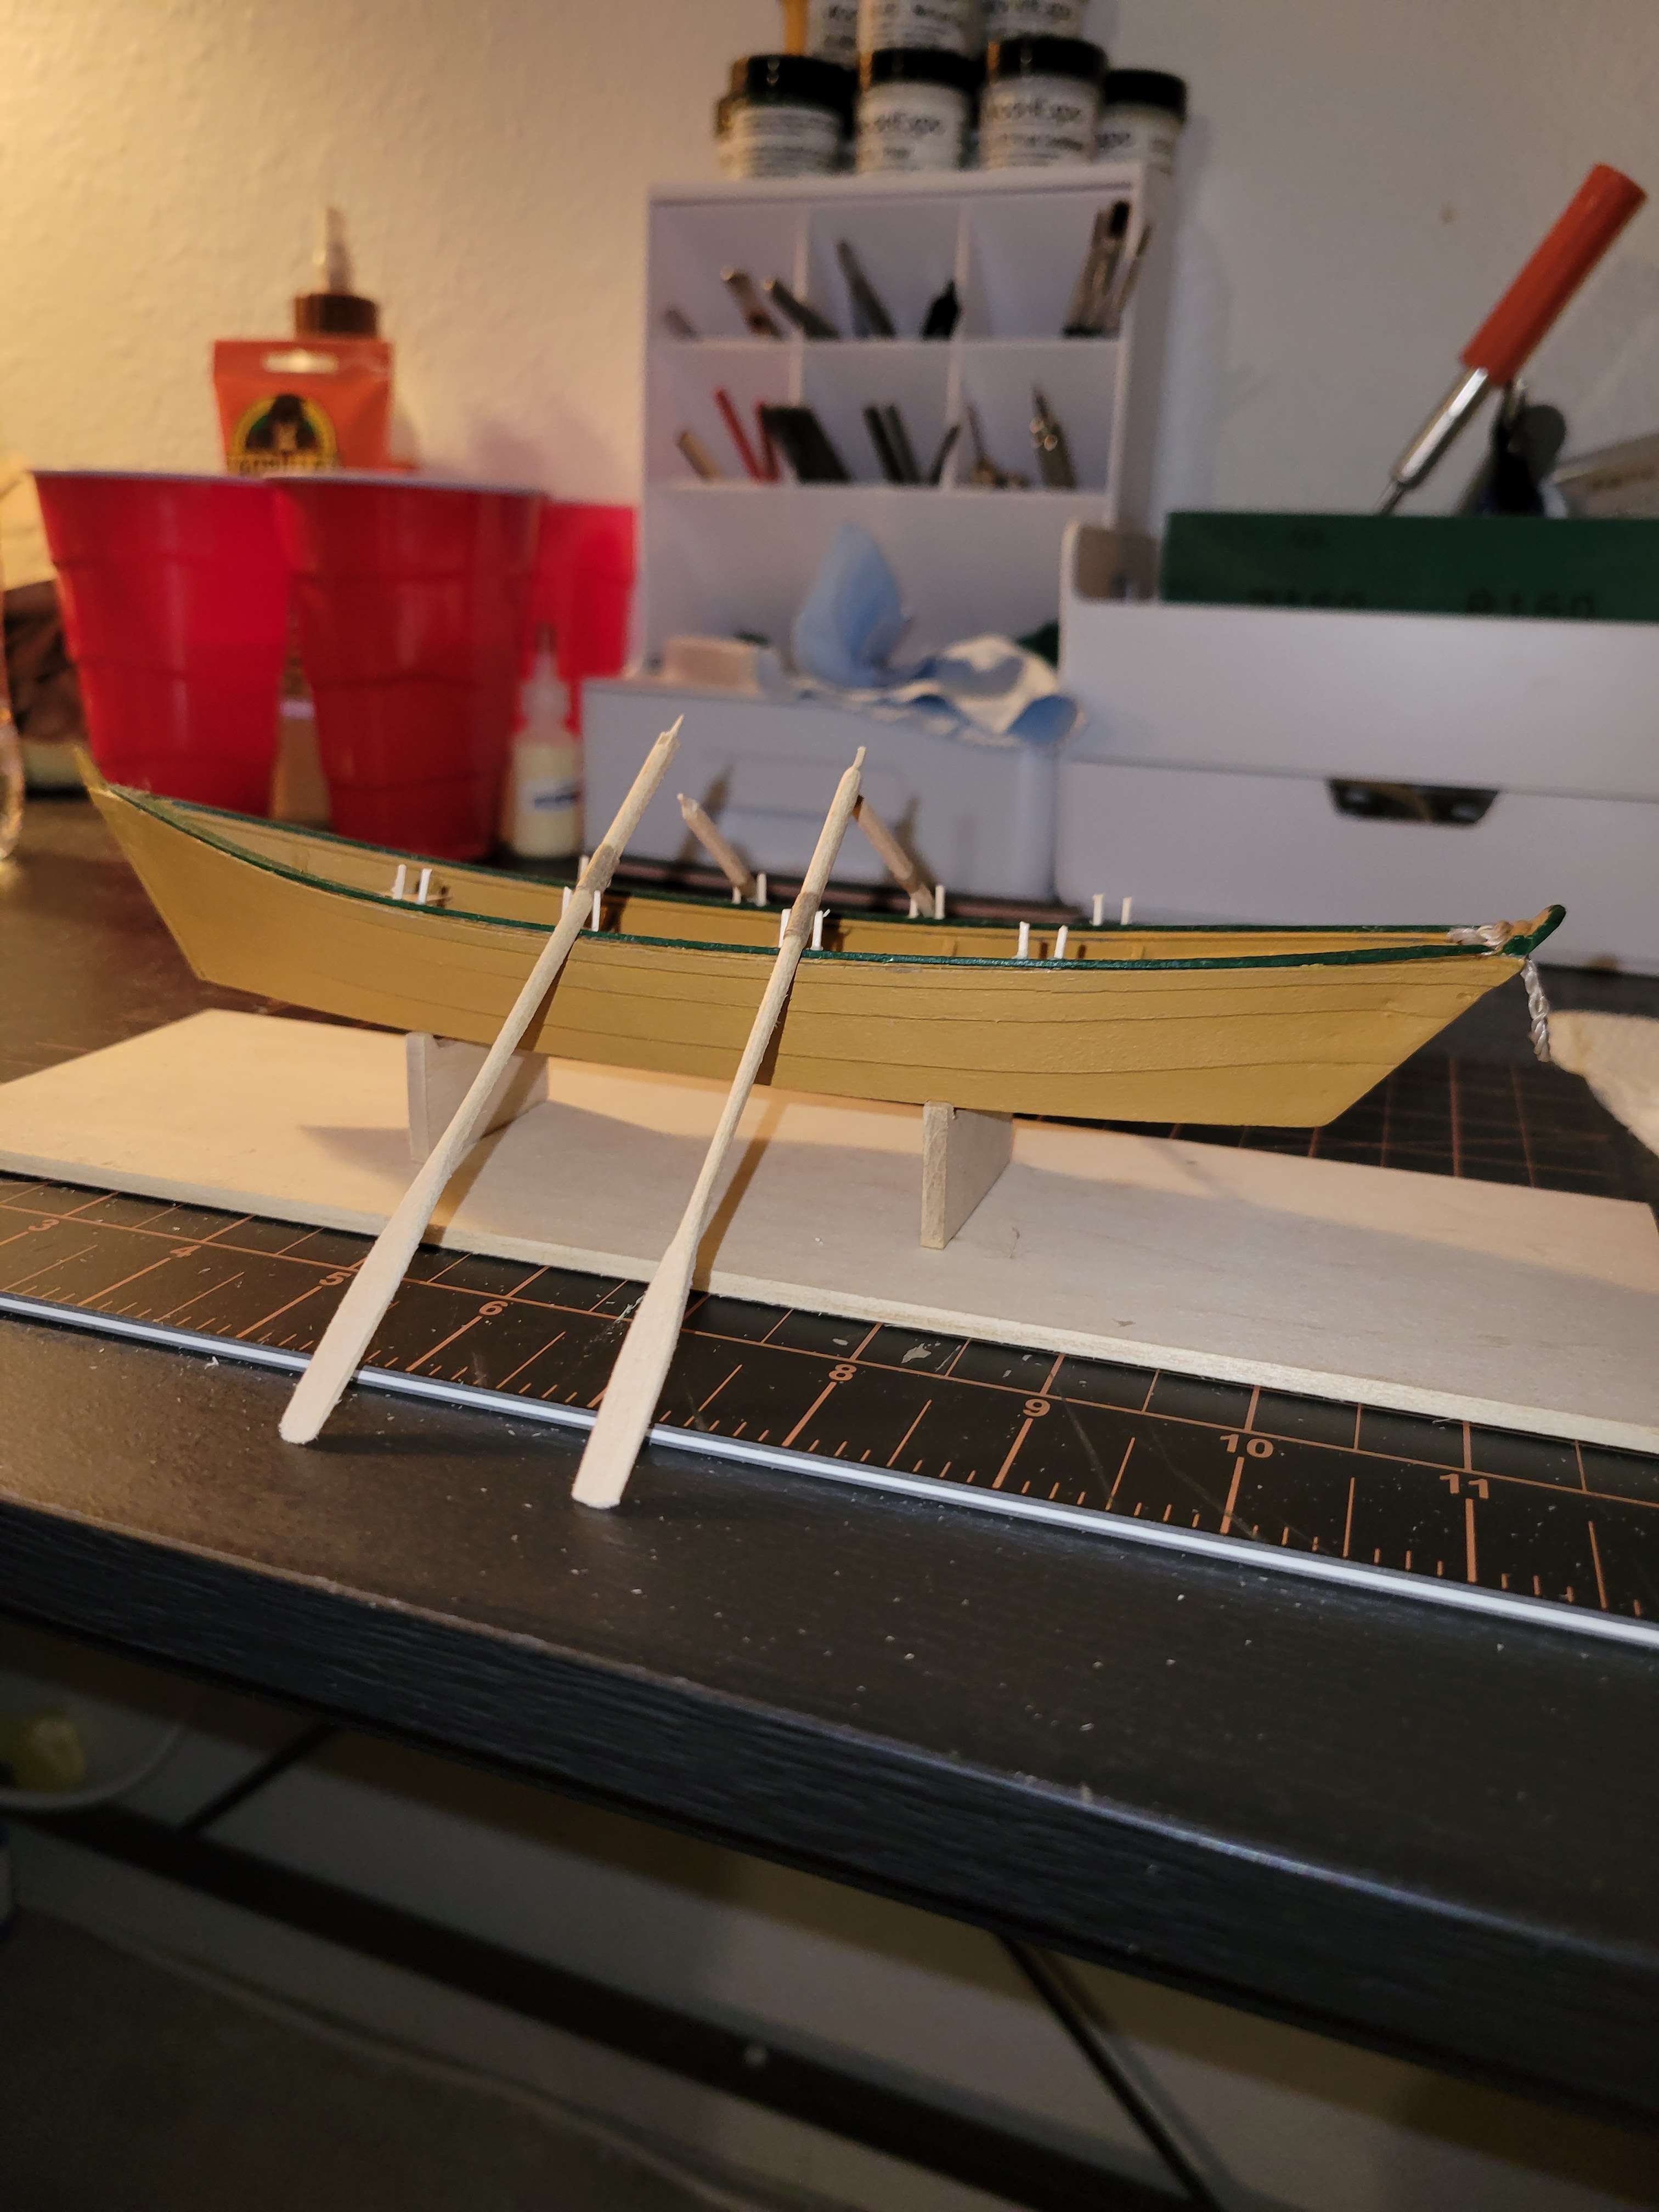
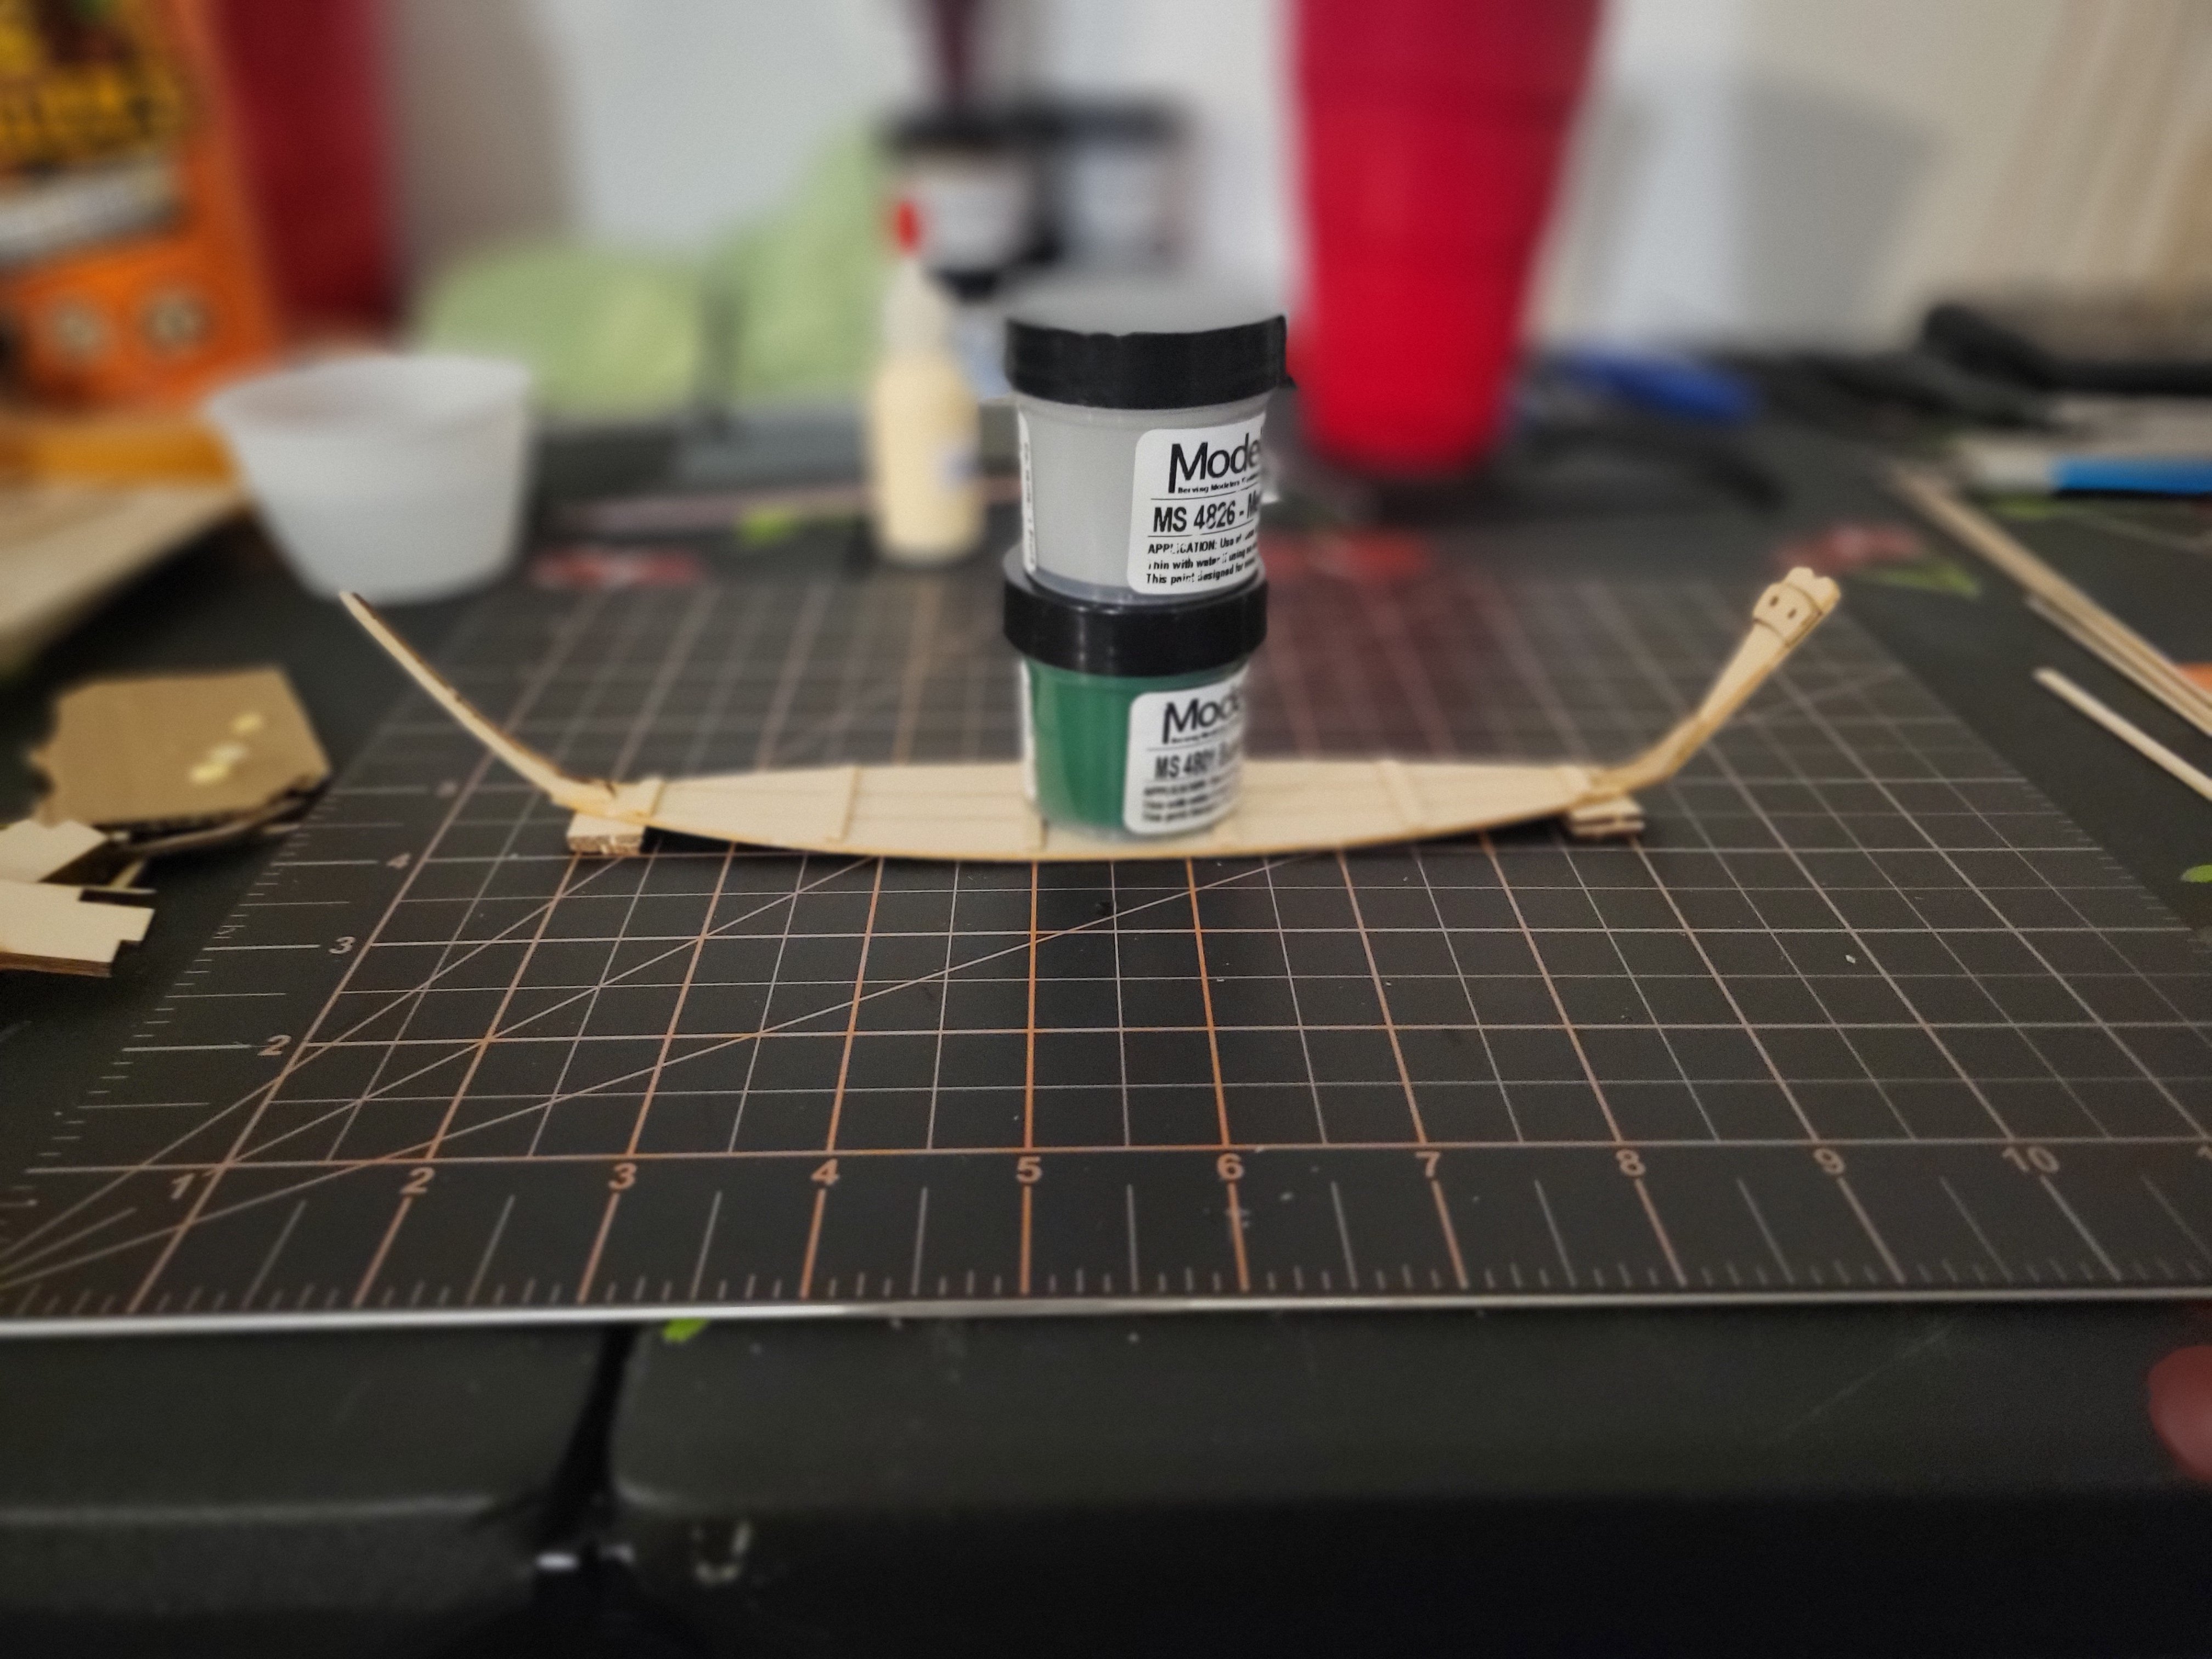
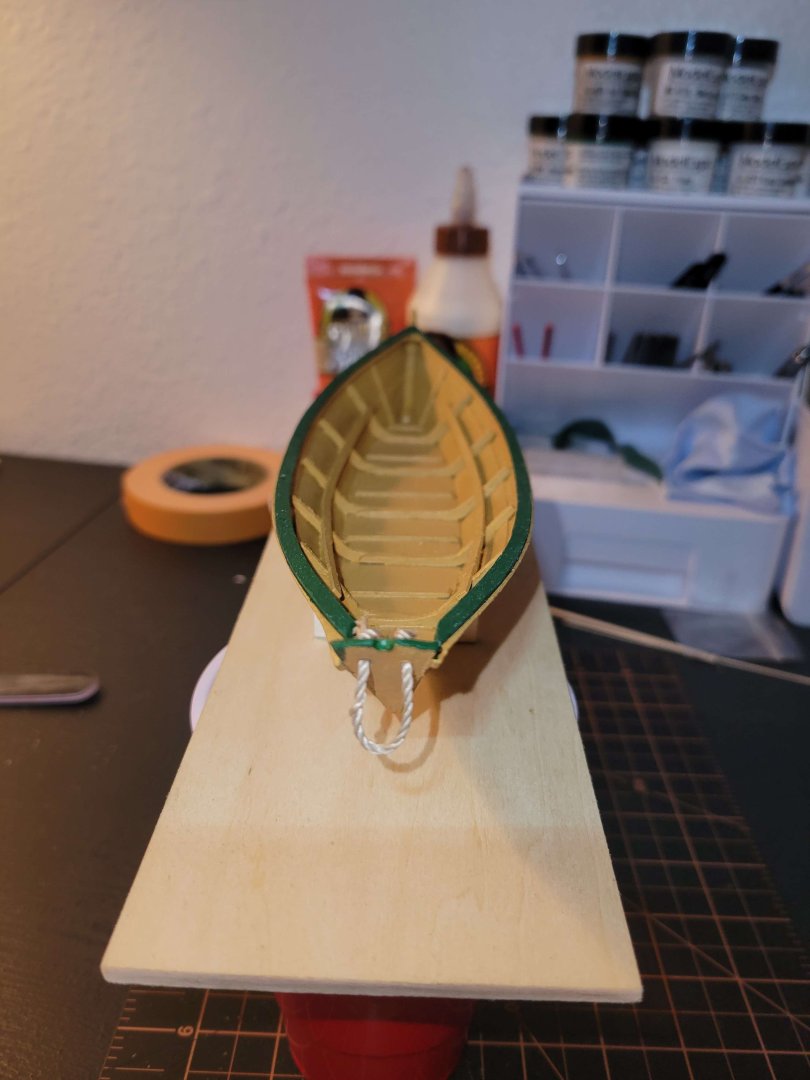
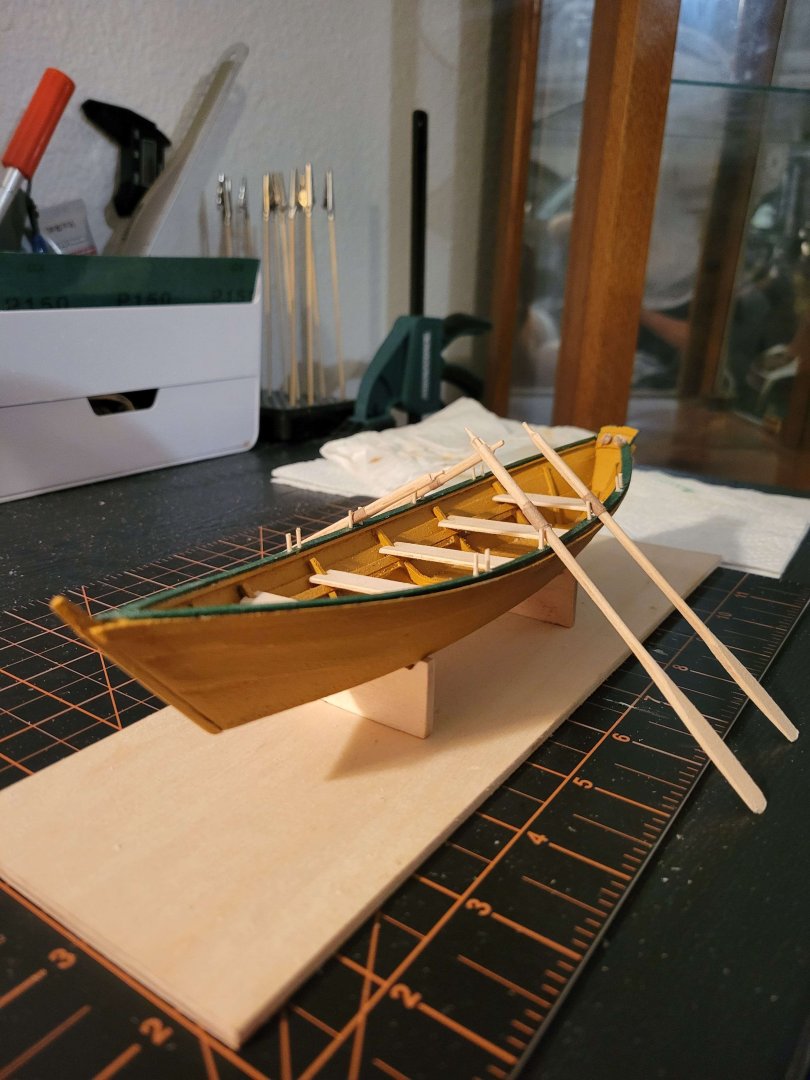
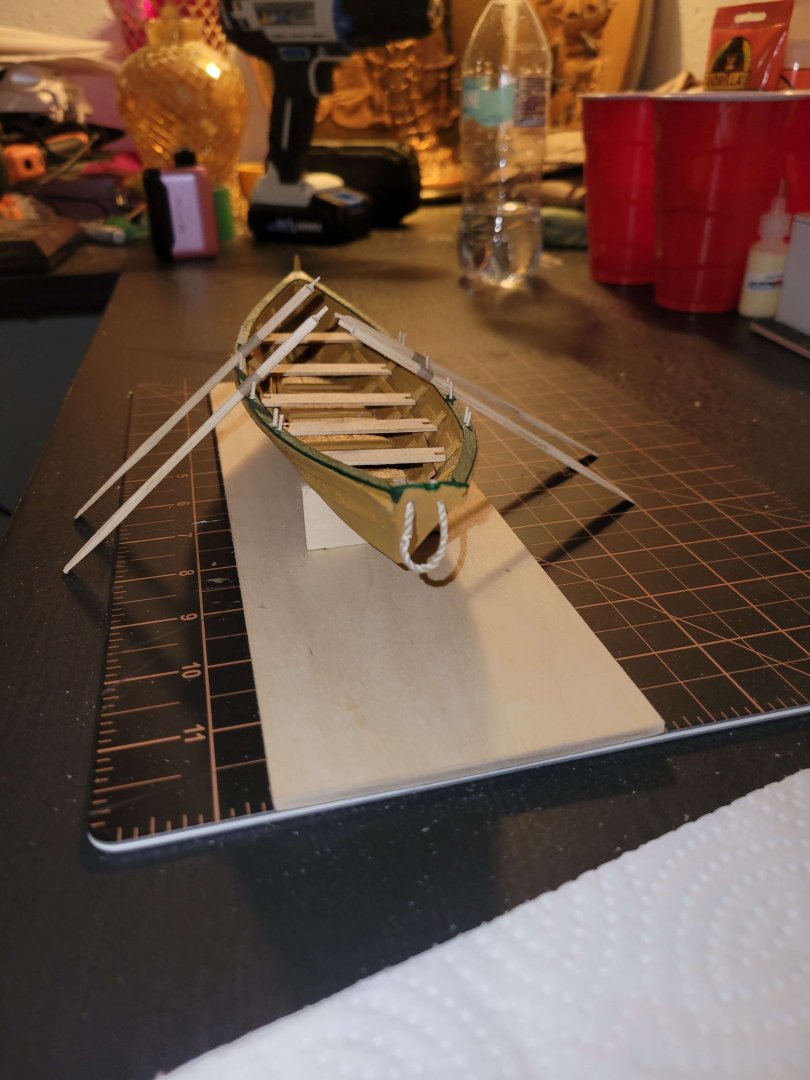
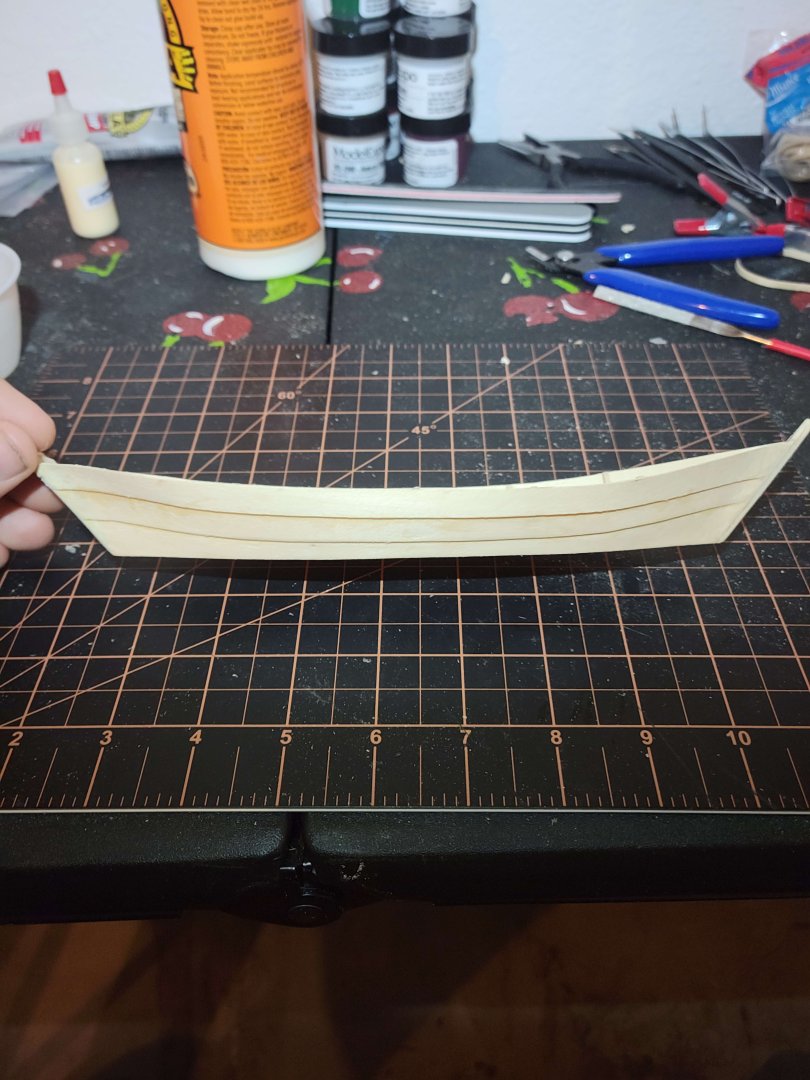
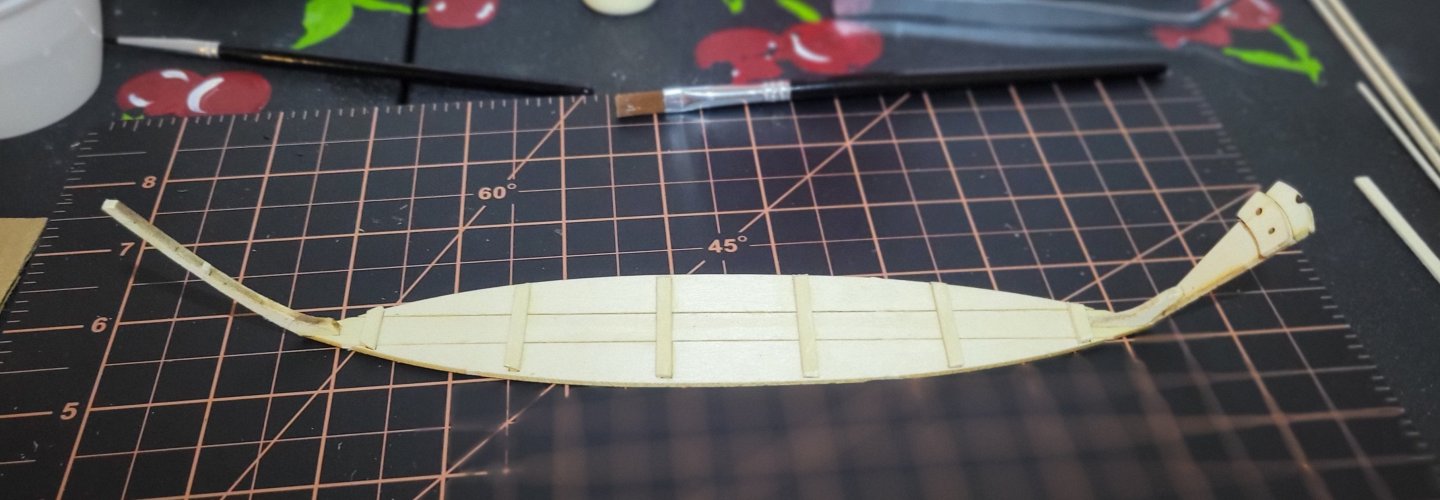
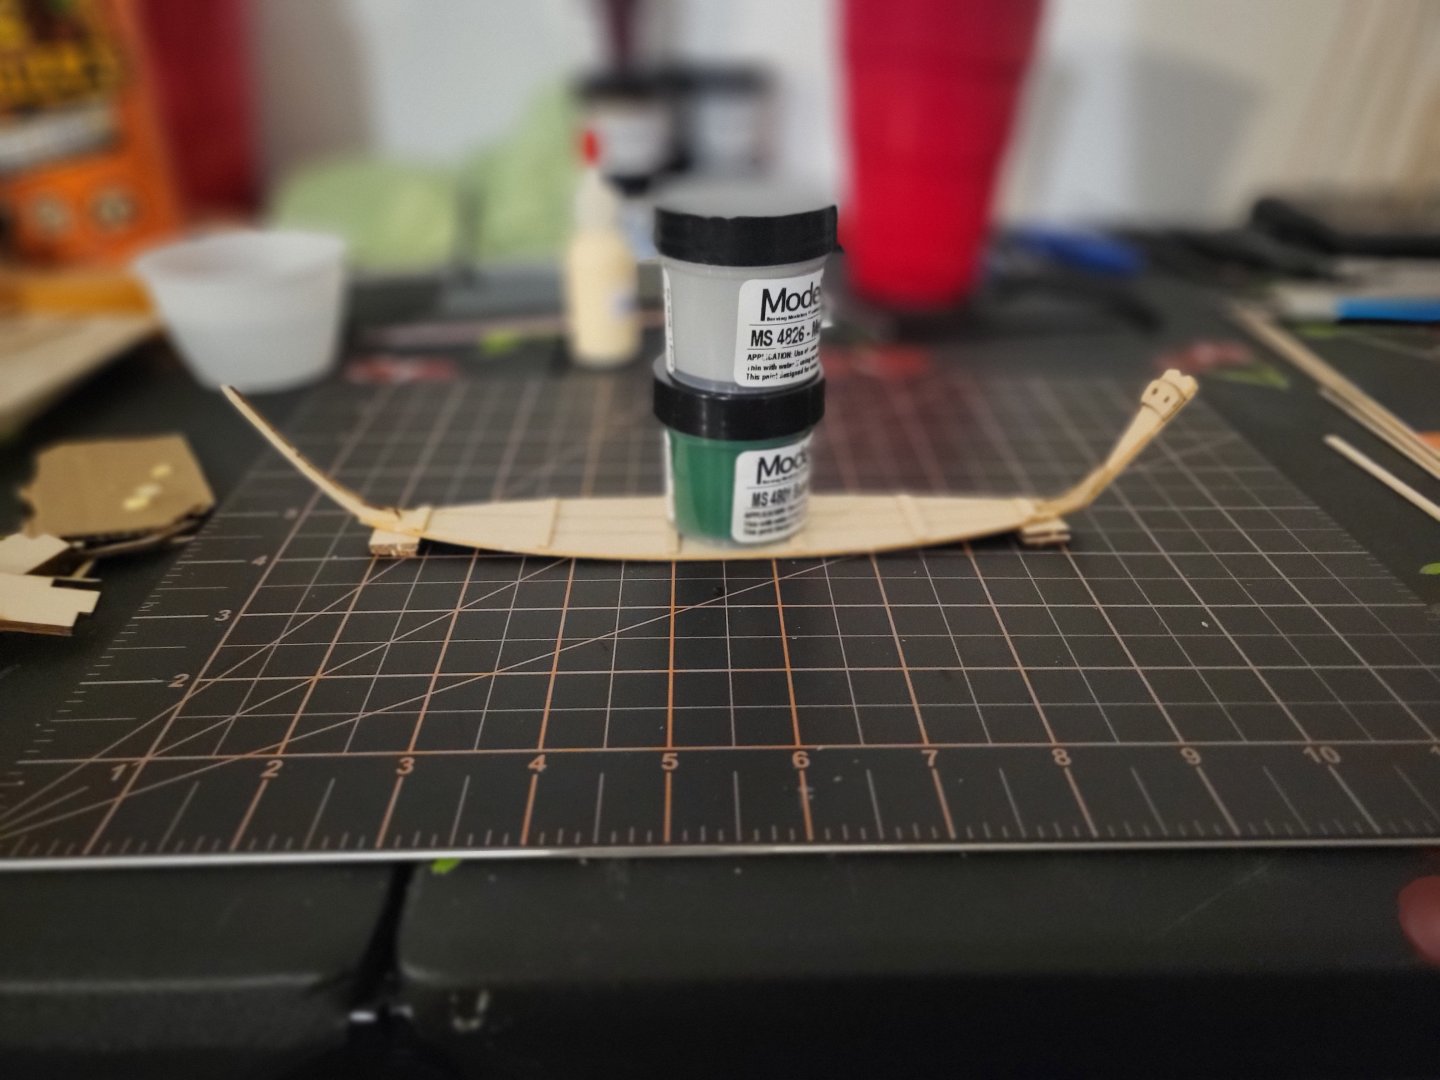
I am back for one final post here I unfortunately quite bad at remembering to update the log and to take pictures. Surely as I get more used to it I'll get better at remembering these things haha. So starting off I did add the last bits to the dowry itself, unfortunately it has been a while since I did it, and I have no pictures. So I'll just skim over it. Most of it was cleaning up the interior of the hull, adding cleats, and shaping the bow and stern. After this was painting time. Luckily I have been painting plastic wargaming models for a long time, so this part wasn't too bothersome or worrisome for me. I haven't painted on wood except staining so there was some differences but overall a enjoyable process. After which I attached the cap rails and added the tow rope. Attaching the rails was a somewhat tedious process but came together well so no complaints there. I also used some wood putty to fill in the gap where they meet at the stern. After this came the oars. This was a very fun process all things considered. Much sanding and shaping but seeing the finished product come from a block of wood was satisfying. I also did the optional step of adding the leather strip on the oar as well, I think it adds a lot to it. At this point I also added the thole pins, they are very small and as such were slightly a pain but nothing to bad. Last two steps were the seats and the stand itself. At present I left it as bare wood, I am considering staining the base but am unsure. But with that the Dory is complete!! Overall I had no build ending mistakes and the mistakes I did make I was able to overcome/rectify. I am really happy with the end product and feel like I learned a lot! I have it proudly set it up on the shelf I put up just for it haha. I am quite excited to start the next ship in this series of "tutorial" builds. I overlooked the instructions today and realized that I will need a few more tools and equipment. So it may be a bit before I am able to sadly. Also reading the instructions for the next ship, it looks to be quite the step up in things. I am excited for the challenge but a healthy bit anxious as well, I'll be sure to post when I can start! Thanks to everyone for reading!


- 12 replies
-
- 6
-
-
-
- Lowell Grand Banks Dory
- first build
- (and 1 more)
-
Desertanimal reacted to a post in a topic:
Lowell Grand Banks dory by ForbiddenShrimp - FINISHED - Model Shipways - 1:24 - first build
-
robert952 reacted to a post in a topic:
Lowell Grand Banks dory by ForbiddenShrimp - FINISHED - Model Shipways - 1:24 - first build
-
davec reacted to a post in a topic:
Lowell Grand Banks dory by ForbiddenShrimp - FINISHED - Model Shipways - 1:24 - first build
-
Oh I'm sure I'll be makin the mistakes for a while as well, luckily I got my fiance to tell me it looks good to a lay person at least haha, most important part is learnin' from em. I see you also completed the same three kit intro as I'm doin', when I get to the smack i'll check out your log for some references. Your most recent completed an' the cross section yer workin on lookin pretty smakin too boss!
- 12 replies
-
- 2
-
-
- Lowell Grand Banks Dory
- first build
- (and 1 more)
-
ForbiddenShrimp reacted to a post in a topic:
San Francisco by SiriusVoyager - FINISHED - Artesania Latina - 1:50 - Cross-Section
-
ForbiddenShrimp reacted to a post in a topic:
Lowell Grand Banks dory by ForbiddenShrimp - FINISHED - Model Shipways - 1:24 - first build
-
ForbiddenShrimp reacted to a post in a topic:
Lowell Grand Banks dory by ForbiddenShrimp - FINISHED - Model Shipways - 1:24 - first build
-
Thanks! And I agree, wouldnt be any fun if I was perfect right away haha
- 12 replies
-
- 1
-
-
- Lowell Grand Banks Dory
- first build
- (and 1 more)
-
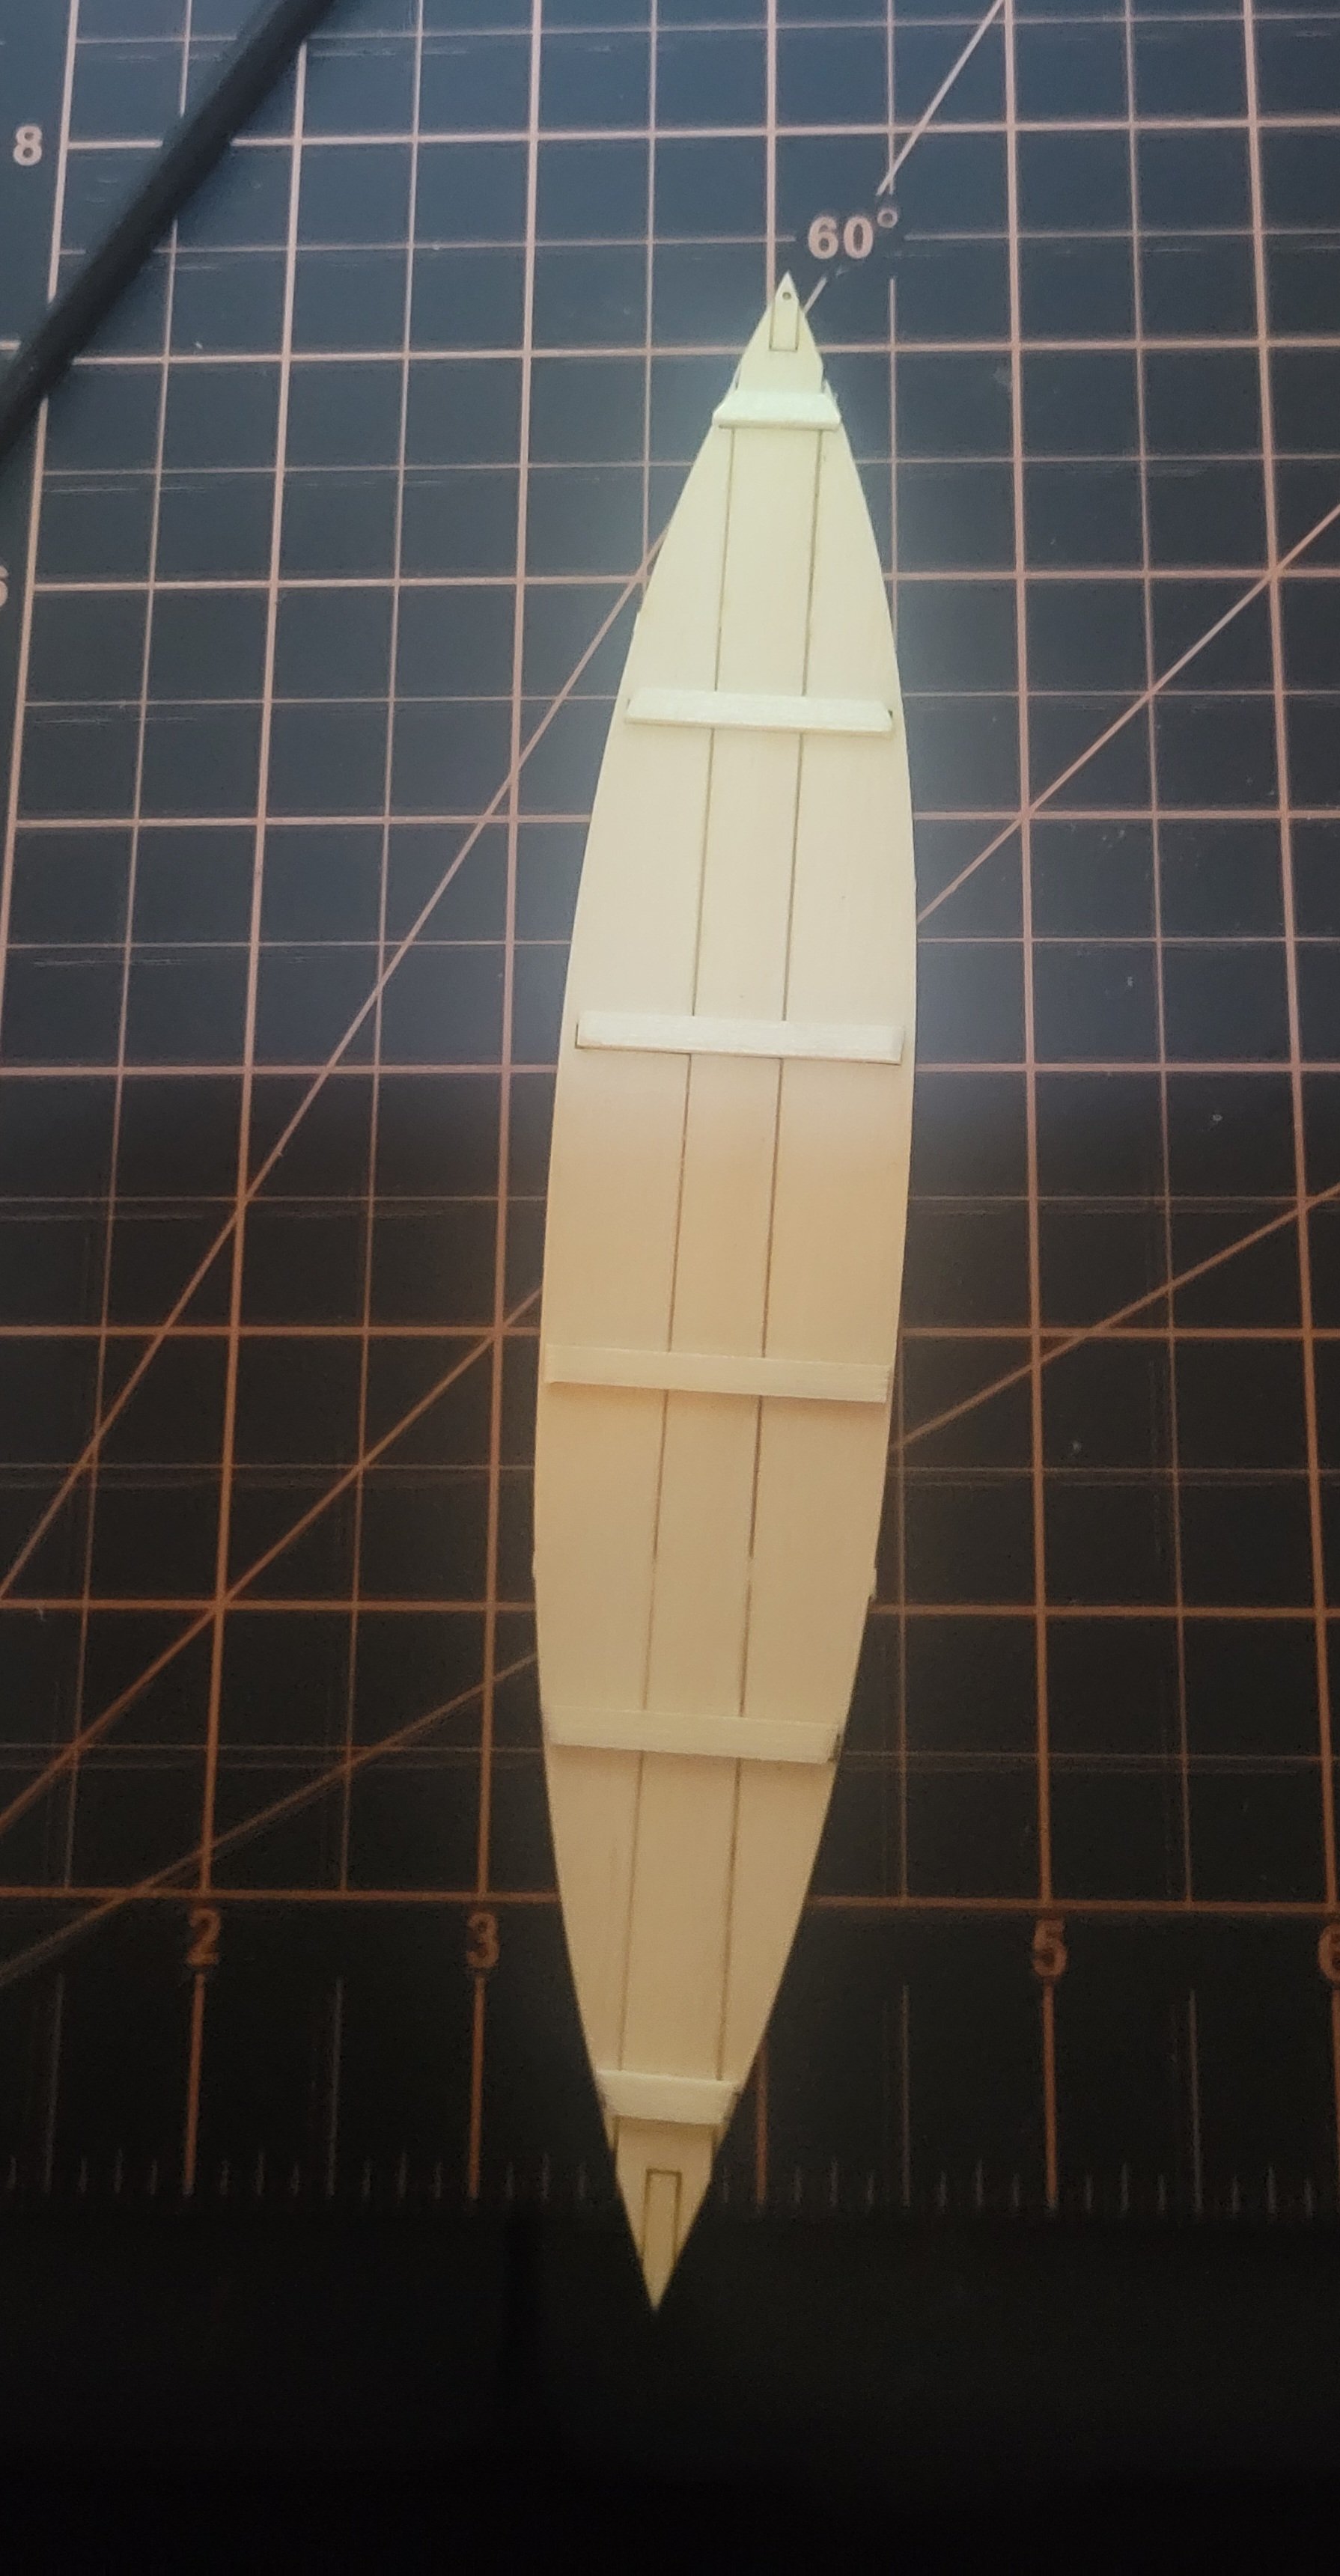
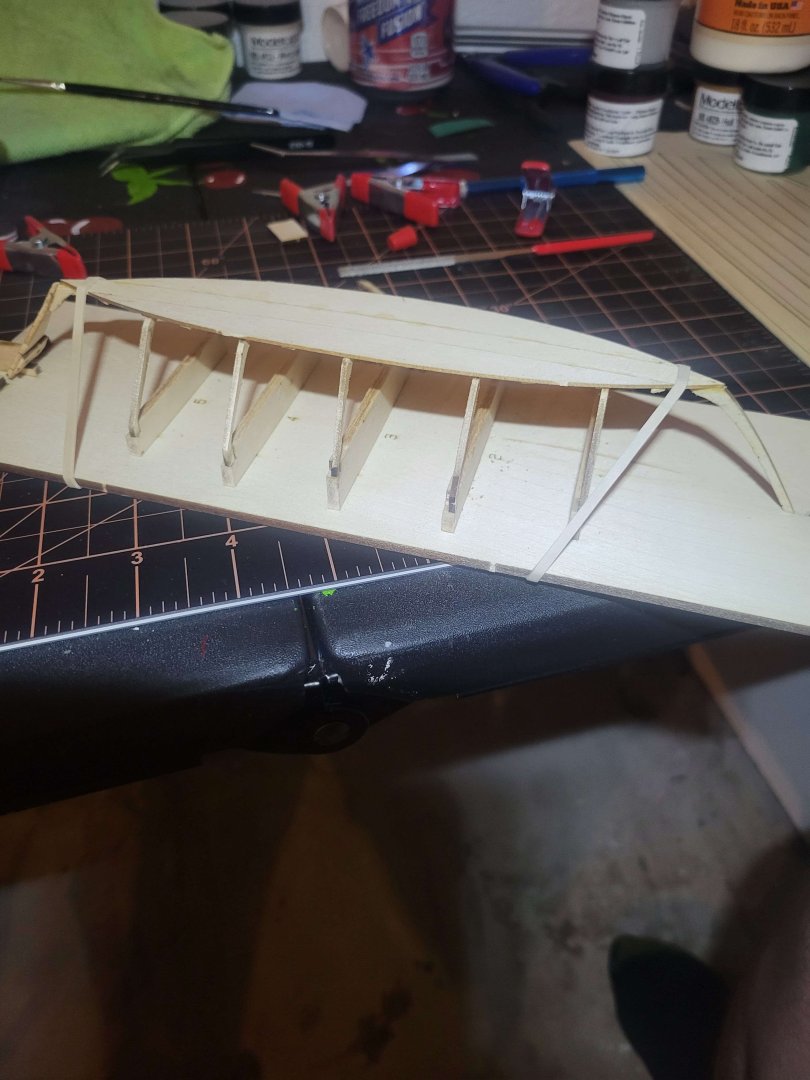
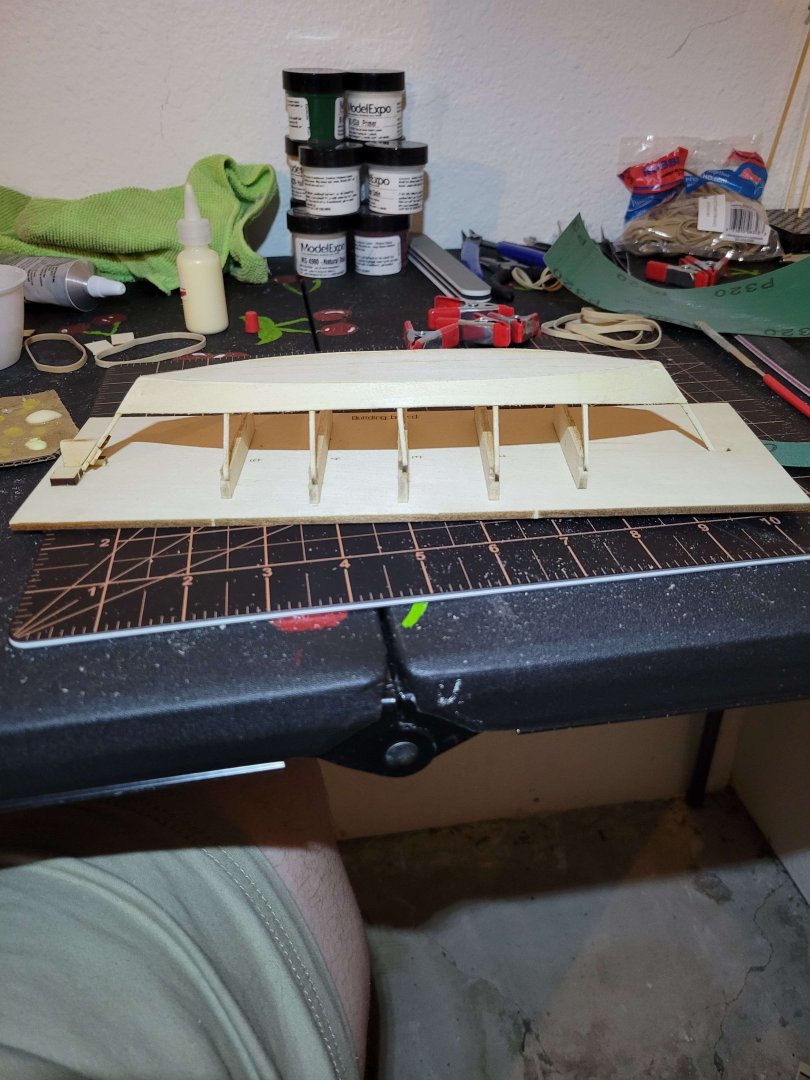
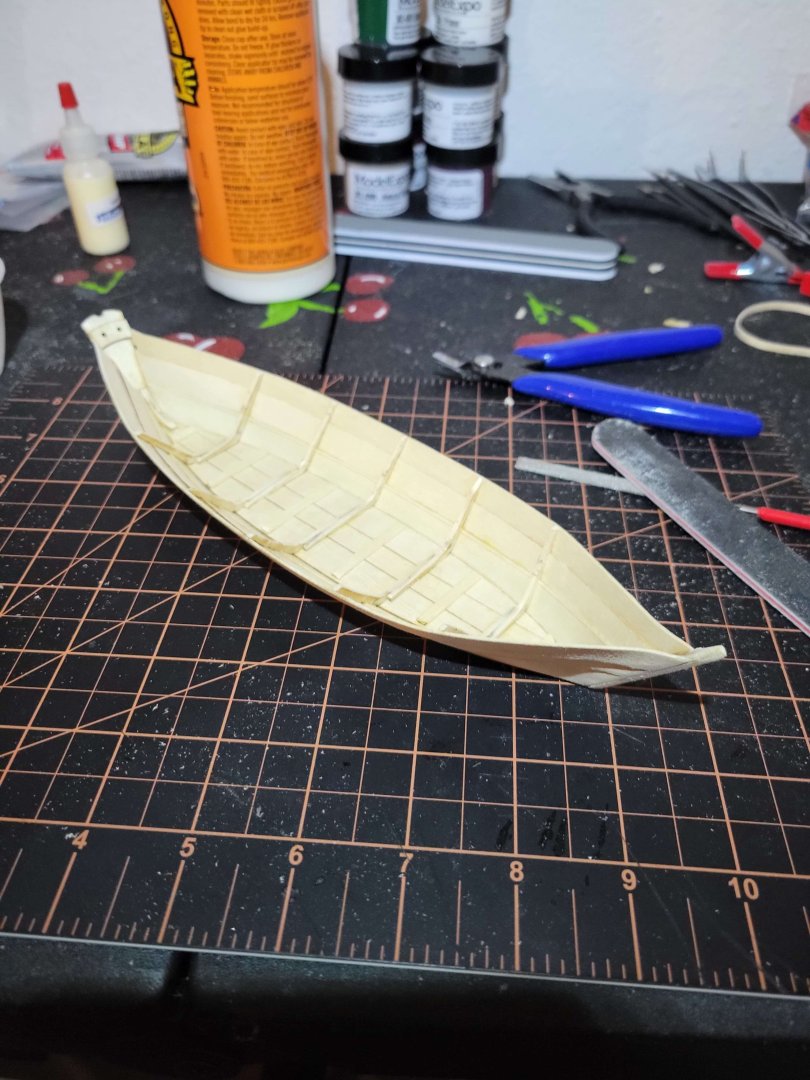
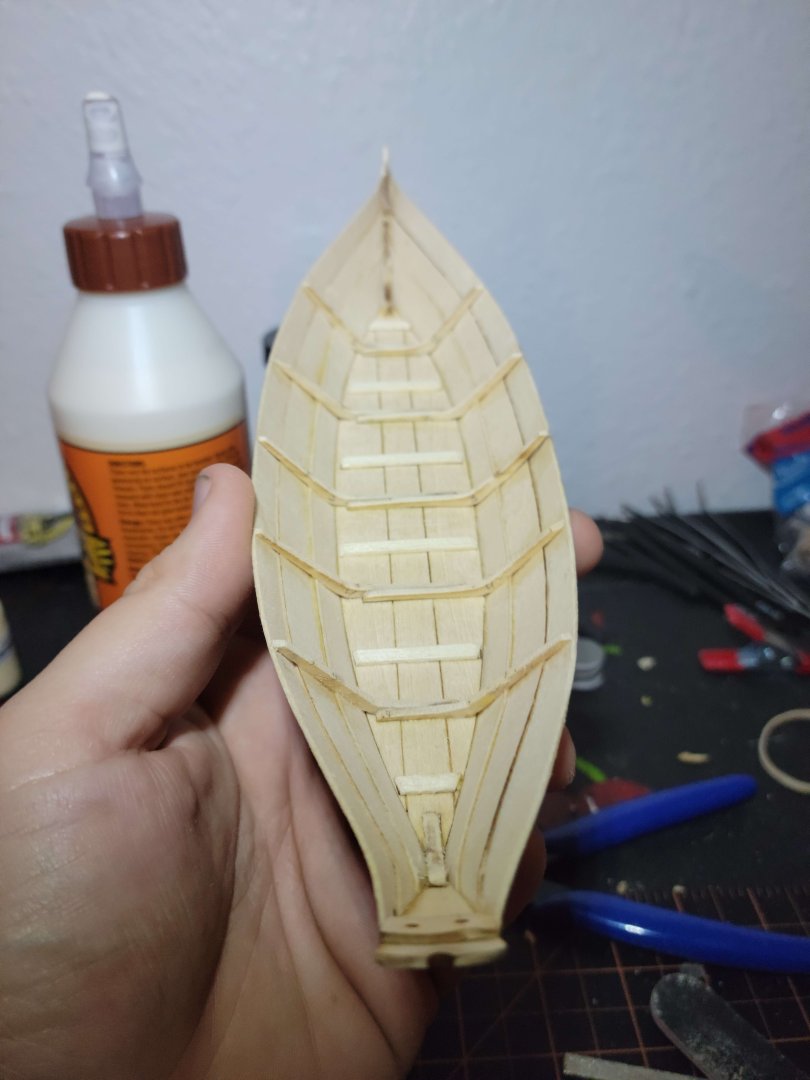
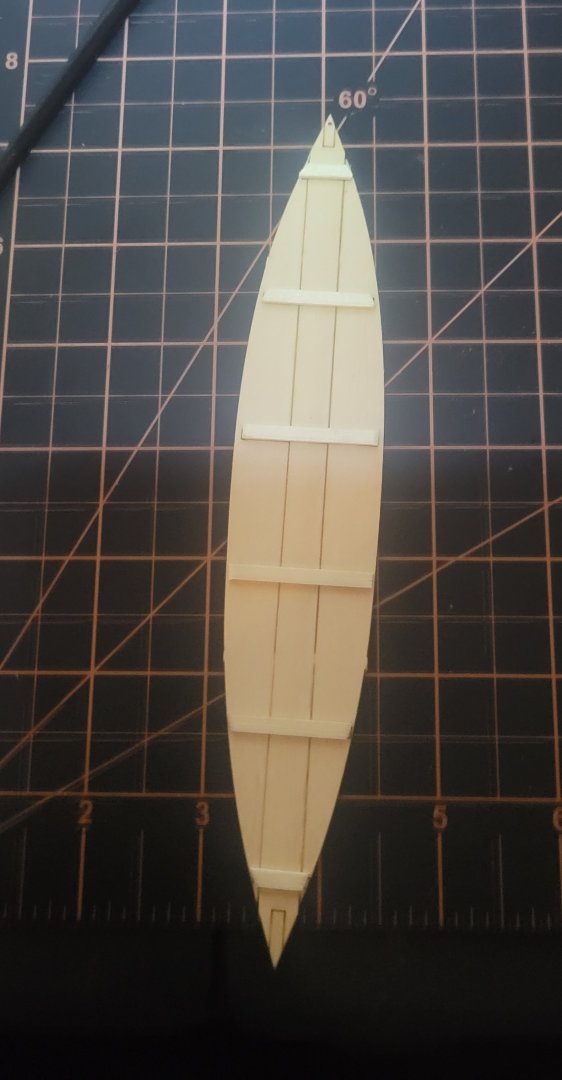
Hello everyone, back again! I've been making slow progress over the past few days and feel I've done enough to actually warrant an update now. So I got back into it by creating the Frames first, pretty much no problems here just some gluin'. I did manage to snap one or two by sanding a little to heavy handily. Still learning that finer touch, not something I needed nearly as much with my plastic models. But since I snapped these I haven't broken anything else... yet haha. I did forget to take pictures of this no great loss. After this I inserted them into the stand and glued the bottom to the frames. Alright, on to the scary and most exciting part, planking. I will be the first to admit that my planking here leaves a decent amount to be desired. They aren't very even and I most definitely had to much over lapping between the Garboard and the Broad planks. But that being said overall, it turned out alright. I could have stripped the glue and redo it but I didn't notice until after the sheer plank. I'd rather keep the beginner mistakes so I can look back some day to see my growth. Plus I know exactly how I messed up and what to do with the next ship. On the next image you can see my mistake with the Broad Plank, I have it to far up in the middle. And as such my Sheer plank followed suit. I must have subconsciously noted my mistake as it does not have the same issue of overlaying to much on the Broad plank though. After have the three planks on I removed it from the stand and got a sandin'. Got the frame looking good, add the false stern and generally cleaned up everything. Well that's everything I got done so far. Lot's of progress over the last few days. Got a few things to add to the boat itself and then on to painting! Once again any suggestions or reccs, are appreciated, thanks for reading everyone!


- 12 replies
-
- 4
-
-
- Lowell Grand Banks Dory
- first build
- (and 1 more)
-
ForbiddenShrimp reacted to a post in a topic:
Cheers from Wisconsin
-
Thank you, I didn't know you could do that. Appreciate the help!
- 12 replies
-
- 1
-
-
- Lowell Grand Banks Dory
- first build
- (and 1 more)
-
ForbiddenShrimp reacted to a post in a topic:
Lowell Grand Banks dory by ForbiddenShrimp - FINISHED - Model Shipways - 1:24 - first build
-
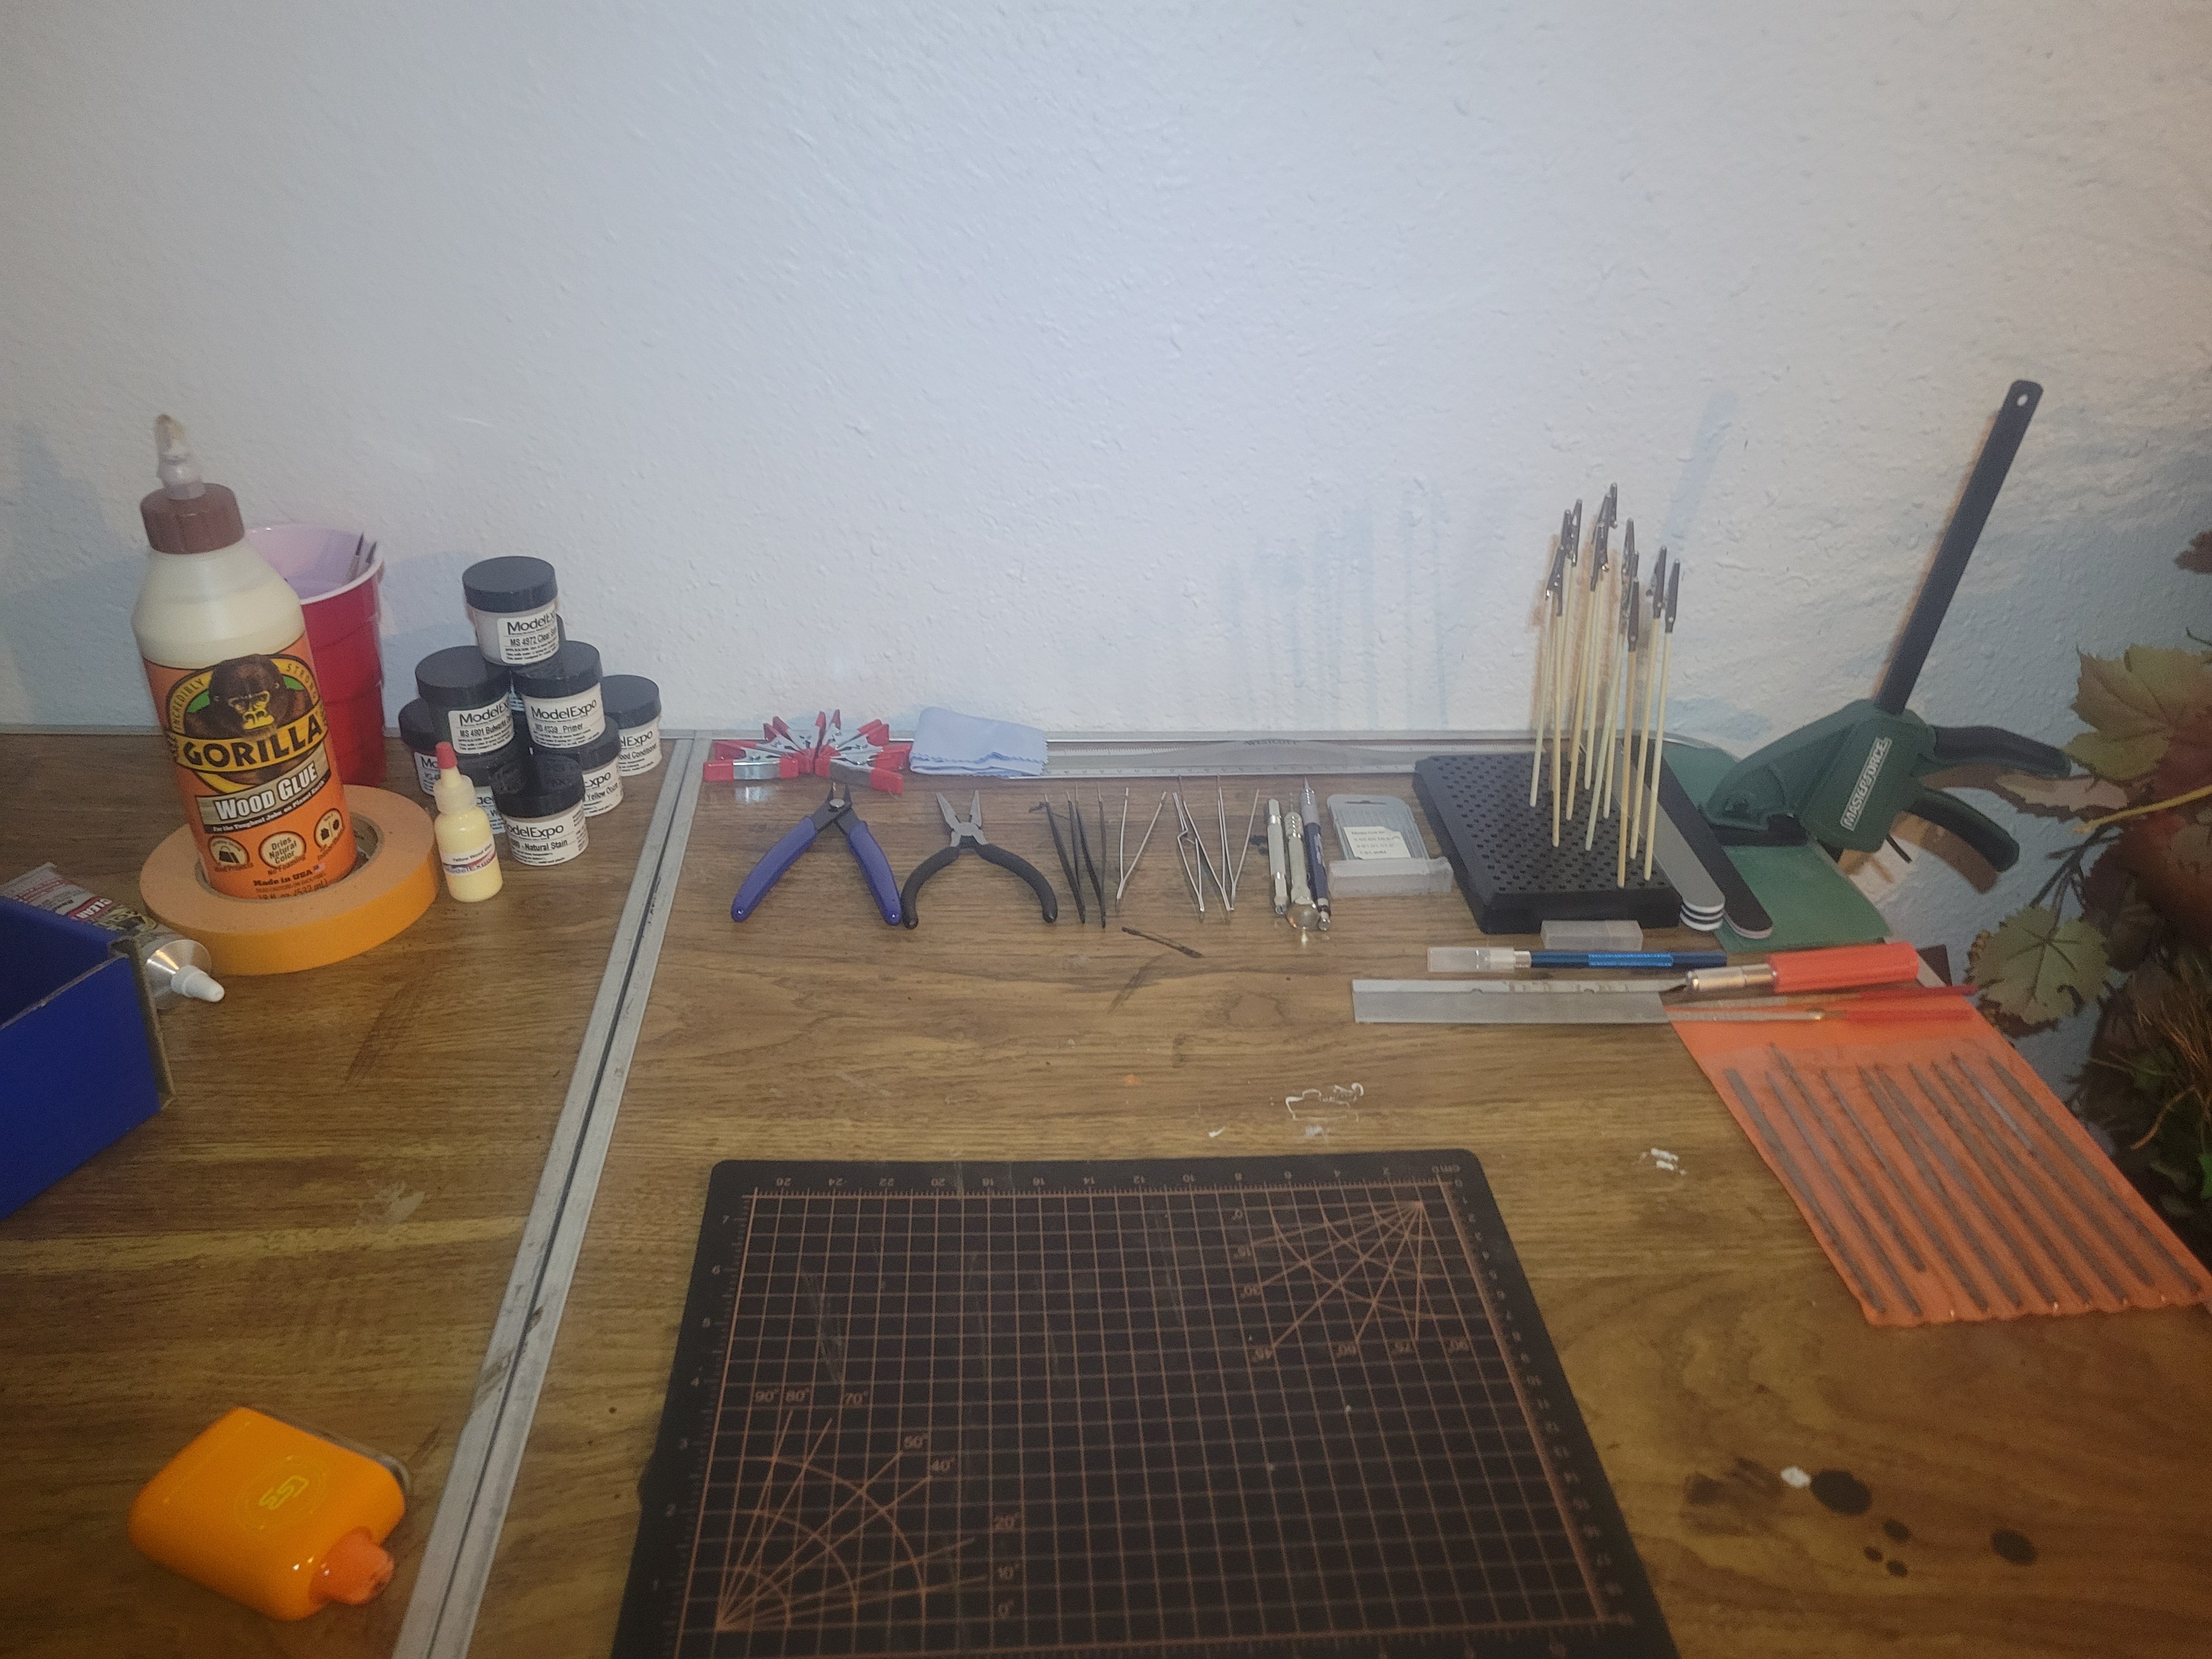
Hello everyone, Starting my first build log so if anything looks wrong please let me know thanks, also since this is my first kit im looking for any feedback on anything and everything! So getting into it I set up my workstation. I later realized that my table choice was a mistake as it is not level and dips in the middle, luckily this didnt affect to much and I caught it pretty early on. Anyways after reading the foreword to the instructions and getting everything out of the box I got right into it and started by gluing the three parts to the bottom of the boat, following that up with gluing on the cleats. I did struggle with the cleats for a little bit just making sure they were the right size and the instructions called for chamfering them which I worried about doing to little or to much. I do think it turned out alright however. Then came the stern cleat, transom, and stem. These were a fun little challenge to get them glued together and sanded. I also had the fun adventure of snapping part of the transom while sanding. Easy fix with some glue, but learned not to use so much pressure. Everything looks good comparing to the pictures the guide includes. Finally I left it overnight to create the rocker or curvature on the bottom of the dory. Thats everything for right now, hopefully I formated this all correct, let me know if not! I also was wondering if people has any advice on sanding in general, so far one of the parts im struggling with is figuring out how much/little to sand each peace before gluing. Besides that any other advice or comments based on my work so far please let me know. Thanks everyone!

- 12 replies
-
- 7
-
-
- Lowell Grand Banks Dory
- first build
- (and 1 more)
-
Cheers from Wisconsin
ForbiddenShrimp replied to ForbiddenShrimp's topic in New member Introductions
I wasnt aware of that thank you! -
ForbiddenShrimp reacted to a post in a topic:
Cheers from Wisconsin
-
ForbiddenShrimp reacted to a post in a topic:
Cheers from Wisconsin
-
Hello all! First I wanted to say thanks for lettin me join this fantastic group. I've been modelin plastic for most my life for wargaming, and finally decied to follow my passion and get into wooden ship kits. Im starting the model expo three kit guide as soon as it arrives for my foray into this hobby and can't wait! I look forward to askin you all many questions and seeing all of your guys amazin work!