NenadM
-
Posts
3,254 -
Joined
-
Last visited
Content Type
Profiles
Forums
Gallery
Events
Everything posted by NenadM
-

Cutty Sark by NenadM
NenadM replied to NenadM's topic in - Build logs for subjects built 1851 - 1900
Side remarks: I know everything looks messy and sloppy right now. (Nothing new in my case 😇) Despite the fact that I apply CA in tiny drops with the tip of a pointed toothpick, some parts of the fittings are so small that even that drop simply sinks and drowns them. This thin devil which hold yard has only 4mm dia, and small drop of CA on top of toothpick just can not be smaller than 1mm. so, that is how it is. But ... Before painting, there will be a fine cleaning and finishing. In doing so, as before, I will use acrylic paint in several thin layers, each of which will be sanded with the finest sandpaper with a grain size of 360-400. I know from previous experience that this way the effect of chiseling is achieved, all little bumps will be aligned, so that everything will look completely different when it is finished. Of course I'm also counting on the effect of visual masking with bunch od ropes sails that will wrap around these little beasts. And another thing to mention: With modern phone cameras (Honor X8a 100MP) it is easy to take a detailed macro shot of your work. Too detailed sometimes, I think, if part is too small. See photos included. Keyboard and a detail ... which also exposes dust between keys ... ugly, isn`t it ... you know what i mean?

- 4,152 replies
-
- 3
-

-
- cutty sark
- tehnodidakta
- (and 1 more)
-
Cutty Sark by NenadM
NenadM replied to NenadM's topic in - Build logs for subjects built 1851 - 1900
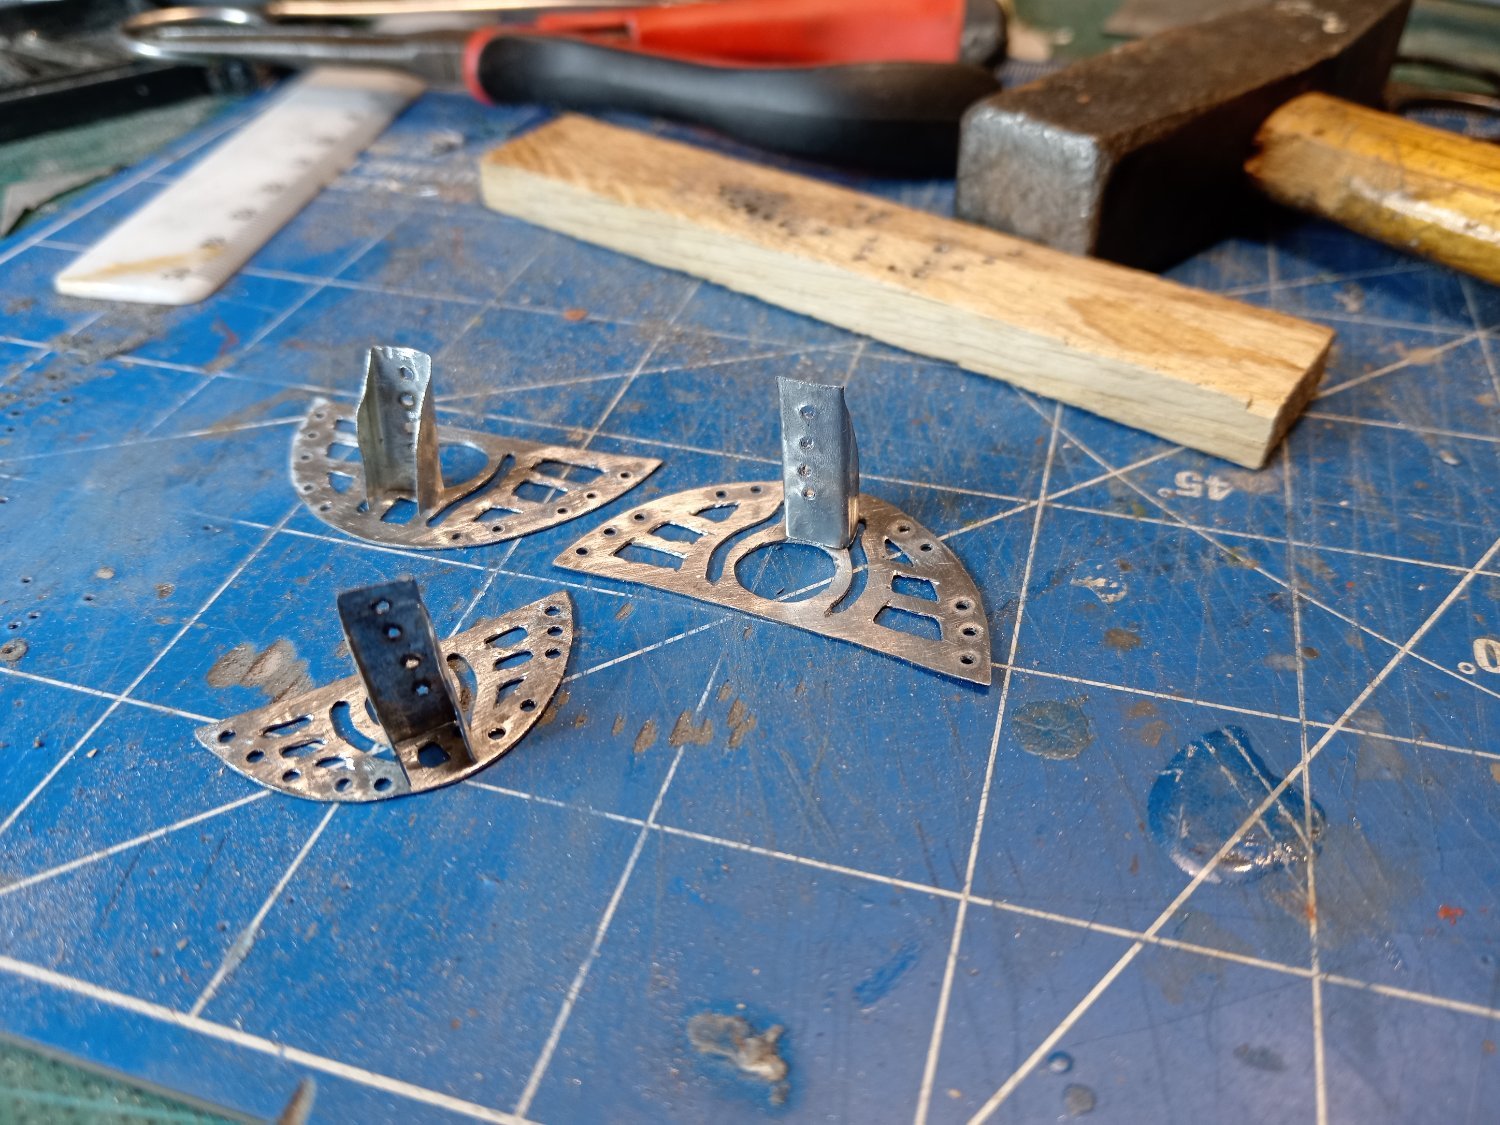
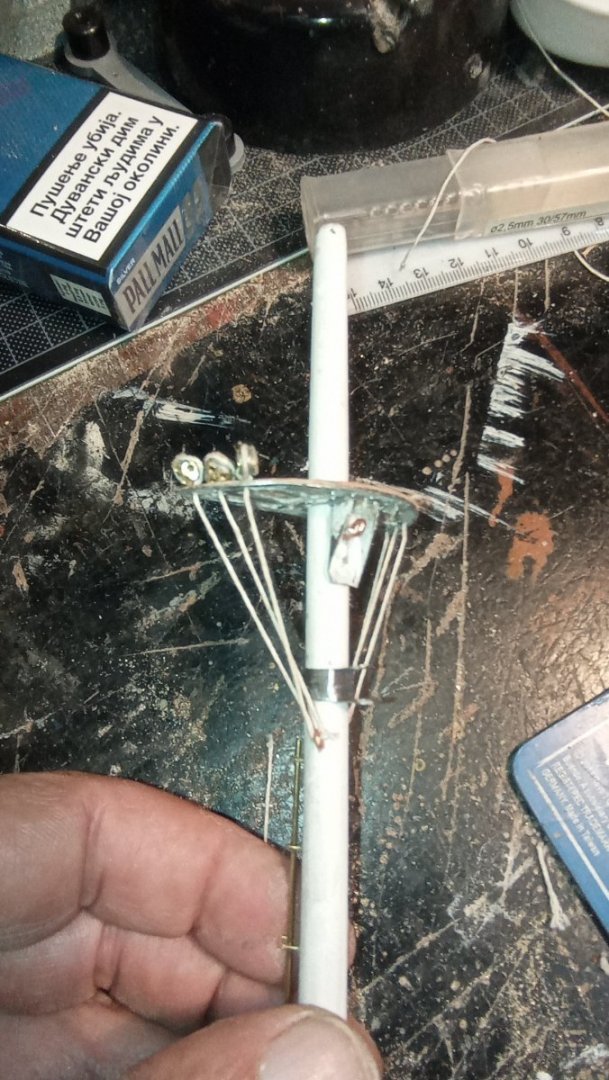
All three nests - metal works done. Holder for yard on fore lower mast done. This was tricky. Made from Cu foil 0.3mm which is harden wirh thin layer of soldering on surface.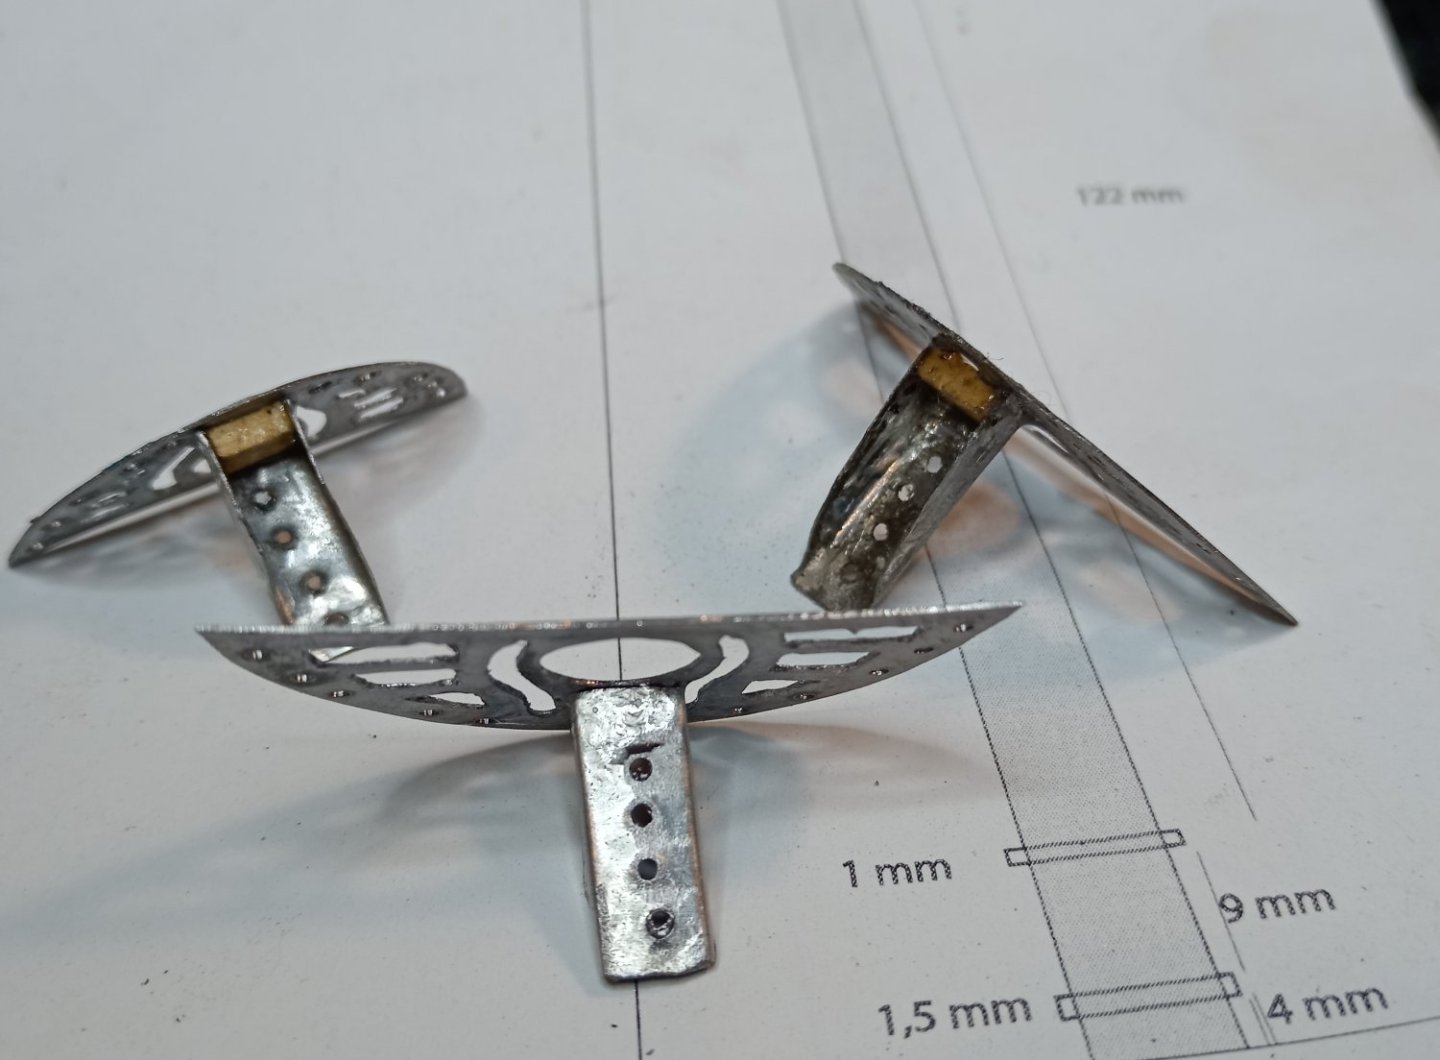

- 4,152 replies
-
- 7
-
-
- cutty sark
- tehnodidakta
- (and 1 more)
-
Cutty Sark by NenadM
NenadM replied to NenadM's topic in - Build logs for subjects built 1851 - 1900
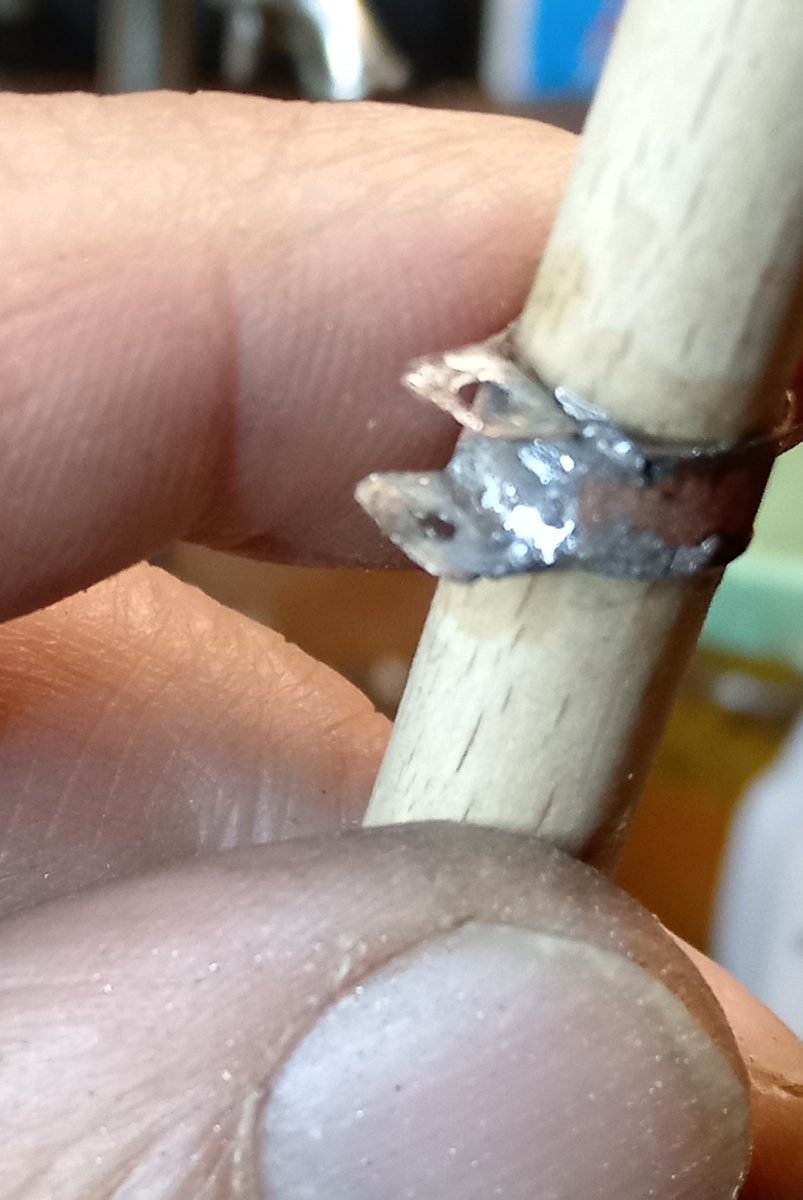
Old saying: "when the hill won't come to man, then man will come to the hill" So, if soldering do not work , super-glue will work
- 4,152 replies
-
- 4
-
-
- cutty sark
- tehnodidakta
- (and 1 more)
-
Cutty Sark by NenadM
NenadM replied to NenadM's topic in - Build logs for subjects built 1851 - 1900
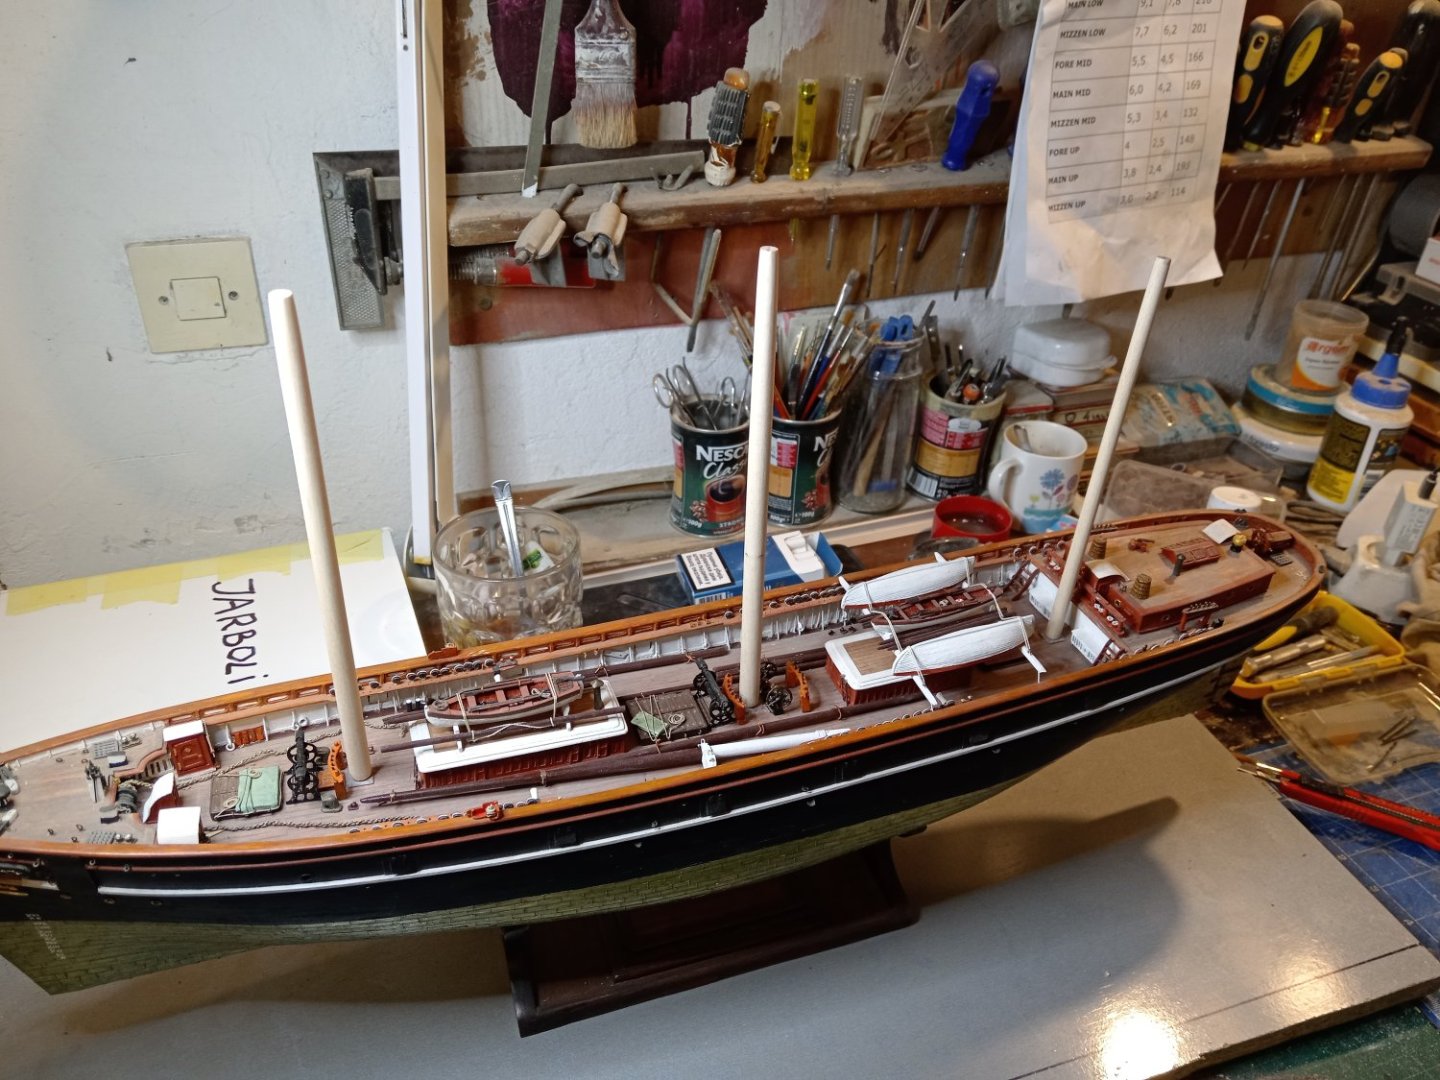
I take a short look at back ... 11 years ... Many things changed since begining. Now, I mainly know exactly what I am doing, where are my limits, where simplifications are necessary, right sequence of moves. Ok, I stray here and there, made my mistakes and remakes, little parts still disappeared from desk, just to be fun For complex structures, as deck are, or as masts and yards are, lesson is learned: first make all parts, and then mount them as Lego blocks. And - dont rush anywhere (which is easy to say, and not that easy to do ... my temperament) So, idea is to make all 9 mast parts, to make all yards, trying them temporary are they fit in place as them have to be, and then, after all is finished to start with standing rigging. (Rigging will be hard to me, considering my eyes have same years as me (65) and magnifying glass over fragile structure can damage it if I should not be careful and patient enough.) Some add thoughts ... before masting and rigging, I have to make Her final stand and glass cage, to save Her from dust during that works. So, go on, slowly but persistently, among my other hobbies- 4,152 replies
-
- 3
-
-
- cutty sark
- tehnodidakta
- (and 1 more)
-
Cutty Sark by NenadM
NenadM replied to NenadM's topic in - Build logs for subjects built 1851 - 1900
Third nest done And holders, too Next - micro soldering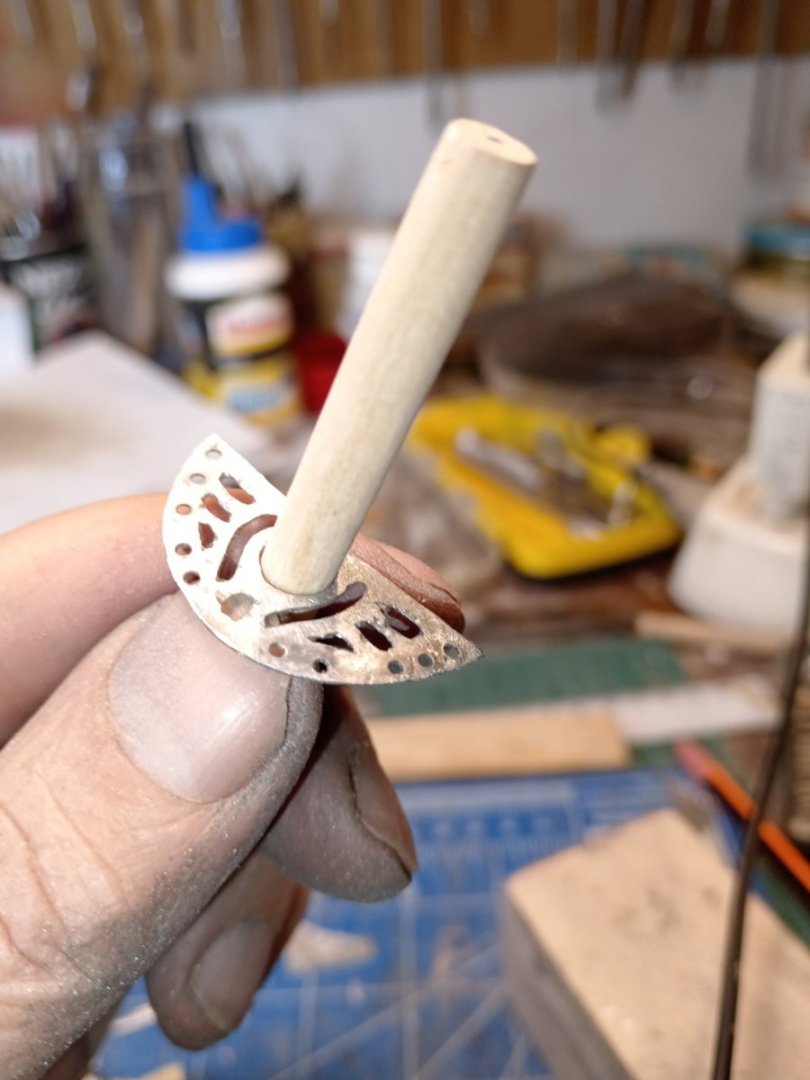

- 4,152 replies
-
- 8
-
-
- cutty sark
- tehnodidakta
- (and 1 more)
-
Cutty Sark by NenadM
NenadM replied to NenadM's topic in - Build logs for subjects built 1851 - 1900
One more to go! Now, it is OK
- 4,152 replies
-
- 2
-
-
- cutty sark
- tehnodidakta
- (and 1 more)
-
Cutty Sark by NenadM
NenadM replied to NenadM's topic in - Build logs for subjects built 1851 - 1900
Feom some reason No 4 didnt upload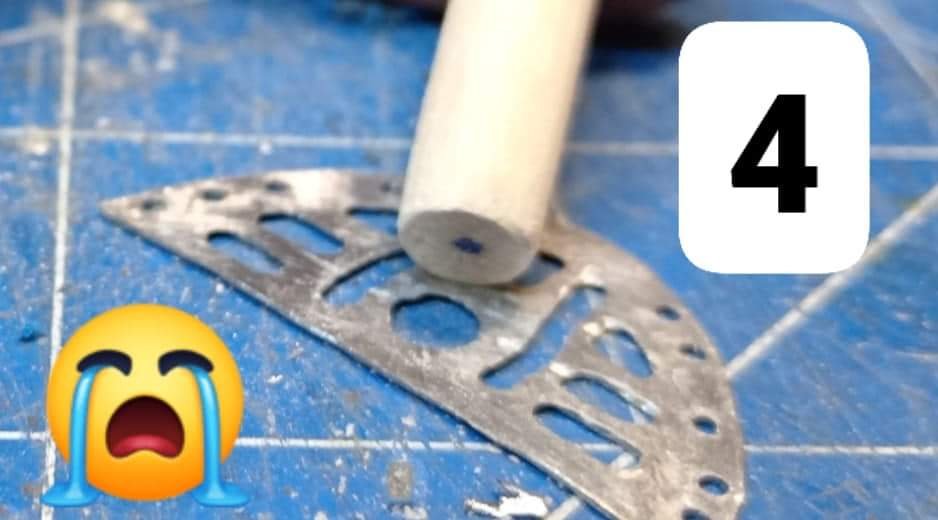
- 4,152 replies
-
- 5
-
-
- cutty sark
- tehnodidakta
- (and 1 more)
-
Cutty Sark by NenadM
NenadM replied to NenadM's topic in - Build logs for subjects built 1851 - 1900
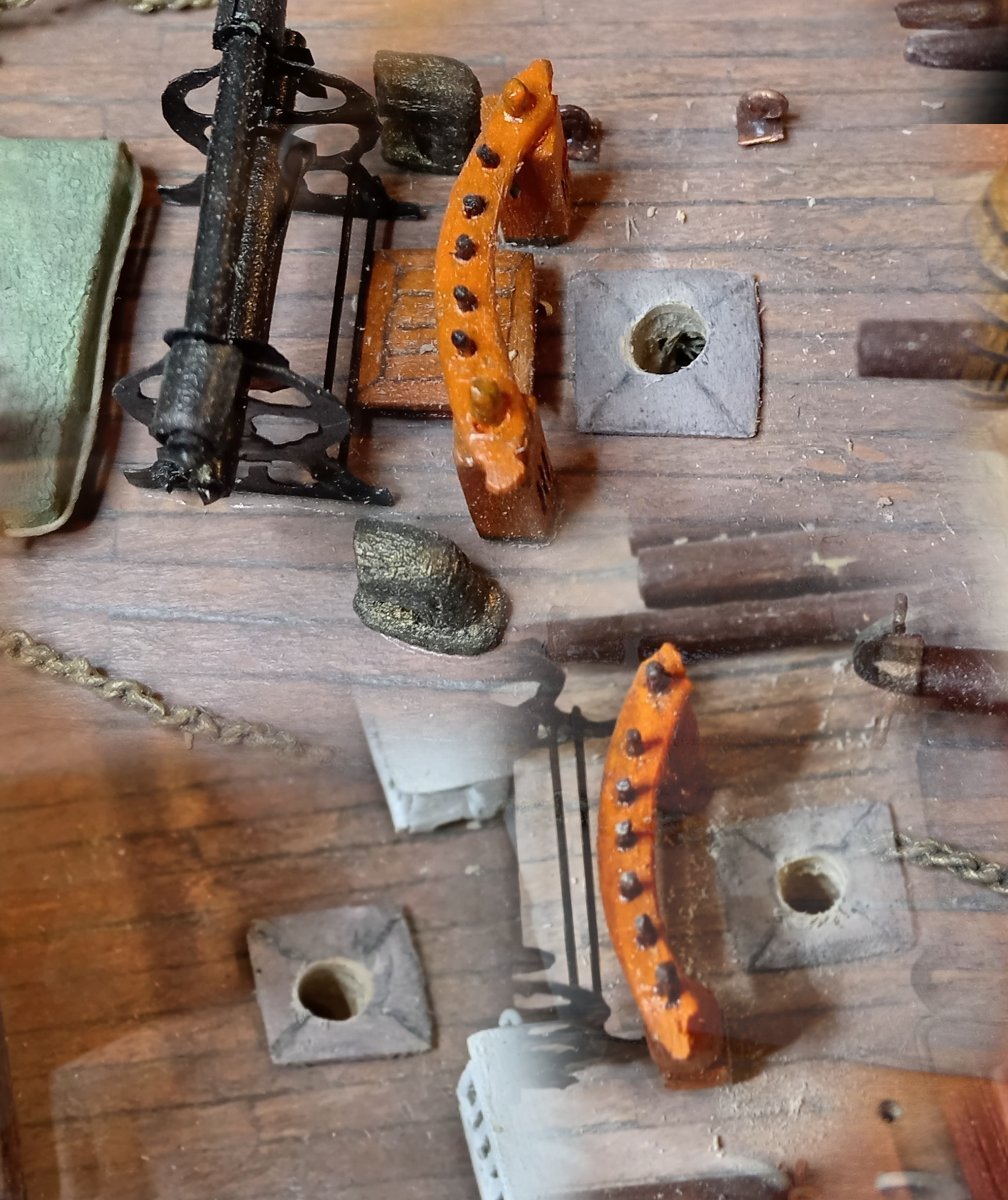
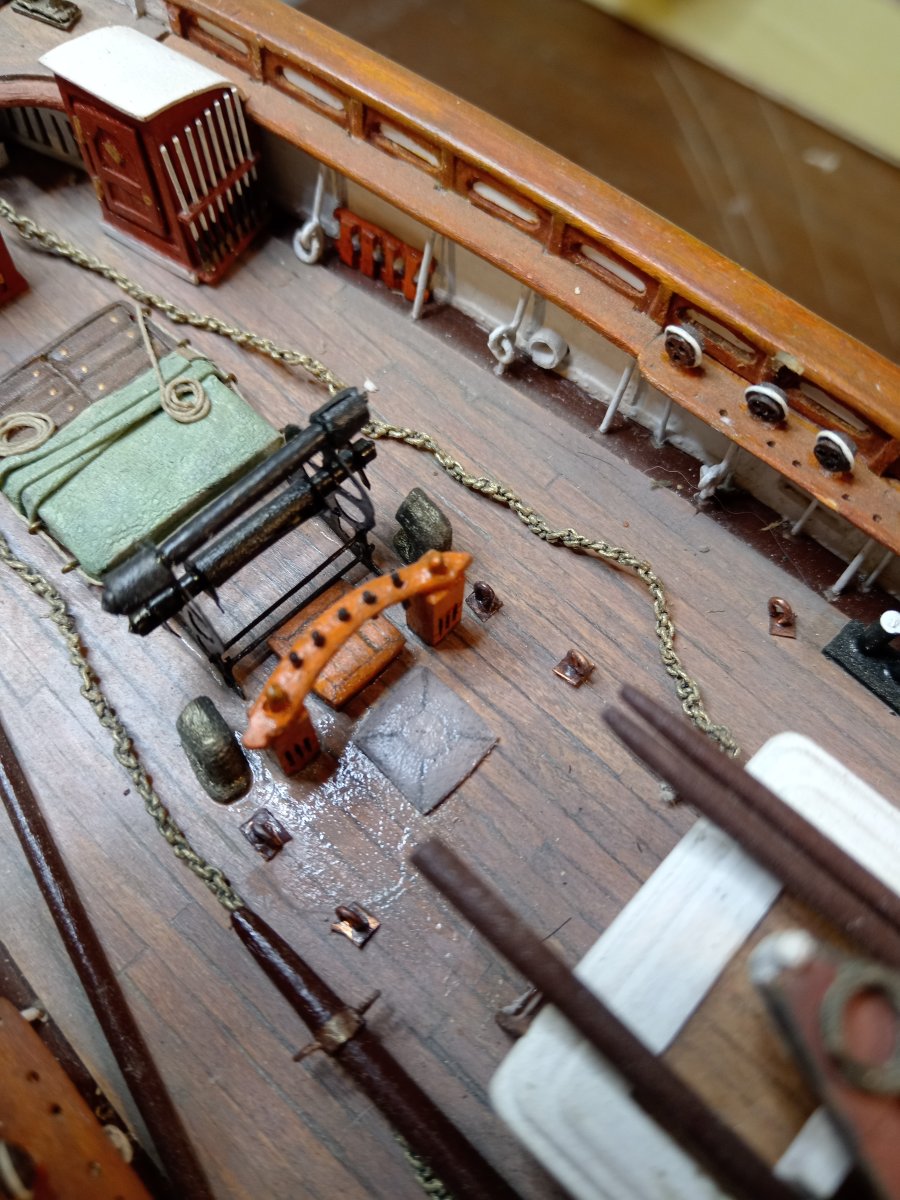
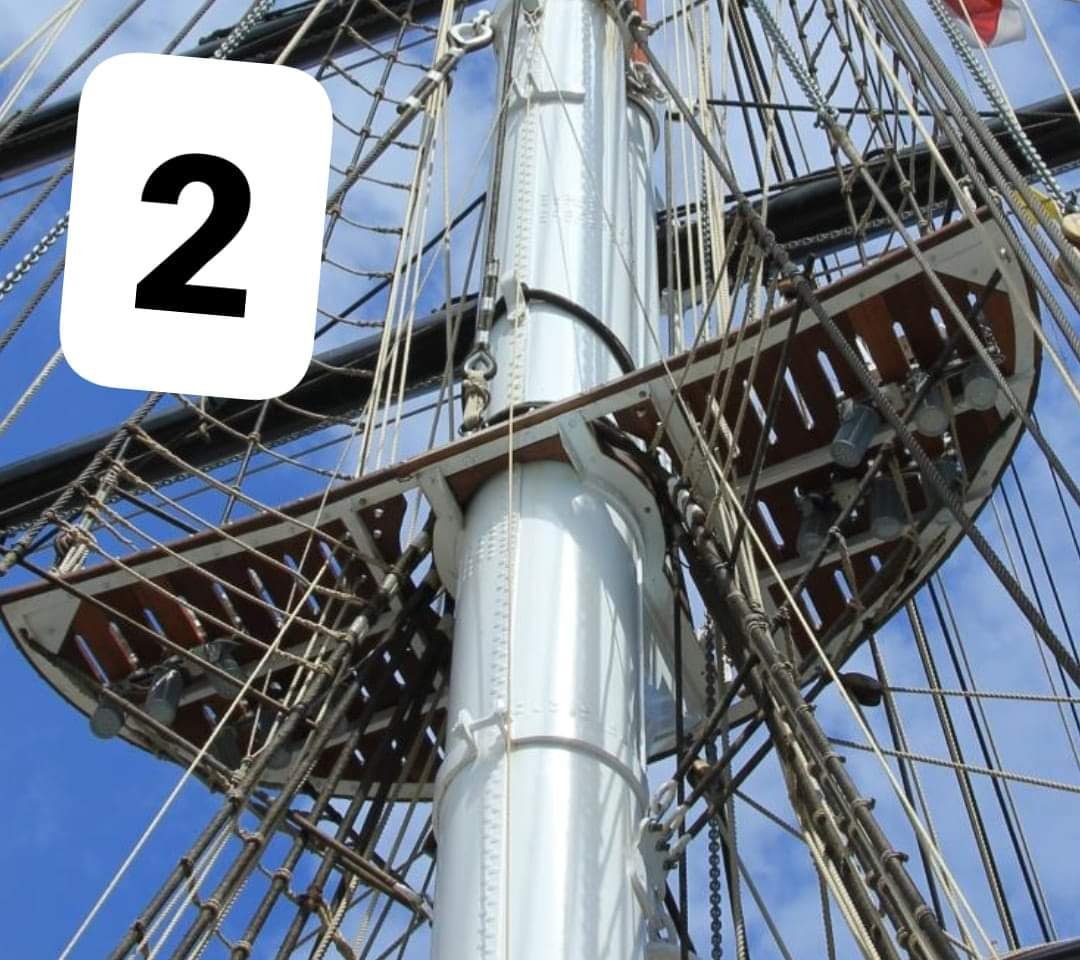
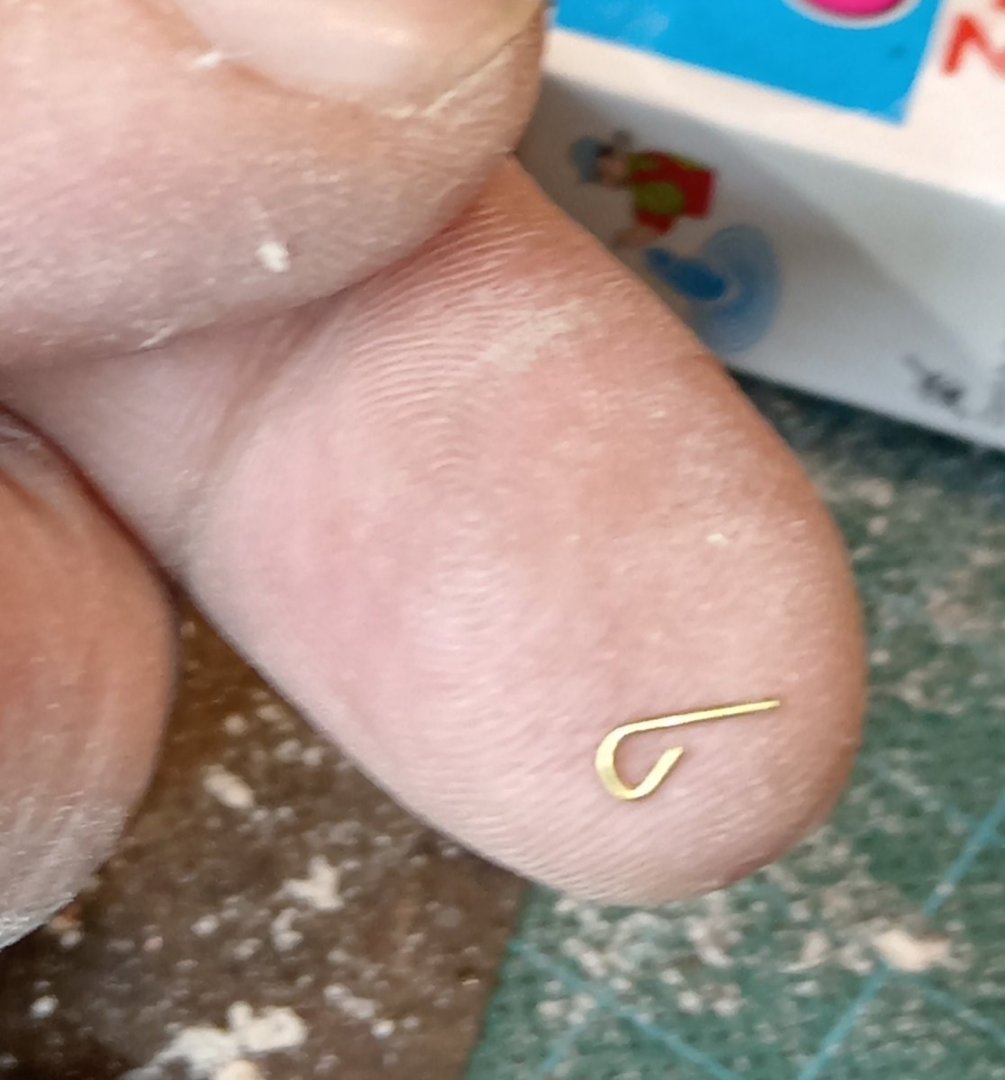
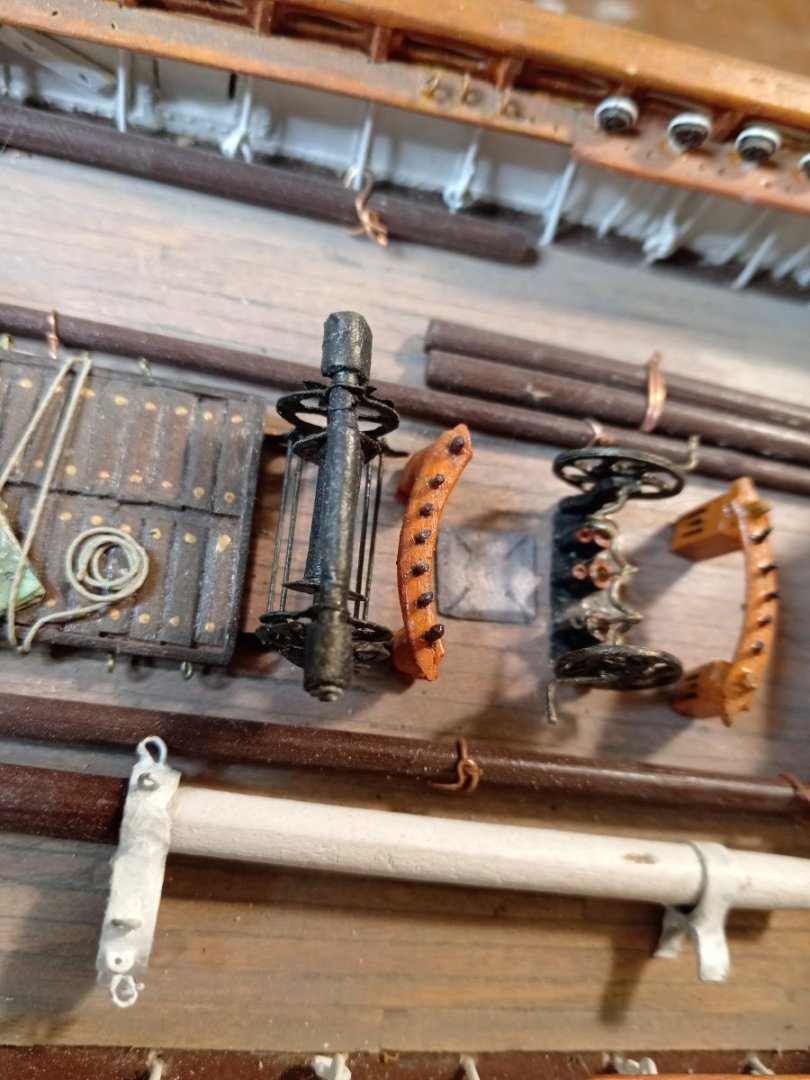
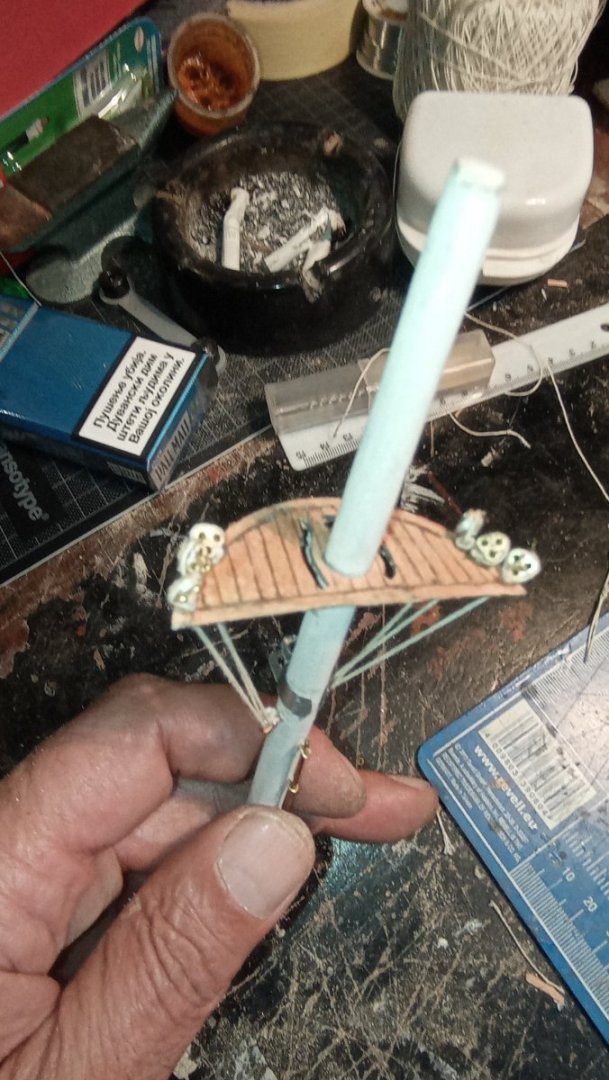
Sometimes you, just, don't think (and we know that thinking is too difficult and the devil's work!) The mast nests on my model have a lower metal structure over which planking is laid. Pictures 1 and 2 show what this is all about. Come on... I struggled to do the lower structure, after 2 hours of drilling and milling finally satisfied, all that was left was to adjust the hole for the mast, when ... hell! It can not get in! The genius forgot that because of the earlier story about the hooks, he made the masts thicker by about 1mm, which required me to make the nest a little bigger. So ... let's start from the beginning.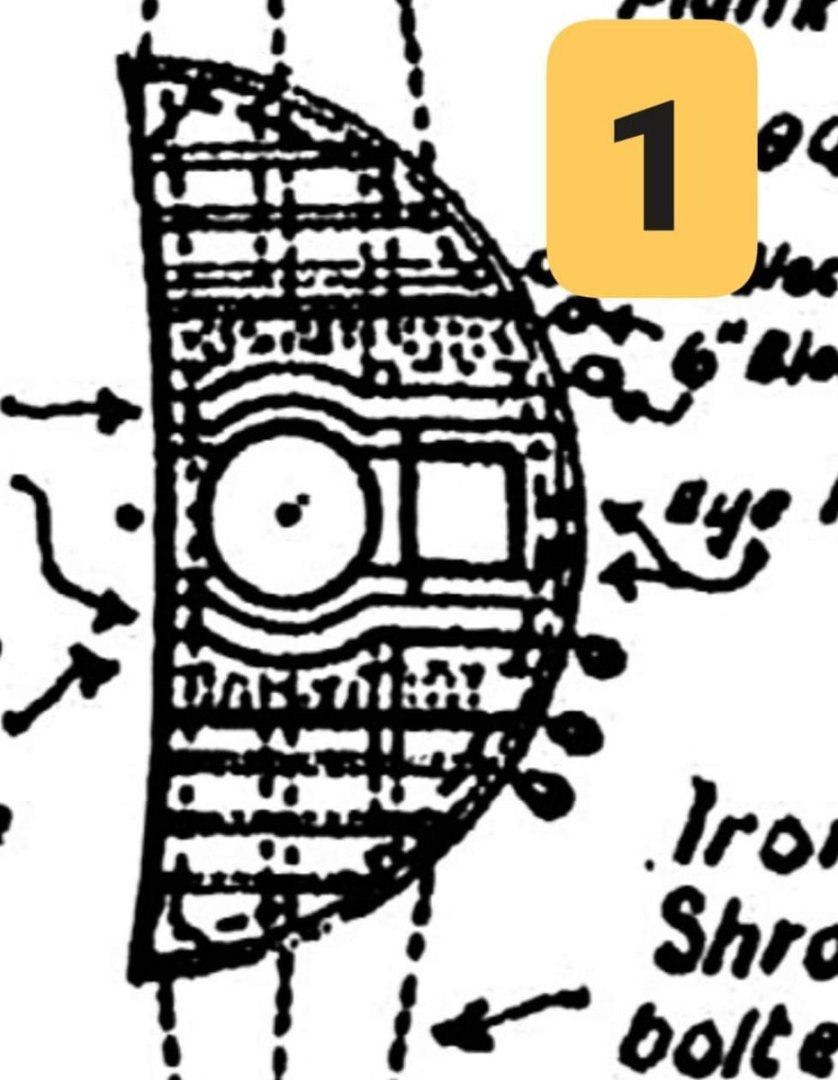

- 4,152 replies
-
- 4
-
-
- cutty sark
- tehnodidakta
- (and 1 more)
-
Cutty Sark by NenadM
NenadM replied to NenadM's topic in - Build logs for subjects built 1851 - 1900
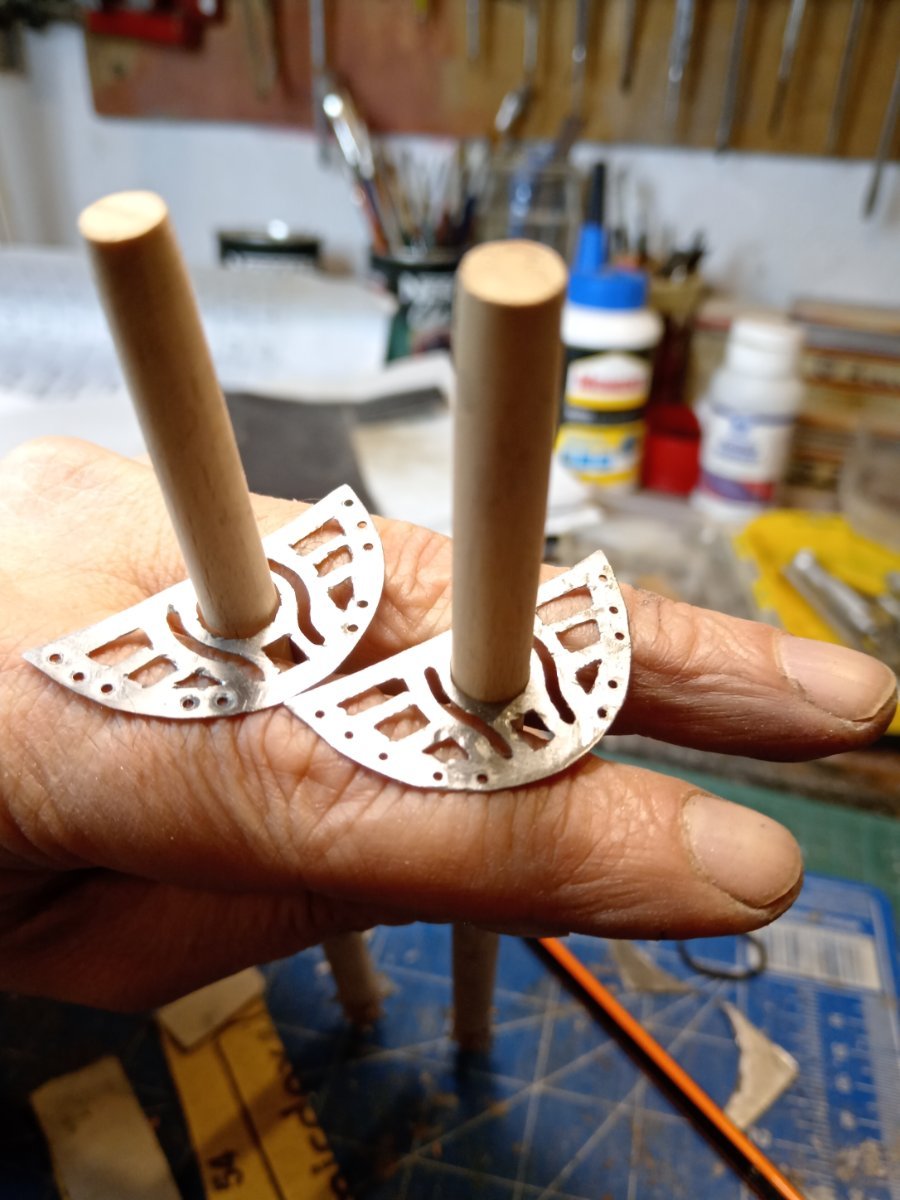
To the nests
- 4,152 replies
-
- 4
-
-
- cutty sark
- tehnodidakta
- (and 1 more)
-
Cutty Sark by NenadM
NenadM replied to NenadM's topic in - Build logs for subjects built 1851 - 1900
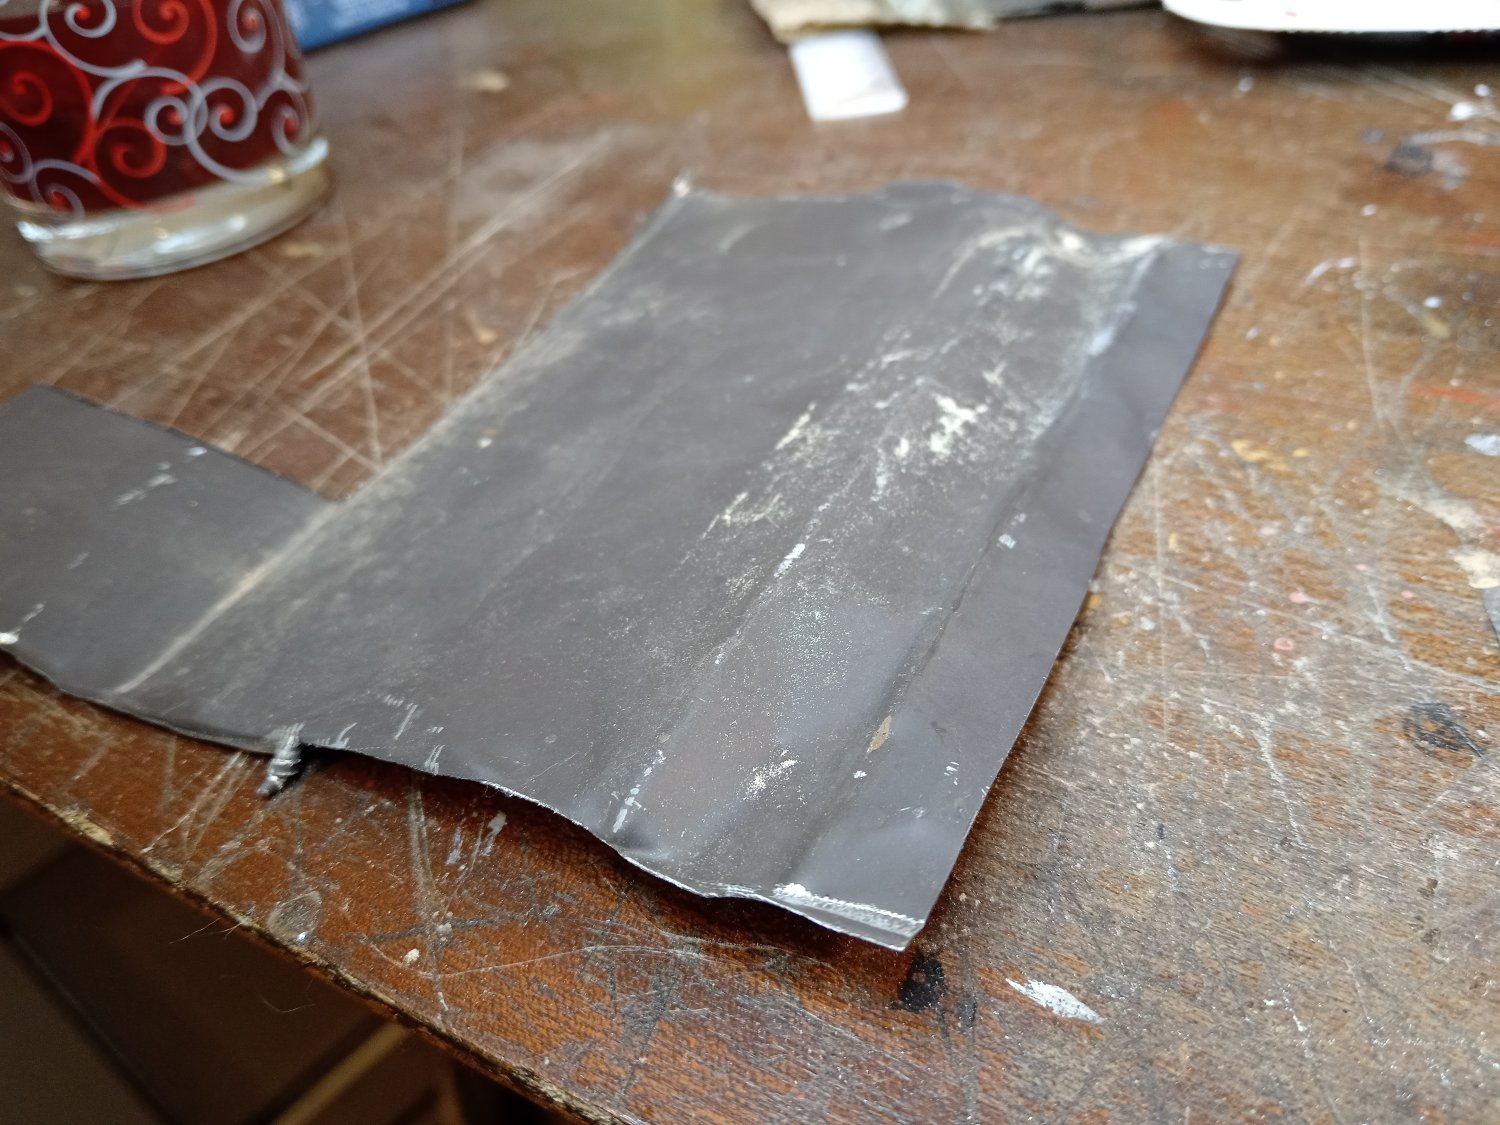
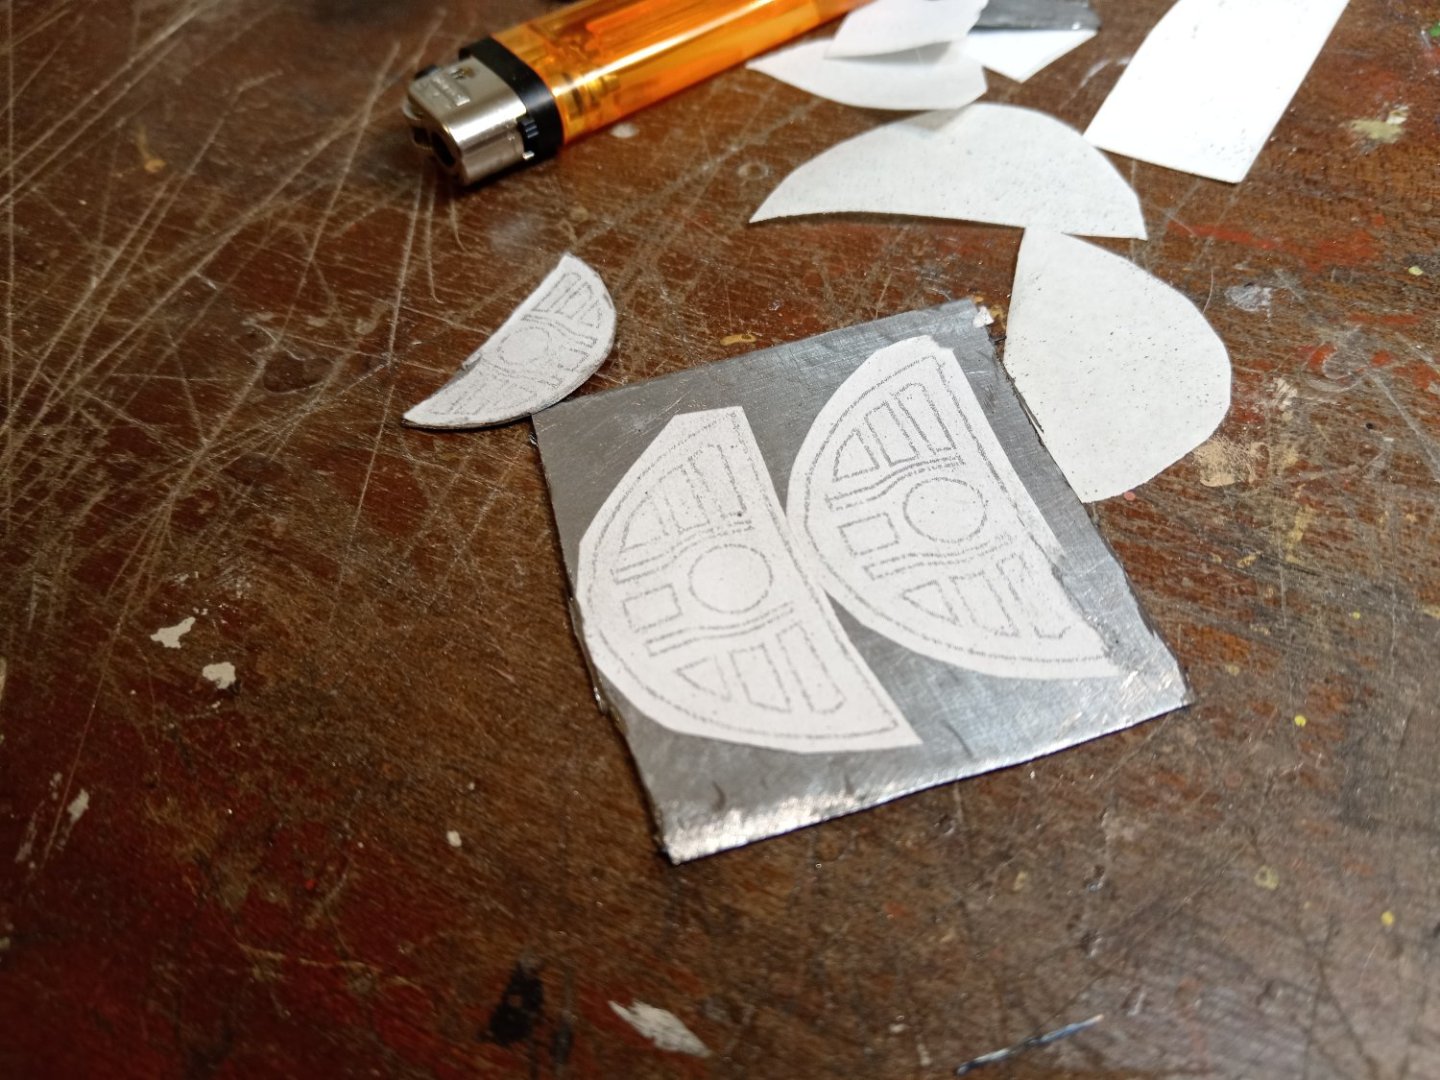
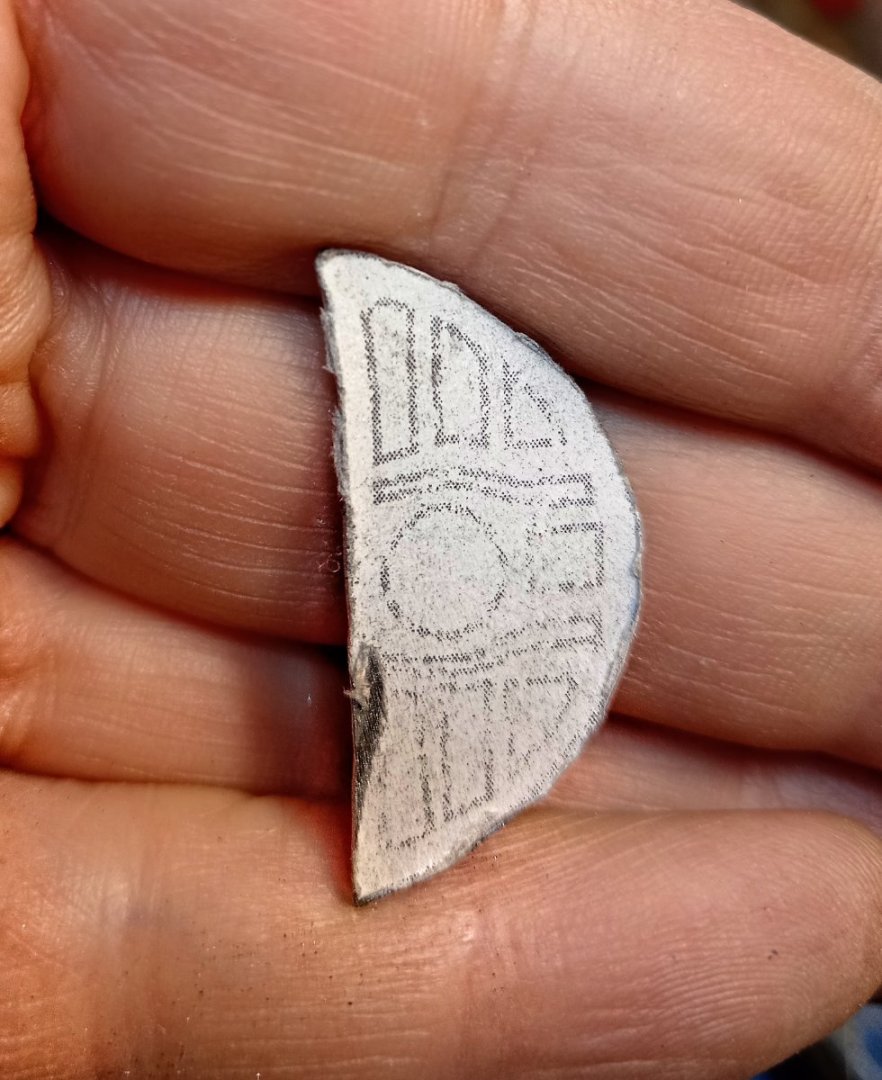
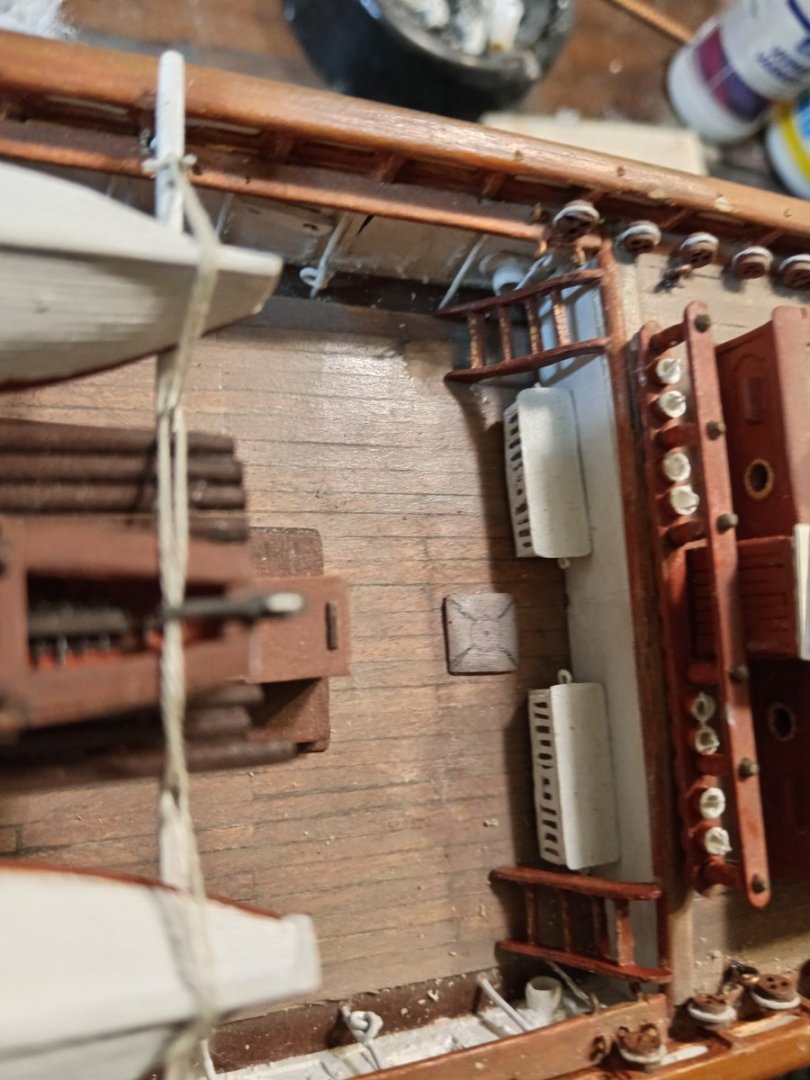
Work drawing in a way to prepare for nests. Material for base - thinned and cleared galvanized sheet for gutters. Strong enough to accept rope lines, also easy for drilling and digging that spaces, also for soldering. Over will come narrow laminate strips, planking on same way as I did on decks Little dead-eyes of course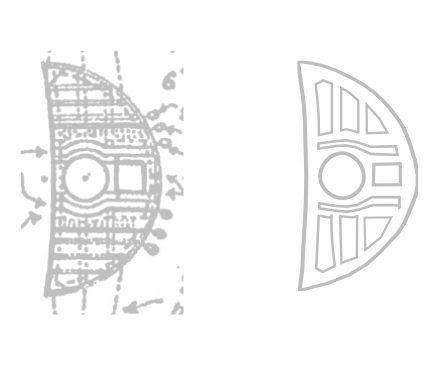
- 4,152 replies
-
- 1
-
-
- cutty sark
- tehnodidakta
- (and 1 more)
-
Cutty Sark by NenadM
NenadM replied to NenadM's topic in - Build logs for subjects built 1851 - 1900
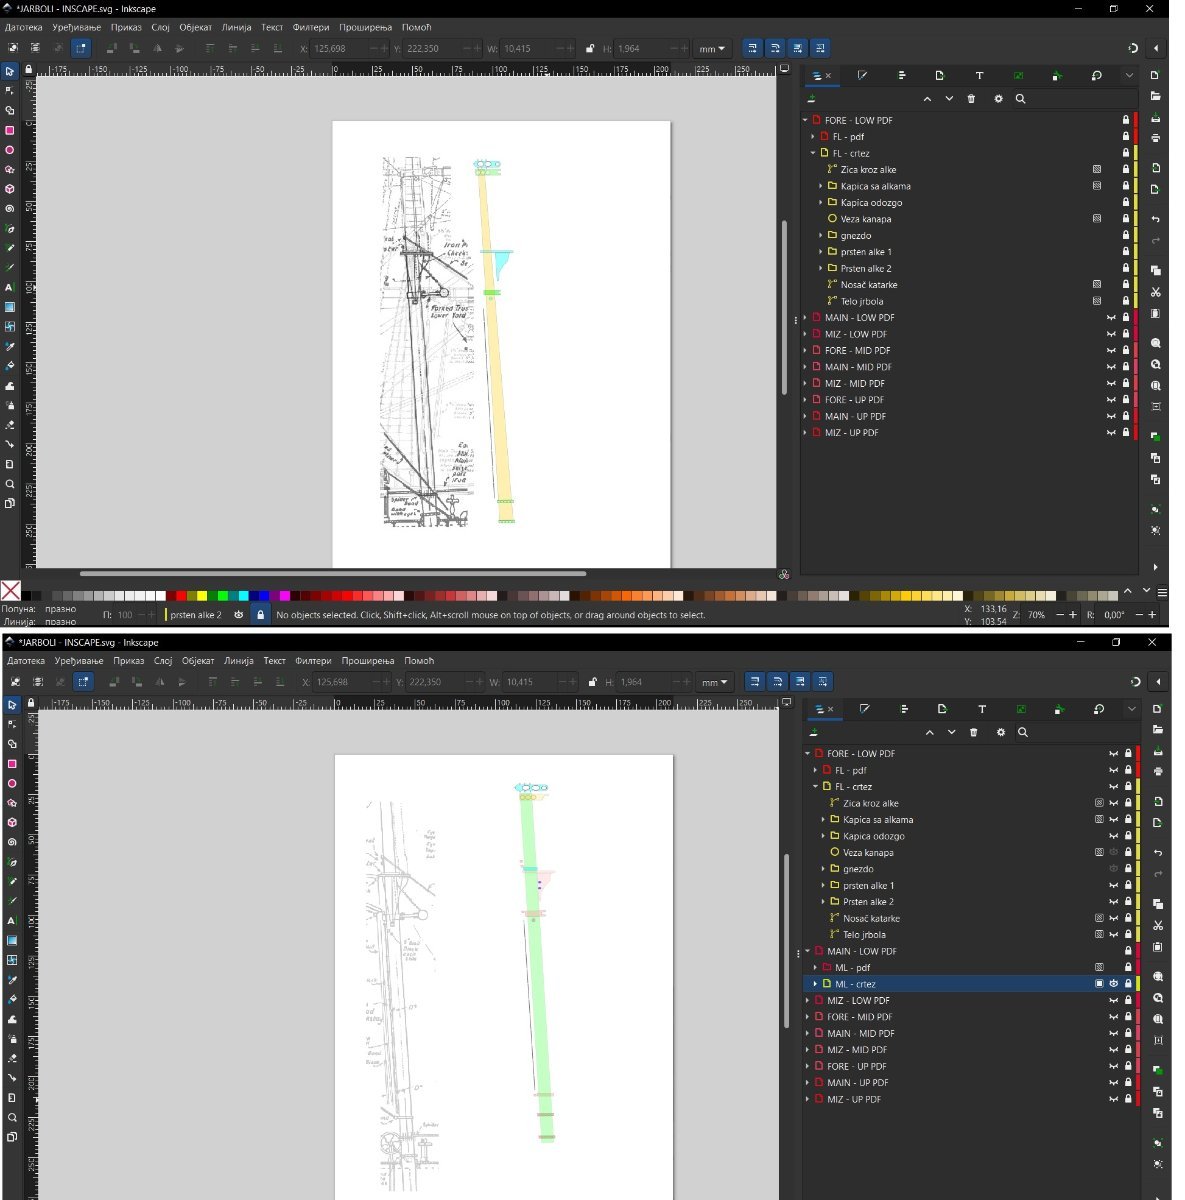
Intermediate phase: analysis of Campbell's plans and photographs to identify all parts of the mast fittings, and production of workshop drawings. Software - INSCAPE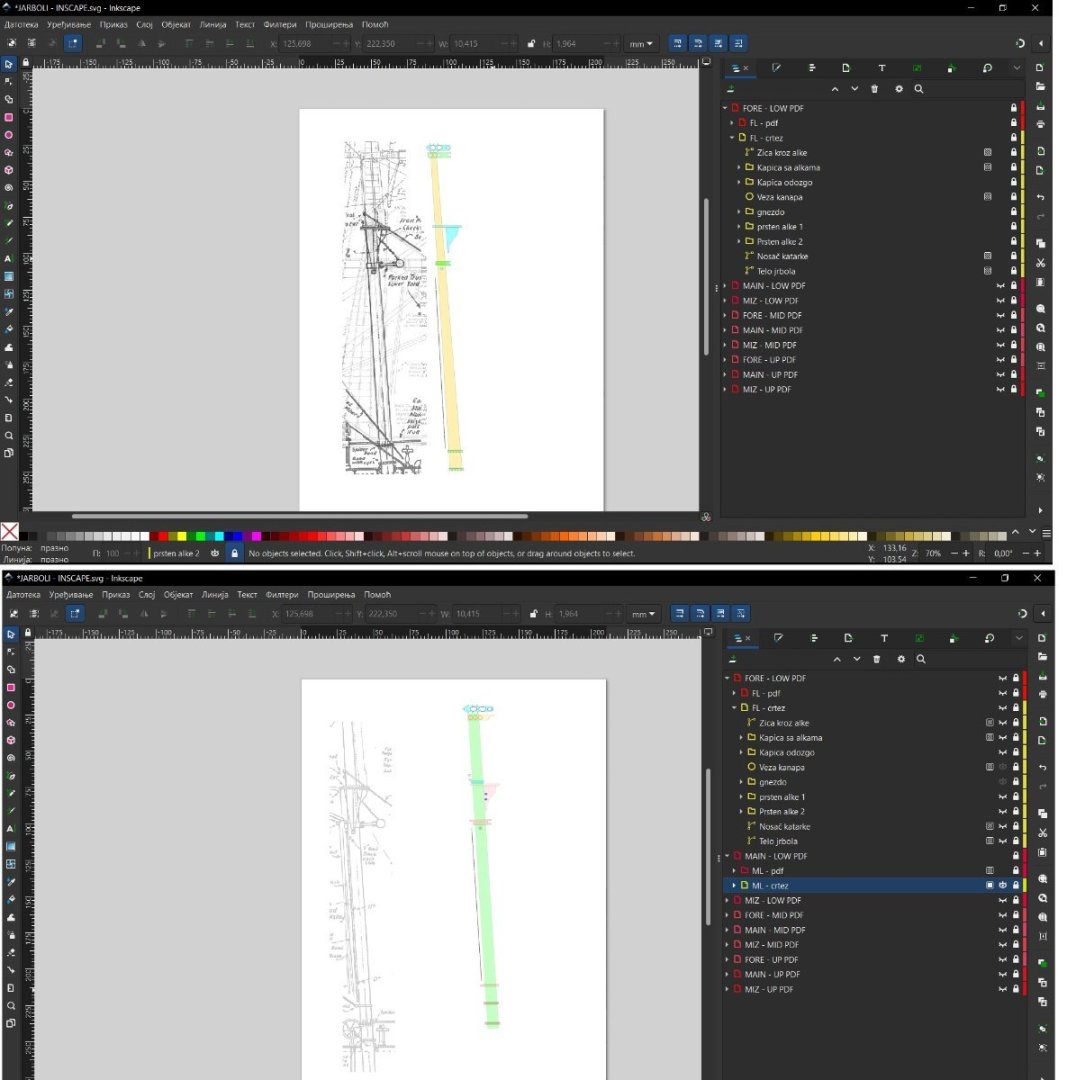
- 4,152 replies
-
- 3
-
-
- cutty sark
- tehnodidakta
- (and 1 more)
-
Cutty Sark by NenadM
NenadM replied to NenadM's topic in - Build logs for subjects built 1851 - 1900
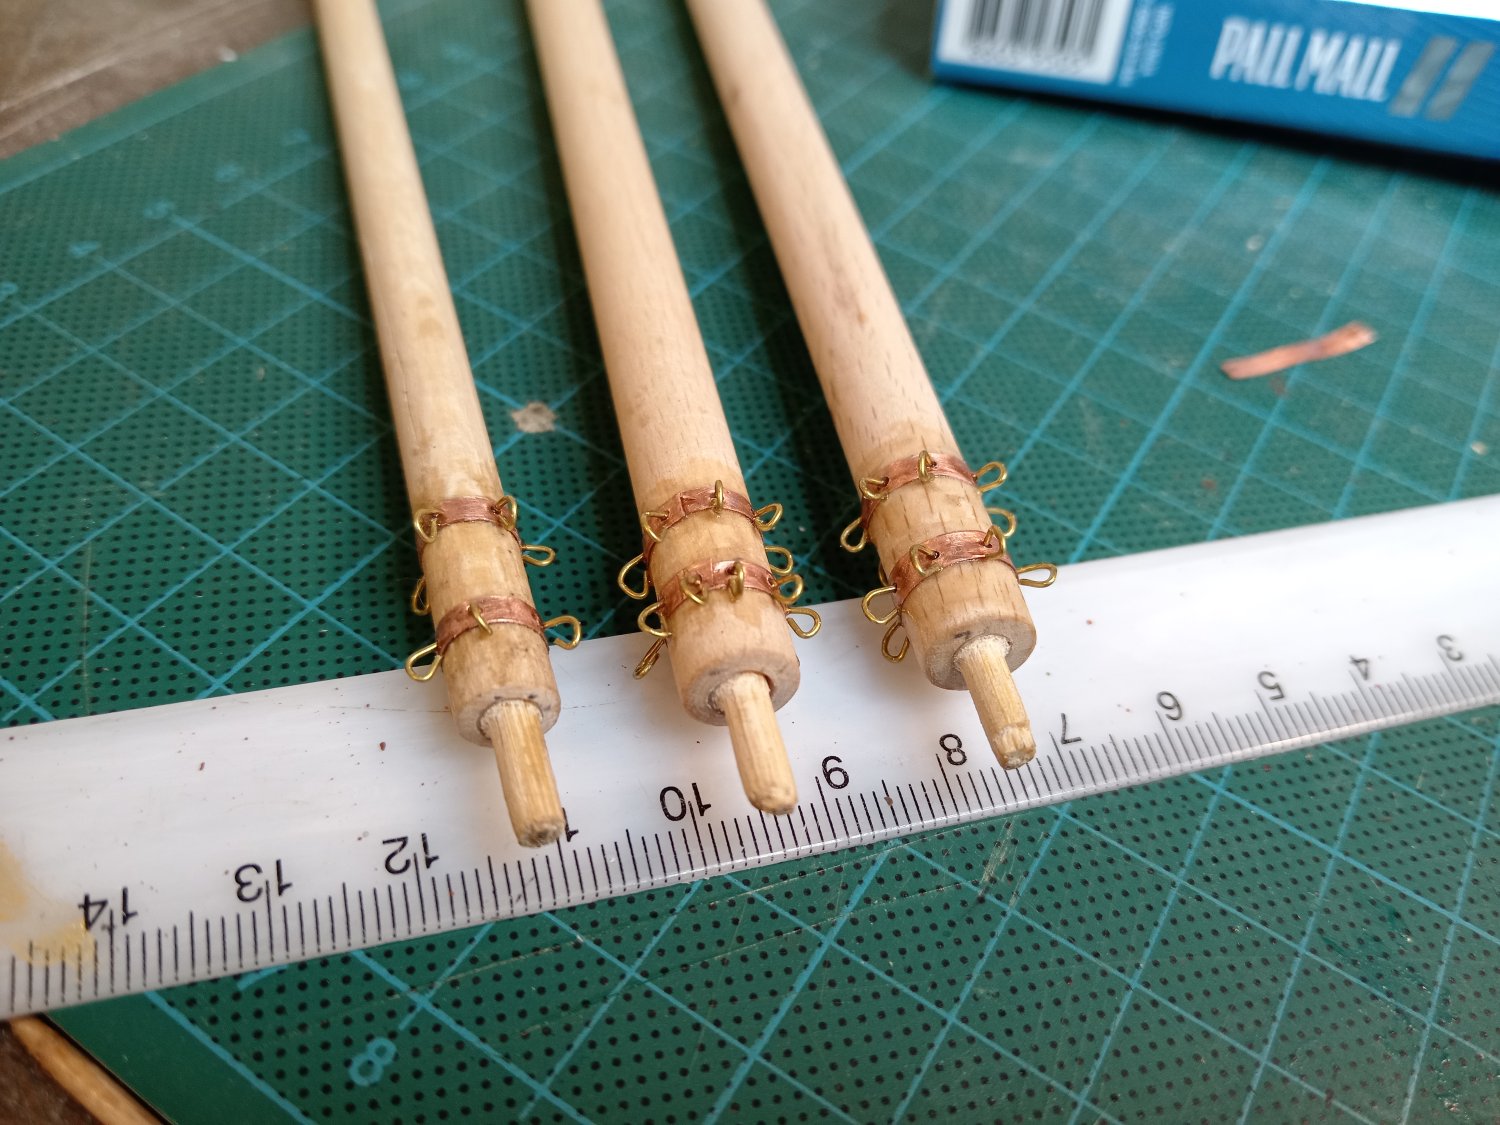
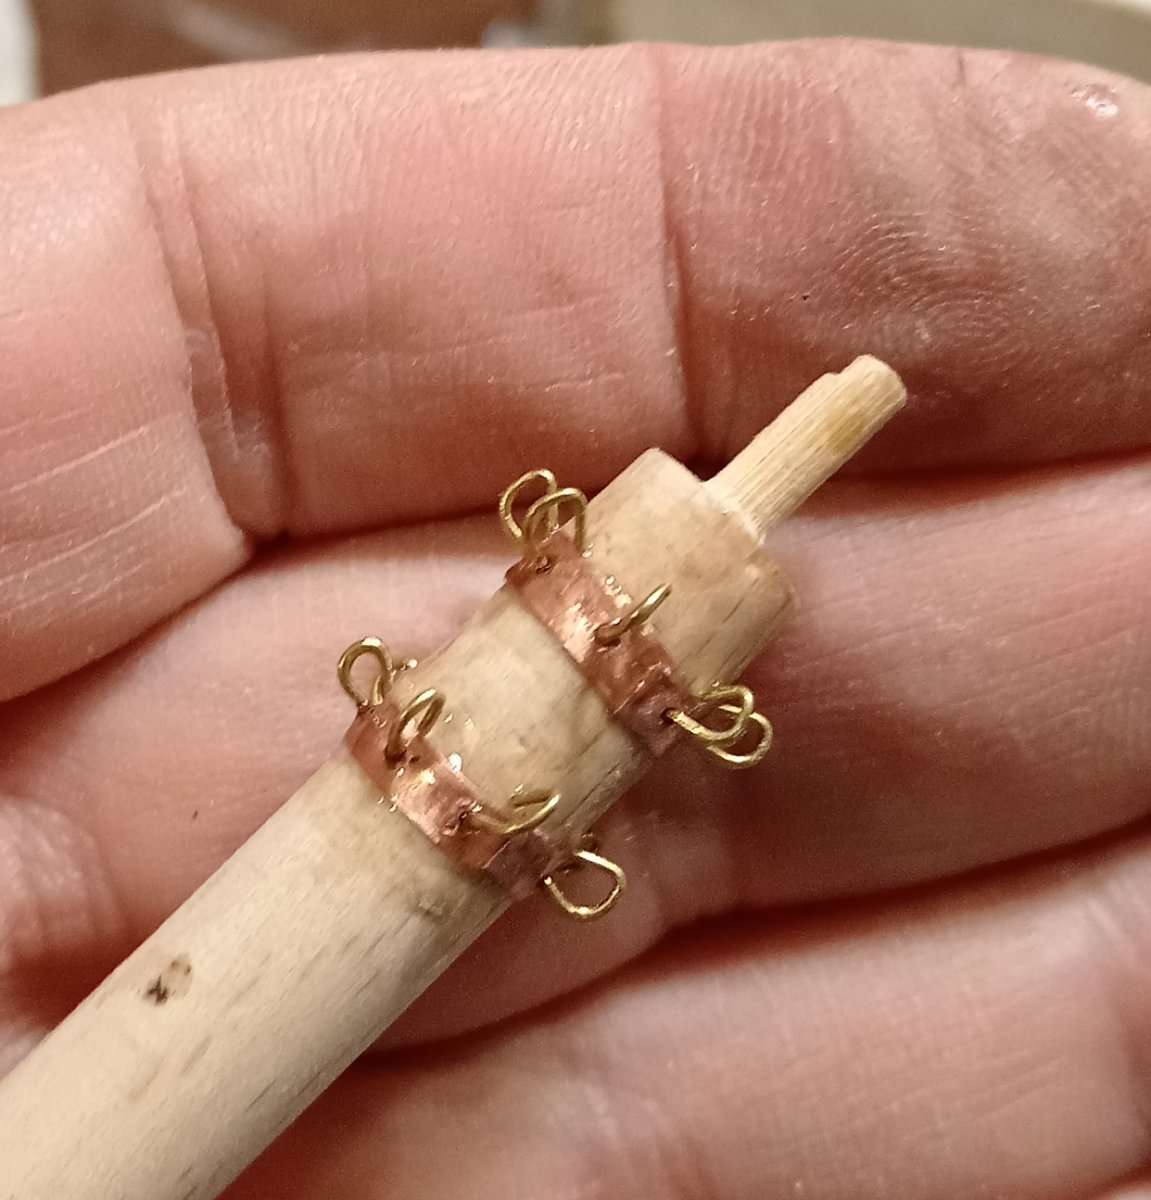
Material: Cu foil 0.3mm and Zn wire 0.5mm All three of them finished.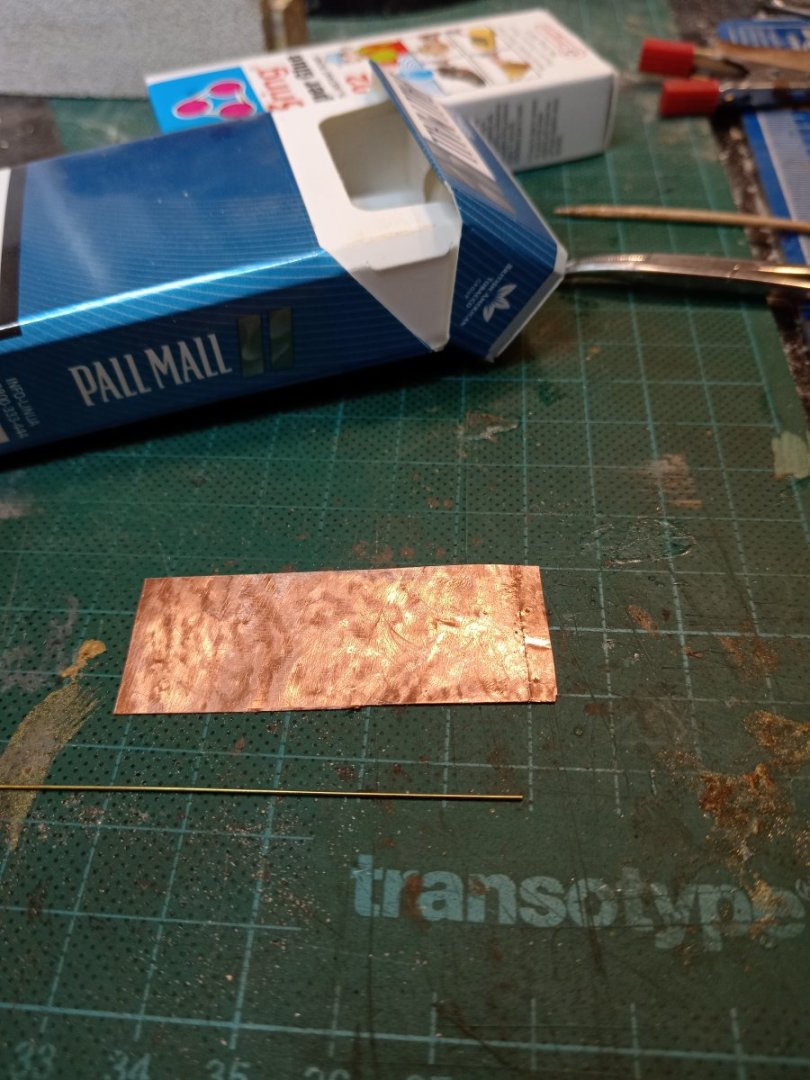

- 4,152 replies
-
- 5
-
-
- cutty sark
- tehnodidakta
- (and 1 more)
-
Cutty Sark by NenadM
NenadM replied to NenadM's topic in - Build logs for subjects built 1851 - 1900
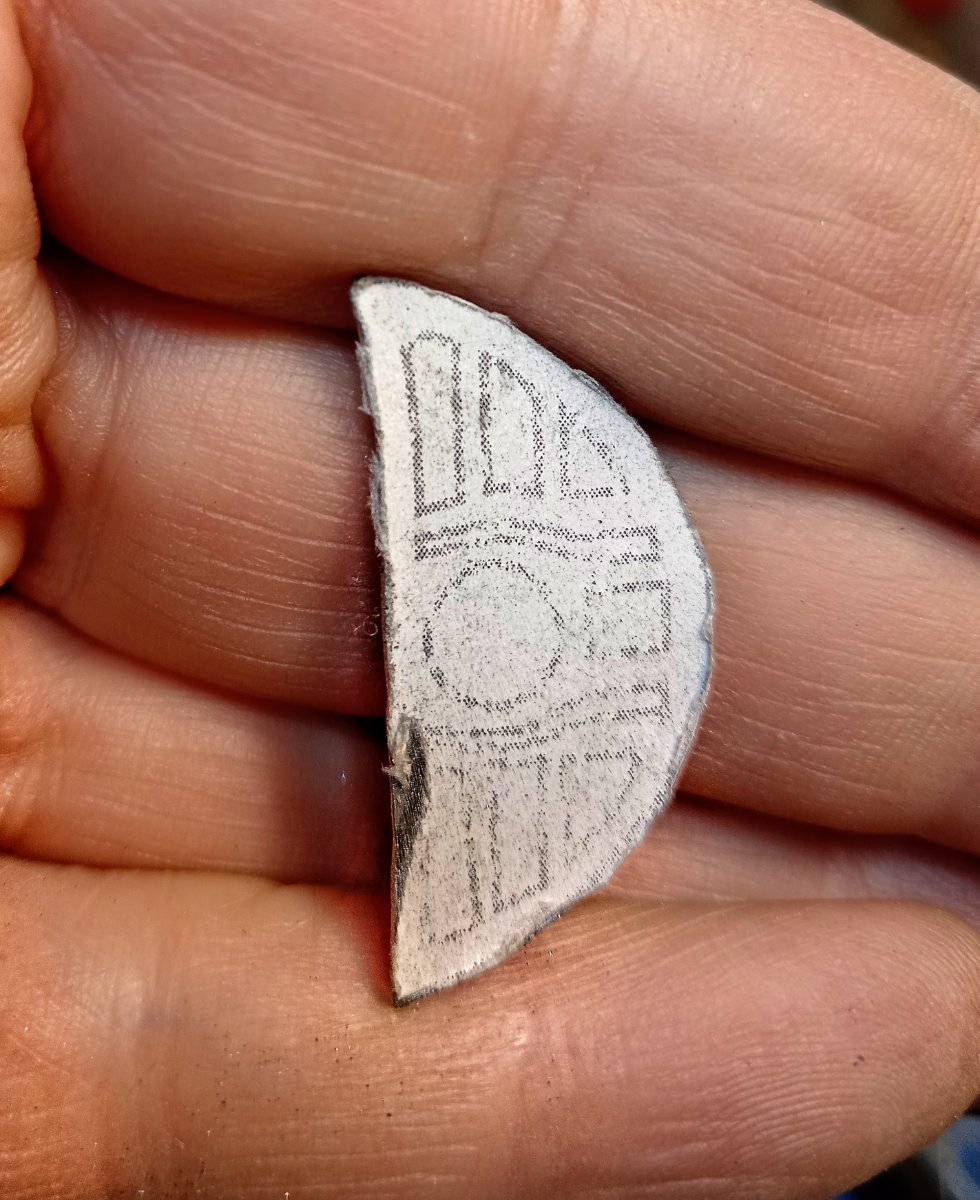
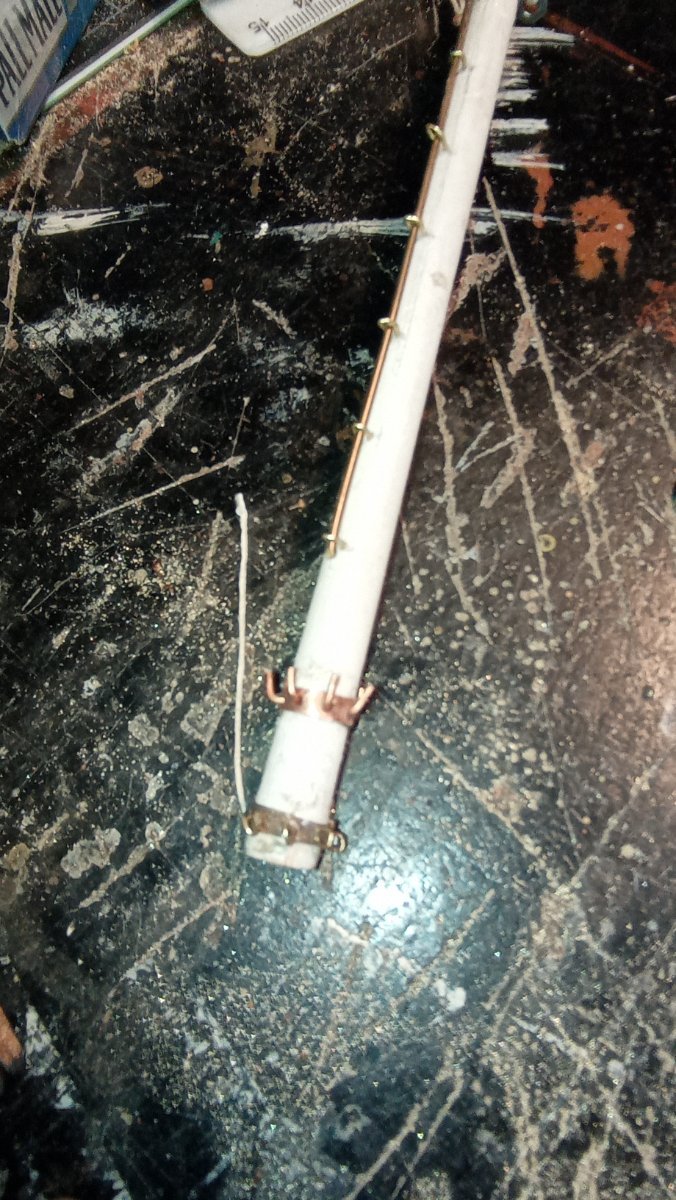
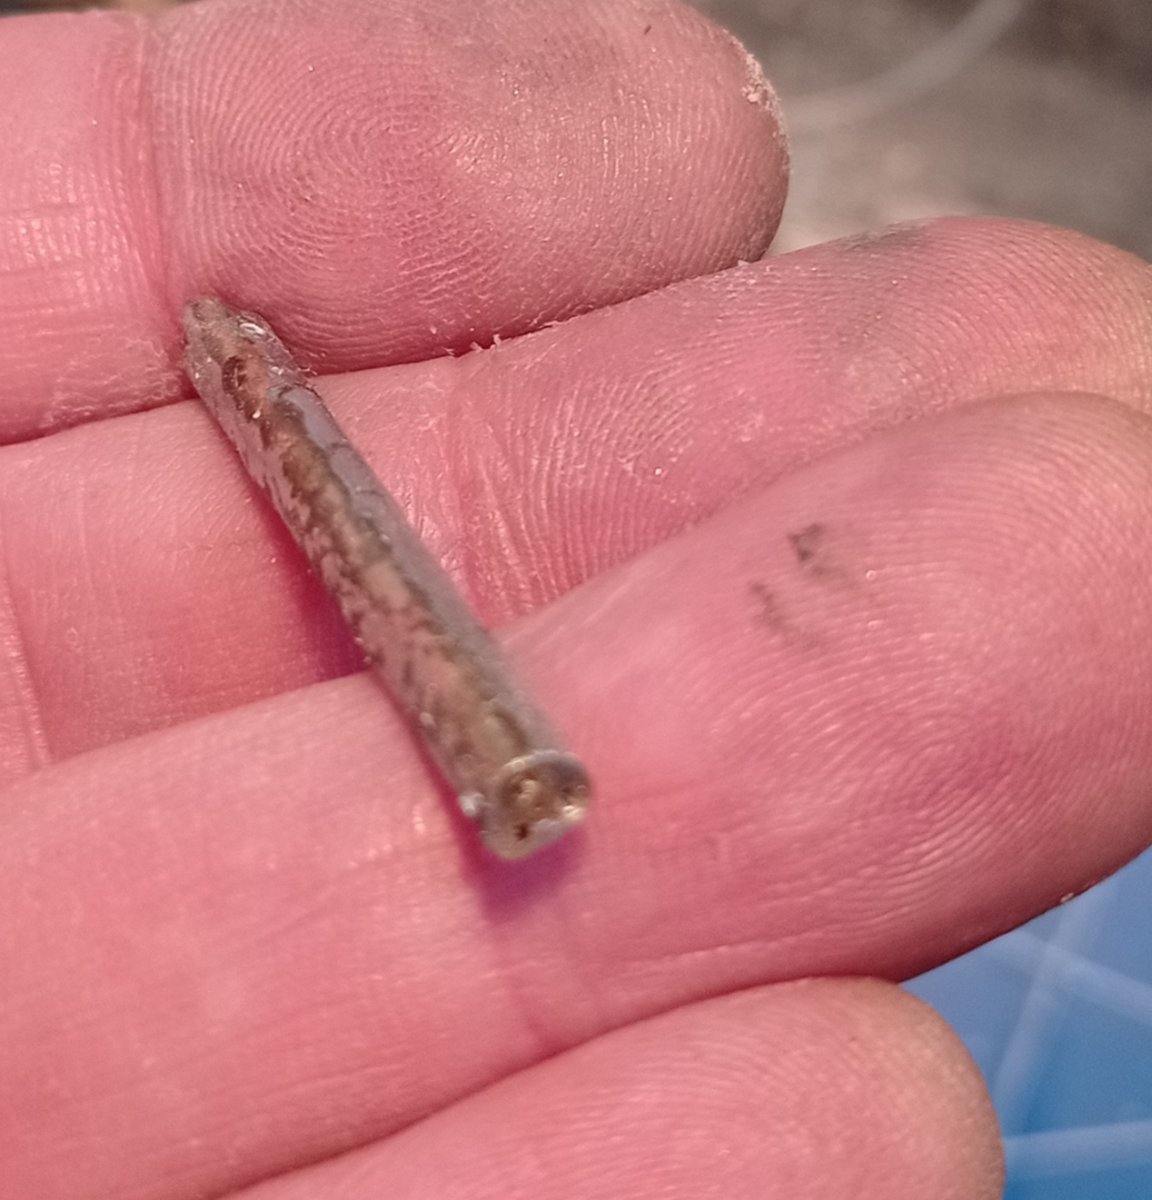
Rings with rings and pins at the bottom of fore mast. Little pins are unusuable on this scale, and it overlays my skill, so I made two rings with rings, a bit larger and simplydied. It would not be visible when ropes come over one day

- 4,152 replies
-
- 7
-
-

-
- cutty sark
- tehnodidakta
- (and 1 more)
-
Cutty Sark by NenadM
NenadM replied to NenadM's topic in - Build logs for subjects built 1851 - 1900
One step forward. Connection by barbeque sticks. Strong and elastic. Not glued jet, first to finish masts.

- 4,152 replies
-
- 5
-
-
- cutty sark
- tehnodidakta
- (and 1 more)
-
Cutty Sark by NenadM
NenadM replied to NenadM's topic in - Build logs for subjects built 1851 - 1900
One step forward. Connection by barbeque sticks. Strong and elastic. Not glued jet, first to finish masts.
- 4,152 replies
-
- 6
-
-
- cutty sark
- tehnodidakta
- (and 1 more)
-
Cutty Sark by NenadM
NenadM replied to NenadM's topic in - Build logs for subjects built 1851 - 1900
Little progress. First I closed and filled wrong holes I drill for masts, and then cover them properly

- 4,152 replies
-
- 5
-
-
- cutty sark
- tehnodidakta
- (and 1 more)
-
Cutty Sark by NenadM
NenadM replied to NenadM's topic in - Build logs for subjects built 1851 - 1900
Hello again. Life is too short for ... Ship model making, classical art of painting research, museums, theaters, concerts, drawing and painting, collecting and listening to music (over 100 GB), playing the guitar, mindlessly reading books, writing and publish short stories (240), history research, Admin FB photo page MBDI, photography, cooking, my home yard, long walking, Bobtail Rhea, furniture making, bicycle, houm reparations, different modeling in wood and Ytong, computers and mobile phones, chess, sudoku extreme, travel trips in Serbia, swimming ... Also visiting Princess in Germany where she live and work, be with Hothead who finally got his master degree in architecture Also some ladies from time to time ... And my office, of course. In April i can retire with 65 years old and full 40 years of working, but I`ll continue to work as attorney. As you can see ... usual staff for me - "monkey see - monkey do" 😜 In all that stuff, I was stuck in finding appropriate material for masts for a long time See you soon here, dear friend. Nenad- 4,152 replies
-
- 3
-
-
- cutty sark
- tehnodidakta
- (and 1 more)
-
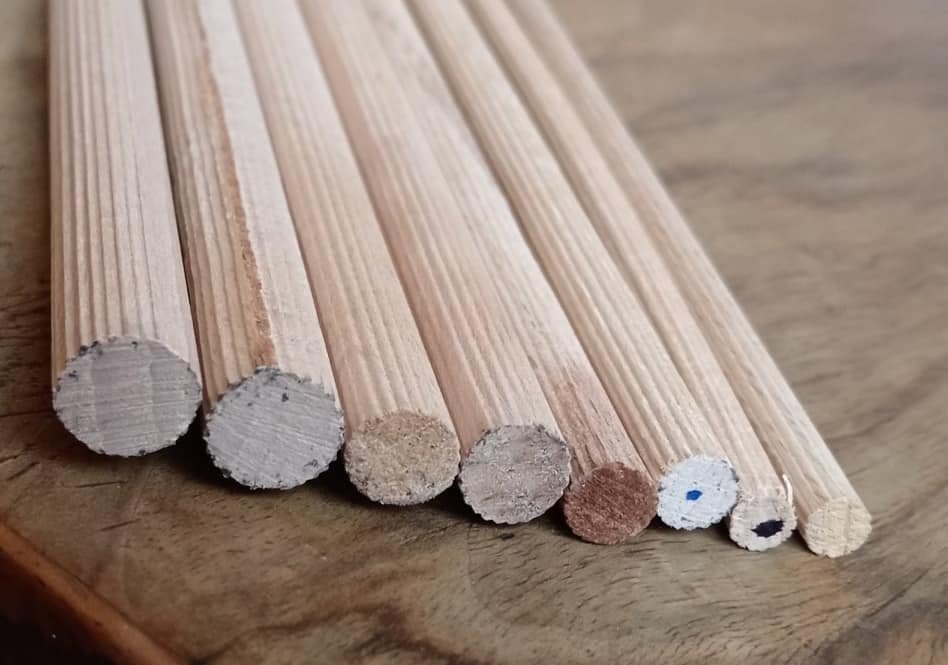
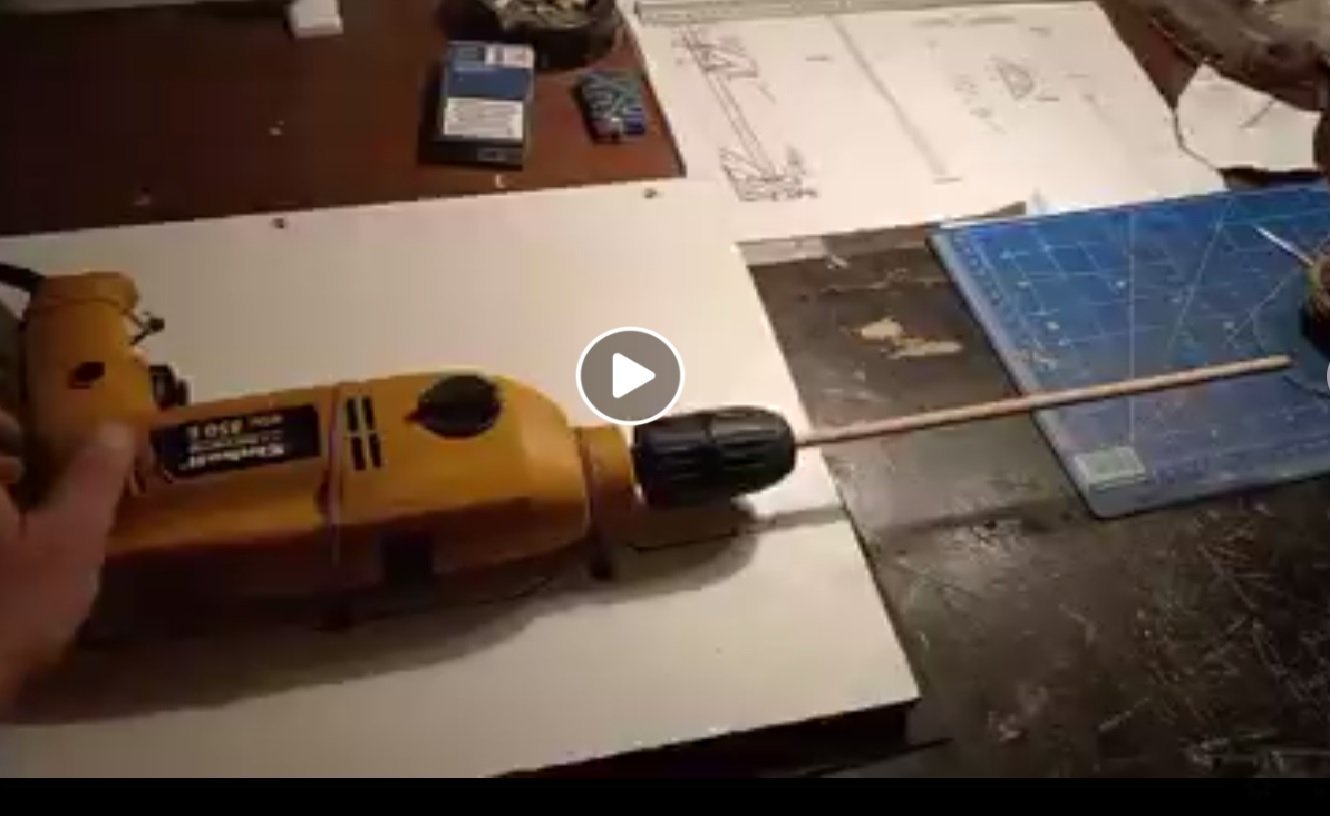
Starting masts in my scratch build, I faced with question: what to use for? And how to do that cones? In hobby stores, there was nothing adequate, or something I found was twisted. And click in brain. Dowel sticks, 1000mm lengh, diameters 6,8,10,12 mm form boiled beech wood. Very very strong even on 2mm dia I don`t have a lathe, and don`t intend to by it, so, what to do? Another brain click I fixed my drill machine, and that was it, after couple of hours of playing And at this point, everything start to be very very fragile, and a really fun begins ....

- 396 replies
-
- 6
-
-
- Idea
- Bright Idea
- (and 1 more)
-
Cutty Sark by NenadM
NenadM replied to NenadM's topic in - Build logs for subjects built 1851 - 1900
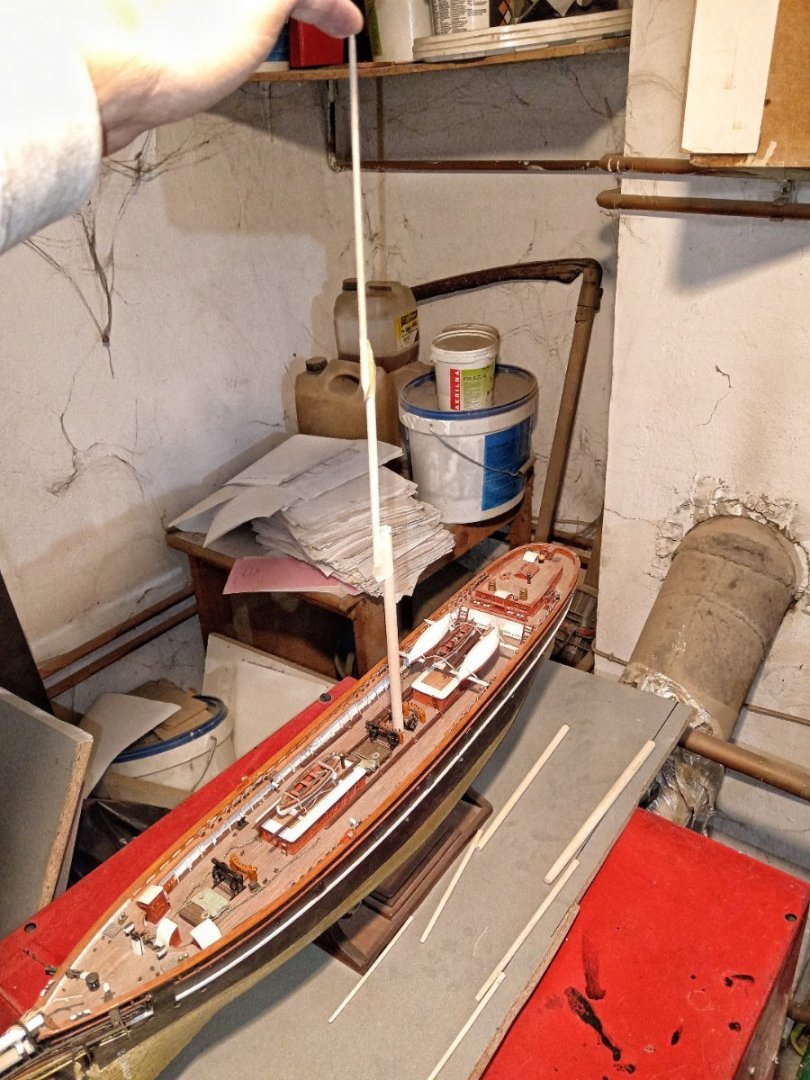
Update, after .... he he ... long time ... Fjnaly found adequate material for masts, and remade bodies for all of them. Really fun starts right there!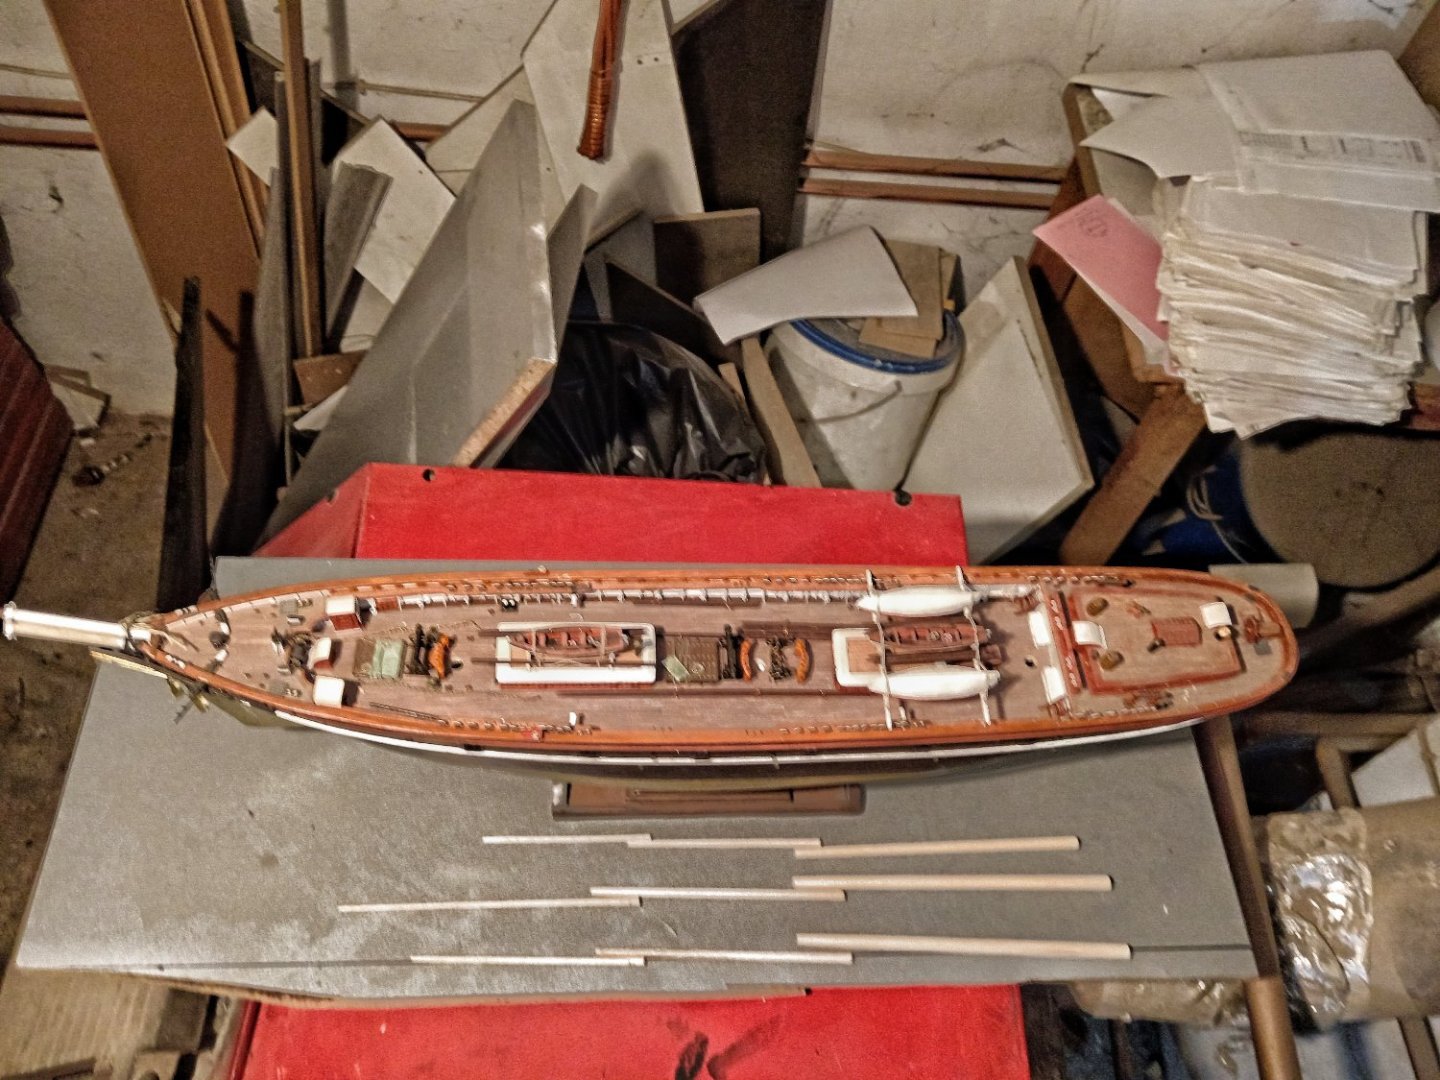
- 4,152 replies
-
- 7
-
-
- cutty sark
- tehnodidakta
- (and 1 more)
-
Cutty Sark by NenadM
NenadM replied to NenadM's topic in - Build logs for subjects built 1851 - 1900
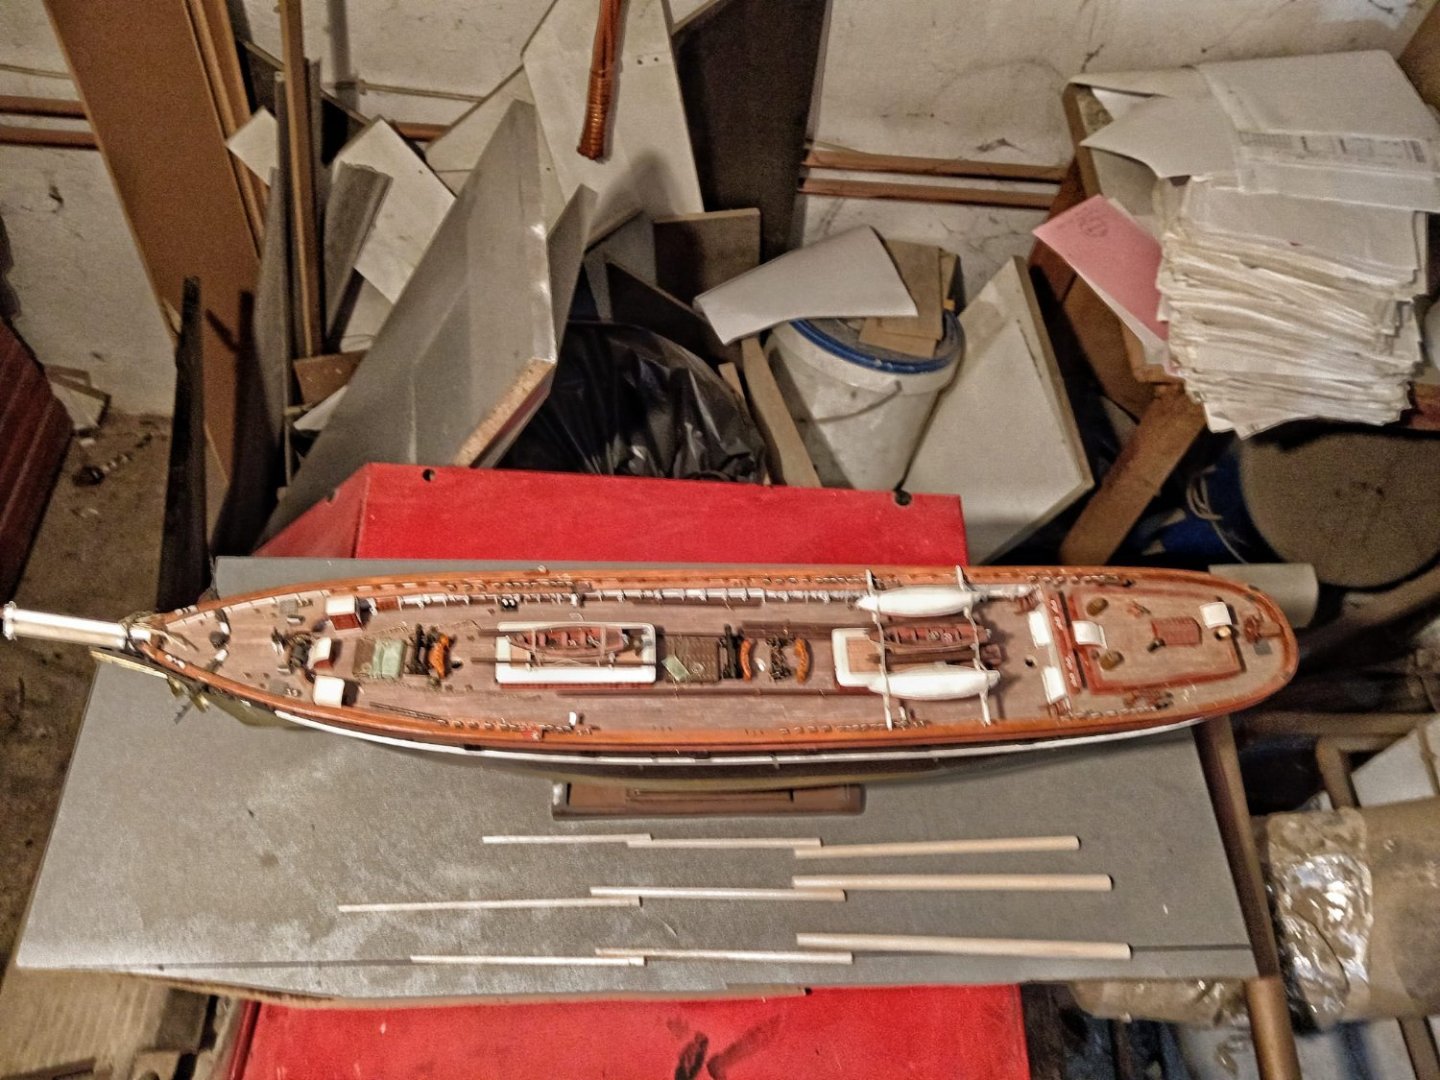
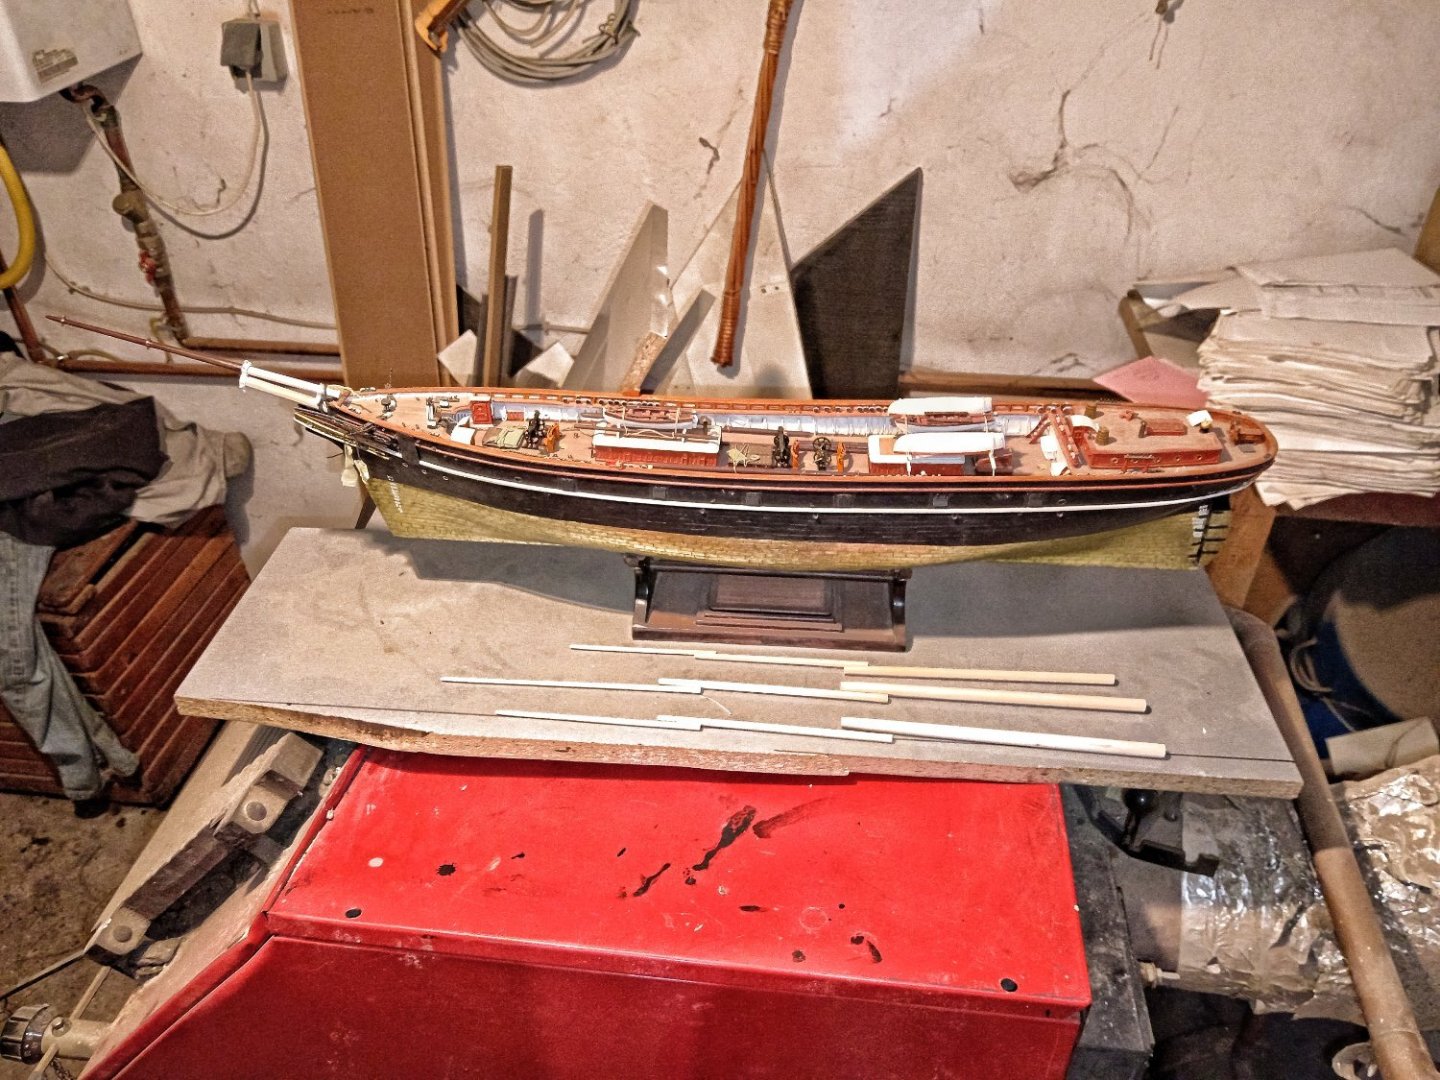
Visual testing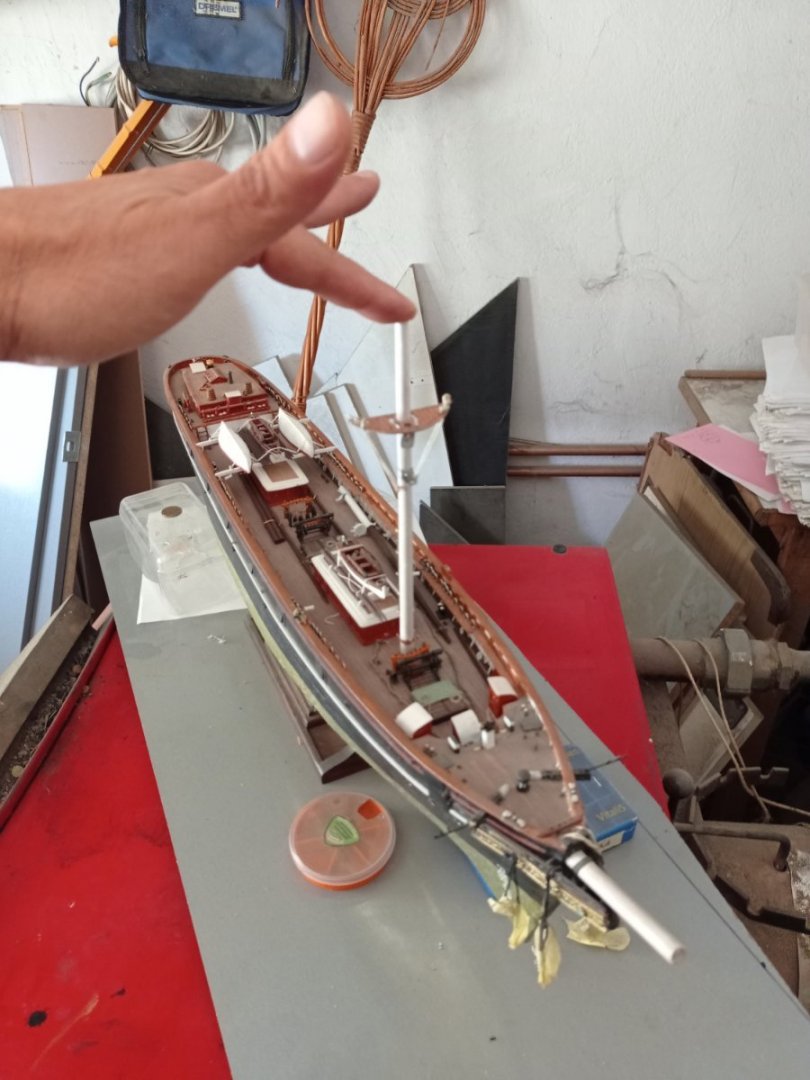
- 4,152 replies
-
- 9
-
-
- cutty sark
- tehnodidakta
- (and 1 more)
-
Cutty Sark by NenadM
NenadM replied to NenadM's topic in - Build logs for subjects built 1851 - 1900
Last test done Now, from beggining to lower masts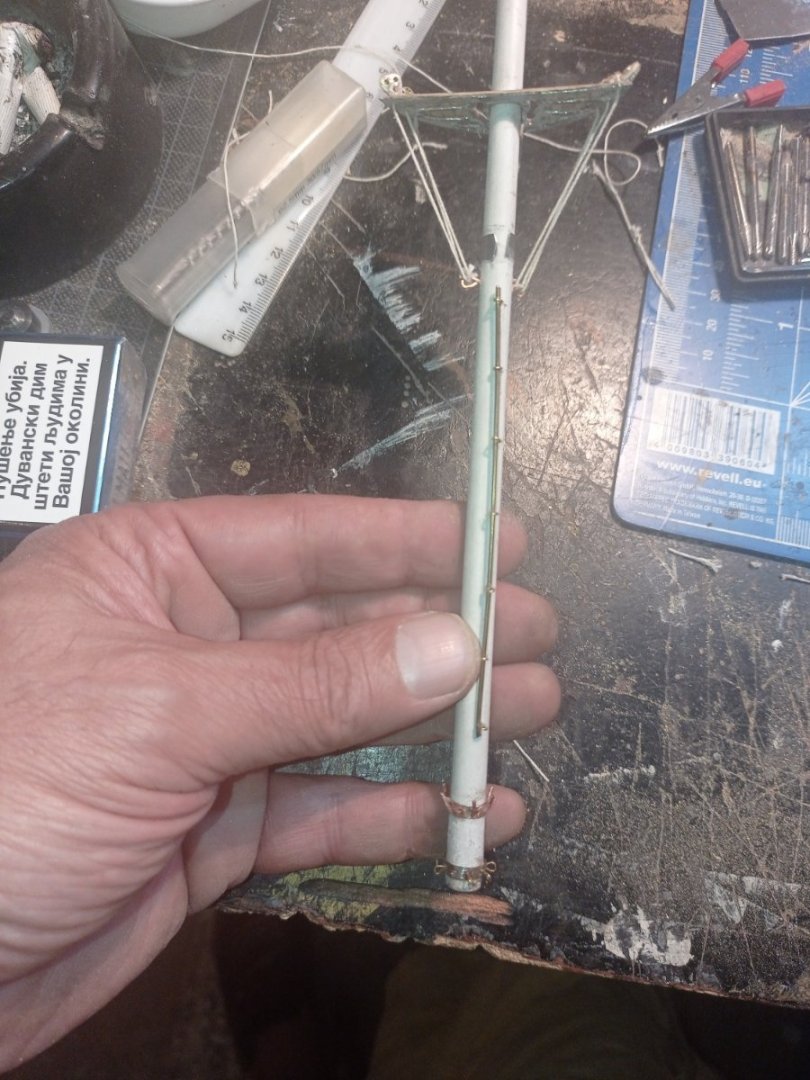


- 4,152 replies
-
- 5
-
-
-
- cutty sark
- tehnodidakta
- (and 1 more)
-
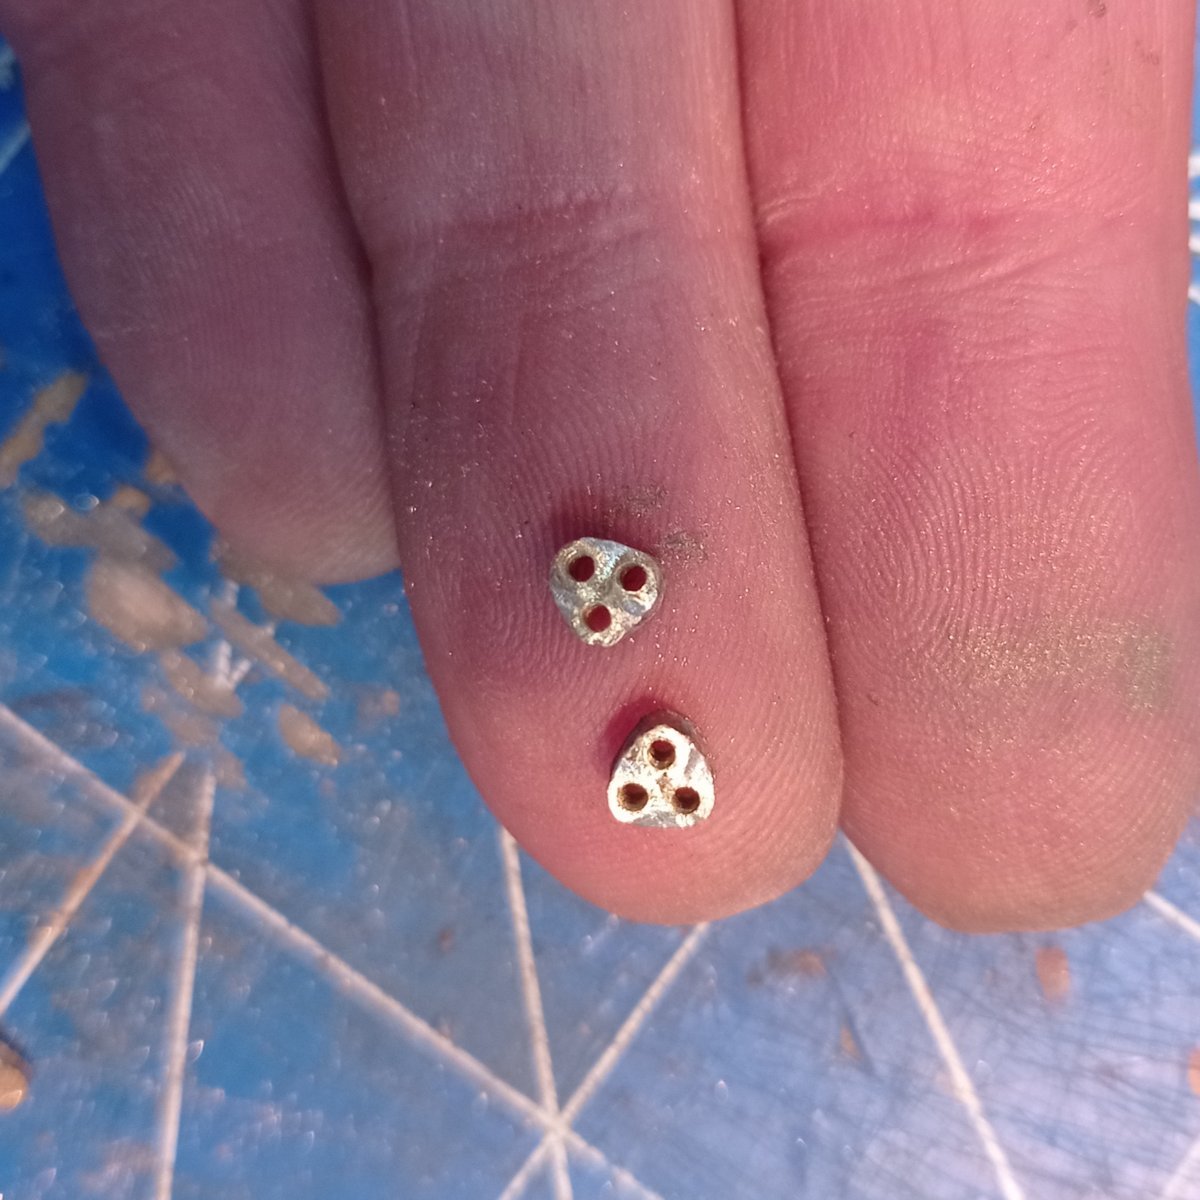
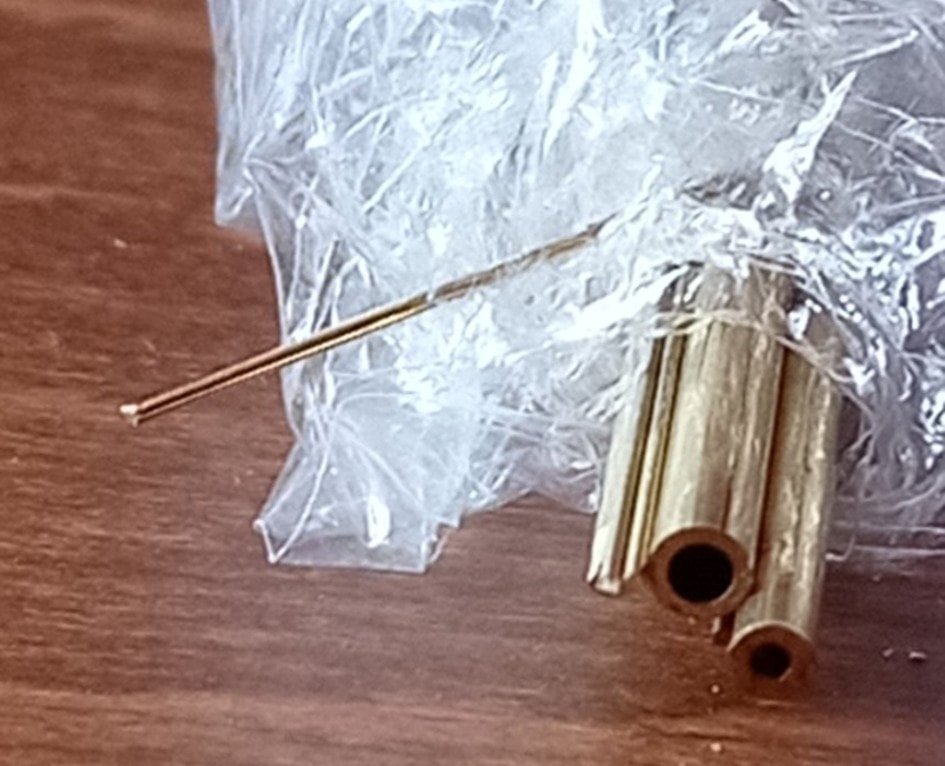
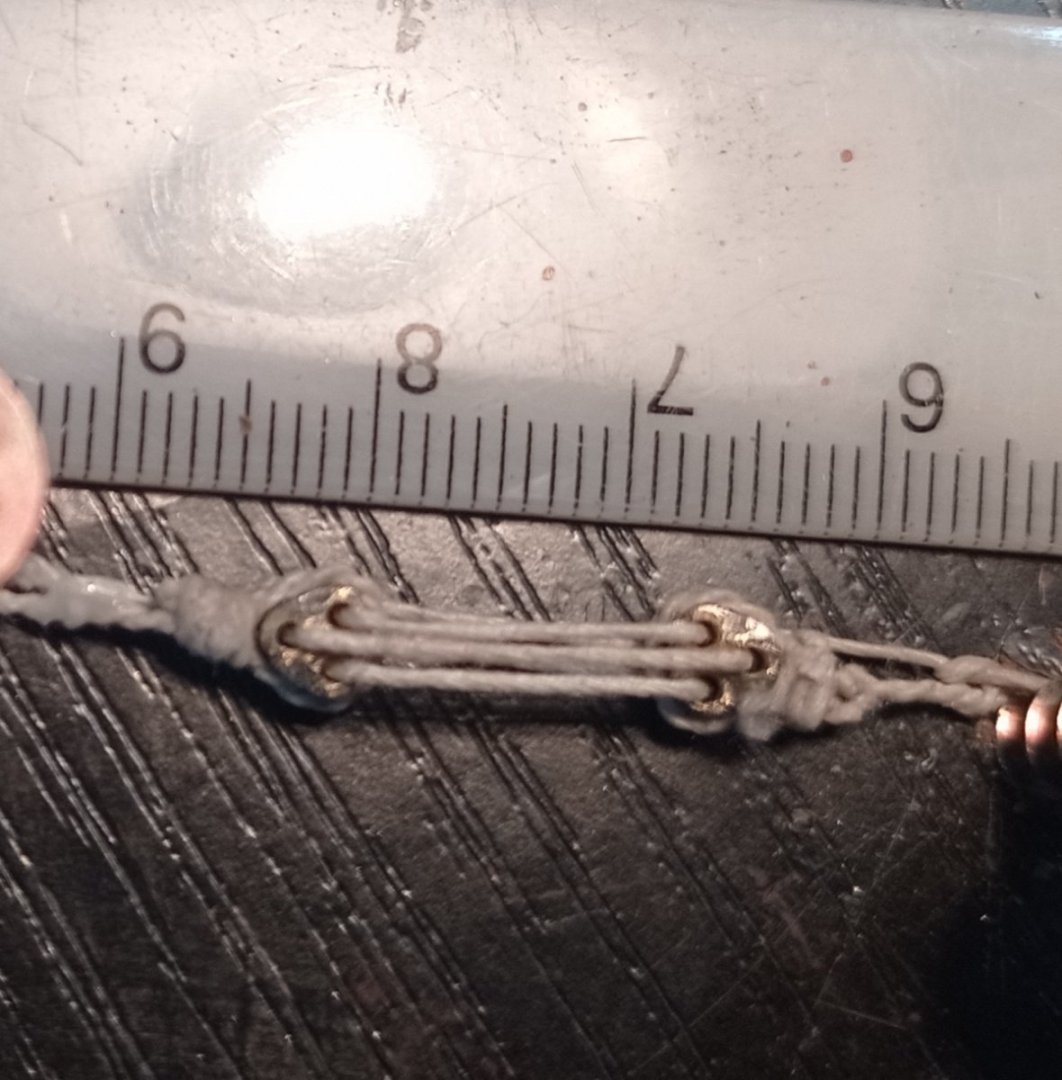
There is one question that made my mind fluffy ... dead eyes 3-4mm dia ... from different reasons I don`t want to order and to by them ... at another side, to make them from wood - impossible mission for me. So - what to do? And idea comes after couple months braking my head On photos I present only idea and testing of idea, with non-adequate ropes and knots I found brass pipes with inside dia 1mm and 2mm ... and thinking ... oneo to other, I have got 3-4mm outer dia ... Soldering three of them in triangle form Cut this structure on desired width and clean holes, and I got this! Playing arround with first "rope" I found in home, just to try Ok, it can be painted .... And just testig does it work And I think this will be final soolution for me


- 396 replies
-
- 8
-
-

-
-
- Idea
- Bright Idea
- (and 1 more)
-
Cutty Sark by NenadM
NenadM replied to NenadM's topic in - Build logs for subjects built 1851 - 1900
Thanks Mark- 4,152 replies
-
- 2
-
-
- cutty sark
- tehnodidakta
- (and 1 more)
-
Cutty Sark by NenadM
NenadM replied to NenadM's topic in - Build logs for subjects built 1851 - 1900
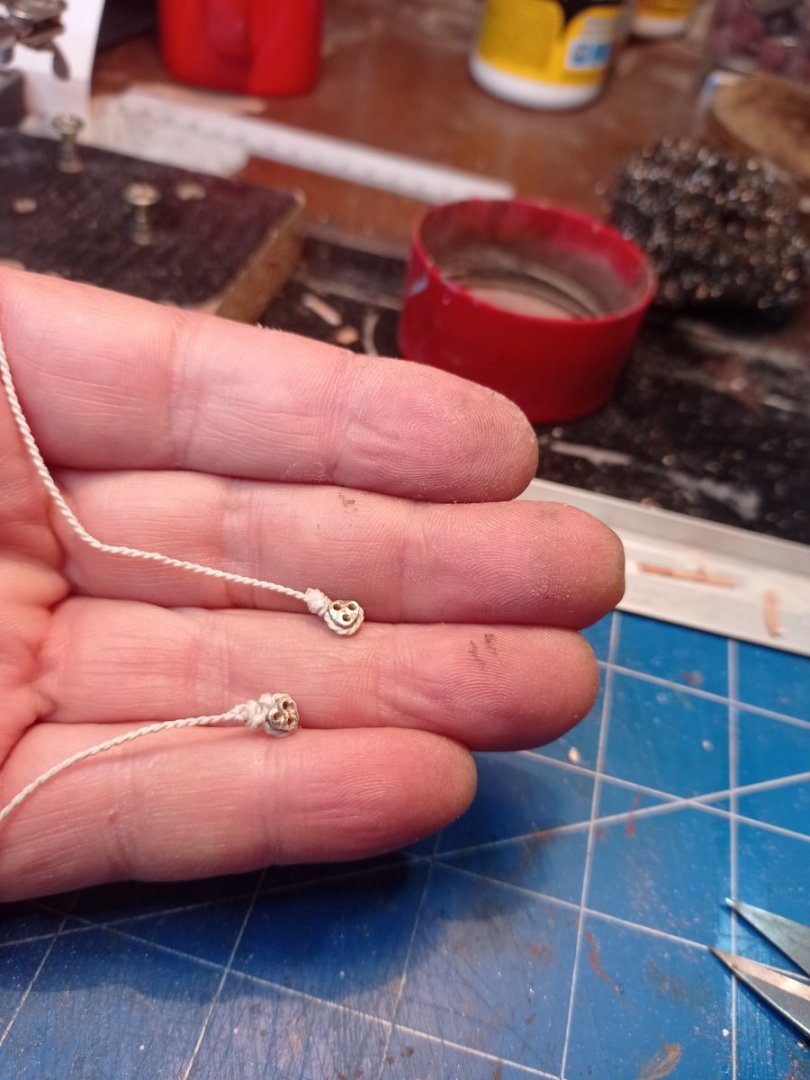
Alternative dead eyes, max 4mm dia ... My madness don't allow me to by parts, so, great problem are dead eyes 3-4 dia. Making them from wood with three holes ... not to throw appart, not possible for me. And idea comes. Tested today succesfully. Three brass pipes 1mm inside dia, soldered in triangle. When it get cold, cut pieces thick 1mm, clean holes. You can paunt them in desired colour. Rest - rigging them is classical path. This is just a test, and ropes are not adequate, knots too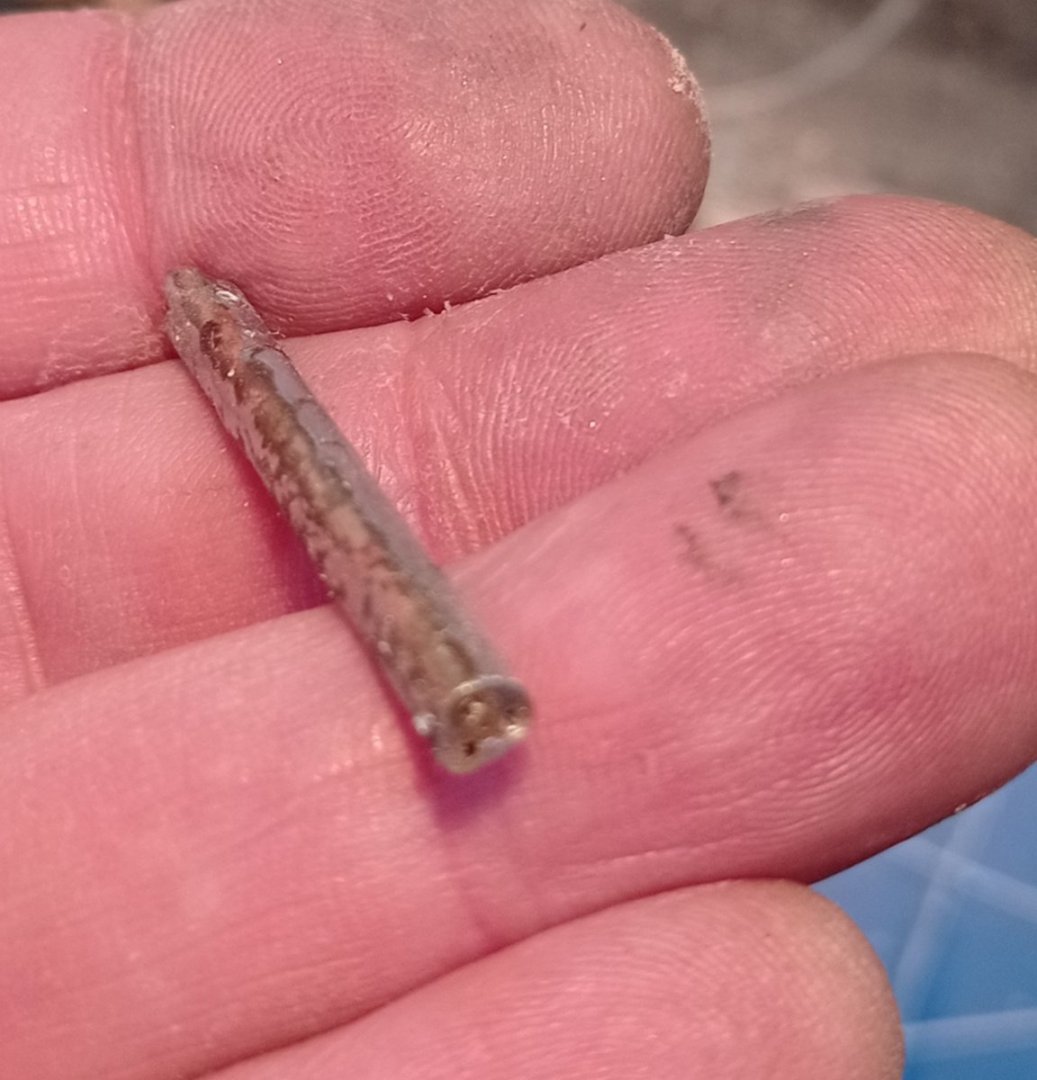


- 4,152 replies
-
- 7
-
-
- cutty sark
- tehnodidakta
- (and 1 more)
-
Cutty Sark by NenadM
NenadM replied to NenadM's topic in - Build logs for subjects built 1851 - 1900
Hi, Simon I am not sure for now, should I make mast again. So, untill I decide, I practice and try to find a way "how to ..."- 4,152 replies
-
- 2
-
-
- cutty sark
- tehnodidakta
- (and 1 more)