HOLIDAY DONATION DRIVE - SUPPORT MSW - DO YOUR PART TO KEEP THIS GREAT FORUM GOING! (Only 20 donations so far - C'mon guys!)
×


Nightdive
-
Posts
34 -
Joined
Content Type
Profiles
Forums
Gallery
Events
Everything posted by Nightdive
-
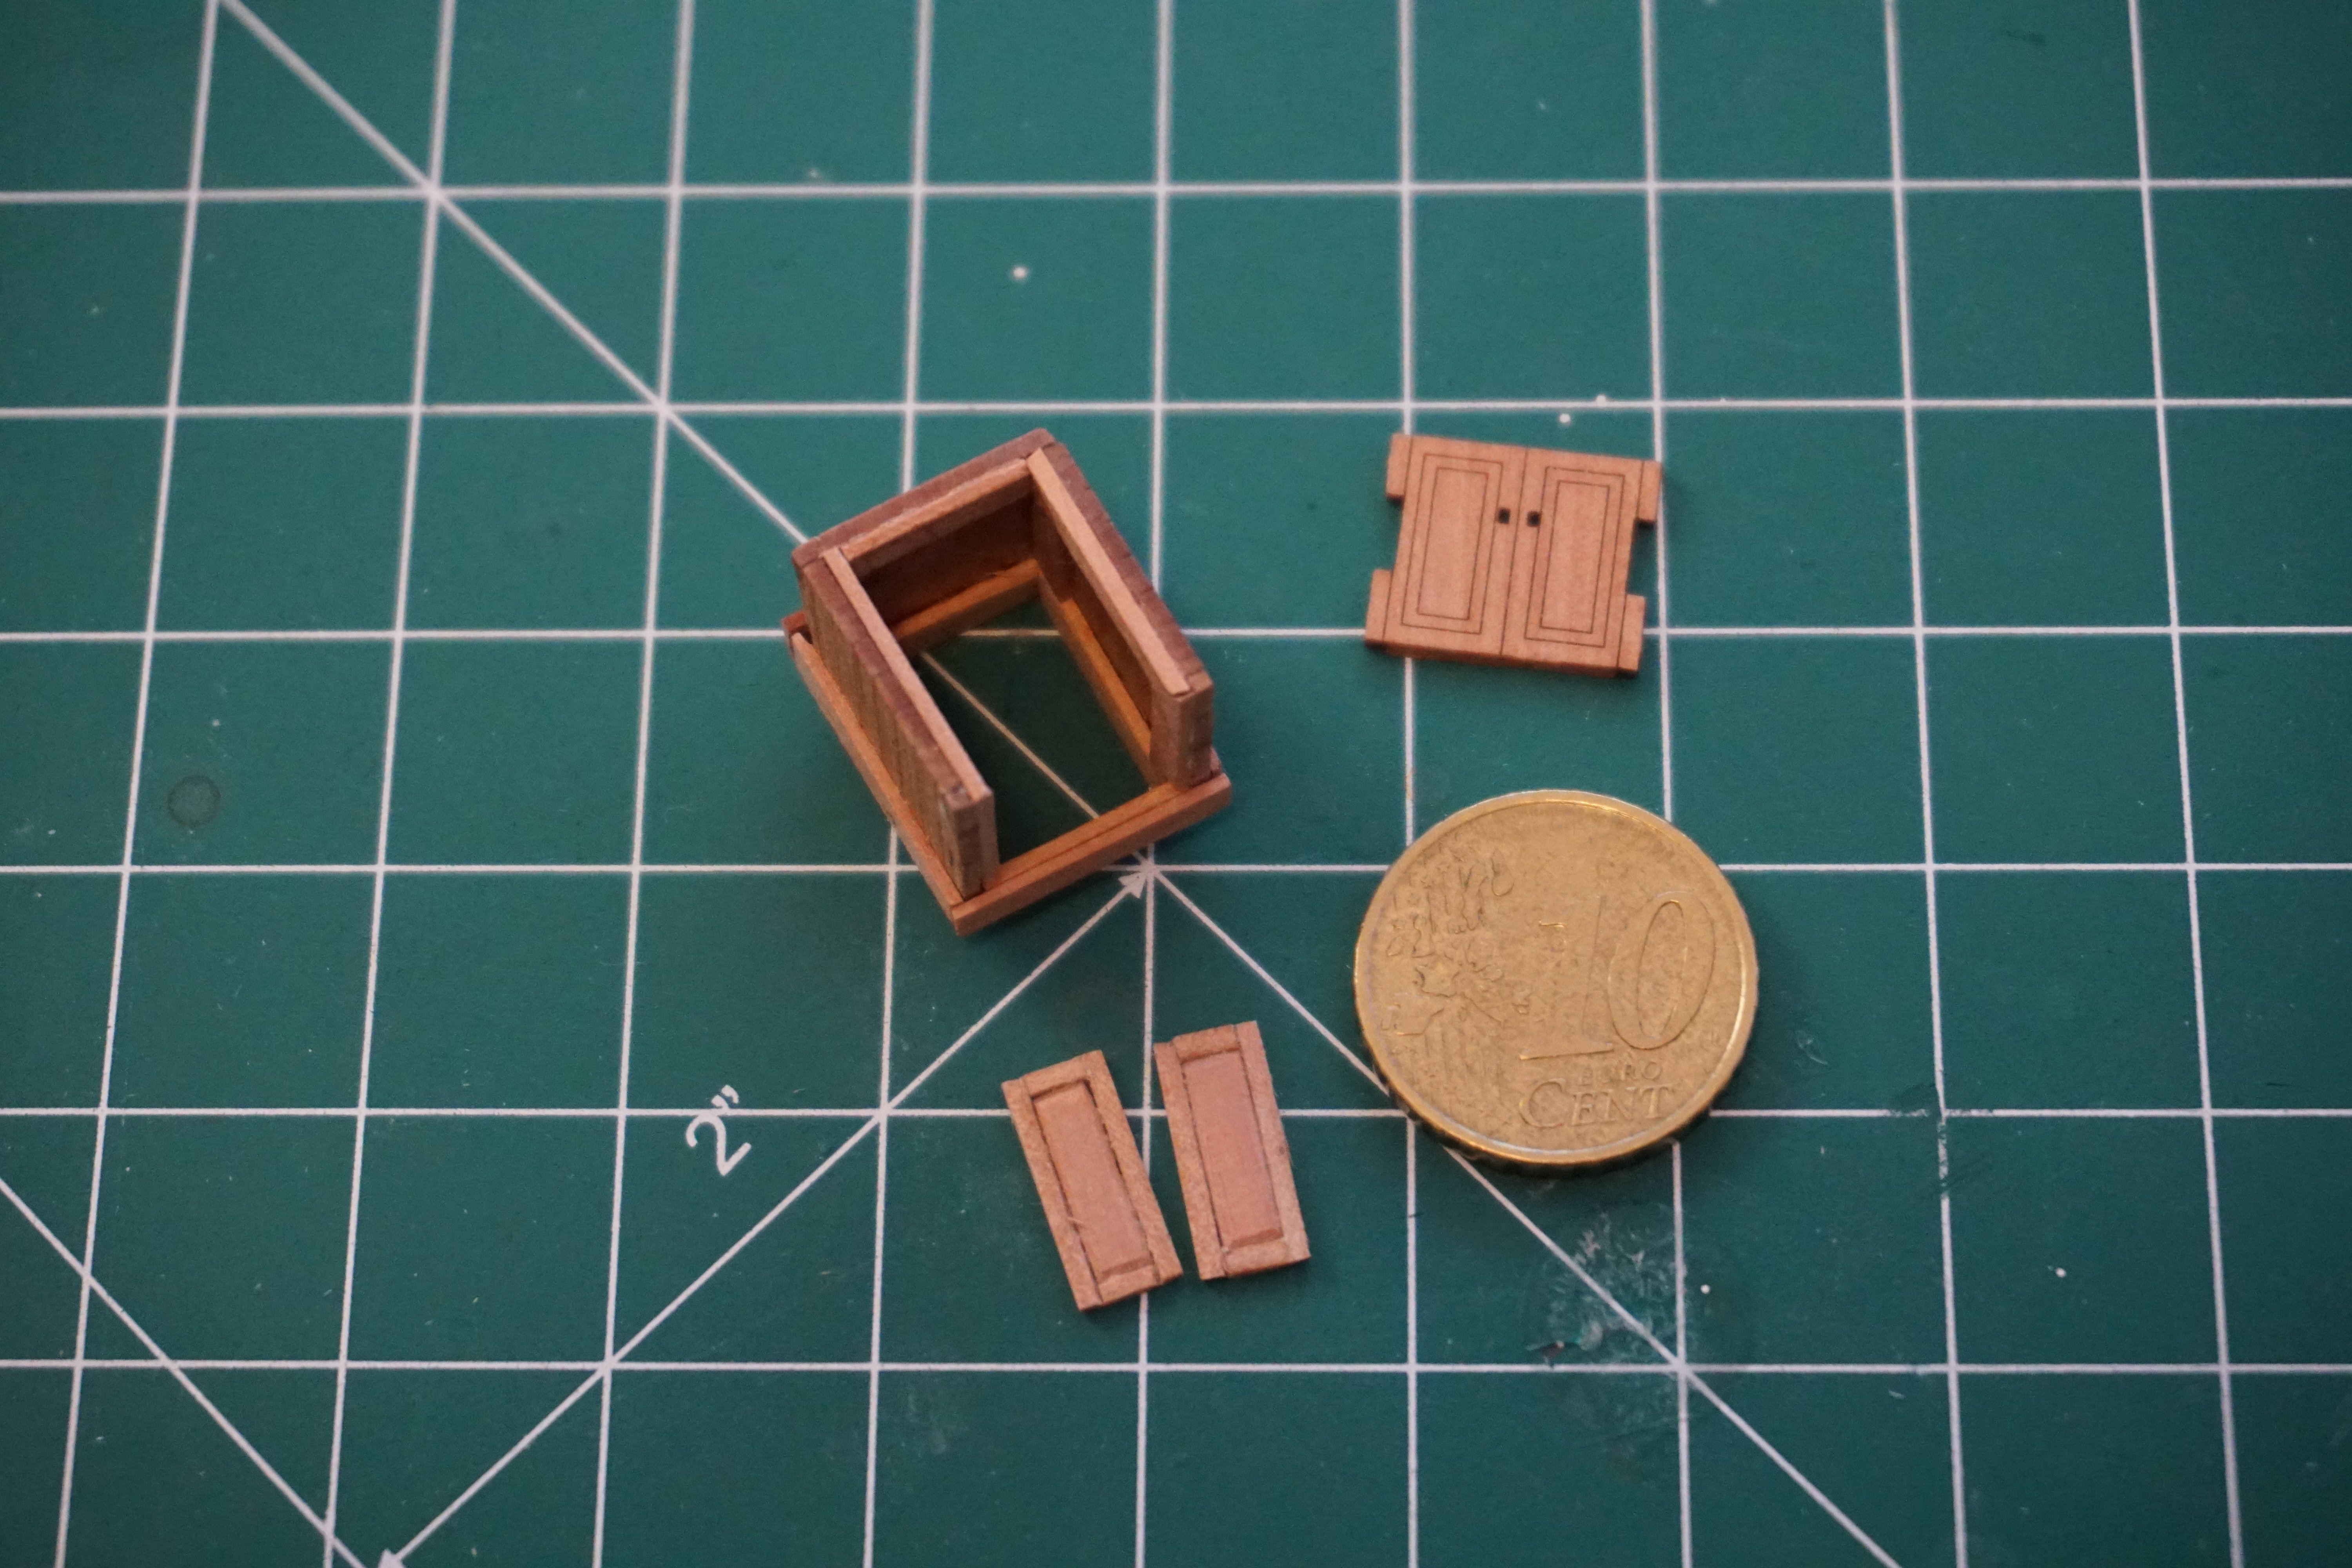
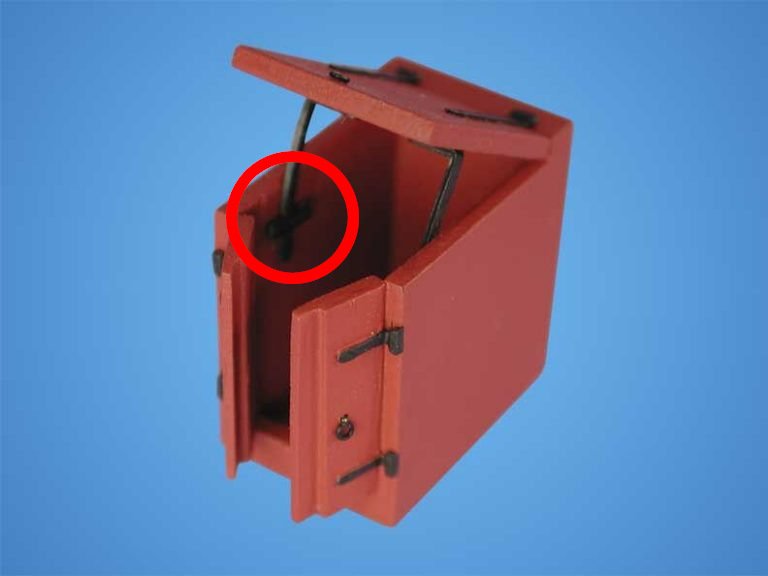
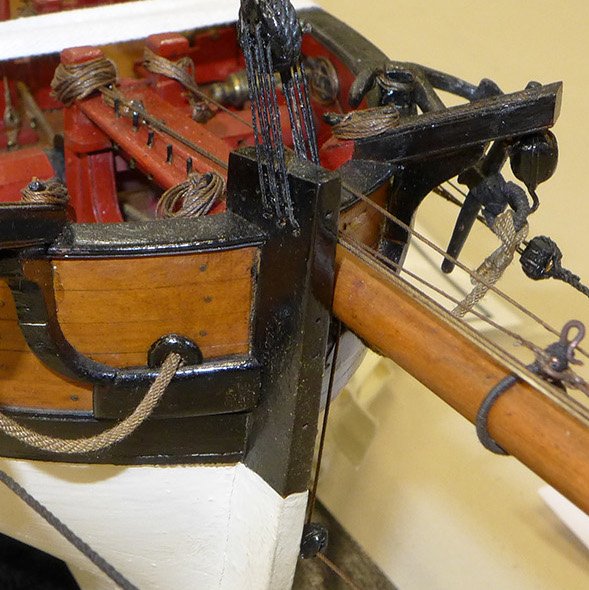
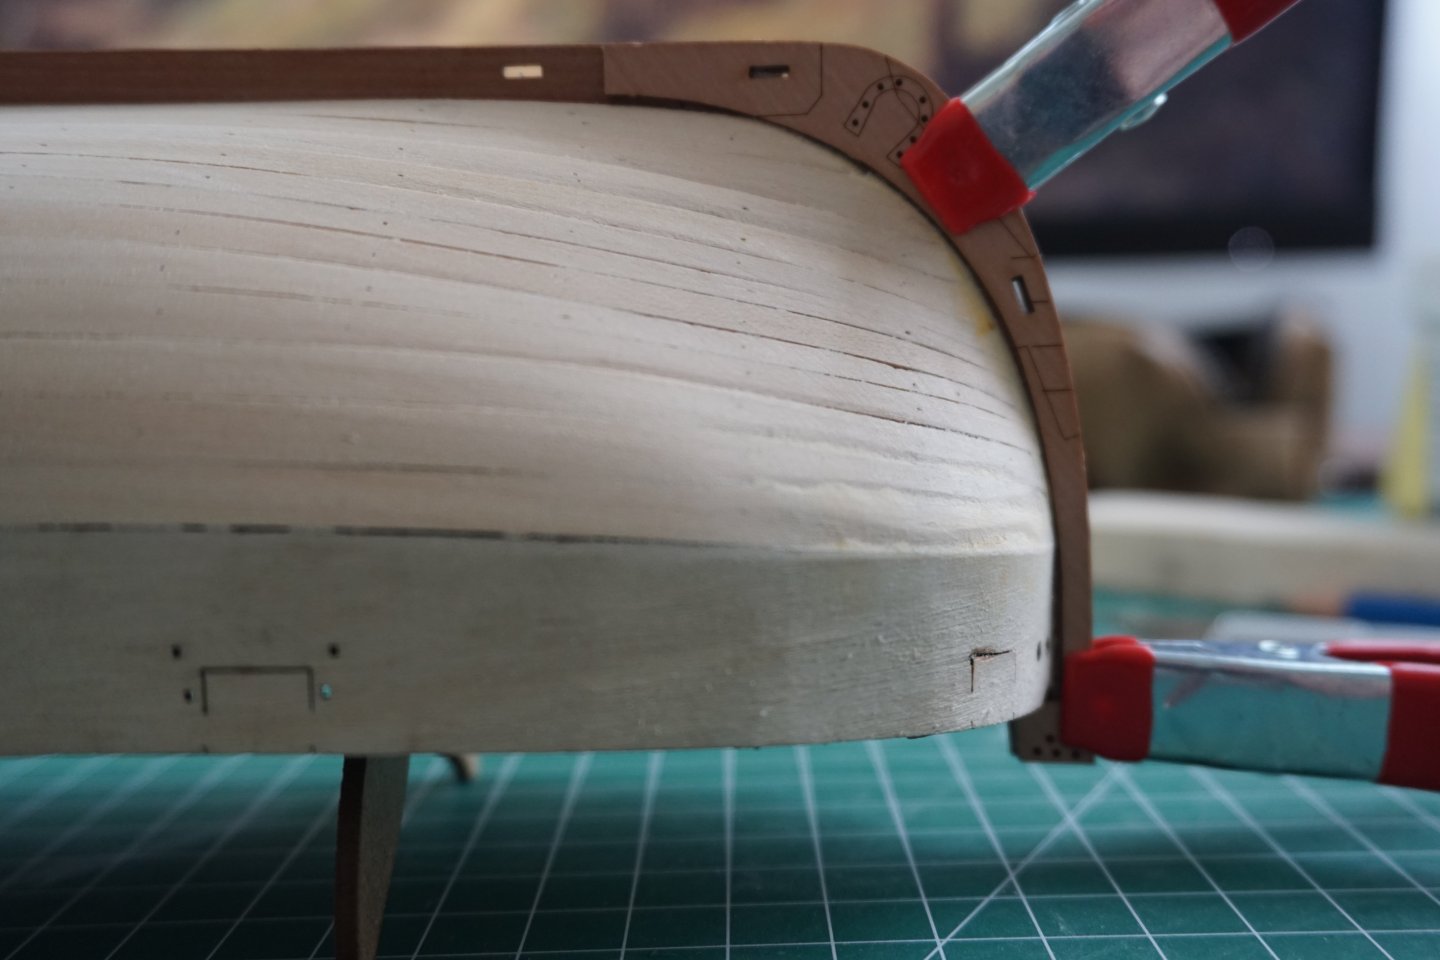
 The companionway is almost ready for paint. I also found a better way to make its footprint slightly larger. I'd greatly appreciate any opinions on the hatch stay that Caldercraft's HMS Pickle has. I'm considering replicating it for the Sherbourne. Is it based on something real, or just model designer's imagination? The part circled in red is also a bit of a mystery to me. I think that the vertical iron has a tooth that catches on the horizontal piece when the hatch is open, but I'm not sure. I haven't been able to find any close-up photos in build logs.

- 61 replies
-
- 5
-

-
- First build
- Cutter
- (and 2 more)
-
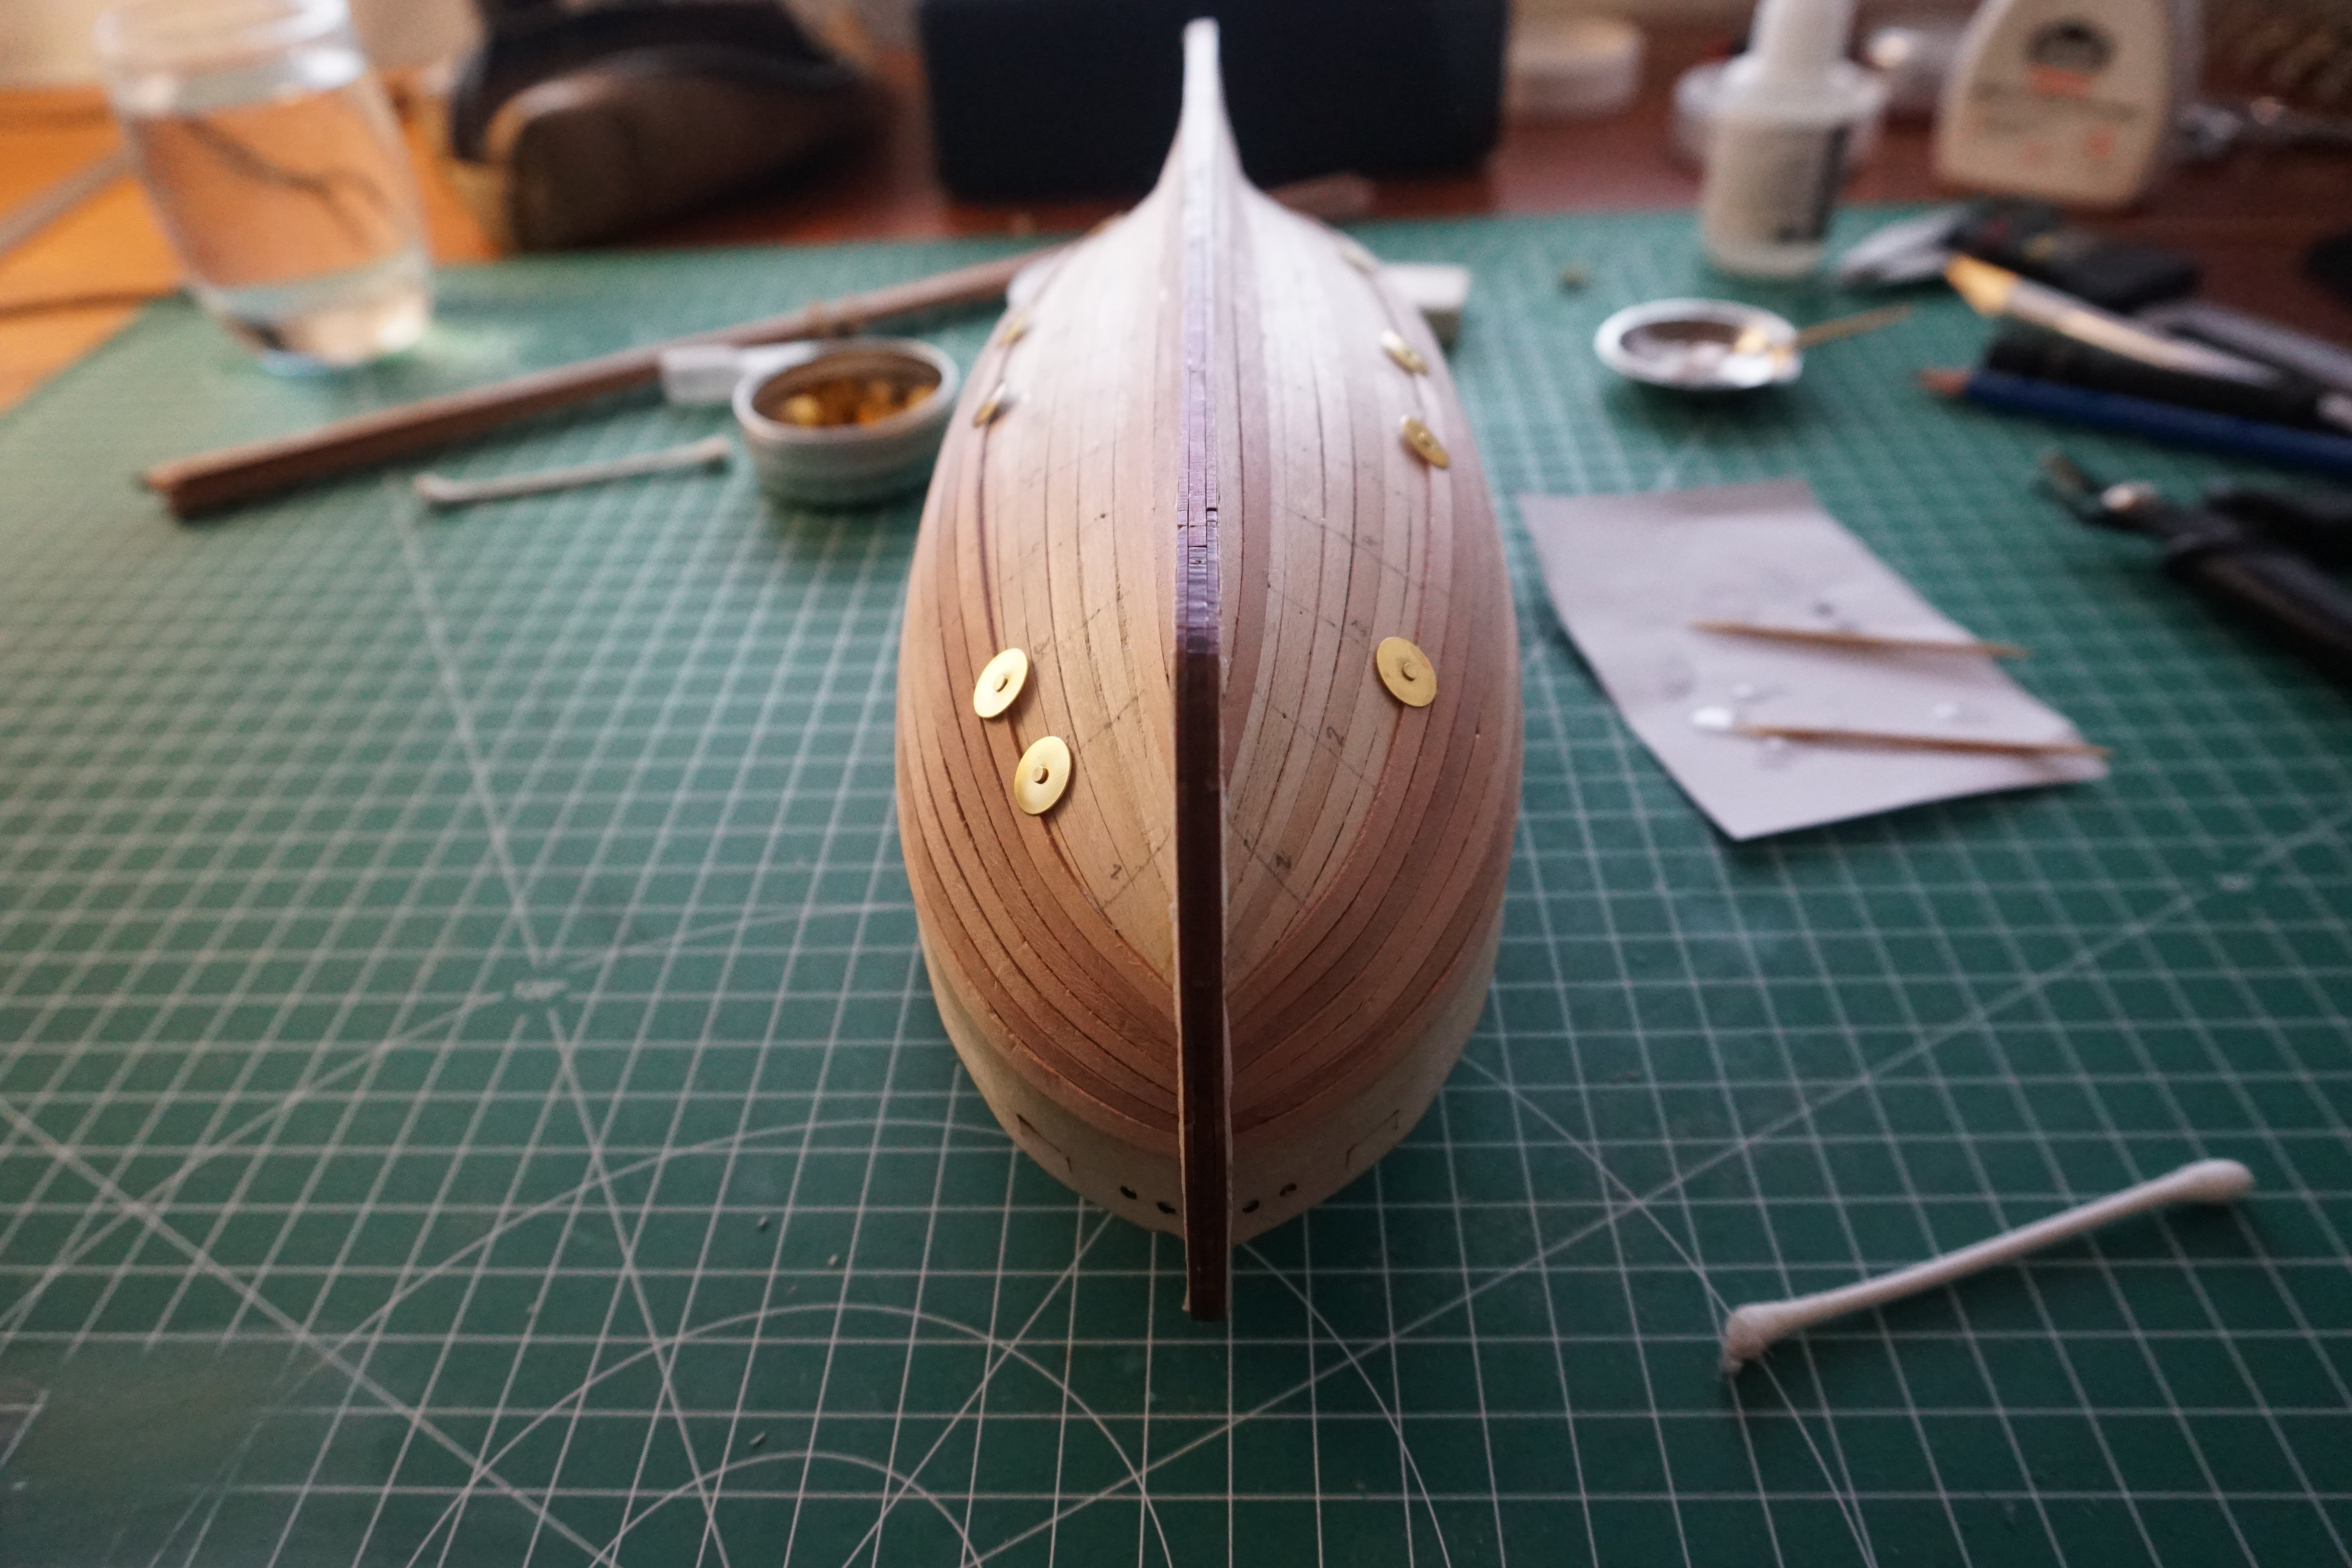
Thanks for stopping by! Those round things are just thumb tacks with the white plastic bit removed.
-
Does anyone happen to have information about the hold-open device that the Pickle's companionway has? Is it based on a real 18th century example, and how is it supposed to work? I can't figure out the part circled in red, all of the images that I could find are too blurry. Maybe there's a tooth on the rod that catches on the horizontal bar? I'm currently thinking of replicating this for my Sherbourne.


-
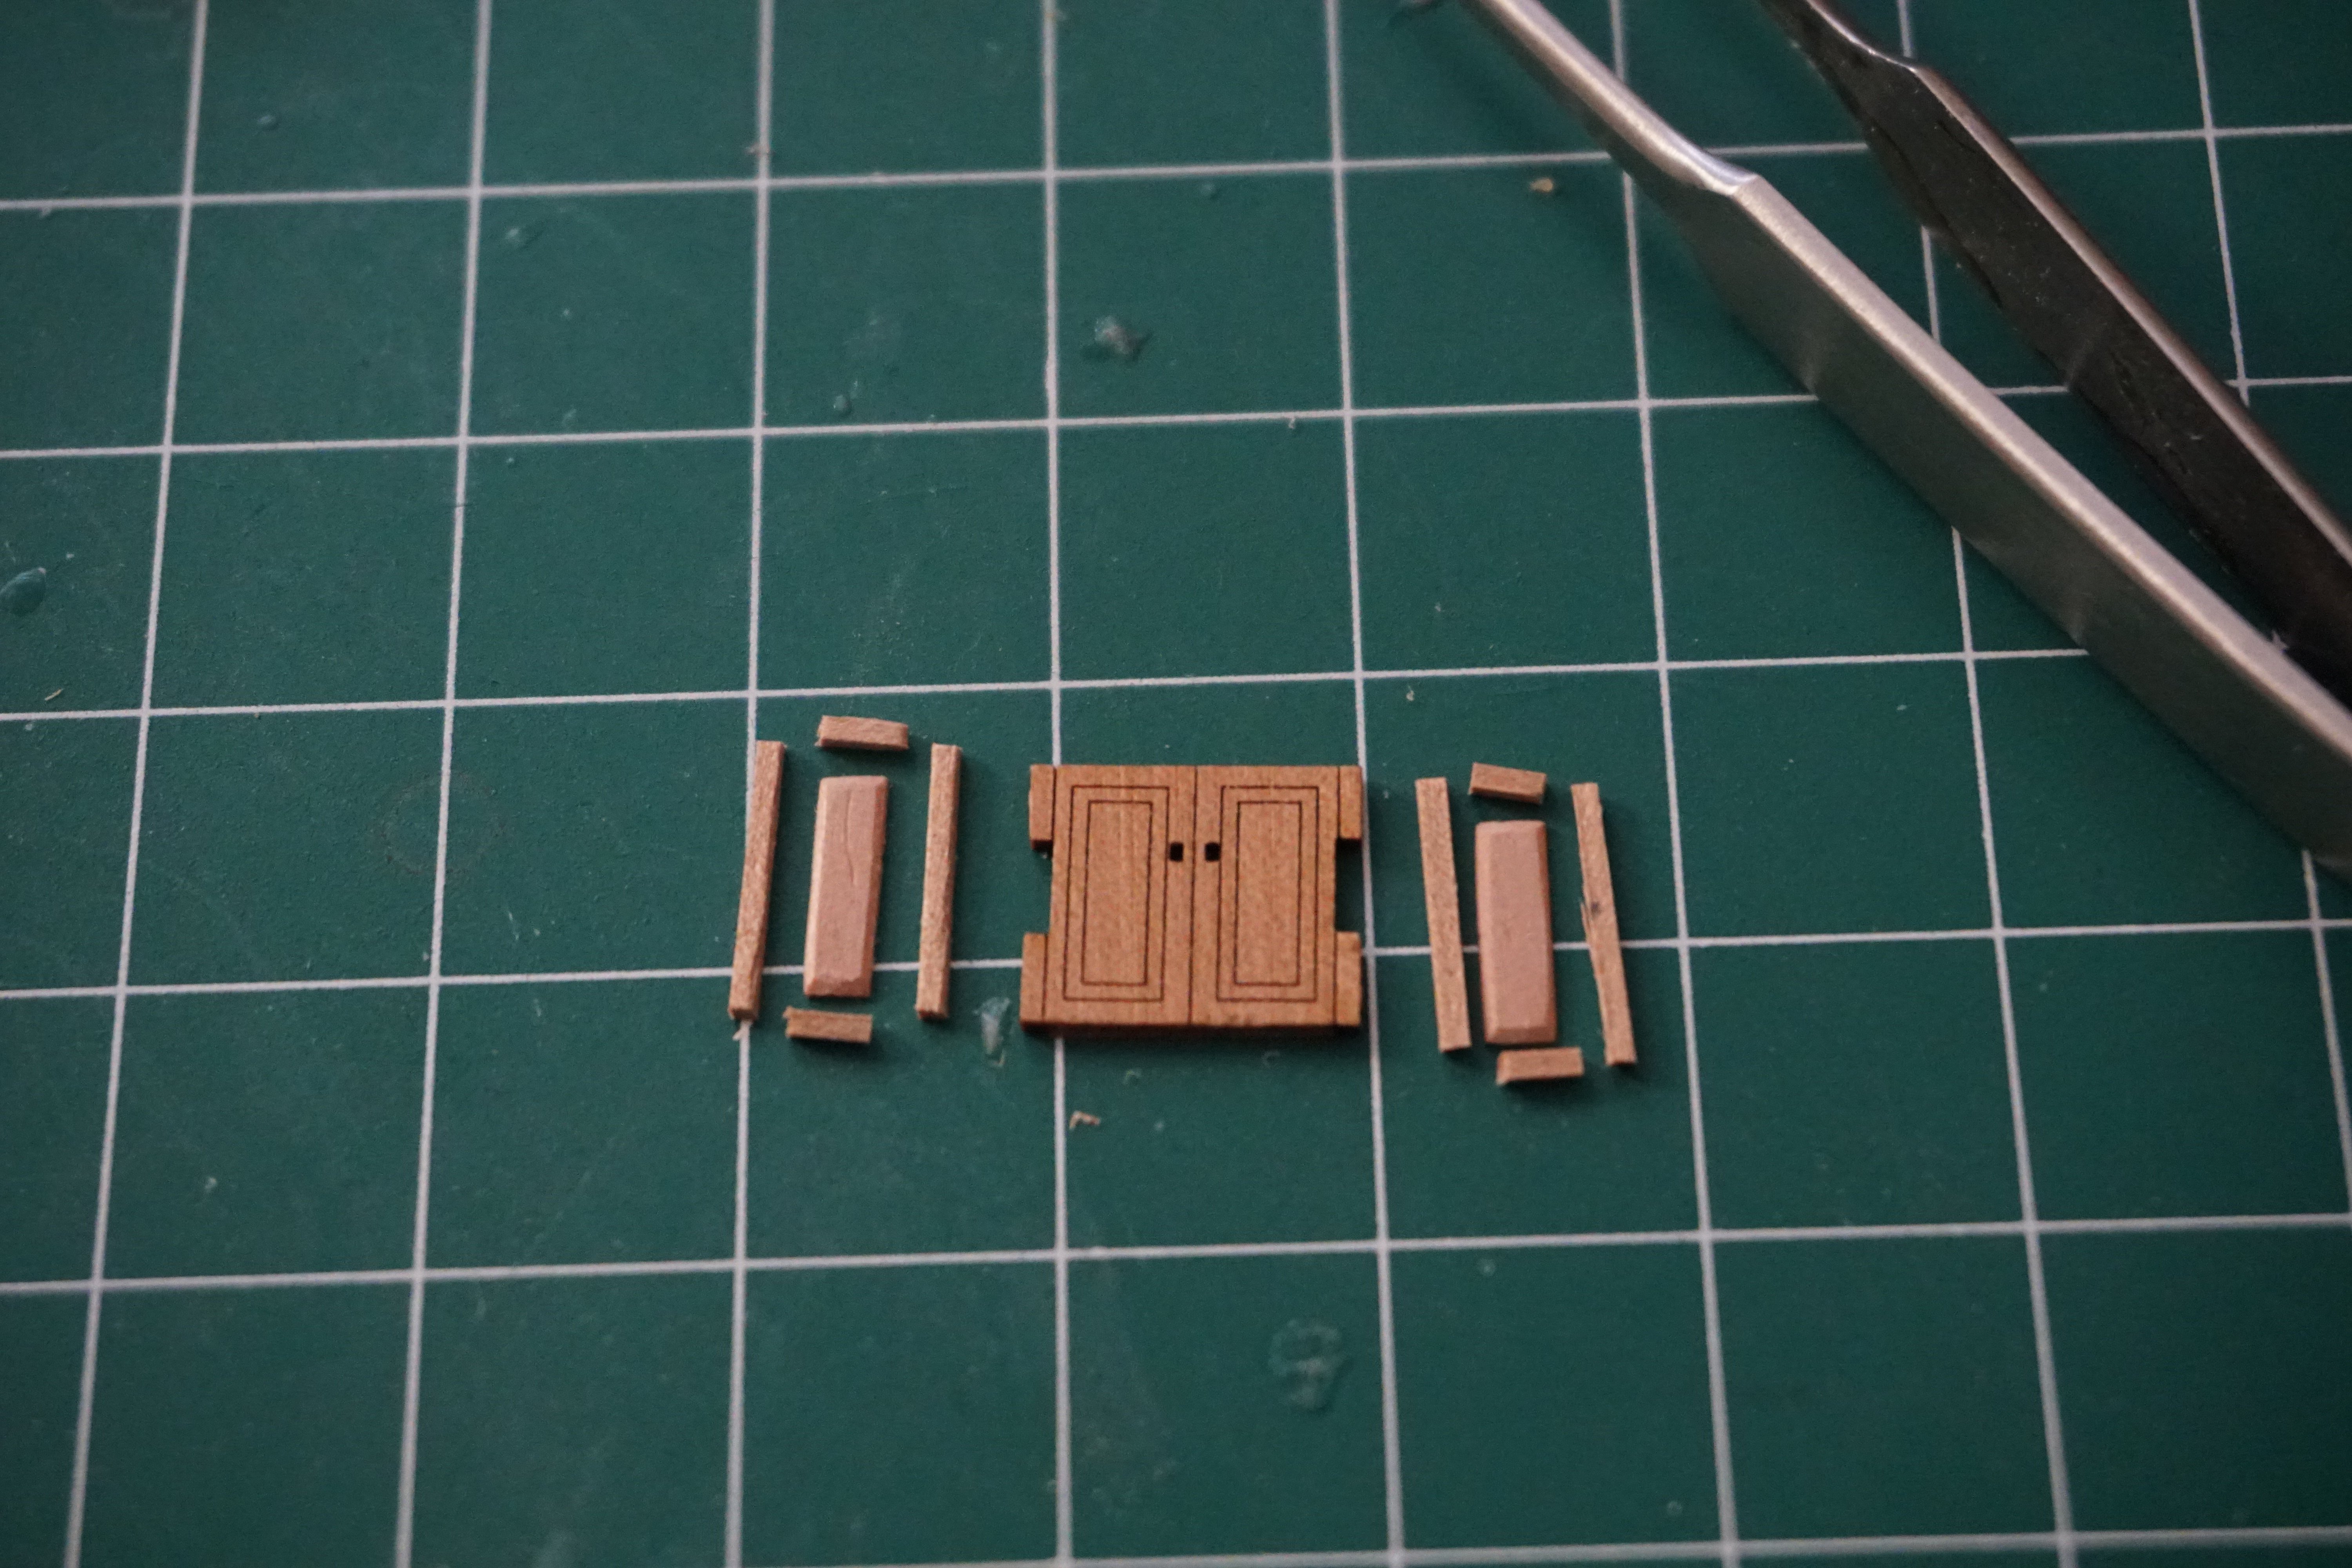
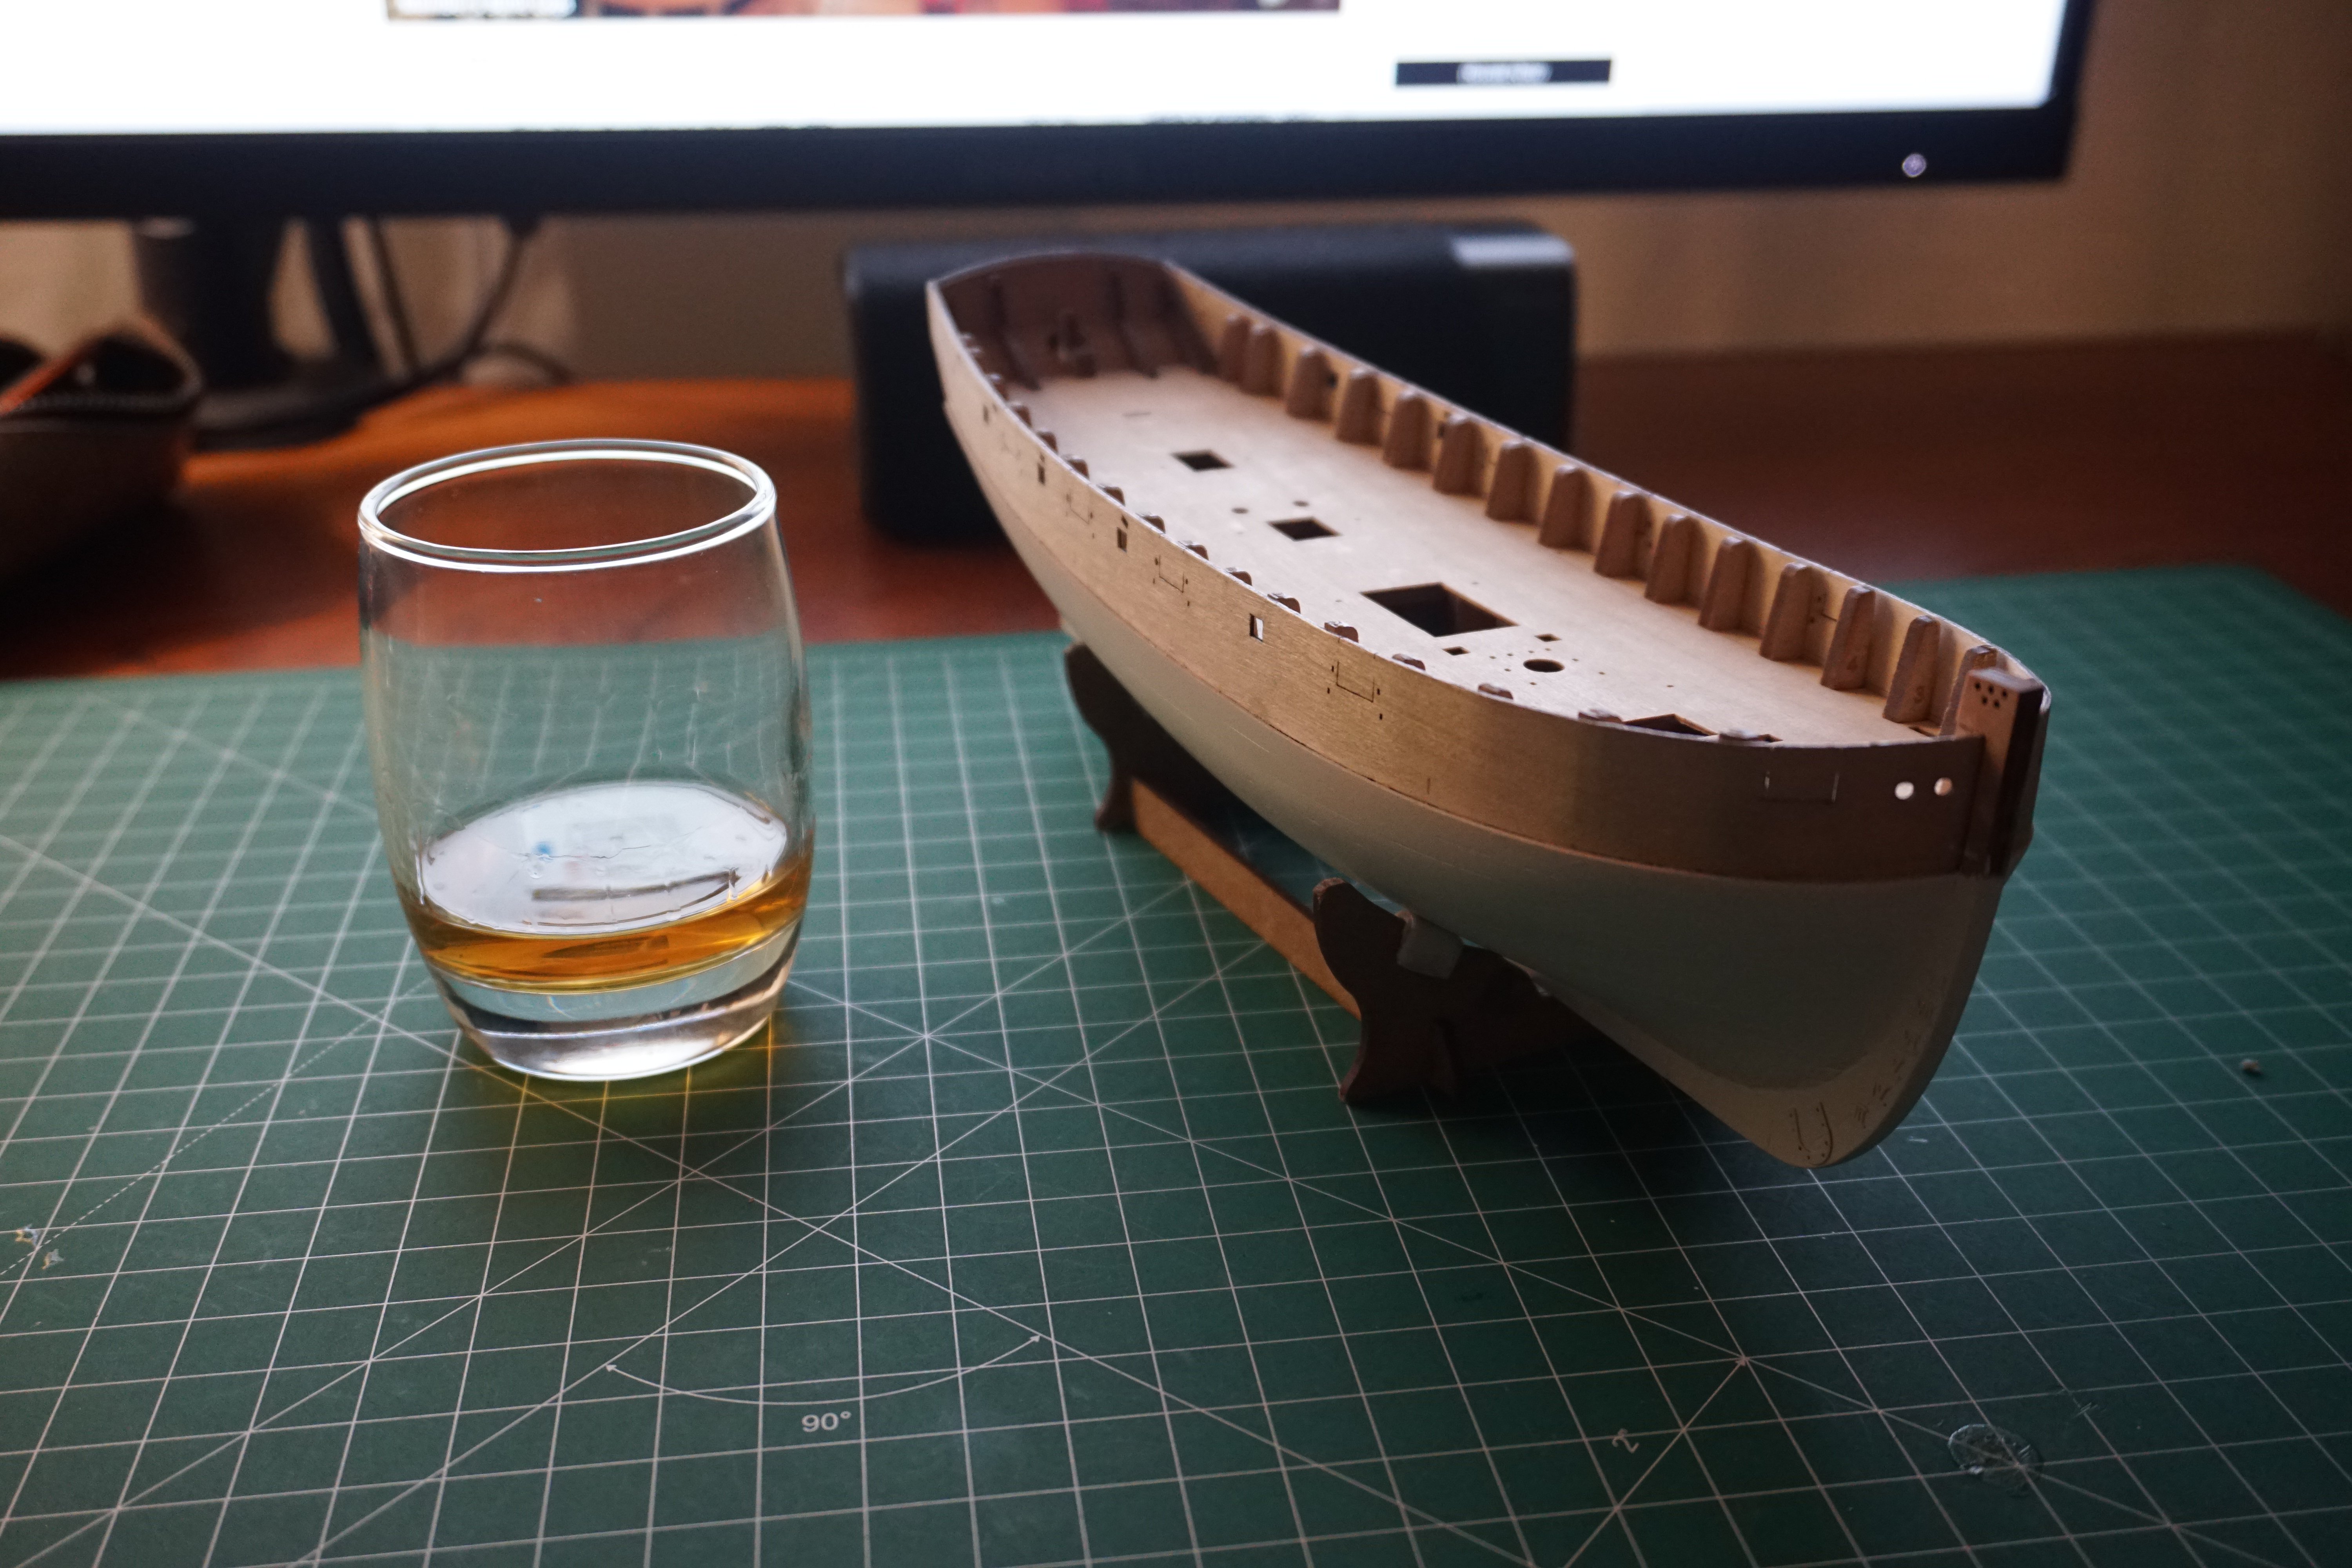
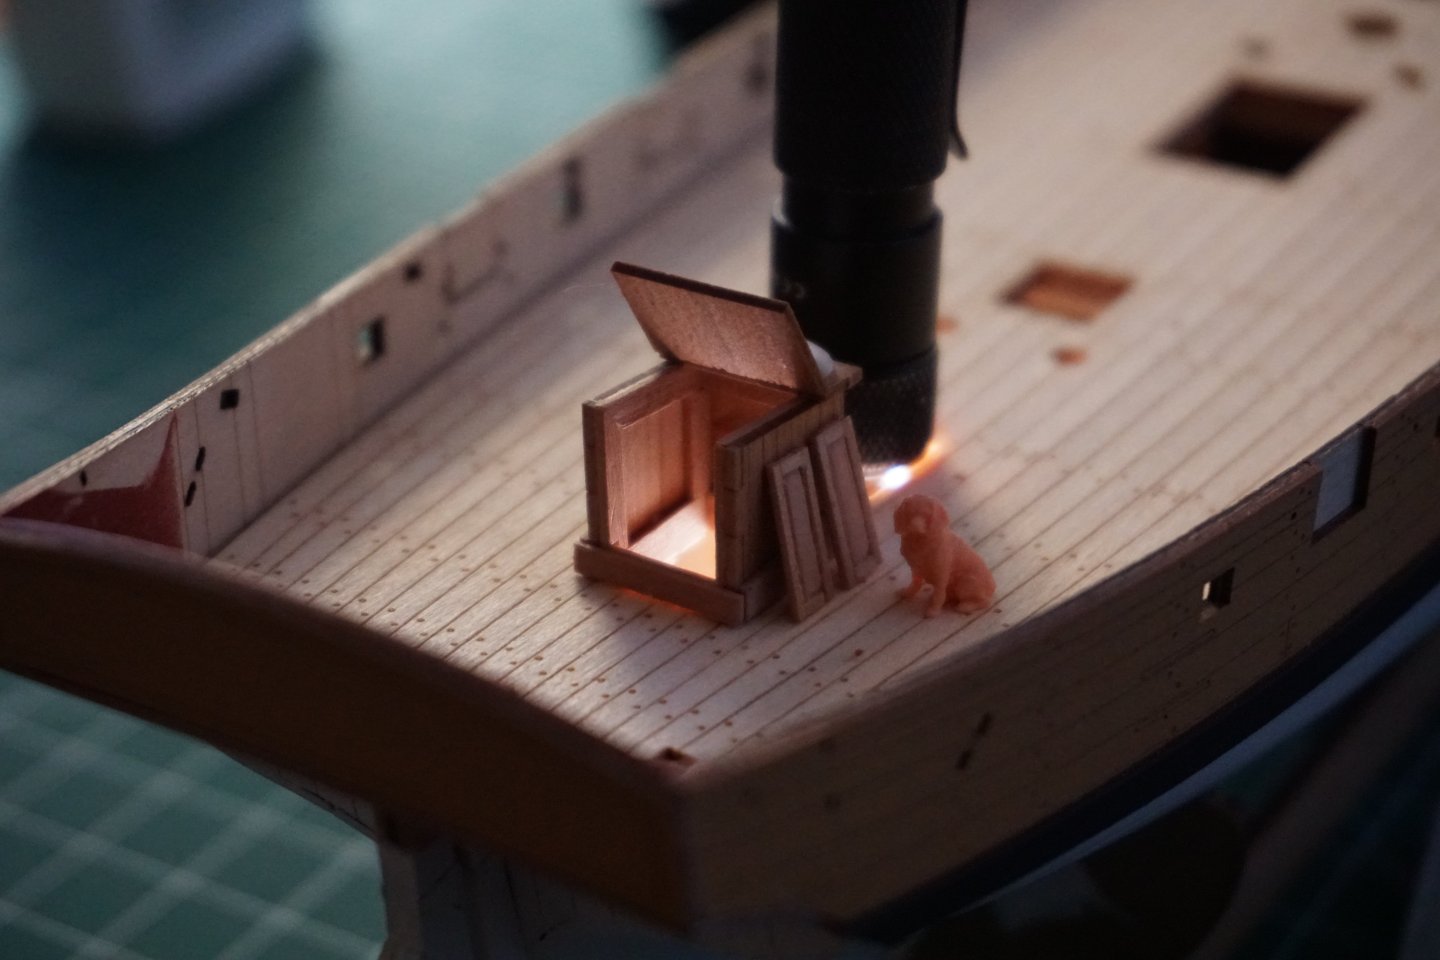
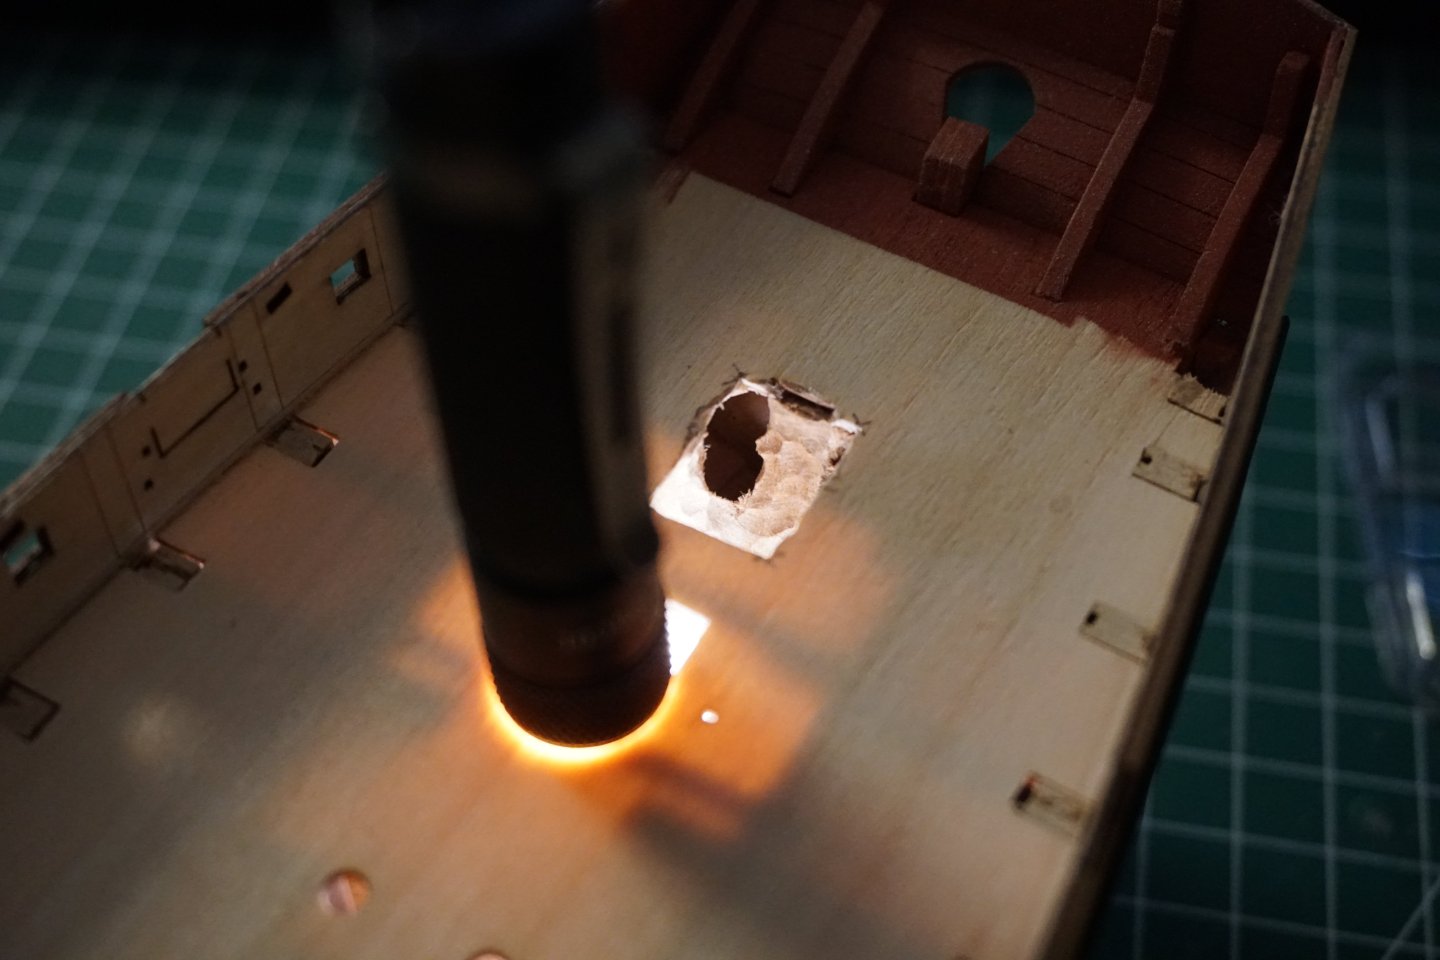
Companionway progress. The laser-etched area is slightly larger than the companionway, so I'll have to add a small board to cover it.

- 61 replies
-
- 7
-
-
- First build
- Cutter
- (and 2 more)
-
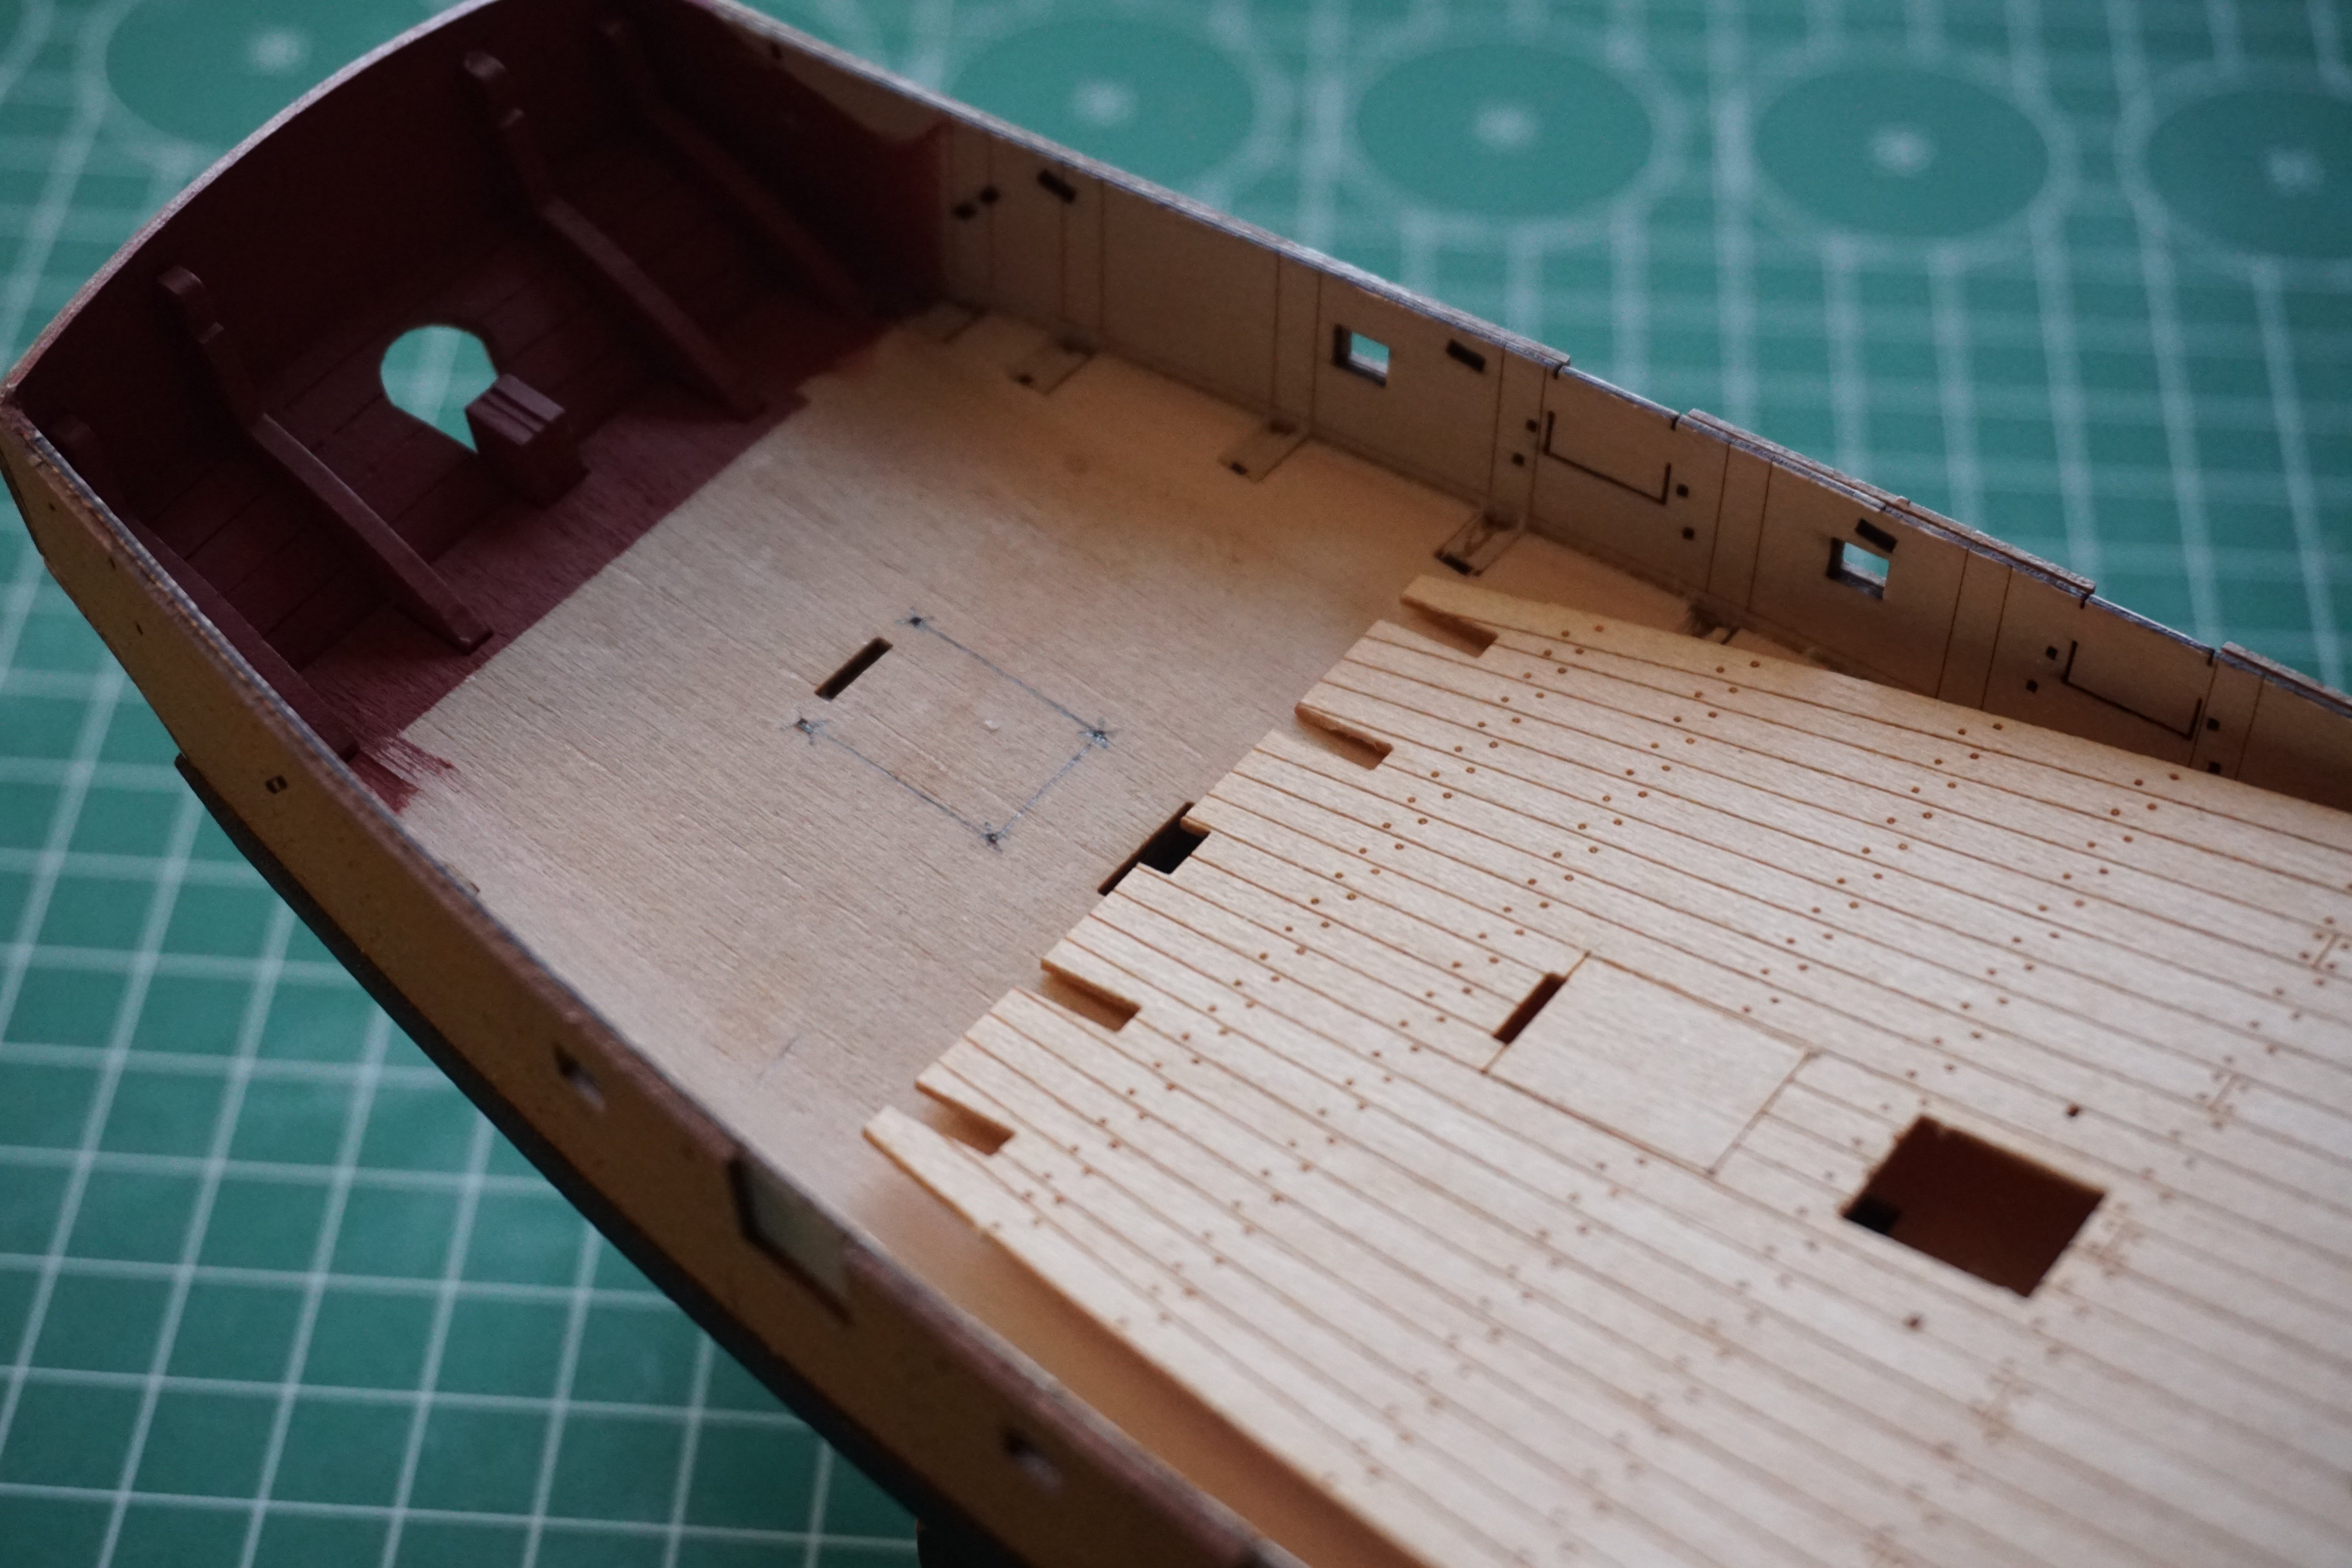
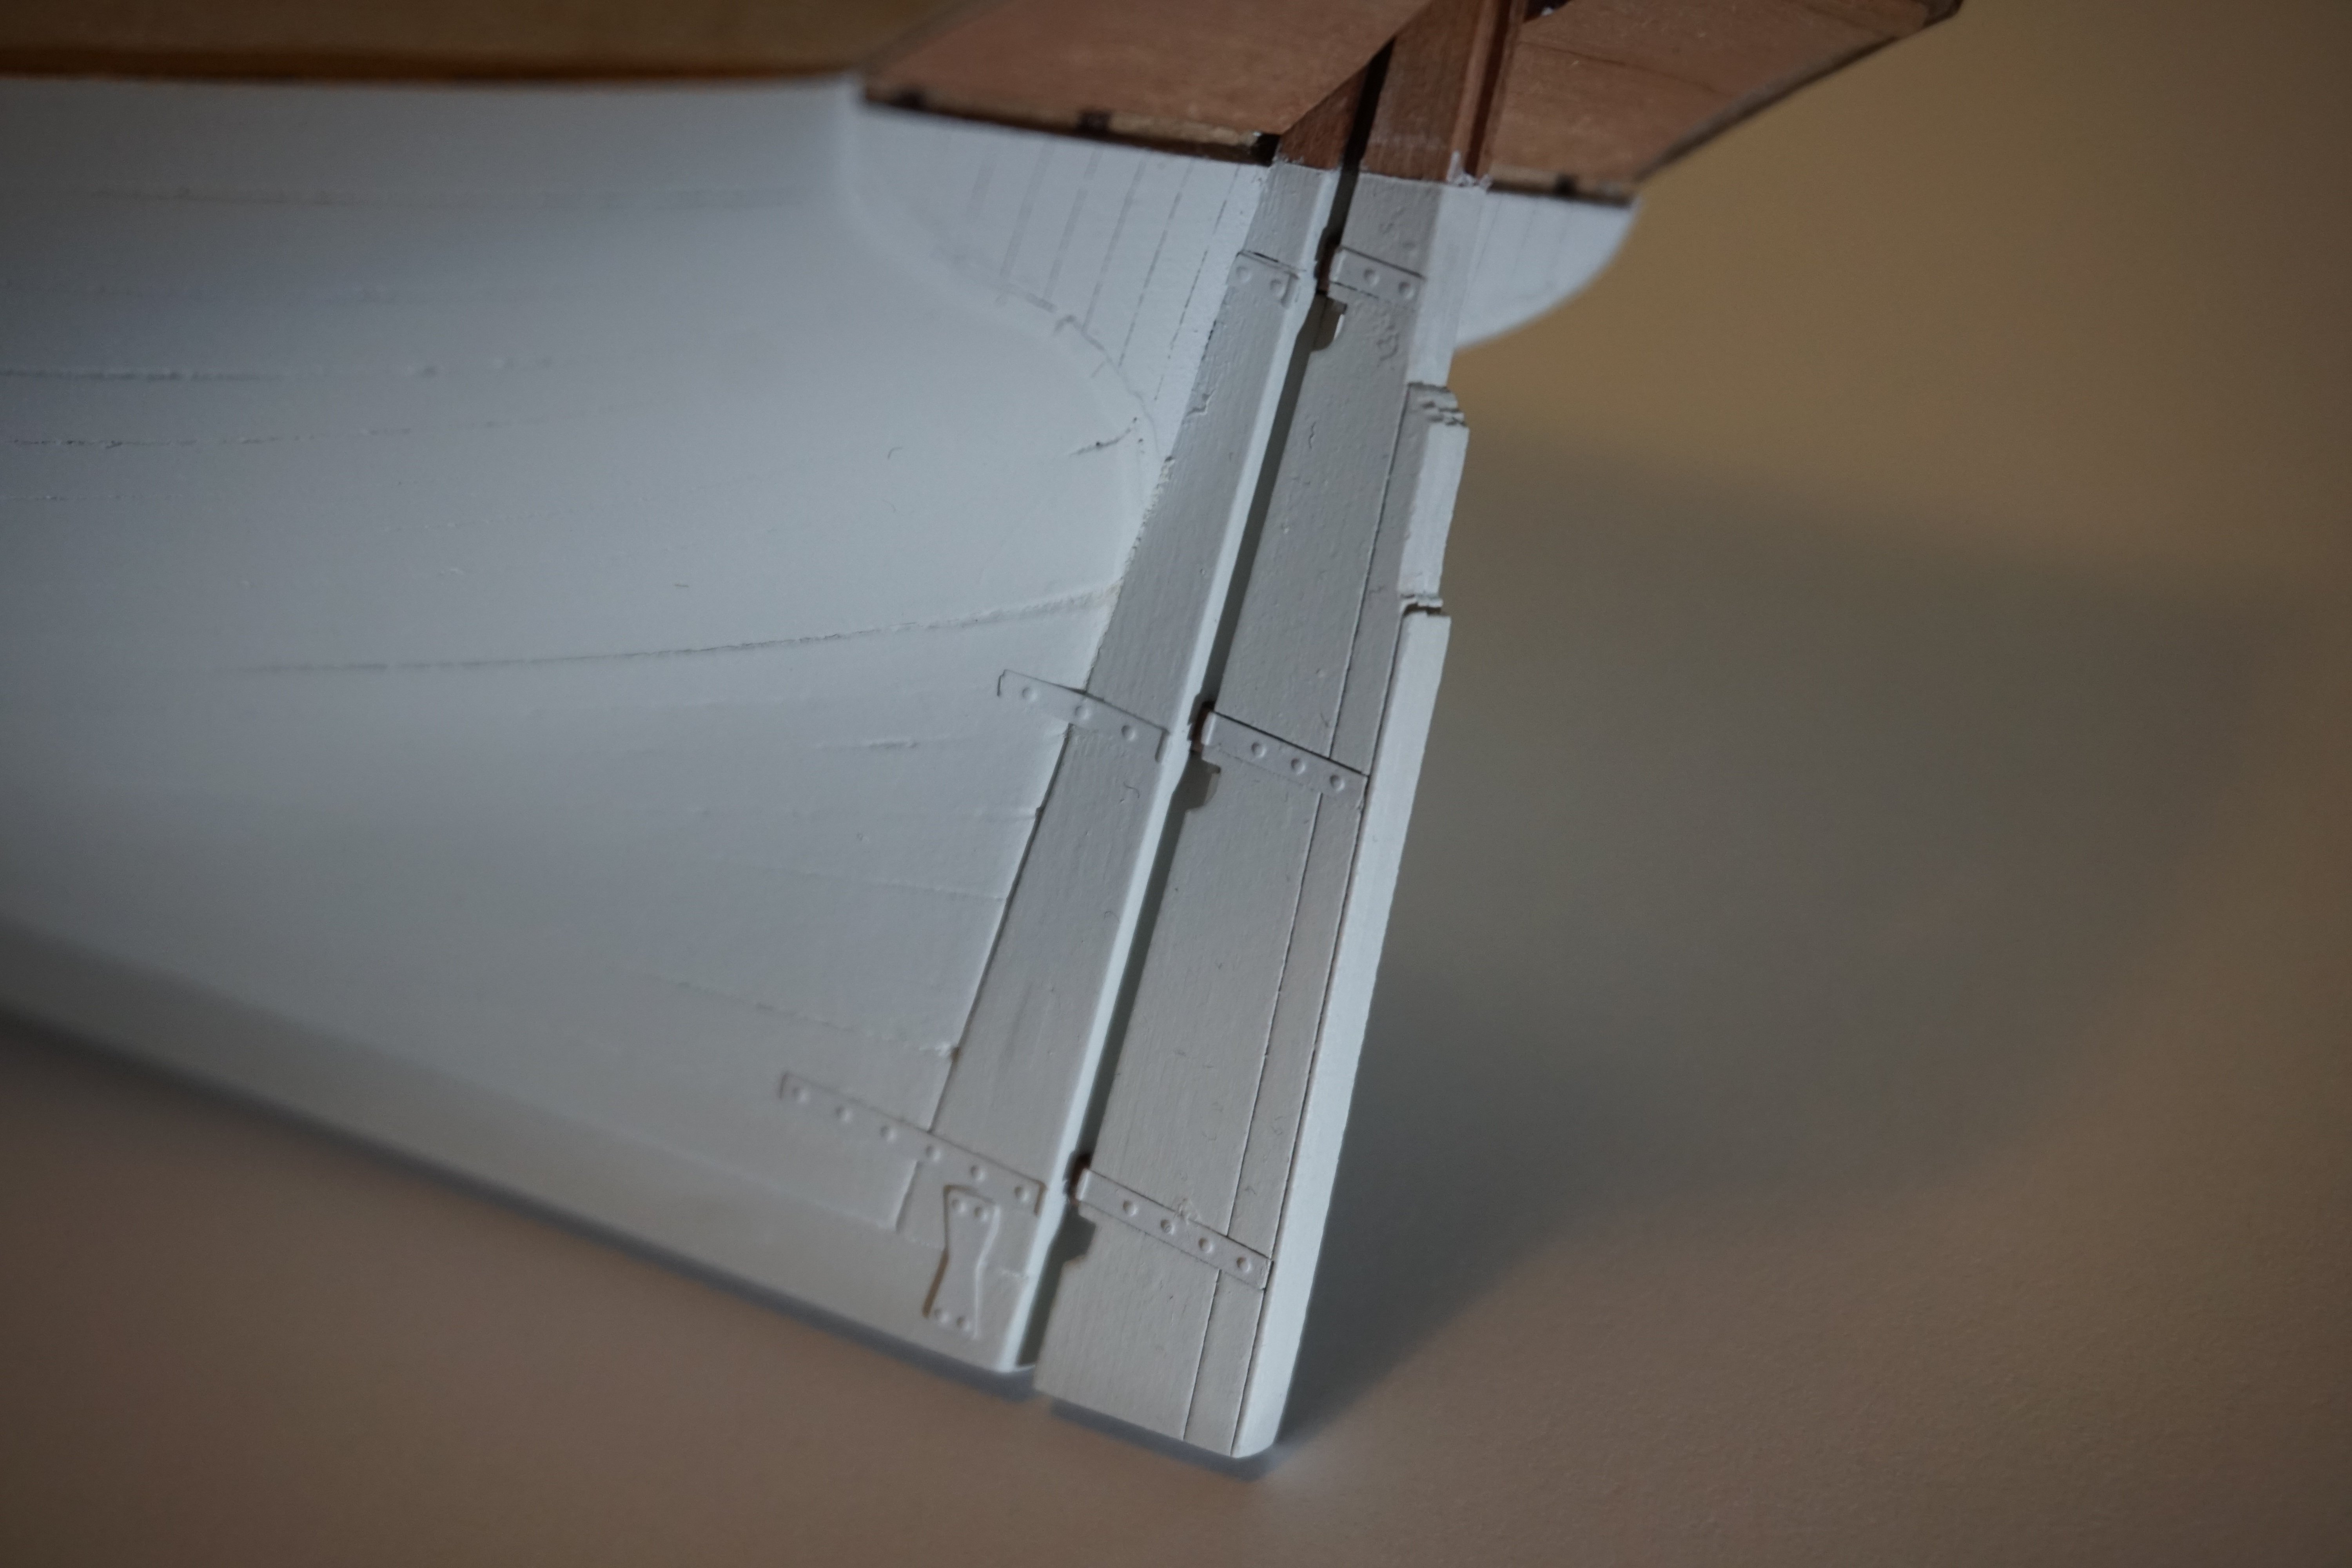
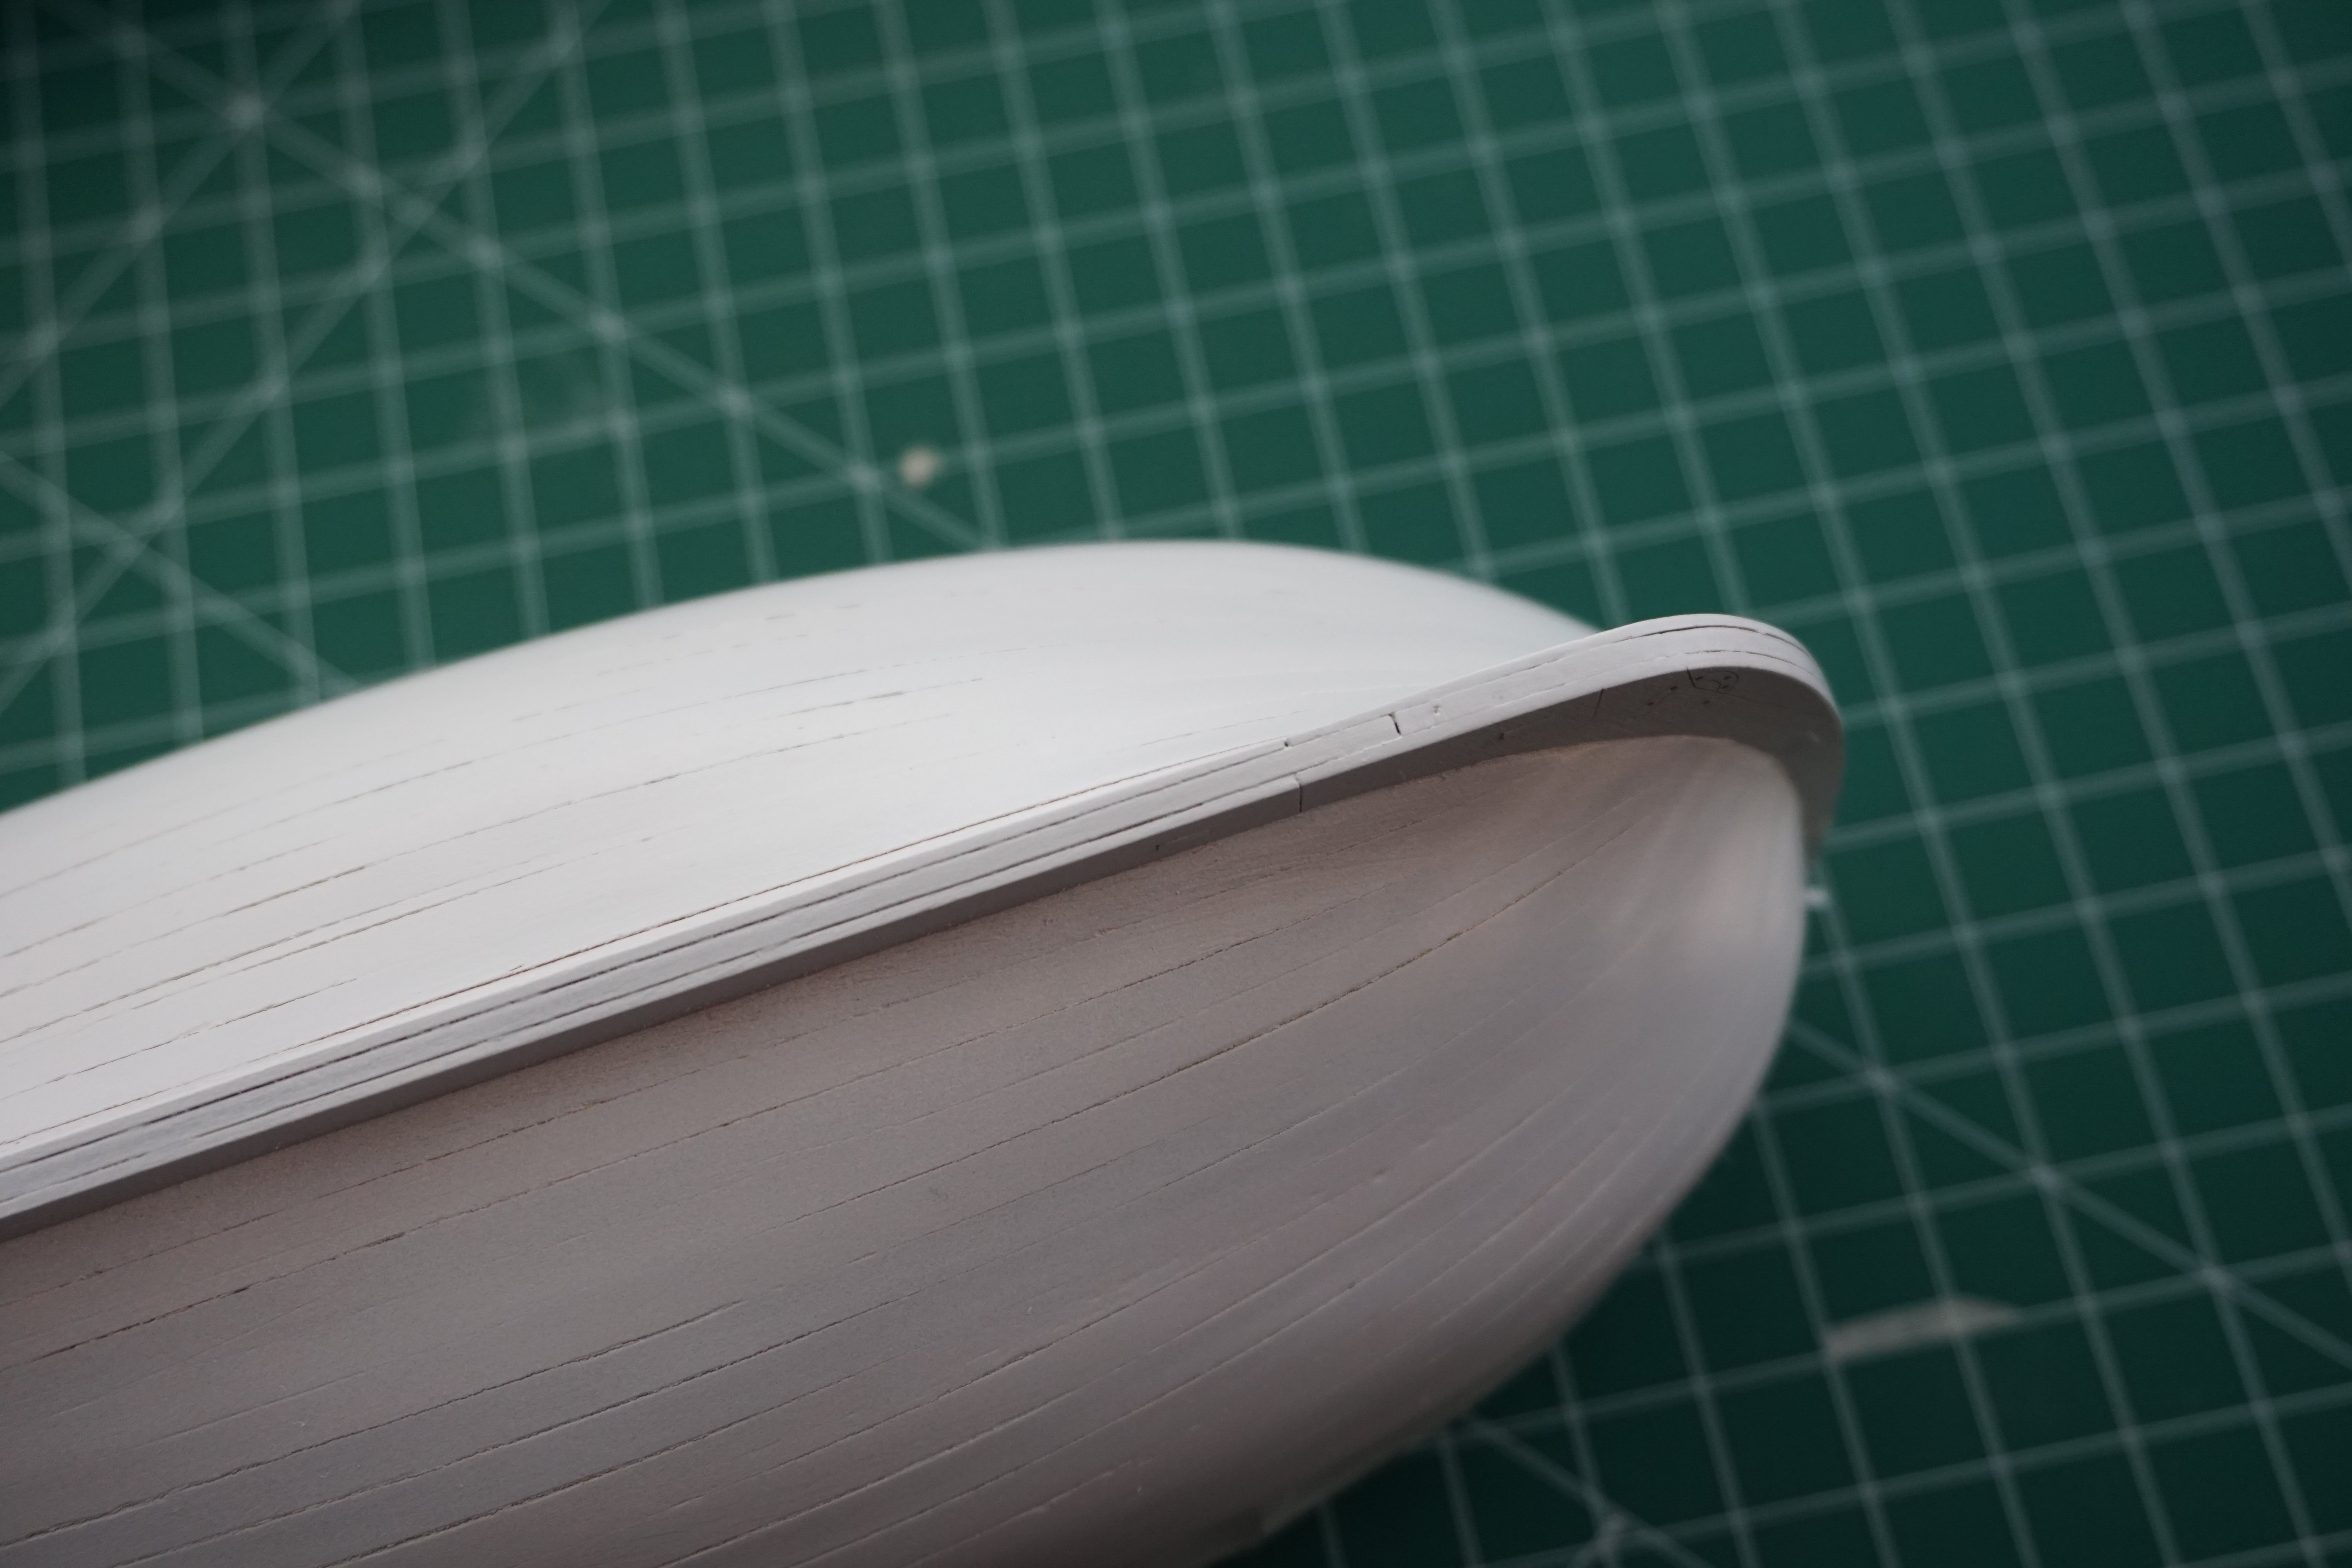
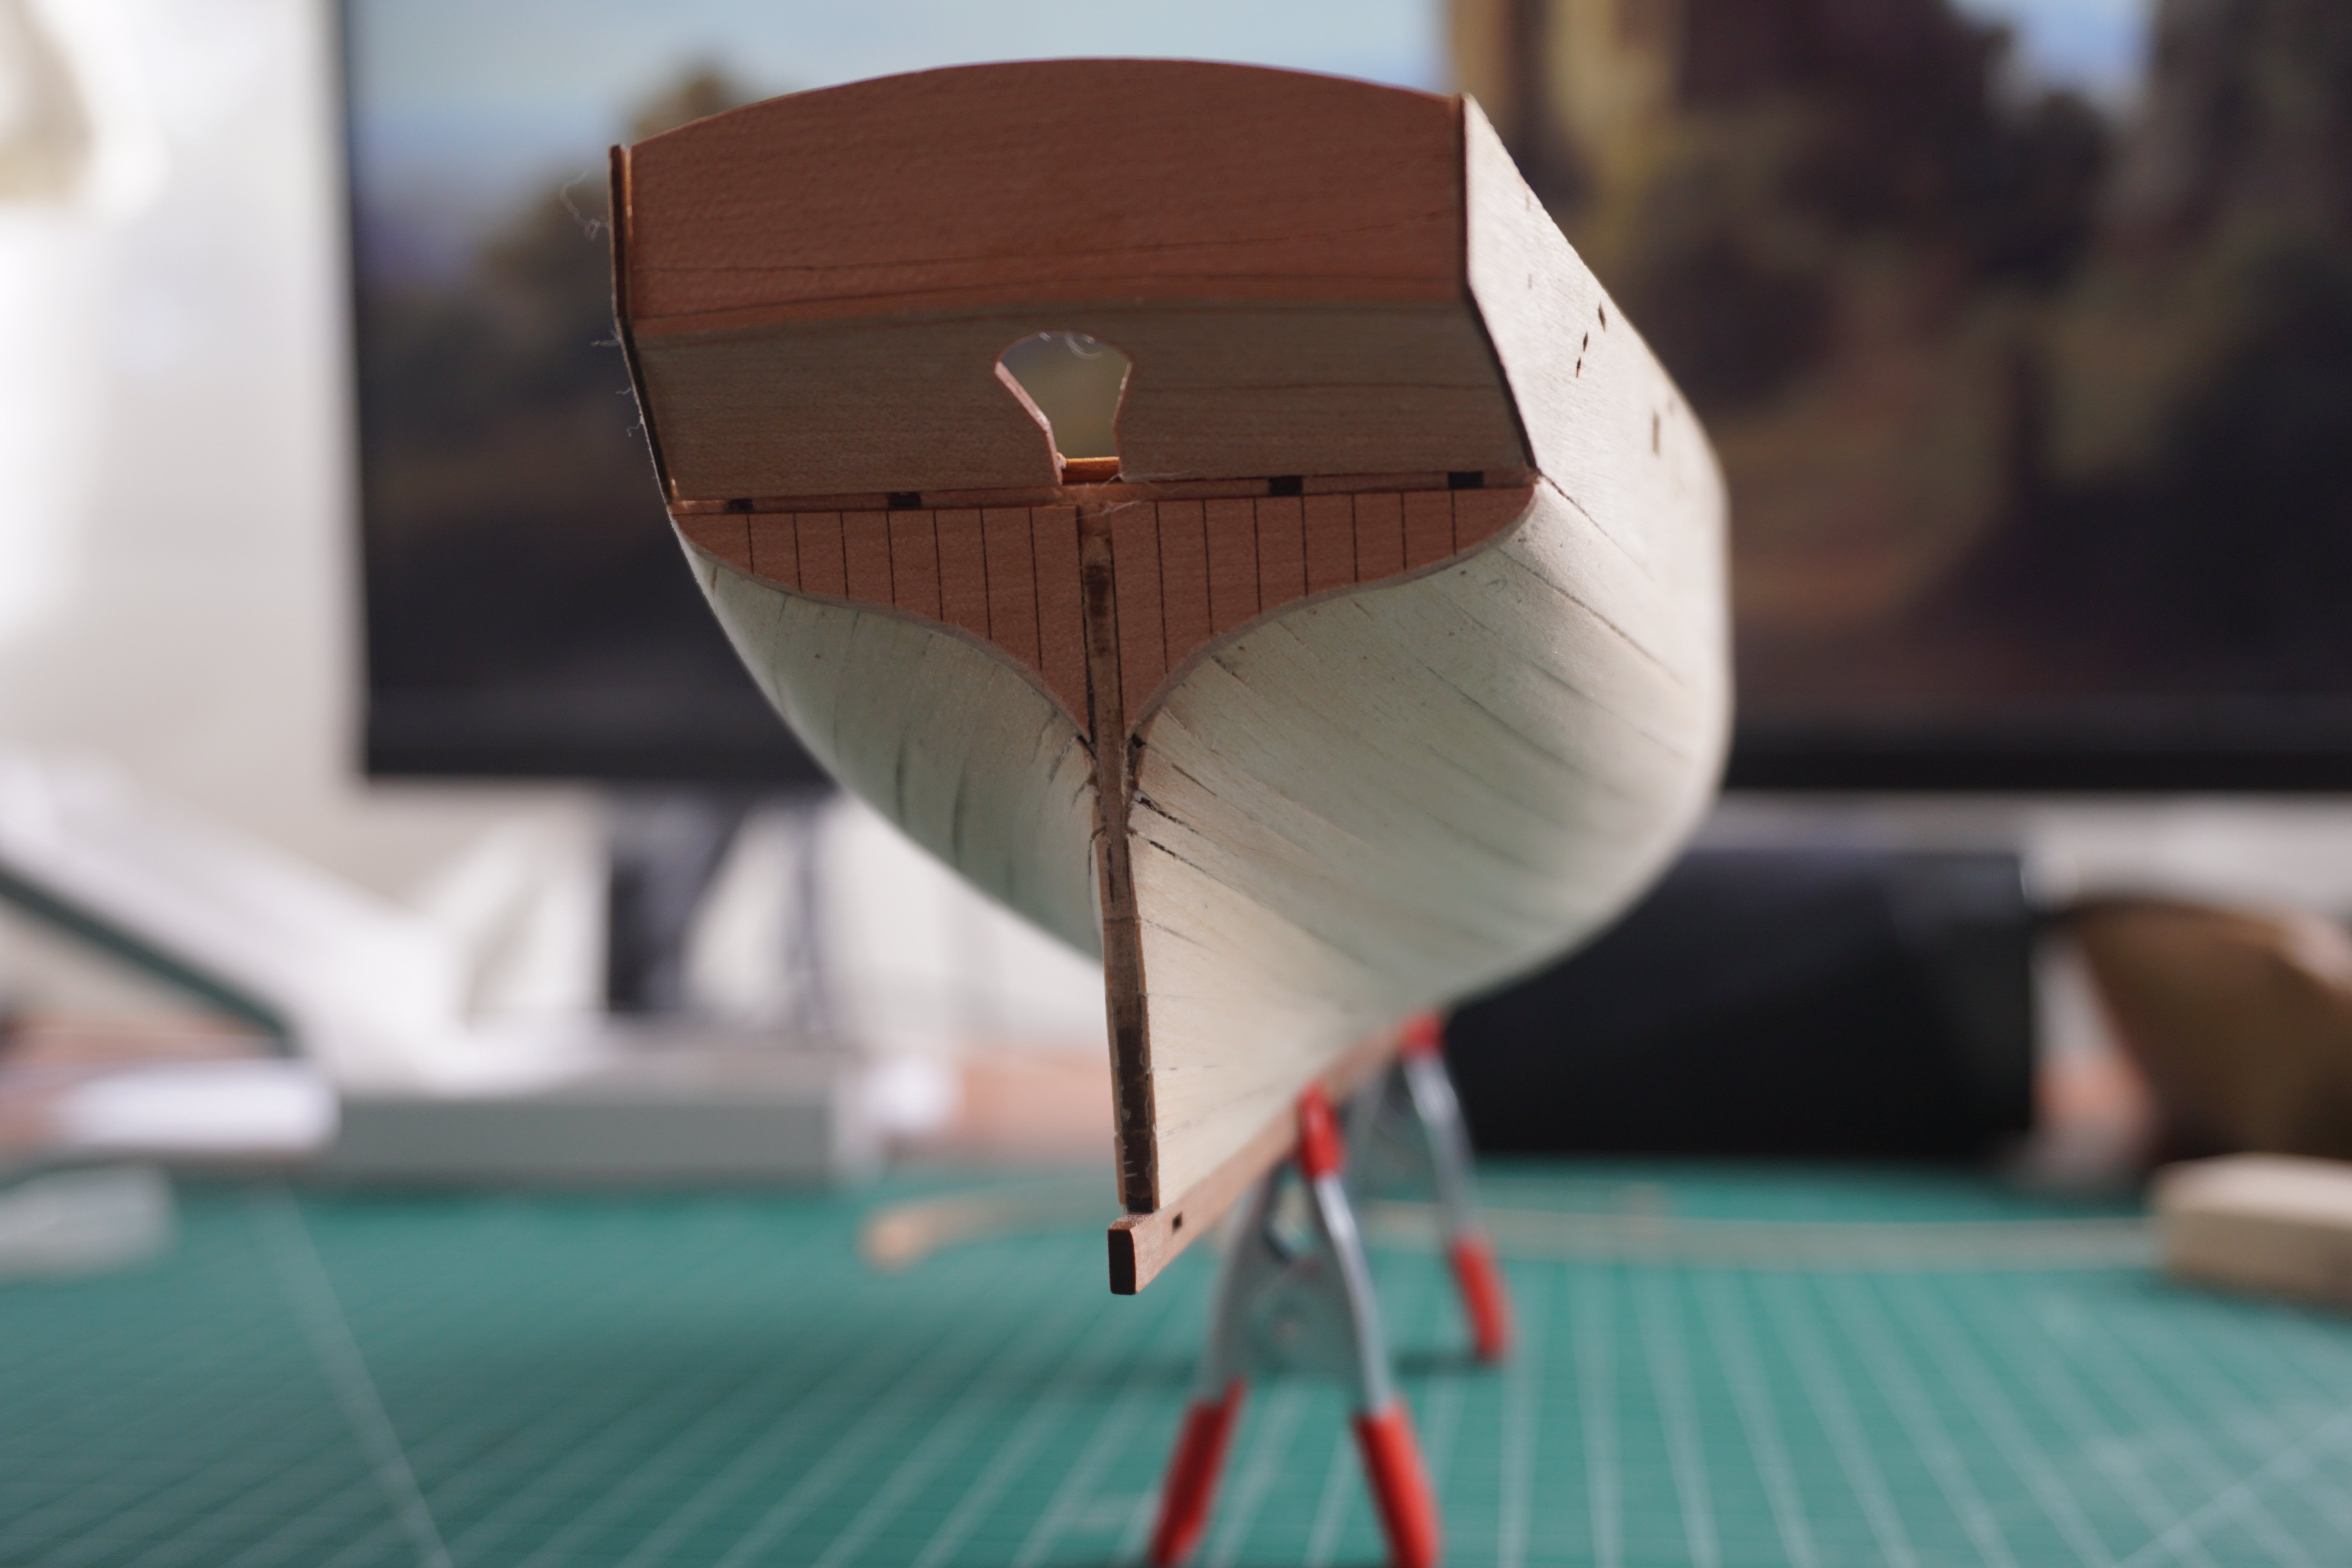
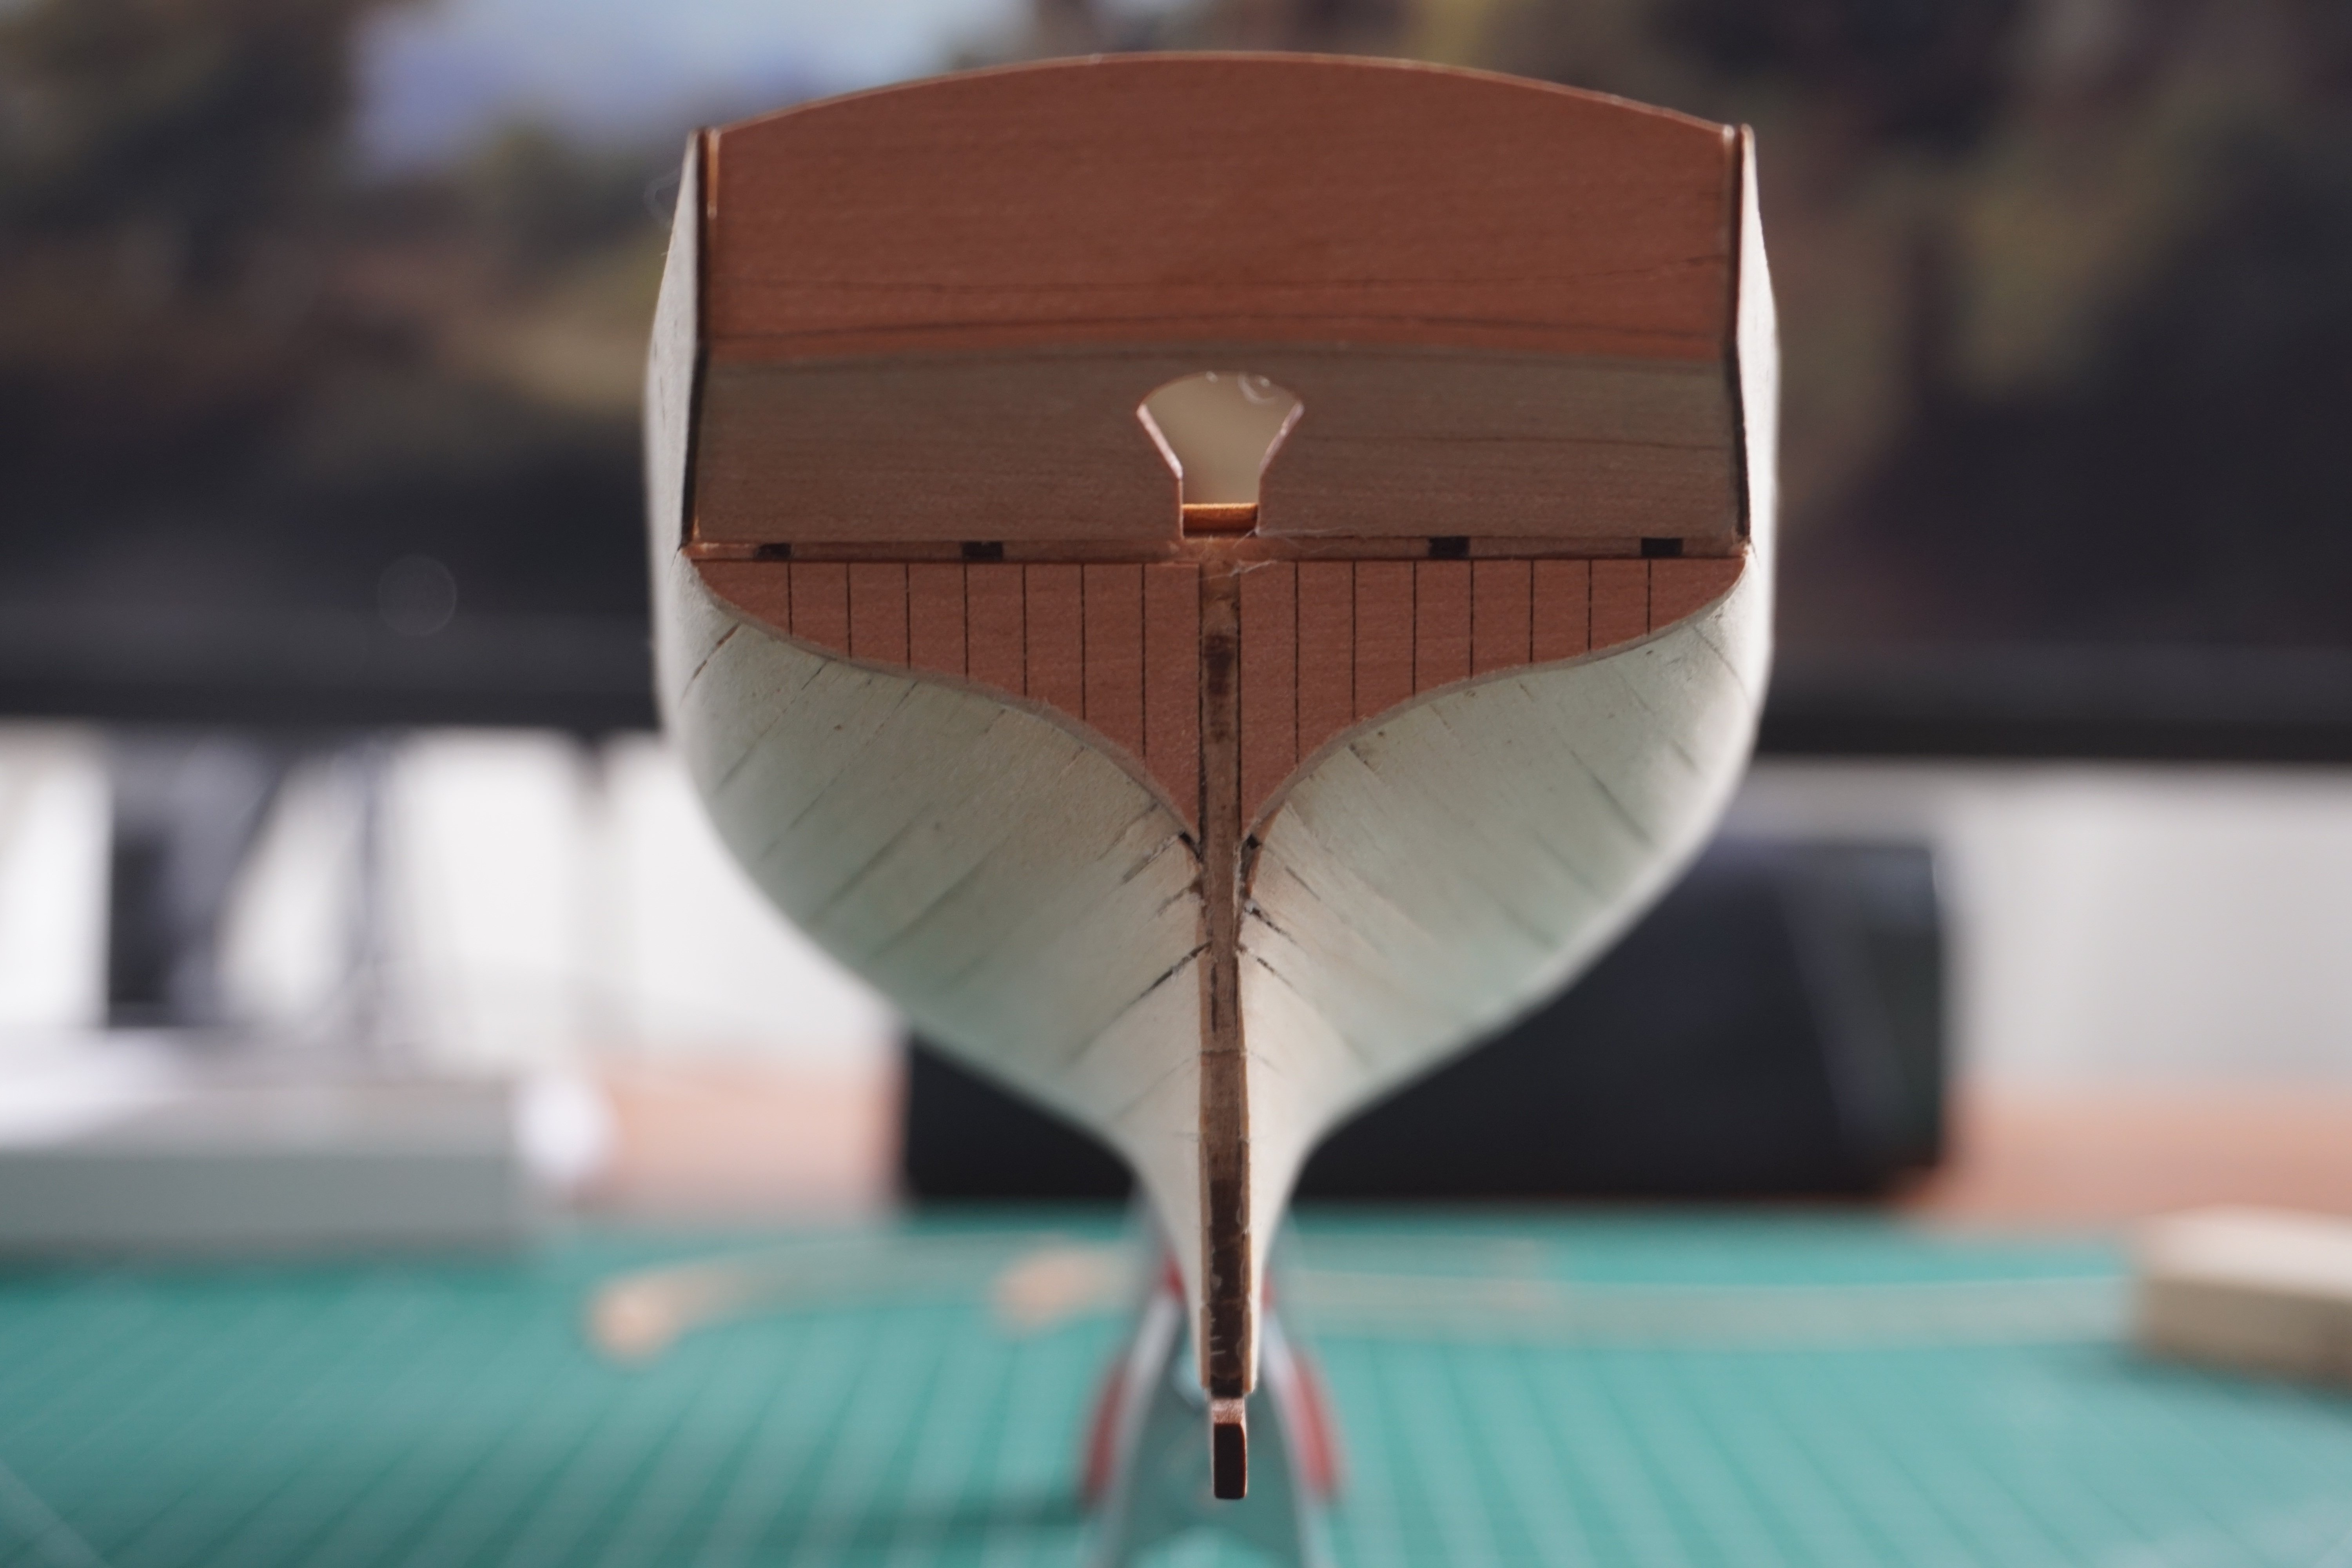
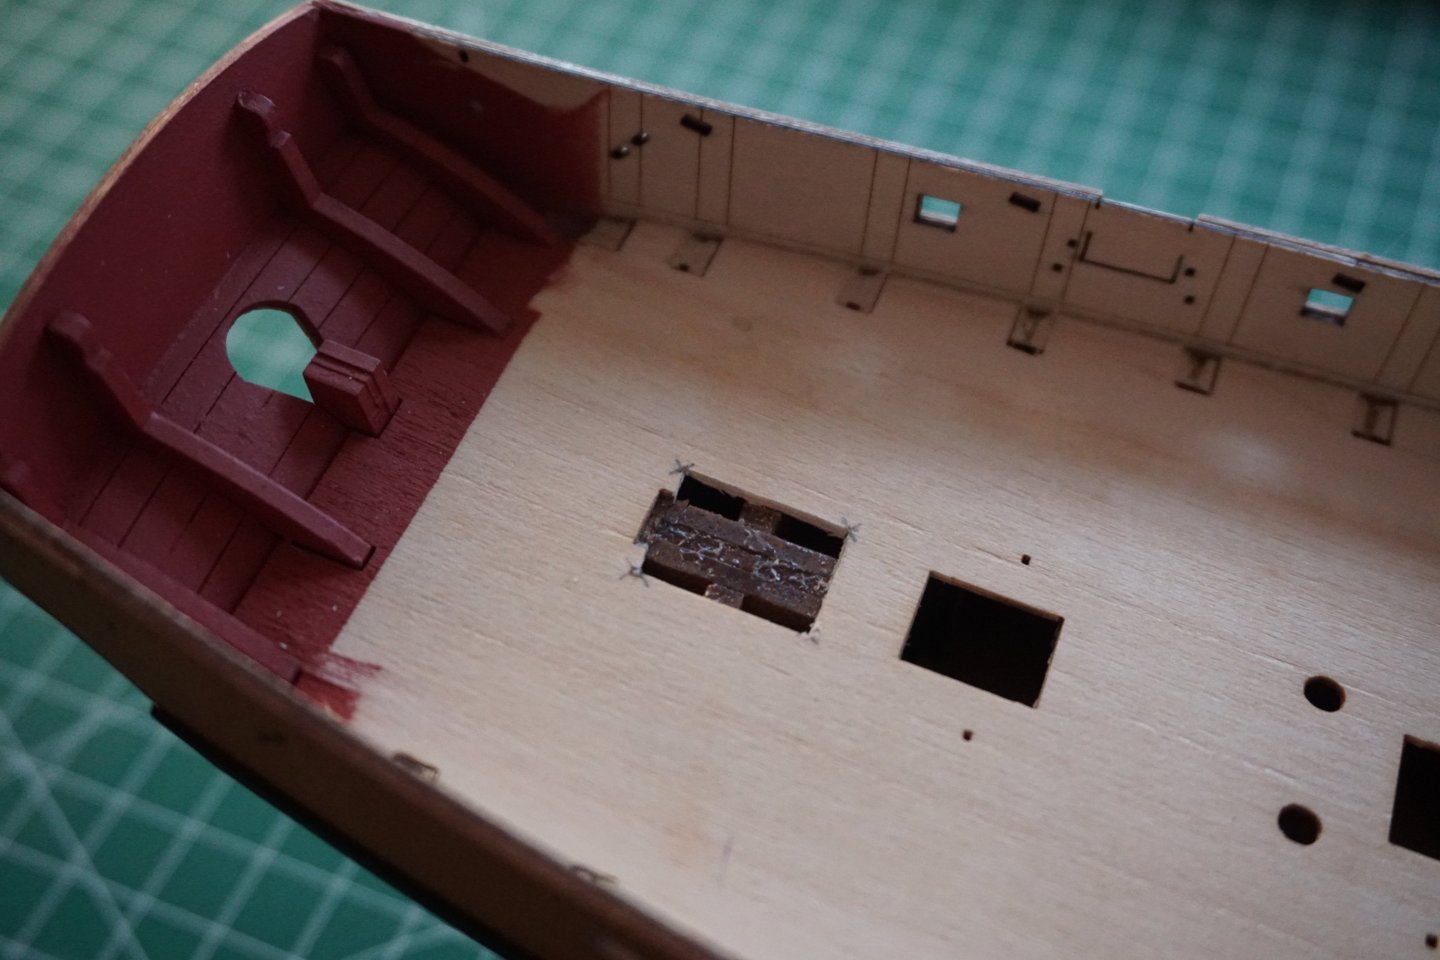
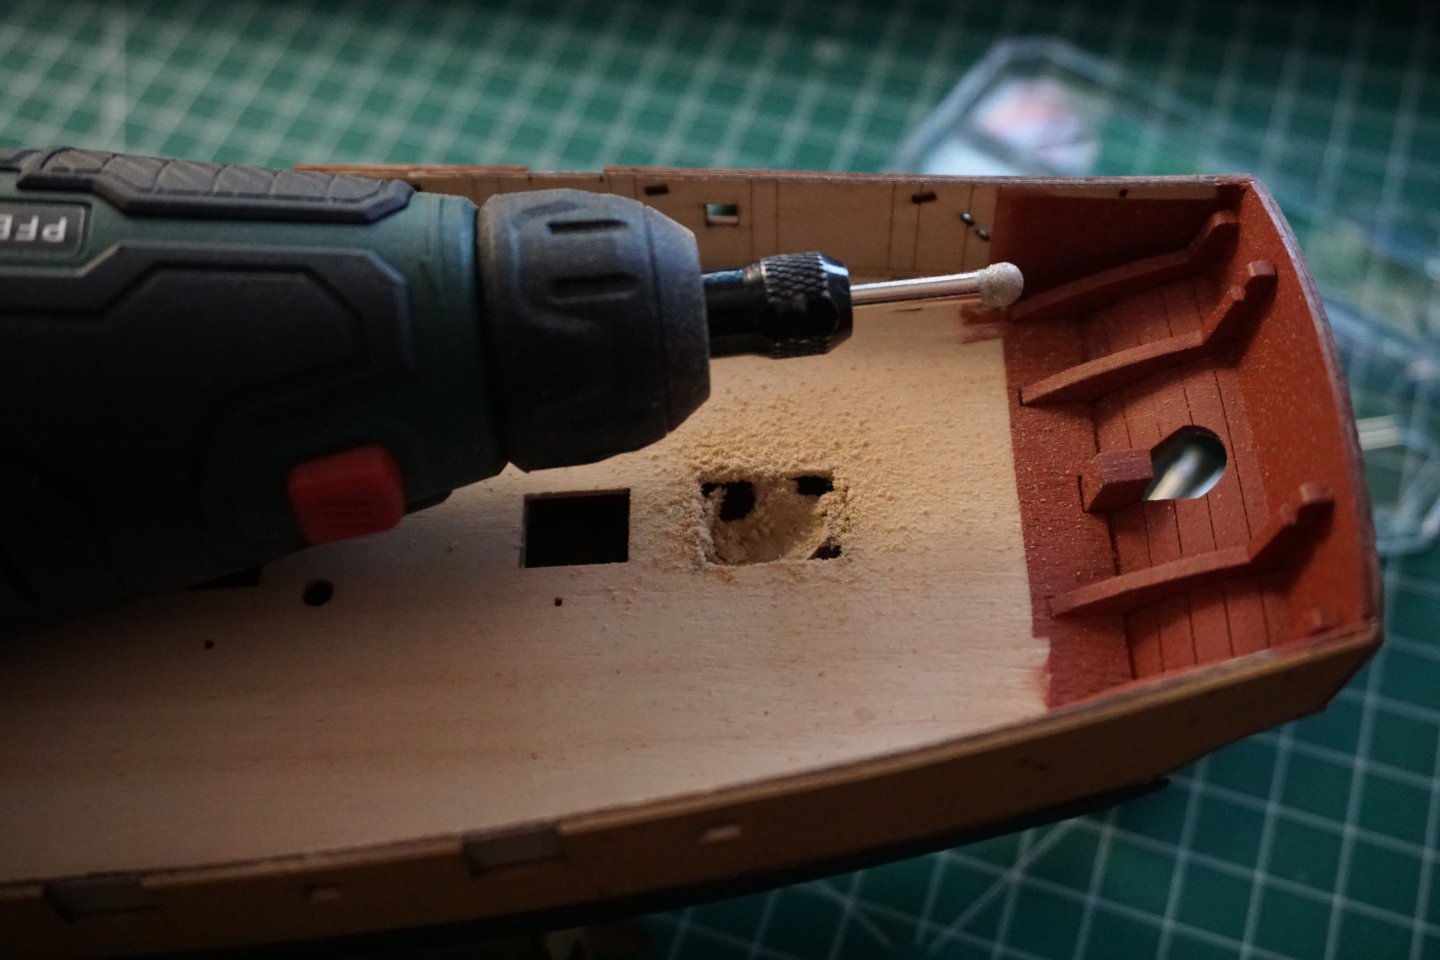
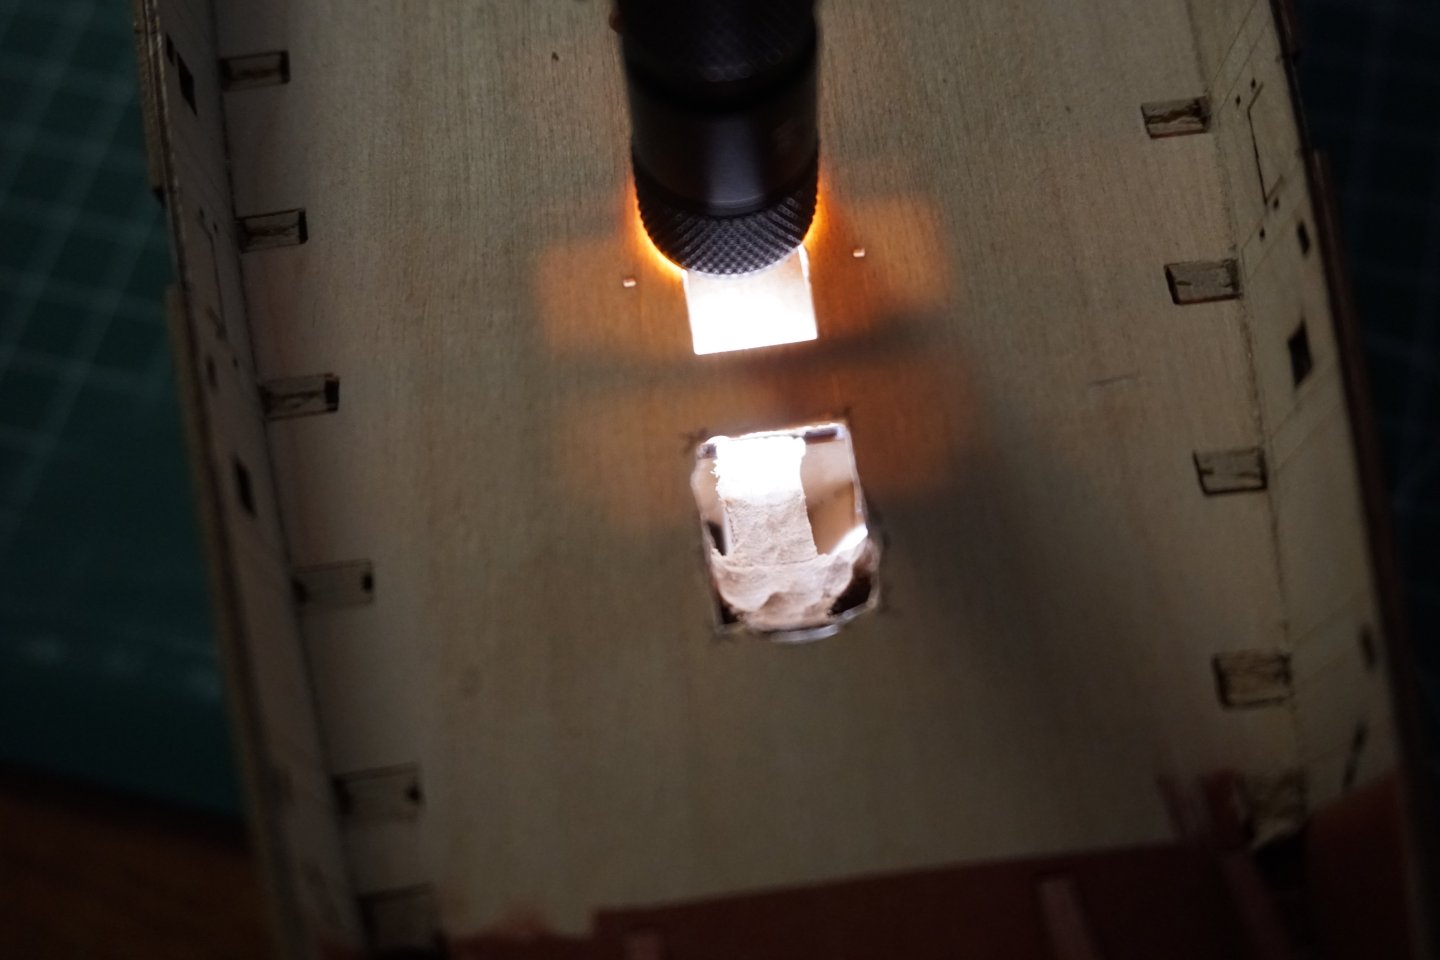
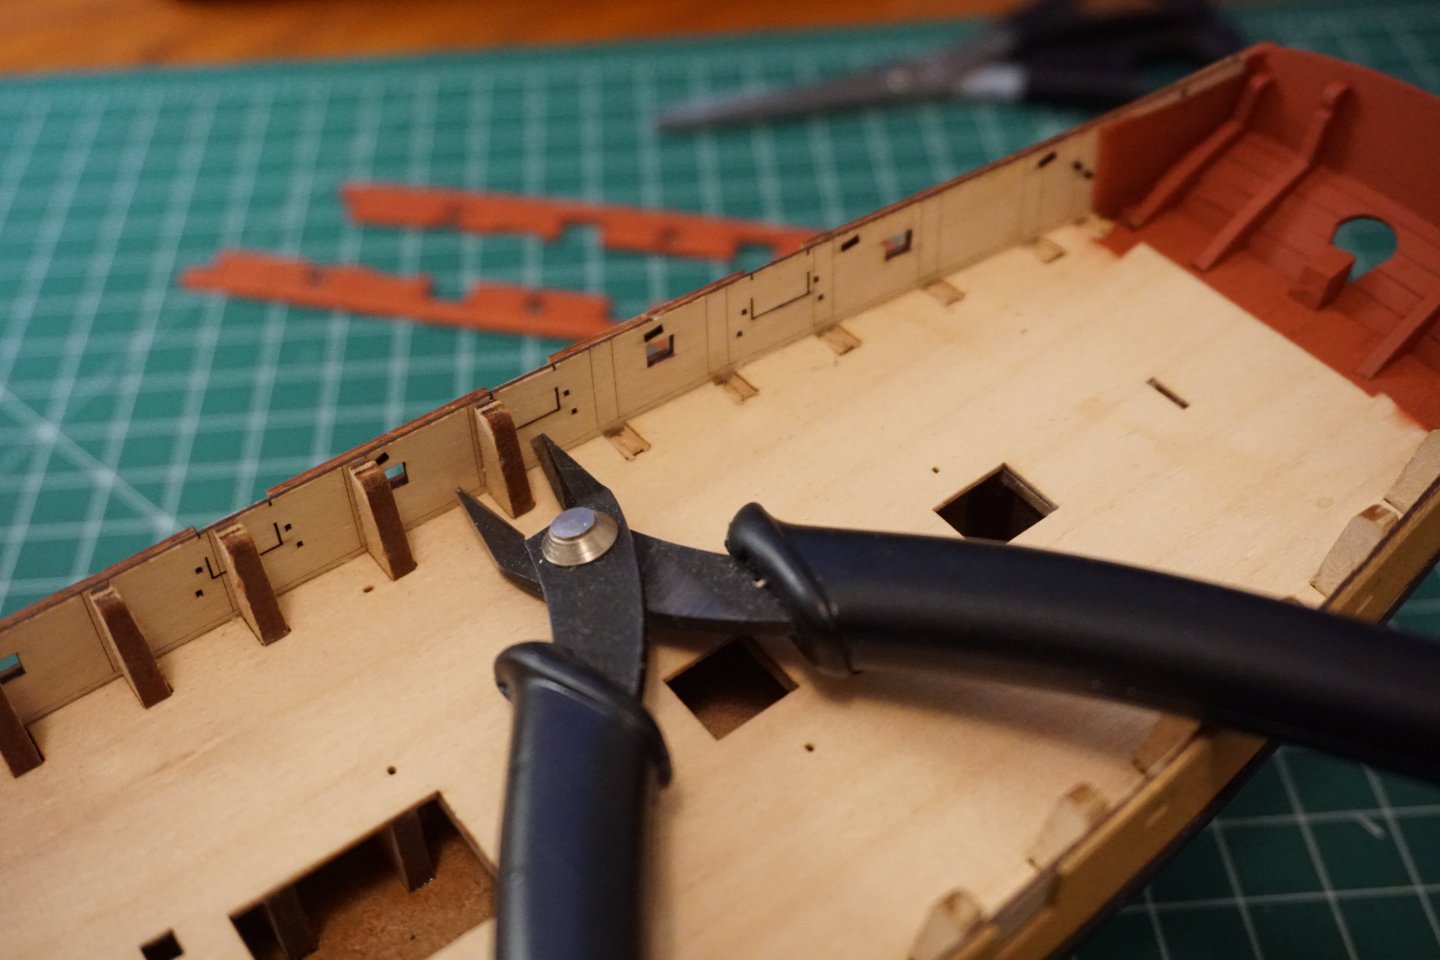
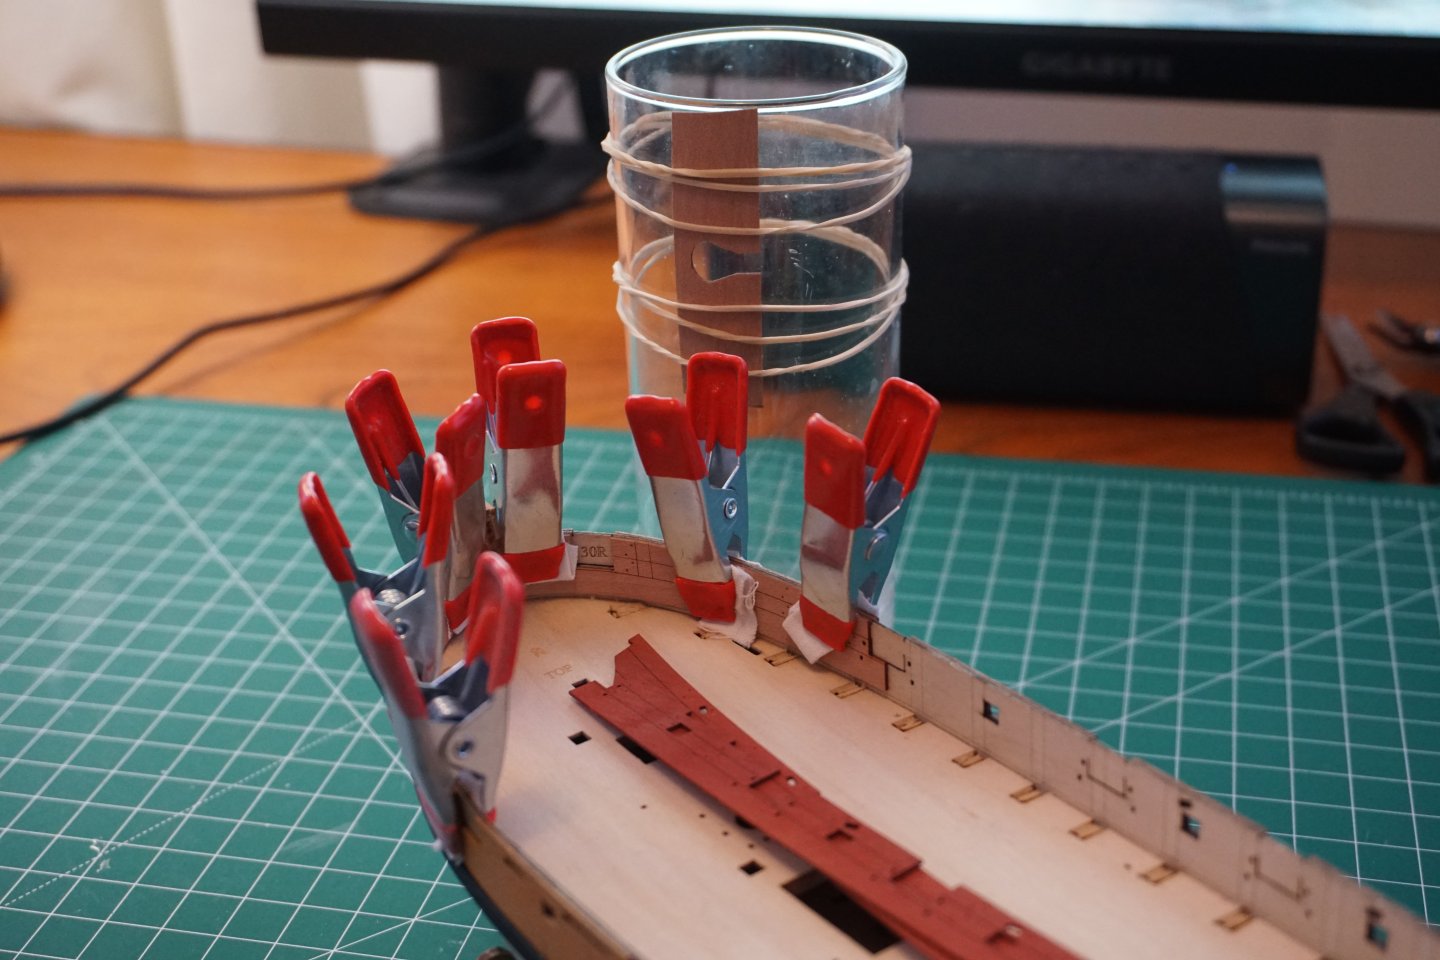
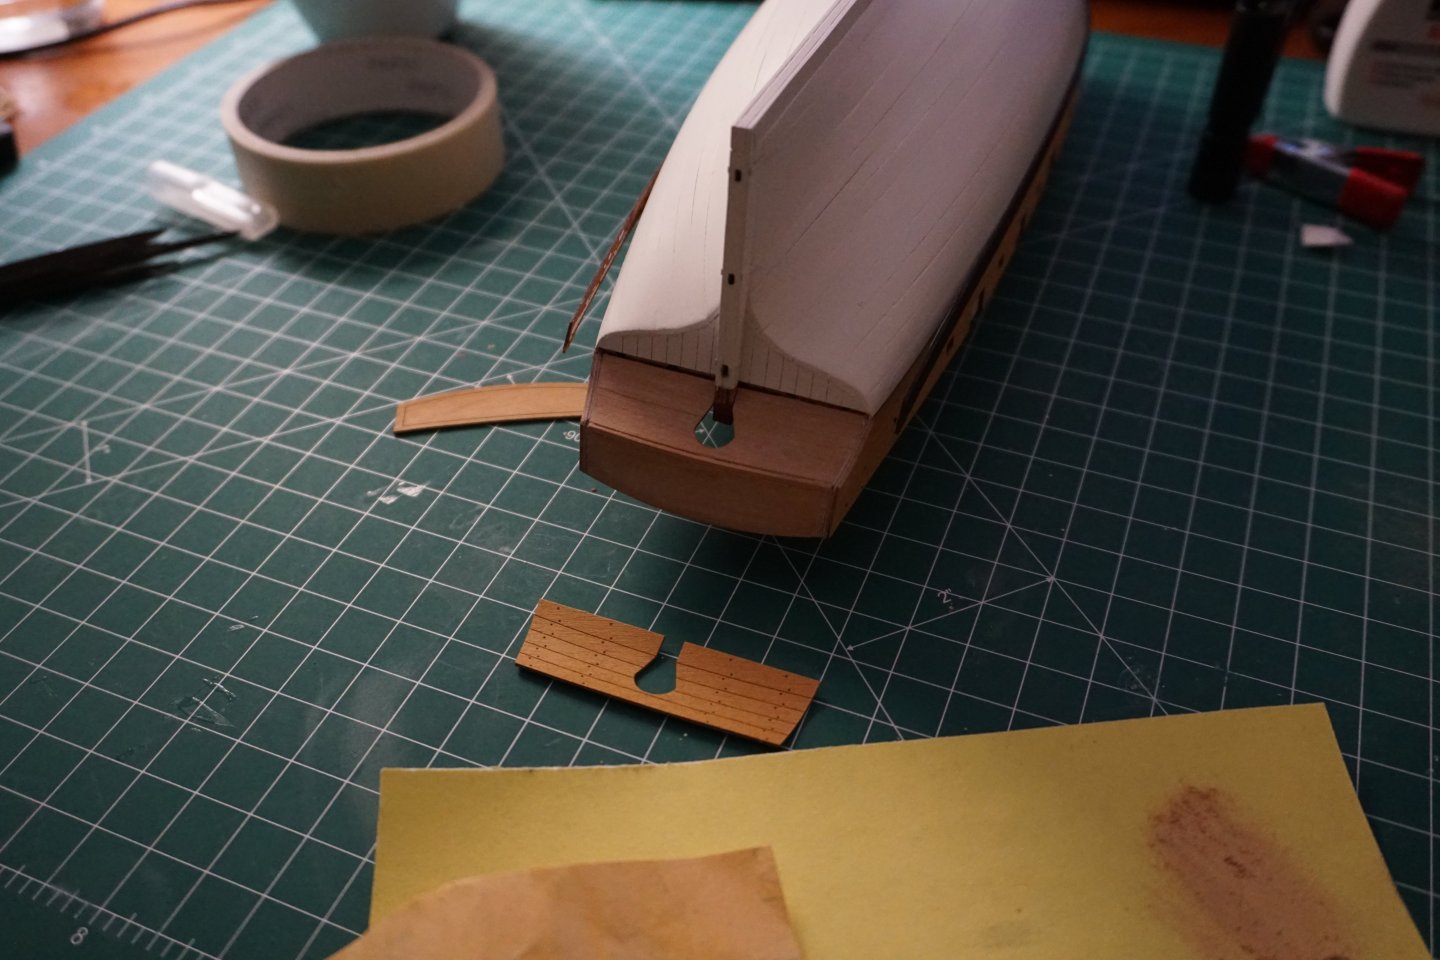
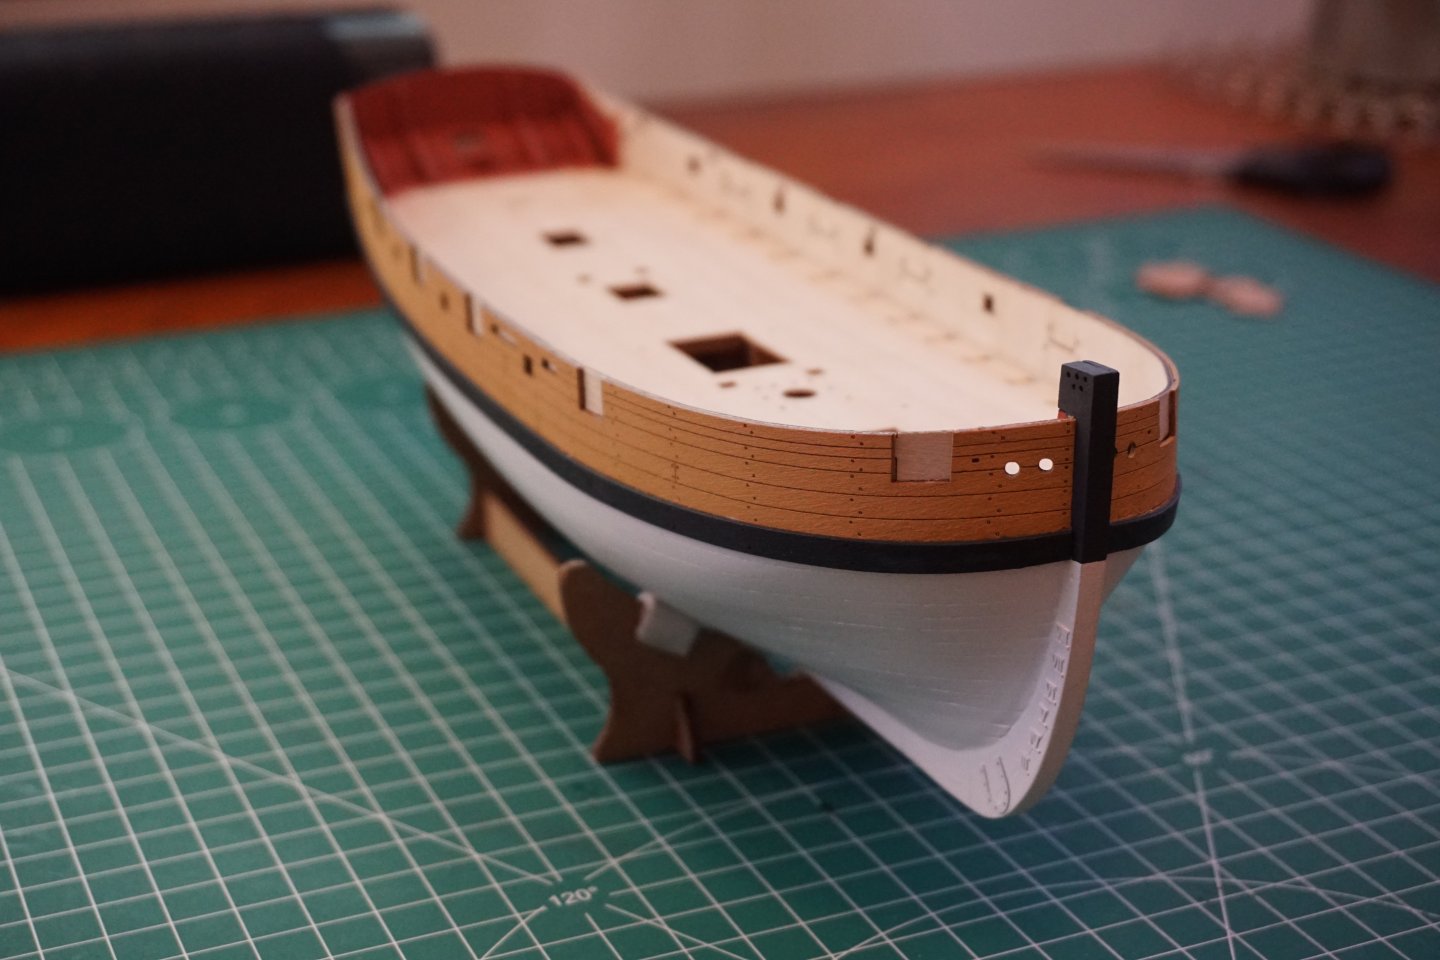
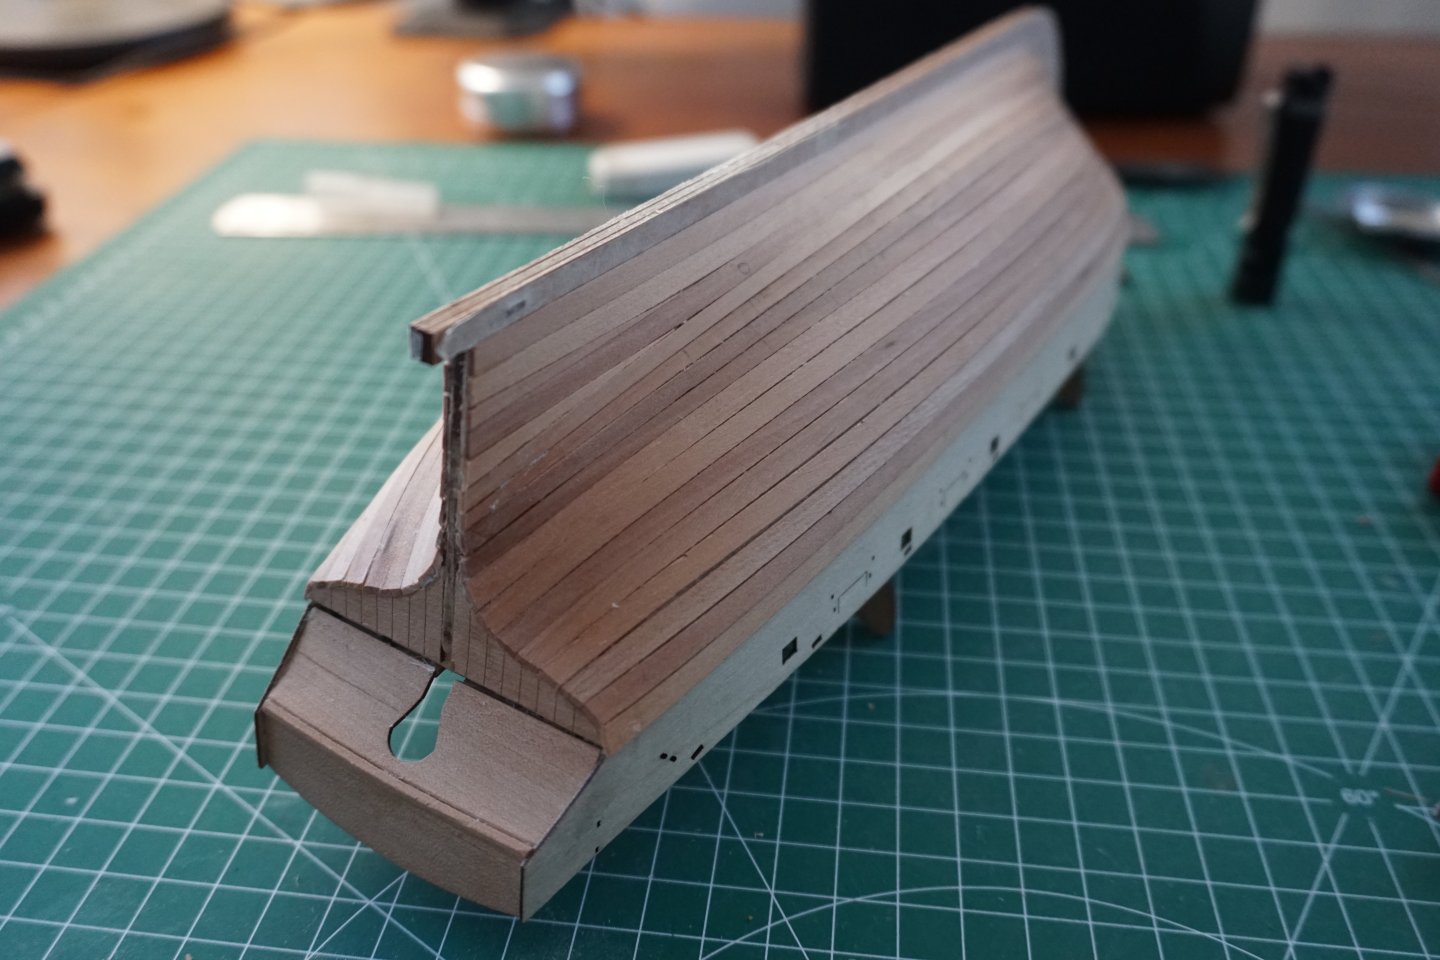
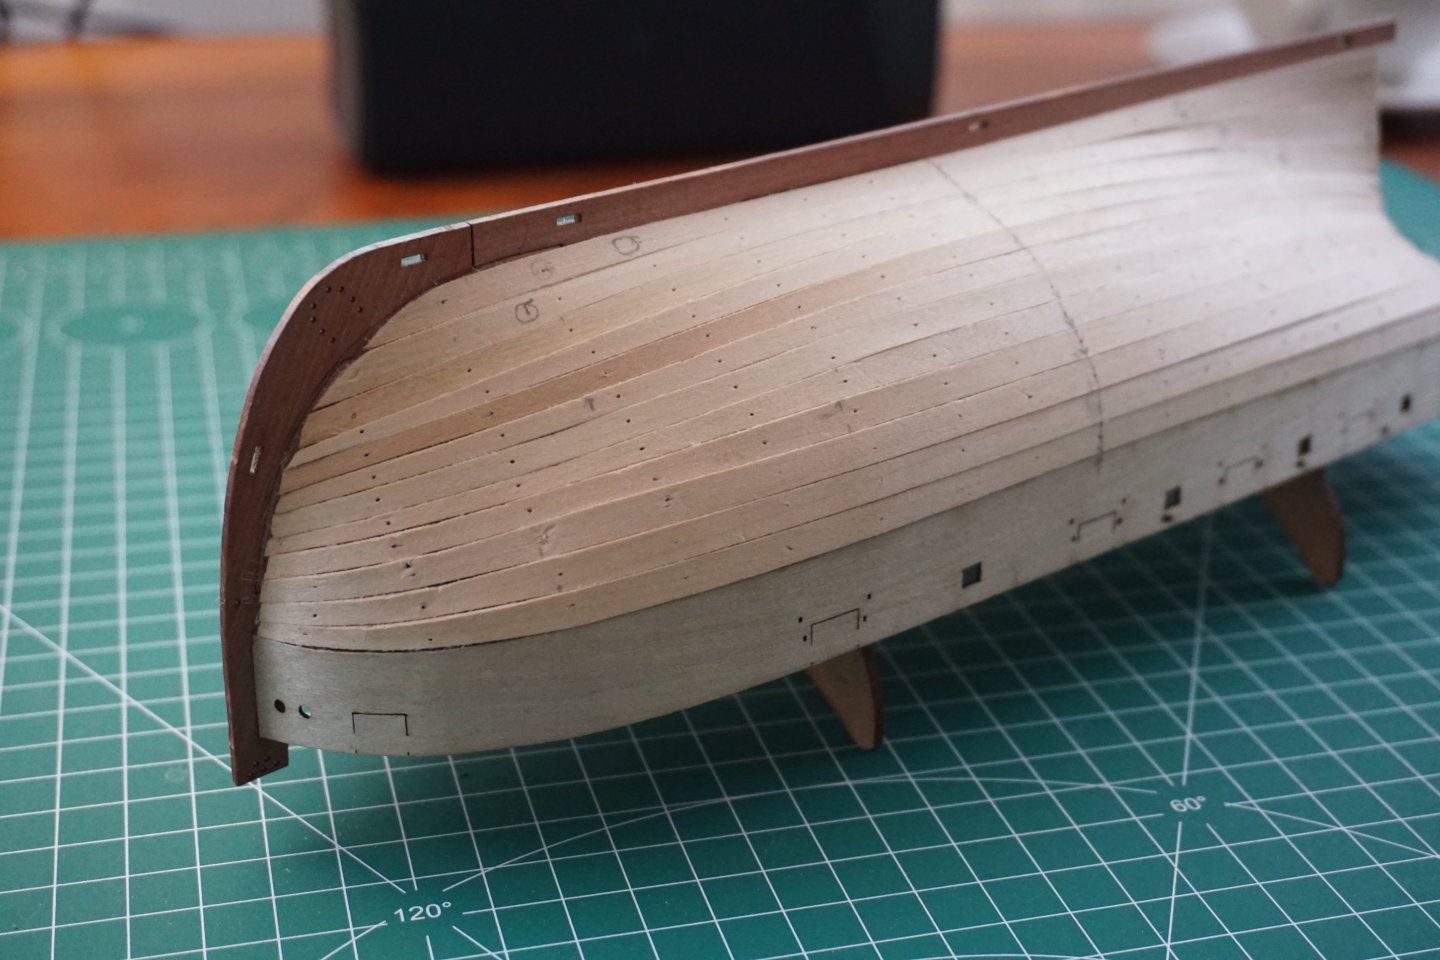
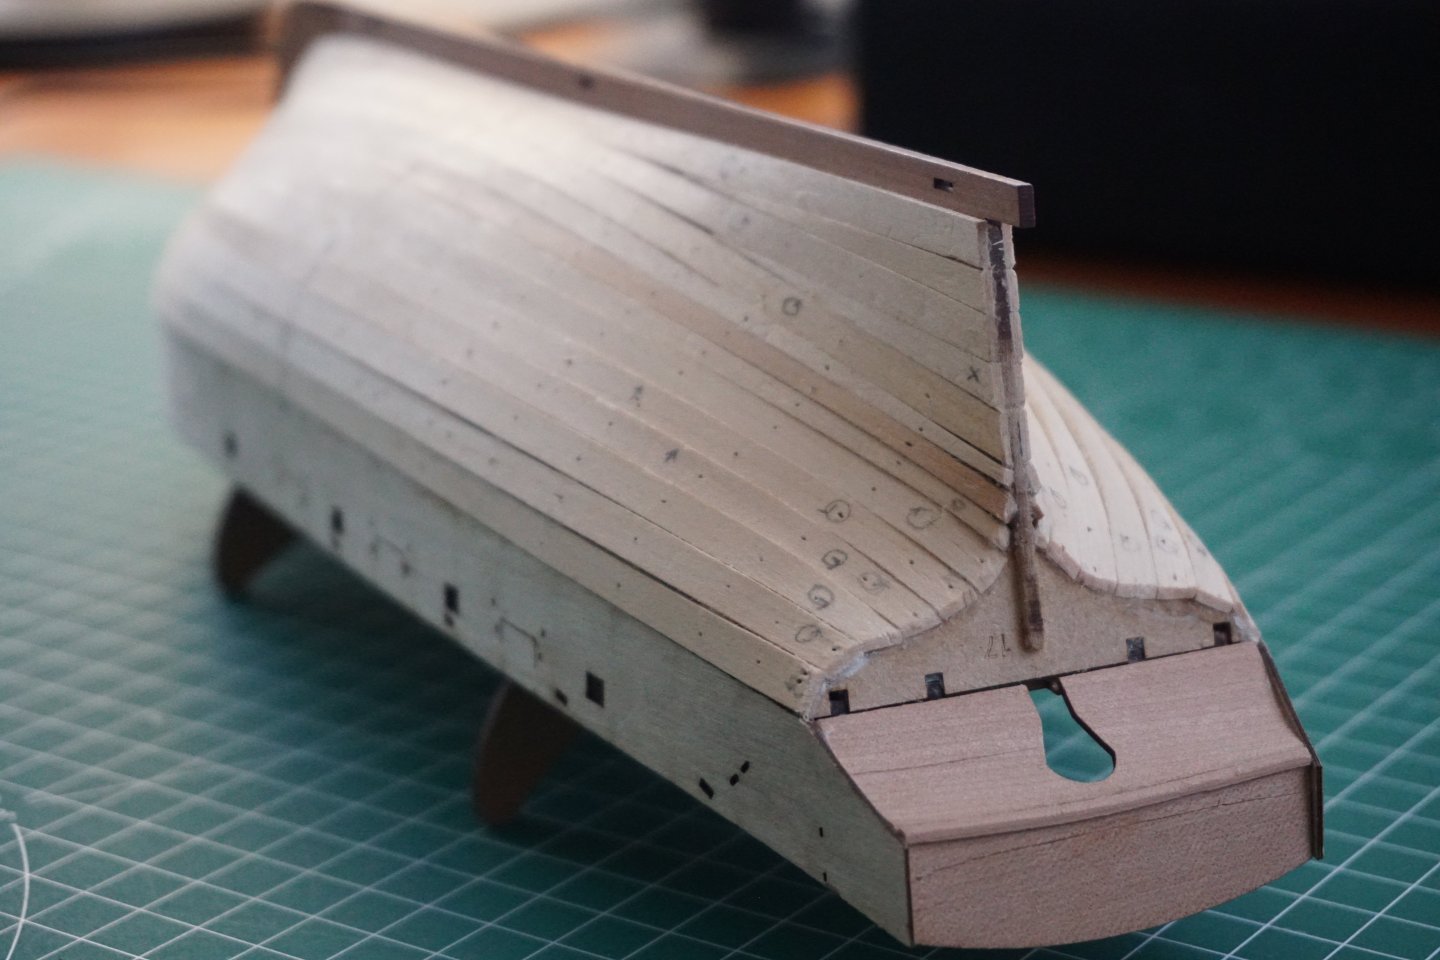
I keep finding small errors in my photos that I hadn't noticed in real life! This time it was the port-side wale that was a little too low. I re-attached the entire thing and it's better now. Getting the wales on properly was a struggle for me, and I'd recommend shaping them with steam until they're a perfect fit. I only bent mine in one direction before putting the paint on. That's probably deep enough. I could have just drilled down, but I opened the front as well, so that some light from the LEDs might shine into the companionway. I'll paint the interior black, if building the open companionway works out.

- 61 replies
-
- 7
-
-
- First build
- Cutter
- (and 2 more)
-
Before I glue the deck on, I'd like to explore the possibility of opening the companionway, as it could be a fun little project. Maybe the doors only, or the roof as well. There seems to be a lot of wood underneath it, but maybe that could be removed with Dremel engraving bits to make room for a ladder.

- 61 replies
-
- 7
-
-
- First build
- Cutter
- (and 2 more)
-
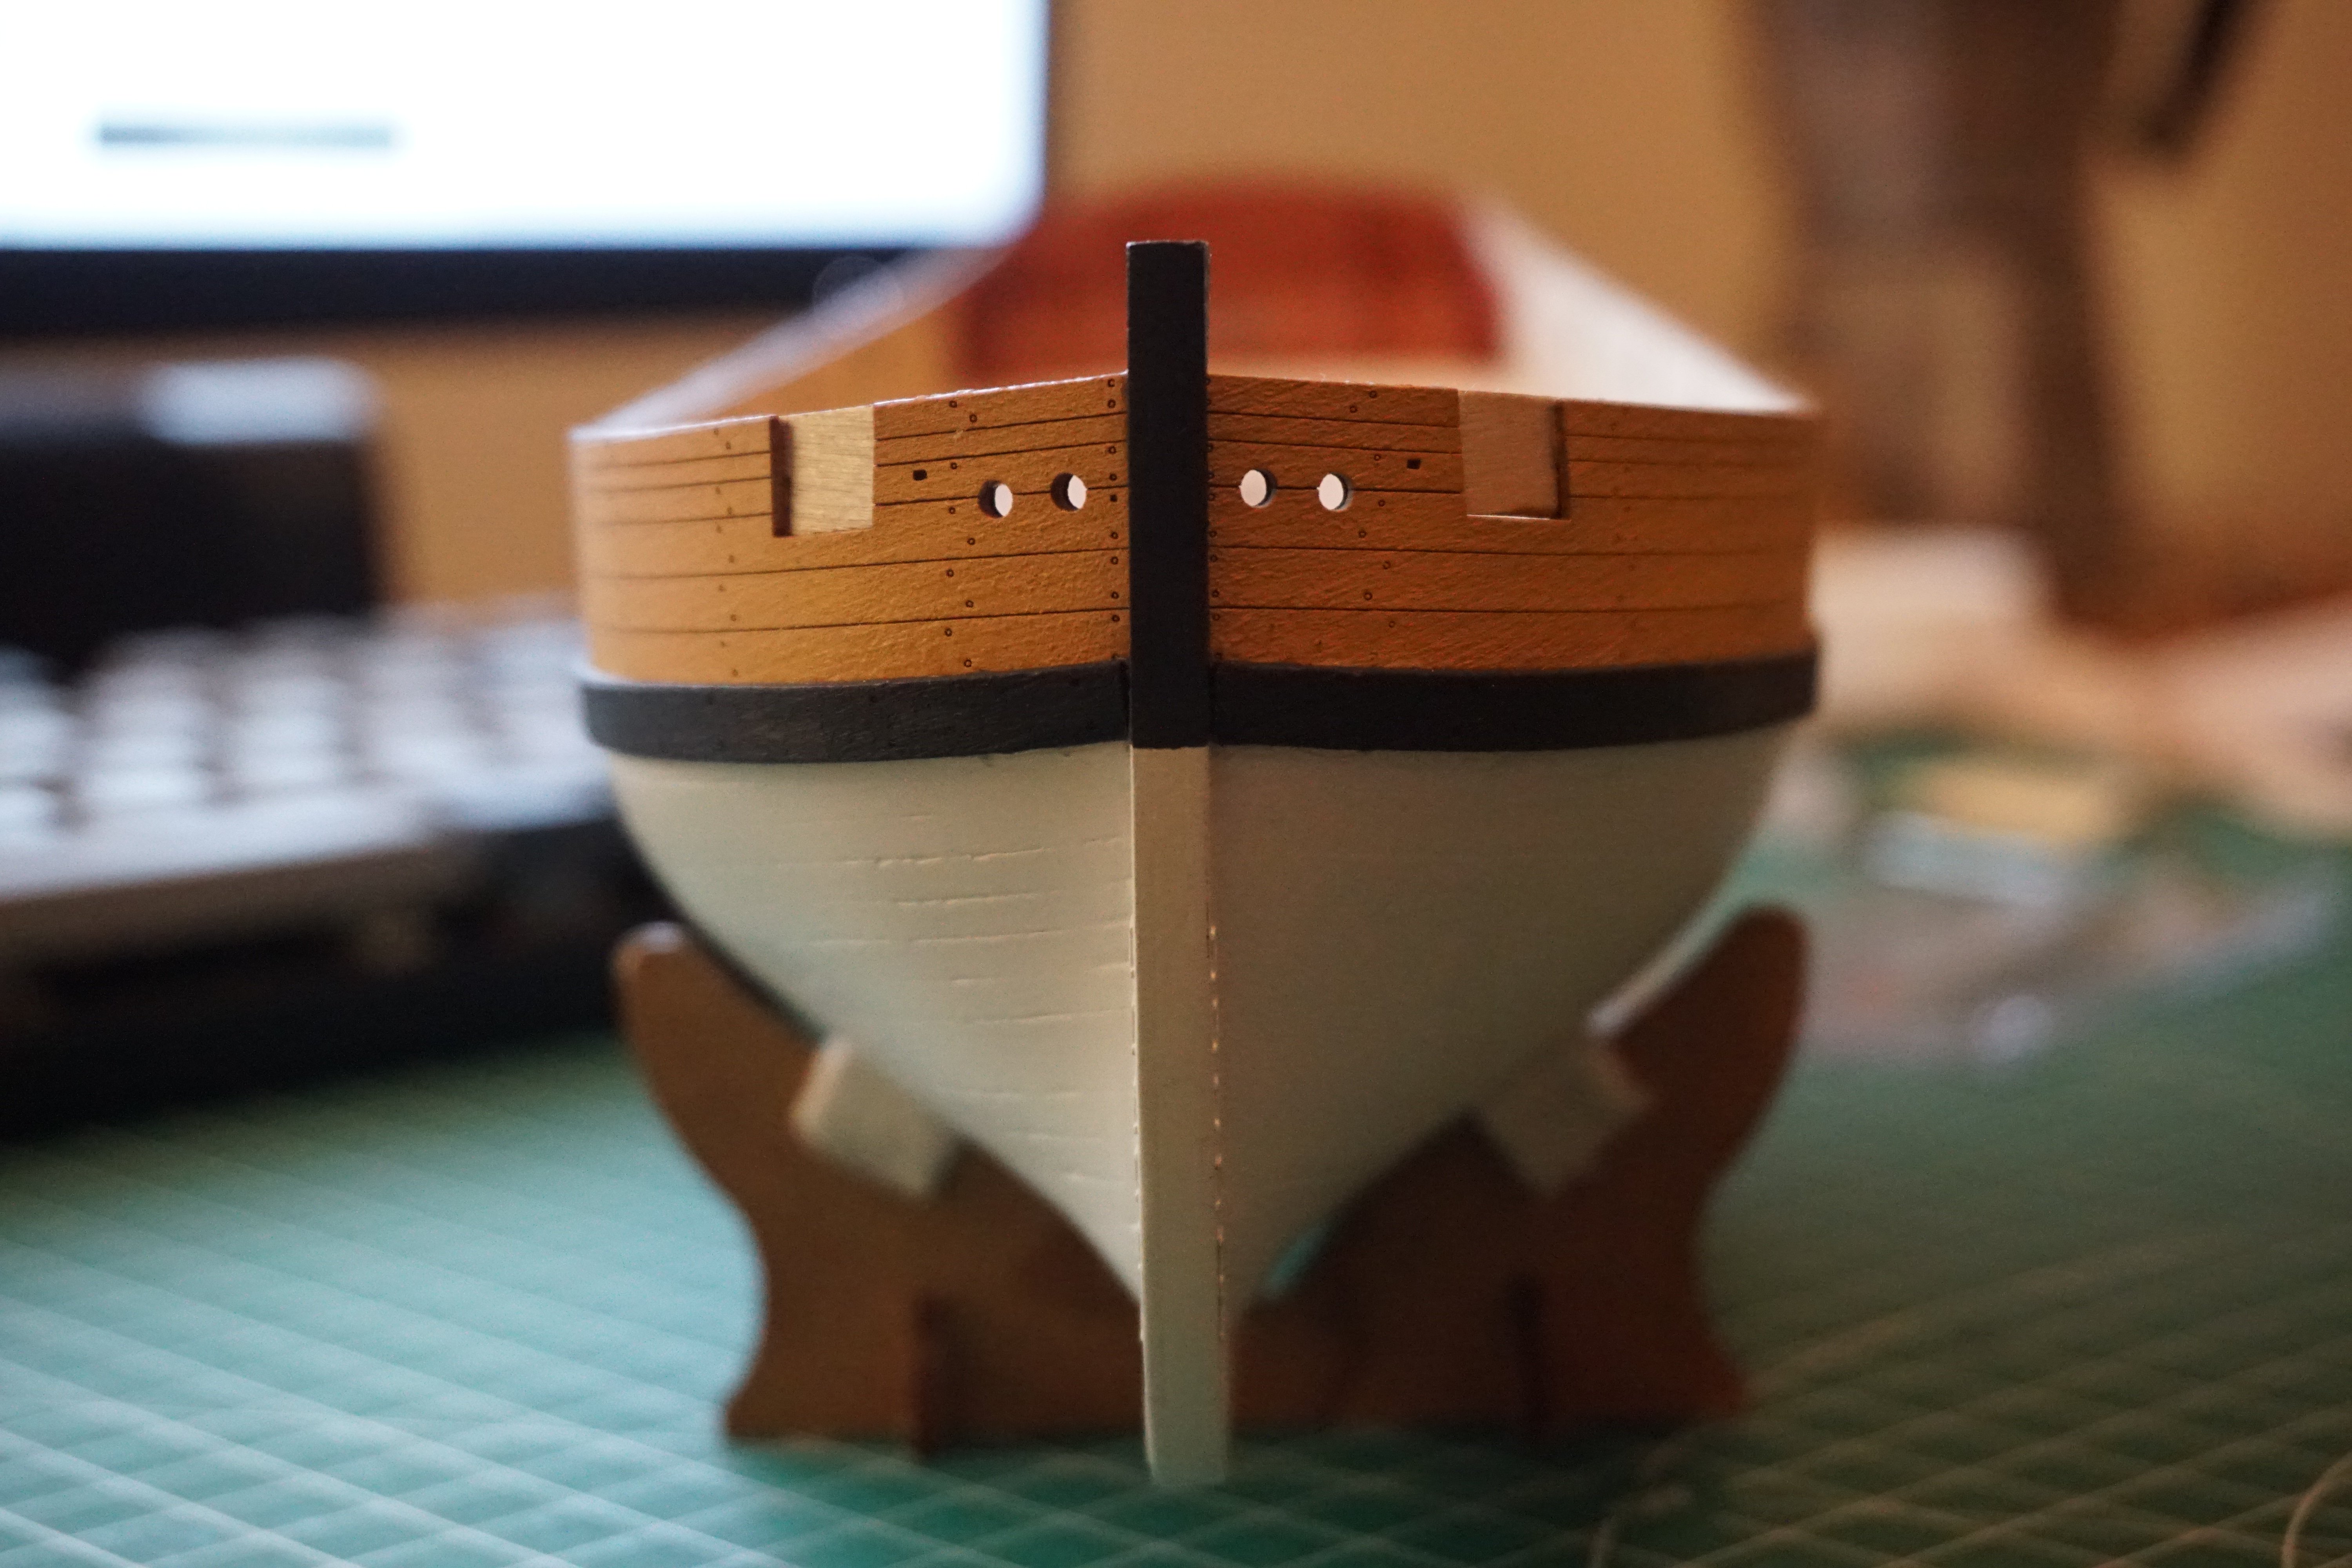
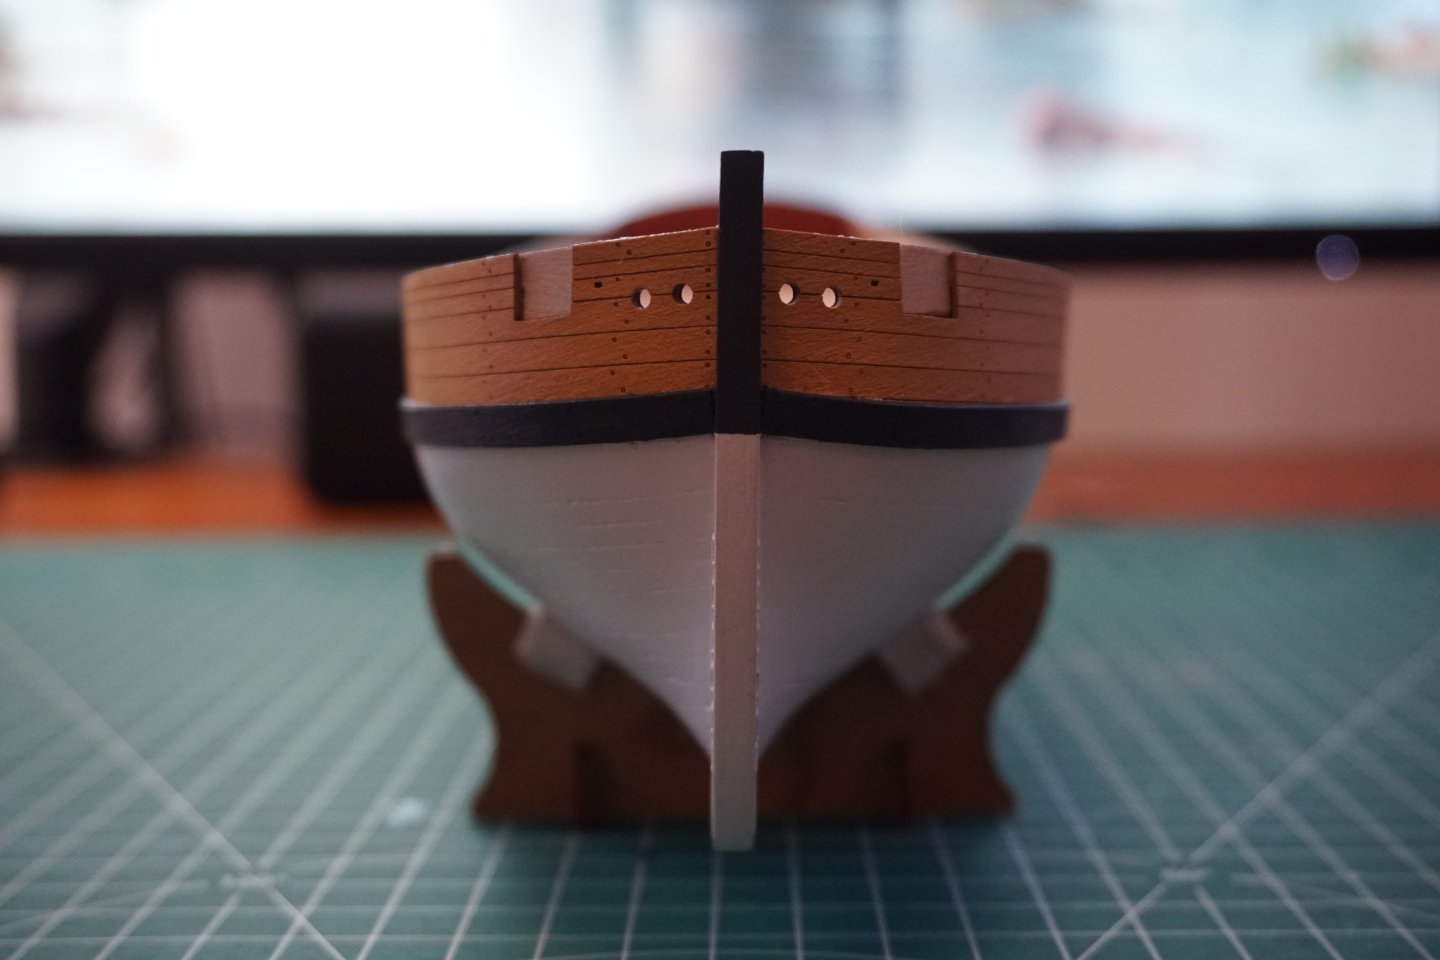
I'm finally back to modeling. The yellow ochre turned out to be a little darker than I'd expected, but I think that it still looks great. I deviated from the manual and attached the wales early, but then I realized that they make trimming excess wood from the stern and lower counter very difficult. Luckily I had only used CA, so the ends detached easily. I painted the prow by hand after this contemporary model. The other side is red, but I might change that before I put the bulwarks and spirketting on.


- 61 replies
-
- 6
-
-
- First build
- Cutter
- (and 2 more)
-
50th anniversary of the sinking.
-
It took me an embarrassingly long time to figure it out myself. I too scoured other build logs, but since there was no mention of it, I assumed my PE sheet had a printing error that others didn’t. Should have mentioned about it in my log though. This is how I did it, not sure if 100% correct: Sternpost: PE-26, PE-24, PE-22 Rudder: PE-25, PE-23, PE-21
-
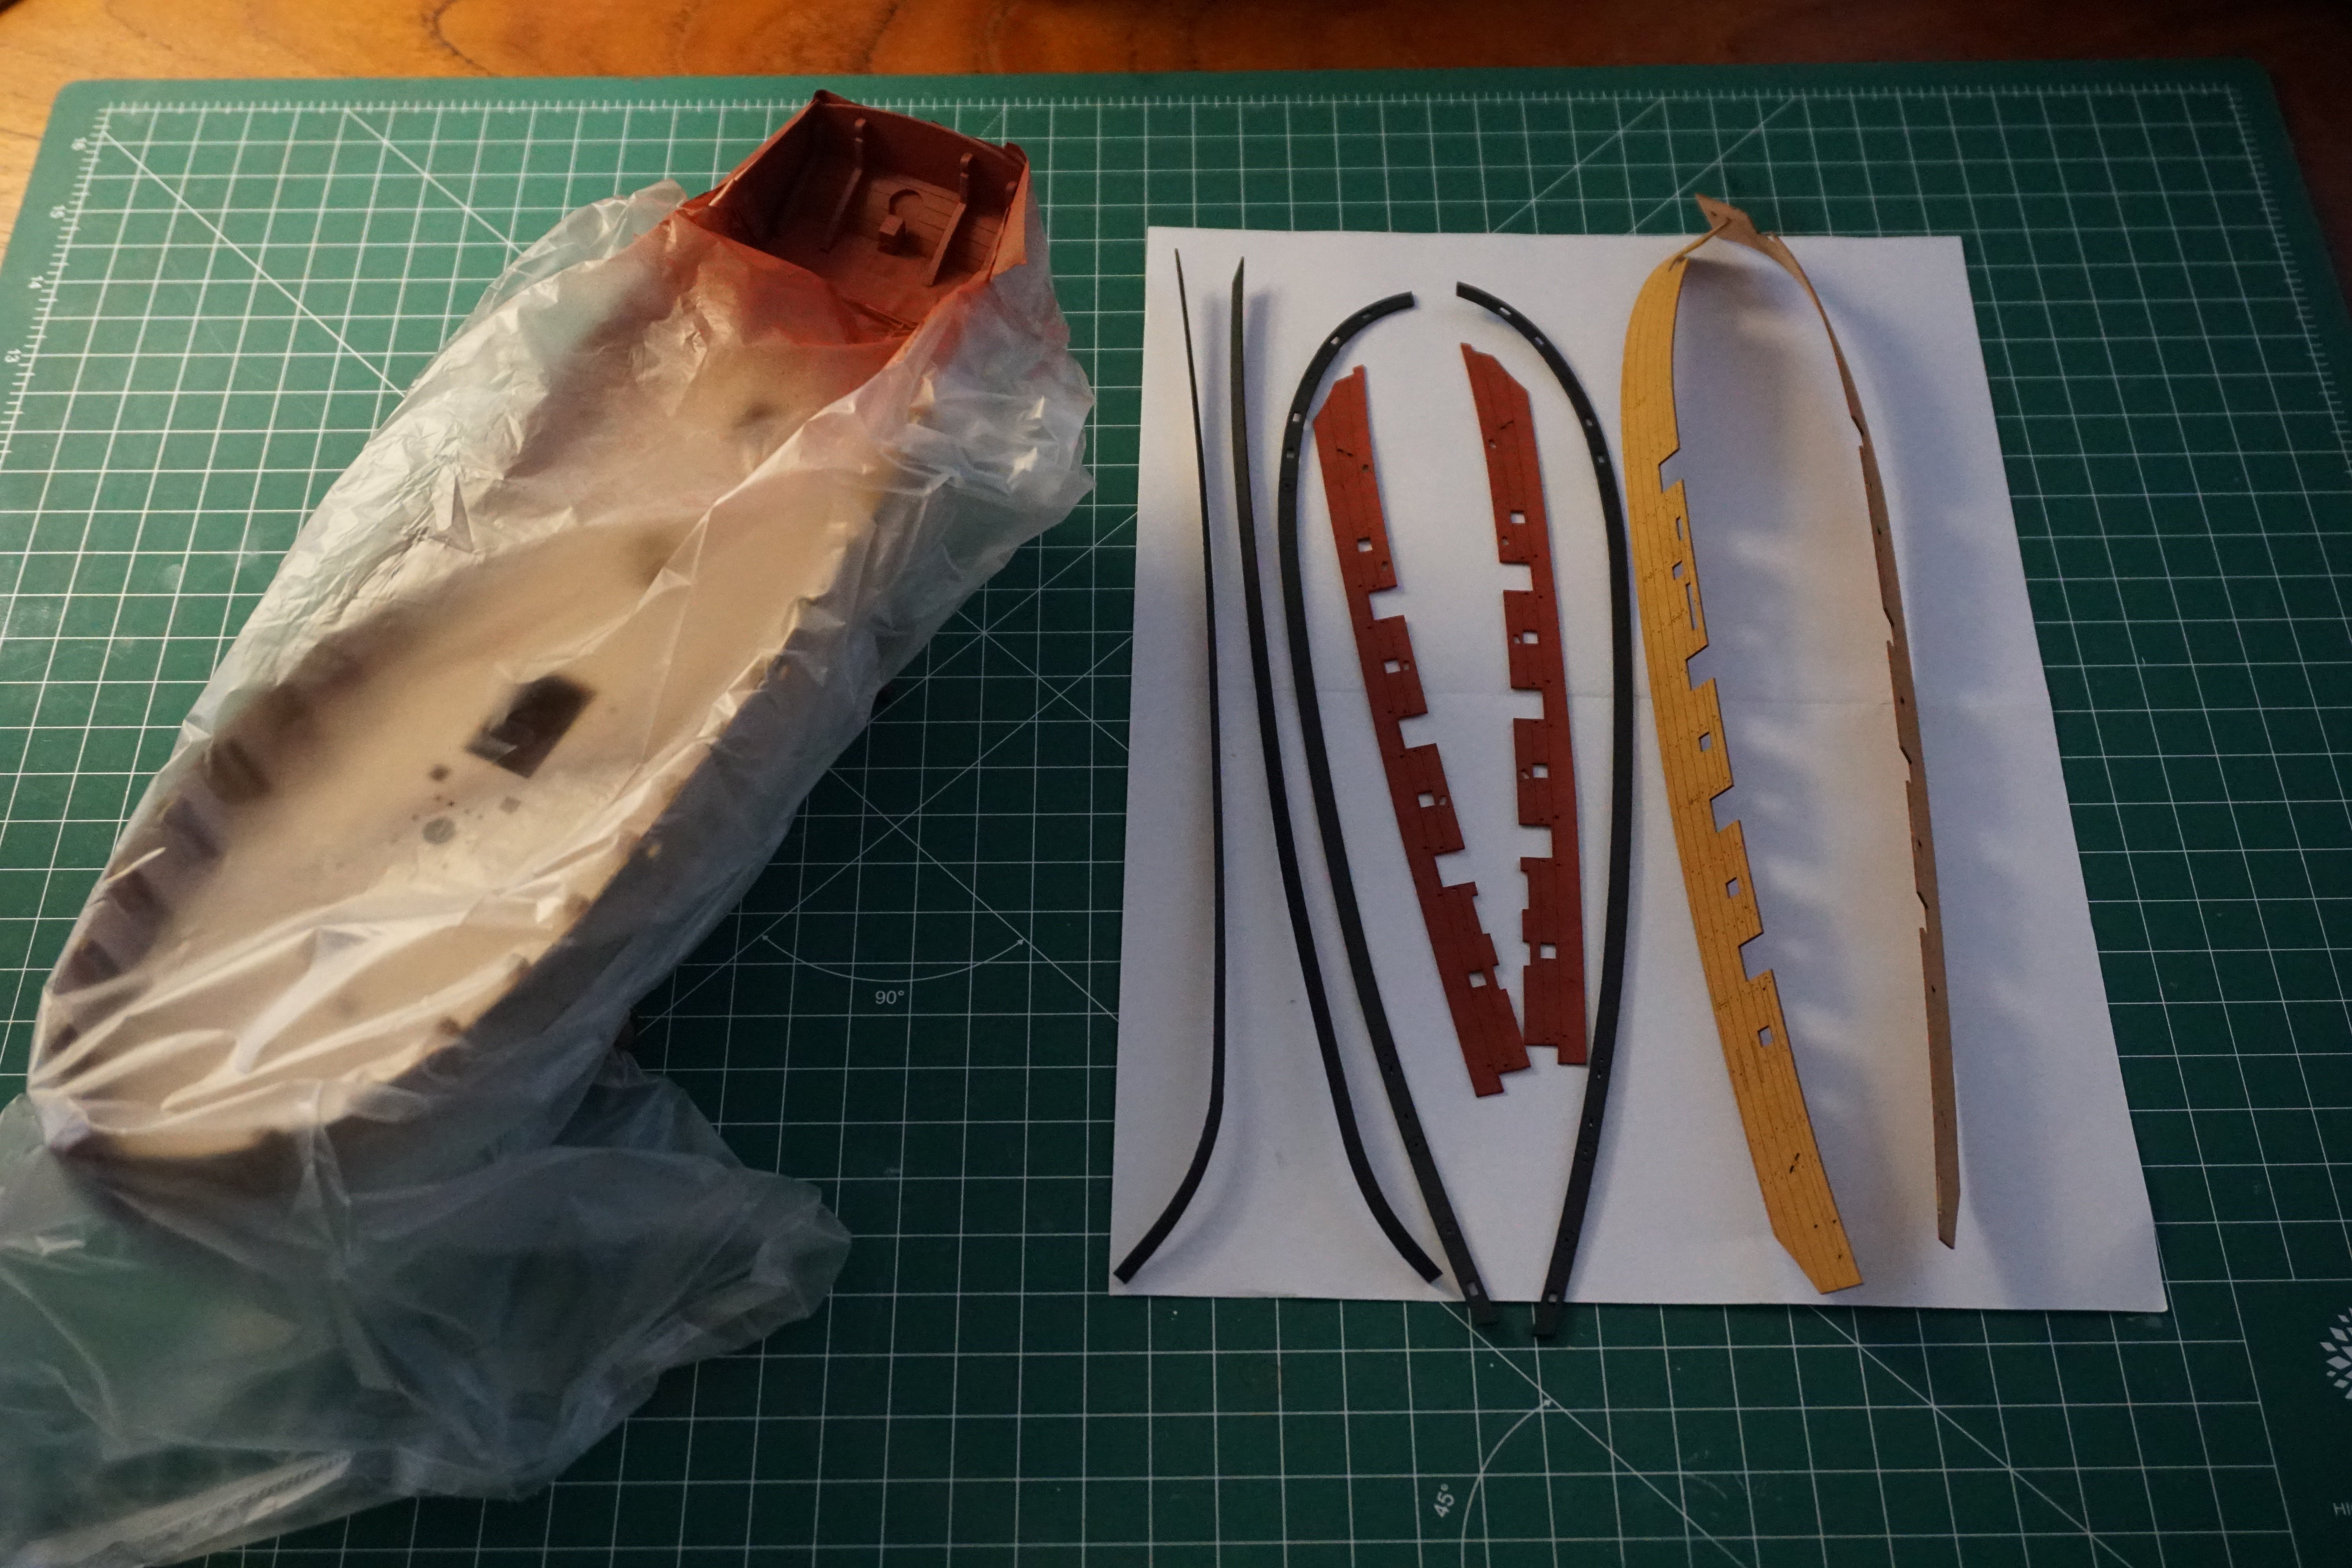
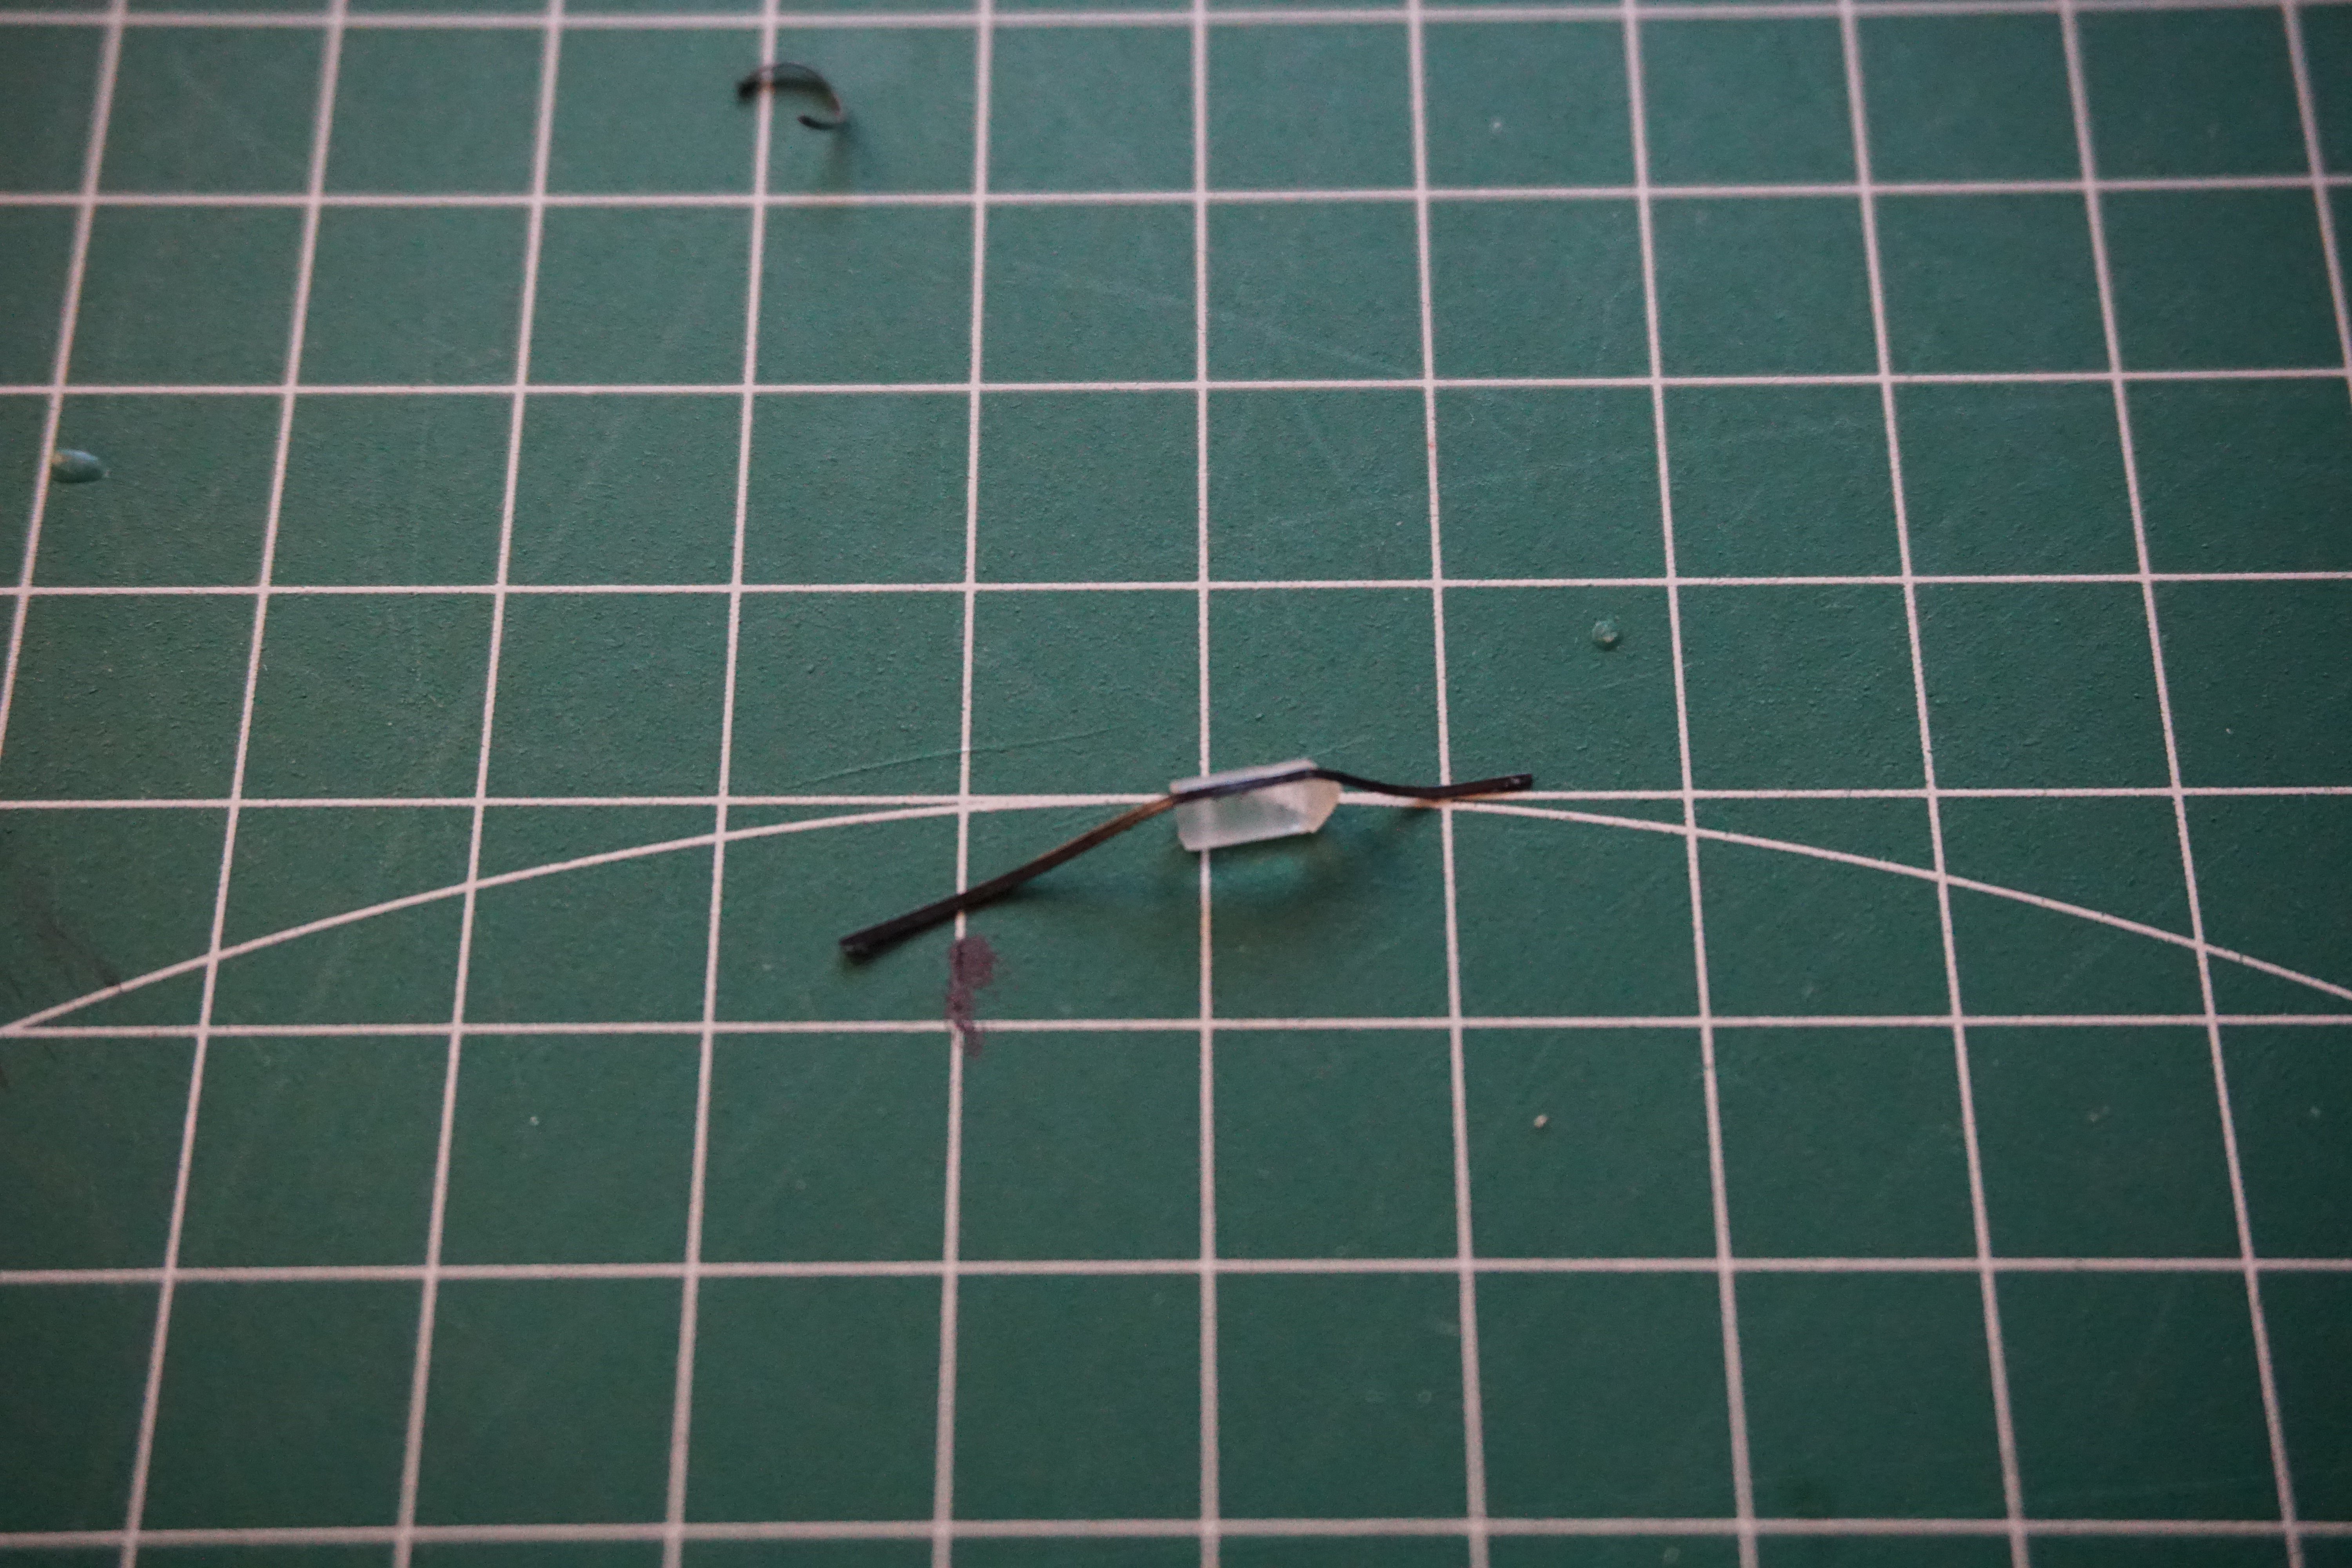
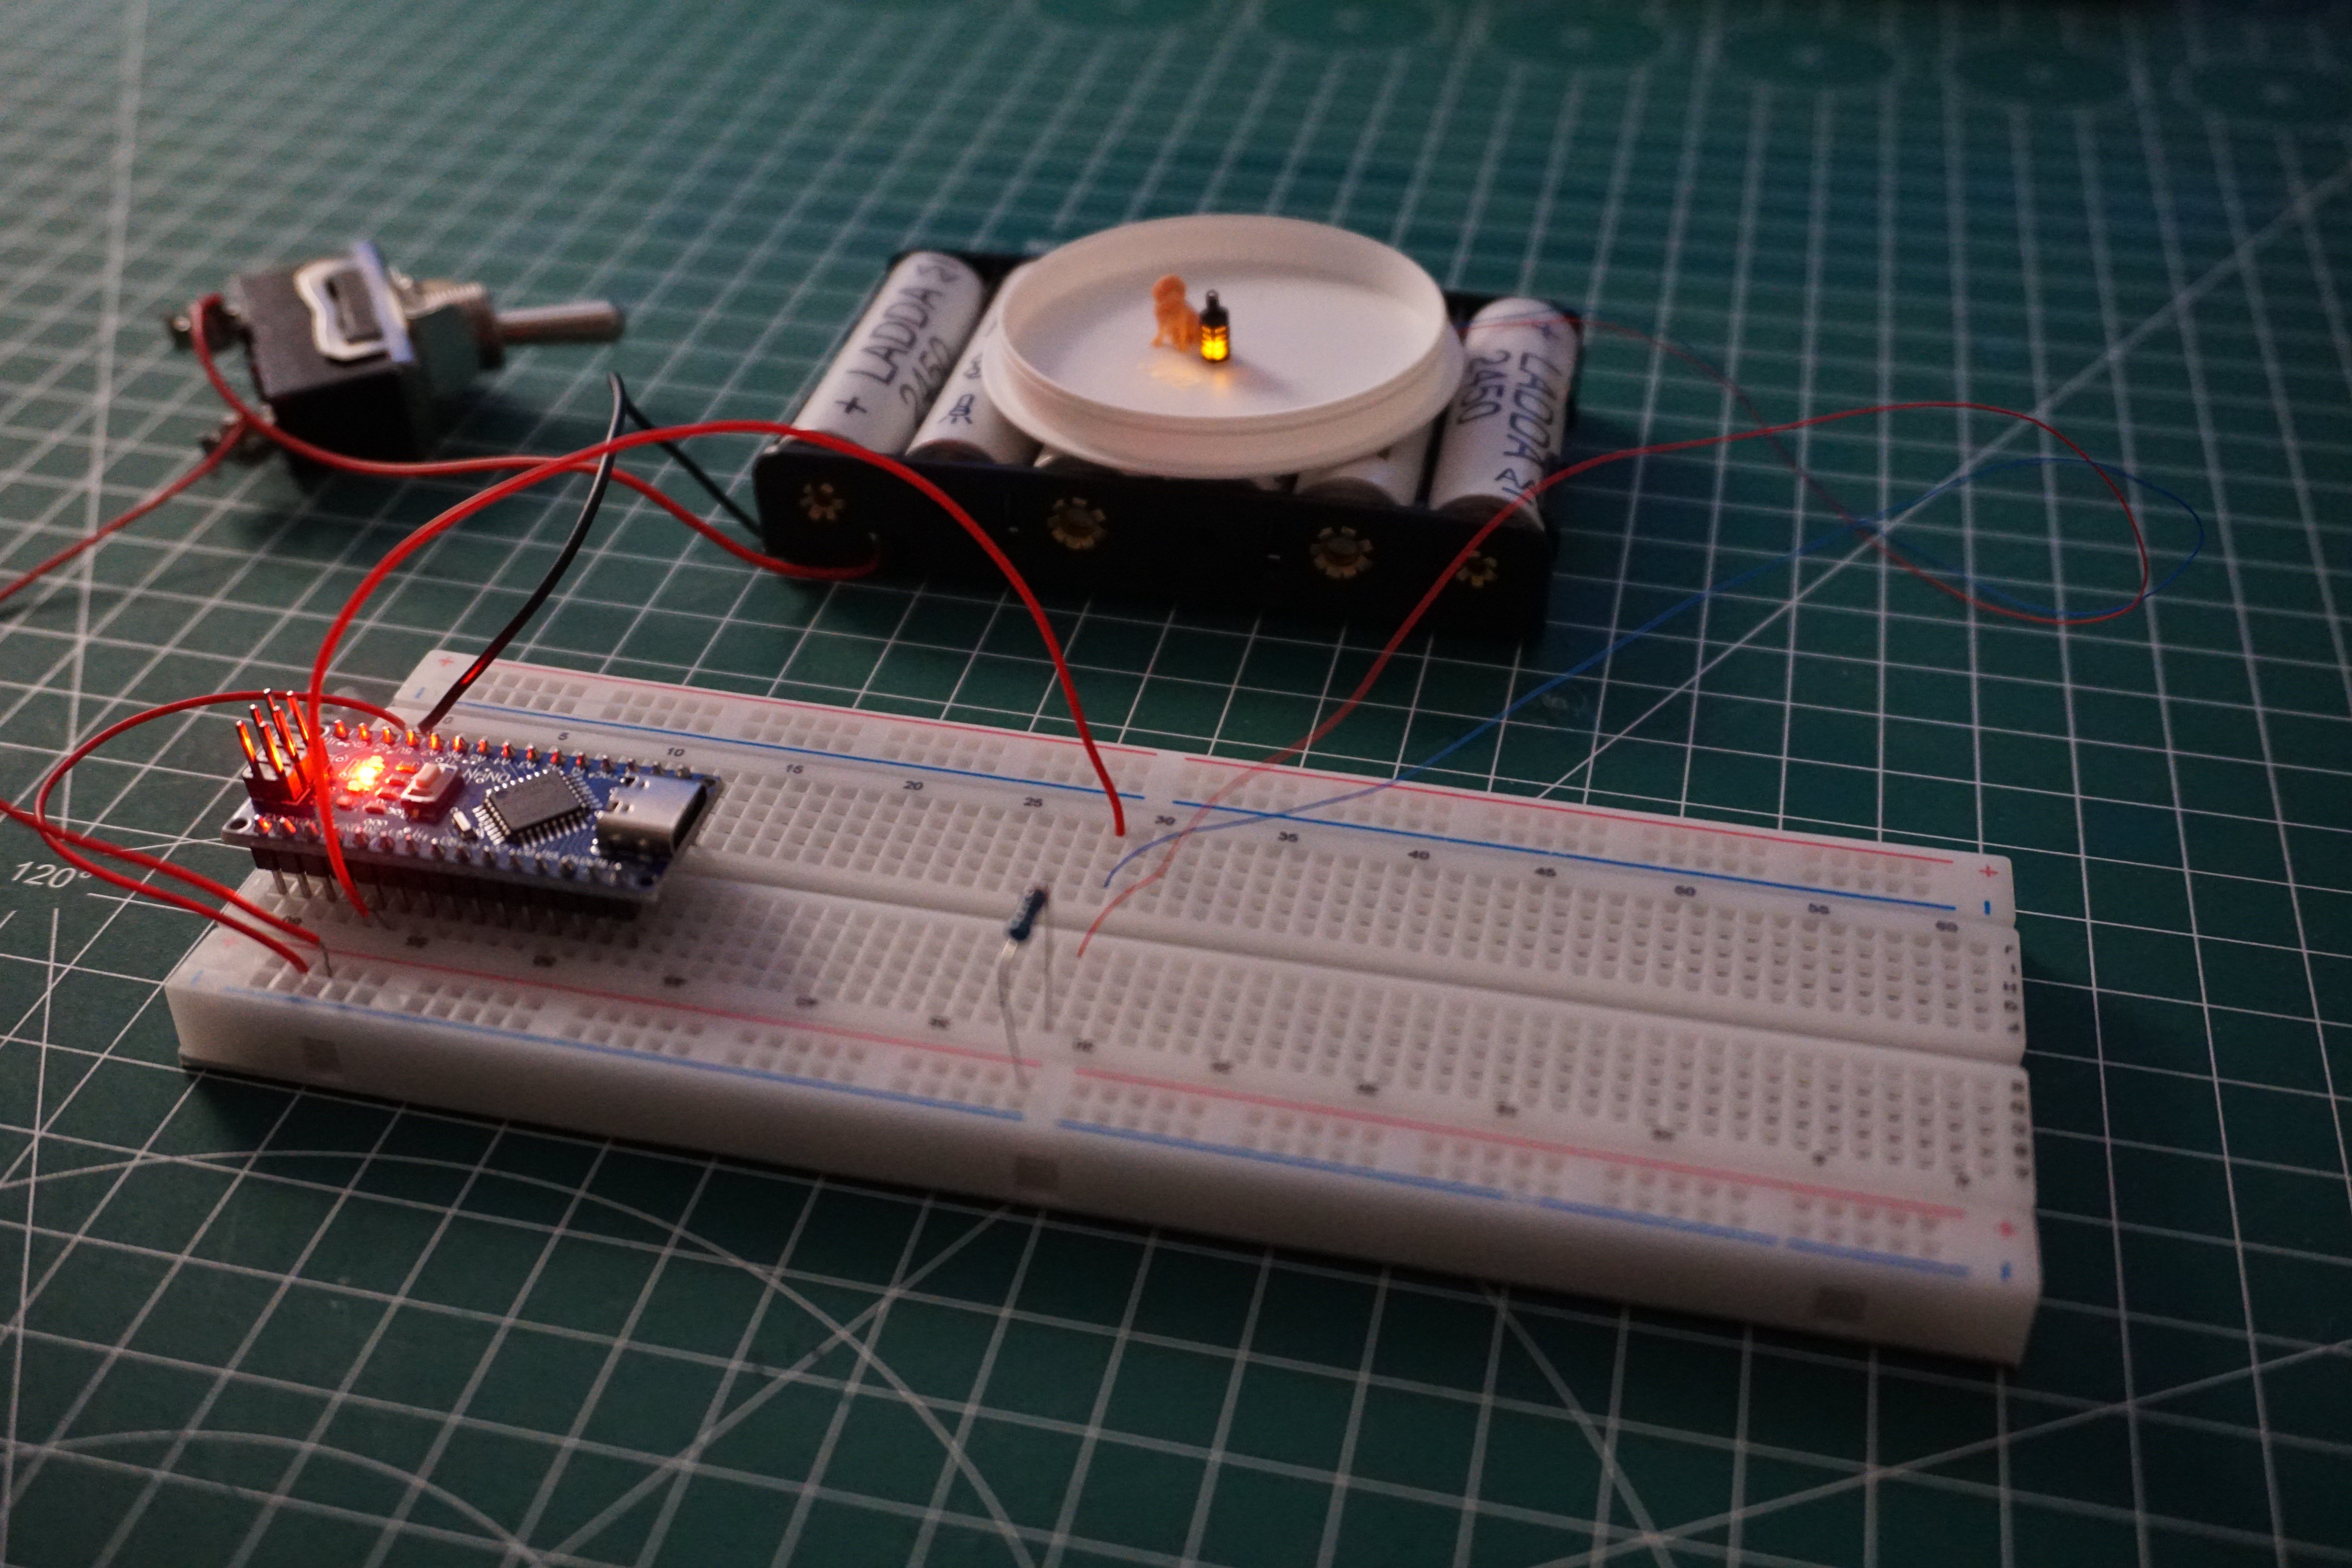
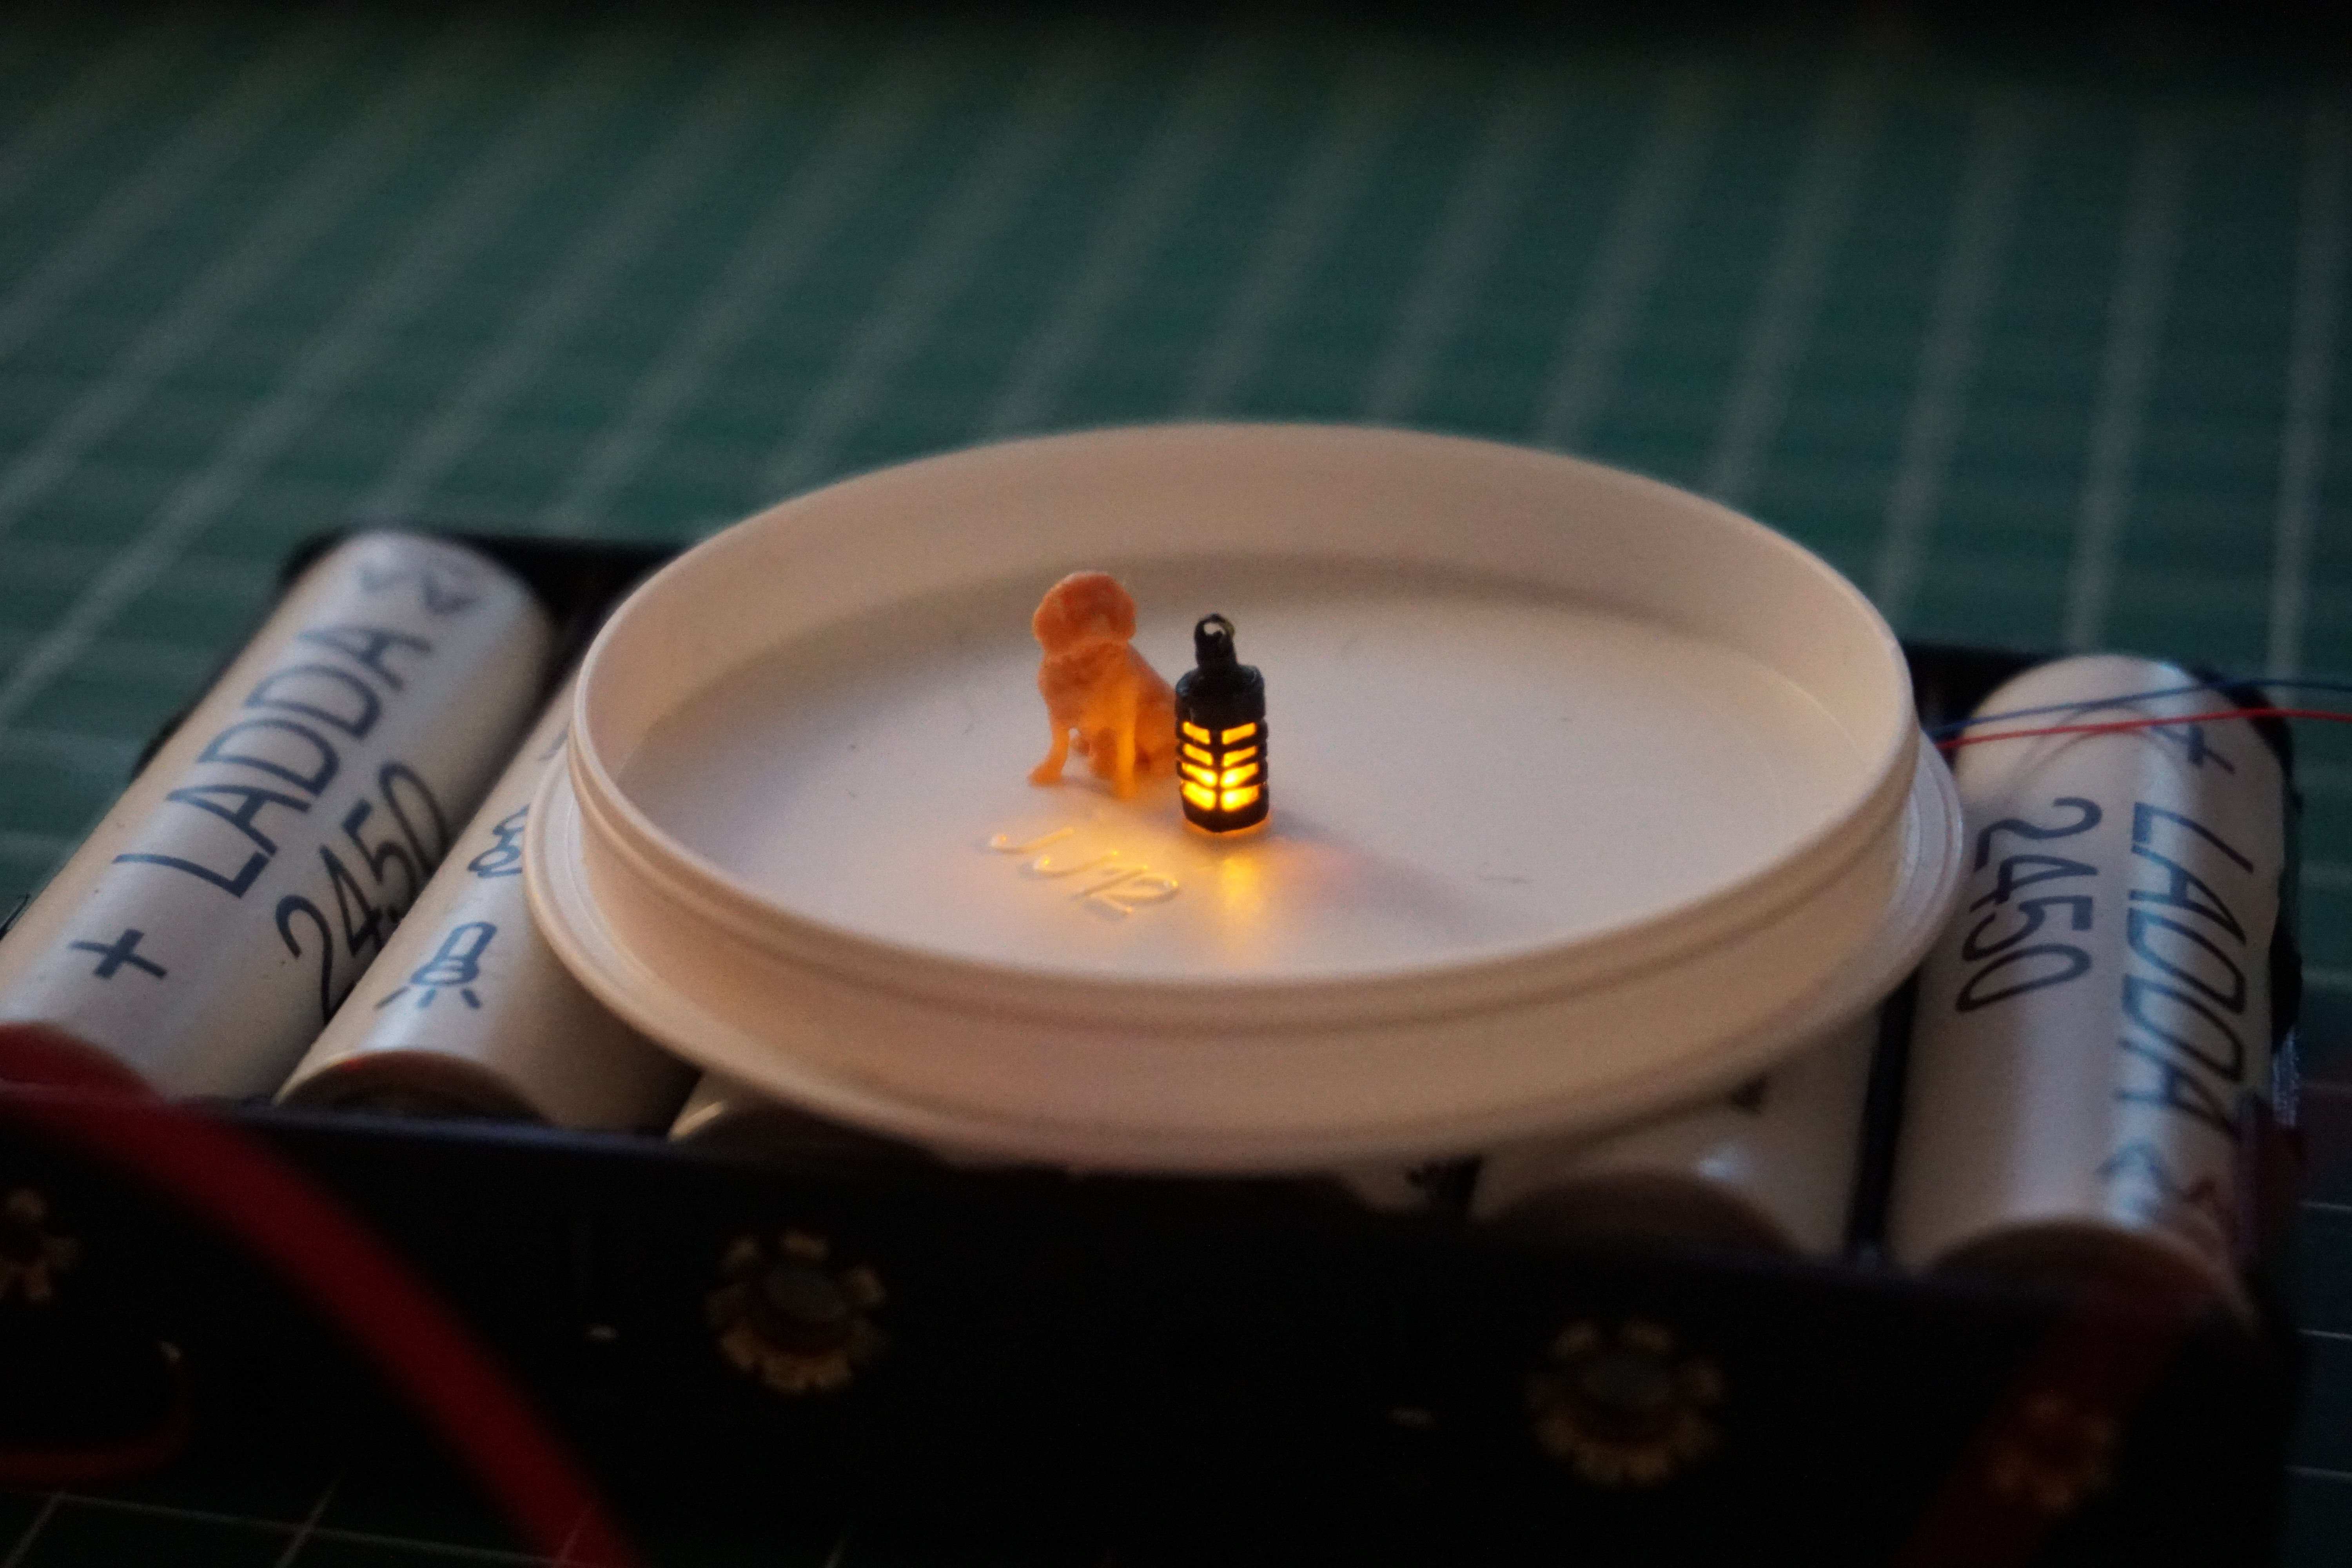
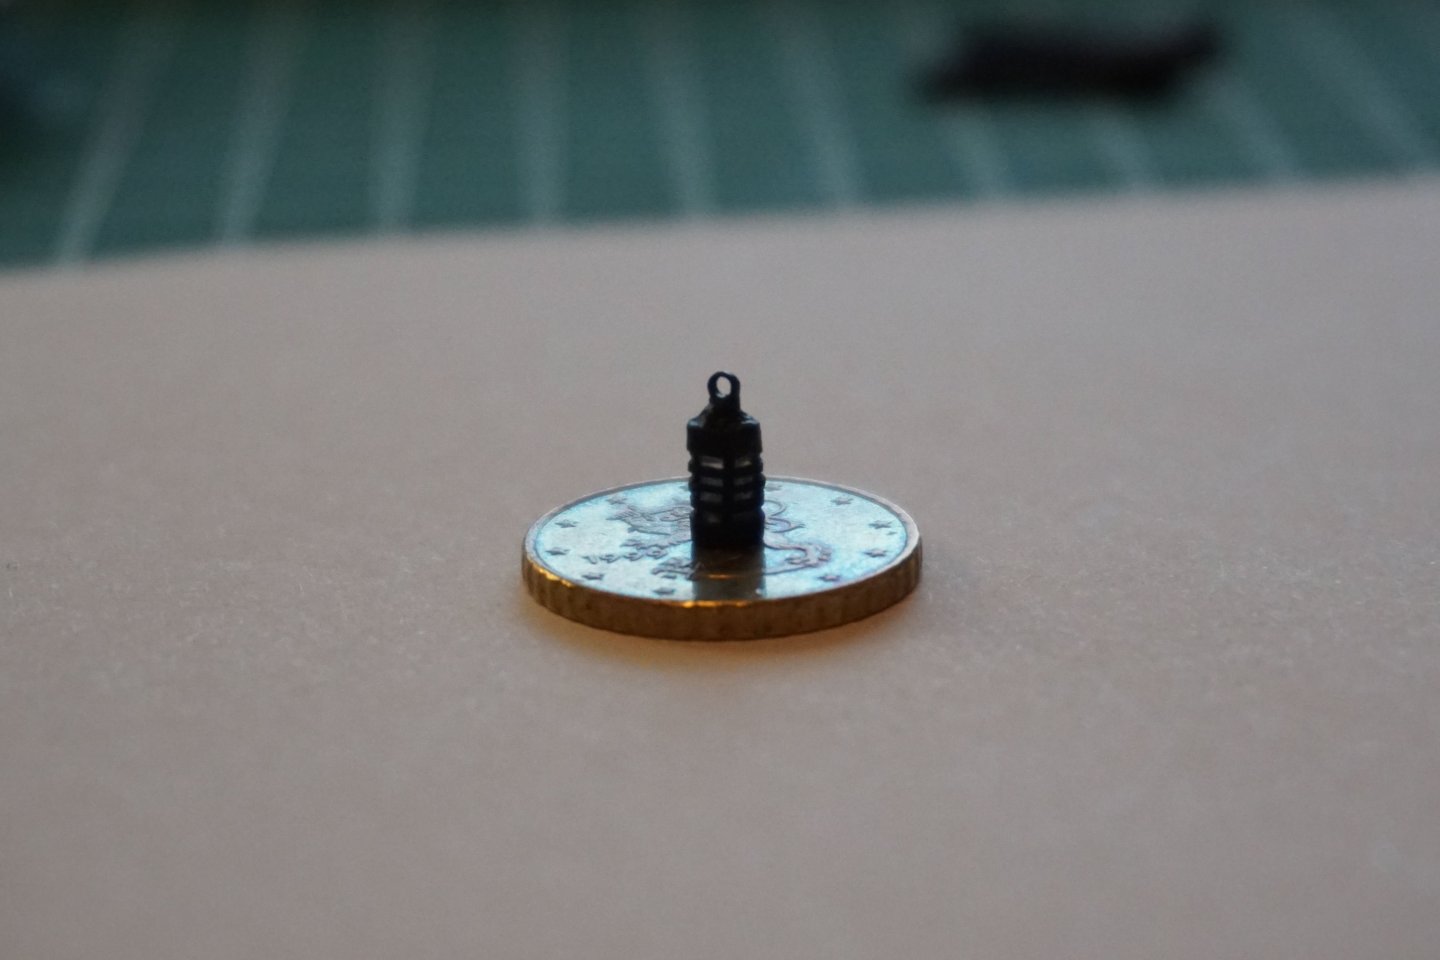
Wow, it sometimes takes a while for parcels to arrive from the UK. In the meantime I started another side project, creating some lighting with an Arduino. I'm planning to place one or two leds below deck, plus one on the deck, but as the Sherbourne doesn't have any fixed lights, I decided to create a portable lantern. I used HMS Victory's lanterns as a model, with dimensions sourced from this website: https://www.invaluable.com/auction-lot/a-painted-tin-and-horn-lantern-from-the-gun-decks-c-ce640afa9a It's made of 3 mm acrylic rod, electrical tape, shrink tube for the horizontal bands, plus some paint and scrap brass. 2025-10-30.mp4 edit: After making my post, I realized that the top part looked a little off. So I went back and removed an extra piece of brass from underneath the loop.


- 61 replies
-
- 5
-

-
-
- First build
- Cutter
- (and 2 more)
-
While waiting for the paints, I started working on the display case. It's mainly alder, which I'll stain later (test piece in the lower right corner). The baseboard is a glued beech panel, and I'll probably paint it black. I've left room for a 2 mm ventilation gap around it. I plan to add some illumination to the case, so the small drawer is for batteries. I'll replace it with a solid panel, if I abandon my lighting plans.

- 61 replies
-
- 10
-
-
- First build
- Cutter
- (and 2 more)
-
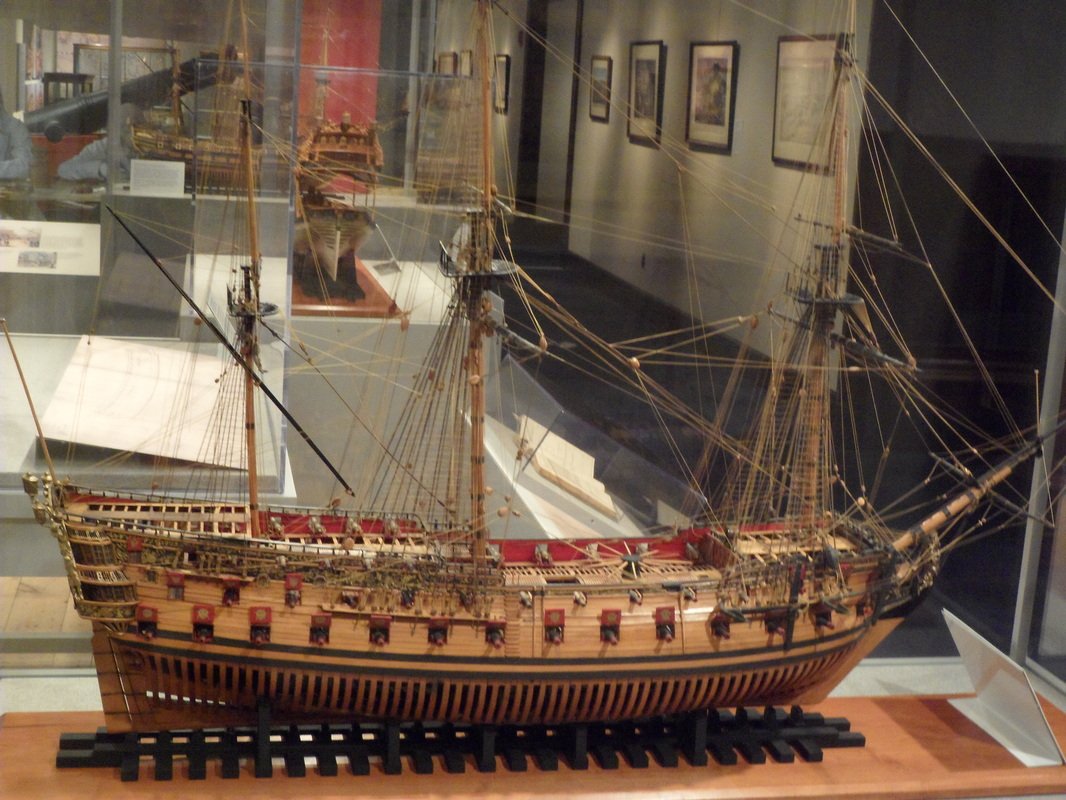
That's awesome, welcome to the hobby! With my limited experience, I actually find scale modeling and scuba diving to share some similarities. Everything is about careful planning, calm execution, and if you're breaking a sweat, you're probably doing something wrong! I started diving at 16, but then forgot about it for well over a decade. For the past 10 years I've been mainly diving shipwrecks in the Gulf of Finland with my old high school buddy. The wrecks are fantastic, but the water is always freezing cold, and visibility is often poor. I wish there was a place with the visibility of the Great Lakes, combined with the variety of intact shipwrecks dating back hundreds of years that the Baltic Sea has. Most of my favorite wrecks are actually from the Sherbourne's era. It's crazy to go down the mast of a merchantman that sank sometime in the late 1700s, and see all of the items where the crewmen left them all those years ago. Sometimes even coils of rope survive.
- 61 replies
-
- 5
-
-
- First build
- Cutter
- (and 2 more)
-
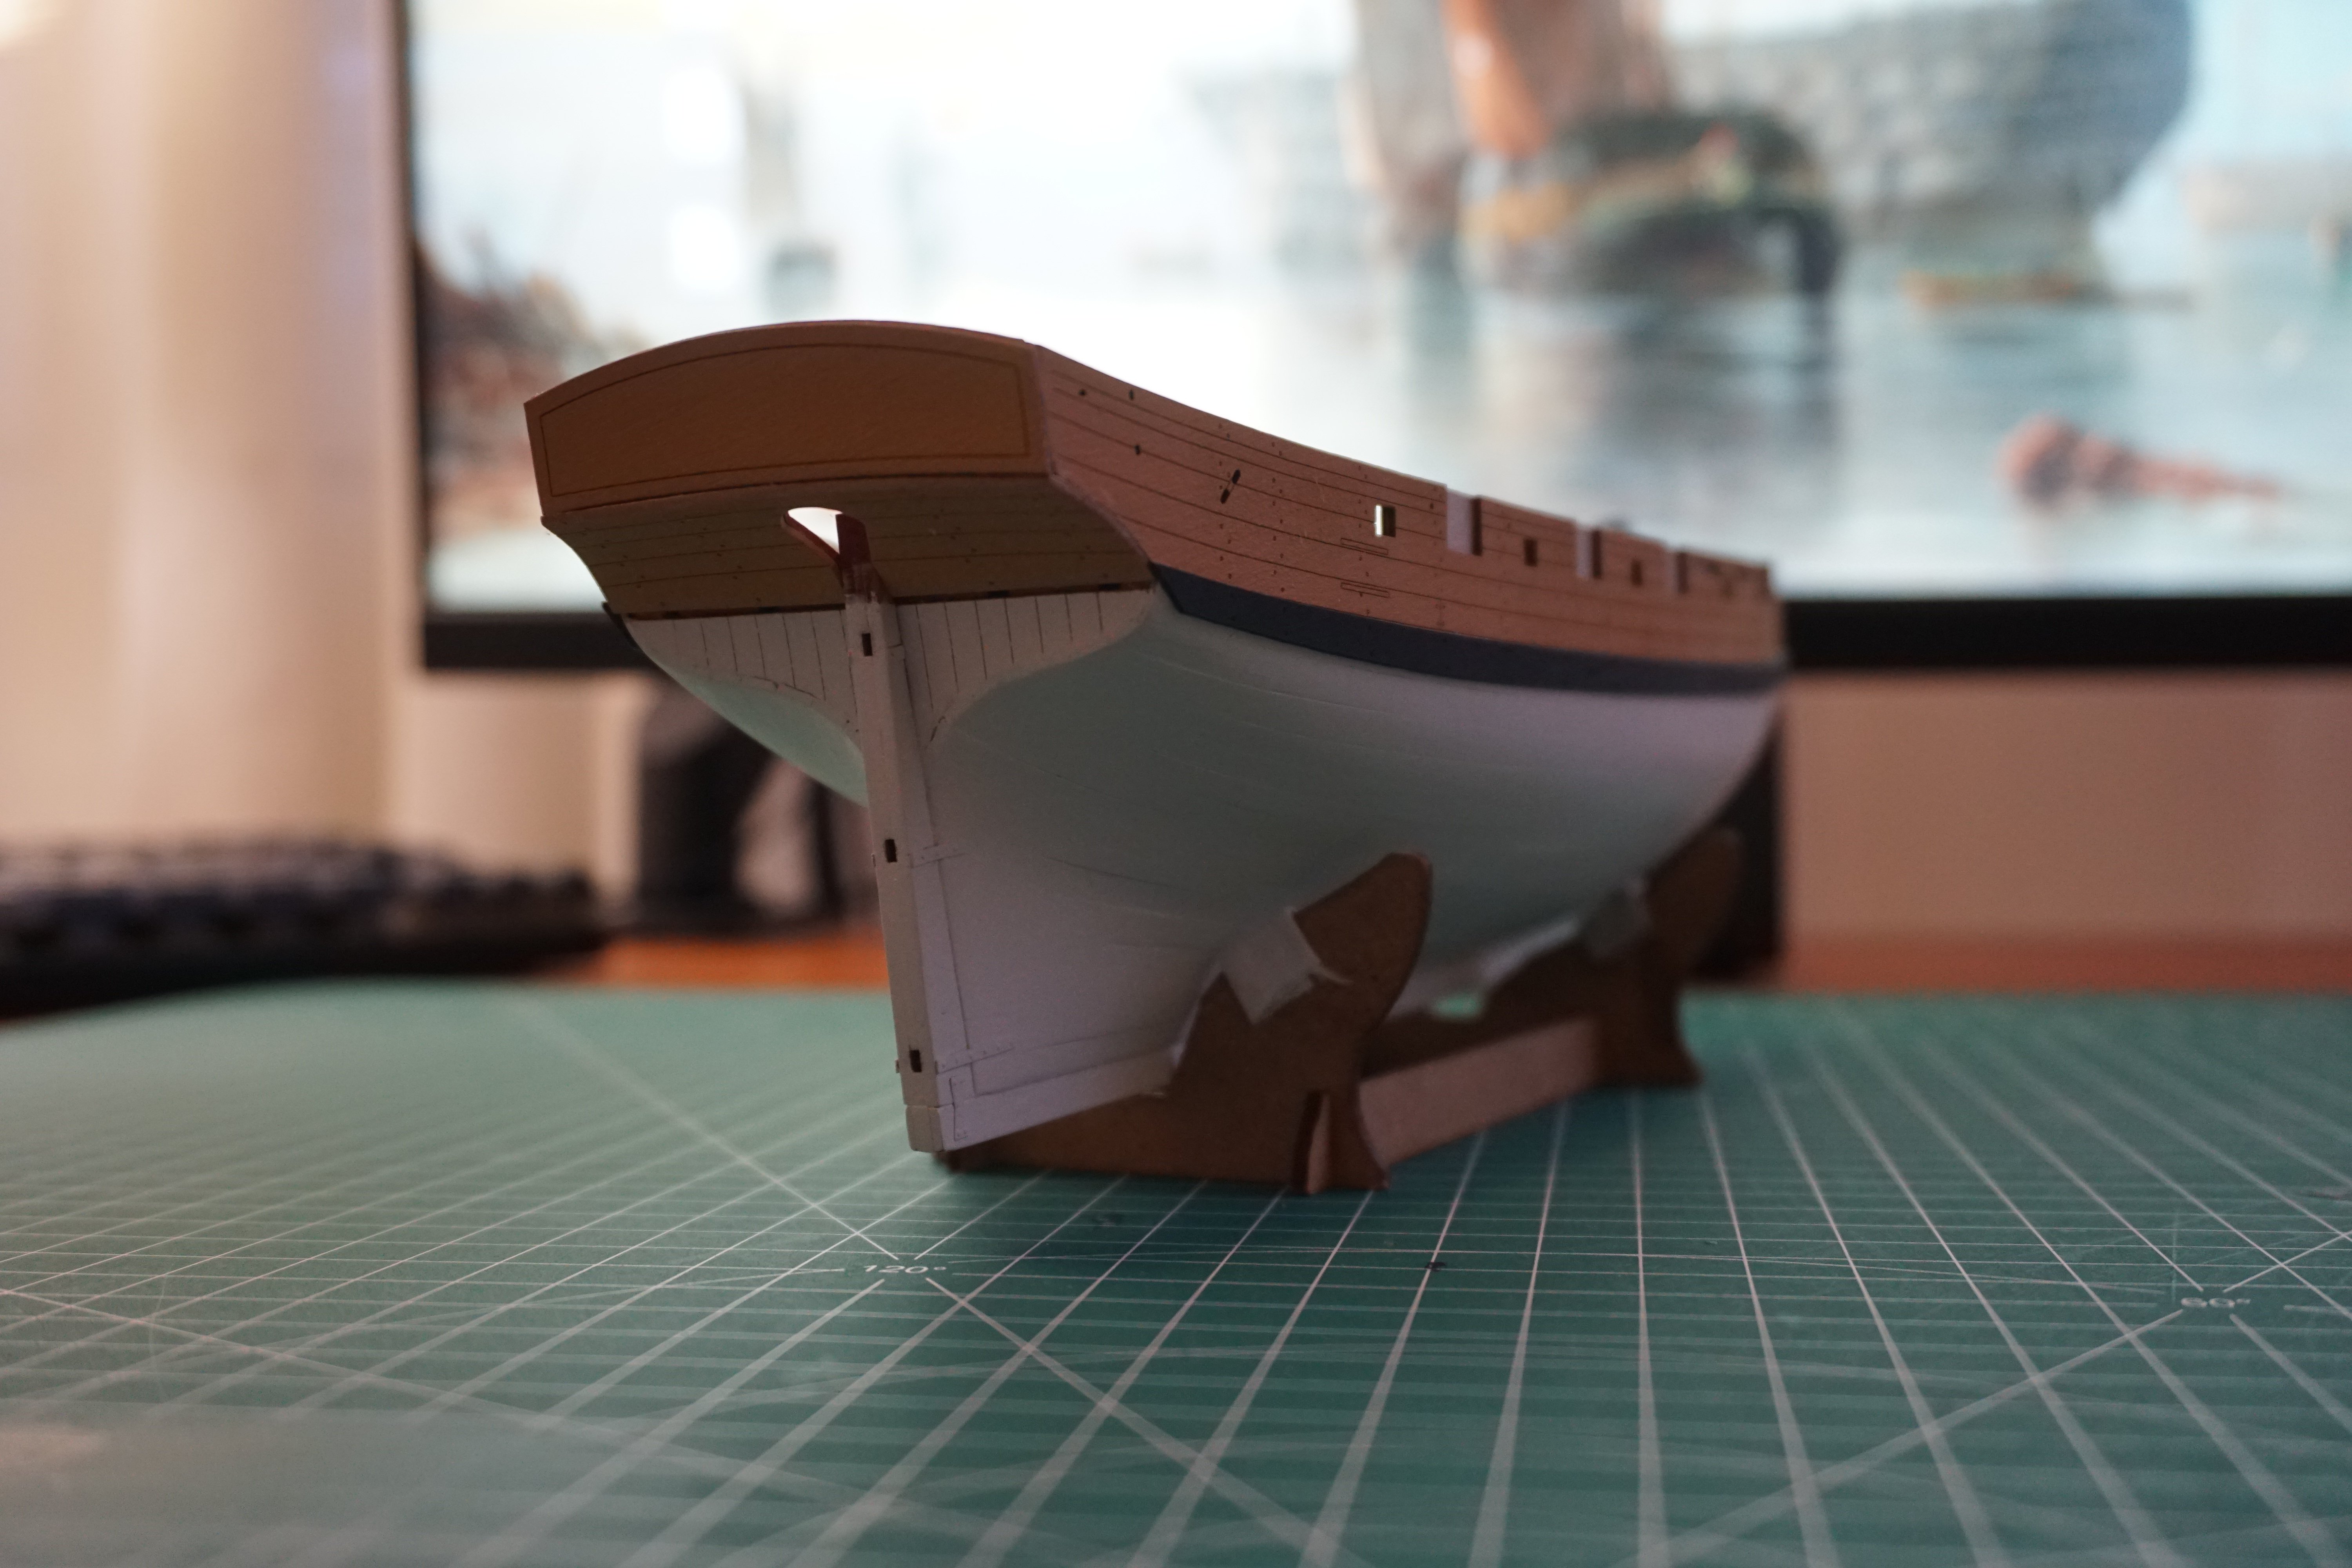
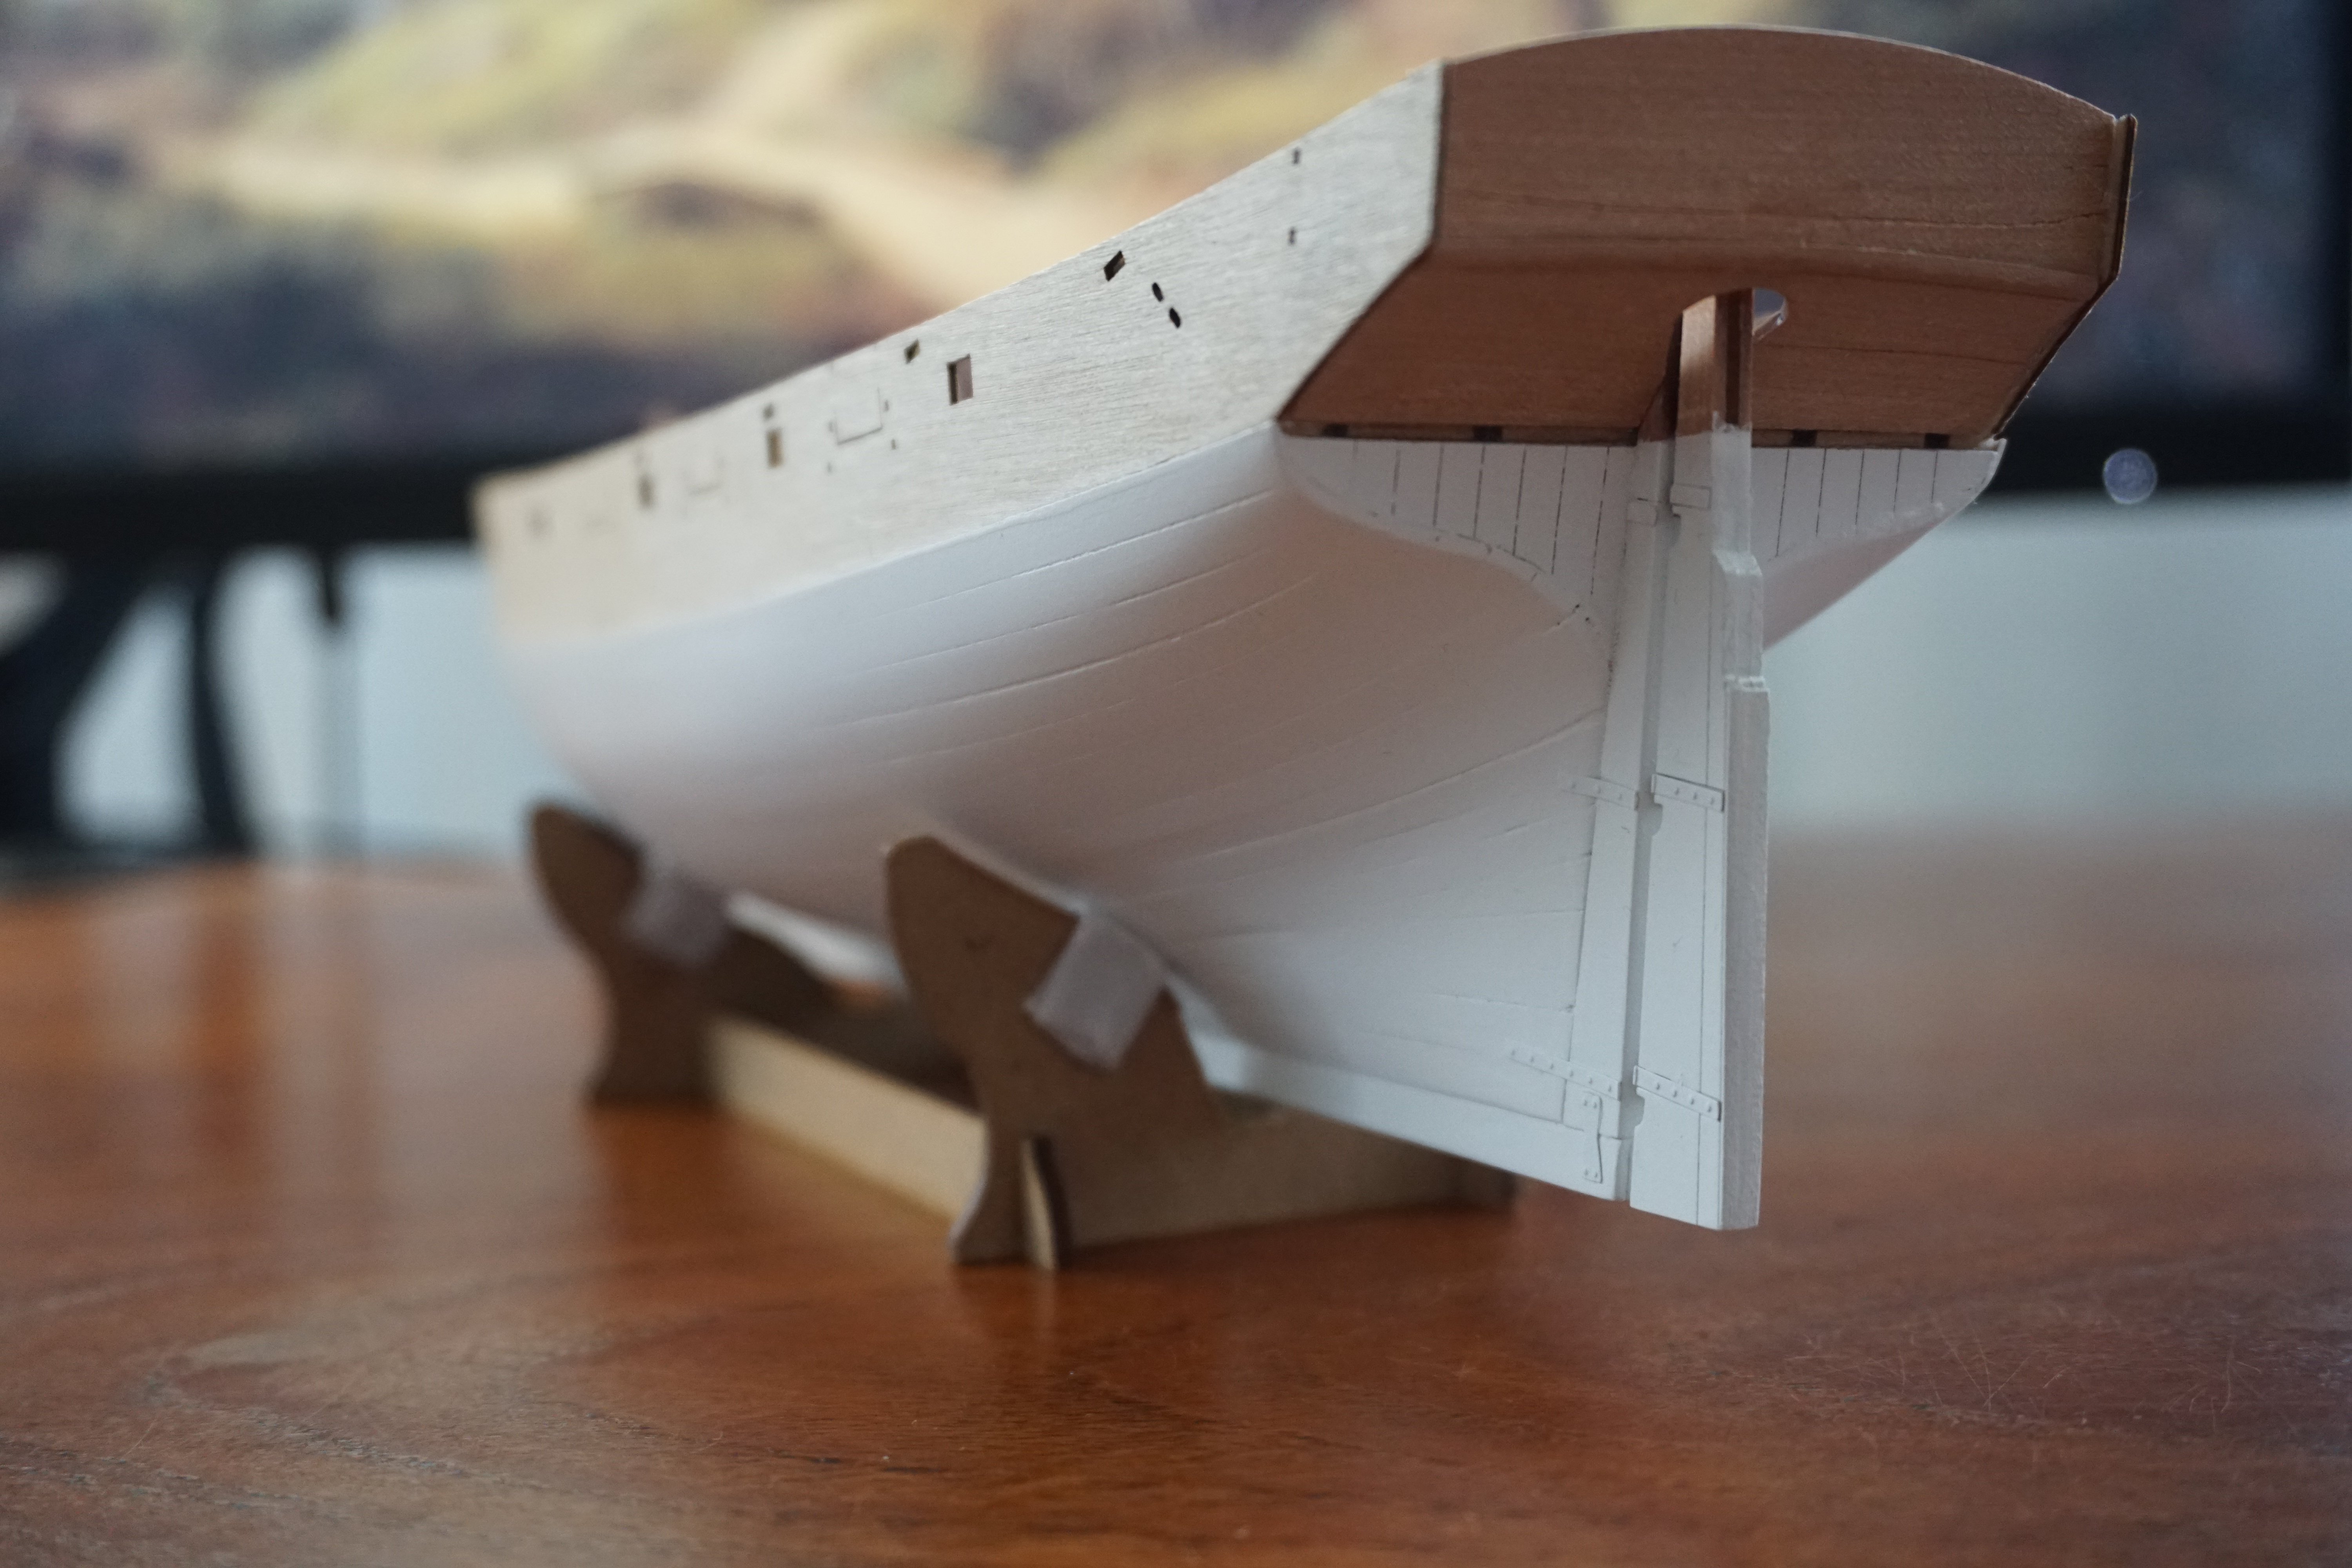
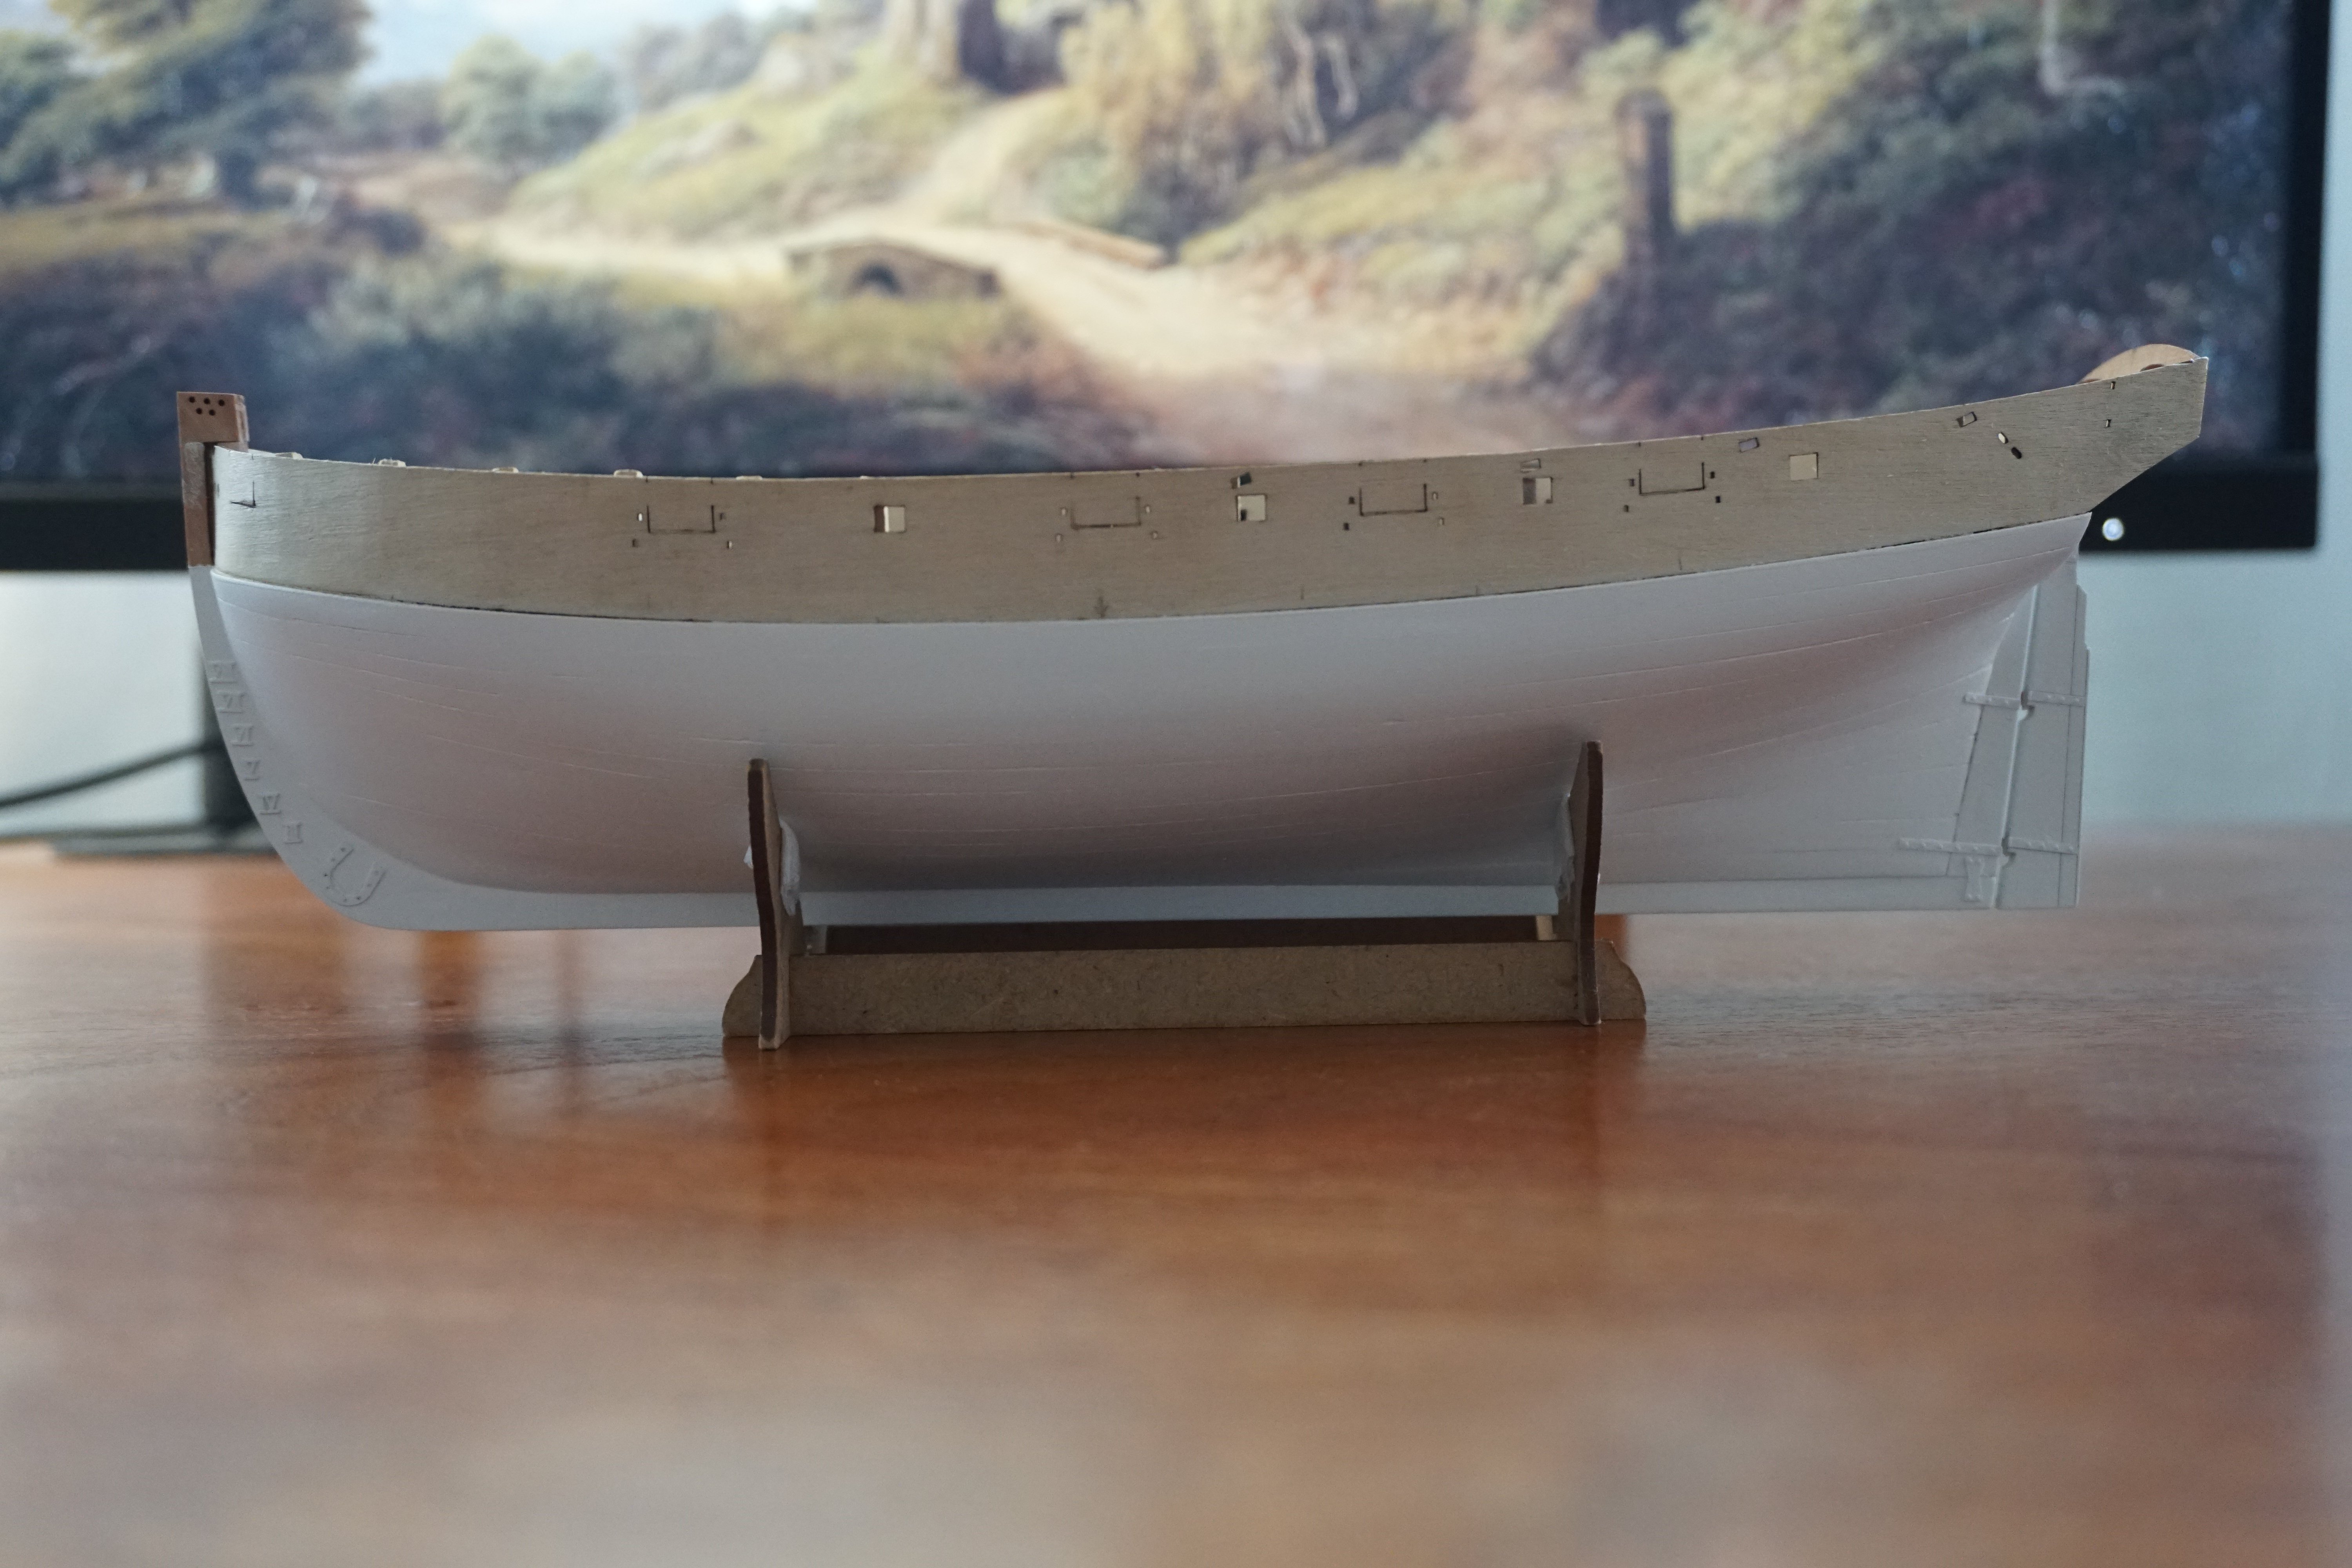
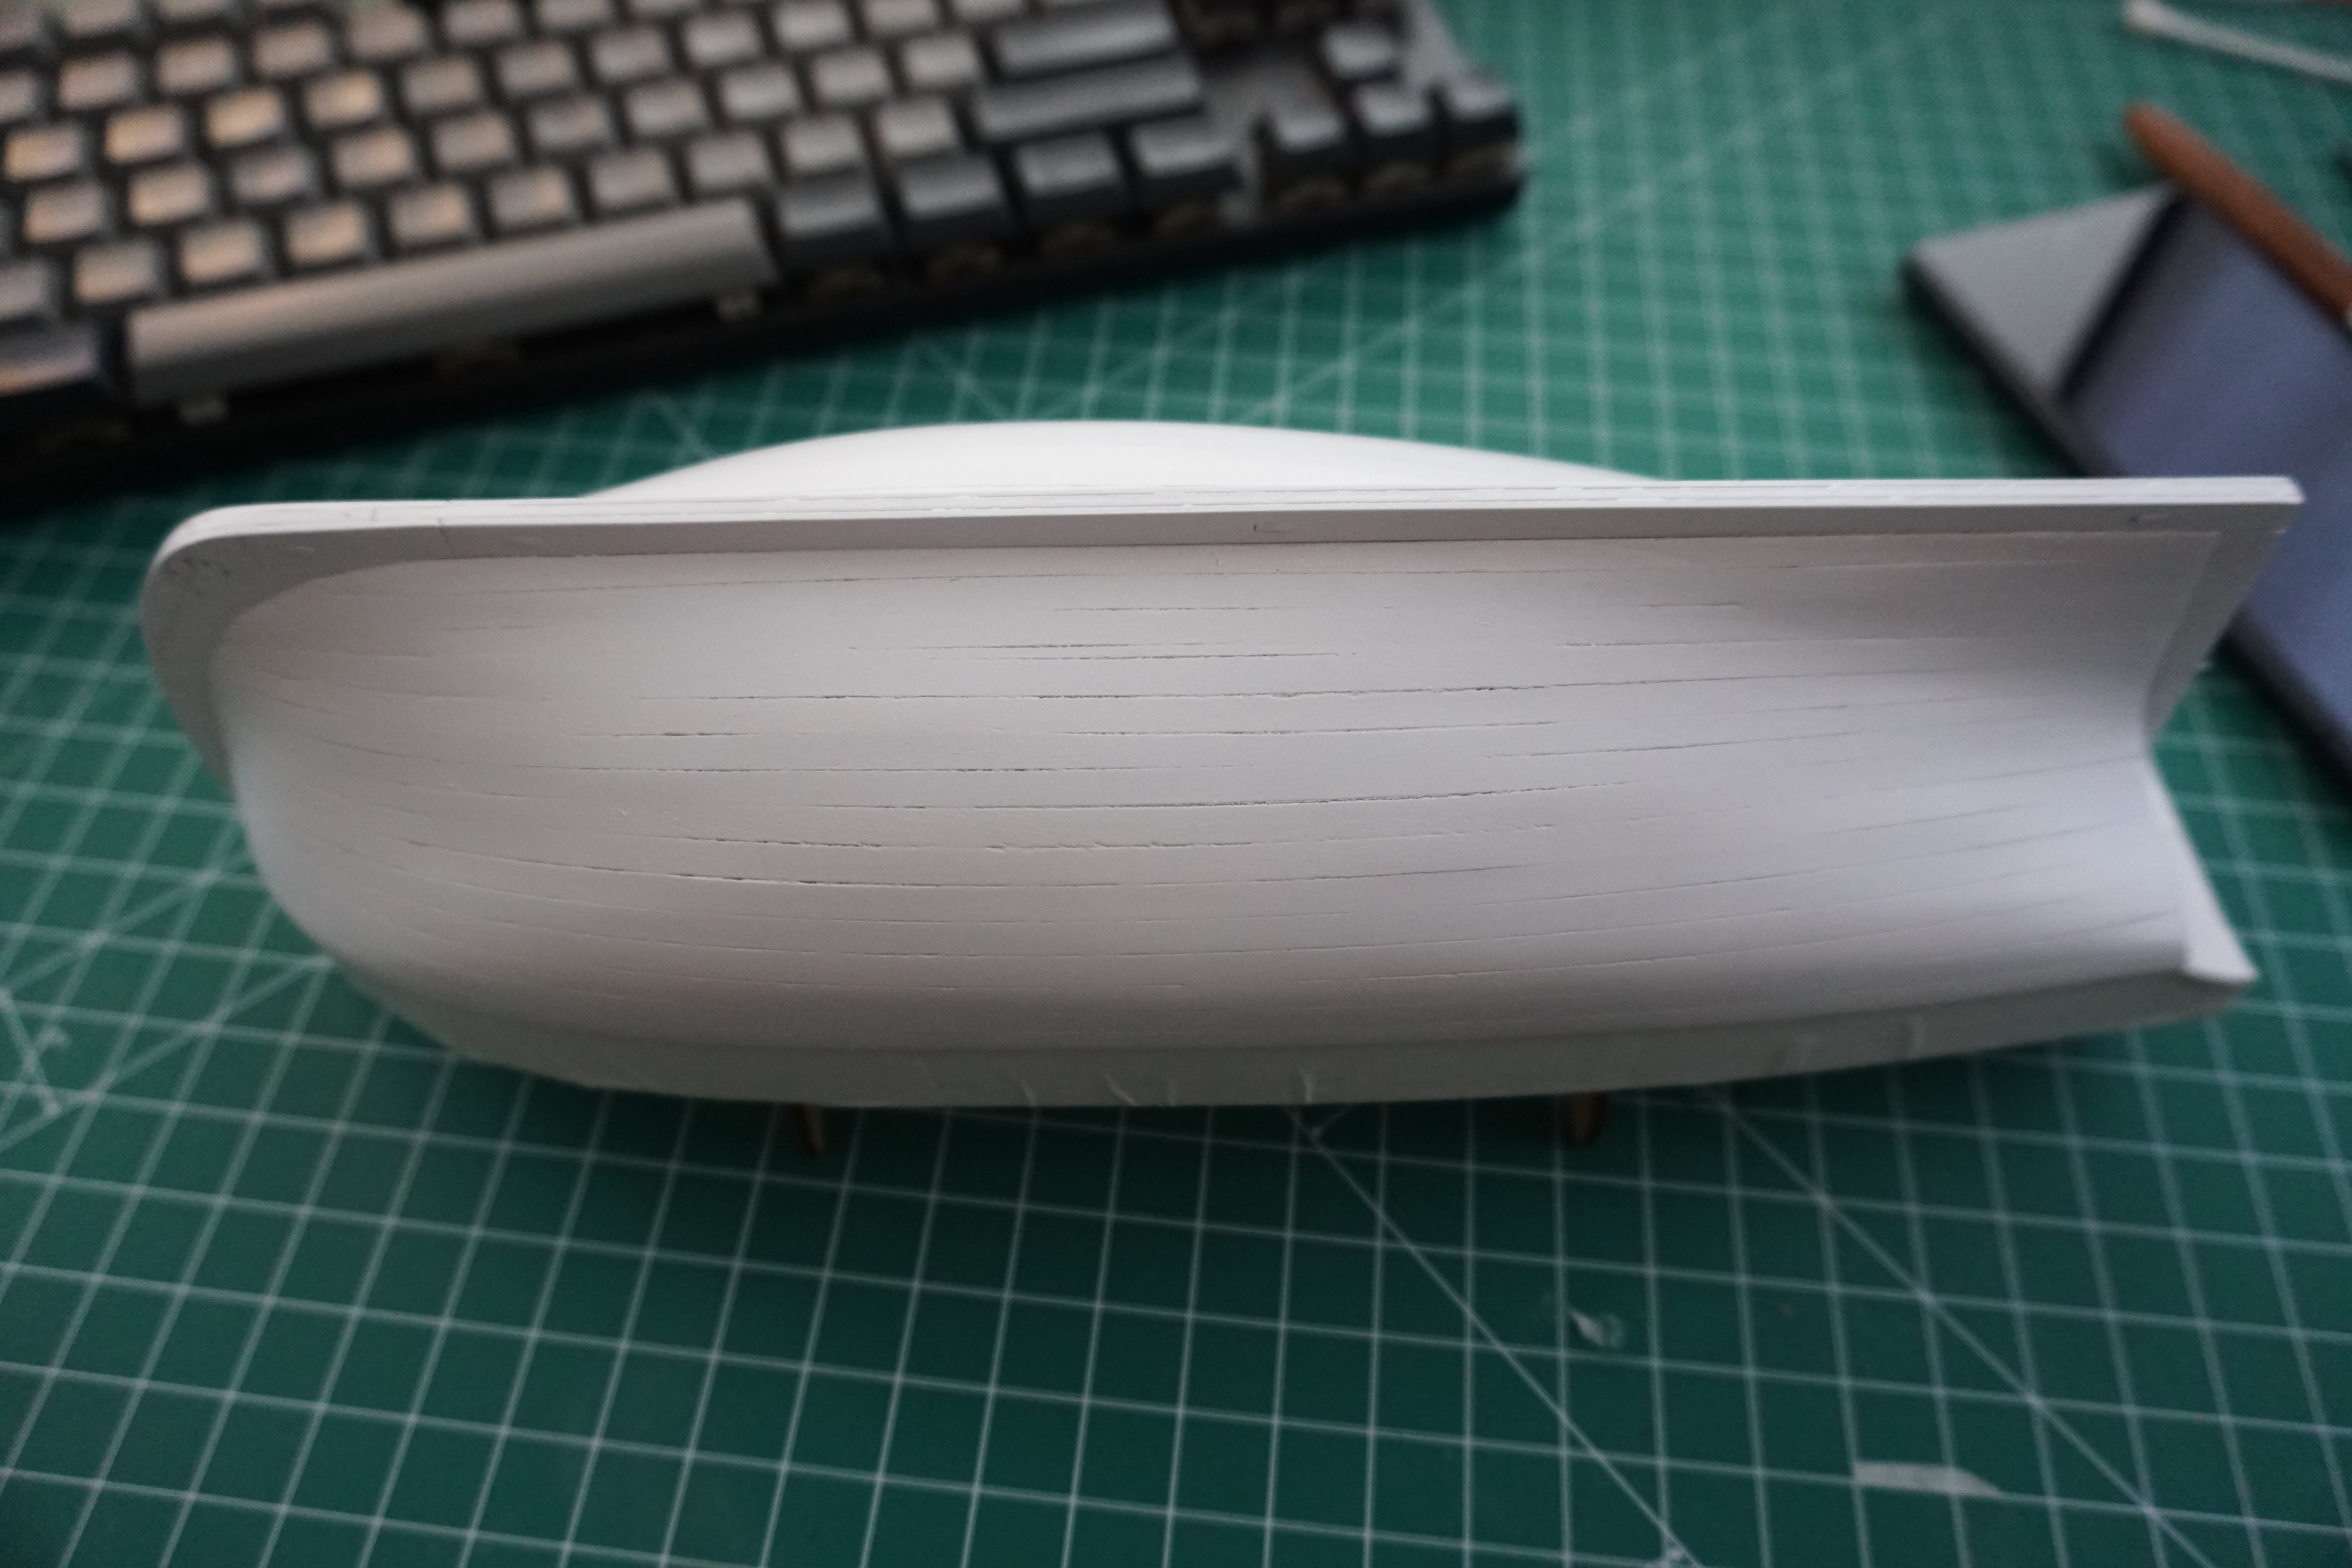
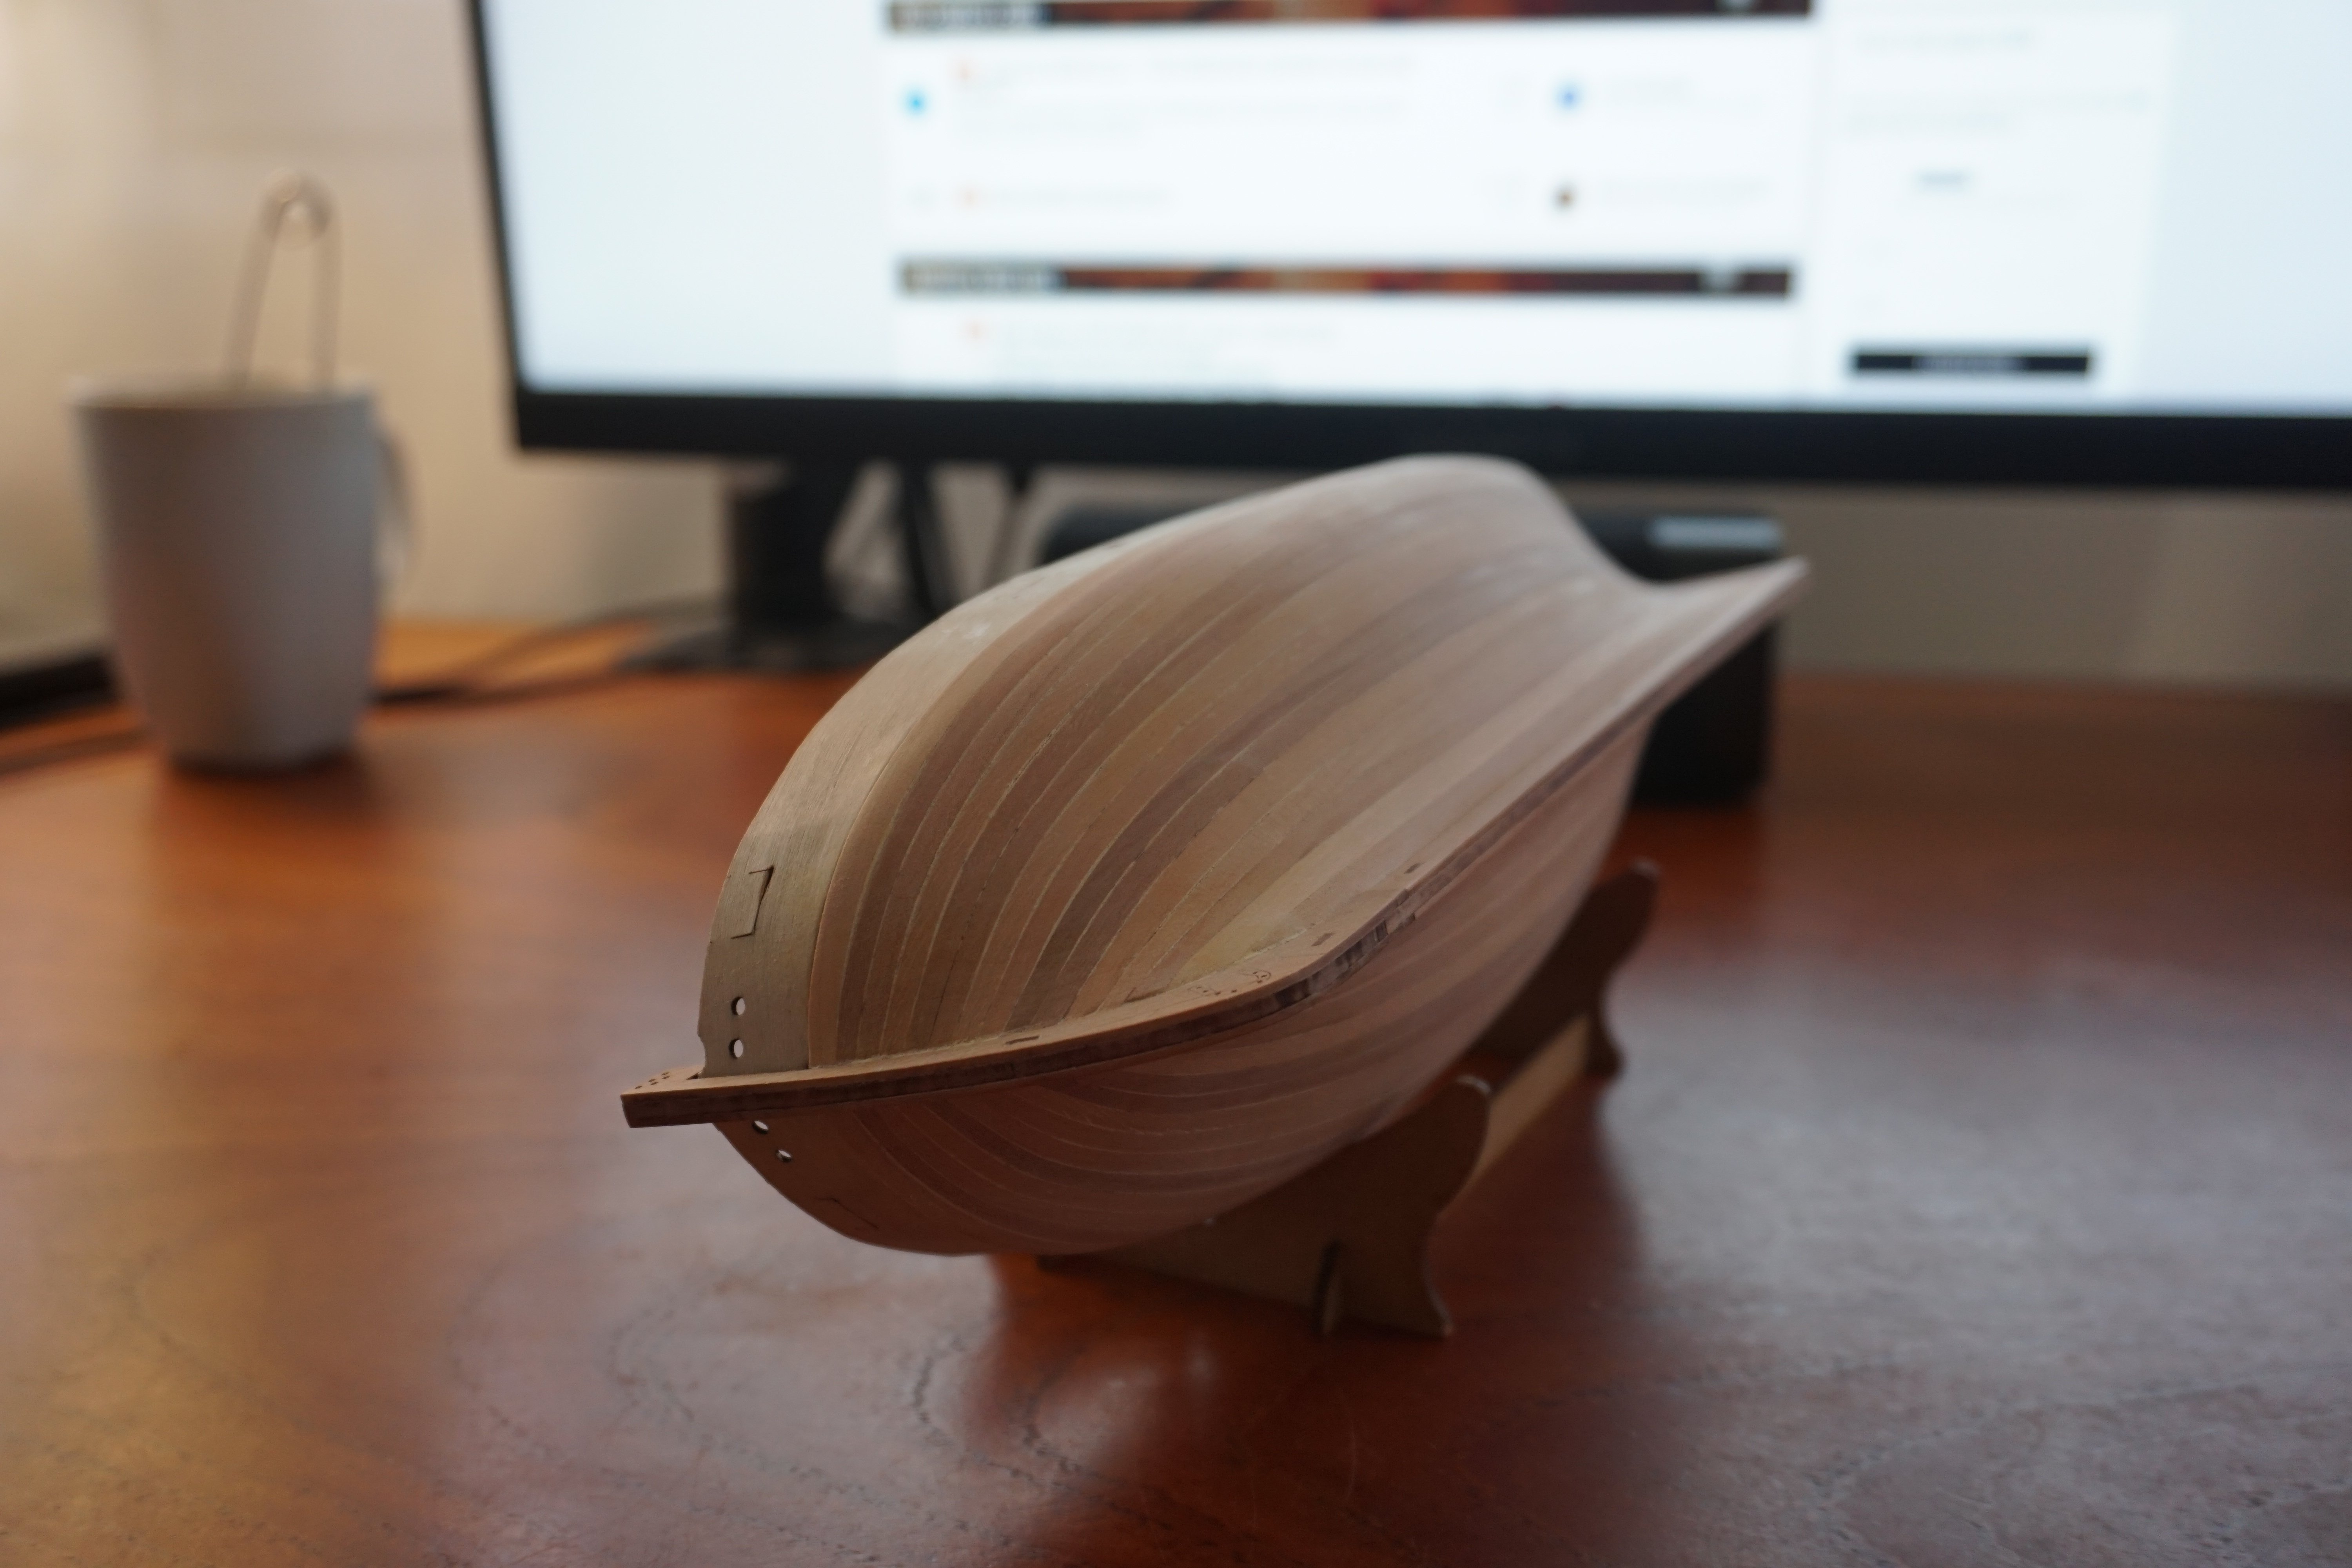
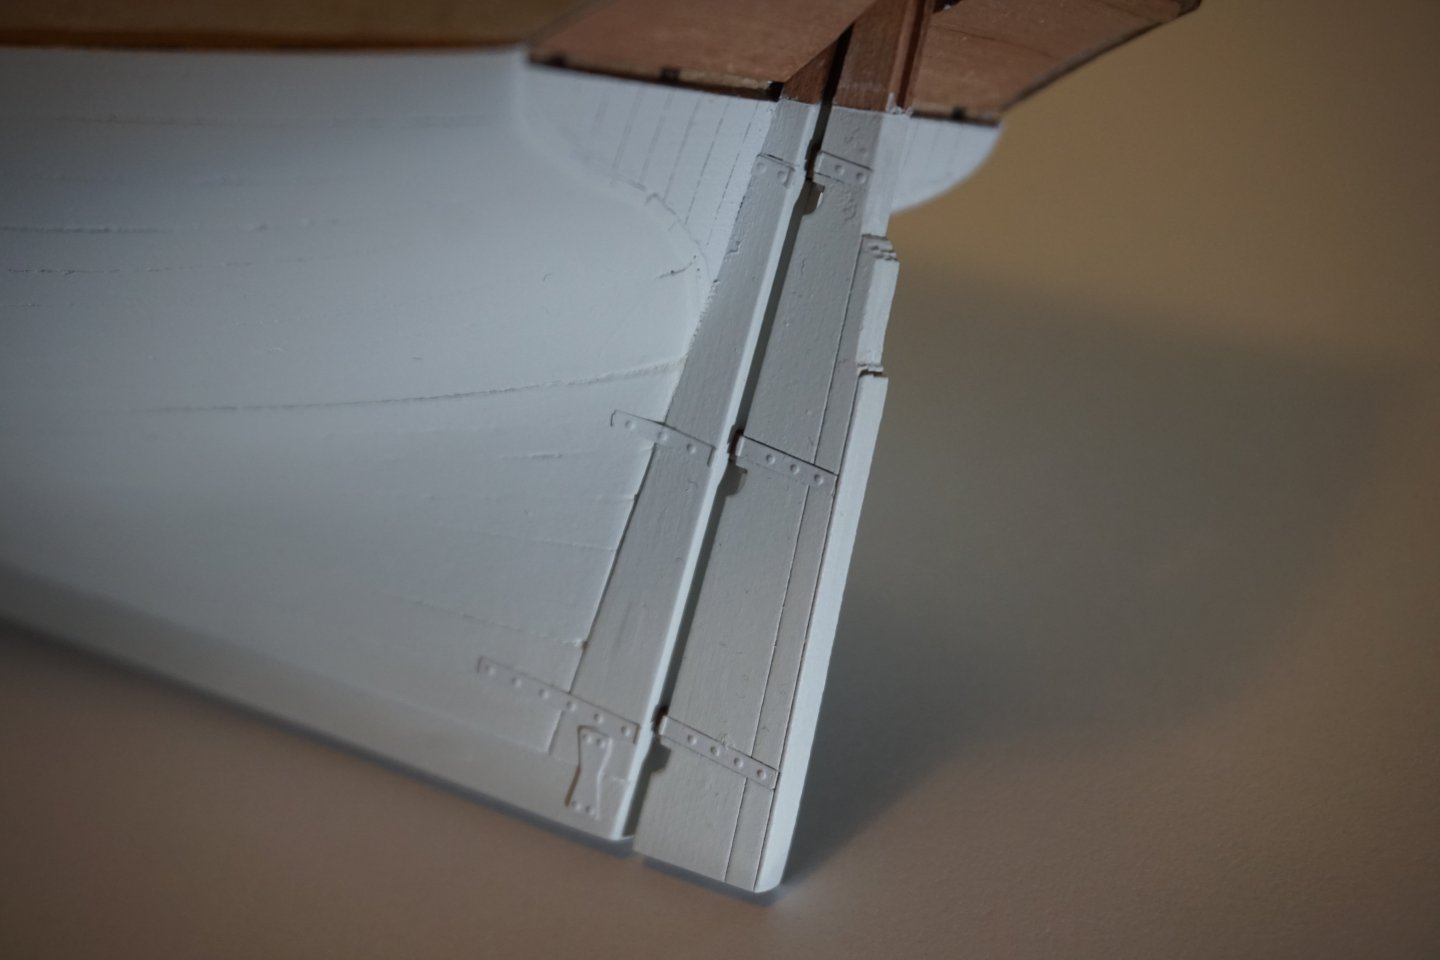
Below-waterline painting completed, time to celebrate a little. After two layers of acrylic, I opted to touch up the seams with a brush. I lost count of how many airbrushed layers of paint I applied, but before the final two ones I attached the PE parts with CA. Too much CA in fact, some of the depth markings had to be removed, bathed in acetone, and re-primed. I think that there is a nice amount of woodwork still visible. I would have preferred more consistent lines of planking, but for a first model it's close enough to the real thing: I have to take a break from modeling now, as I'm waiting for Cornwall Model Boats to restock Admiralty Paints' yellow ochre and 5x5 mm walnut strips. The strips are for a little slipway that I'll try to build for the finished ship, inspired by these models: https://nauticalhistory.weebly.com/the-70-gun-third-rate-prince-frederick-of-1714.html


- 61 replies
-
- 3
-
-
- First build
- Cutter
- (and 2 more)
-
Thanks @palmerit, I used a tiny bit of filler at the bow, but think I'll leave the plank seams alone at this point. We'll see where it goes after a couple of coats of acrylic. I also decided to prime the PE parts separately and add them later, their details might become cluttered by paint if added at this point.
- 61 replies
-
- 1
-
-
- First build
- Cutter
- (and 2 more)
-
Thank you again! Your build logs and tips have helped me reach this point in the build. The hull is now primed, but some of the gaps seem a bit large. Do you think that I should use some watered-down filler, or will layers of top coat and sanding in between be enough? I'd prefer planking to be visible in the finished model, so I'm concerned that using filler might be too much.


- 61 replies
-
- 2
-
-
- First build
- Cutter
- (and 2 more)
-
Thank you for your likes and comments, everyone! The Sherbourne is now sanded, filled, and ready to be painted - if the weather permits - later this week. My plan is to seal the wood with Tamiya fine surface primer, sand if necessary, add the photo-etch parts, prime those parts, and then apply as many coats of AK off-white as needed.


- 61 replies
-
- 7
-
-
- First build
- Cutter
- (and 2 more)
-
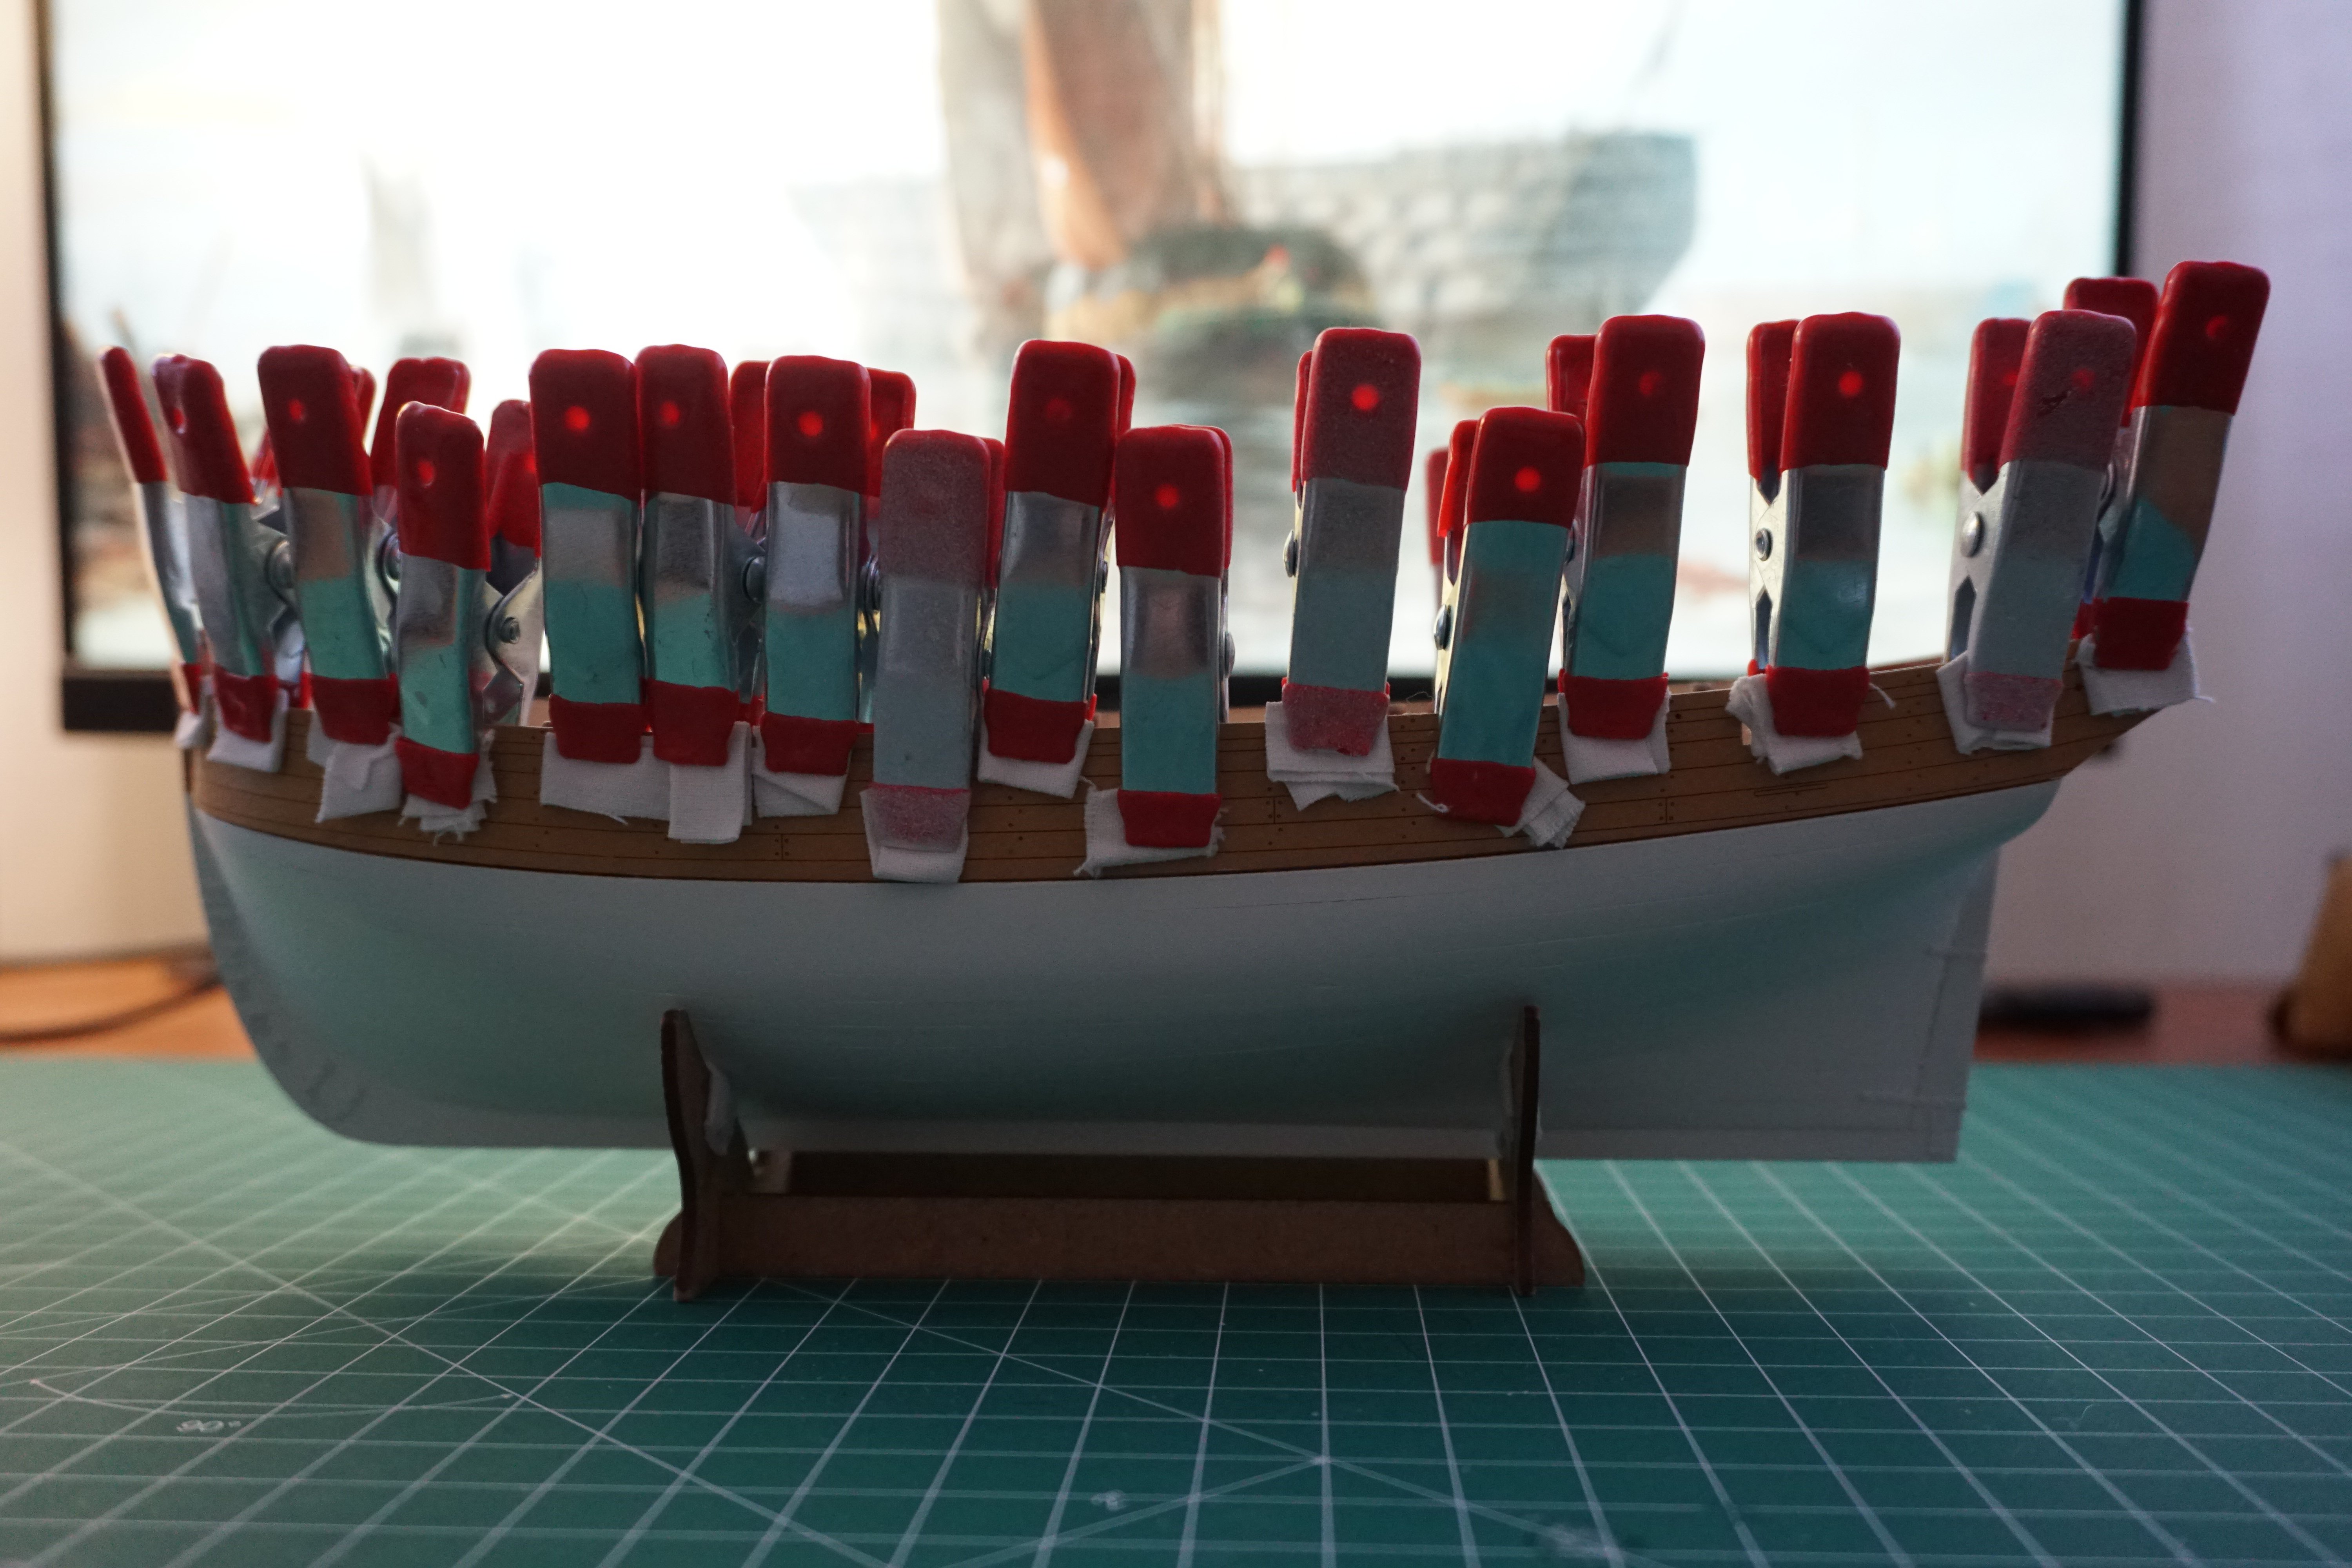
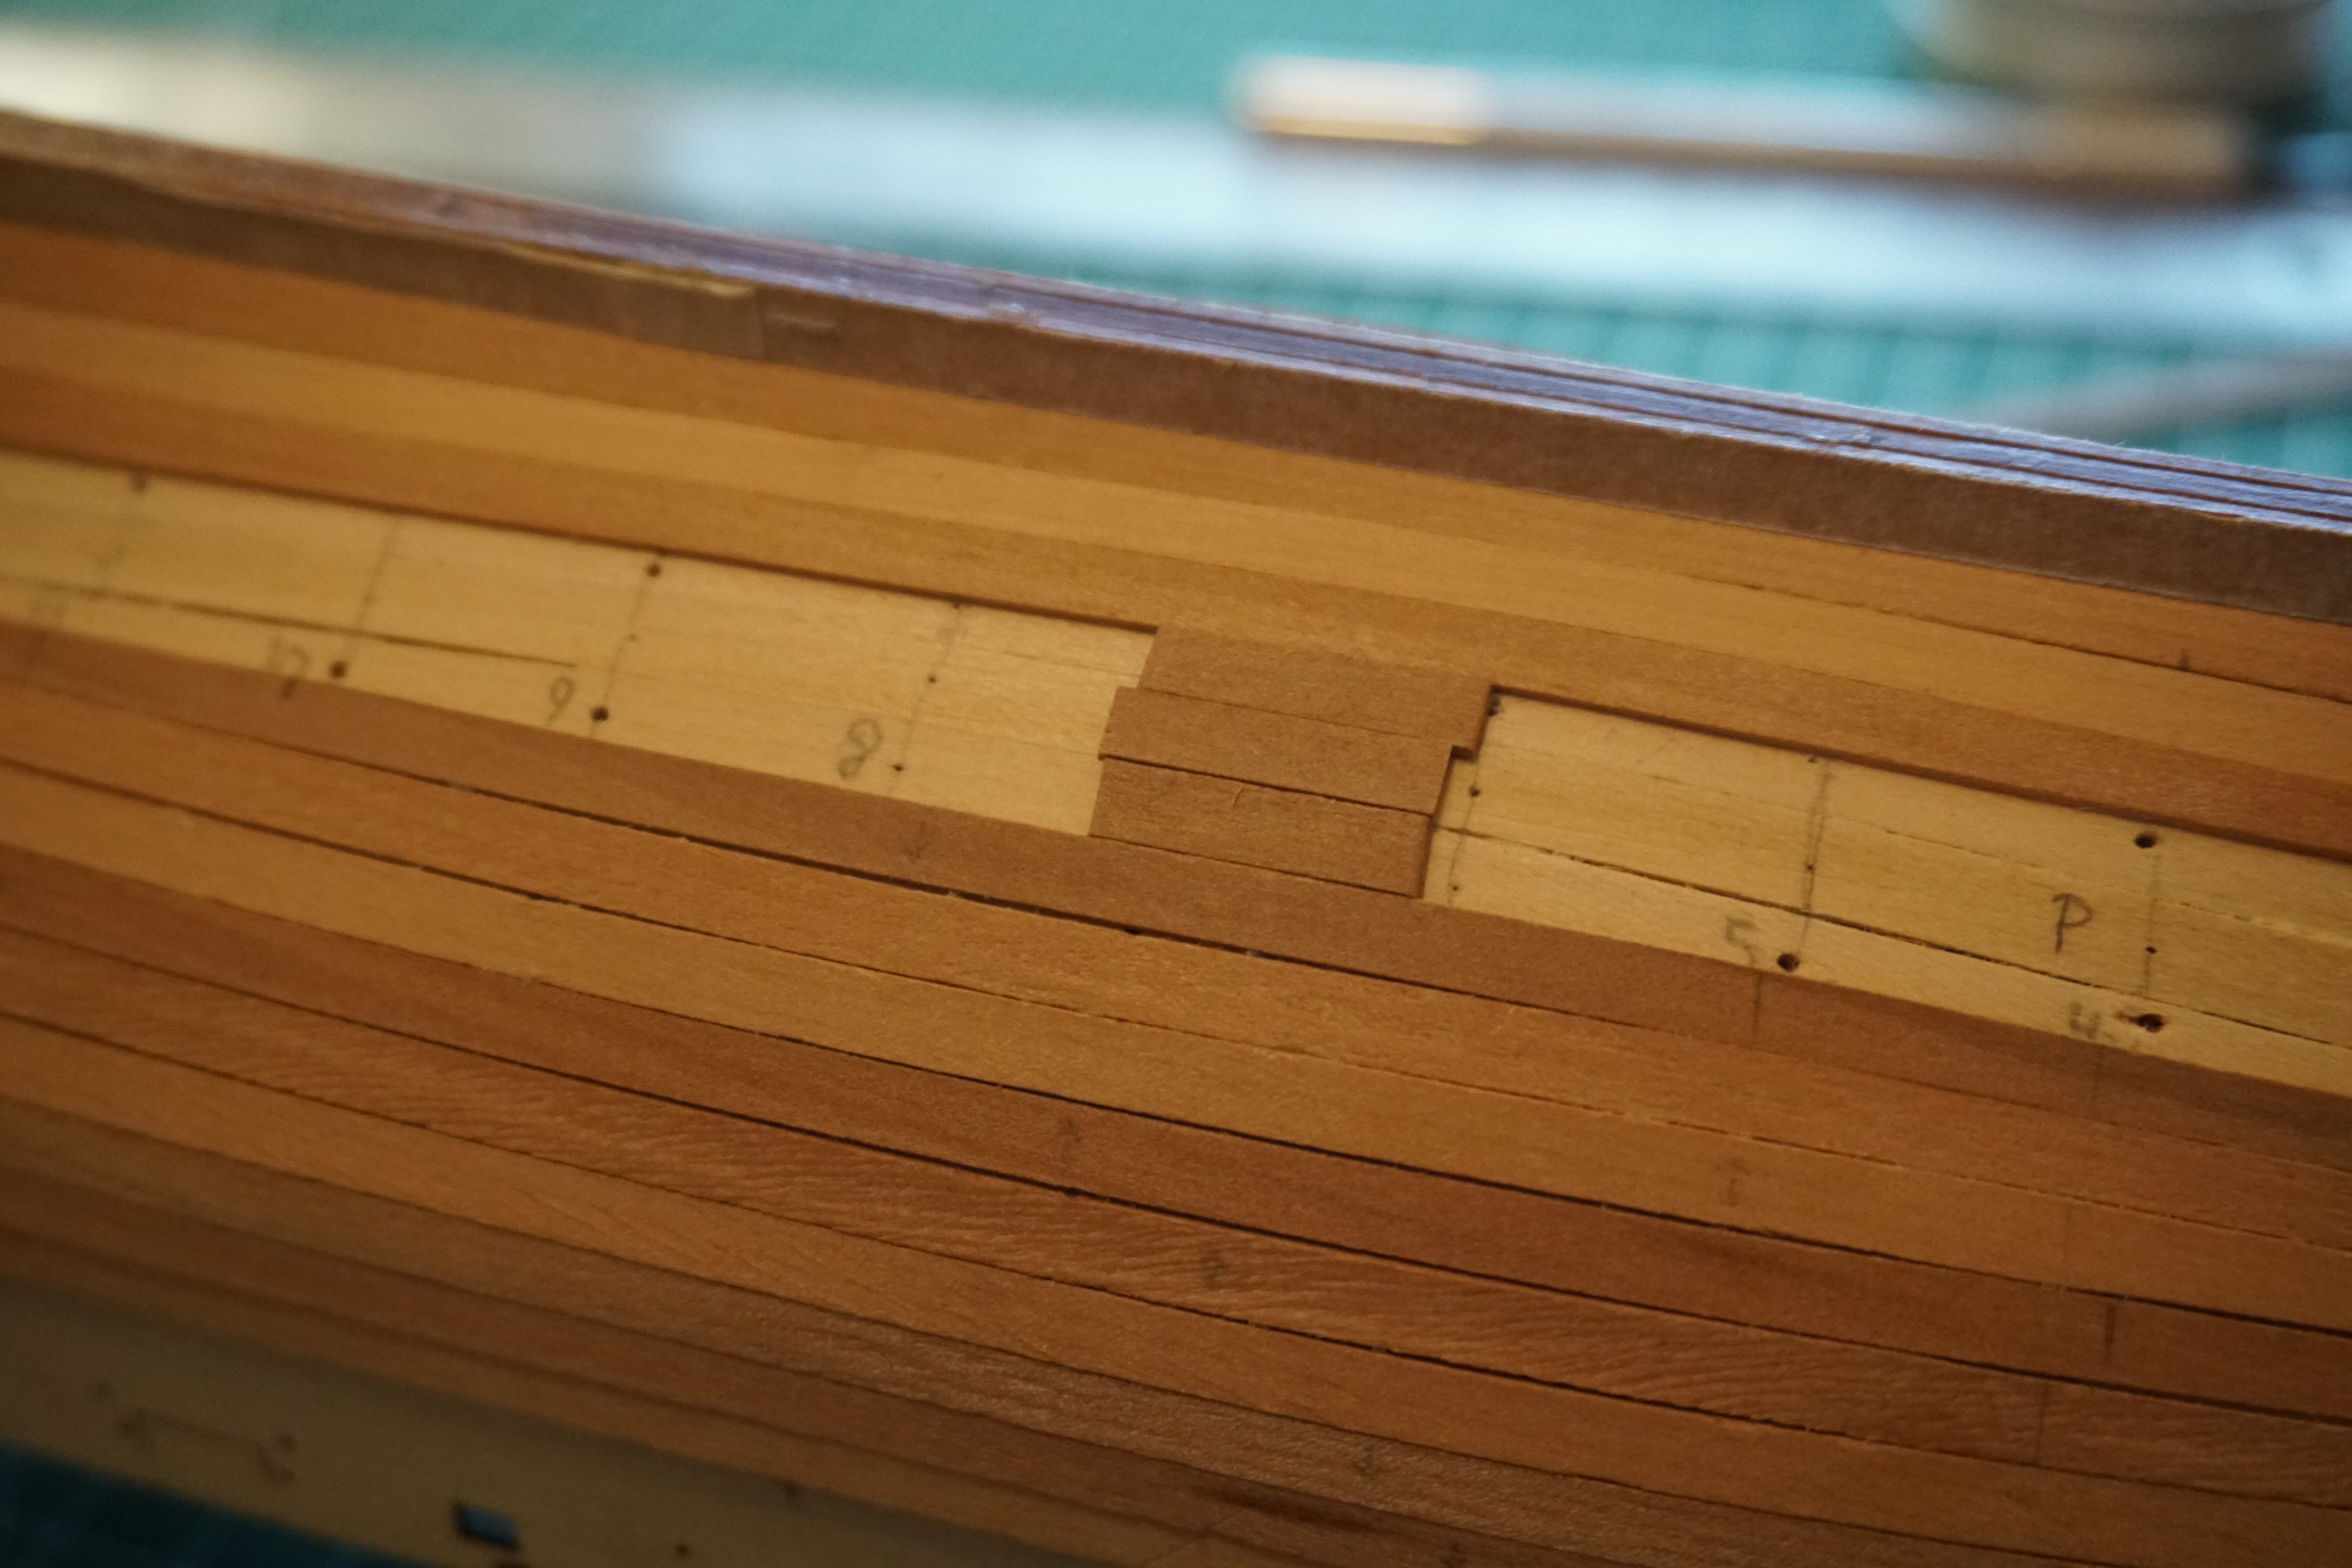
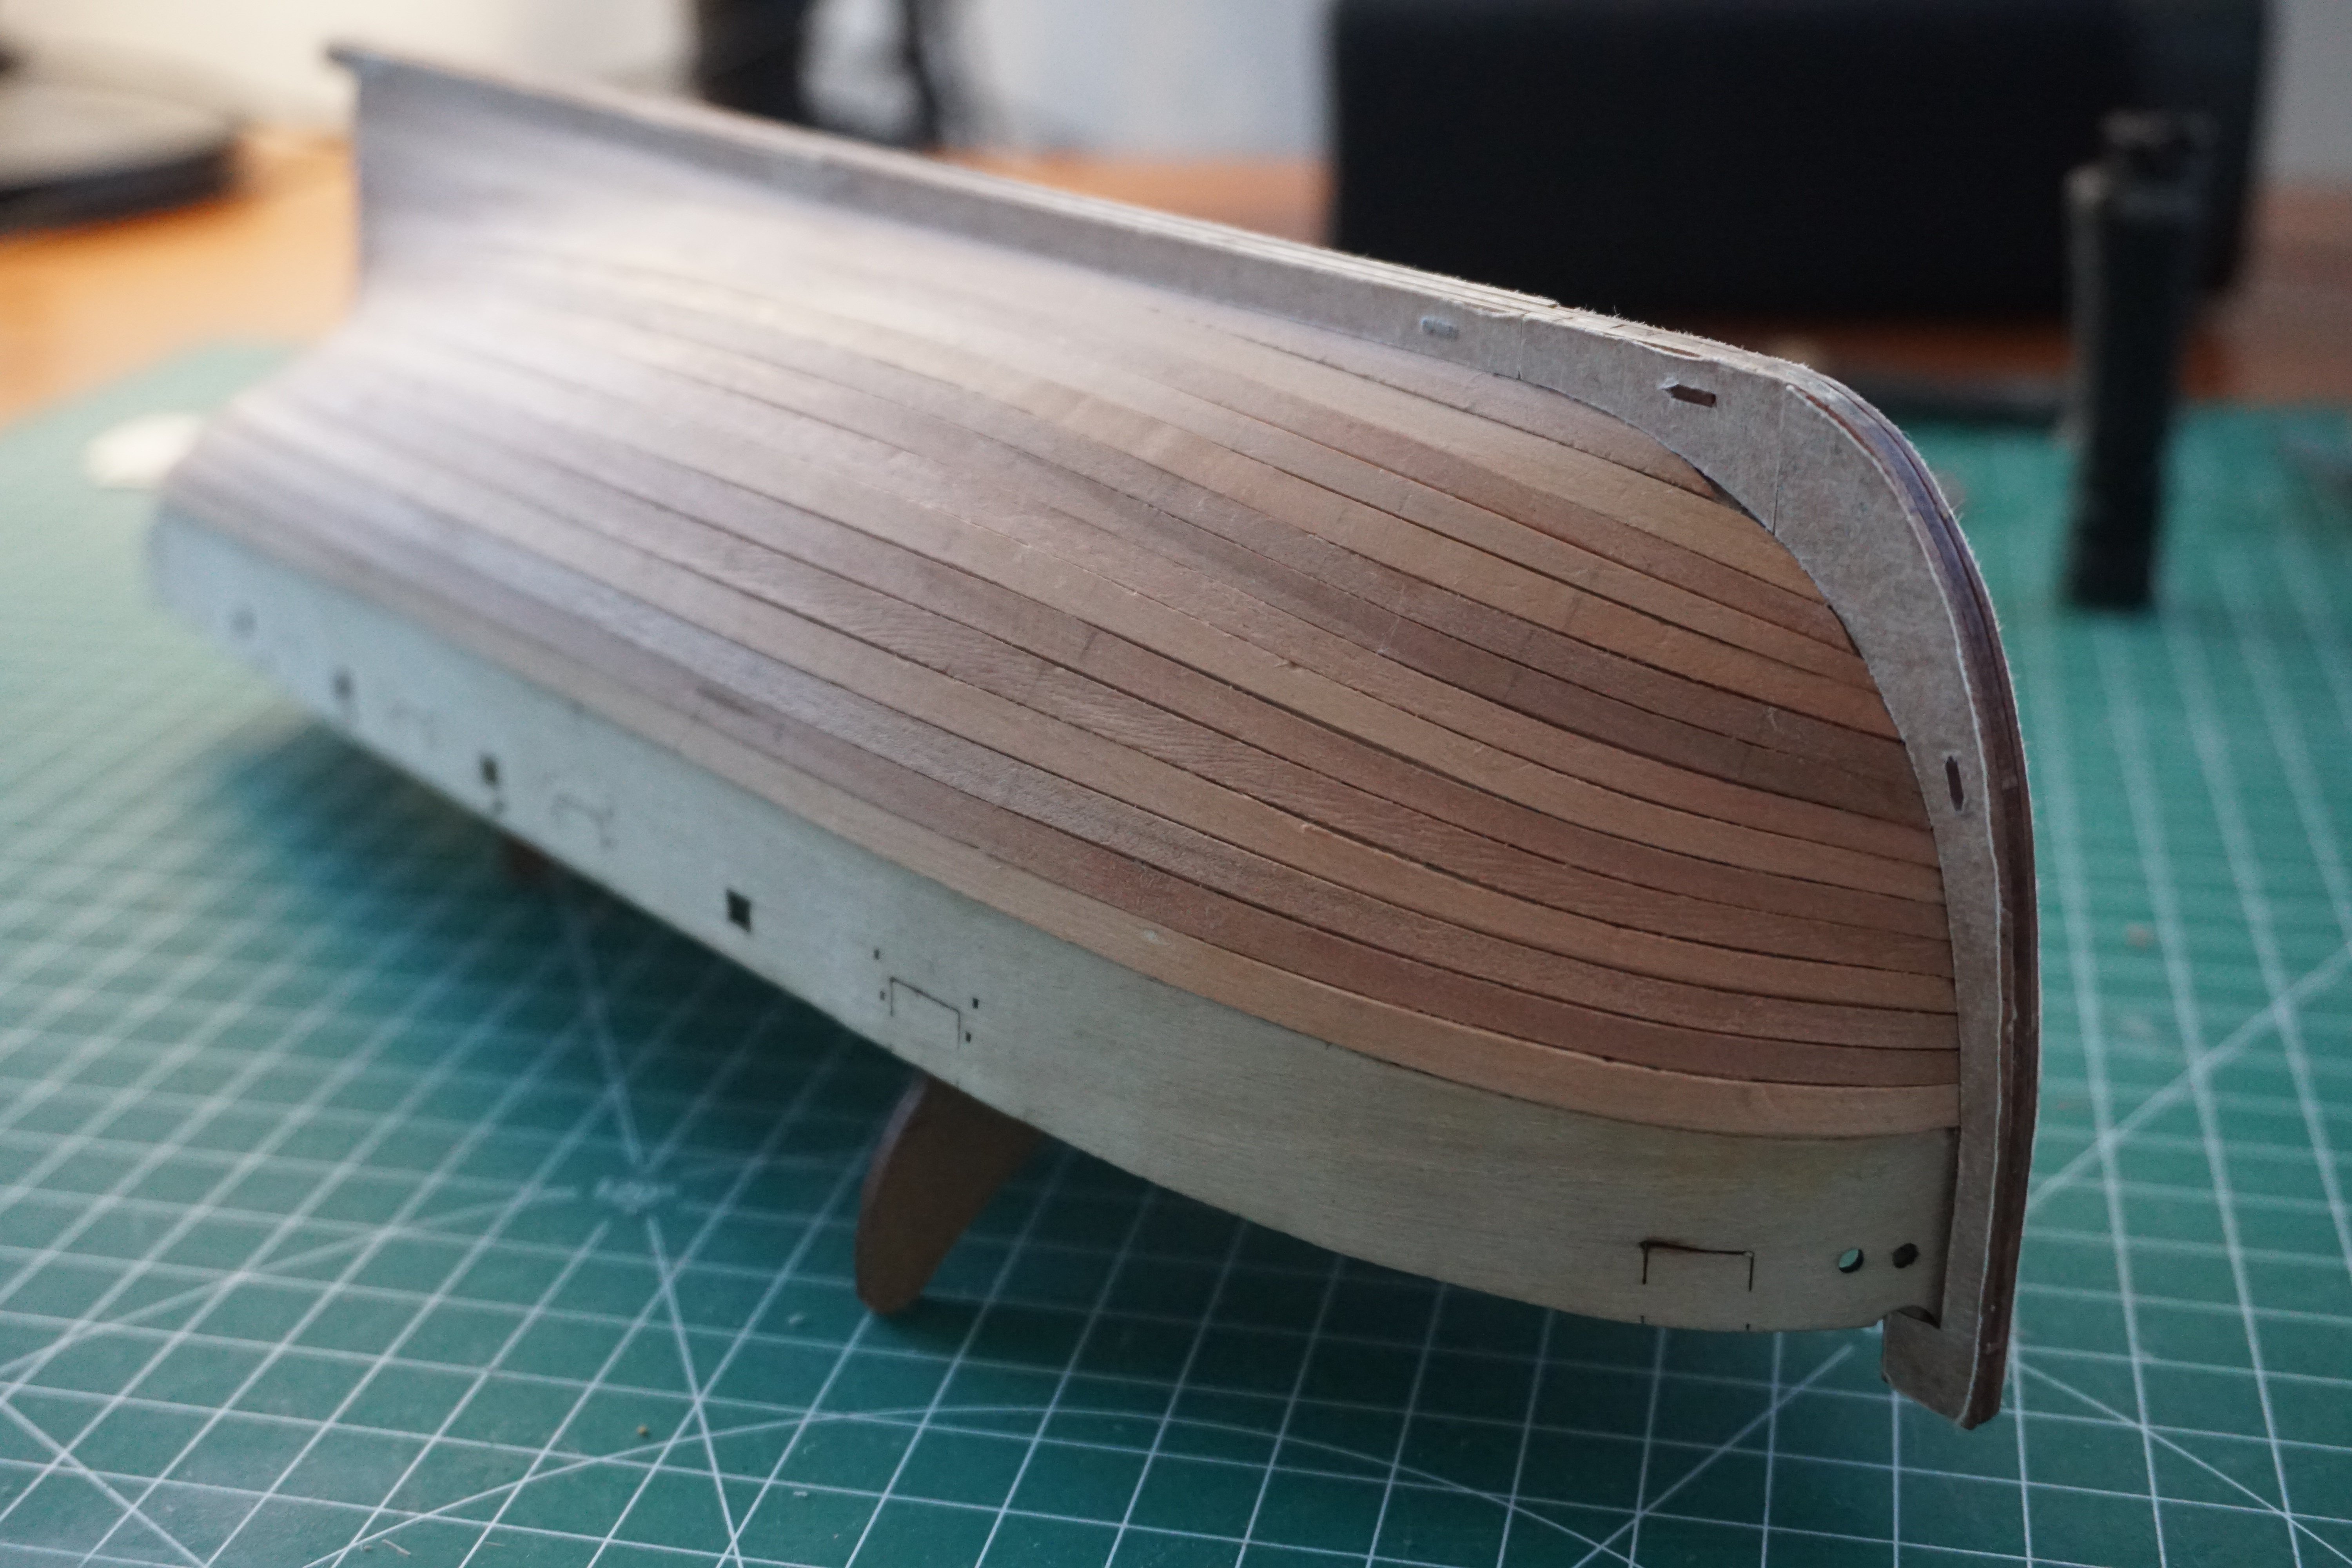
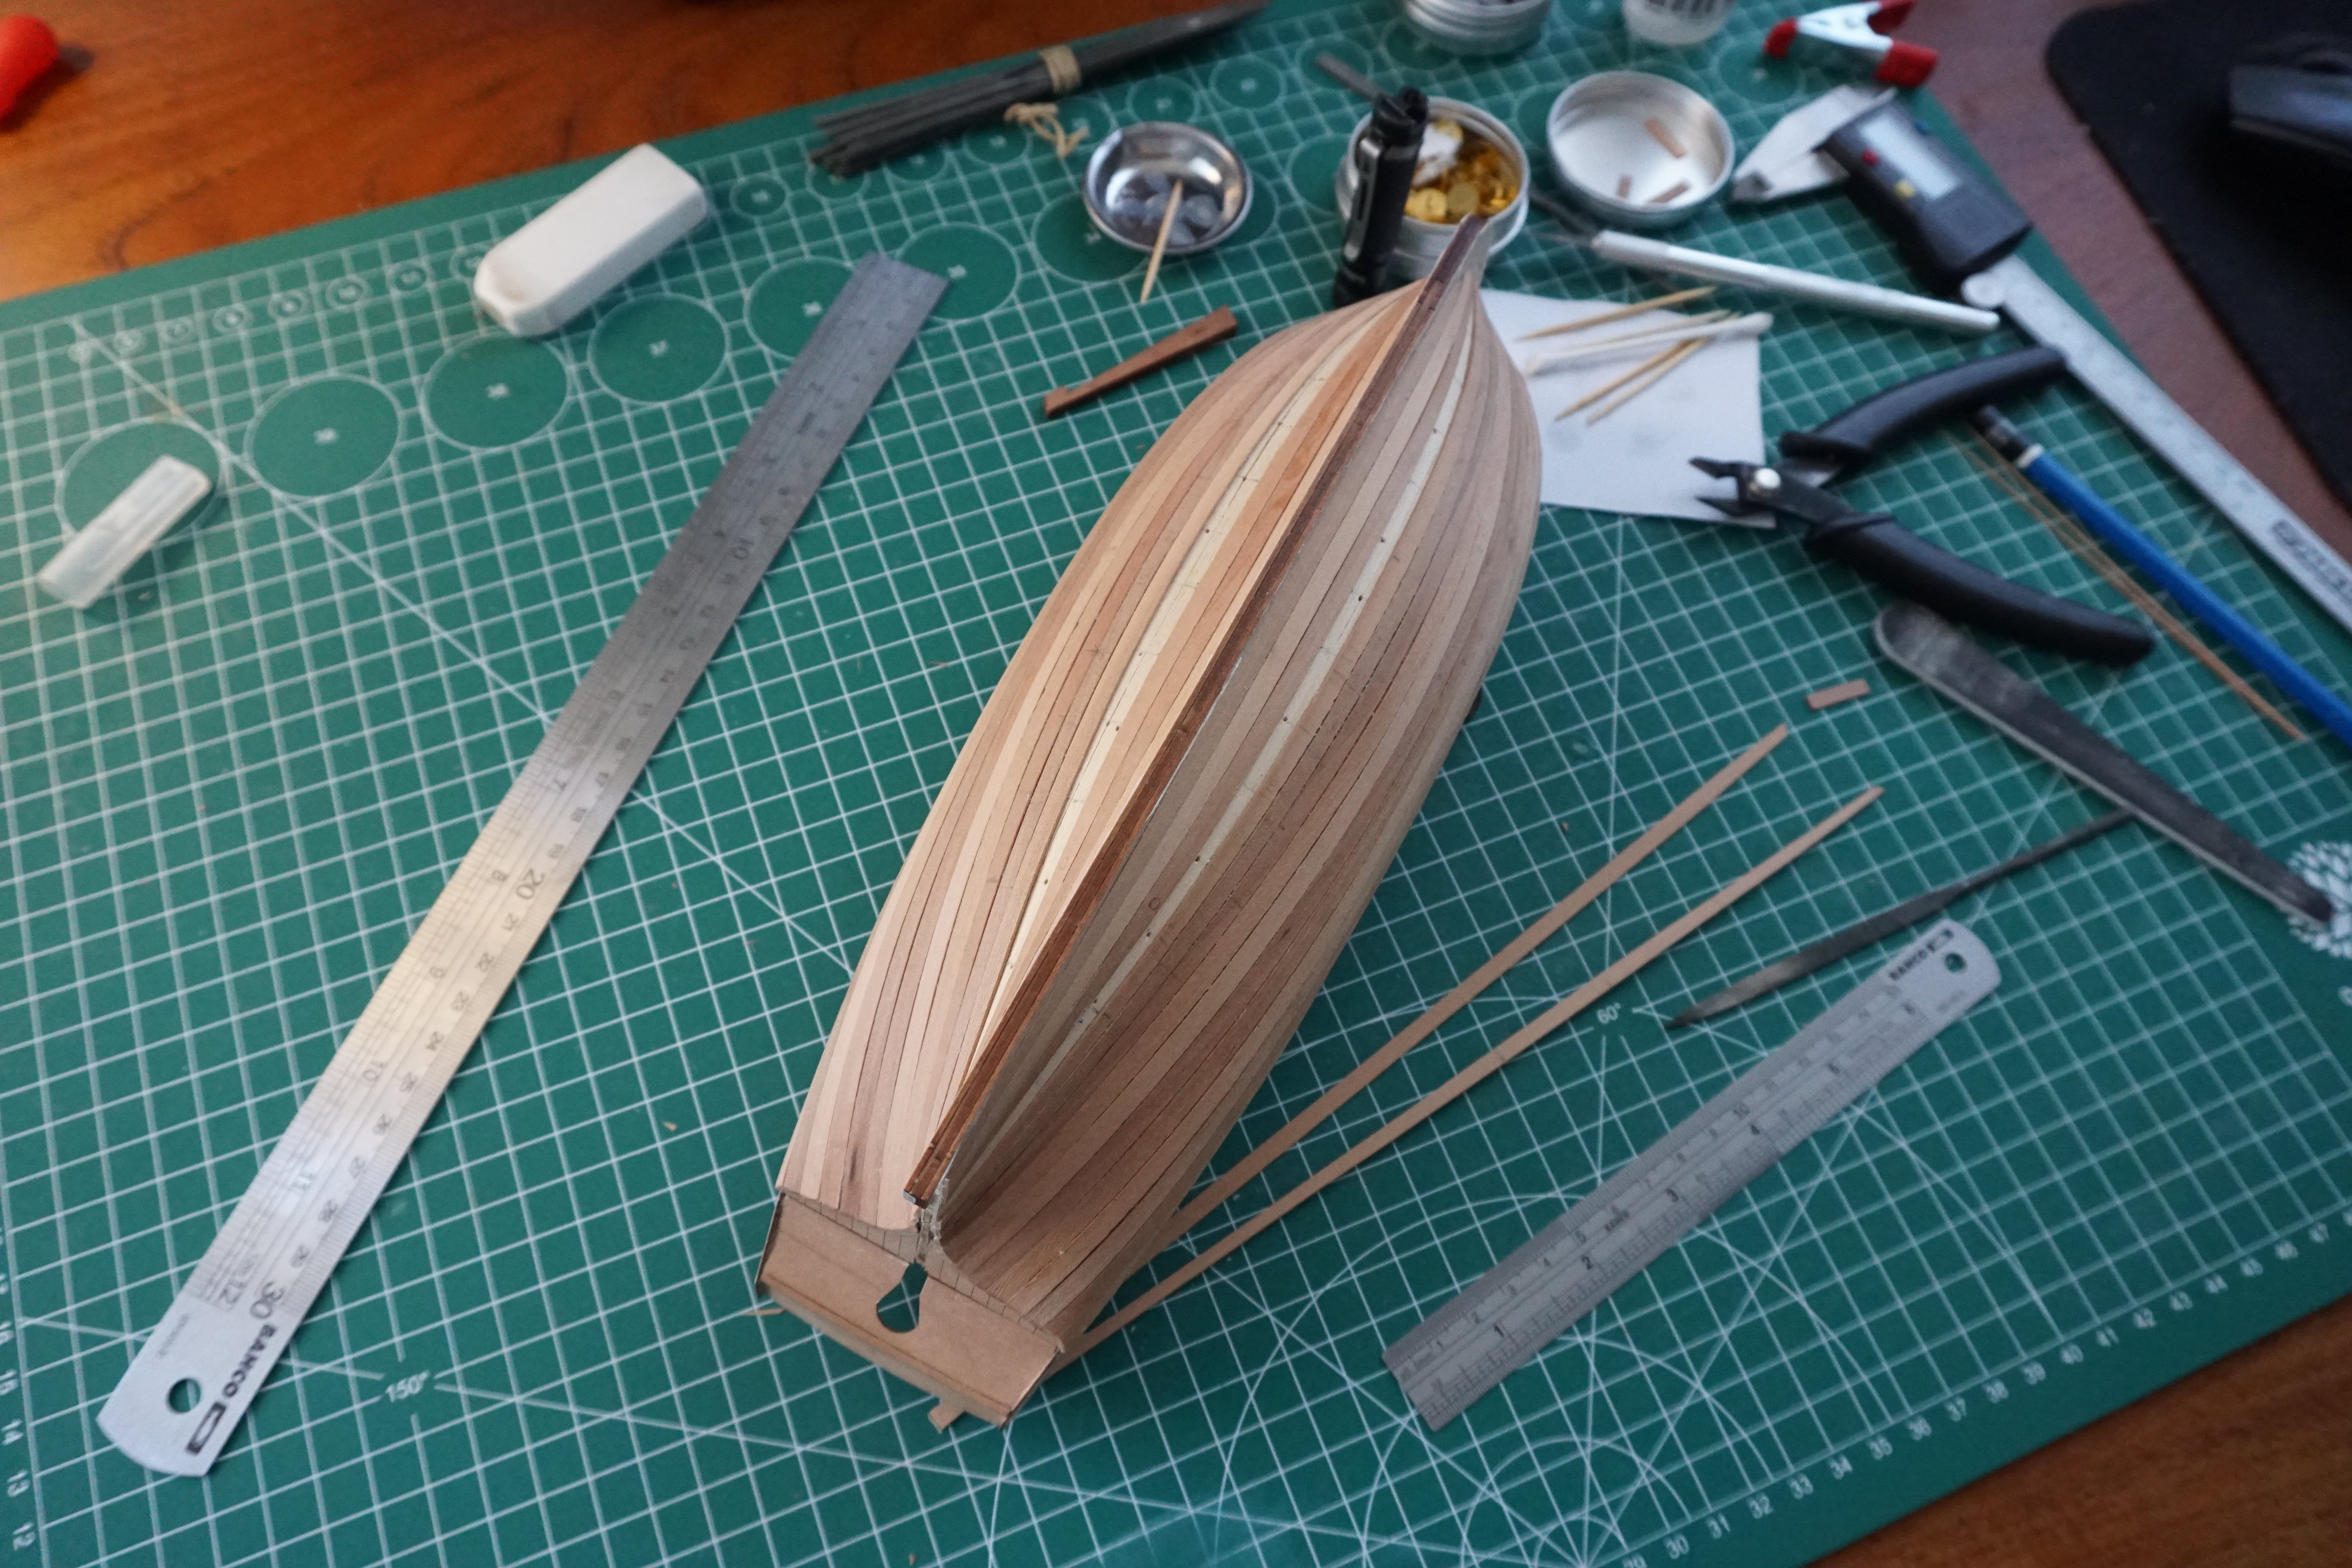
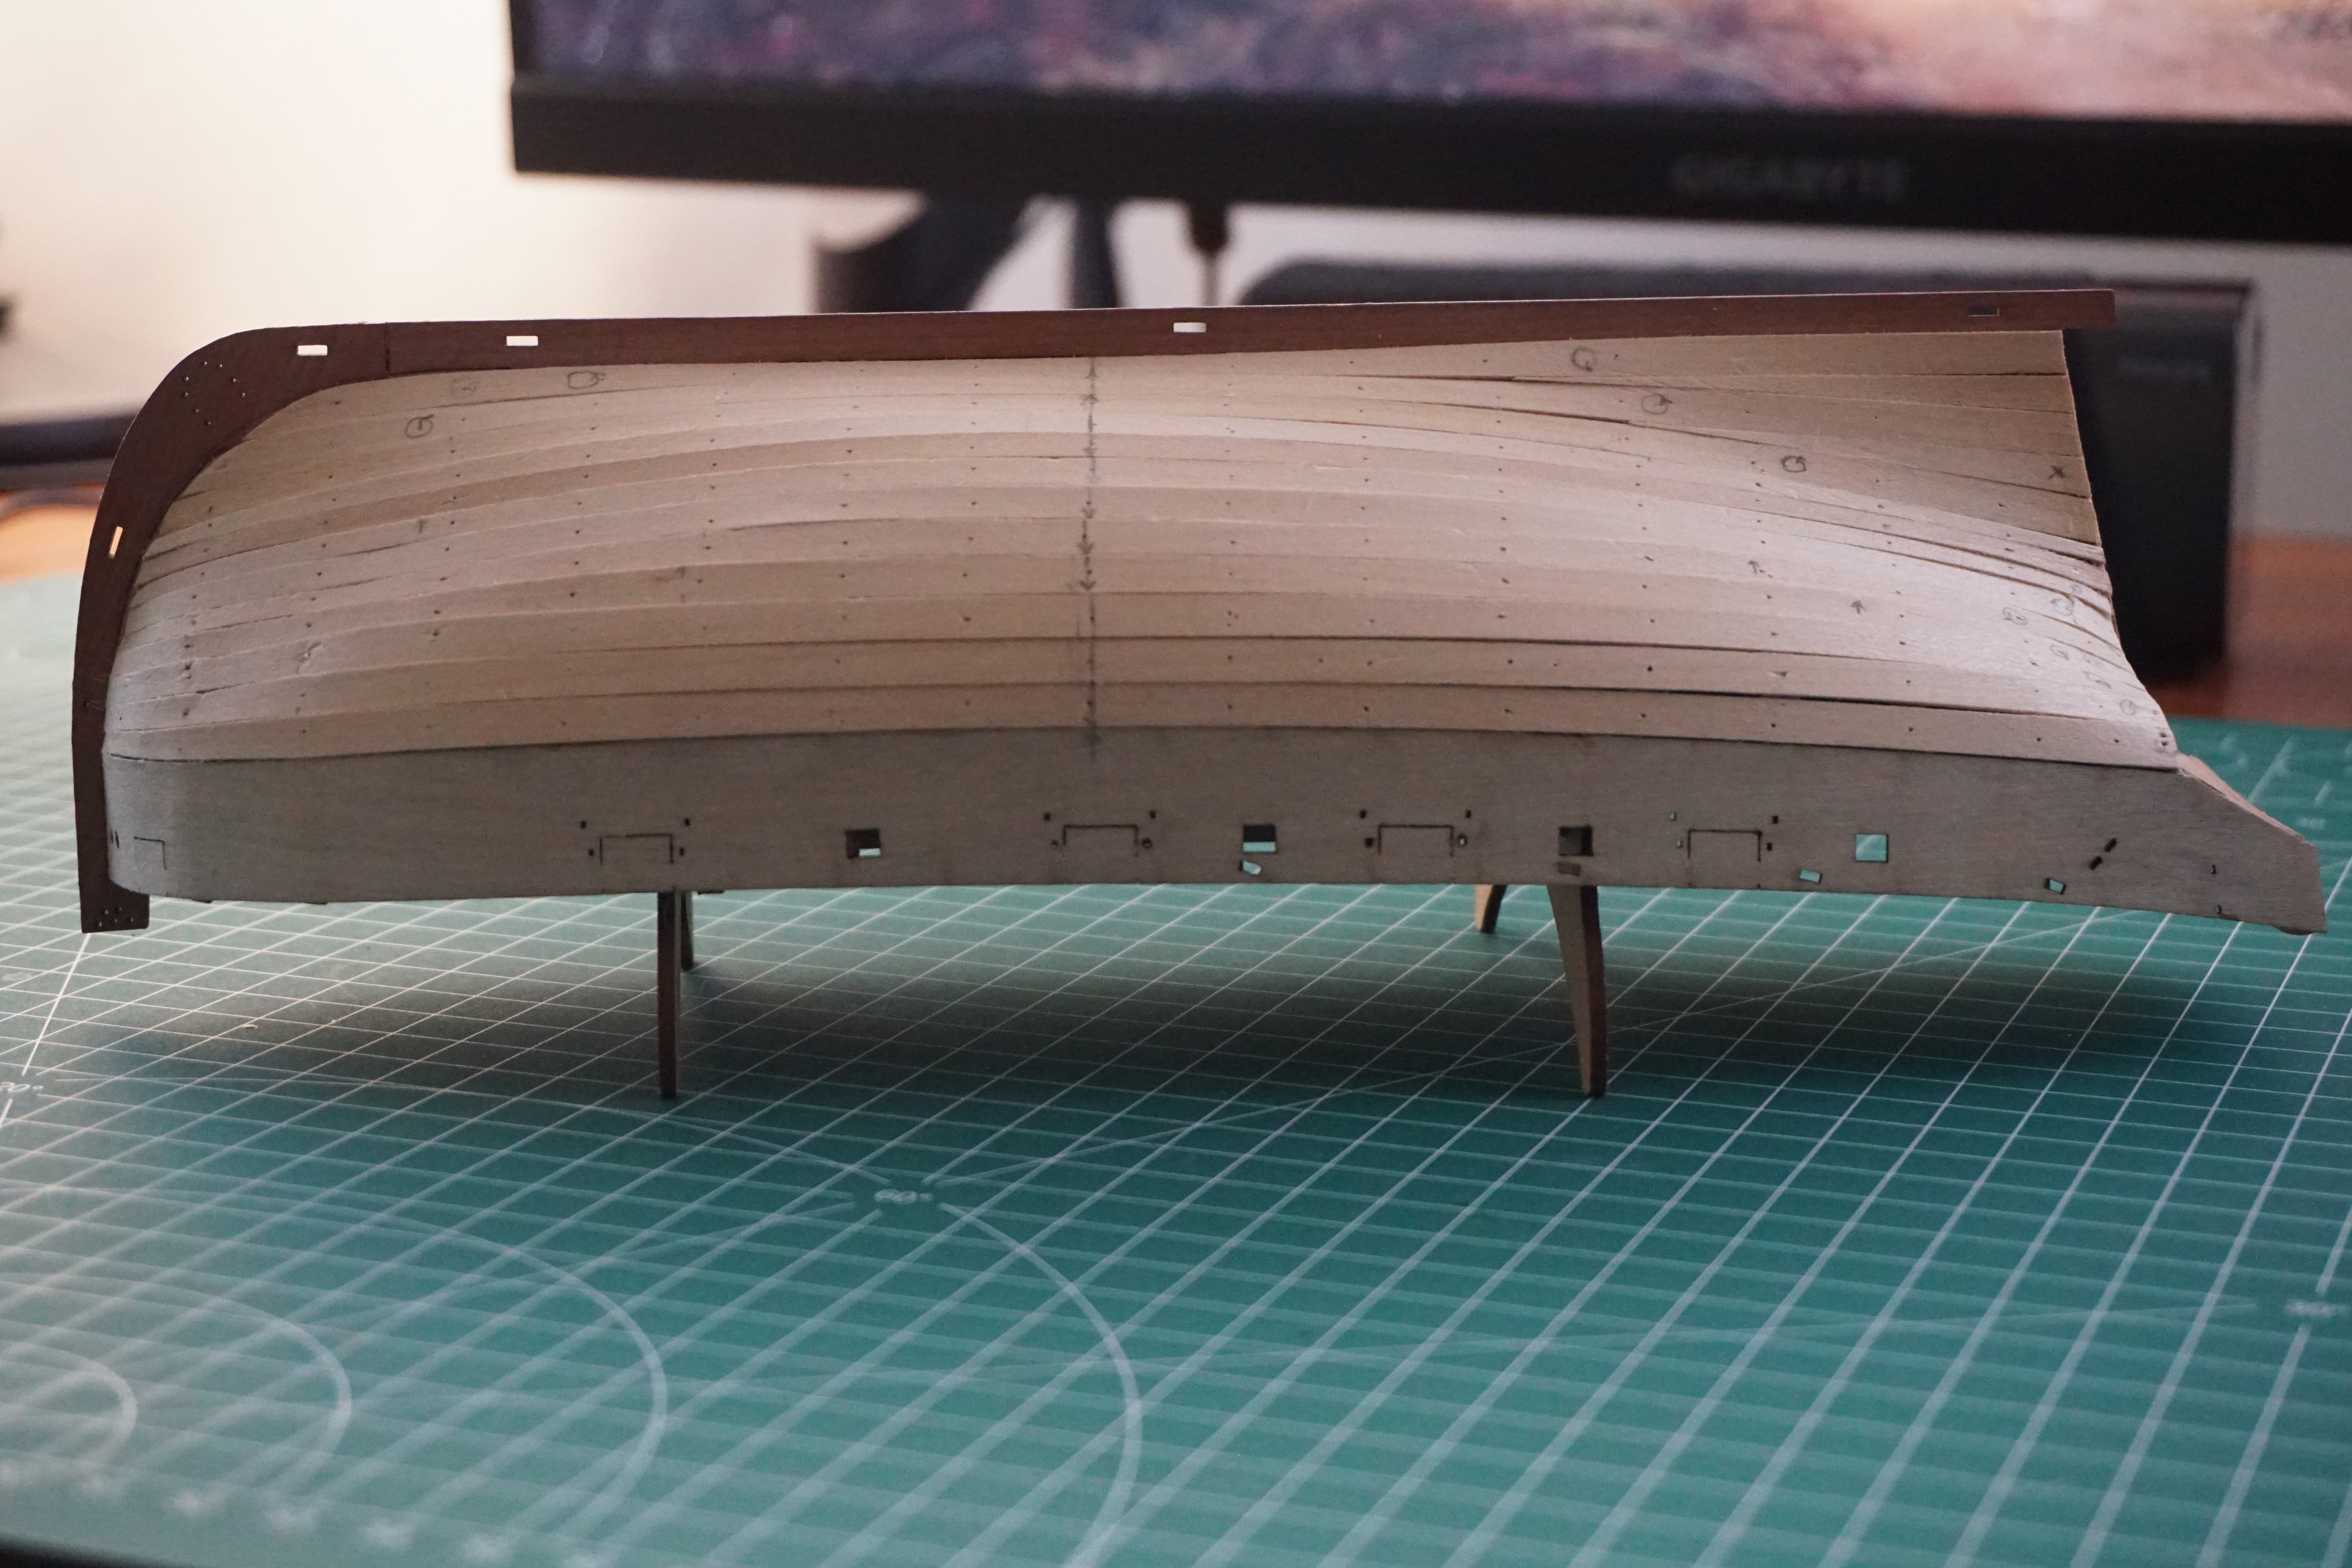
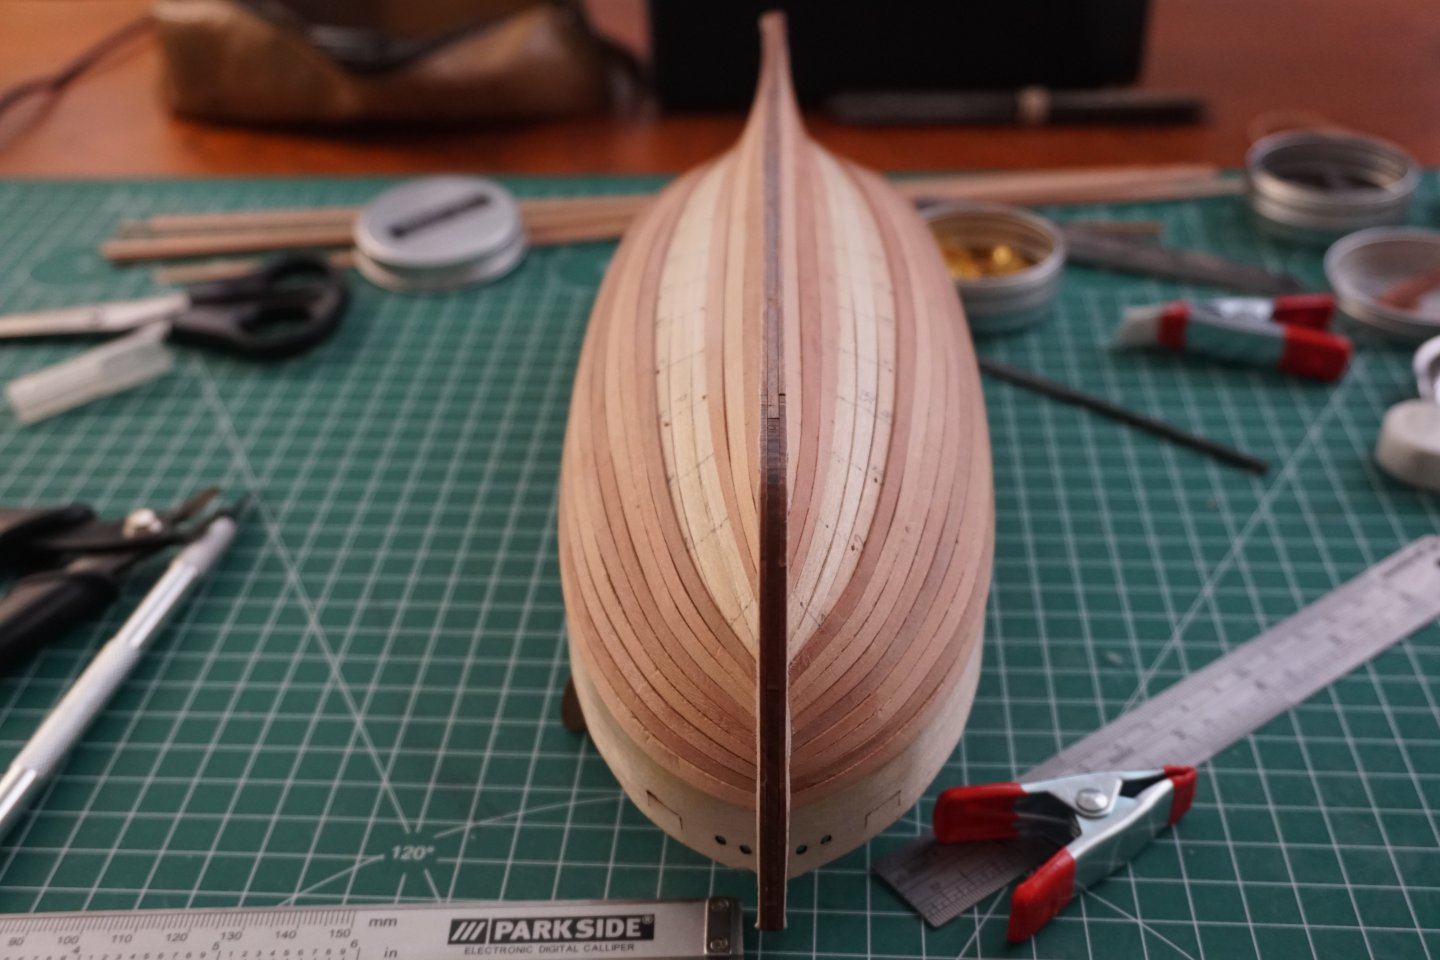
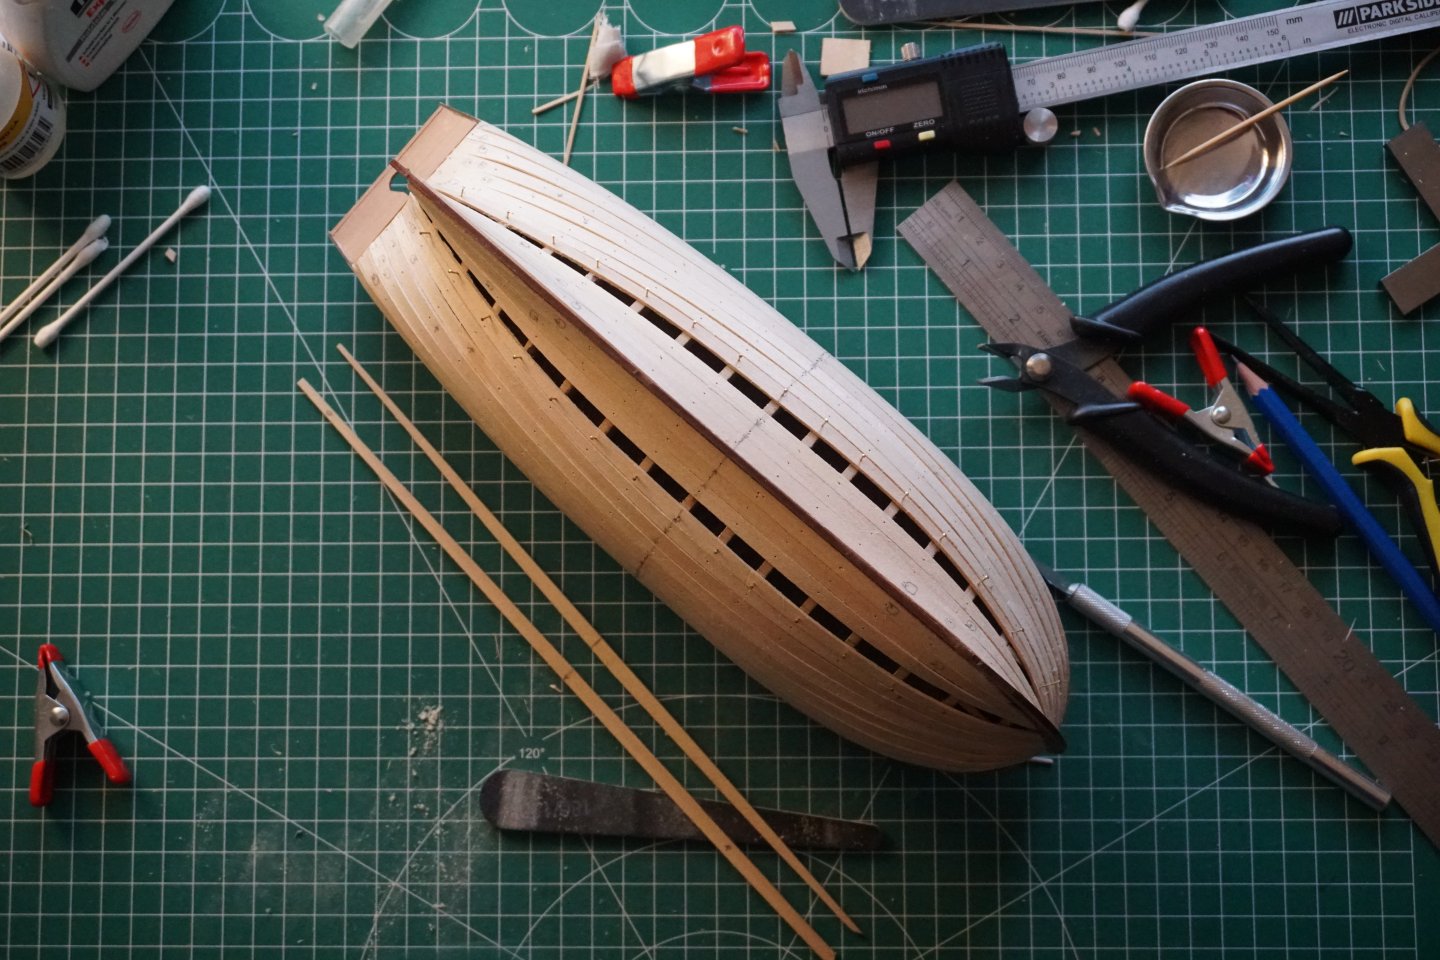
As I got to this point in the planking, I noticed that there was a 2 mm difference in the remaining gaps. I could finish the port side with 15 planks, but the starboard would require 16. So initially I split my spreadsheet in two and had elaborate plans about heavily thinning and tapering all eight remaining planks. But after shaping the first one, I understood how laborious it would be and decided to just finish both sides identically with three planks each, then add a small filler piece to the starboard side. And with that, the second planking was done. While everything I learned during the first planking certainly helped a lot, I think the second layer was easier in general, as there was almost no need to twist planks over a kettle in multiple spots.


- 61 replies
-
- 12
-
-
- First build
- Cutter
- (and 2 more)
-
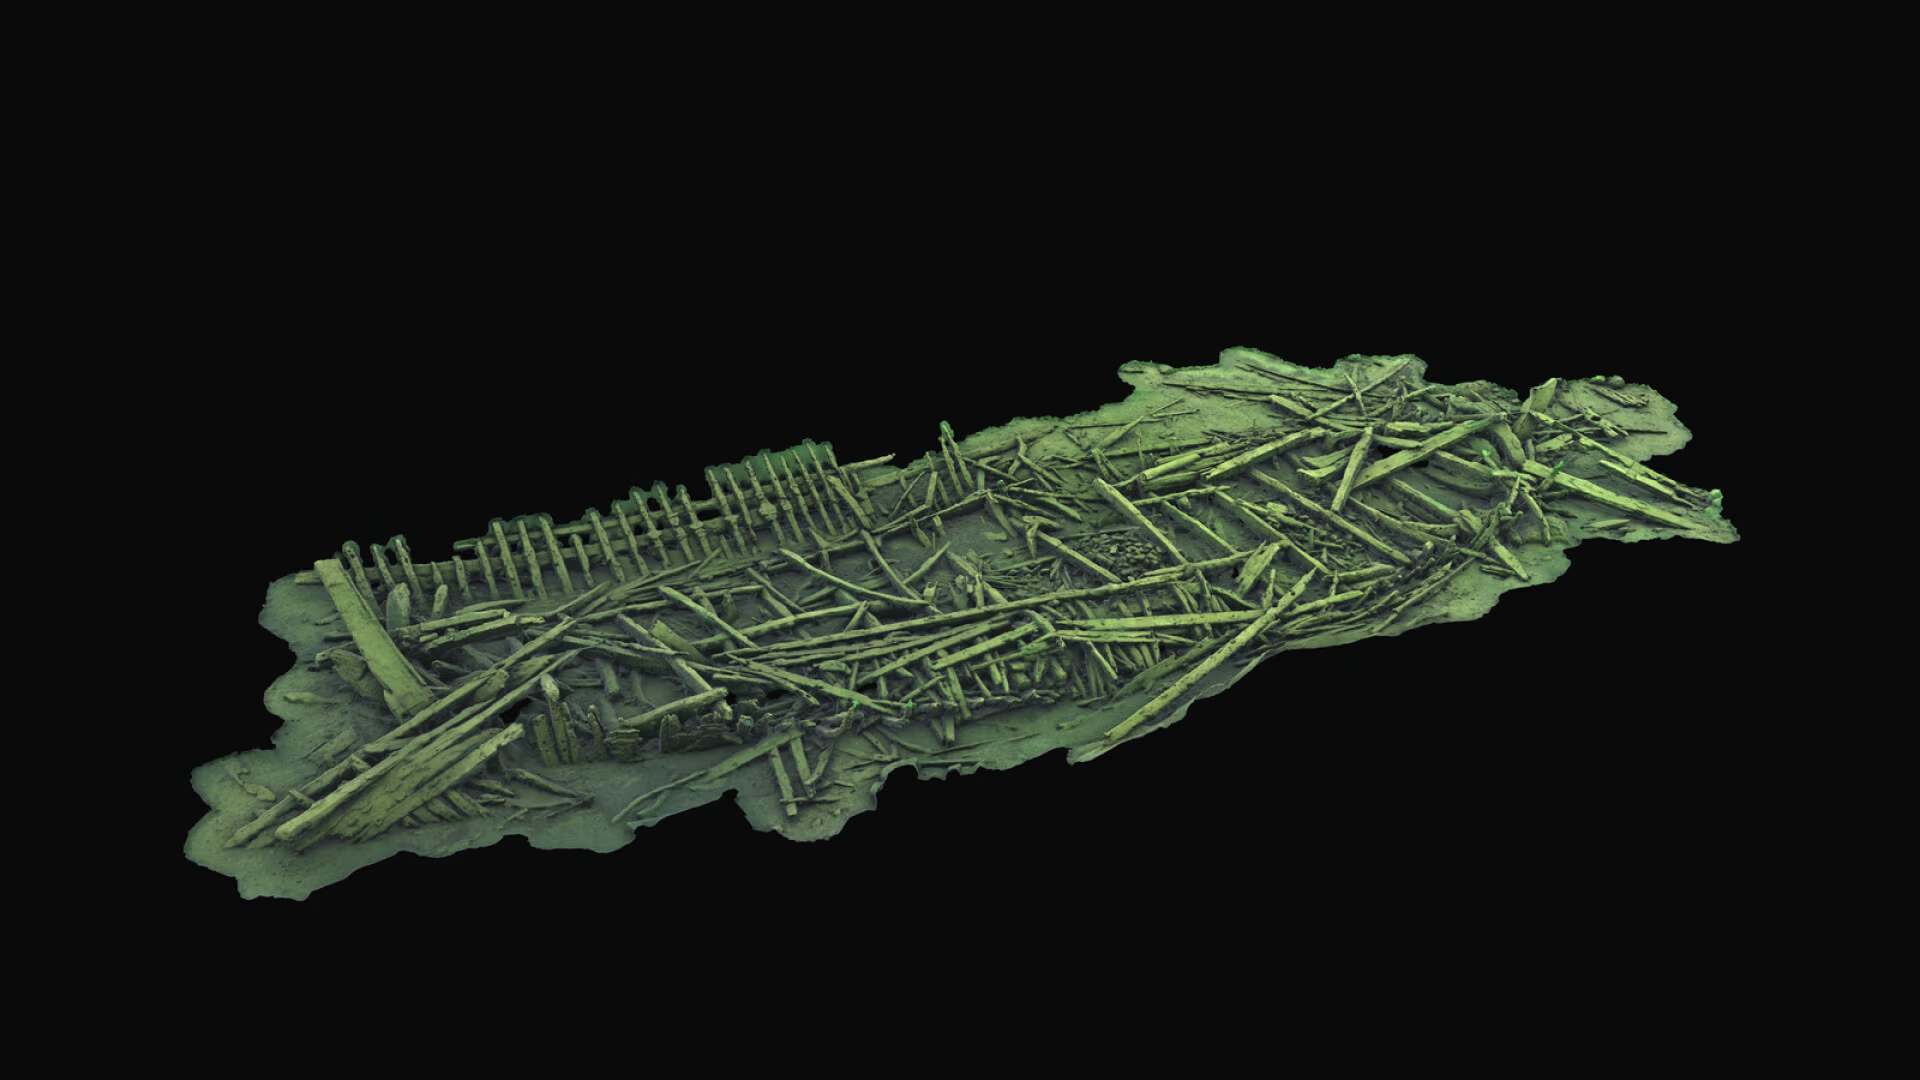
HMS Falken - little sister of HMS Wasa
Nightdive replied to Nirvana's topic in Nautical/Naval History
https://sketchfab.com/3d-models/shipwreck-uunihylky-varmbadan-kirkkonummi-9e3320db5a2c45faa24f414b68799421 Before its identification, the Falken was known as the 'Stove Wreck' due to a large brickwork stove found within it. It has been a well-known dive site since its discovery in 1974. The details of her loss remain unknown, but due to her shallow location (above 9 m/30 ft), it has been speculated that she was intentionally grounded to allow some salvage of her cargo. I planned to dive it and other wrecks in the area last summer, but the weather didn't permit on the days that we had set aside.
-
Damaged model, looking for the original details on it
Nightdive replied to Kevin Kenny's topic in Wood ship model kits
The visually closest one I could find is the SS Peruvian of the Allan Line. Could very well be some other migrant ship of that era.
-
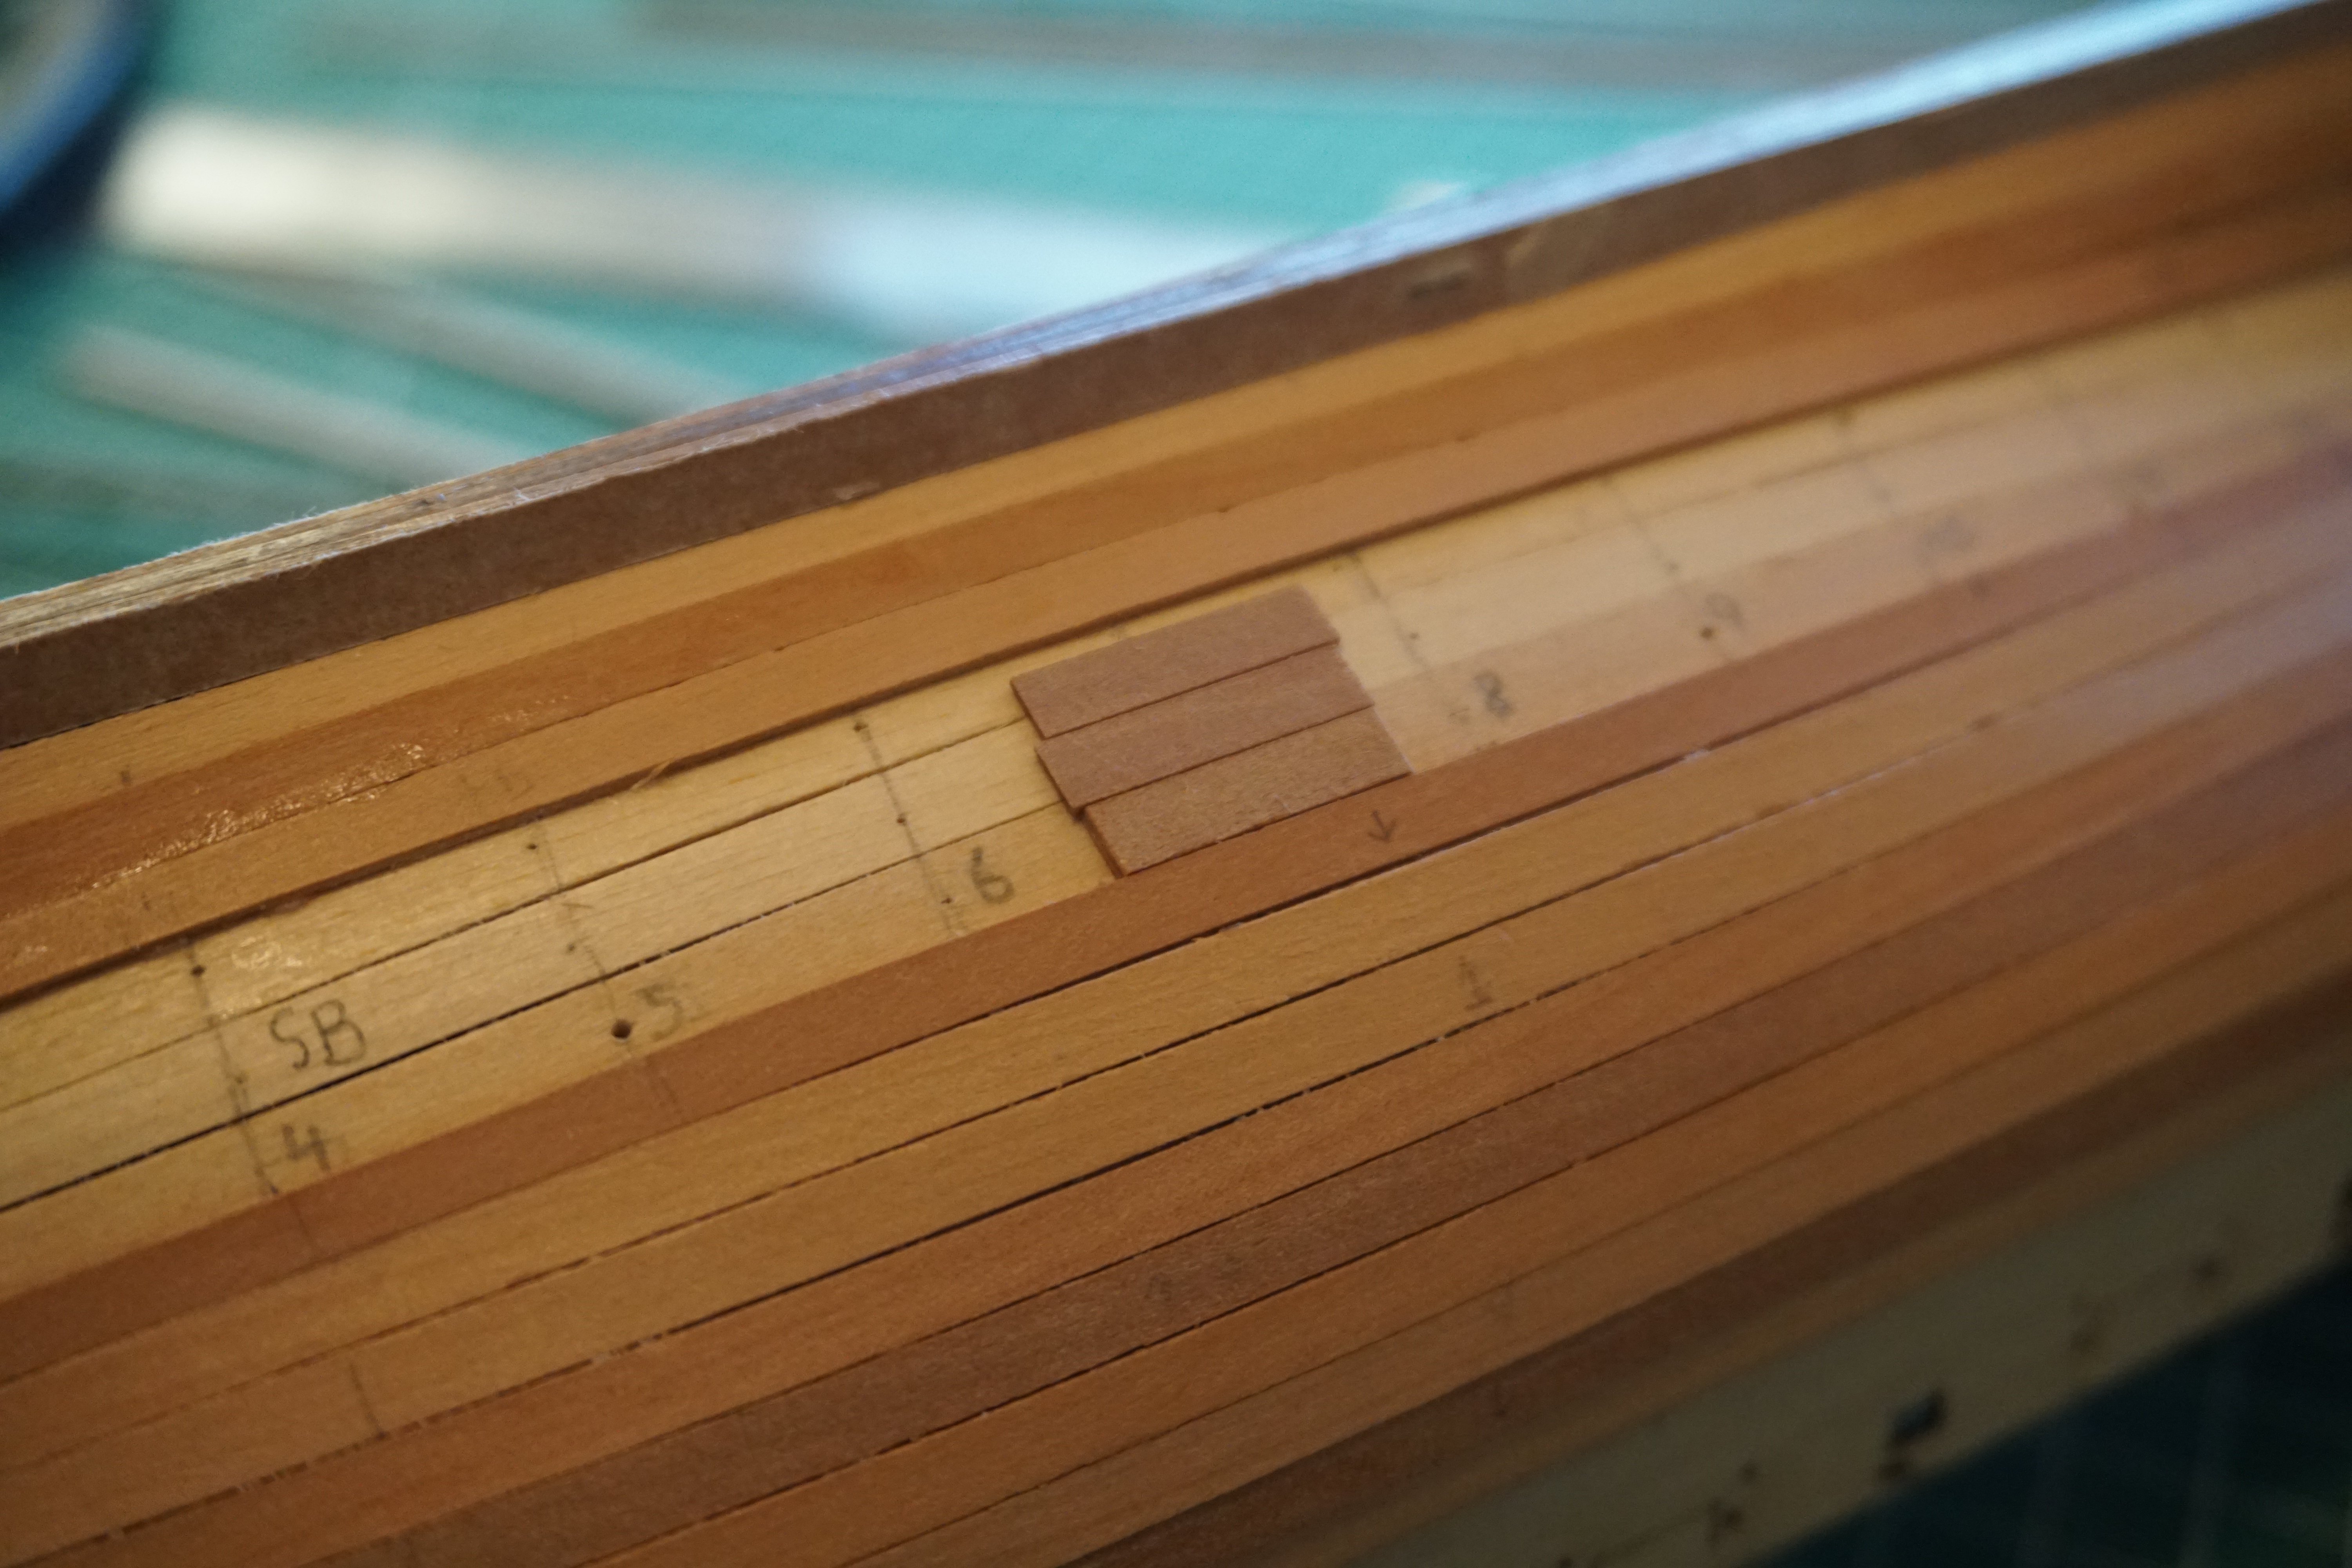
I'm now past the halfway point on the second planking and have been able to get away with fairly little clinker. I've used @Jase's spreadsheet method and re-measured after every few planks. Only some small adjustments to the spreadsheet have been needed. I've primarily used PVA again, with some CA for the bow and stern.


- 61 replies
-
- 8
-
-
- First build
- Cutter
- (and 2 more)
-
Excellent information, thank you for taking the time to write your posts. @ERS Rich interesting point about sealing, as a beginner, I assumed that harder woods should just be airbrushed directly. I've been meaning to mix some shellac from dewaxed flakes to touch up some old shellacked furniture scratches, Sherbourne will give me the perfect reason to finally do it. There's also plenty of extra wood in the kit, and that will give me a chance to experiment with different methods before doing the final painting. @palmerit I've already gone ahead and purchased an airbrush, though it is a fairly inexpensive hardware store one. I haven't tested it with paint yet, and I'll keep your Iwata and Badger recommendations in mind if it turns out to be of low quality. I was hoping to do all my painting outside, but it's getting late in the year. I might have to purchase one of those cabinets for later stages of the build. For compressed air I've decided to use a scuba tank. It should work well, the air is already bone dry. The adapters and a small additional pressure regulator cost only a fraction of a compressor's price. For fun, I'll post a picture of the setup once I get to the painting phase. @Desertanimal @palmerit Good point about blackening. I was already opting to do it for companionway hinges and belaying pins, but just as with hardwood, I assumed that PE can also be painted directly. My local hobby shop seems to carry Tamiya primer too, so I'll use that one in case I decide to paint the below-waterline brass parts white.
-
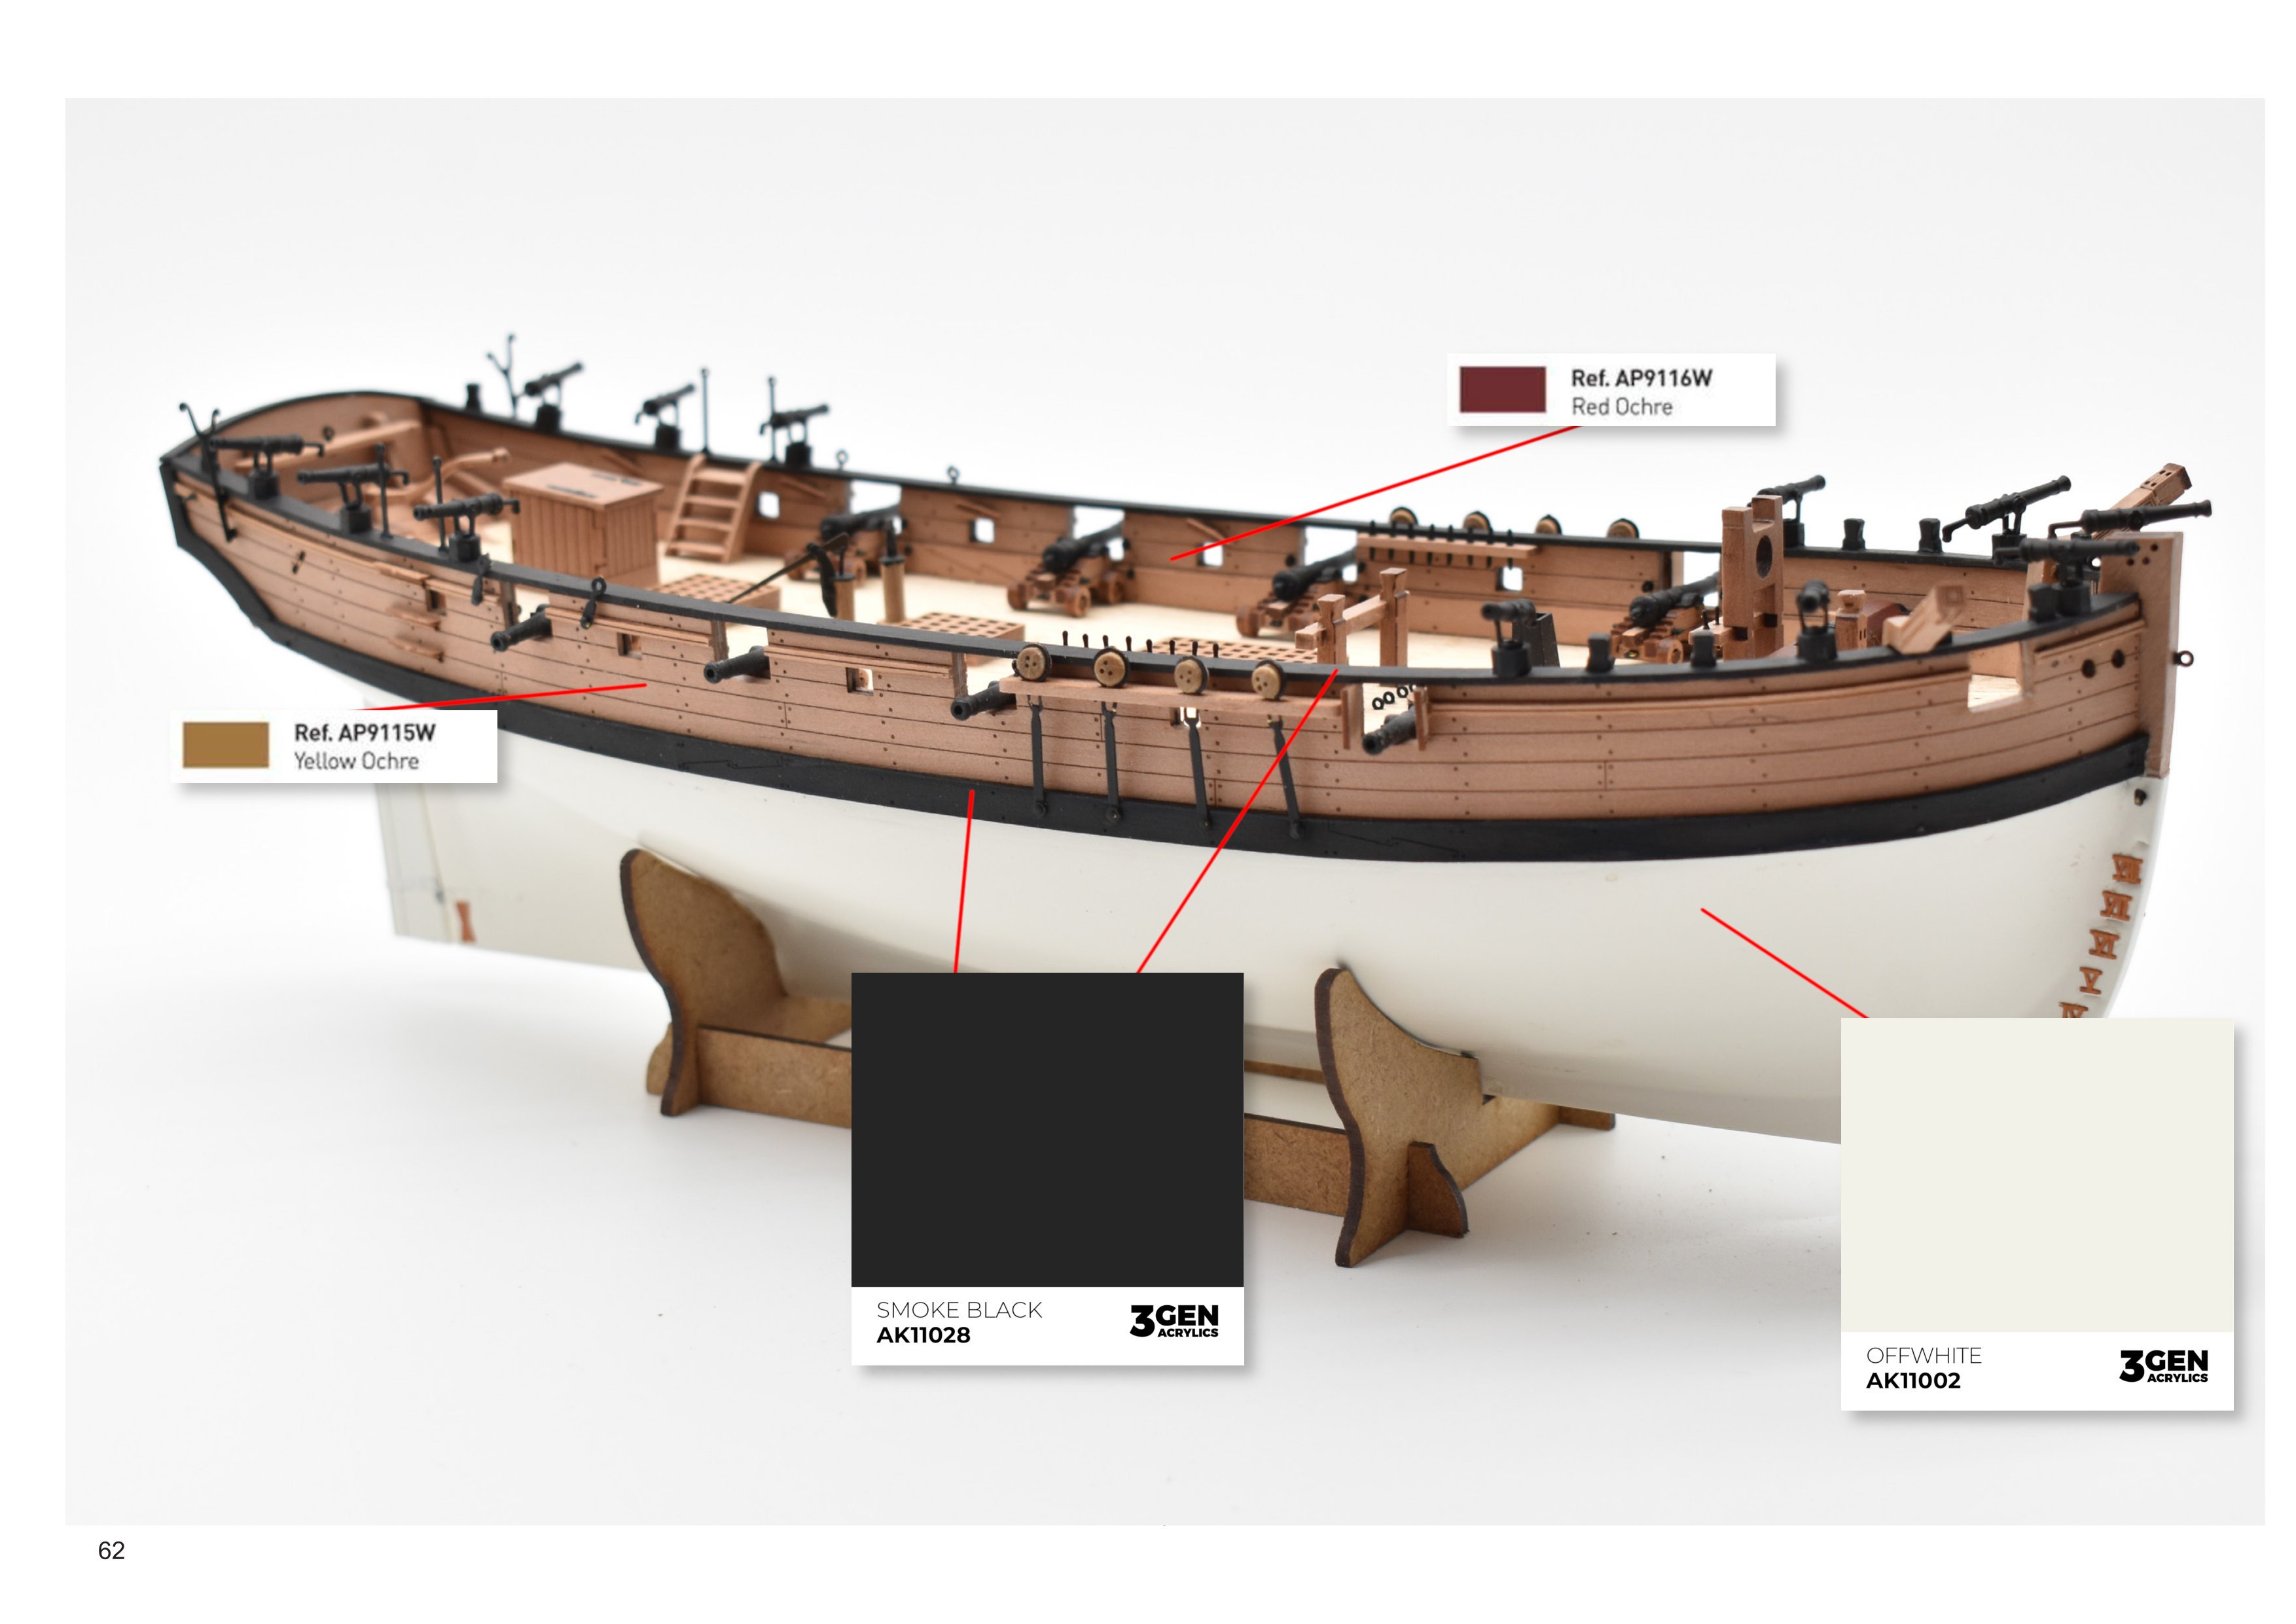
Thank you for the encouraging comments! I hope that the second planking goes well too. Sanded with 180 grit paper. I also used a little bit of filler at the bow to ensure a snug fit for the second layer of planks. I have some thoughts and questions about paints, as I need to order them soon, and I'd appreciate your opinions. This is completely new to me, so I've done some research by reading older discussions on this site. If I've understood correctly, there is no single correct mix for the ochre paints or the "white stuff". The colours varied in real life, and it's ultimately up to the modeler's taste. So I've decided to go for more muted colours for scale effect, plus it looks better to my eye in other models. My current paint selection is Admiralty Paints’ red ochre for inner bulwarks, AK off-white for the white stuff, and AK smoke black for wales. I originally wanted to paint the sides with Admiralty Paints' yellow ochre. It seems fairly close to HMS Victory's current colour scheme, which I like personally, and it could be a nice little nod to the connection between these two ships. However, after looking at these contemporary cutter models, I'm no longer so sure about painting the sides at all. In this thread, it was mentioned that yellow or red sides were mandated by the Navy Board in 1777, so I suppose it's theoretically possible that the Sherbourne was painted yellow in the last years of her career. My question is, if I choose to paint the parts, can they be thinly airbrushed so that the lasered details will remain visible? Also, would it be historically inaccurate to paint the depth markings, horseshoe and stern fish plate white at the same time as I airbrush the hull?


- 61 replies
-
- 1
-
-
- First build
- Cutter
- (and 2 more)
-
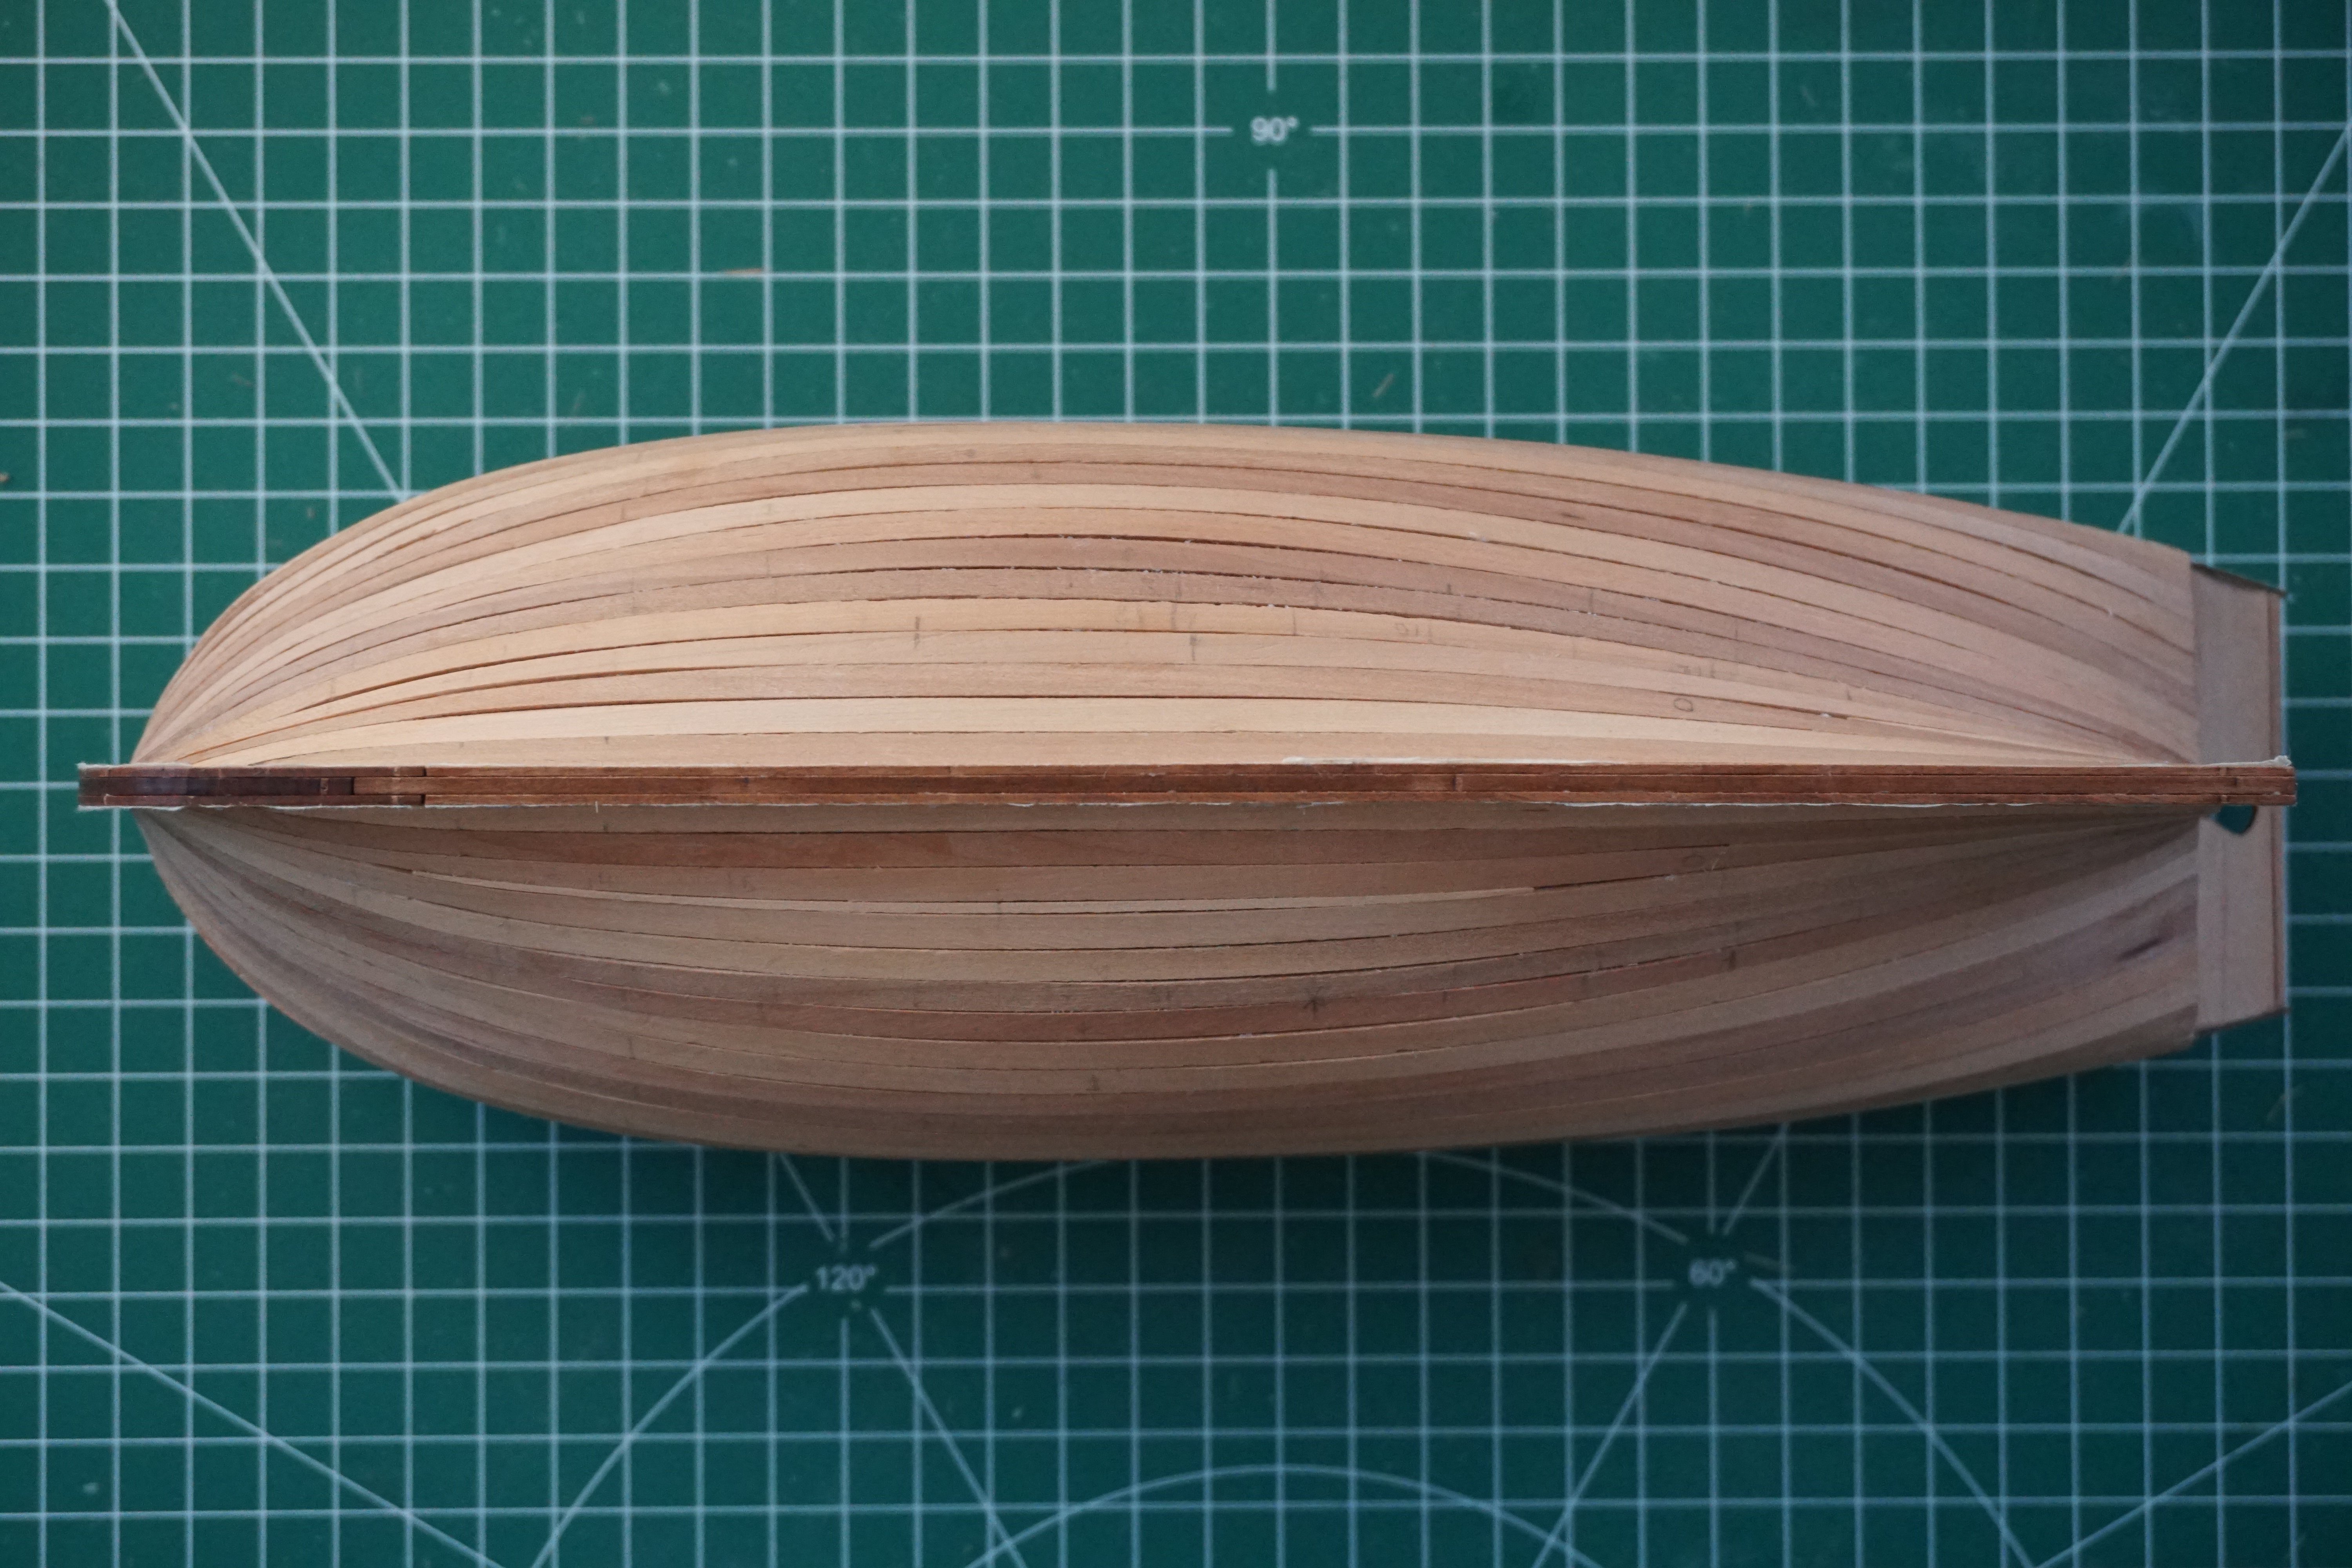
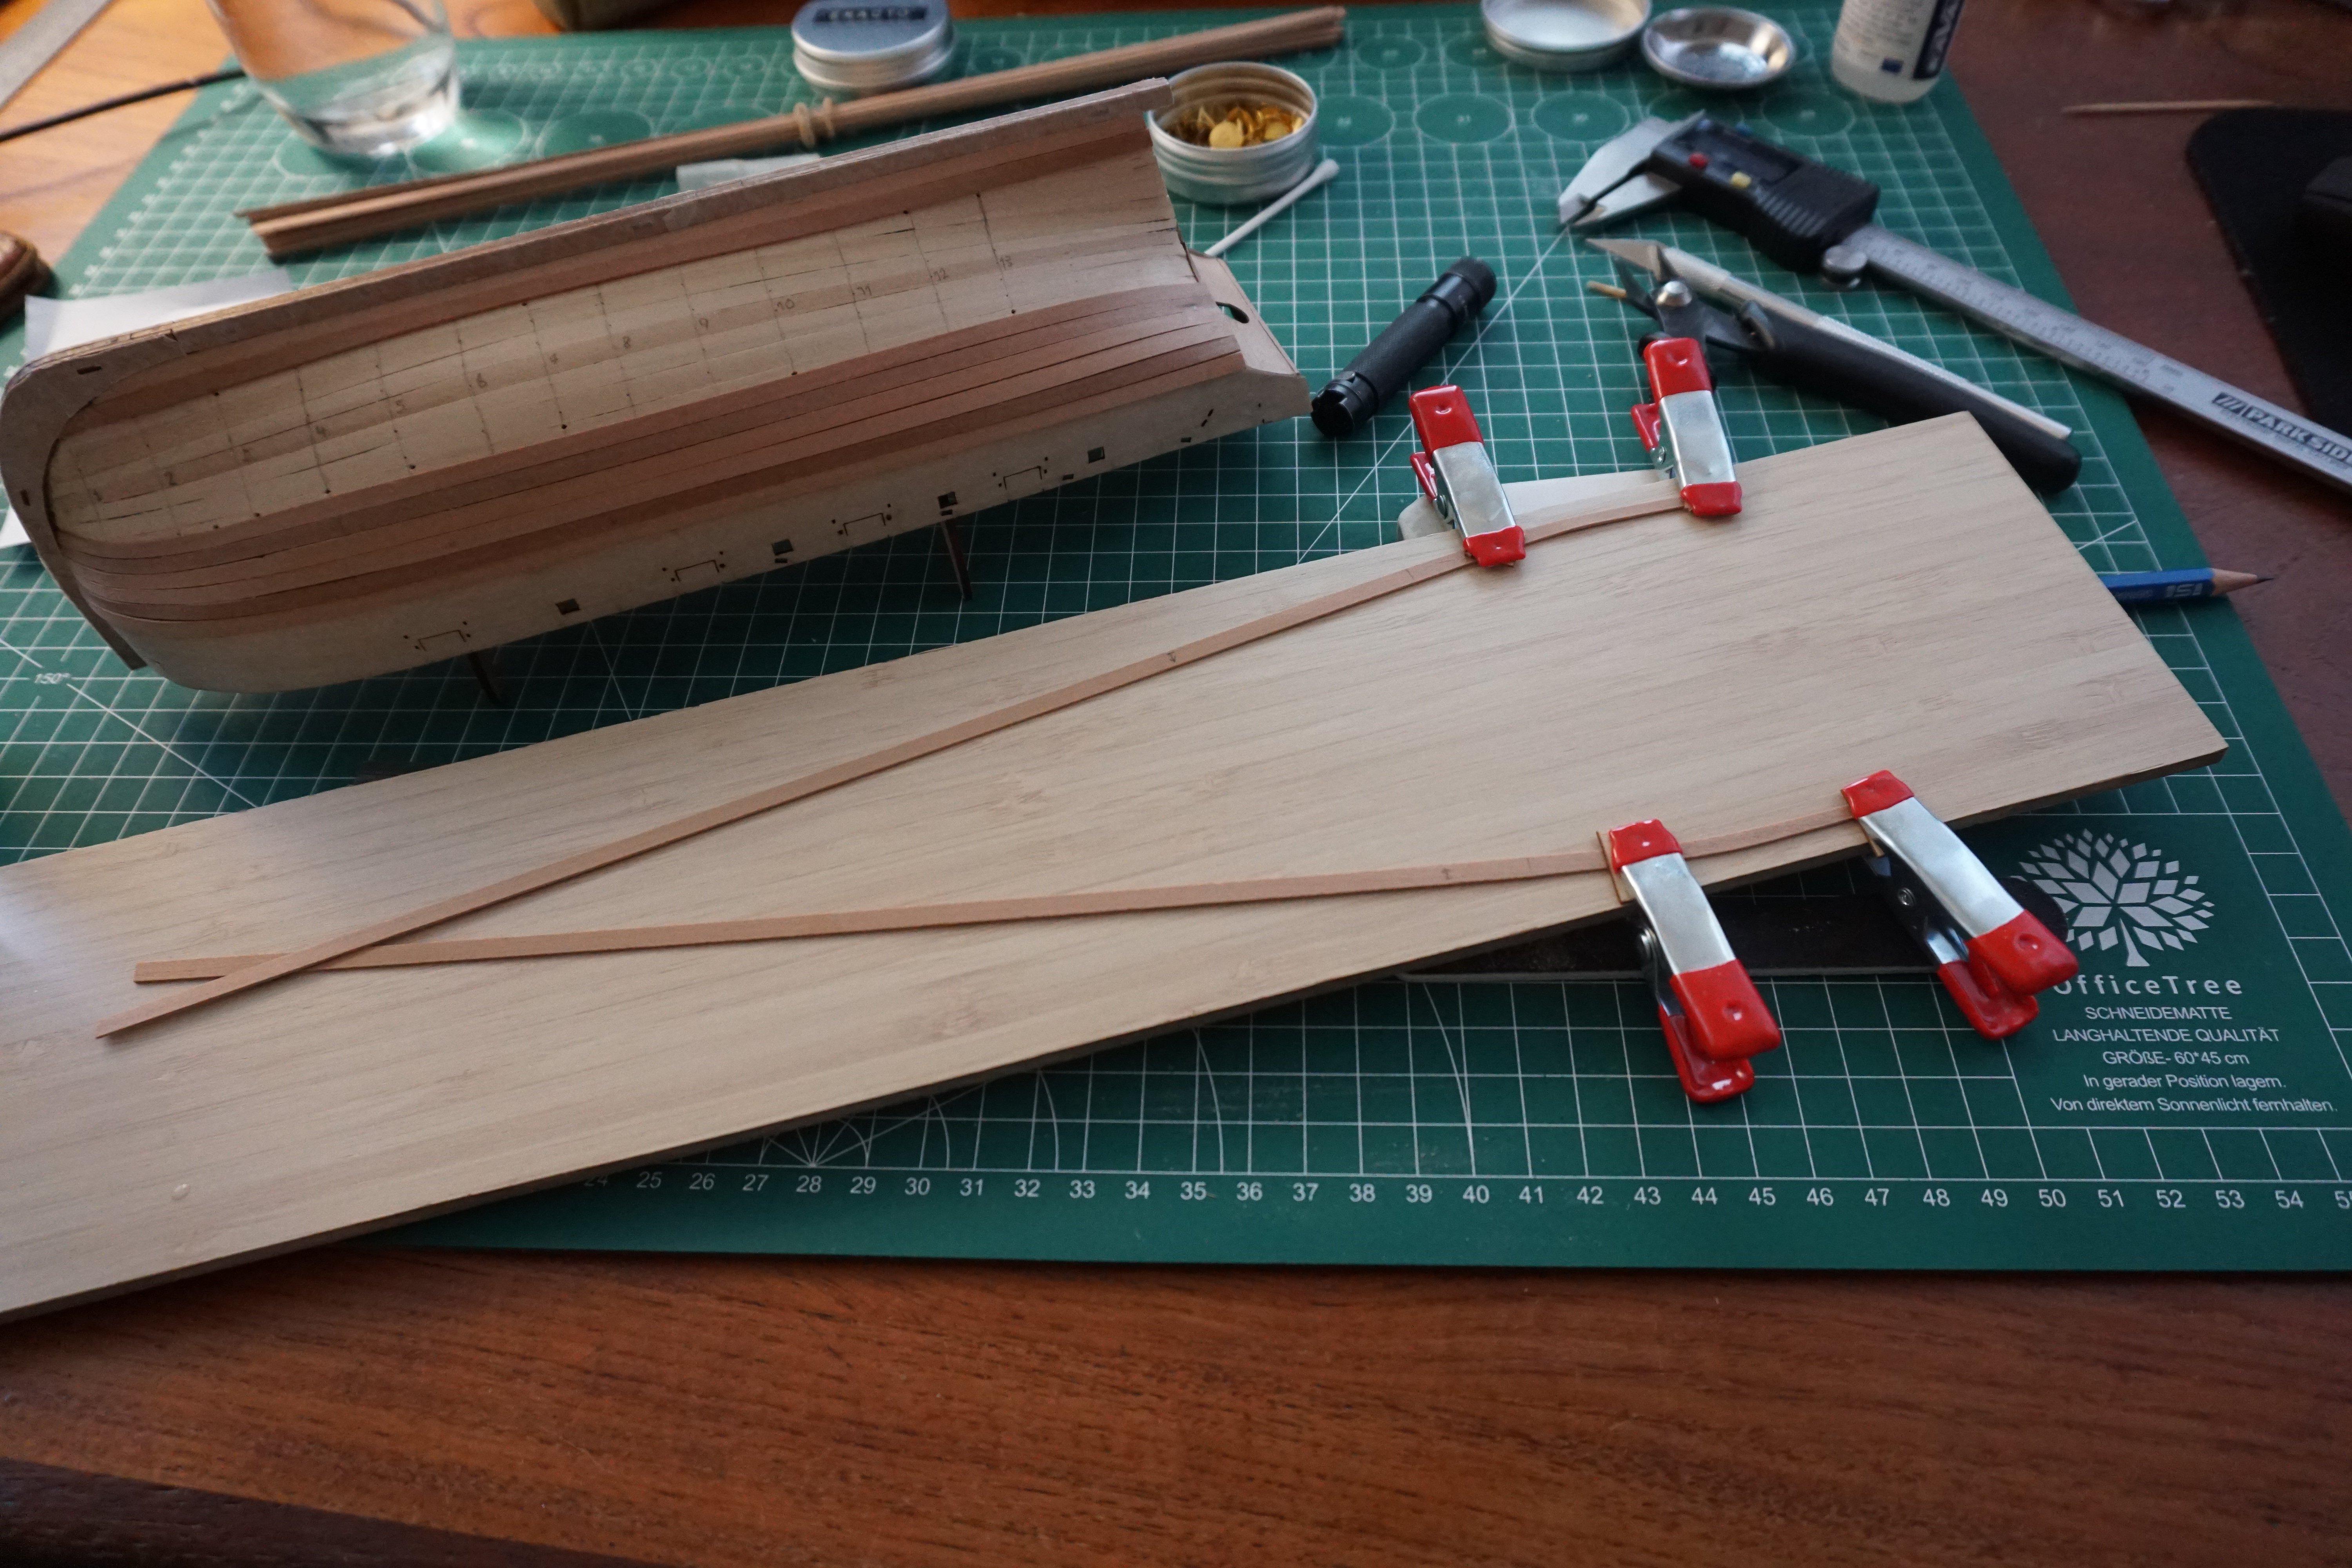
First planking done! It took some measuring and planning, but I was able to finish it without creating terribly irregular last planks.

- 61 replies
-
- 14
-
-
- First build
- Cutter
- (and 2 more)