Venti
-
Posts
60 -
Joined
-
Last visited
-
 robert952 reacted to a post in a topic:
Muscongus Bay Lobster Smack by Venti - Model Shipways - 1:24
robert952 reacted to a post in a topic:
Muscongus Bay Lobster Smack by Venti - Model Shipways - 1:24
-
Yes moved in also. Just hadn't unpacked all the shop building stuff.
-
robert952 reacted to a post in a topic:
Muscongus Bay Lobster Smack by Venti - Model Shipways - 1:24
-
 Venti reacted to a post in a topic:
Muscongus Bay Lobster Smack by Venti - Model Shipways - 1:24
Venti reacted to a post in a topic:
Muscongus Bay Lobster Smack by Venti - Model Shipways - 1:24
-
ccoyle reacted to a post in a topic:
Muscongus Bay Lobster Smack by Venti - Model Shipways - 1:24
-
ccoyle reacted to a post in a topic:
Muscongus Bay Lobster Smack by Venti - Model Shipways - 1:24
-
JacquesCousteau reacted to a post in a topic:
Muscongus Bay Lobster Smack by Venti - Model Shipways - 1:24
-
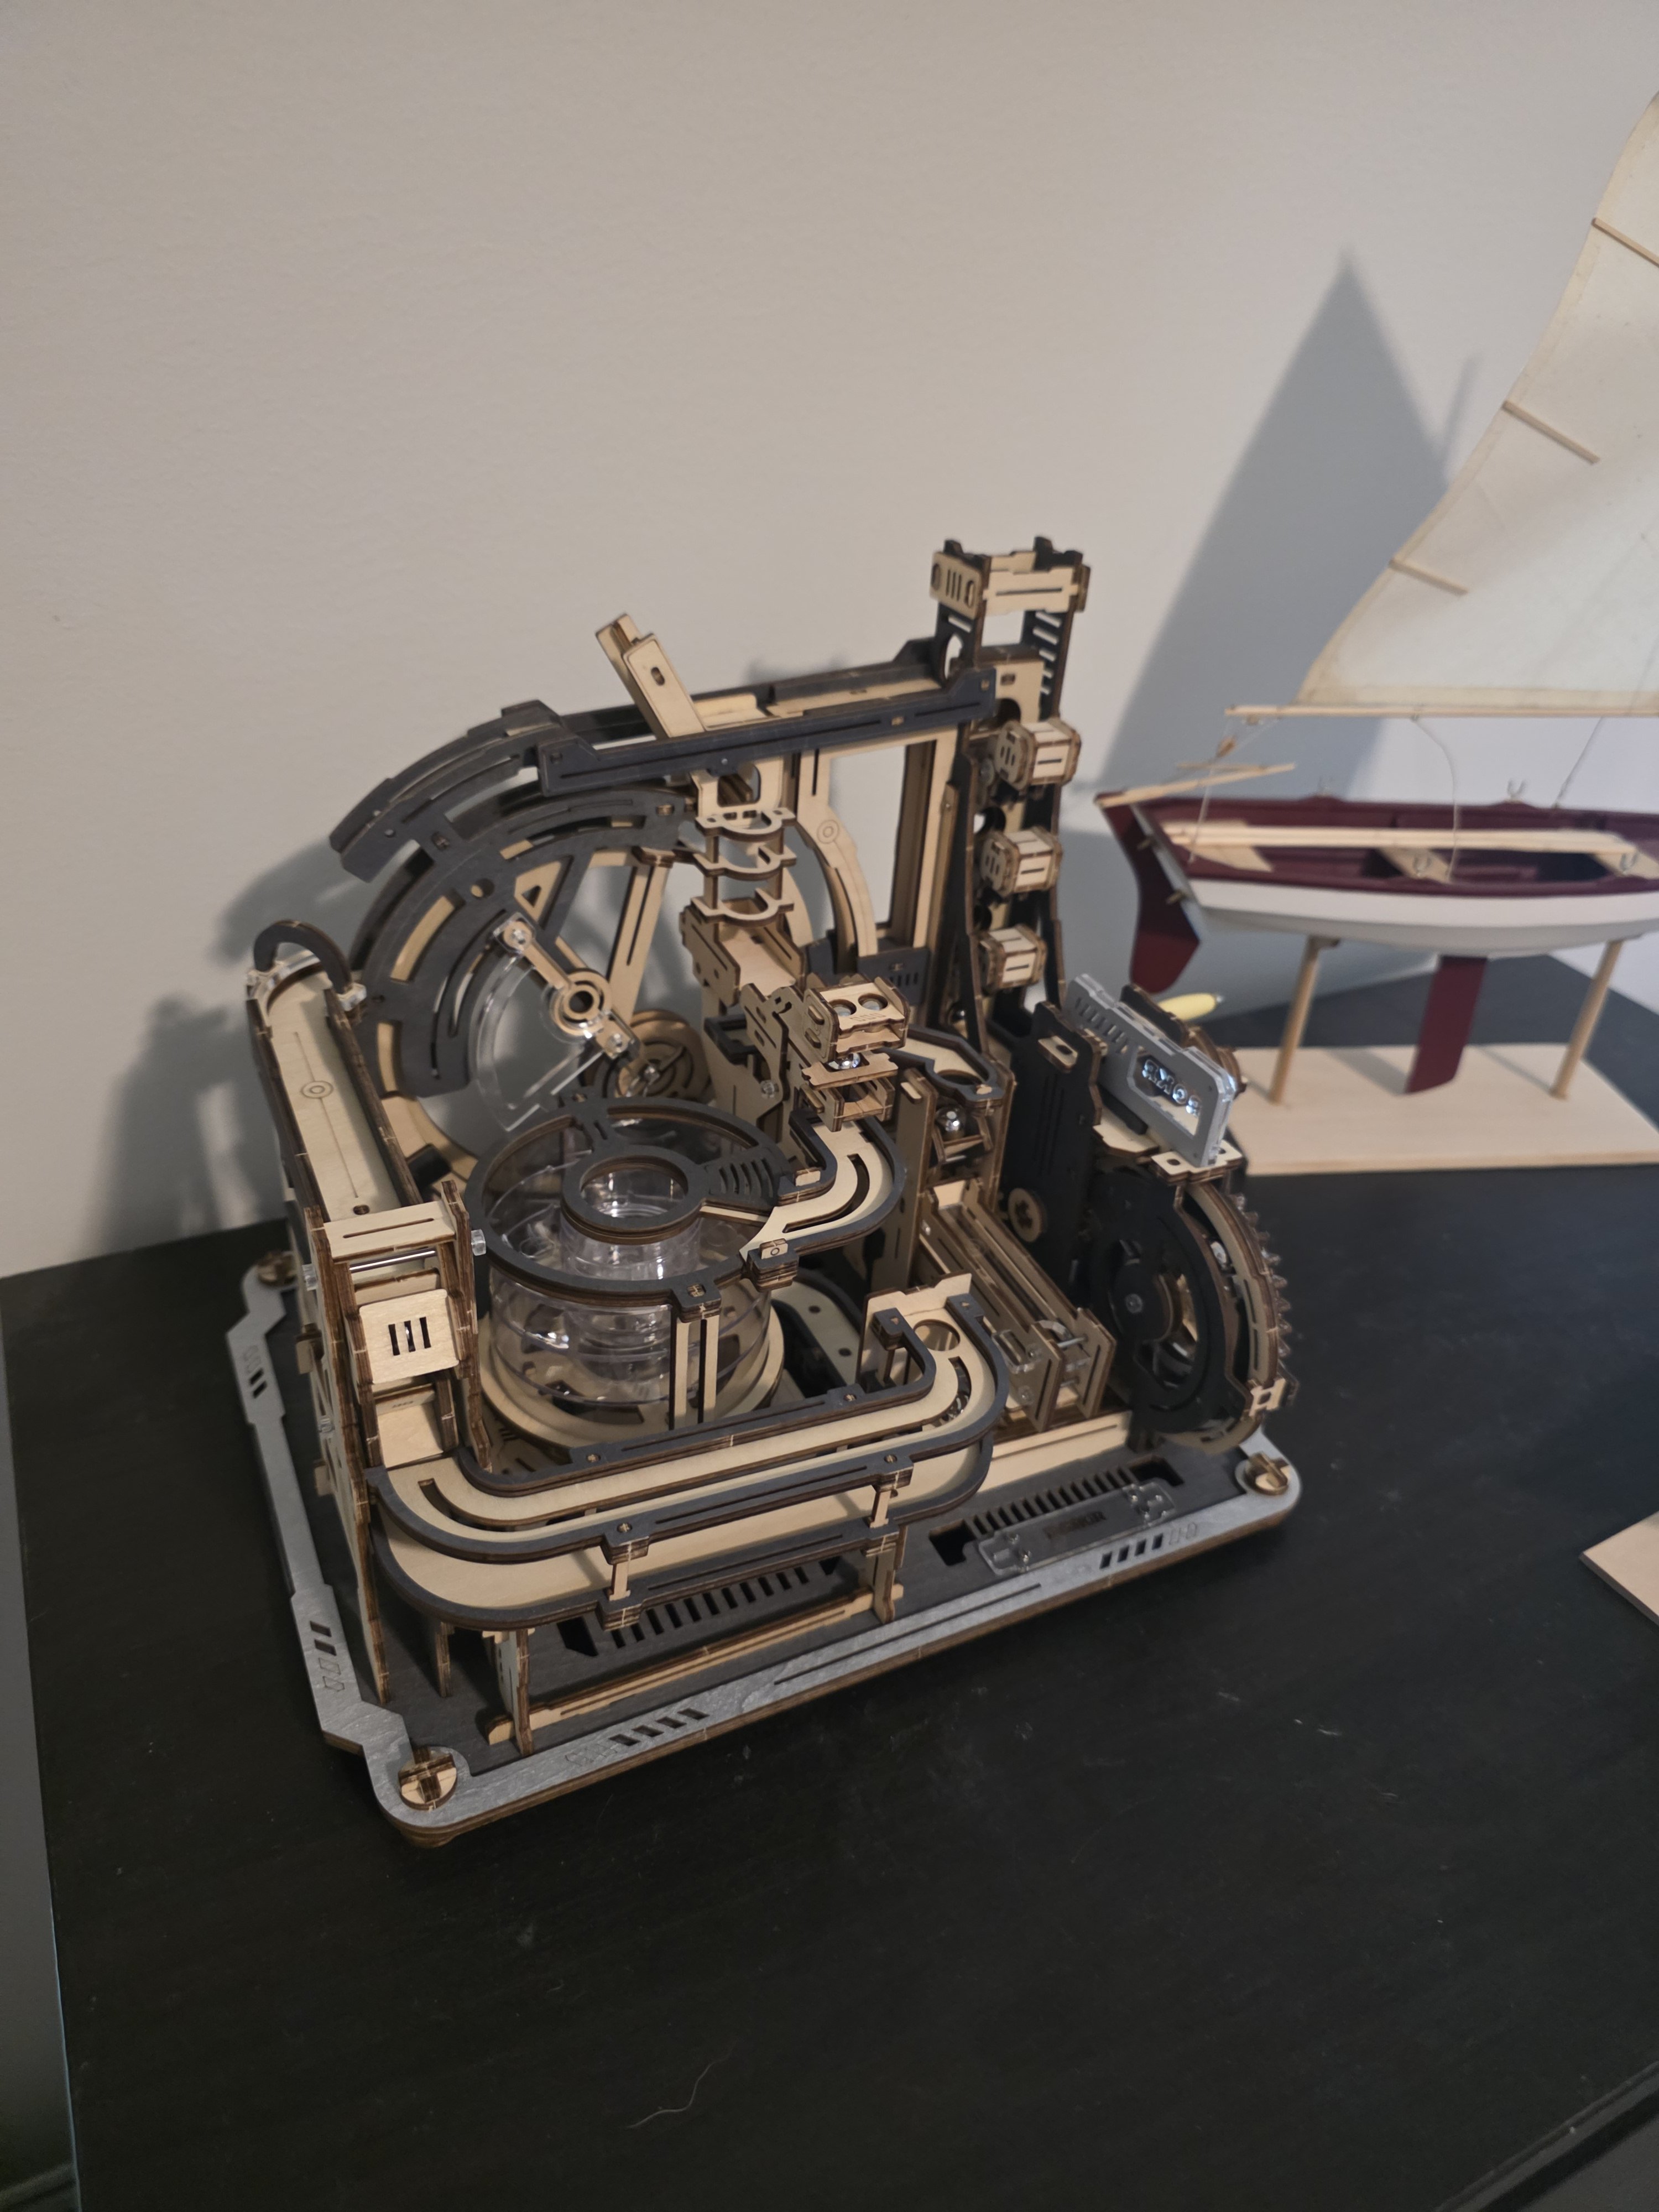
Doesn't feel like it's been as long as it has since I last posted.... But so much has happened since then. Bought a new house so I haven't been setup to work on this. A friend got me a marble run kit for Christmas, and it got me to get all my ship stuff out for it so now it's time to continue with the Smack! I need to get back into some other build logs/the instructions to refresh my memory of it all! I had done some of the fairing before I packed everything up, so I will make sure that all looks good and get ready for planking... Remember, I ordered Cherry wood strips to do the planking with! I think this will add a lot of challenge since it's a smaller boat, but I think it'll be great practice for the bigger ones when I get to them. I need to really refresh my memory how to plank with build logs and Chuck's guide.
-
Scott Crouse reacted to a post in a topic:
Muscongus Bay Lobster Smack by Venti - Model Shipways - 1:24
-
GrandpaPhil reacted to a post in a topic:
Muscongus Bay Lobster Smack by Venti - Model Shipways - 1:24
-
Capt. Kelso reacted to a post in a topic:
Muscongus Bay Lobster Smack by Venti - Model Shipways - 1:24
-
robert952 reacted to a post in a topic:
Muscongus Bay Lobster Smack by Venti - Model Shipways - 1:24
-
JacquesCousteau reacted to a post in a topic:
Muscongus Bay Lobster Smack by Venti - Model Shipways - 1:24
-
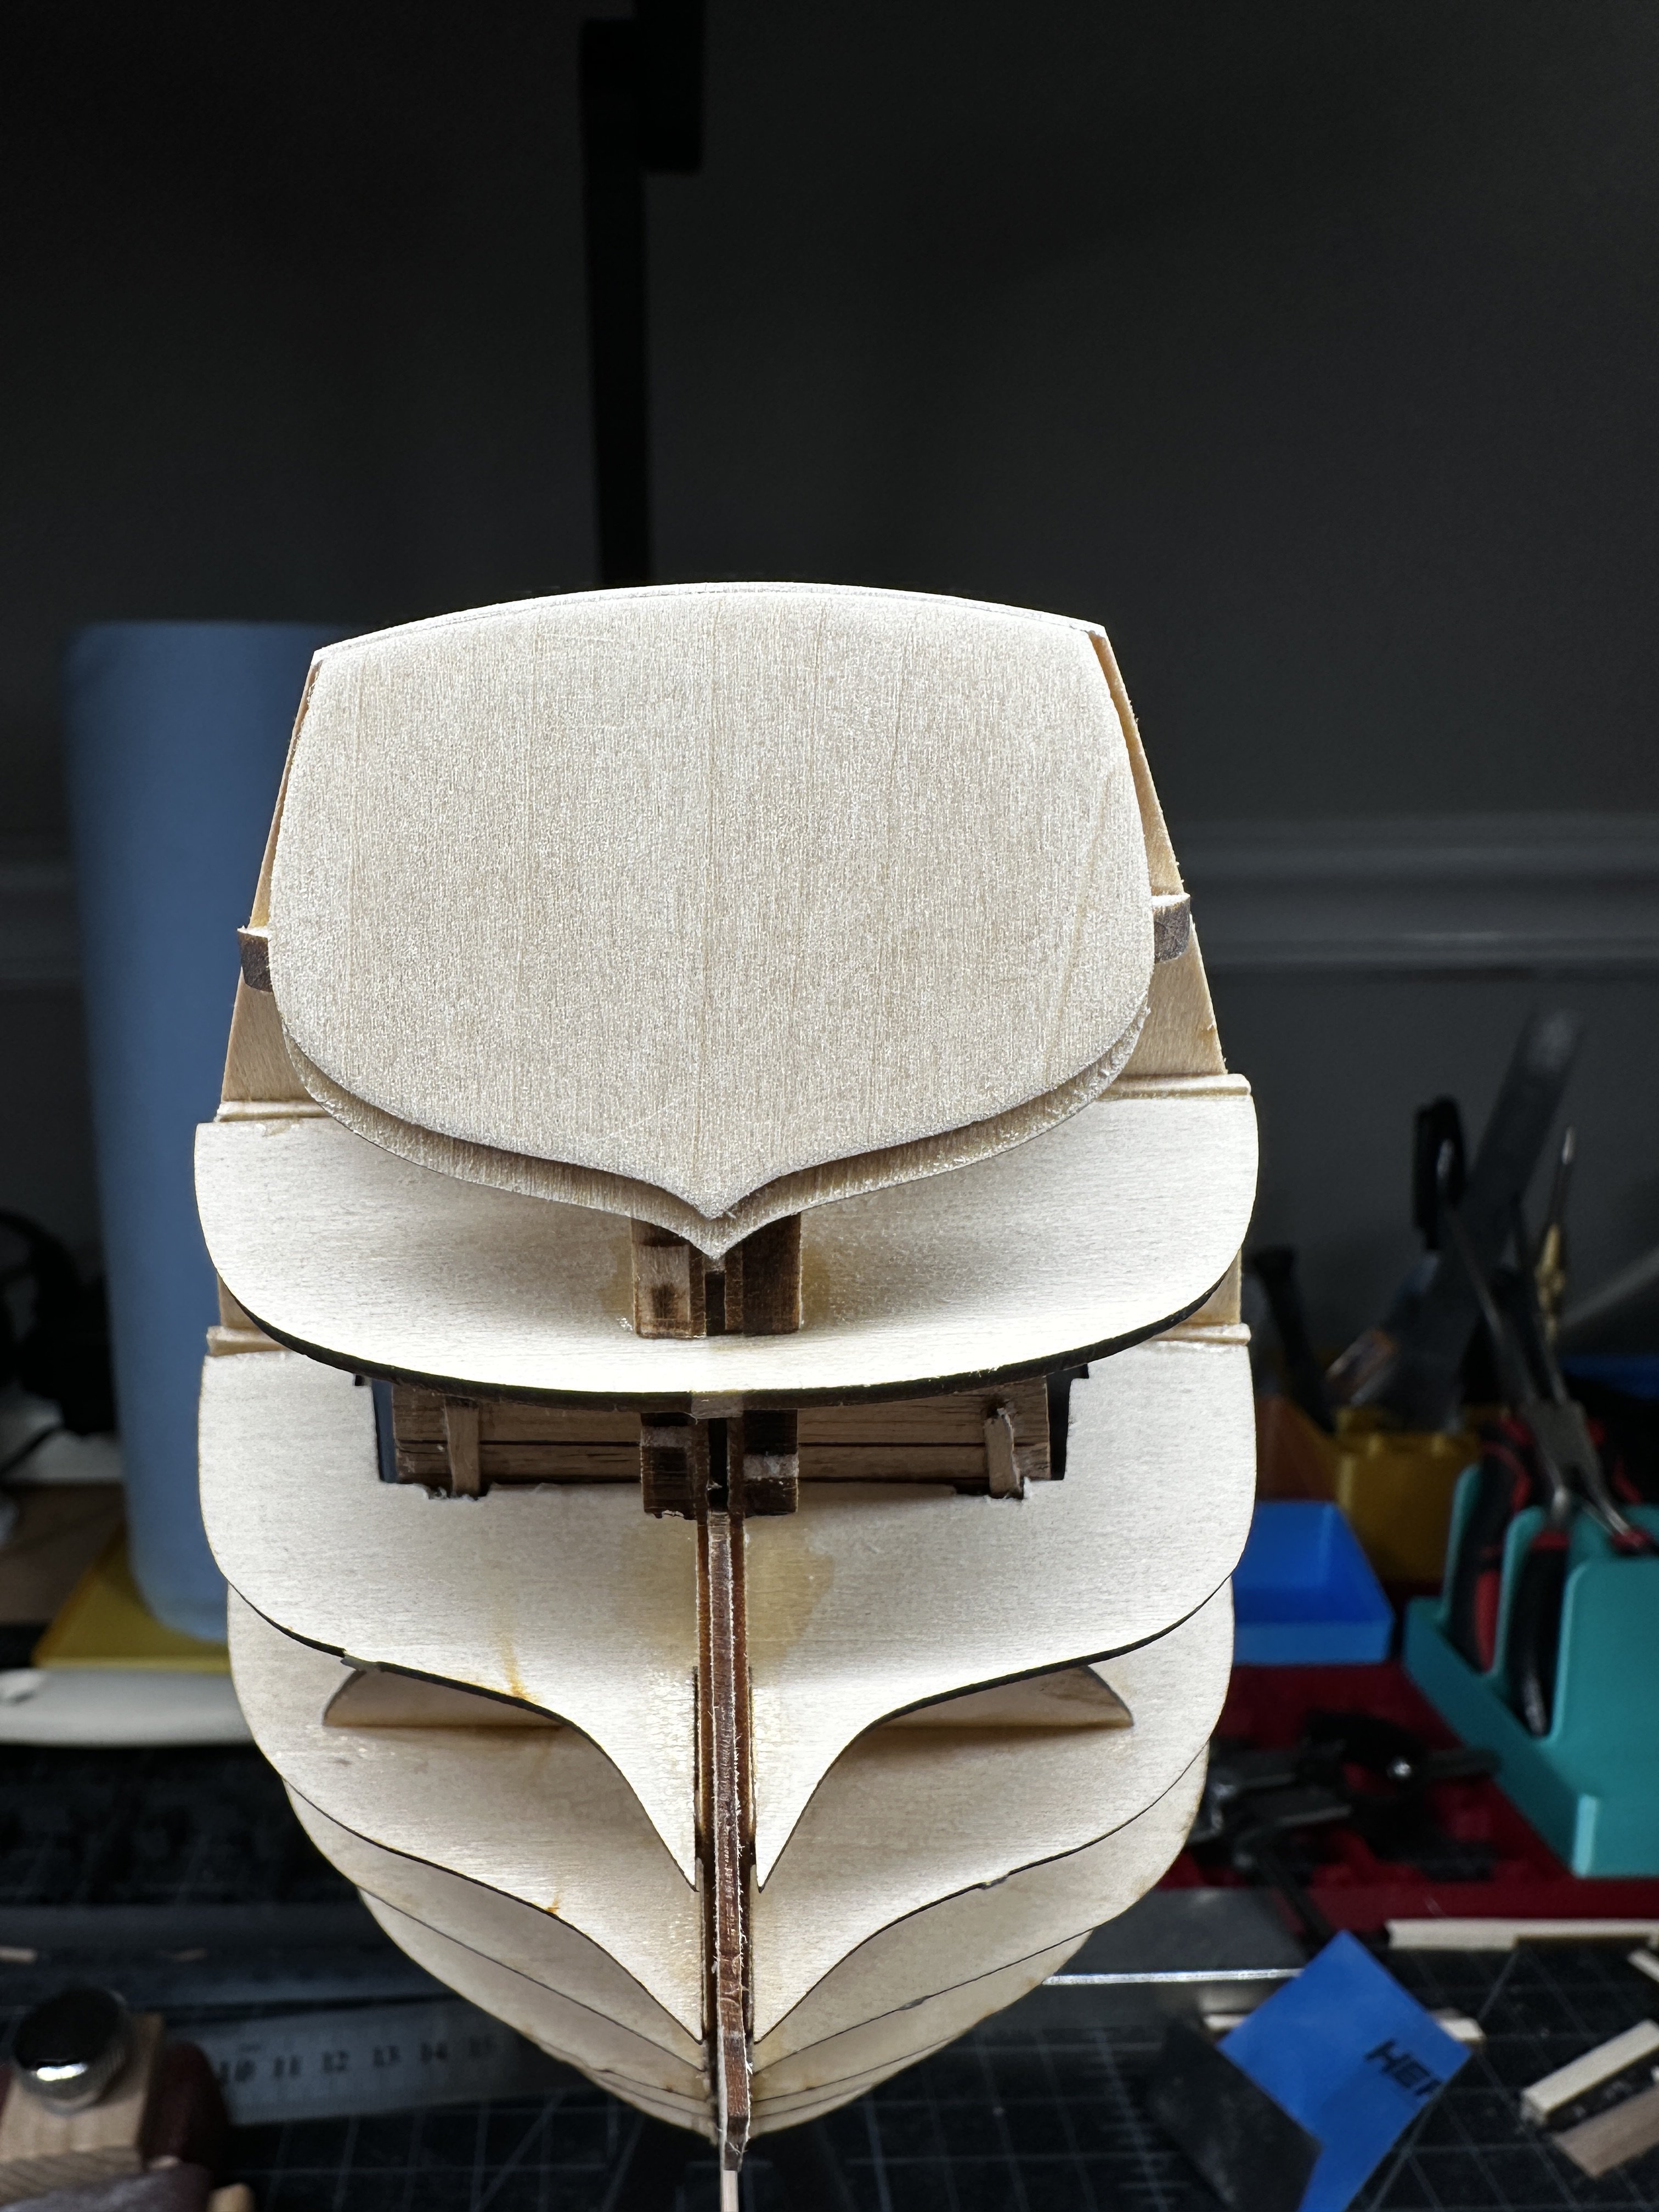
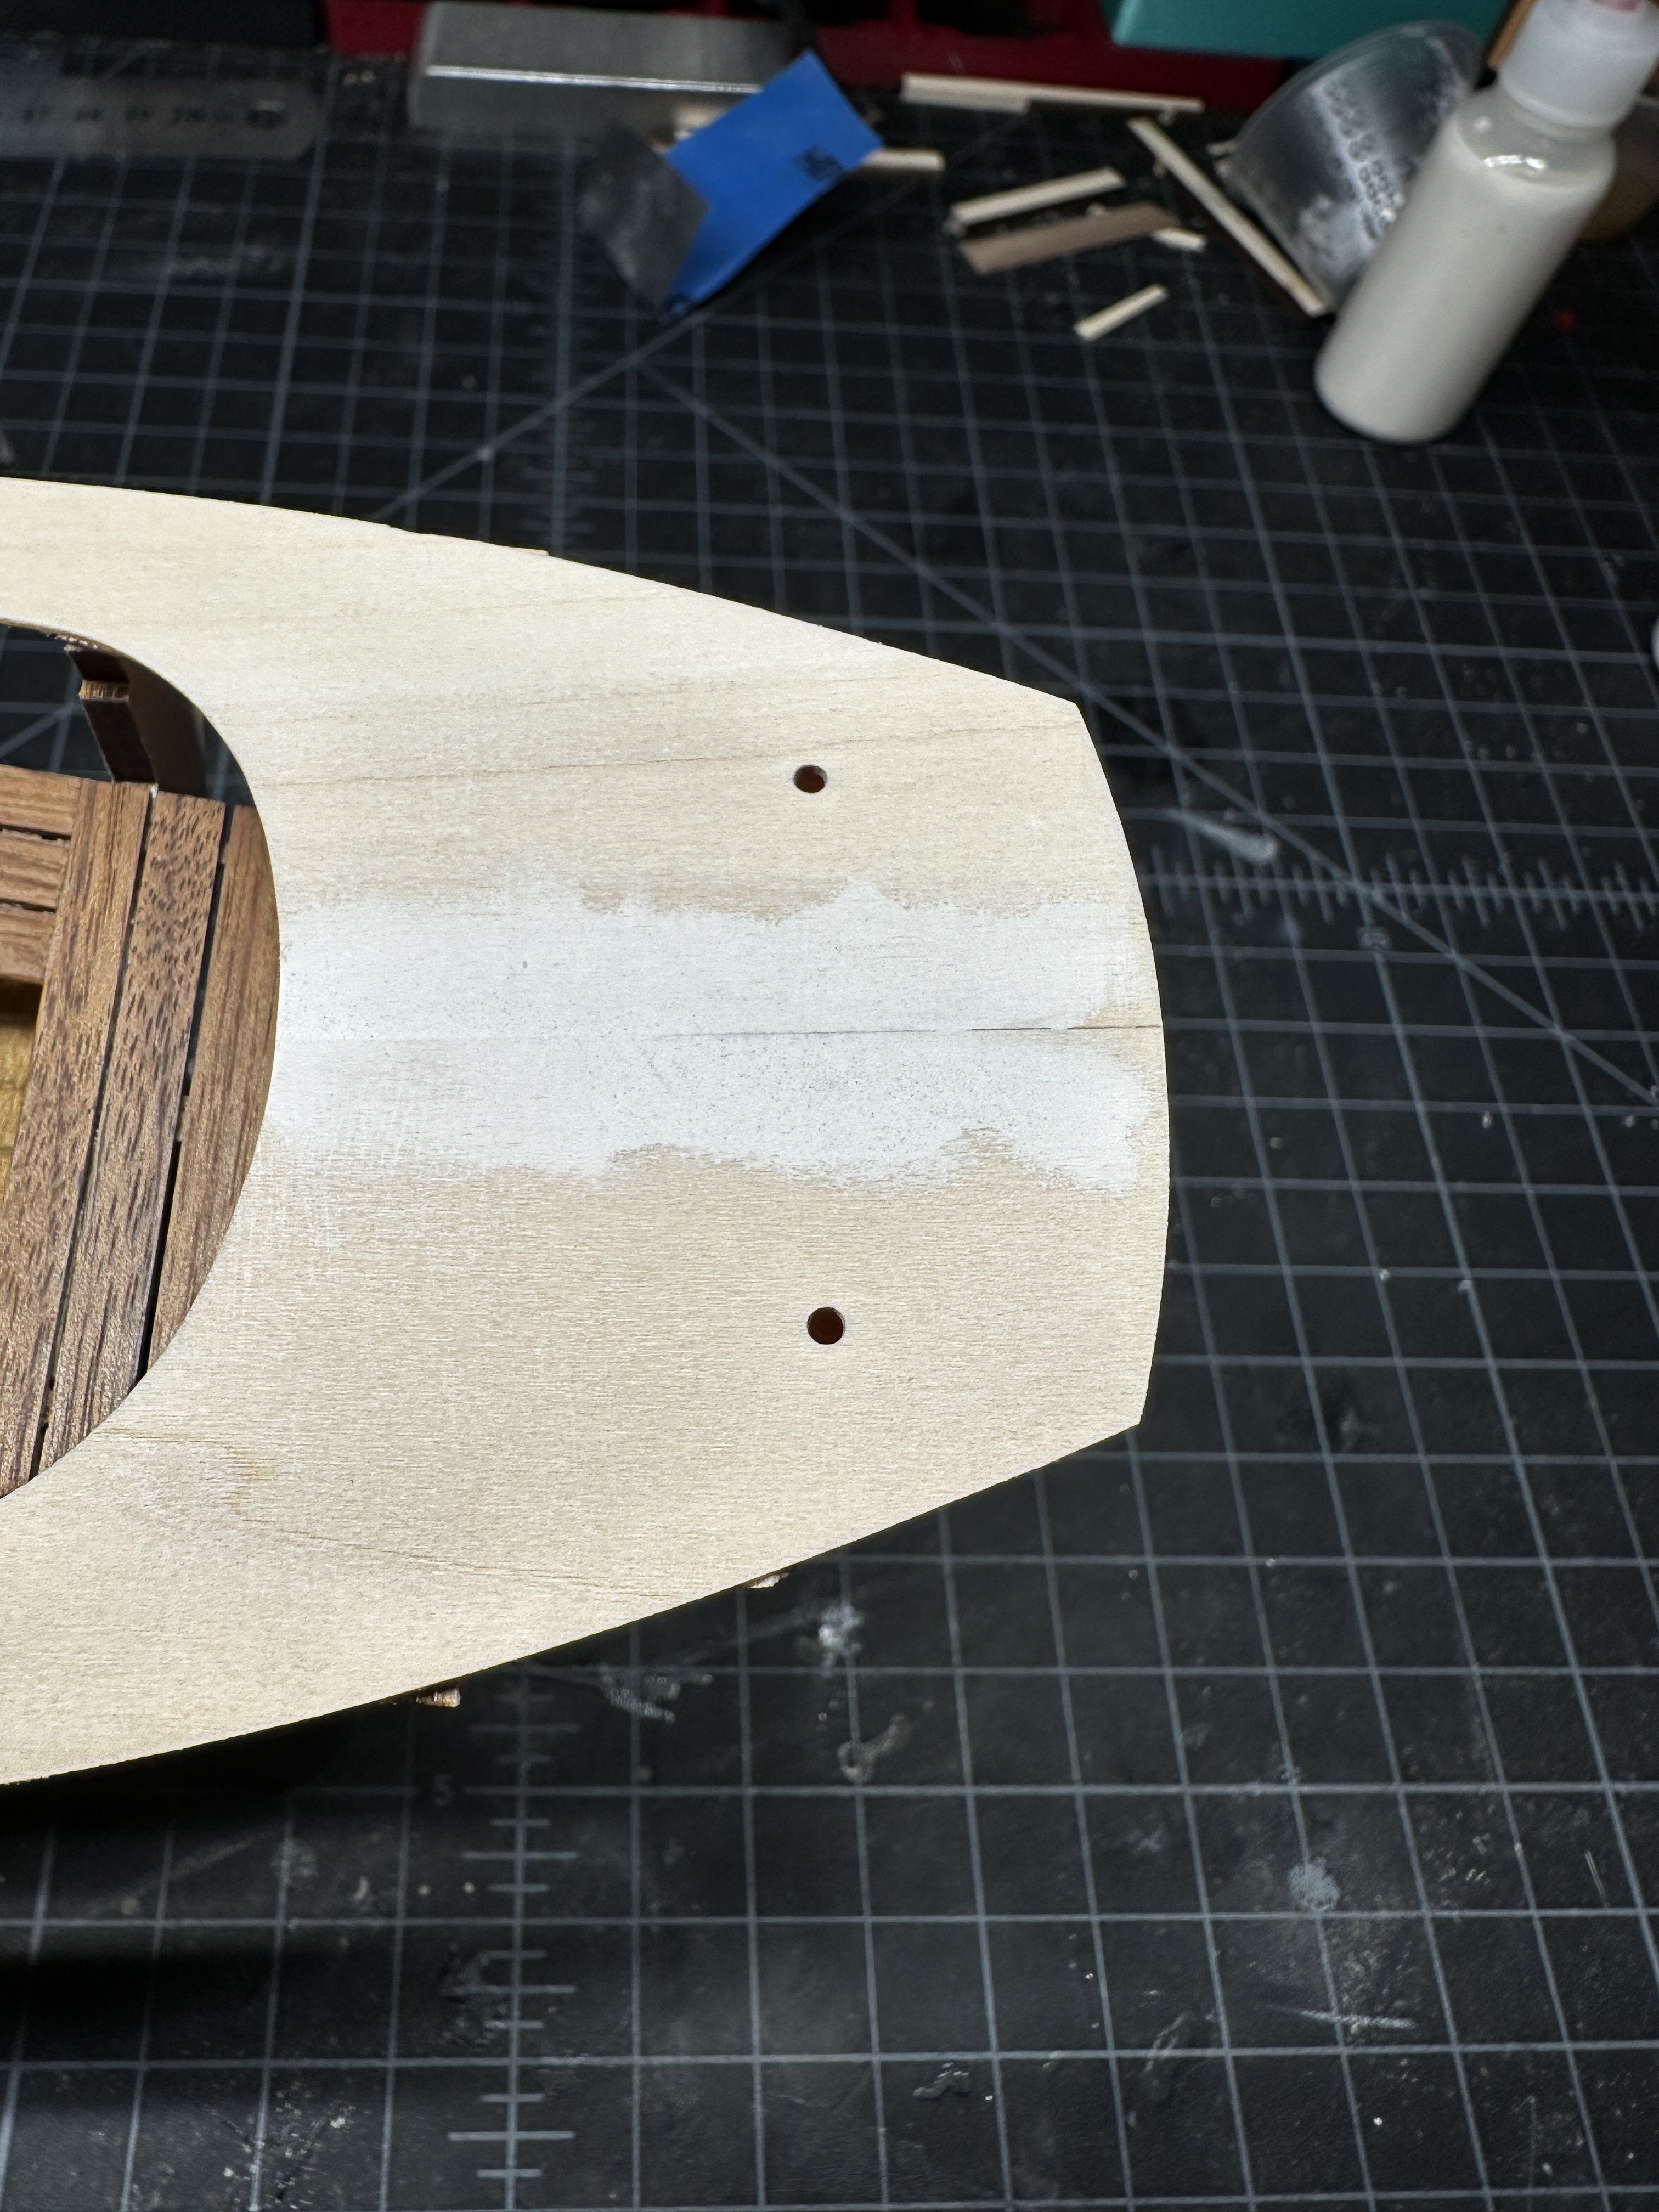
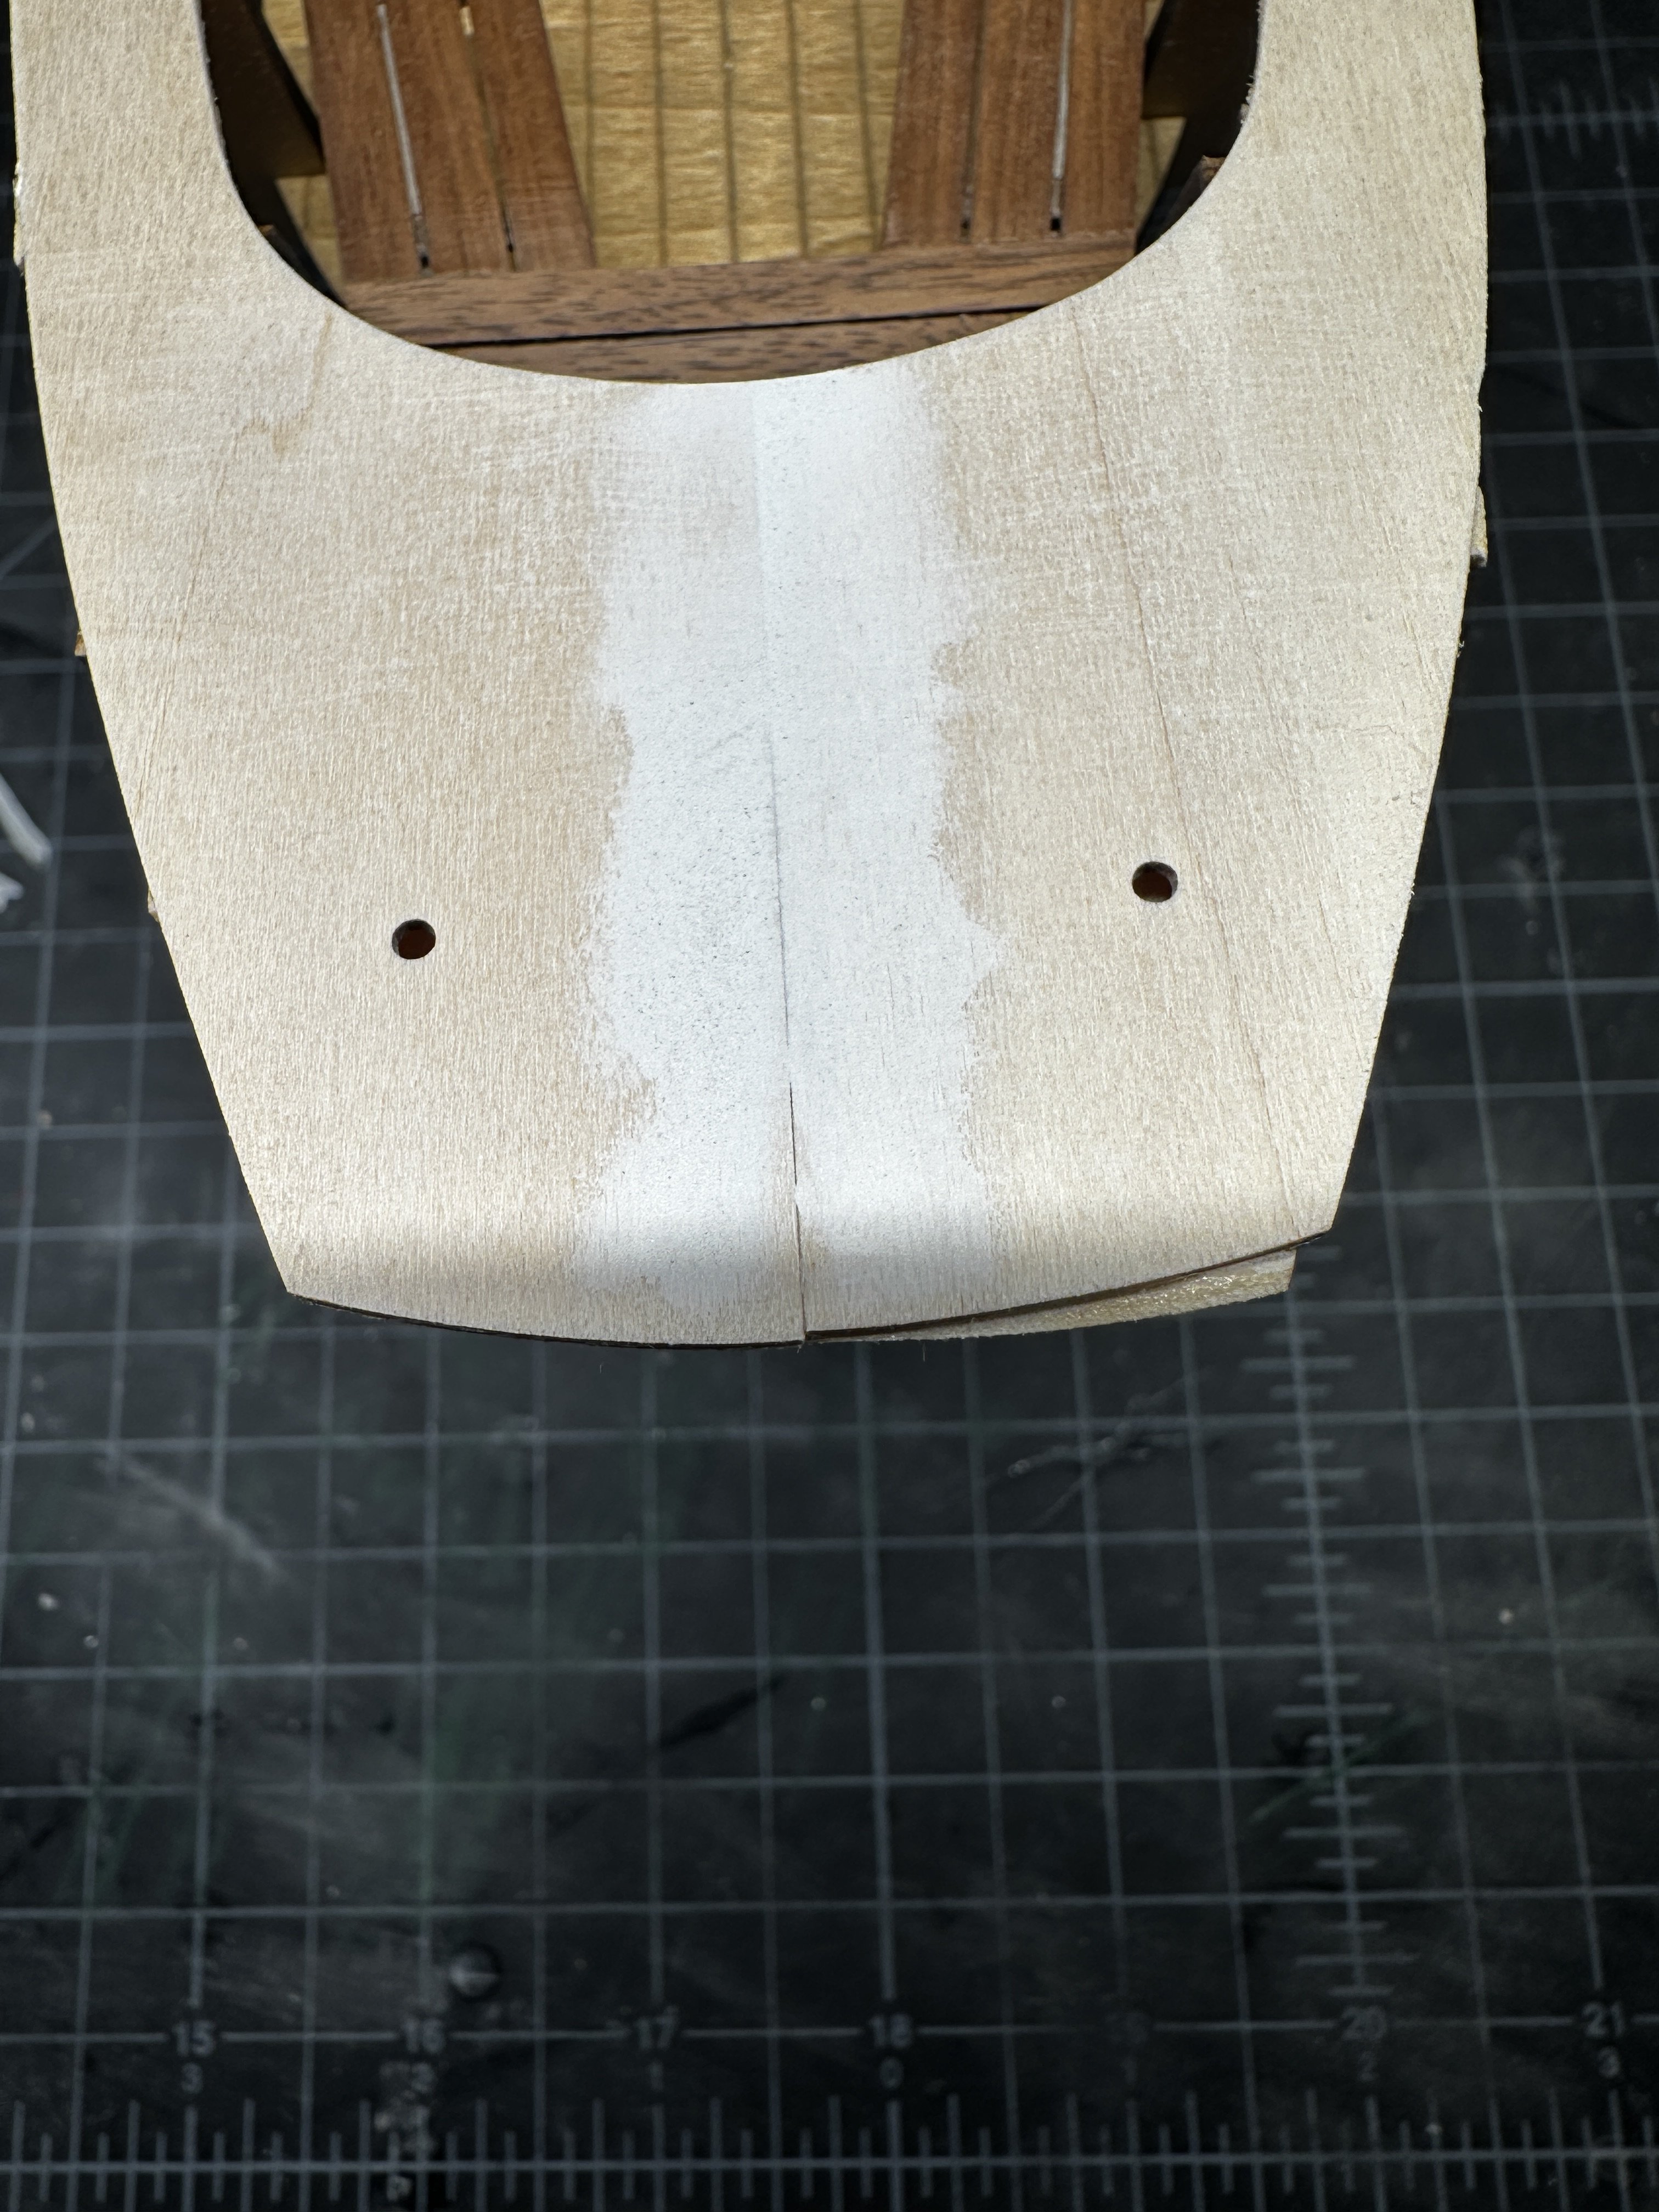
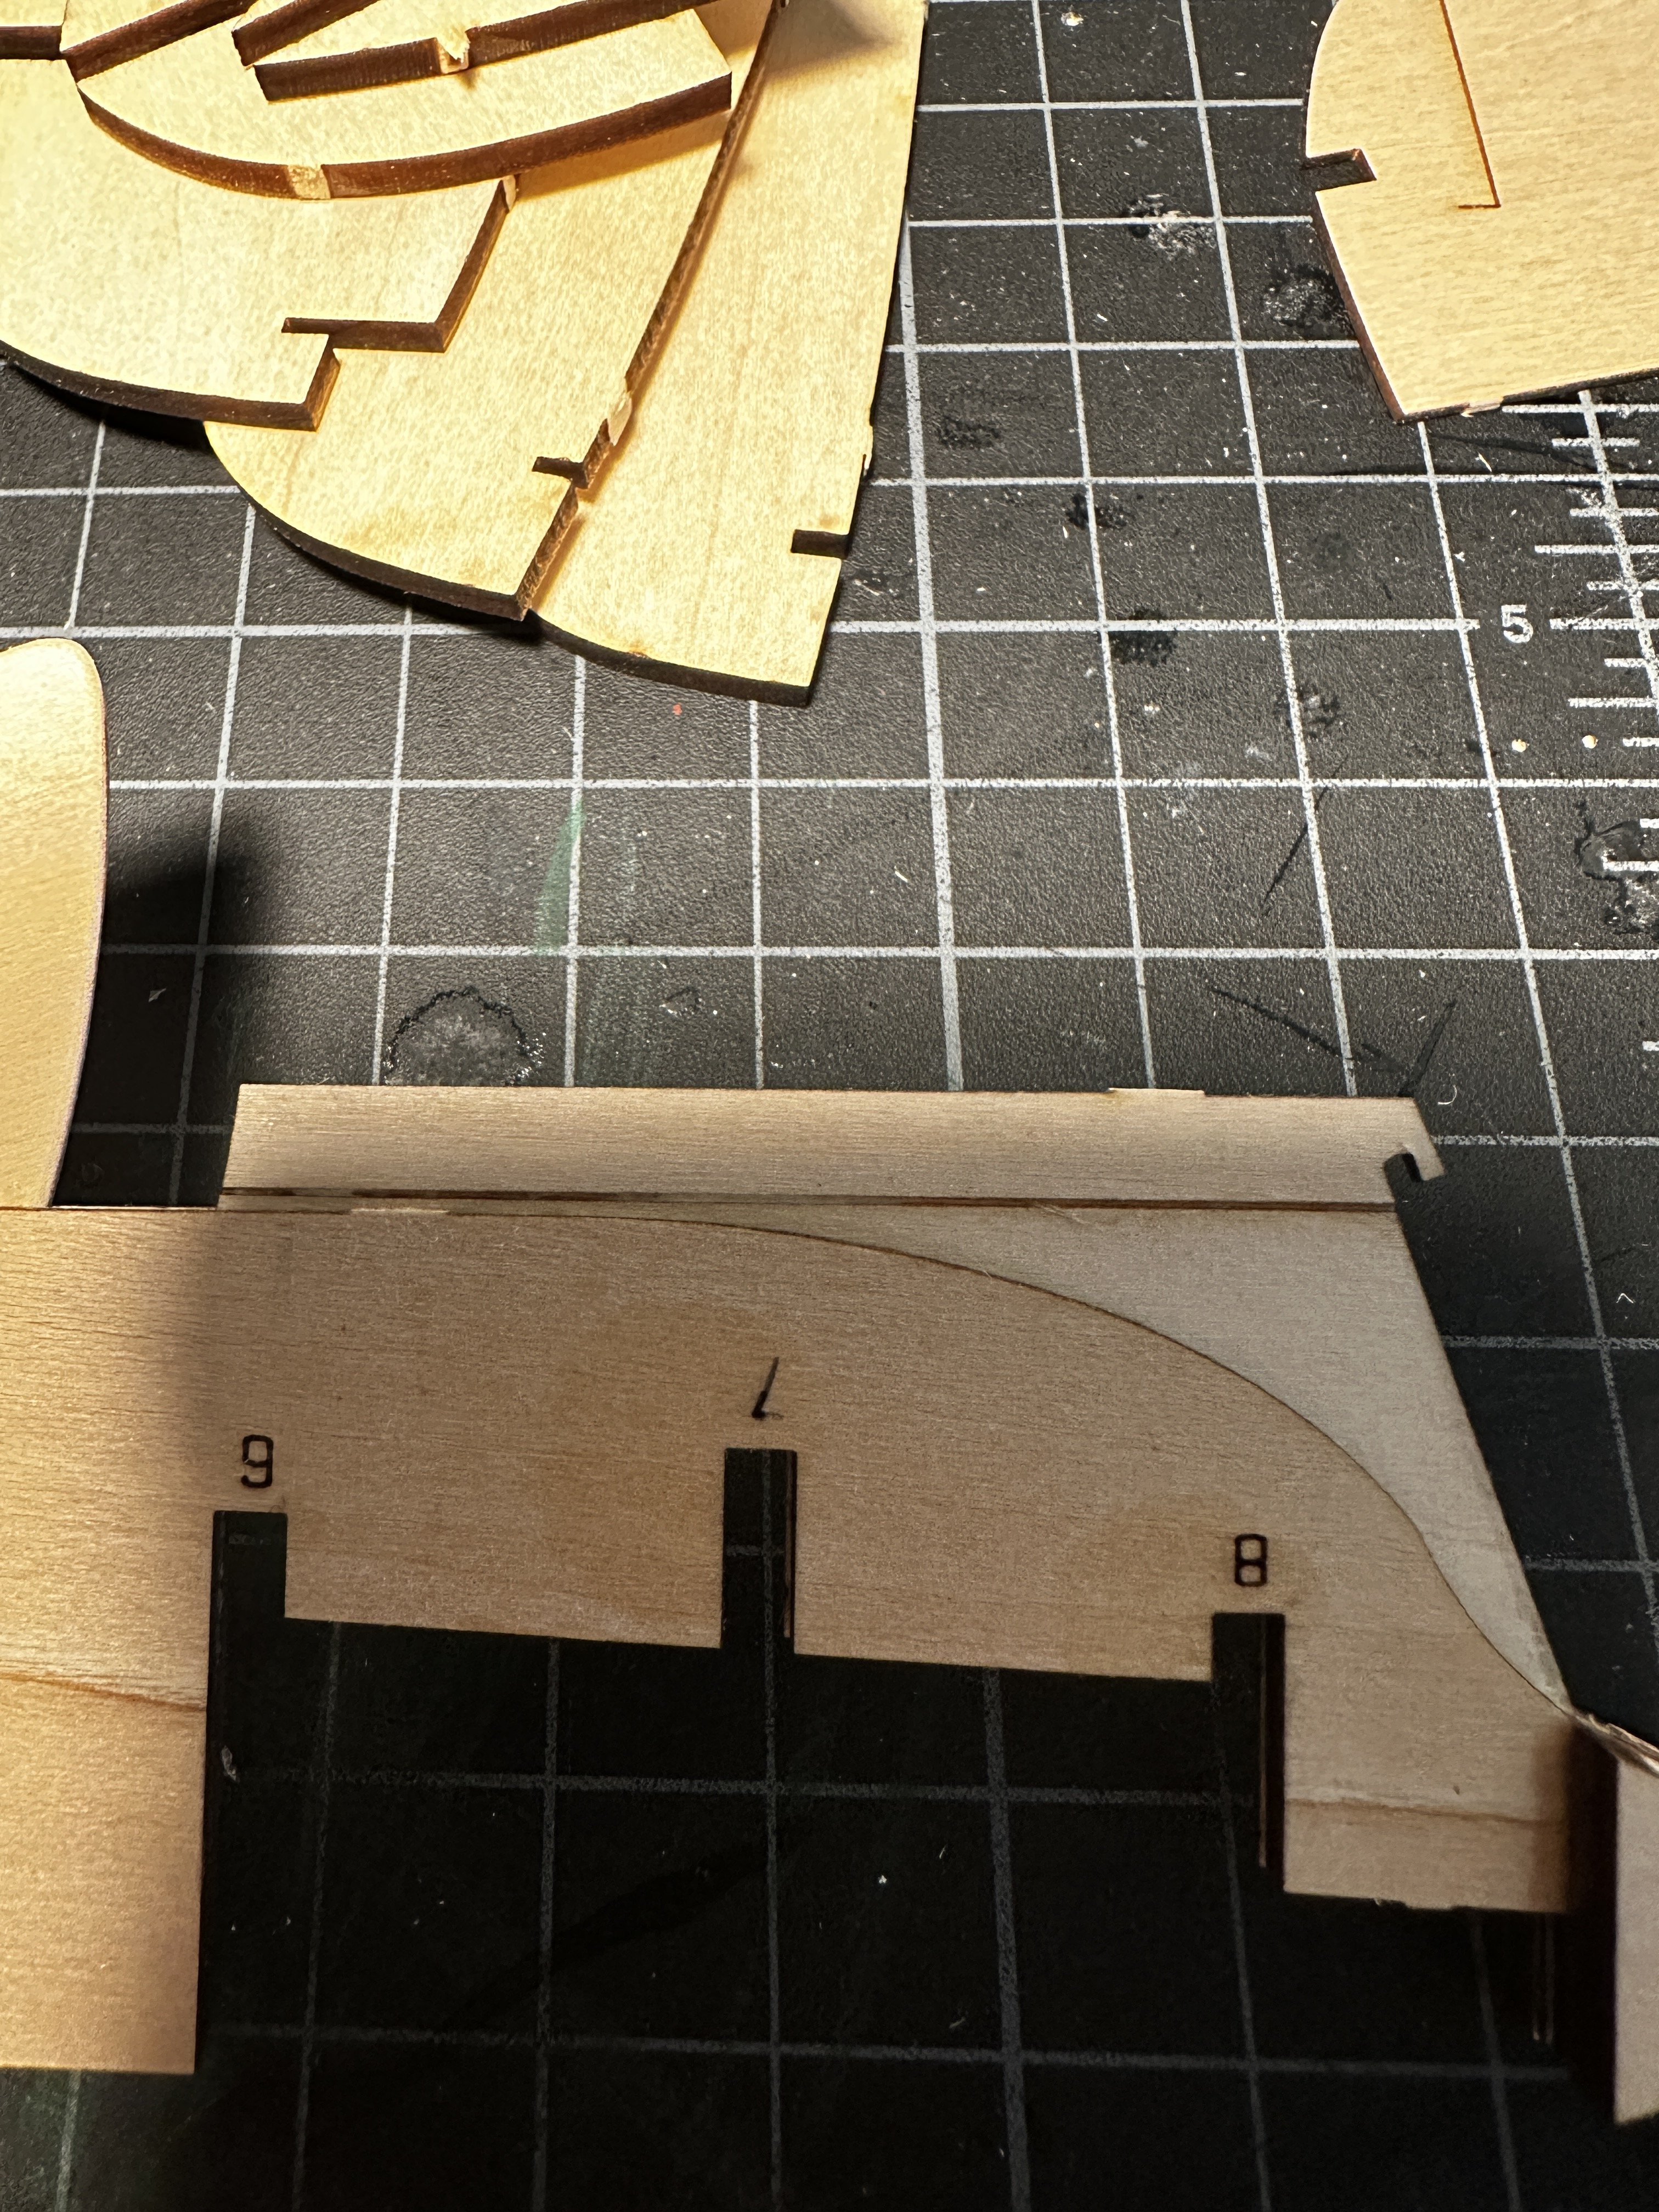
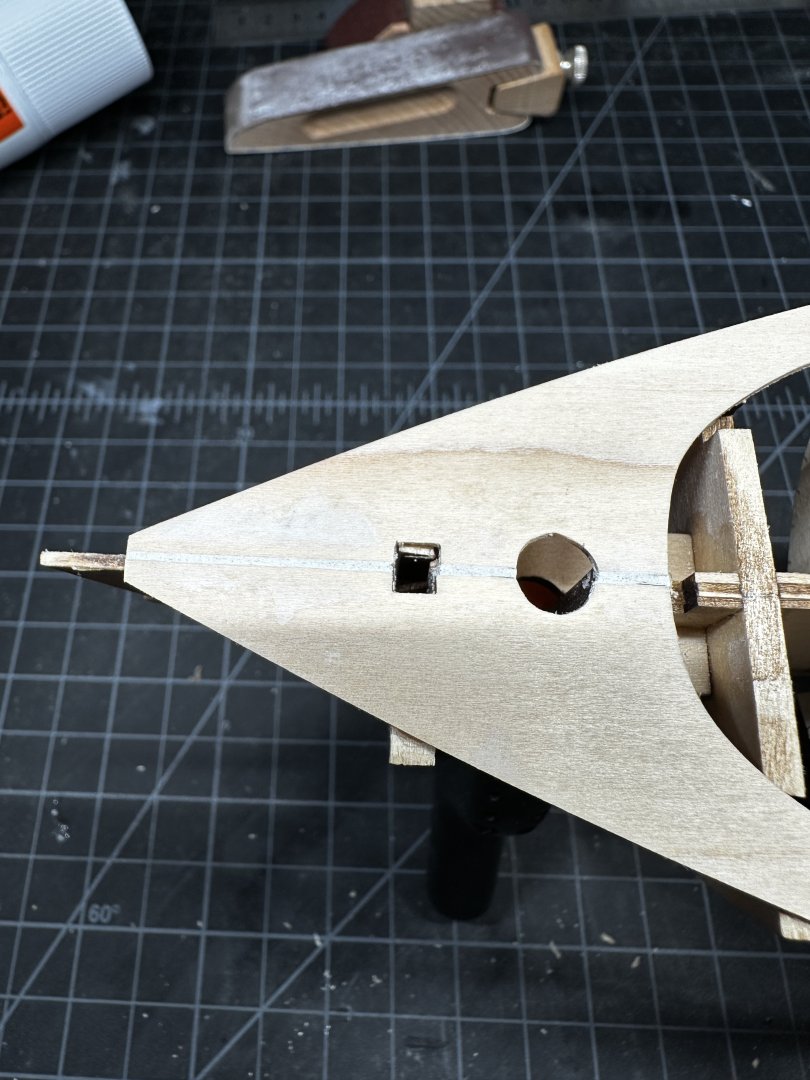
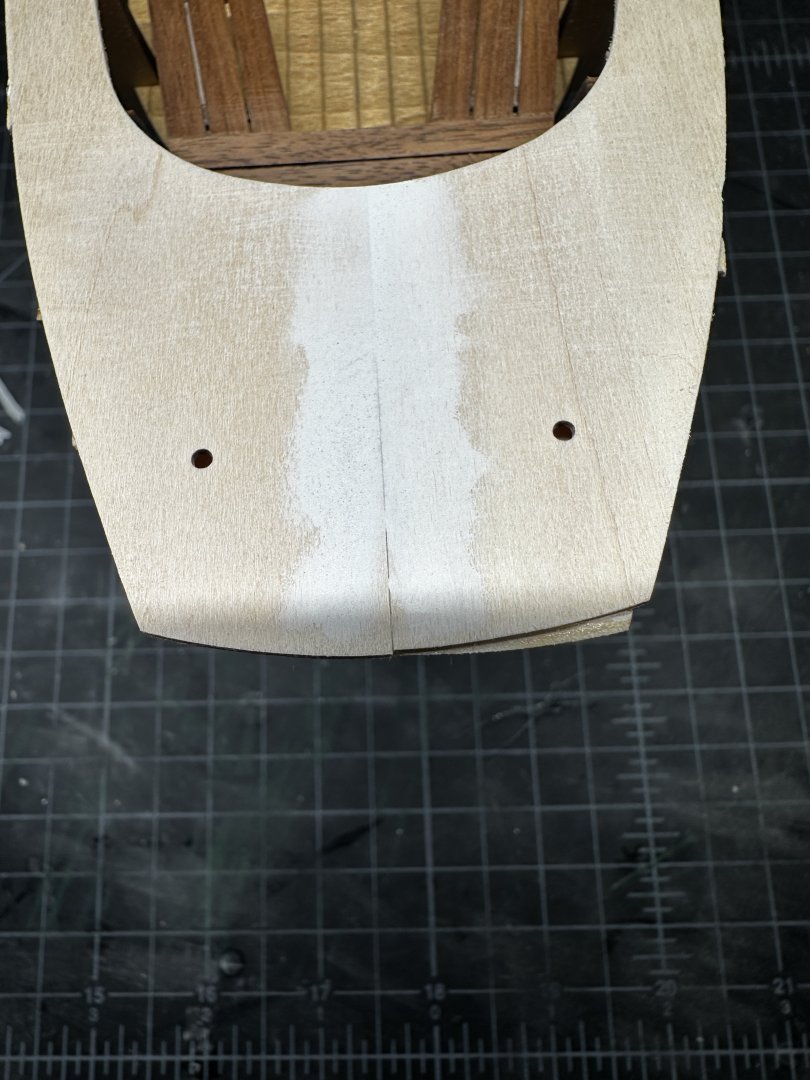
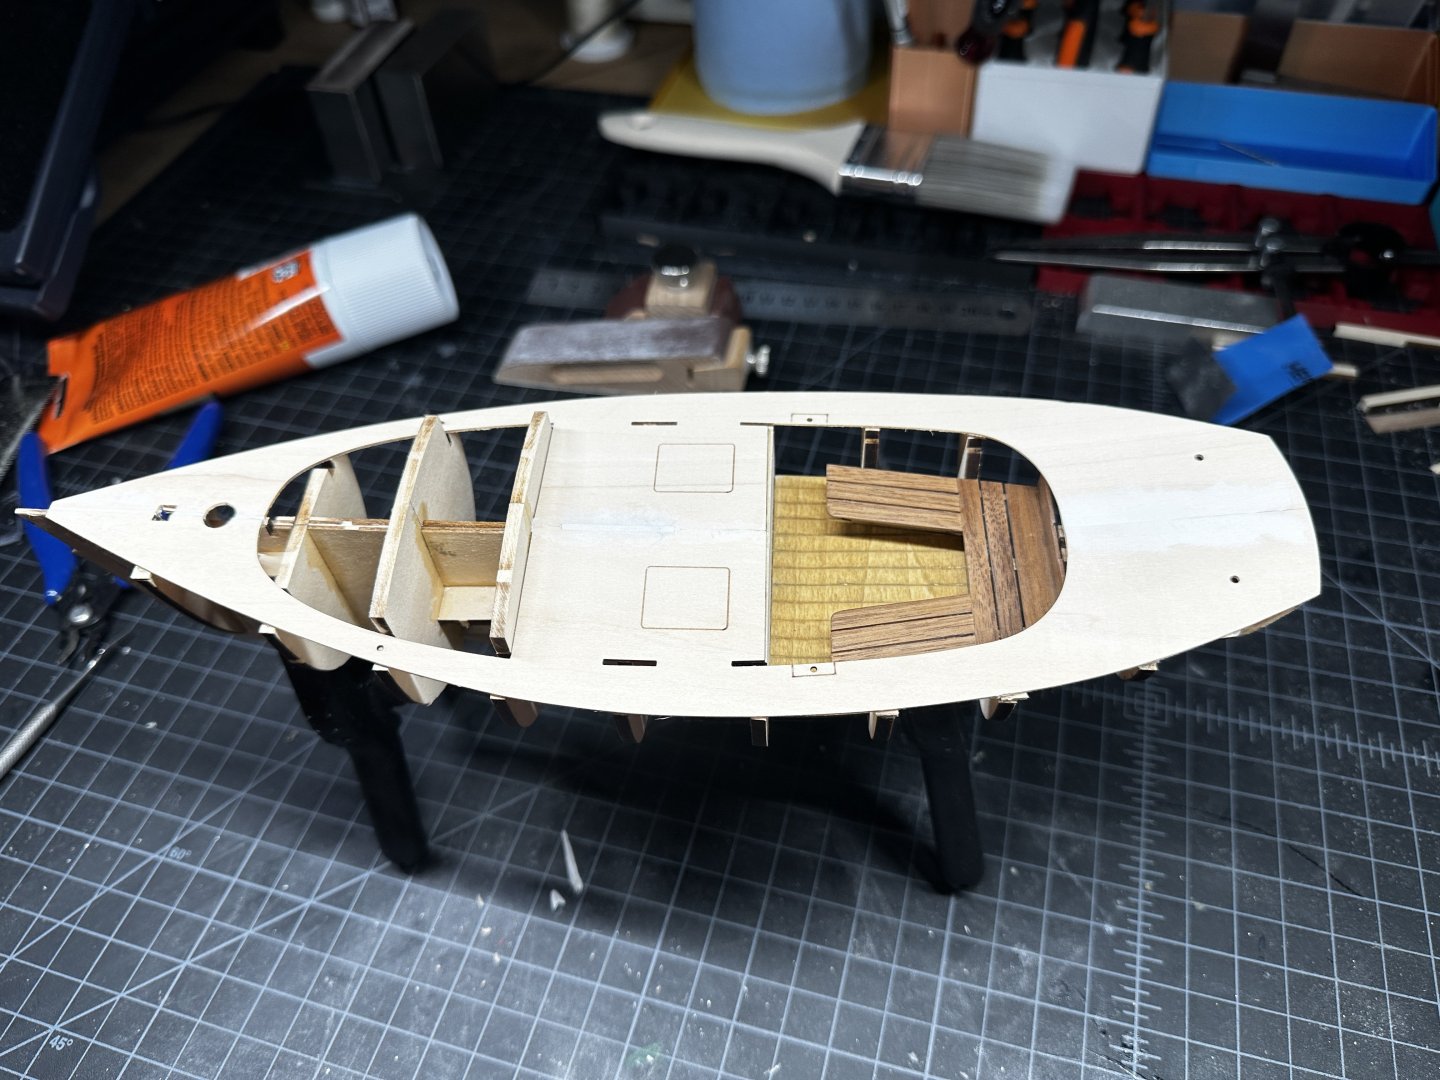
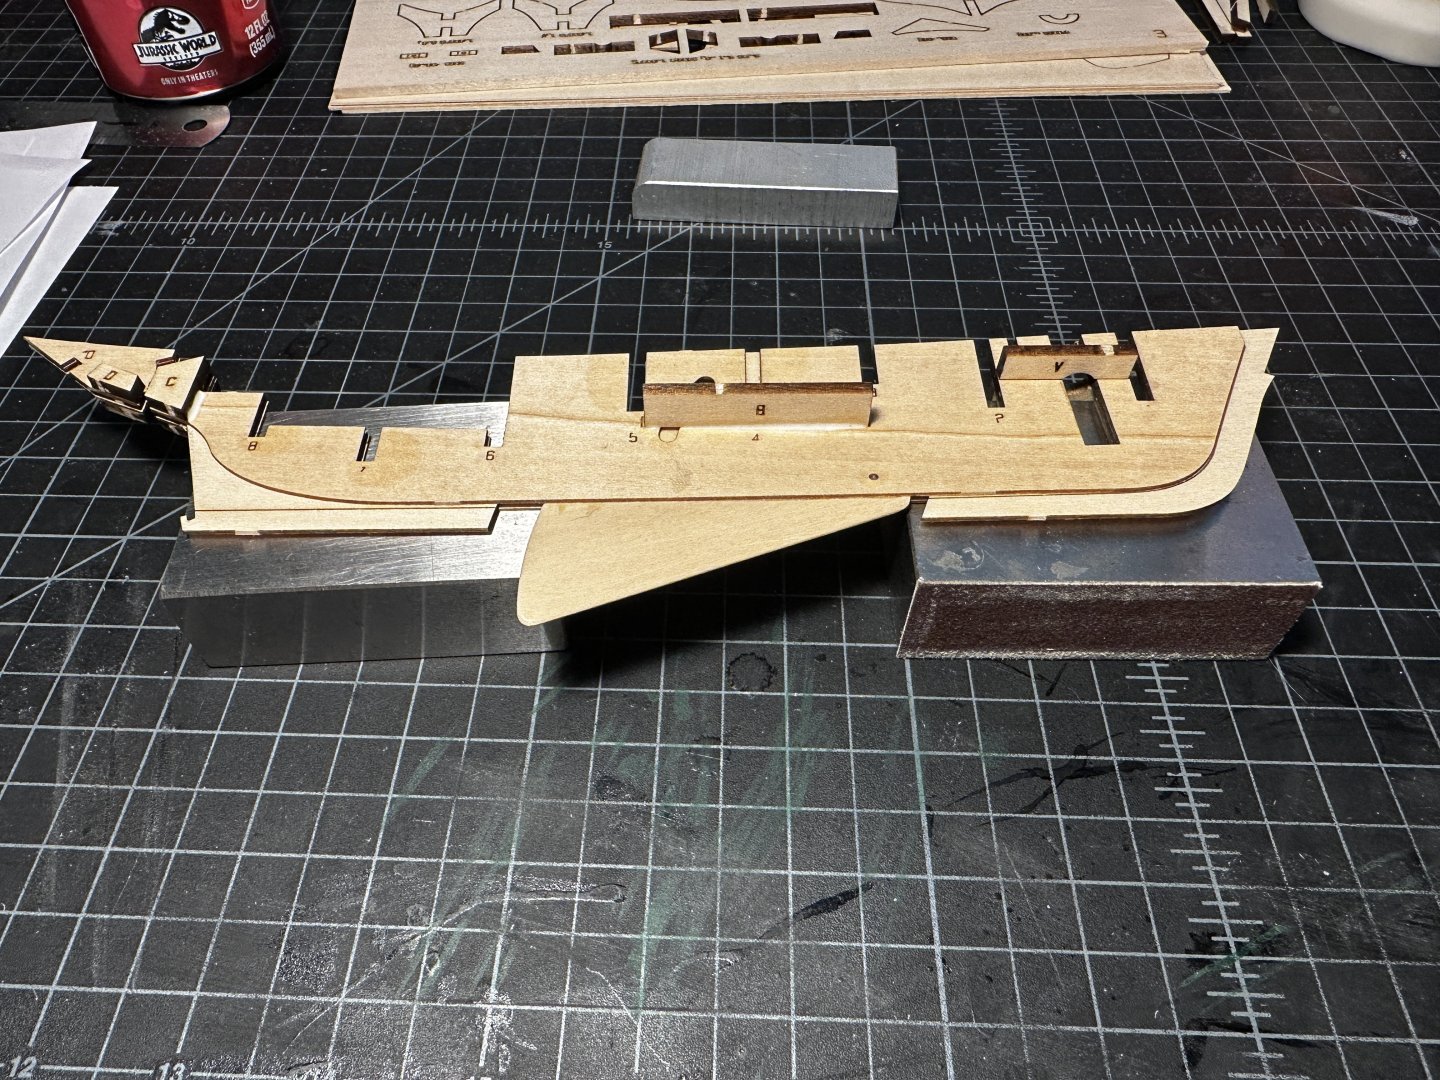
Step 8: The Deck This step wasn't toooooo bad. Like the transom, I did not wet the top surface of the deck like the instructions say to. What I ended up doing was dry fitting them both as best I could to make sure they would come together in the center. Before gluing I looked at the tops of the frames to see how flat they were to each other and it wasn't good.... I had to sand a couple down as they were much higher than the 2 next to it and multiple were too low and would need shims to make the deck flat. I started by gluing one half down only on frames 4, 5 and 6. The instructions say to put glue on all of the frames... I'm very glad I didn't do that and started with the middle 3 only for two reasons. The frame at the transom still had a slight twist and I was able to use the deck to twist it back and glue it in place. The other reason is what I mentioned earlier, frames 1, 7, 8 and 9 all needed shims to make a nice looking curve of the deck. The first half of the deck went on without an issue; the edge of the deck lined up perfectly with the center of the spine. The second half went on mostly fine... The front section of the deck where it meets the other deck had a small gap in it somehow... I used some wood filler to fill it in along with the hole for the centerboard rod since I am not using it. The transom, somehow, was not perfectly lined up with the edge of the deck either. I suspect it was because this slight twist was there when I put frame 10 on and squared it to the other frames. Then when using the deck to get rid of the twist, the transom wasn't square anymore. Not a huge deal. I sanded it like the instructions say and it looks fine now! One concern I have is the fore edge of the cockpit does not line up perfectly with frame 6. I'm considering adding some wood filler to bring it all flush with each other. You can see this in the last picture of the last post for the cockpit seats. I have lots of sanding to do next for the fairing... it's my most dreaded step of the whole thing I think...


-
Venti reacted to a post in a topic:
Muscongus Bay Lobster Smack by Venti - Model Shipways - 1:24
-
Venti reacted to a post in a topic:
Muscongus Bay Lobster Smack by Venti - Model Shipways - 1:24
-
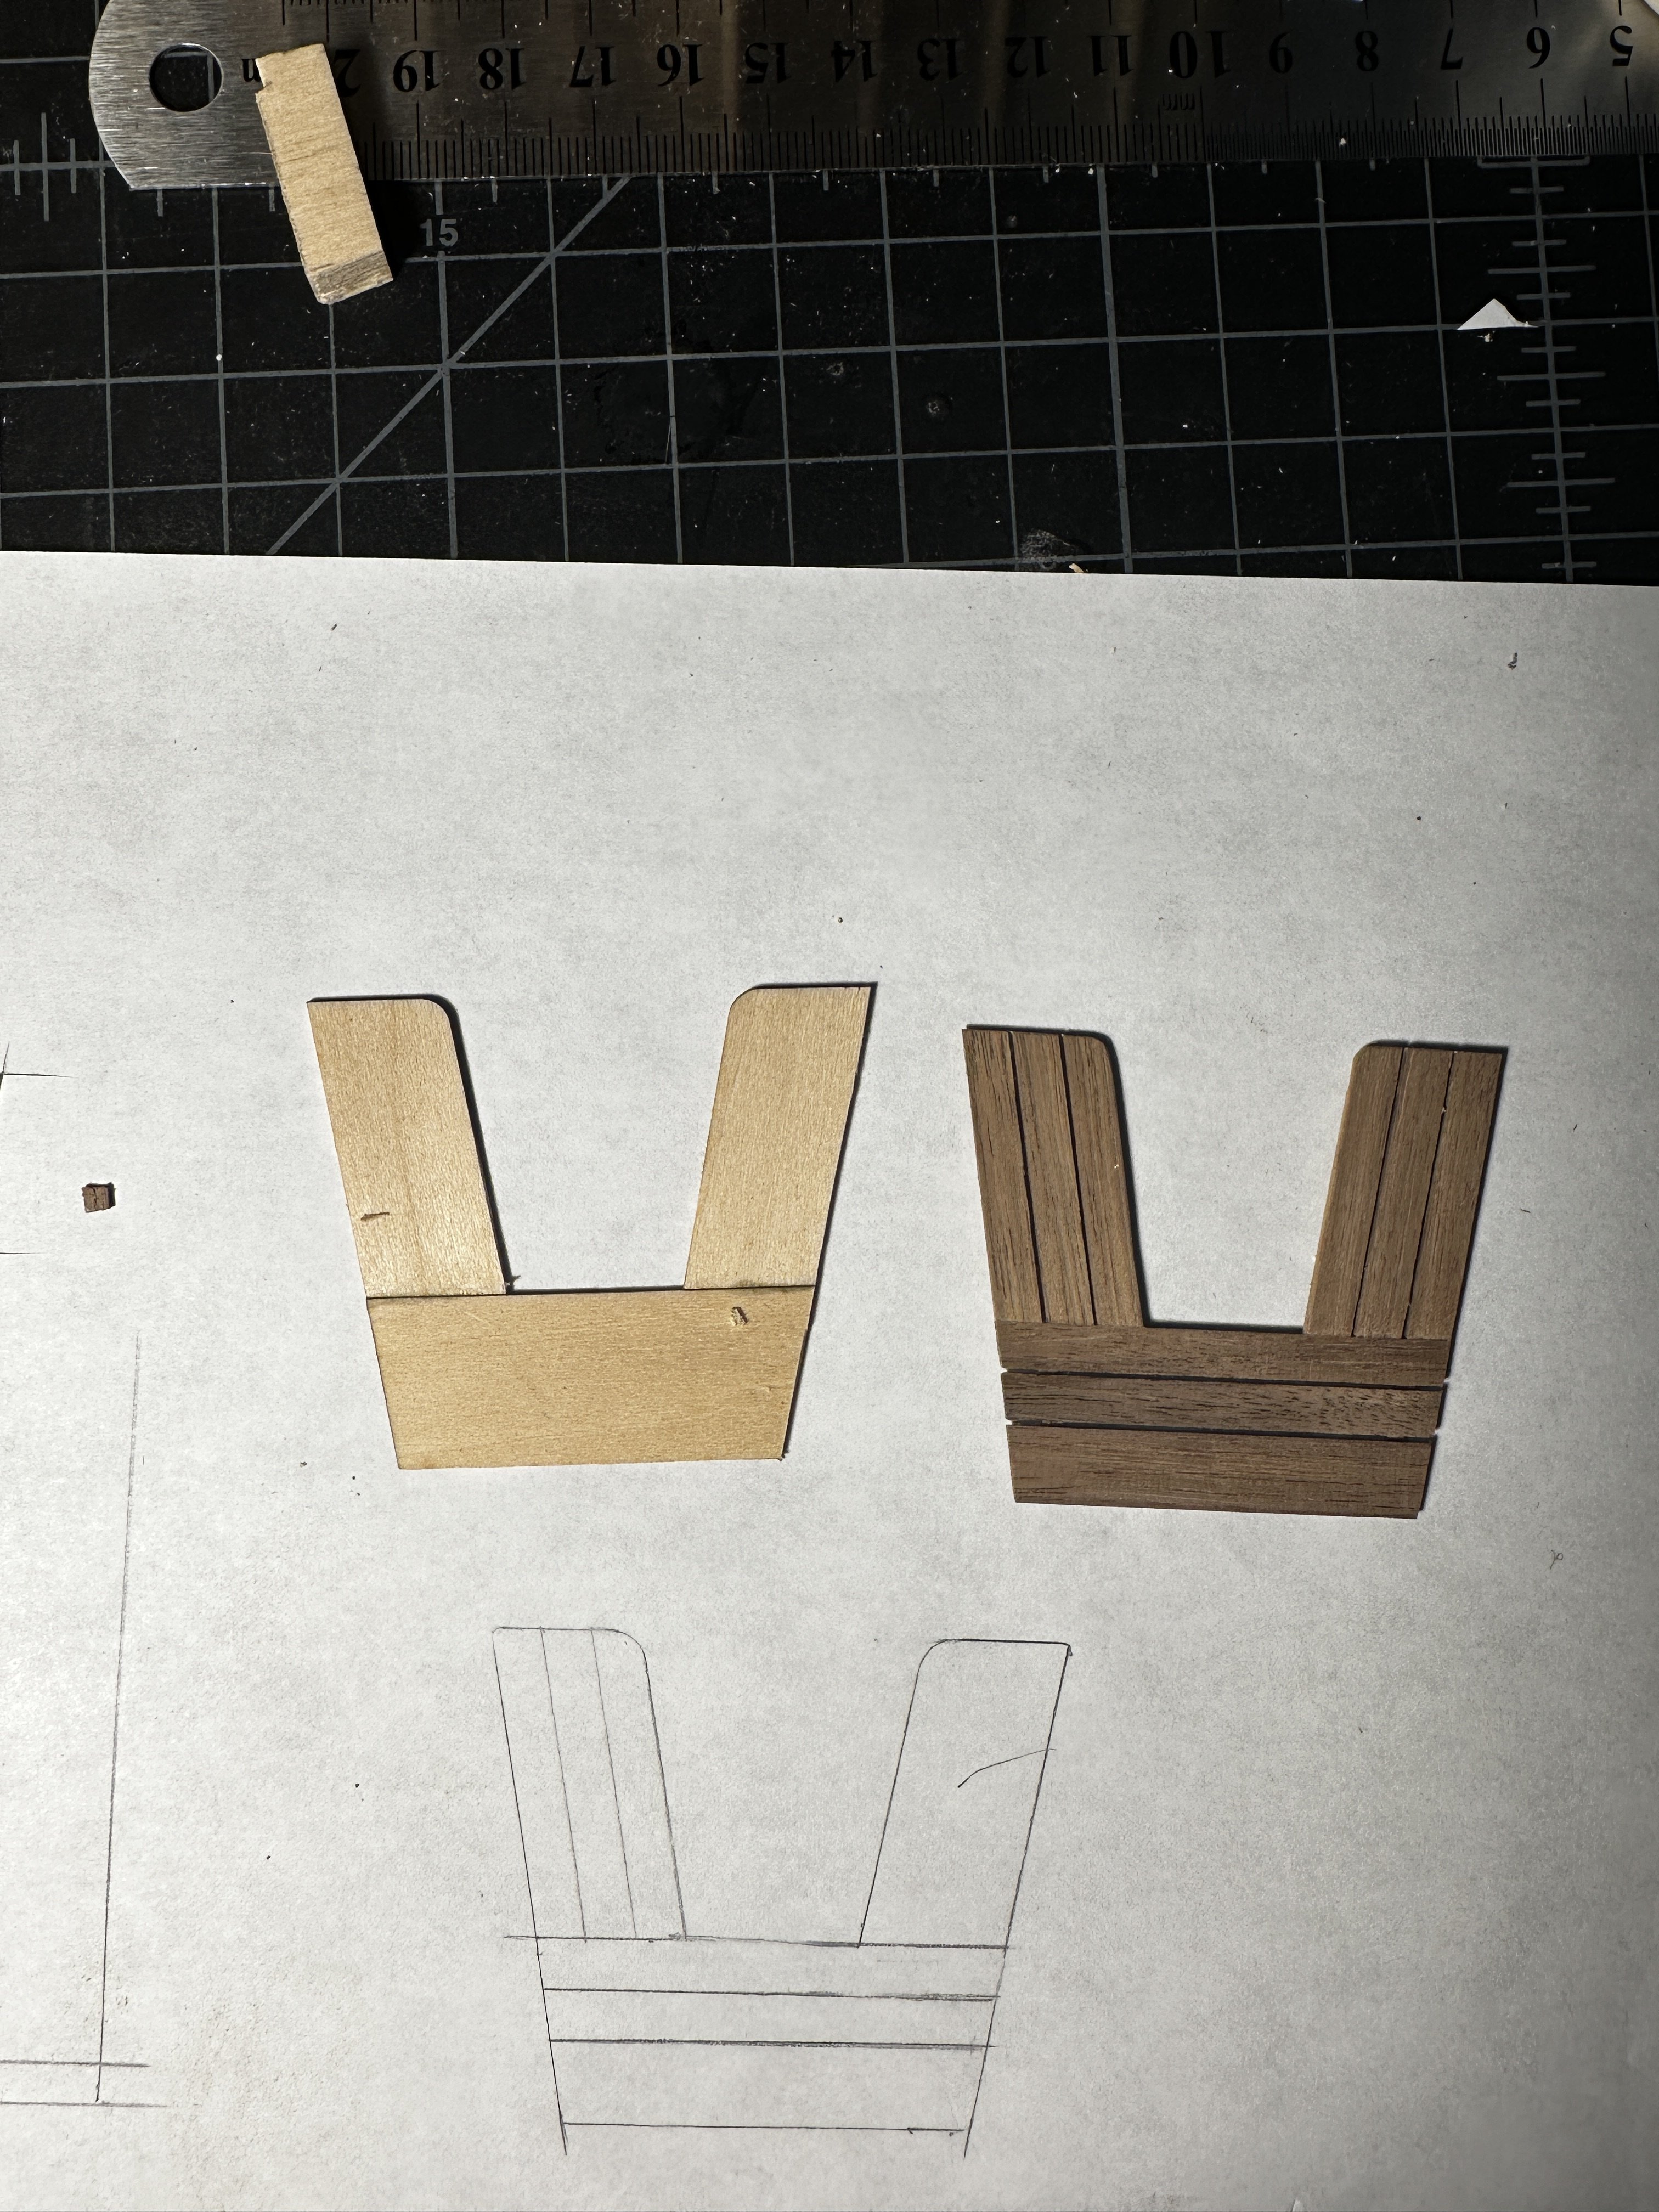
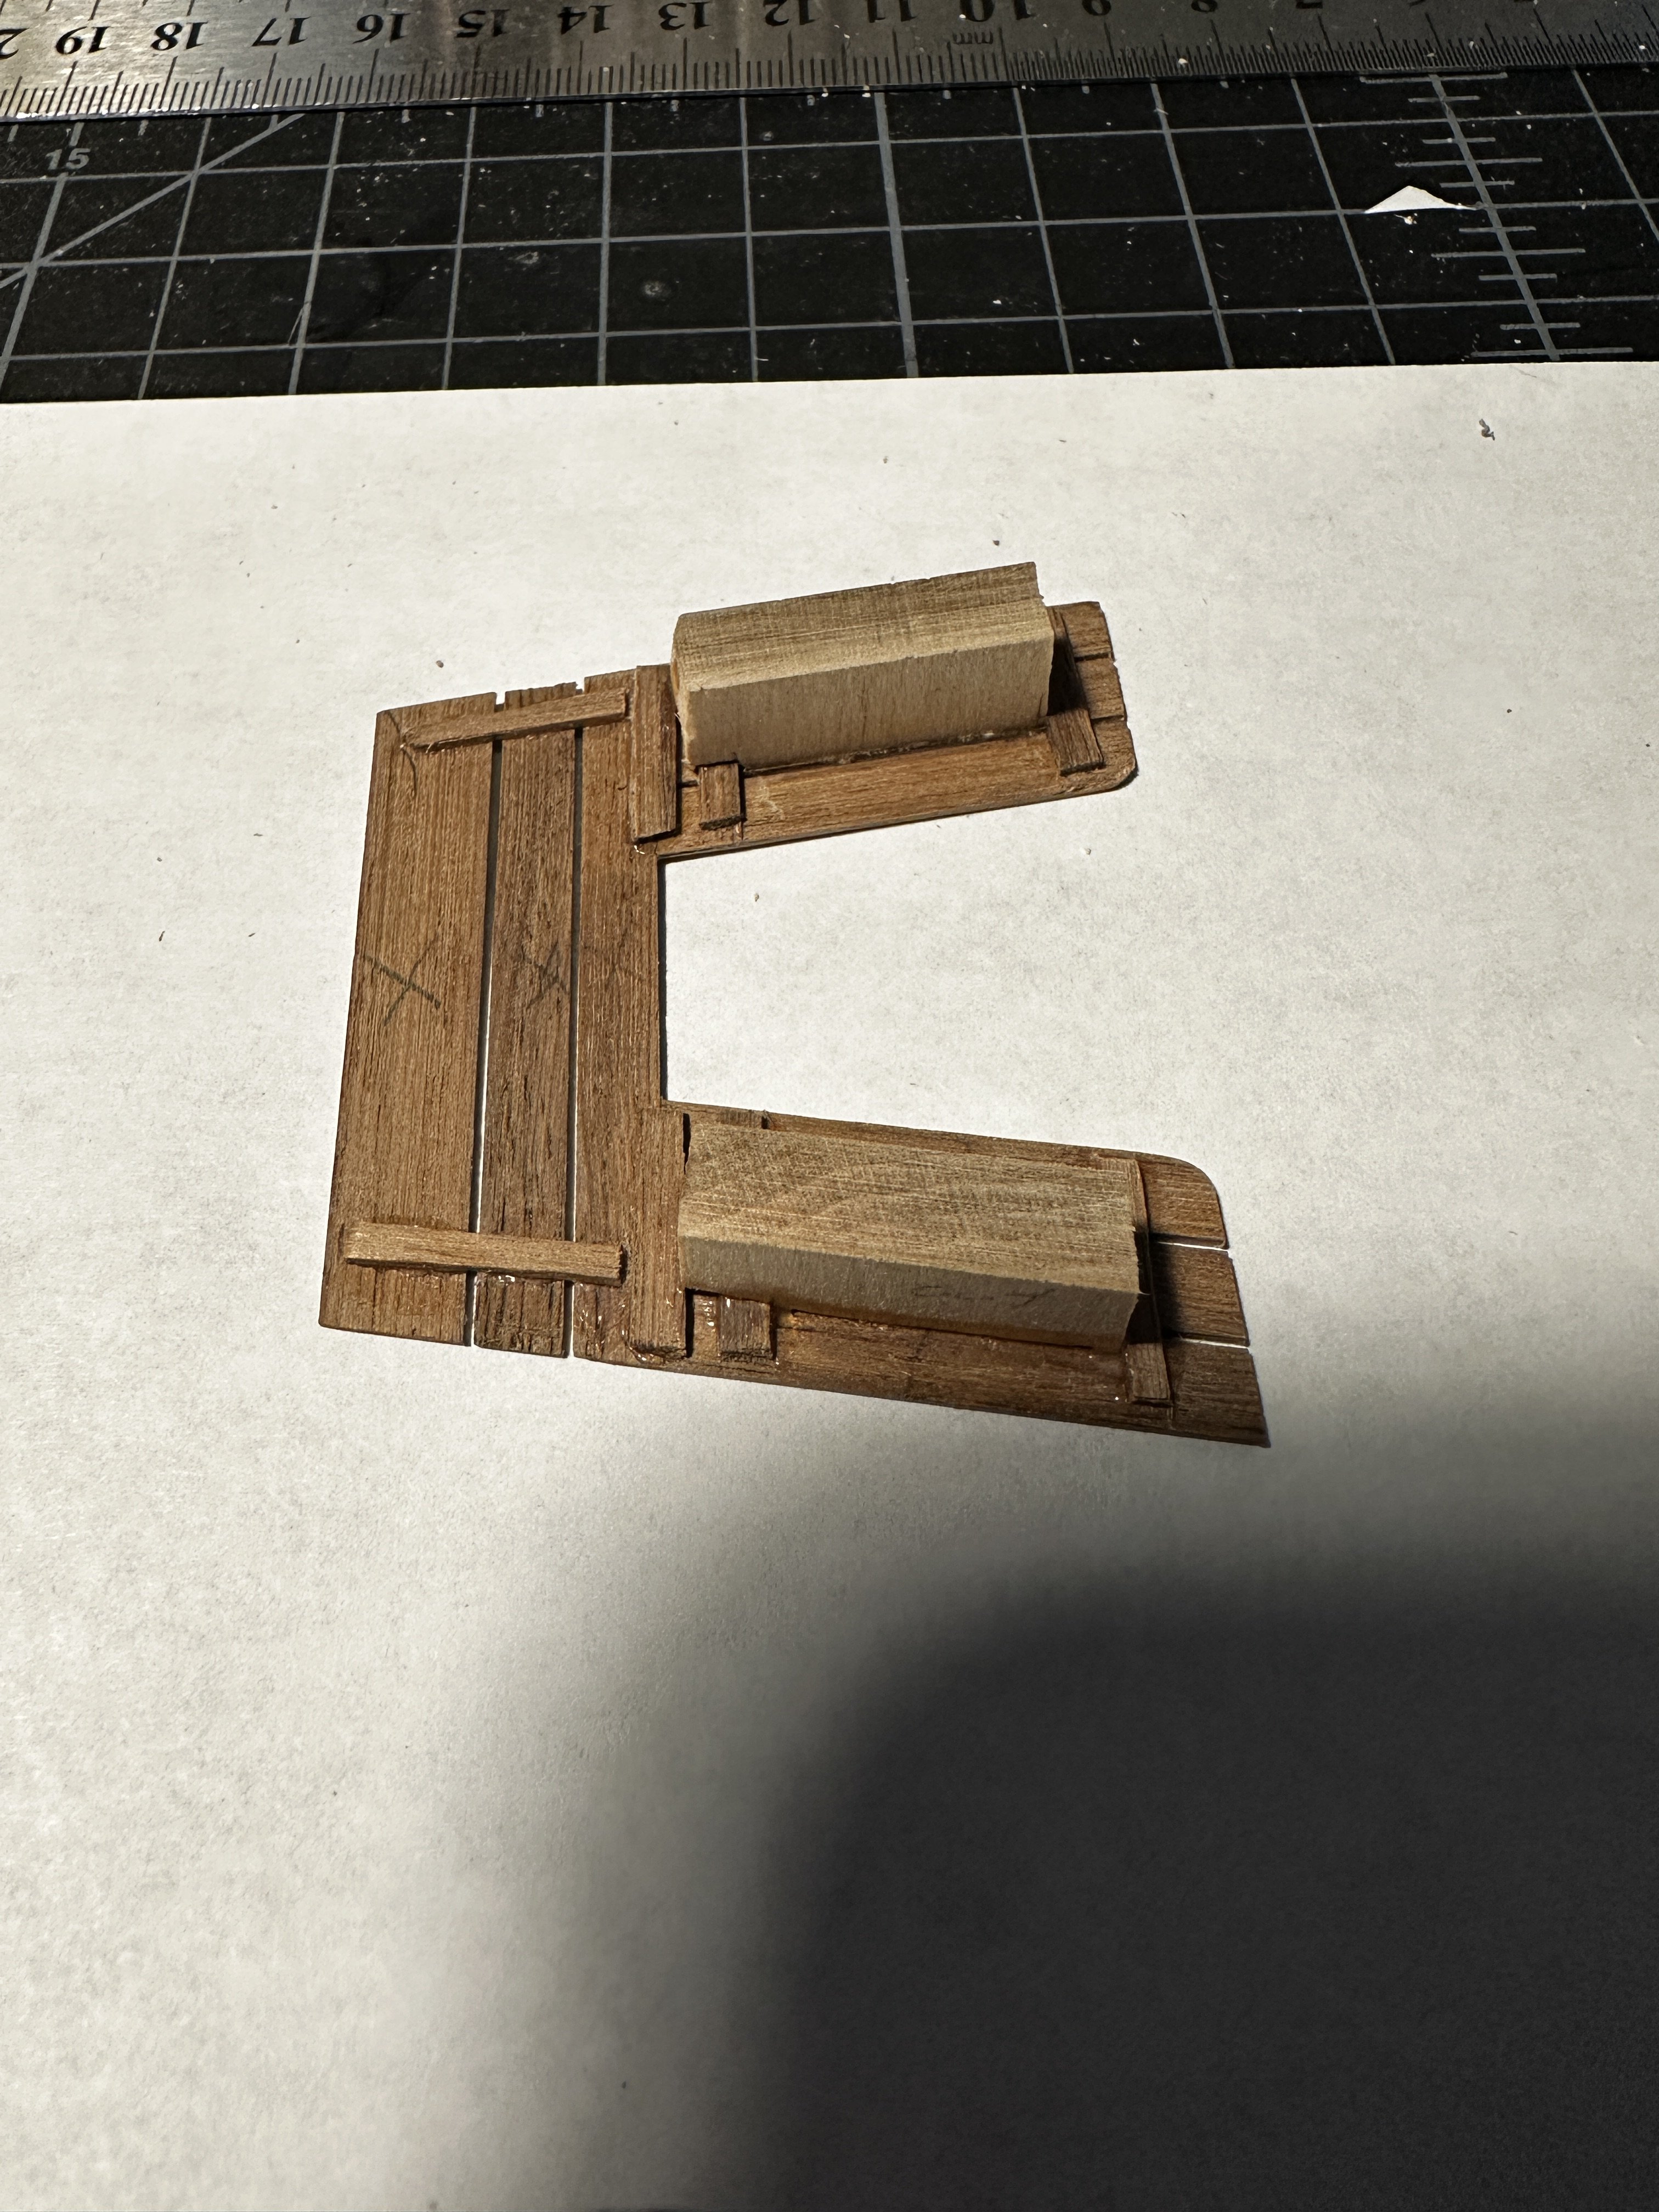
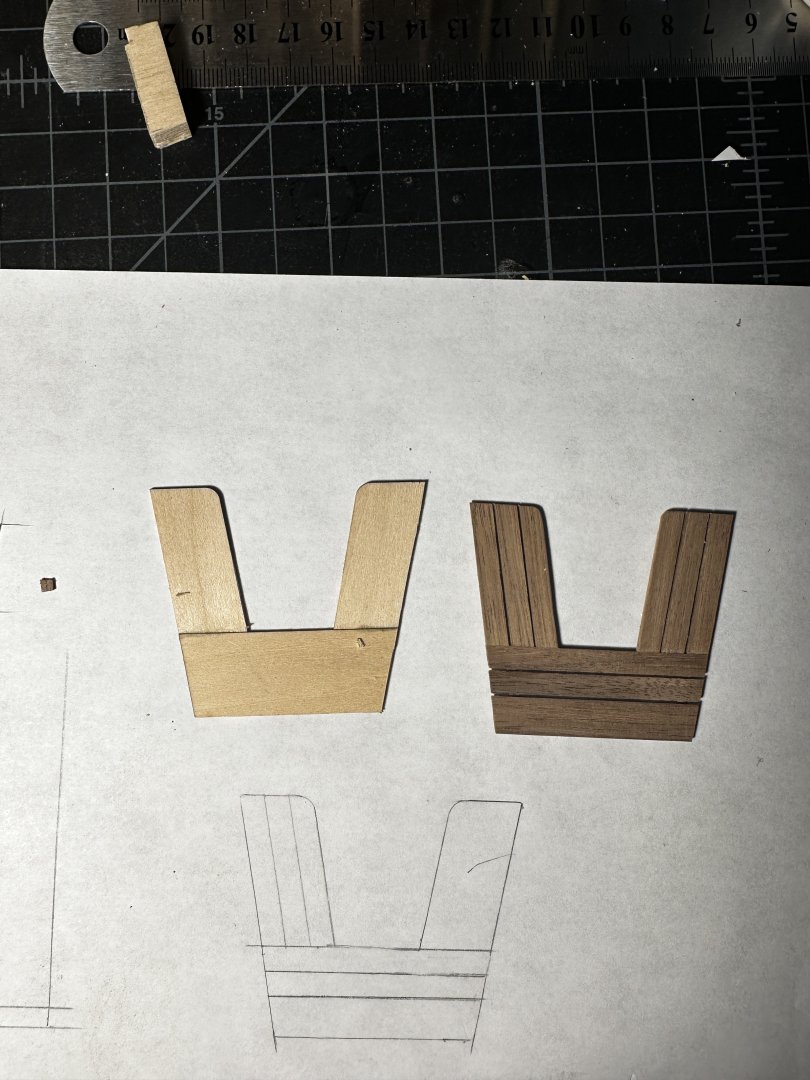
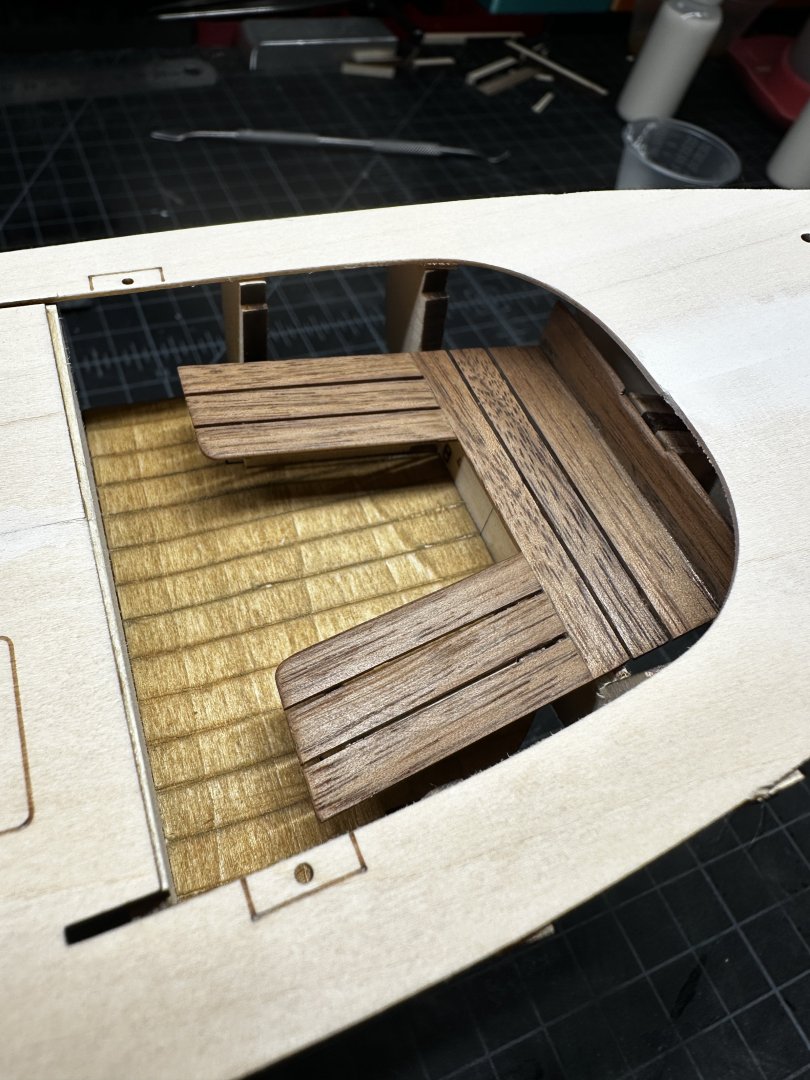
Step 7: Cockpit Seats Now I had a ton of fun with this step! I ended up not using the parts they supplied for the seats and ended up using some walnut strips to make my own. This was completely unplanned and only happened because Joe from Modeler's Sawmill accidentally sent me the wrong wood when I ordered some for the planking (he was great and corrected the issue before I even received the walnut planks). I ended up putting the supplied seat together just to make a stencil to plan my seats out. I used some spare pieces to hold all the planks together from underneath and just went for it! I glued the seat supports to the bottom of the seat and had to cut out some slots for the support planks underneath. **Note I had to sand the seat supports quite significantly in order for the seat to be level with the floor. I also used a piece of walnut for the back but didn't quite make it the same size as the supplied back. I have 5/16" wide strips and just used that for the back, cutting out a square slot at the same height as the spine. Lastly, I applied some wipe on poly and glued it in! I'm so happy with how it came out and really just confirms my eventual desire to do more scratch based builds. (Ignore the fact the deck is on in the last photo... I forgot to take one of the seat after i glued it in)

-
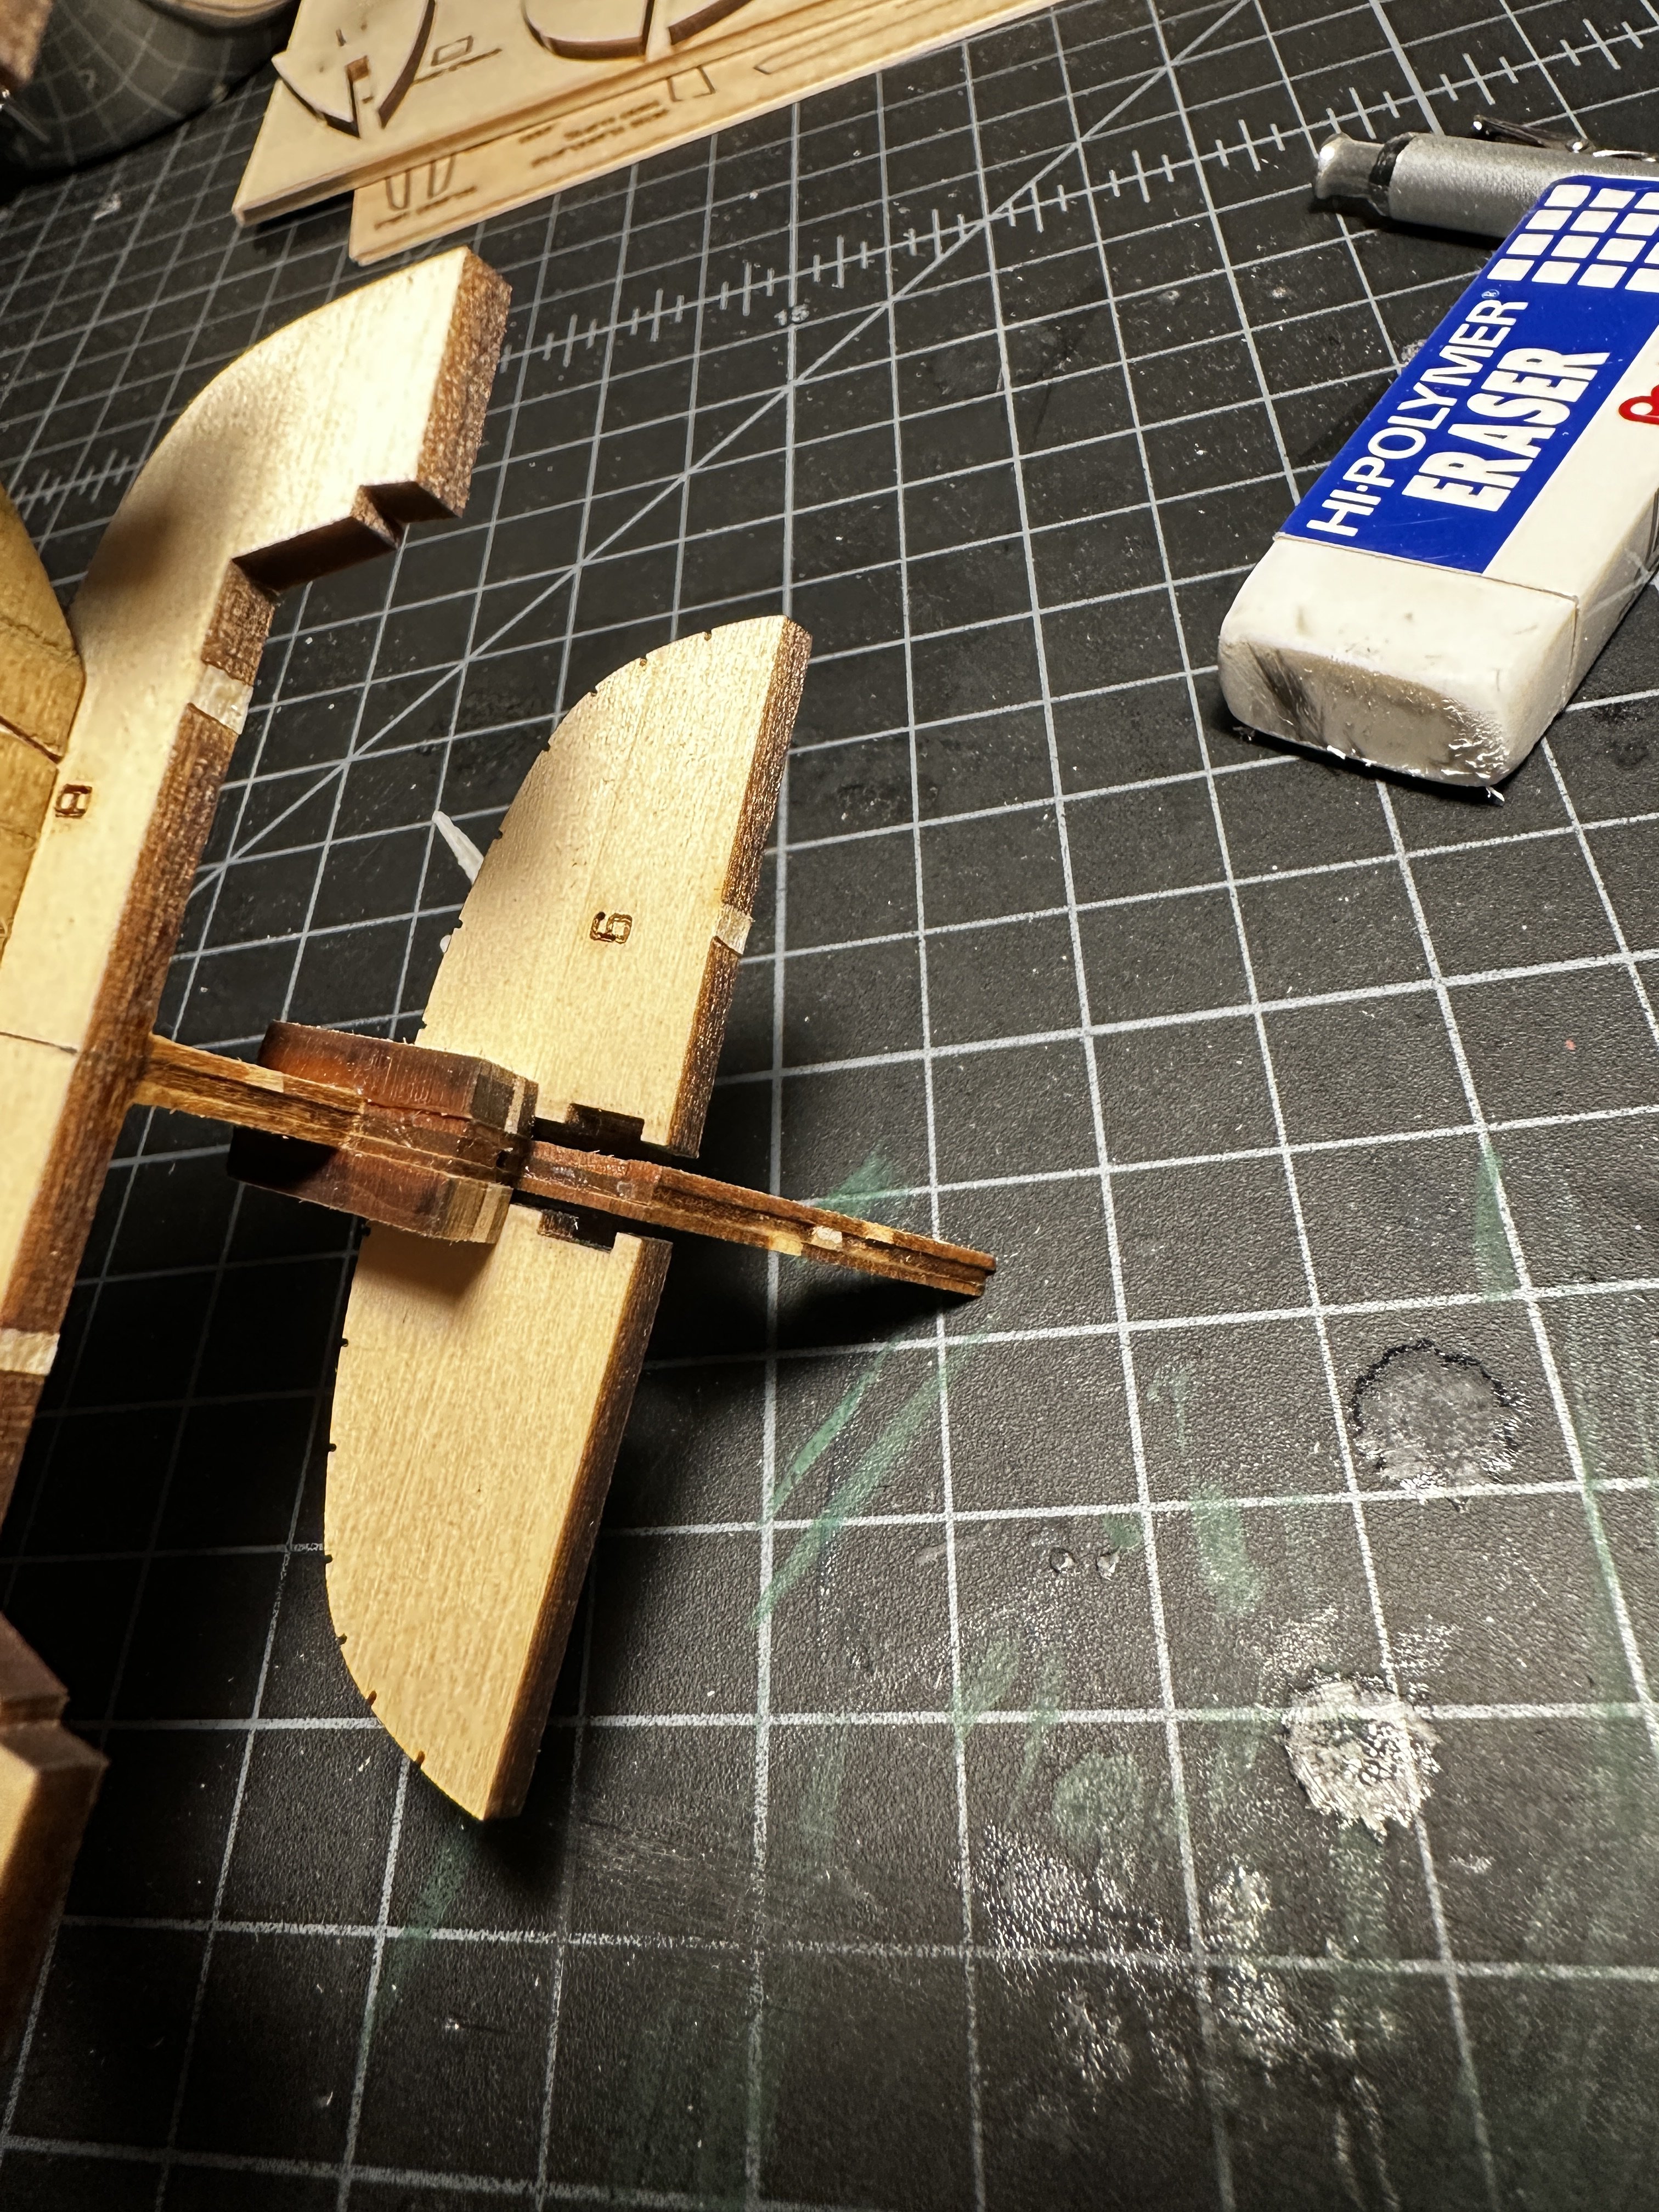
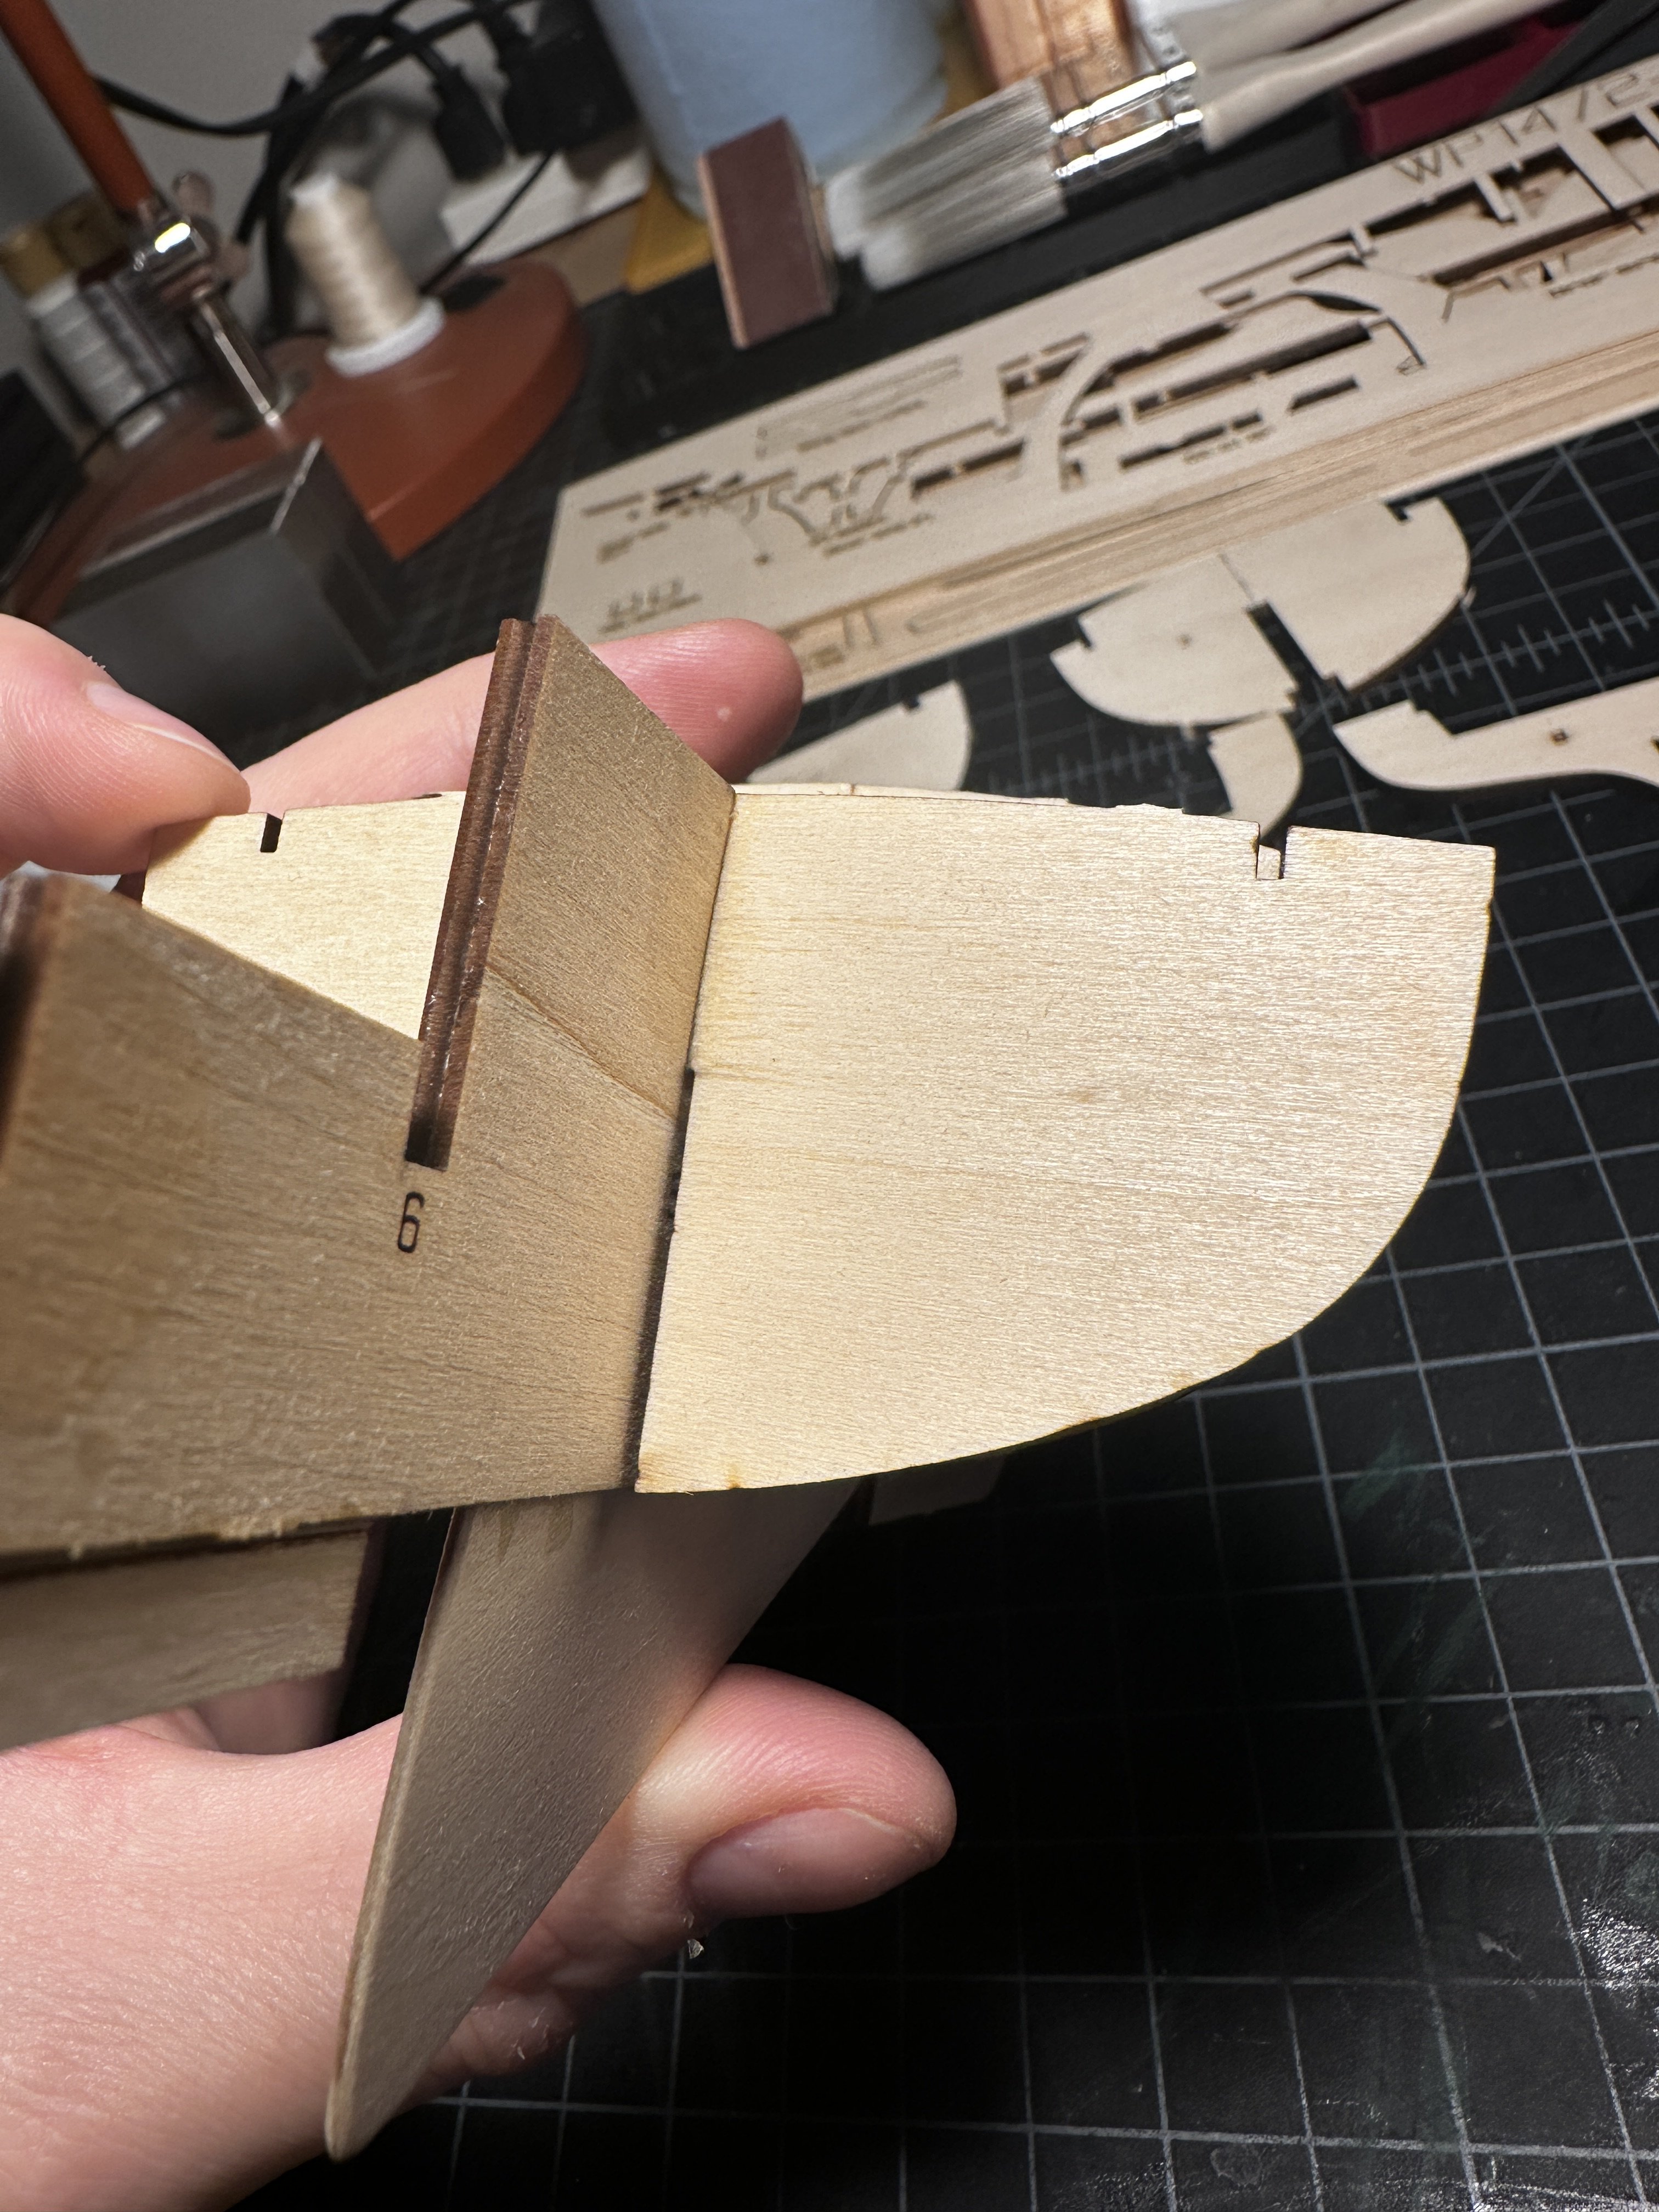
Step 6: Frame 10 and Transom The only thing I did differently than what the instructions say was I did not wet one side of the either piece. I found that I could hold them together well enough and keep the slight curve without it. (after the glue-pocalypse, I fear getting anything more wet than it needs to be). I glued the frame and transom to the spine and made sure it was lined up with the spine as best I could. It seemed that the top of the frame and transom were way taller than the spine but I don't think this is an issue as I just cut them down to be flush with it.
-
Yeah I actually saw her mentioned in another build log and was watching the series! Unfortunately hers is the Midwest which I imagine is different than the Model Shipways version. But I have kept her in mind in case something I run into that it could help because I'm sure a lot is similar.
-
Venti reacted to a post in a topic:
Muscongus Bay Lobster Smack by Venti - Model Shipways - 1:24
-
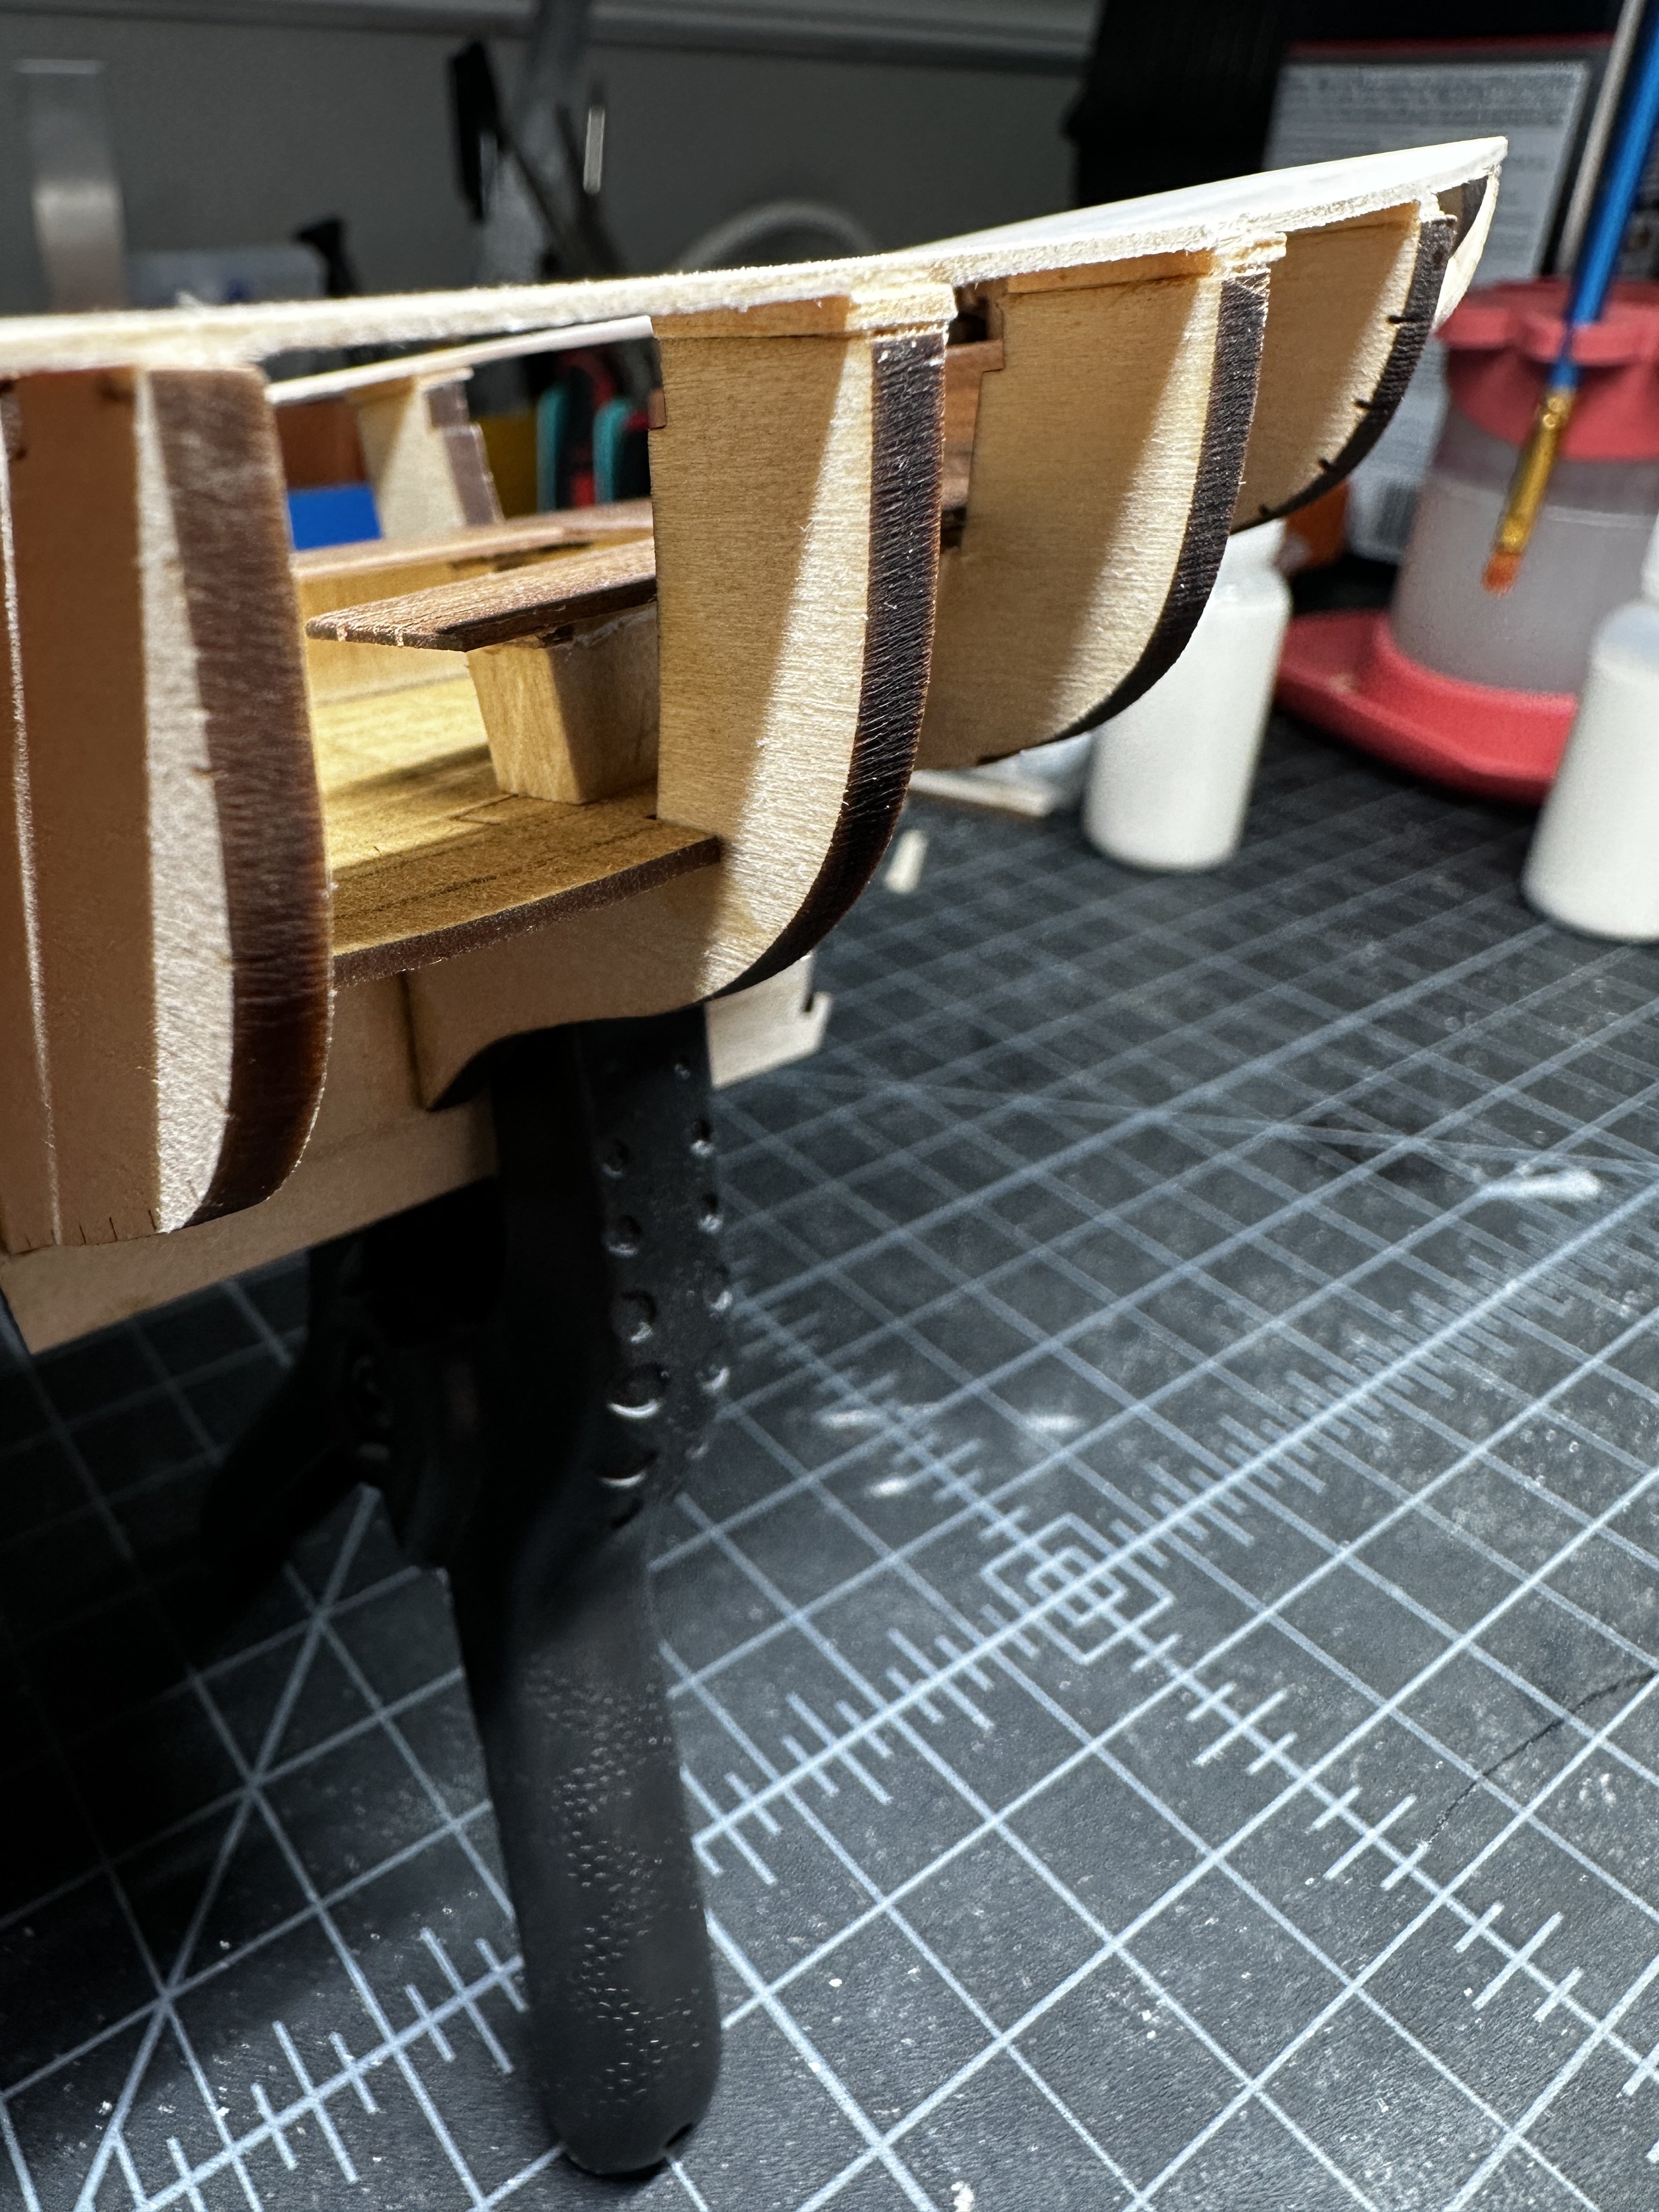
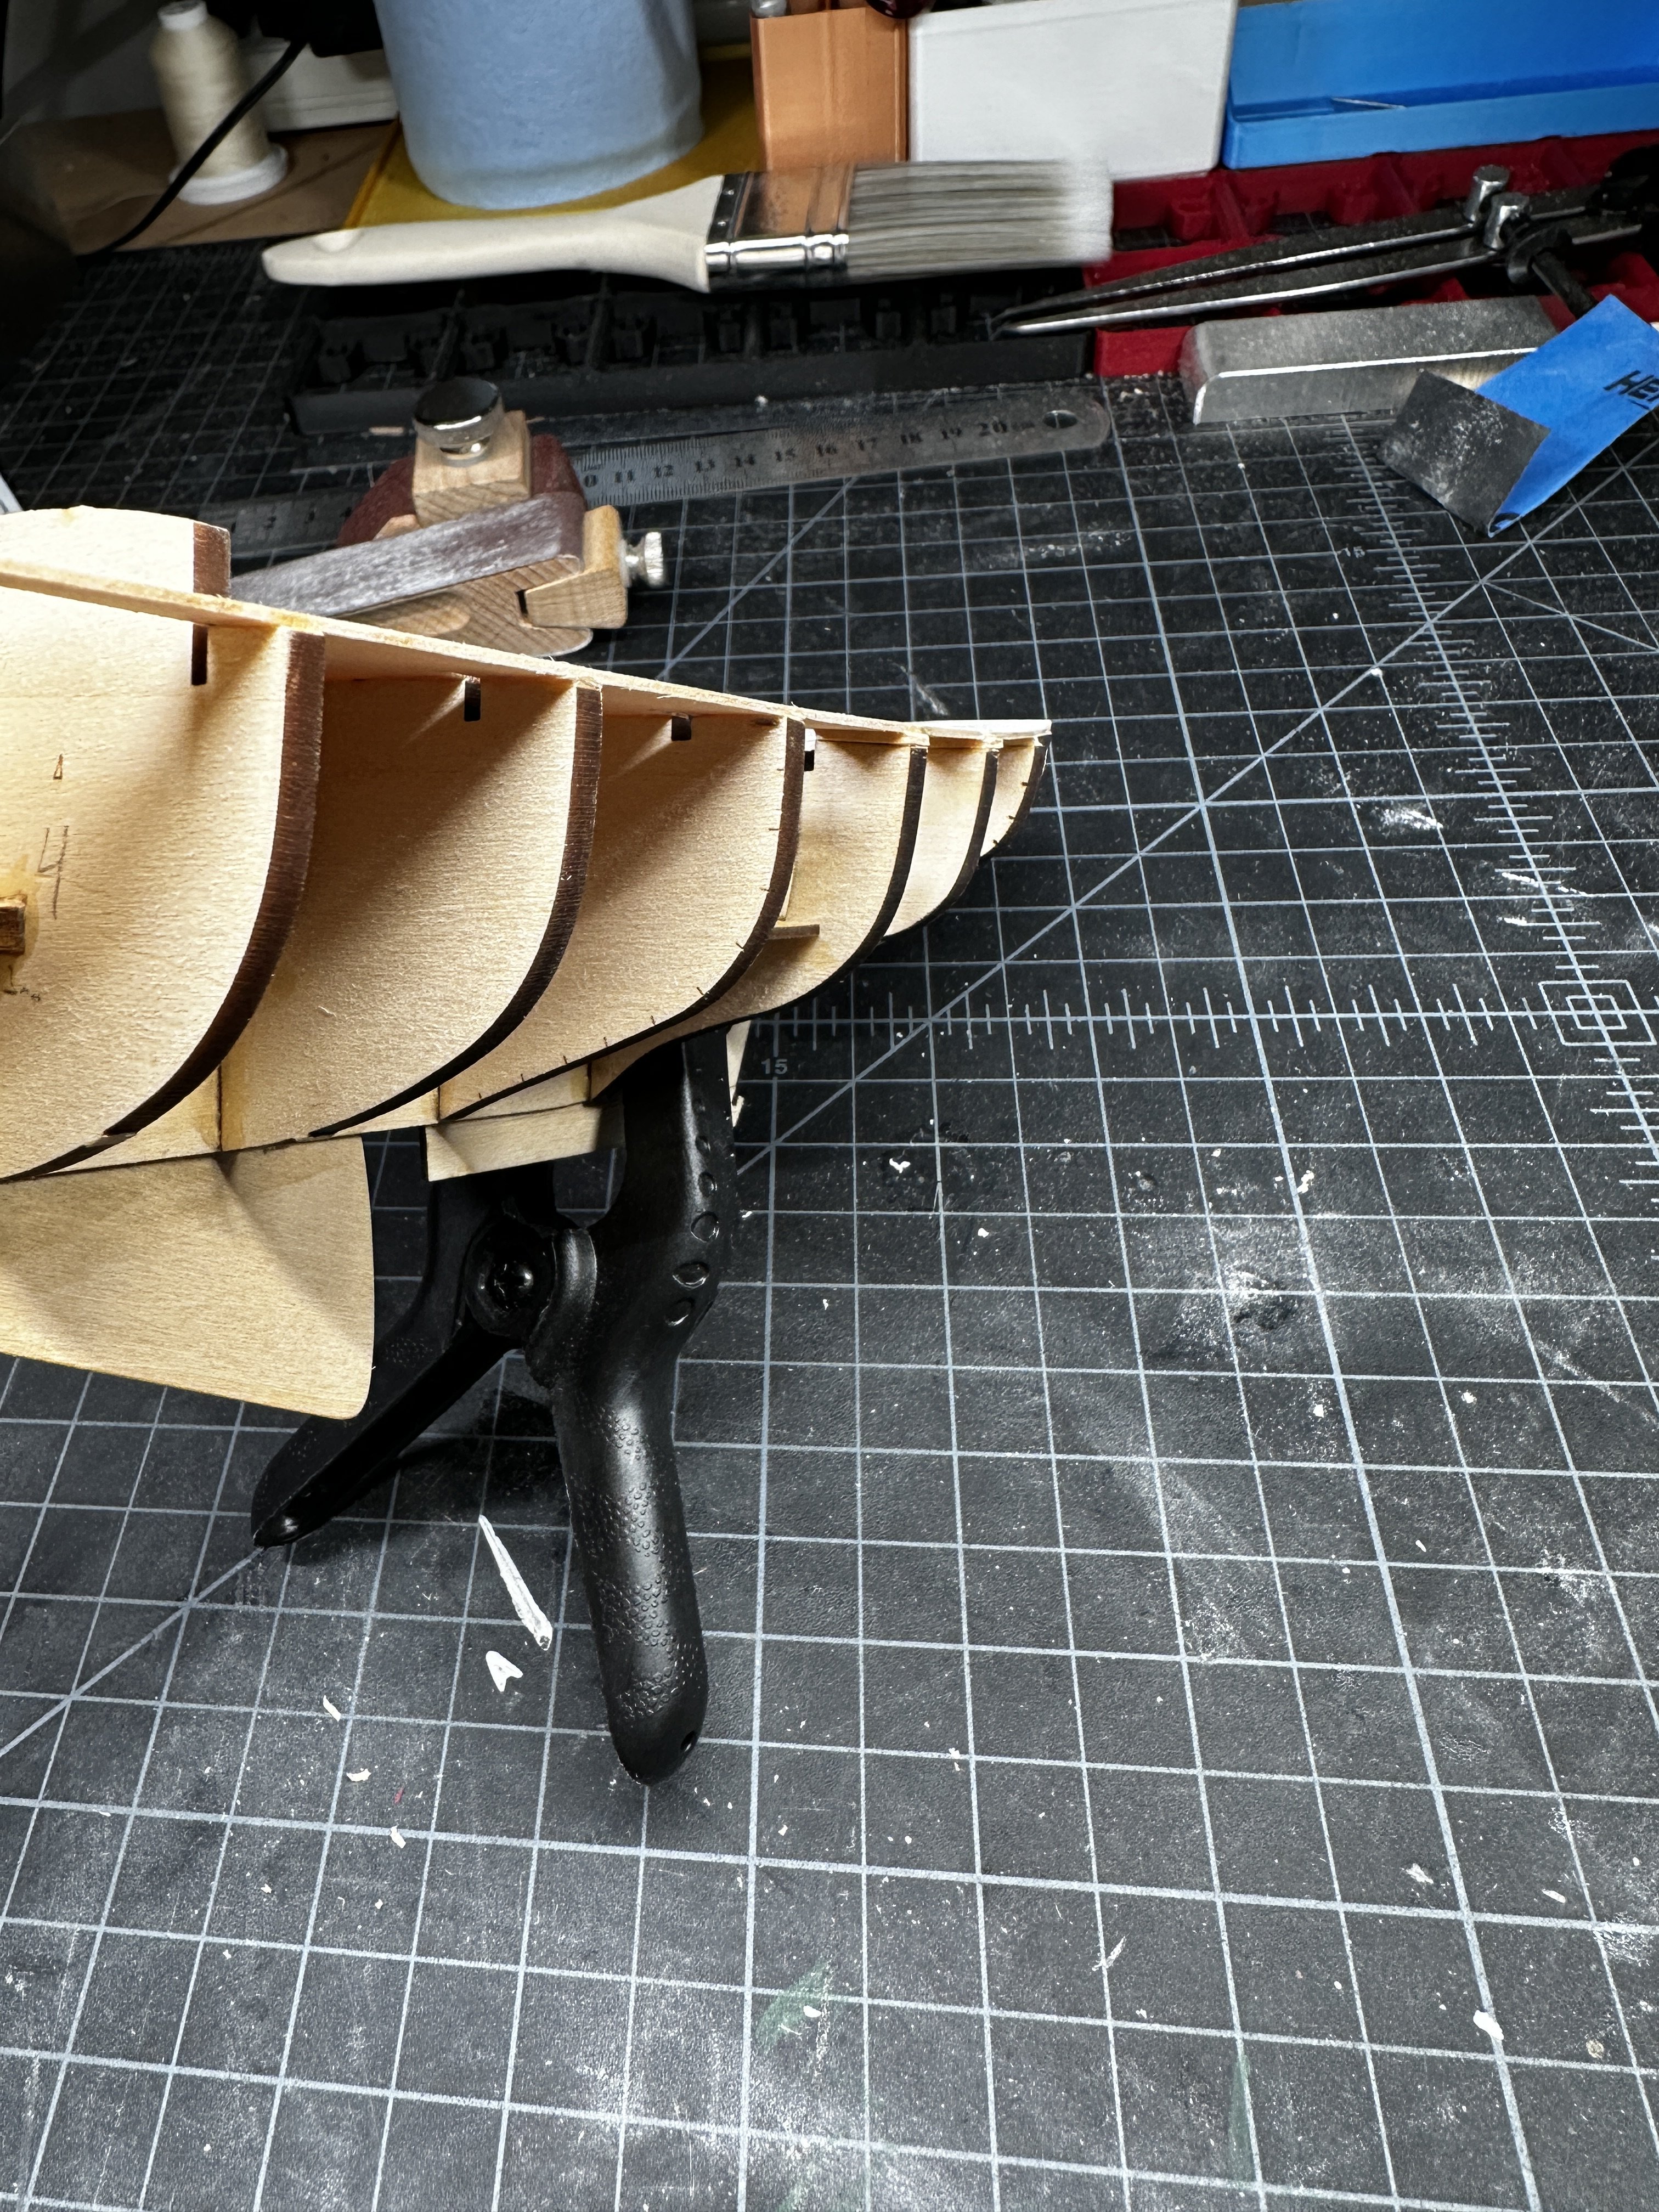
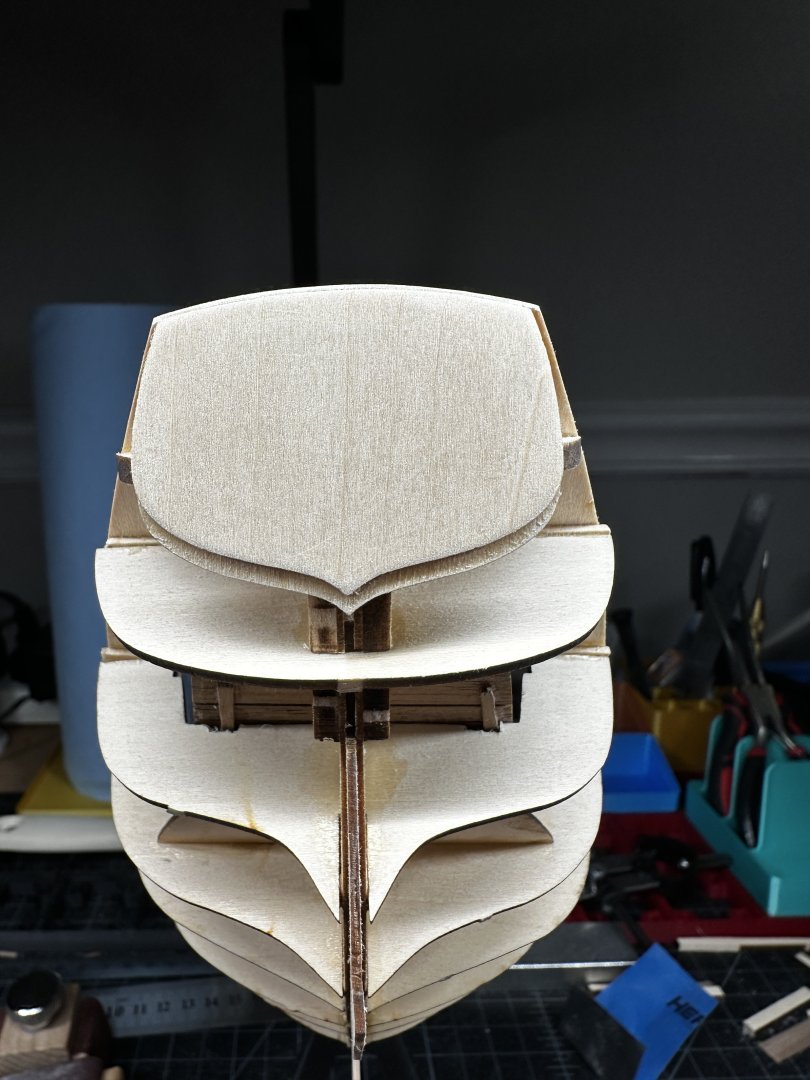
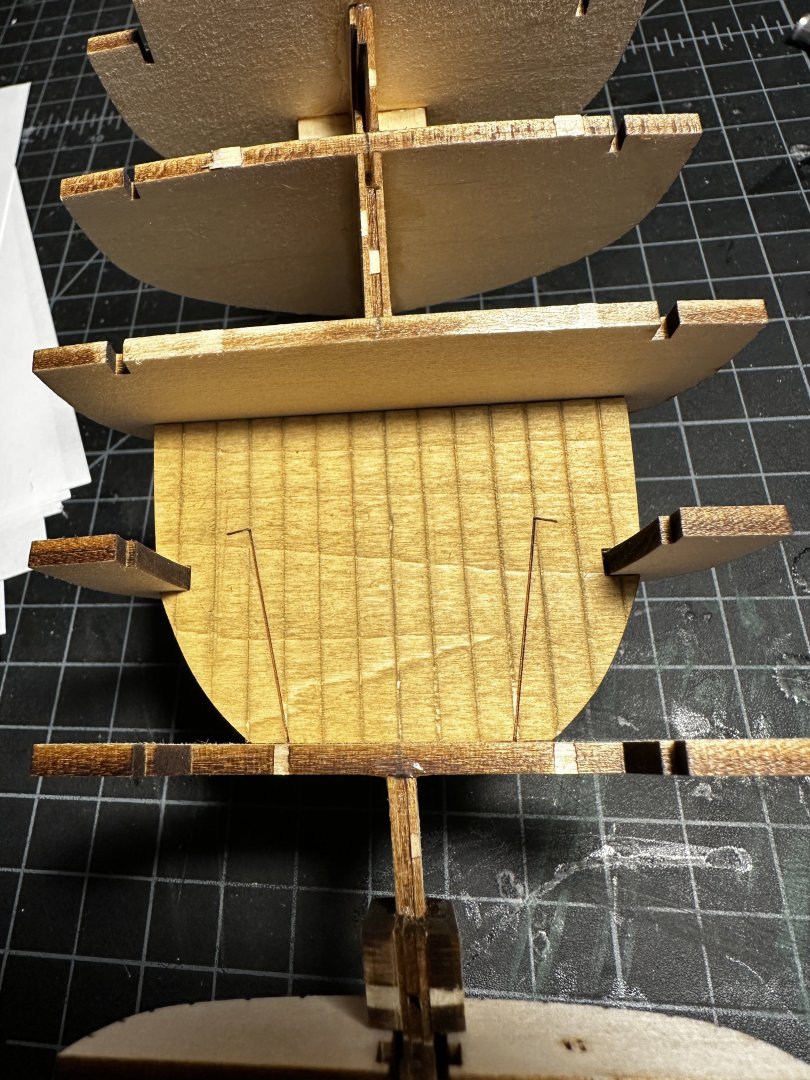
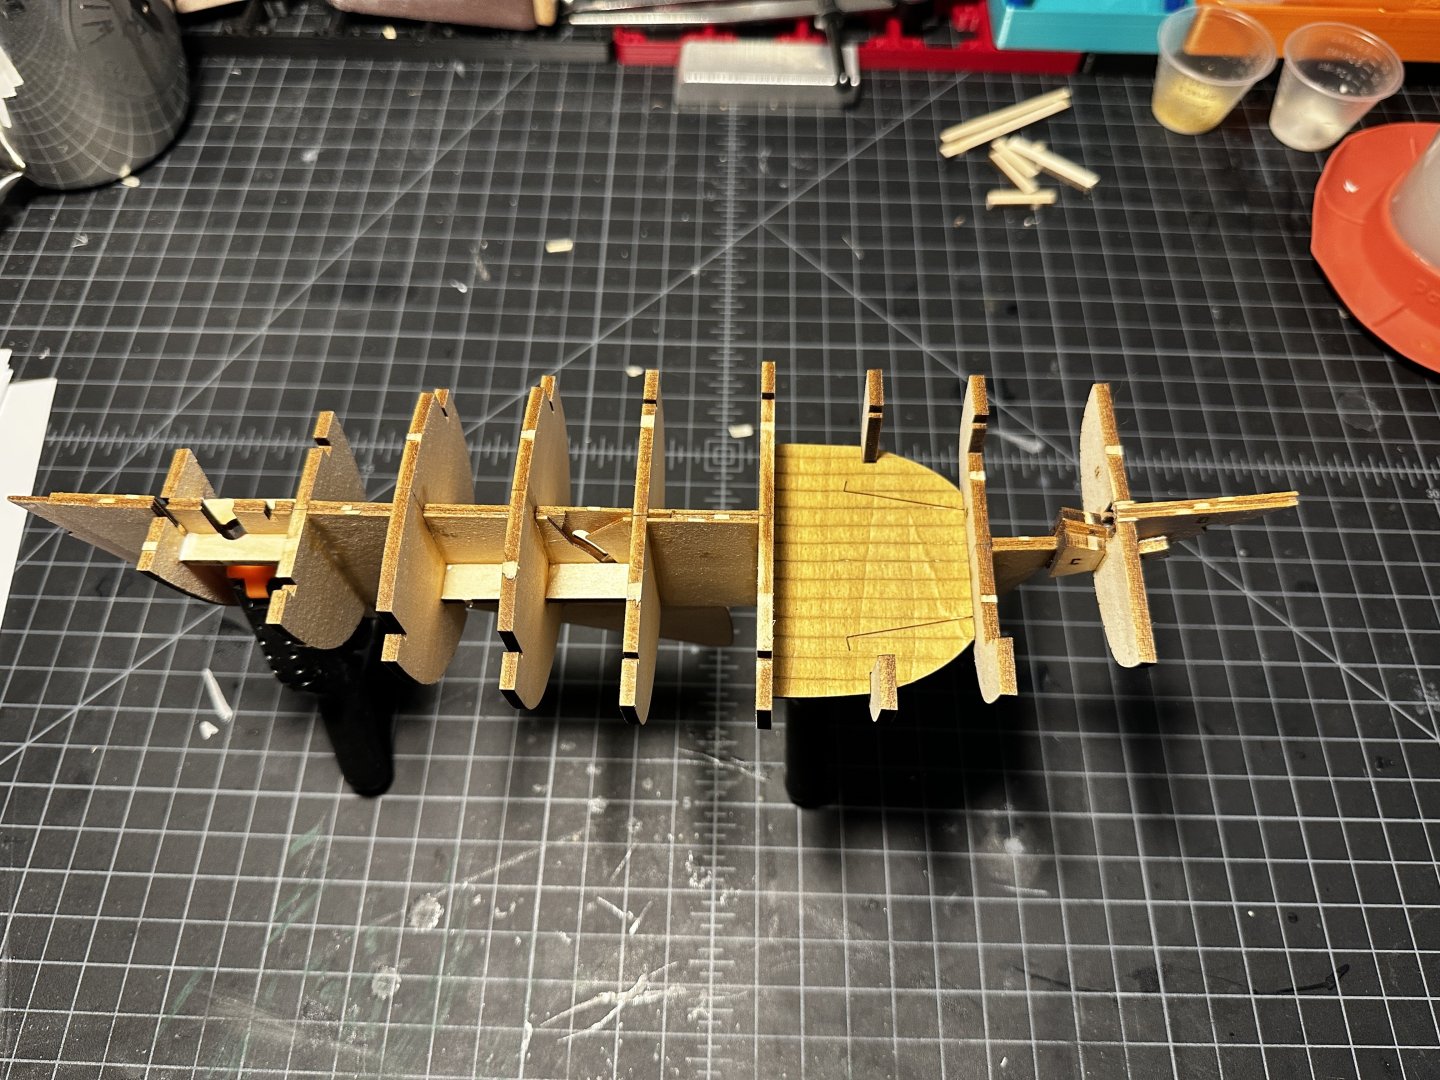
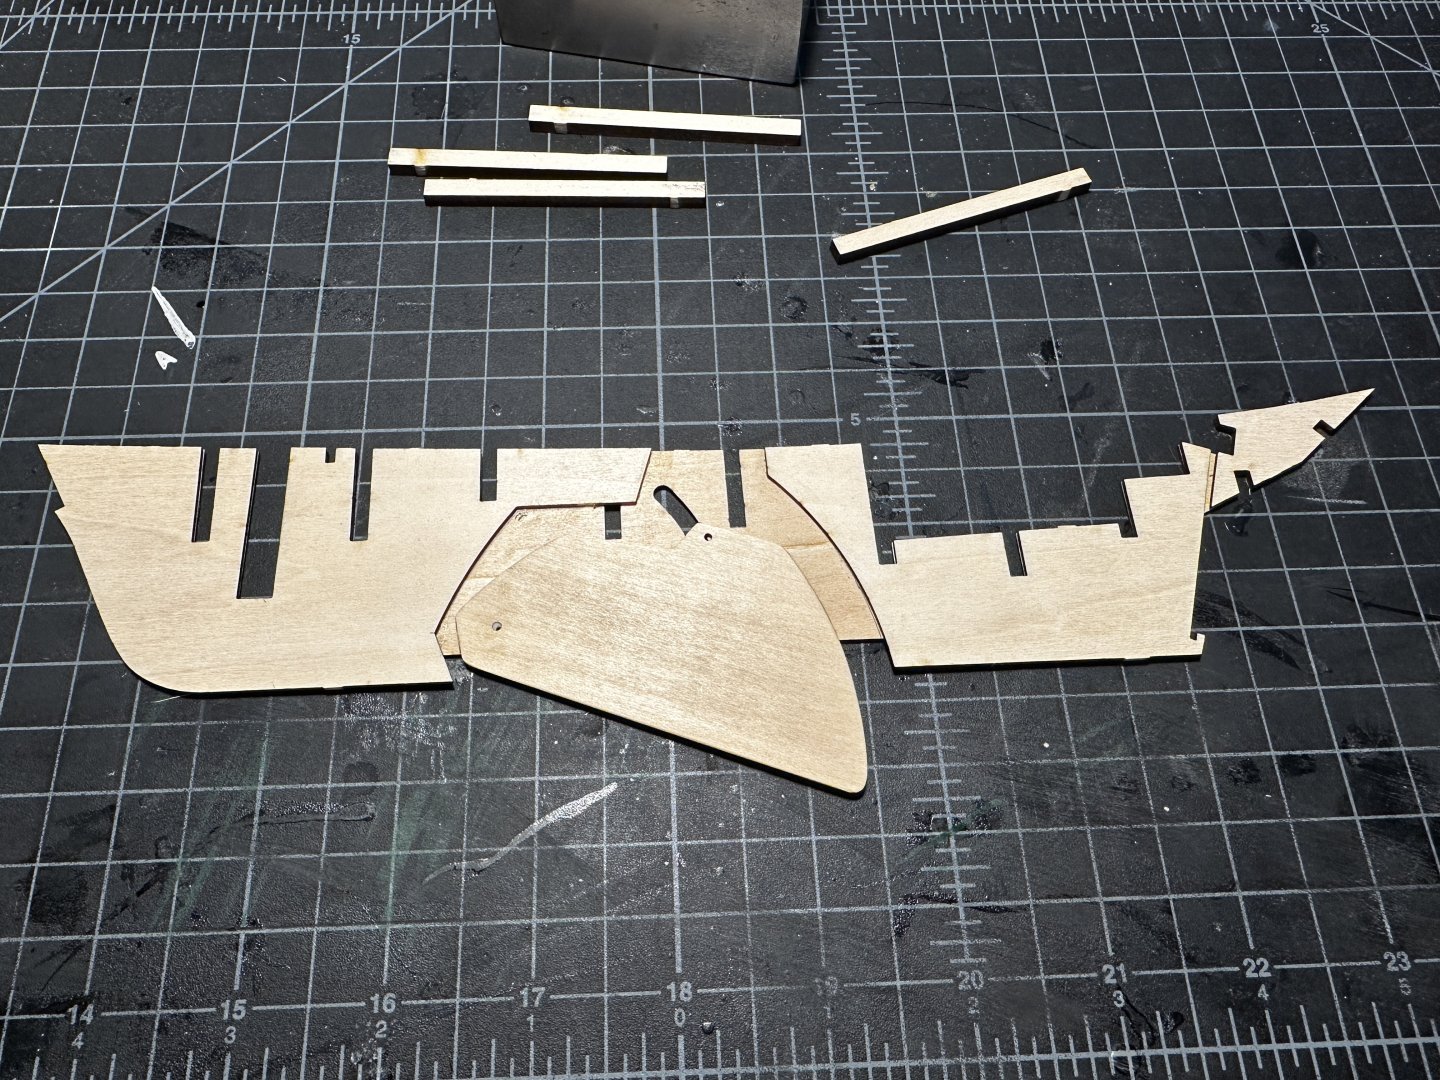
Step 5: The Bulkhead Frames I had been looking forward to this step for no particular reason other than it will start to look like a boat after haha. Unfortunately, it was a very long, very annoying step... The warp from the previous step was initially so frustrating that I almost stopped and ordered new/replacement parts... In my head if it was this warped, surely it will affect many many things later and make it look terrible... I ended up decided to just move on with it and see if I can straighten things up with the bulkheads. This was where another very frustrating discovery was made... the fit for ALL of the bulkheads to the spine was TERRIBLE... I had seen other logs having the same issue but still annoying the lack in quality for the bulkheads. Then when dry-fitting bulkhead 8 it was a little tight and I pushed too hard and broke the bottom of the spine where the keel goes.... I glued it back on and after these 3 things I had to call it a night as I was not in the right mindset to continue... When coming back the next day I started with bulkhead 4. The slot for the reinforcing piece had to be extended more than 3mm... I took lots of time to make sure these were square to the spine in hopes to keep everything good down the line... All of the other bulkheads fit to the spine was so bad that I had to find the center of the bulkhead and mark it so I could line it up with the spine and then also shim each side of the spine between the bulkhead and spine... I'm new to building ships in general and this is my first one with bulkheads but this seems like a fairly critical step to have this poor of a fit... After slogging through this taking WAY too much time (I think) on this step it is done... The bow from before isn't even noticeable now, thankfully and the bulkheads all look square! I ended up going for a faux planked cockpit floor and staining it with a light oak color. Unfortunately, this brought out the grain of the basswood and kind of gives away it's fake haha.


-
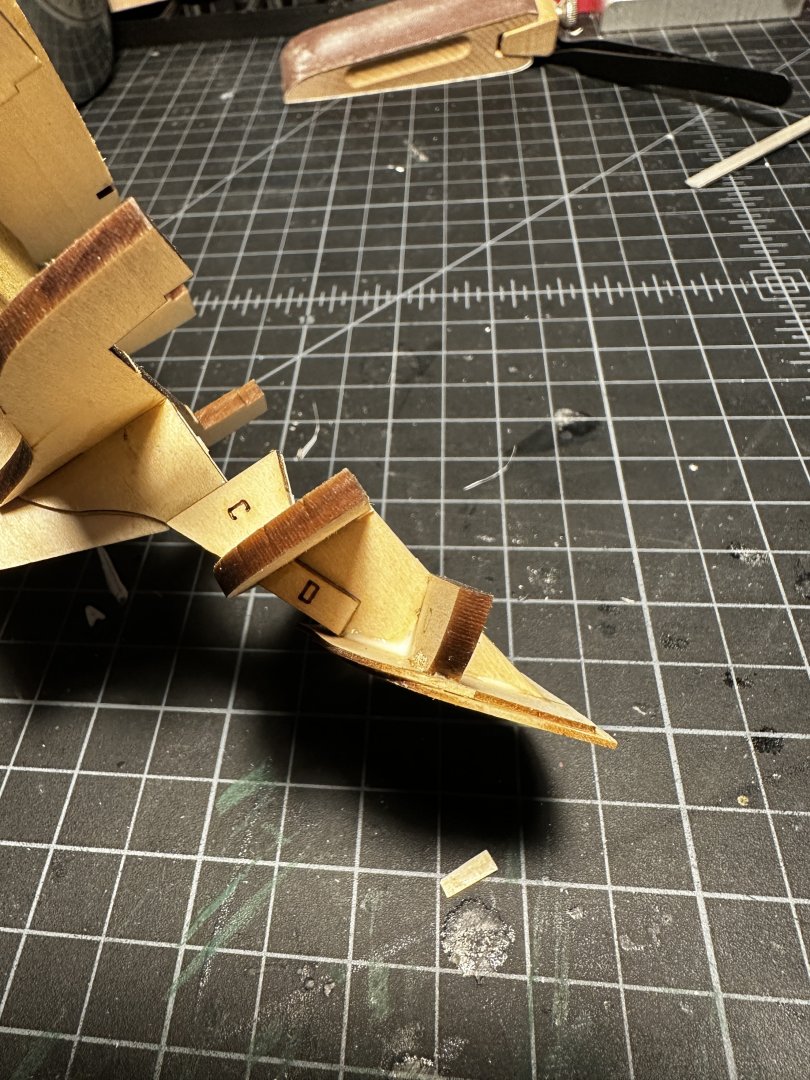
Step 4: Reinforcing Pieces This step was very straightforward (if you had correctly marked wood sheets showing you where they go). A big thing to note that the instructions don't really say is that bulkhead 4 will slot onto the B-pair of pieces. One of my spines had the laser etch of where B should but it didn't help much as the reinforcing piece was much wider than the spot lasered... I ended up getting out the two bulkhead halves and using them to know where to put the B pieces. C and D I just tried to line up with the slots and the bottom of the spine since they are used for the planking later. After I got them all glued on, I let it sit overnight like how it is in the picture which was a HUGE mistake... I didn't think about it and was very frustrated after the glue-cident but all that glue on the wood make the wood wet and without doing anything special the spine had a pretty severe bow in it... Looking at it from the front it looked like a parenthesis - ) . VERY frustrating and unfortunately I did not notice until starting the bulkheads...
-
Steps 1-3: The Central Spine These steps were pretty straight forward. I took extra time to make sure the slots and top of the spine lined up to try and prevent any issues later! This went well and didn't have any issues. Almost glued in a spacer but caught it in time haha. I also took a lot of extra time letting glue dry while I had my 1-2-3 blocks pressing them together to try to prevent any warping and it did great. I decided to fix the centerboard in. Partially because I didn't want to test my luck with another moving part and mostly because when I was dry fitting it, the curved slot in the spine did not line up with the hole for the brass rod... I sanded the centerboard and rounded the fore edges and glued it in in a mostly down position. Lastly, I went to glue the other half of the spine on... I had been using a cheap squeeze bottle with a fairly precise nozzle for the first time. So I wouldn't have to squeeze some out into a little cup and apply with a brush. it worked great for the first half but when putting glue down, I guess I squeezed it too hard and popped the lid off and my white glue POURED out right onto the wood... It was a disaster... I cleaned up the model as fast as I could and finished putting glue on where it was needed and put on the other spine... It ended up being very slightly shifted back but considering the situation I was pretty happy with it... p.s. I guess I didn't get a picture with the other spine half on but it doesn't show much more than this picture!
-
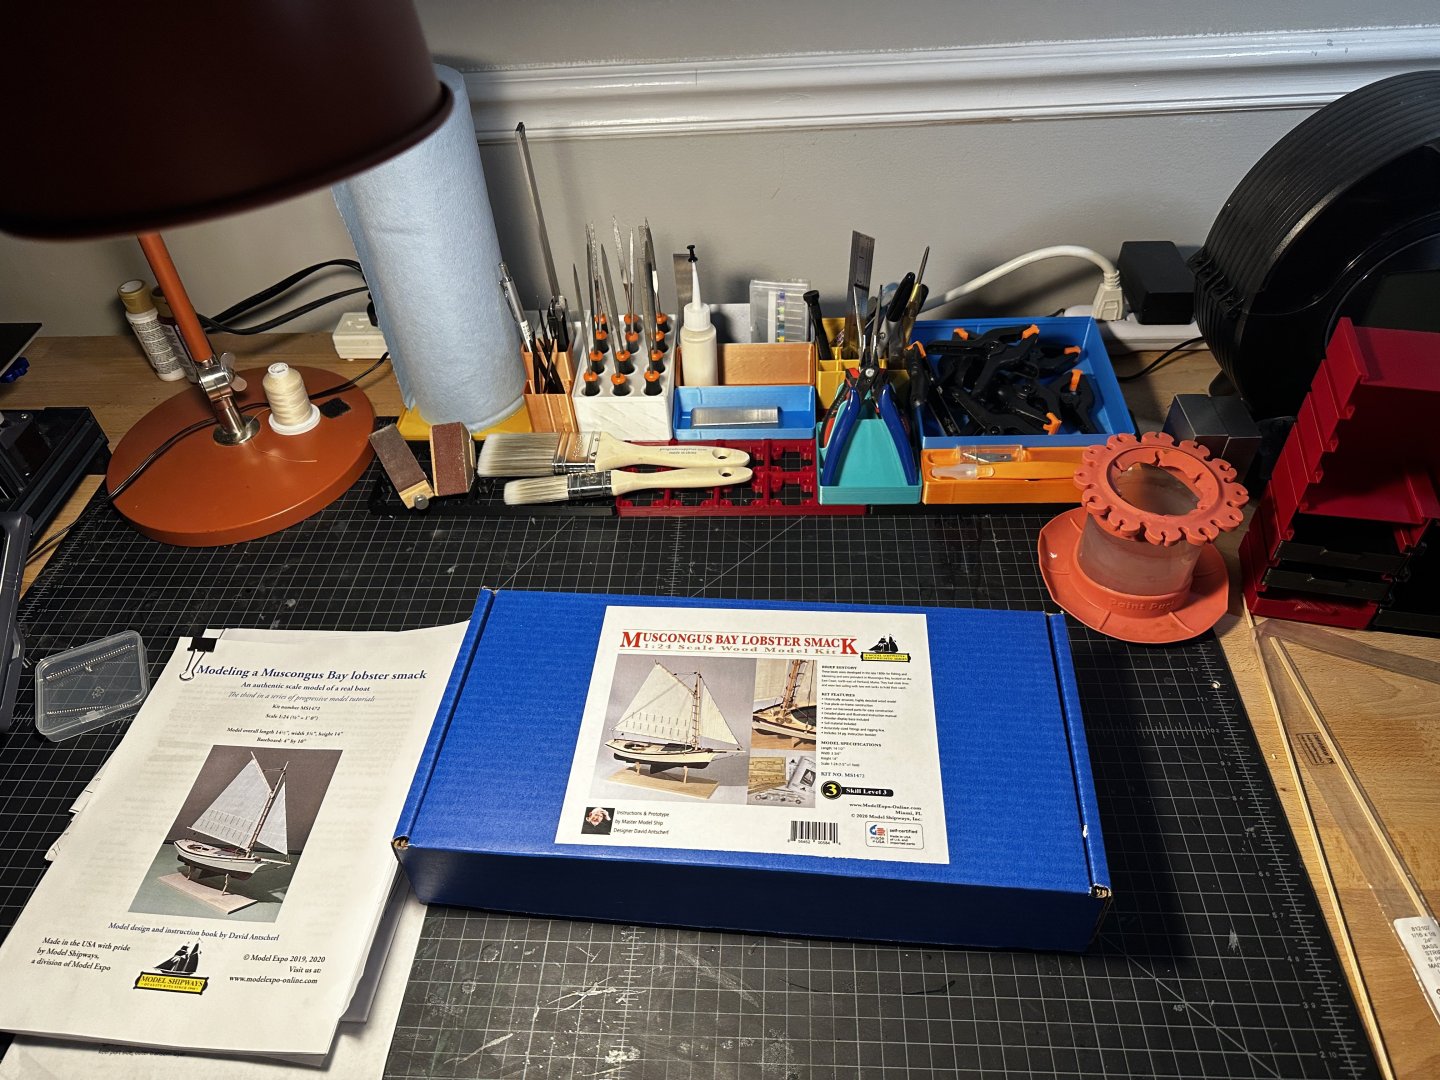
Sooooo I couldn't wait any longer... I've been trying to hold off on starting this until we sold the house but it's going much slower than we hoped so here we are... I'm going to be trying to split up posts by steps and try to have an index at the top so that if someone reading this in the future can go to specific steps if needed. I decided to upgrade my shipyard with some 3d printed tool holders! so far it's been great! Not having to go into a drawer for EVERYTHING is very nice. I need to get some drawers made but having some printer issues 😭.
-
How does it deal with two or more objects touching each other? It's going to depend on how good the "template" is for the thing being counted. I just downloaded CountThis and tried it a bit. They have a bunch of prebuilt templates for random things. I tried the "similar items outstanding from background" one with the picture Chuck posted of the thimbles and it counted them all plus an extra invisible one 🤣 but that template is "experimental". I then got some ibuprofen out and used the pill counter template and it did perfect. I even had some on the sides to try to trick it. Picture result below. The experiment template didn't do very well and clumped them together. That said, this app was the first I saw and tried. It doesn't seem like it will let you create your own template but I'm sure theres a more open source one out there somewhere.

-
Hey! A little late but thought I could suggest a phone app that counts objects in a picture. I've seen quite a few different ones like CountThings or CountThis. I haven't looked into them at all but could be a good alternative to manually counting.
-
Venti reacted to a post in a topic:
Muscongus Bay Lobster Smack by Venti - Model Shipways - 1:24
-
Got a response from ModelExpo finally! They sent a copy of the part sheet, so I'll throw it in here in case someone else needs it! WP1472MLMuscongusLobsterSmack-PartsListRev8723.pdf
-
I appreciate all the extra information, everyone! DeeDee, thanks! I read your build log and the boat you made is incredible! Hey Robert, thanks! Those pictures look great! Would you be willing to get all the pages about the MBLS and post them here or send them to me? 😁