TerryPat
-
Posts
150 -
Joined
-
Last visited
Content Type
Profiles
Forums
Gallery
Events
Everything posted by TerryPat
-
 When your son posted his kit here on MSW was it a build log? I'd like to see it. When my son said 2 kits Terry It was in reference to an old Monty Python bit, 2 sheds Jackson, which we're both fans of. A good laugh. Will your 2nd kit be your son's kit? Looking forward to that. Thanks 2 kits Rick!
- 58 replies
-
- 1
-

-
- Endeavour
- j-class yacht
- (and 1 more)
-
- built and Installed the mast. -installed mast shtouds -built the boom -glued deck structures in place -added plenty of deck bling.. It's a crowded deck -Installed blocks. Next steps will be rigging and deciding full sail? No sails? Or furled main sail on the boom only? 🤔
.thumb.JPG.7ae44b567290dd02e9f94bd707871a9b.JPG)
.thumb.JPG.6003994abe3e59cd0fb449a78c69da72.JPG)
.thumb.JPG.dabb1c6f0ba6ad6f87bea2ce33936961.JPG)
.thumb.JPG.ae8c1996932c5ef92f6bd678c6eda662.JPG)
.thumb.JPG.bd6e44efef21552e037aca1f00bca884.JPG)

(1).thumb.JPG.935109a2dc2d506be1af4ec726872afa.JPG)
- 58 replies
-
- 1
-
-
- Endeavour
- j-class yacht
- (and 1 more)
-
That looks great! A nice base for the main rail. The rail is a fun one to build!
-
Many builders did the railing after planking like you're describing and did fine. My brain better aligned with the writers of the instructions I spen a lot of time with that railing. I wanted to be sure the size and overhang was correct before I started planking. Particularly in the stern section. I made sure that the laser cut stern rail piece fit properly with the correct amount of overhang around the sides and back of the stern.
-
I followed the recommend path in the instructions. One reason was because of my burned stanchions that you can see in my log. I wanted to get that all sorted out before going further. I also thought it would be good to start the first plank hard against the bottom of top rail and then plank downward to the first belt line as defined in the planking instructions. So, for making the railing and marking the overhang i pinned a temporary plank against the stanchions and then marked the hull line along the bottom of my top rail piece. I made sure I had at least of 1/16 inch overhang beyond that marked line. I then installed the railing and cut the many little stanchions and the fitted them between the rail and waterway. Tedious, but what isn't in this hobby. I then cut away my burned stanchions and replaced them.
-
Looking nice! Progressing well..
-
I appreciate the comments.. Thank you! I saw your 1:35 version. Beautiful ! I like your treatment of the stern and the sort of herringbone plank ends on the deck. I haven't found your 1:80 version yet
- 58 replies
-
- 1
-
-
- Endeavour
- j-class yacht
- (and 1 more)
-
Looking great! You got a lot done in a short time
-
Love it ! I sent you some questions in PM. Thanks!
-
Seriously? I've been looking at the Cisson V8. Expensive but YOLO. I'm seriously considering it. I think I have to order direct from China. Did you order from Sterling? PM me if you don't want to clutter your build log
-
Beautiful! Excellent work. I'm now building the smaller 1:80 version. Love the lines of the hull I looked at doing this big one. But it's too big for my display areas. It's awesome though. I wish they had offered a size between 1:80 and 1:35. Sadly, nobody does.
-
One of my bulkheads was slightly asymmetrical. I added wood strips to it during fairing. In fact i added strips to most bulkheads. Remember I have those extra bulkheads that ME sent me. I'll look at H. I can send them to you if better. I'll let you know. Out of order? That's weird
-
I better be following this one..😃 Great bargain! I wonder how old the kit is? Your kit shows it's double planked. Mine is not. I bought mine direct from Model Expo a few months ago. From what I can see from your pics the wood in your kit looks really nice. Mine?.. not so much. To be fair, Model Expo is using better wood after mine was put together.. They told me so. Anyway, congrats on a nice kit! I think overall it's a fantastic kit. It's nicely scaled and fun to build. You'll have fun
-
Excellent idea with the super glue! The hull looks fantastic. Nice job around the keel. You'll have a nice base for the second planking
-
It looks good at the stern. Sounds like you have a plan to fix the gaps. Some chunks of scrap wood and/or filler? That bender tool looks pretty handy. First time I've seen one. Cool !
-
Living the life my friend! That whiting is excellent eatin'! Keep in touch with those of stuck up here in the snow. I will be getting in a couple of weeks in Florida to thaw out soon. Enjoy!
-
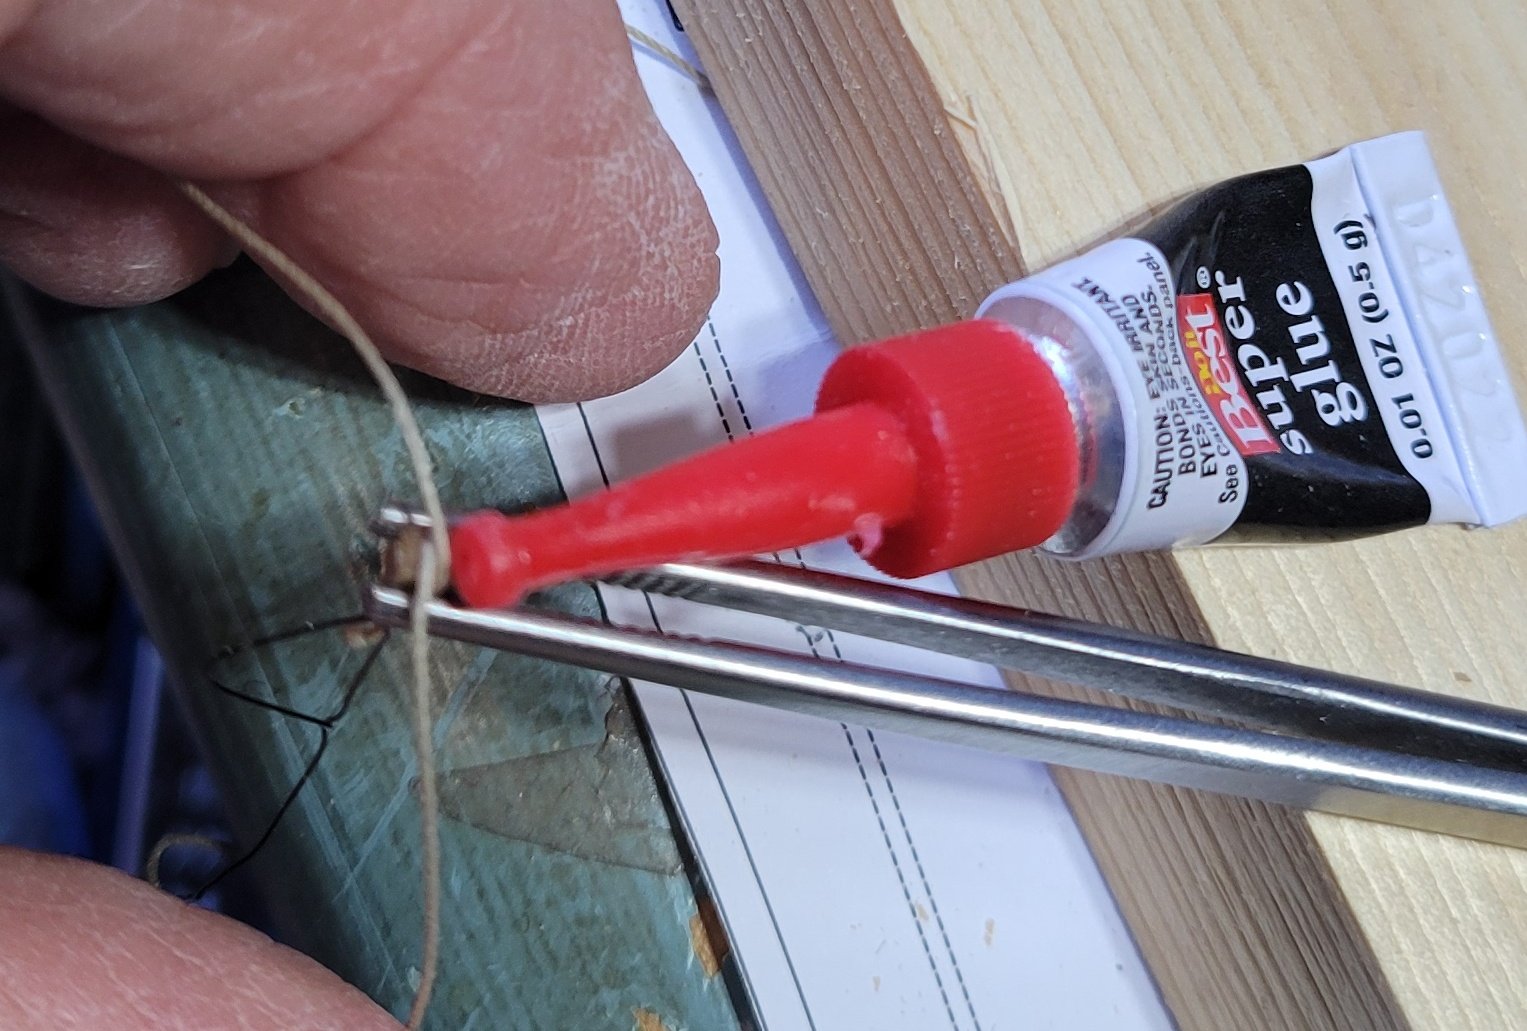
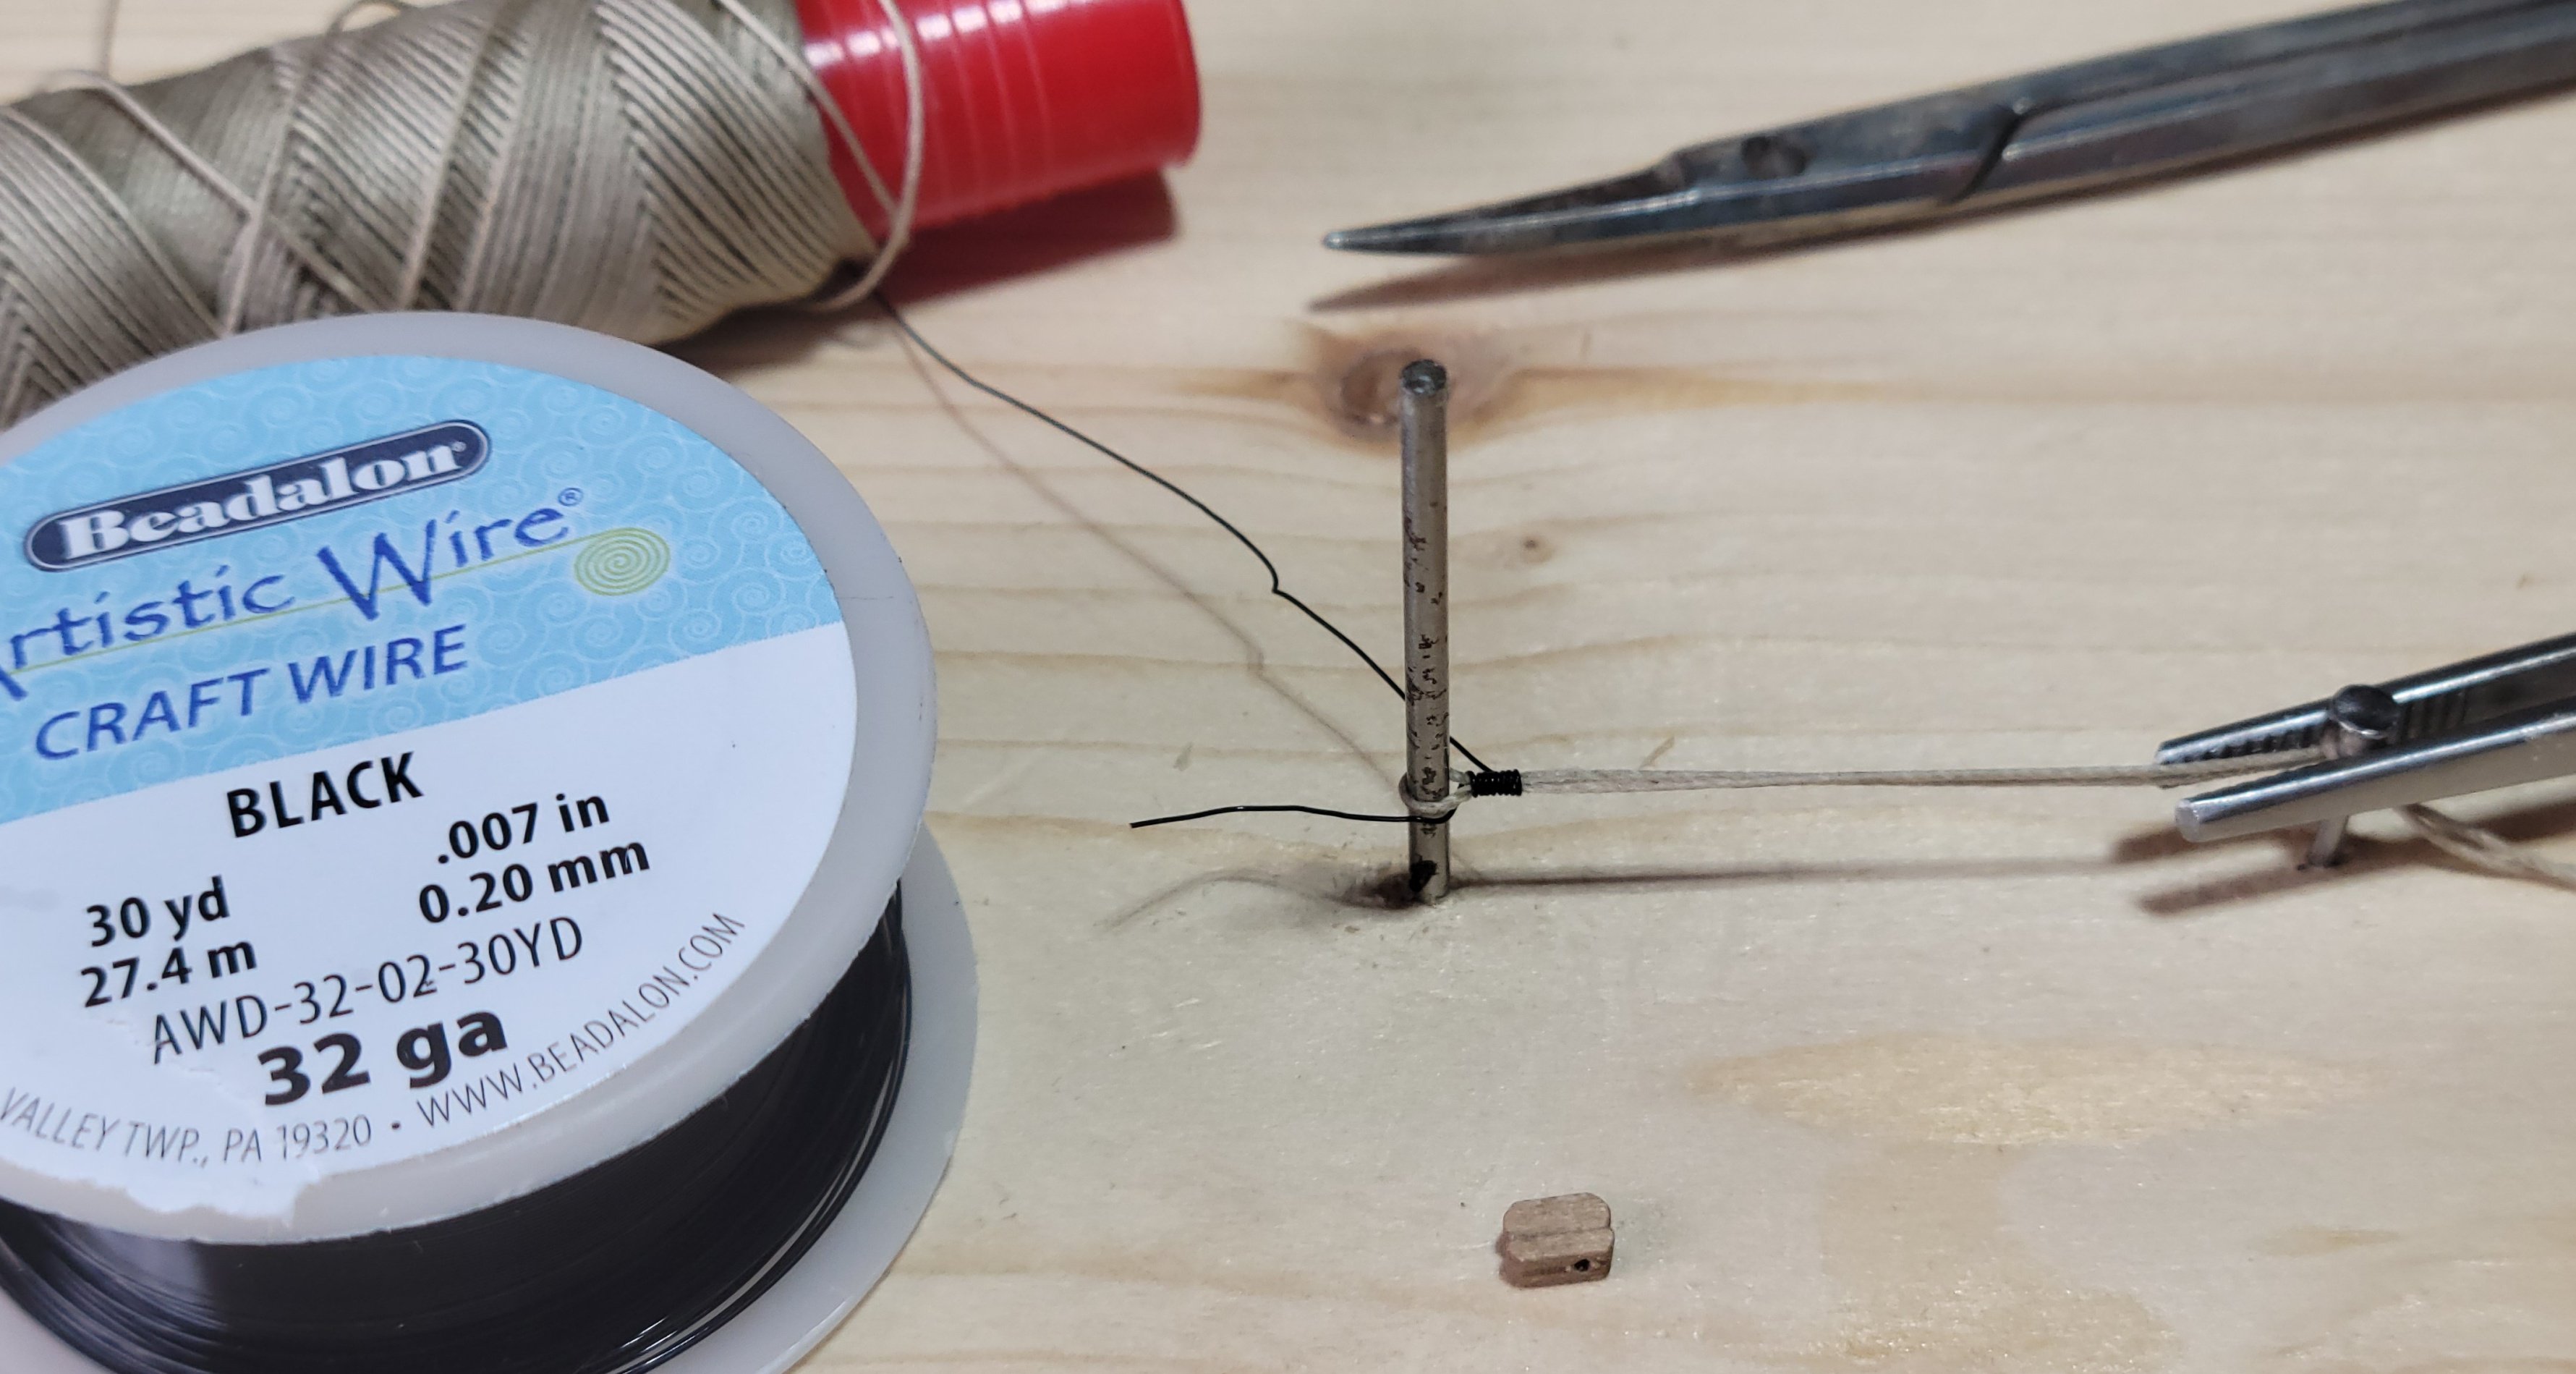
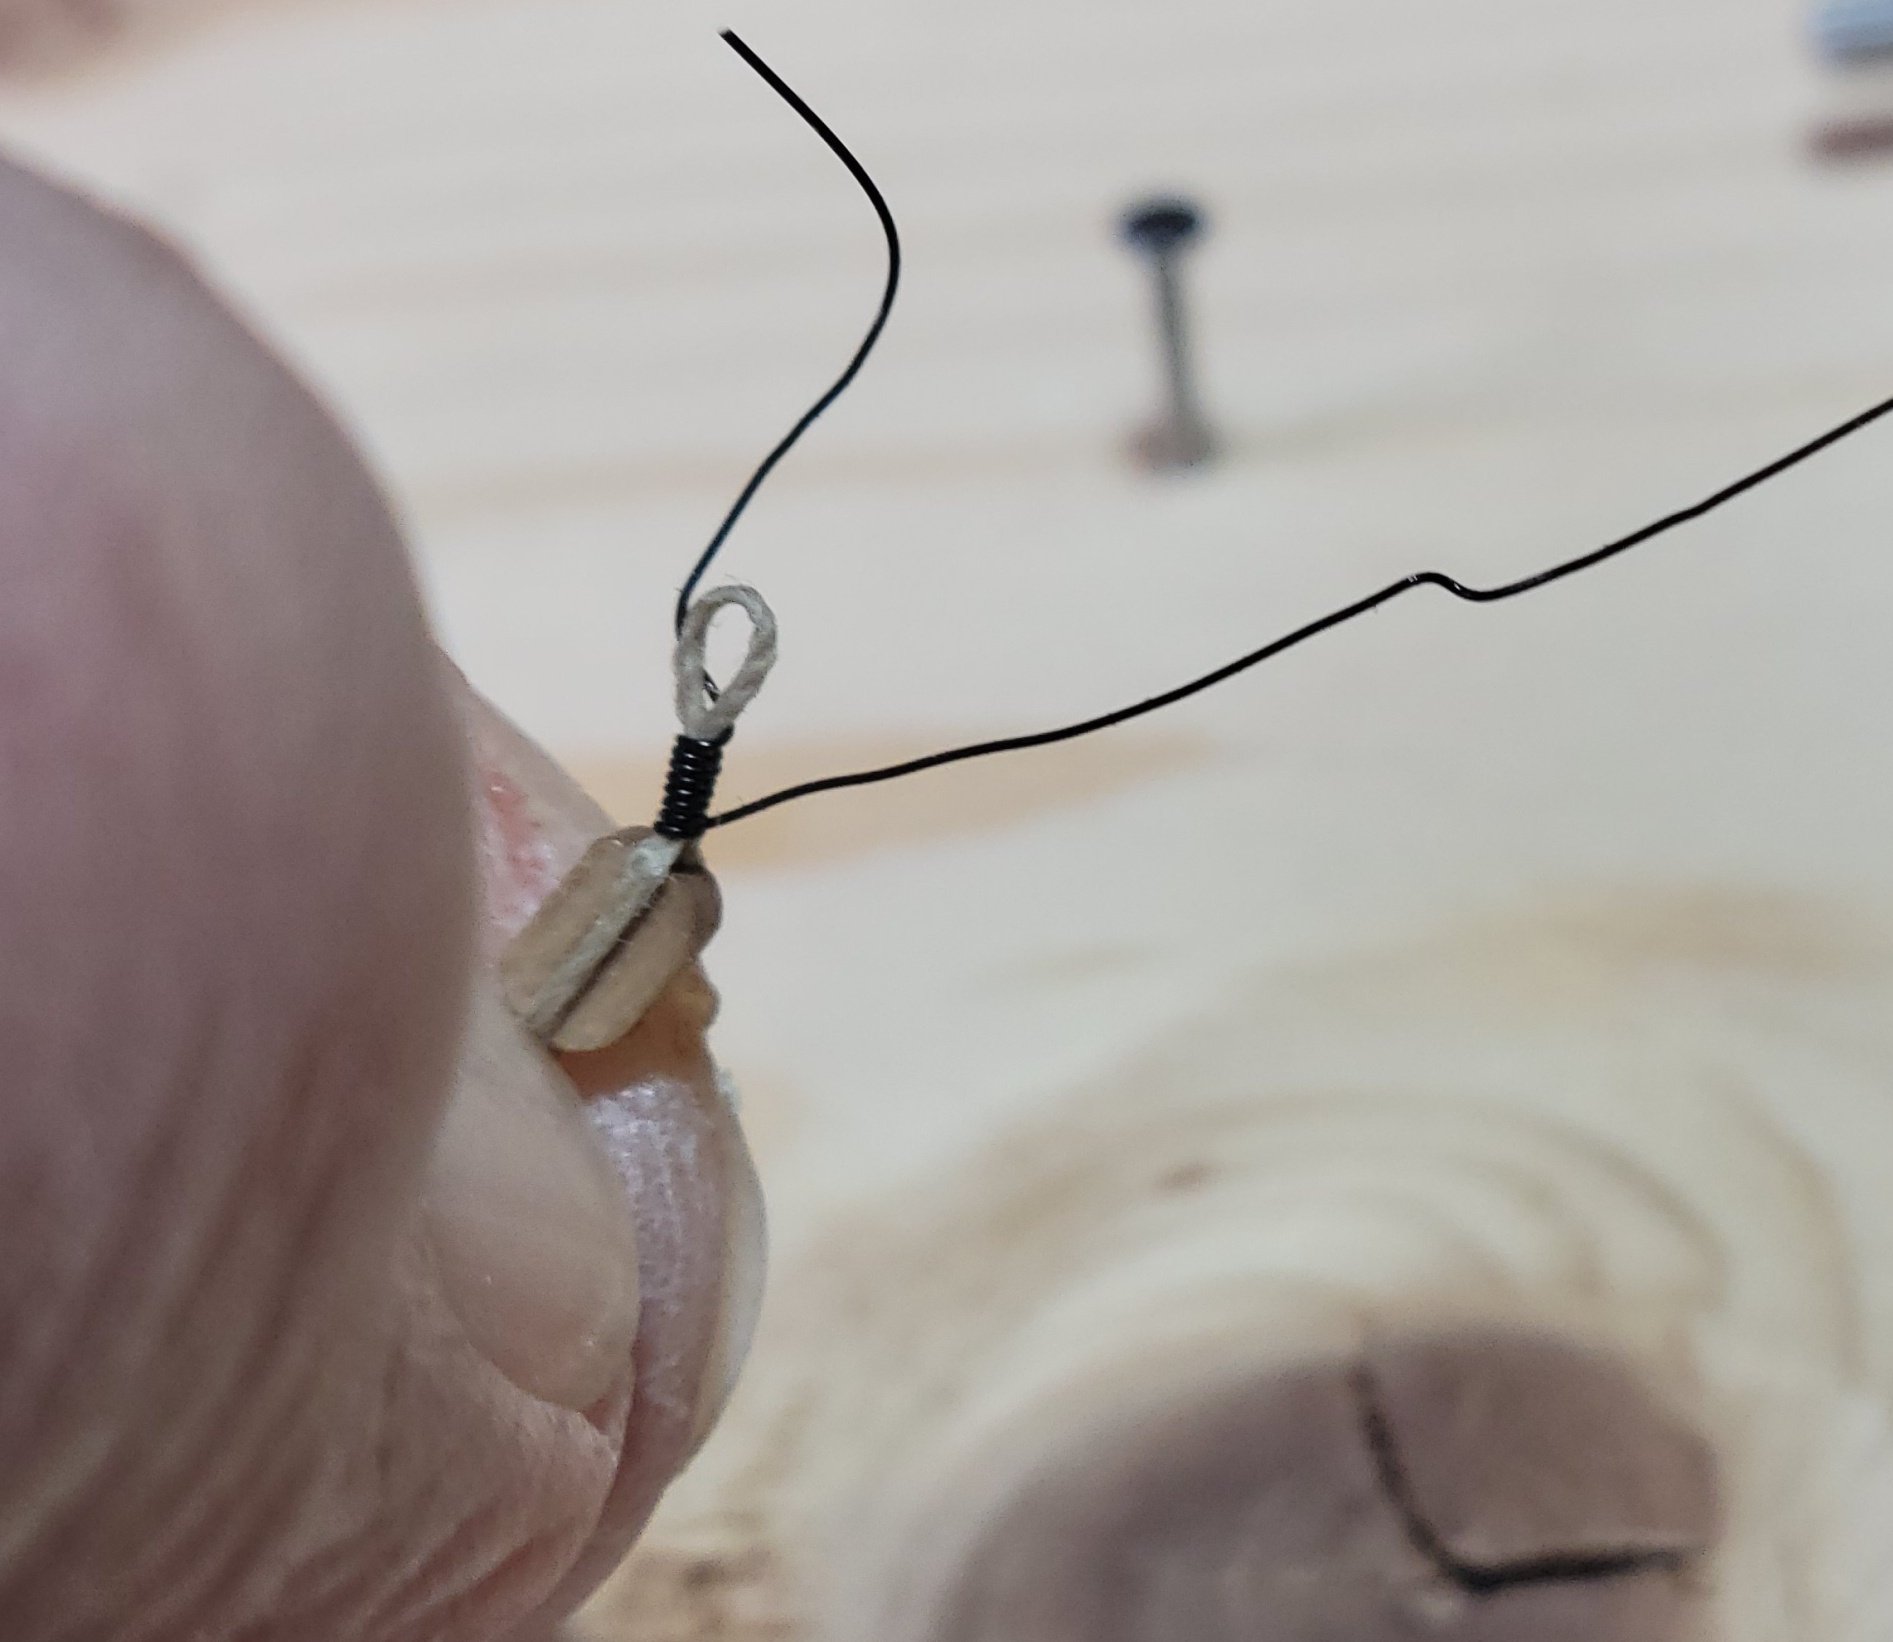
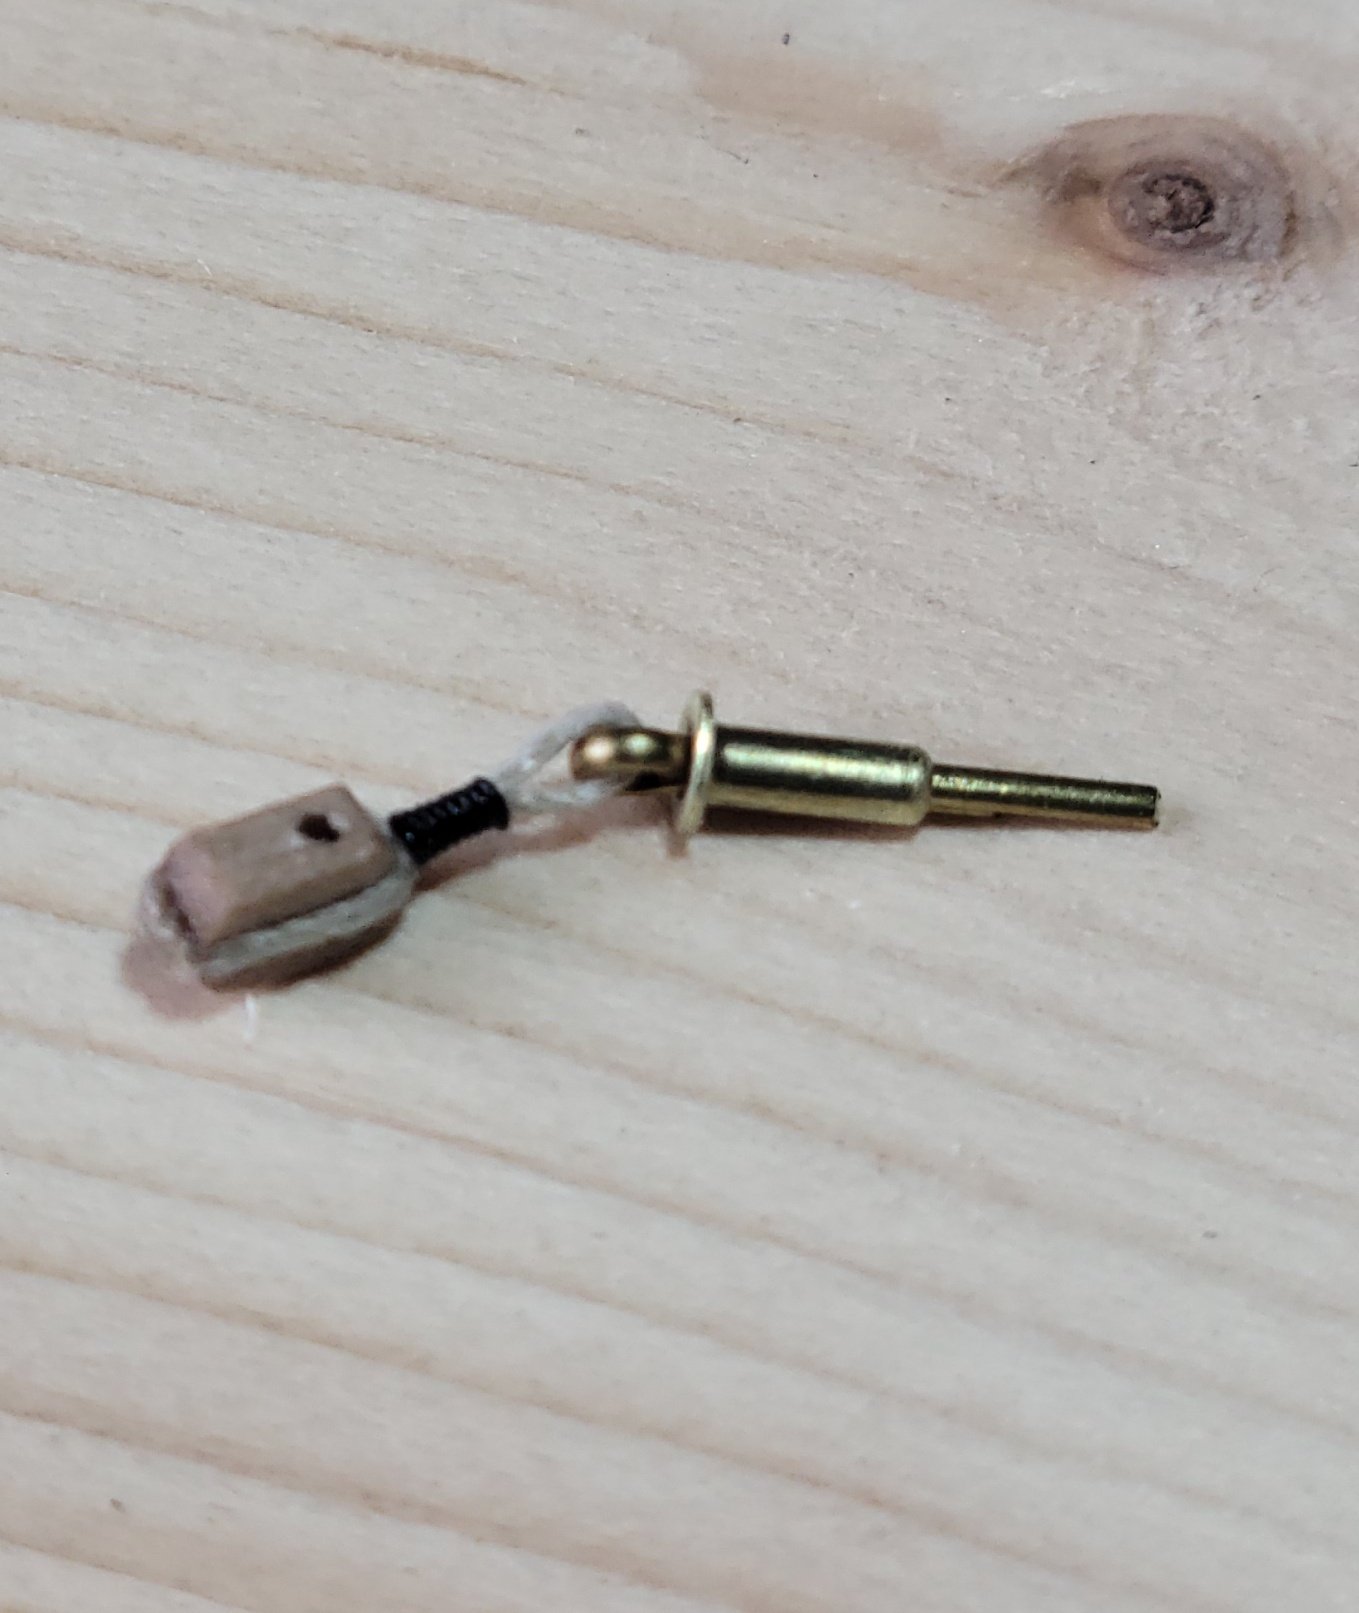
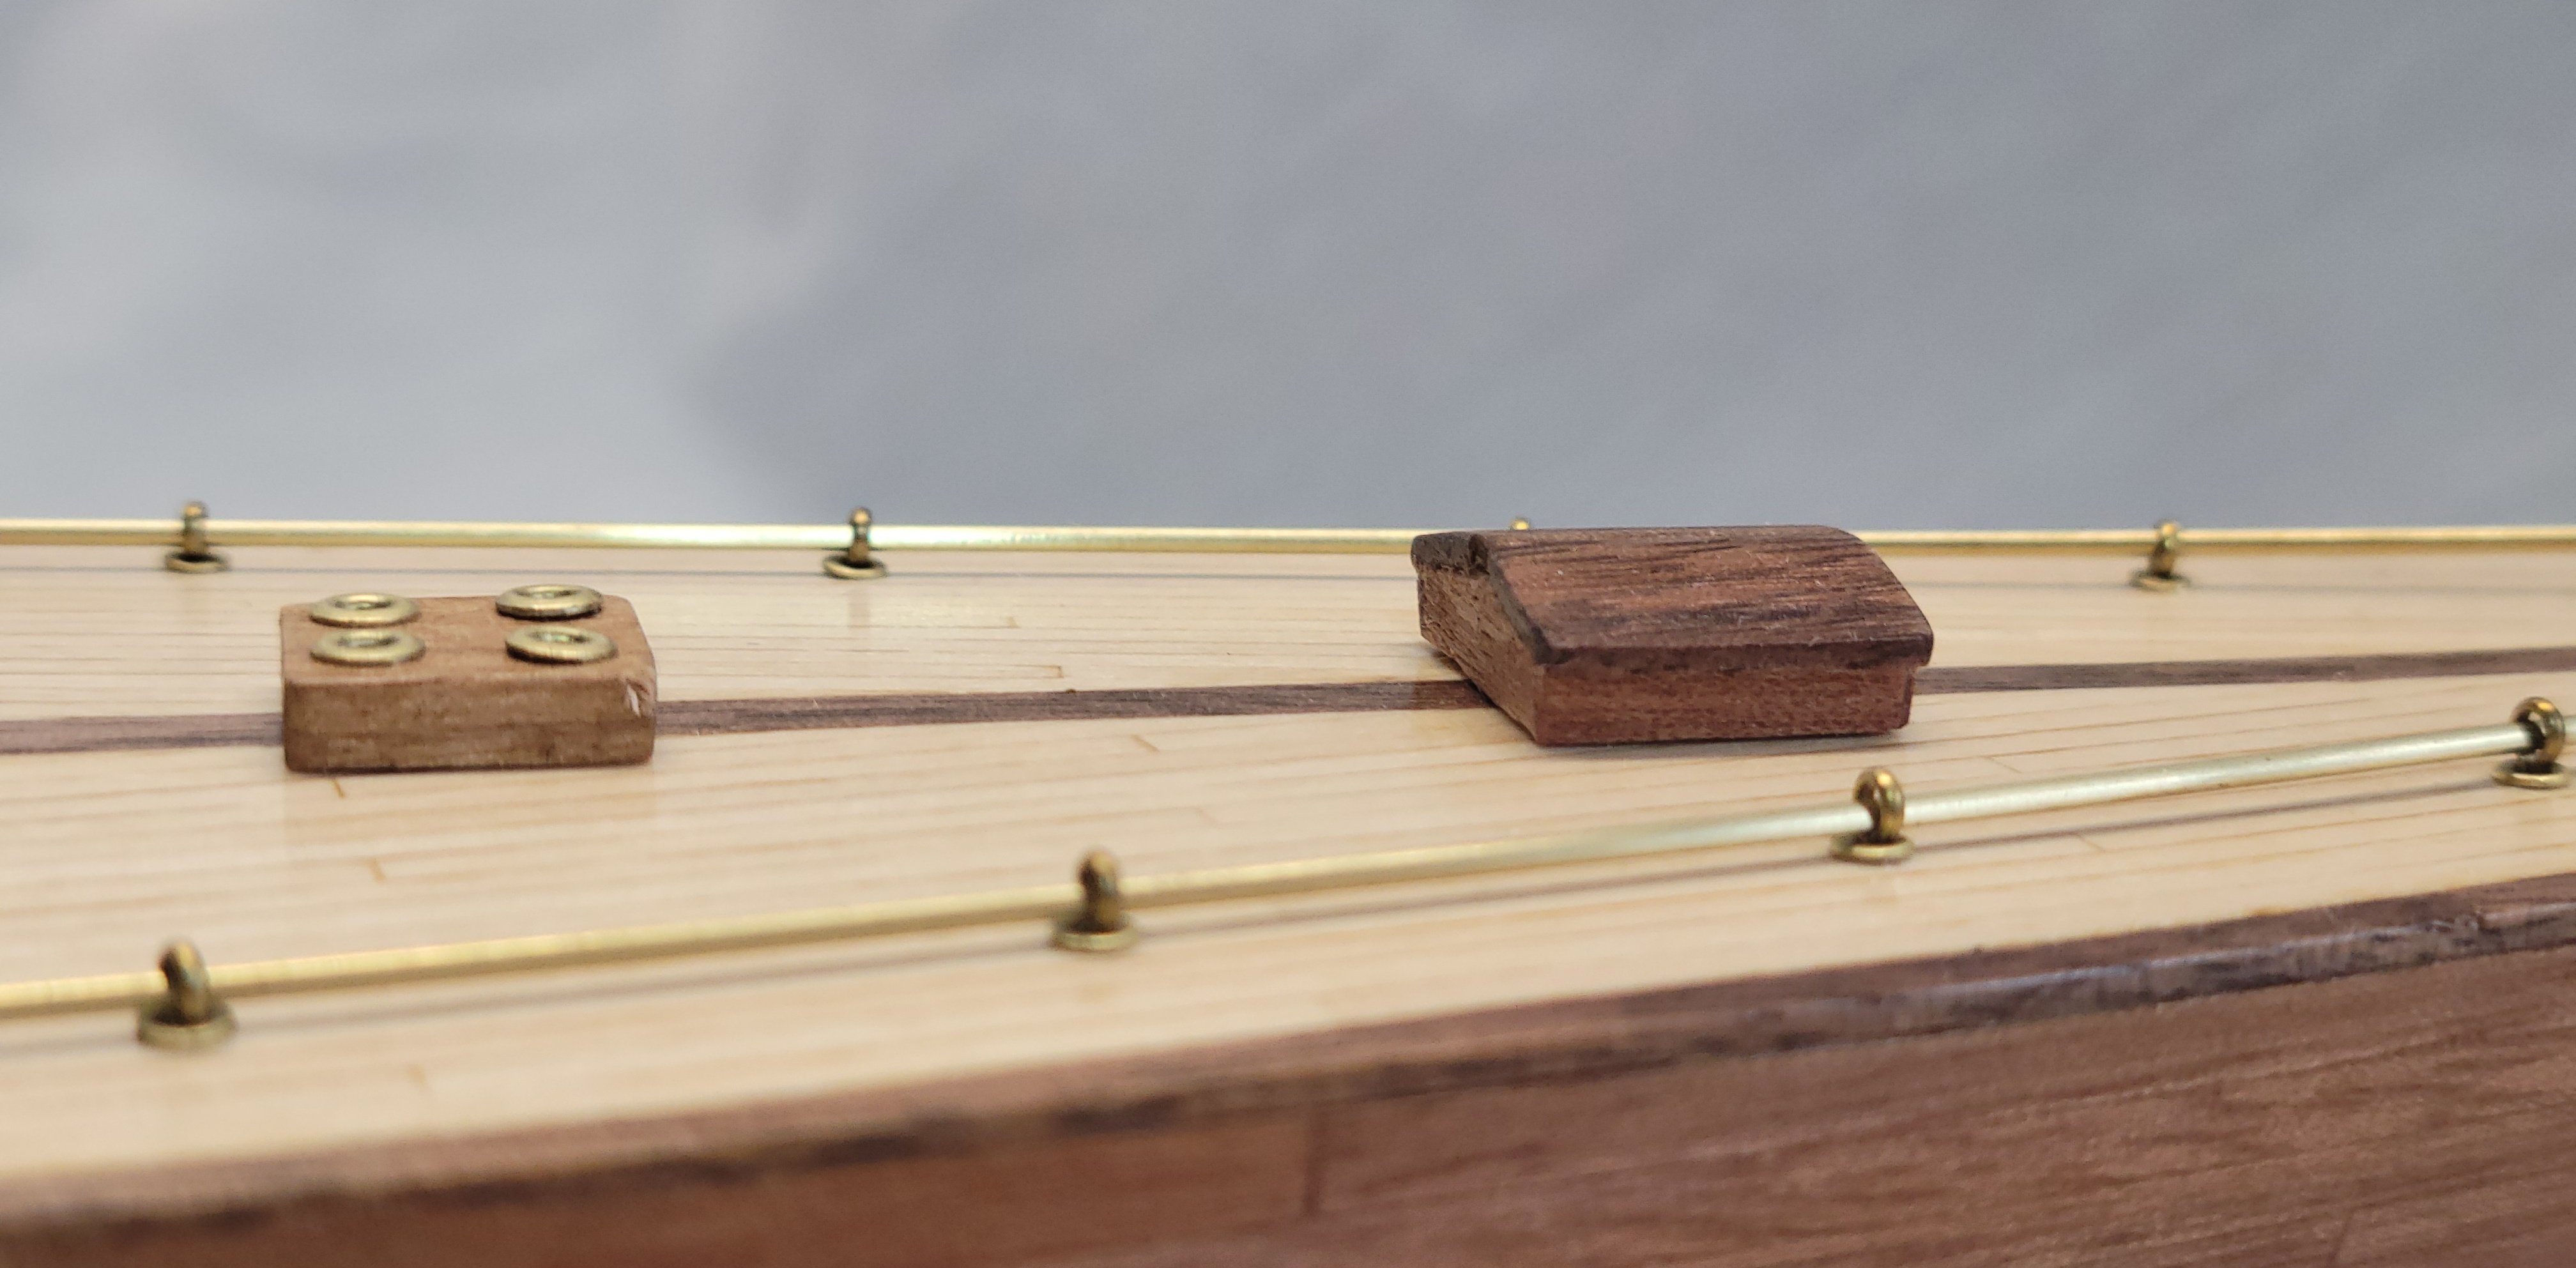
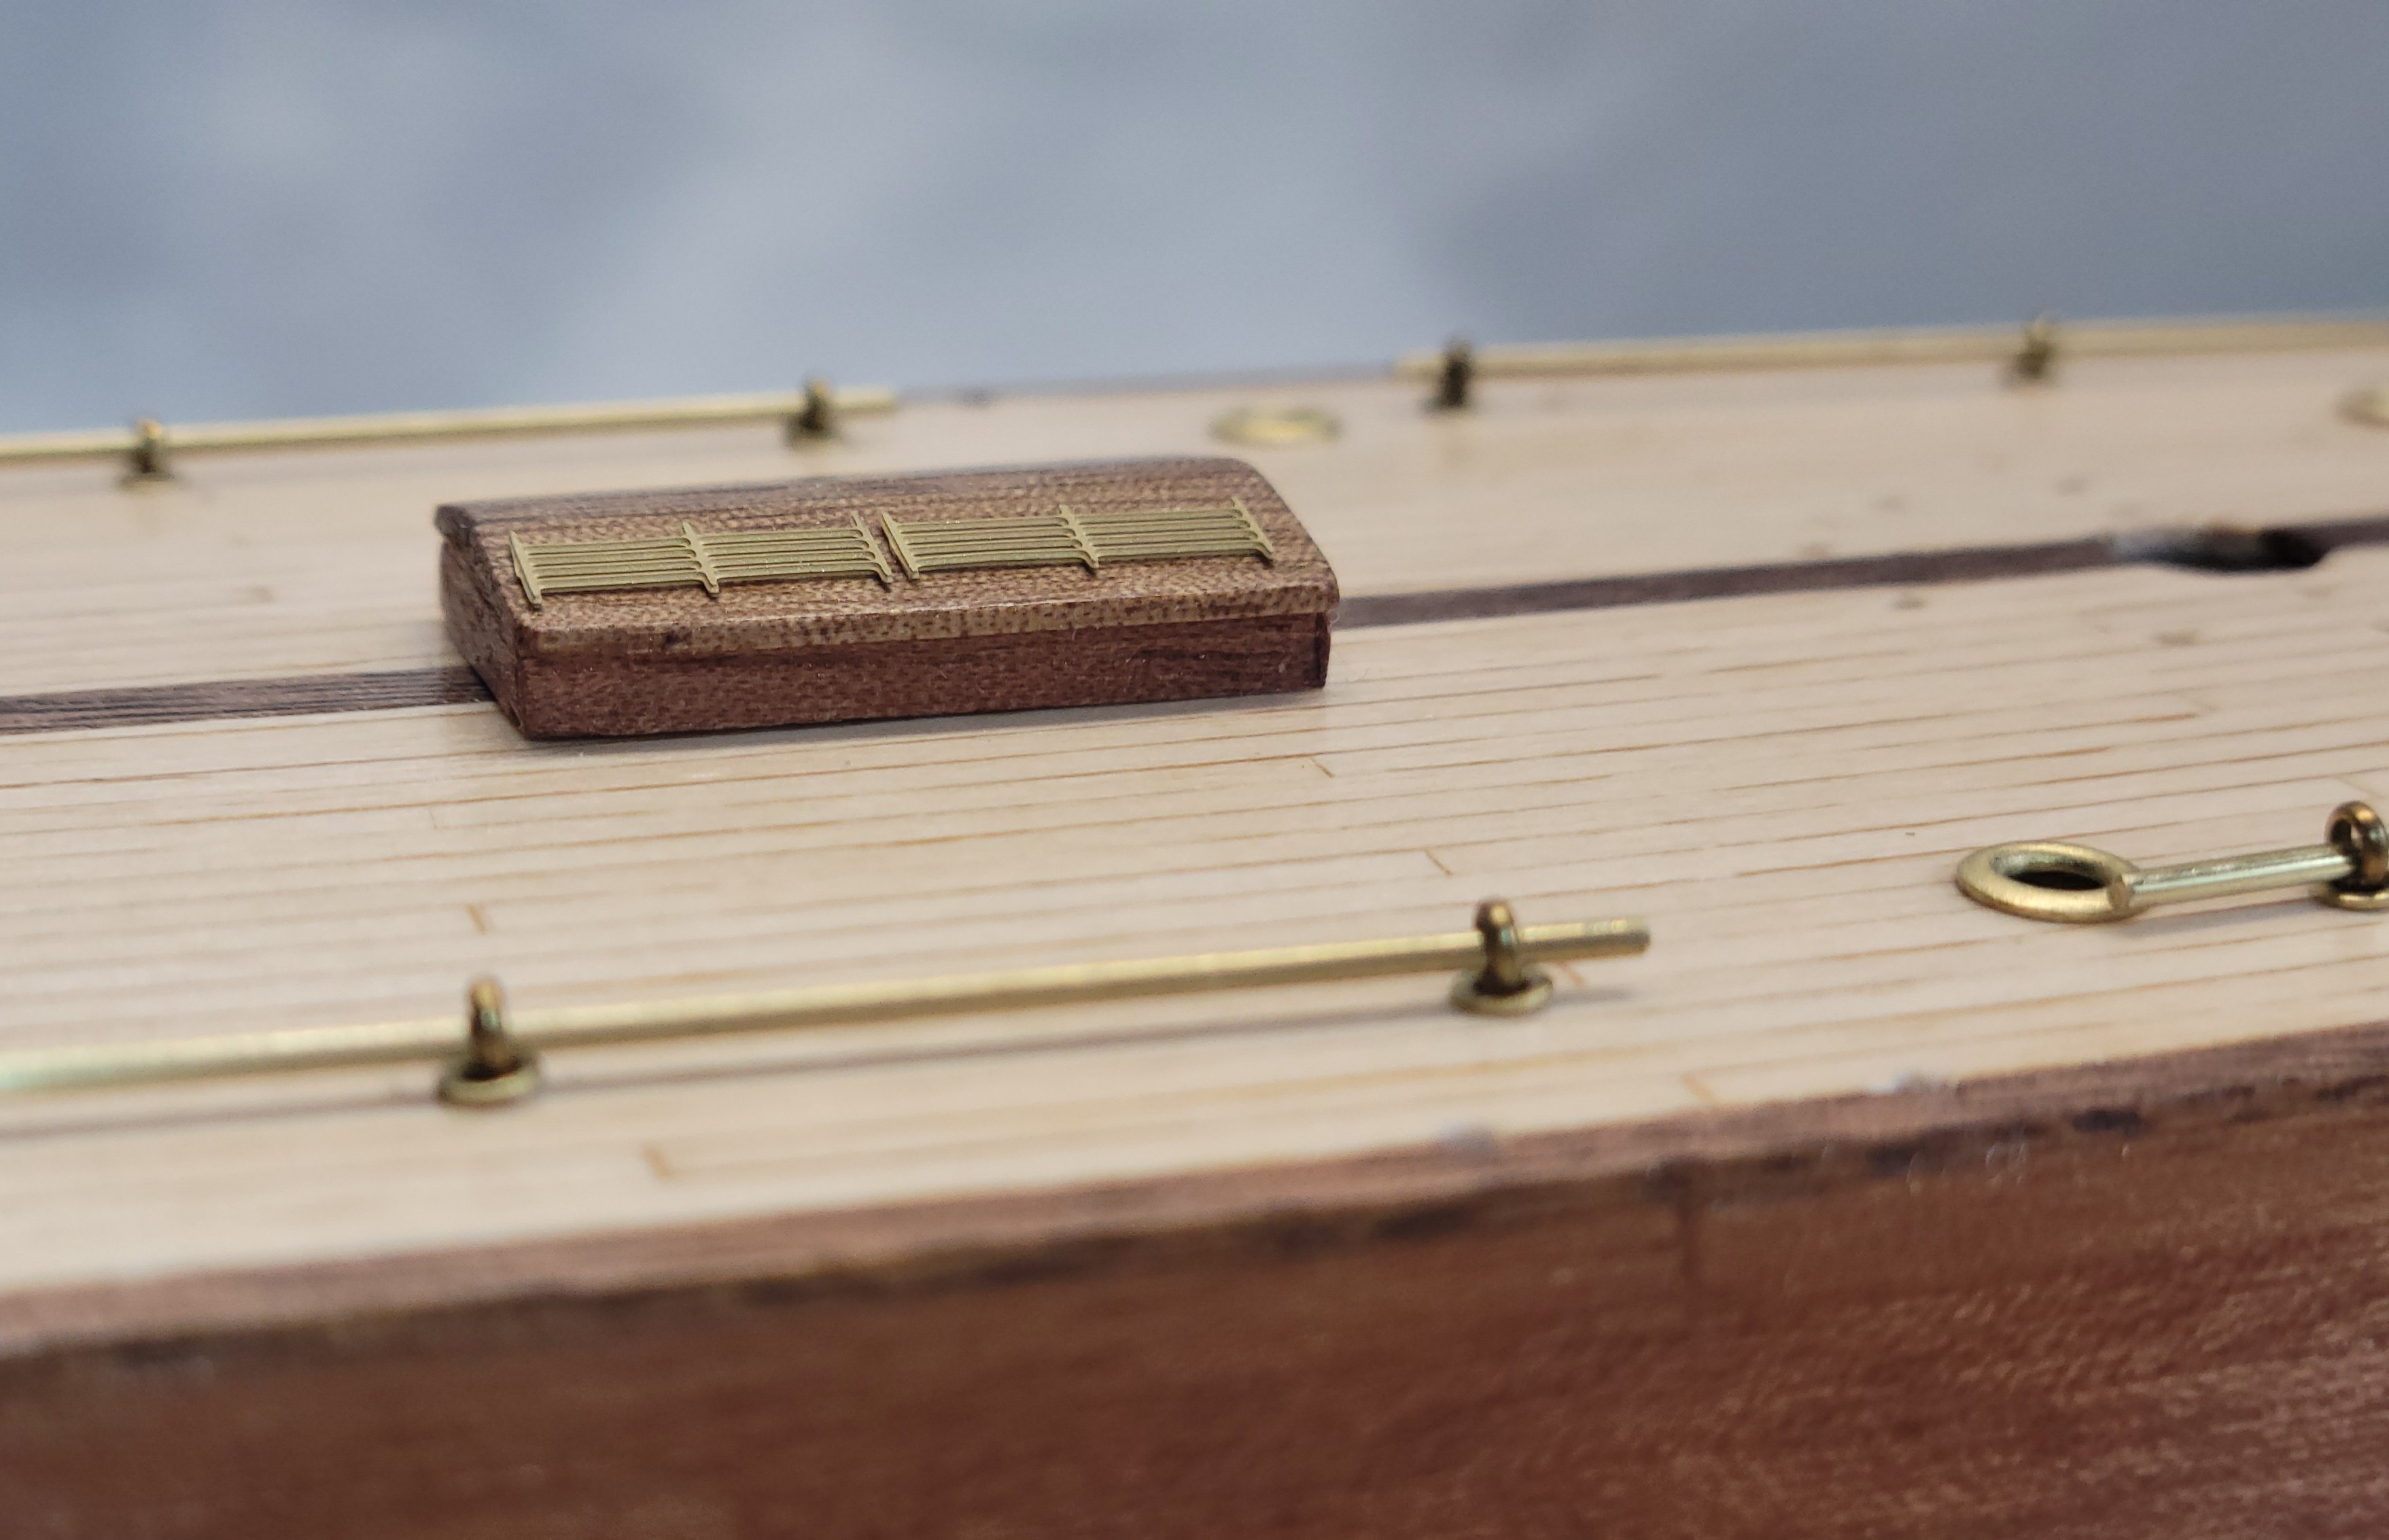
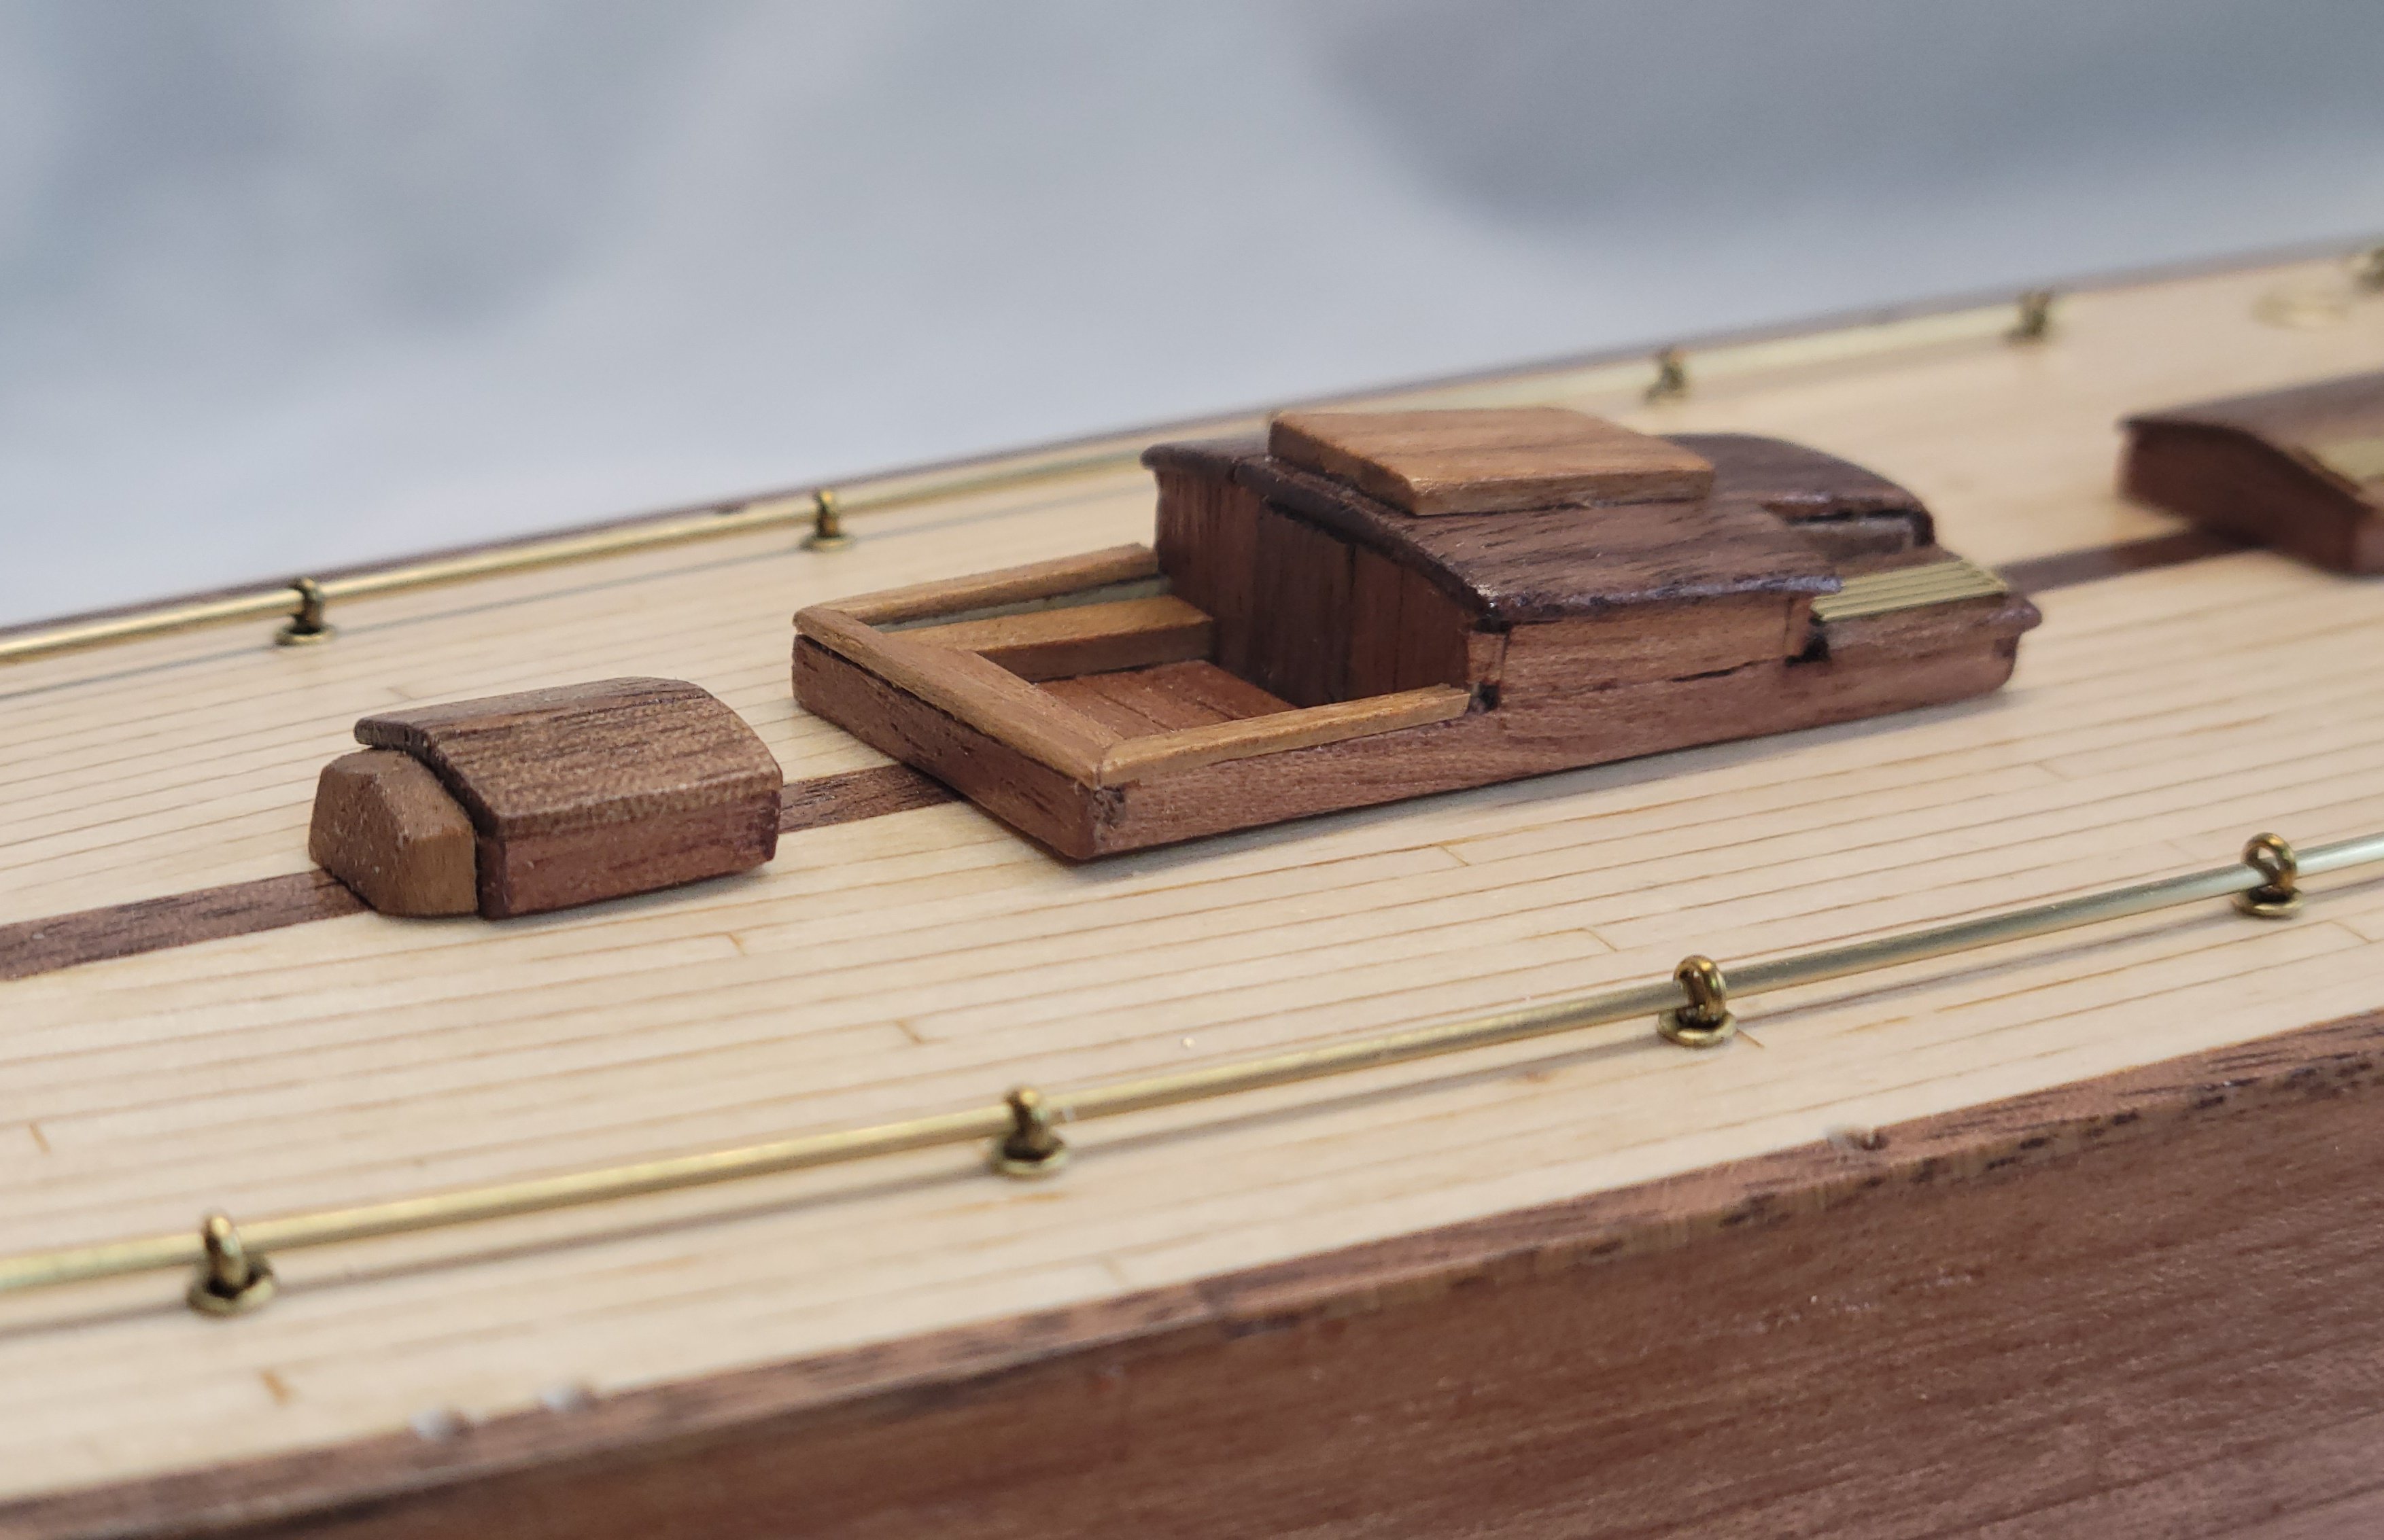
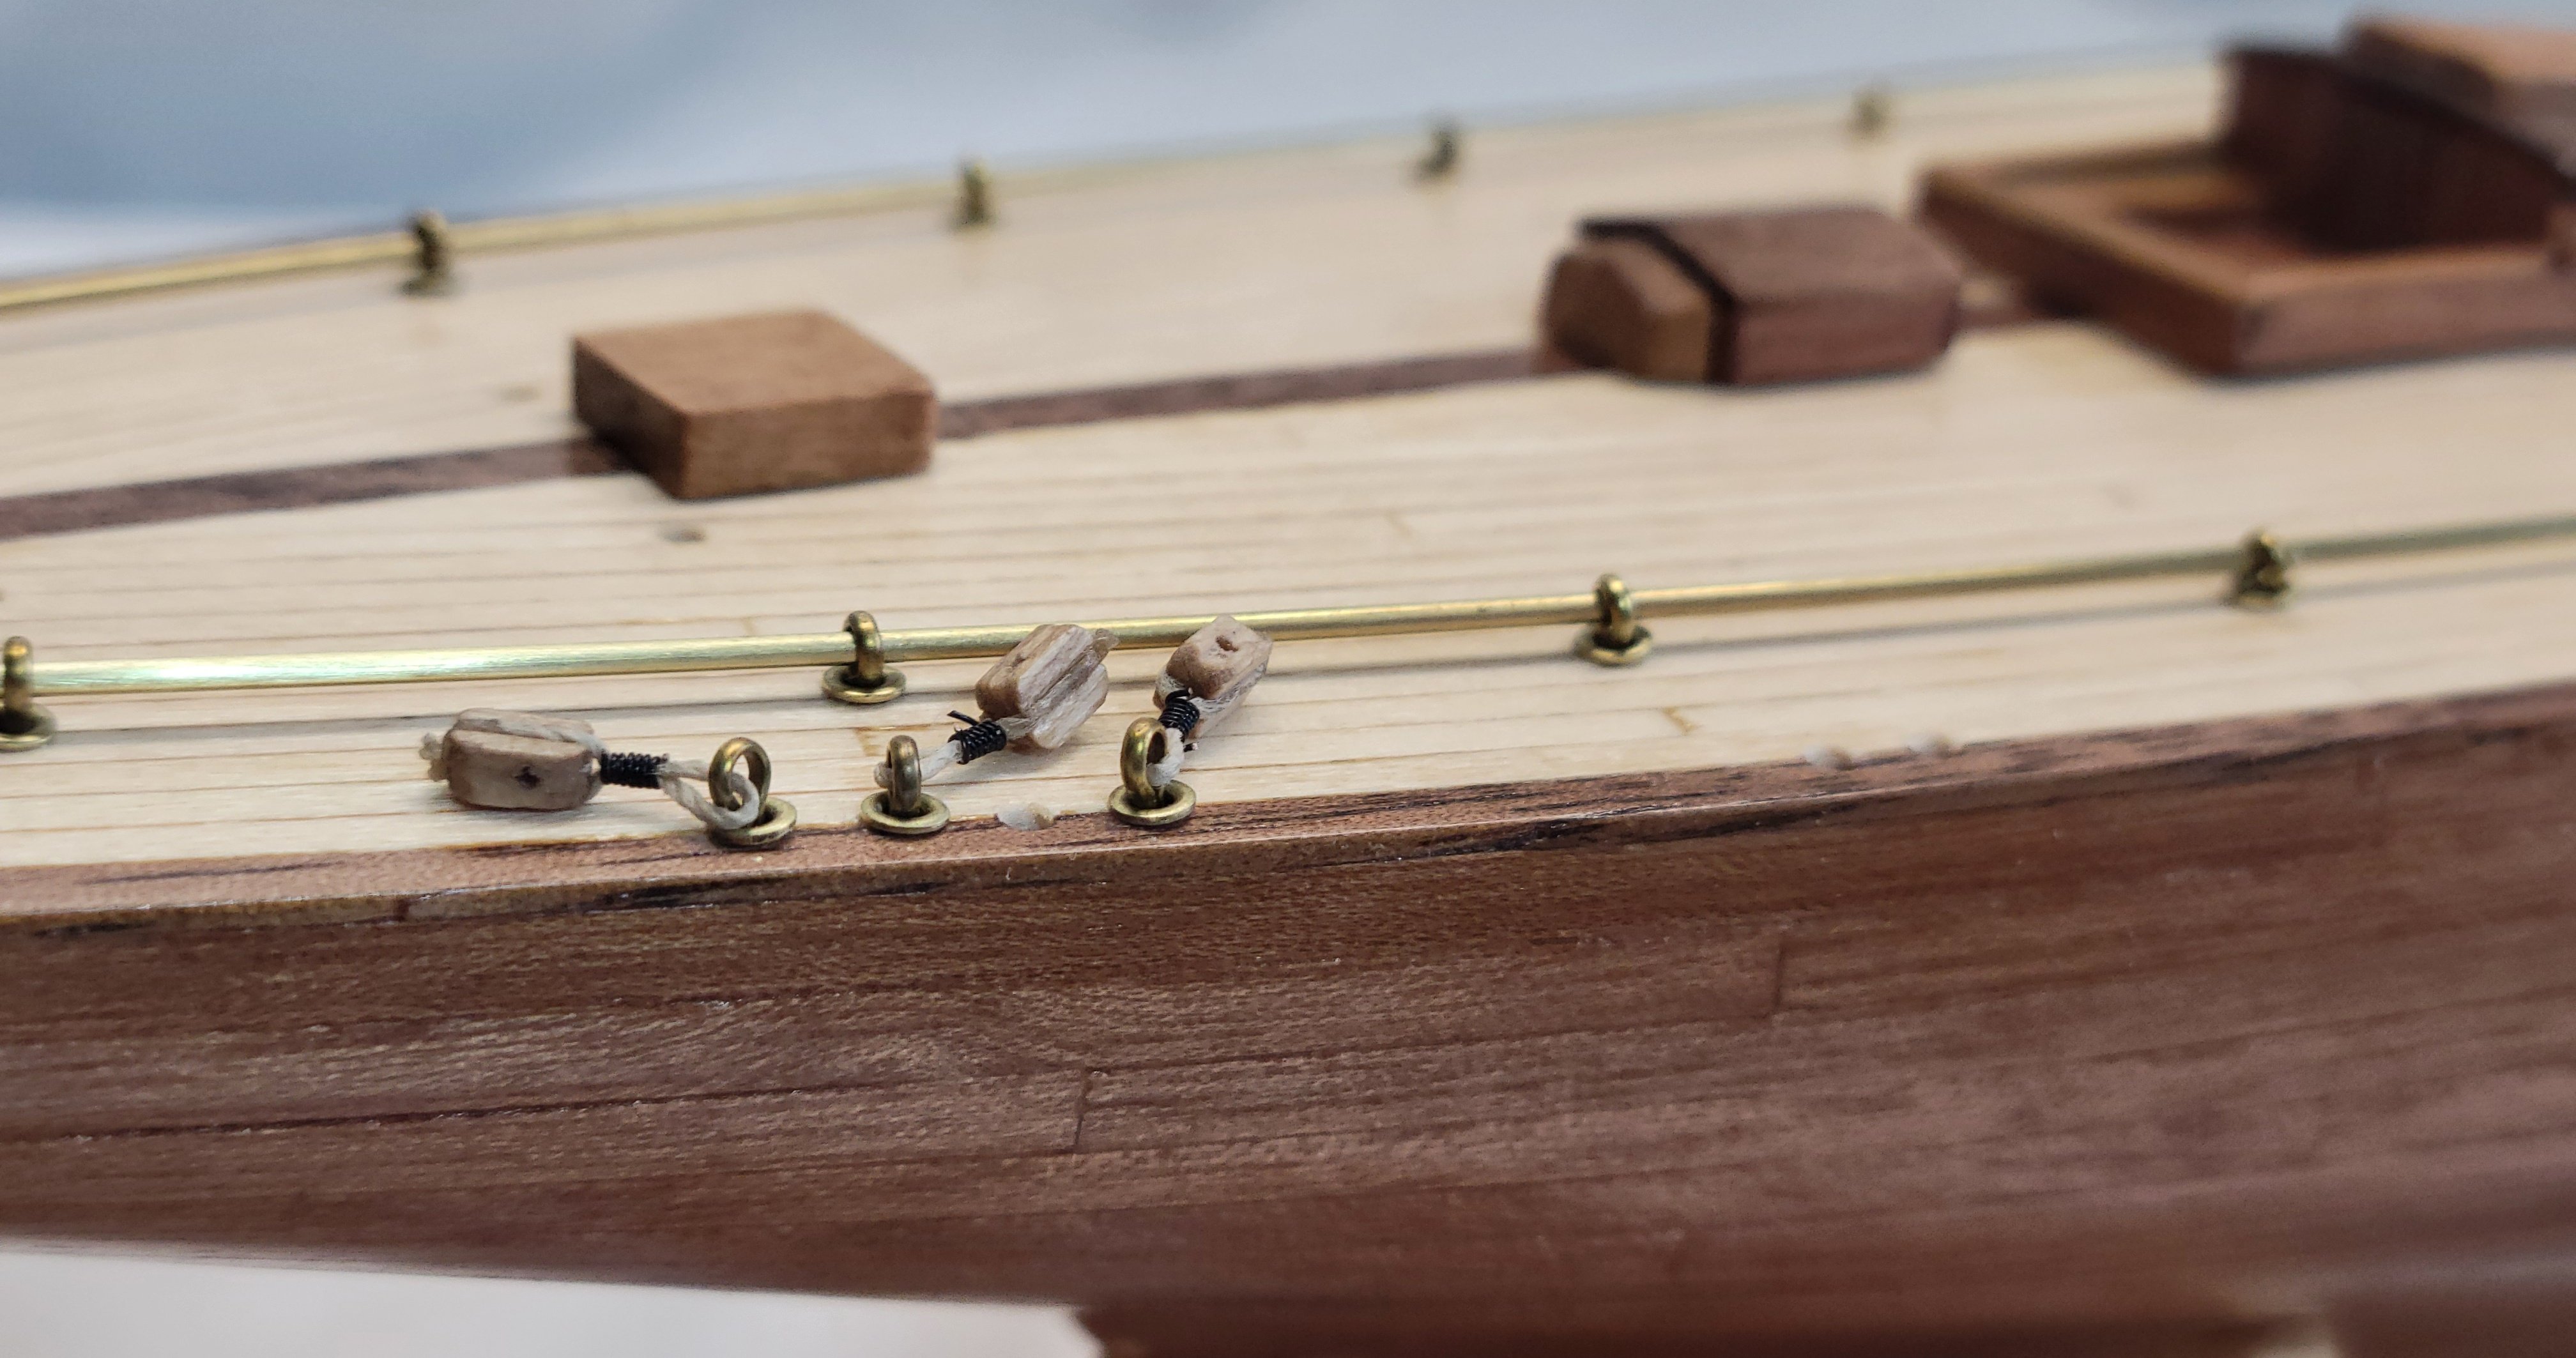
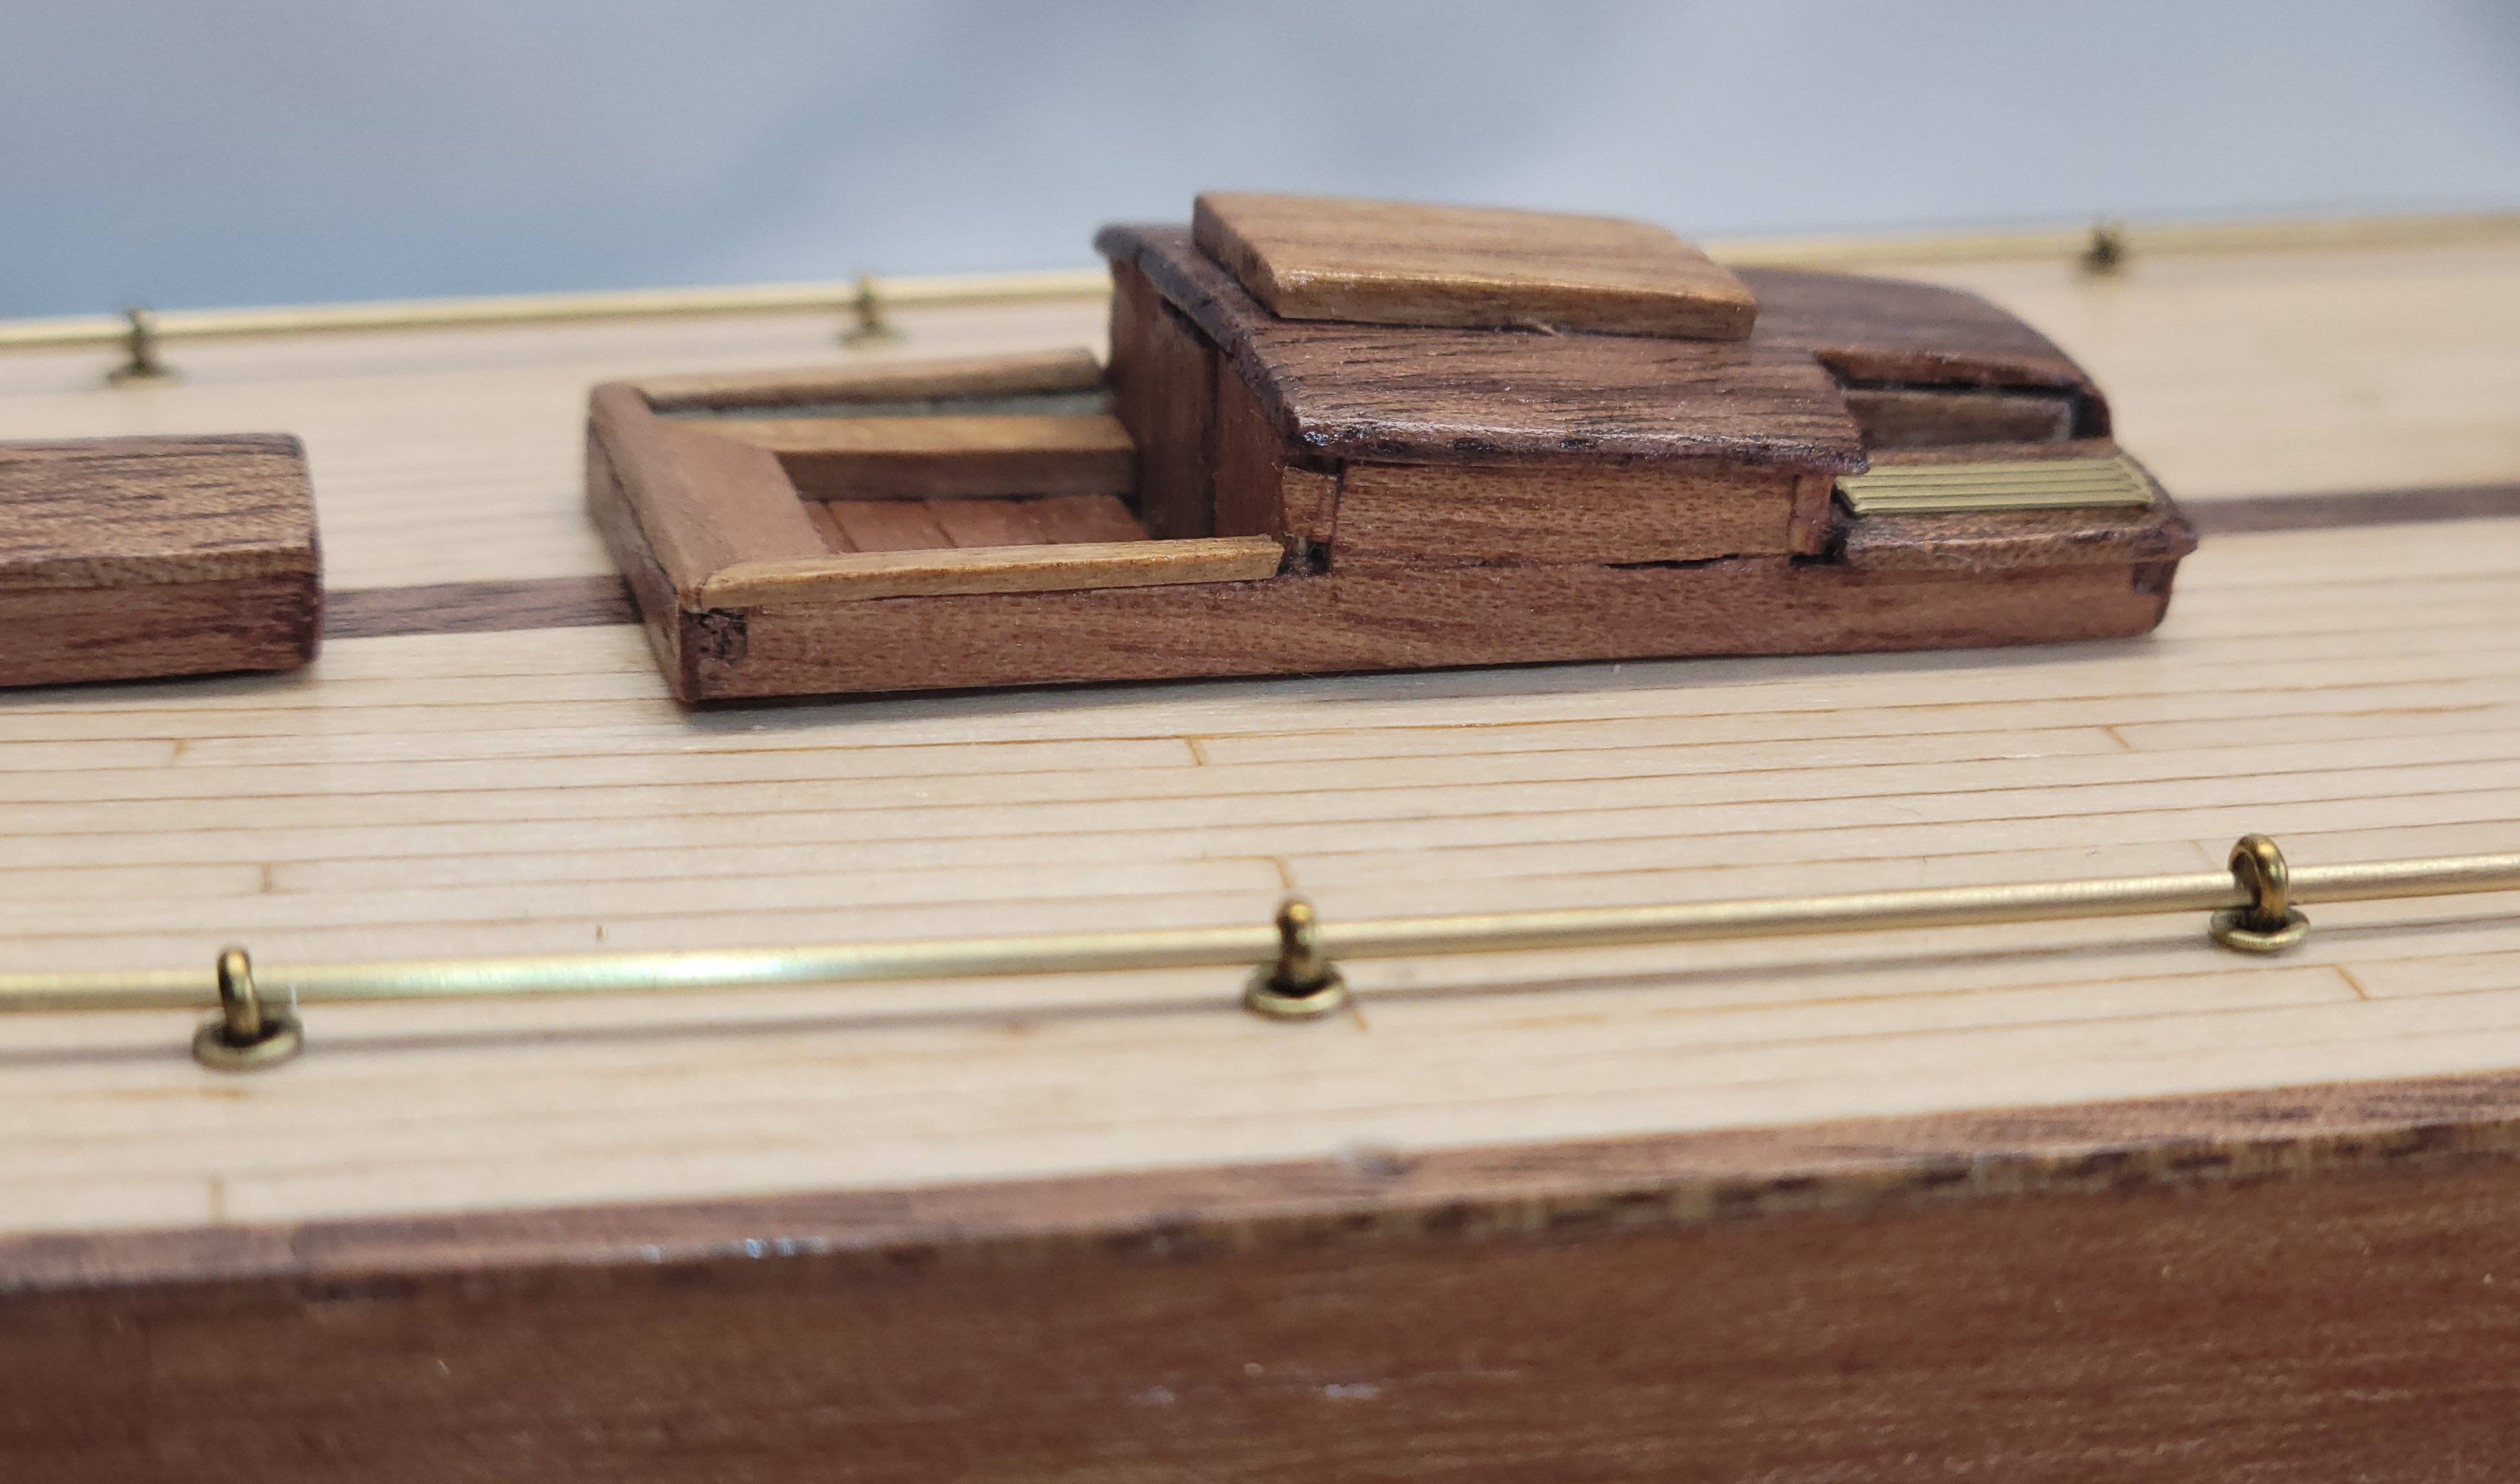
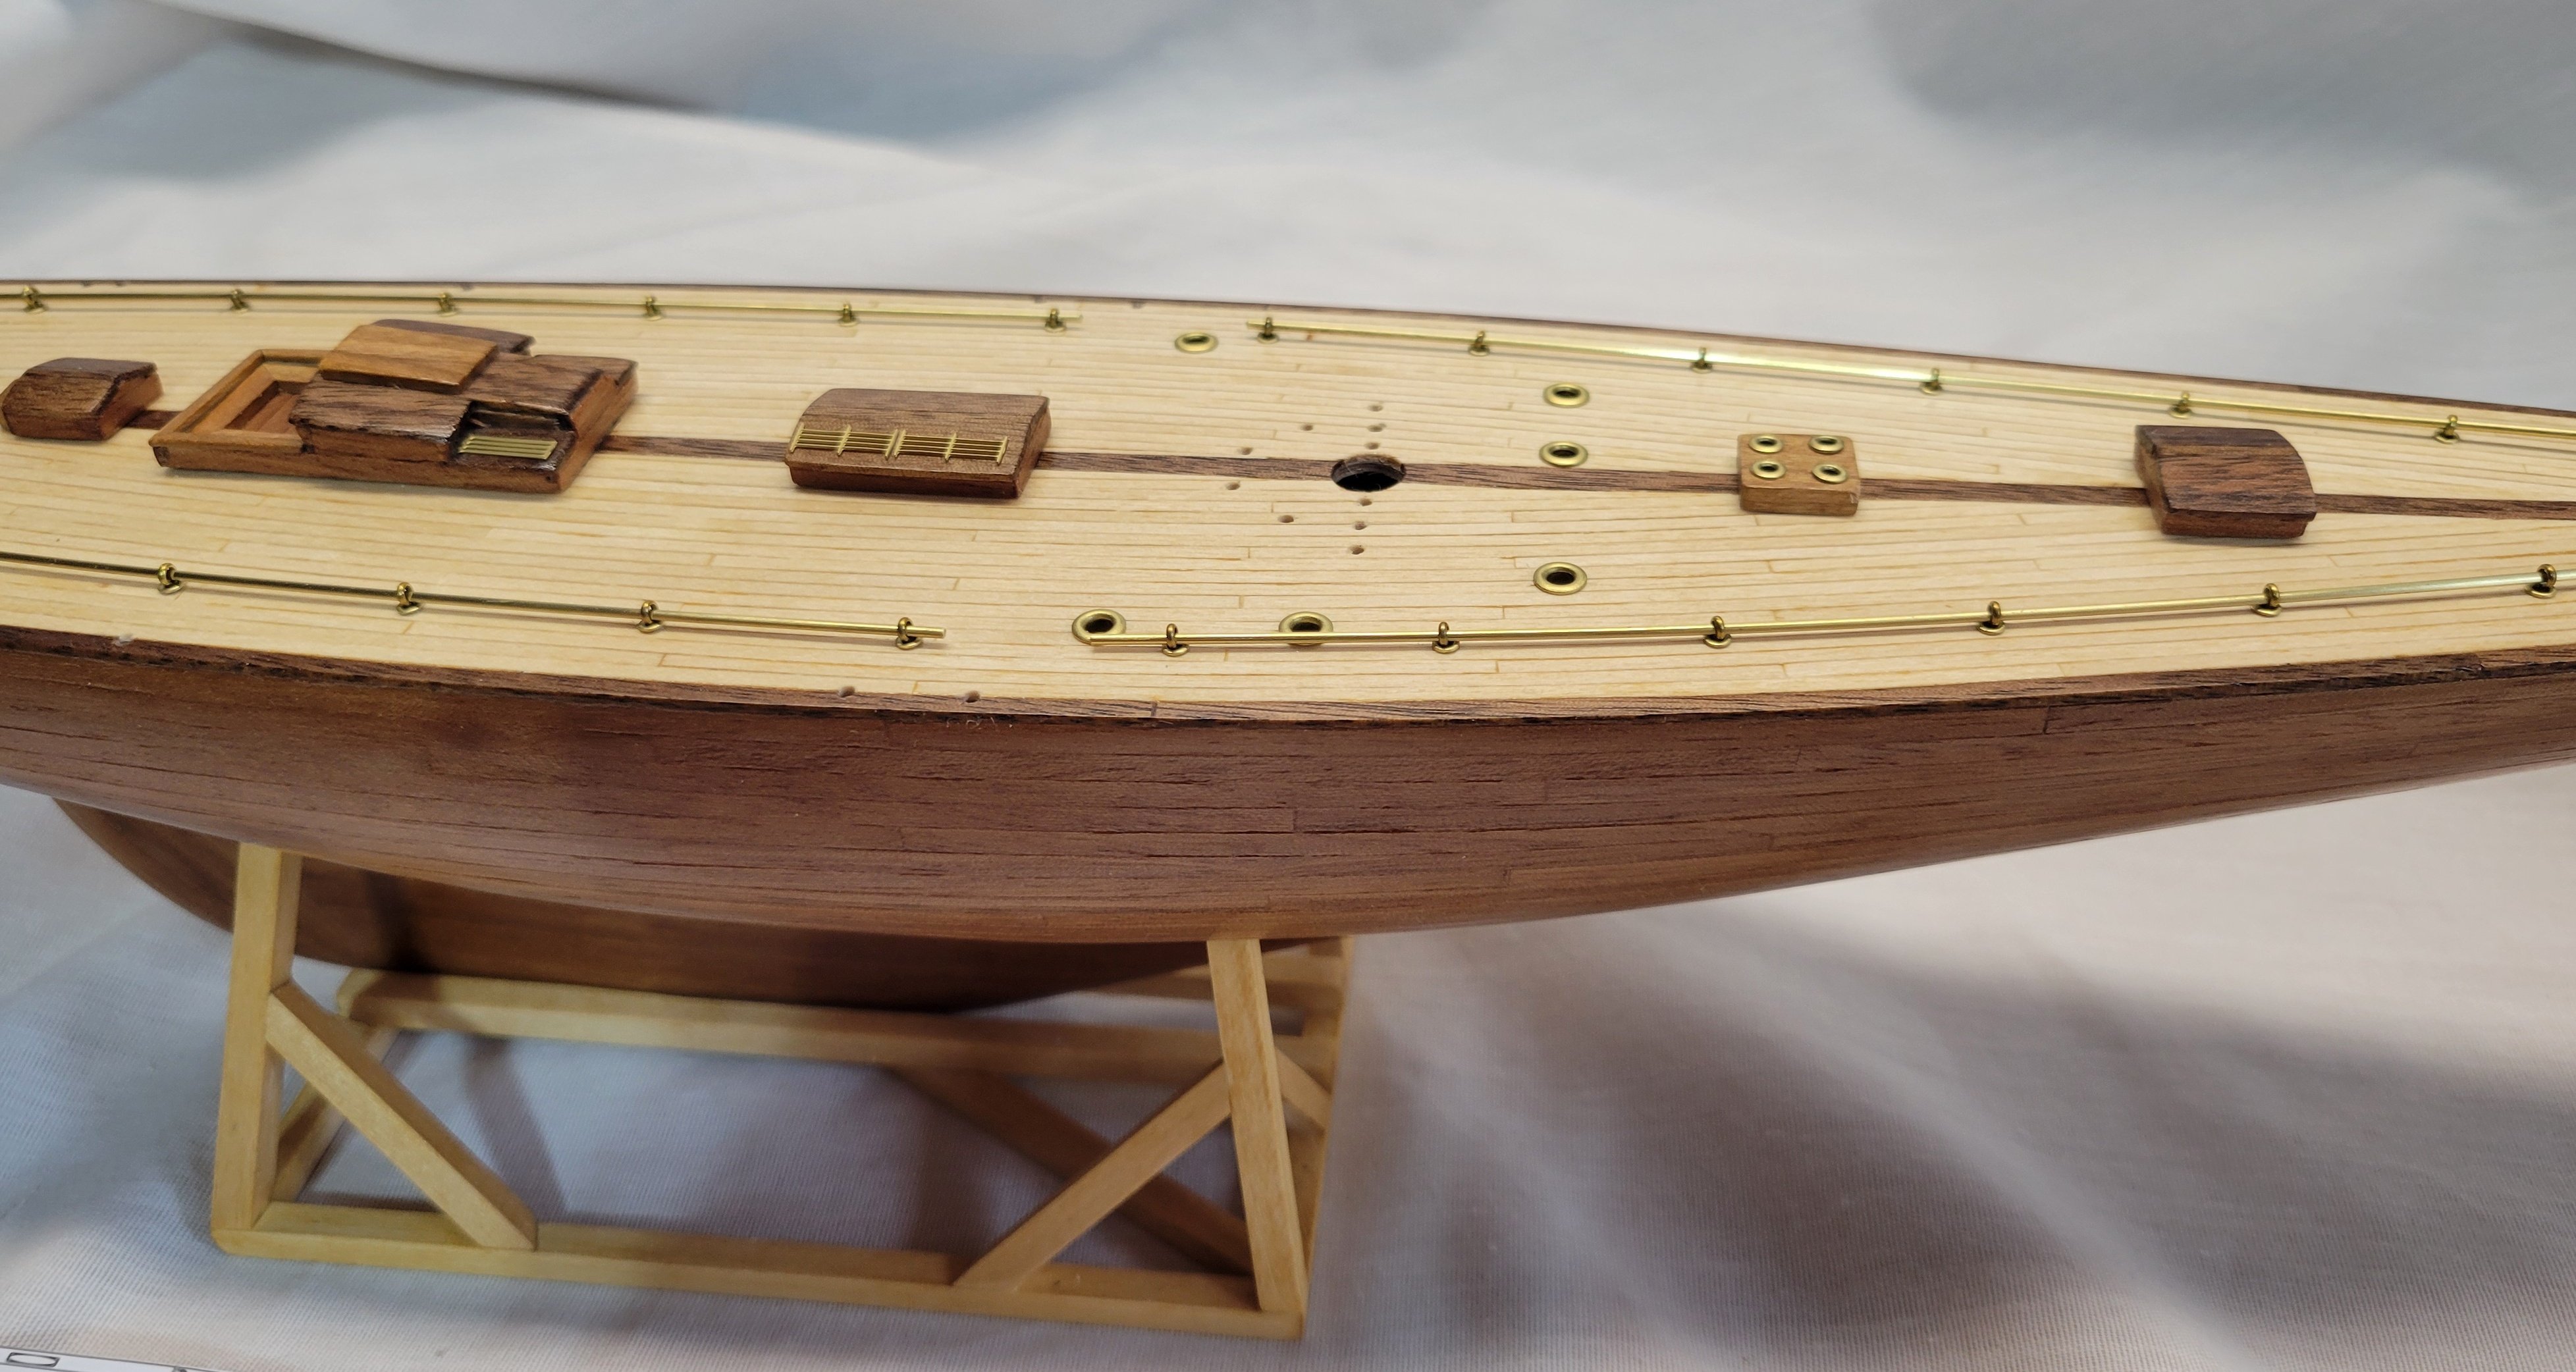
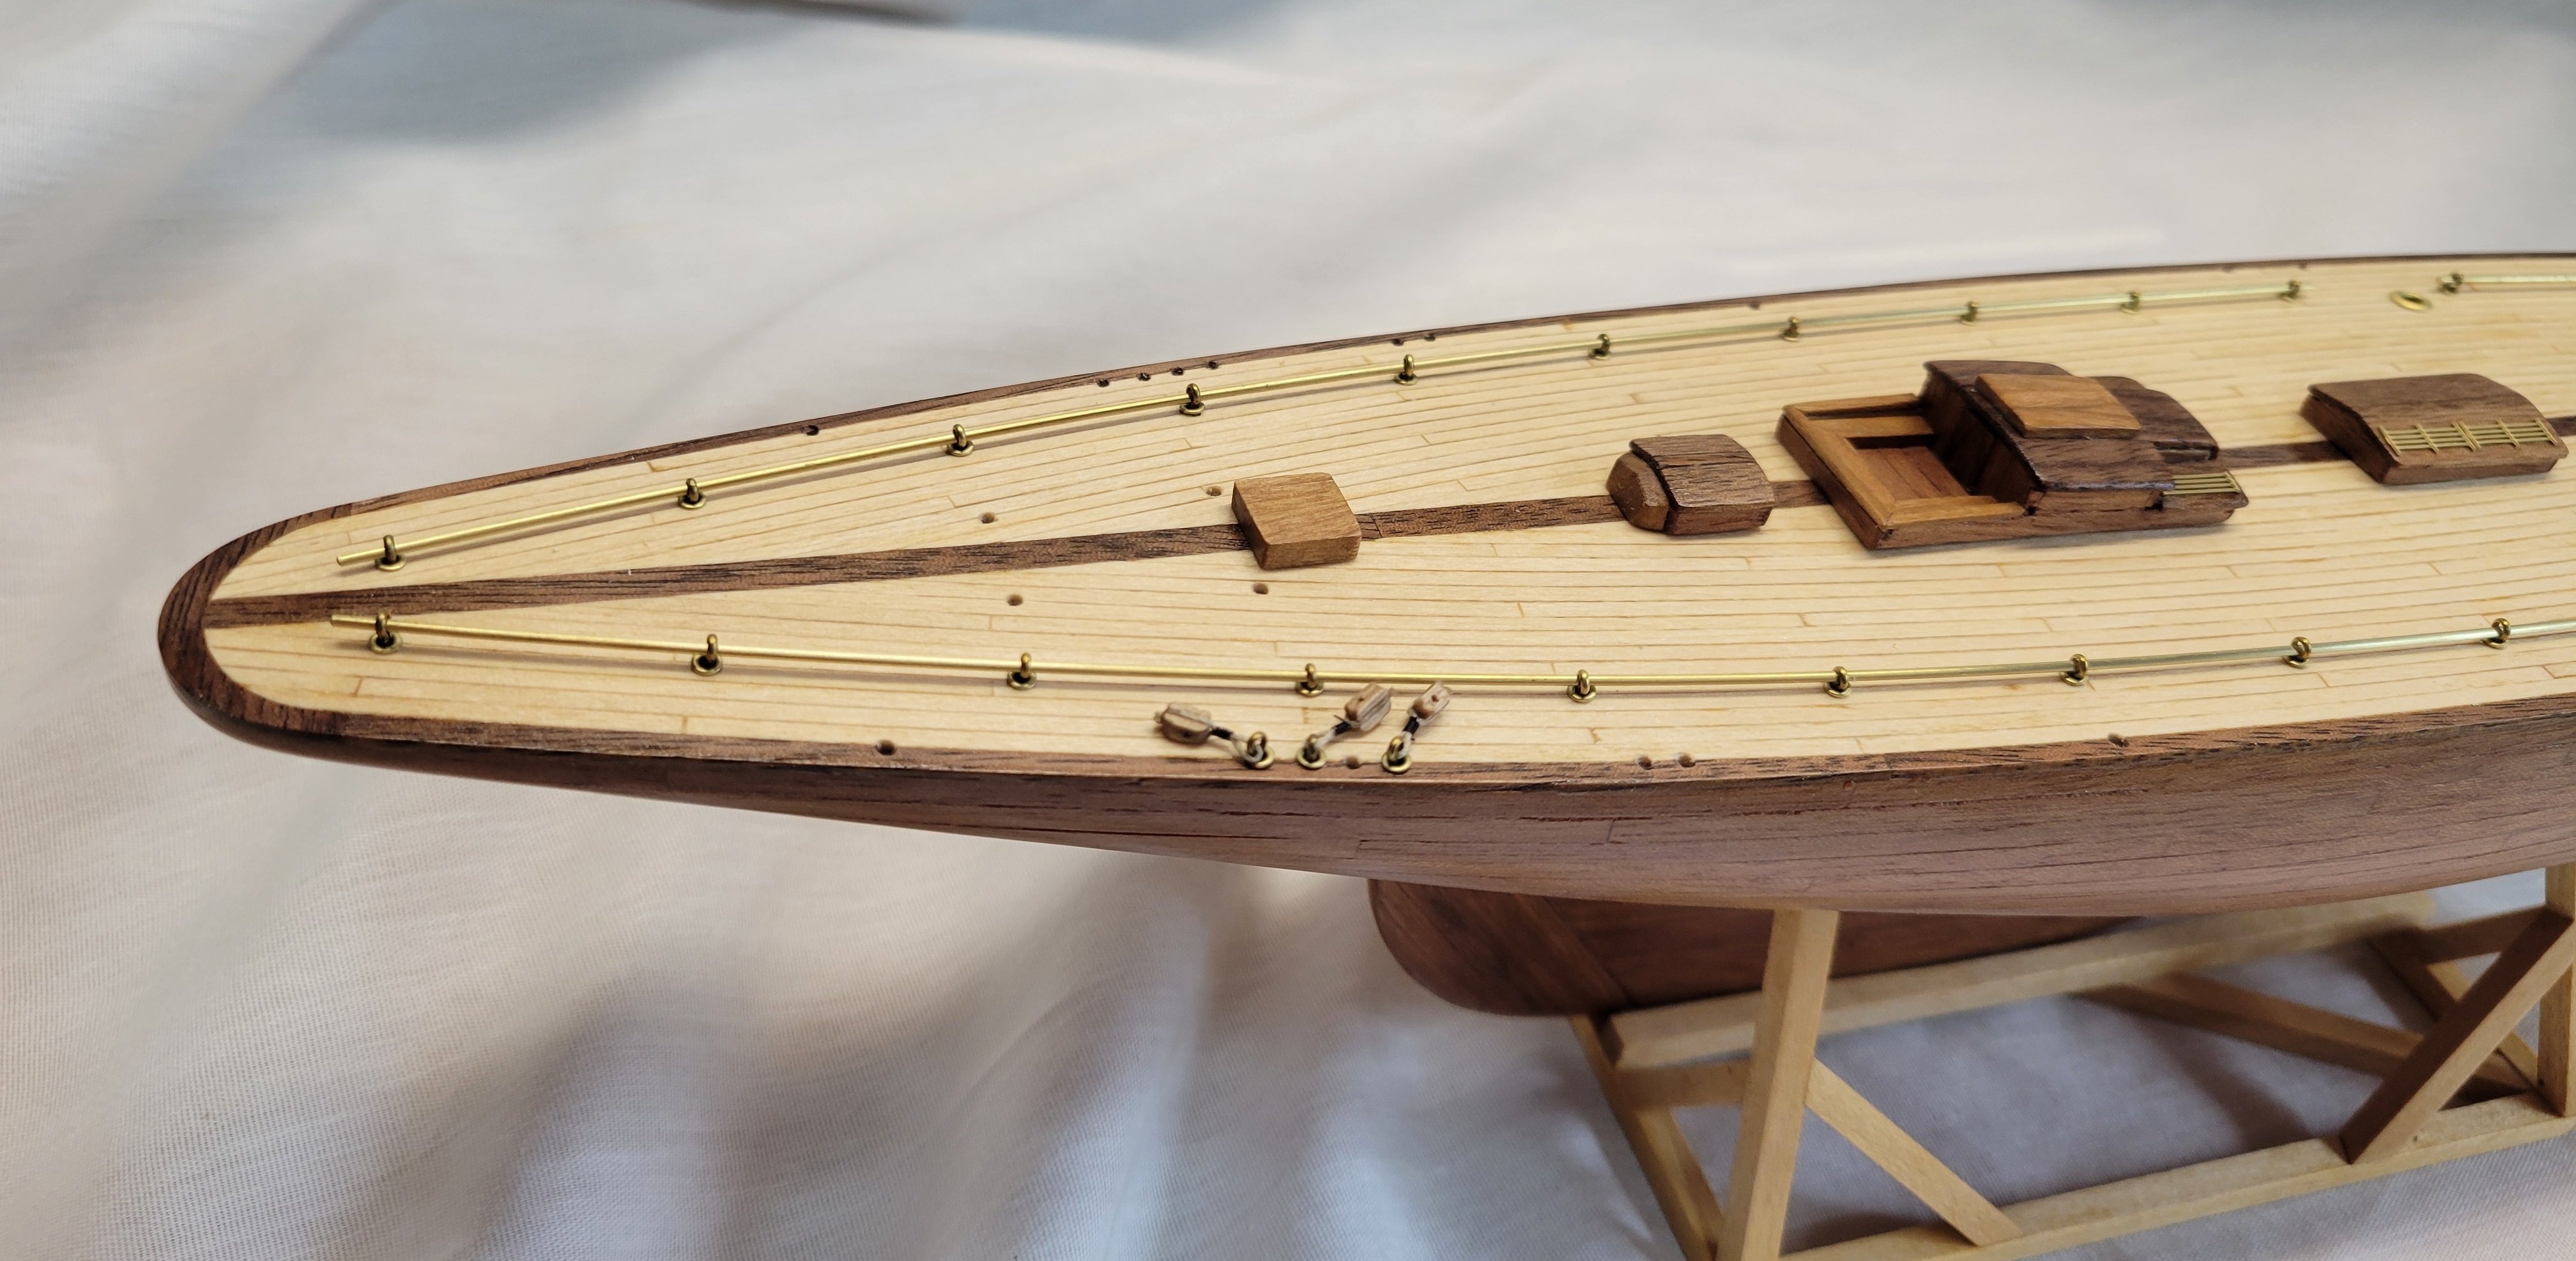
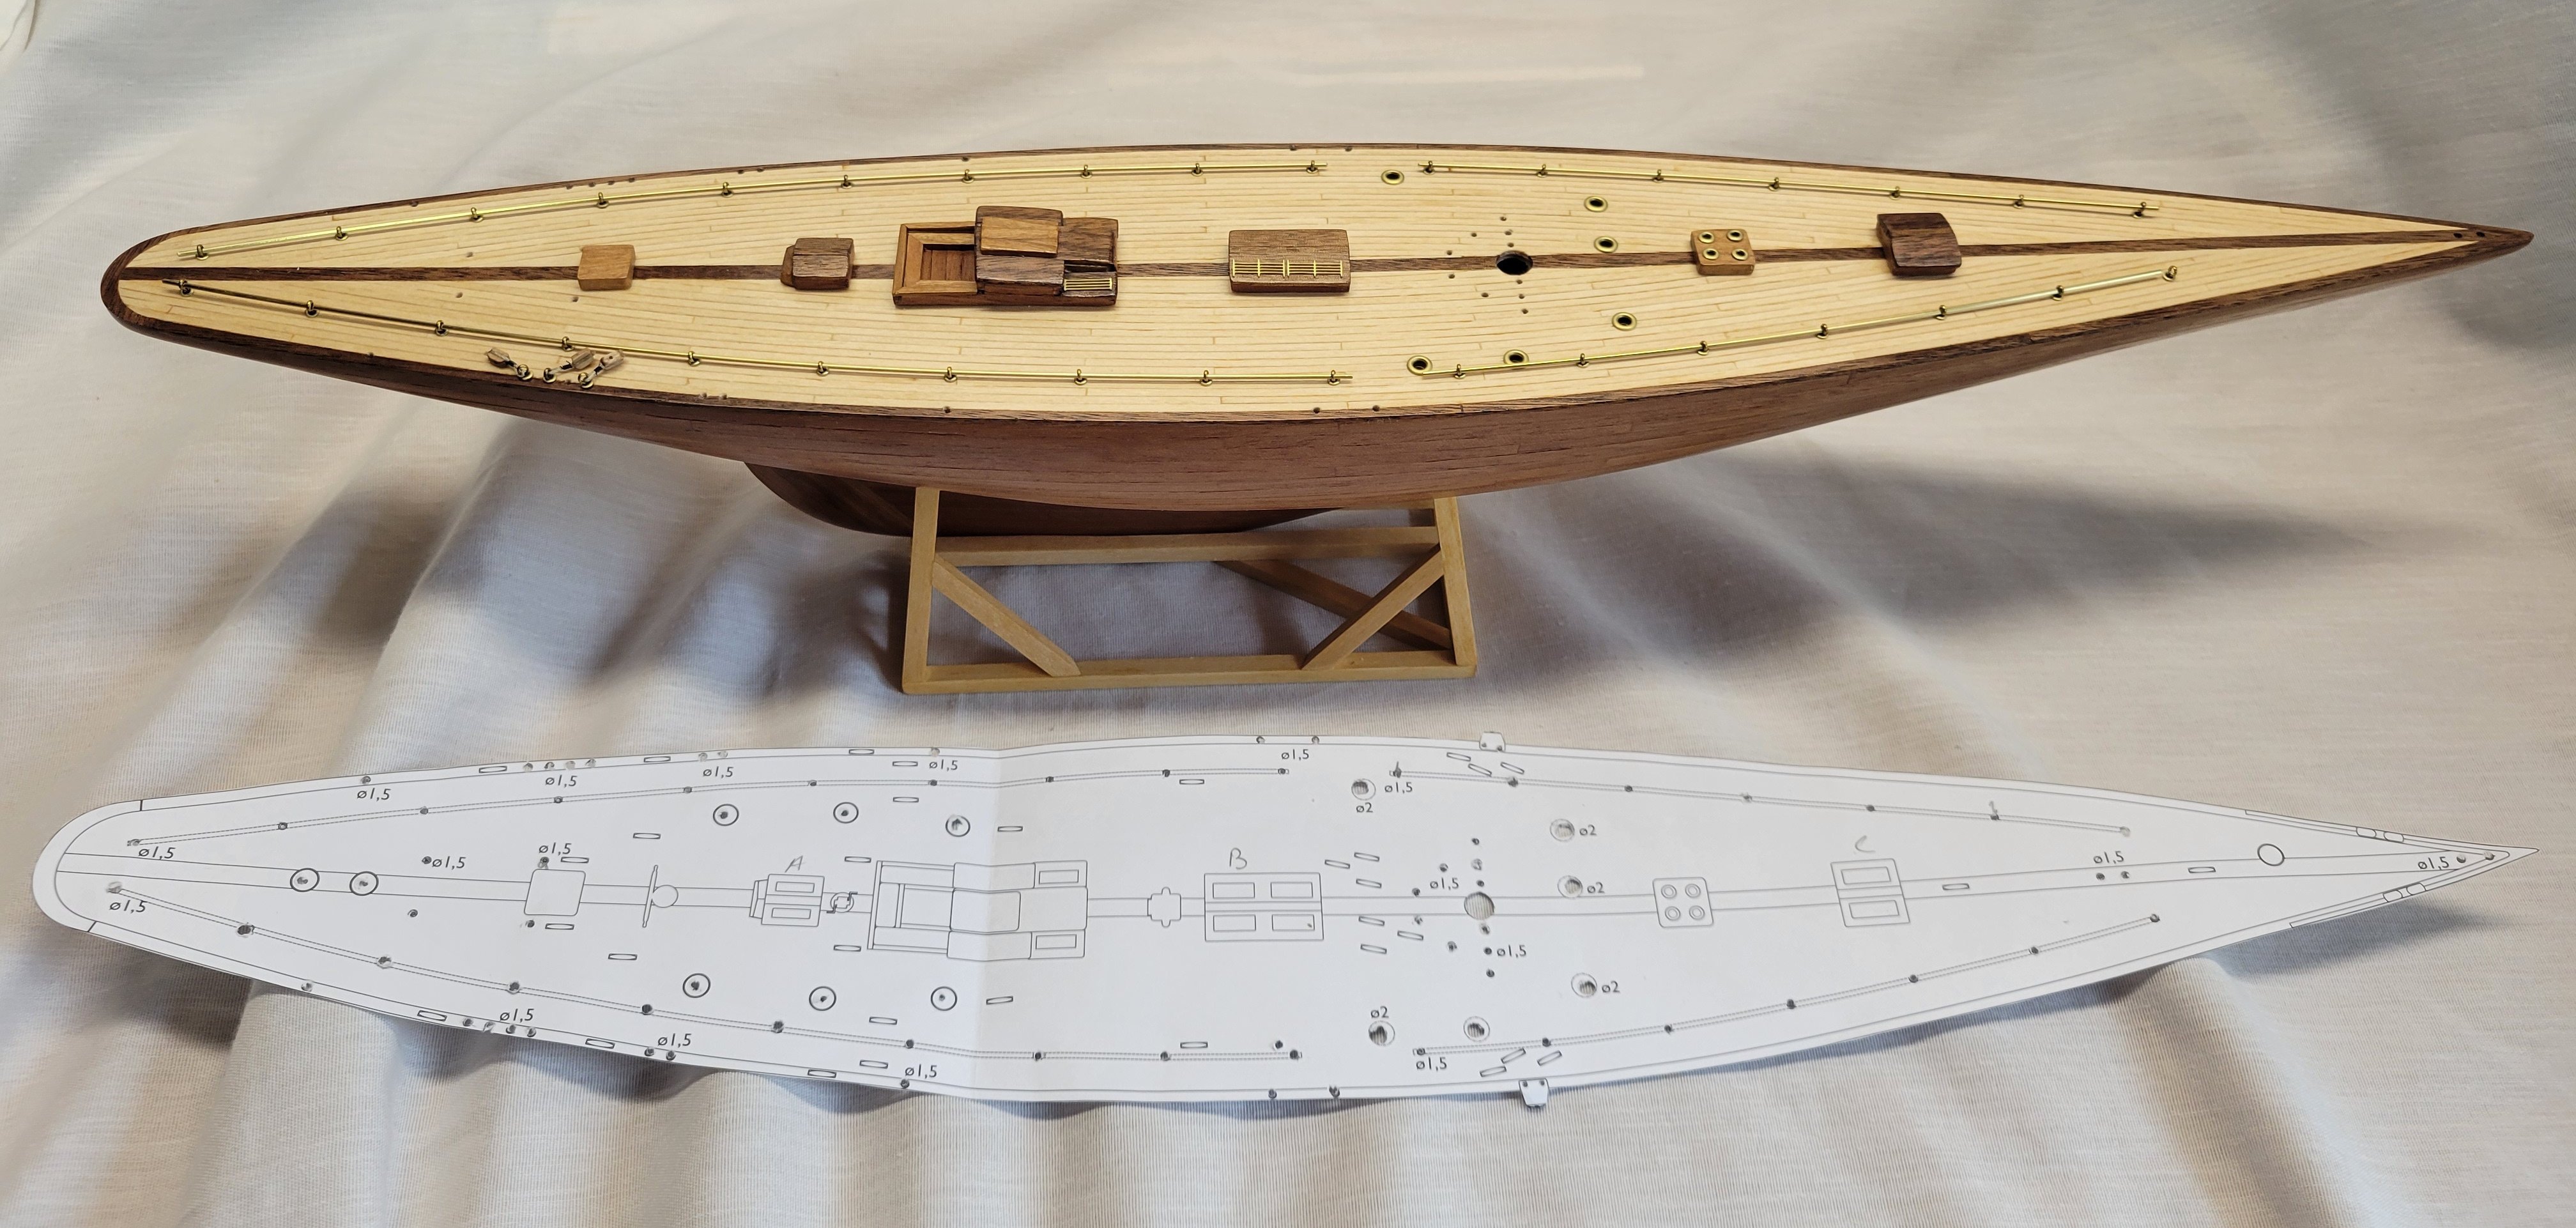
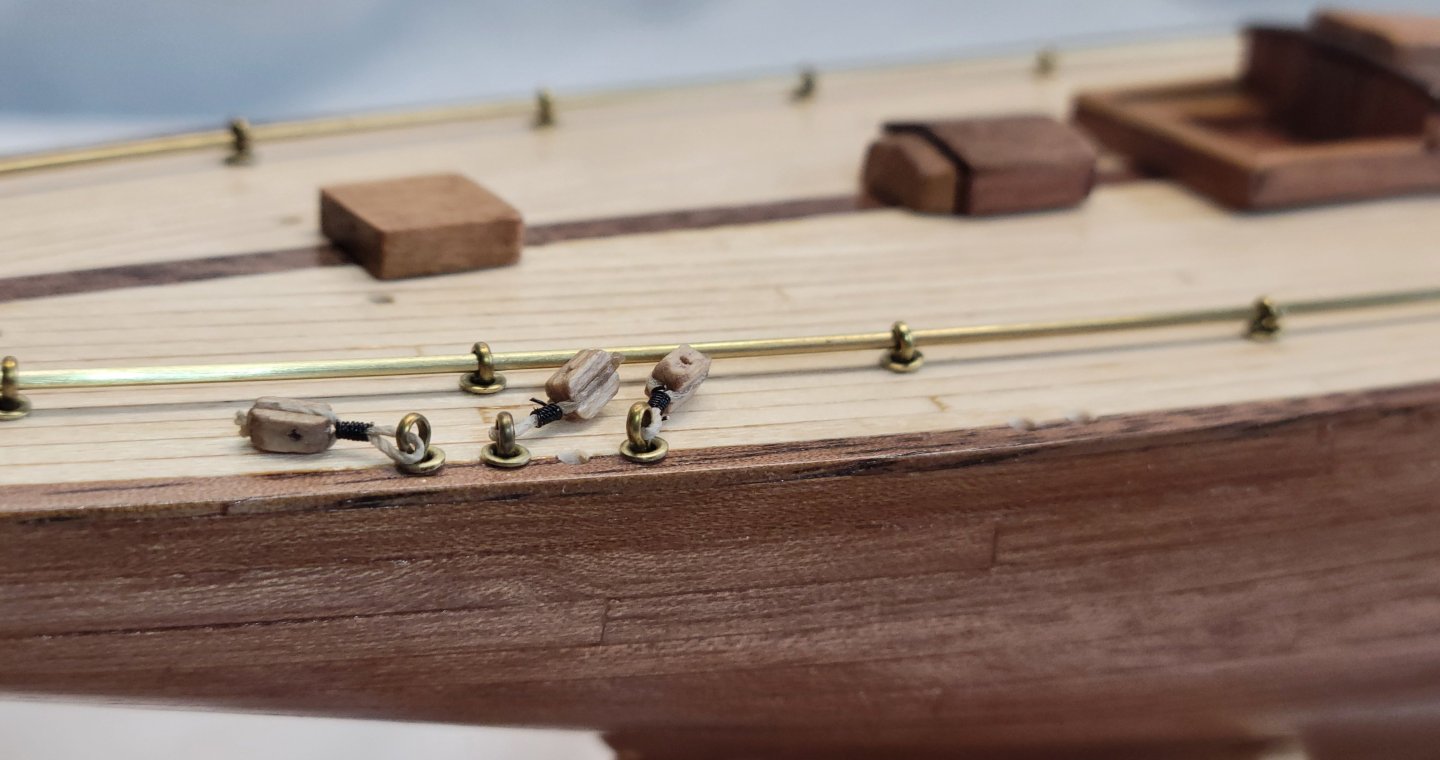
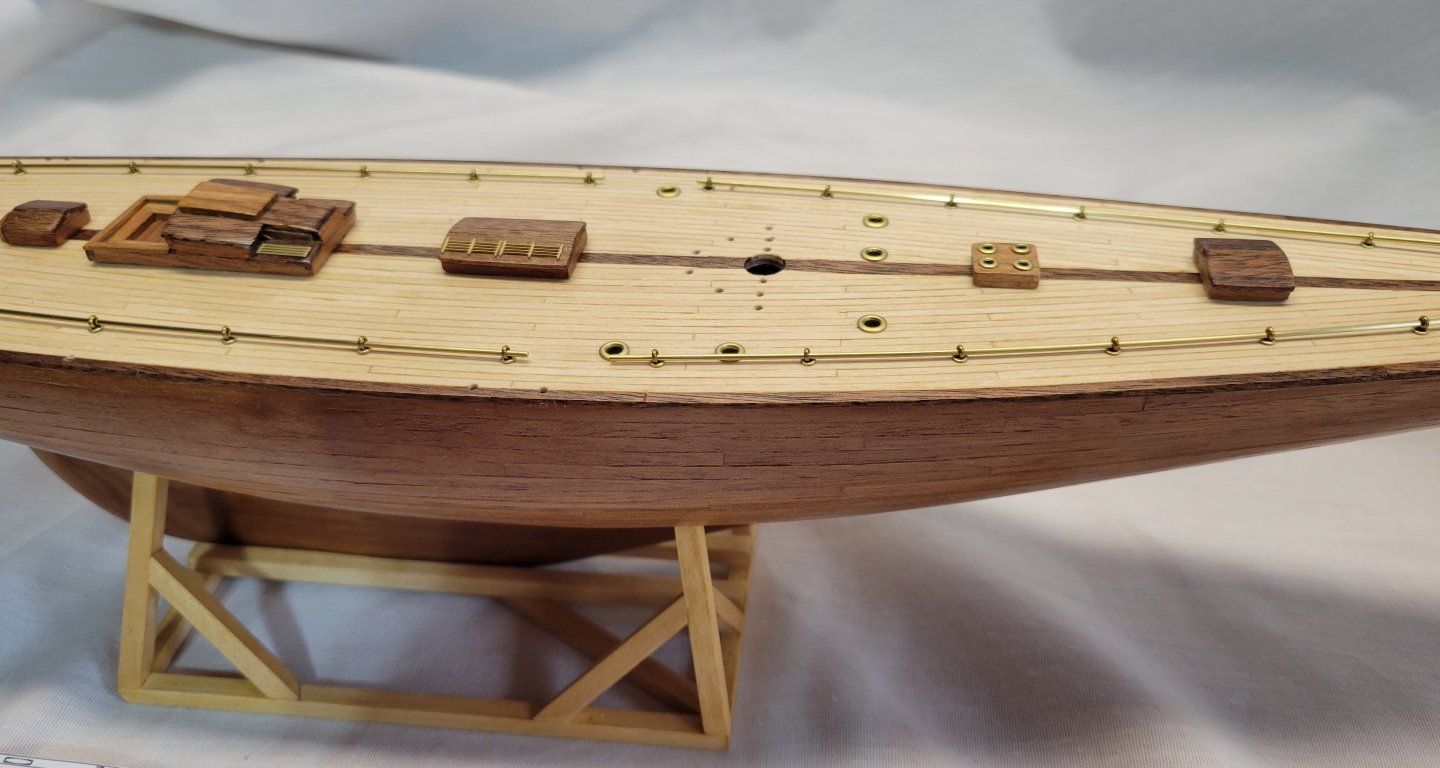
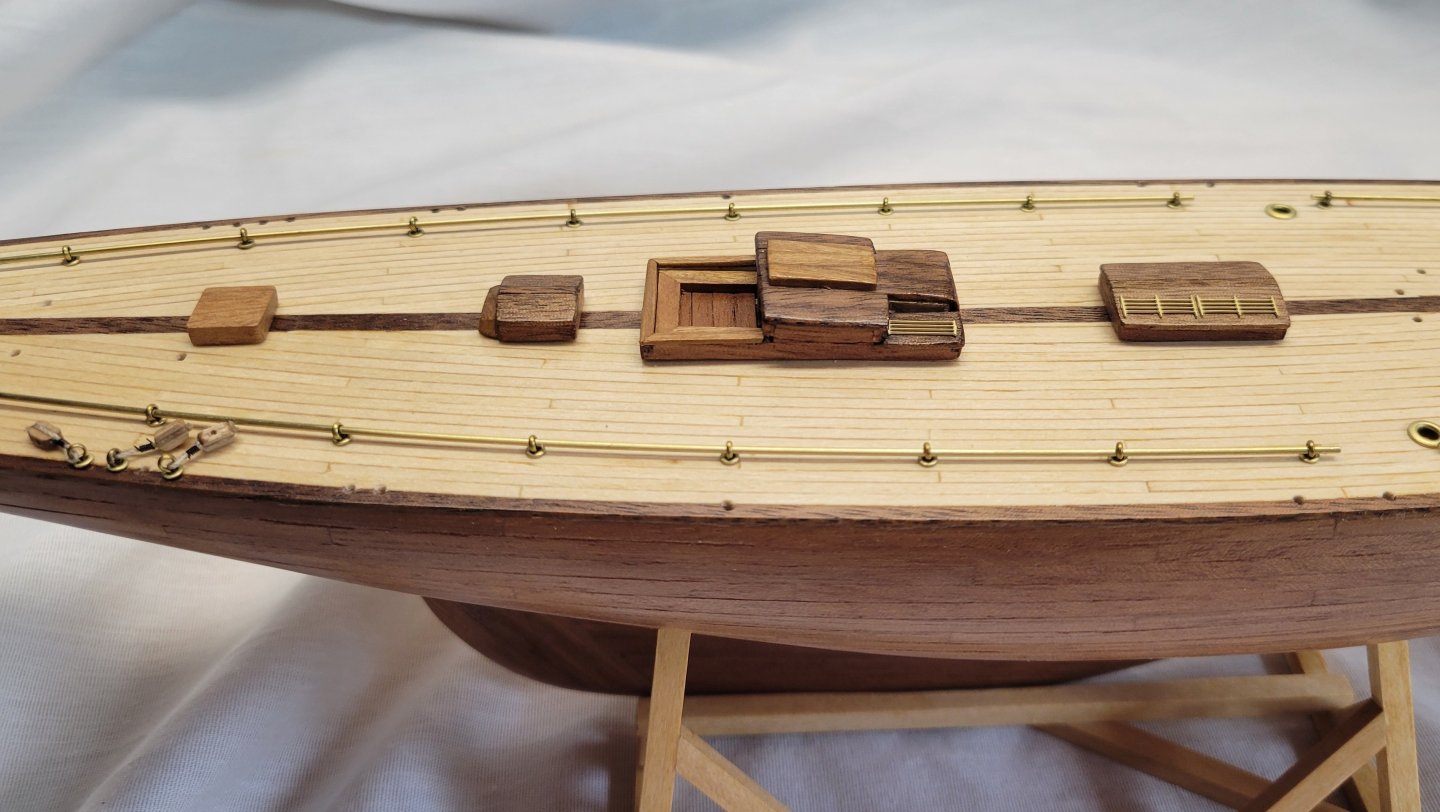
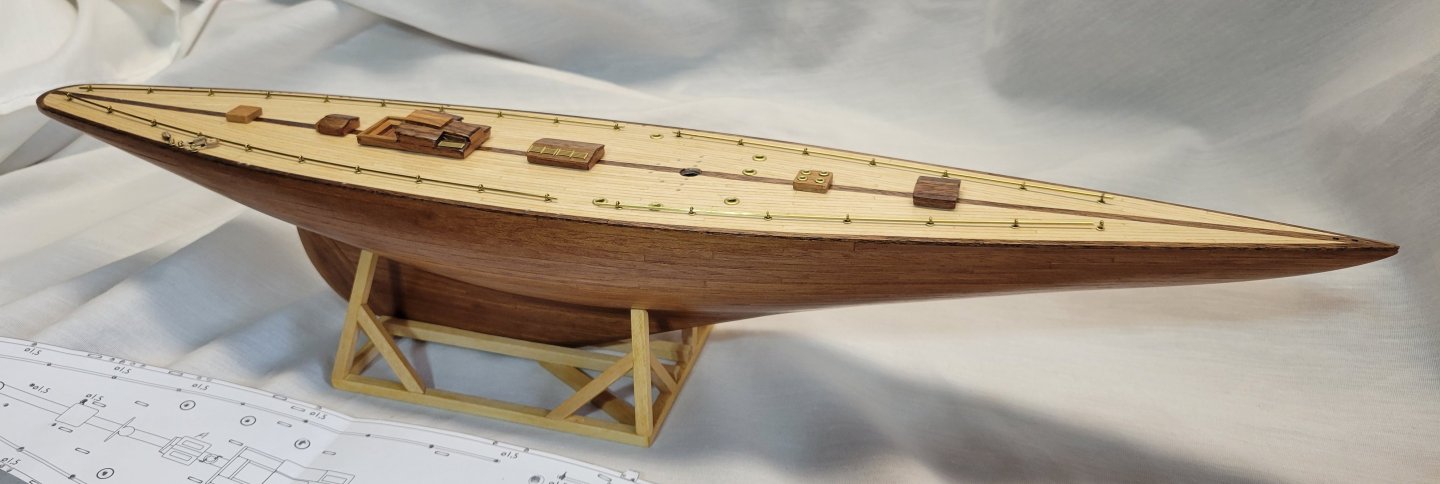
Build update: Progressing slowly. -drilled all holes in the deck using the included template. I was a little nervous to drill holes along the outer hull rails but it went very smoothly. Had to make up 29 stropped blocks to attach to the deck for rigging. After a lot of searching for stropping methods I settled on a method inspired by Olha Batchvarov in one of her YouTube videos. My methed differs where she used thin black line or thread and I used 32 guage black annealed wire. And her results were much better than mine. But good enough. I made a tying jig with a drill bit into a block of wood. - I built up deck structures using the supplied laser cut pieces except for the roofing which I replaced with walnut pieces. I didn't cut openings for skylights and windows. I may paint black under the skylight and window brass grates to simulate openings. We'll see. I covered the sides of the structures with left over walnut planking. -Installed the brass hand railing. In the following pics nothing is glued down. All for now


- 58 replies
-
- 3
-
-
- Endeavour
- j-class yacht
- (and 1 more)
-
@Admiral Rick i wish I was as organized as you. I go hunting for parts as needed which can be an annoying chore.
-
That looks great! I haven't done that yet. Glad you did. I'll look back on what you did when I get to it
-
Aye aye Admiral.. Back to work! I'm looking forward to following your Bluenose build
-
Thank you so much, Ellie I'm glad you're back! You have such a good start going. I can't wait to see what you create
- 58 replies
-
- 2
-
-
- Endeavour
- j-class yacht
- (and 1 more)
.JPG.13a77cb80c49e1c50ba4ee2b3ff5772c.JPG)
.JPG.31aae884552cca1ebe8b6718ad1eaa11.JPG)
.JPG.2597de2eae6def90649d7169732a0ea4.JPG)
.JPG.5fdf3315e2531f5c2e6d252f36f88356.JPG)
.JPG.fe578e0d0c02cb122111a8e6cf7df395.JPG)

(1).JPG.88b2dfe16adc696ae54e1843cd48fc47.JPG)