Maid of the Mist
-
Posts
80 -
Joined
-
Last visited
-
 Ah yes, that was probably one of most fiddly parts of my Beagle build. Trying to insert and glue those tiny pins without making a mess with the CA wasn't much fun.
 -
 Maid of the Mist reacted to a post in a topic:
HM Cutter Sherbourne 1763 by Bomber_County - Vanguard Models - 1/64 - First Build
Maid of the Mist reacted to a post in a topic:
HM Cutter Sherbourne 1763 by Bomber_County - Vanguard Models - 1/64 - First Build
-
RossR reacted to a post in a topic:
HM cutter Sherbourne by Maid of the Mist - Vanguard Models - 1:64
-
Paul White reacted to a post in a topic:
HM cutter Sherbourne by Maid of the Mist - Vanguard Models - 1:64
-
ubjs reacted to a post in a topic:
HM cutter Sherbourne by Maid of the Mist - Vanguard Models - 1:64
-
palmerit reacted to a post in a topic:
HM cutter Sherbourne by Maid of the Mist - Vanguard Models - 1:64
-
Thank you. I've done a bit of beveling of the edges on this first layer, so I'm sort of getting the hang of it. I know how it's supposed to work at least! I'm also going to use a planking fan and properly mark up the hull for the second layer, which I hope will enable better tapering. I just have to keep reminding myself two things: 1) This is the most successful I've yet been with a tapered hull. I didn't attempt tapering planks on my first build (I used OcCre's suggested planking) and my second build ended up a mess. 2) I'm going to be filling and sanding and painting multiple times before it's finished, so plenty of opportunities to get it looking just right!
- 18 replies
-
- 2
-
-
- cutter
- Sherbourne
- (and 1 more)
-
JacquesCousteau reacted to a post in a topic:
HM cutter Sherbourne by Maid of the Mist - Vanguard Models - 1:64
-
Knocklouder reacted to a post in a topic:
HM cutter Sherbourne by Maid of the Mist - Vanguard Models - 1:64
-
tmj reacted to a post in a topic:
HM cutter Sherbourne by Maid of the Mist - Vanguard Models - 1:64
-
Diver reacted to a post in a topic:
HM cutter Sherbourne by Maid of the Mist - Vanguard Models - 1:64
-
Paul White reacted to a post in a topic:
HM cutter Sherbourne by Maid of the Mist - Vanguard Models - 1:64
-
Paul White reacted to a post in a topic:
HM cutter Sherbourne by Maid of the Mist - Vanguard Models - 1:64
-
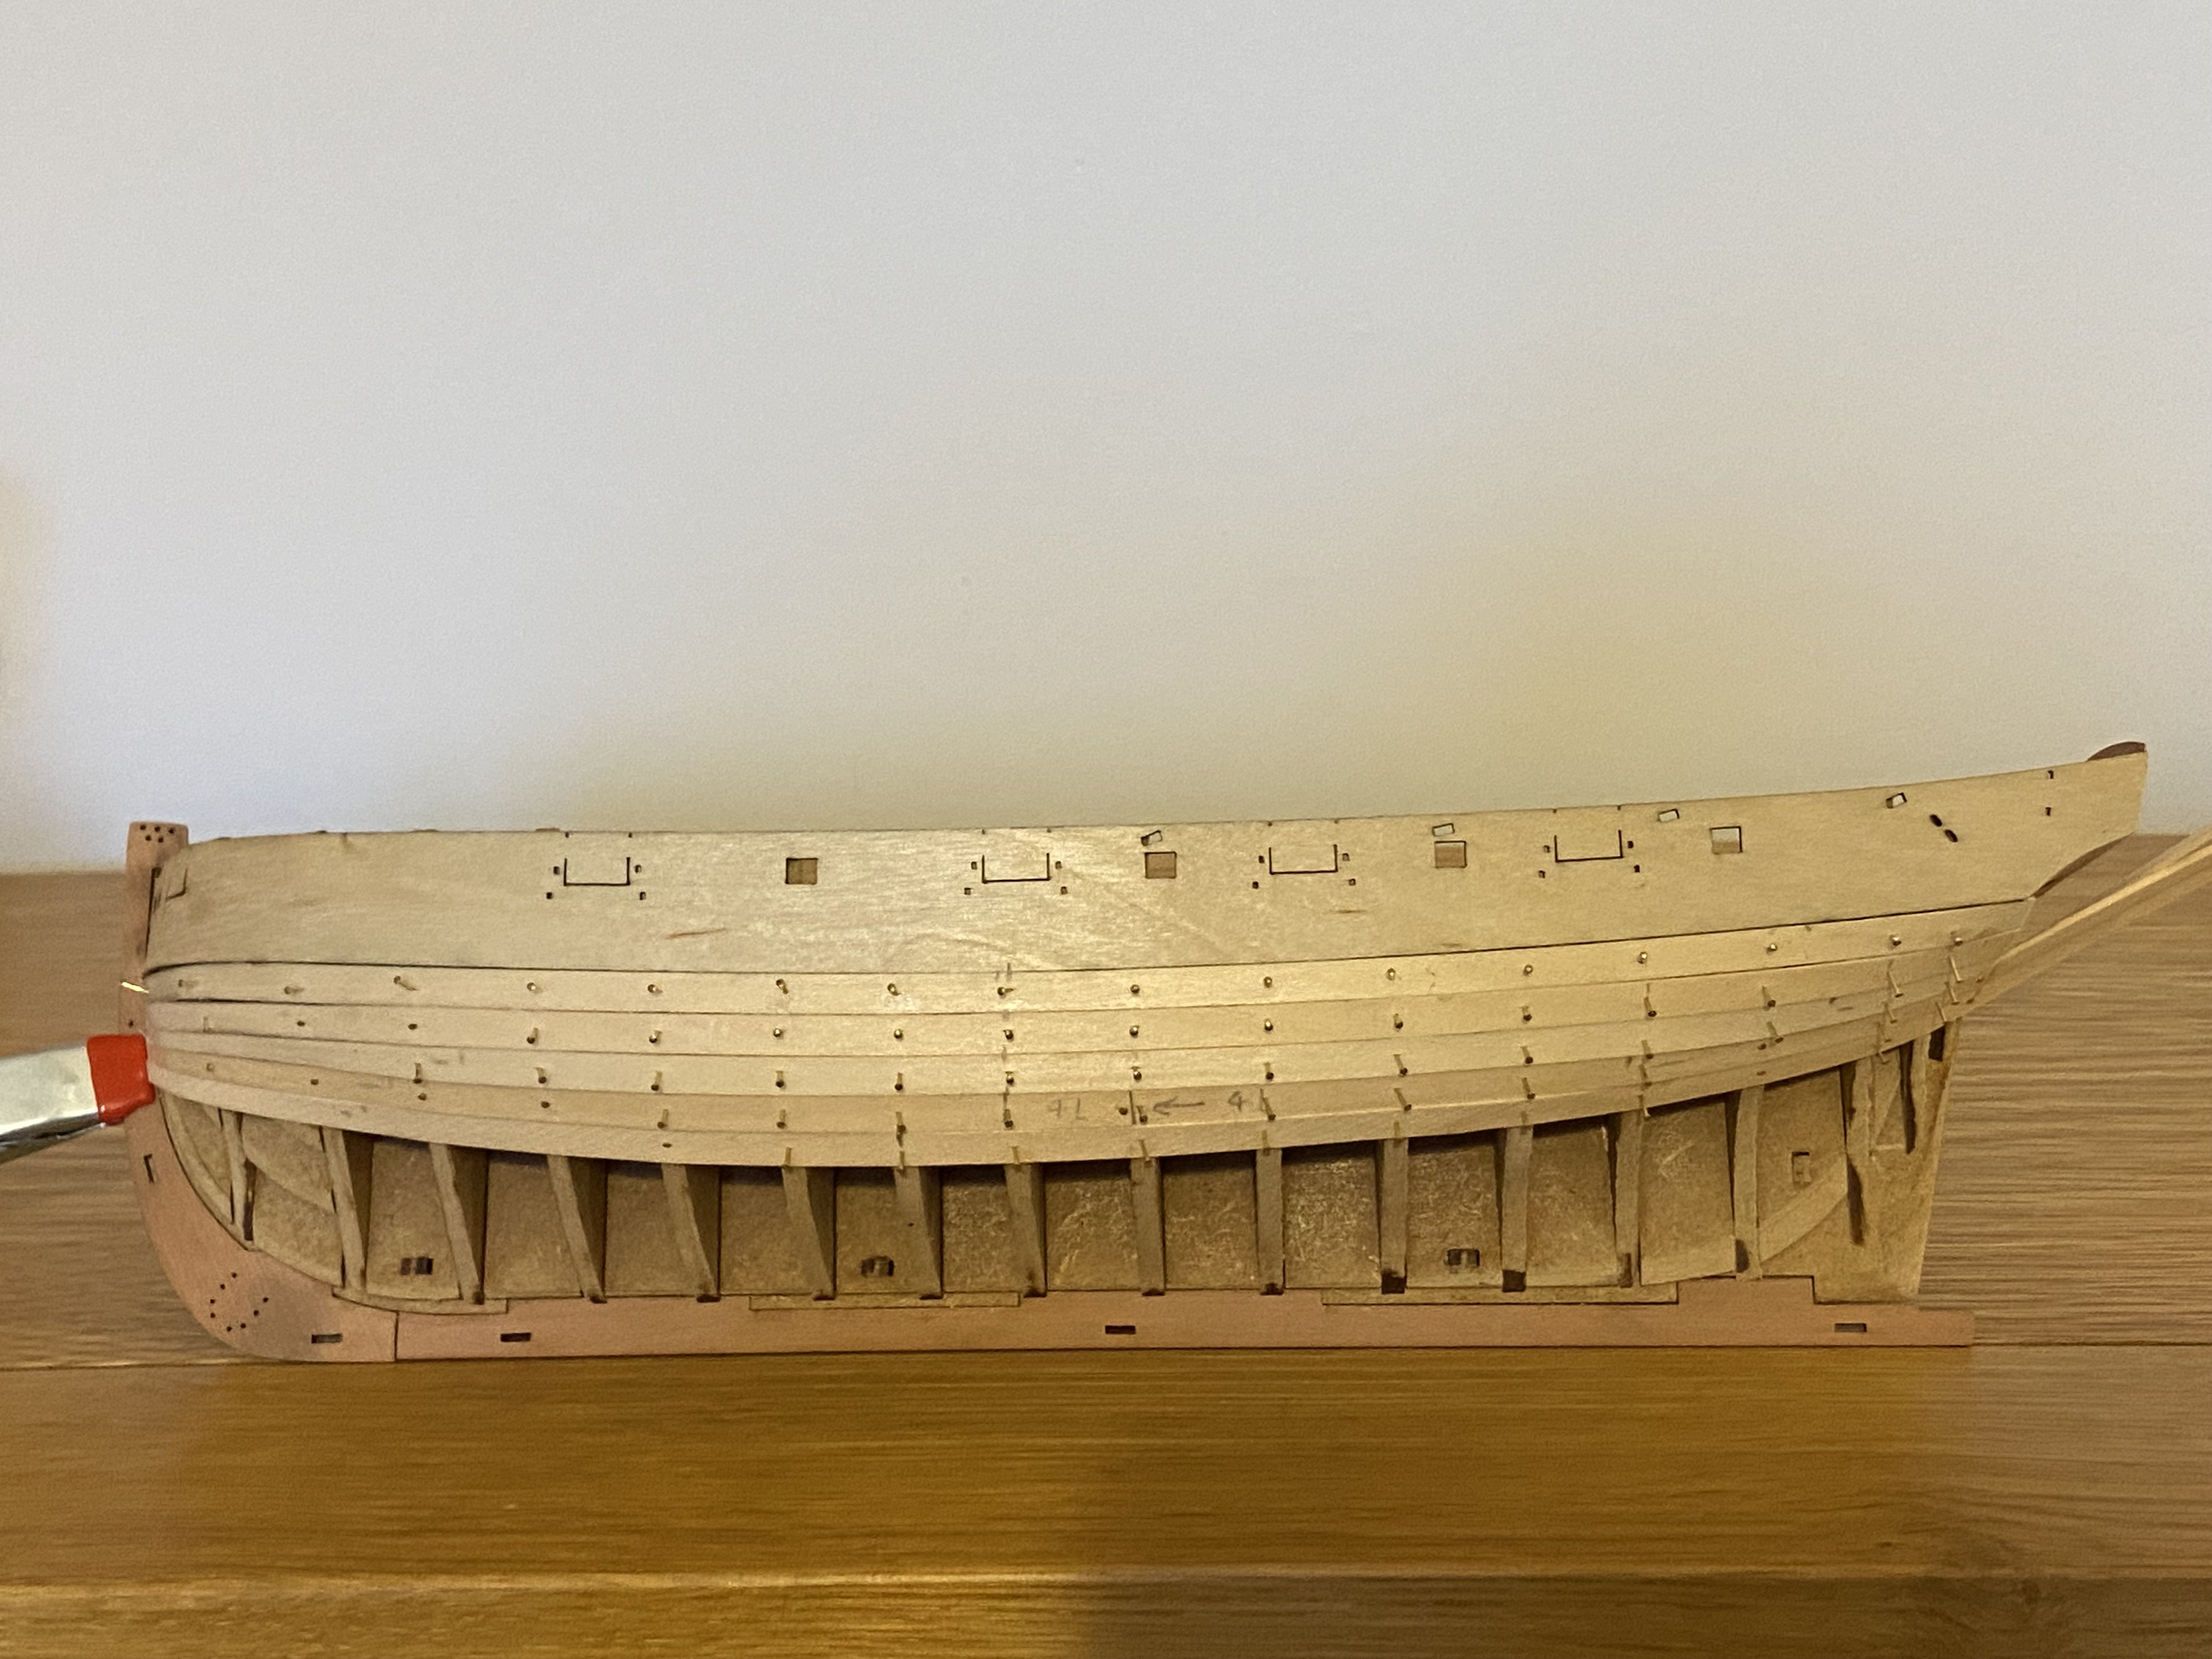
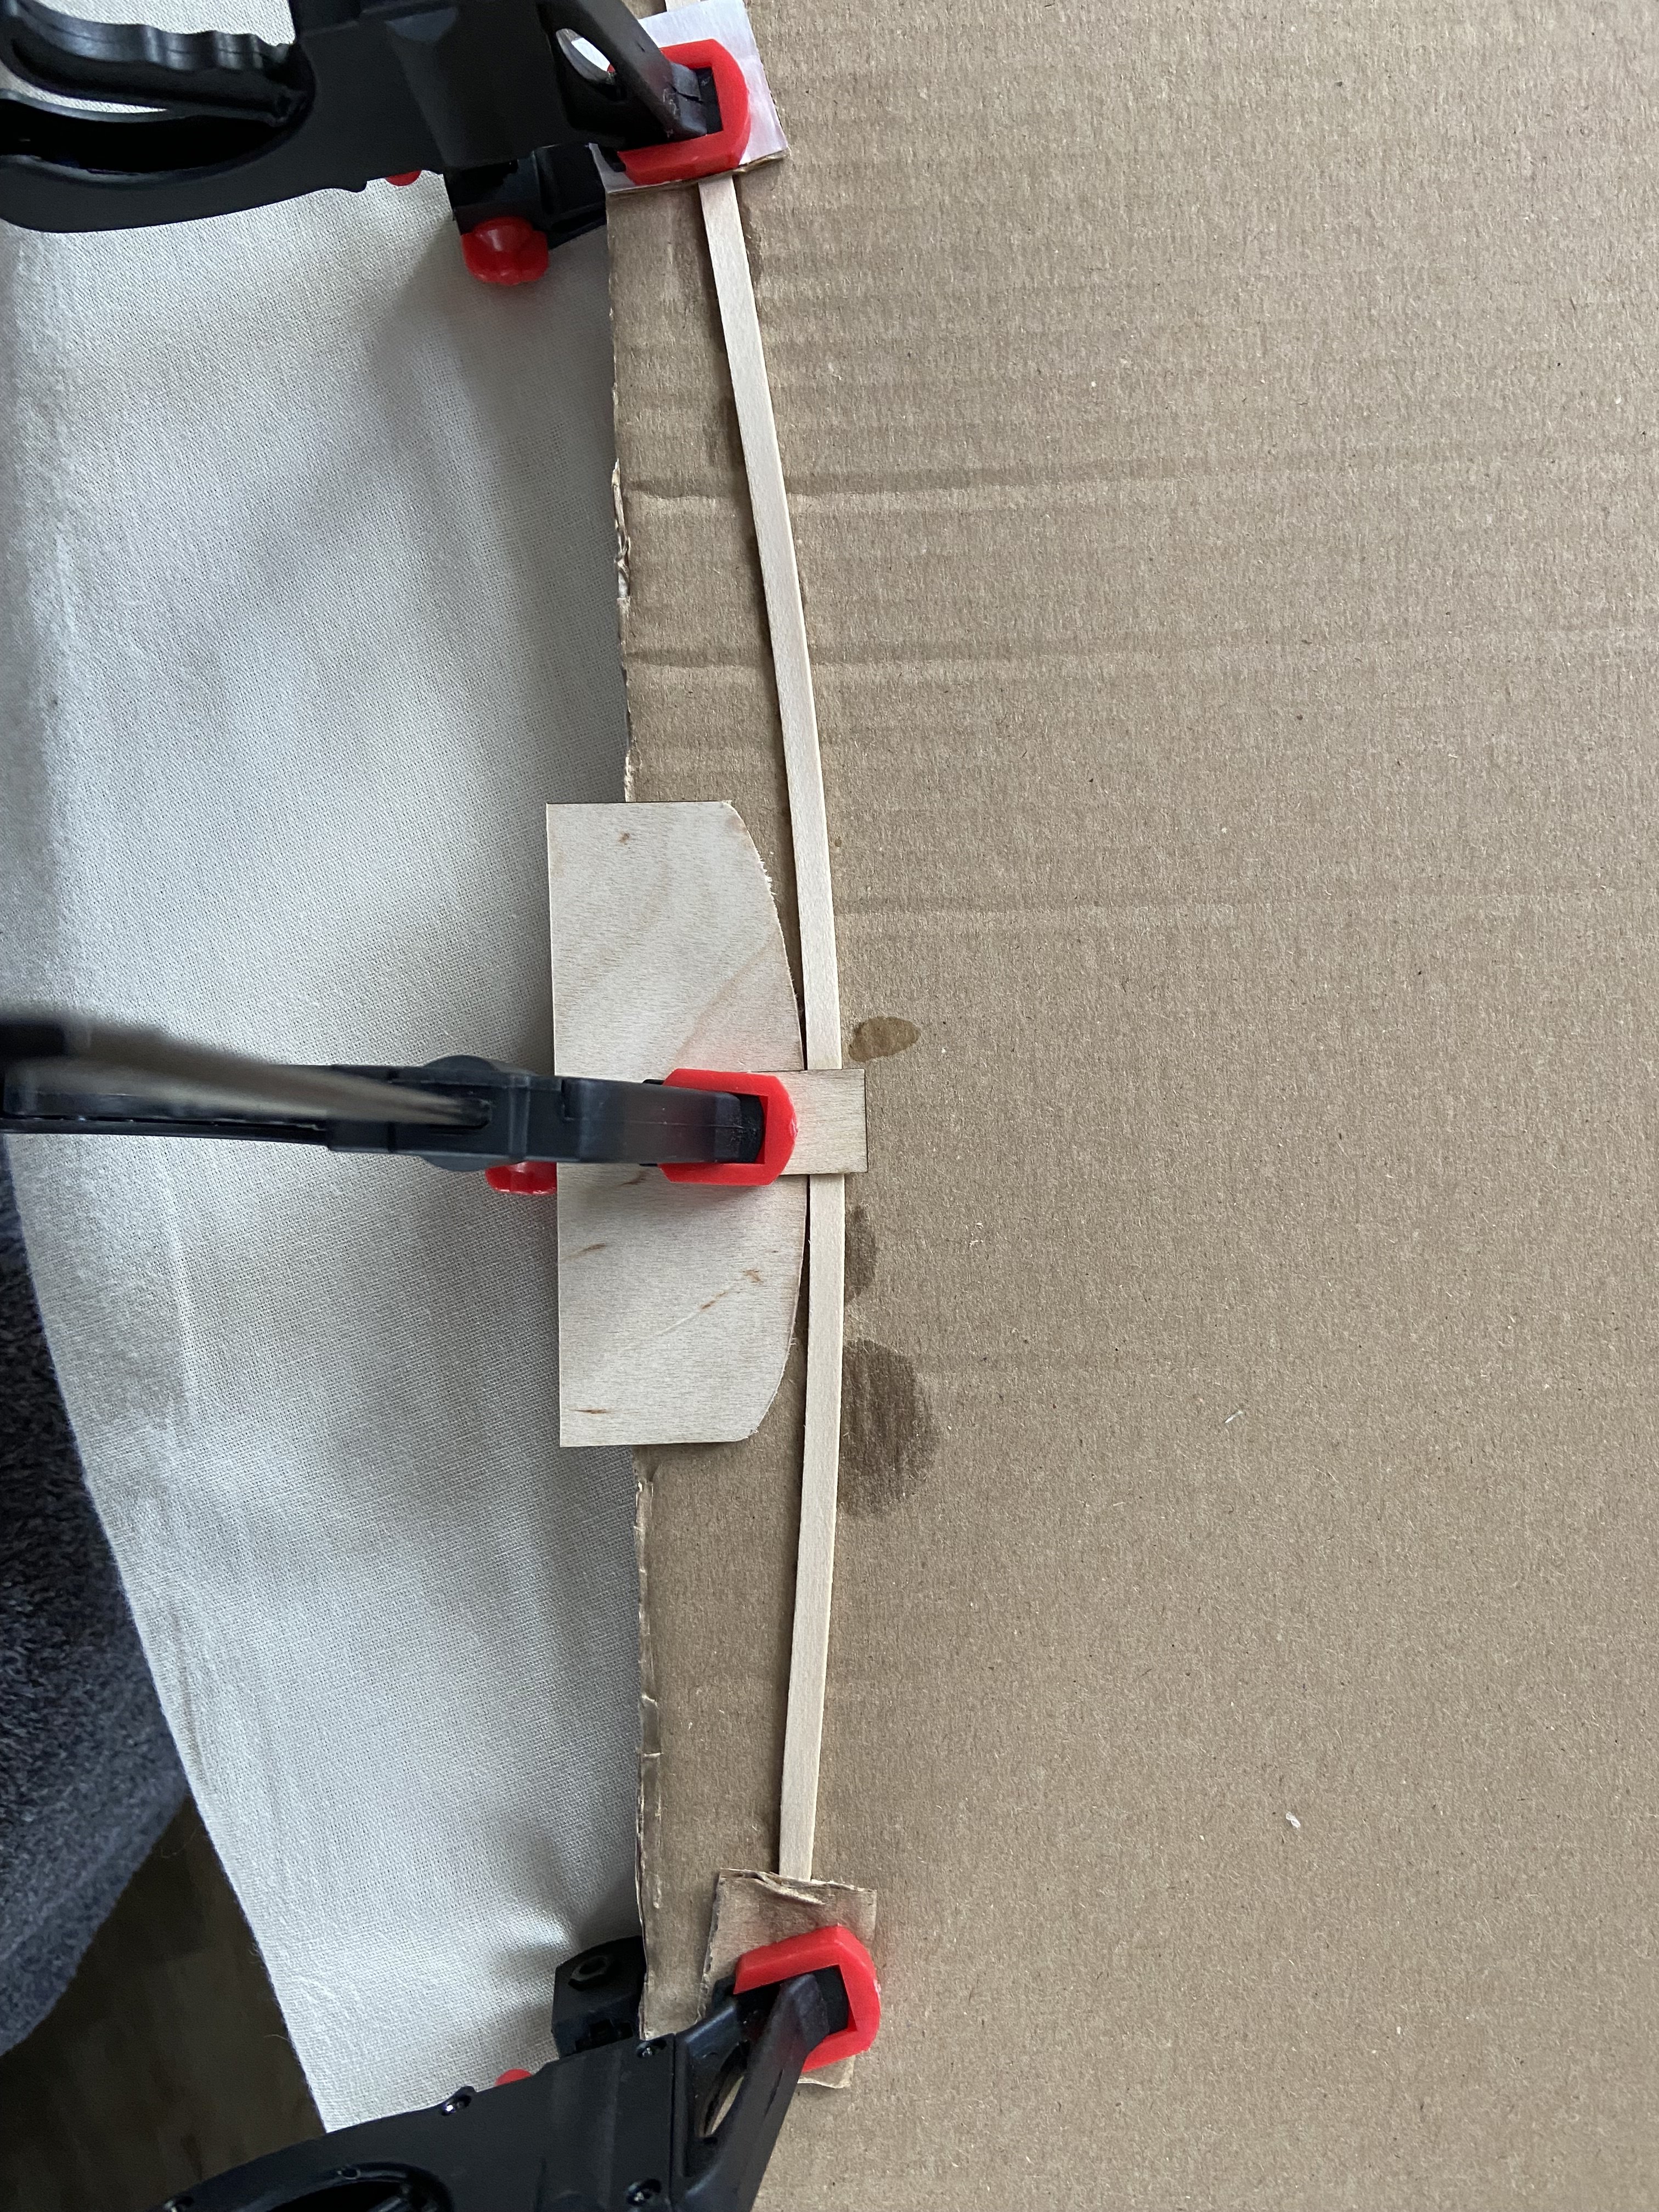
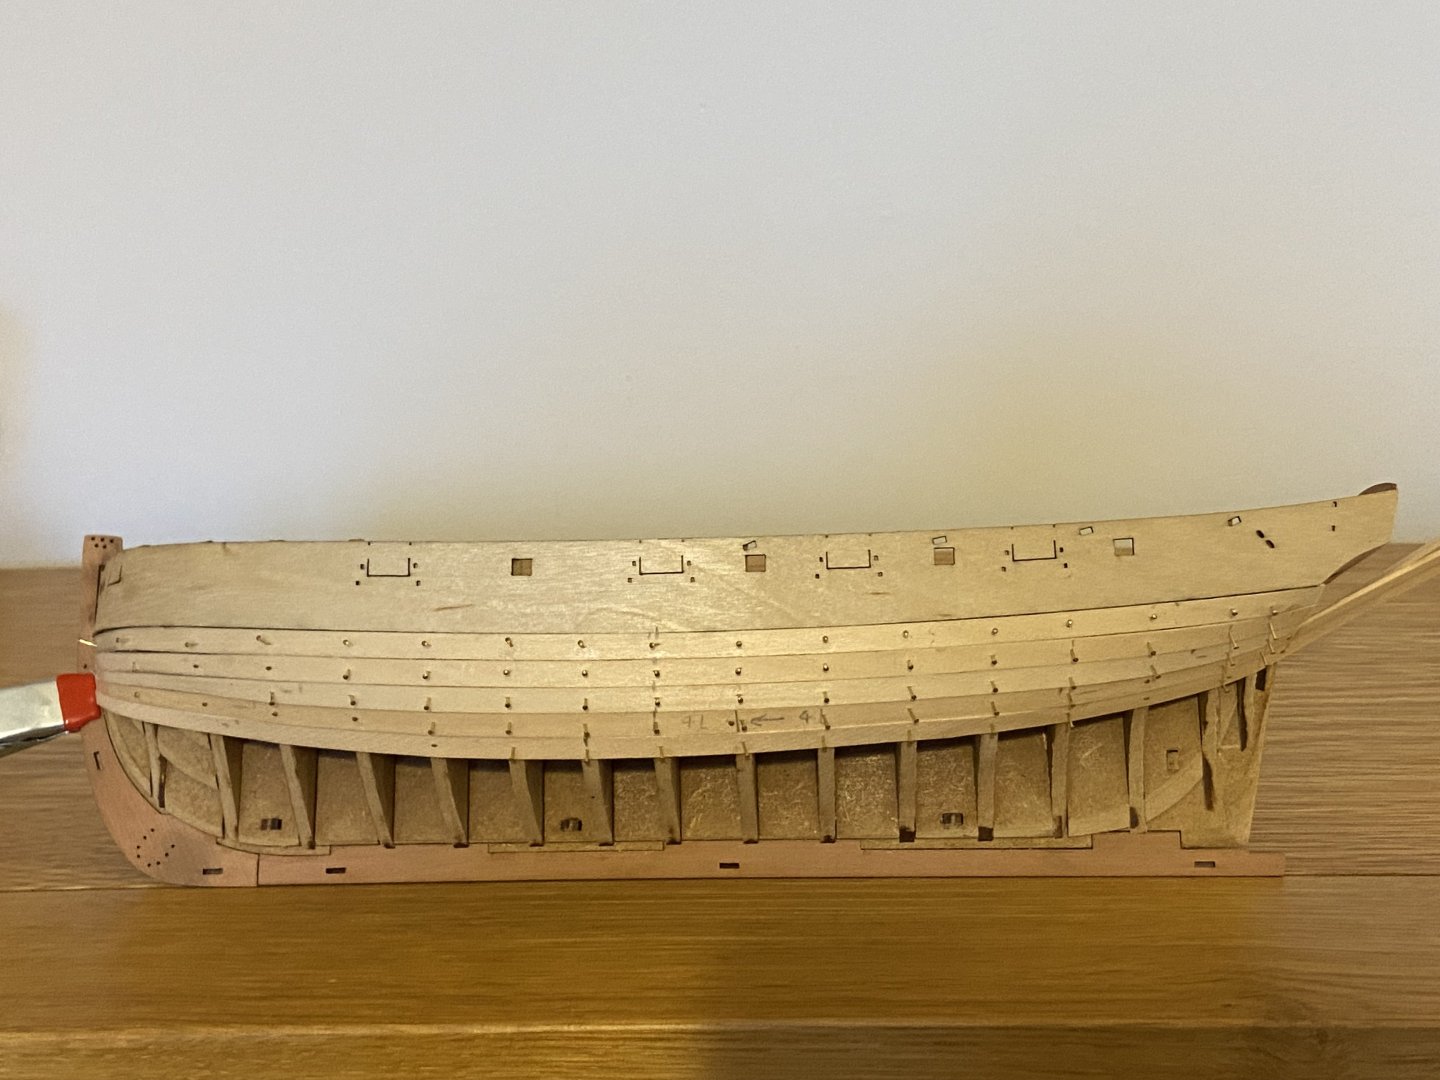
Planking progress: After a false start, things started moving in the right direction, thanks to the advice posted and suggested. Thank you, friends. I found the supplied 1mm limewood requires very little persuasion to bend. A bit of edge bending with a simple jig and iron is helpful... Near the bulwarks there are planks that twist from near vertical at midships to almost horizontal at the stern. This was easy to do by soaking the plank, twisting it by hand and setting the twist by holding it in front of a hairdryer. Some stairstepping at the bow, but I'm hoping sanding will take care of this and I won't have to resort to heavy use of filler Port side has five planks done. I'll do one more plank on the starboard side so that there are five each, then I'll do the garboard and start working my way up from the keel.

- 18 replies
-
- 9
-
-
- cutter
- Sherbourne
- (and 1 more)
-
Maid of the Mist reacted to a post in a topic:
HM Gun Brig Adder by albie-forgotten - Vanguard Models - 1/64
-
Worry not, friend. Wood filler and sanding covers all manner of sins.
-
Maid of the Mist reacted to a post in a topic:
HMS Beagle by vvvjames - OcCre - 1:60 - Second Build
-
Nice neat planking. Wish mine had looked as good as yours does at this stage. I ended up having to use a ton of filler and about six hours of sanding to reshape the bow after my planking nightmare.
-
I did a bit of normal bending near the bow, but no lateral bending. I've detached both planks now. I really want to get this right. I did want to buy the NRG planking project in the hope it would teach me proper technique but unfortunately they don't seem to ship to the UK. Are there any really detailed youtube videos to recommend? It's very hard to look at pictures or read descriptions to understand what to do. I get what the finished result is meant to look like, I've seen several beautifully done models on here (Ronald-V's Sphinx is a sight to behold) but I just don't know how to get there.
- 18 replies
-
- 1
-
-
- cutter
- Sherbourne
- (and 1 more)
-
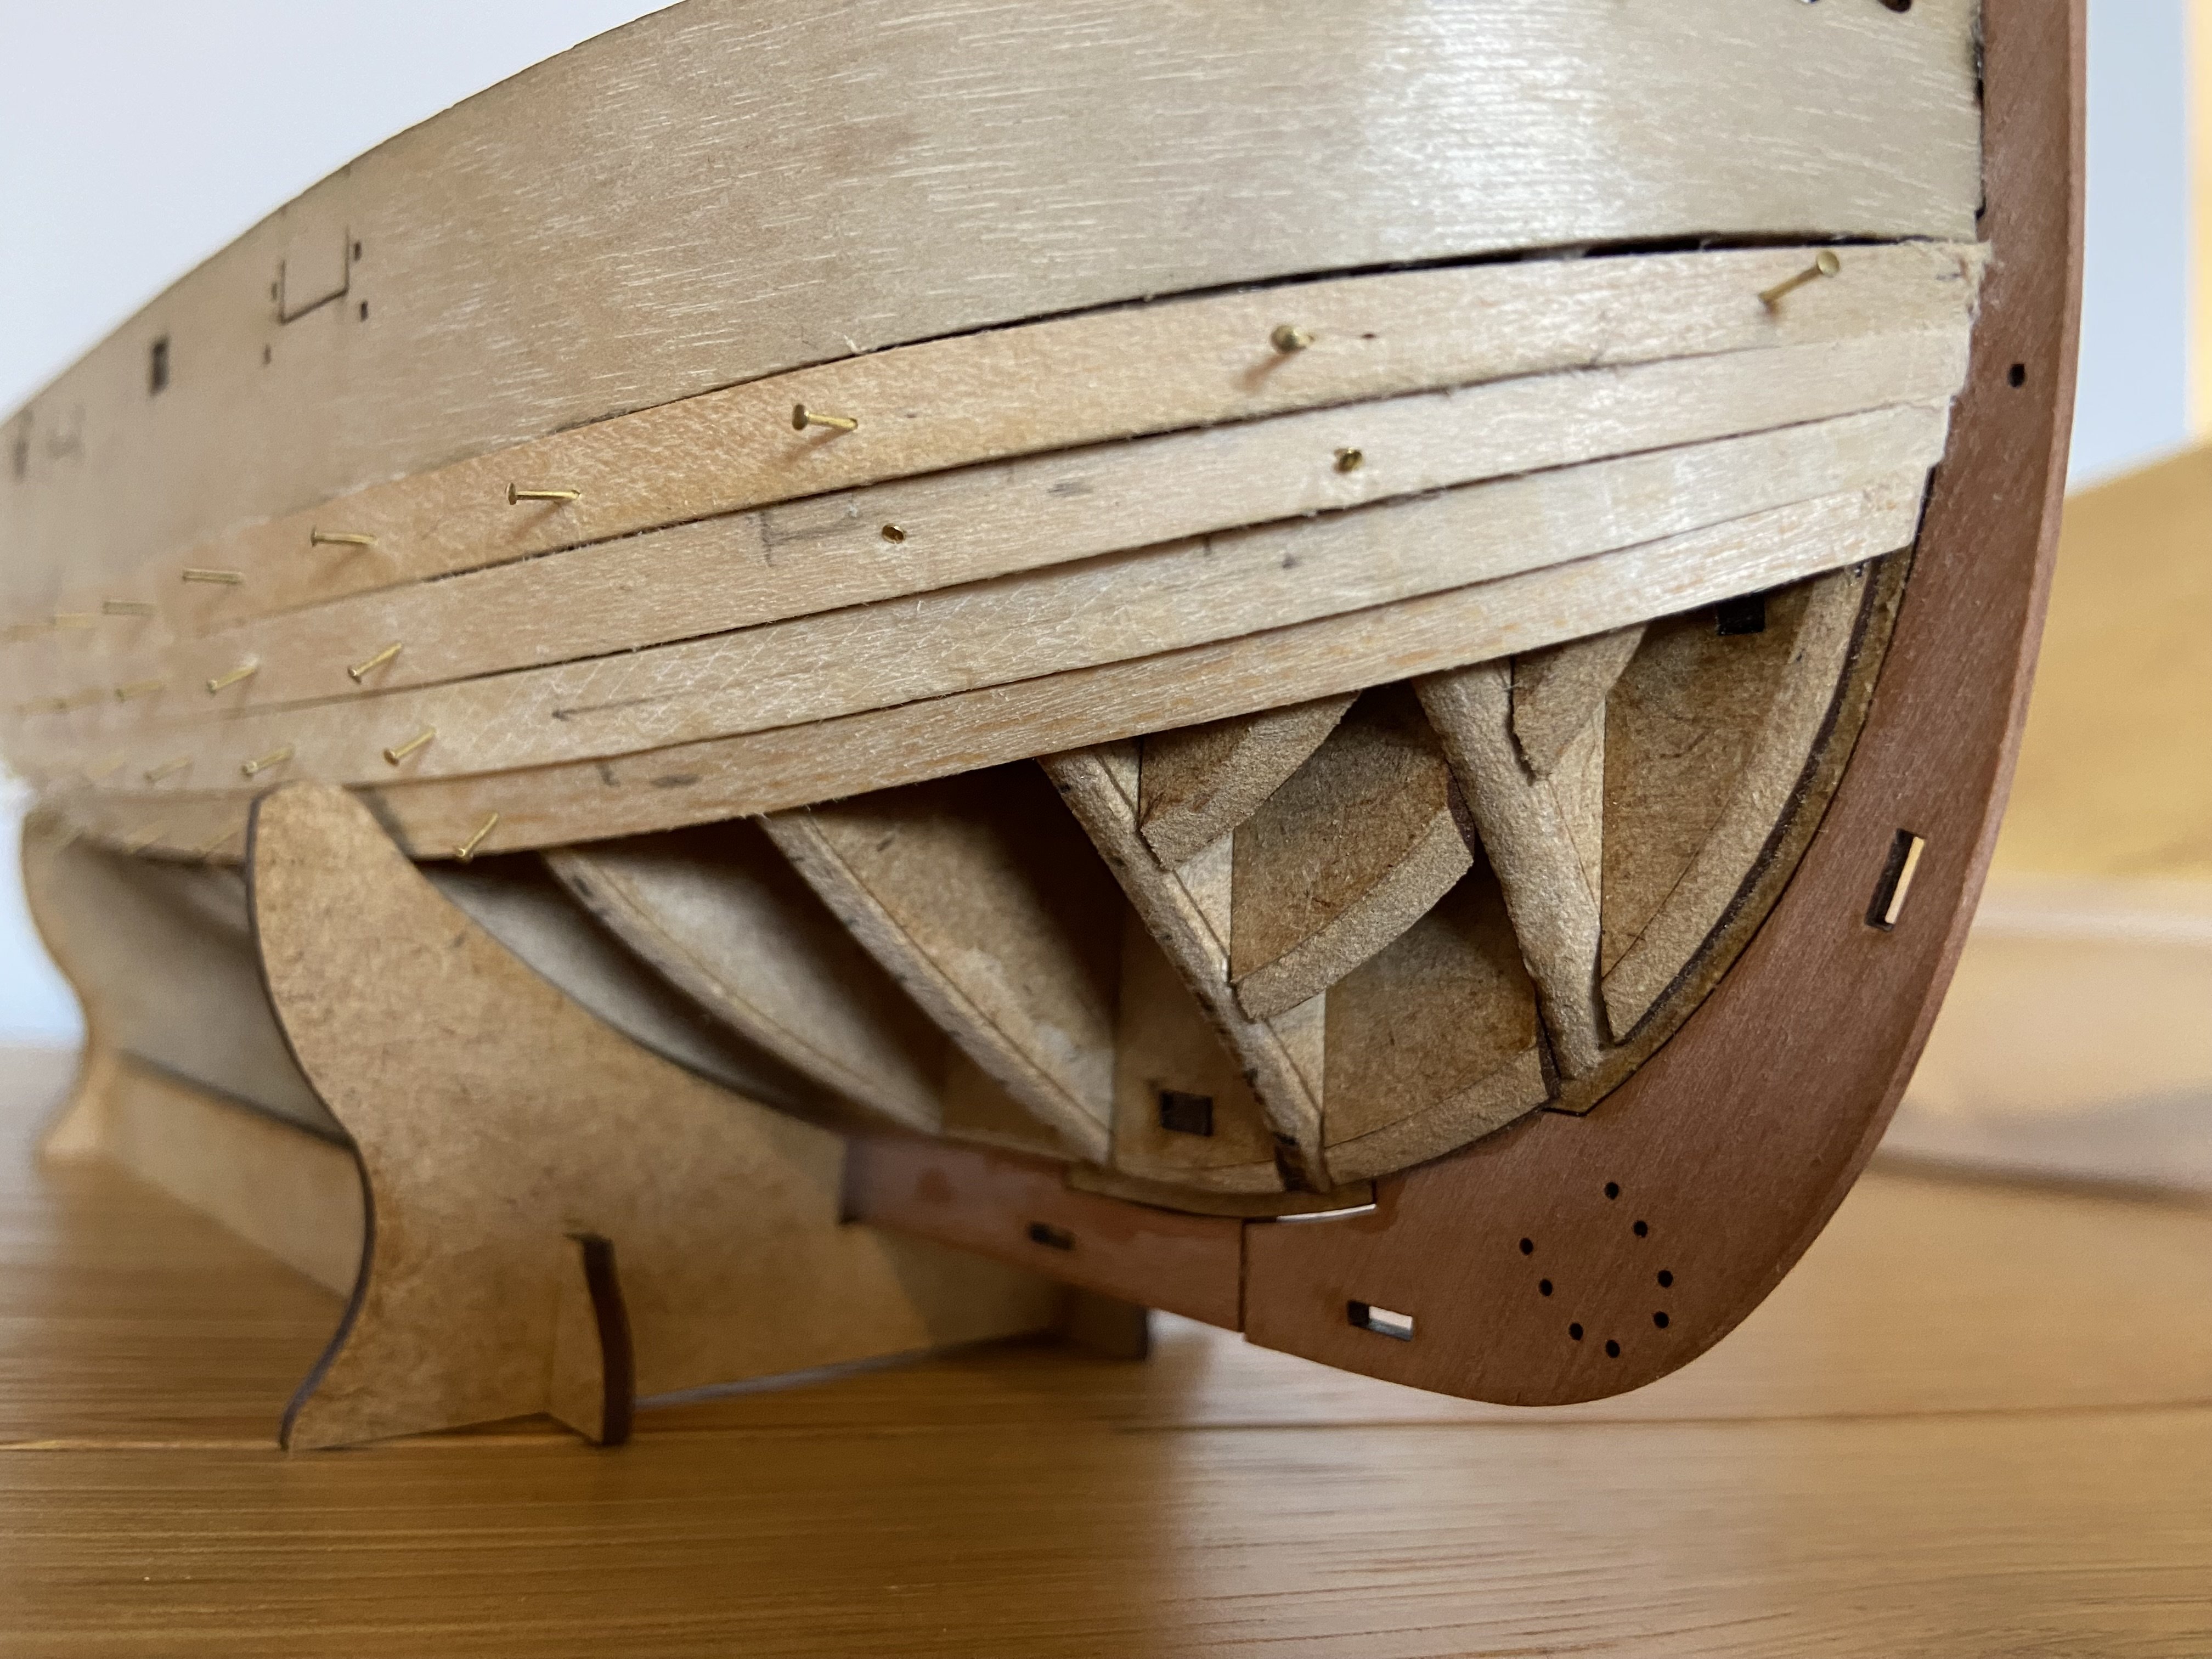
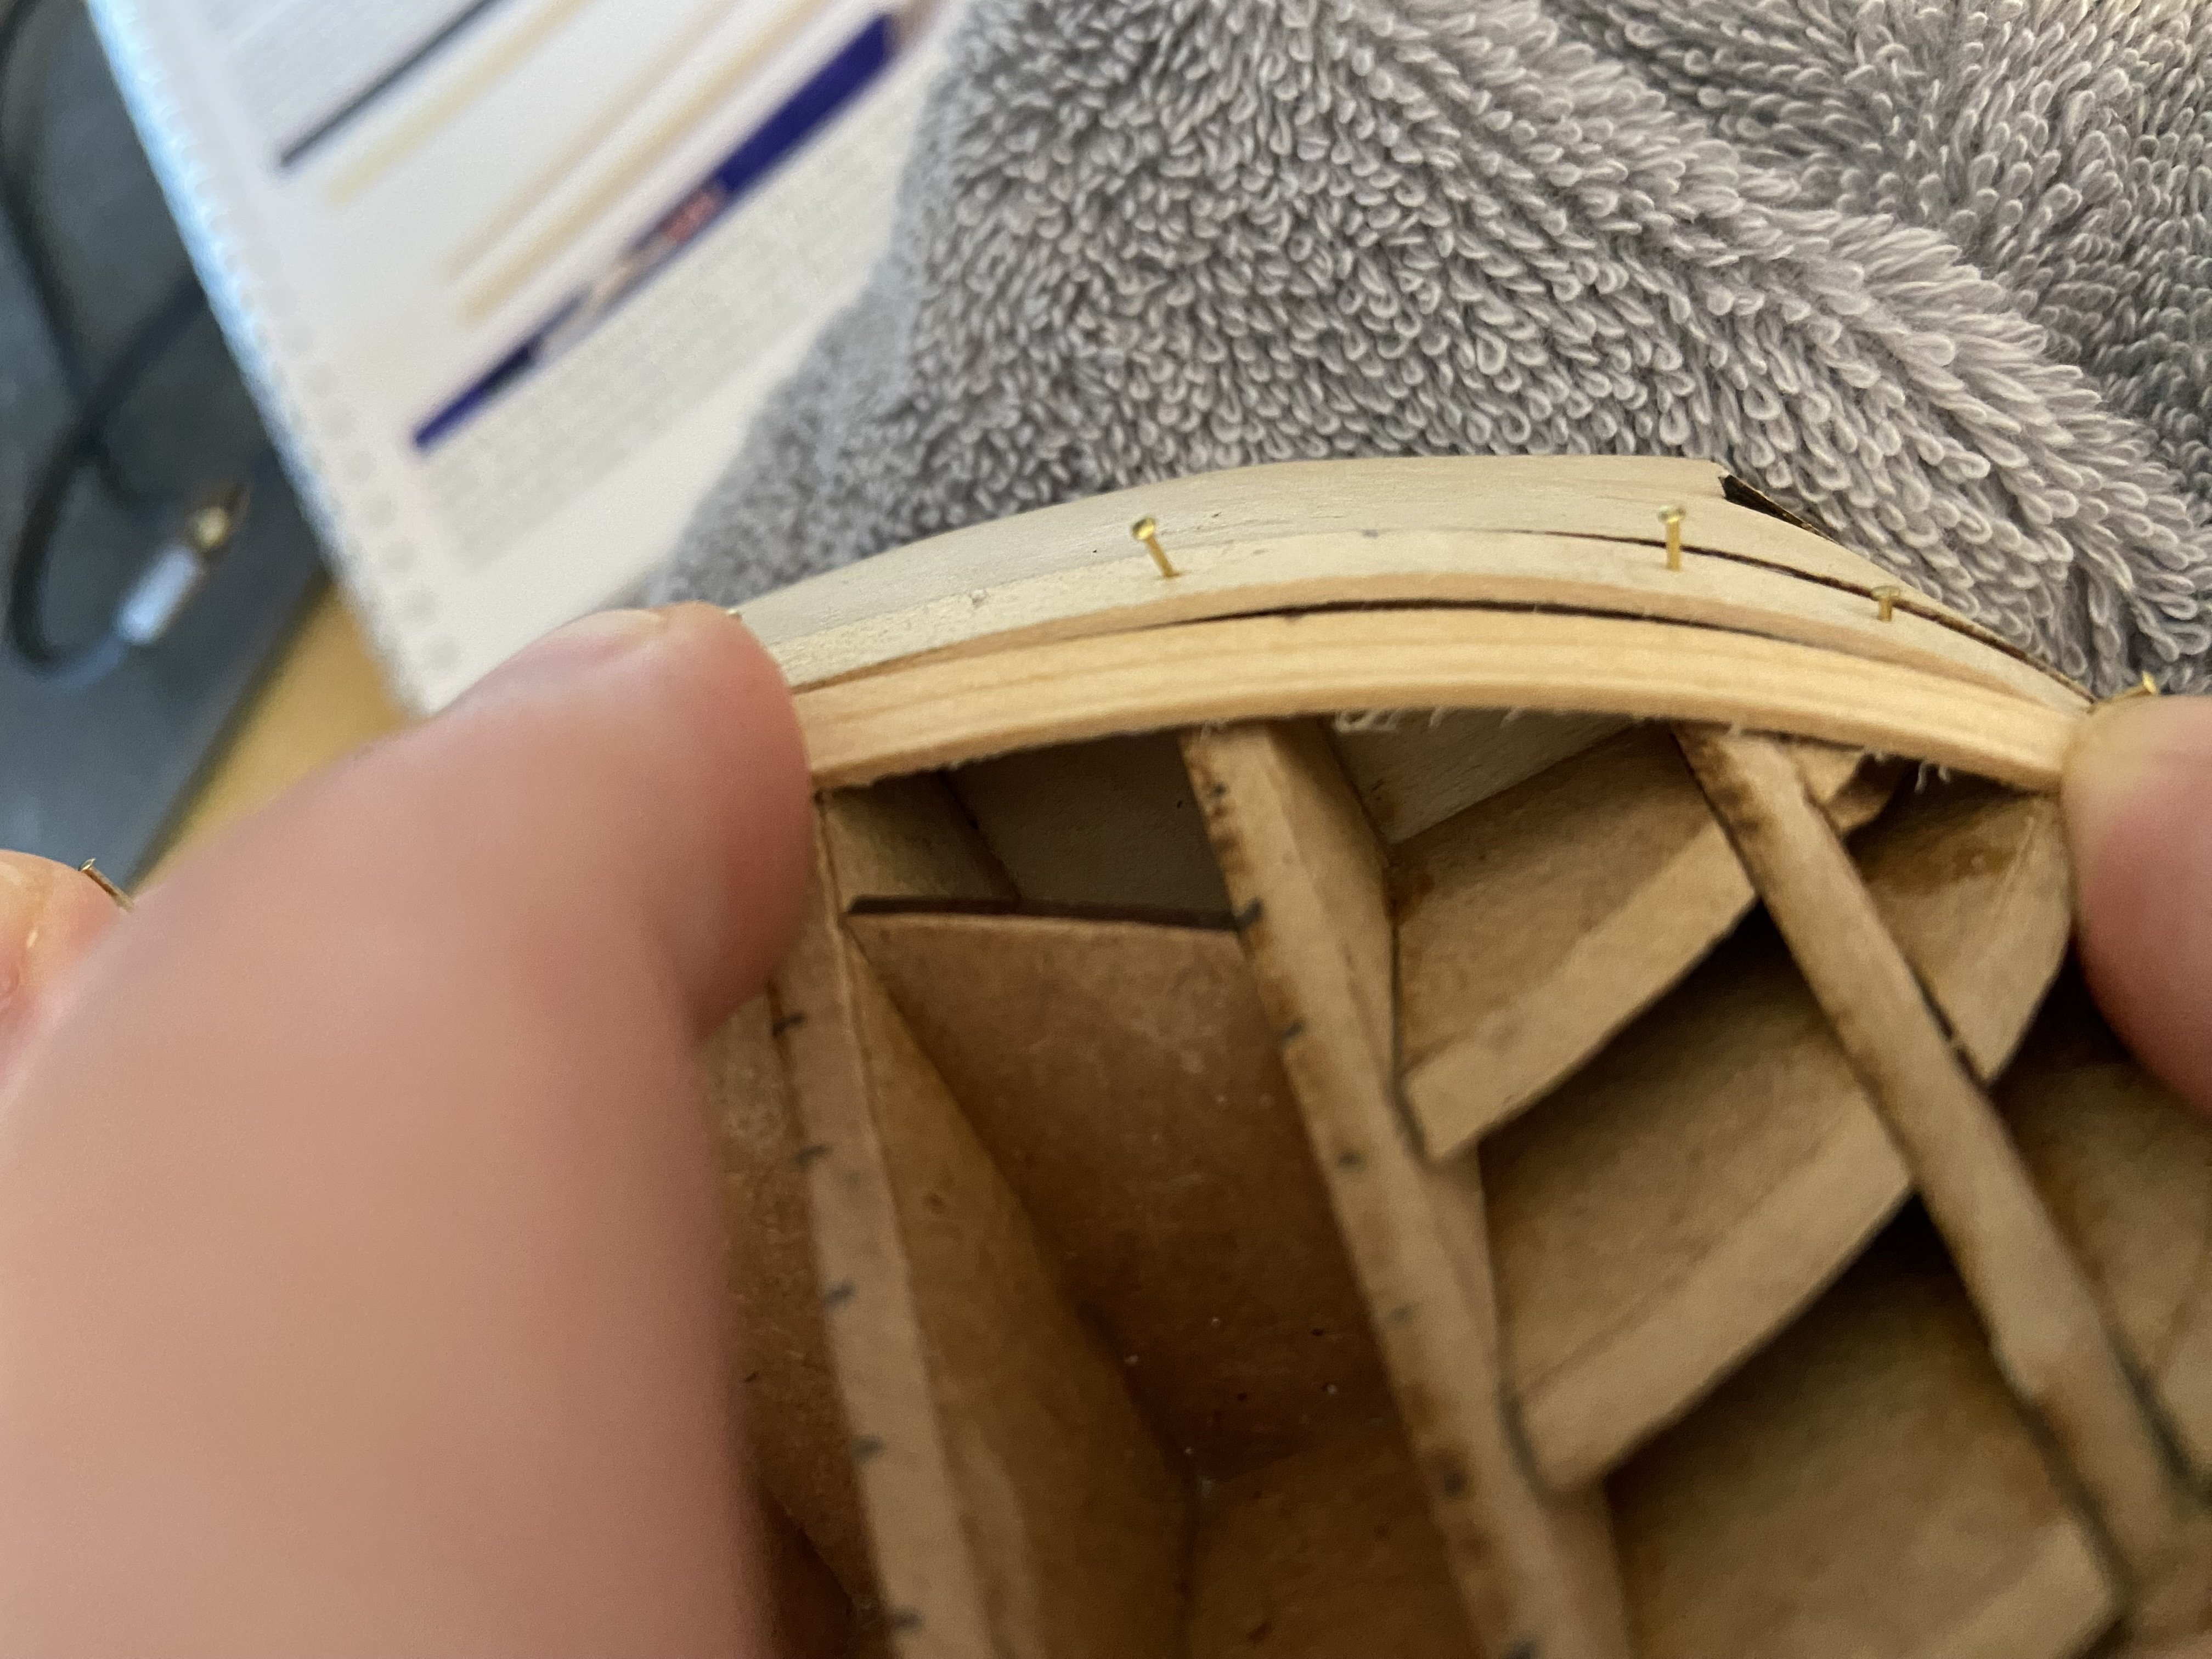
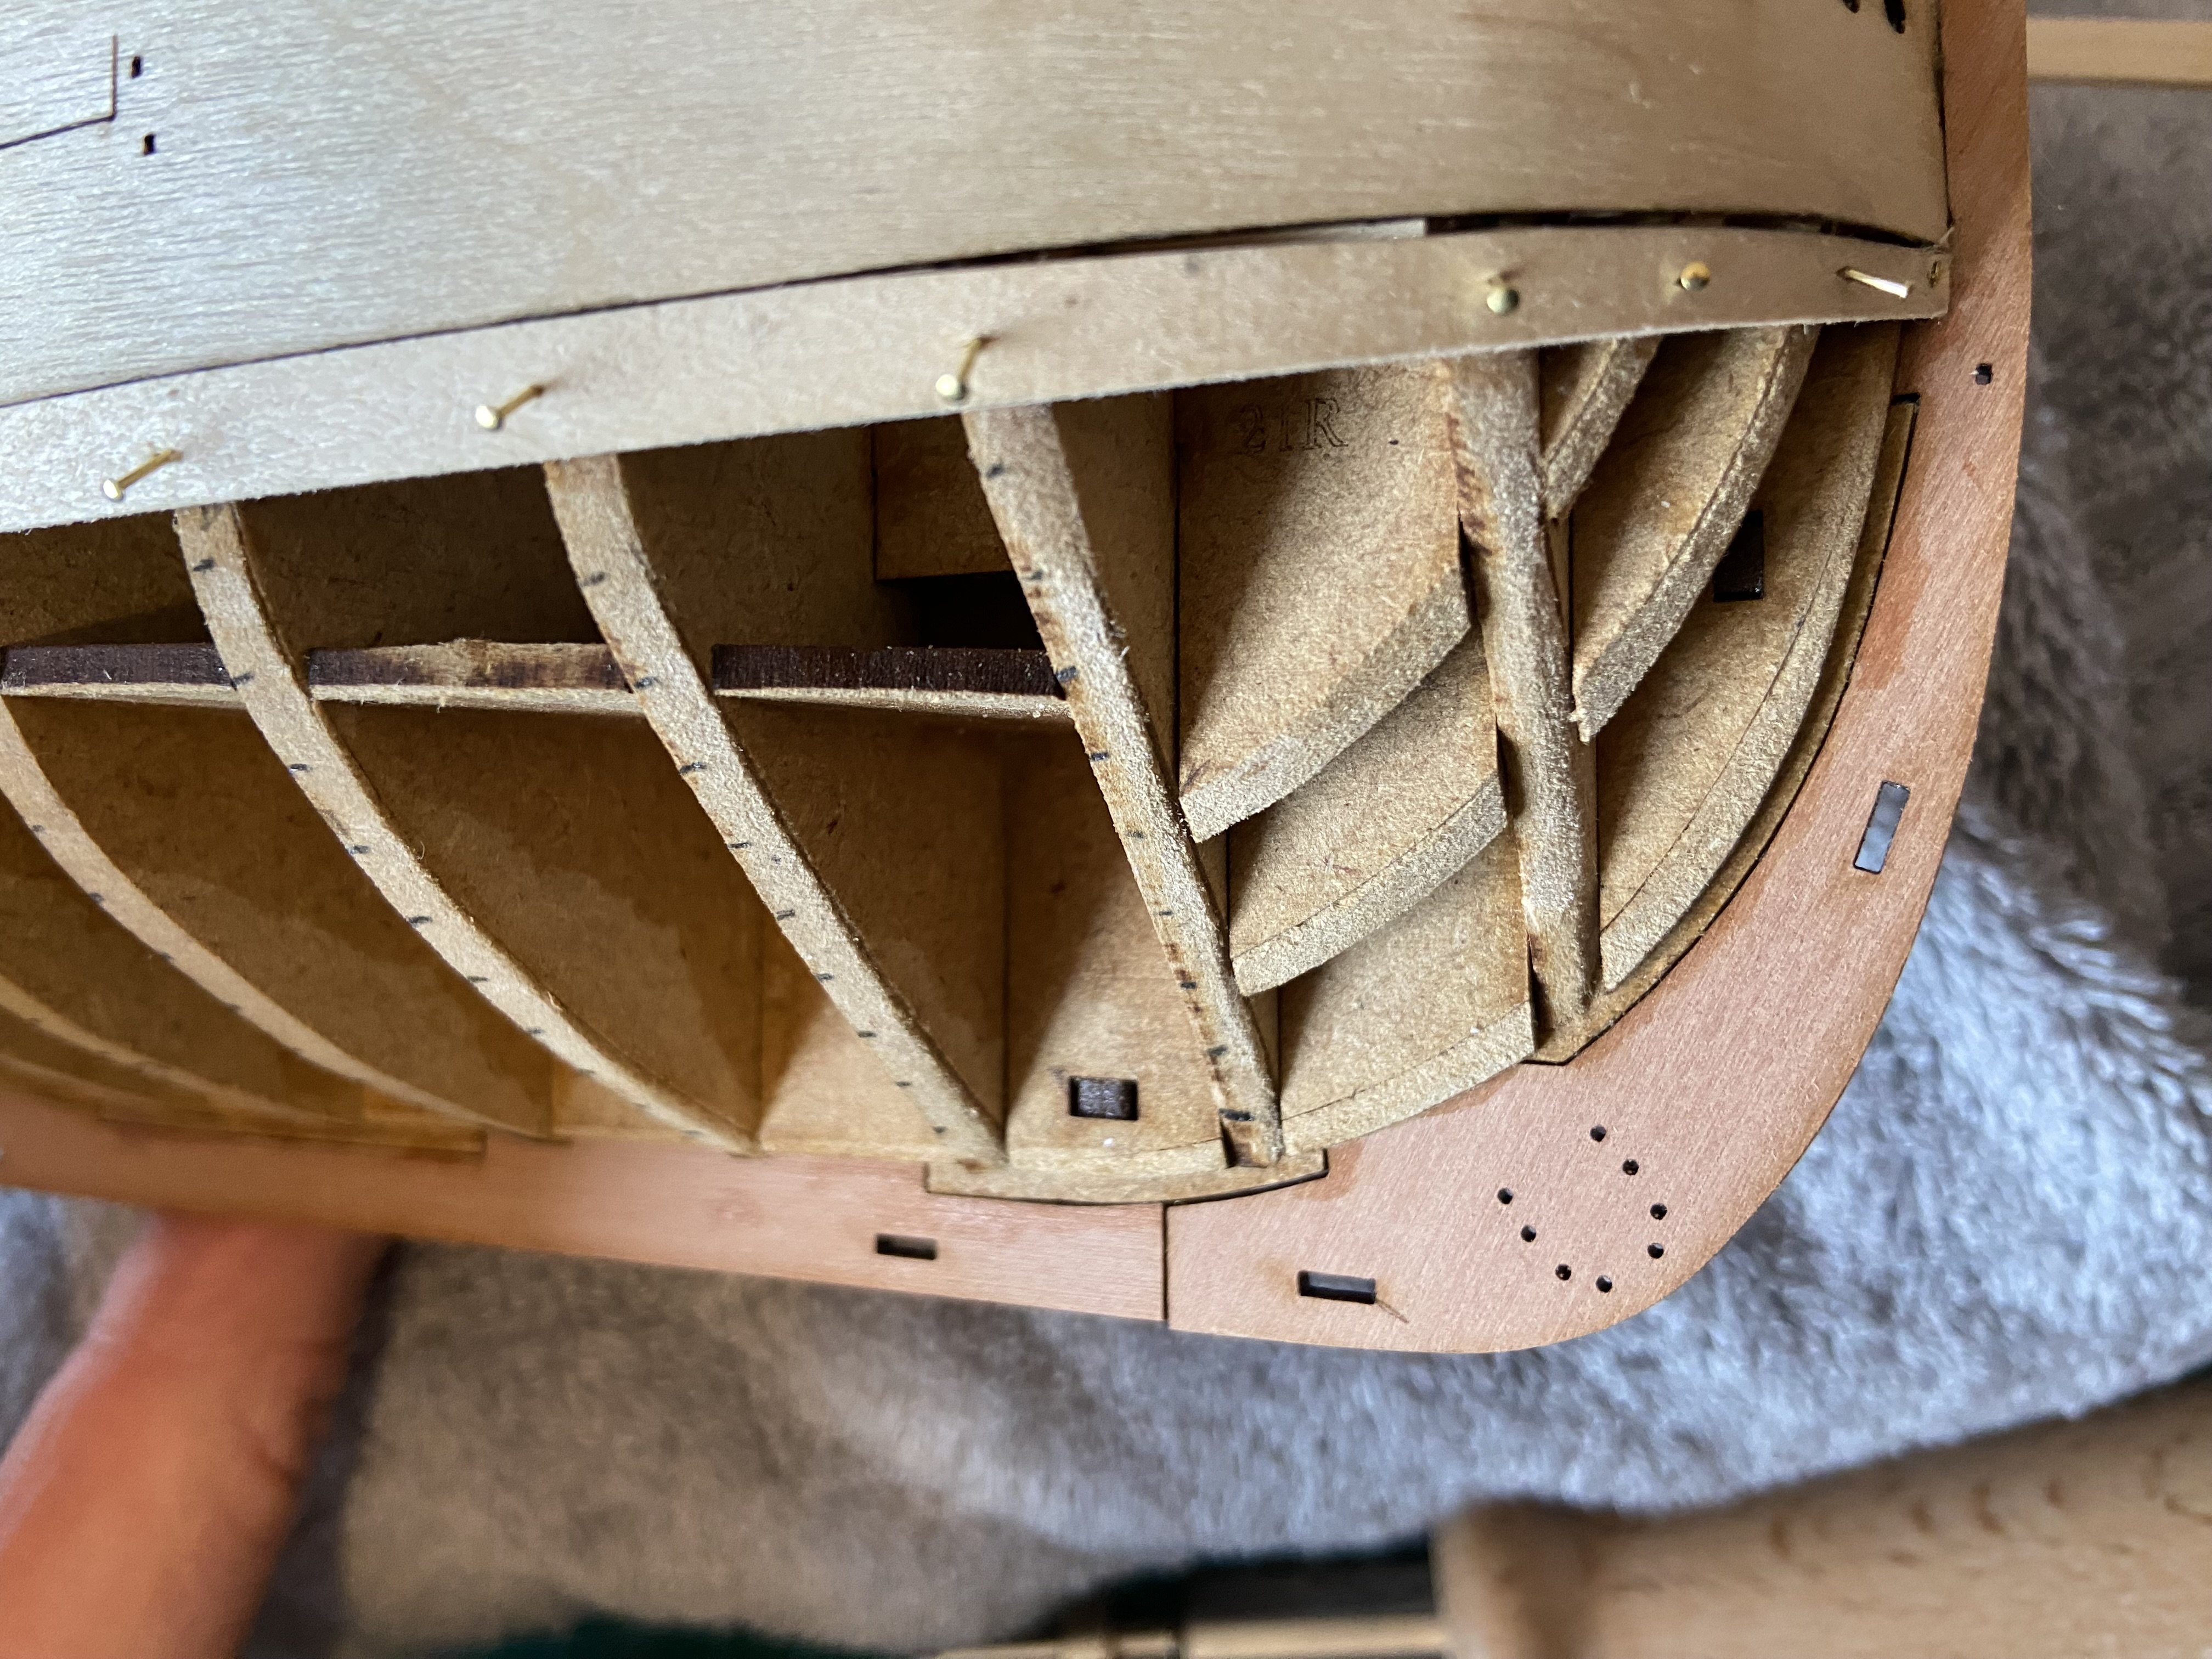
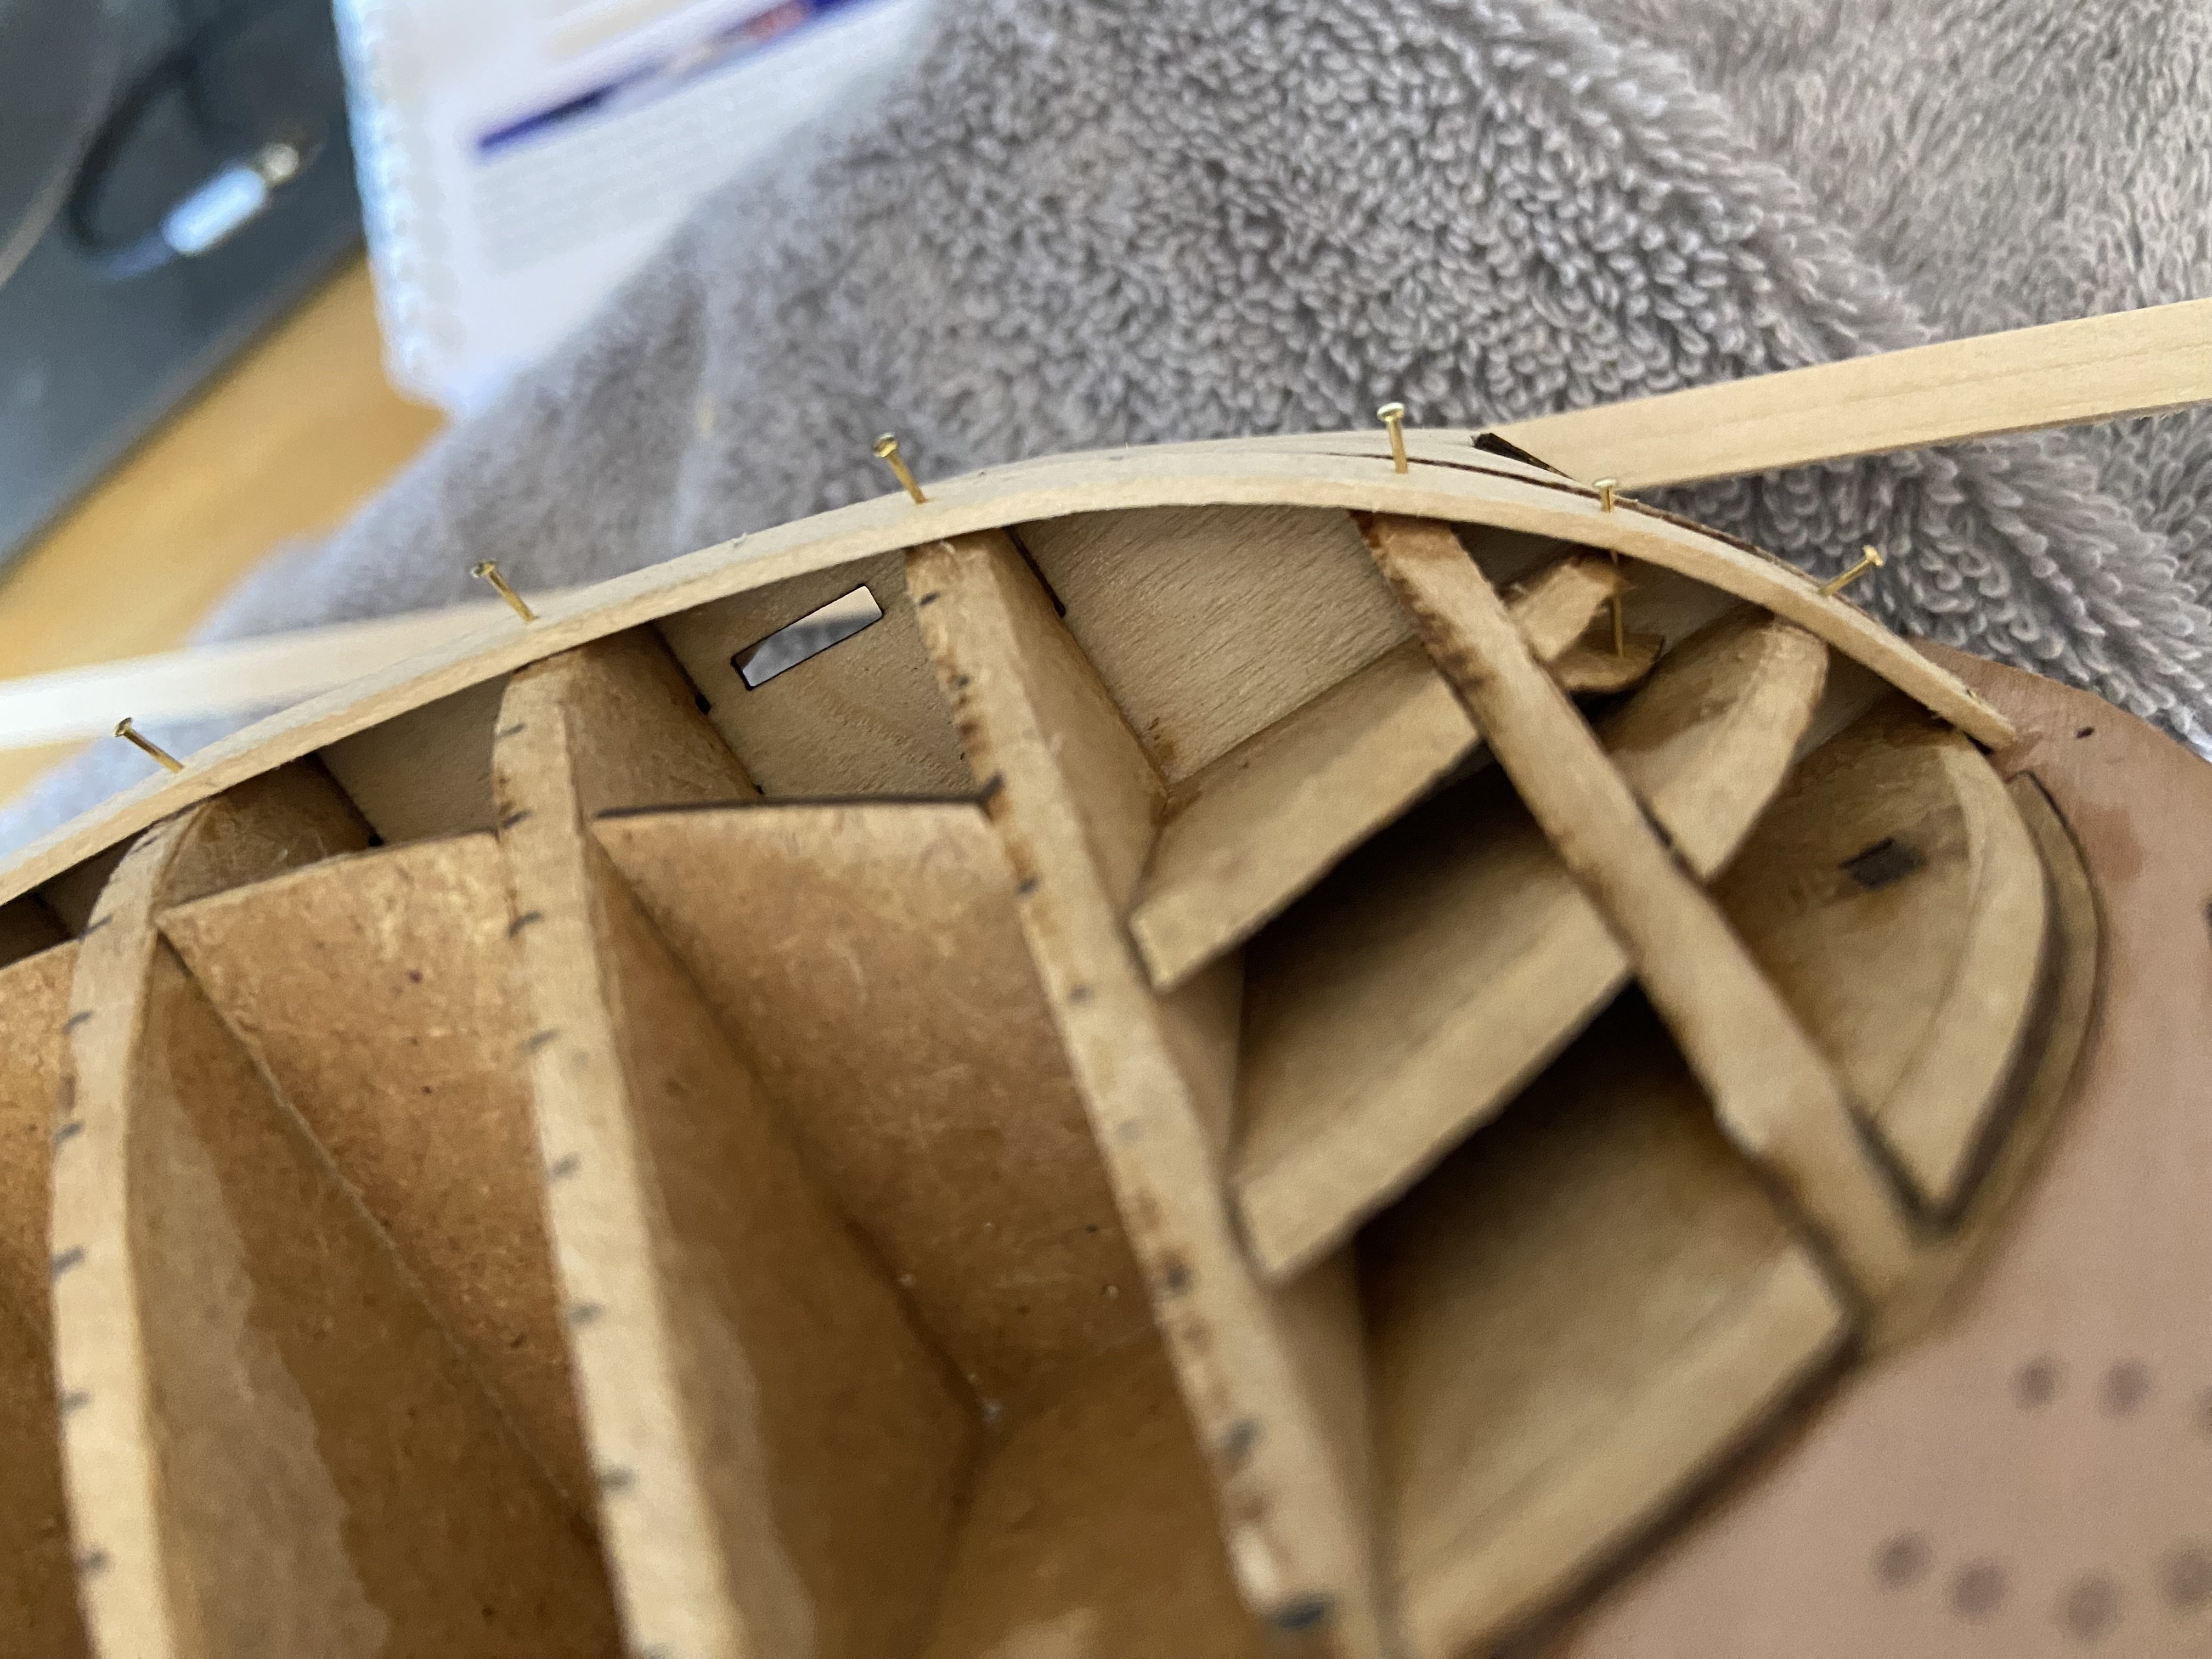
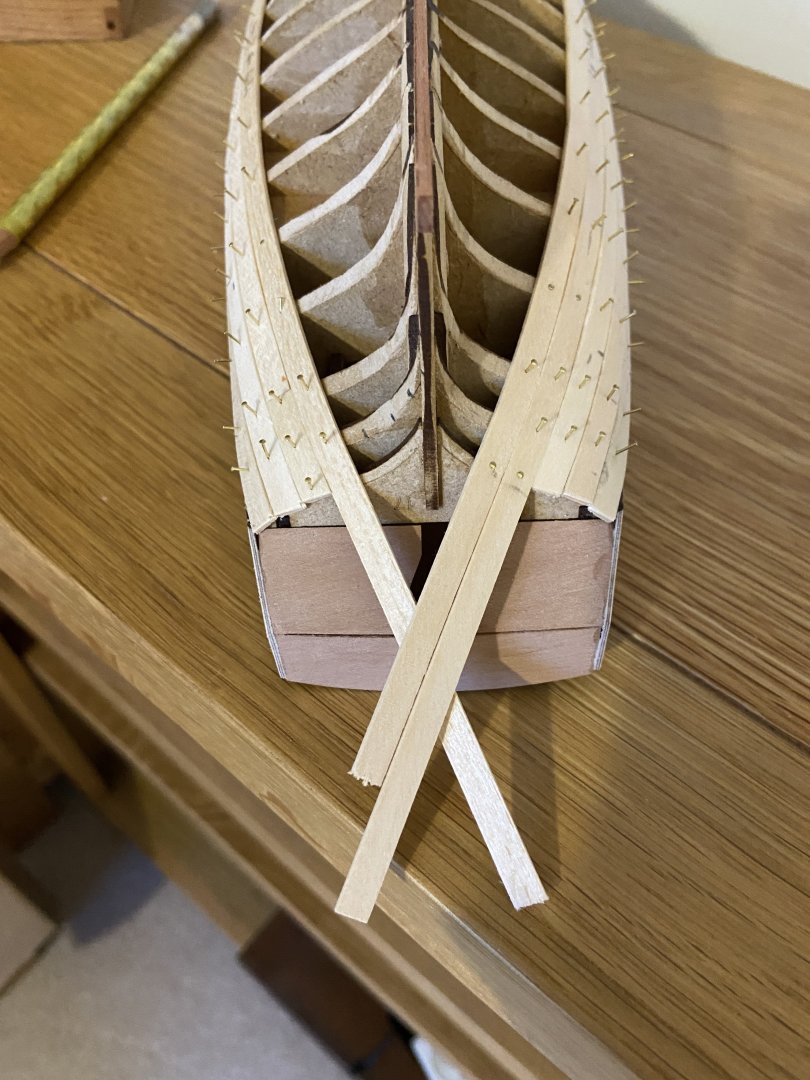
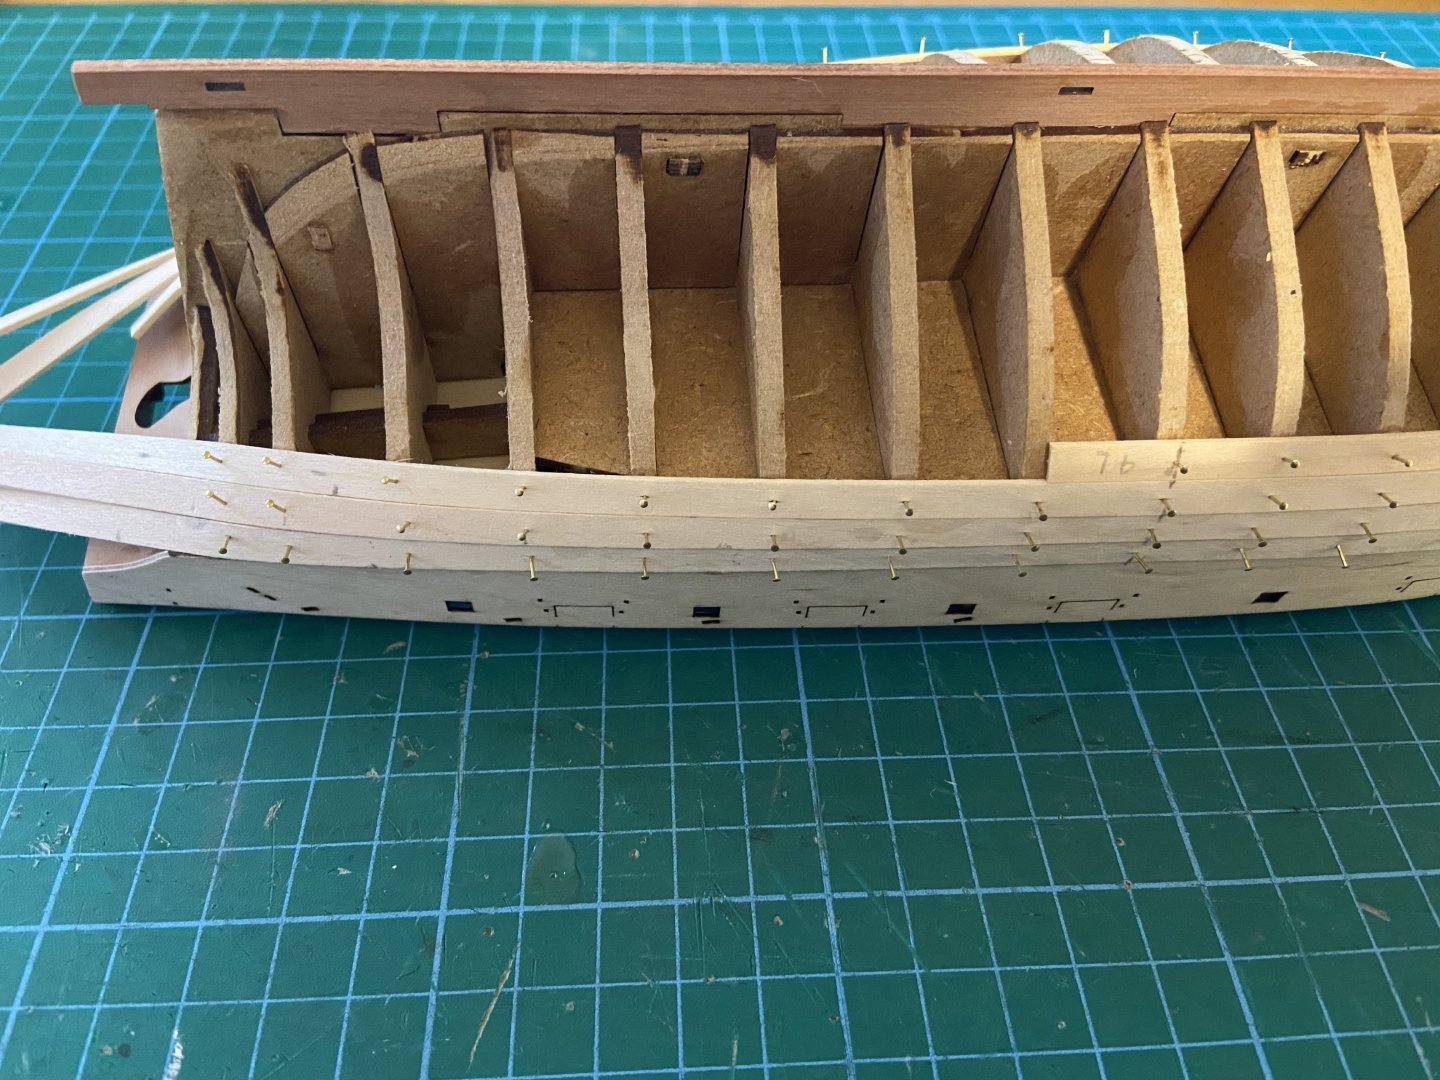
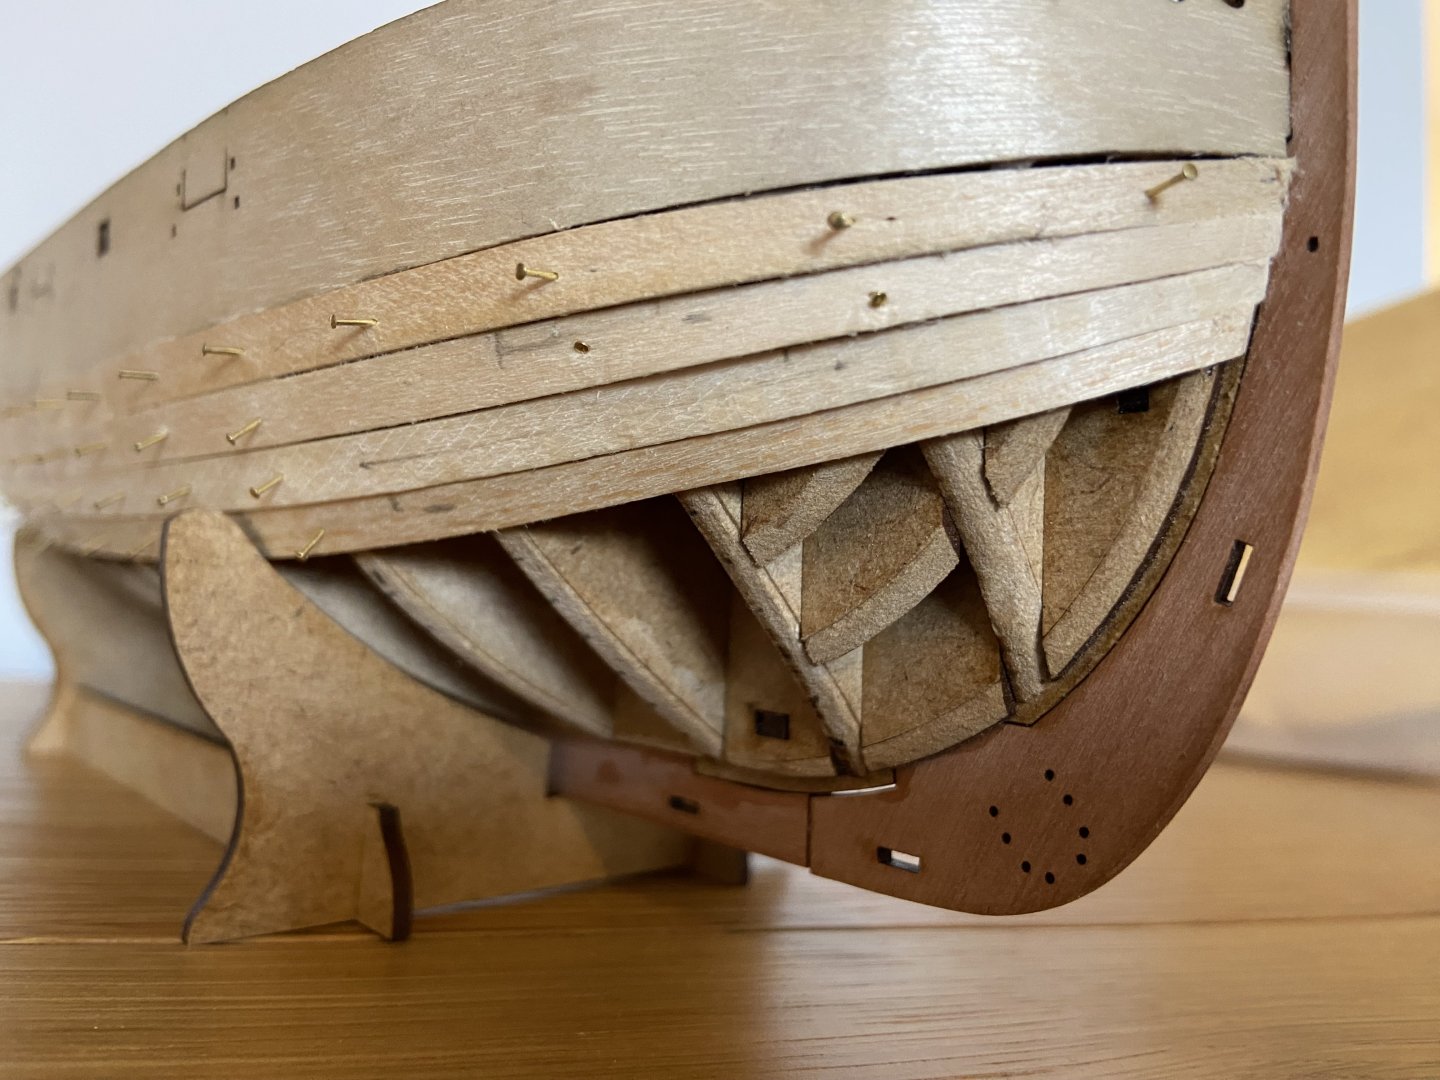
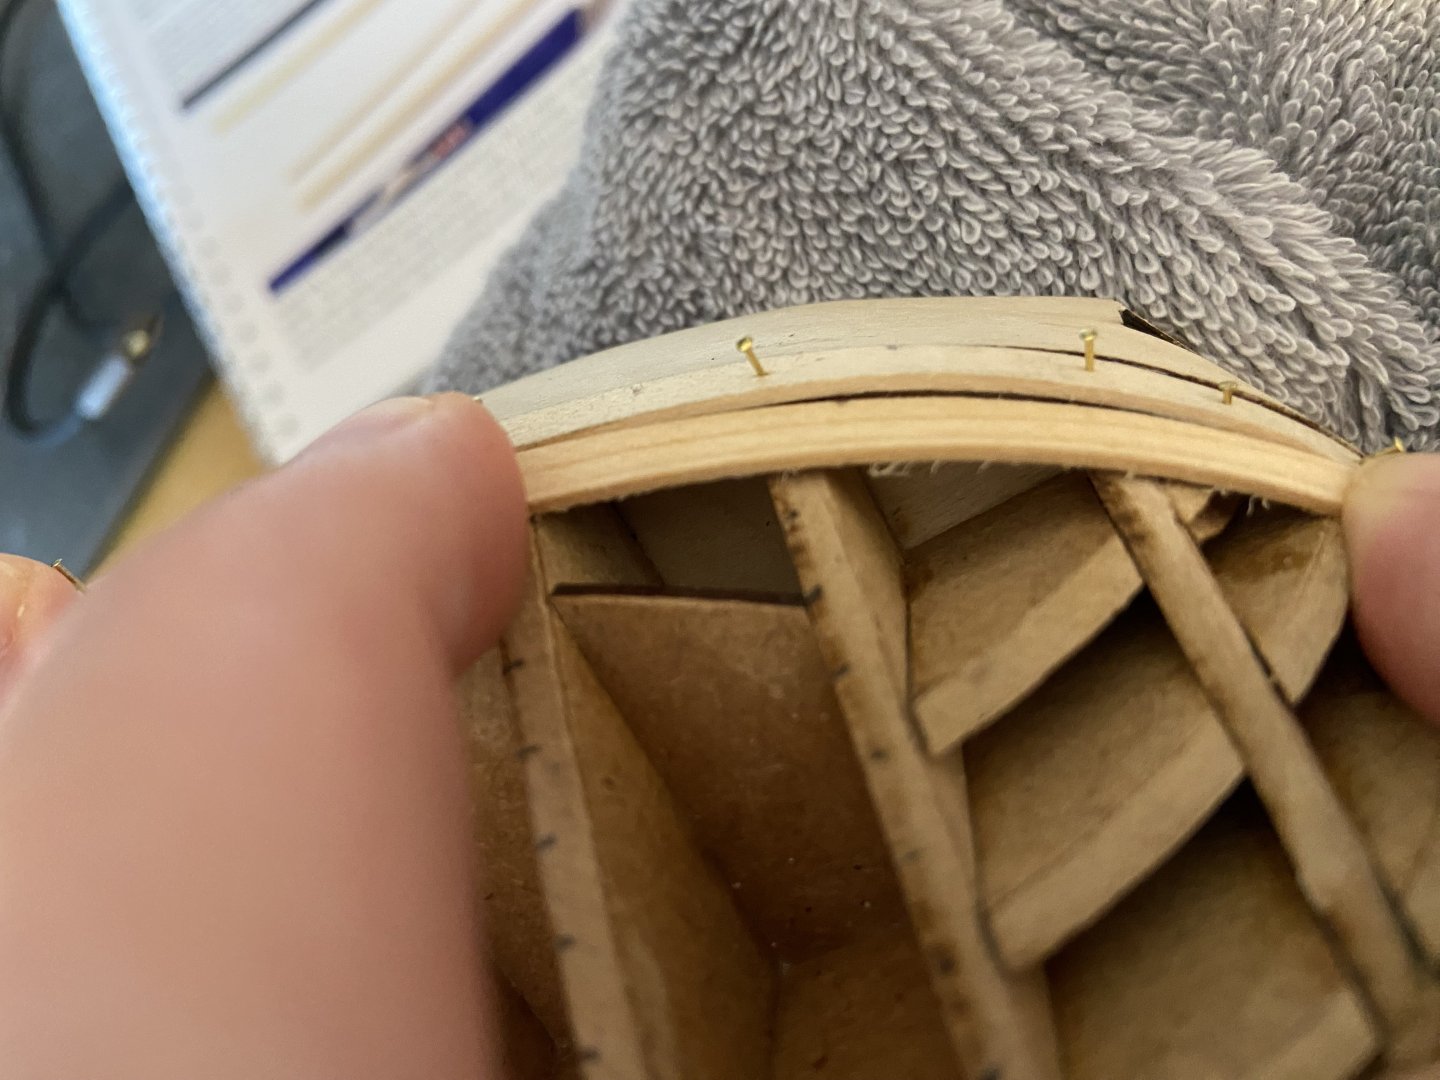
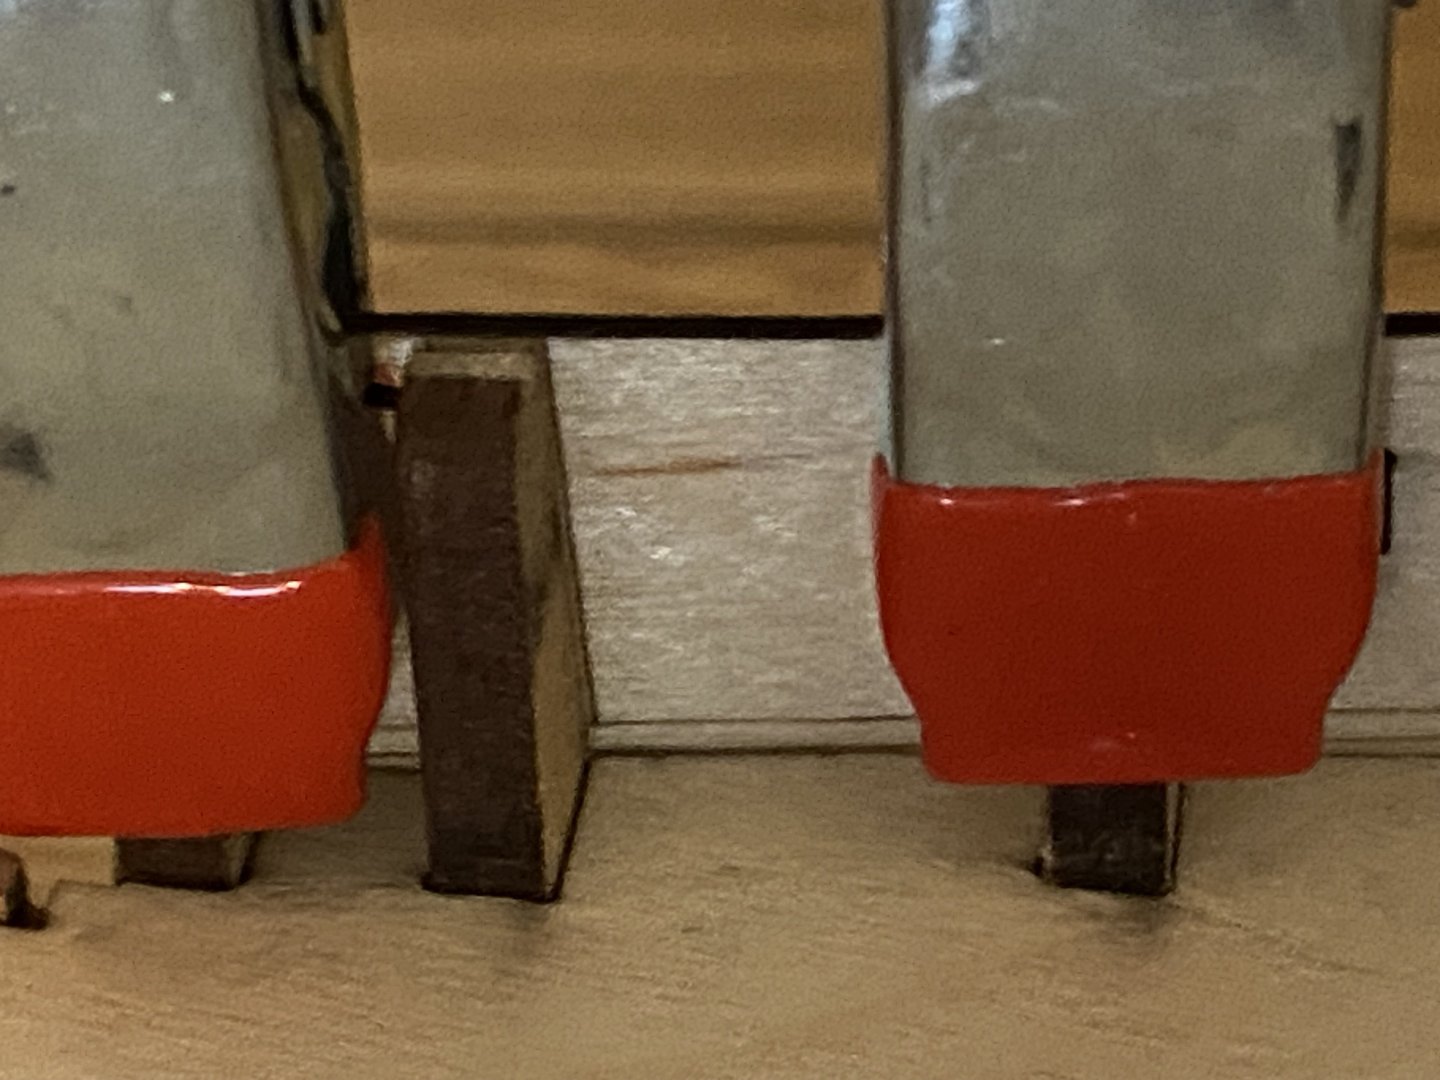
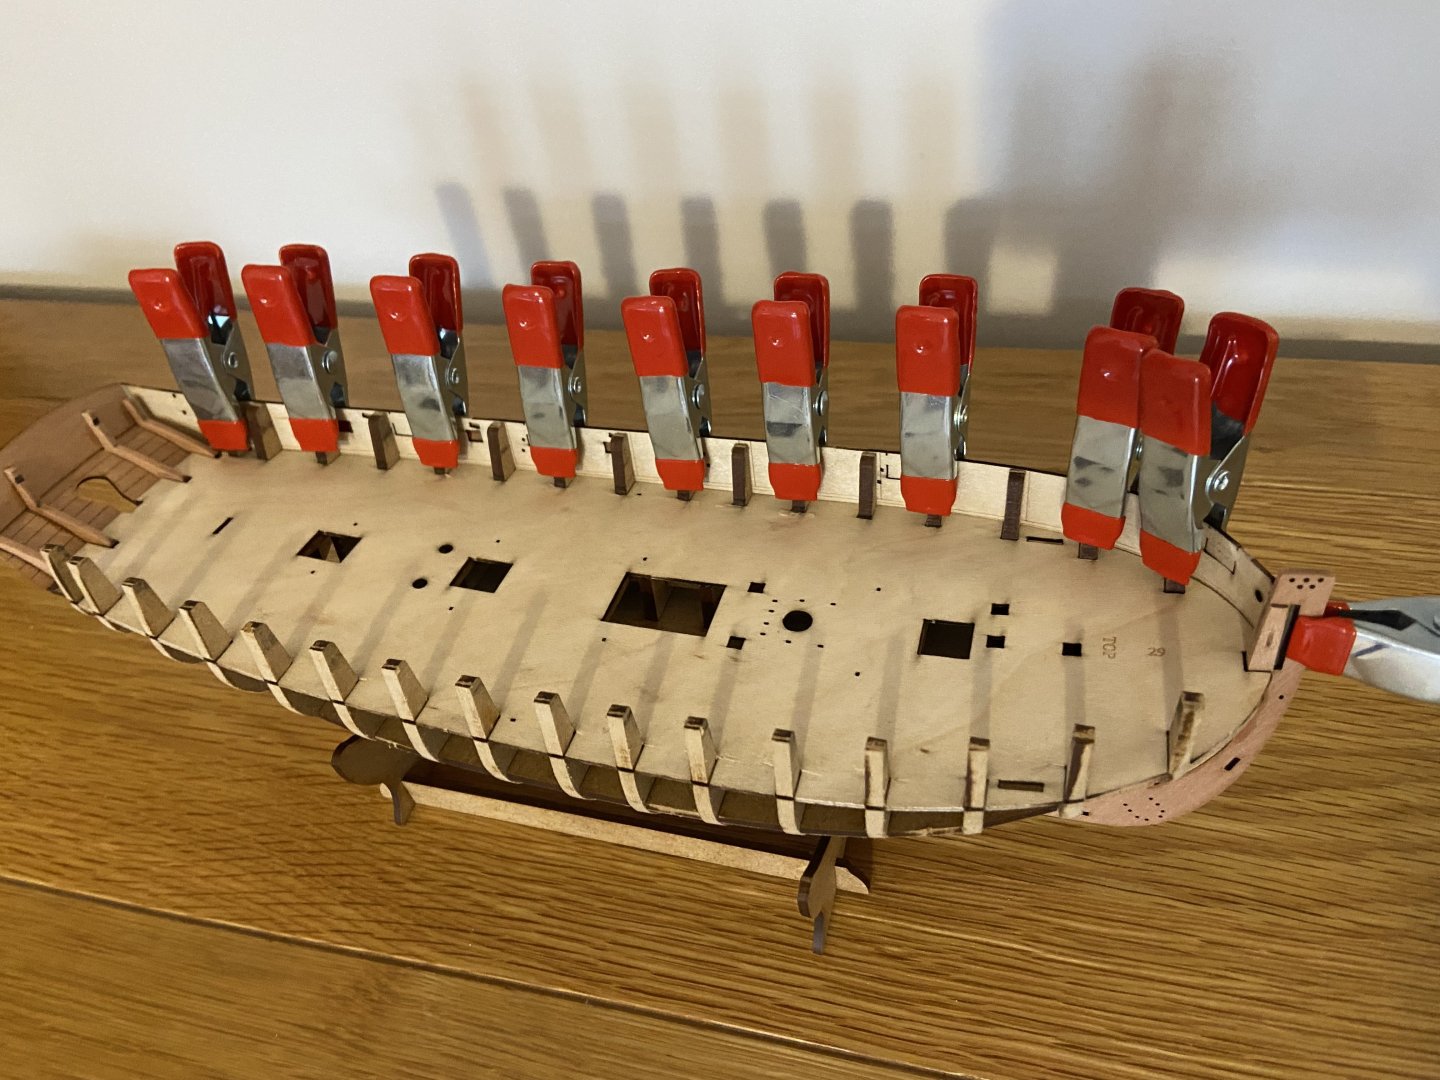
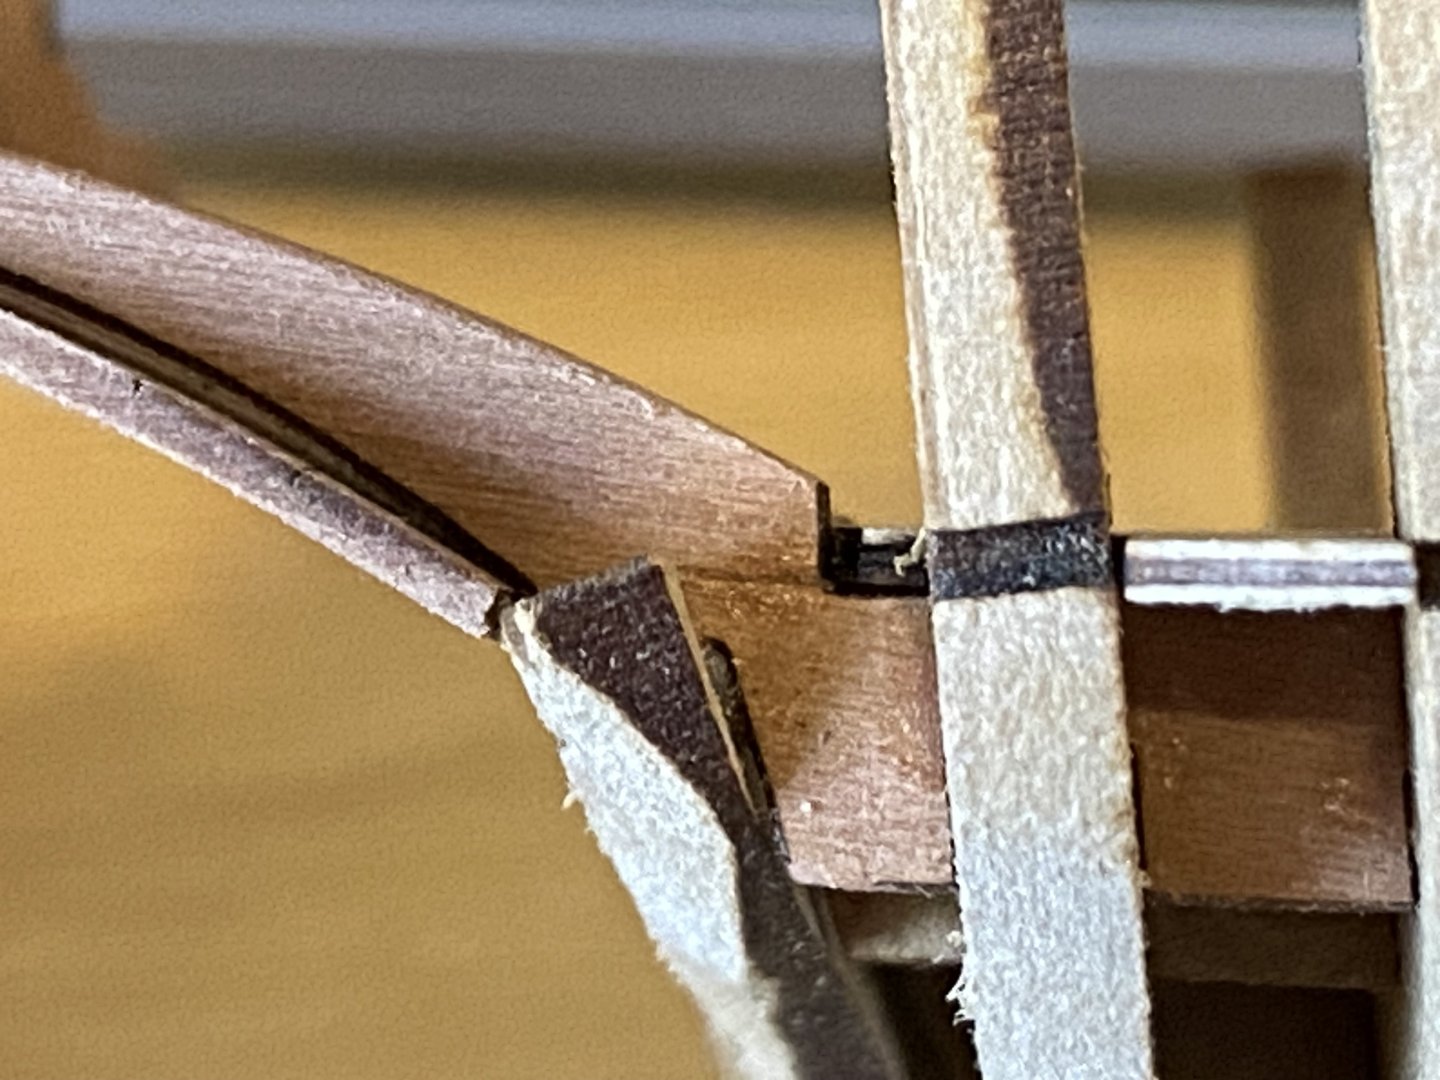
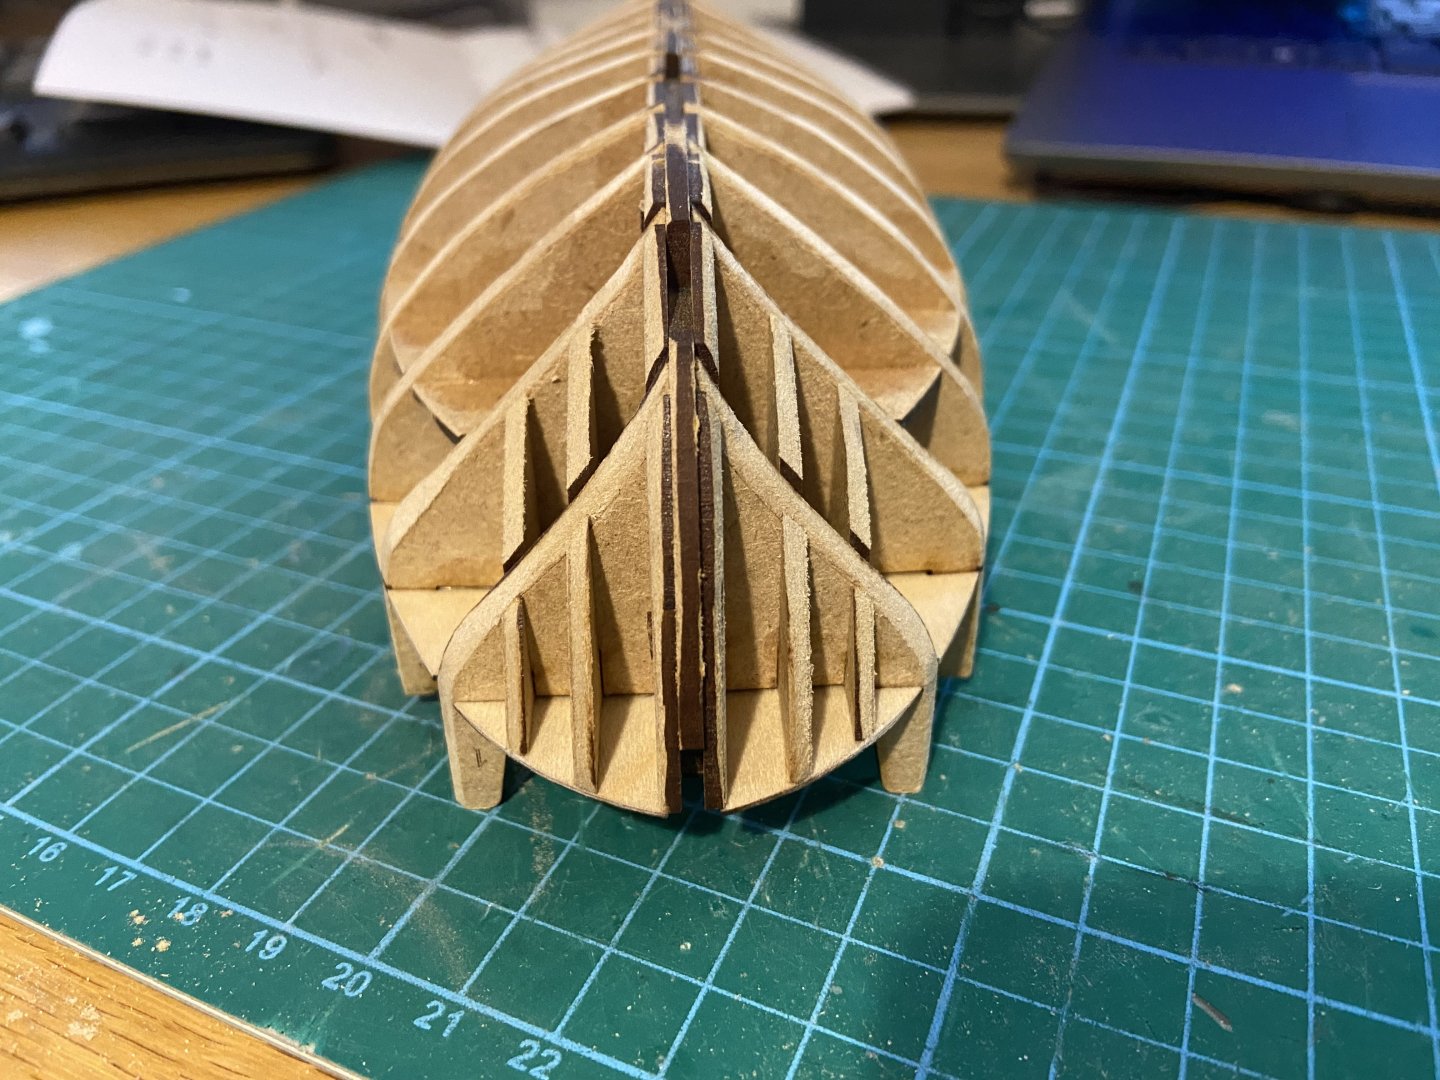
Planking: I really need help here please. I can tell I'm starting to run into the same issue I had when planking my Beagle. Basically as soon as the bow section turns inward, I end up with a step between planks. Here it is with the first plank. A bit of a gap with the bulwark, but I don't mind that. The underneath view of that first plank: Now, when I start lining up the second plank, there is this big step between the first and second: What have I done wrong and how can I get this right? It's maddening. This in my third build and I always seem to come unstuck on the first layer of planking.


- 18 replies
-
- 1
-
-
- cutter
- Sherbourne
- (and 1 more)
-
Looks very good. Polaris was my first kit and I didn't get results as good as you've managed.
-
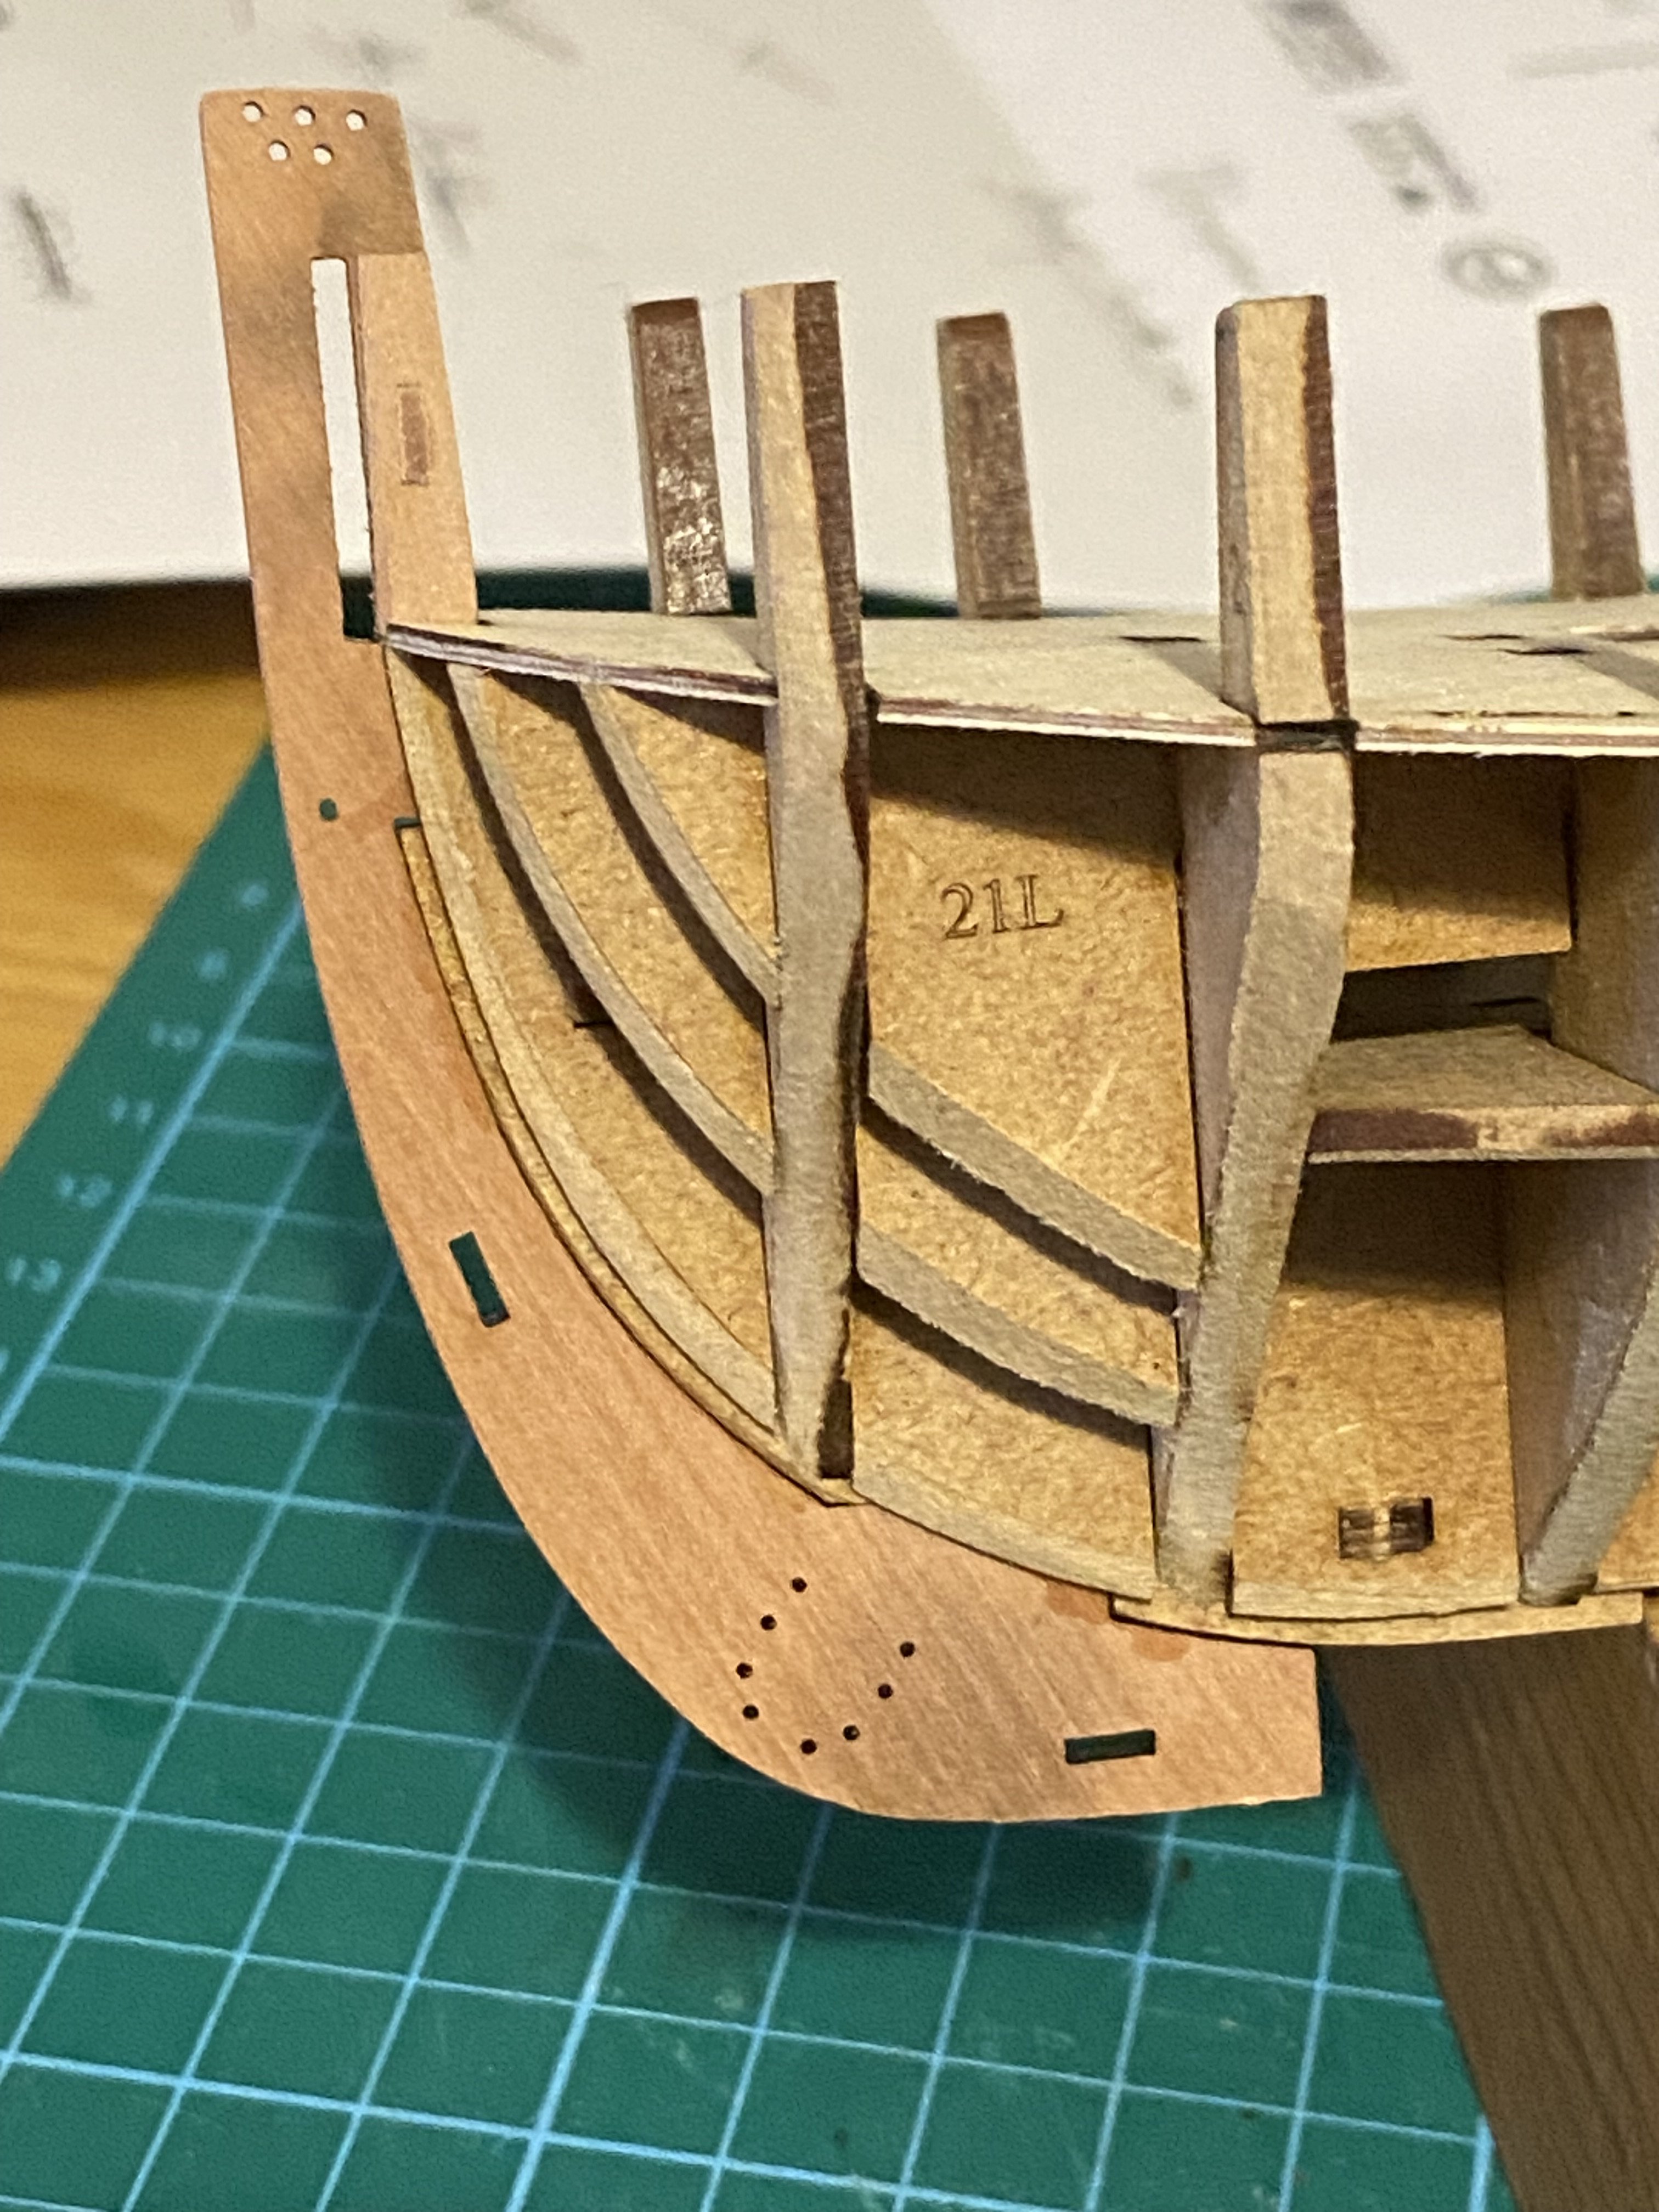
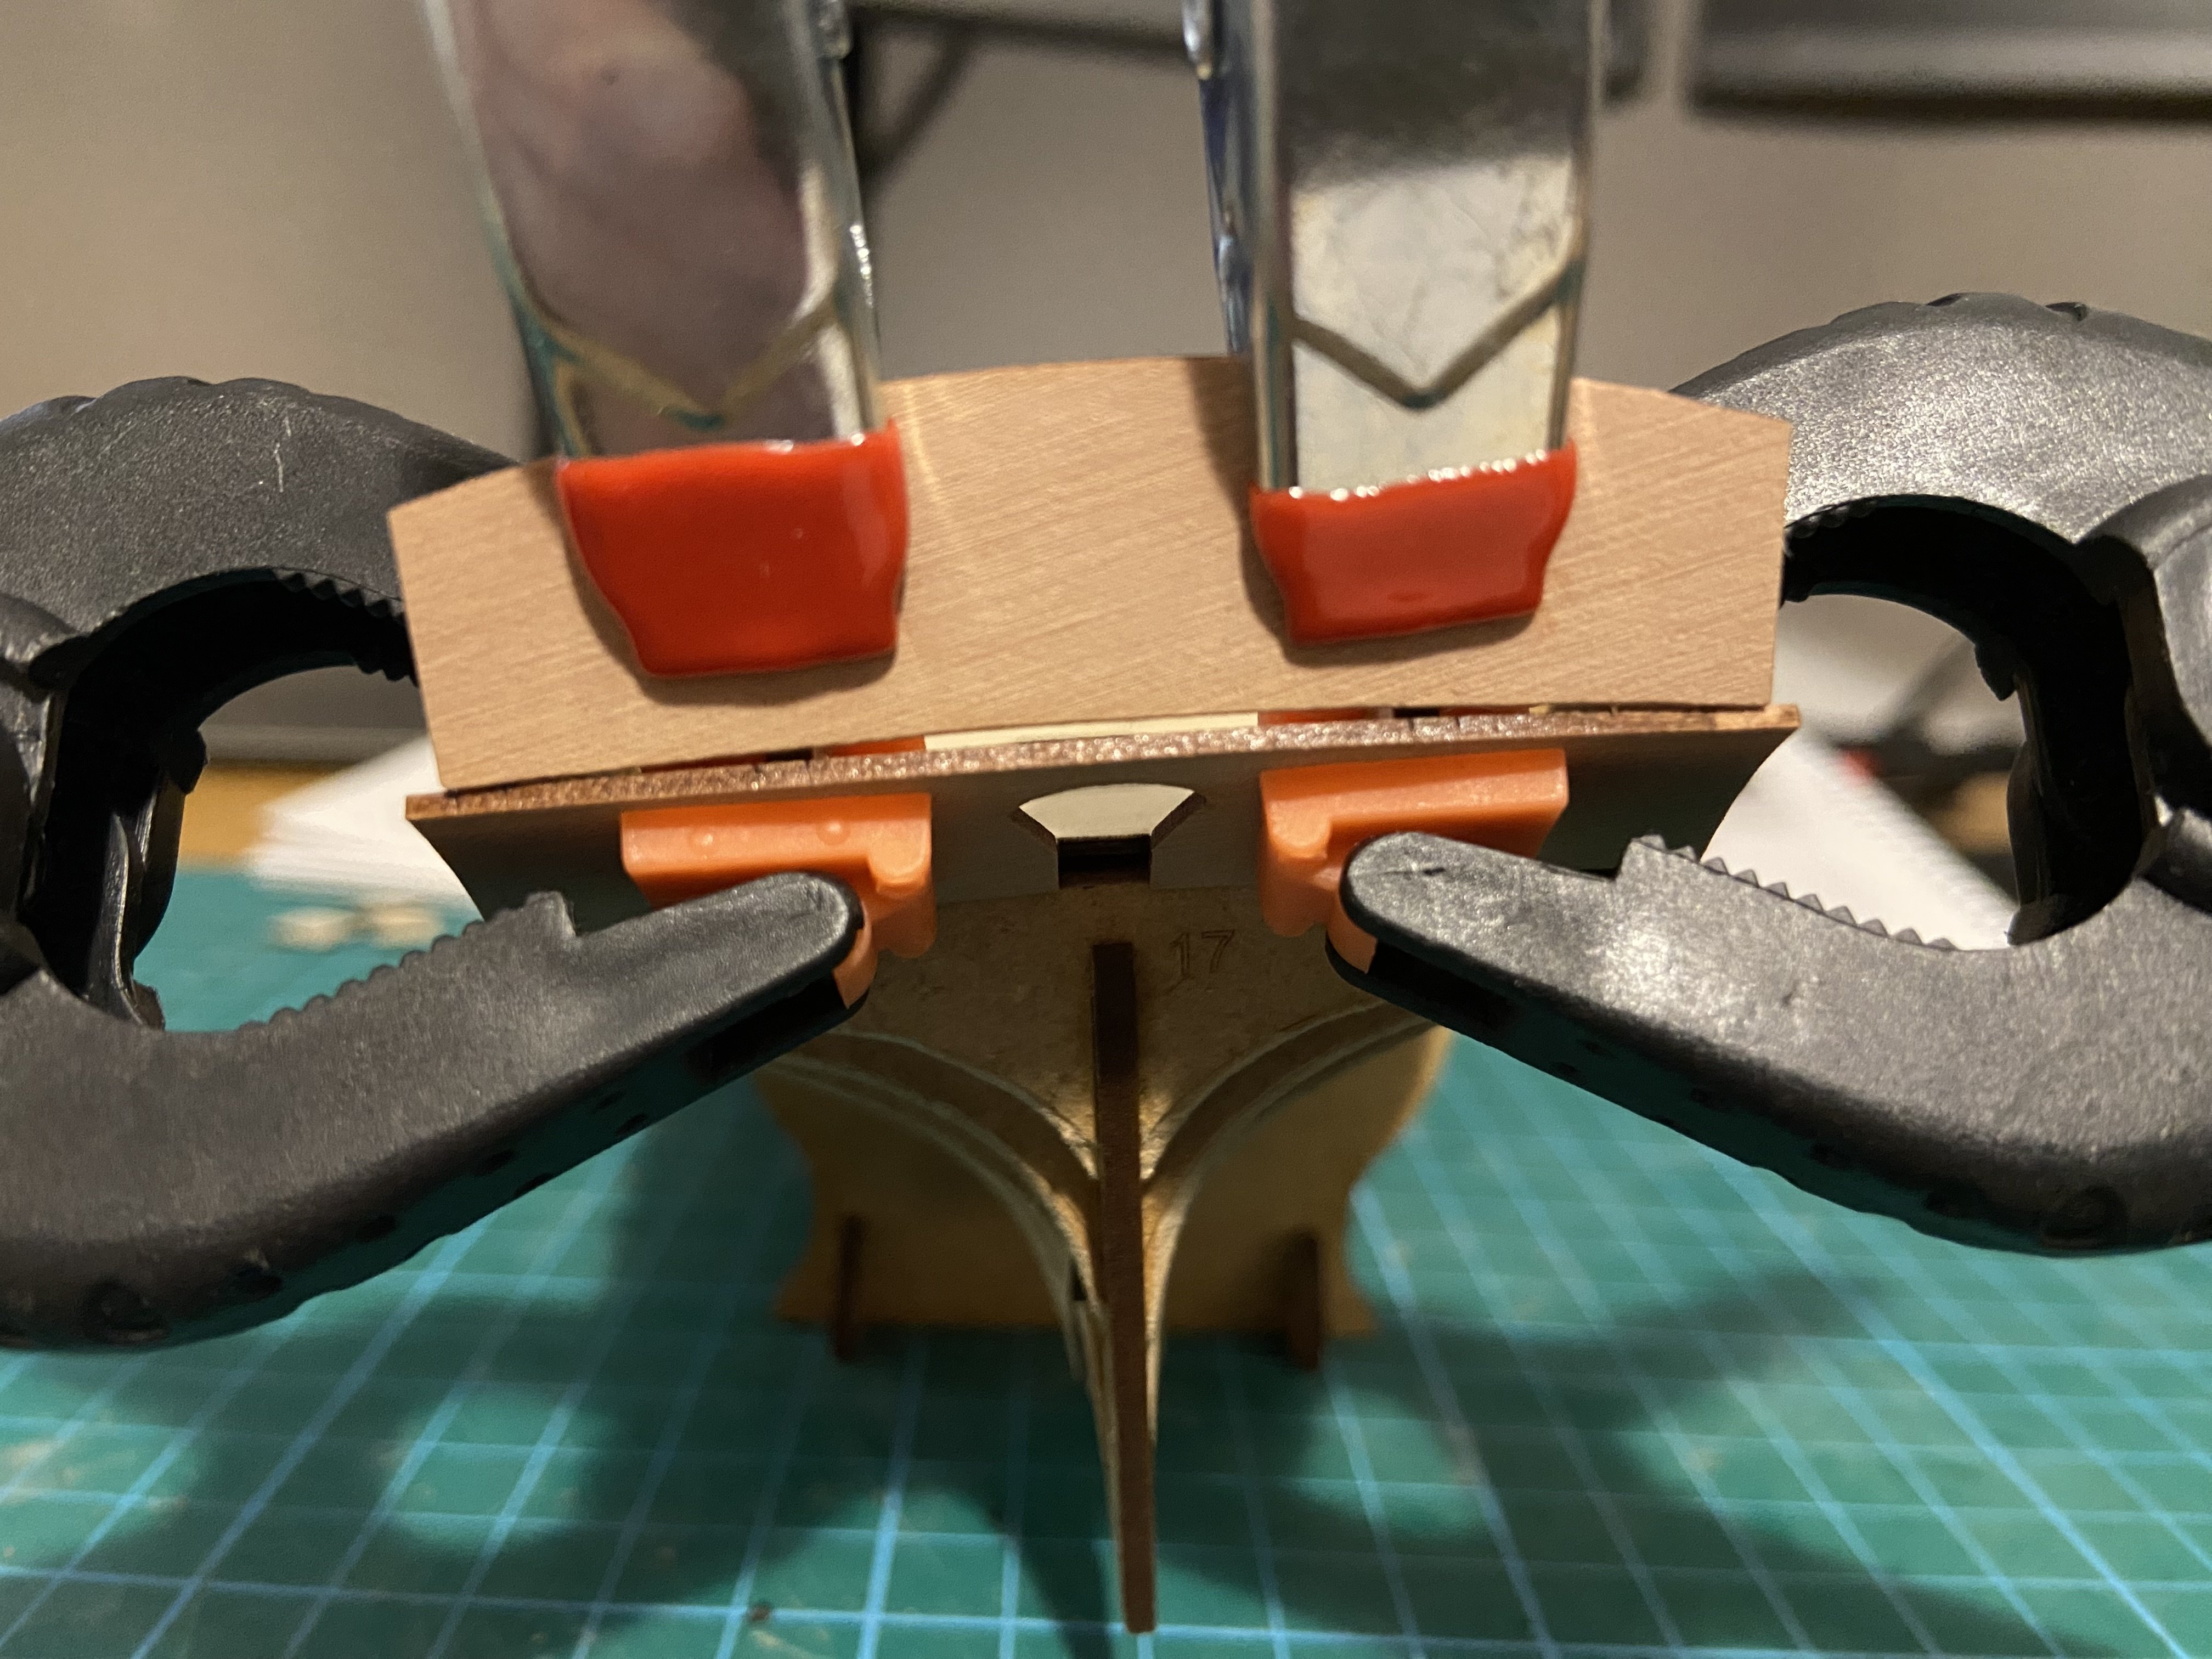
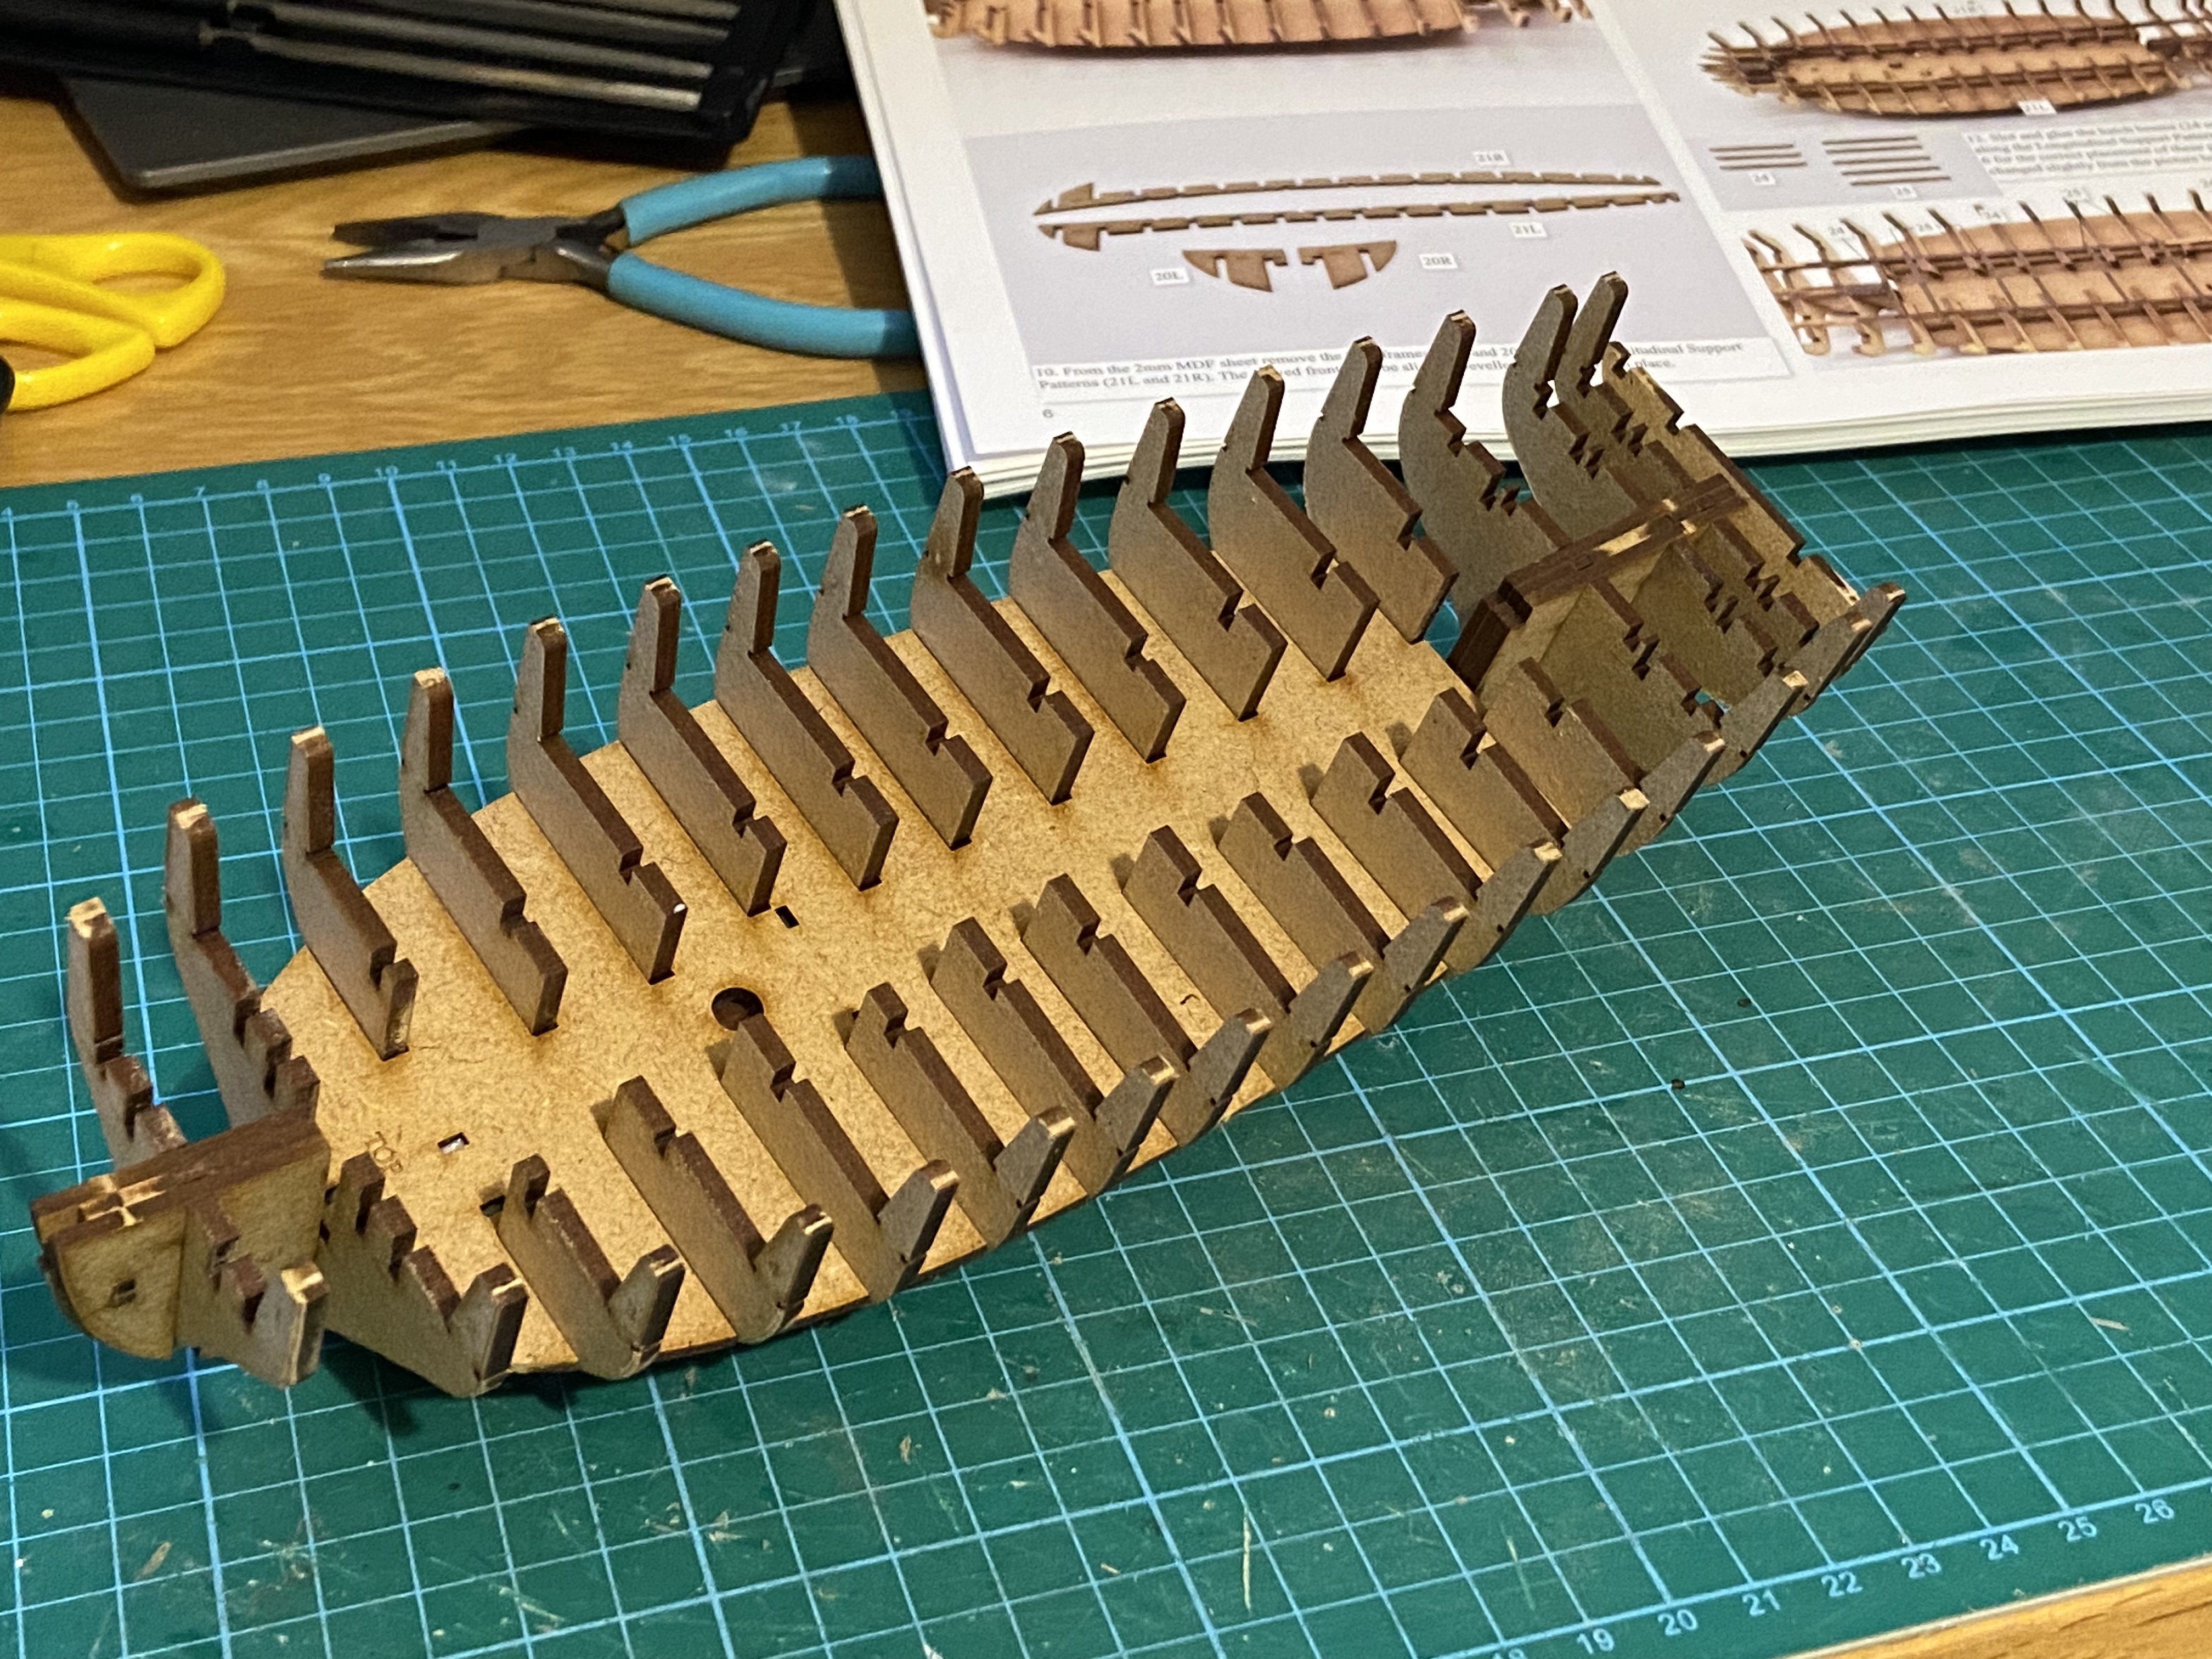
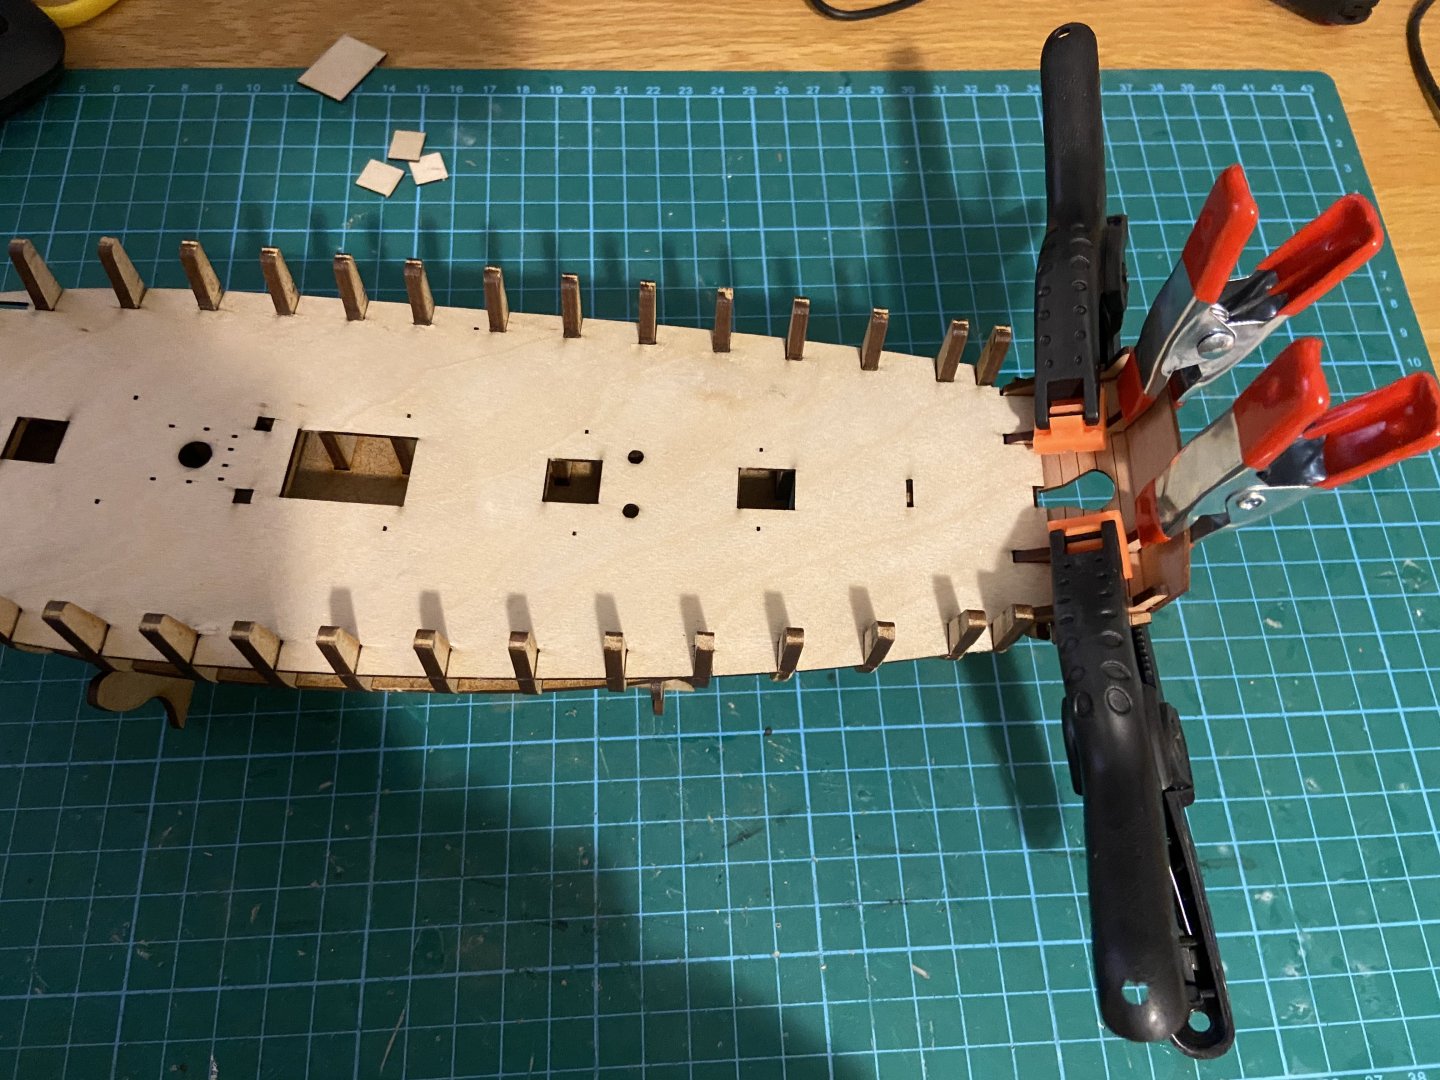
Fairing Fairing the hull was straightforward using 120-grit sandpaper on the MDF, though not without mishap. Sherbourne has a “scoop” shape and I forgot that the transom sits higher than the bulkhead stubs and, after laying the model flat and applying pressure, I snapped all four stern frames at deck level. Fortunately, the breaks were not all the way through and will be completely hidden once the bulwarks are fitted. Glue repaired the damage and the bulwarks will reinforce the area, a careless mistake from a momentary lapse in concentration. The stern is quite a delicate area, in contrast to the rest of the ship at this stage, which is rock solid. The break is barely visible: Stern I removed the laser char from upper parts of the stern frames, as these will remain visible on the finished model. While this would have been easier before installation, the parts are very delicate, so I’m not convinced it would have helped much. It’s a level of detail I might have overlooked on earlier builds, but the speed at which the basic structure has come together has allowed more time for refinements. Prow and Keel The keel and prow fitted perfectly without the need for clamps. Having the keel supplied as a single, continuous piece that interlocks with frame made alignment far easier than on previous builds with multi-section keels. Although these parts will be painted white, I sanded off the laser char to avoid any chance of it showing through the paint. Bulwarks This is the first of three bulwarks per side (the other two are inner and outer patterns). The 0.8mm plywood is thin and flexible enough that no soaking or pre-bending is required. Careful placement is made easier by the engraved lines and then clamping to the bulkhead stubs. This kit is full of small design touches like that that make precise assembly easier.


- 18 replies
-
- 6
-
-
- cutter
- Sherbourne
- (and 1 more)
-
Maid of the Mist reacted to a post in a topic:
HMS Bellona by Frecap - Corel - 1:100
-
 Maid of the Mist reacted to a post in a topic:
HMS Indefatigable 1794 by Mowzer - Vanguard Models - 1:64
Maid of the Mist reacted to a post in a topic:
HMS Indefatigable 1794 by Mowzer - Vanguard Models - 1:64
-
Maid of the Mist reacted to a post in a topic:
HMS Harpy 1796 by dunnock - Vanguard Models - 1:64
-
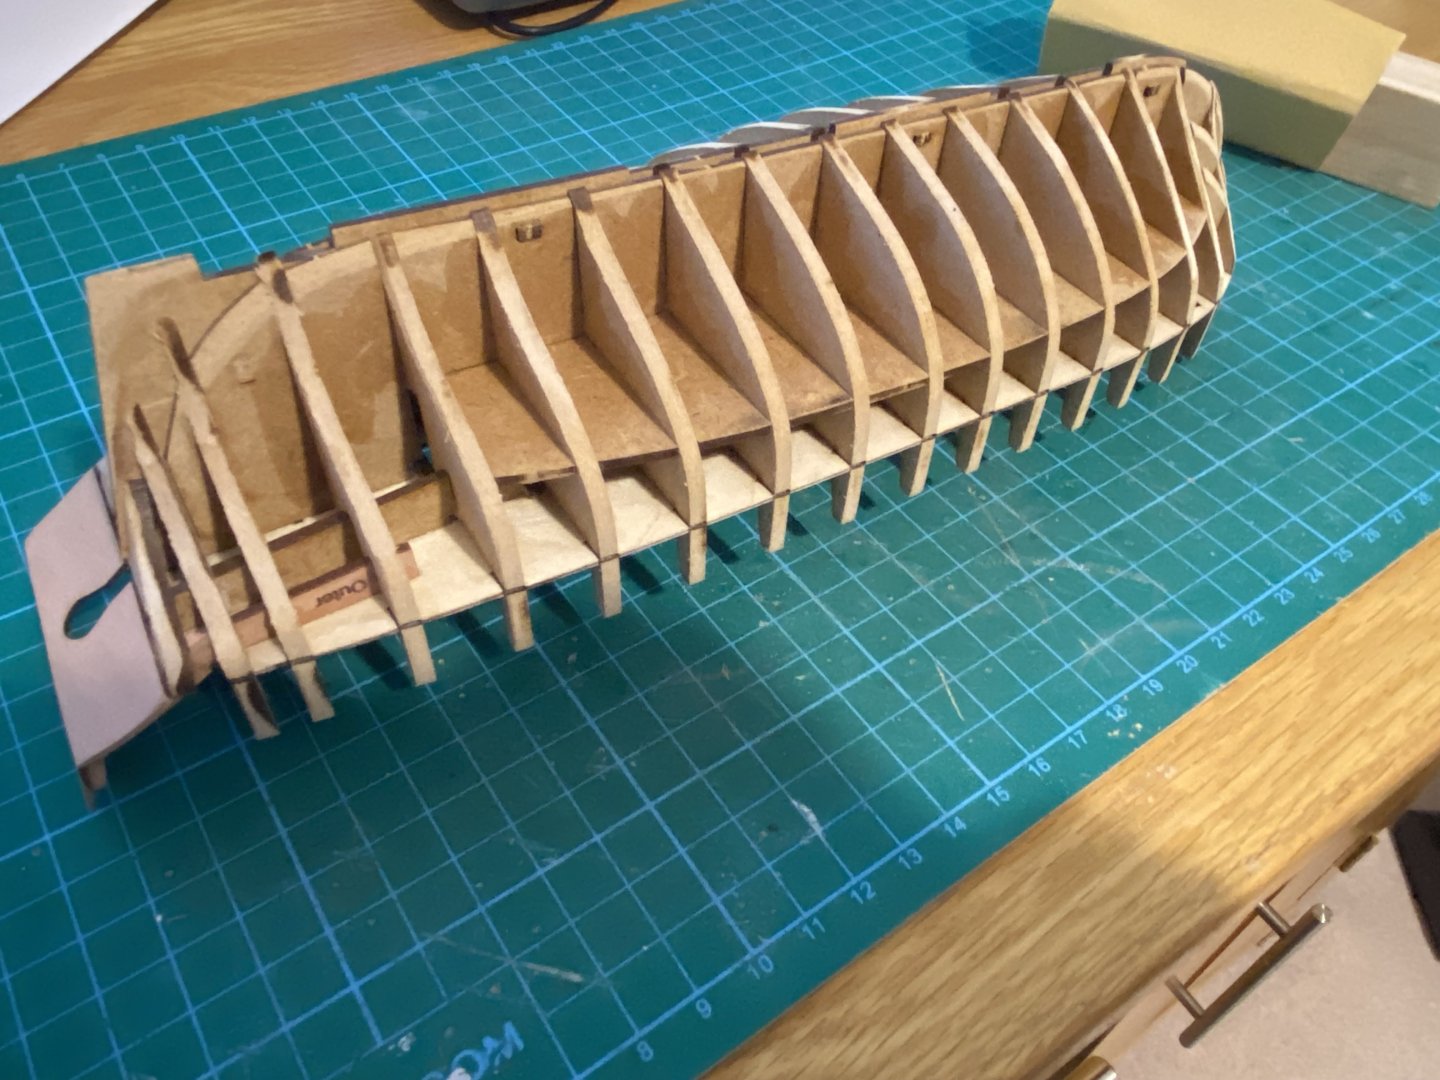
Moving along very quickly, I'm almost ready to begin sanding the hull in preparation for planking. The false deck was a very tight fit, but ultimately it snapped into place due to some handy notches on the bulkheads. You do have to check that every bulkhead is lined up with the level of the deck, so you need 32 "clicks" effectively. The inner stern counter and inner transom are glued and clamped. These are the only pieces so far that don't have a perfectly flush fit because the transom has a curved lower edge. I don't think this matters but I can see later on in the instructions there's no gap between these parts, so maybe when building the prototype a little bit of filler was used? I don't think it matters because the outer transom, stern counter and stern transom rail will surely conceal any gaps. Any ideas?

- 18 replies
-
- 2
-
-
- cutter
- Sherbourne
- (and 1 more)
-
It's coming together nicely so far. It actually reminds me a lot of the book nooks that I was building last year. Everything interlocks and is perfectly measured and cut. There's no messing around trying to square things off, the structure is so well designed it barely needs glue at this stage. My overriding feeling, other than enjoyment, is a wish that this has been my first introduction to model ship building. I love the inclusion of a "lower deck", it all helps to create the illusion of building a real ship. Here's how it measures up against my Beagle. It's a slightly smaller scale of course, but also a little ship by comparison.

- 18 replies
-
- 5
-
-
- cutter
- Sherbourne
- (and 1 more)
-
Okay, Sherbourne will be my third kit log and my first venture into Vanguard Models, following two OcCre builds: Polaris (Summer 2025) and Beagle (August 2025–January 2026). I enjoyed both projects, but I have felt two things (1) my skills need a lot of development and (2) I need to be more patient with each build to get the most out of it. In Sherbourne, I’ve chosen a beginner-level ship that will hopefully allow me to focus on accuracy and technique. That said, I felt I was ready to step up to a higher-quality kit, which is why I chose Vanguard. My first impressions on opening the box have been very positive: compared to an OcCre model, the materials and fittings are finer, almost delicate by comparison. I particularly like the spiral-bound instruction manual. Including a bit of history about Sherbourne was a great idea and helps make the manual on its own a nice keepsake. Even though this is a beginner’s model, it feels like a very thoughtfully designed product that’s been made with real care and one that deserves to be assembled with the same level of attention. I’ll be following a Sherbourne series on YouTube (channel name is Modelkit Stuff) to assist with this build. I don’t know his real name, but I’ve watched a few parts of his series already. He seems excellent at explaining each step and the quality of the model he manages to put together speaks for itself.
- 18 replies
-
- 2
-
-
- cutter
- Sherbourne
- (and 1 more)
-
Maid of the Mist reacted to a post in a topic:
HMS Beagle by vvvjames - OcCre - 1:60 - Second Build
-
Maid of the Mist reacted to a post in a topic:
HMS Indefatigable 1794 by Mowzer - Vanguard Models - 1:64
-
Maid of the Mist reacted to a post in a topic:
HMS Beagle by Maid of the Mist - FINISHED - OcCre - 1:60
-
Maid of the Mist reacted to a post in a topic:
HMS Beagle by Maid of the Mist - FINISHED - OcCre - 1:60
-
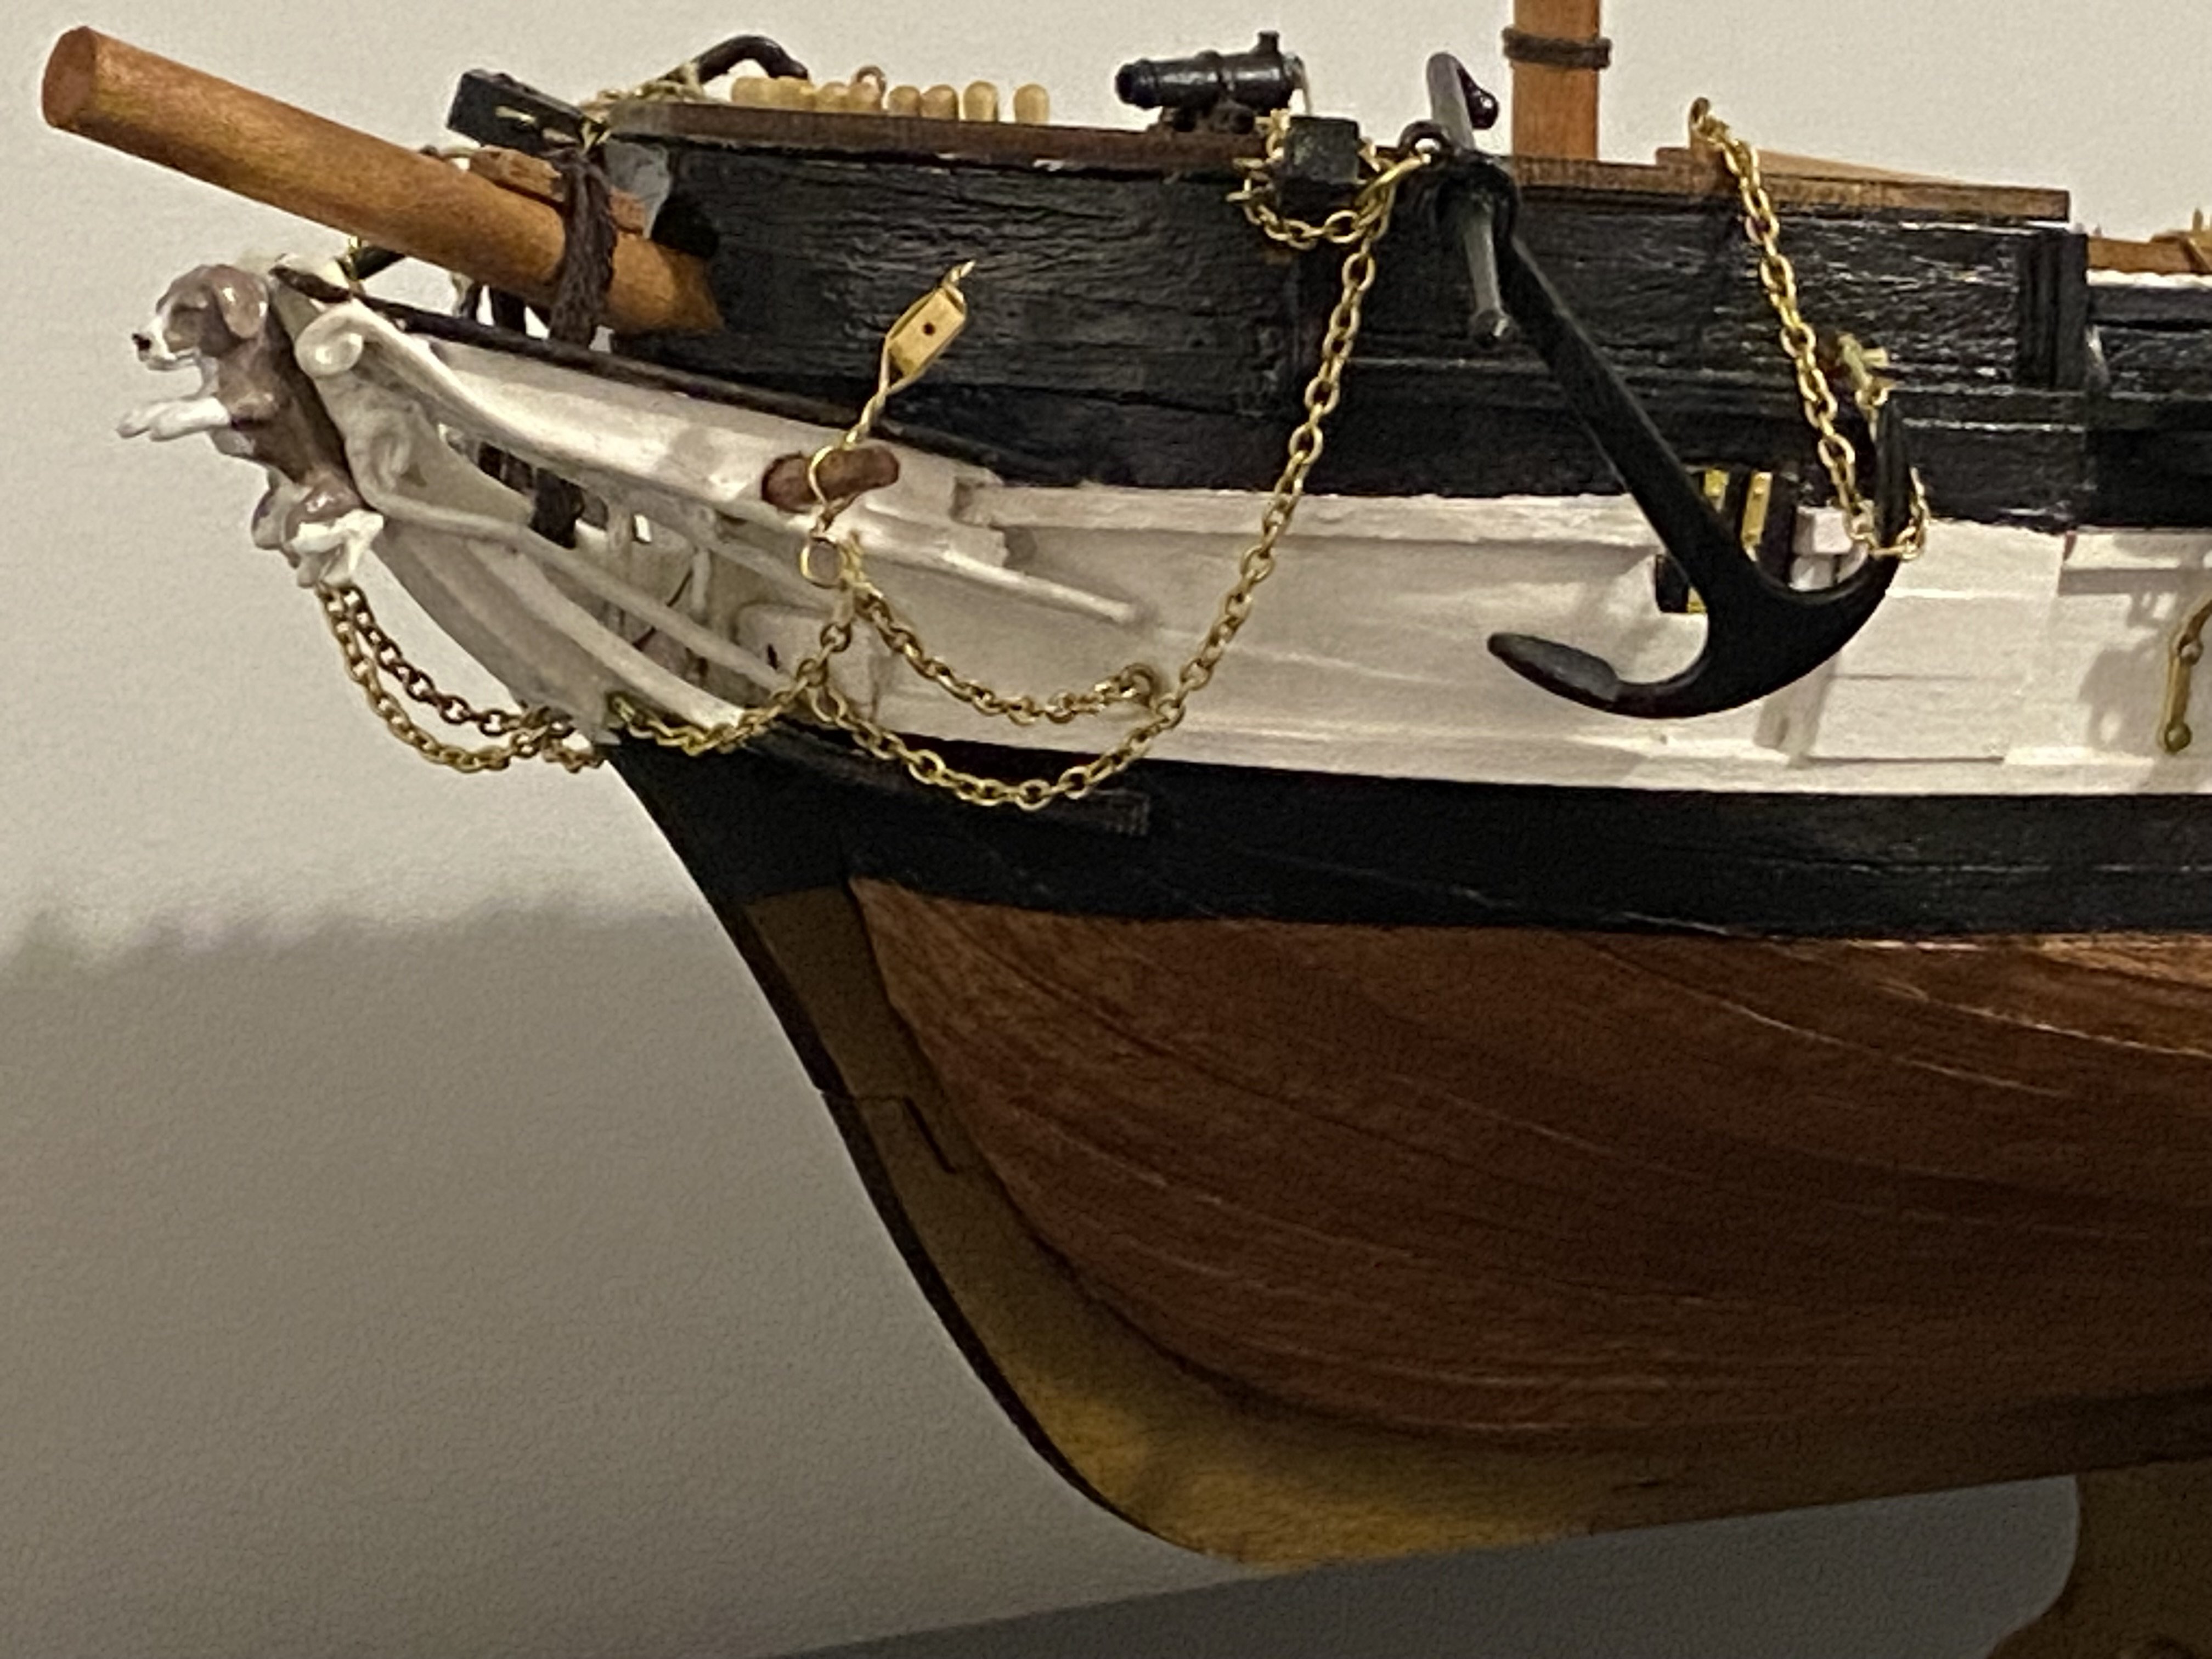
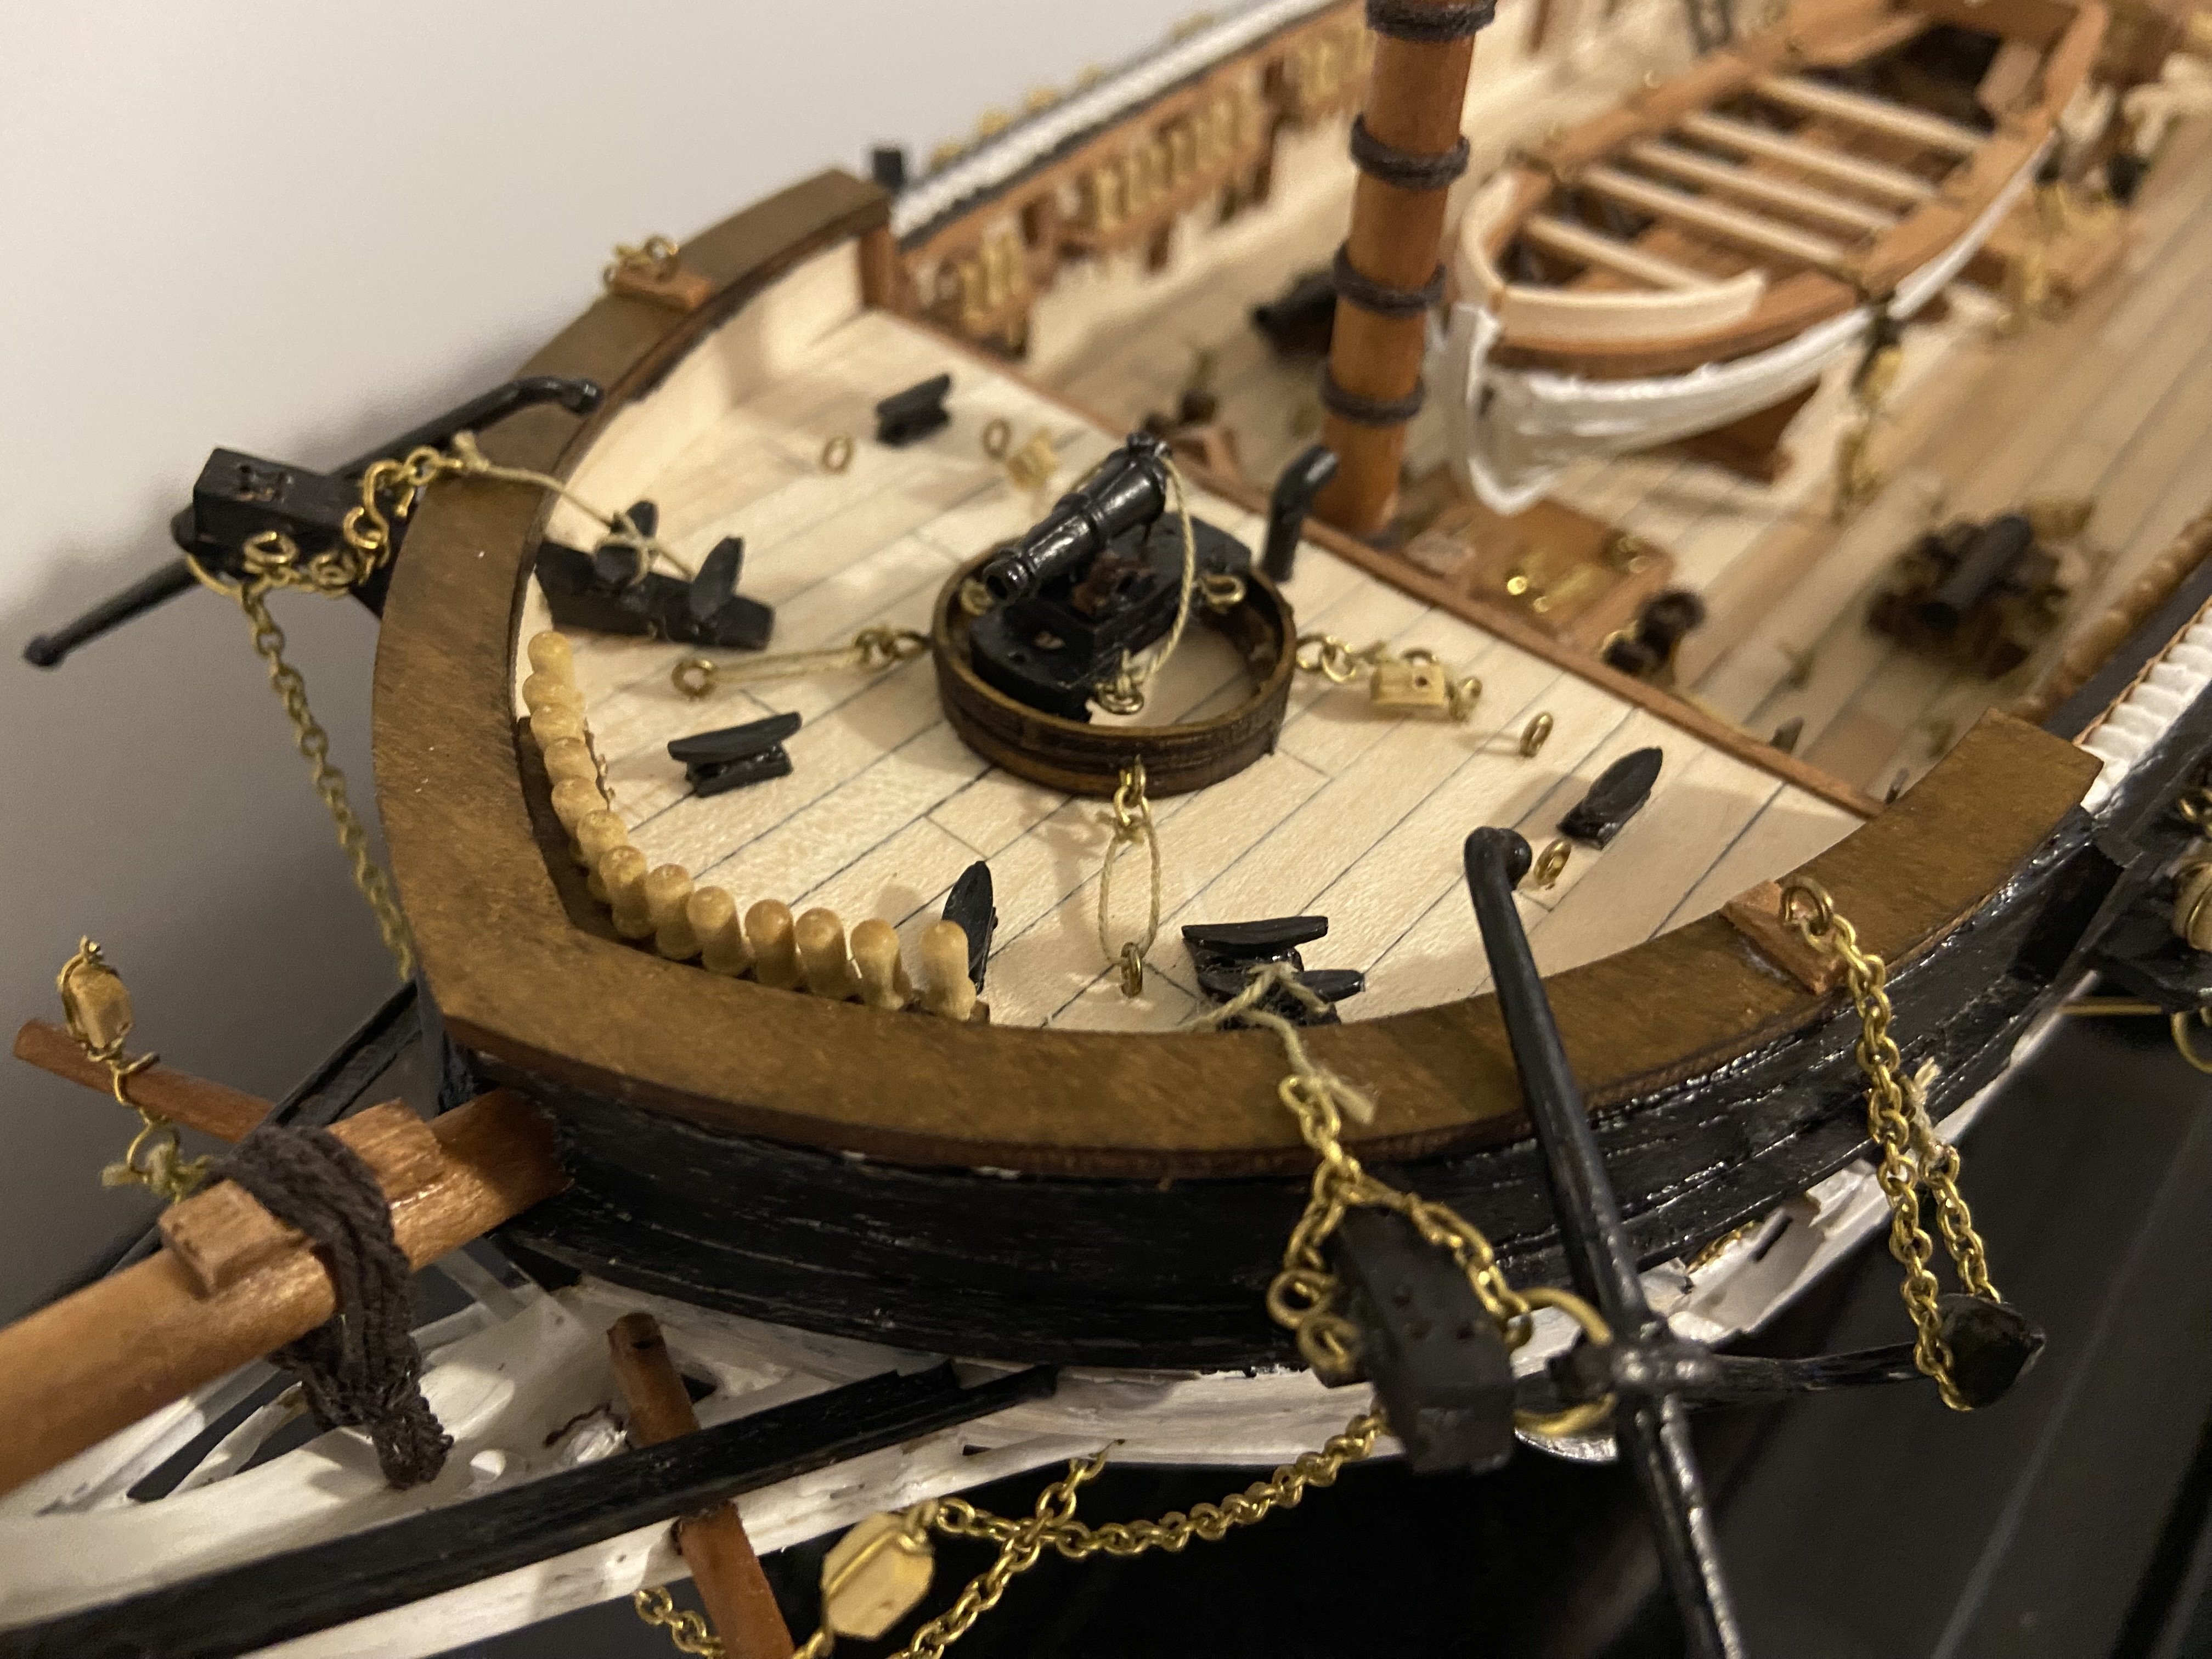
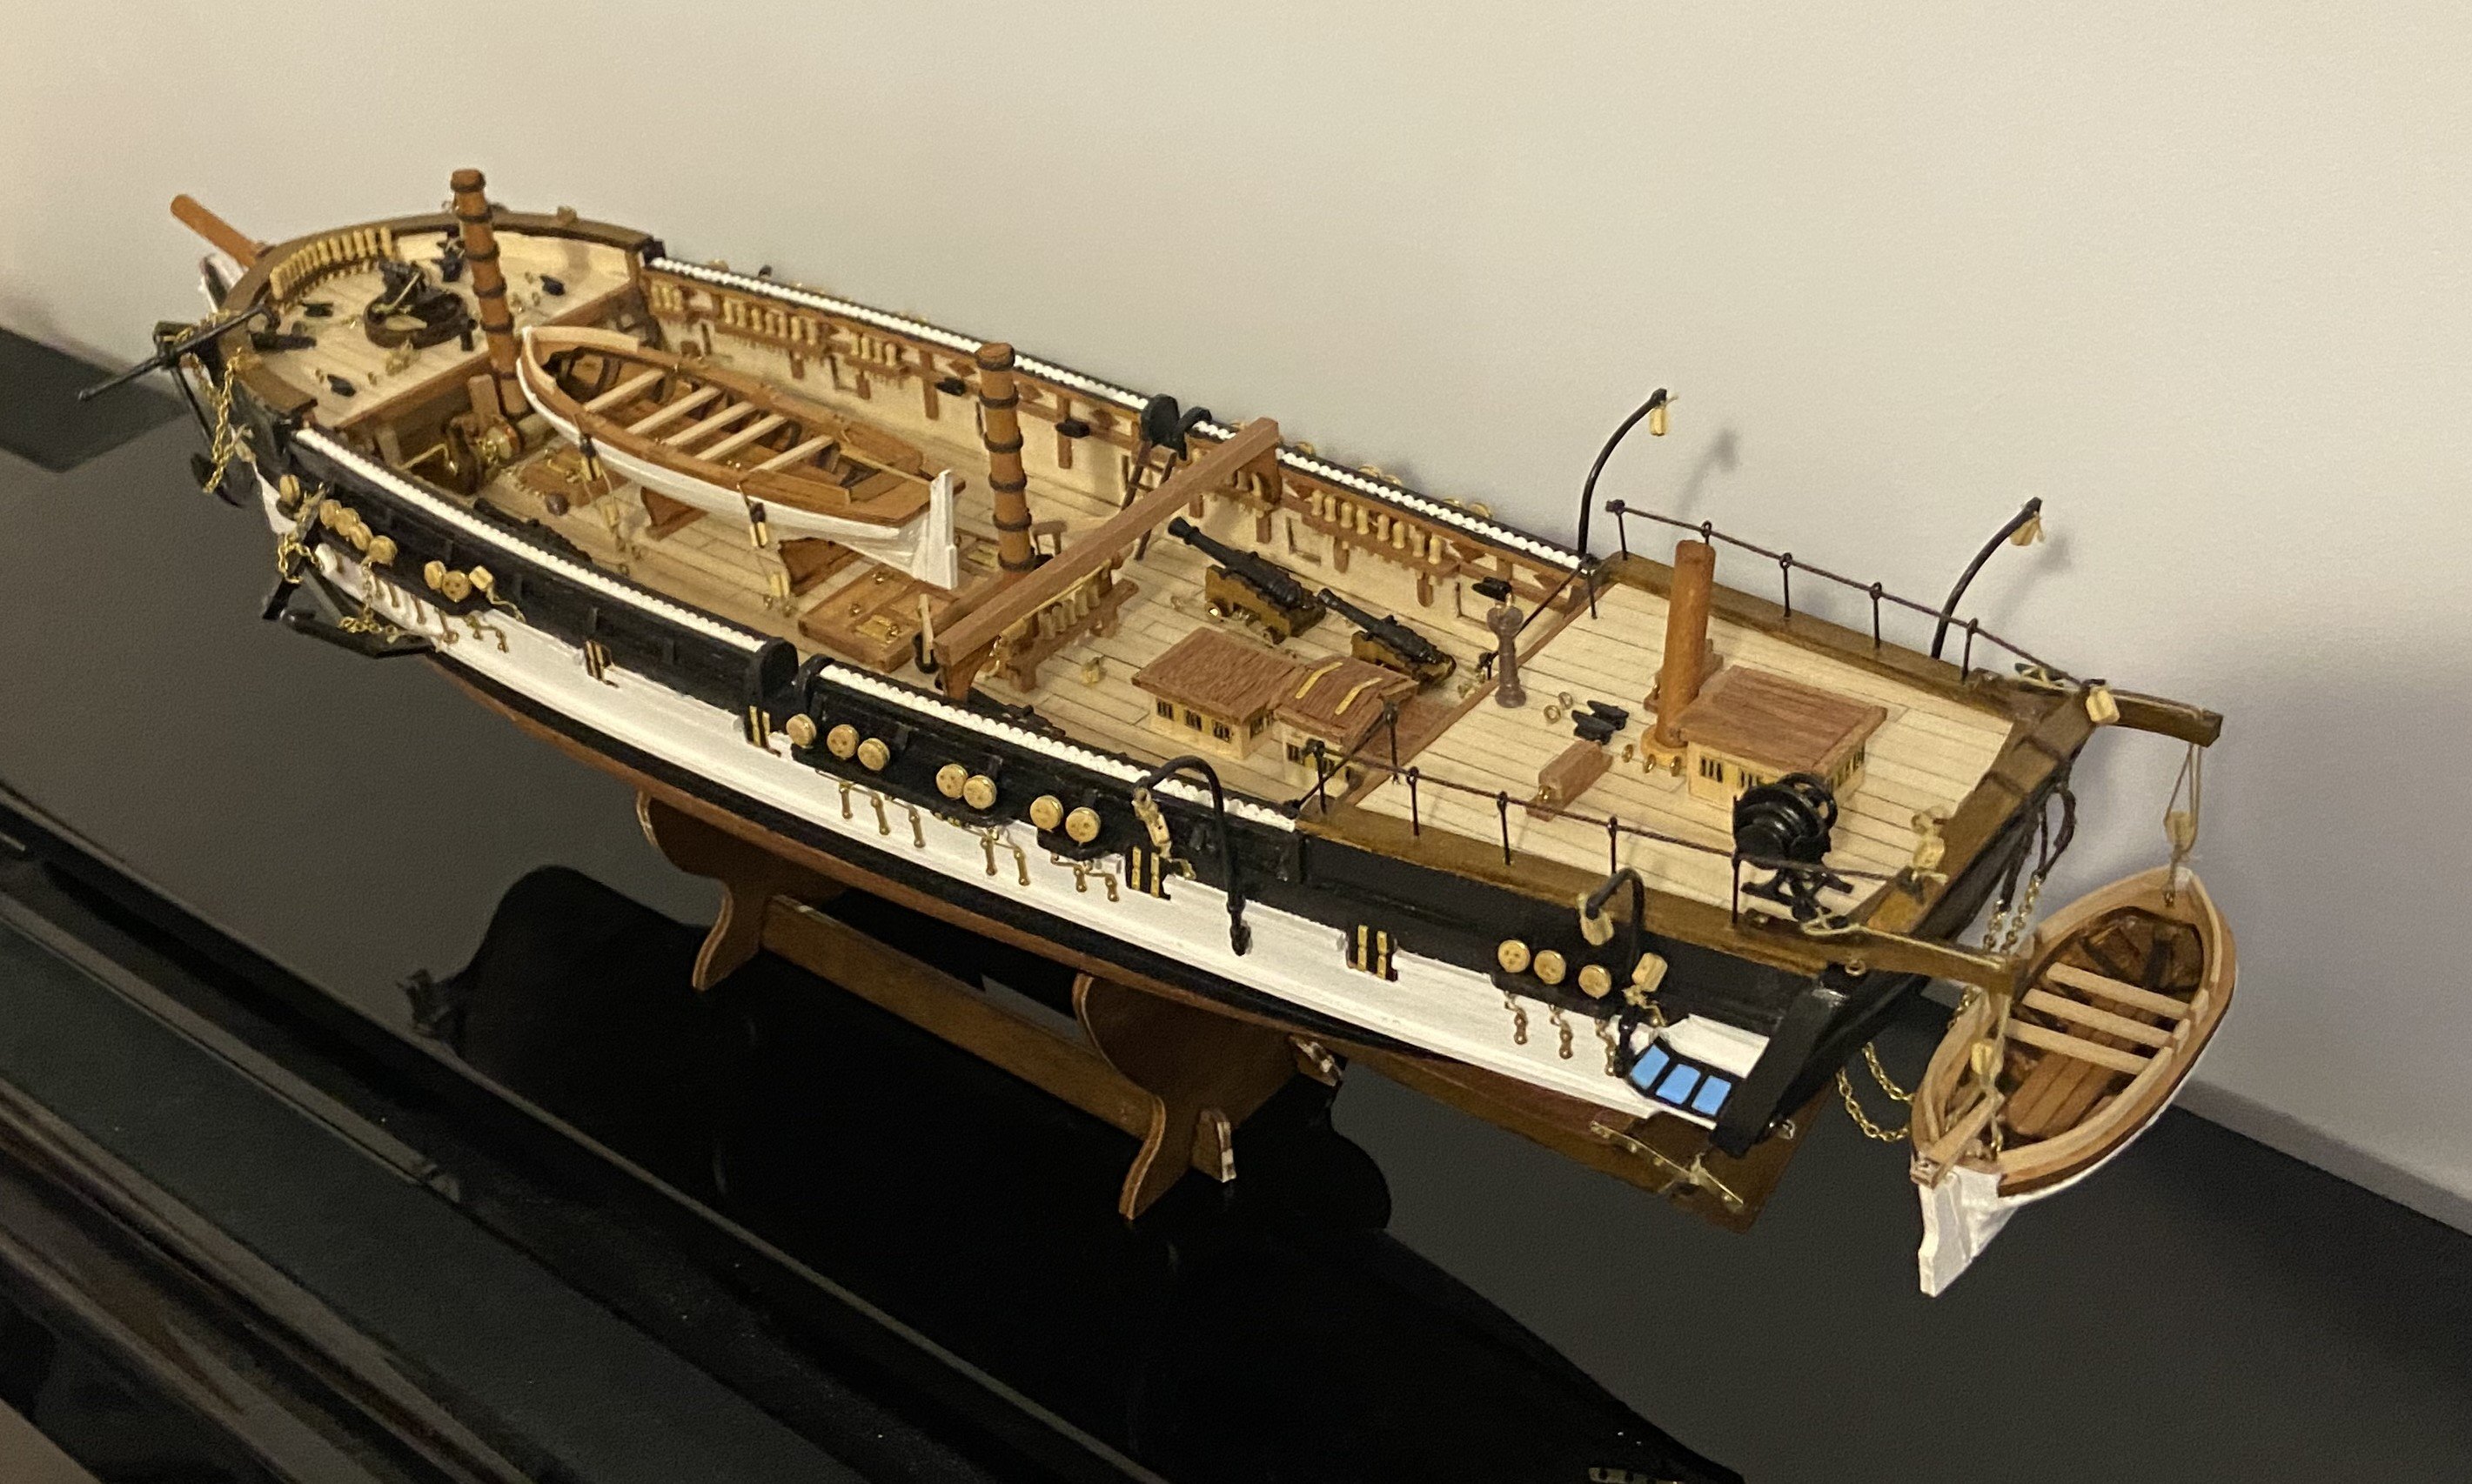
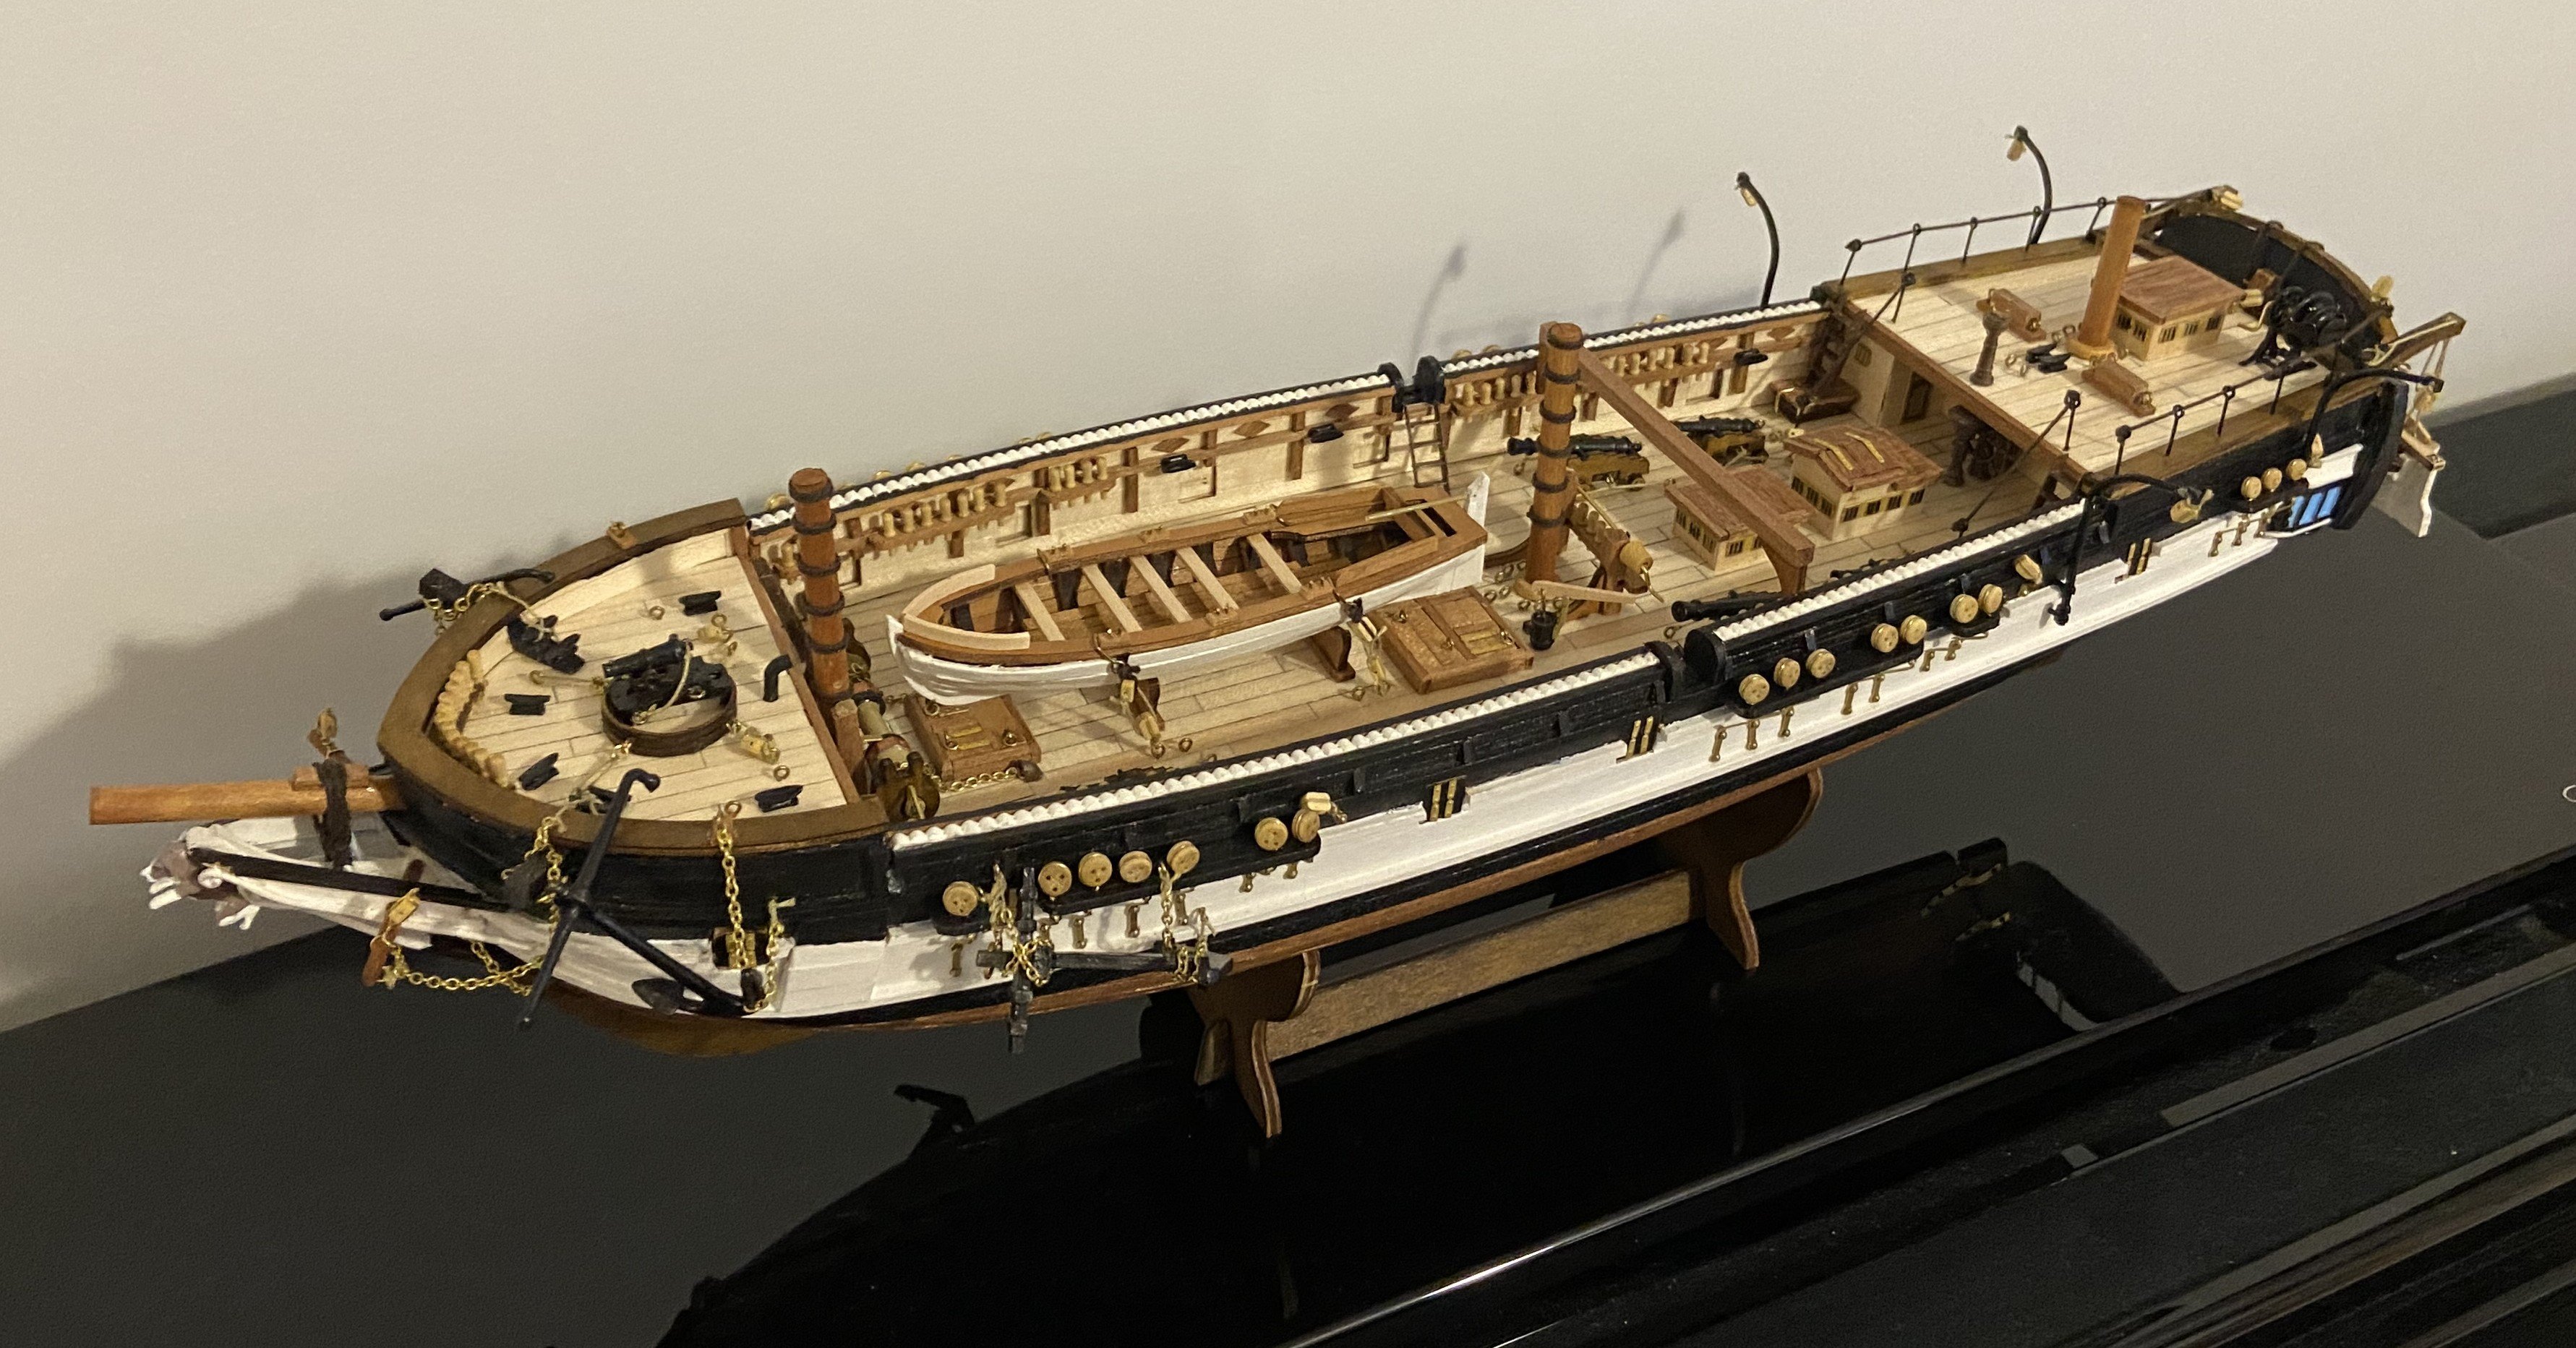
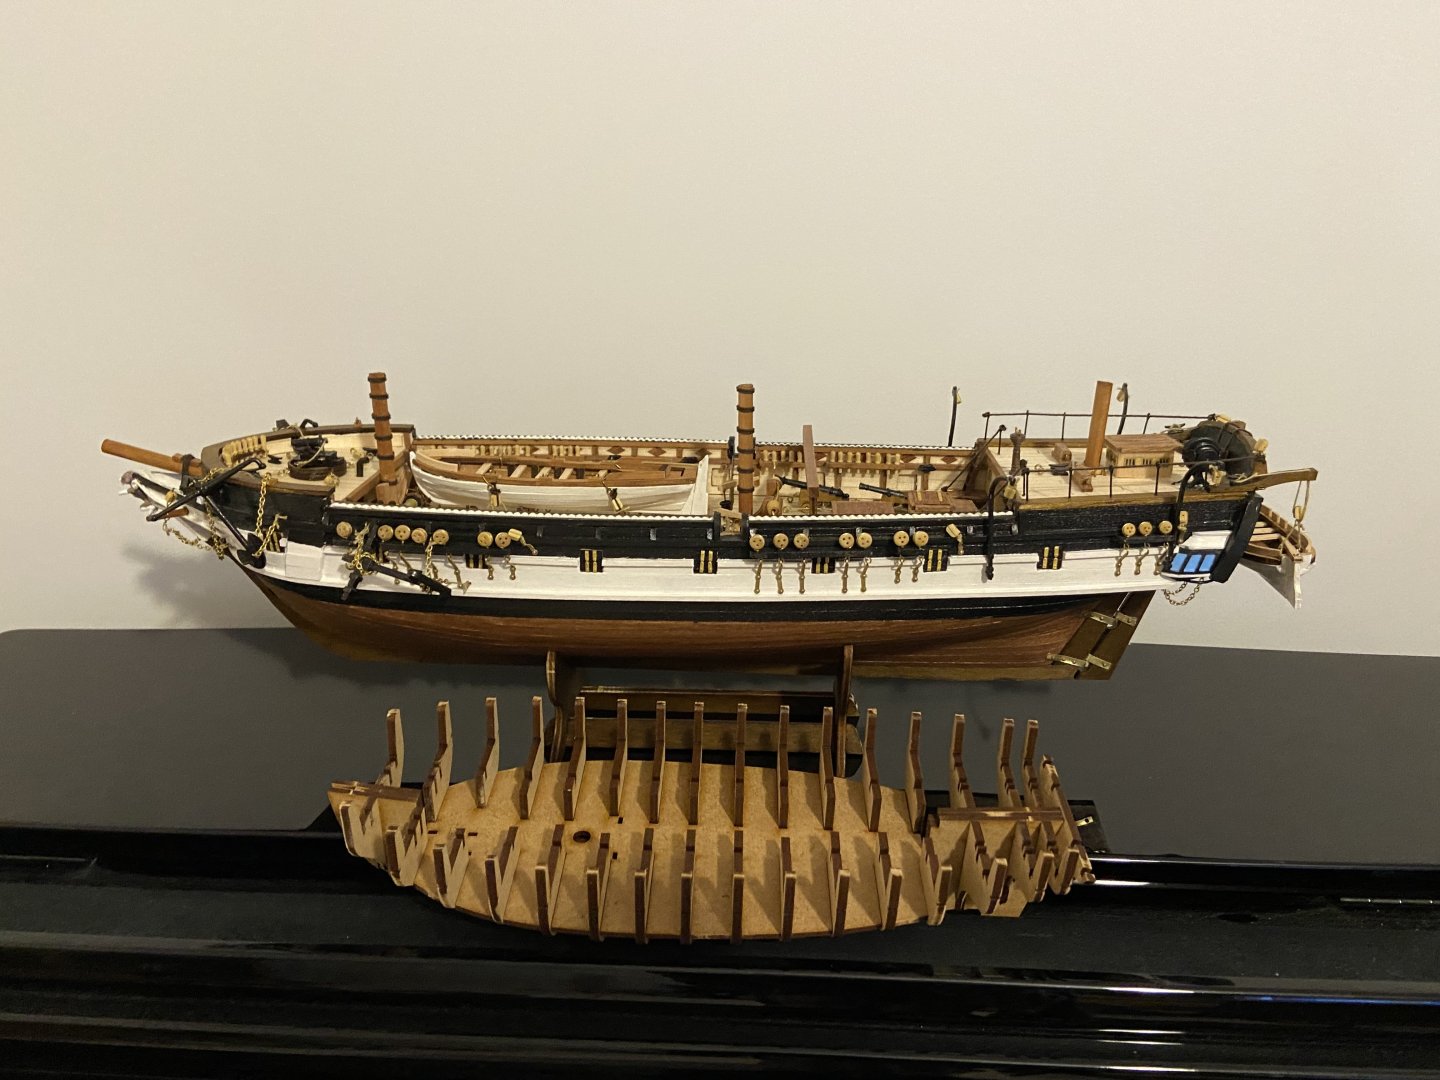
I’ve made quite a significant decision regarding the build. Over the past month I’ve been working on the masts and had started the rigging, but my enjoyment of the project was steadily diminishing with those jobs. I found the masts and rigging far too delicate for my liking, with unforgiving tolerances that needed to be precise to achieve a satisfactory result. Keeping the masts perfectly upright while maintaining properly tensioned lines proved frustrating rather than rewarding. I also realised that once the yards, bowsprit and masts are in place, the model became very large and, for me, somewhat impractical to display, particularly as I’d like to continue expanding my collection. Presenting the model without the full rig also has the added benefit of making it much easier to appreciate the deck details, as you can lean directly over the model without worrying about anything getting in the way. So, I've decided to present it like a contemporary dockyard model - perhaps a gift to a senior naval officer - with shortened masts and bowsprit and no rigging. While there’s a sense of disappointment in not completing the model exactly as originally intended, I invested five months in the build and was genuinely pleased with the result right up until the mast and rigging stage. Presenting it this way has allowed me to finish the project in a manner that still reflects the enjoyment and effort I put into it. I think this will be the approach I take with future ships as well. Of course it's convenient because I personally struggle with rigging, but I like to think I'm following a historically legitimate presentation style as well. I leave you with final photos of the finished build.
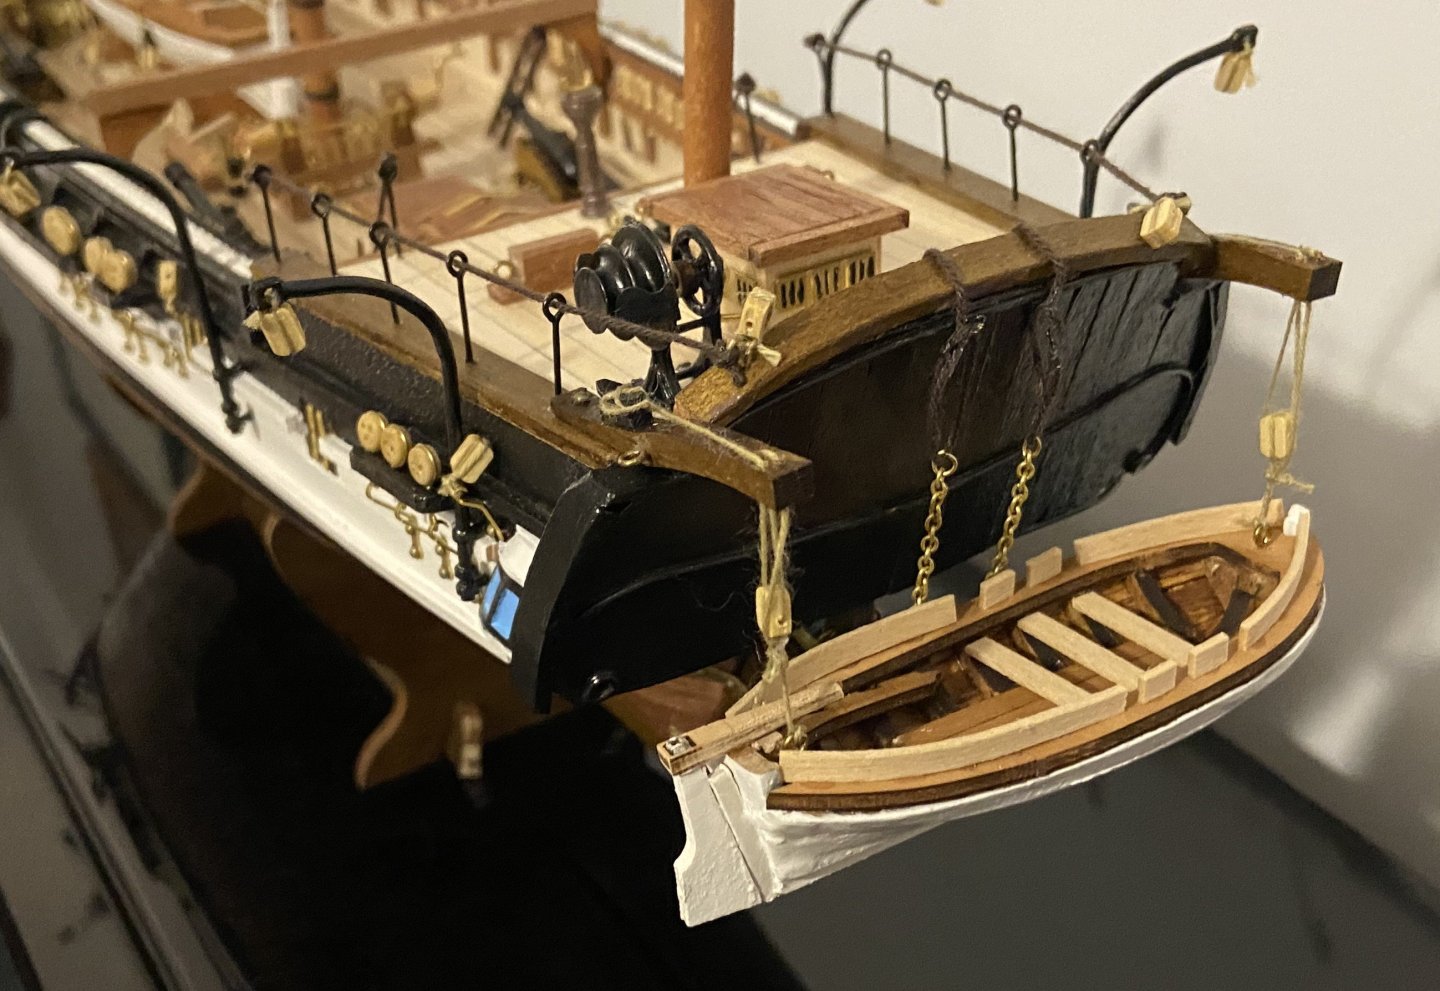


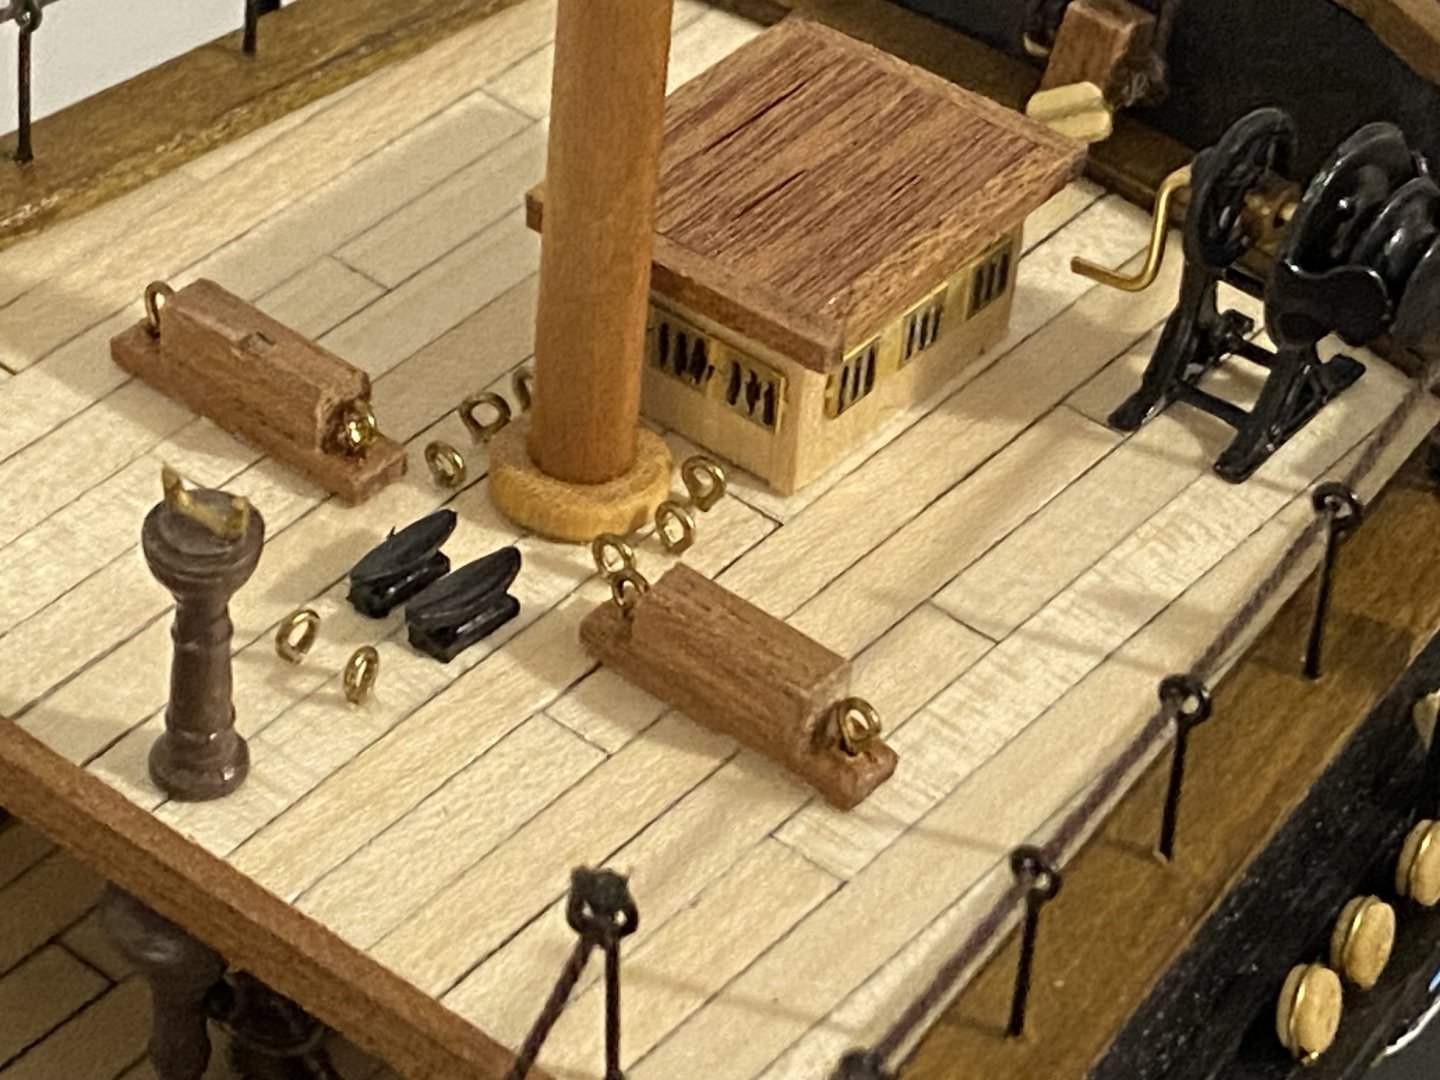

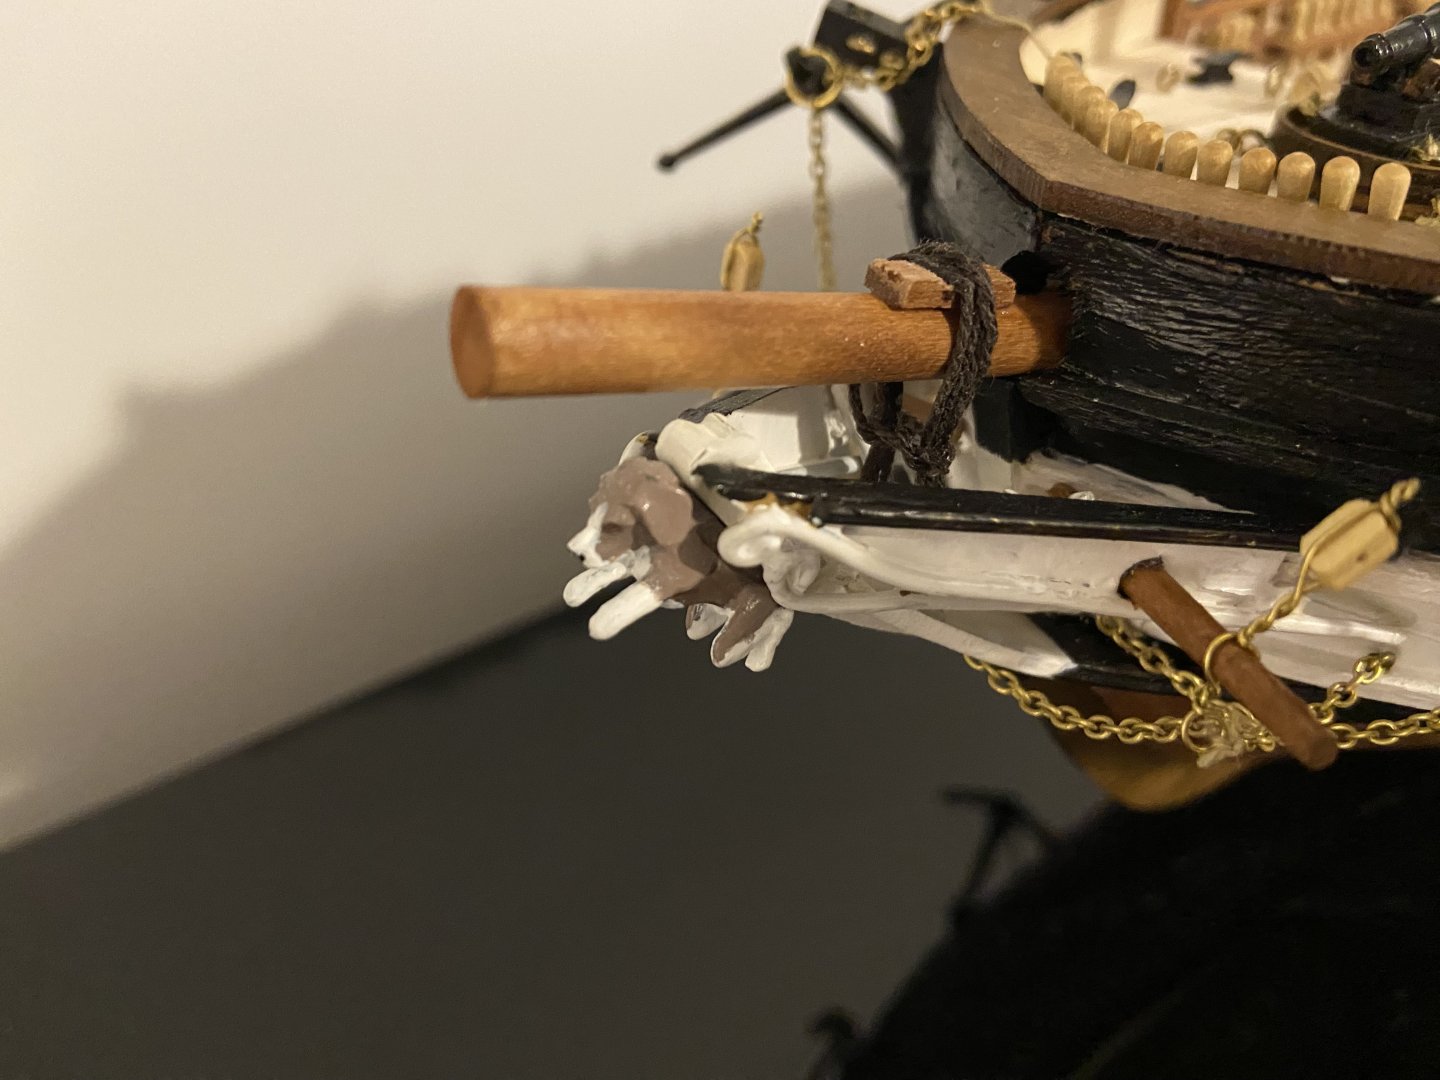


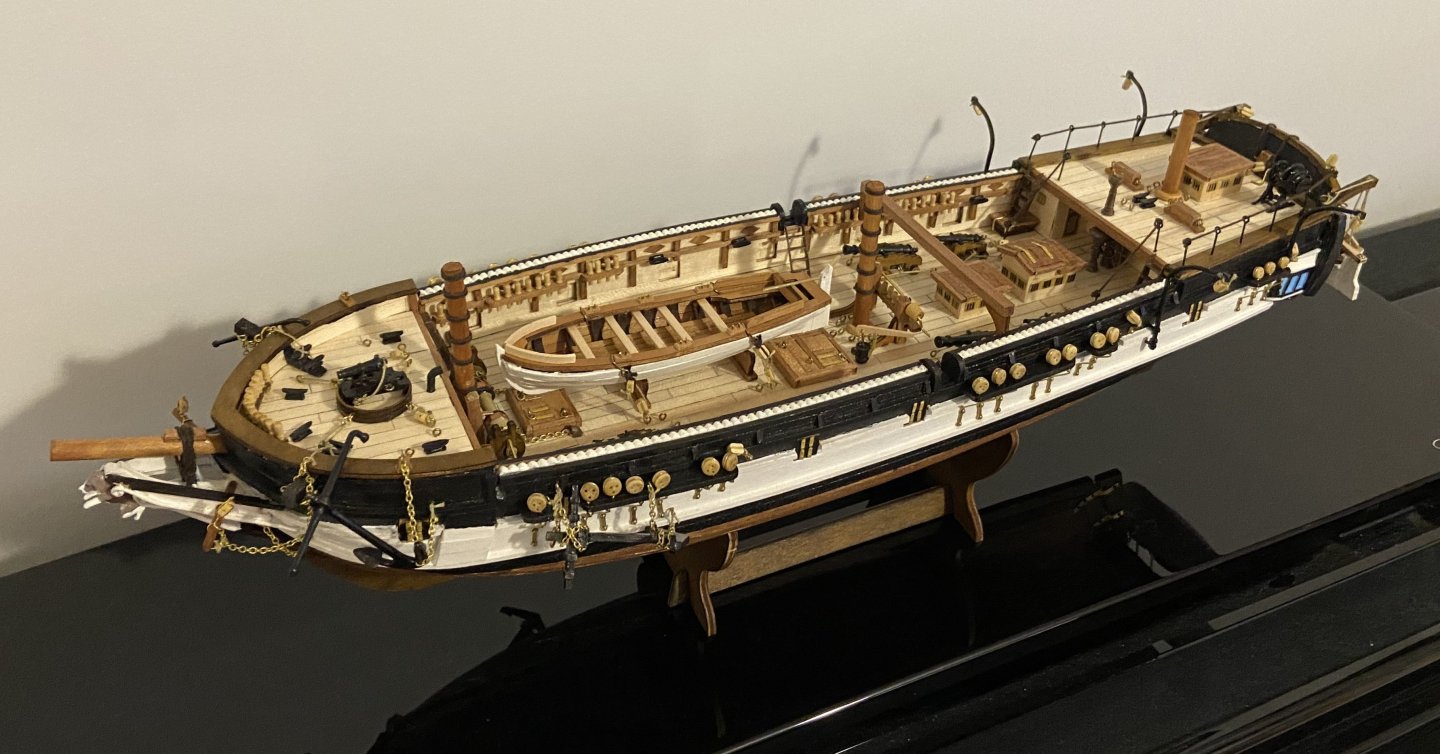
- 72 replies
-
- 15
-
-

-
2026 is 200 years since HMS Beagle first set sail. There's no better time to build one than now 🙂
-
Eck, what thread did you use for the shrouds, please? It won't be too much longer before I start doing those on my HMS Beagle and I wanted to know if the thread OcCre provided is the same as what you've used (in which case it looks plenty good enough!)