Maid of the Mist
-
Posts
69 -
Joined
-
Last visited
Content Type
Profiles
Forums
Gallery
Events
Everything posted by Maid of the Mist
-
 Okay, Sherbourne will be my third kit log and my first venture into Vanguard Models, following two OcCre builds: Polaris (Summer 2025) and Beagle (August 2025–January 2026). I enjoyed both projects, but I have felt two things (1) my skills need a lot of development and (2) I need to be more patient with each build to get the most out of it. In Sherbourne, I’ve chosen a beginner-level ship that will hopefully allow me to focus on accuracy and technique. That said, I felt I was ready to step up to a higher-quality kit, which is why I chose Vanguard. My first impressions on opening the box have been very positive: compared to an OcCre model, the materials and fittings are finer, almost delicate by comparison. I particularly like the spiral-bound instruction manual. Including a bit of history about Sherbourne was a great idea and helps make the manual on its own a nice keepsake. Even though this is a beginner’s model, it feels like a very thoughtfully designed product that’s been made with real care and one that deserves to be assembled with the same level of attention. I’ll be following a Sherbourne series on YouTube (channel name is Modelkit Stuff) to assist with this build. I don’t know his real name, but I’ve watched a few parts of his series already. He seems excellent at explaining each step and the quality of the model he manages to put together speaks for itself.
 -
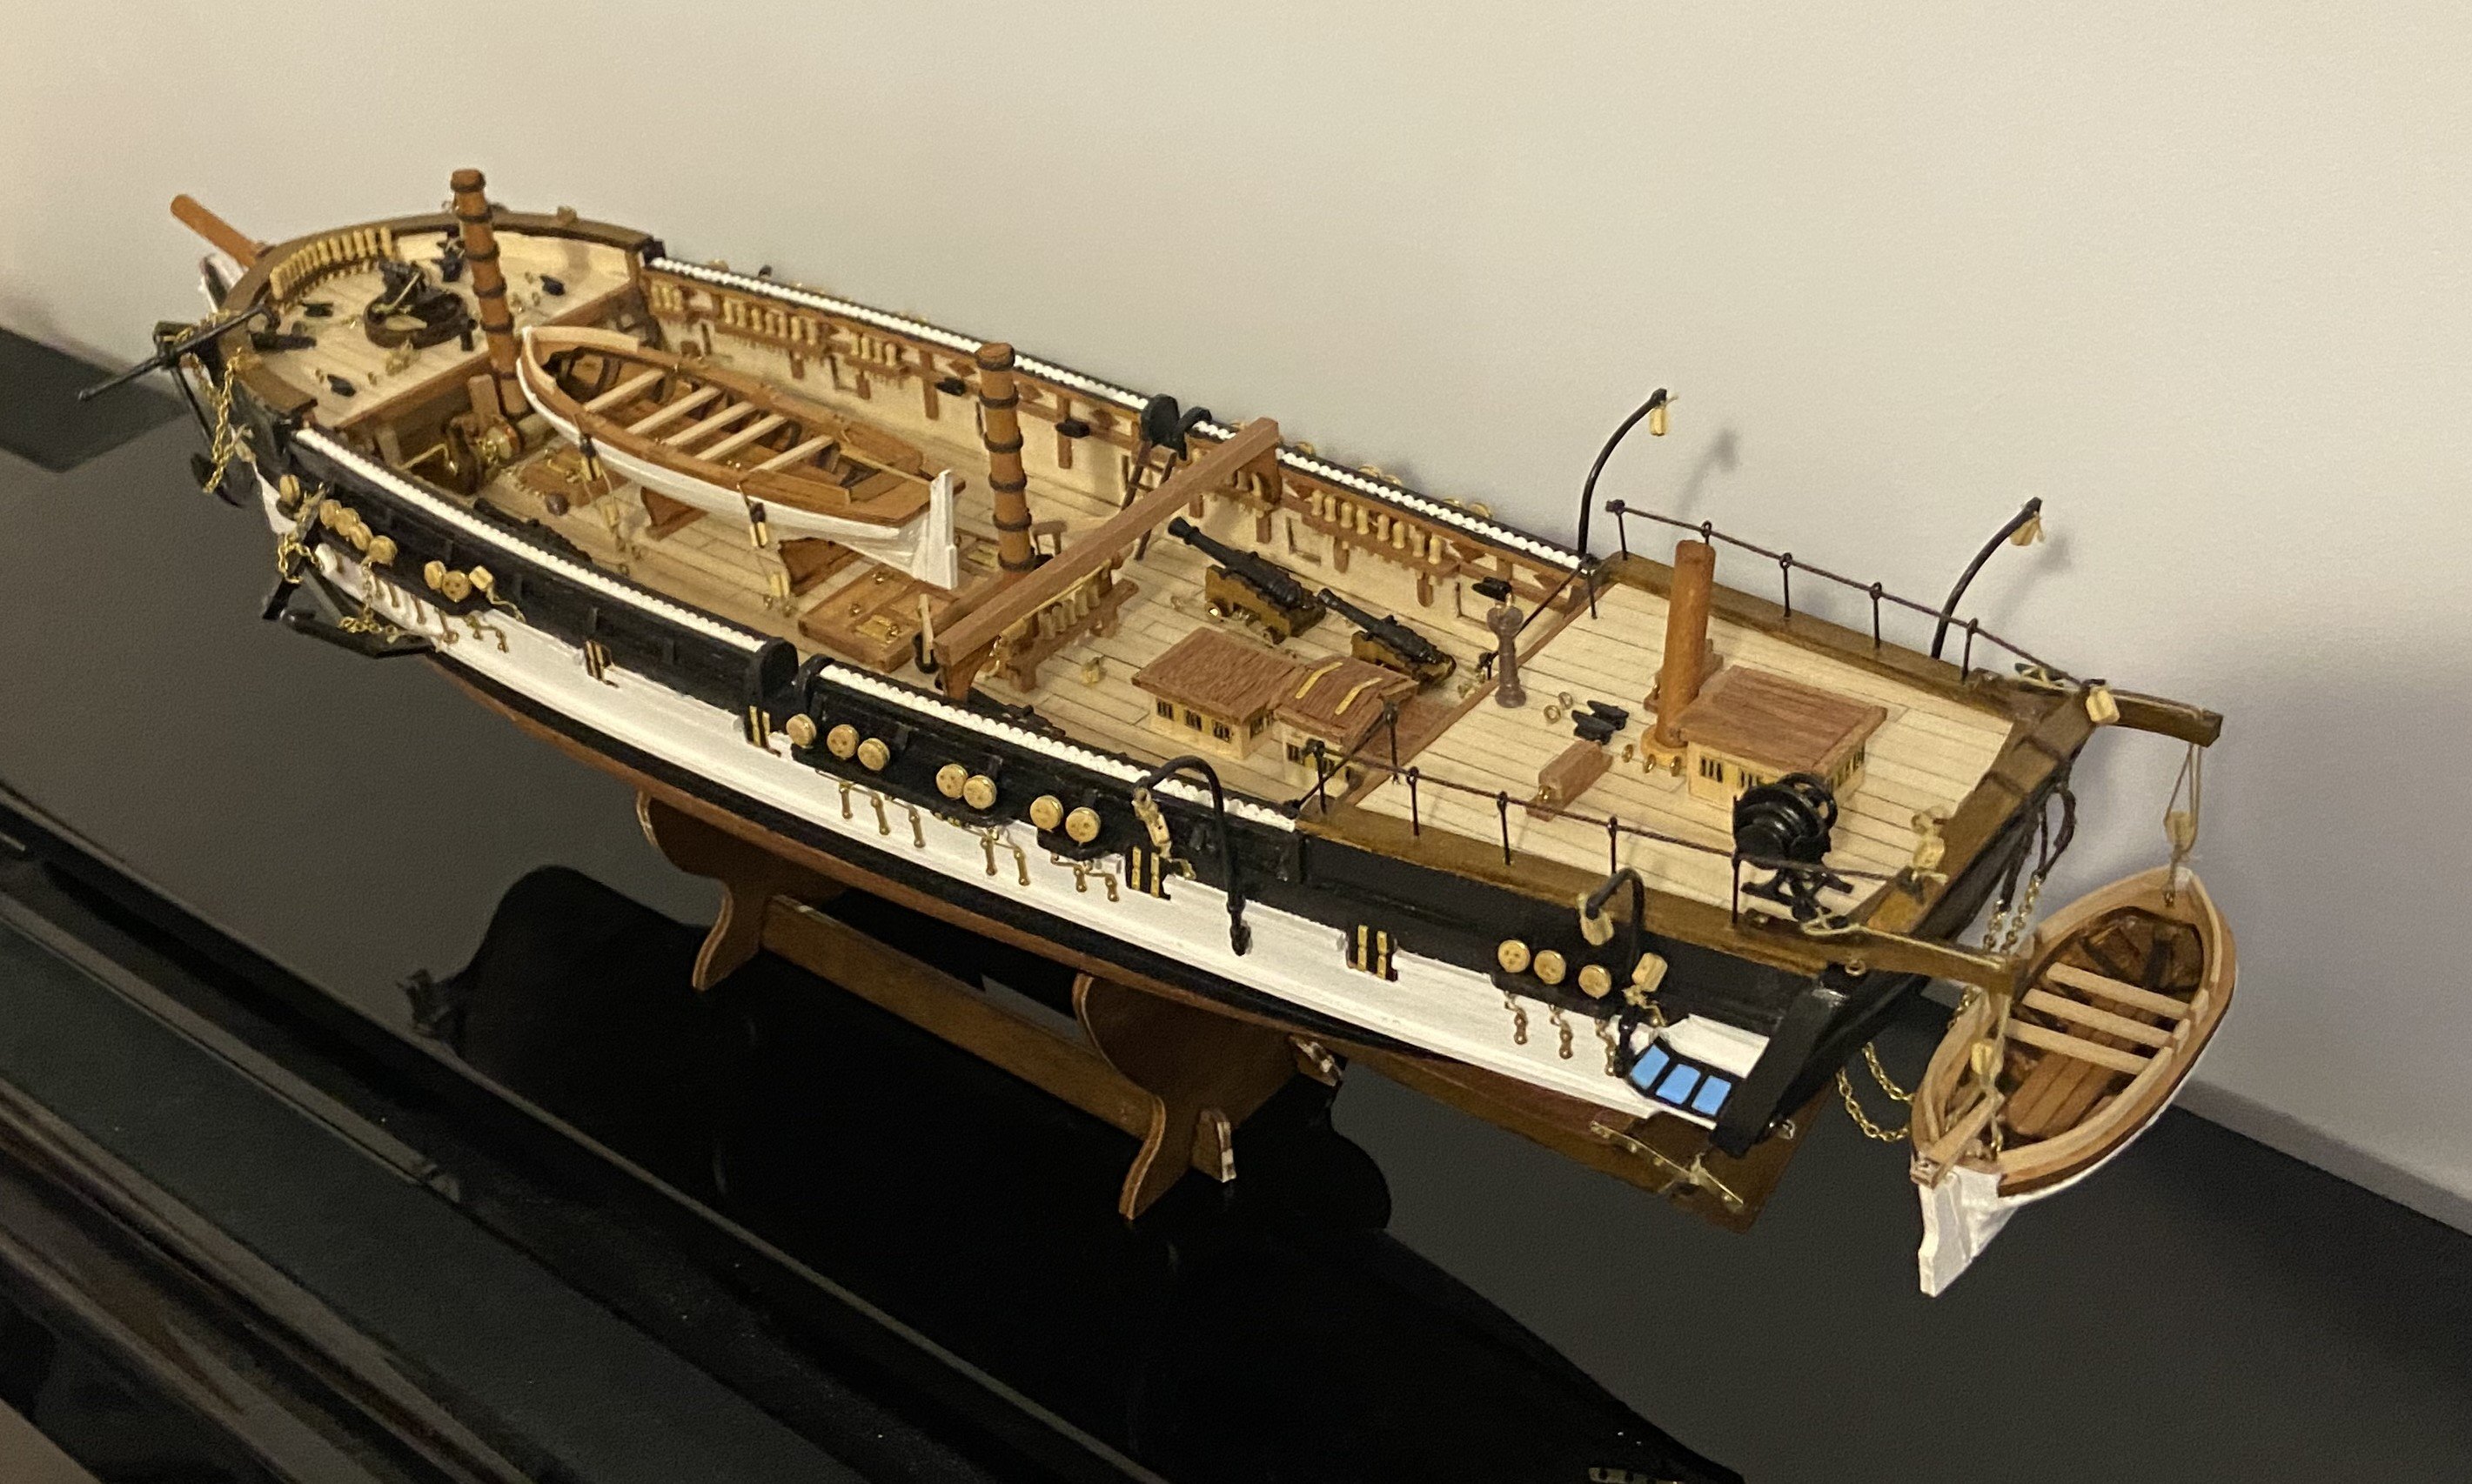
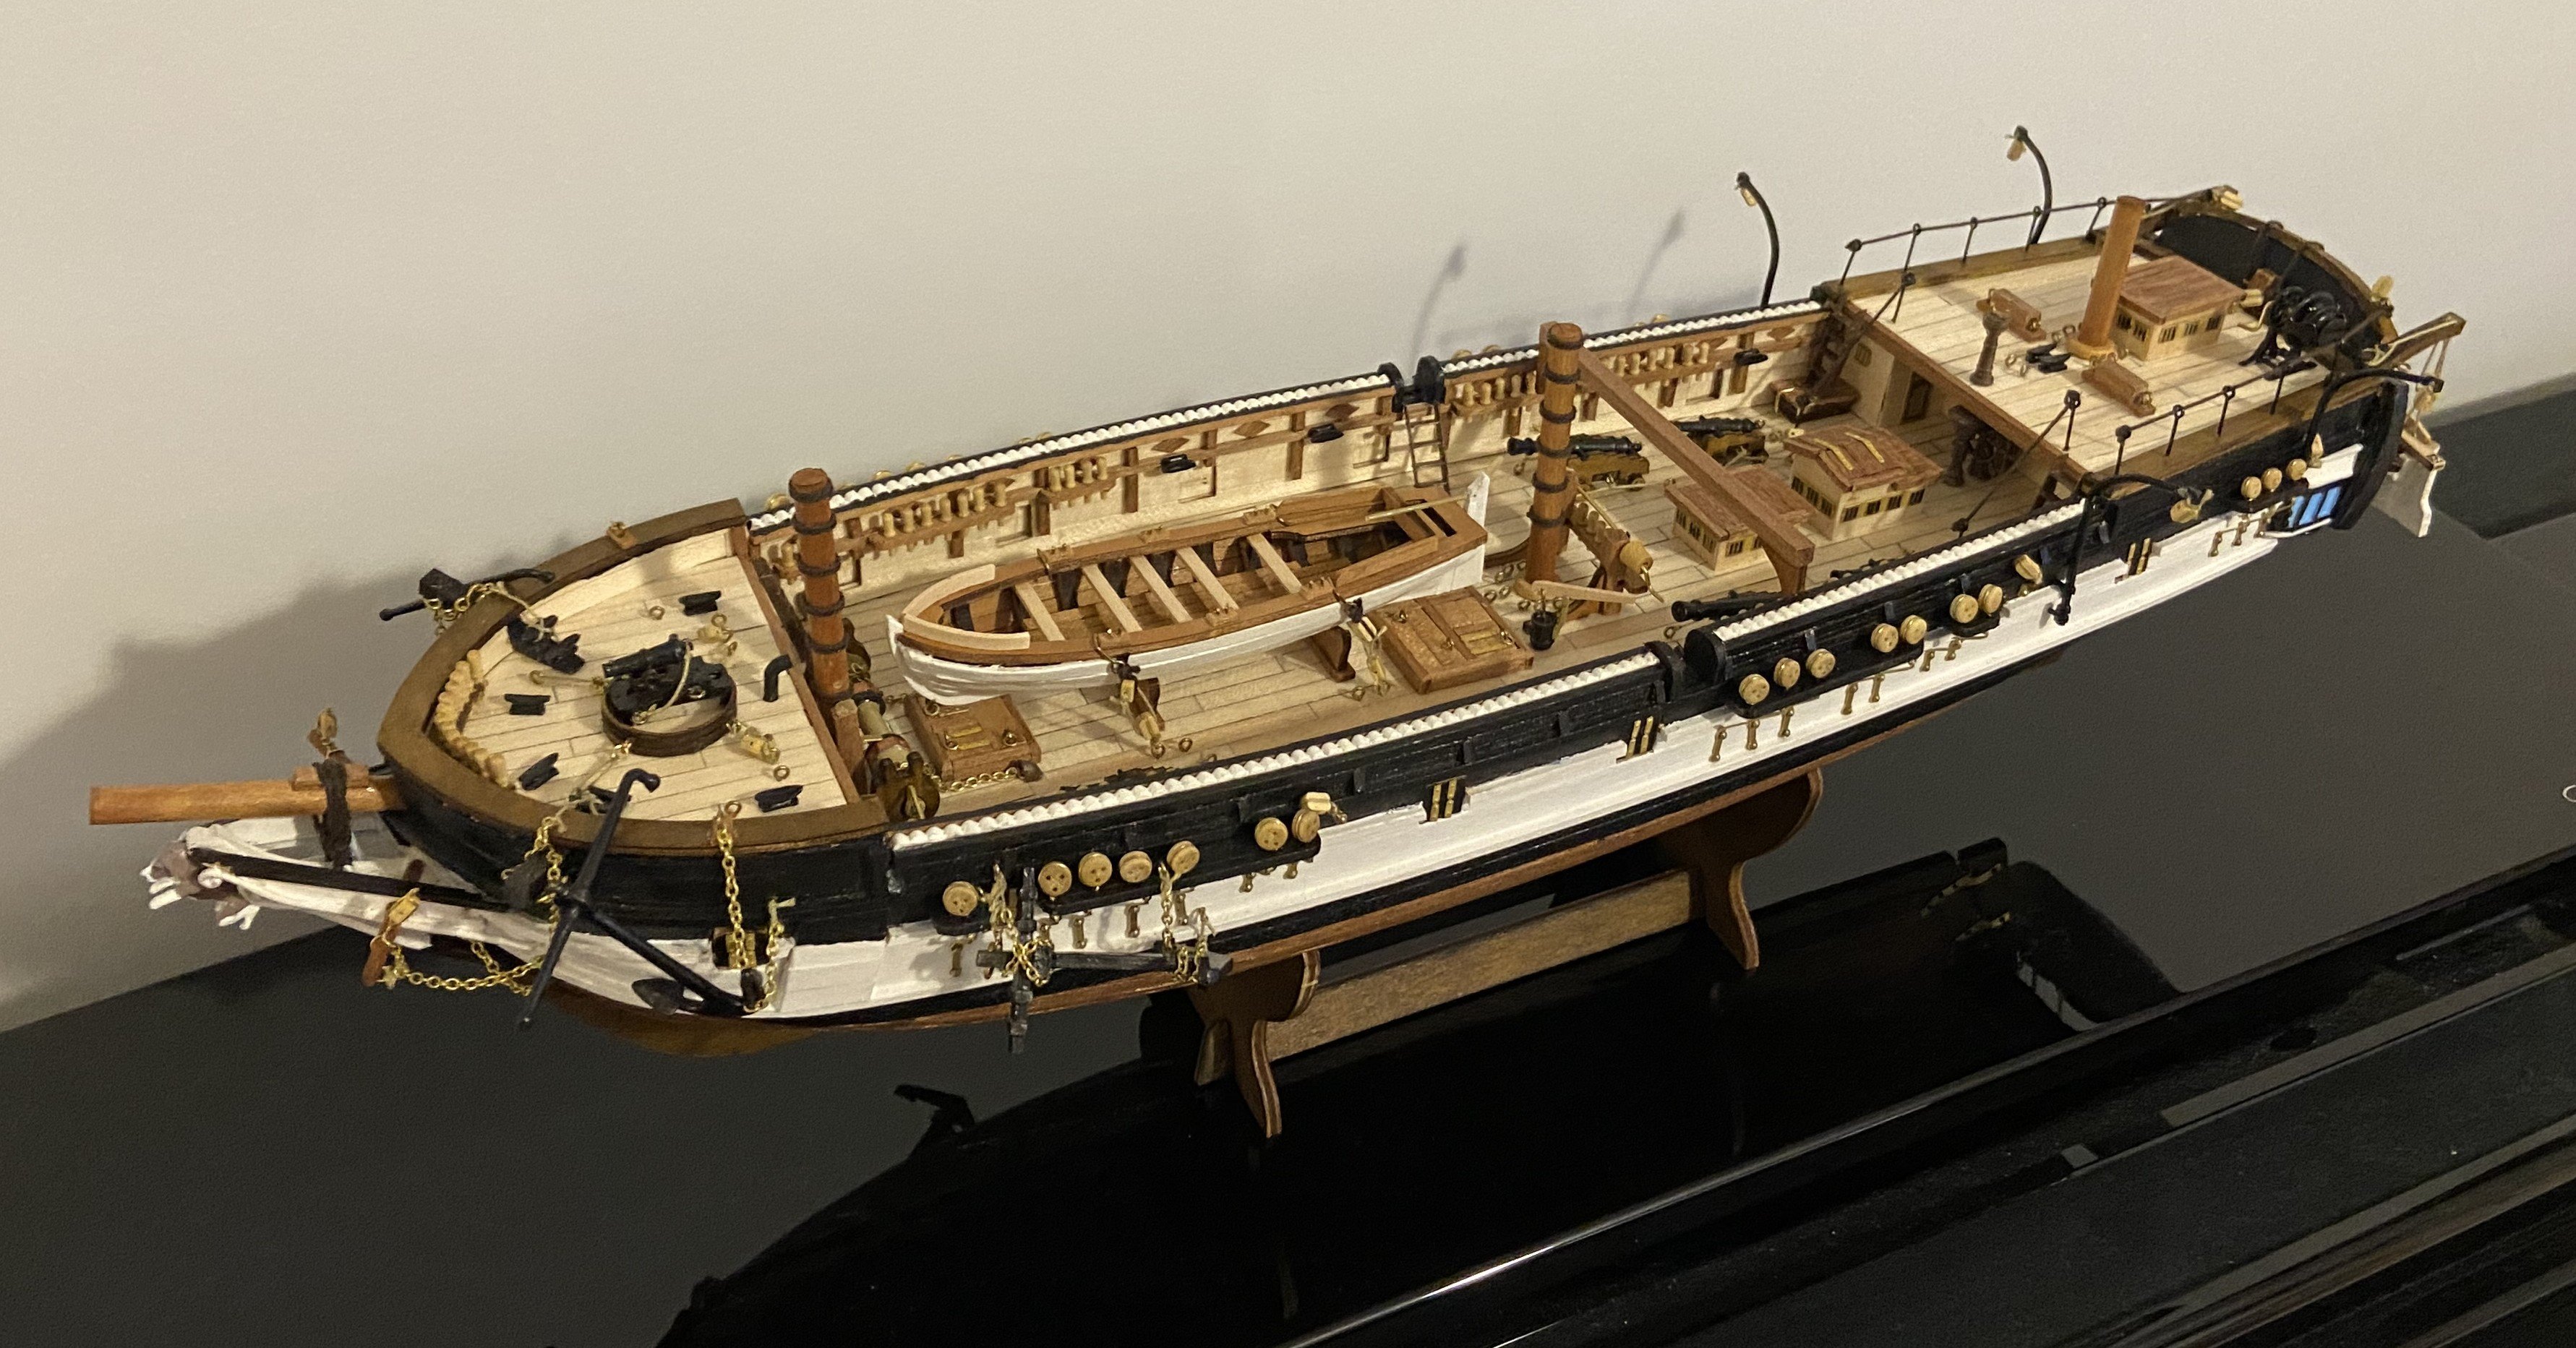
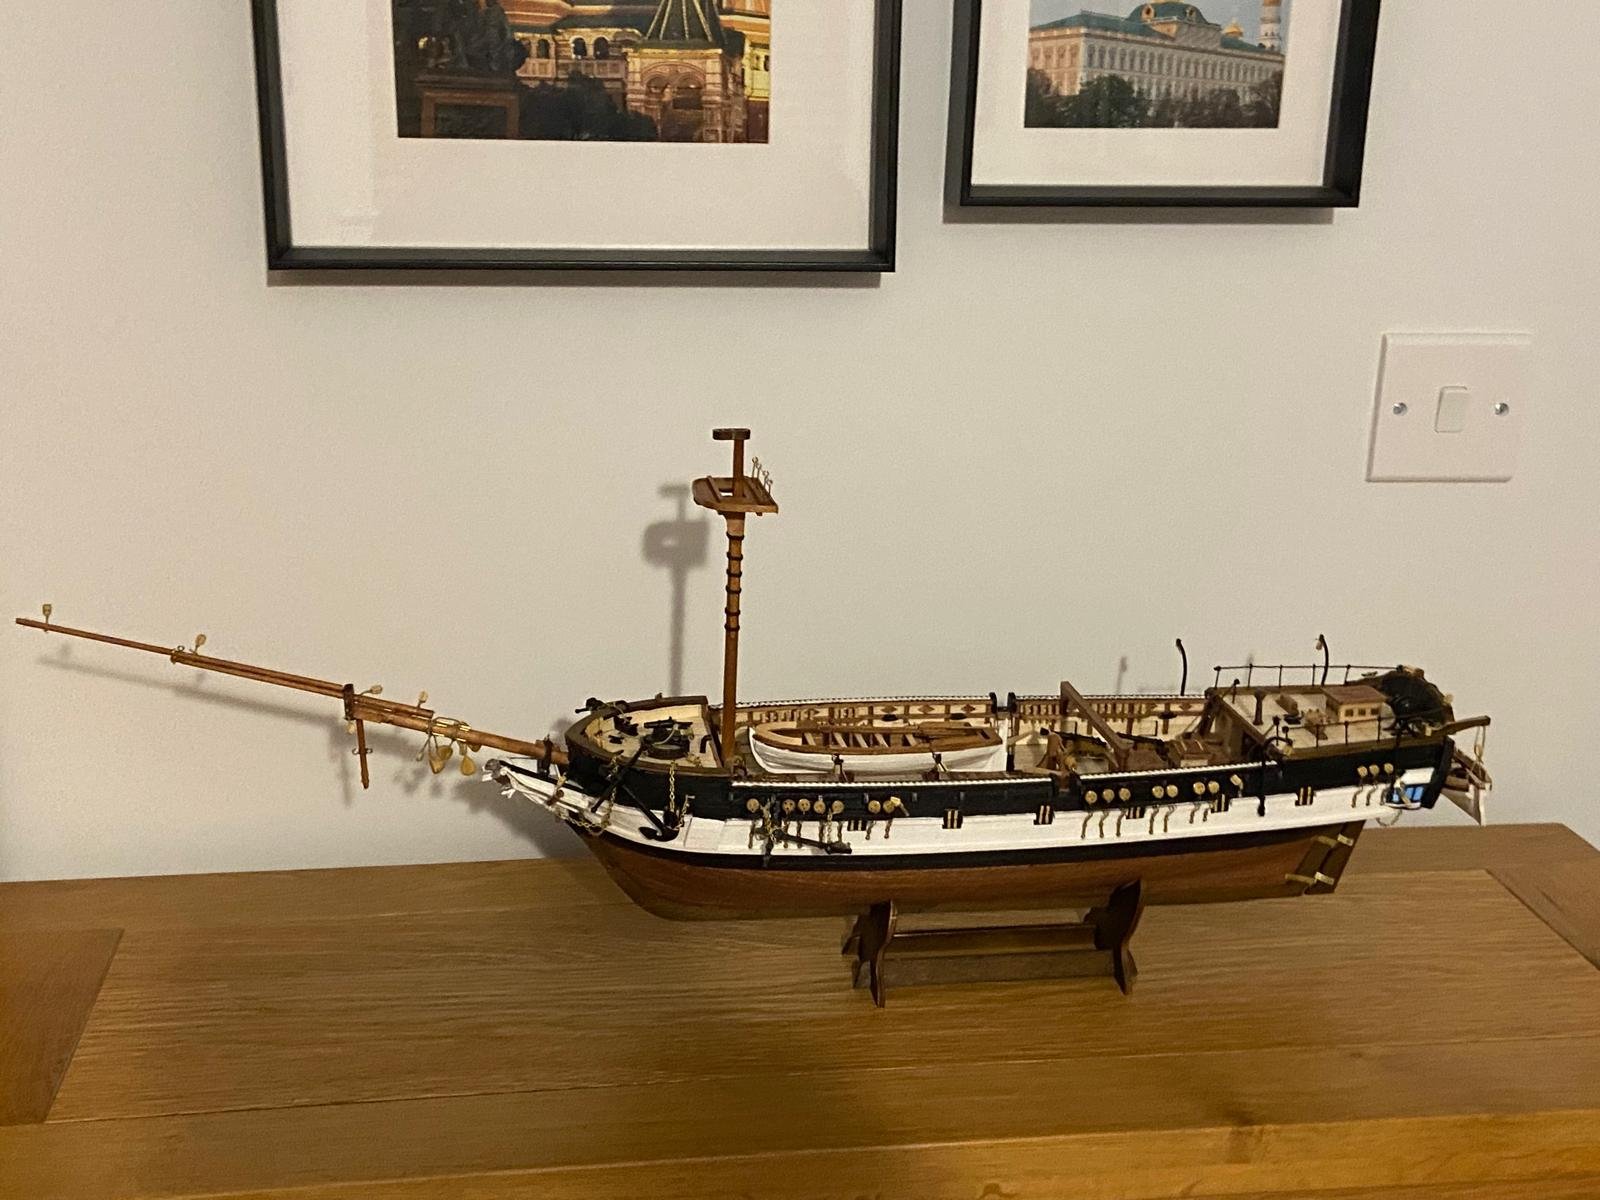
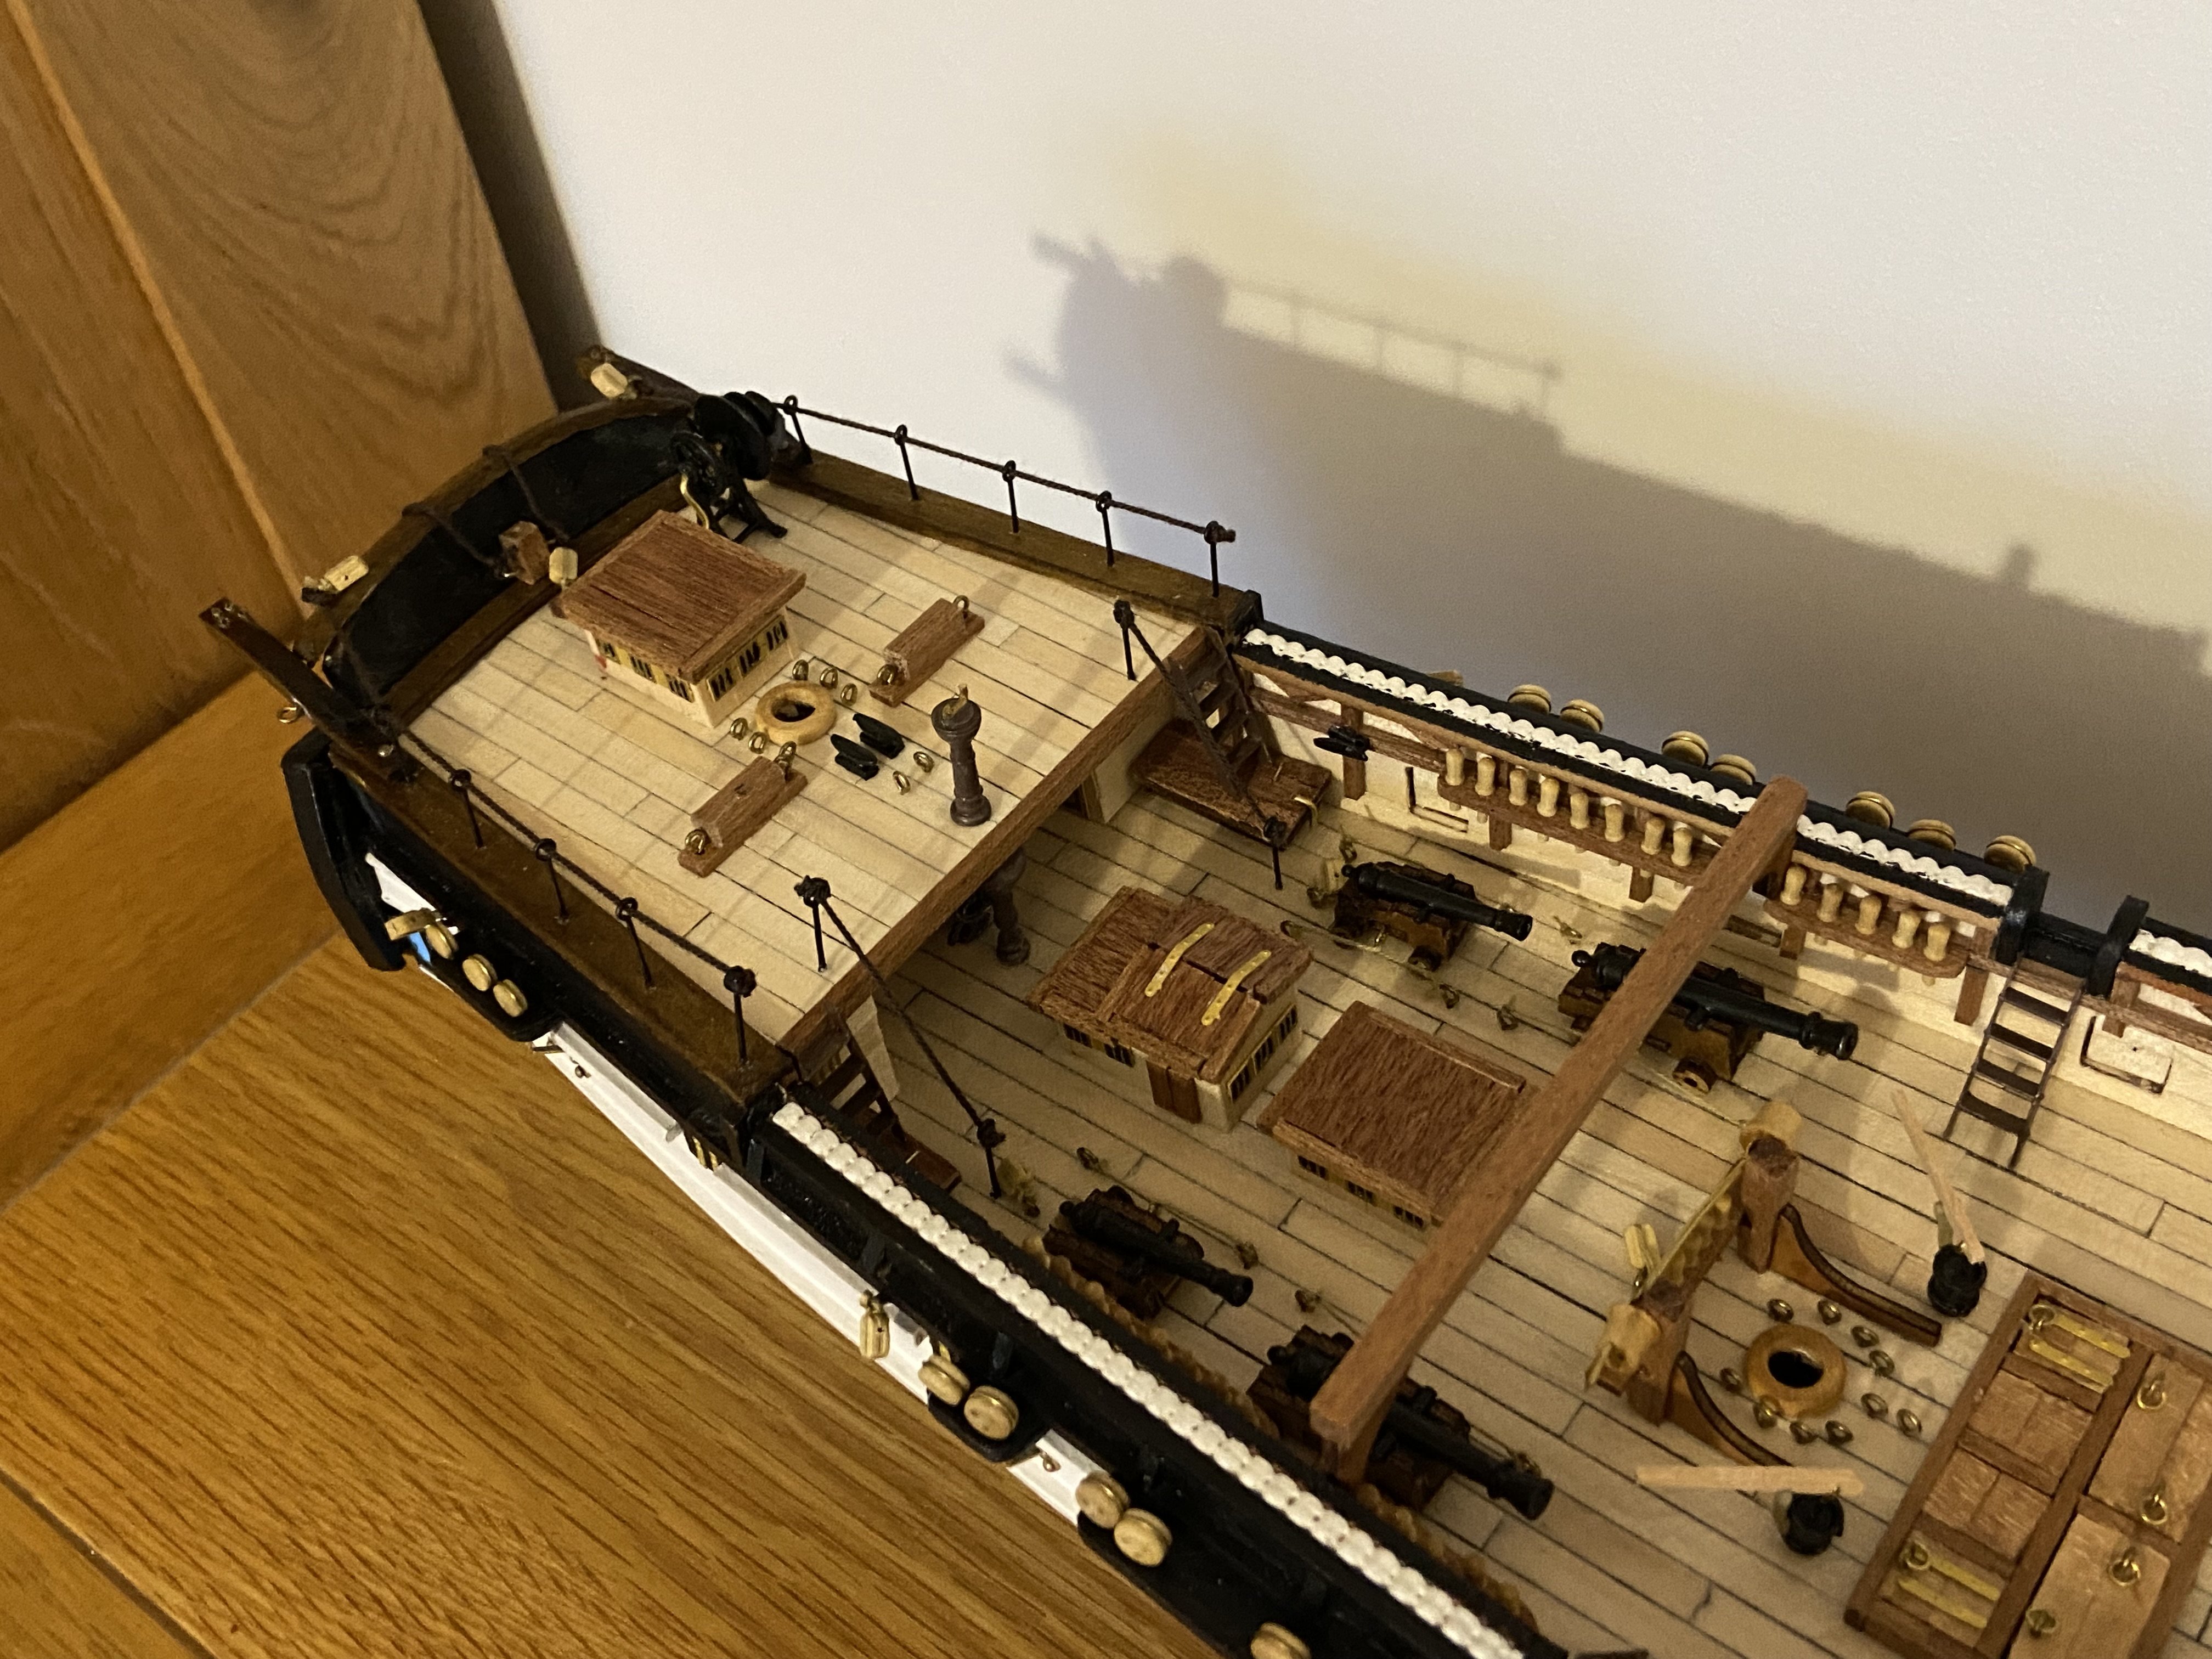
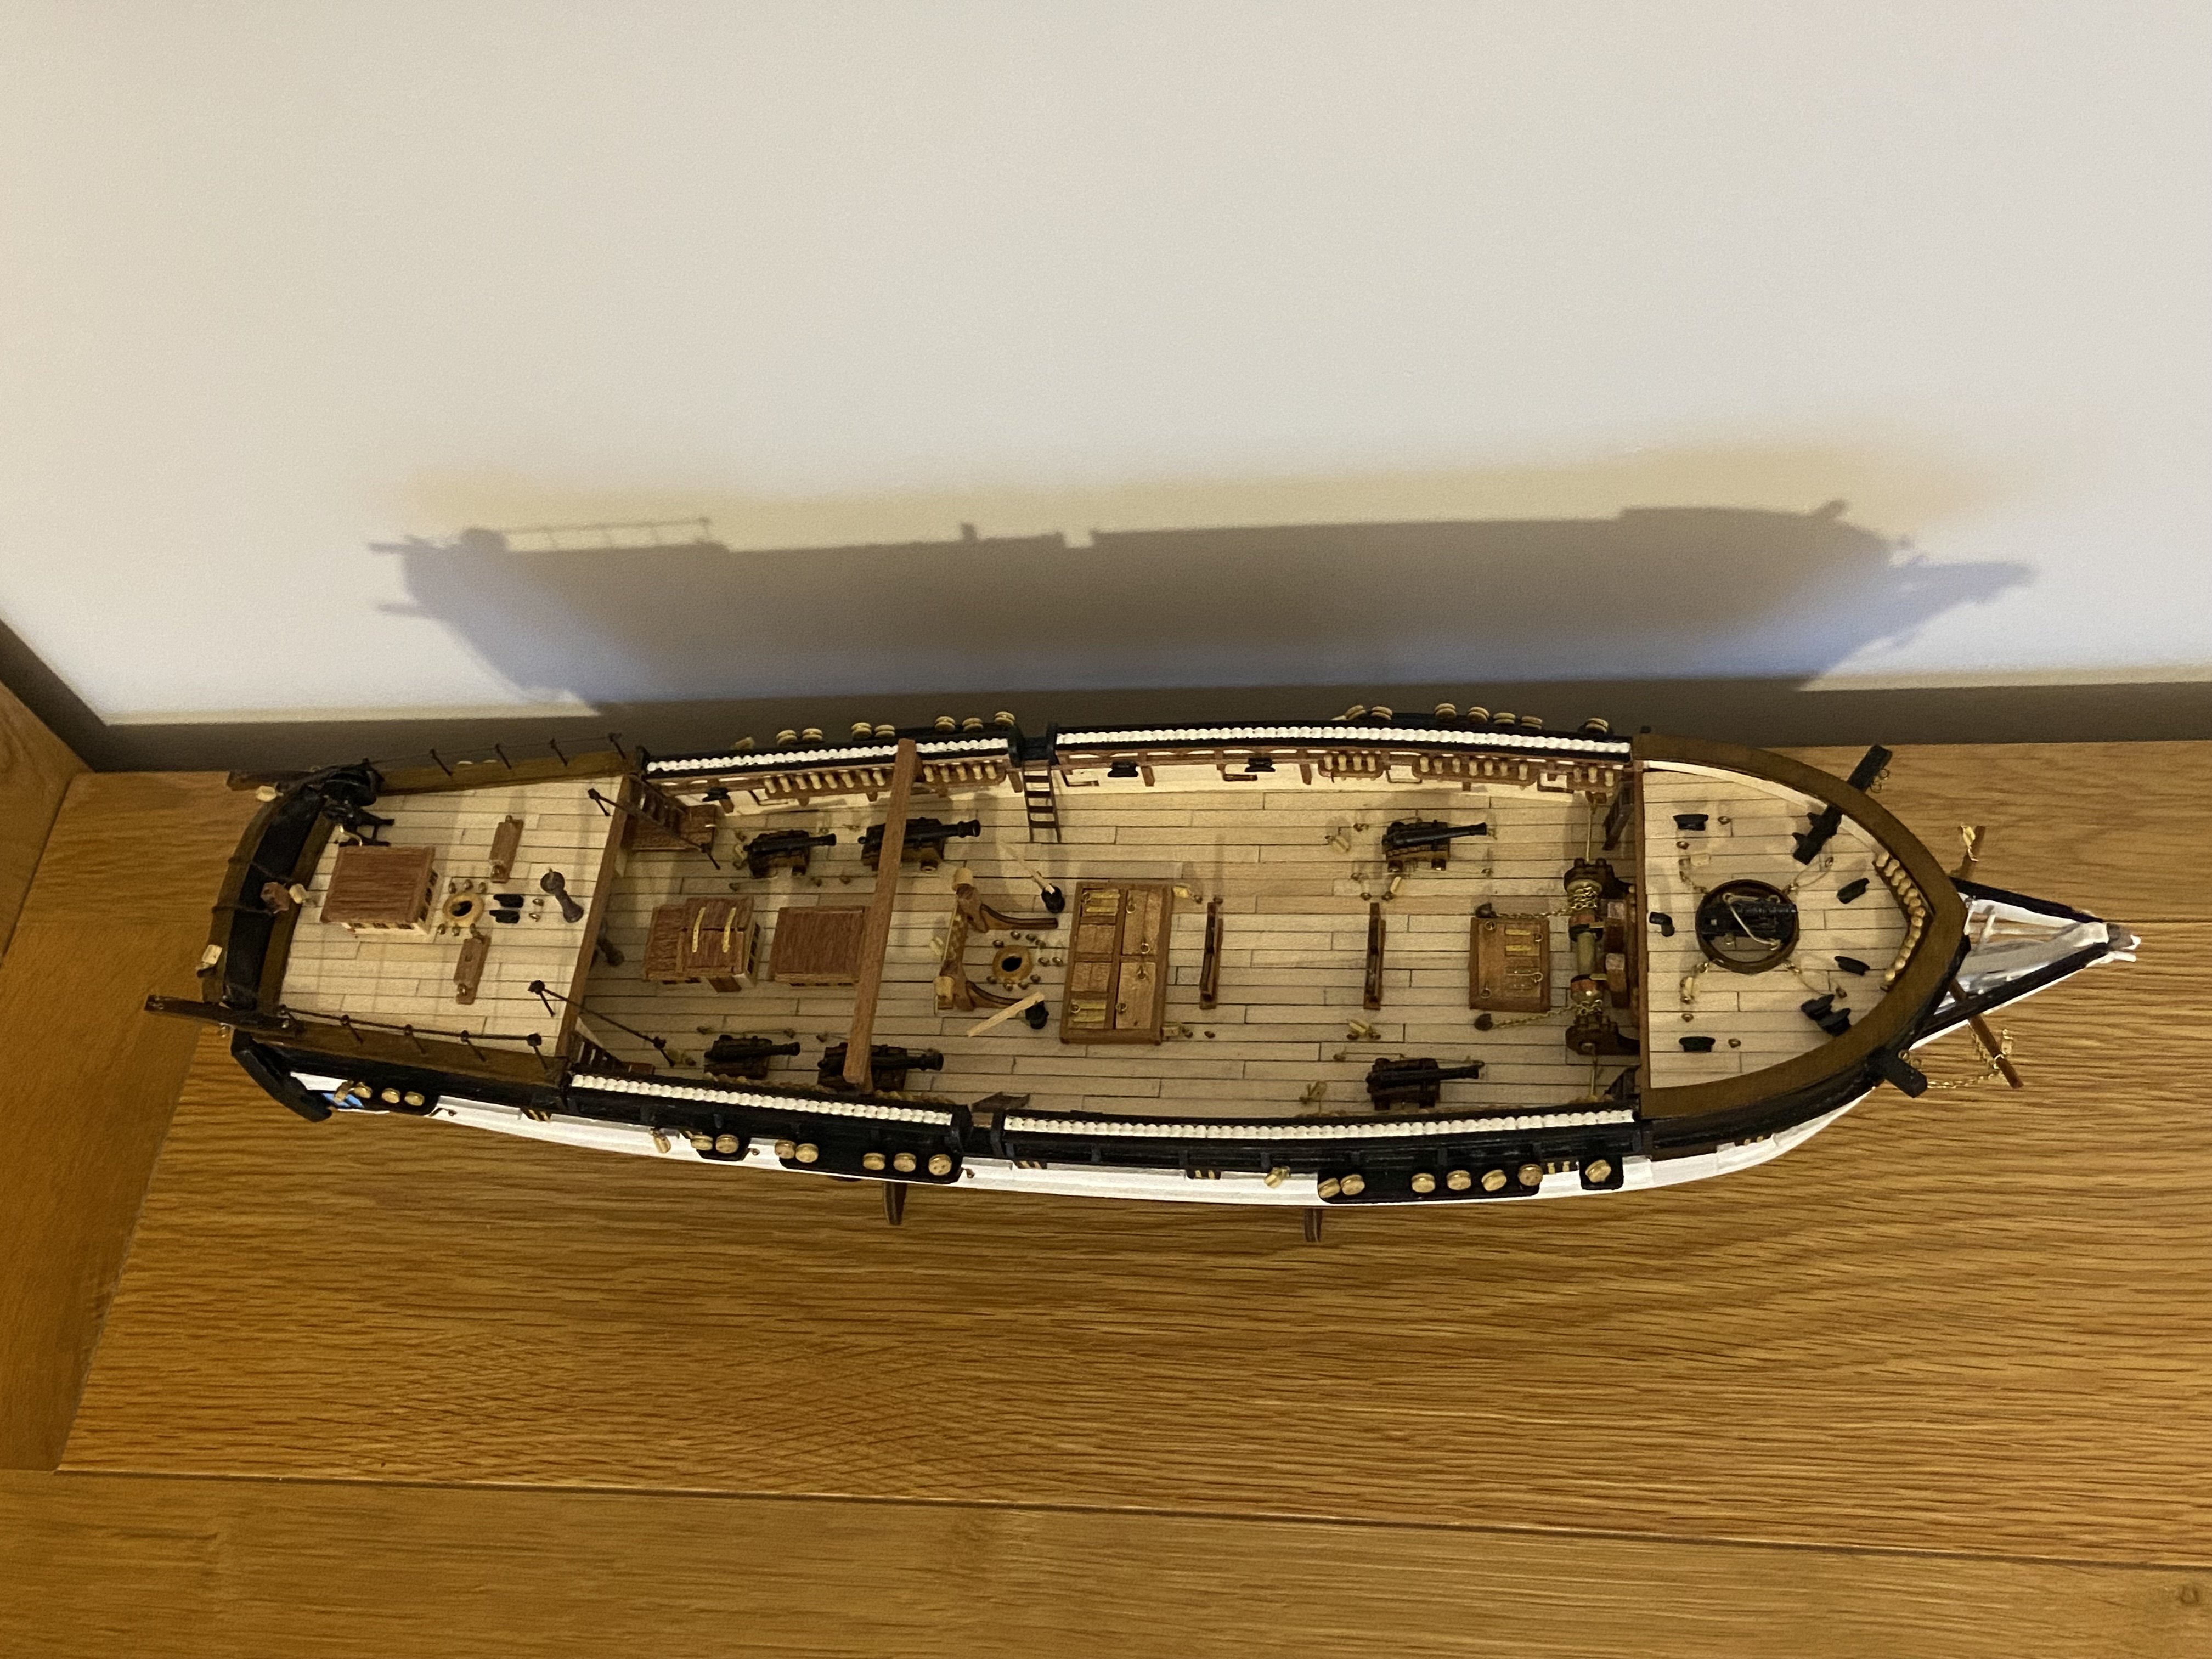
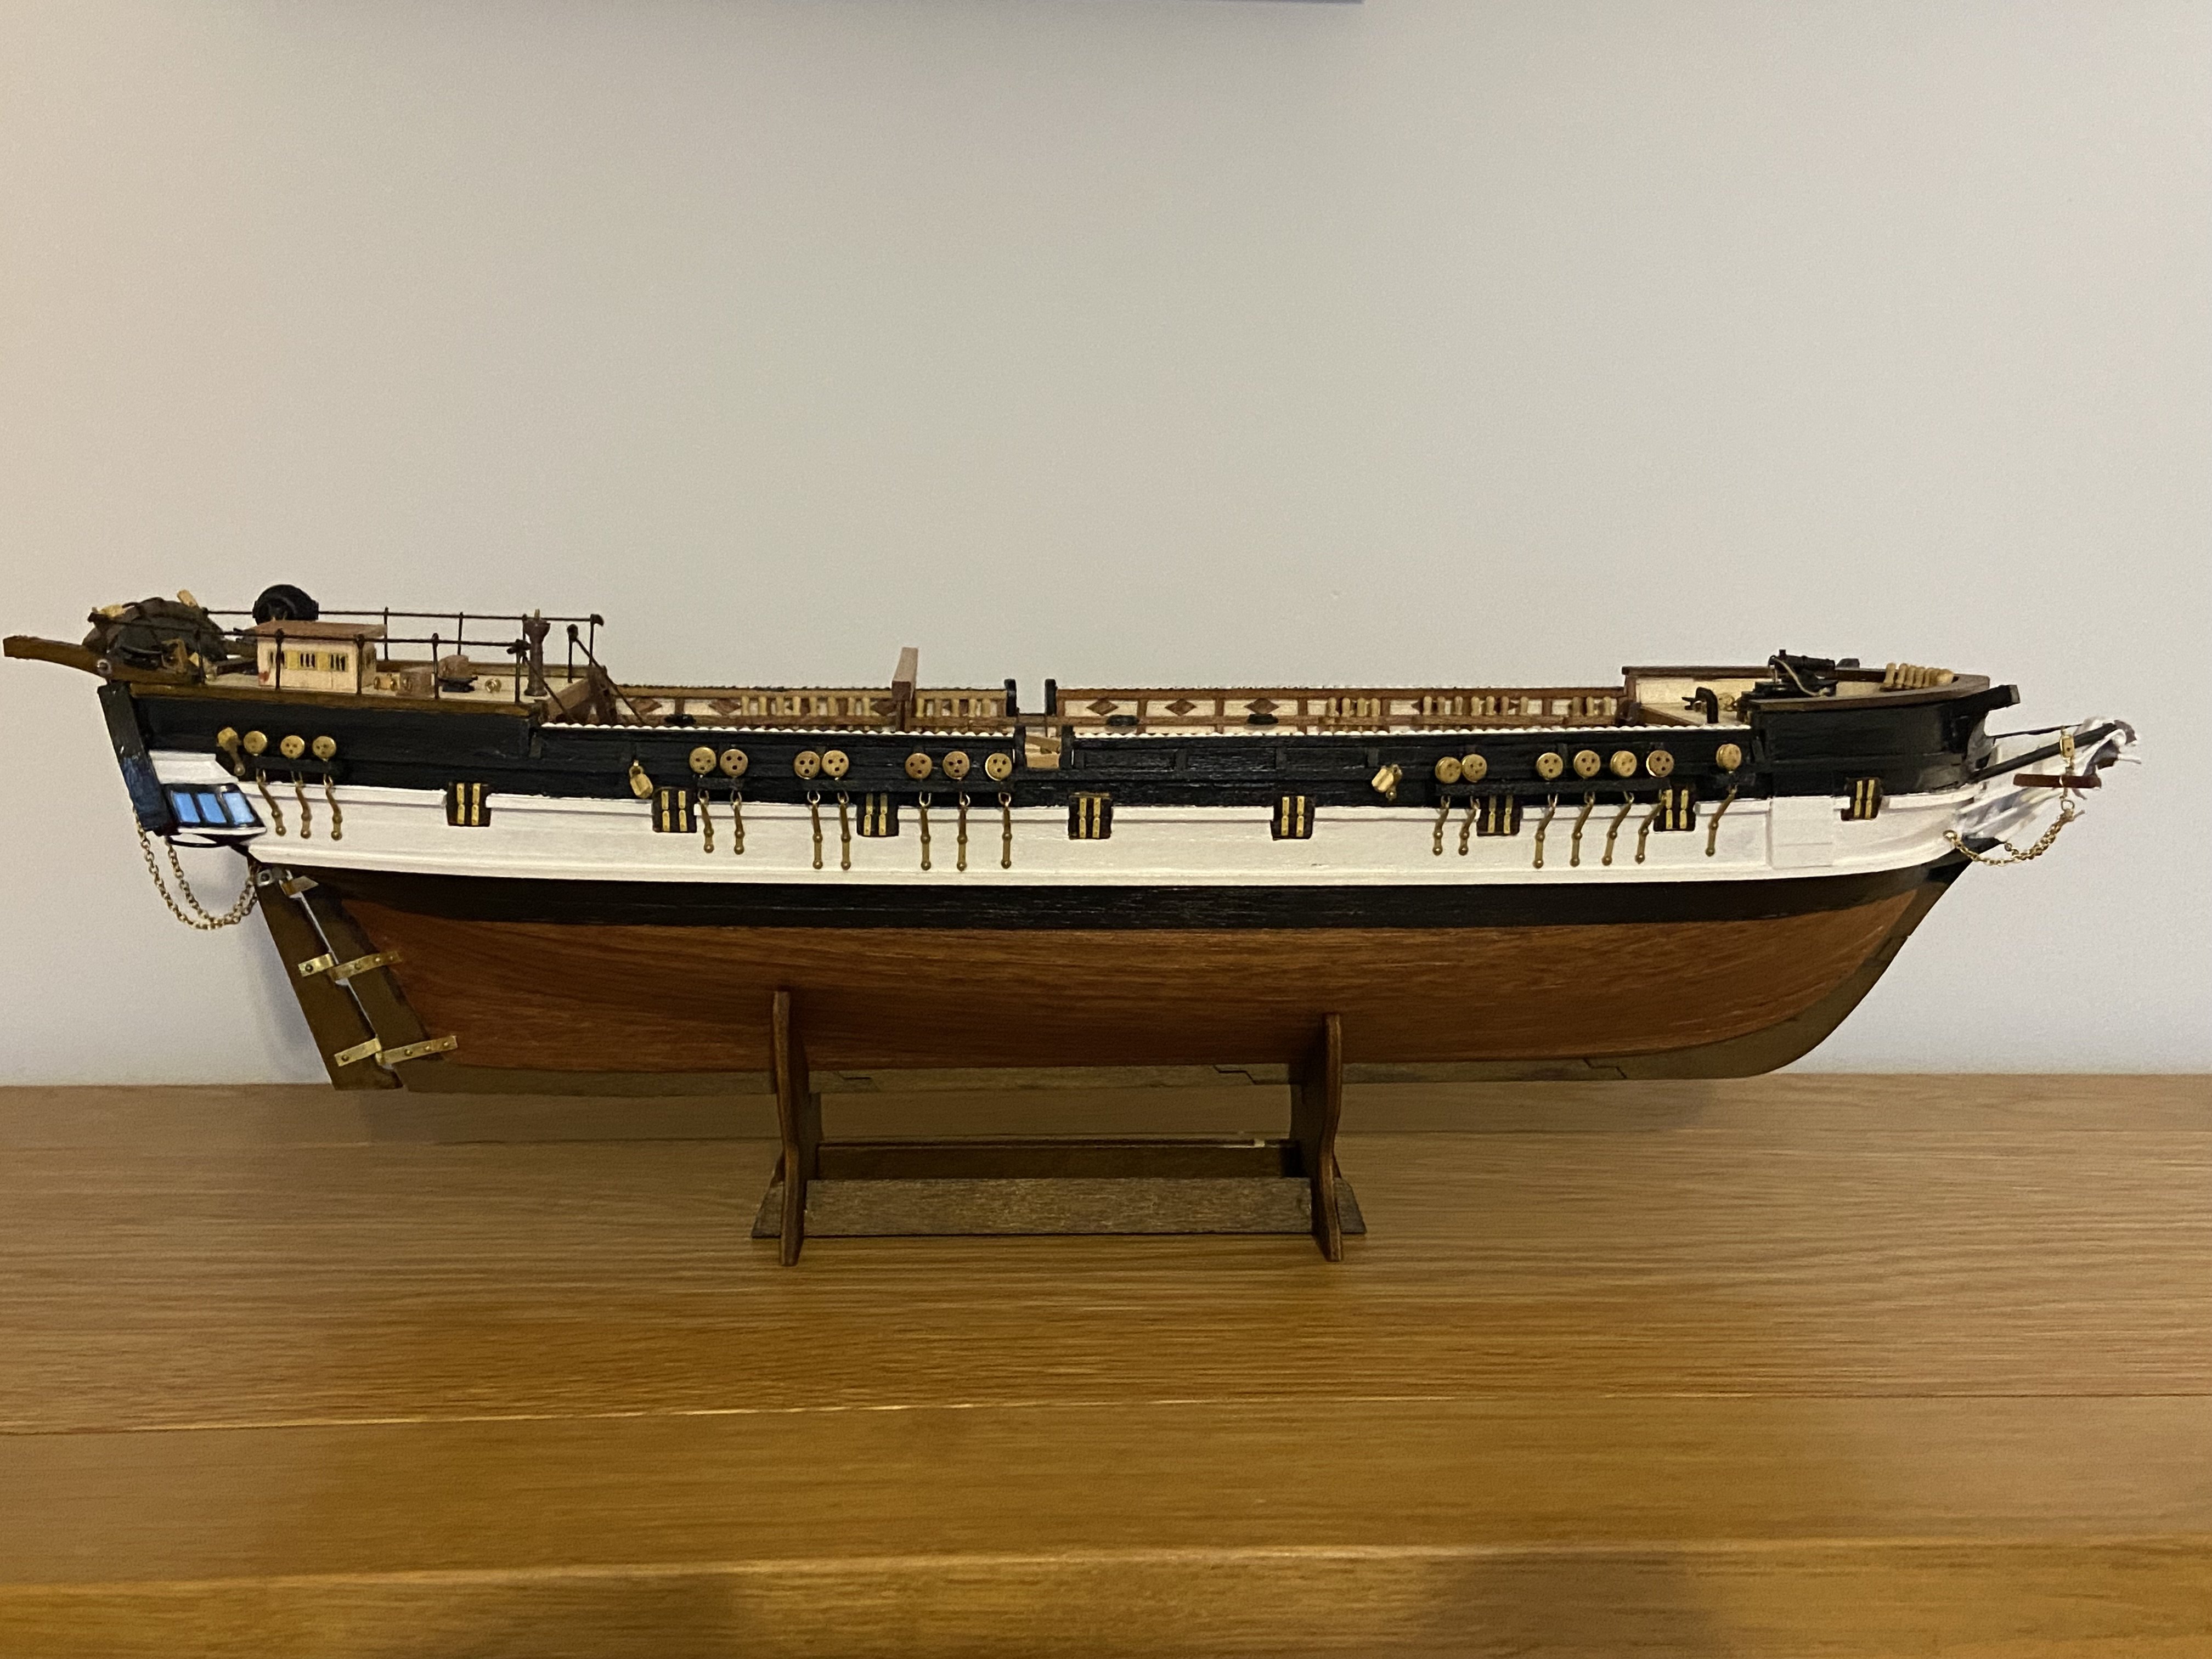
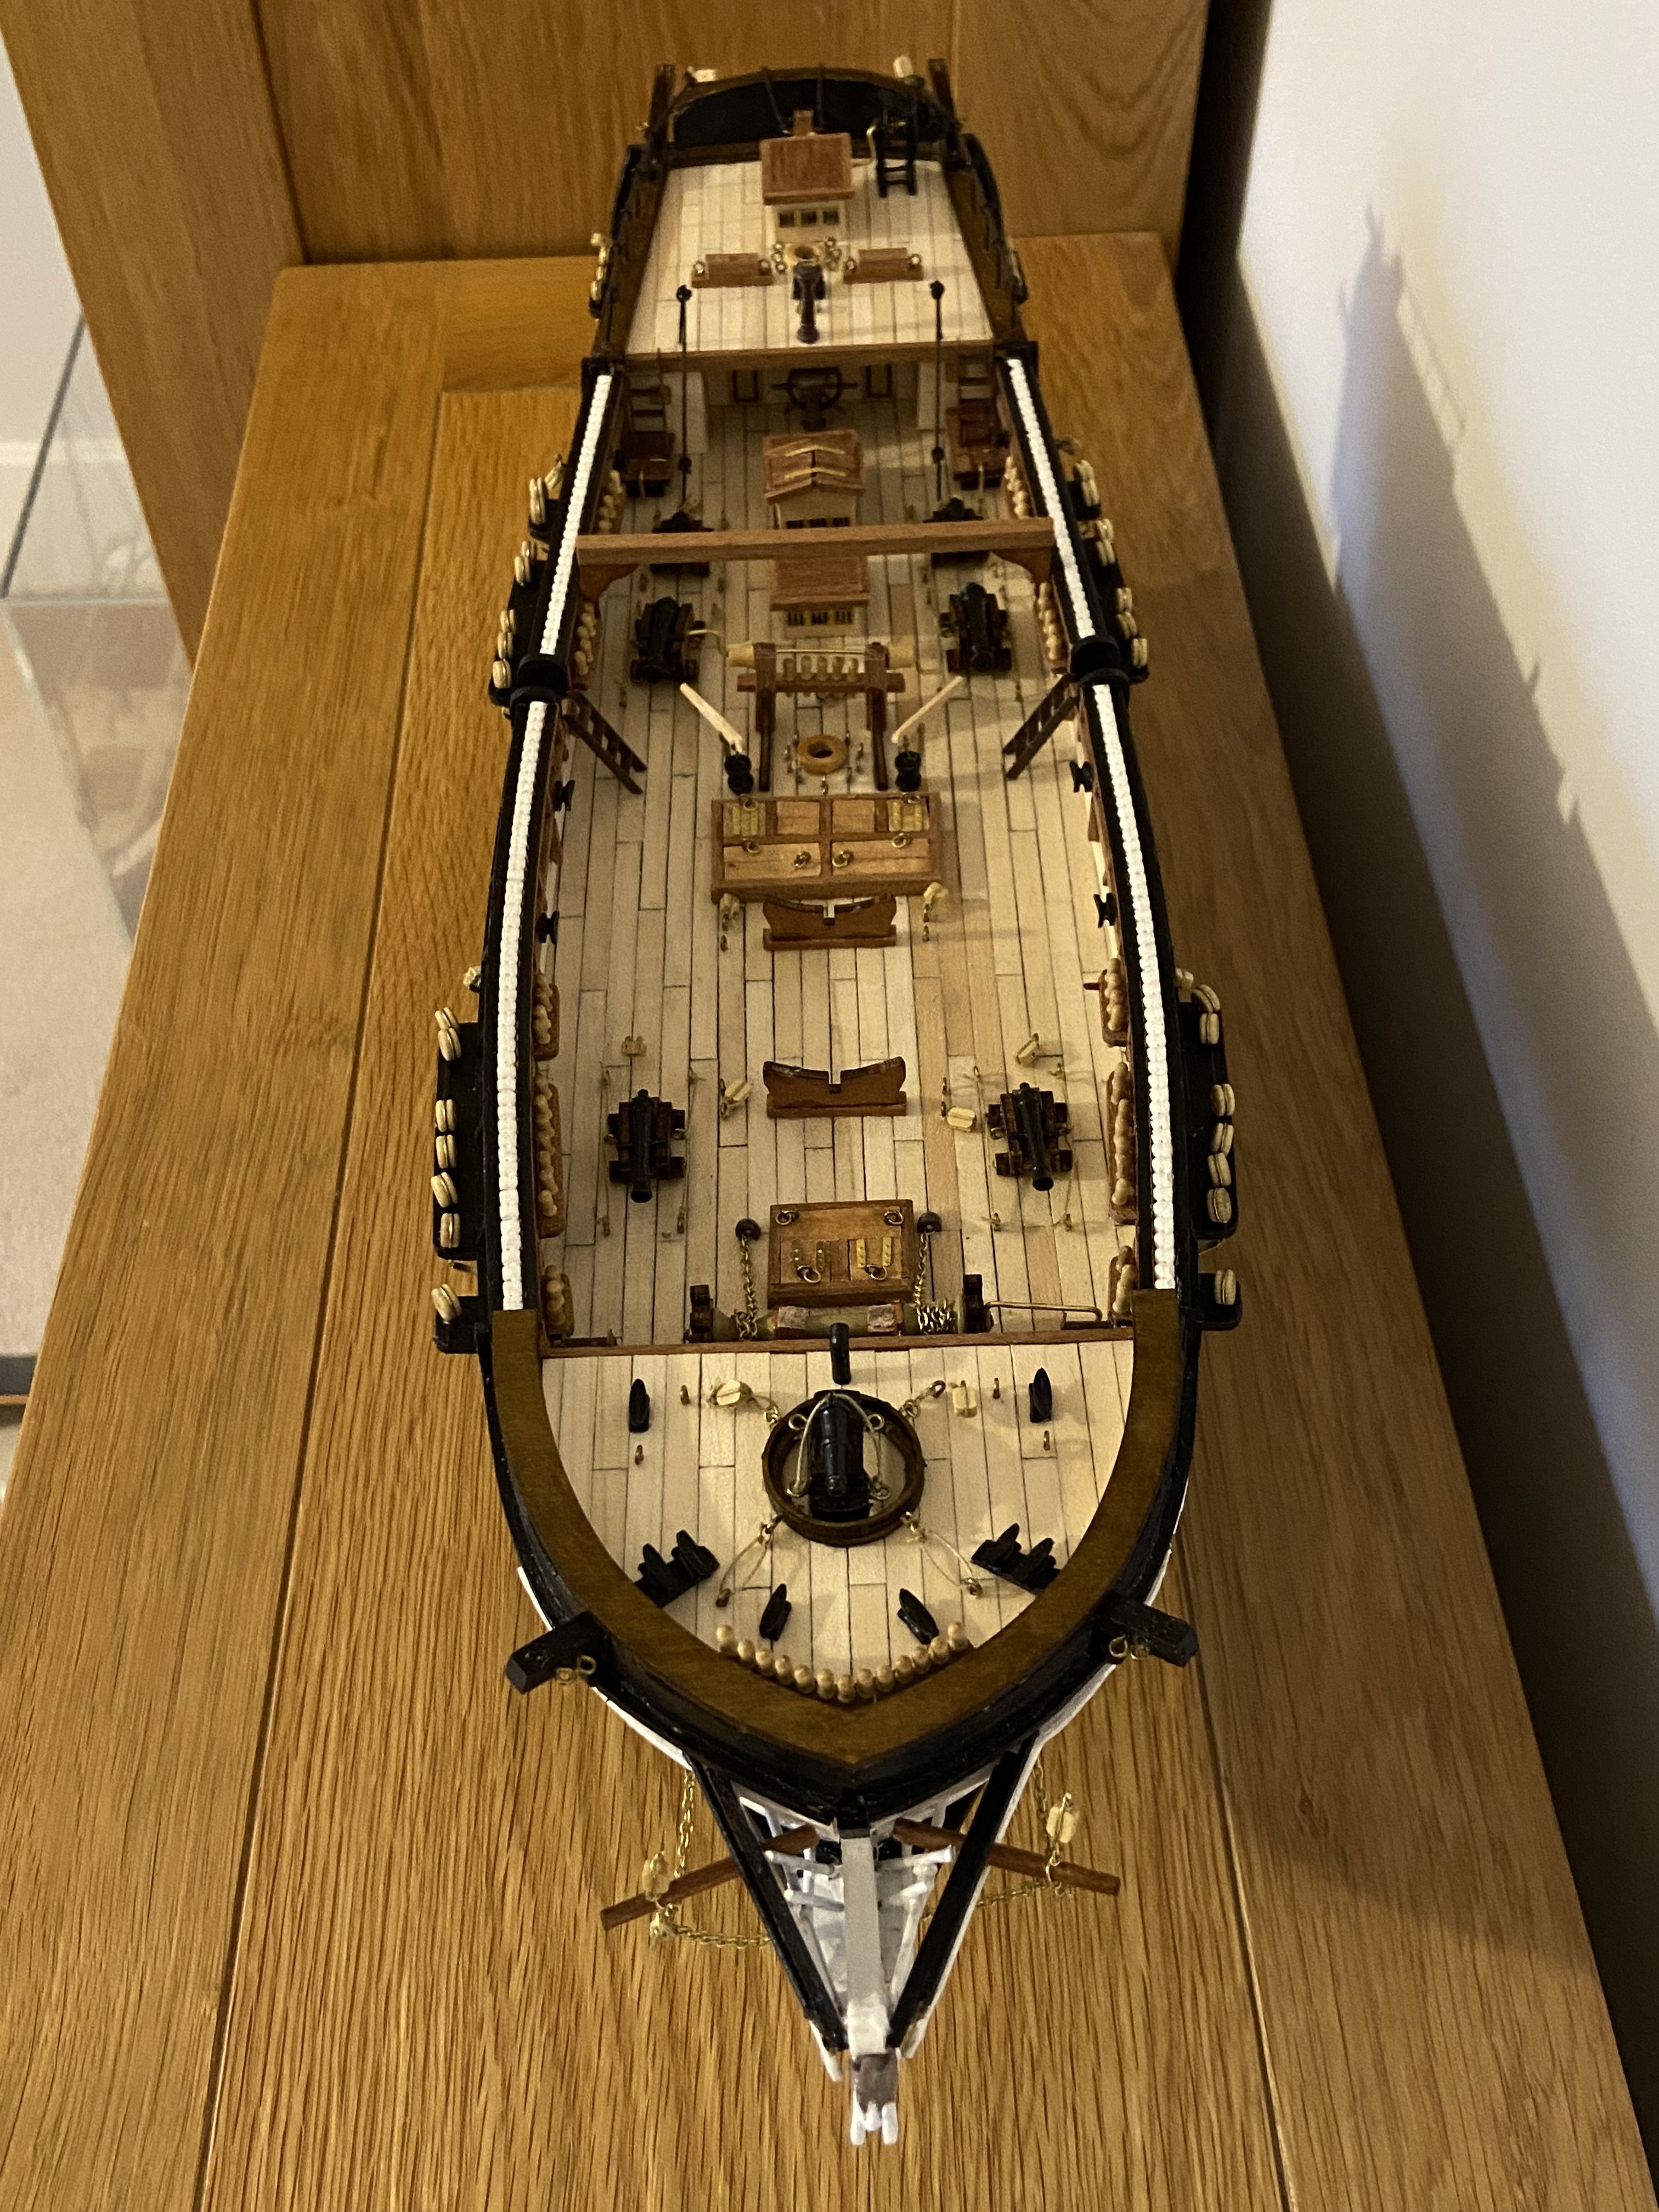
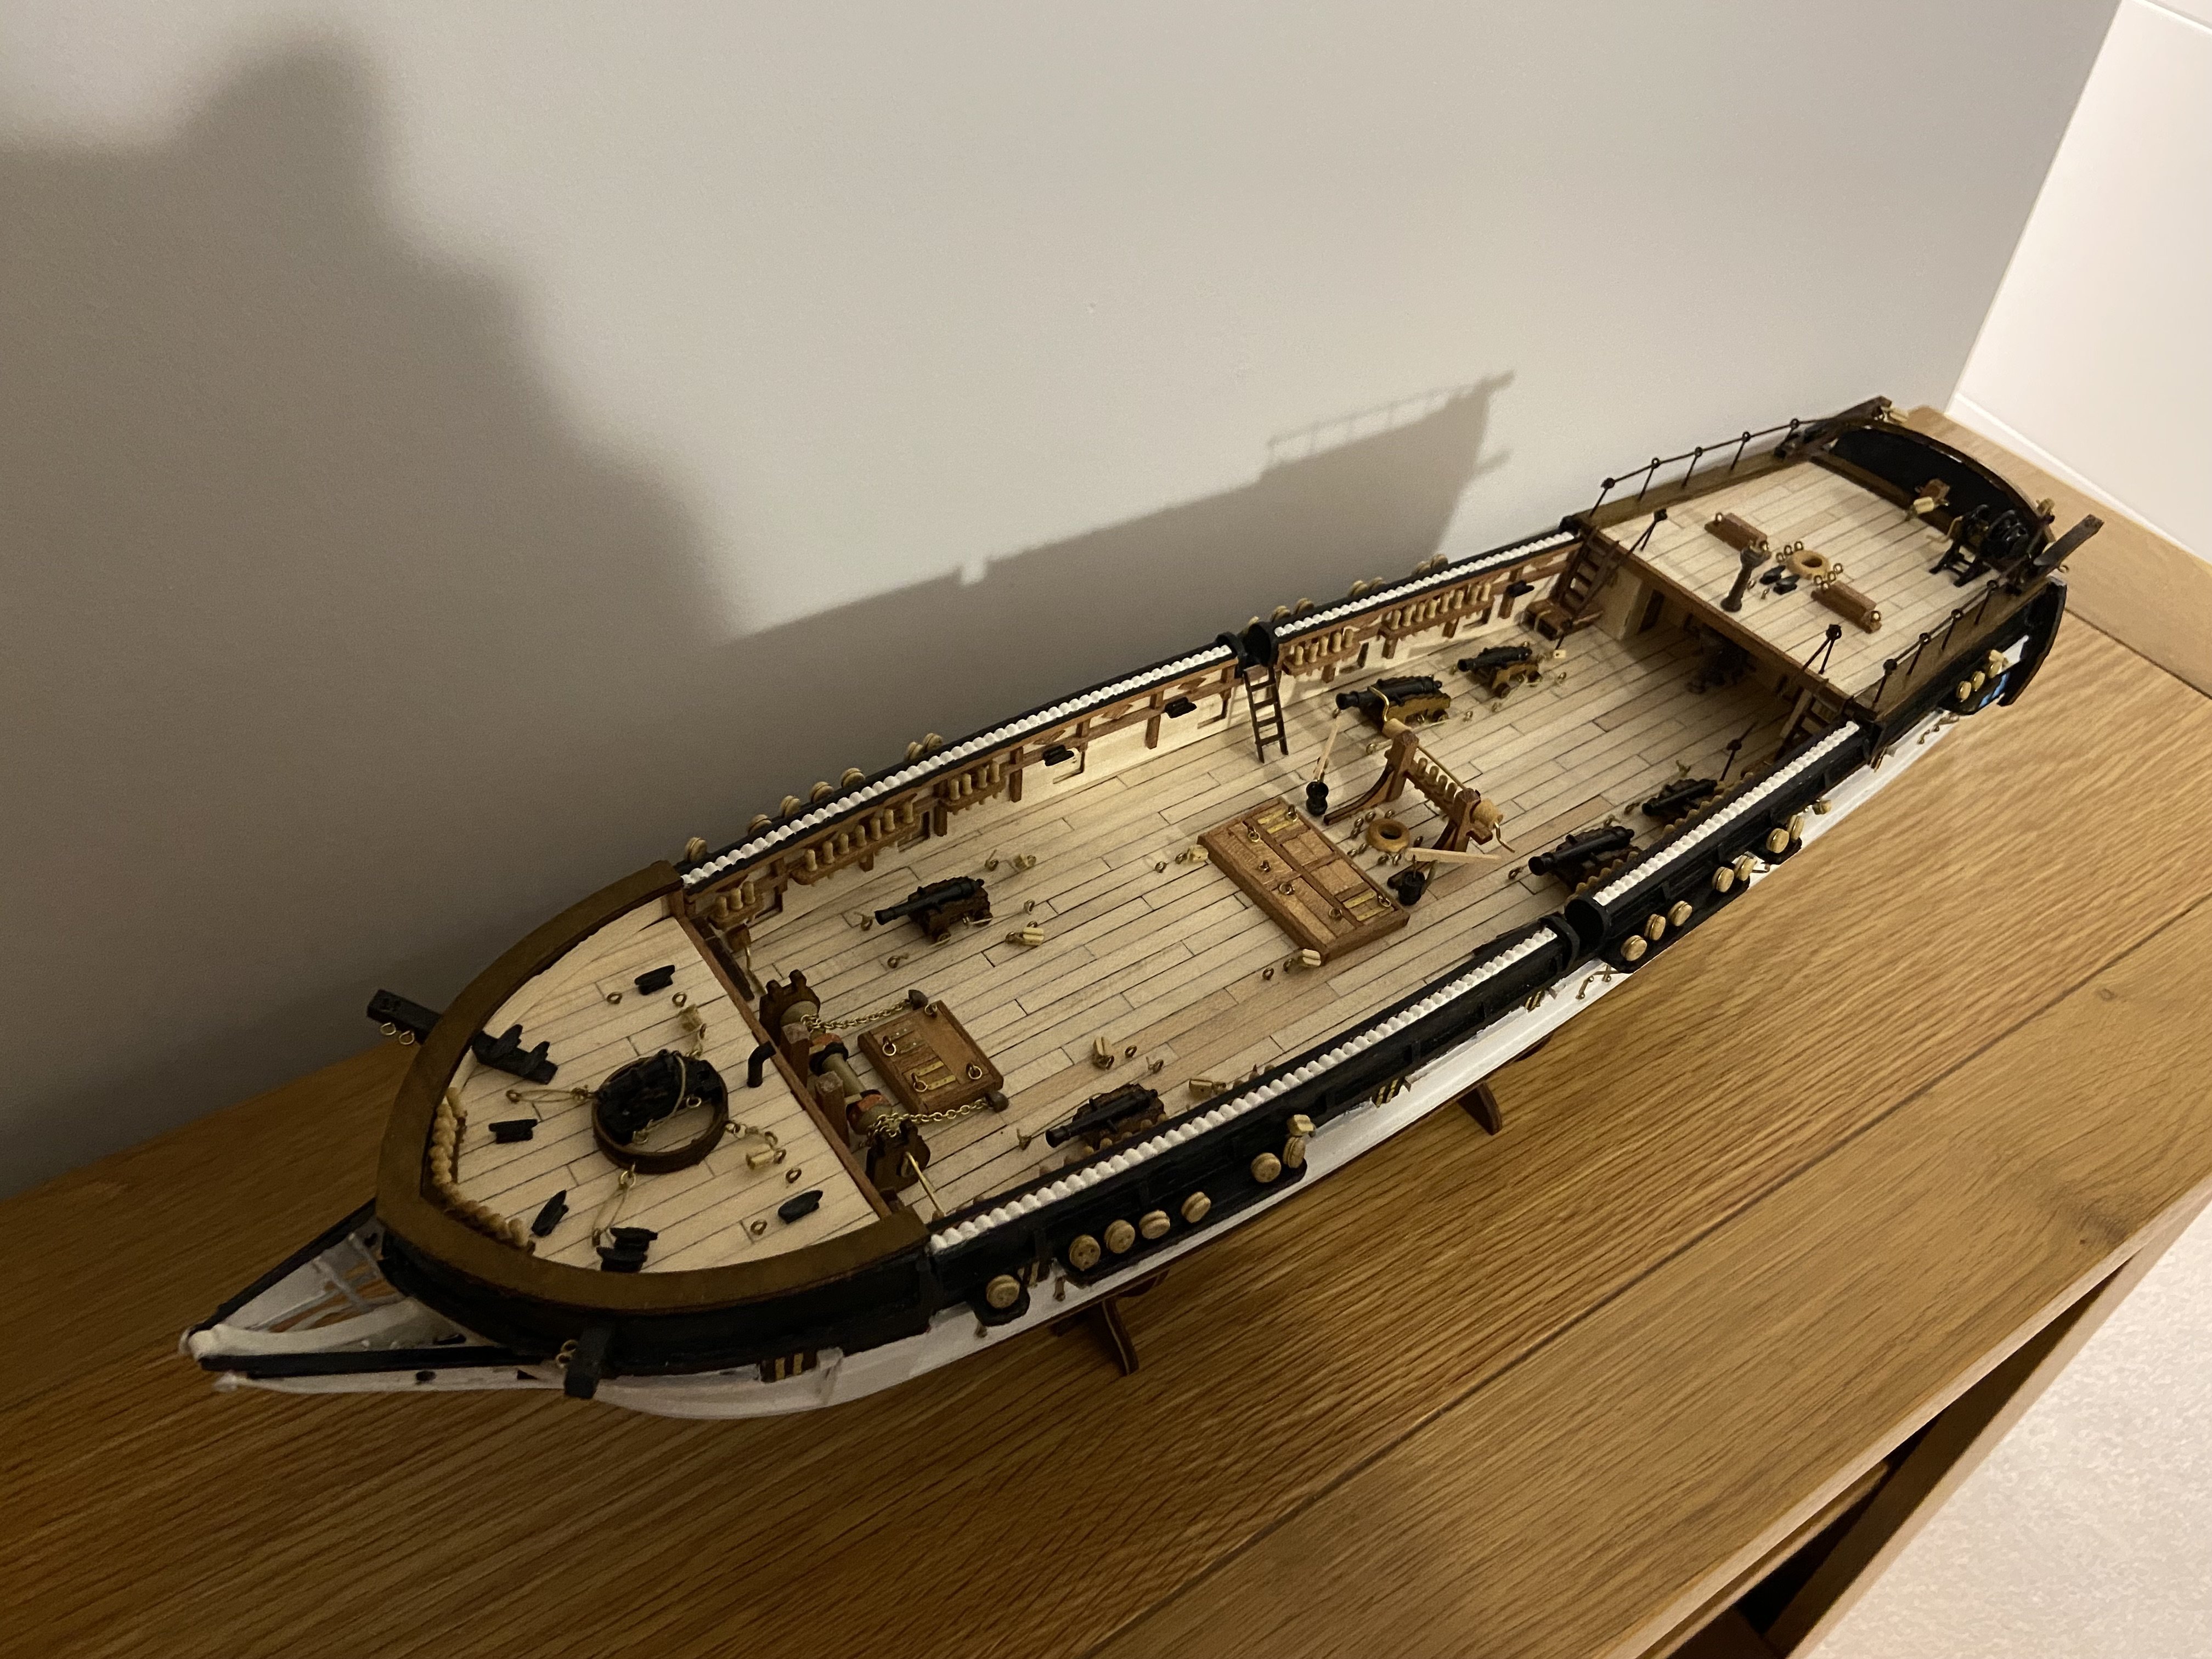
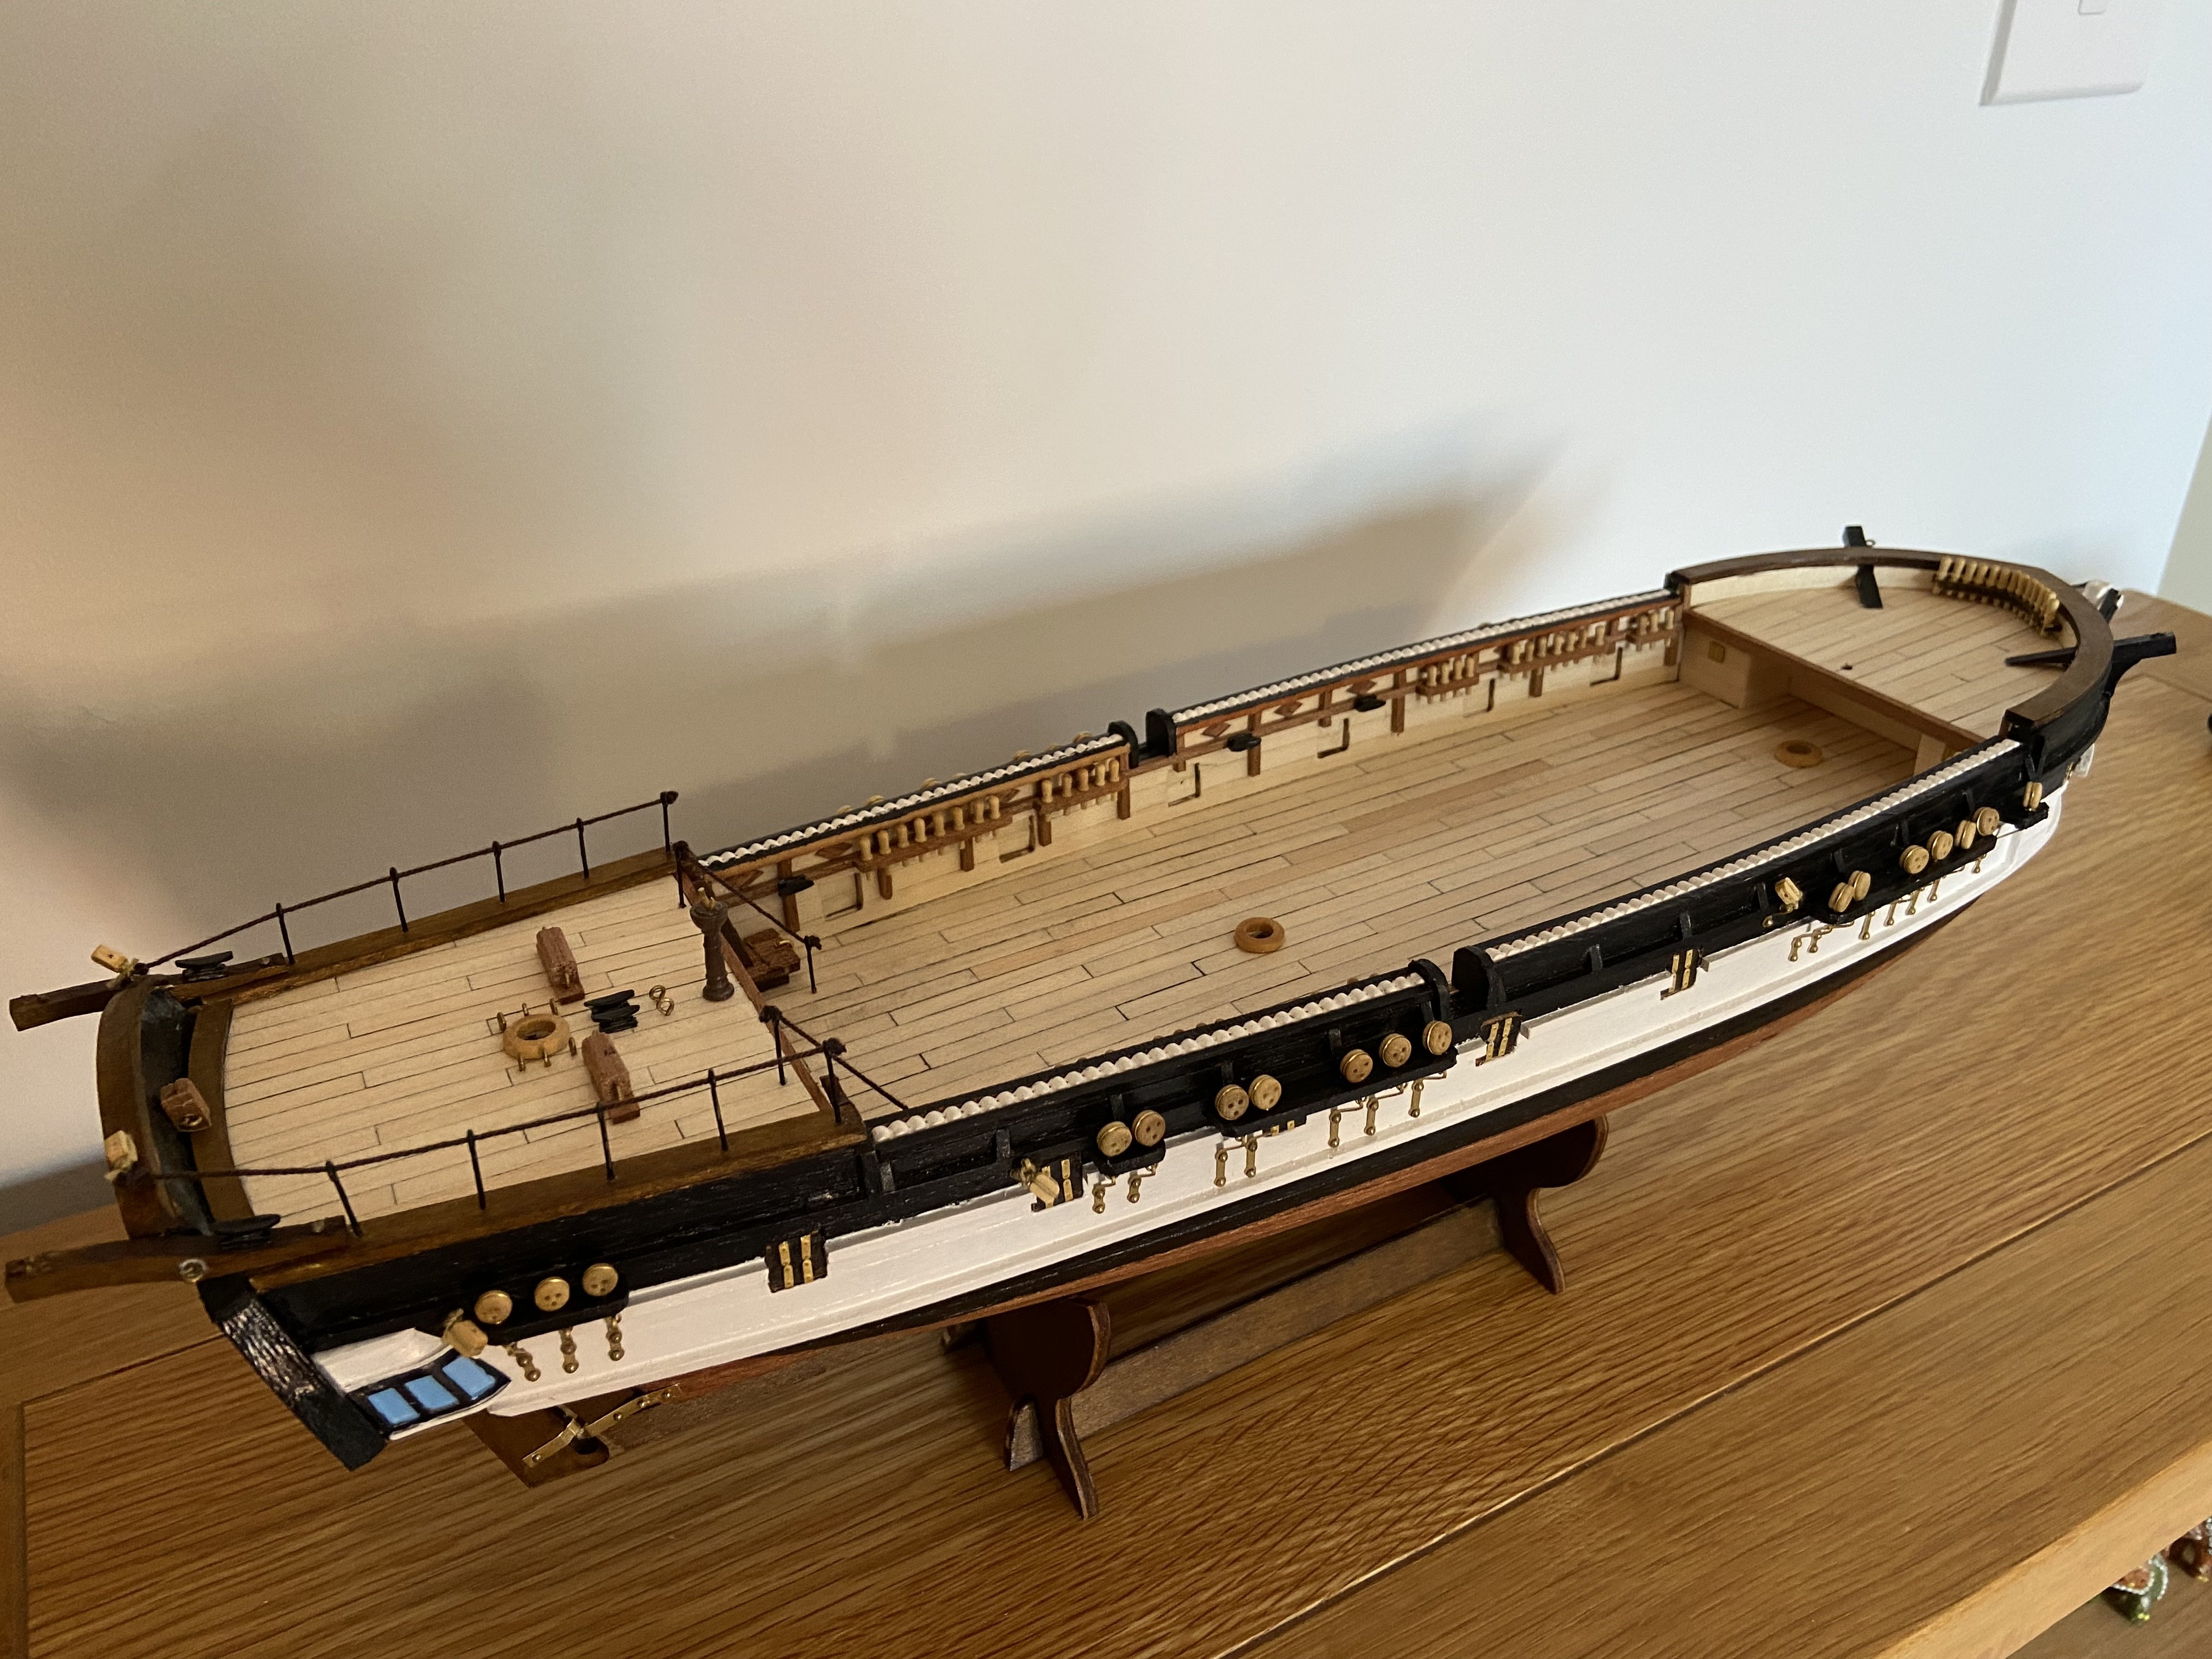
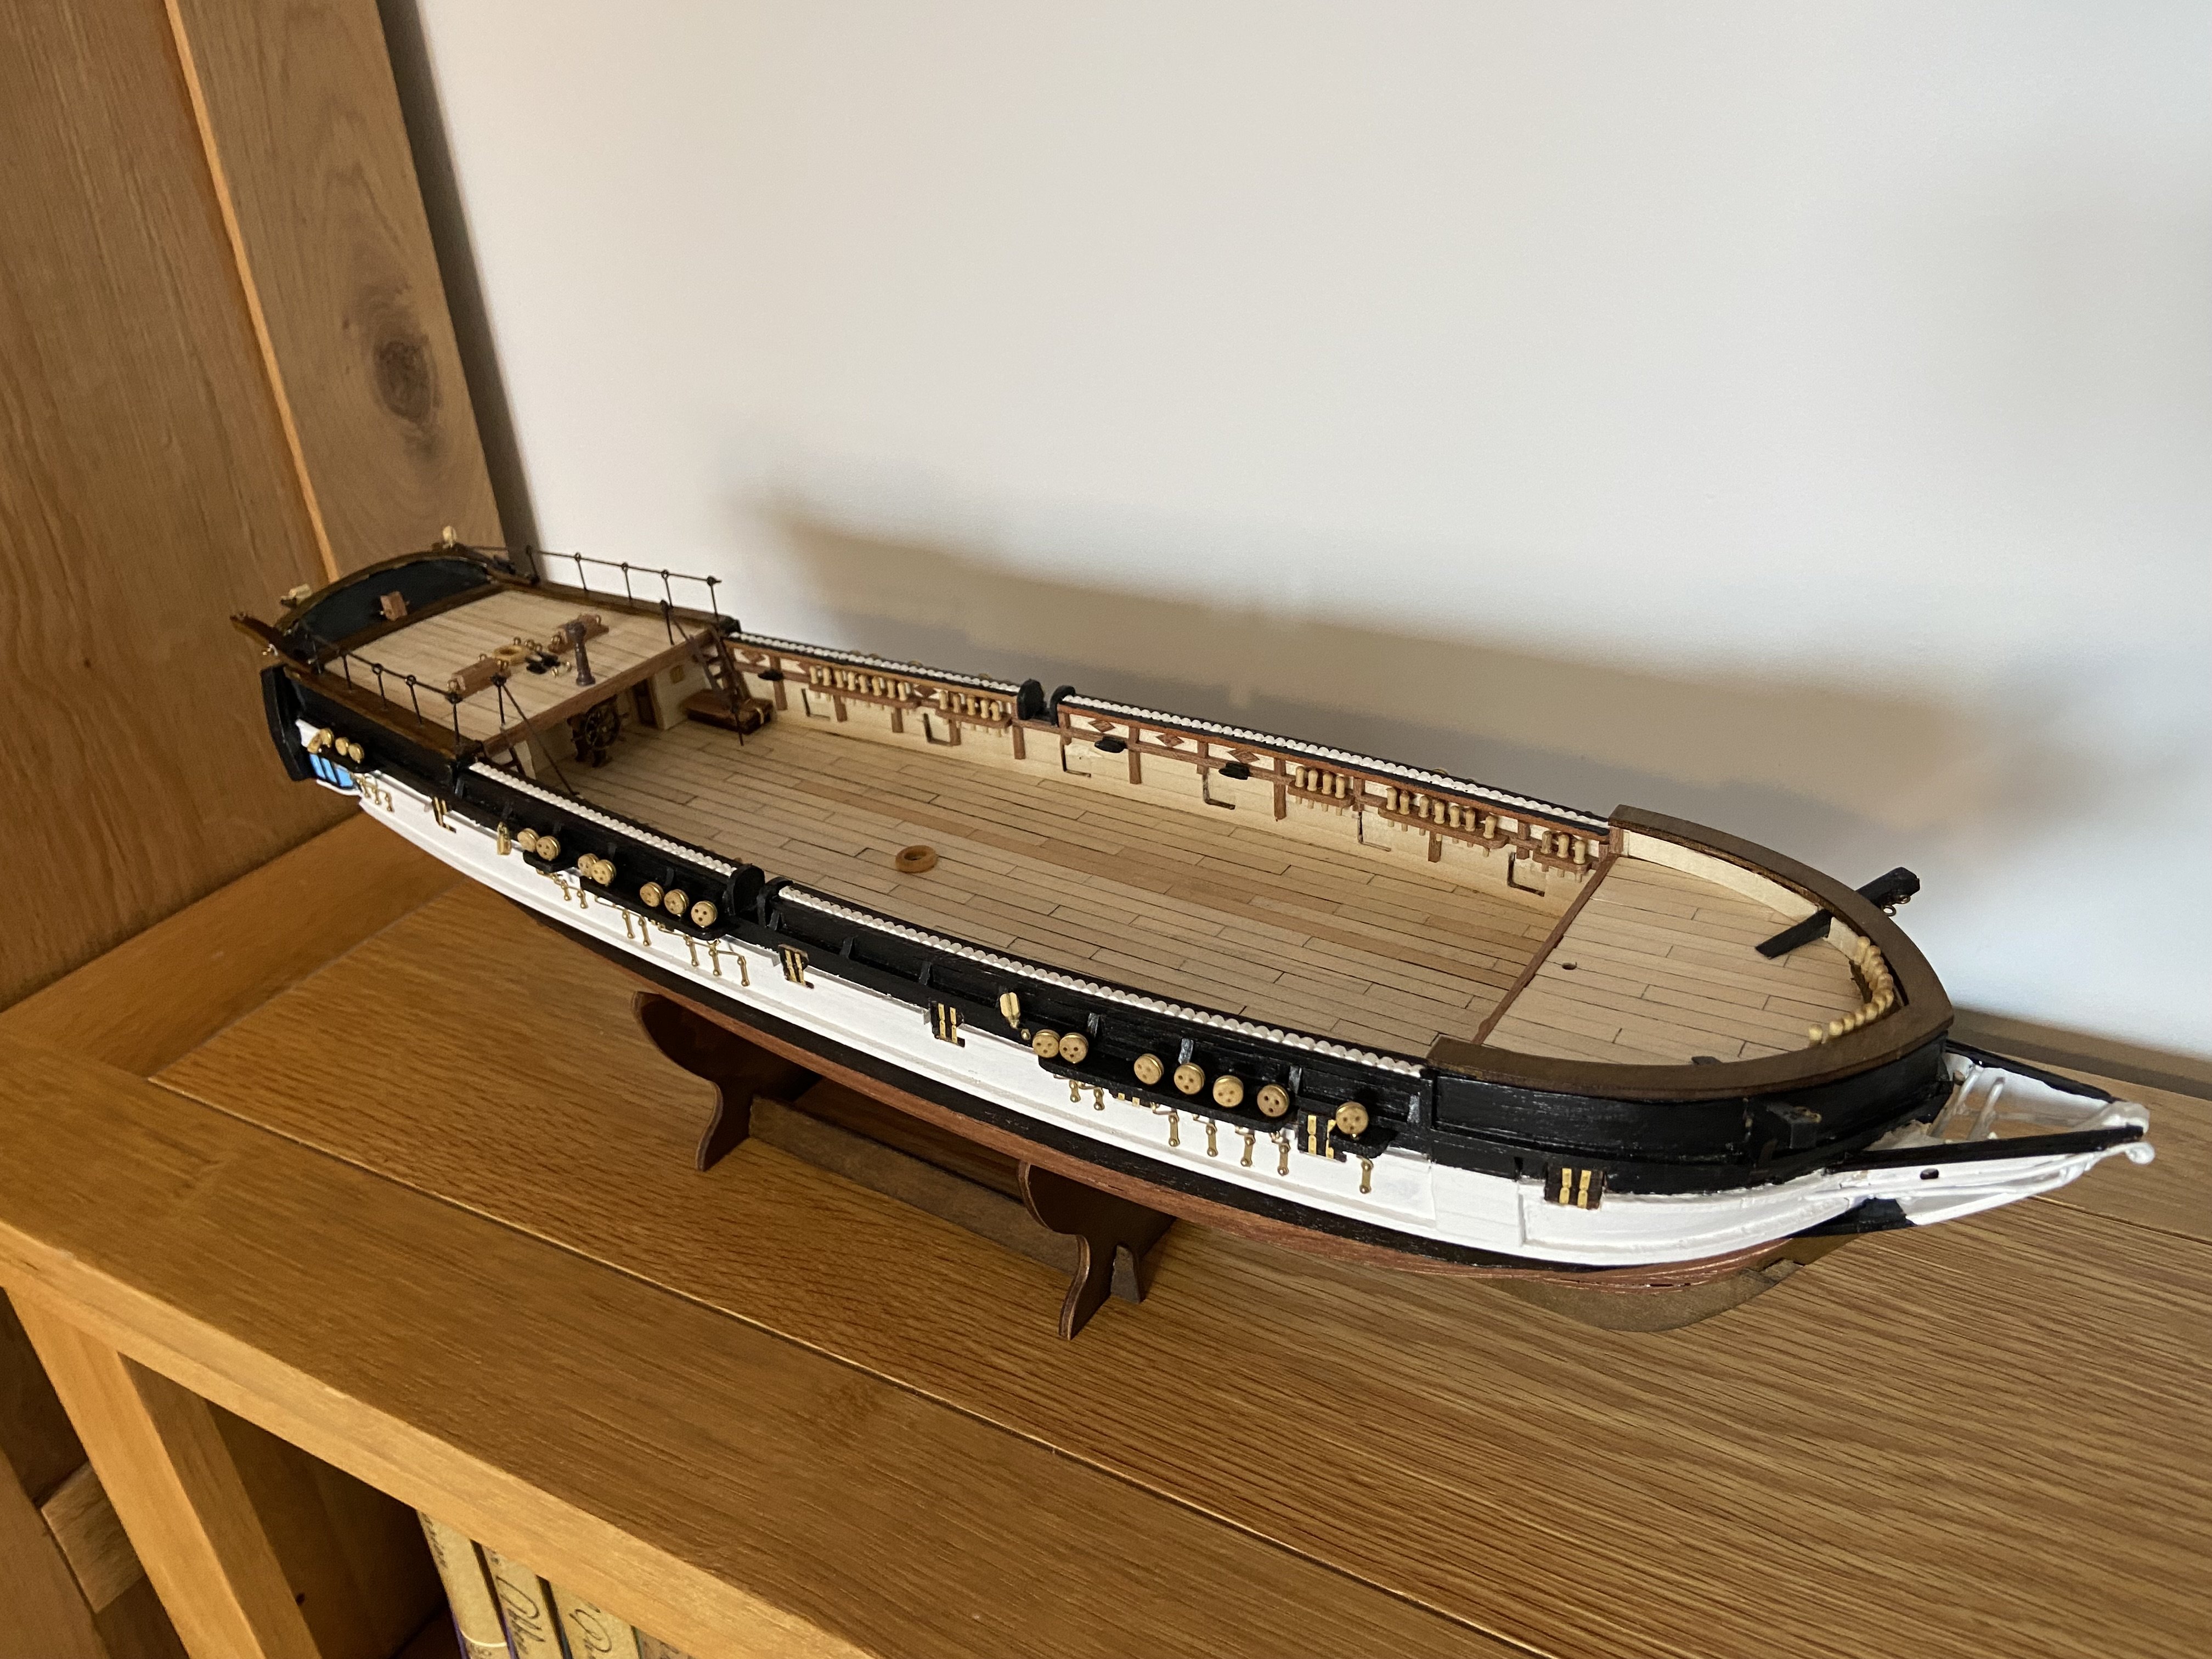
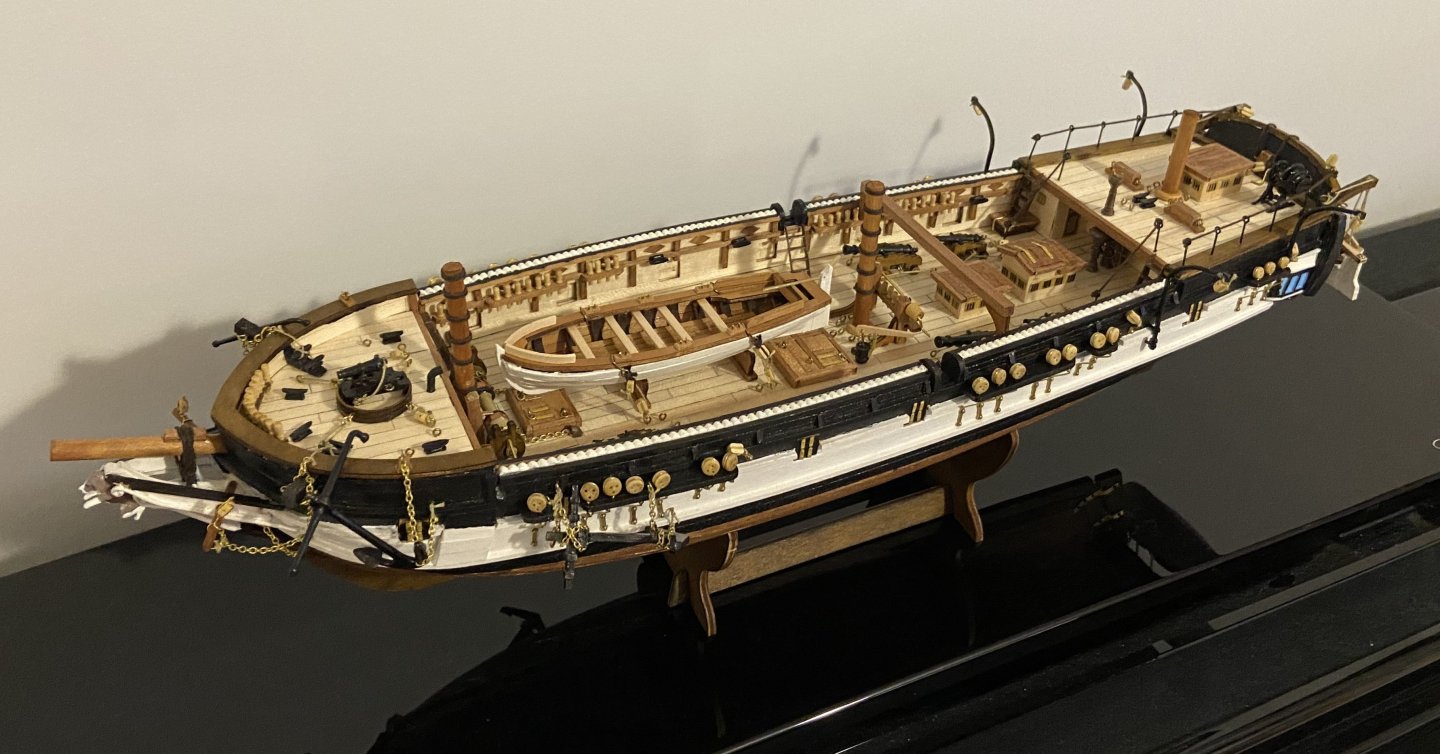
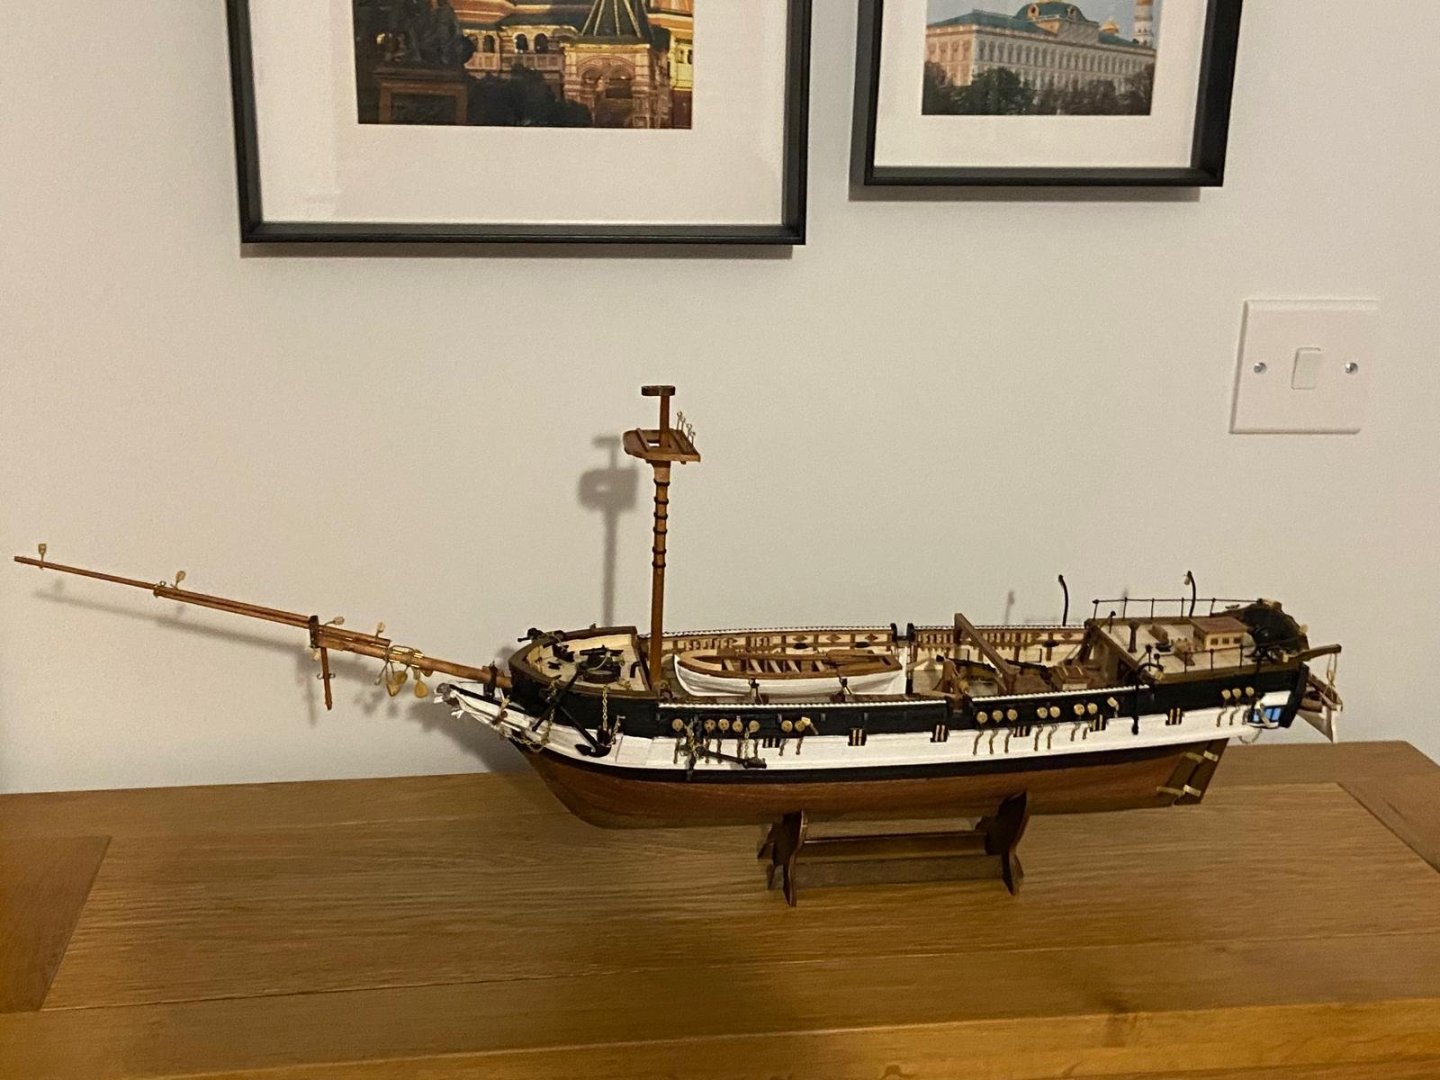
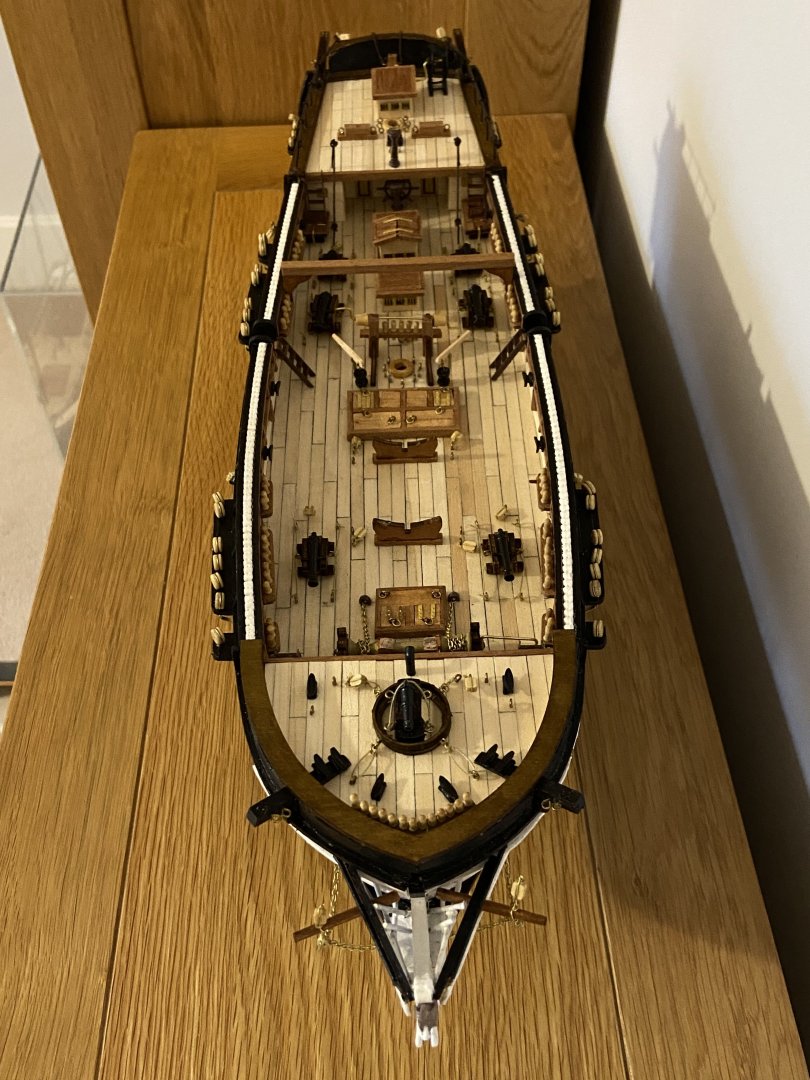
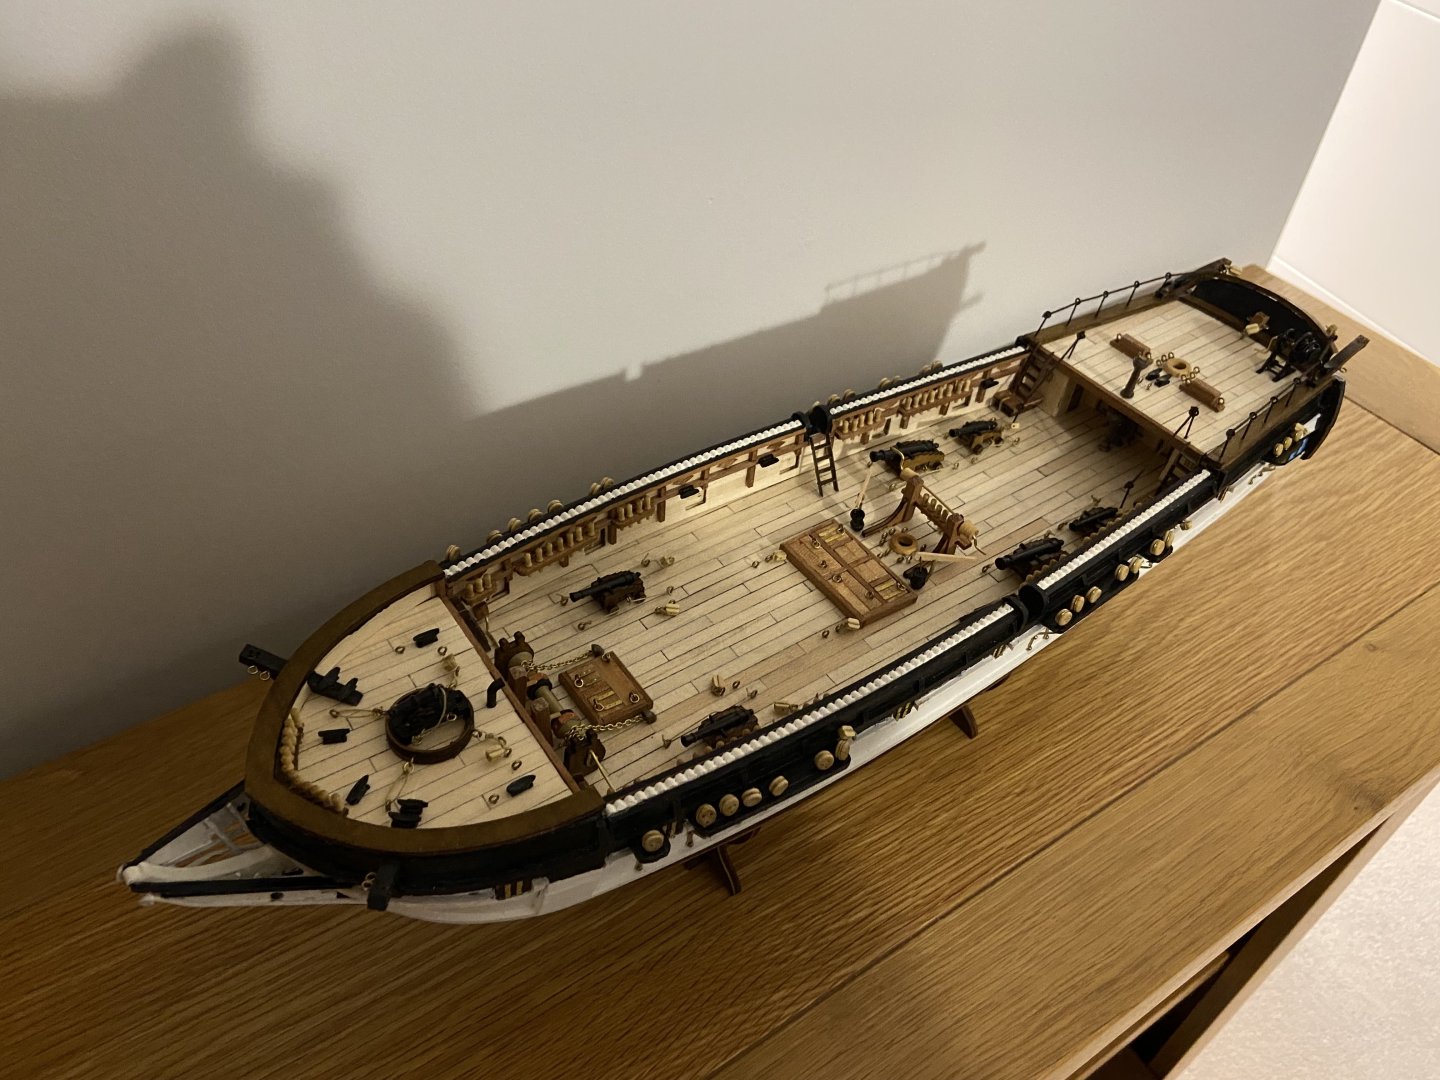
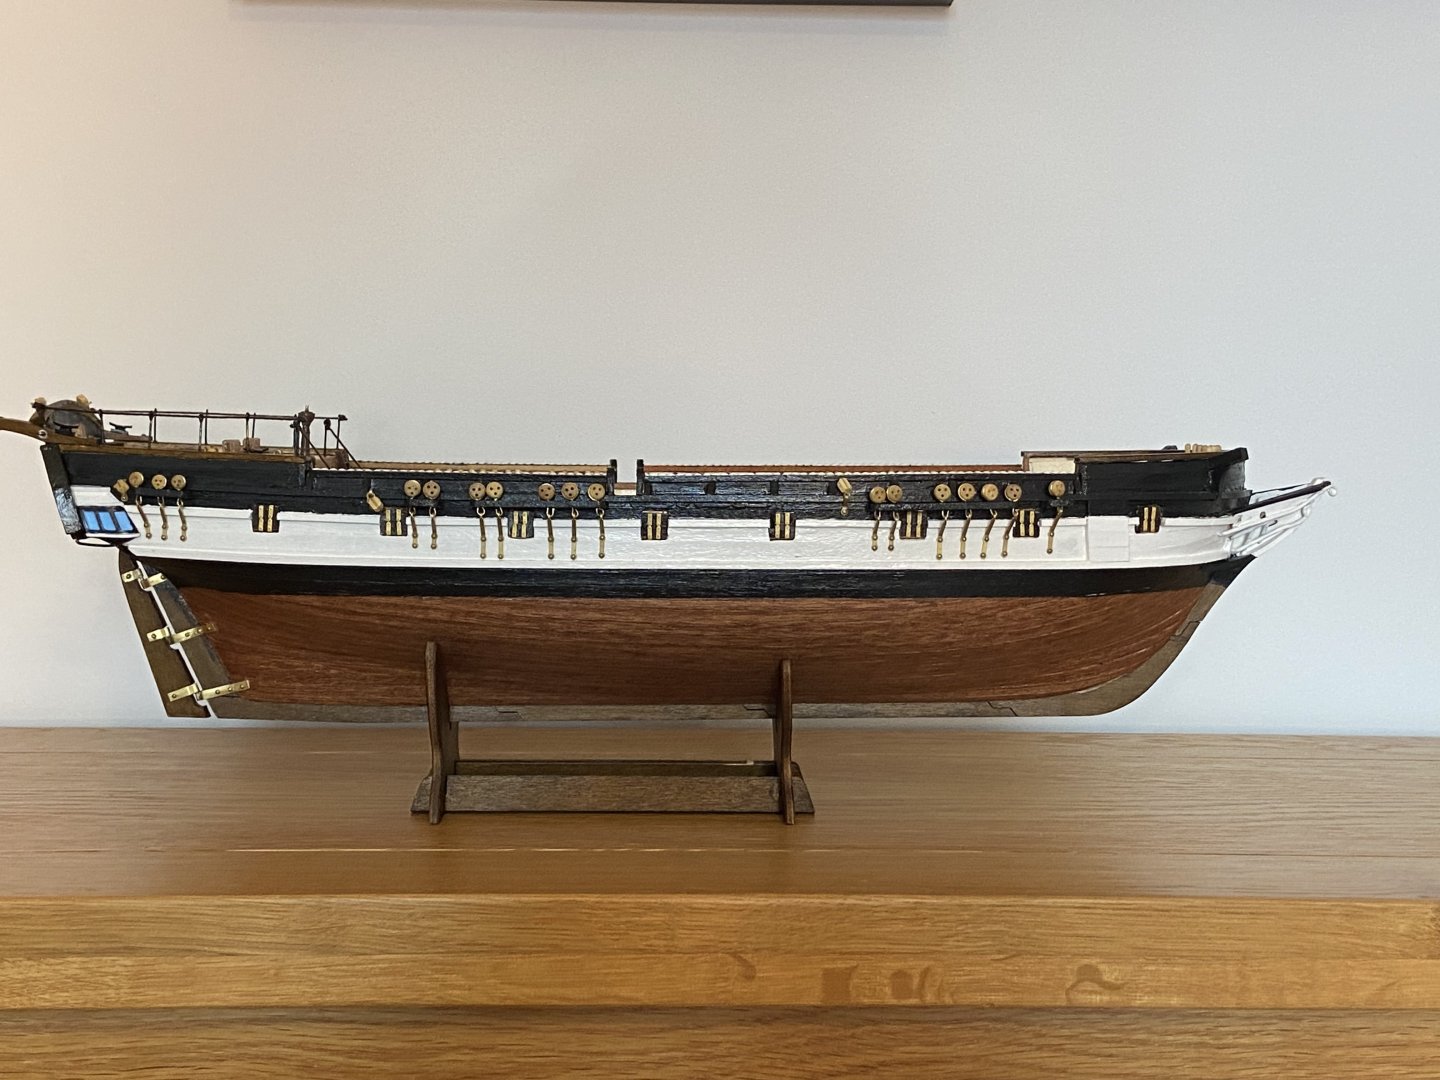
I’ve made quite a significant decision regarding the build. Over the past month I’ve been working on the masts and had started the rigging, but my enjoyment of the project was steadily diminishing with those jobs. I found the masts and rigging far too delicate for my liking, with unforgiving tolerances that needed to be precise to achieve a satisfactory result. Keeping the masts perfectly upright while maintaining properly tensioned lines proved frustrating rather than rewarding. I also realised that once the yards, bowsprit and masts are in place, the model became very large and, for me, somewhat impractical to display, particularly as I’d like to continue expanding my collection. Presenting the model without the full rig also has the added benefit of making it much easier to appreciate the deck details, as you can lean directly over the model without worrying about anything getting in the way. So, I've decided to present it like a contemporary dockyard model - perhaps a gift to a senior naval officer - with shortened masts and bowsprit and no rigging. While there’s a sense of disappointment in not completing the model exactly as originally intended, I invested five months in the build and was genuinely pleased with the result right up until the mast and rigging stage. Presenting it this way has allowed me to finish the project in a manner that still reflects the enjoyment and effort I put into it. I think this will be the approach I take with future ships as well. Of course it's convenient because I personally struggle with rigging, but I like to think I'm following a historically legitimate presentation style as well. I leave you with final photos of the finished build.


- 72 replies
-
- 14
-

-

-
2026 is 200 years since HMS Beagle first set sail. There's no better time to build one than now 🙂
-
Eck, what thread did you use for the shrouds, please? It won't be too much longer before I start doing those on my HMS Beagle and I wanted to know if the thread OcCre provided is the same as what you've used (in which case it looks plenty good enough!)
-
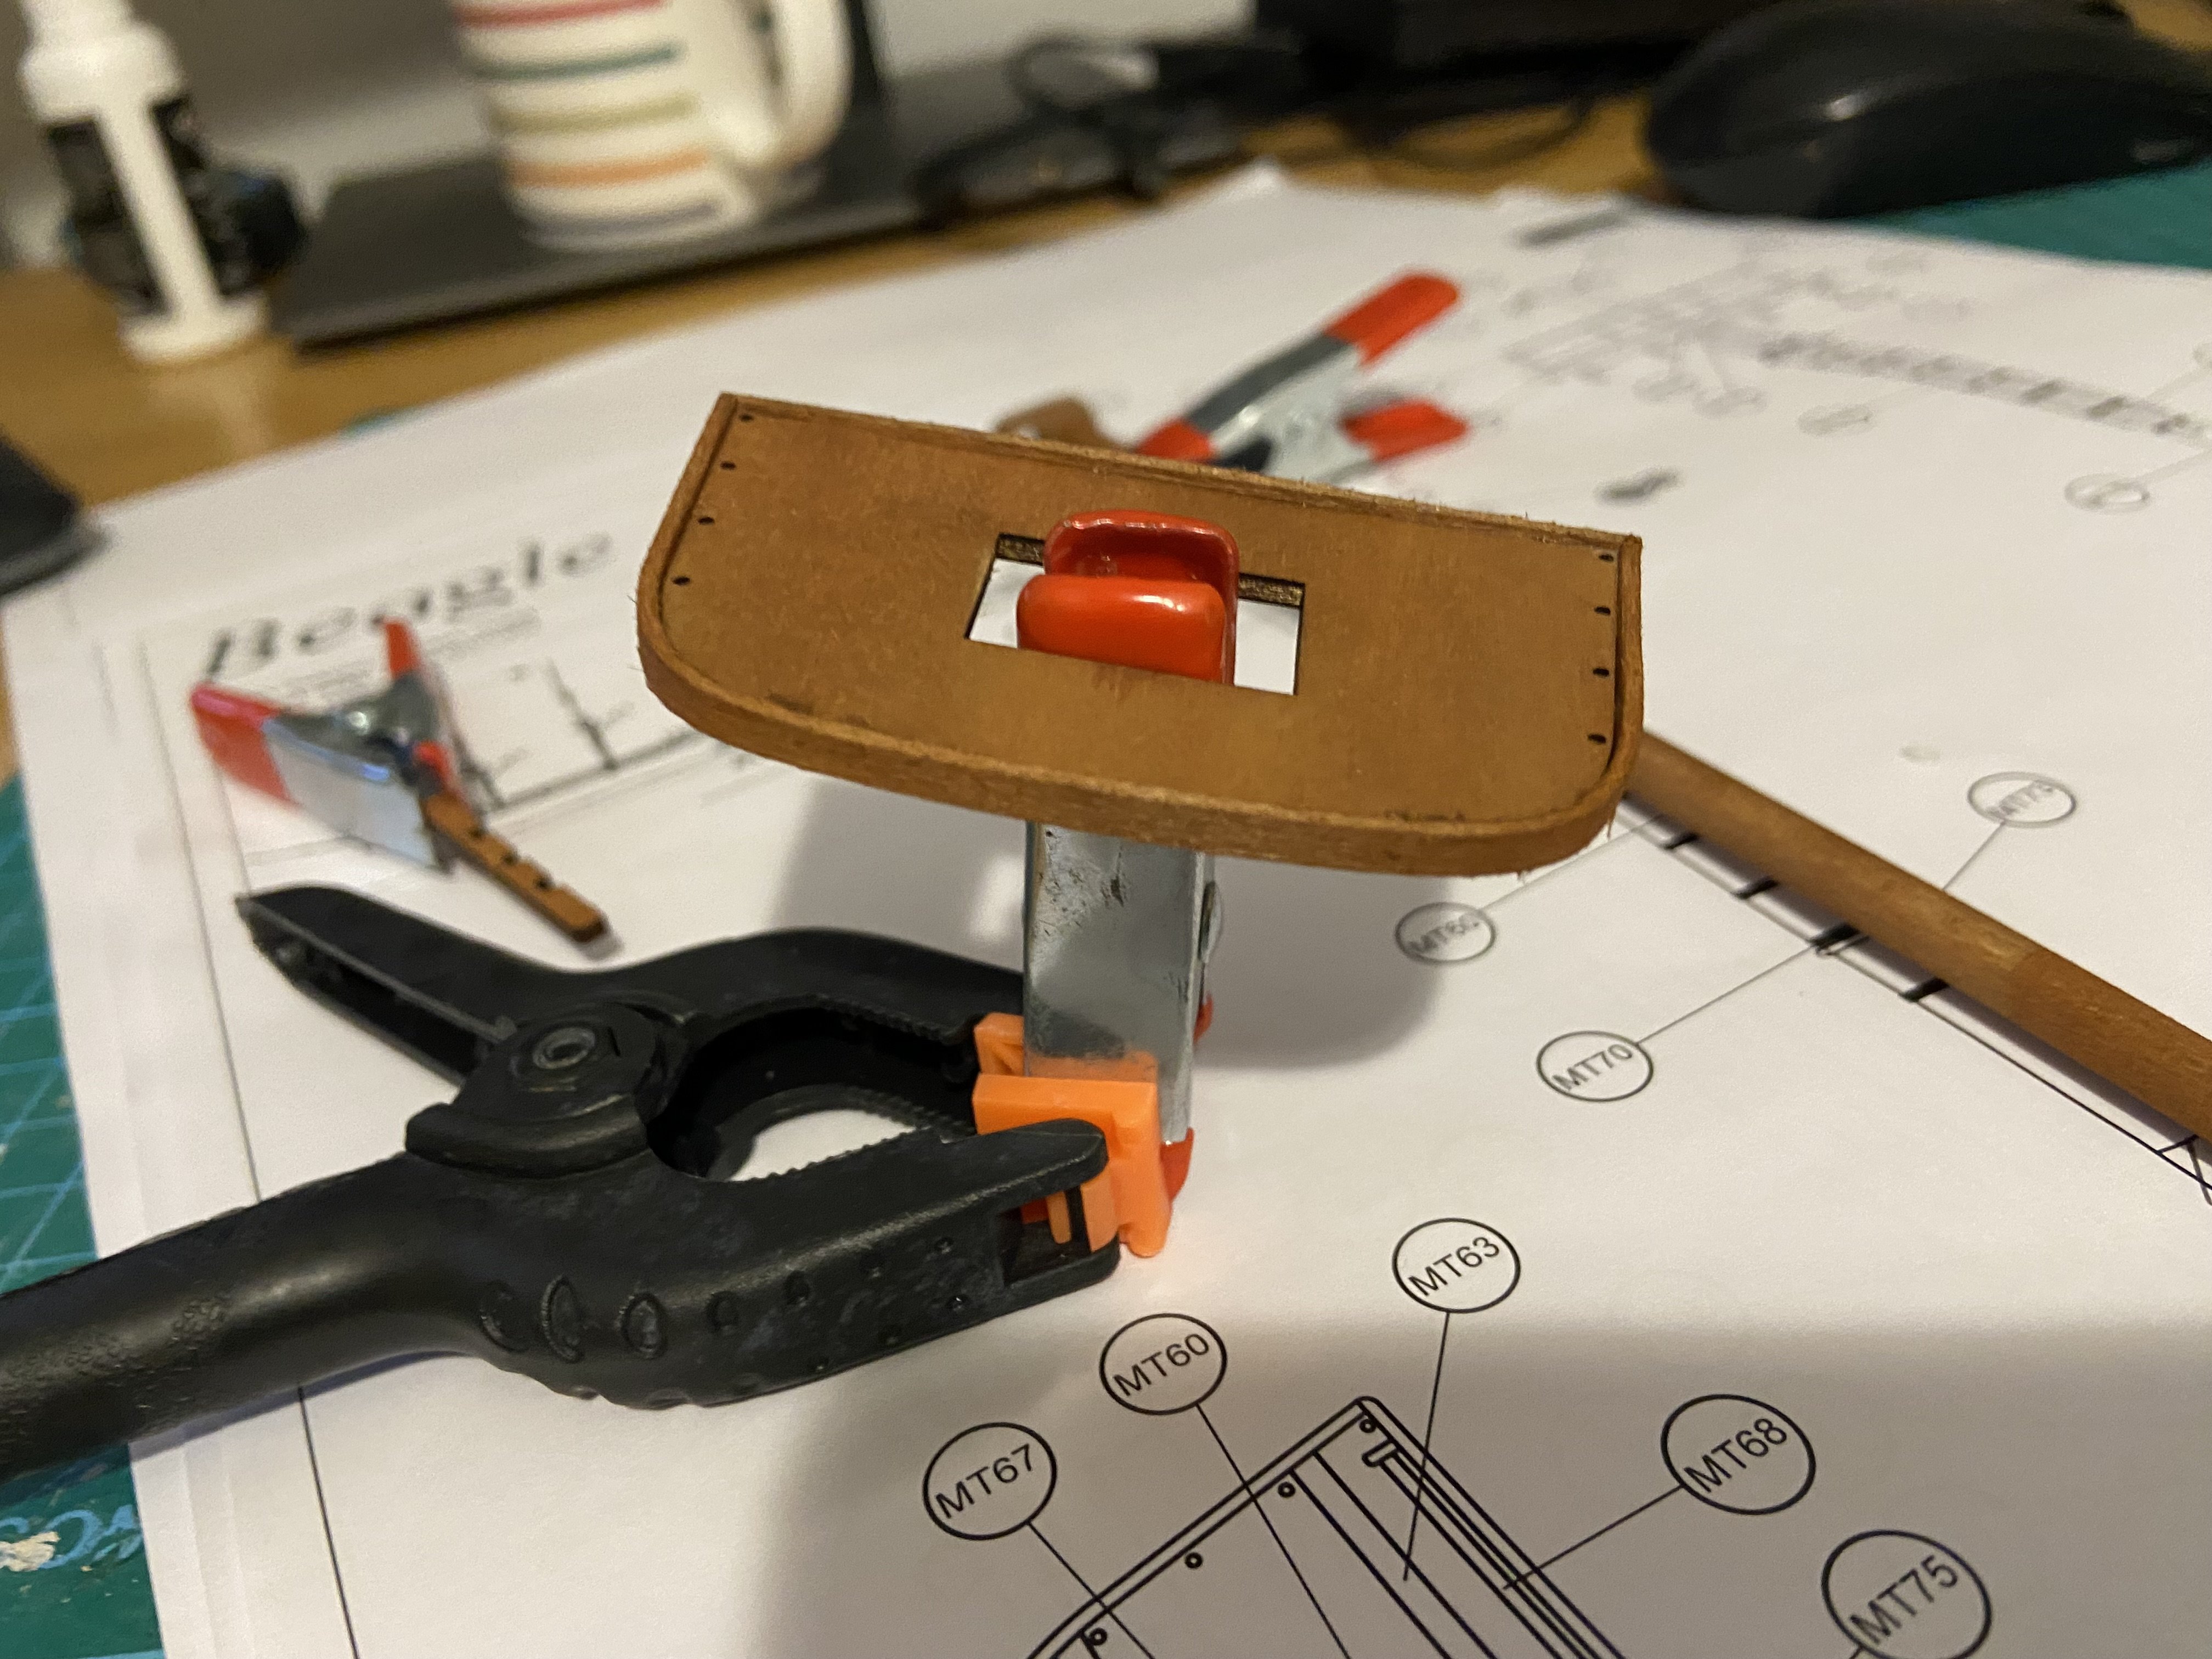
Well, the plank bending tool has come out for the final time to shape the "border" around the maintop. The limewood is so thin it bends to shape with little pressure. You just have to be careful not to burn it. It can then be bent the rest of the way and fixed with CA glue: The main mast for HMS Beagle is meant to tilt backwards slightly (compared to the foremast which is vertical) so for the main top and the various supports to remain flat relative to the ground they have to be attached at an angle. You can see in the picture below I've started attaching the supports:


-
Assuming ChatGPT is accurate 😉 that stuff about using brass cannons instead of iron is really interesting and helps explain why OcCre suggests painting them a copper-ish colour, rather than the usual black.
-
The round-to-square transition is done and the connection piece fits snugly. The transition has to leave a bit of an edge as a guide for the maintop supports: Before the maintop goes on, however, we have to stain all the pieces a nice sapelli wood colour. The 3x1mm limewood pieces on the right side below will be stained, and then bent around the edges of the main top. As you can see from the maintop below, the curves required are quite tight, but my plank bending tool and some CA glue got it done for the foretop.

-
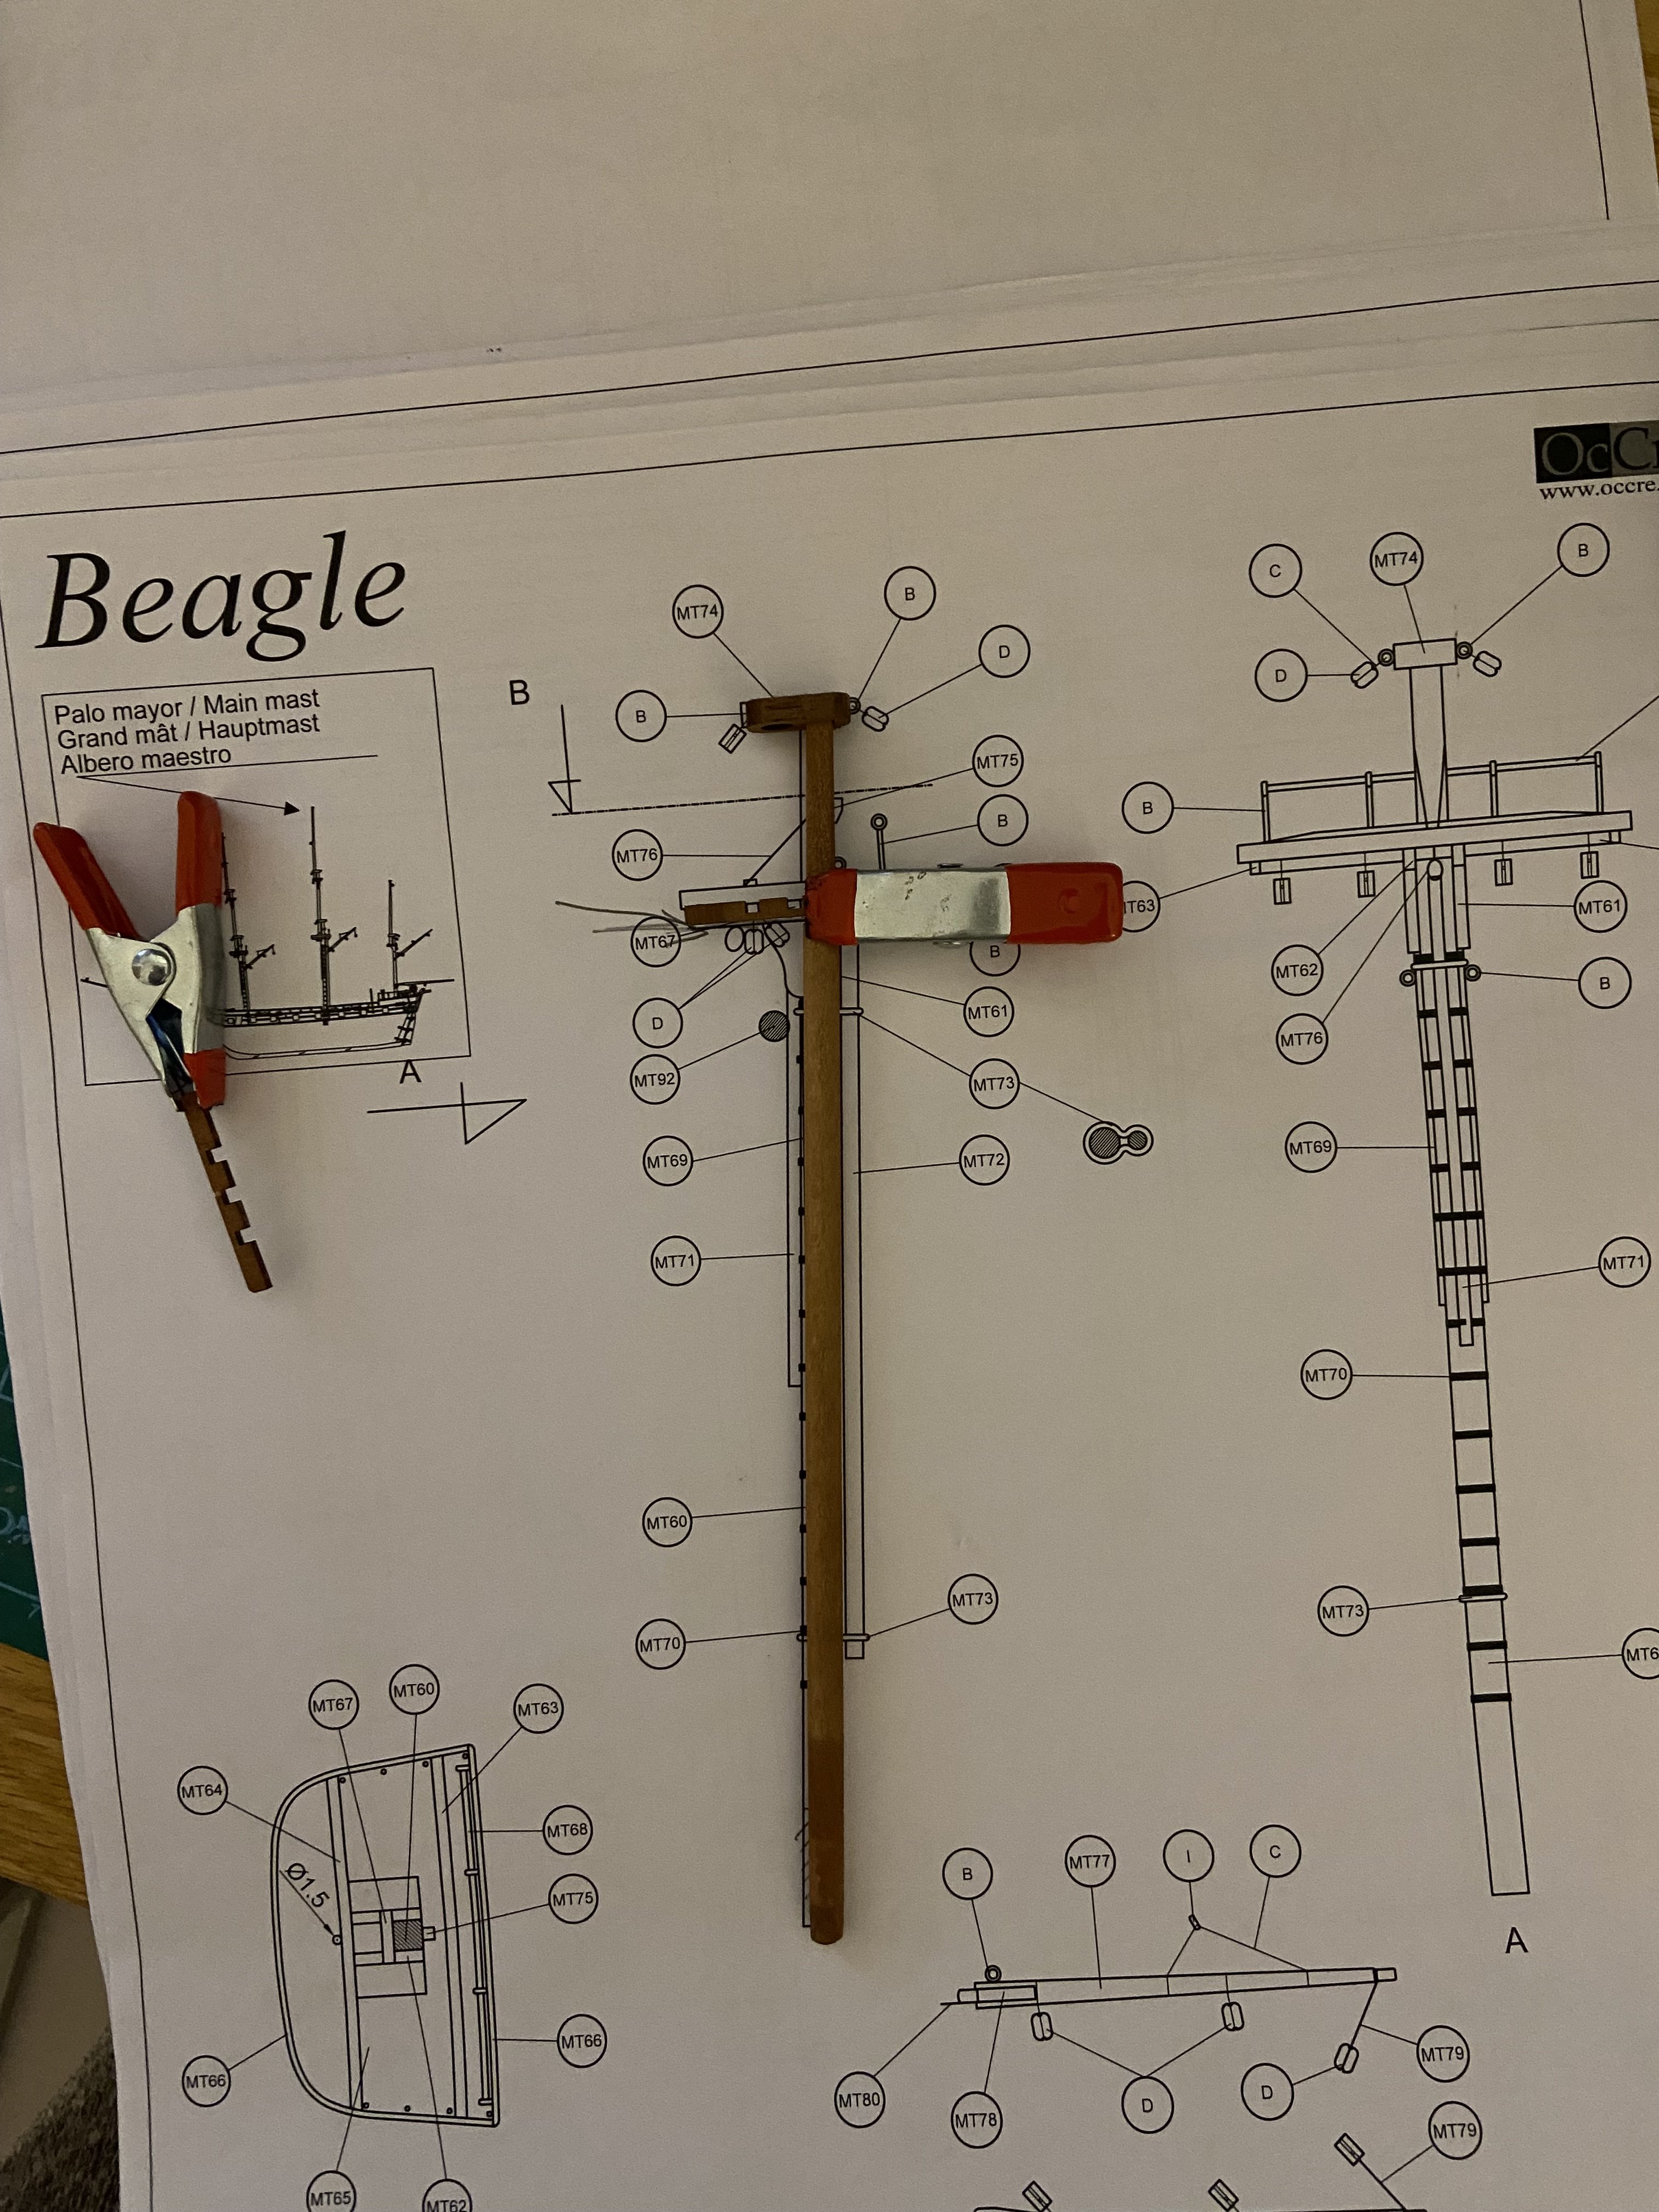
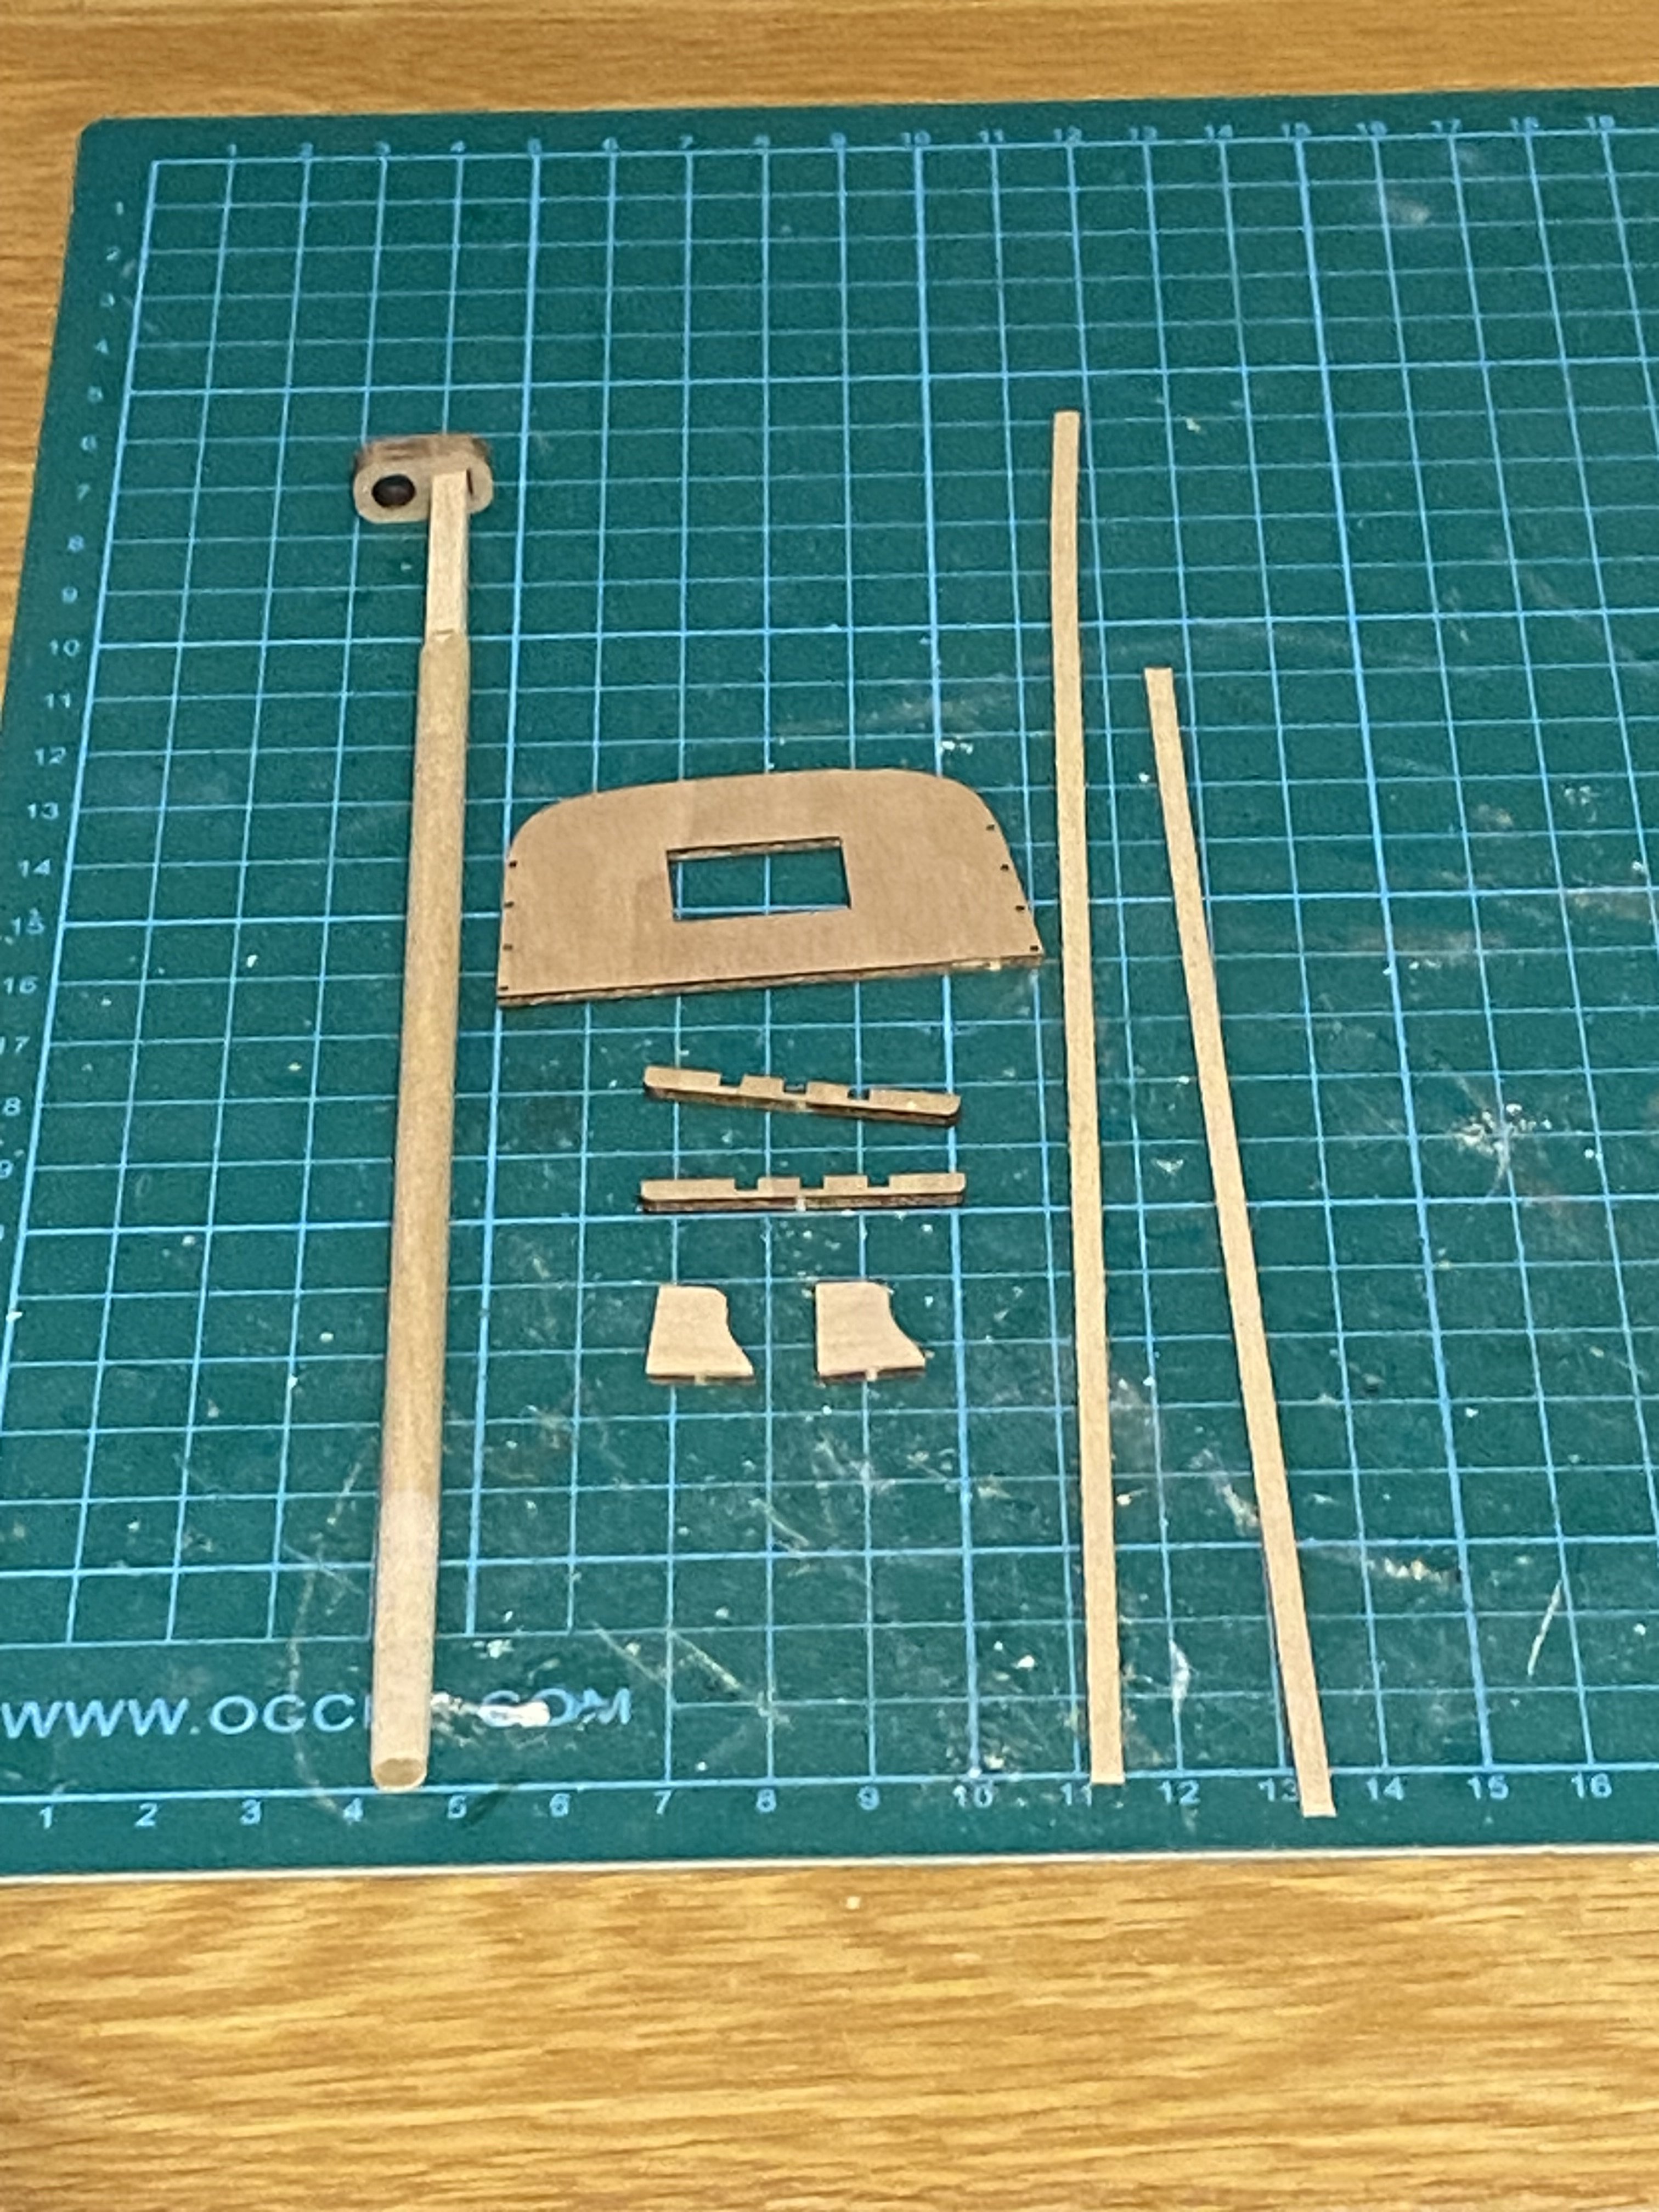
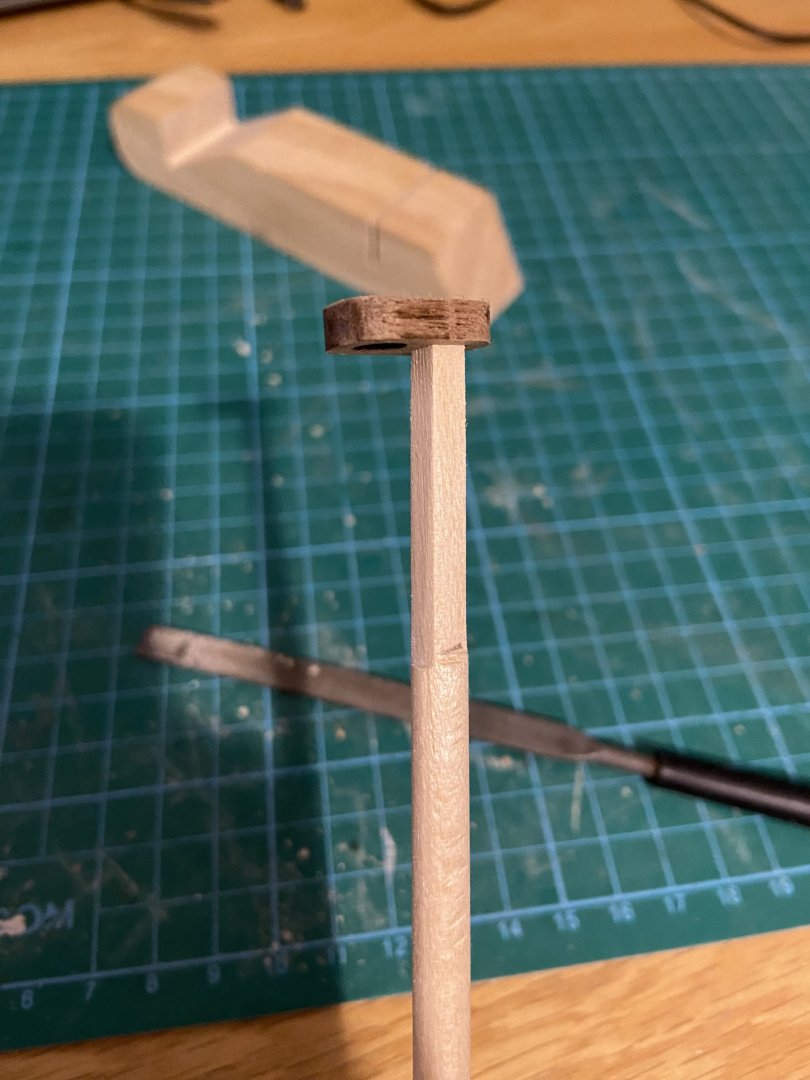
The foremast is now complete, except for the yards: As I’m now into the final couple of months of this build, I’m starting to run a bit low on certain materials. I don’t think I’ve been wasteful with what OcCre supplied. I still have around 40 (!!) spare 60 cm limewood planks that were intended for the first hull planking. At the same time, I’ve completely run out of 1mm brass wire, which is required for four of the largest yards, and I’m also short of 2×2mm limewood. While I wait for a replacement supply of 1mm brass wire to arrive from China, I’ve decided to document the construction of the main mast in a bit more detail, as I've had a nice bit of practice building the foremast. The first step was cutting the main components to length: In order to get these masts to fit into the deck holes without any force, I've found it's necessary to very lightly sand the bottom 20mm of the mast and therefore narrow the diameter. I'll do this the same way I taper the masts and yards (using my makeshift lathe, i.e. clamping it into my electric drill). Like the foremast, the main mast also requires a round-to-square transition for the top 36mm. This is quite easy to just eyeball, with a metal file and then a sanding block. I would love to have a precision tool for this to get a perfect square, but no matter 🙂


-
It already looks beautiful. I especially love the 3D printed drops. Taking full advantage of modern tech is what puts these kits a cut above the rest.
-
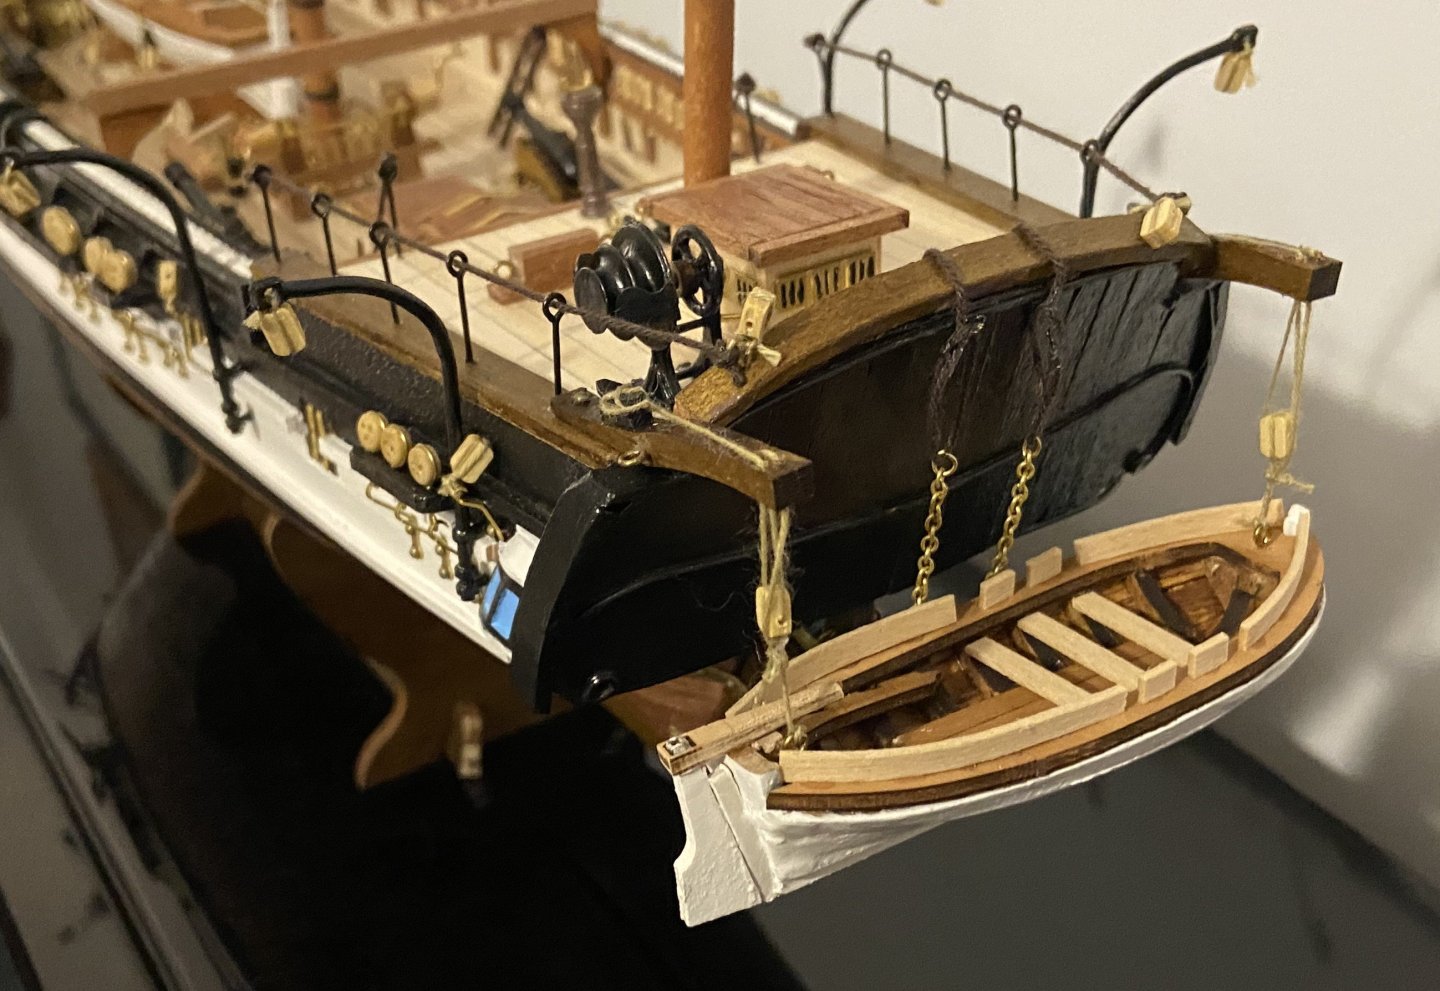
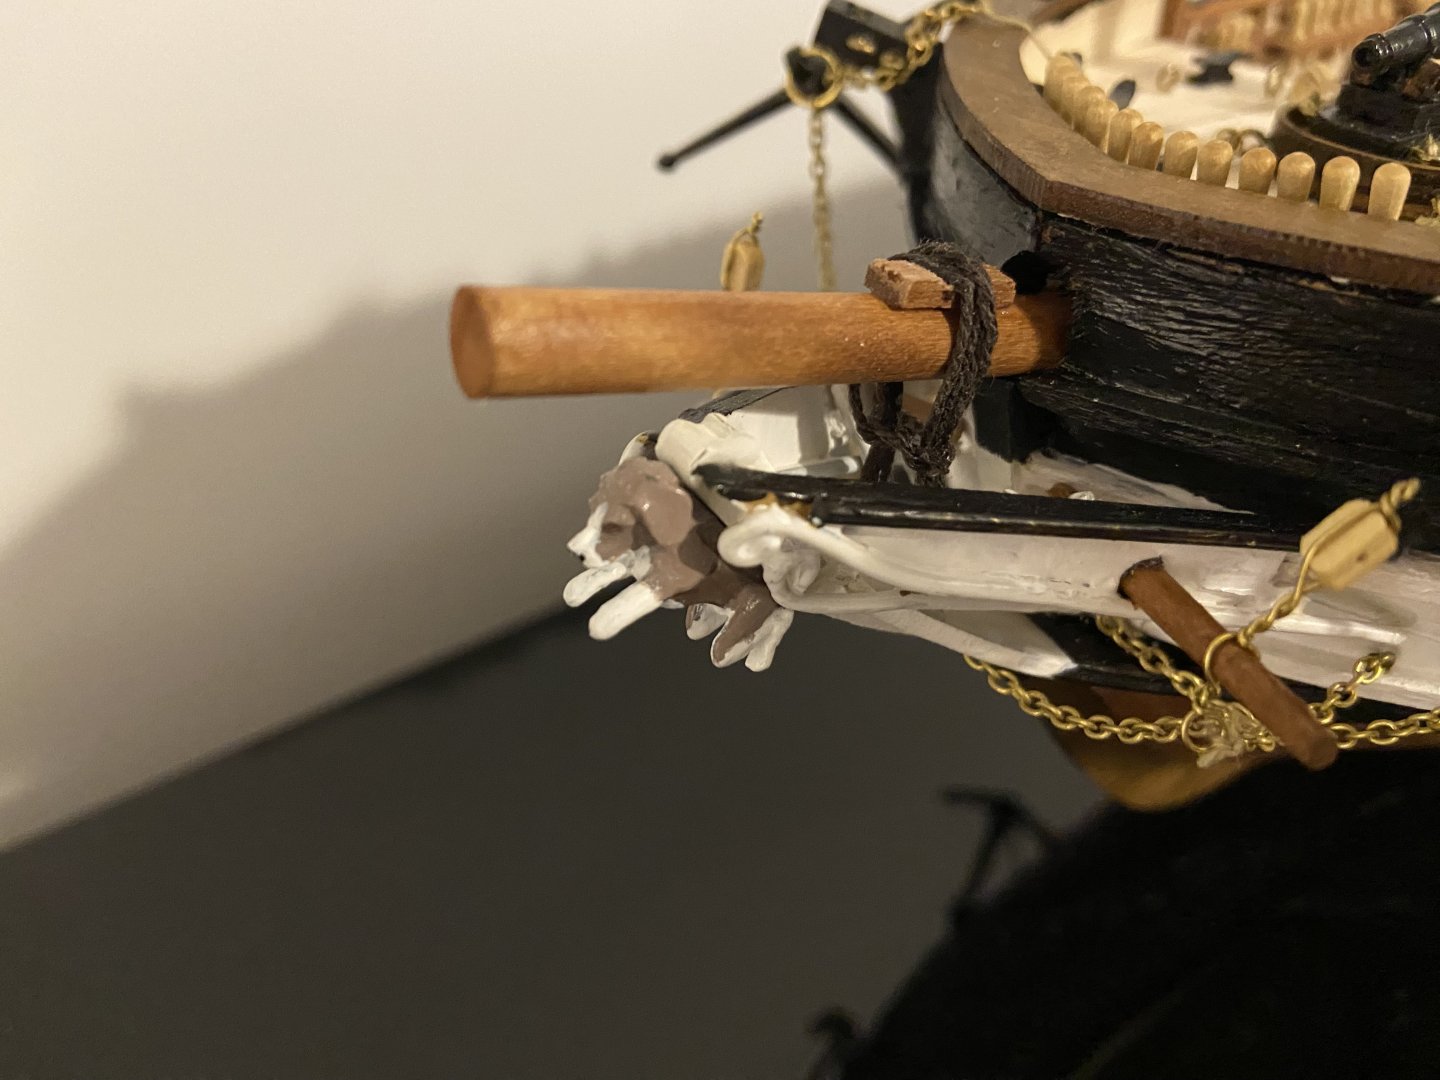
I’ve ticked off a nice milestone this month by completing the Jolly Boat and attaching it to the stern of the ship. It’s a satisfying detail to have finished, but the really exciting progress has been starting work on the masts. I began with the bowsprit, which is now glued and tied in place. The trickiest part of this stage was creating the hole at the front of the ship without damaging the delicate work in that area. To tackle this, I picked up some wood-carving bits for my Dremel and used the smallest, most precise ones I could find. Even then, it required a very careful touch, the Dremel can jump if you’re not paying attention. Even more enjoyable has been starting on the foremast. In the photo it’s temporarily fitted into the ship, purely to check that it seats properly in the mast hole before I add the finer details. I’m really liking how the model is beginning to look now that proper masts are going in, and I can already see how much more impressive it will be once the main mast and mizzen mast are added. This is one of the things I love most about this hobby. Every so often you add a single component and it completely transforms the model, suddenly pushing it much closer to looking like a real ship.
-
Very neat painting on your doors. Excellent attention to detail. How did you manage that?
-
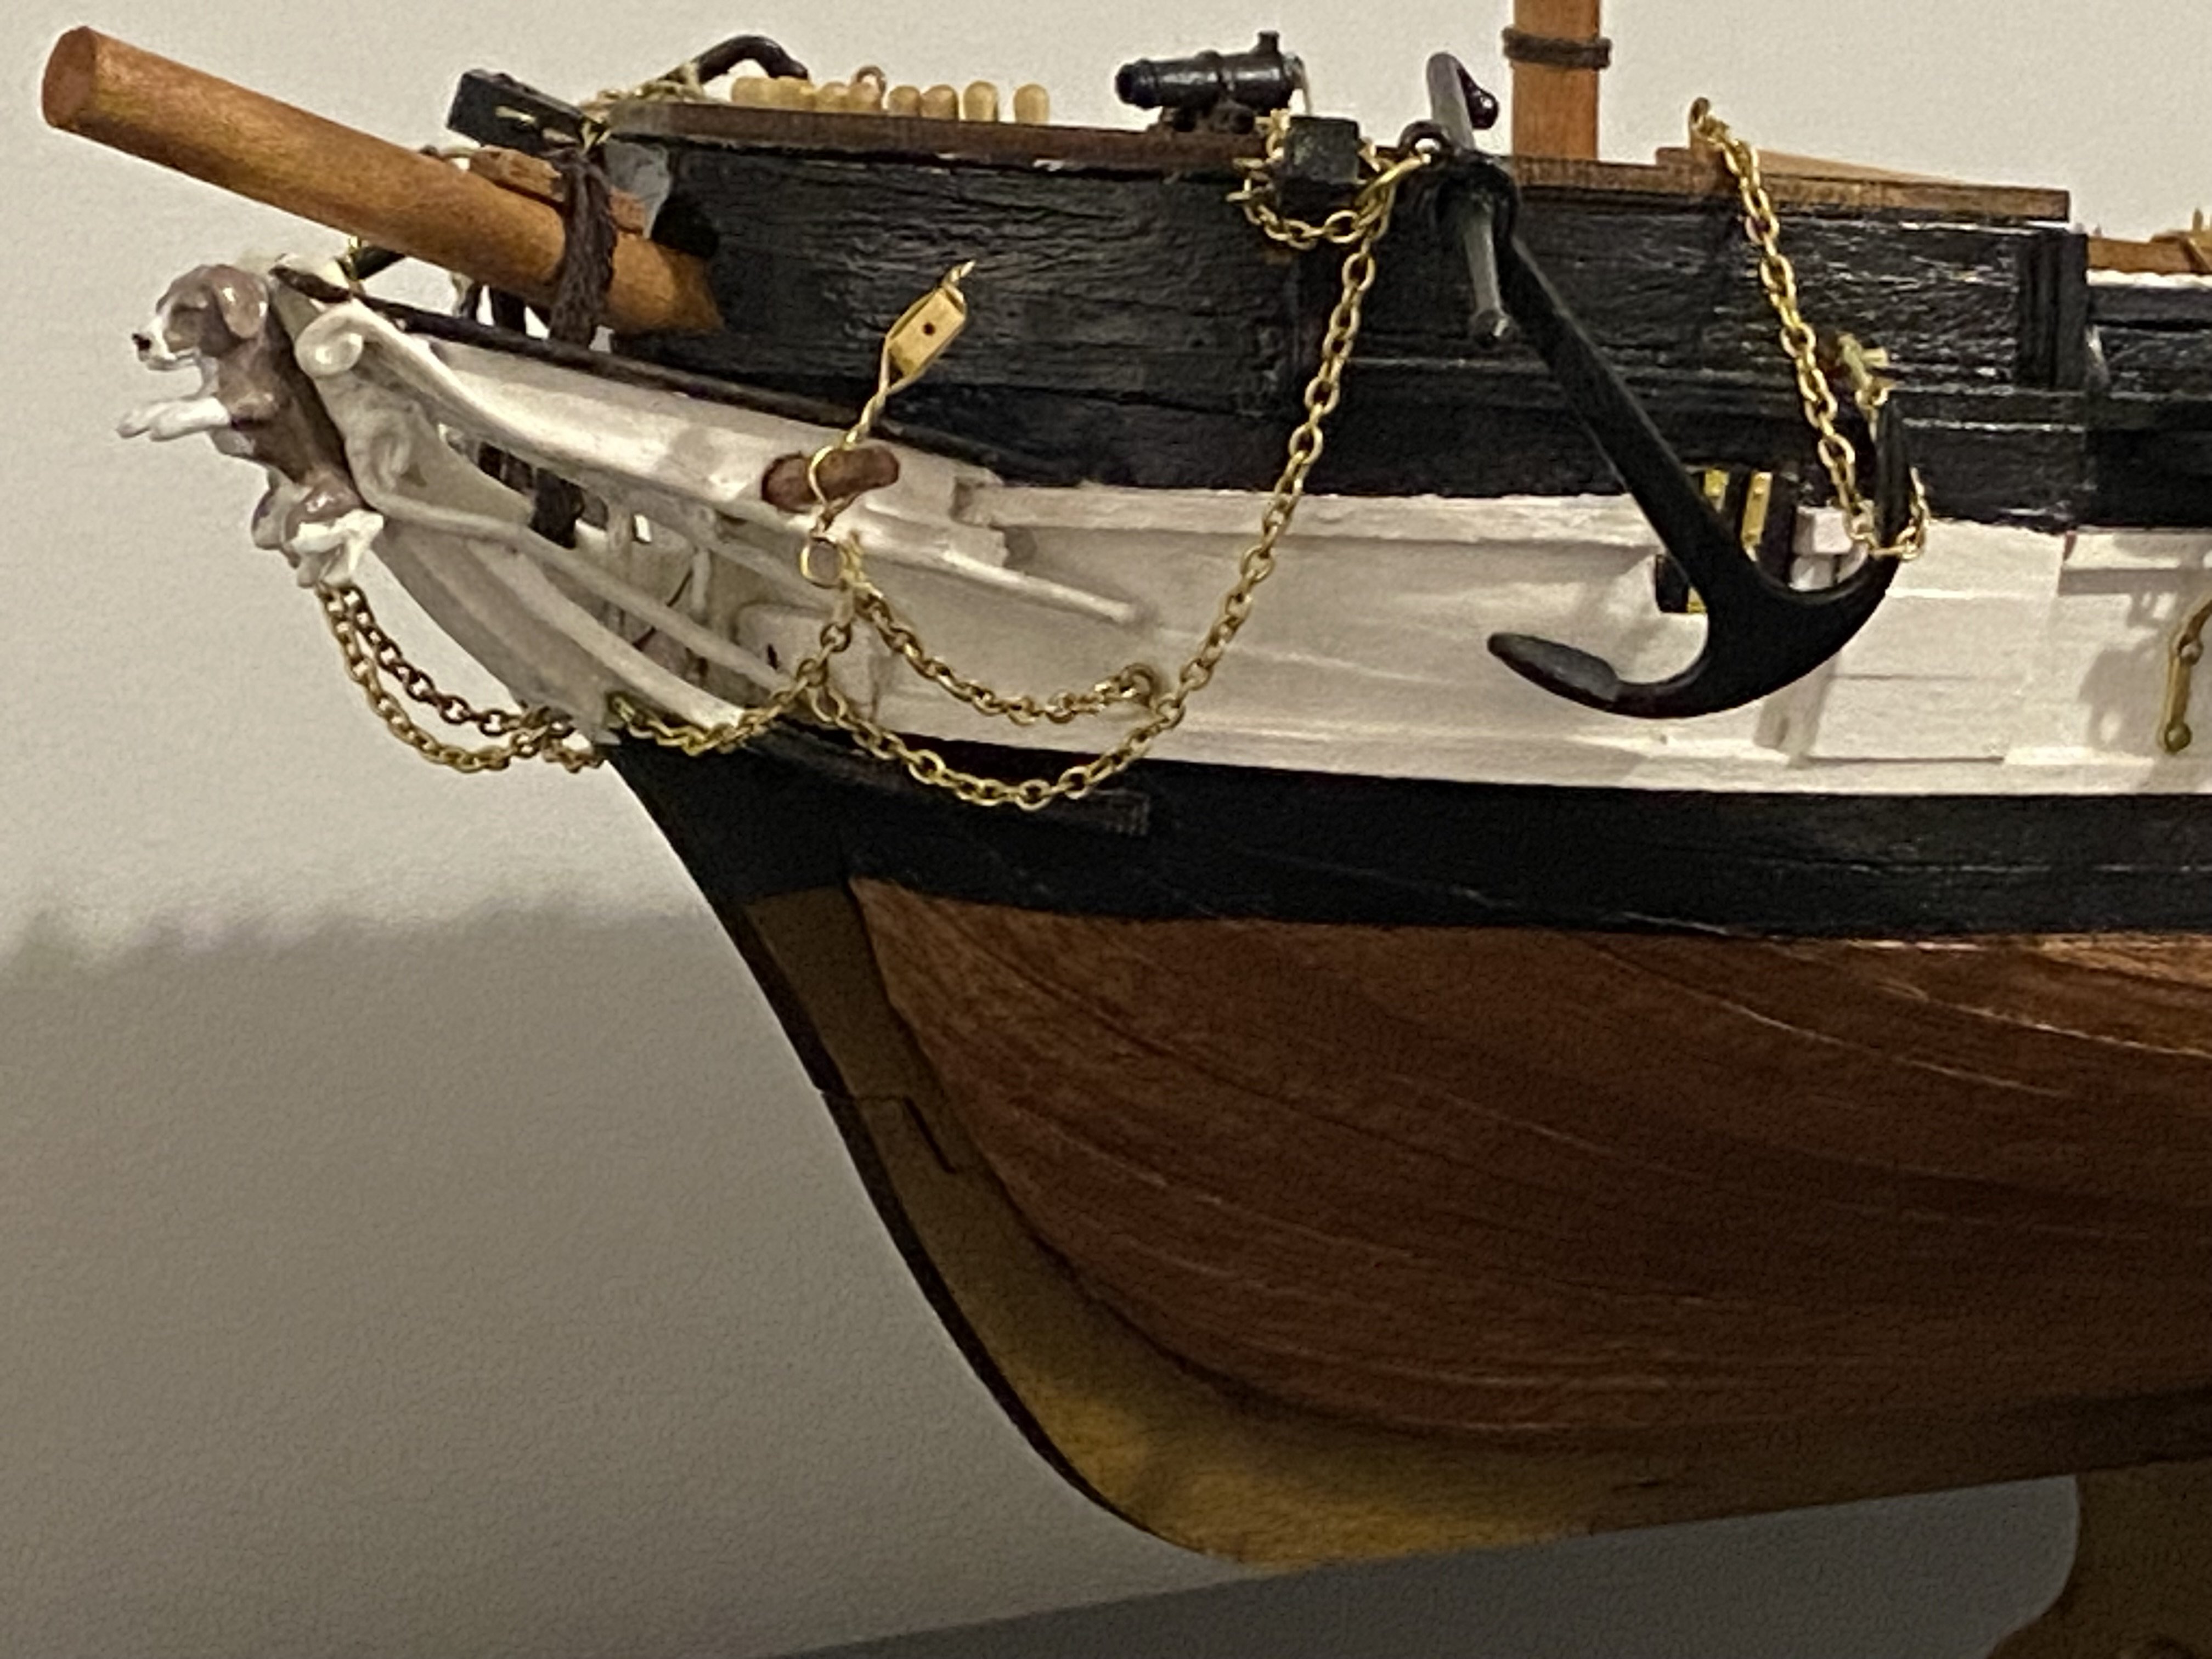
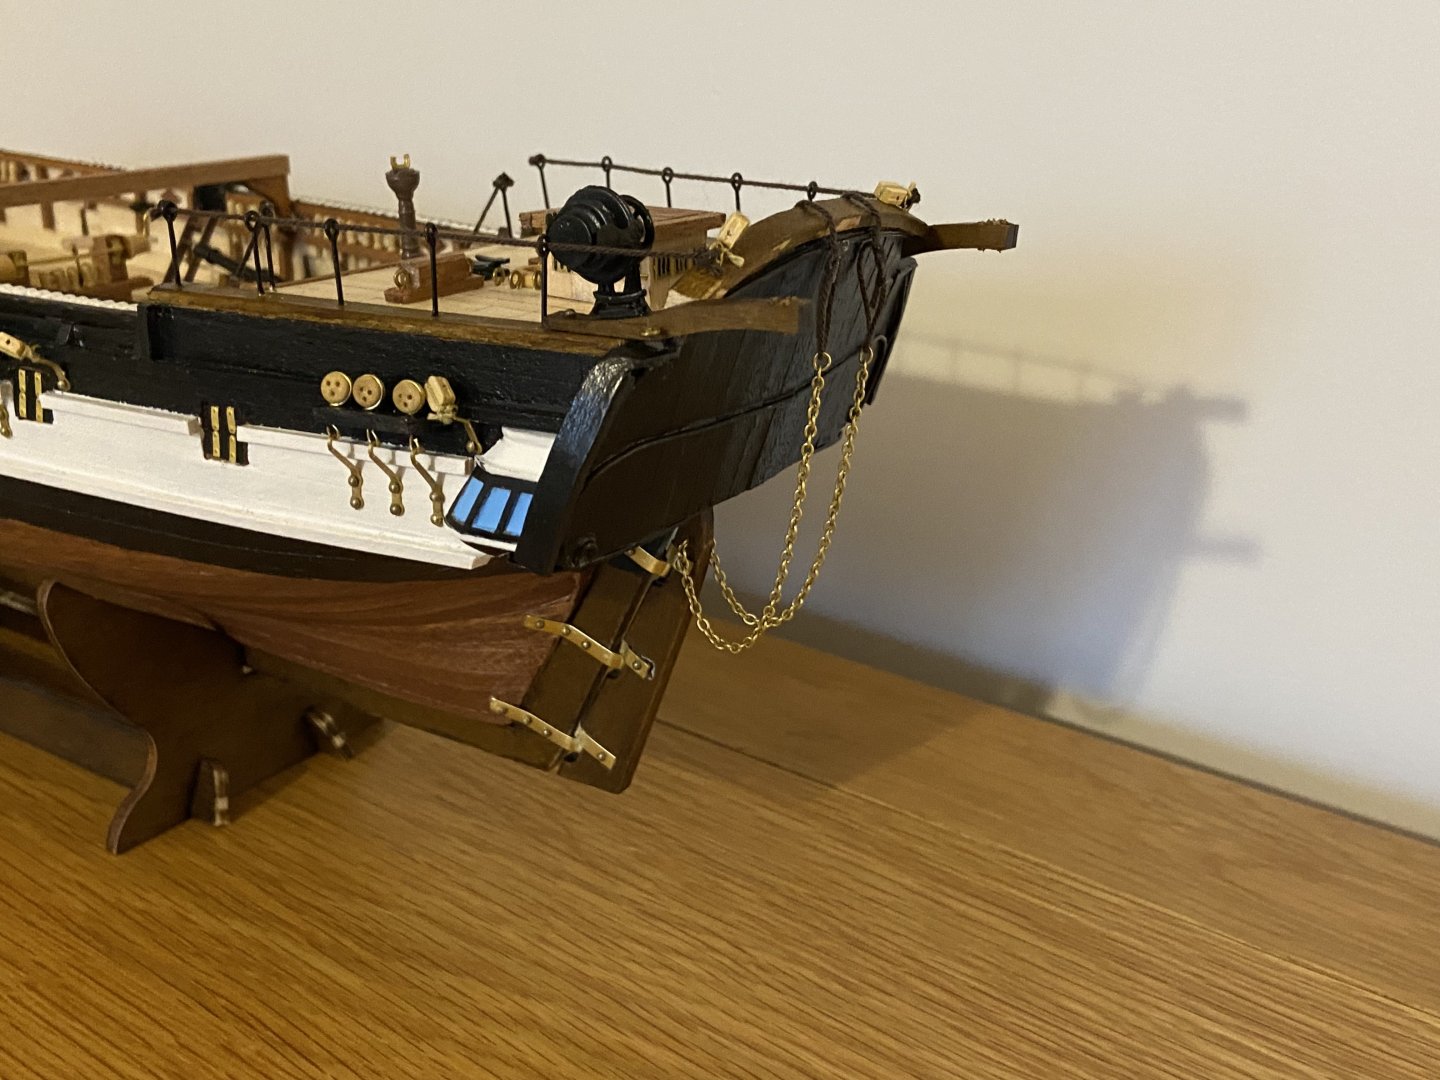
Took a short break from the jolly boat today and focused on finishing and fitting the anchors. The ship has four metal anchors, all of which had to be glued together, painted black and hung from the hull with different lengths of chain. Surprisingly, this ended up being one of the most frustrating parts of the build so far. I’m reasonably happy with how they turned out but I can’t shake the feeling that the anchors hanging off the sides interrupt some of the sleekness of the hull. What I’m less sure about is the actual prototypical setup: the two bow anchors make sense, since their chains run forward, inside the ship and would attach to the windlass. But the two positioned closer to midships aren’t connected to anything. If they were untied, they’d just drop straight into the sea. Were these meant to be spare anchors that would only be rigged properly when needed, or is this just a bit of inaccuracy from the Occre? Either way, the job is done. It took me about four hours to get all four anchors mounted. Tiny chains, deadeye bolts, bits of rope and surprisingly heavy metal anchors are not the easiest things to wrangle at this scale. But they’re on!


-
Looks beautiful 🙂 What's with the big sheet of paper?
-
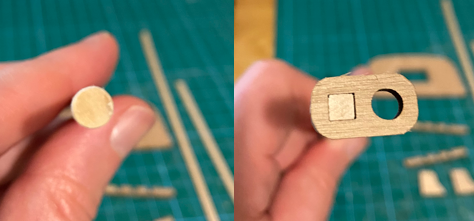
The Beagle kit includes four small boats: a large cutter, a smaller cutter, the Captain’s whaleboat and the jolly boat. For now, I’m only working on the large cutter and the jolly boat. The other two will be mounted along the ship’s sides, and building them at this stage would get in the way of the rigging, so I’m saving those for the final stages of the build. The boats go together much like the larger Beagle hull, but they use a plank-on-frame approach instead of plank-on-bulkhead. The planking is done with 3mm limewood, and since the inside surfaces remain visible, I chose to stain the wood before installing any planks. As you can see, my planking skills still need a bit of refinement, but I wasn’t too worried, this particular boat was to be painted white, so any small gaps would be easily filled before painting. I applied three coats of white acrylic to the underside of the boat. The photo shows how it looked after the second coat. Once the planking was complete, I removed the boat from its base and moved on to the interior work, which involves some internal planking and fitting the various seats. Despite my efforts to align them with the frames, the seats ended up slightly off, most likely because the frame itself had a very subtle twist. Even so, I’m pleased with how it’s coming together. The level of detail you can achieve with this type of small boat is surprisingly good. I know it isn’t perfectly to scale, and higher-end kits often use 3D-printed hulls for greater accuracy, but I really enjoy the craftsmanship involved in building this one. Here we have the finished cutter, alongside the jolly boat frame. And the cutter mounted onto the Beagle deck:


-
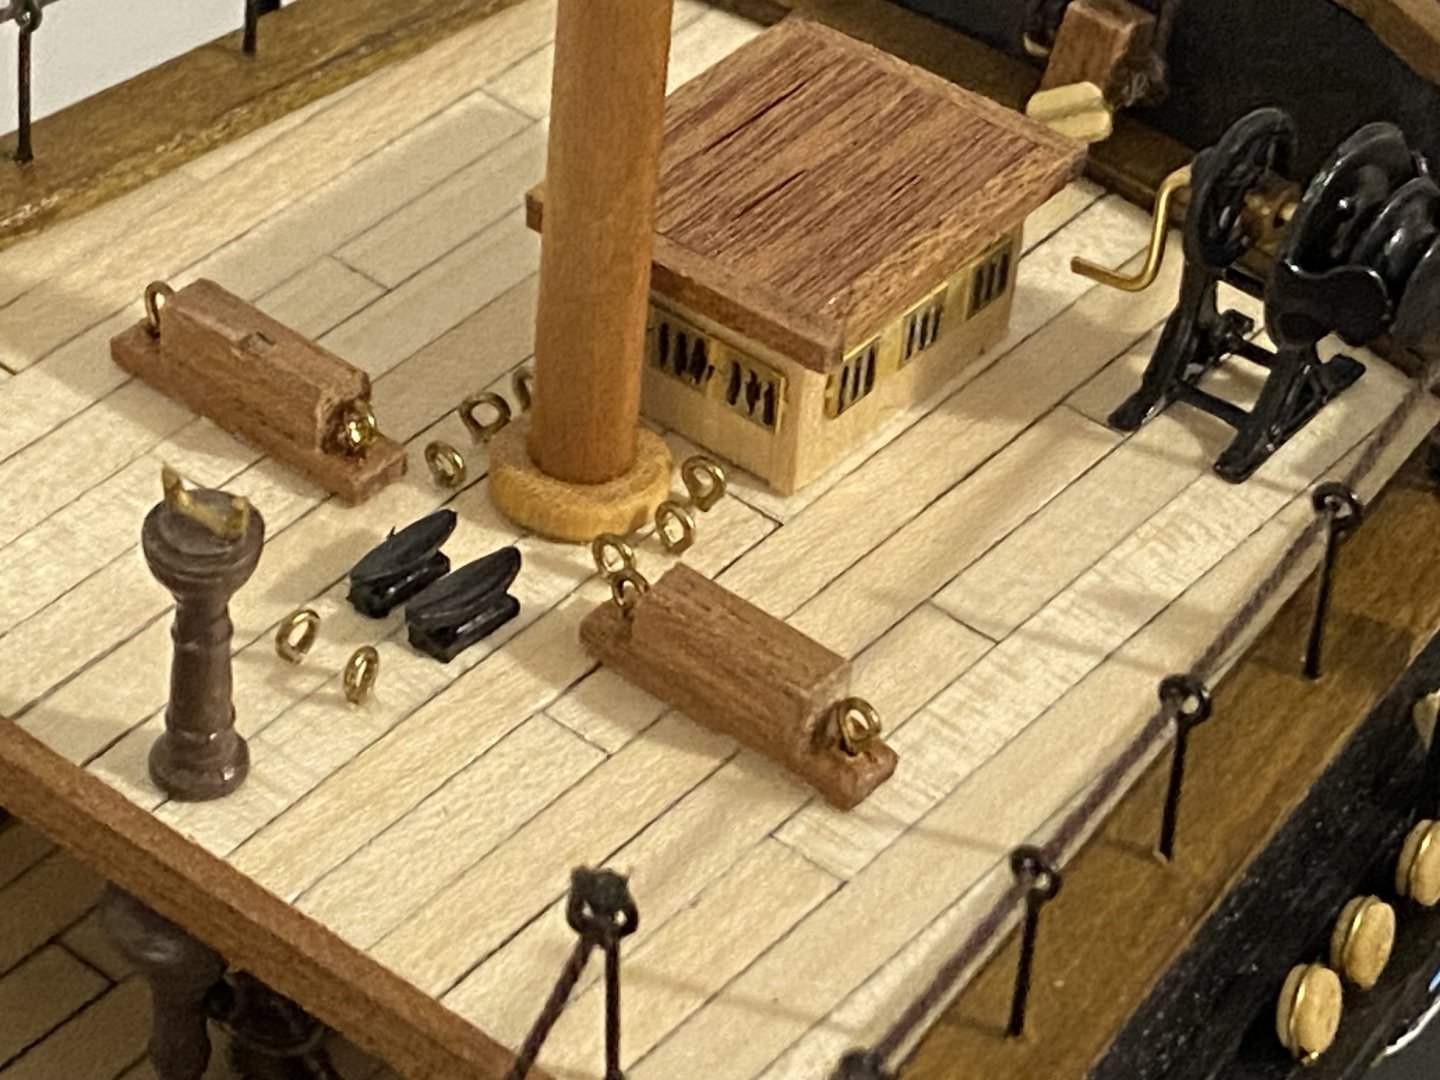
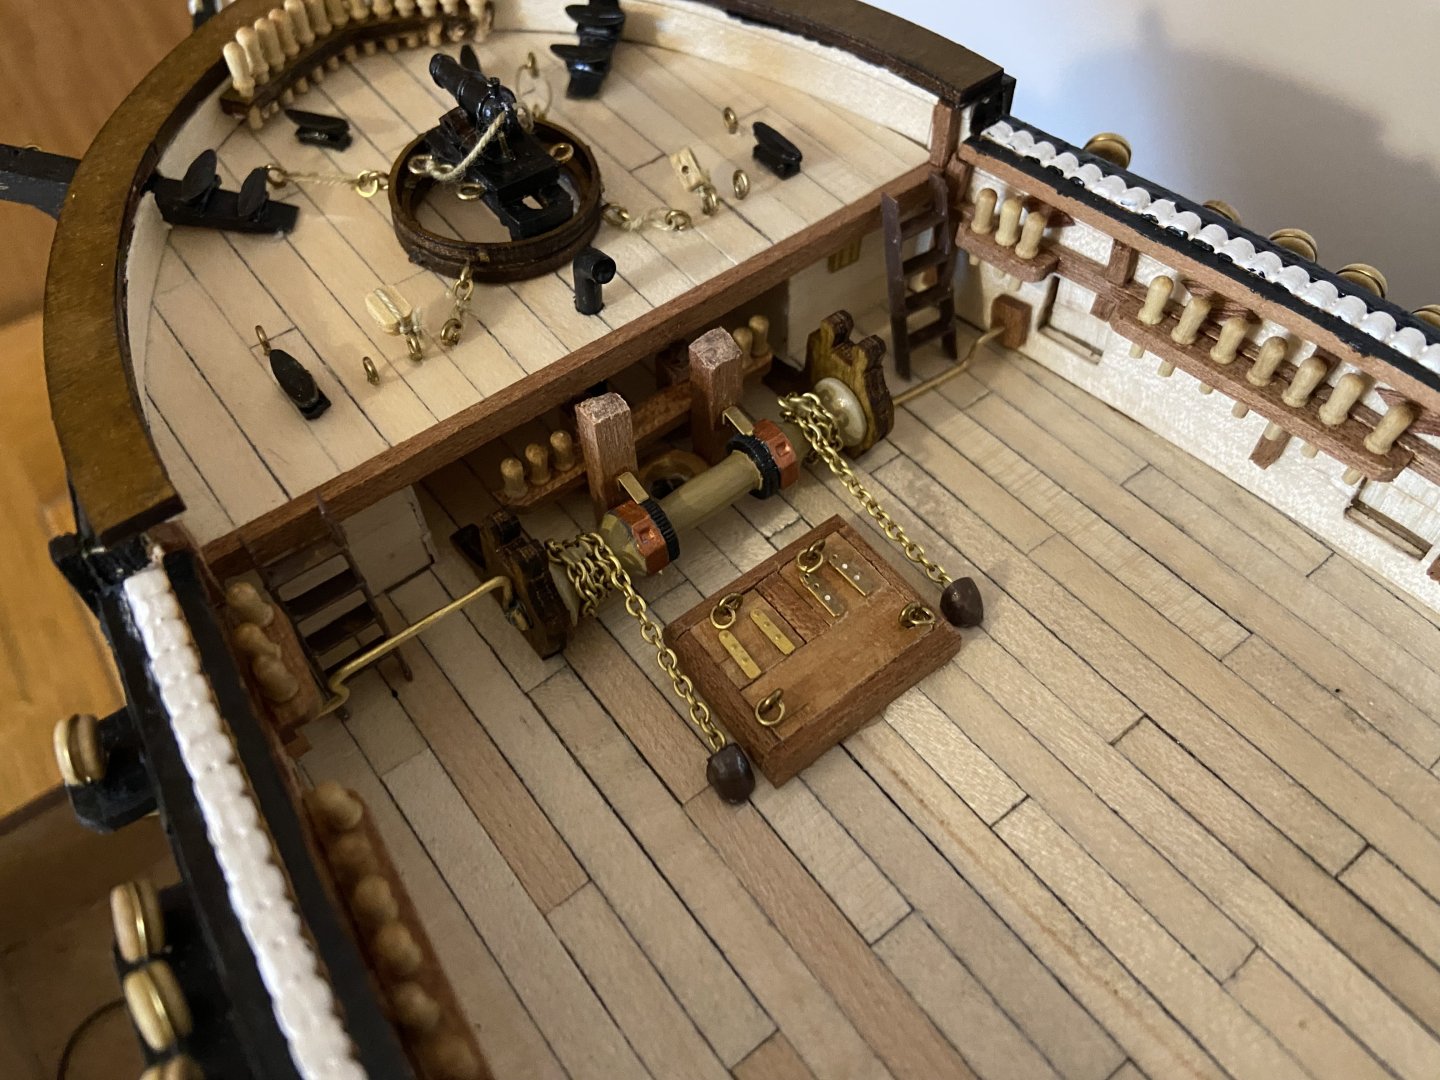
Thank you for your kind words 🙂 The deck and hull are now close to completion in terms of added details. I have placed all of the cannons. Each one was tied down following the kit instructions. Nothing historically accurate of course, but the combination of simple knots and a bit of rope twisting gives them a convincing, tidy look for display. They add a lot of character to the deck. There is also the large stern support beam running across from one side of the ship to the other. I also assembled the small deck huts. These were surprisingly intriate little builds. I'm still not entirely sure what the real structures were used for. Certainly they're too small for a real person sit in. I assume they served as storage for equipment and tools. I also completed the boat supports towards the front of the ship. This prepares the way for the upcoming task of assembling one of the four (!!) little boats that come with the kit. They will be fiddling work, but they should look great. At the bow, I installed the figurehead. It sits nicely and I think the natural colours I used work well with the model overall. At the stern, the rudder chains are added: Aside from the small boats and the anchors, the main structure of the ship is essentially done:


-
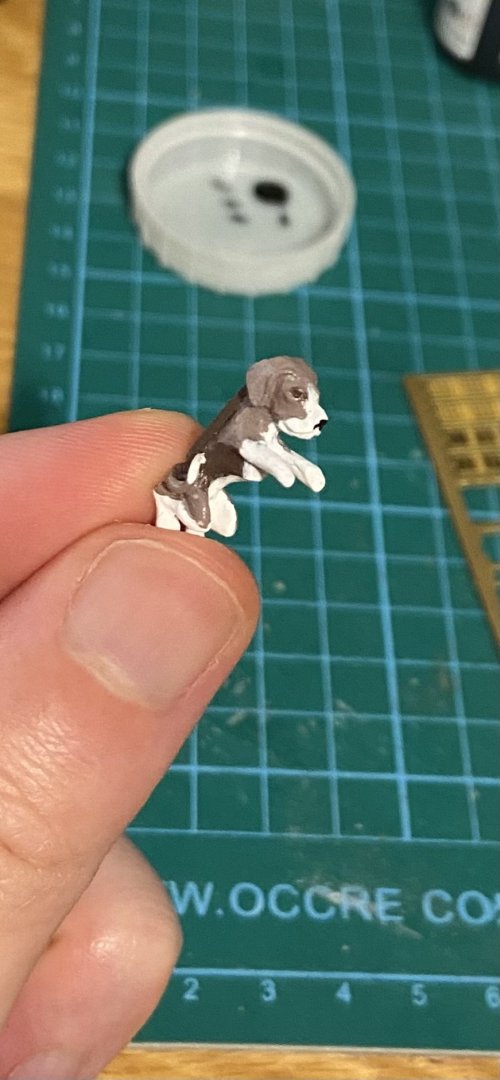
Figurehead is done. I've not done anything clever with the colours. Just white, dark brown and a mix of the two. Pretty happy with it 🙂
-
Less than 4 months in, and your work on this kit looks like a year's labour. Seriously impressive.
-
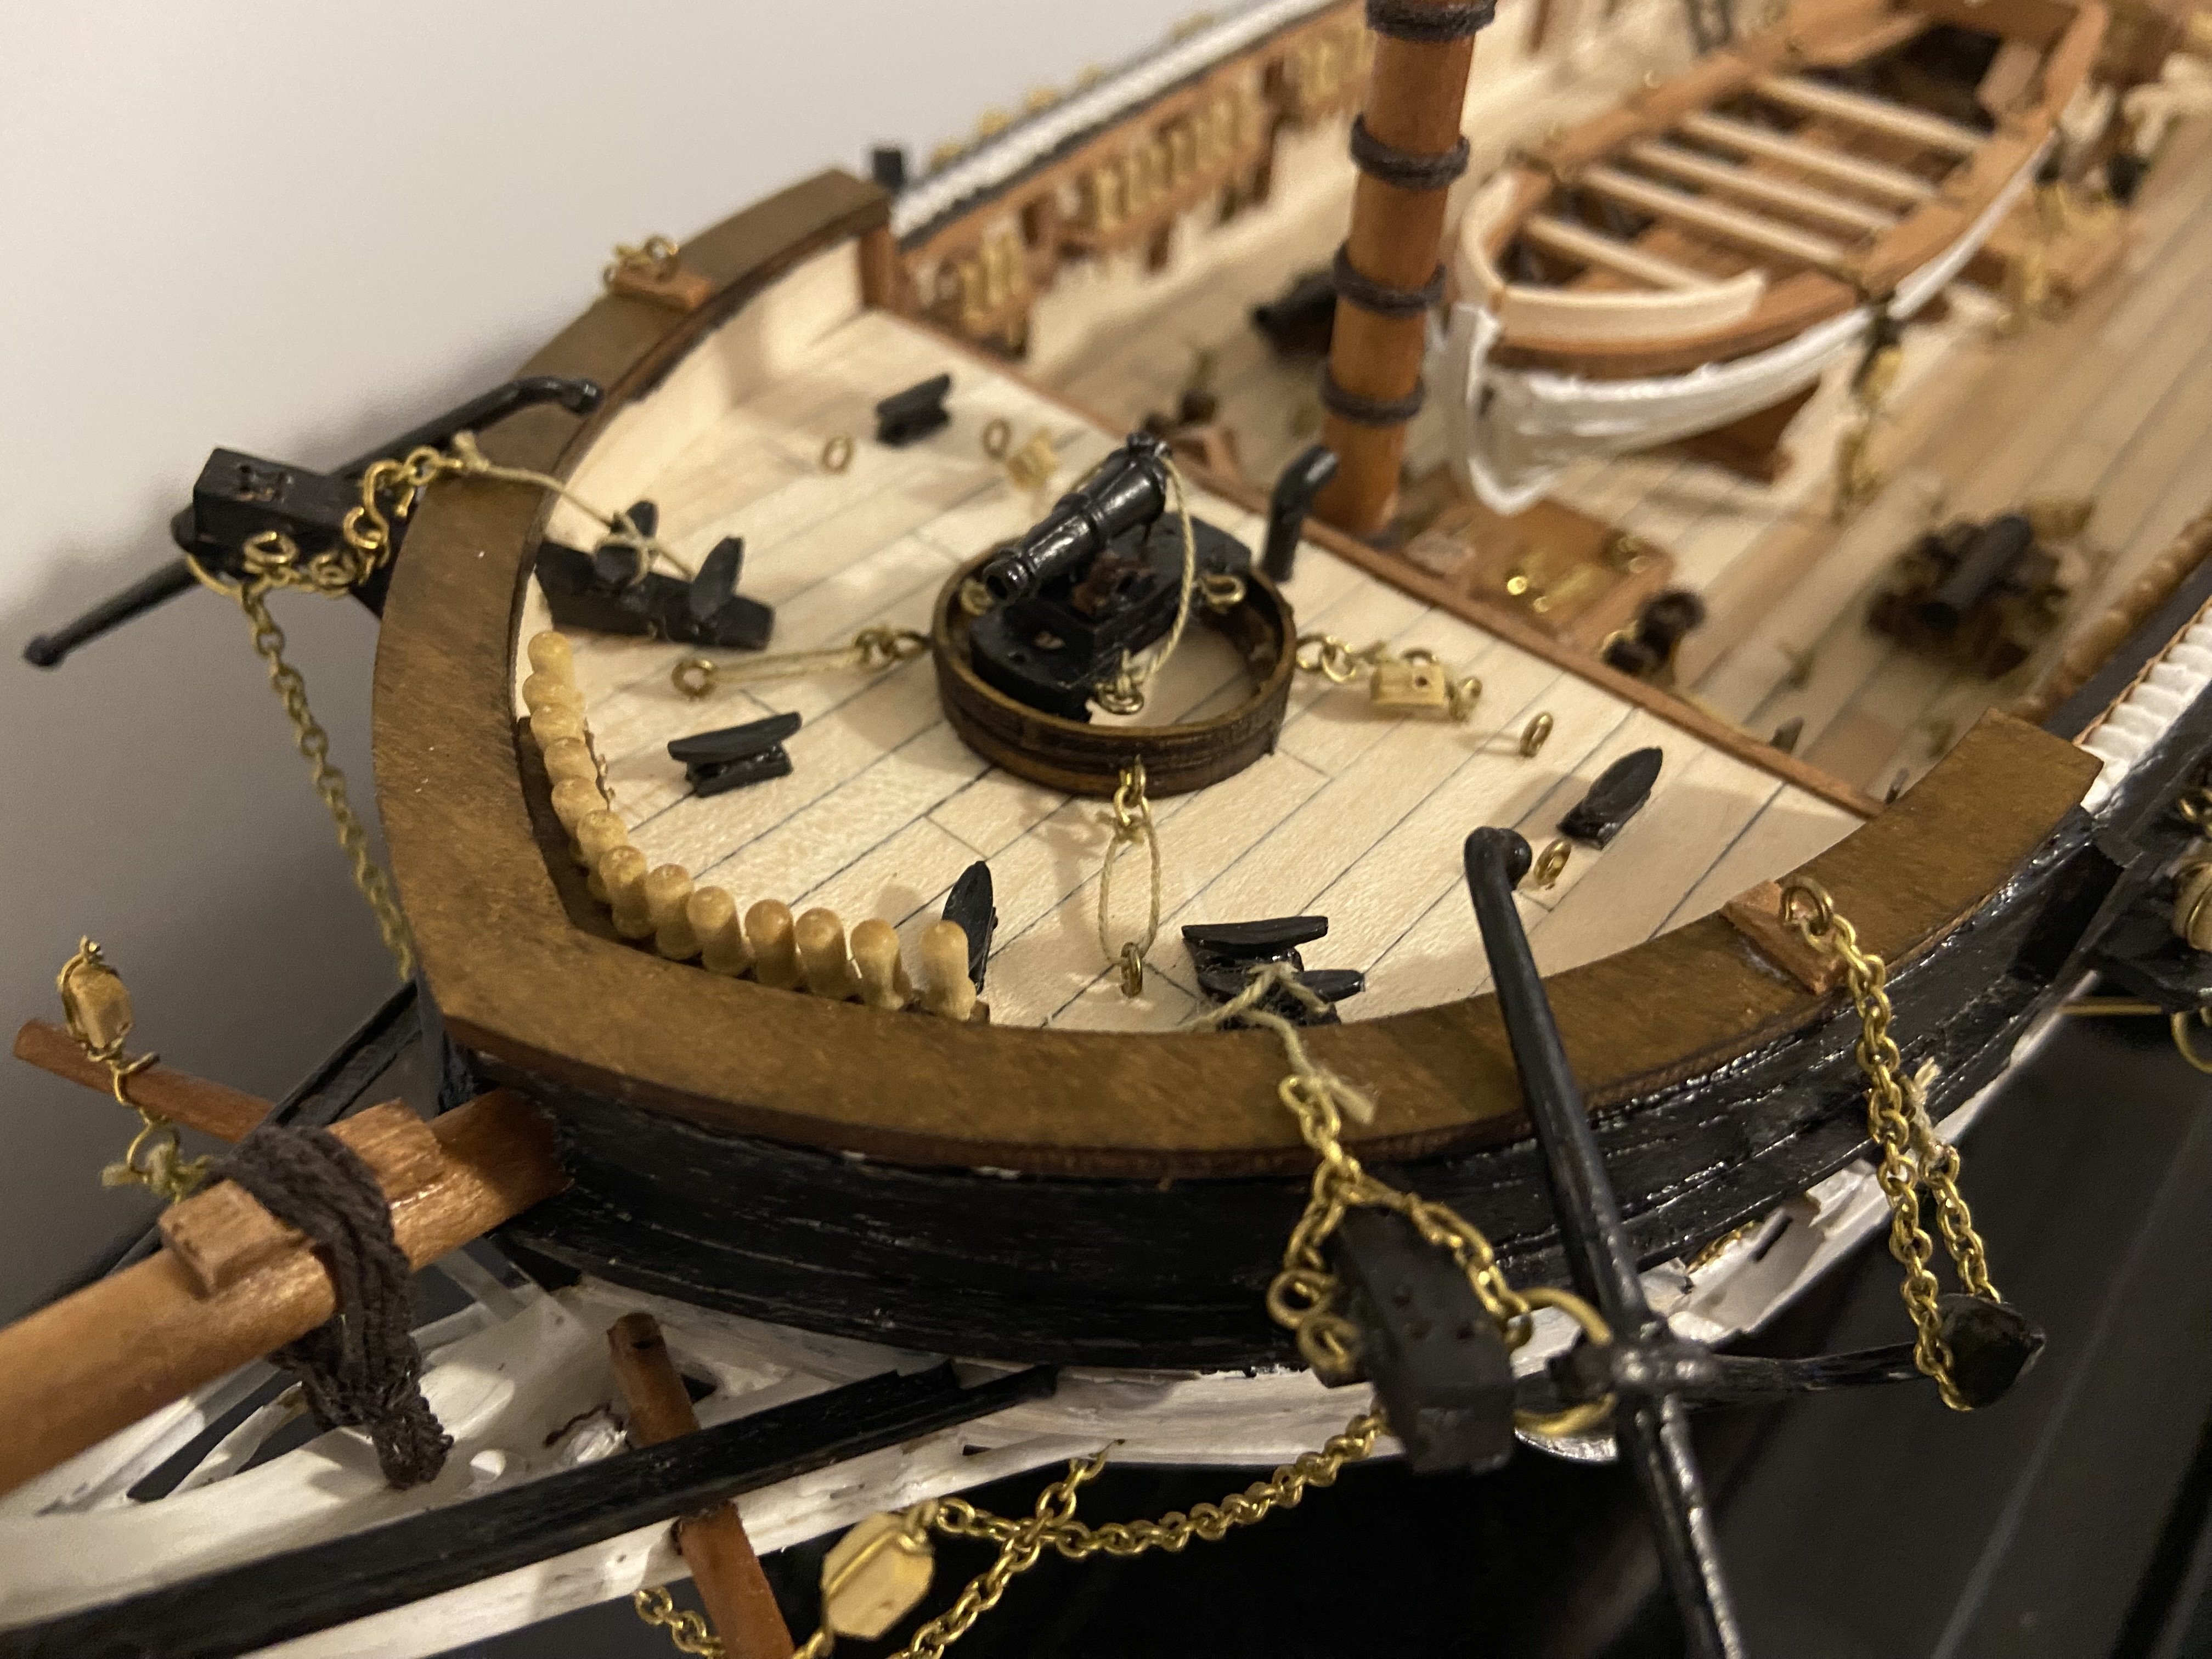
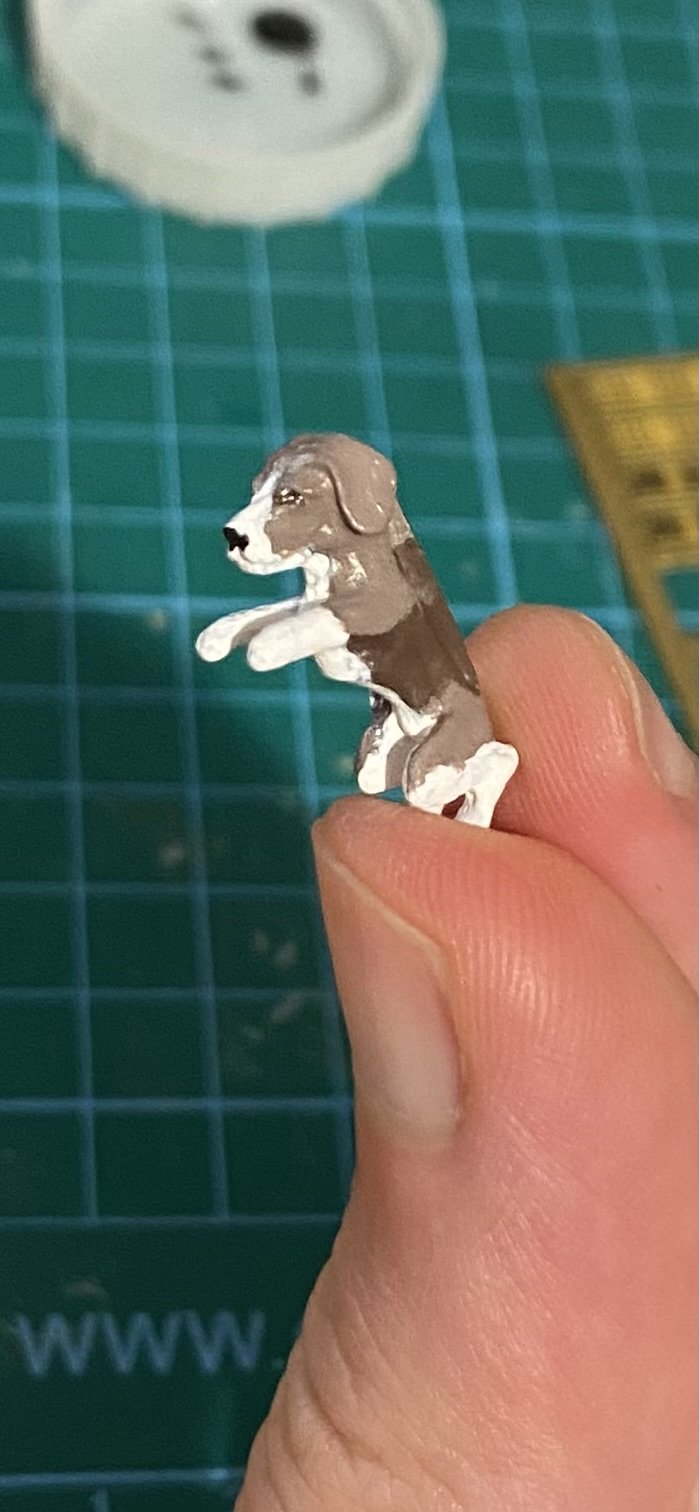
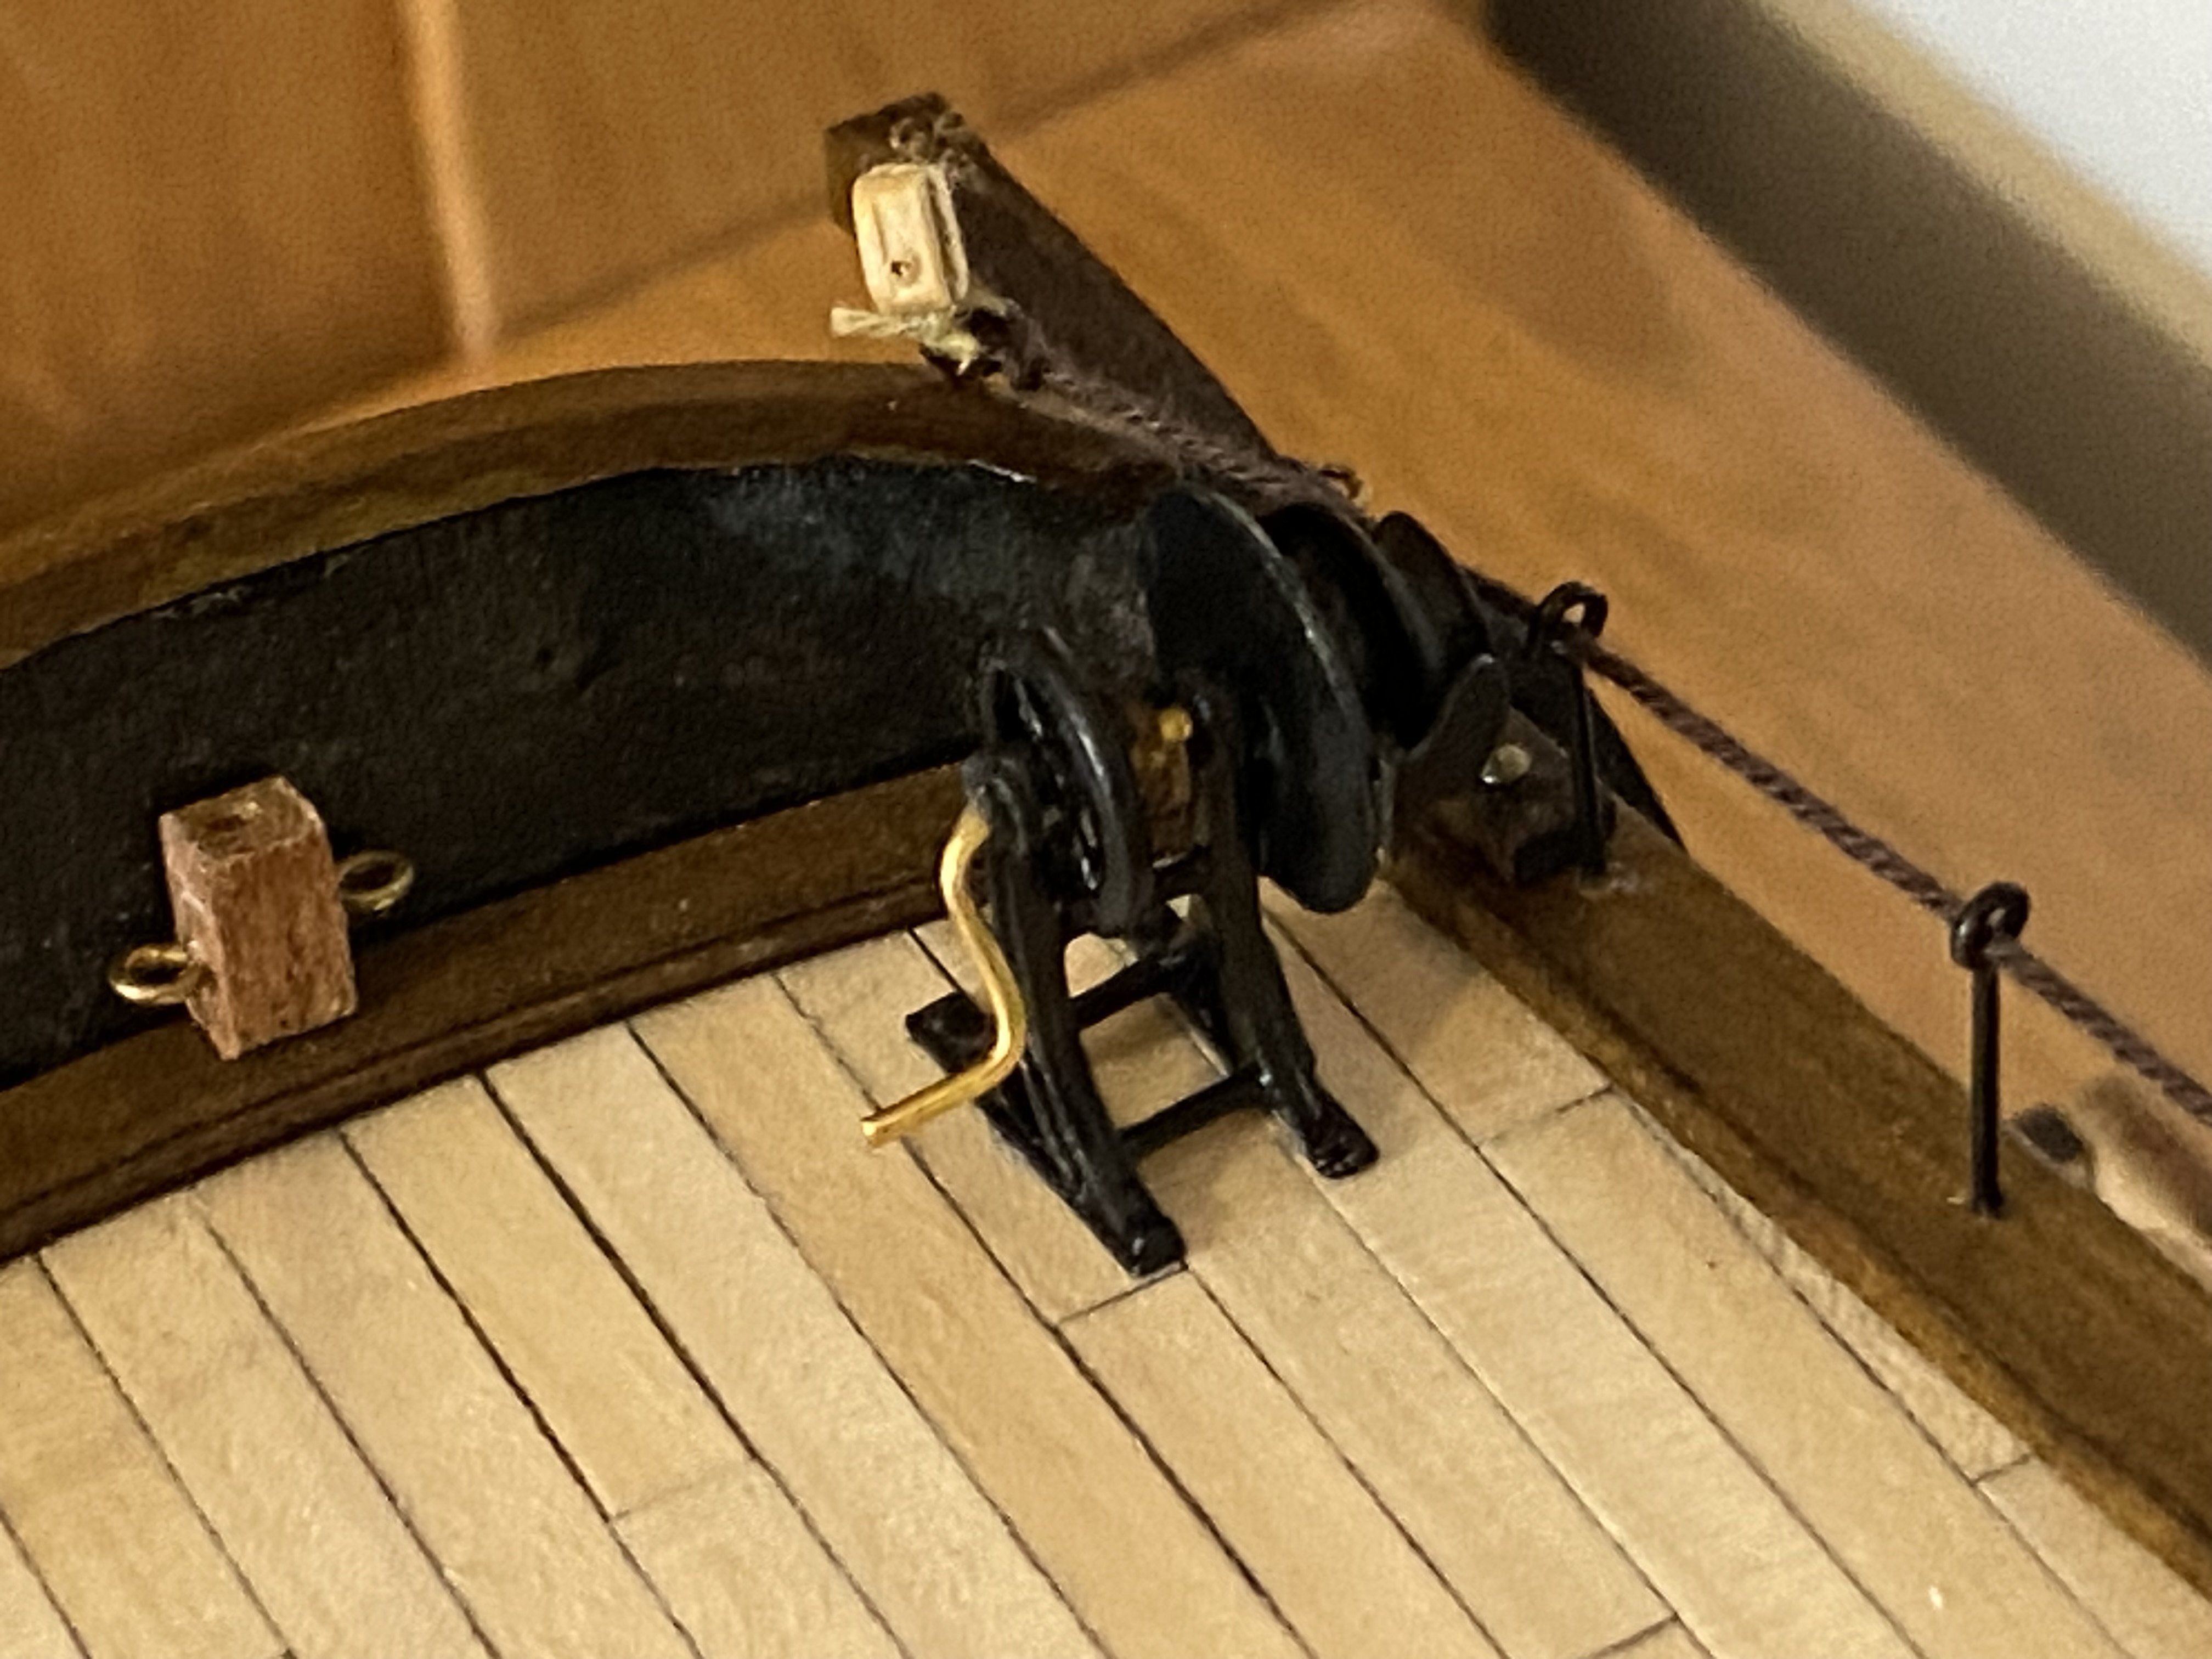
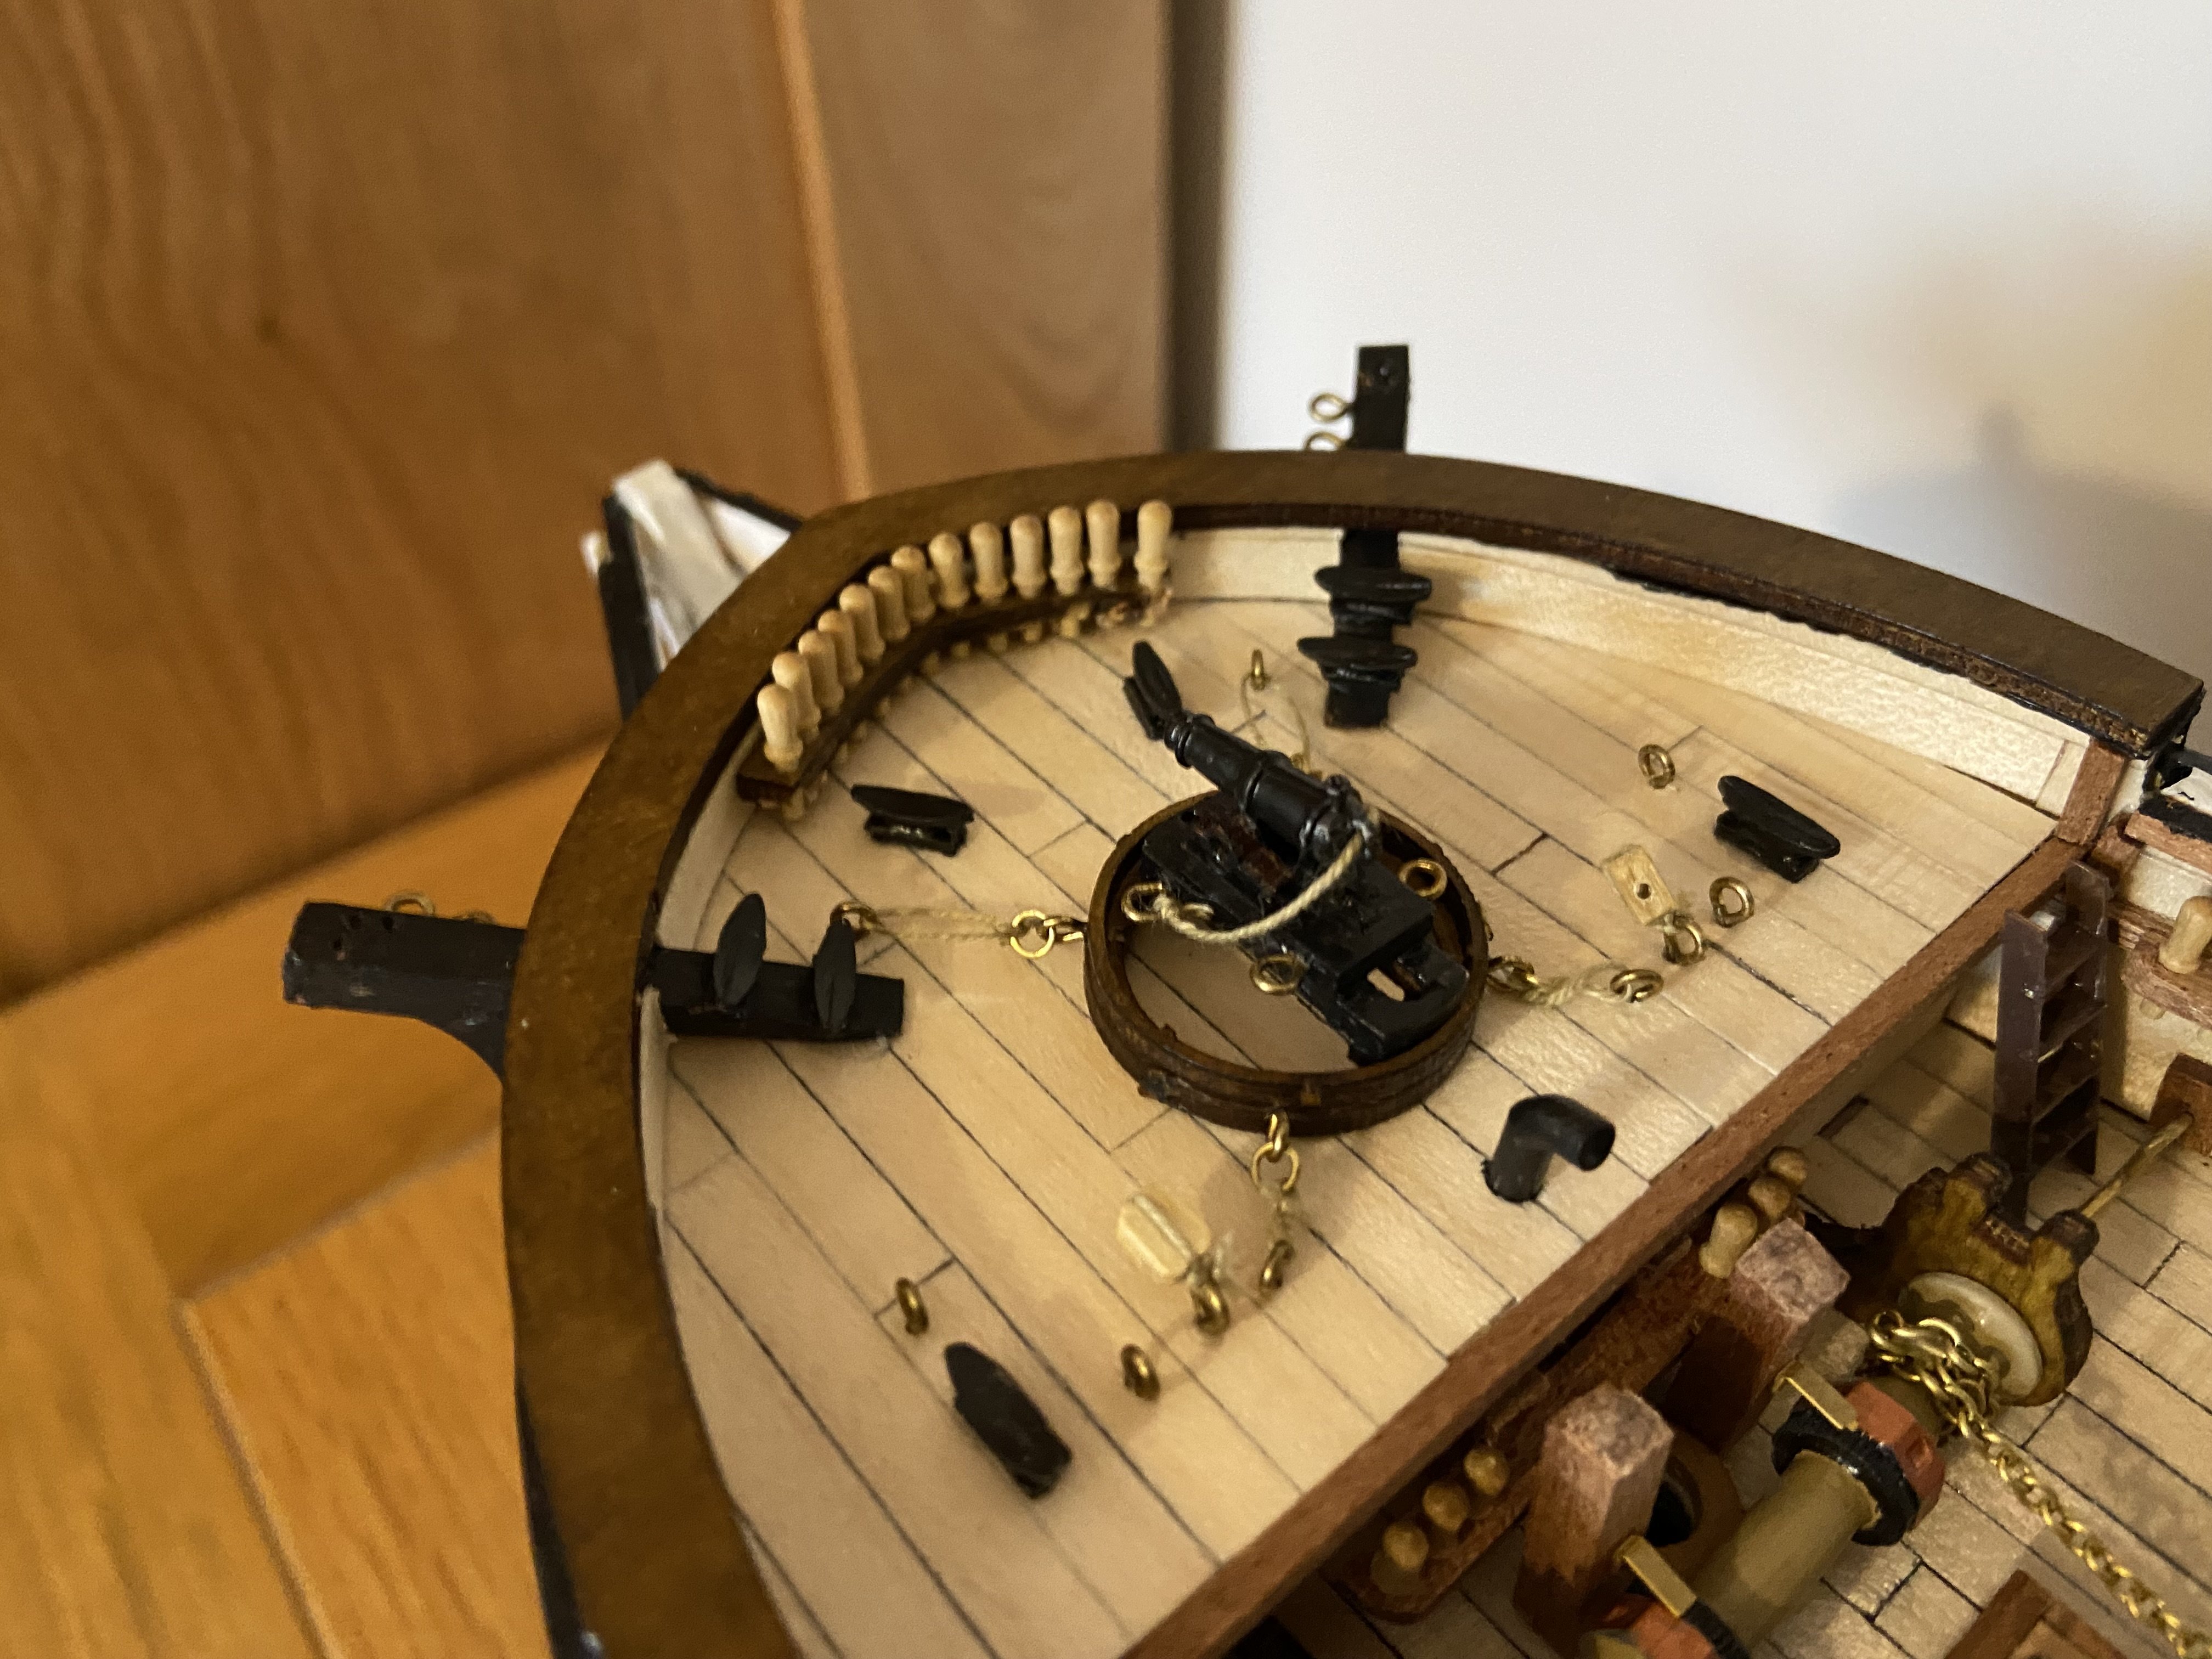
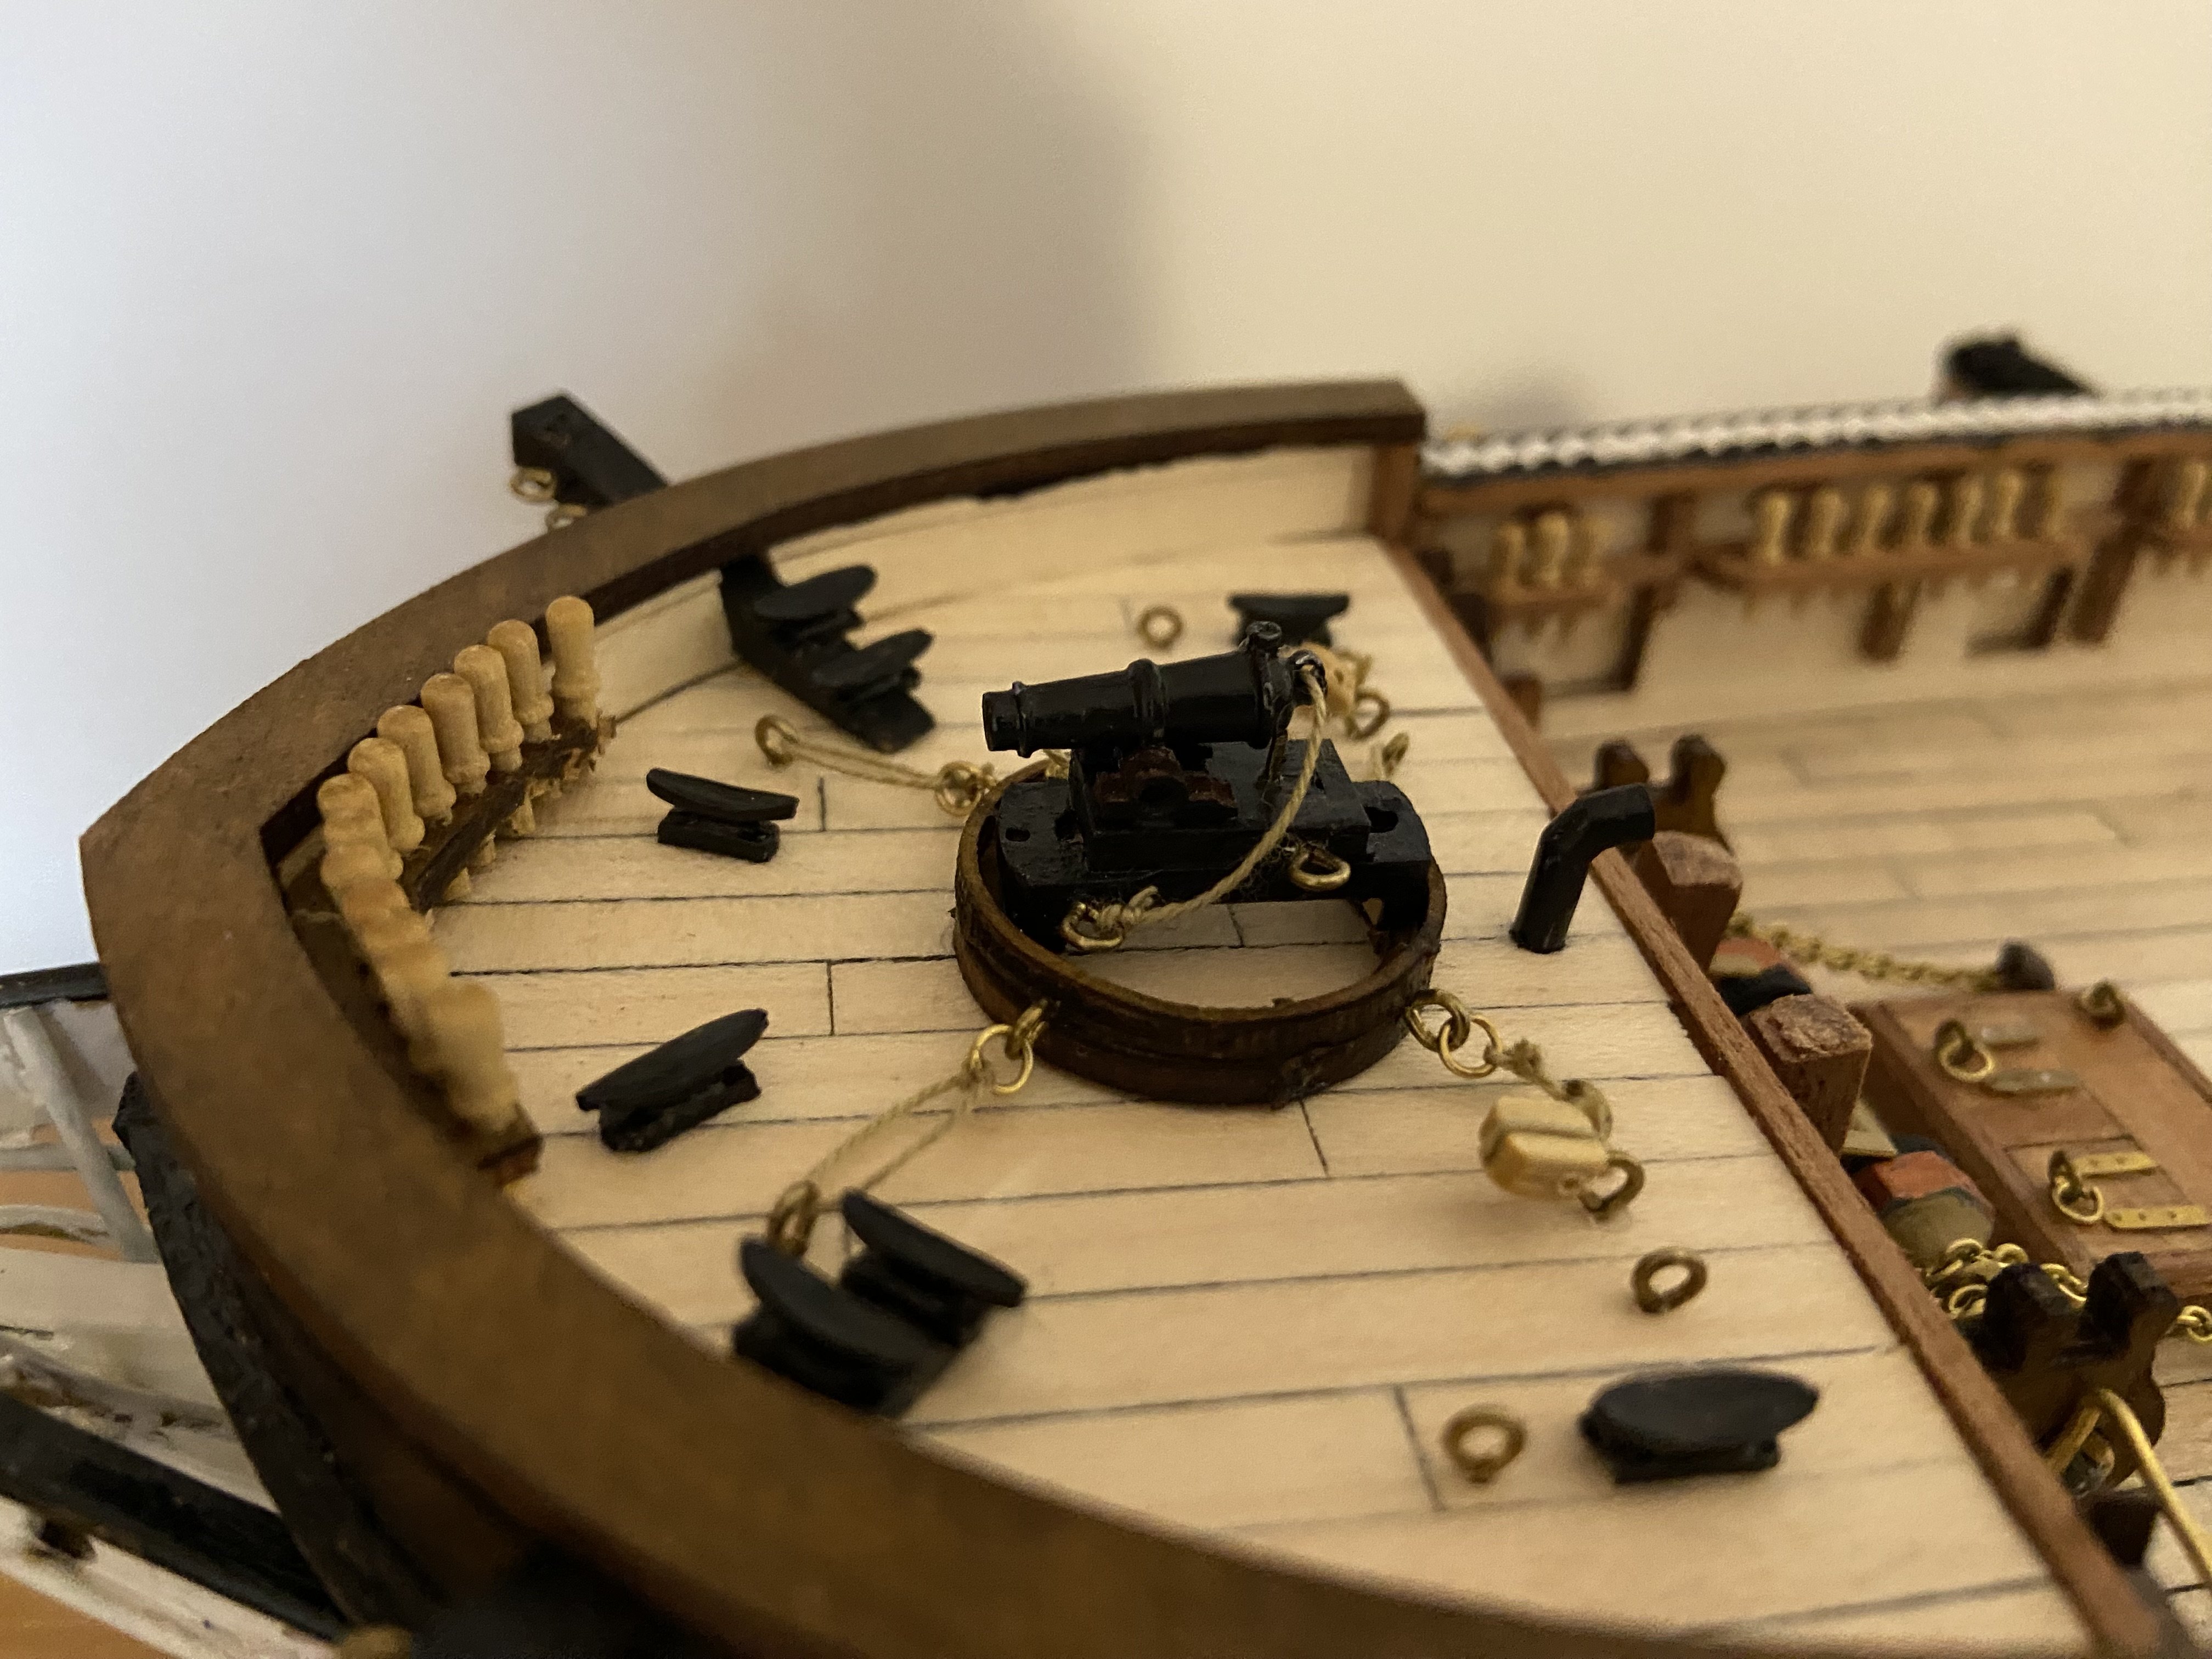
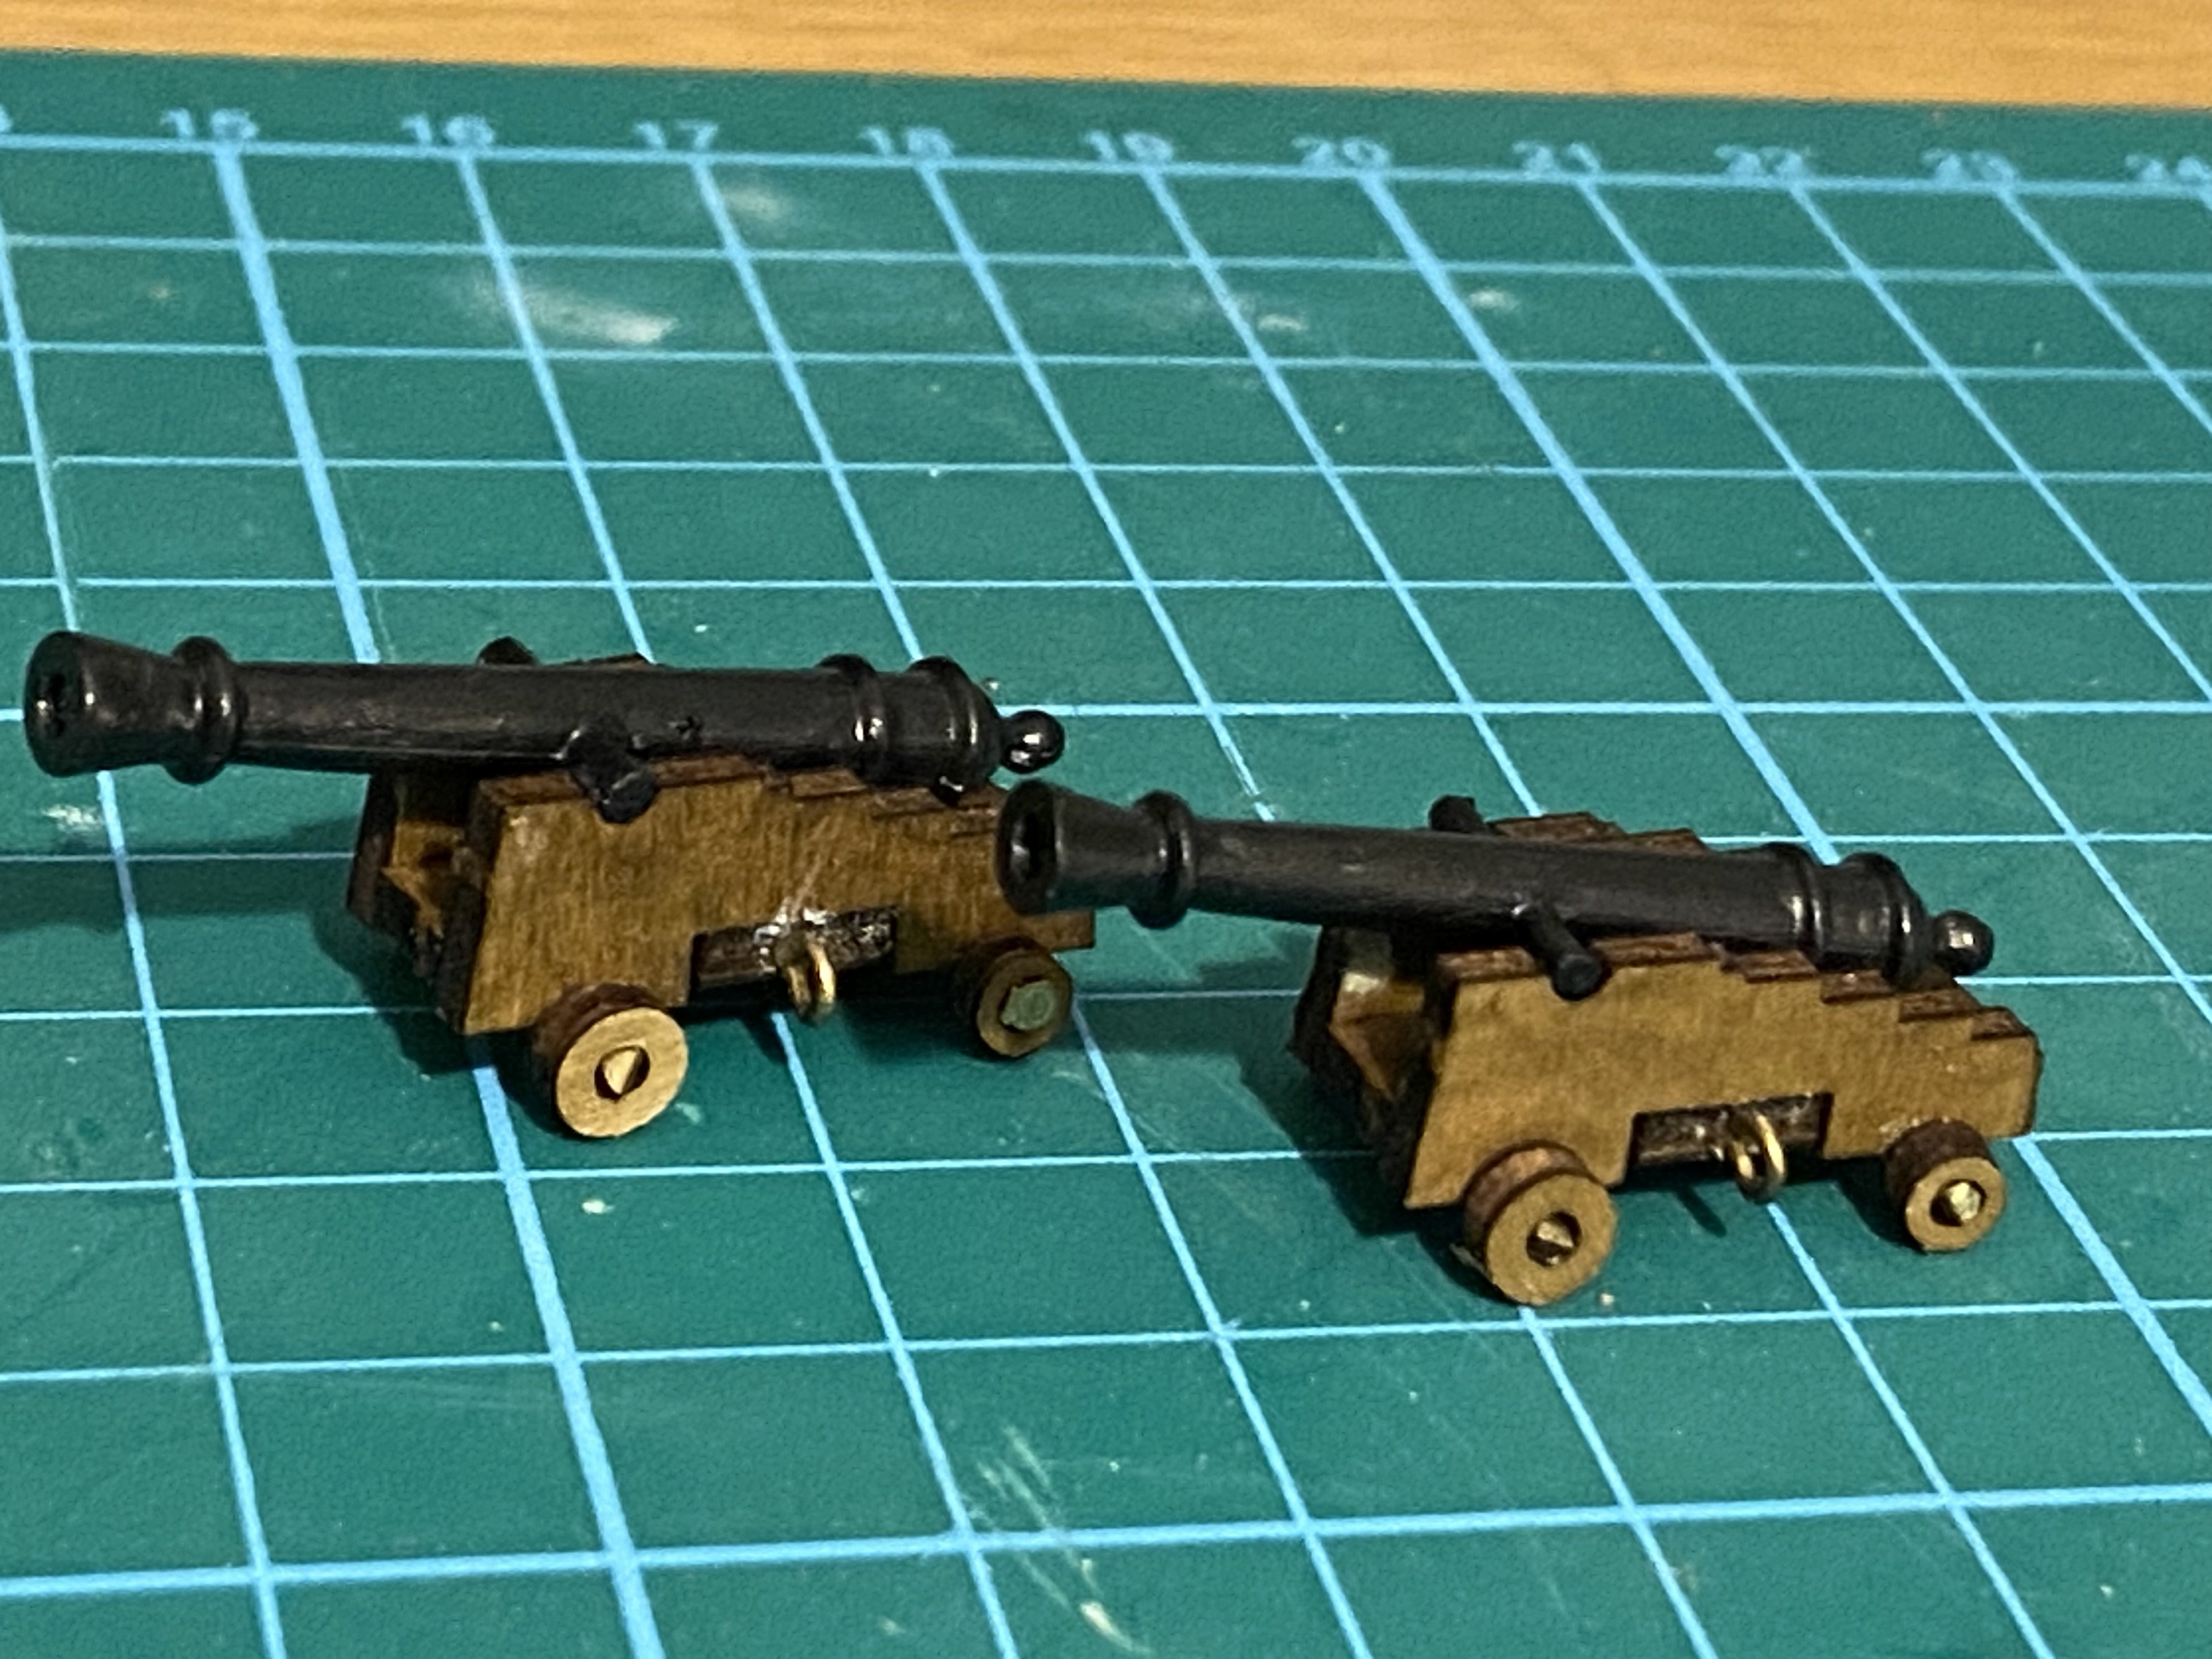
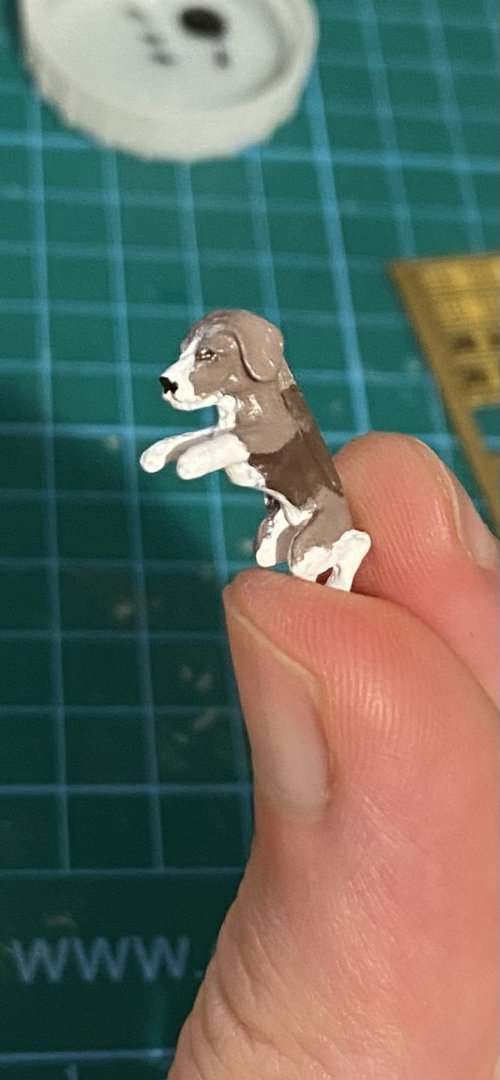
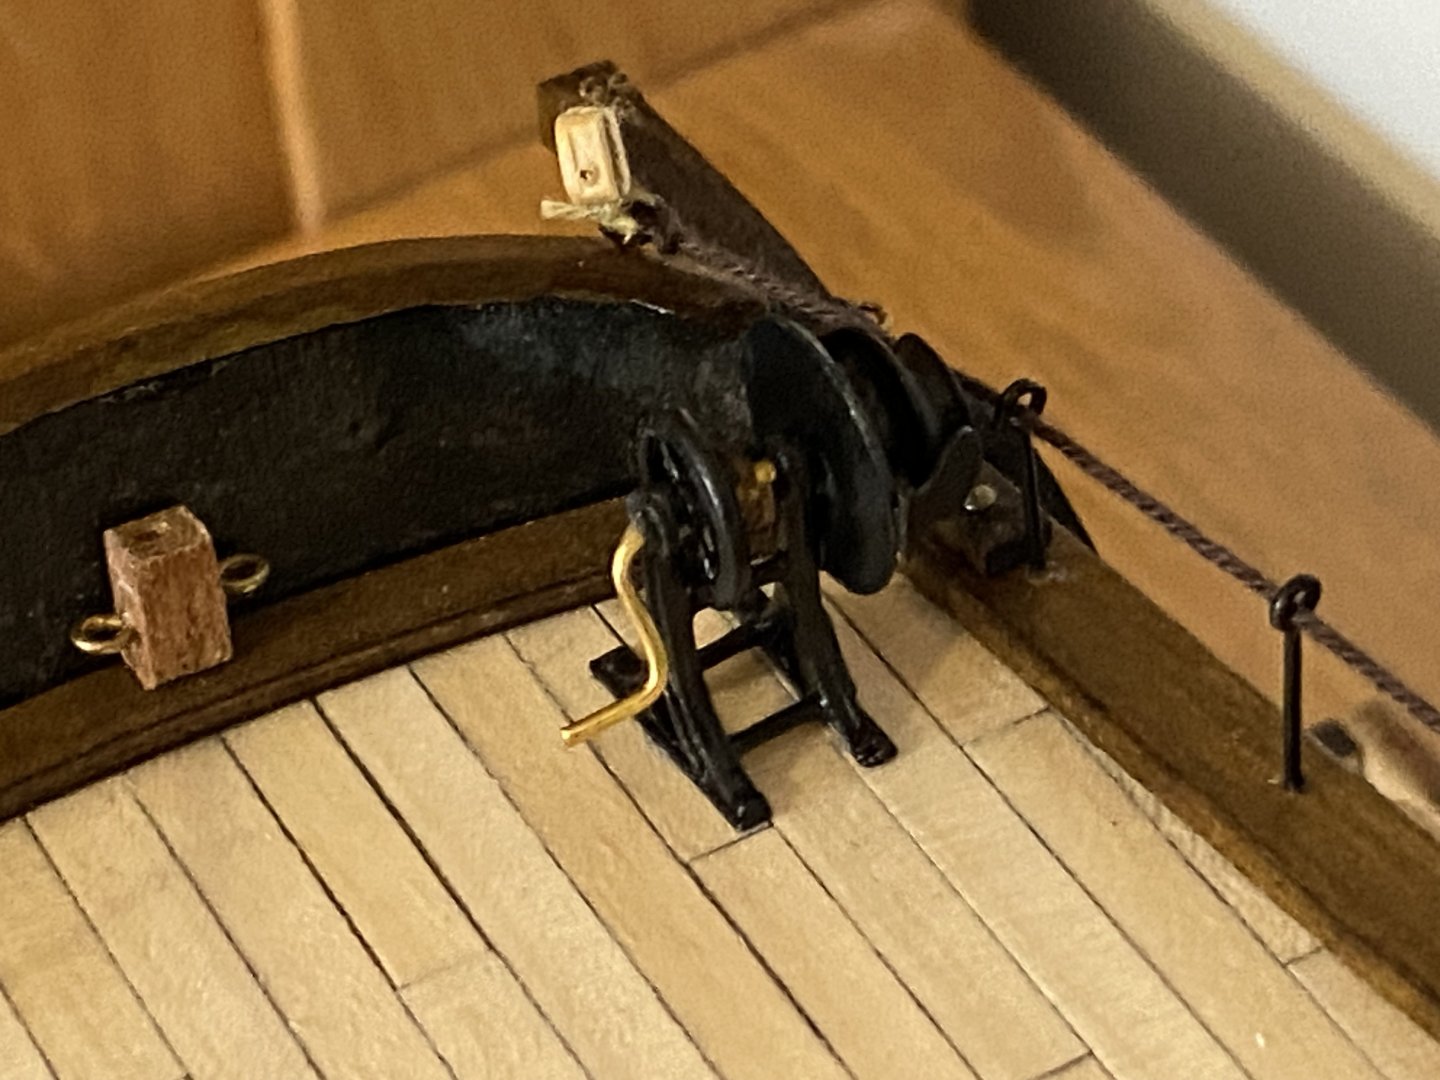
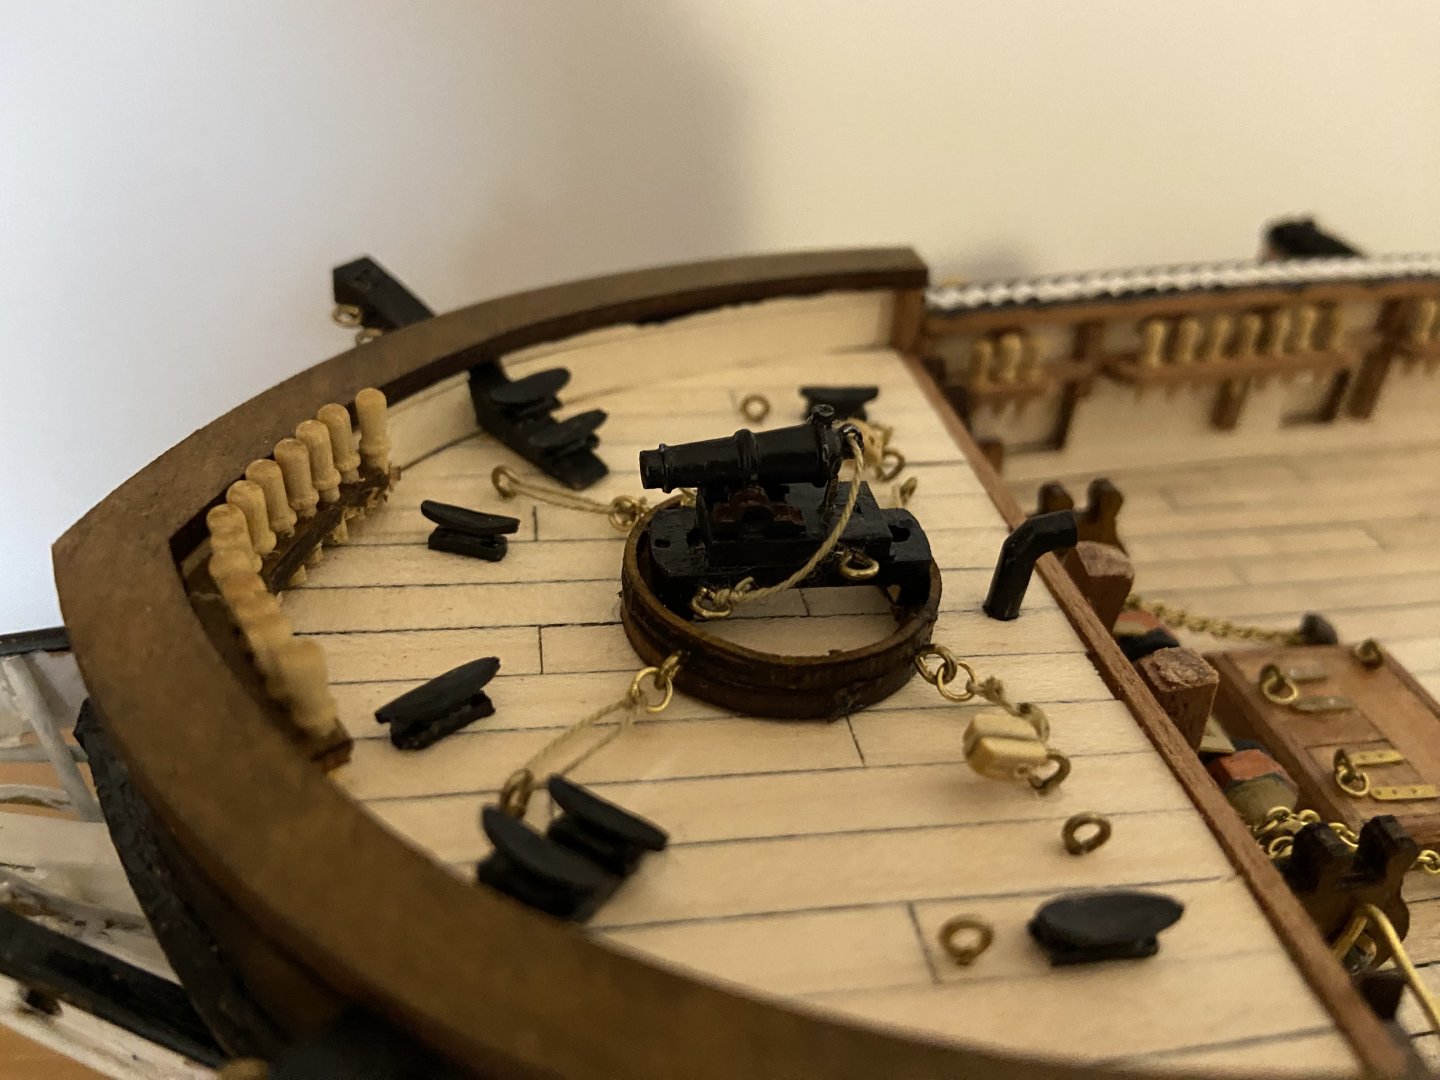
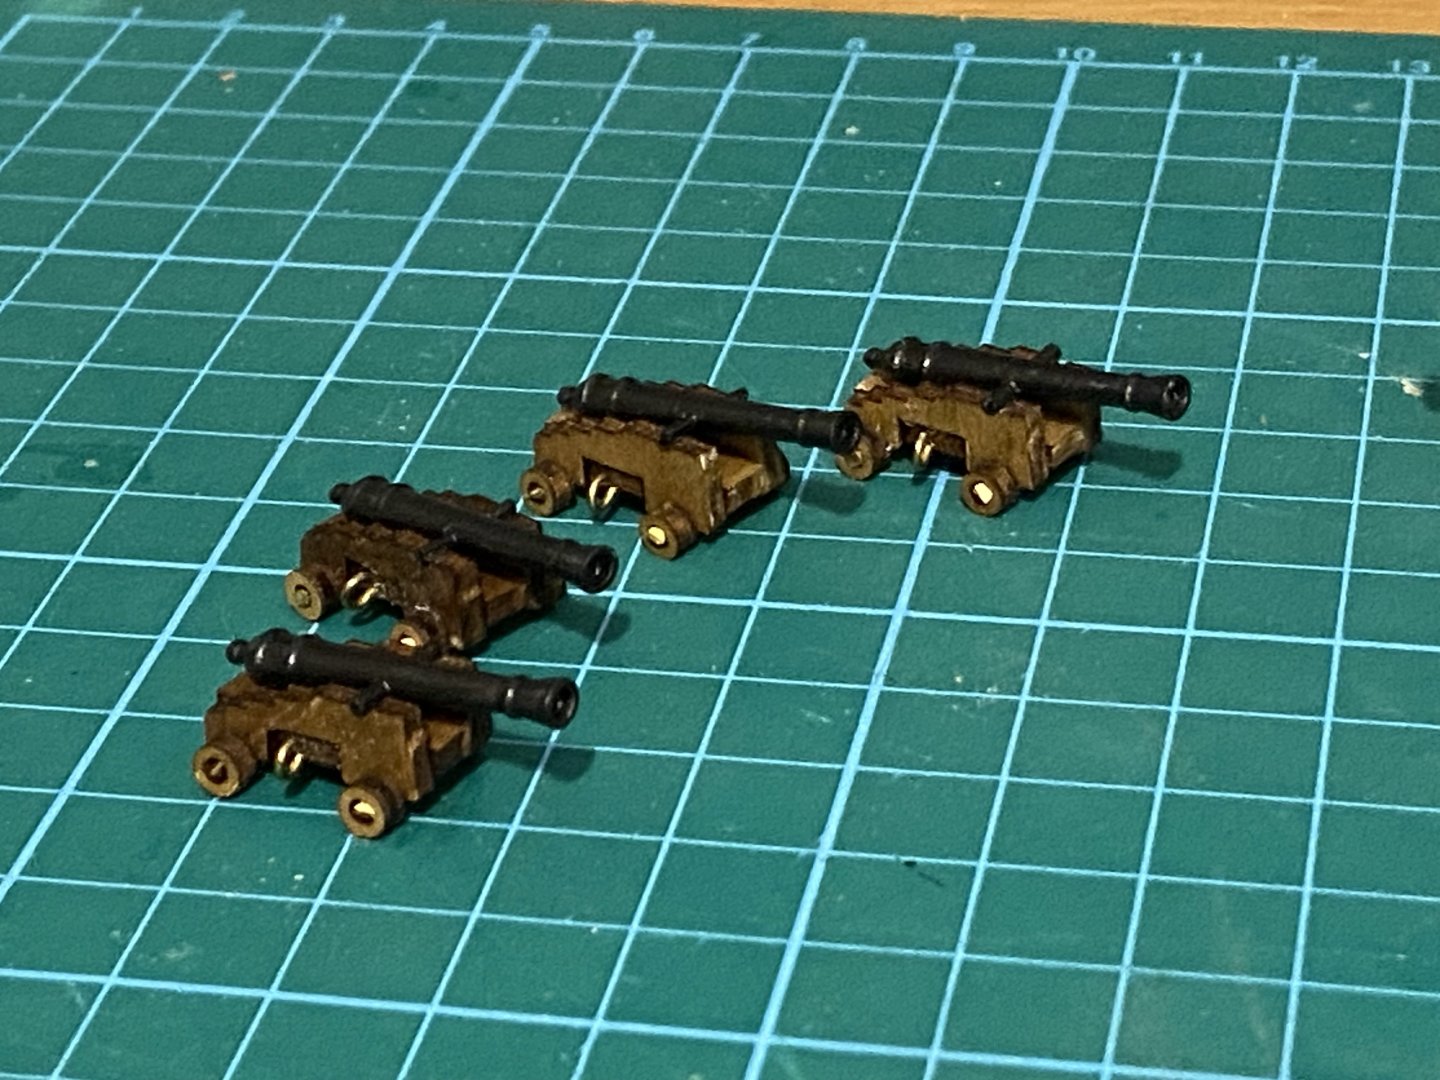
At the front of the ship, I put together the carronade, which went together quite easily. I went with lots of black paint and added a touch of walnut stain to the wood. As for the cannon itself, I decided to keep it simple and paint it entirely black. The official instructions suggest painting it black and then dry brushing with copper for a bit of shine, but I preferred the plain look, it feels cleaner. Next up was the windlass.. This turned out to be a fairly intricate assembly, featuring a large metal piece that I painted with ochre, copper and black. It also involved some tricky wire bending, and the entire assembly had to be inserted and glued as one piece since it stretches from one side of the ship to the other. Aligning it correctly was a bit challenging, but I’m about 90% happy with the result. I really enjoyed wrapping the chain around the windlass, presumably simulating the anchor chain. Watching the chain weave through the deck is a surprisingly satisfying visual effect, and I think it looks really cool. At the rear of the ship, I assembled the depth winch, mostly following the instructions. I left some parts as polished brass and painted the rest black. It was a fiddly little assembly, but I was happy with how it turned out and had no trouble gluing it in place. And now for the part that almost every model ship builder loves: the cannons. Like the carronade, I painted the main cannons plain black, and for the gun carriages, I went with a simple walnut stain to give them a natural wood appearance. I’m not entirely sure whether cannon carriages from this period would have been painted red, I suspect they probably were, but I’ve mostly been building this model for enjoyment rather than strict prototypical accuracy. If I were really focused on authenticity, a lot of the polished brass on the ship would have been painted black anyway, so leaving the carriages as stained wood feels fine to me. I did think about adding red for a bit of visual interest on the deck, but I worried it might look a little toy-like, so I stuck with the walnut stain for a more classic, realistic wood look. Current state of play: I've decided to skip ahead a few steps and tackle the figurehead, using this little chap as a reference photo. There don’t seem to be any records of what the HMS Beagle’s figurehead actually looked like, but a bit of research helped guide my approach. By the time Beagle was built, the Royal Navy had moved away from the elaborate, gilded figureheads of earlier decades, opting instead for more realistic designs. I'm taking took my time painting a Beagle in tricolour style.


-
I have a quick question for anyone with knowledge about gun carriage colours. From what I’ve read, Royal Navy gun carriages of this era were often painted a brick red, which would add a nice bit of colour contrast to the deck. I kind of like that idea, it feels more authentic and visually interesting. What do you guys think? Any recommendations for the particular colour? Humbrol No. 100 Red Brown perhaps?
-
Thank you, and thanks to everyone for your messages and encouragement so far 🙂 Still a long way to go with this one. I'm taking my time, but I reckon completion around New Year is possible.
-
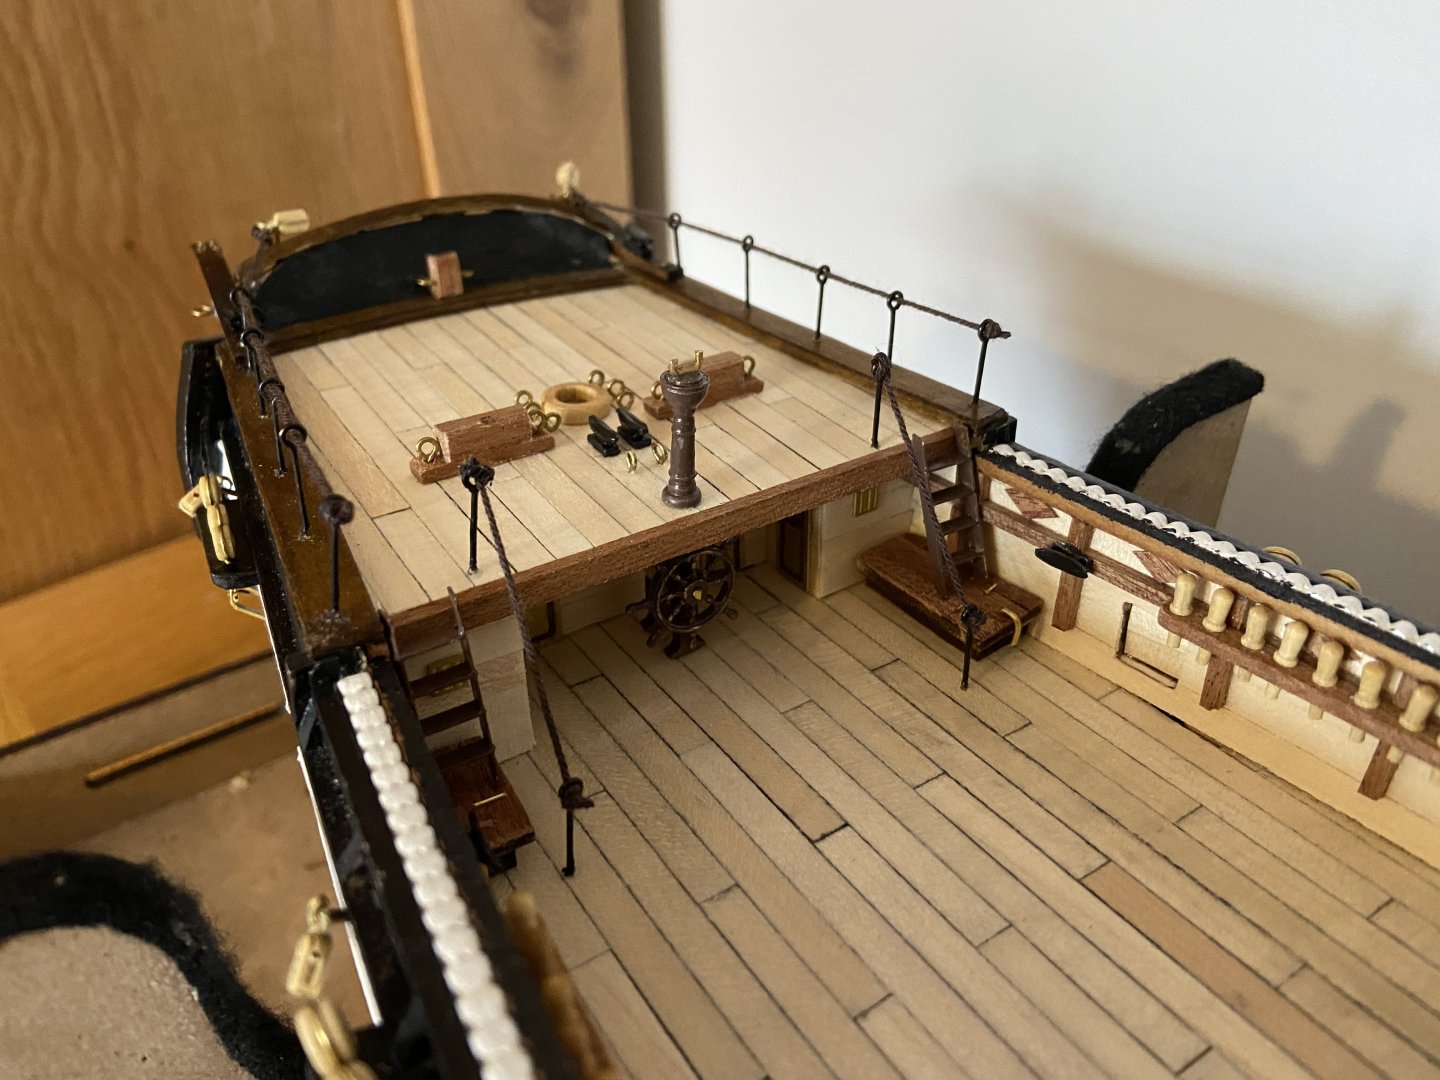
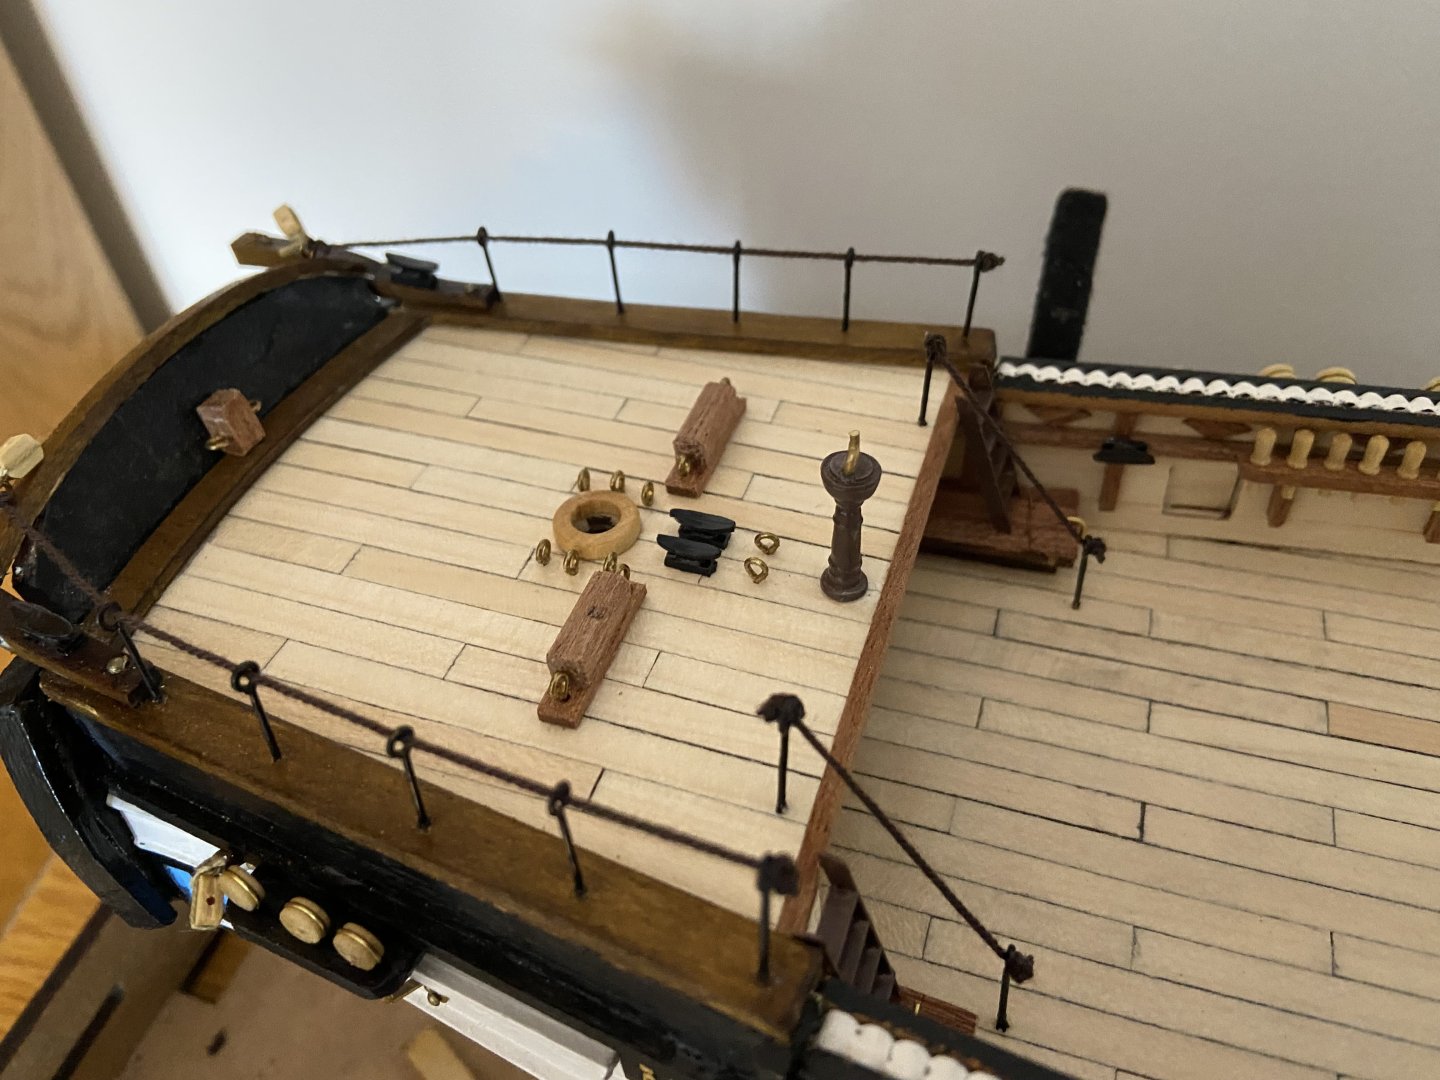
I spent quite a bit of time working on the quarterdeck this past week — all of it very enjoyable. The rudder wheel and binnacle are metal parts that turned out nicely with a coat of dark brown acrylic. I added a touch of gold dry brushing to the wheel to give it a subtle shine, as I imagine it might be the only part of the ship finished with a bit of gloss varnish. Gluing the wheel in place proved tricky, since it sits tucked beneath the quarterdeck and tends to tip forward due to its weight. It’s not perfectly centered, but I doubt the King needs to know his ship is being built by an inexperienced craftsman. I also found the use of rope for the handrails quite interesting. I wonder if that’s realistic? In any case, it probably doesn’t matter much, as there will be boats on either side of the quarterdeck once the kit is complete. Current progress:


-
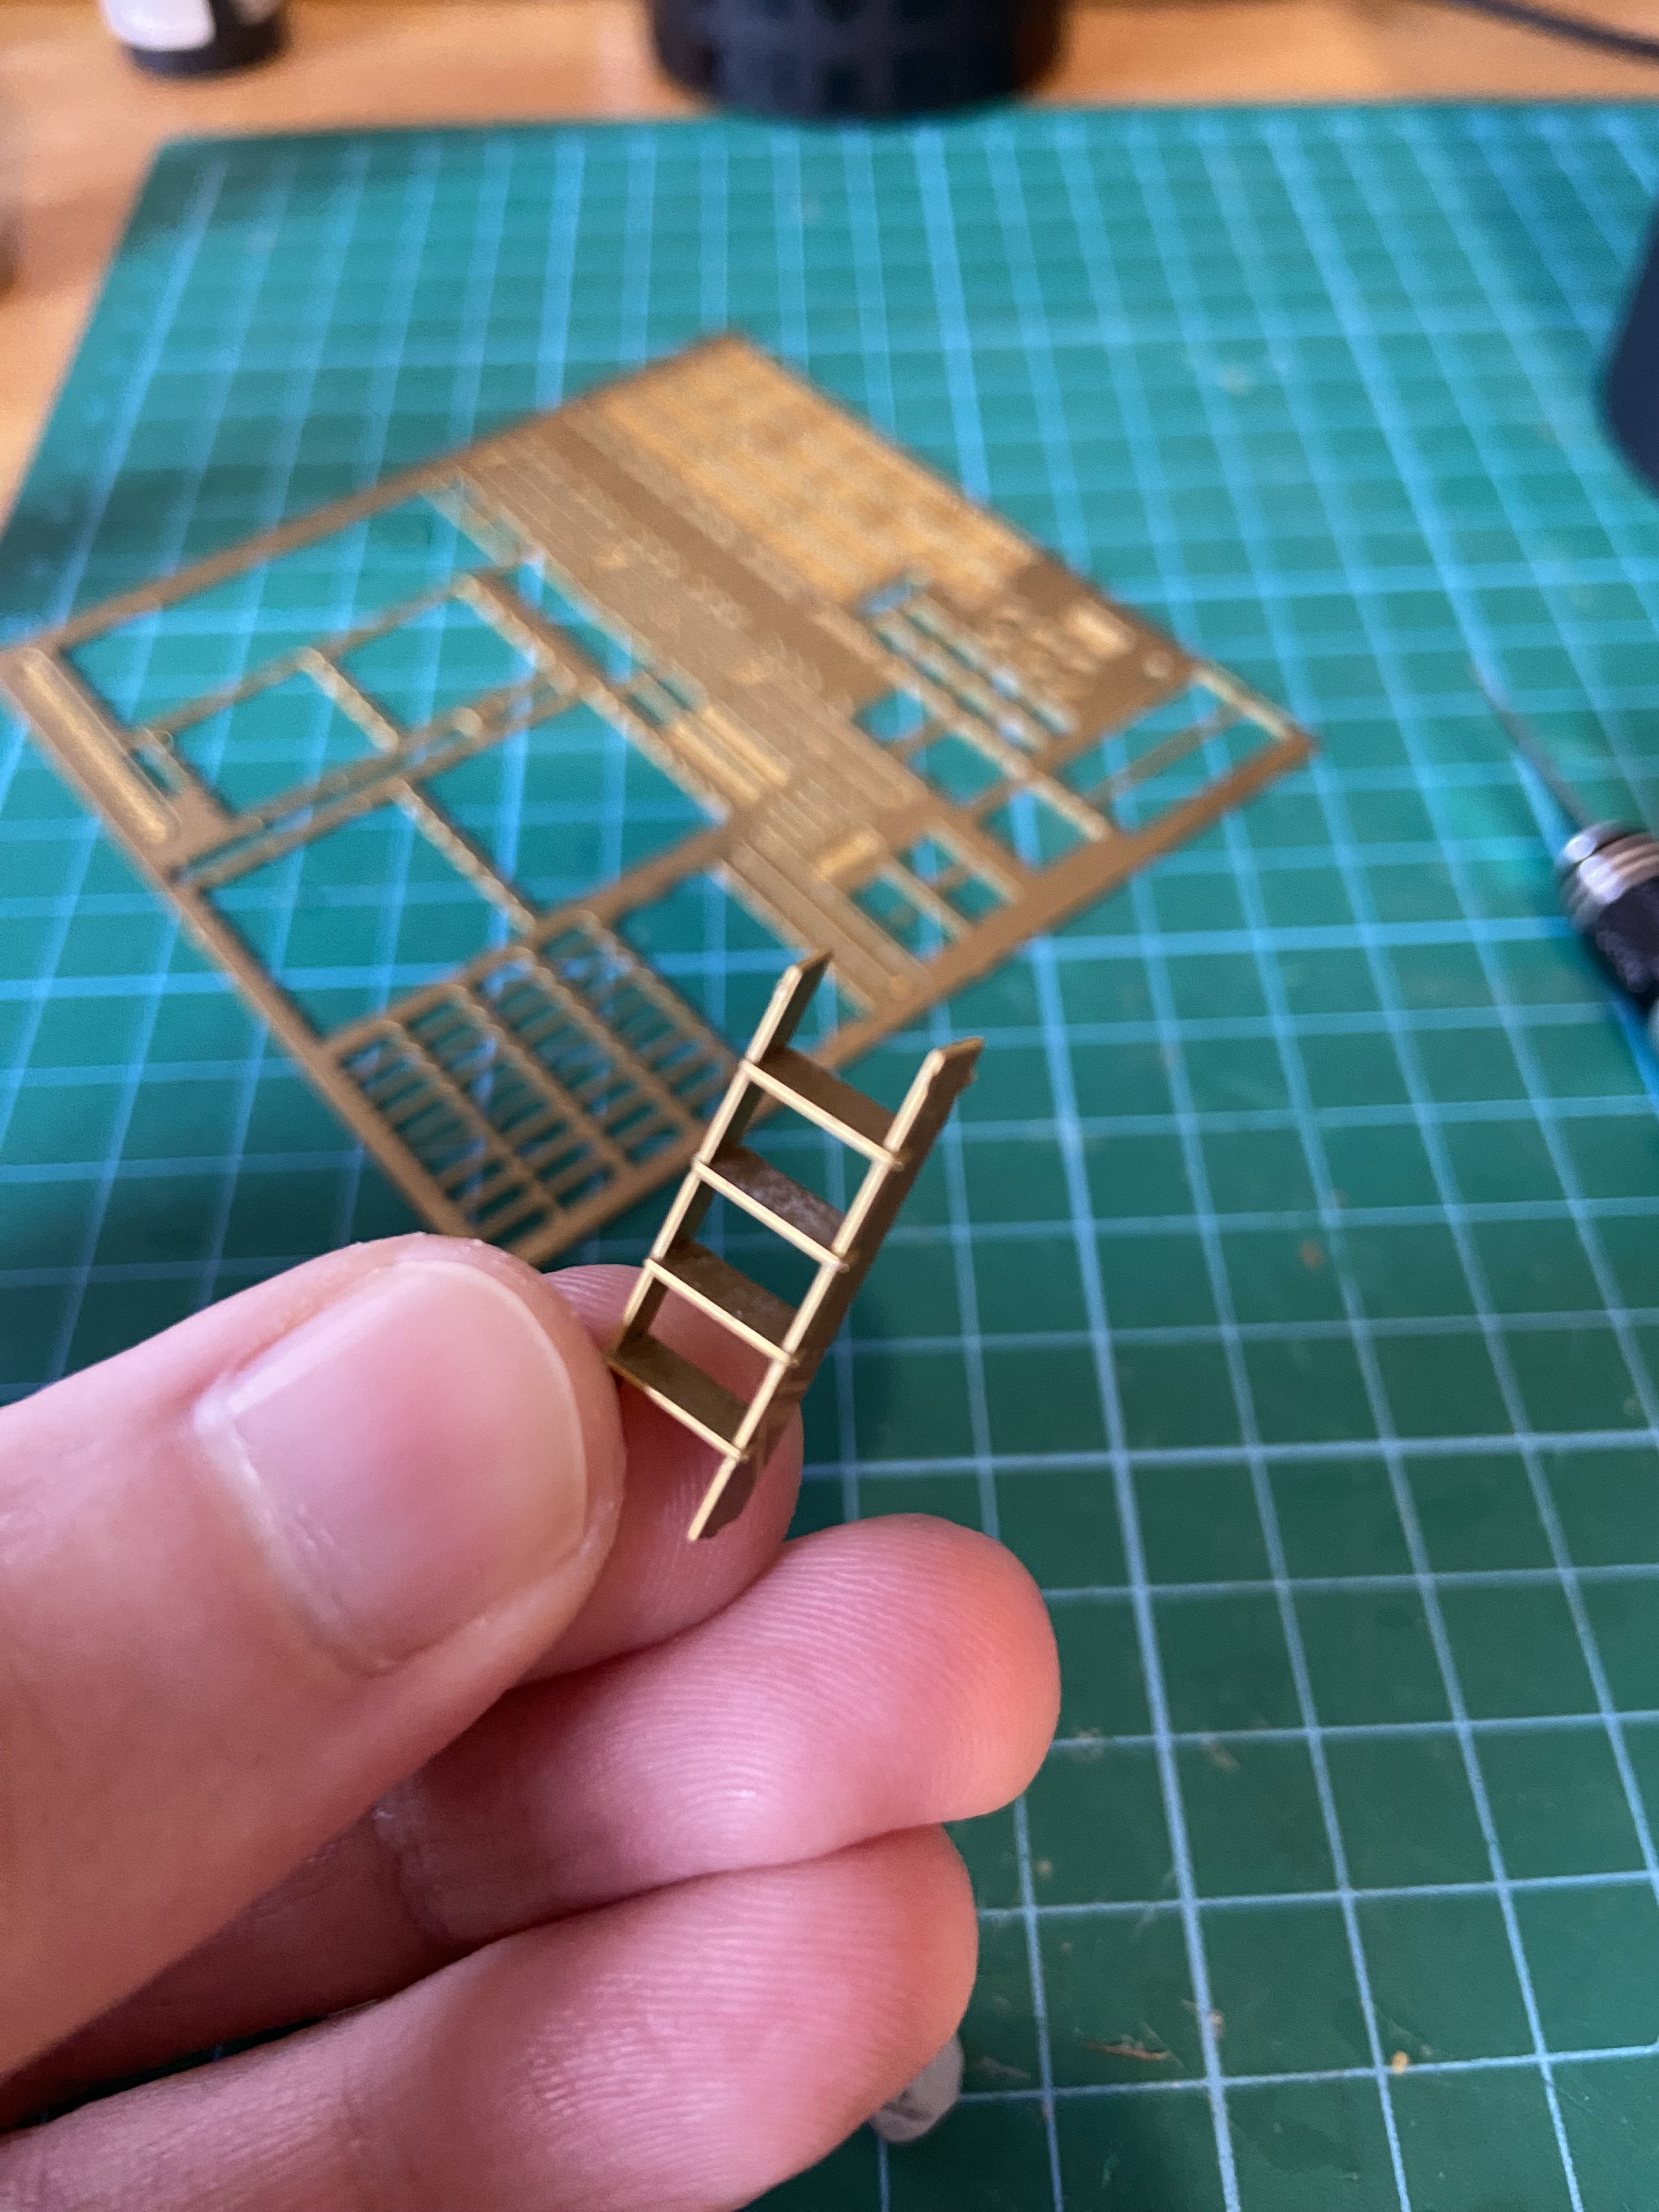
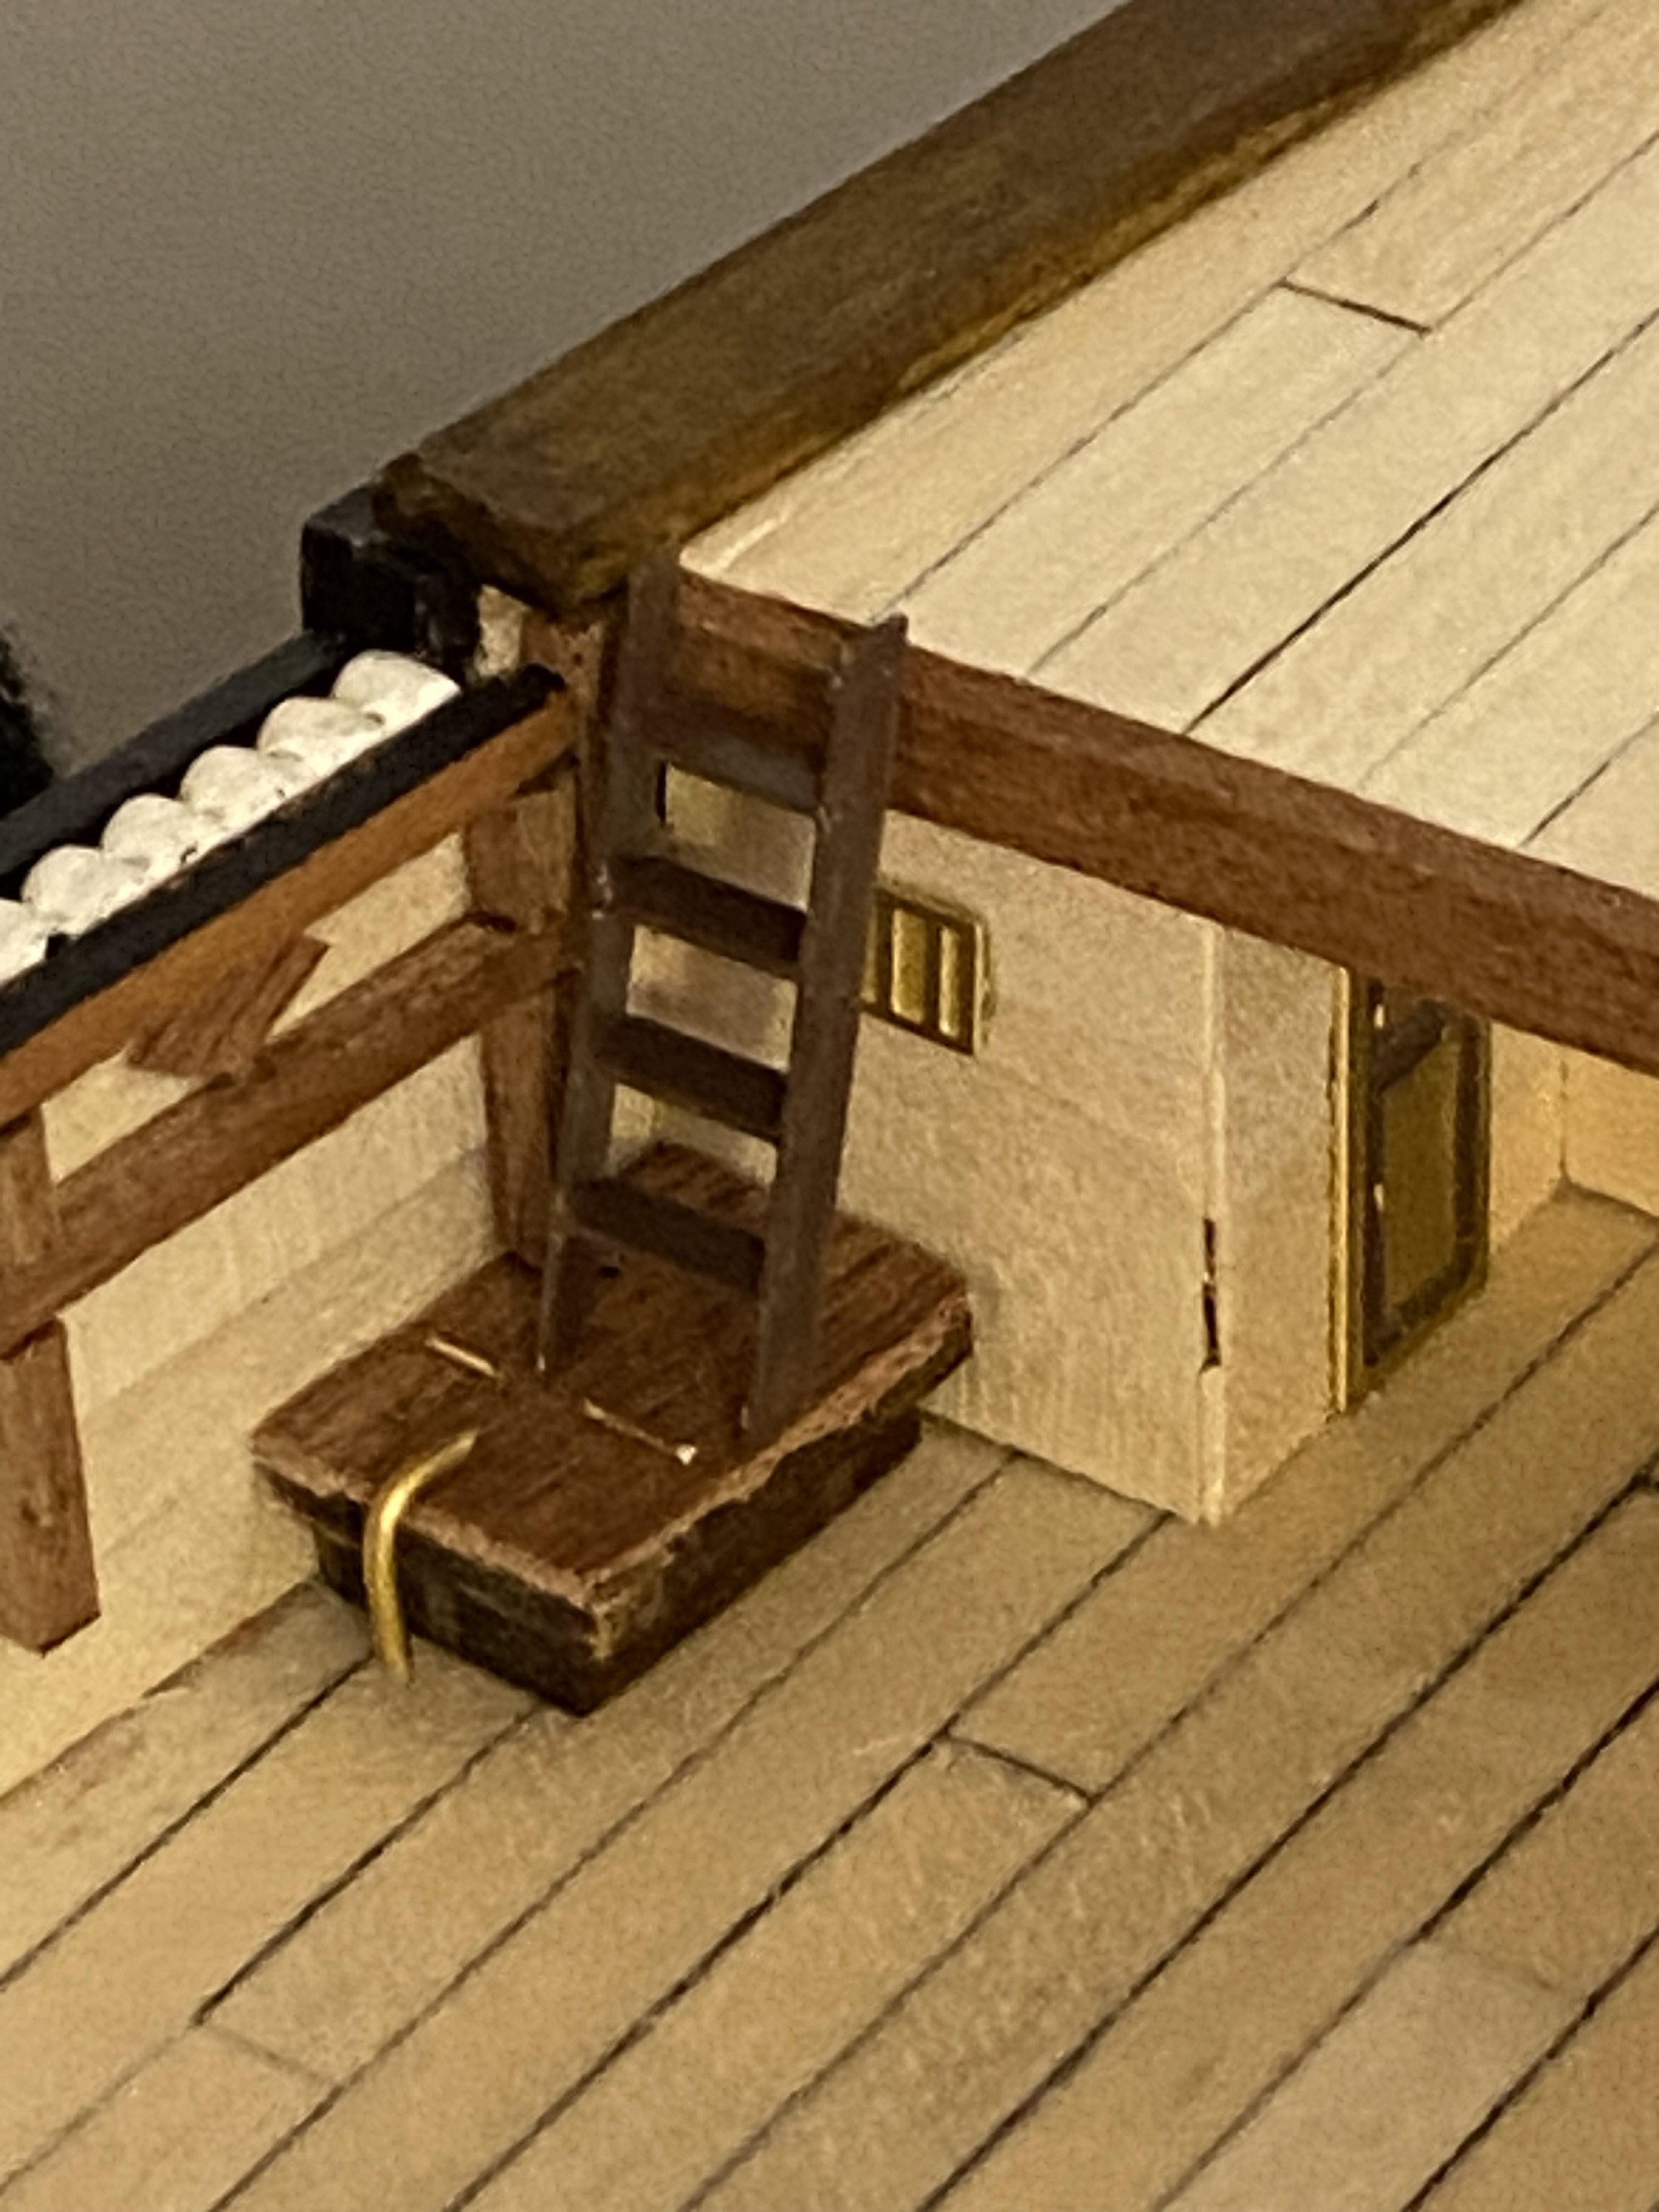
Chain plates are all finished now. I've moved on to making tiny little ladders. More experienced modellers seem to dislike that these parts are made of PE brass rather than wood, but I think they look good once painted with a bit of dark brown acrylic. Nice clean edges. My “gateway drug” to model ships was book nooks, and I’ve always loved the feeling of putting together a miniature world, which is what you get with deck furniture!


-
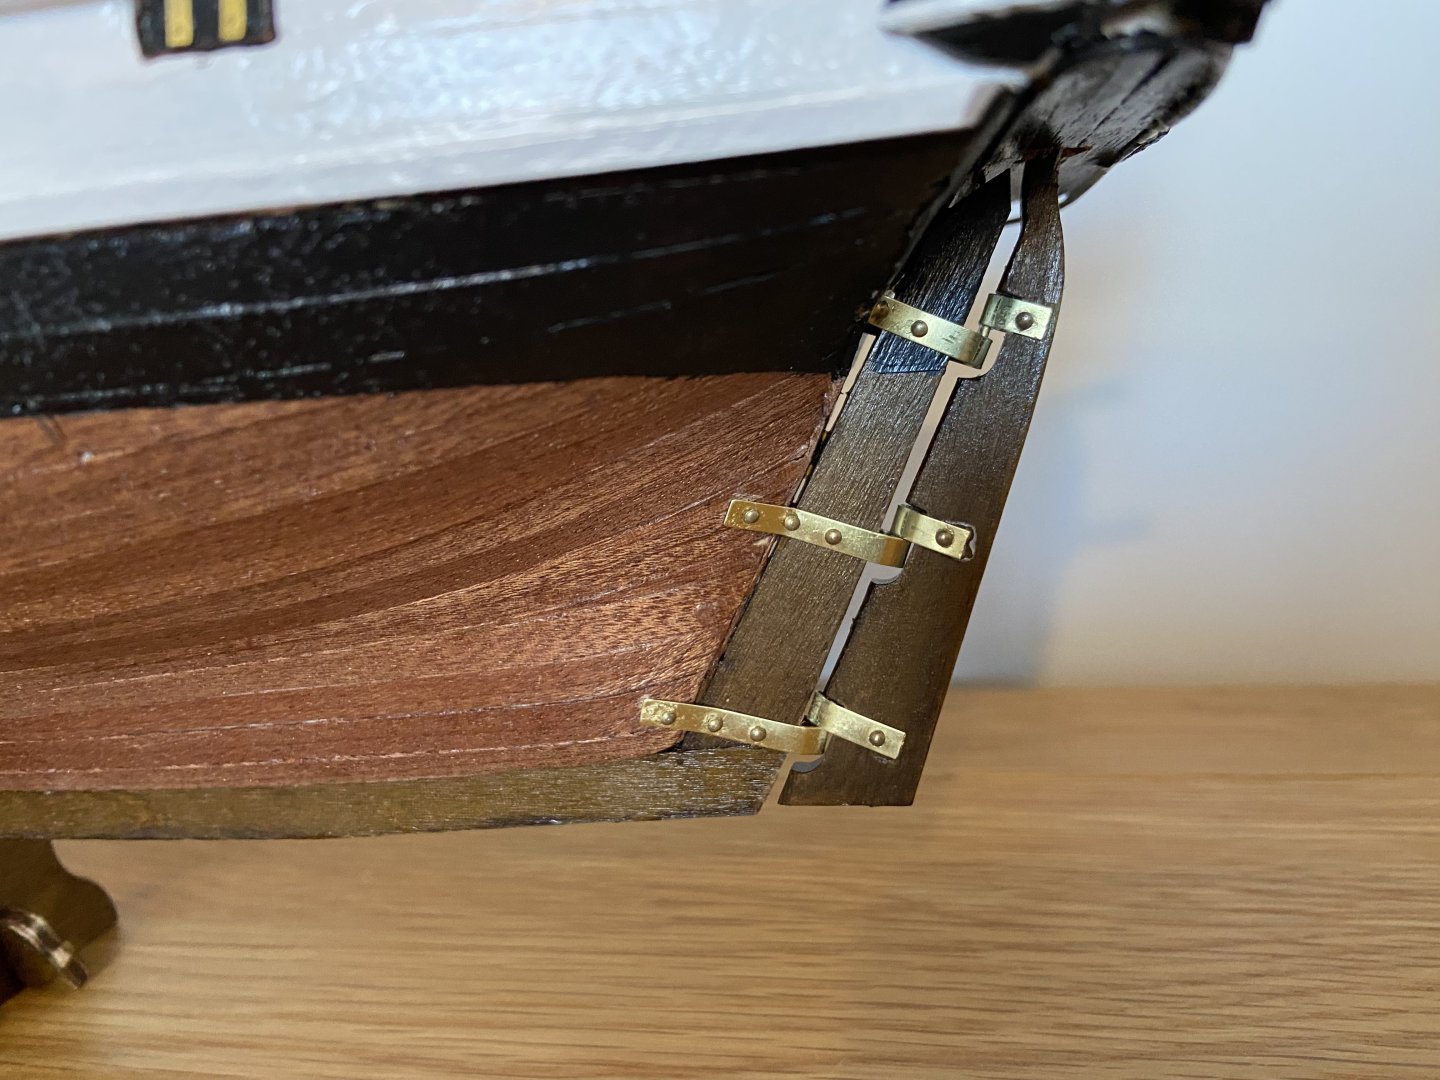
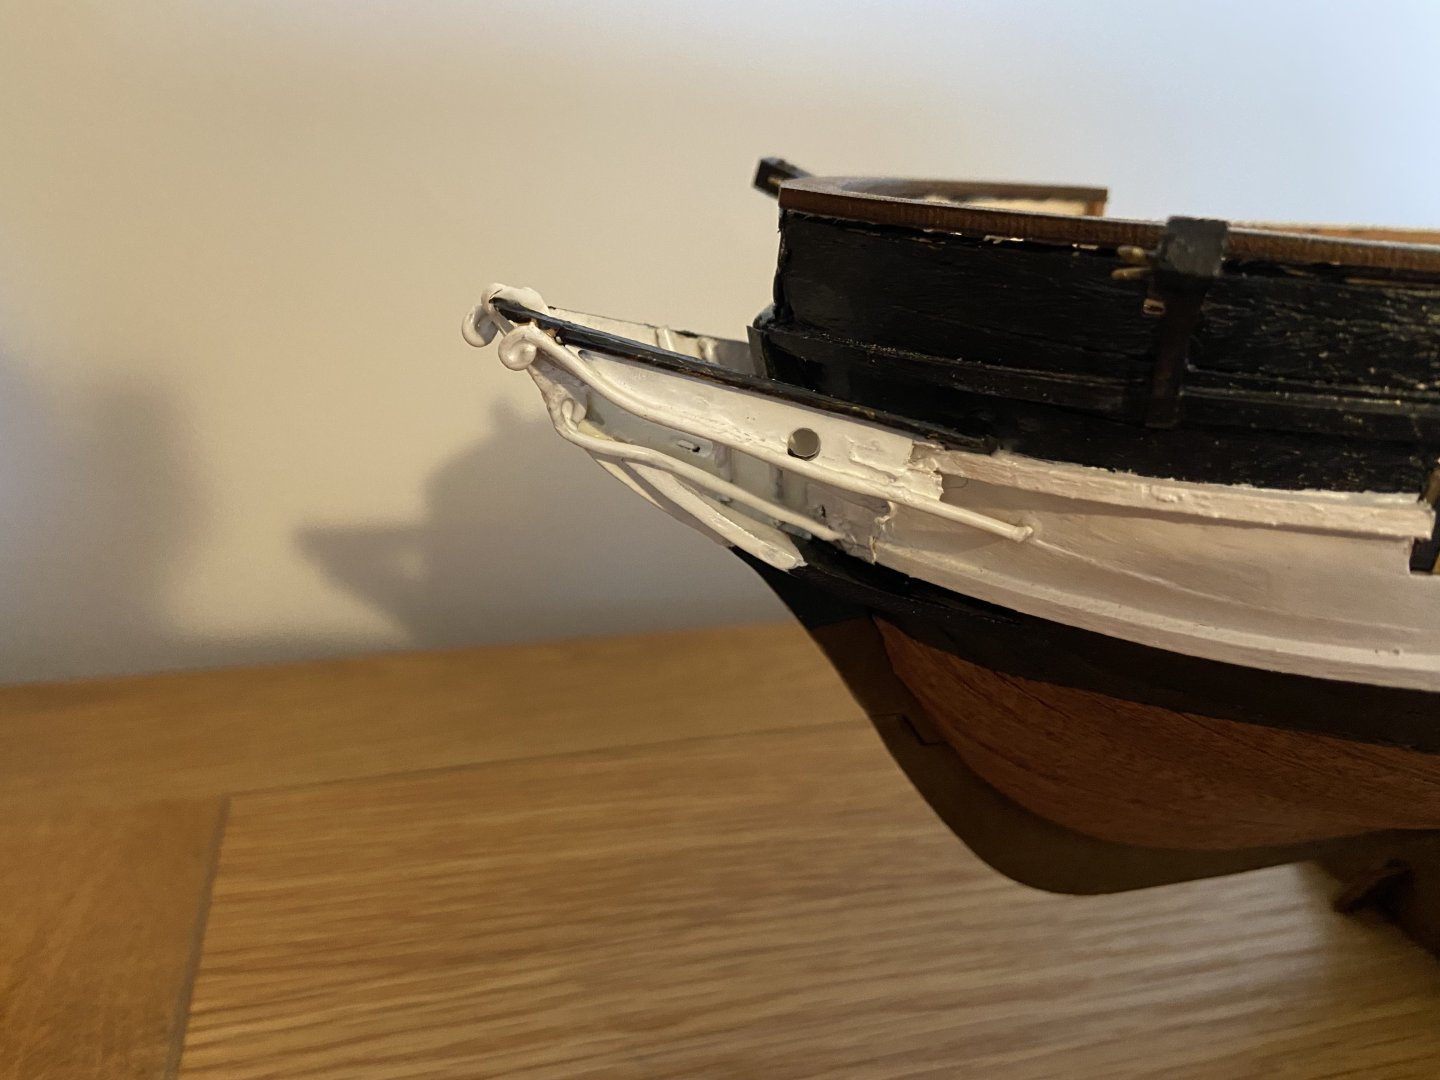
Fairly decent progress. I fit the rudder, the most challenging part of the process turned out to be cutting the nails down to a suitably small size and then gluing them into the pre-drilled holes without creating too much of a mess with the super glue. Judging from other builders’ logs, this seems to be a fairly common headache, regardless of kit, so it’s nice to know I’m not the only one who wrestled with it. I also finished up the bow decorations, which turned out to be a fairly enjoyable task overall. The 1.5 mm brass wire was easy enough to work with, though the real challenge came when trying to get both sides to look identical, which I failed at rather miserably. That said, I’m not too concerned, since only one side of the ship will ever be visible when on display. So if one side looks a little different, no one will ever know… apart from me. In hindsight, I think using laser-cut wood, as some manufacturers do, would be a preferable approach here. It’s a bit more precise than trying to get artistic with metal wire. Still, I really enjoyed the painting aspect, lining everything up with the black and white stripes on the hull was quite satisfying, and it gives a lovely sense of continuity across the whole ship. I made slow but steady progress on the gun ports. These tiny wooden squares were cut from the gunwales, then veneered front and back, painted black, varnished, and fitted with four pieces of PE brass each. A very fiddly job, especially since every tiny brass piece needed a slight trim to fit properly. The instructions seem to suggest applying a black wash over the brass, but not feeling confident, I skipped that. The bright metal adds a nice bit of contrast and visual interest, and since this build is more decorative than strictly accurate, I don’t mind a touch of shine. You can see I've also made a start on the chain plates. I absolutely love adding these. So much visual interest and three dimensional detail....


-
It’s frustrating and baffling in equal measure. I could prepare a better set of instructions for this kit than OcCre have and I’ve been building model ships for all of 10 minutes.
-
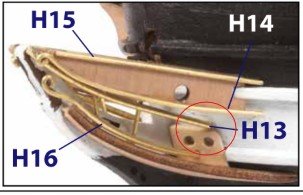
Attaching the prow adornments gives me another opportunity to have a quick moan about OcCre's dodgy instructions 😆 See below the attachment location for H13, as per the paper instructions. Then the same step in the YouTube tutorial: The attachment location of that piece matters for the vertical supports. Only a minor adjustment, but it means yet again having to detach and rework pieces I've already done! That said... I've found the wire bending at the prow to be quite enjoyable 🙂 It's much thicker wire than used at the stern, so it doesn't lose it's shape easily.