HOLIDAY DONATION DRIVE - SUPPORT MSW - DO YOUR PART TO KEEP THIS GREAT FORUM GOING! (89 donations so far out of 49,000 members - C'mon guys!)
×


federicoaa
-
Posts
63 -
Joined
-
Last visited
Content Type
Profiles
Forums
Gallery
Events
Everything posted by federicoaa
-
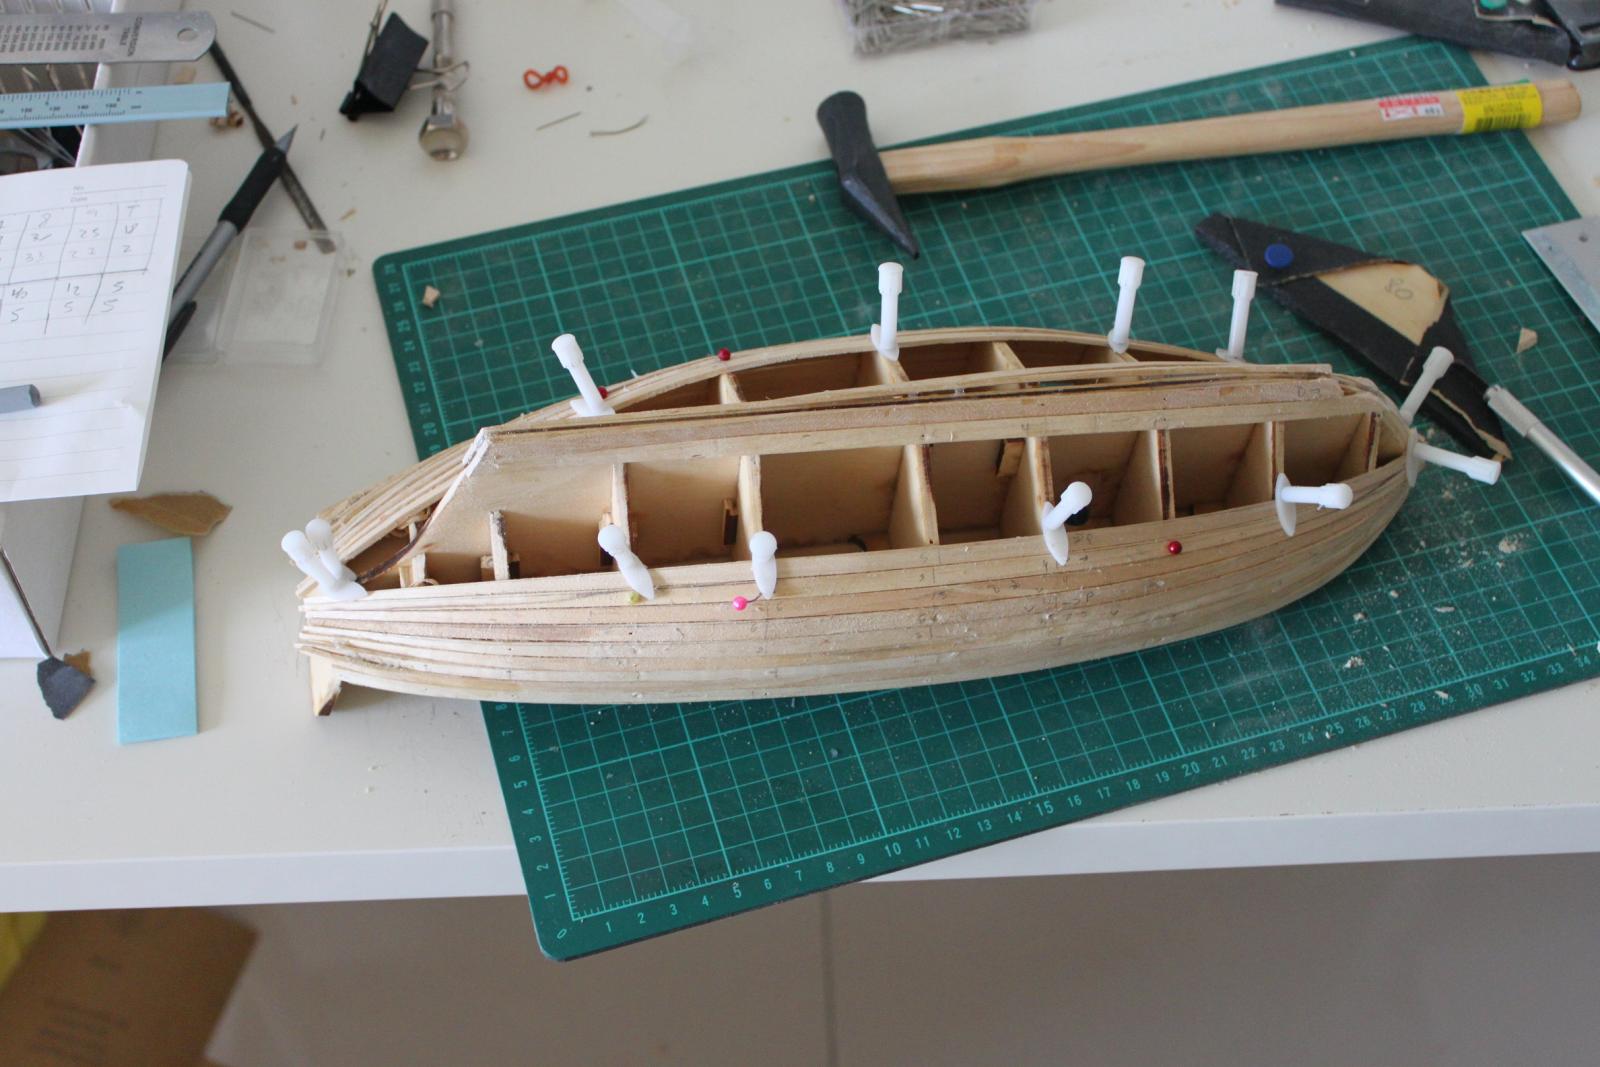
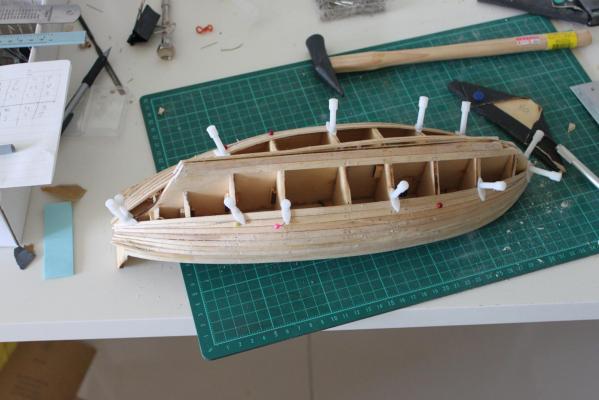
Bulwarks are wet molded as the manual suggests and fitted in position with two part epoxy. The wet molded was not quite good, and it took me a hell of a time to fit the port bulwark. Finally I had to add some filler at the transom (and that's why the false deck looks dirty). After some sanding the bulwarks are smooth with the hull. Next step is deck planking. I've started drawing a diagram in paper for the deck planks and also wondering how to make the treenails. By the way, what kind of glue do you use for fitting the treenails? PVA, superglue, contact cement? See ya next time with more updates
-
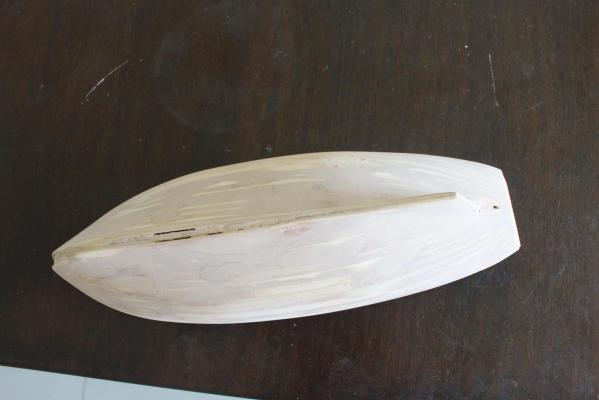
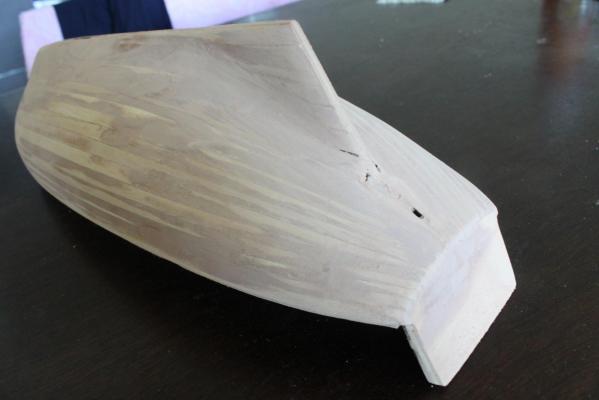
Planking took me a lot of time. I made some errors with the second plank and that made all the transom part looks bad. Also, the garboard was really difficult to glue in position because of the twisting. After finished the planking, put some filler and sanded away the mistakes Something I learnt till now: a good fairing will avoid hours of sanding later.
-
I can't get tired of watching the pictures in this log. It is truly amazing!
- 662 replies
-
- 2
-

-
- bonhomme richard
- frigate
- (and 1 more)
-
Oh I see. Do you know any other similar model kit? By the way, i wonder why it is 170 euros in the soclaine webpage but almost 500 dollars in modelers shipyard store.
-
Hi guys, I am interested in this ship, as it looks similar to one I'd like to build by scratch some day. Looking on internet, the webpage of Soclaine looks weird. Also, I've seen a high price variation in this model, from 200 to 400 dollars. Anyone has built/seen this model? Thanks!
-
Hi, I was looking the building logs and I found this log that uses small planks between bulkheads for the first planking level. I think this method wastes less wood and it is also simpler to make. Is there any advantage in making the first planking layer with full planks (from bow to stern)?
-
Hi aliluke, I already talk with anoter user that built the model and yes, the false deck at the transom is ~7cm whereas the transom is ~6cm. It may be an error from the designers, but the only thing to do is file/sand it until fits. Thanks for the help
-
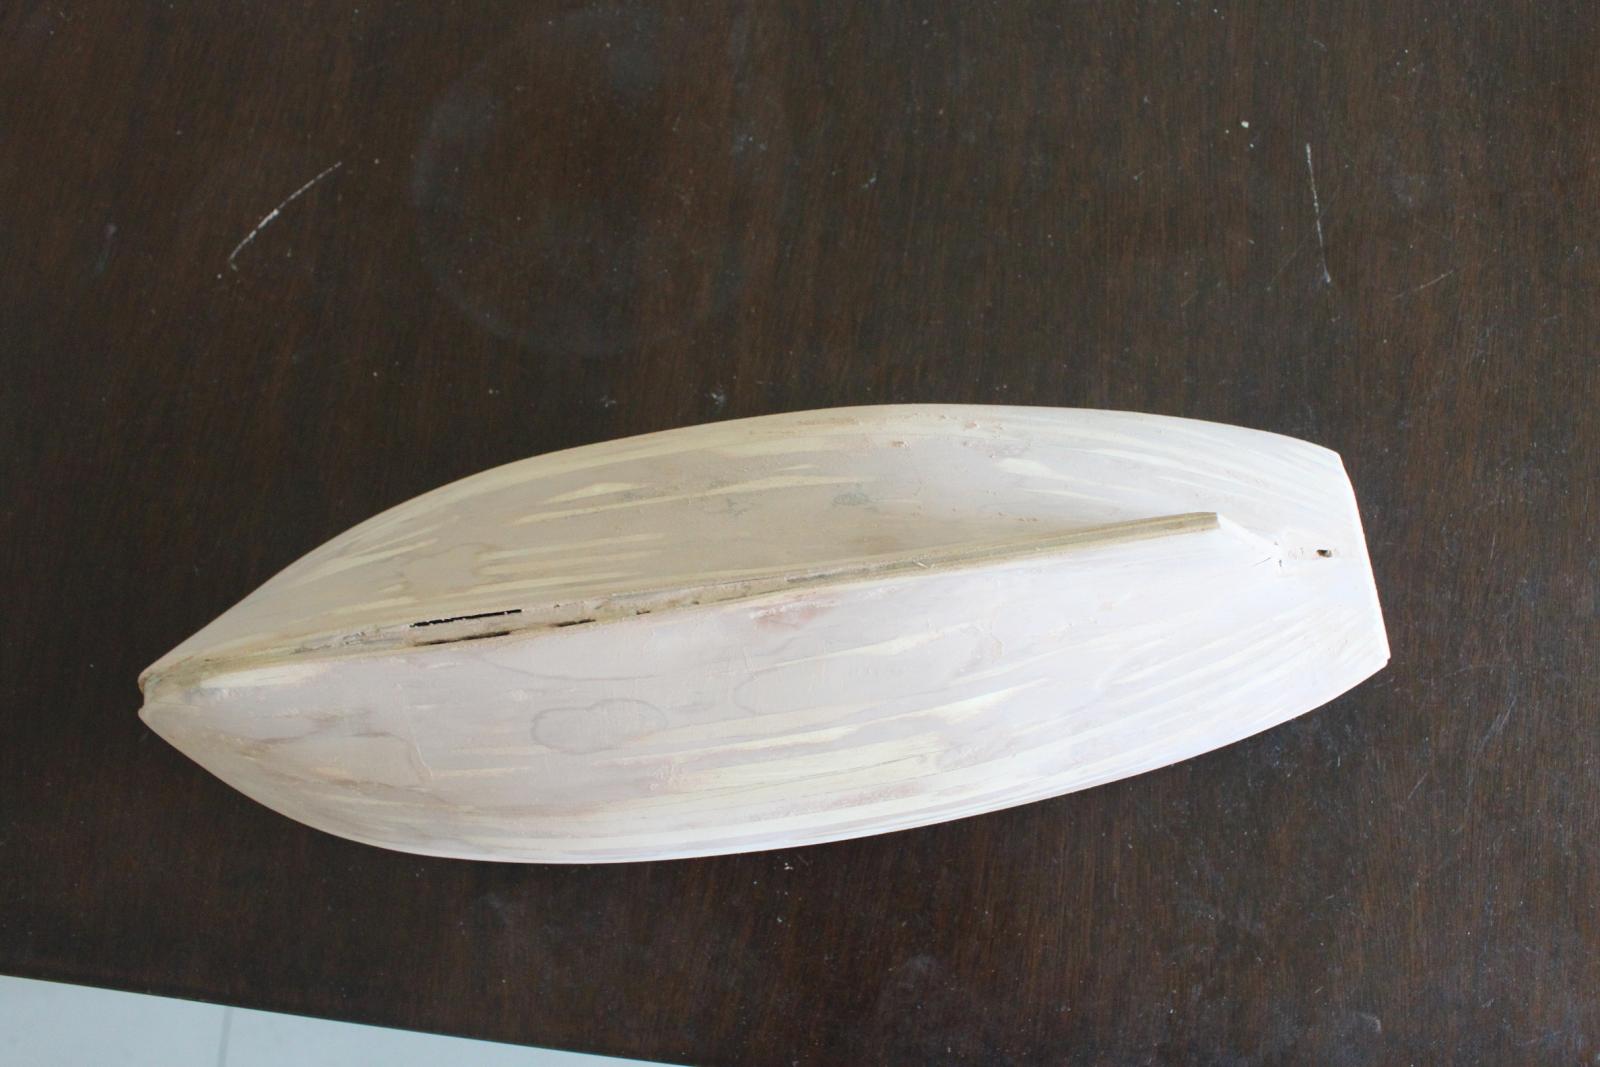
Hi everybody. I almost finish the fairing. I had to give some thought to some parts and that's why it took me some time. Now that I am fairing the last bulkheads, I realized that the BH 9 is 1mm or 2mm lower than it's supposed to be. If I place a plank between the transom and BH8, it doesn't touch BH9. Fairing BH 8 is not an option I think, because then I should refair the others to keep the line, and fairing the transom to follow BH 8 - B 9 line may finish on the false deck line, and maybe the line would be too pronounced. I am actually inclined to just ignore BH 9 or add some filler, I actually like the line the plank does with my actual fairing. I hope I can solve this dilemma soon so I can start with the planking next week.
-
No I didn't, I bought the starter kit online. I thought I had the DVD on building the ship, but only got the 5 DVD set, the beginners guide. Sadly, the DVDs on hull planking are broken, so I am waiting for the new ones.
-
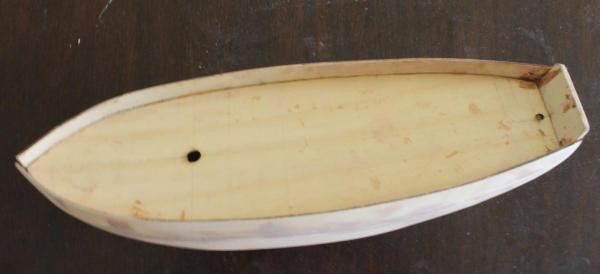
Hi, I am building the HM Cutter Mermaid from modellershipyard. I started fairing the hull, but I have some doubts. First, the transom is much smaller than the false deck, about 5mm on each side; on the other hand, the false deck fits ok in the last bulkframe (in fact, the false deck follows all the bulframes expect the transom). I'm still wondering how to fair this part keeping a good shipline. Also, I have some doubts on how to bend the garboard to sit smooth on the keel and frames. Suggestions are welcome
-
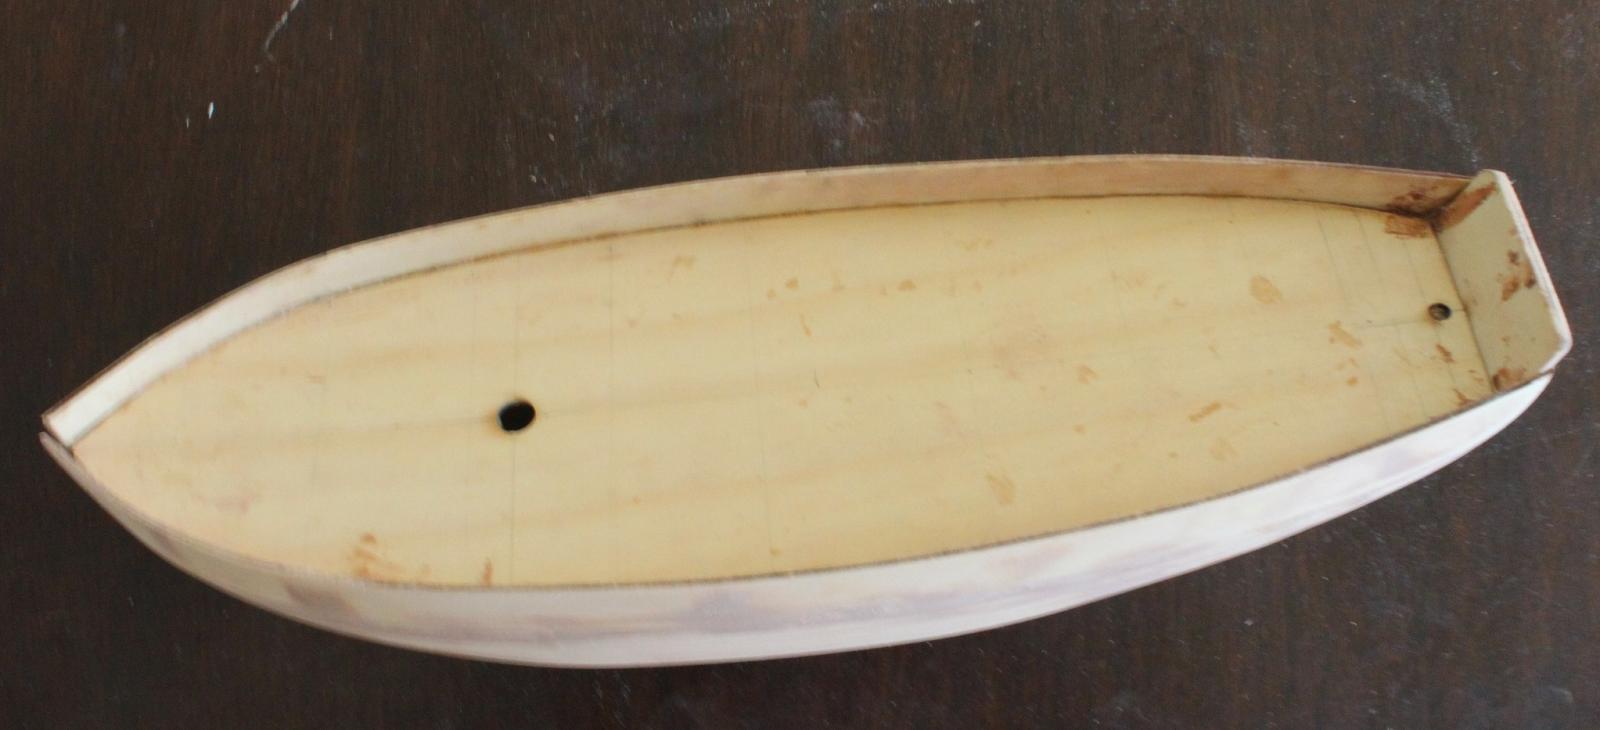
Day 3 The next step is to put the false deck in position. First, I had to trim the false deck about 3mm in the back to have a good fitting. Also, the keel is not flat on the upper part, but it has some curvature, so the false deck was nailes to the bulkframes to maintain it in position. I noticed also that at the transom, the false deck is about 5mm thicker on each side, so I guess I will have to do a lot of trimming tomorrow.

-
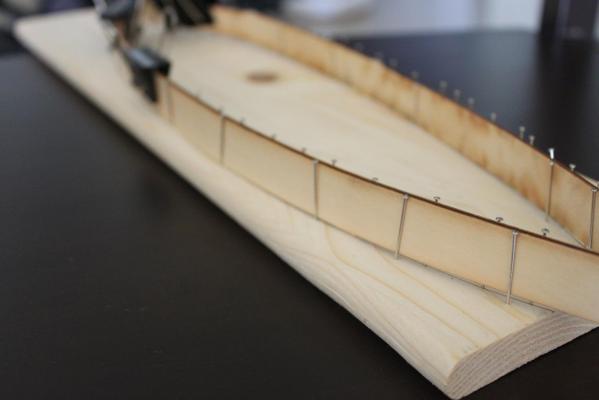
Day 2 I finished cutting the keel and bulkframes and glued all in position. I used some small blocks to help me keep the frames in the correct position while the glue sets.

-
Hi, this is my first build log. I decided to get into the ship modelling hobby, so I bought the Modellers Shipyard started kit, that includes the HM Cutter Mermaid, a set of basic tools, and a beginners guide to ship modelling in e-book and DVD. On the picture you can see the unboxed model kit and the tool set. I took a step further and decided to add later the sails to the model, so I also bought sail cloth, the sail plans, and an instructional DVD on the topic.