HOLIDAY DONATION DRIVE - SUPPORT MSW - DO YOUR PART TO KEEP THIS GREAT FORUM GOING! (89 donations so far out of 49,000 members - C'mon guys!)
×


federicoaa
-
Posts
63 -
Joined
-
Last visited
Content Type
Profiles
Forums
Gallery
Events
Everything posted by federicoaa
-
looking forward to see more pictures of your work
- 662 replies
-
- 1
-

-
- bonhomme richard
- frigate
- (and 1 more)
-
Karl, You never cease to amaze us, excellent work as always
- 662 replies
-
- 1
-
-
- bonhomme richard
- frigate
- (and 1 more)
-
Good job! At that point my model was a mess XD. I had to use a lot of filer at the transom.
-
I've been out for like a year. As I bought an apartment and recently moved in, I've had no time to put into this. Besides, some parts were broken during the moving Probably at the end of the year I'll have some saved money to build a workshop and continue this model... or start another one.
-
Hi Karl, could you put more pics of the longboat, it's amazing!
- 662 replies
-
- 1
-
-
- bonhomme richard
- frigate
- (and 1 more)
-
I did not have problems crimping the clamps. I bought the crimping tool they have on the store and works well. Did you solve your problem with the transom?
-
Thank you Karl, very clever and skilled you are!
- 662 replies
-
- 1
-
-
- bonhomme richard
- frigate
- (and 1 more)
-
Hi Karl, do you have some pictures of the barrels alone and/or some pictures during the building of the barrels? they look really nice!
- 662 replies
-
- 2
-
-
- bonhomme richard
- frigate
- (and 1 more)
-
It's getting better and better. I can't wait to see it when finished. Good work!
-
And a good thing about modeller's shipyard is that they also answer questions if you are stuck in the build. If you are going for the mermaid, check all the fittings and cords. In my build, I got short on the walnut strips, used even the last splinter of mahogany, and got very short on .25mm cord.
-
Hi SpencerC, I see some drop planks in the last picture.
-
Please ignore the background mess on the third photo
-
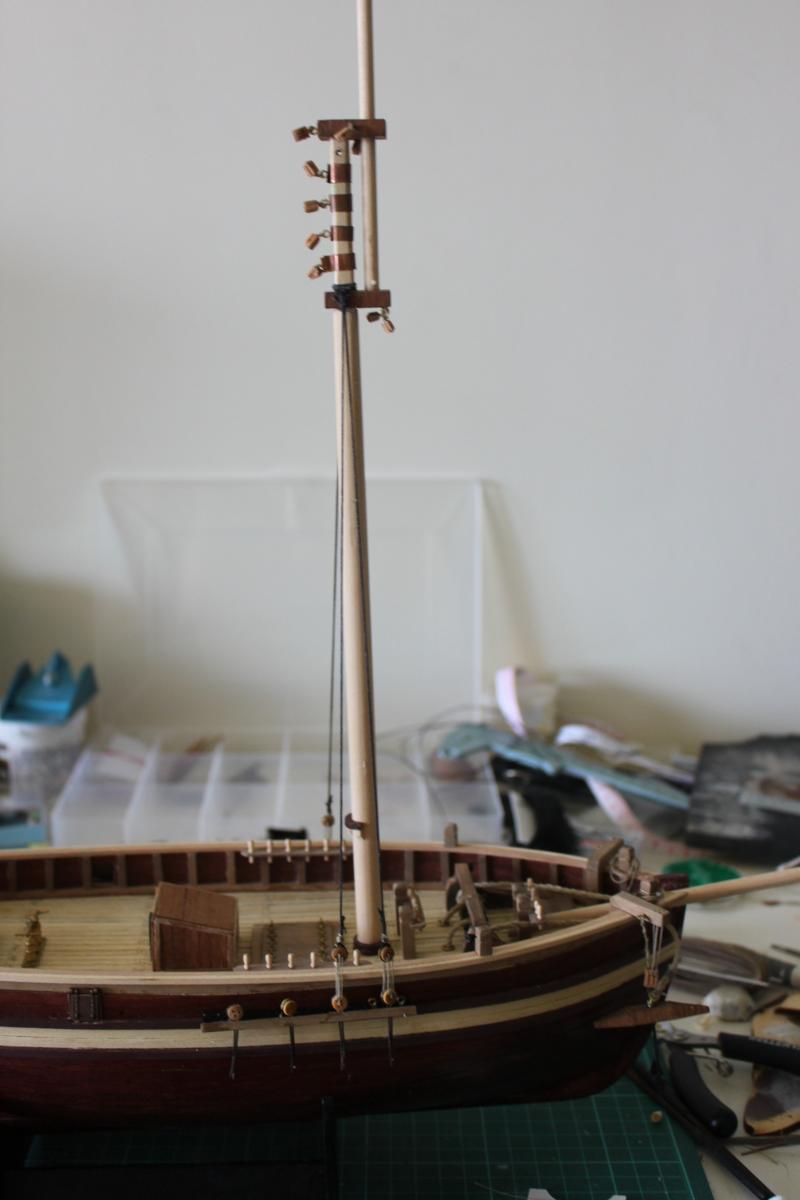
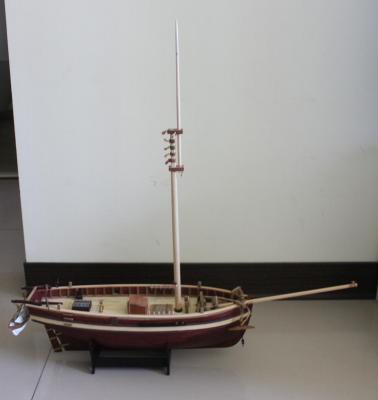
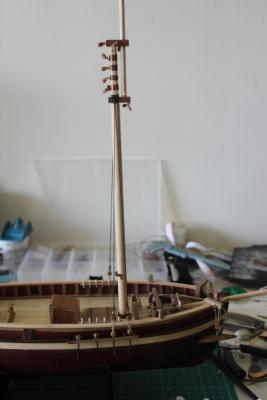
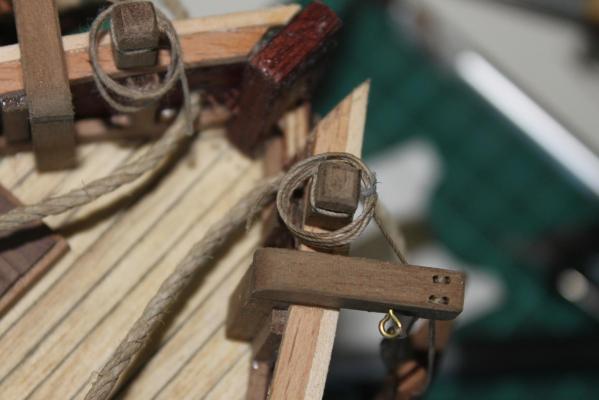
I've had a quite busy time in my lab these weeks. Finally some time free to start masting and rigging. Attaching the pulleys to the mast was a bit challenging at first, I couldn't get one done without covering my whole hands with super glue XD. After I got the first one, the others were much easier to fit. In Fig 1 you can see the mast and bowsprit fit in the ship (now it does like a ship ) And I just finished installing the first two pairs of shrouds and lanyards (figs 2 and 3). Tomorrow I'll try to finish the lanyards and start with the lanyard strips. See ya.
-
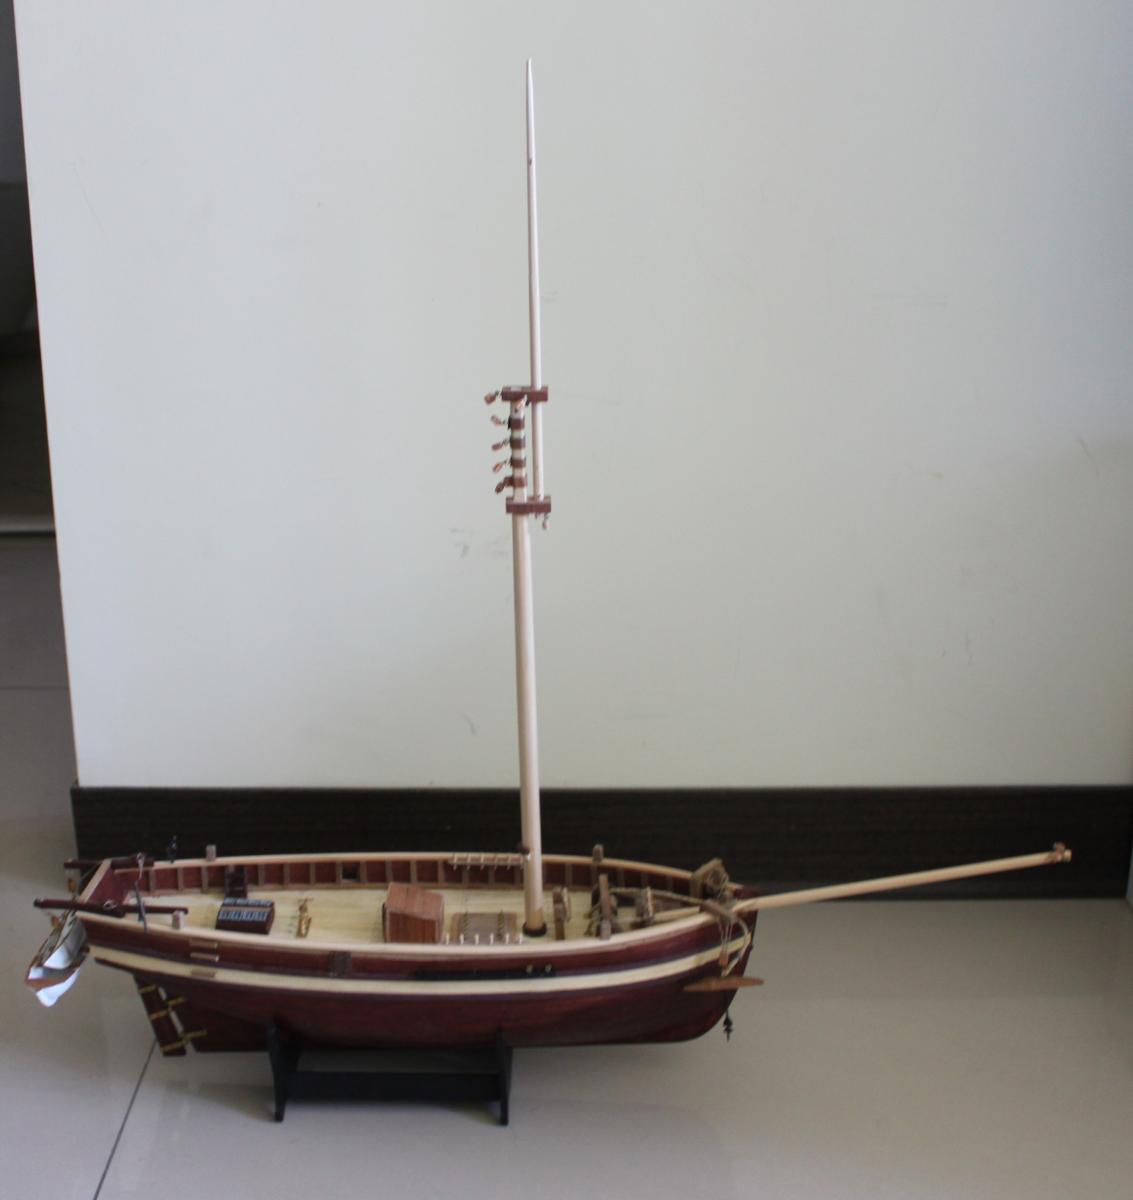
Small update. Today I fitted the boats and finish gluing the deck furnitures. The only thing I did not glue yest is the knight head, I will glue it when I put the bowsprit.
-
The manual pictures are blurry, pixelated, out of focus, or all of them. It's hard to see so I put them like that without too much thinking. Now, I think you are right. I will see if I can remove them and put in the correct position. Thanks.
-
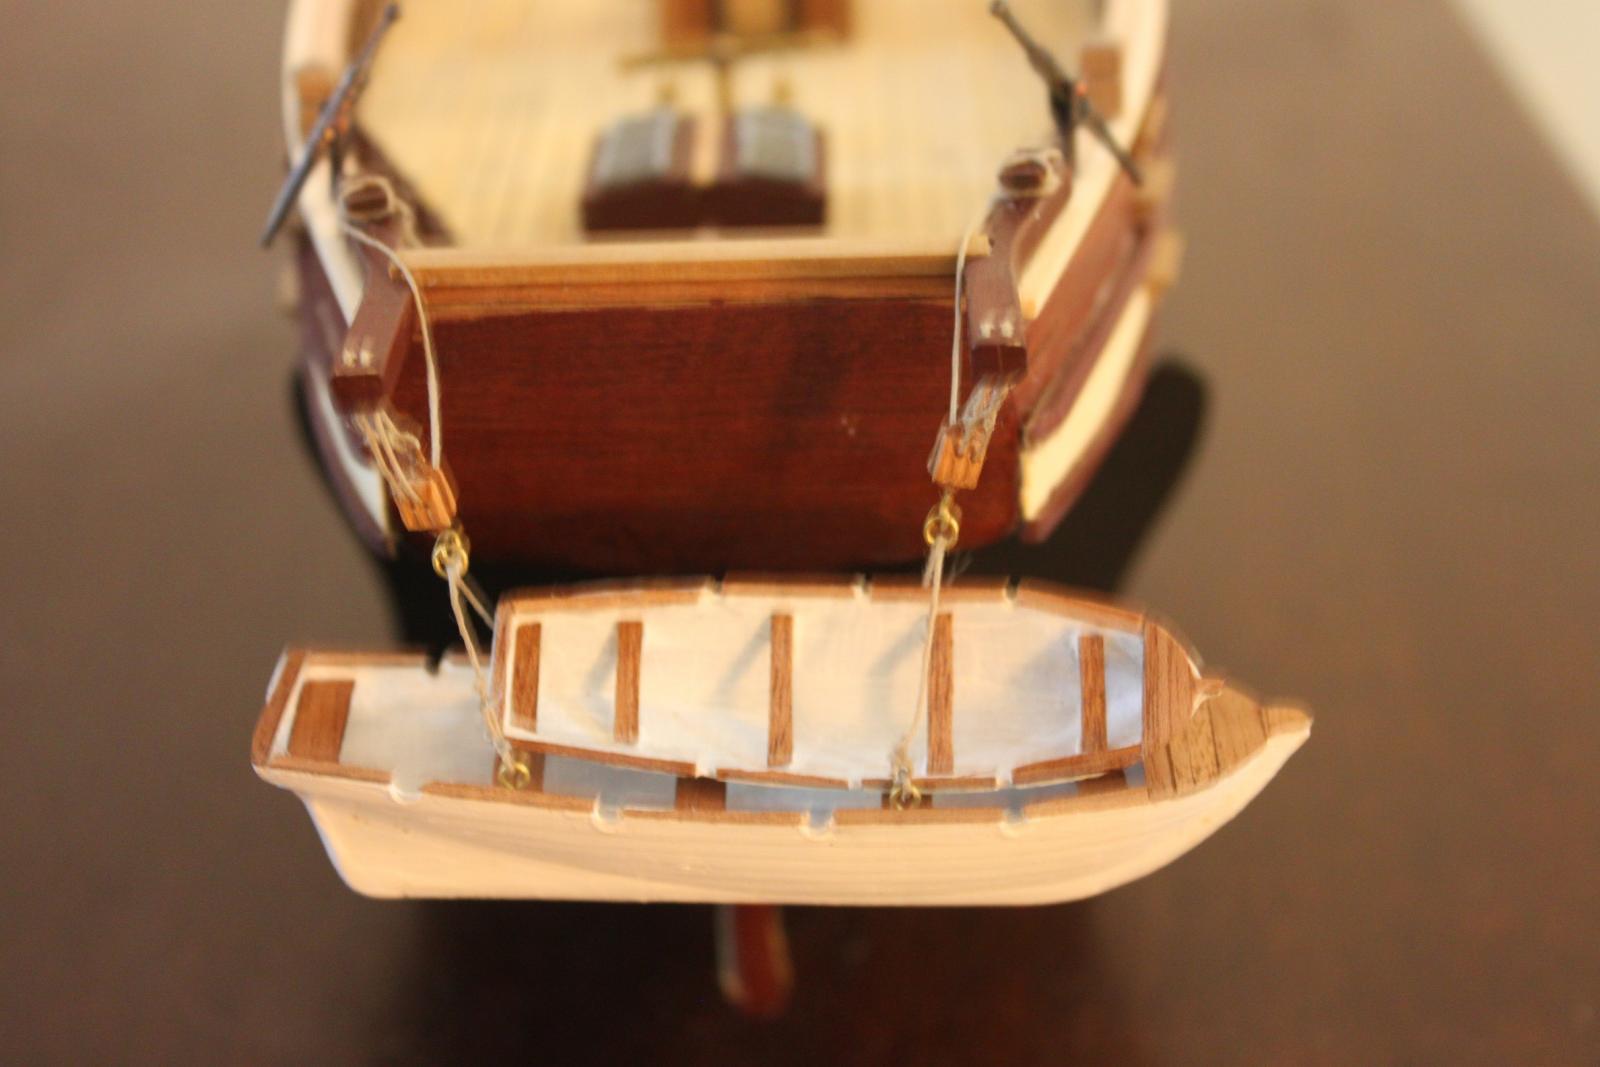
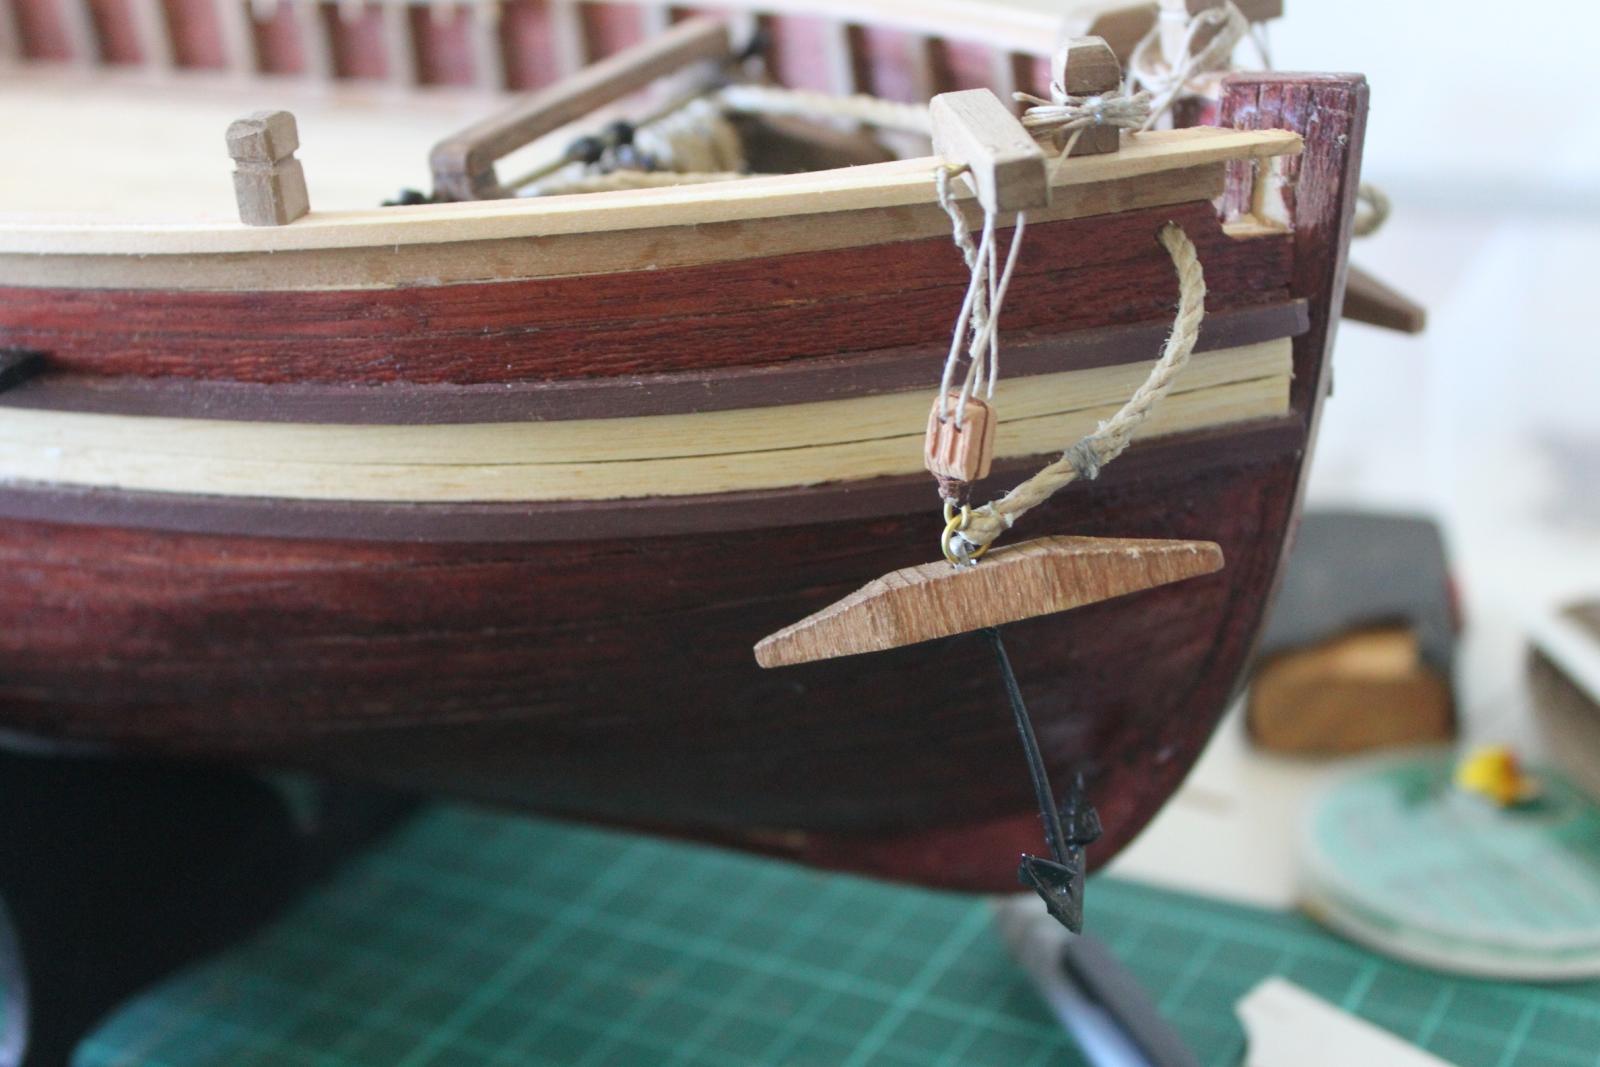
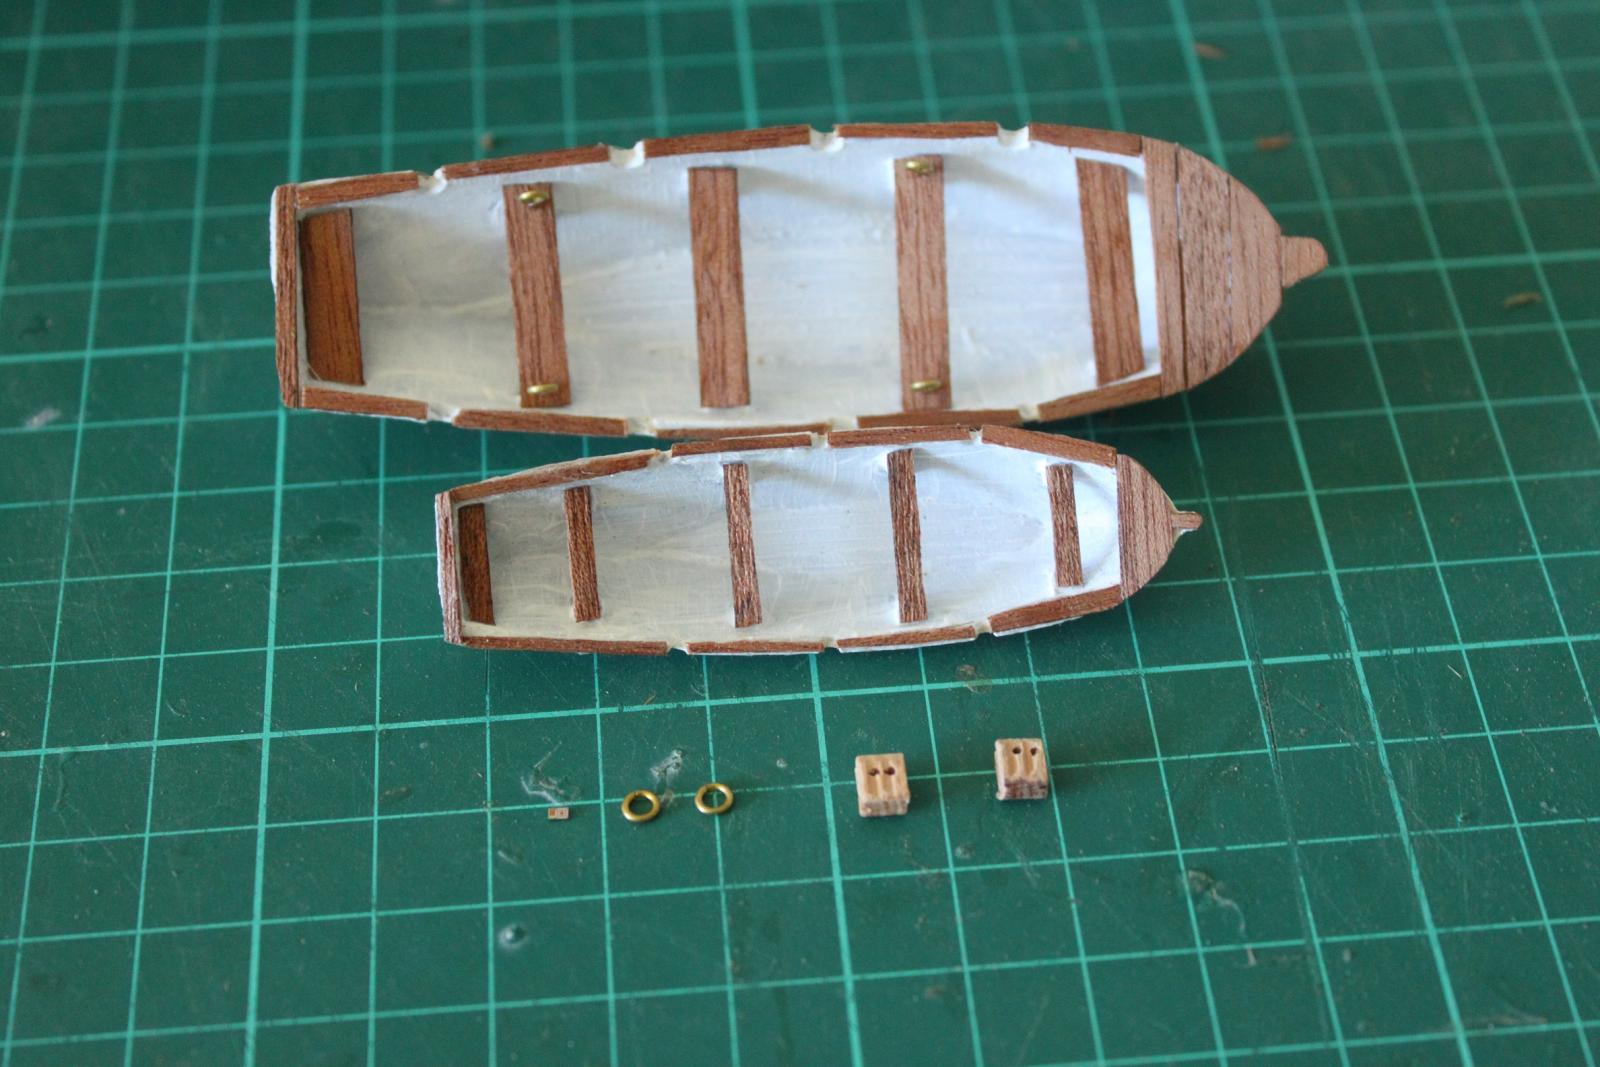
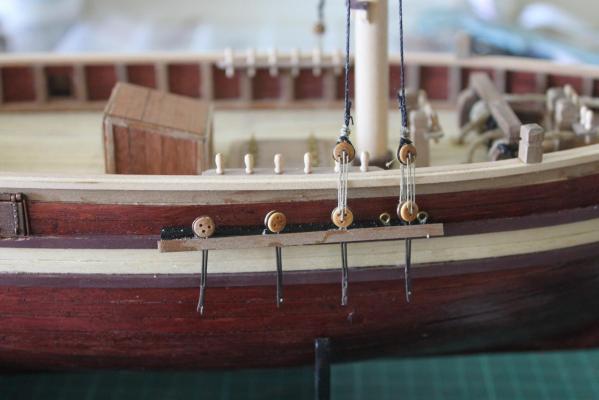
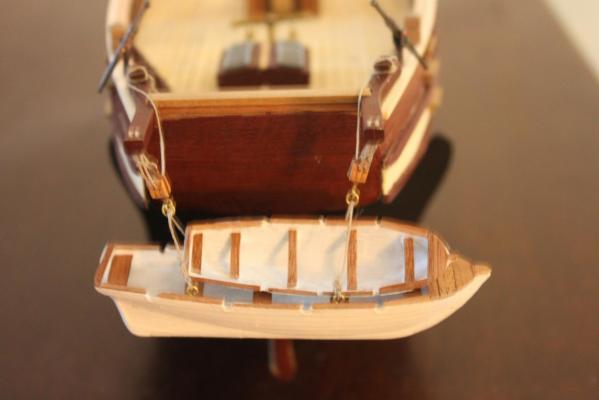
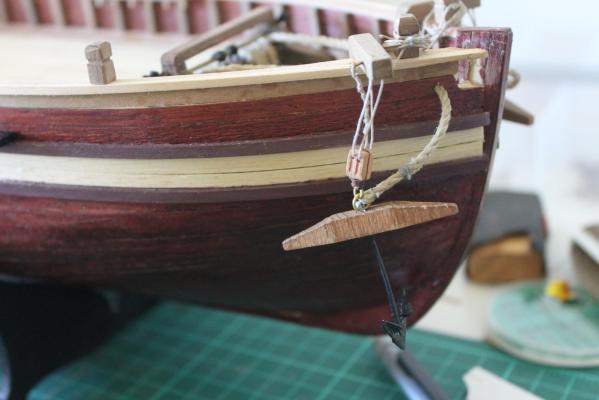
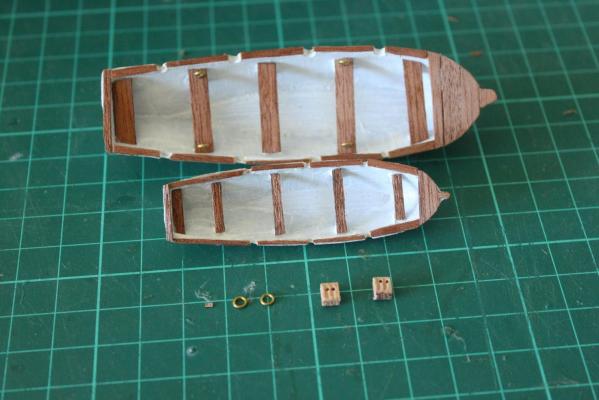
The anchors are finally rigged in place. Second picture shows a termination I was trying for the bit head. Now I am rigging the boats. I paint the boats white as the manual says and fit some mahogany leftovers for decoration. The boats are nested and hung from the davits at the transom. I'm still wondering if I make a hook for the pulleys or just tie them to the rings. I found difficult to work with small cords in tight places, but I'm used to work with smaller things, so I put a 1mmx2mm chip I made in 65-nm, just for reference hehe.
-
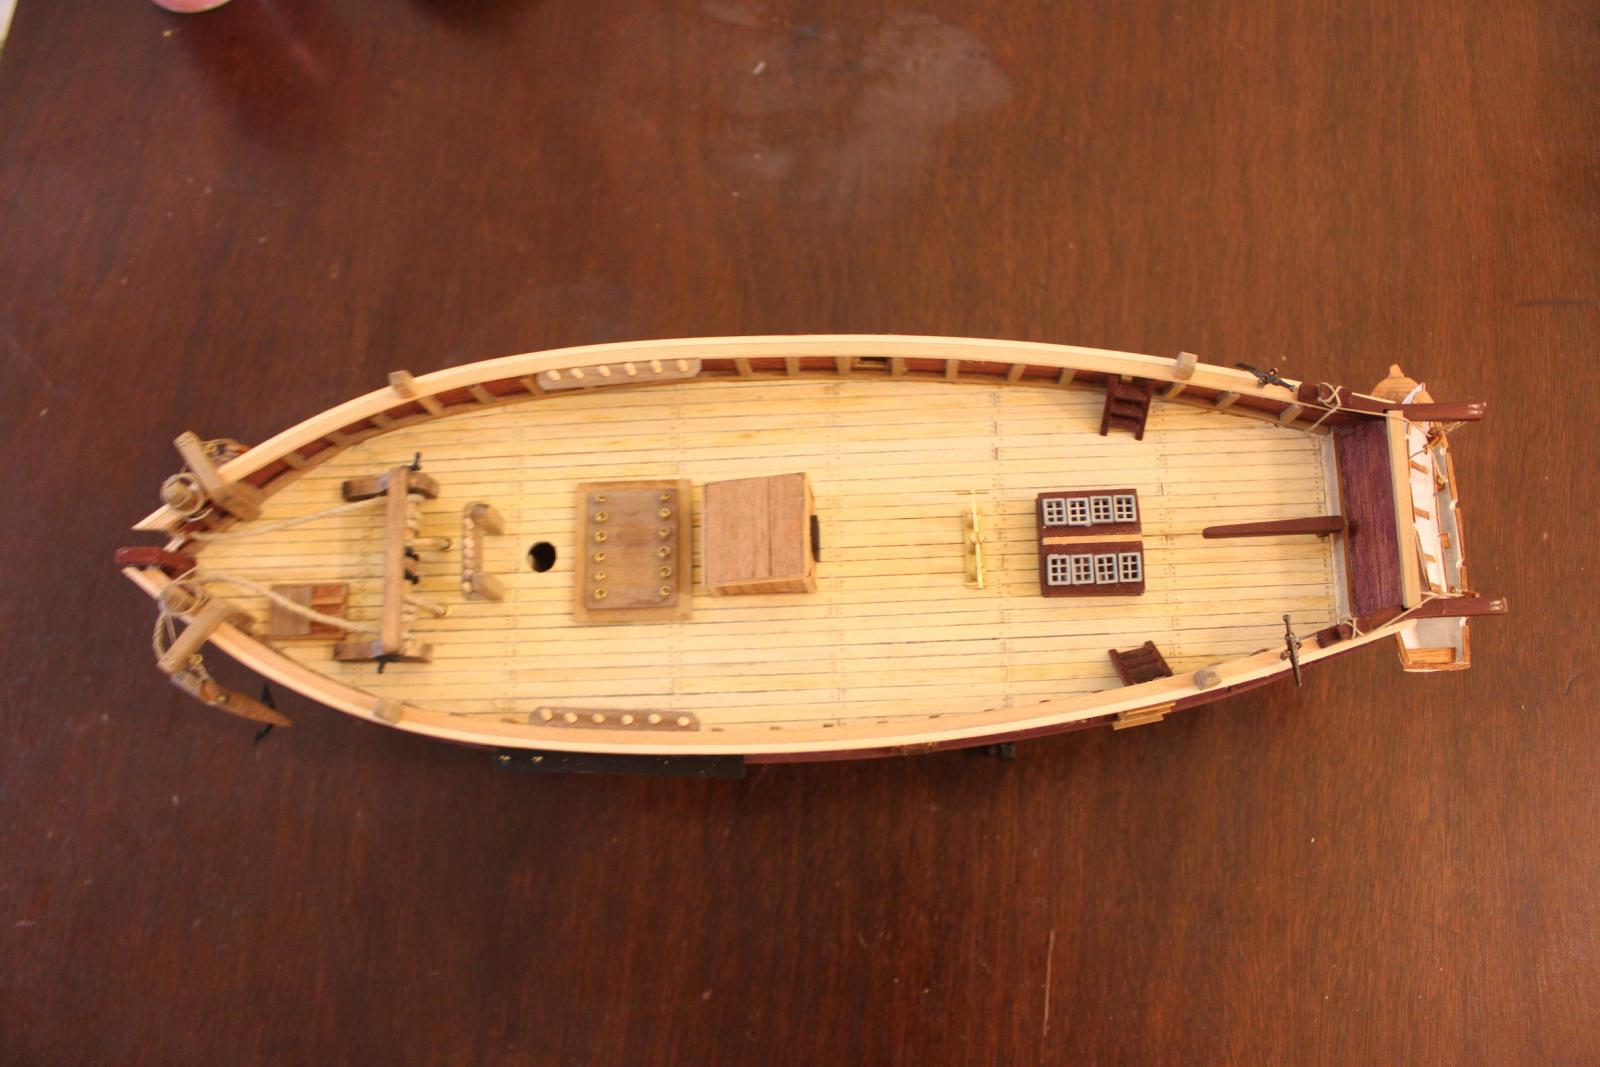
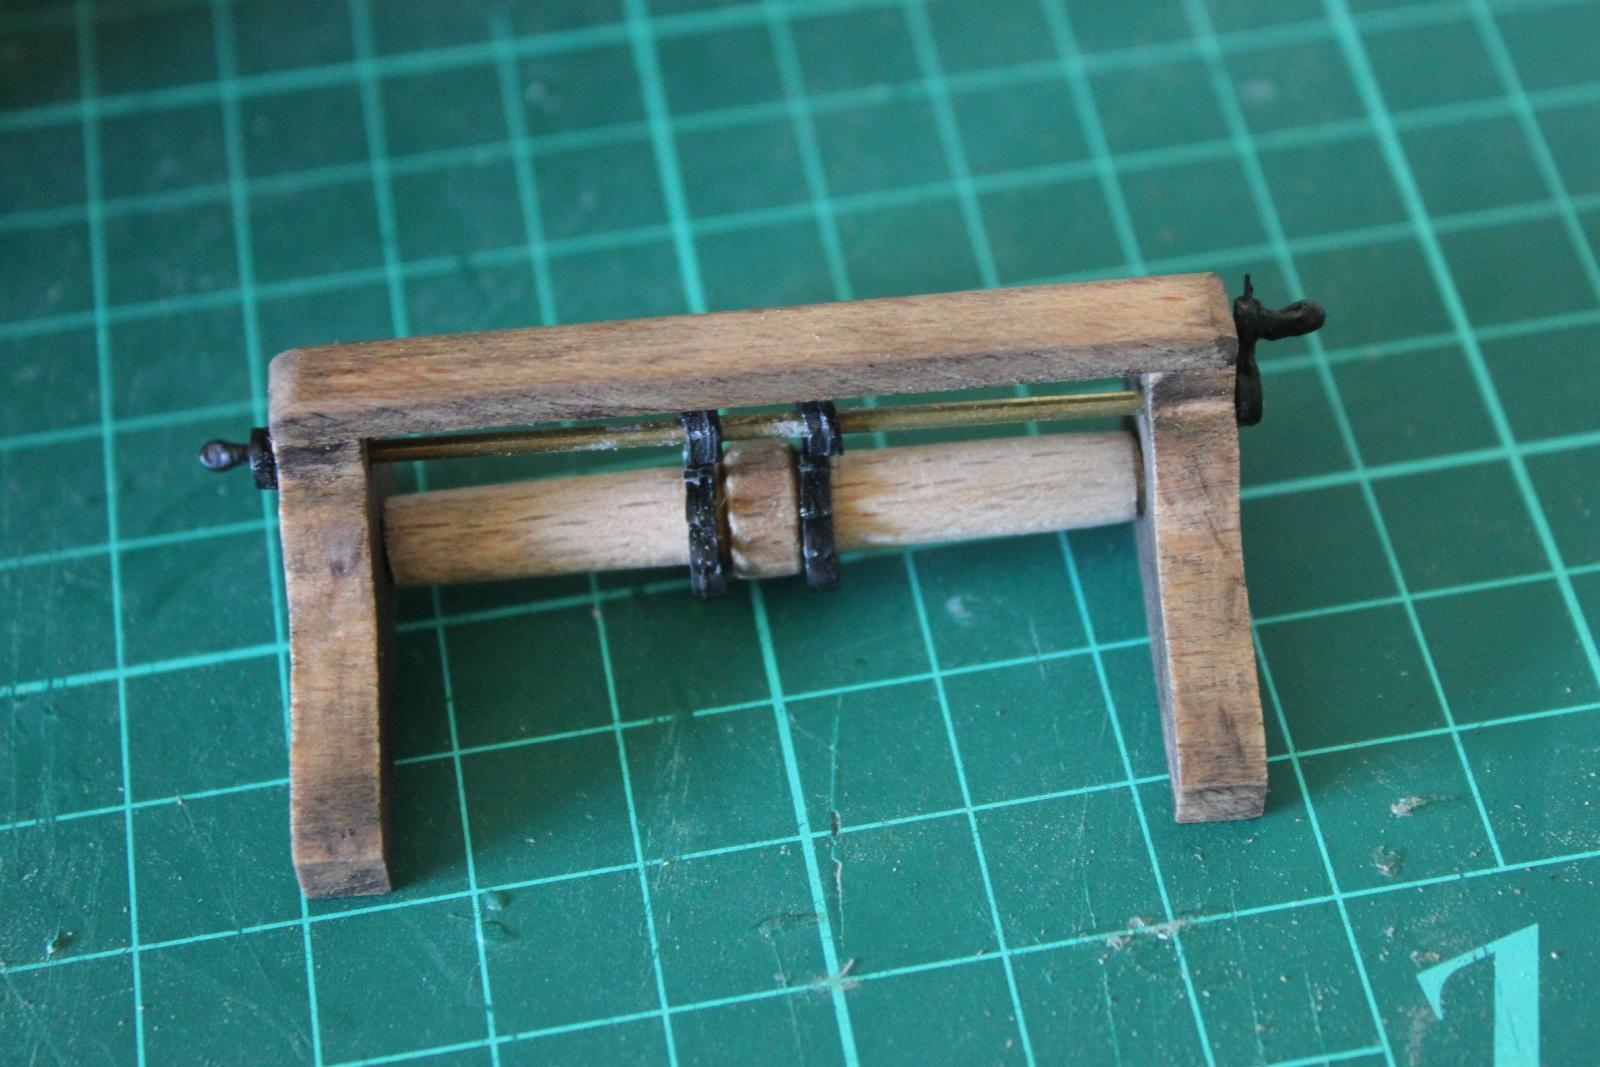
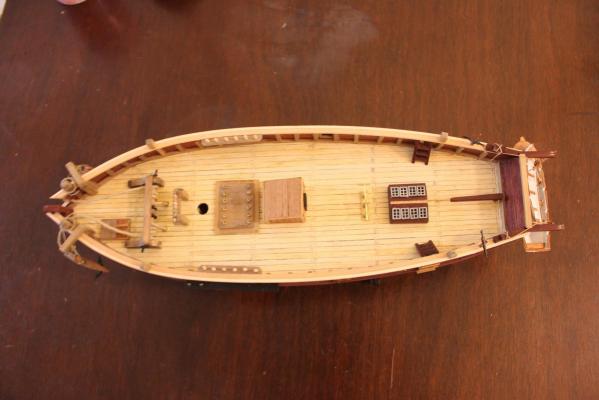
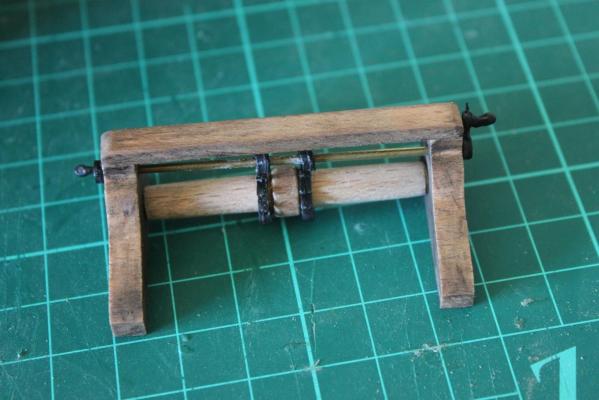
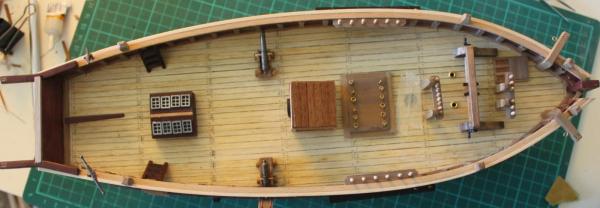
I finished the deck furniture and I'm ready to start fitting the anchors and boats. First picture is the anchor winch. It took me a while to realize how to assemble it, as the manual has a blurry brown thing instead of an actual picture of the winch XD. I used a burned cork from a wine bottle to give the stain. It is something I remember I learned when I was like 5 or 6 years old. You burn a cork and rub it gentle on a surface to give a dark stain. Second picture shows a general view of the deck (it is a dry fit). When I was placing the false frames on the deck I didn't realize to ensure alignment on both sides and so the gun ports are not aligned. Another lesson I learnt here is that making the gun ports BEFORE second planking and adding the bulwark trim would had been much easier. You may also notice I covered the mast hole with tape to avoid small things going inside while working. Also, when making the cat heads and bit heads, all of them in walnut, I discovered how pleasant is to work with walnut, it is really easy to carve! By the way, my kit was lacking one belaying pin, so I did the pin rails with 6 pins instead of 7, which is not big deal as only 5 are used for rigging (also I think having them shipping one single pin was not worth the trouble, and delay).
-
How did you do the metal pieces in the second picture?
- 662 replies
-
- 1
-
-
- bonhomme richard
- frigate
- (and 1 more)
-
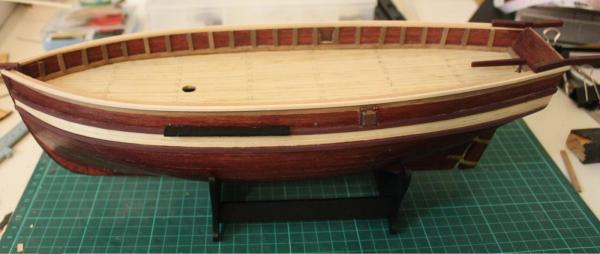
I've postponed my update for long time. After the deck, I thought taking pictures until finishing the hull won't look good, so I waited until now. Here is what I have done: Plank the inner part of the bulwarks with mahogany and walnut strips Plank the hull second layer with mahogany, and apply varnish. I had problems to find varnish, since practically everything I can find here is in japanese (and sometimes chinese translation). But just one of the guys at the store could read japanese son I bought a varnish with mahogany color. Then I installed the bulwark extension in walnut and the cap rail. I then opened the holes for the gun ports (and realized I could have done this earlier and have a better alignment). The kit comes with two cannons and four cannon ports, but I decided to install only two ports since I only have two cannons. Installing the rudder was quite challenging but I finally made it (second picture shows the rudder). Then I glued the wales and wales trim. For the wales trim, I got walnut strips of two different colors, so I painted the wales trim with brown acrylic paint. Finally, I painted and glued the davits. Looking at the manual, I see the transom is about 1cm lower in my model. I will try to fit walnut or mahogany to level the transom with the davits.

-
The transom goes in line with the keel line. Remember to check is is square to the keel. Mine did not fit quite good so at the end it's a few millimeters higher on the port side. The false deck is oversized, you need to trim a lot at the transom to make it fit flush with the bulkheads. Before fitting the false deck remember to sand the bulkheads, or the false deck may not sit straight. Keep posting pictures as you progress in your build (and you can check mine also )
-
Remember to do a proper fairing or you will need a lot of filler later. For my build, I had to add some wood to the last bulkhead (the one next to the transom).
-
It is looking nice. I'll keep reading this log. Go for it
-
I'm on the same build. Remember, patience is the key. Good luck with your build
-
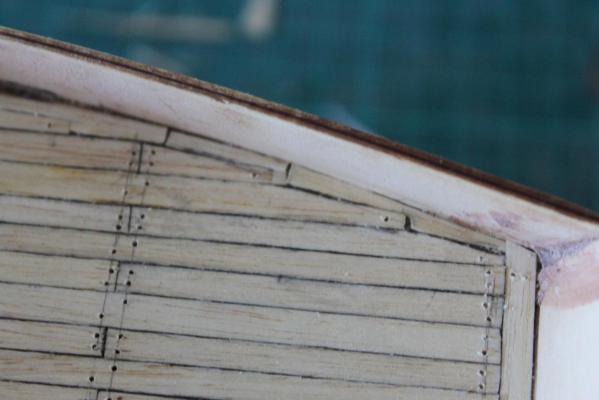
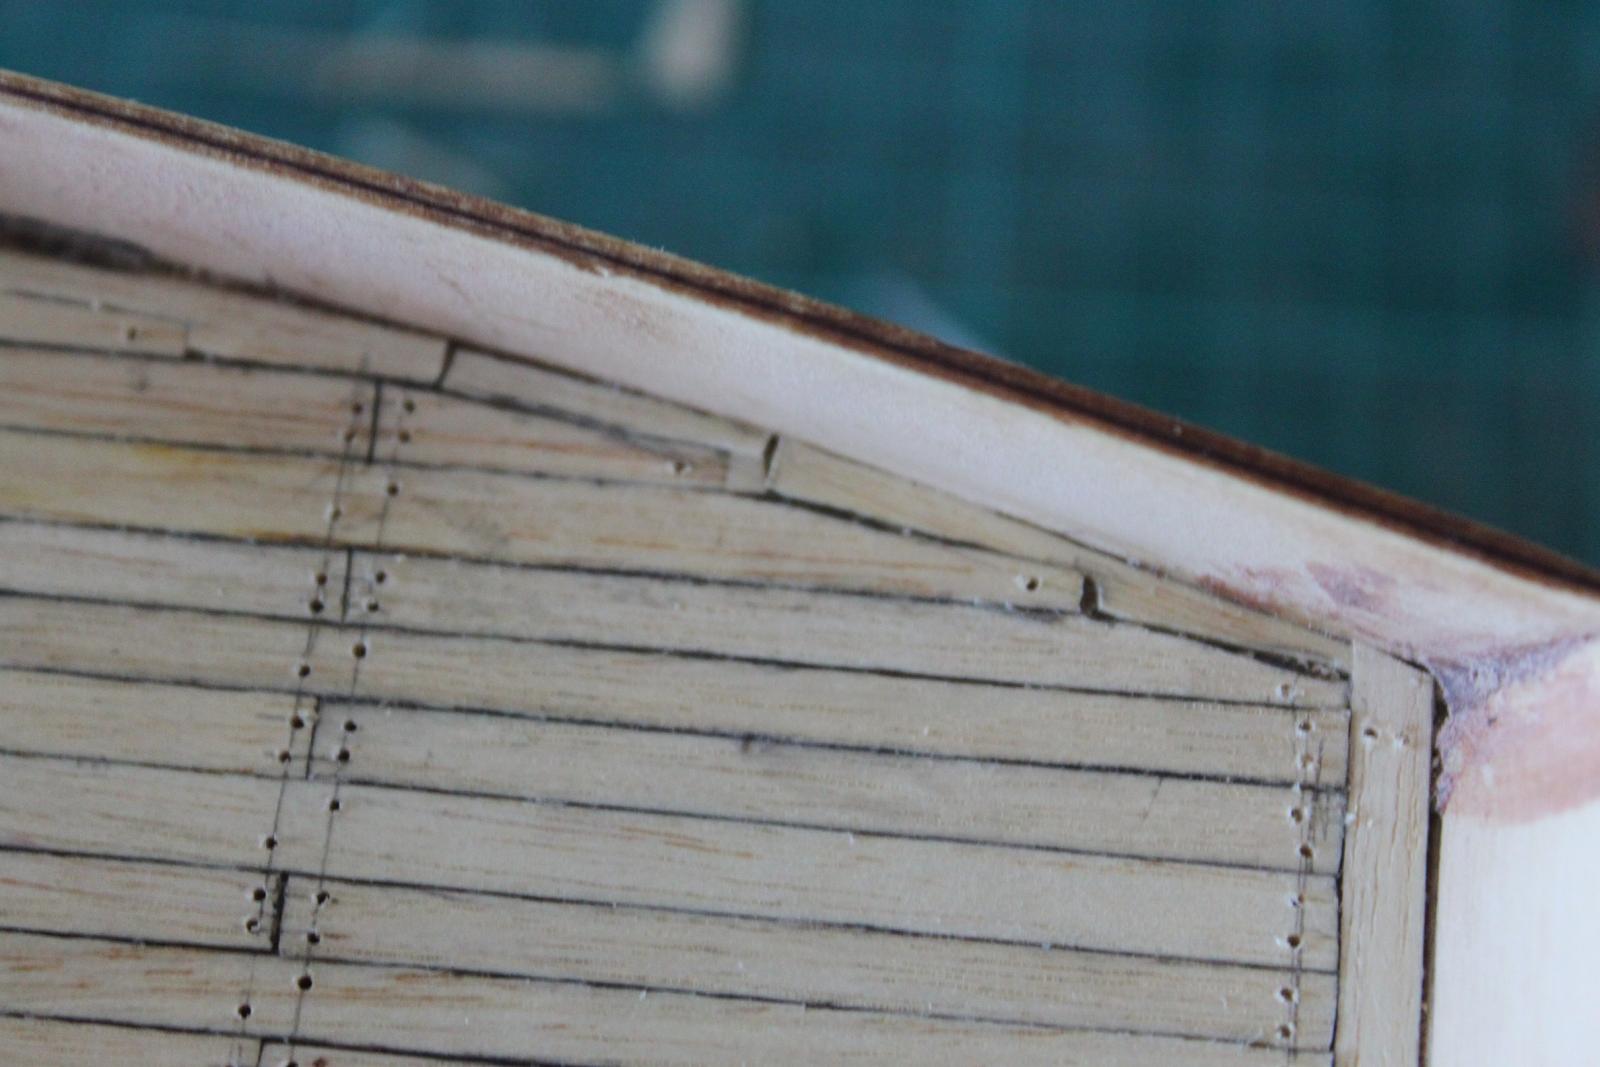
Today I finished the deck planking. First I started cutting the planks in 10cm pieces, but I soon realized there was a large mismatch in the planks width (from 4mm to 6mm), so it was quite difficult to do the planking that way. I decided to lay the full planks and then cut them where correspond once glued. It was hard to make the whole cuts lie in line. Nonetheless, the final result looks good. First attached picture shows the termination at the transom. There will be a 2mm deck trim placed on top of the deck planks at the bulwarks, so the union between deck and bulwarks is not done carefully. I also decided to add treenails to enhance the model. I only had at hand a pin vice I used to drill about 500 holes (my back and wrist both hurt hehe). Because the planks have different widths, it was not practical to use a pattern to drill the holes, so what I did was to use a ruler to draw lines parallel to the cuts to mark the holes positions. The result of the holes is not perfect, but it is the most I can do with what I have at hand, and also it's my first time, so I am happy with the result. Second picture is the treenails being placed using toothpicks. Next step is to plank the inner part of the bulwarks and add the deck trim and false frames.