

3sheets10
-
Posts
72 -
Joined
-
Last visited
Content Type
Profiles
Forums
Gallery
Events
Posts posted by 3sheets10
-
-
Alright Shawn, I was hoping you would start this one up soon. I look forward to following along! Looking good so far.
-
@Shawn: Thanks Shawn! These holiday breaks with nothing to do leads to a lot of building!
@TMC: Thank you! You are exactly right, the hull shaping process is very satisfying. You can finally see all your work on in the planking process paying off. It is great seeing the clean curves of the hull.
@Bug: I appreciate that. I agree with you, this kit is very fun to work on. I certainly need these opportunities to learn how to work with this material. It has been a good learning opportunity for me. I am still working on what I want to add. That is the exciting part.
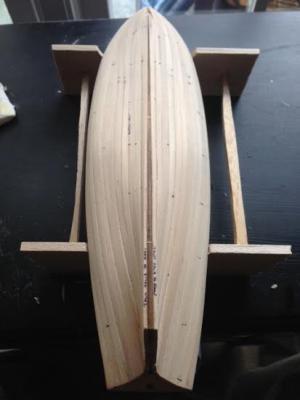
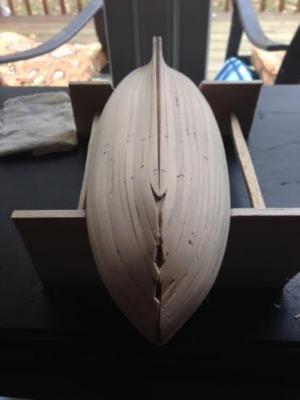
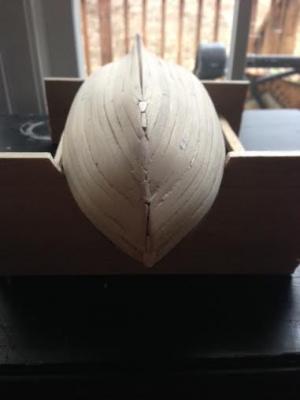
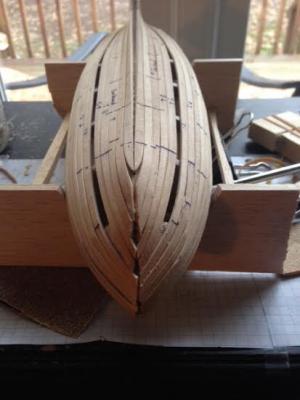
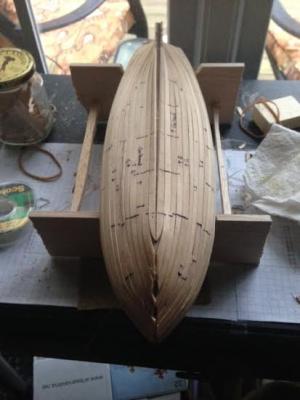
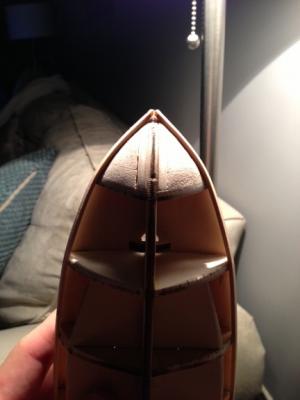
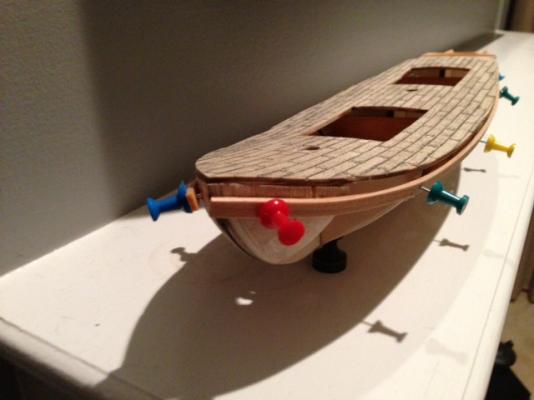
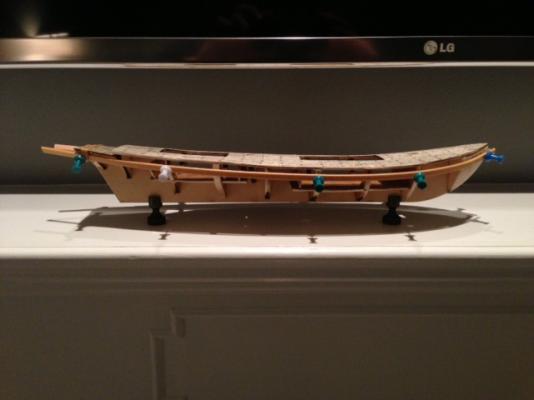
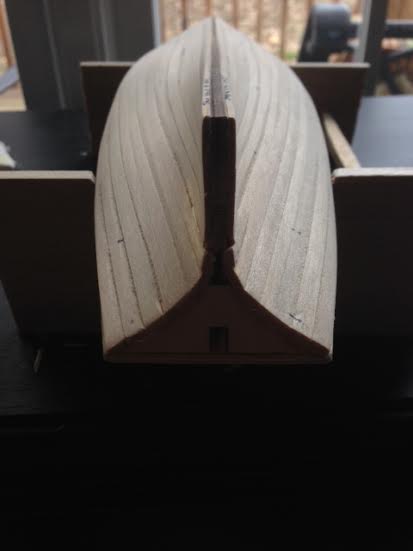
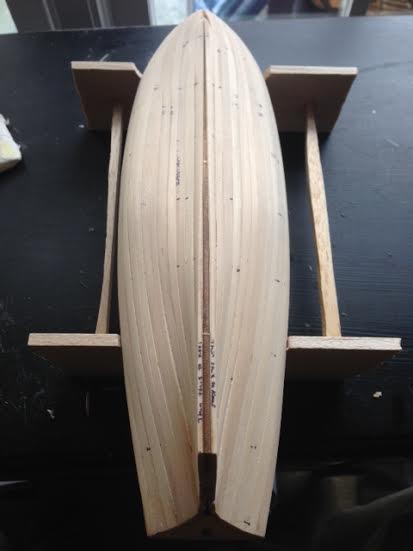
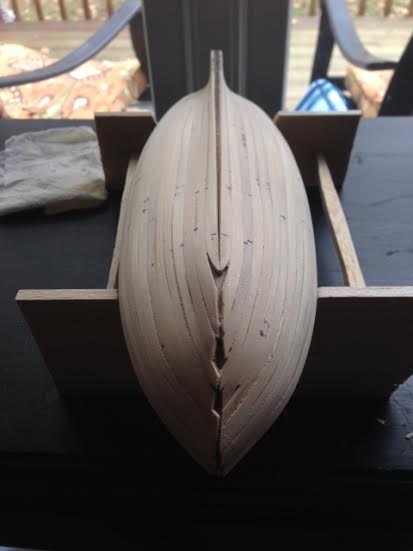
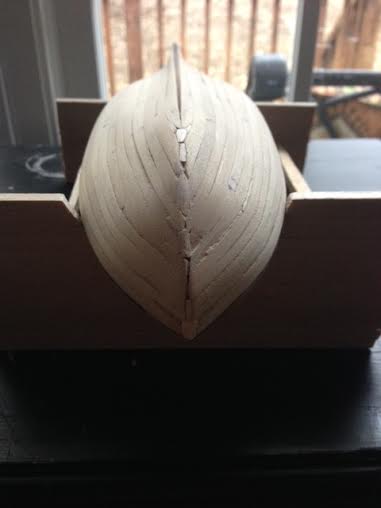
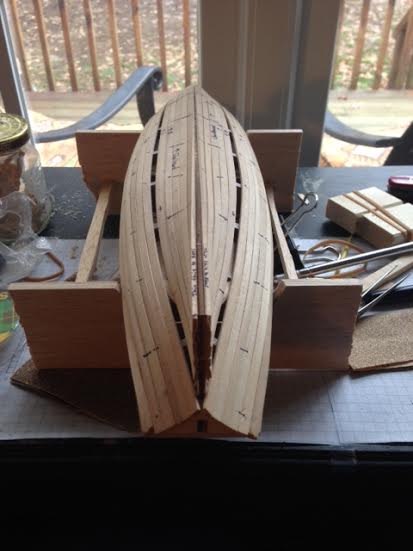
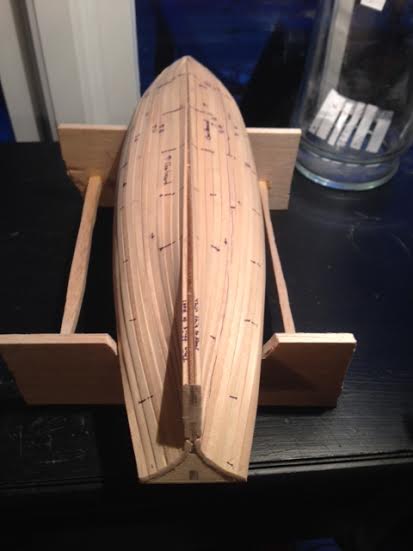
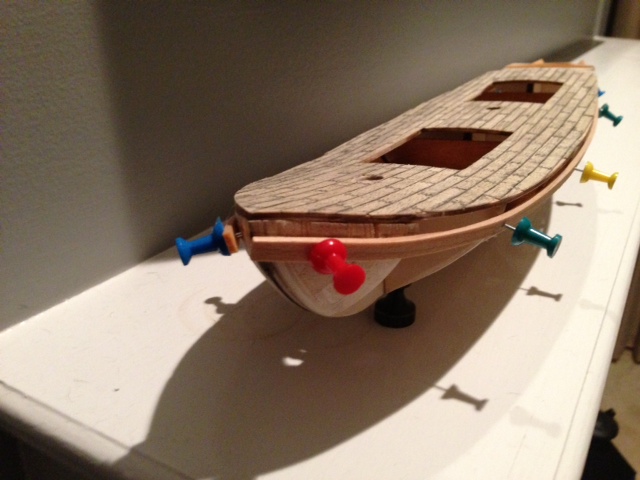
I spent sometime sanding the hull with a fine grade sanding pad and I added some pictures of how it turned out. I am not completely finished sanding, but I think it is getting close. I also filled in some of the empty spots at the bow. I believe it looks a little better.


- themadchemist and shawn32671
-
 2
2
-
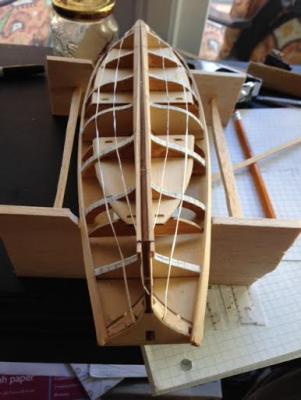
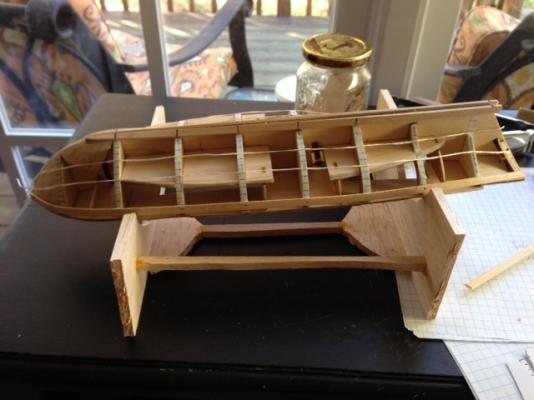
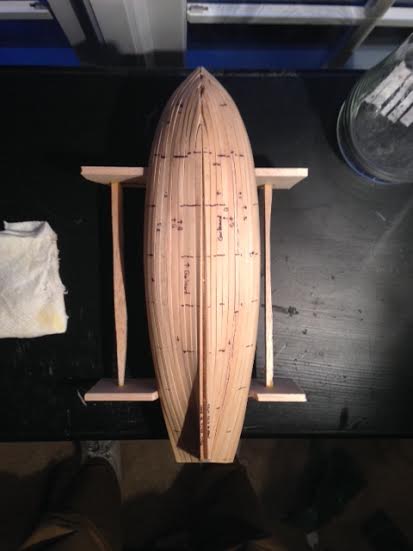
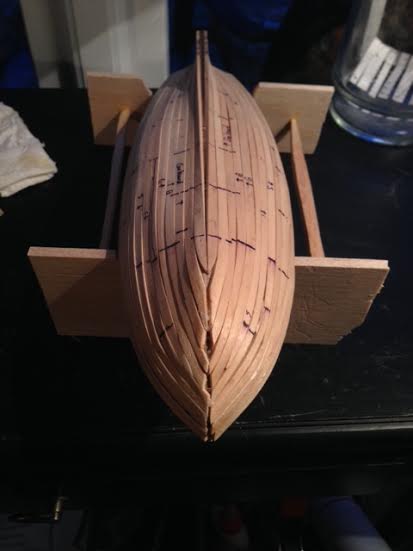
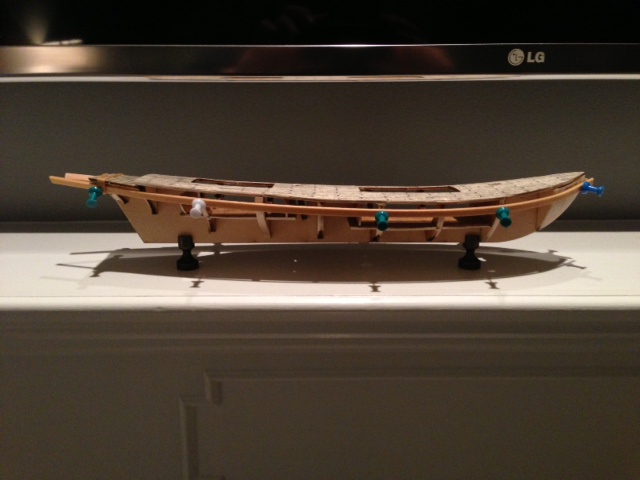
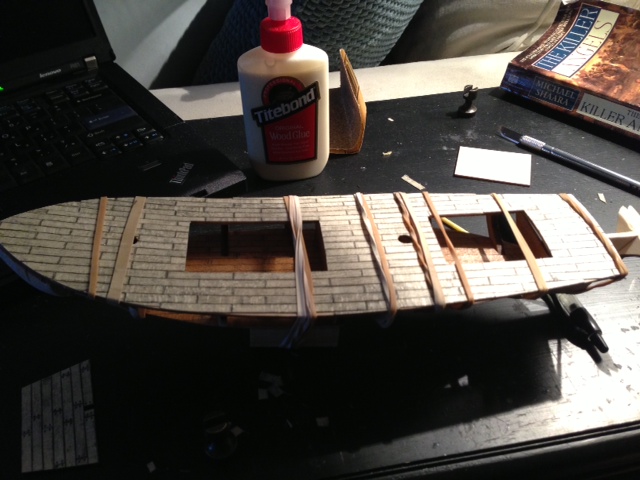
And I have reached the end of the first planking. What an experience! I certainly learned a lot! You may be able to tell that the bow was the area of most difficulty for me. I had to learn shape the end of the plank so that the same plank on the port and starboard side will meet at an angle. Towards the end, I got the hang of it. I had to put the planks on and then shape them right before I glued them to the bow. I would cut of small bits of the plank and then offer it to the spot it will be glued to see if it would fit. I also had a hard time with spacing at the bow. I found that as I was putting the planks in place, the shape of the bow would pull the plank down from the edge of the plank it will be placed next to. I think that stems from my shaping job of the bow blocks and frame long before I started planking. I had to shape the planks and put balsa wood under them to get it to sit in the right spot and not dip too low from the plank next to it. Overall, I think that was the right choice. It came out better than if I would have let them sit like they wanted to.
I had to put one plank that did not fit like the others. I account that as a result of the mis-measurements I made throughout the planking process.
Now I am going to sand the hull and start work on the bulwarks. I am still working on my sanding skills, so any advice about sanding the hull is certainly appreciated.


- themadchemist and shawn32671
-
2
-
Great work Shawn! The paint job looks awesome. I am really impressed with your work sanding out those blocks. They look to be nice and even. That is not an easy task.
-
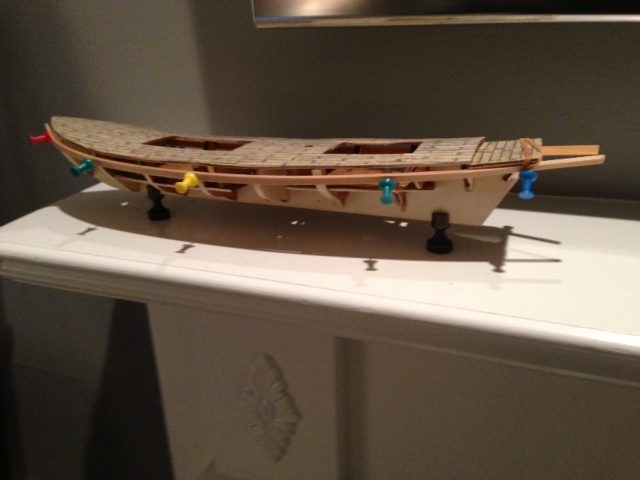
Working towards finishing the first planking process. Doing some work over here!


- themadchemist and shawn32671
-
2
-
Thank you TMC! It is shaping up nicely I believe. Everyone's advice has certainly helped.
-
-
A plank a day keeps the project underway.


- themadchemist and shawn32671
-
2
-
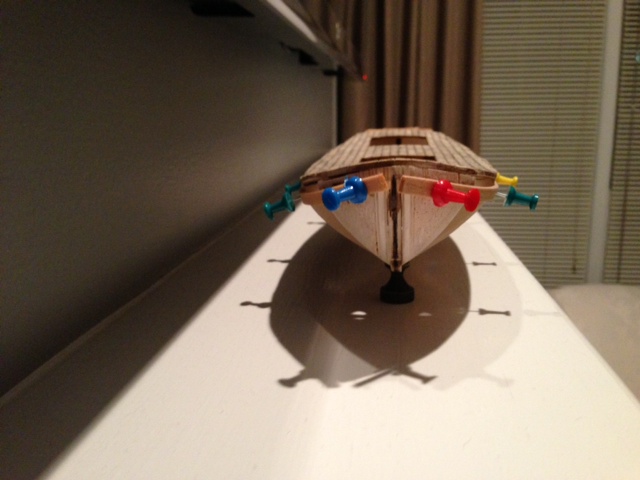
Shaping and putting in the pesky plank from the garboard.
This was tough. I had a lot of trial and error here, but I got something that I think will work. It is not as aesthetically pleasing as I would have hoped, but I think it will do the trick. Some paper towel got stuck on the plank as I was trying to set in place. It will come off as I sand it down....i hope.


- shawn32671 and themadchemist
-
2
-
Putting in the next plank from the wale.


- themadchemist and shawn32671
-
2
-
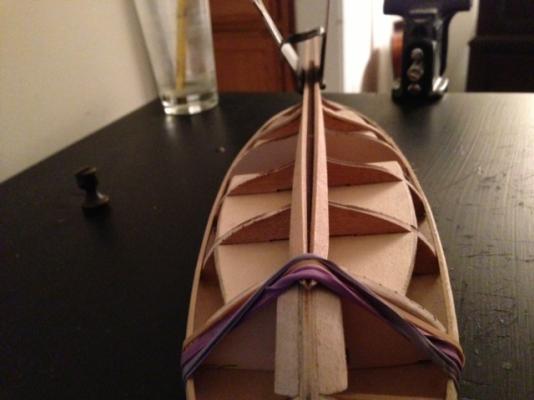
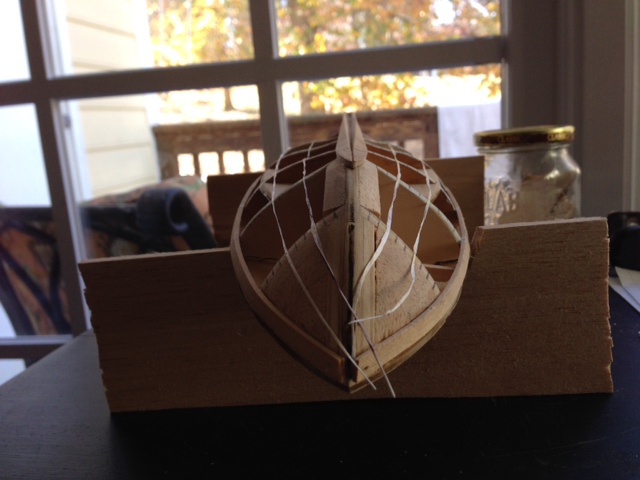
Lined out the hull for planking. The only string I had on me we floss, so I went for it! Worked out well! Now all I smell is mint at my work place. Not the best job on my part, but it gives me an idea. The only thing I am struggling with is the plank that lines up next to the garboard. I cannot seem to fit it with the standard 5mm wide planks. I see people using wider planks to cut out the right shape, but I cannot find a place to get such a product.

-
Thank you TMC, I appreciate that!
I will be ready to have a good grasp of this planking so it is a little less daunting, but it certainly is a fun challenge!
-
The garboard strake installment.


-
Slowly but surely making my way through the planking. I have the wale in and now on to the garboard strake. Just shaping them now before their final placement. Should the planks run along the false keel at all or should you set them in place along the frames with the bow end connecting and then splitting as you reach the stern?

- DaveG and shawn32671
-
2
-
Thanks guys for the advice! Alright, well I got a little ahead of myself and glued on the first plank. Lets see how I can get out of this one.
I see what you guys are talking about. The bow is a little more rounded than what your's s TMC. I was thinking there was too much of a gap between both the planks at the bow. So I will need to sand the bow's edge a little more to get that point huh?
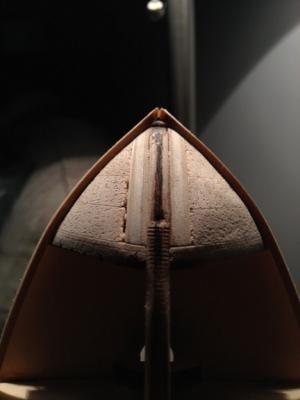
Now for the spiling of the planks, I suppose I do not exactly understand that process fully. I will have to do some more research. Here are some pictures of the bow Kevin.
-
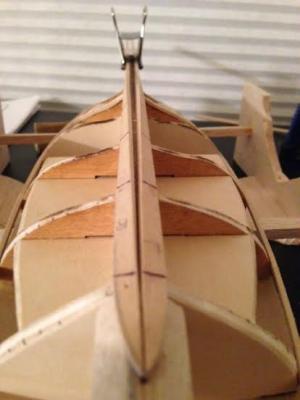
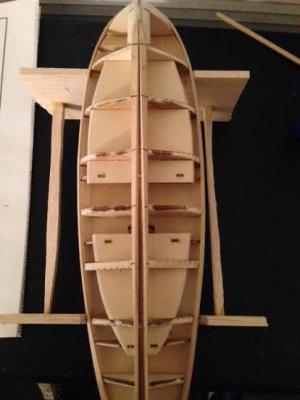
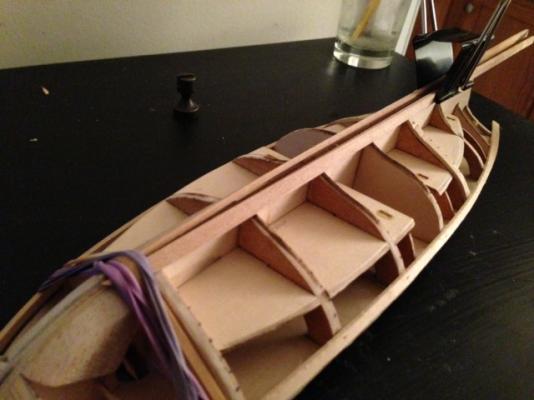
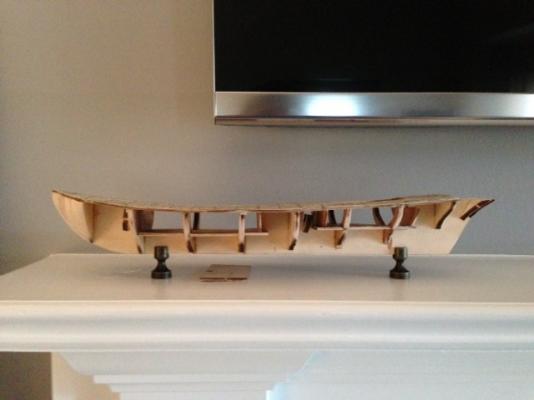
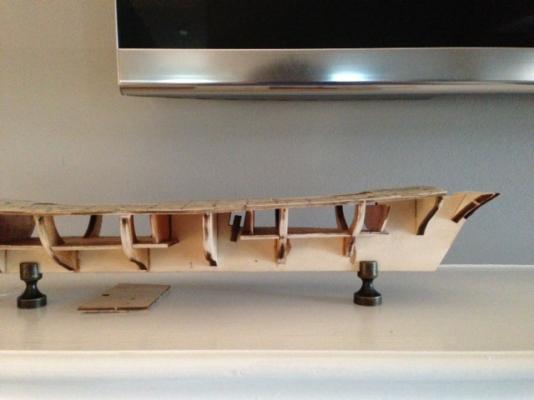
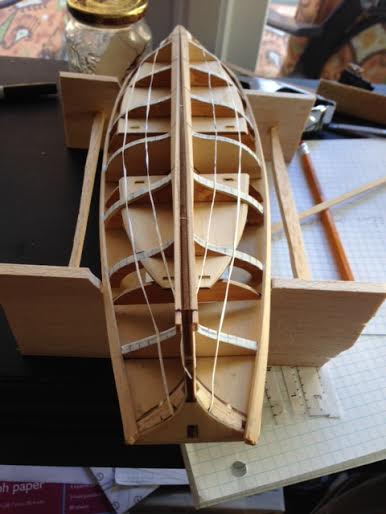
Alright, back from a long break and ready to tackle the hull planking. Here are a couple pictures at the start before I make anything permanent.


-
Good luck with your build Shawn!
-
-
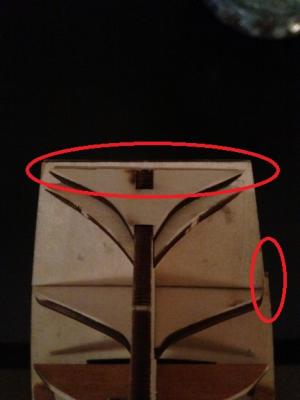
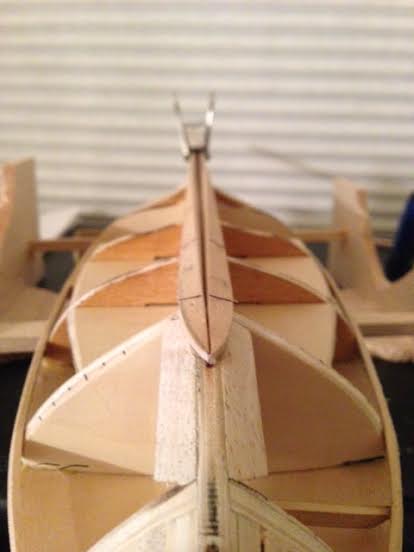
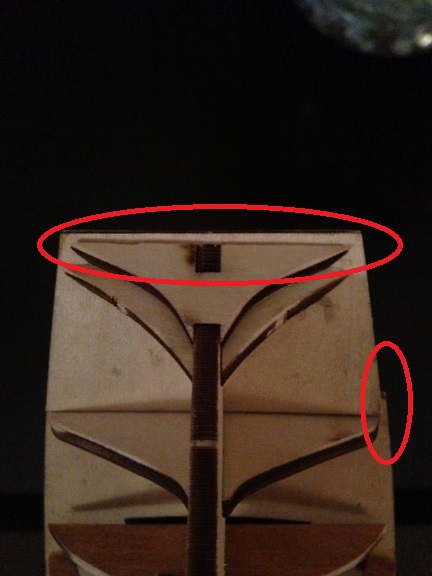
Here you go Kevin. The areas that are in question are marker in red. To describe it, the top circle marks where the stern deck is uneven with the 10th frame. The thing I am most worried about is the side circle where there seems to be a significant difference in where the edges line up. It is staggered where I assume it should be even for the bulwarks.
-
I placed the stern deck onto the frame and tried to correct the unevenness of it by rigging up a system to pull everything somewhat even, but despite my effort, I do not believe it was effective. I was hoping to get some feedback as to how much this will affect my progress in the future and what I can do to remedy the issue. I have sat and thought a lot about how I can fix it and I am hesitant to take any drastic action just yet even though I have come close.

-
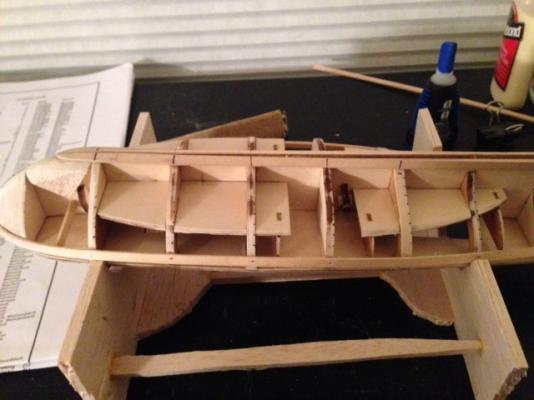
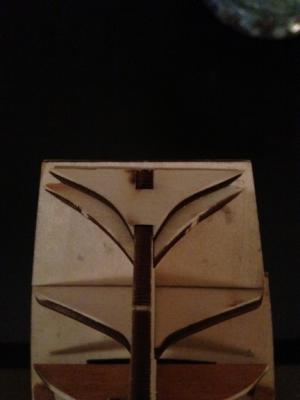
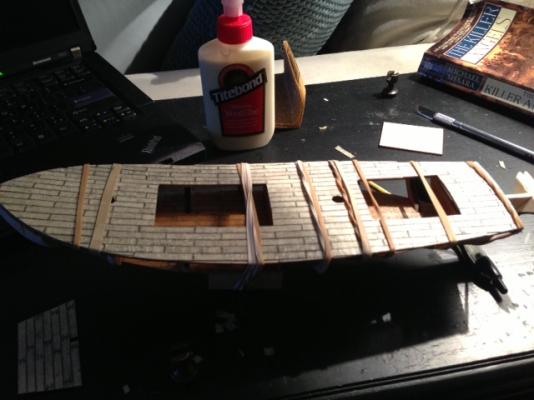
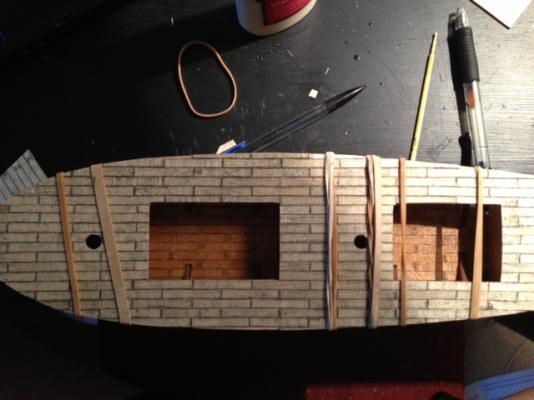
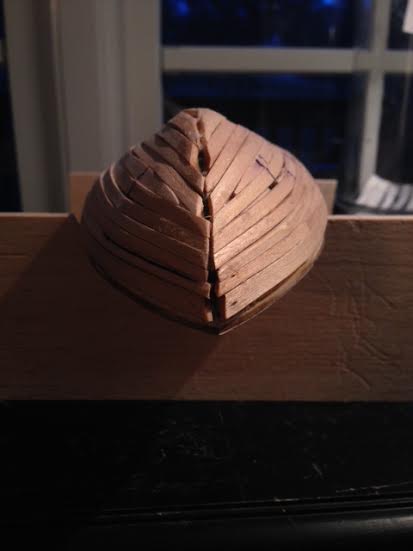
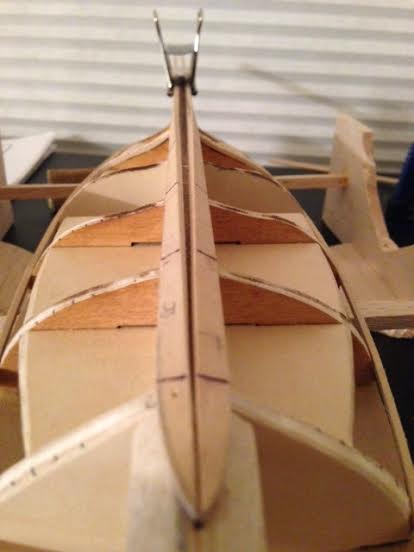
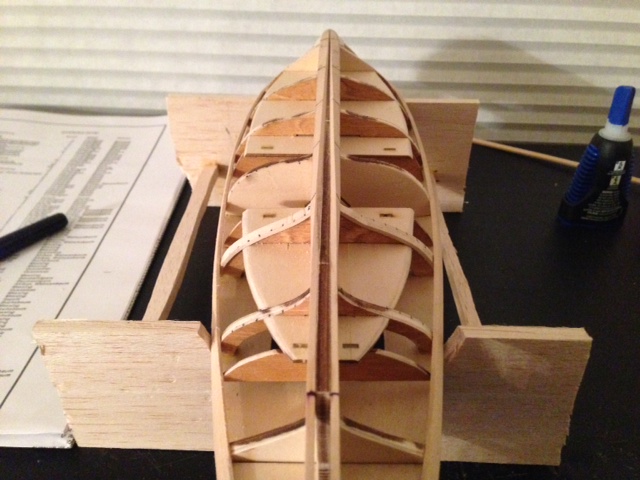
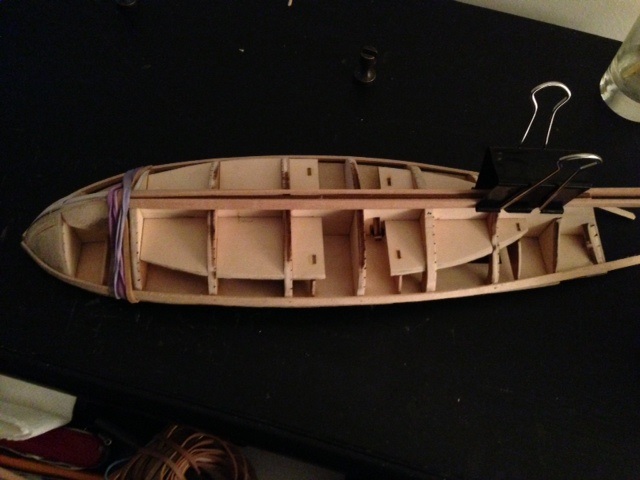
Here are some photos of the main deck being set on to the frames and the end product. I think the bow has a very sudden incline. I have looked over the plans that came with the kit and other builders photos and I am not sure if it is suppose to be that steep or if I messed it up when I was sanding the bow, most likely the latter.
There were also some uneven parts where the deck dipped a little too low so I had to add some material to push the deck up a little to a level that followed the curve of the ship.
Are there any other areas of improvement that anyone can see that are necessary fixes before I start planking?

-
-
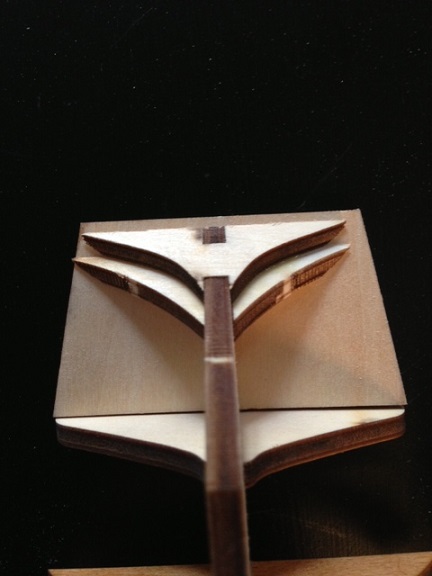
I am thinking that after I file the stern frame down for planking, I can even the sides out enough so that the stern plank sits even on the stern frame.
-
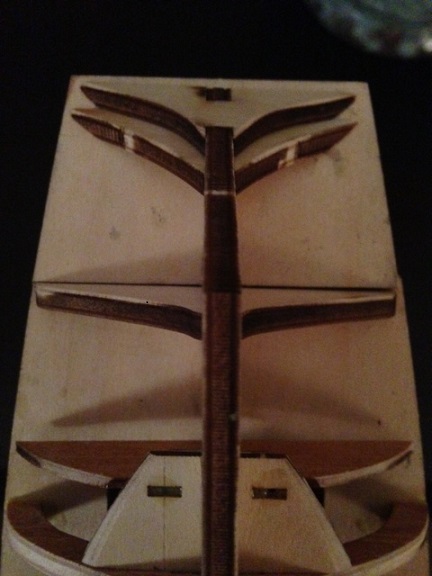
I also came across the issue of the 10th frame not fitting evenly below the stern deck. I noticed a couple other builders came across this problem , but I could not find a solution. I was wondering what the best way is for me to go about resolving this issue.


Swift by 3sheets10 - Artesania Latina - first build
in - Kit build logs for subjects built from 1801 - 1850
Posted
Haha I have that mentality too Bug. I know if I get too carried away with it, I will find myself burning a hole through the hull. Once a day I run some sand paper over it and inspect it. I am interested to see first-hand how this second layer responds to any blemishes in the first layer. I do not want to risk it.
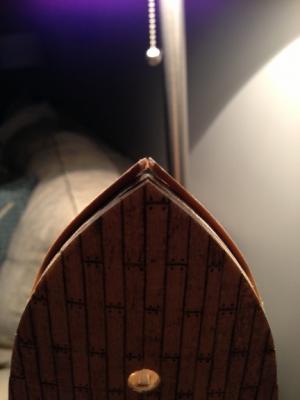
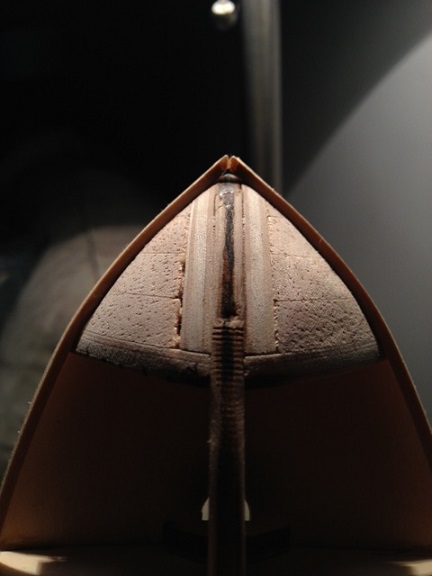
After taking the advice you, TMC offered (thank you sir), I inspected the bulwarks from the kit to find that one was actually coming apart, so I located a basswood sheet and made my own. It was a task getting those to closely match the original piece. I also flattened the area where the keel will sit and marked up how much material to remove. The only thing that I am struggling with is where to start the thinning of the stern planks to match the keel. I have demonstrated in a picture below what I am questioning. Do I want to start thinning at 1, 2, or 3. I know you have to match the stern piece as well? I am just not sure how far up to start. It might be an obvious answer, but I want to make sure I have all my ducks in a row before I start taking materiel off of the hull.