

JanV
-
Posts
394 -
Joined
-
Last visited
Reputation Activity
-

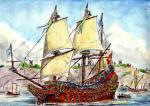
 JanV got a reaction from Hennie in HMS Agamemnon by Sjors - FINISHED - Caldercraft/Jotika - 1:64
Sorry to hear Sjors, but a good decision. You as builder will always see such errors, but lucky you noticed this now and not in a later stage.
-
 JanV got a reaction from Piet in HMS Agamemnon by Sjors - FINISHED - Caldercraft/Jotika - 1:64
Sorry to hear Sjors, but a good decision. You as builder will always see such errors, but lucky you noticed this now and not in a later stage.
-
 JanV got a reaction from Elijah in HMS Agamemnon by Sjors - FINISHED - Caldercraft/Jotika - 1:64
Sorry to hear Sjors, but a good decision. You as builder will always see such errors, but lucky you noticed this now and not in a later stage.
-
 JanV reacted to mar3kl in Vasa by mar3kl - Billing Boats - scale 1:75
After doing a bit more research I decided to route the main topsail braces somewhat differently. The Rigging of Ships in the Days of the Spritsail Topmast says that on early 17th century Dutch-rigged ships, the braces head straight to the deck from the leader block on the mizzen shroud. It also says that other rigging methods existed, in particular running the braces from the mizzen back to a second leader block on the aft mainmast shroud and thence to the deck. If you look closely at the museum plans and the 1:10 model, it appears that they use the second routing with the extra leader block. So I redid the braces to route in that way:
Then on to the sheets. These are combined with a clew block. The clew block has a loop in one end, and the sheet passes through it with a stop knot on one side. The sheet then passes through the large block on the end of the main yard, to a block near the shrouds and thence to one of the small knightheads that support the bitt aft of the mainmast.
The clewlines were similarly straightforward. They are attached about halfway to the end of the yard, run down to the clew block where the sheet is attached, back up to another block, then straight to the bulwarks where they are belayed. Be careful with the location of the belaying point - I found the one indicated by the plans was too far aft and caused the line to bend against the foremost main shroud. Moving the belaying point a bit farther forward fixed the problem.
And the finished main topsail yard. As with the main yard rigging, the lines will be tensioned and trimmed once the topgallant yard rigging is done.
-
JanV reacted to mar3kl in Vasa by mar3kl - Billing Boats - scale 1:75
I decided I didn't like the final part of the main sail sheet dropping over the channel, so I tucked it back behind the deadeyes:
The main topsail yard tie. It's very simple - a loop around the yard, then back through a sheave in the main topmast and down.
And the halliard. The kit plans are as usual confusing here. They don't show how the halliard is attached to the tie, or where the other end of the halliard falls are located. Fortunately the museum plans, the 1:10 model, and Clayton's model make it clear. There's a two-sheave rams head block to which the tie is seized. The halliard runs between that block and the knighthead forward of the doors to the helm cabin. Unfortunately I didn't think ahead when I originally attached the knighthead to the deck (the nice clean deck...) and I needed to remove it to attach a ring bolt for the standing end of the halliard. There was just no way to get a drill through all the rigging and maneuver the ring bolt into place, and seize the halliard to it.
The parrels. The kit says to use six parrel ribs, but that's too many to fit snugly around the mast. I used five. As with the fore topmast, there's no truss tackle; the parrel ropes are wound back and forth and the end seized back on itself.
The lifts. Again the kit plans are wrong here. As with the fore topsail yard lifts, the main topsail yard lifts also serve as topgallant sheets. When the topgallant sail isn't deployed, the lifts are made fast to ring bolts under the mast cap. The lifts run from the ring bolt, out to blocks on the ends of the yards, back through two pendant blocks, and down to the bitt just aft of the mainmast. The pendant blocks are seized to the trestles and stick out a bit through the futtock shrouds .
And the braces. Sounding like a broken record, the kit plans are wrong. Again. They don't show where the standing part of the line is attached, and have an odd double block on the mizzen mast through which both braces travel on their way to their belaying points on the bulwarks.
It's not clear from any of the other sources exactly where the standing part of the lines are attached is, but a pretty good guess is that they are seized to the front-most mizzen shroud, low enough that the mizzen topsail won't foul on it. The running end travels through the brace pendants, back to leader blocks attached to the same mizzen shroud, and thence to the bulwarks.
-
JanV reacted to mar3kl in Vasa by mar3kl - Billing Boats - scale 1:75
The kit supplies the correct 3-row parrel ribs for the mainmast. They say you should use nine of them but that was way too many for me - I ended up wrapping over half the mast with six. There isn't a clear "right" way to rig the parrel, so I just made an eye at one end and looped it around the yard, then went back and forth three times , then a fourth and fifth time in the valleys of each rib.
The remainder heads toward the deck and terminates in a double block, forming the head of the truss tackle. The other side is a single block seized to a ring bolt in front of the center of the main mast.
The lifts were very straightforward, rigged identically to the fore course yard lifts. The kit plans are for once correct here.
The lift lines terminate at the bitt just aft of the mainmast. Here you can see that, plus the halliards and truss tackle.
Braces were similarly straightforward, although the kit plans appear to be incorrect in the routing. The museum plans and the 1:10 model both have the running end of the line traveling through a leader block, then over the railing to the nearest kevel bitt.
And a view of the entire brace.
Next will be the clewlines, sheets, and tackles.
-
JanV reacted to mar3kl in Vasa by mar3kl - Billing Boats - scale 1:75
Fore course yard clewlines, sheets, and tacks. Without a sail, the clewline simply hangs down. I could have pulled it up to the yard, but the sheet and tack would have been way up in the air and visually distracting.
A close-up of the tacks. Each tack runs from the clew block, down to a fairlead under the beak, and back up the other side, where it terminates at one of the kevel bitts at the front railing. One tack crosses under the other. I'm missing a photo of the fore course sheet; I'll try add one later. It's pretty straightforward - runs from an eyebolt on the hull, up through the clew block, and back to a sheave in the bulwarks, through it, and round the kevel bitt behind the sheave.
Getting the tacks and sheet to hang properly was a little tricky. First I needed to get the lines well soaked so they were heavy enough to hang properly. Then brush with diluted white glue and wait to dry.
More detail on the fore course yard halliard and top rope. You can also see where the topsail and course lifts terminate, on the rail between the two roman soldier heads. The sheaves under the heads are where the topsail sheets terminate.
Here are two photos of the topsail and topgallant yard lifts and clewlines. The topsail yard lifts are fairly straightforward. The kit plans are once again incorrect here. The topsail yard lifts are supposed to do double duty as topgallant sheets, where in the kit plans they are separate. The routing is straightforward: the lift starts from a ring bolt on the mast cap, then to a block at the end of the yard, then back to a pendant on the trestle, then down to the bitt behind the foremast.
Topsail clewlines are similarly straightforward: down from the yard to the clew block at the end of the course yard below, back up to the topsail yard, then down to the pin rail on the bulwark, just behind the termination of the fore course clewline.
Topgallant lifts and clewlines are essentially the same, but terminate at lower deadeyes on the fore topmast top. Again, the kit plans are wrong here. The lifts are supposed to start from a ring bolt on the topgallant mast cap, out to a block on the end of the yard, back to a pendant, then down to a lower deadeye.
Close-up of the topgallant braces, lifts, clewlines, and parrels. The parrels are very simple, with no ribs or truss tackle. You can also see where the lift and clew lines terminate
Two photos of the topsail and topgallant brace routing, and the topsail and topgallant ties and runners. The course braces route back to a block on the mainstay, then to the railing. The topsail braces route back to a block on the main topmast stay, then down to a leader block on the main stay, then to the railing. The topgallant braces route back to a block on the main topgallant stay, then down to a leader block on the main topmast stay, to a second leader block on the main stay, then to the railing. So it's all quite consistent.
The topsail and topgallant braces both hit their first blocks about the same distance back on their respective stays. The fore course brace hits its first block on the main stay a bit farther back than the topsail and topgallant braces.
One note - it's crucial to have good tension on the stays before attaching the braces, or the stays will pull up and look odd.
Regarding the ties and runners, again the kit plans diverge substantially from everything else, and are very hard to read. Since they appear to be wrong anyway, I ignored them. As far as I can tell from all the other sources I have, the topsail and topgallant halliards were a baroque (literally!) arrangement of blocks, tackles, and crowsfeet. The book "The Rigging of Ships in the Days of the Spritsail Topmast" makes a dry reference to the 17th century Dutch bosun hitting new heights of baffling complexity in this area.
Hopefully the pictures make it clear - both yards are done in the same manner, just to different stays. The yard tie terminates in a block. A runner travels from a ring bolt by the mast, up through a leader block on the mainstay (main topmast stay for the topgallant runner), the tie block, and then terminates in another block. Two sets of crowsfeet each end in euphroe tackles; the line connecting them runs through the block at the end of the runner. It was a lot of work, particularly getting the crowsfeet tensioned without distorting the stays.
A close-up of the ties and runners for the topsail and topgallant.
And we're done! The best angle showing the entire foremast rigging is this photo. There's a little distortion on the stays, but I minimized it as best I could.
Now it's on to the mainmast. The mainyard will be the halfway point in terms of the number of yards. Hard to say whether it's the halfway point in terms of work. -
JanV reacted to md1400cs in Wasa by md1400cs - FINISHED - Corel - 1:75
Hi Mates,
Preparing the weather deck foremast area for installation of the foremast, and then attaching the shrouds
1) Drilled holes in the lower railing to insert the vertical beams for the (later) upper railing trim pieces.
2) Discovered a 1/10th photo that showed blocks attached to the frame of the entry into the upper gun deck.
I also found these four blocks in the museum weather deck running rigging fastenings 53 & 57. So added those as well.
Some before and after shots follow
3) Cut the weather cover to better fit the now smaller entry to the gun deck.
4) Added eyebolts and a block at the foremast base. Along with a cleat on the mast (my idea ) hmmm
I WILL repaint those poor heads that have lost their yellow -
Thanks for still dropping by and looking in at this very very slow build (J
Cheers,
Michael
-
JanV reacted to Sjors in HMS Agamemnon by Sjors - FINISHED - Caldercraft/Jotika - 1:64
Thanks Ulises
I can now speak a little Spanish
Hello Andy !
How are you today.
Nice to see you !!!!!
Are you still building or only working ?????
All 3 crowfoots are done.
So picture time.
Now I have to do the futtock staves and then I can go to the ratlines
But that can take a while because of work
Sjors
-
JanV reacted to mar3kl in Vasa by mar3kl - Billing Boats - scale 1:75
On to the fore course yard. My kit was missing some of the dowels for the yards, so I needed to head to the hardware store and get a dowel for the yard. I turned it down with a drill and sandpaper, then added the various blocks and braces.
The tie rigging is fairly straightforward - two lines through sheaves in the foremast, then down to a rams head block which has a tackle that connects to the knighthead.
You can also see the large laser-cut blocks through which the fore yard lifts will be routed.
Here's the halliard part. I had to hand-carve the rams head block from a chunk of wood, but it wasn't too difficult. The halliard runs through the three rams head sheaves and three of the four knighthead sheaves, with the fourth used by the topmast top rope.
You can also see a pin rail attached to the bulwark - the kit specifies this and it turns out the rail isn't supposed to be there, so I'm going to remove it.
Next up were the parrels. The actual ship had three rows, but the kit only uses three-row ribs for the main yard.
The kit plans are also missing the truss tackle for the parrel. The end of the parrel rope is supposed to terminate in a double block, with a tackle connecting it to a single block fixed to the deck. My first attempt used a single block and a simple whip up and back to a ring bolt, but I fixed it later.
The lifts. The kit plans were accurate here (!!) so nothing much to add.
And a final view of the yard with ties, halliards, parrels, and lifts added.
-
JanV reacted to mar3kl in Vasa by mar3kl - Billing Boats - scale 1:75
Time for the sprit topsail yard. The kit plans have problems here - they show extra lines for the sprit topsail sheets, where as far as I can tell those never existed - the sprit yard lifts did double duty as sprit topsail sheets, and were attached to the bowsprit with ring bolts when the sprit topsail wasn't deployed.
I attached the various blocks to the yard - brace pendants, clew blocks, and lift blocks - and then set up the tie and halliard. Here you can see the tie from the front. There are no parrels - it seems the ship had them, but the kit doesn't specify them so I'm going to wait until all the other yards are done to see if there are enough extra beads left over.
And the tie block from the back.
Here is the halliard assembly. I found a couple of ways to do this. Nothing of the original ship's sprit topmast or topsail yard survives, so there's no way to know how it was rigged. The kit plans call for a block attached to a ring bolt on the top, and the halliard to run between the tie block and the top block, tied off at the bottom. The tie block would have been a fiddle block, but you can use a double block. The kit plans are too vague to see what to do in any detail. Two other sources show early 17th century Dutch ships with the halliard tied to a ring bolt on the top, then run up through a single block on the tie, back down through the top to a leader block on the bowsprit, and from there to a cleat on the bowsprit.
I chose the second approach, mostly because I didn't want to face the complex block rigging on the top with all the deadeyes in the way.
Now the lifts and braces. The braces head up to the forestay, then back down through leader blocks on the bowsprit before terminating at the pin rail on the side of the beakhead, next to the spritsail braces.
The clewlines are pulled up against the yard since there is no sail deployed and no sheet to attach them to. They route down to leader blocks, then to the front pin rail on the beakhead, next to the spritsail clewlines.
A photo showing where some of the lines terminate.
And the final result. It's different from the kit plans in a number of small ways, but conforms as best as I can make it to a combination of the 1:10 model, Clayton's model, and my rigging books.
-
 JanV got a reaction from md1400cs in Wasa by md1400cs - FINISHED - Corel - 1:75
Hi guys
do not bother El Nino is lost and now in Western Europe
Michael I am looking forward to see your mice finished as this is something I need to do also shortly
-
 JanV got a reaction from GLakie in Wasa by md1400cs - FINISHED - Corel - 1:75
Hi guys
do not bother El Nino is lost and now in Western Europe
Michael I am looking forward to see your mice finished as this is something I need to do also shortly
-
JanV reacted to md1400cs in Wasa by md1400cs - FINISHED - Corel - 1:75
Hi Mates,
Thanks for the nice comments, likes and just dropping by.
Ferit, you are too kind. I am still a student who has a lot of learning ahead. (;-)
Speaking of learning – third attempt to serve an eyelet and make a mouse;
SO
Back to the serving tool
Finished the first section for the eyelet. THIS time, after uncoiling the end strands I ONLY kept one strand, cutting the others off at the served end.
Above post I tried to keep all four strands. What was I thinking? Trying to “weave” the four strands back in was just not working.
So, inserted the one uncut strand through the other end of the served section rope to create the eye.
Glued and left to dry (note that the two end served threads have not been cut nor the “pulled through” rope strand. All left in place.
The served leftover threads were then spooled and knotted through the base of the eyelet to help visually fill the served “gap” that was left after pulling the one strand through the rope.
The “pulled through” strand was left because with my just previous attempt (no photo) with the pressure of the serving tool the eyelet opened up, Grrrrrr. Leaving the last strand (after gluing helped to add strength to the eye during serving)
Next used two carriage wheels to make the mouse. Ran it through the rope, attached four ropes.
This was done because I feared that when I got to trying to serve the mouse; the thread would just slip and not cover the mouse. The four threads should help to hold the thread in place as it was being served.
You will note that mid-way between the eyelet and the mouse there are to long stands of thread.
Unexpectedly as I was using pressure with my thumb and forefinger allowing the serving to progress, inside my closed palm the thread (from the bobbin) started knotting itself up. SO I had to snip the thread and start over mid-way.
NOTE the thread bobbin was then left hanging and gravity allowed it to keep twists unspooled.
Now reaching the first half of the mouse – All good so far, but then thread started slipping forward. Stopped--
Glued thread mid-way and started serving backwards towards the mouse from the other side. ALL ok.
Oh - used very little flat brown paint to “hide” dried glue marks, then rubbed the paint off with my thumb
What did I learn?
• Serving thread needs to be same color as rope (thanks Henry)
•Thread may bunch up
•Mouse needs more than four cross-threads (allowing for a more rounded look once served and covered.
• Need to improve the actual serving of the mouse bit – rope is ok but close up mouse is a bit “weak”
•Mouse might be a bit too big ??
• Don’t start serving when Admiral is around, she will always need my assistance for something, She did indeed. (:=))
Enjoyed this learning. And mate’s thanks for your advice!
Cheers
Michael
-
JanV reacted to mar3kl in Vasa by mar3kl - Billing Boats - scale 1:75
Thanks for the compliments, much appreciated. Here are some more photos of the topmasts, with the ratlines installed. These were way easier to deal with than those of the lower masts. The shrouds don't spread as much so it's easy to keep the ratlines tensioned properly. Here's the mizzen topmast:
And the main topmast:
And the fore topmast:
And on to the two topgallant masts. Same technique for mounting the deadeyes to the tops. As with the mizzen and sprit tops, the deadeyes are pretty close together, so it gets a little fiddly tightening the lanyards down. I also installed topropes, which route through the top and down to the main and fore tops below, where they are tied off on a lower deadeye.
Although the kit plans call for ratlines along the topgallant shrouds, I'm not going to do them. According to Fred Hocker, it was unlikely that they would have been needed, since everything to manage the topgallant masts was accessible from the tops. And the shrouds are so close together and the rigging so fine that I think it would be difficult to get a good result.
Next it's on to the topgallant stays, and then the standing rigging will be Done.
-
JanV reacted to fmodajr in Wasa by fmodajr - FINISHED - Corel - 1:75
Hi Jan,
I ordered the Corel Lantern from "cornwallmodelboats.co.uk"
If you go to their Web site you should find it.
Reference # AMNF022 CF22 Conical Period Stern Lantern with Side Bracket 30MM
My cost was 8.43 British pounds plus 2.02 pounds shipping
I hope this helps!
Frank
-
JanV got a reaction from GLakie in Wasa by fmodajr - FINISHED - Corel - 1:75
looks great.
do you have the part number from Corel for this nice lantern?
-
JanV reacted to fmodajr in Wasa by fmodajr - FINISHED - Corel - 1:75
Continuing on with the lantern:
I bought some thin styrene sheets and I cut out windows that matched the size and shape of the red ones that came with the lantern.
Next, using some plastic window screen, I glued the screen to the windows using the Testor clear glass glue. (Thank you Mark for suggesting this glue!!)
I cut away the excess screen and glued the windows to the lantern.
Finished lantern mounted onto the stern with the supports
Well thats it on the ship! It's been a long a fun journey.
My next step is to finish the base for the case. I will begin to stain and finish the base and assemble it.
I will post some photos soon.
Thanks again for the "likes" and the visits to the log!
Frank
-
JanV reacted to md1400cs in Wasa by md1400cs - FINISHED - Corel - 1:75
George,
Thanks for the link. The debate has to also do with actual tarring or not. The Vasa was not tarred when it sank. That was to presumably be done after all fittings were installed, and it was readied for sea duty. Also as you noted none of the Museum's lines are tarred. Though the main mast stay is served.
Henry, yes of course, that makes sense. My confusion has to do with how actually lines were served back then. Did the craftsmen pre tar the serving ropes before spooling them to the shrouds? Which is why as asked that question - I just don't know about those details. In any case I will use brown thread.
PS: My wife did not have any so I grabbed black ha ha
Thanks for adding your thoughts.
-
JanV reacted to mar3kl in Vasa by mar3kl - Billing Boats - scale 1:75
Next up, the fore topmast shrouds. These were straightforward, just more of the same. I also tied off the futtock shrouds and added ratlines for them
The remaining topmasts were both more or less the same as the fore topmast. I did top ropes for both, with the rigging identical to that of the foremast top rope. The main top rope falls through the main top and then along with the main yard halliards through a cutout in the deck. On the real ship there was a four-sheave knighthead on the deck below; on the model there's a small false floor and I'll glue a block with four holes to it.
The main and mizzen topmast shrouds are angled to follow the angle of the tops.
-
JanV reacted to Sjors in HMS Agamemnon by Sjors - FINISHED - Caldercraft/Jotika - 1:64
The chain and dummy gunport lids on the stern are on it.
Now I can start the rigging....
The first shrouds and lanyards are on the ship .
Also done the pendants on the mizzen.
It was a long time ago that I did shrouds so it takes time before it was right.
Re-do it 3 times before I was satisfied.
Now I can go to the main mast.....
Sjors
-
JanV reacted to mar3kl in Vasa by mar3kl - Billing Boats - scale 1:75
First step in installing the sprit topmast was installing the top. It took me a while to figure out a good way to mount the deadeyes. The original ship seems to have had topmast deadeyes with iron strops, and iron futtock plates below the top, to which the futtock shrouds were attached. The kit plans were as usual useless, with no information at all. It looks from the kit photos like their modeler made a combination futtock shroud and deadeye strop from rigging line, but it's hard to tell.
I decided to fabricate combination strops and futtock plates from a single length of thin annealed copper wire, finished in black. I took the wire through the top, then made a small eyelet at one end for the futtock shroud attachment. Took a few tries to get it to look decent, but I'm happy with the result.
Once the top was mounted, I mounted the topmast, which I had built a while back. Then, on to the shrouds and ratlines. The deadeyes are quite close together, but there's room to get everything installed. I used 0.3mm scale rope for these shrouds, and 0.2mm scale rope for the ratlines.
The futtock shrouds are supposed to terminate on ring bolts mounted to the bowsprit. I thought that looked too clunky, so I just drilled fine holes through the bowsprit and ran a single shroud down, through, and up the other side.
And then the backstays. The book "Rigging of ships in the Days of the Spritsail Topmast" (a very useful source for me) says that this is where the 17th century rigger really let themselves go wild, and the author is right. There are three stays, each with an eye in the end, and just like the larger mast stays, looped through the eye and down. I didn't bother creating a mouse to prevent slippage. All three end with a single small block.
Then the crowsfeet, used to distribute the load of the sprit top backstays on the foremast stay. There are three sets of eight; I ran each set through a 4-hole euphroe tackle that I fabricated. The ends are seized to the foremast stay with clove hitches. I needed to be very careful to maintain even tension on them before tying them off. Here's where it's also important to have put a fair amount of tension on the foremast stay, otherwise it'll pull up when you tension the crowsfeet.
Almost done. You can see that one of the euphroes is seized to the end of a running line, and the other two are seized to small single blocks through which the line zigzags, between those blocks and the blocks on the end of the stays. The far end of the line is seized to the foremast stay. By carefully adjusting the tension on the running line, you can get the crowsfeet also properly tensioned.
And the final result. I over-tensioned the crowsfeet intentionally, then brushed them with very diluted white glue, and then removed the extra tension. The glue let the lines stay rigid without undue tension on the foremast stay. All in all I'm pleased with the result. The kit plans show something similar, but without euphroe tackles, and with fewer crowsfeet. What I did matches Clayton's model and various period diagrams from l'Art de Batir and the rigging book I mentioned above..
-
JanV reacted to mar3kl in Vasa by mar3kl - Billing Boats - scale 1:75
And on to the mizzen. The mizzen ratlines were easier than the fore and mainmast ratlines; not only were there much fewer of them, but the shrouds weren't as steeply angled top to bottom as on the other two mainmasts, which made it easier to get uniform tension on everything. Here's a photo of the ratlines before trimming:
Some more photos of the main and foremast ratlines
And finally a picture of all three masts. Looking at the photo, the ratlines look so innocuous for the huge amount of work that went into tying all those little knots. I calculated and I think all the remaining topmast ratlines are about the same as both sides of the mainmast.
The horizontal spacing is a little less than 6mm, which scales out to about 16 inches; according to the various sources I've looked at, that's in the ballpark.
Next step - the sprit top, topmast, and backstay...
-
JanV reacted to mar3kl in Vasa by mar3kl - Billing Boats - scale 1:75
Thanks for the compliments. I've gotten much useful information from you folks, so hopefully I can return the favor with lots of photos. Installing the rigging is a lot of detective work; the kit instructions are useless except for the most basic information. Much of the diagrams are missing information, or have incomplete routing, or are just plain wrong. I've ended up having to use a combination of the kit plans (last resort), existing models (Clayton's is very good for this), input from Fred Hocker at the Vasamuseet, and various treatises on period rigging. The result is almost certainly not completely correct, but it's as close as my skills can get it.
On to the mainmast ratlines. These were mostly endless clove hitches, looking better as my skills improved. What's difficult about the mainmast is that the shrouds spread a lot at the base, and the ratlines tend to get wonky the more space there is between shrouds. Lots of problems maintaining tension.
One slightly tricky aspect is that the rake of the mast, the main top, and the channels means that the ratlines look odd if perfectly parallel to the deck (which I assume a sailor would want for practicality). I ended up compromising, raking them up and aft just enough so they didn't look strange.
-
JanV reacted to mar3kl in Vasa by mar3kl - Billing Boats - scale 1:75
Sorry for the long absence. I've actually made good progress on the rigging, just taking forever to get photos uploaded. It took a long time to do all the ratlines - in the 10 years or so since the previous model I built I'd forgotten how many knots there are! It took a long time to get clove hitches into muscle memory, so the first side of the foremast shrouds isn't quite as nice as I'd like.
I experimented with the best way to proceed with the ratlines - top to bottom or bottom to top. Turns out top to bottom worked best for me; bottom to top caused too many issues with tension of the shrouds as I worked my way upward. In any case maintaining the right tension was for me very difficult in the beginning. I ended up having to undo several rows because they were causing curves in the outermost shrouds, or causing lines above them or below them to hang oddly. I found myself having constantly to run a straight-edge along each shroud to make sure odd curves weren't working their way in. Then there was also constant measuring that each row was level with the row below and above, that each of the lines hung the same way. All in all a very fiddly task that I don't want to do again!
The kit provides no indication of a futtock stave at the top, but other rigging sources indicate it's there. I took a toothpick, drew it down so it was thin, and then attached it with thread at each junction with a shroud.
The finished result. I brushed the entire rows with white glue heavily diluted with water, just to make the lines hang as nicely as possible.