MORE HANDBOOKS ARE ON THEIR WAY! We will let you know when they get here.
×

Rail and Tie
-
Posts
63 -
Joined
-
Last visited
Content Type
Profiles
Forums
Gallery
Events
Everything posted by Rail and Tie
-
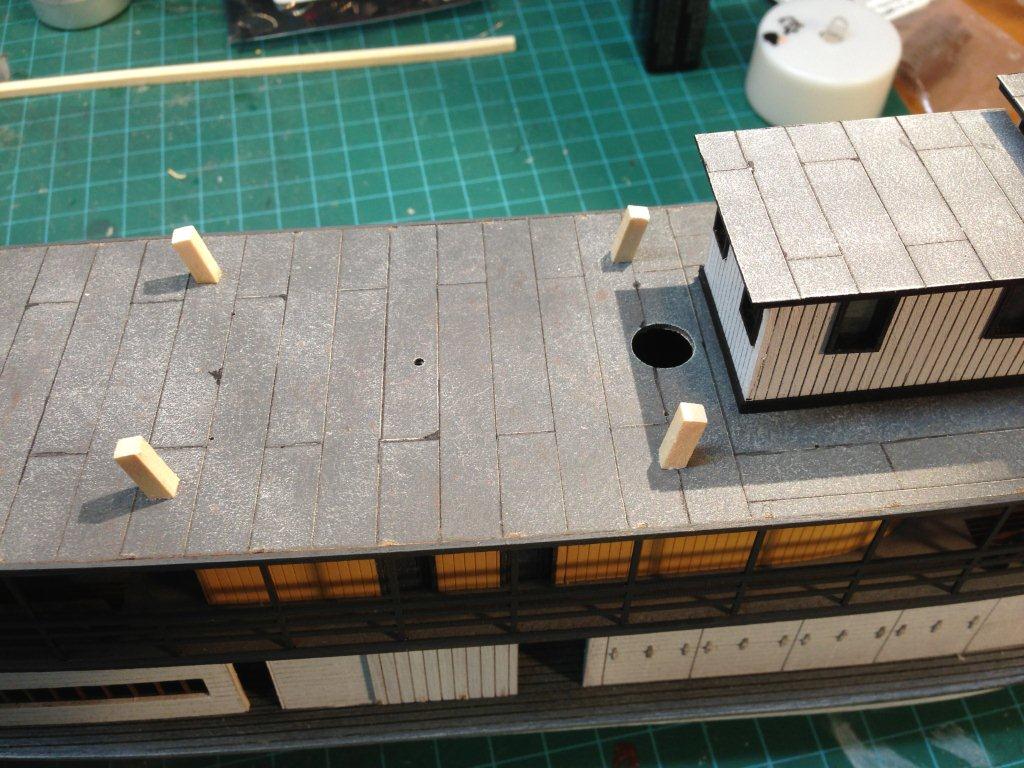
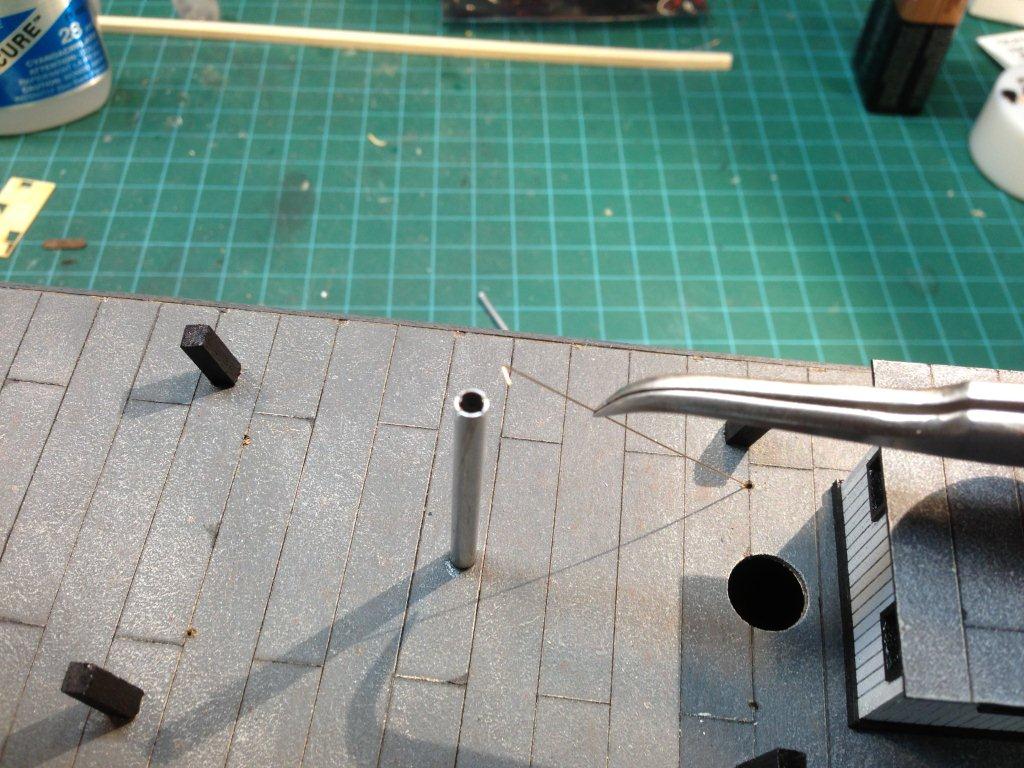
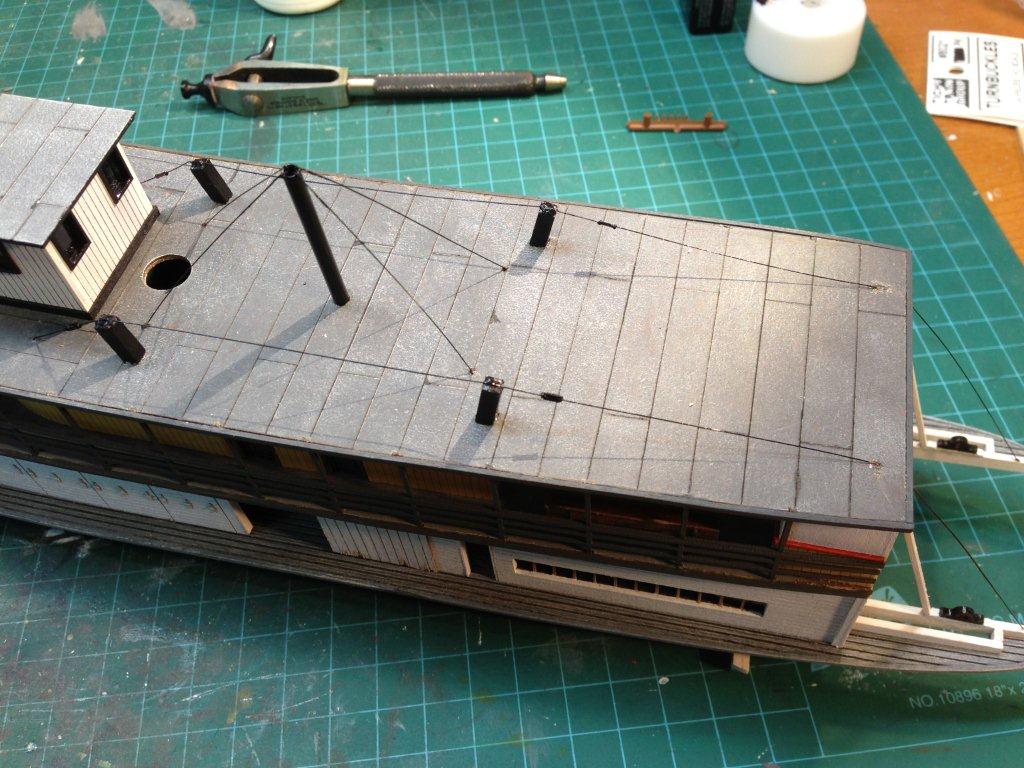
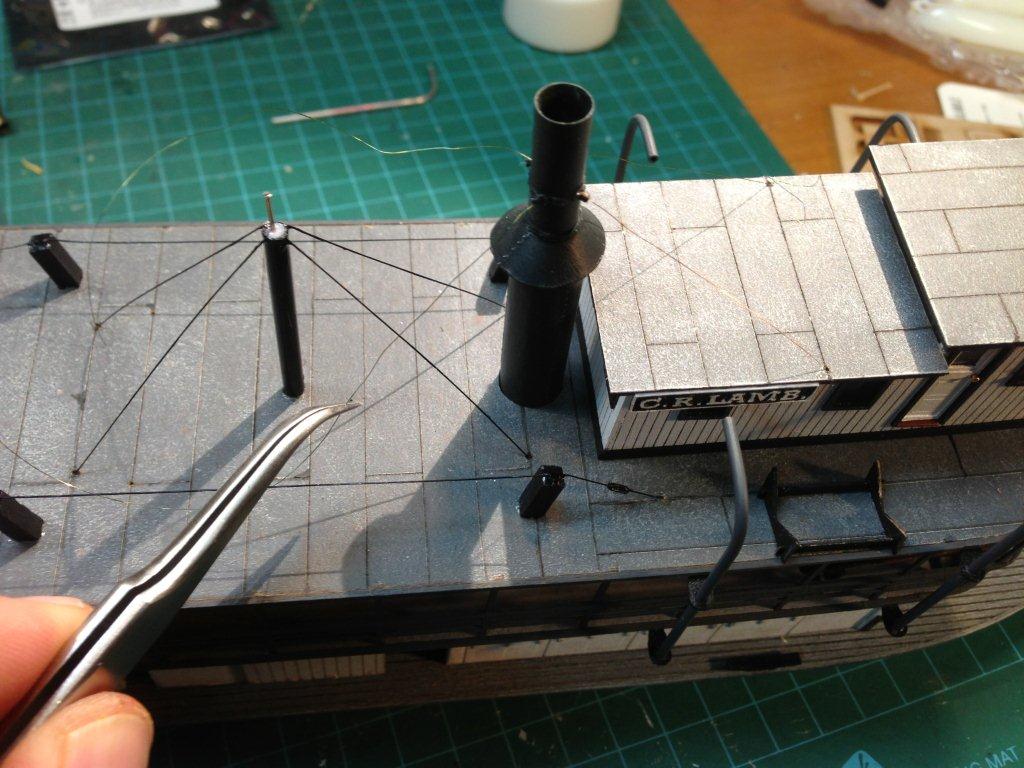
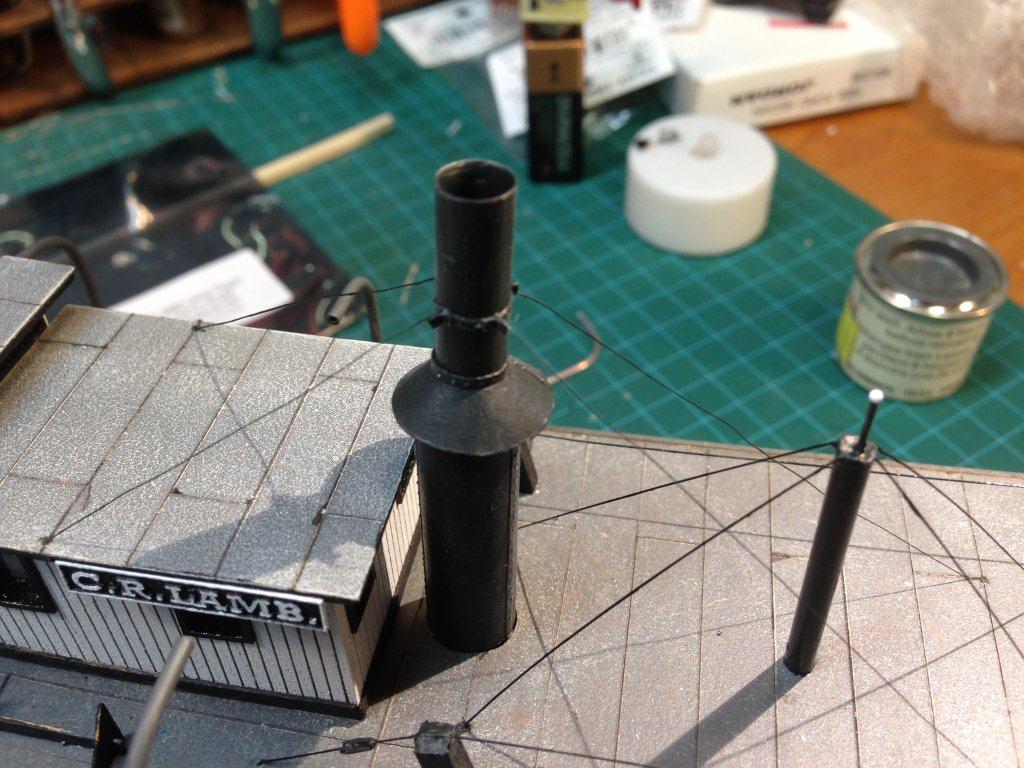
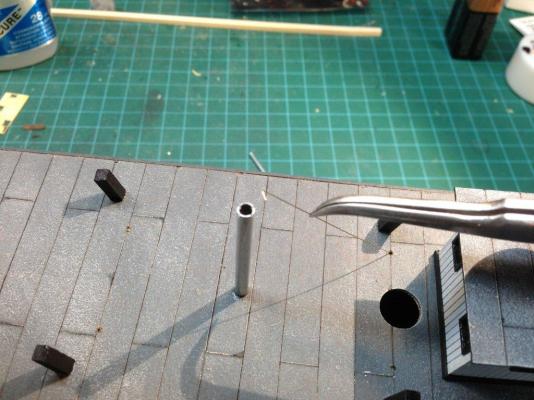
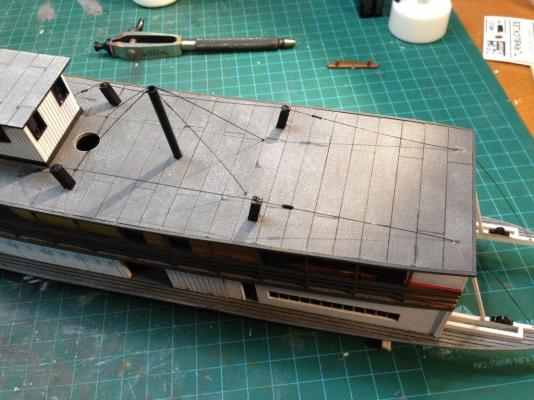
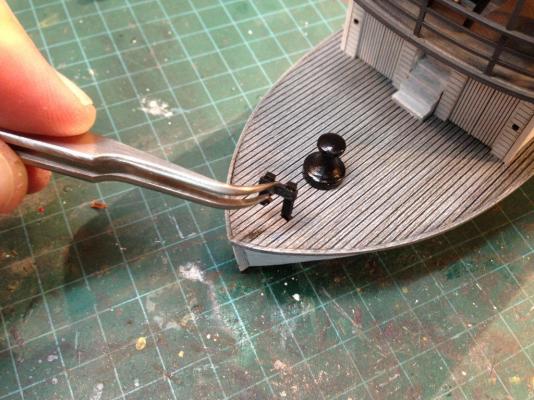
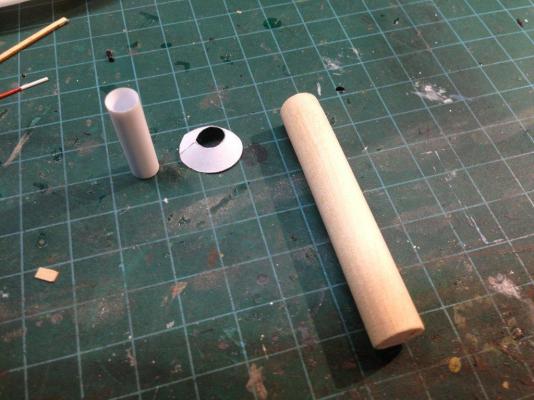
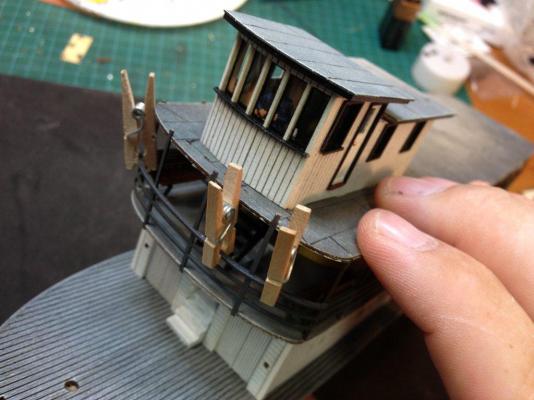
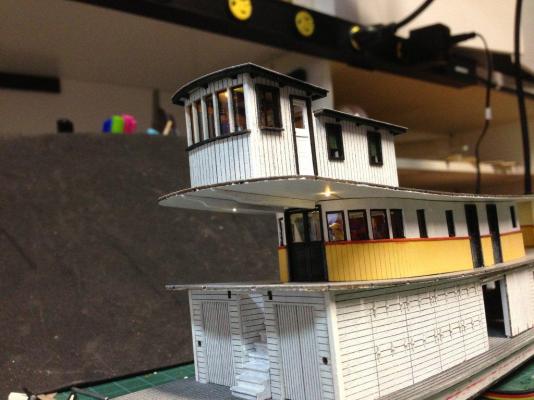
 Next up is the king and queen posts (I think I got the terms right!): Tension posts are installed at a 10 degree angle to the top deck. These represent the thru beams that would have extended through the decks into the hull. Used a 1/8" dia aluminum tube for the queen post and used some 0.008" Phos Bronze straightened wire for the hanging cables. Pre bent and glued in place with CA Cement. I used some Tichey turnbuckles on the 008 wire and they turned out pretty good on the tension cables. Front deck details added. The smoke stack is built out of a paper cone, and tubing/dowel. The dowel is covered with paper, glued on some stips of paper for strapping and some white glue dots for rivet detail. Magnet wire was used for the stack tiedown wire. This wire is finer than the 008 bronze wire I had so I used that for a size difference. Lots of wires and cabling clutter up the top deck quite nicely.


- 32 replies
-
- 1
-

-
- interaction hobbies
- c r lamb
- (and 1 more)
-
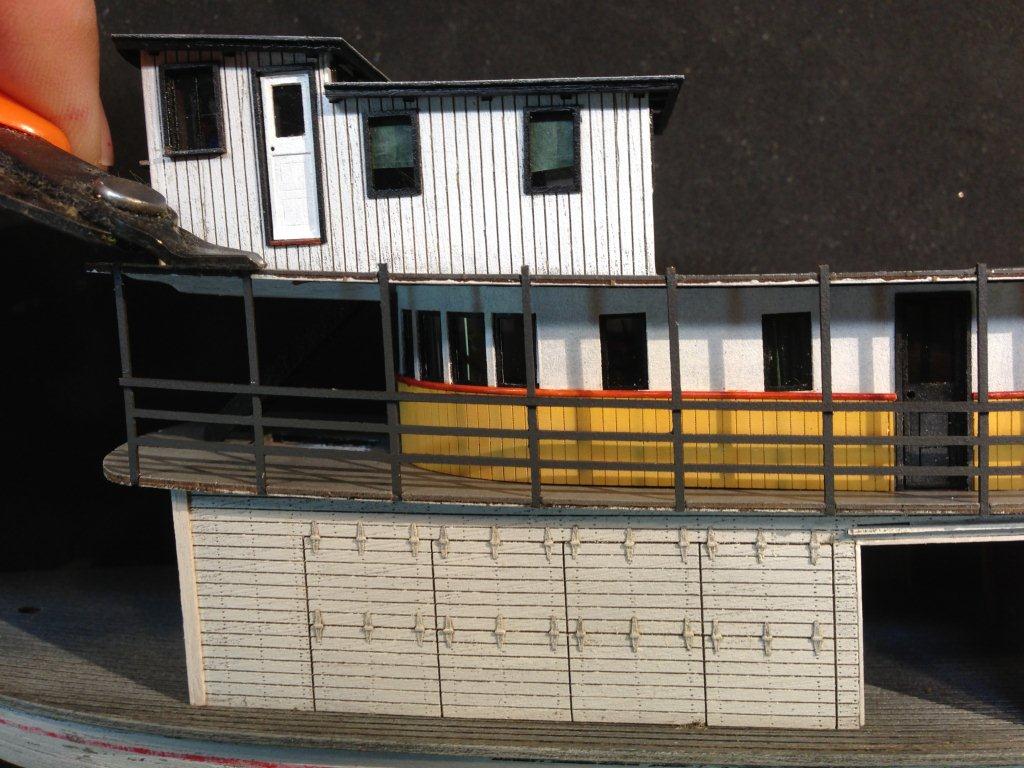
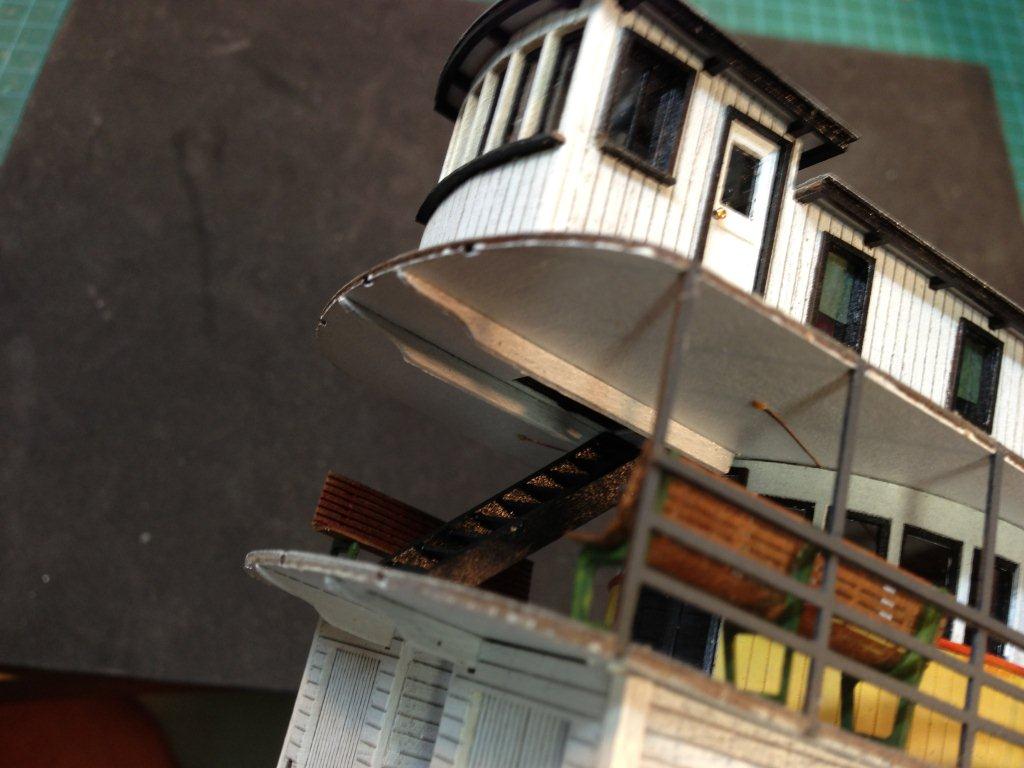
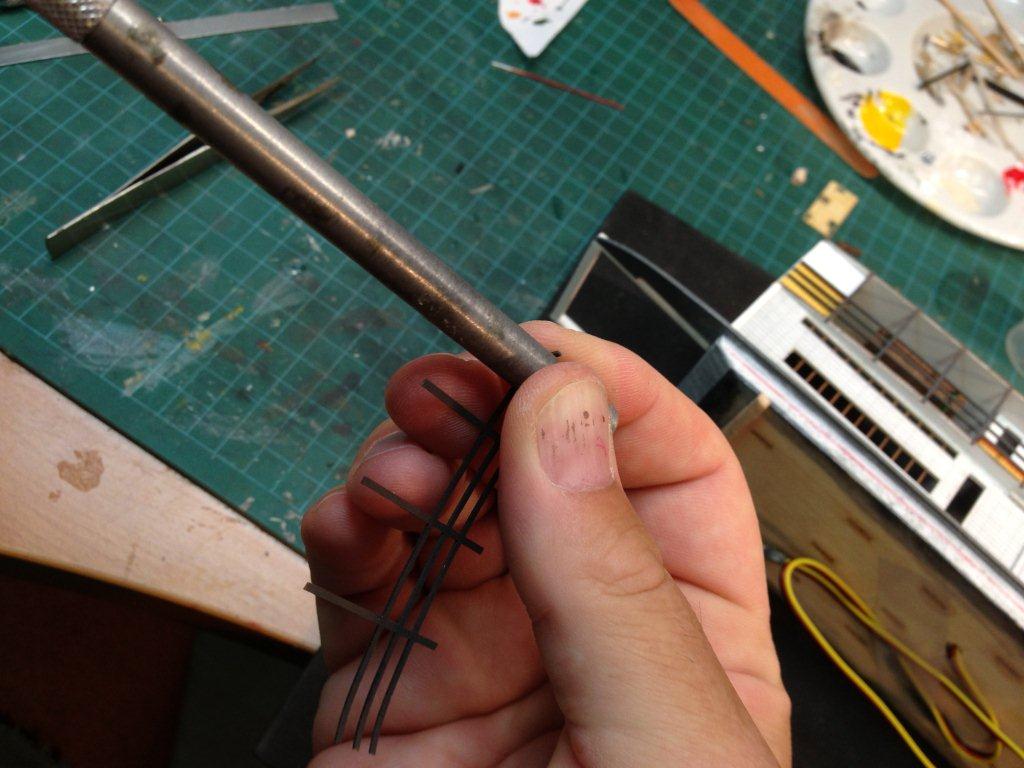
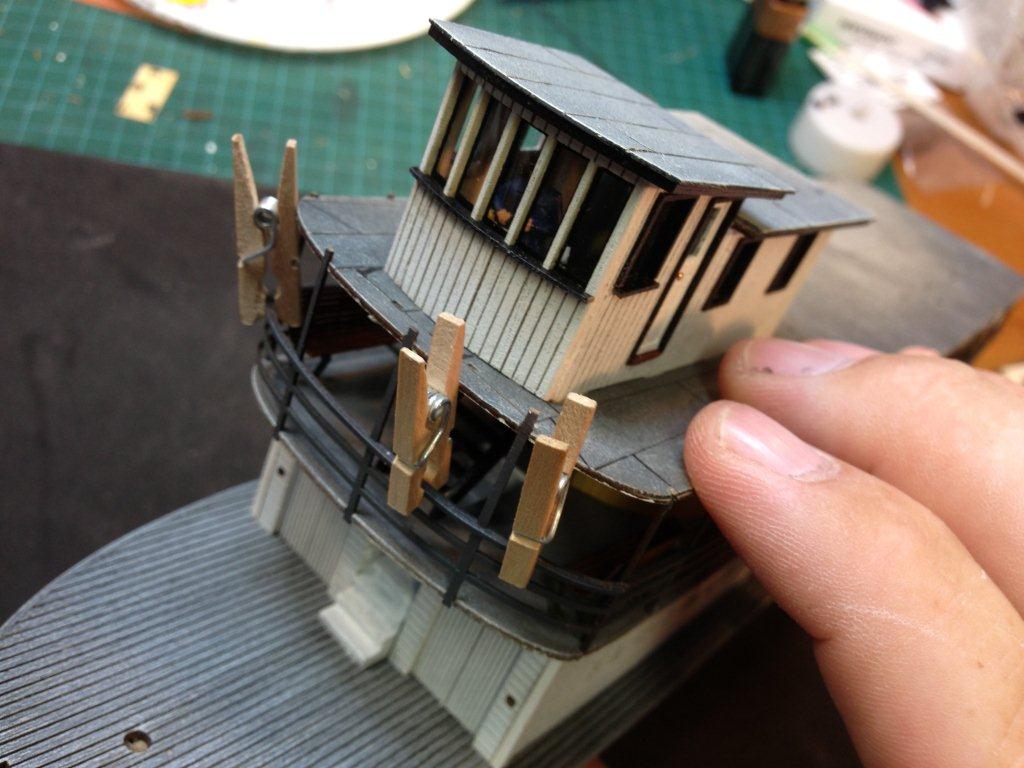
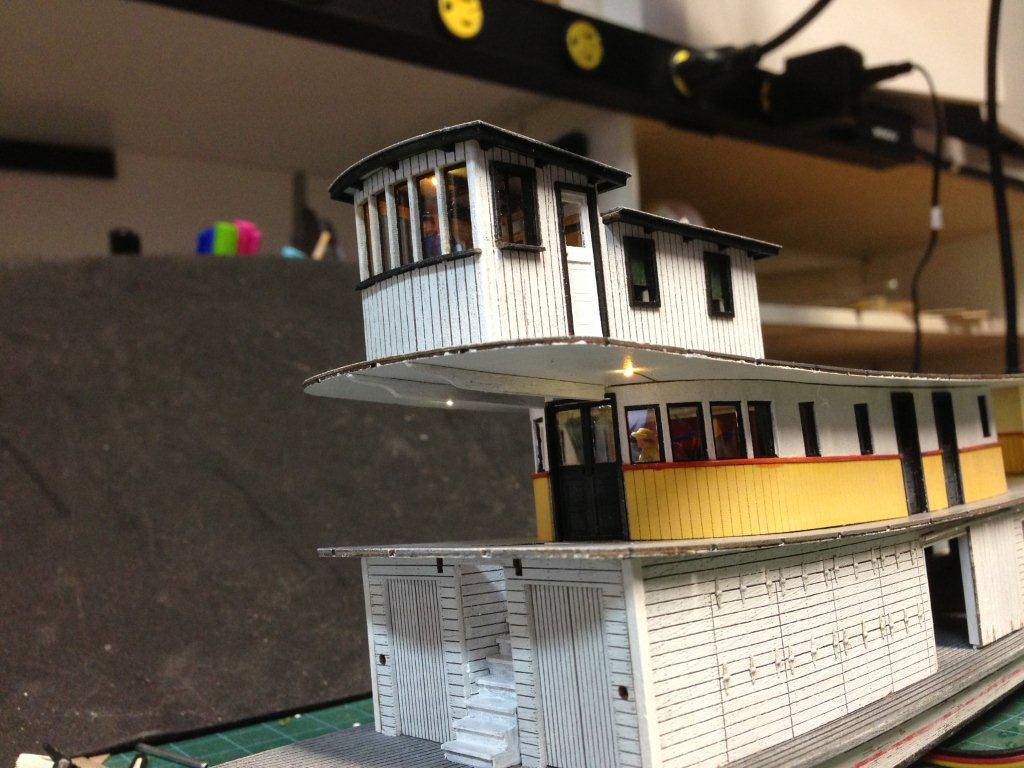
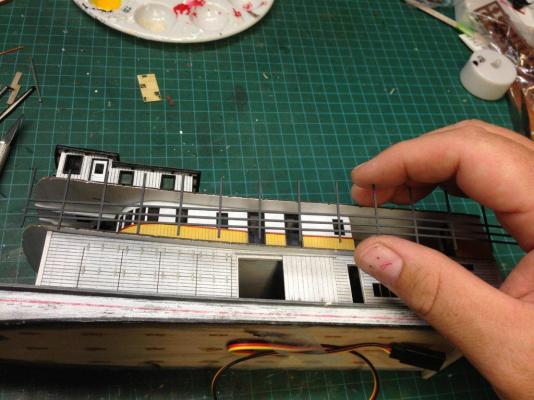
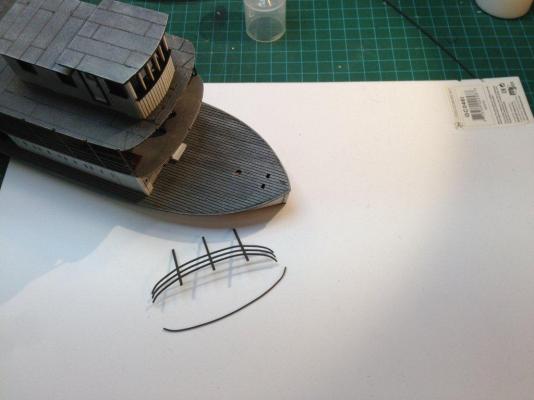
So the next step is doing the passenger deck railings. I designed this model in 3D cad so having the railings cut out as one piece that follows the deck curves was fairly straight forward. The simply fit into the notches in the deck and glue in place. The front railing is a bit more tricky as it needs to be curved by rolling the railing around a radius bar. Also installed the bridge stairs and some benches before closing up the railings. A bit of fitting of the railing and the top rail doubler and getting the curves right. The RIB material is fairly easy to form as compared to wood or plastic. After the railings are installed, a 1/16 X 1/32 strip is wrapped around the top and bottom deck edges to finish the form. I simply soaked the strips in Windex for a few minutes and curved to shape on the decks and clamped to the edge and let dry in place. Then using CA, glued the strips in place.


- 32 replies
-
- 2
-
-
- interaction hobbies
- c r lamb
- (and 1 more)
-
Thanks Bob, and all! I have been learning a lot from the builders on this site. Some really fantastic work. I like to learn from other modeling hobbies as it gives on a great perspective on our own hobbies. My problem is that I just like everything that is miniature! Too many models and not enough time! Darryl
- 32 replies
-
- 1
-
-
- interaction hobbies
- c r lamb
- (and 1 more)
-
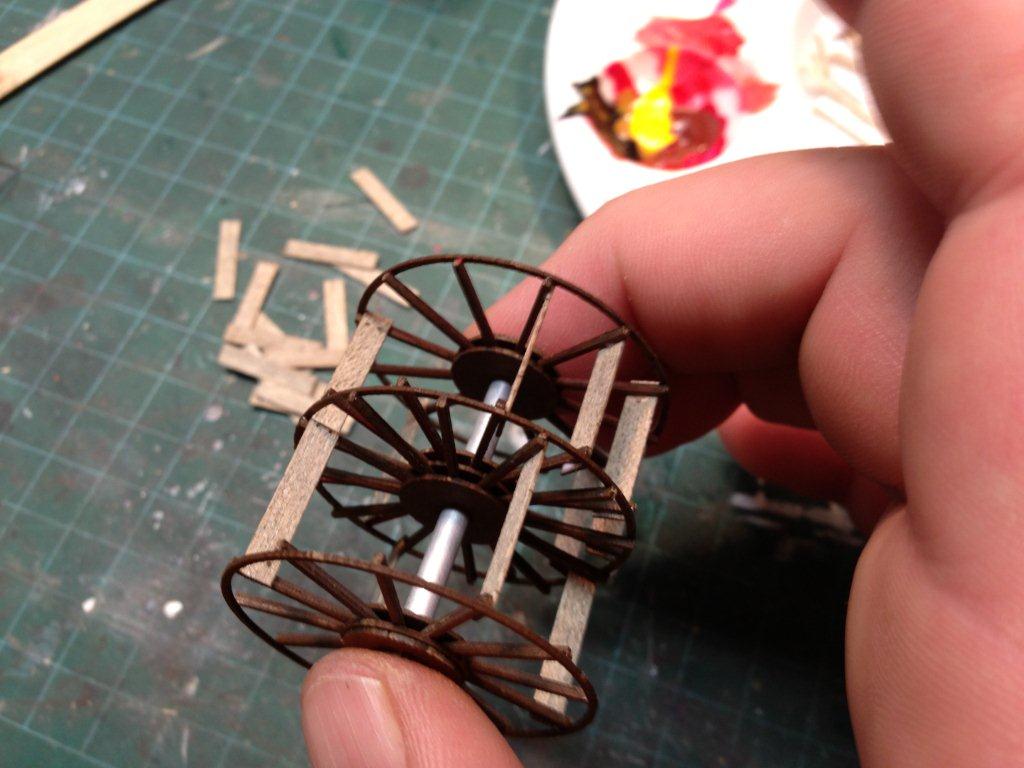
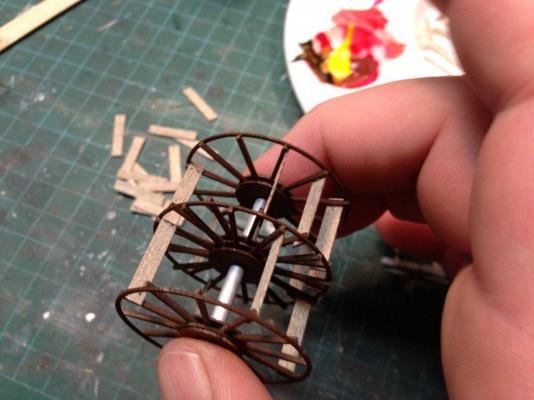
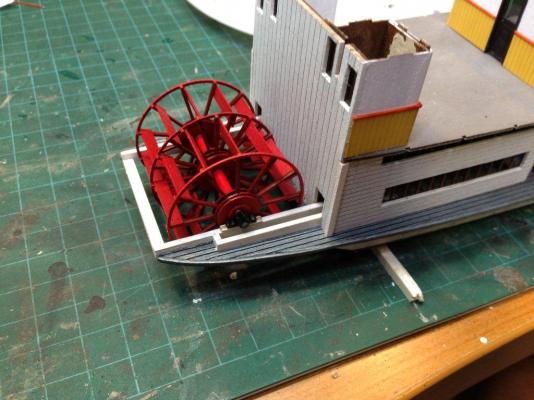
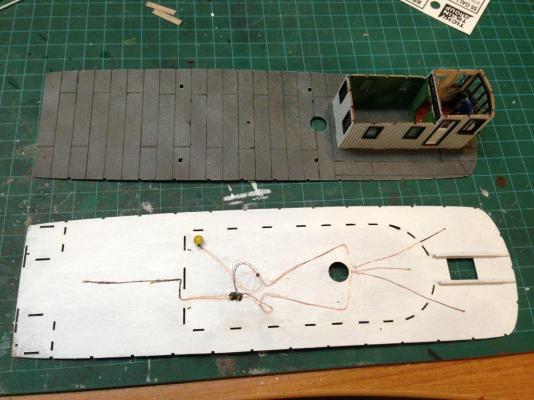
The paddle wheel assembly has 50 parts to it and I am not sure if I will add the 96 bolt heads or not! Paddle axle bearing blocks and support beams Detailing the Tarpaper roofing joints. A view of the LED wiring (my wiring needs some work!!)

- 32 replies
-
- 2
-
-
- interaction hobbies
- c r lamb
- (and 1 more)
-
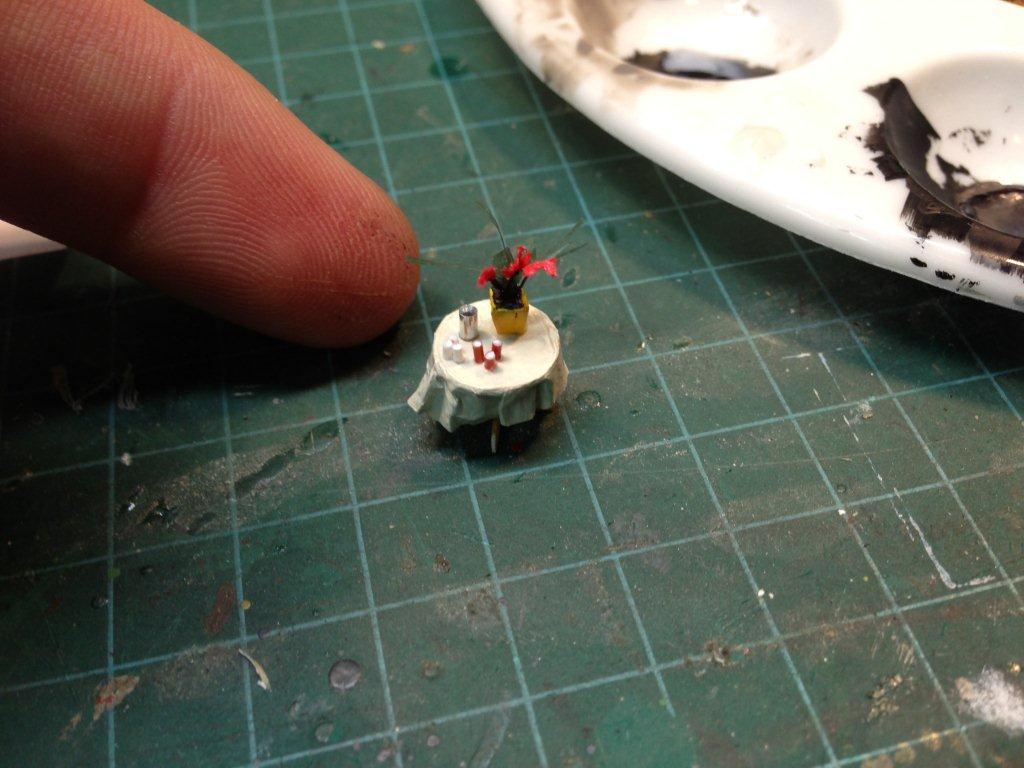
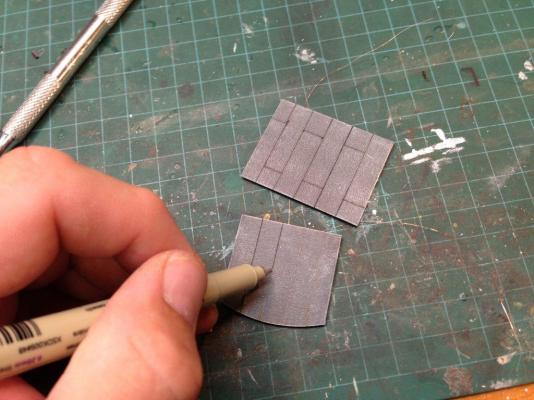
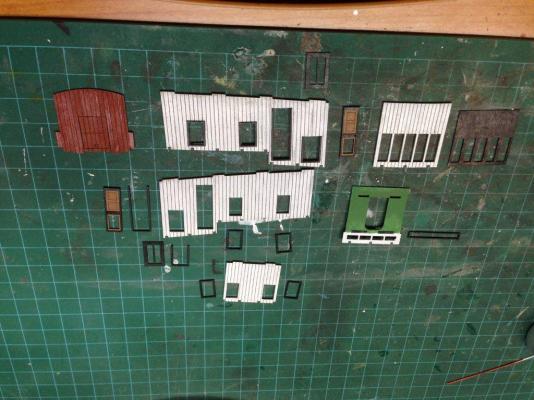
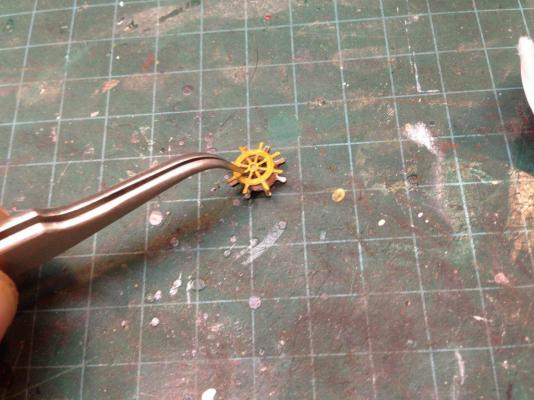
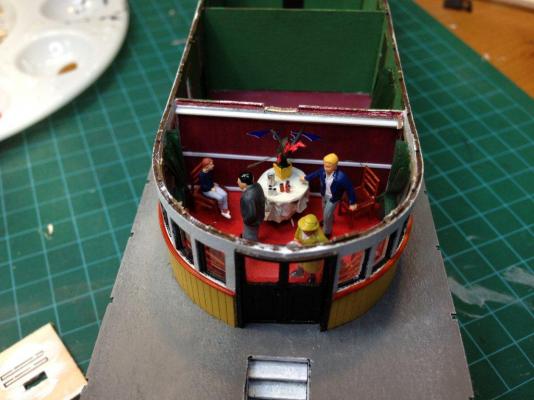
It has been a busy month with the kitting business, so this build is a bit behind. Here is a quick catch up... Parts for the ships bridge and masters quarters. the 3D laser engraved ships wheel Refreshment table and flowers! The crumpets and brandy are being served! Some deck lighting using some micro LED's Seems the blinds were not drawn!


- 32 replies
-
- 2
-
-
- interaction hobbies
- c r lamb
- (and 1 more)
-
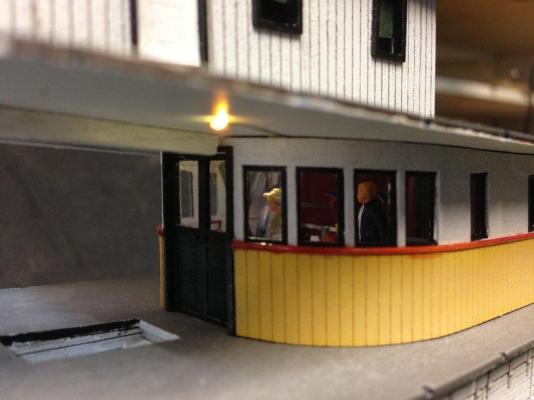
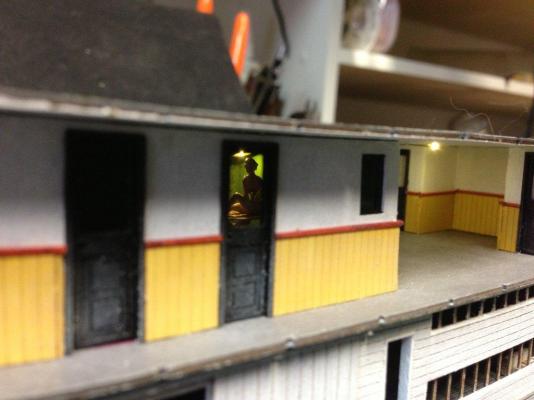
Thanks for the comments folks. the more I look at this forum, the more I find on modeling tips. I love the woodworking and attention to detail that consumes all here!! I decided to add a bit of detail to the interior of the boat. The parlour room is the most visible so I will add some interior items, chairs and probably some people before I close it up. I will also add some LED lighting to the room and the deck. To install the window glazing, I usually use Canopy cement, but for the parlour windows being curved, I used some double sided tape strips (Scotch brand) to hold the glazing in place and then spotted some glue along the edges after it was installed. Some dividers were added to block light from the rooms. Also seen is the yellow wainscoting that is added to the cabin walls. I will add a chair rail in after the deck is complete. Toilets are completed I made up a kit of simple chairs to add to the parlor room. Painted and decaled back wall of the parlor room, some curtains, table and chairs. I will probably add a pot and some flowers and maybe a floor plant or two before adding a few figures to the room.


- 32 replies
-
- 4
-
-
- interaction hobbies
- c r lamb
- (and 1 more)
-
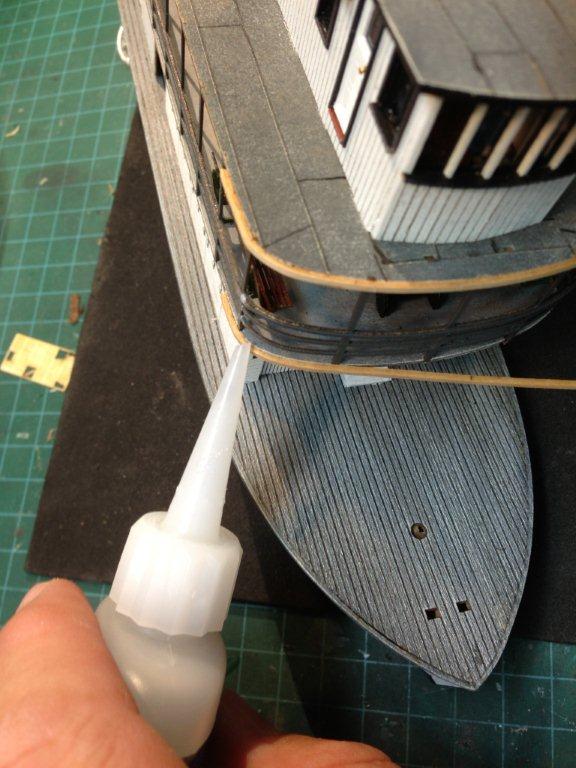
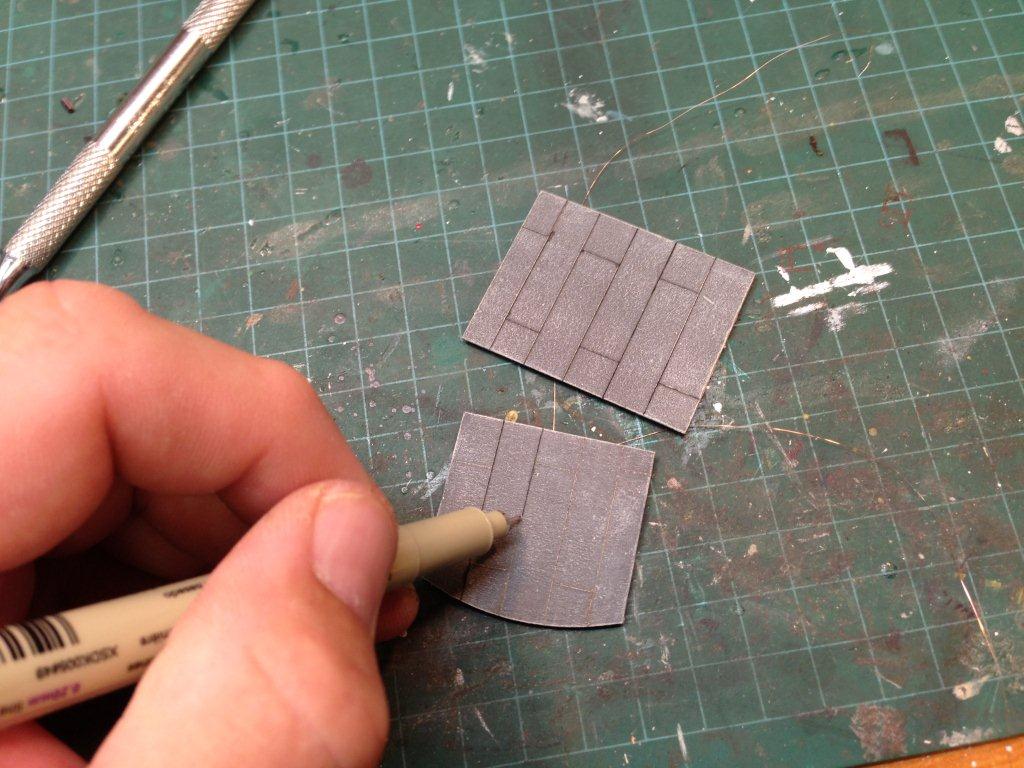
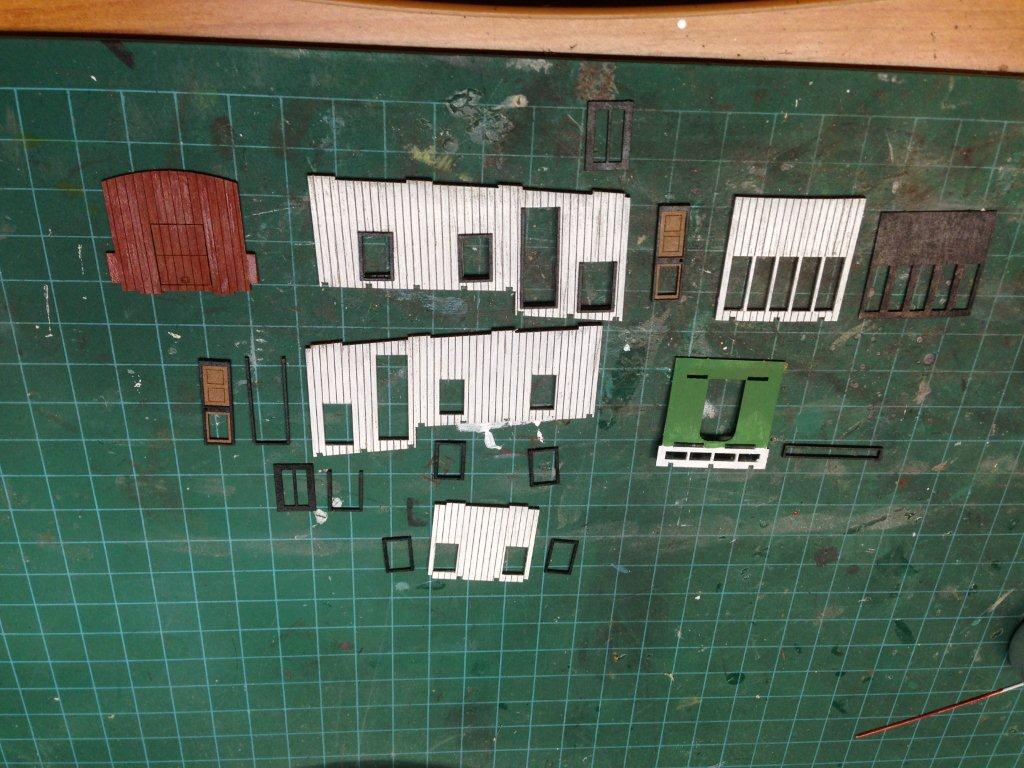
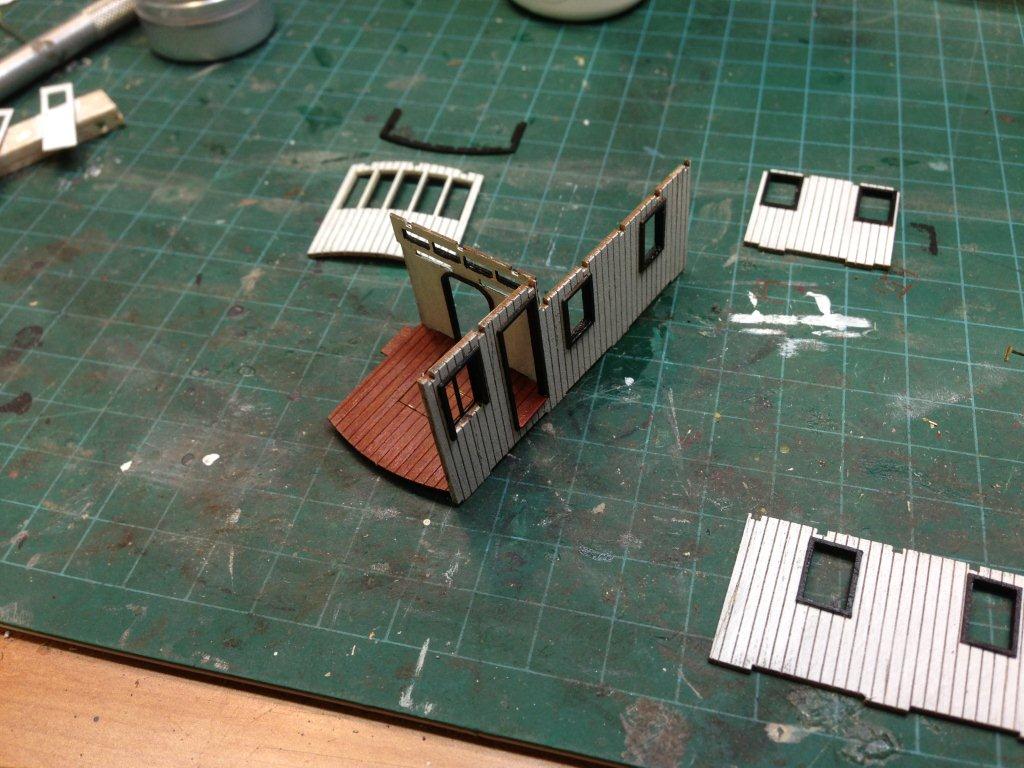
The laser cut and engraved walls are treated much the same way as the hull with a bit more grain enhancement using a fine wire brush between dry brush coats. The colors will be toned down after the building part is complete using washes and chalks. I did up some strap hinges and 3D engraved them along with the ships wheel and some other details. I applied the hinges (all 48 of them to the cargo / steerage doors on the front half of the main deck sides. In the model railroad world many modelers apply nail holes for added detail. I did this to this build while I usually don't do it on buildings as it is over done. I think I like the effect, though it might look over done in this scale. The completed main deck looks pleasing and the added door jams provide another level of interest. I like to design my deck floors/ roofs in to layers to accomodate the tabs needed at each level to lock things together. I was contemplating deck joists and beams, but at this scale and the fact that the exposed area is very small at the end of the day so I elected no to add them. Many of these ships had their decks and roofs in tar paper and painted canvas. I have had problems finding details on how the decks were coated. The main deck of the CR Lamb was planked and painted grey. The upper decks are in question?? The promenade deck is doubled out of Resin Impregnated Fibreboard which is painted first and then laminated to provide crisp paint lines between the layers for window and door frames. The material is rolled to get it to curve using a piece of small round bar. The promenade room carpet is painted deep red and coated with matt varnish dabbed in 4 coats to go dead flat and looks like carpet close up. I'll add some interior walls and detail to this room before putting the roof one it. Will probably light it with LED's as well.


- 32 replies
-
- 7
-
-
- interaction hobbies
- c r lamb
- (and 1 more)
-
New to the forum and just went through your build thread! Fantasti, inspiring work in 1:90th!!
-
To get the hull to have that aged appearance when the boat is complete, I start by applying 5 or 6 coats of an Alcohol India Ink wash until the surface is built up and chalky. This will assure that the paint does not stick in spot on the next steps. Then I dry brush light grey in alternating directions on the hull in very light and dry strokes. Also I dab a slightly wetter brush to build up the paint along the uneven surface of the plank joints. Then using some scotch tape I rub it onto the mostly dry surface and pull back to remove some of the paint to provide a worn and badly in need of repair, rotting hull! The effect is over done somewhat, but the end result when looking from a distance is a ship that has seen service for 30 years of it's 15 year planned life!


- 32 replies
-
- 7
-
-
- interaction hobbies
- c r lamb
- (and 1 more)
-
Aft hull planking with 1/16" X 1/16" basswood. Love these little clothes pins I got from the dollar shop! Messy planking to give the aged and unkept look of the fullsize after 26 years of service and abuse. (please don't be appauled by my sloppy work here!!) Carving down the planking before sanding. Planking is finished!!


- 32 replies
-
- 2
-
-
- interaction hobbies
- c r lamb
- (and 1 more)
-
Thanks Ian, I am glad to be aboard and you guys do some fantastic work!! Once in a while, you hear them called sleepers here as well!! Also timbers...
-
I will attempt to get things up to speed on where I am at today in the next couple of posts. I designed the model in 3D cad using Rhino which is a great 3D modeling software and fairly easy to learn. This is a waterline model and meant to find its way onto a layout or diorama. I did up a design for the hull using a series of frames and keel strip (s). I cut these out on the laser. Sanding the frames to match the curves for planking. Sanding the top to match the deck. Gluing the 1/16" basswood deck to the top of the hull. Remarkably rigid after this step.


- 32 replies
-
- 3
-
-
- interaction hobbies
- c r lamb
- (and 1 more)
-
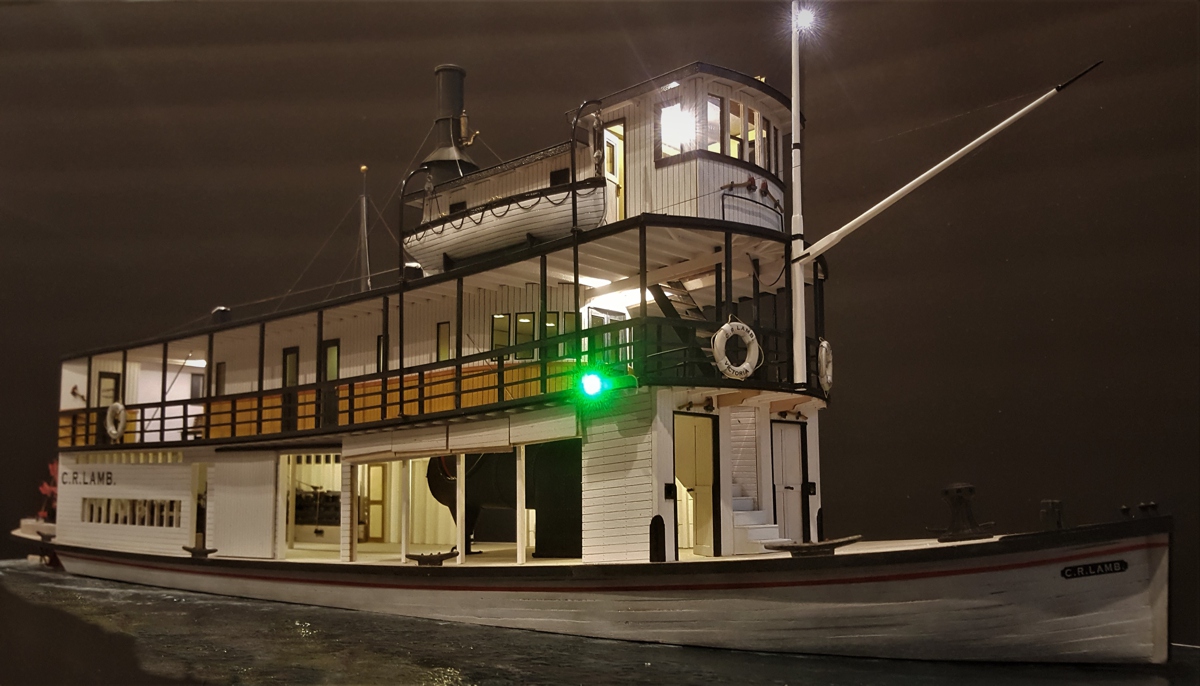
Ahoy All! This is my first build here on MSW. Most of my recent work has been in the model railroad world of structures kits and details, but I thought I would share this prototype build of an upcoming kit that I am designing. The Arrow Lakes Lumber Company commissioned the construction of the CR Lamb in 1907 for $23,000. She was built by G.B. Ward, a boat builder from the Maritimes, working in Kamloops. Constructed with a wooden hull, she was 91 feet long and twenty feet wide, with a draught of four feet. The vessel had two 34 horsepower engines made by the Schaake Machine Works in New Westminster for a gross weight of 192 tons. She spent more than two and a half decades serving the logging company and residents fo the Shuswap Lake before being bought by Captain William Louie. He ran the boat well into the 1930’s providing cargo carriage, passenger services and even moonlight cruises and dances on-board. C.R. Lamb was decommisioned in 1936, her hull filled with gravel and now rests underwater in the Thompson River at the end of 8th Avenue in Kamloops BC. As an interesting aside to the CR Lamb story, Captain Louie who had captained the CR LAMB for 15 years and then bought the CR LAMB and continued service into the 1930's with the boat, was of Chinese decent, but born in Canada. He took a lot of flack from government and press when he forced the Waterways commission to keep the opening span bridge working on the Thompson River long after the government had deemed it not necessary for shipping traffic. He was somewhat of a unspoken legend in these parts, keeping the steamboat working well past its prime of the early teens of the century. He even converted the upper deck of the ship to a dance floor and had bands and parties under the stars on the lake. Wow, that must have been a great time!! I did do up a 1:160 version of the model which is a bit less detailed compared to how this build of the 1:87 version is going.


- 32 replies
-
- 1
-
-
- interaction hobbies
- c r lamb
- (and 1 more)