


shawn32671
-
Posts
296 -
Joined
-
Last visited
Content Type
Profiles
Forums
Gallery
Events
Posts posted by shawn32671
-
-
I agree, hindsight is 20/20 though, I hadn't even considered breaking one so buying at least 6 so lots of extras lol
-
I finally got a chance to run the airboat today on the snow in the vacant lot I own next door to my house and boy howdie...zipbang she really zooms along. But after 4 flips upside down however, I ended up breaking the only propeller I have so she's docked until I can order several more. This is going to be so much fun on the pond nearby this Spring....If we ever have Spring, stupid snow.
-
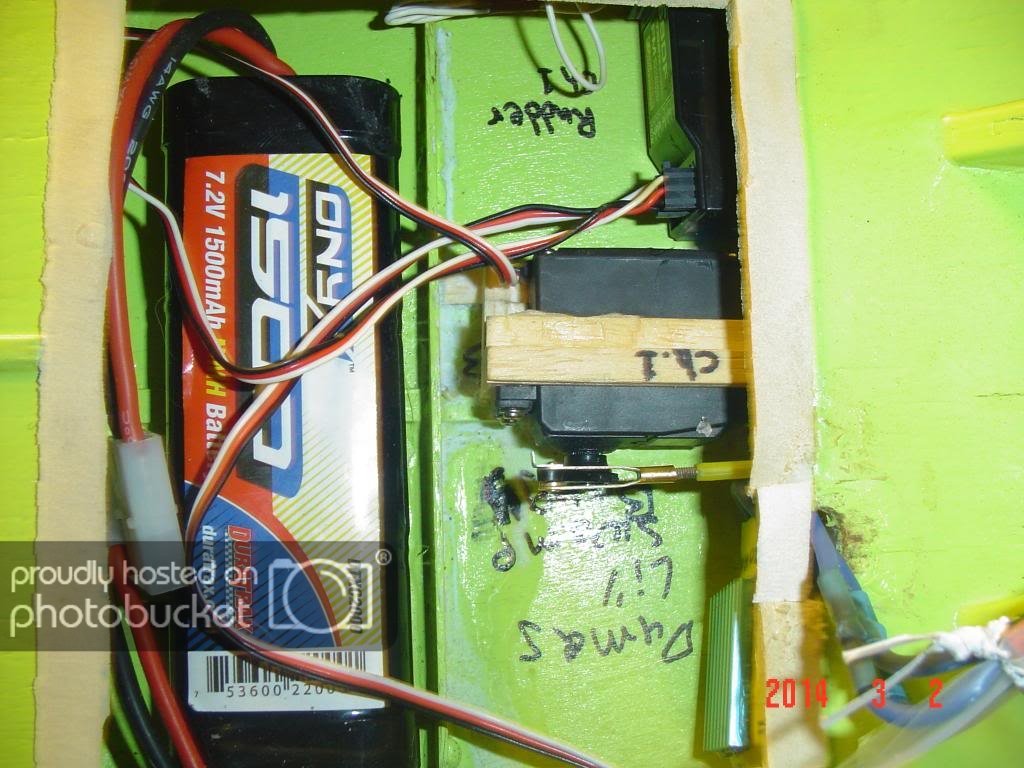
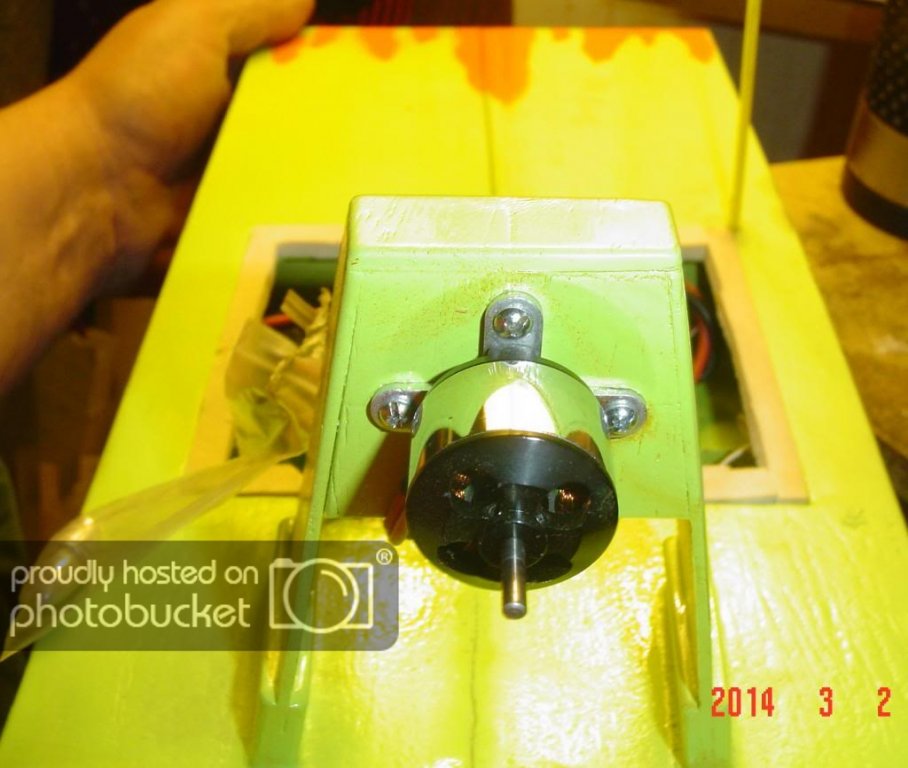
Thanks, I did end up reversing the red and black wires on the electric speed control and it now runs correctly....too late in the day to go try it out outside but it moves well across the carpet....This is going to be super fun on the pond this coming Spring.
-
This following is actually a copy of a post from today I had made to my Facebook page in follow up to a build progress report I had started on Facebook before I had joned this forum. I thought it'd go well here...Although this doesn't show the whole build process, I'm sure you all get the idea of what went into building this and even though it's actually an R/C kit build, I hope no one minds.
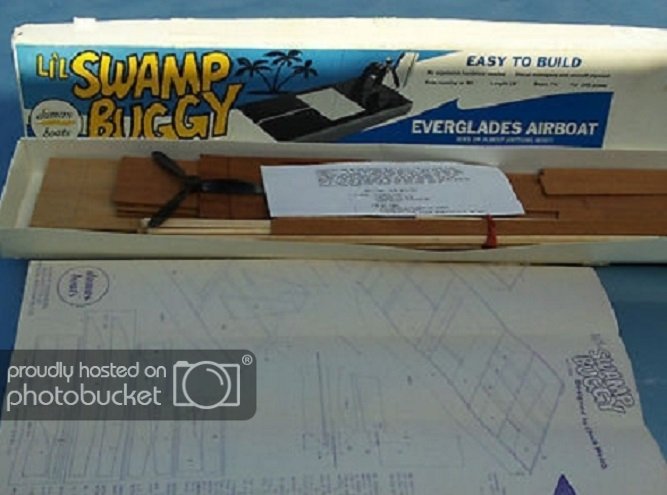
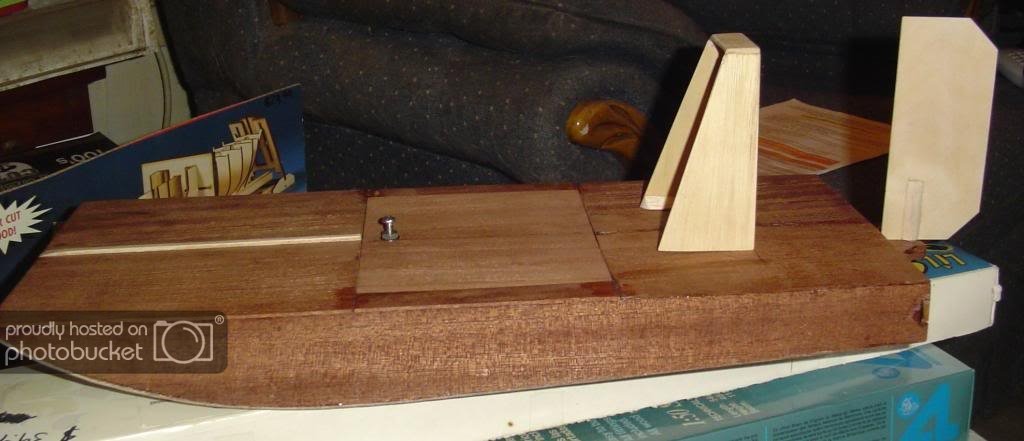
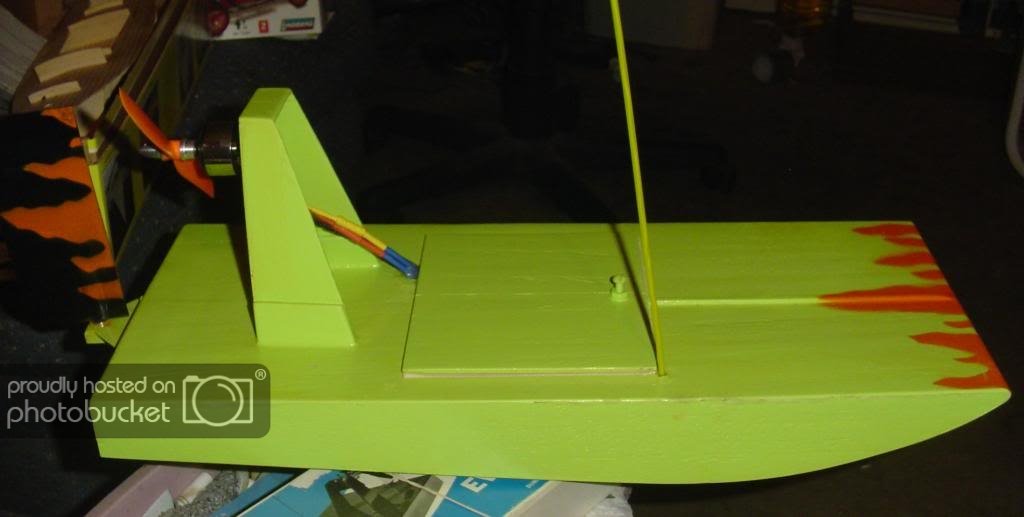
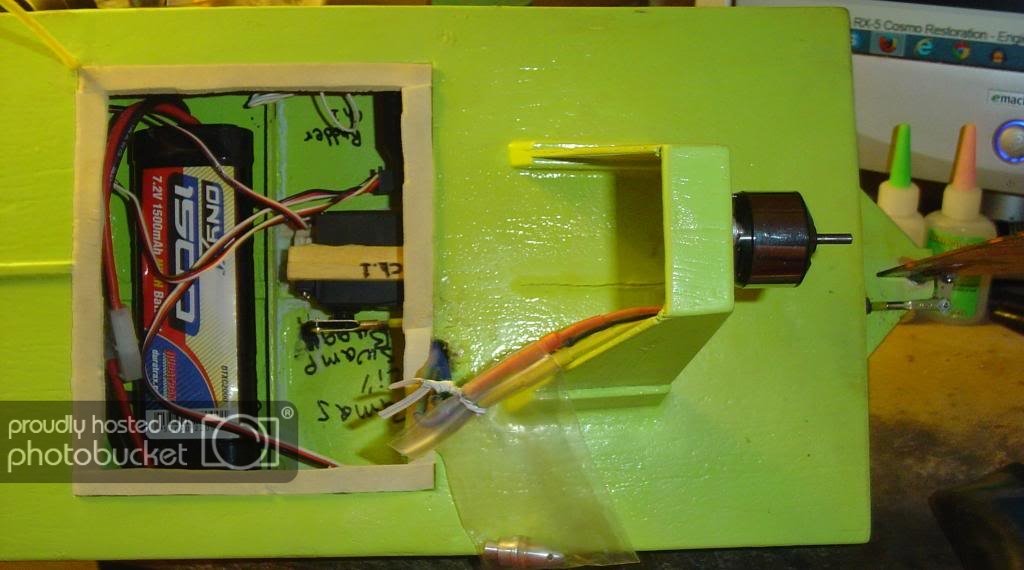
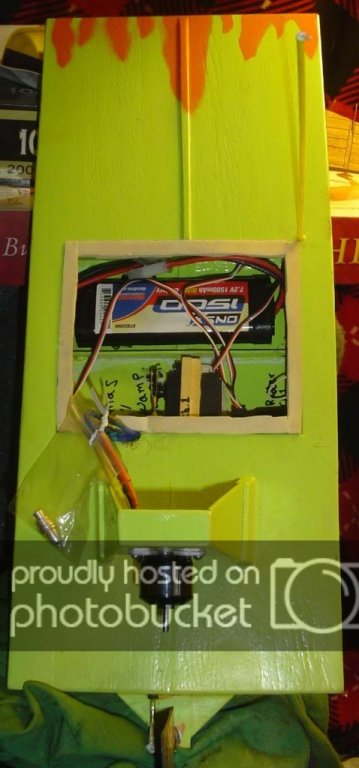
Here's a long awaited final build update on my Dumas Li'l Swamp Buggy R/C electric motor conversion boat build. I had started this build this past fall but the original electric speed control I'd purchased was DOA right out of the package and I just recently finally ordered another one. Everything works perfectly now but I had purchased the wrong propeler. The one I need is a "pusher" type prop and the one I bought is a "pull" type. In other words, a pusher prop propels a boat/plane forward and a pull type prop pulls the boat/plane....so with this prop on the boat, it wants to pull the boat backwards. There are 3 wires on the speed control and without knowing exactly which does which, I really don't want to try installing wires in a reverse fasion to try to get the boat to run in a forward direction and risk frying the new speed controller so I will be buying some "pusher" props this week. Then it's off to my vacant lot I own next door for some fun in the snow, yeehawww.
-
good work David, you're really goin at it today
-
-
Thanks Popeye and David. A nice thing about the kit is that it has a series of templates that you check your work against the side of the hull in various spots as you carve, sand and shape the hull to the exact shape of the finished hull. I also keep a wetstone at hand and resharpen my blade often. David your idea of the wash to seal the hull is a great idea and will be sure to try it out.
-
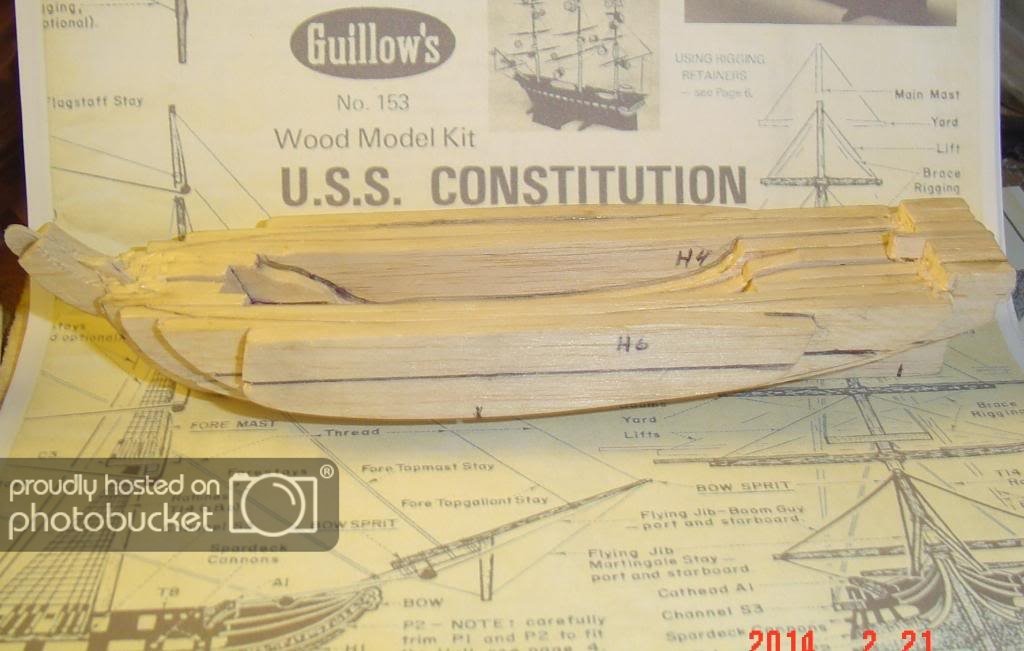
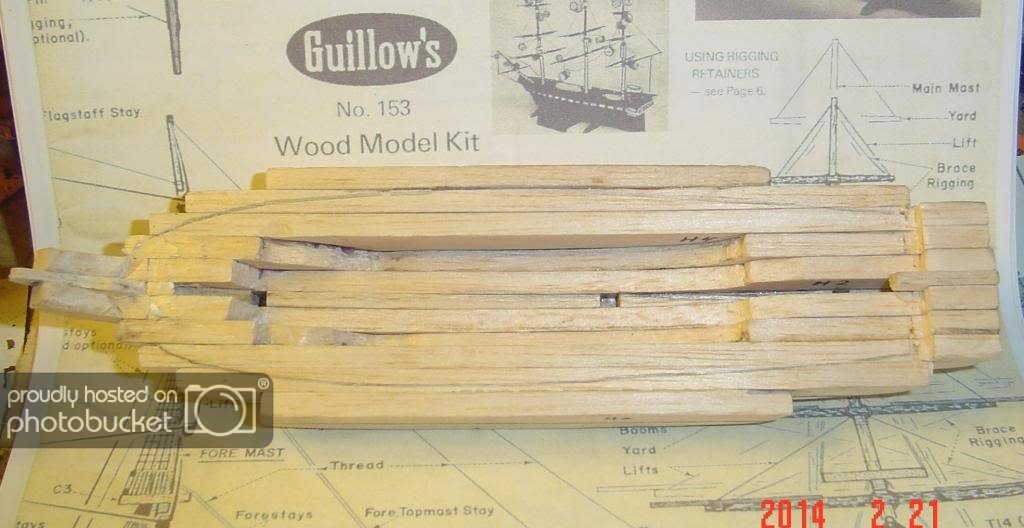
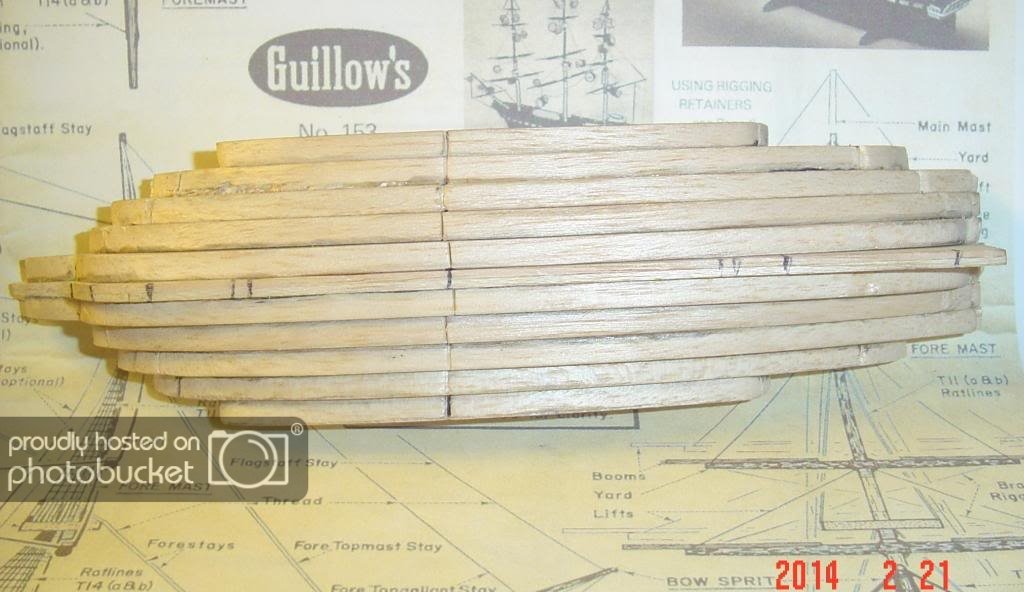
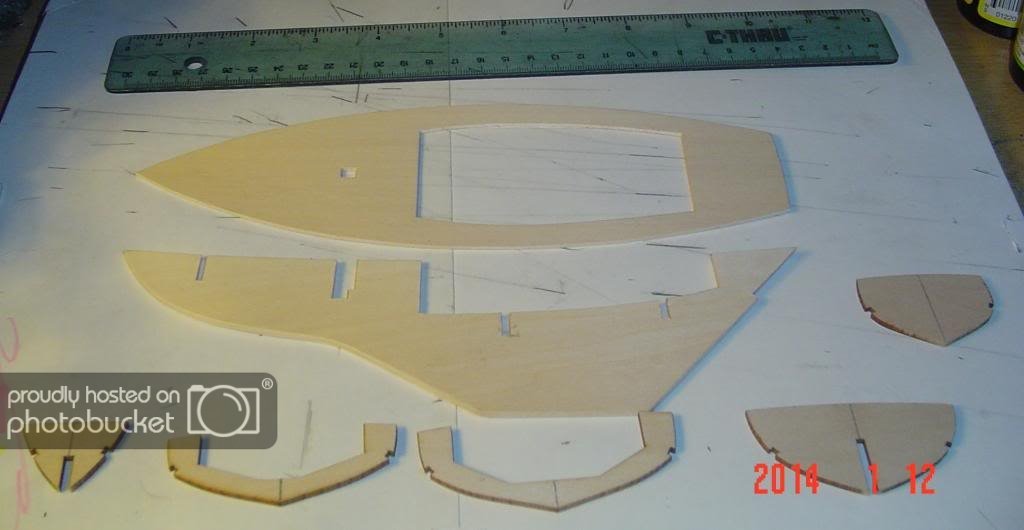
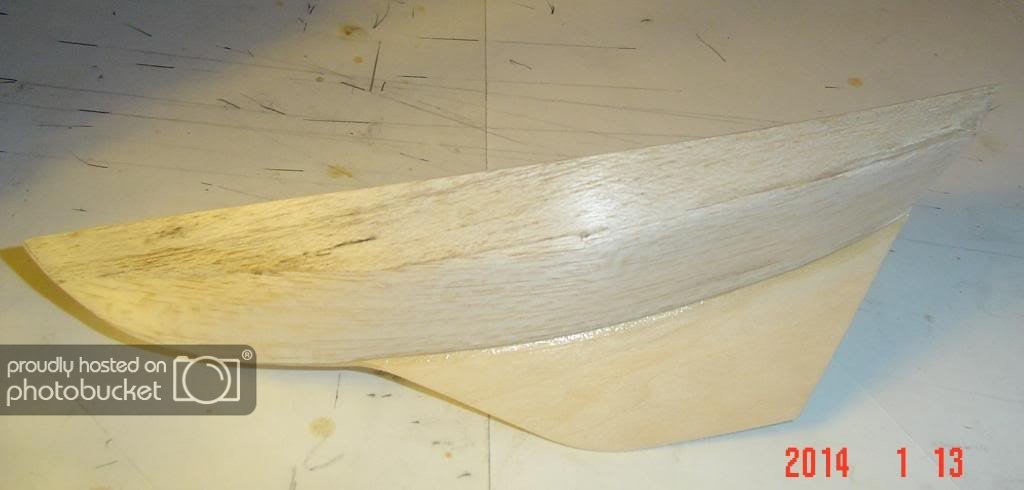
Really nothing too exciting to post but I got the patterns I'd made for the remainder of the parts from sheet B transfered to 1/8" balsa sheeting and cut out. Next, sanding the hull to shape and many here know how much I dread lots of sanding. But hey, we all gotta do it.

Sorry for the awful quality of the first picture.
-
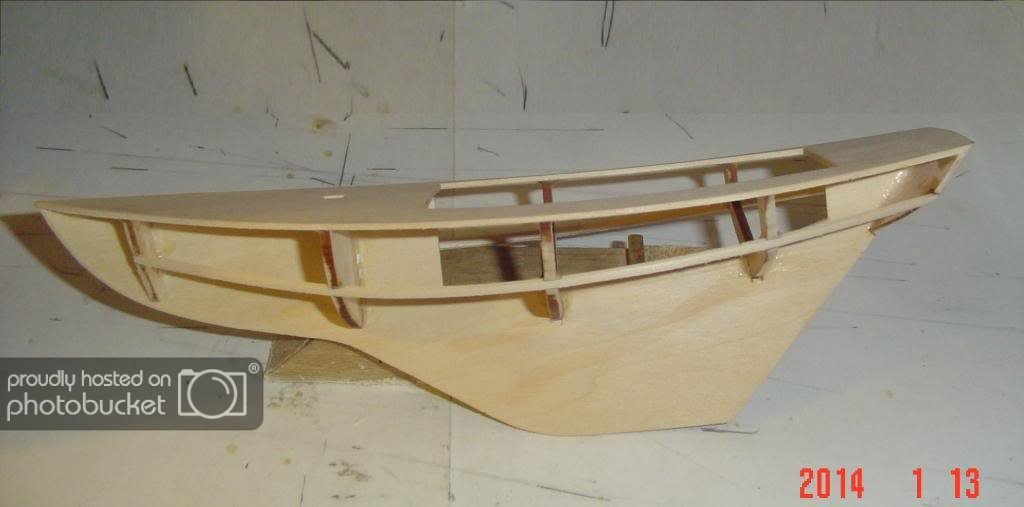
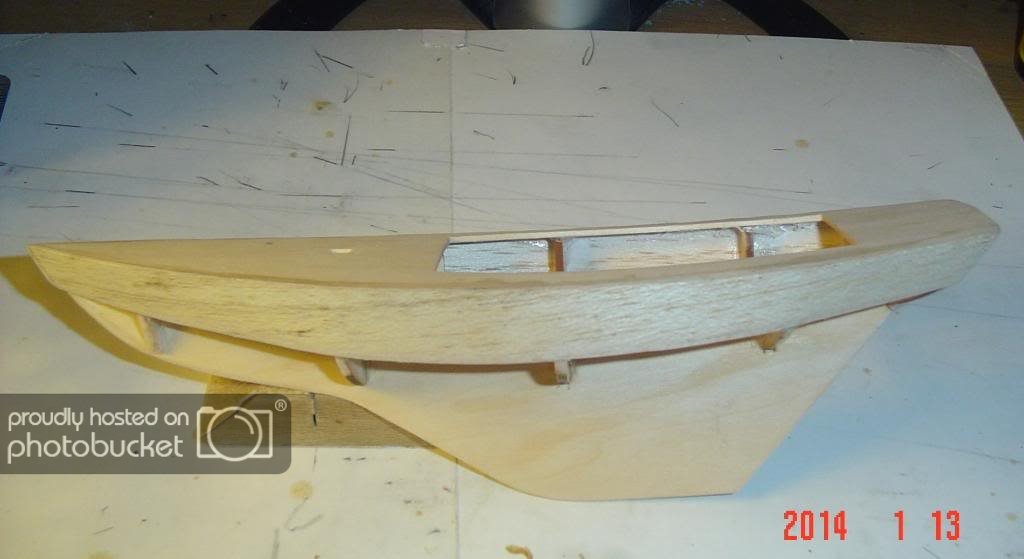
Another quick update, I've got the hull completed (again) ;o) Next, start carving the hull to shape. This should be fairly easy since it's fairly soft balsa.
More later...Thanks for looking and your interest in this build so far.
-
Thaty looks so much better, good work.
-
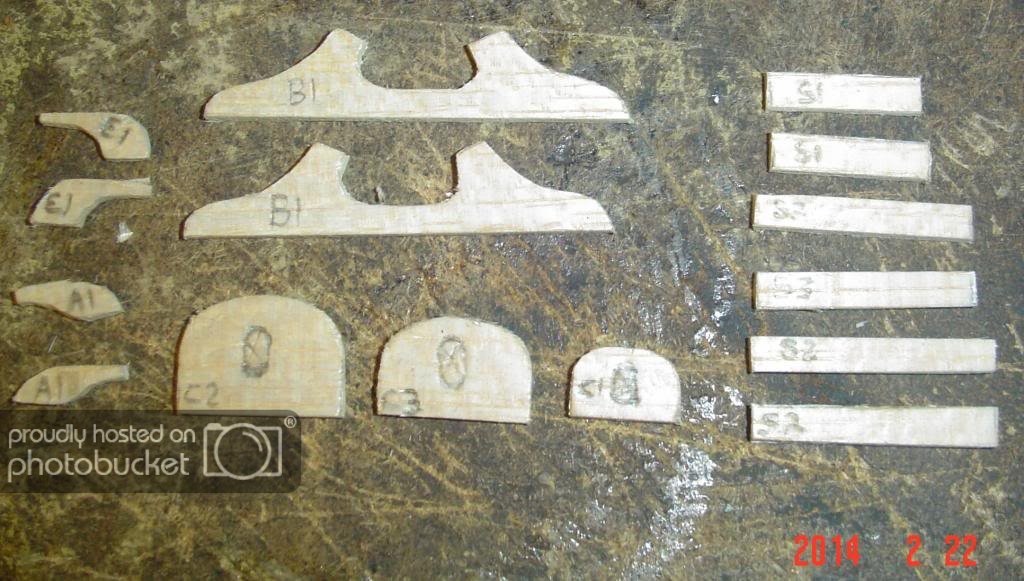
Just a small update, I began to reassemble the hull this morning and also made a scanned copy of parts sheet B which has all of the remaining die cut parts on it and use it to make patterns to make my own parts since the die cutting on the sheet is awful and the balsa is pretty low quality. More to come as I progress.
-
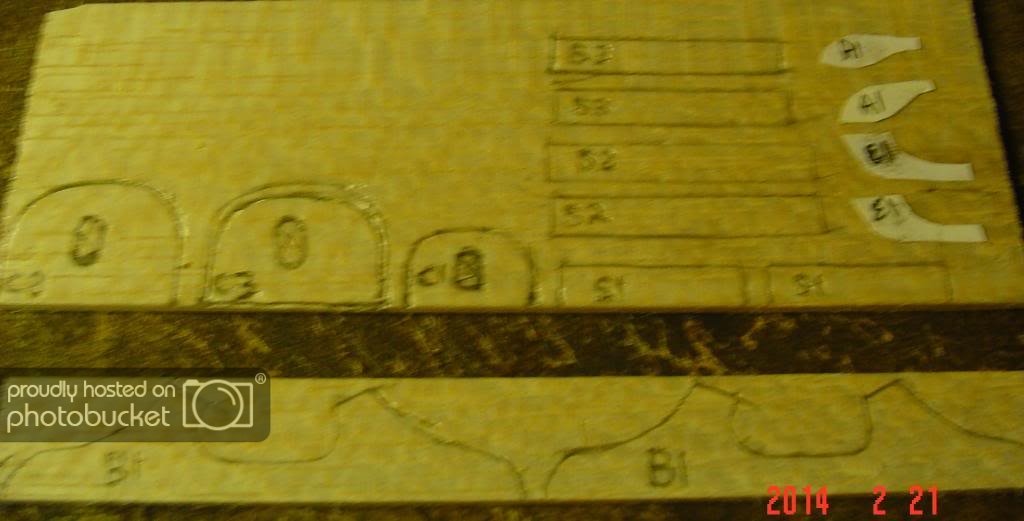
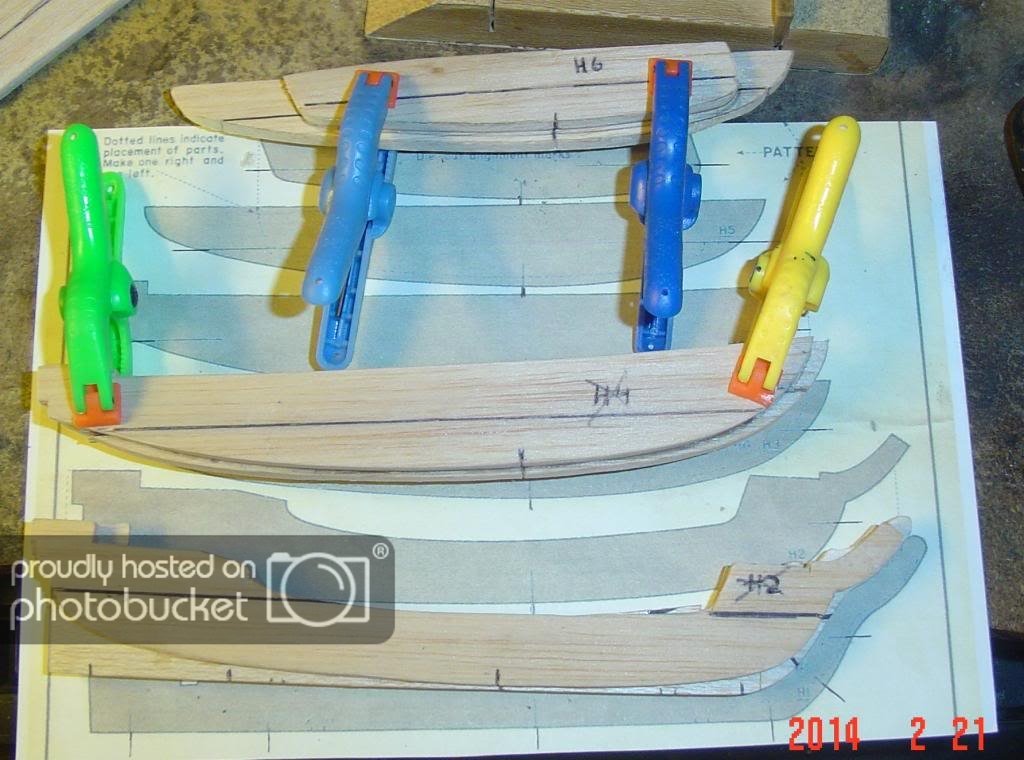
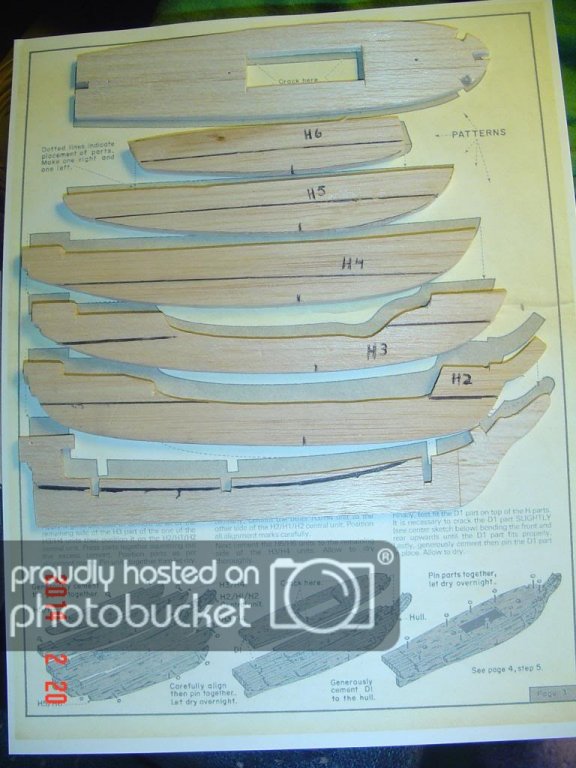
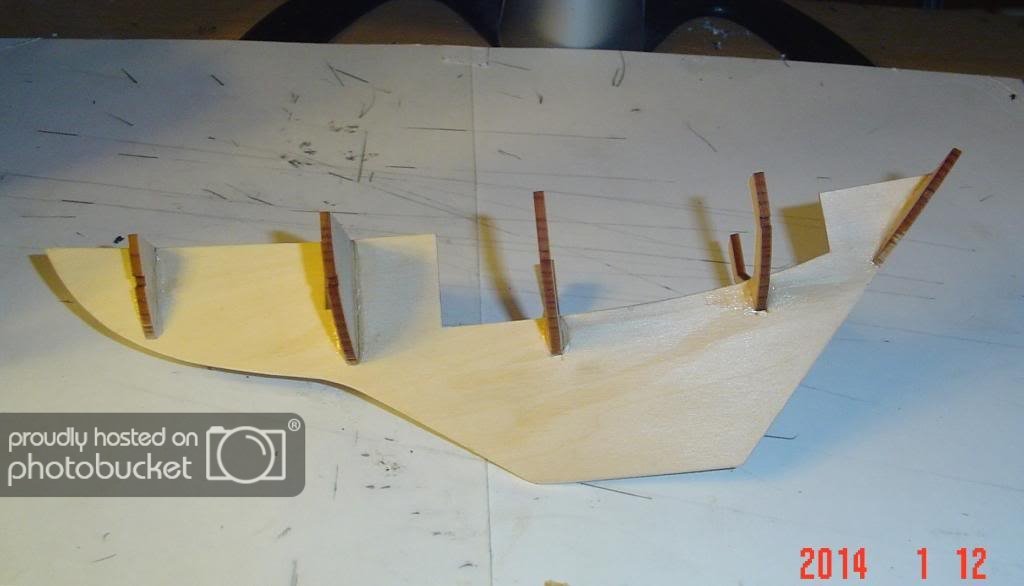
I got all of the hull slabs cut out and ready to assemble the hull (again). Two pieces of each except the deck (top piece) and main keel (bottom piece). I will post more once I start assembly. Note: the lines drawn on the pieces are alignment marks to aid in assembling the hull pieces and to be sure each is straight as each piece is glued on the corresponding piece. Ignore the mark on the keel, that mark was already on the balsa sheet.
-
-
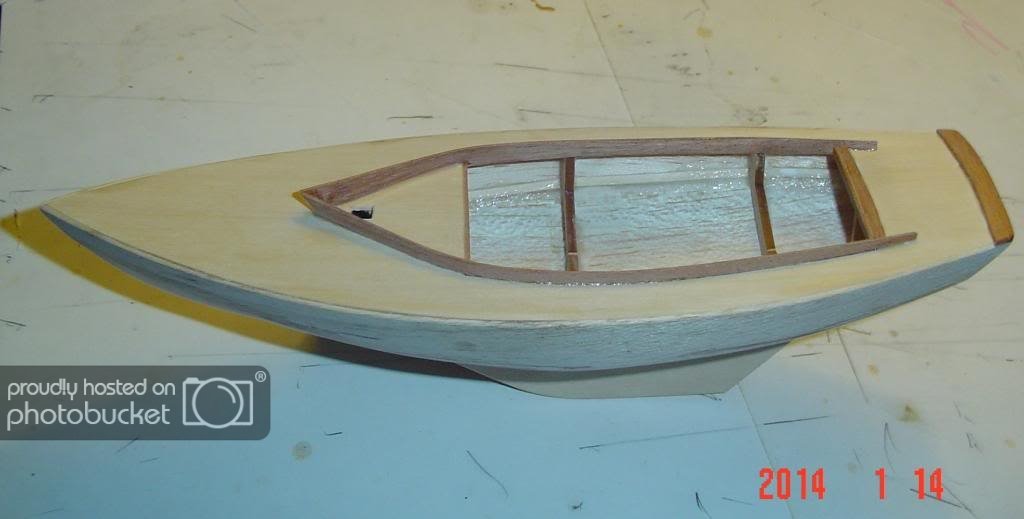
Well I had finished this build last month or so but hadn't had the chance to post update pictures until now. I'm adding a YouTube video of the build here too. I hope you all like it...Enjoy. My apologies for not having many build progress pictures this time of most aspects of the build but the video shows it all.
Video:
-
very nice so far. I've been thinking of trying out card stock ship modeling myself, Ive built several card aircraft and a couple vehicle ones so the process should be the same.
-
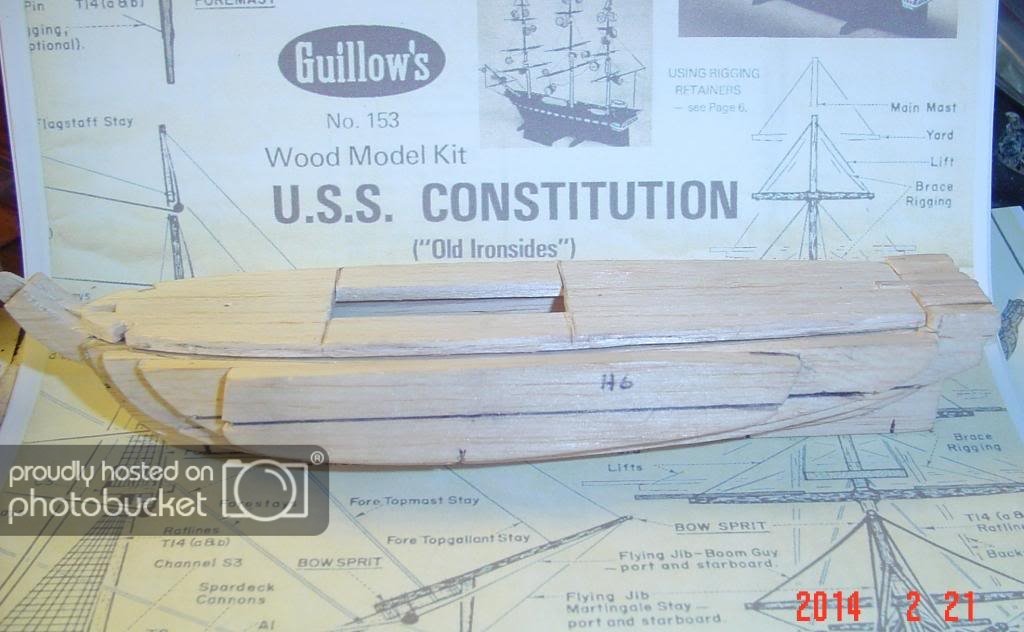
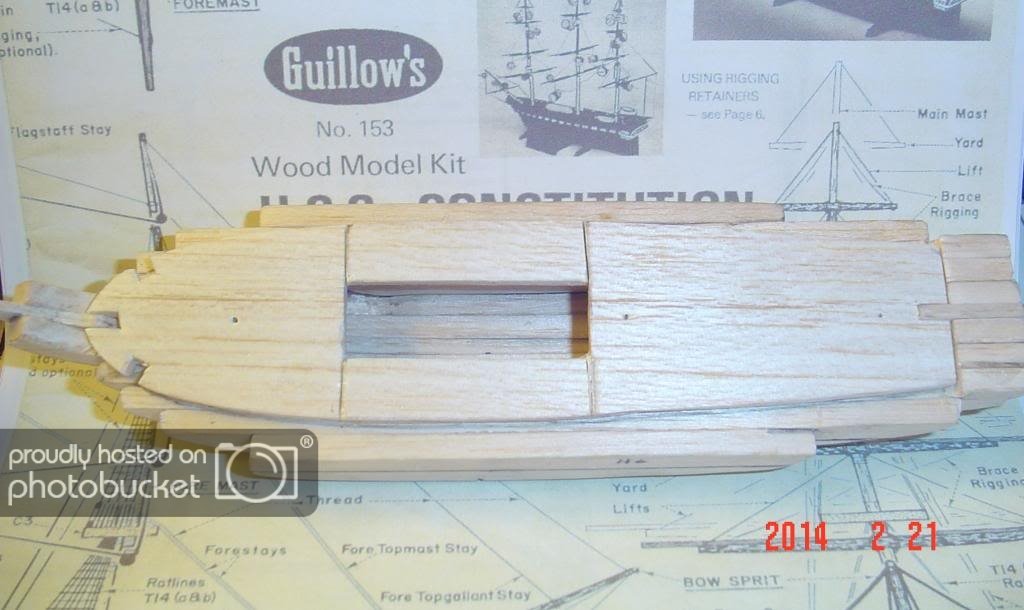
I finally got my Guillow's Constitution kit back out. I had recently purchased some 1/4" balsa sheet and 3/16" balsa sheet to recut the "sandwich" pieces of the hull. I have patterns tack glued to the sheets to facilitate in easier and more accurate tracing of parts. I also purchased a few packs of #11 xacto blades and will hopefully have the pieces all cut out this morning and start gluing the hull slabs together. This time, I will be sure not to leave anything within reach of my silly dog to be chewed to bits. ;o) Sorry no pictures to add at this moment but not much exciting in seeing patterns on balsa sheets being readied for tracing and cutting. I'll post more as I progress.
-
Thanks Tim, I had a lot of fun building this boat model.
-
-
That's pretty cool philo, I plan to build a large ship similar to the type of yours in the near future.
-
I use CA for everything and try to use it sparingly. I try to avoid it in areas where I'll be staining wood though like outer planking.
-
I do in fact have a bottle of Titebond II laying around somewhere, sounds like a good choice to use to me too.
-
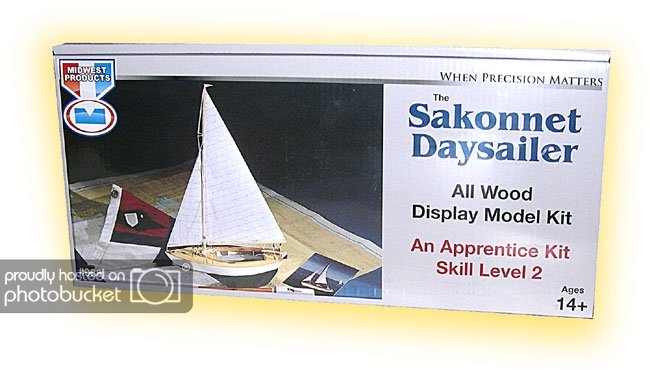
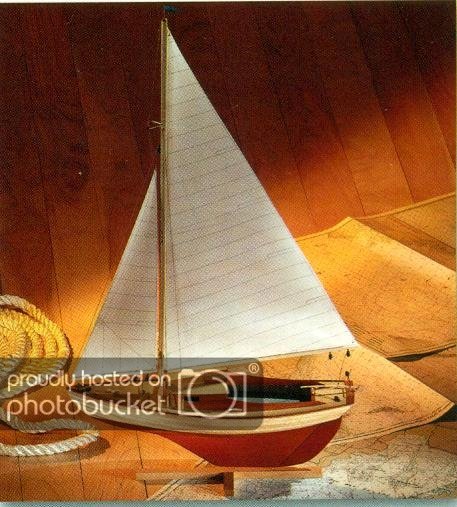
My next project I'm starting tonight is a Midwest Products Sakonnet Daysailer. Here is a picture of the box art and what the boat should look like once completed.
-
Casey, I had purchased the Swift about mid year 2013 and finally got around to working on it again. I was originally put off and kind of displeased with the fact that the keel was warped so severely and no amount of soaking in water and weighing down would get that warp out but all is well now. I'm thinking I may just stain the wood depending on how nice it looks once I finish the hull, it's still a toss up at this point though. Going to be starting the Midwest Sakonnet Daysailer I received in the mail tonight so look for a build topic on that very soon.
-
I agree Bug, especially after the trouble I'd had building the hull on my first tall ship, the Albatros by Constructo and using CA. I will likely go with PVA for the second layer as I'd had this very problem with stain looking blotchy and I'd like to have a less sloppy looking finish after I apply stain and sealer.


Lil Swamp Buggy by shawn32671 - FINISHED - Dumas - RADIO - SMALL - Airboat
in - Kit build logs for subjects built from 1901 - Present Day
Posted
Good Idea Ollie, I'll see if I can rig something up.