Tim1786
-
Posts
31 -
Joined
-
Last visited
Recent Profile Visitors
402 profile views

.thumb.jpg.c459ce4140b54c12eddb8eedfd446df3.jpg)

-
 SiriusVoyager reacted to a post in a topic:
Mayflower by Tim1786 - Artesania Latina - 1/64 - First Build
SiriusVoyager reacted to a post in a topic:
Mayflower by Tim1786 - Artesania Latina - 1/64 - First Build
-
SiriusVoyager reacted to a post in a topic:
Mayflower by Tim1786 - Artesania Latina - 1/64 - First Build
-
SiriusVoyager reacted to a post in a topic:
Mayflower by Tim1786 - Artesania Latina - 1/64 - First Build
-
Bill Morrison reacted to a post in a topic:
Mayflower by Tim1786 - Artesania Latina - 1/64 - First Build
-
Bill Morrison reacted to a post in a topic:
Mayflower by Tim1786 - Artesania Latina - 1/64 - First Build
-
Bill Morrison reacted to a post in a topic:
Mayflower by Tim1786 - Artesania Latina - 1/64 - First Build
-
Bill Morrison reacted to a post in a topic:
Mayflower by Tim1786 - Artesania Latina - 1/64 - First Build
-
Bill Morrison reacted to a post in a topic:
Mayflower by Tim1786 - Artesania Latina - 1/64 - First Build
-
GrandpaPhil reacted to a post in a topic:
Mayflower by Tim1786 - Artesania Latina - 1/64 - First Build
-
GrandpaPhil reacted to a post in a topic:
Mayflower by Tim1786 - Artesania Latina - 1/64 - First Build
-
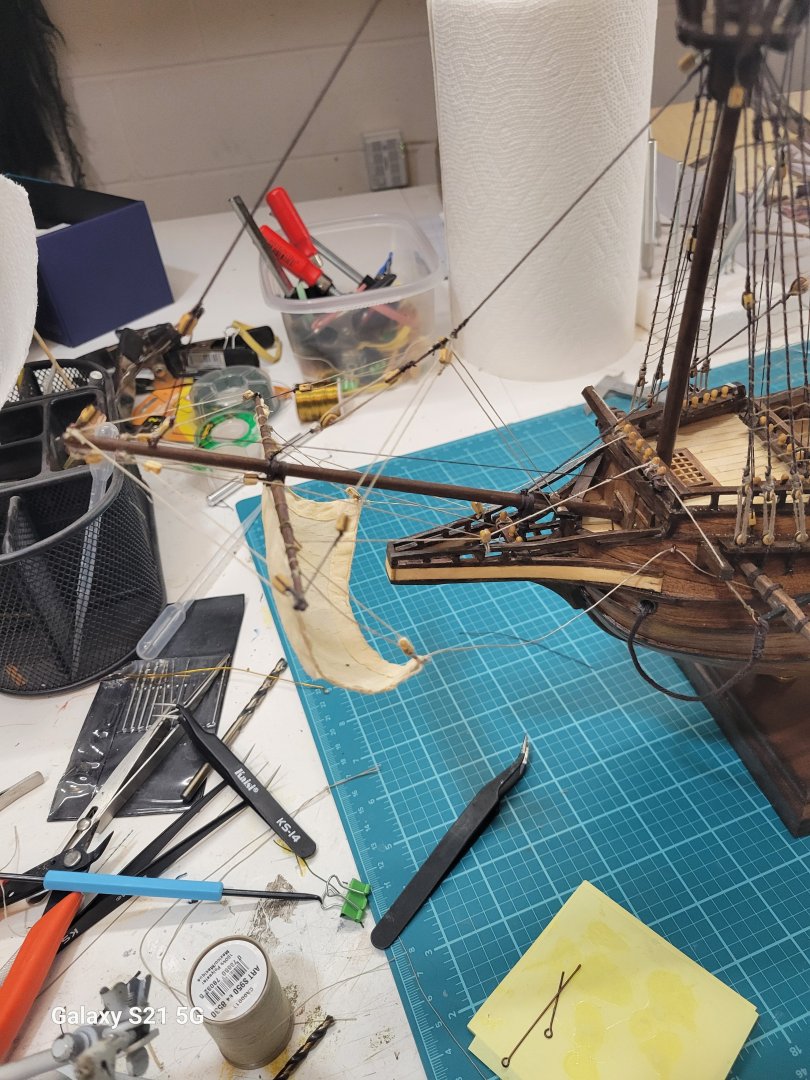
Bow sail is installed and rigged. It's not perfect, but I like the look. And I'm impressed with what I'm learning about rigging sails. It's a logical system allowing the sailors to move the sail in any direction along the mast. Incredibly clever.
- 46 replies
-
- 5
-
-
- Mayflower
- Artesania Latina
- (and 1 more)
-
Tim1786 reacted to a post in a topic:
Mayflower by Tim1786 - Artesania Latina - 1/64 - First Build
-
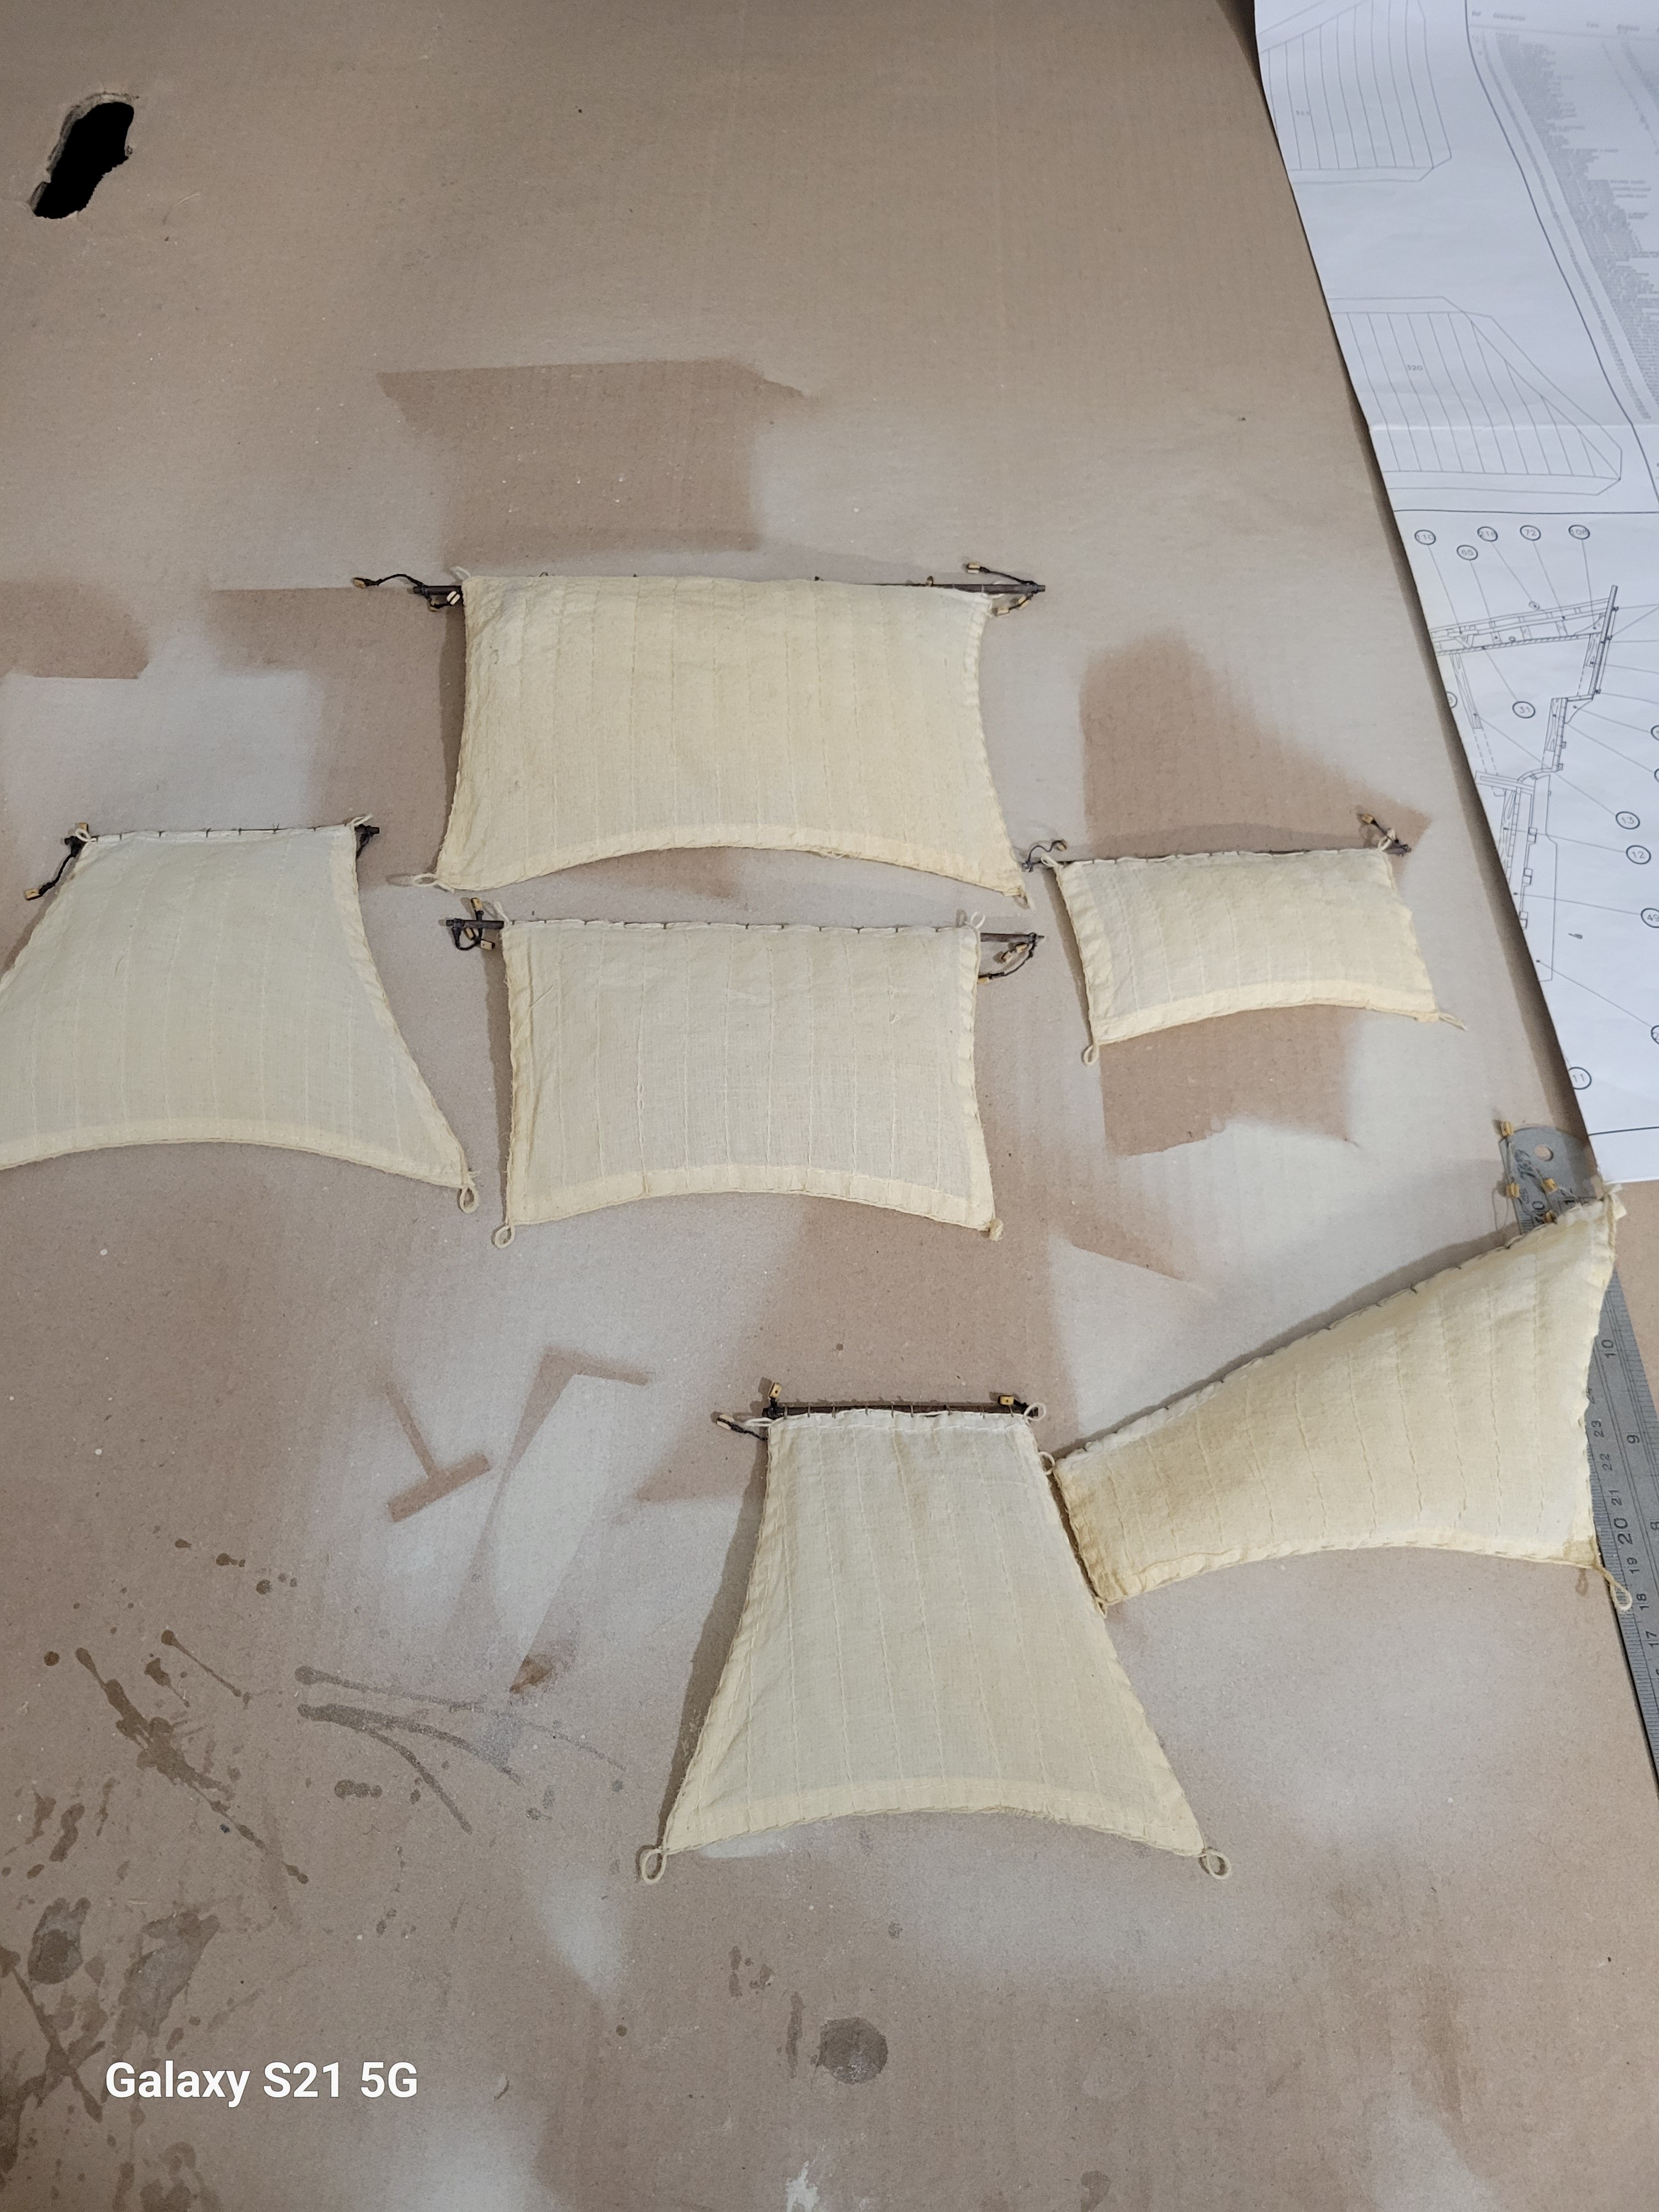
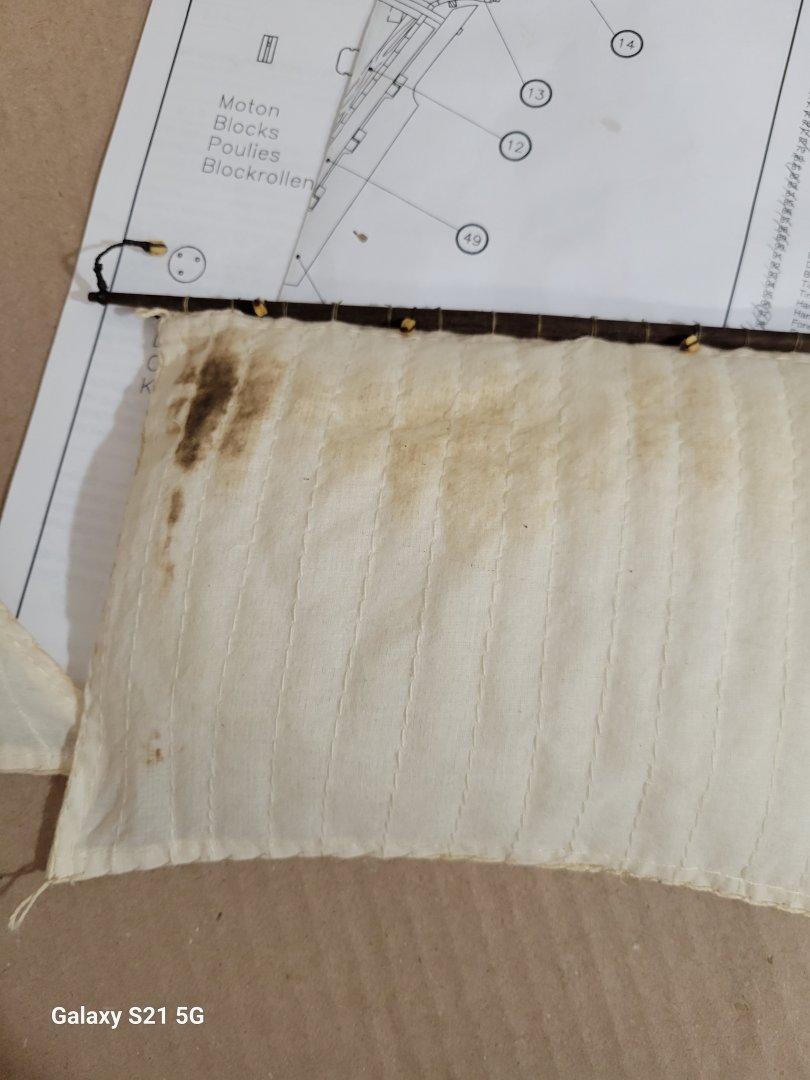
Success. I managed to find a paint that closely matched the existing tint of the sails. Repeated misting of the burnt area, and a final misting of all of the sails got me to a satisfactory match while covering the problem area. I re-stretched/starched the sail with the issue, and re-dried it. I think the results look good. I cleaned up any overspray with a q-tip soaked in acetone.

- 46 replies
-
- 5
-
-
- Mayflower
- Artesania Latina
- (and 1 more)
-
Thanks, I'll reconfigure that if I have room!
-
I actually ditched the vinyl and covered the inside with mahogany strips, matching the hull of the ship. I think the results are better.

- 46 replies
-
- 4
-
-
- Mayflower
- Artesania Latina
- (and 1 more)
-
Thanks, I agree, but this is for my 86 year old mother, and she expects light sails, so it's more of an aesthetic issue than a historical one. I will take your advise in for the next model, I wasn't aware they were ever any darker than a tea color.
-
Ugh. I burnt one of my sails a bit. My plan is to buy some ivory colored paint and mist the sails until the spot is hidden and the sails are all the same color--unless one of you has a better idea!
- 46 replies
-
- 1
-
-
- Mayflower
- Artesania Latina
- (and 1 more)
-
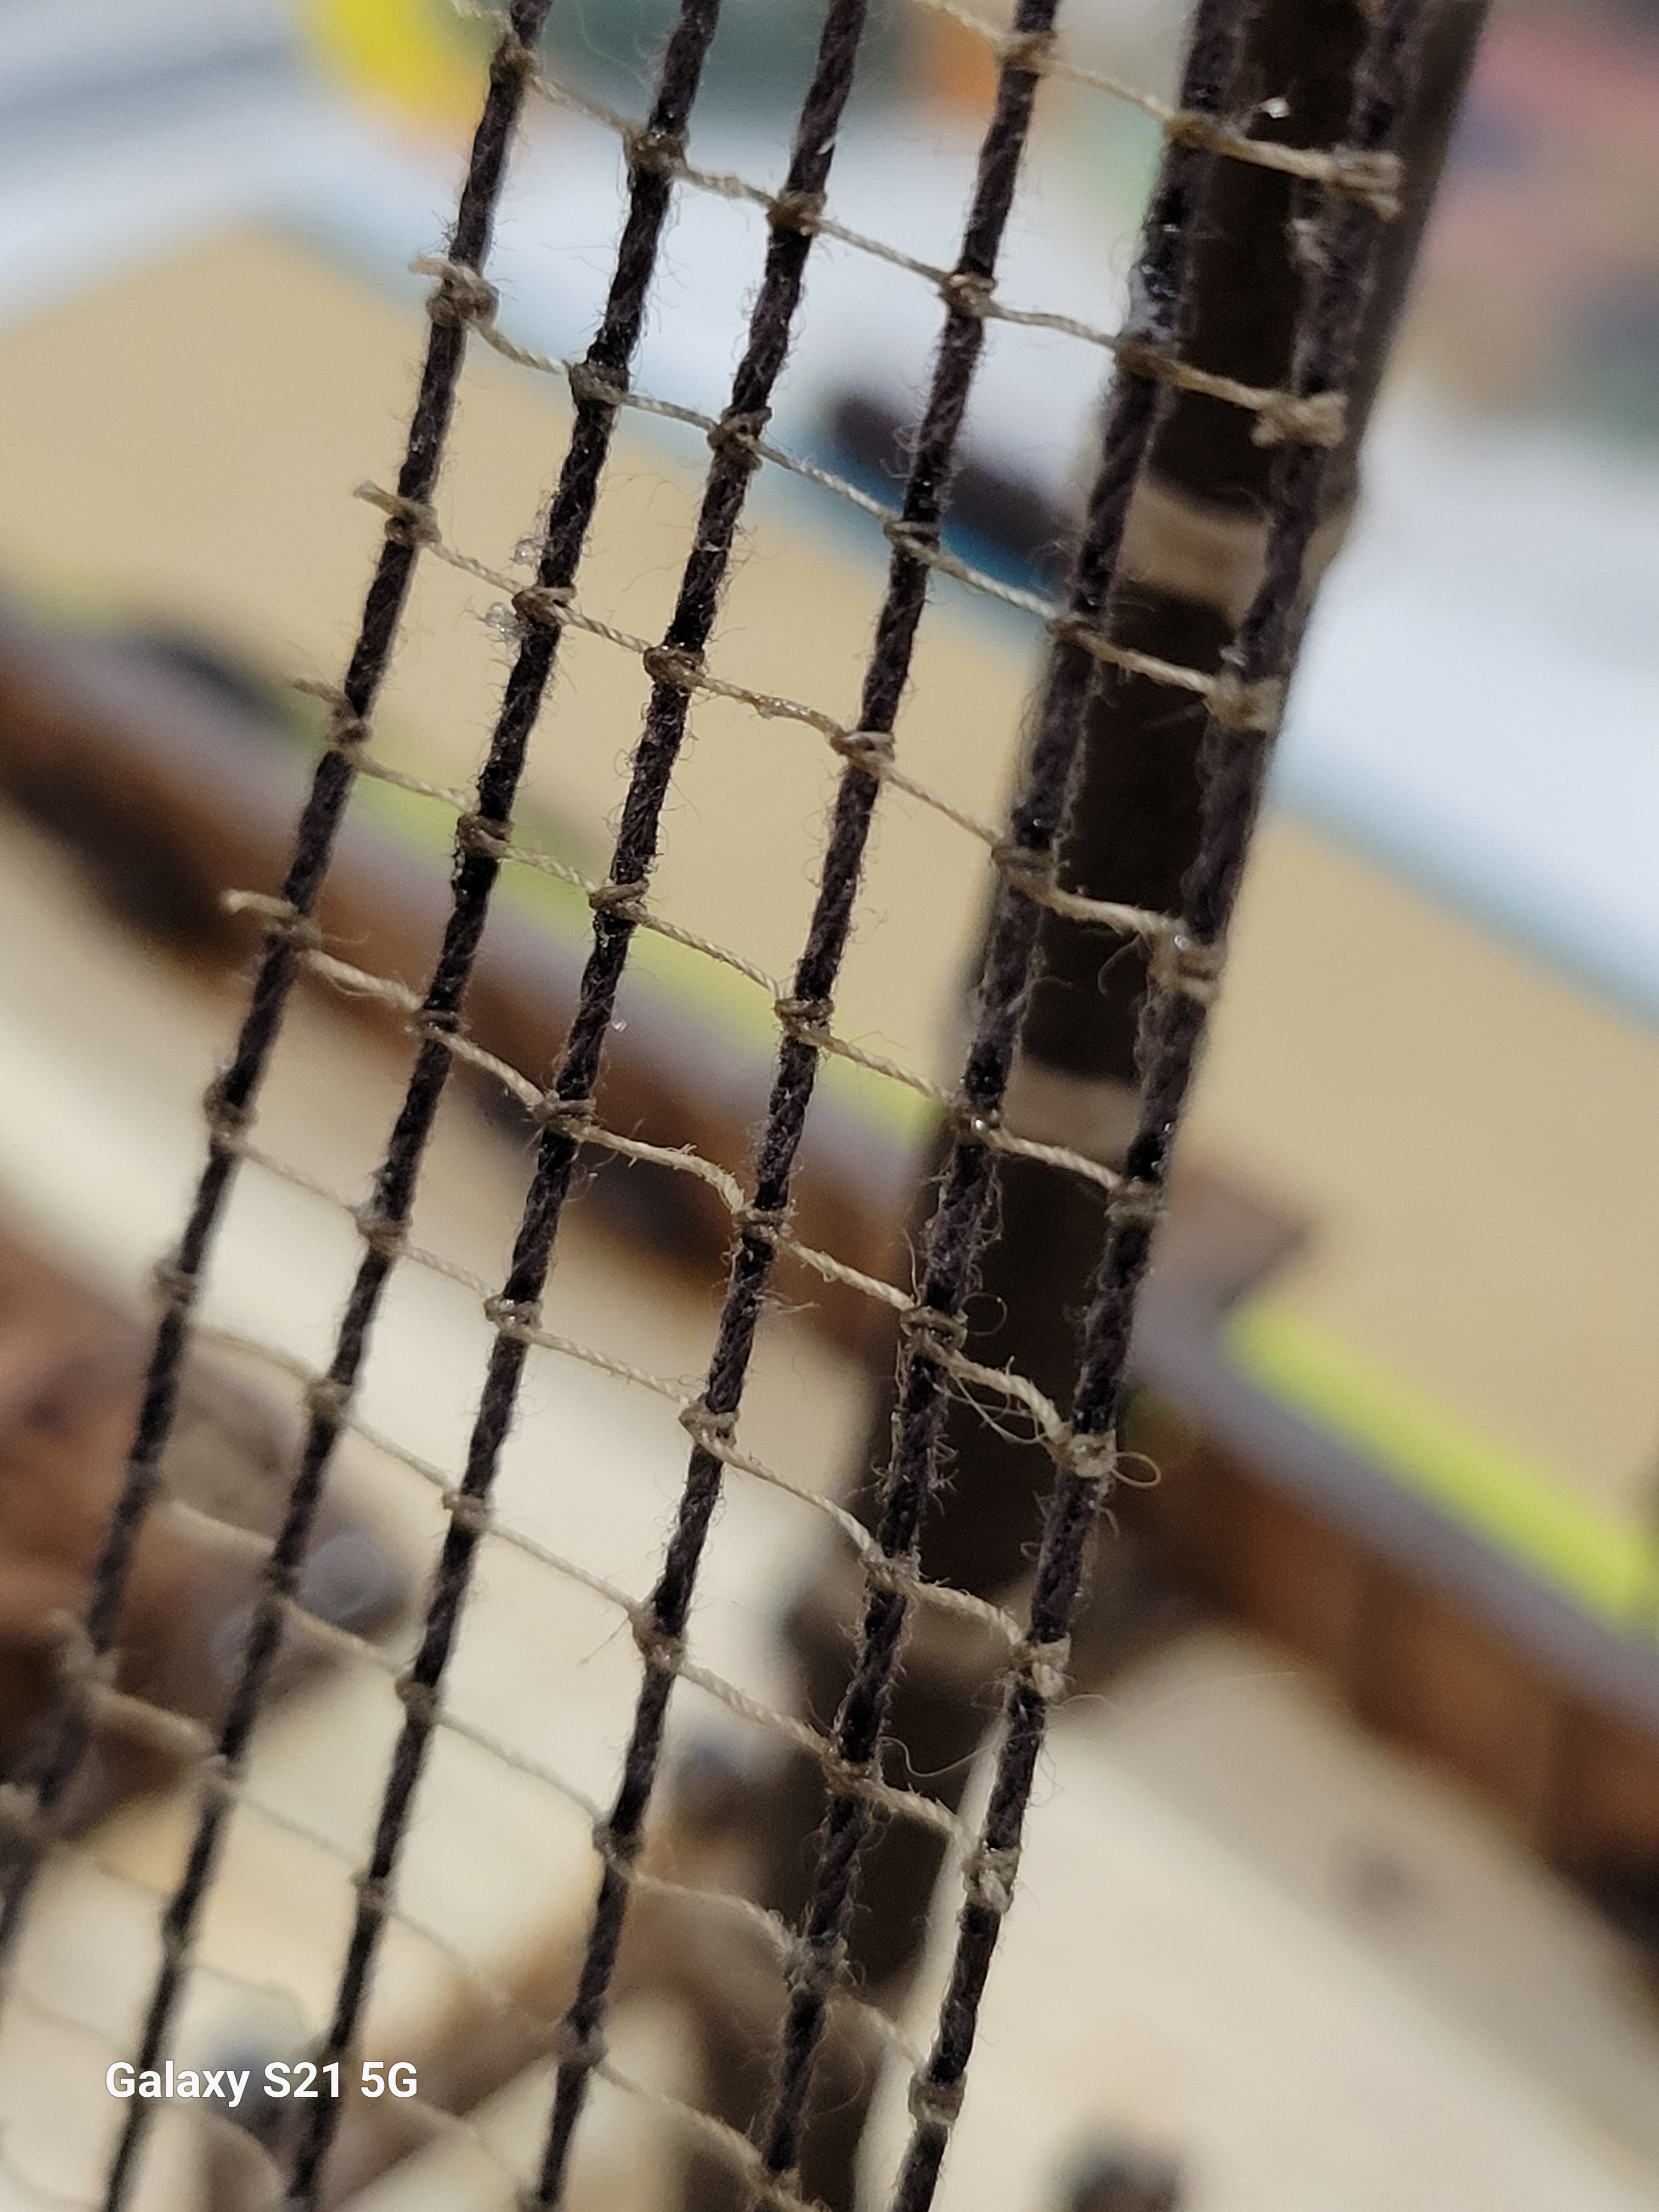
I don't think I'll ever forget how to tie a clove hitch..
- 46 replies
-
- 2
-

-
- Mayflower
- Artesania Latina
- (and 1 more)
-
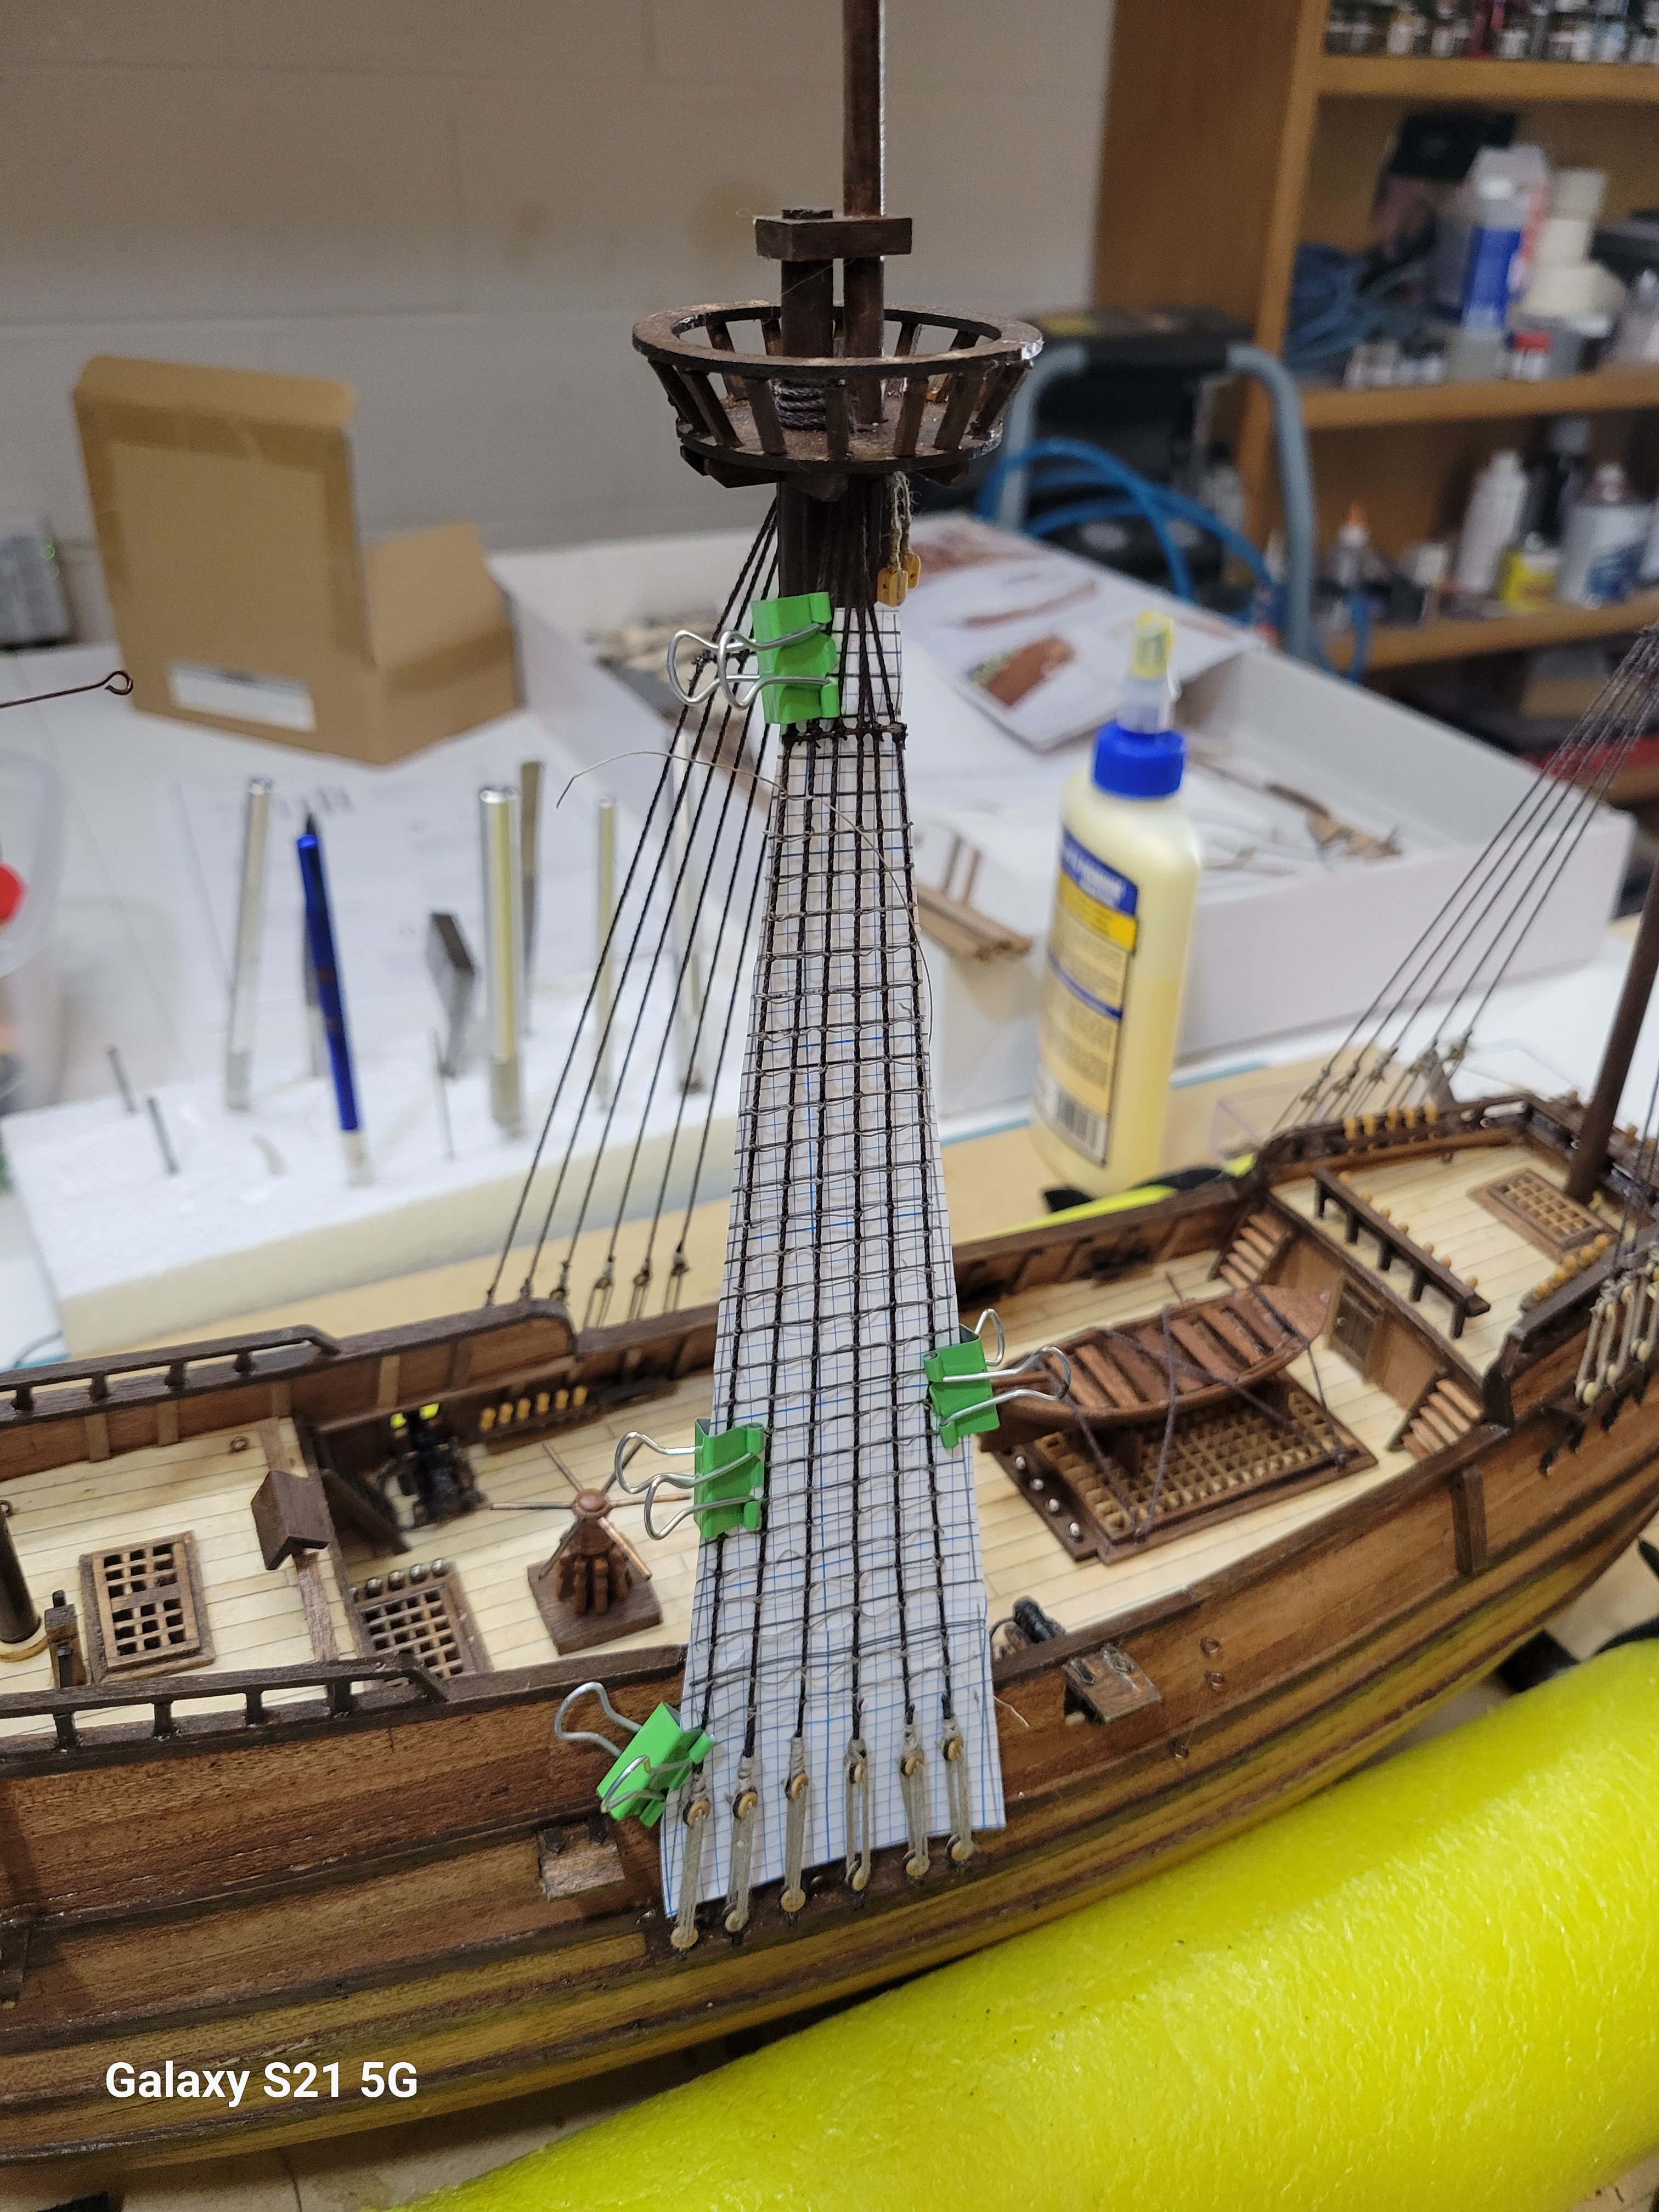
Ship update. Putting in ratlines. The graph paper is a guide. Every intersection gets a clove hitch knot. No plastic ratlines for this baby.

- 46 replies
-
- 4
-
-
- Mayflower
- Artesania Latina
- (and 1 more)
-
Tim1786 reacted to a post in a topic:
Mayflower by Tim1786 - Artesania Latina - 1/64 - First Build
-
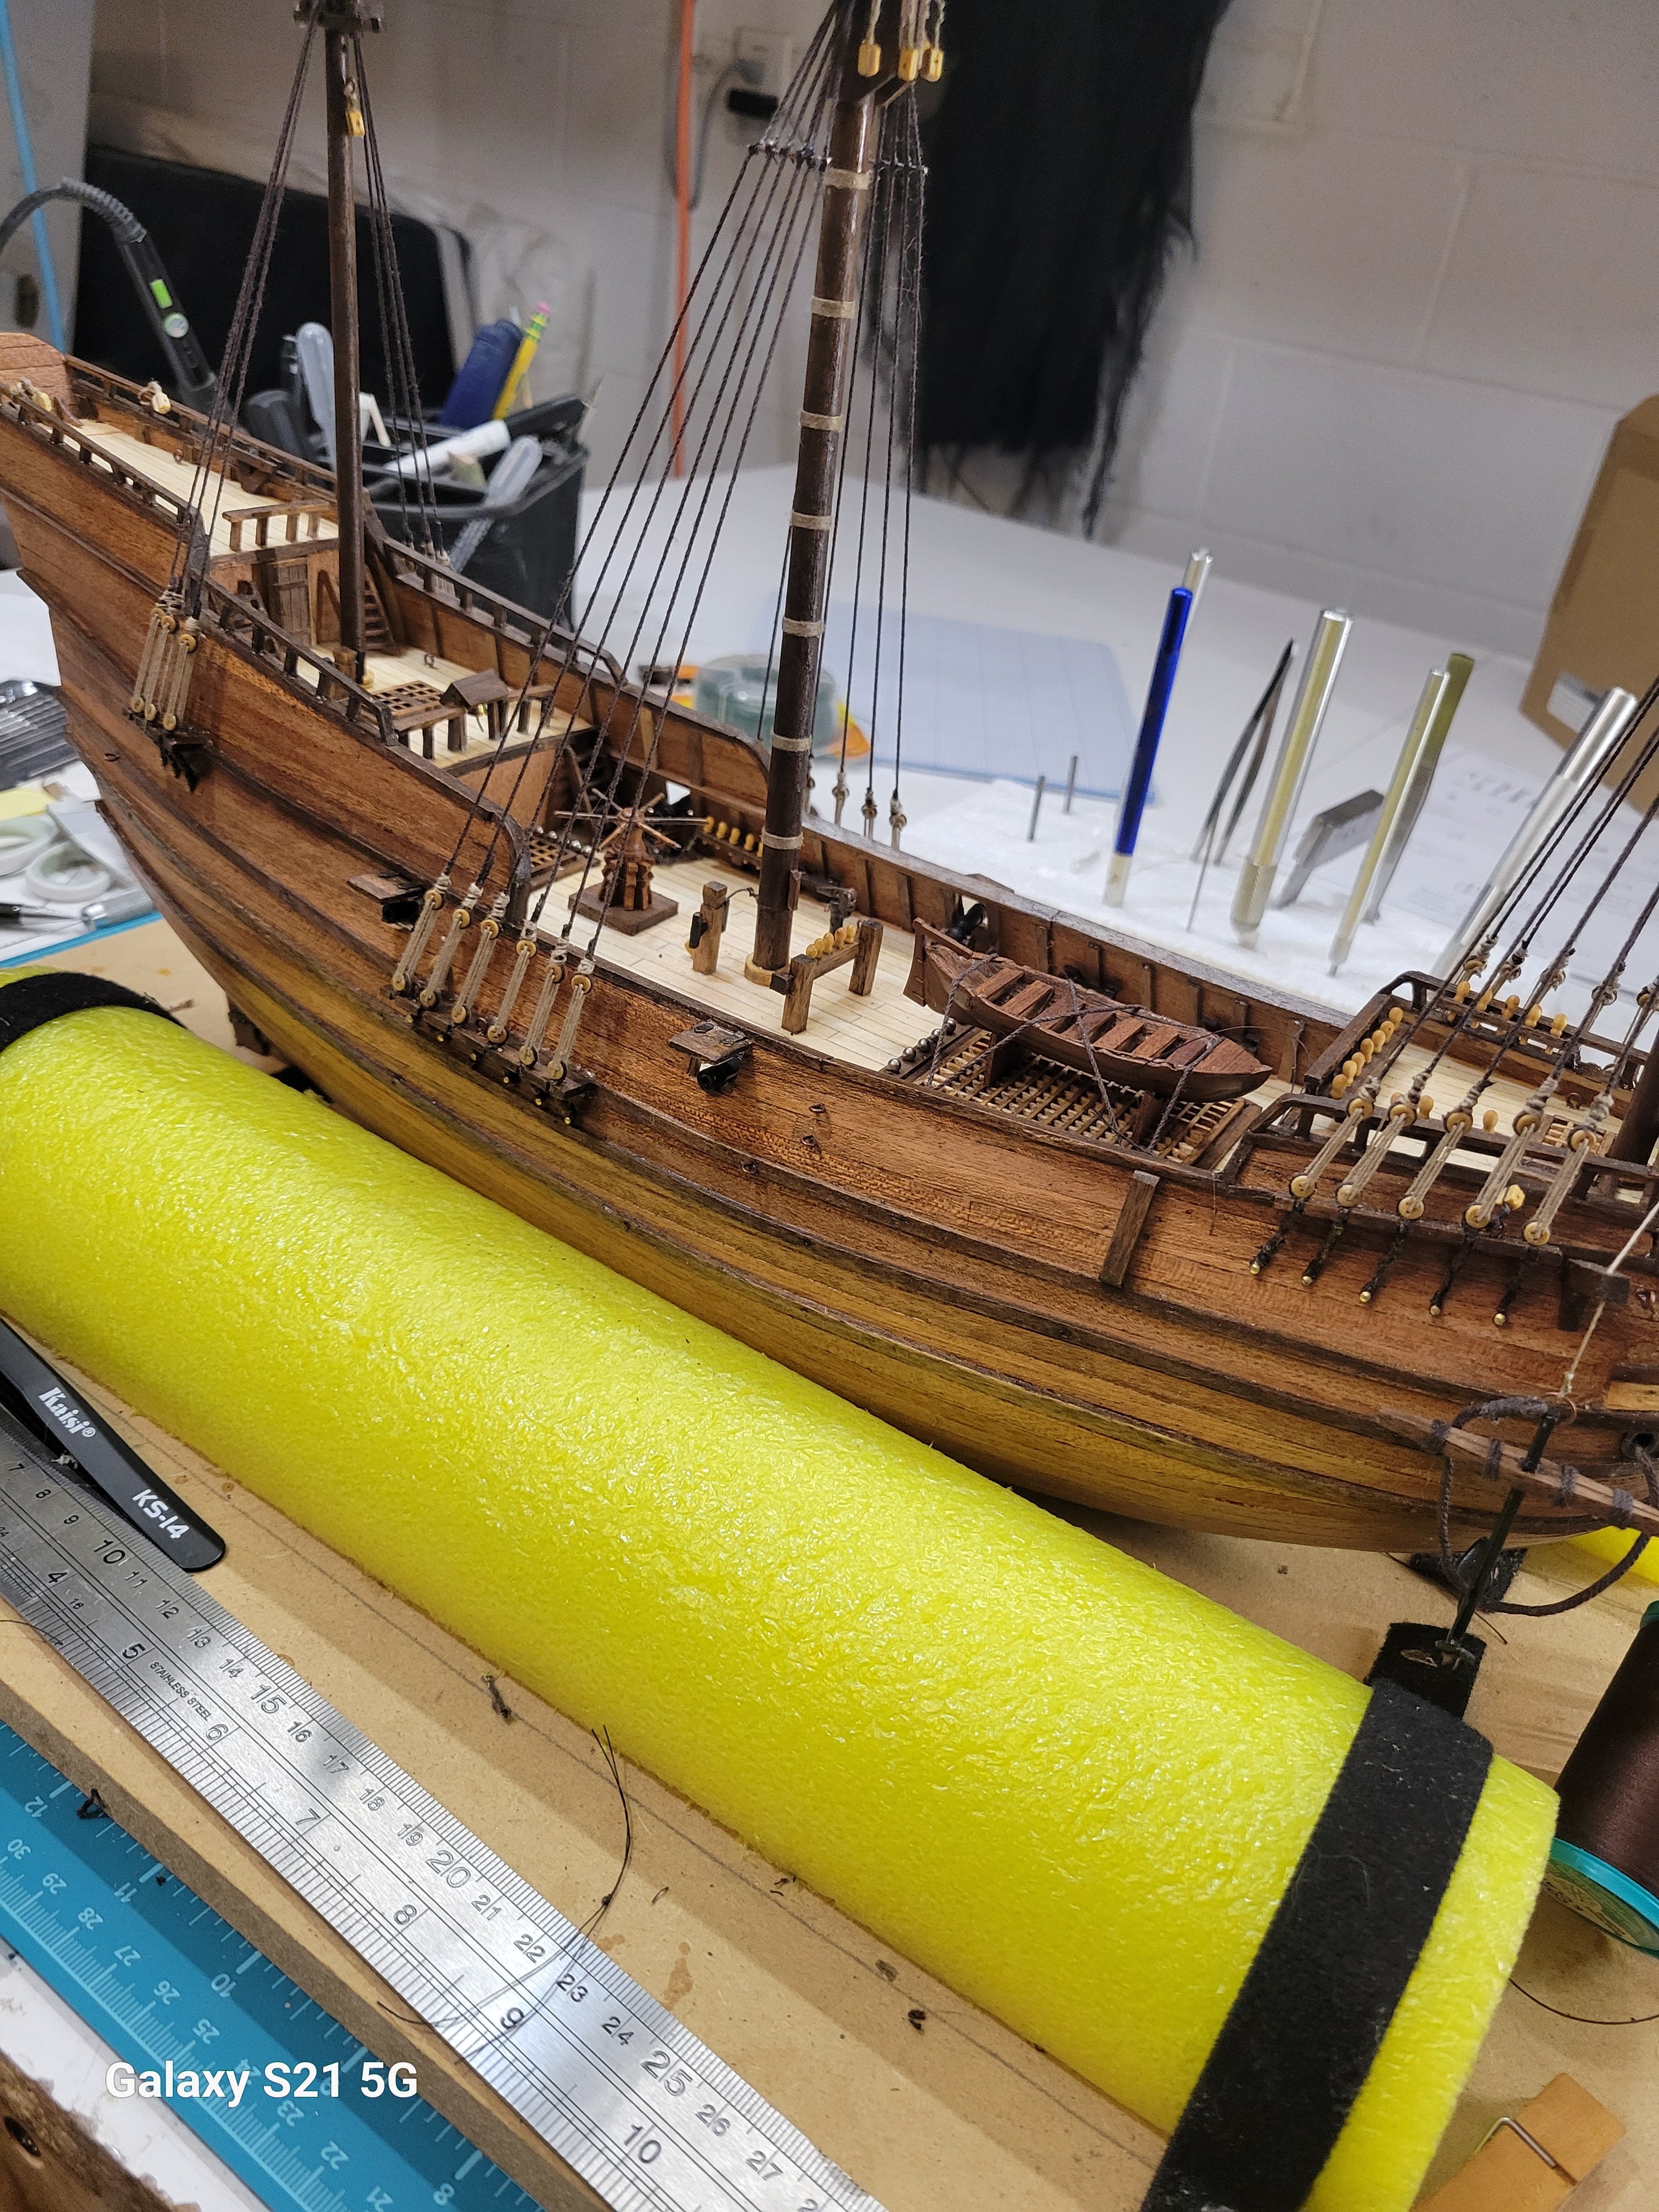
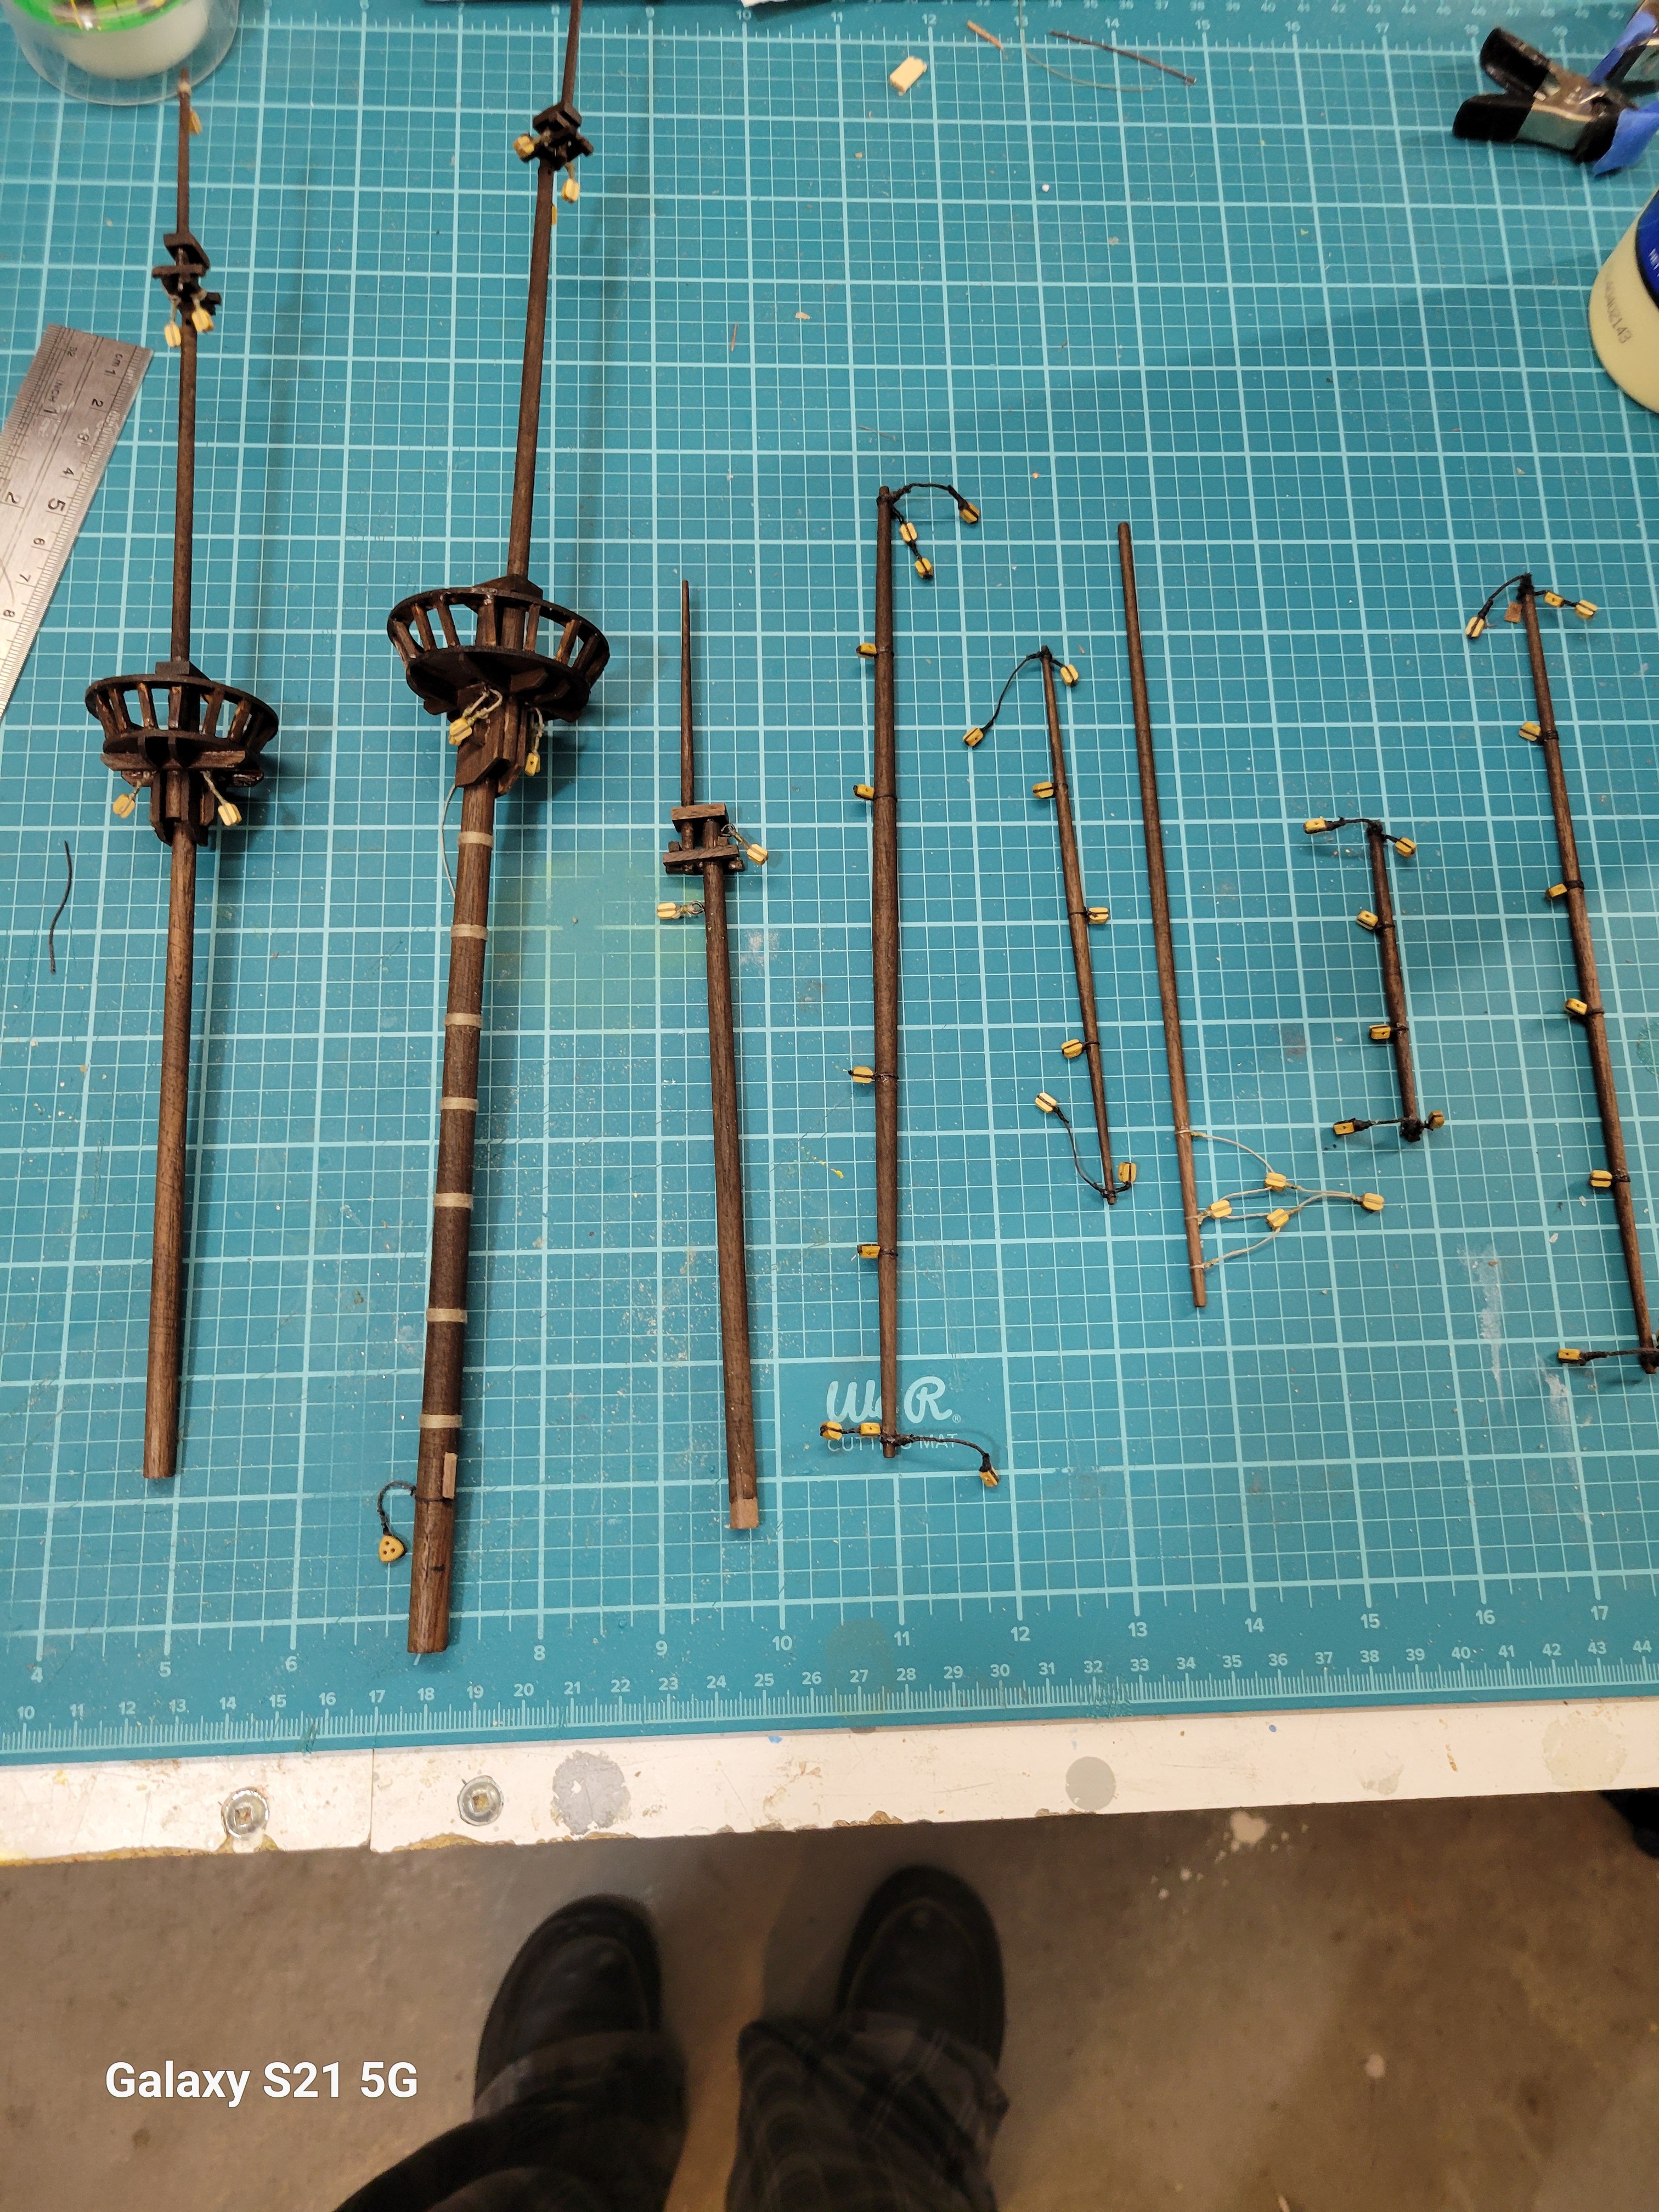
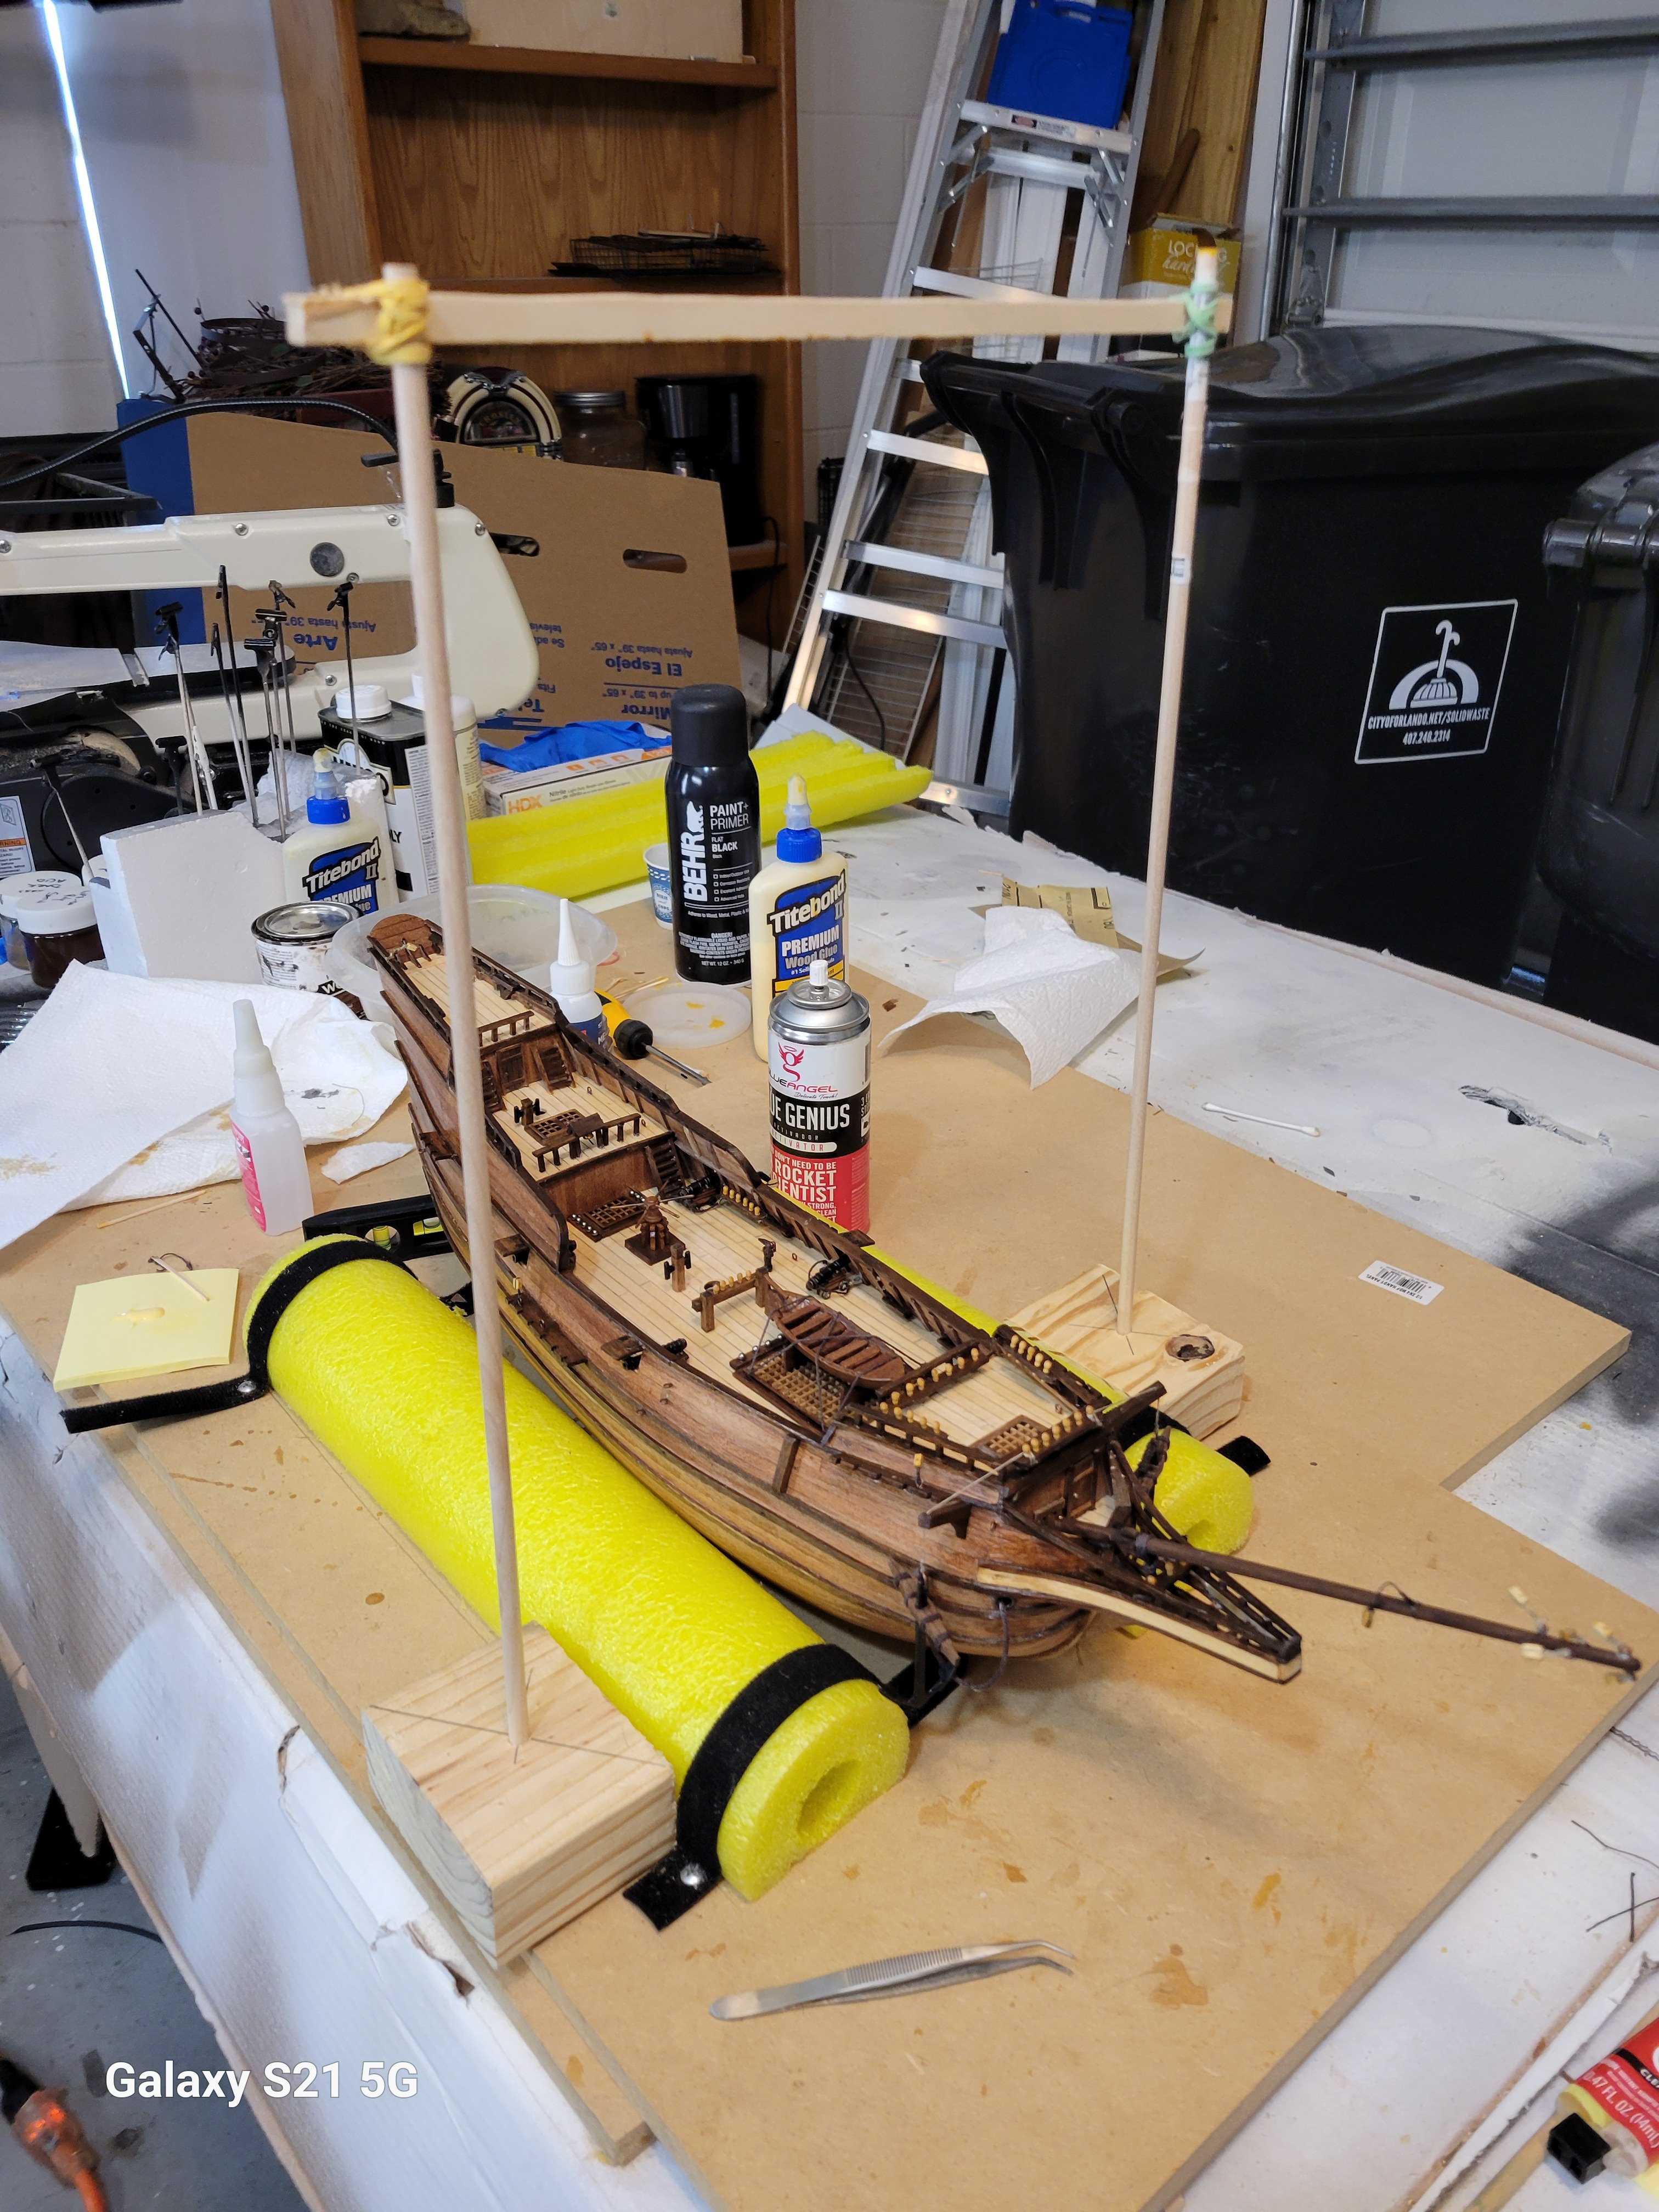
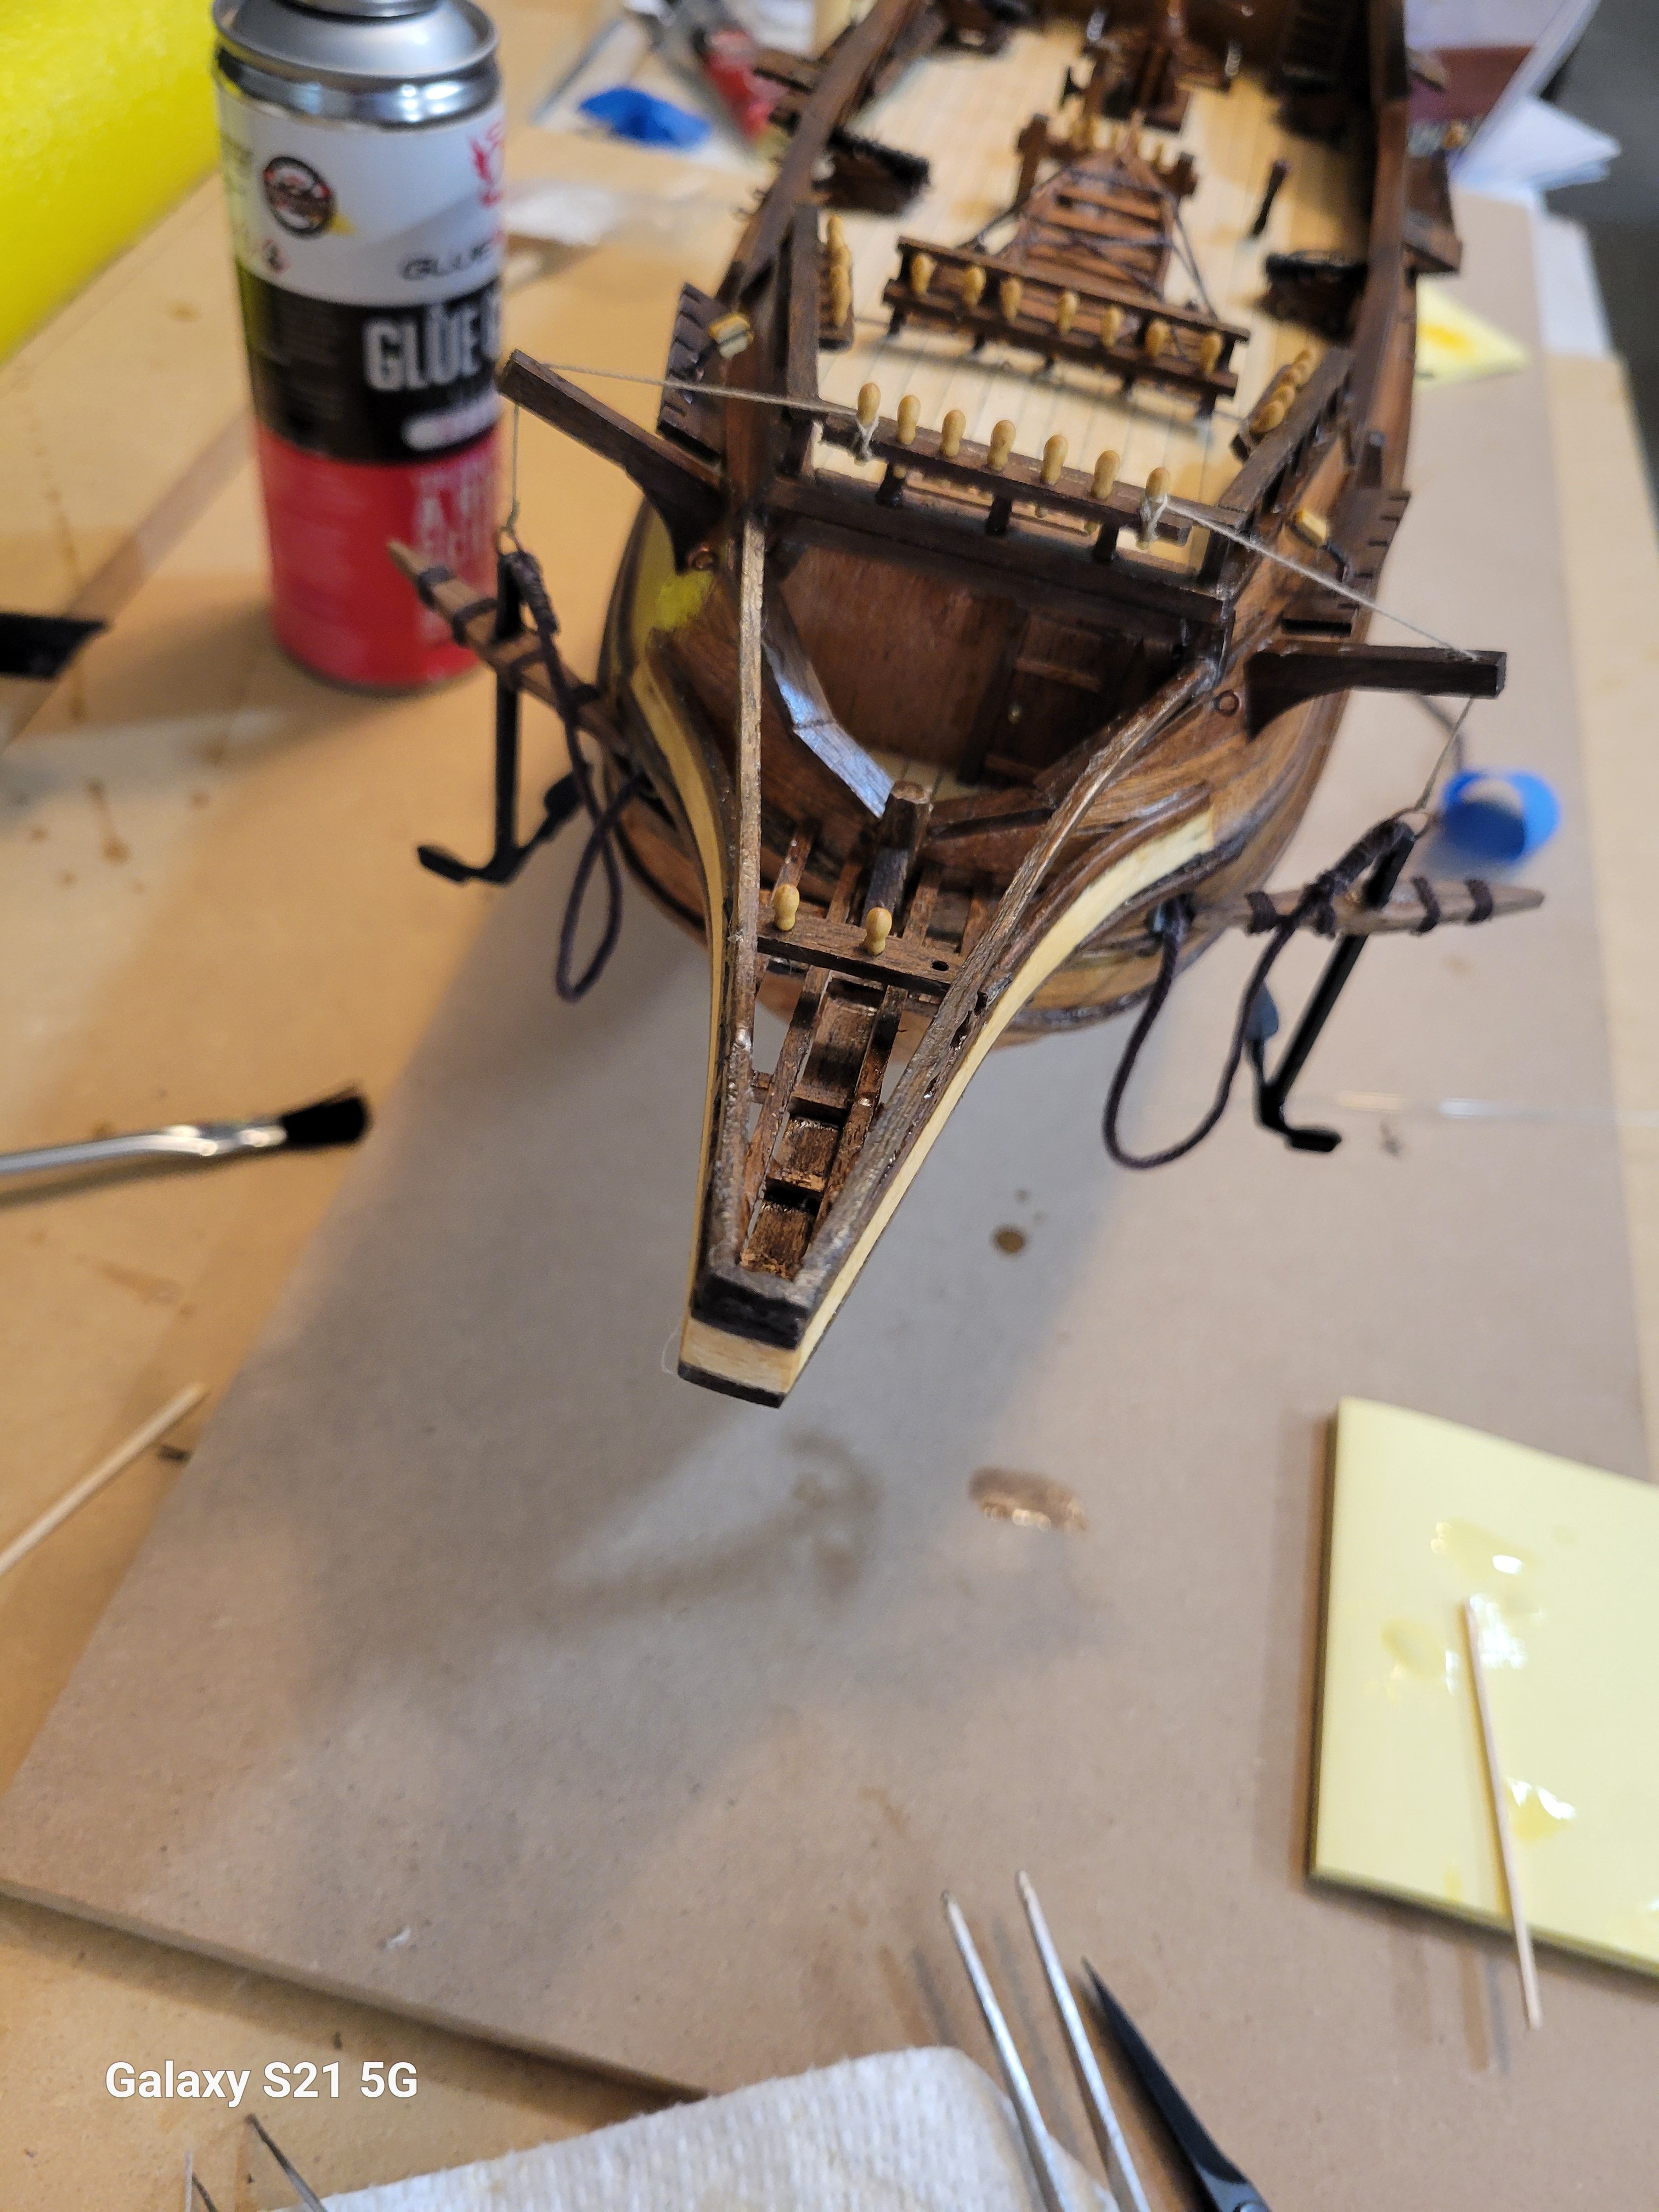
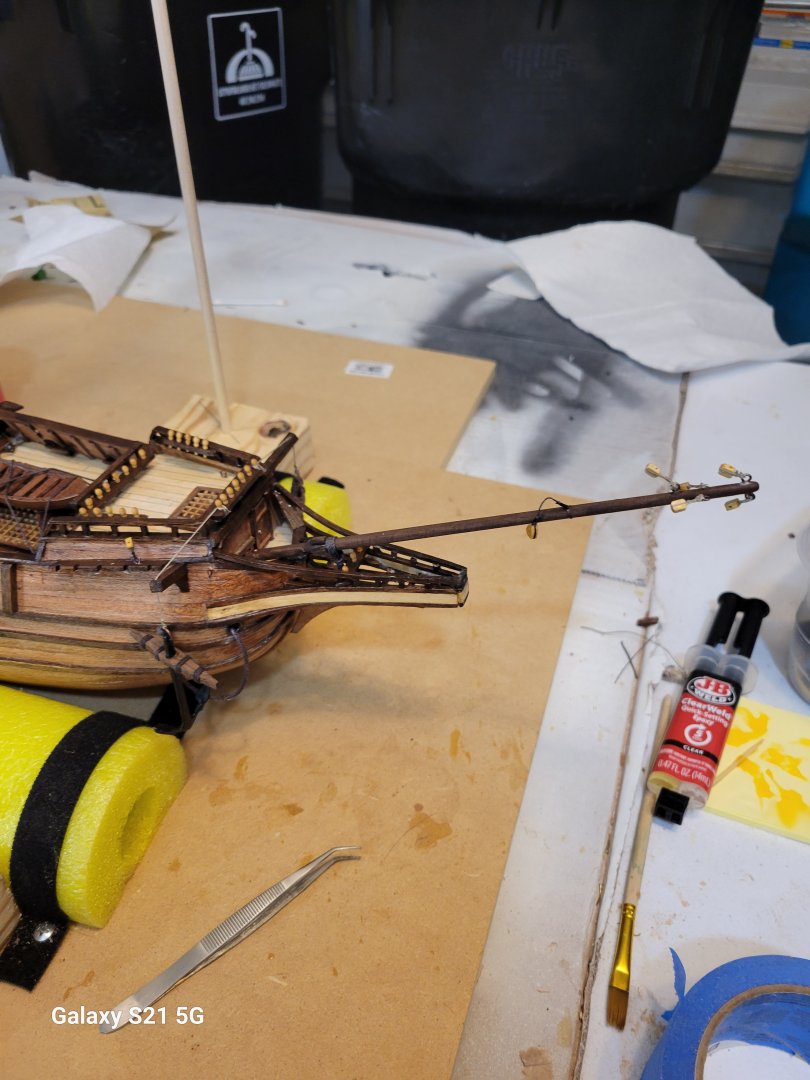
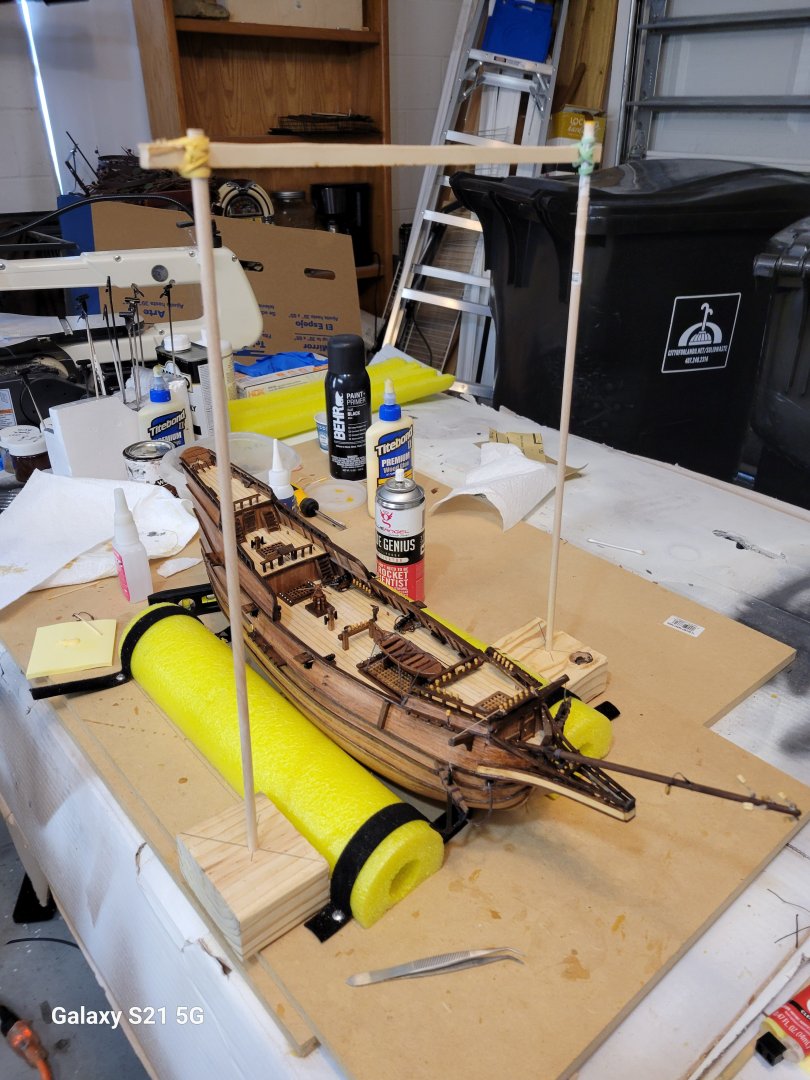
Bow sprite installed and lashed. All of the mast and yard blocks attached. the frame around the model is part of a jig to set the masts plumb.
- 46 replies
-
- 3
-
-
- Mayflower
- Artesania Latina
- (and 1 more)
-
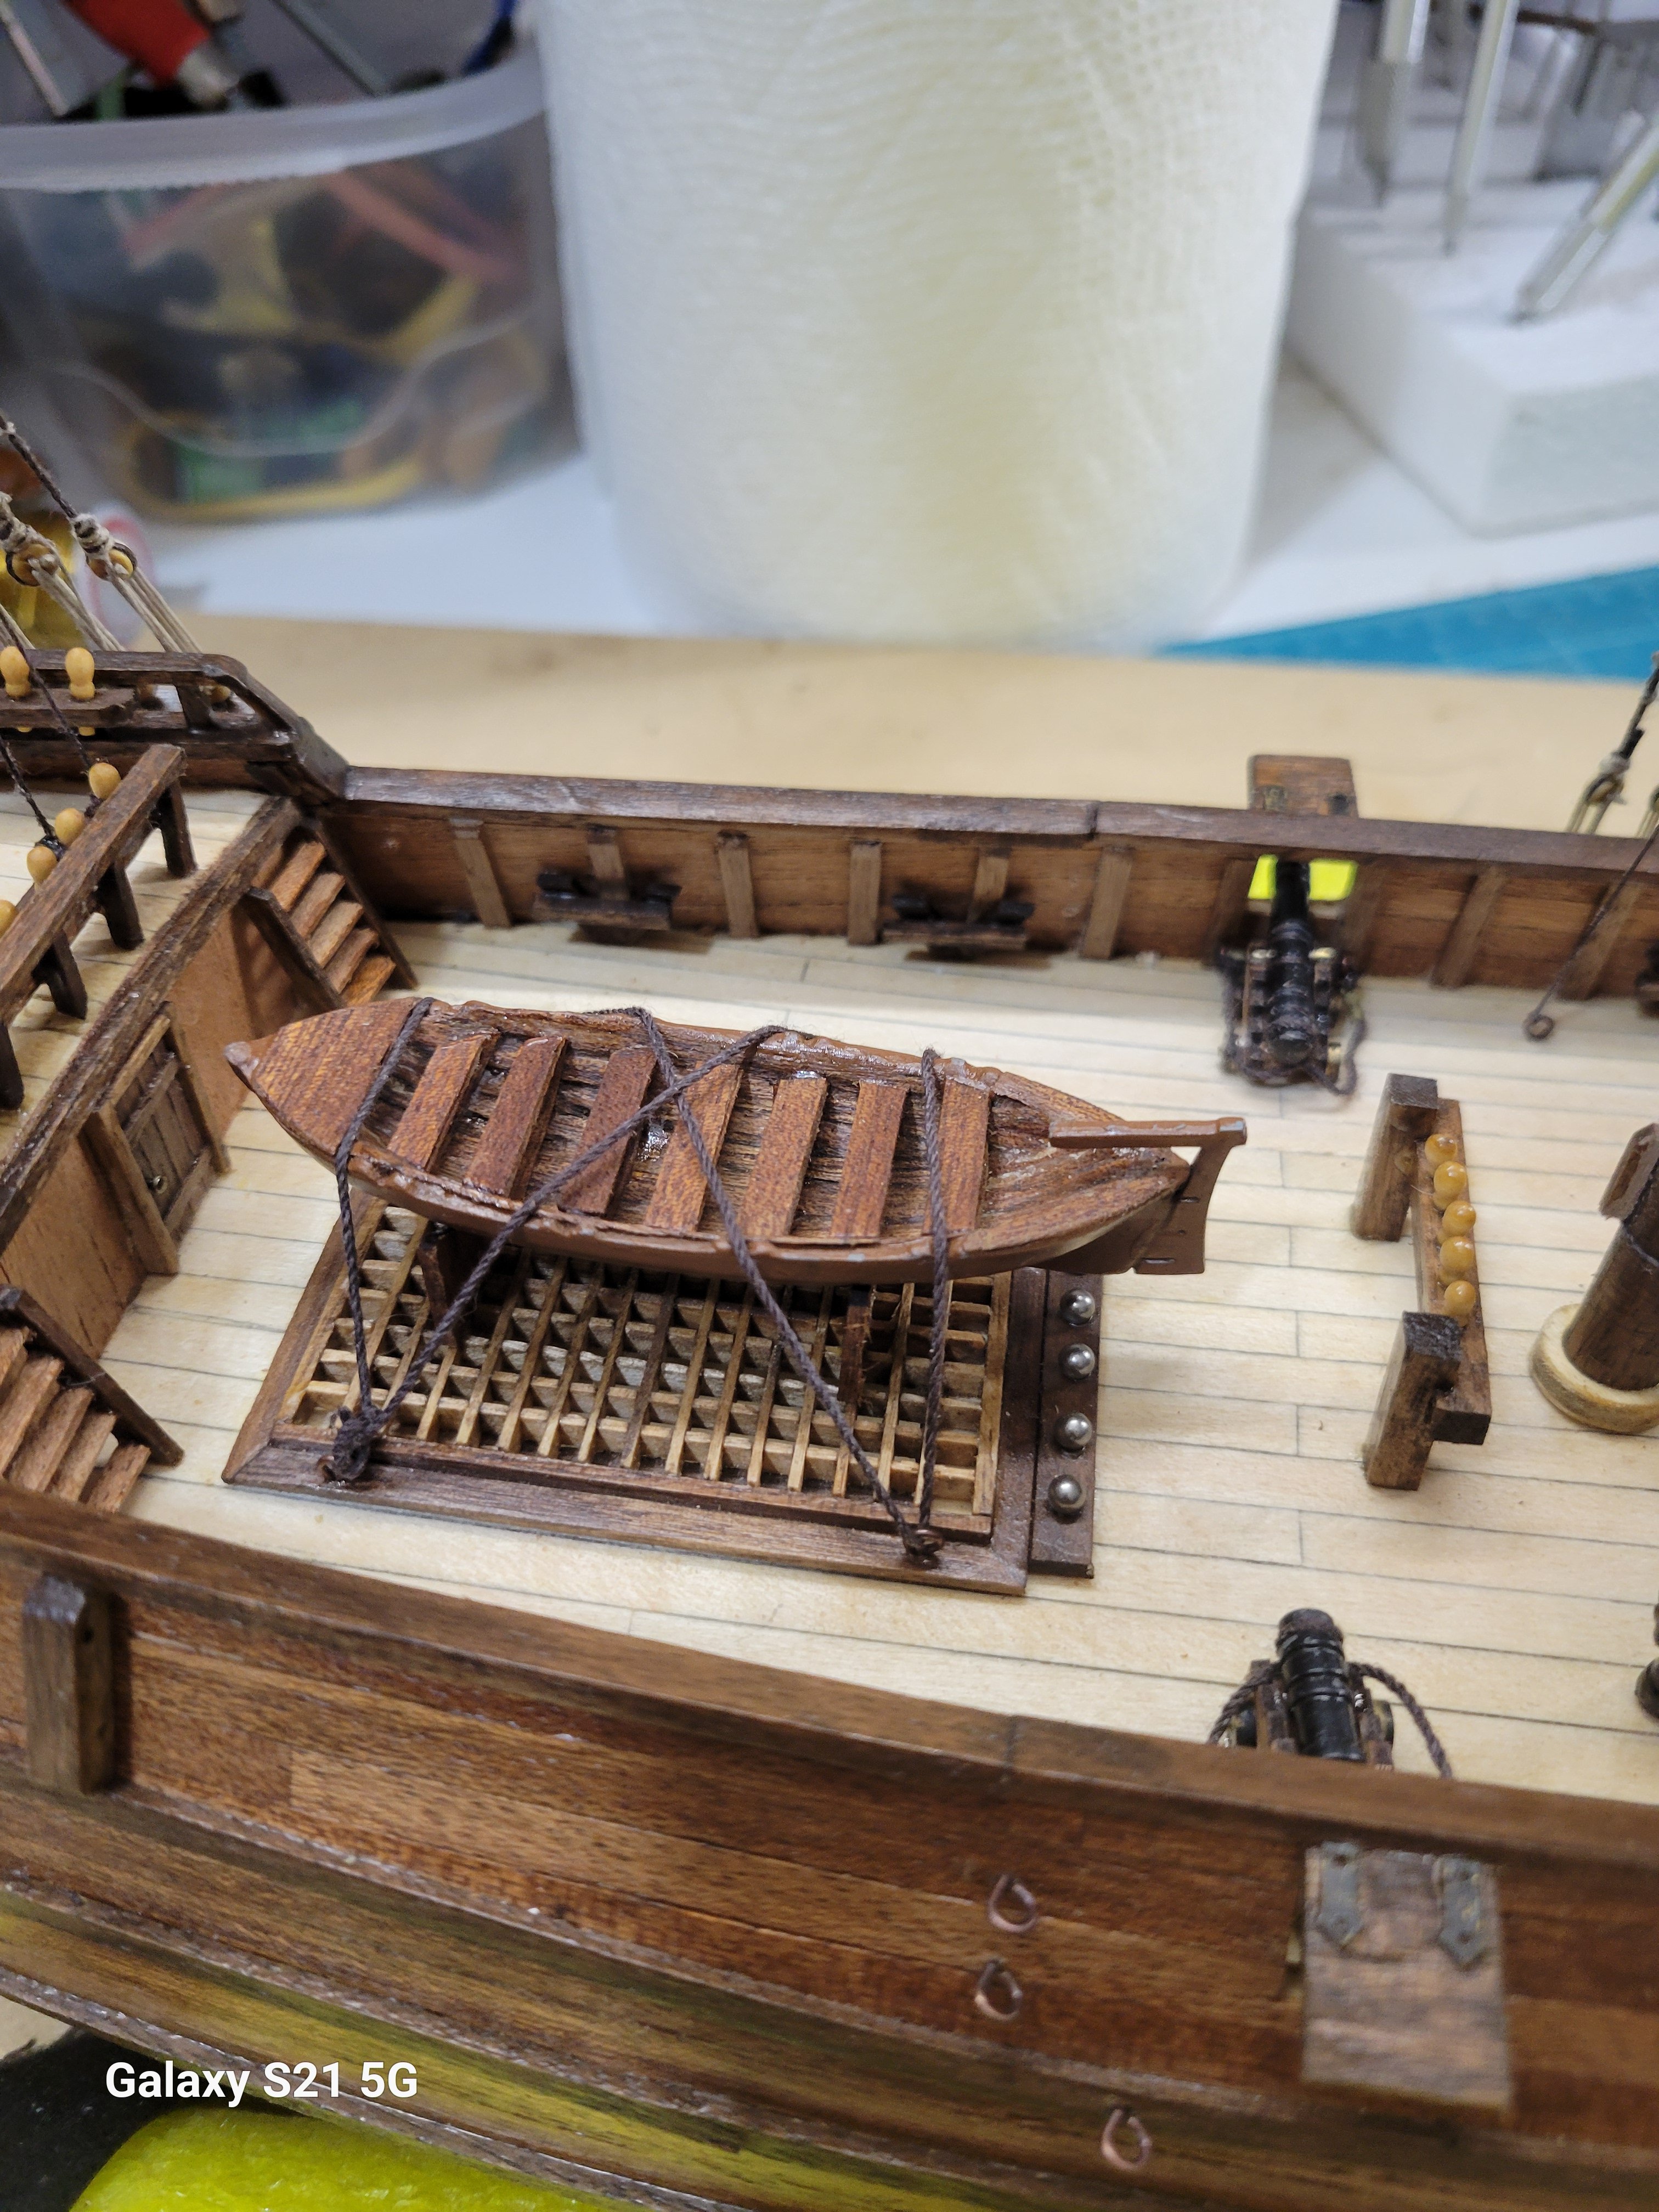
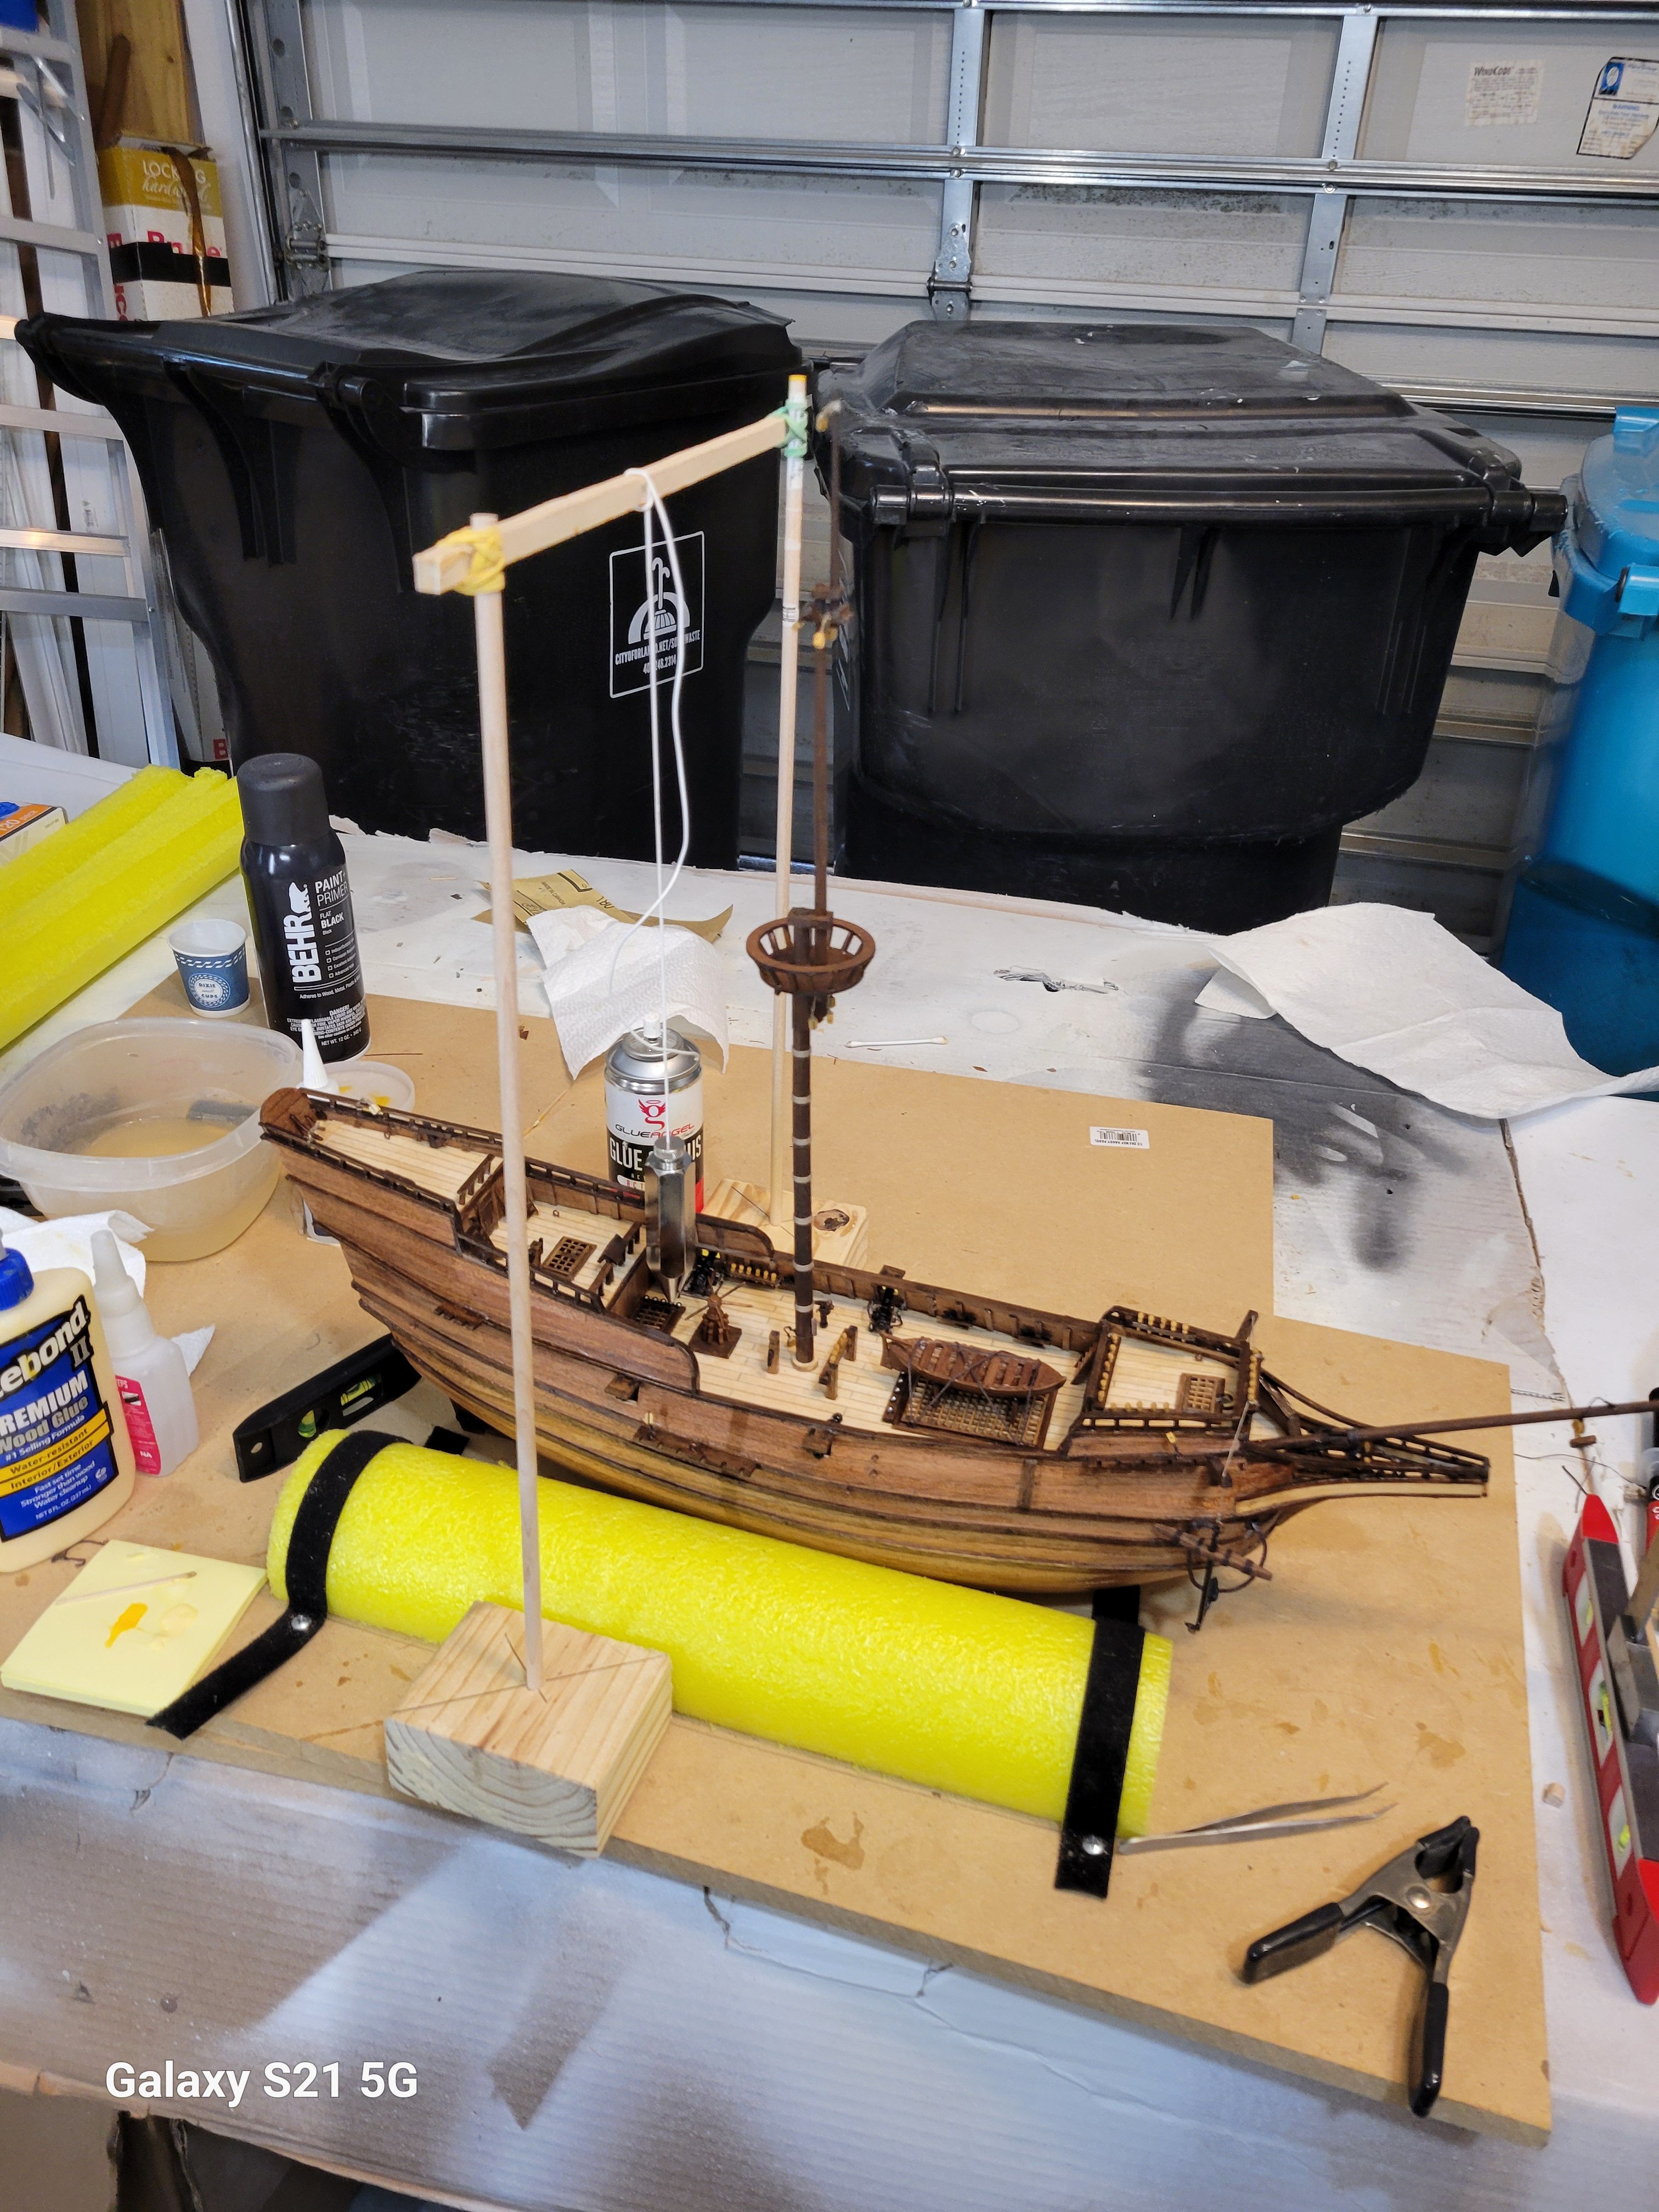
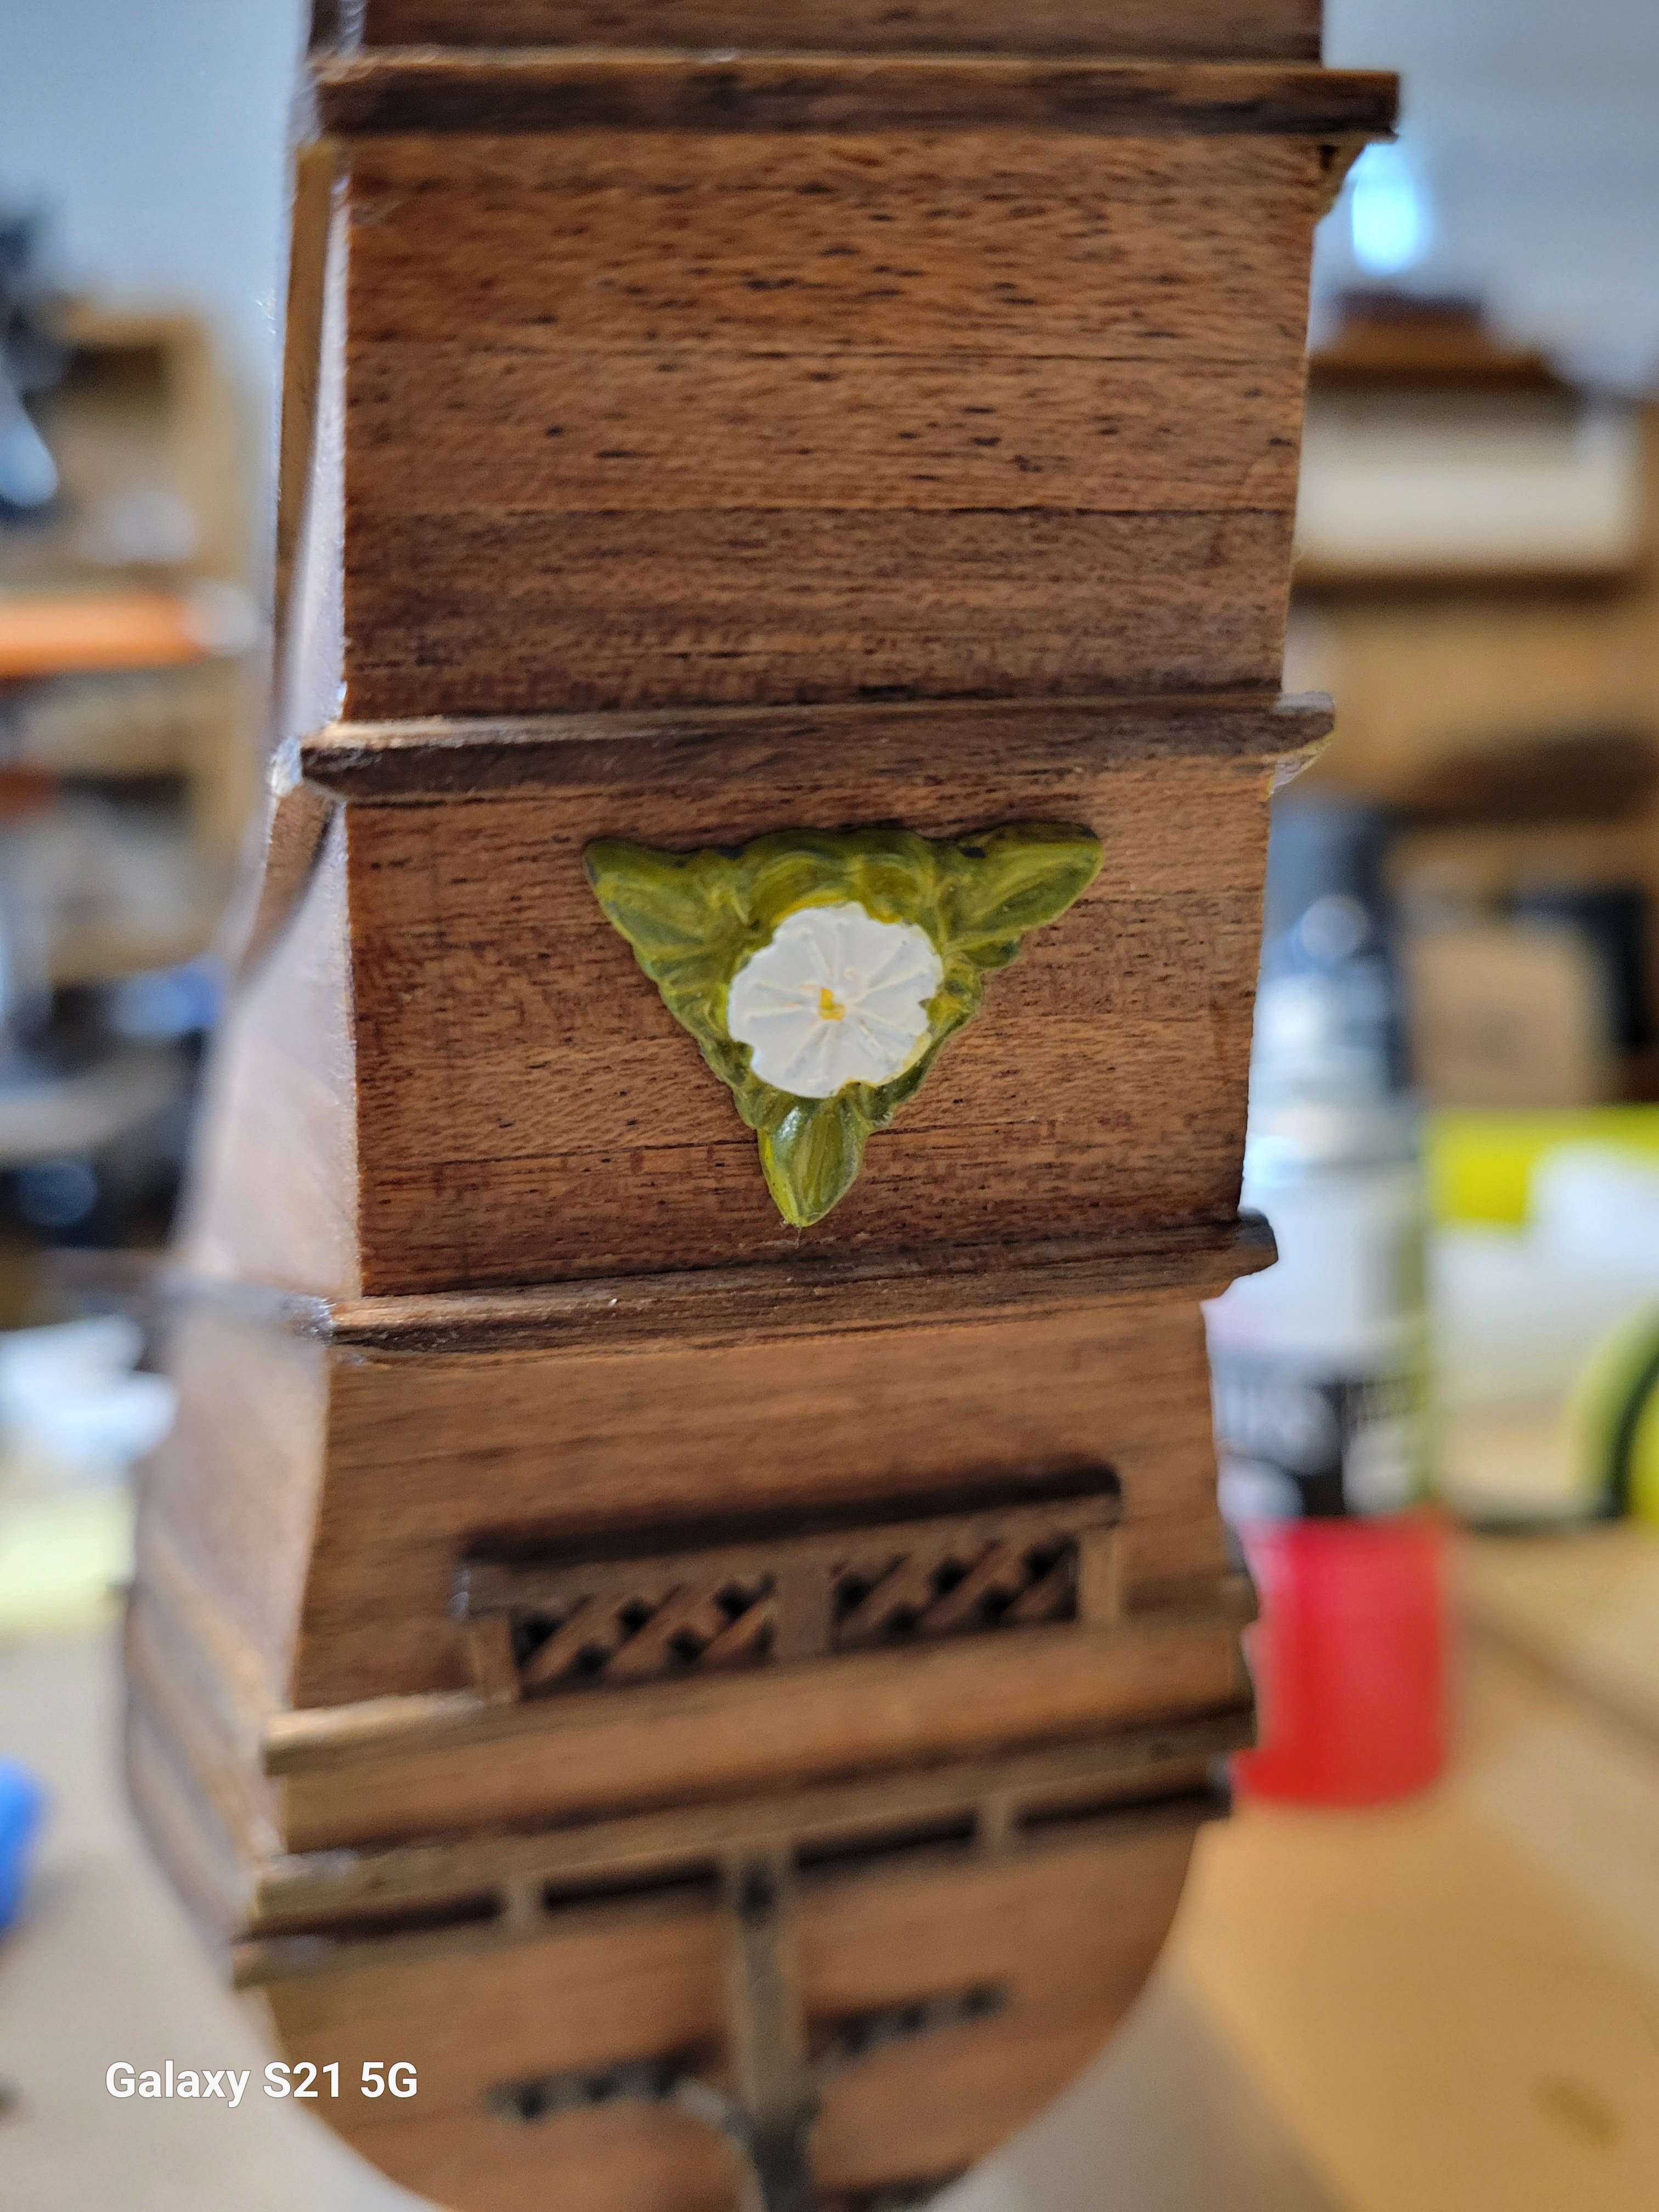
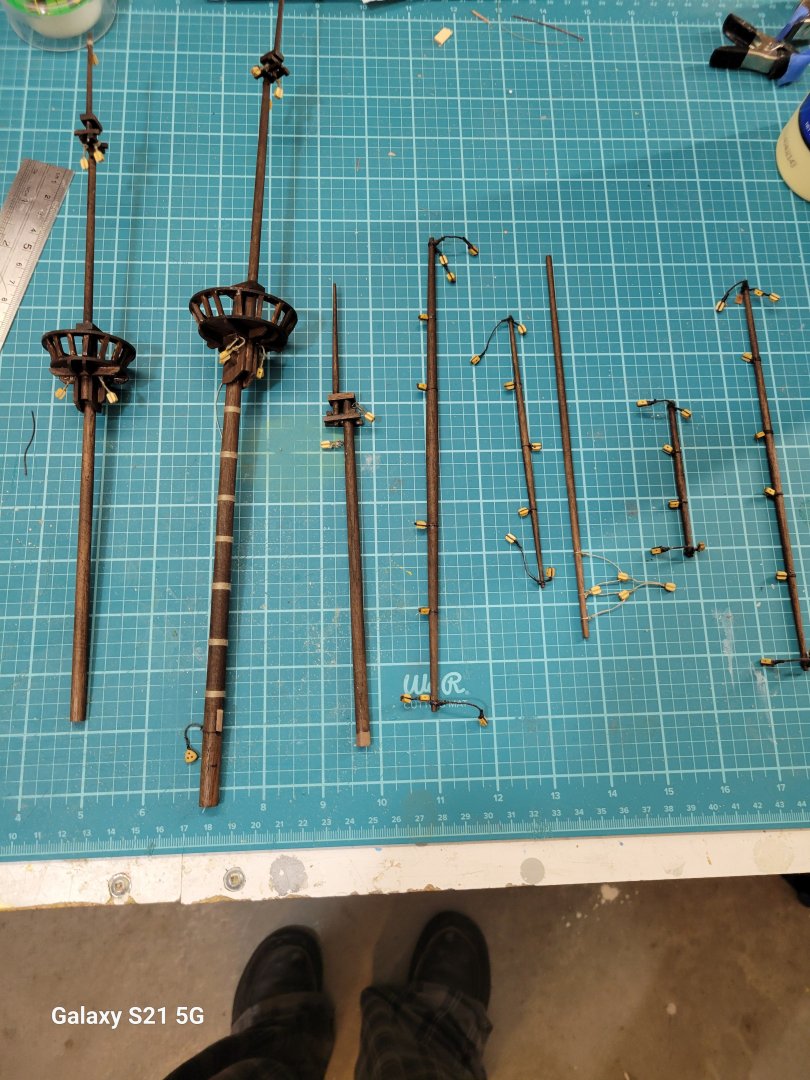
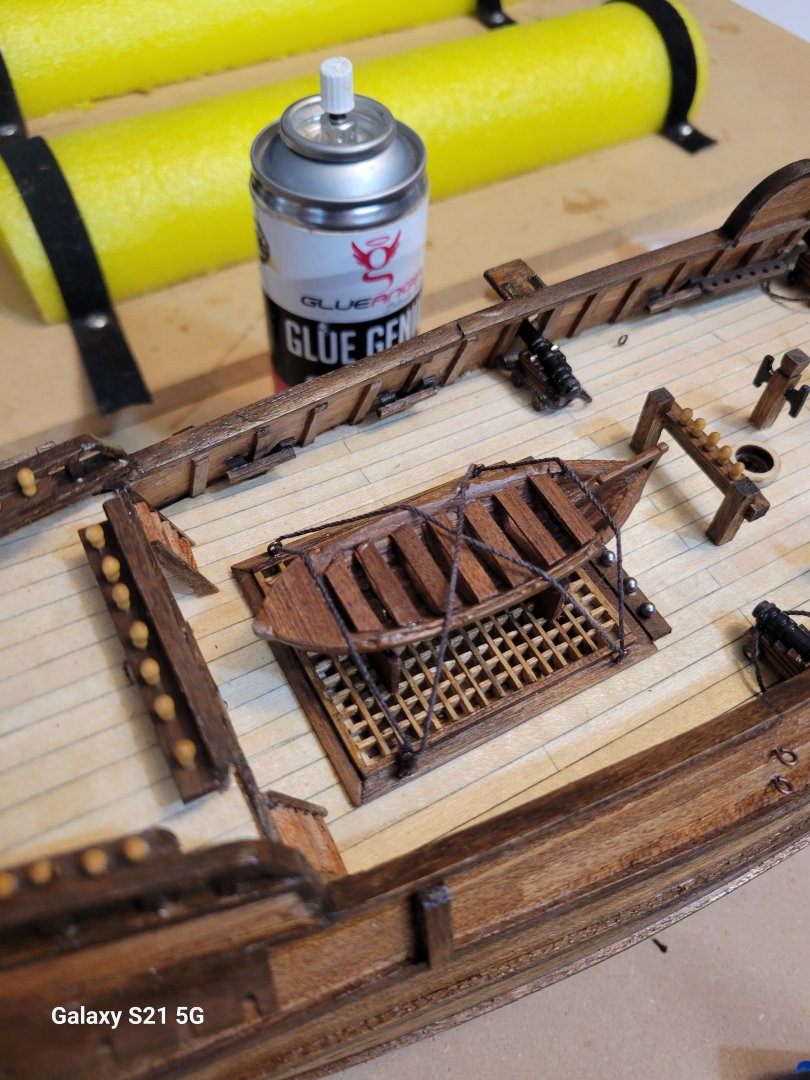
Rr⅘Some details finished in the last few days. Anchors installed, Mayflower emblem painted and installed, Boat installed and lashed down. Working on blocks for masts and yards.


- 46 replies
-
- 1
-
-
- Mayflower
- Artesania Latina
- (and 1 more)
-
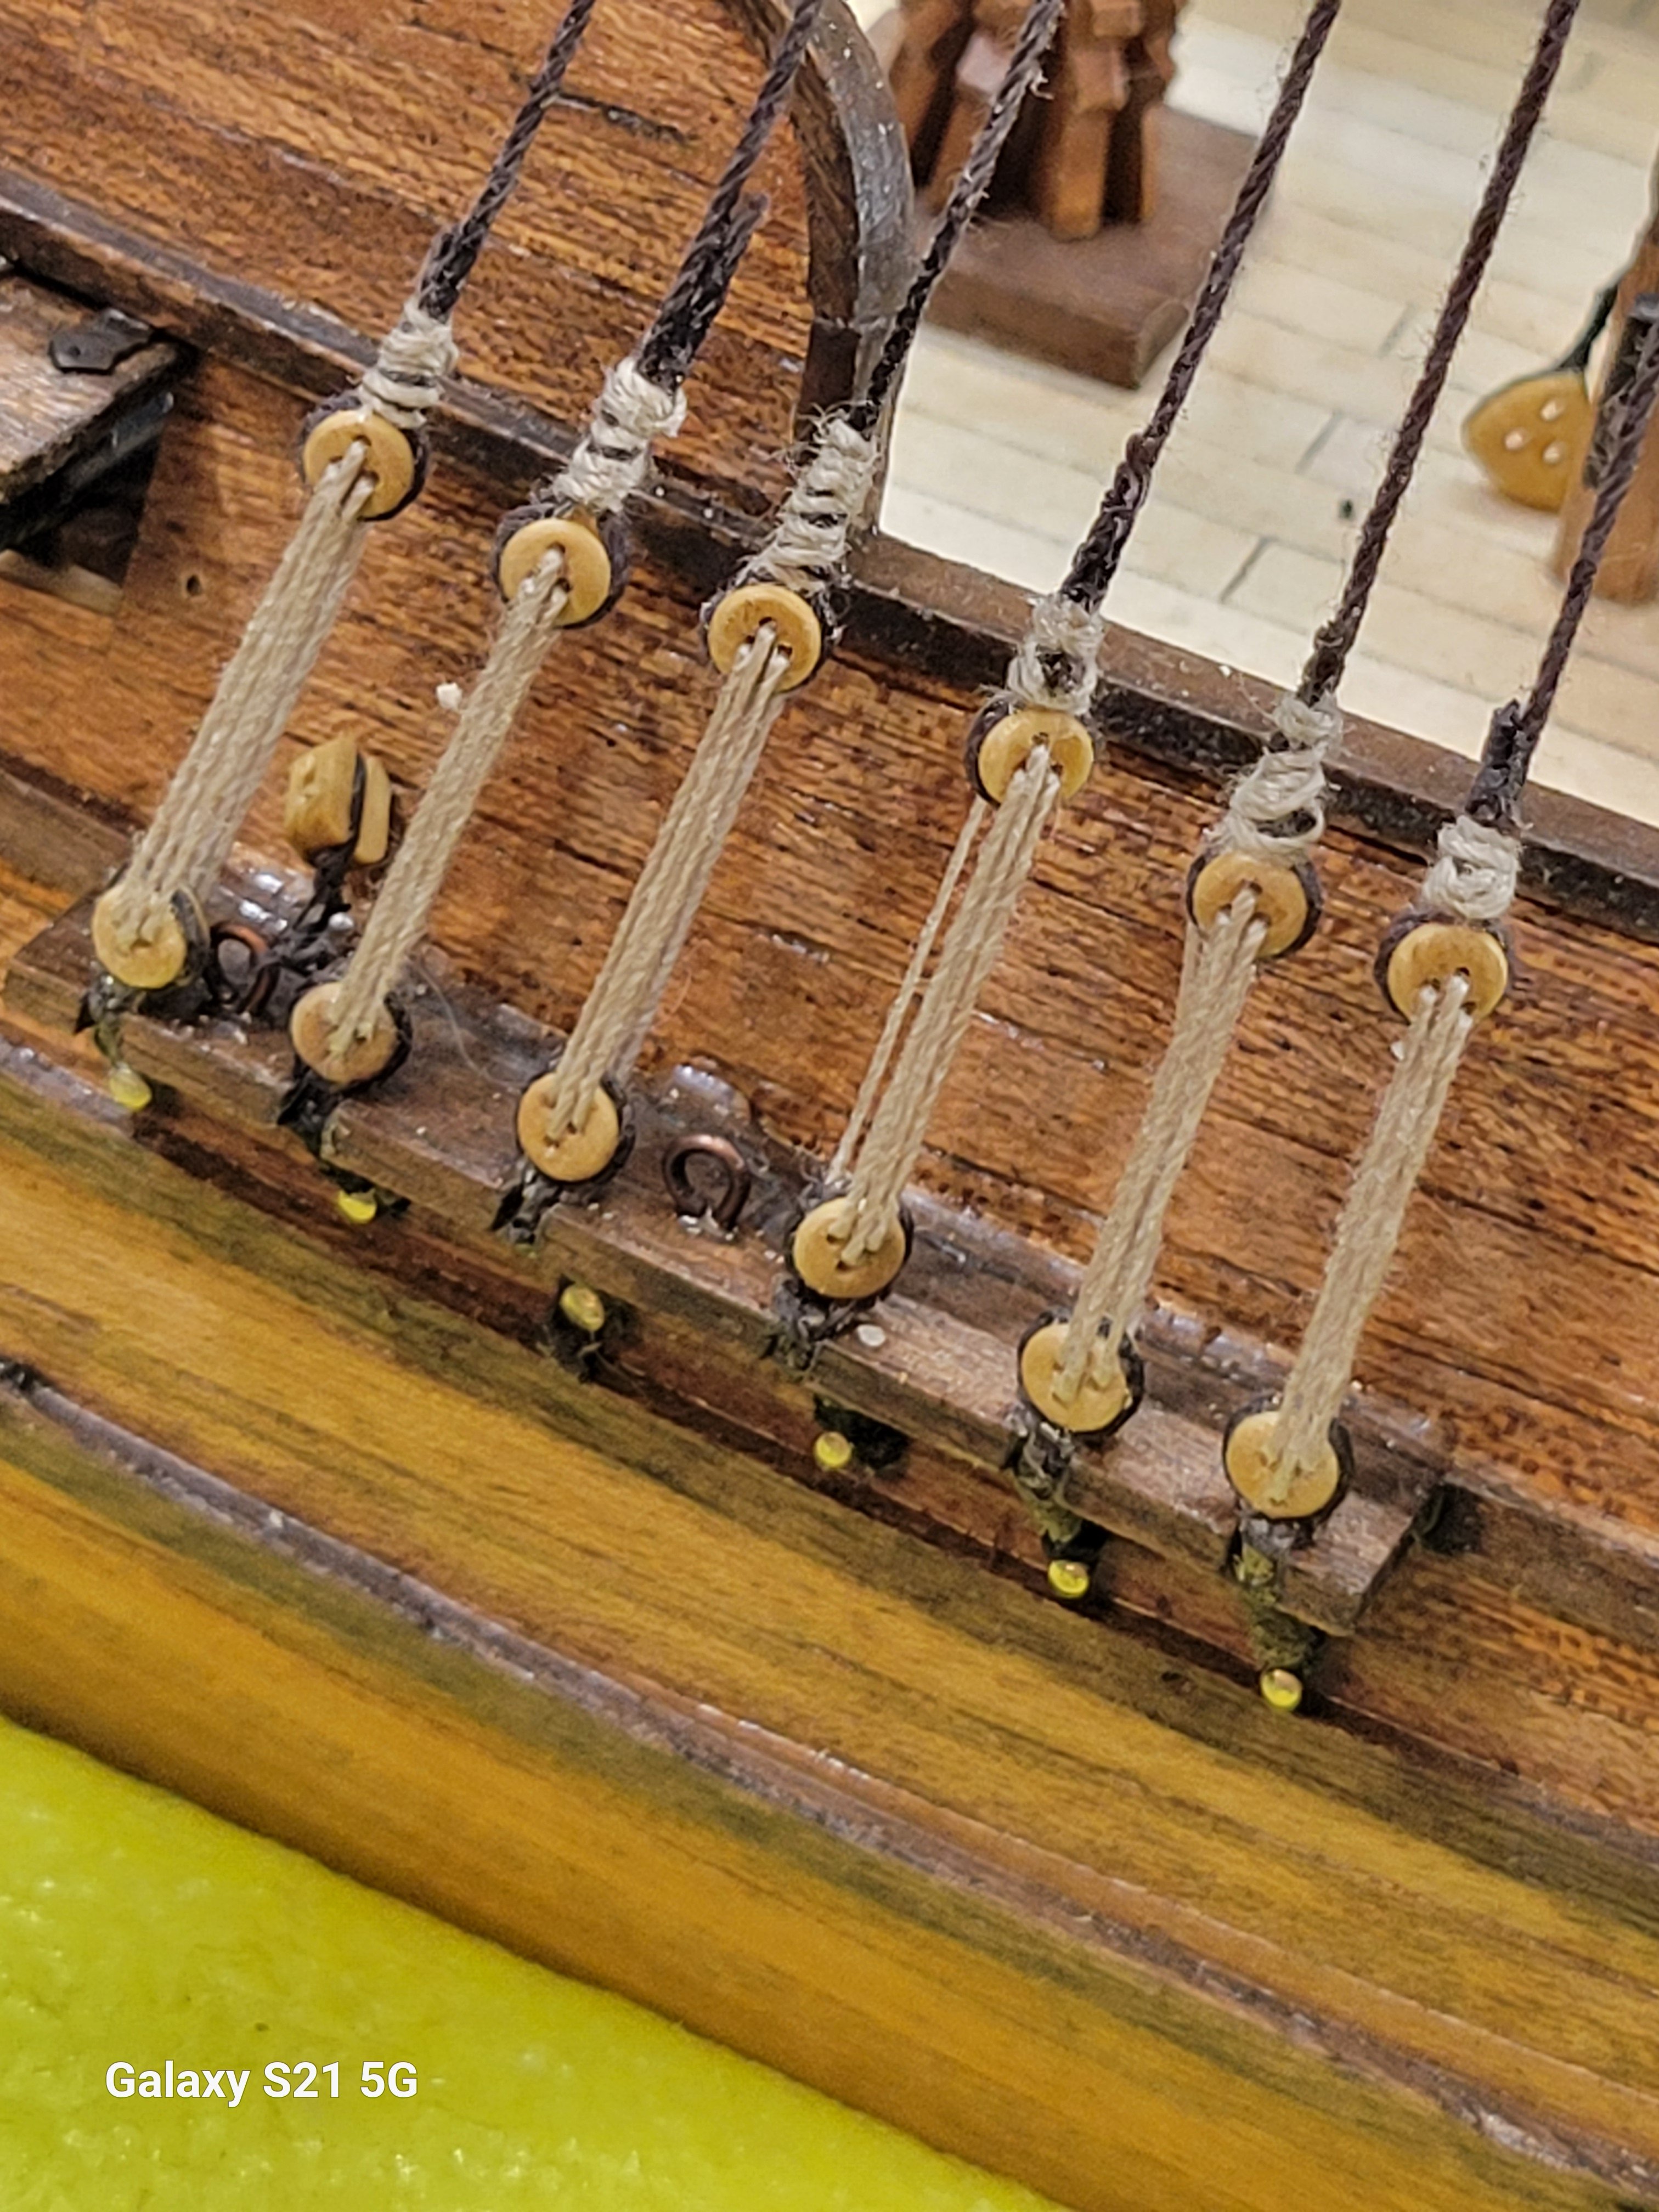
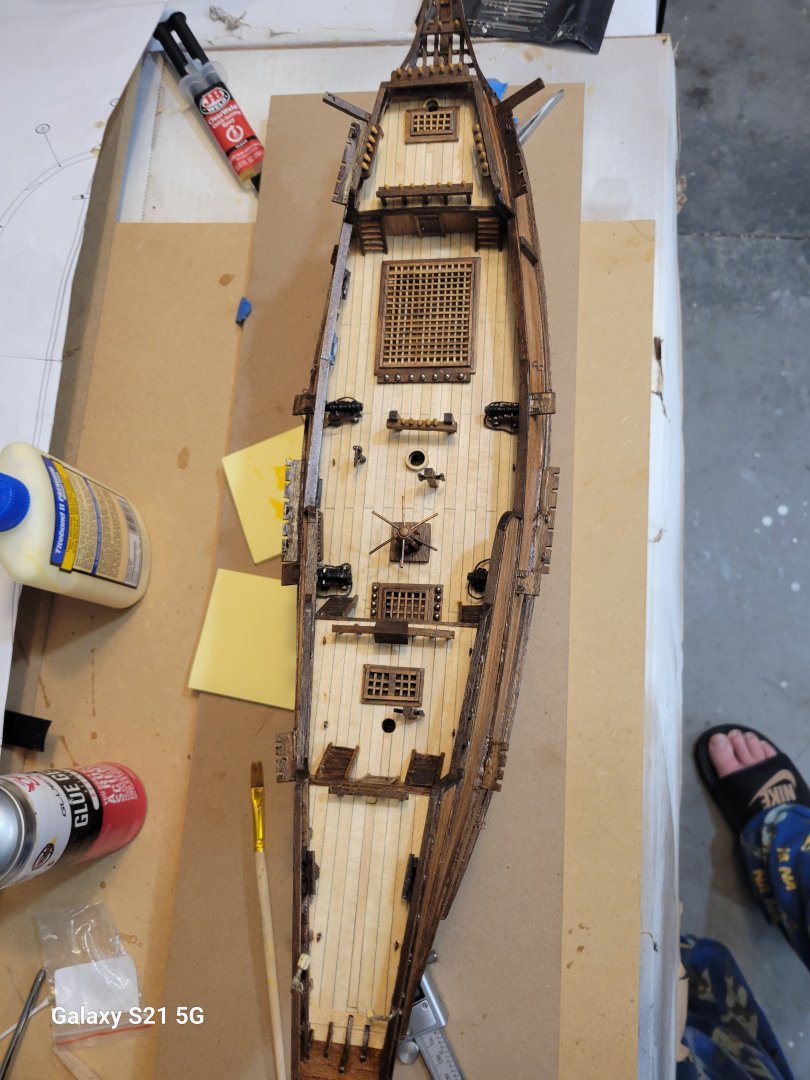
Added all furniture, except the kit was a few belaying pins short, so they're on order. Working on blocks for the masts.
- 46 replies
-
- 4
-
-
- Mayflower
- Artesania Latina
- (and 1 more)