


Adrieke
-
Posts
1,625 -
Joined
-
Last visited
Content Type
Profiles
Forums
Gallery
Events
Posts posted by Adrieke
-
-
my wife was going to subscripe me to the hms victory kit ($15 AUD a week) . was very tempting but in a 120 issues the price would be a fair bit higher then if bought as a kit (even with the extras they provide)
instead i said thanks hun but instead of doing this just add $15 to my weekly hobby budget and i can buy some other stuff with it

-
672 is not that much more then if you bought it as a kit and you do get the tool kit with it (dont know if the tools are good) and it does seem they give good step by step instructions with it
for most of the other ones i have seen of them the price is a fair bit more (up to double the price of a kit)
-
thanks for the information jpett
 that gives me a better idea of this tool
its so confusing for me since it seems lots of tools overlap in functionality .
my aim is to slowly build up some essential powertools and to get experience with them so that when i decide to go from kit buiildign to scratch building i know how to use them
-
as i am a total newbie to most powertools cna someone explain these combo drillpress/milling machines
and most important what things you can and cant do with them
-
no worries
good luck with it
what i also do i s i wrap up the de differnt wood and mark them with deimension and number and how much spare i have calculated i have
that way yuo get reminded when you are using it that you have plenty or you need to be very careful with it
-
hello DCironfist
i get a notepad and the partslist.
then i start with the first part that is not preformed and wirte down the dimension and type of wood and then underneath the length and the number of parts
then i scan the rest of the list for the same dimensions and write them all down
then i take the wood of that dimension measure the length and number of them
now start with the longest length and fit them into the length of the wood till its comes up to the total length
example :
sapelli 1x3
2 times 200
3 times 90
1 time 400
20 times 30
i have 5 pieces of the wood with length 400
so i have 1 ful lenght one
then 1 x200 + 2X90 = 380 thats 2
then 1 x200 x 1x90 + 3x30 = 380 thats 3
then 13 times 30 = 390 thats 4
then 4x30 = 120 thats 5 with about 280 in spare
lots of work but its worth it
-
thank you Rebecca i wil check out these other glues. i sympathize with you as for me its mostly just sneezing runny nose headaches and a bit of wheezing which is already bad enough but so far i have had no asthma attacks.
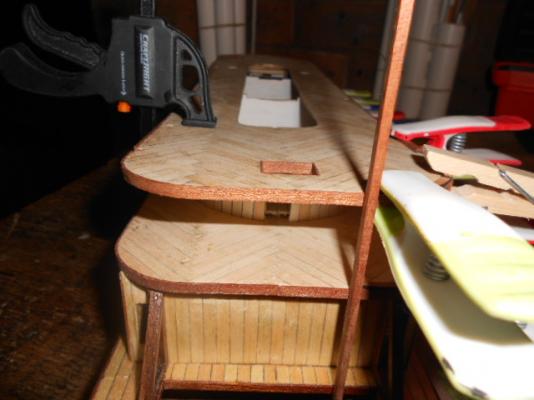
today i am certain that i am not happy with the door. have to think about it thats why i worked mostly on sanding the burnmarks of the curved railing parts
also i cut a bunch of the straight railing parts and together with the curved one did a measure on how the 2nd dack railing should go.
surprise surprise the ful scale plans are wrong. they show that the aft straight railing should be 35mm long
but if you look at picture 70 in the instructions and count the railing vertical poles of that piece you come to 21 while the normal 35mmm piece only has 17 . that would mnake this aft part about 43mm and with the measuring i came to 44mm . close enought to be right
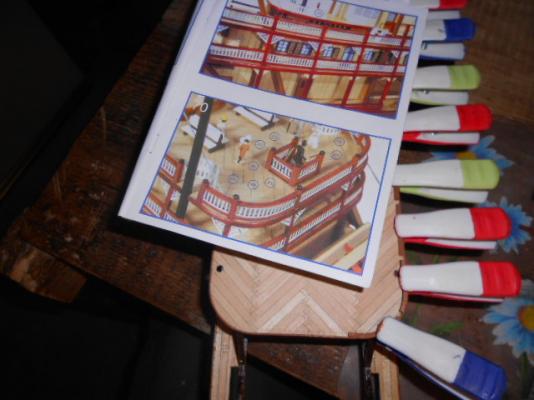
also the two differnet sizes of part 186 are correct (why not number them differedntly AL) the longer ones are for deck 2 the shorter ones for deck 3
the last picture shows that way the railing vertical bar line sup perfectly
-
-
hi John
no i decided to not put windows in the doors
-
thanks for the comments Jim
i have seen your build and its looking really good
dont know how you do it i alreayd have trouble on my scaleunfortunately for me my alergies are still the same. but now that i figured out what is causing the issue (the CA+ glue) i am wearing a mask when using itand so far i have had no issues again
oh i noticed that the link to your robert E lee in your signature is not working
-
thank you Sjors
so far he has just been doign his work . but i did tell him to put away that ukelele
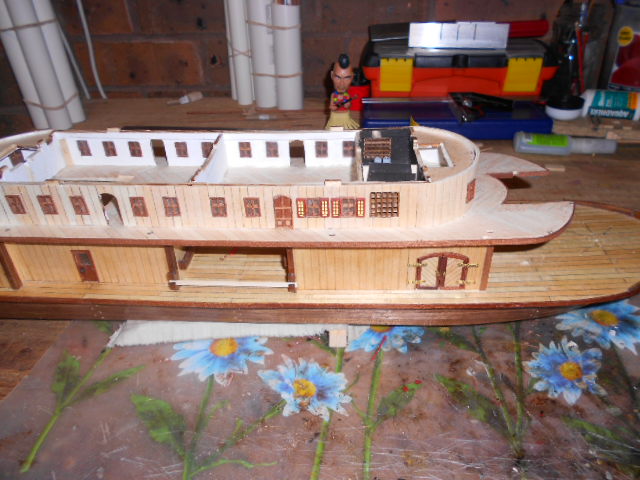
finished the first door. not sure if its a success or not


also had a look at markign where the railing posts shoudl go so i can start making the holes.
I hope John can figure it out because i cant. first there are suposed to be 4 preformed curved parts for the railing aft acording to partslist. however there are 8 acording to the drawing of the preformed part sheets. but they are actualy 2 different lengths
with fitting them and using the plans it seems like they are not long enough. looking at the building fotos it could be that the aft middle railing is wider then the 35mm its supposed to be.
-
-
Thanks Adrieke for your best wishes and no, you are still in time. It's only 22:42 in Palm Coast, Florida.
I'm winding down though, glass of wine is almost finished and then for my beauty sleep.
btw, you speak Dutch???
Cheers,
yup
i am from belgium but living in oz
-
i know i am a day late but ne gelukkige verjaardag from me too
-
hello Ian
yes i think you can do it as a waterline model but you have to figure out where to cut the hul sheets to the correct size
-
-
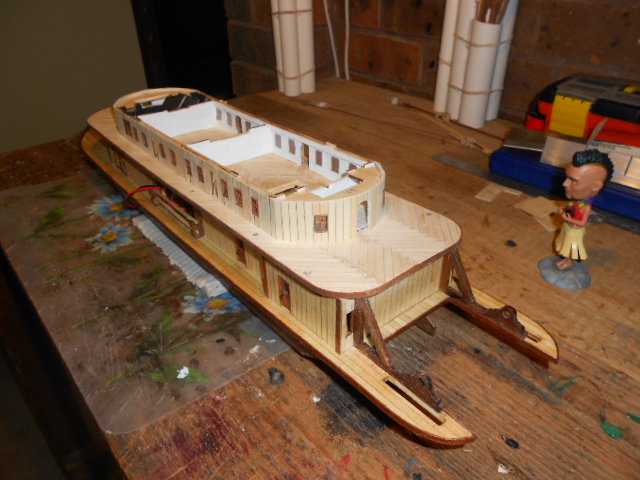
lol
nah thats my new workbench supervisor to make sure i keep it clean
although he is a bit weird keeps asking : do you know the definition of insanity ?
-
HI John
no i am alergic to dust, cats dogs and anything that has sharp smells.
in this case i think its the ca+ glue as i had been using it a fair bit . so from now on i am using a mask to prevent this again
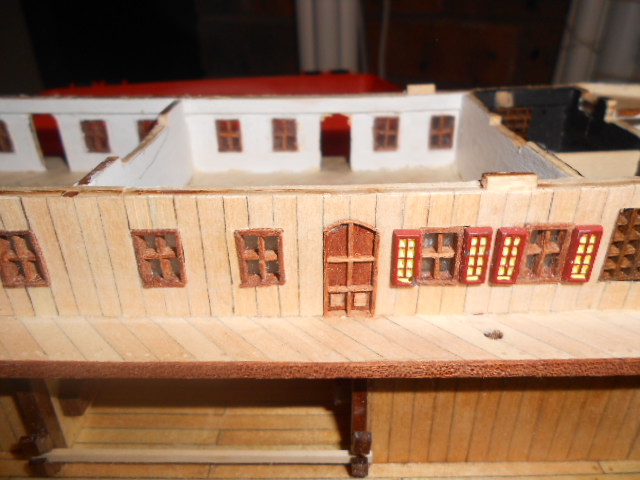
i finished all the windows on the 2nd deck state room
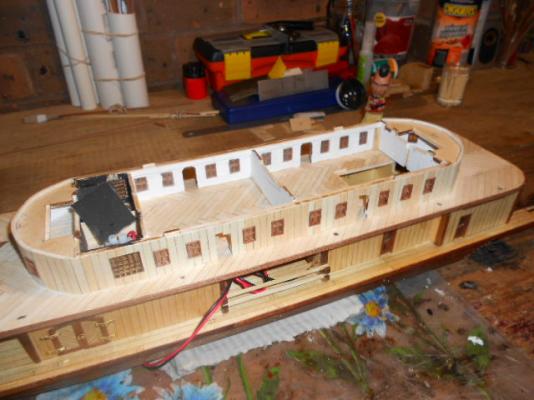

next the doors. from earlier trials just plain veneering the metal parts was not enough. so i am going to try to recreate how the metal door looks but then in wood. i will need to slice 1x1 mm sapelli strips from the 1x3 ones to get the fine detail so thats going to be a lot of fun. atleast there are only 6 of these doors
-
yup almost there Andy
looking really good -
not much done this week. after cleaning up my workbench i had a lot of issues with my allergies this weekend.
i did finish 8 of 10 last windows i ll be fitting them in tonight hopefuly
-
its amazing what you are doing on such a smale scale
-
no worries glad i saved you a trip
-
yes its the advanced one
just something to keep me busy when i cant be in my workshop
-
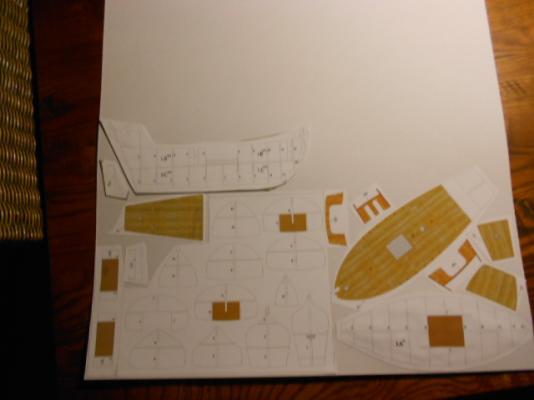
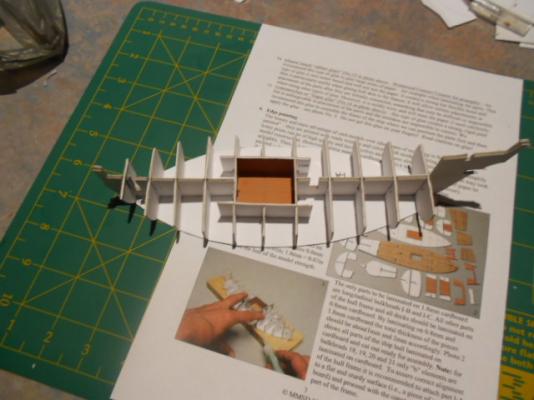
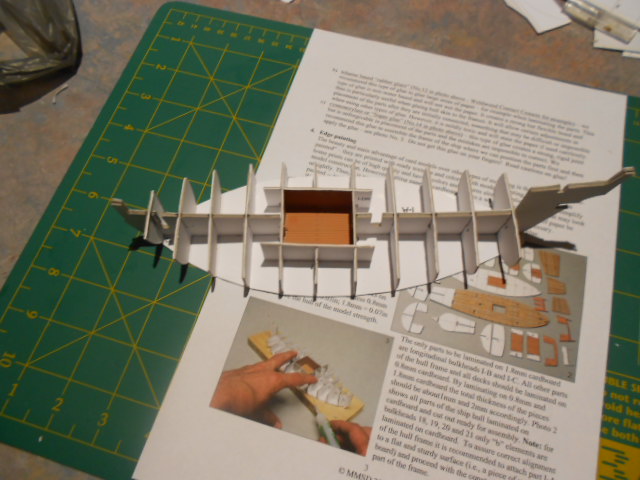
i downloaded and started this free model from the Maritime Museum of San Diego to see how it is building in card
first some of the parts needed to be on 1mm and 2 mm thick cardboard
upper hull structure assmebled


Gorch Fock by Adrieke - OcCre - 1:95
in - Kit build logs for subjects built from 1901 - Present Day
Posted
a bit of history about this ship.
there are 2 ships wiht this name and they are named after the pseudonym of writer Johann Kinau who died abaord the sms Wiesbaden in WWI
the first one was build in 1933 as a training ship. she has more then 300 ton steel ballast to make her safe and even when heeling 90 degrees would upright herself. she was not used during WW2 until 1944. in 1945 she was scuttled to prevent her from beign captured. She was salvaged in 1947 and used as a training ship by the Soviets and renamed Tovarishch. she sailed around the world and won the operation sail race twice. in 1993 she was deactivated as there where no funds for repairs. 1995 she was brought to the UK for restoration but this failed. in 1999 she was sialed to welhemshaven and in 2003 she was finaly transfered to Stralsund Germany and renamed Gorch Fock. She is now a museum ship and in poor but stable condition.