

SaturnV
-
Posts
167 -
Joined
-
Last visited
Content Type
Profiles
Forums
Gallery
Events
Posts posted by SaturnV
-
-
Hi all,
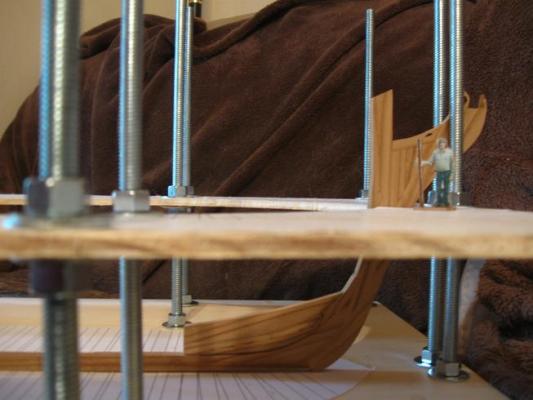
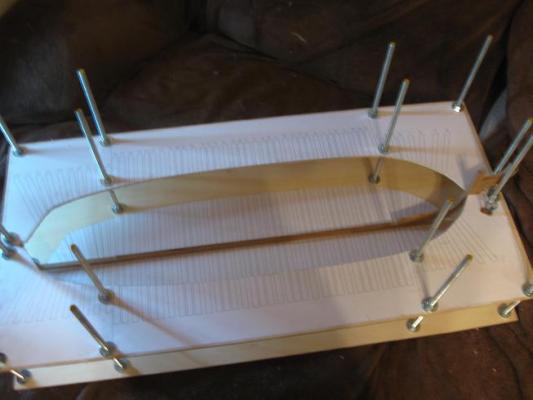
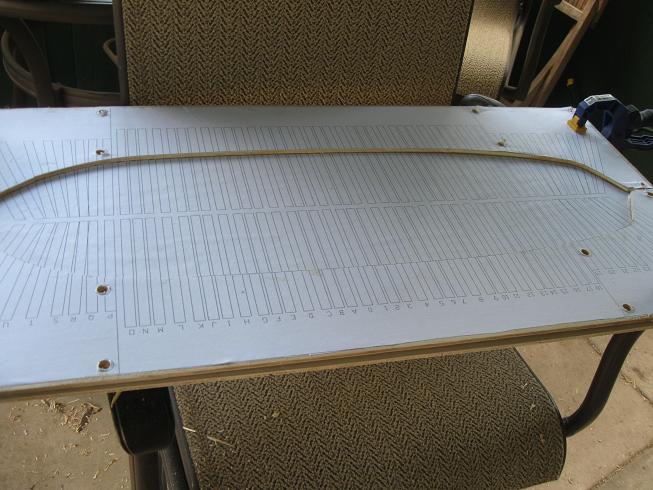
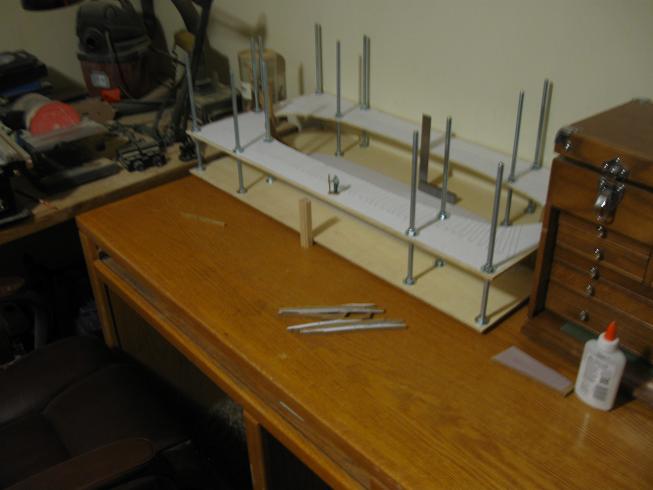
Built the building jig over the weekend - see below pictures. Also made and attached the false keel. Still need to run the entire keel assembly through the thickness sander.


-
Ha ha! A miniature me for displaying with my progress pictures! Downright silly but still funny. Perhaps I have too much time on my hands.........

- mtaylor, sonicmcdude, st george and 1 other
-
 4
4
-
I'm going to use the jig. I bought the wood and threaded rods for it last night.
I'm not getting any answers to my questions. I thought you guys were supossed to be helpful? ;-)
Richard
-
I have completed the bow portion of the keel and also all of the way back to the stern deadwood. I want to install the false keel before proceeding with the installation of the stern section so I am concentrating on that at the moment. The false keel is rather thin and I have to sand in the interlocking joints (term for this?) on them prior to installing. Should prove to be a learning experience. The false keel will be made from some walnut I collected from a friends house. He cut down the tree 10 years ago so that now the logs are perfect for modeling.

-
Thank you Matrim. That is a good idea. I will go home to tonight and try to get an appropriate picture of myself.
I have another question, on the frame drawings for frames 28 through 19 there are degree numbers - i.e. frame 28 says 29 degrees.
Is this the amount of twist in the frame from top to bottom?
Richard
-
All,
A couple of questions:
1) On the Jig Plan, is the "support post template" the height at which the plan should be placed above the the building surface? I think it is, but wanted to be sure.
2) Where do you all get the picture of the scale sized little man holding the stick? =) I see this guy in several posts and wanted one for myself.
Thanks ahead of time for any responses,
Richard
-
Hello all,
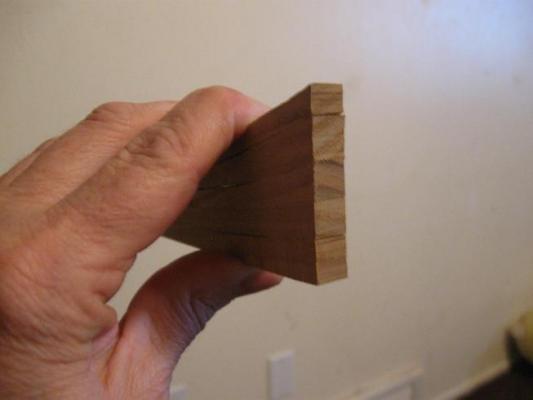
I have made some progress on the deadwood over the weekend. This is much better than the last attempt and I feel confident that I can move on to the fore deadwood now.
It is difficult to take a picture of a taper but with the right shadows it kind of stands out. Here is a picture of my work in progress on one side of the deadwood. I think I will save the final sanding of the taper until I get some frames made up for that area so I can get the taper to blend well with the frames:
- Elmer Cornish and fatih79
-
2
-
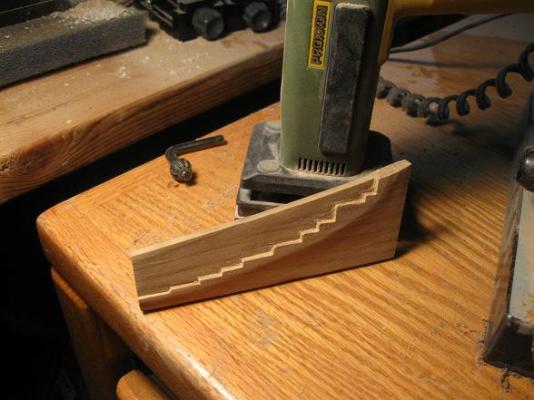
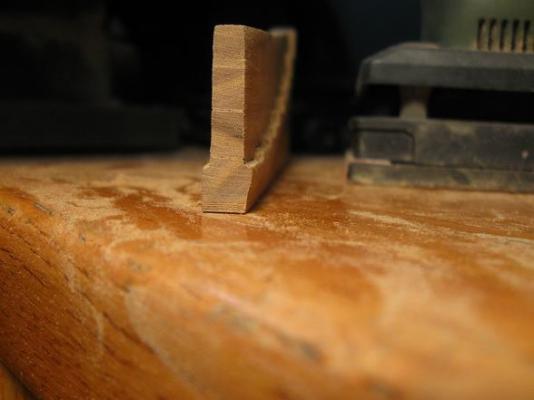
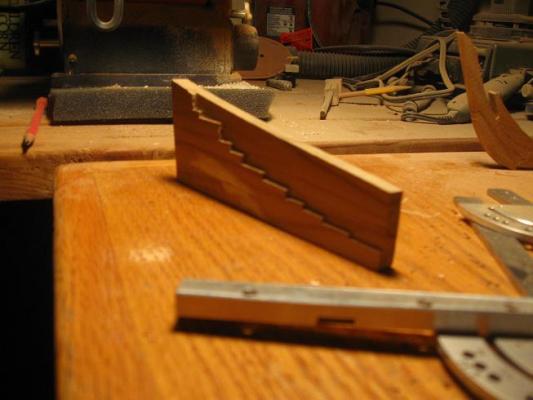
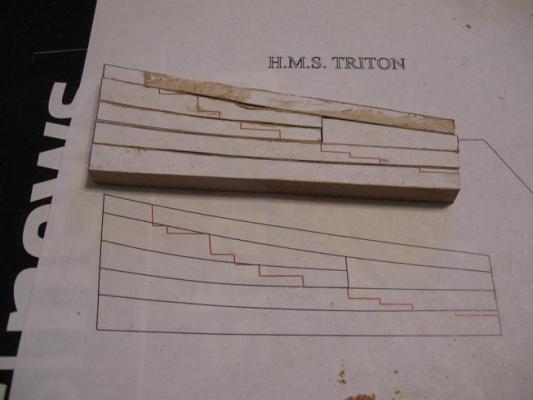
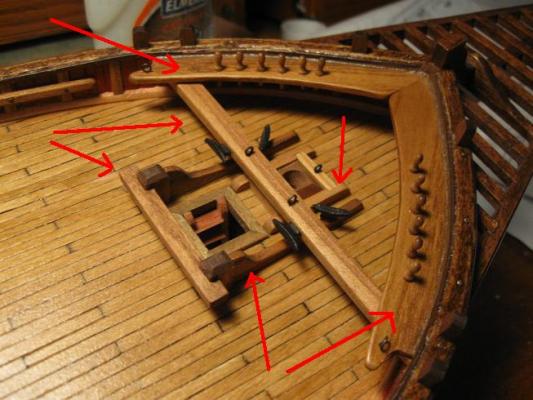
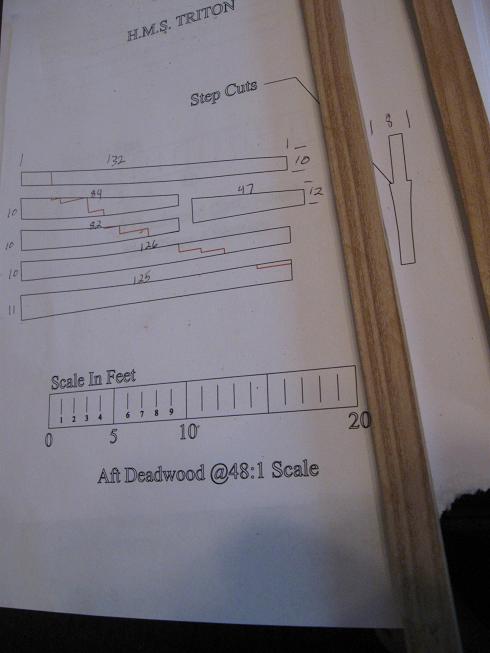
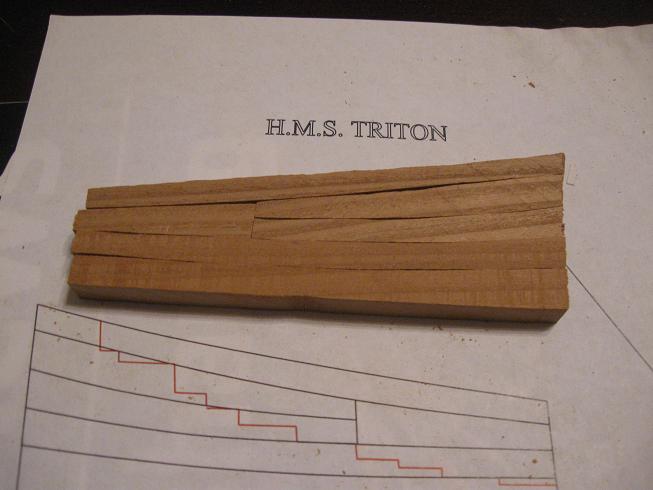
I had some time this weekend to work on the Triton. My first attempt at making the steps on the aft deadwood was a failure so I made all new pieces and tried again.
Here is the second attempt. Came out better. Just need to so some cleanup work then cut out the steps on the other side:
- fatih79 and aykutansin
-
2
-
Hi All,
Started the aft deadwood section. I cut out the pieces and have begun sanding them to fit each other. Used my new Jet 14" with a 1/8" blade - works very well. I just need a steadier hand and some practice but what I have done so far is acceptable. Once sanded completely I will post more pics.
Looked into those books you all mention. Pricey stuff! It will have to wait for a while before I can gather the money to buy them. Maybe the begining of June I can get the first volume.
Richard


-
Thank you all for your input. As I go through the build logs for others I learn quite a bit and more and more this is all making sense now.
I will look into getting the precribed books for reference.
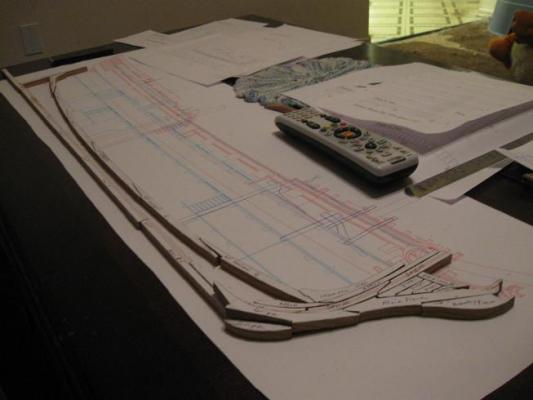
Meanwhile, I did some work over the weekend. Cut out the keel parts and test fitted them together:
- Elmer Cornish, fatih79 and sonicmcdude
-
3
-
I believe I answered my own question.....the frames fit into the steps. Thank you Daniel for your pictures of this area in your build log - very helpful.
Richard
-
What are the steps for on the aft and fore deadwoods?
In real life would they be made up of individual planks? Seems like it would be easier for me to make them from planks rather than cut them out with the jigsaw.
Richard
-
Heres is an article from a newspaper in Montana about their problem with this tree.
They should let me go in and cut it all down for my own use! =) Of course I just want the trunks.
They can keep the small branches and the thorns.
Richard
-
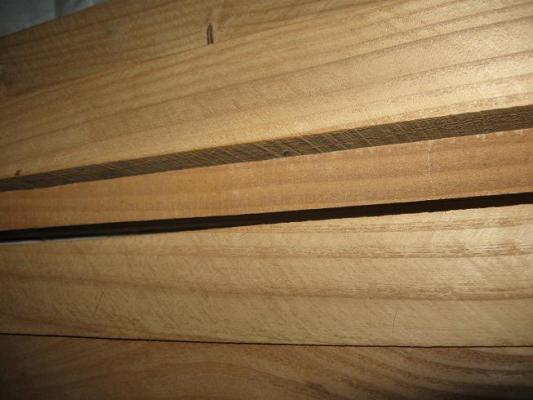
Here we go. Russian Olive cut up boards and Russion Olive in use on a different model:
- Elmer Cornish and Archi
-
2
-
Thank you all for the welcome - you guys are the best!
Russian Olive is a local tree in the Denver, Colorado area. It grows wild but is not native. The state considers it an invasive weed however I consider it good fortune. There are lots of them that are cut down or are dead so the there is a plentiful supply of already dry wood to collect.
It takes a nice edge, can be cut small yet remain strong and I like the color.
I am trying to figure out how to post a picture on the new MSW 2.0
Twas'nt hard on 1.0 but I will need some time to figure this one out. I can't do URL's......
Richard
-
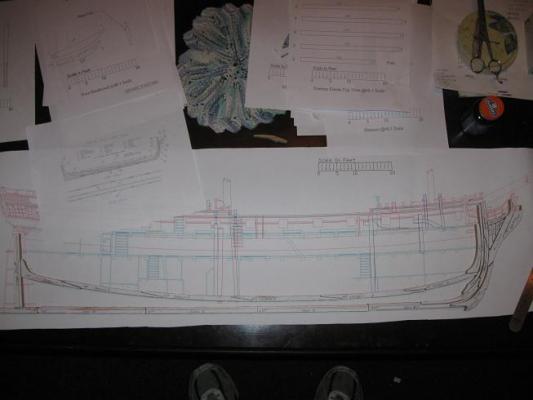
Hello all,
So it begins.
I spent Saturday looking for logs to use for my build. I have a decent pile of Russian Olive to work with on this build. Tonight I will get a tally of what size wood I need to build the keel. Once I have that I will go to the bandsaw and tablesaw, cut the rough size boards, and then run them through the thickness sander to obtain the pieces needed to make the keel parts.
I have high expectations for this model - it is grander than anything I have tried in the past but I do so like a challange!
I will take pictures and post them as soon as I have something besides a pile of logs to show you.
Thanks for having me.
Richard
-
Hey, I found you Bob! Nice looking work on the cross-section. You jumped ahead of me on scratch building as I am still trying to finish the Pinco kit. As soon as that project is done I will join you in the scratch building world. So far you seem to be doing quite well with it.
Did you get anything from the wood working store on Saturday? Maybe a bandsaw? I picked up a Jet 1220vs lathe so the wife could join me in the woodworking hobby (getting her to build model ships is next).
Richard


SaturnV's 1:48 Full Framed Triton Build
in Build Logs for the Full Hull Version of HMS TRITON
Posted
Thanks for stopping by Daniel.
The threaded rod goes all the way through the board and there are 3/8" nuts and washers on the bottom - the threaded rod does not protrude out of those nuts on the bottom. The nuts, being of uniform thickness, give a nice level surface on the bottom board. This setup is not recommended for use on top of nice furniture because it will scratch whatever surface it touches.
I left the threaded rods long so they can be used for other things in the future after I am done with this project.
Richard