


Boccherini
-
Posts
379 -
Joined
-
Last visited
Content Type
Profiles
Forums
Gallery
Events
Posts posted by Boccherini
-
-
Pete,
the frames look good. Your building jig is simlar (but better) to the one I used. Chocks between the frames work well for strengthening the assembly during fairing. Looking forward to seeing it all glued in place.
Regards,
Grant.
-
The colouring looks great, I'm with Joss, the oil has bought out the warmth in the timber. Would've been best to mask off the two top timbers (deck clamps), the knees will be glued to them. You'll probably get away with it though, as the knees will be glued to the deck beams.
Regards,
Grant.
-
Paddy,
nice clean rabbet (better than my attempt), you'll have a great model if you continue at that standard.
Regards,
Grant.
-
Ron,
nice job with the treenails, it's certainly a bit spiky in there. Btw, the limber boards aren't treenailed, they were meant to be loose to allow easy removal for cleaning access.
Regards,
Grant.
-
Doc,
you have my sympathy regarding the hands, my fingers are a bit stiff first thing on cool mornings. Good to see you starting over.
Regards,
Grant.
-
Paddy,
all mine were turned on a lathe, whilst they are not exactley identical, you have to look closely to spot the differences. I did one first to work out an order to the process, then did four together. The idea is to do the same step on all four barrels, then move to the next step. This will help keep them similar, and is much faster than doing one barrel to completion at a time. Good to have you on board, look forward to seeing your progress.
Regards,
Grant.
-
Mark,
this may be the site you were thinking about. Scroll down, there is an article on harvesting timber and another on milling it.
http://mysite.verizon.net/ELLshipmodeler/
Regards,
Grant.
-
Daniel,
I only just noticed this build log. Looks like you'have made a good start. Interesting stern jig, on the inside of the frames instead of the outside. Any particular reason for this? Seems to have worked out for you.
Regards,
Grant.
-
Hey Snowmans,
that's looking great. I like the golden stain sample. Have you 'made' your treenails yet? I hope the wife appreciated you sacrificing shed time for her birthday.
Regards,
Grant.
-
Rusty,
that is looking good. The mortices into the knees for the carlings are neat, I found them a little awkward to get right.
Regards,
Grant.
-
Ron,
good start. You might want to leave a little more width on the frames to allow some room to move when fairing. It's easier to remove a little excess than to fill in low spots.
Regards,
Grant.
-
Harvey,
thanks. The barrels were turned on my lathe.
Fixing the trucks proved to be quick and painless, if only all stuff ups were this easy to repair. The trucks and keys were not glued in place, removing them was easy. I ended up using a dab of supa glue to tack the trucks to a drill shank in a collet on the lathe, then skimmed them down to size. The smooth surface of the drill shank prevented a permanent bond to the trucks.
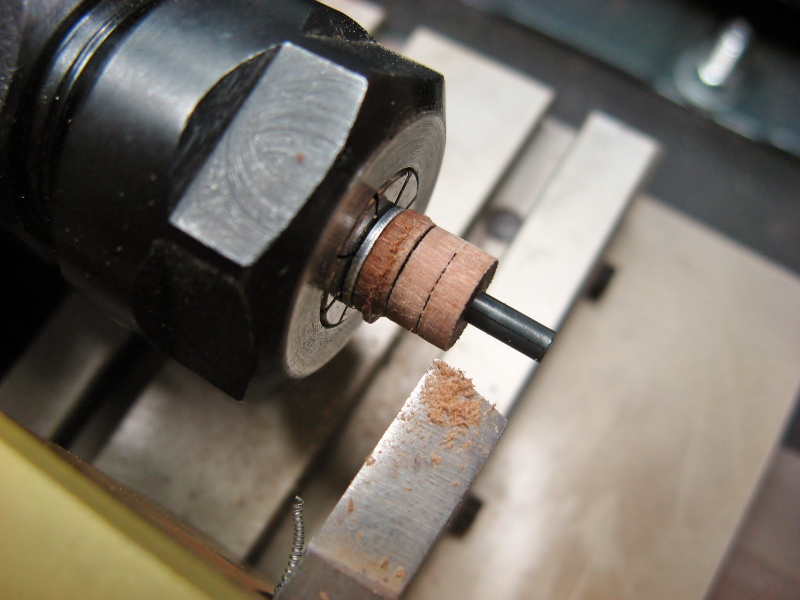

Grant.
-
Ron,
great diy thicknesser, better than my Heath-Robinson model. Take regular breaks from the scroll saw, it'll save your neck.
Grant.
-
Rusty,
looks really good, 'specially like the way you built the ships boat.
Regards,
Grant.
-
Pete, 42 Rocker, Ron,
thanks for the comments. Pete, the barrels were turned on a lathe. Ron, you'll do fine, just take your time. Rushing leads to errors and poor workmanship......see below
 .
. Mark & Russ,
thanks for the comments, particularly picking up my error. As previously stated....haste makes waste. I had not noticed the different sizes of the trucks, mine are all the same
 . The remedy will possibly be relatively painless, I should be able to remove the offending trucks and replace them. Thanks again for picking that up. What's another week or so.
Regards,
Grant.
-
Daniel,
glad to be of help to you.
The gun assemblies are finally complete, time required:10 weeks. For a first attempt at this stuff, I'm satisfied with the result. This model was supposed to be finished for my sons last birthday, I'll be lucky to finish in time for the next one. Still, haste makes waste.
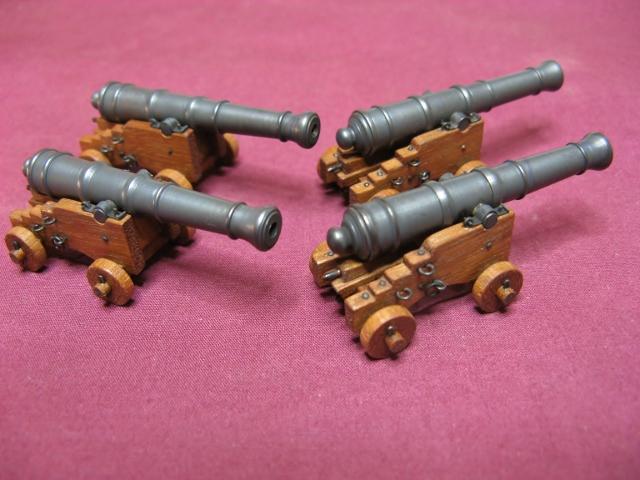
Grant.
-
Dick,
a very promising start. Like you, I love the red colouring of jarrah. Haven't encountered any problems using it yet.
Regards,
Grant.(the other one)
-
Bob,
Pete has it right, there were only other build logs as references. Several were very good, but that is all past history. I see Joss (Matrim) has reposted his build log along with a couple of others. The Fully Framed Model books by David Antscherl are very helpful if you are looking for guidance on construction methods and extra detail.
Regrads,
Grant.
-
The Fully Framed Model from seawatchbooks.com
Regards,
Grant.
-
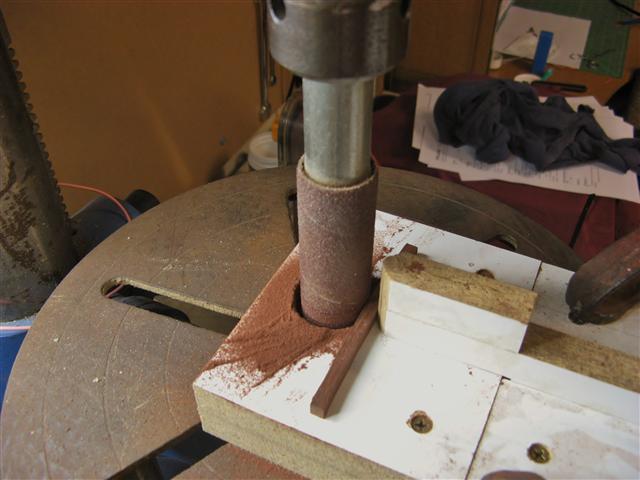
Bob,
deck beam jig pictures (design from The Fully Framed Model by David Antscherl).
Basic construction, this is a realy rough looking jig (built out of scrap lying around the workshop), but it works well. The height extension on the head of the jig is not neccessary, I put it on to sand the curve into my beam arms.
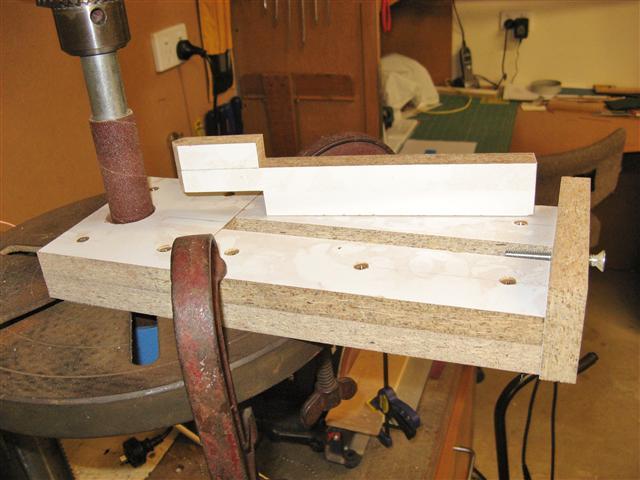
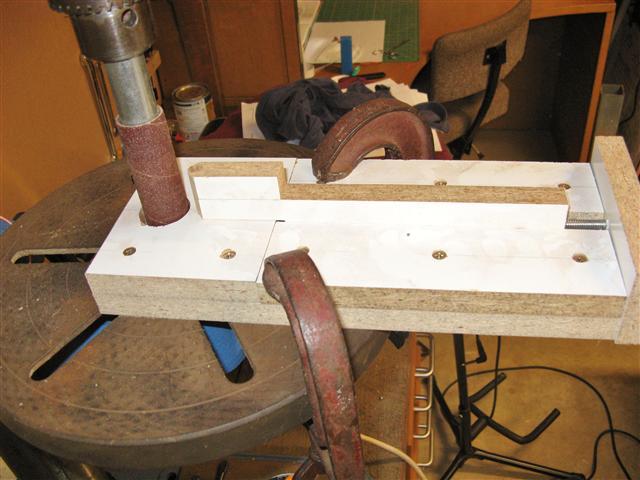
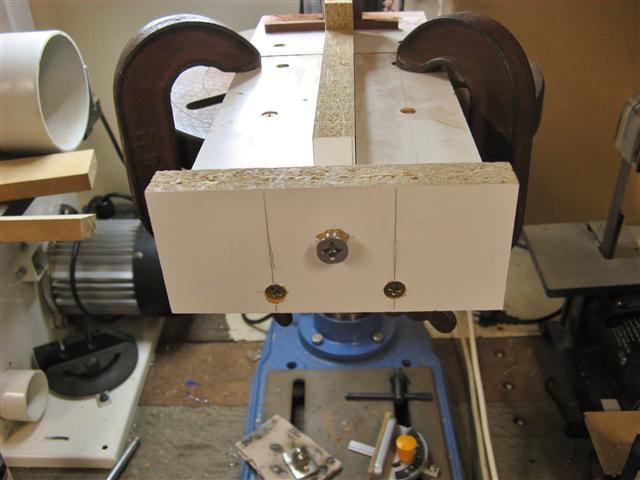
Sand the curve into the underside of the beam as normal, then adjust the depth of the jig and feed the beam in from the left, against the drum rotation. You need to try and keep the curve of the beam at a right angle to the head of the jig whilst feeding it through, my apologies, this is badly described, but I think you will get it. Repeat, gradually screwing the jig toward the drum until you get to the required thickness. I was doing 2 passes through jig between adjustments. Do be aware that you are using a drill press for a job it is not really designed for (horizontal force), it's best not to sand too much at each pass.
I hope I haven't offended you by highjacking your log. If you have any queries regarding this, please just ask.
Regards,
Grant.
-
Bob, Ron & Russ,
thanks for the kind words. Glad to know you are finding this stuff useful.
Grant.
-
Glad you finally overcame the technology. Can't wait to see the extra detail at your scale. Btw, do you have copies of The Fully Framed Model? They are a great reference.
Regards,
Grant.
-
Thanks for your interest, and, it's a pleasure.
Grant
-

Larry's Triton Cross Section
in Cross Section Build Logs for HMS TRITON
Posted
Larry,
it's good to see some more progress. Congrats on reworking the stuff that you weren't happy with, it's a good attitude to have. Did you change the gun deck beam pillars? The ones in a previous picture seemed fancier.
Regards,
Grant.