


Boccherini
-
Posts
379 -
Joined
-
Last visited
Content Type
Profiles
Forums
Gallery
Events
Posts posted by Boccherini
-
-
Thanks Sinan.
Grant.
-
The frames are looking good Bob. You won't regret the extra width left on them.
Regards,
Grant.
-
Larry,
you're making rapid progress, the extra detail on the topf the bitts looks good.
Regards,
Grant.
-
Rusty,
nice start. Are you cutting out mortices for the ledges or filing angled slots in the carlings?
Regards,
Grant.
-
Antony,
good to have you on board. Looks like a promising start. Please keep us up to date with you progress.
Regards,
Grant.
-
-
Joss,
TFFM Vol 1 pp273/4, seems split gratings were not unknown. They made handling easier. I didn't have any problems with losing 'teeth'. Different timber? Two btw's: i) could you please give me access to the drawings, and, ii) how's the house extension progresssing?
Thanks Pete.
David,
thanks for your interest. The mill seems to have been a good investment, and, as you say, it's not a financially debilitating purchase. Still coming to grips with what it can/can't do. The people I 'spoke' to prior to purchasing it assured me it would be adequate for modelling puposes. I'll know for sure in 12 months.
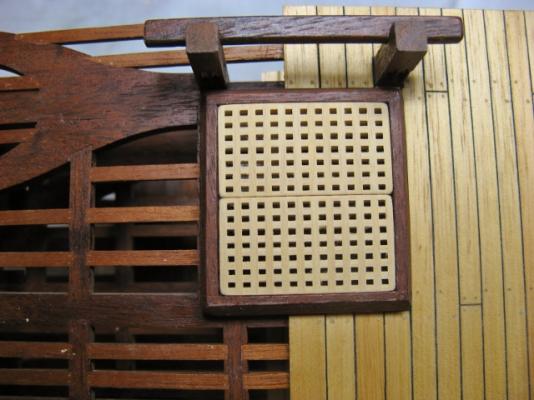
Splitting the hatch worked out far better than I could hope, won't need to leave half the hatch open after all.
Grant.
-
-
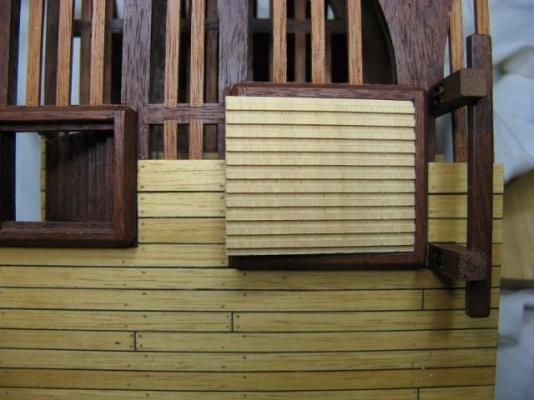
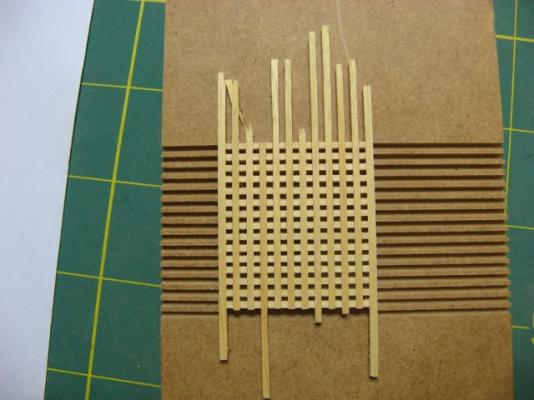
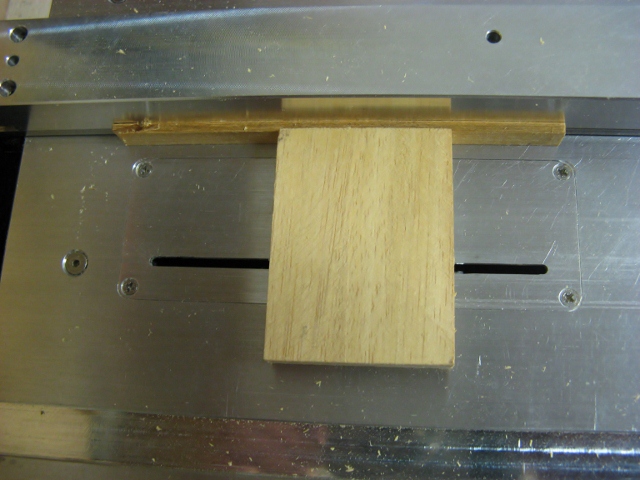
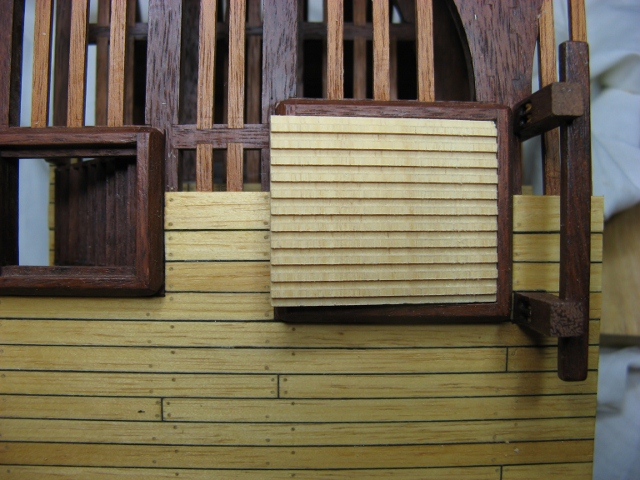
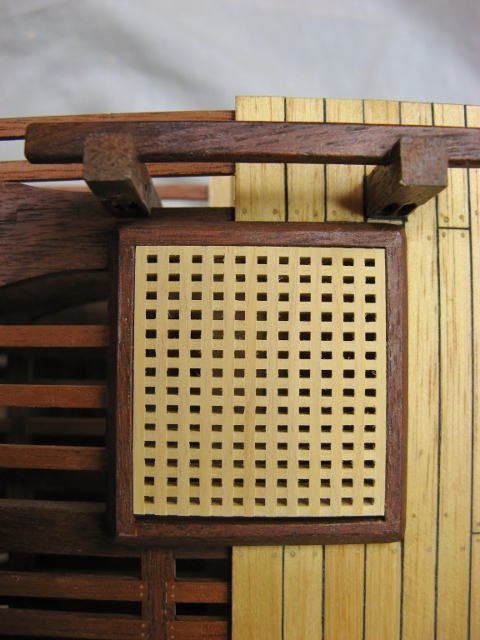
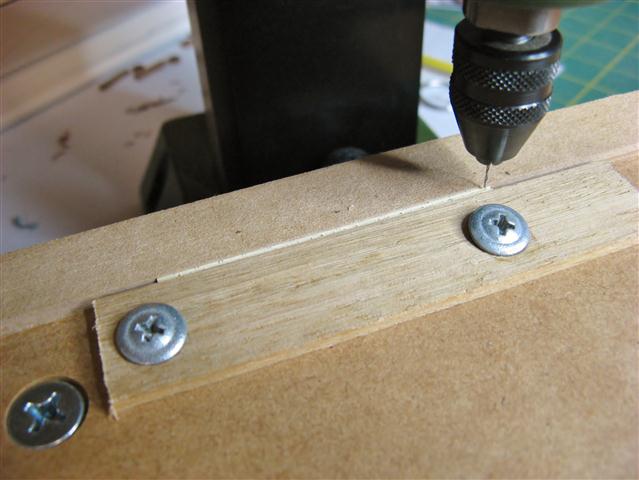
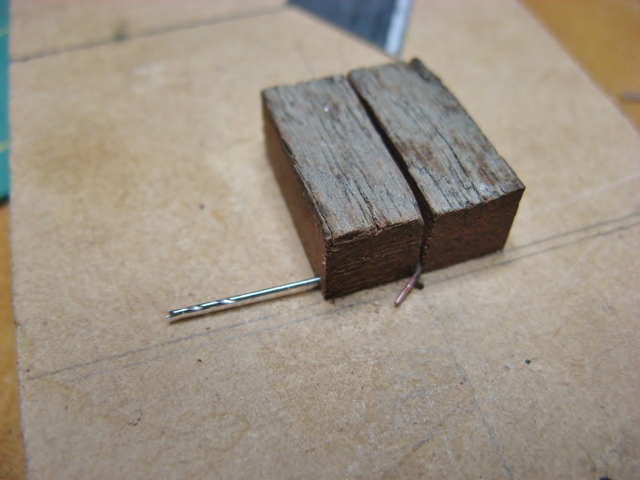
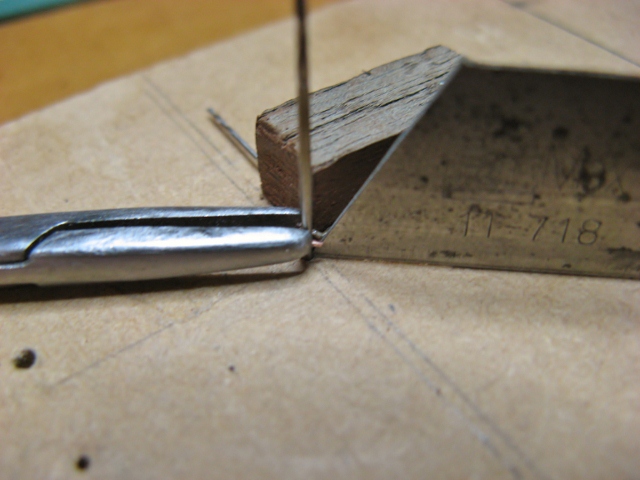
I have been putting off the hatch grating for some time, yesterday the desire to tackle this job came upon me.
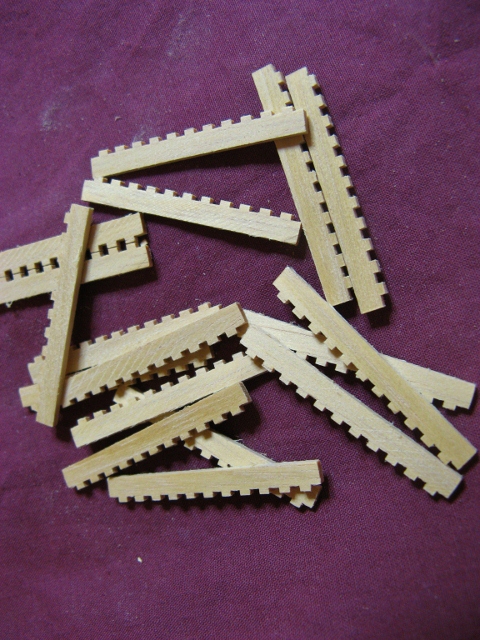
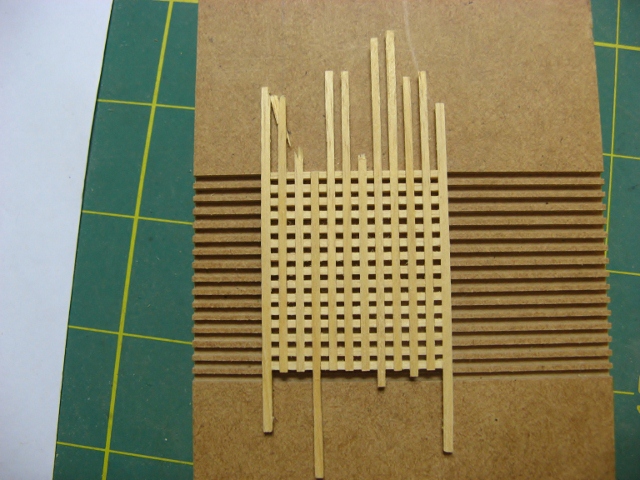
Being too lazy to build a jig for this, I used a spacer with the combined thickness of the saw blade and gap between the planks to cut slots the correct distance apart.


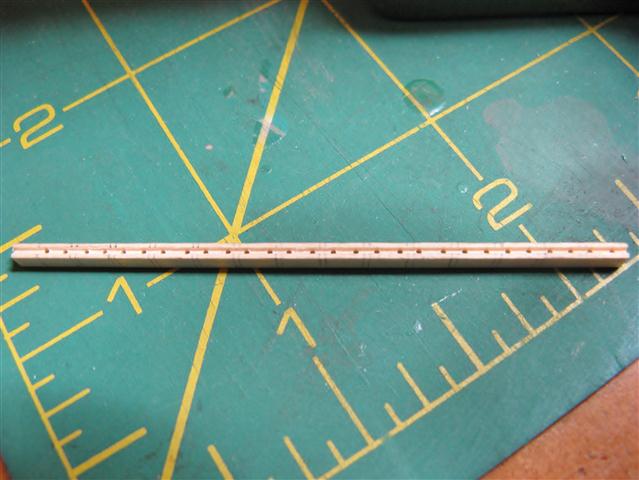
The block was cut down to the correct width and the grating ledges cut off.

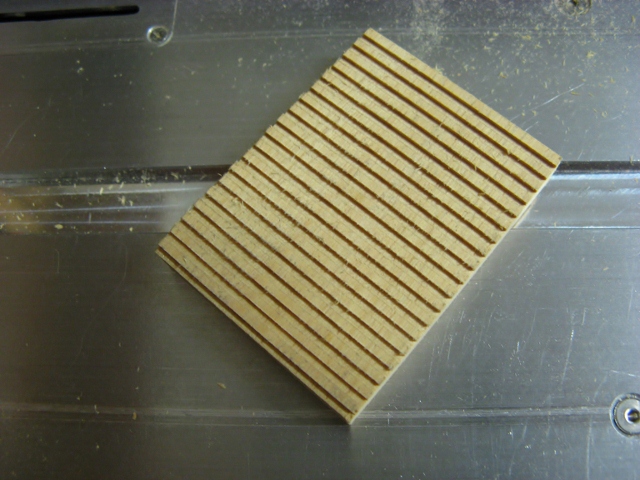
The assembly jig and grating.
At this point, it became apparent that my grasp of complex mathematical processes (addition, multiplication and division), was sadly lacking........aaaagggh! As Maxwell Smart would say, "Missed by that much." Shame the hatch opening isn't square. Another failure put down to haste and lack of careful checking when the carlings were put in place.
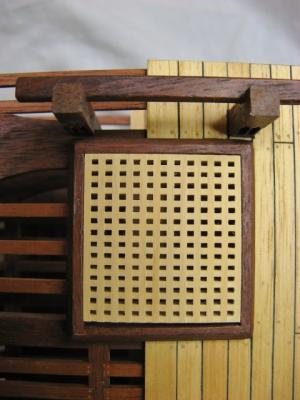
The solution at present is to cut the grating in half, then make up a new half which will be left siiting on top of the grating in position, leaving half the hatch open.
Grant.
-
-
-
Ron,
I'm with Russ, it's easier off the model and less likely to damage anything. My x section is not a perfect match for the plans, so I marked out the position of the notches with all the beams pinned in place on the clamps (rather than using the plans to mark them). That way everything was in correct alignment.
Regards,
Grant.
-
Maury,
you are doing a really great job. I spent some time 'twisting my pin vice' on the internal planking (Triton x-section), it was the least satisfying part of the build. Smart solution on your part.
Regards,
Grant.
-
Thanks Daniel, I will be posting pictures on the rope walk experiment as it progresses.
Grant
-
Ron,
make the limber boards in one length, then cut them into the appropriate size pieces. Drill small holes on the centre line of your cuts first, then cut them. The holes provided access for a tool between the individual boards to pull them up.
Regards,
Grant.
-
Rusty,
nice work. I'm glad you can keep it all separate in your head, I'd be struggling. The saying about struggling to walk & chew gum simultaneously applies to me.
Regards,
Grant.
-
Maury,
just went through your log, that is a good looking job so far. Congratulations.
Regards,
Grant.
-
Thanks Paddy. There are ways of doing things without power tools, don't rush in buying stuff, do your research first. I have been gradually acquiring machinery over the last 8 years as my needs and ability increased. Having said that, they do make things easier.
Pete, thanks. Yeah, looks like it's a good investment. There is a learning curve though, I didn't hold the first strip into the fence tight enough, it surprised me by climbing up the end mill. I also may have been trying to cut too deep, several shallow passes seem to work better than one deep one.
Grant.
-
Ron,
I cut mine slightly above the planking with side cut pliers, gave them a rough clean up with a small square section file (itis slightly narrower than the planks), then finished the job with narrow sanding sticks/blocks.
Regards,
Grant.
-
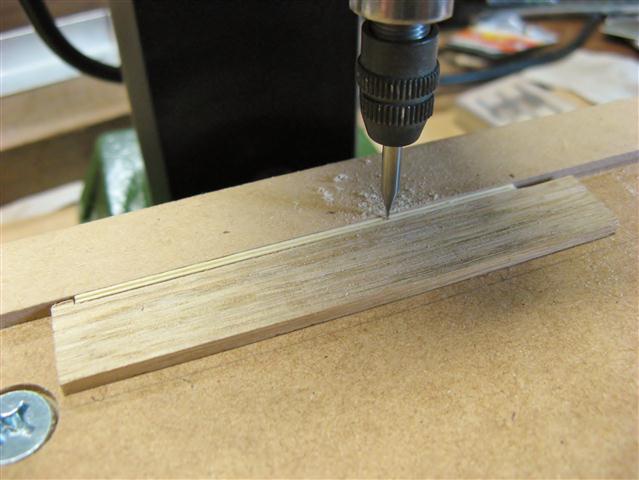
I recently purchased a Proxxon mill, this is its first time in use. The timber for blocks is lemon wood, harvested from a tree pulled out to make way for an extension several years ago. It is beautiful timber to work with, very close grained.
I made a fence set up for the cross slide table to make things easier, the idea is not mine, but copied from a Russian build log from several years ago.
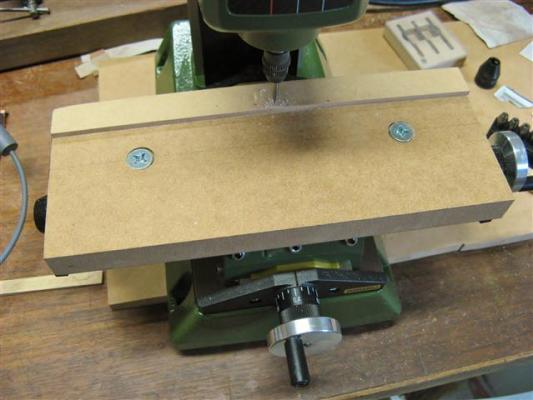
A strip of timber has been cut to the right thickness and width, then a slot cut on the two sides for the sheaves and a light score on the two faces for the rope strops by pulling the strip through with a featherboard(?).
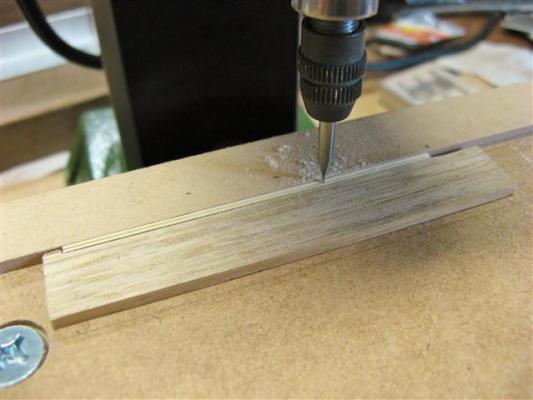
The length of the blocks is marked on the strip with a small gap between them and the holes drilled to define the sheaves. This is a test strip to try out the technique, which seems to work quite well. The mill makes this work less time consuming. The blocks will be shaped by hand from here.


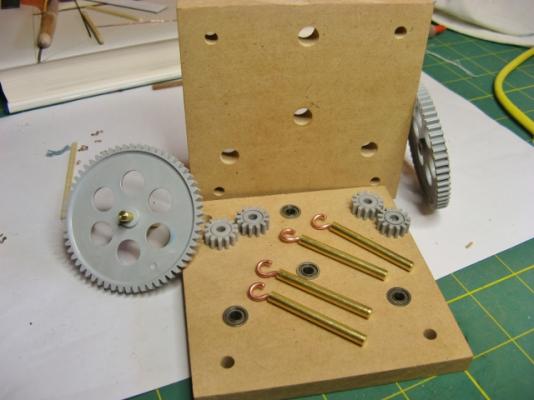
There will be rope needed for the rigging, so I have started constructing a rope walk to manufacture it.
Grant.
-
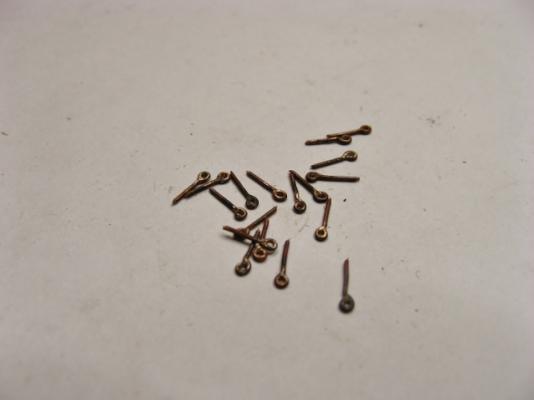
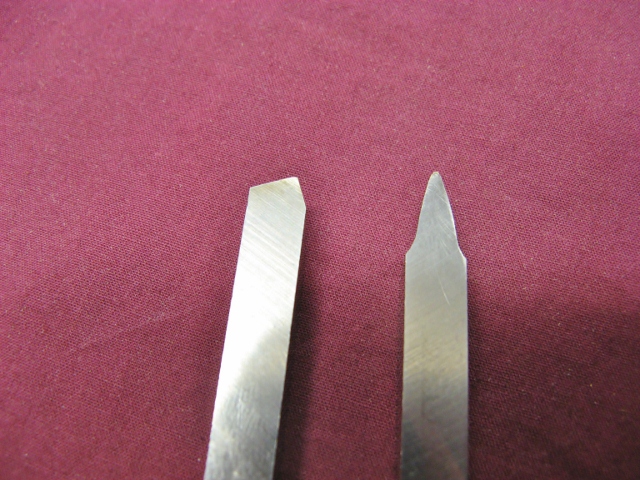
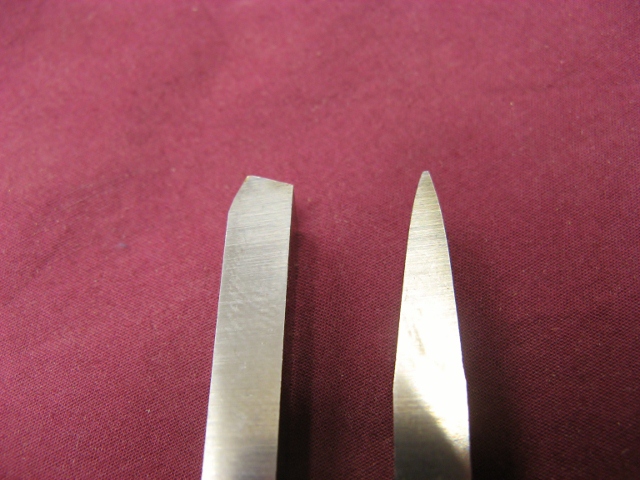
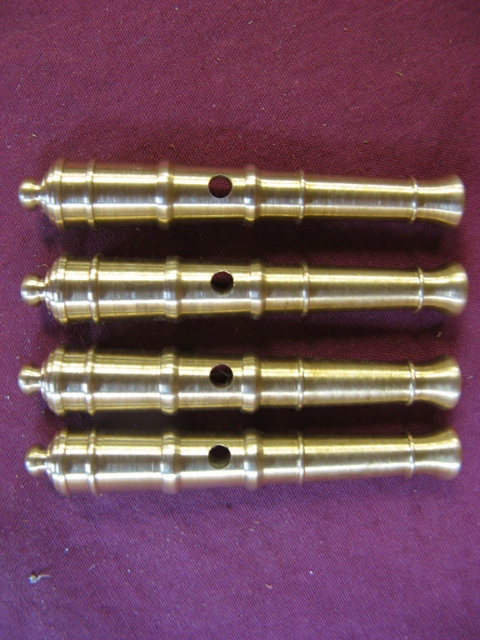
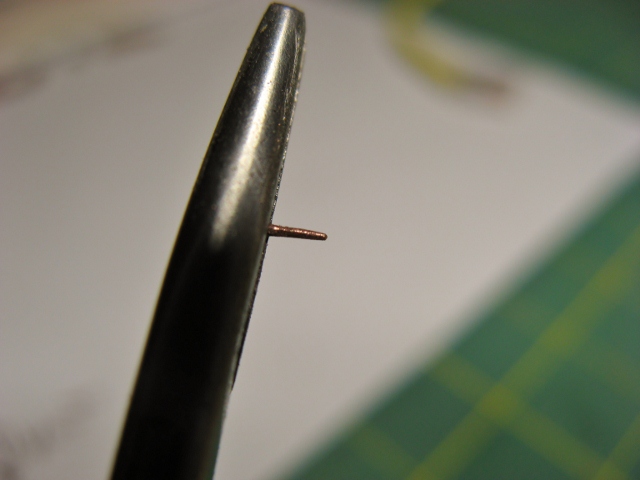
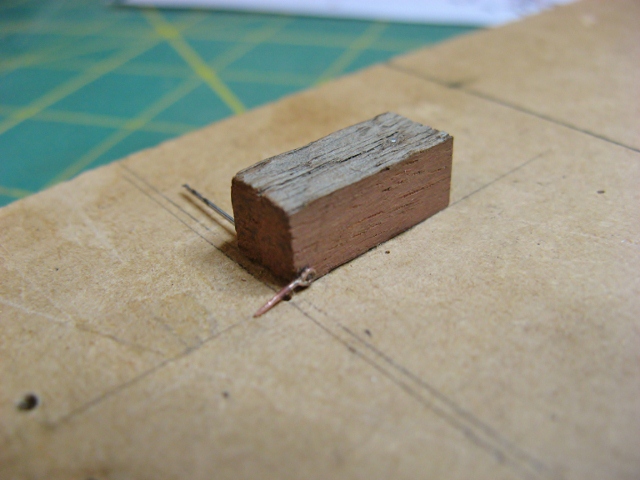
Life has tossed up a few distractions, and I'm doing several things similtaneously so progress has been a little slow. The hooks for the gun rigging are complete, and a start has been made on the blocks. I think the following sequence is pretty self explanatory. The second last picture shows putting a slight reverse curve on the end of the hook.
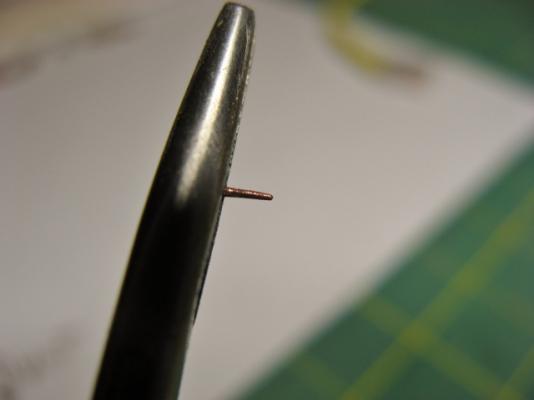
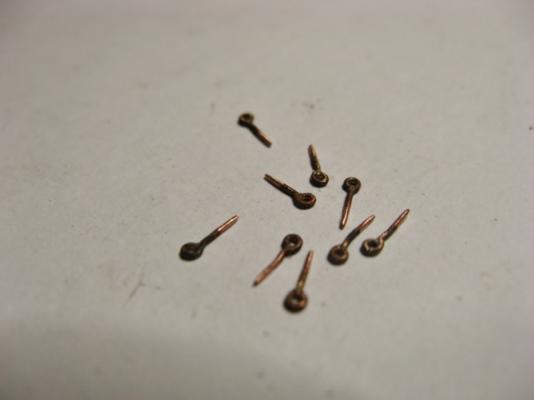

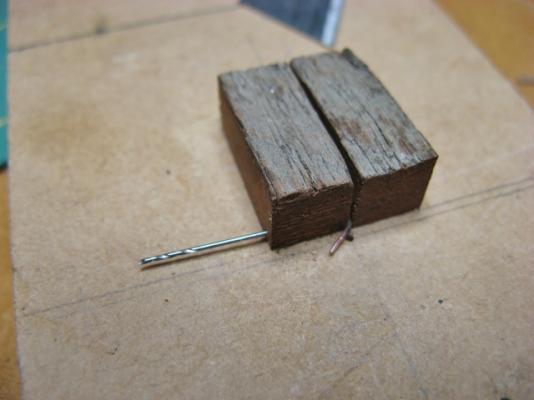
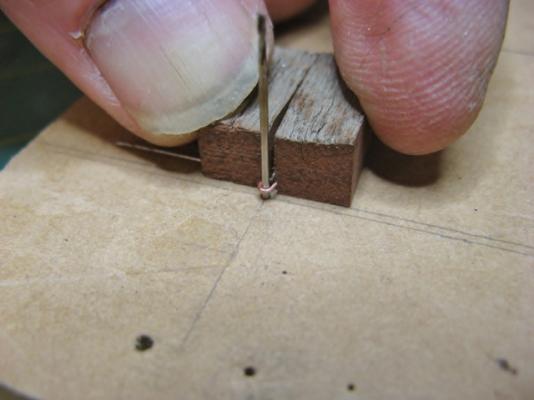

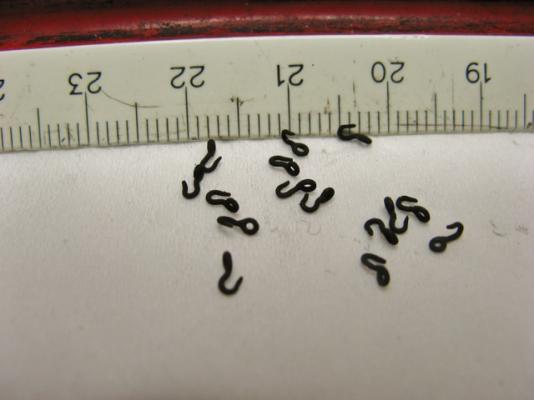
Grant.
-
Bob,
welcome to x-section. Nice start on the keel. Cutting frames with a fret saw on this model won't be too bad. My first project had about 60 frames, all hand cut with a fret saw. You become reasonably quick after a while. Just make sure you keep the frame well supported whilst cutting, the frame may snap otherwise. Very important: cut slightly outside the lines, the extra timber will give you some wriggle room when you fair the hull.
Regards,
Grant.
-
Rusty,
just been catching up with everyones progress. The build is looking really good, congratulations. Nice work with the deck beam pillars, little details like that really lift the quality of a model. You have a lathe?
Regards,
Grant.
-
Seems like life keeps throwing up obstacles to your progress with the x-section. I hope things start moving along smoothly for you.
Regards,
Grant.


Grants Triton - FINISHED
in Cross Section Build Logs for HMS TRITON
Posted
Thanks Joss.
Grant.