Capt.Fisher
-
Posts
52 -
Joined
-
Last visited
Content Type
Profiles
Forums
Gallery
Events
Everything posted by Capt.Fisher
-
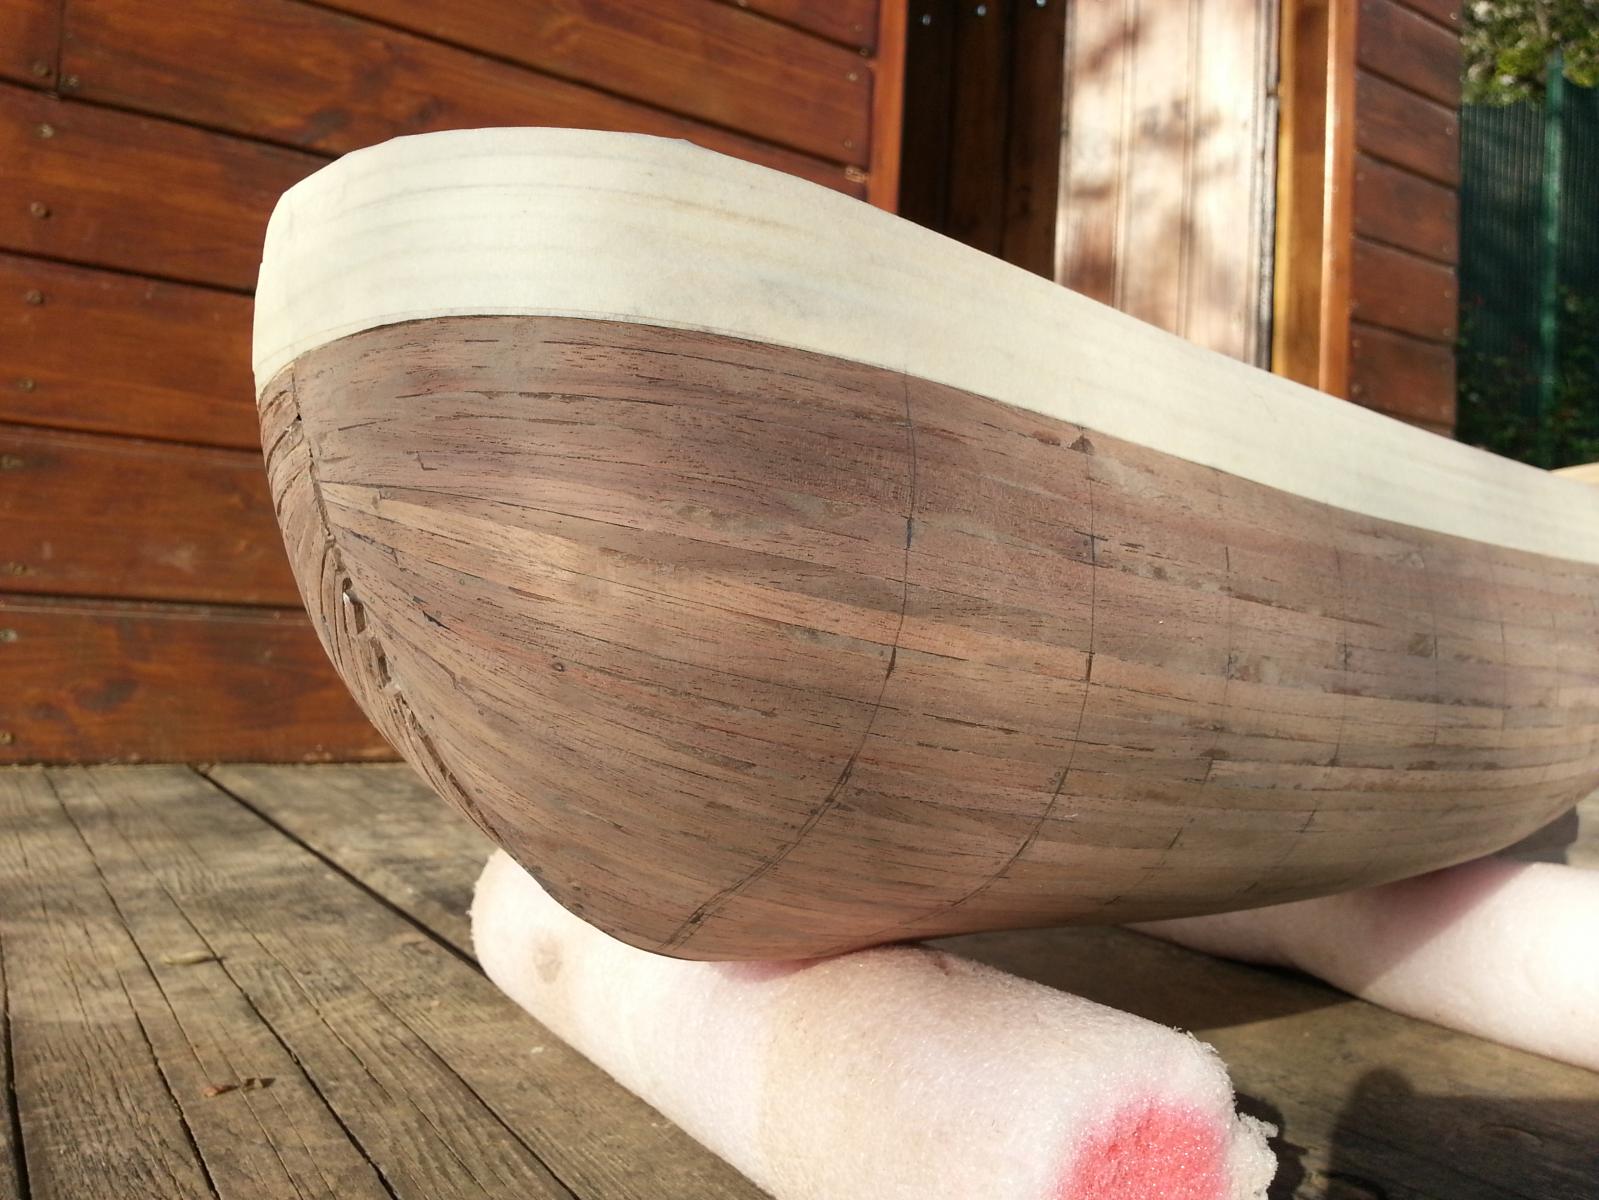
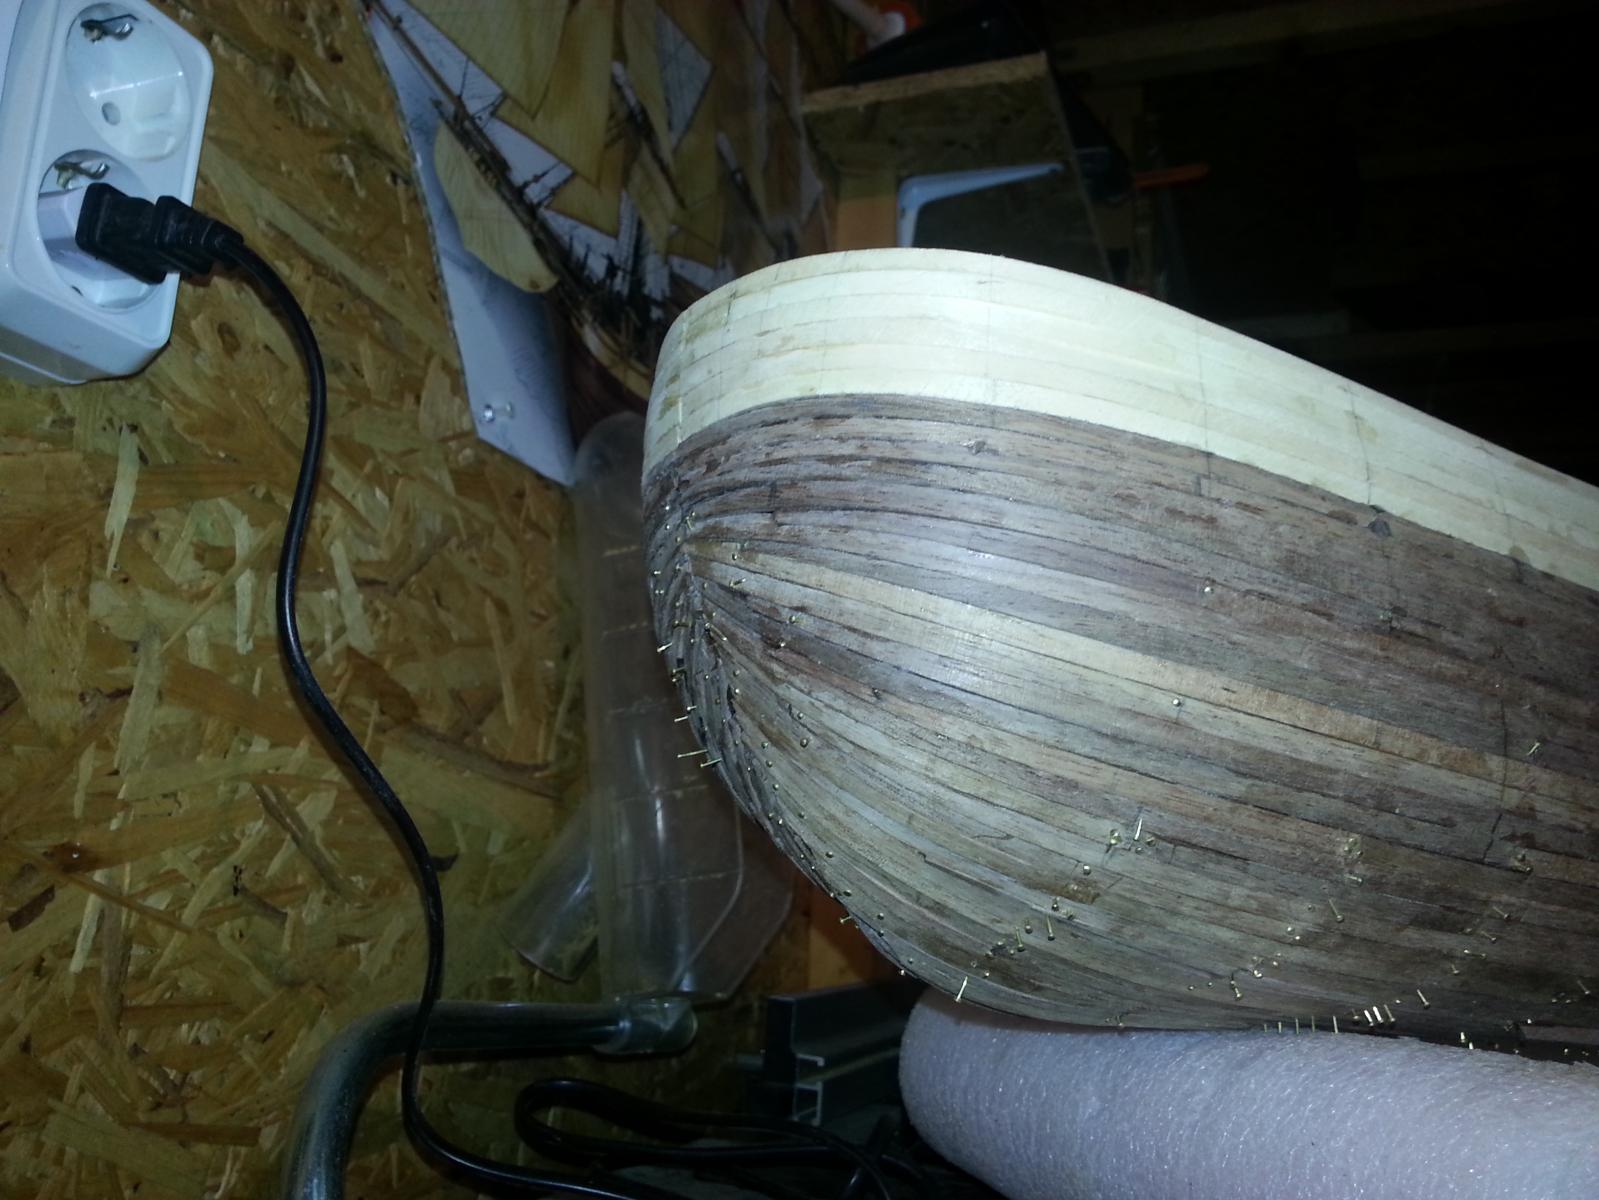
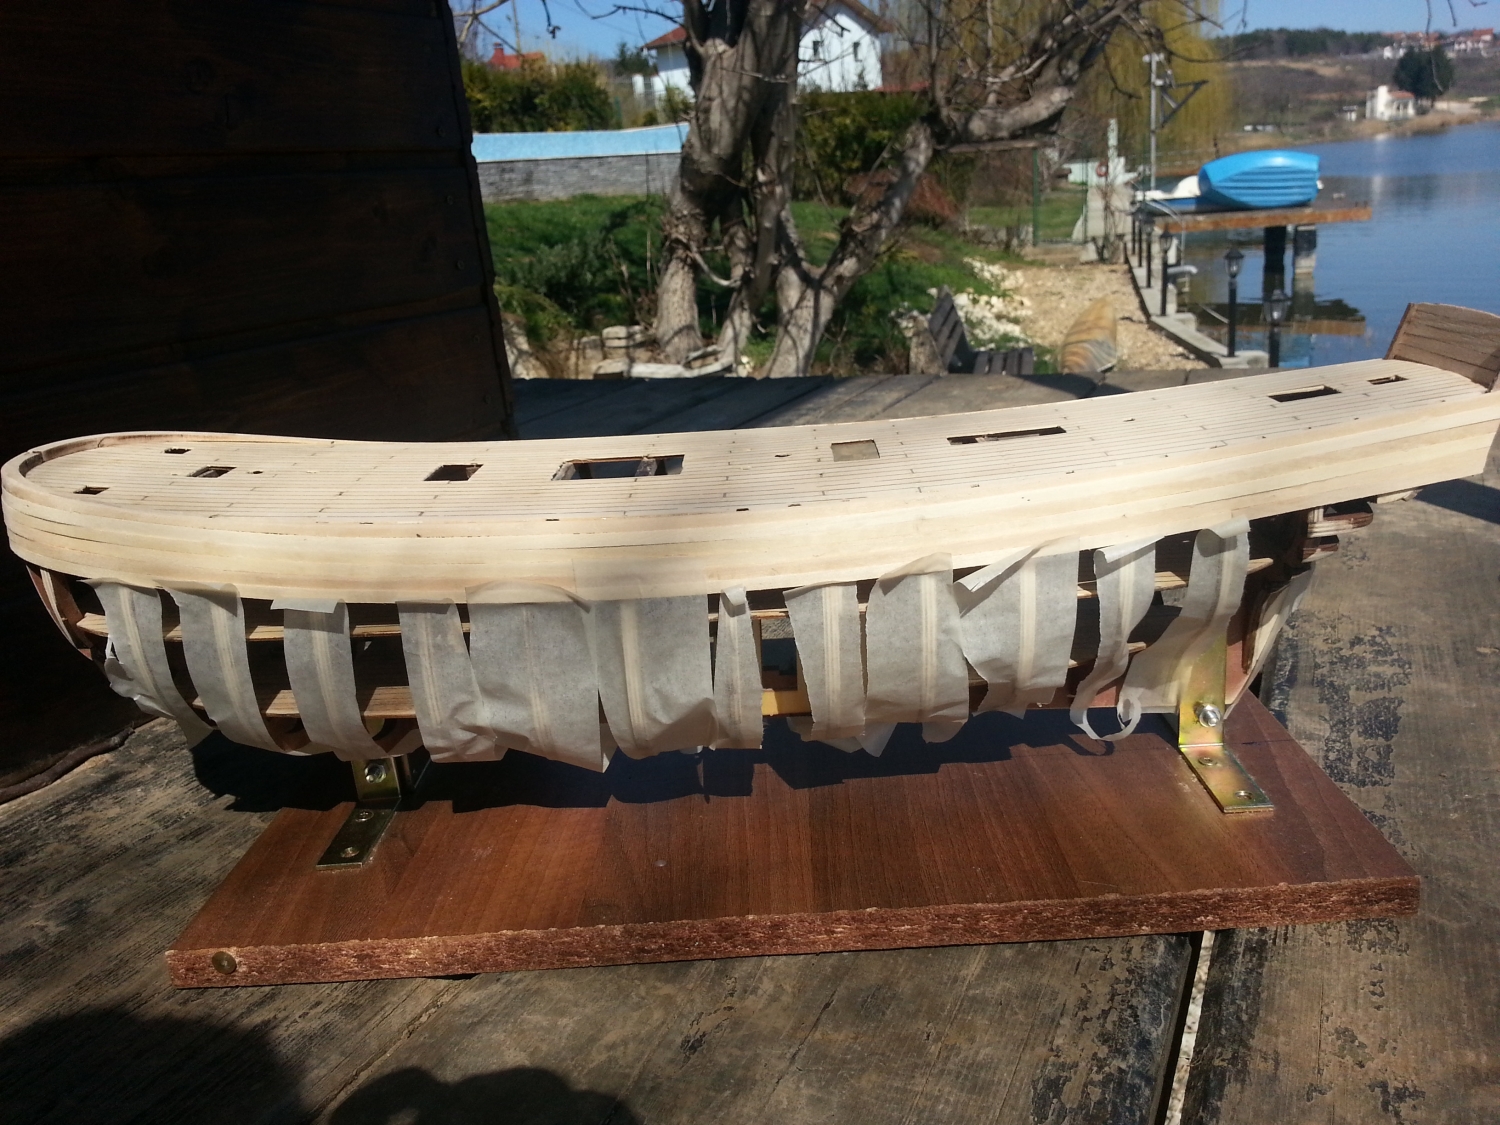
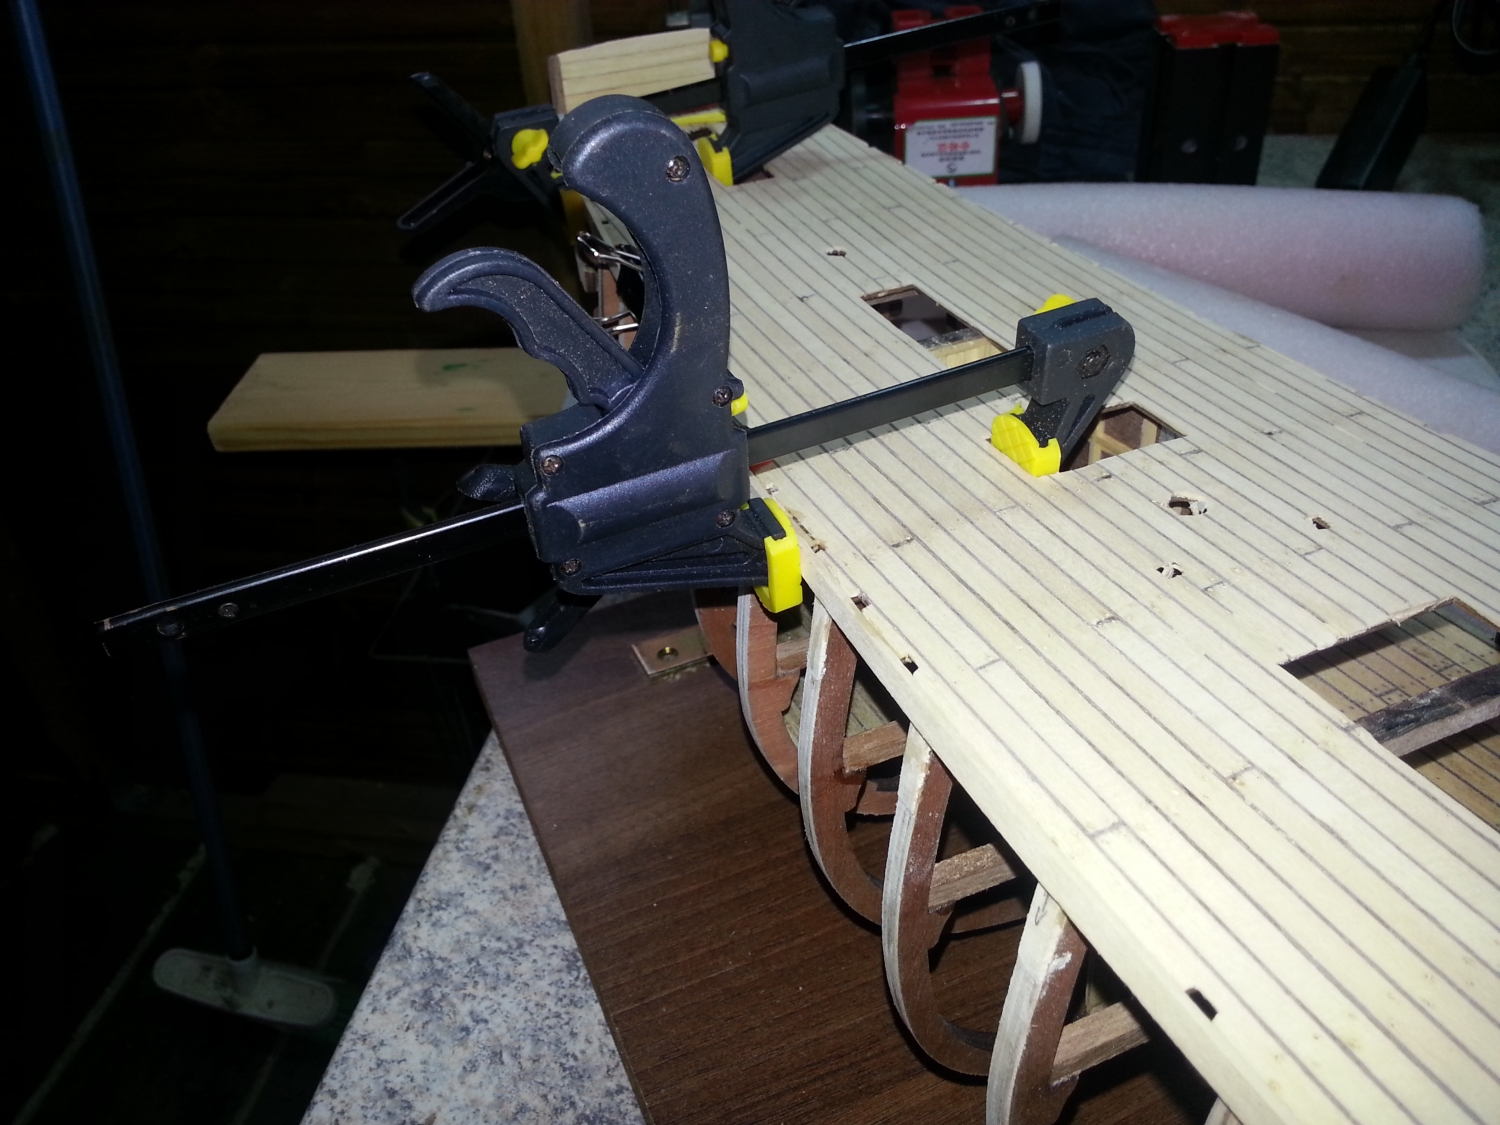
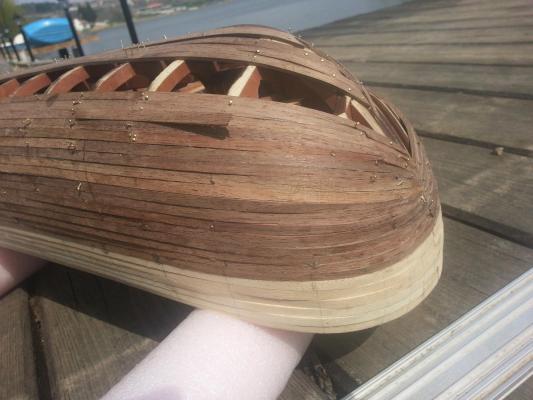
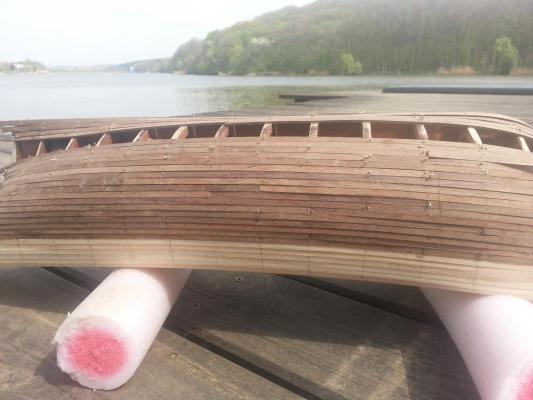
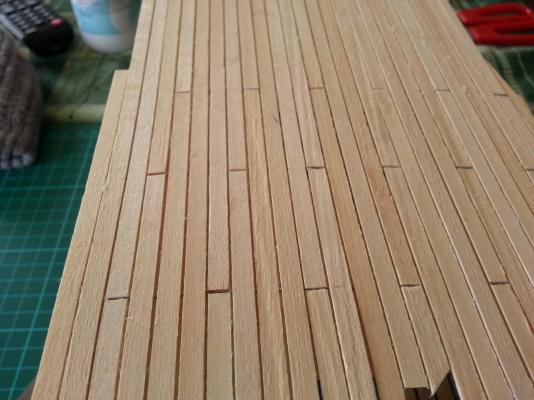
 Port side, after some rough sanding. Now follows nailing, some more putty and fine sanding
-
Exactly thats what I mean! Planking at 90deg with 1 mm lime is quite different from planking at different angles with bended 2 mm walnut.
-
Hi Al, Yes, i disregarded the instruction a litle bit. I thought it will be easier to form an even streight opening by cutting it afterwards, rather than forming it with the ends of the planks. God knows if i'm right or wrong... The plan is to cut abt 5 mm opening and then sand it upto 6 mm, until the stema nd the keel fit tight inside. But I'll do this after the final shaping of the hull. I did a bit of sanding this weekend, and believe me - it's a sweaty and dusty job ;-). I have my portside almost ready. I got so obsessed, that I forgot to take pictures of the different stages - rough sanding, putty, fine sanding, nailing, finest sanding... etc. I'll try not to forget it with the starboard side. Regarding the Samson posts, waterways and all that 'timberware'ob the main deck - no, I still have not given them any serious consideration. Not yet. I stoll have a lot of sanding to do :-)
-
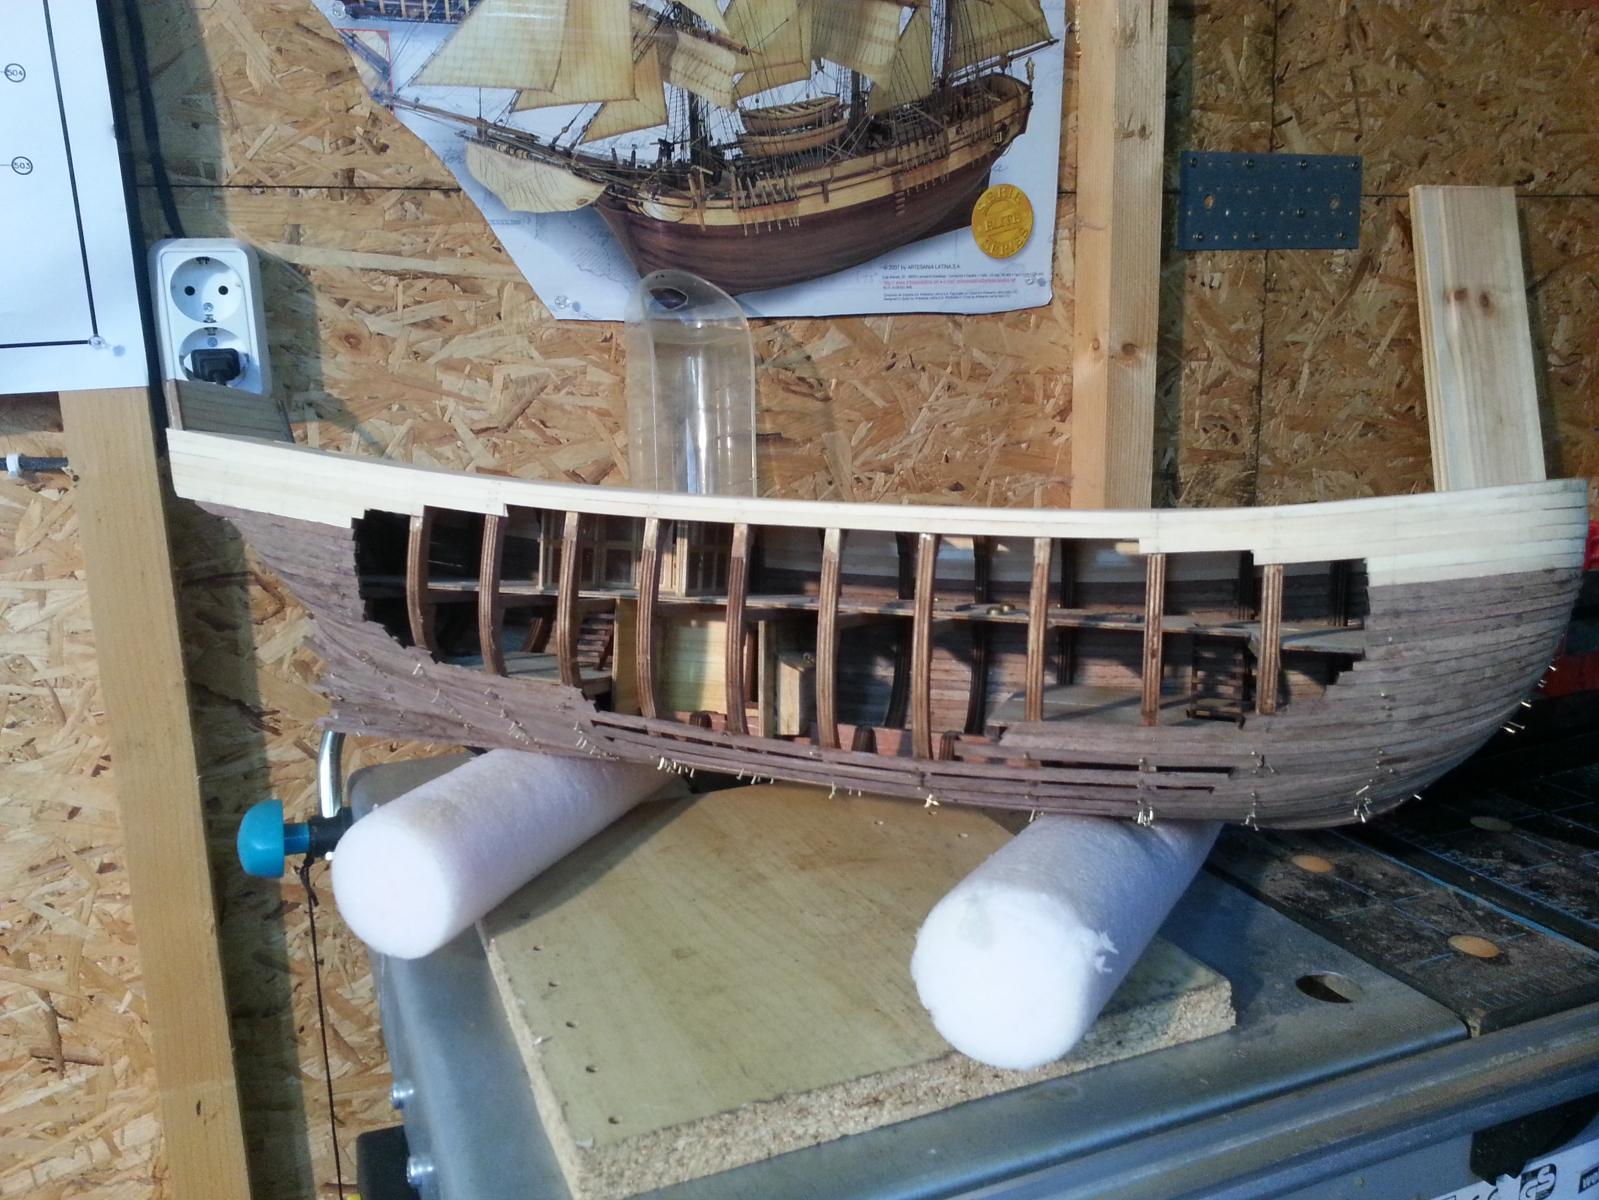
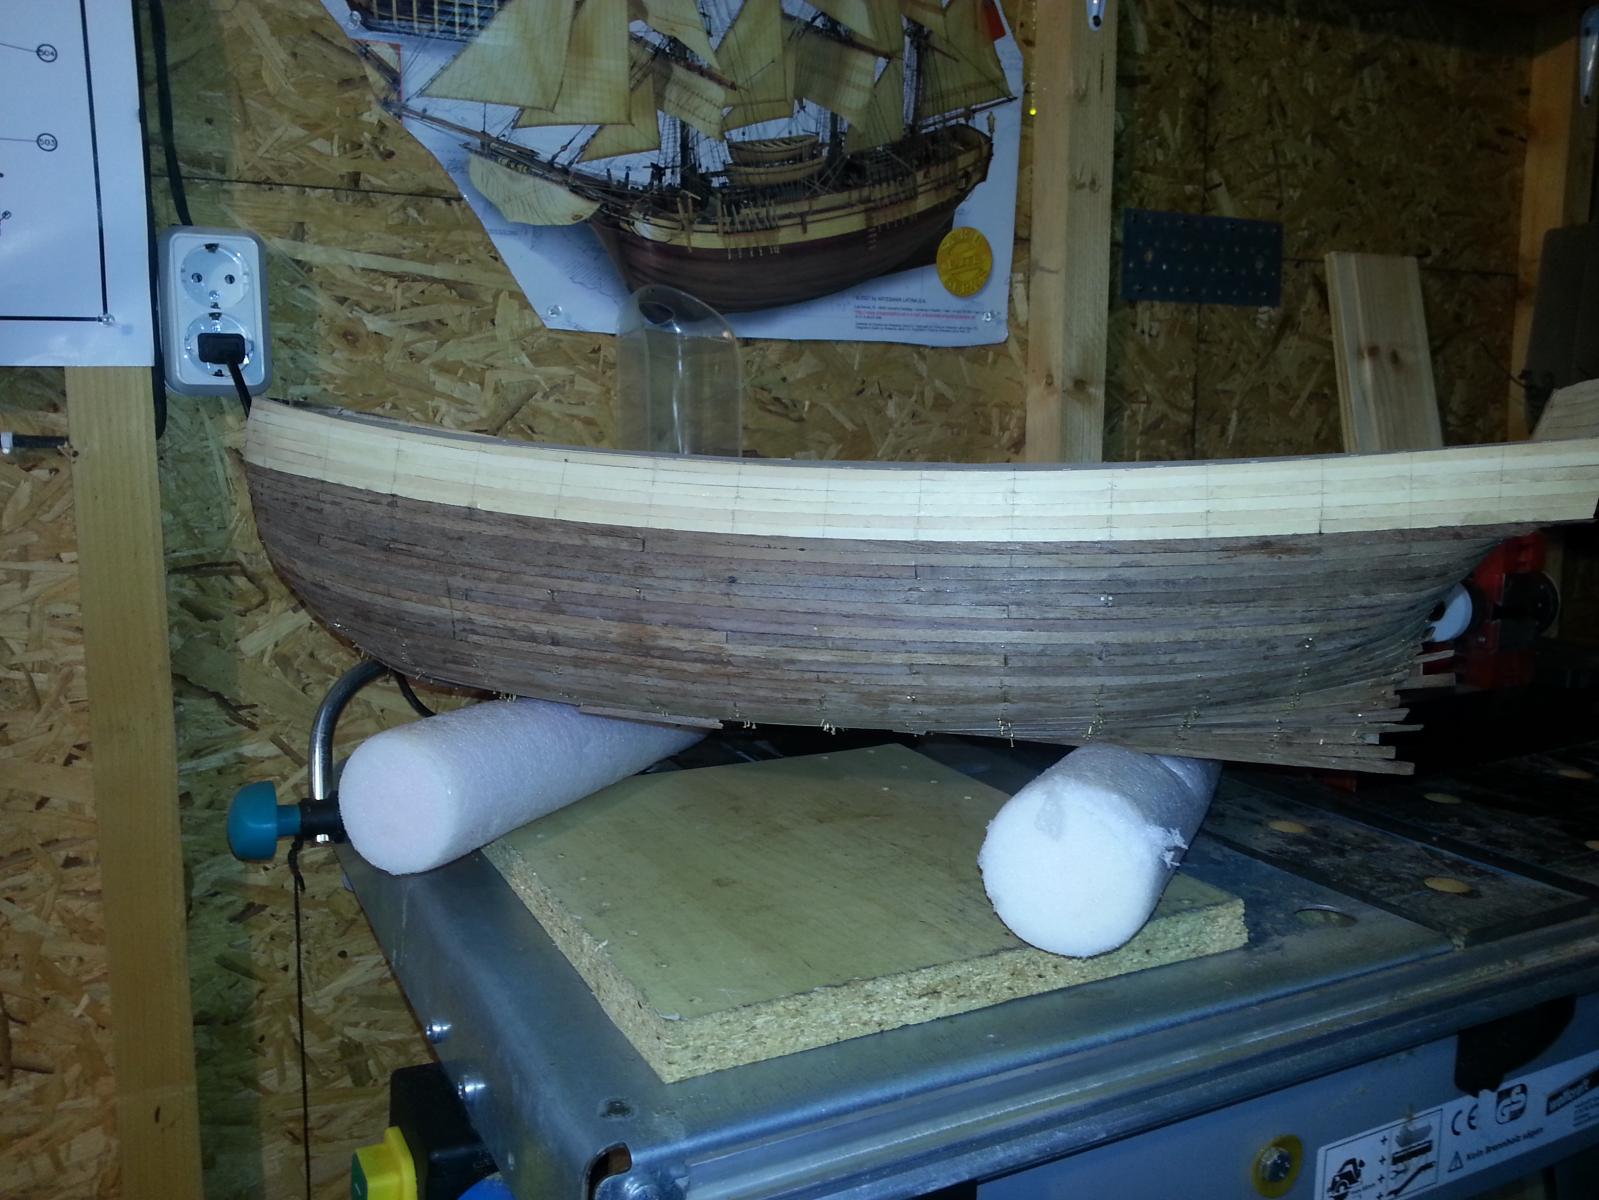
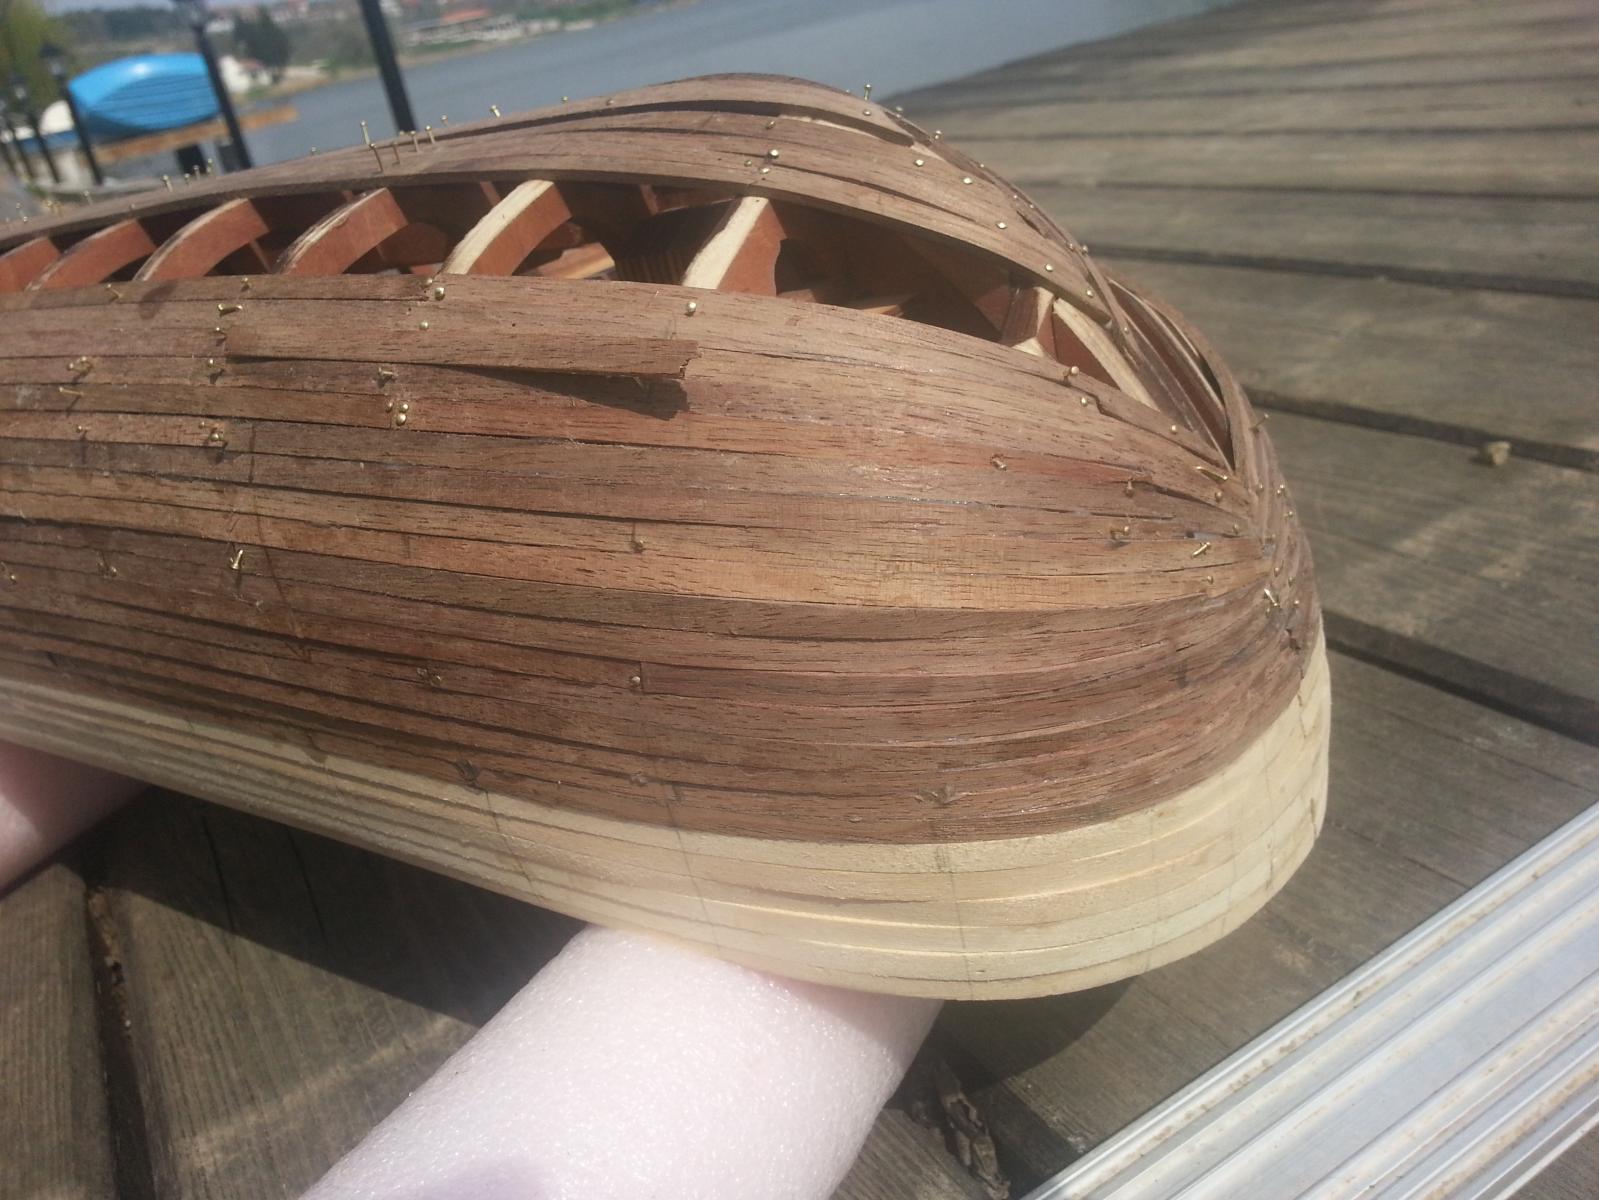
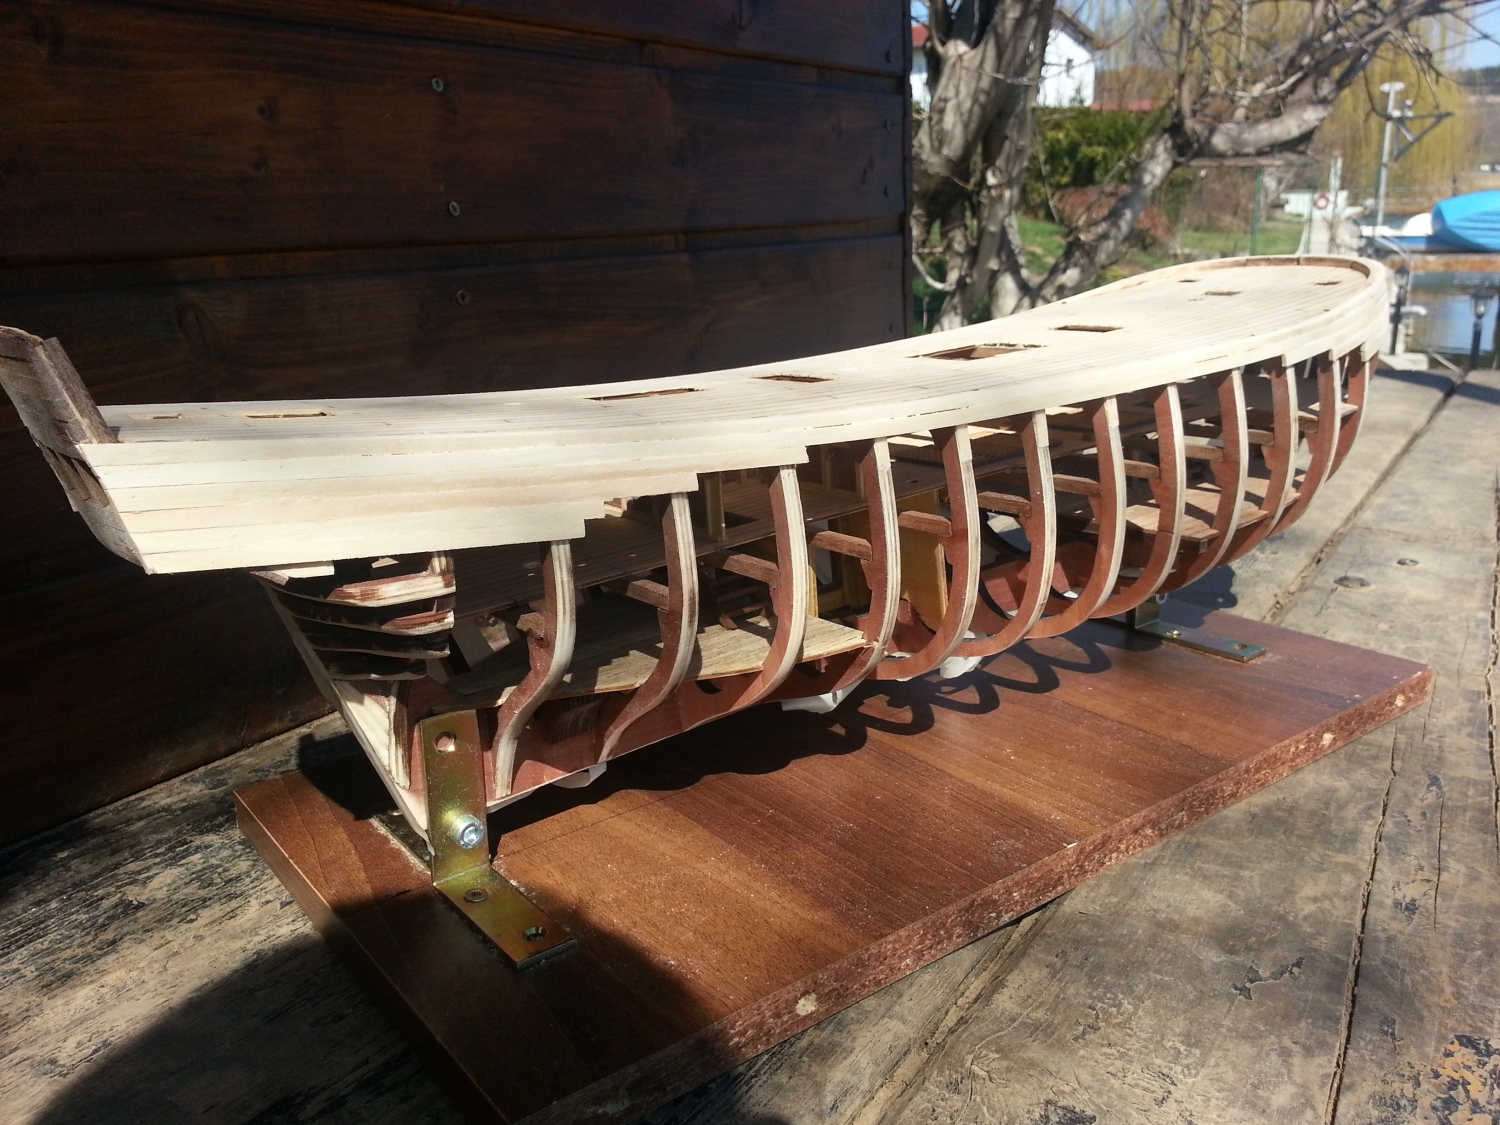
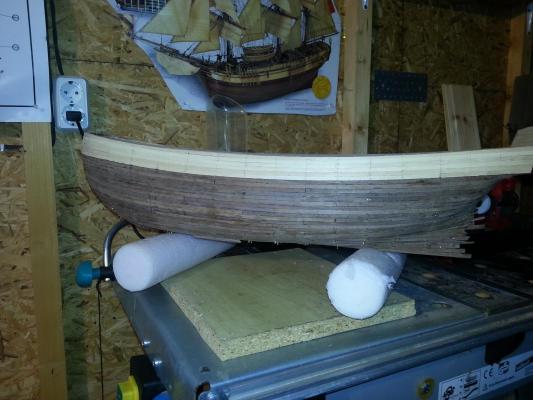
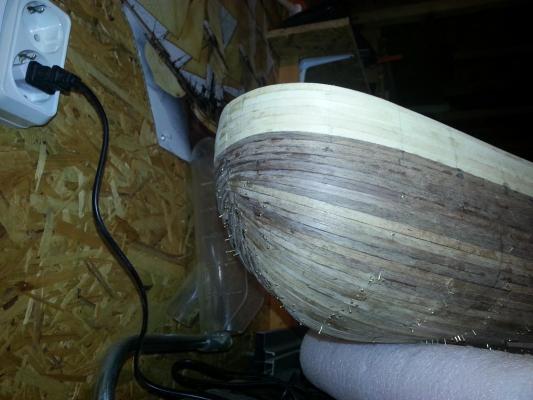
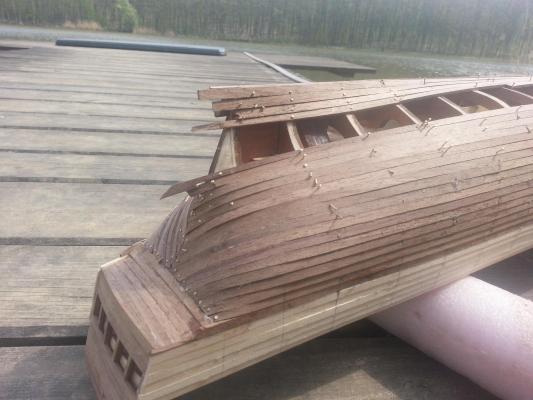
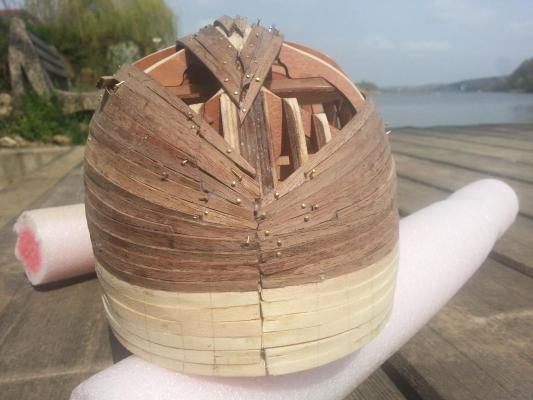
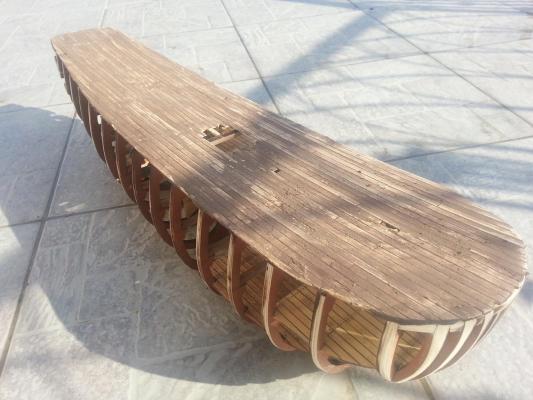
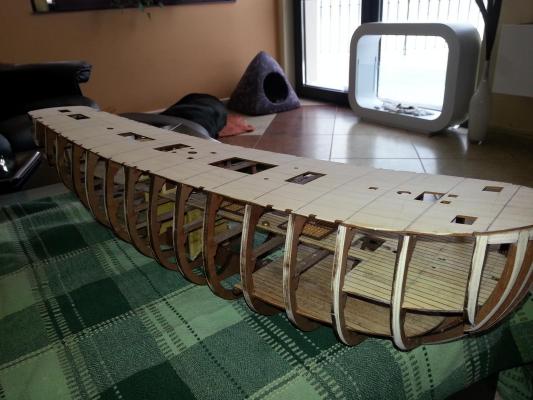
Well, all planks are in place. I don't know if this is good news or bad news, but that is it. As a whole I am not quite pleased with what I have achieved. I could have done much better. As Mike expressed it very well earlier - "I know folk like to see the bad news as well as the good ...", so I upload pictures for everyone to criticise, or,eventually like. A couple of pics how she looks like from all angles. Remind you guys, this is BEFORE any sanding! so do not be cruel Starboard side Port side Bow Stern And, by the way The planks were really NOT enough! Here is how I decided to solve the problem - I skipped every second plank at the bottomsige of the starboard side. As a result I have only 1 plank left!! (and I swear I did not waste any piece of plank bigger than 1 inch!!). I will keep it, just in case I need some repairs after sanding


-
Nice progress, Al. If you ask me, do not give much thought on up/down discrepancies. Just make it tight! The deck itself is relatively firm, so it will form an even curve, even if slightly wrong. This should not lead to major complications. BUT please do pay additional attention on LEFT/RIGHT declinations! Thats where your hull will be formed later on and a couple of frames in the wrong left/right position could make your life difficult!
-
Well, my case is that I covered a little bit more of the opening than recommended, thus making the inside "cleaning" much more of an issue.. OK, soon I shall know, by my own experience
-
Two more planks and she is ready!!! She looks scary at this stage, I'll post pics as soon as I finish the last plank, hopefully tomorrow. Now when the time comes for hard sandwork, I want to ask another major question, which keeps me awake these days..: We have a beautiful body, open from one side, full of furniture and other details, which of course we need to keep neat, tidy and clean. But we also have a lot of sanding to do, with all that dust getting in everywhere.. So what is the right thing to do? Clean, paint and install all details inside first, while hull is still wide open? and cover it all in dust after that Or - wait till final sanding, cleaning and varnishing is done, dust removed from everywhere and only then go to complete the inner details (I mean plant pots, staircase, railing etc..), struggling with the very limited access problem. Maybe somebody who have already gone through this can give a hint about how they did it? thanks in advance
-
Mike, there is one thing I am very curious to know... How do you plan to plank that bow? I can see you leave it unplanked for the time being, which is not the case with my Bounty. Are you supposed to plank at all or just fill it with some material and sand it to the shape needed?
-
Oh, it's so kind of you to offer assistance Keith! Thans a lot. Yet, I will try to solve my problem within next two weeks. Already have a vague idea, hope to figure it out soon. Will keep you posted and thanks again! Regards
-
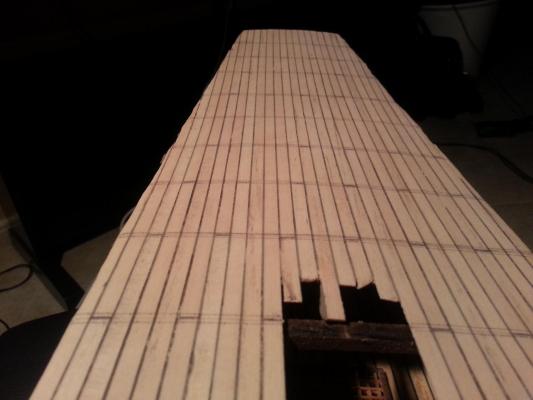
Time for bad news... Approaching the end of planking I counted the remaining planks and guess what - they are 5 short !!!! I want to kill someone!!! The fact that I have 1 extra useless staircase does not hel me at all I have absolutely no Idea how to solve this. It is hard to find readymade planks here. I should order from abroad, which will be funny, for 5 straws.... But even if I can somehow find planks, there is no wey they will match the others in colour and texture. Bl**dy niggard manifacturer ...
-
Hi Al, Well, that IS a trouble, I know...Sorry to hear that. What I did at the very beginning was lay the frames and the main deck in place without gluing them, just to see how they fit to each other. It was a sleaky task, believe me But having them put together I could see which frame needed plus or minus correction, and marked the exact joining level on the keel. Only after that I proceded with glue, according to the marks. BUT! Thoudg this tricky operation saved me discremancies in vertical (up and down), it did not help me a lot in horisontal (in and out). So when I came to the stage that you are at no, I was furious to see that some of the frames stick out of the main deck line, while others are way too in... This lead to some extra sanding and filling. The good news is that the planking hides this, so it is not a major trouble Anyway, I like your precise work! Your stairs railing looks nice, though I did not see such in The Anatomy. And most of all I liked your grating. Mine looks so rough and hairy compared to yours I have to put some more efforts when I make the main deck ones Good luck with the frames+main deck!
-
Come on Al, we want to see.... Show something
-
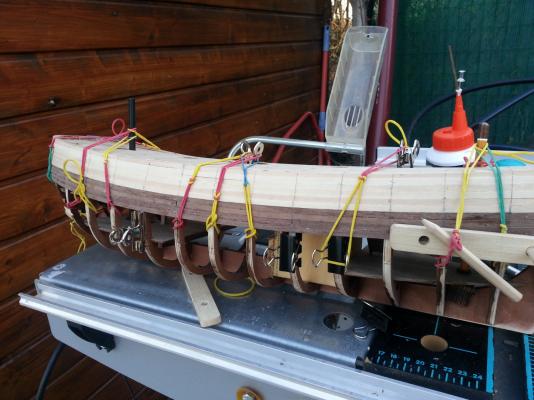
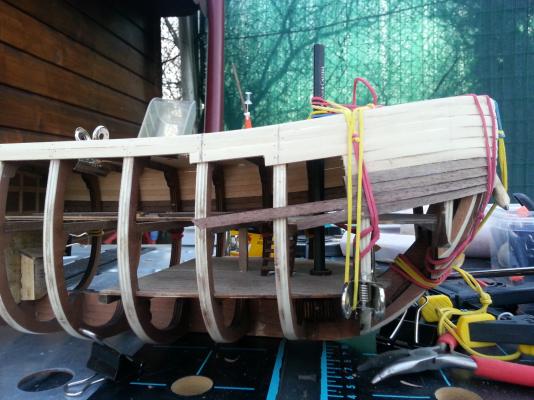
Hi Al thanks for the kind words. it's always a pleasure to share any experience, which could be useful to others. But, watch out! I am a newby too, and not a trustful resource at all! Now, regarding the L-planks - the bolt that pulls them together goes beneath the keel and the planks clamp the keel without damaging it. The cords are rubber sling, or bungee as you call them. I find them very useful and convenient for pressing the planks tight while the glue is dry. Later I found another method - better and faster, but that's another storry Here are some very recent pics. In fact from now on I will be publishing 'real time' photos.
-
it's not easy Mike... Please note that when we have single planking each and every piece of wood should be laid as it is meant to be, because it remains there worever. I still do not understand why you worry so much about your planking?!? As Al said it plain - first layer is nothing but the base to the second one. What you need it to be is strong and even. And even you make it by hard sanding. What worries me more with your planking (i dont want to be rude, but just have to mention..) is the way you lay the planks after the middle. All planks should be parralel to the main deck, not to the waterline as you have layed them. I hope you know that and will do it proper with the first layer. Regarding my model - I do not have a better picture of the port side available, but I can take and send you. What exactly do you want to see? I am about to finish planking these days, 5-6 more layers to go.. I think I learned how to make the bloody stealers, it took me some time. Yet, my planking is far from perfect - Too much carcas... hope sanding will not lead to a hole in the hull. And another thing is I cannot make planks tight enough to each other... My next ship - if there is going to be a next one - will definitely be double planked! Its much more comfortable and easy to work with thin venier on a smooth solid base
-
And some more


-
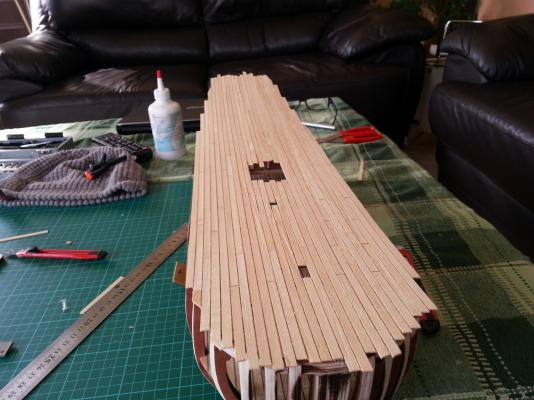
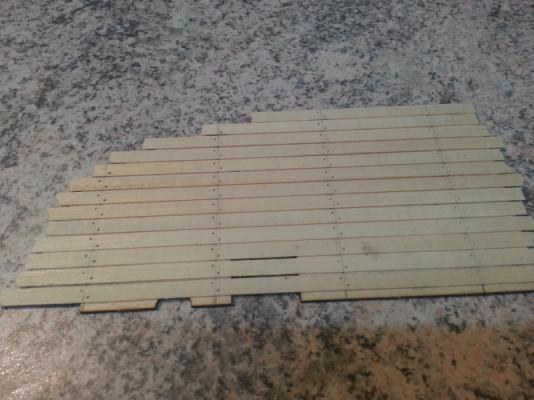
Yes Al, It appears that I also have enough timber to make 5 stairs, though the plans shows 4 only. The stairs in this kit is one of the things that are completely wrong I think. Wrong numner, wrong place, no railing.... Anyway, it's just a model Here are some pics of the next stage - planking

-
Happy Birthday Mike! What you should really do now is leave modelling alone and concentrate on some other activities, which are more appropriate to the occasion!
-
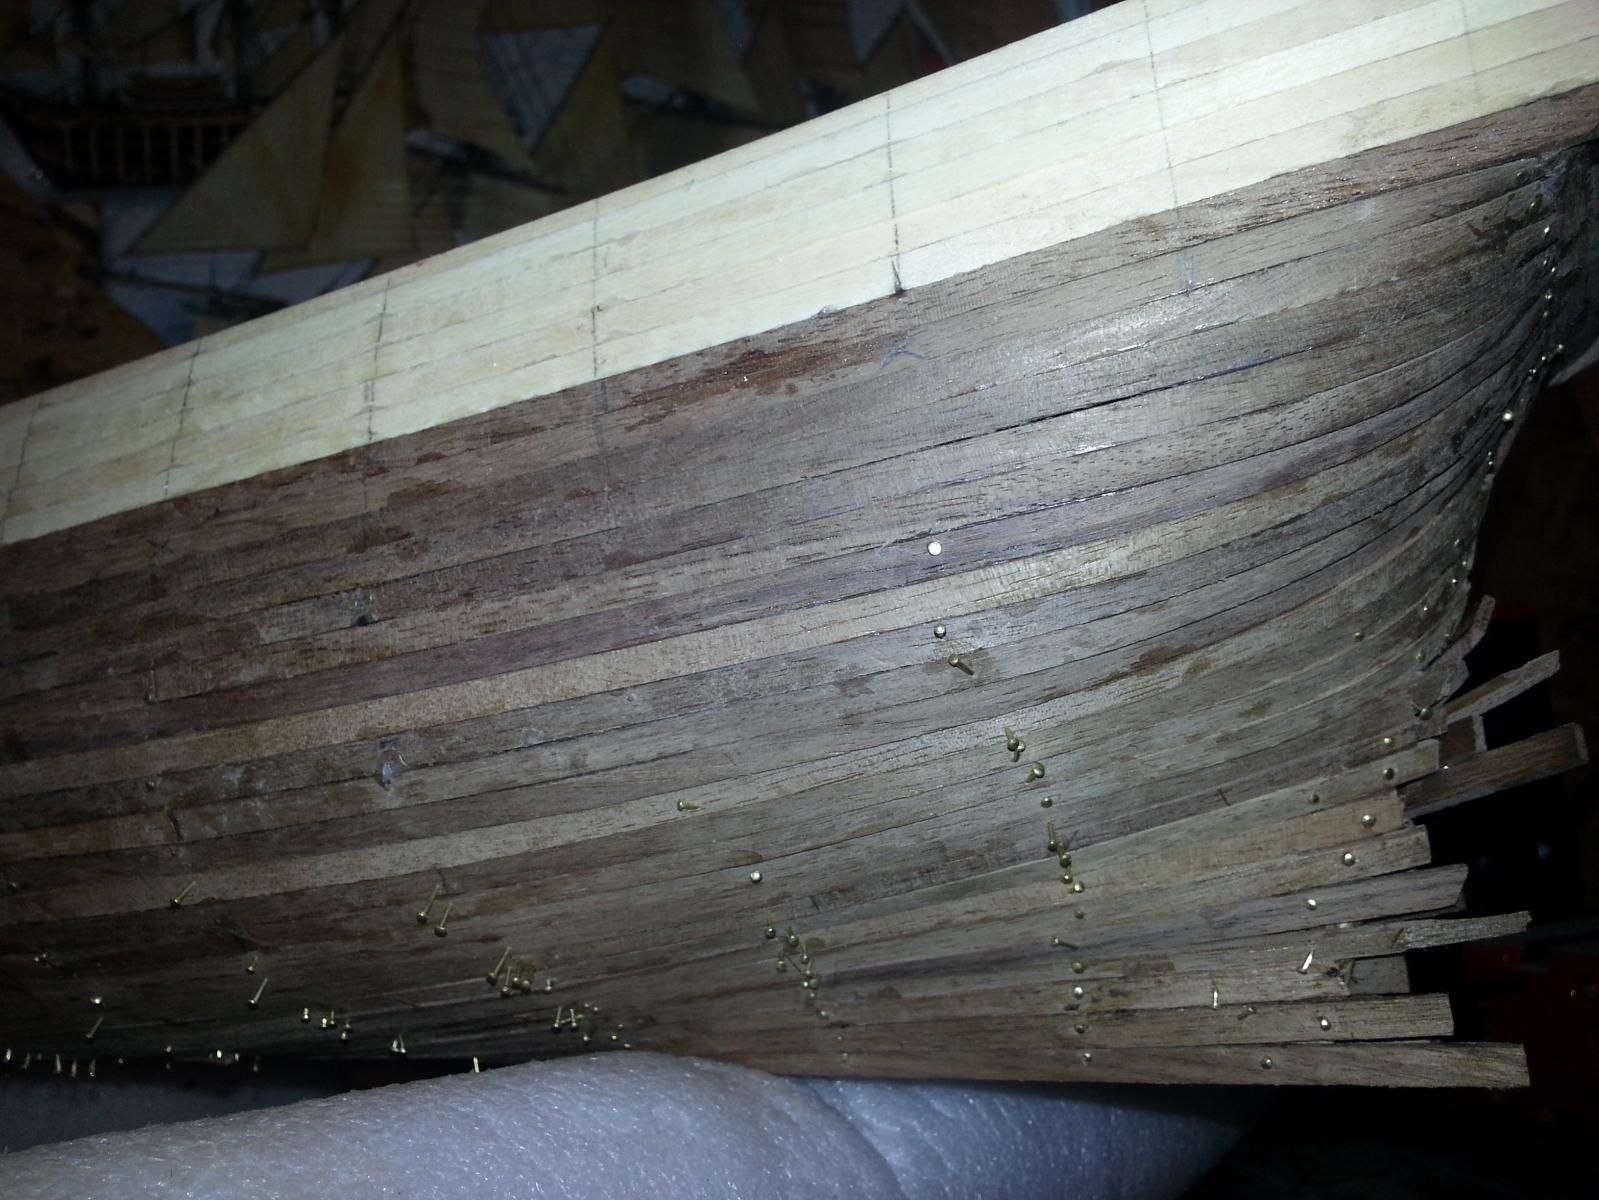
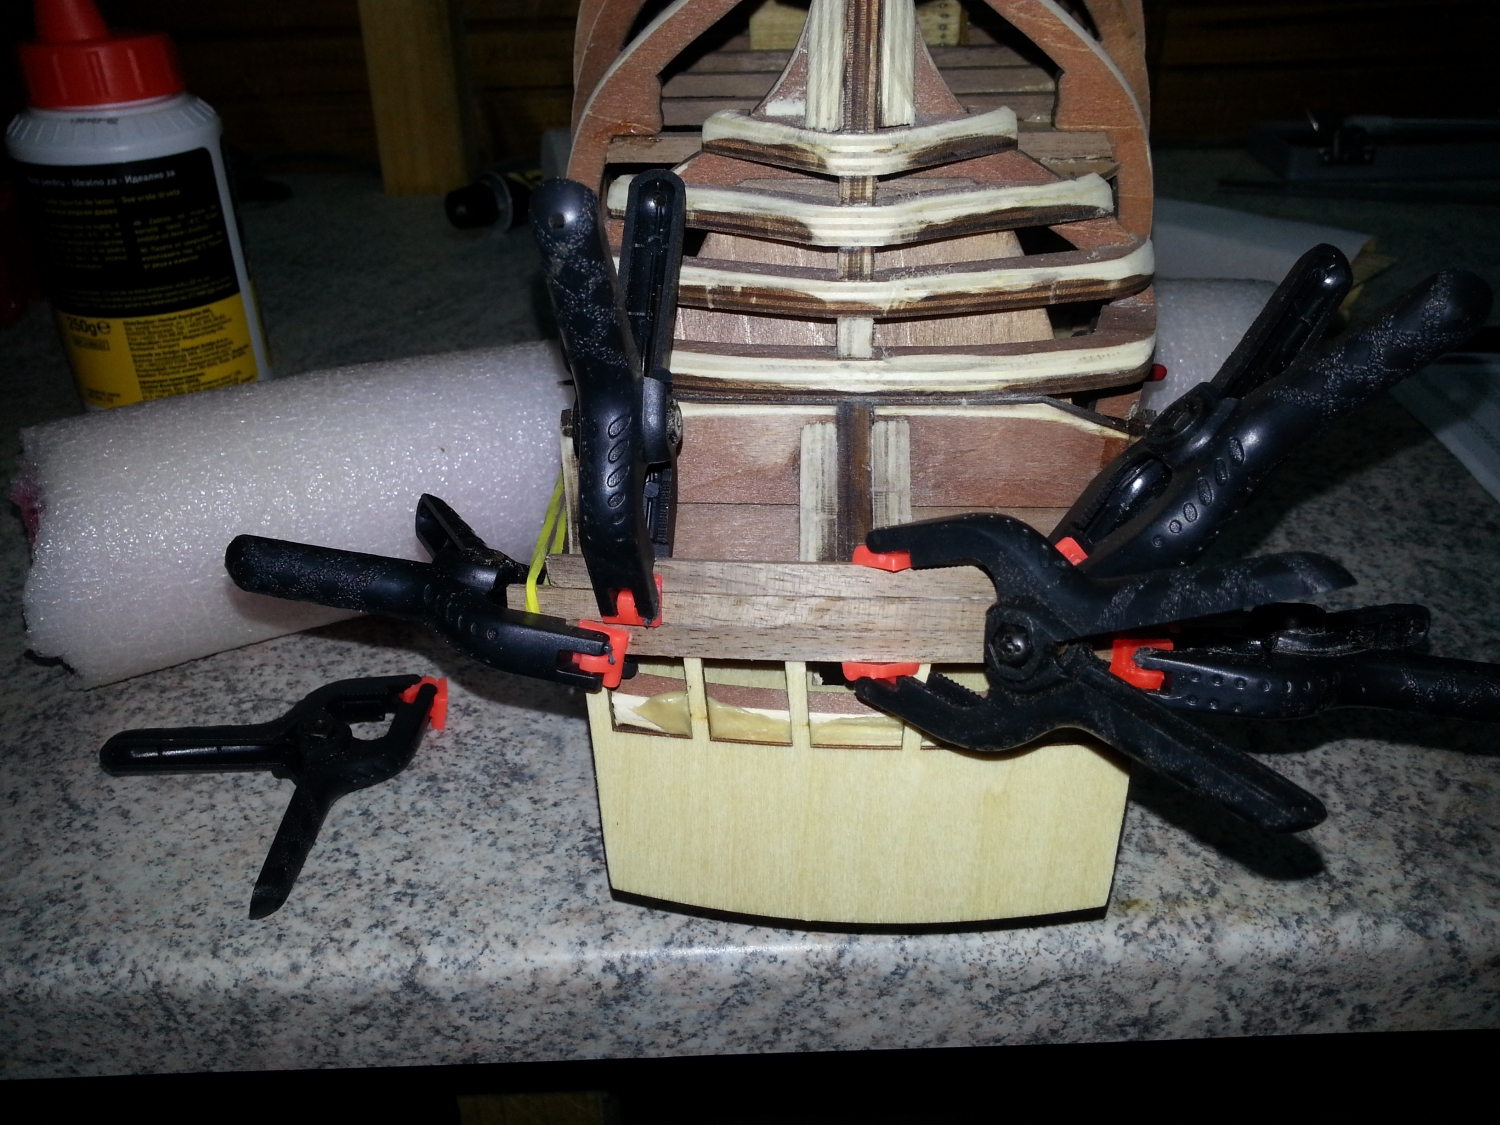
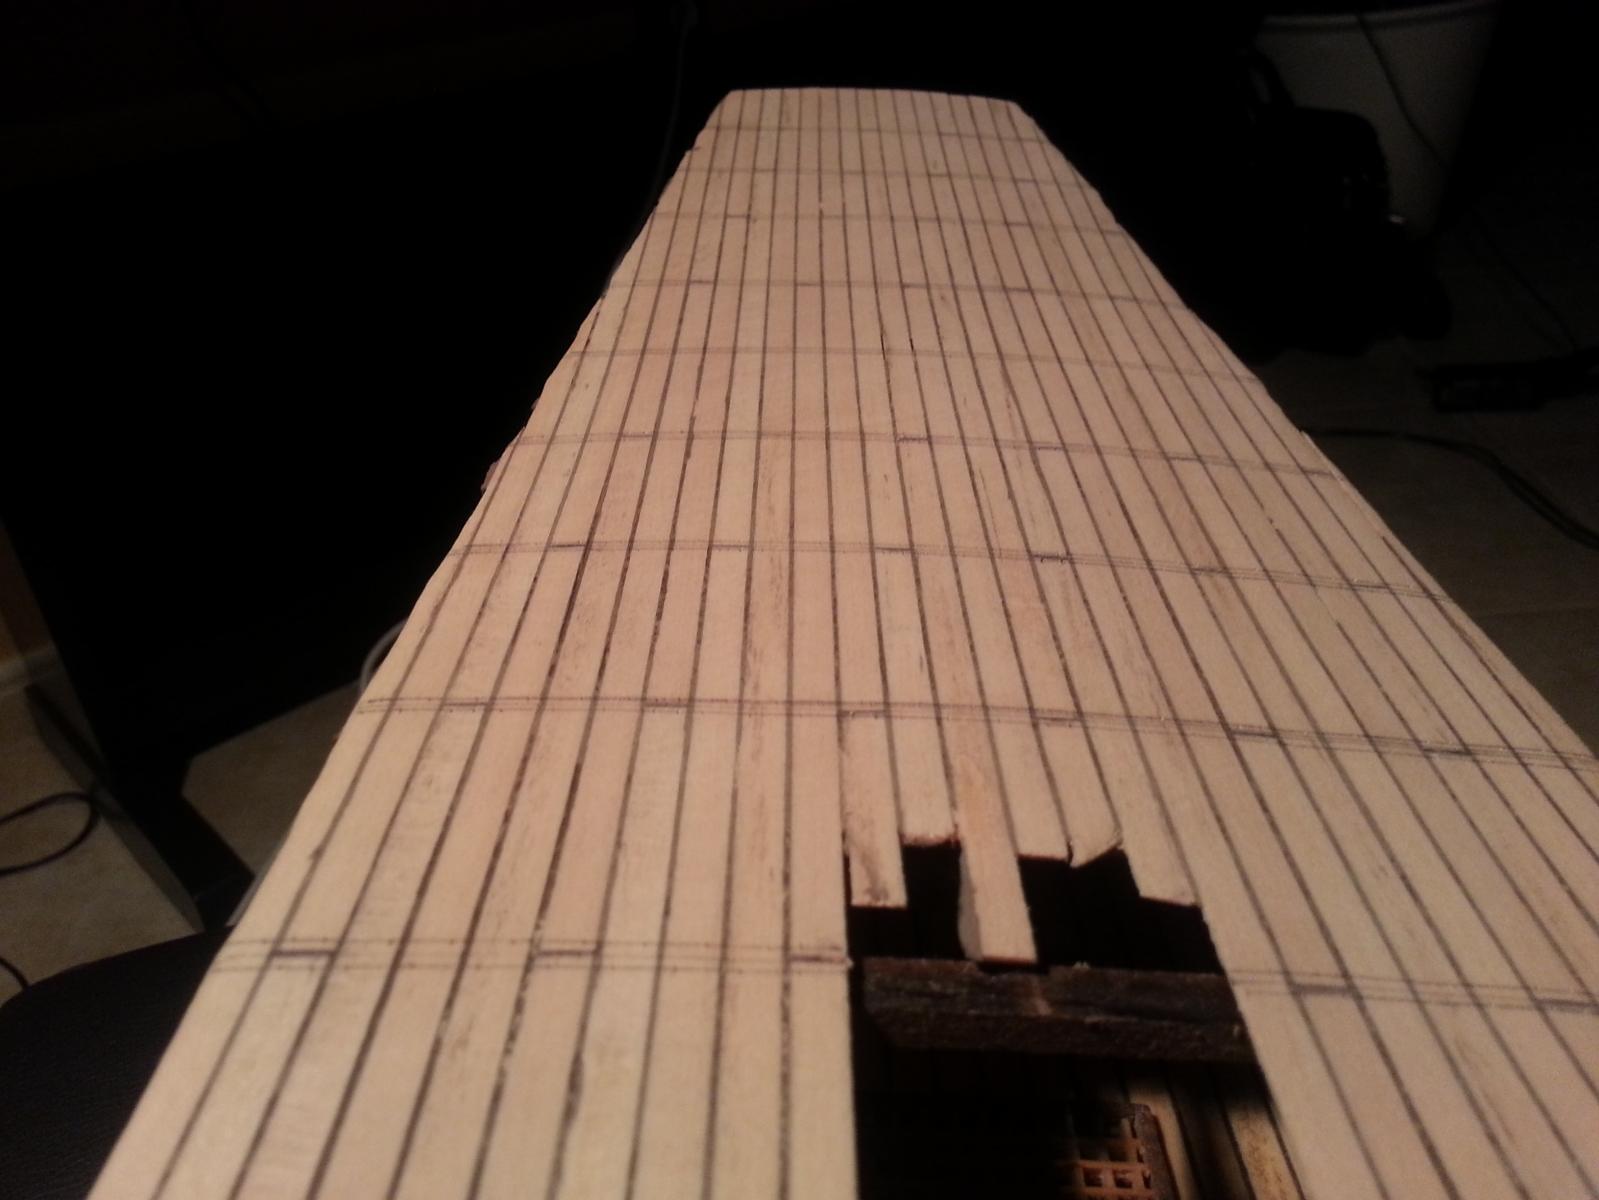
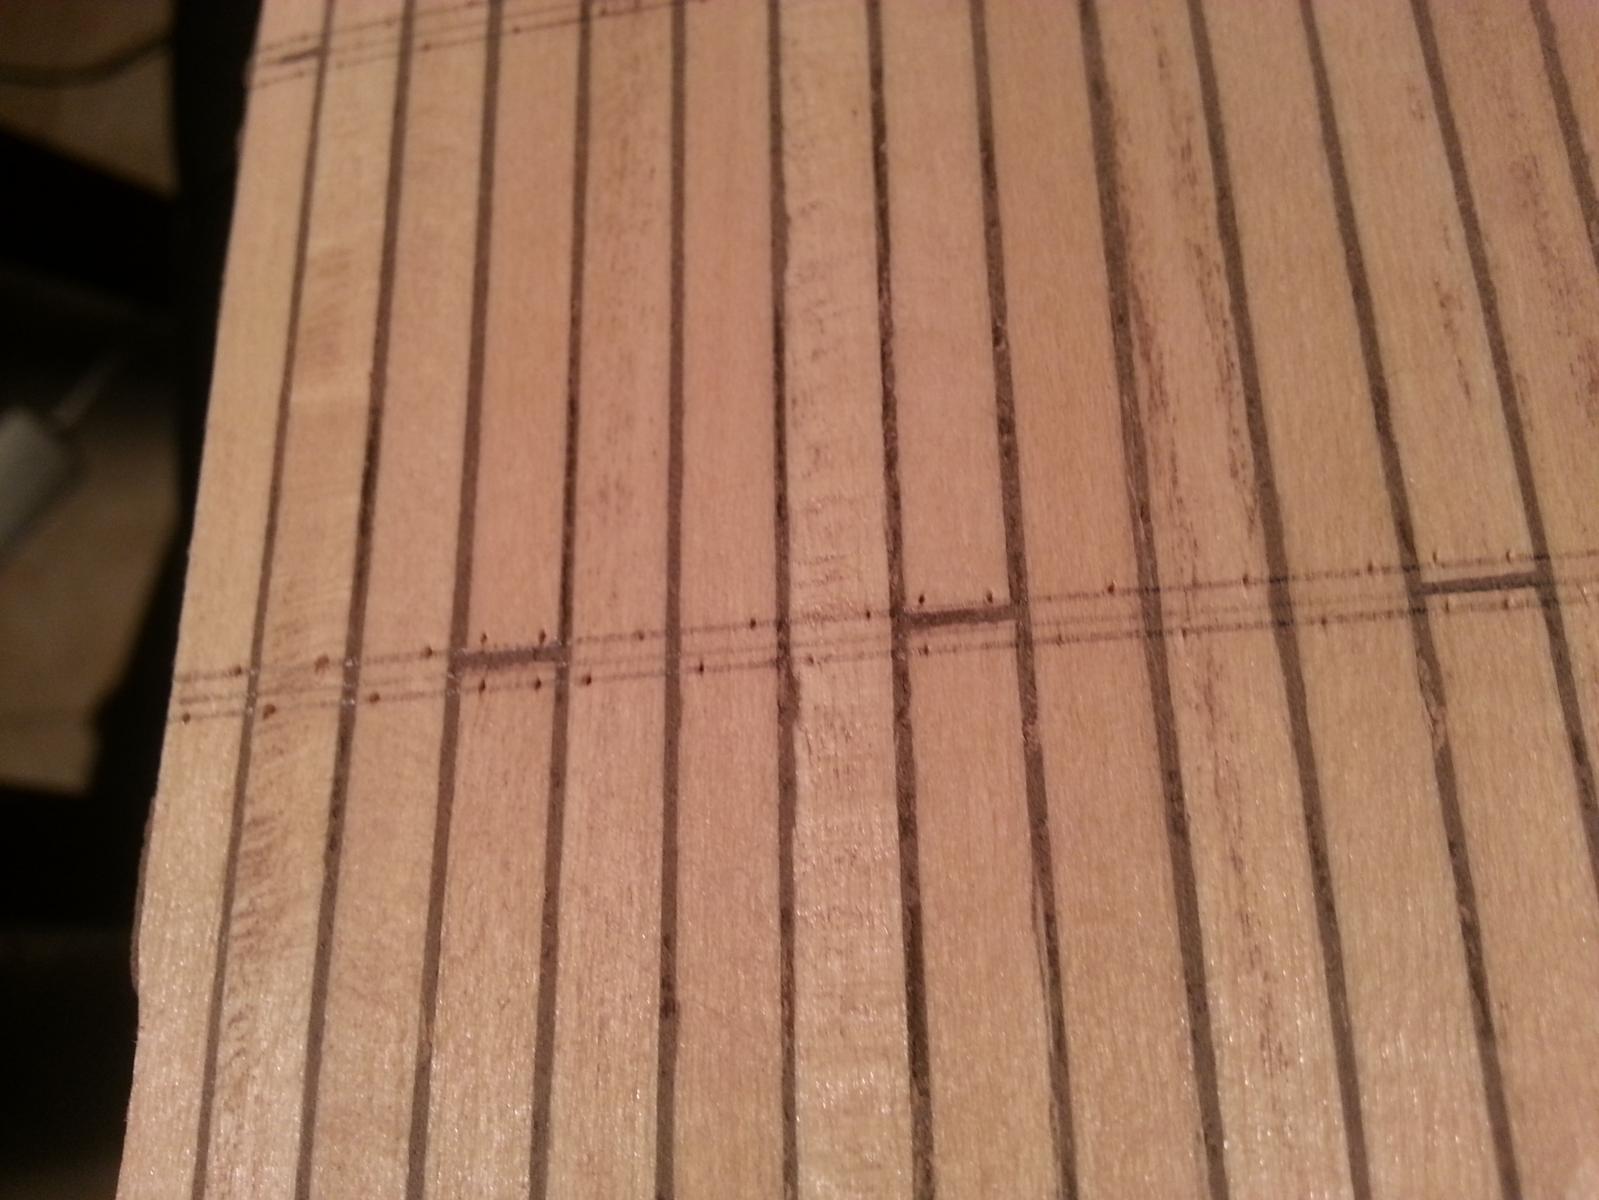
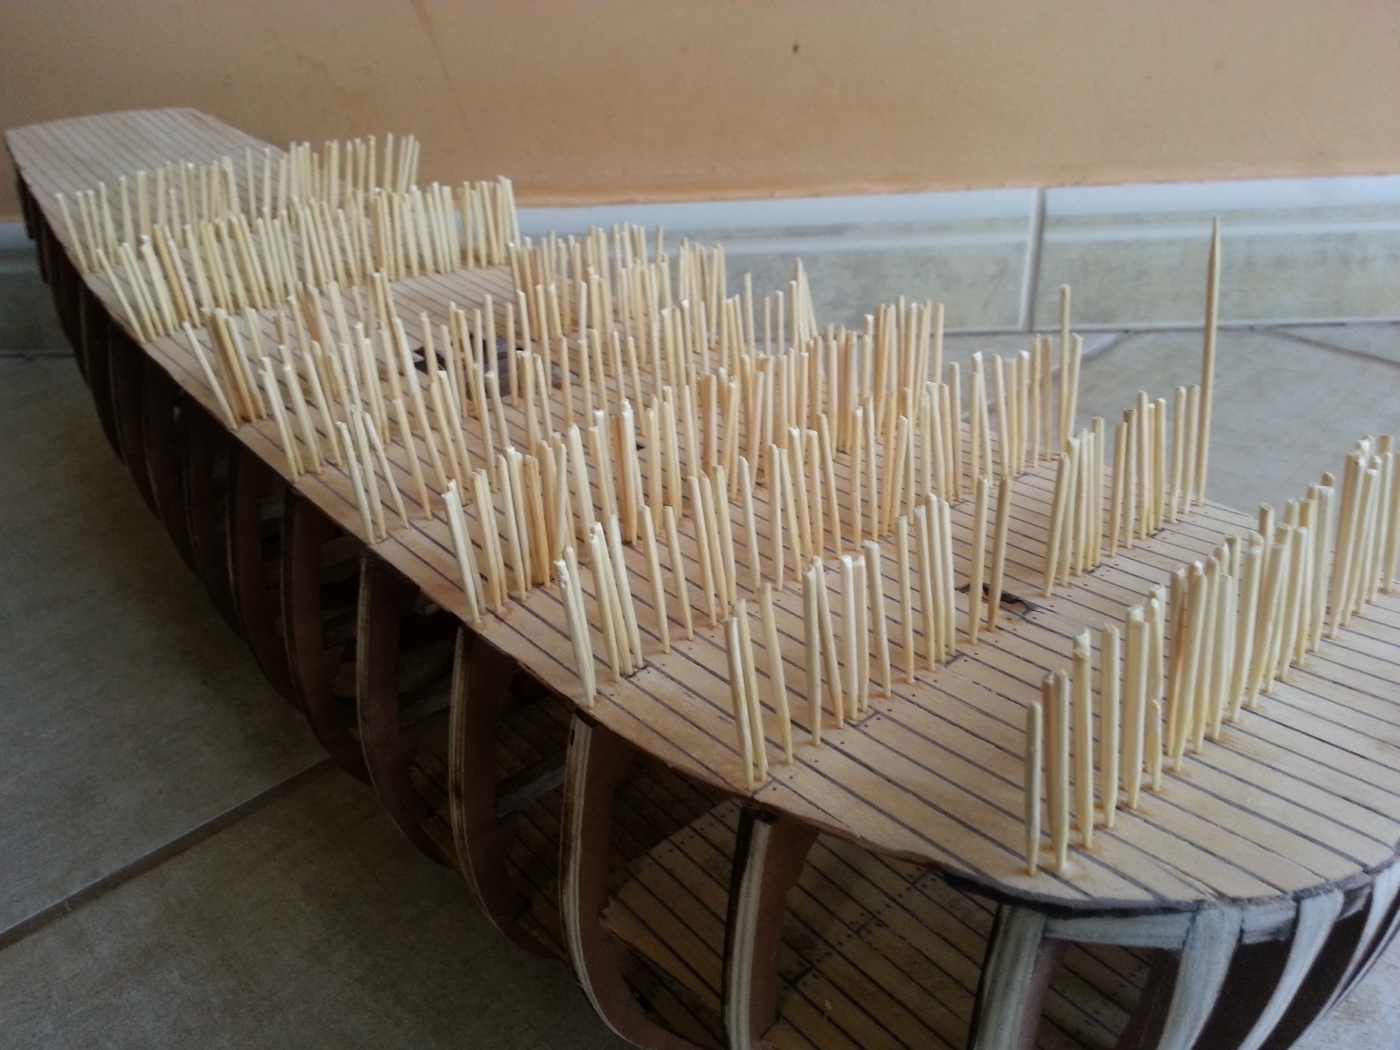
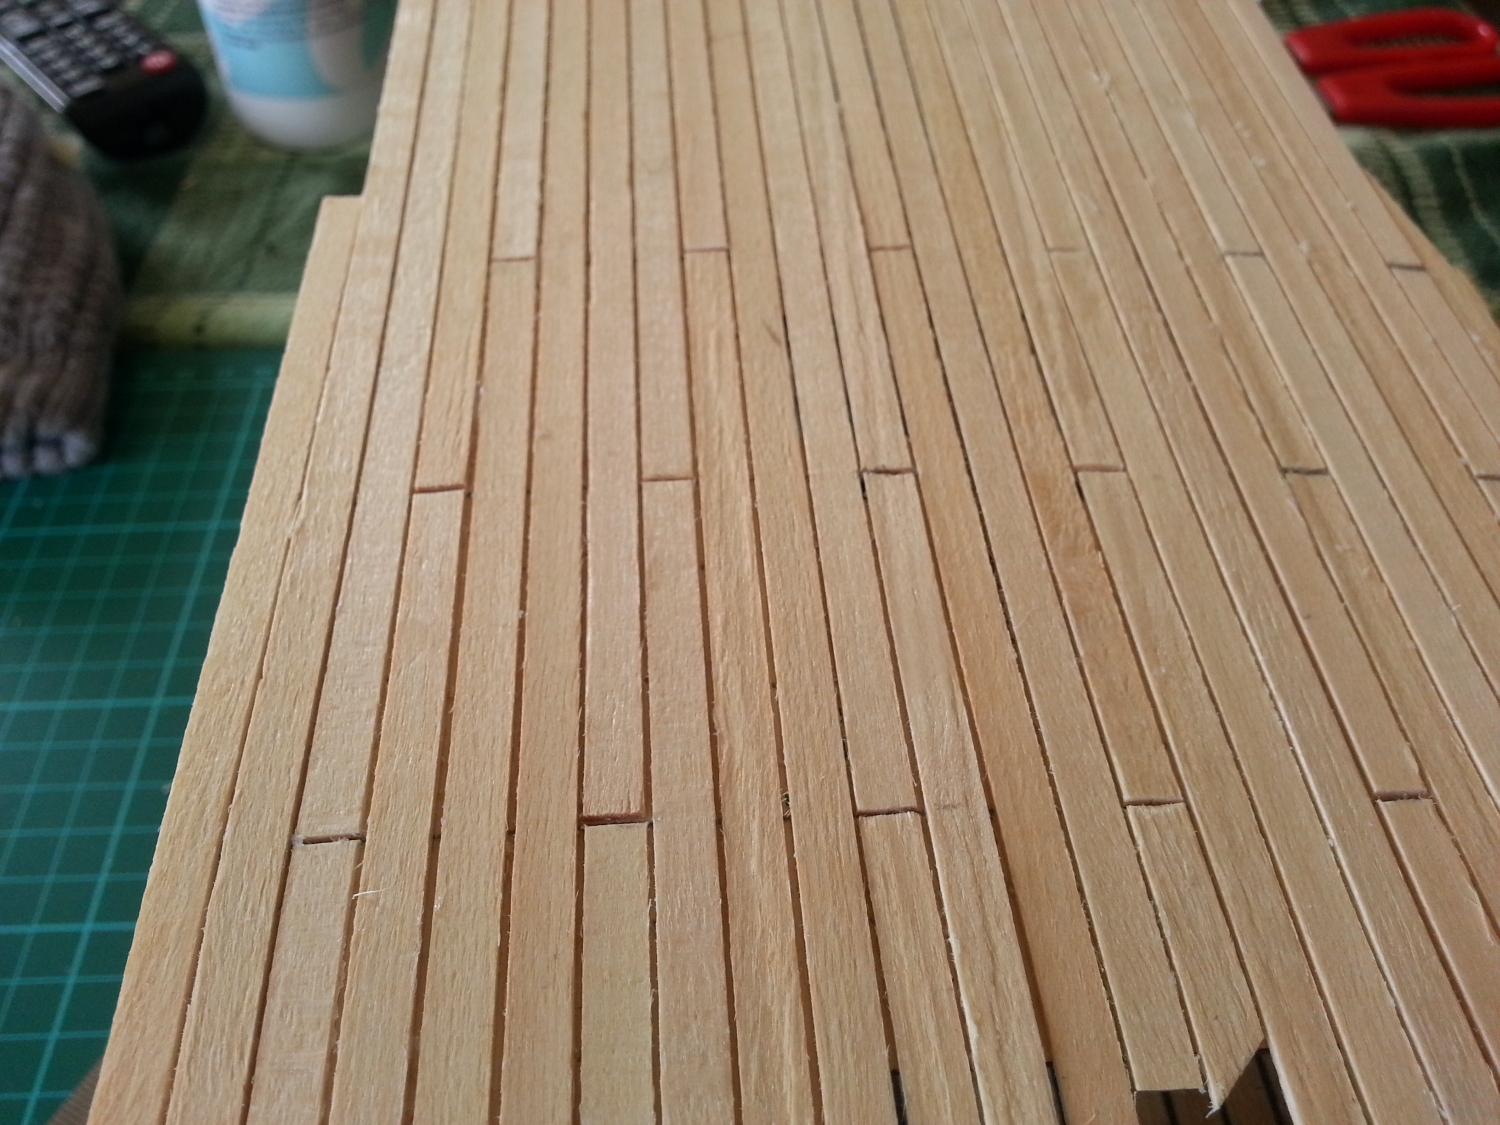
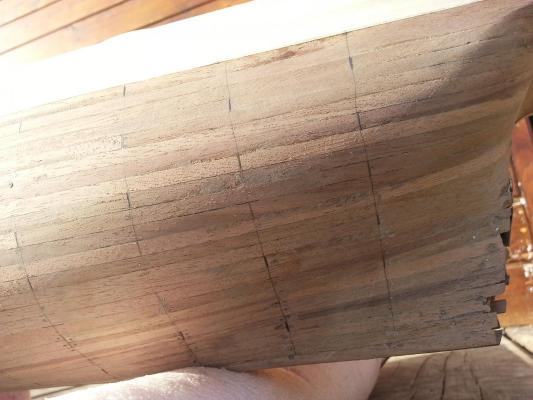
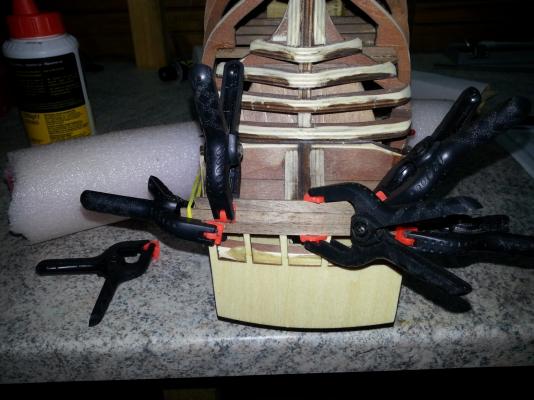
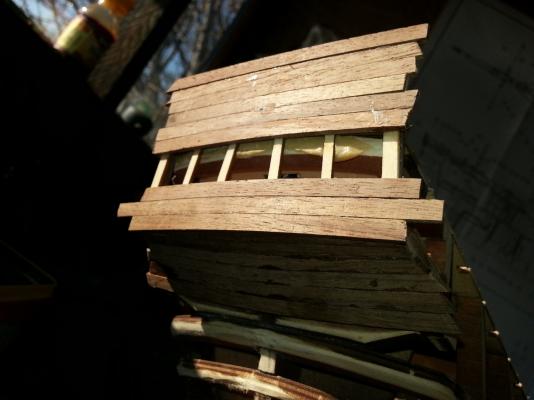
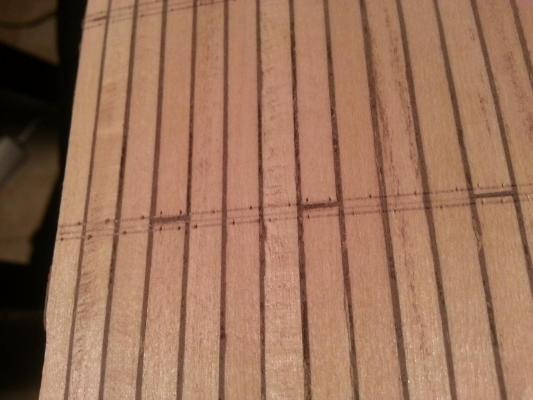
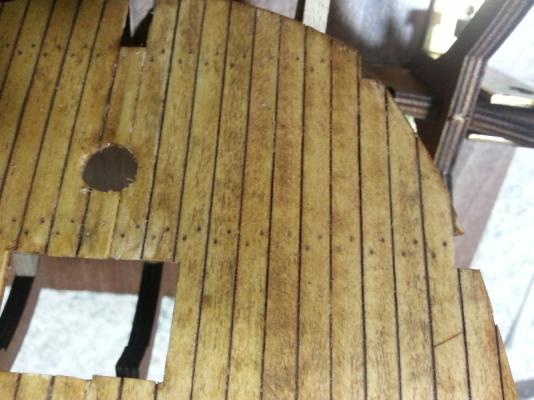
Al, you got it right - the pins are used as spacers. As they appeared to be the right size (0.5mm), this was the easiest method I could think of to keep the seams calibrated. Caulking was done by filling the seams with brown putty. I use some special one - acrylic or sth similar - which does a great job to me. Then comes sanding... That's why I planked all openings - you get better results with sanding this way. Here's what I got after first round of sanding Next came drilling holes for the "nails". .... and 'nails'themselves..... Strange, but I do not have a pic of the main deck ready. Maybe because I still have not made the final sanding and shaping of the openings. Rough idea of what is looks like you can get on that pic, showing the beginning of planking


-
Morning, Scotland! Mike, in fact I am at almost the same stage as yours, with almost the same boat as yours and vith ABSOLUTELY the same dilema as yours - should I stop at the middle (whatever they call it) and start from keel upwards, or just procede downwards. For what I know from reading a lot they all say start from the keel and meet in the middle. For what my fingers feel like... go on as you have just god used to.... and maybe shoot yourself in the head in the end..... Today is the day for me to decide. So I would ask you - did you make your choice, how far have you gone and could you post some pics? BTW, are you doing the first planking? is it followed by second or not? My AL is a SINGLE planking model, which makes things even more dreadful.. Besides, it is 2x5 mm walnut, which is quite more dogged than lime
-
Ha-ha! Al, you made me smile! I could be anything but FAST! Maybe you didn't read carefully my first post - I started this project beg.October. I started this log only now and decided to start posting pics from the very beginning. The truth is that I an in a great shortage of free time.. I spend maybe 3-5 hours a week in my wonderful shipyard. I wish I could make them 3-5 hours per day, but I'm afraid this would crash my family wellbeing So, here are some more pics, and very very soon I am catching up and start posting them in real time. And as you will see - this will be slow!

-
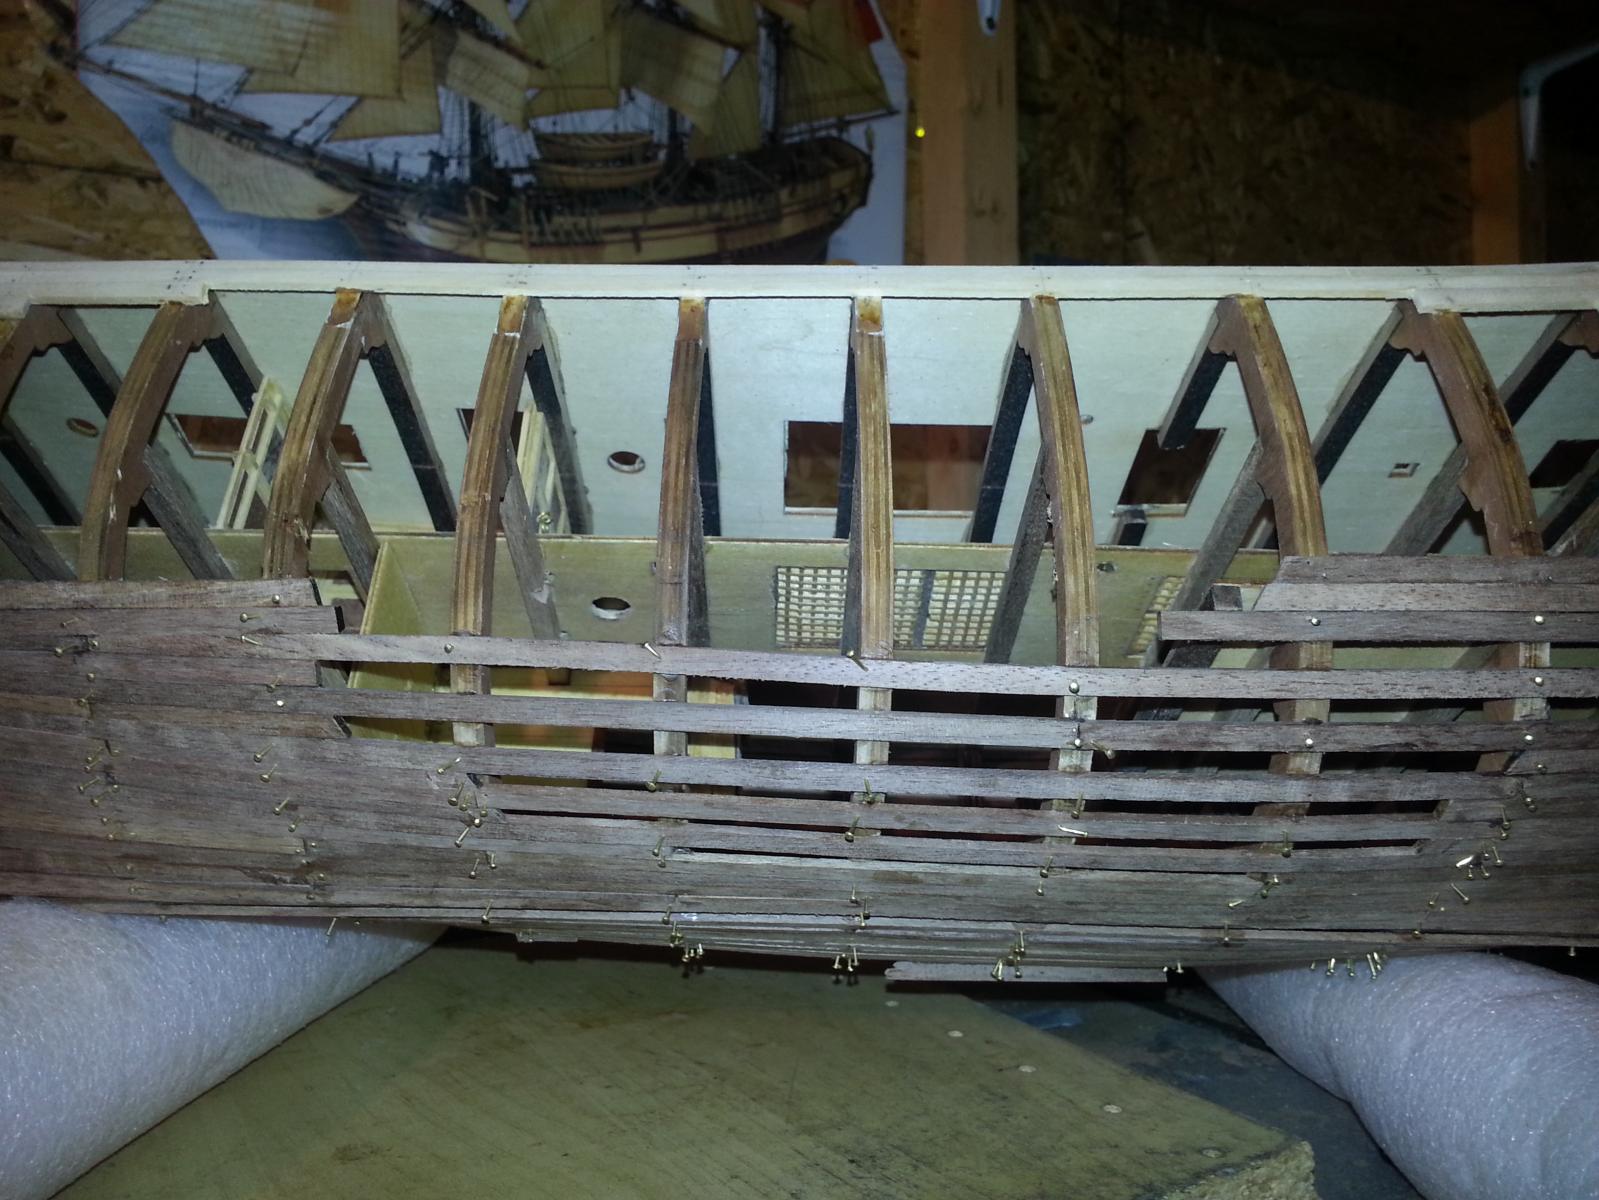
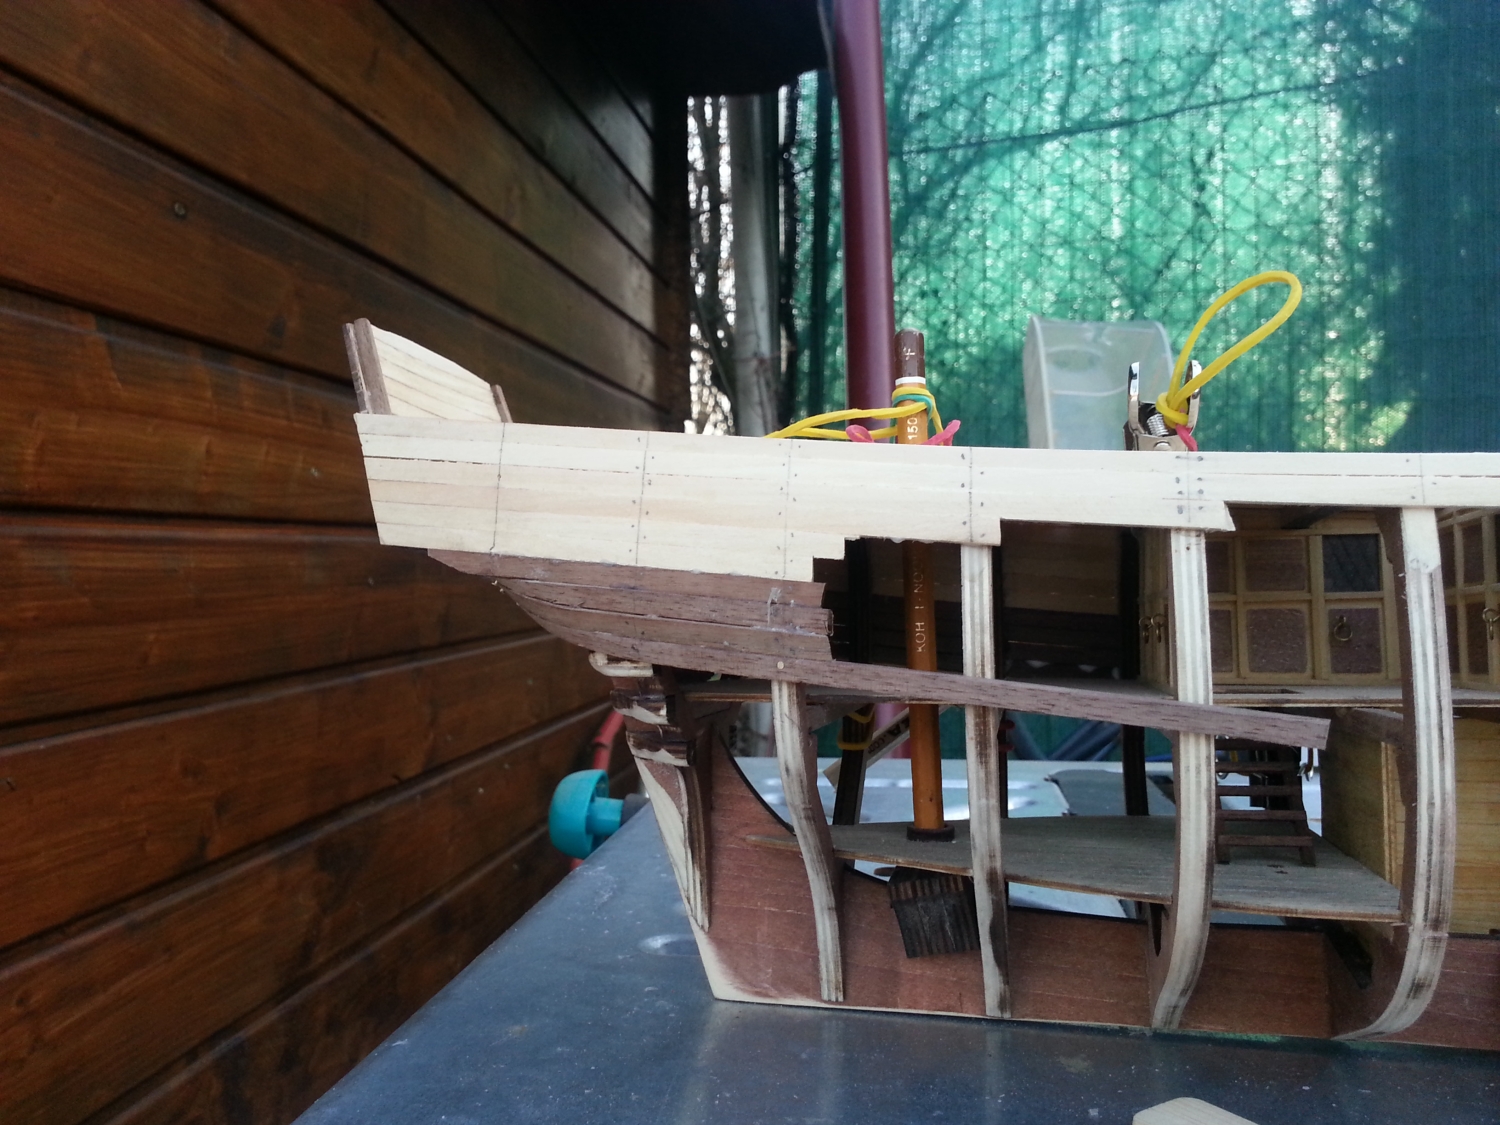
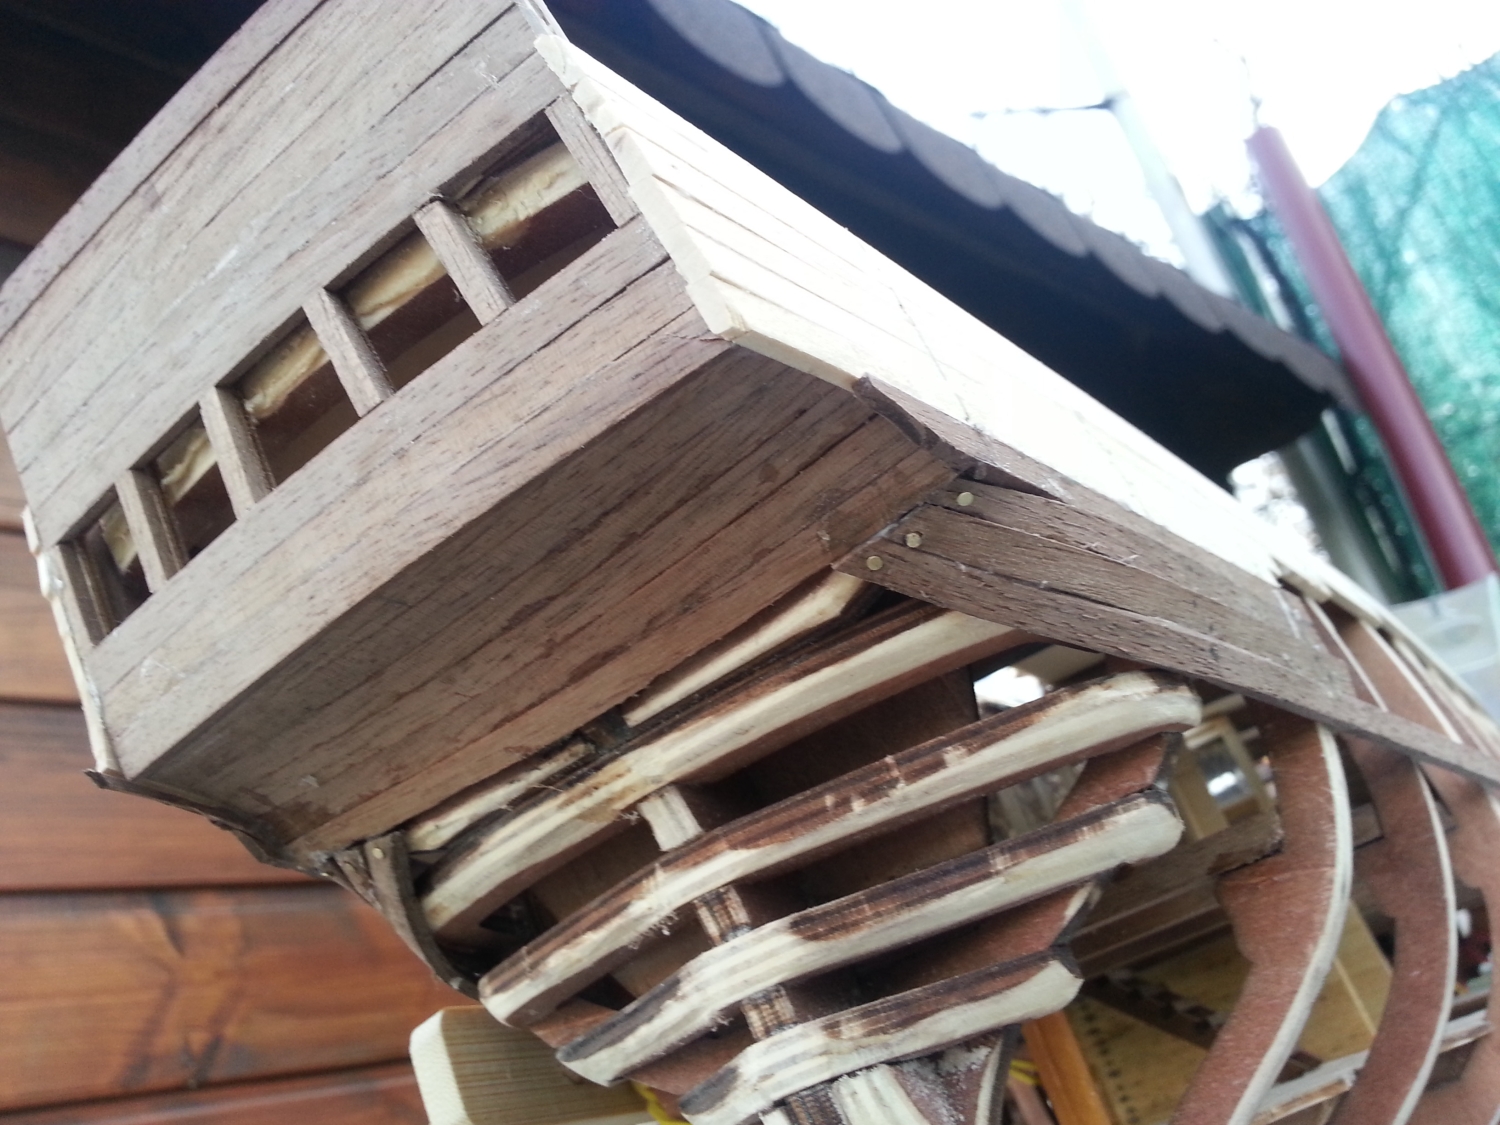
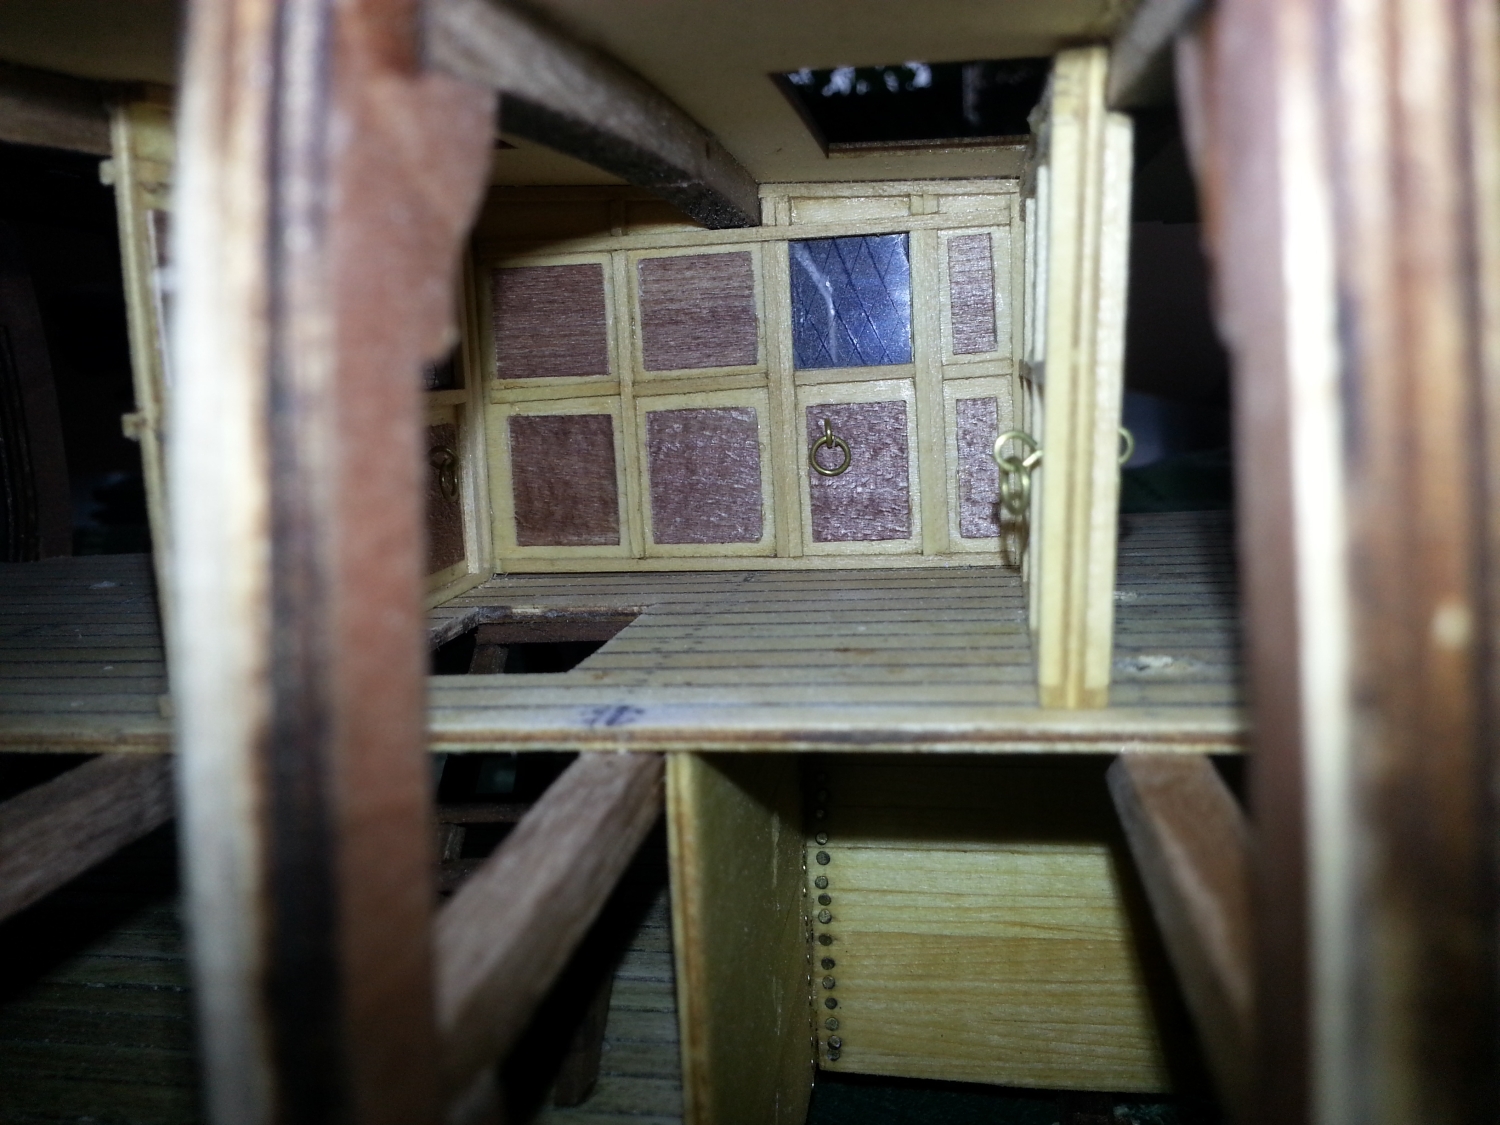
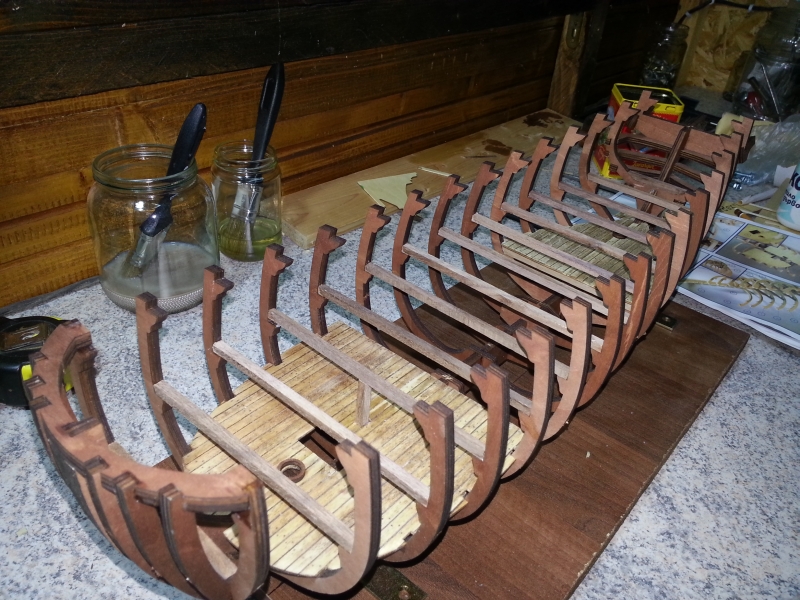
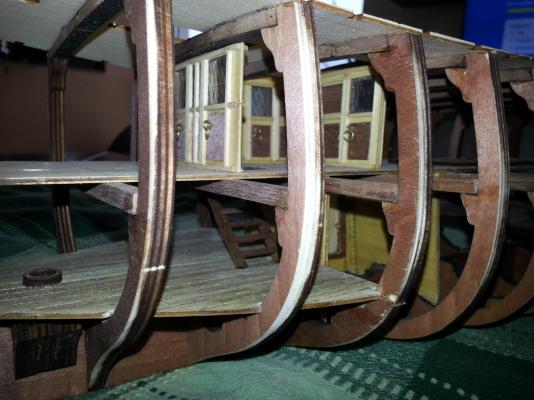
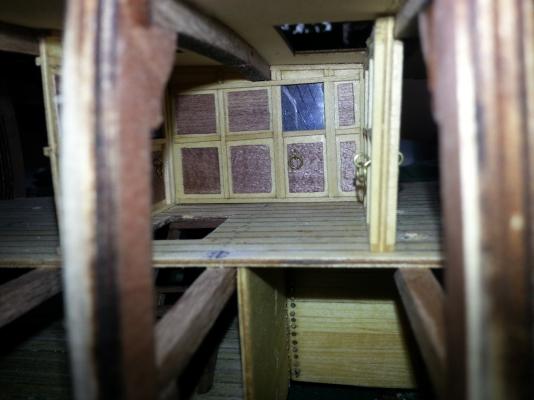
We go upstairs, to the Middledeck

-
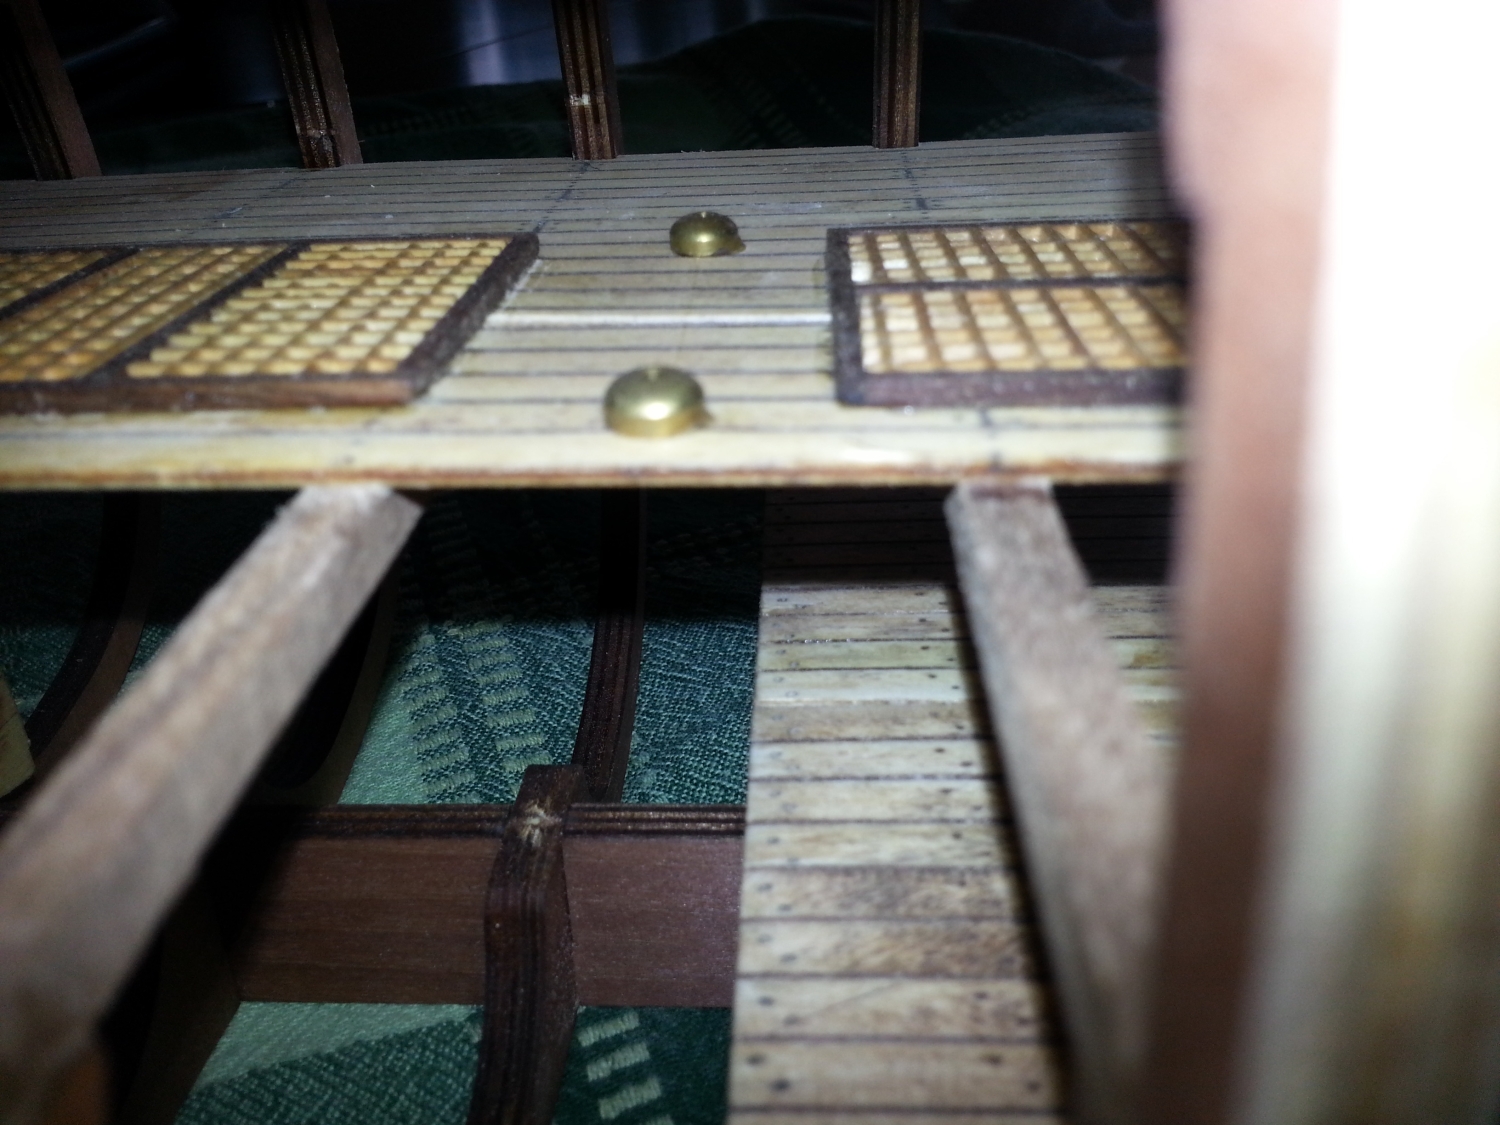
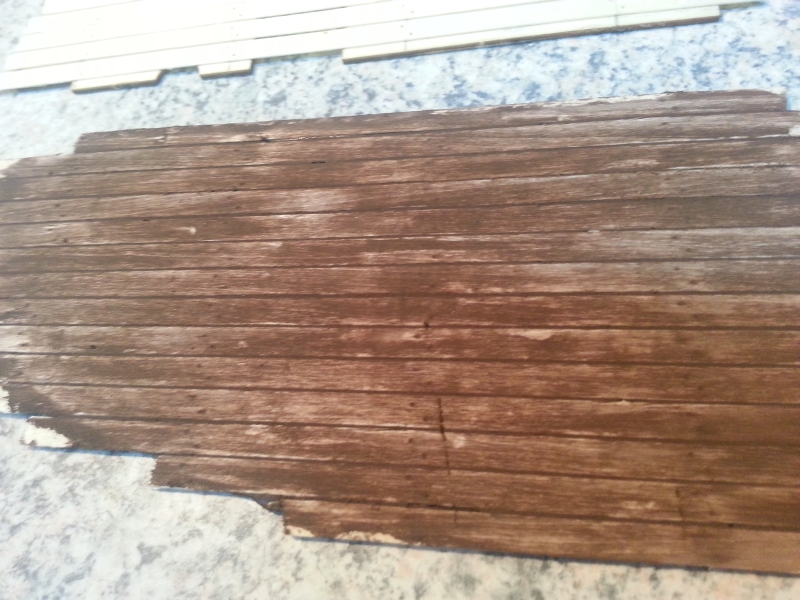
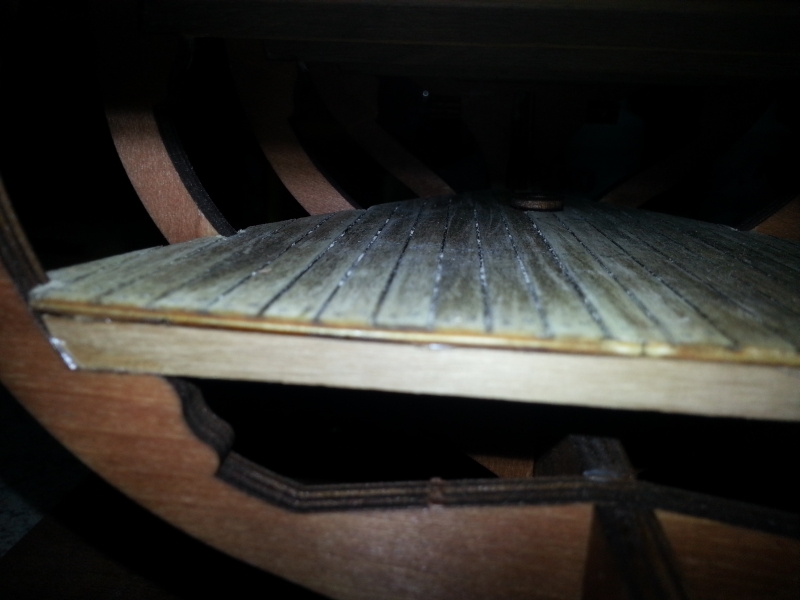
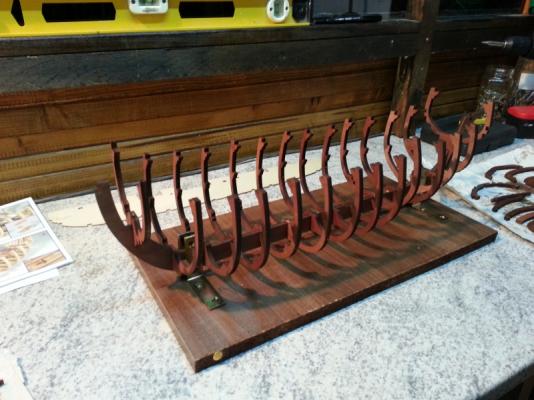
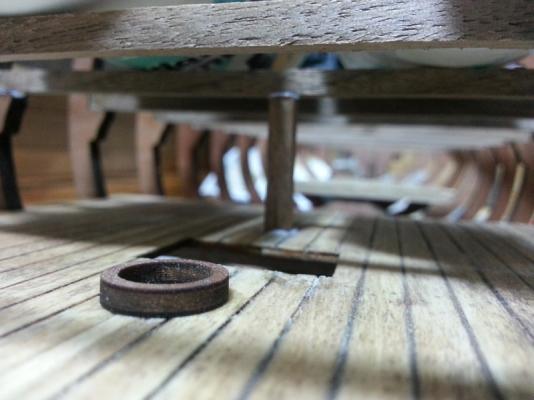
Which means that you can see the picture! Great so far! Here we go further then: Keel was layed on Nov.3rd 2013 Champain for all! Then we go to the lower decks Maybe you wonder what's that? Its my first experiment for caulking and nailing. What I did was leave 0.5 mm between the planks, drill 0.5 mm holes, then fill it with fine grouting mortar of anthracite color. I was aiming at a double effect - imitating nails and caulks plus staining the wood and bringing some aging effect. So here's the result after sanding: By my own estimation this experiment lead to average result. Decided not to repeat it on the upper decks. Final looks of the lower decks in place:


-
Hi guys, Here's a pic of a 3-months old breadfruit tree. I believe that was more likely to be their appearance at the time of transportation
-
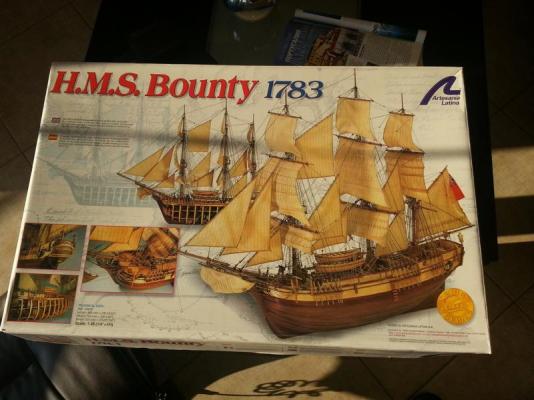
Well, let me get onboard, too This will be my first lod in MSW. Hope to enjoy, as I already saw plenty of nice people here, and quite willing to help as well! A short note about me - My name is Theodor, I live and work in Bulgaria. Used to be a Captain's mate on a fishing trawler long long ago.. (there comes 'Capt.Fisher' as you can guess). So still there's some salt in my blood, which could explain my attitude to this amazing hobby. I have already given it a try with a nice 1:150 GOLDEN STAR by Mantua. Never finished the rigging... Decided to skip and go to the real thing - 1:48 And there she came - a nice birthday present : Nice looking, half open model of one of the most famous sailing ships in the history. What added to my choice was the presence of full detailed information about anything on that vessel -John McKey's Anatomy.. , as well as some pretty detailled and highly professional build logs on the net, especially in Russian forums. Plus a couple of nice movies starring The Bounty, where you can see it from inside 'in real' ) Well, the kit is here, the workshop is equipped well enough... All we need now is time, time, time .... for work, work, work... First pictures will follow soon. Regards everyone Capt.Fisher