.jpg.d48db35f74616289e21aa1b7f7668853.jpg)

milw
-
Posts
37 -
Joined
-
Last visited
Content Type
Profiles
Forums
Gallery
Events
Everything posted by milw
-
 Todd, have you tried printing any yet?
 -
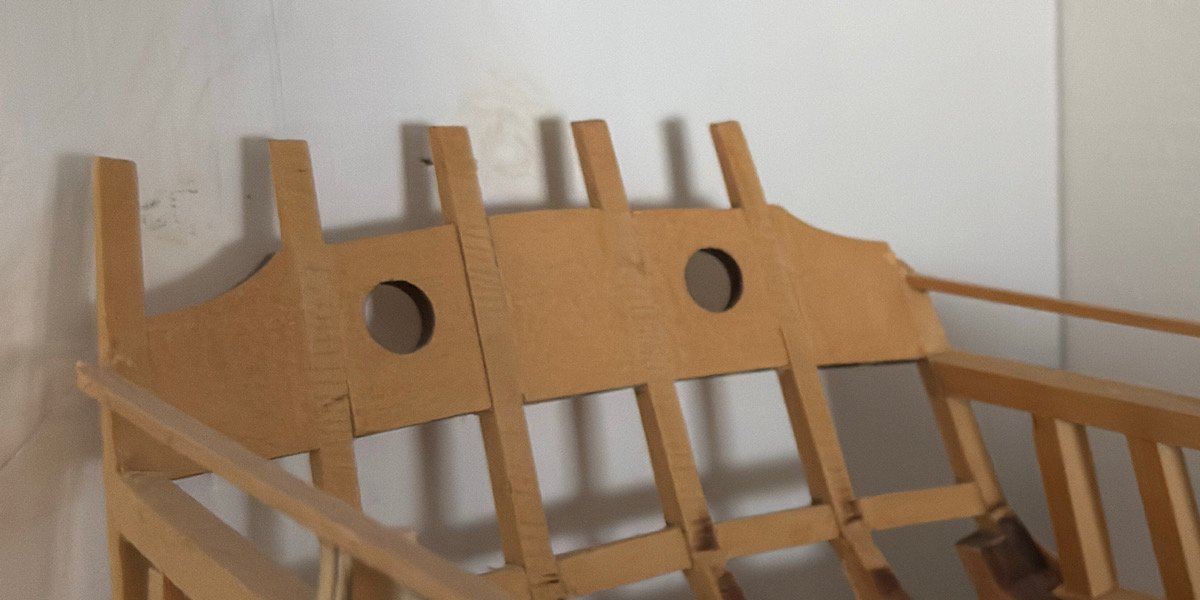
Thanks Frank, that gives me some hope! I won’t lose anything by trying repair, right? Now i need to make a pattern to remake that stern frame
-
Well, it’s been over 4 years on the shelf, after a couple of disasterous falls onto the floor. The first one took out one of the stern posts, and I never found the lost piece. The second one, in the pandemic years, took out most of the fore frames and the stem. I find myself in need of advice- the damage seems too extensive to hope to repair… and I was barely beginnning Chapter 2, although I bought parts thru Ch. 4 or 5. Question is, start over from scratch, ordering new frames and Ch 1 parts? If I go this route, I am thinking to use cherry as the yellow cedar does not do it for me. Great to see so many of you have finished!! cheers- Scott

-
Apologies for resurrecting this thread, but I’m now in this exact position and wondering if your email enquiry turned anything up, or if you found a suitable substitution? From the drawings in the plan (&your photo) it looks like the harpoons used similar weight line to the whaleline, and the lances a bit lighter weight?
-
Ok, this does seem much better!
-
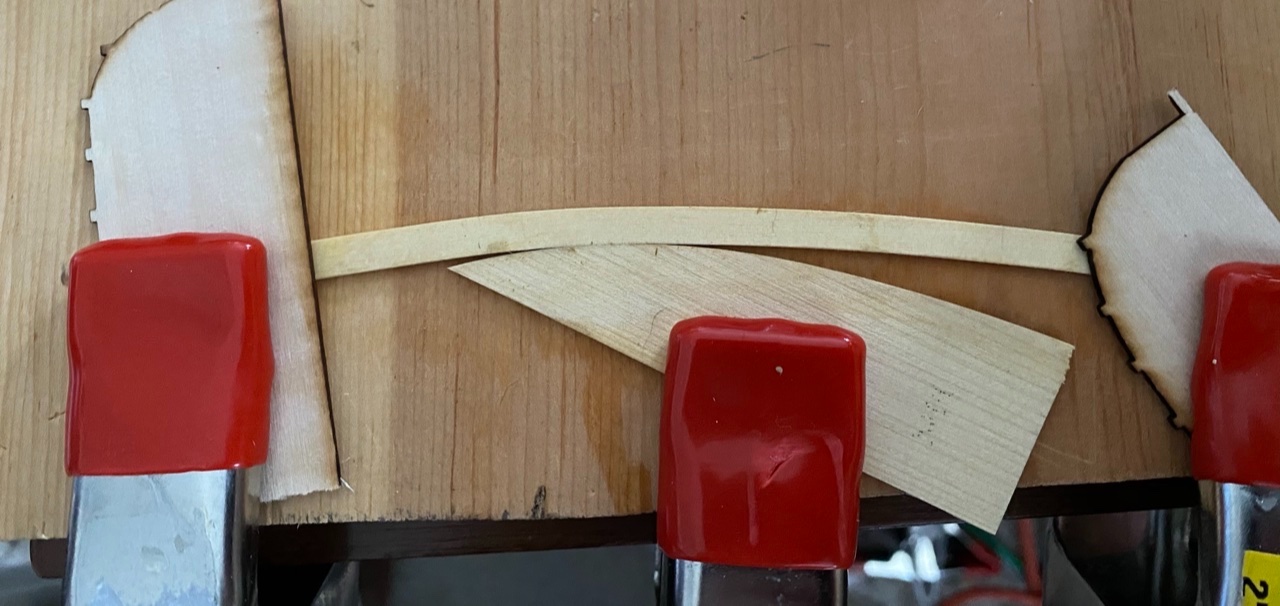
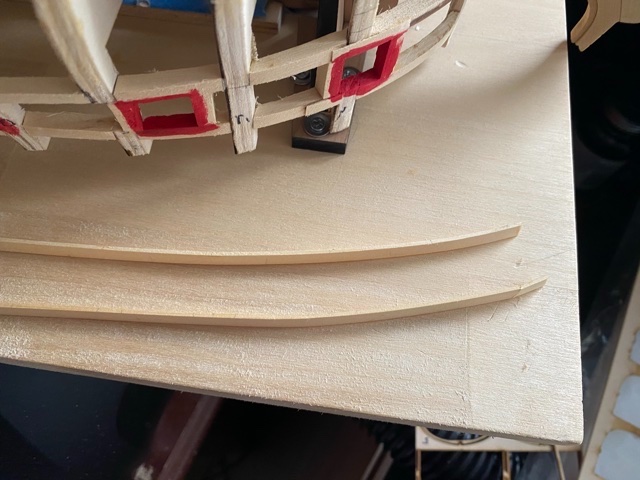
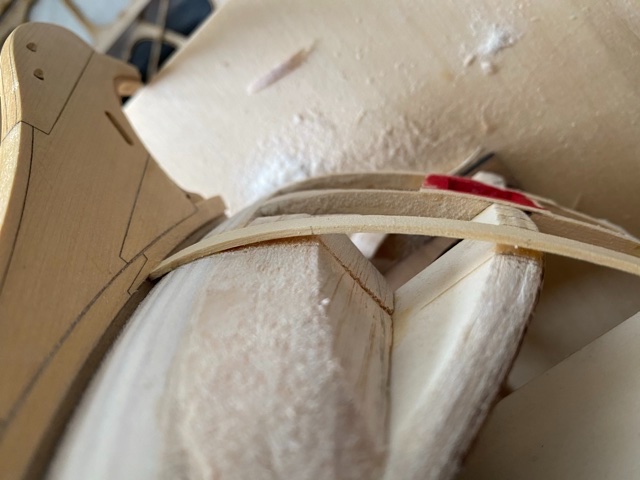
Thanks Chuck, I watched your videos and this is the first time I’ve tried ironing in the plane of the plank. Here’s the pictured plank after I took it off, and its predecessor with the snapped end. So more bend in the plane? Plus I’ve adjusted the filler angle now.

-
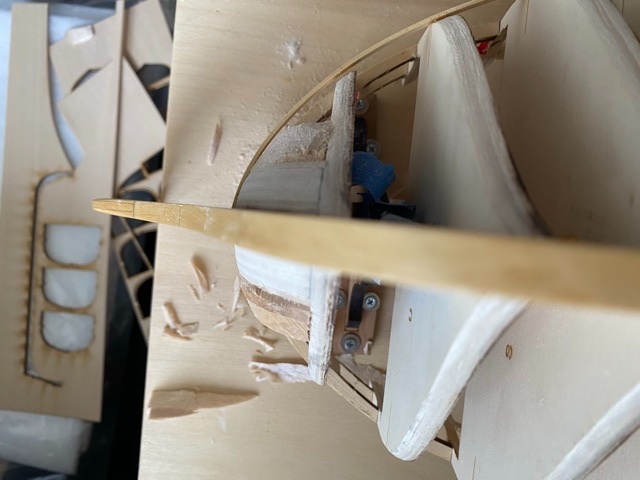
Fairing problem at the bow. The very bow end of the first plank keeps breaking about 1/4 inch out from the rabbet. This is about as close as I can get the plank to the first frame without it snapping. Does that mean I should try to make the bow formers a bit more acute, so the plank comes into the rabbet at a slight angle? (not at 90 degrees to the keel).
-
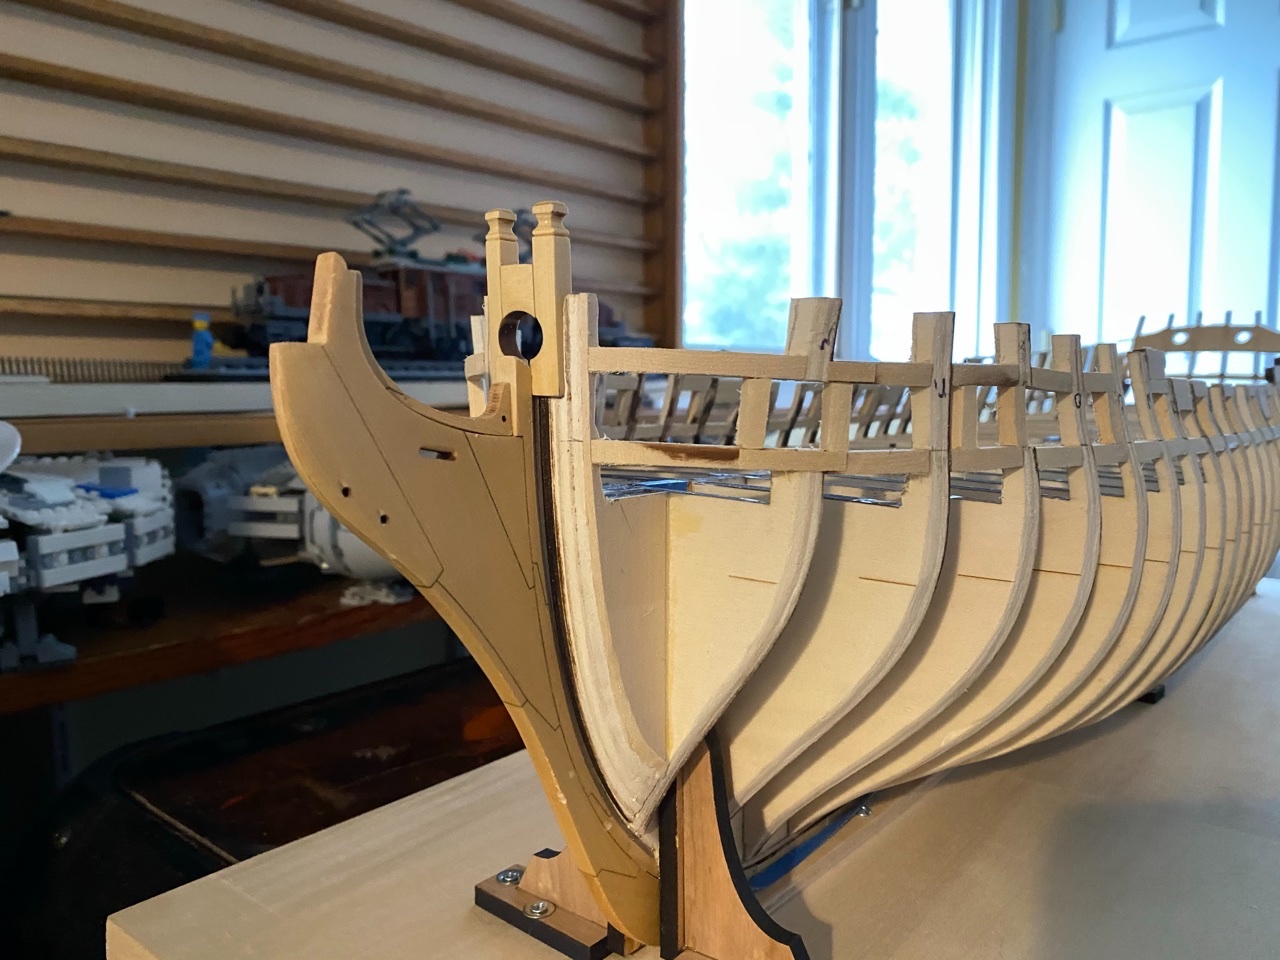
And Chapter 1 nearly completed! Just need to angle the bollard opening and finish fairing the inner bulkheads. Mainly aft in the qdeck section. Time to start ripping some planks methinks!
-
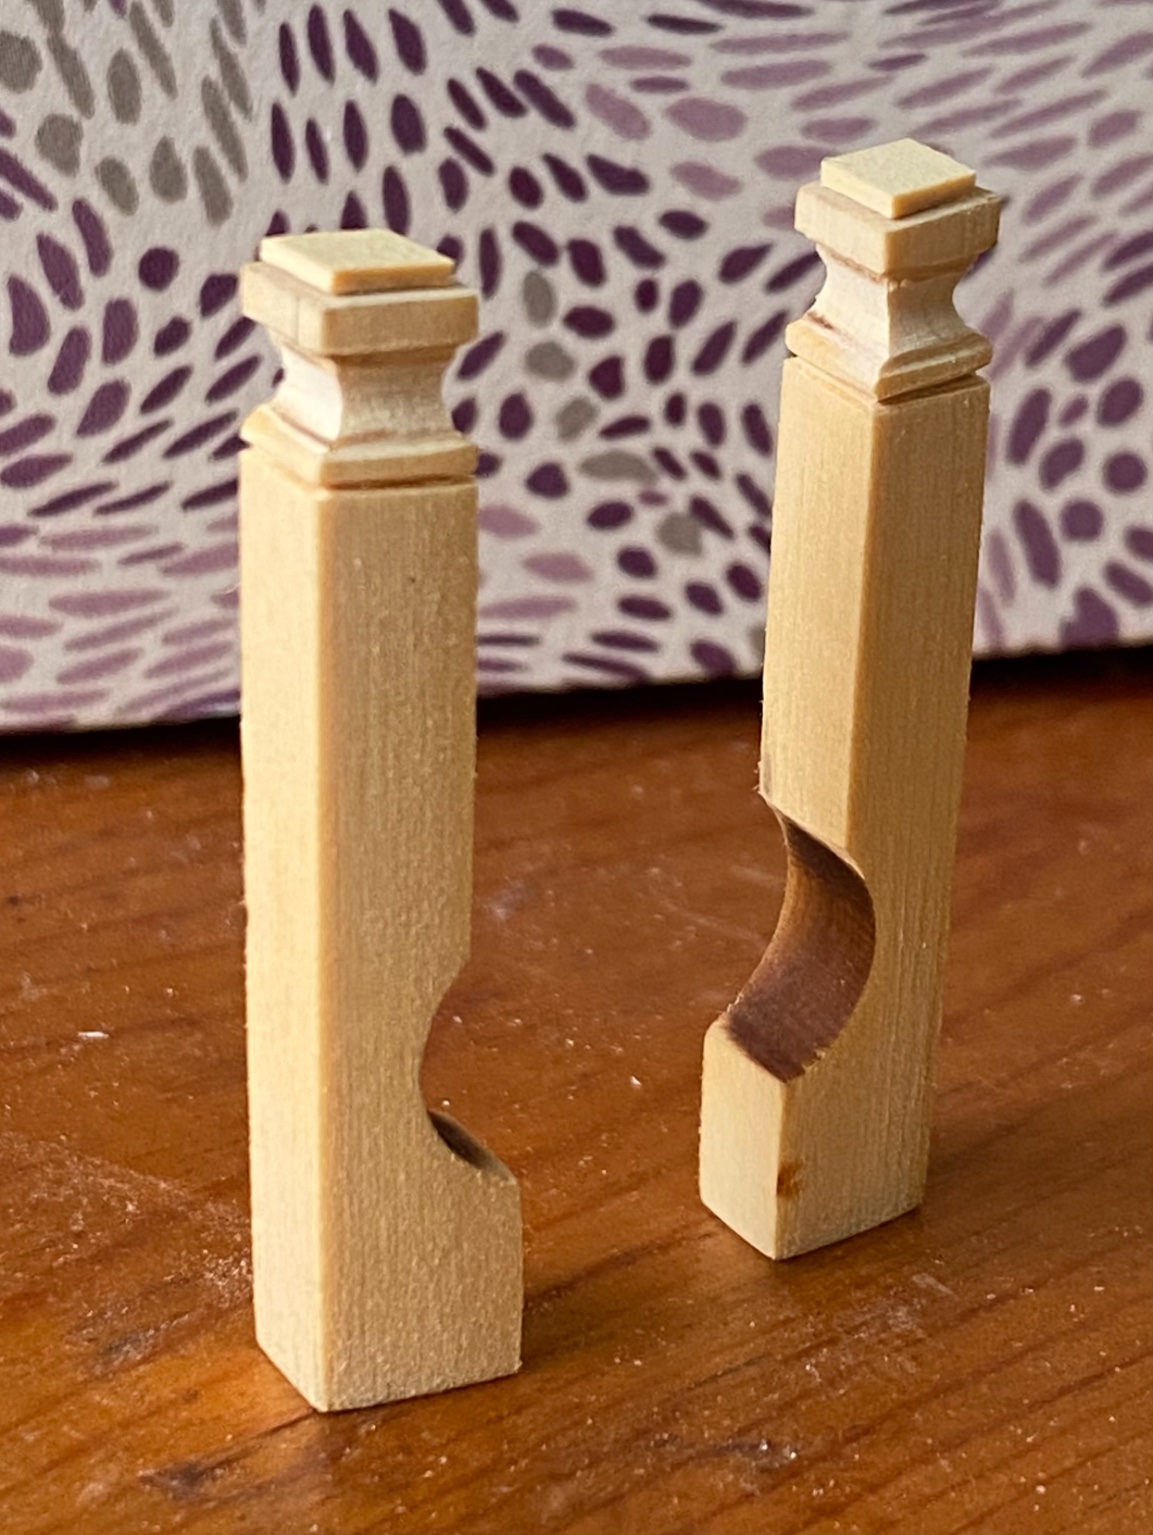
Bollards shaping, not quite complete yet, still some traces of laser char, and the caps haven’t been sanded down yet. First try and I’m 99% happy with them!

-
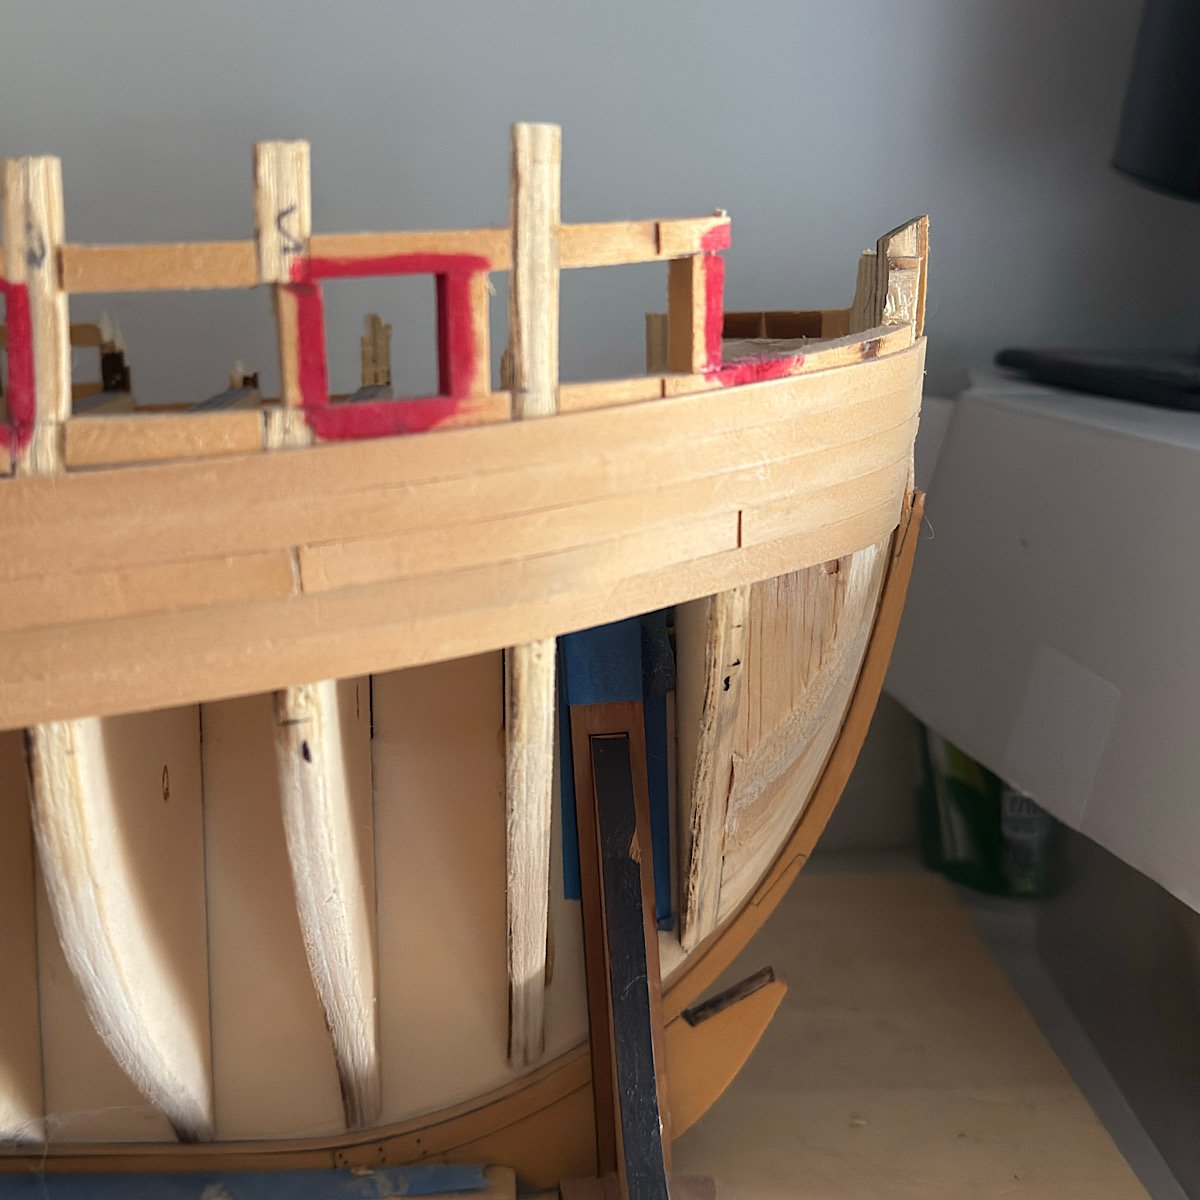
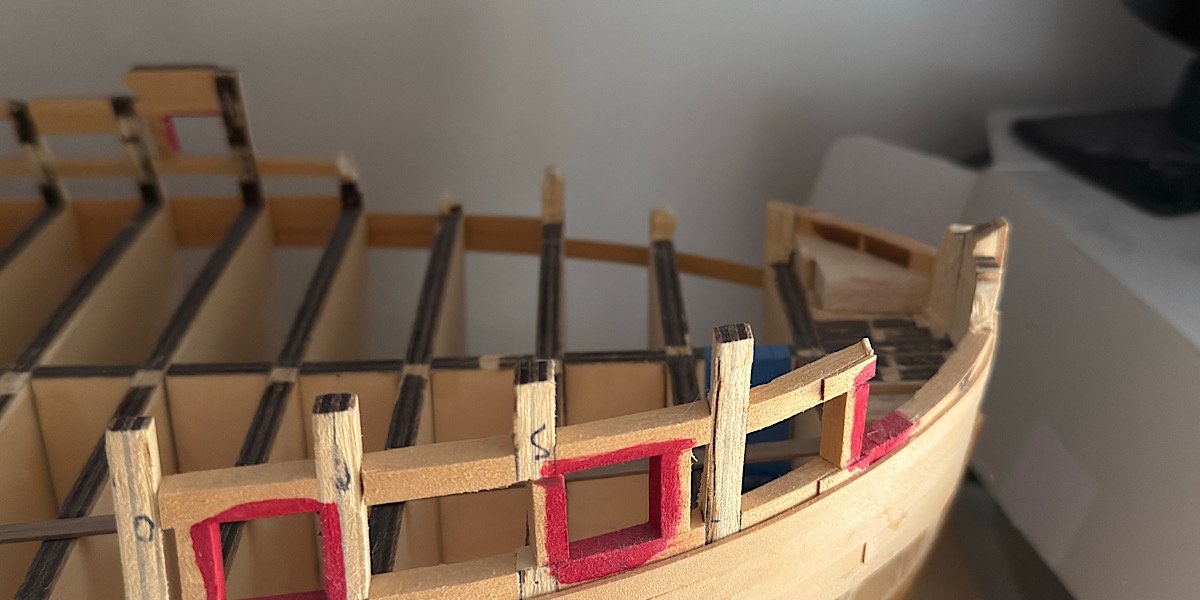
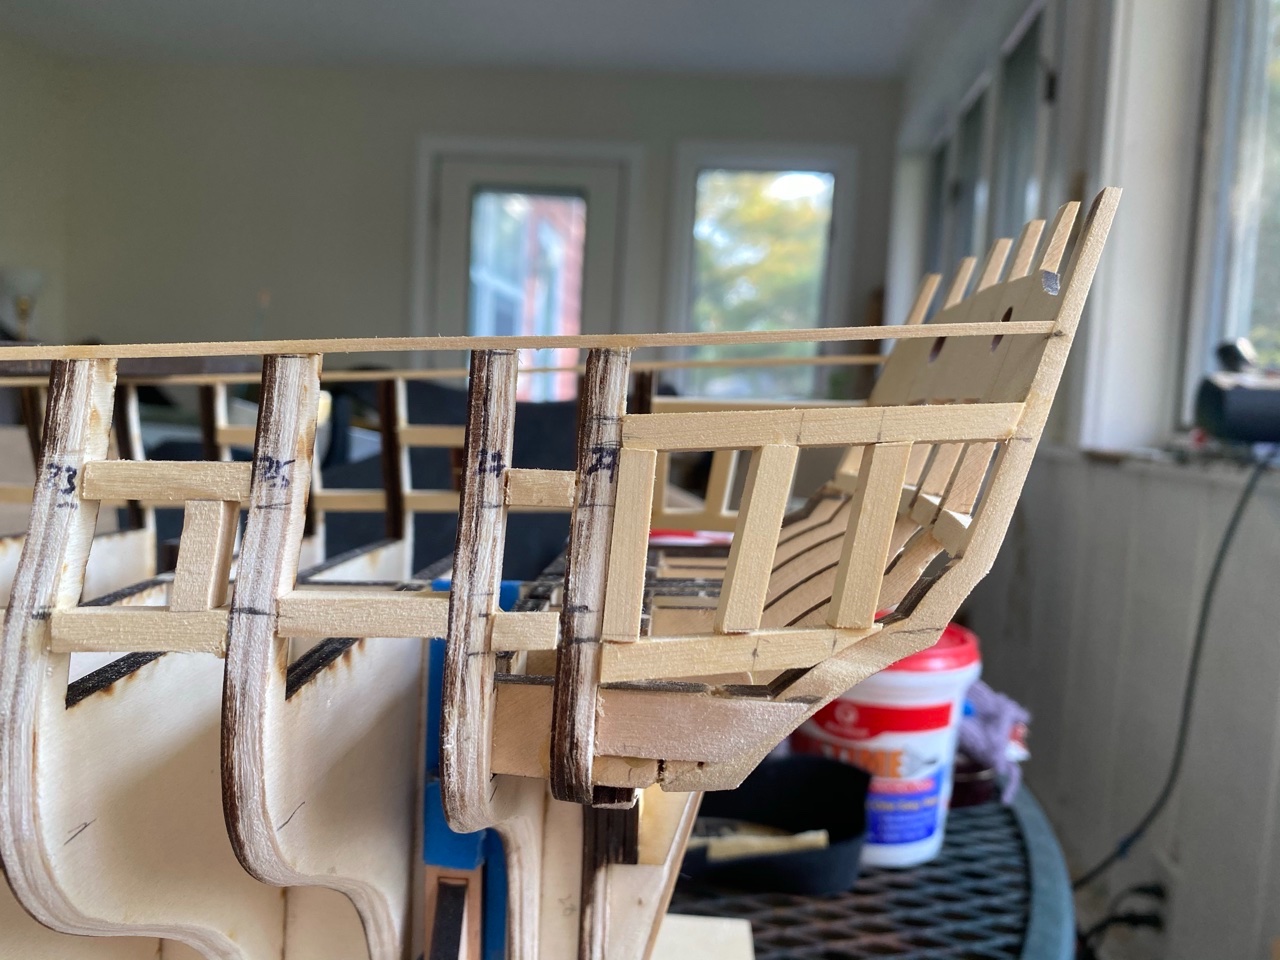
Second attempt at framing port side, I think I have a nice run of the cap rail now. I had to lower the last three gunport sills by a couple of mm to make it work. Still needs to faired in, and I’m going to redo the framing on the other side to make the angles consistent (the last frame is still too high and causes a bump on the cap rail run ). Thanks for the kind words and encouragement!
-
I’m feeling much happier now!

-
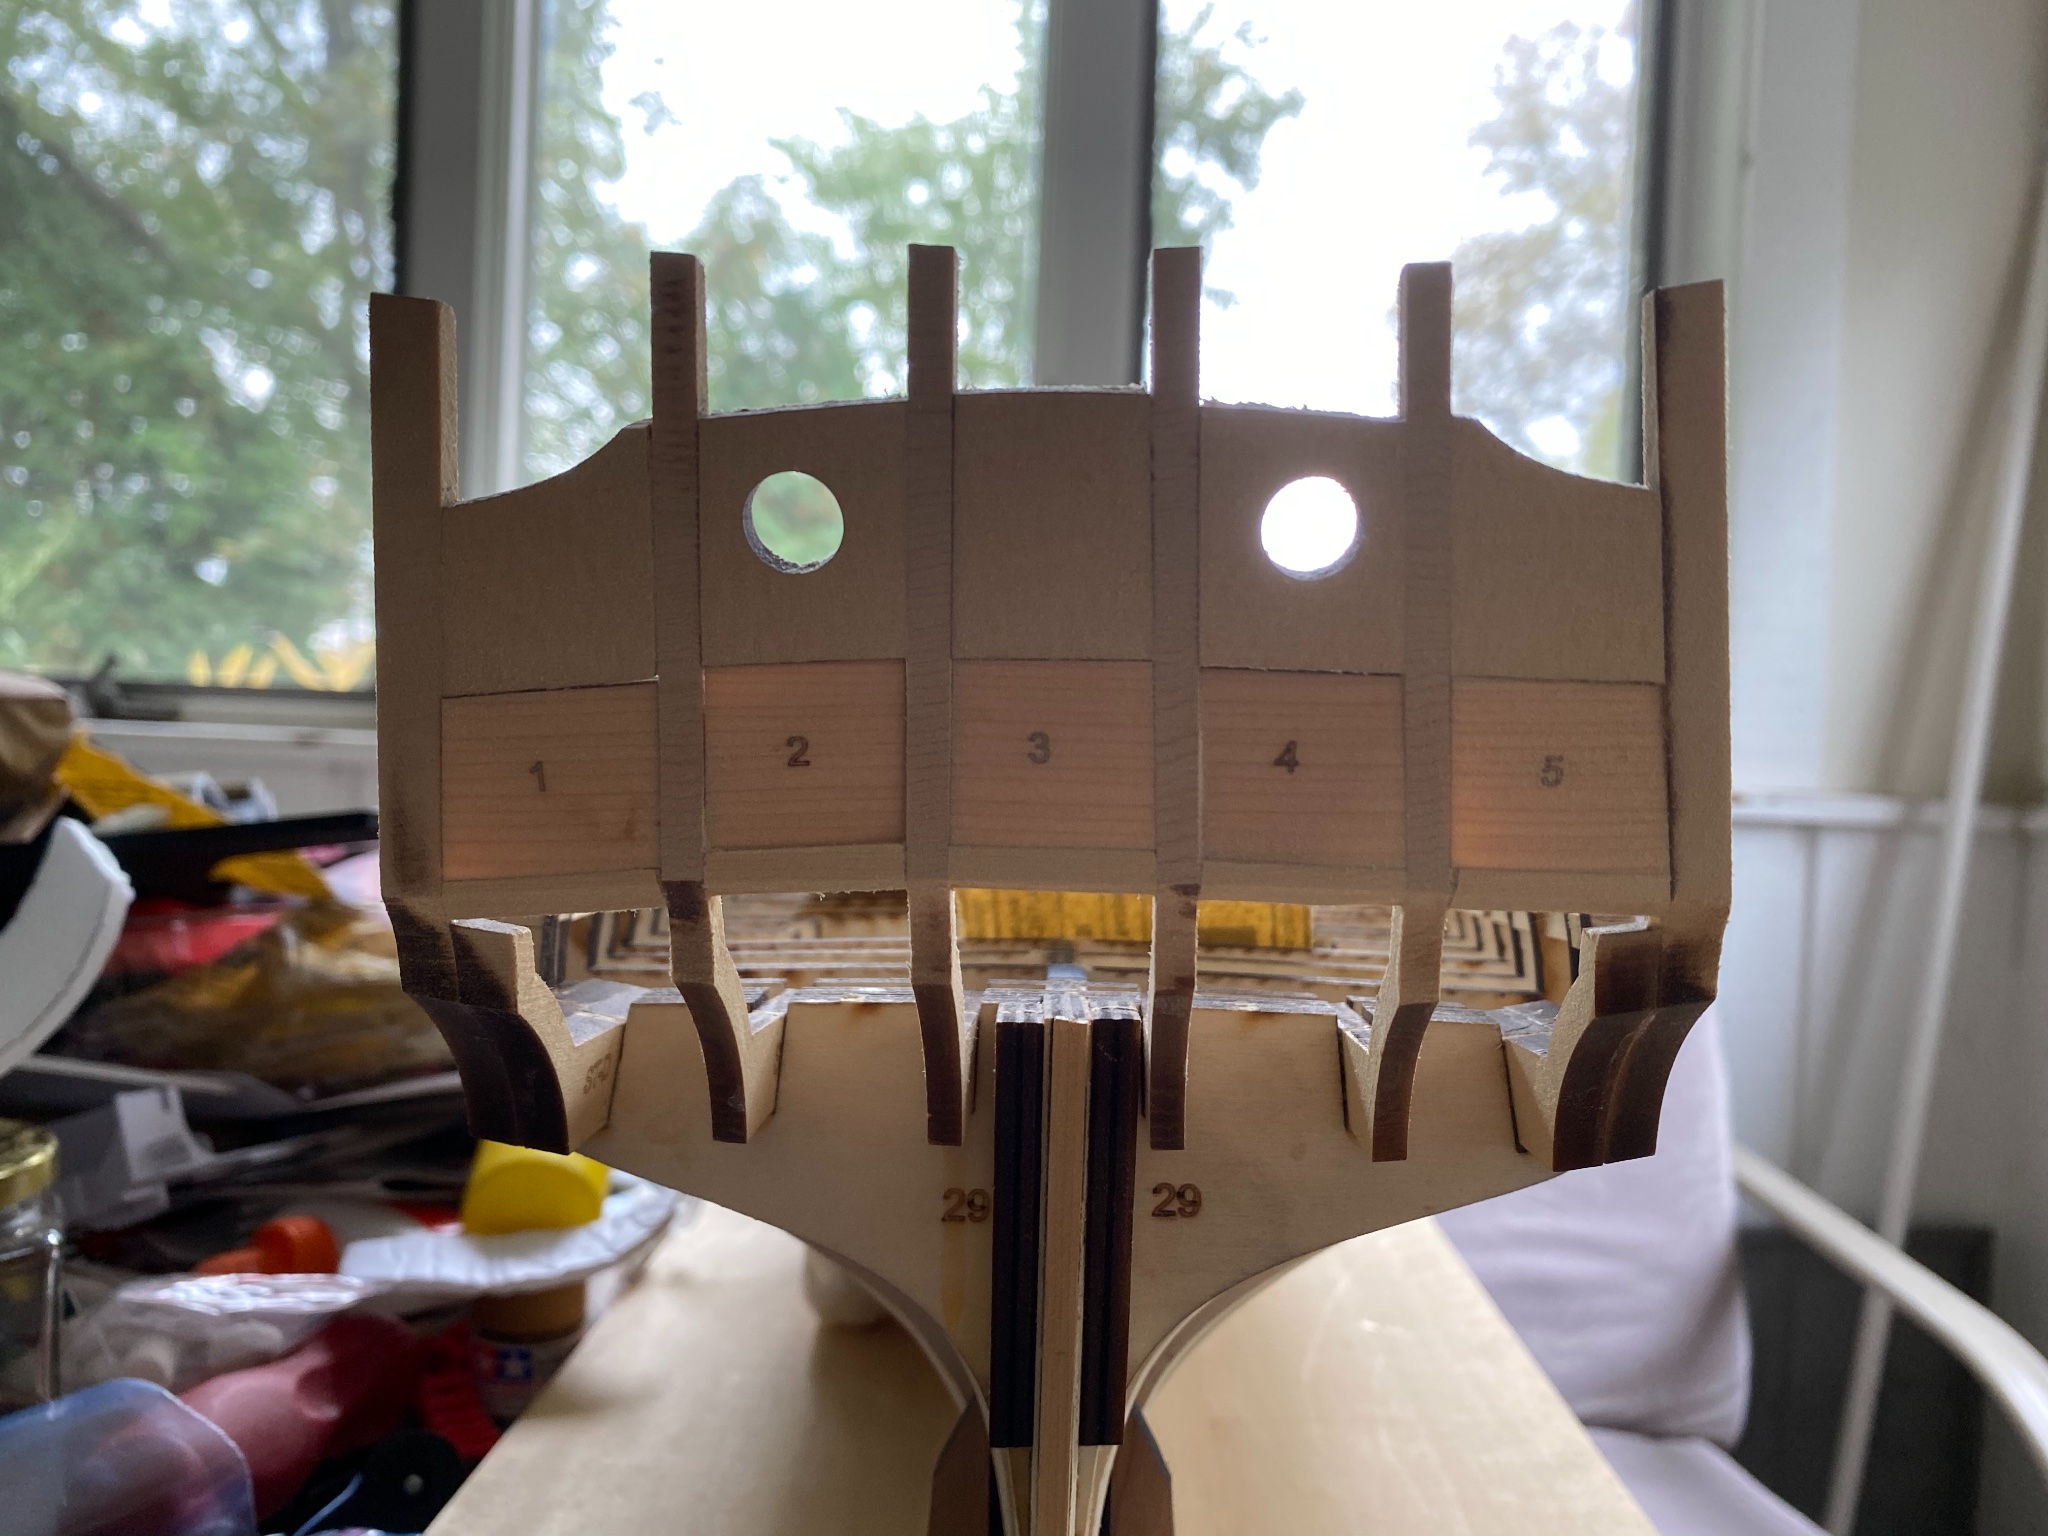
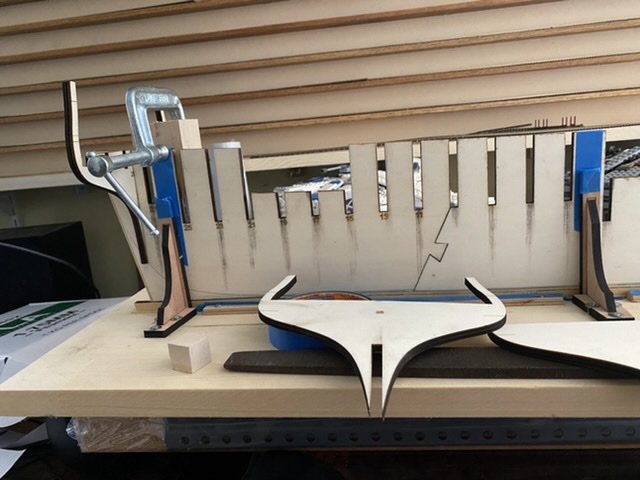
Ok, the sills and fillers are out without significant damage but it appears the frames themselves need adjustment. I’m surprised that the wood glue seems to pop off of the yellow cedar quite cleanly.
-
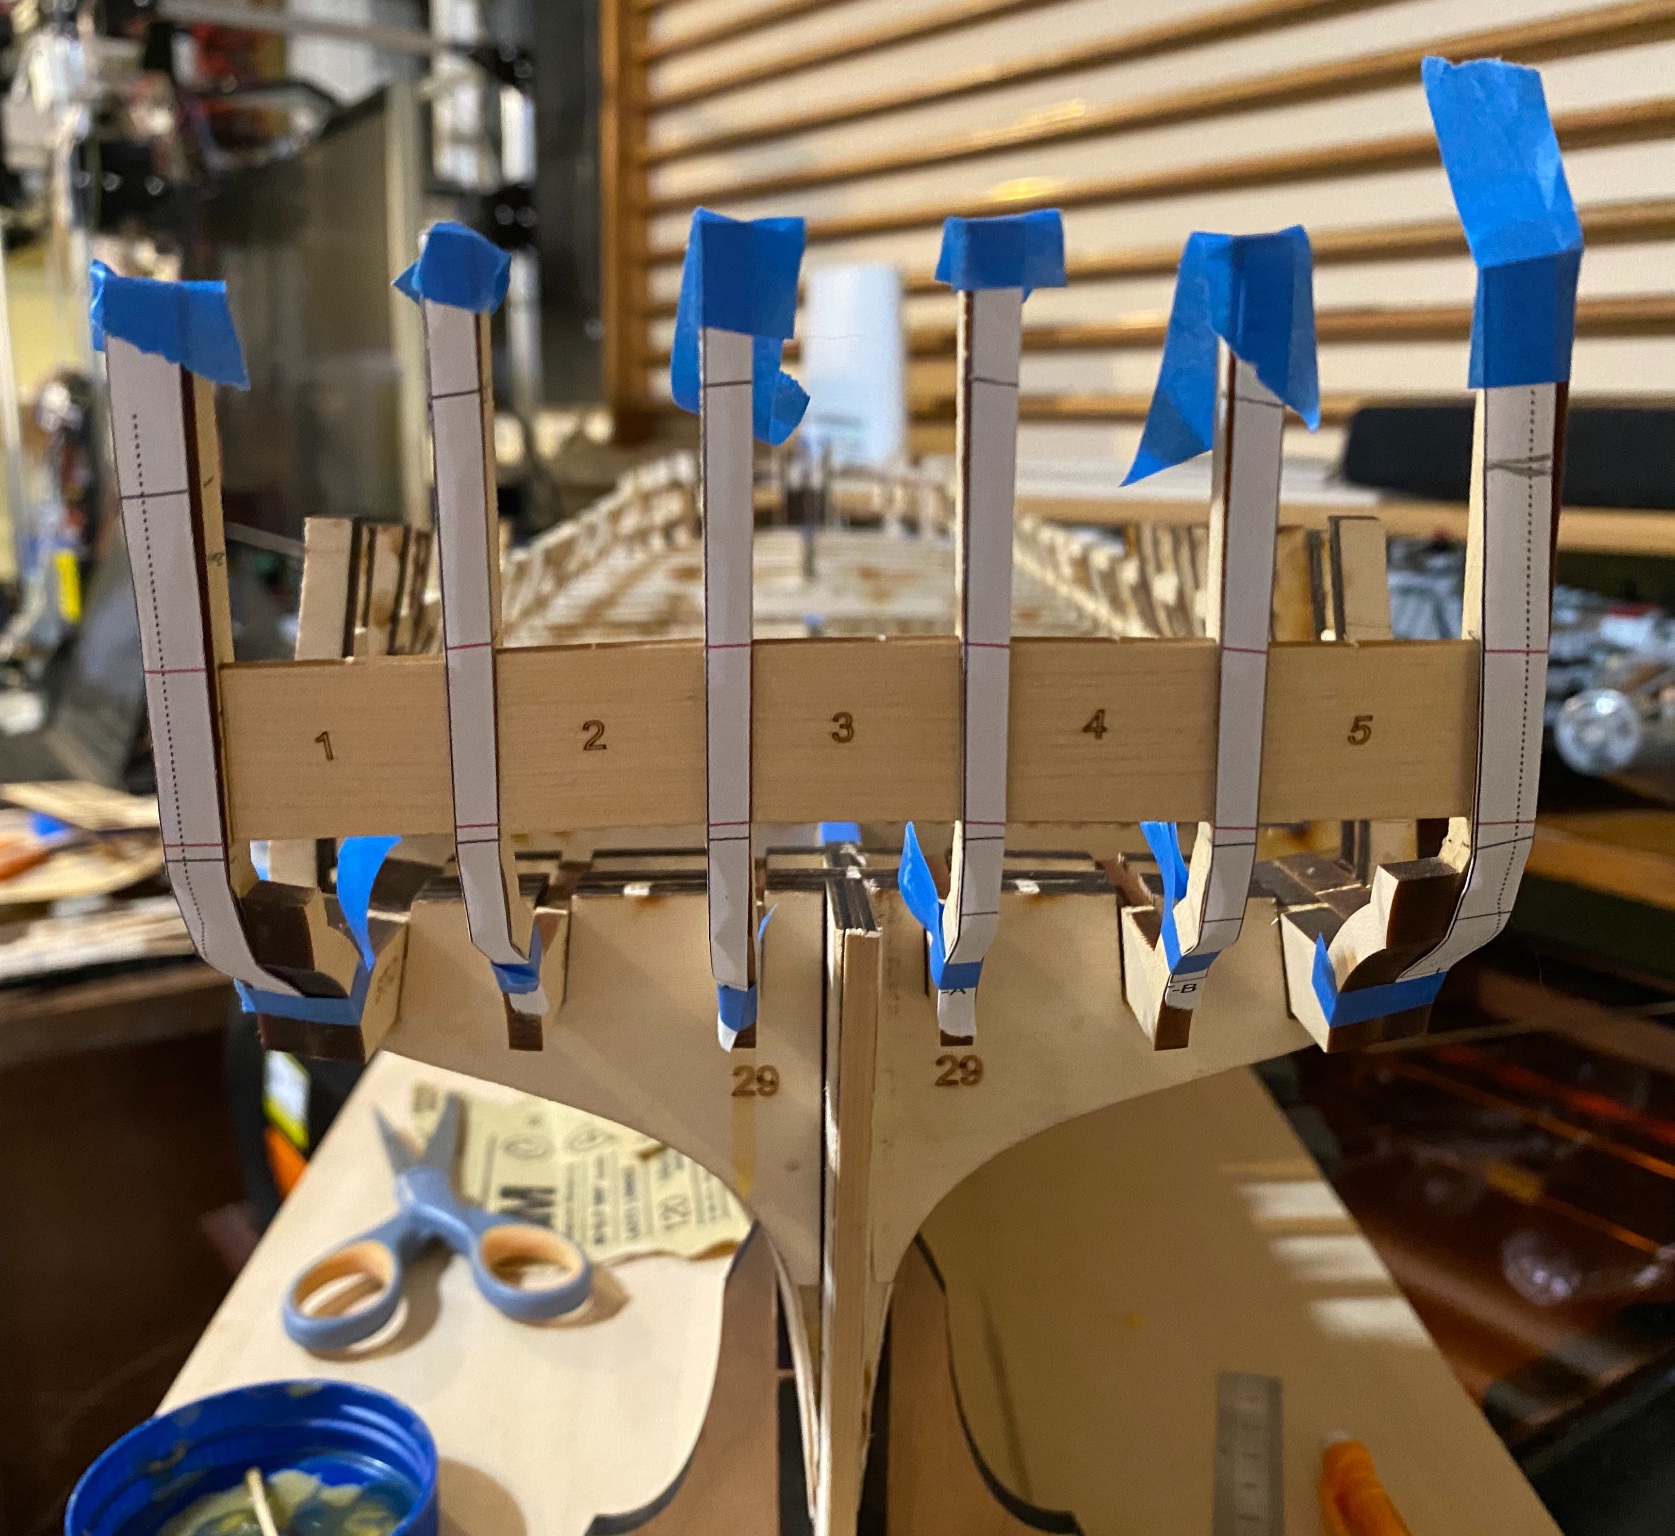
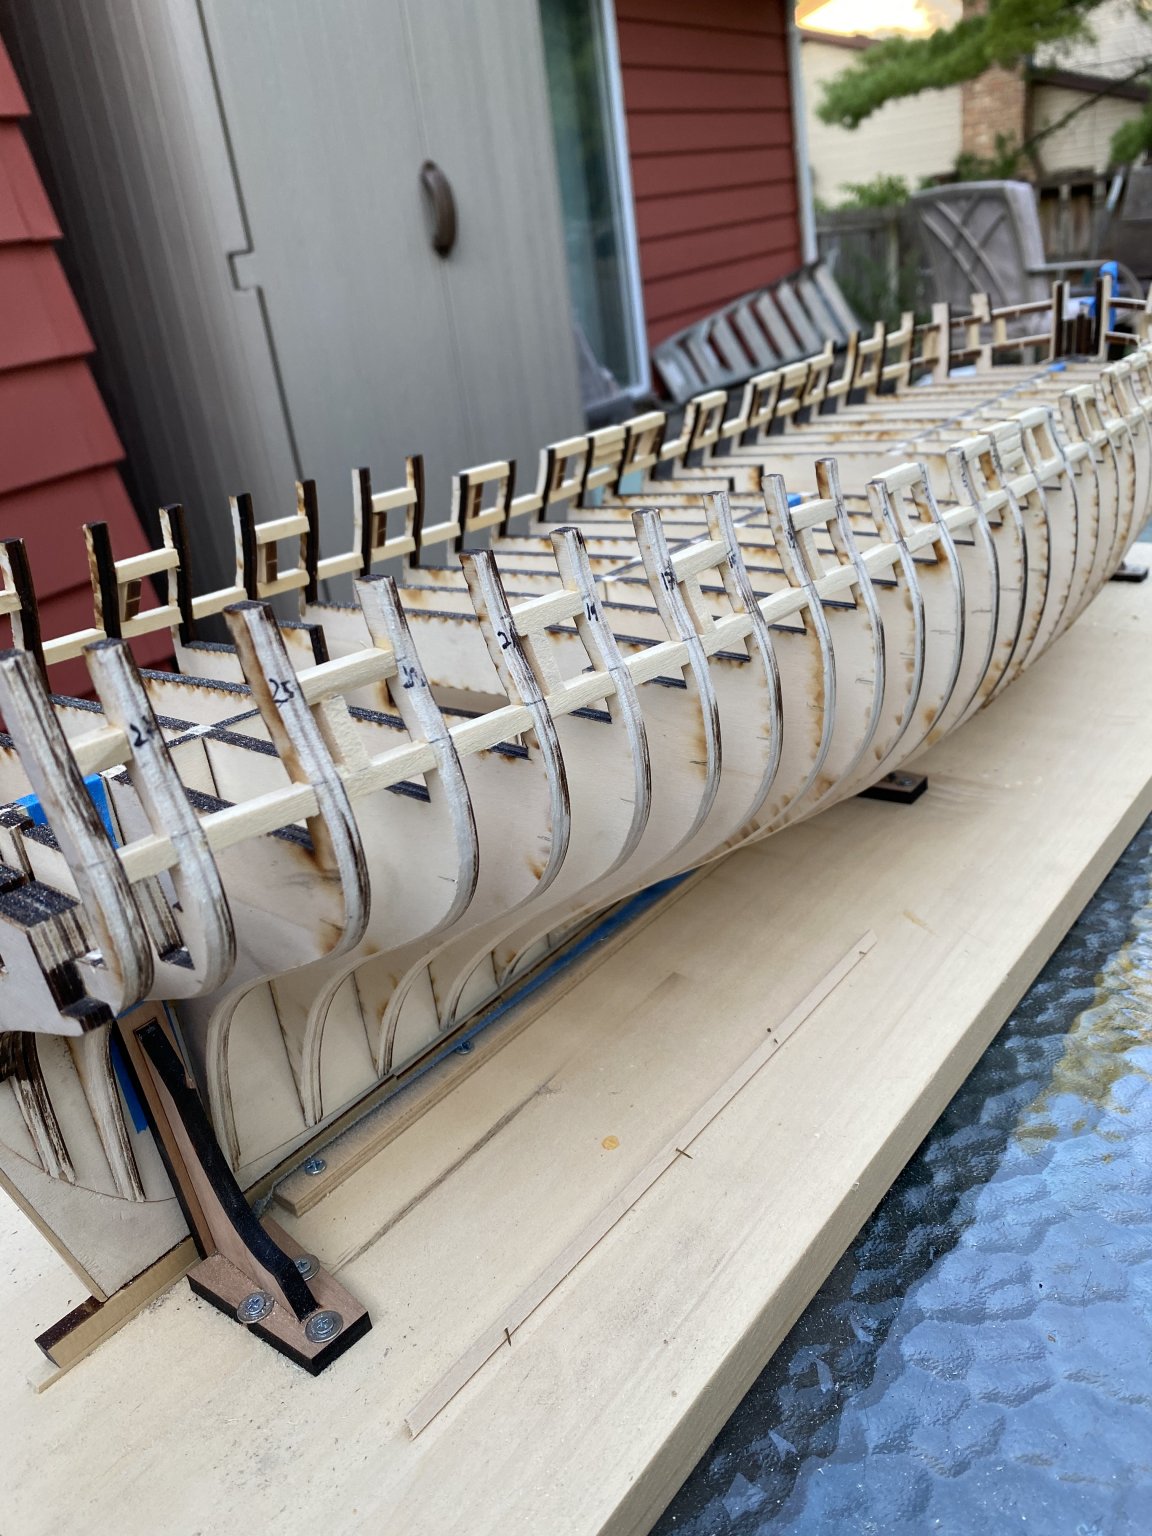
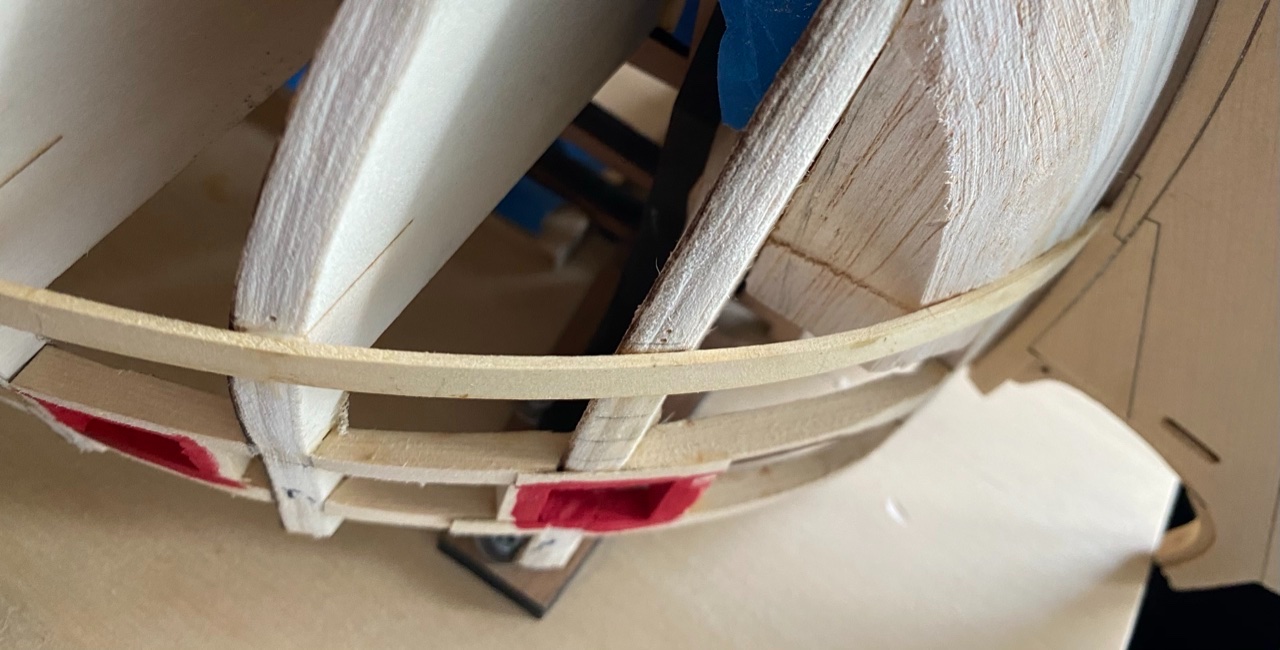
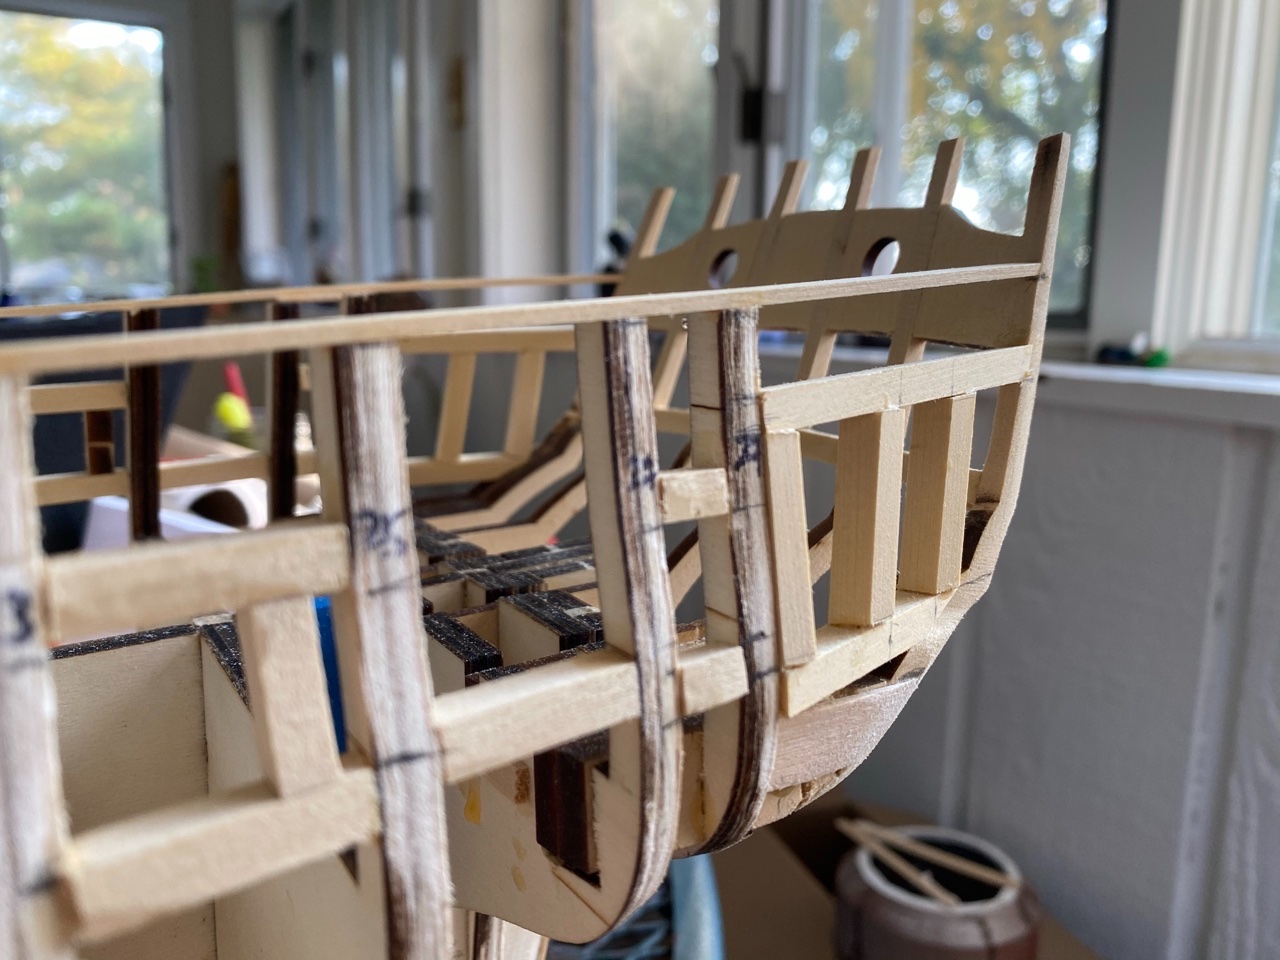
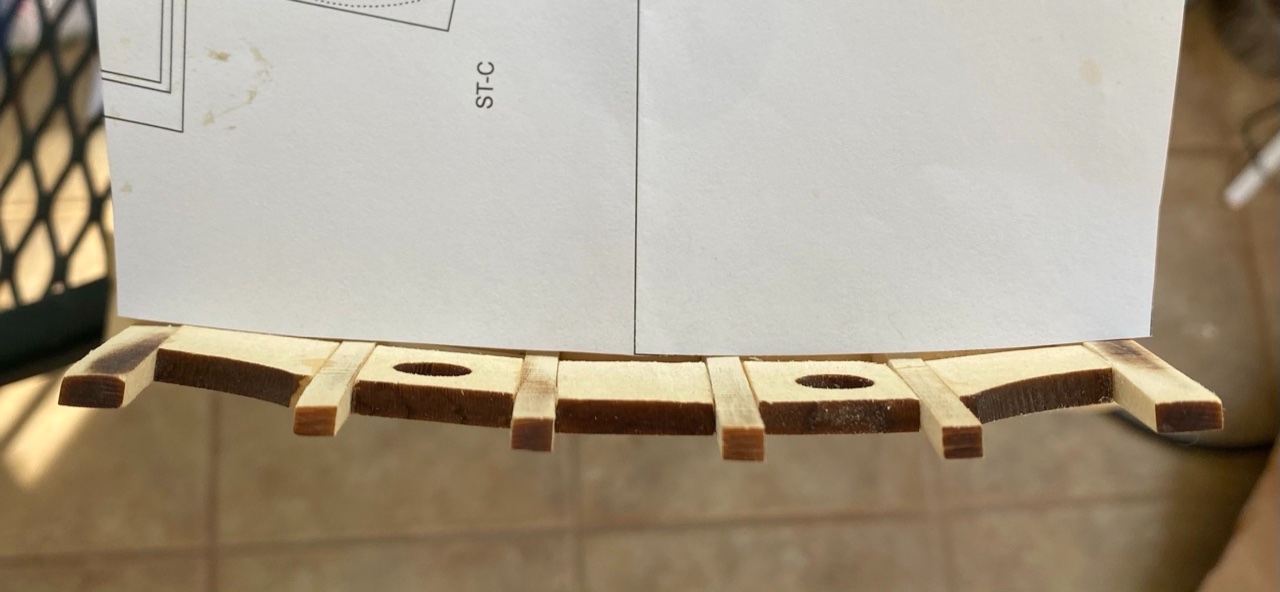
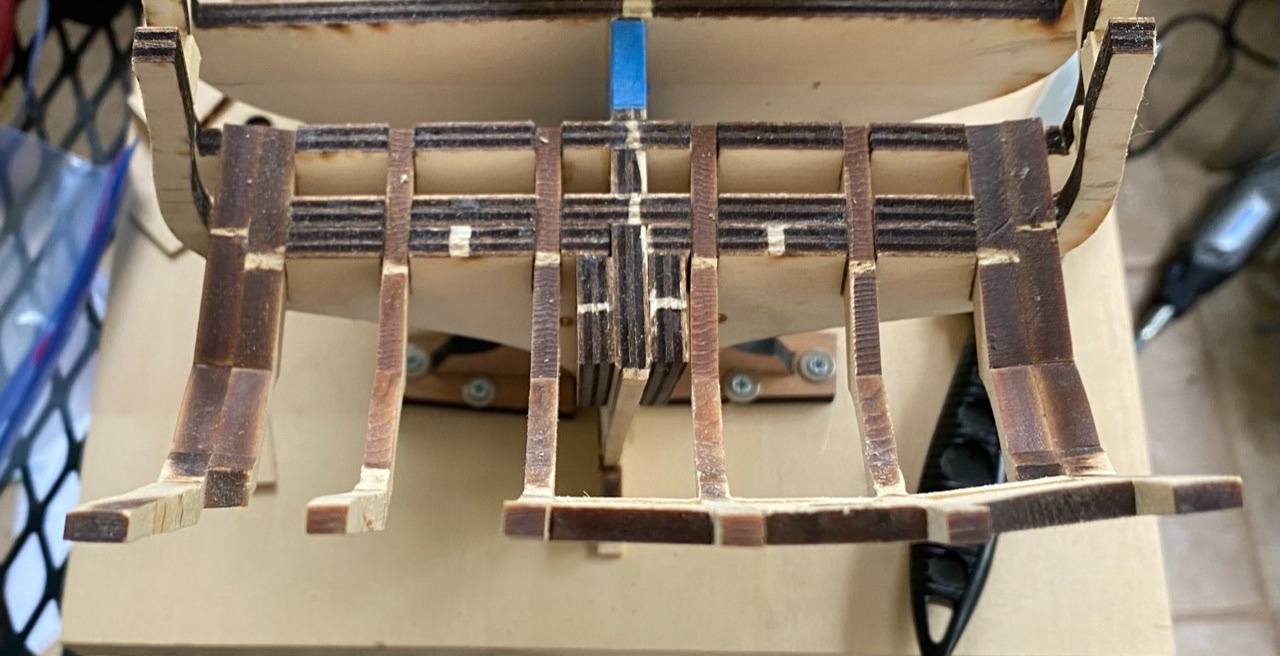
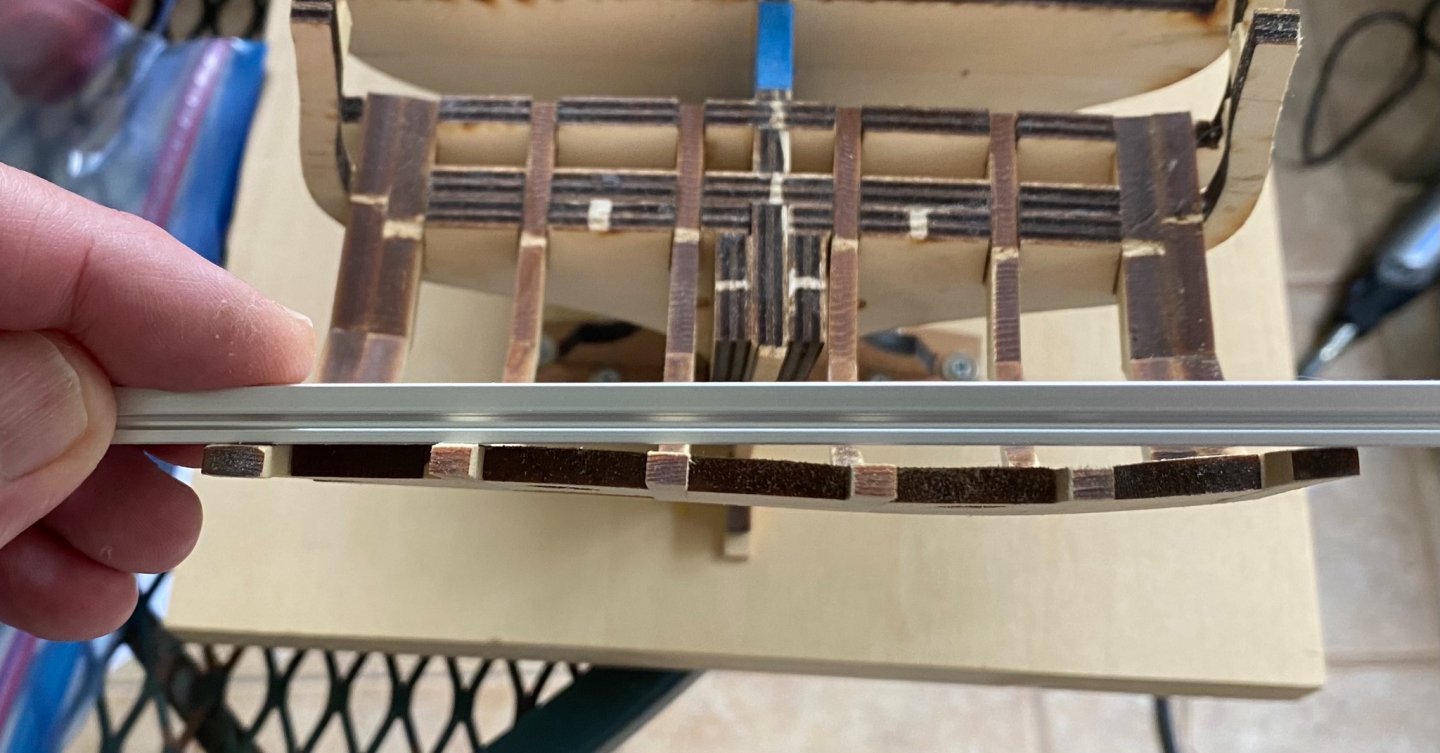
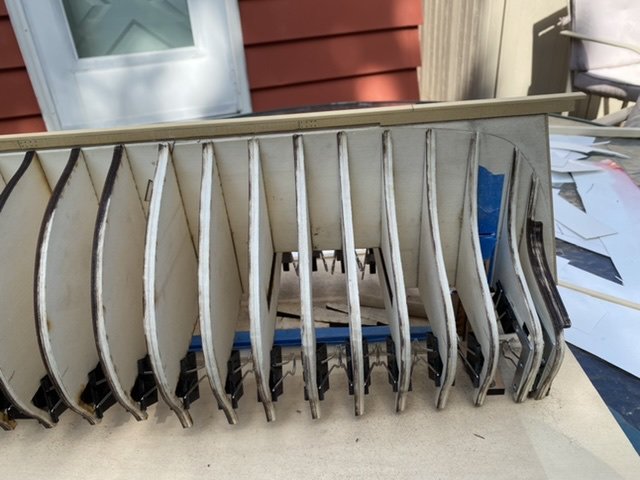
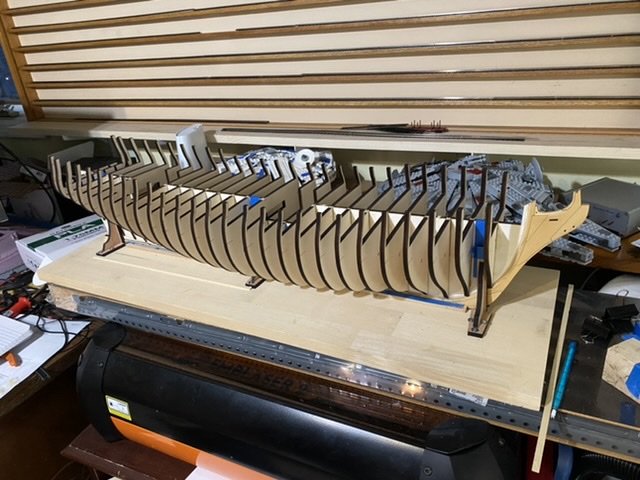
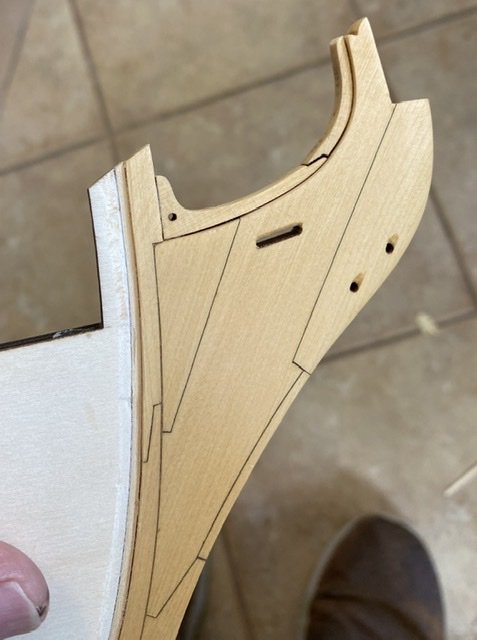
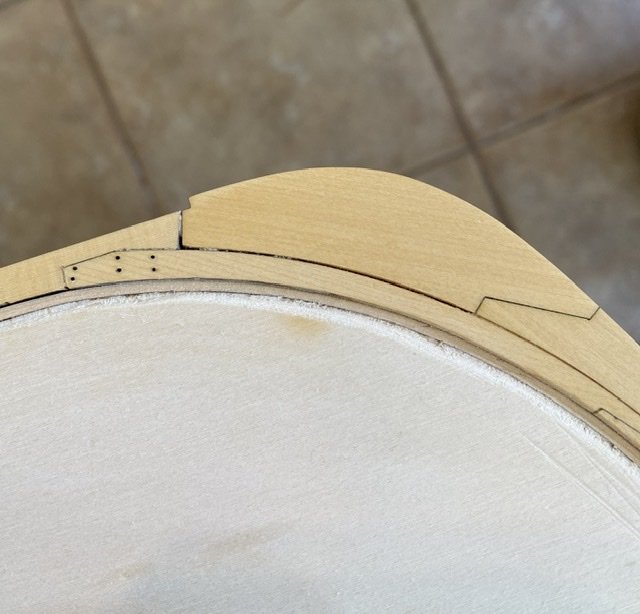
Stern framing-I thought it was going ok at this stage but a top view says otherwise. I think it will be hard to force the curve now, I guess my angling of the filler edges was off. Support for taking the frames out and trying again?


-
Hi all, just starting on the POB kit by Dumas- City of Buffalo lake steamer of 1890. Will post pics shortly- the kit is really intended for R/C and is a bit light on detailing, so there's lots of room for additions at this scale! Cheers- Scott
-
Sounds good, thanks Mike and Rusty, on to the stern framing!
-
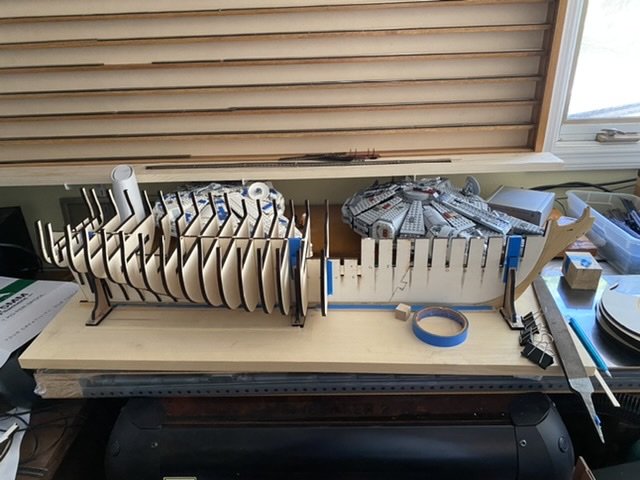
Sills are in and working on fairing them. One question- some of the top sills are higher than the bulhead ends, should I plane them down even? I’m happy with progress so far and looking forward to the stern framing! Have test fitted them and may have more questions before gluing them in place. cheers! Scott


-
Placing the lower sills now, I took a couple of days to keep looking at and adjusting the battens first. I might still have pushed down when marking it (the batten wasnt pinned on every frame) because a couple of the sills are not on line with the other side; I think I may have to cut them loose and try again. Overall smooth progression though!


-
Fairing underway, nothing like a long weekend to get stuff done! Nice weather helps too
-
Thanks Rusty! but Sigh, there are at least two things wrong now. One easily fixed (I put all frames with etch marks forward) and the other, not so easy perhaps. I was puzzled by the Chapter 1 mentioning 3 bow filler parts; no I say in my mind, theres 4: 2 copies of BF2 (identical, so that counts as one, maybe?) and two different BF3, obviously one for each side. Today I unrolled the plan sheet again (going to tack it up after this!!) and lo and behold, theres a 3/64 “BF1”! But wait, those BFs were 1/4”... it slowly sank in, and with my glasses on I can now see that there are 3 BF pieces per side! Arrghhh. BFs 2 and 3 solidly glued in place, meaning the inner space between the BF3s is now too small by 3/32”.... I think I can trim the inner ply off of the BF3s to remediate the space, and perhaps add 3/64” to both outsides? Other than that, I think I’m in good shape to begin fairing the frames. Wish me luck! -Scott
-
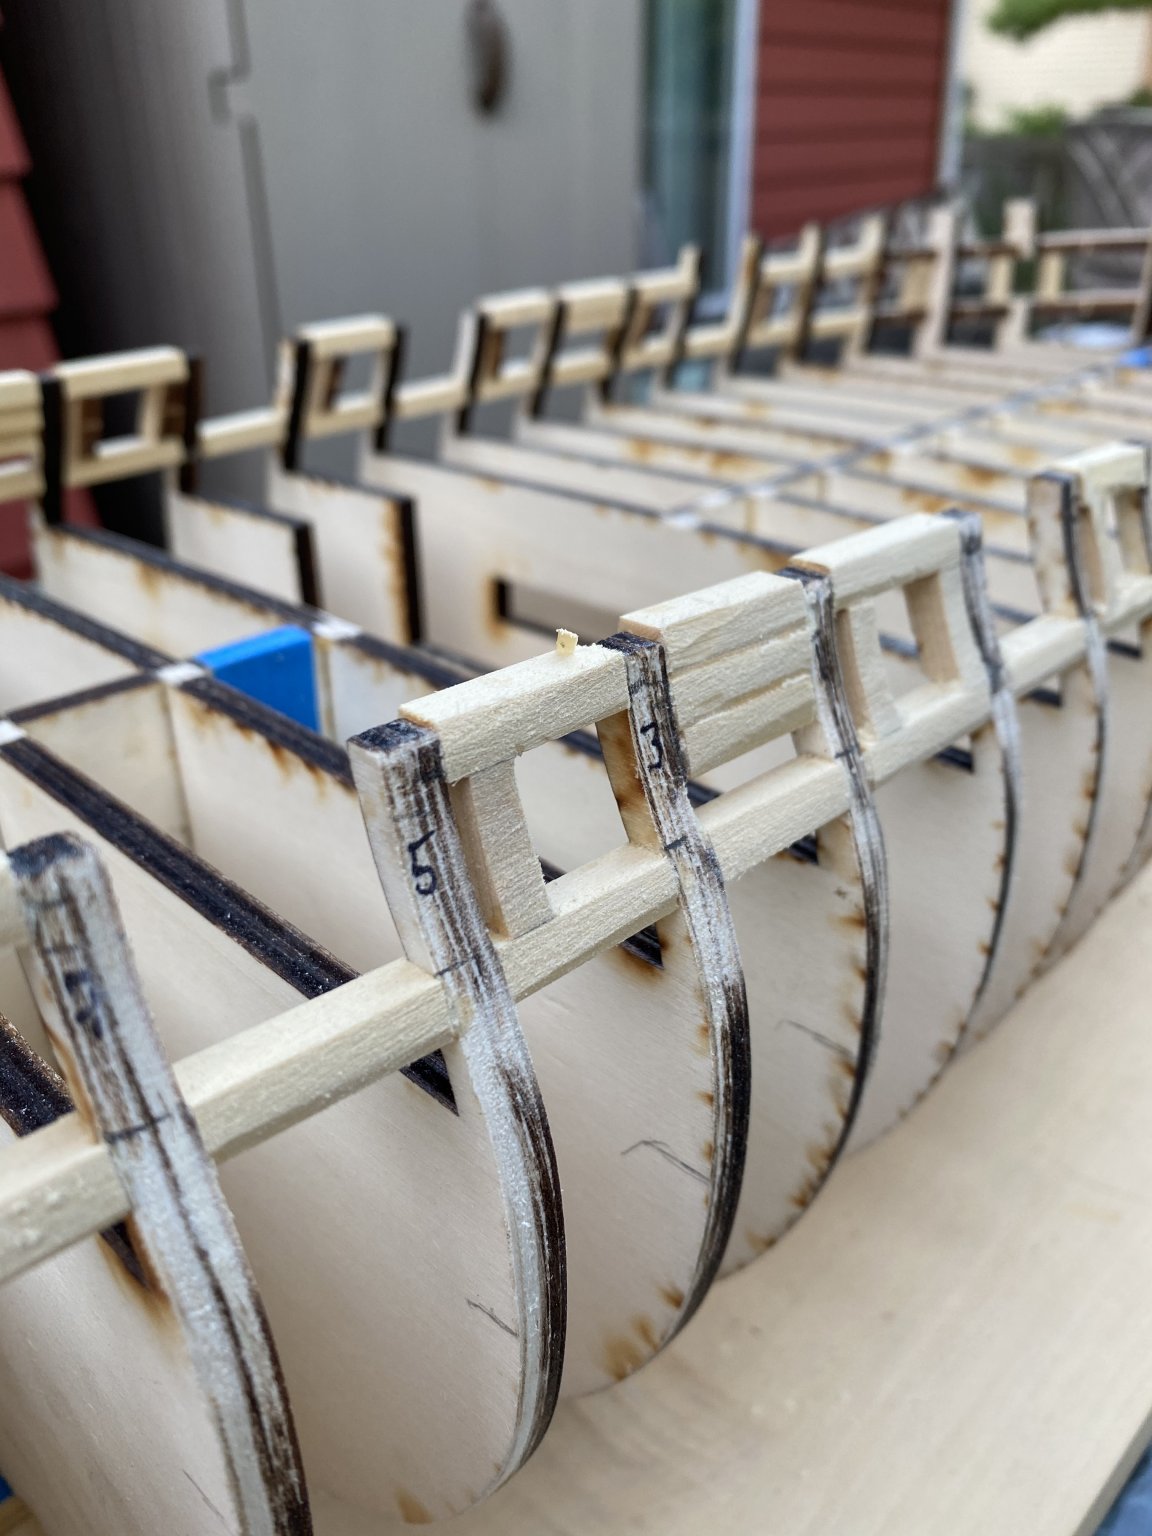
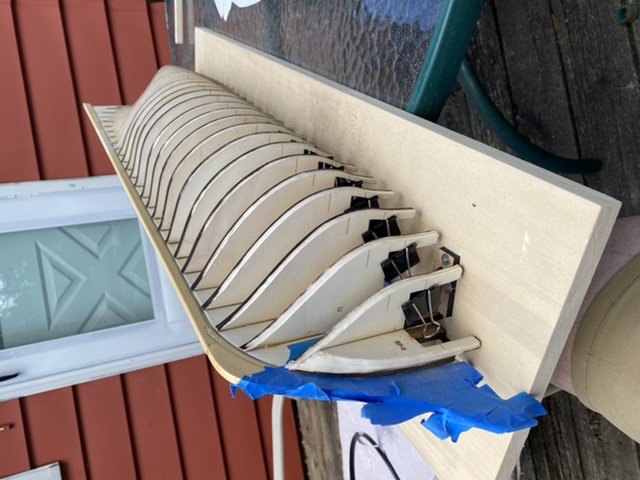
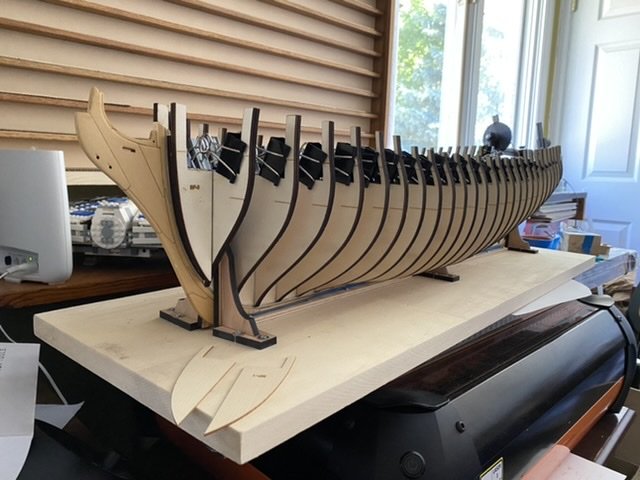
All frames glued up! Almost no issues, only a few needed opening up of the slots with a file. Test fitted all before beginning to glue.
-
Thanks Chuck! At least I can get one side looking tight, the other... not quite as good. In fact, I think I should redo the gammon knee and extension.
-
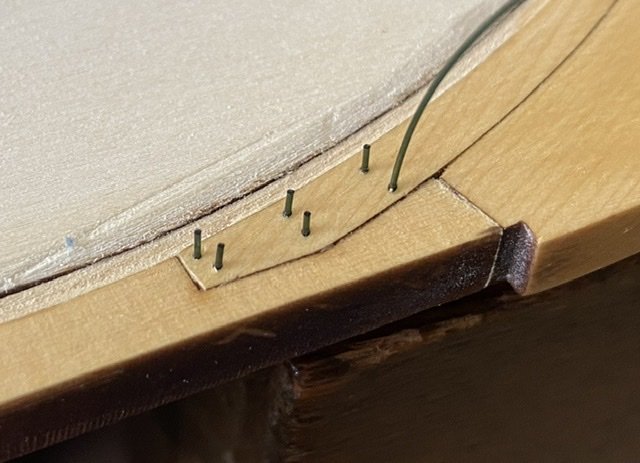
Progress on the keel, adding the monofilament bolts. A question on the false keel though- is it supposed to be one strip, or shorter sections with joints staggered from the keel joints?
-
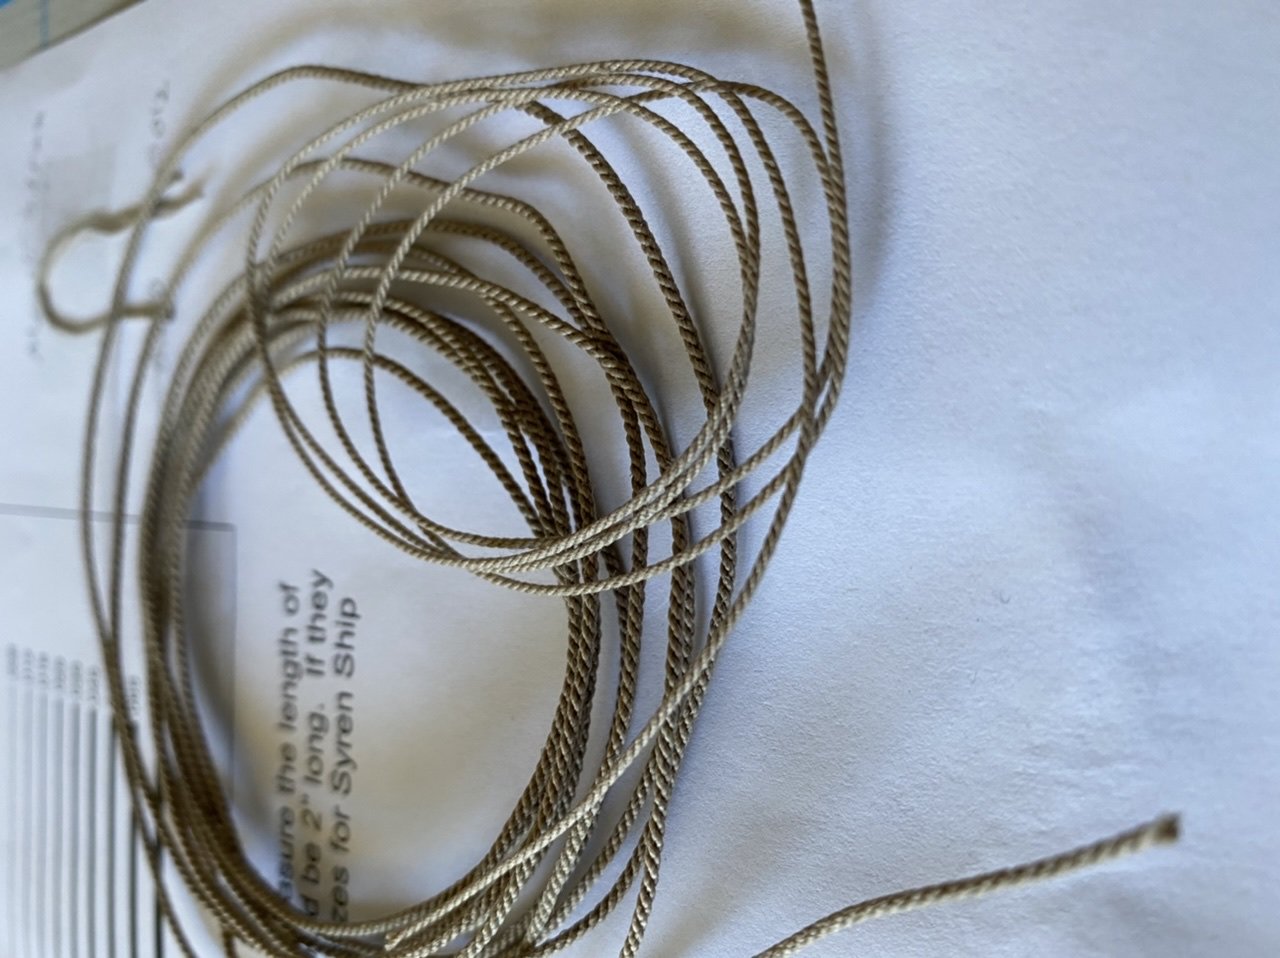
Hi Chuck, this is my first couple of attempts using some Corel rope. It isn’t unravelling, but it doesn’t feel like cotton either- the thicker one is stiff too. I’m pretty happy for the first go with the Rope Rocket, and I agree it’s extremely fast and everyone should try!
-
Frames! arrived today, 6 days after estimated delivery (thanks USPS new management). Lets see if image insertion direct from phone works!

-
Approaching the rigging stage for my 1:48 HMS Surprise, so refreshening on the Winchelsea- I'm going to go with the laser cut frames from Chuck, otherwise this will be a 5 year project!