


jre8655
-
Posts
154 -
Joined
-
Last visited
Content Type
Profiles
Forums
Gallery
Events
Posts posted by jre8655
-
-
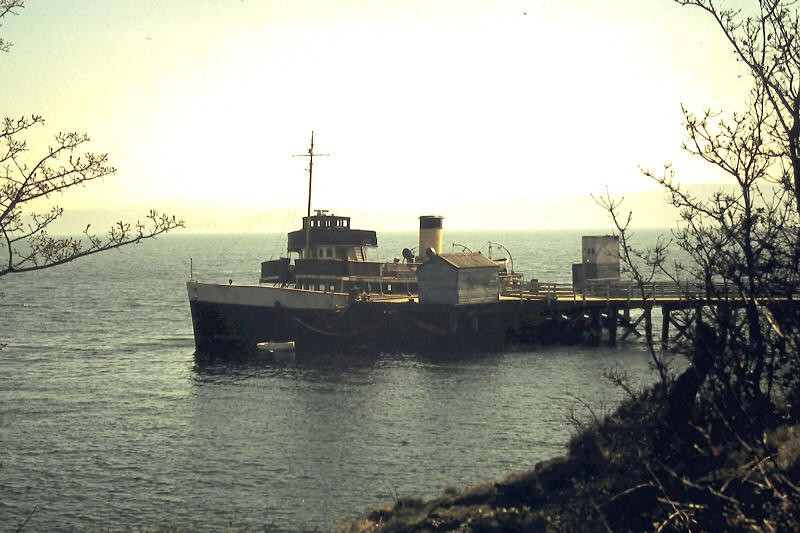
Nay. Maid of the Loch is a paddle steamer and she's up on Loch Lomand.
-
We seem to be stalled.
Not an icebreaker nor a pilot cutter.
Neither is she Nordic or Canadian/Alaskan.
These photos were taken in 1982 at the Blairmore Pier, Loch Long, Scotland.
She was built in 1935 by Warren's New Holland Shipyard. She's had four different names. This is the third configuration of those four.
-
Two photos of the same ship from different elevations.


-
Drove down to the local hobby shop and presented my problem to them. Had a couple of the people scratching their heads.
The general concensis was that the one attached to the output side of the regulator was not correct. The diameter and threads did not match anything they had. They were able to find a 1/4" x 1/4" male/male nipple and a 1/4" airbrush hose adaptor. All is now fixed and the compressor is functioning as it should.
-
How about the Eureka?
-
Guys,
Thank you very much for all your input. The compressor arrived last Monday. I did order the Master TC-20C through Amazon. I didn't get a chance to unpack it until last night. Been tied up with a family medical emergency.
Not sure what the deal is, but the nipple on the output side of the regulator is too small. The adaptor for the airbrush hose will not fit. I believe the nipple is supposed to be a 1/4" NPT, male/male? This one has the 1/4" male on one end (screwed into the regulator output side), but a smaller diameter threaded side on the other end. Guess I'll have to make a trip to the local Harbor Freight this weekend.
Ken; I would greatly appreciate any information you have on airbrushing. Thank you.
Once I get this contraption working I have a great test for it. The Admiral bought a second hand doll house for our granddaughter I have been tasked with making repairs and repainting it. Lots of area to test painting techniques.
-
Venturing a guess; the Eppleton Hall?
-
Tom,
Very close to what I ordered and yes I went through Amazon.
http://www.amazon.com/gp/product/B0038D38AA/ref=oh_details_o01_s00_i00?ie=UTF8&psc=1
Same company: TCP Global
-
Thank you for your insight. I plowed through the Internet and checked out all your links.
I finally found what I think will work for me. I located a web site for TCP Global. They seem to specialize in spray painting equipment. Found a compressor, with a tank, designed for airbrushes. It's the right size and the price is right.
-
I've started my first build and am still in the process of aquiring hand and power tools to complete my shop. The one area I'm not familiar with is painting with an airbrush.
I've not had the occasion to work with an airbrush before. I read the post on air compressor alternatives, but am actually in a position financially where I can afford an air compressor.
I made a trip to our local Home Deport and looked at their small, portable air compressors, but was told by the sales person that the smaller compressors would not work for an airbrush because they do not deliver constant flow. They said that even though the unit had a tank (1 to 2 gallons) the compressor would not cycle often enough to provide the constant psi needed for the airbrush.
I don't get it!
My question is; what would be a good air compressor to use with an airbrush?
Any assistance would be greatly appreciated. I have some time before I'm ready to begin paining.
-
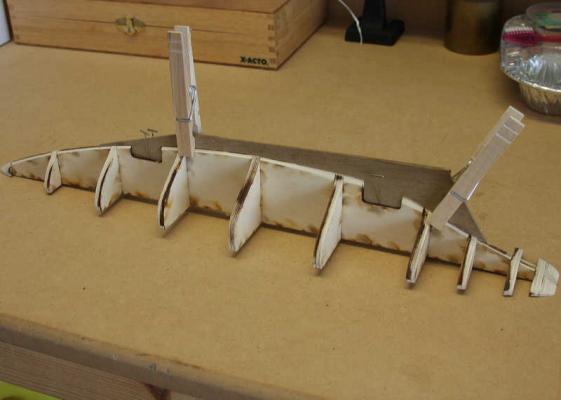
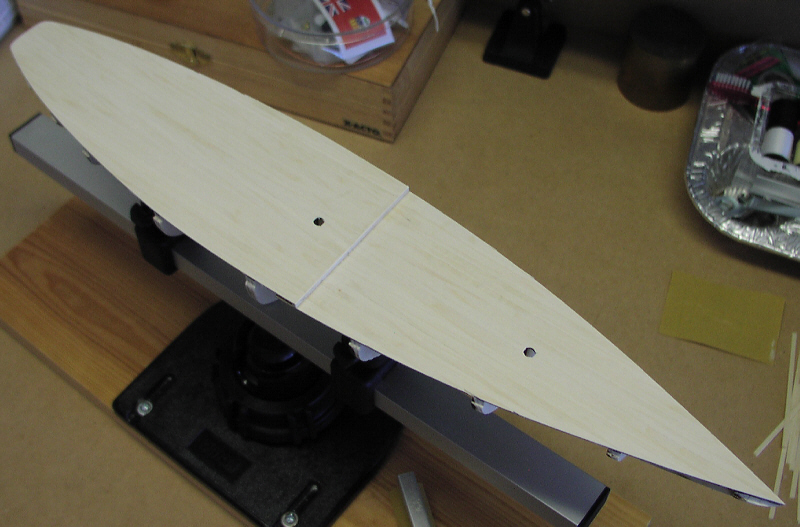
Experienced a break in progress, but am now continuing construction. Glued the decks onto the top of the false keel and bulkheads. I had to trim a bit of the decks to ensure they conformed to the shape of the hull as dictated by the bulkheads.
Following the instruction manual, I laid the first deck plank down the center of the decks then proceeded to glue the remaining deck planks. Looks nice, but after finding some posts pertaining to deck planks I discovered that one plank wouldn’t run the entire length of the deck. I’m not too keen to cut all these planks off and start over. Besides, I don’t have enough to accomplish this. I’ll leave this one as is and make a note to myself on the next build.


-
READ – READ – READ – THEN DOUBLE CHECK!
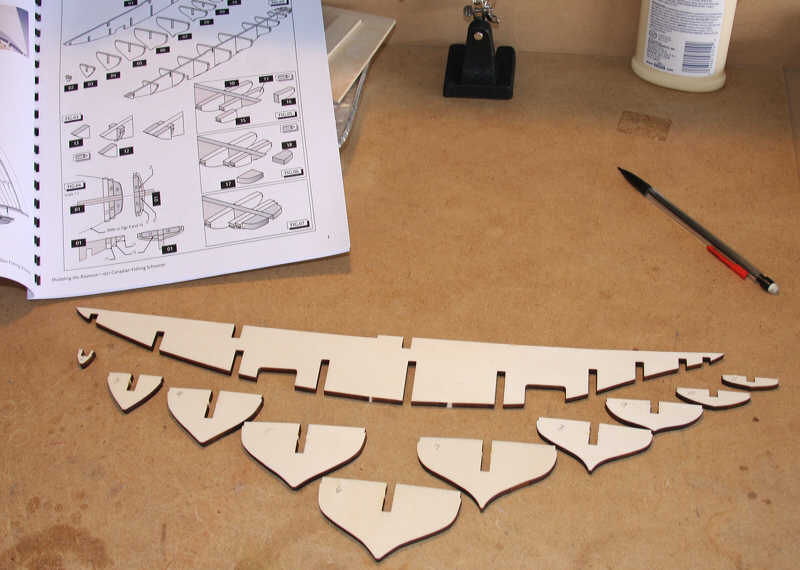
While I was preparing to cut out the stem and stern reinforcement blocks I discovered that the stern blocks, numbers 15, 16, 17, and 18, are mislabeled on the plans. I made a pencil correction on the plans and the wood parts then cut everything. Once I had all the blocks sanded and squared they went into place very nicely.
I finished tapering and blending the false keel, bulkheads, and reinforcement blocks. I checked the tapering on the false keel with the keel to make sure it blended into the keel. Made some minor adjustments to the keel to ensure a good fit across the false keel then glued the keel to the false keel.
It was at this point that my 5 year old granddaughter saw what I was doing and asked if she could see it. I didn’t think she would break it so I let her look. She very dutifully studied the construction then asked, “What is it?”
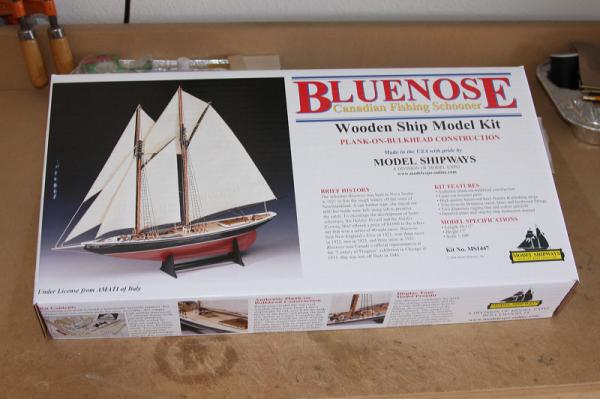
I showed her the photo on the front of the kit box and she brightened up and said, “Oh. It’s a sailboat! Will you make me one?” I have a fan club. I asked her what she would do with it and she told me she would put it in her bookcase. That sort of tells me that she realizes it’s not a toy. Guess grandpa is going to have to build one for her.

- ronald305 and gulfmedic1
-
 2
2
-
-
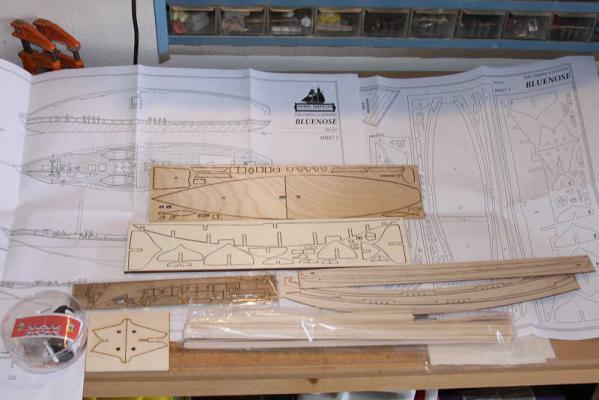
I joined this forum in February with the express desire to obtain as much information as possible before beginning my first build. I have remained in the background, so to speak, reading the posts on kit selection, tools, and building techniques in an effort to begin with a model that would not overwhelm me and piece together a workshop without breaking the bank.
I found that most of the tools I already had, with the exception of some power tools and specialized model ship building devices. I have now acquired most of what I need to get started with the exception of a ship to build.
My final choice was to be the HM Schooner Pickle, however, fate, or providence, stepped in and presented me with an unusual opportunity.
Prior to my retirement in January, a couple purchased the house across the street from us. I didn’t have the time, while working, to get over to meet them and it wasn’t until about two weeks ago that I finally saw someone at the house. I introduced myself and found that these new residents were from Canada; which explained why I hadn’t seen much of them before this.
In getting to know them it came out that I was getting into model ship building. Much to my surprise my neighbor told me that he had a ship model kit that he never had a chance to build. He went on to say that he brought it to this new house with the intention of building it, but was now finding he really didn’t have the time to work on it. A few minutes later he came over with the kit; which had not been opened. After some discussion we came to an agreement that I would buy it from him for $20.
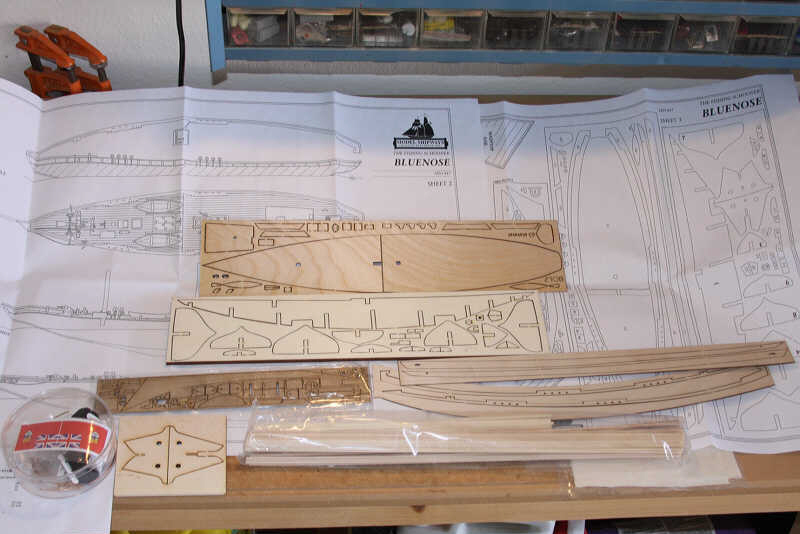
I therefore submit my build log for the Model Shipways, 1:100 scale, Schooner Bluenose.
Jack


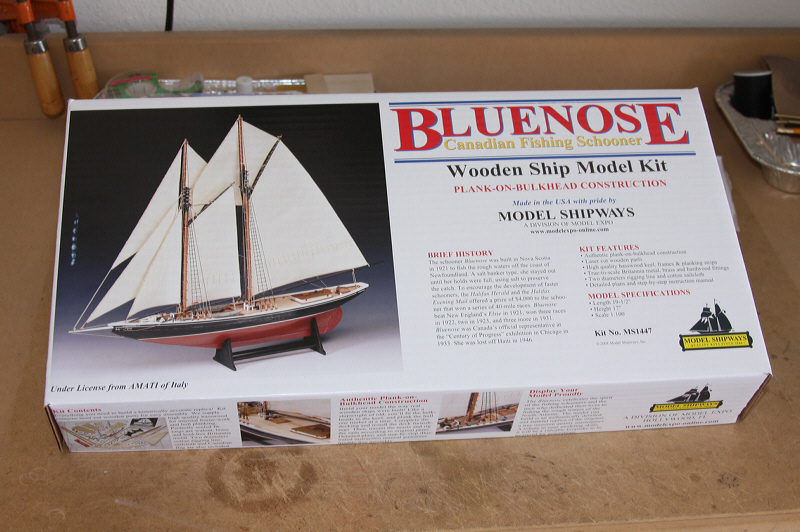


Bluenose by jre8655 - FINISHED - Model Shipways - Scale 1:100
in - Kit build logs for subjects built from 1901 - Present Day
Posted
Moving along slowly. I have been away from the workbench for a while because of family needs.
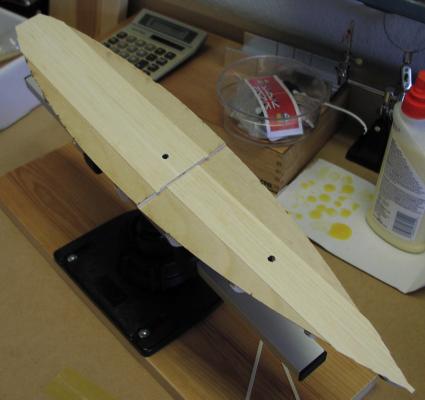
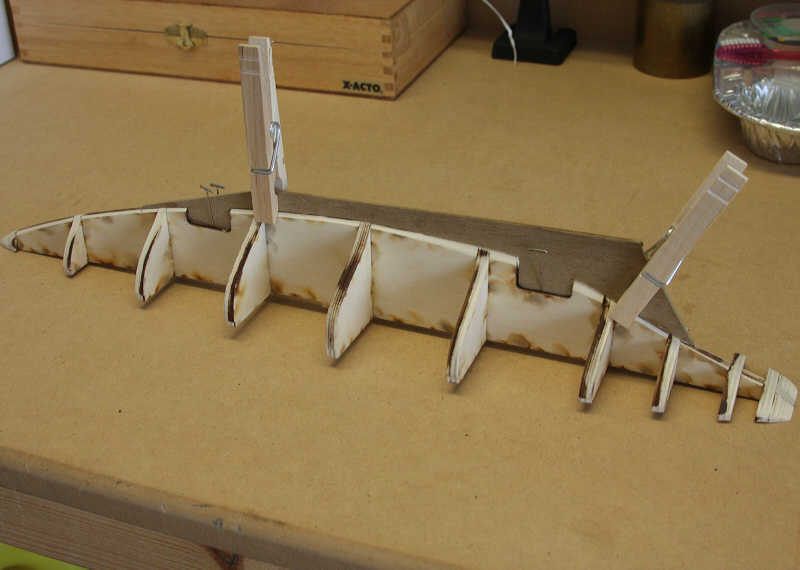
I was getting ready to start planking the hull when a thought struck me. I felt uncomfortable with the wood supplied for the planking. It just seemed to me that it was too flimsy and would give too much spanning the bulkheads. So I decided to glue filler blocks between the bulkheads to better support the planking.
I have completed these filler blocks and shaped the hull. I’ll add some wood filler to round out the sharp curves and fill in any holes then begin planking.