FKarl
-
Posts
28 -
Joined
-
Last visited
Content Type
Profiles
Forums
Gallery
Events
Everything posted by FKarl
-
I've been looking for a place to buy the coffee stirrers!! I've actually laminated a solid hull out of Popsicle sticks. Happy with the results so far. Trying to save money right now but trying to further advance my skill set. (Even worked with wet sand at the beach recently). Anyway, it's a very slow process but I'm finding that throwing scale out the window and "scratch building" from an image in my head, I am having a great time. My "sail boat" will end up about a foot long if/when I finish it. Laminating the mast and boom as well. Superglue, hot glue and Popsicle sticks are all I've used so far. It's a ton of sanding, but a very pleasant time sitting on my deck working away. Hadn't seen anything like this done on here before and so I was curious.
-
Anyone else use them? If so, what for? I'm finding them useful in many ways.
-
Awesome! Thank you!! No OSHA back then!
-
I do but I think its in the wrong place. This is a project that spends months on the shelf when I reach a point where I have issues and get stuck. I am quite a ways from that actual step, but wanted to share here what I had thought after reading through your log yet again. I seem to think of something everytime I do. I'll certainly post a photo here when i try it and I am sure I will pick your brain again. I've been slowly reading through other logs of the Connie, even from different kits, just to get an idea on what works, and what doesn't. Three years of modelling and I am still a big rookie, but I am really trying to do the very best I can. I'f I cant look at a step and be completely satisfied with my work, I either redo it or keep working at it until I get it right. I've found that, the better I do, the more I enjoy my hobby. Thanks for all the inspiration!
- 246 replies
-
- 1
-

-
- revell
- constitution
- (and 2 more)
-
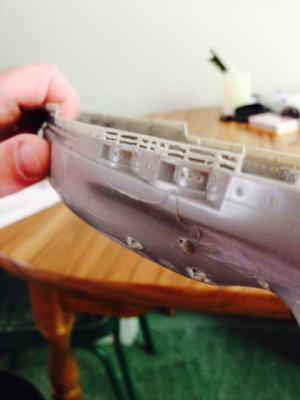
Working several problems out ahead of time.... Anyone struggle with the fit of the transom/stern? With all the decorative trim I can't seem to find a way to make it fit even close. I plan on filling in any gaps at the bottom but doing so at the top would wreck the decoration. Help?
-
I don't know. Hoping that ca solves that issue completely. I understand what you're saying though. Anyone else?
-
eye bolt replacement..... as a fly fisher I will be hitting the fly shop tomorrow to look for some "big eye" hooks in very small sizes. I suspect they will have what I need and the finished product will be stiffer and stronger than the plastic ones from the kit. I'll post back with what I find. Ideas that come to me like this are the exact reason I let this project sit for as long as I did. I'm still not "full steam ahead", but ideas are starting to come.
-
so I've not done a lot of work this week as I worked extra shifts. but it has occured to me that I am NOT happy with the hull as it was painted by hand three years ago. Any thoughts as to how I may strip and repaint it without harming the plastic? I've read mixed reviews on simple green and acetone although both seem to work well. I've considered purchasing a second kit and bashing one of them into something else.... still holding out hope that I may salvage the one I have. I suppose I could go with it as is, but I've gained many new skills and KNOW I could do a much better job now than I did three years ago.
-
Just bought some army men at Walgreens for $3. Comes with two tanks, some fencing etc... Also found a toy train, (metal), in a random box of stuff. Thinking I can practice various techniques on these toys to build skills. Anyone else buy "toys" to practice with? Painting is a weak spot for me so I feel I need to work at it. This seems to be a good way to sharpen those skills in between projects.
-
- 1
-
-
You've no idea how long i've looked for this info!!! So, youre saying the pilot would get up and attach the hook afterward? One hook? what did it hook up to? Just a big D ring on the fuselage? ANychance you nmight steer me towards that video?
-
I'm reading and rereading this build as I am working sporadically on the same kit. Wondering how some diluted Elmer's over the inside surface of the poly flex might work. I'll get back to you. I like the idea of old looking glass, but not the hours and hours doing and redoing you went through. Even though it is an astounding effect!
-
looking good Kim! I think we are at similar skill levels. I find that the slower I work, the better my results. Looking forward to seeing more.
-
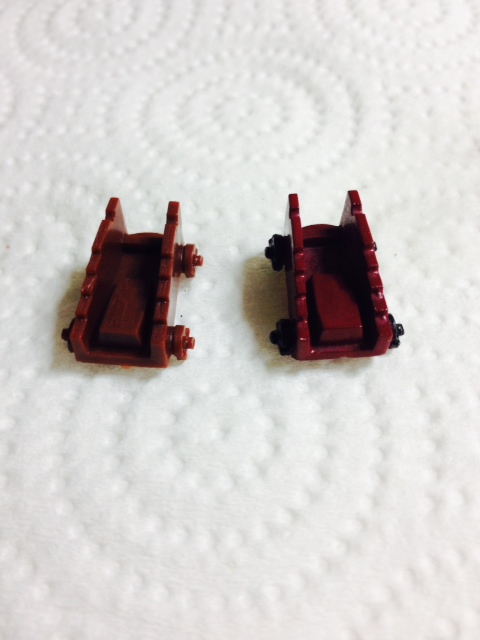
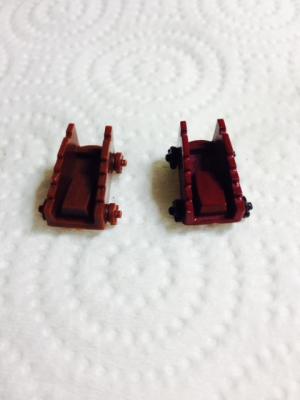
picture of the raw piece and the test piece. I like the color as its not really brown and not really red.... I have seen both colors used and thought a combination would be good.
-
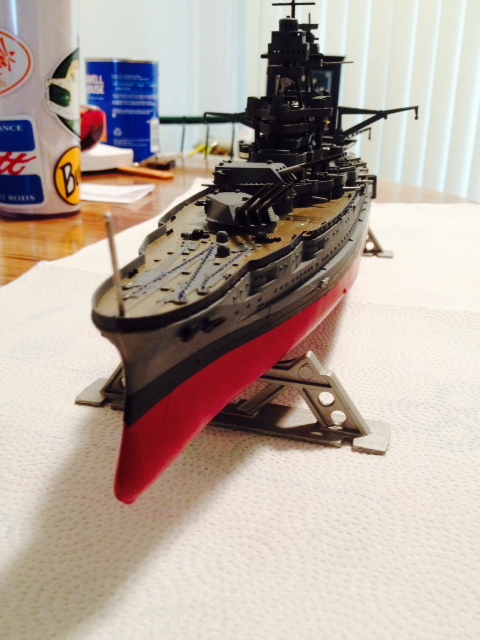
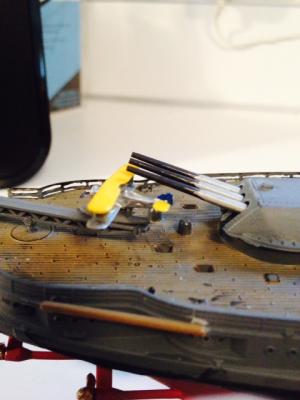
As some of you may have noticed.... this is a very slow build. I put it away for months on end as I do other small projects to gain skills for this. so, this week I went back to work. and have found a gloss black spray paint that I like a lot. Painted the long guns today before work. I will know what I have when i get home. I also have found a flat burgundy (ish) spray paint that I like for the carraiges. spent several hours sanding those last night in preparation for paintint them hopefully this weekend. Test painted one and am fairly happy with the result. The lower deck guns won't be seen but I still wanted to do a good job as I will know they are there.....
-
I have always used bow string wax. Just what I had laying around the first time and i dont shoot the bow any more so I use what I have.
-
still learning the techniquies you all speak of here. I am happy enough with the result for such a small scale but aim to do better on whatever is next. Thanks for the tips on decals. I hope to have time to get the needed supplies this weekend. More photos as requested.


-
The, "not quite finished" photo. I suck at decals..... dread them in fact. any pointers before I try not to botch them too badly?
-
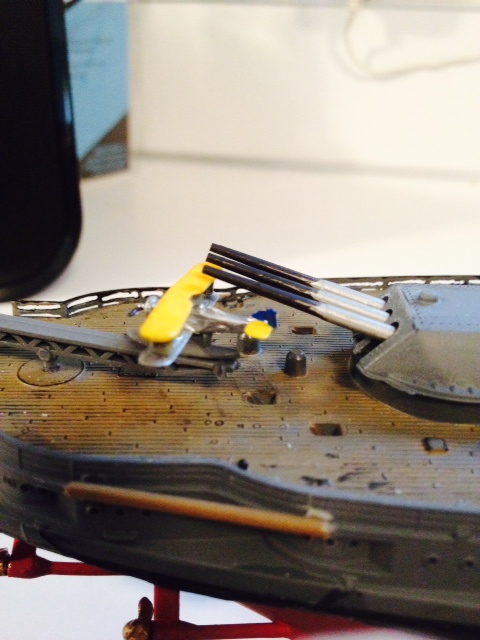
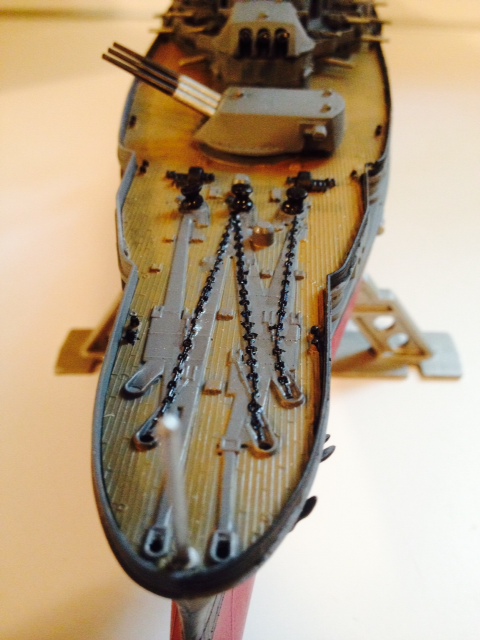
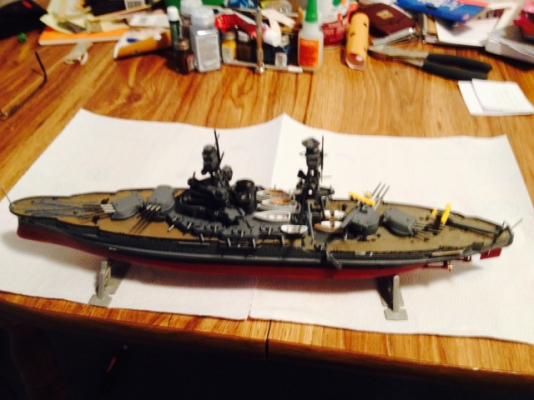
railings were more tedious than I thought. only did one side..... broke a few in the "sawing process" although it worked fairly well and is a technique I will use in the future I am sure. been working along pretty steadily and just about finished. I tried my hand at weathering (deck) and need more practice for sure.... overall I am pleased with my efforts though. Decals and "optional" rigging still to go... here are a couple progress photos. The railing got sanded as best as I could but I wish it had come out better. one question. I was unable to find exactly how they retrieved the planes? I know with the crane... but exactly how did they "hook up"? I cant imagine they put anyone over the rail to use cables and hooks. Stymied.


-
Not a build log. Just wanted to share.... I've seen many versions of this where folks just paint the railing without removing the plastic between the rails. I've seen also the photo tech route taken. What I've discovered just today is that with a small bit used as a saw in my pin vise, I can remove that material. Tedious for sure but I think it'll make a difference. I'm just hoping it cleans up with some 600 grit paper. I'll post the result after I get a few done. Just wanted to share the idea.
-
I love what you did there..... I may do something similar. I also found a few videos on shrouds and ratlines, I will probably do my own. I tie flys to fish with so those knots don't look bad at all. Now, question about the seams on the cannons..... I have decided they shouldn't be visible. By trimming a very thin piece of sandpaper I have found that I can mostly eliminate them from in between the bands on the guns themselves. Its very tedious work though and I am wondering if anyone has another idea. 10 minutes per gun just to sand the seam is fine as I am in no rush, but damned if I can't think of any easier way to get the same result.
-
Having read several build logs and gotten way more ideas than this rookie can ever hope to achieve on my first build of this size I have decided to try and do the very best I can with the actual kit as it is and with the instructions provided. Has anyone attempted this? Do the eyebolts and dead eyes really present such a structural problem as to be completely unuseable? I started this two years ago and did a not so hot job painting and glueing the two hull halves together So I am working to clean that up as much as I can. I have started a build log on paper and will be transferring it to the forum as time permits. I am keeping track of time spent and pretty good notes as to what I am experimenting with to solve problems such as mold lines and weak parts..... Currently working on the long guns first. (seems everyone starts there). ANy input as to weakness of parts where it comes to rigging would be appreciated. If I absolutely must substitute eyebolts and dead eyes etc. then I will but I rather think it might be interesting to hear if others have tried to use them and failed or just looked at the parts and, Based on more experience than this rookie builder, decided they were inadequate. Thanks for all the advice and interest in the following months, (years?), as I embark on this task. Karl
-
I've pulled mine off the shelf and will be following along as I build. This is my first ship of this scale and I've already glued the hull halves together...... I like the idea of deck clutter and replacement cannons. the ones in the kit aren't very good. I hadn't given any thought to thickening the hull and wonder if its too late as I have it glued together. I'll hunt around for a source for strip styrene or something similar I can paint.
-
http://images2.snapfish.com/232323232%7Ffp83232%3Euqcshlukaxroqdfv3%3C23%3Dot%3E%3A368%3D456%3D346%3DXROQDF%3E25%3B888646%3B255ot1lsi My finished Connie.
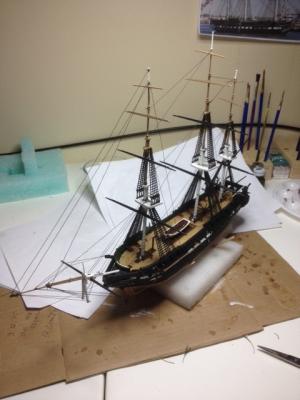
-
Not quite done with the rigging.... but this is where I am at as of a few days ago.