HOLIDAY DONATION DRIVE - SUPPORT MSW - DO YOUR PART TO KEEP THIS GREAT FORUM GOING! (Only 68 donations so far out of 49,000 members - Can we at least get 100? C'mon guys!)
×


kayakerlarry
-
Posts
117 -
Joined
-
Last visited
Content Type
Profiles
Forums
Gallery
Events
Everything posted by kayakerlarry
-
 Beautiful boat! What a great shot in Sydney Harbor - perhaps you were sailing the day I climbed to the top of the bridge in 2003...look forward to seeing your progress!
 -
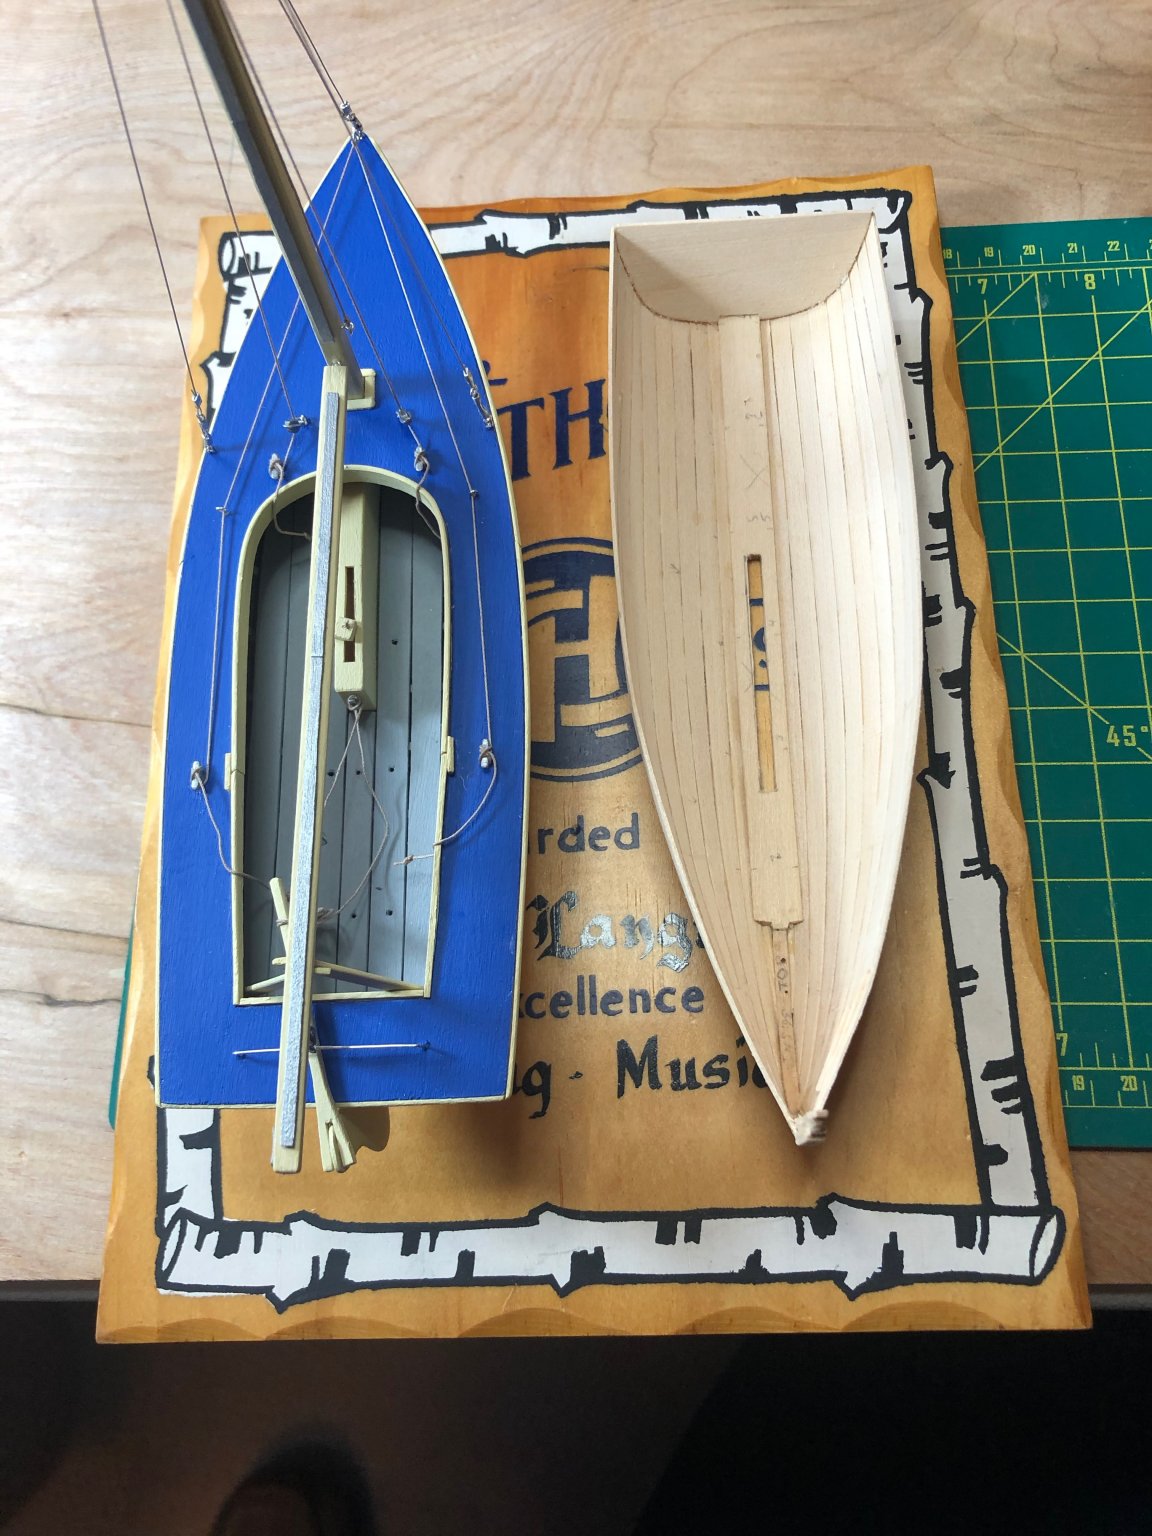
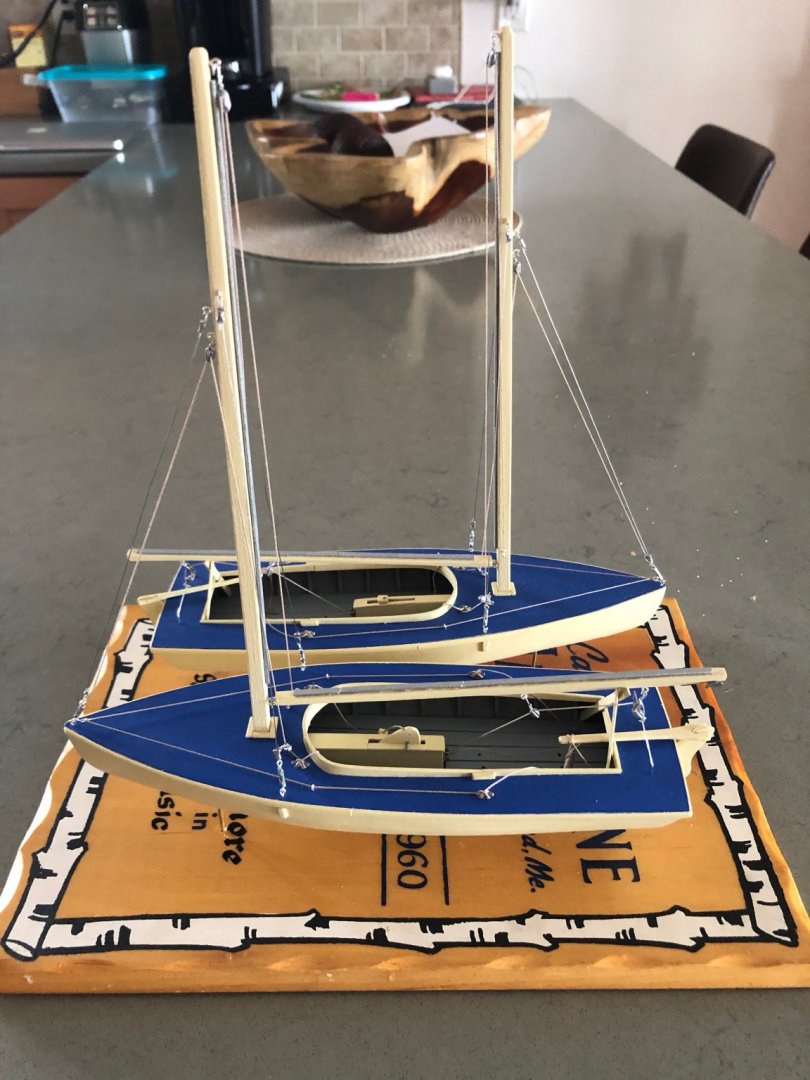
Thanks, gentlemen! Keith, no worries...I still have two more builds to complete (Gull and Falcon) to round out the fleet of 4 boats the camp had until I purchased Flying Dutchmen Junior replacements in 1967. Besides, I just purchased custom cut glass for two cases so now I have no excuse not to continue!
- 84 replies
-
- 2
-

-
- nimblet
- knockabout
- (and 1 more)
-
Oh, maybe like two pigeons sitting on a wire all in a row...
-
Pigeon pair???
-
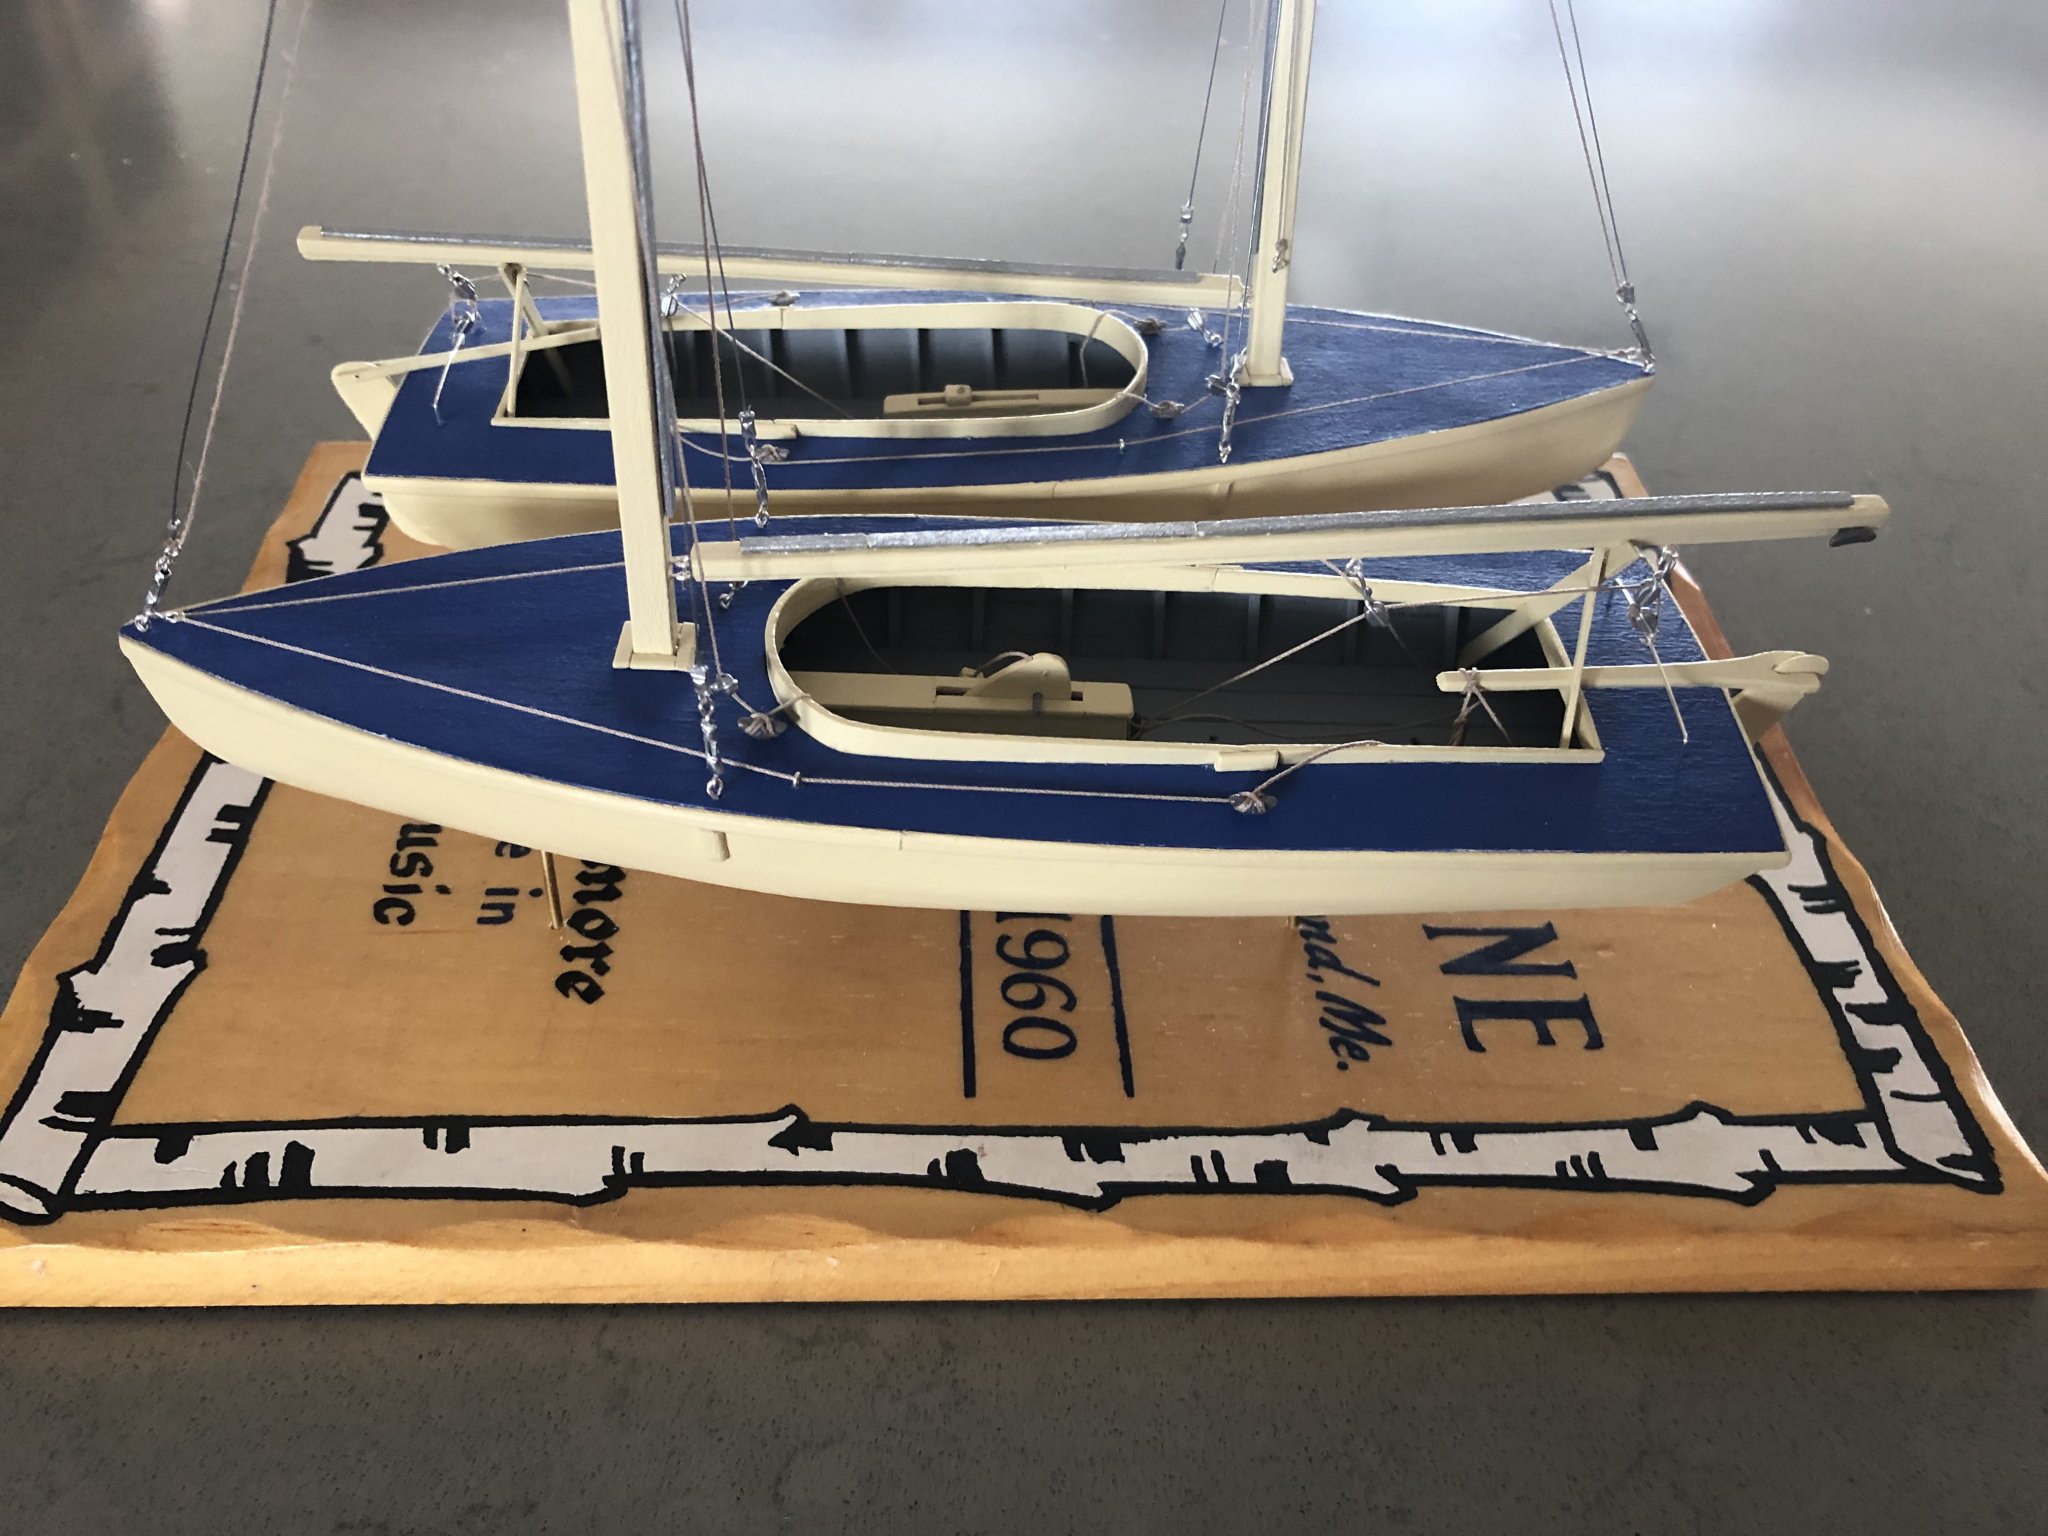
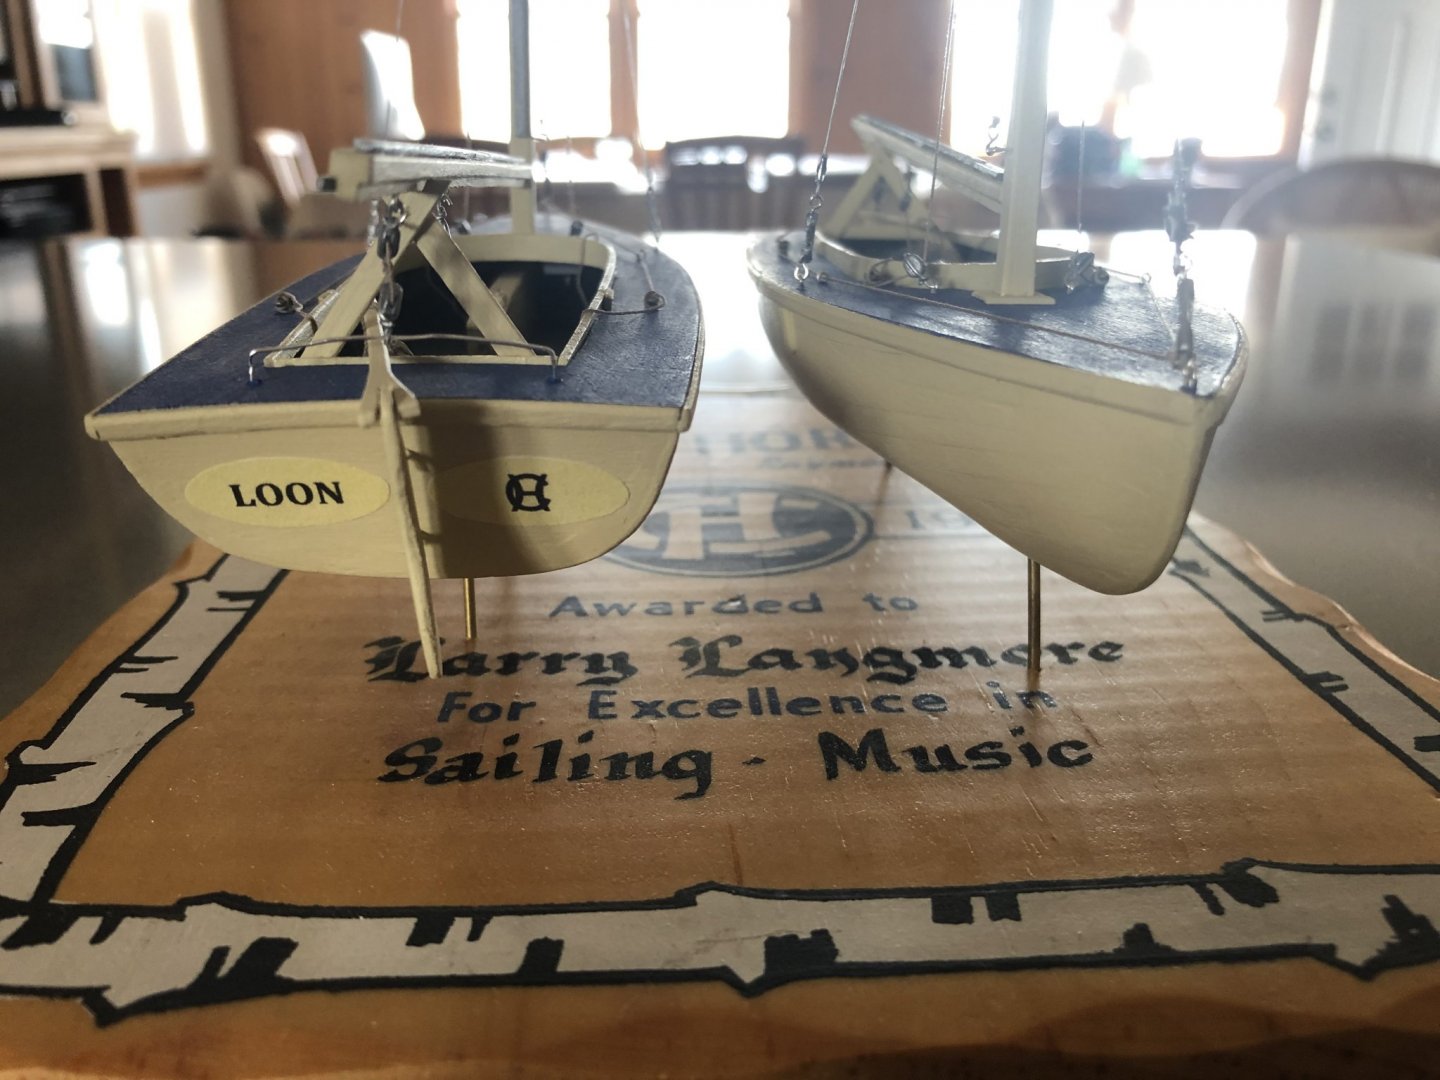
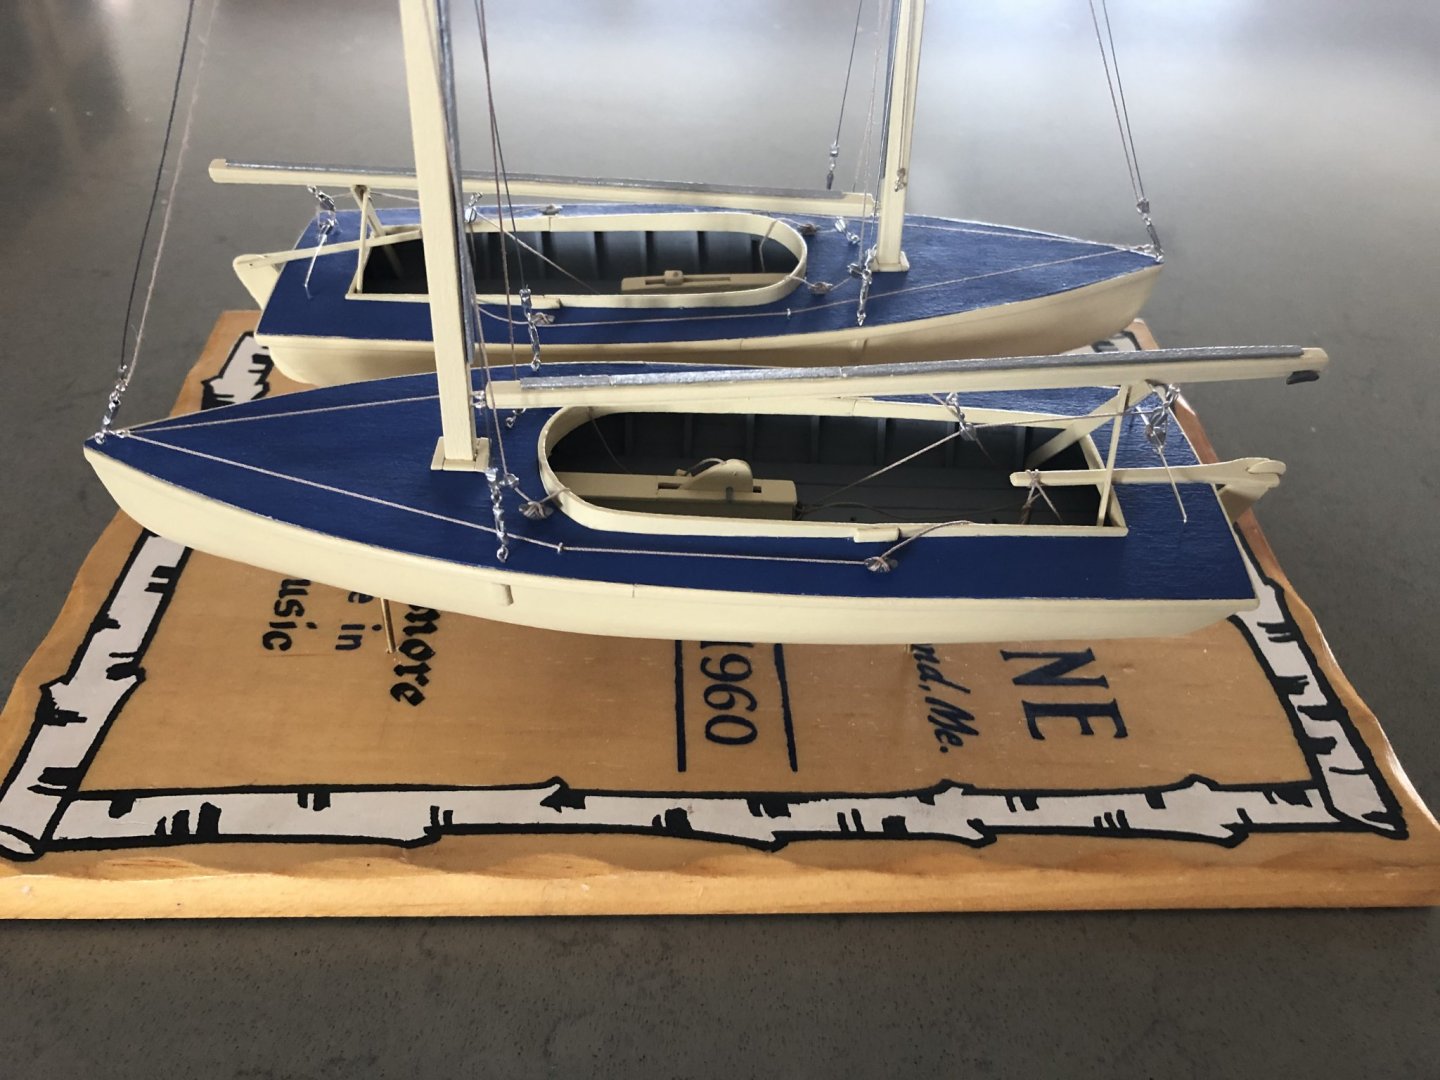
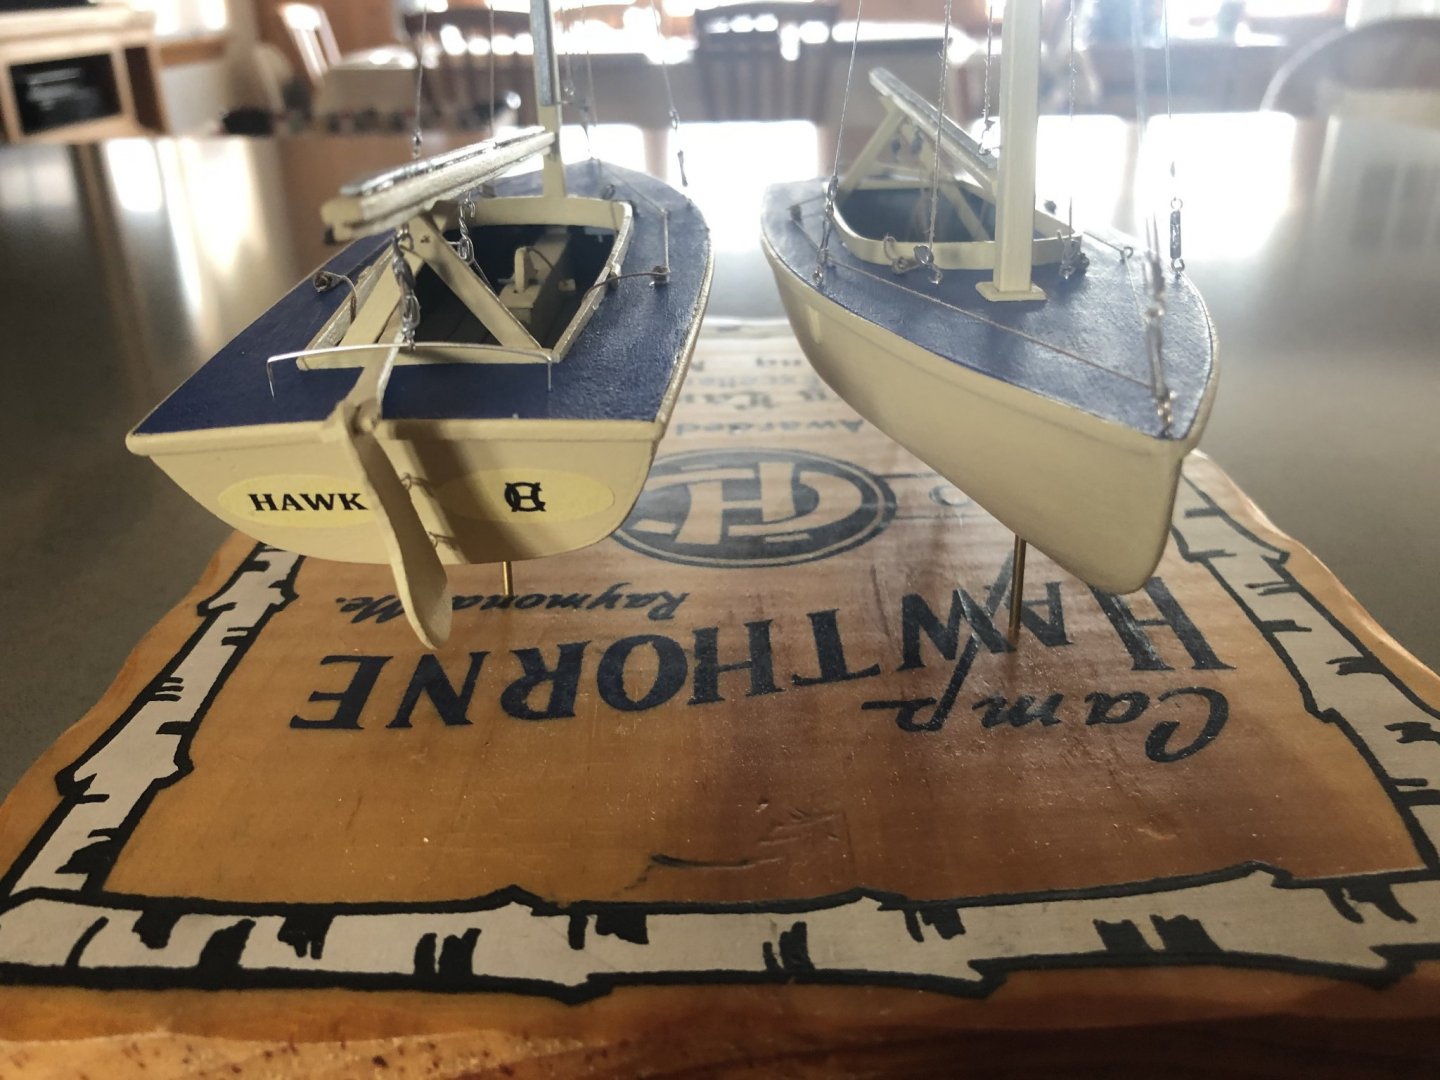
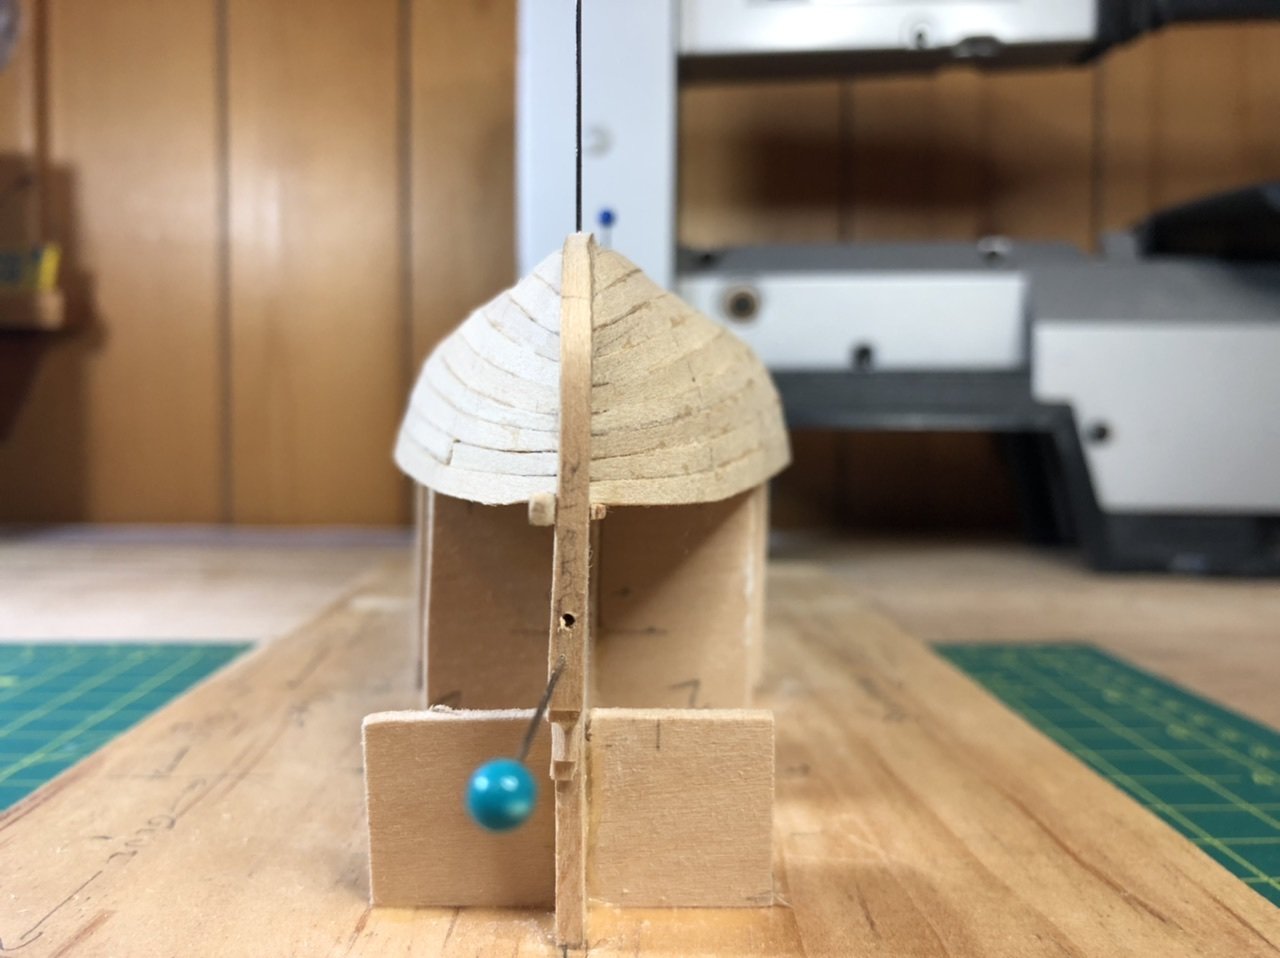
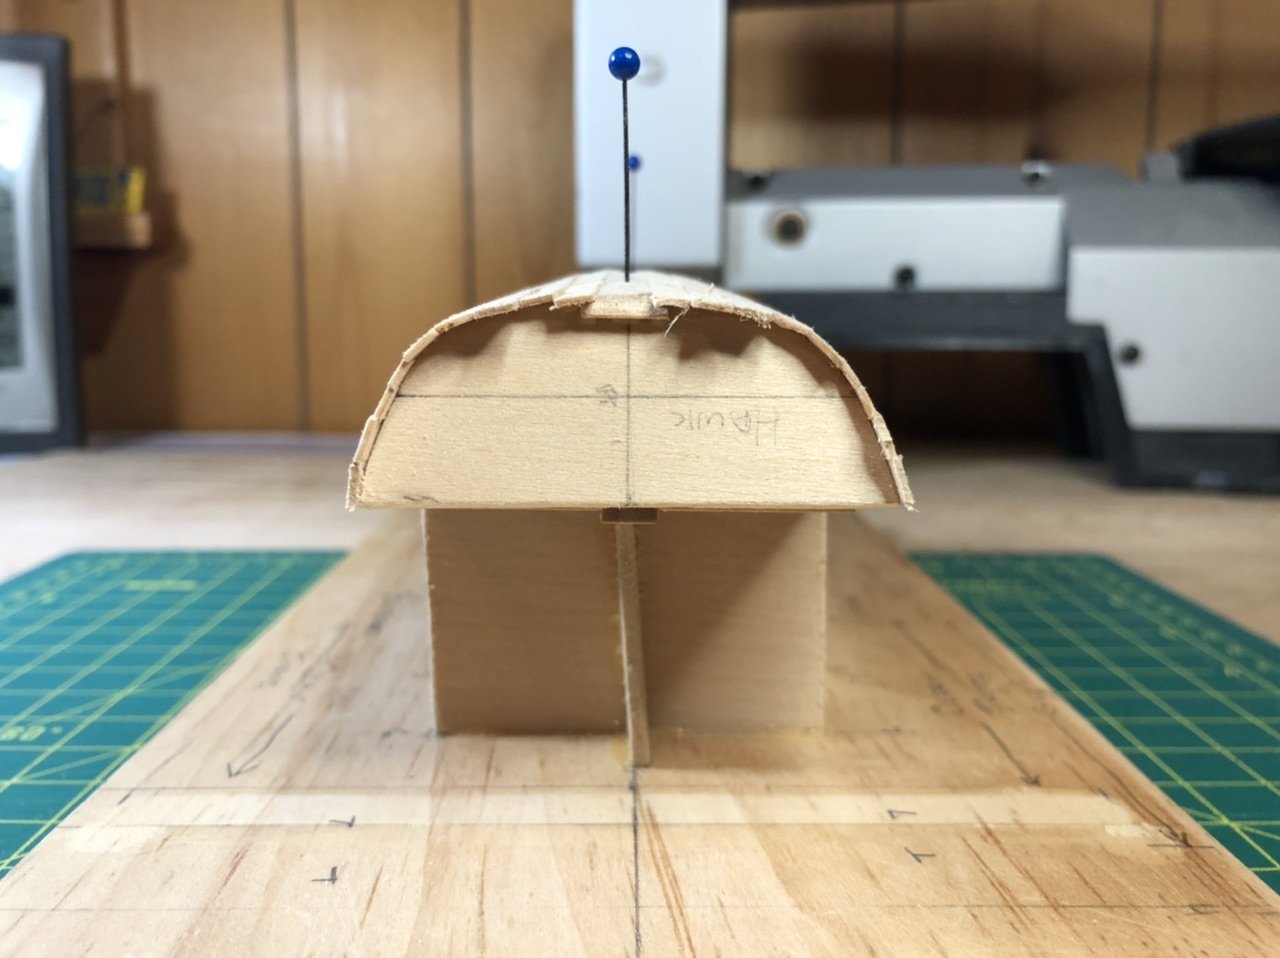
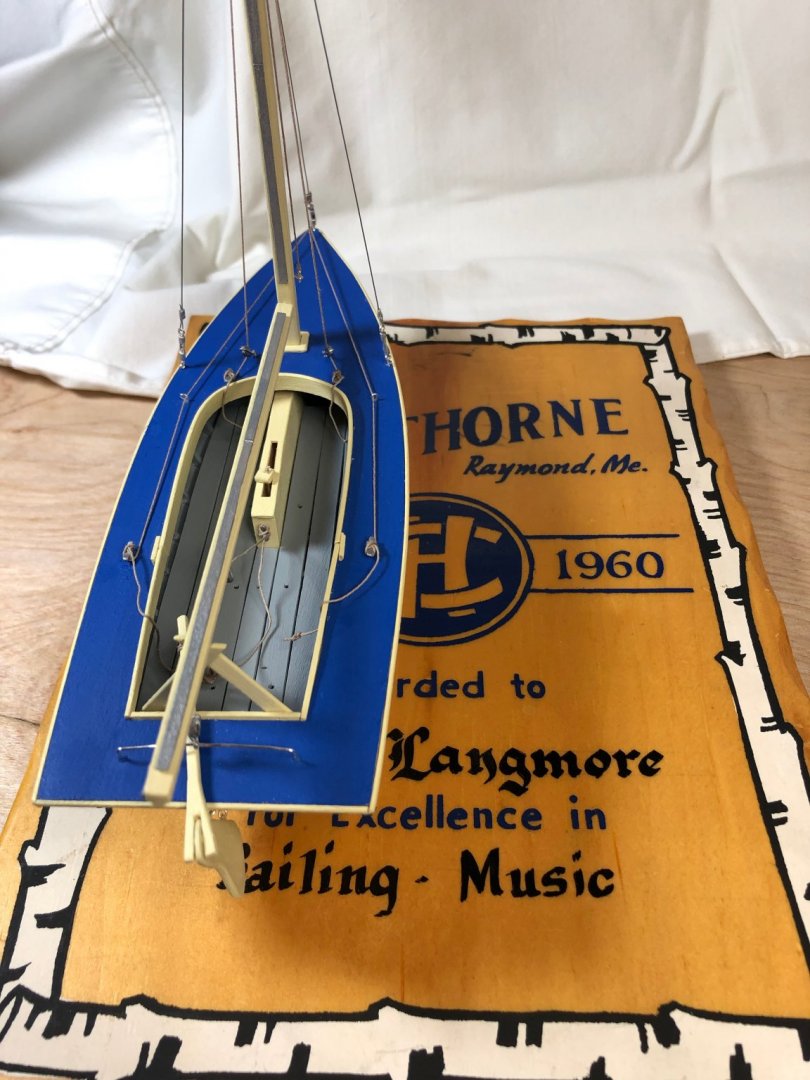
FINISHED HAWK - second of four! Mounted on my 1960 camp plaque ready for presentation to Camp after Covid 19 one year delay of 100th anniversary now schedule for 2021. Glass case will be next and then onto the Gull and Falcon which I may decide to rig with sails.

- 84 replies
-
- 5
-
-
- nimblet
- knockabout
- (and 1 more)
-
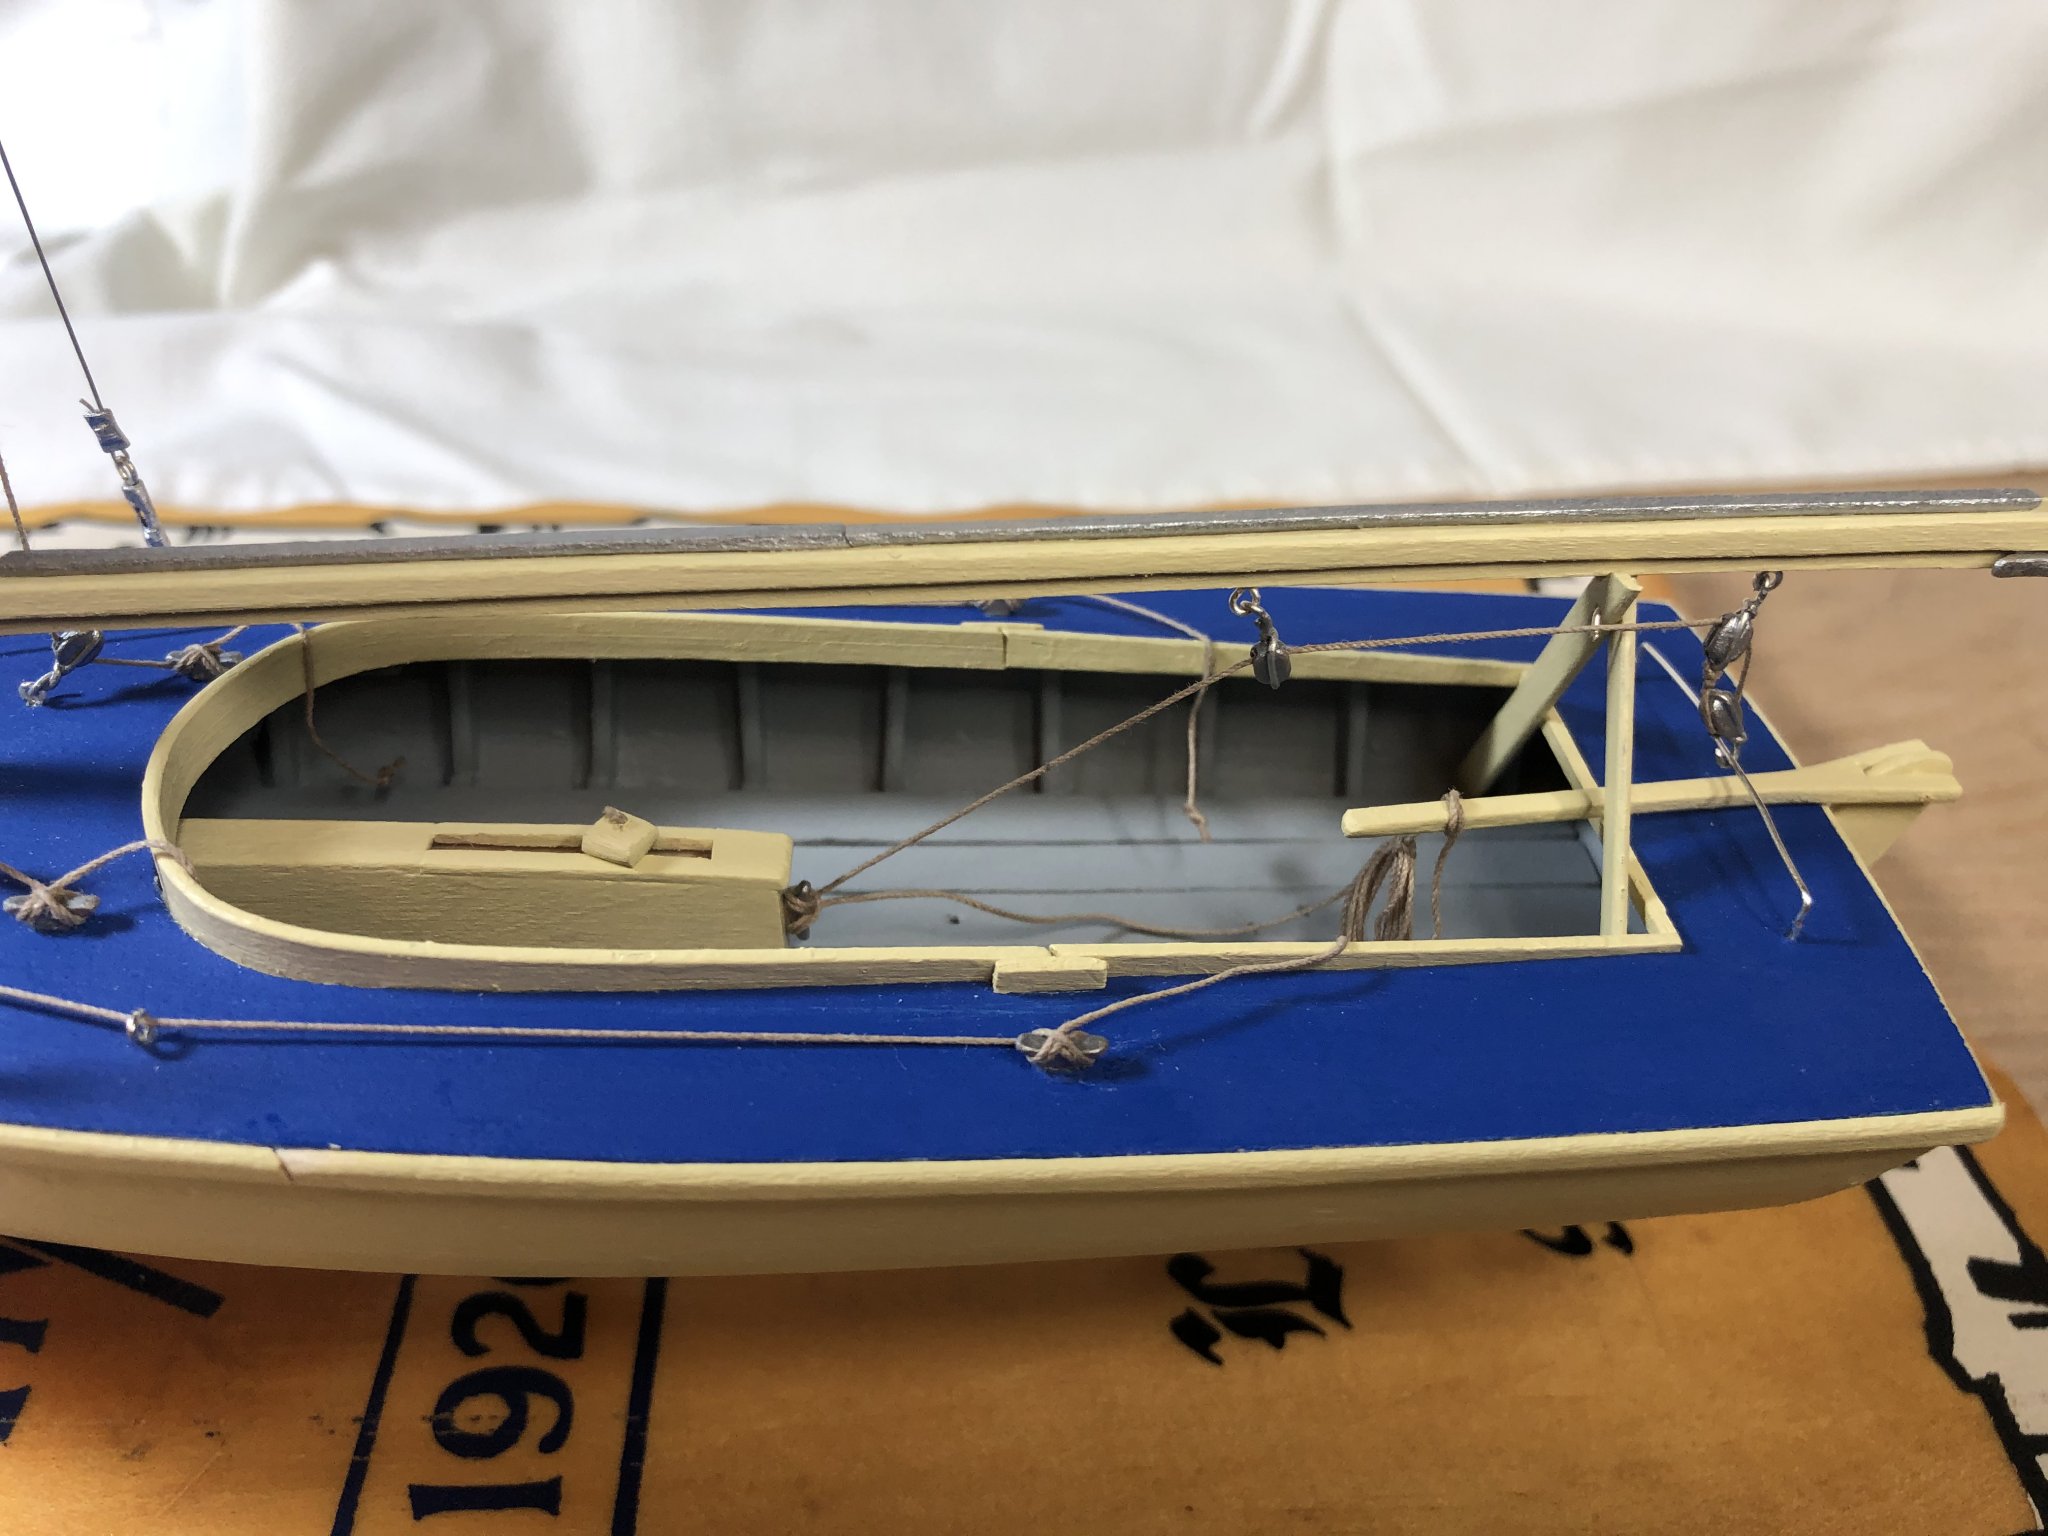
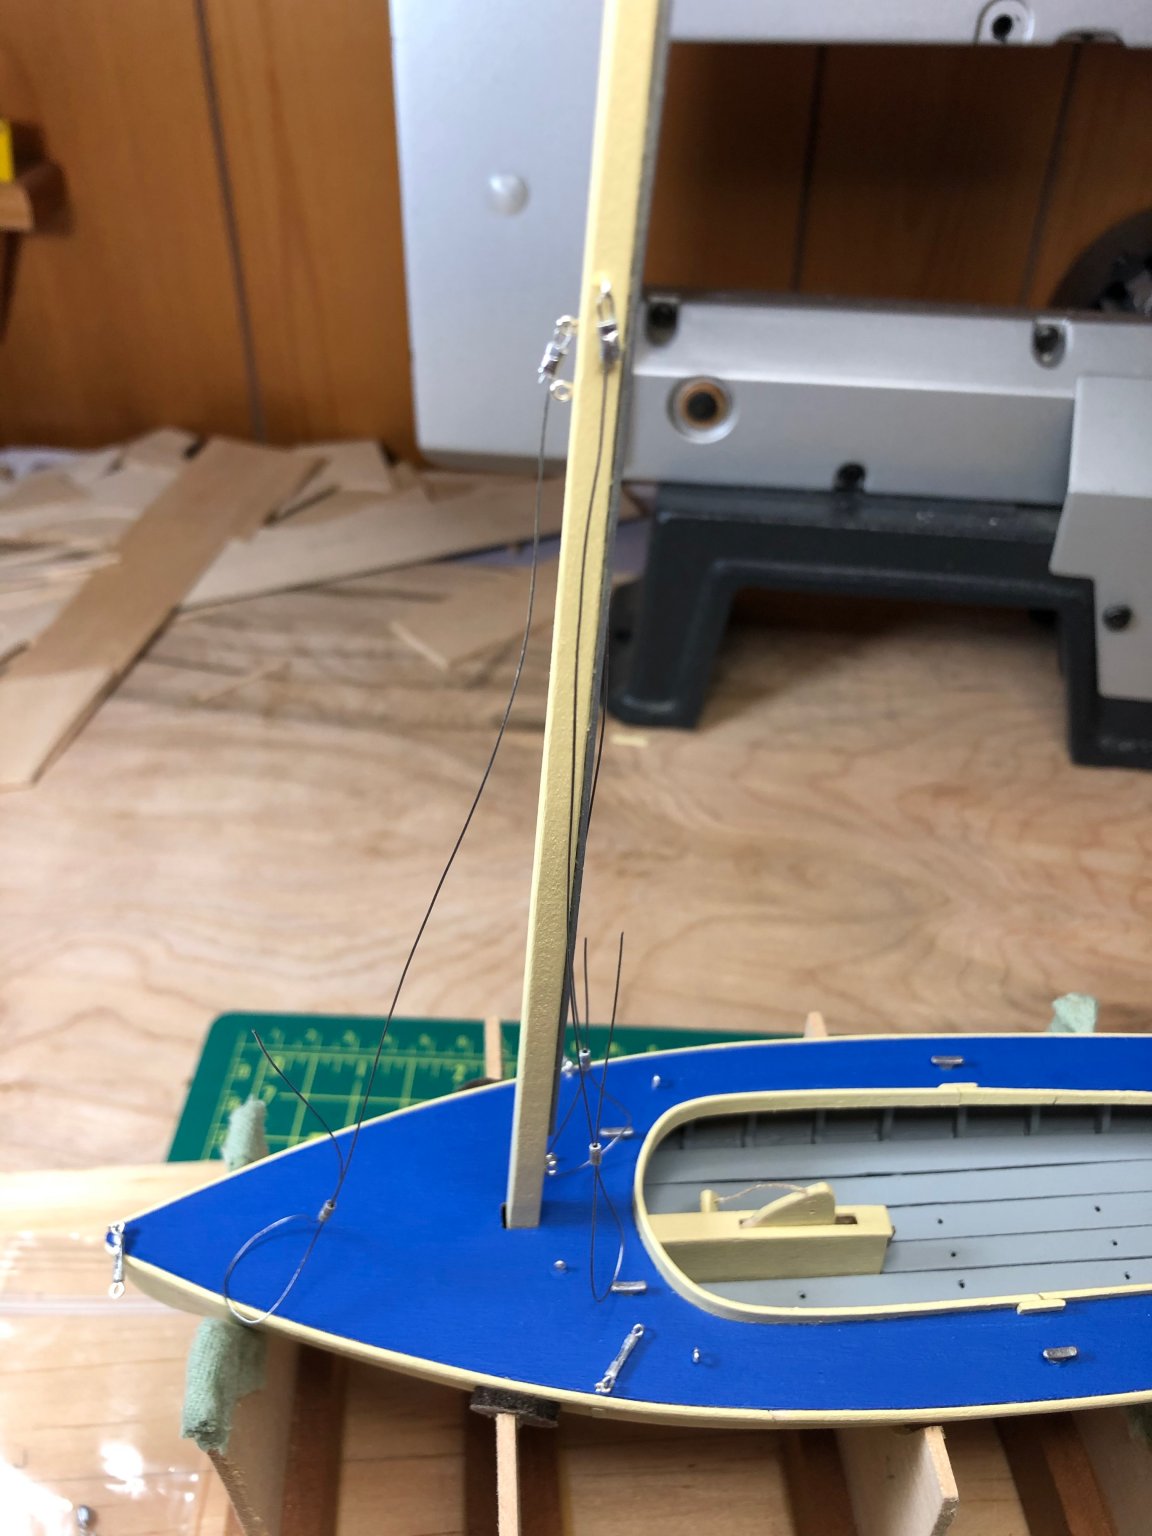
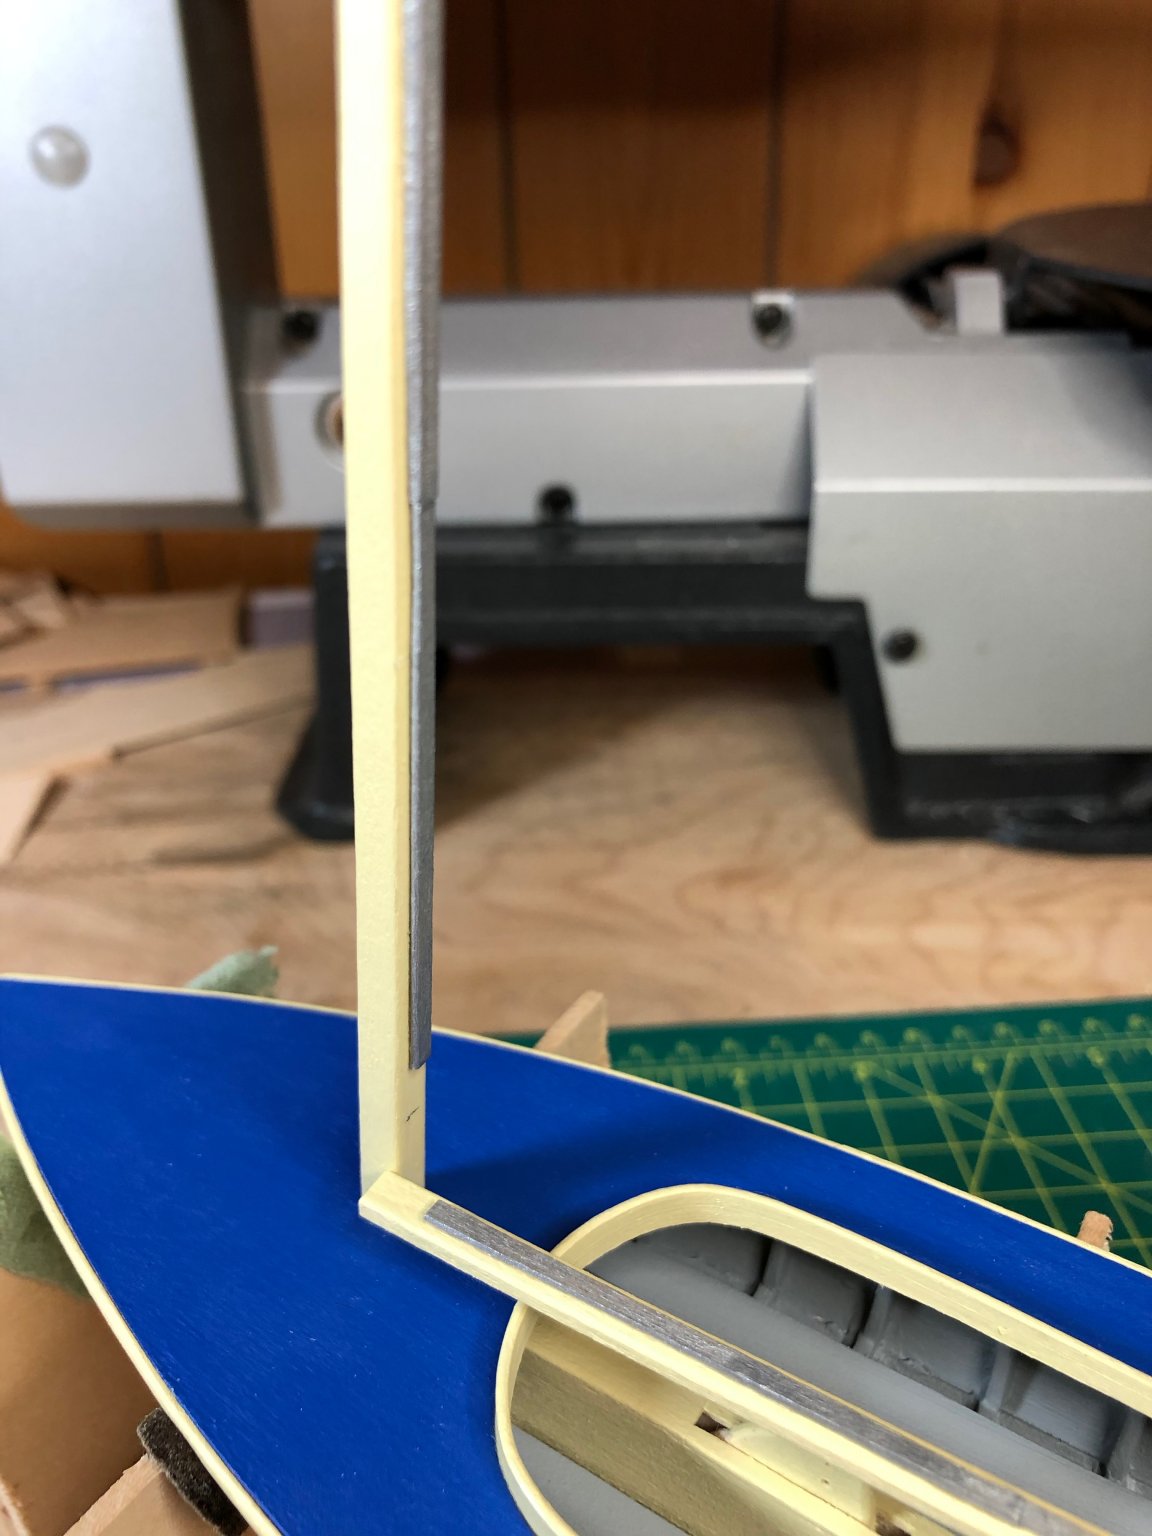
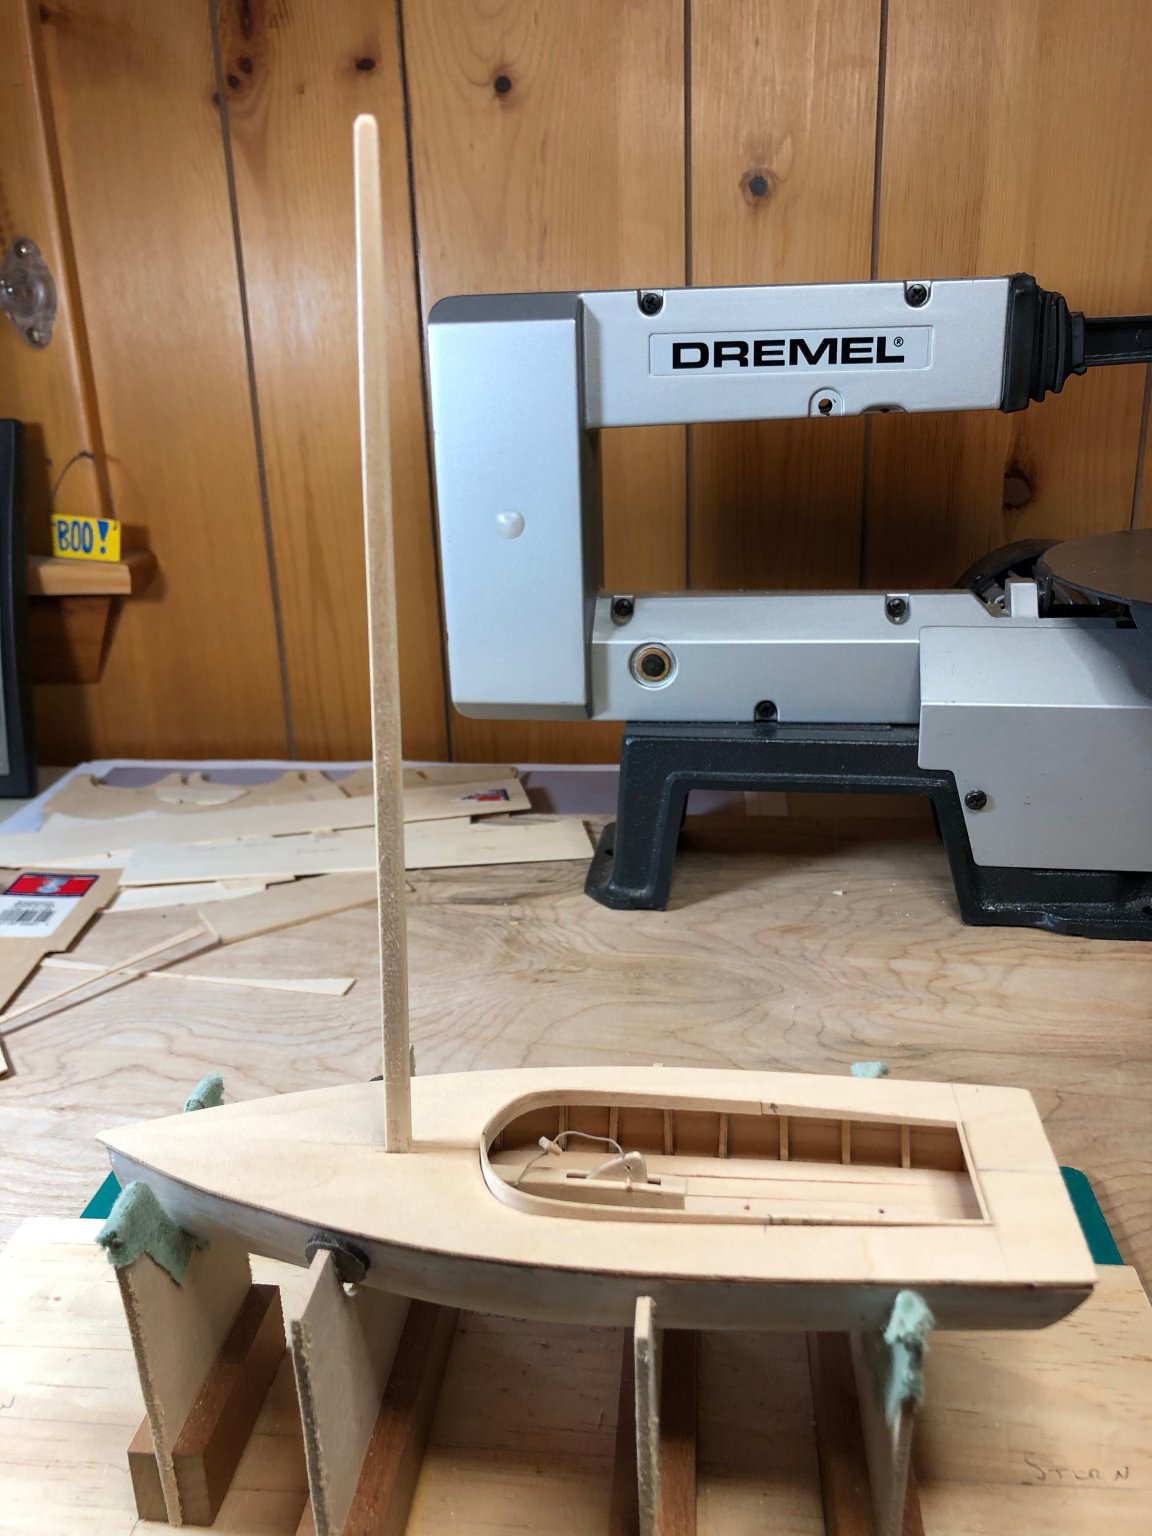
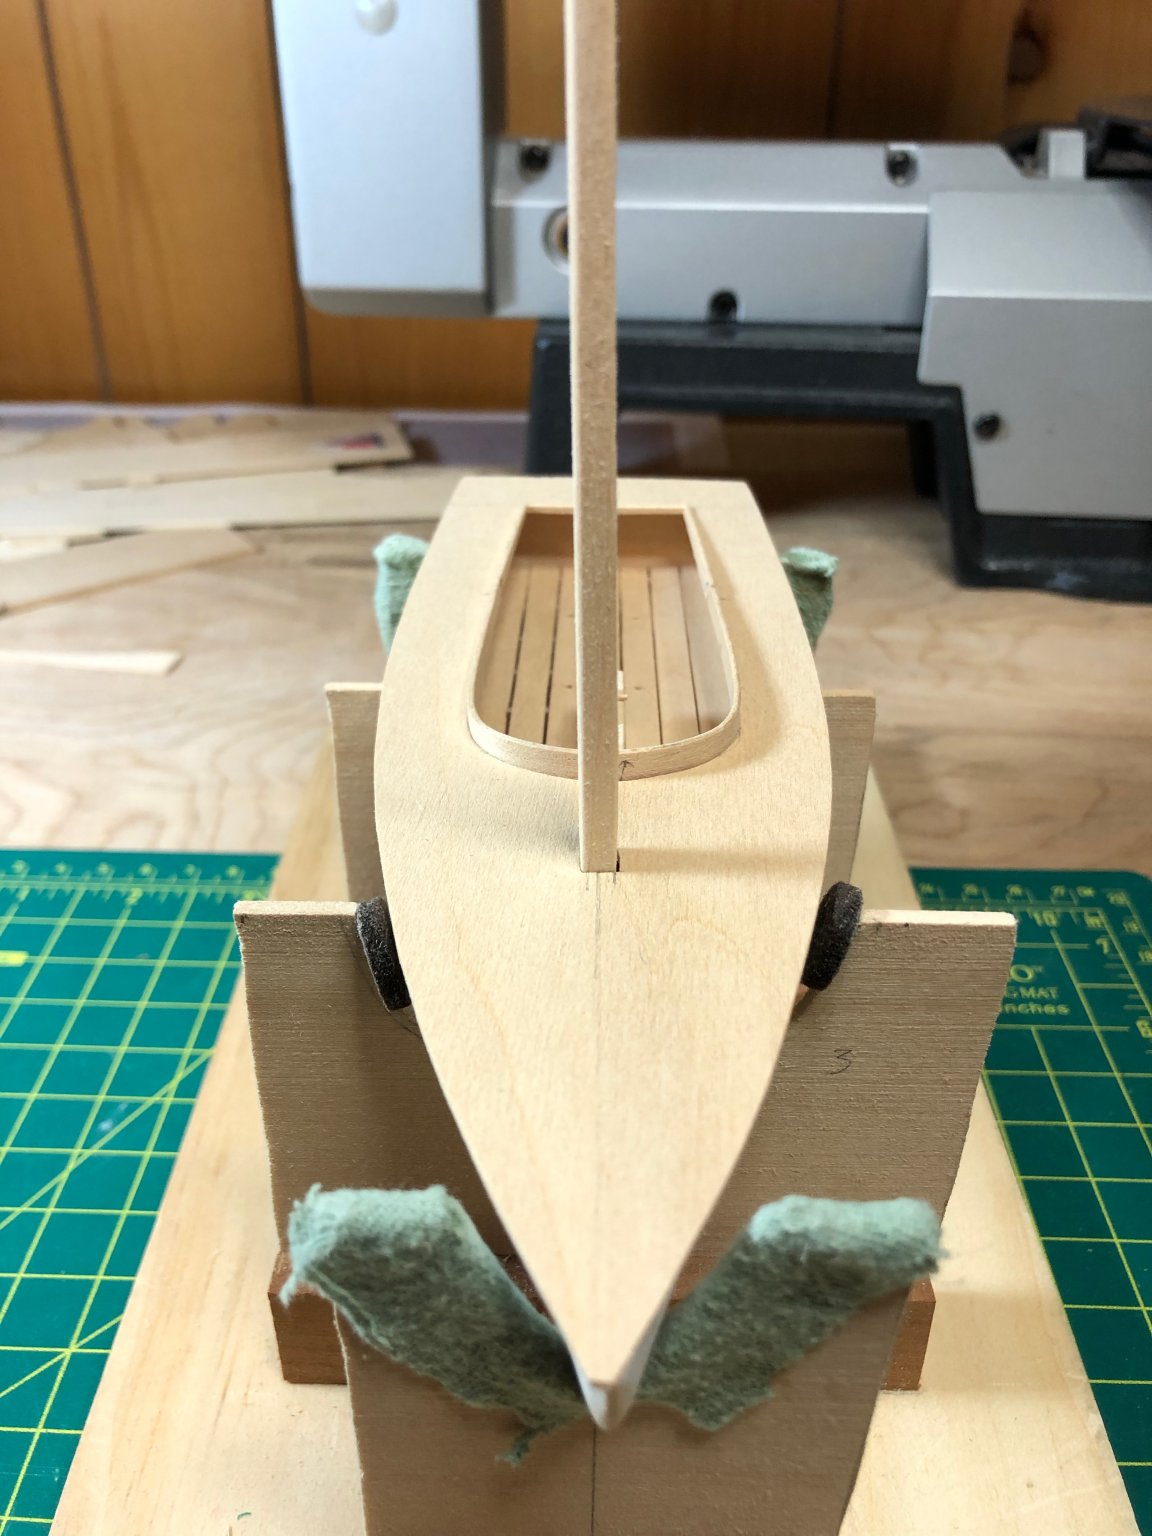
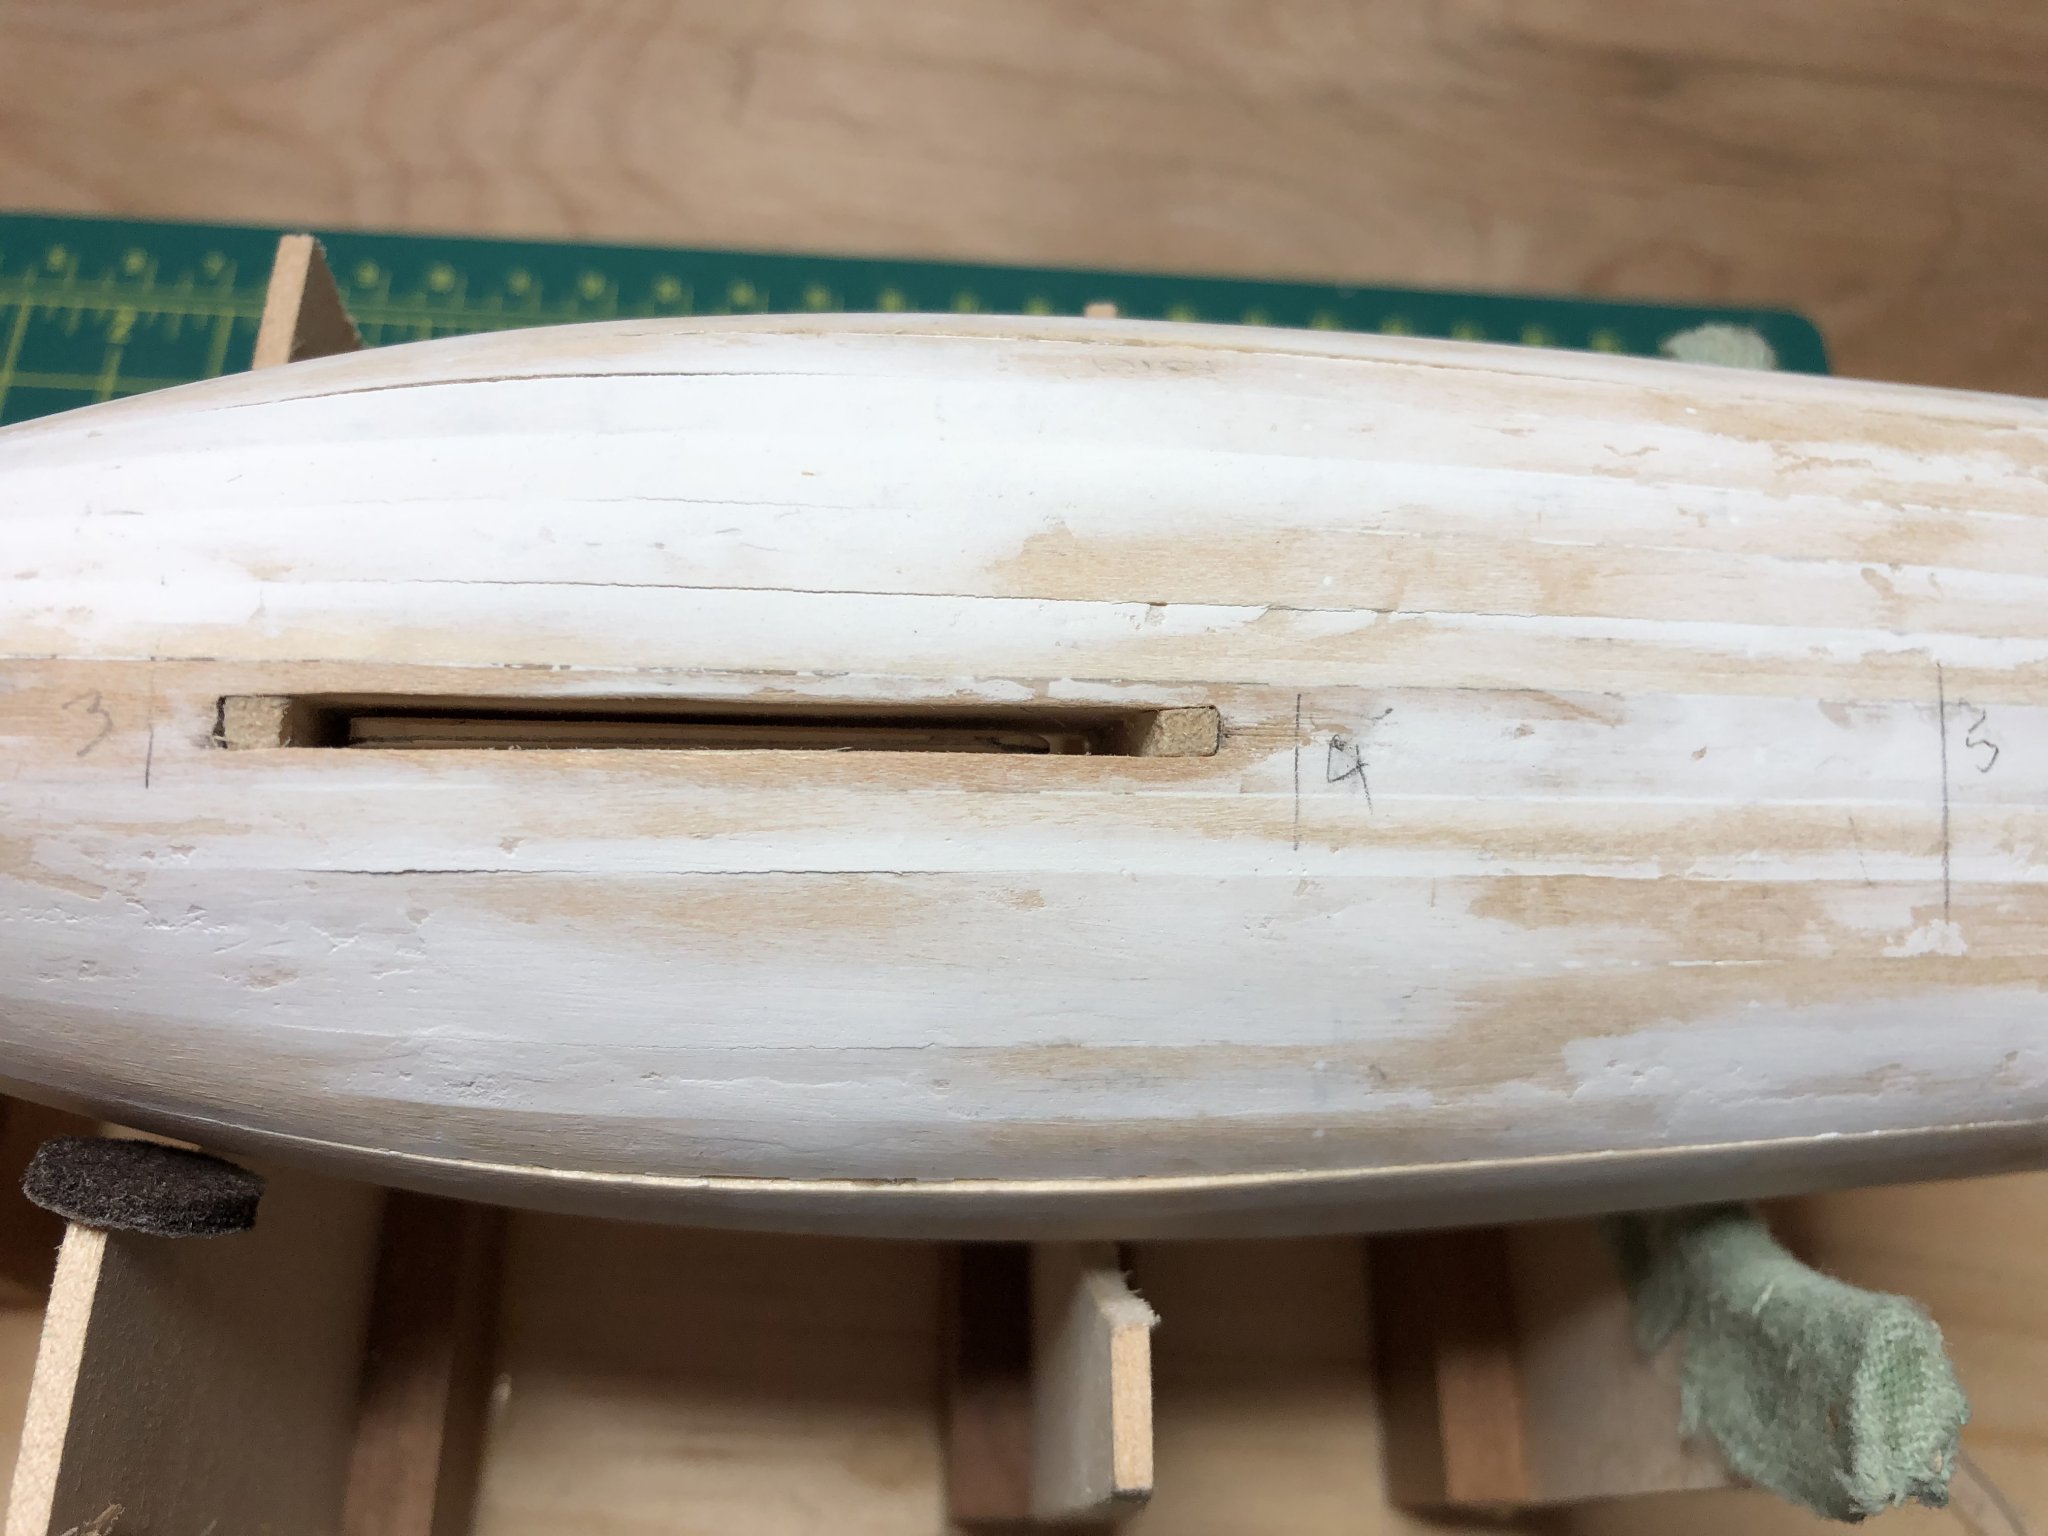
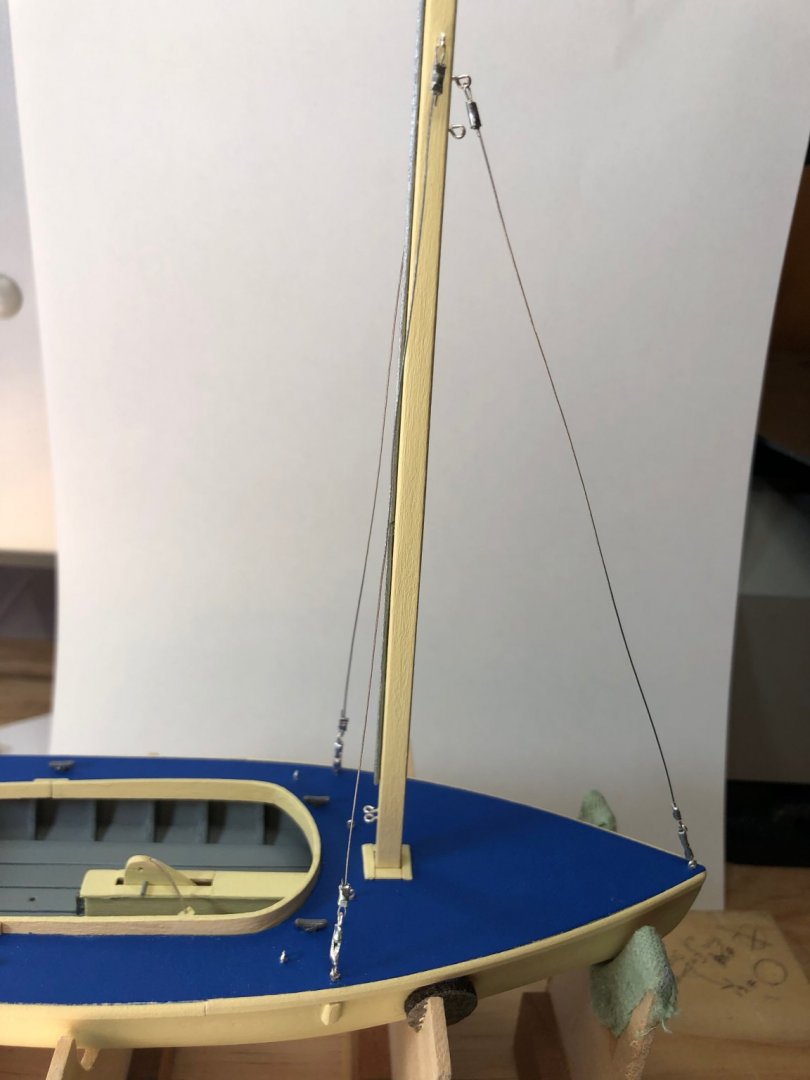
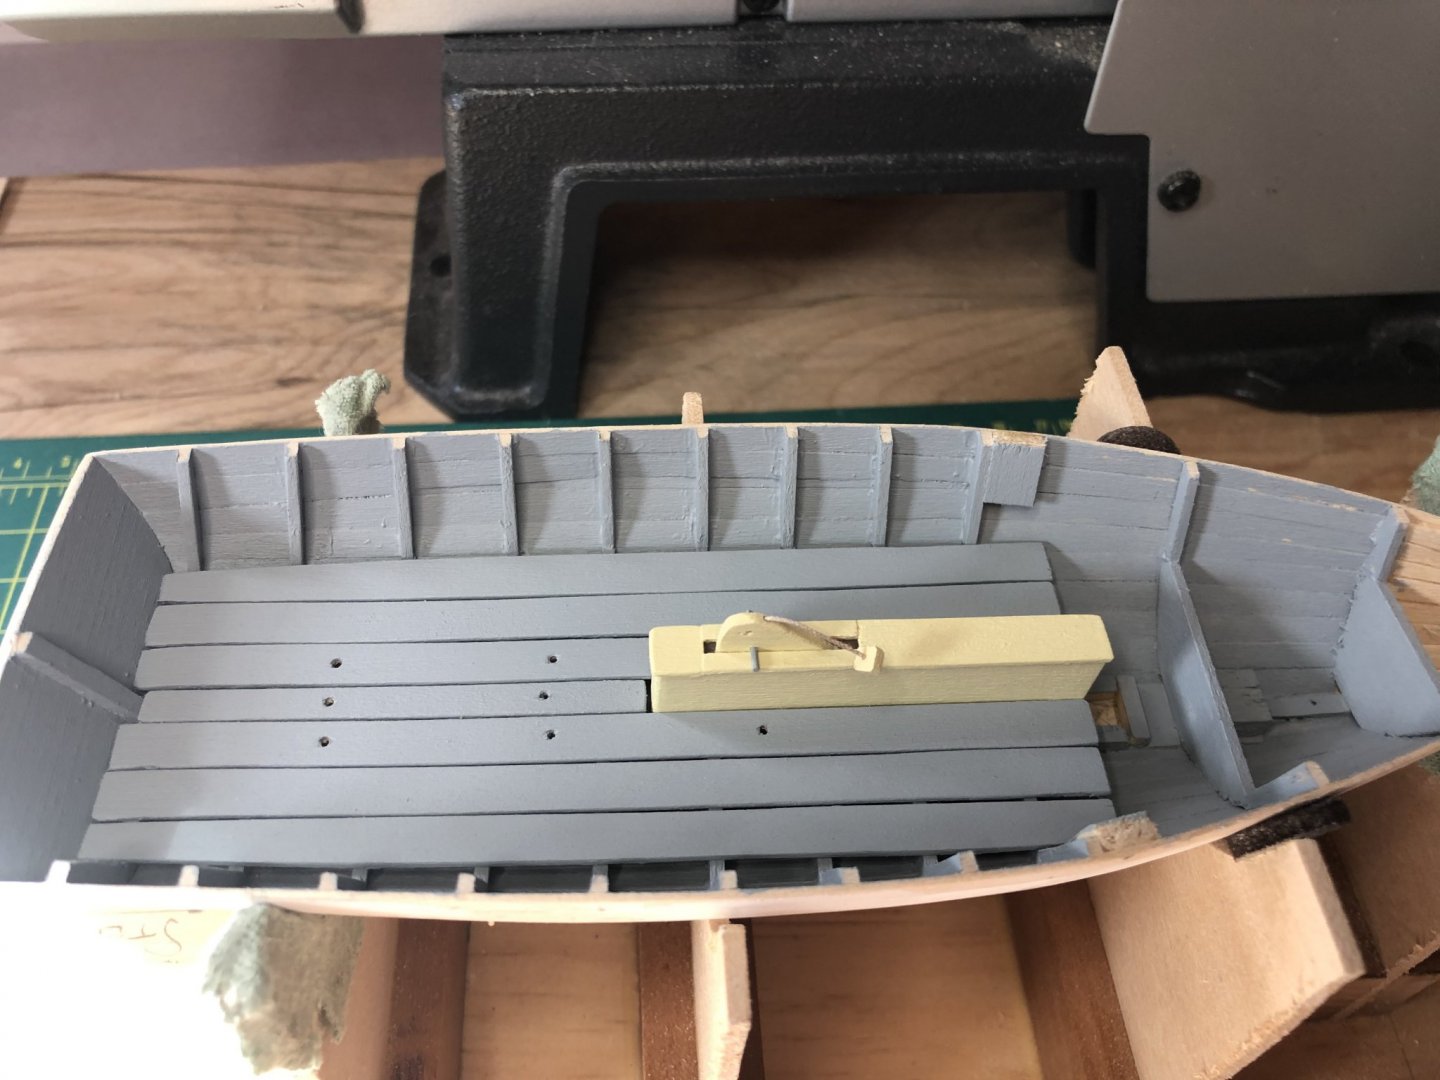
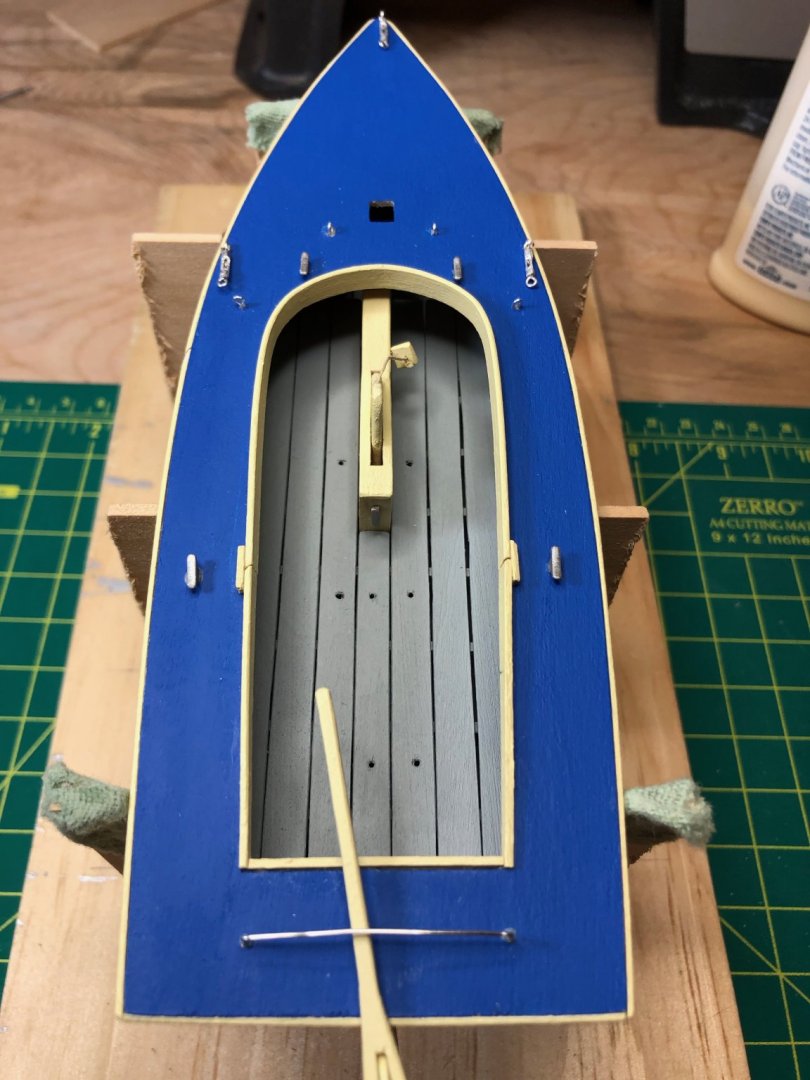
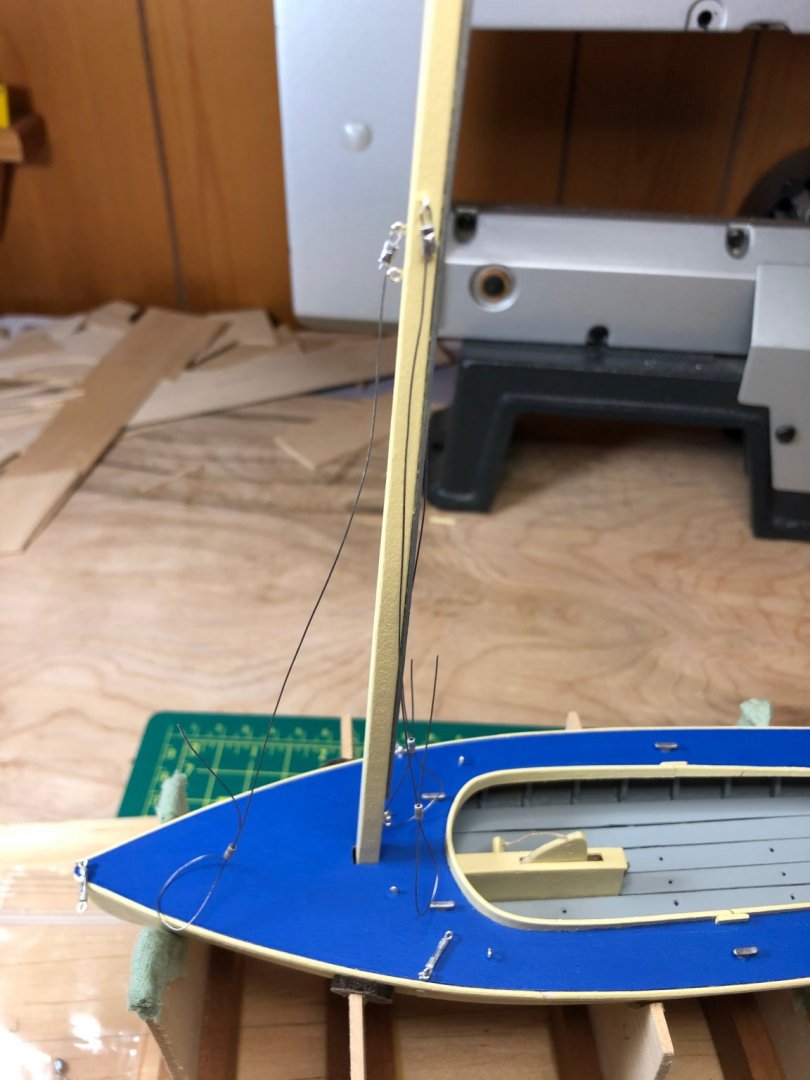
Mast stepped and all eye hooks in place for running rigging. One painful lesson I just went thru - the way I made the turnbuckles for the Loon had two separate eye hooks at each end (reality????) but in trying to tighten the shrouds this time the wire eye hooks came out of the crimped end of the turnbuckle. Solution was (had to do this jib and port halyard shrouds) to just make a single wire thru the turnbuckle and make eye hook at each end and attach to deck hook (which can take a lot of tension as the twisted loop is superglued into the block beneath deck - see last pic below). Then loop shroud thru top of turnbuckle and crimp off wire. If anyone has any other suggestions on how to best create tight shrouds, I'm all ears... Blocks on underside of deck to secure shroud and halyard eye hooks.


- 84 replies
-
- 5
-
-
- nimblet
- knockabout
- (and 1 more)
-
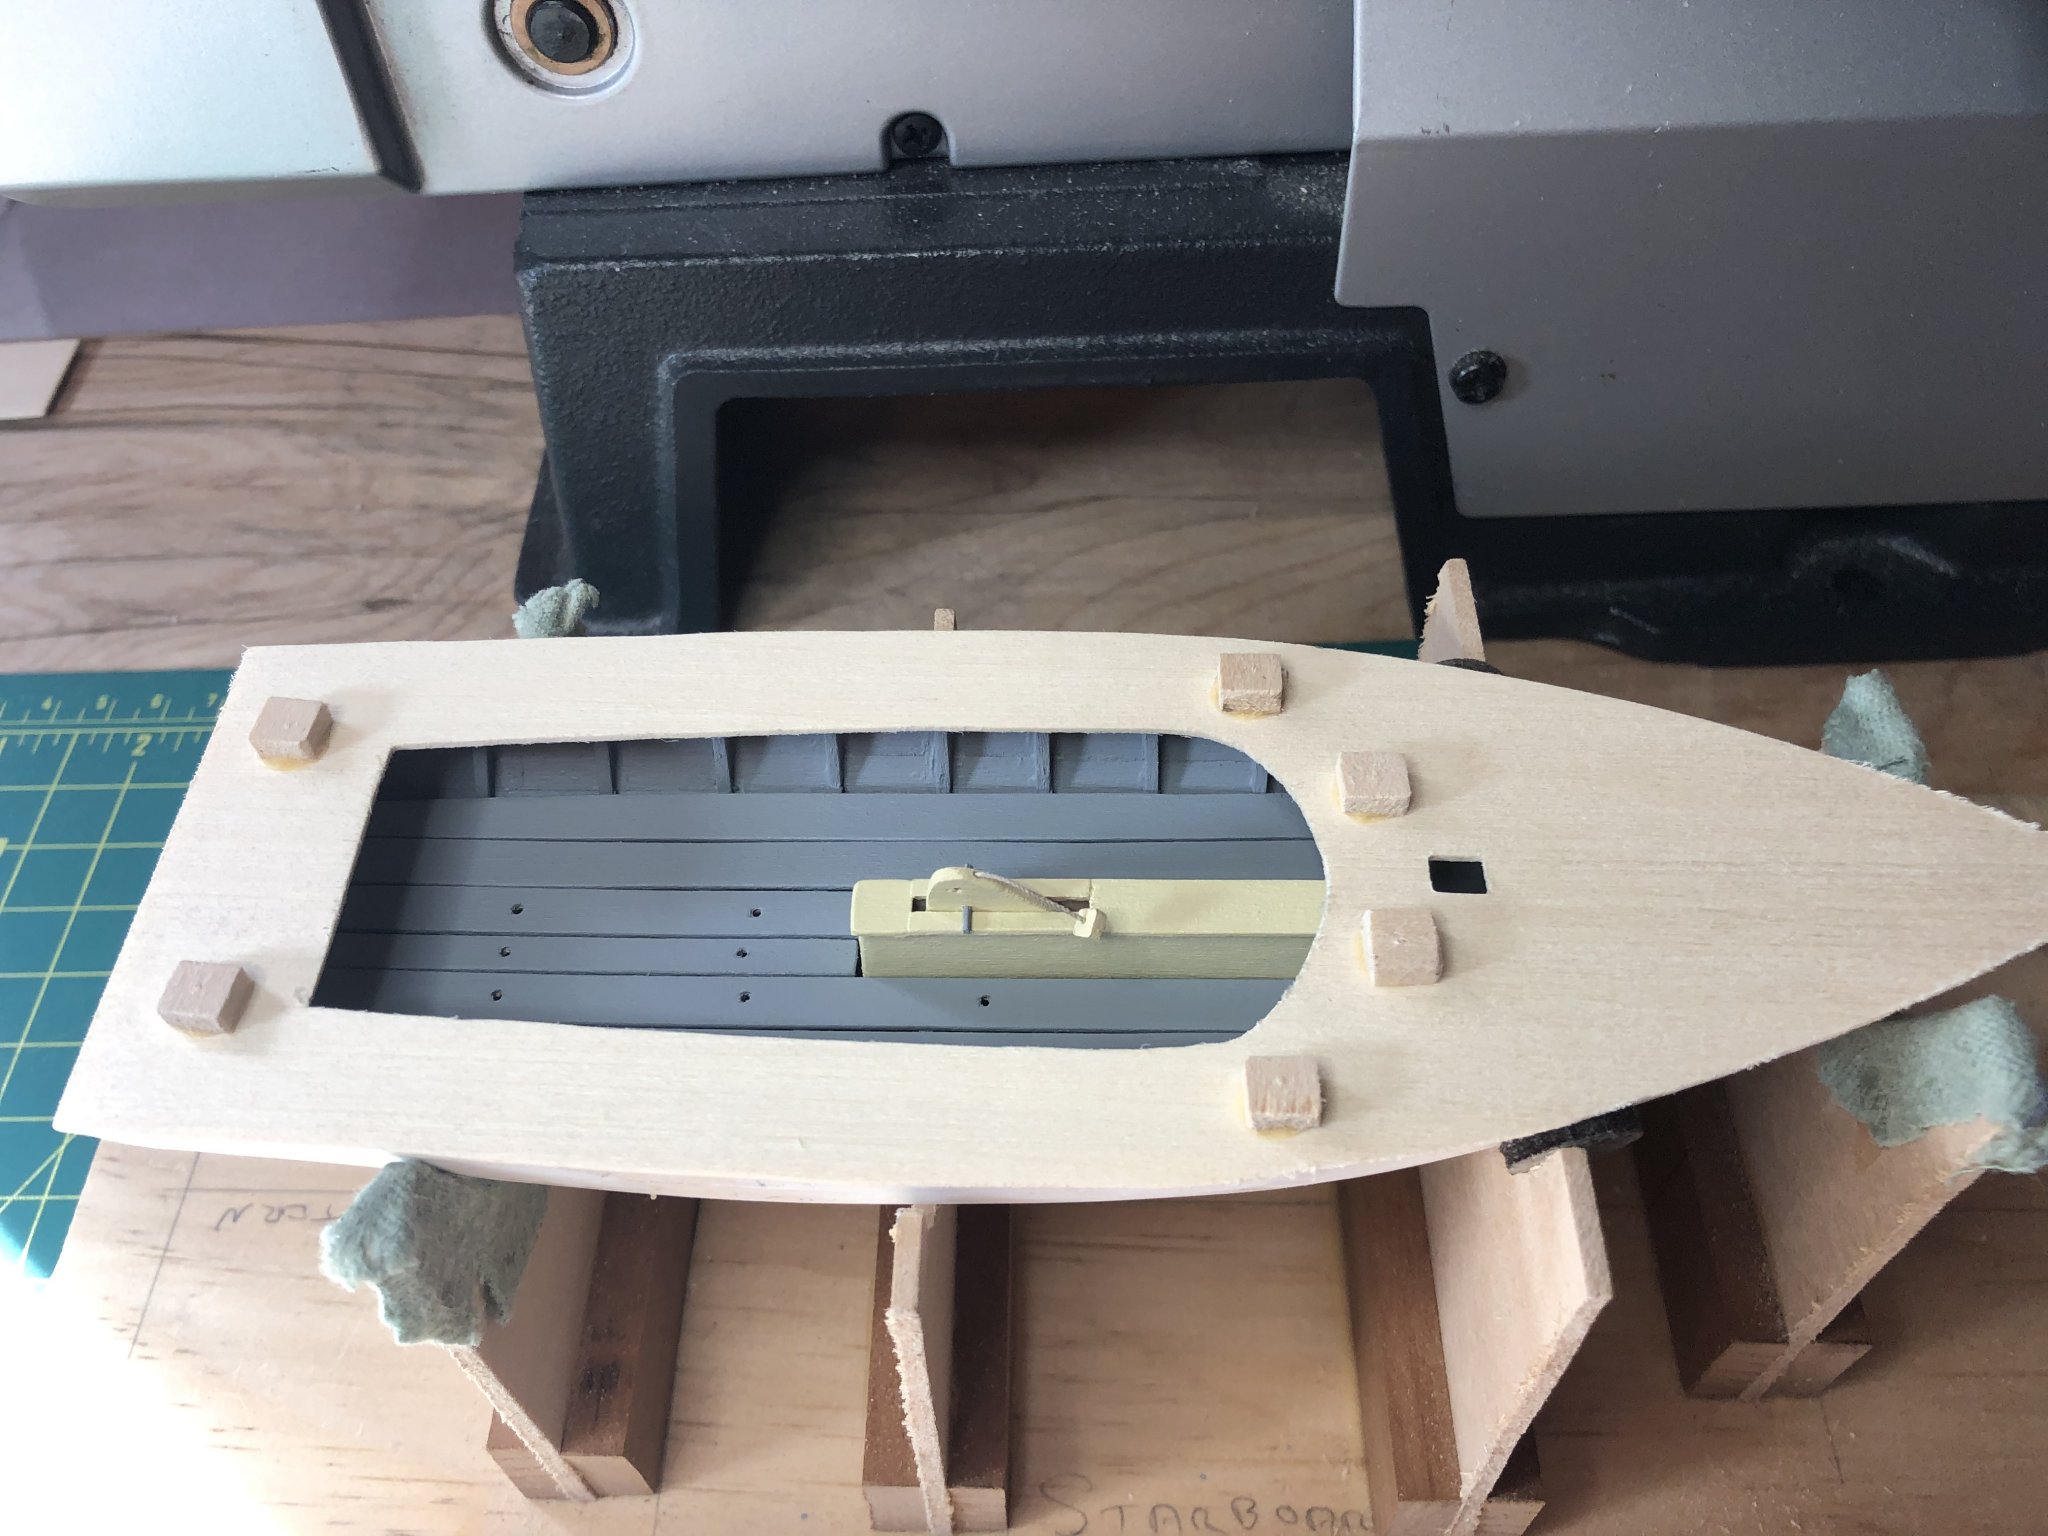
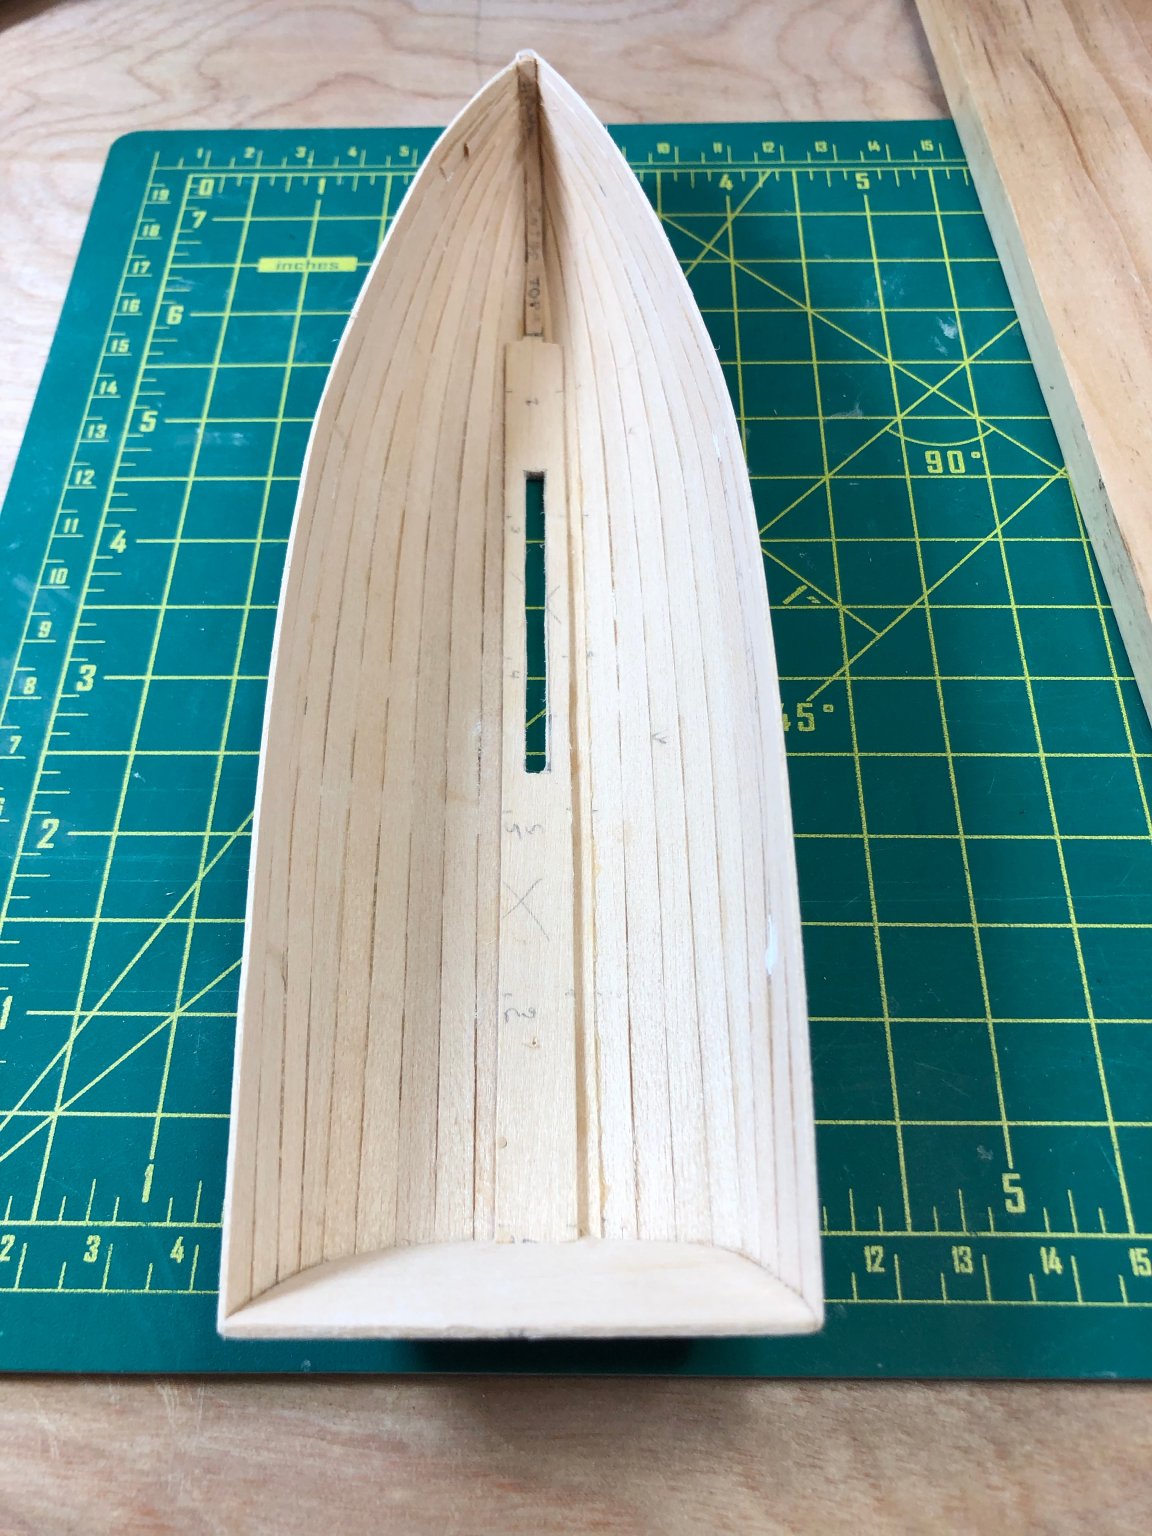
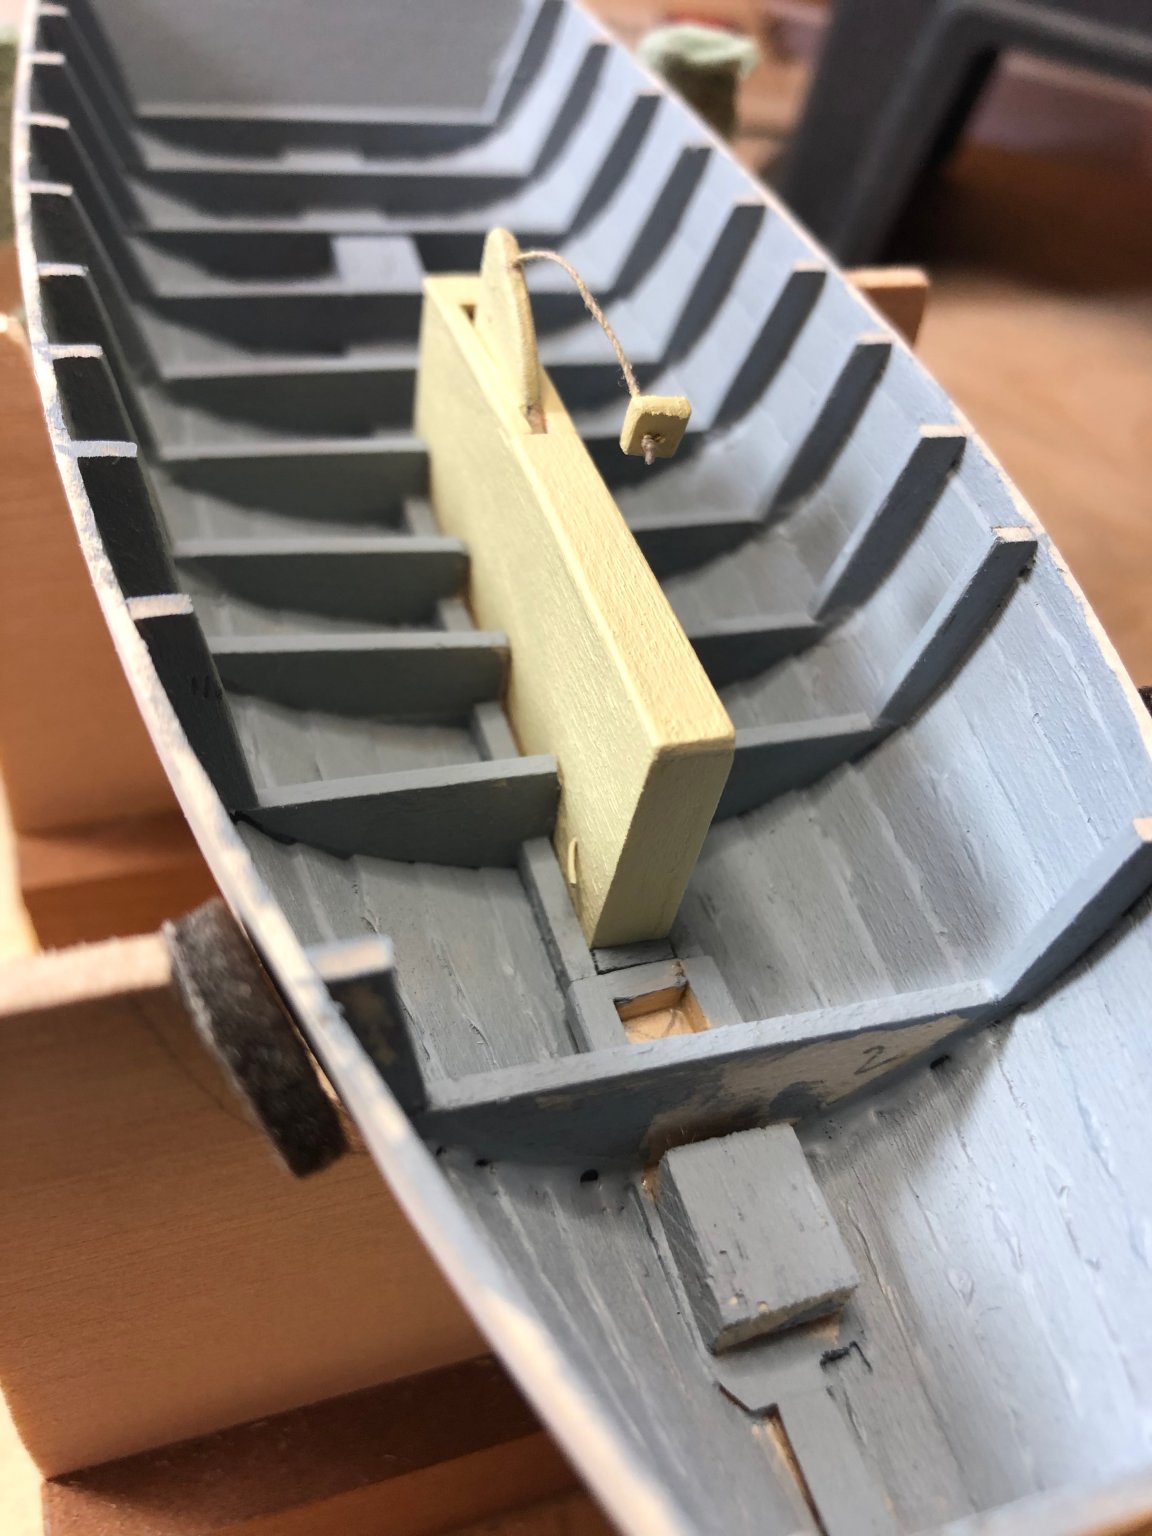
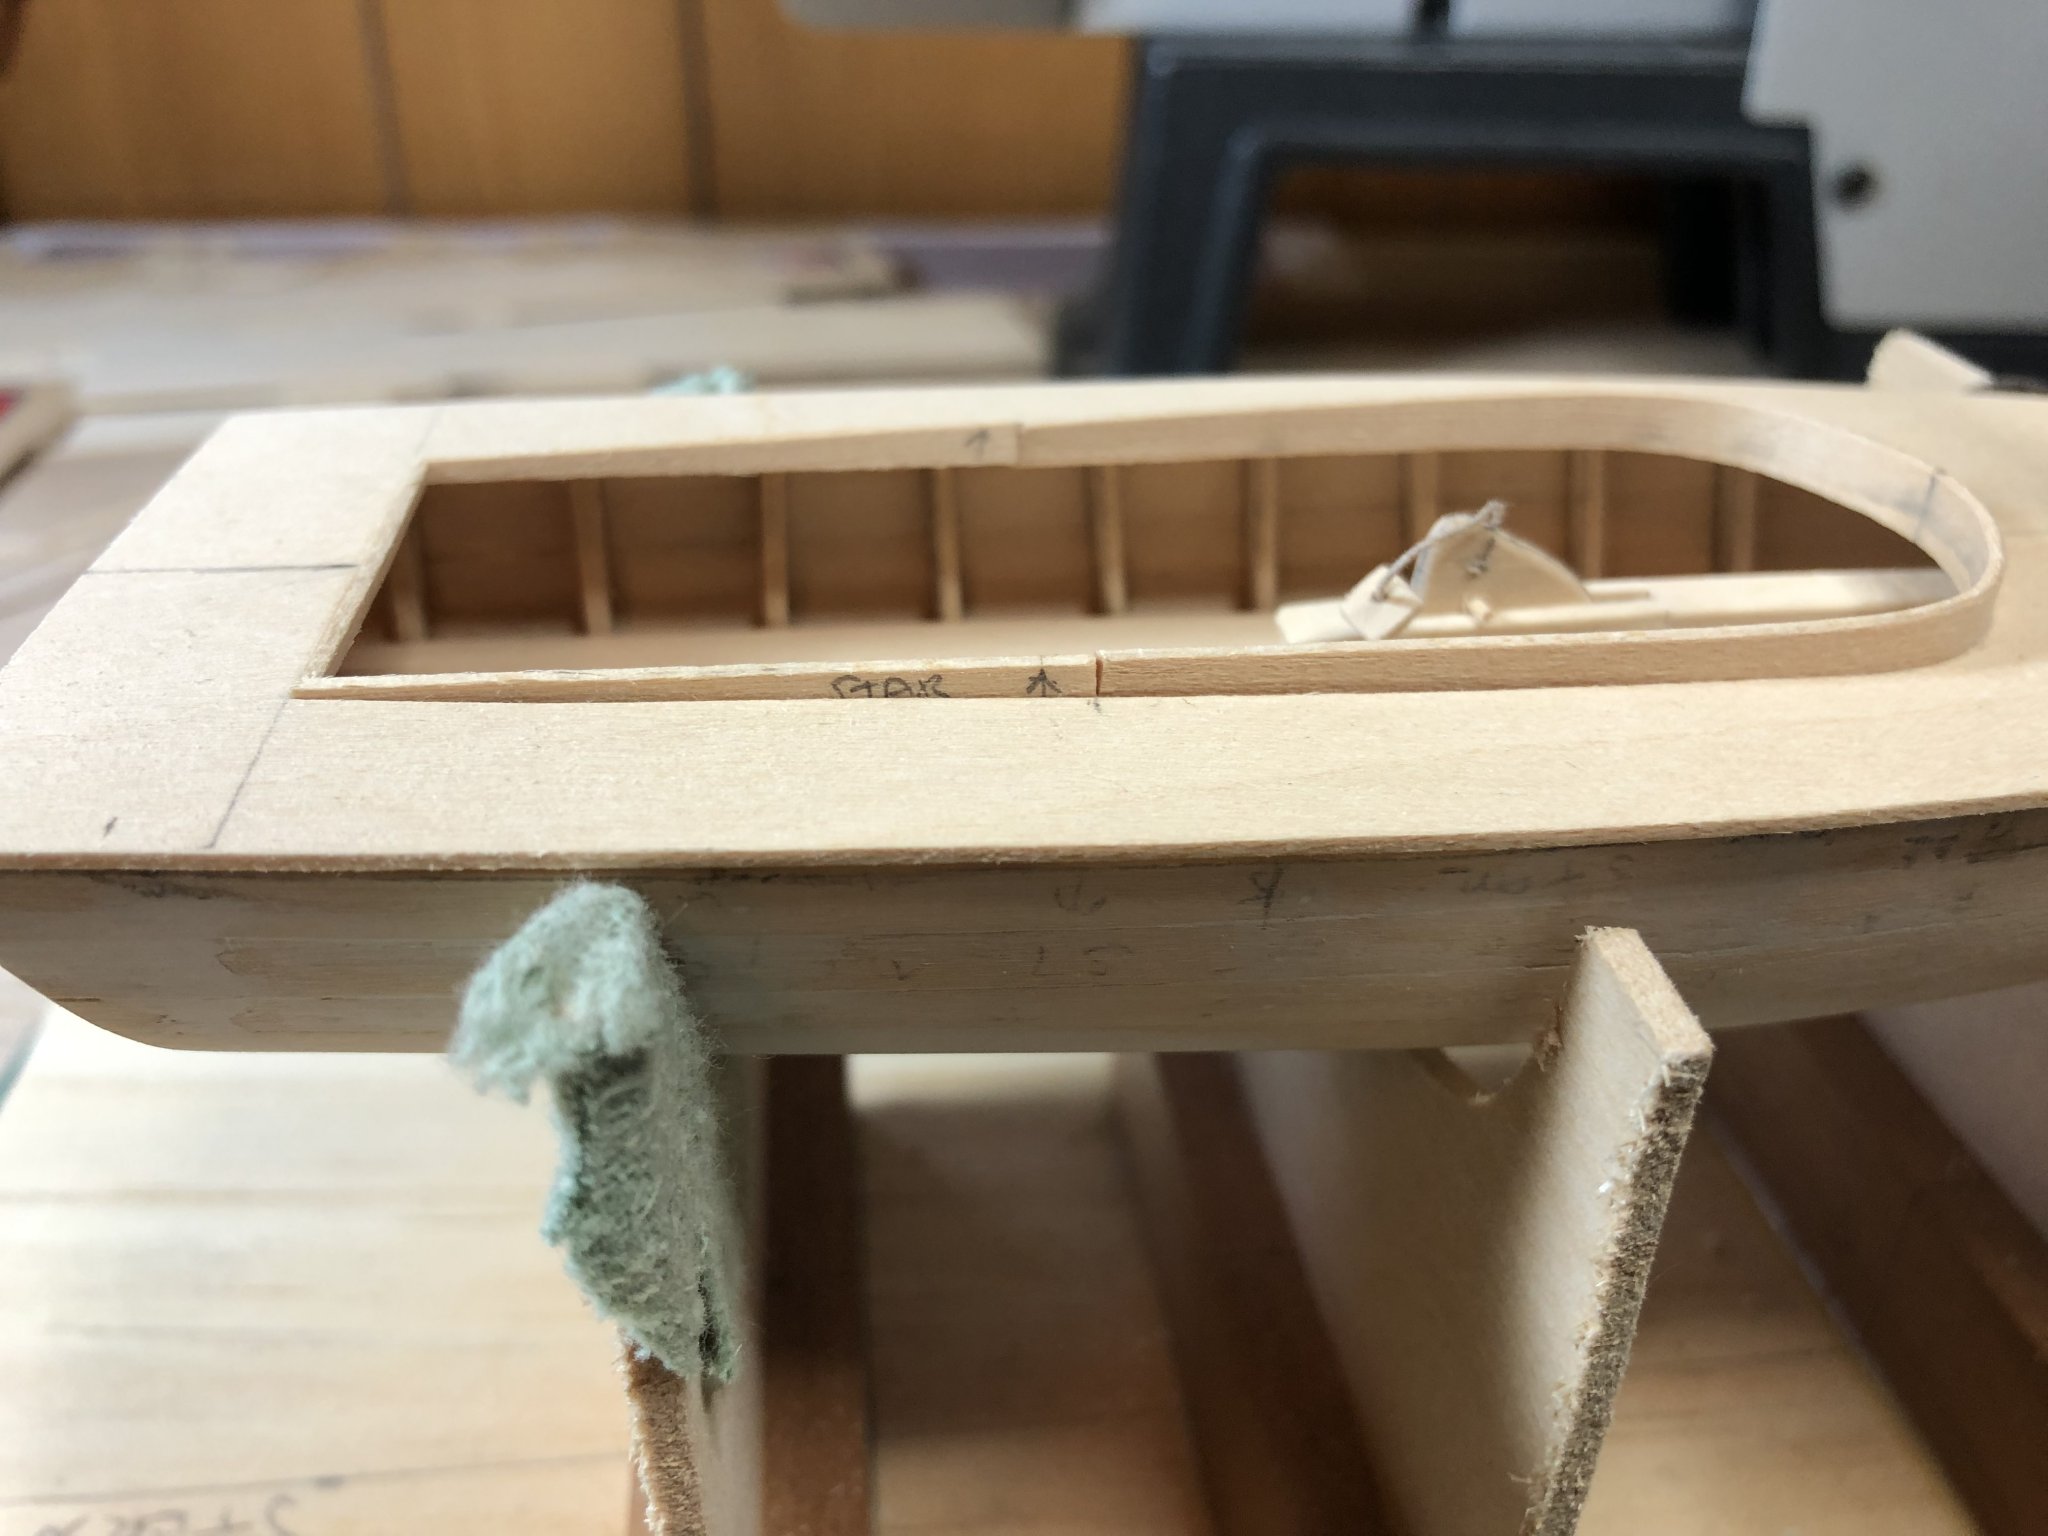
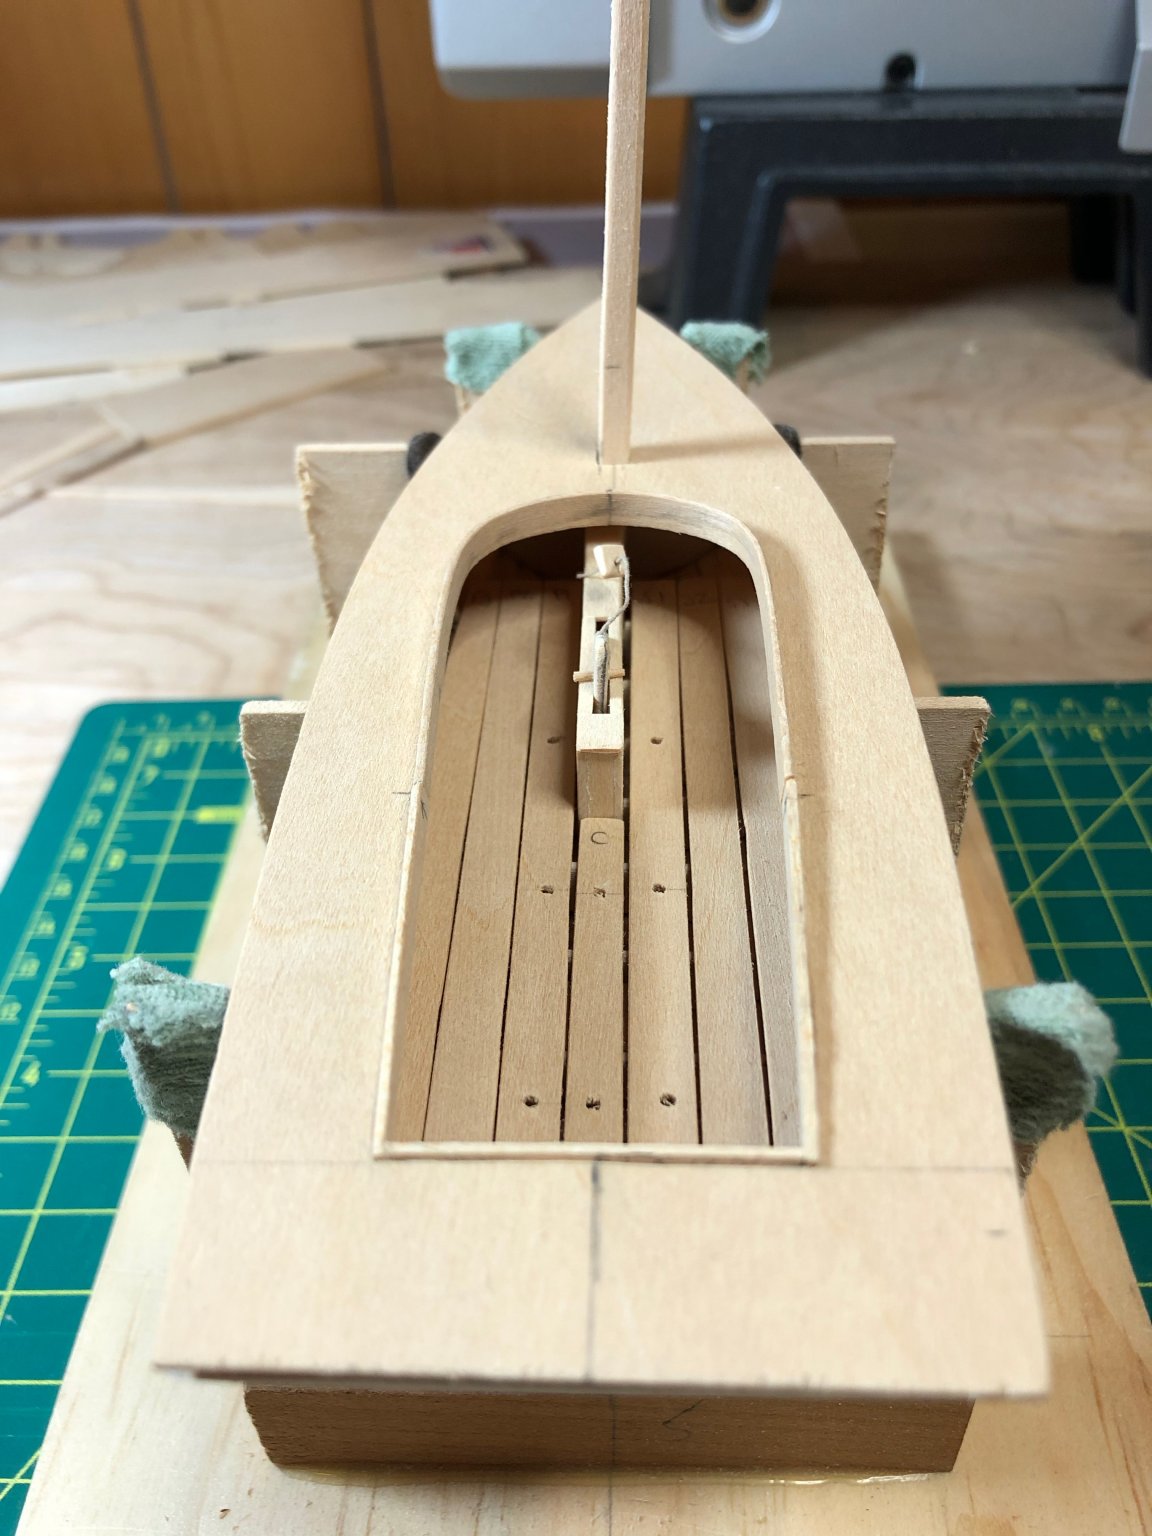
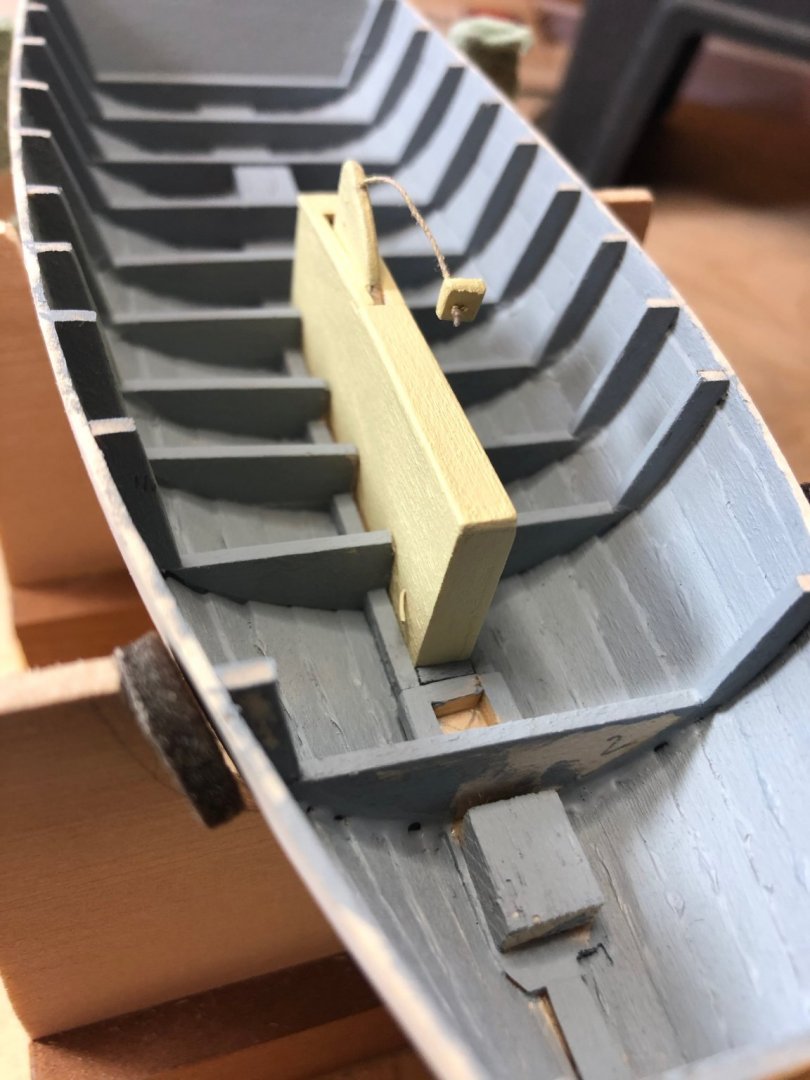
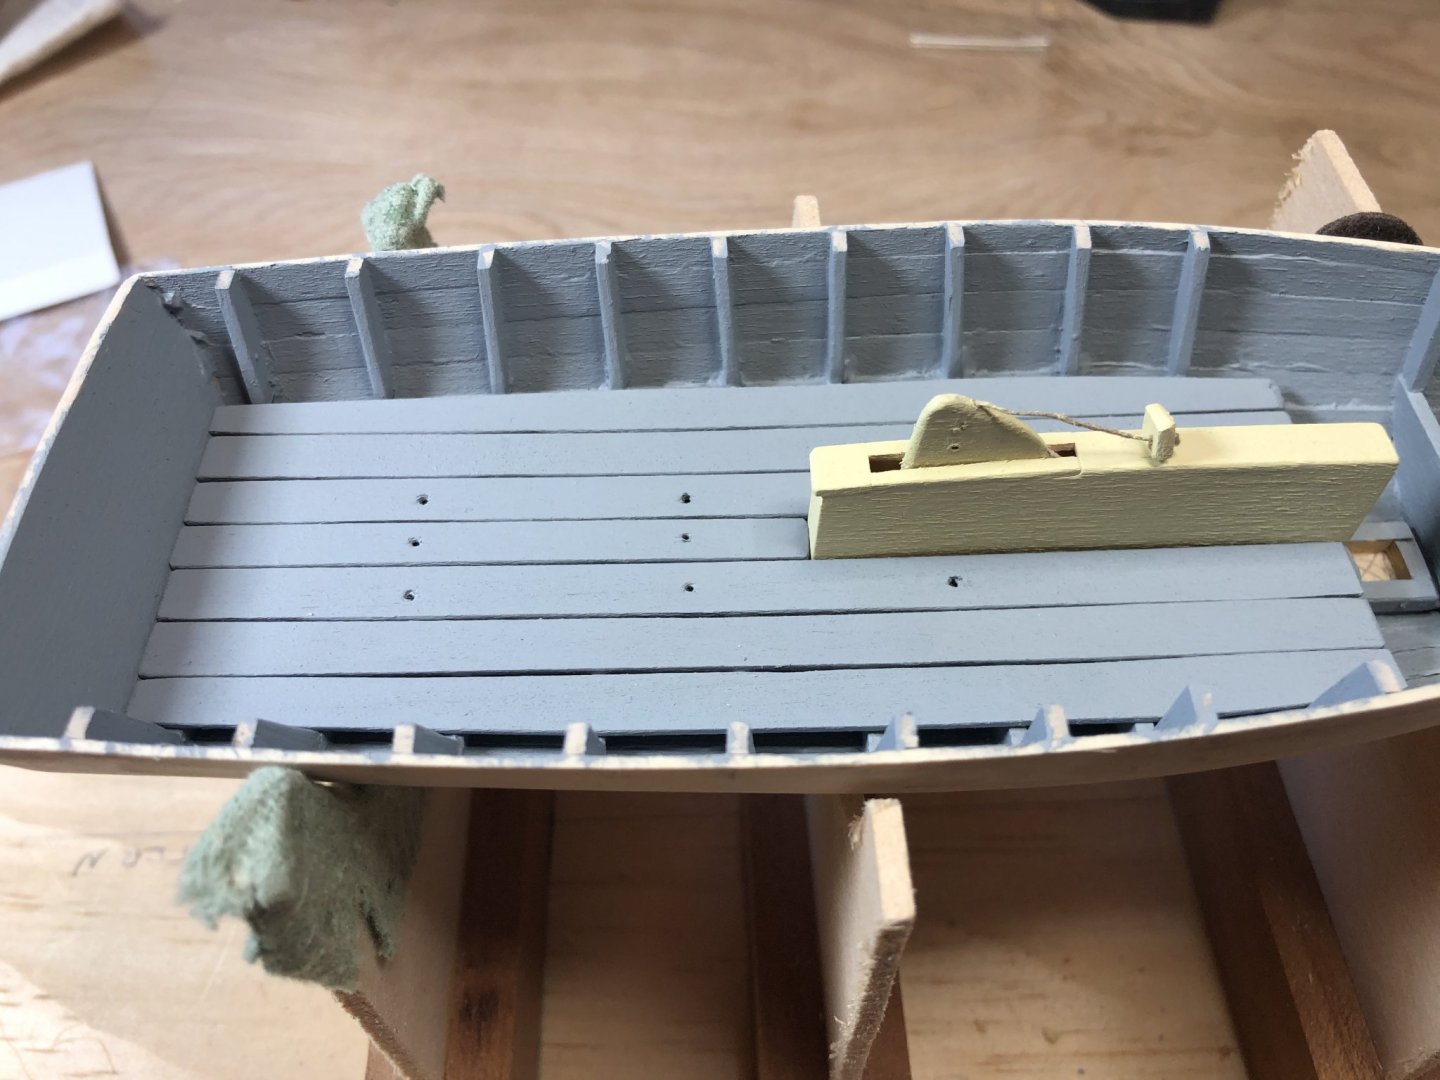
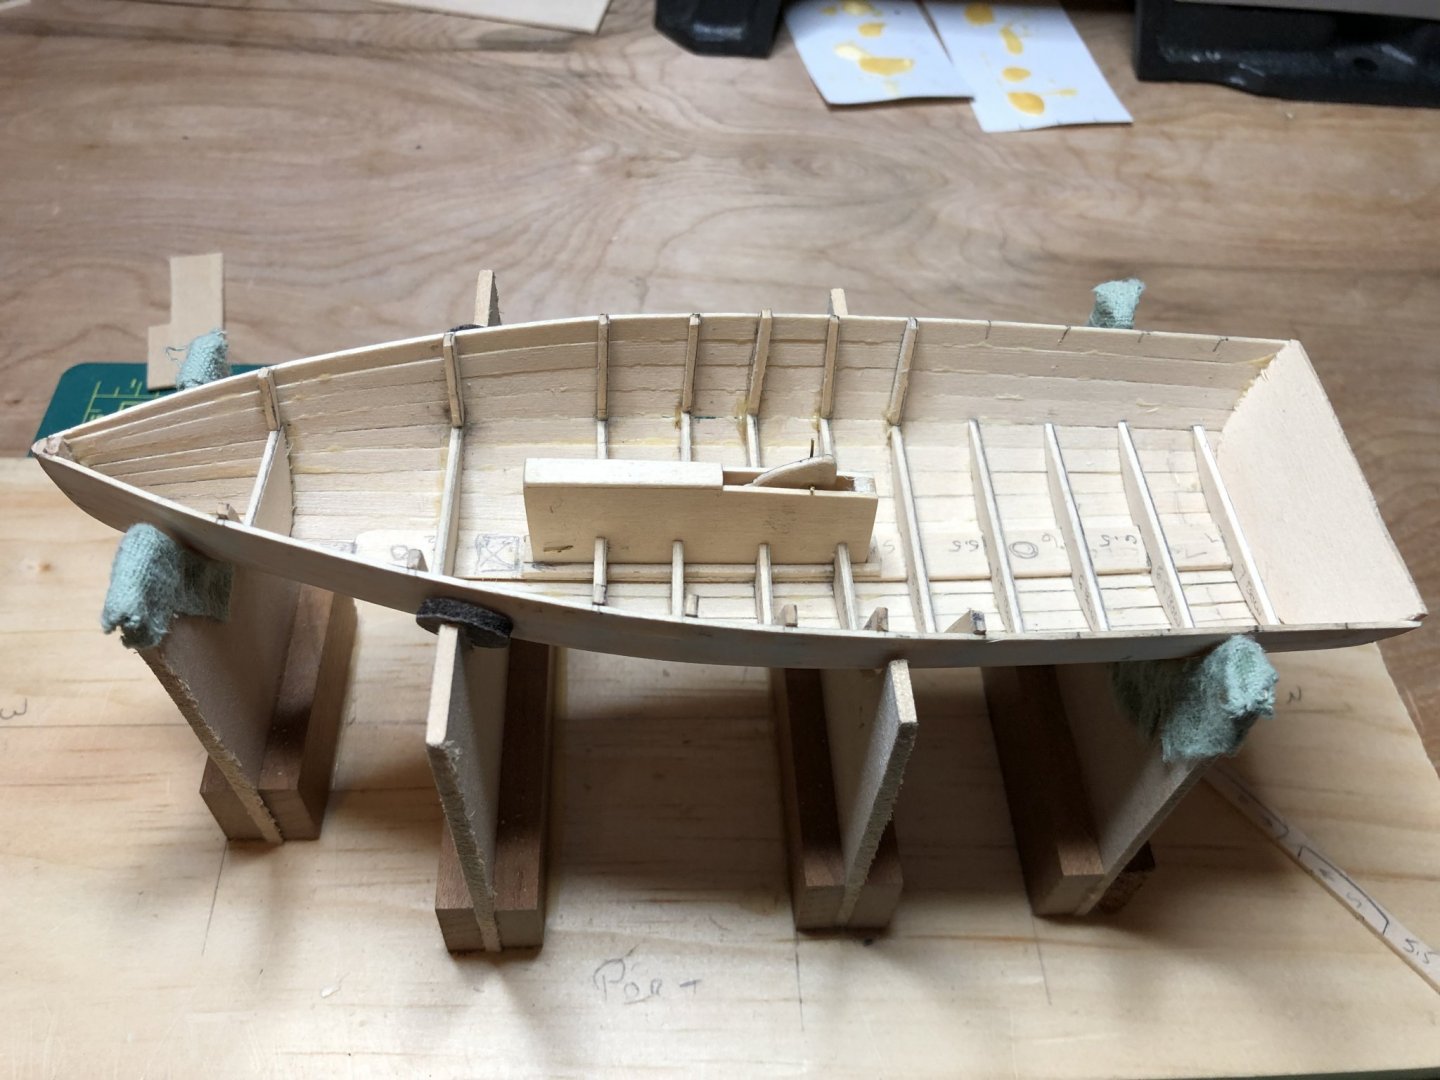
Interior completed. Learning from Loon - shroud, halyard blocks, jib eyes and traveler needed more support than 1/32" deck thickness could offer so I installed 1/8" thick blocks under each location - port shroud block glued to hull at front of floorboard (first picture) and all other blocks glued to underside of deck (second picture). Also added a post on inside of transom to give a bit more support for the gudgeons.

- 84 replies
-
- 6
-
-
- nimblet
- knockabout
- (and 1 more)
-
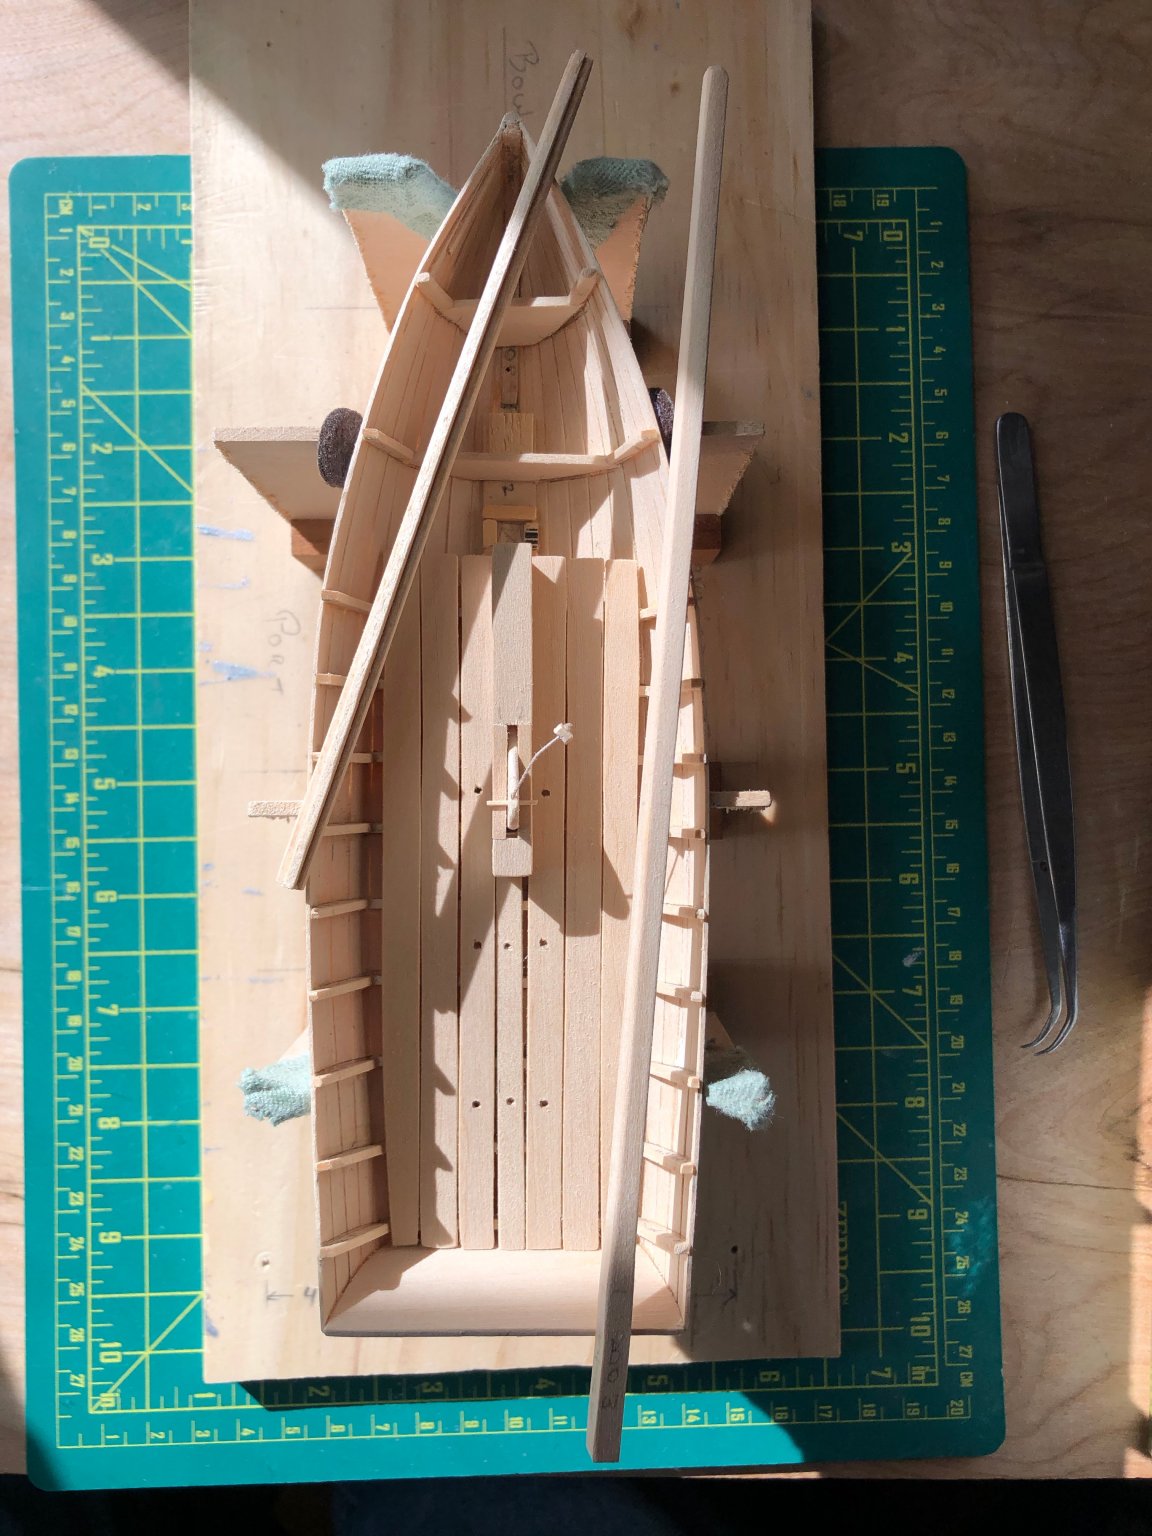
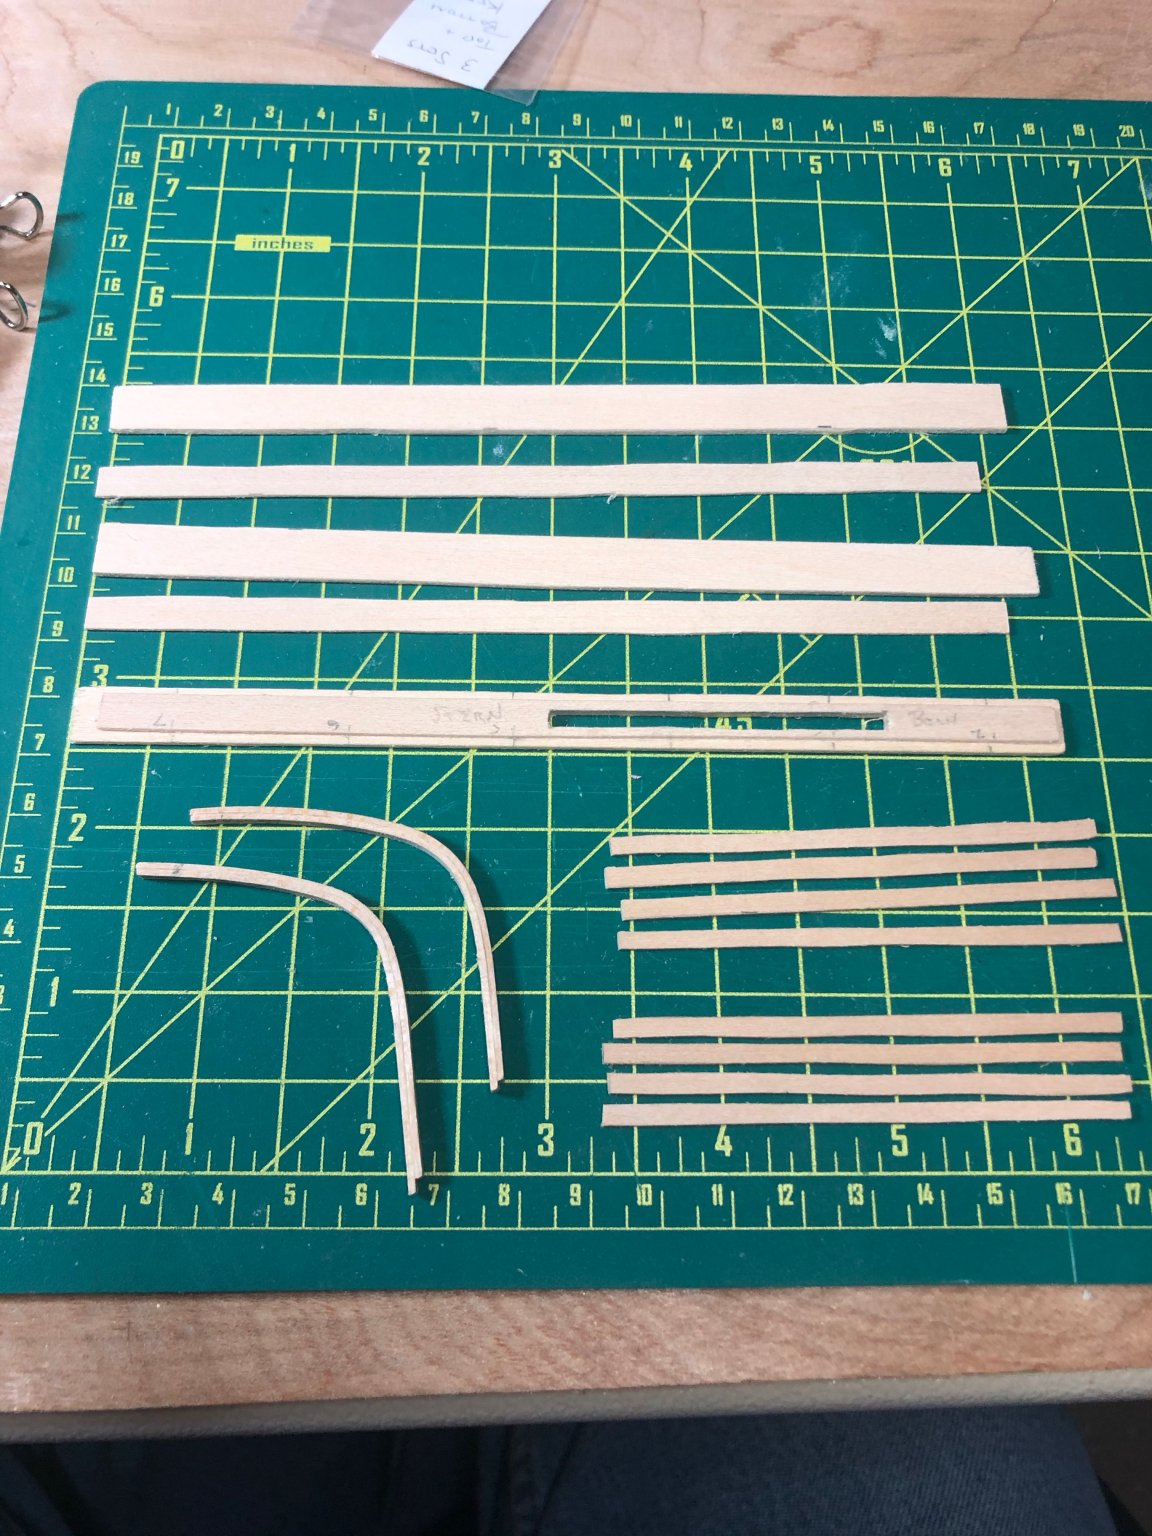
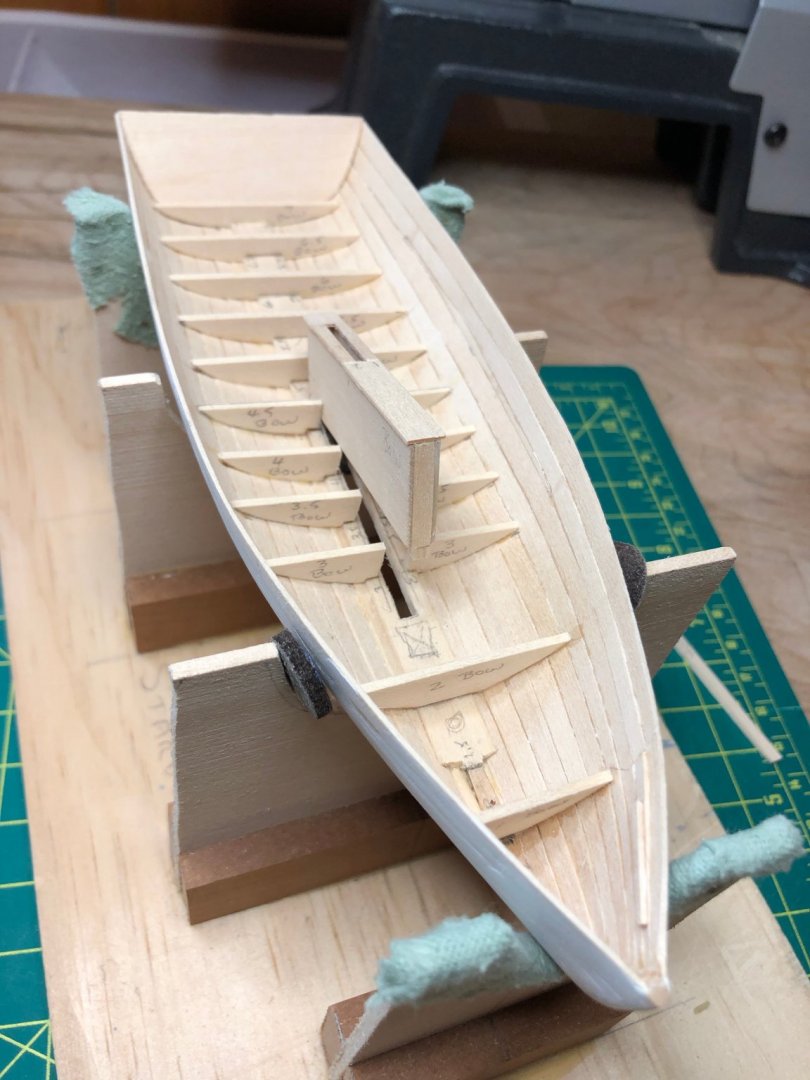
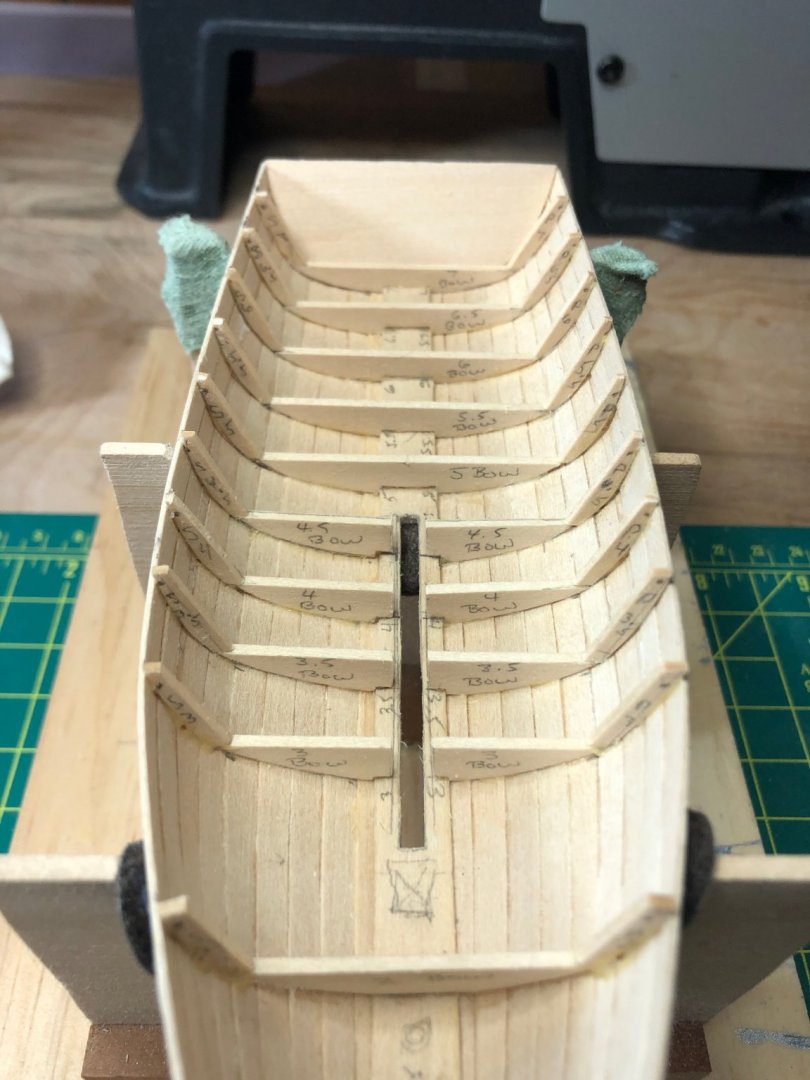
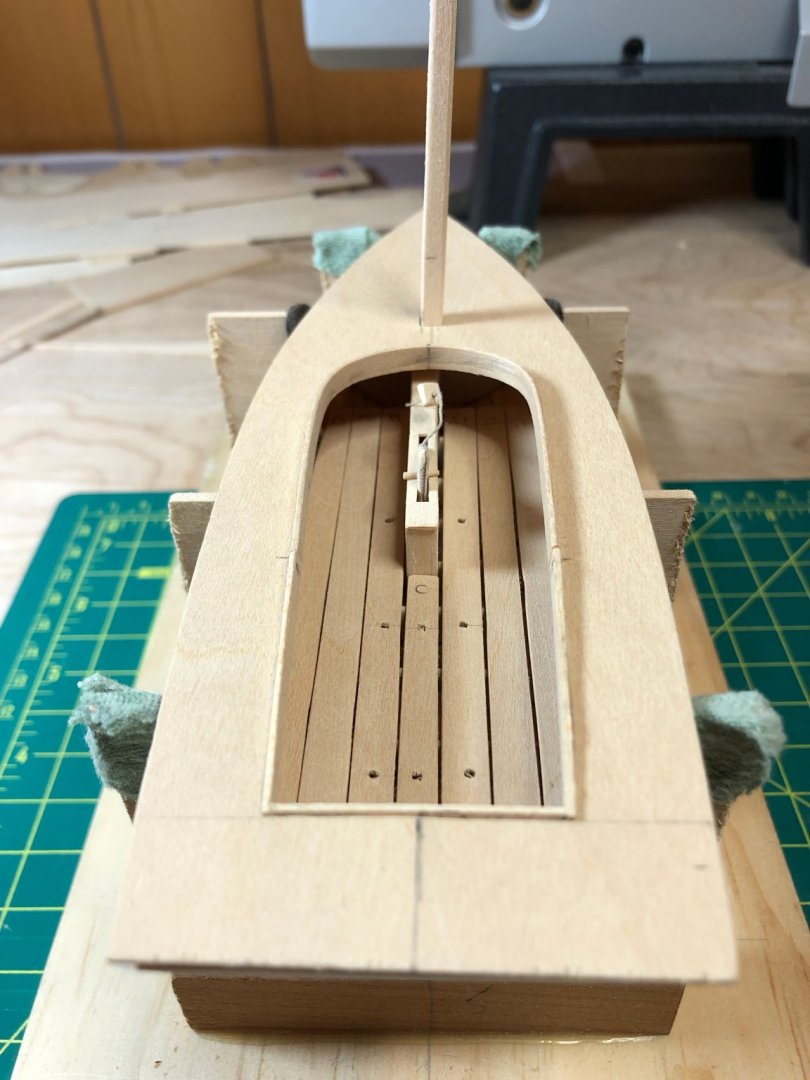
Frames, centerboard, floorboards, mast and "T" shaped boom all complete. Mast step and supports for brass posts all installed in the "bilge". Much easier to install the upper frames with the slightly wider planks. Deck and combing up next.

- 84 replies
-
- 5
-
-
- nimblet
- knockabout
- (and 1 more)
-
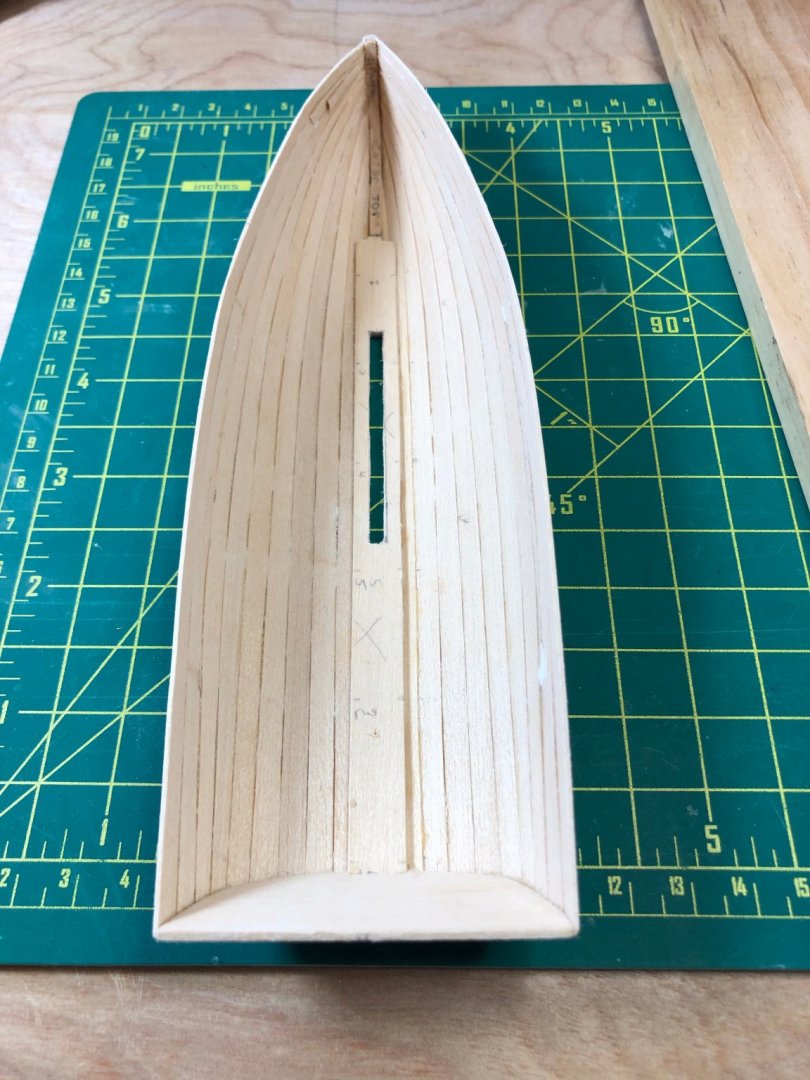
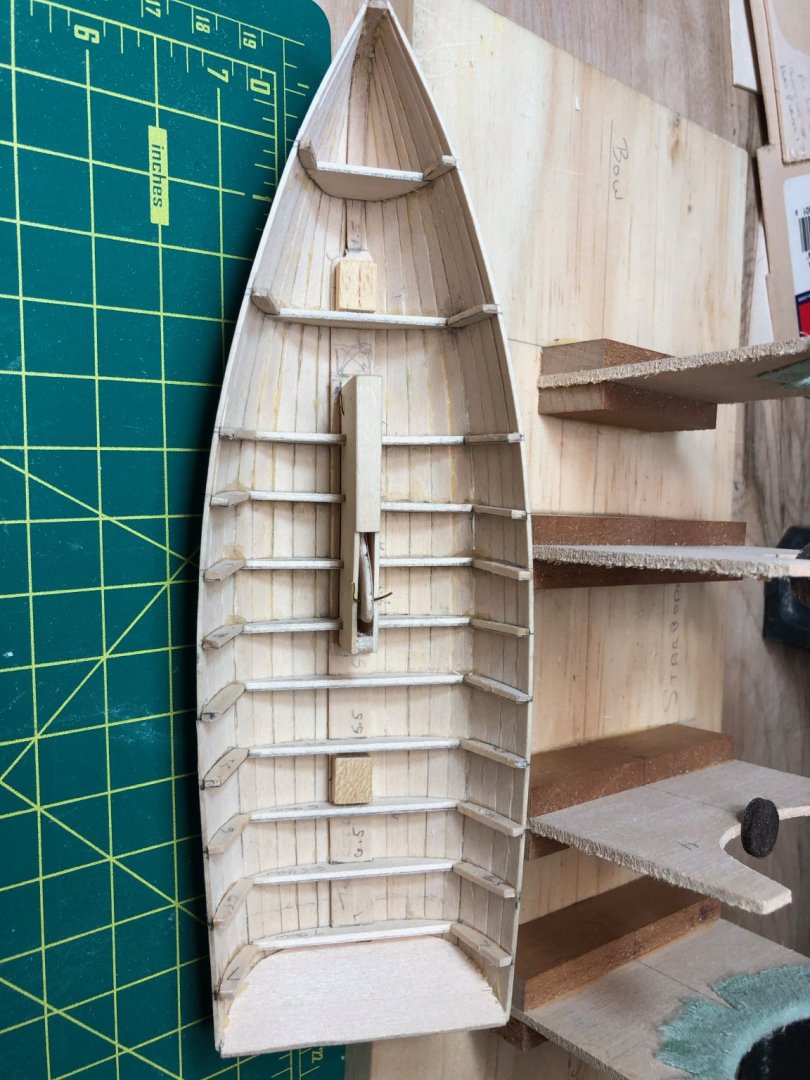
Hull came off the mold in good shape and have started with the floorboard frames. The change in the planking process gave a bit more width at the beam so I am much closer to the true beam width of 5'1" so should not have to force the frames to widen each side. Now the Loon will have the Hawk for a dock mate...

- 84 replies
-
- 6
-
-
- nimblet
- knockabout
- (and 1 more)
-
Lesson Learned...Another difference from the Loon construction that seemed to work better - rather than using carpenters glue and pinning each plank all at the same time I used CA glue and broke up the gluing process into 3 sections. That way I could better fit each section to the adjourning plank and end up with a smoother transition between each plank and avoid the excess bowing. Makes sense as these boats wouldn't have used one 15 foot plank but rather 3-4 individual planks butted together.
- 84 replies
-
- 1
-
-
- nimblet
- knockabout
- (and 1 more)
-
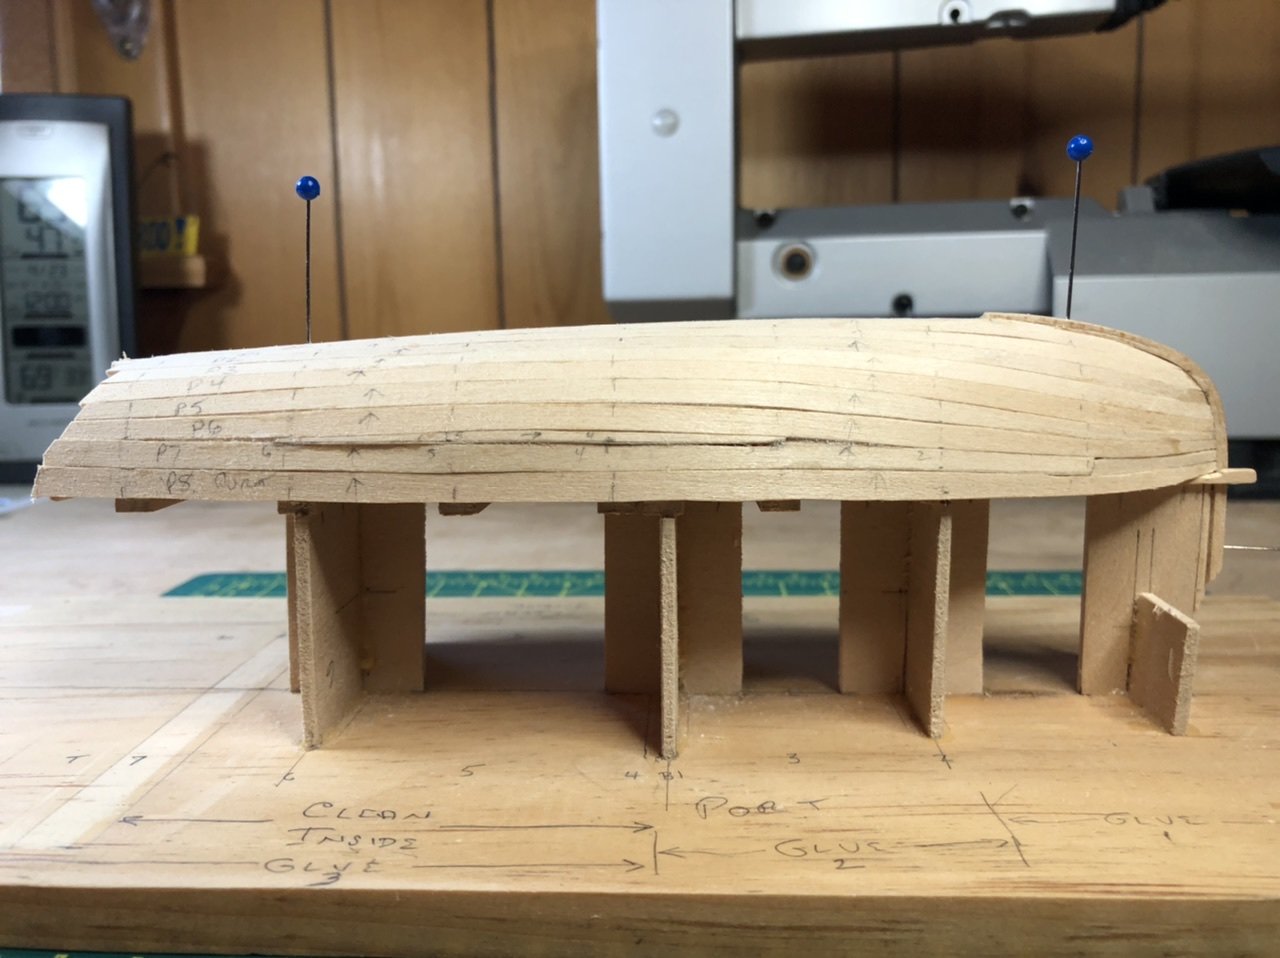
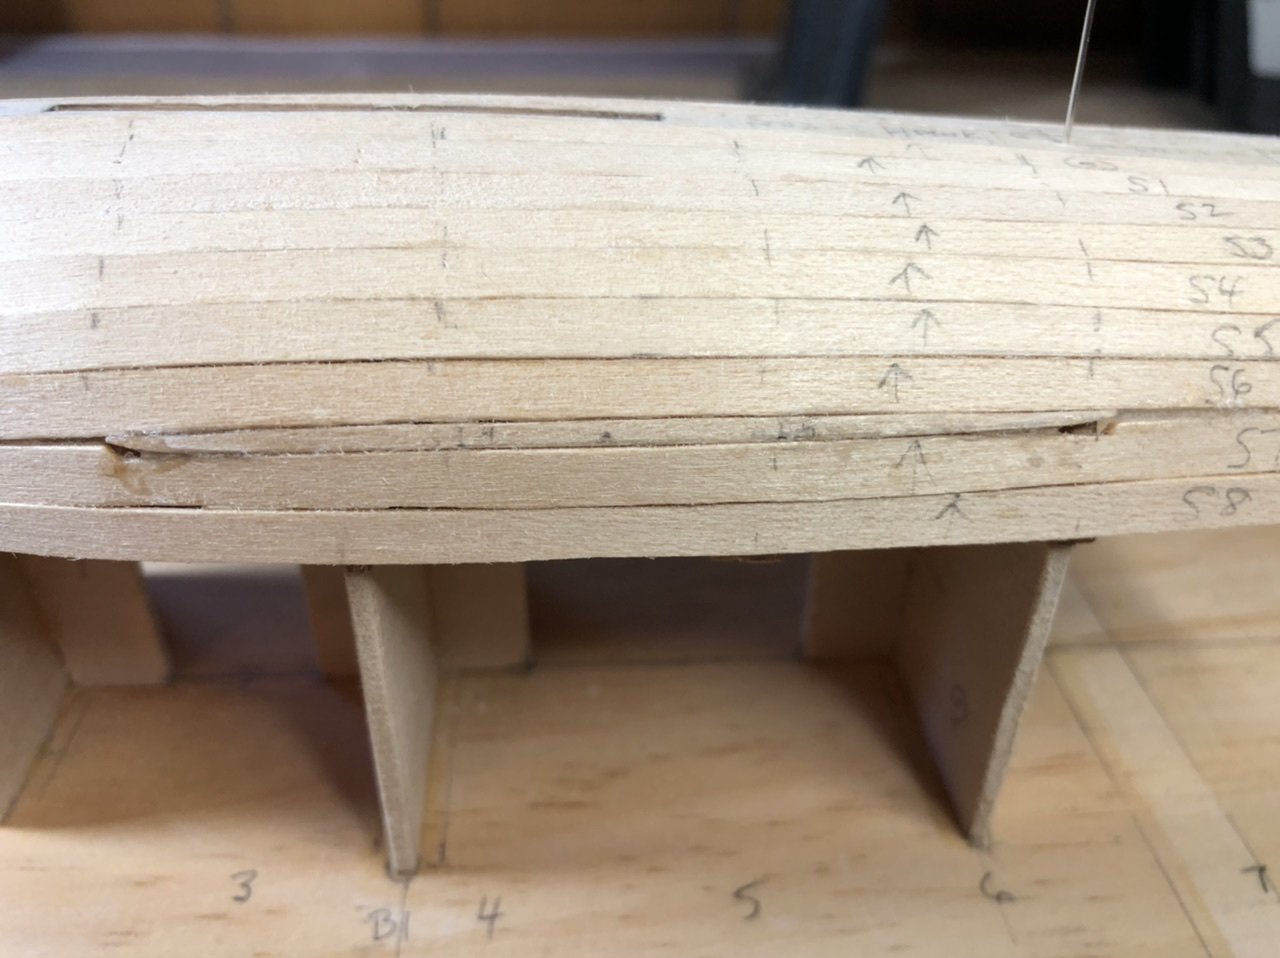
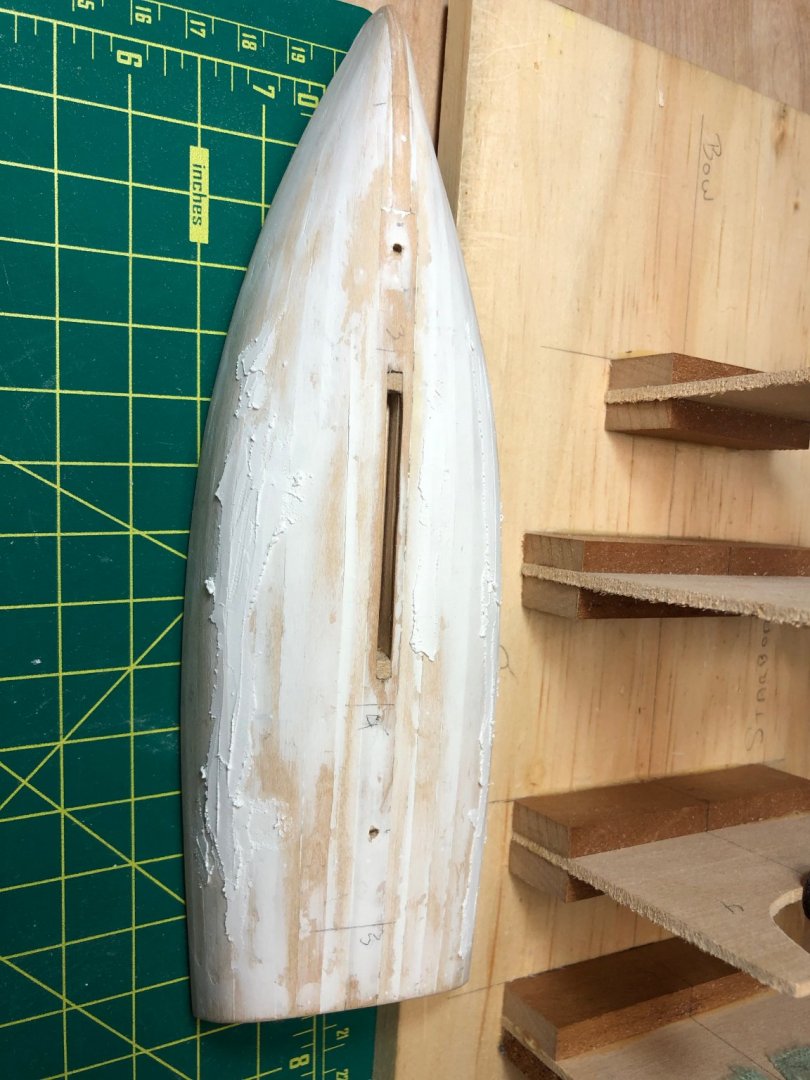
Planking completed... but not without some challenges/learnings. I must have cut planks just a bit narrower as I need garboard + 8 vs garboard + 7 on prior model. I debated making one of the last two planks wider vs adding a spacer piece. I opted for the latter and wasn’t real happy with outcome. Looked at Underhill’s plank and frame book after the fact and see there is a “preferred” method. Maybe number three will be better! Now onto hull sanding and wood filler.

- 84 replies
-
- 3
-
-
- nimblet
- knockabout
- (and 1 more)
-
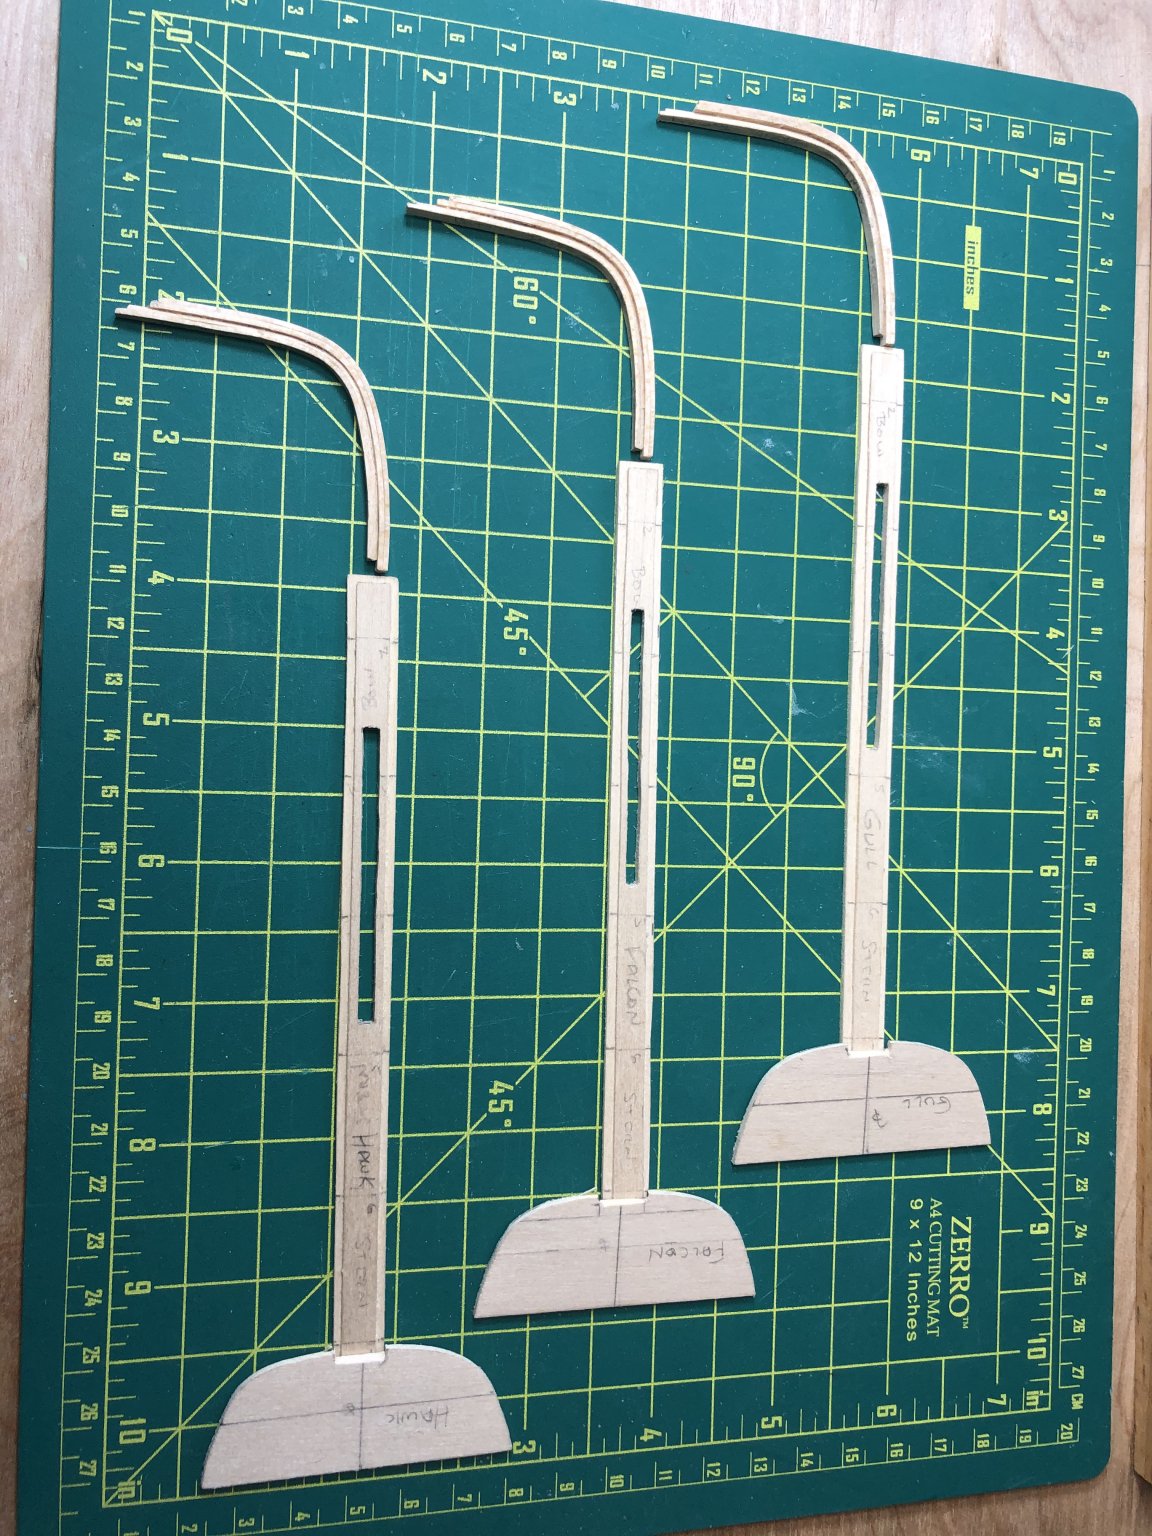
Thanks all. I have started the next 3 boats in hopes of getting at least one more finished in time for the anniversary (assuming it happens this year!). I will continue with this log to note the highlights and lessons learned from my first build. I think to the extent possible I will complete the parts for all 3 at the same time to maximize my learnings. Here is the first phase of stem and keel structures for all three. I may not be as ambitious when it comes to the planks but we'll see...

- 84 replies
-
- 4
-
-
- nimblet
- knockabout
- (and 1 more)
-
Thanks for the compliments gentlemen. I will continue with a more simplified log for the next three boats - either continue this one or start a new one for each construction - Chris, as a moderator is there a preferred method? Just spoke to the organizer of the 100th camp anniversary last night and with all the unknowns it may be deferred until summer of 2021 - that would really give me time to finish all four!
- 84 replies
-
- 2
-
-
- nimblet
- knockabout
- (and 1 more)
-
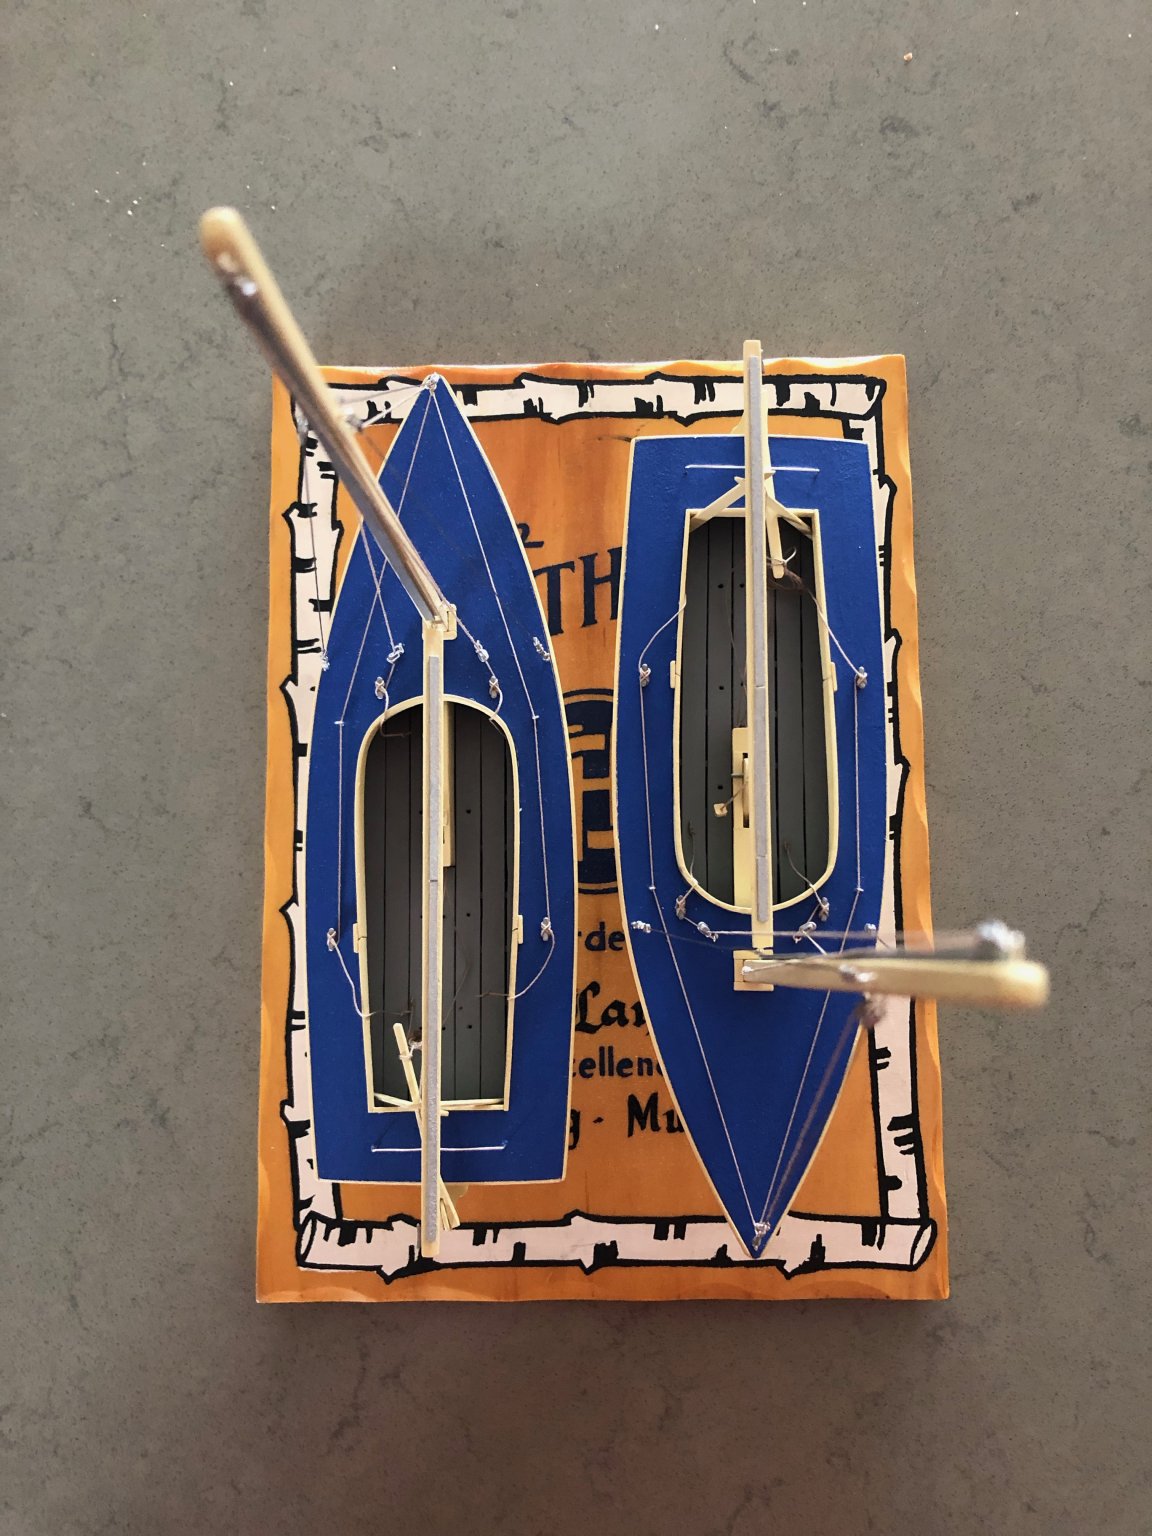
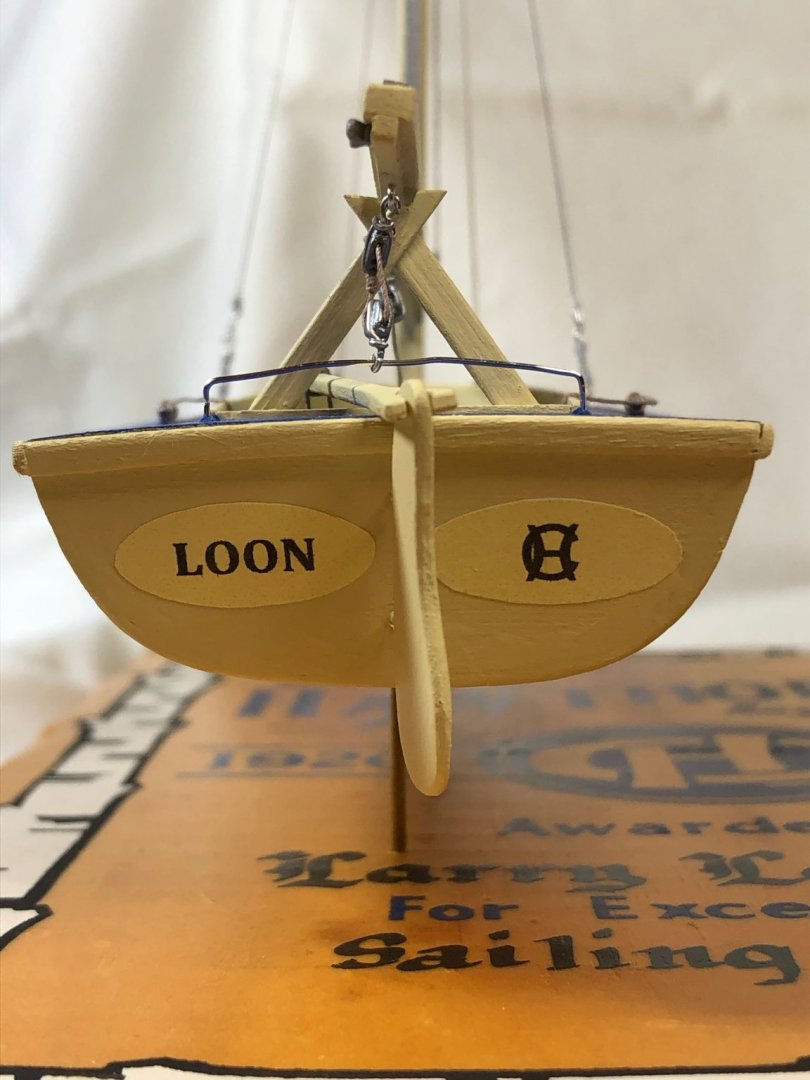
Well I think I am DONE with the Loon which is the first of four! I mounted on the Camp plaque we received each year we were campers (this one is from my 2nd year at camp in 1960 - appropriate as my plan is to give this at the 100th camp anniversary this summer - 60 years after I received this plaque). The next model will be the Hawk which I will mount next to the Loon and then build a case. I am still planning on building the final two models (Gull and Falcon) for myself and mount on my last camper plaque in 1964 but we'll see...I will keep this log open and only note major progress going forward.

- 84 replies
-
- 12
-
-
- nimblet
- knockabout
- (and 1 more)
-
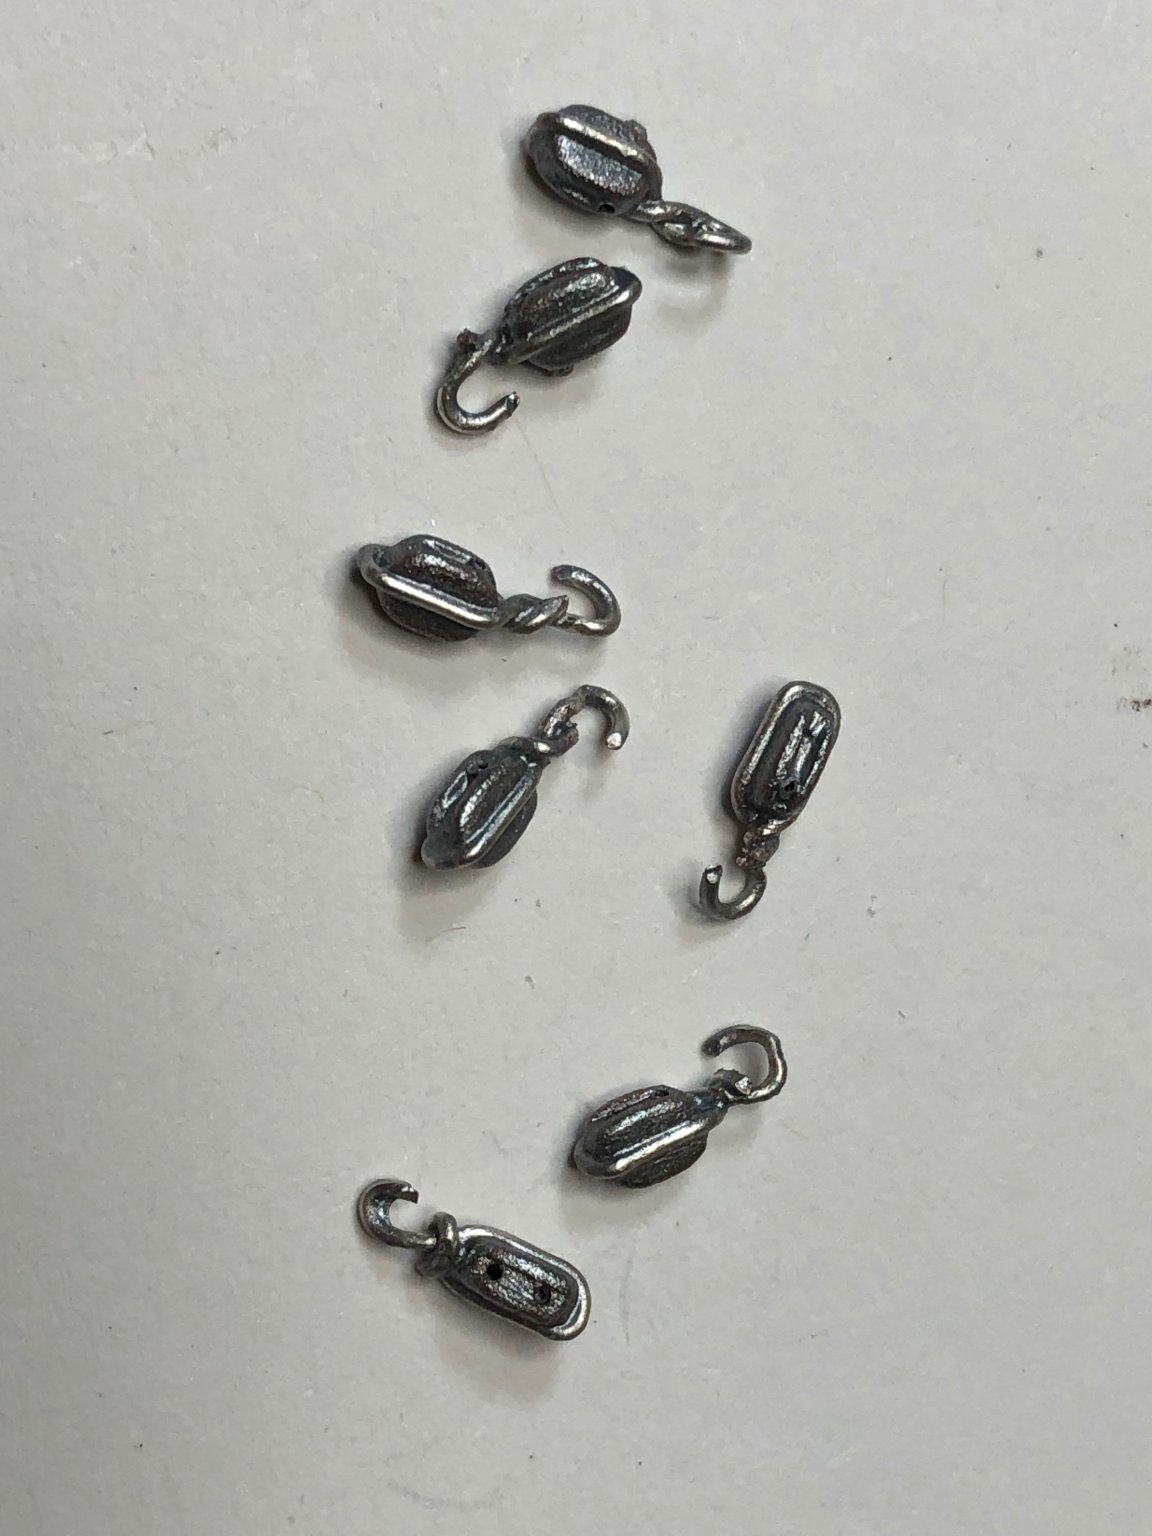
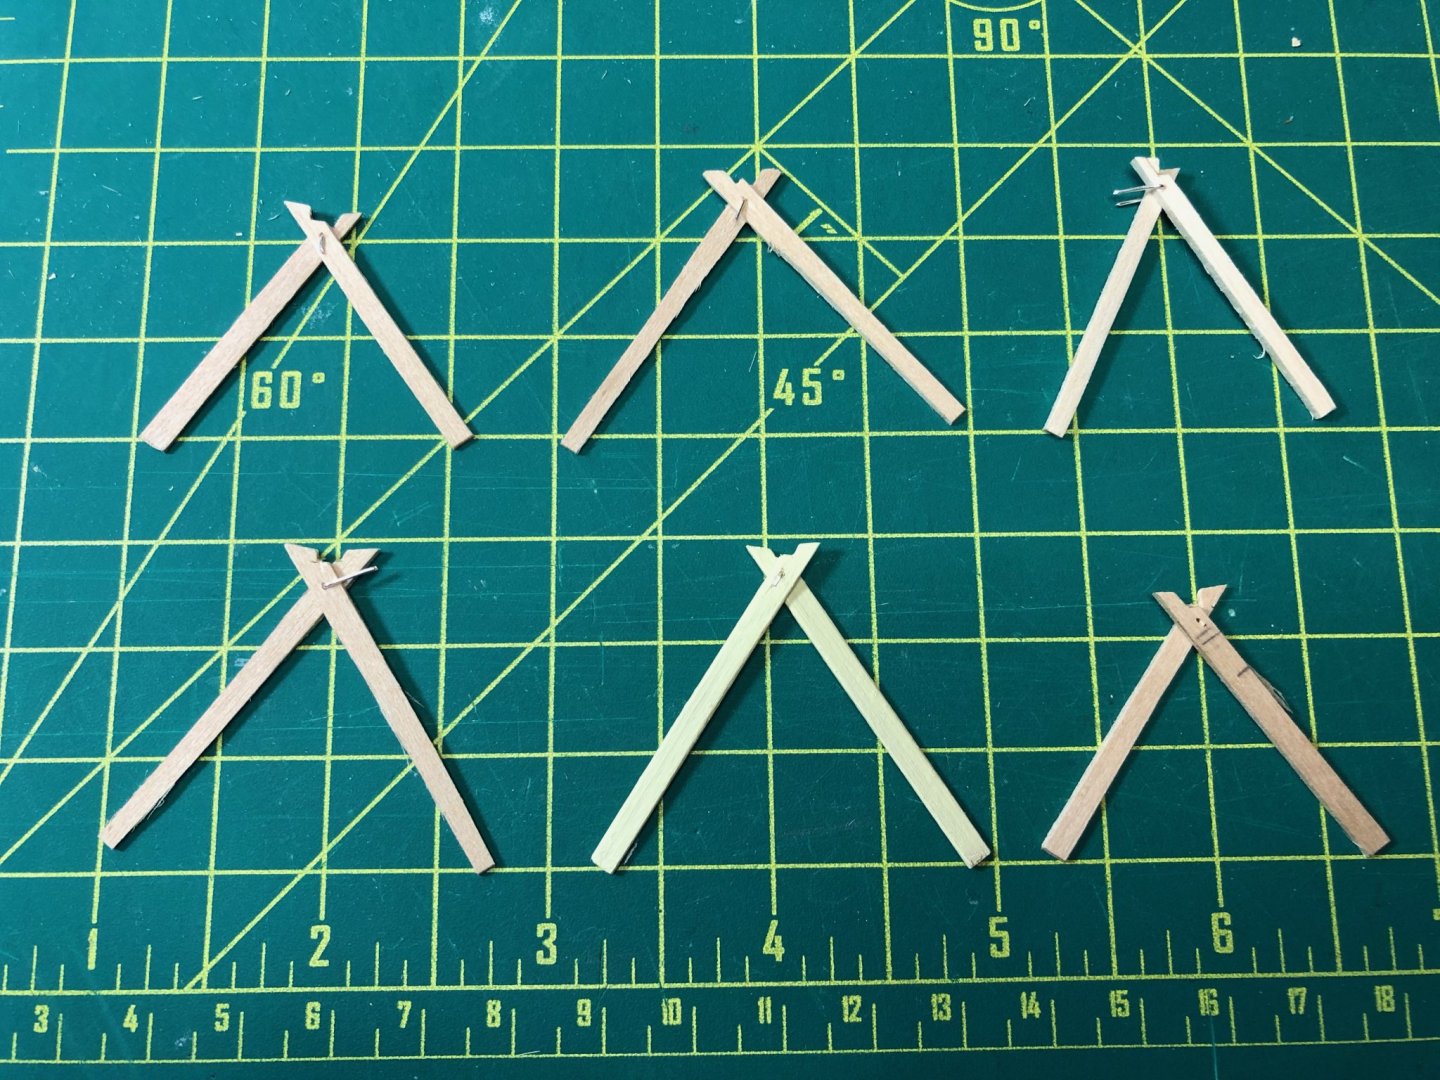
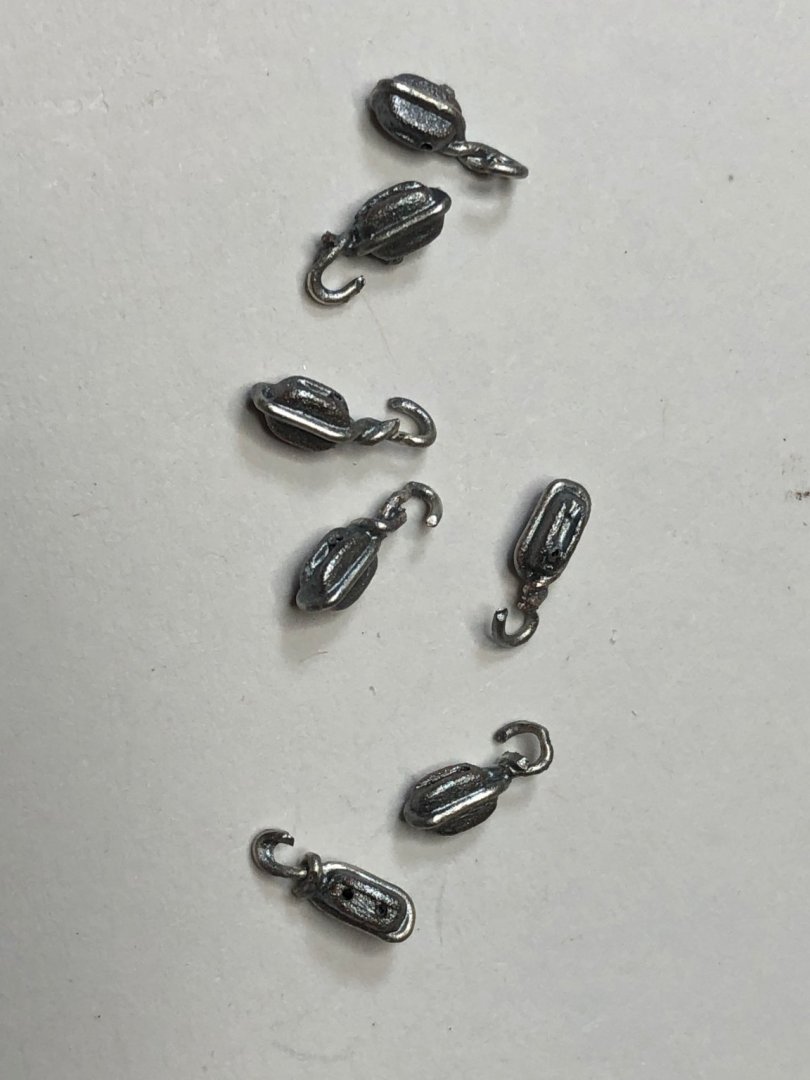
The hardest thing so far was building the right boom crotch! After 5 prototypes I finally found the "right" one! Lower row, middle is the "perfect" crotch... Final rigging and details being completed on the Loon. Pictures to follow in a day or so.
- 84 replies
-
- 4
-
-
- nimblet
- knockabout
- (and 1 more)
-
Getting there...All standing rigging fixtures in place, blocks stopped and painted silver, and ready to step mast. And mounting posts ready for final steps
- 84 replies
-
- 7
-
-
- nimblet
- knockabout
- (and 1 more)
-
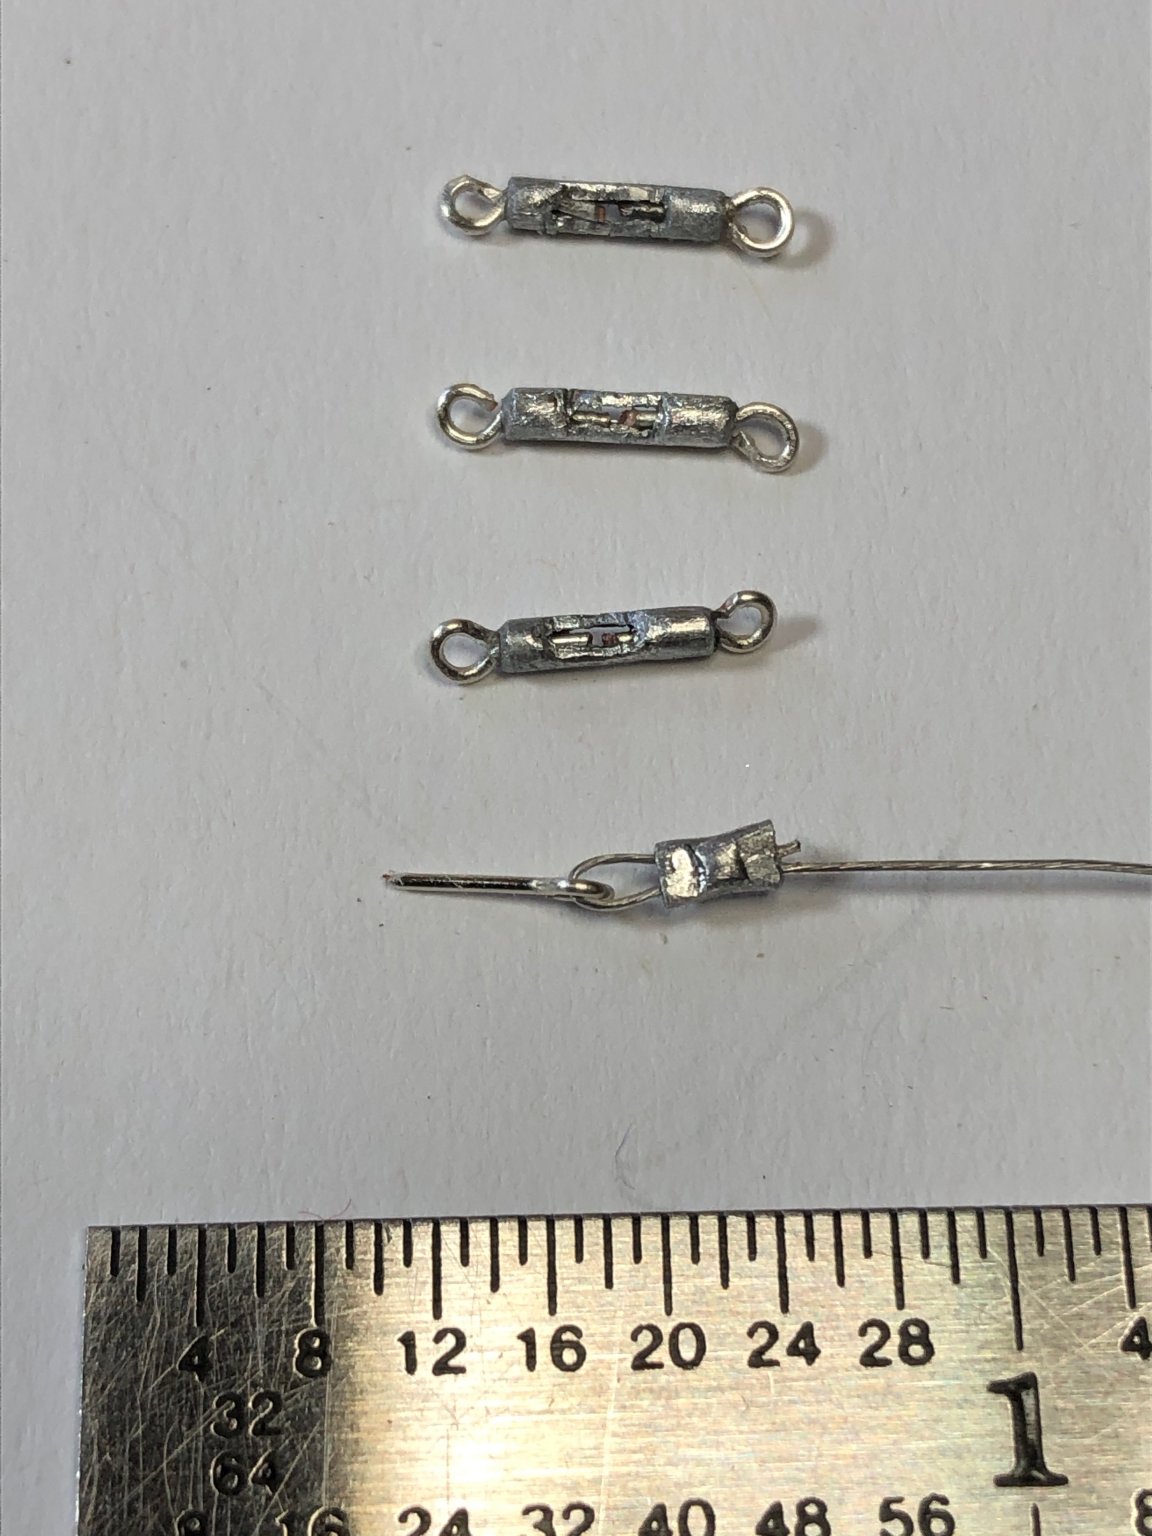
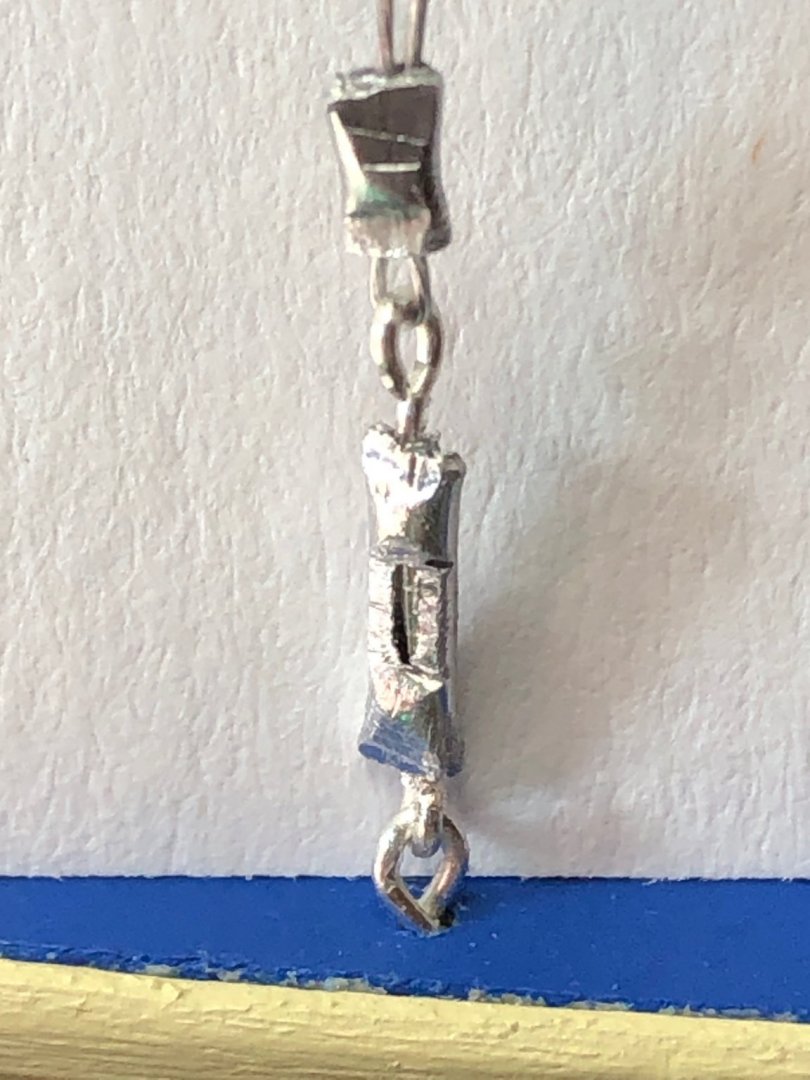
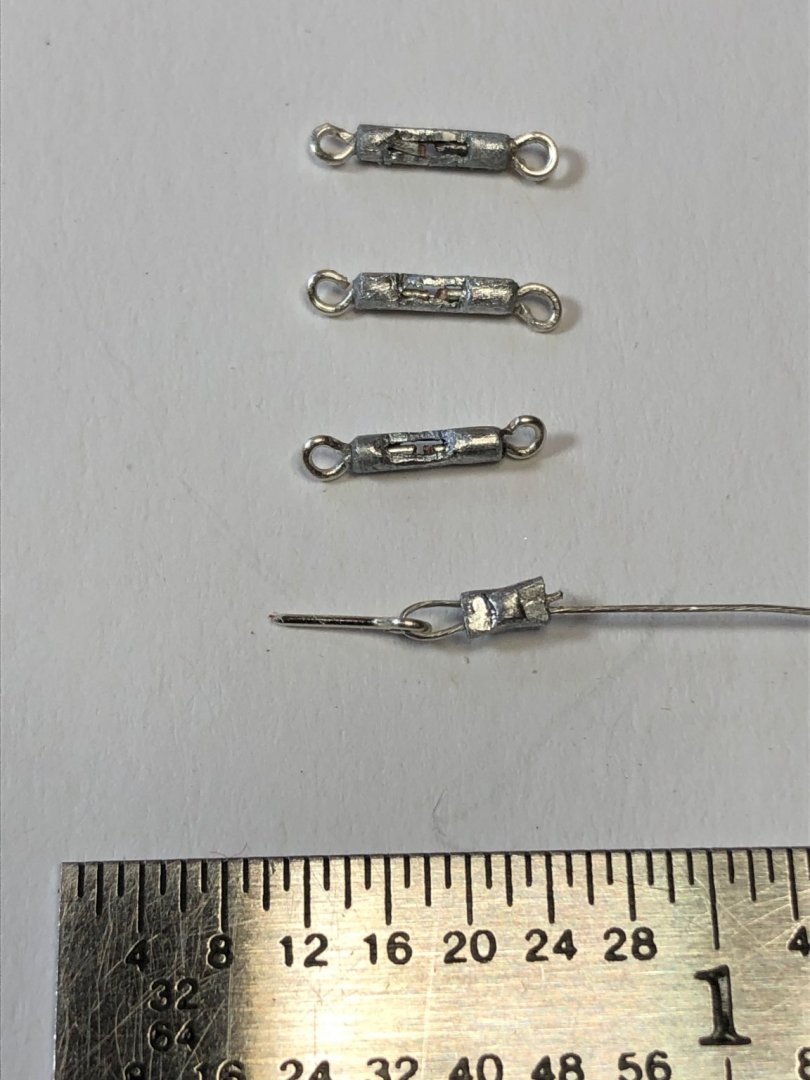
Three turnbuckles and top of mast shroud fastener "manufactured". Took me a while to figure out best way to do turnbuckles but put aluminum tubing onto wire and used Exacto knife to shave away the side slots - easier than my first attempt of filing tubing. I think using CA glue to keep loops in rather than crimping ends looks better.
- 84 replies
-
- 7
-
-
- nimblet
- knockabout
- (and 1 more)
-
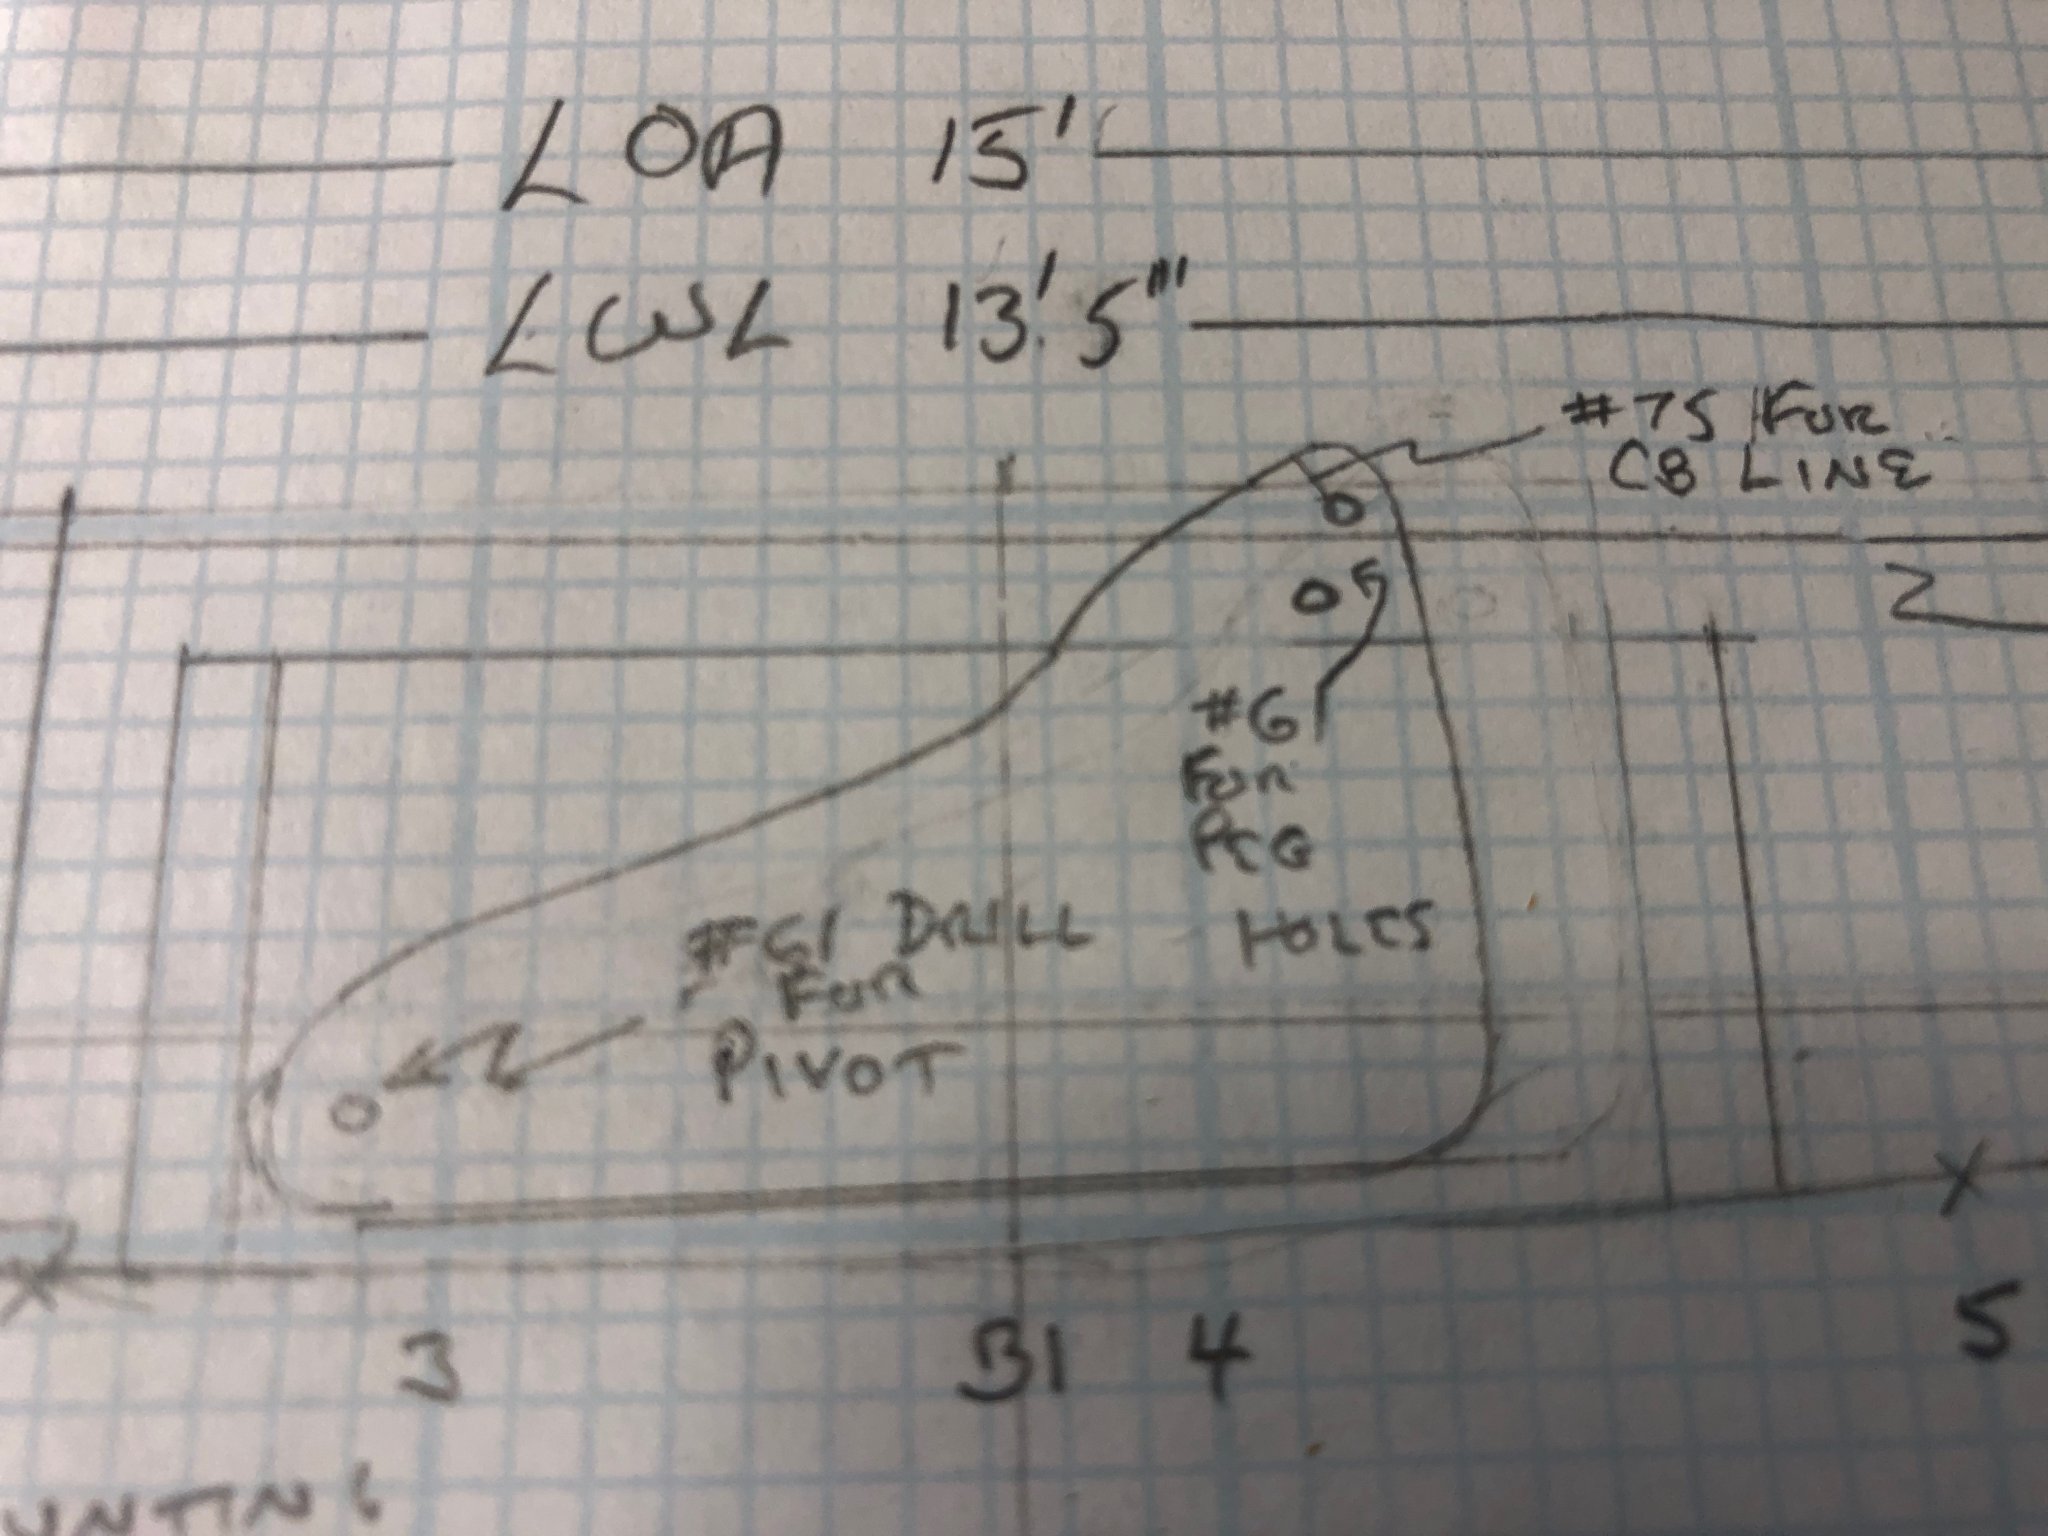
Mike, Thanks for your comments. Looks like I should have indicated the pivot point on my plans - good input for the future. The lower forward point is where the centerboard pivots. The upper aft point is where a peg would be pushed into to keep the centerboard raised. And yes, I would have run this boat aground a few times when I learned how to sail so can attest to the fact that the centerboard does indeed bounce up! Larry
- 84 replies
-
- 1
-
-
- nimblet
- knockabout
- (and 1 more)
-
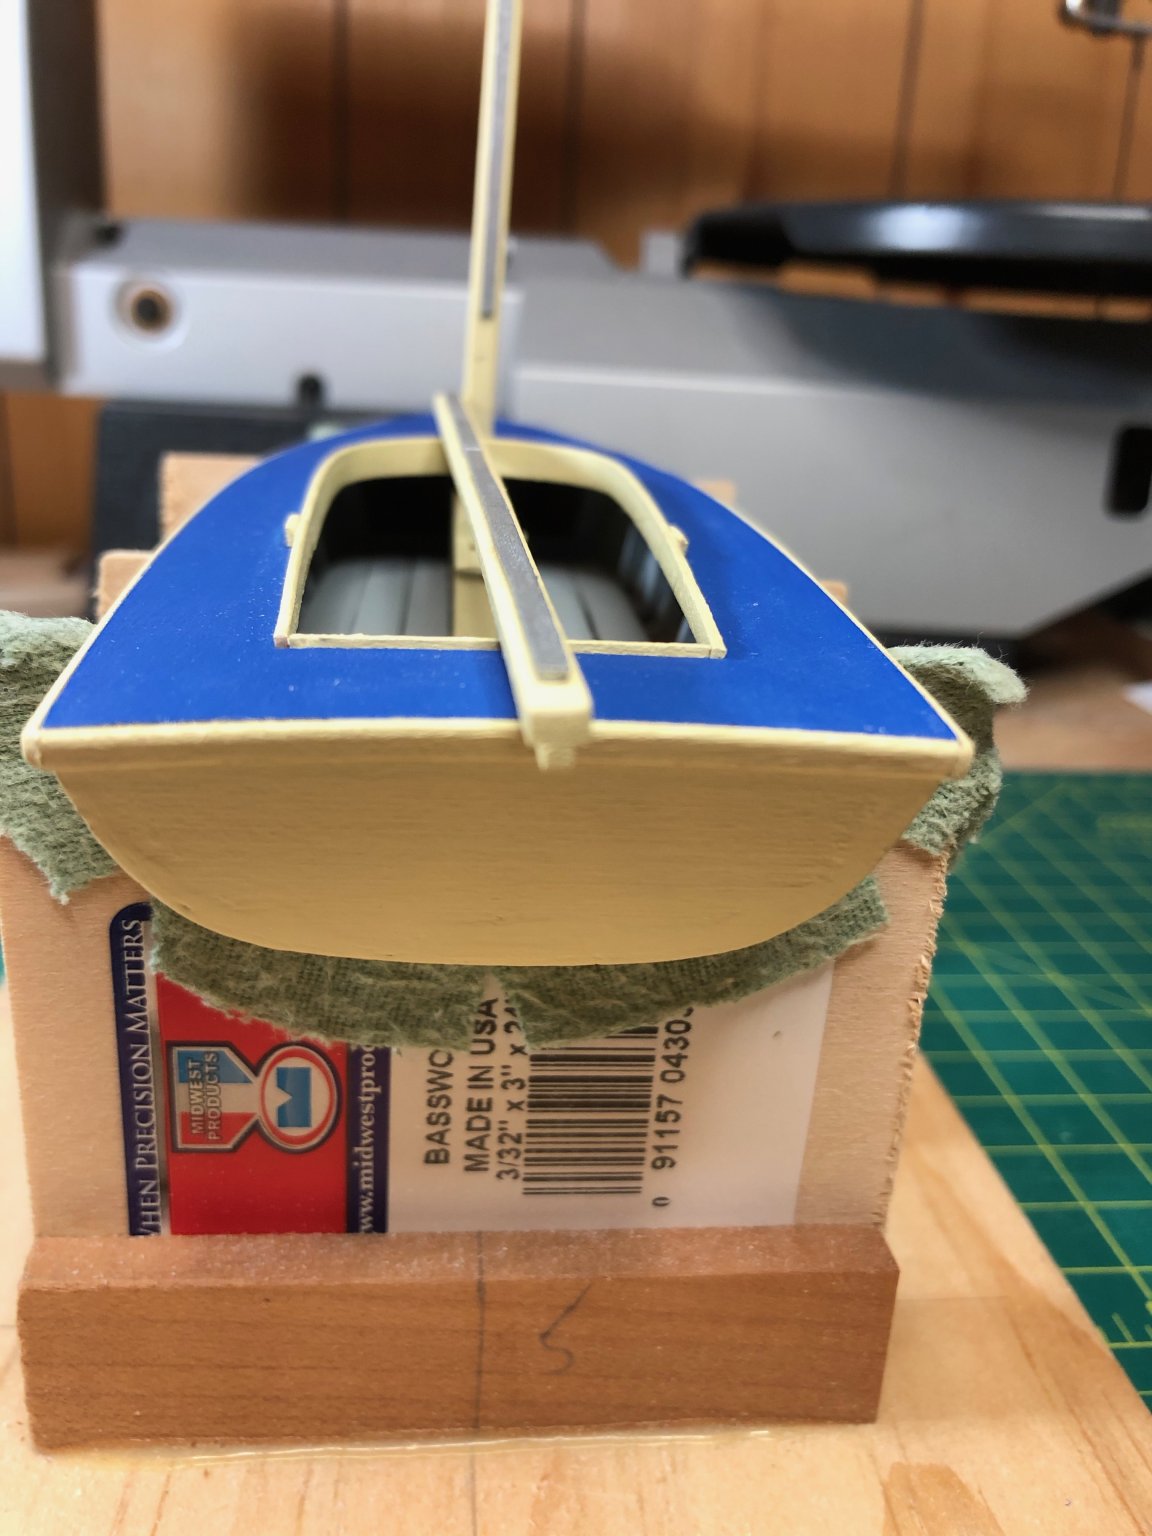
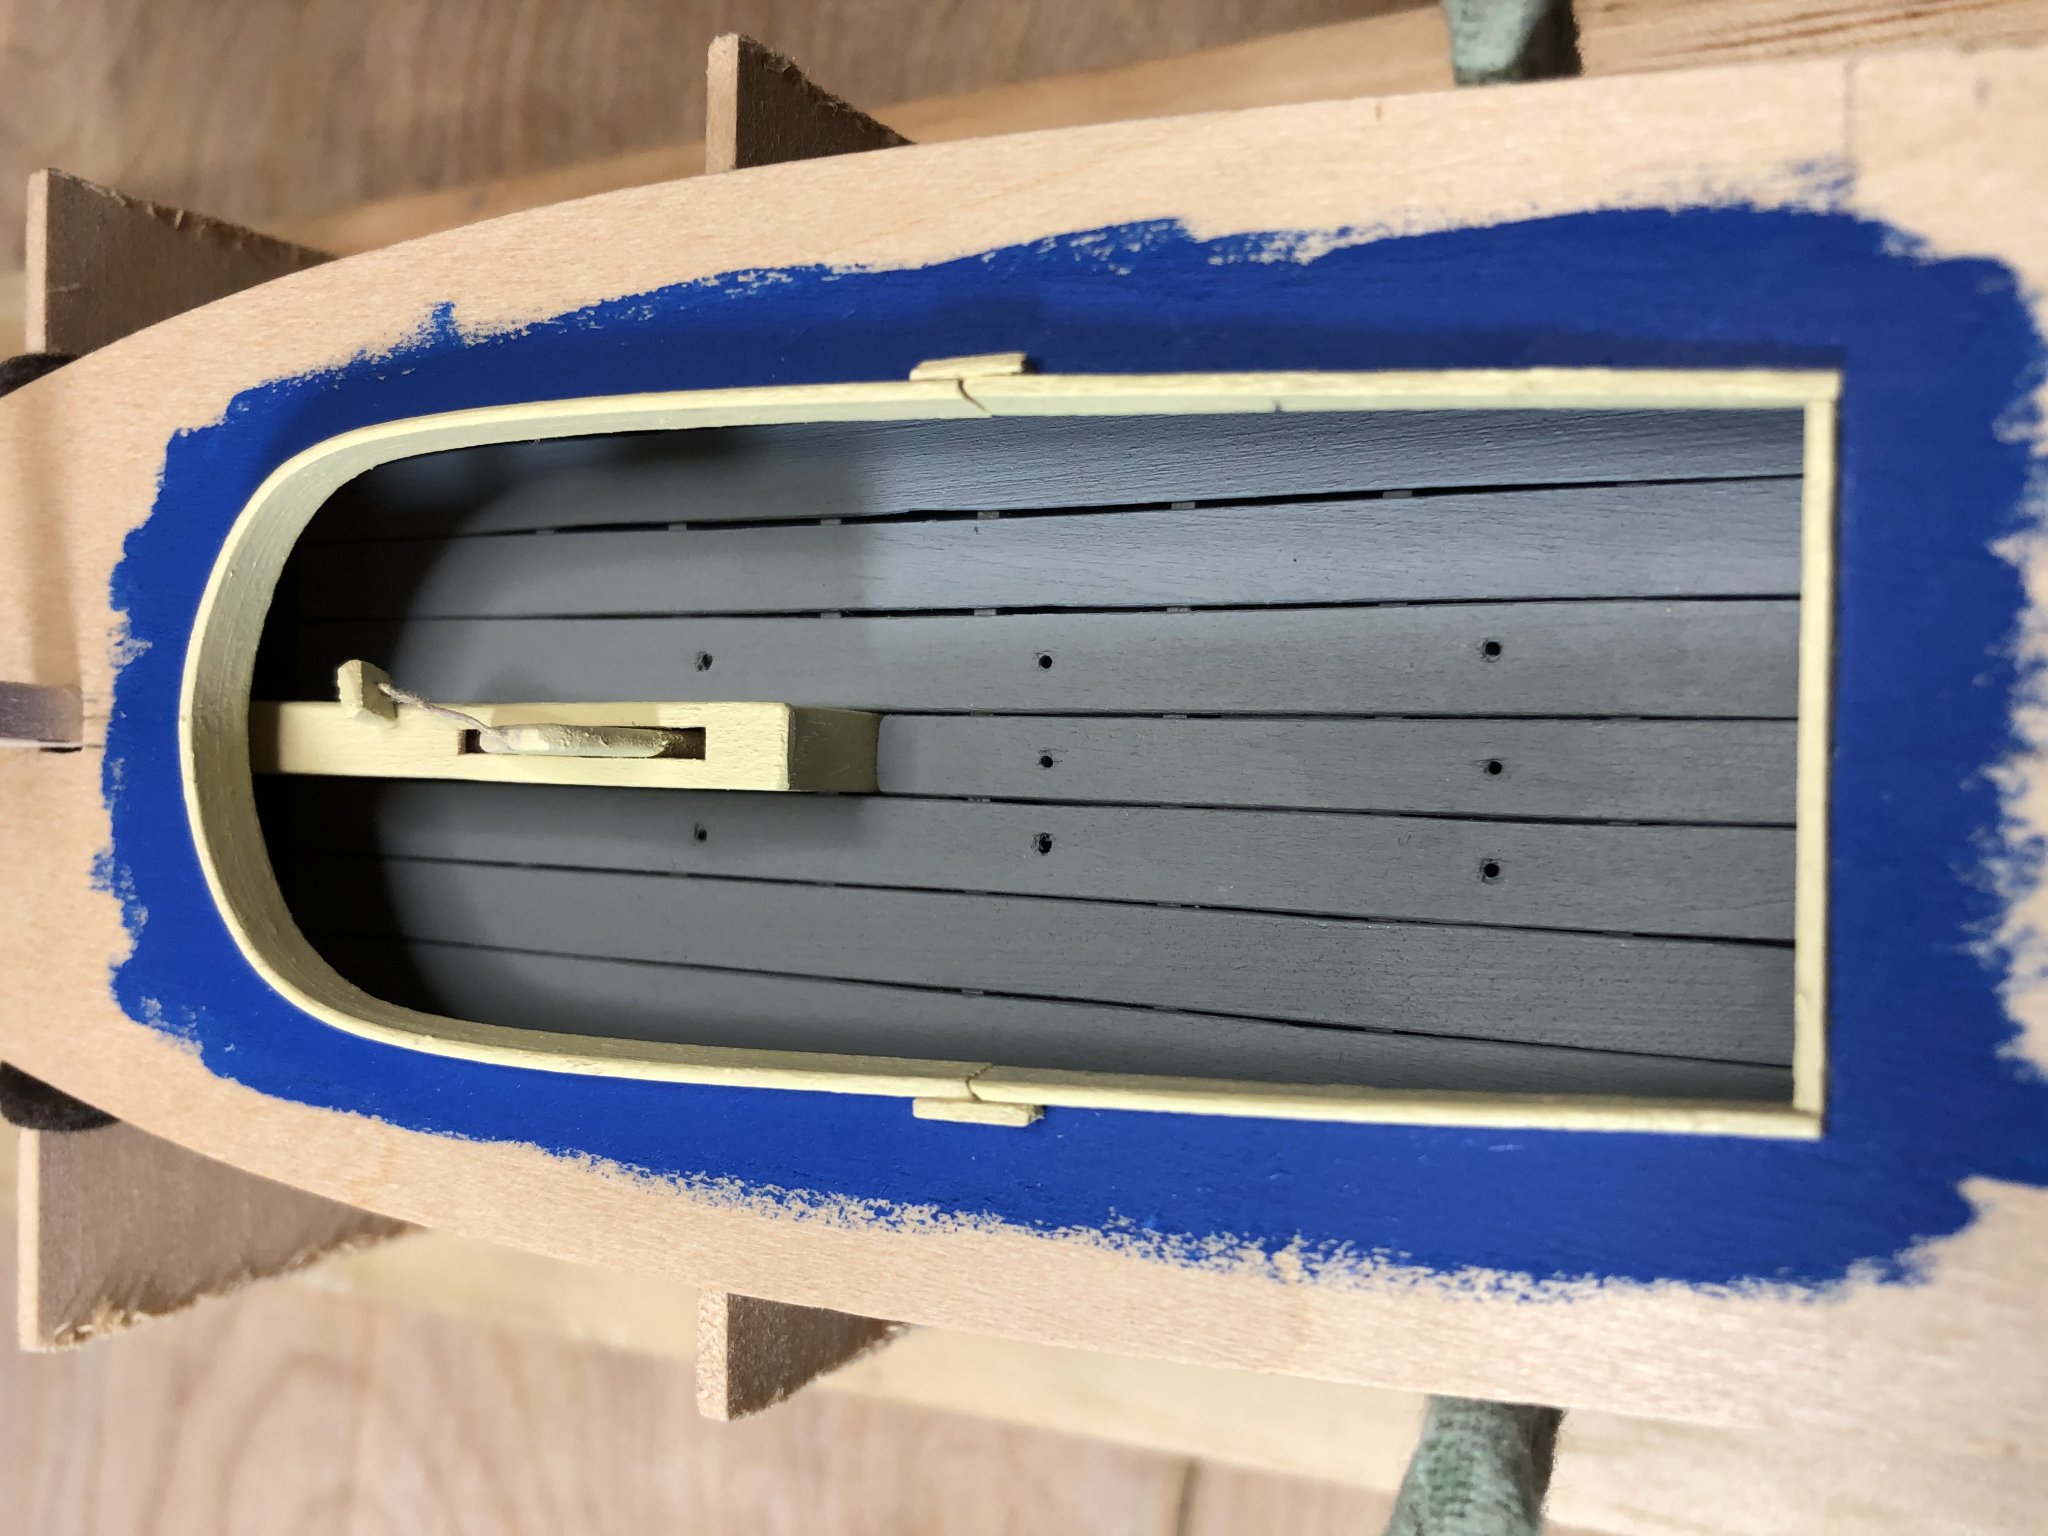
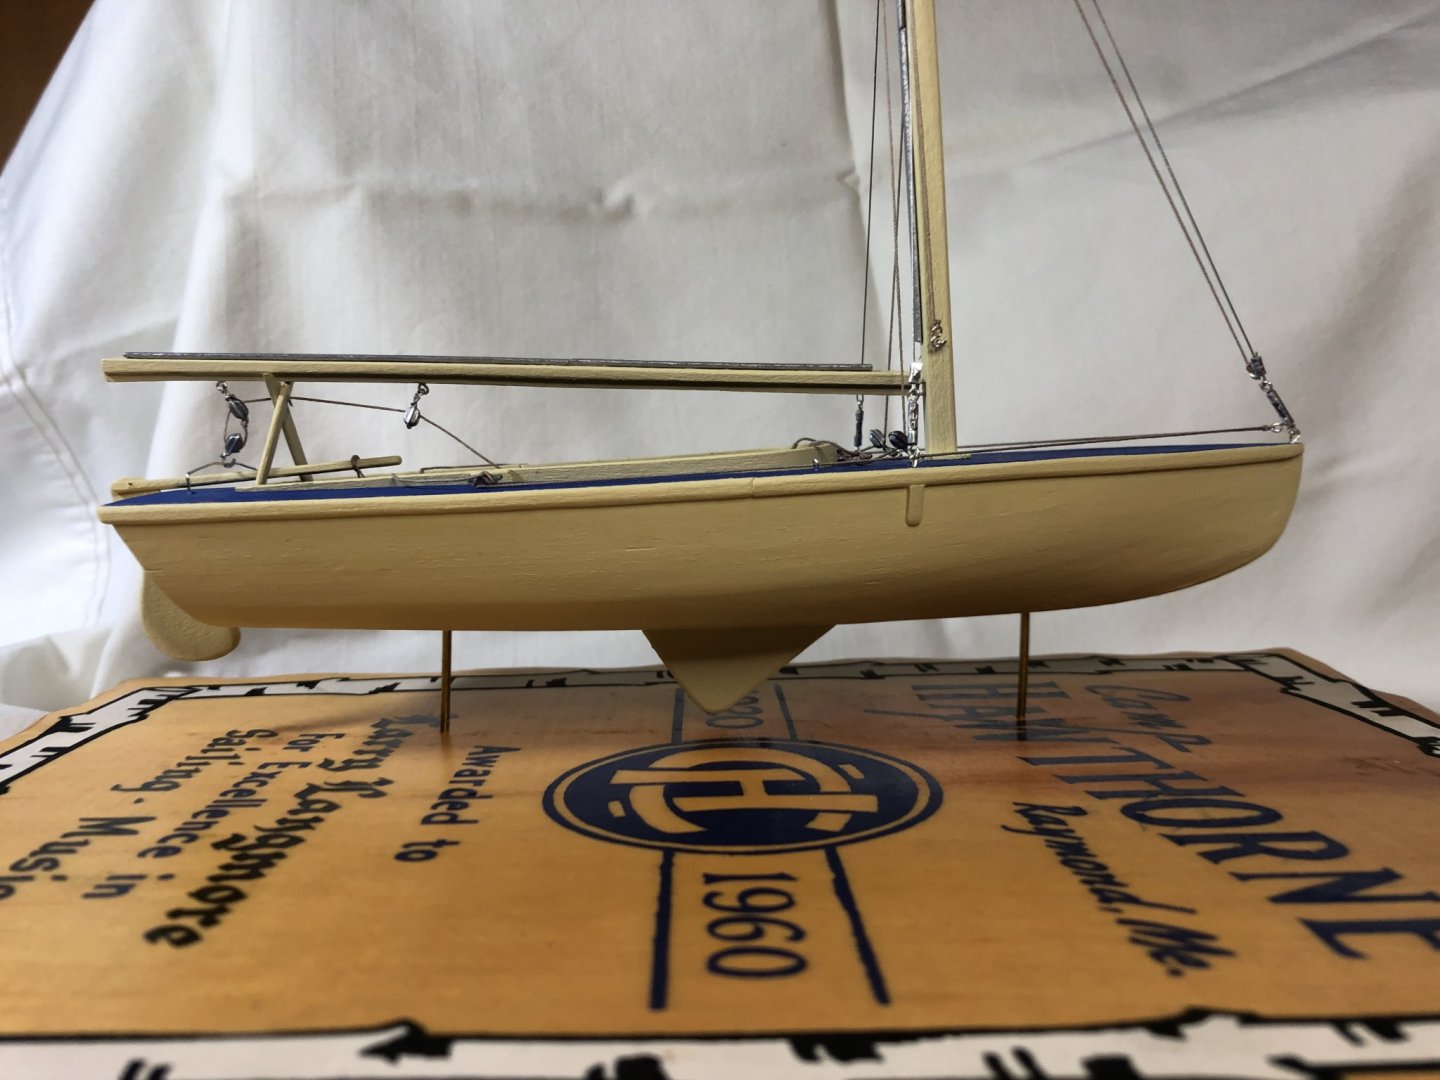
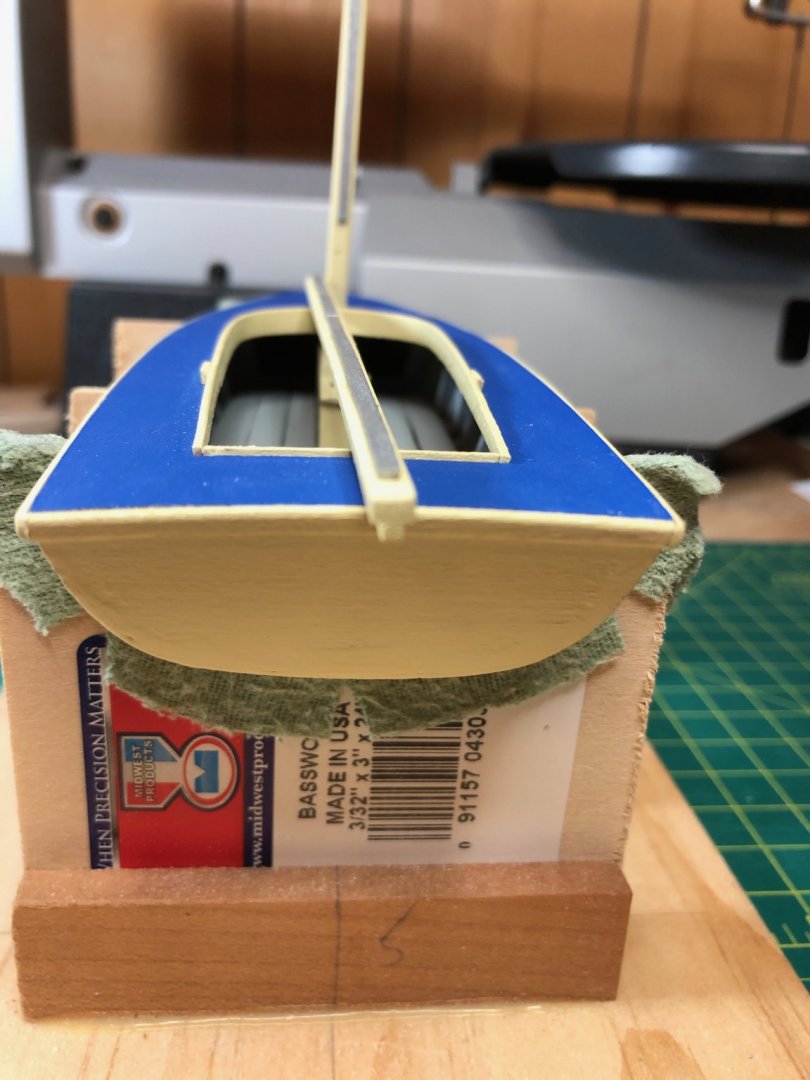
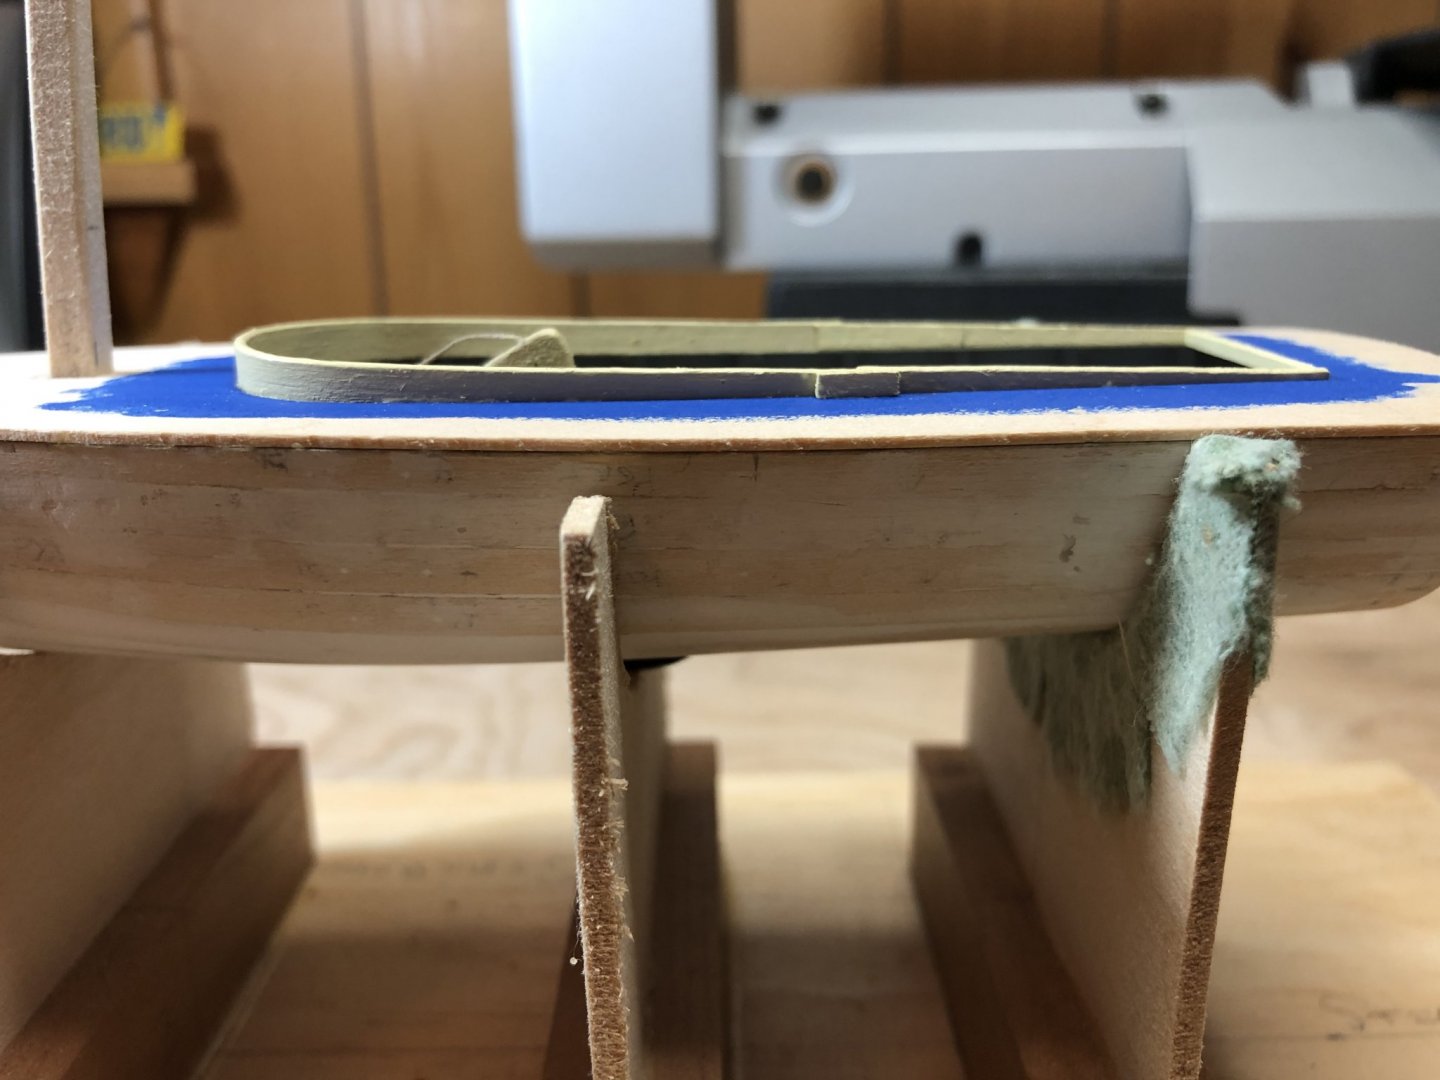
Hull painting finished and combing added. Mast and boom "metal" sail track installed. Next steps mast standing rigging and turnbuckles/chainplates.

- 84 replies
-
- 7
-
-
- nimblet
- knockabout
- (and 1 more)
-
A bit more progress...will finish hull and then onto rigging.

- 84 replies
-
- 5
-
-
- nimblet
- knockabout
- (and 1 more)
-
Another two days and the Loon (first of four) is coming along. Next will work on rudder with pintle and gudgeon and tiller. Rest of interior, deck with cockpit combing all cut out ready for paint and final install. Mast shaped, boom to be done and then need to figure out how I am going to construct the sail tracks. Found 9 strand beading wire for shrouds and will see what I can come up with for turnbuckles (certainly nothing like I saw somewhere else on this site...). Tough to find time to keep this moving with 5 days at H&R Block and 4 grandkids - not a bad problem to have!


- 84 replies
-
- 6
-
-
- nimblet
- knockabout
- (and 1 more)
-
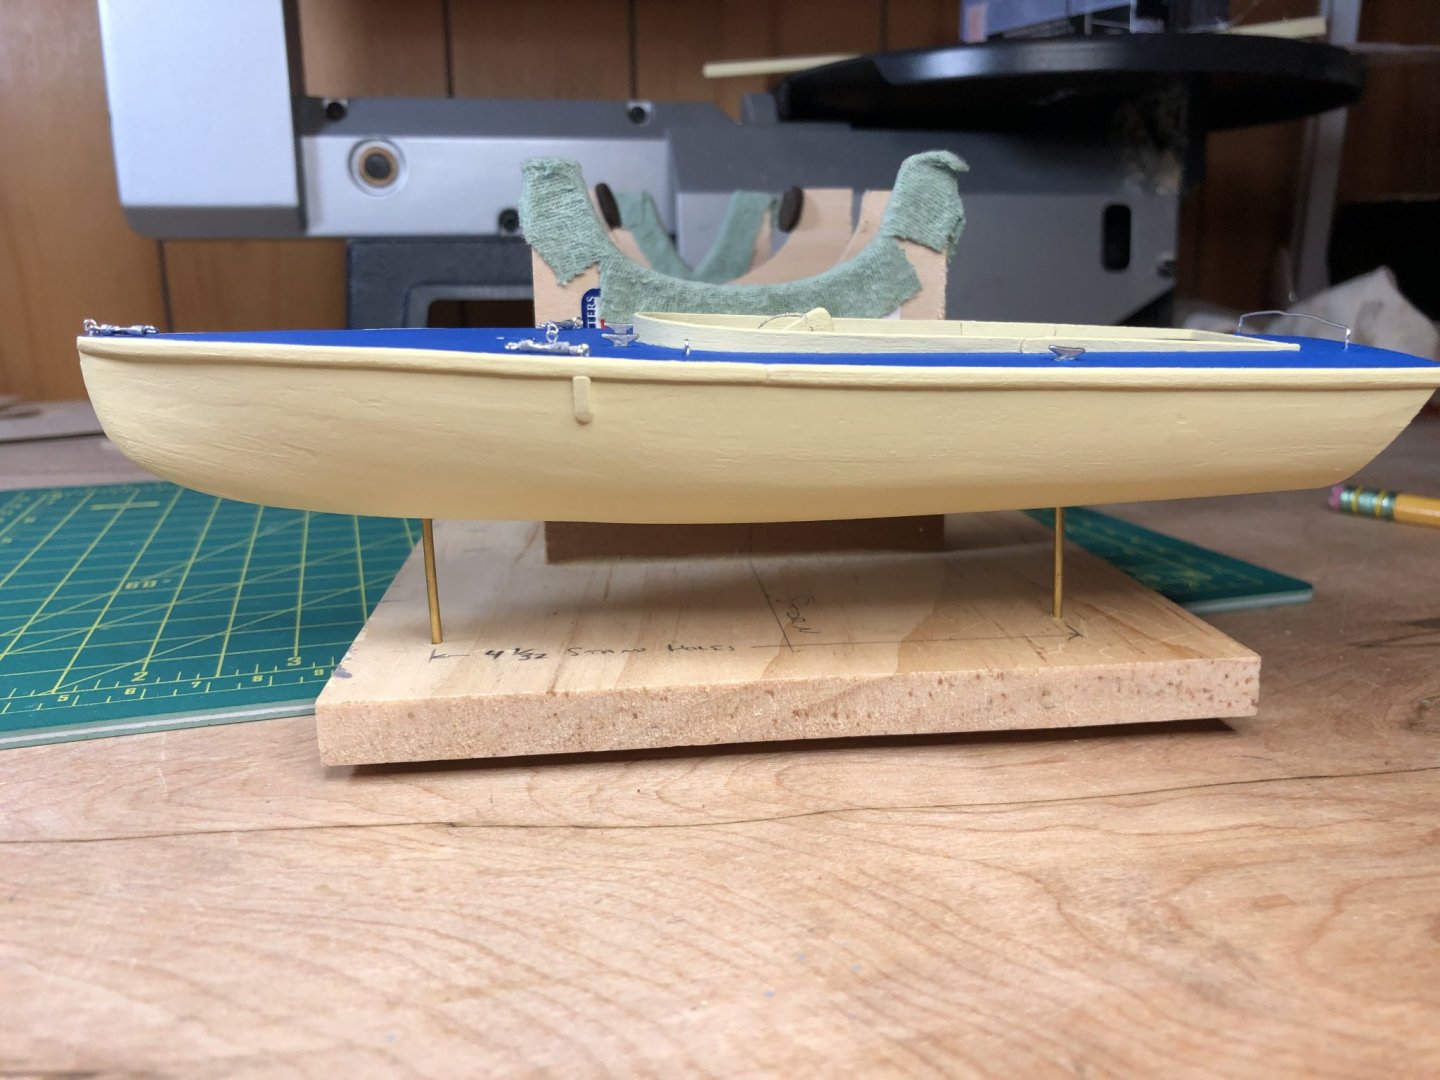
Frames complete and from my past "learnings" 1/16" holes drilled into blocks ready for brass rod for mounting on base BEFORE decking installed. Also put down another layer of wood filler to fix gaps in plank seams - should be able to sand smooth. Mast cut and working on mast step.
- 84 replies
-
- 7
-
-
- nimblet
- knockabout
- (and 1 more)
-
Slow and steady with frames and centerboard. Beam is now correct width by using CA glue on upper frames to hold out sides. However, this extra pressure put a bit of stress on planks and seams have separated a bit but should be able to go over with wood filler and make invisible.

- 84 replies
-
- 8
-
-
- nimblet
- knockabout
- (and 1 more)