kayakerlarry
-
Posts
117 -
Joined
-
Last visited
Recent Profile Visitors


-
I REALLY like your idea of a silent auction to support a worthy cause. I was thinking of selling my models at the Holiday Bazaar we have. This is much preferable.
If you don't mind sharing with me, what was involved in setting this up?
-

Hi. I was not successful in selling my model at any of my events. I discussed a reasonable auction price with Nic at Bluejacket based on what he sells the finished model in case for at retail. I went lower but still no offers. The problem is we are dealing with a very small population who values our work. I had silent auctions and live auctions and by far the best success is with a live auction. I’m sure if I had the model at the live auction it would have been sold especially if you have an excellent auctioneer. Not sure this helps but I wish you best of luck. Happy to talk live if I can help. There are lots of other ways to raise money for your charity. I was very fortunate this year and raised over $30,000 for ZERO Prostate Cancer. Good luck!!
-
-
 aaronc reacted to a post in a topic:
New Bedford Whaleboat by Mike_In_RI - FINISHED - Model Shipways MS2033 - Scale 1:16 - Small
aaronc reacted to a post in a topic:
New Bedford Whaleboat by Mike_In_RI - FINISHED - Model Shipways MS2033 - Scale 1:16 - Small
-
JpR62 reacted to a post in a topic:
New Bedford Whaleboat by kayakerlarry - Model Shipways - Scale 1:16
-
JacquesCousteau reacted to a post in a topic:
New Bedford Whaleboat by kayakerlarry - Model Shipways - Scale 1:16
-
bbrennan737 reacted to a post in a topic:
New Bedford Whaleboat by kayakerlarry - Model Shipways - Scale 1:16
-
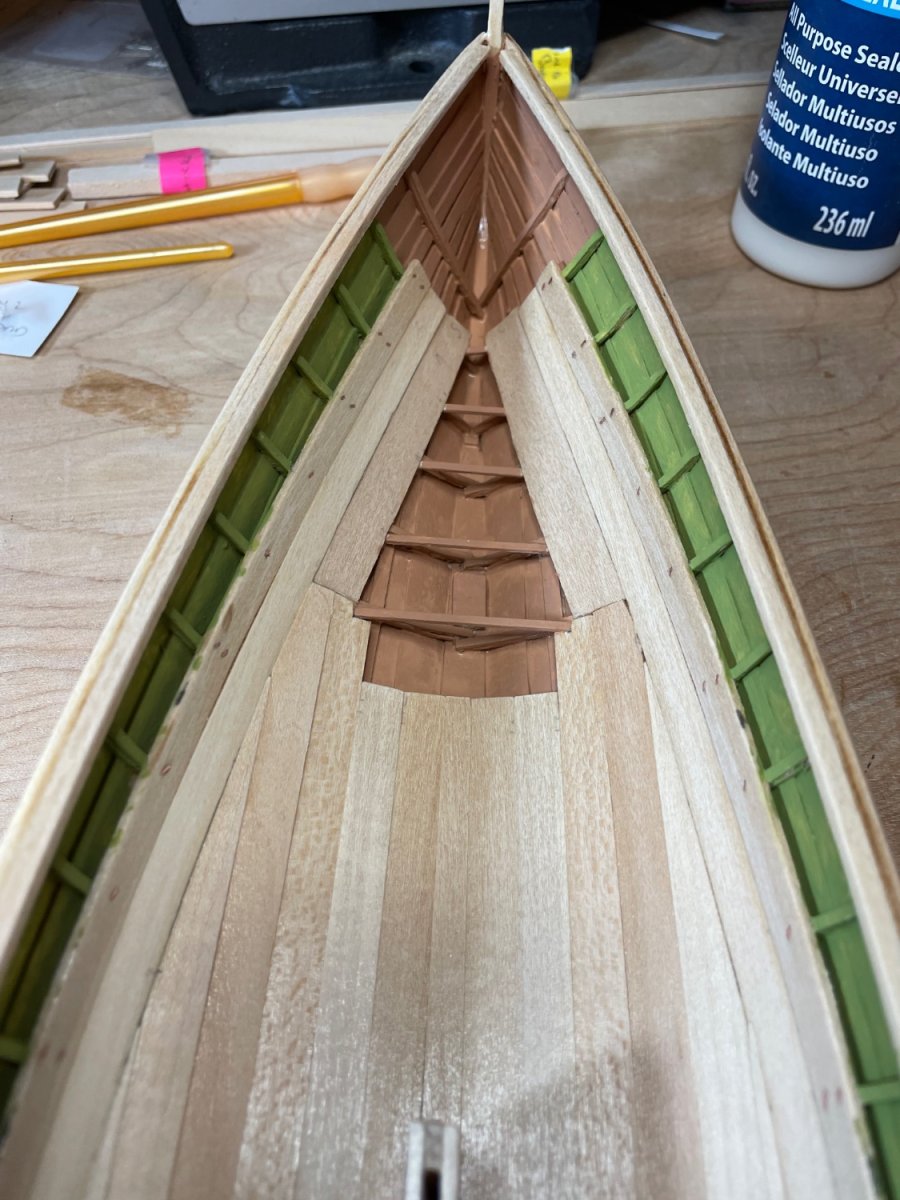
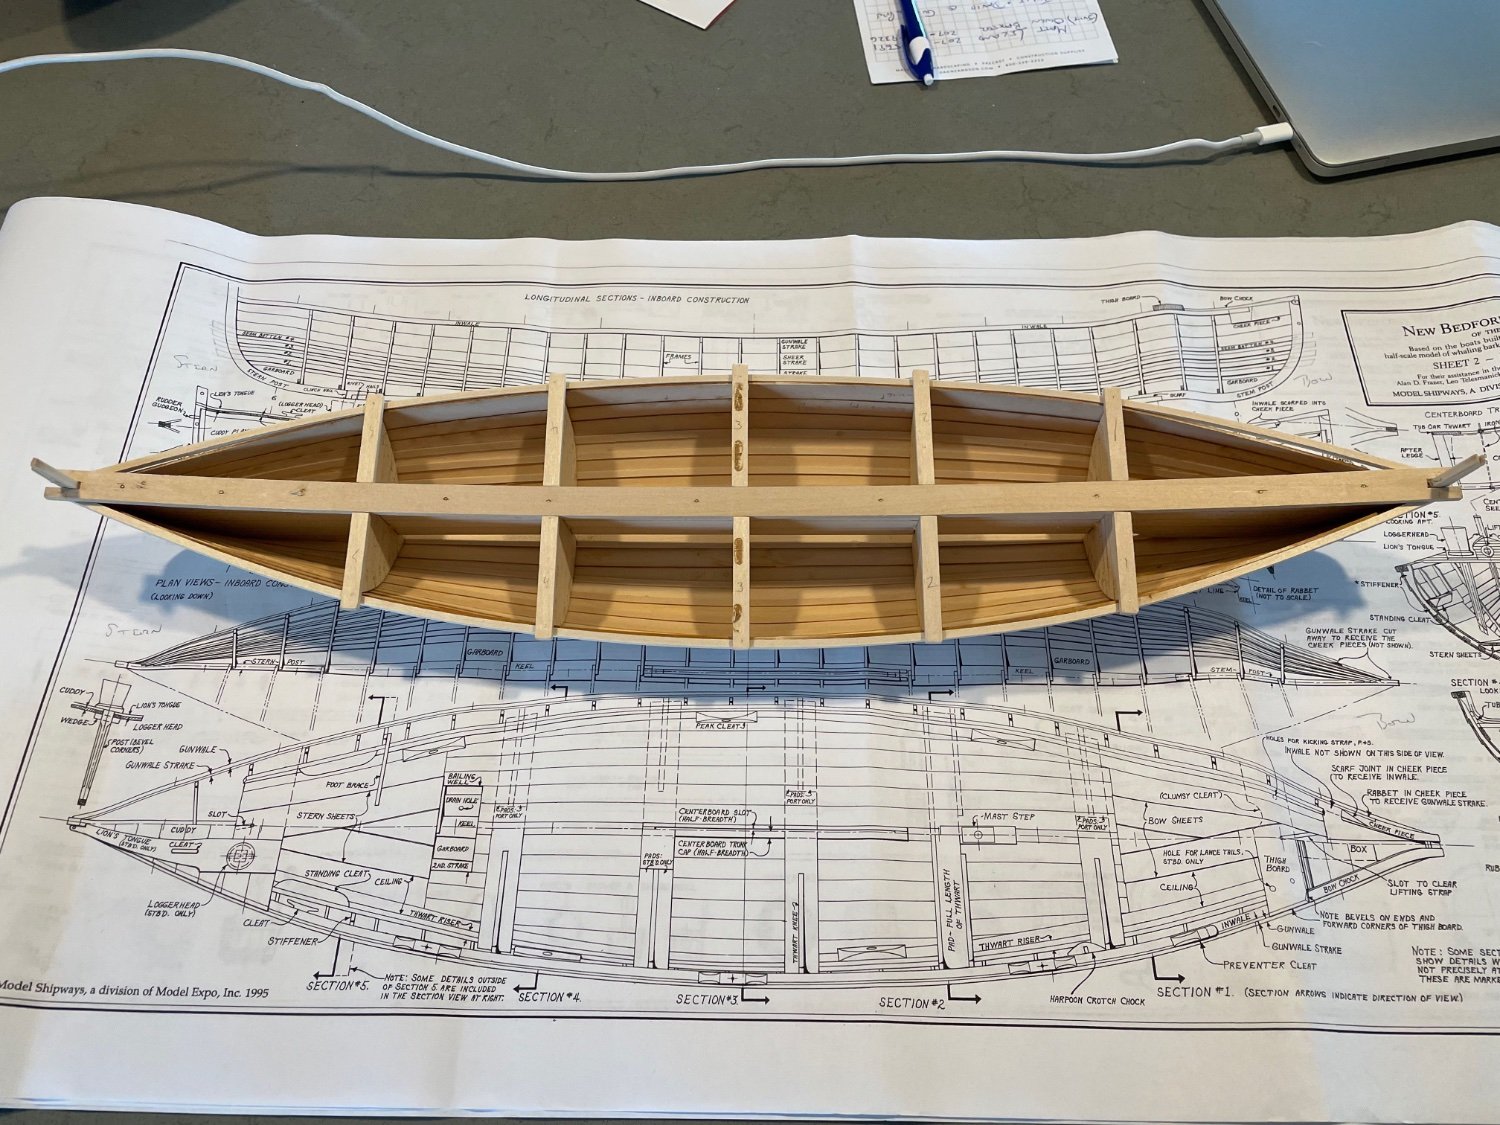
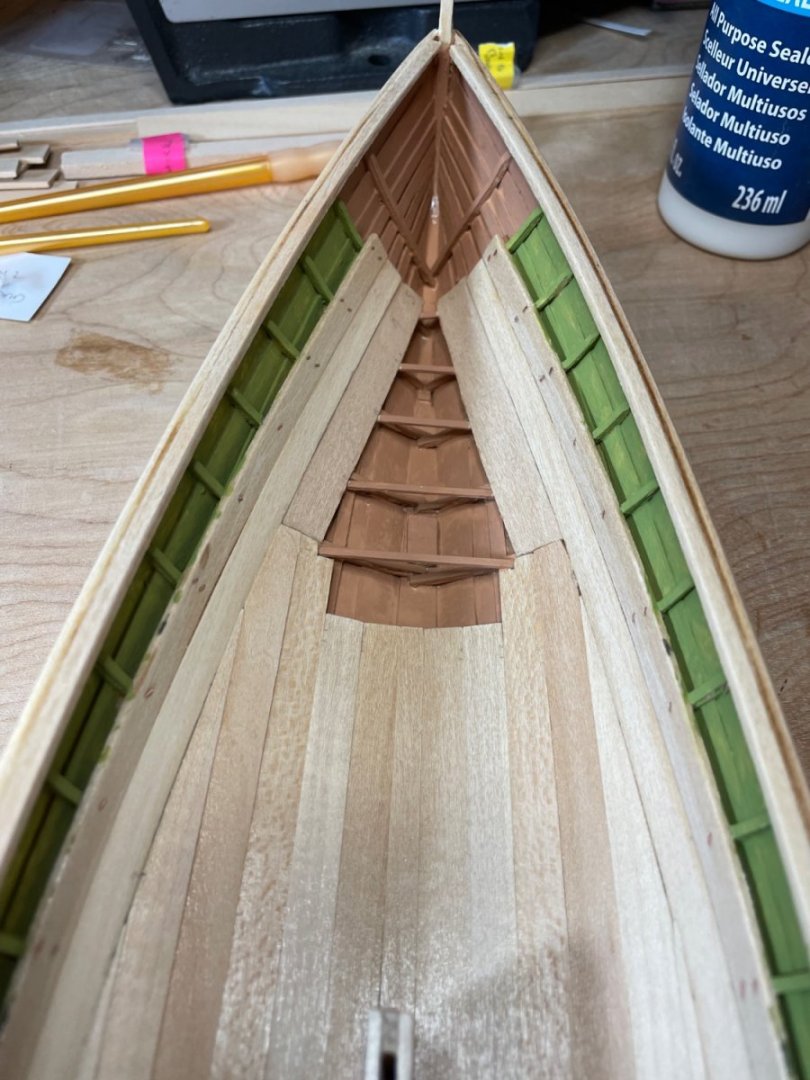
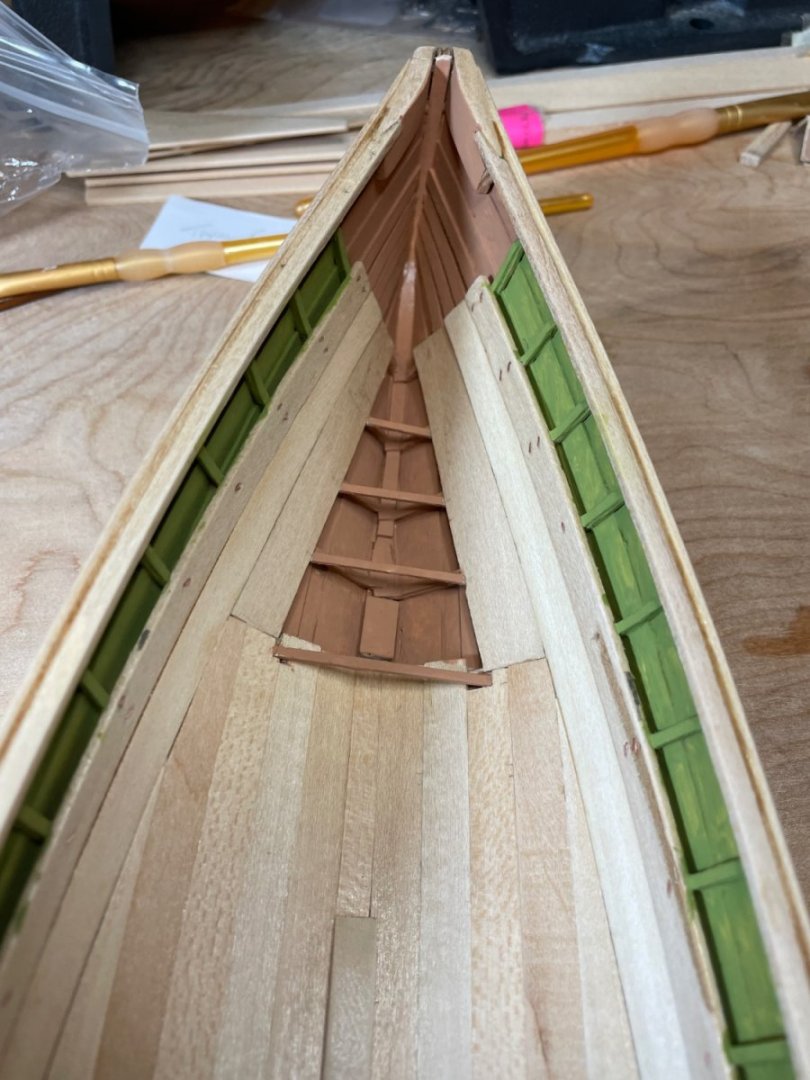
Primed two coats and started to paint inboard before securing thwarts, etc. Used a golden brown in bow and stern to represent unfinished planks below ceiling. I think it’s reasonable. The “pea green” the book suggests is a Spanish olive green. Again I think it works. Second coats next.

-
SiriusVoyager reacted to a post in a topic:
New Bedford Whaleboat by kayakerlarry - Model Shipways - Scale 1:16
-
SiriusVoyager reacted to a post in a topic:
New Bedford Whaleboat by kayakerlarry - Model Shipways - Scale 1:16
-
SiriusVoyager reacted to a post in a topic:
New Bedford Whaleboat by kayakerlarry - Model Shipways - Scale 1:16
-
SiriusVoyager reacted to a post in a topic:
New Bedford Whaleboat by kayakerlarry - Model Shipways - Scale 1:16
-
SiriusVoyager reacted to a post in a topic:
New Bedford Whaleboat by kayakerlarry - Model Shipways - Scale 1:16
-
bbrennan737 reacted to a post in a topic:
New Bedford Whaleboat by kayakerlarry - Model Shipways - Scale 1:16
-
As a bit of an aside, I am using one of my older models (Herreshoff Buzzards Bay Boy's Boat) in a silent action I am holding to raise funds for a great charity - ZERO Prostate Cancer. I have it on display at Harbor Fish Market in Scarborough, Maine if anyone is "driving by". As of today, I have bids on everything except the model (minimum bid $500) but obviously there is a much smaller customer base for that. If someone bids the minimum on the model that will put me over $15,000 raised since end of July.


-
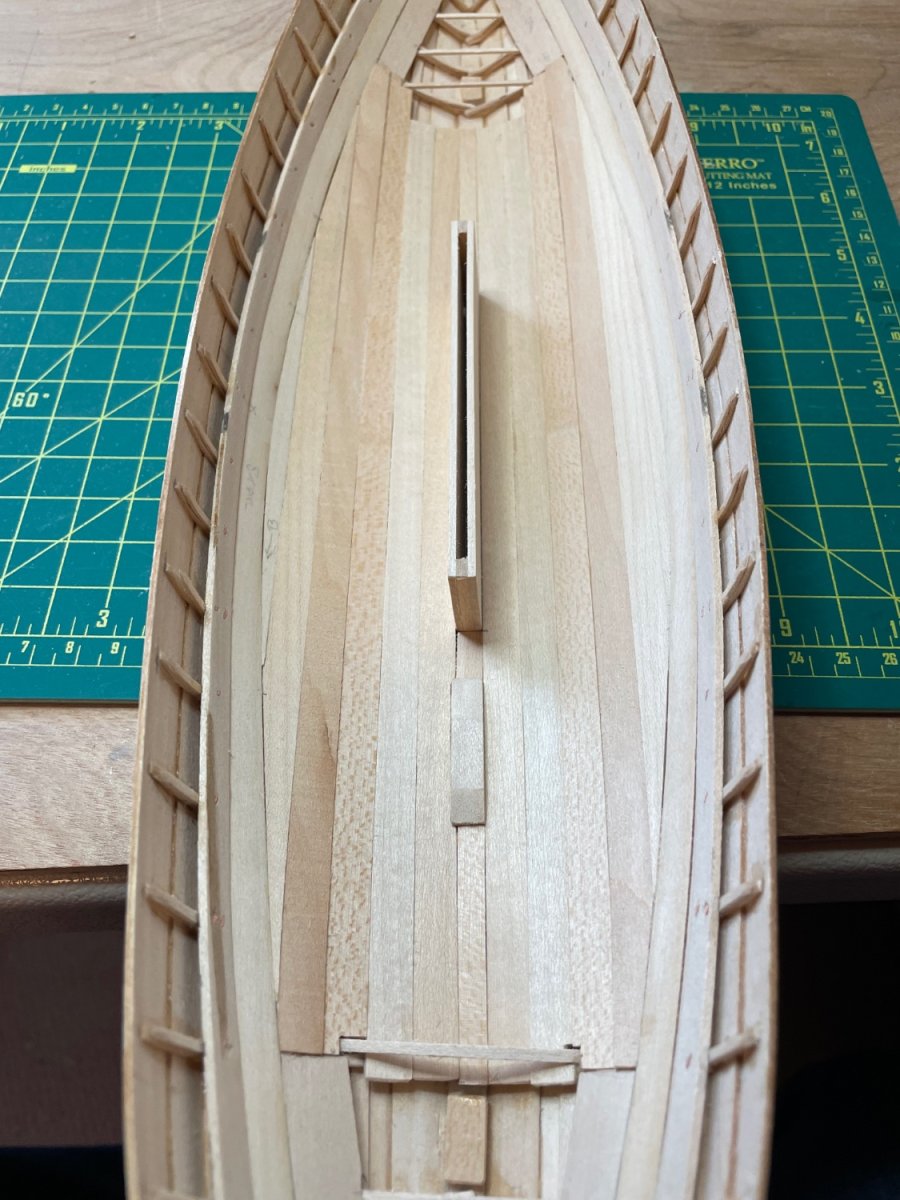
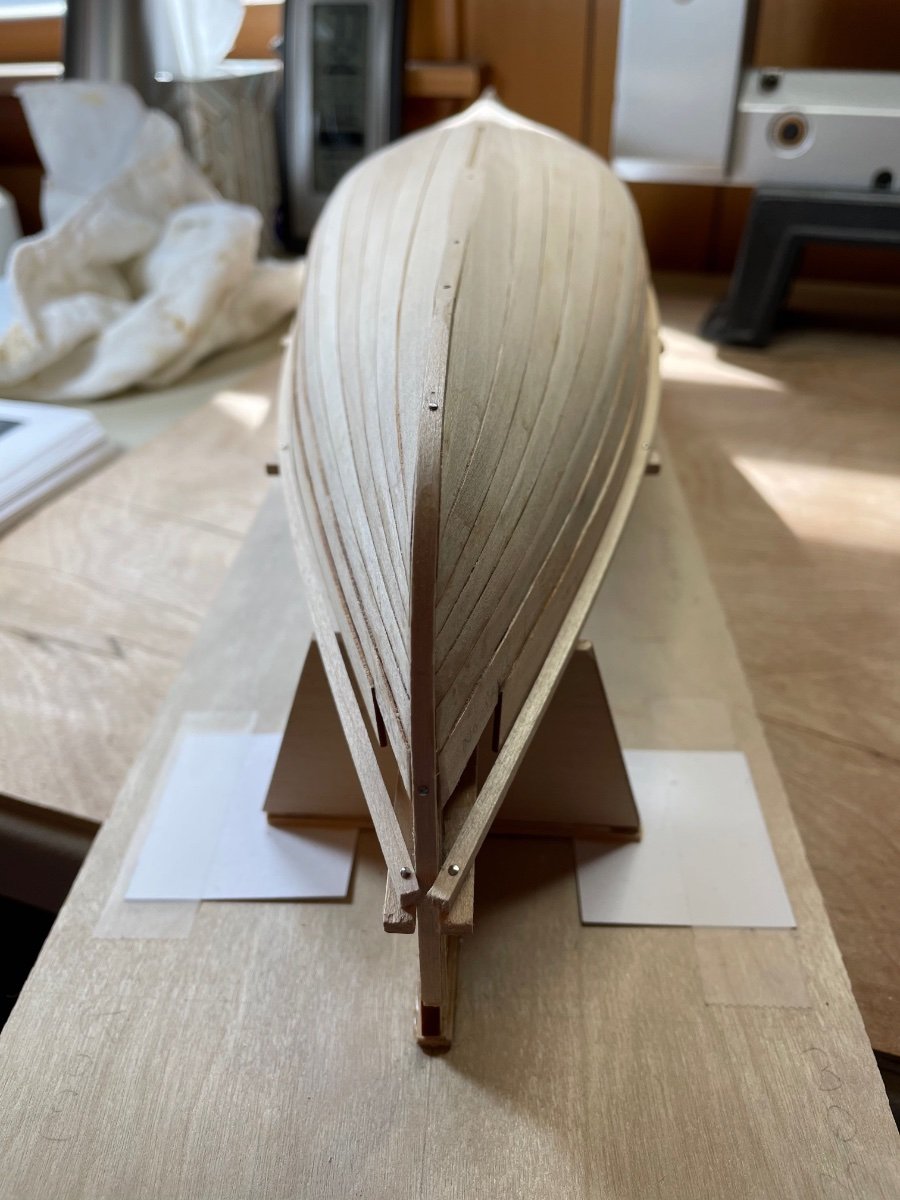
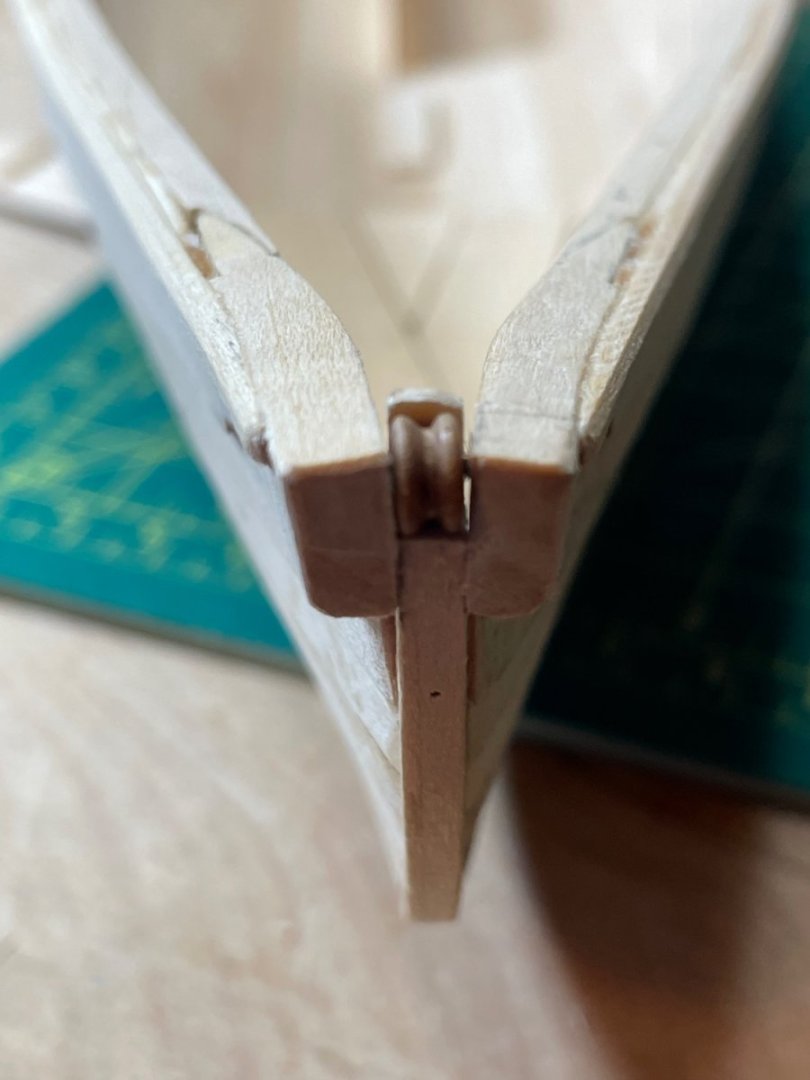
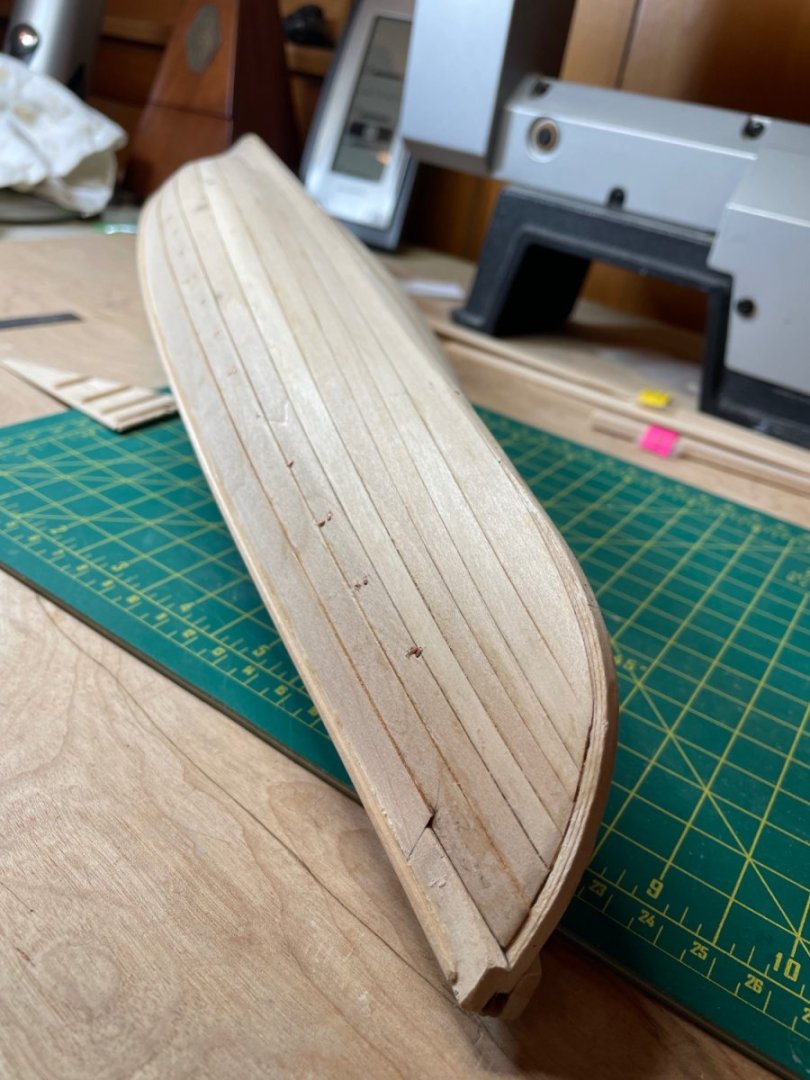
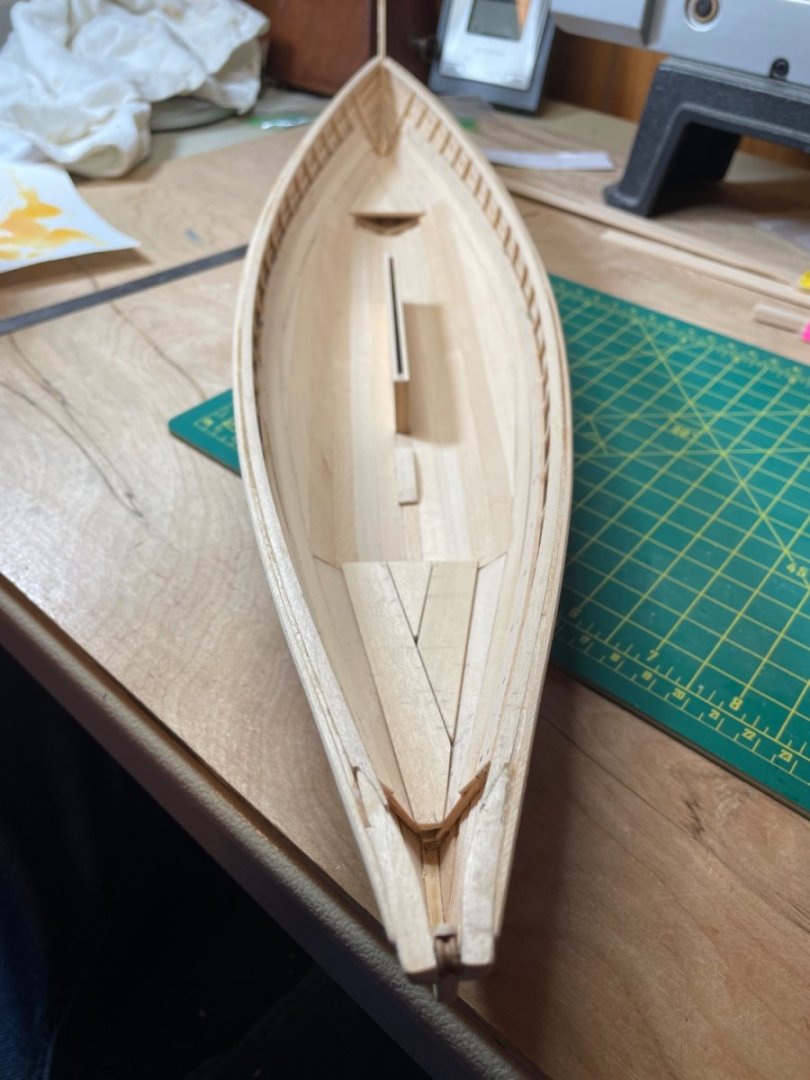
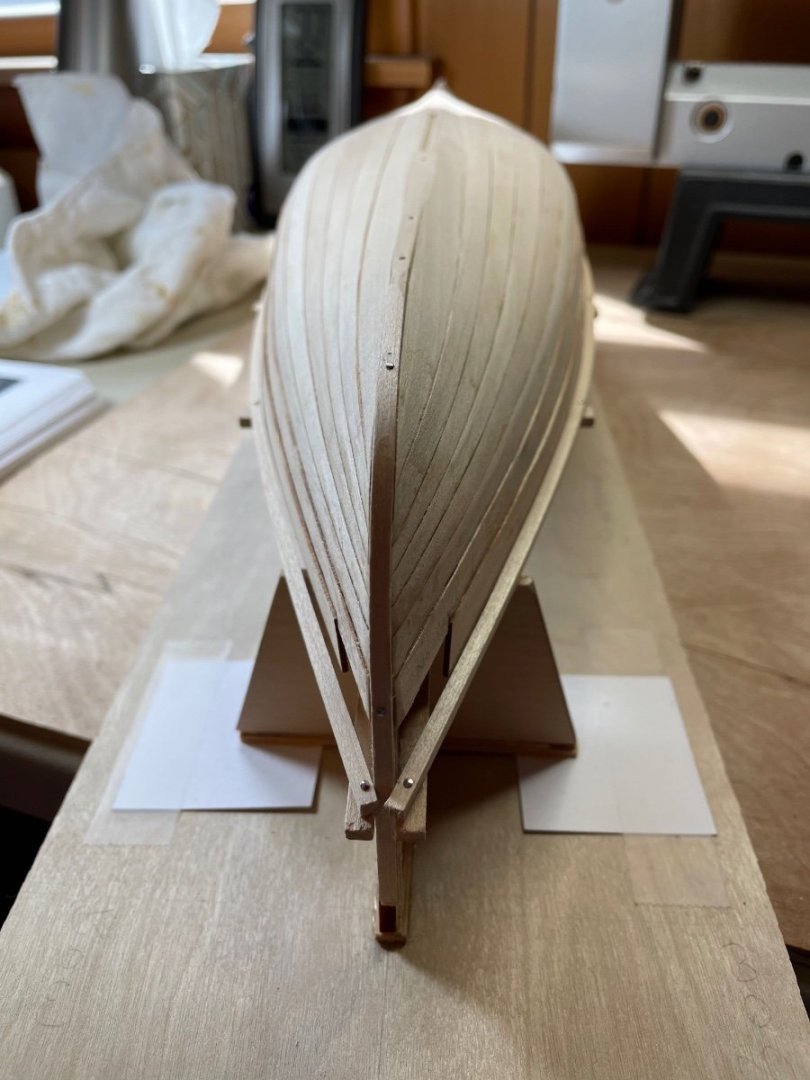
It's been a while since I posted anything but here are a few pictures thru inwales, gunwales, bow/stern sheet build (page 82). I opted to only use the nails in the first ceiling plank just to get the feel of the process. Now onto priming and painting hull interior. As the paints I used to use (Model Master acrylic) are difficult to find I have ordered acrylics from Vallejo on Amazon. They seem to get decent reviews on wood so will give it a shot. I did find this set which has all the colors called for so hopefully all will go well - Vallejo Naval Steam Era Paint Set, 17ml, Naval Steam Era Paint Set 17ml, 0.5 Fl Oz (Pack of 16). Has anyone had any experience with these? Mike - thanks for the heads up on keeping proper beam measurements. After installing the gunwale I'm dead nuts on at the beam.
-
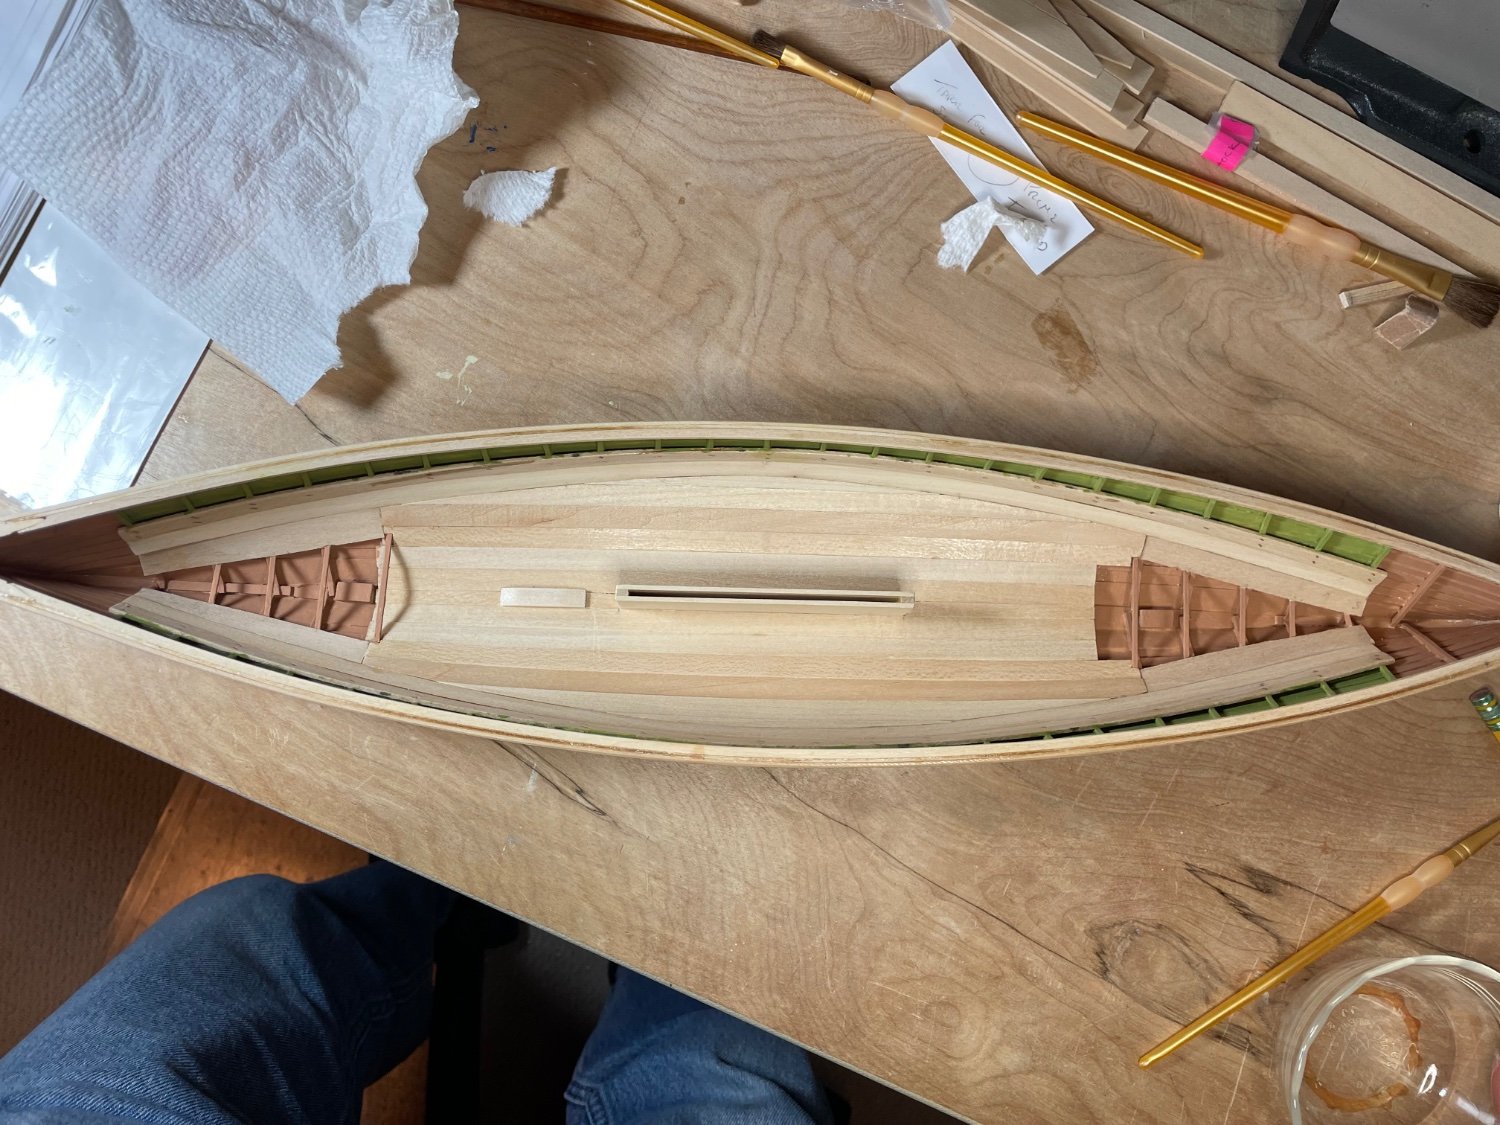
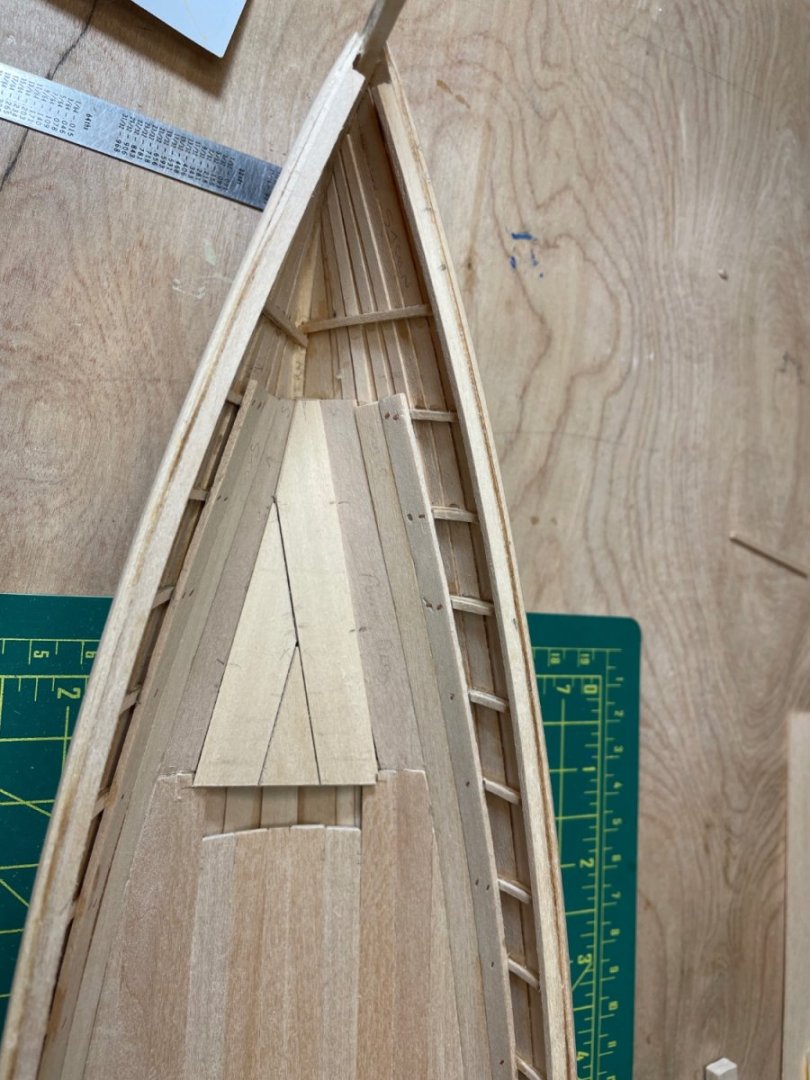
Ceiling complete...


-
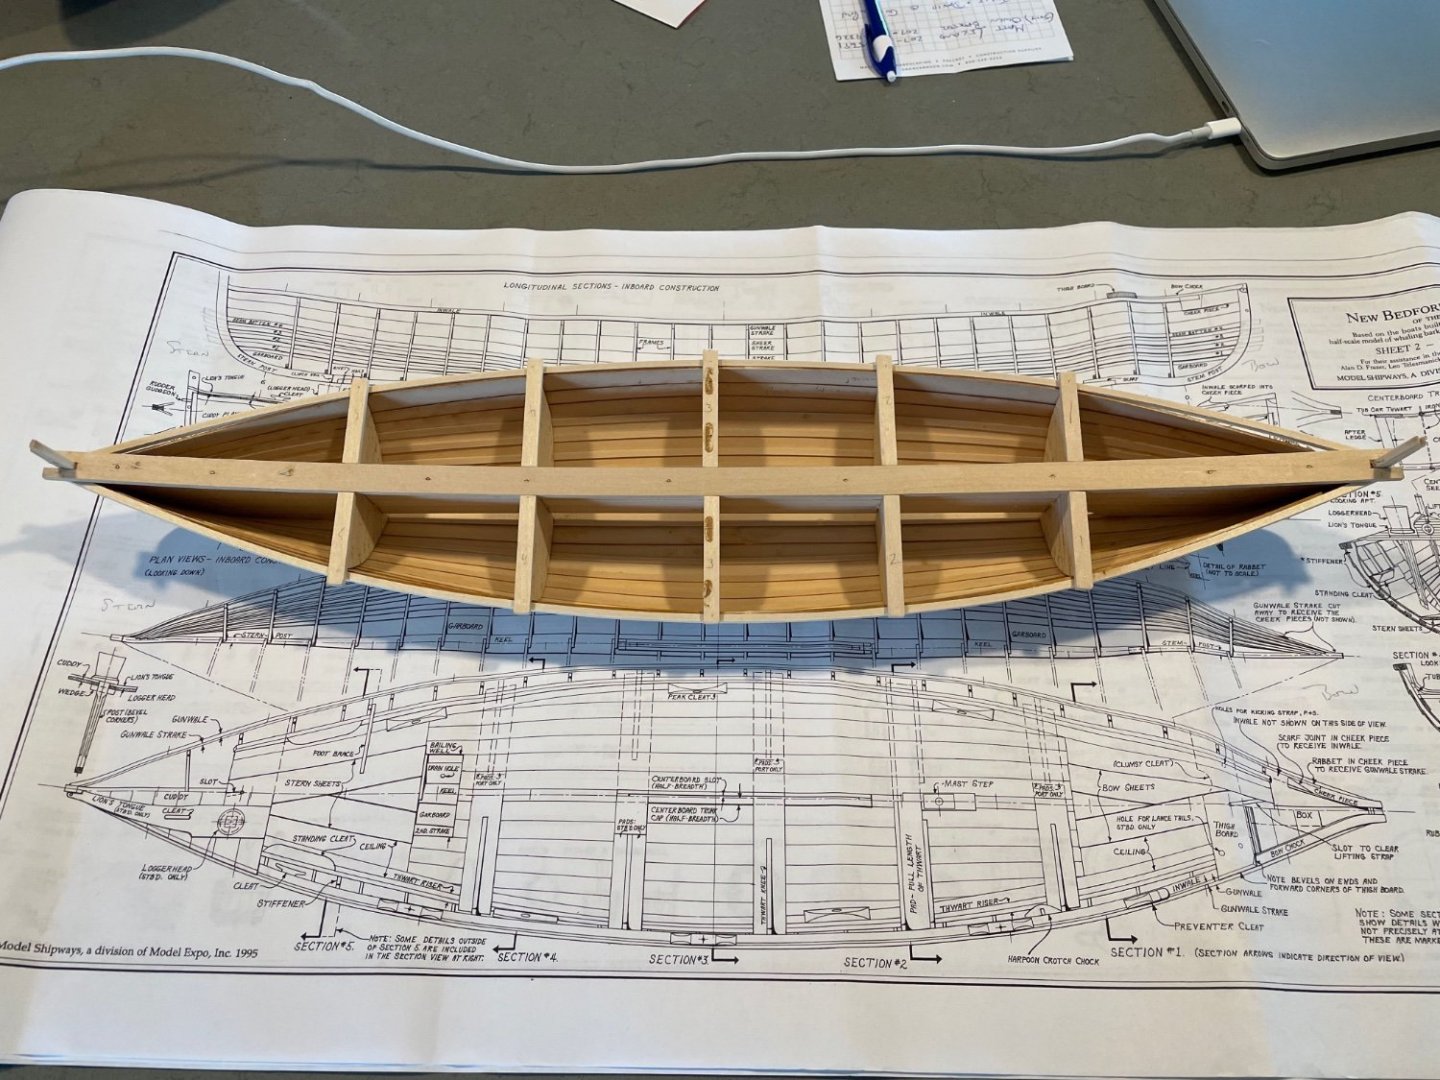
Thanks Mike. Both bow and stern had to be widened by 3/32” at third frame. At least both ends were equal so I assume that’s a good thing. Is there a trick to keep the spreaders in place?

-
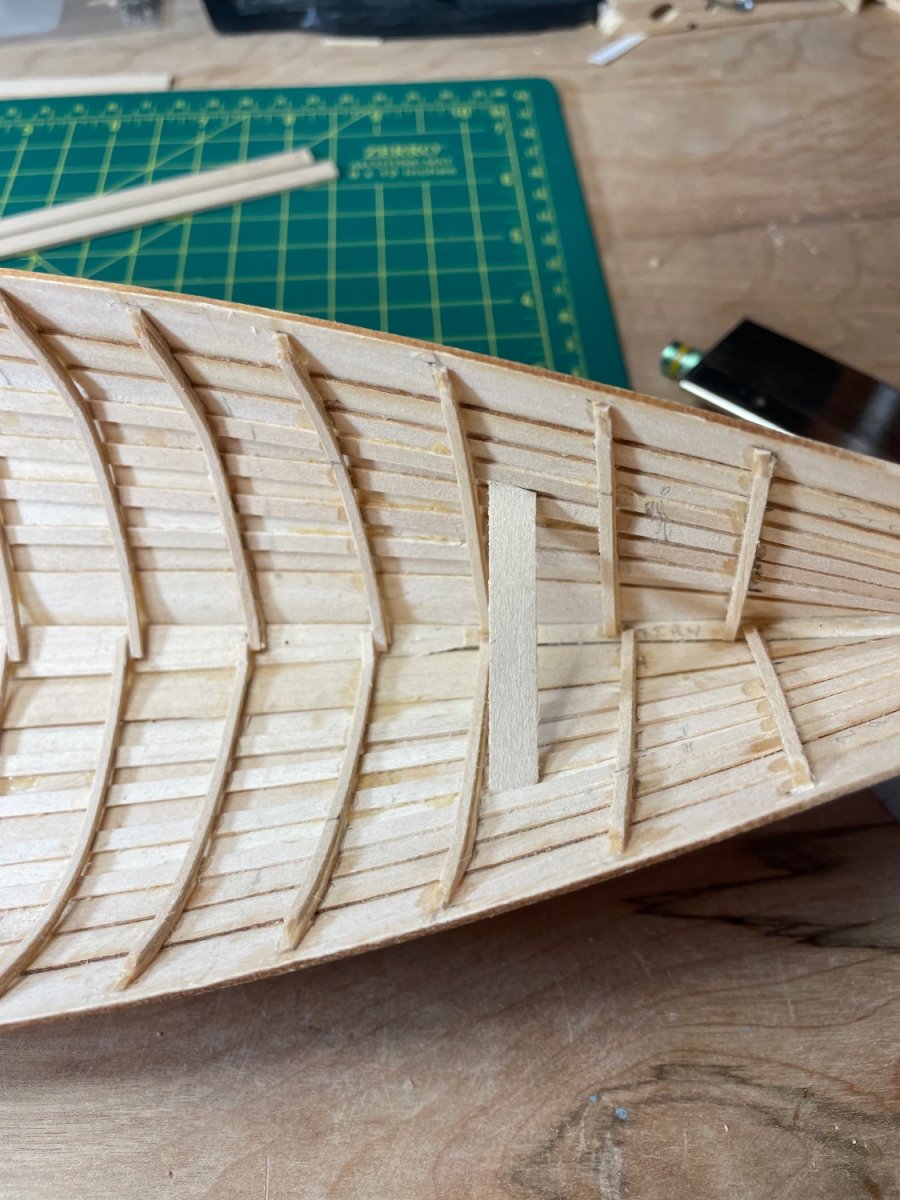
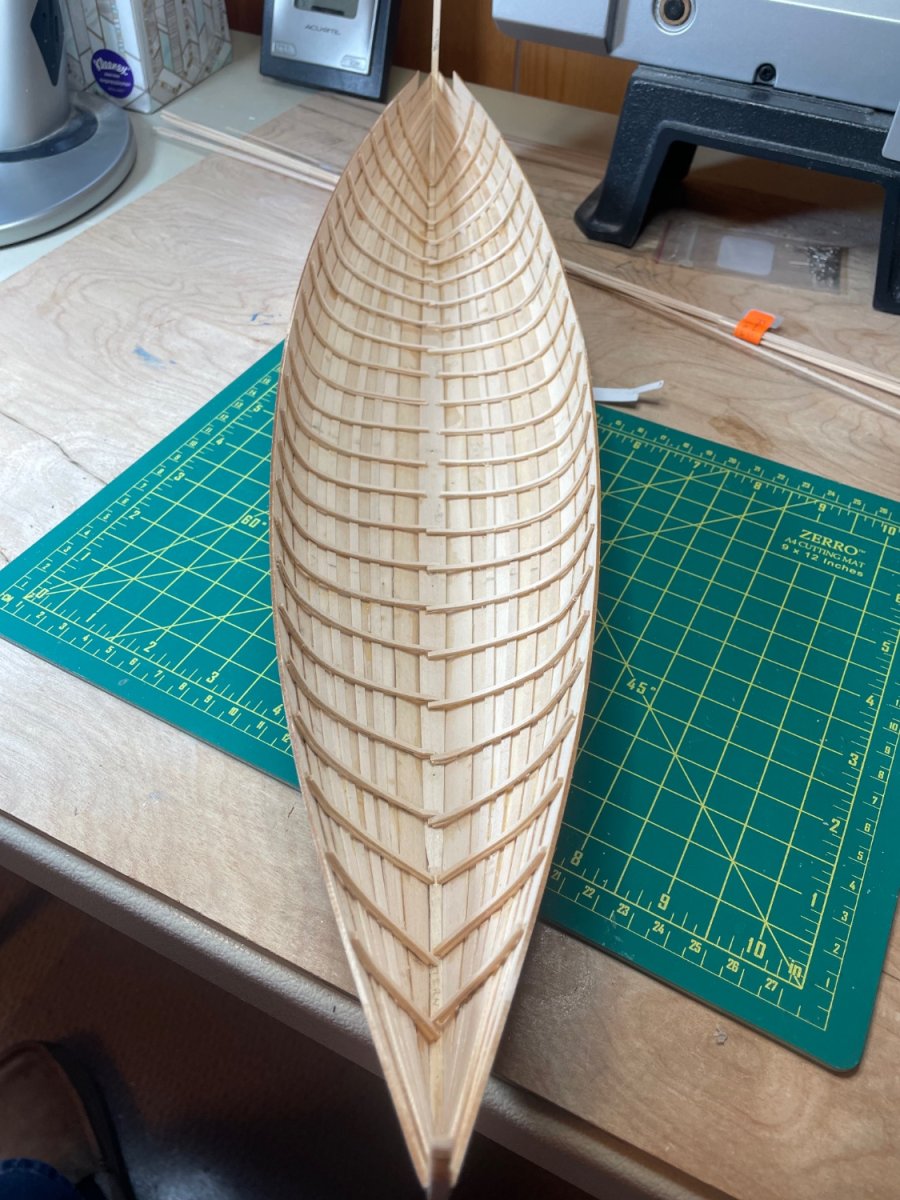
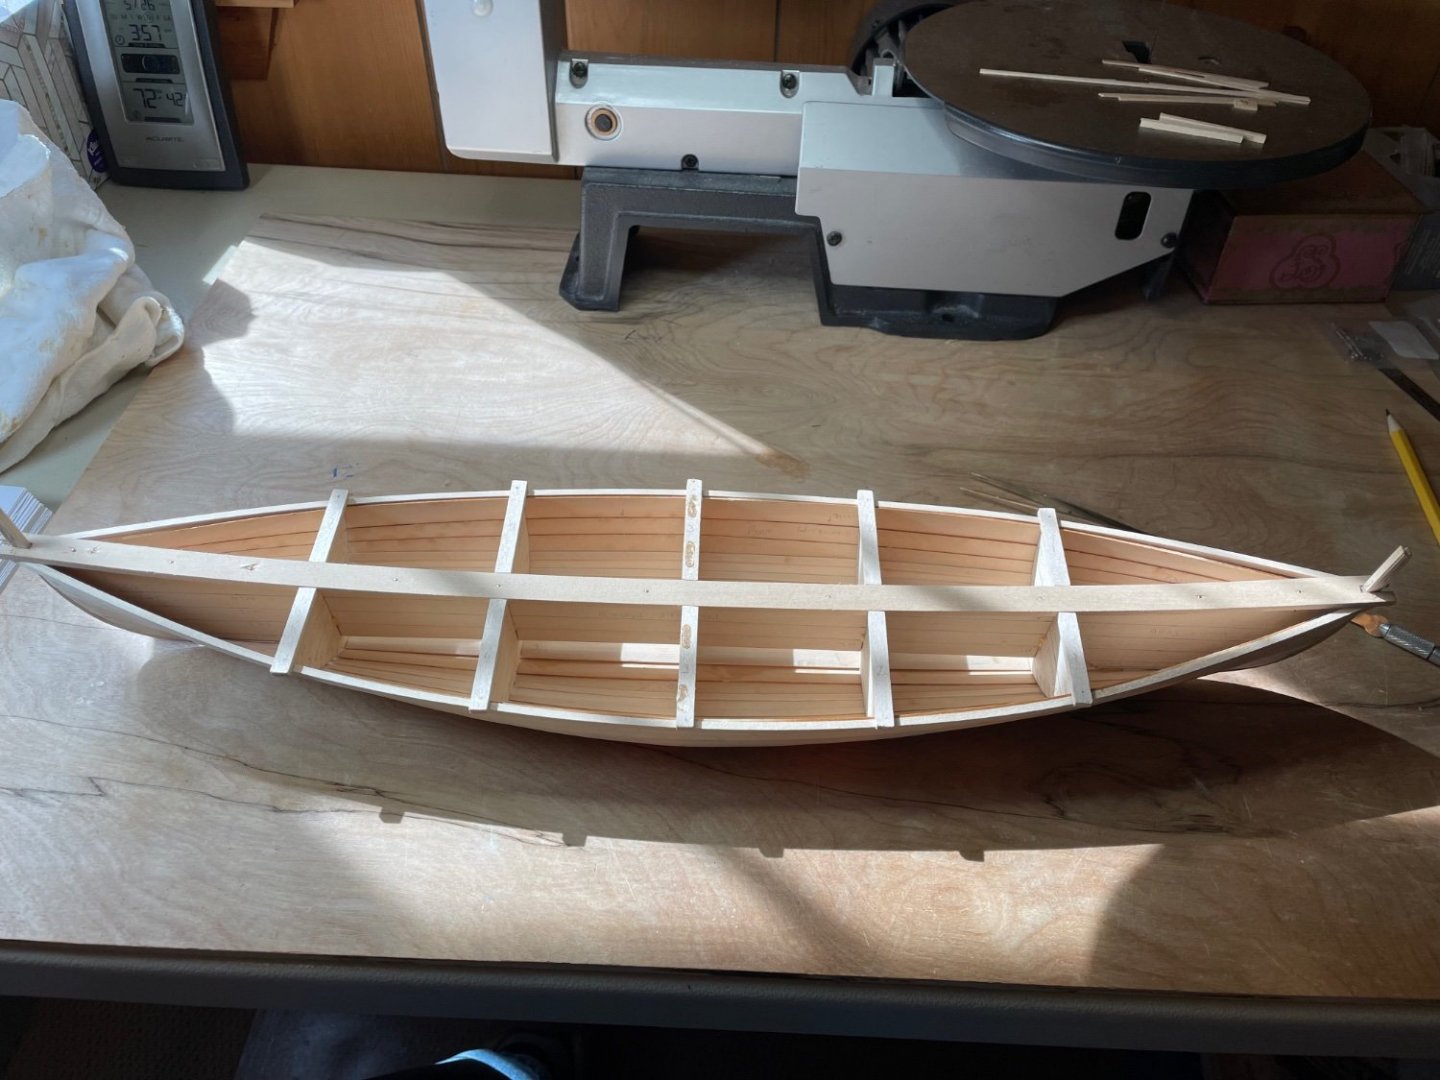
It's been a while since I worked on the Whaleboat but just finished all 96 pieces of the frames. I final figured out it was MUCH easier to work on the frames closest to the mold pieces after removing the mold - first layer was down but waited on second for about half of those closest to the mold. Also, I didn't read ahead enough to see that I should wait on the frames outside of mold pieces #1 and #5 and struggled with the first layer of frame pieces in the stern - the bow pieces are properly bent and sistered along the keel. Now I will read ahead...

-
Limited time to work on model but it's coming along. Have started on frames - about 1/2 of first layer complete. My apologies to Mike_In_RI as I inadvertently posted to his site - that's what happens when you haven't been around for a while...
-
Sorry, I forgot I can't use Apple formatted pics here... Limited time to work on model but it's coming along. Have started on frames - about 1/2 of first layer complete.8D11B079-197E-4838-933C-3095E4D38DE6.heic7709C238-1A6A-471A-870B-5CB4470EFAE3.heic

- 128 replies
-
- 5
-
-
- model shipways
- new bedford whaleboat
- (and 1 more)
-
Limited time to work on model but it's coming along. Have started on frames - about 1/2 of first layer complete.8D11B079-197E-4838-933C-3095E4D38DE6.heic7709C238-1A6A-471A-870B-5CB4470EFAE3.heic
-
Reposted from Mike_in_RI Whaleboat build log... I just restarted my Whaleboat after taking a break for my Cape Cod Nimblets and see I have a question. Appears page 56 is missing from my Ronnberg "To Build a Whaleboat' that came in the Model Shipways kit. I can probably figure it all out but if anyone can take a picture of that page and send to me, that would be much appreciated. I'll start my own log shortly.
-
I just restarted my Whaleboat after taking a break for my Cape Cod Nimblets and see I have a question. Appears page 56 is missing from my Ronnberg "To Build a Whaleboat' that came in the Model Shipways kit. I can probably figure it all out but if anyone can take a picture of that page and send to me, that would be much appreciated. I'll start my own log shortly.
-
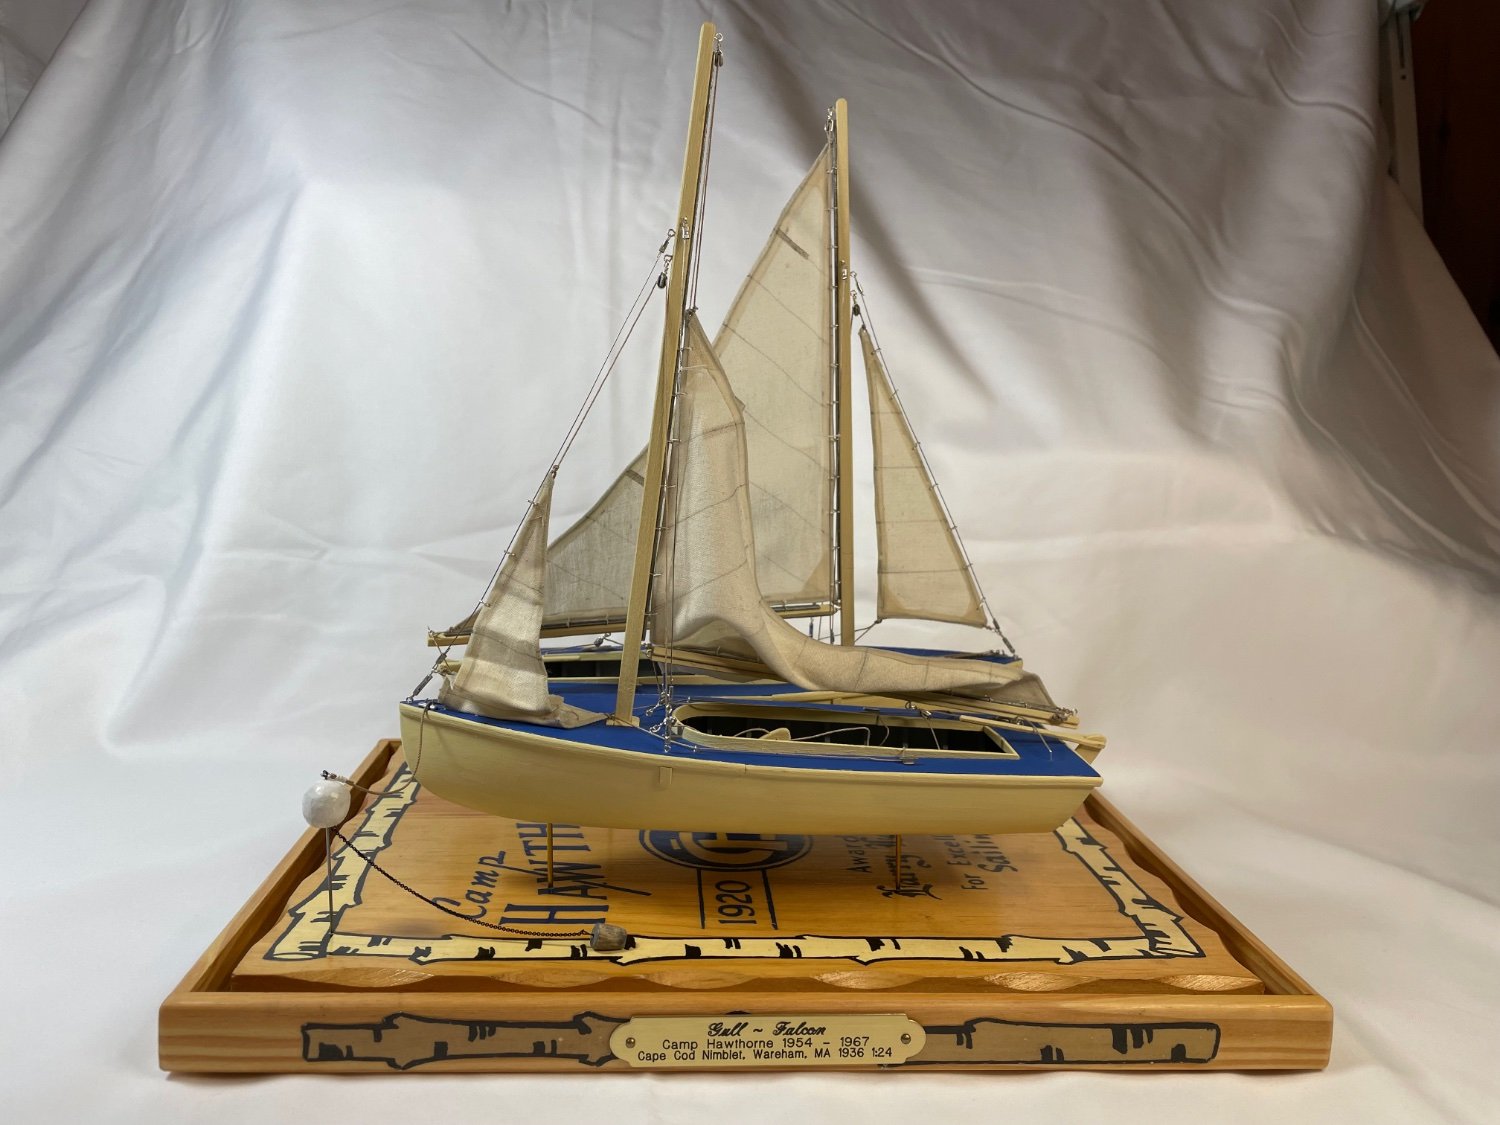
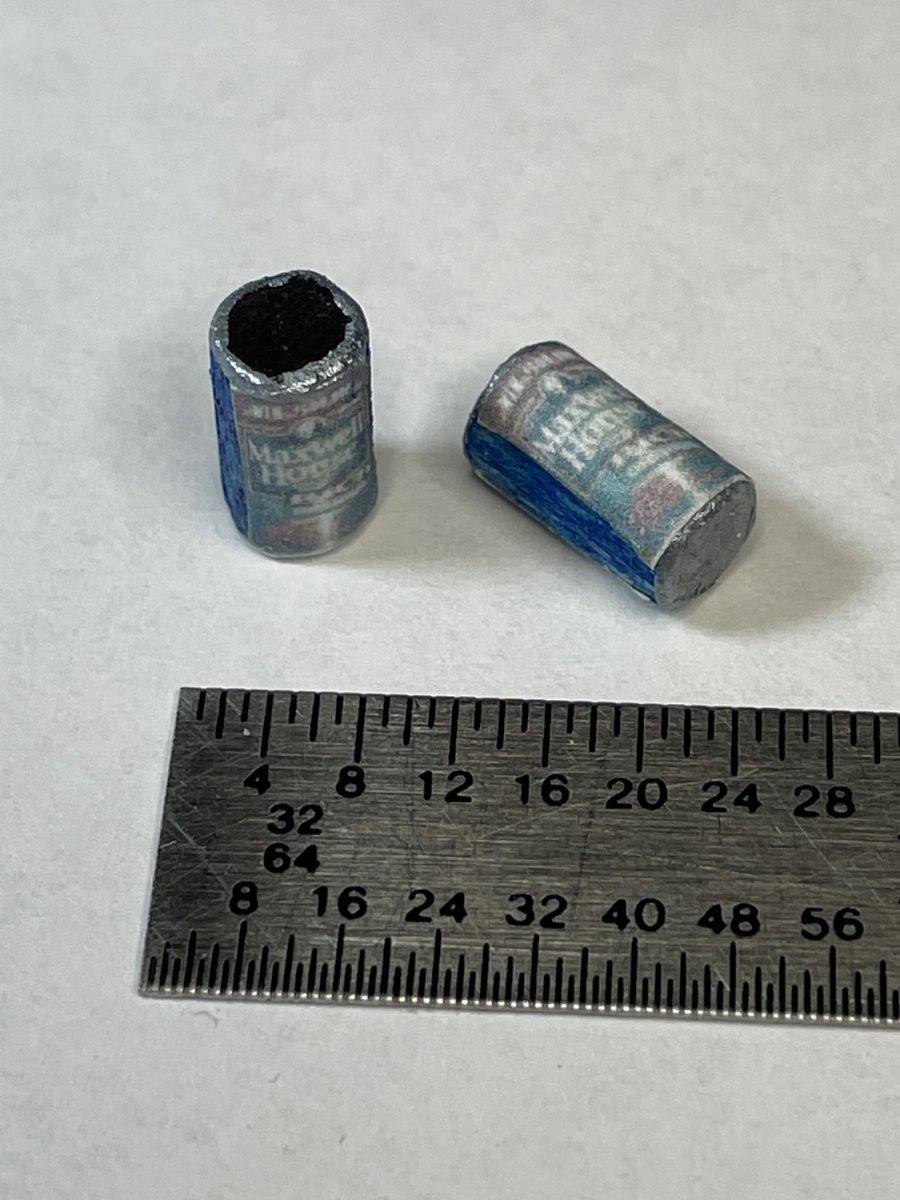
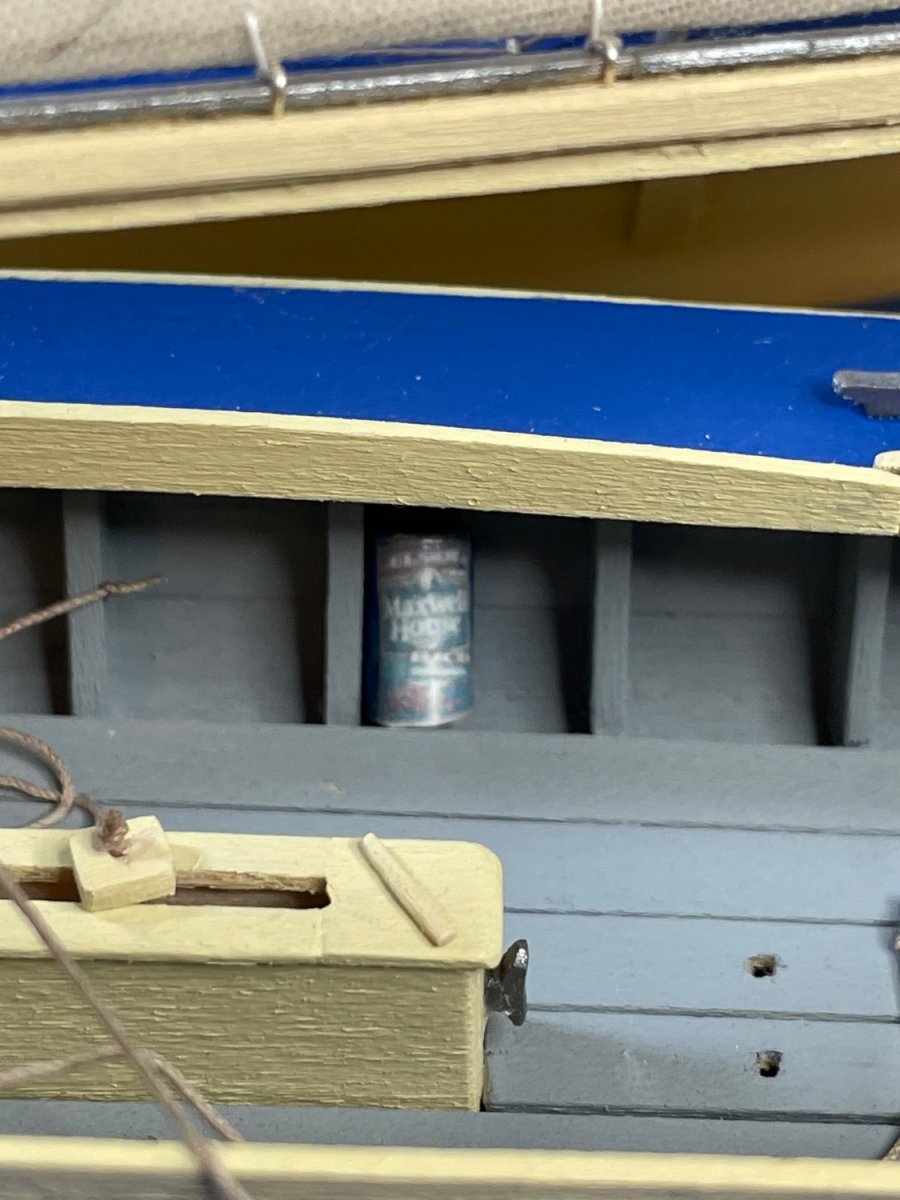
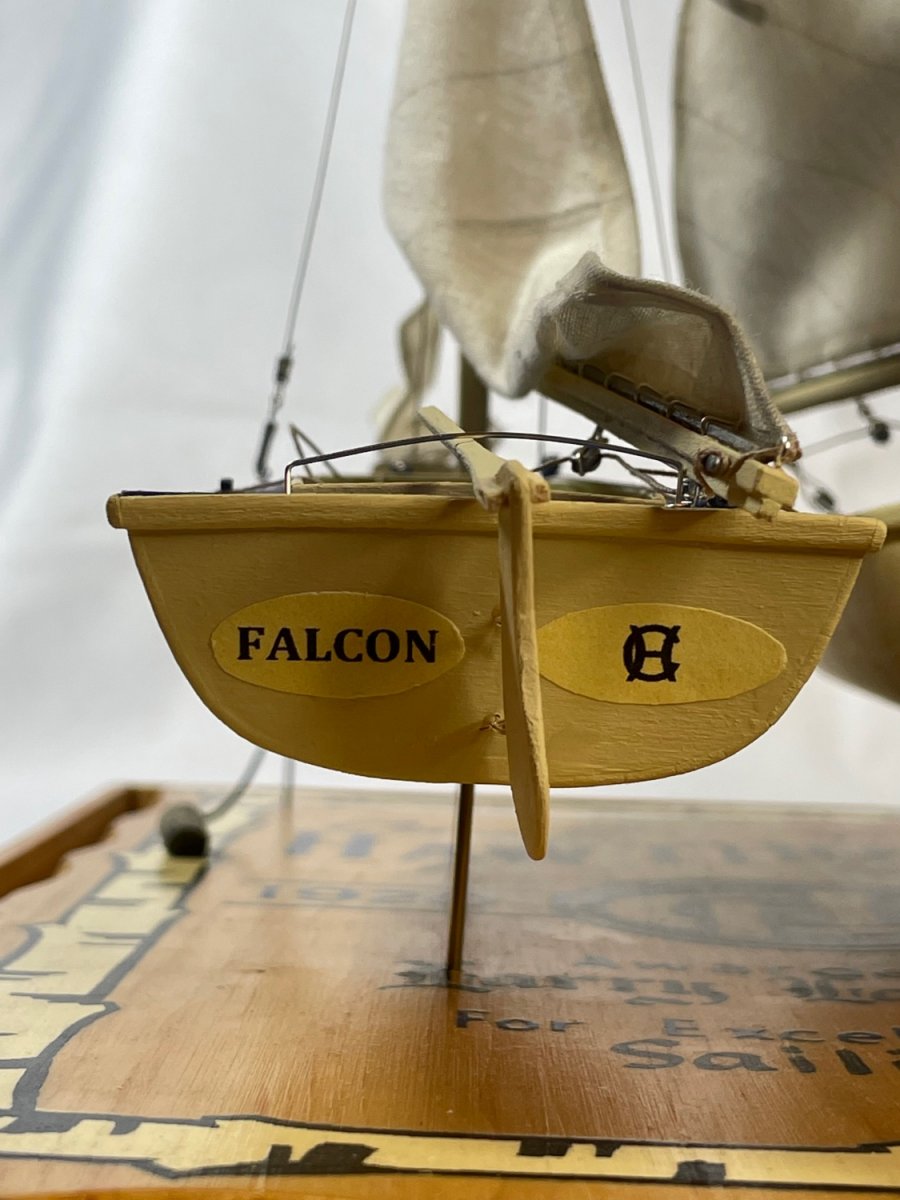
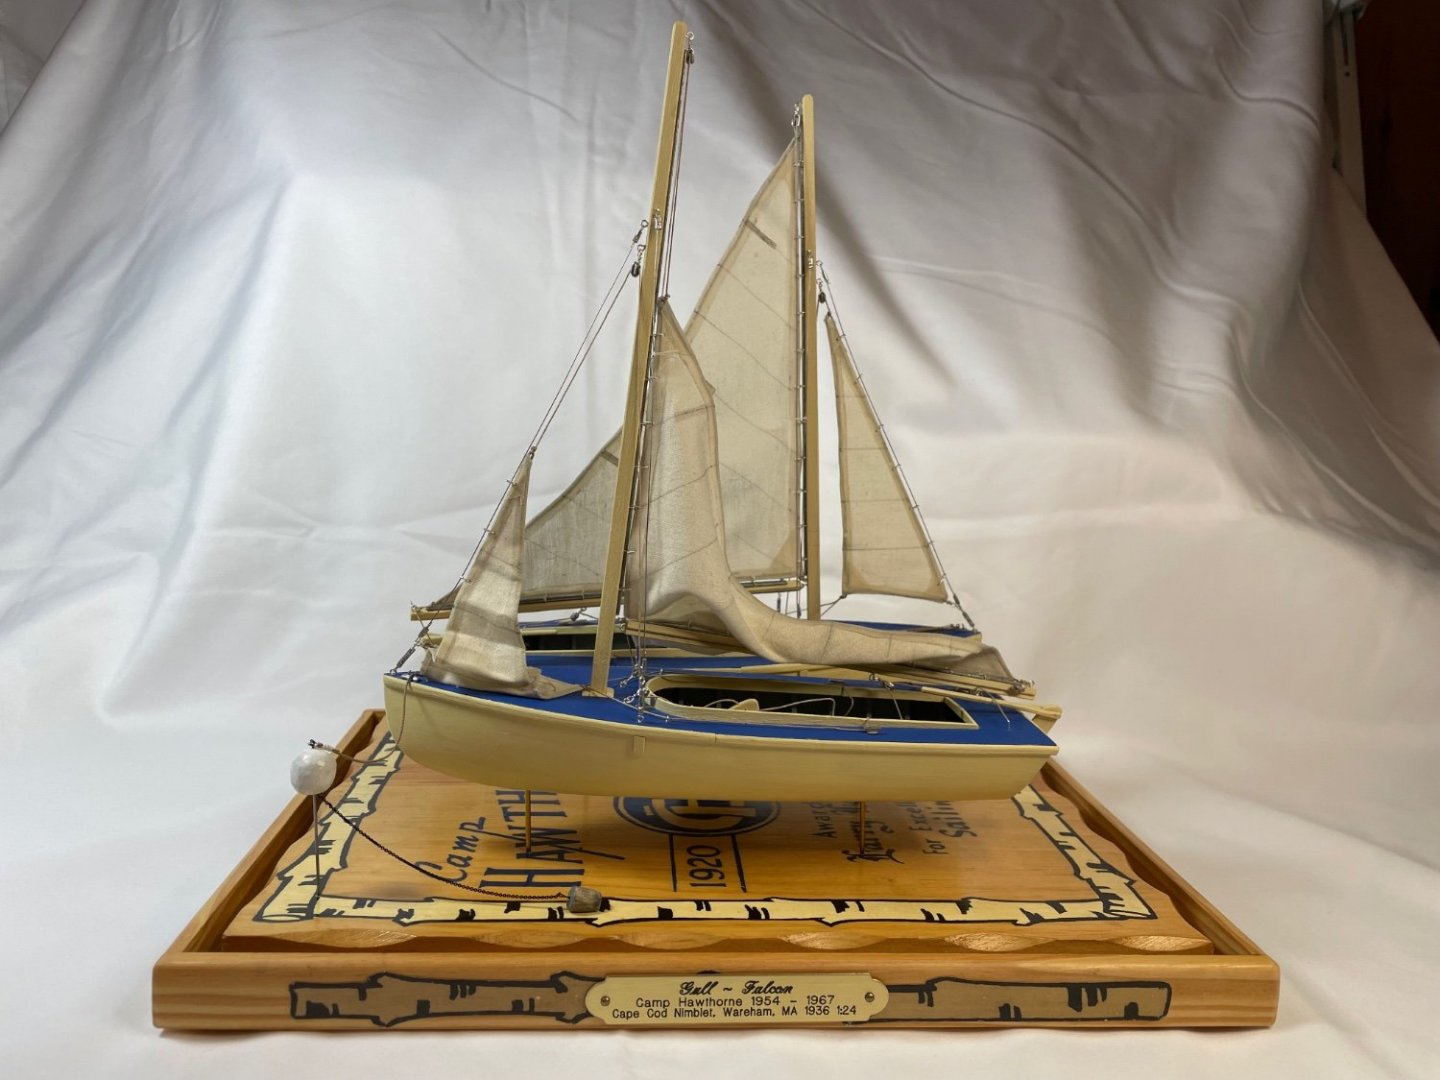
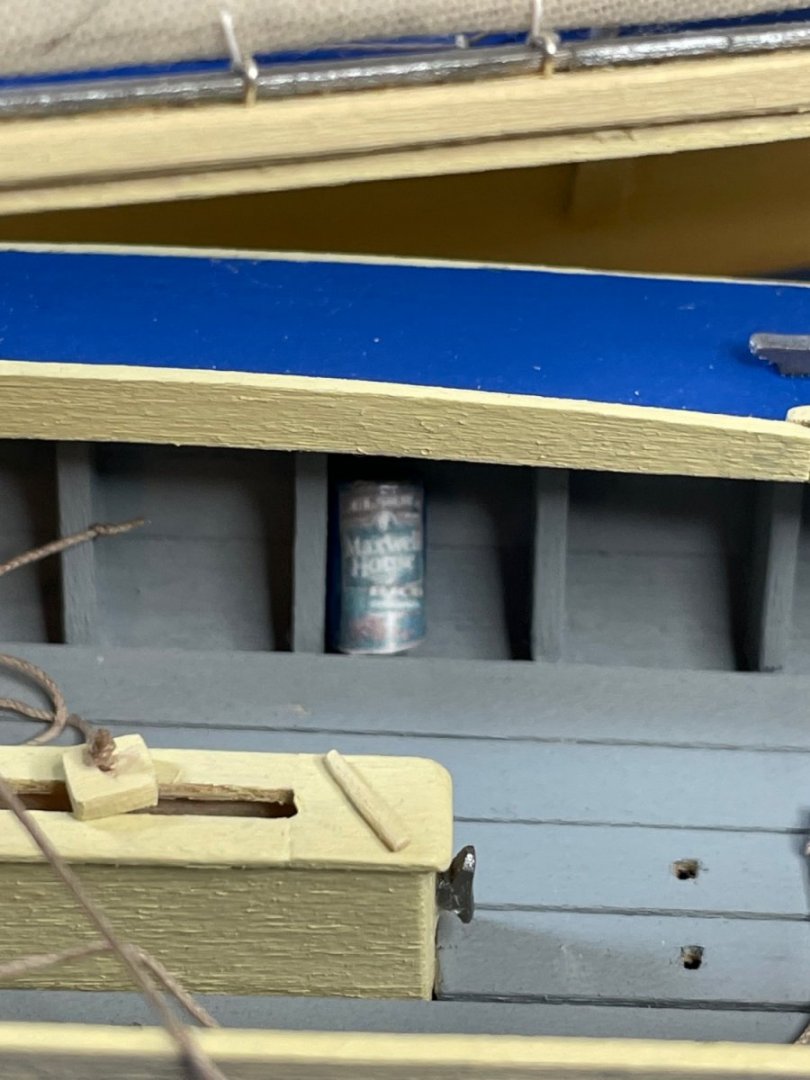
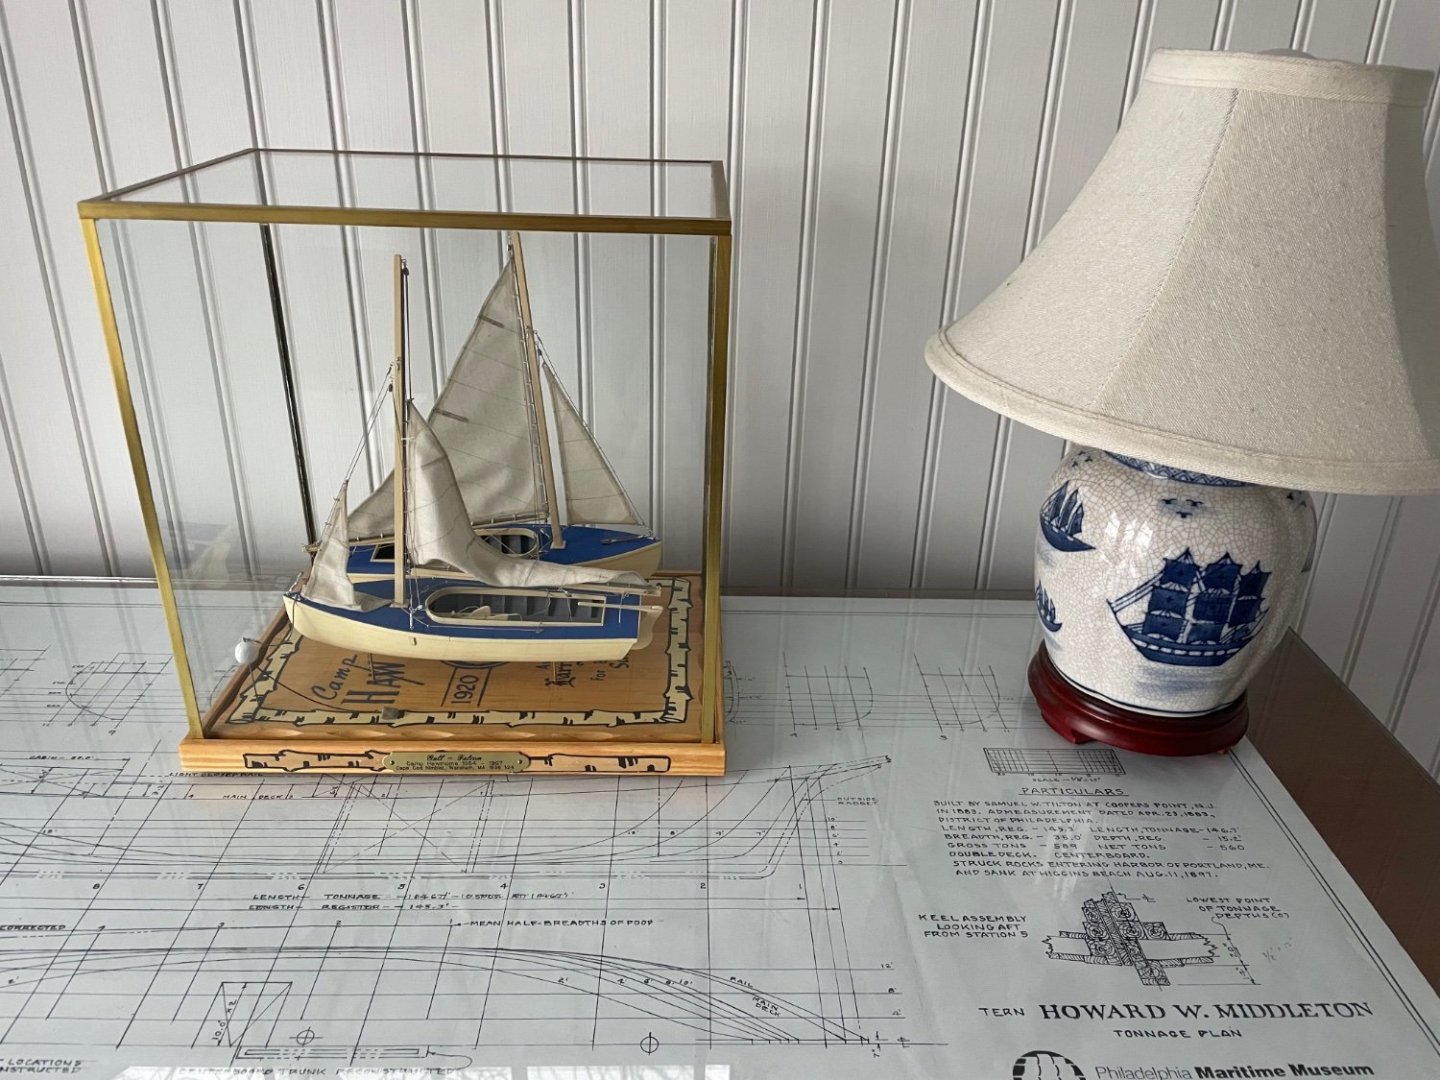
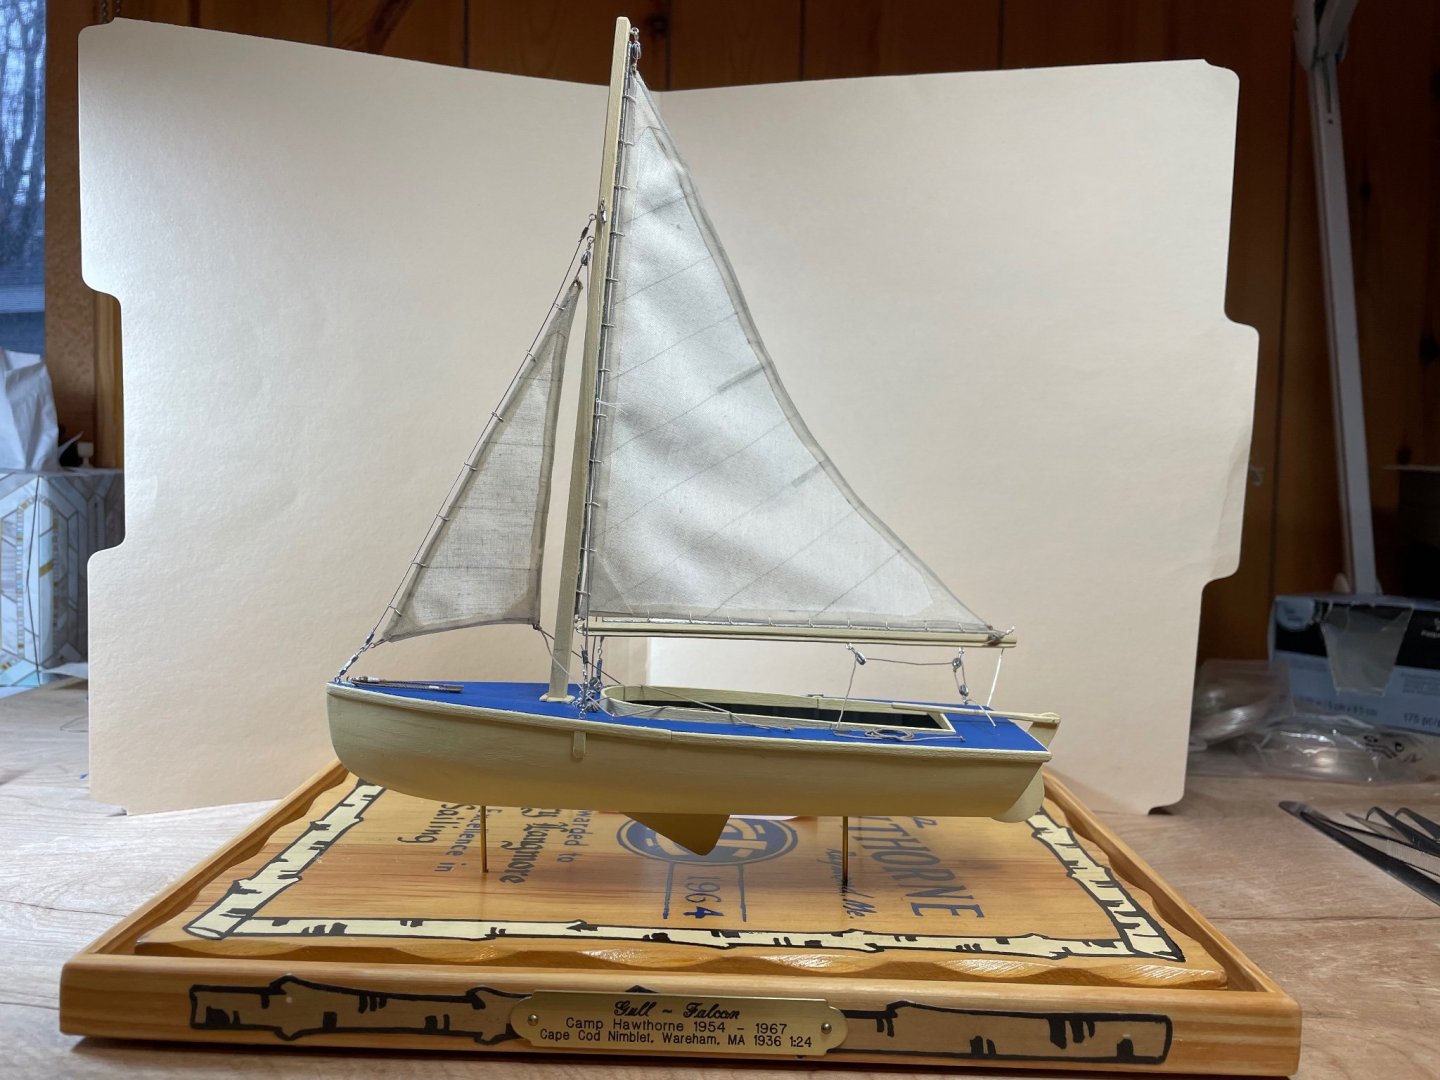
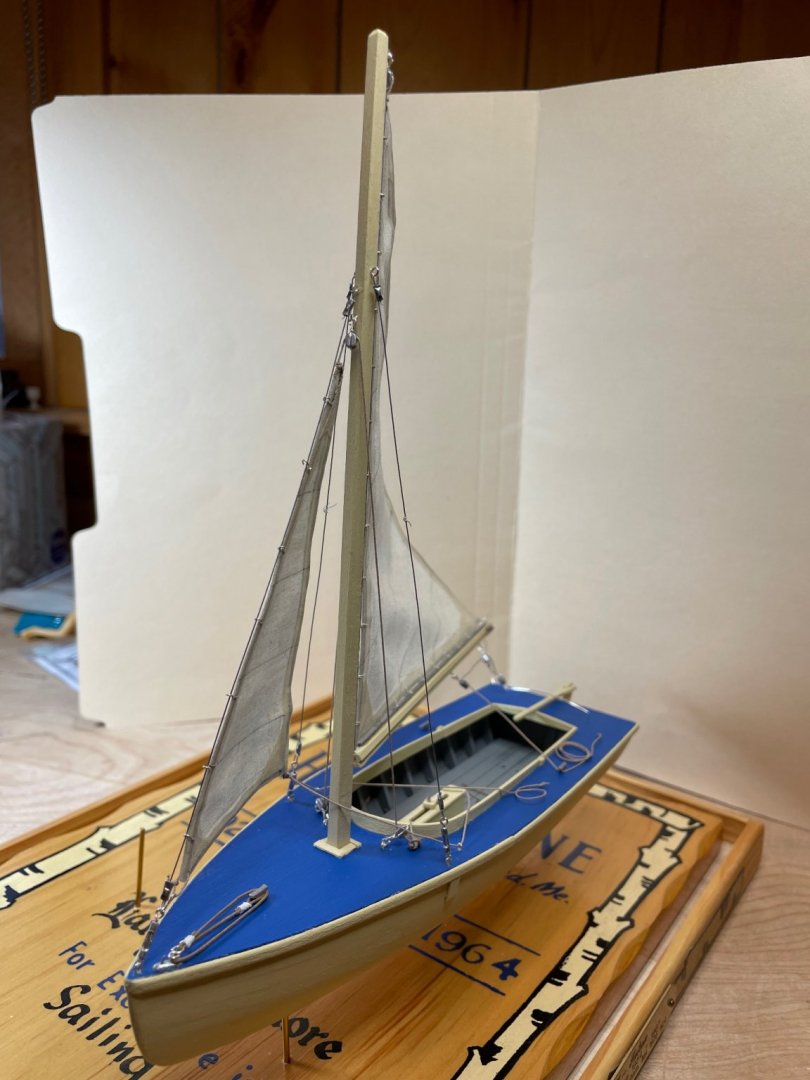
Well as it is a new year it is time to wrap up my 100th reunion camp project with the completion of the last two boats - the Gull and Falcon. Finished with the two Maxwell House bailing cans yesterday and placed the completed models in the case. The rigging and set up of the sails was modeled on the two pictures - I did buy 1:24 scale people but in my wife's words - they looked freaky so opted to just leave natural. So here are a few of the final pictures including the final resting place on my bureau along side the plans of the Howard W. Middleton that was completed several years ago (see link below). I'll be back - probably get back to the New Bedford Whaleboat.


- 84 replies
-
- 2
-
-
- nimblet
- knockabout
- (and 1 more)
-
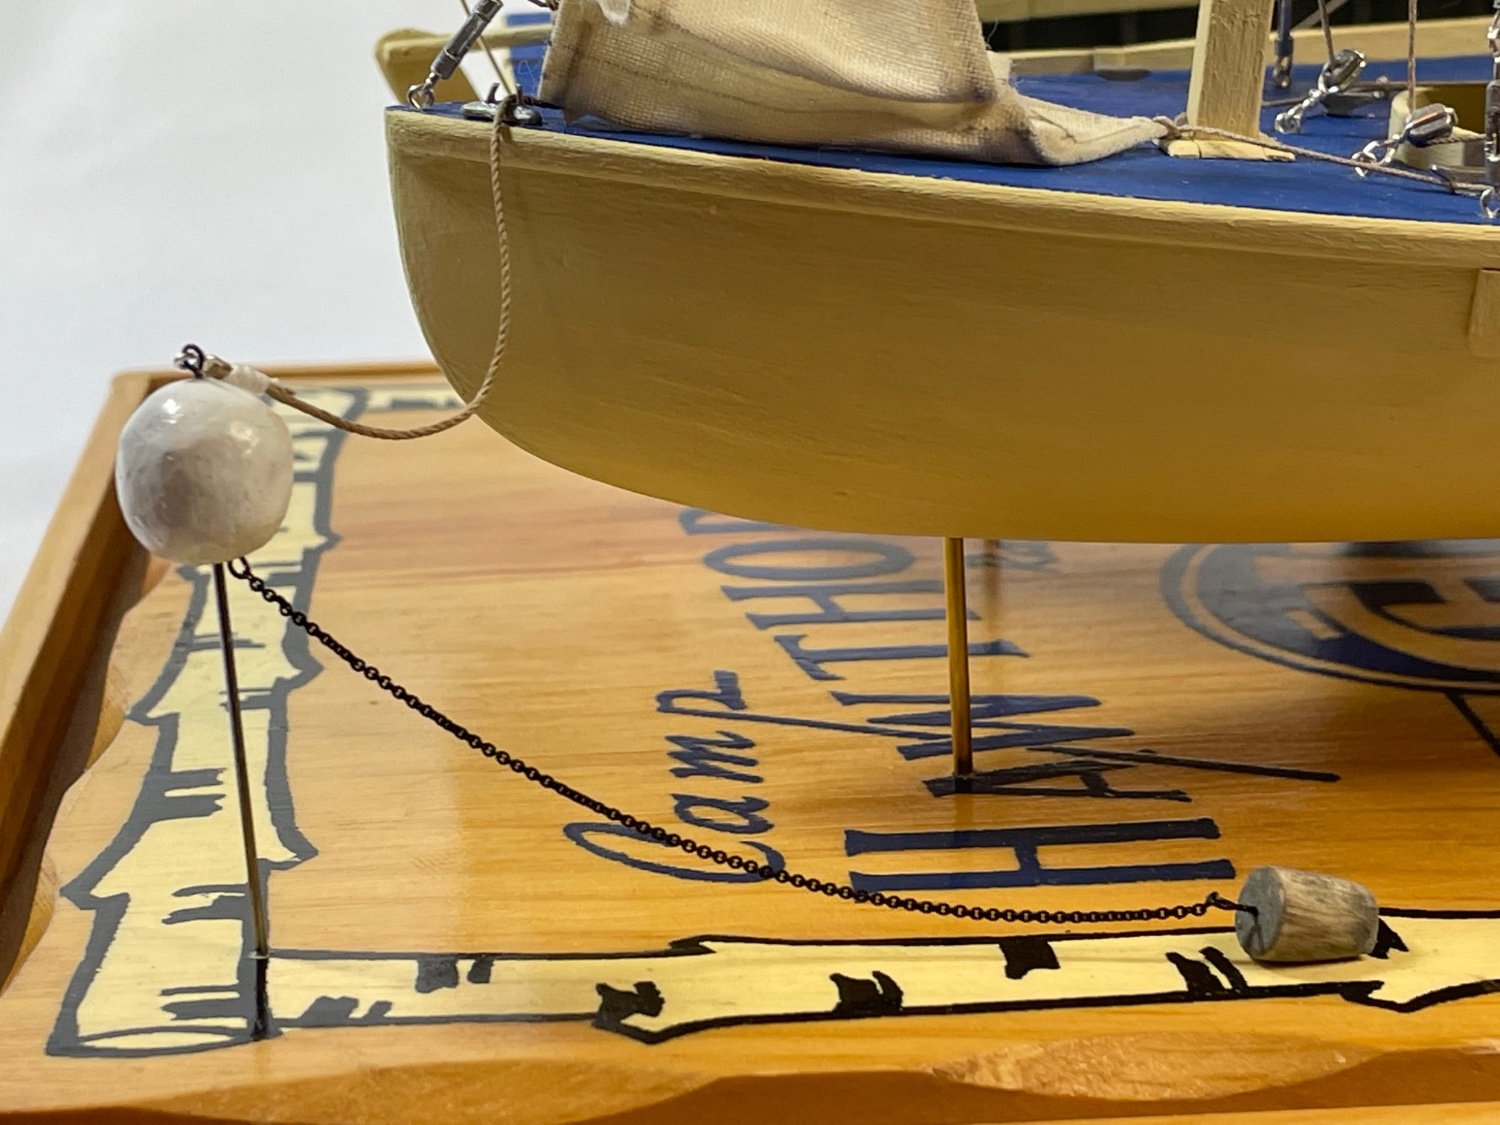
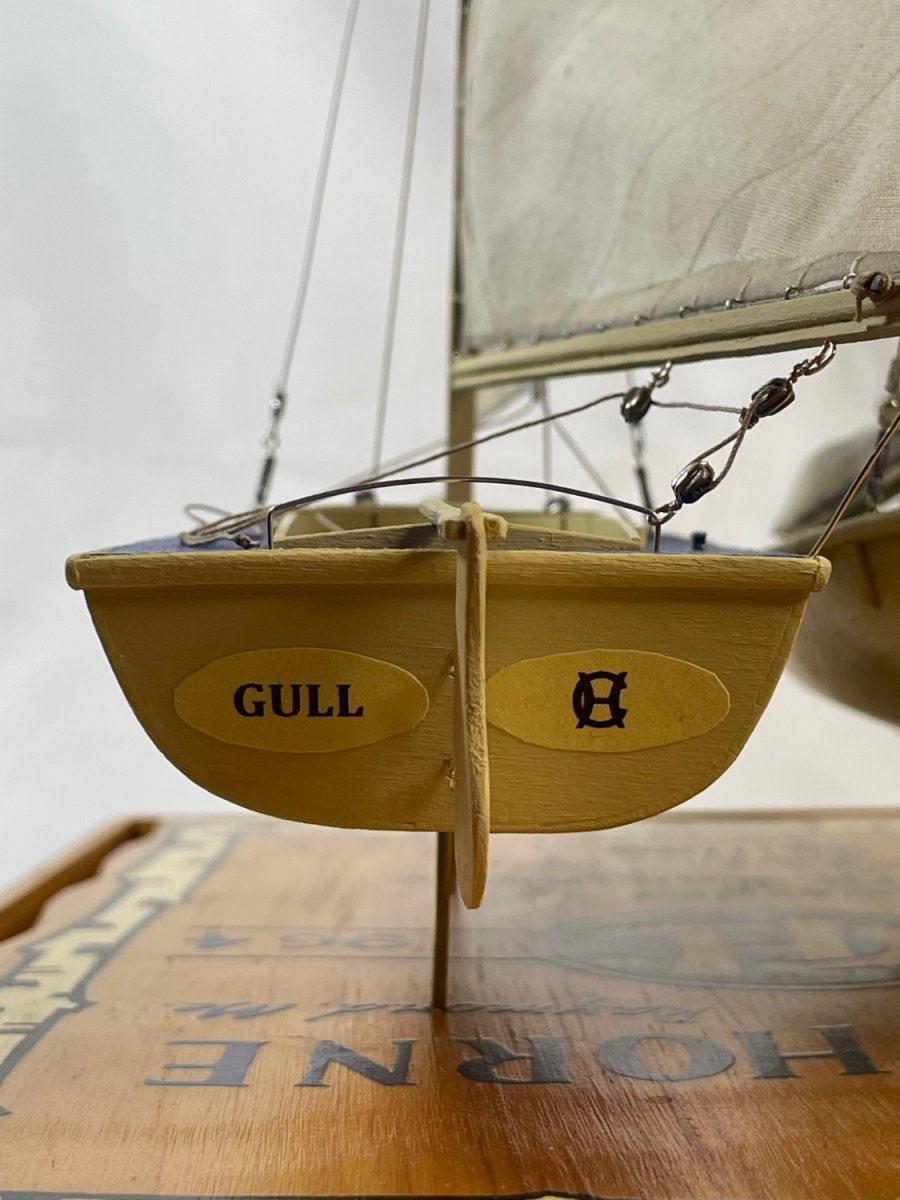
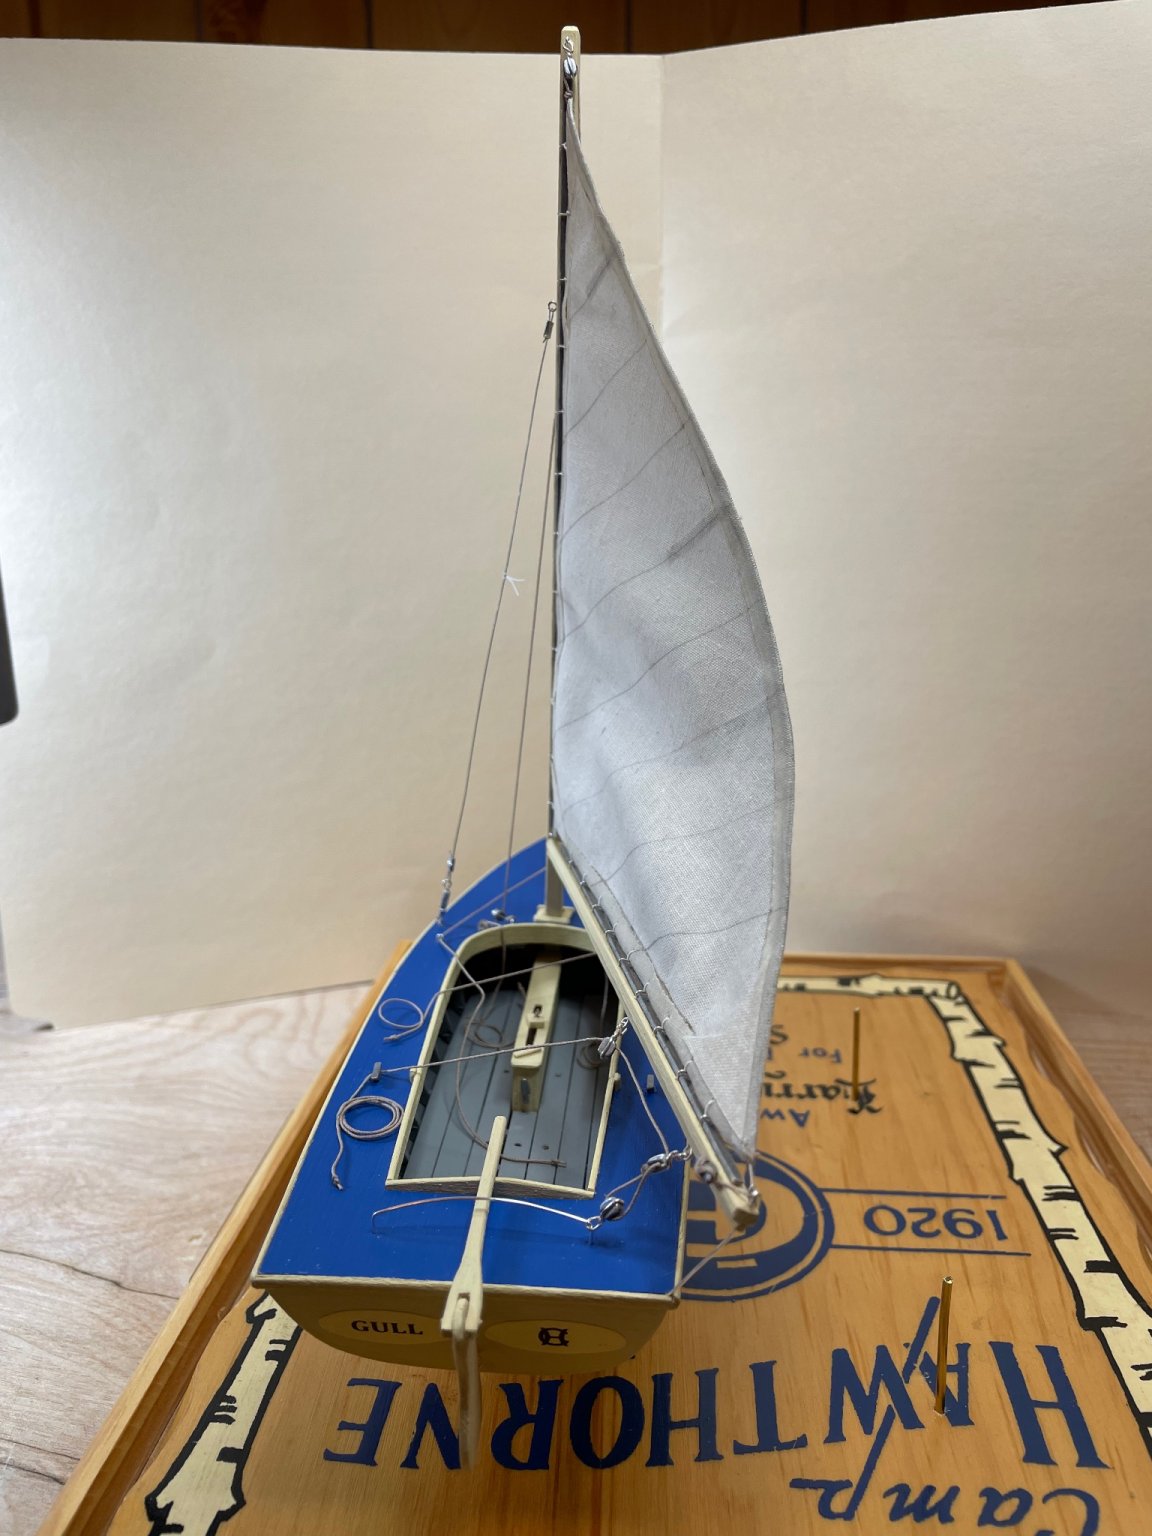
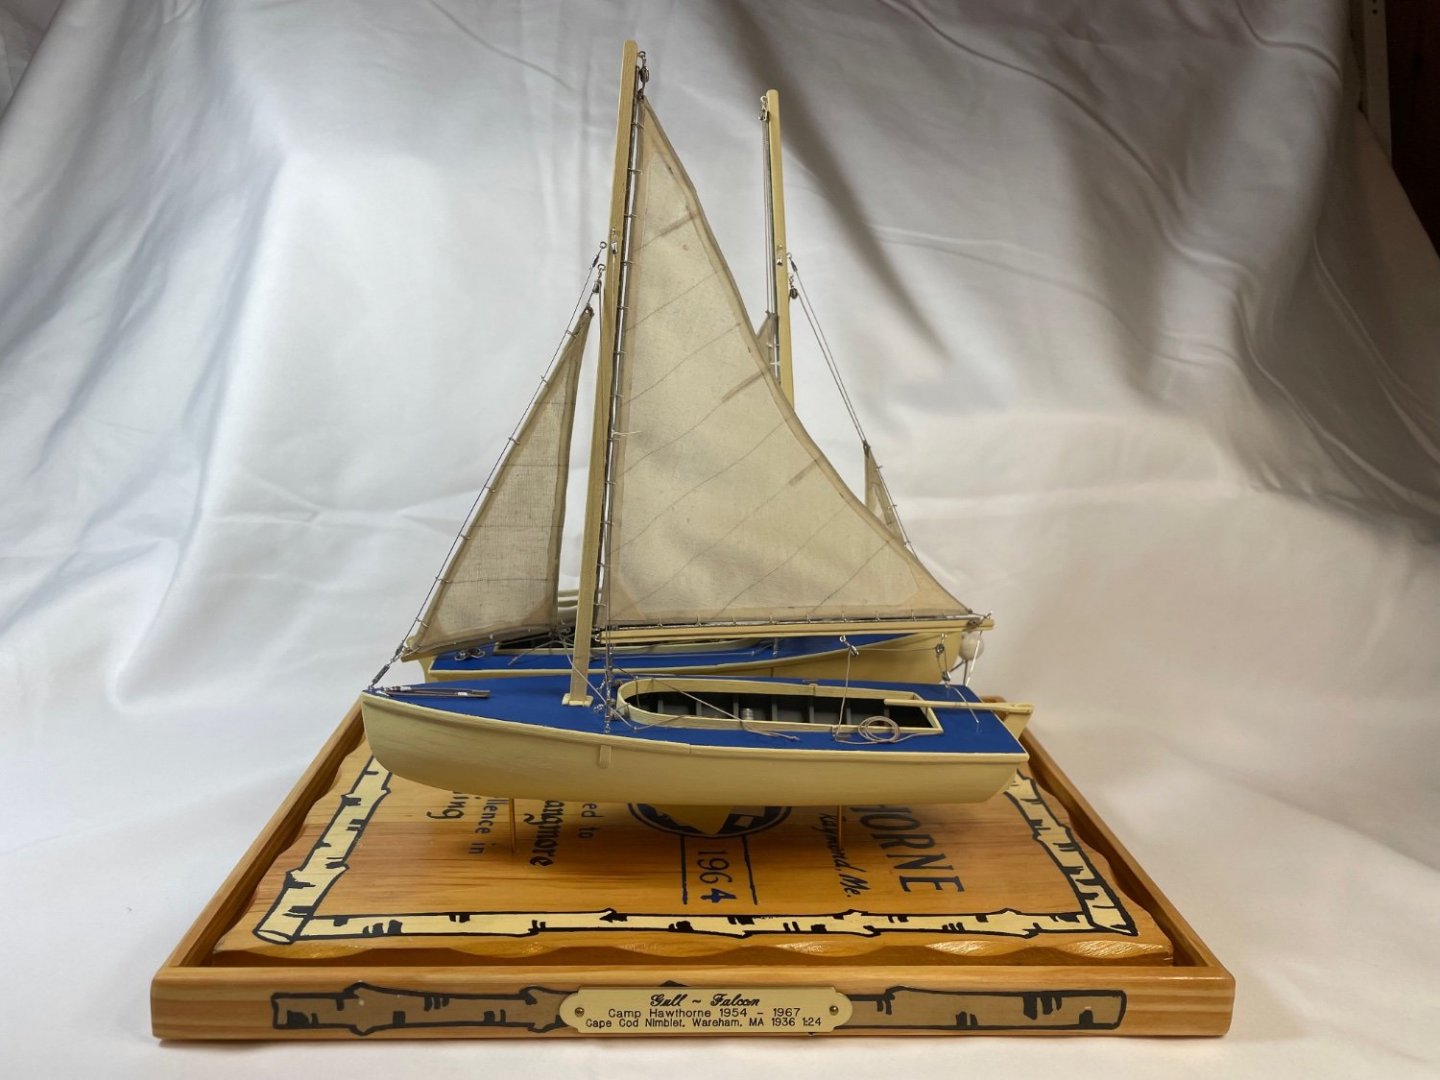
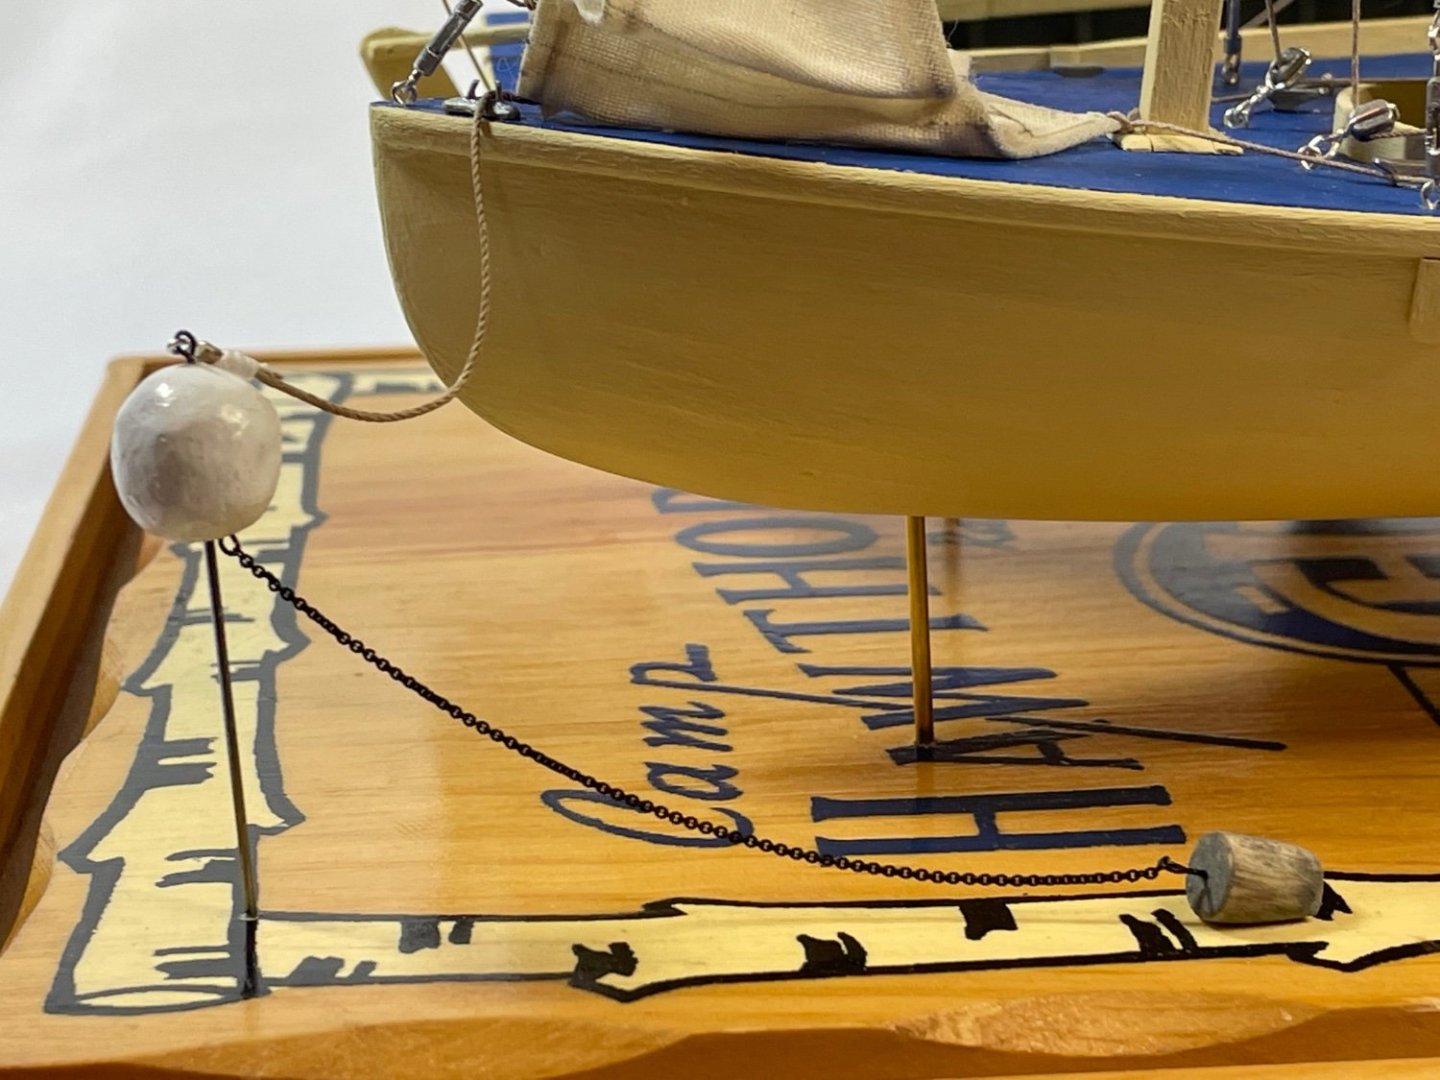
Third boat (Gull) complete. I used a small piece of 24 gauge silver wire to hold the mast out so it appears to be catching wind while sailing close hauled on port tack. Forgot to include painter line in first set but after looking at some old photos realized my mistake so now included. Once I determine how I want the sails to look (hoisting or furled) on last boat (Falcon) will begin final steps. If you look closely you can see the telltails on the two shrouds indicating a close haul tack.


- 84 replies
-
- 3
-
-

-
- nimblet
- knockabout
- (and 1 more)