KevinR
-
Posts
214 -
Joined
-
Last visited
Content Type
Profiles
Forums
Gallery
Events
Everything posted by KevinR
-
 Cap'n'Bob, I love the stove. It is similar to what I was planning for my build. I hope mine come out as nice as yours.
 -
Skipjack by KevinR - 1:24 - abandoned
KevinR replied to KevinR's topic in - Build logs for subjects built 1901 - Present Day
Mike, Welcome aboard! Michael, I believe I read that the average life expectancy of a Skipjack was 20 years. Of course The actual life expectancy for each boat varied based on how well they were maintained. The Skipjack Kathryn was built for oyster dredging about 1901, and worked until ~2008. From the survey Kathryn appeared to have been in much better shape than EC Collier and to have had fewer stop-gap repairs. "KATHRYN is not typical of the skipjacks in her construction. Most skipjacks were cross-planked and built principally of pine. KATHRYN's bottom is plankd fore-and-aft, and most of her original structural members and her bottom planks are oak. This construction technique allowed the builders to round the chin much more than is found on cross-planked skipjacks. Kathryn is the only skipjack known to have fore-and-aft planking and a rounded chine." (Taken from the "Historic American Engineering Record" for the Two Sail Bateau "Skipjack" - Kathryn.) I believe the Kathryn was built by someone who, just believed, that the boat should be built to last. Thanks everyone for stopping by, -
Skipjack by KevinR - 1:24 - abandoned
KevinR replied to KevinR's topic in - Build logs for subjects built 1901 - Present Day
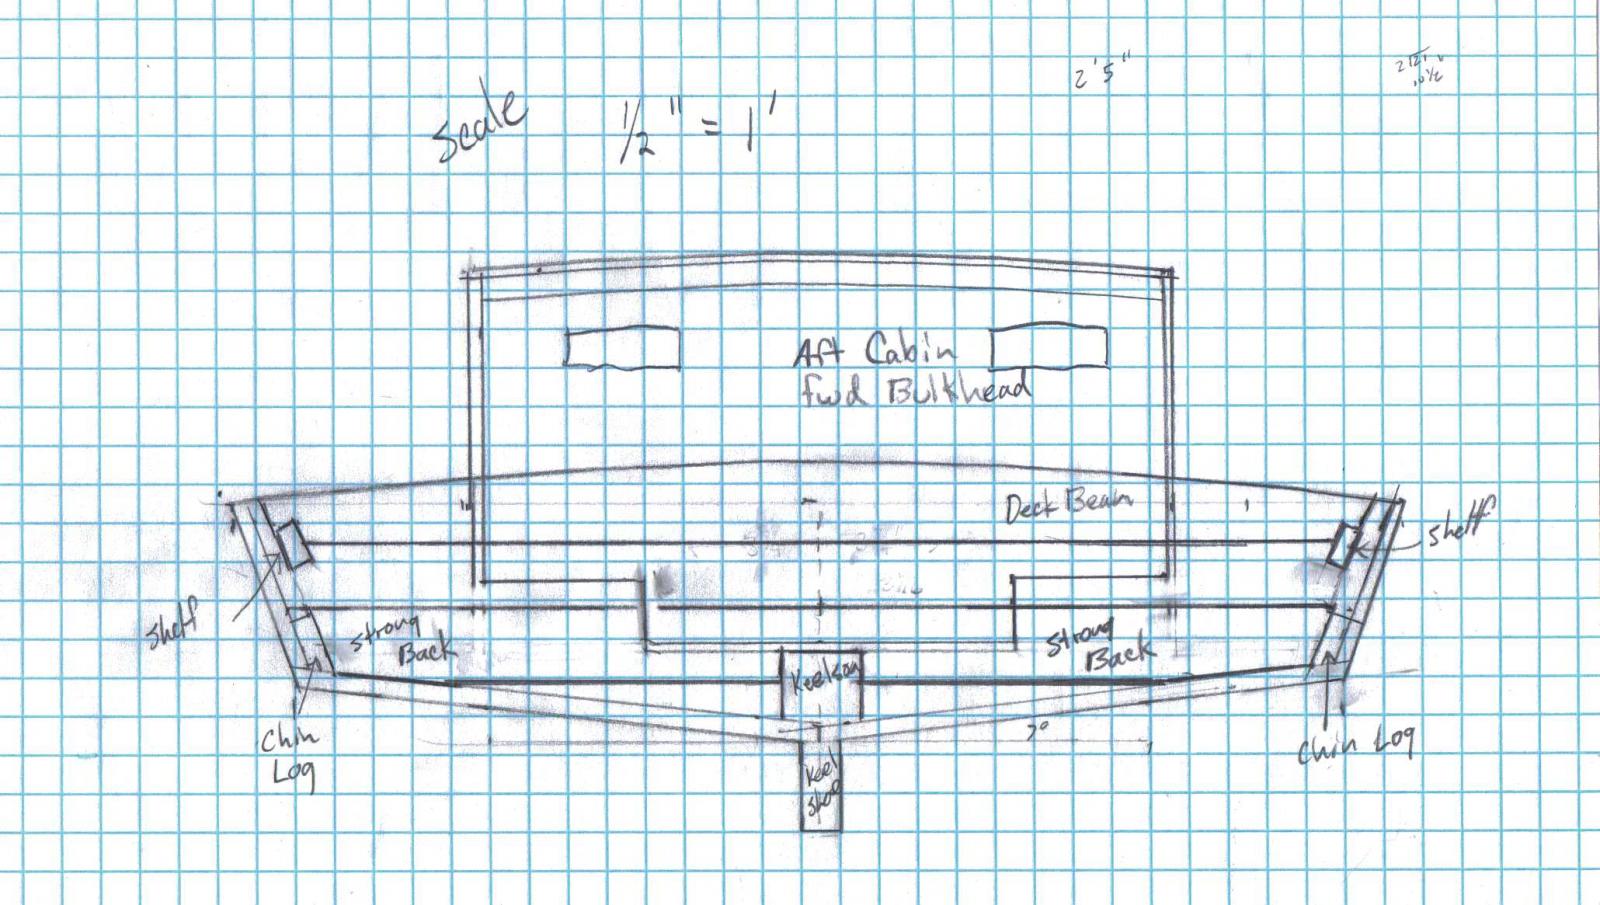
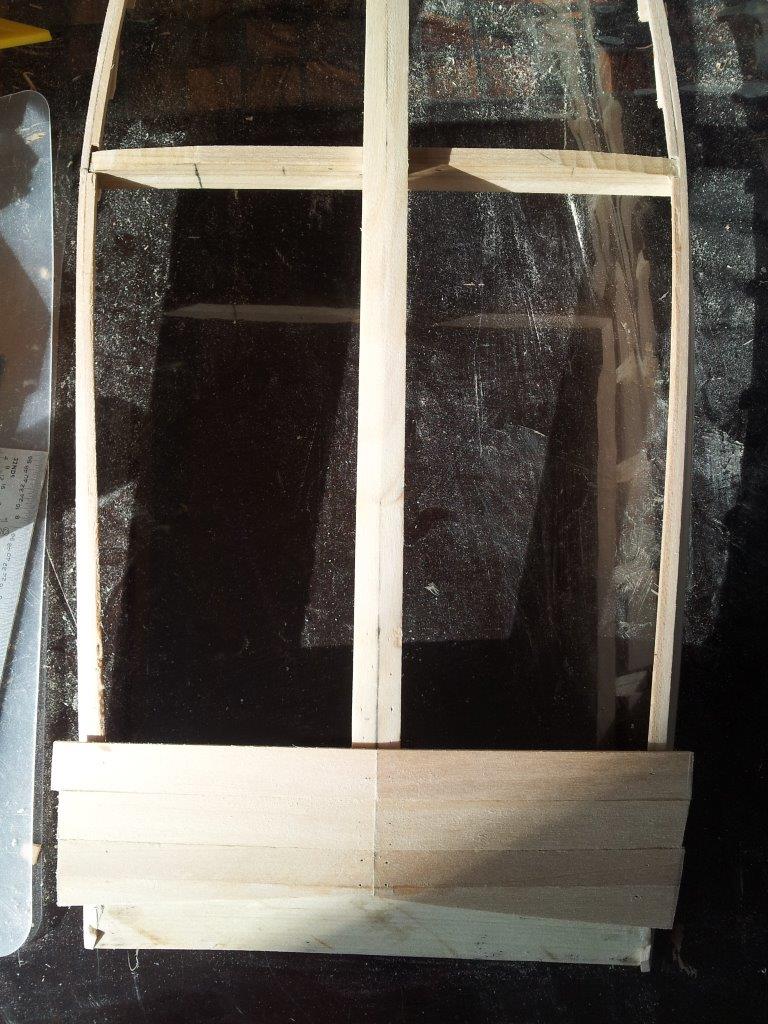
A belated welcome to JesseLee. And Welcome Dave and Druxey. Thank you everyone for all the complements and the likes. Cap'n'Bob, I like the detail of the framing and the cross planking as well. It it is a shame to hide it, I just hope the ceiling floor will look good enough to make up for it. What is really a shame, is the whole thing will be painted except for the wainscoting in the aft cabin. Marty, after drilling a couple of holes in the keelson and trying to join the holes together, I decided I really did not want a working centerboard. Maybe next time. My first foray into scratch building should have been with a set of plans, not a book showing how easy it is to build a skipjack. If I was to do it all over again I would build the EC Collier. The plans are very detailed and combined with the information for the Willie Bennet, would make a beautiful and detailed model. If someone wanted to build a plank on frame model of a Skipjack, the plans for the Kathryn are almost as complete as the EC Collier's. I thought it was funny that the skipjack was suppose to be an easy and cheap boat to build and someone comes along and spends the extra money to build one plank on frame. i.e the Skipjack Kathryn. The Kathryn may look like the other Skipjacks but she was built to last. The EC Collier was made of pine and fir. The Kathryn used oak framing and I believe pine planking. The plans for both describe the materials used in the original construction. My plan is to leave the hatches open to both of the cabins and allow the hatch covers to be removed. This will allow viewing of the inside details. My fall back plan is to glue them shut if I screw it up. It is always good to have a plan. Speaking of planning below is some of my planning for the aft cabin. I need to reduce the cabin hieght by about 6 inches.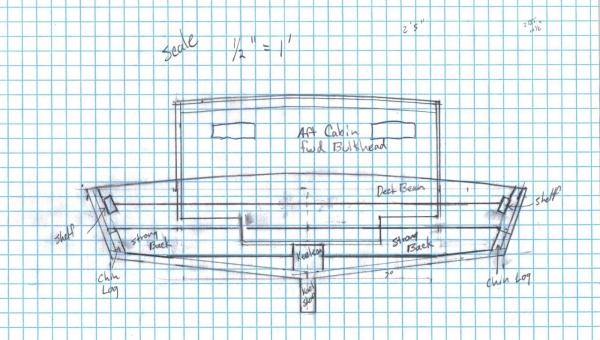
-
Skipjack by KevinR - 1:24 - abandoned
KevinR replied to KevinR's topic in - Build logs for subjects built 1901 - Present Day
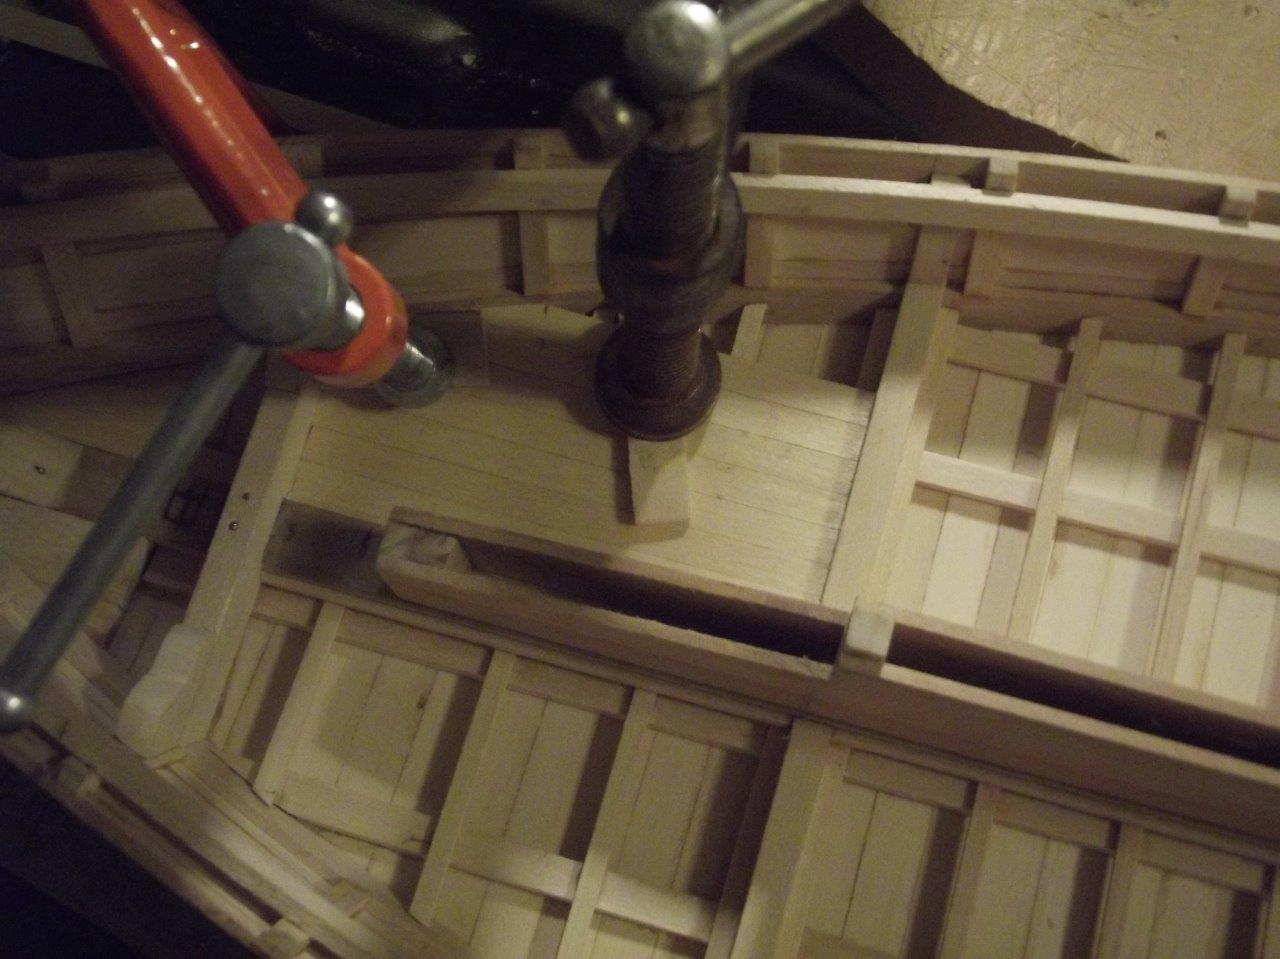
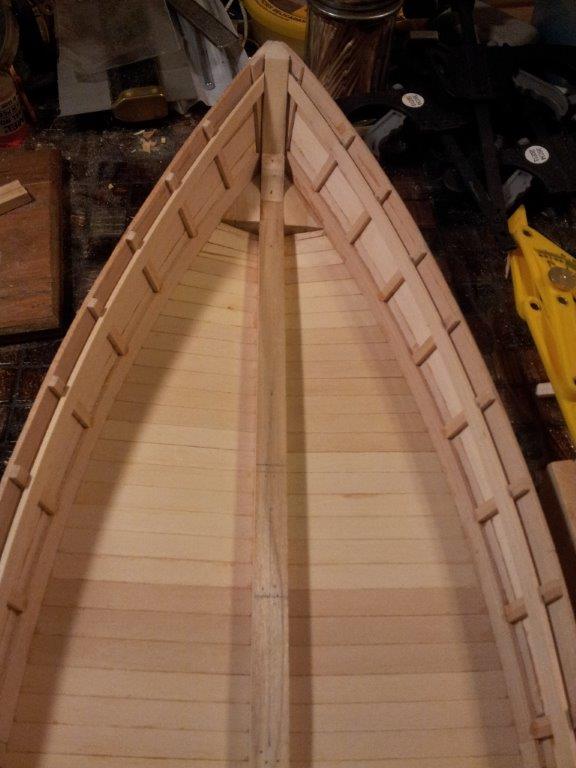
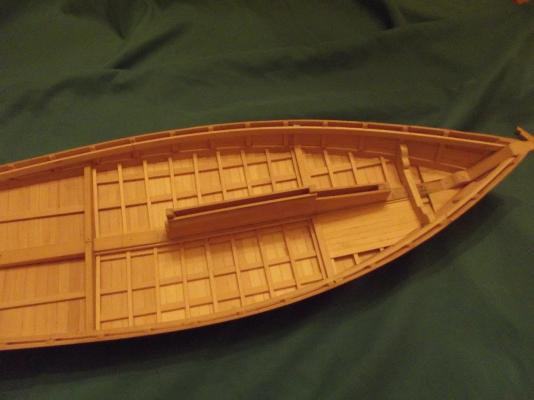
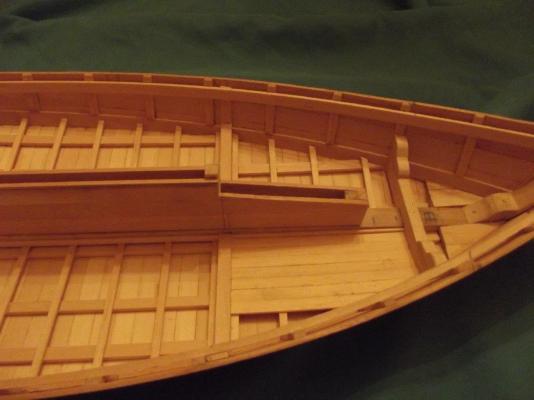
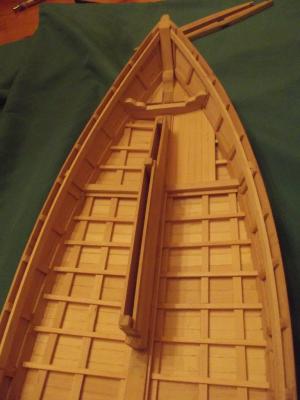
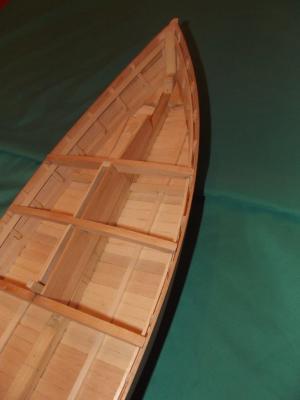
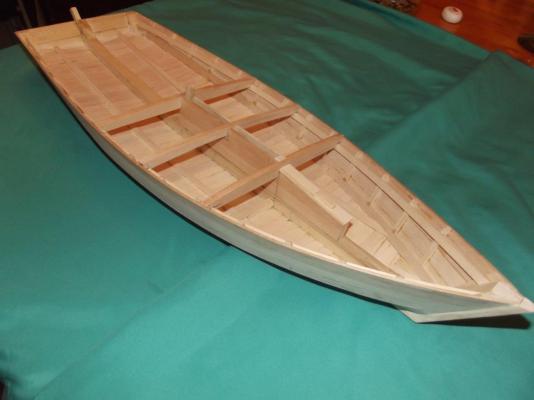
Hi Everyone, Well The weekend is over and I have made some progress. Most of the progress was in researching and planning my next move. I spent 3 days planning where to put everything. My skipjack is very close in size to the Willie Bennet, so I did not want to use the same deck layout. I was hoping to put the second cabin midship like on EC Collier and Kathryn, but there was not enough room. So I believe my only concession to be different is that the forward cabin will have a flat roof and not sloped like the Willie Bennet. The living accommodations on the Skipjacks were pretty slim. The headroom in the aft cabin on the Willie Bennet was only 3-1/2 feet. On the EC Collier (50') which was 7 feet longer, the headroom was 5 feet in the aft cabin and 3-1/2 feet in the midship cabin. Apparently the second cabin on Skipjacks was only big enough to lay down in and the aft (main) cabin was barely big enough to sit and cook in. I got back to work on the boat and added the aft strongback, the forward strongback with knees and started adding the ceiling floor in the fo'c'sle cabin.

-
What keel clamp is recommended?
KevinR replied to MarkBseau's topic in Modeling tools and Workshop Equipment
Model Shipway's Planking Vise on Ebay. 1 Left for $8 plus $3 shipping. I figured it was worth the $11 to give it a try. http://www.ebay.com/itm/Model-Expo-Hull-Plankng-Clamp-3-16-MX104-/221660219186?pt=Model_Kit_US&hash=item339bfa8732 -
Skipjack by KevinR - 1:24 - abandoned
KevinR replied to KevinR's topic in - Build logs for subjects built 1901 - Present Day
Cap'n'Bob, Thank you for the information. That helps me understand some of what I have read. When I search the internet I was coming up with "Center of Lateral Plane" and "Center of Effort". Which to someone who has never learned to sail, is Greek. I also read that it was not uncommon for the masts to be repositioned during a refit to correct handling issues. Thanks again. -
Skipjack by KevinR - 1:24 - abandoned
KevinR replied to KevinR's topic in - Build logs for subjects built 1901 - Present Day
I am trying to figure out where the mast goes. Looking at the three plan I get three different ratios for the mast placement. 1) Willie Bennett: Length of Deck 42' 6"; Distance of Mast from Stem 7' 4"; Ratio: 0.17254 2) EC Collier: Length of Deck 49' 8"; Distance of Mast from Stem ~8'; Ratio: 0.16108 3) Kathryn: Length of Deck 50'; Distance of Mast from Stem ~10' 6"; Ratio: 0.21 My Skipjack: Length of Deck 44' 6"; Distance of Mast from Stem 1) 7.678', 2) 7.168', 3) 9.345' In am going to discount Kathryn's measurement because she is not typical. She is not cross planked like the usual skipjack. She is framed and fore and aft planked. Using the Willie Bennett's and the EC Collier's measurements give me 6" (1/4" in scale) to play with when placing the mast. The rake of the mast is 80 deg. The top of the mast should be centered over the hold. My spreadsheet says the mast should be 59.88' and I calculate it should be 10.4 feet foreword of the center of the hatches. That places my mast 1' aft from what I figured. I also noticed the Willie Bennett's and my centerboard are place way forward of the other 2 skipjacks. Steve Rogers based his plans off of the Willie Bennett so that is why they match up. Was there that much variation is the placement of the Centerboard? I wouldn't thank so. The placement of the centerboard would affect the way the boat handled. If I move the centerboard aft 1.8' that will change my inboard layout some. O well I will figure it out. Thanks for reading my ramble. More will probably be coming as I try to figure out what I am doing. -
Skipjack by KevinR - 1:24 - abandoned
KevinR replied to KevinR's topic in - Build logs for subjects built 1901 - Present Day
Thanks everyone for stopping by and for the likes and comments. Well I have not made much progress over the last week. Took the admiral out of town this past weekend. I have done a lot of research and come to a couple of conclusions. Steve Richard's book “Model Boat Building: The Skipjack” is only good for a very basic build. There are several of the finer details missing. Someone gave me a copy of Ben Lankford's "Modeling Guide For Model Shipways Kit Willie L. Bennett" as well as the plans for the Model Shipway Willie Bennett. These items provide a lot of the details that I was looking for. Online I have found the Historic American Engineering Records (Surveys) for the Skipjacks EC Collier (http://www.loc.gov/pictures/item/md1203/) and Kathryn (http://www.loc.gov/pictures/item/md1454/). These provide more details on the Skipjack construction methods used. With these additional resources I will be using Steve Richard's book as more of a guideline and do some of my on thing. Also, Marty want's me to make a working centerboard. So I will need to cut the slot in the keelson before I go any further. ( He didn't have to twist my arm to much.) I will post some more progress soon. -
I was searching through the Library of Congress "Historic American Engineering Record" for information on ships and boats and came across this record. I had never heard of the Sub Marine Explorer. It was a submarine built in 1865, to harvest pearls. It was abandoned in Panama after a couple of years use. http://www.loc.gov/pictures/collection/hh/item/cz0044/
-
Skipjack by KevinR - 1:24 - abandoned
KevinR replied to KevinR's topic in - Build logs for subjects built 1901 - Present Day
Micheal, Thanks for stopping by. I like the look of the cross planking as well. I also like carvel planking. They both have their appeal. The cross planking is a lot easier. -
Skipjack by KevinR - 1:24 - abandoned
KevinR replied to KevinR's topic in - Build logs for subjects built 1901 - Present Day
Marty Thanks for looking in and the complements. I will be at the meeting on Saturday. You can get a better look then. I had some free time earlier today and was doing some reading online. I found the Historical Survey of the Skipjack E. C. Collier. It gives a great description of the construction, it's history and the history and development of the Skipjacks. http://lcweb2.loc.gov/master/pnp/habshaer/md/md1200/md1203/data/md1203data.pdf Here are the pictures and the detailed plans. http://www.loc.gov/pictures/collection/hh/item/md1203/ -
She looks great!
-
Skipjack by KevinR - 1:24 - abandoned
KevinR replied to KevinR's topic in - Build logs for subjects built 1901 - Present Day
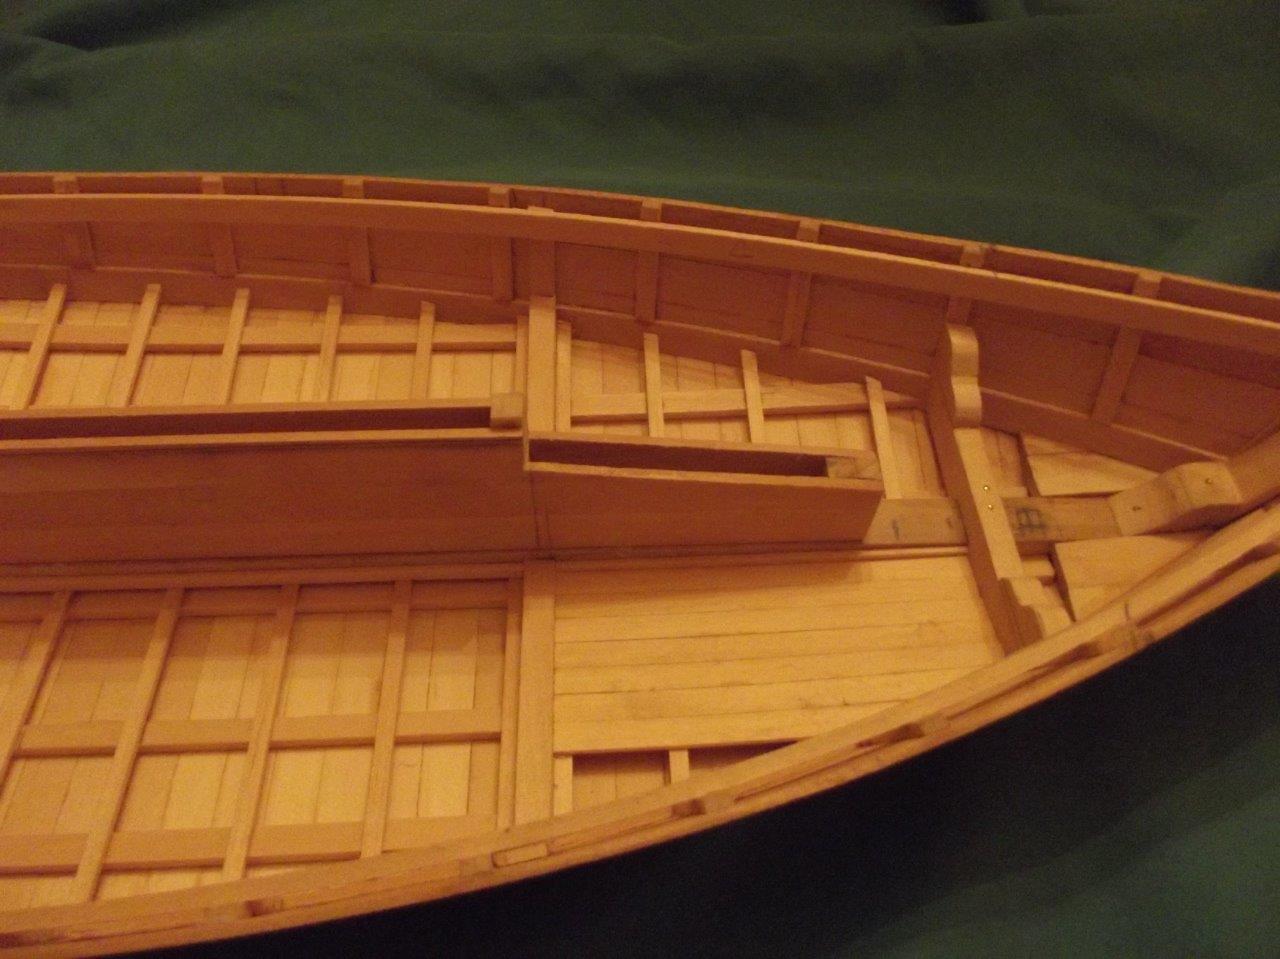
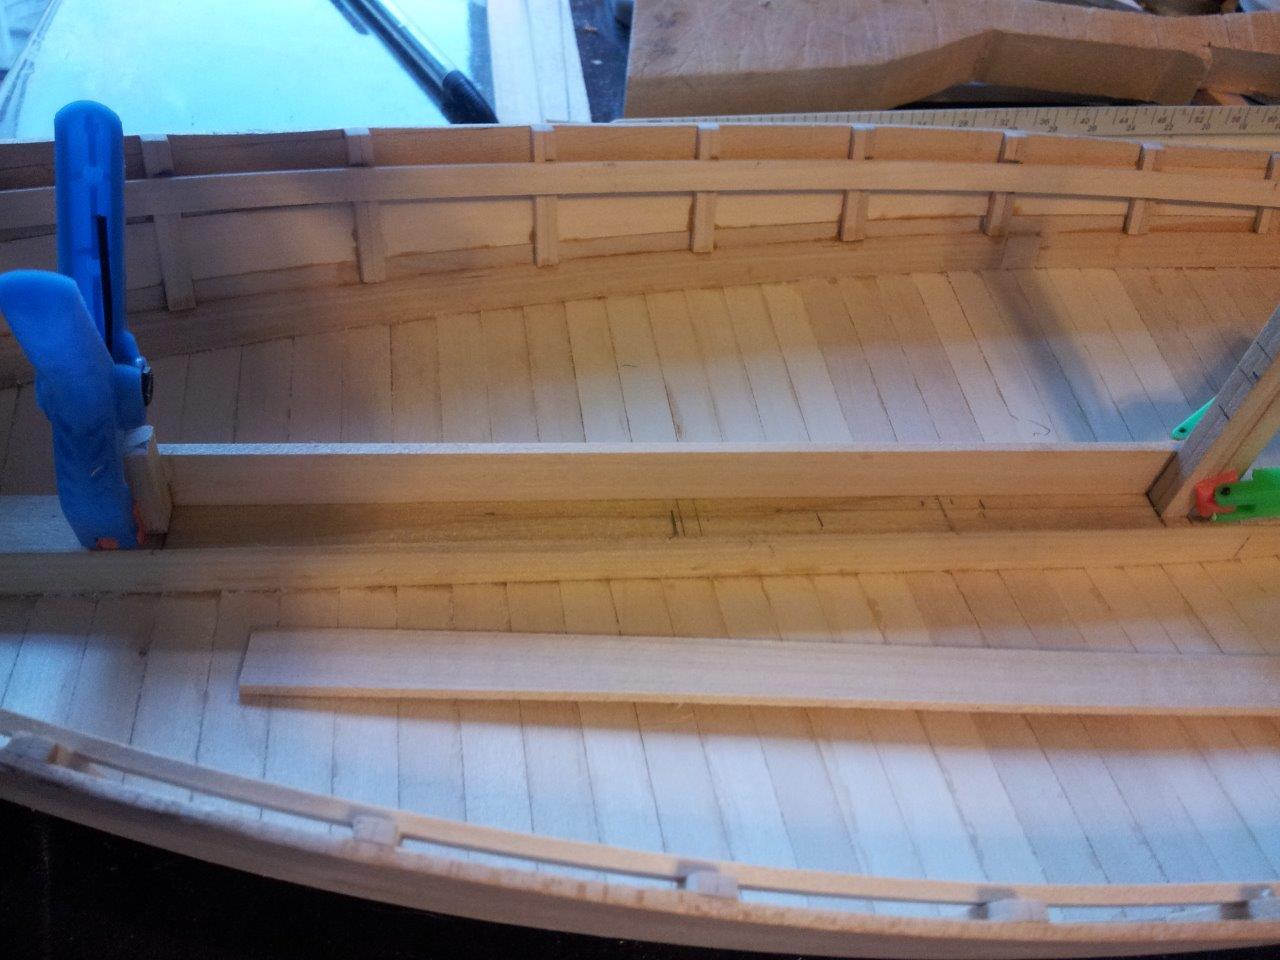
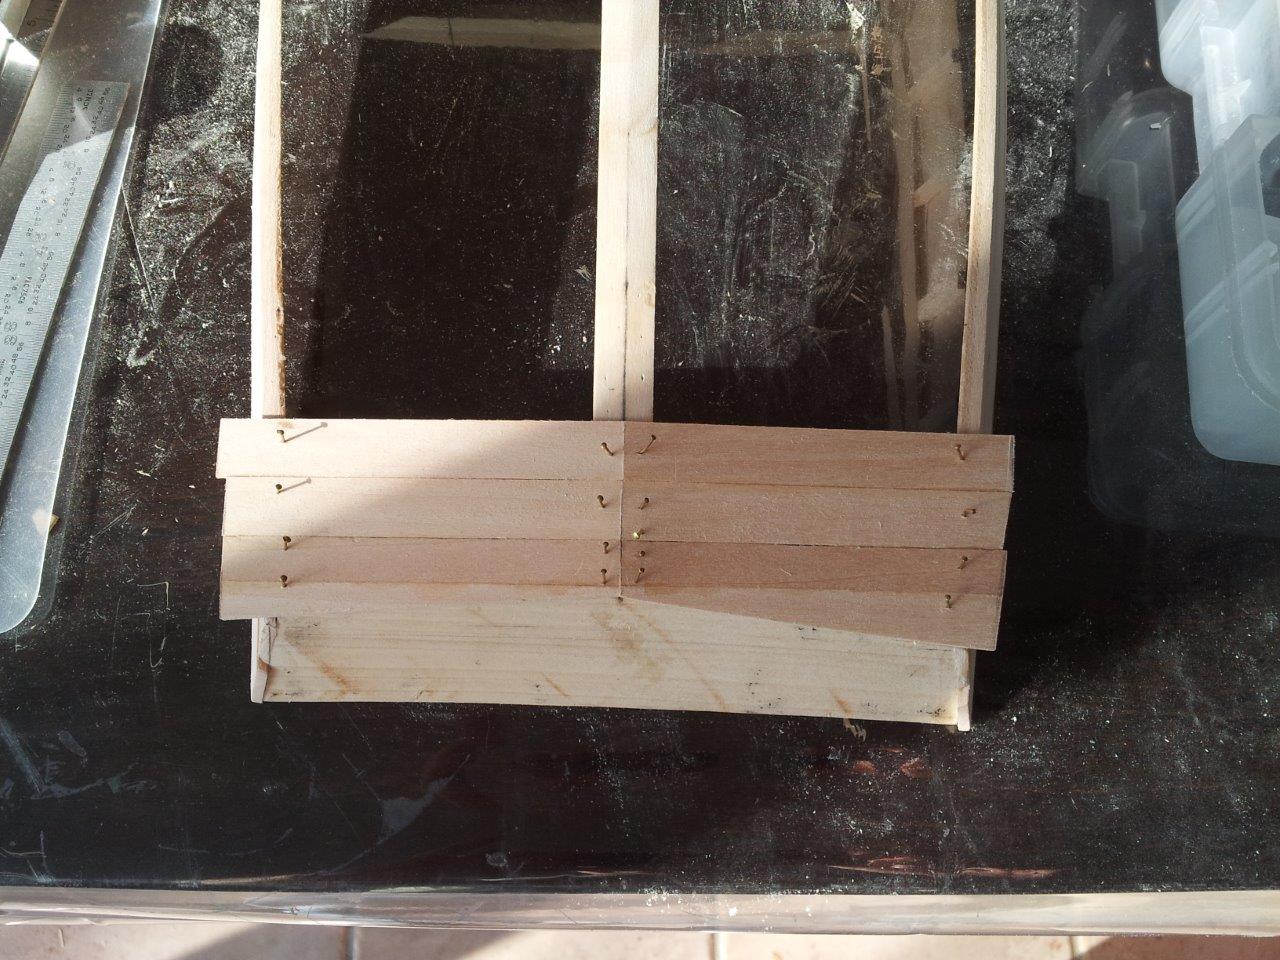
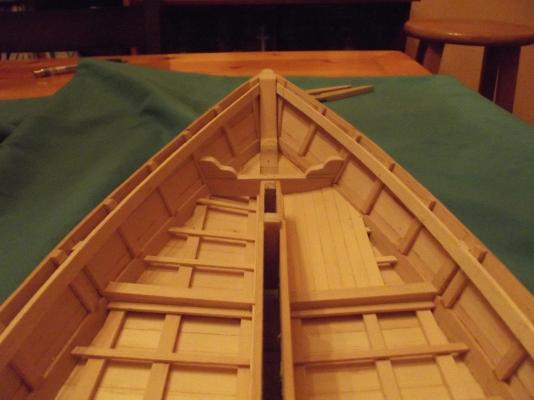
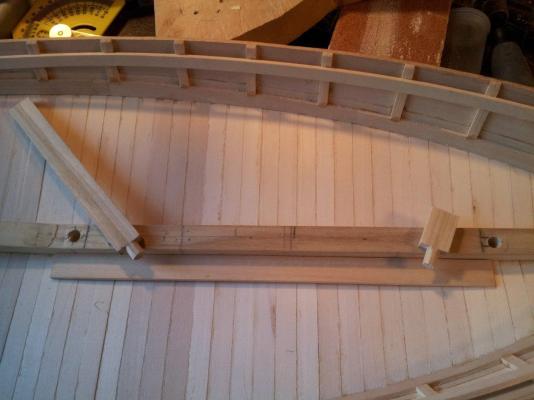
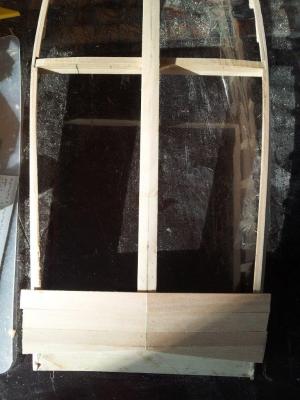
OK, I decided to redo the centerboard case, sort of. The aft support had not been trimmed to size yet and the forward support was the correct height already. I just needed to replace the top planks. That has been done and as soon as the glue dries I can cut the top planks to the correct shape and size. I need to decide how I am going to address the shelf camps next. Replace them or just add a 1/8 inch shim. -
Skipjack by KevinR - 1:24 - abandoned
KevinR replied to KevinR's topic in - Build logs for subjects built 1901 - Present Day
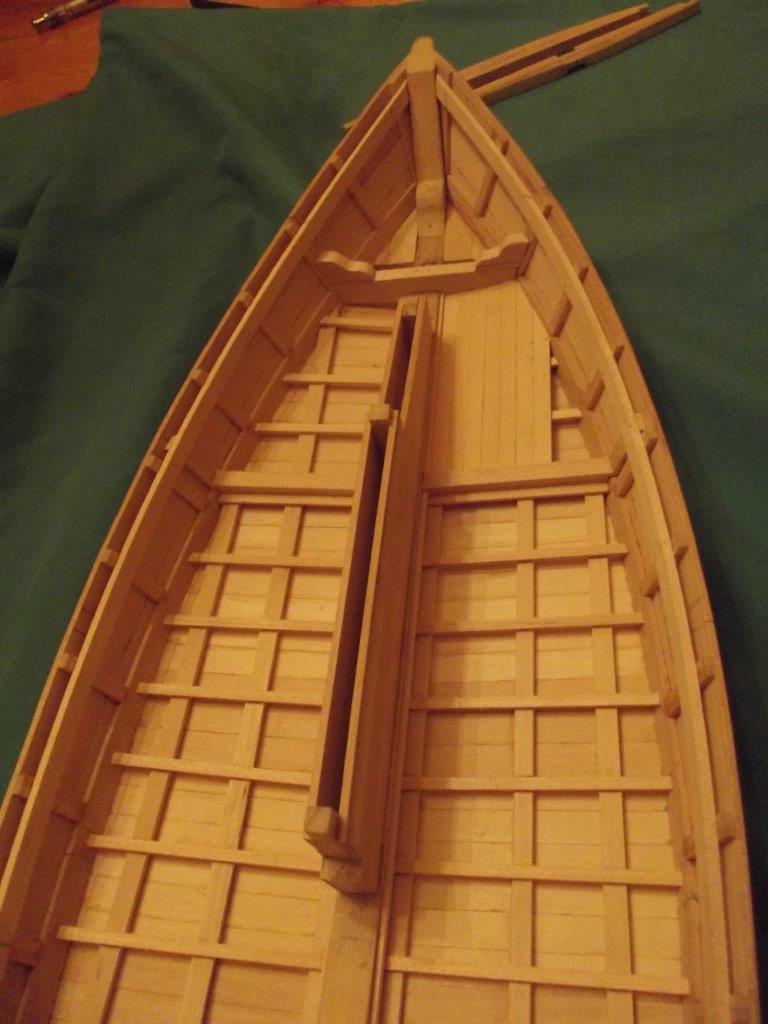
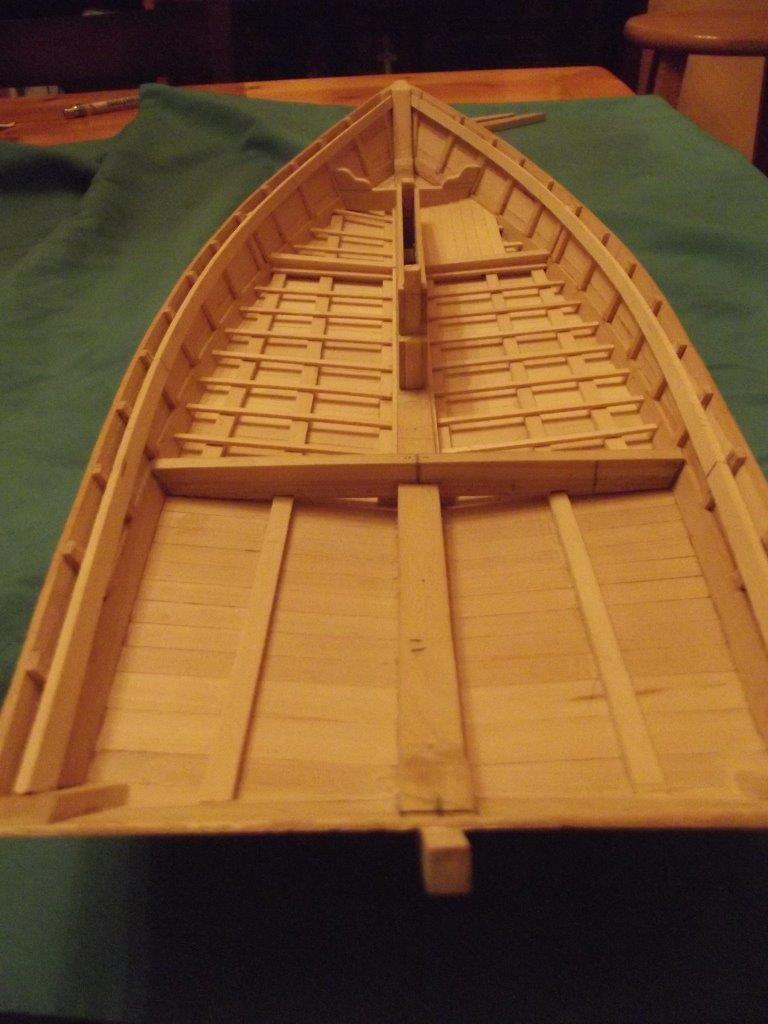
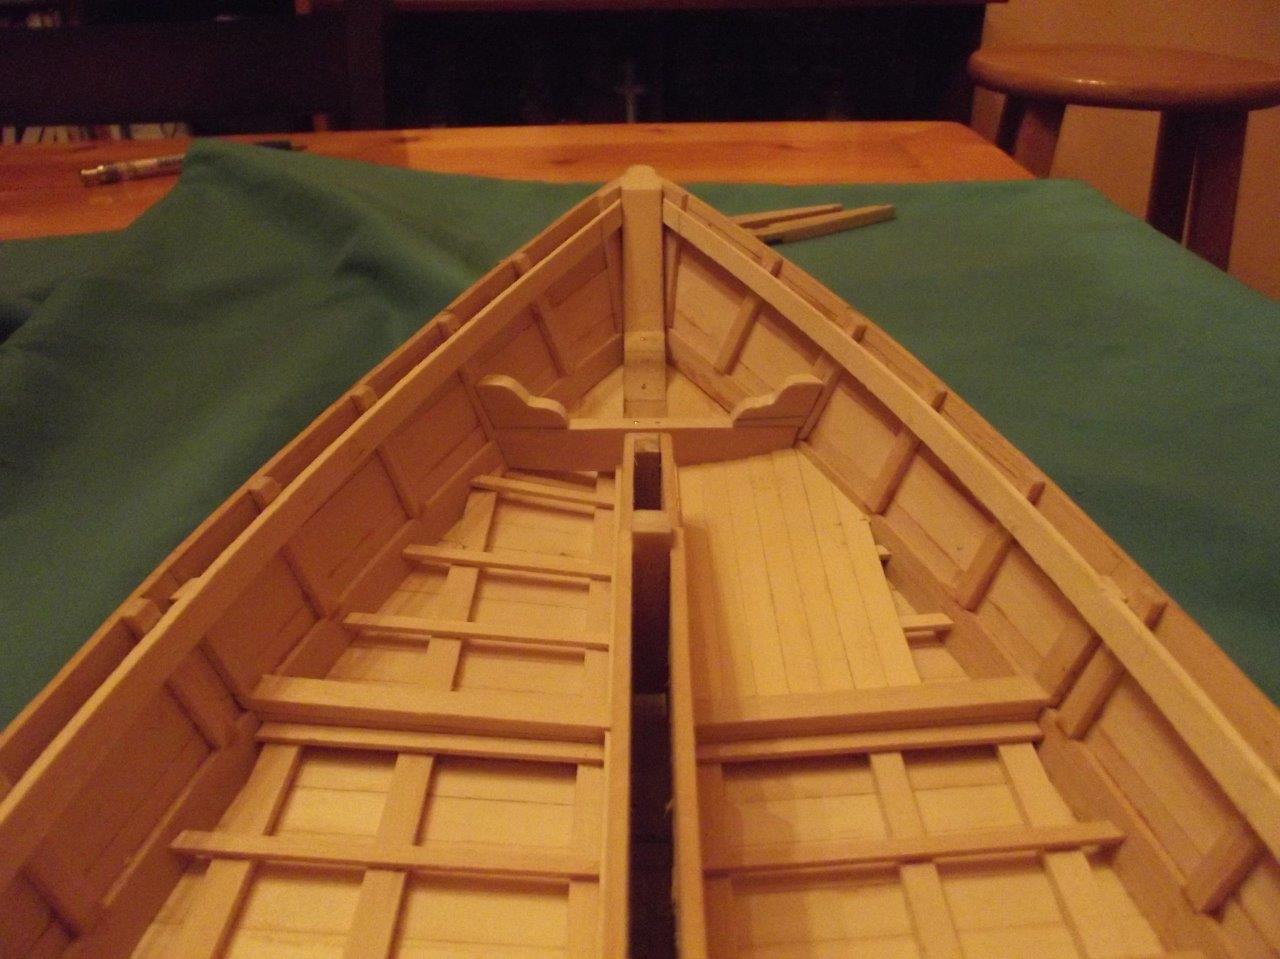
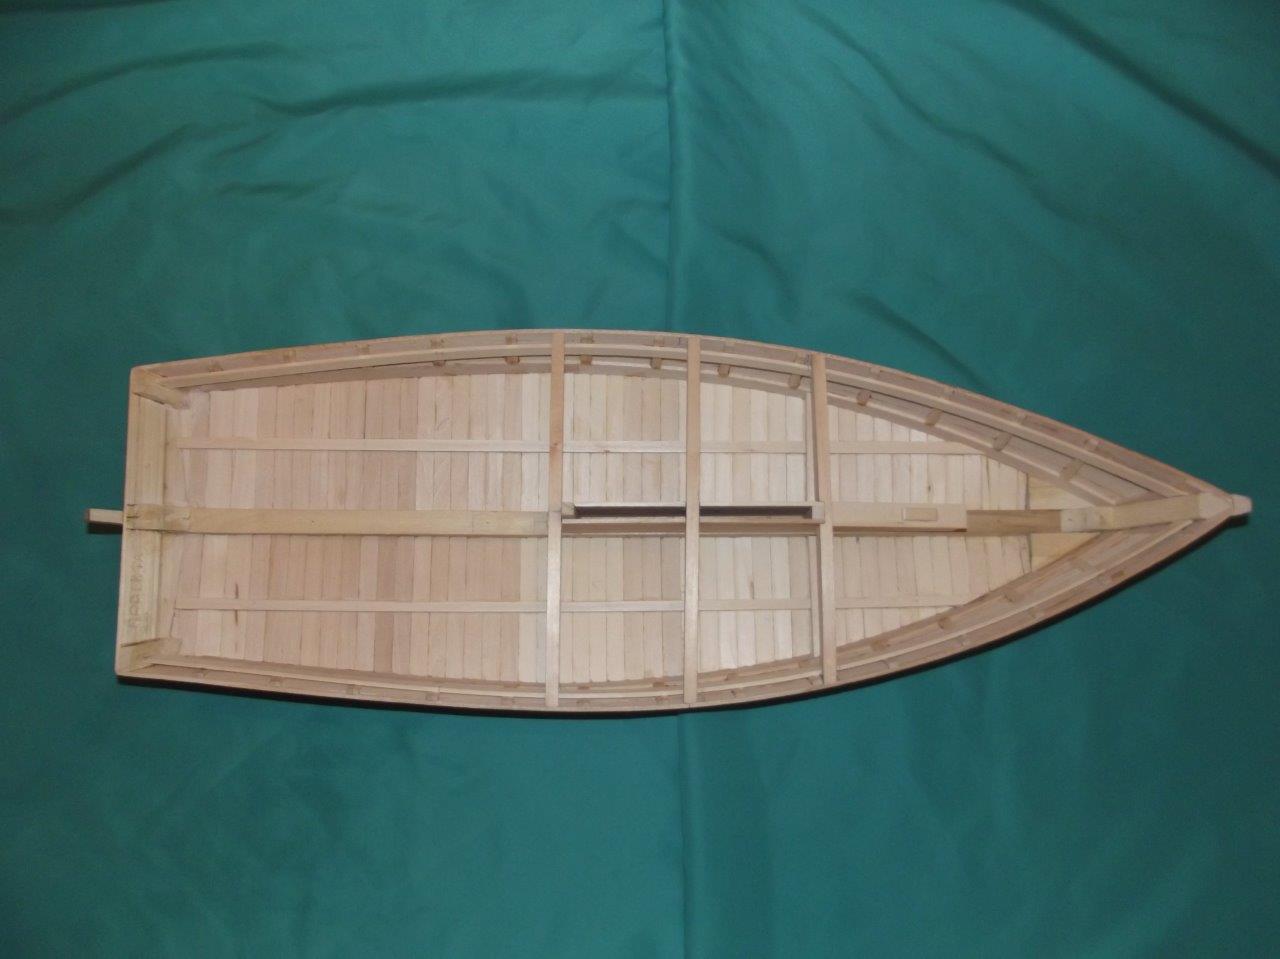
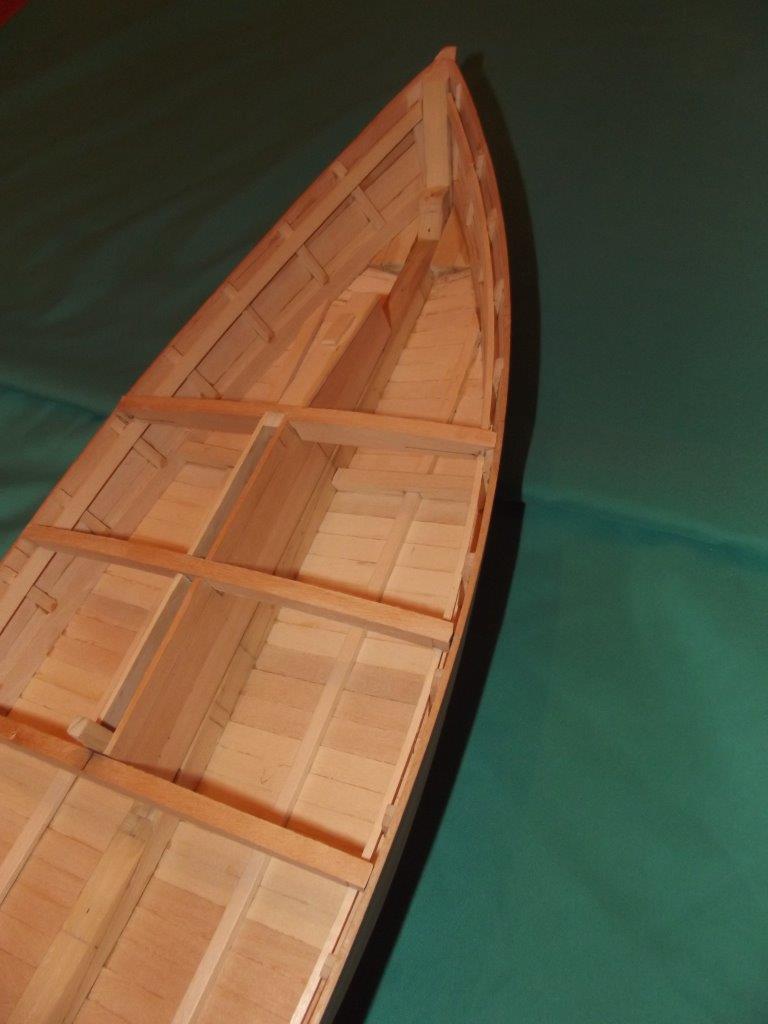
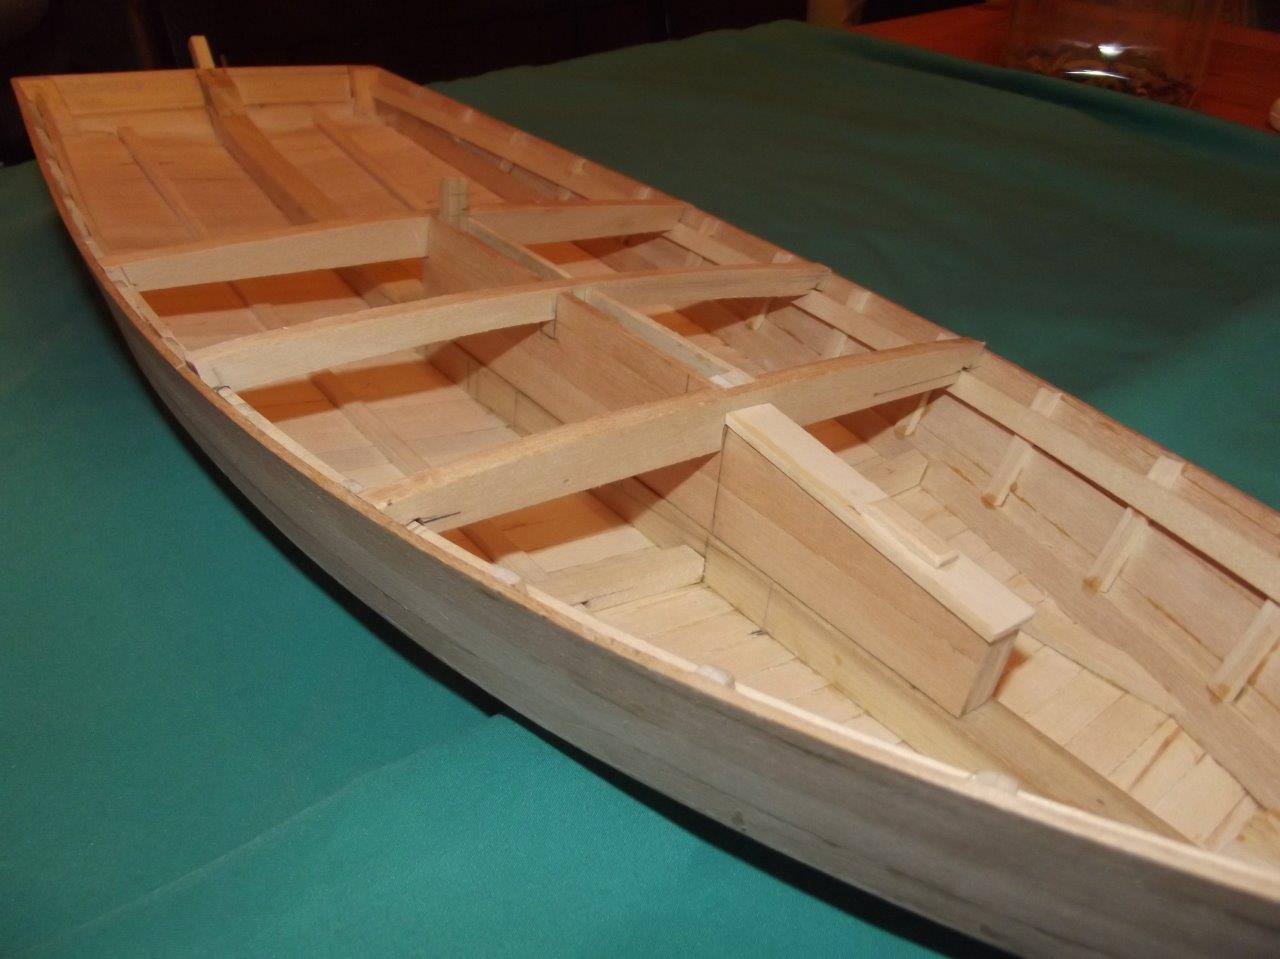
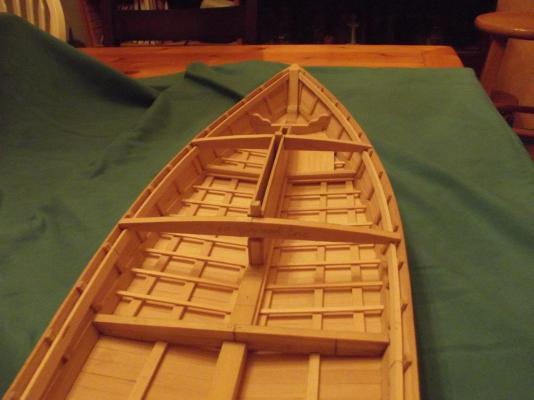
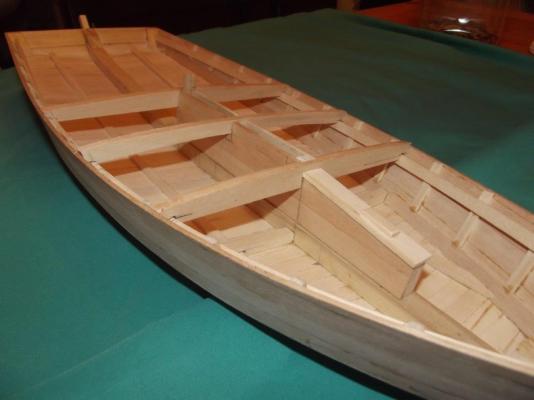
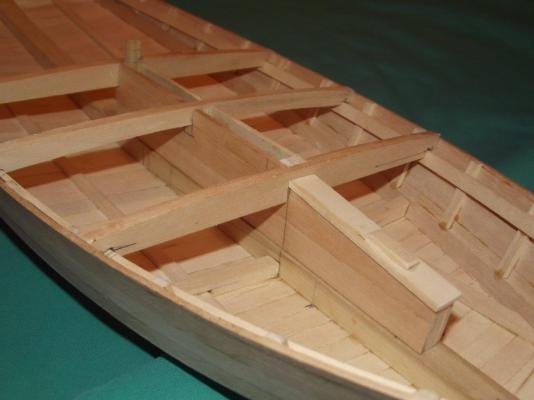
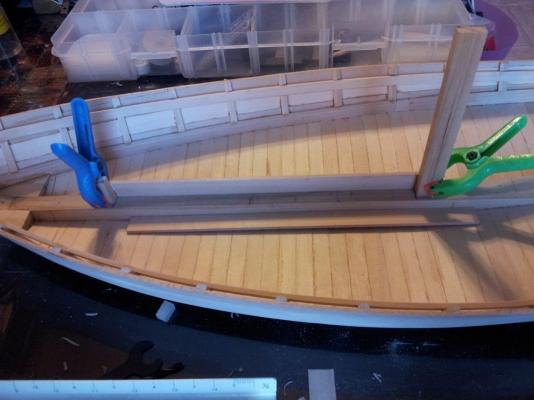
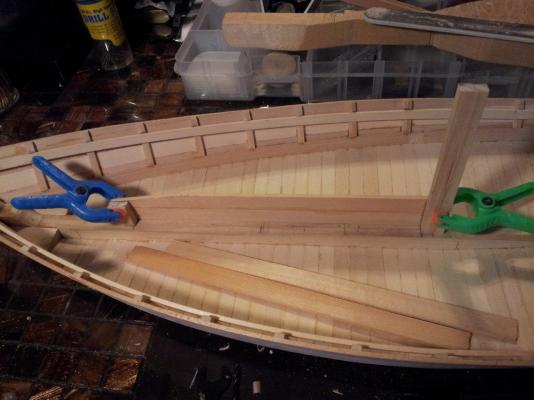
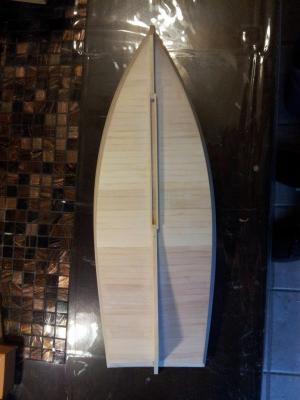
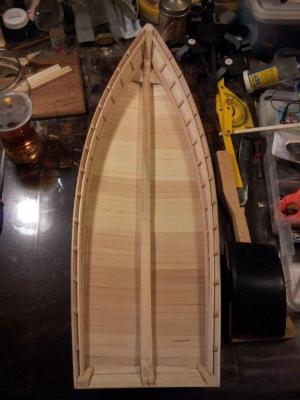
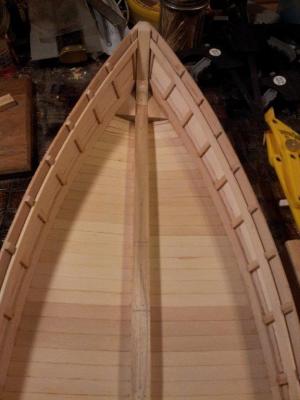
Cap-n-Bob, Thanks for the complement. The cross planking is something different and it is a lot easier to install. I have been working on the Centerboard Case and the midship deckbeams. When I started I ran into some problems with the plans and instructions by Steve Rogers. The Center Board case is suppose to be 1-1/2 inches (3 feet scale). The deckbeams are 1/2x1/4 inch strips. The deckbeams are suppose to be notched to fit over the shelf clamps (deck beam supports). The shelf clamps are installed 1/4 inch below the top of the side planks. When I started laying it out, for the deckbeams to be even with the top of the Centerboard Case, they would have to rest on top of the shelf clamps. This would also make the height of the deck camber 1/4 inch (6 inches scale). At the time 6 inch camber seemed excessive so I shortened the center board case by 1/8 inch and notched the deckbeams. I notice today in the photos in the plans, that the shelf clamps looks like they are installed 1/8 inch below the top of the side planks. I also noticed that the deck will have a good rise at the bow. Re-thinking the 6inch camber now, it does not seem so excessive for a boat with a 14 foot beam. I believe that the error was in the placement of the shelf clamps. They should have been placed at 1/8 inch vice 1/4 inch. Now the big question is do I scrap the centerboard case and deck beams I worked so hard on this weekend or keep going with what I have? I had a lot of fun and learned a lot, this weekend working on the inside of the hull. I also believe I could do a better job if I did it all over. The Centerboard Case and deckbeams are just dry fitted so replacing them would not break any thing. The shelf clamps are glued on. I could cut them off and place a new one in the correct location. I have also thought about just running a 1/8 inch strip right above the current shelf clamp. Now for the photos.
-
Skipjack by KevinR - 1:24 - abandoned
KevinR replied to KevinR's topic in - Build logs for subjects built 1901 - Present Day
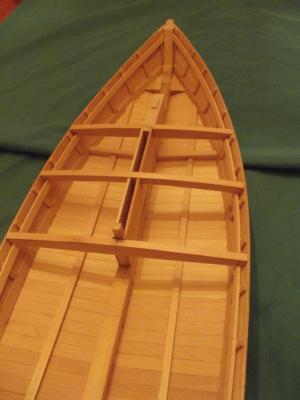
Today I started working on the Centerboard Case. My plan is to finish it over the centerboard Case over the weekend. We will see if I can follow through with my plans.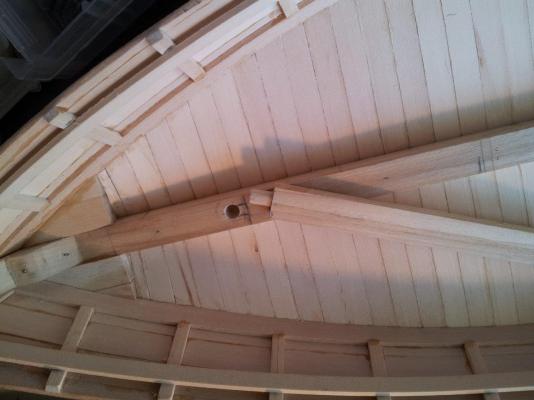

-
Skipjack by KevinR - 1:24 - abandoned
KevinR replied to KevinR's topic in - Build logs for subjects built 1901 - Present Day
Patrick, Thanks for the comment. I like the look of the skipjacks as well. The sharp bow, shallow draft and large sail area made them fast for a small fishing vessel. Thanks, Kevin -
Skipjack by KevinR - 1:24 - abandoned
KevinR replied to KevinR's topic in - Build logs for subjects built 1901 - Present Day
Me Too! They were there yesterday. I have re-uploaded the images. -
Skipjack by KevinR - 1:24 - abandoned
KevinR replied to KevinR's topic in - Build logs for subjects built 1901 - Present Day
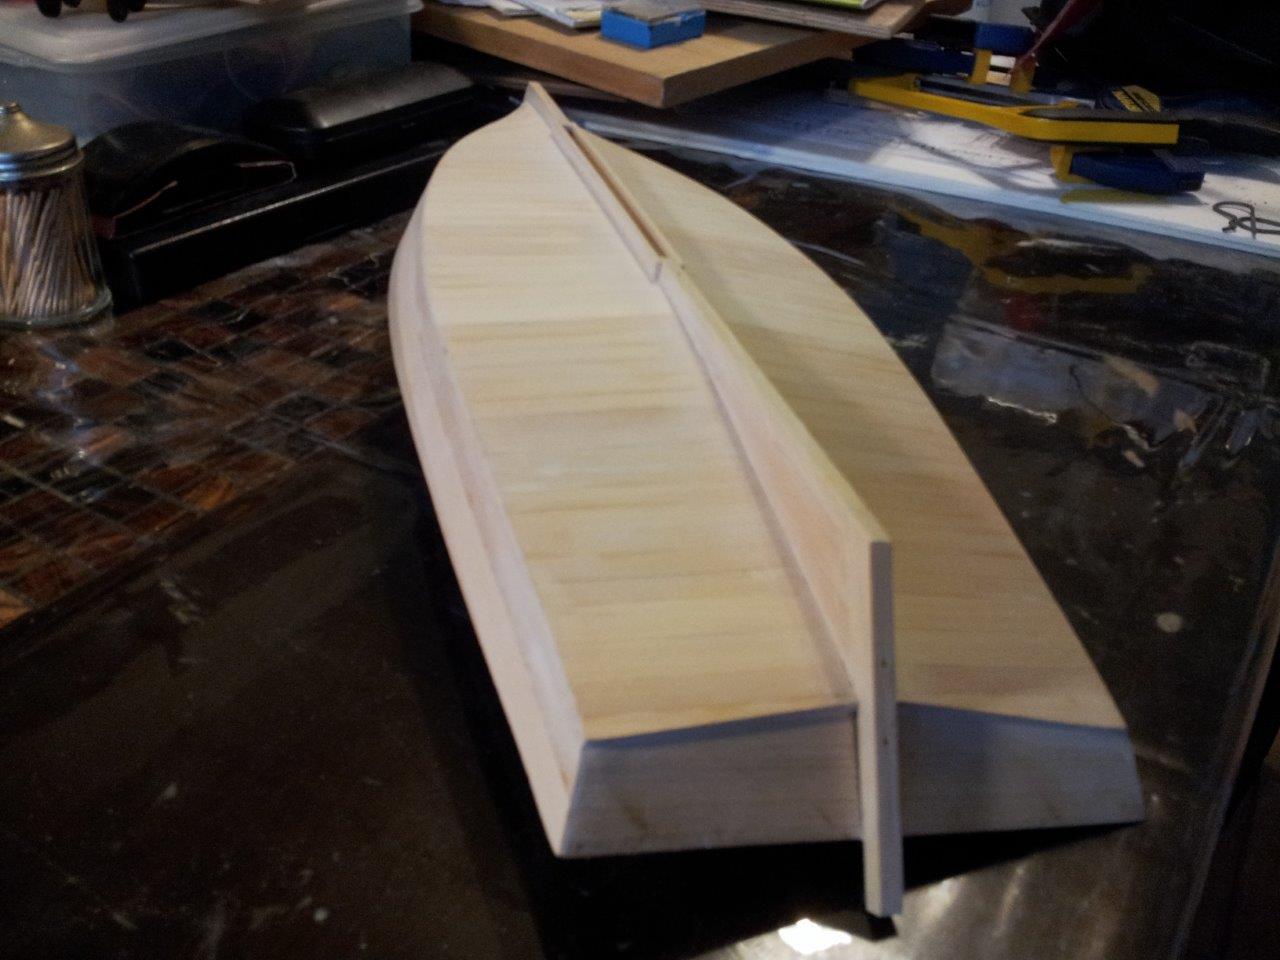
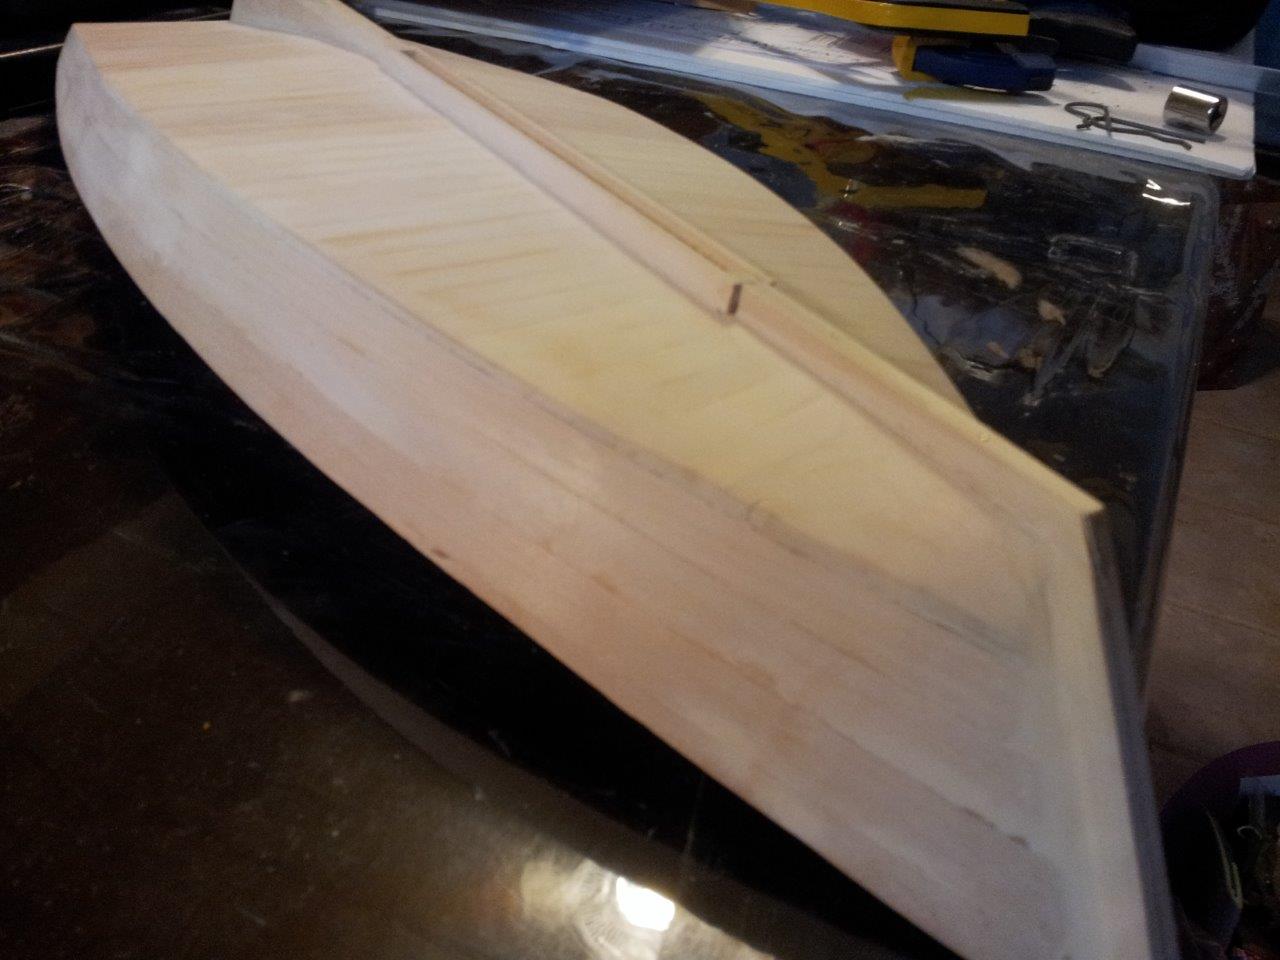
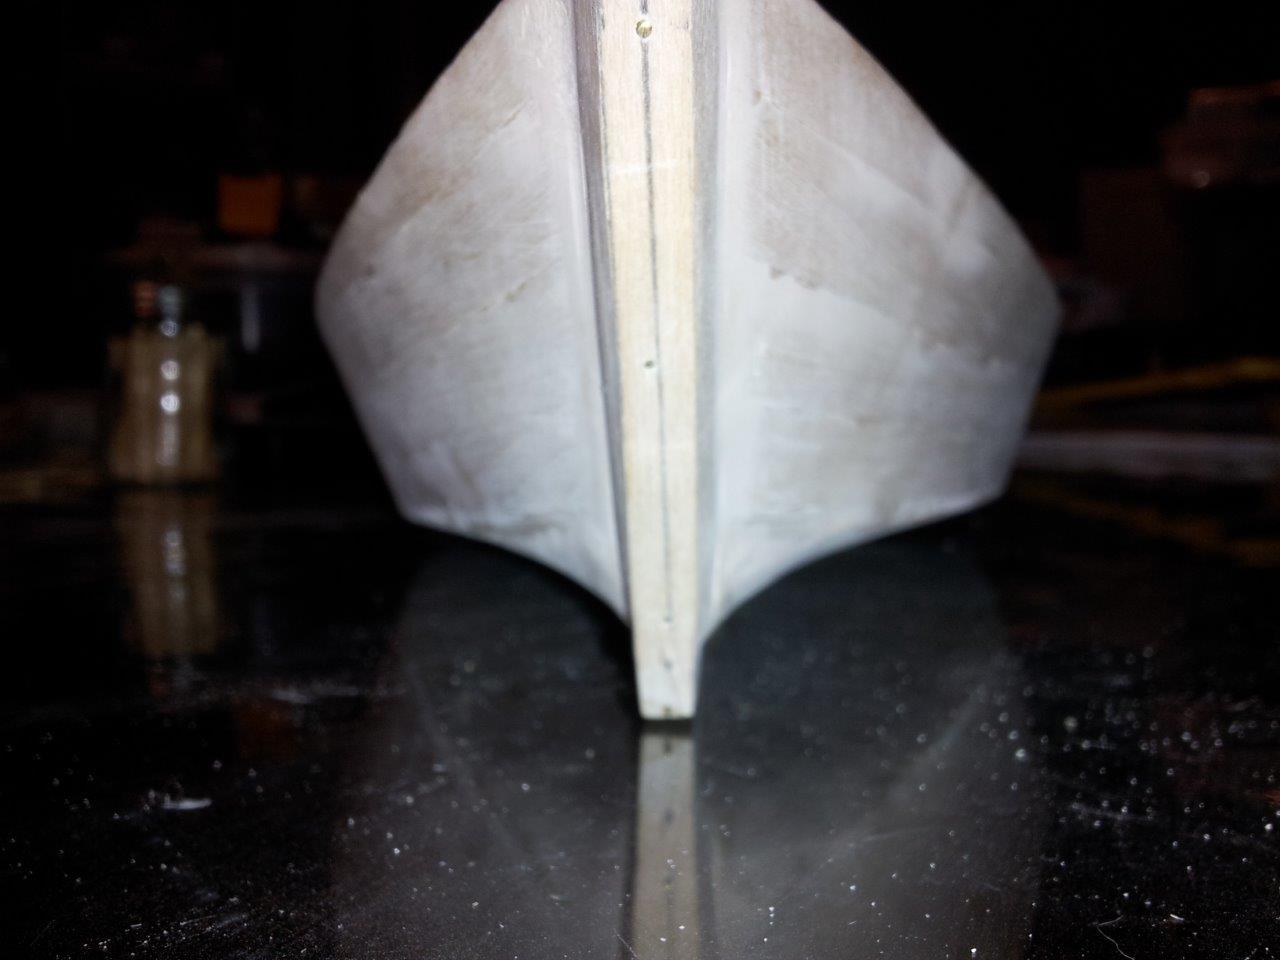
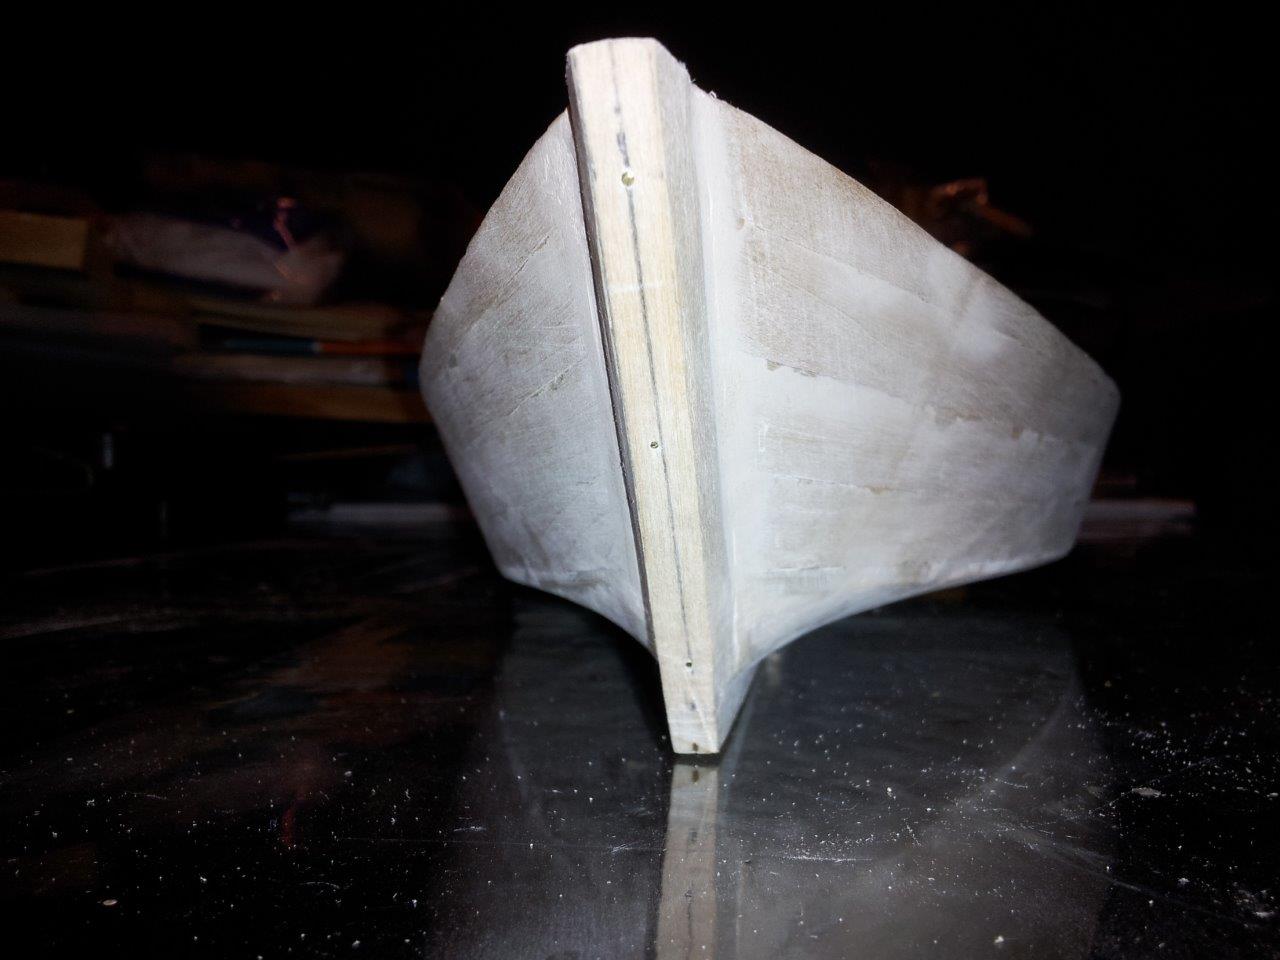
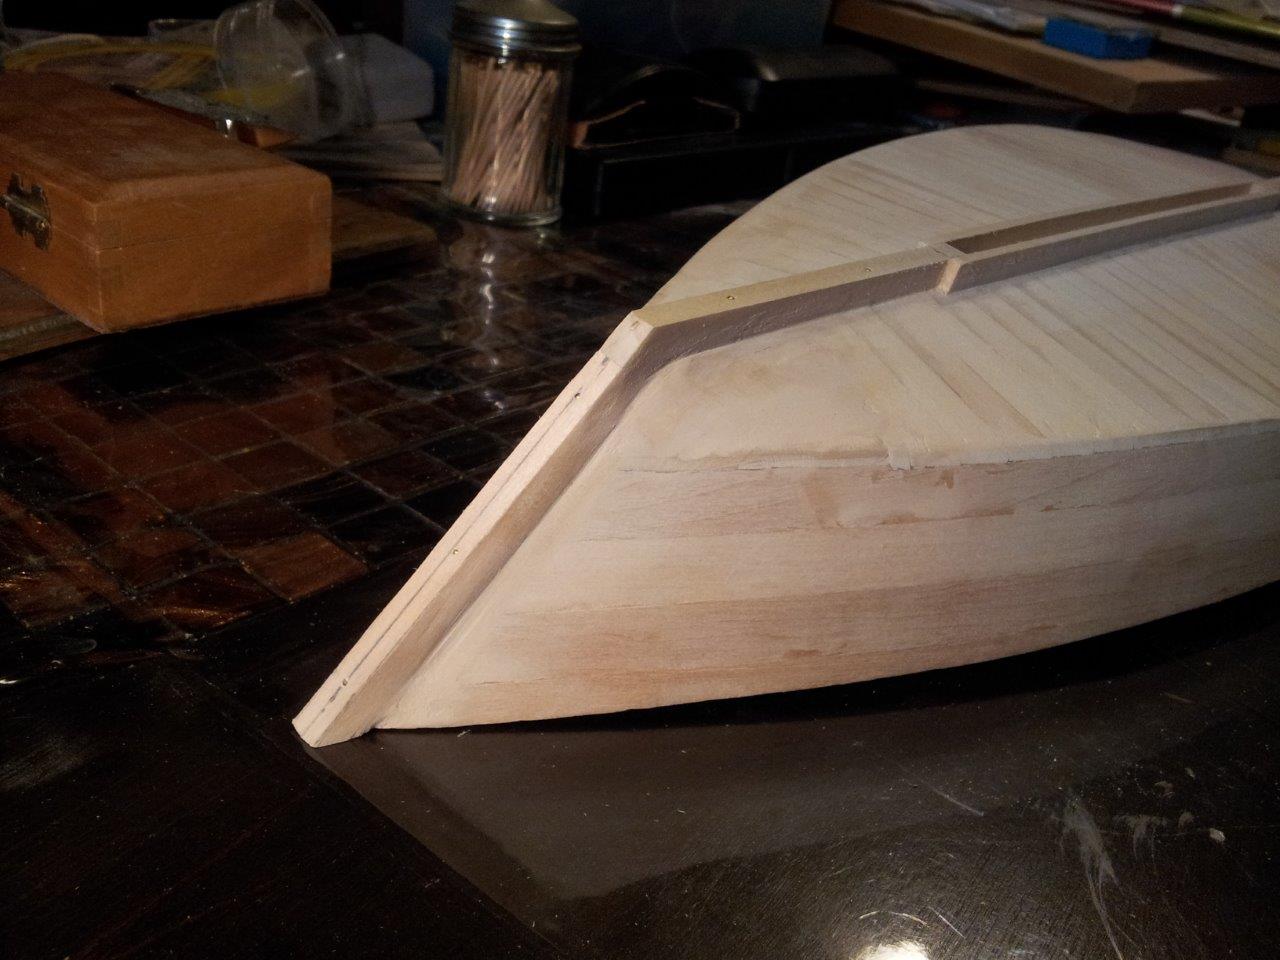
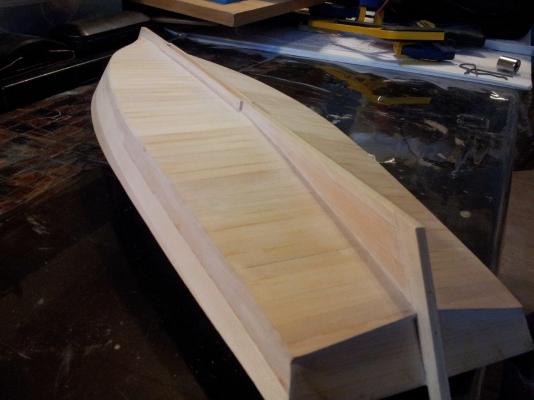
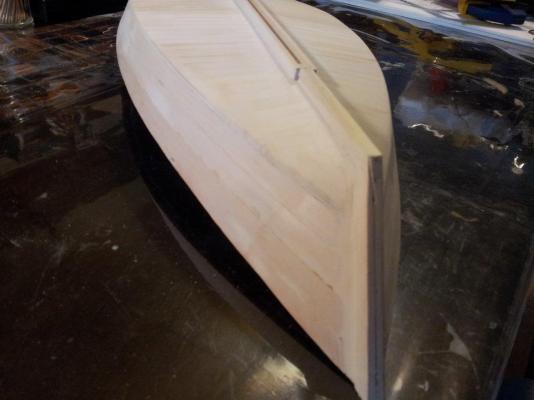
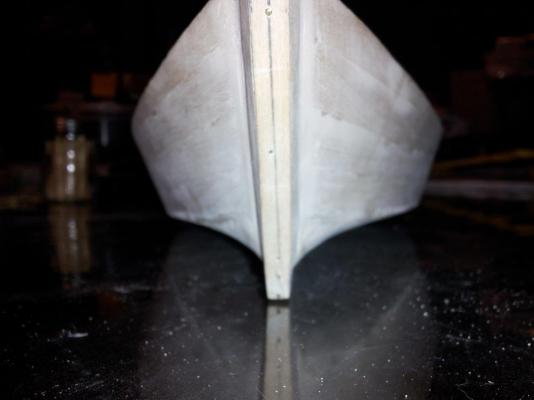
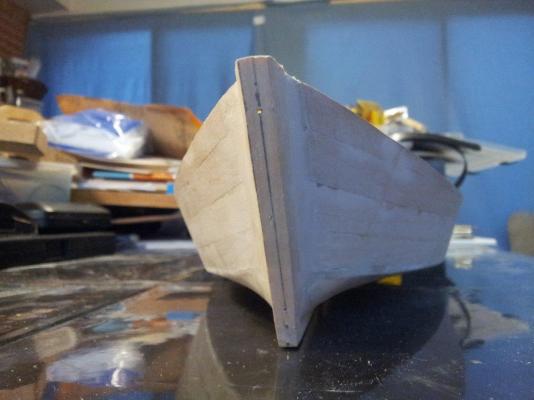
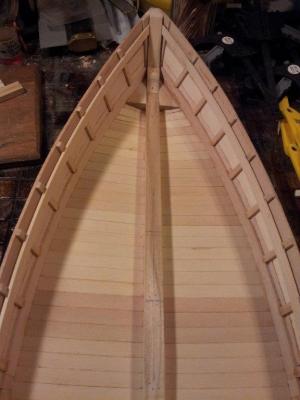
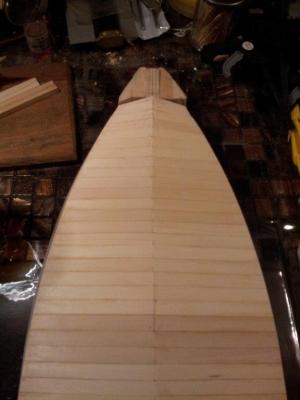
The outside of the hull is almost finished. I finished shaping the bow and added the keel.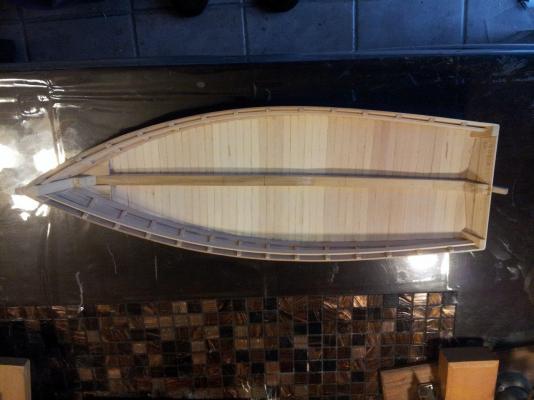


-
Skipjack by KevinR - 1:24 - abandoned
KevinR replied to KevinR's topic in - Build logs for subjects built 1901 - Present Day
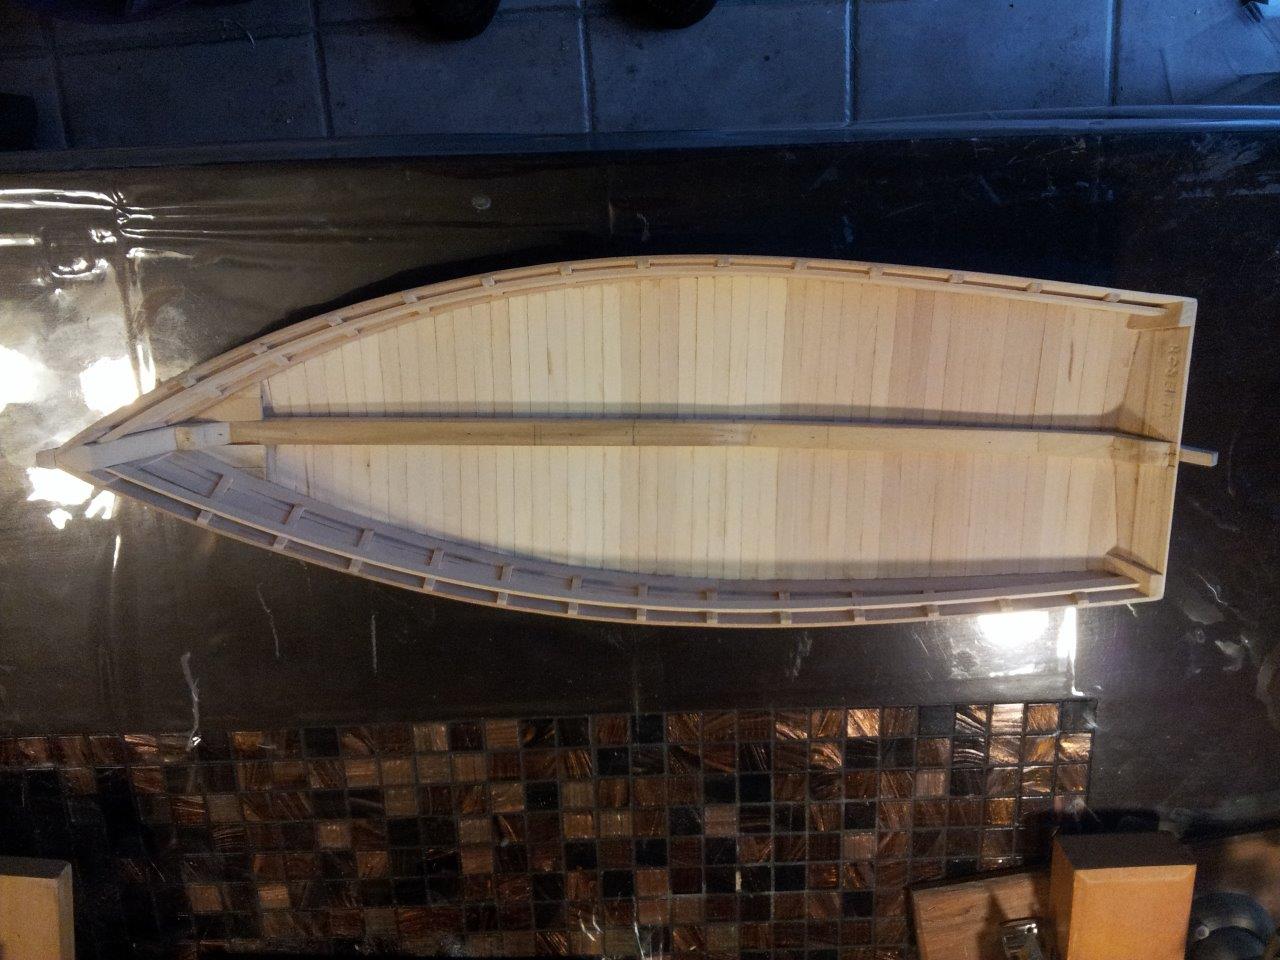
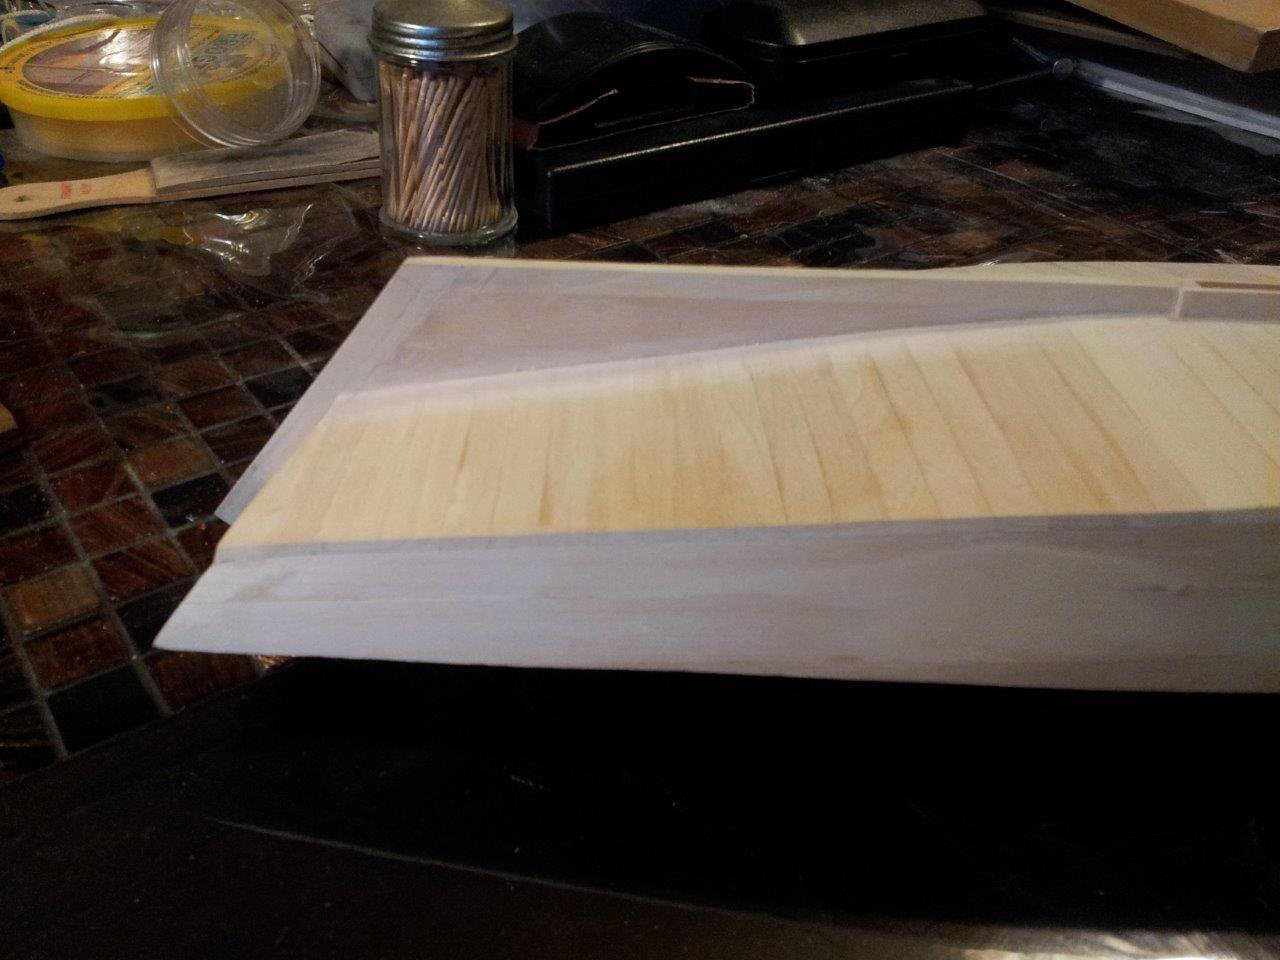
I have completed the planking on the Skipjack this evening. I still have a lot of sanding to smooth out the planks and shape the blocks at the bow. The planks were purchased from National Balsa. The dimensions of the bass wood strips are not consistent and leave a lot to be desired. You get what you pay for.
-
Roger B. Taney rigging and sail plans
KevinR replied to captpjn's topic in Masting, rigging and sails
Paul, Sorry I missed your post in June. I just stumbled upon it. I have the sail plans for the Model Shipways Roger B .Taney. Send me a message and I will see if I can get you a copy. -
Skipjack by KevinR - 1:24 - abandoned
KevinR replied to KevinR's topic in - Build logs for subjects built 1901 - Present Day
Cap'n'Bob, I check with my square after each plank. So far I have not had to taper any, but I am watching. dgbot, Actually the skipjack is a simple design, that is why I picked it as my first scratch build. Skipjacks were not built to a plan. The dimensions are all based on the length of the skipjack. Skipjacks were built in back yards, in some cases by the local carpenter with no boat building experience. *Edited to clarify my meaning. -
Skipjack by KevinR - 1:24 - abandoned
KevinR replied to KevinR's topic in - Build logs for subjects built 1901 - Present Day
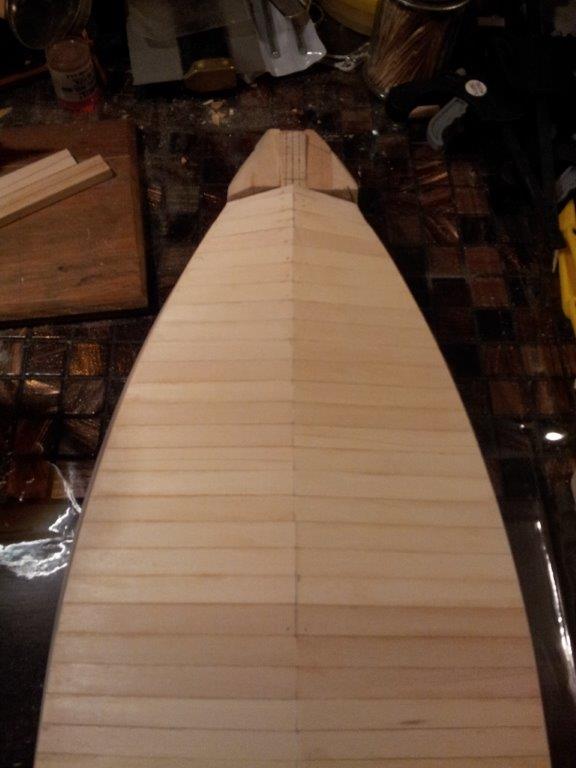
I prefer to use clamps, but I could not get them to work, so I am using pins to hold the planks in place until the glue dries. The first set of planks were aligned with the transom. This created some odd angles to the transom. Now the planks are 90deg to the keelson and should make planking faster. It also looks better to me.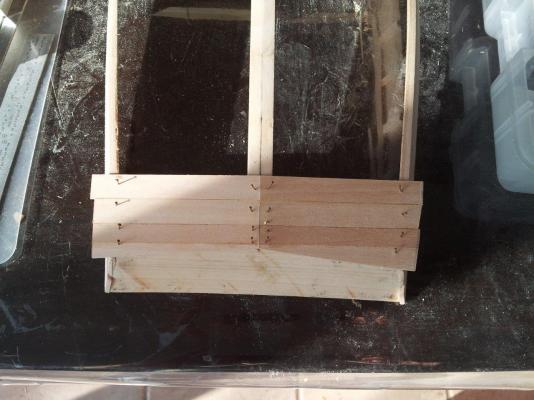
-
Skipjack by KevinR - 1:24 - abandoned
KevinR replied to KevinR's topic in - Build logs for subjects built 1901 - Present Day
I had about 8 planks on but did not like how it looked. I started by aligning the planks with the transom. This put the planks at an angle to the keelson. I tried tapering the planks to get them perpendicular to the keelson but it looked worse. So I ripped out the planks and started over on the bottom planks. I have 3 rows in and it looks much better. Symmetrical. I will post pictures tomorrow. -
Skipjack by KevinR - 1:24 - abandoned
KevinR replied to KevinR's topic in - Build logs for subjects built 1901 - Present Day
Hi everyone. Sorry I have not posted in a while. With all of the warm weather that summer time brought, I could not seem to find the time to work on my models. But now that the weather is cooling off, I have resumed work. Yesterday I completed beveling the keelson and today I started planking the bottom of the hull. I will post some pictures soon. -
Skipjack by KevinR - 1:24 - abandoned
KevinR replied to KevinR's topic in - Build logs for subjects built 1901 - Present Day
Some interesting information on the Chesapeake Workboats from the Mariner's Museum. They use to have a great display on the Workboats and fisherman, but it has been replaced by Dinosaurs of the Deep. http://www.marinersmuseum.org/sites/micro/cbhf/waterman/wat000.html