HOLIDAY DONATION DRIVE - SUPPORT MSW - DO YOUR PART TO KEEP THIS GREAT FORUM GOING! (83 donations so far out of 49,000 members - C'mon guys!)
×


KevinR
-
Posts
214 -
Joined
-
Last visited
Content Type
Profiles
Forums
Gallery
Events
Everything posted by KevinR
-
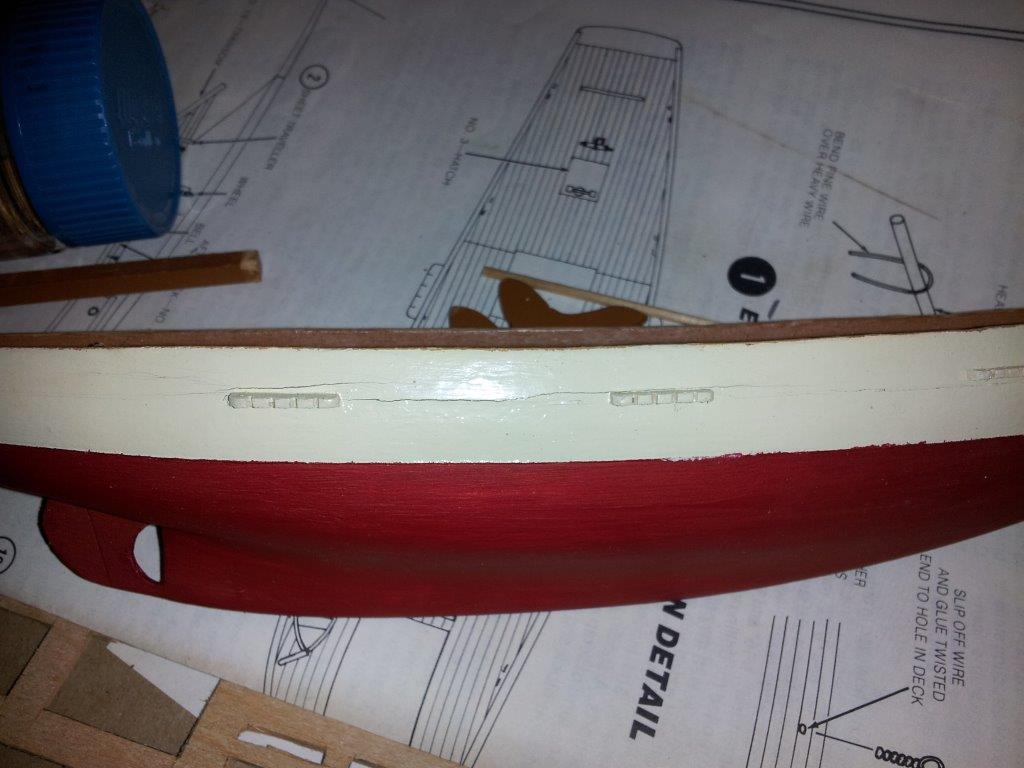
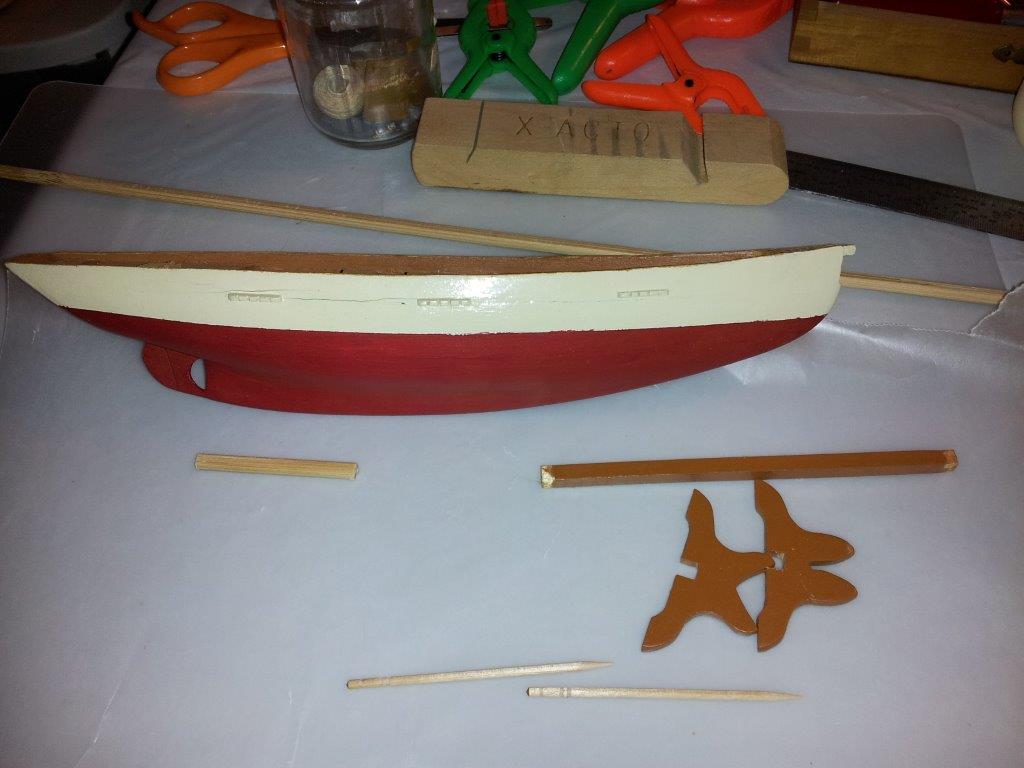
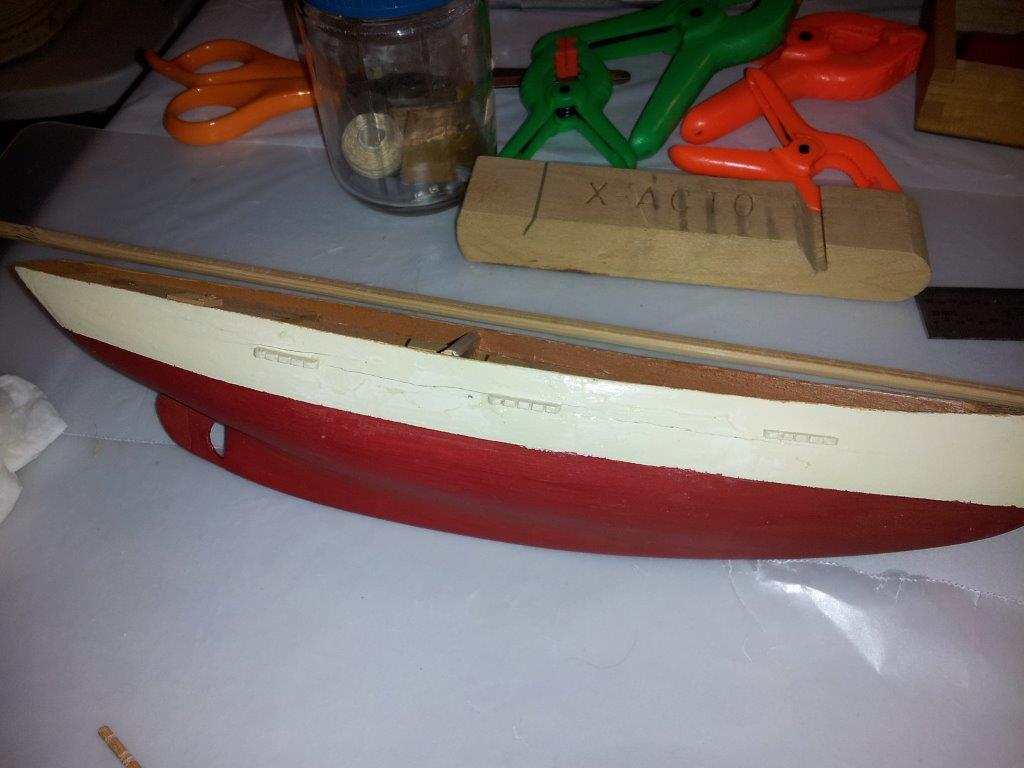
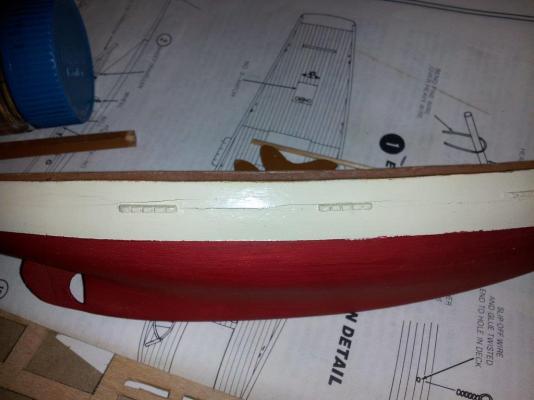
 Had some free time today due to the weather, so I finished carving and sanding the hull. The instructions have no cross sections to check the hull with so the shaping of the hull was pure guess work. I decided that the keel should be more obvious. The next step is to paint the hull again this weekend.
-
I had some free time today due to the weather so I planked the transom. I am now back to where I was when the stern post broke on the original.

- 55 replies
-
- 3
-

-
- ships boat
- model shipways
- (and 1 more)
-
I have the keel glued to the frames now. I dry fitted the shear lines and see that the bow is going to need additional work to get a proper fit.


- 55 replies
-
- 4
-
-
- ships boat
- model shipways
- (and 1 more)
-
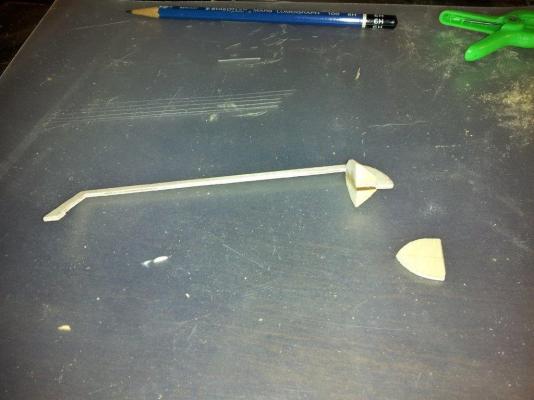
I worked on the Mast and Bowsprit Spreaders. They are made from 20 gauge steel wire. The directions have you glue the stays to the end of the spreaders. I decided to add eyes to the end of the spreaders. It has been years since I have soldered anything smaller then copper pipe, but I figured I would try my luck. I dug out my old soldering iron but the only solder I could find was 3mm for plumbing. I did Ok on the mast spreaders despite the fact the soldering iron did not seem to be as hot as it should. The soldering iron actually stuck to the wire a couple of times. The plan also has you solder the dolphin striker to bowsprit spreader. This is where a hotter iron would have been nice. After several failed attempts to solder the spreader and striker together, I decided to make the bowsprit parts out of wood dowel. After the parts dried I decided they were to large to use. I decided to give the soldering another try and I would skip soldering the parts together. The soldering iron worked perfectly today and the bowsprit parts came out looking than the mast spreaders. I found the old pennys looking through boxes of old model parts. Thought I would hold onto them to use for size comparison. I started this model in 1988 and found it in the cabinet a couple of week ago. I realized last week the hull was never carved completely. There is about a 1/4" to much in the bow. I apparently only sanded and then painted it. Looking at it and seeing the hull not shaped correctly bothered me, but I kept telling myself that no one would notice. Well I did not listen. This evening I took the knife to it. It is still not the correct shape, but the bow has the correct rise and at the casual glance it looks correct.


-
Pat thanks for the information and the link. The log gives some good information on building the model as well as the actual construction of the boat. I was looking for plans for a Chesapeake Sailing canoe and came across Wye River Models site. I will keep them in mind, but keep looking for better plans. I still have a lot to learn before I tackle a scratch build though.
-
Hello Everyone, I was doing research on Chesapeake Bay Sailing Canoes today and came across "Wye River Models" out of Queenstown Maryland ( http://www.wye-river-models.com/ ). I was wondering if anyone has had any experience with the company or their models?
-
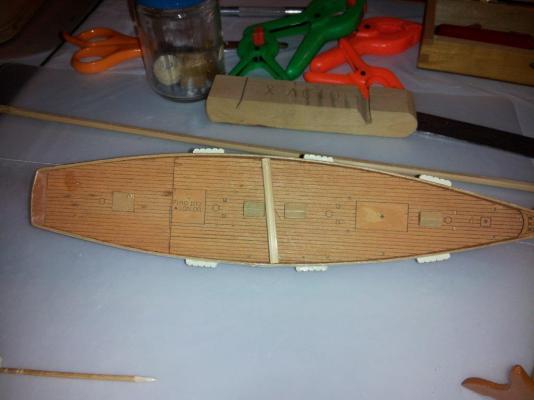
I got some time to work on the Atlantic this weekend and here is where it is at. Greg, green is my favorite color,but I decided to paint it black to better match the original. I also made 25+ eye bolts from some very fine wire wrapped around 20 gauge wire. Then drilled and mounted them on the deck. I also mounted the bowsprit. I added some wood putty to fill in the gaps.


-
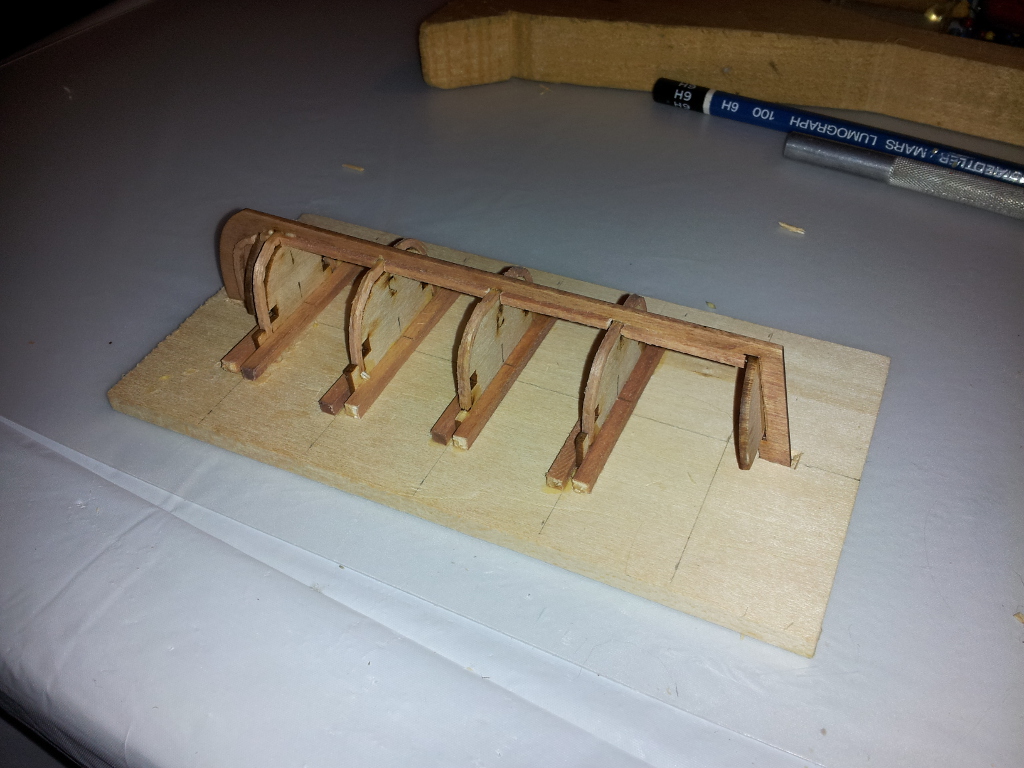
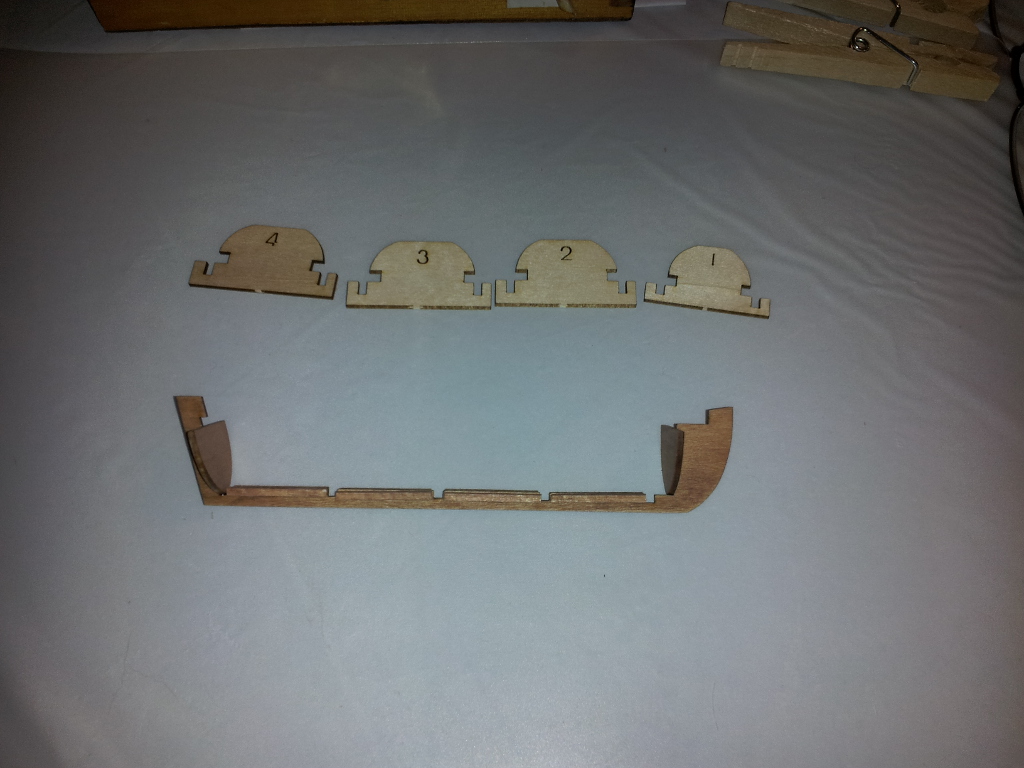
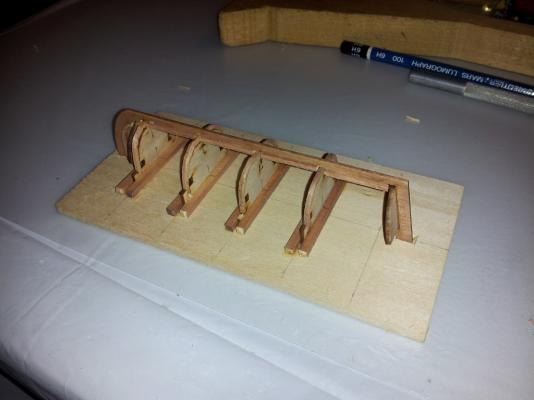
Hi everyone. I was able to get some work in this weekend and here is where I am at. I finished cutting out the formers and worked on getting the ribs shaped. I found the what worked best for me was to soak the 1/16x1/16 inch strips for about 4-6 hours and to slowly wind it around a 1" dowel and let it dry. I still had some strips splinter, but I came to the conclusion that they were going to splinter no matter what. I have the ribs glued into the formers now. I need to glue the formers to the base and then attach the keel to the ribs.


- 55 replies
-
- 2
-
-
- ships boat
- model shipways
- (and 1 more)
-
Tim, I am also working on the Schooner Atlantic. Your Atlantic looks great. My kit is an old one from Scientific that I picked up in the 80s.Looking at information on the Internet I see that mine is not very accurate either.
-
I was searching the web and found these images of the Schooner Atlantic. In 2010 a full size replica was built. In all of the pictures of the original Atlantic, the hull is a dark color and the reproduction the hull is black. The kit had me paint the hull ivory. I am thinking about changing the hull to black to better match the original. What do you think?
-
JesseLee, How has your Atlantic held up? I finished the paint and will start putting it together tomorrow.
-
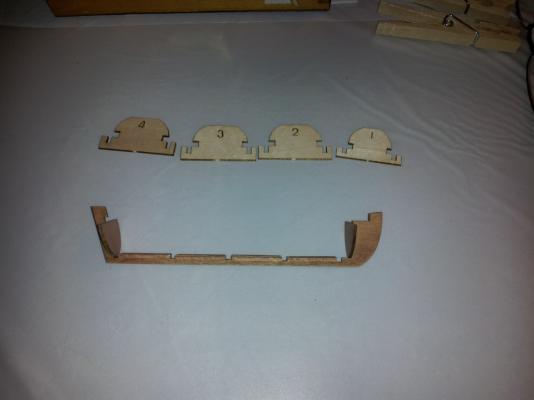
Today IO cut out the new keel, transom and forward bulkhead. I added filler blocks to the bow. I still need to cut out the new formers.

- 55 replies
-
- 1
-
-
- ships boat
- model shipways
- (and 1 more)
-
I need to buy the paint tomorrow.
-
The glue held, the wood below it did not. It broke with the gran of the wood. The piece was just to small and my hands to big. I am thinking about buying a sheet of plywood and starting from scratch. The plans has the keel and formers. I will just have to try my hand at cutting out the small parts.
-
I will be starting over. The kit parts list said that the keel was 1/16" plywood. What I actually received was basswood. Plywood would be a better choice for the keel. I will pick this up later.
-
Well accidents do happen. I planked the transom and while I was sanding the edges the keel broke at the bottom of the transom. Lesson number 3: things break. I think if I was to do it all over I would plank the transom before gluing the ribs to the frame. I have glued the keel back together. Hopefully this works, if not I will have to start over. Starting over would not be to bad, because I have already learned a lot and believe I can do better next time. On to the good news. I am getting better at bending wood. What is working for me is to soak the wood overnight and then use the steam iron to bend it by heating then pull the wood up as I slid the iron off.
-
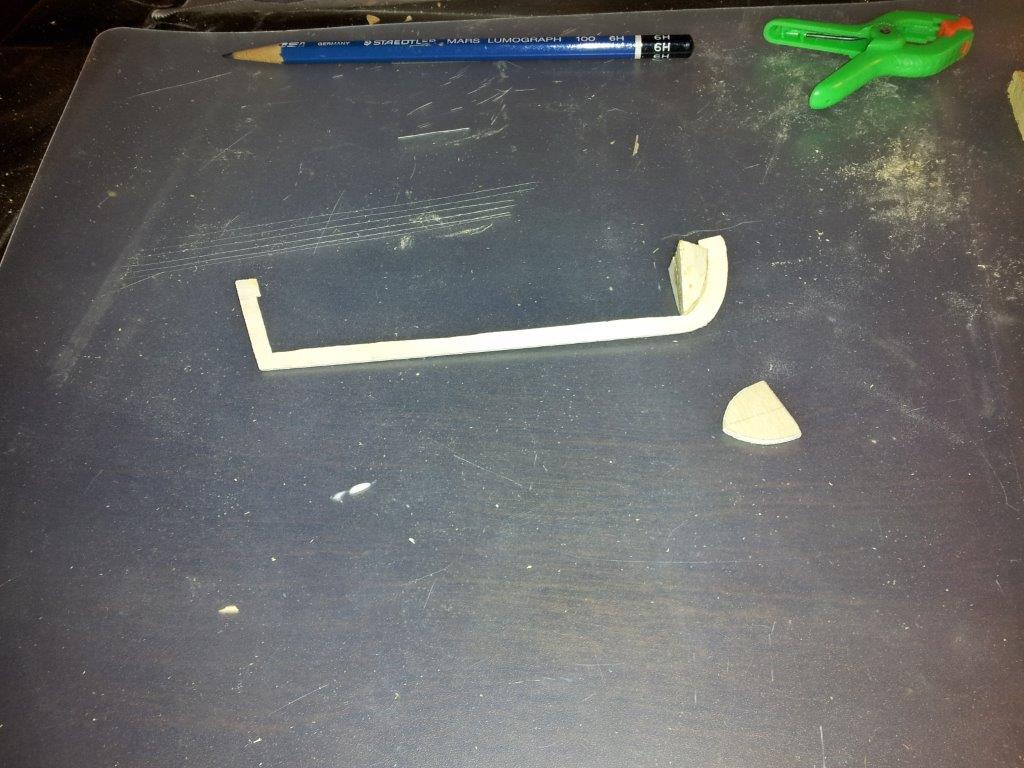
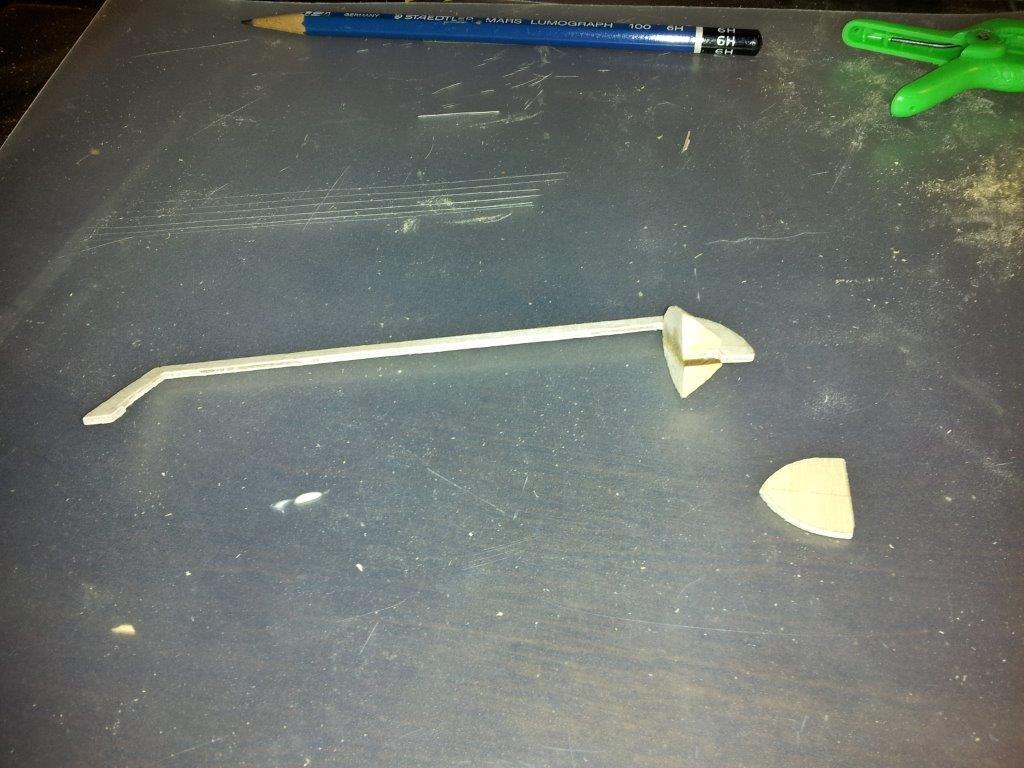
Yesterday while I was in the garage looking for tools I came across a model I started back in 1988/9. I never got a chance to finish the model because I joined the Navy. I thought this had been lost over the years so was a nice surprise. I did not plan to start another build log until I was further along on the Ship's boat kit, but I need to soak some of the strips before I could continue. This gives me something to do while waiting on the other project. I had completed the work on the hull and was working on the deck fixtures when i left off. I believe I still have all of the parts. The bulwark on the starboard side was cracked either from age or being banged around. All of the fixtures that had been fixed to the deck had fallen off. Today I just plan to glue the crack in the bulwark. I cut a piece of bamboo to use as a spreader to push the bulwark out while the glue dried. After the glue dries I will sand the crack and repaint the ship.


-
Happy New Year Everyone! Thanks Themadchemist and Amfibius for the help. I like the Idea of a the extra clamps and the steam iron. I had already decided to to try the iron today, but the wood has not been put onto soak yet. I will put it on to soak this evening and I can work on it tomorrow night after work. I guess today I will look over some of my other kits to see what is next. Over the years I have purchased or received 5 wooden kits. I have a model I started in 1988 The Schooner Yacht Atlantic by Scientific. I thought it was misplaced and stumbled upon it looking for tools.The hull is completed, but needs some touch-up. I think I may give it some attention today.
-
The size is proving to be quite a challenge. I have learned a few things along the way, just because the parts are laser cut does not mean they are the perfect shape. As for as the kit there are a few things that I would recommend are do differently. 1. The strips placed along the keel between the ribs, I would recommend just using one long strip and after the glue dries cut out the notches for the ribs. This will give you a straighter line to glue the planks on. 2. #1 former is shorter than the other formers. When you build the frame plan accordingly. 3. A block of wood to help shape the bow would be a good idea. As for bending the ribs, I have no recommendation. I soaked the strips for an hour and they bent nicely around the formers, but as they started to dry they kinked and split. I can sand out the imperfections, I was just hoping for nice round curves. Does anyone have a recommendation for bending the ribs?
- 55 replies
-
- 1
-
-
- ships boat
- model shipways
- (and 1 more)
-
I have the transom and the forward bulkhead attached. I hope to have ribs attached soon.
- 55 replies
-
- 1
-
-
- ships boat
- model shipways
- (and 1 more)
-
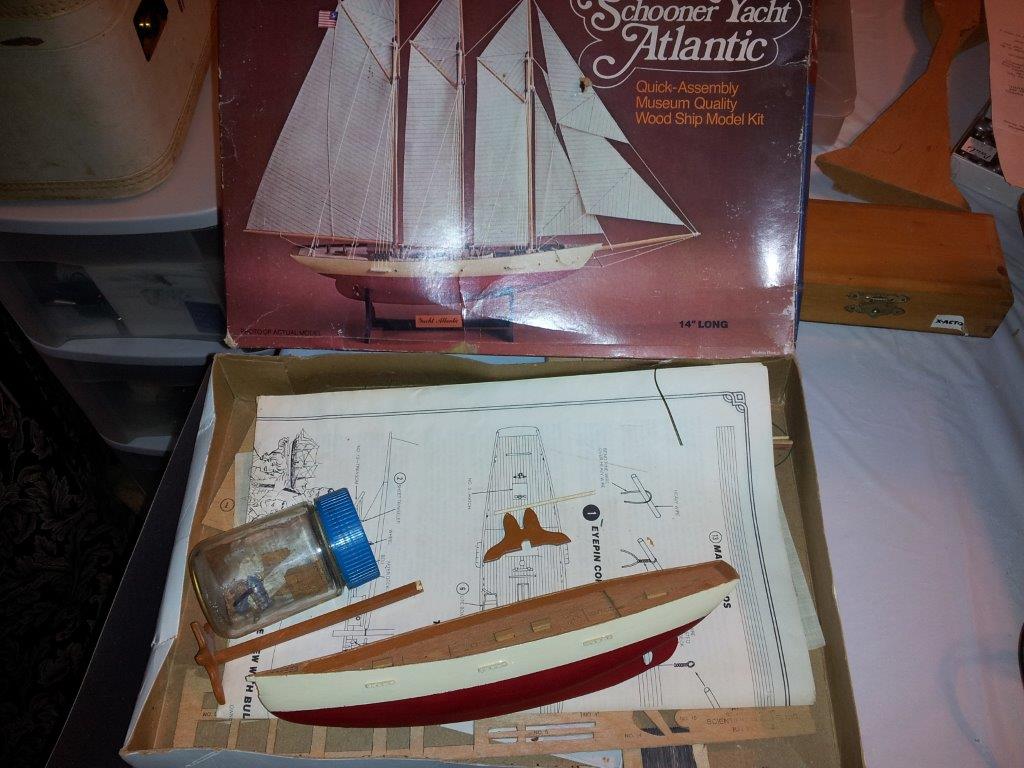
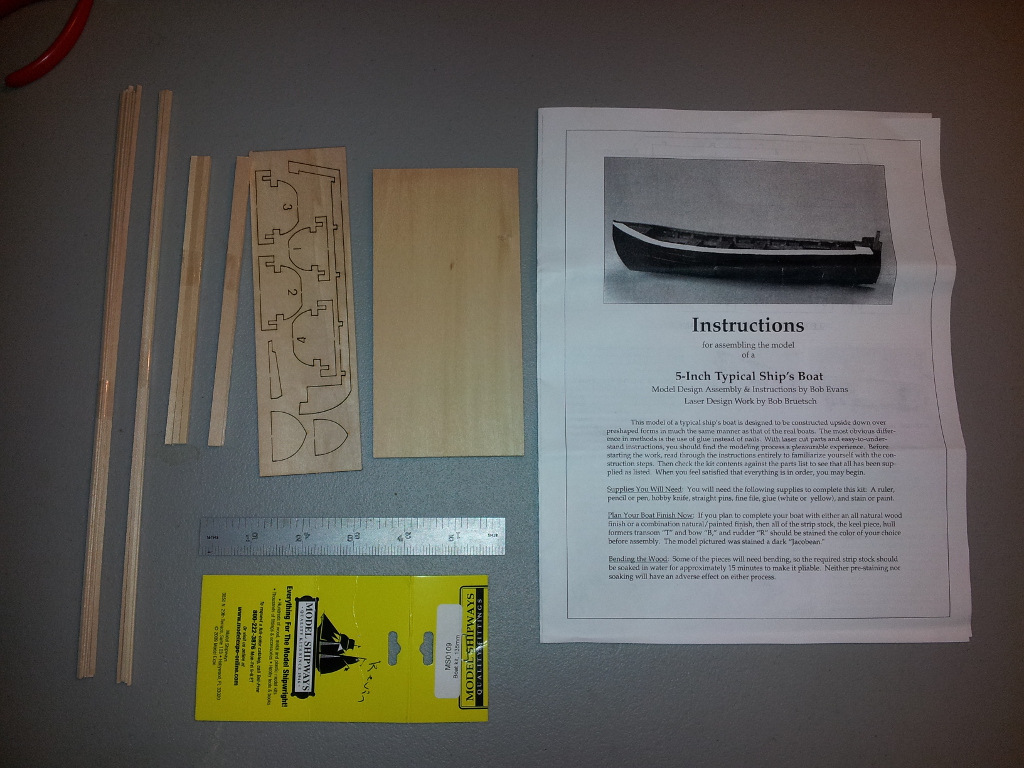
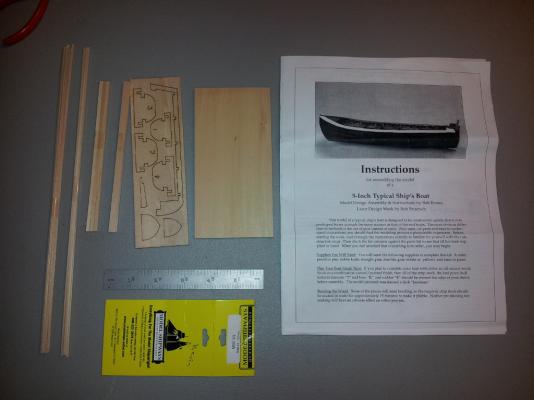
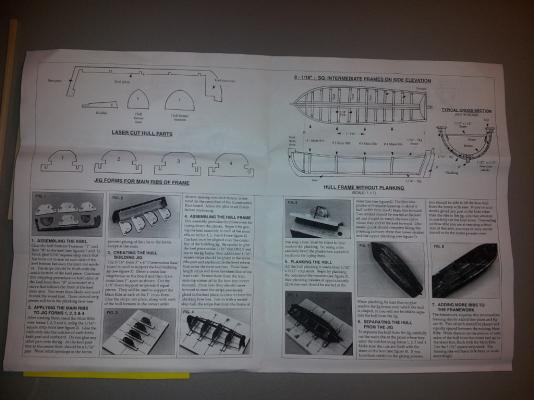
Hi everyone. This is my first Build log. I have built several plastic models over the years but this is my first planked model. I chose this model because it was cheap and small. I figured it would be a good project to learn on. If I screw it up I would only be out $5. Here is what was in the kit. Not much to see. I cannot see any details in the images so they are no help. If it was not for the line drawings I believe I would be lost. My first step is to stain the parts. At this point I have not decided whether to paint it or leave it natural. I have a feeling that I will paint it to hide my mistakes. (Edited to fix images)

- 55 replies
-
- 1
-
-
- ships boat
- model shipways
- (and 1 more)