KevinR
-
Posts
214 -
Joined
-
Last visited
Content Type
Profiles
Forums
Gallery
Events
Everything posted by KevinR
-
 It looks great. You did a splendid recovery on the broken ribs.
 -
Skipjack by KevinR - 1:24 - abandoned
KevinR replied to KevinR's topic in - Build logs for subjects built 1901 - Present Day
Gary, Welcome aboard. The Library of congress plans for the Skipjacks EC Collier and Kathryn are quite complete. I have seriously considered starting over using one of those plans, but, I have to much tied up in my current build just to throw it all away. I recommend getting Ben Lankford's book “Modeling Guide for Model Shipways Kit willie L. Bennett”. I started off using Steve Rogers, Patricia Staby-Rogers book “Model Boat Building: The Skipjack”, but have found that Ben Lankford's book more useful. As for as fittings, My build is at 1/2 inch scale (1:24). I wouldn't know where to look for them. I am looking forward to trying my hand at creating some of them. The plans for EC Collier and Kathryn are 3/8 inch scale (1:32) the same scale as the Willie Bennett. You may be able to get fittings from Model Shipways if you use the 3/8 inch scale. I hope this information helps you. Catch Yall later. -
Skipjack by KevinR - 1:24 - abandoned
KevinR replied to KevinR's topic in - Build logs for subjects built 1901 - Present Day
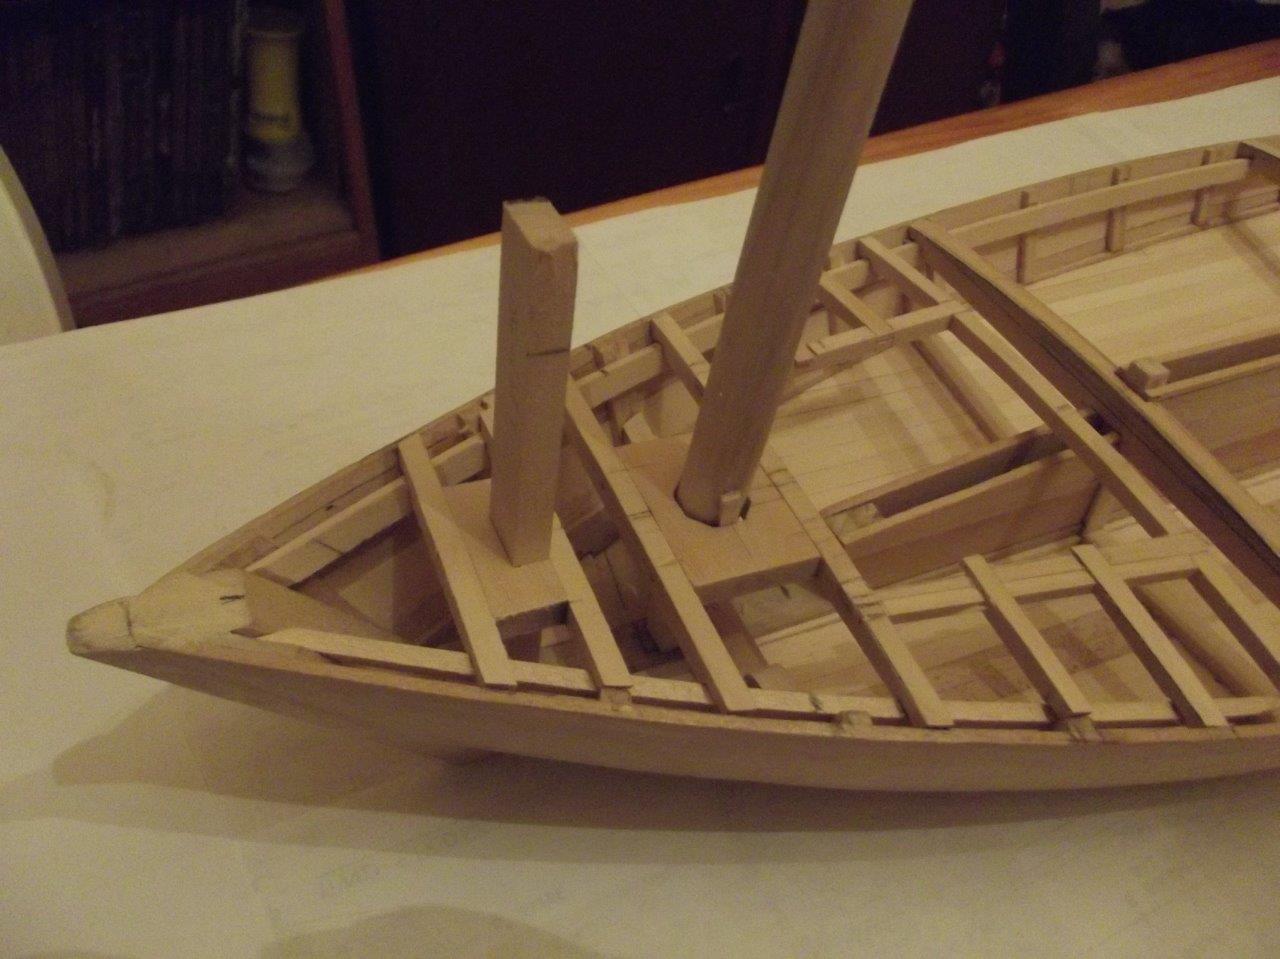
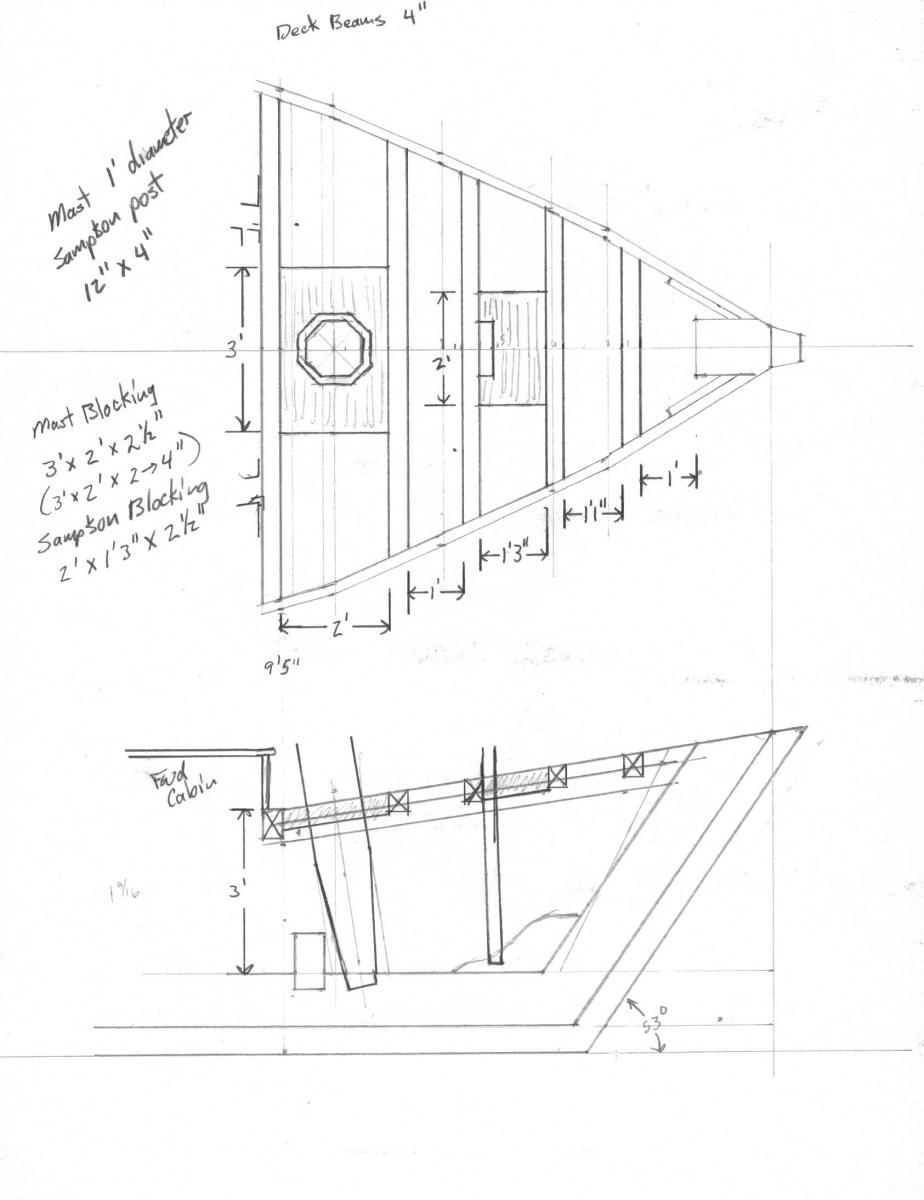
Lawrence, Welcome, I am glad to have you along for the show and thank you for you kind works. Thanks everyone for the comments and the likes. Well not much of an update. I thinned out my sampson post. I don't know what I was thinking, I originally made it 6x12 inches. It should have been 3-1/2 to 4 inches thick. In stead of remaking the blocking I just shimmed it. I figured the deck planking will hide my mistake. I made 4 deck beams, and promptly lost one in the clutter on the workbench. I am not sure what would be faster, clean up the workbench or just make a new one. The Admiral votes for cleaning the workbench. Well until next time, Catch Yall Later -
Skipjack by KevinR - 1:24 - abandoned
KevinR replied to KevinR's topic in - Build logs for subjects built 1901 - Present Day
Pat, The deck camber or crown on my build is 6 inches midship at the aft end of the centerboard case. The plans for the Willie Bennett I believe, show 4 inches. I am not sure if it is correct but Chapelle stated "The deck beams were made with a great deal of crown as this was considered necessary for seaworthiness." I am not sure if I have to little or to much. You can read more on how I arrived are 6 inches in this Post. On the the Crab Scapper you plan to build, where are you getting the internal detals? I have not had a chance to read Chapelle's book on the Crabbing Skiffs yet. Does he provide enough detail to do the scratch build? -
Skipjack by KevinR - 1:24 - abandoned
KevinR replied to KevinR's topic in - Build logs for subjects built 1901 - Present Day
Welcome aboard Gerty, Ron and Pat! Always room for more. Thank you everyone for the likes. I have read about half of the H.I. Chapelle's book on the Skipjacks. There is a lot of information on their construction. There are also 14 plans of Two-Sail and Three-Sail Bateau. Chapelle talks about the origin of the name Skipjack, but always uses the terms Two-Sail and Three-Sail Bateau when referring to the boats. The plans are small, but may have enough detail when enlarged to use for a scratch build. I do not have any updates to post. If nothing comes up this weekend I will get some more done and post pictures on Sunday. Catch Yall later. -
Bob, It looks nice and comfy. good enough to sit on.
-
Skipjack by KevinR - 1:24 - abandoned
KevinR replied to KevinR's topic in - Build logs for subjects built 1901 - Present Day
I received the following books today "Notes on Chesapeake Bay Skipjacks" by Howard I. Chapelle $9.95 "Chesapeake Bay Crabbing Skiffs" by Howard I. Chapelle - $5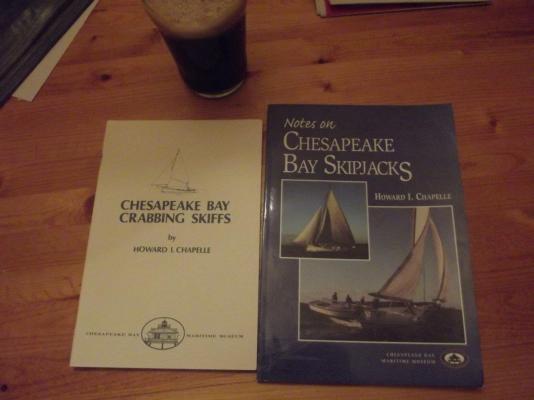
-
J, I look forward to following your Longboat. I have a longboat on the shelf that I hope to get around to one of these days. Kevin
-
Sailmaking and Boltropes on Working Sails
KevinR replied to JerryTodd's topic in Masting, rigging and sails
Jerry, Thanks for putting this tutorial together. Great information. Kevin -
Jond, This looks like a wonderful project. Can't wait to see you progress. Kevin
-
Skipjack by KevinR - 1:24 - abandoned
KevinR replied to KevinR's topic in - Build logs for subjects built 1901 - Present Day
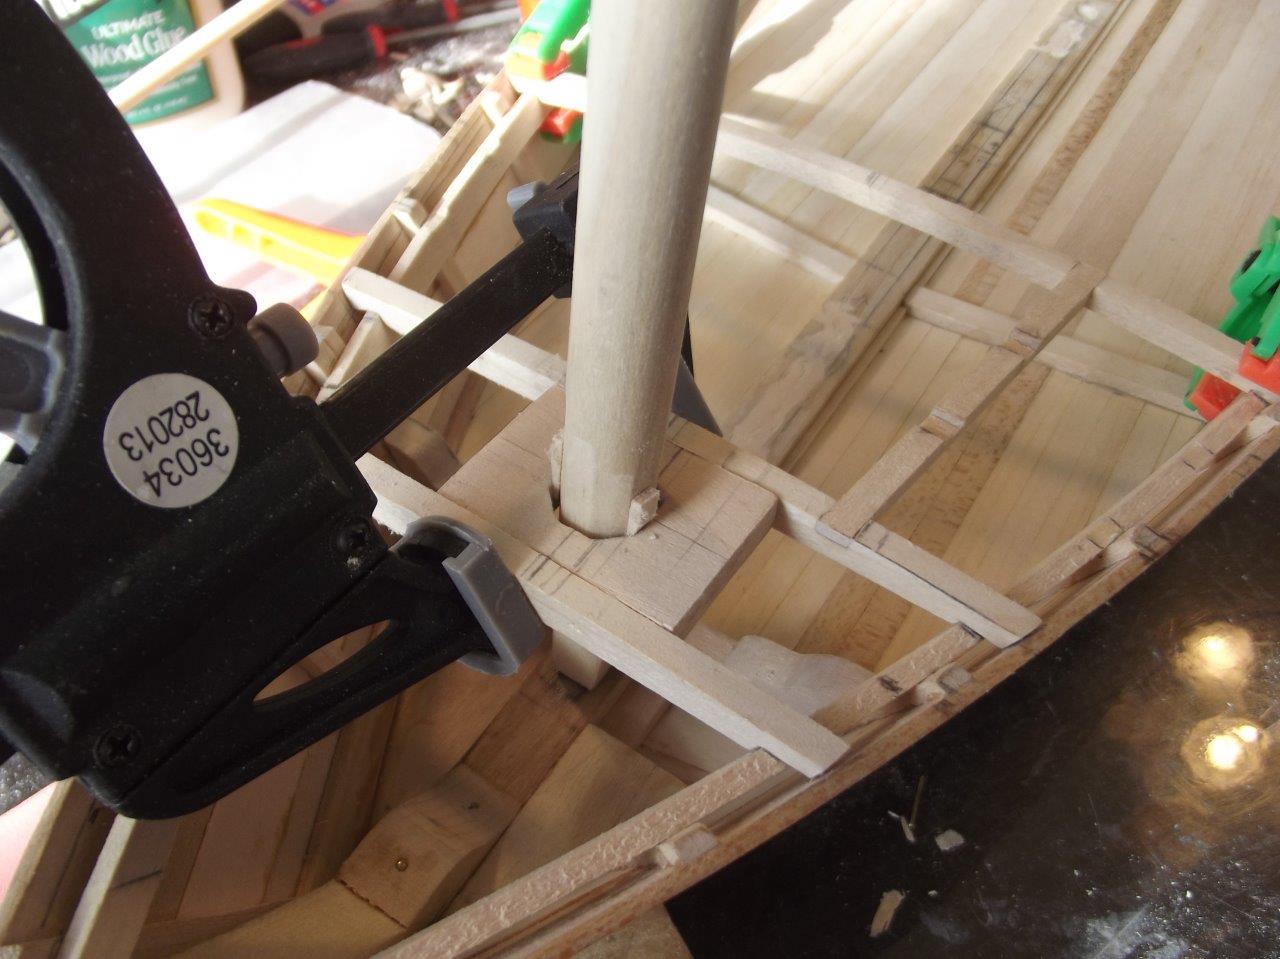
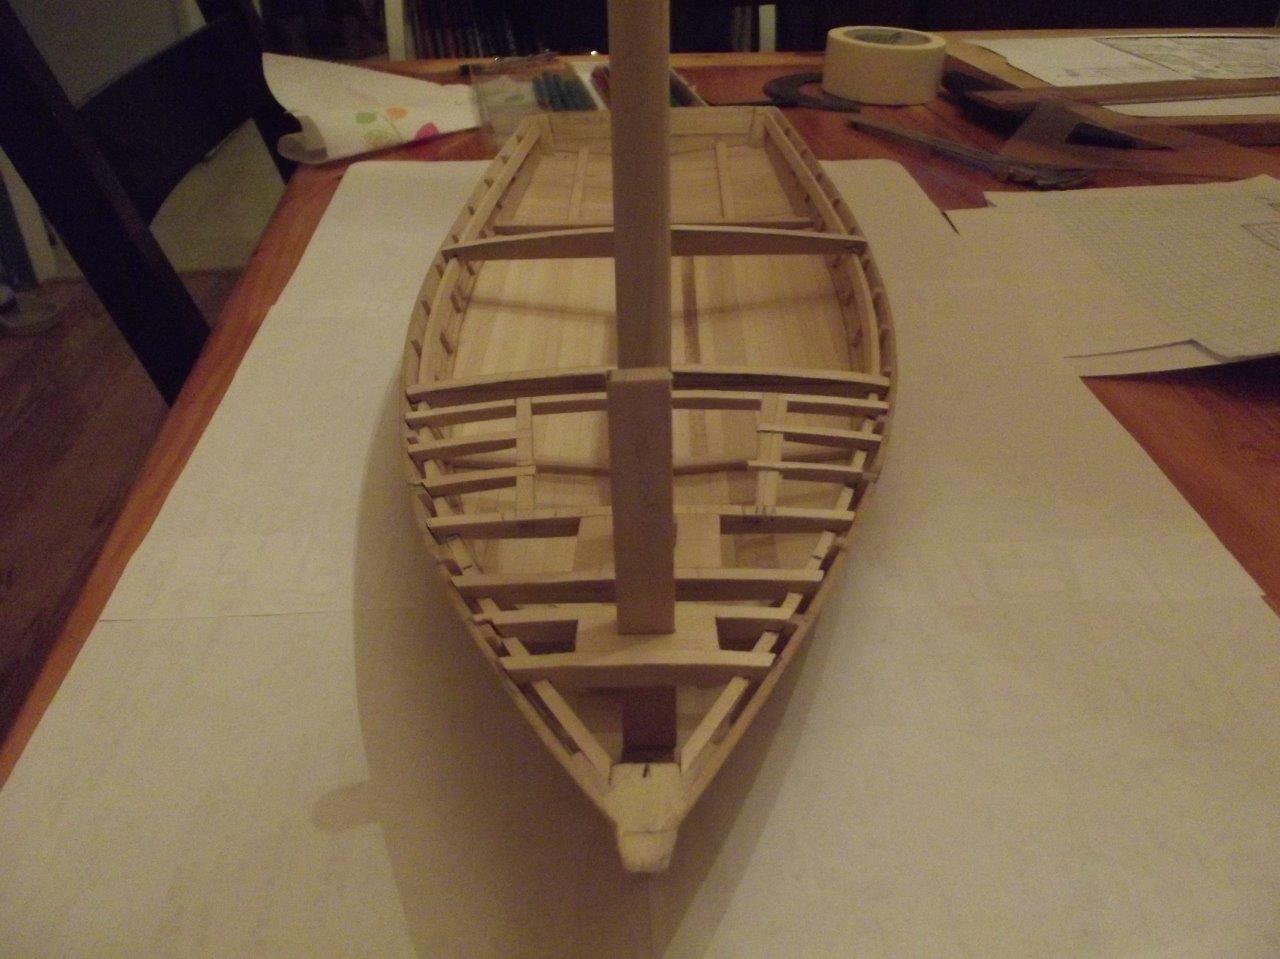
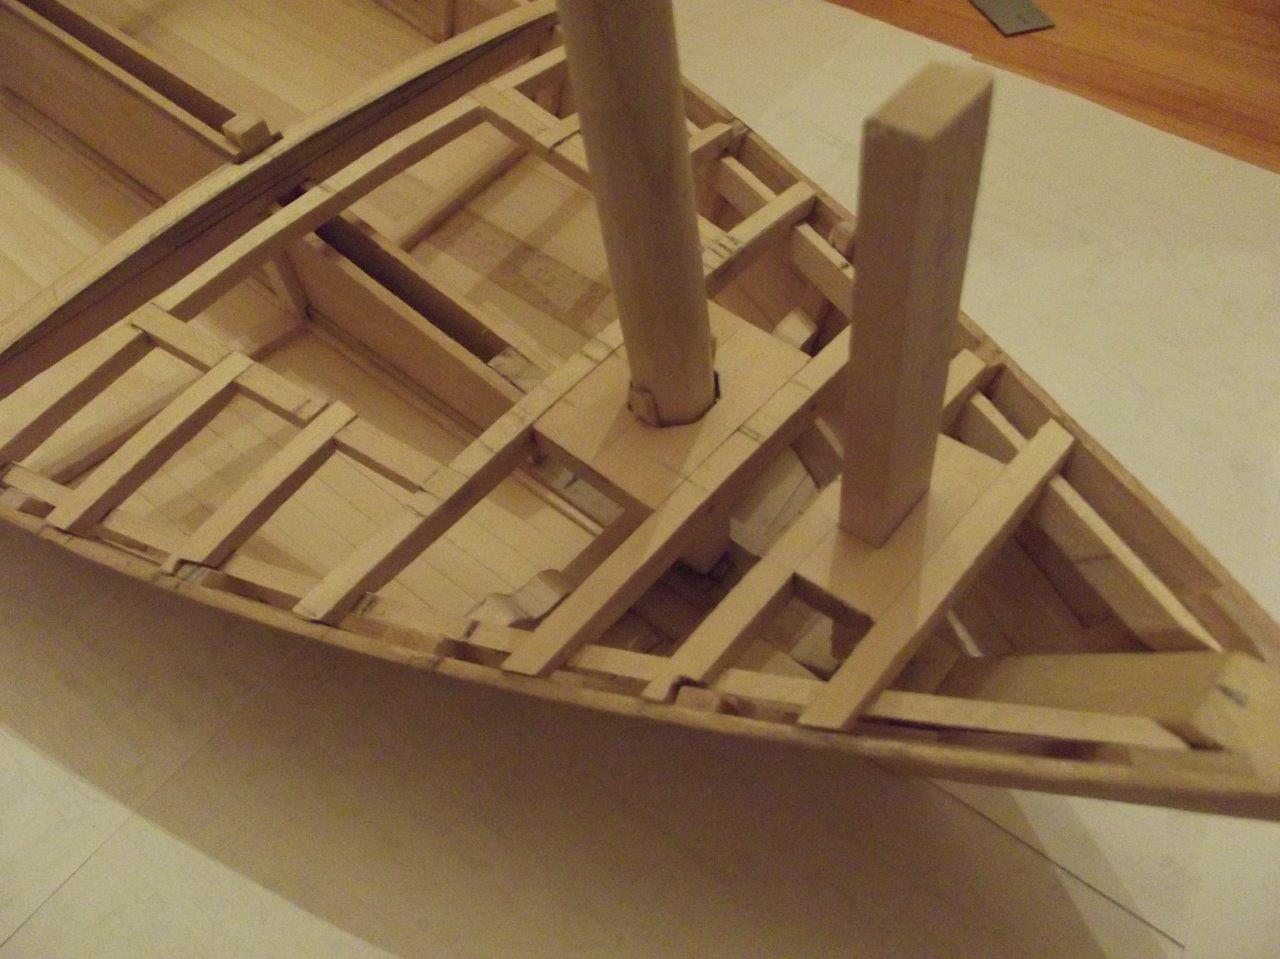
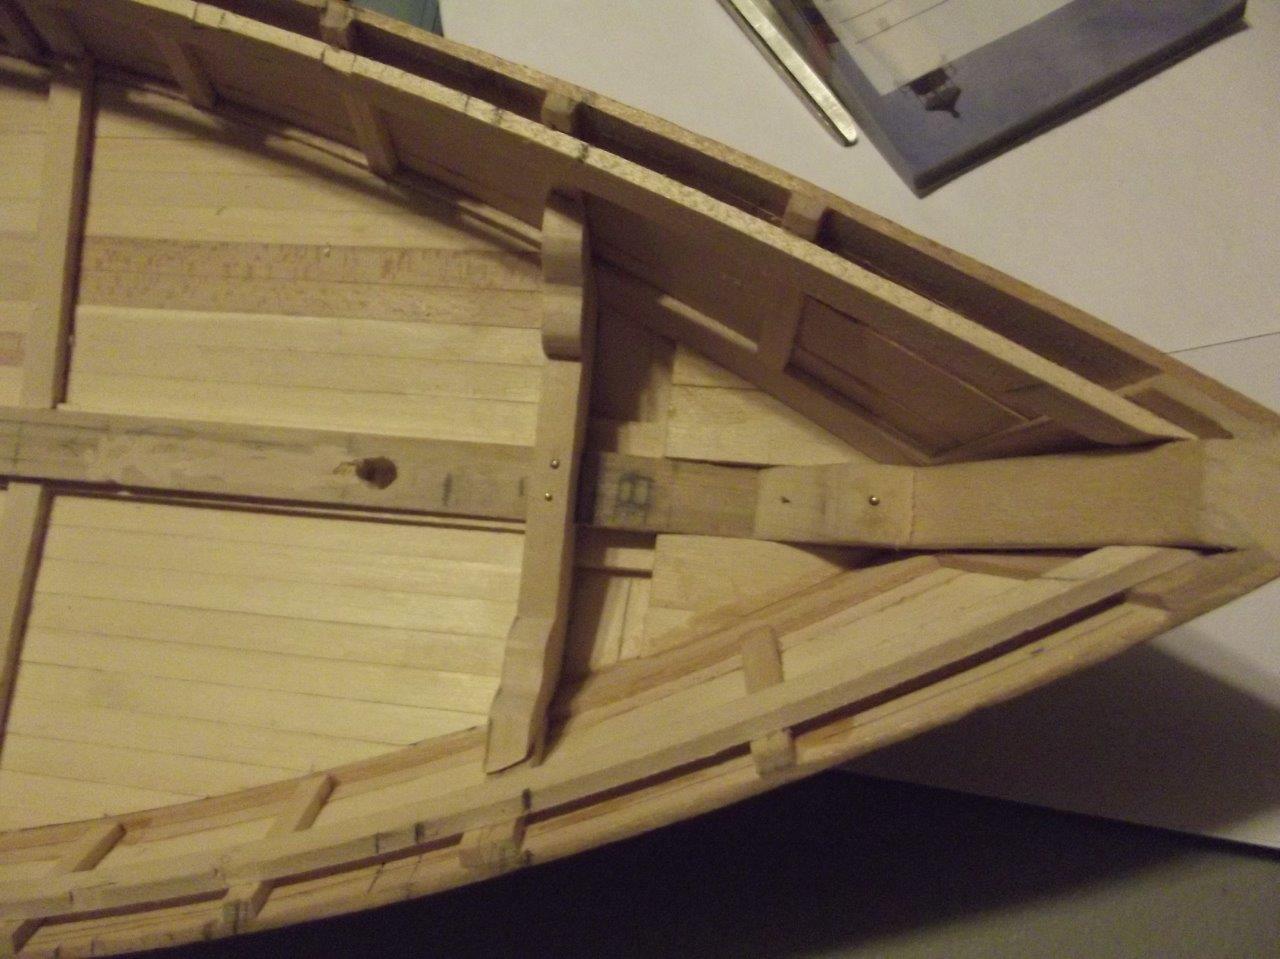
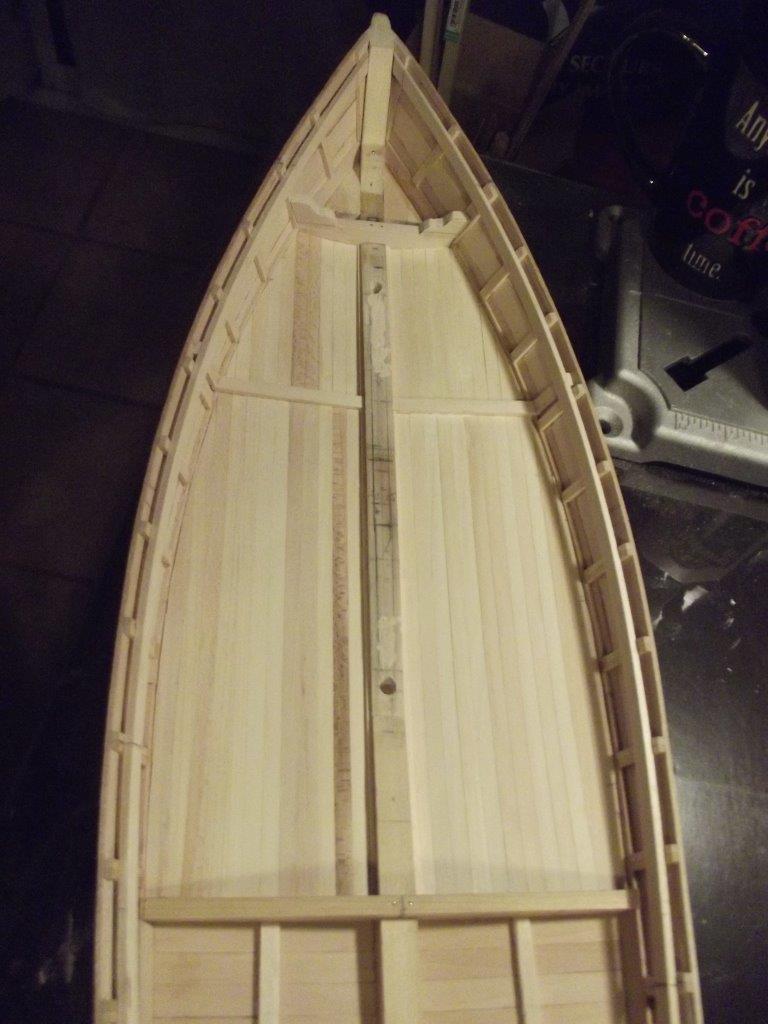
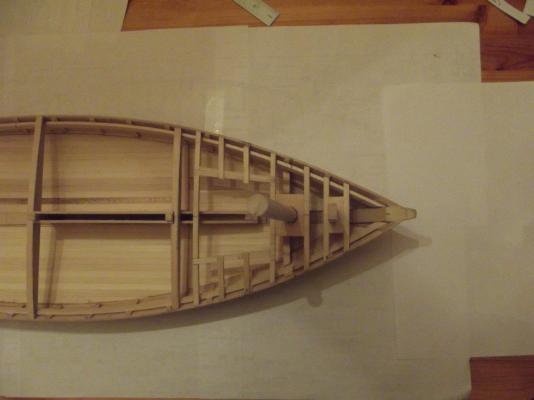
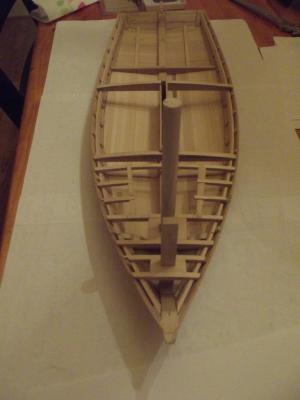
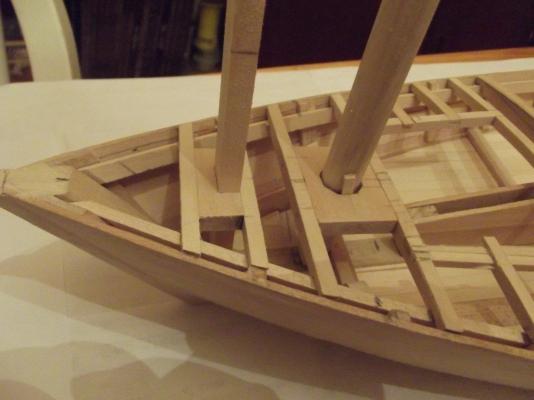
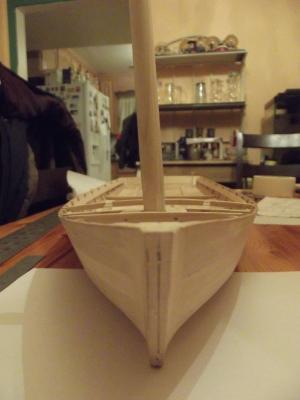
Hi everyone! Thank you for stopping by and all of your advice and help. The problem is that the angle of the starboard side planks is greater than the port side. The distance from center line on the starboard is grater than the port. I was able to realign the mast blocks with the stem and keelson. I also moved the forward port side the the forward cabin 3 inches closer to the side. I will have to trim some of the planks on the foc's'le to try and hide the difference. I have only 1 deck beam to complete on the foc's'le. That is the very first one. I placed a stub mast and a temporary sampson post to get an idea of how it will go together. I have not glued in any of the deck beams. The are a couple of additional tasks to complete on the hull before I can glue them in place. Disassembling the mast blocking. Making sure the mast is straight this time. It looks straight this time. My current status. Thanks again everyone.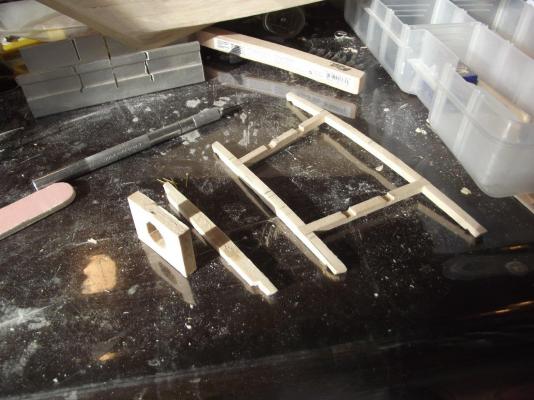


-
Blockade Runner Ship, Available??
KevinR replied to flying_dutchman2's topic in Wood ship model kits
The schooner America served as blockade runner in the American Civil War for a brief period. -
Skipjack by KevinR - 1:24 - abandoned
KevinR replied to KevinR's topic in - Build logs for subjects built 1901 - Present Day
Cap'n'Bob, To late, I already repositioned the mast. I think the route that I am taking will work out. The mast is now straight. With the forward cabin, I believe I can hide the alignment problem with the deck. If I had move the mast step, the planks would not have lined up with the stem. I have moved the fwd port side of the cabin out by 3 inches. I still will have to trim 3 inches from the port side planks to get the alignment correct. (I Hope ). The tricky part is around the cabin. How ever it turns out, I guess I will have to make do. It does not appear to be as bad as it looked yesterday afternoon. I remember reading about a fishing schooner with a twisted keel from when it was built. It had a long life despite the imperfection. On the survey of the EC Collier, I believe, It was noted that nothing was square or true. Maybe this just makes it more realistic. -
Skipjack by KevinR - 1:24 - abandoned
KevinR replied to KevinR's topic in - Build logs for subjects built 1901 - Present Day
OK, after sleeping on it. I plan on re-centering the mast blocks and continue. The forward cabin will help hide the mistake in the planking. I believe there are 2 -1 ft king planks running from the stem to the cabin. I don't remember where I read that, have to find it again. I will shave the planks on the port side so the number of planks will be the same as the starboard. I will see how it looks after I reposition the mast. -
Skipjack by KevinR - 1:24 - abandoned
KevinR replied to KevinR's topic in - Build logs for subjects built 1901 - Present Day
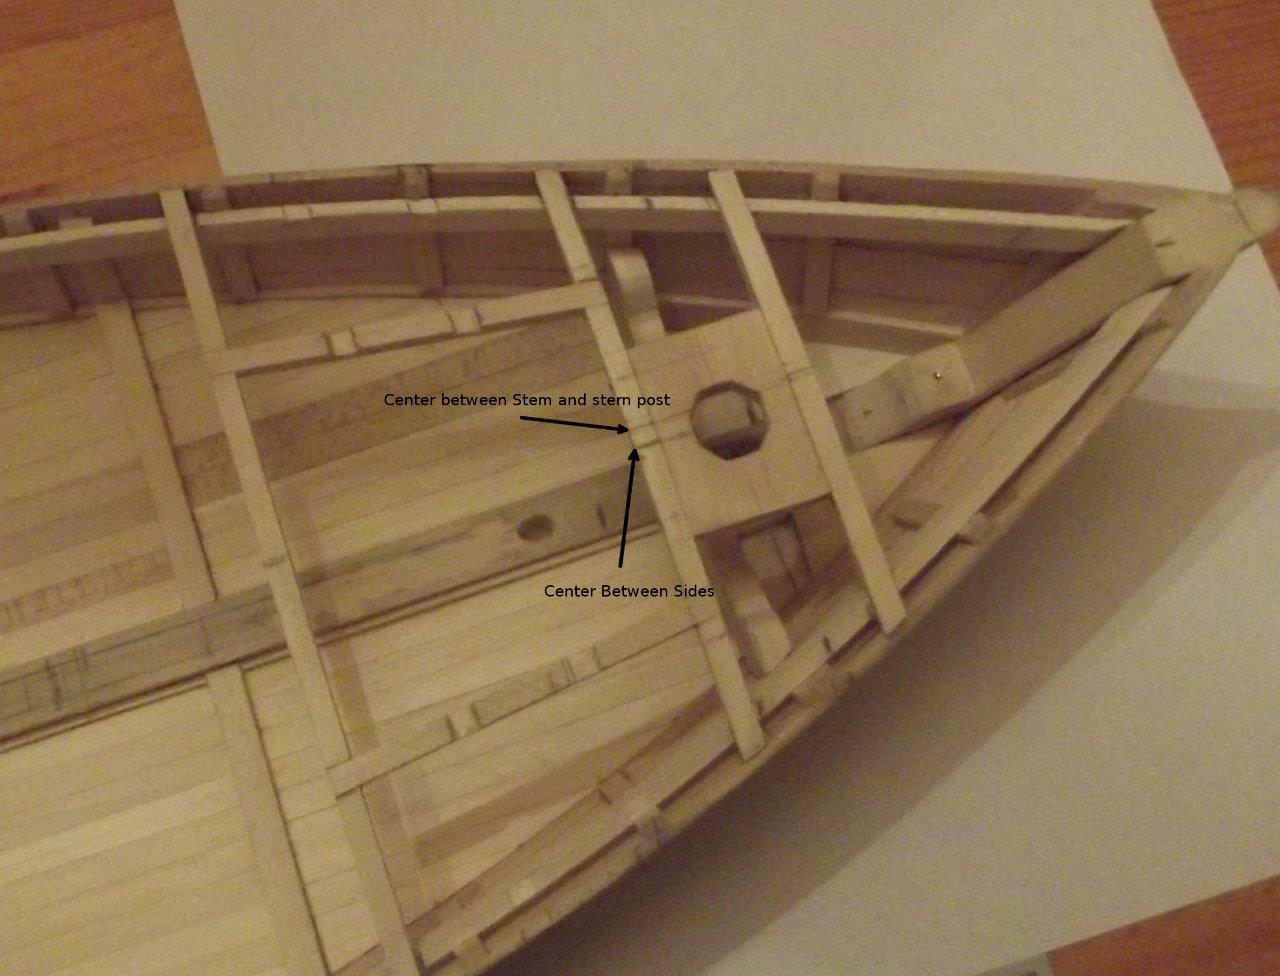
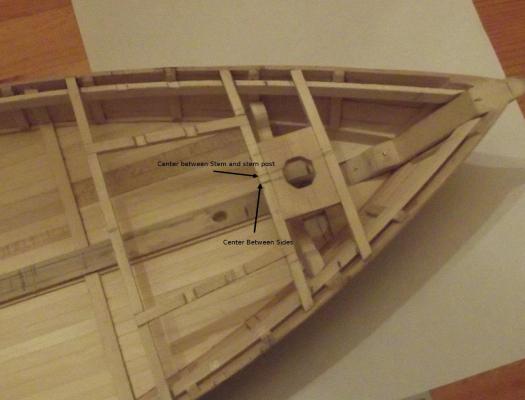
I wasn't planning on posting tonight, but I discovered a problem. I planned out the mast and sampson post placement. Then I started on the blocking for the mast. It looked pretty good and I was kind of proud about what I had accomplished. Then I looked at the boat from the front. Something was not right. When I placed a straight edge between the stem and stern post they did not match up with the center between the sides. The mast blocks are not centered over the keelson. They are off by 3.5 scale inches. I was real tempted to chuck it and start over. But I have been thinking it over and even though I am disgusted that I did not discover the error sooner. I have to much invested just to toss it. I am thinking that I can re-align the mast blocking so that the mast is straight. Hopefully it will not be obvious the the mast is off center by 3 inches. So, I am looking for feed back here. Has anyone else had to deal with this? And Is this salvageable? The big question is, can I live with this?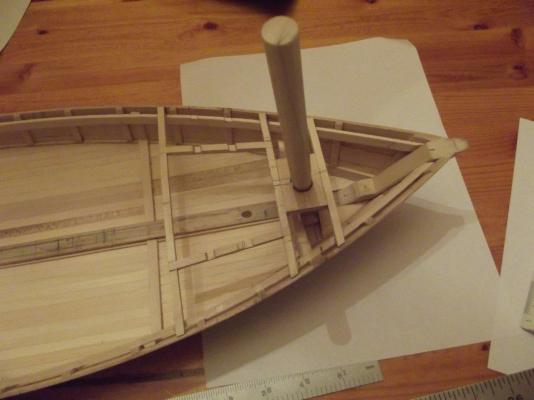

-
Skipjack by KevinR - 1:24 - abandoned
KevinR replied to KevinR's topic in - Build logs for subjects built 1901 - Present Day
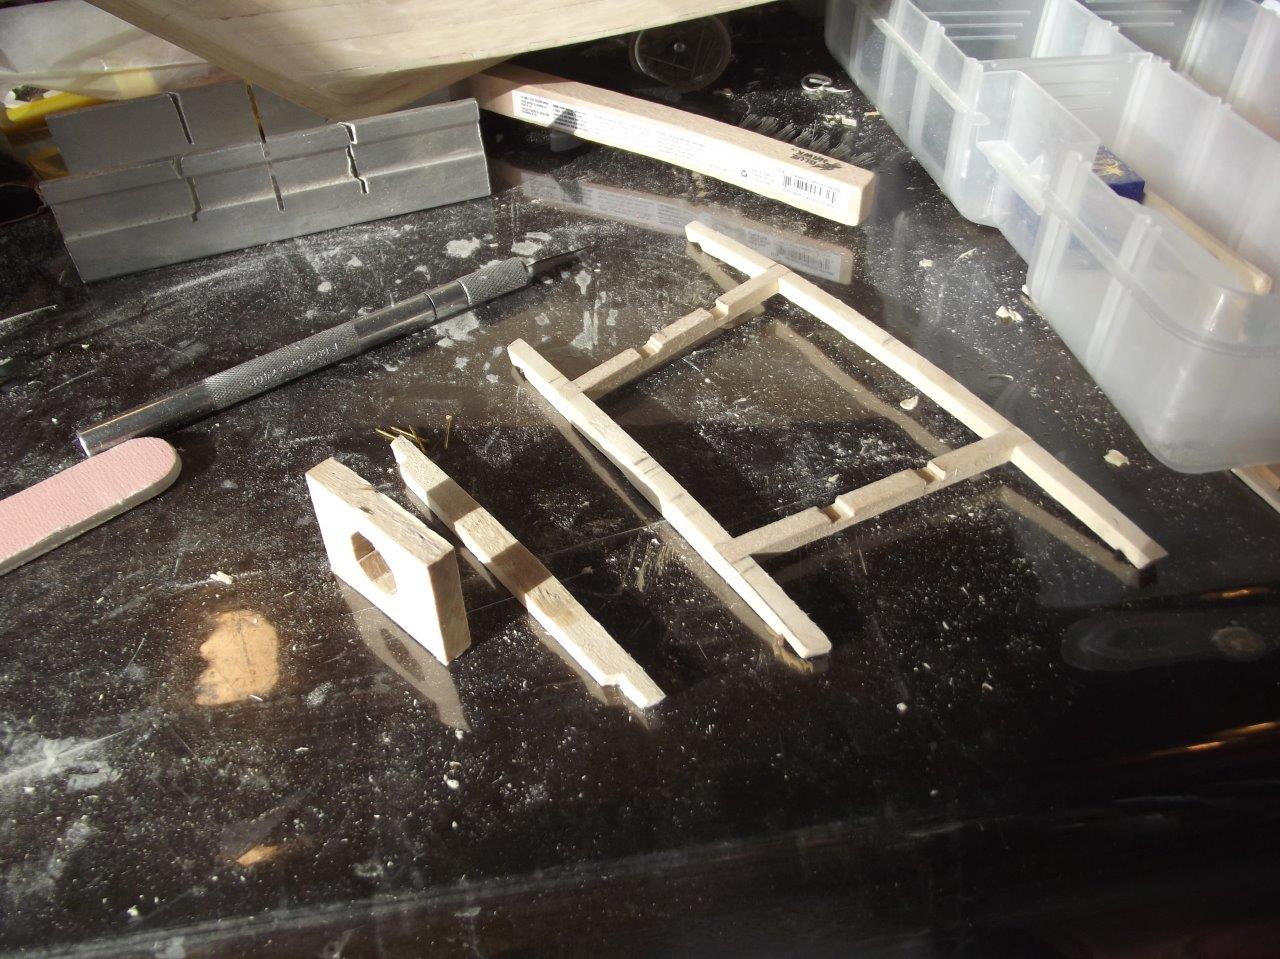
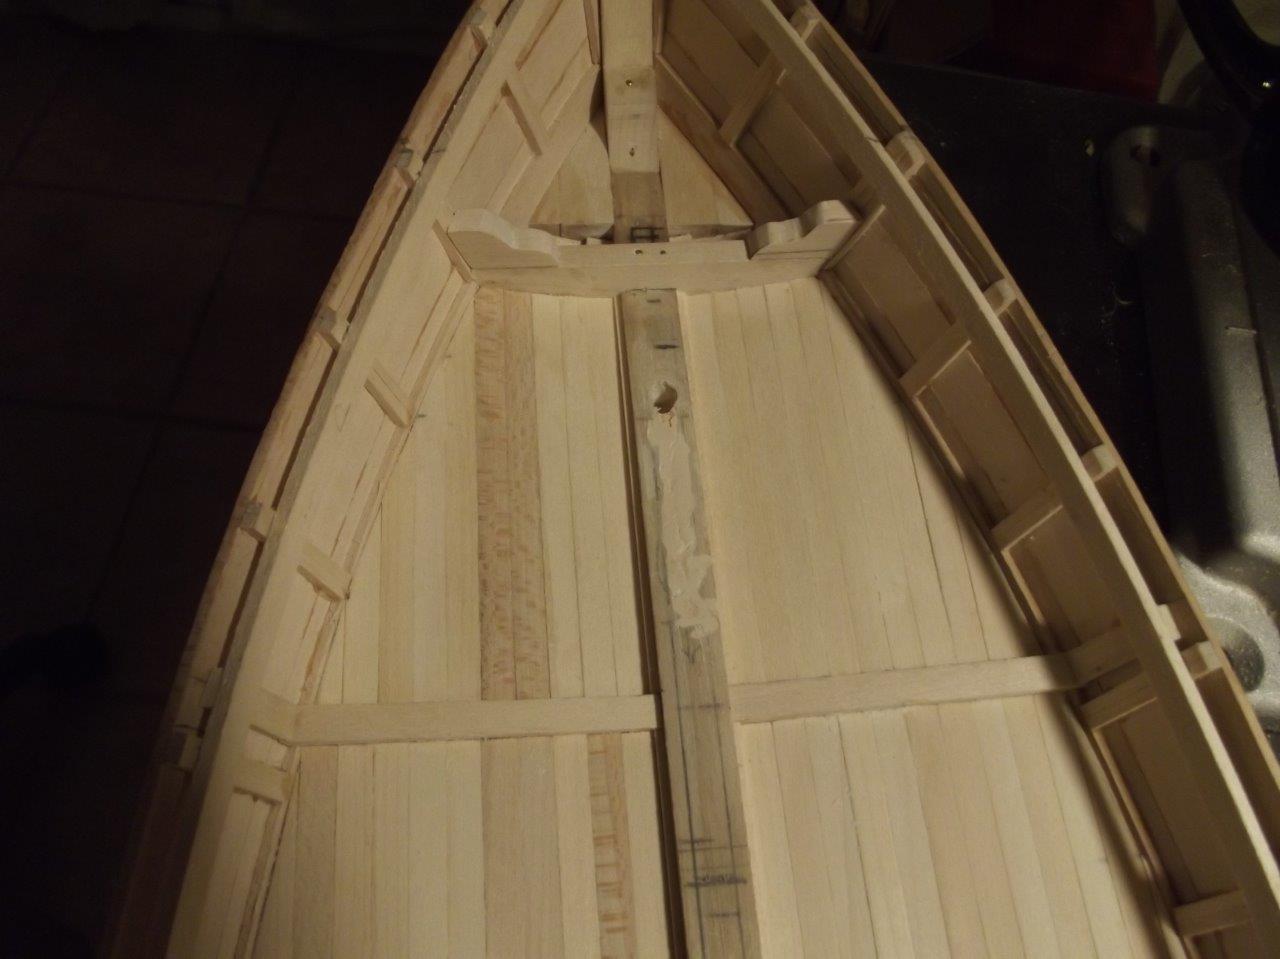
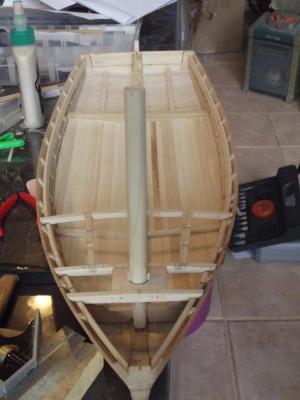
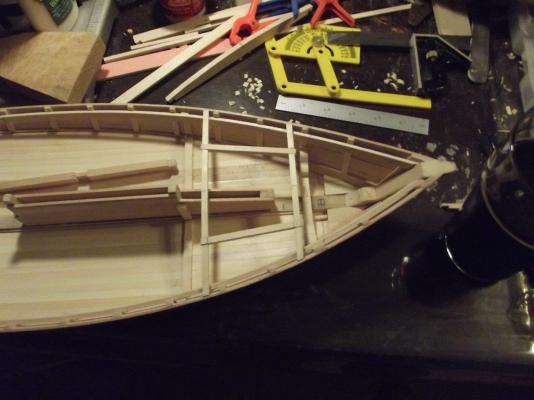
Thanks Marty, I am looking forward to, and dreading, building all of those gizmos. Unless something comes up, I plan on being at the meeting. Patrick, The part of the internals I would most like to show is the Foc's'el area. It shows the bottom planking, the wood chunks, the strongback with knees, the cabin decking and interior, stem liner with knee, the mast and step and the sampson post and step. I plan on leaving the cabin hatch open so this would allow additional light for viewing from both angles. the more I think about your idea the more I like it. I will have to see if it can be done. The Foc's'el is a very crowded place.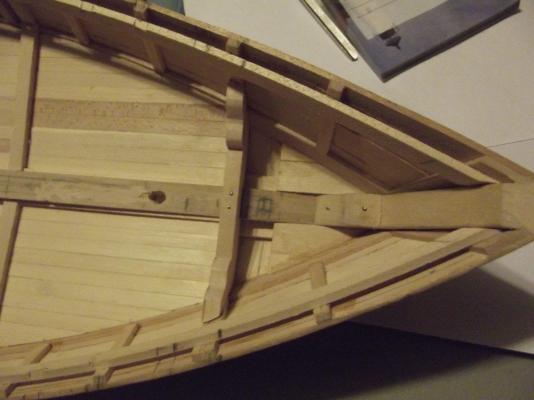
-
Skipjack by KevinR - 1:24 - abandoned
KevinR replied to KevinR's topic in - Build logs for subjects built 1901 - Present Day
Patrick, I like that idea. I would need to clean up a lot of glue. When I started, I was not worried about the glue in areas I thought no one would see. I am being a lot more careful now, even in areas that will be painted. I will give it some thought. Thanks for the advice! -
Skipjack by KevinR - 1:24 - abandoned
KevinR replied to KevinR's topic in - Build logs for subjects built 1901 - Present Day
Came across these web sites today while surfing the web at lunch. Skipjack Kathryn - 1901 http://coastalheritage.org/cha-east/restoring-skipjack-kathryn/ http://en.wikipedia.org/wiki/Kathryn_%28skipjack%29 Skipjack Rebecca T. Ruark - 1886 (Oldest surviving skipjack) http://en.wikipedia.org/wiki/Rebecca_T._Ruark Both of these are fore and aft planked. In the write up about both, it stated that the early skipjacks were fore and aft planked with soft (rounded) chins. -
Skipjack by KevinR - 1:24 - abandoned
KevinR replied to KevinR's topic in - Build logs for subjects built 1901 - Present Day
Patrick, I sometimes wish that I could show of the internal framing. I too like the way it looks. I like the way you do the cut-away on your models. I left off a "8 hinges" from the list of items I need to make. A last update before the end of the weekend. I made the deck beams that will support the forward cabin. It went pretty quick, I only had to remake a couple of the parts.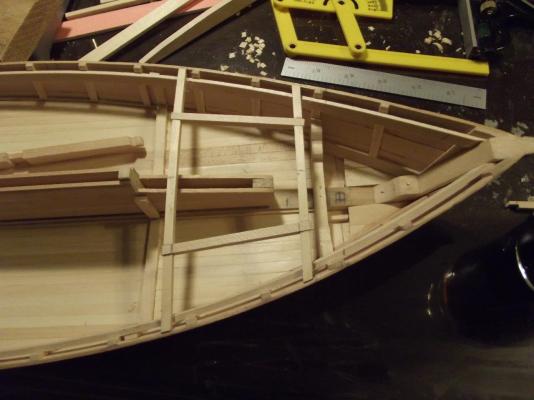
-
Skipjack by KevinR - 1:24 - abandoned
KevinR replied to KevinR's topic in - Build logs for subjects built 1901 - Present Day
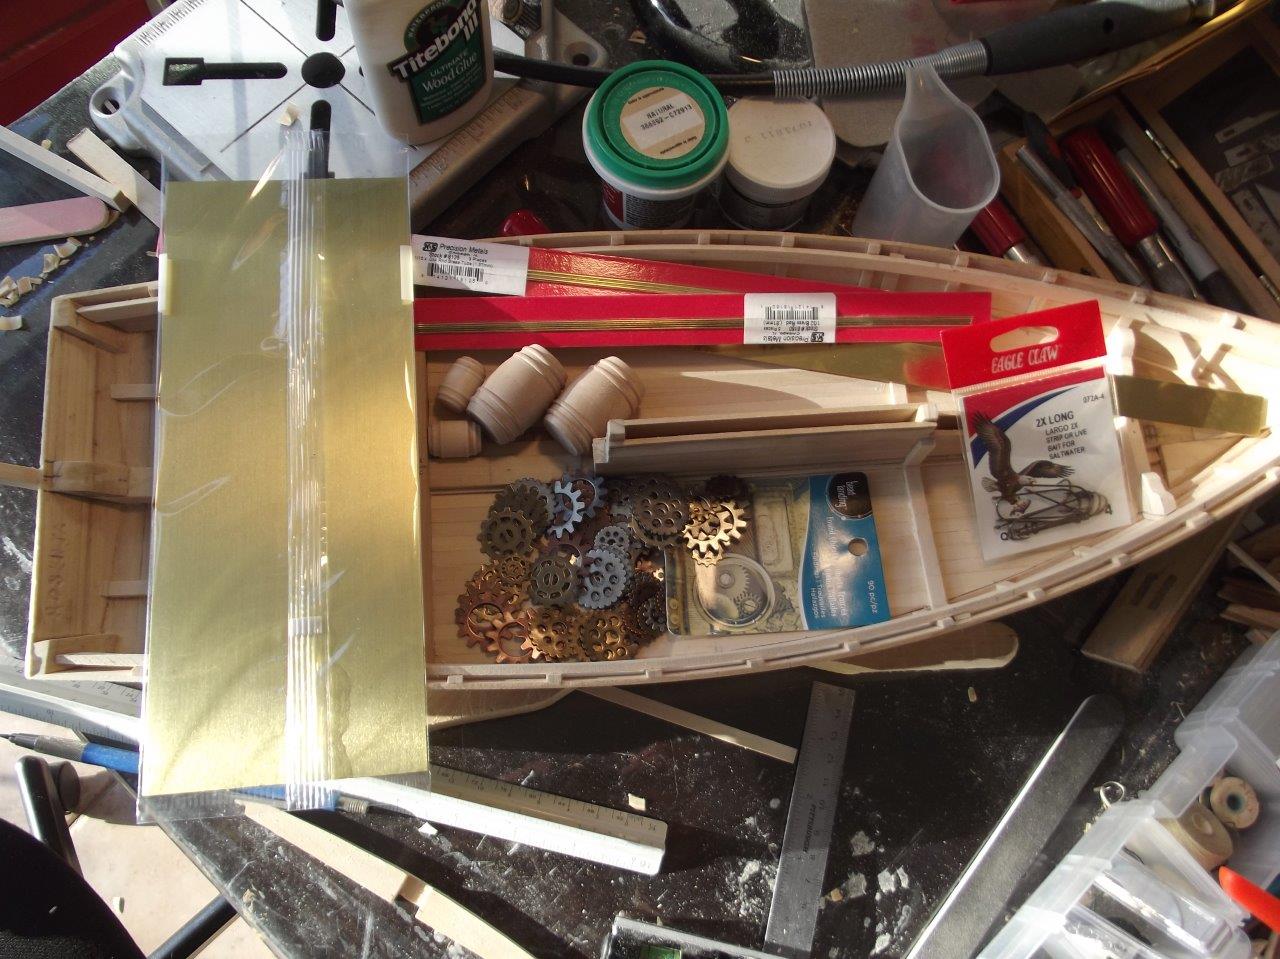
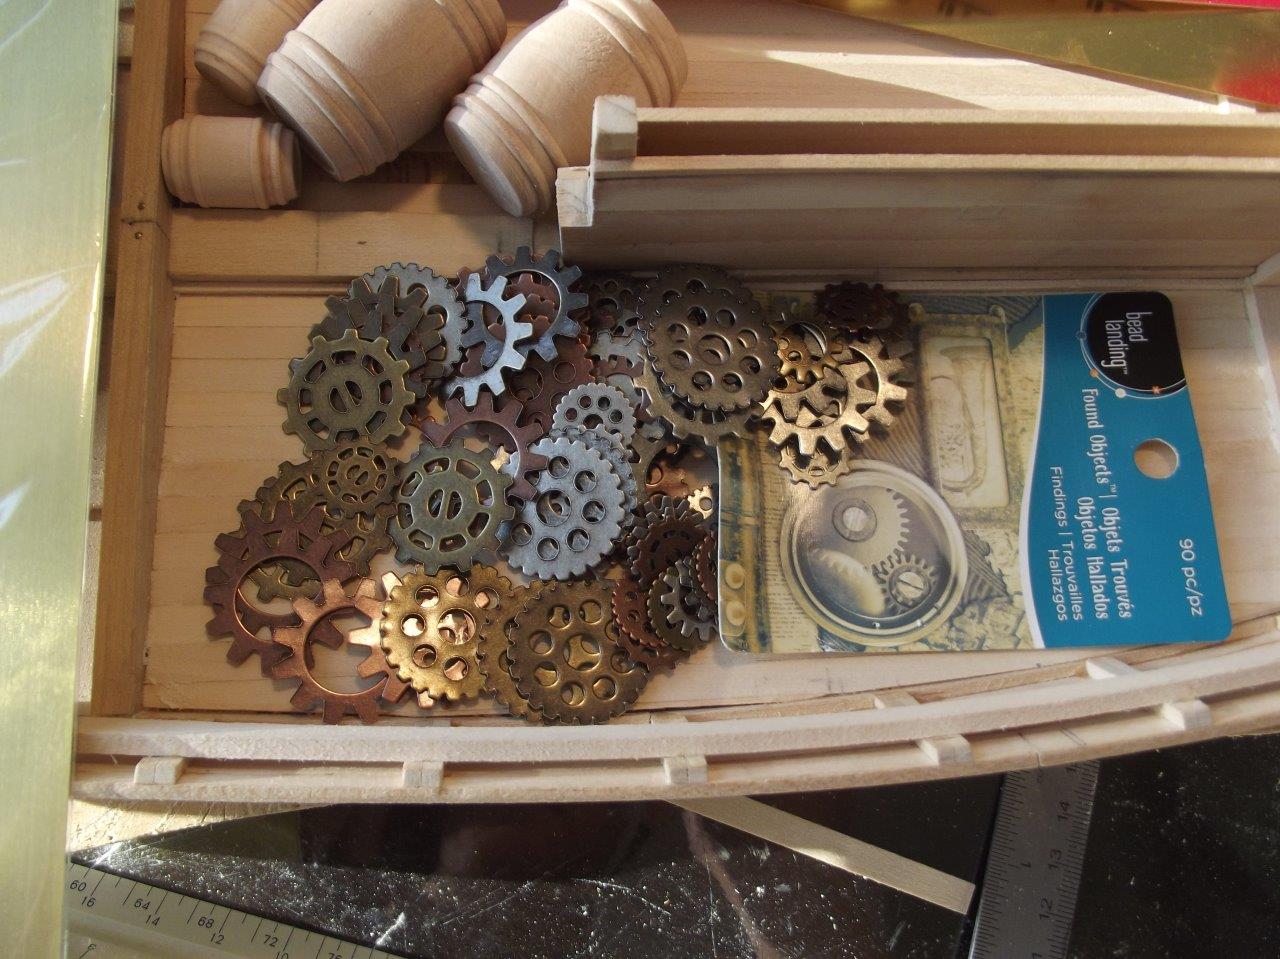
Patrick, Thank you for stopping by and for your kind works. This being my first scratch build I am happy with how the planking has turned out. But the pictures do not show everything, there are gaps at the edges and some of the planks did not lay as flat as they should. The plank thicknesses are not uniform, so I have had to soften the edges of some with a chisel blade or else they would be trip hazard. I am also working at 1:24 scale, not the small scale you work at. Patrick, your planking on that scale is amazing. 1:24 scale has some advantages. I believe the gaps are not as obvious as they are in smaller scales. The drawback I am finding, is that a lot of the detail that can be omitted at the smaller scale, would be noticed if missing at 1:24 scale. When I started I figured I could get this done in about a year. I have been working on this for 7 months (I did take 2 months off over the summer, so say 5 months actual working). I think I will be doing good to have started the deck planking when 1 year rolls around. I am trying to plan out long term, so I will not have to rush to get supplies when I need them. There are several items that will need to scratch built. Windlass Stove Coffee Pot ( You can't go to sea without Coffee) Winder (Dredging Winch) Dredge Rollers Oyster Dredge Dredge A-Frame Steering Mechanism 2 Lanterns Running Lights I have been on the look out for Items that would be useful in building those parts. I believe my best find was some decorative gears at the local Michaels Craft Store. I have picked up 2 sizes of wooden barrels, fish hooks with straight shanks and some assorted brass. Hopefully I can use some of the gears in the winder and the windlass.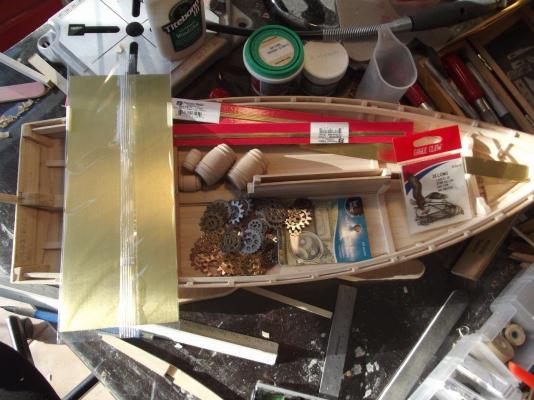

-
Skipjack by KevinR - 1:24 - abandoned
KevinR replied to KevinR's topic in - Build logs for subjects built 1901 - Present Day
John, Thank you for stopping by and for the book recommendation. I have added the book to my Amazon wish list. I have been wanting to get over to St Micheals to visit the museum for a while now. Maybe the wife and I can get over there this summer for a weekend. Last April we went to the Fishermans Museum in Reedville VA. They have the Skipjack Claud W. Somer there. I have been to your website many times now to check out your models. I was on your site last week looking at the crab scraping boat. You have built some amazing models. I found your Colonial Ferry project very interesting. A project like that must be very rewarding when completed. -
Skipjack by KevinR - 1:24 - abandoned
KevinR replied to KevinR's topic in - Build logs for subjects built 1901 - Present Day
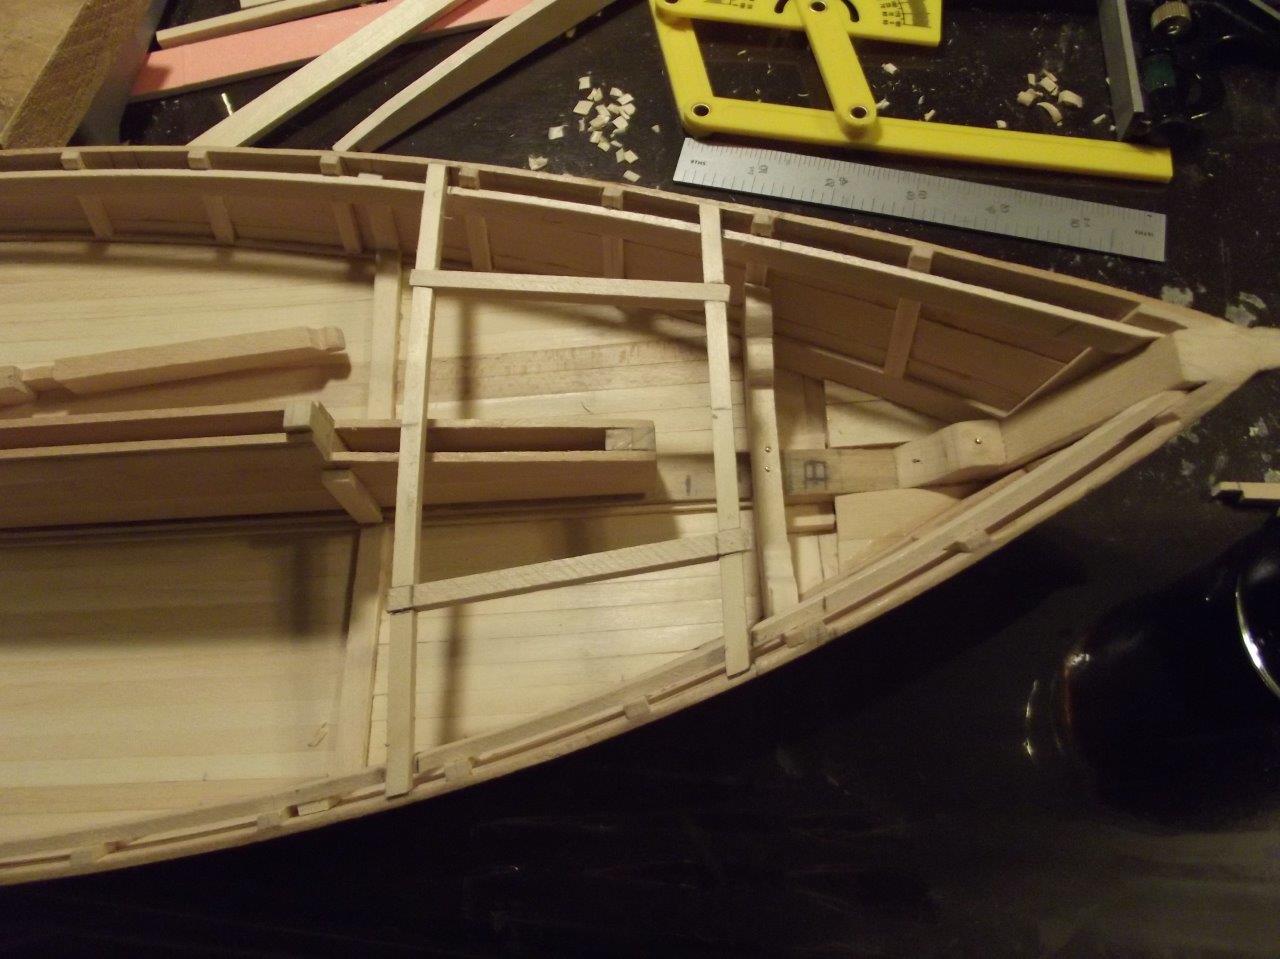
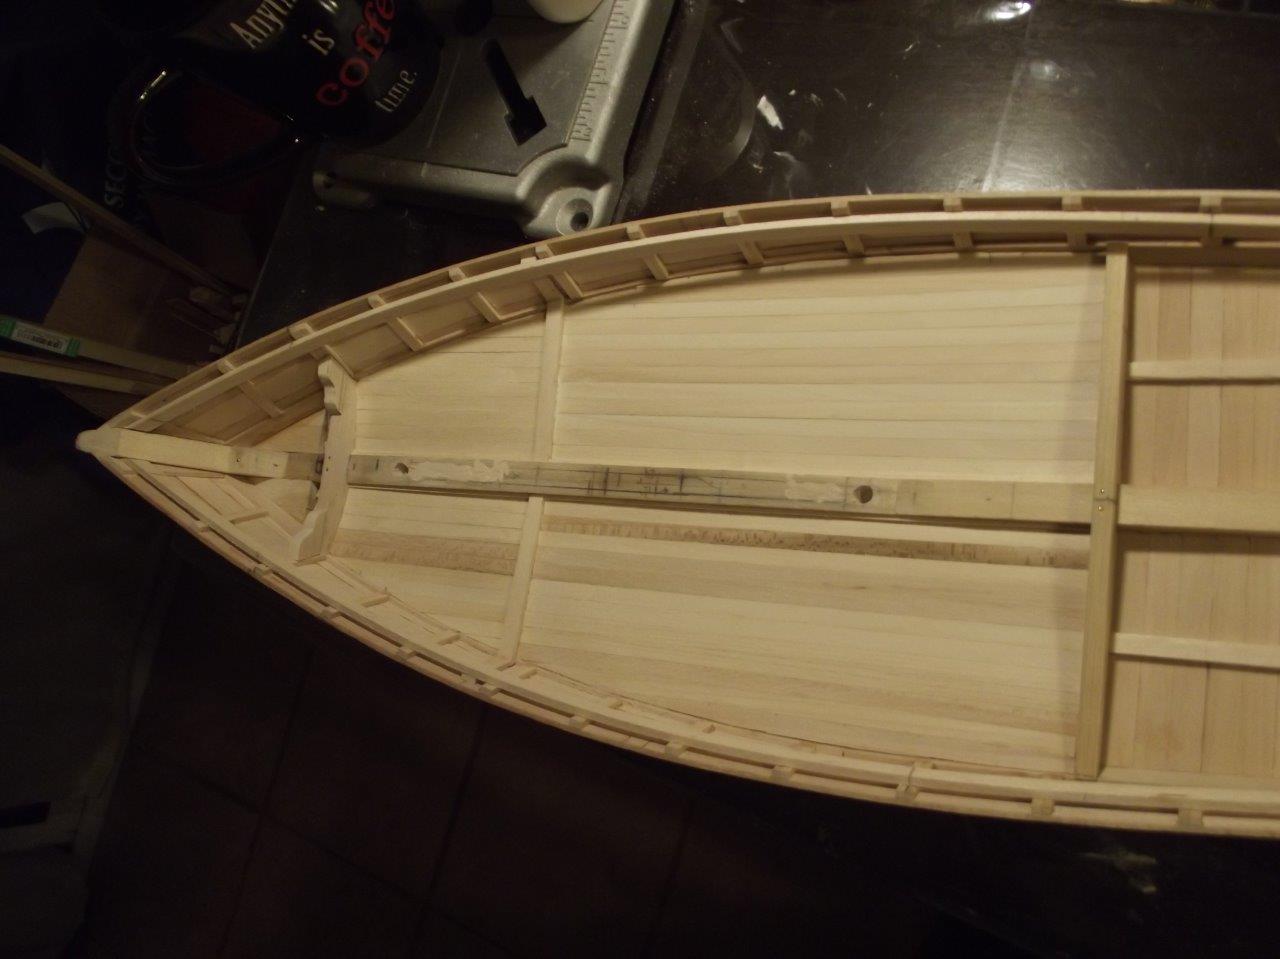
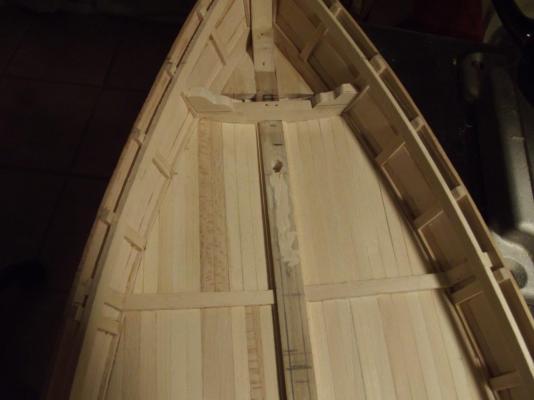
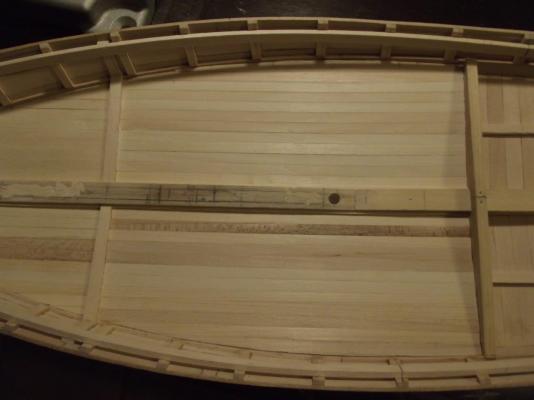
Hi Everyone, Well I spent the past 3 days planking the Ceiling Floor in the hold and the forward cabin. Next I think I am going to finish the deck beams and the forward cabin bulkhead and bunks. I need to stat planning for paining as well. I want to paint the interior before I glue the deck beams on. Ben Lankford in his book stated that the interior of the boats were painted grey. I would have thought the interior would have been white to reflect as much light as possible. I guess I will look for a light grey. I have not decided weather to paint the interior by brush or airbrush. When I have been around wooden boats the interior seems to have had a buildup of paint on all of the surfaces. I am planning on airbrushing the hull.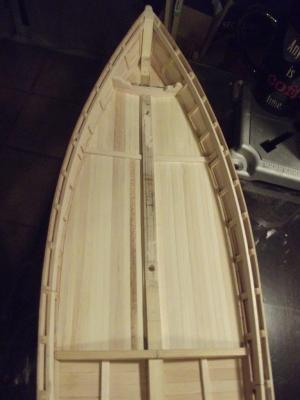

-
Al, To upload photos, There is a link at the bottom of the editor "More Reply Options", click on this. It will open up a more advanced editor. At the bottom is a button "Choose Files". This will open the dialog to upload files. Once the file is uploaded, there will be a link "Add to Post" beneath the file name. This will add text that looks like: (square bracket)attachment=210587:Strong_Back.jpg(square bracket) You can place this anywhere in your text. There is a button "Preview Post" that will load up what you have typed with the images so you can get an idea how it looks. If you are still having problem PM me and maybe we can figure this out. Al are you still on active duty? Good Luck,