HOLIDAY DONATION DRIVE - SUPPORT MSW - DO YOUR PART TO KEEP THIS GREAT FORUM GOING! (83 donations so far out of 49,000 members - C'mon guys!)
×


KevinR
-
Posts
214 -
Joined
-
Last visited
Content Type
Profiles
Forums
Gallery
Events
Everything posted by KevinR
-
Italian cruiser Raimondo Montecuccoli
-
HMS Nelson, 1876
-
I have been following this discussion because I am about to start my rigging. The conservative wax sounds good but I thought it was to expensive and not easy to find. I decided to go with the beeswax for the time being and upgrade on later models. i went to Joannes's Fabrics to pick up the beeswax and came across a product called "Thread Heaven", next to the beeswax. It is suppose to Prevent tangling and fraying, won't melt, Acid Free and safe for all threads and fabrics. It was only $2 more, so I decided to give it a try. Has anyone else used this product before? http://www.threadheaven.com
-
 Correction to my earlier post. The kit comes with 1/4" strips for the rowing benches which translates to 1' at 1:48 scale.
 -
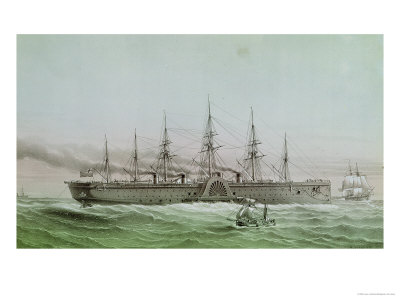
Jason, You got it. Dave, my understanding of why the Great Eastern was not a success was that she was too big. There just was not enough passenger and cargo to fill the ship. If I remember correctly she was considered fast. Crossing in 9 1/2 days. Your turn Jason.
-
Jud, you are half right. Cable laying was the only think she was successful at.
-
Ok, this has to be one of my favorite ships. Probably to easy.
-
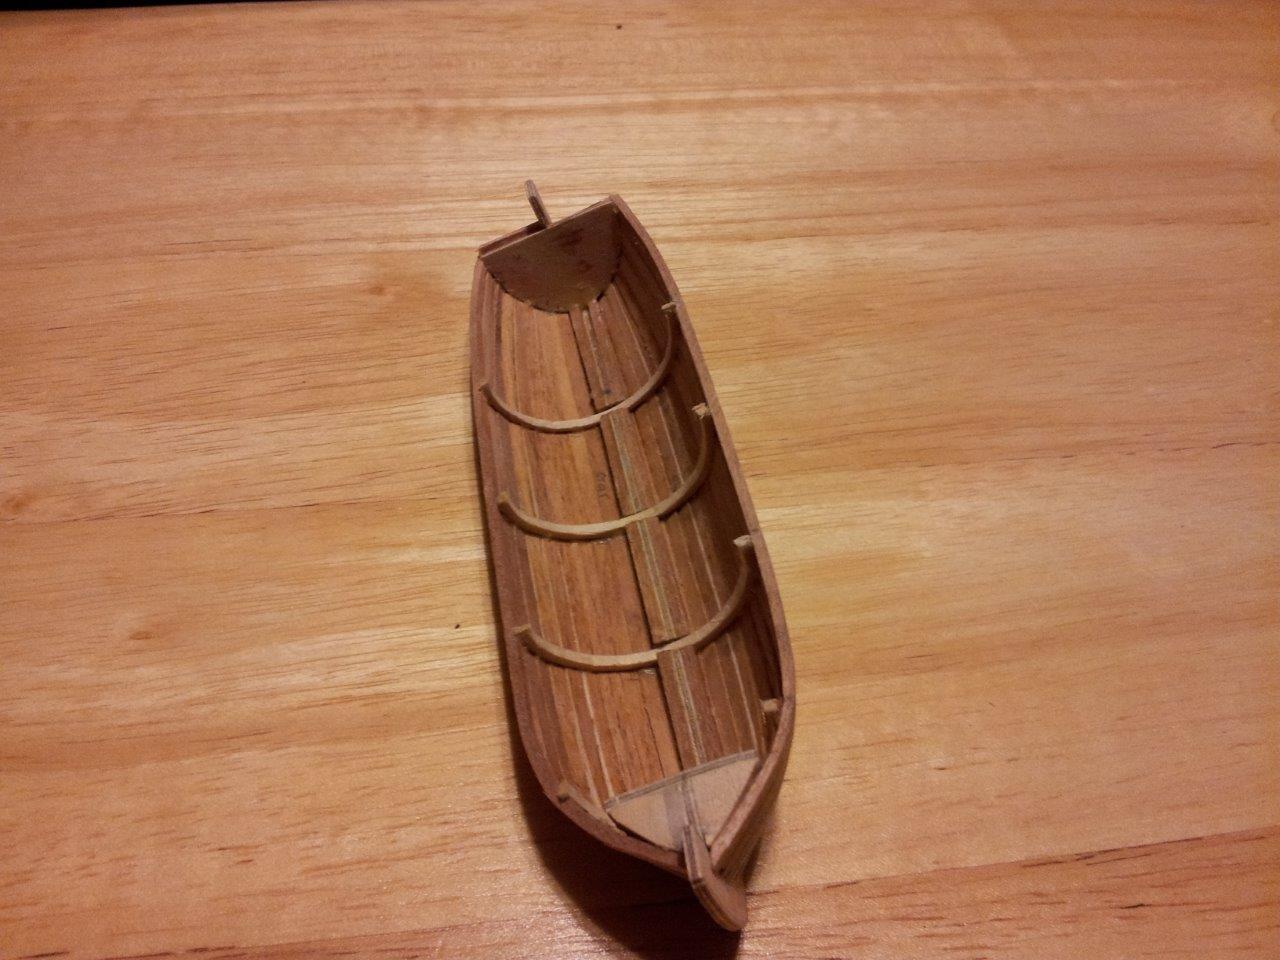
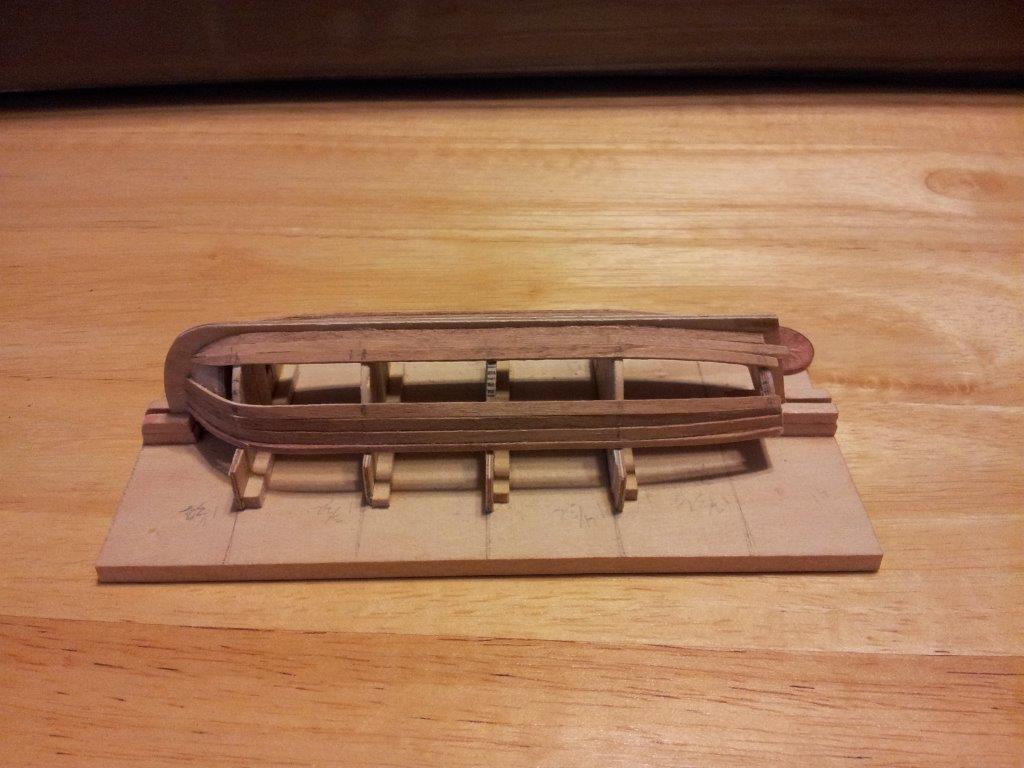
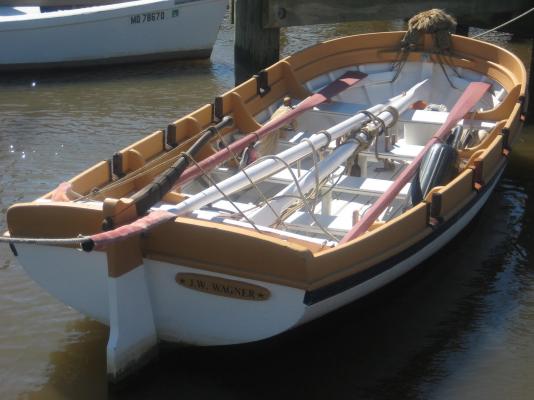
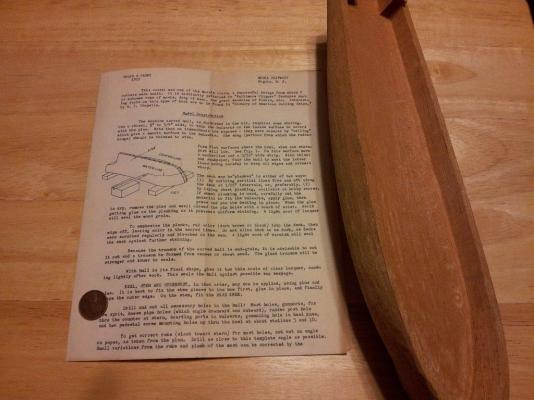
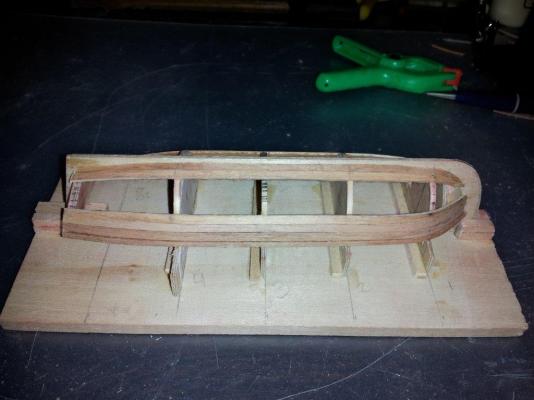
Jon, You may be right on the positioning of the bulkhead. When I added the shears, I realized that this was going to happen. I just did the best I could. Options I have considered: 1. Fill it in with wood putty. 2.Cut wood to fill the gaps. 3. Cover it with another bulkhead. The bow is suppose to be a locker, but adding another bulkhead, even at 1/32" thick, would make it to big IMO. Whatever I do, I hope planking over the bow will hide any defects. Up until now I have not worried about scale. Now I am re-thinking the plans. If I treat this as 1:48/1:50 scale the full size boat would be 21-22'. By my reckoning that would be 4 or 5 rowing benches. The plans show 3 rowing benches and a large area for the coxswain. I will most likely have at least 4 benches. Maybe I can squeeze in a 5th. I have been looking at the Sultana's boat to get ideas. I estimate the sultan's boat about 18' and has 4 rowing benches.The benches look to be about 8" wide. The strips for the benches in the kit are 1/8" which translates to 1'. The Sultana's boat also has washboards with knees bracing them. Lots of possibilities.
- 55 replies
-
- 1
-

-
- ships boat
- model shipways
- (and 1 more)
-
The "Pan Crescent" and "Pan York" (renamed Atzma'ut and Komeimiut) were the two largest ships in the history of illegal immigration to Palestine. http://www.jewishvirtuallibrary.org/jsource/Immigration/pams.html Dave, I was looking for the wrong illegal activity all along. I started with prohibition then tried pirate radio with no success. This was a tough one.
-
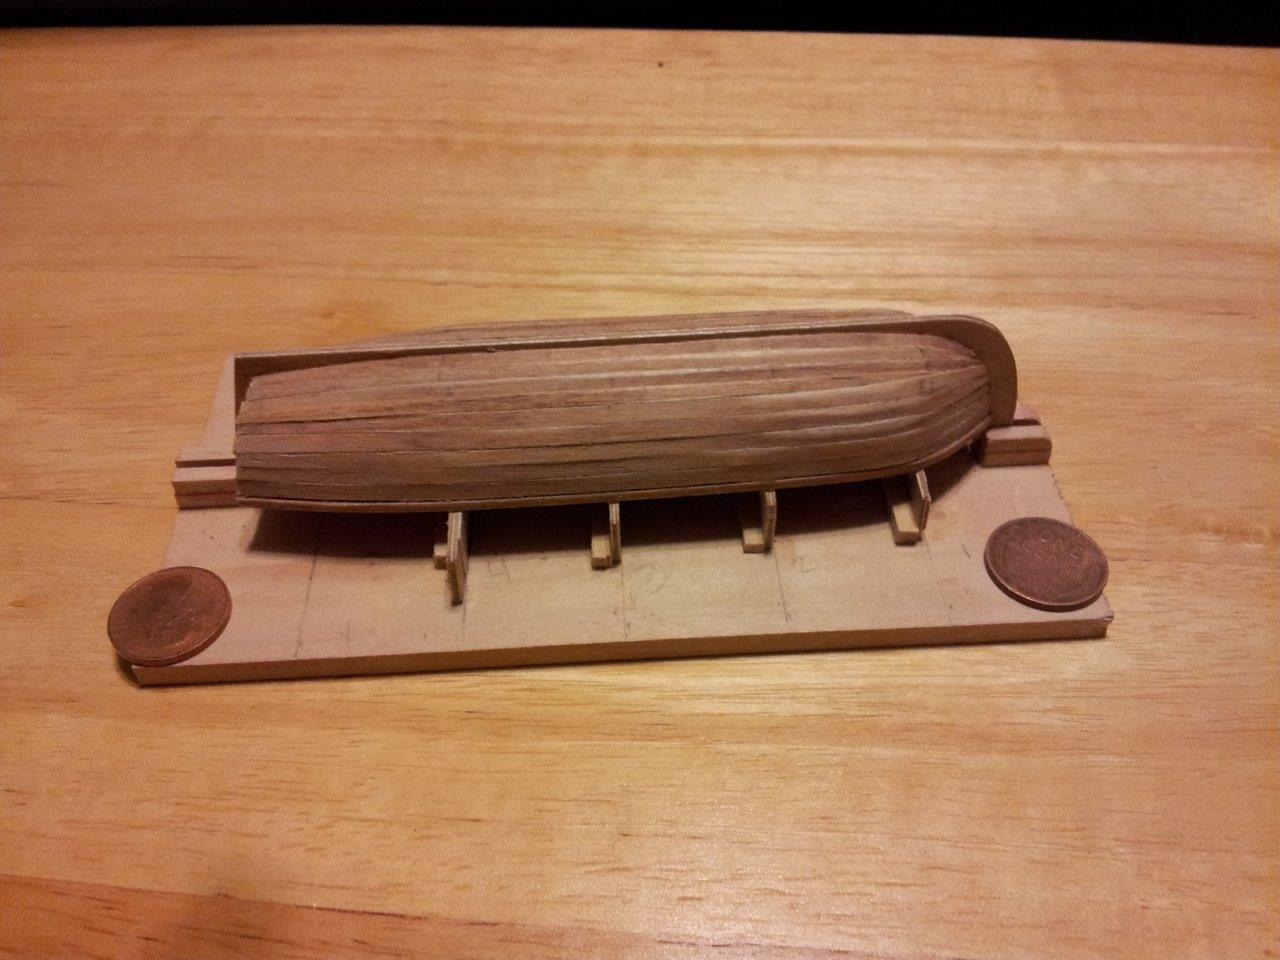
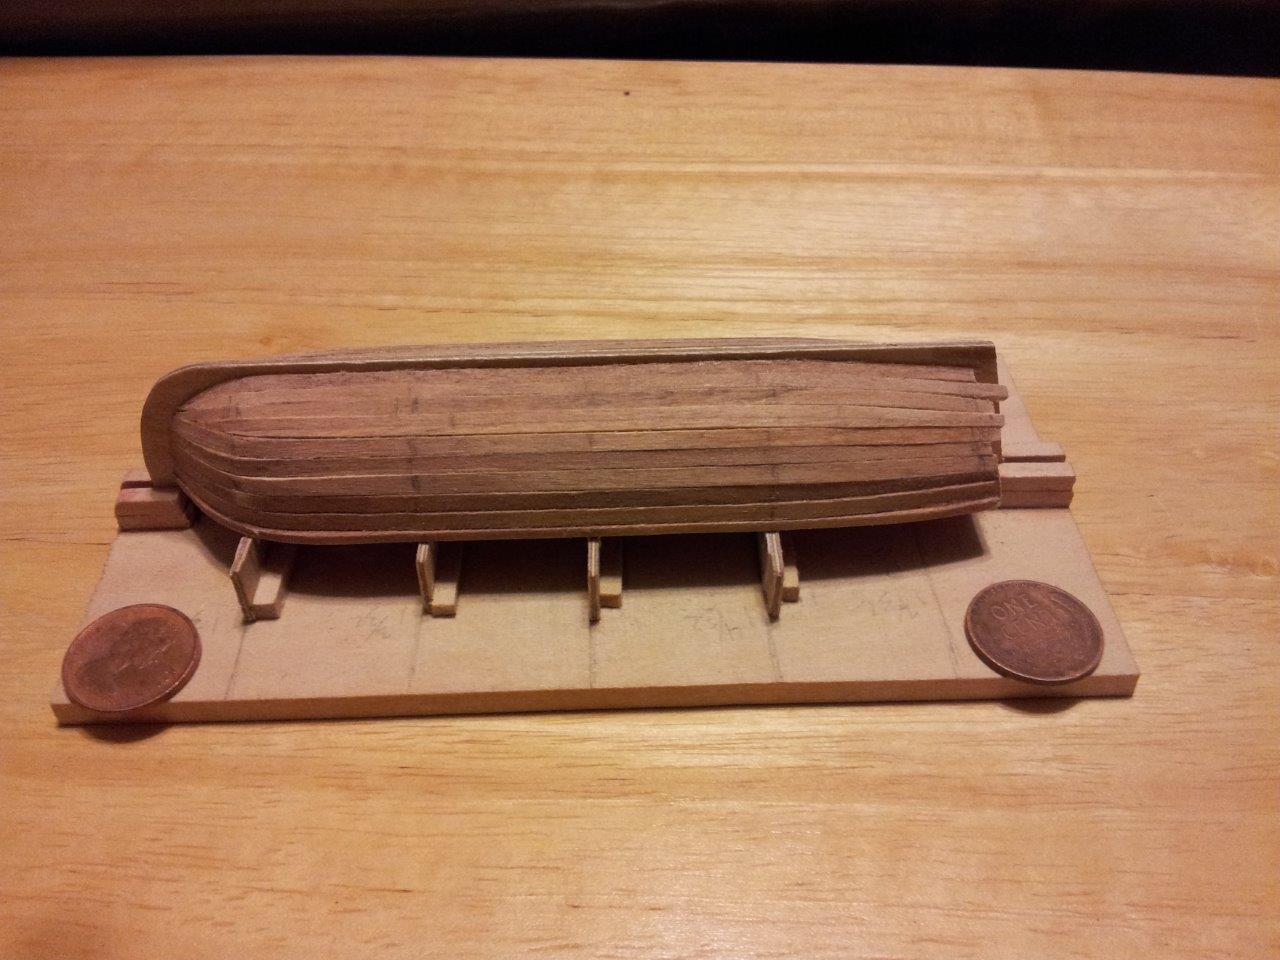
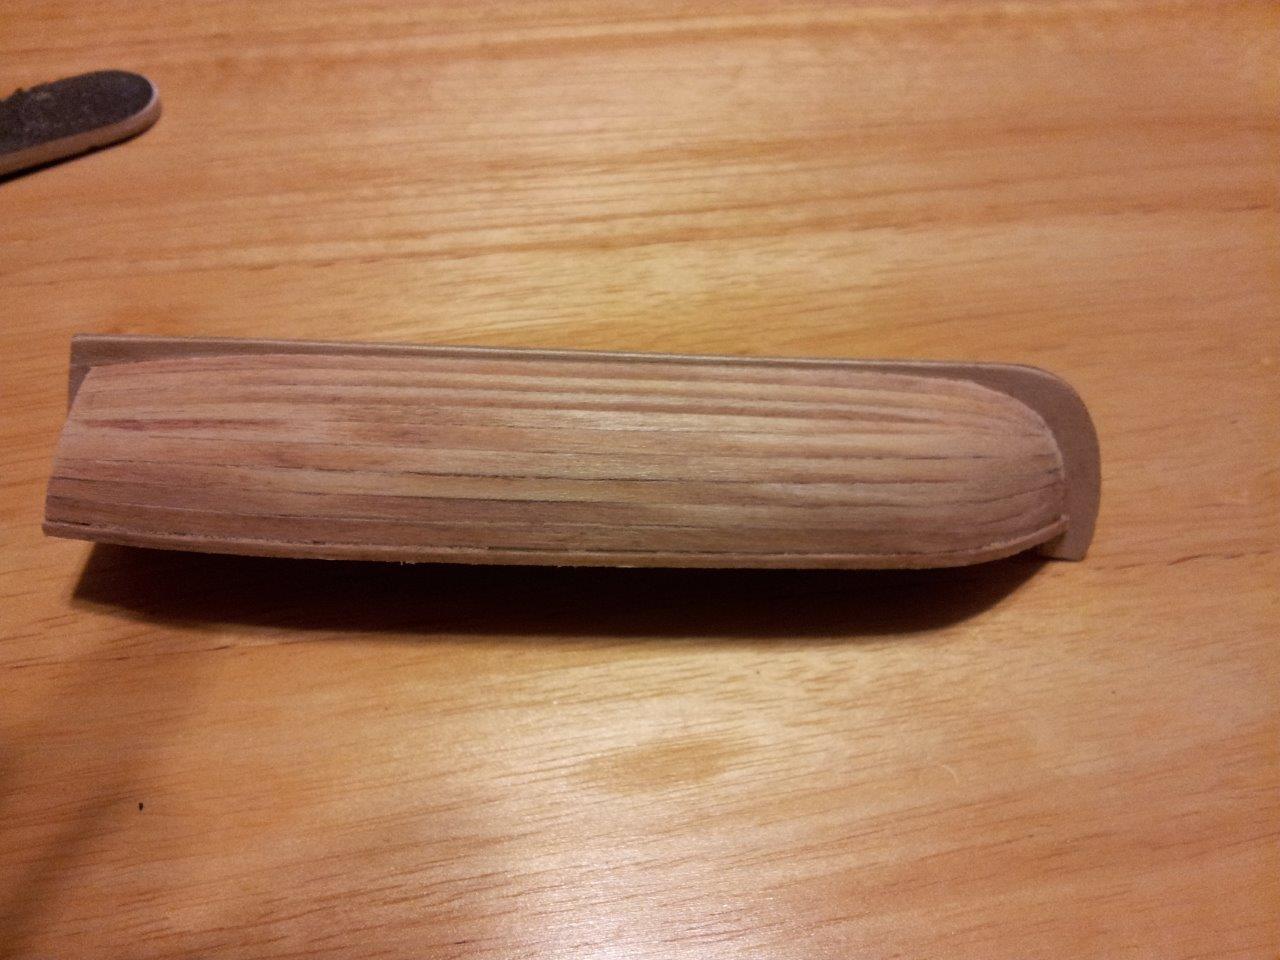
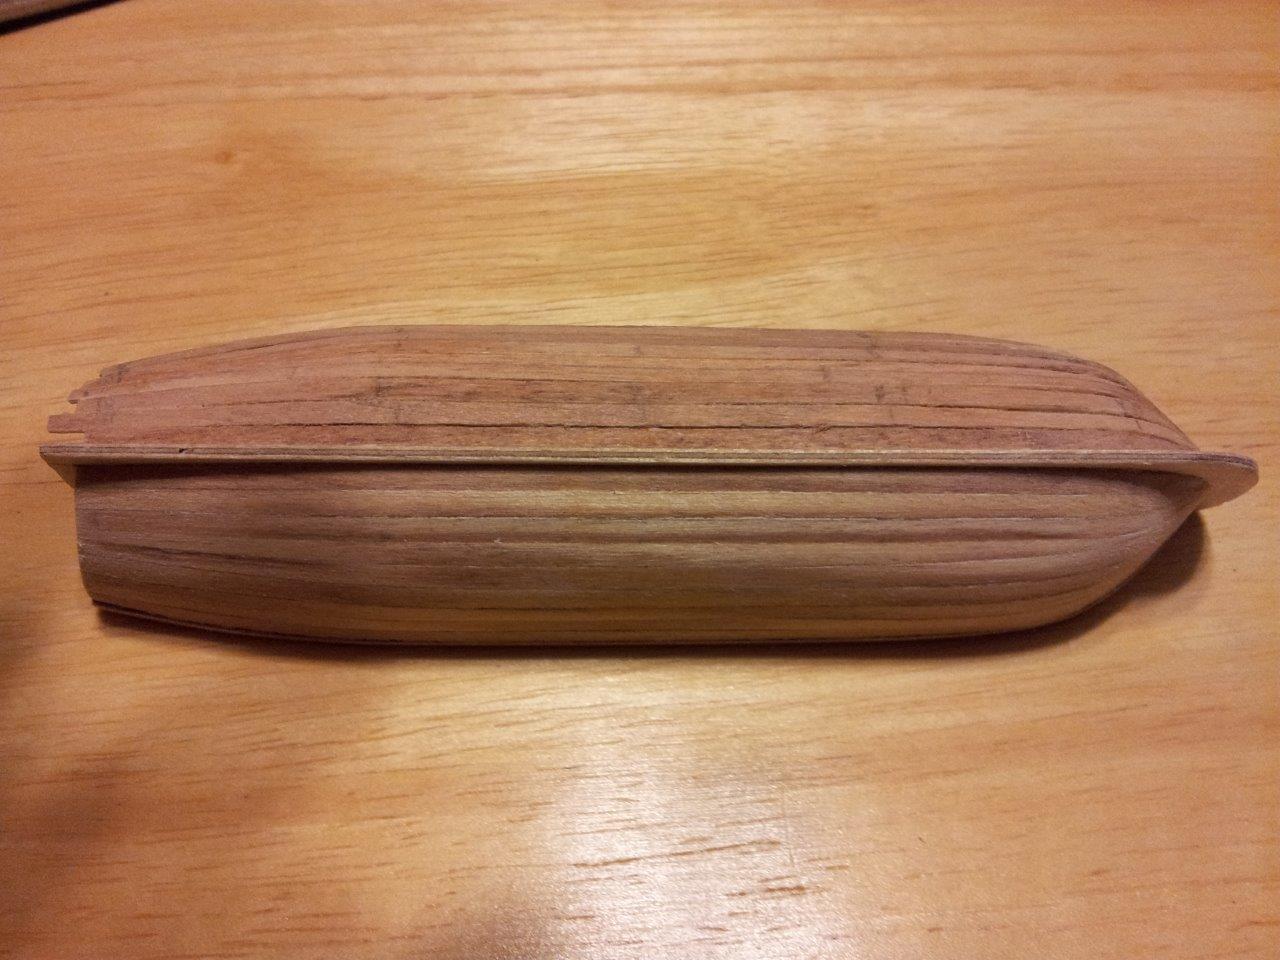
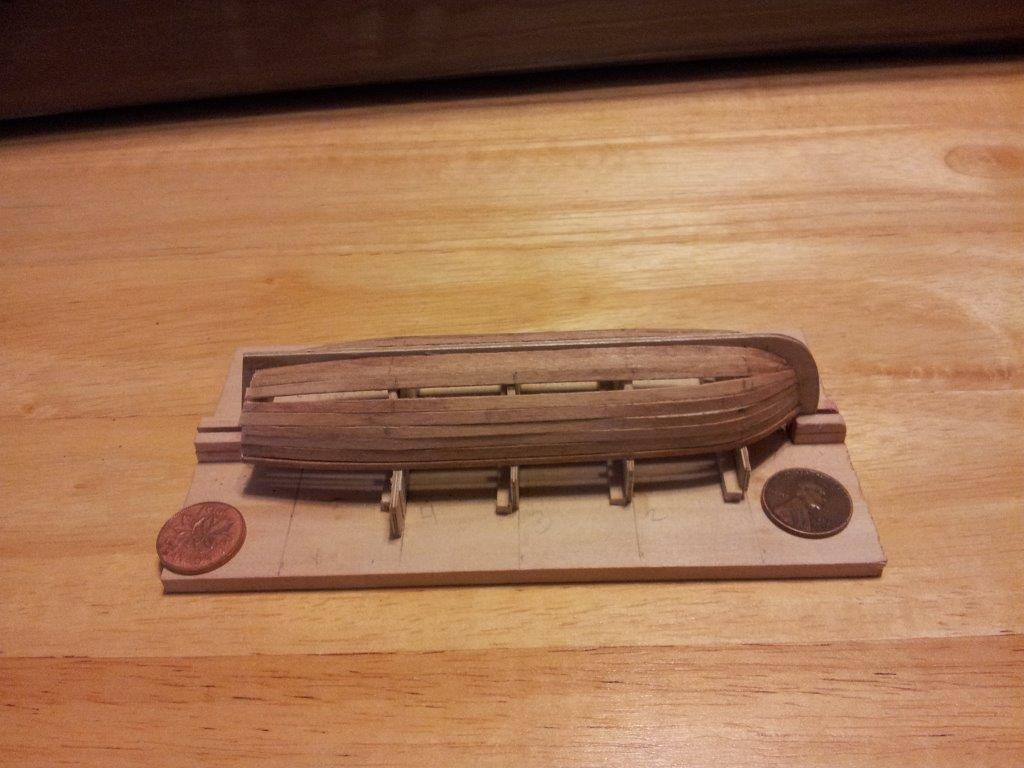
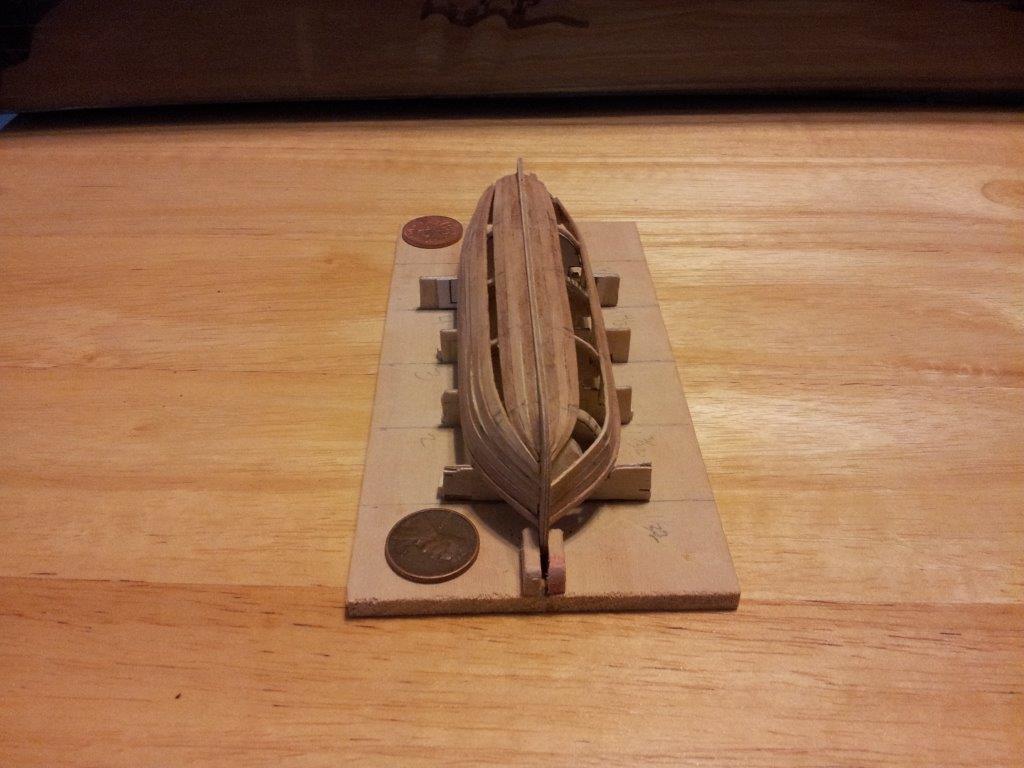
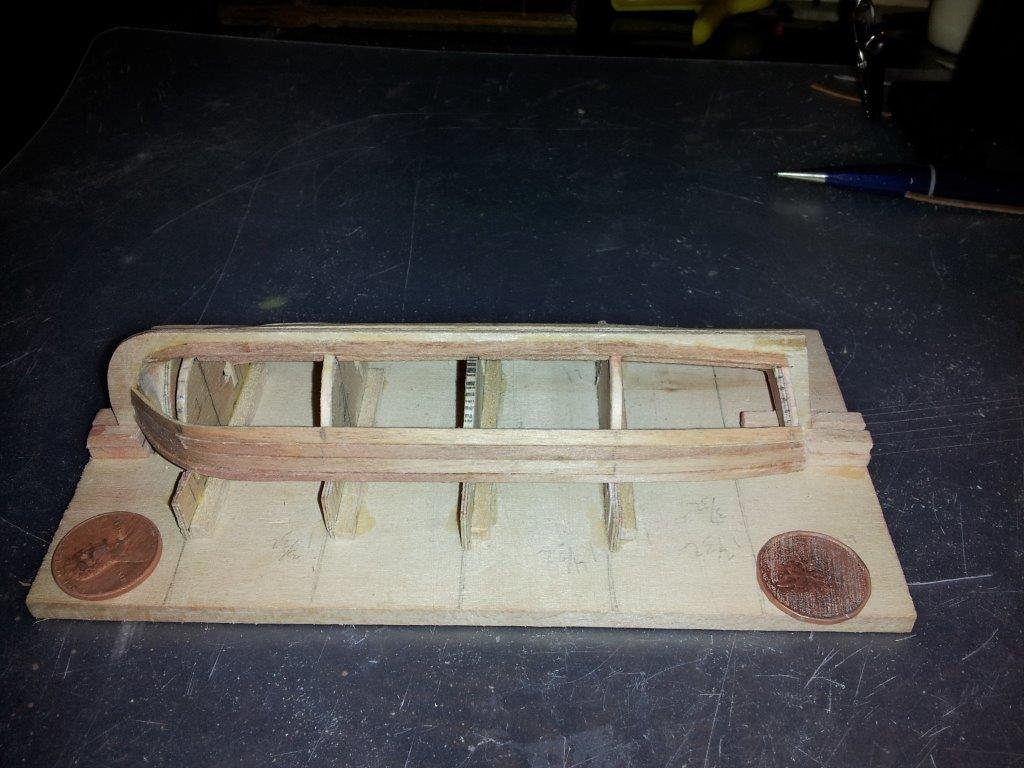
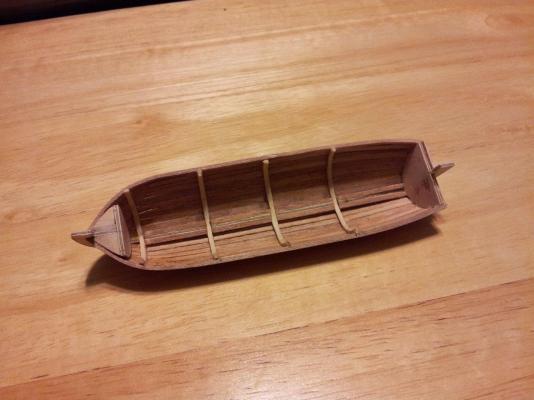
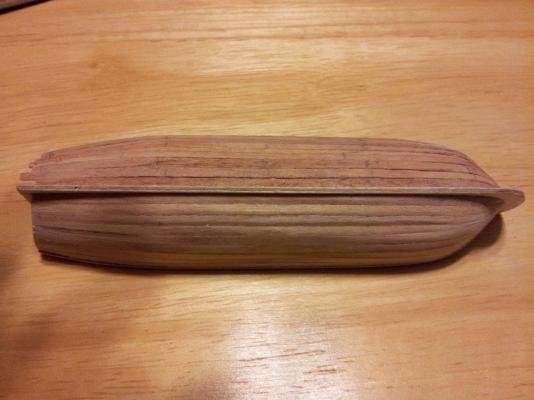
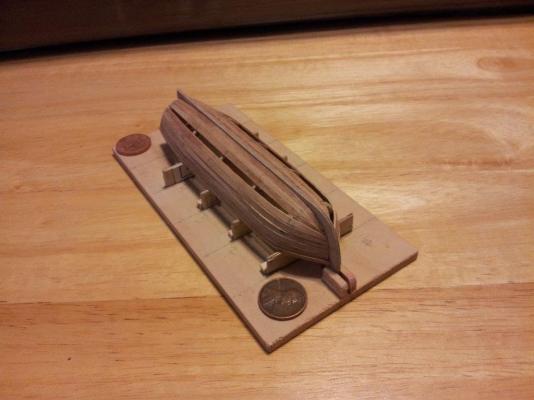
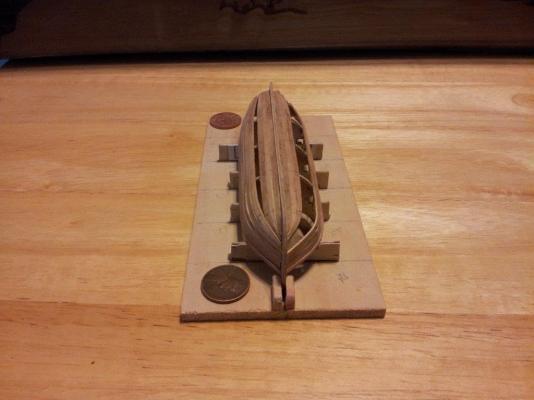
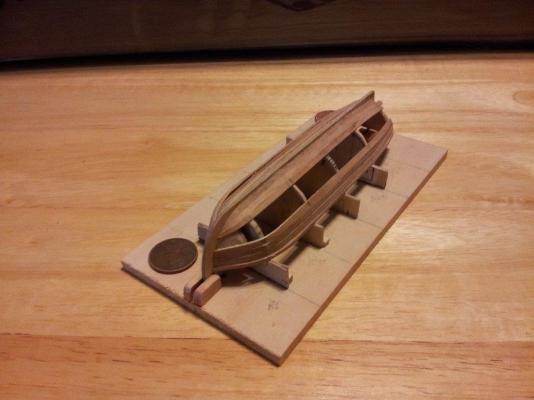
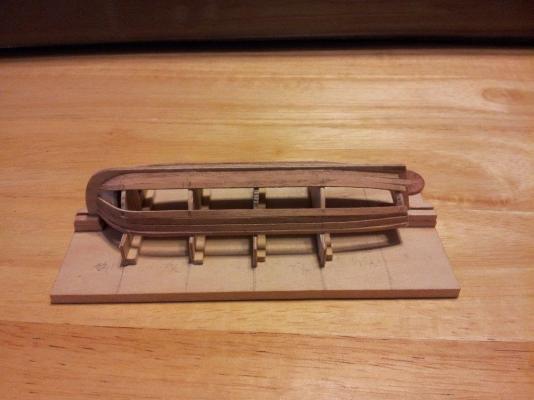
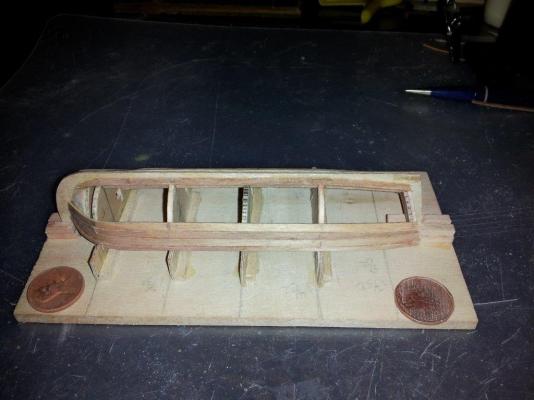
I finished the planking today and cut the boat off of the formers. I started sanding the port side. I left the starboard side alone so that I could see the difference. Marty, I am hoping that the glue does not screw up that stain. I really do not want to paint it. I See no reason to use a plastic or cast metal ship's boat if you can build a boat to replace it.


- 55 replies
-
- 2
-
-
- ships boat
- model shipways
- (and 1 more)
-
Marty, sorry for the short answer, I was on my way to bed. My plan is to sand it down and stain it. If I like ho it looks I leave it. If to much glue shows or my planking job bothers me to much I will paint it. I never intended this to be a show piece. I just figured it would be a easy and cheap leaning tool. It may not look to good, but I have already learned a lot and know that I can do much better next time.
-
Tim, Thanks for the information. it has been a couple of years since I have been to the Eastern Shore. That sounds like a nice weekend or day trip for this summer.
-
Marty, thanks for the comments and advice.
-
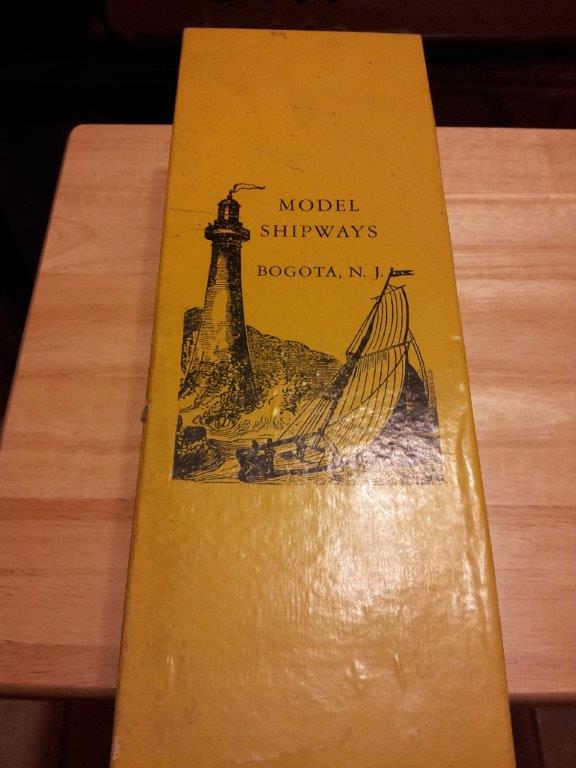
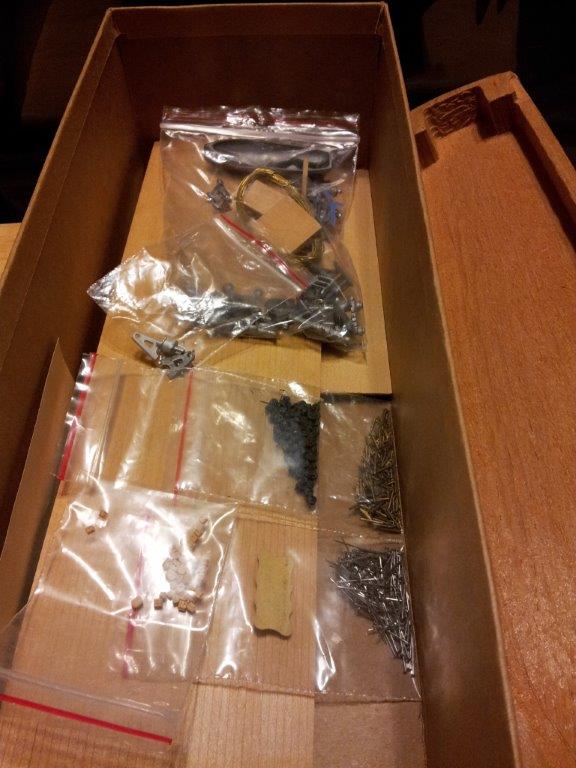
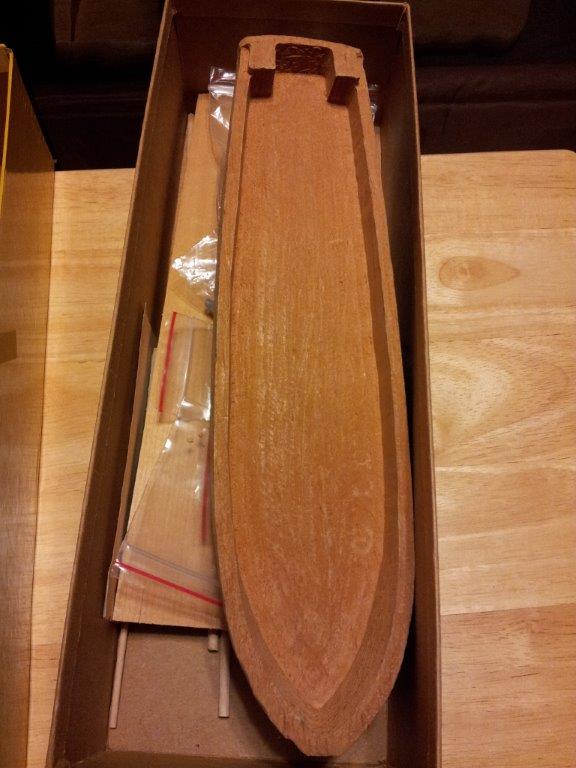
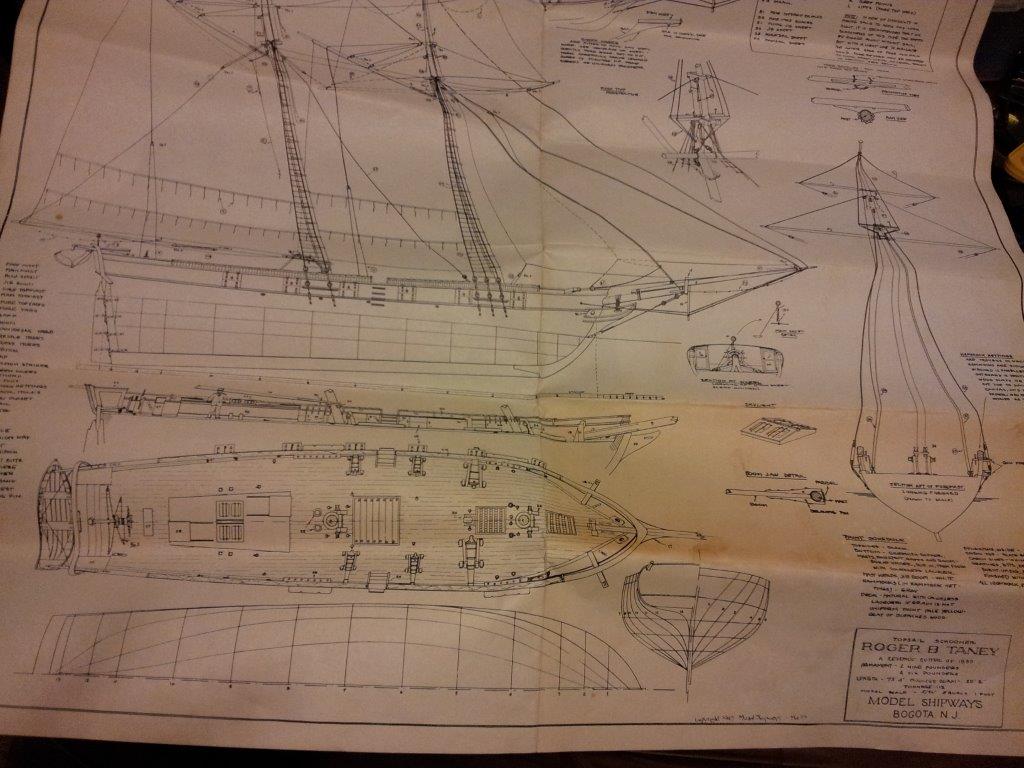
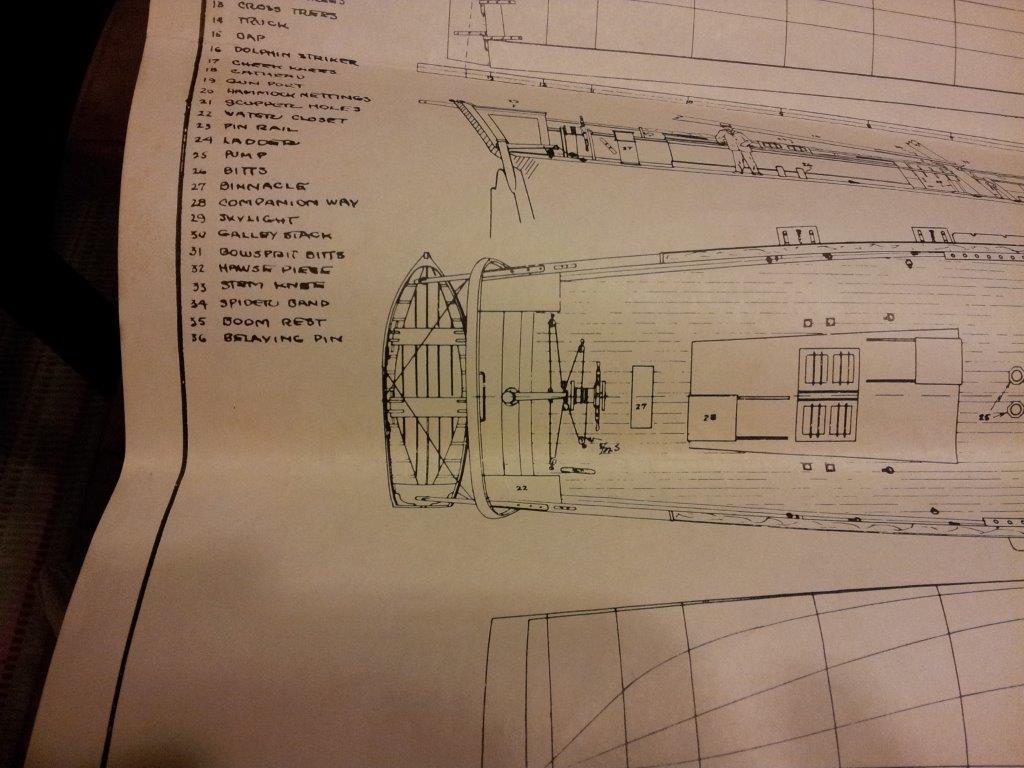
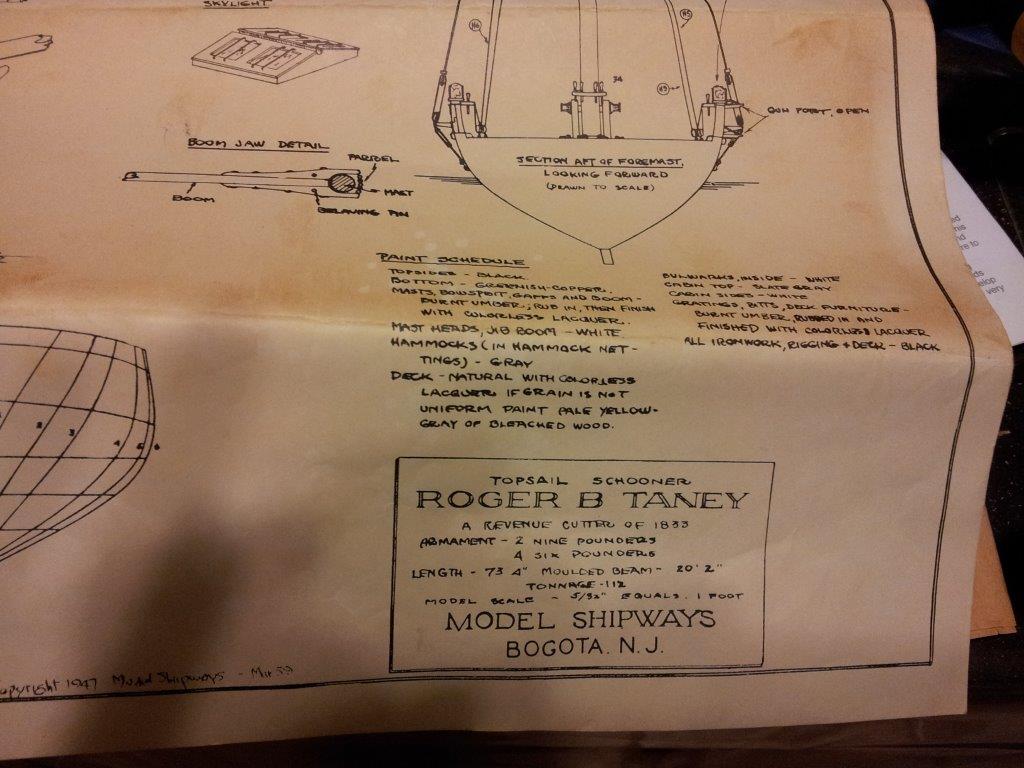
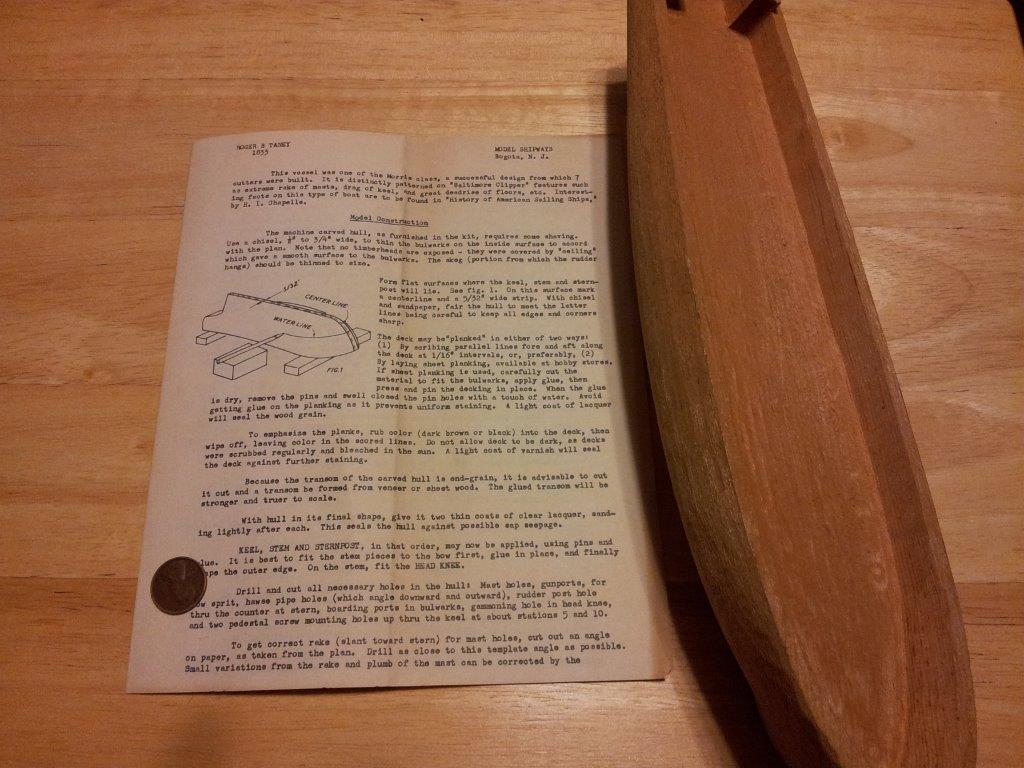
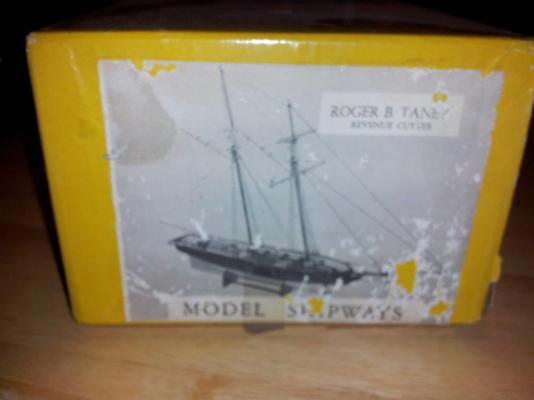
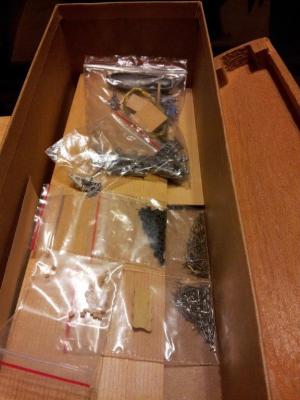
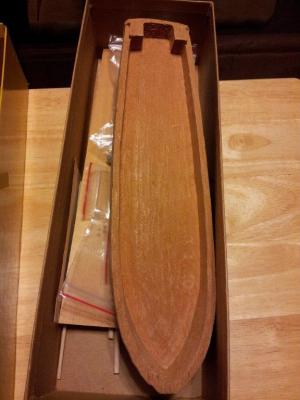
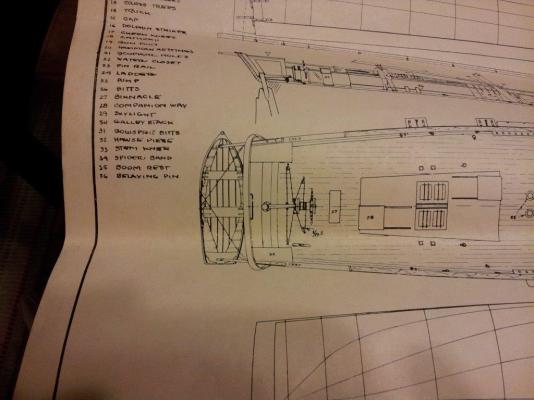
I purchased the Model Shipway Roger B. Taney kit that I found on Ebay. The price was to good to pass up. I was more interested in the plans than in the kit itself. I have included some pictures of the kit content if anyone is interested. Lots of tiny parts. Metal belaying pins, wood blocks. The deadeys are either metal or a hard plastic. Anyone have an idea of what type of wood the hull is? One discrepancy I noticed is the steering. According to Chepelle, Morris Class Revenue Cutters (Roger Taney was of the this class) were the first government vessels fitted with geared steering wheels. He gives a pretty good description in "The History of the American Sailing Navy". The scale is 1' = 5/32". If I did my math correctly that is 1:77. The second descrepency is the length is listed as 73' 4". This tells me the plans are not for the Cutter Roger B. Taney. The plans are for either the Cutters Morris, Alexander Hamilton, Albert Gallatin or the Andrew Jackson. The Cutter Roger Taney was based off of the plans for the Cutter Morris, but was 74' 6" in length. The instructions are all of 4 pages. Over all I believe the kit would create a nice model. There are some inaccurate details. The Cutter Roger Taney was based off of the Cutter Morris, but it was 1' 2" longer. At this scale it would be hard to tell the difference. The steering is the big issue. In "The History of the American Sailing Navy" Chapelle describes the geared steering mechanism yet in his plans "Inboard arrangement for Morris and class", he shows the barrel type steering. So which type of steering did the Revenue Cutter Roger B. Taney have? If anyone has any opinions, insight, more or better information please chime in. Till next time, see Ya!


- 1 reply
-
- 3
-
-
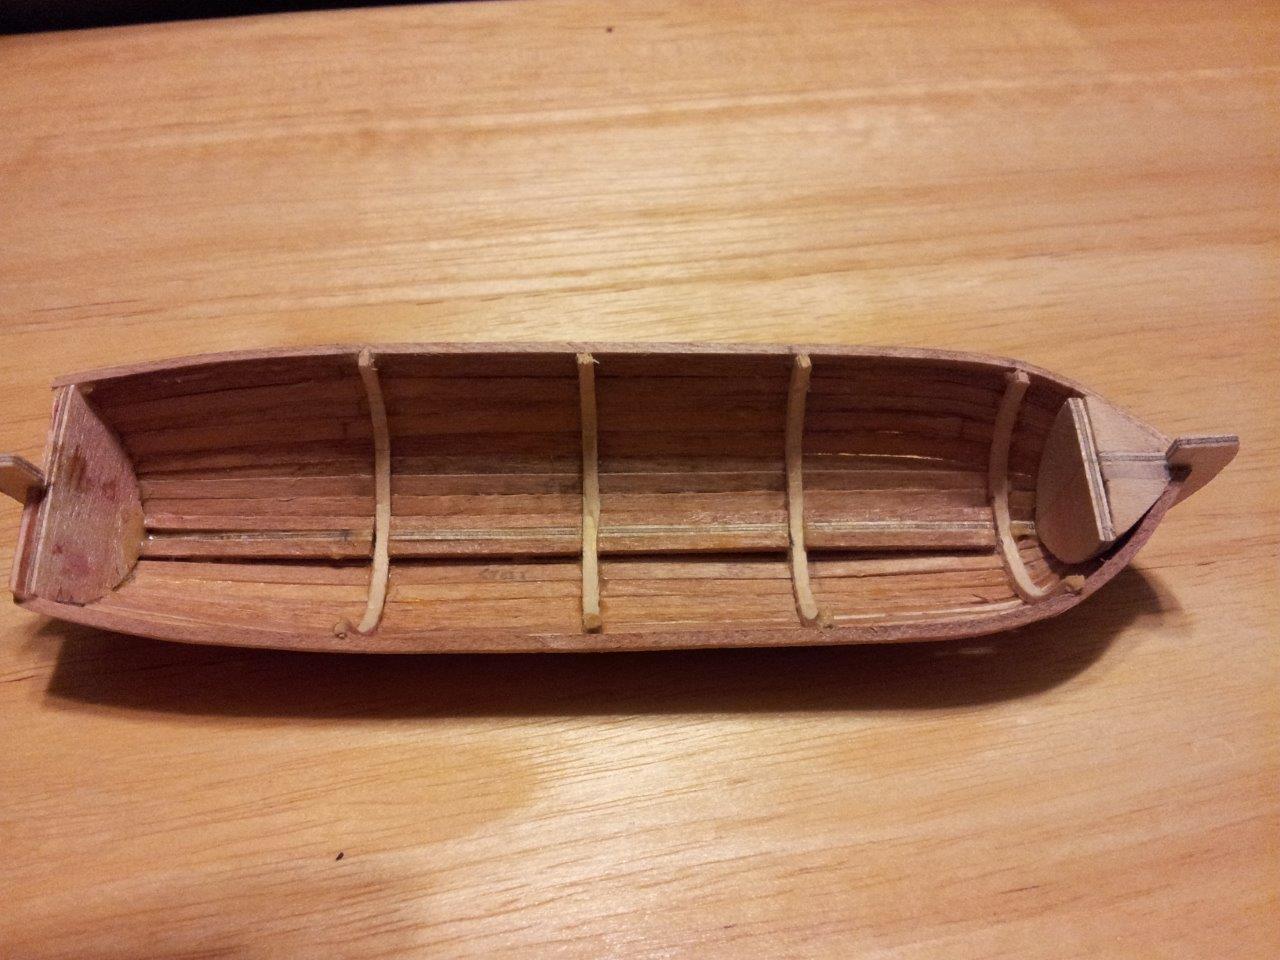
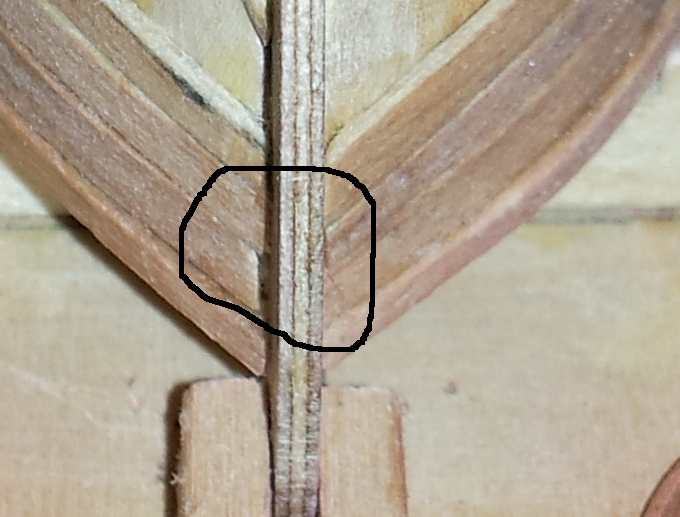
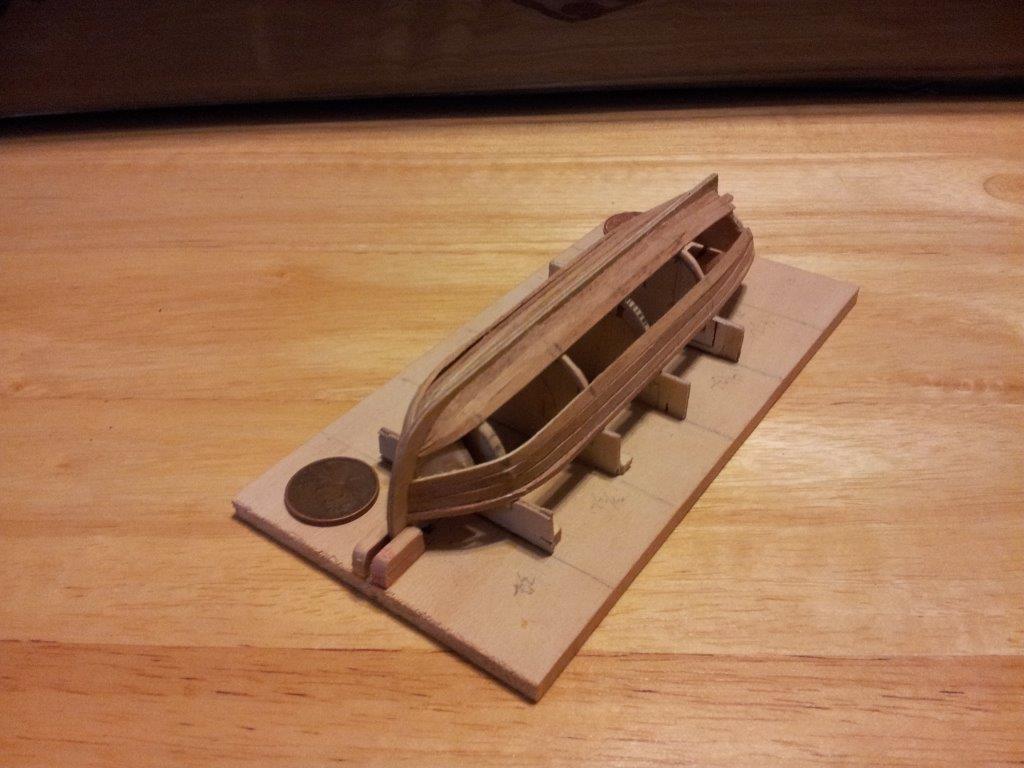
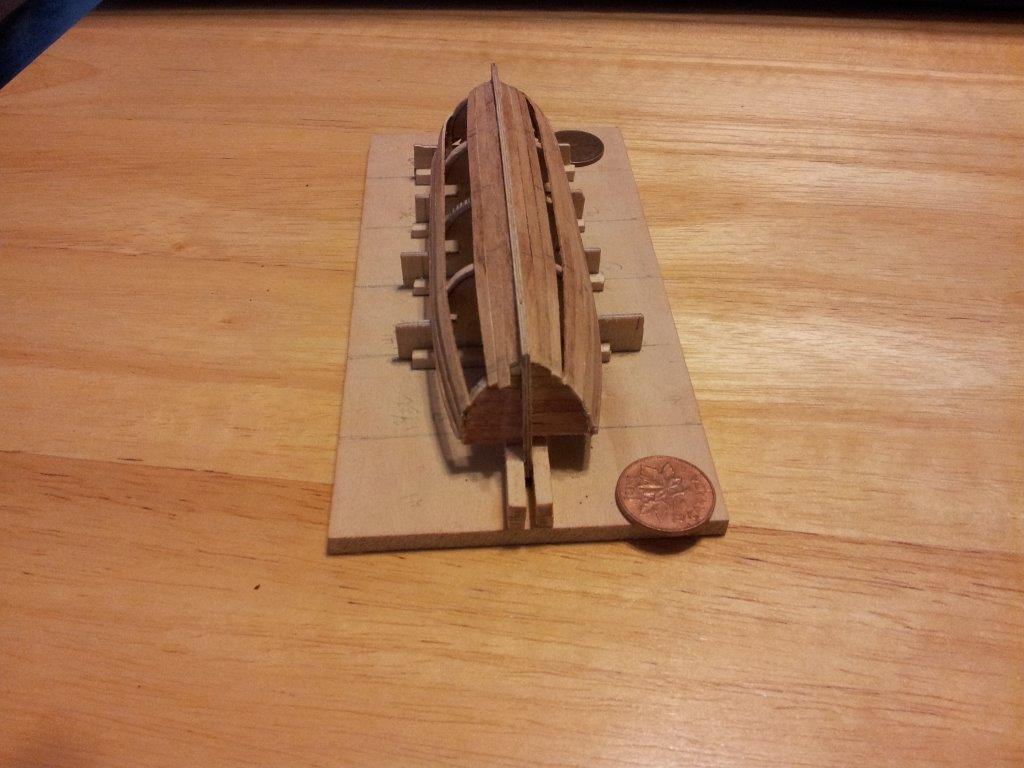
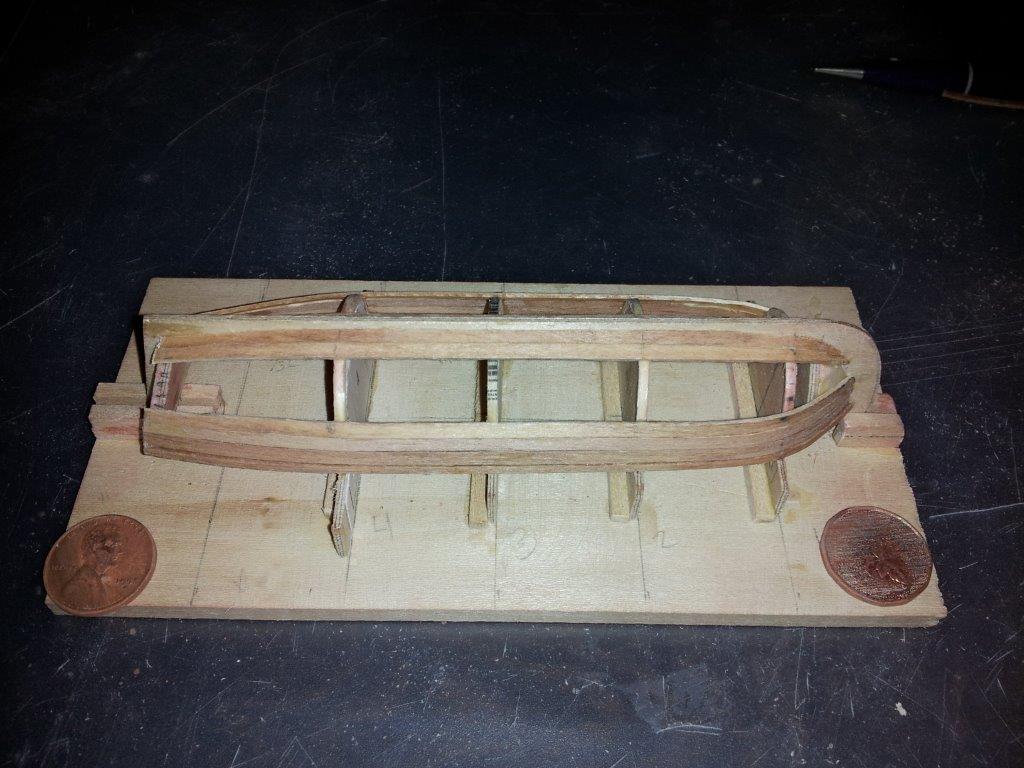
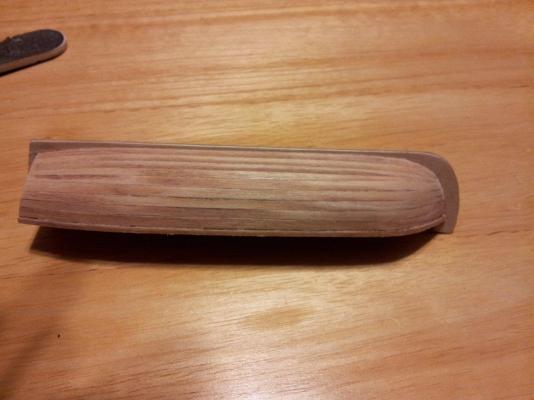
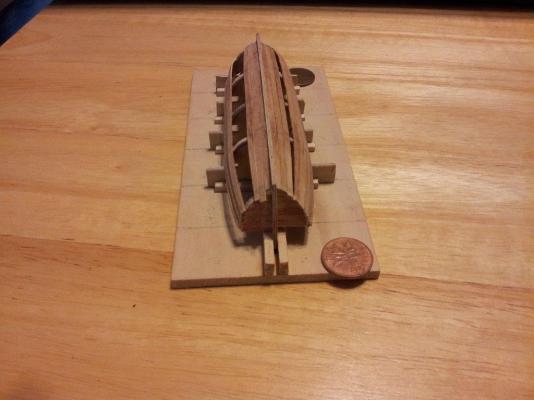
Jon, I also noticed the transom was short. After I remade the keel, I noticed that I forgot to cut the notch for the transom, when I went to glue it. I thought about going back and cutting it, but decided that it would look better if the transom was a little higher, and it fit perfectly without it. If I had cut the notch the bottom of the boat would have been straight. The bottom of my boat is a little higher in the stern. I think it looks more realistic. Whether it is historically accurate, I do not know. As for the shear meeting the stem, I just estimated based off of the drawing in the plans.
- 55 replies
-
- 3
-
-
- ships boat
- model shipways
- (and 1 more)
-
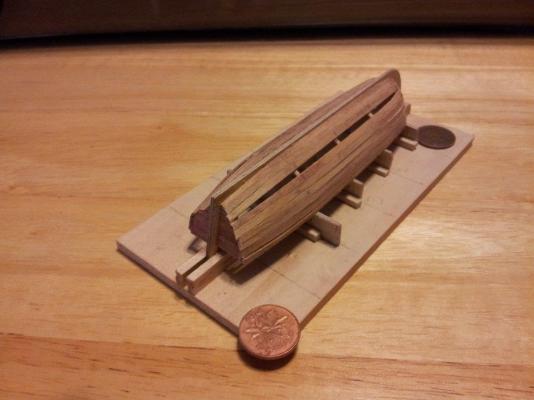
I like seeing the wood grain, but I am a messy glue-er.
-
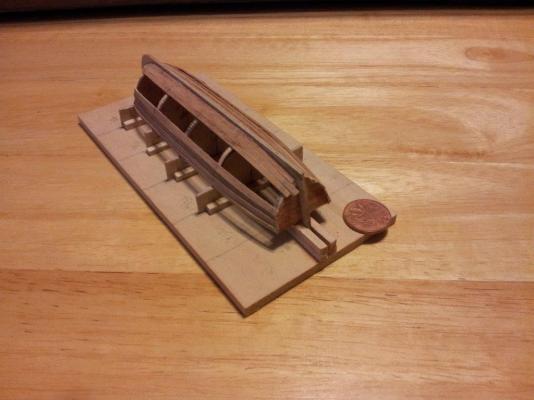
The keel and formers are replacement plywood. The rest of the wood is the basswood strips that came with the kit. As for as painting it, I will wait and see how well it cleans up after sanding. Even then, there are some mistakes that bother me, so painting may help hide them. As you can see the planks are not the same size. I tried to shape a plank with my xacto and over did it. I had to use the plank because I only have what came withe the kit. I found that I have a lot more control sanding the planks. Edited to add picture.

-
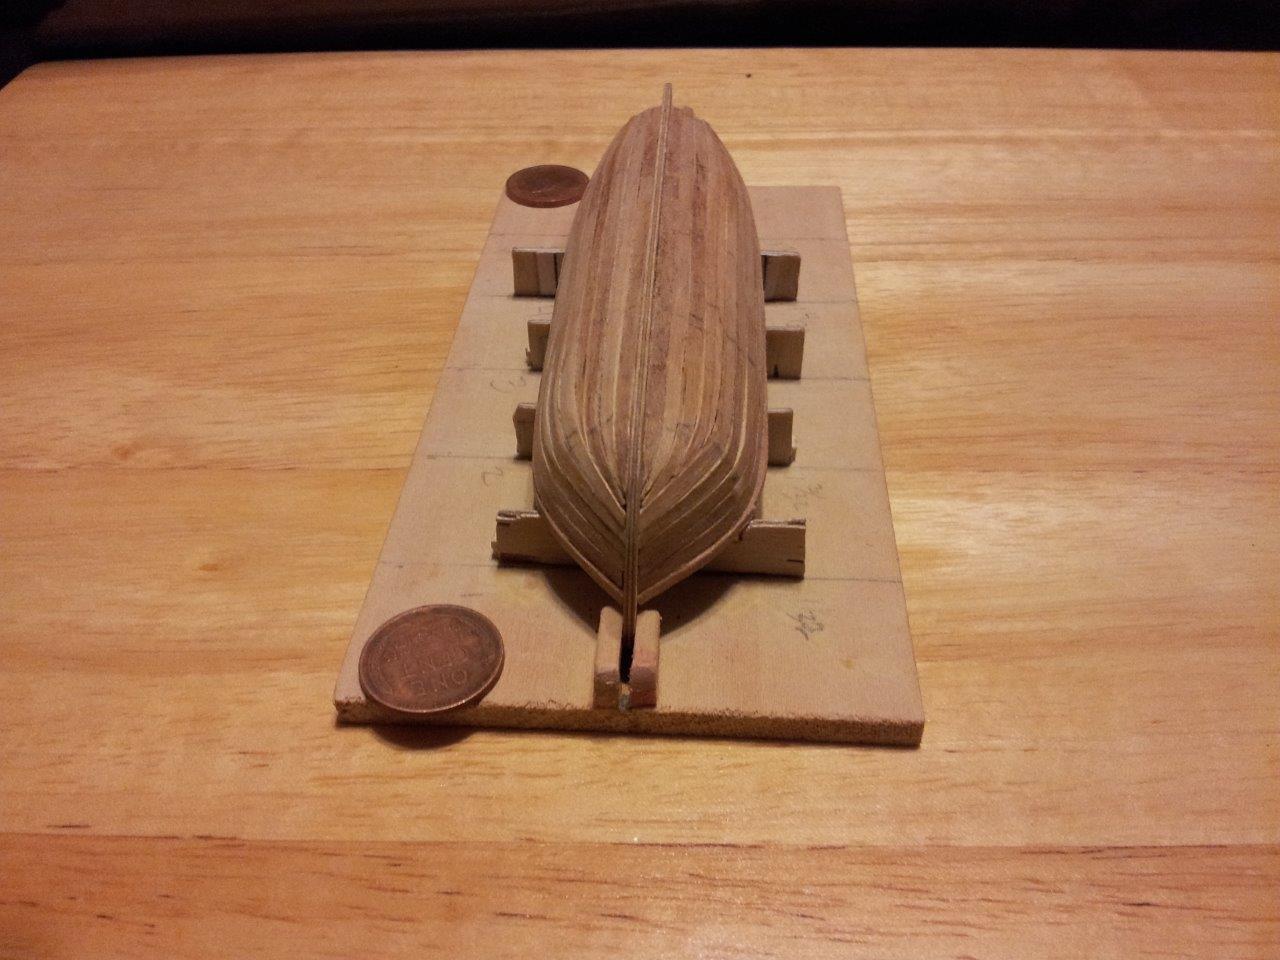
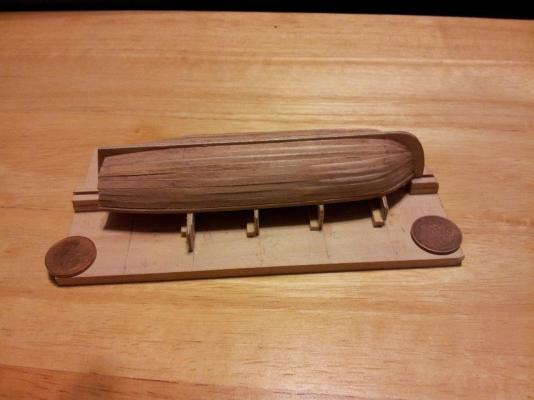
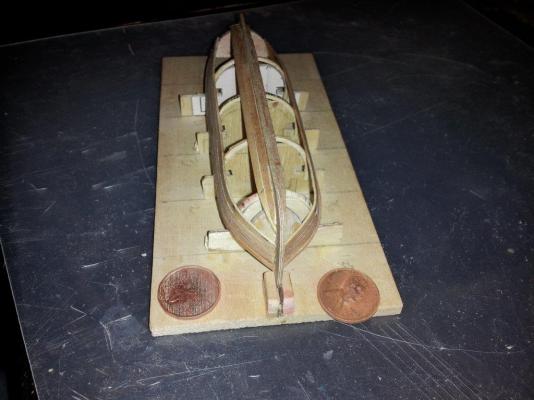
The Coins are just for scale. Do I need to mark port and starboard?
-
Here is the latest. I have most of the port side planked. I just need the stealer. I should be able to finish planking this weekend. I see lots of mistakes in the planking, but I think it looks OK. There are several things I would have done differently. I appreciate all tips, tricks, hints, suggestions and critiques. Till next time, see Ya!

-
I am building the 5 3/16" kit. I like your idea of laminating the ribs. I am going to try that next time.
-
I notice the height difference as well, only after I had mounted them to board.
-
It is looking good. I thank I will follow along, so when I start my MBLS, I will have inside knowledge.
-
David and Marty thanks for stopping by and the complements.
-
I stayed busy this weekend and got some planks on. I learned a lot doing the planking and broke a few planks along the way.

-
Ryland, Thanks for the complement and the information.