Search the Community
Showing results for tags 'Del Prado'.
Found 5 results
-
 This topic is created to show the build of my first model ship, which is a Cutty Sark (not the easiest one to start with I agree, but I have patience ). The kit is from Del Prado (no longer on the market) and bought the complete set from ebay. This kit was sold in 100 different packages, I guess there were weekly issues that could be bought from newstands or order to home. My package supposedly was sitting in a cellar or attic, and seems to have everything I need to build the complete ship. I have read many bad things about Del Prado - mostly of the scale and the not accurate details (of which I can live with without any problem). After scanning through all the packages I found a few broken pieces what I will have to recreate somehow, and one major problem.... The figurehead Del Prado provided in the sealed package is of the HMS Victory and not the Cutty Sark, so either I use that (unlikely) or reproduce the original figurehead once I got there (more likely). Also I decided to create some minor upgrades to the build if possible (not redesigning the model or changing the scale, but mostly adding extra feature). For this I am closely monitoring Nenad's and Bob's log of their build. Now the reason: I am not a new guy in modelling, I usually work on dioramas of WWII, building in 1:35 scale, using kits, natural materials and polystirol. Recently less kits and most scratch work of my own. Since I am not only making tanks and figures I usually take up half to room (nearly half the flat we live) for my hobby, so my wife (from now on my Admiral) told me to create a Sail ship for her, so I took the challenge, and her we go.... Pictures to come later Gyula
- 74 replies
-
- 2
-

-
- del prado
- cutty sark
- (and 1 more)
-
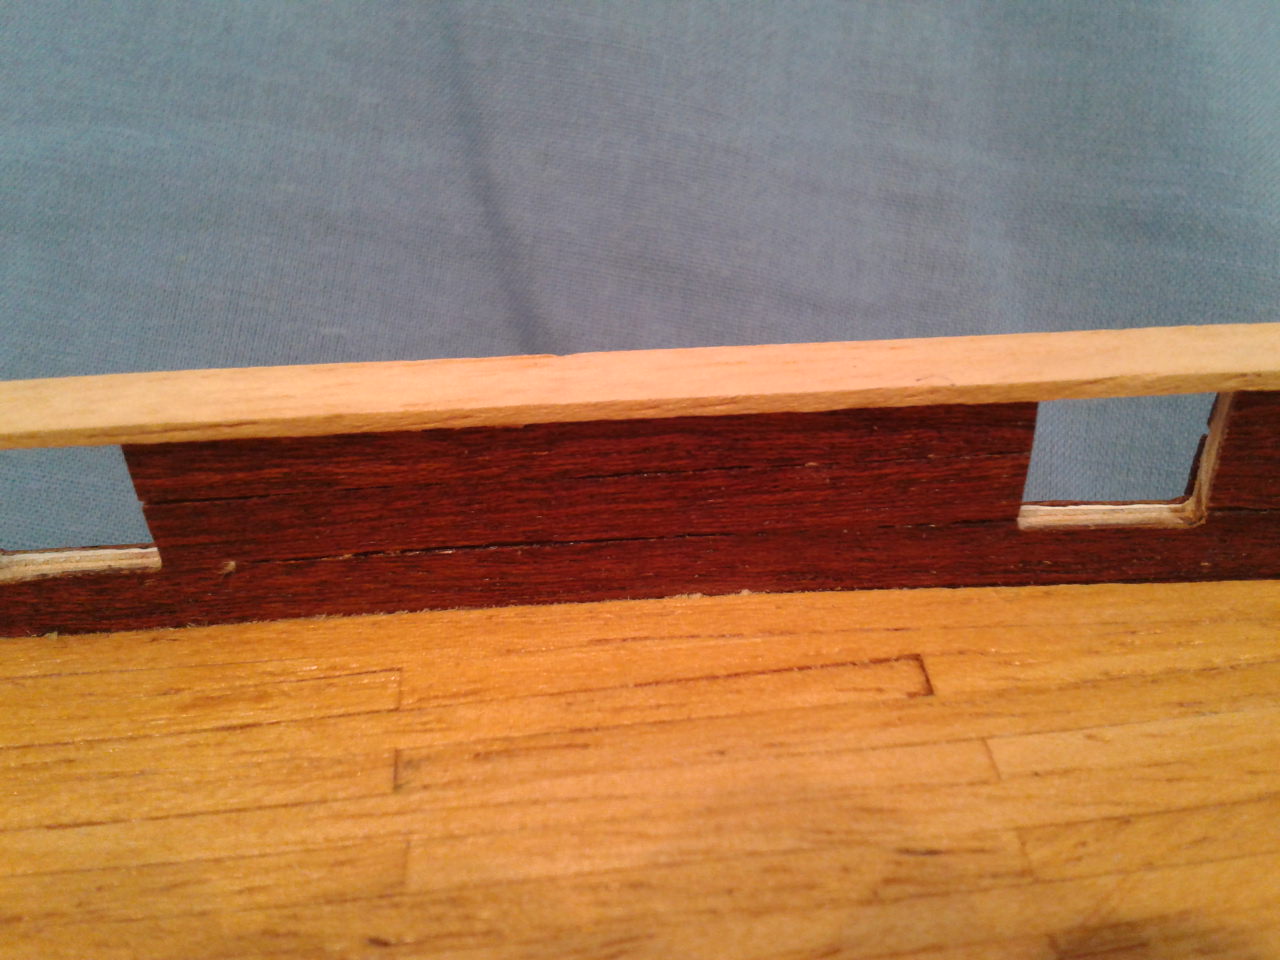
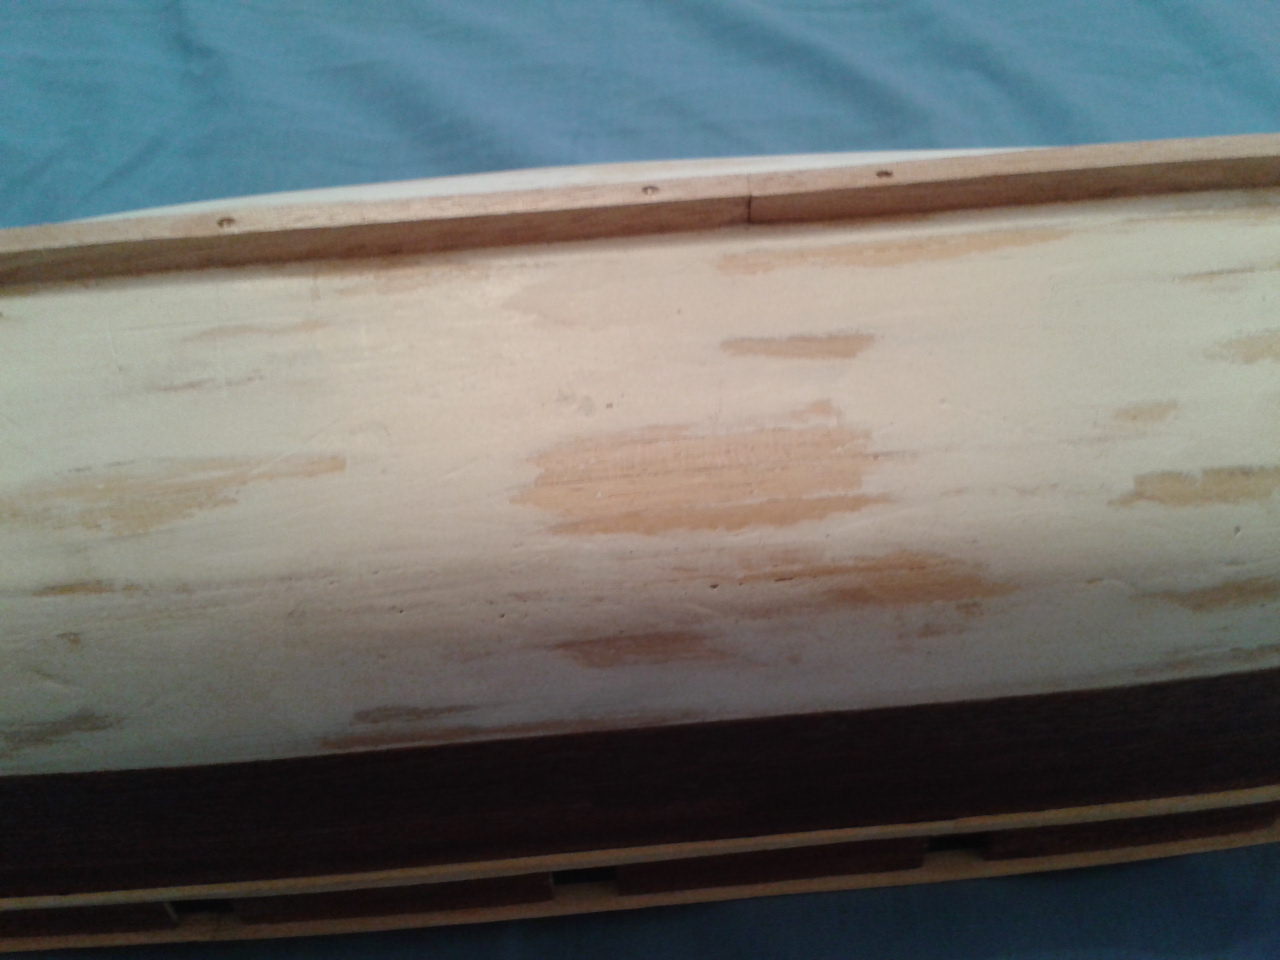
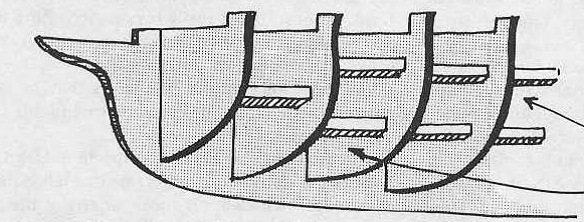
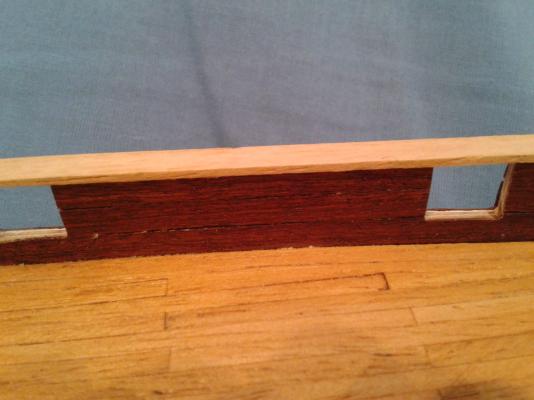
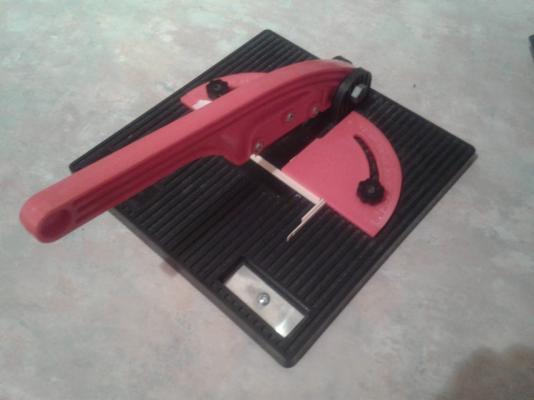
 Hi – this was purchased as a skill leaning exercise prior to finishing my Billing’s Cutty Sark version and was purchased through Ebay as was cheap with some parts missing. No pictures of early stages as never thought of taking any! I will detail the changes I made/make as it may be of help to other new builders. If anyone has comments always welcome as first time I've posted to ant forum The model was published in weekly/monthly parts sent through the post. Not sure how people got on with actually building it on this basis, as having all of the building instructions to go through prior to starting is helpful as the build sequence and instructions are vague in many places and also after mounting the masts and yards holes need to be drilled in these to attach other parts. Difficult as the yard being drilled is attached to the mast and unsupported. Although expensive if bought on a monthly basis this would result in the project being broken down into small manageable parts with no confusion as to what is the correct part to use for where and also step by step instructions, useful for other projects as well. Recommendations before building would be:- To go through all building instructions to get an understanding of how the build progresses and work out what needs completing before a part is attached. Obtain a copy of Harold G Underhill’s Cutty Sark plans, as recommended by other members on this site. I purchased mine from Royal Museums Greenwich (£14.50 for 3 plans including postage), but also managed to download a set for free from the internet. Don’t rush, make sure that the parts fit correctly prior to gluing. To obtain a really detailed scale model a lot of additional work will be required to most parts, but if built as per instructions will give a good representation of the Cutty Sark plus a lot of building experience gained. To assist with rigging suggest obtain copy of the Revell 1/96 rigging instructions (available on the internet) as these give a lot clearer understanding of the various rigging parts and where they go. To date the problems encountered have been:- Hull developed a twist in building despite following planking instructions. Would suggest that anyone building it adds additional bracing between the frames, making sure that masts can still be mounted, I would suggest sheeting diagonally from keel to deck level. To form a triangle between deck and keel. Attached diagram just shows square timber, but the main frames appear to be set at a distance of 62mm so easier than if all frames at different distances. Certain liberties appear to have been taken to simplify the build. Two options are either ‘go with the flow’ or amend as per additional information obtained. Certain dimensions are not given so it’s either a bit of guess work or look for the information elsewhere, luckily I have the Billing’s plans for CS so have used them To date hull completed as per following picture:- Hull was built as per instructions but would suggest that all of the keel is glued together prior to adding frames as care is needed to ensure that the hull remains square, filling in between frames as suggested above would stiffen structure up. The masts are kept in place on the keel by a square box, however I found that the position of these results in a vertical mast not canted backwards as is correct, easy fix for the foremast and mainmast is to leave out the front part of the box as this is against a frame and for the mizzenmast to once again leave out the front portion and glue a spare piece of material across the front of the sides, this will result in 3 rectangular boxes allowing front to rear movement The hull was planked as per instructions but nails were only partially inserted and removed when glue set. Planks bend quite easily if soaked in water. For the planks around the stern planking was soaked in water, excess water dried off and the formed round jar with masking tape and elastic band. Careful shaping of stern and bow braces is required to ensure smooth flow of lines of planking. One major error in the design, presumably for ease of construction, is that the fore and rear decks are flush with the top of the hull whereas the hull should extent above these slightly. Decks form part of the hull and sit on top of the frames so only easy solution would be to add a 2-3mm extension on top of the current planking all the way round. Deck planking per instructions is cut to 12.5mm x 3mm lengths which does not fit the pictures of the build. I modified this and cut to 62.5mm x 3mm, which gives actual life size of plank of 18.5ft x 10.5inches. About right for length but twice the specification width, which was 5 inches. I put a border plank around the outside of the hull and all main deck structures and then planked to these, but didn’t joggle the planks where these joined. Latter per the instructions the main deck planking is cut back by 2mm to add the bulwarks, which are 2mm thick, I moved the edge plank in on the main deck in by the 2mm to avoid trying to remove a thin strip after planking I cut all planking using a balsa cutter which was useful as the surface was divided into 1.5mm strips so made measuring easy, as a stop could be set to get all planks equal length. The bulwarks are pre-cut and require two strips joining together with a strengthening piece glued inside and then planked outside, and after fitting planked inside. After joining and planking the outside I cut off the strengthening piece to give a smooth surface inside. Once hull planking completed I made a mixture of polyfiller, PVA glue and water to fill gaps etc. and then sanded to a smooth finish (shows as white in the photo). Adding too much PVA glue, as I found out, results in a very hard surface which is difficult to sand, ended up using a wood chisel in the end. Careful sanding at bow stern and where bulwark joins is required to obtain a flowing shape. A second layer of thin planking is added of either sapele veneer or ‘copper planking’ so finish after sanding does not need to be ultra-smooth.
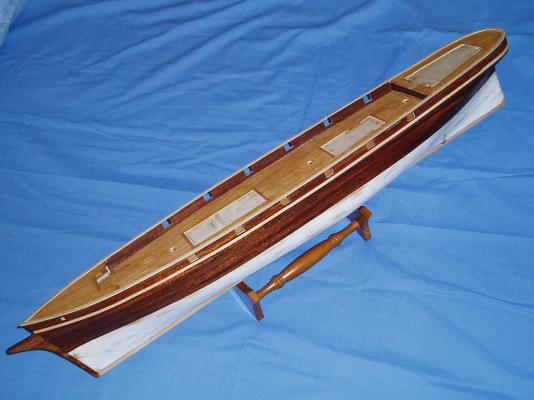

- 12 replies
-
- 2
-
-
- cutty sark
- del prado
- (and 1 more)
-
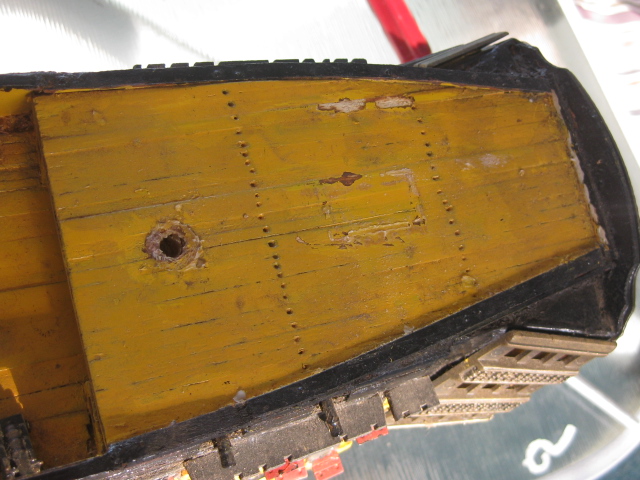
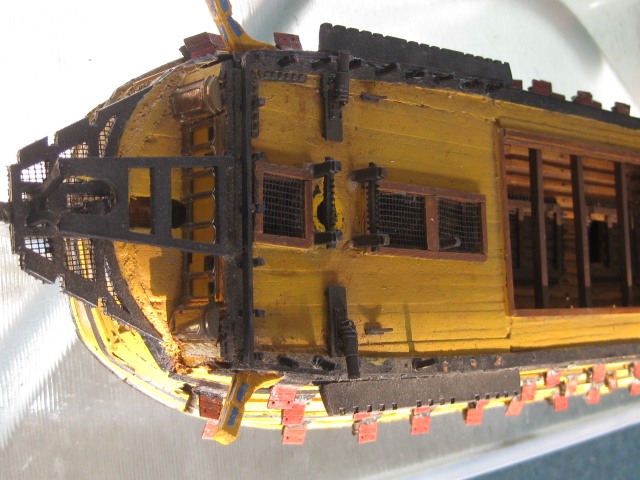
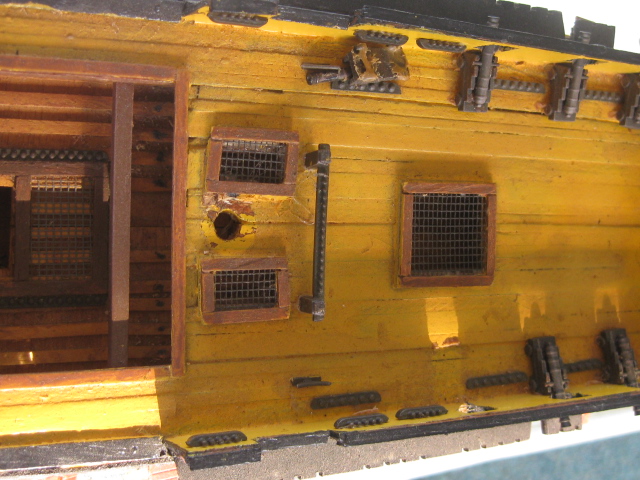
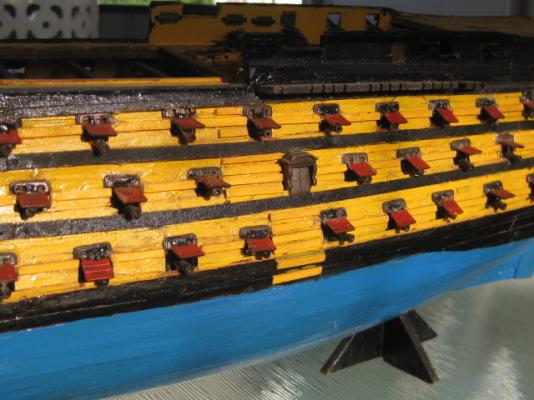
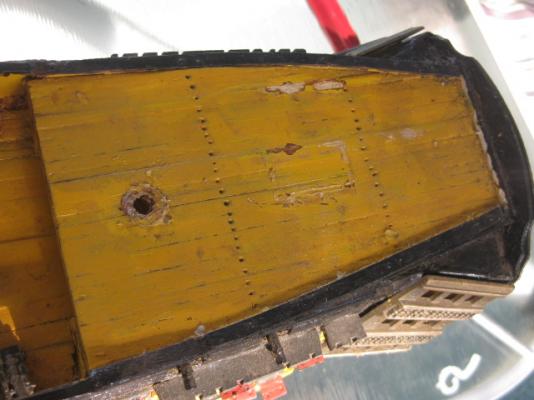
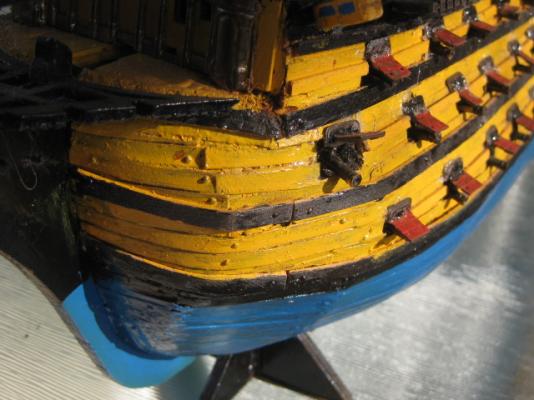
 About six months ago a friend of my girlfriend's asked me if I could finish off a model ship which her father was building before he passed away. Being the sucker I am, I said yes before I'd even laid eyes on it, or even before I knew which ship it was - MISTAKE. It turned out to be one of the worst constructed models of HMS Victory I've ever seen - only the one I'd previously restored for a friend (similar circumstances) was worse, but at least he didn't want me to spend too much time on that one. As I'd already promised both my girlfriend and her friend that I'd do the job I was stuck with it . This was the old guy's first ever attempt at building a wooden ship, and he couldn't have picked a worse kit for his debut - a Victory, and a Del Prado part-work kit to boot. I doubt I've seen another kit with worse materials and instructions, at least the timber on my AL HMS Suppy wasn't too bad for an experienced builder to make something of it even though the rest of the kit was rubbish. A novice attempting this Victory kit was never going to get far (bloody thing should have been banned on it's release . Here are a few of pics of what I faced when I first saw it : I have spent the last 18 days stripping and re-planking the decks, ripping out and replacing a lot of hull planks, bogging the entire hull and replacing wales and deck furniture. I am currently re-painting the hull. I will update this log when I get home from my holidays in a week or two - the internet connection I am using at the moment is as slow as a wet week and it takes me forever to try to send anything. Danny


-
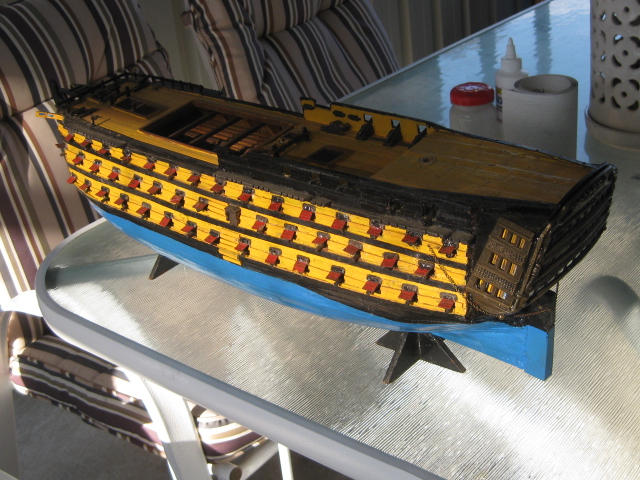
 A model I collected some years back now and have been working on it all this time it's DelPrado kit, but iv made many improvements by looking at models and ships on Pinterest. I have spent many hours on this model, its in full paint. It's my first and I just wanted to make it look as real as possible. Oz
 -
hello fellow likely minded people... i have got a chance to get del prados bounty kit as a full set for almost peanuts. is it worth it? i could probably pay something about £85 for all the issues + it already has got the hull partly built, at least the frame has been put together. has anybody succesfully built this, is there a lot of problems? how about instructions? thank you guys for any help. pavol