T_Warris
-
Posts
19 -
Joined
-
Last visited
1 Follower

-
 BenD reacted to a post in a topic:
Corsair by T_Warris - OcCre - 1:80 - Heavily reworked kit
BenD reacted to a post in a topic:
Corsair by T_Warris - OcCre - 1:80 - Heavily reworked kit
-
american reacted to a post in a topic:
Corsair by T_Warris - OcCre - 1:80 - Heavily reworked kit
-
GrandpaPhil reacted to a post in a topic:
Corsair by T_Warris - OcCre - 1:80 - Heavily reworked kit
-
kier reacted to a post in a topic:
Corsair by T_Warris - OcCre - 1:80 - Heavily reworked kit
-
kier reacted to a post in a topic:
Corsair by T_Warris - OcCre - 1:80 - Heavily reworked kit
-
kier reacted to a post in a topic:
Corsair by T_Warris - OcCre - 1:80 - Heavily reworked kit
-
kier reacted to a post in a topic:
Corsair by T_Warris - OcCre - 1:80 - Heavily reworked kit
-
kier reacted to a post in a topic:
Corsair by T_Warris - OcCre - 1:80 - Heavily reworked kit
-
Heronguy reacted to a post in a topic:
Corsair by T_Warris - OcCre - 1:80 - Heavily reworked kit
-
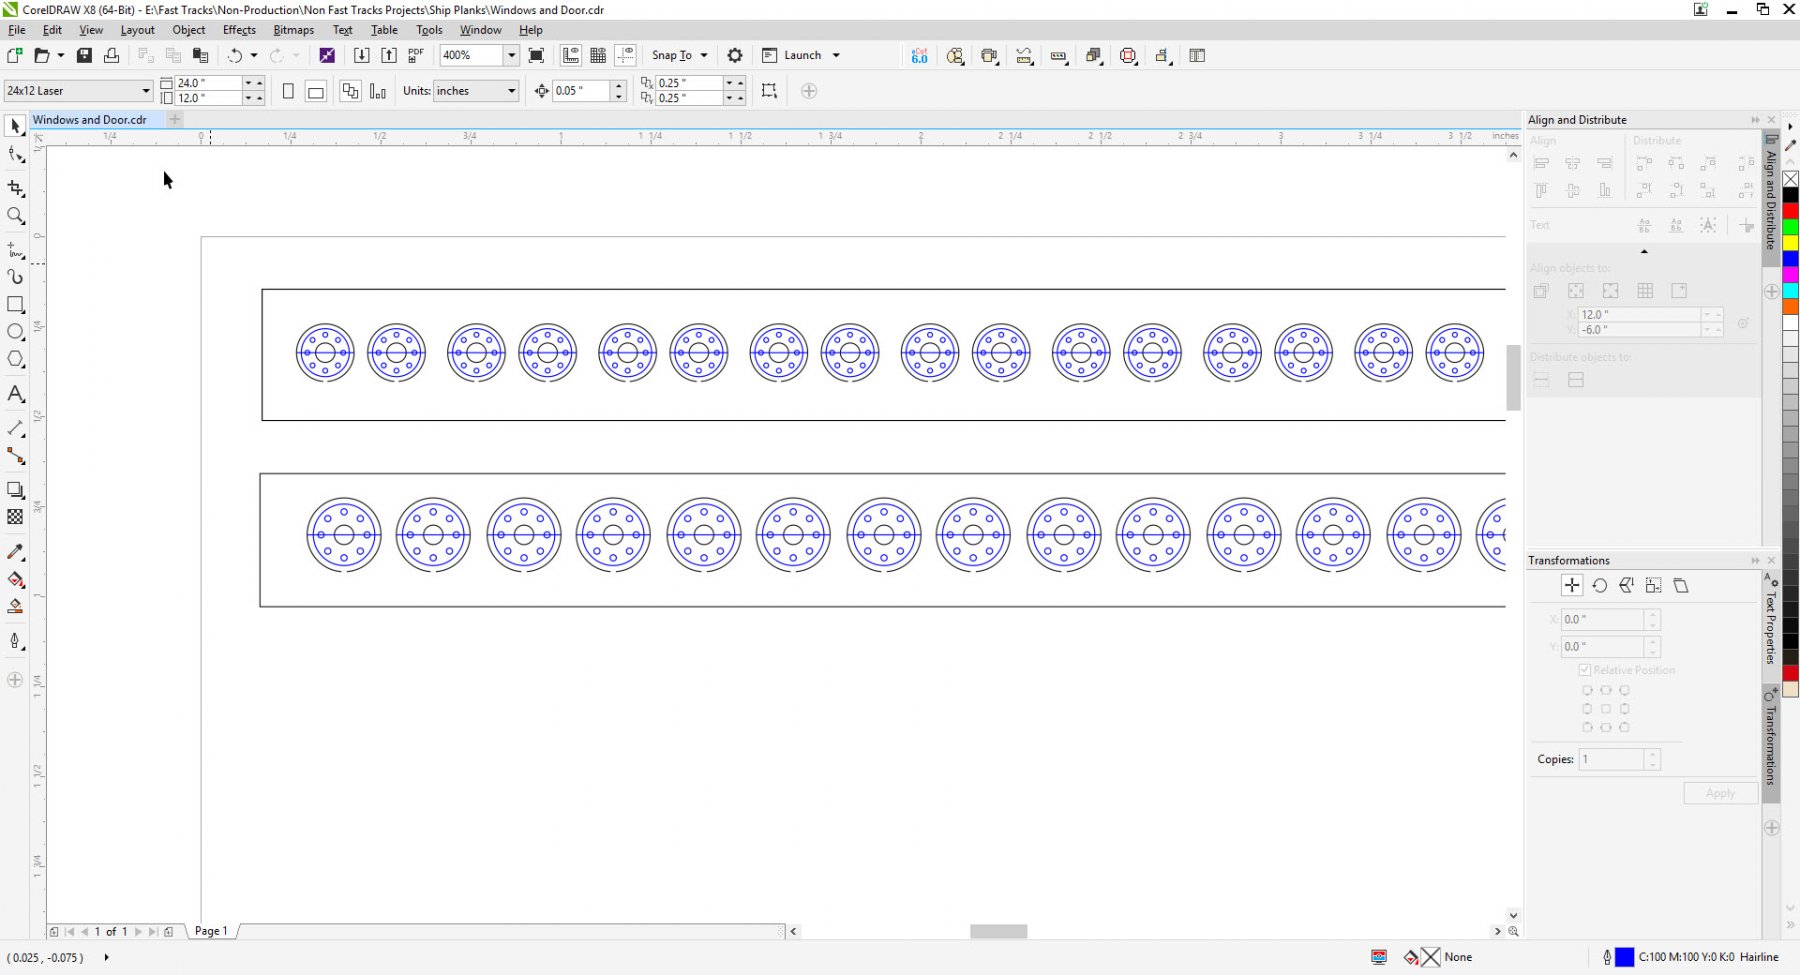
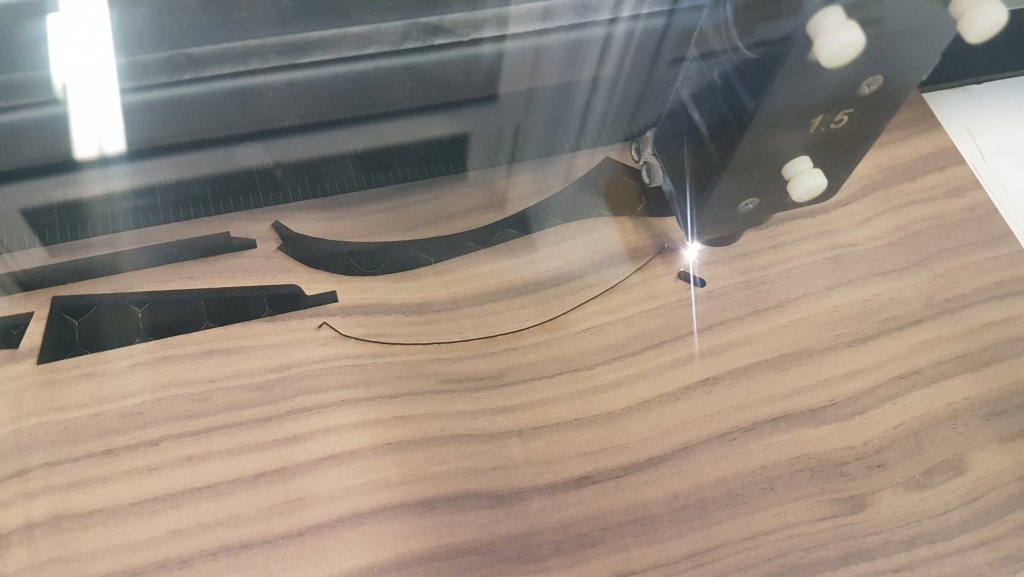
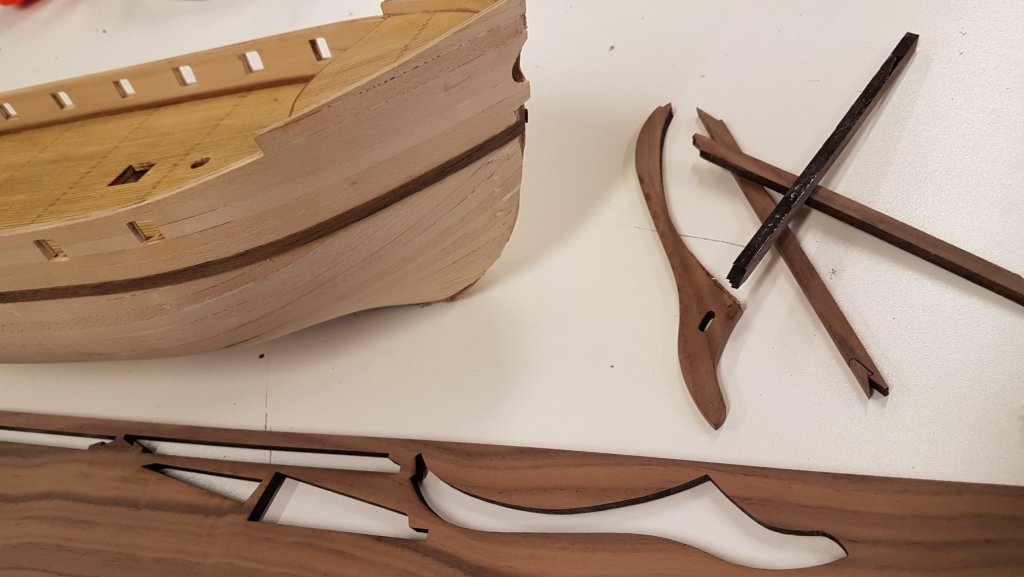
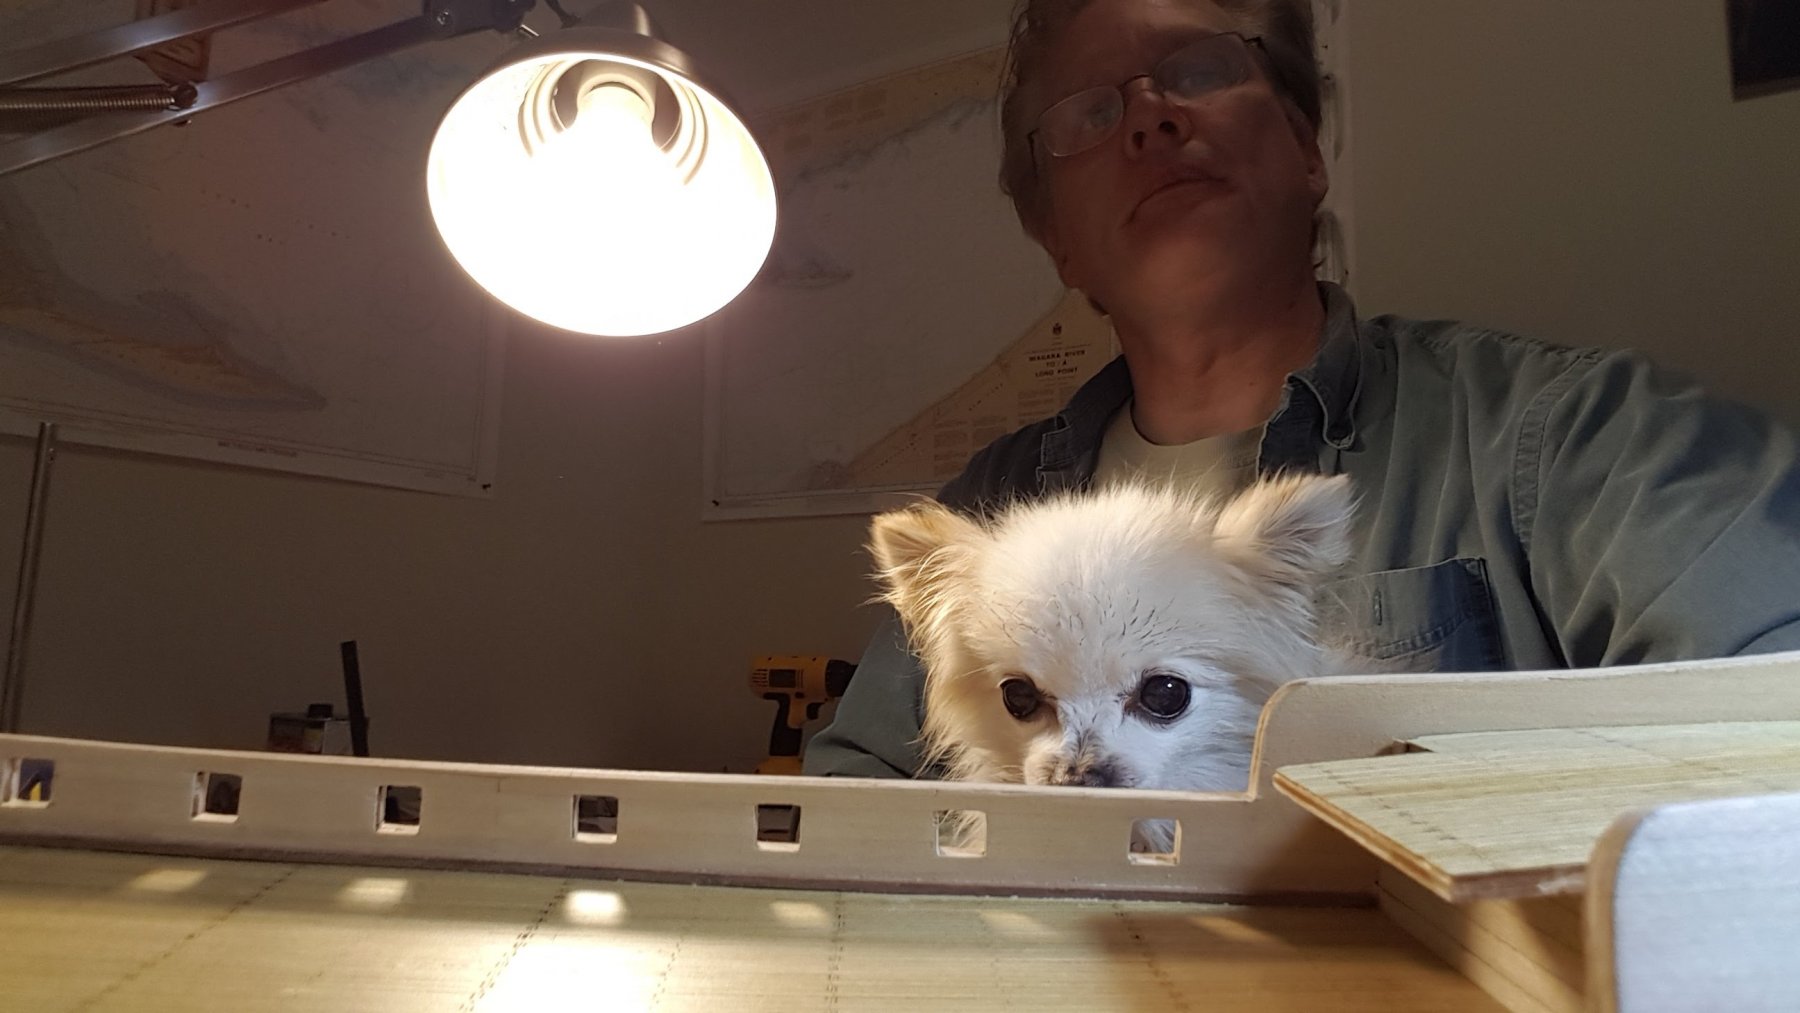
 It's been some time since an update. Over the last month or so I've returned to the project after a long break triggered by the death of my little dog and friend. After that I just didn't feel like working on the project without him sitting at my feet. But, now I'm back at the project and thought I'd post a progress update. I bought a kit online (where escapes me at the moment) to replace the crude metal cast launch included in the kit. This proved to be a very challenging build! But worth the effort once done. It turned out quite well. Like a lot of the casting in the kit I wasn't satisfied with their quality. Having a shop full of laser cutters available I reworked the windows on the stern of the ship with finer looking laser cut wood. Again, this was worth the effort as they look much better when installed in place. Figuring out how to tie the various knots needed... Still lots to learn. Saying goodbye to my friend. I designed and built a motorized serving machine which seems to work well! Haven't used it a lot as yet, but anticipate getting lots of use of it shortly. Foremast almost complete and ready to put in place. Deadeyes installed. I realized after that I had these inverted and have since fixed them...
.thumb.jpg.35d9570c6cfa783da3c3ef31fedb9c2b.jpg)
.thumb.jpg.bf866a7e1ac8c7446375401acc809d0c.jpg)
.thumb.jpg.52a236d86938e078435aa208ec1c51bd.jpg)
.thumb.jpg.e499e6351a0ea8a26f10a2784c0b0dcd.jpg)
.thumb.jpg.7025a1ded03268059b4d23ea409df3a9.jpg)
.thumb.jpg.bad7b634f215d5a97104a76418fd47b2.jpg)
.thumb.jpg.6170e41e515a80c98d15b08b97895a60.jpg)
.thumb.jpg.9d9cdfebeff0898eb4046decadc8080b.jpg)
.thumb.jpg.9bc505eb115ad2d7ca698a100617e5aa.jpg)
.thumb.jpg.7d755ddc5ea7e574064c1785a314856b.jpg)
.thumb.jpg.860dbaa5767cdac4b6bdf6c5898a6a91.jpg)
.thumb.jpg.90925b4962f7a29457ae49d83c1503f8.jpg)
.thumb.jpg.bcae7b8ebbb0710ad59c1c000ff8a20f.jpg)
.thumb.jpg.13fbaa97856c67d0cf83fdf5215dacf2.jpg)
.thumb.jpg.bf009dab7c87b83733ae13a897fa1b25.jpg)
.thumb.jpg.eca7eb1876cd7d82a6eb94b01382f2b5.jpg)
.thumb.jpg.70d00ce0d293ef55ab128a0a52fbf5f7.jpg)
.thumb.jpg.afcb5d09b1ec7db4de530369c0bcf33b.jpg)
.thumb.jpg.7c58f0eeef52af6e4dd1c458e199683c.jpg)
.thumb.jpg.5238ca27062c165a7a9861c34fda0c4f.jpg)
.thumb.jpg.325a54b718e88a7e0f8e03bf875c556a.jpg)
.thumb.jpg.c2c7c2915dbdacdf2ea767fa436a33a2.jpg)
.thumb.jpg.cc7665fdd33dfd344d28b5d15b17df53.jpg)
.thumb.jpg.692c19fdd7d01ba9911bd93b3fdc1907.jpg)
.thumb.jpg.faf3ed7a90d563c9603a0c299a8d585d.jpg)
.thumb.jpg.47574e34495fef65656fe736c1f26459.jpg)
.thumb.jpg.781d058c60c172d3d14a532b371e1d14.jpg)
.thumb.jpg.7426738bb4f769611c9215fda9753518.jpg)
.thumb.jpg.4a26f5743de4c6801770b18dbaca3eb9.jpg)
.thumb.jpg.dced4a1633262e2a478309533adb17d7.jpg)
.thumb.jpg.9786daee7cc608dad0899ae00bd1b7bd.jpg)
.thumb.jpg.25fb94056df3f56bb2c542d694ee65be.jpg)
.thumb.jpg.4cff6e99647cff787d383704b0fec2ab.jpg)
.thumb.jpg.b3420893b71feceeca7e8959e7c99011.jpg)
.thumb.jpg.d1fd57192bd31369d1522b54ee9c6b06.jpg)
.thumb.jpg.866a709899c2b471652f8785d452dd5f.jpg)
.thumb.jpg.513db06e94faad39670585f3c1b6c111.jpg)
.thumb.jpg.f50f4d64a54240bc819075dd8e6d018a.jpg)
.thumb.jpg.ba339f9ae63646ca93dfd6769c9ce67c.jpg)
.thumb.jpg.bfae47c12887ccbe6d196f036bc17b13.jpg)
.thumb.jpg.c6ebe2ee77bdd7cc5b2d5dfebd820ee1.jpg)
.thumb.jpg.8953e9bf0acc118ab3f42670863b3a95.jpg)
.thumb.jpg.4fb03321cb7f8f003417ab1fc84dea3a.jpg)
.thumb.jpg.966a2c1cf350cd4057c823439dedecdf.jpg)
.thumb.jpg.3d740bd8d3c6d9f09794241fc03e4d35.jpg)
.thumb.jpg.a92451da62adf00d2be55b42e8593552.jpg)
-
GrandpaPhil reacted to a post in a topic:
Corsair by DCIronfist - FINISHED - OcCre - 1:80 scale (First wooden ship build)
-
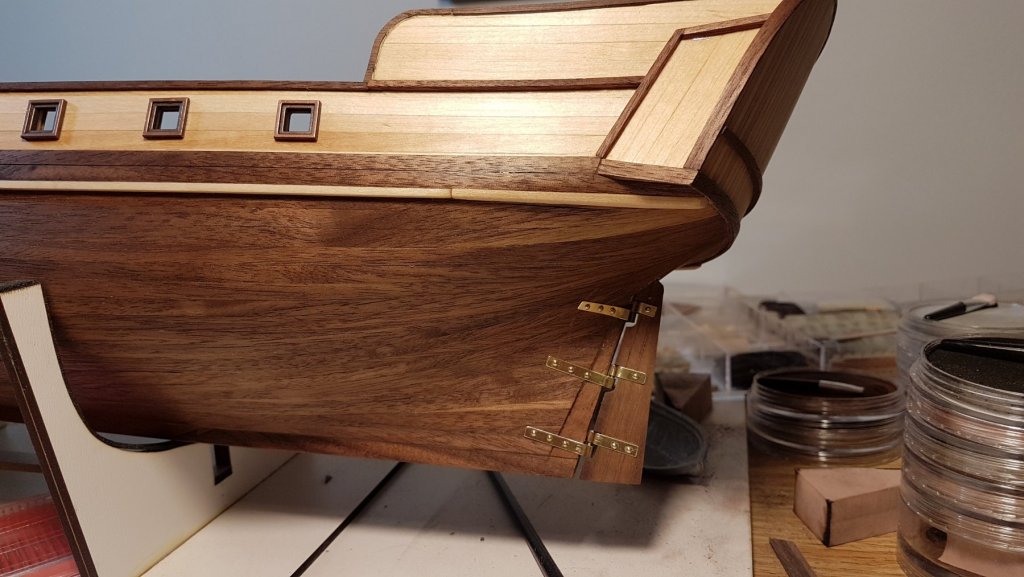
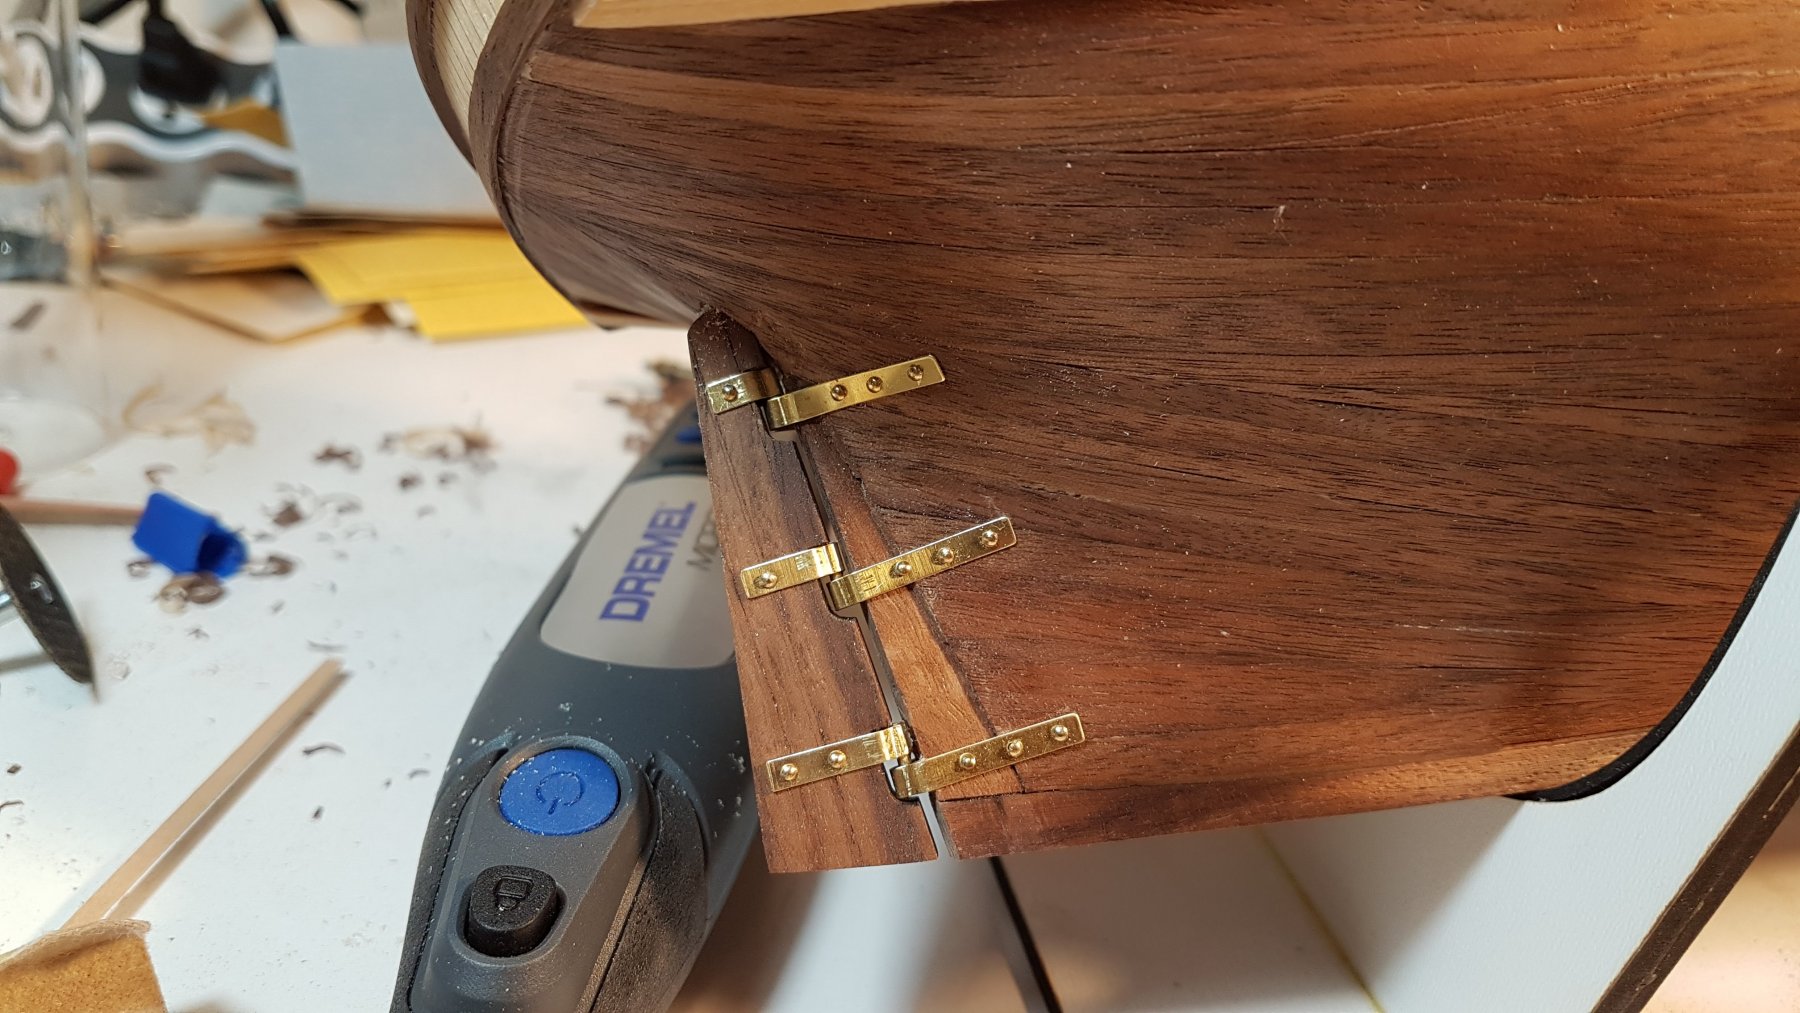
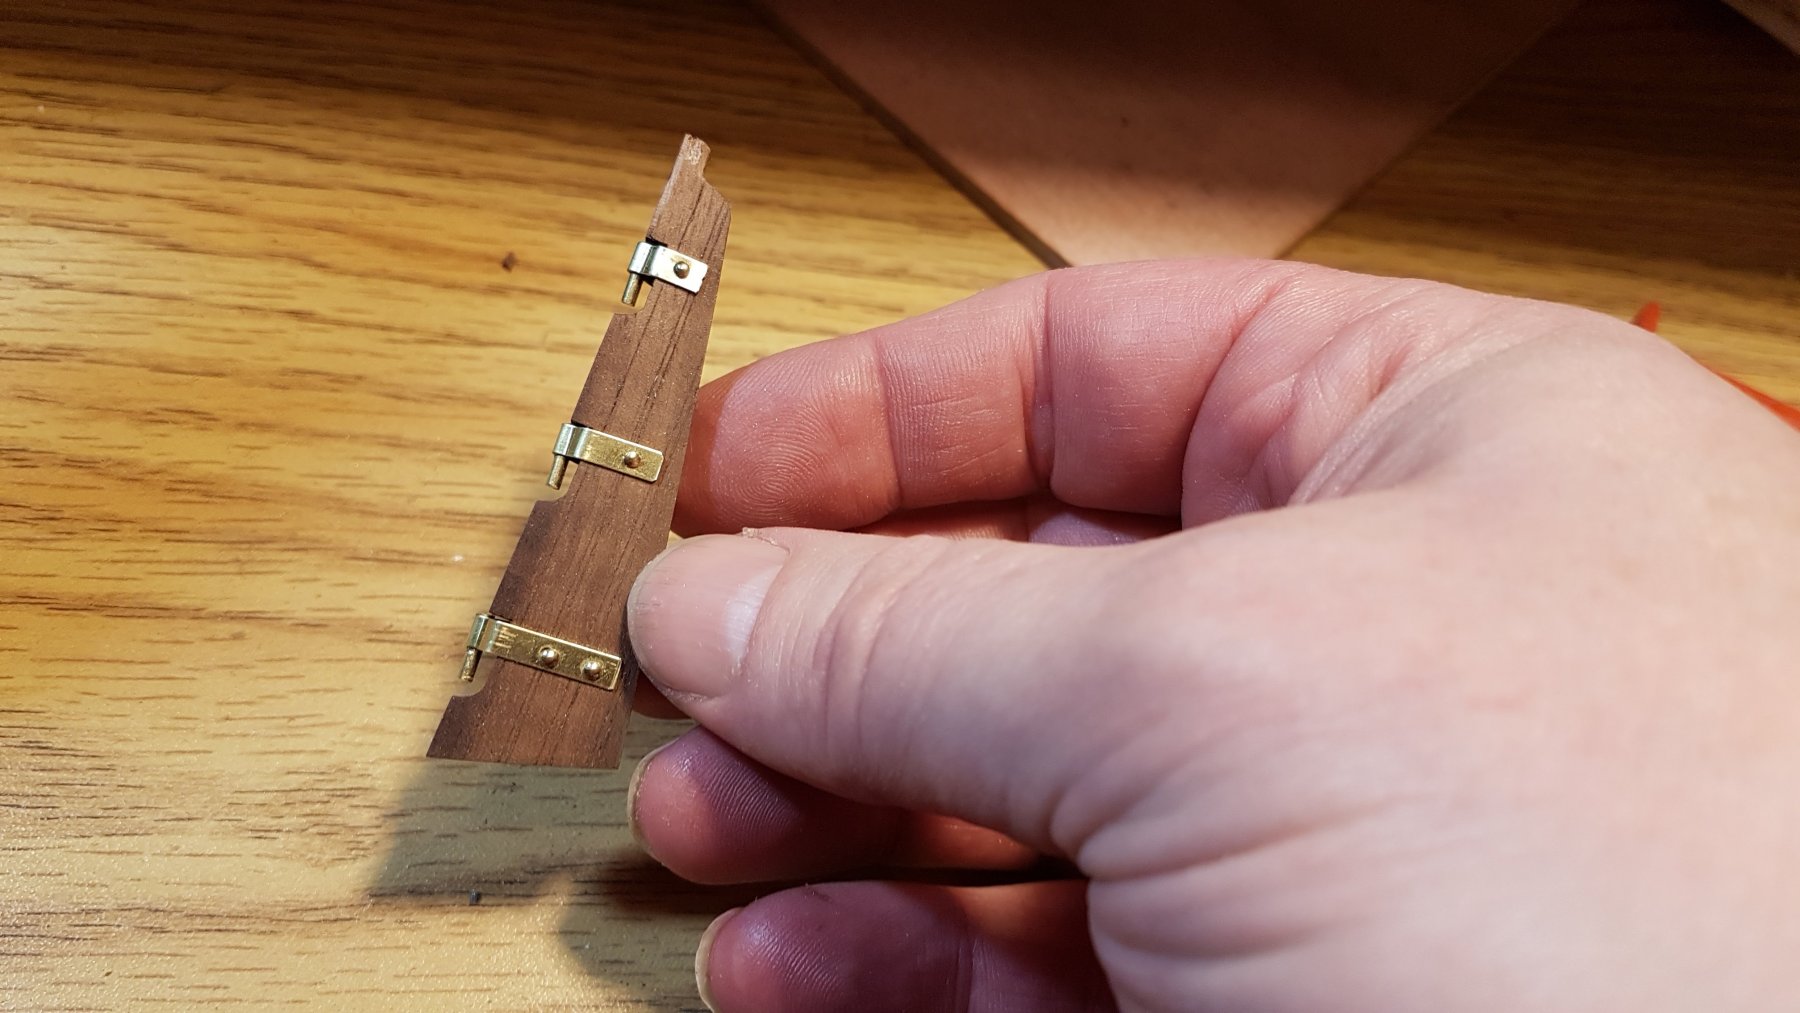
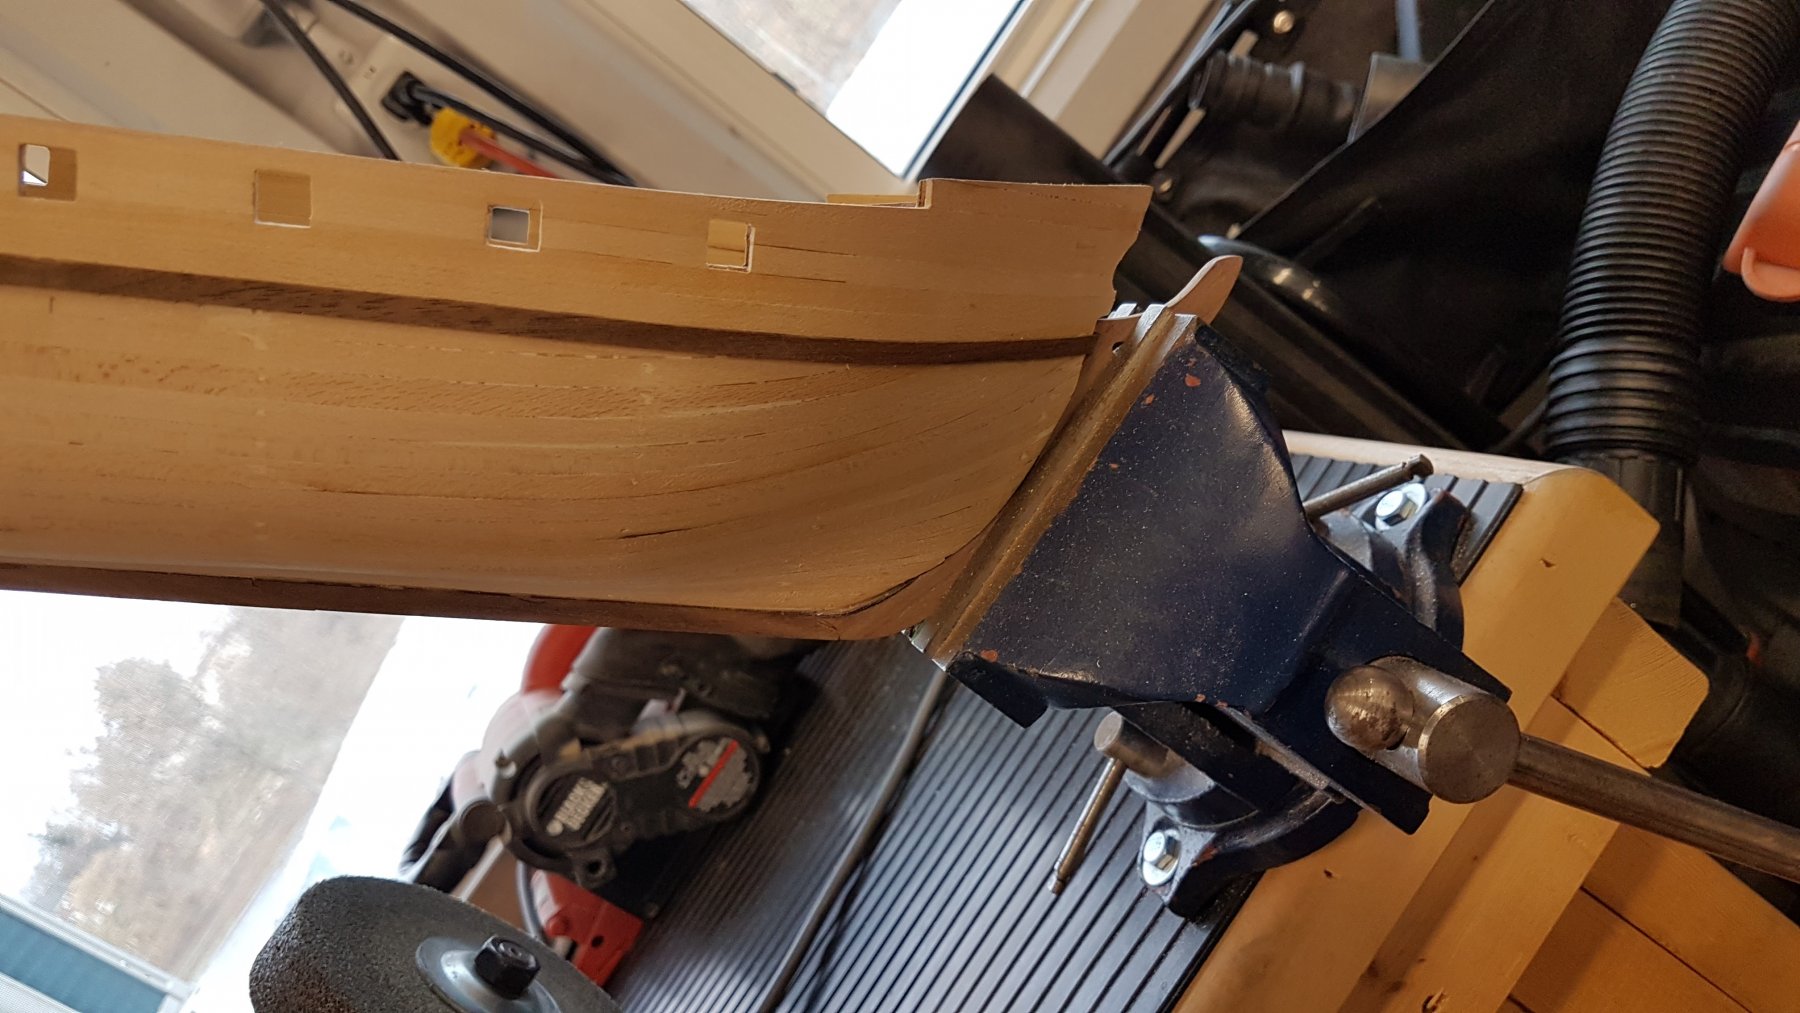
Fit the rudder hinges in place last evening. This went a lot easier than I had anticipated. Still a bit of a challenge, but turned out pretty good. Later in the build I will airbrush these, not happy with that shiny brass look...


-
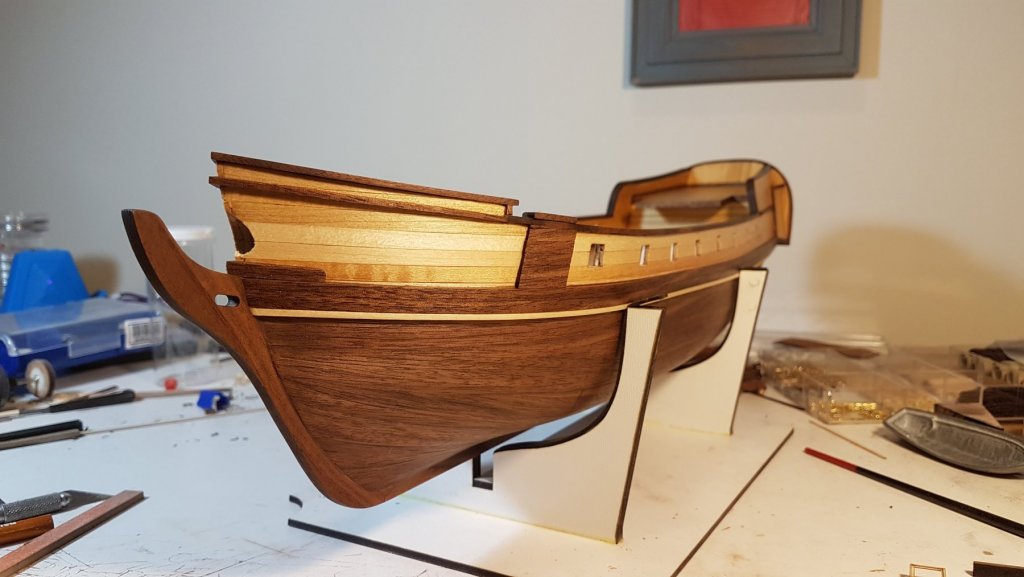
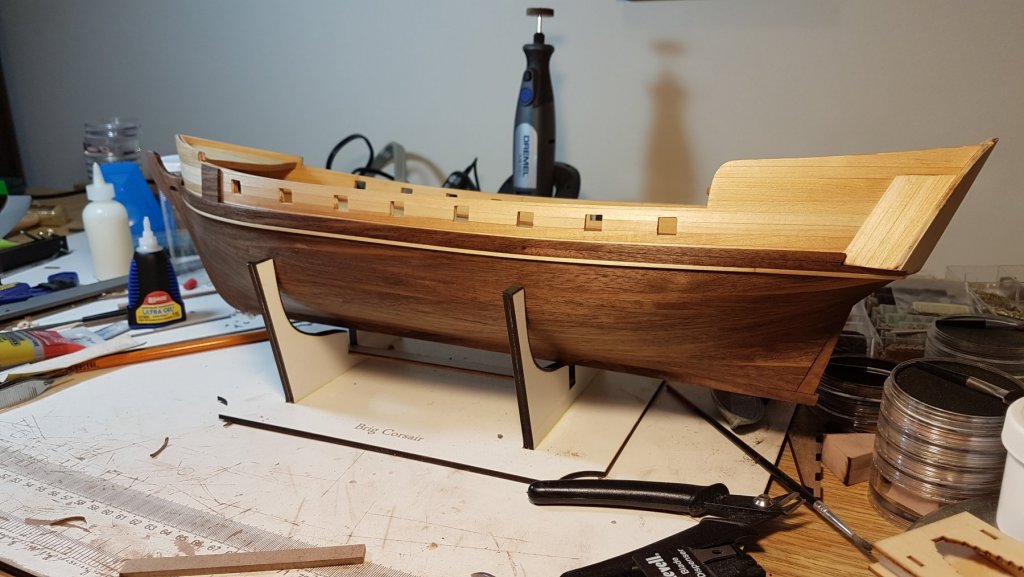
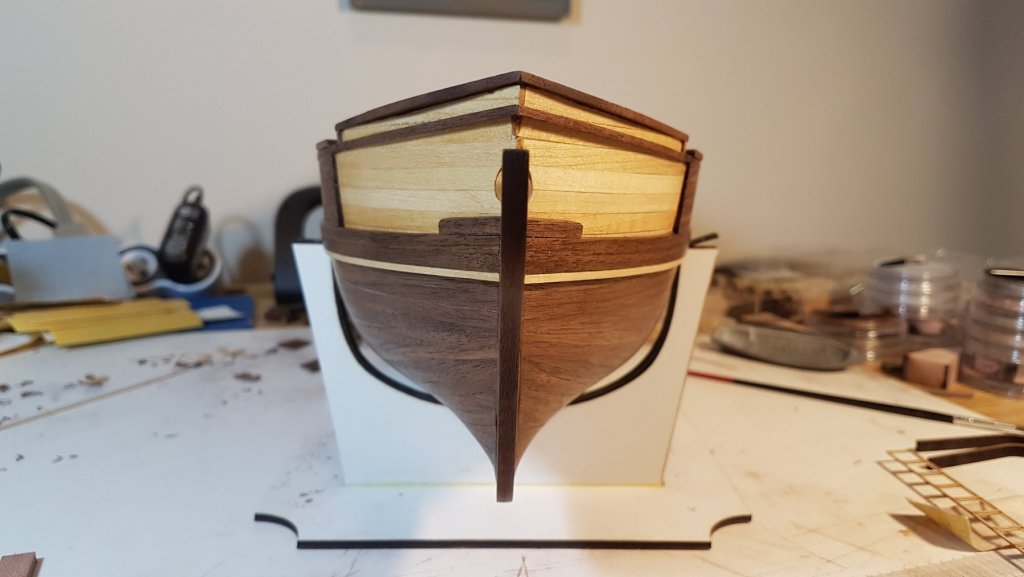
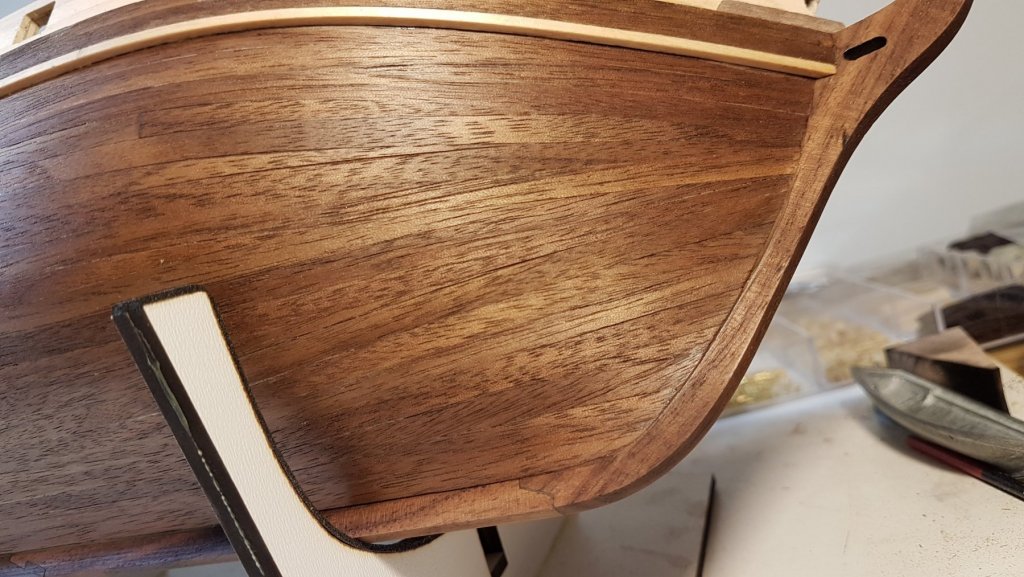
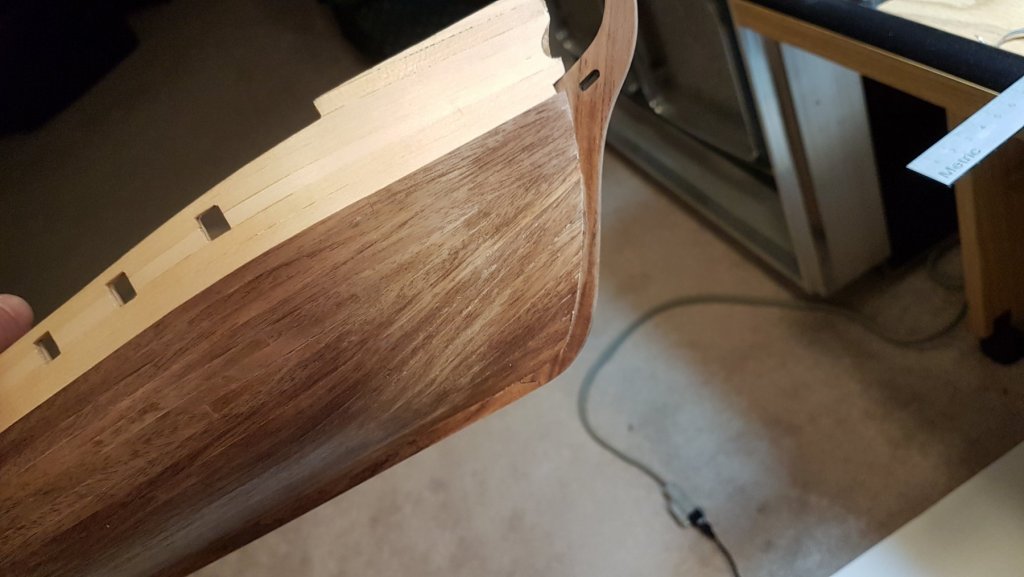
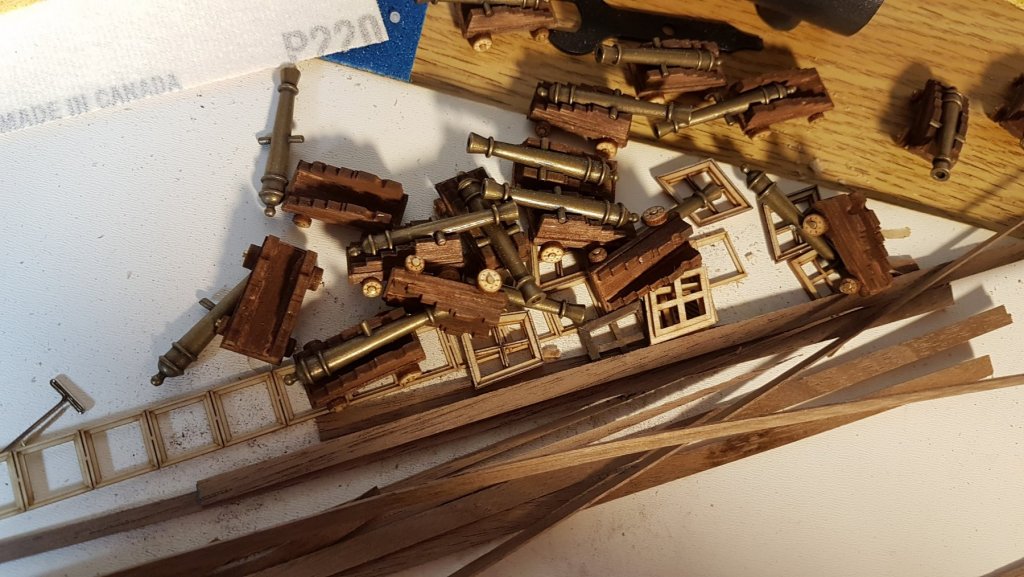
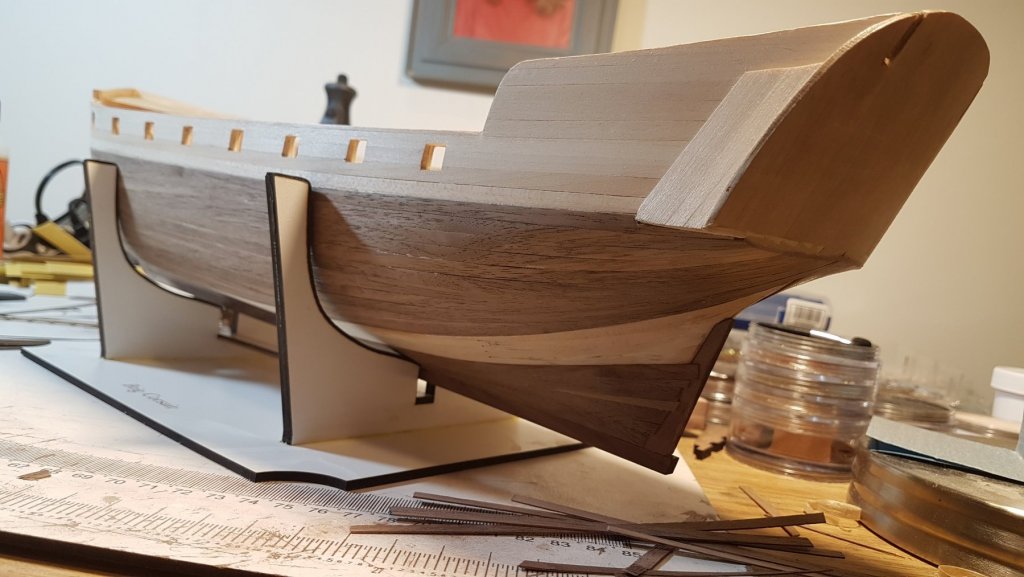
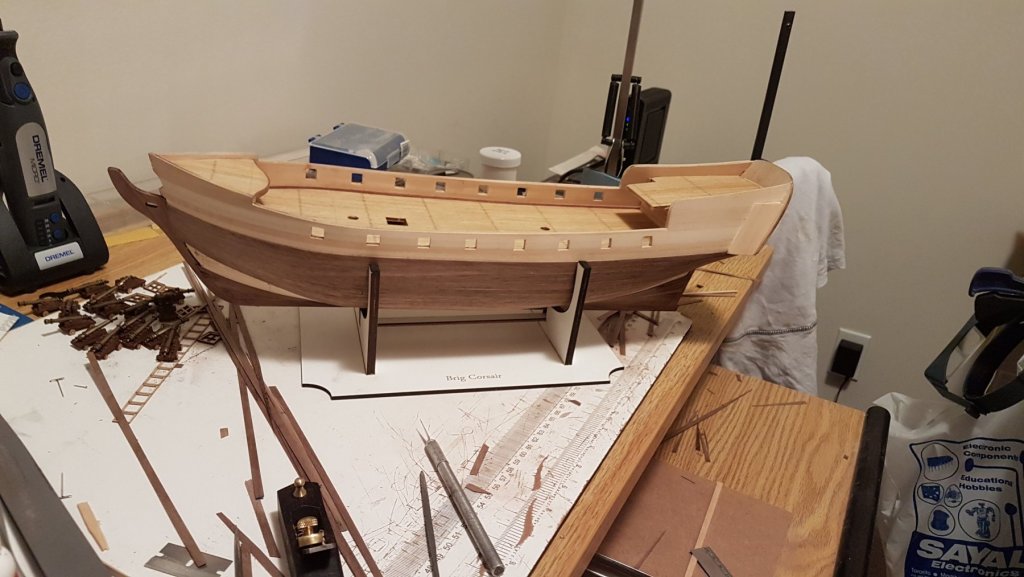
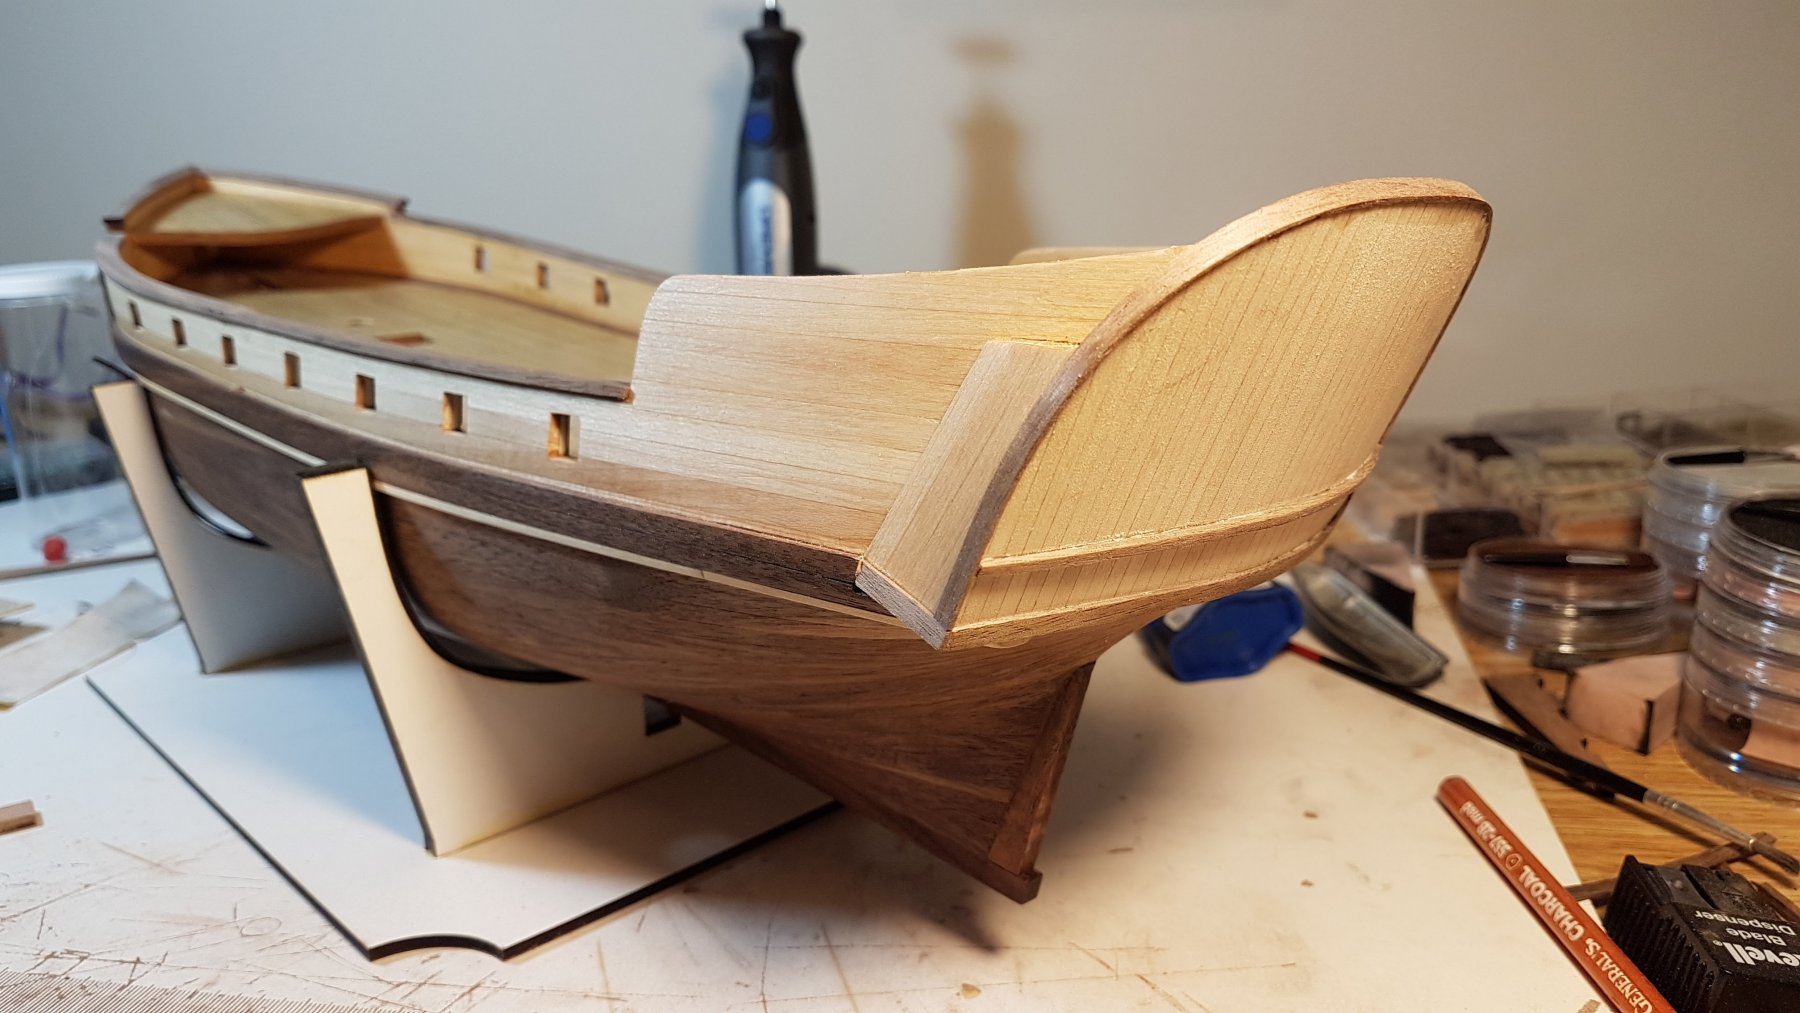
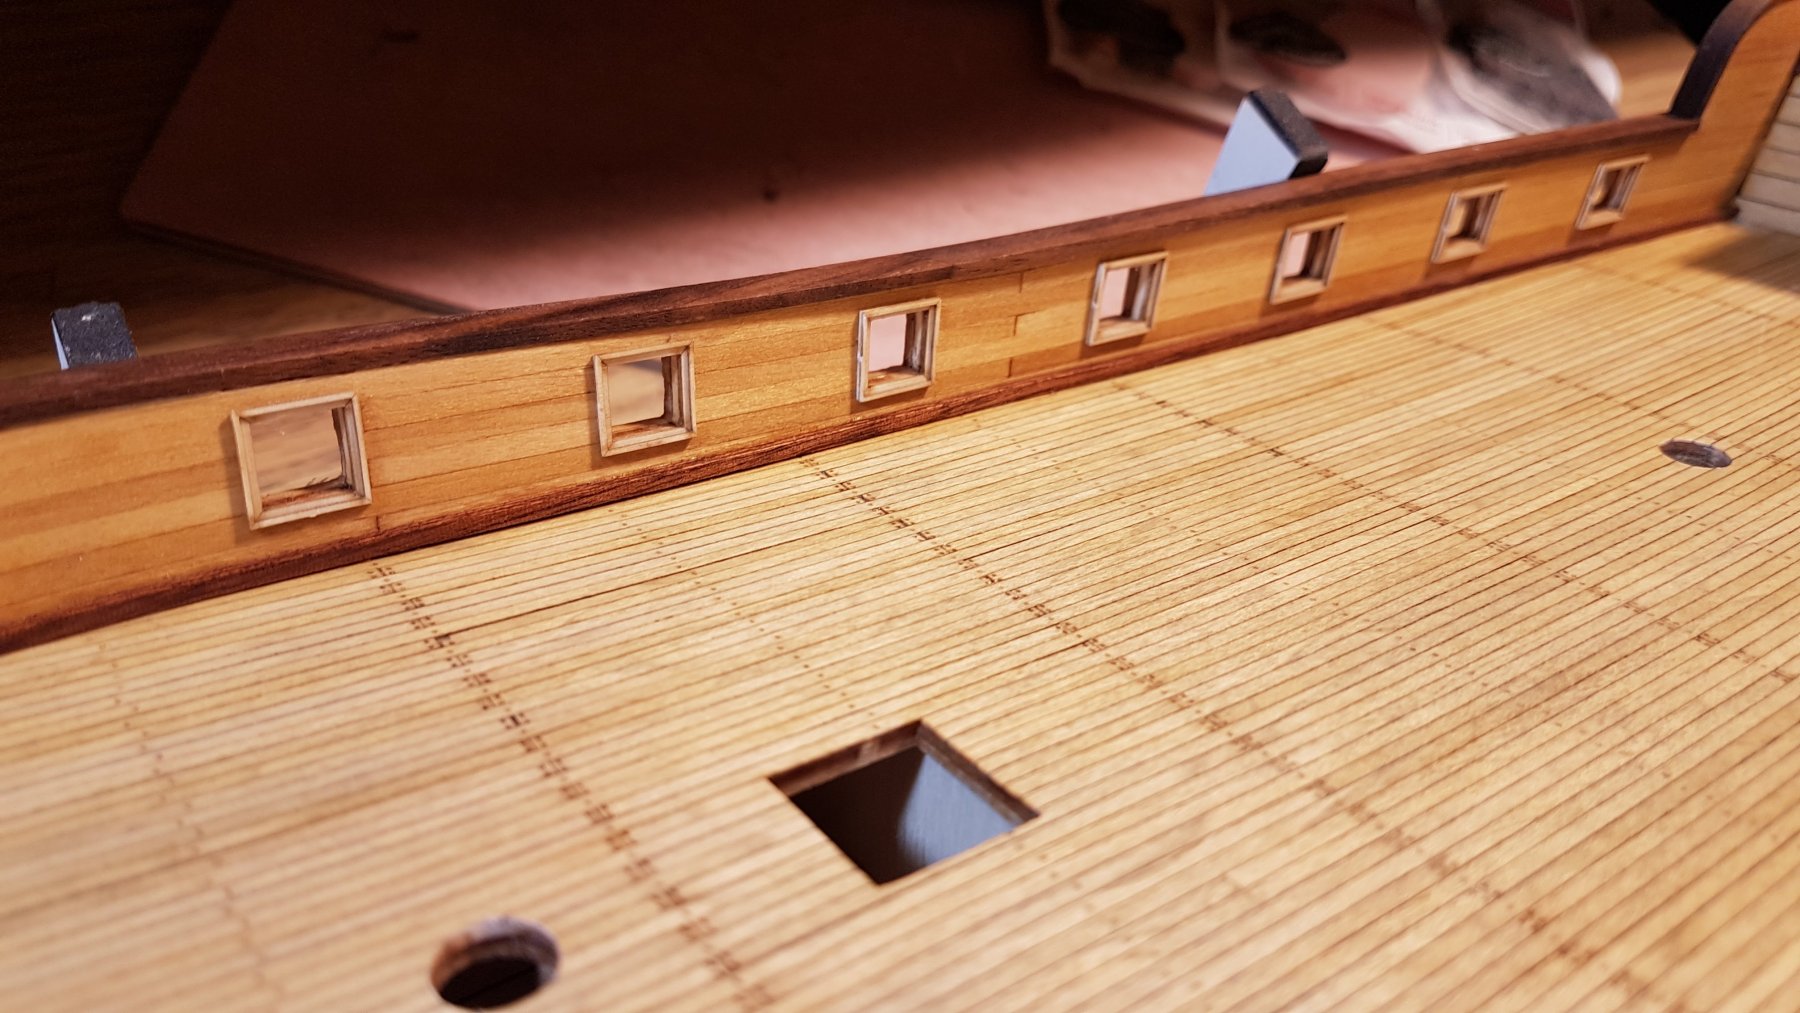
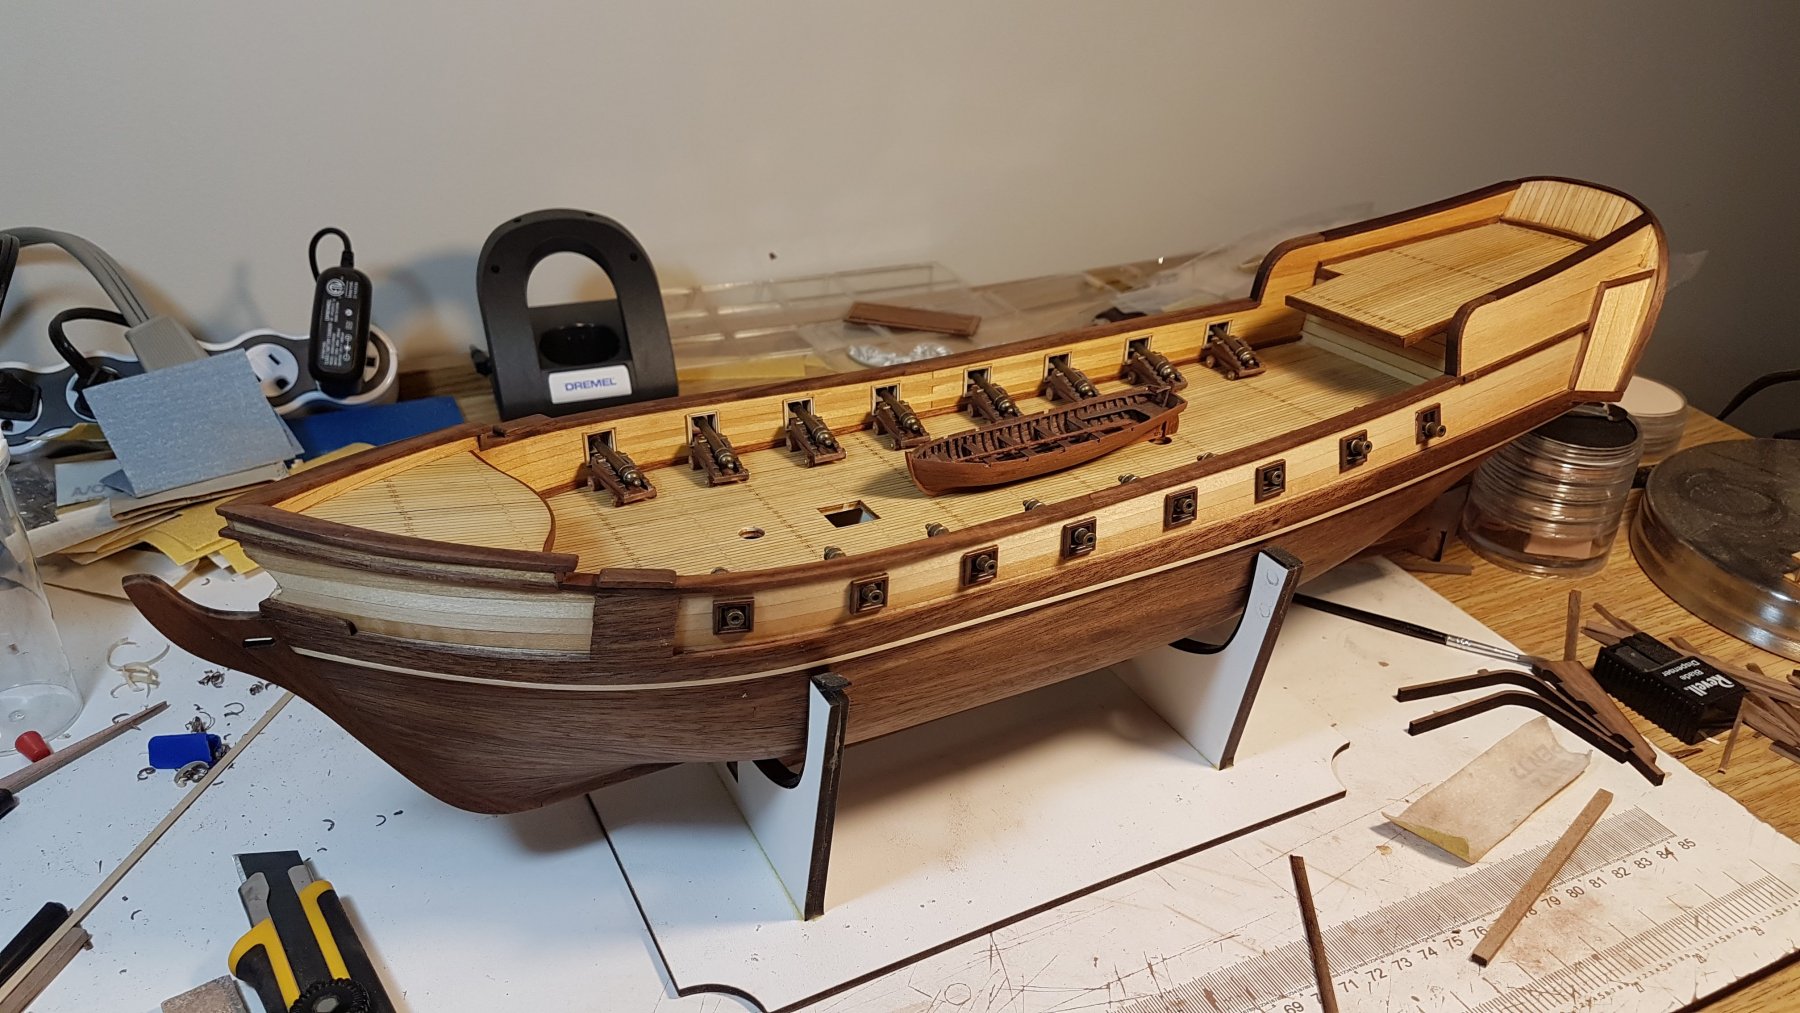
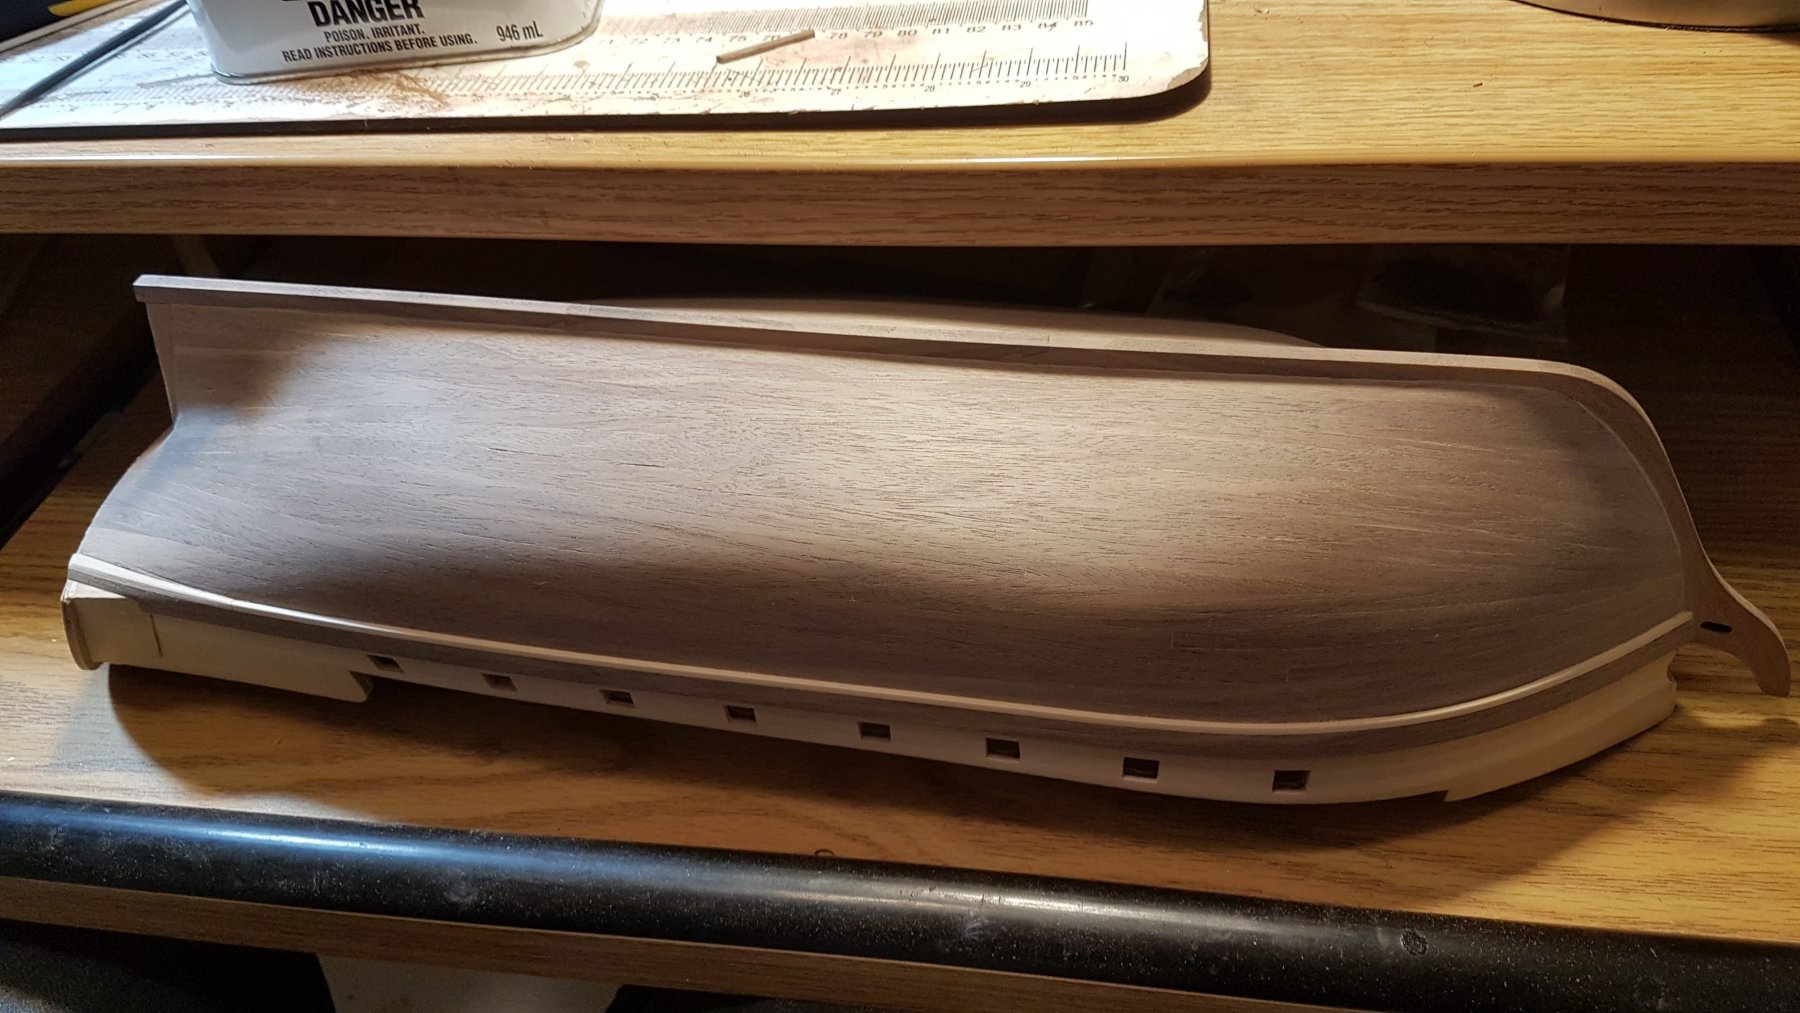
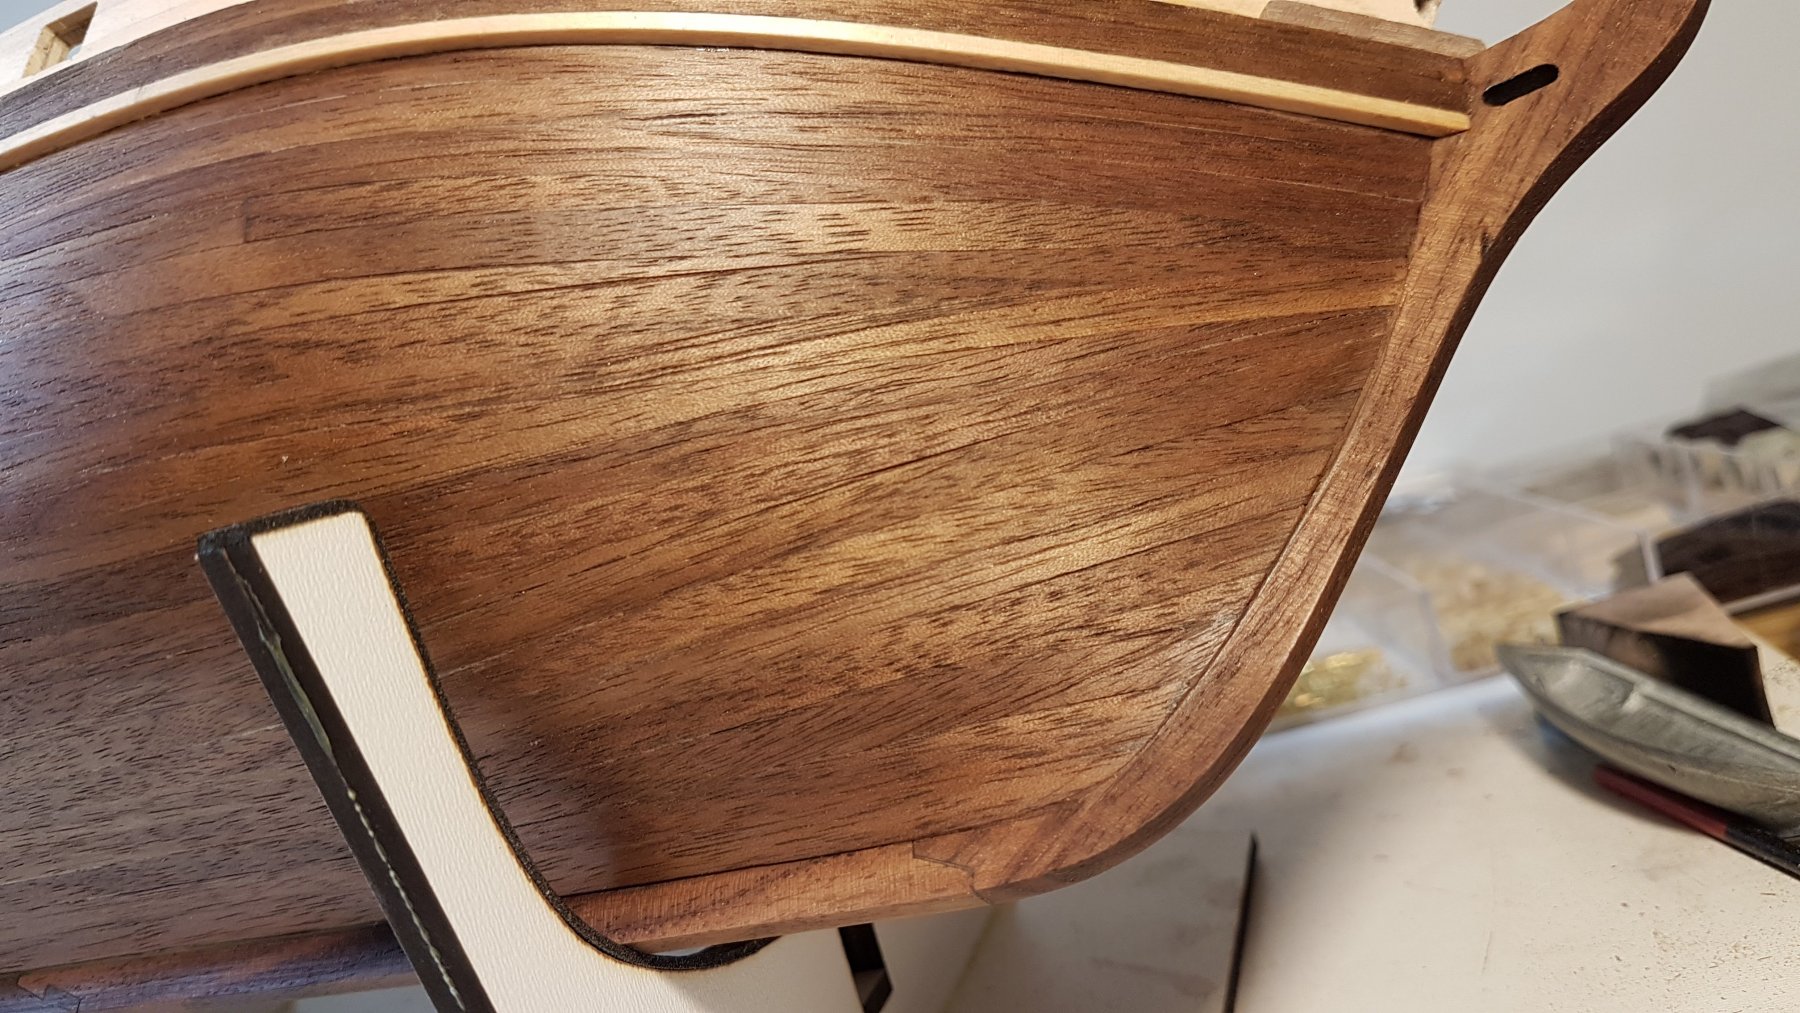
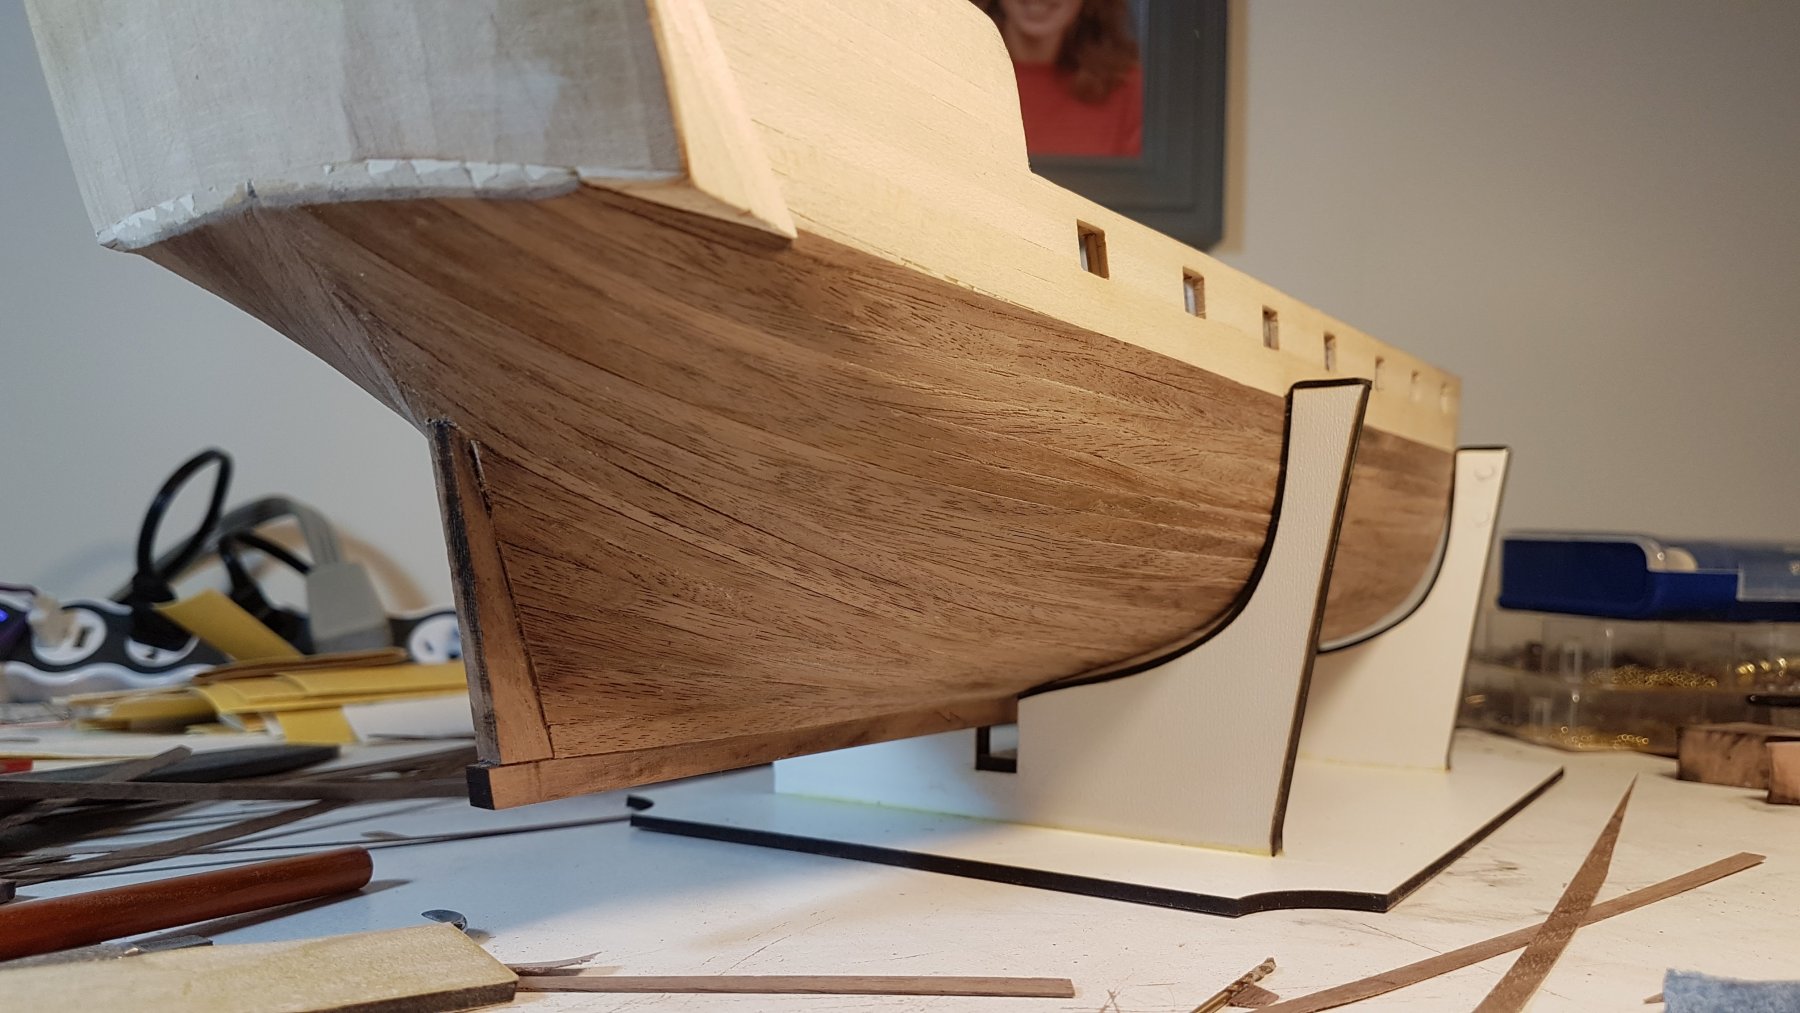
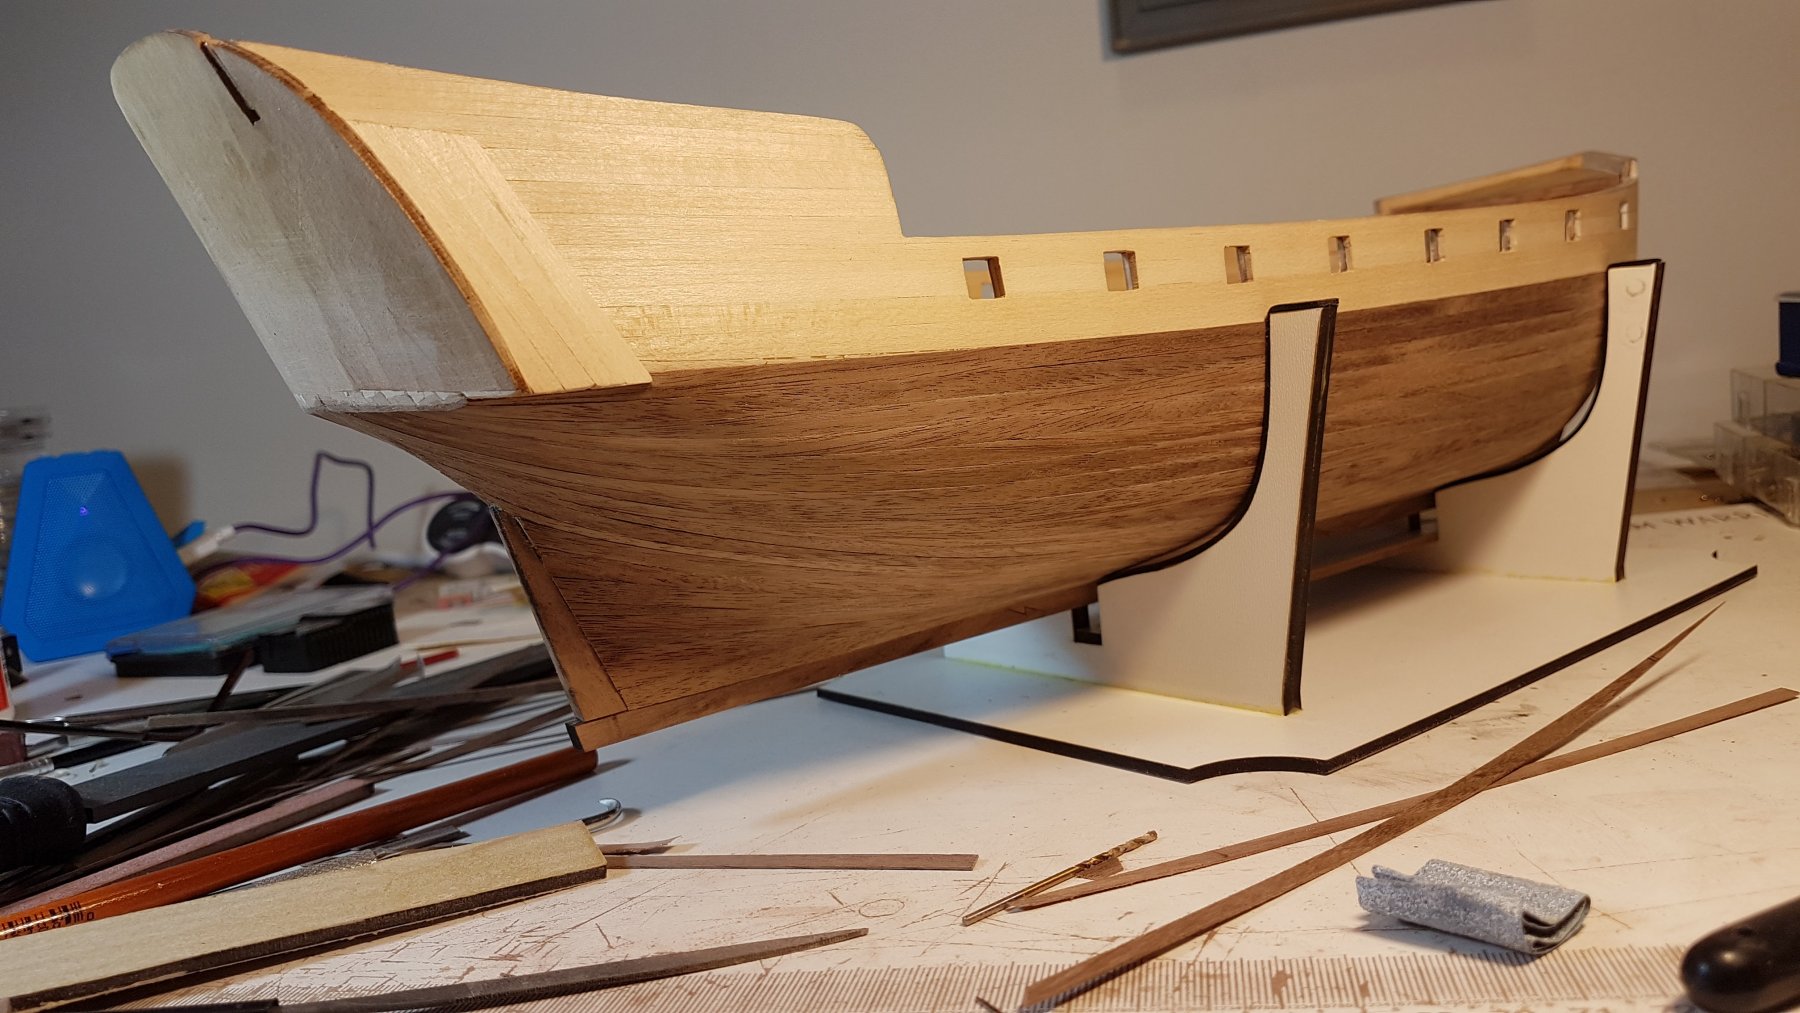
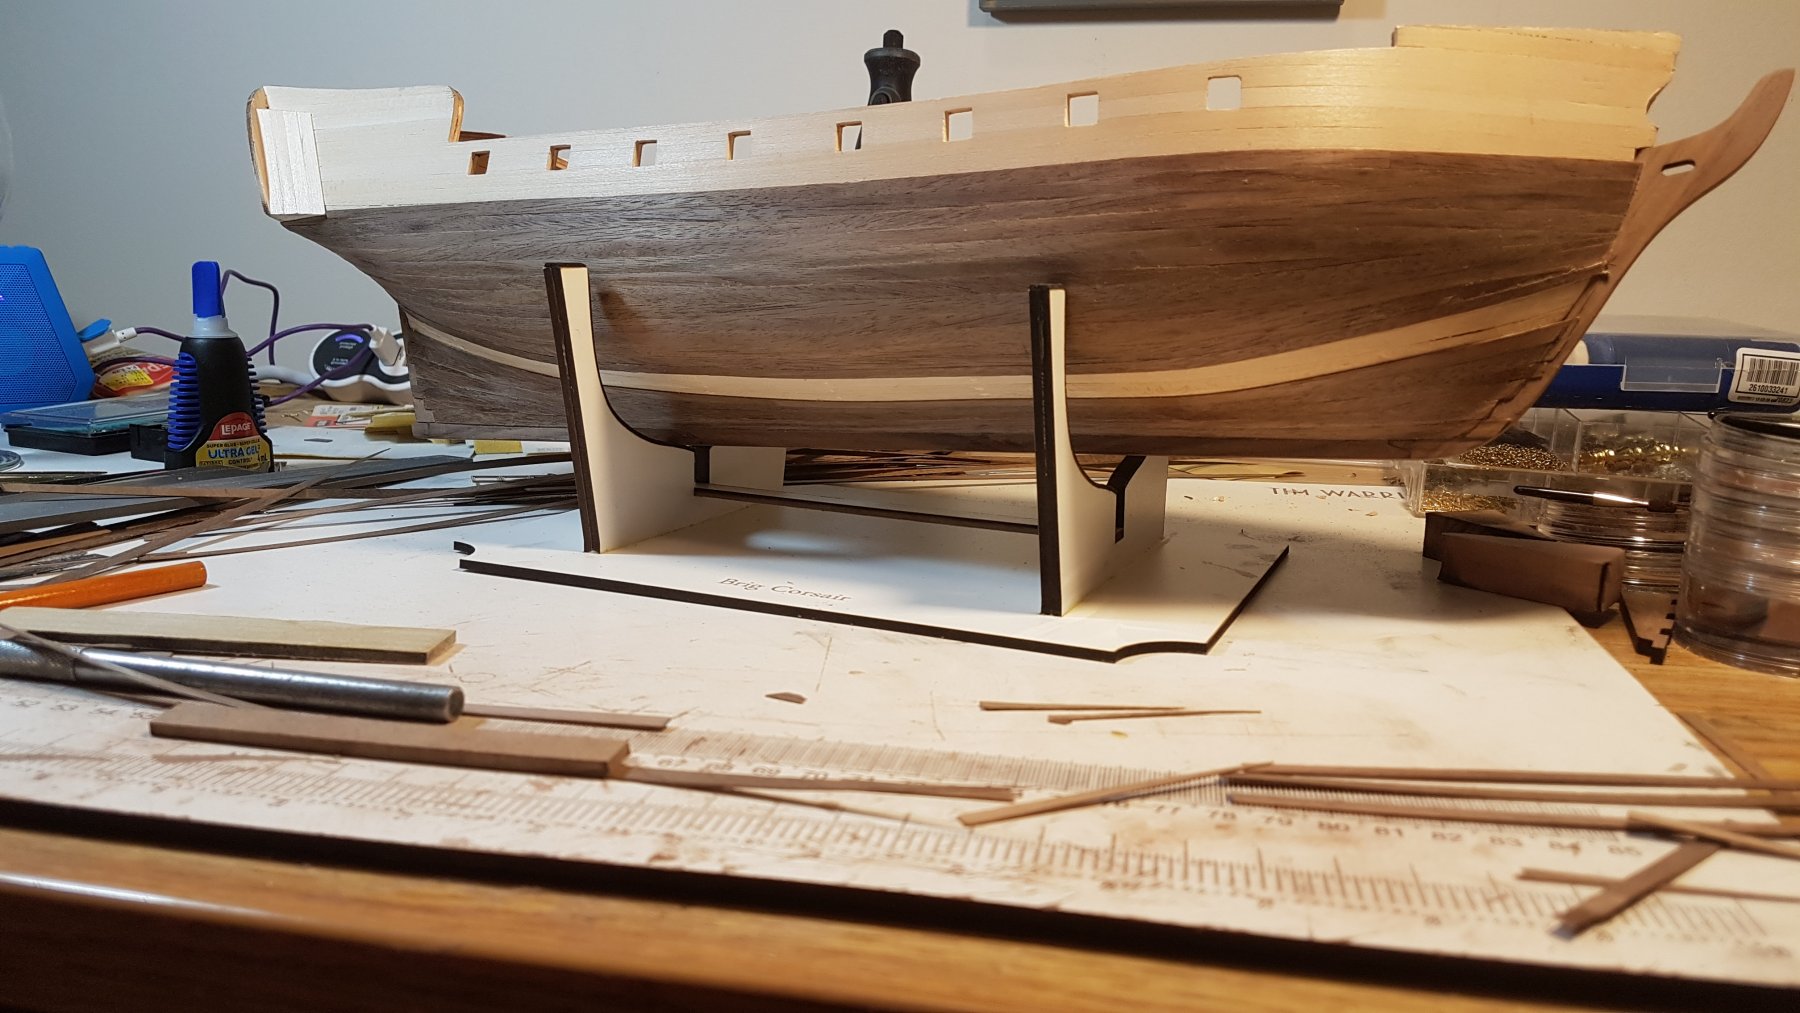
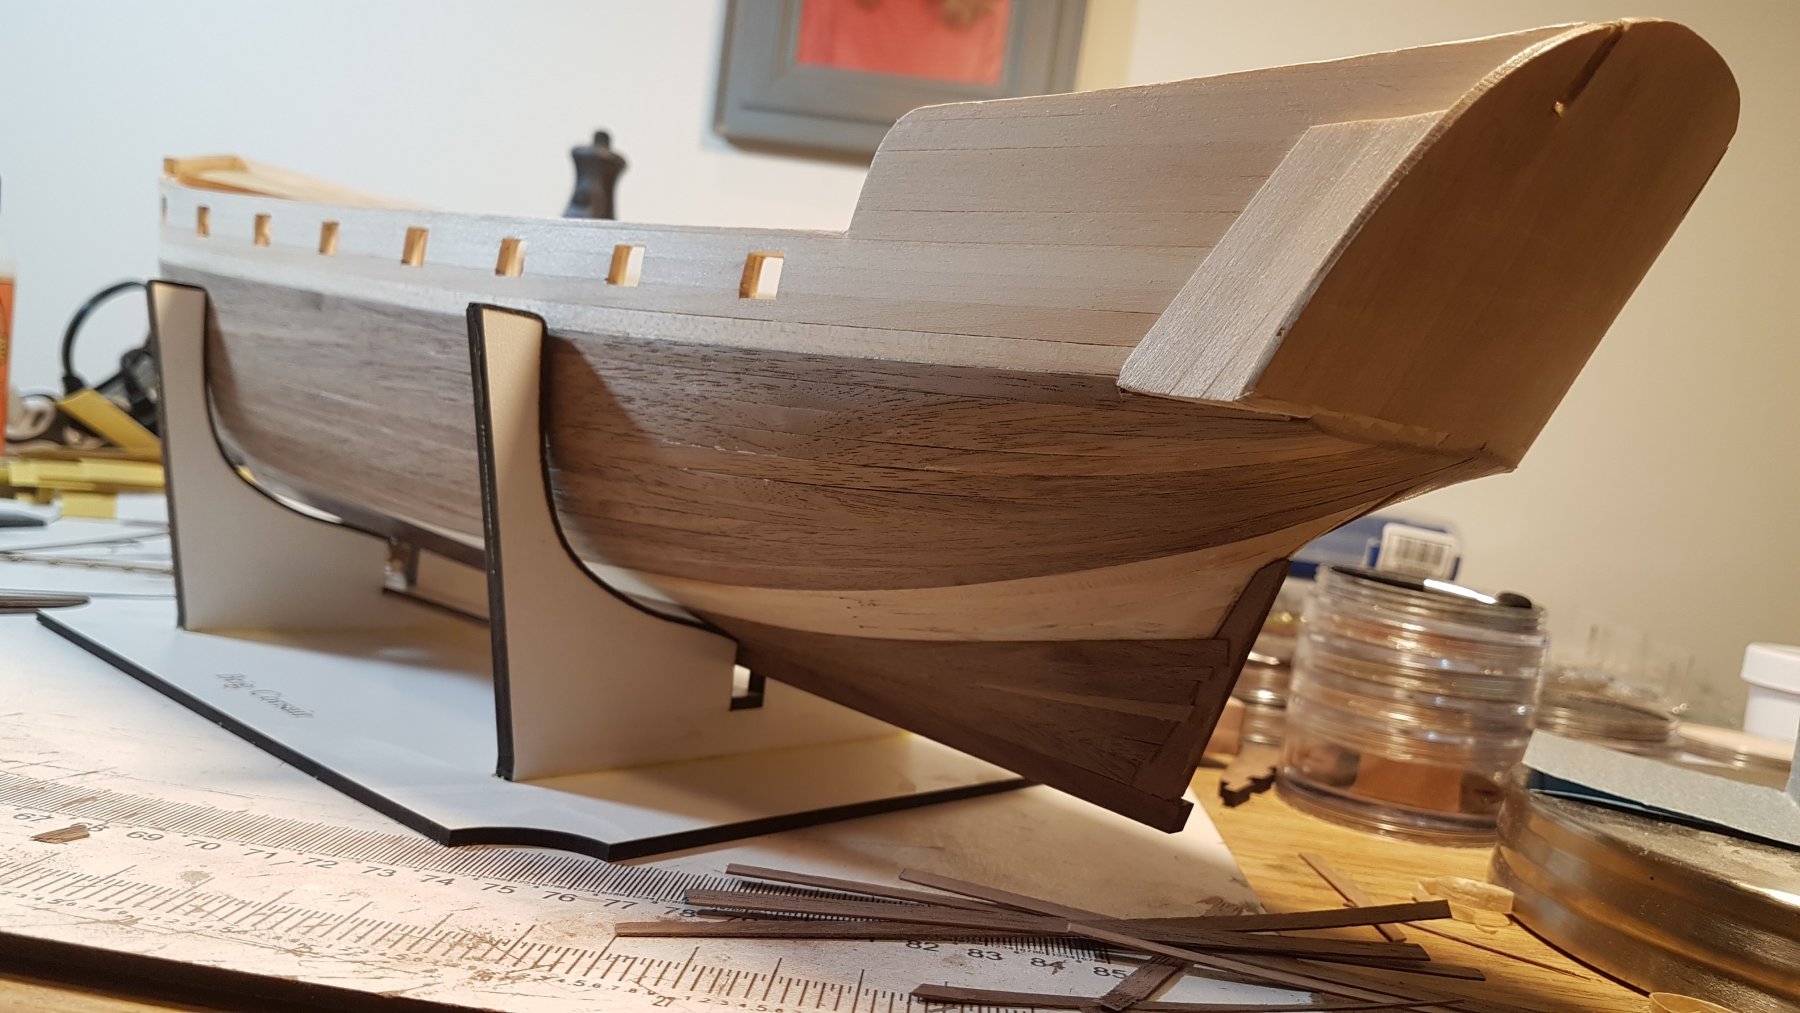
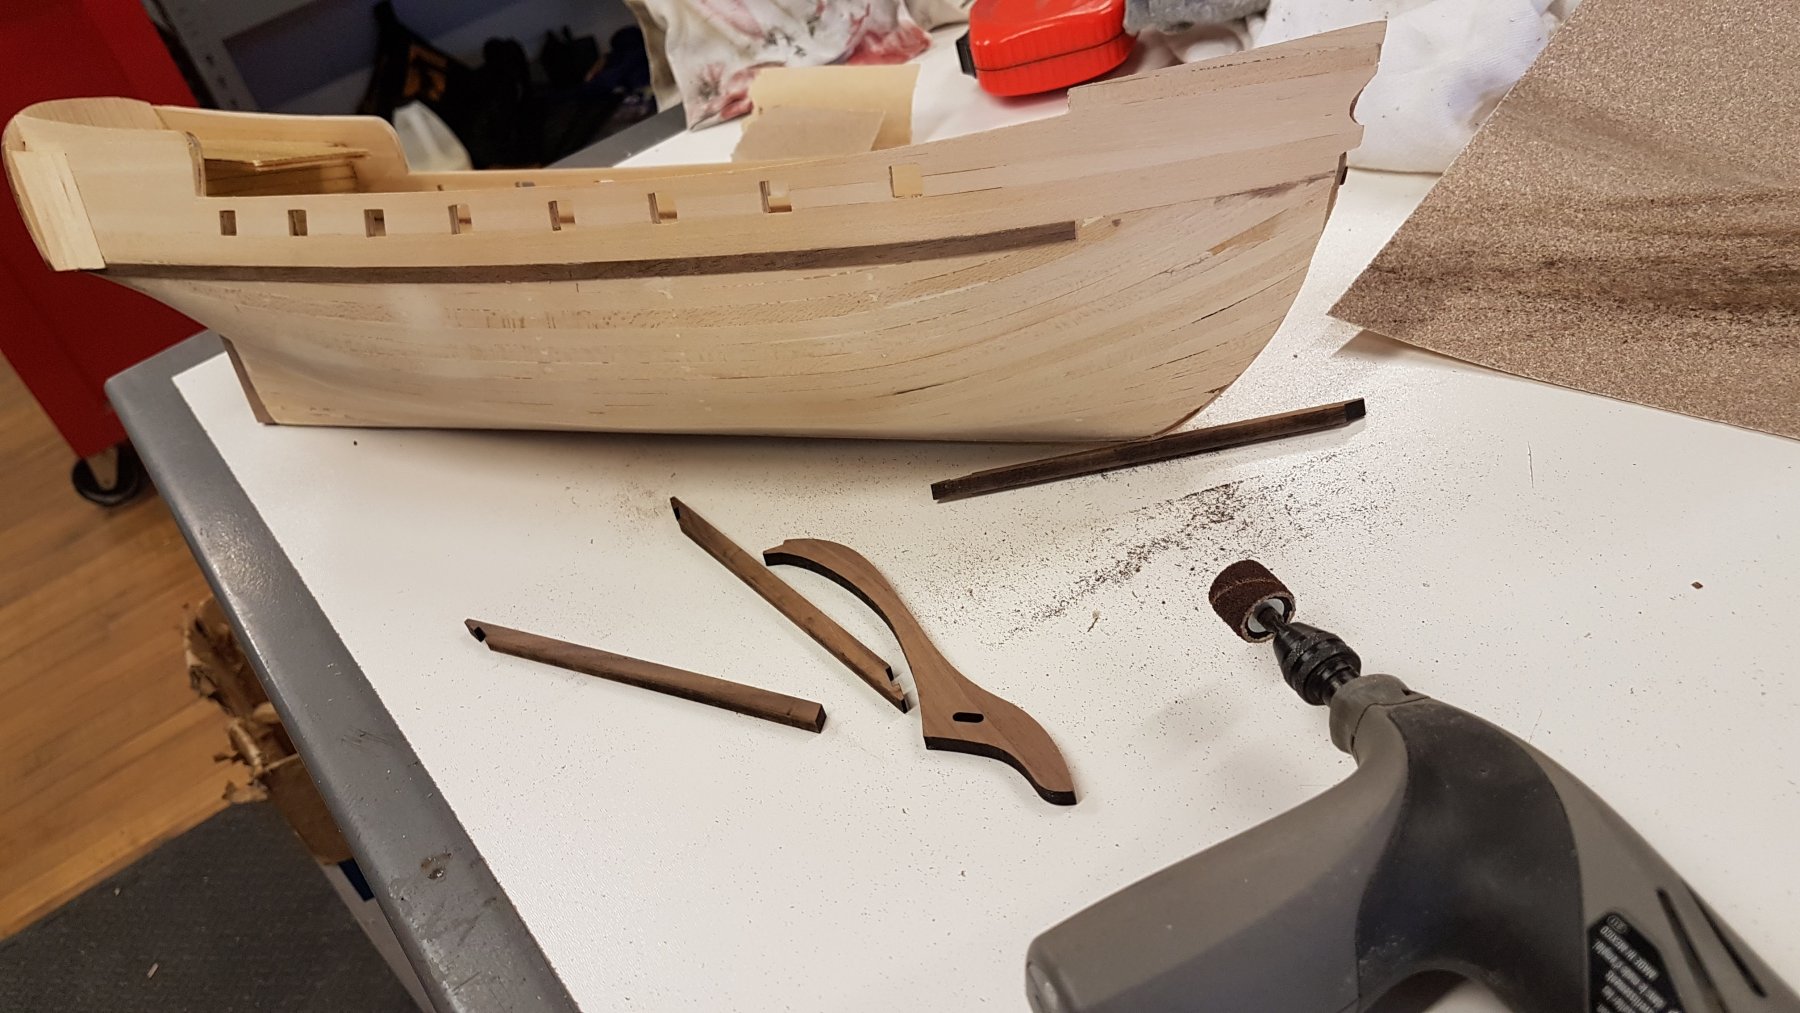
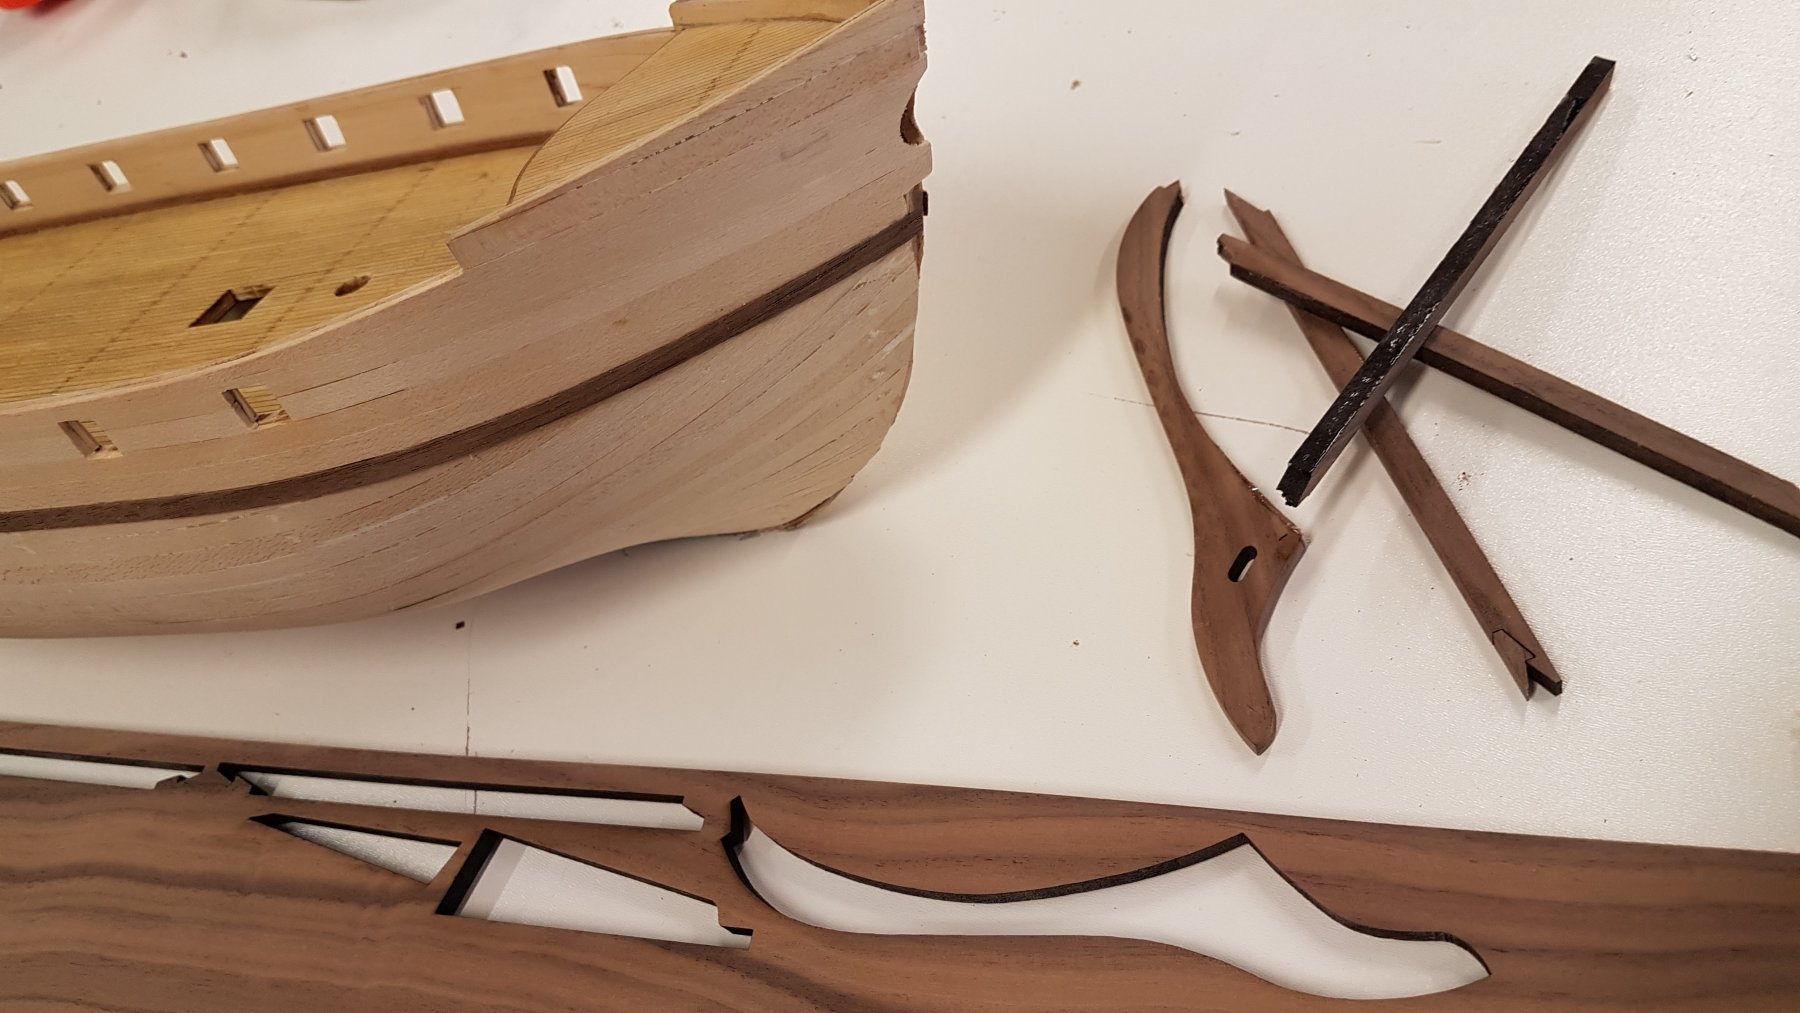
Hi, Lots accomplished since my last post! Hull completed and most of the trim added... Final sanding complete. A quick coat of antique oil really makes the black walnut planking look great! Fitting this around the stern was a bit of a challenge, but got it after a few tries. Most of the hull trim added and rubbed down with antique oil. I made up some laser cut frames to go around the gunports, looks a bit better then just the planking and hides a few bad cuts. Starting to come together! Placed the cannons on the deck to get a feel for what it will look like.


-
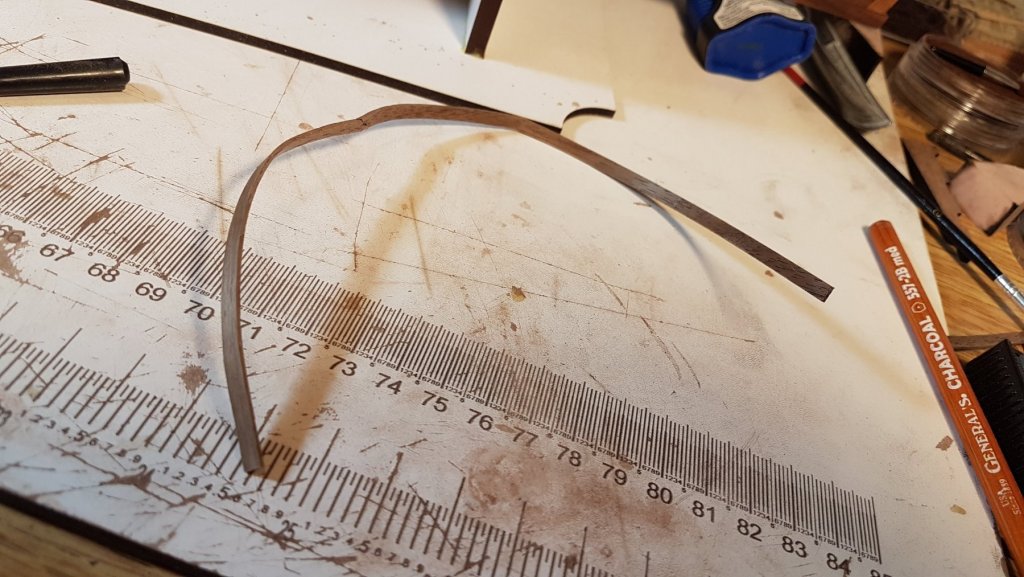
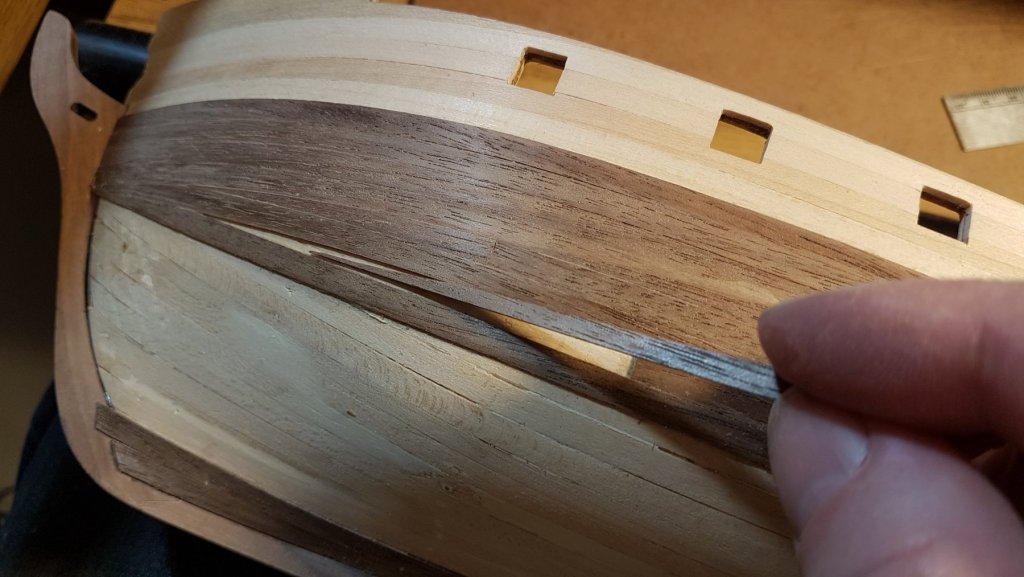
A bit more progress tonight. Hard to believe fitting these few boards took an entire evening!

-
T_Warris reacted to a post in a topic:
Le Superbe by kedes1 - Mantua Model - 1:75
-
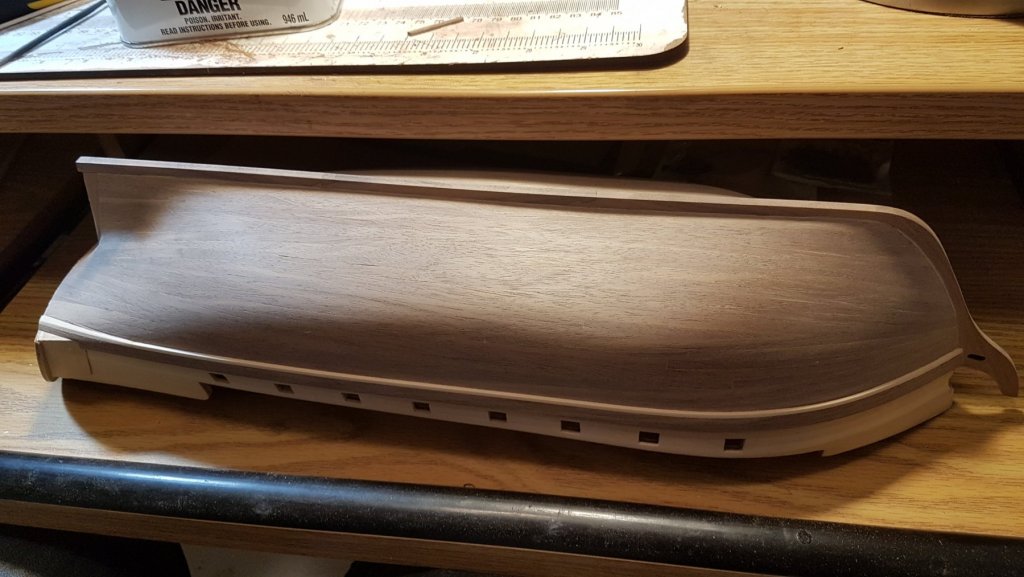
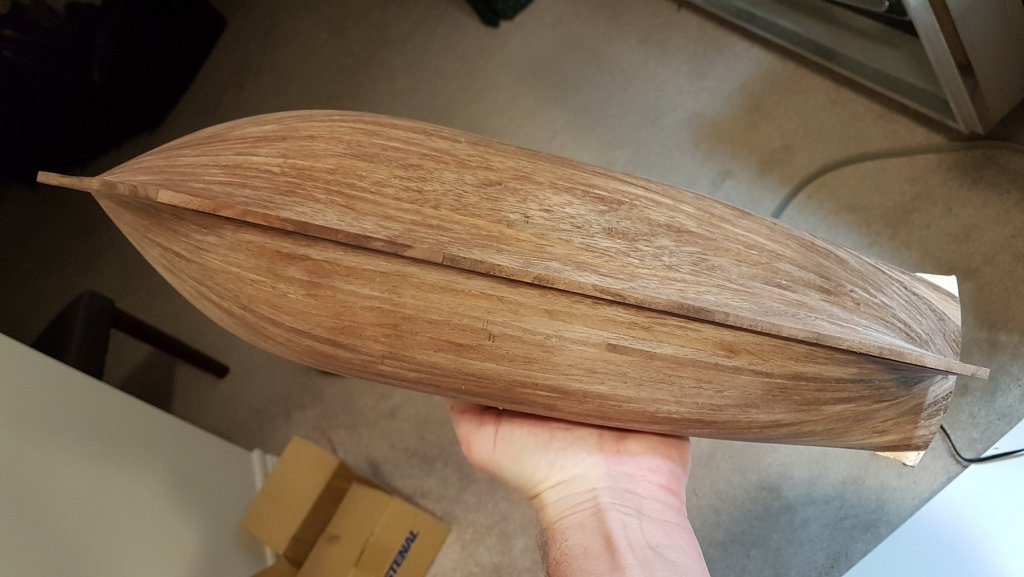
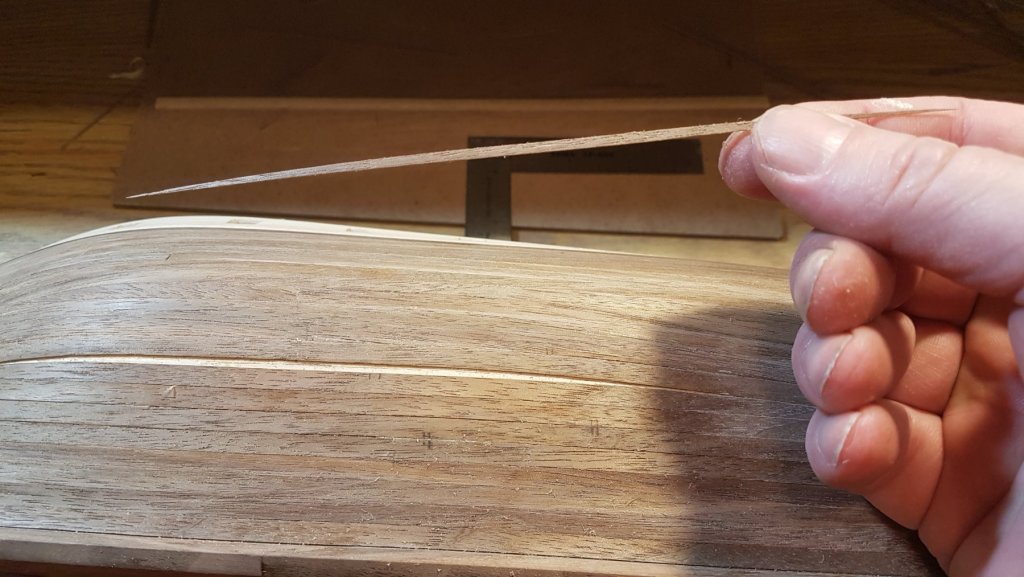
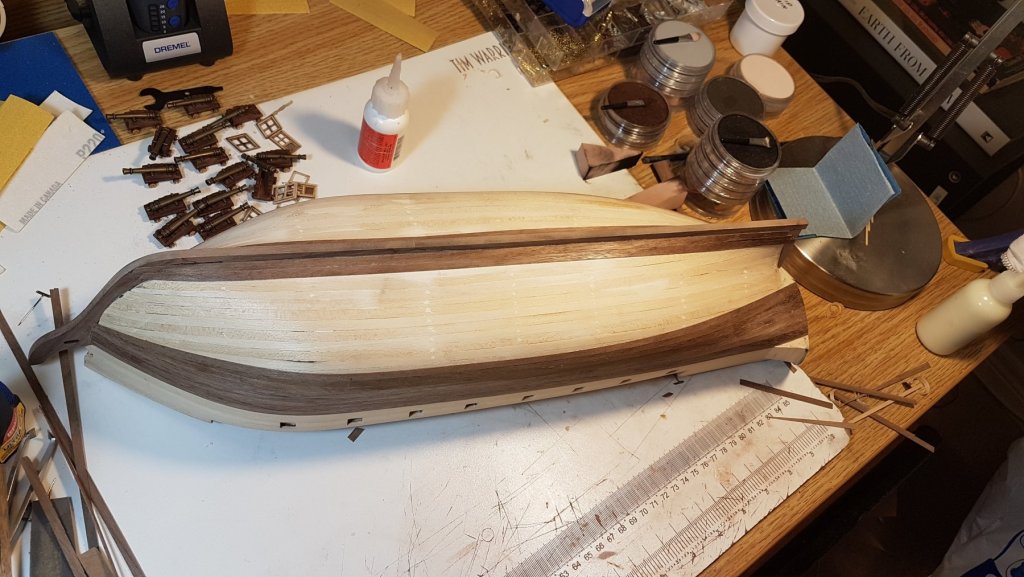
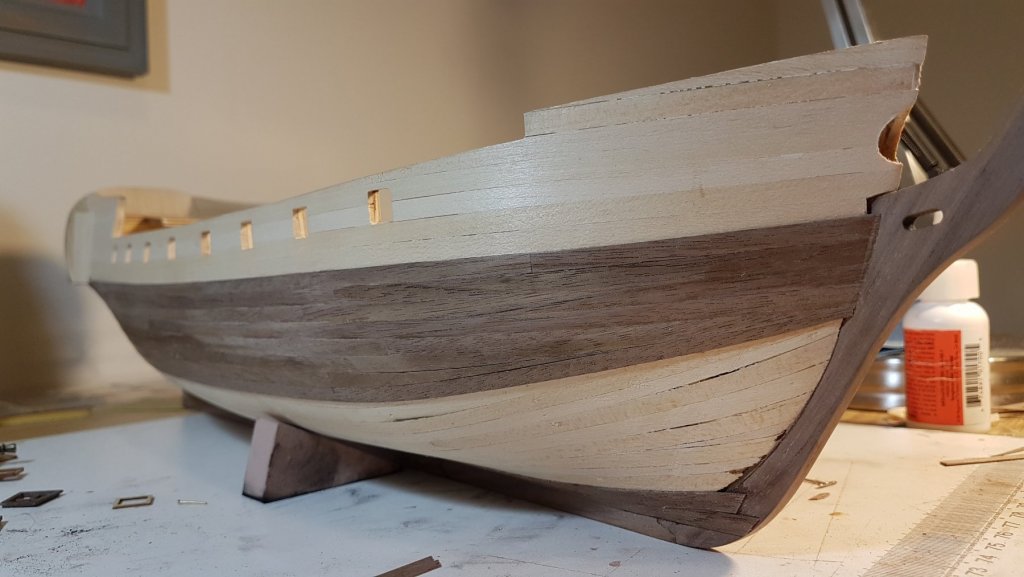
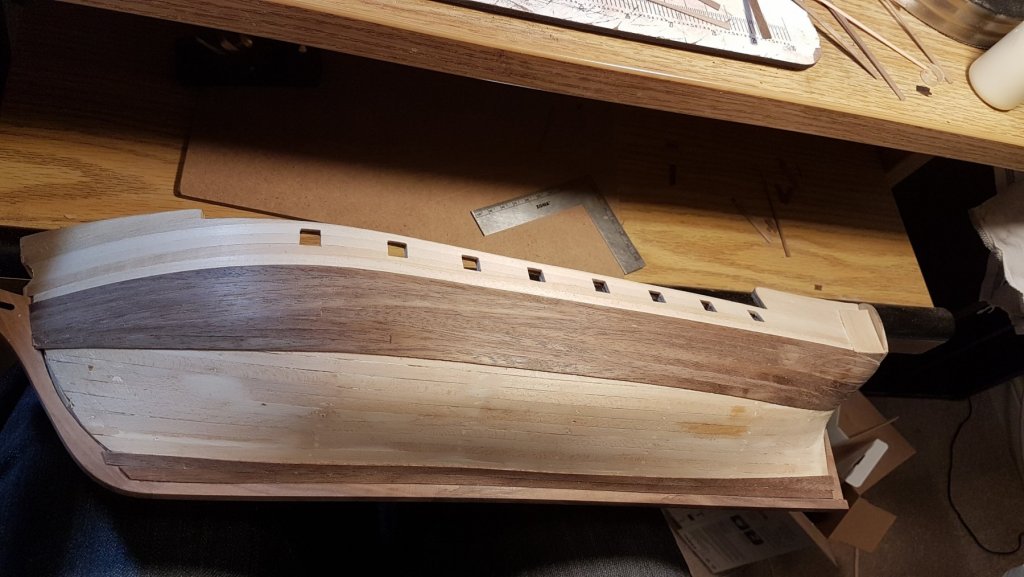
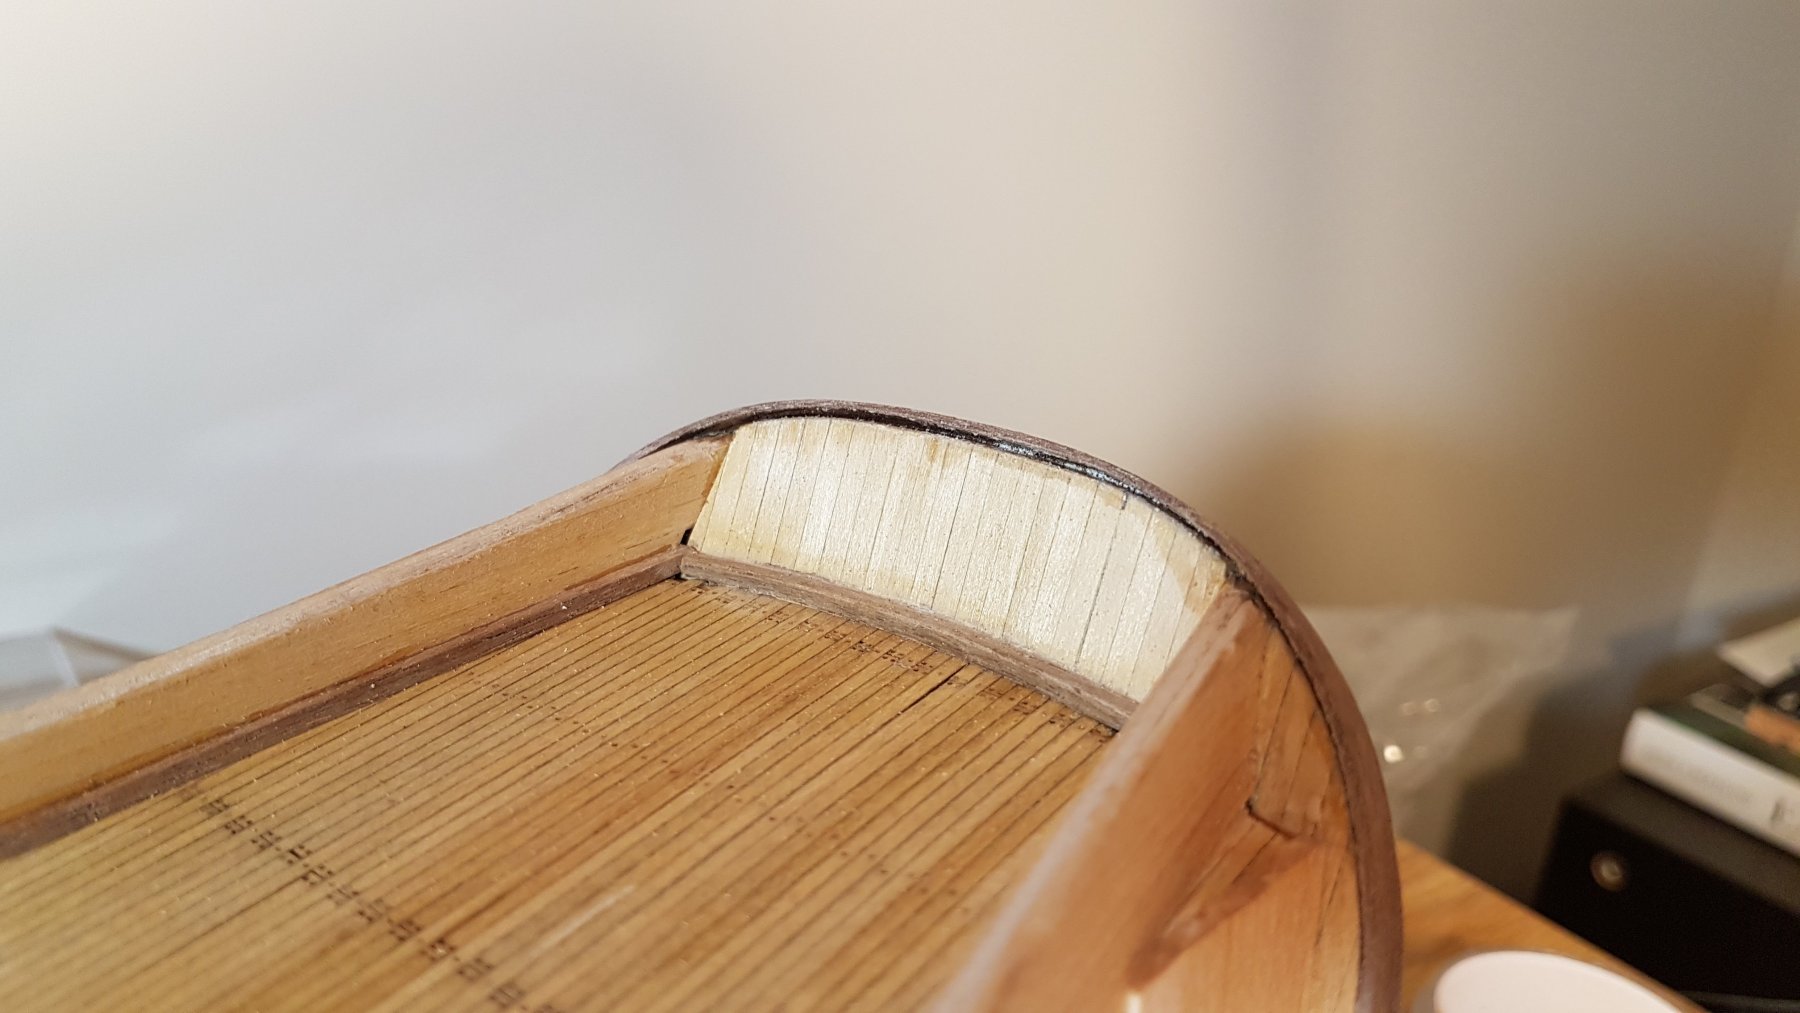
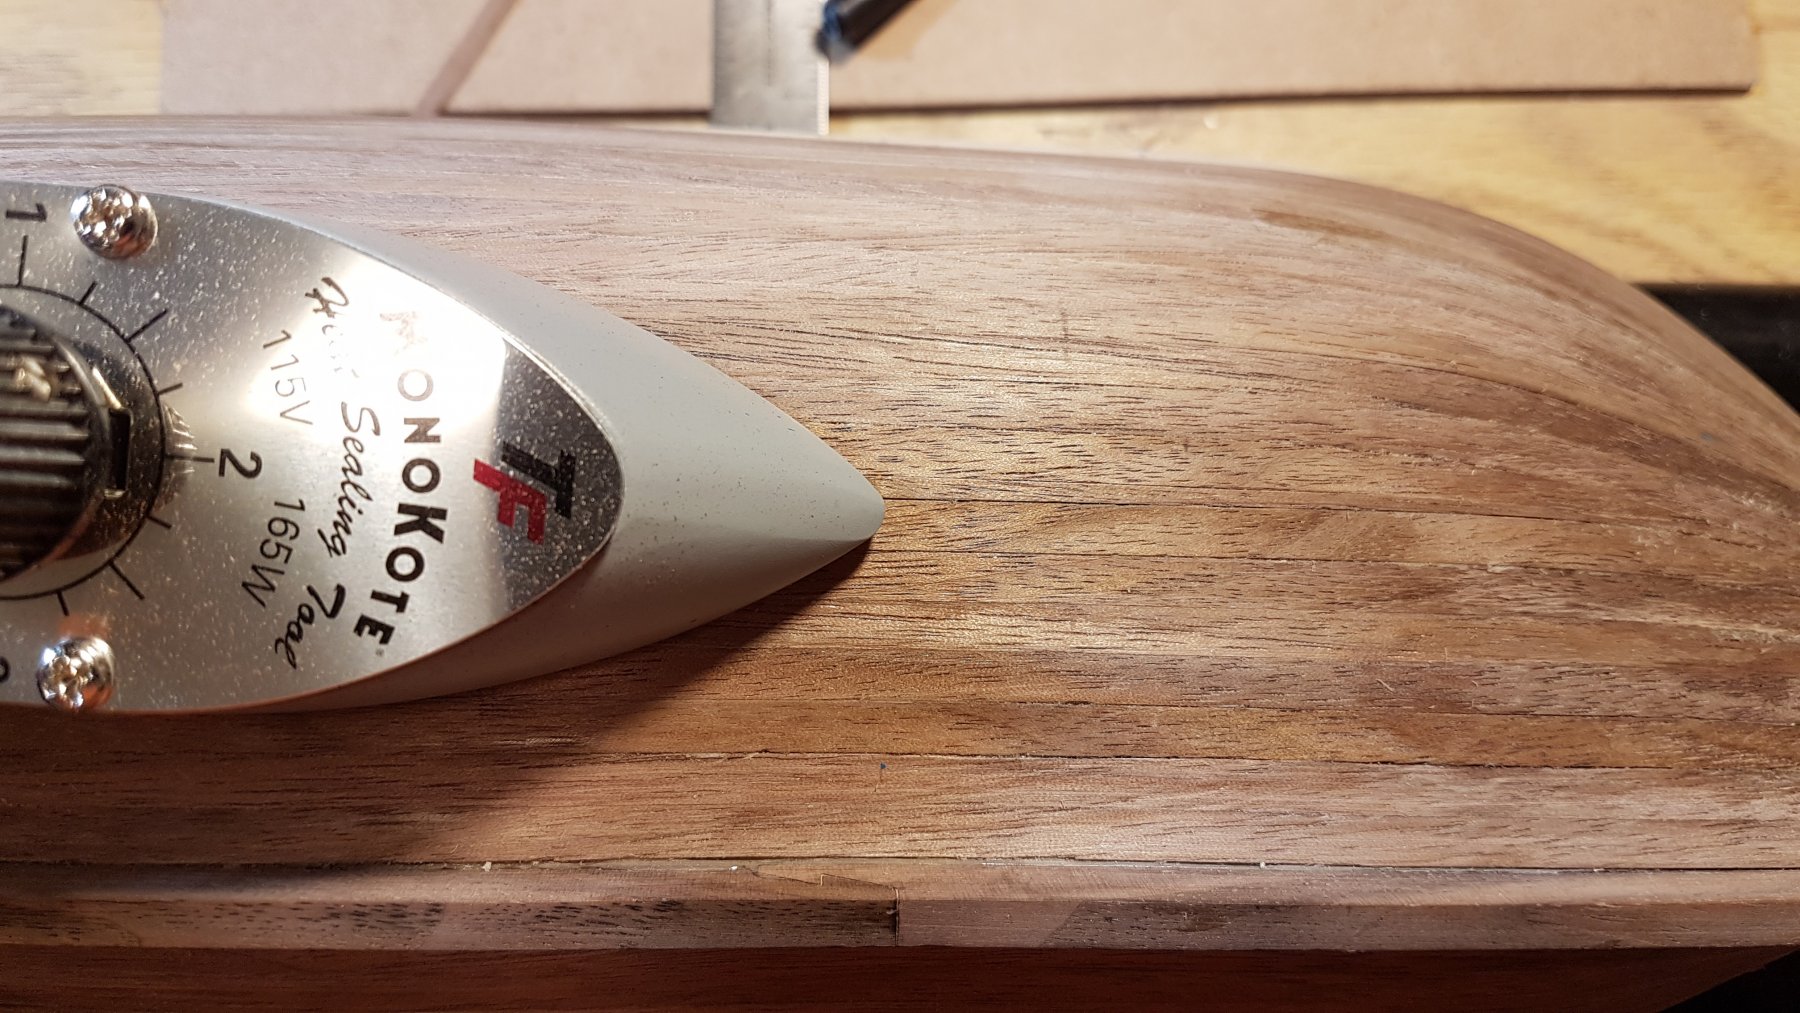
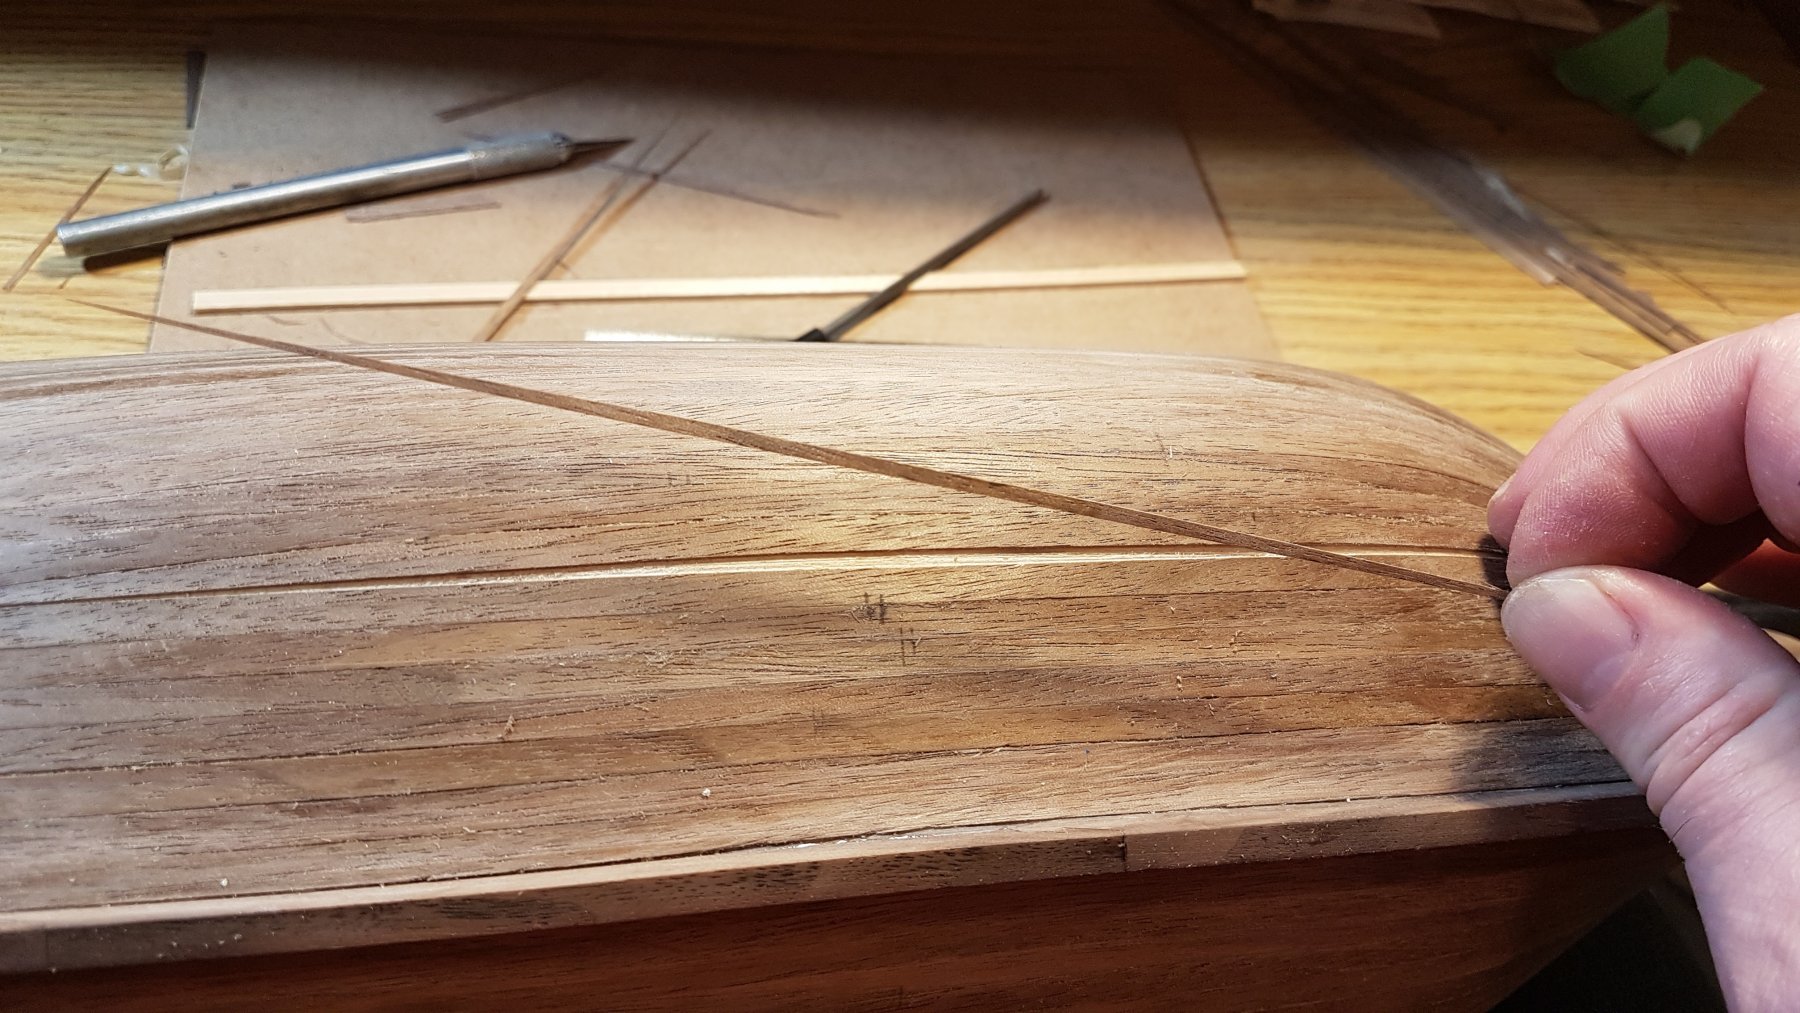
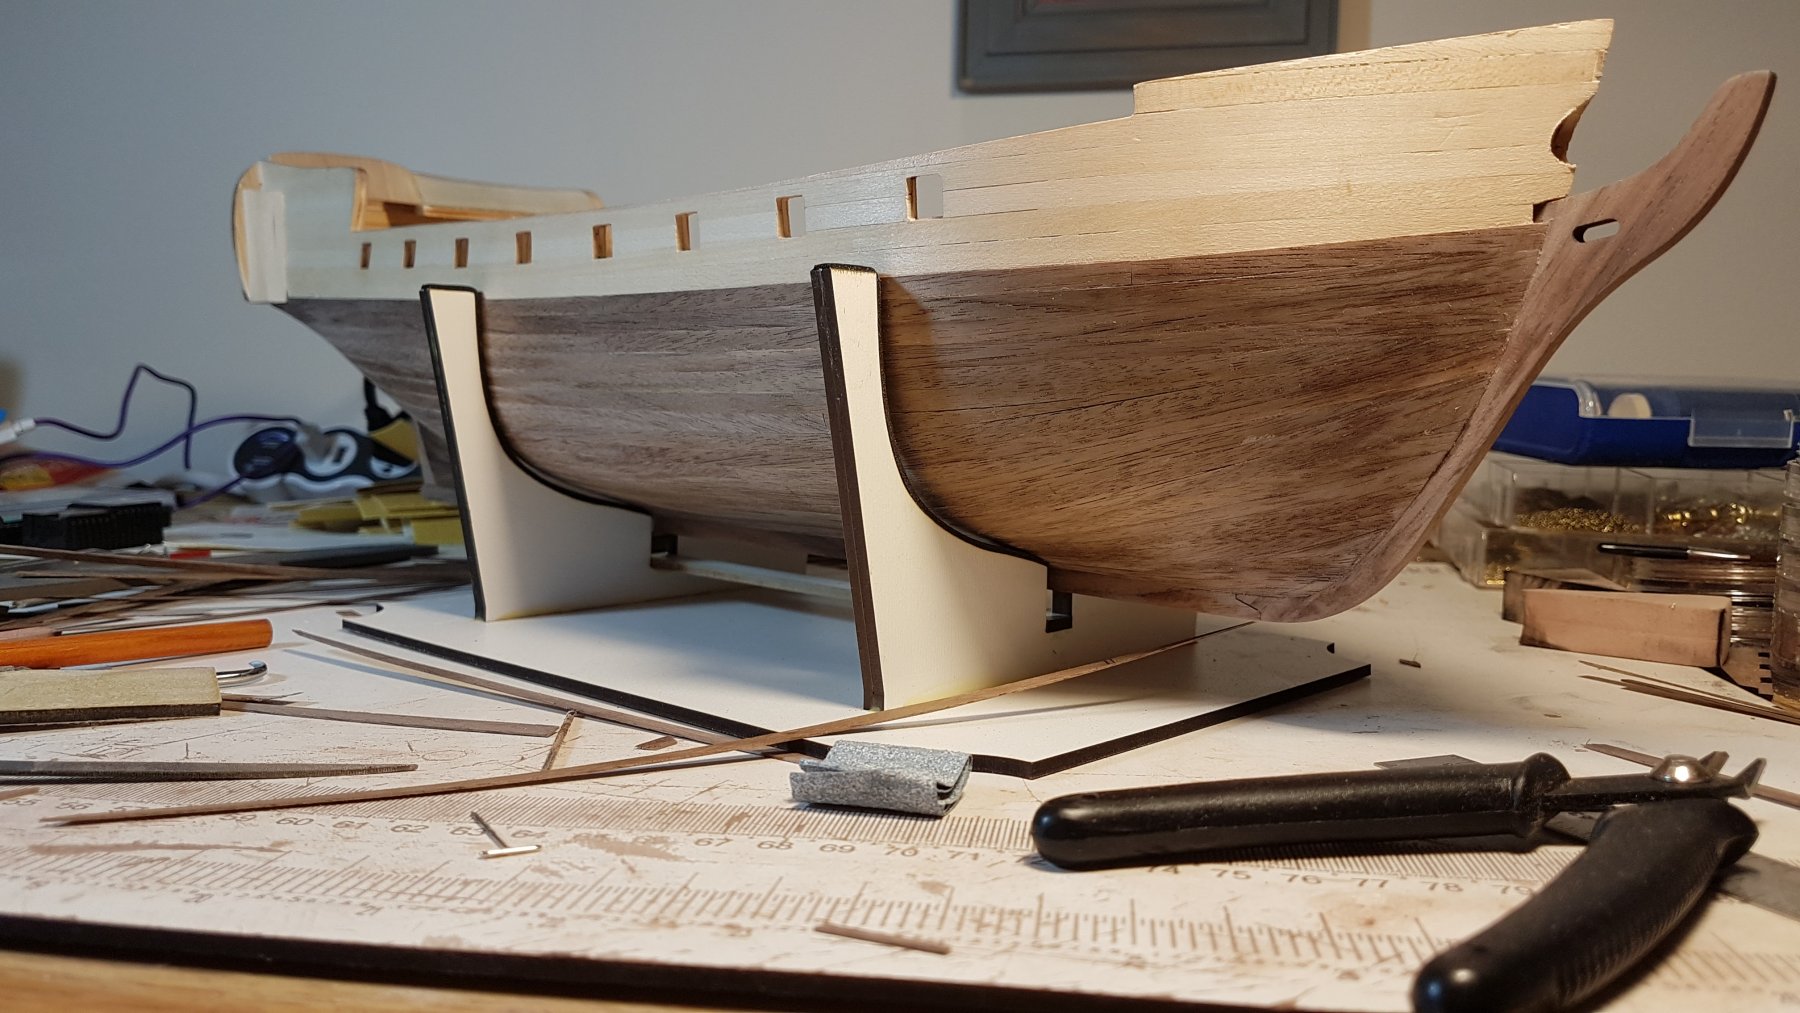
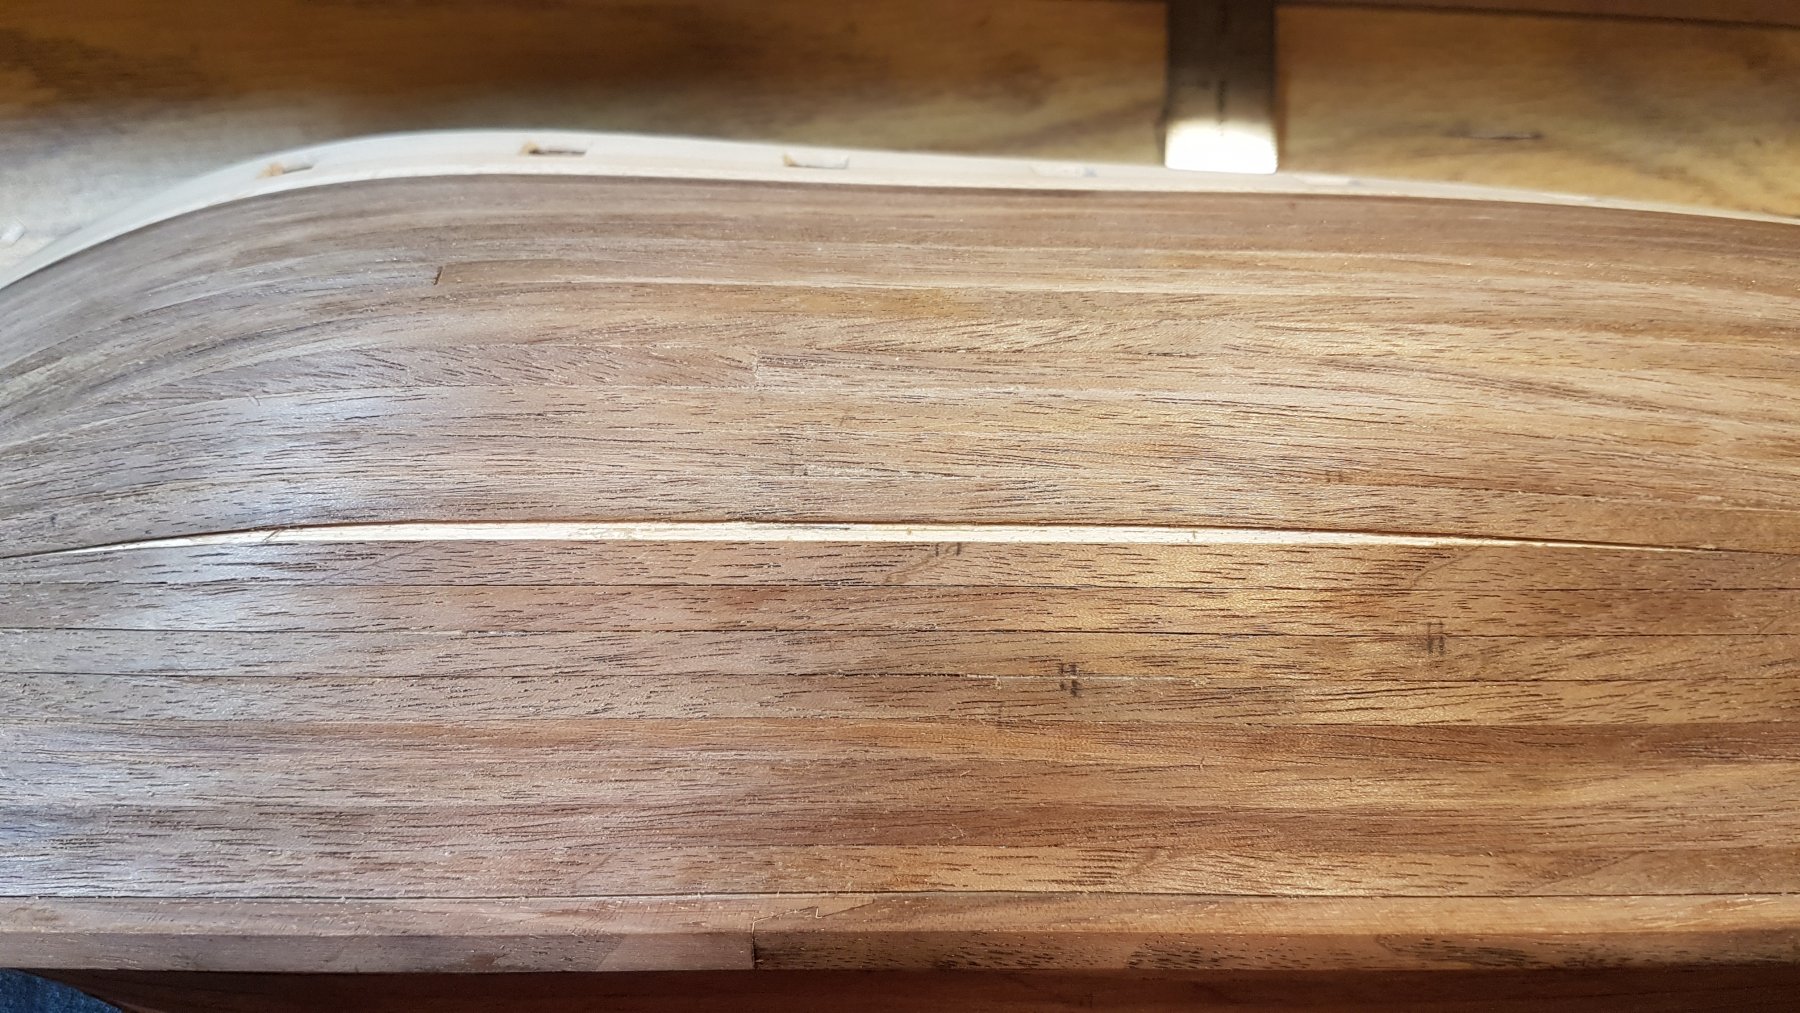
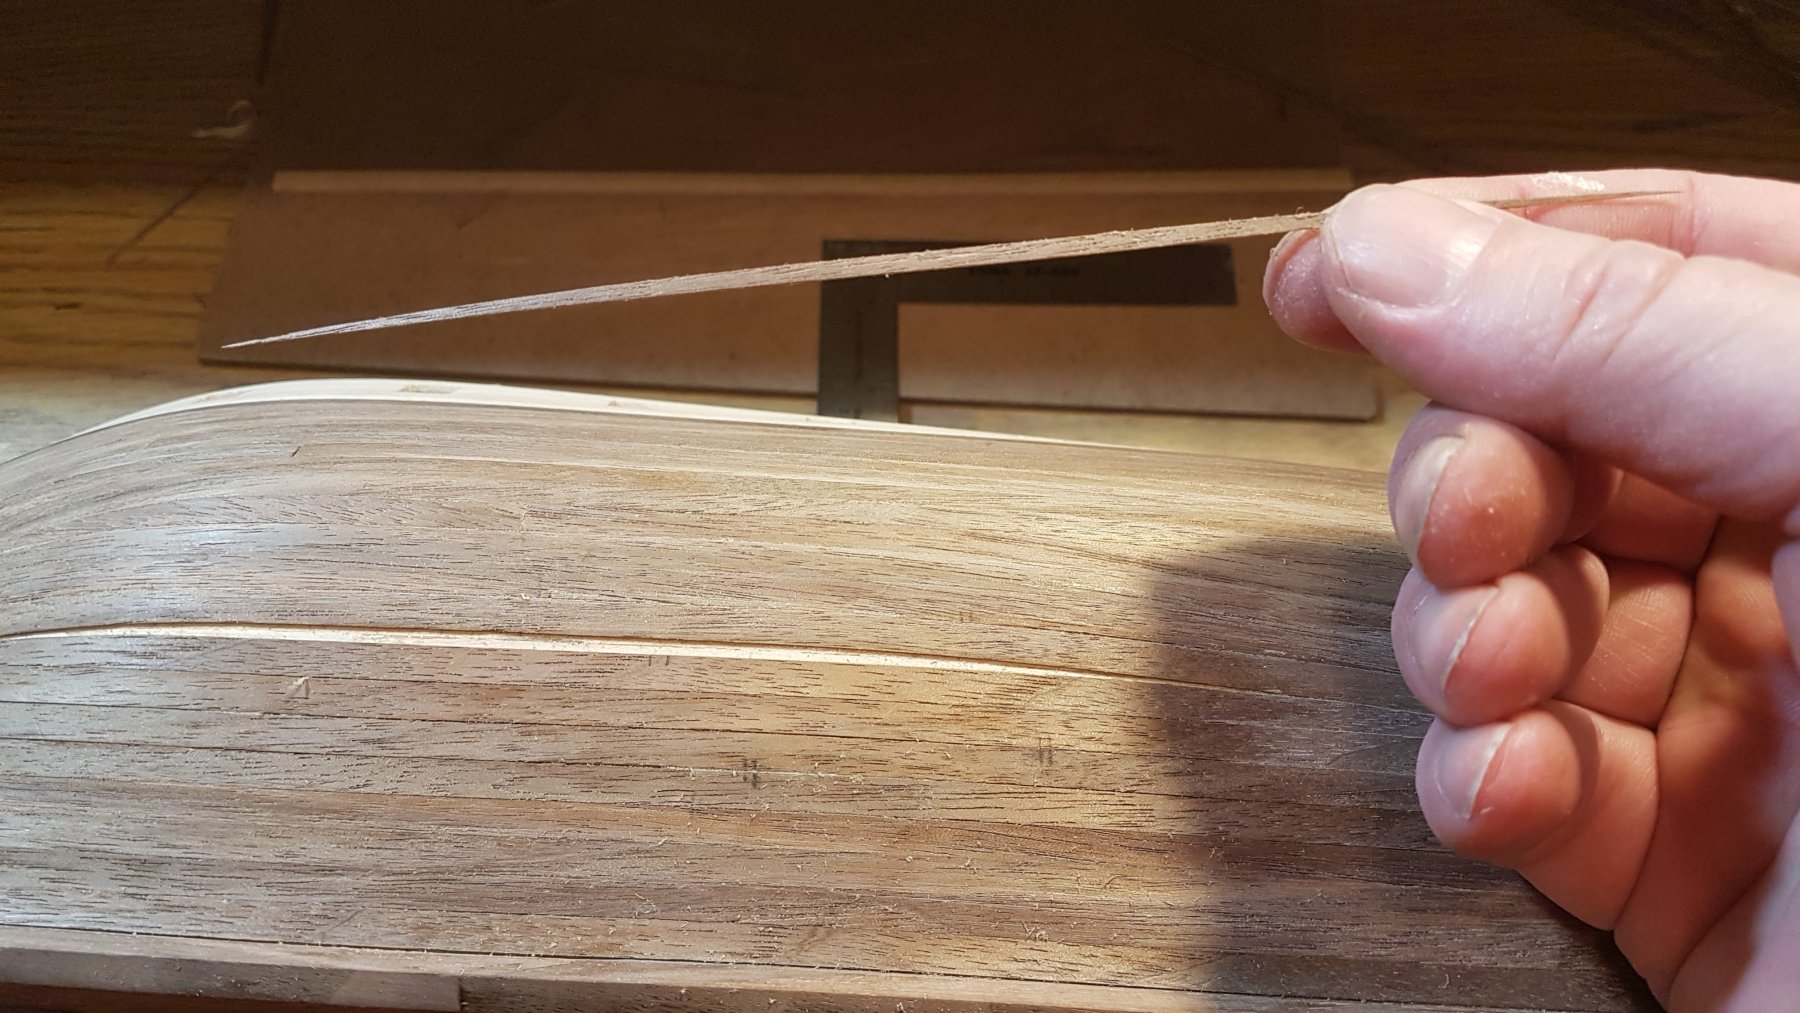
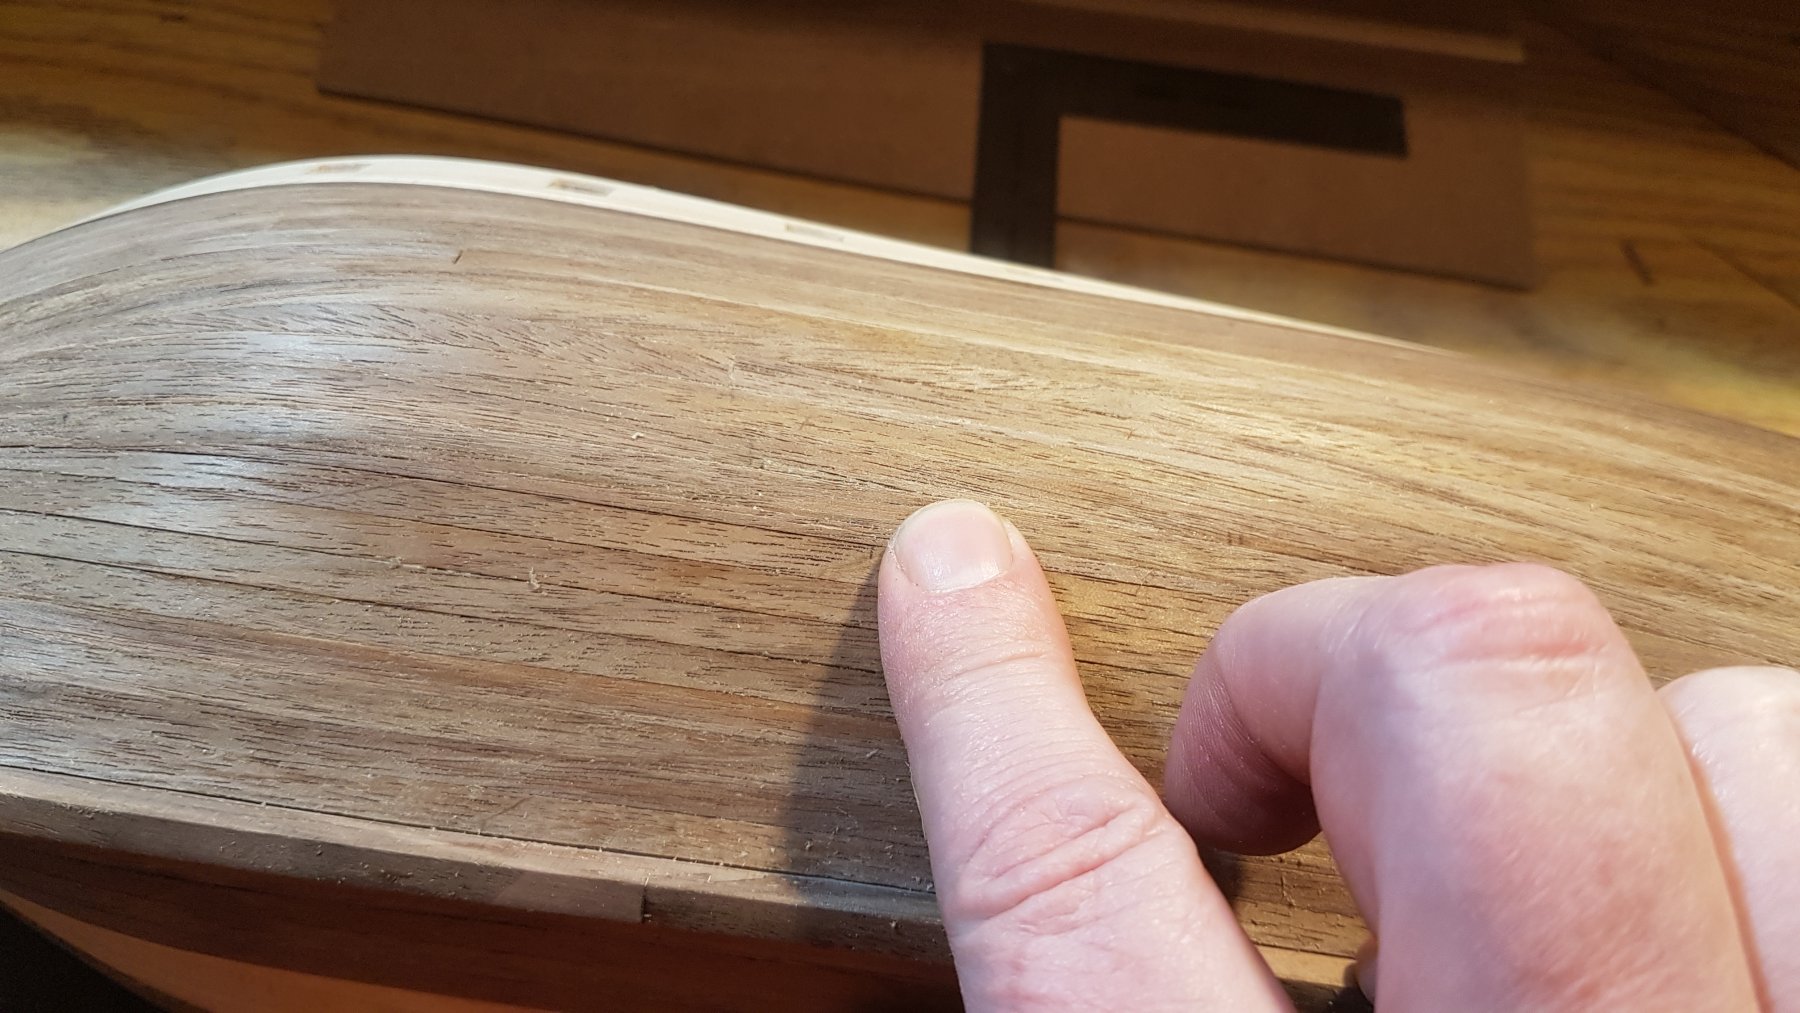
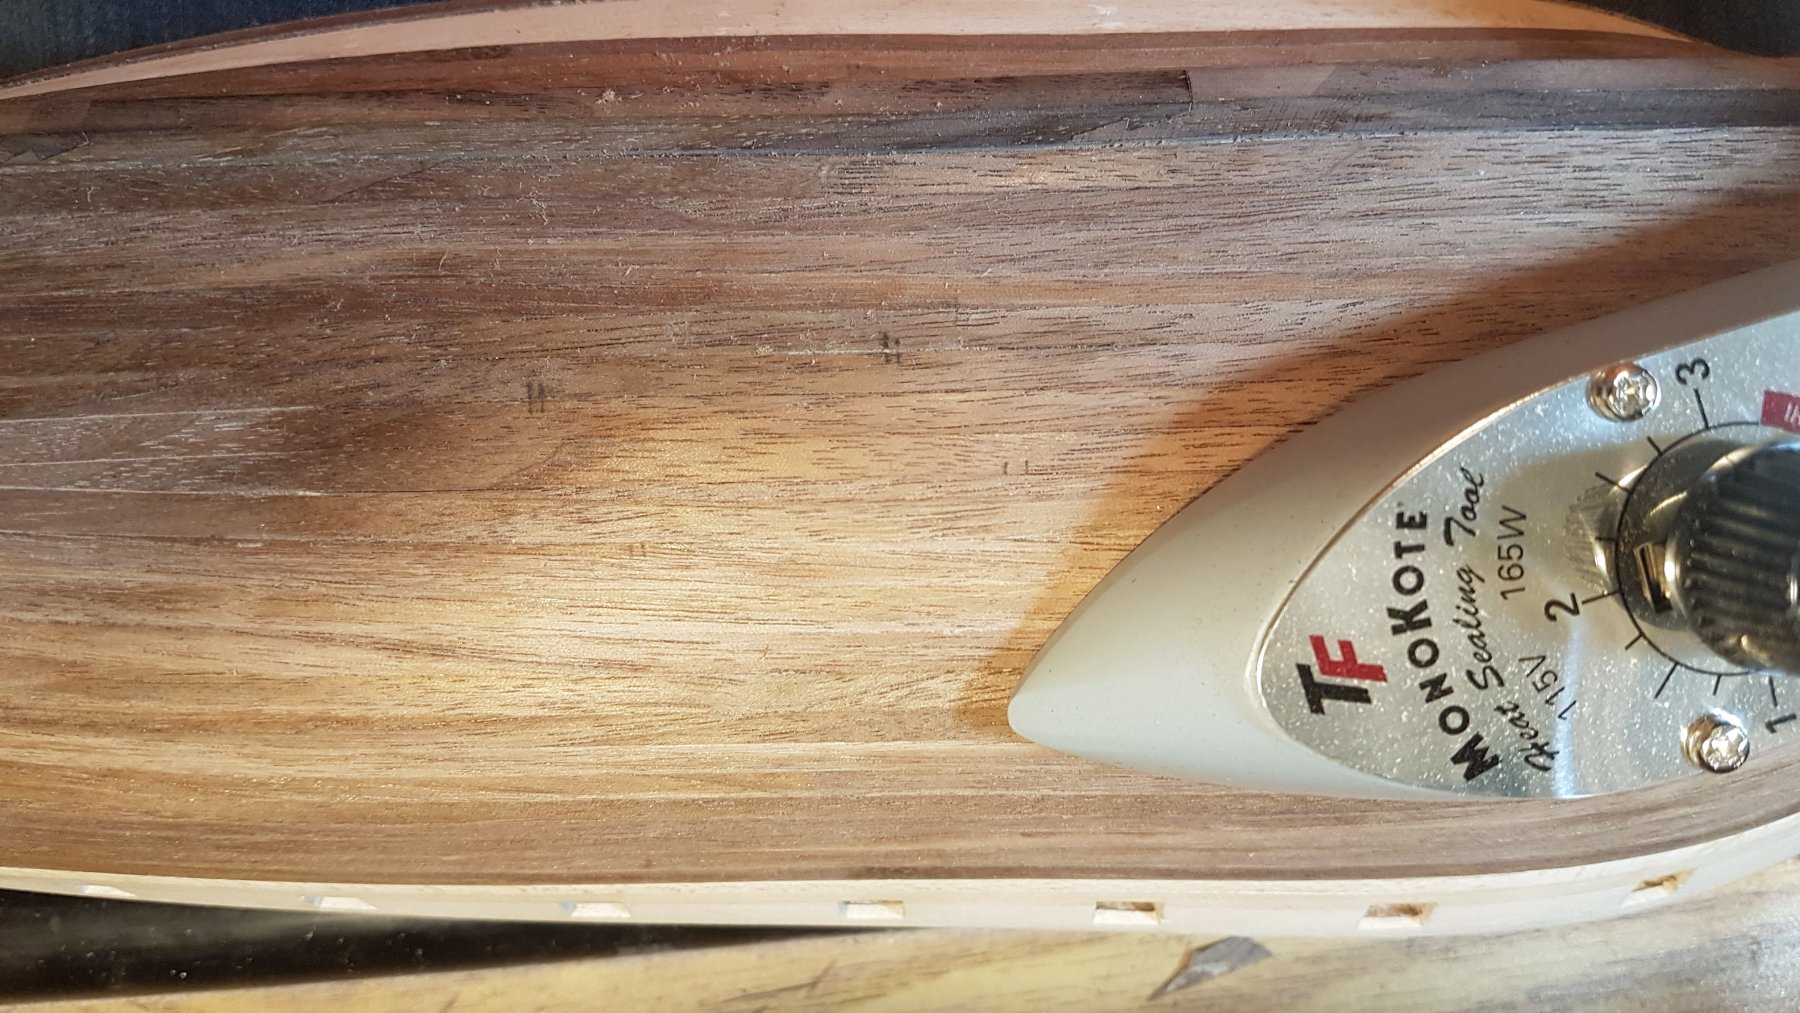
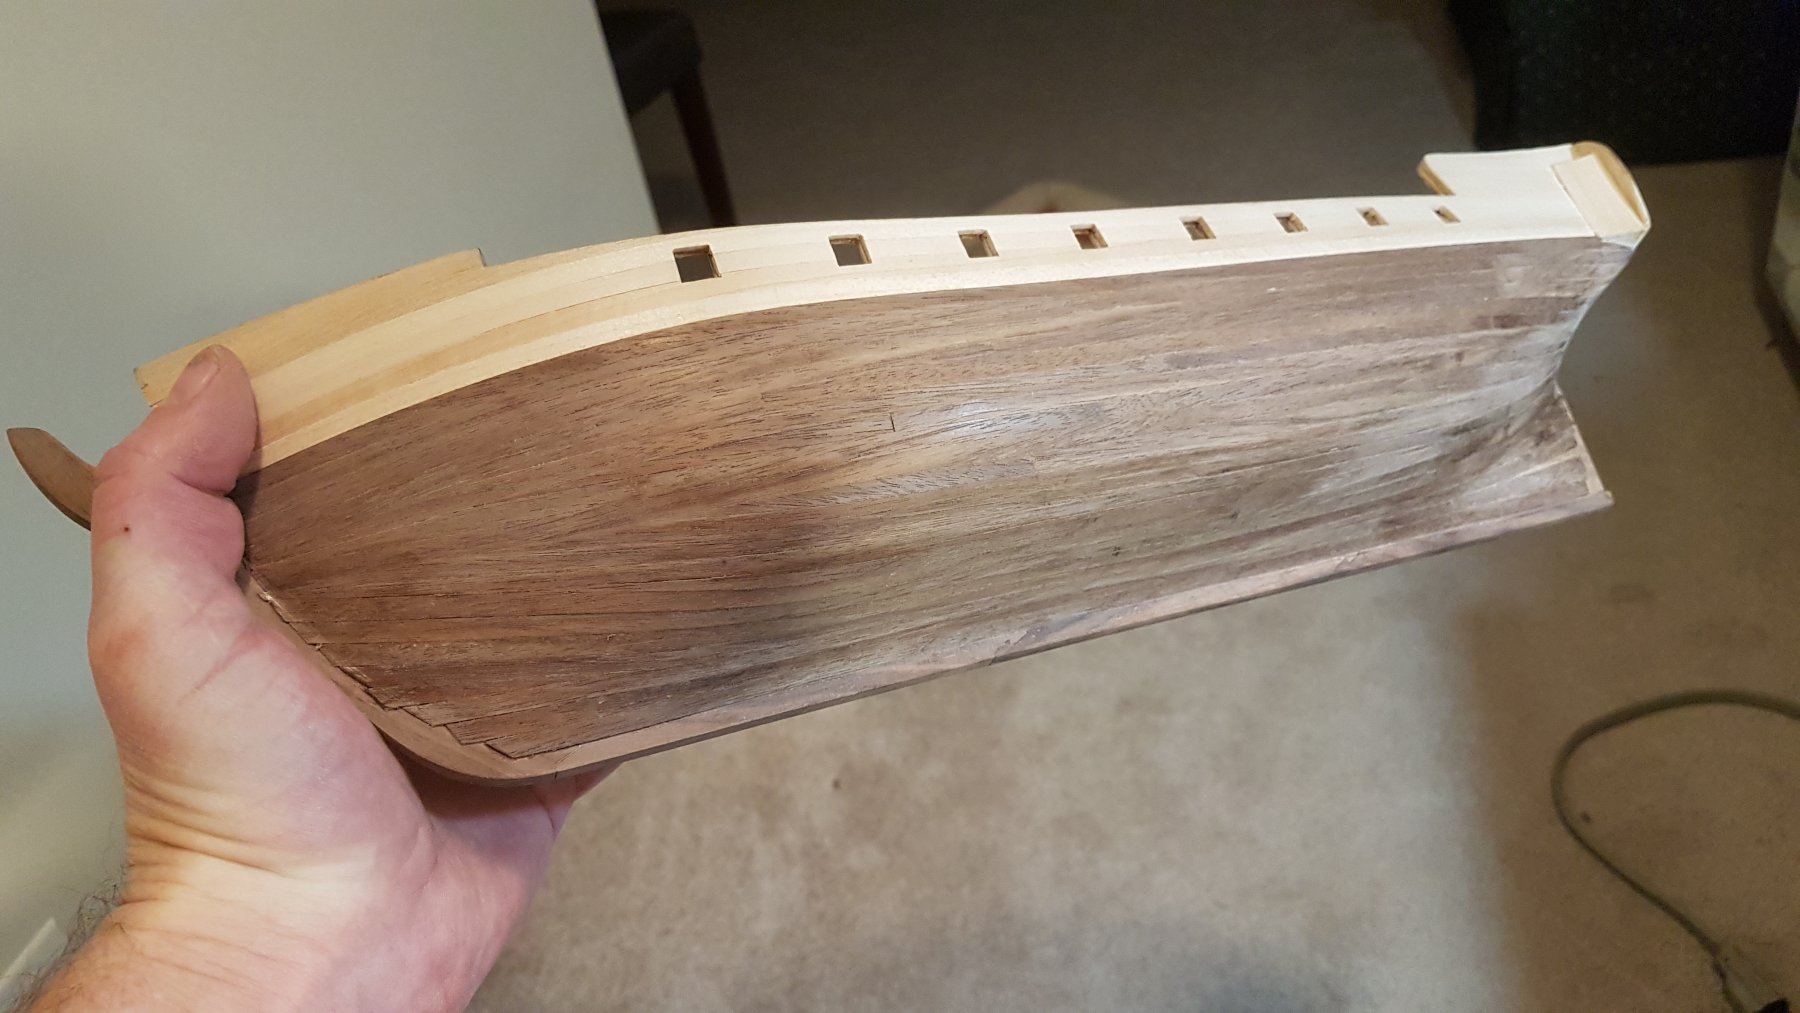
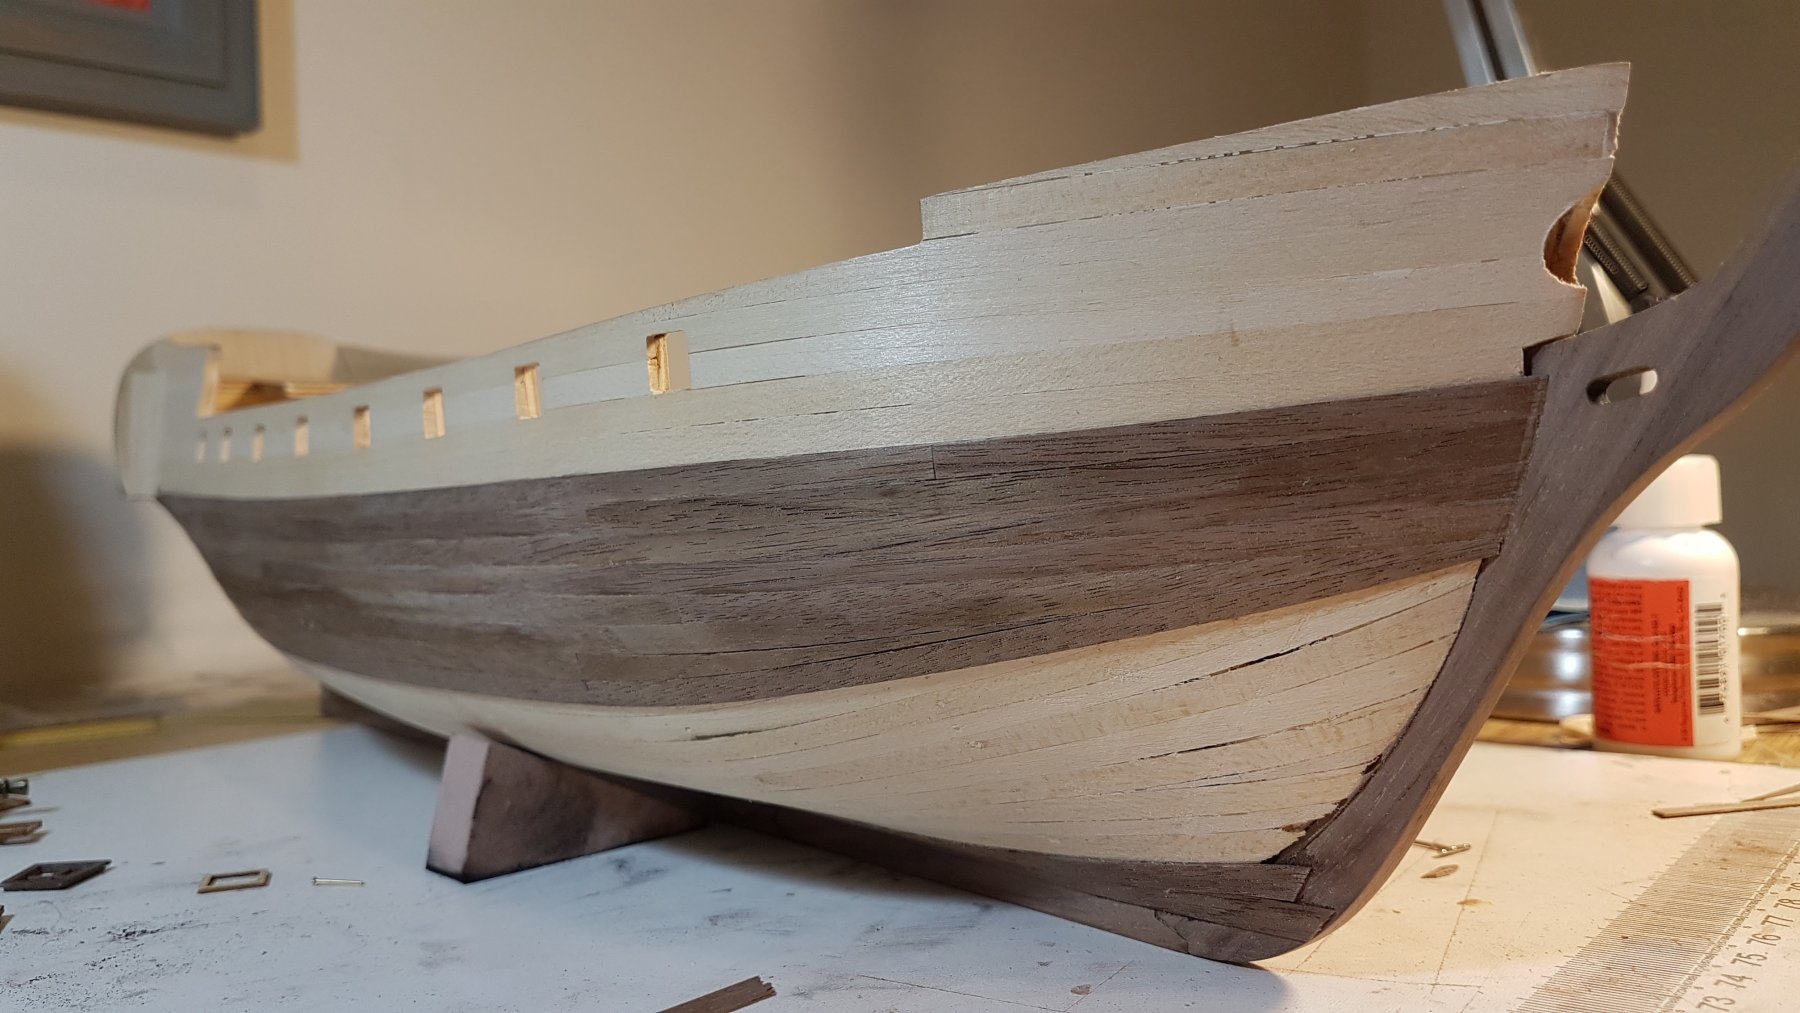
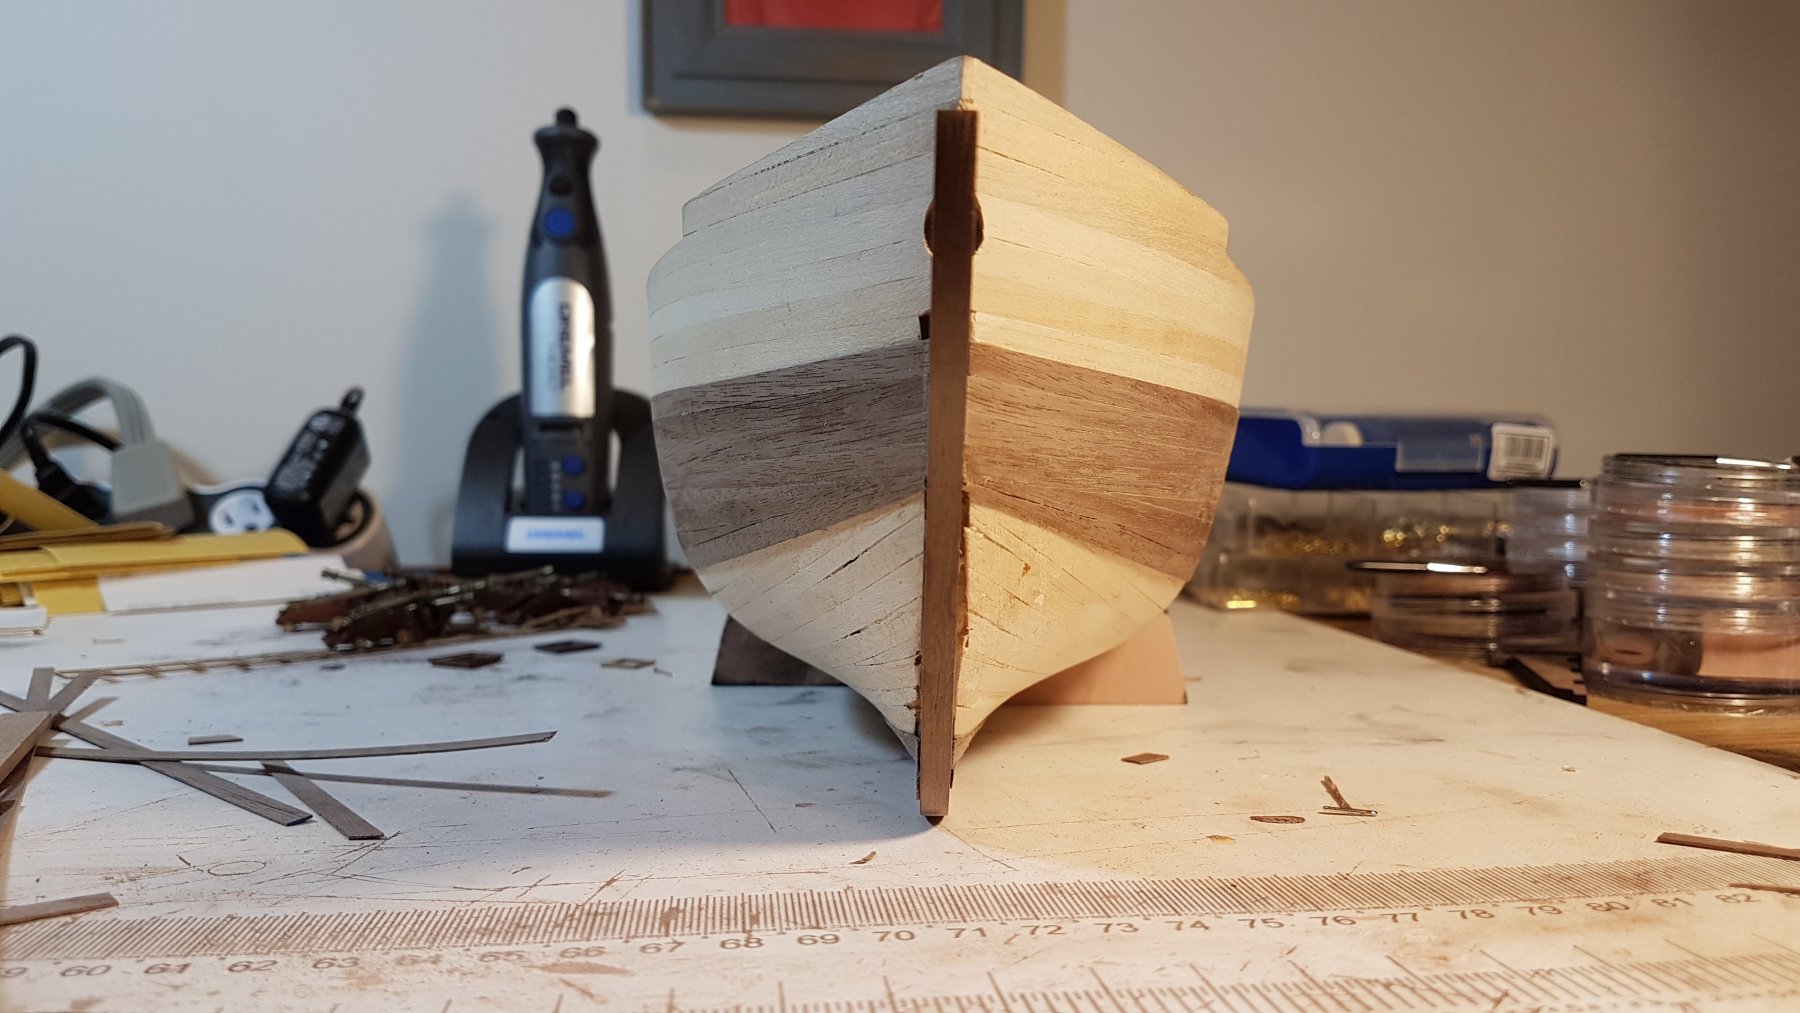
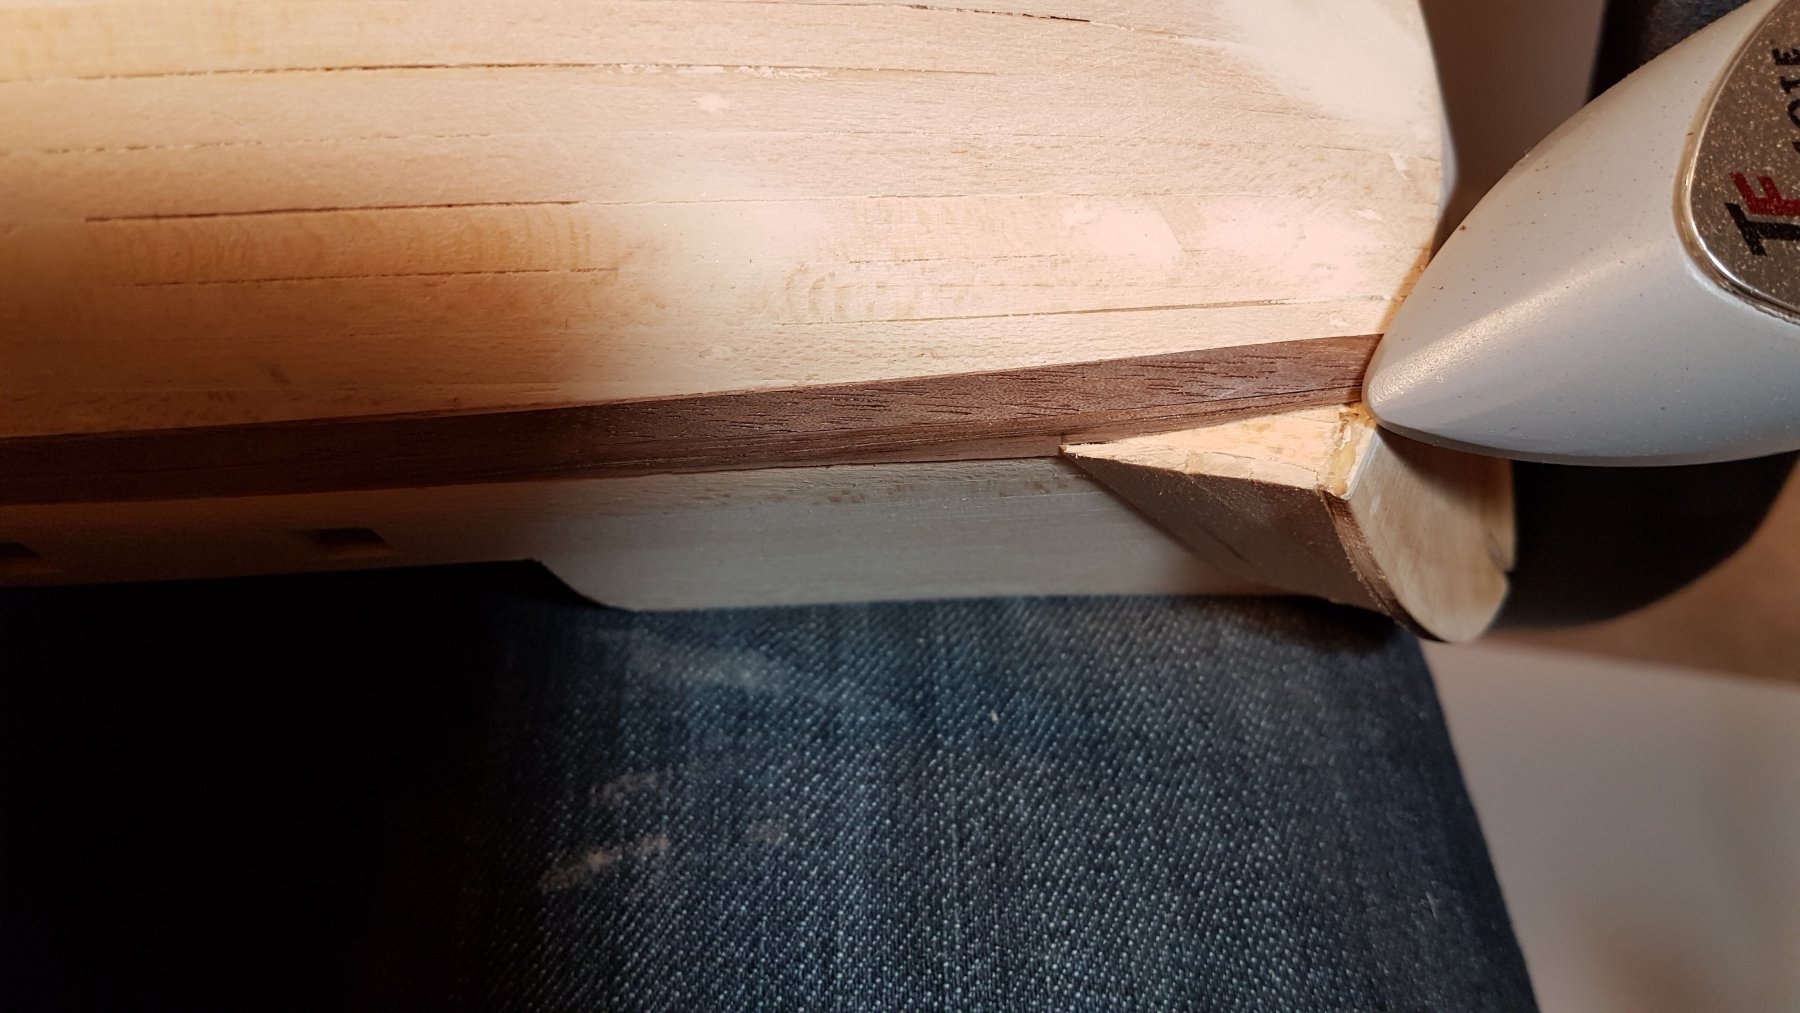
The second layer of planking is complete! Went a lot quicker than I had expected, done in about 4 evenings, perhaps 8 hours in total. The ironing technique speeds things up quite a bit, basically iron on planks.... I quite enjoyed the zen like process of planking. I suspect there are some inaccuracies in how I did it, that will improve on the next model. The final little strip of plank pressed in place. Still have not sanded it down yet, will take it into my shop to do that. It was dusty enough last time doing the first layer of planks in the house! Pile-o-cannon await! On to the next phase of the build!


-
One side of the hull finished!


-
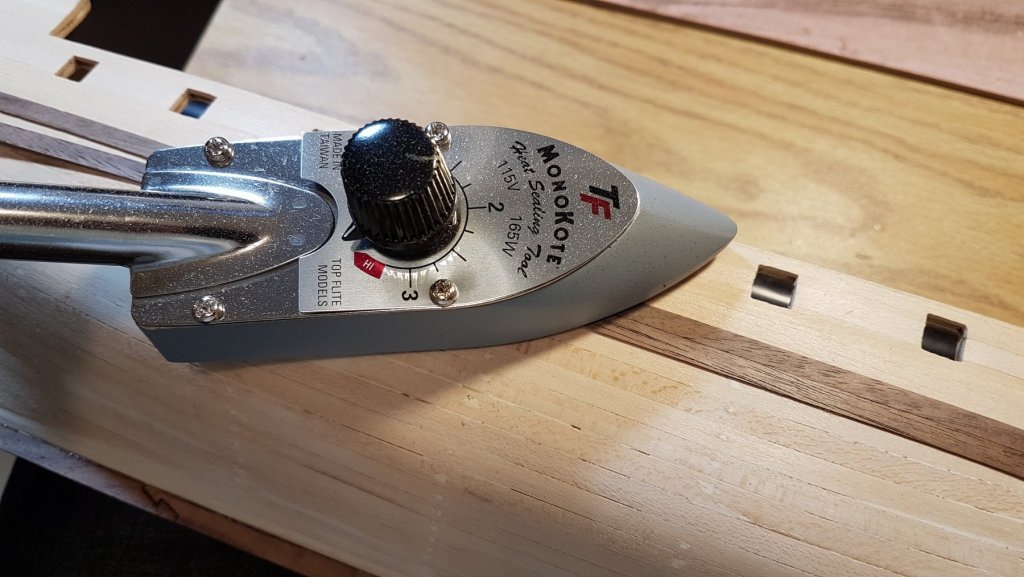
Only suitable on pretty thin wood. Works great for deck planking and second planking, but on heavier wood it is hard to get the heat to transfer through.
-
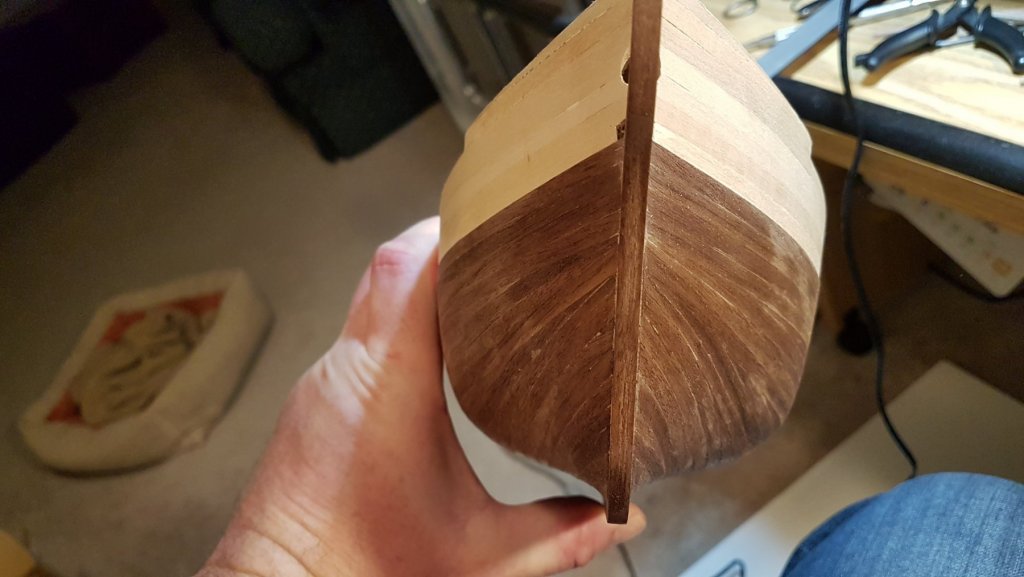
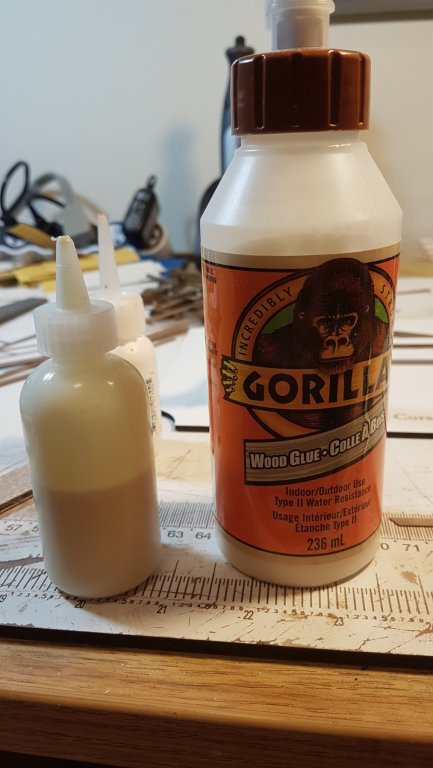
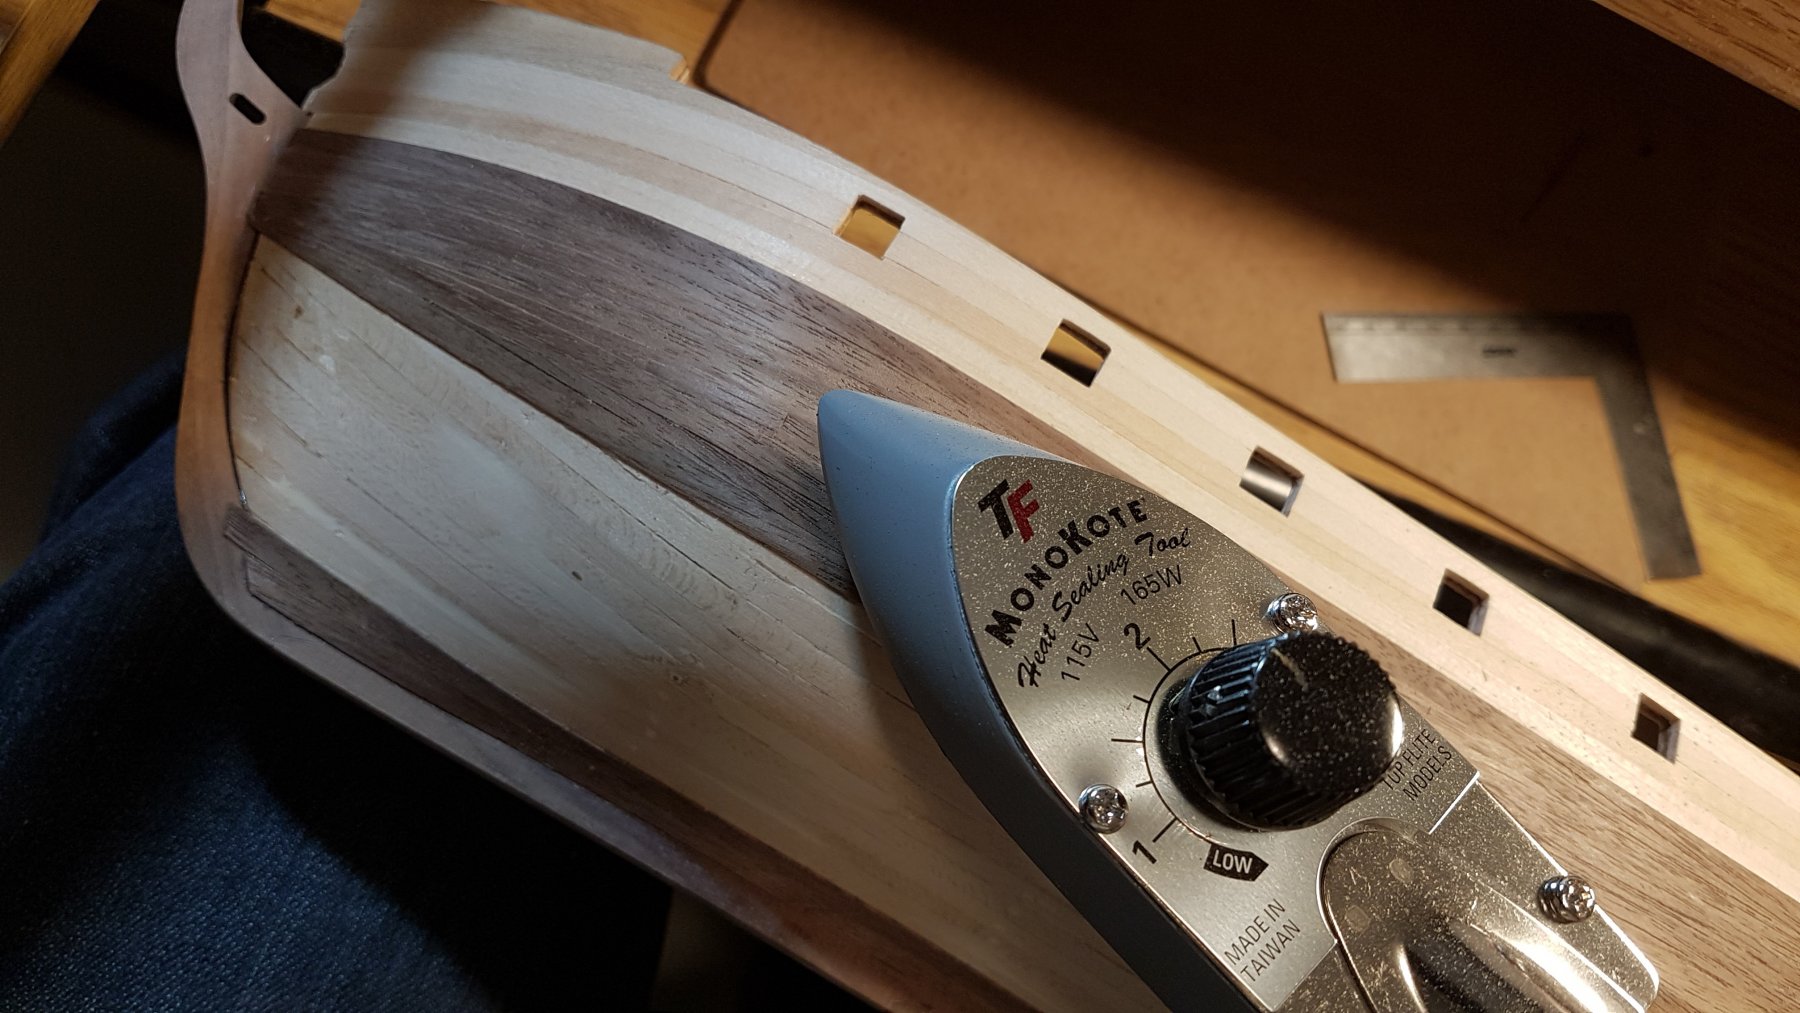
Good point about the cradle. I quickly made that one up on the laser. Hard to see in the images, but the inside edges of the cradle are covered with foam. Heating the wood while planking works extremely well, while pressing the plank in place with the small iron it completely cures the glue. 5 seconds is the same as 24 hours with a clamp. Can't be removed. I've been using this technique for other wood models for years with great results. Sort of like iron on planks...
-
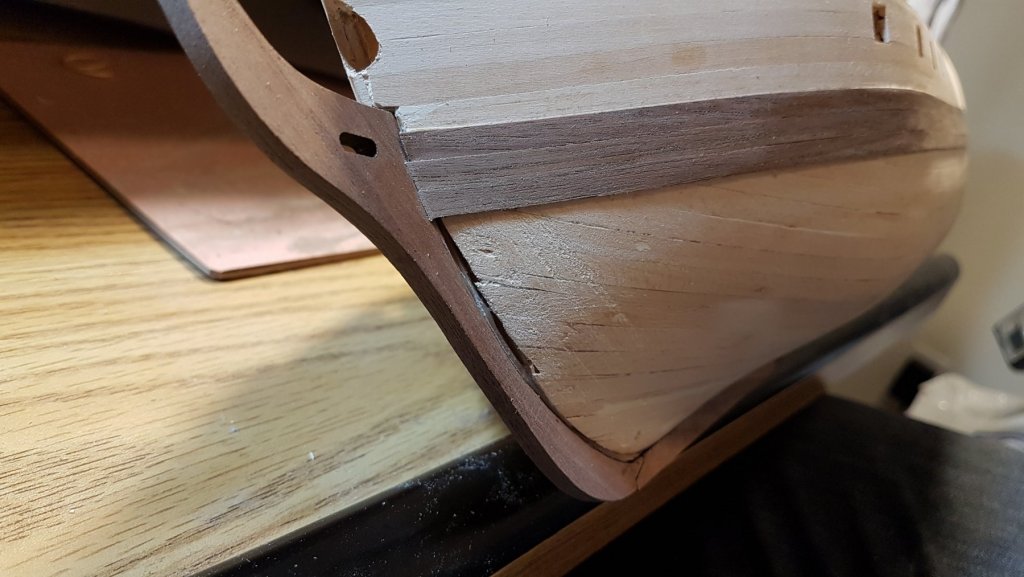
Long day at the day job left only an hour or so for the shipyard. Slow going on the last few planks, but getting closer!

-
Noting special, all wood glues cure with heat.
-
Made good progress last evening, all but 5 rows to go! I suspect I should be able to finish it up tonight. I suspect this isn't quite the way it should have been done, but it's been a good learning experience and I'm looking forward to the next project and doing it again. (once this one is done...)
-
T_Warris reacted to a post in a topic:
Corsair by T_Warris - OcCre - 1:80 - Heavily reworked kit
-
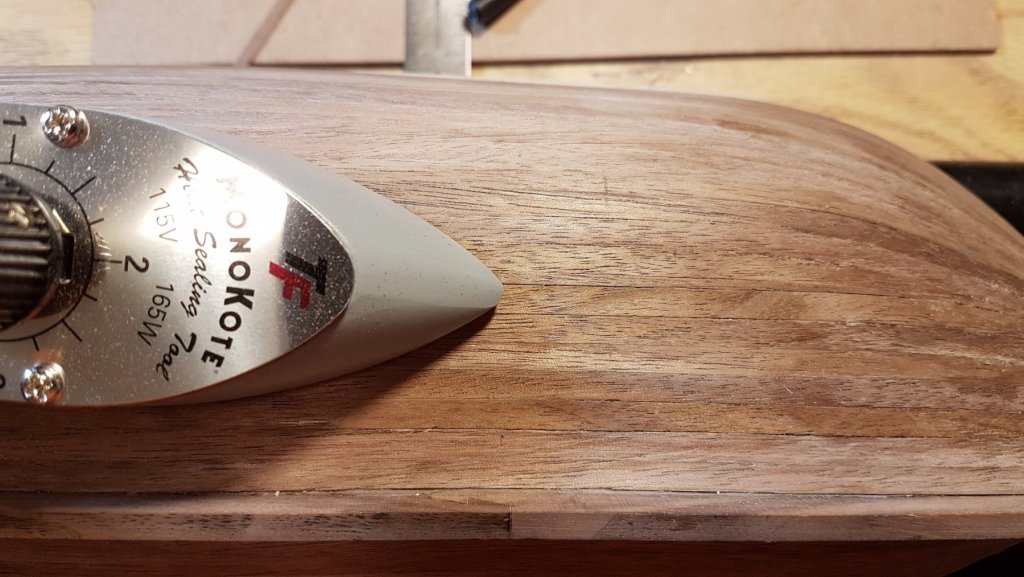
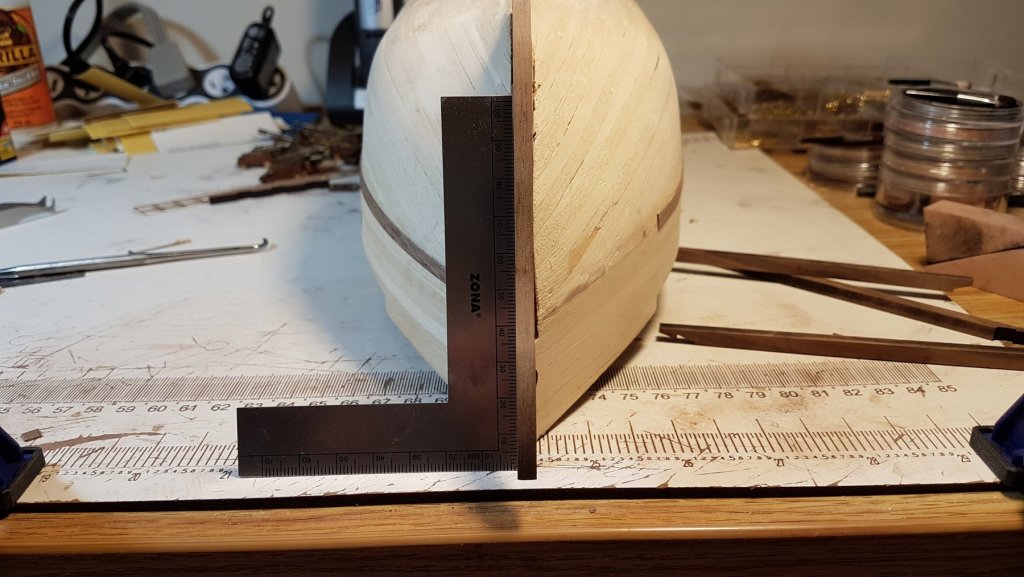
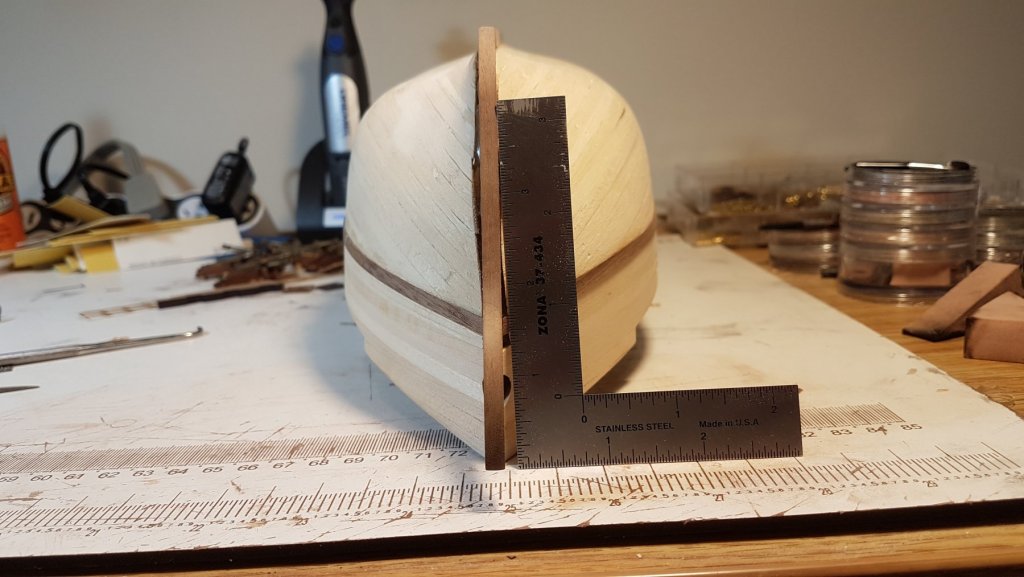
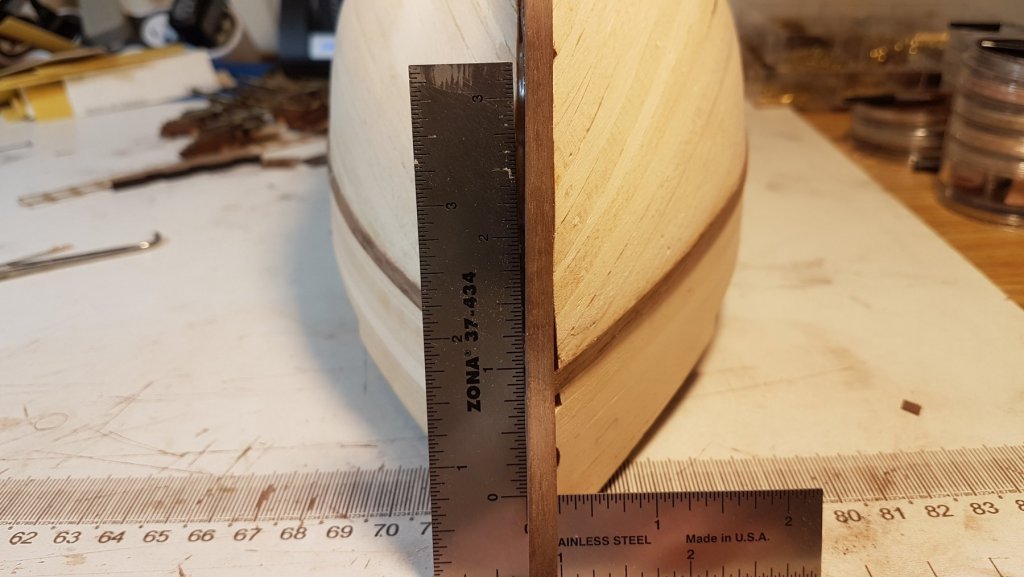
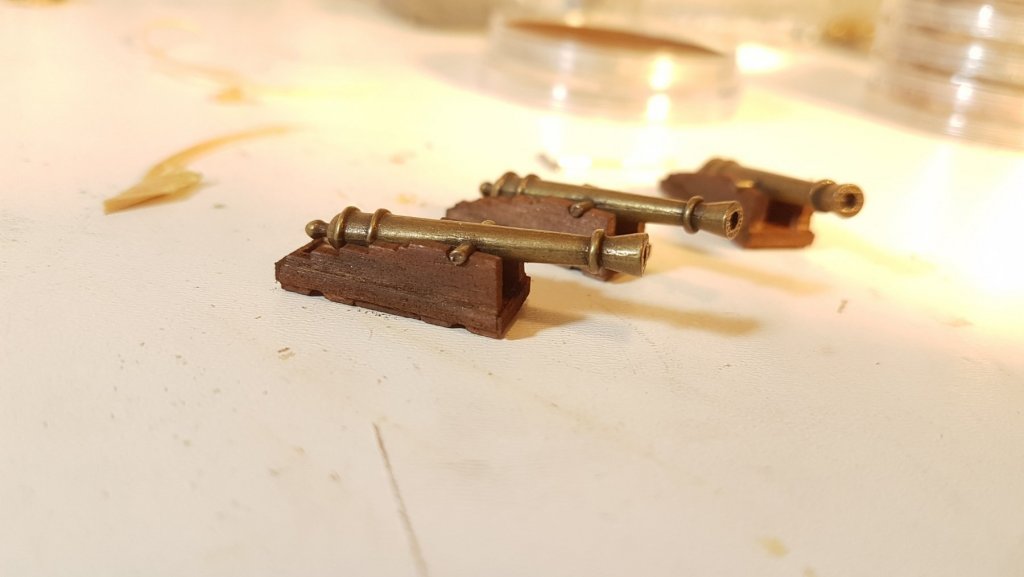
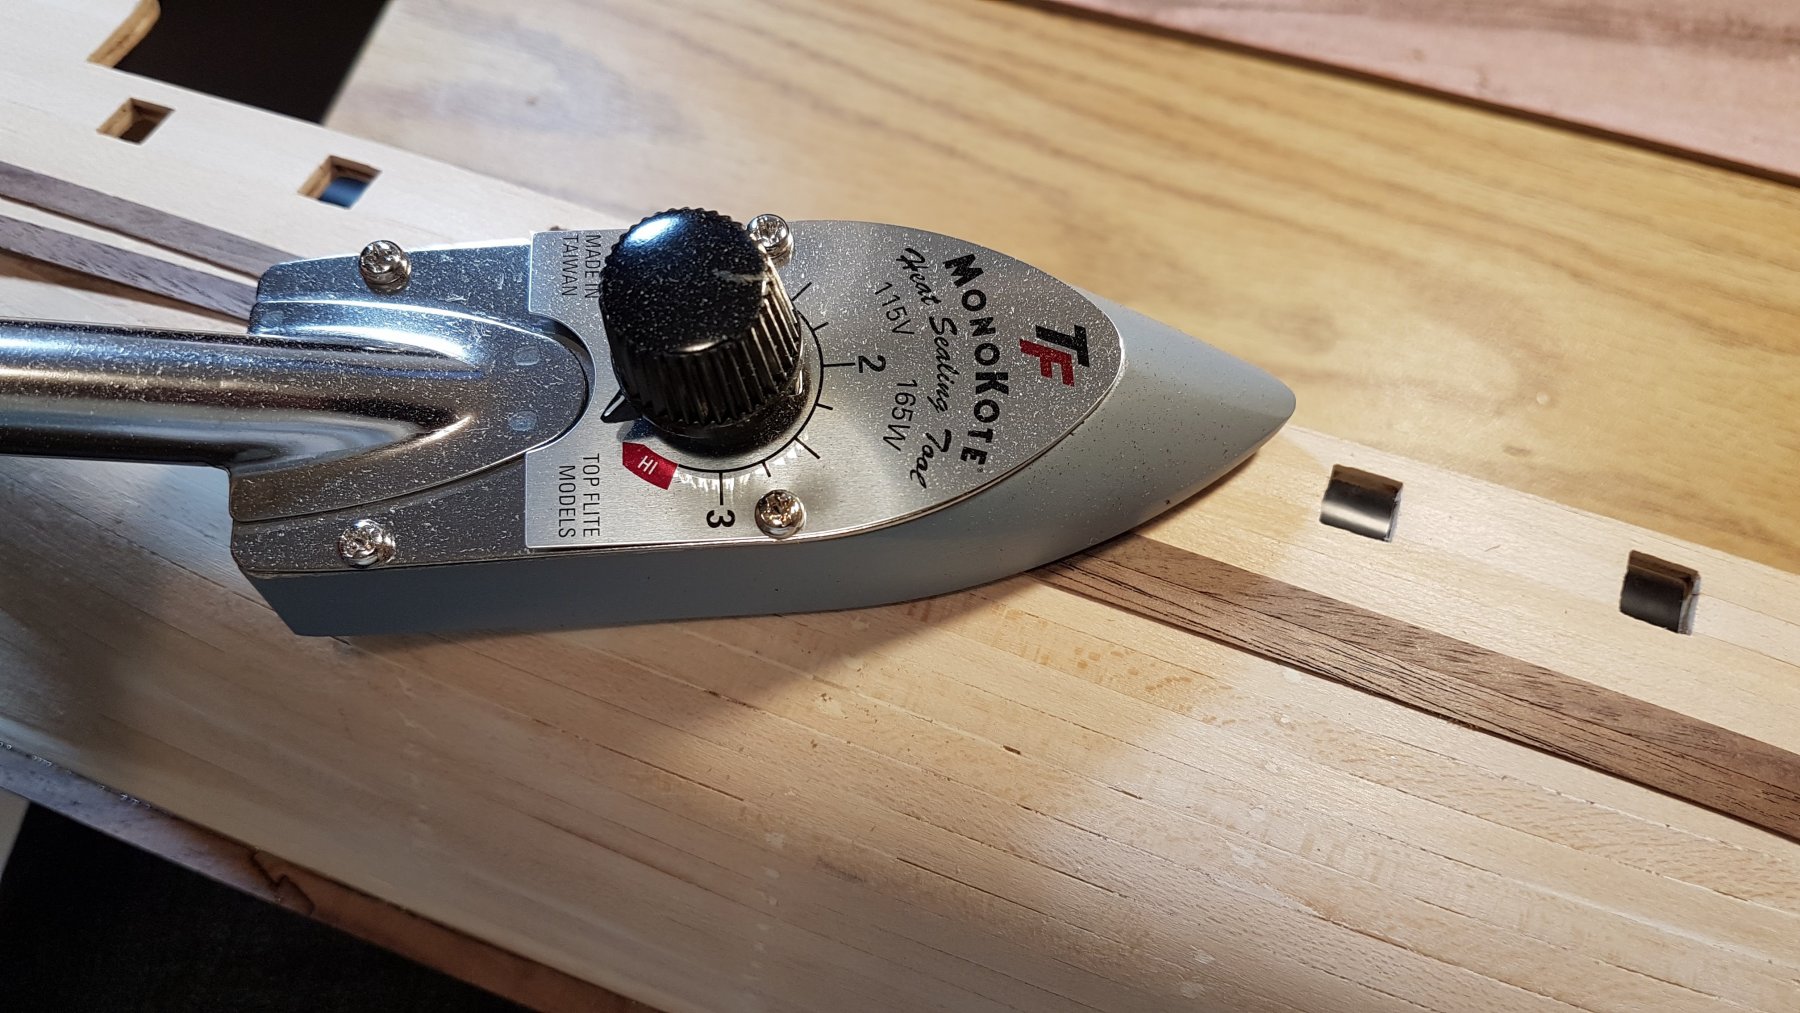
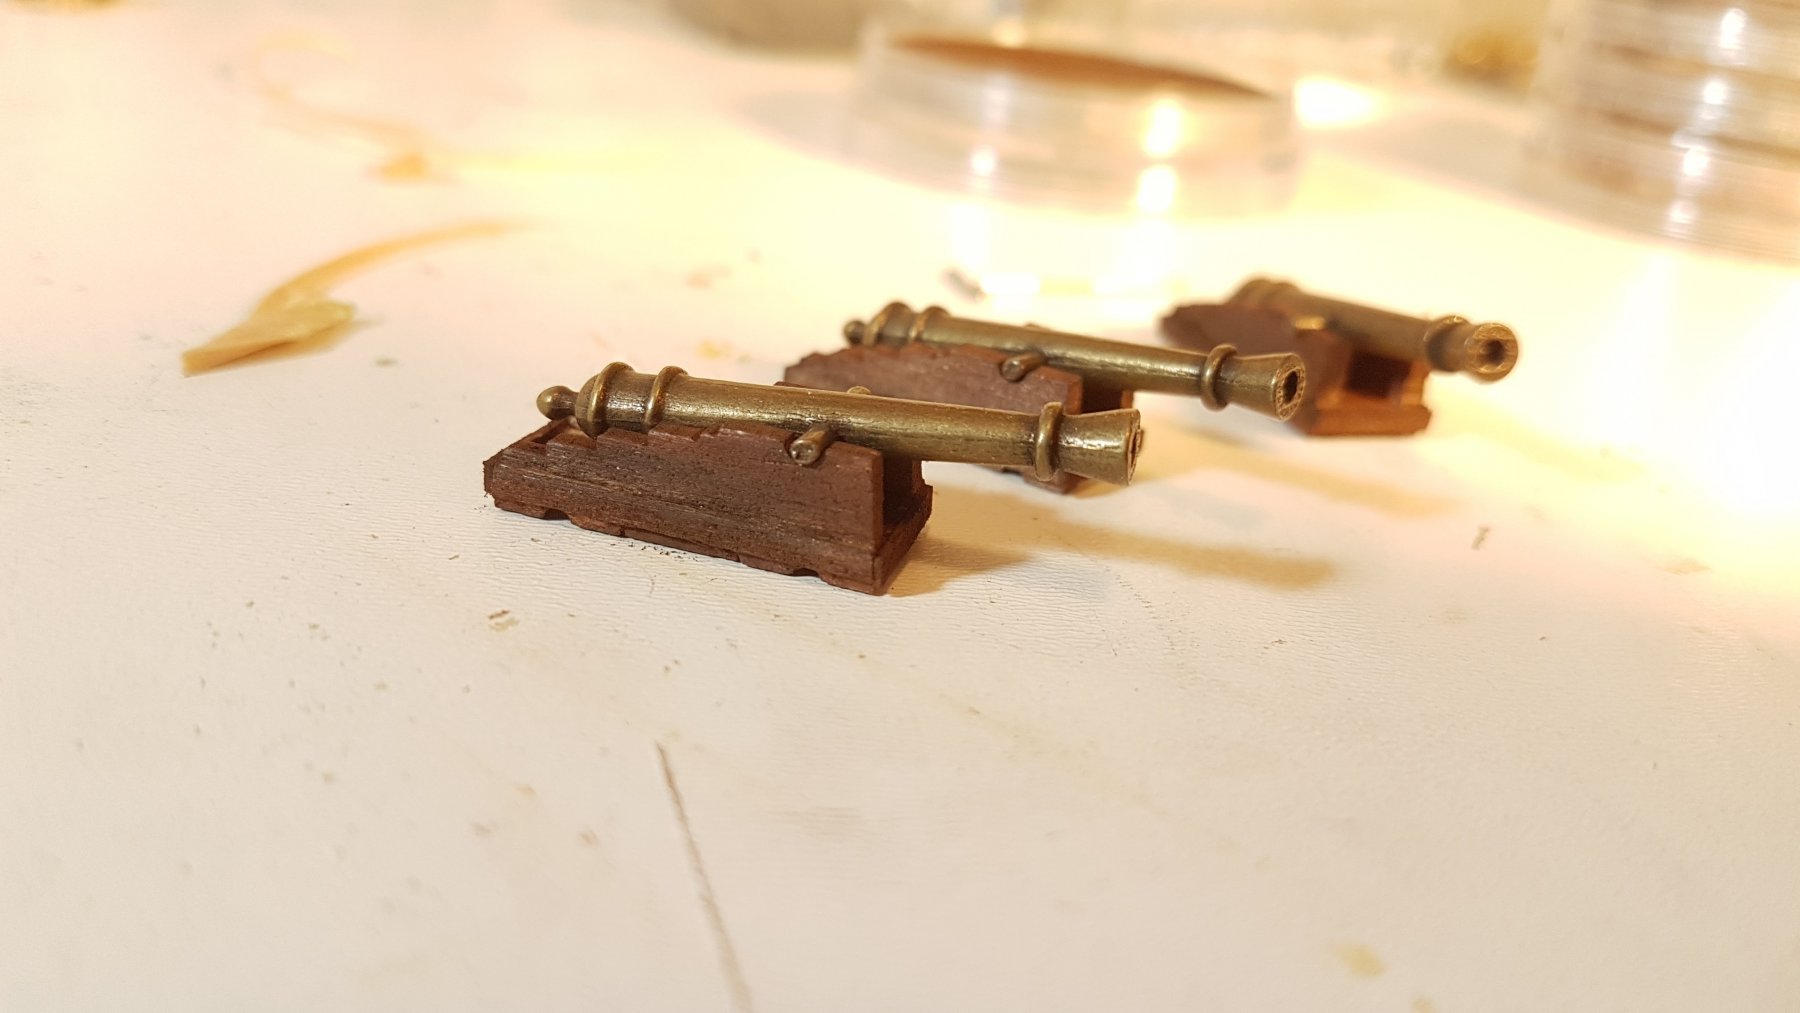
I finished assembling all the cannons. Haven't decided yet if I will add the rigging to the cannons or not. With the first layer of planking complete, I have started on the second layer. I decided to replace the wood in the kit with some .5mm walnut. I prefer the rich look of walnut and since this model really isn't based on any real ship I figured I have the leeway to do what I want with it. Cutting Black Walnut Stripwood video on YouTube The link above will show how the walnut stripwood was cut. (I can't see any way to embed a YouTube video into a post here...) After starting the first strip of planking I noticed that somehow I got the keel glued on VERY crooked. No idea how that happened, I checked it a bunch of different ways when gluing it on. I used Epoxy to glue it in place, and I suspect it moved while it was curing. I debated leaving it and hoping it wouldn't be that noticeable, but in the end I caved and decided to crack it off and make a new one. I made the new keel from some .190" Black Walnut board I prepared and laser cut it. Had to grind down a few spots to get it to fit correctly. The second time around I got it straight! Much better. Had I left it it would have certainly made me nuts.... Made good progress on the second layer of planking over the weekend. I suspect I'll get it finished up this week. Curious if anyone else uses a hot iron to cure wood glue quickly? The first ship I built several years ago was done at a time when I was flying R/C planes. Having a small iron used to shrink wing coating I used it to quickly cure wood glue. With this build I bought another iron for the same purpose. It only takes a few seconds of heat to cure the glue. Once it cools it is very securely bonded. Works great and also will help press the wood down and into shape. Nice freshly ironed flat planks!


-
T_Warris reacted to a post in a topic:
A Model Railroader adding ships to the repertoire!
-
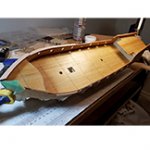
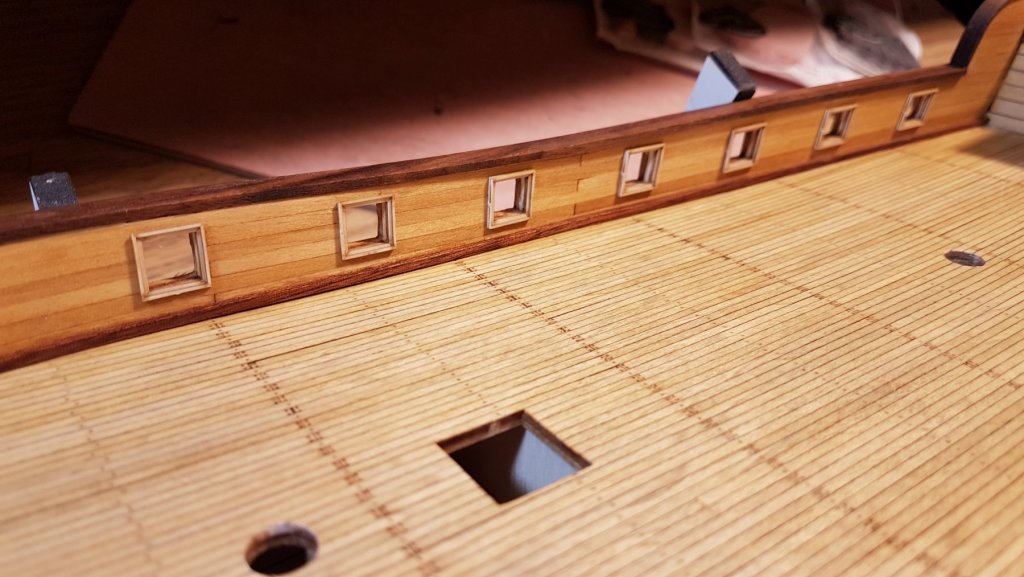
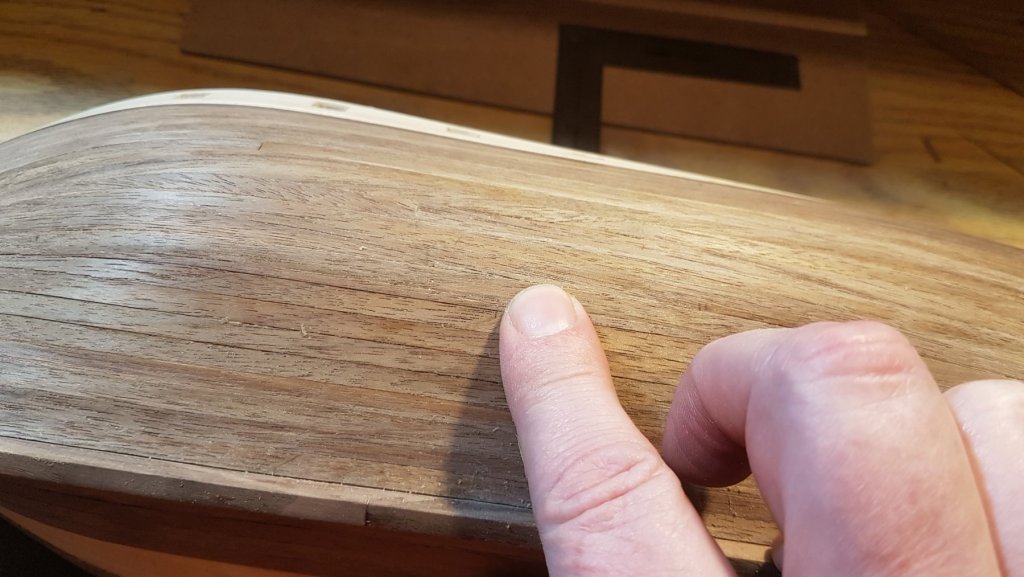
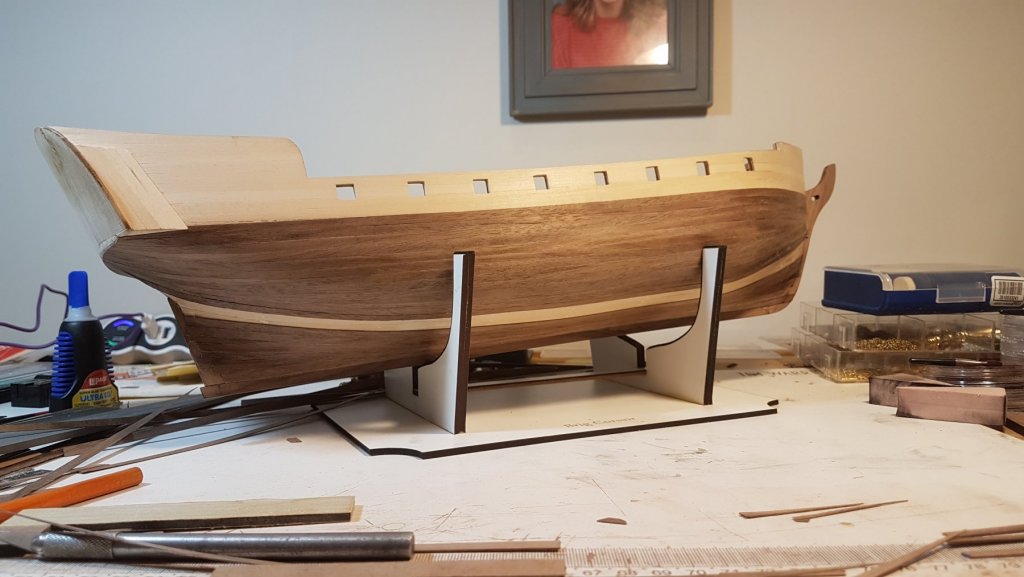
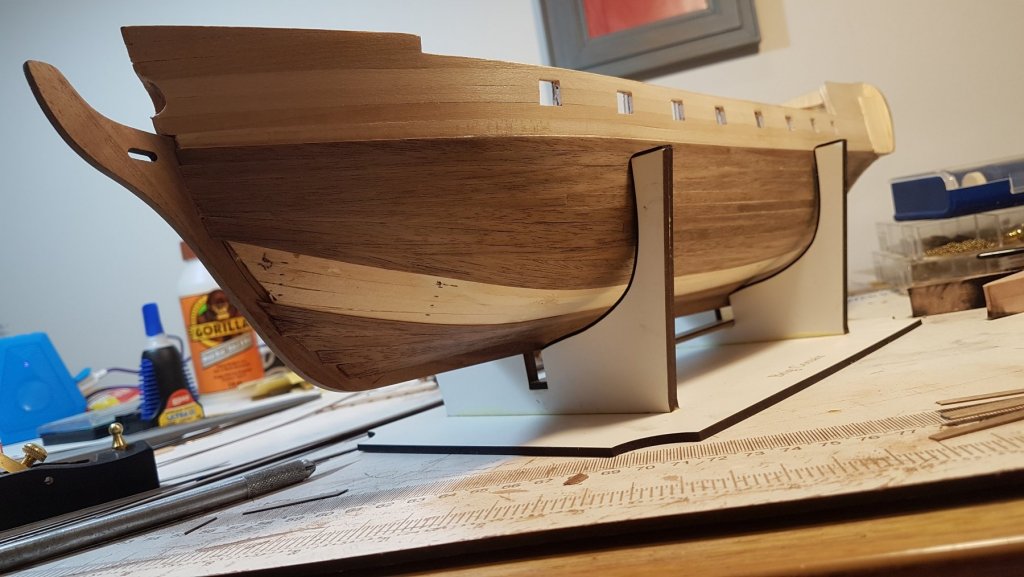
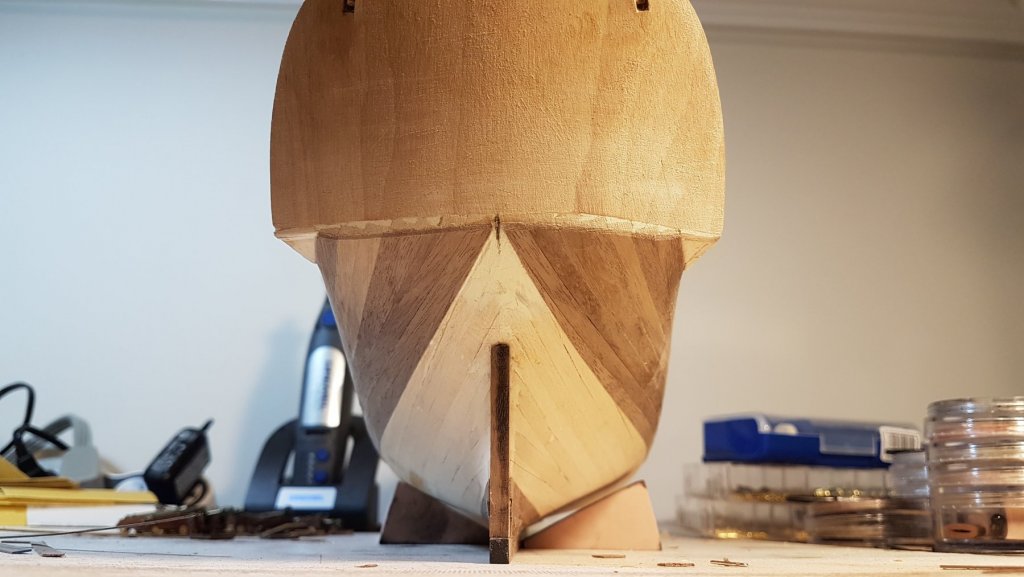
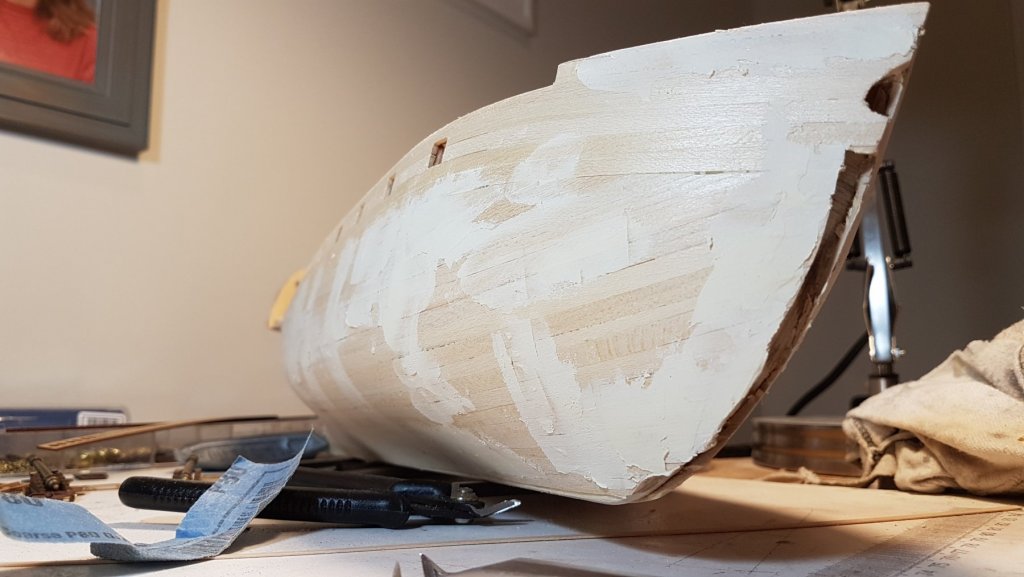
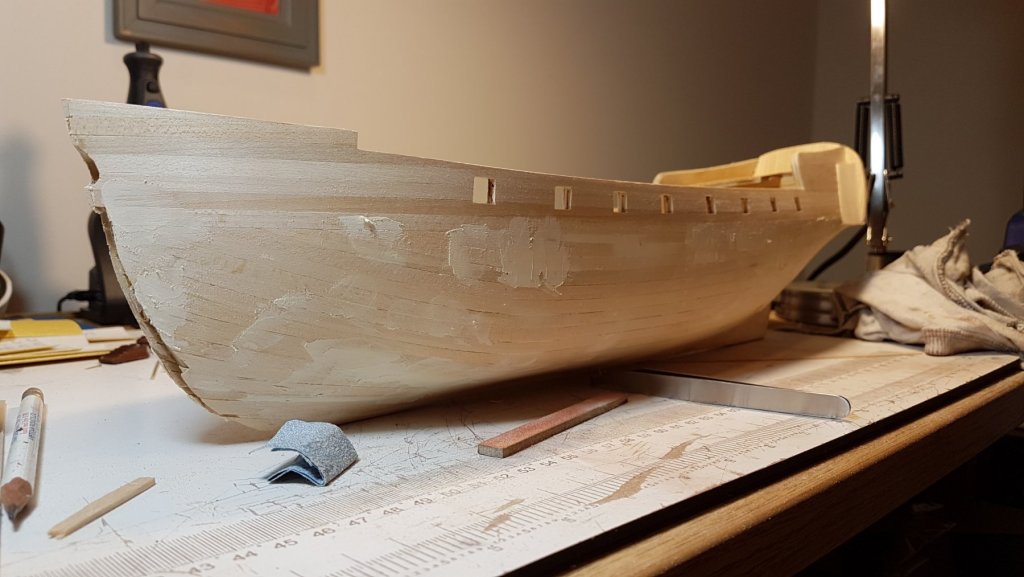
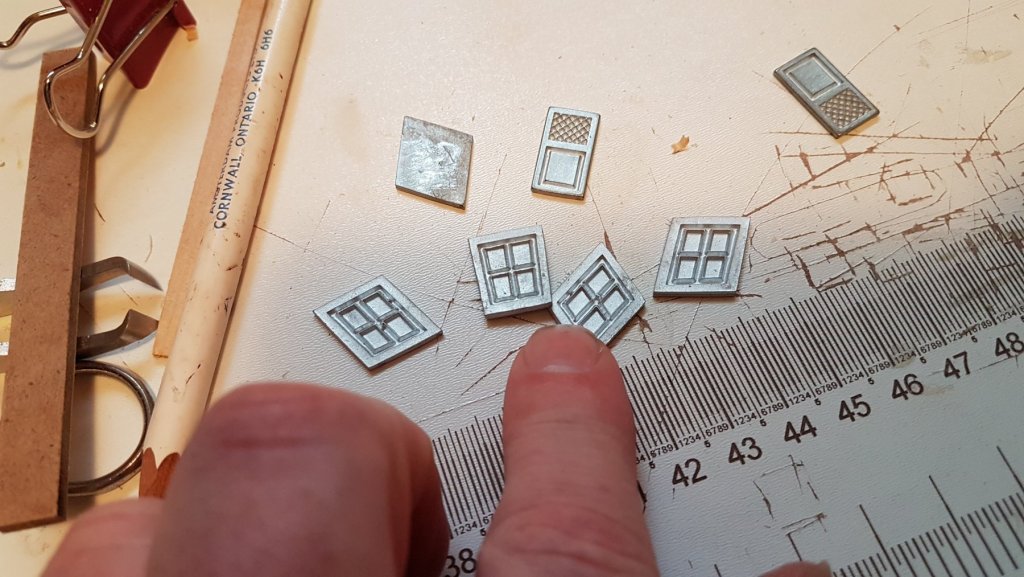
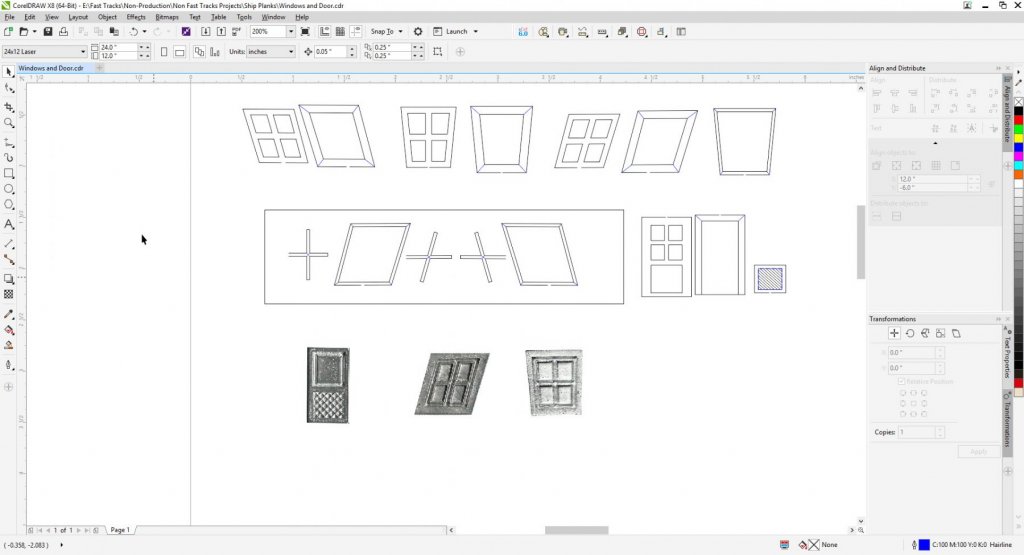
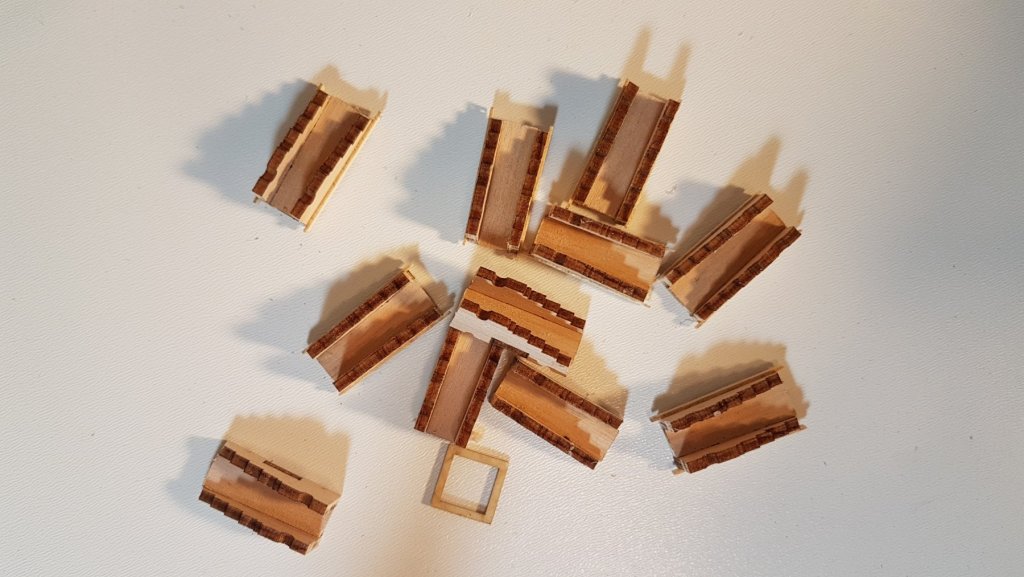
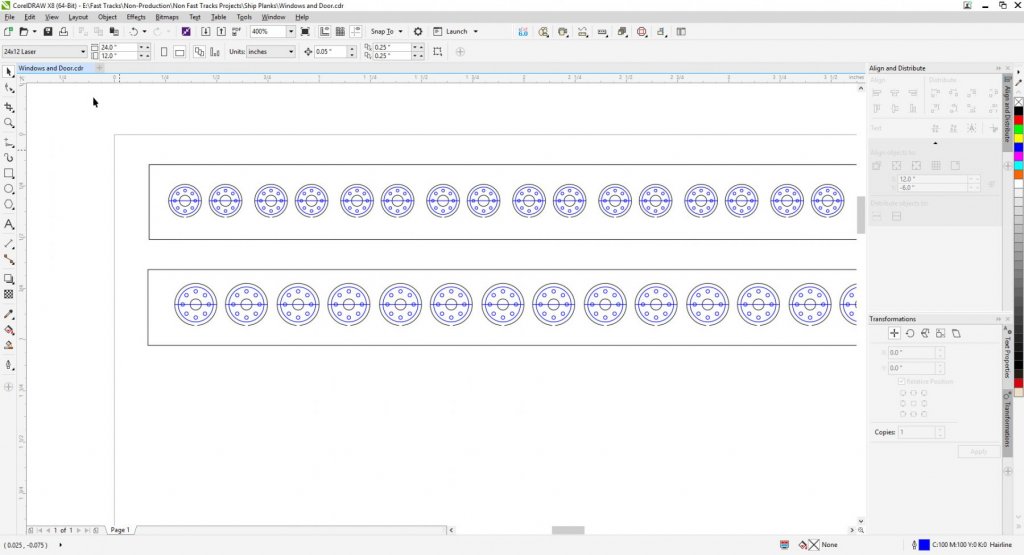
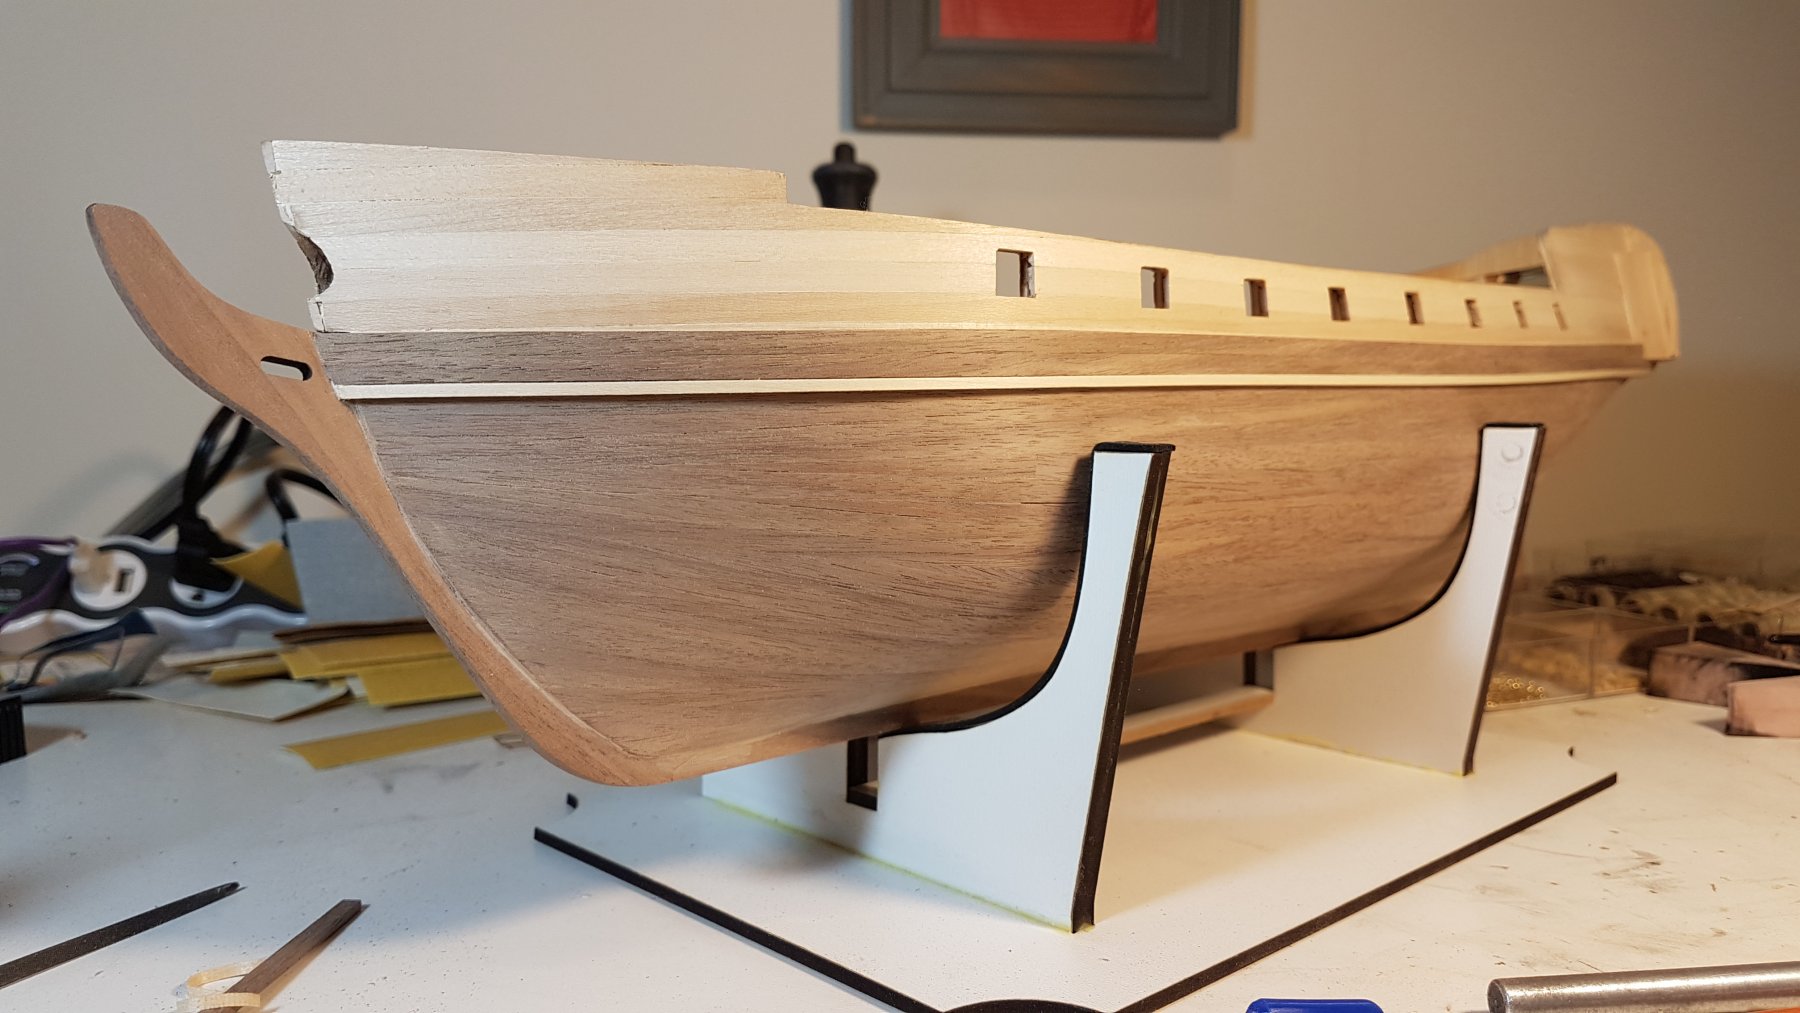
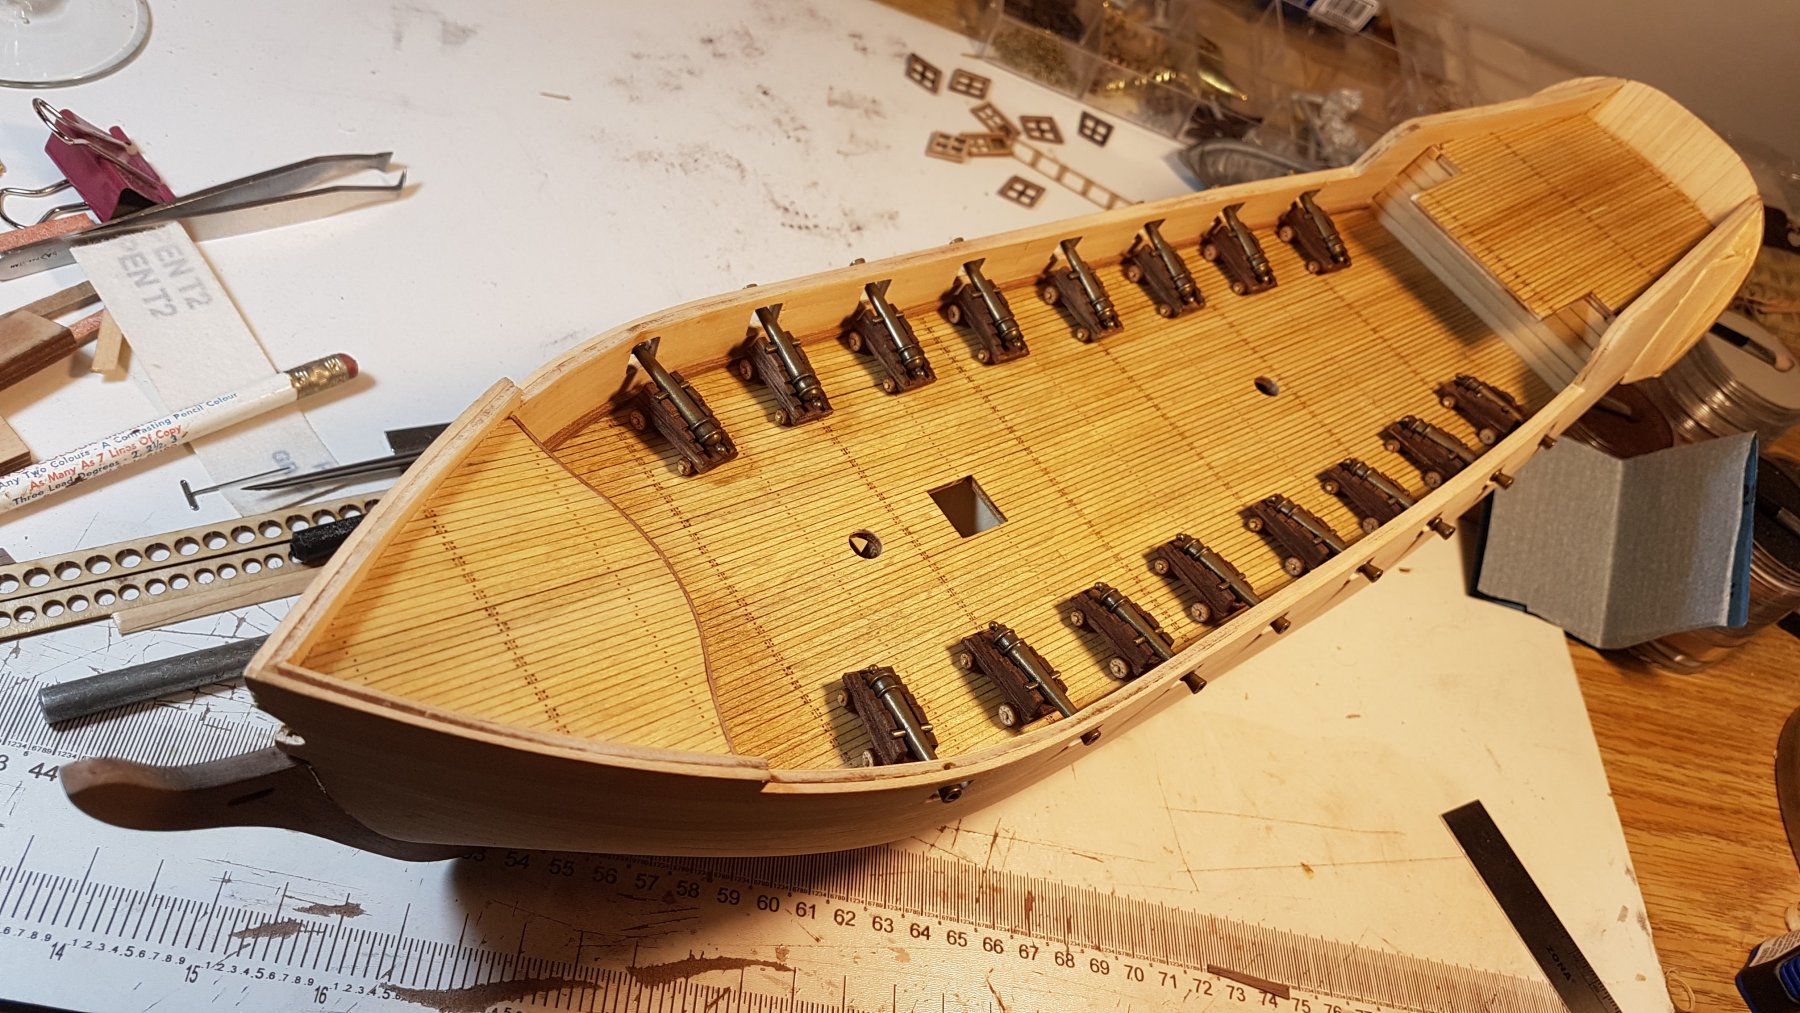
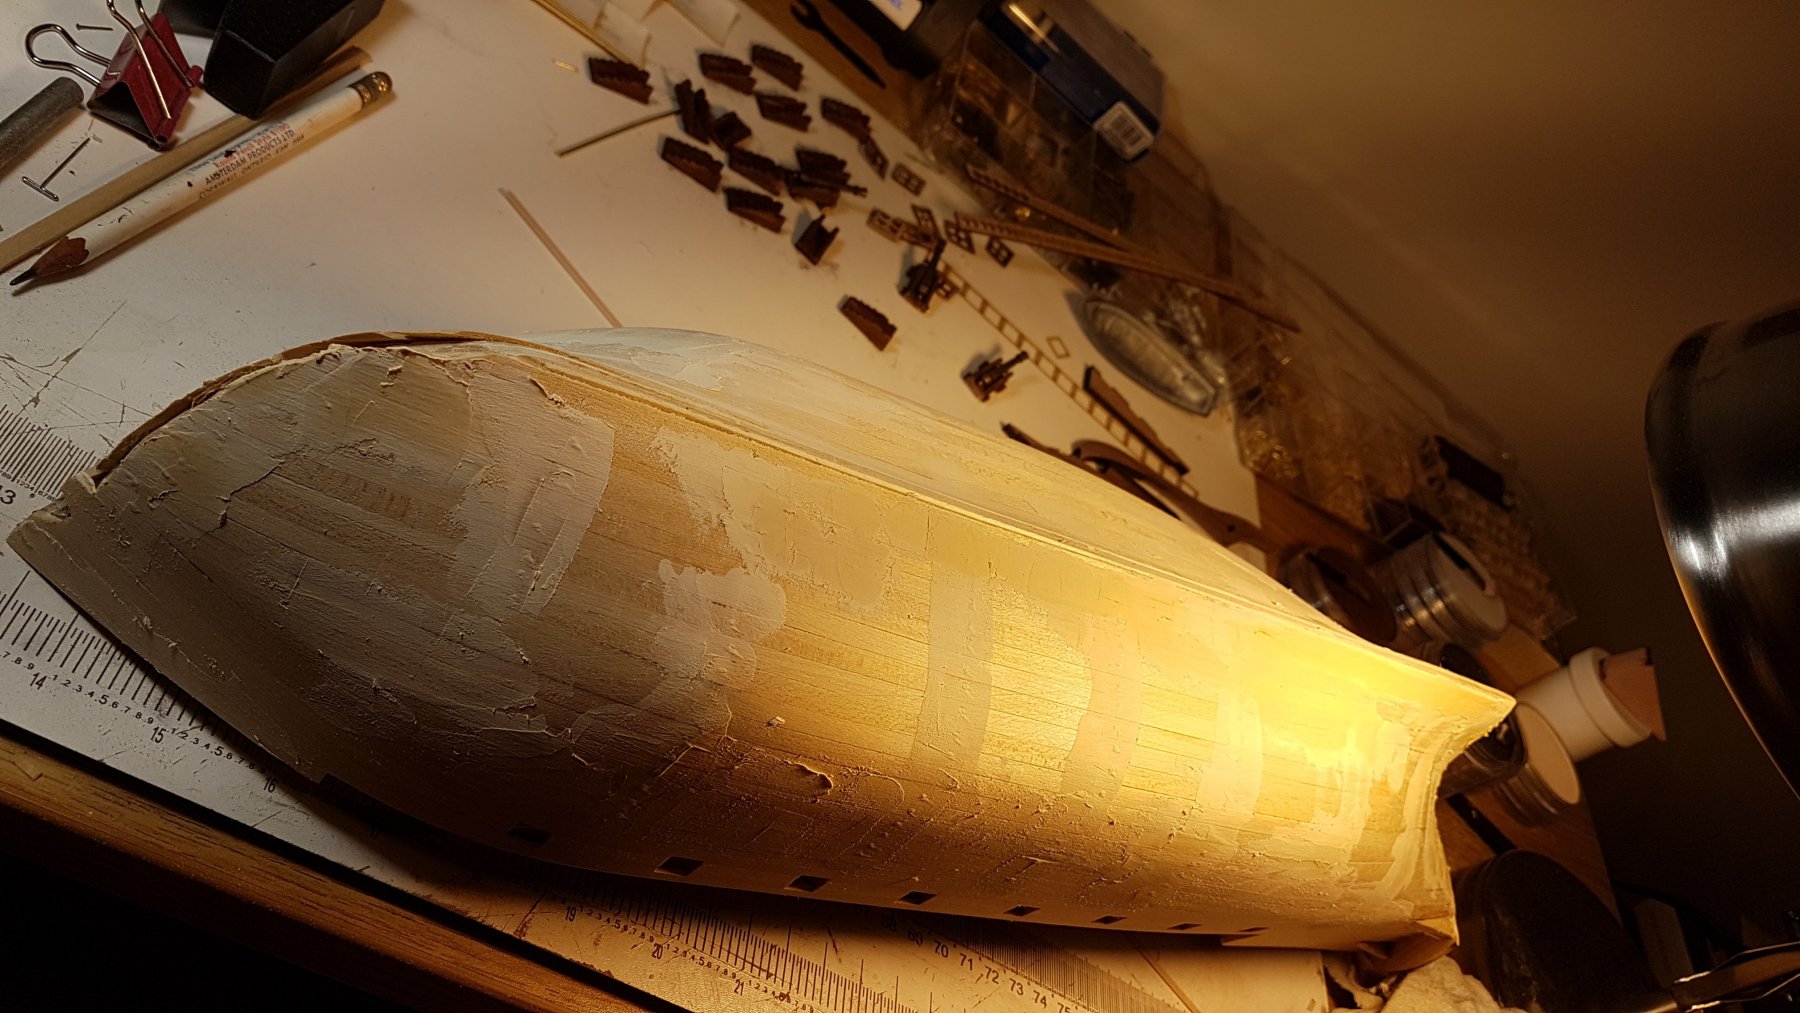
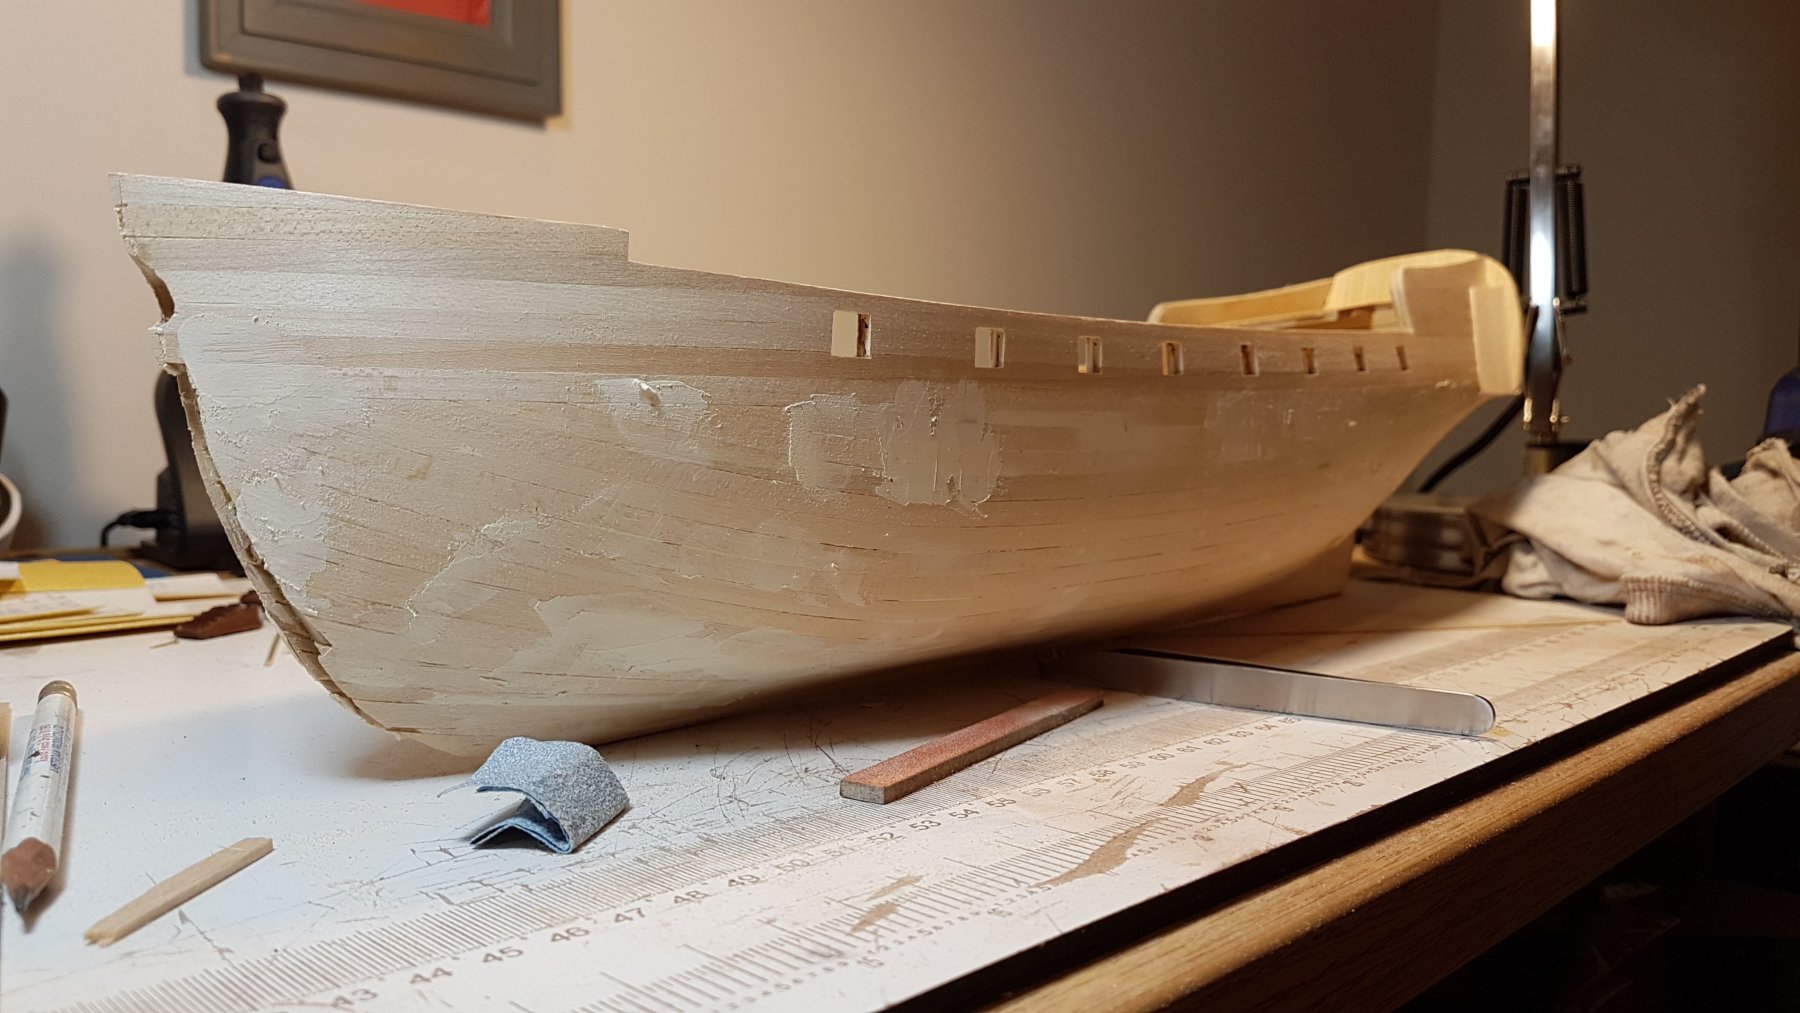
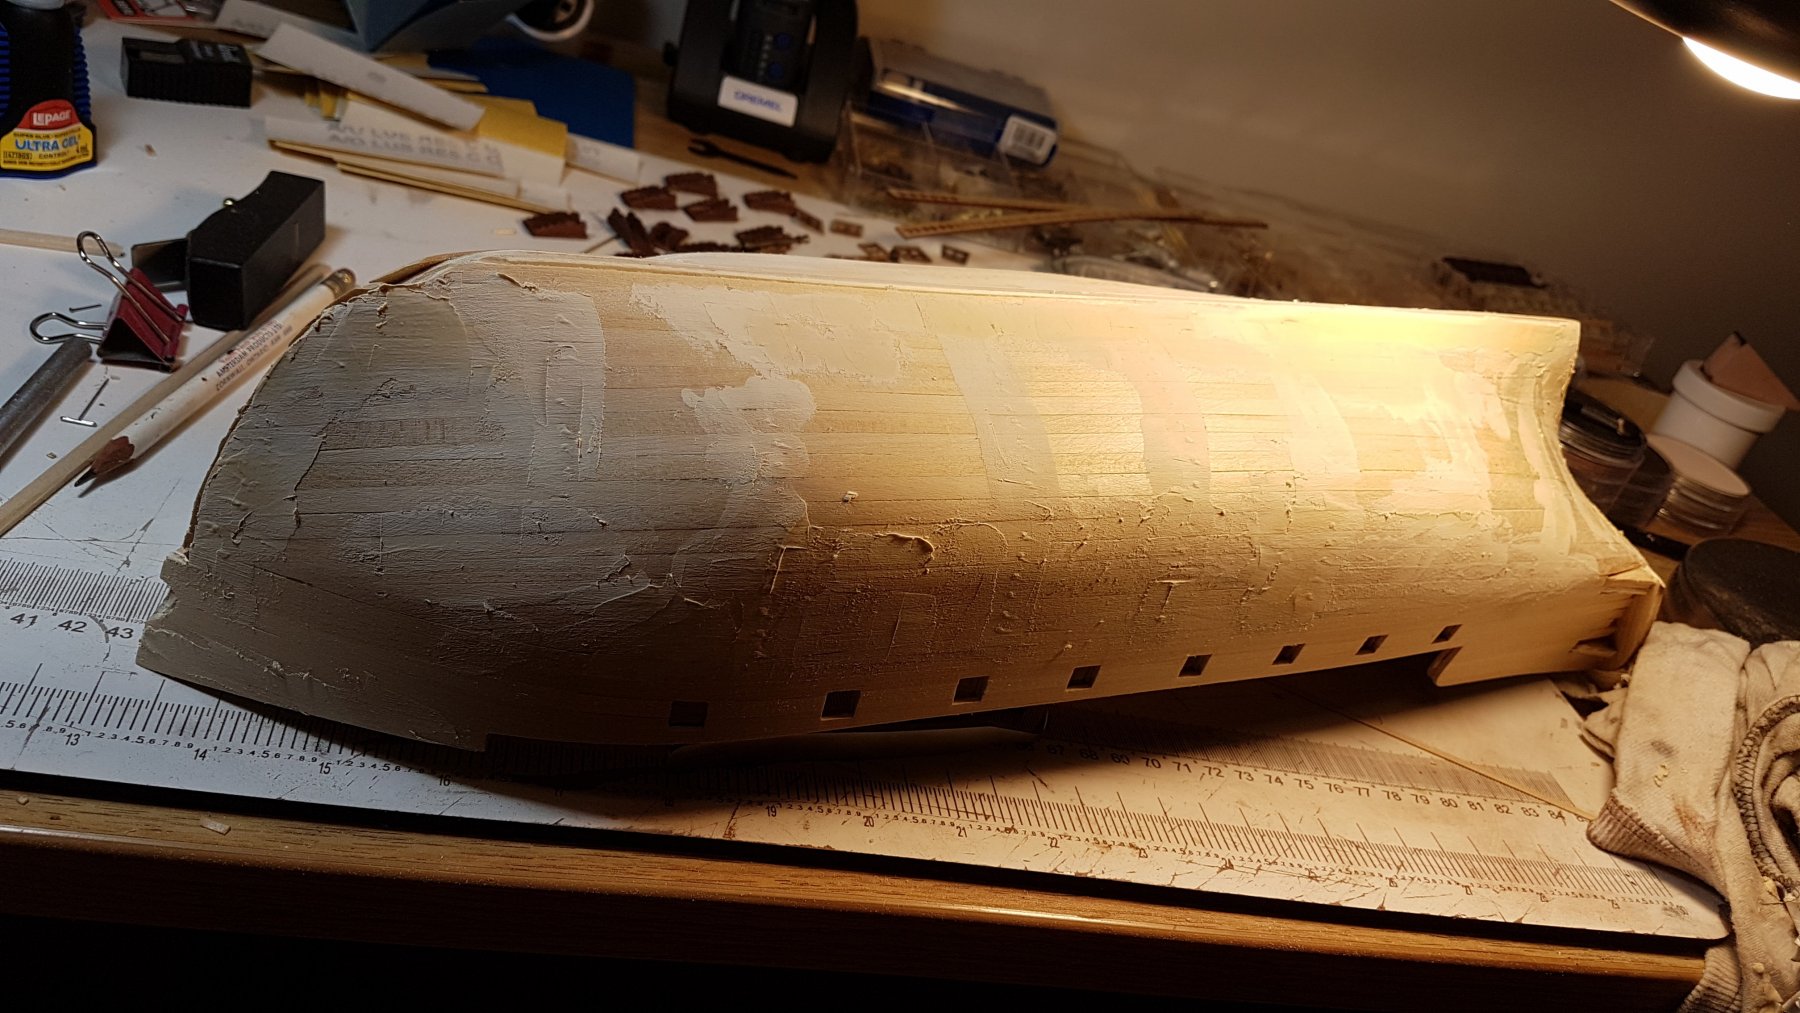
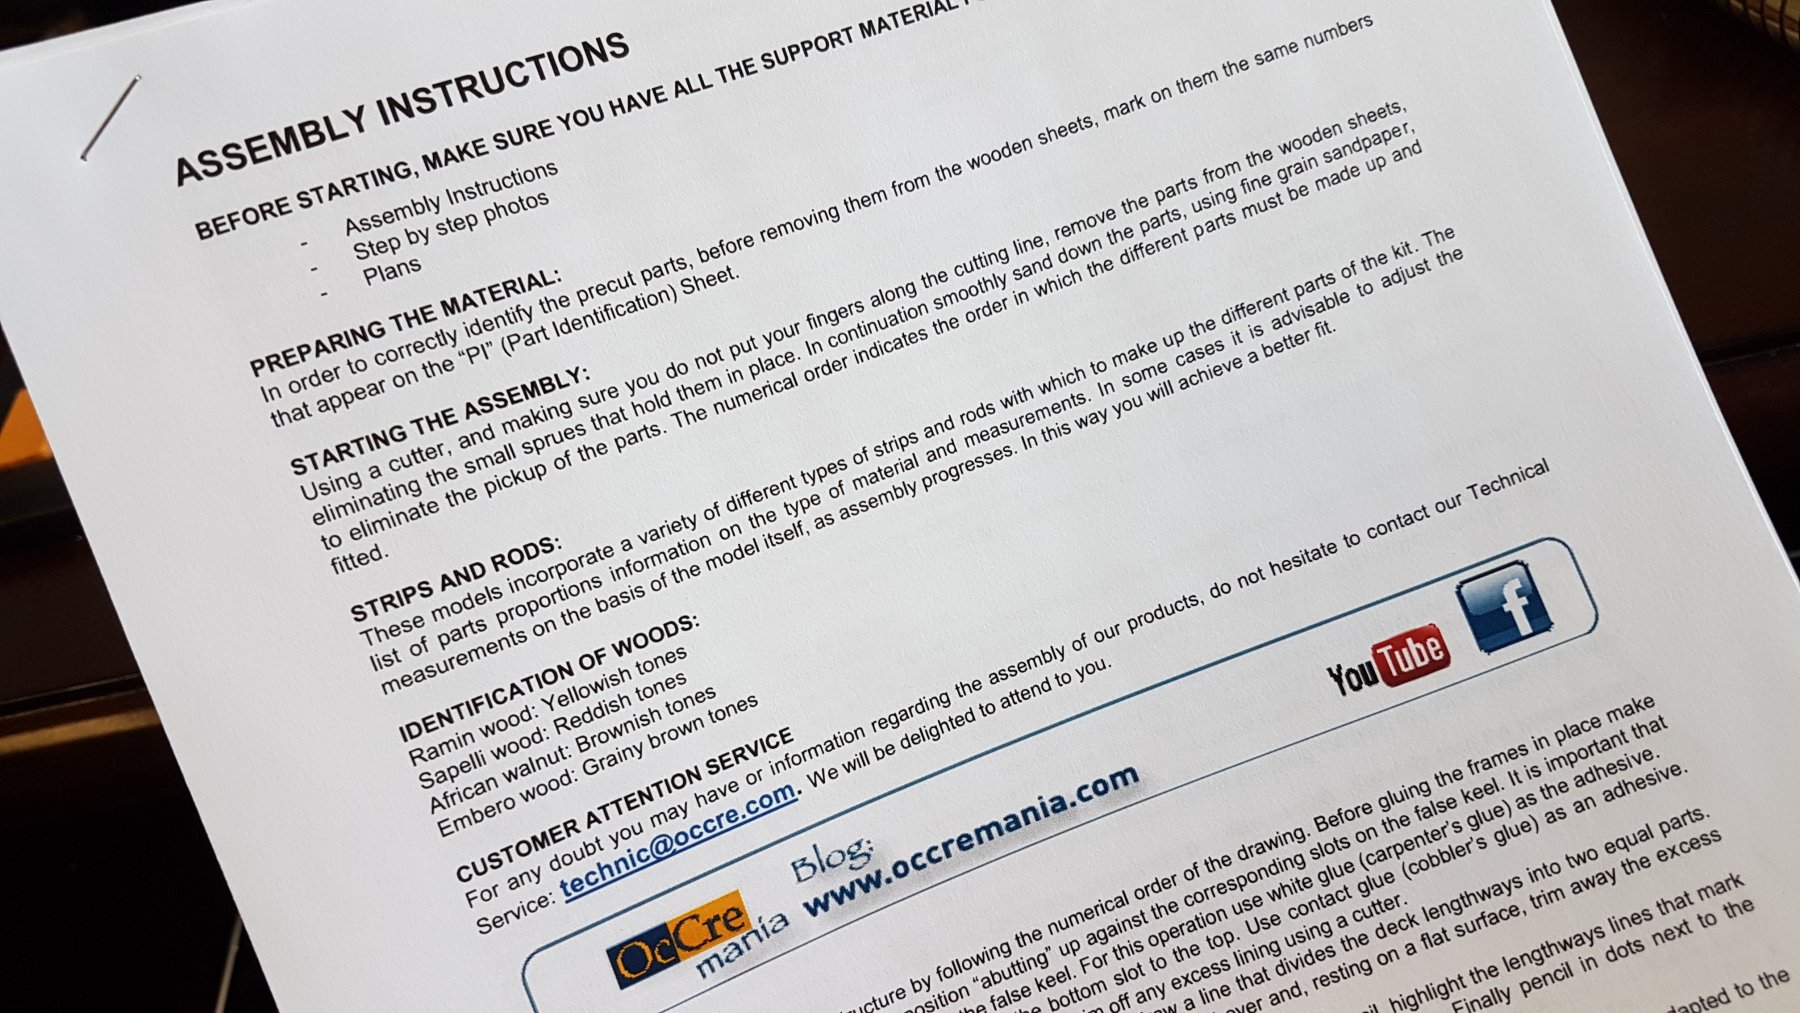
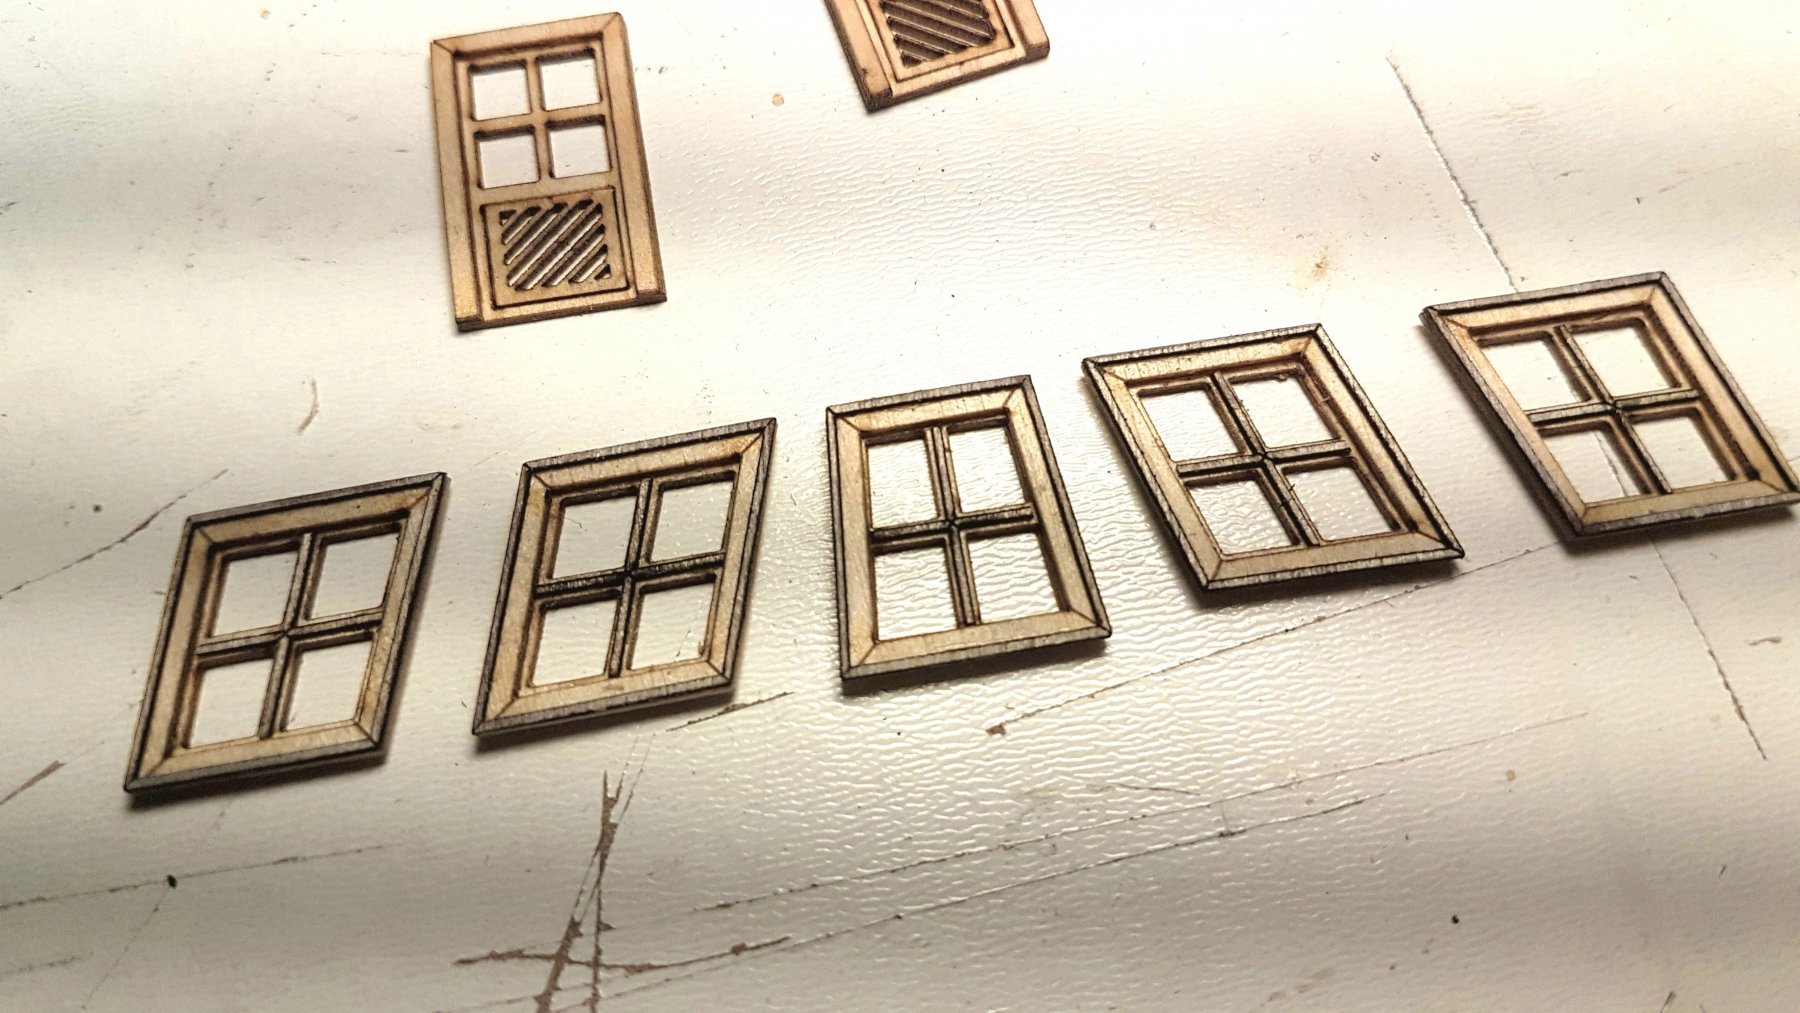
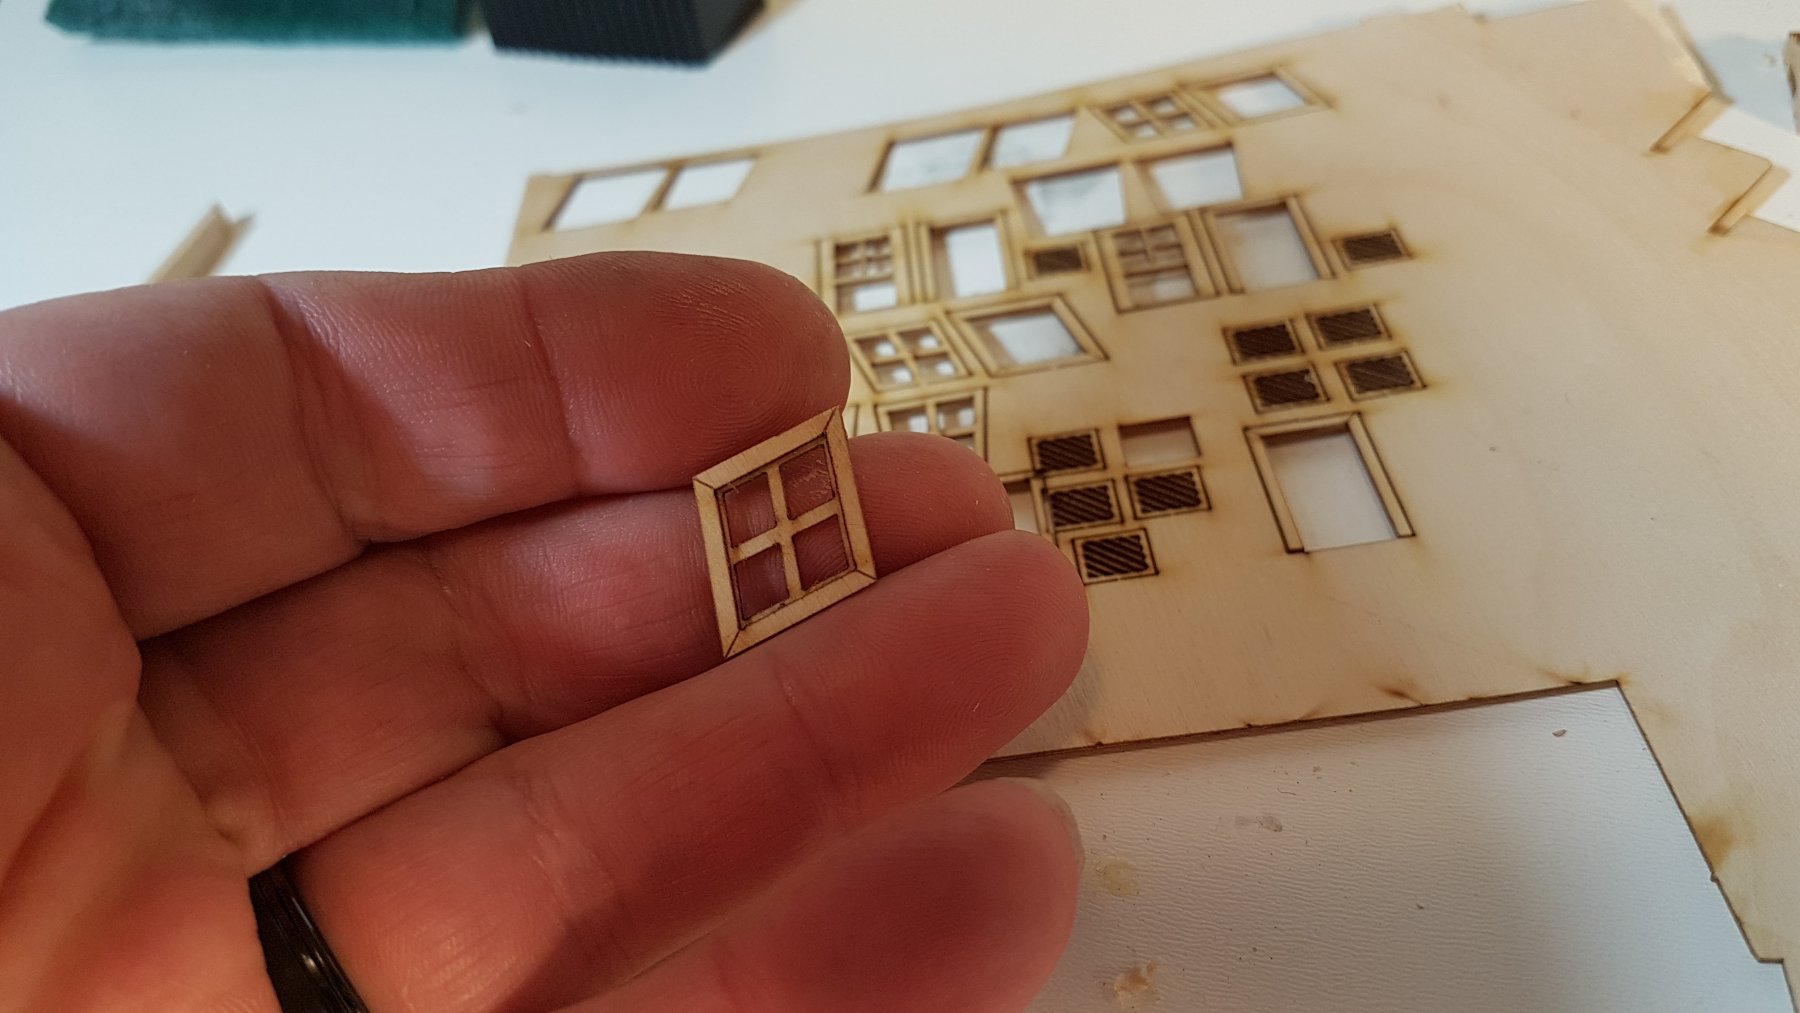
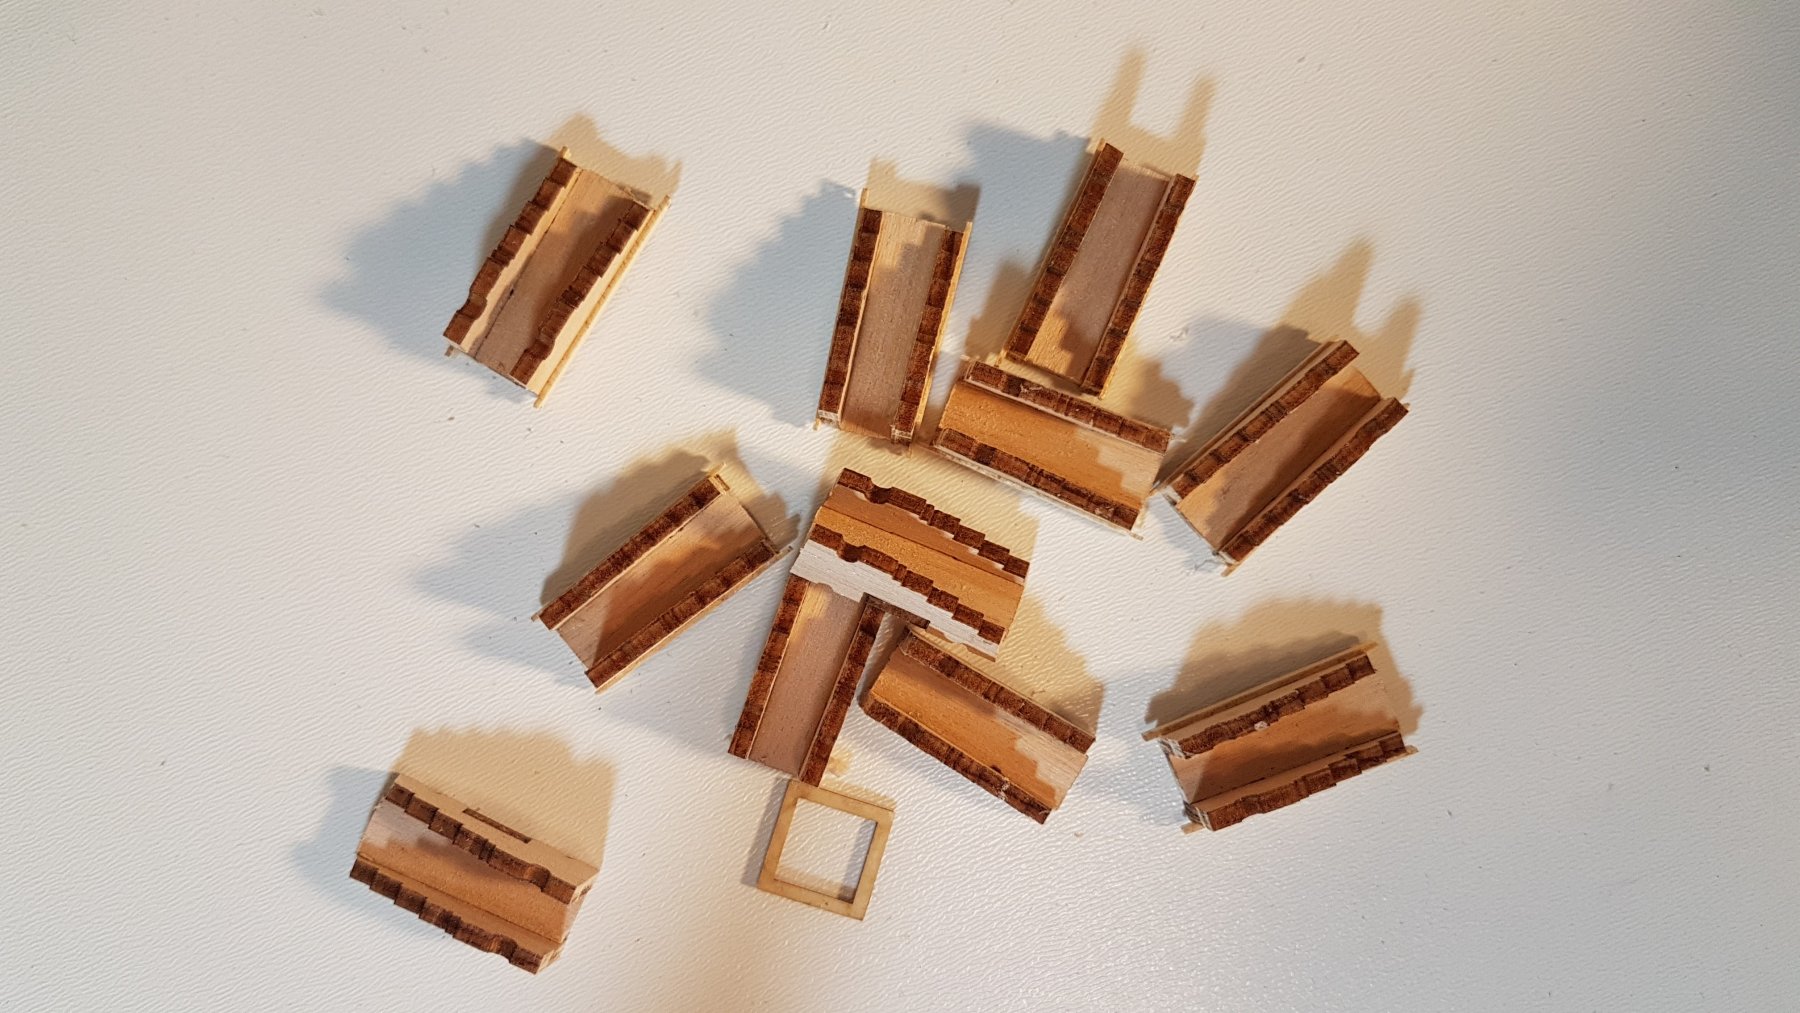
Sanded and shaped the hull last evening. Spent the night sneezing! That was a dusty job. Next time, I'll do this job outside. I removed all the nails, that made sanding much easier. Filled all the nail holes with wood filler and will sand that down next. Really happy with the final shape of the hull. There were some very noticeable bulges in the shape of the hull that I corrected while planking. The final sanding took care of the rest. The flow of the ship looks great! OcCre came through with the English instructions! I honestly didn't think they had an English version and that I'd be on my own. Watching some build videos on YouTube I noticed in some of the shots that others seemed to have English documents, so I contacted OcCre on the weekend. Overnight they emailed a PDF with the English version. Got my respect! The kit included some cast windows and doors. To me they look crude and would likely still look crude even after painting, so I decided to made some new ones. I scanned the castings and recreated them in Coreldraw so they could be laser cut. Cut from some .8mm and .4mm ply, once built up they look much better! I'll add some frosted glass to them when installed. Haven't decided whether I'll paint the frames or leave them wood. To break up the monotony of planking I have been piecing together the 16 cannons in the kit. Coloured with Pan Pastels. Like the looks of this. What I didn't like that much are the solid brass turned wheels included with the kit. I prefer the look of wood wheels, so back to the laser! Drew these up in Coreldraw and cut from 2mm and 1.5mm ply. The blue lines are lightly etched to simulate the rivets. Once in place on the cannons I think they look pretty good. Thumb for scale. Next step is the second layer of planking. It's been a while since I have done this and am doing a lot of research on the best way forward.


.thumb.jpg.60aa8bef43e3ae7a19415577197478e0.jpg)
-
T_Warris reacted to a post in a topic:
Marie-Jeanne by captgino - FINISHED - Artesania Latina - 1/50 - Thonier de Concarneau
-
A Model Railroader adding ships to the repertoire!
T_Warris replied to T_Warris's topic in New member Introductions
No, no store front, online only. Of course the best day to come would be Friday 13th! If you can get through the 150,000 motorcycles in town that day... -
I have no idea how I managed to add all those duplicate and extra images to the post. Can't seem to remove them either, so enjoy!
.jpg.a57e1ded59bd136091e0f79446a9796c.jpg)
.jpg.ae8f83d11c4230eda09ebd2a504ad025.jpg)
.jpg.16f680f4fd1a34635b6b7d5b22346c25.jpg)
.jpg.b48179f408065defc9432f3b7175aa80.jpg)
.jpg.aec0ca02a63f9ca9bda8baae982e94b1.jpg)
.jpg.c80047f9e08893db91053b525ad2c12b.jpg)
.jpg.a2d6e30666213ac434b6dff772f0b9ac.jpg)
.jpg.957d8033db17040192b4e86859fcf25a.jpg)
.jpg.01343034c3bd9950ffa0178976c017ca.jpg)
.jpg.5969aac15816e7852de0ad73ee347c07.jpg)
.jpg.4bed02373e7d2f1b22abe9a824fa8cda.jpg)
.jpg.55c5146eed8ec8fd7792dbc1c5fa4f99.jpg)
.jpg.95153e1027cd9955651273b8d5f0c06b.jpg)
.jpg.06bc409065f3b81519dbbc6bd5ecabd5.jpg)
.jpg.2bfa4f9bab2a42f964cce6eb50f1f21b.jpg)
.jpg.8dea3d8e739ce9fa0954c821fc714491.jpg)
.jpg.69d49495cc58b1b58c83f3f720d5ec28.jpg)
.jpg.2071be9a6ff7d3123f3f2b8c78258beb.jpg)
.jpg.1c6de7d97c56aa5946f64adc5ec8b005.jpg)
.jpg.fa7077e3c5ca708f986045cfdcfde296.jpg)
.jpg.7edc761e984792a1a3127629754f5560.jpg)
.jpg.480a4649514b97ad409e9ad83a663890.jpg)
.jpg.e9b2e523332bf23c6774b459a2357526.jpg)
.jpg.a2bcd487aecc1bfe7e8bf6922e481edb.jpg)
.jpg.49a84759f222c9f4272b7a3c26d8c354.jpg)
.jpg.7e43f96bfeefaa88bff8465fe5712368.jpg)
.jpg.1e09dcacd7c337eb11c1349eba90ba29.jpg)
.jpg.2dd89124fef4bed974c7b23f6a96adc5.jpg)
.jpg.c23f8a0fd1d41669b8855580e379de1b.jpg)
.jpg.81b7a5226ff58706cf87cfcaa24b8645.jpg)
.jpg.108bc9a7cfae2ec400c79f99e48014d9.jpg)
.jpg.3d8045f42f8638570004ee7e30c29bb4.jpg)
.jpg.eea3fb2b1b082af8058c9c880cb761c0.jpg)
.jpg.a989503540b9214ba89daec0d30c6918.jpg)
.jpg.98fe6f3c1019cc938a600693402df46e.jpg)
.jpg.0aa086ed27f5b7c119ccf6c8db007a23.jpg)
.jpg.c35ed7e3512ae7f1954596584f8b796b.jpg)
.jpg.d6446cdc00090f08dee0445f9d18cf3a.jpg)
.jpg.99ac14047f30c84df4321f59c352bec5.jpg)
.jpg.54c6f94e5a2f09d8246ecd8033726081.jpg)
.jpg.fb33ac42a82844f0c078c6b4fc204b21.jpg)
.jpg.f2e90afdf37c7757853291c9e8a90276.jpg)
.jpg.46347258410861650d16e43ef677821a.jpg)
.jpg.415ad13c84e5c1ebc5f12e8c70311951.jpg)
.jpg.0c53c43520db824760da1e58ac034103.jpg)
.jpg.e9d073693e4c18e49e48de86851714df.jpg)


.jpg.c5569b7c233ee6c3215c1b85e17647de.jpg)