Search the Community
Showing results for tags 'planks'.
Found 5 results
-
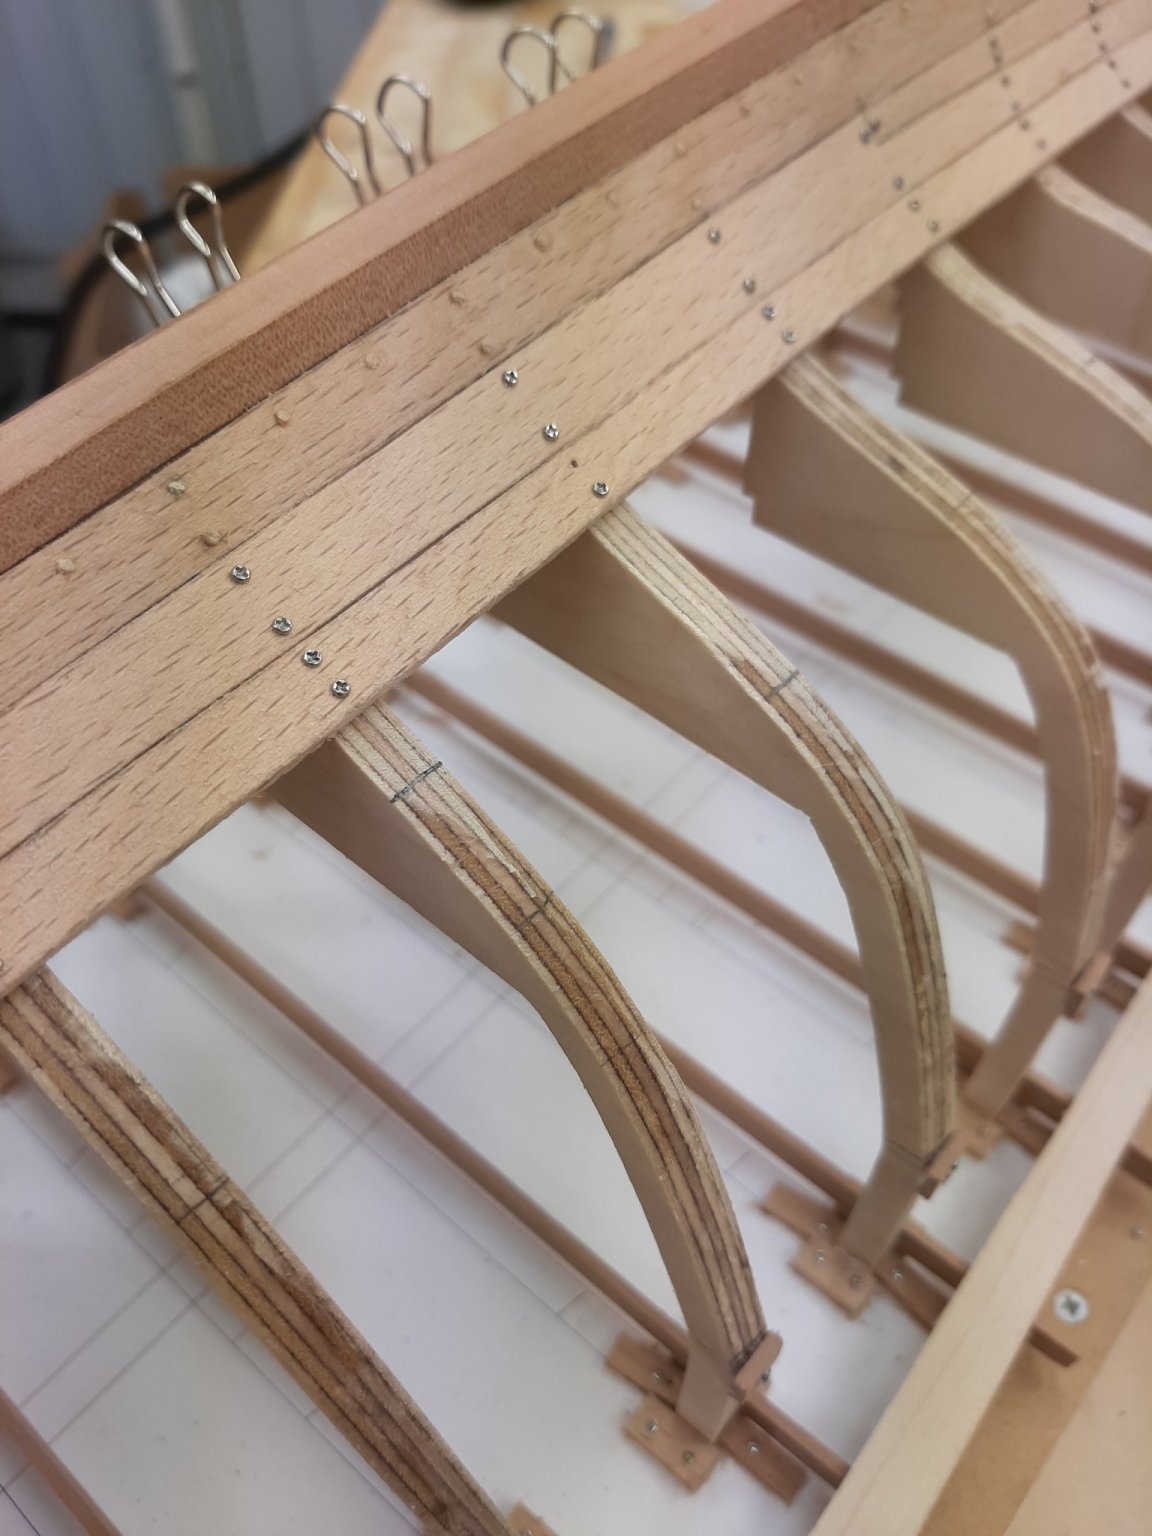
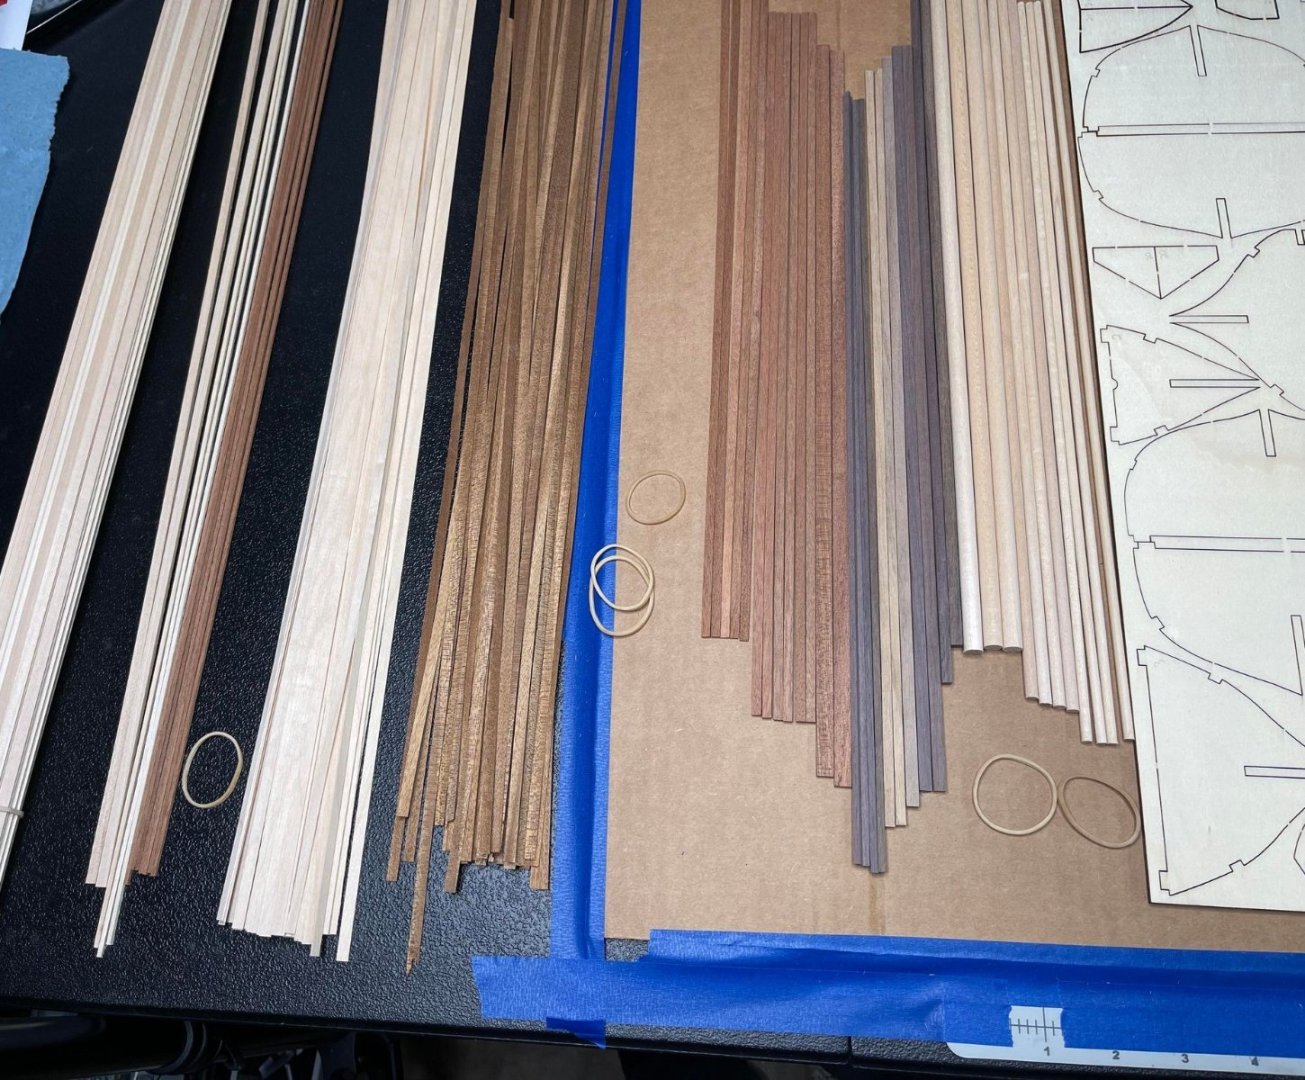
 Hello everyone, I'm currently building the OcCre model Corsair (1:80 scale) and it's my first ever super detailed model ship. I've been a huge fan of building dioramas and crafting terrain/monsters/miscellaneous things for my D&D group, and also I've been quite handy in assembling all types of kits from Tamiya, Revell, Trumpeter, etc. Being new to wooden plank on bulkhead models, I'm having a hard time finding anything about the identification of the types of woods generally used in these model kits. I've included a couple pictures of the wood that was in the Corsair kit and a picture of one of the pages in the IP manual/parts list. Unfortunately (or fortunately, I don't really know yet lol), the parts list doesn't include a list of how many of each type of wood was included with the kit, rather a cut list for each individual piece to be assembled. In the right column it states what type of wood to use for each particular piece but that's where I'm stumped. I don't have any idea what is what, and to make things worse there are multiple different colors/types of wood with the same dimensions. The only thing I've found online really is that most types of wood commonly used in these kits can vary wildly in color and texture, and that sucks lol. My main concern is just that I use the wrong type of wood for a particular series of parts and then later on in the build find out that I've ran out of a specific kind of material and get stuck. If anyone has built the OcCre Corsair, or can help me identify what the woods are that were included in this kit, I'd be forever grateful for your help in figuring this out. Thanks to anyone who has read this, have a good day! Cheers, and take care <3.
-
 Every now and then something in my workbench stresses me out and needs to go. My supplier of planks has gone out of business and so I will not be able to replace the stock of planks that I sell from this supplier so I just want to clear out what I have left. The product is a sliced veneer from Spain. The Europeans call this stuff Spanish Sycamore and it is really nice and bendy. Clients who have used this product are very pleased. There are two sizes of planks; 6mm x 1mm x 1200mm and 6mm x .6mm x 1200mm. The thicker planks are in bundles of 25 and the thinner planks are in bundles of 40. I would like $25 USD per bundle and I think there are seven or eight bundles left of each size. I really would love to sell everything to one person. Offers are welcome and will check the number of bundles if someone wants to take them all. Shipping will be $30 USD anywhere in Canada, $60 USD anywhere in the US. For anywhere else, I'll check the price if someone is interested. Thanks for looking! Rick
-
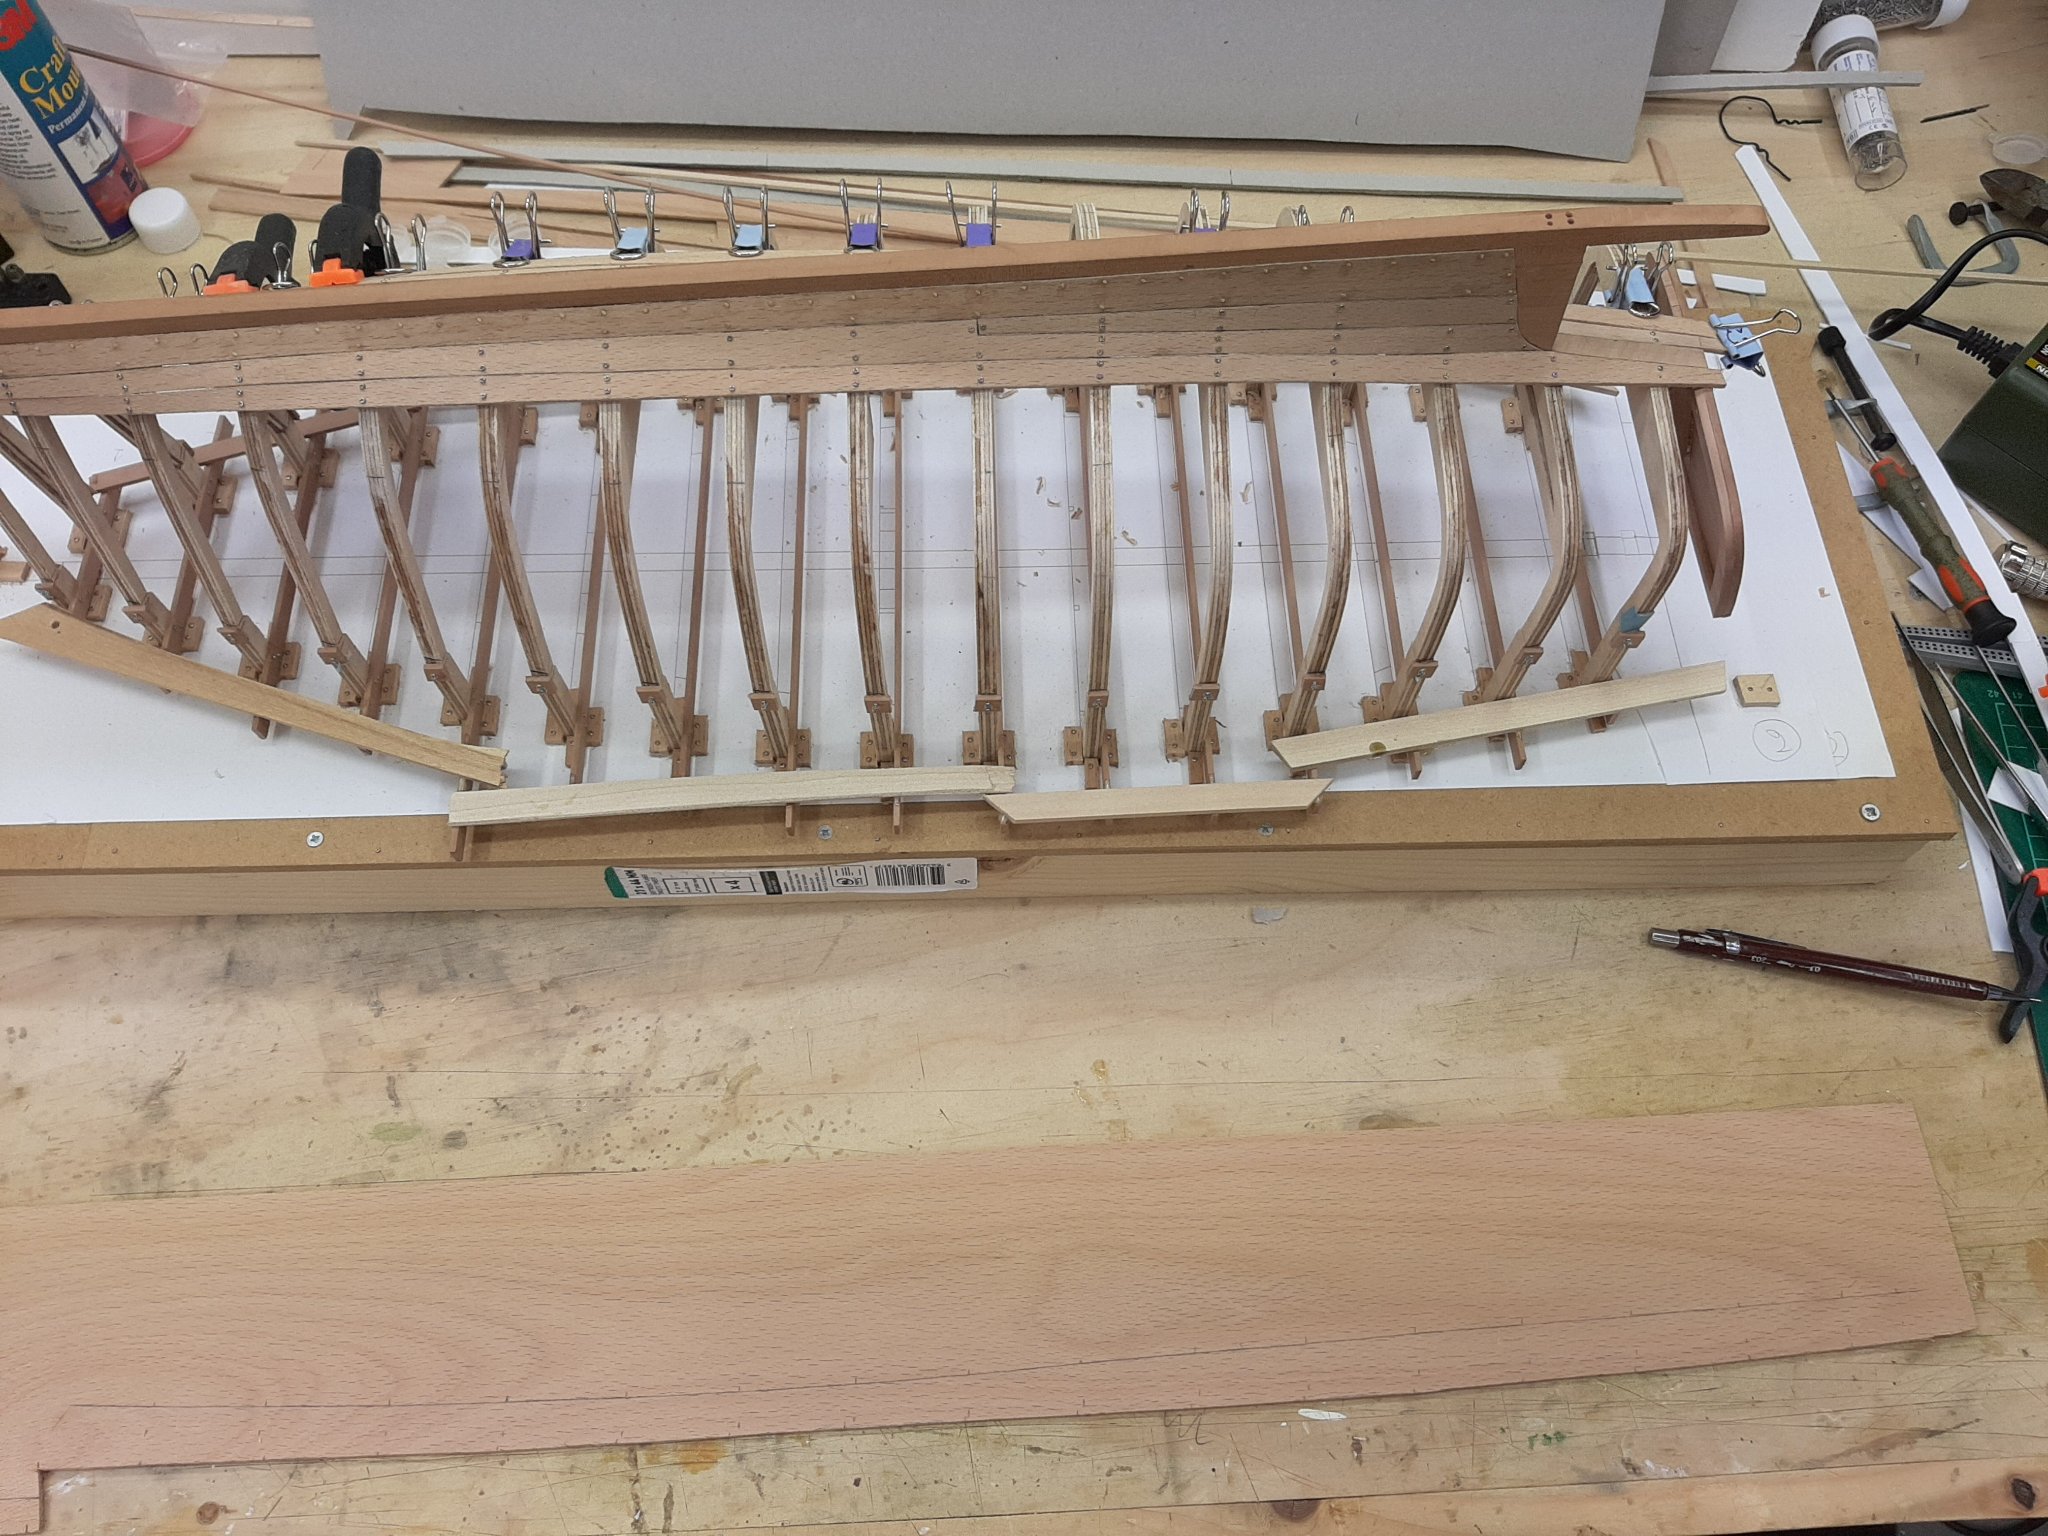
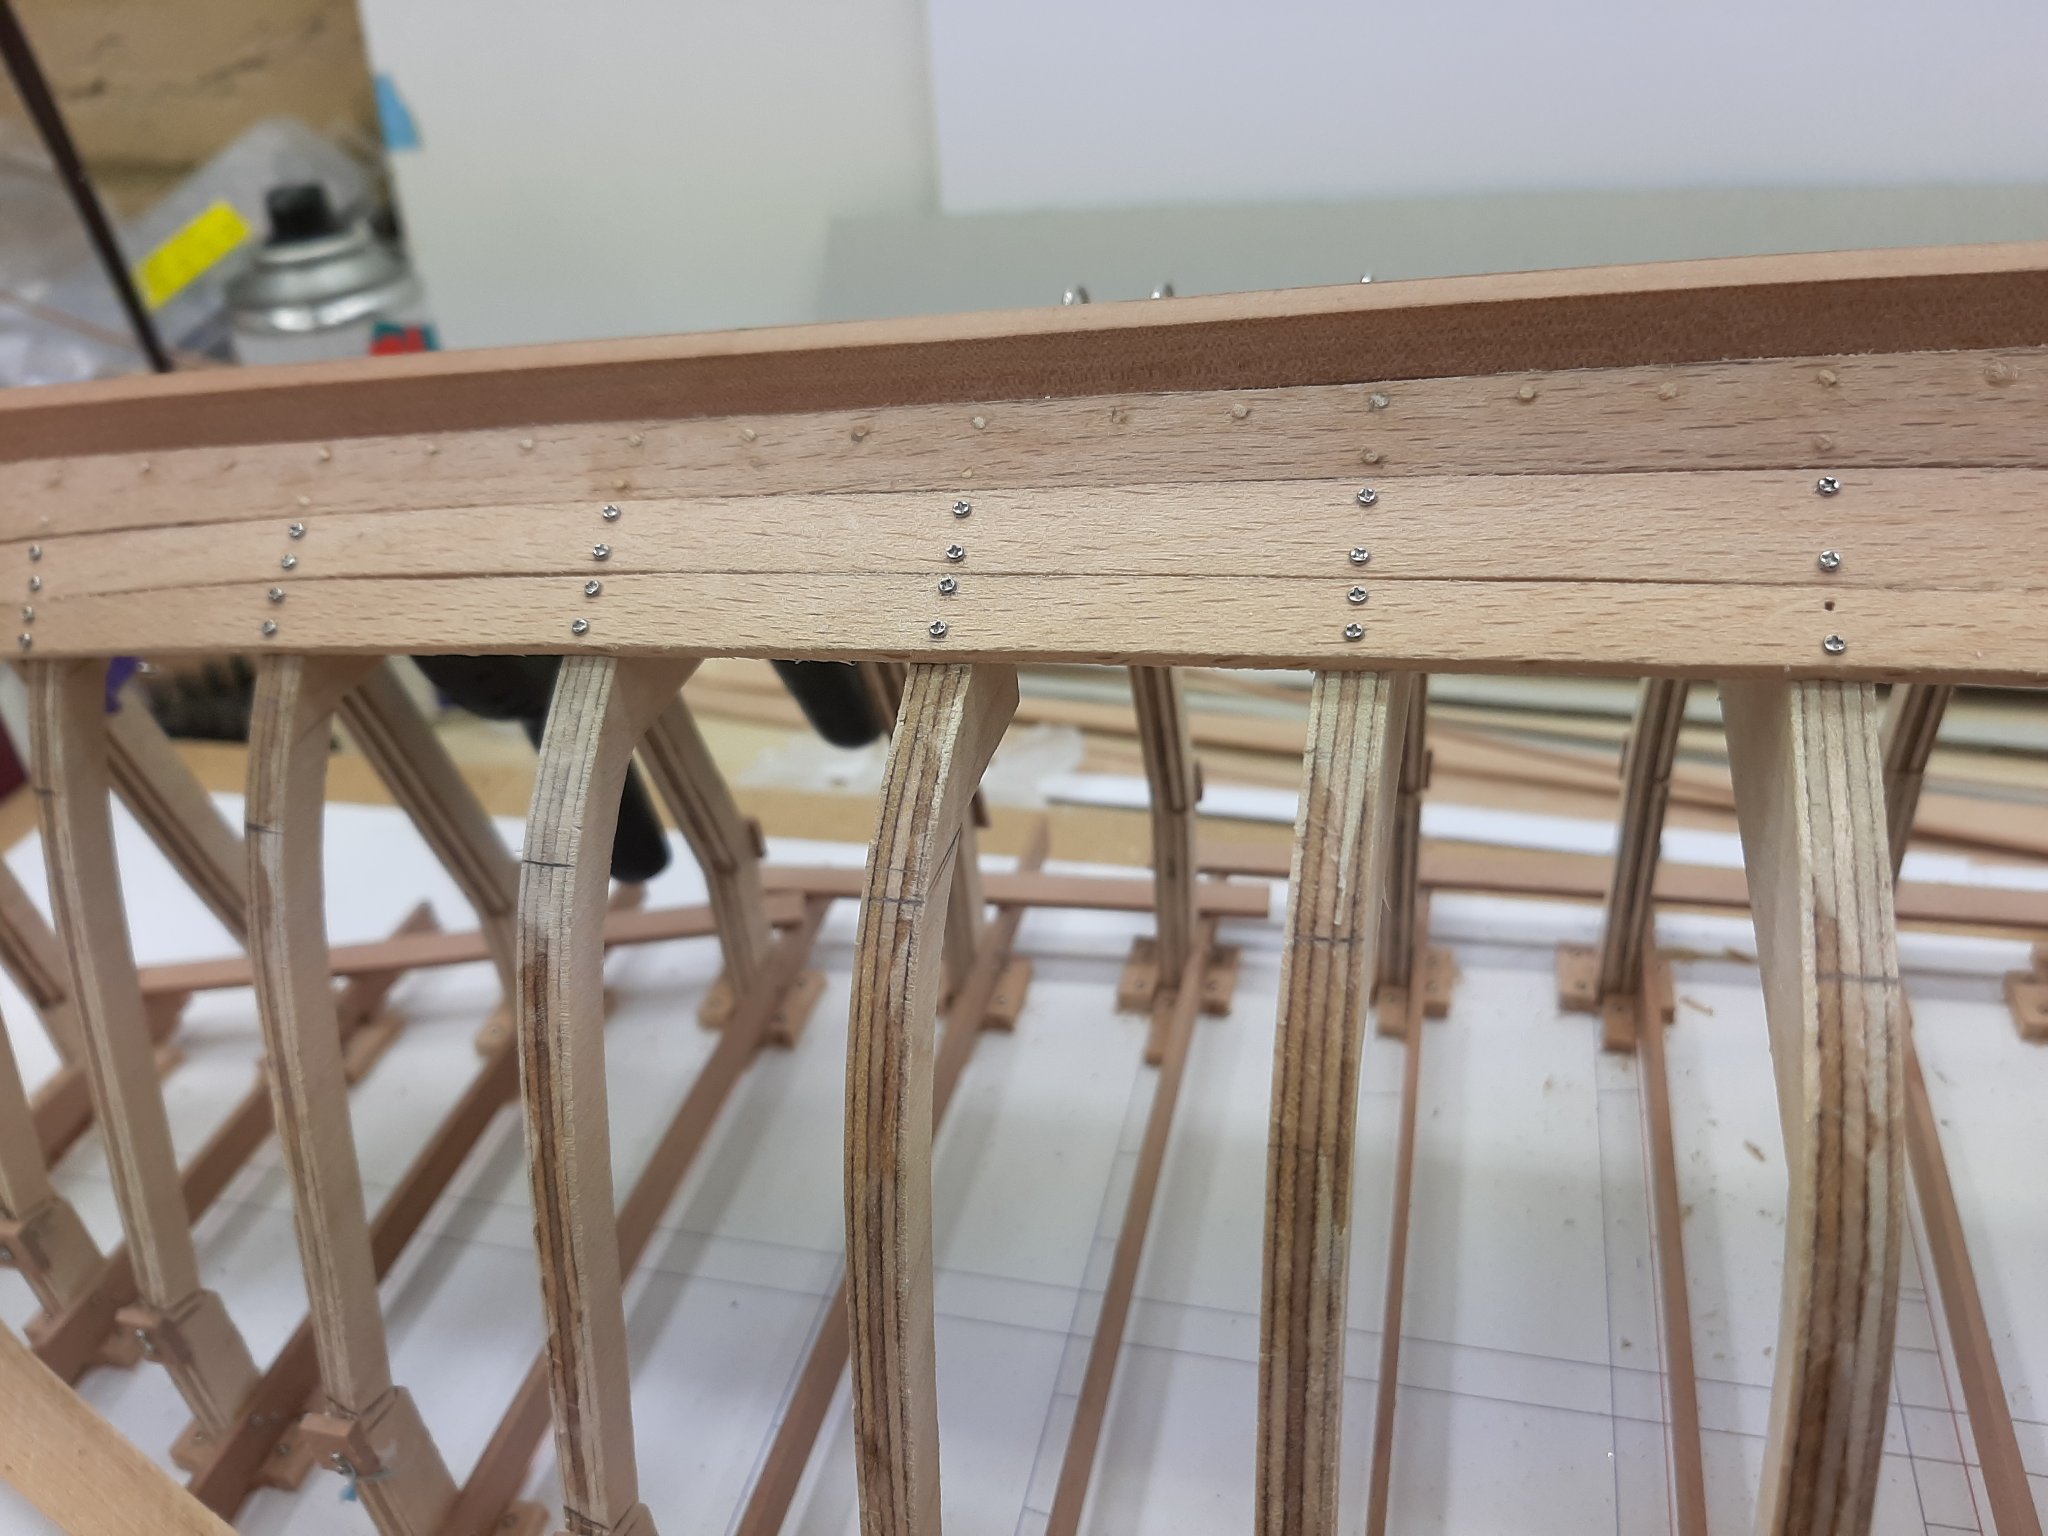
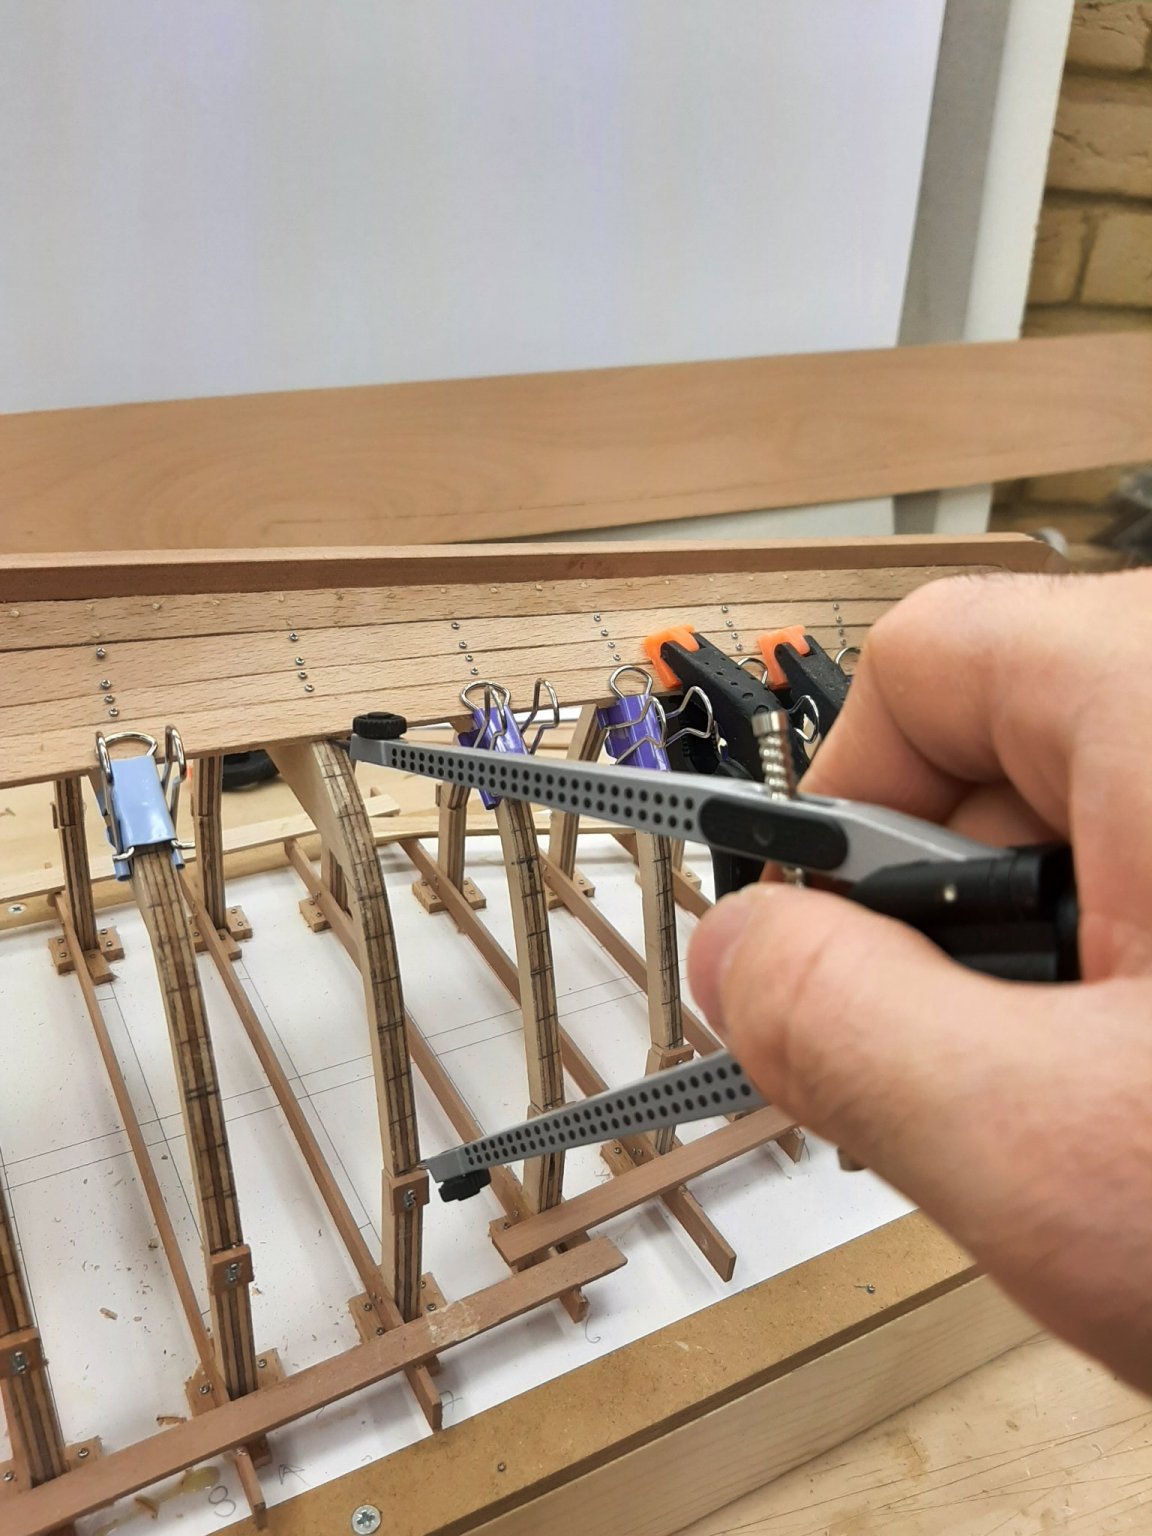
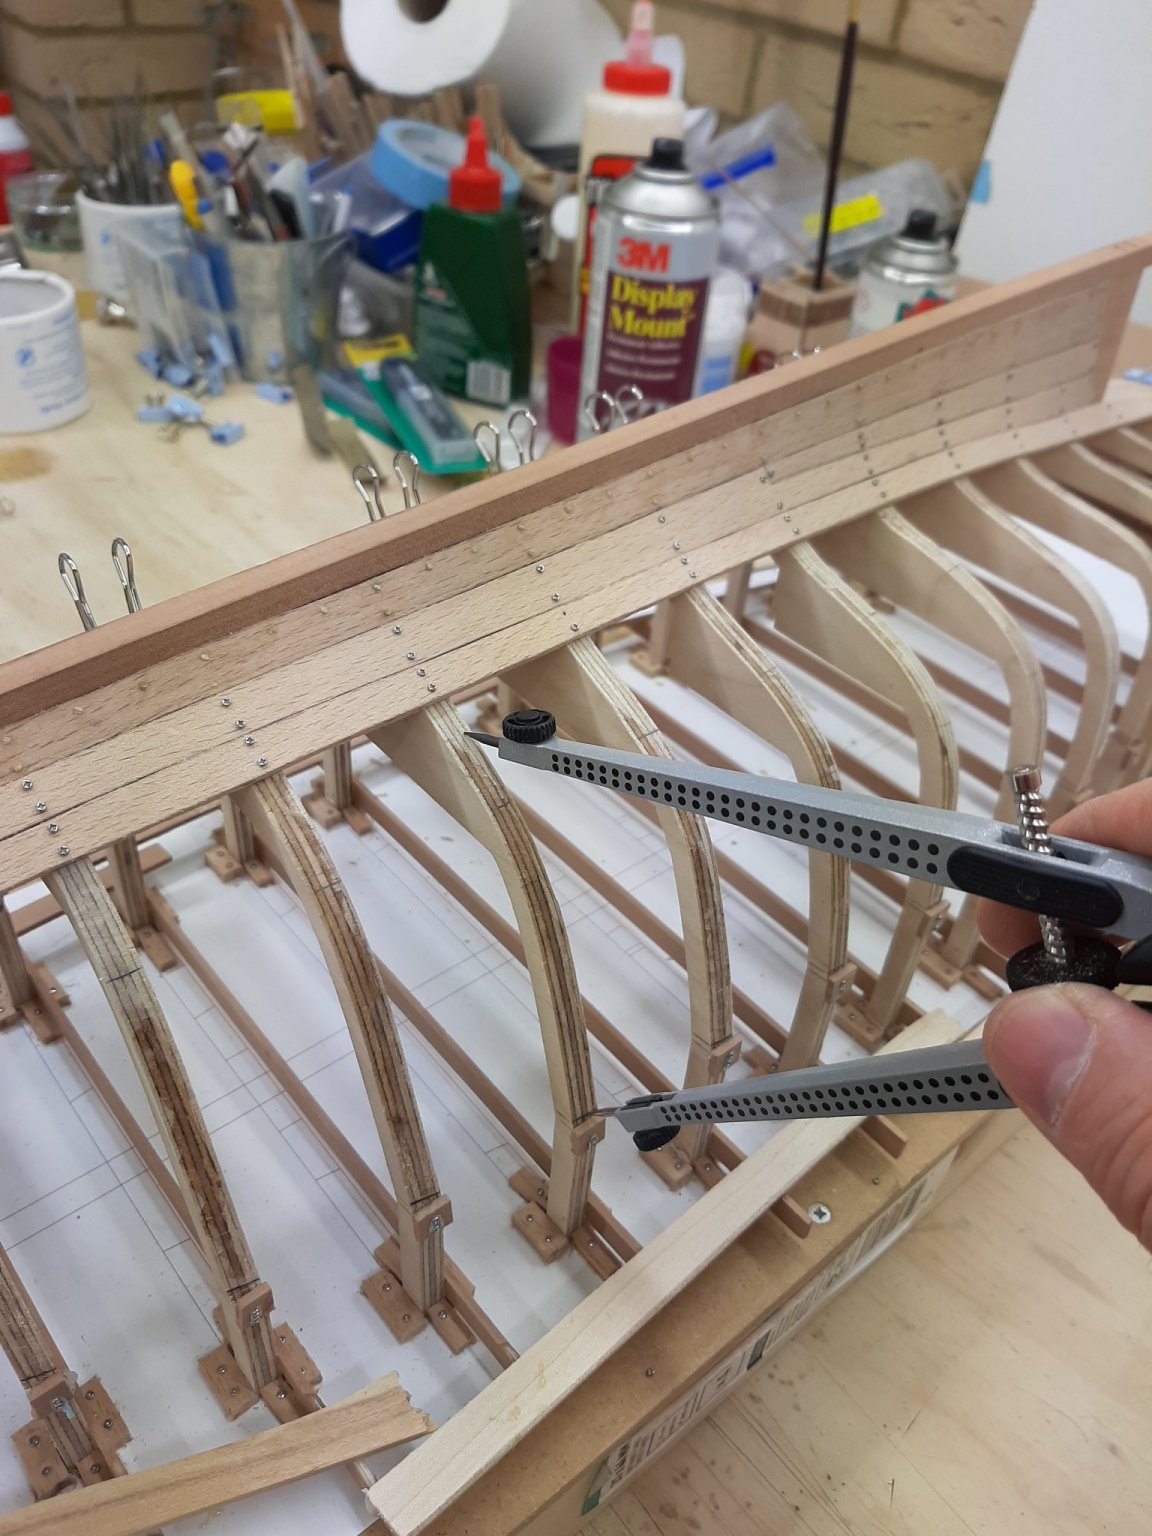
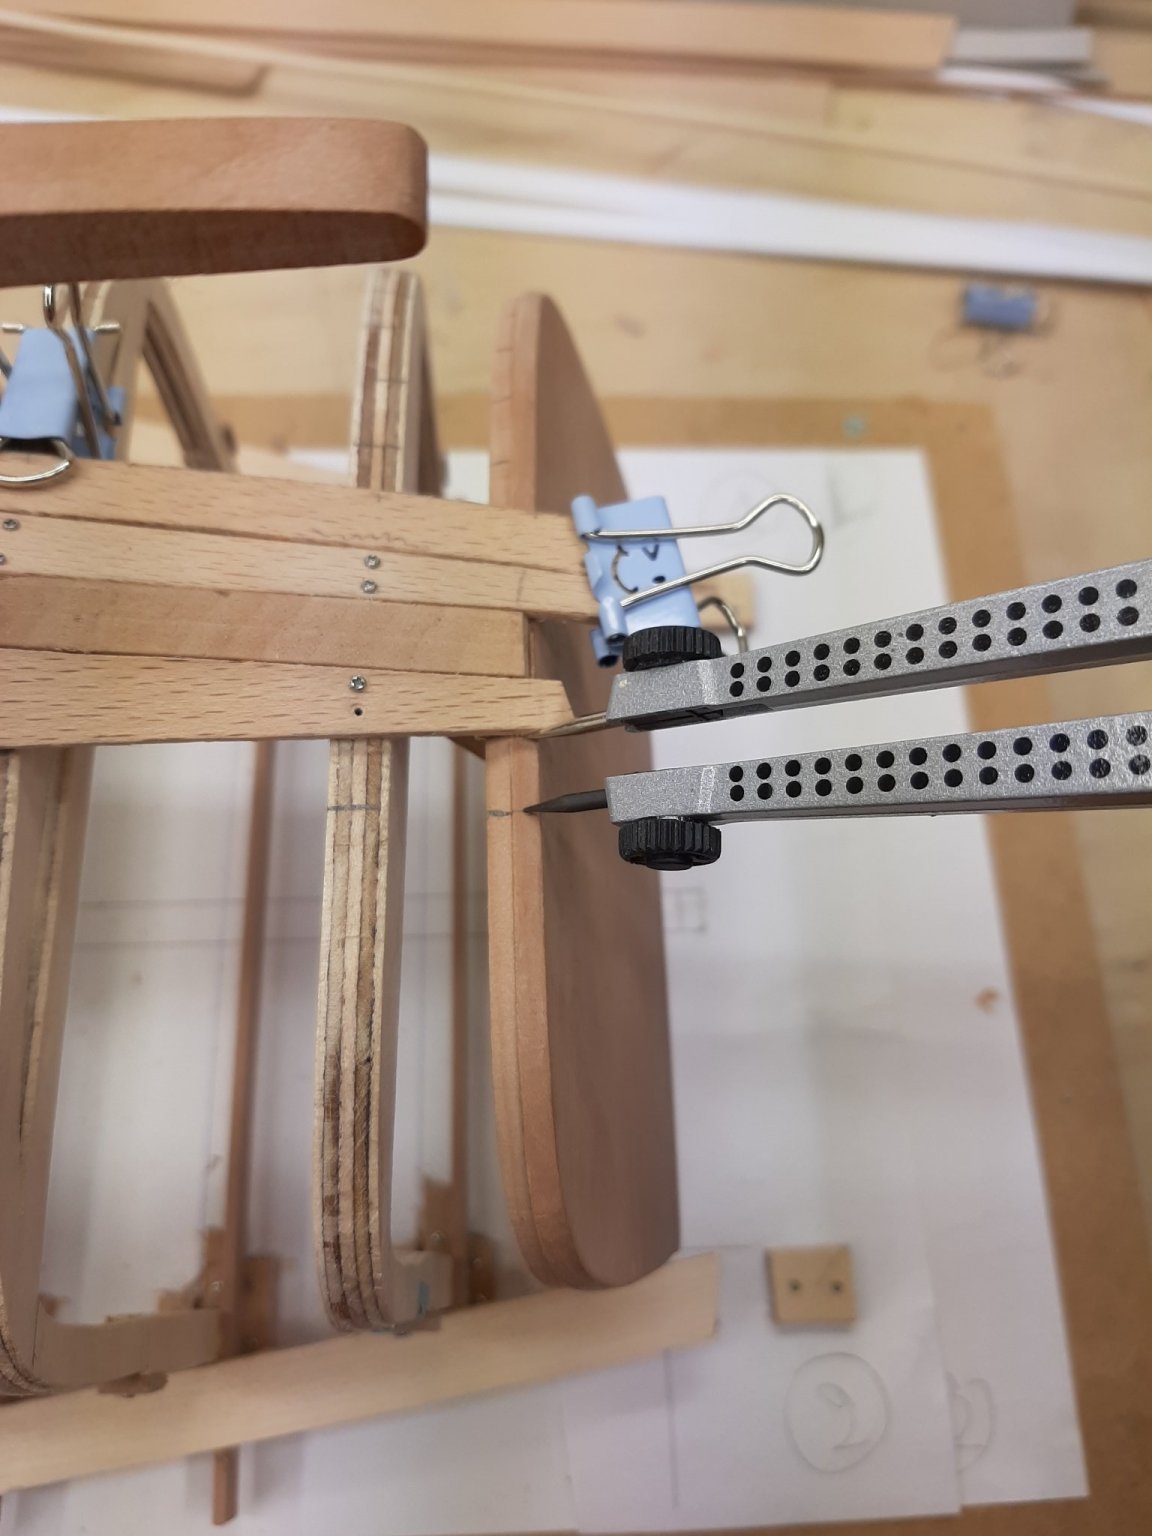
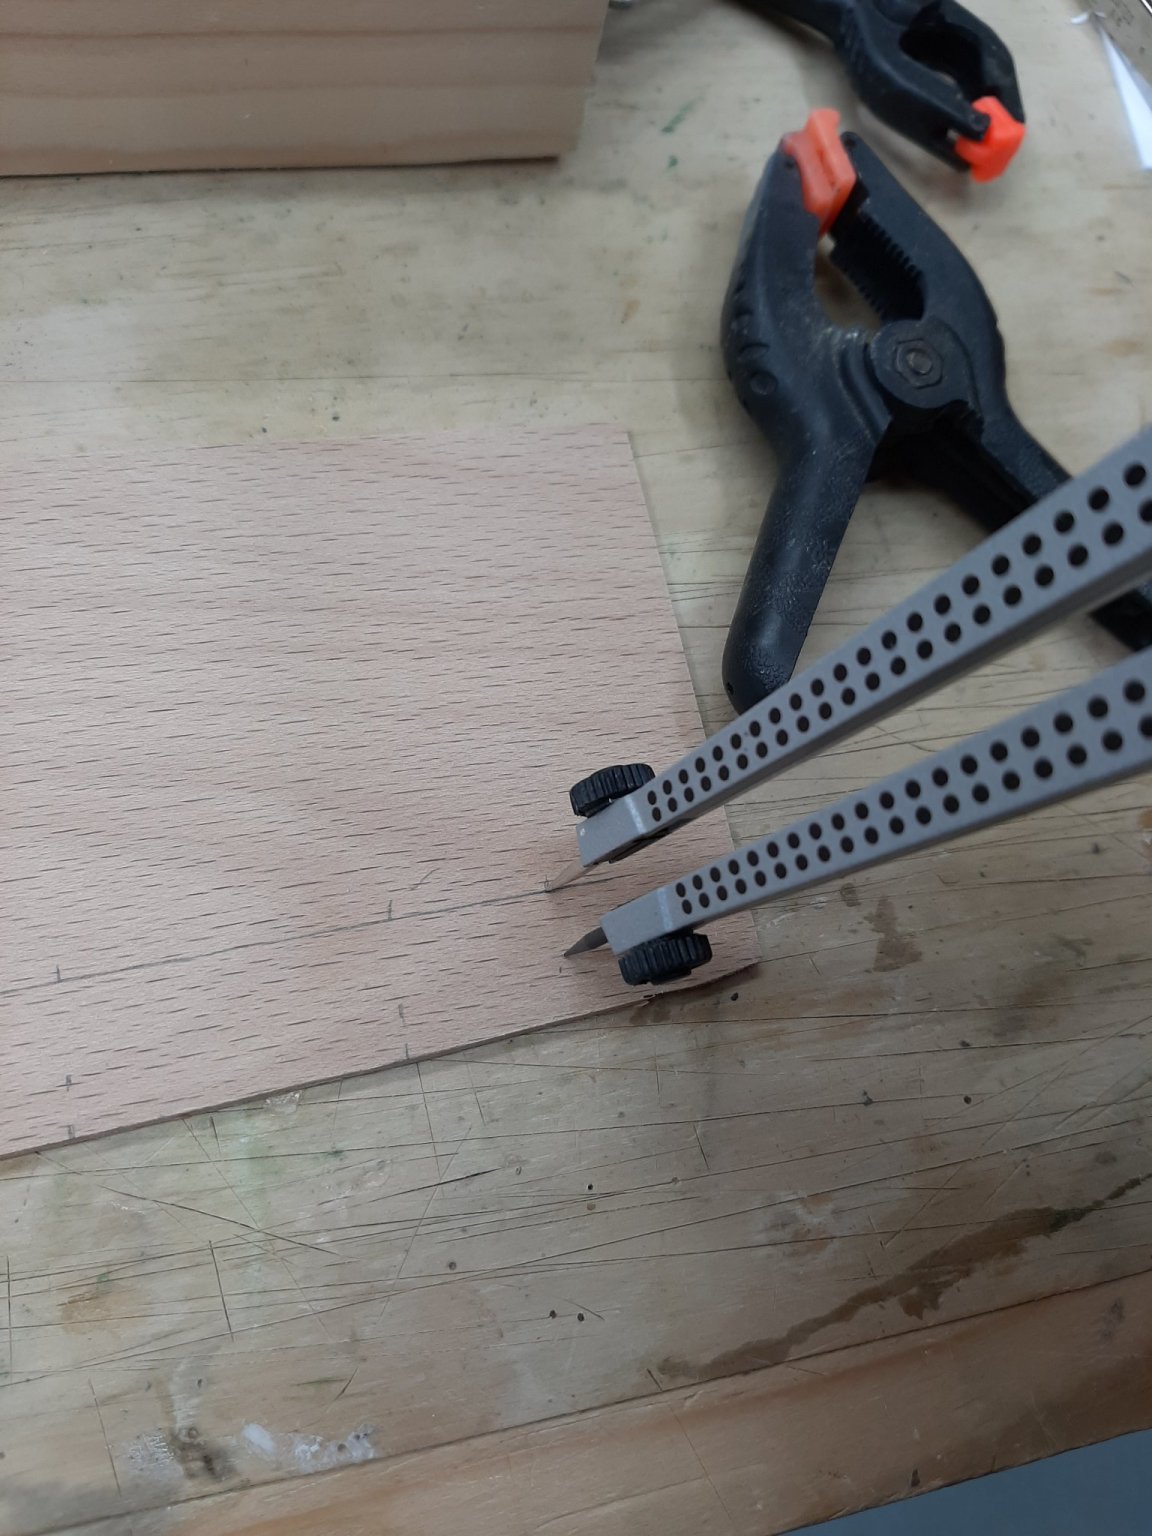
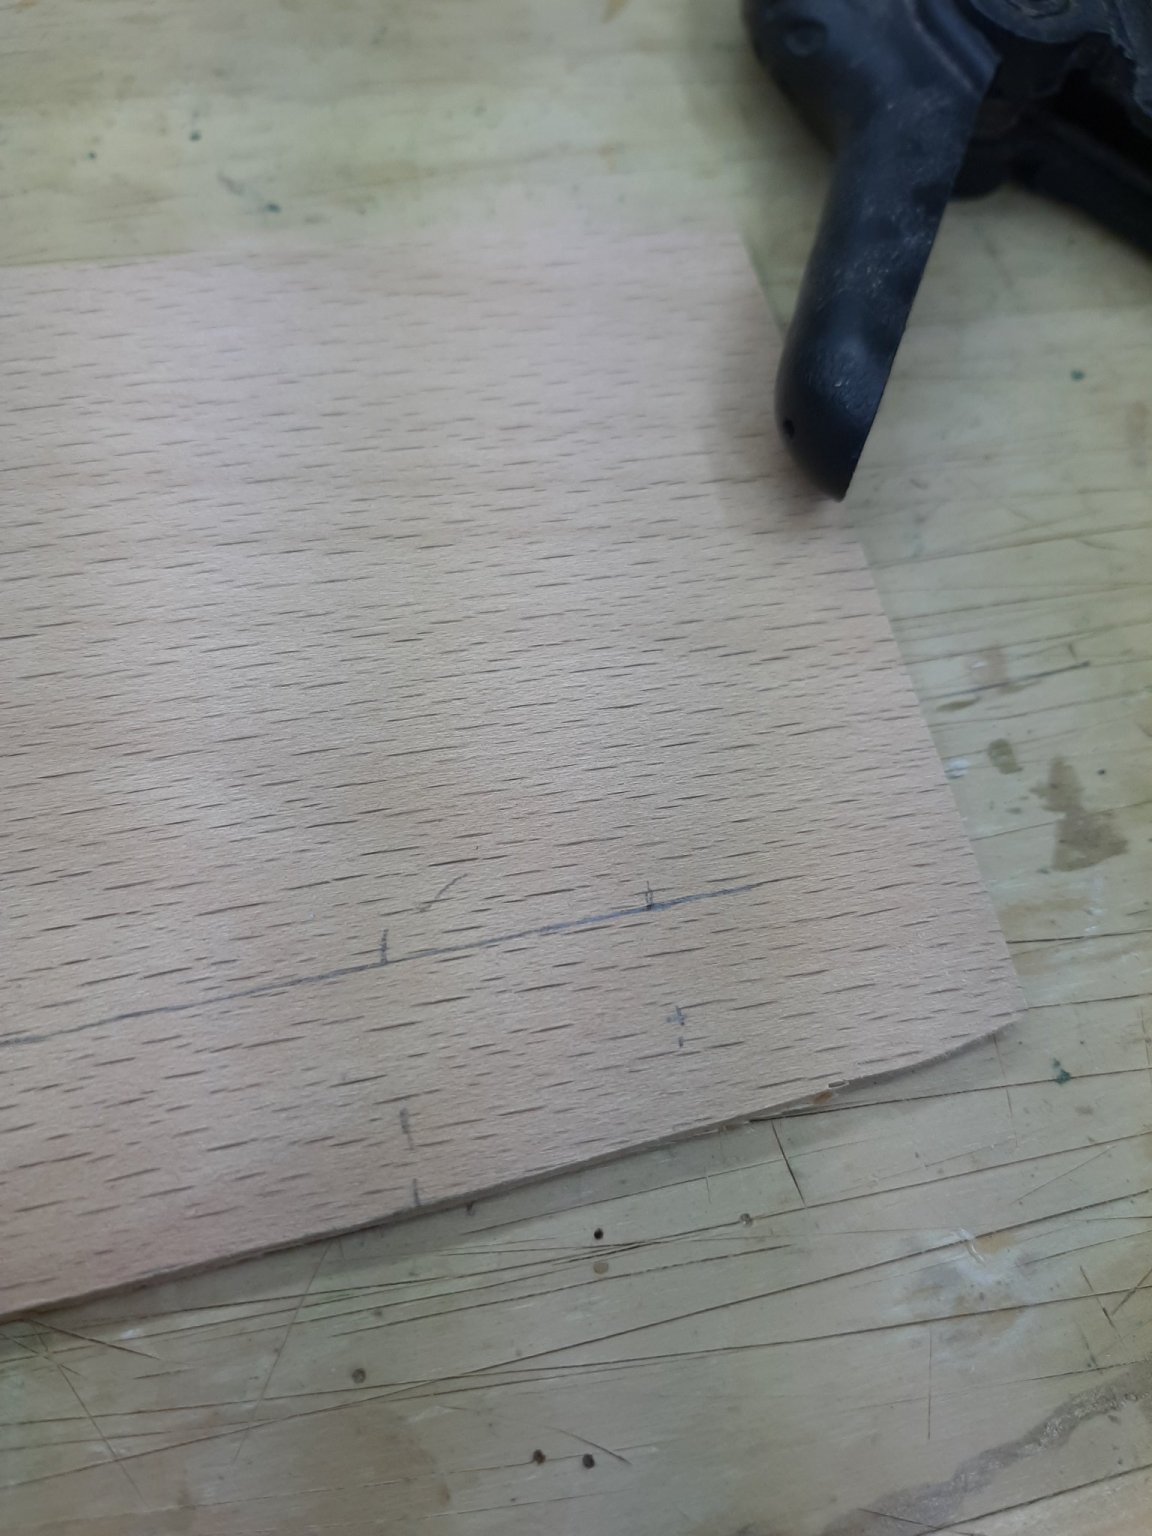
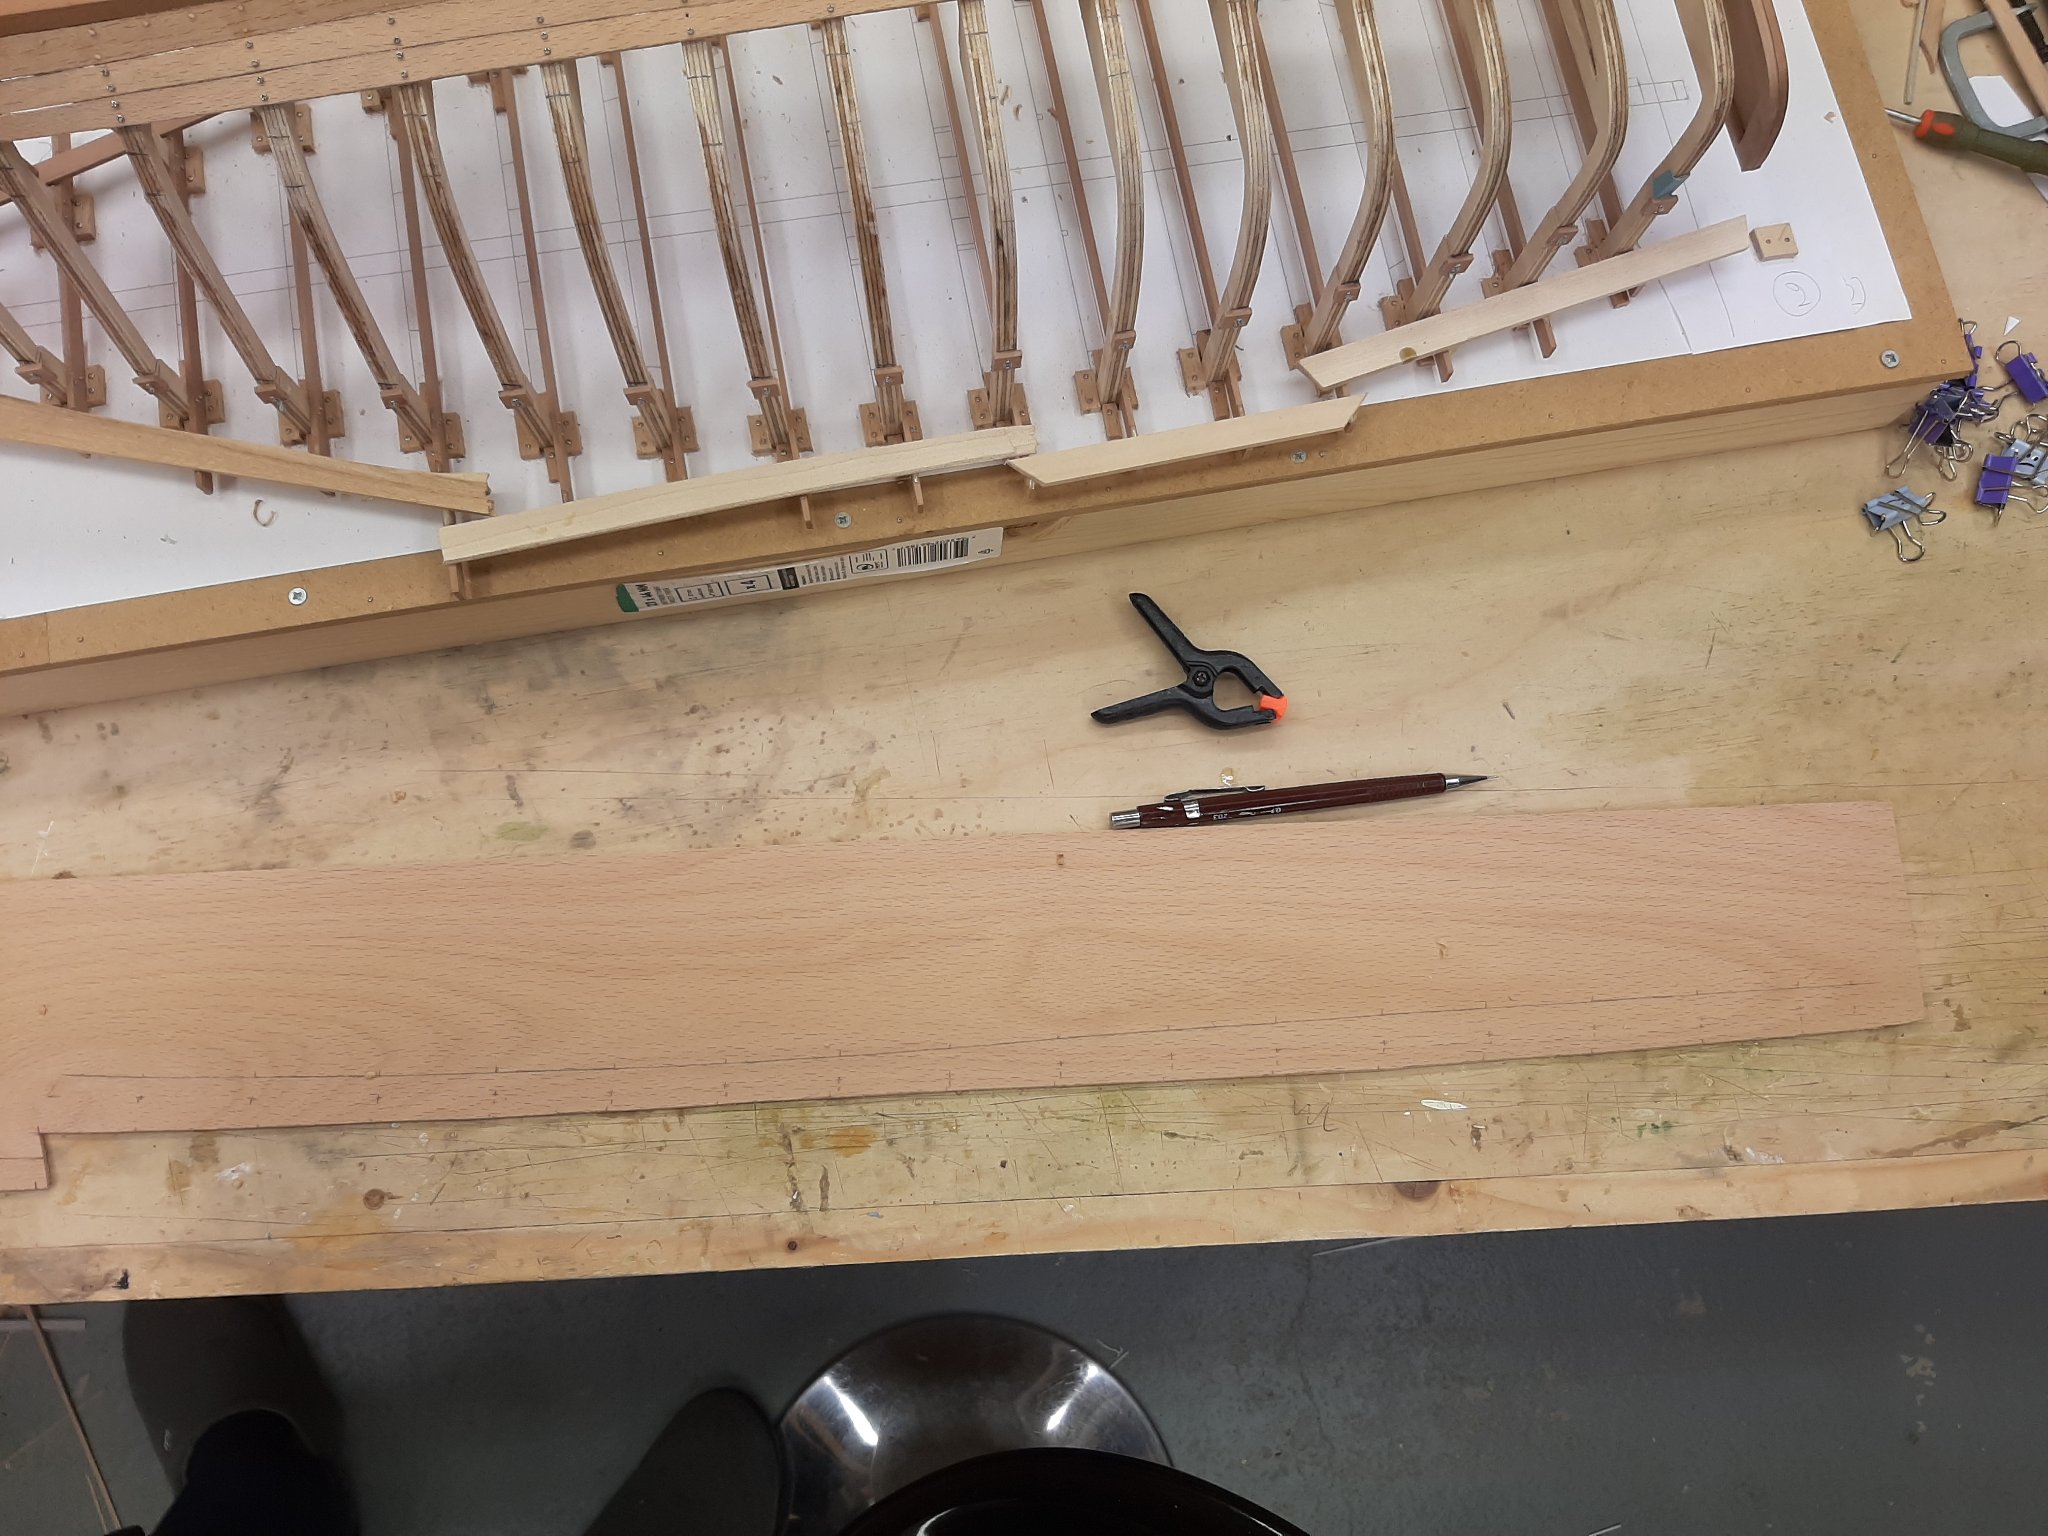
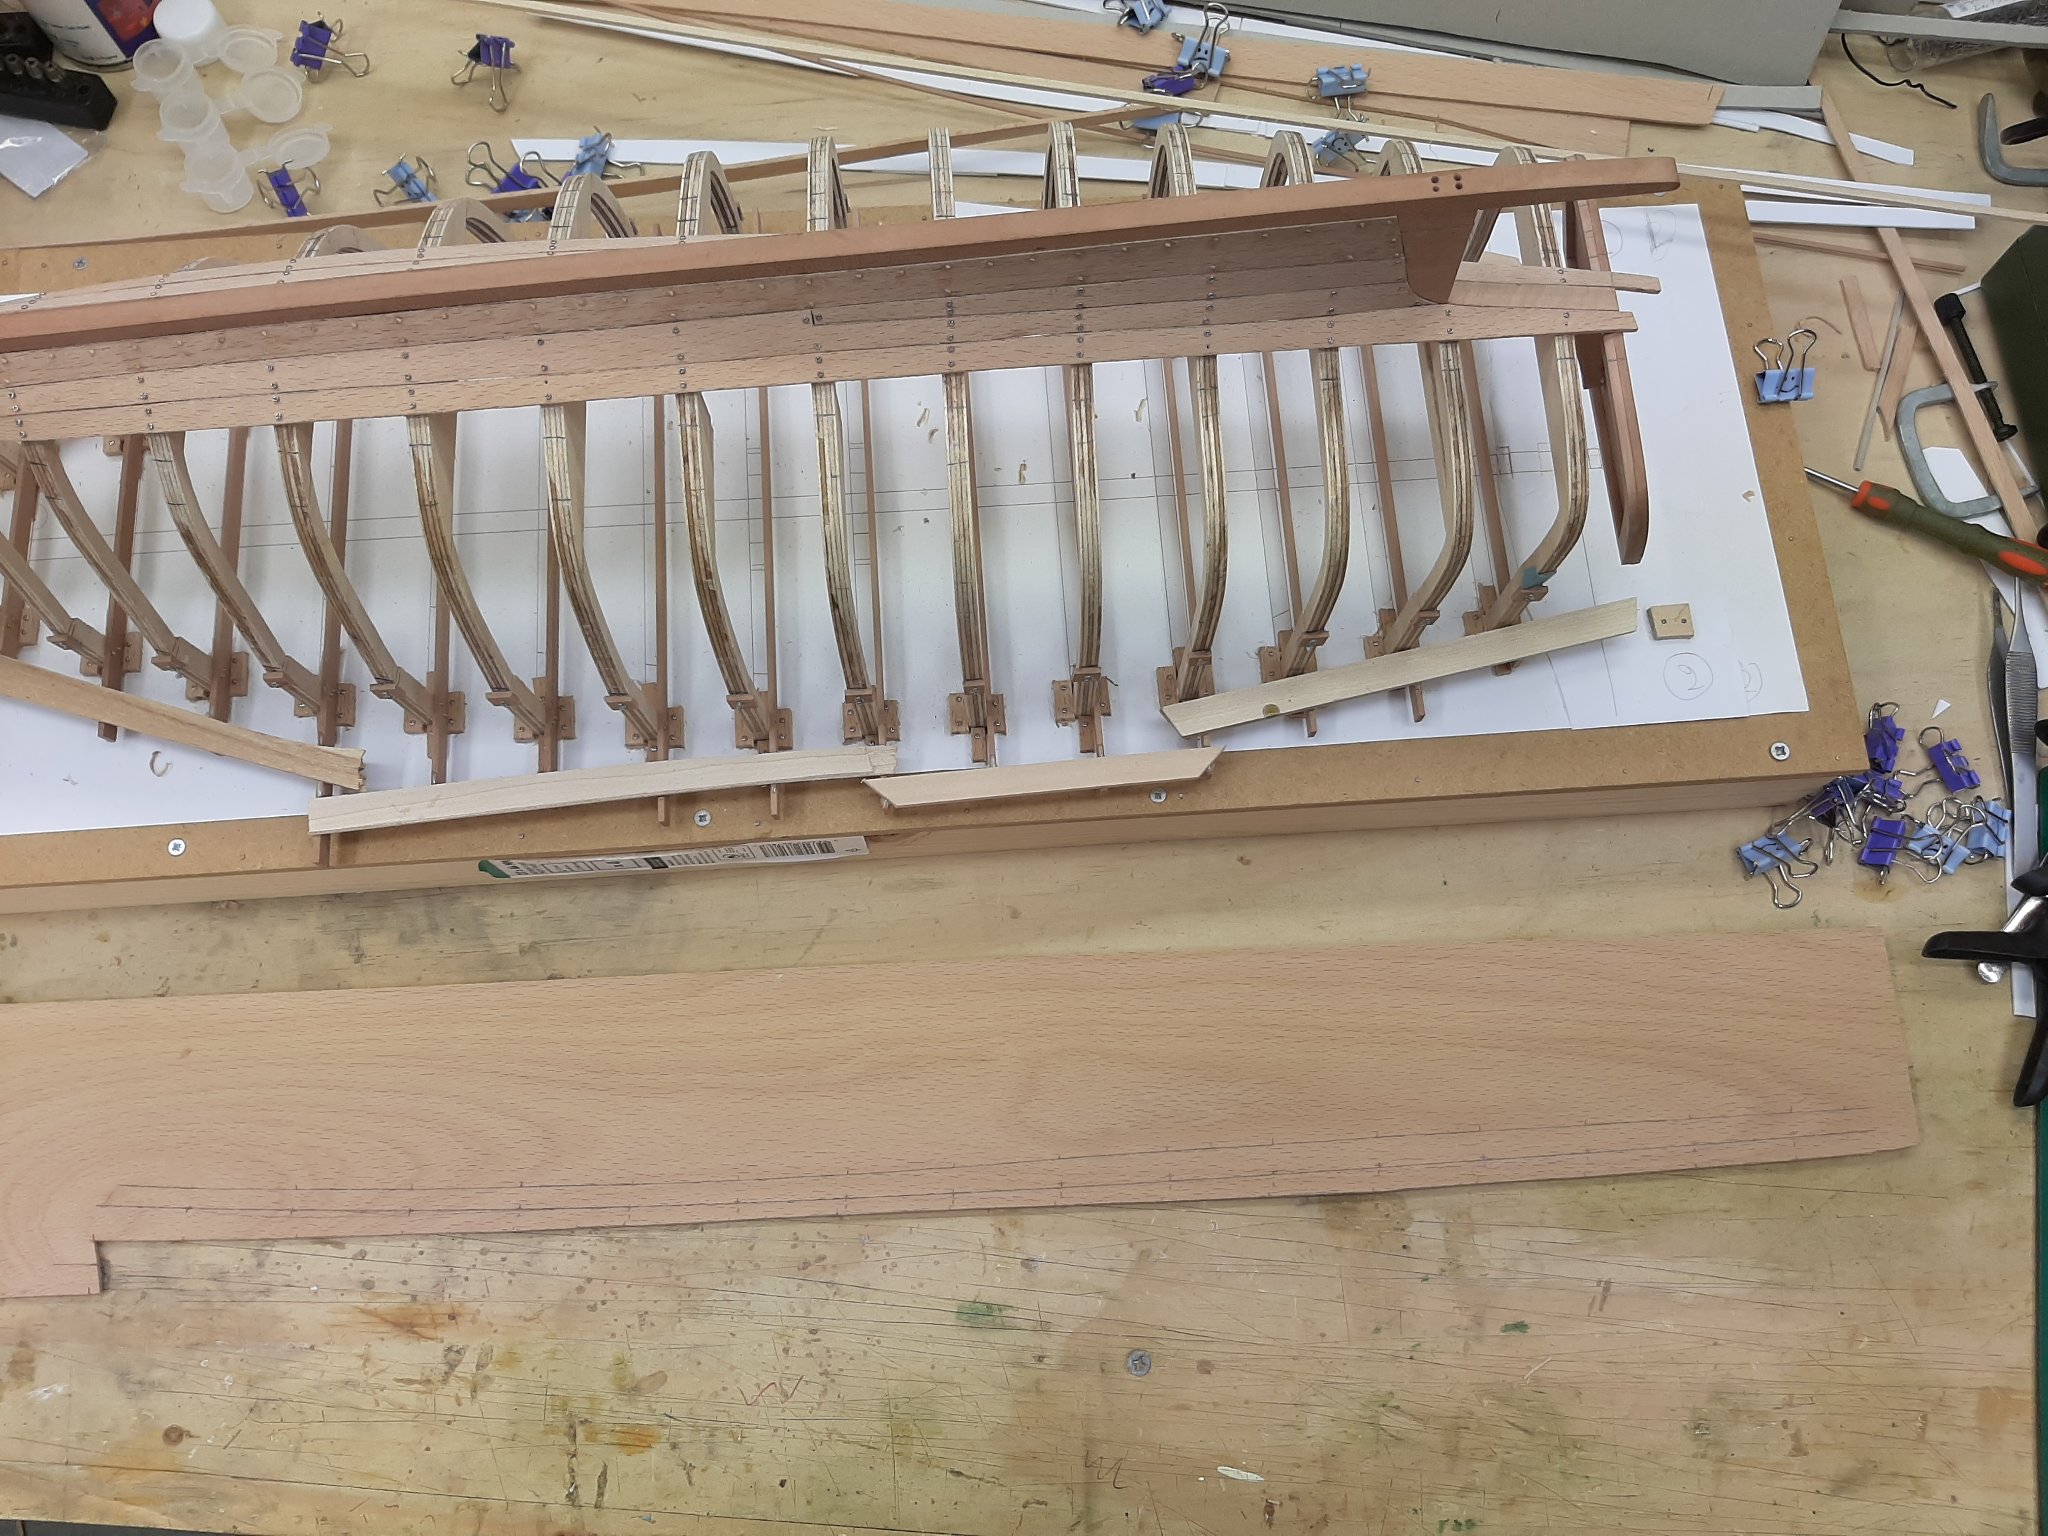
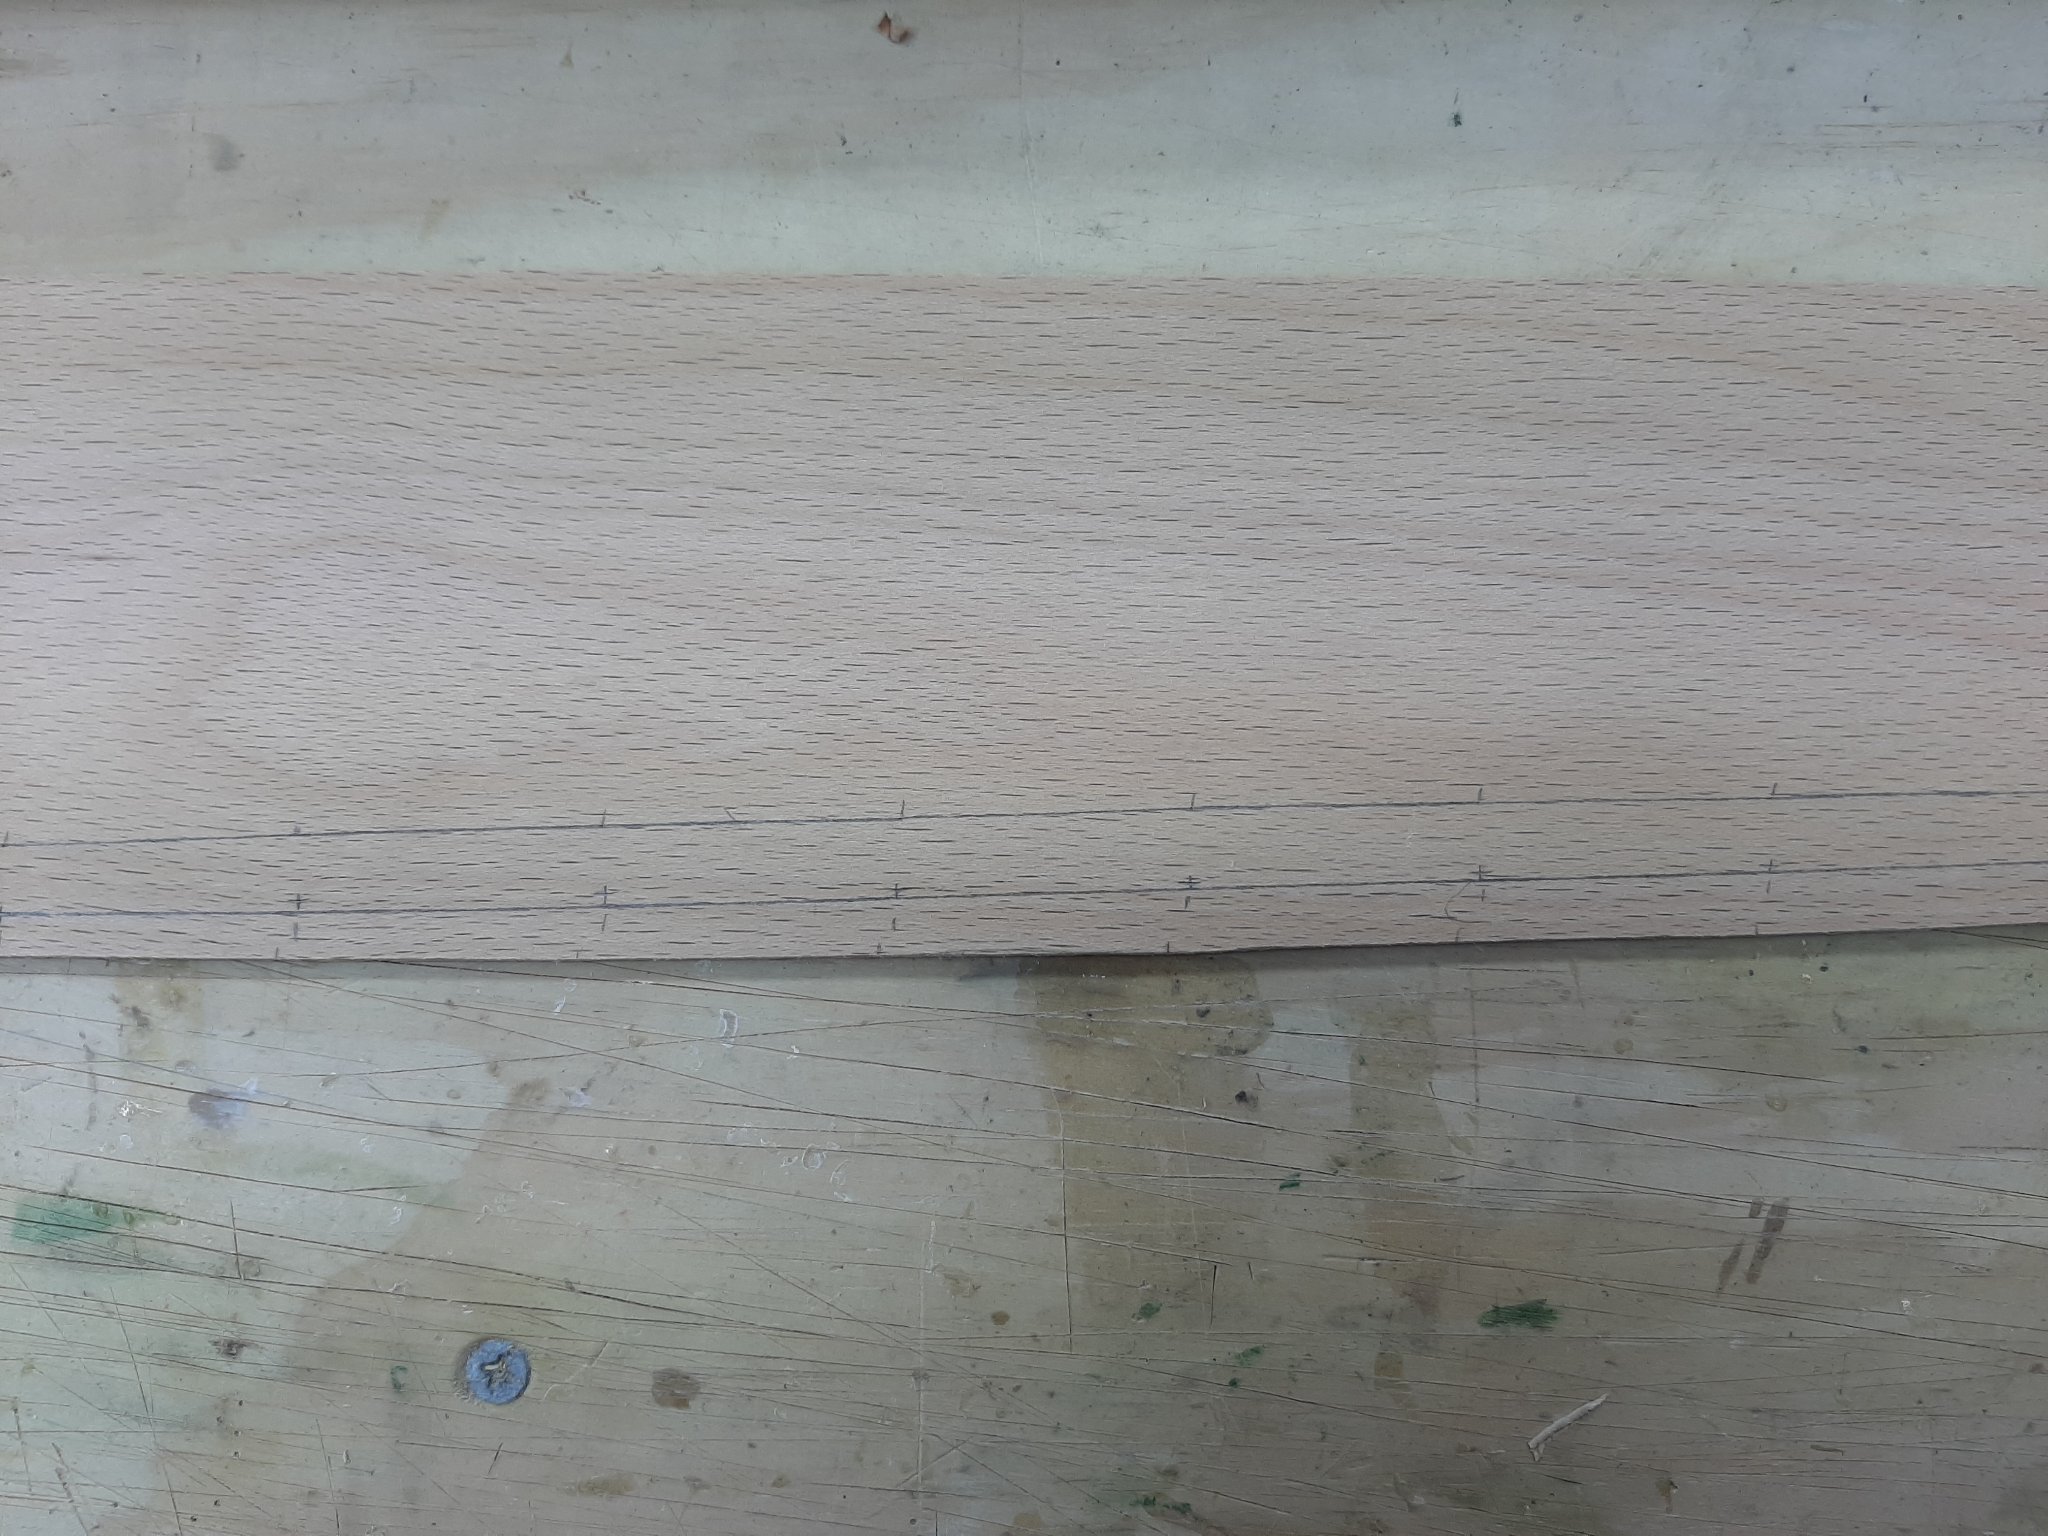
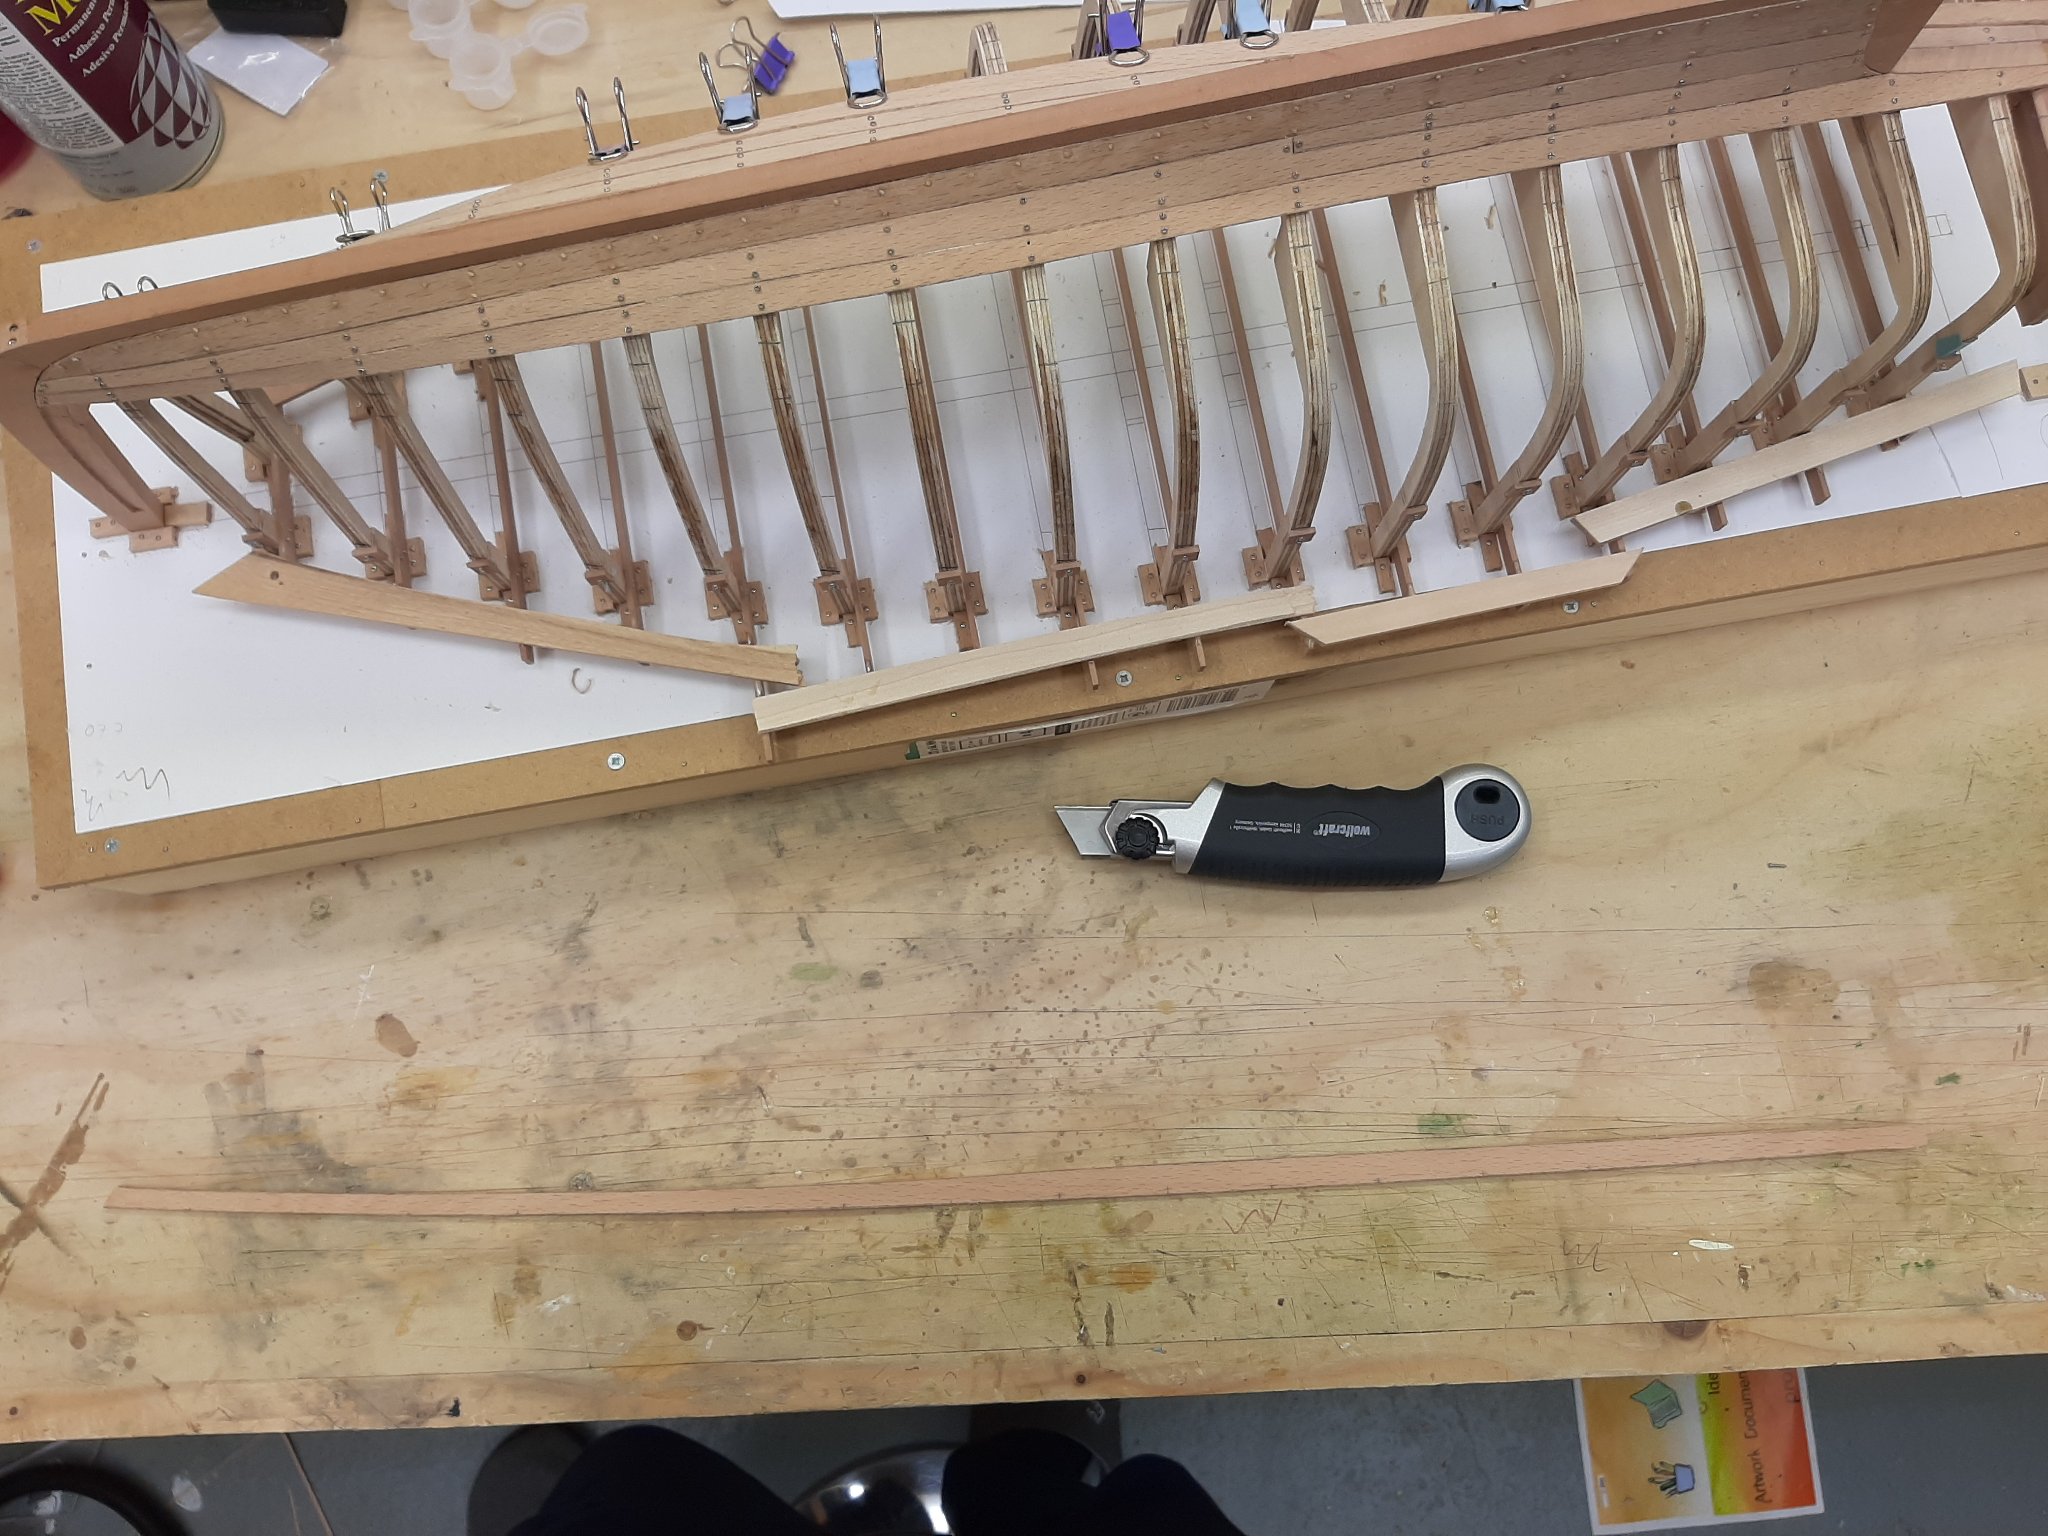
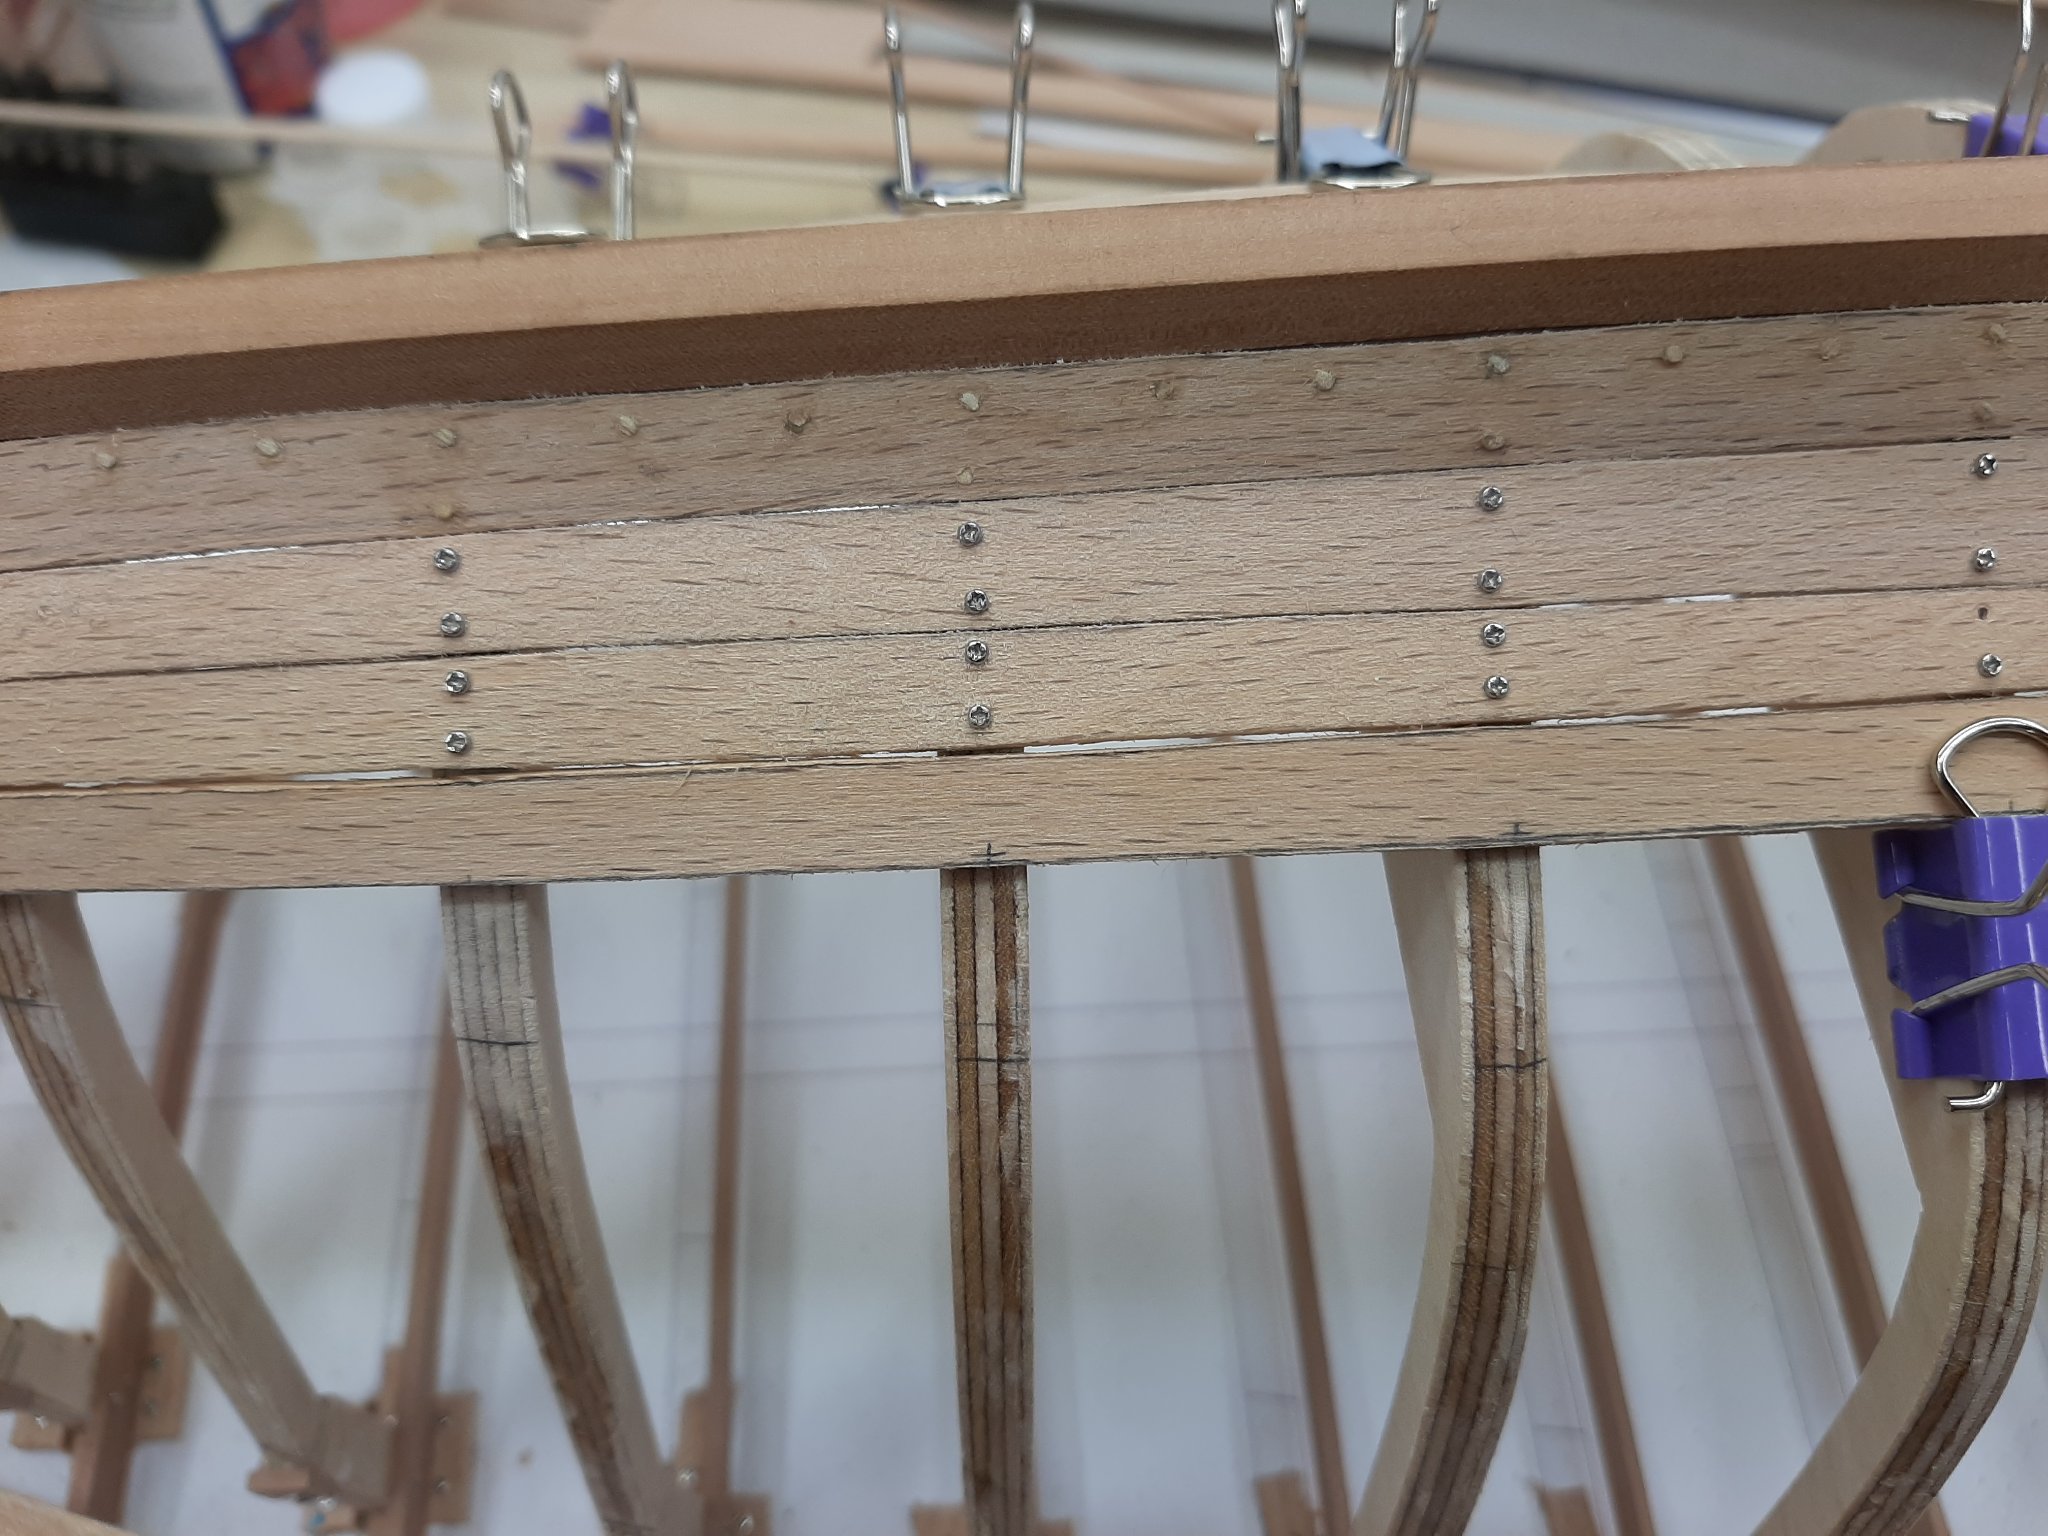
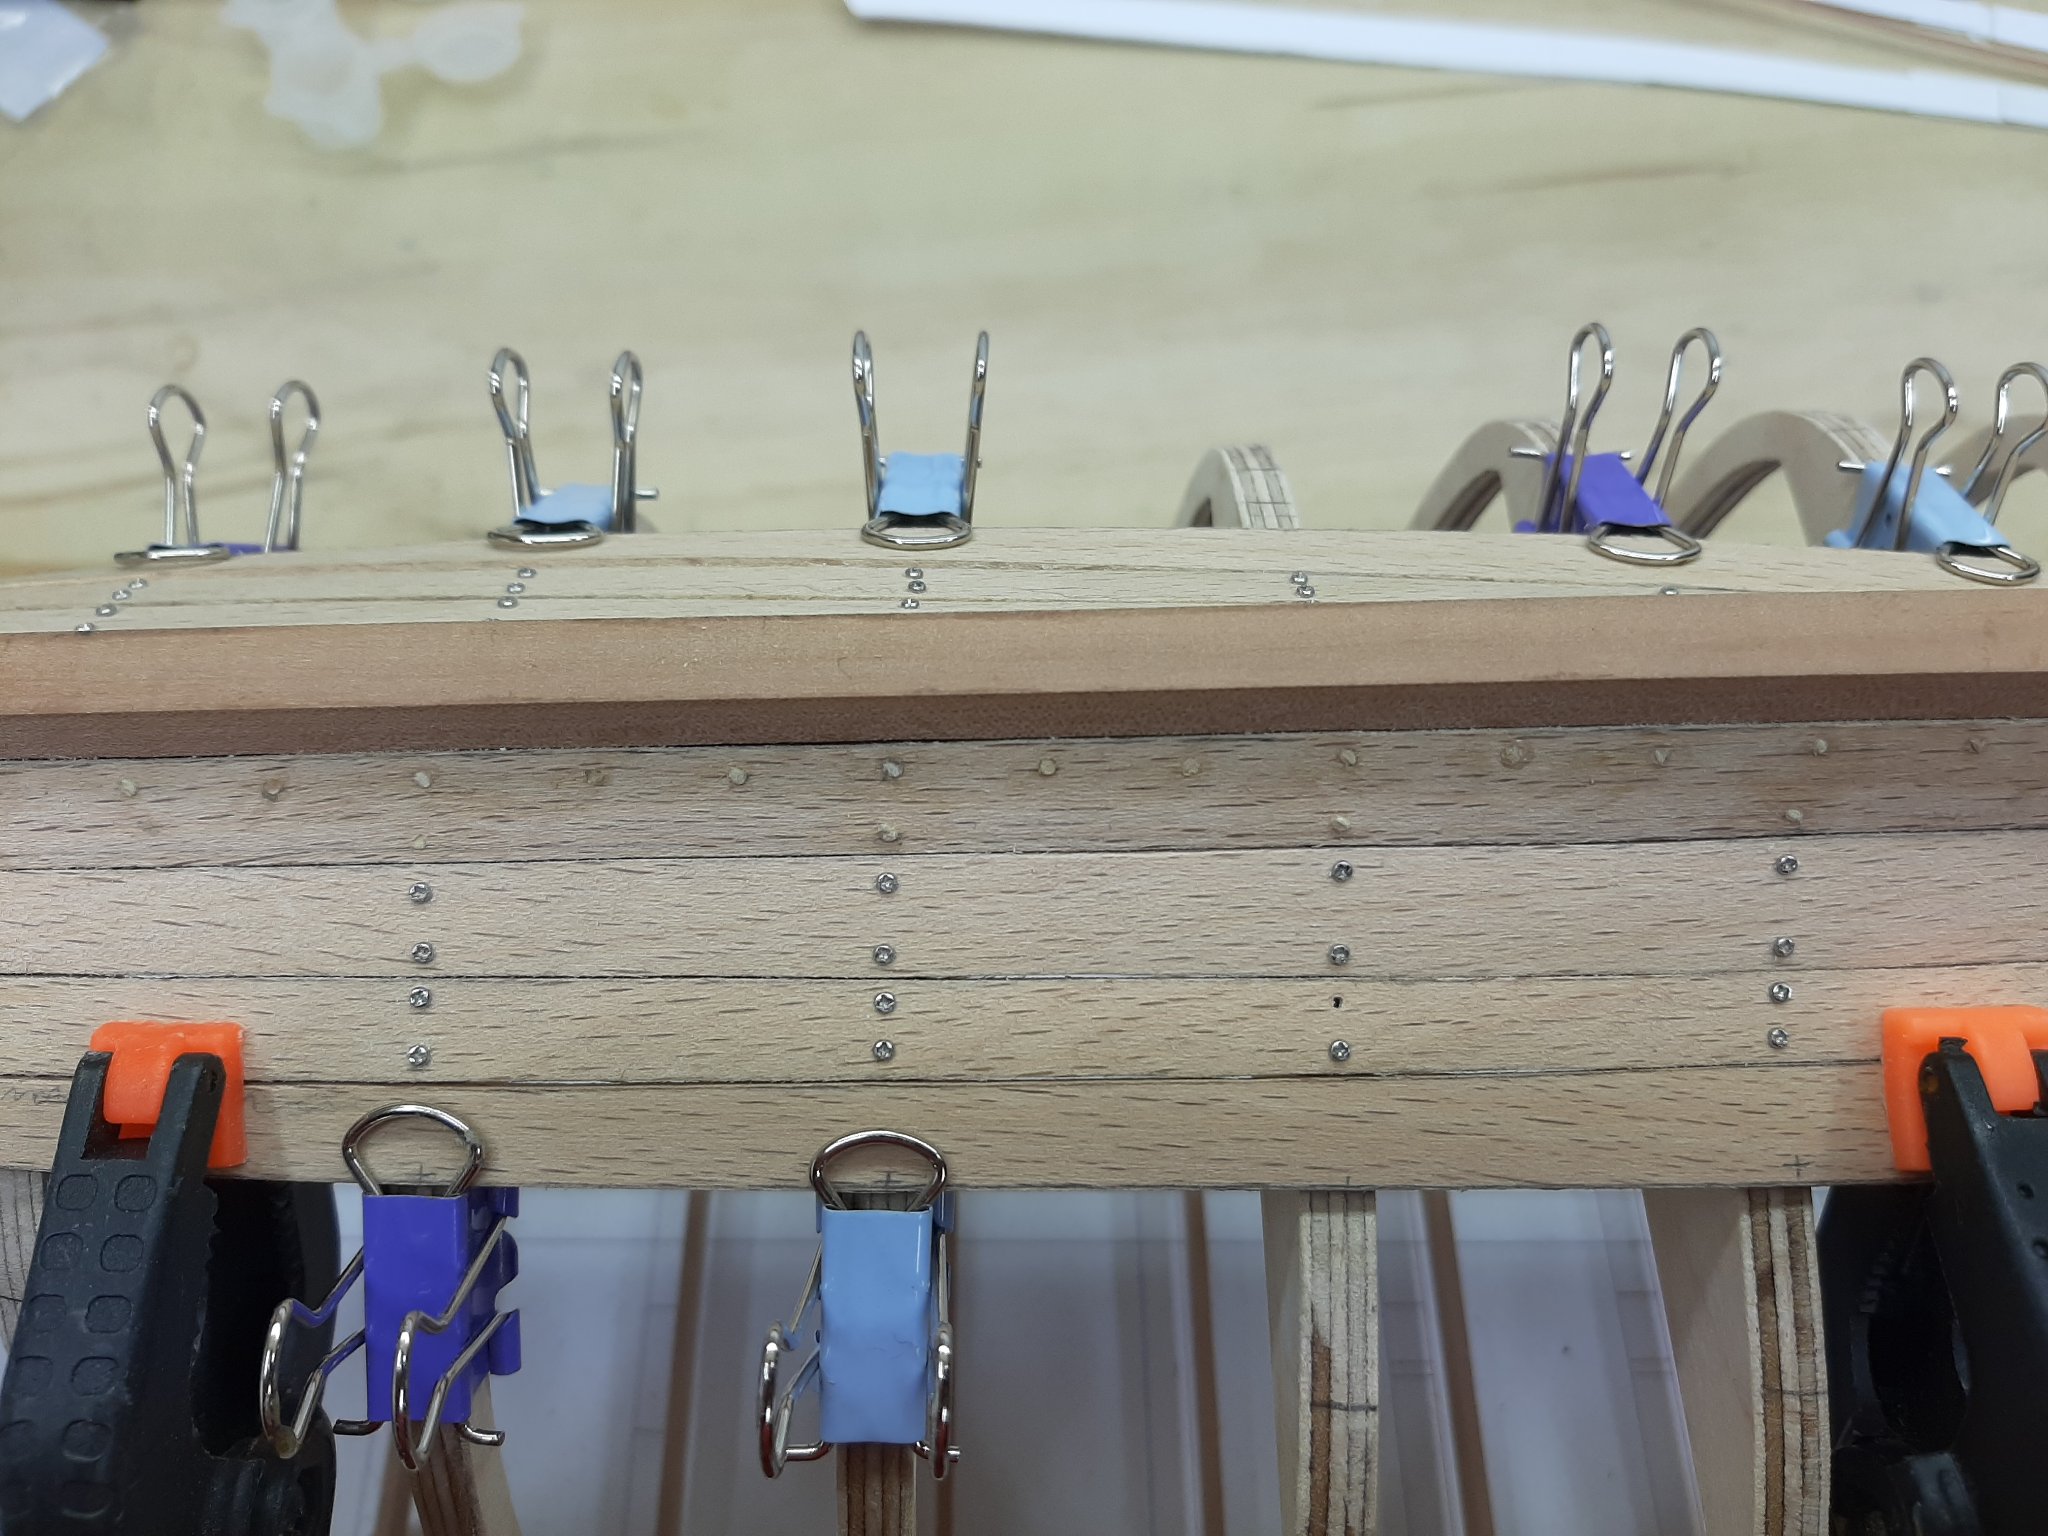
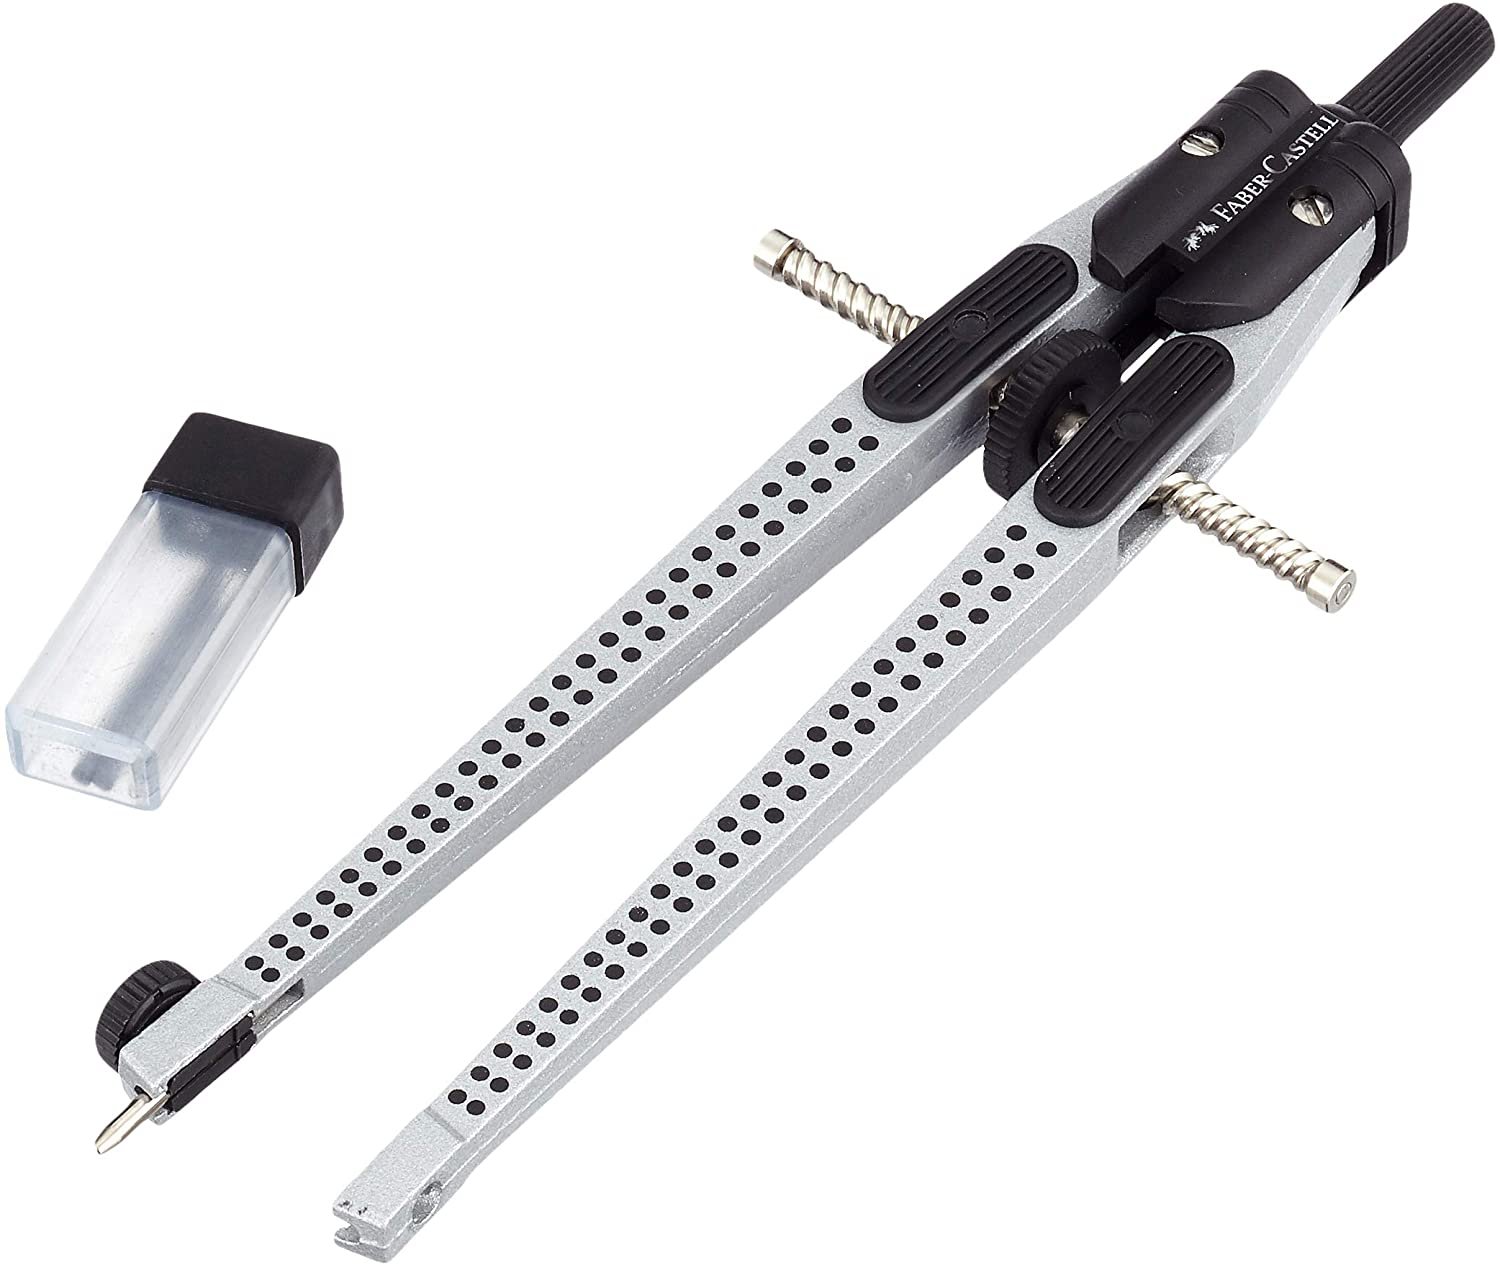
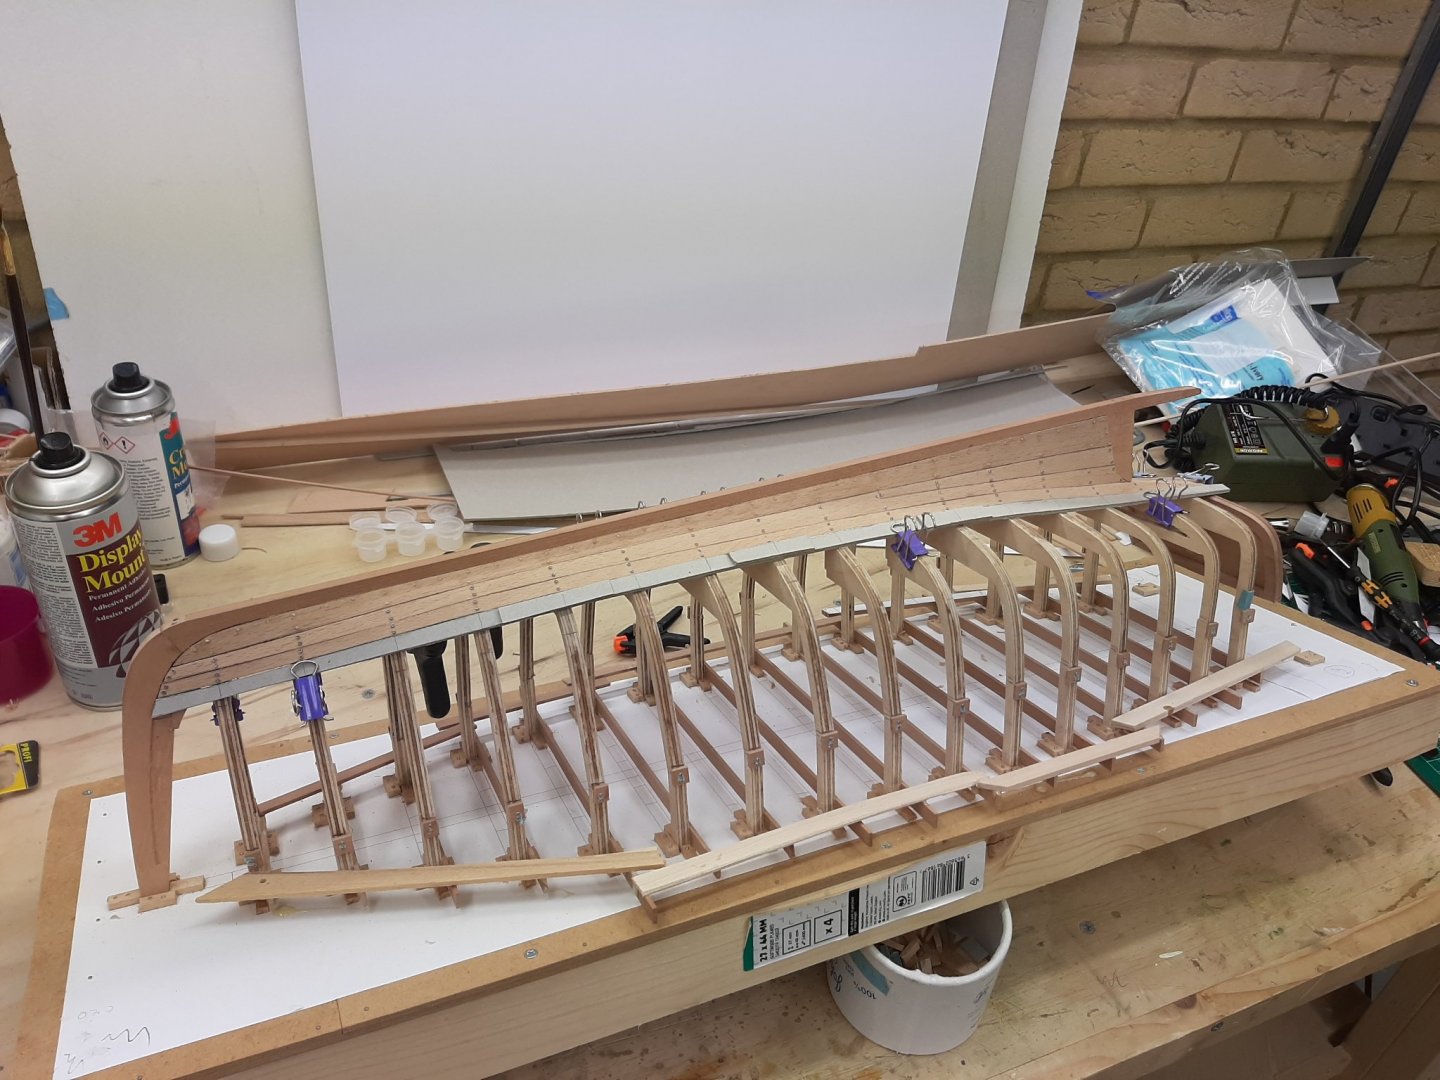
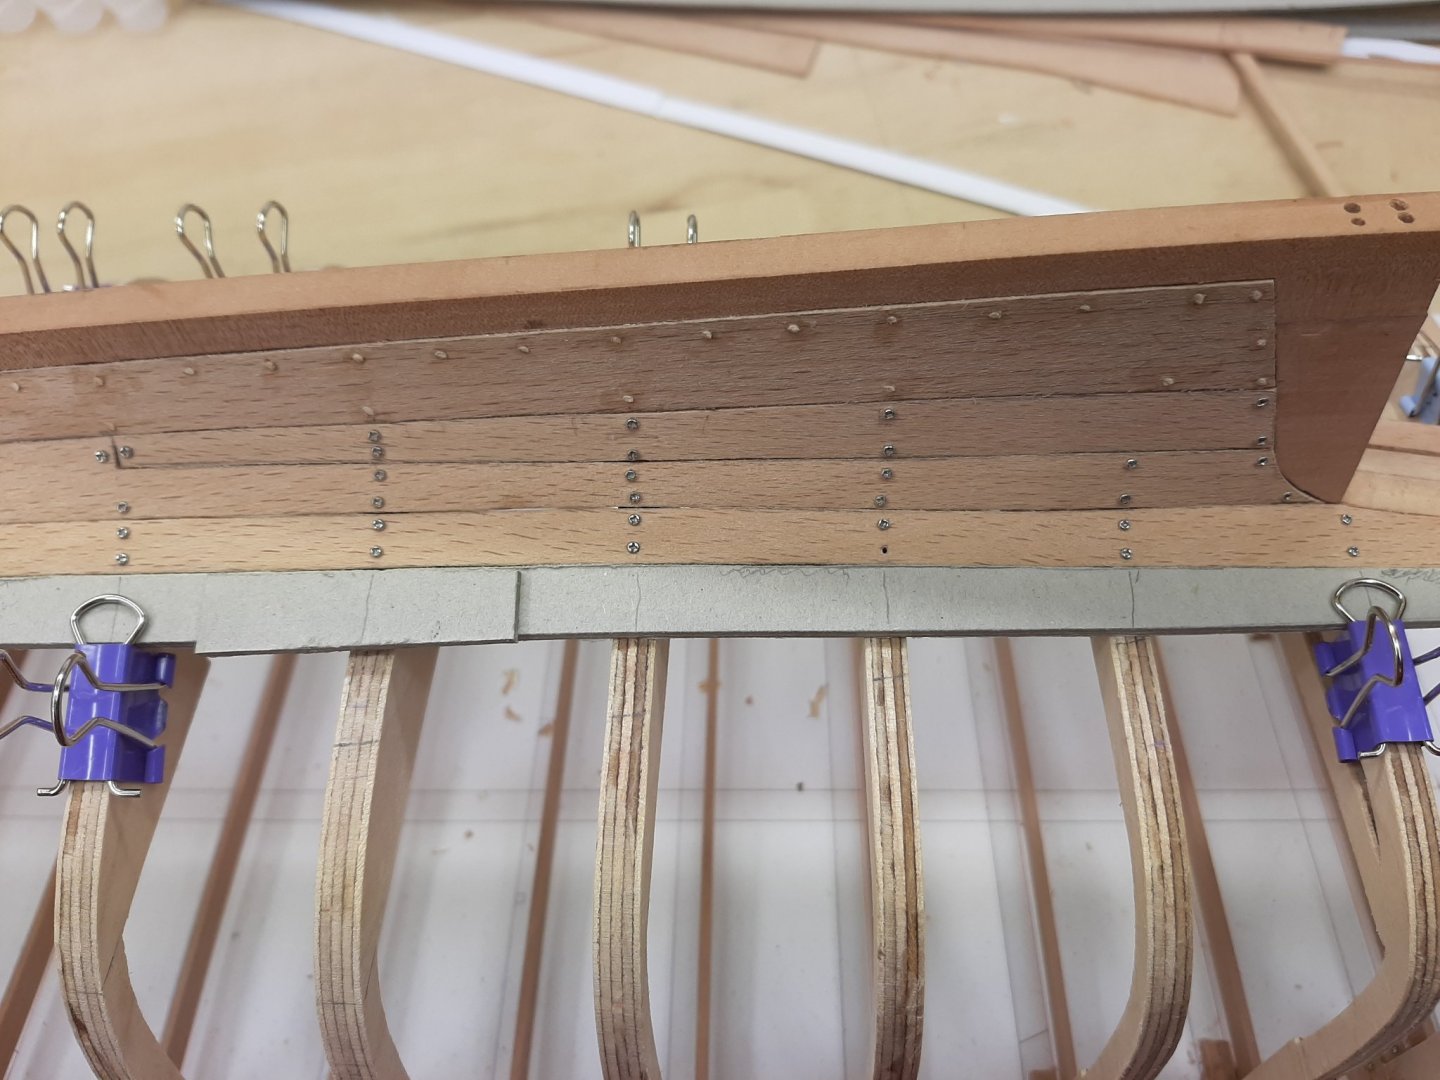
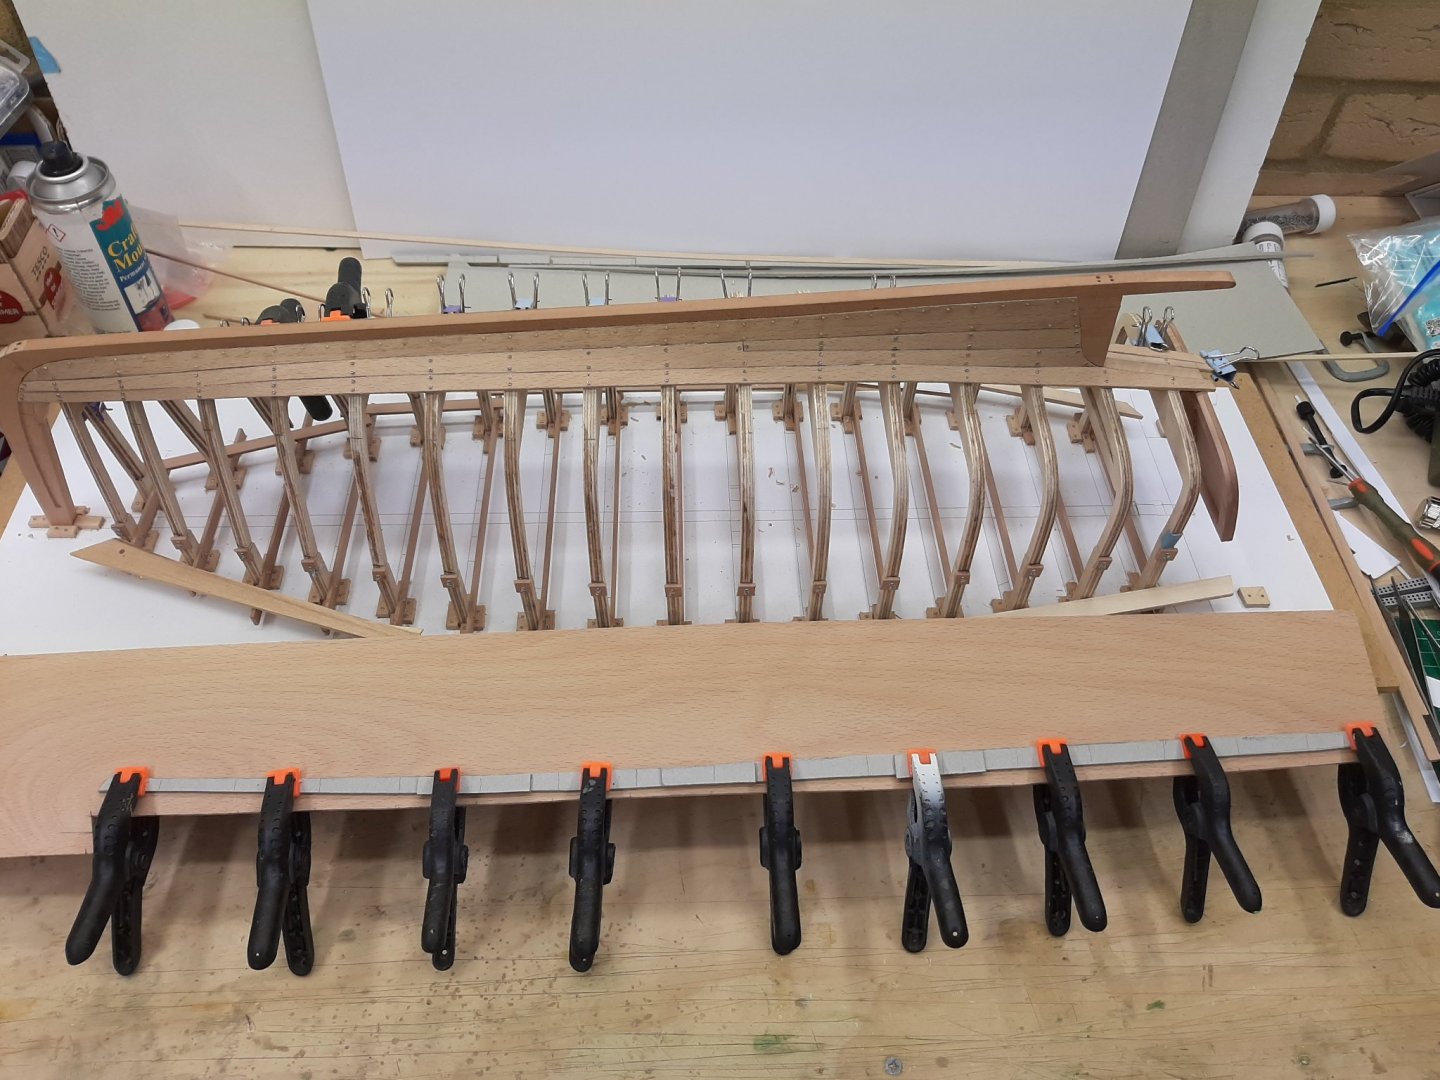
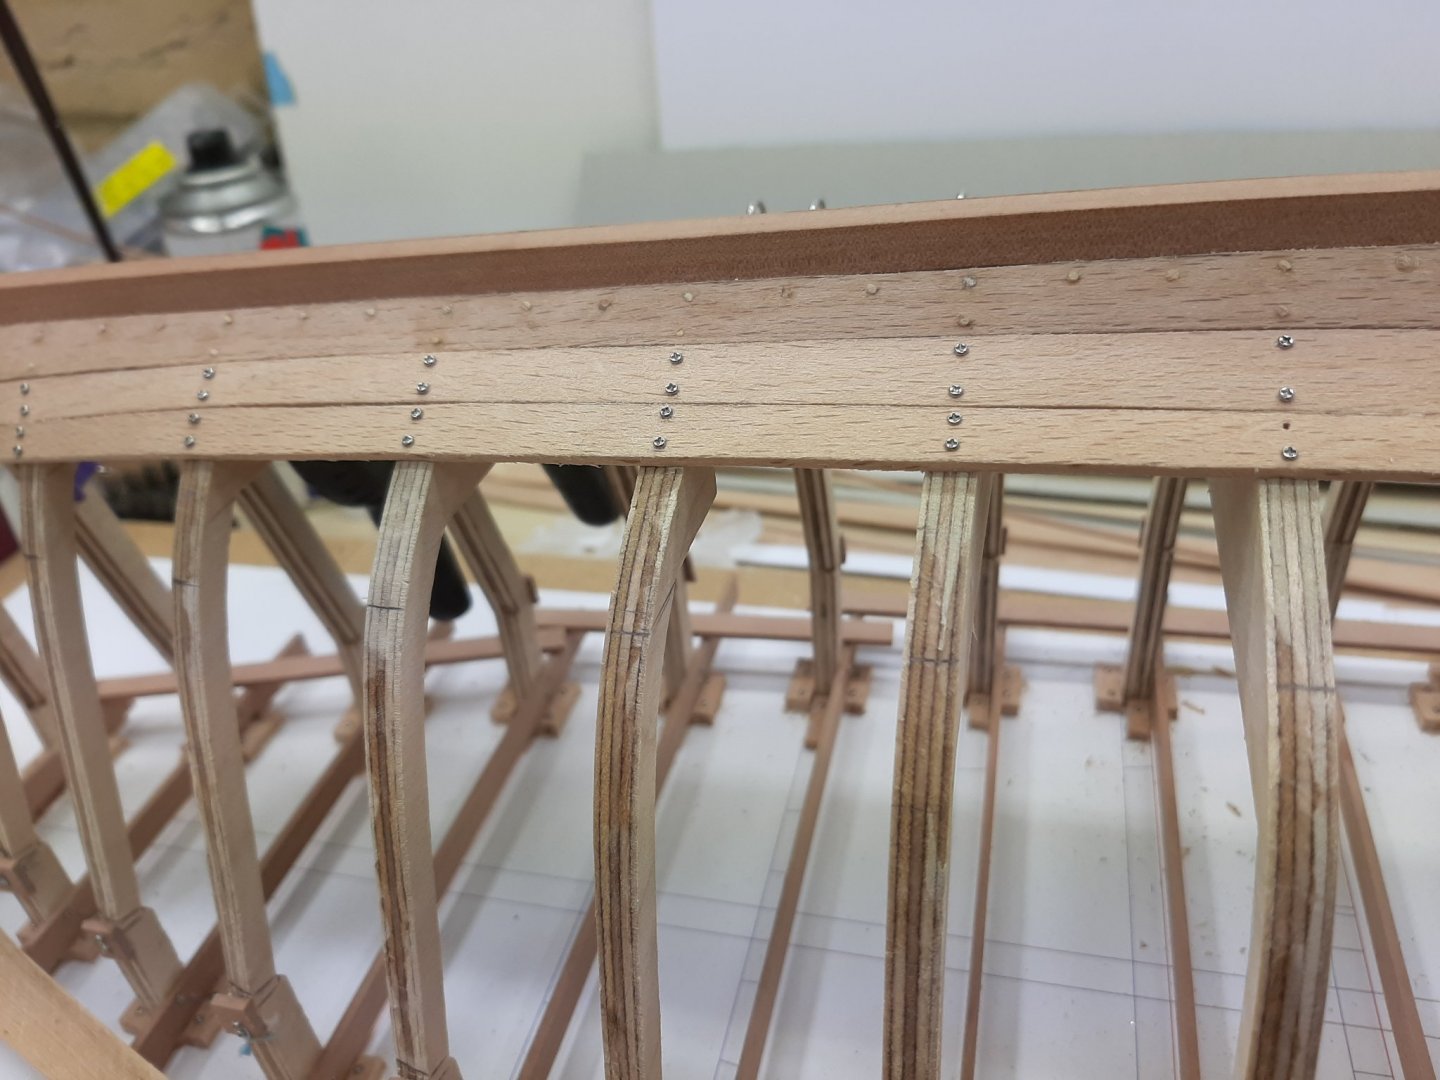
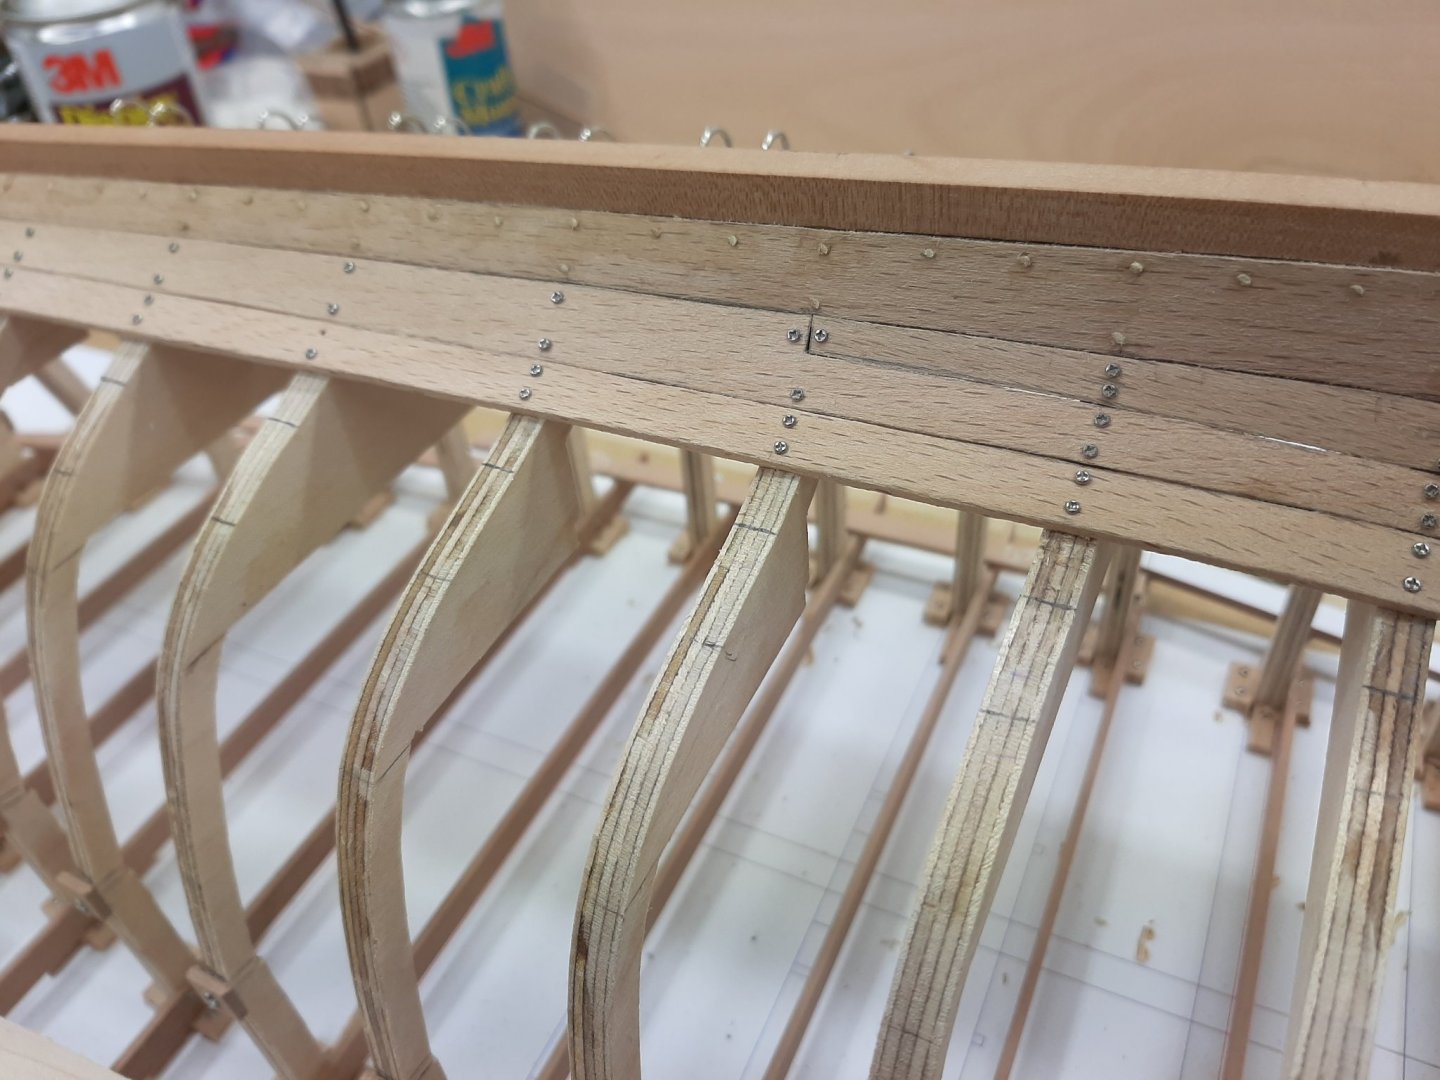
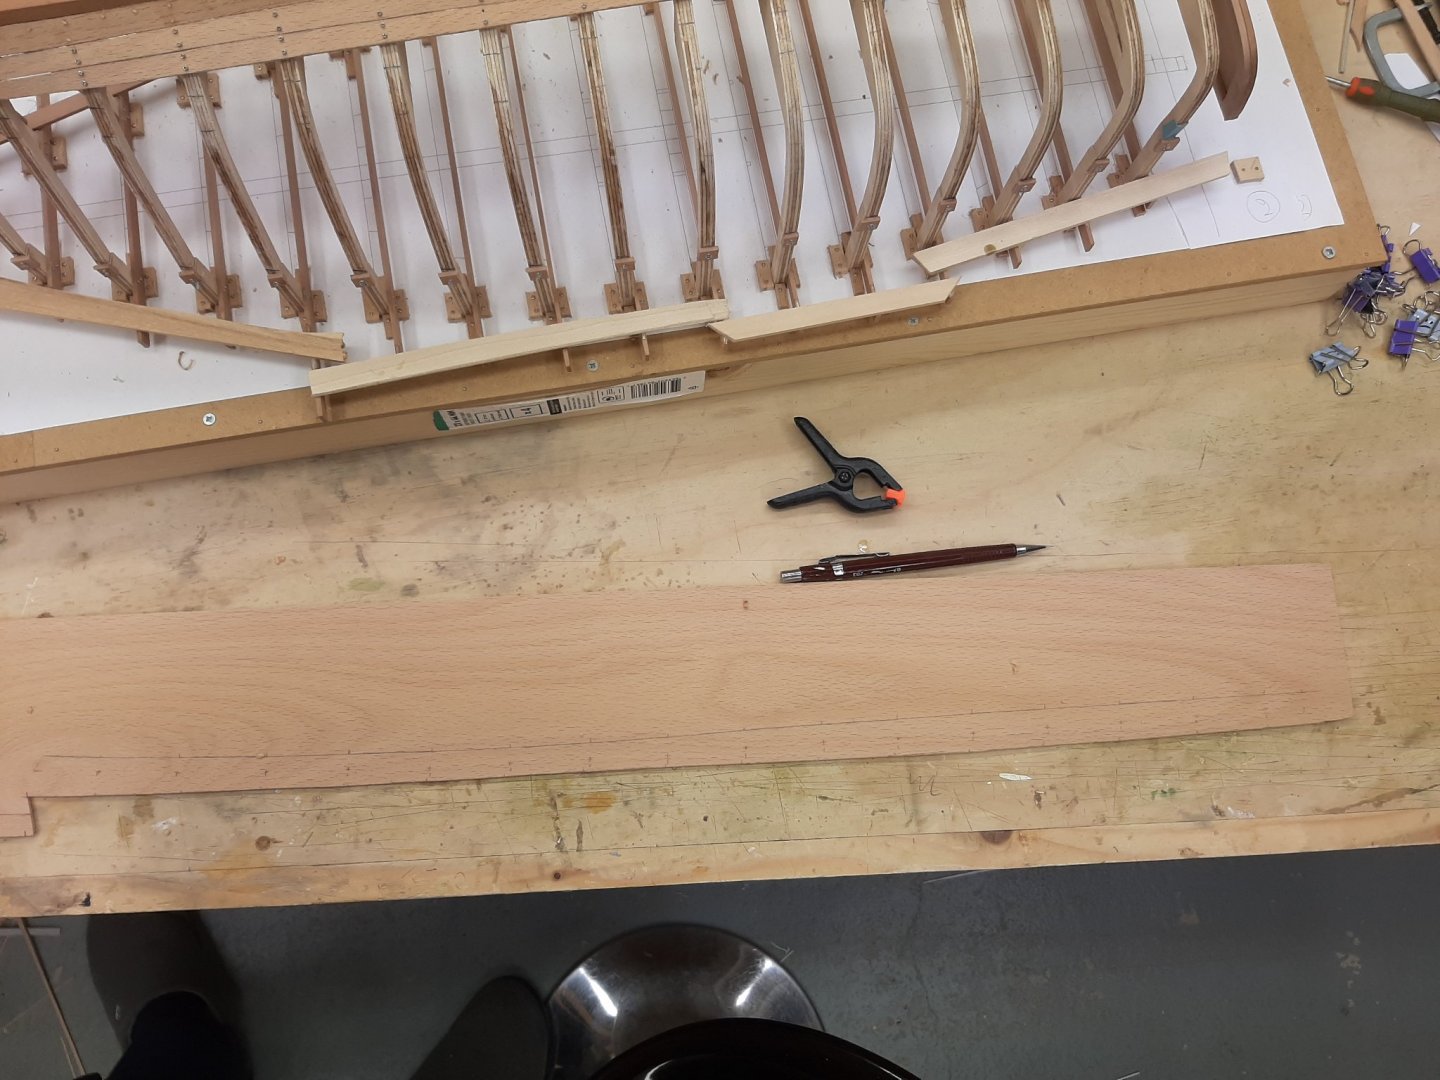
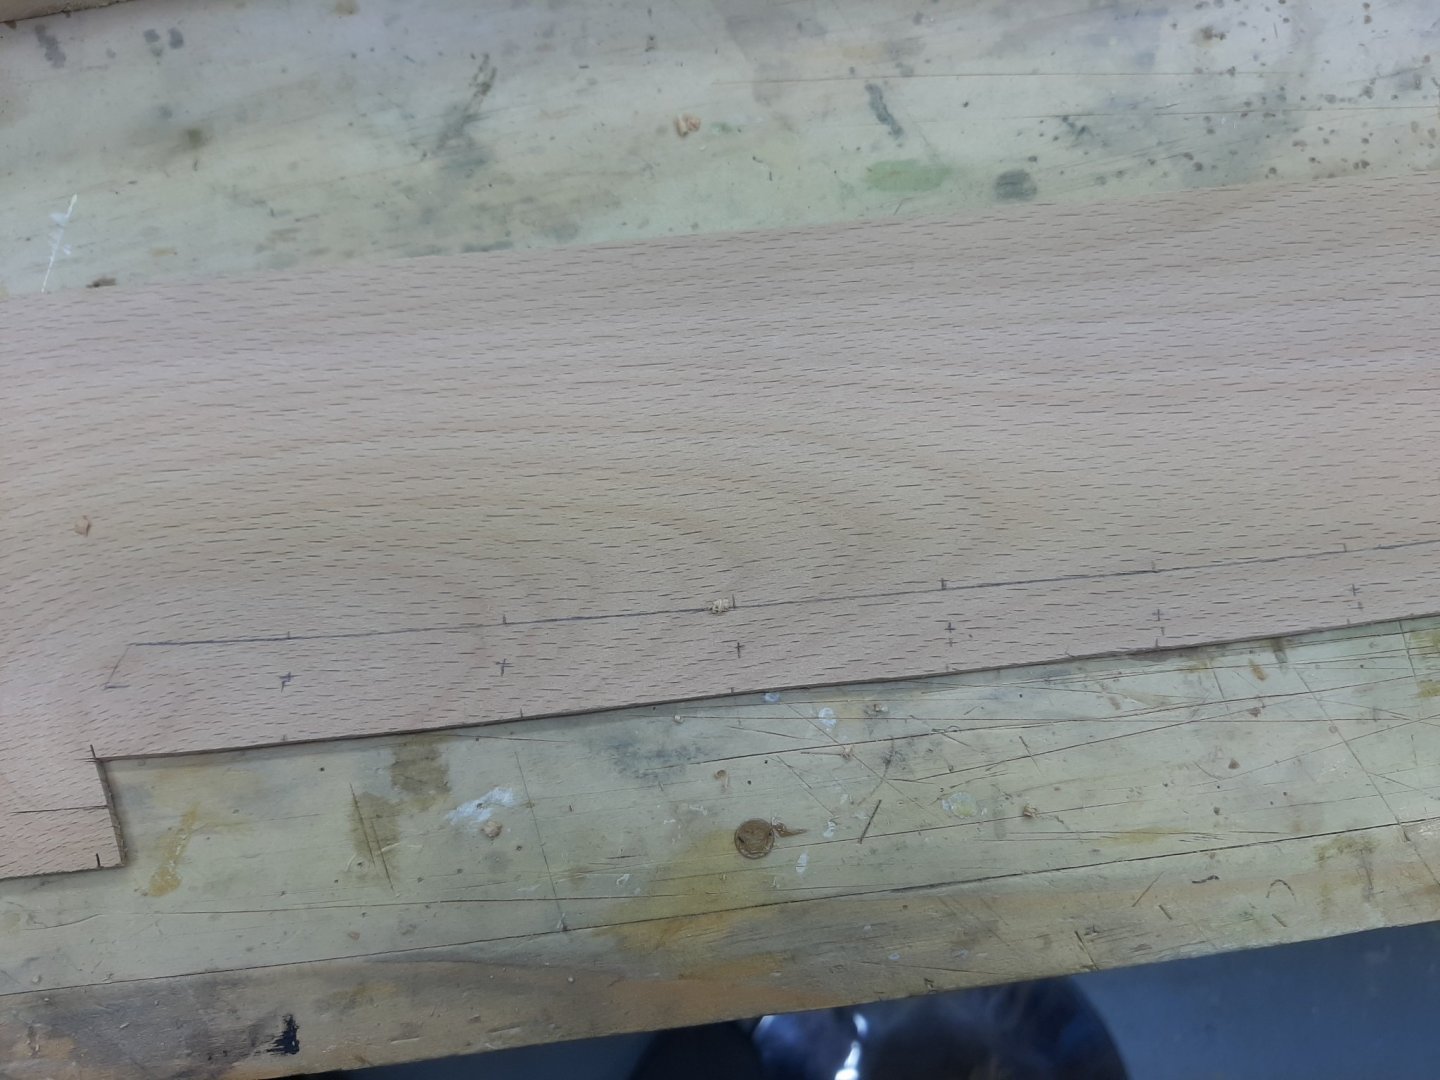
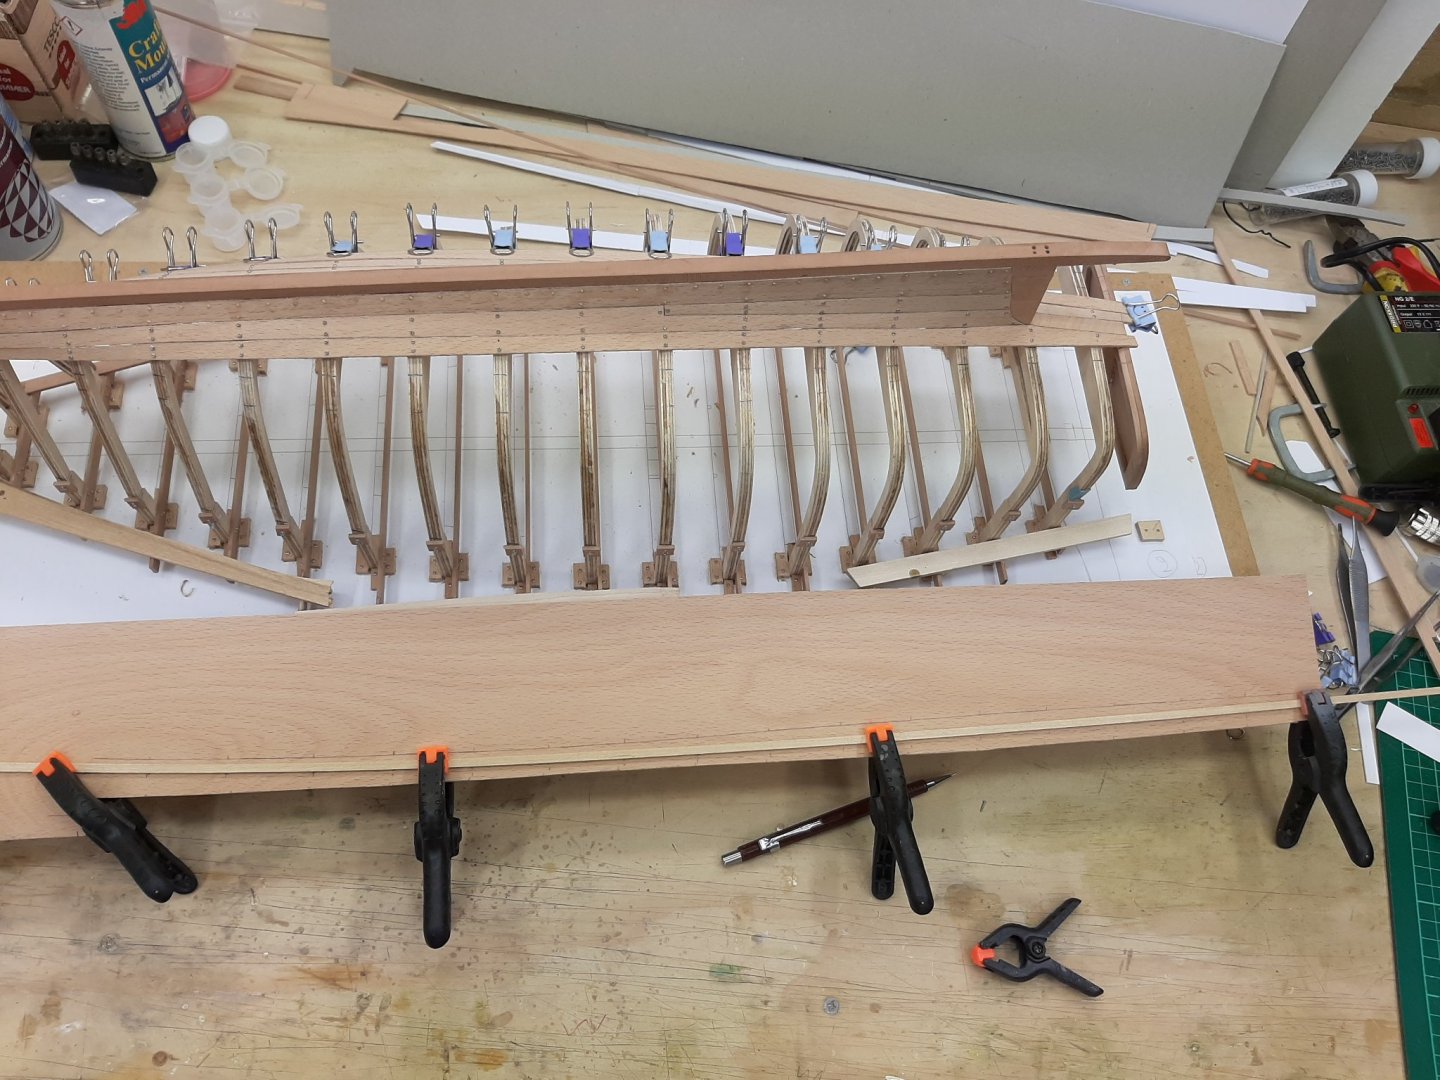
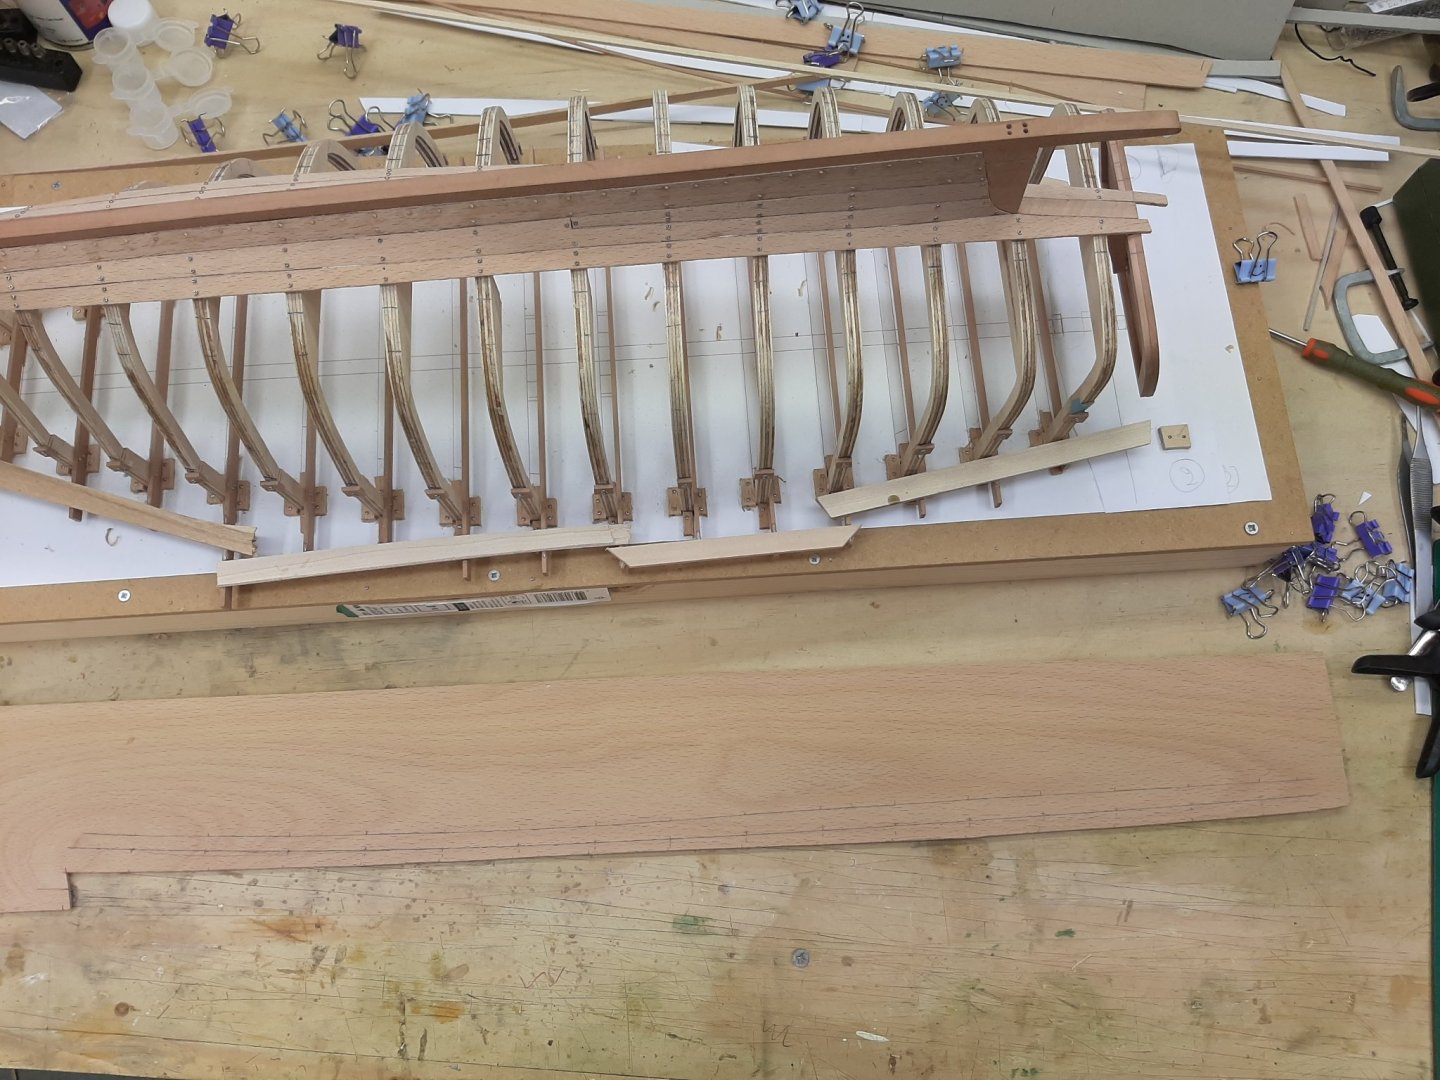
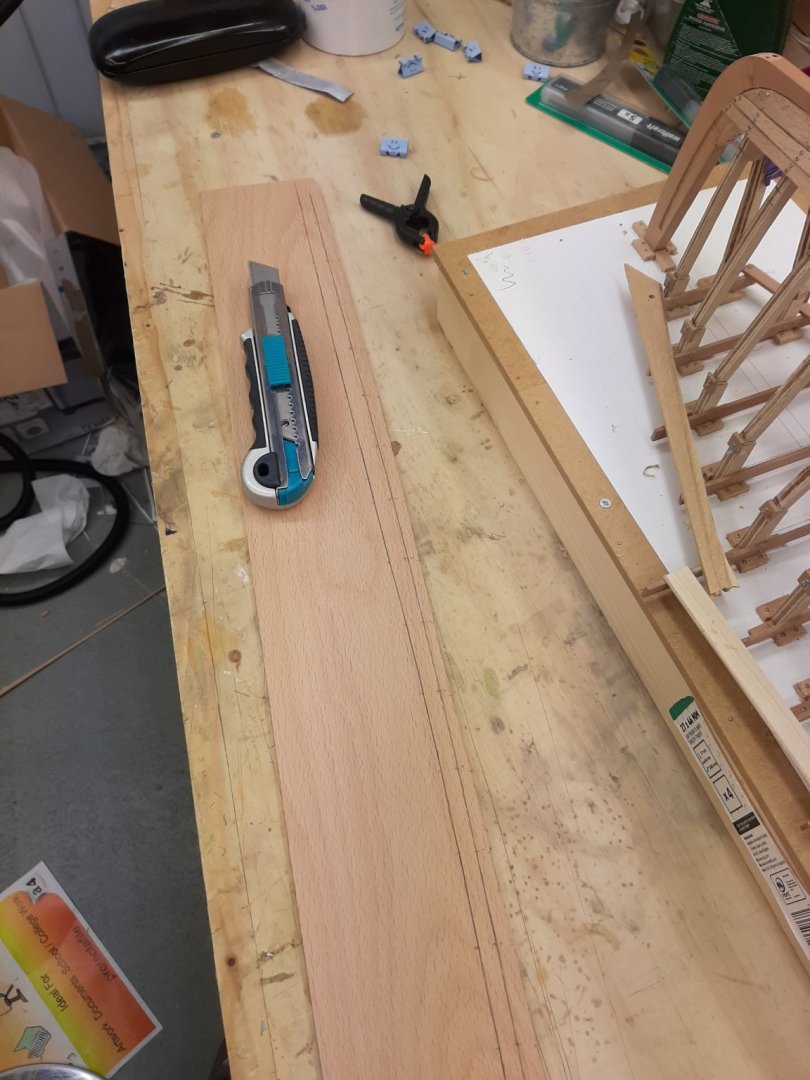
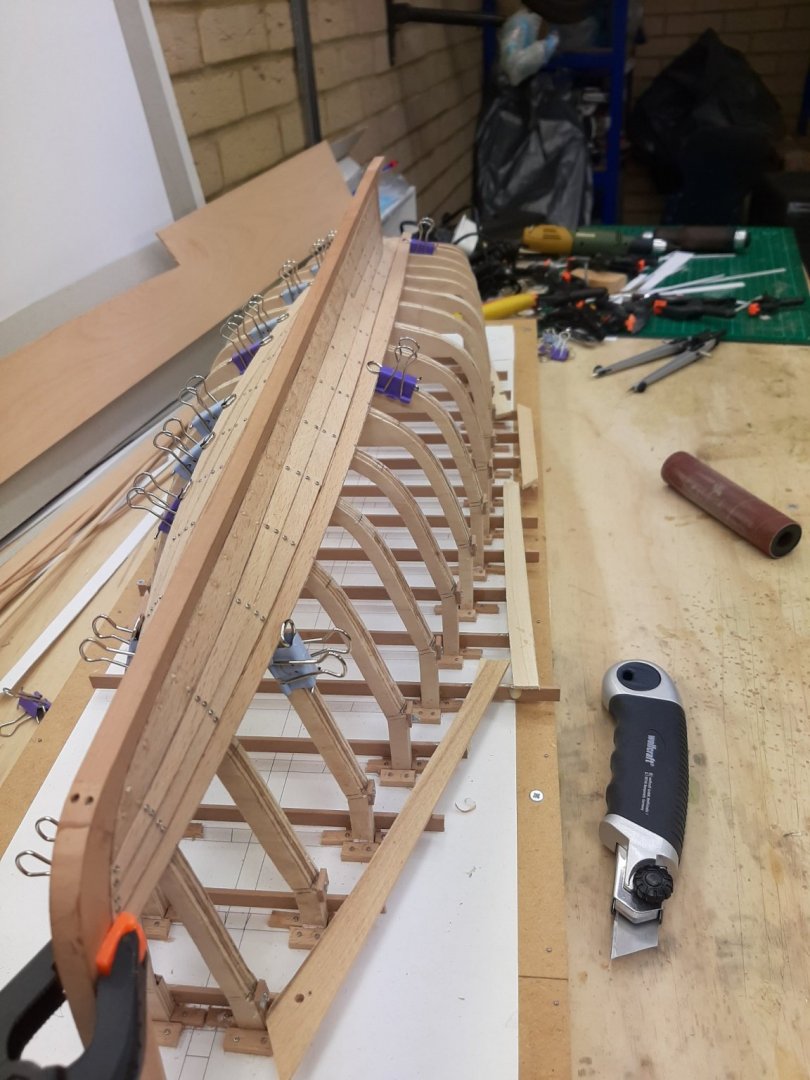
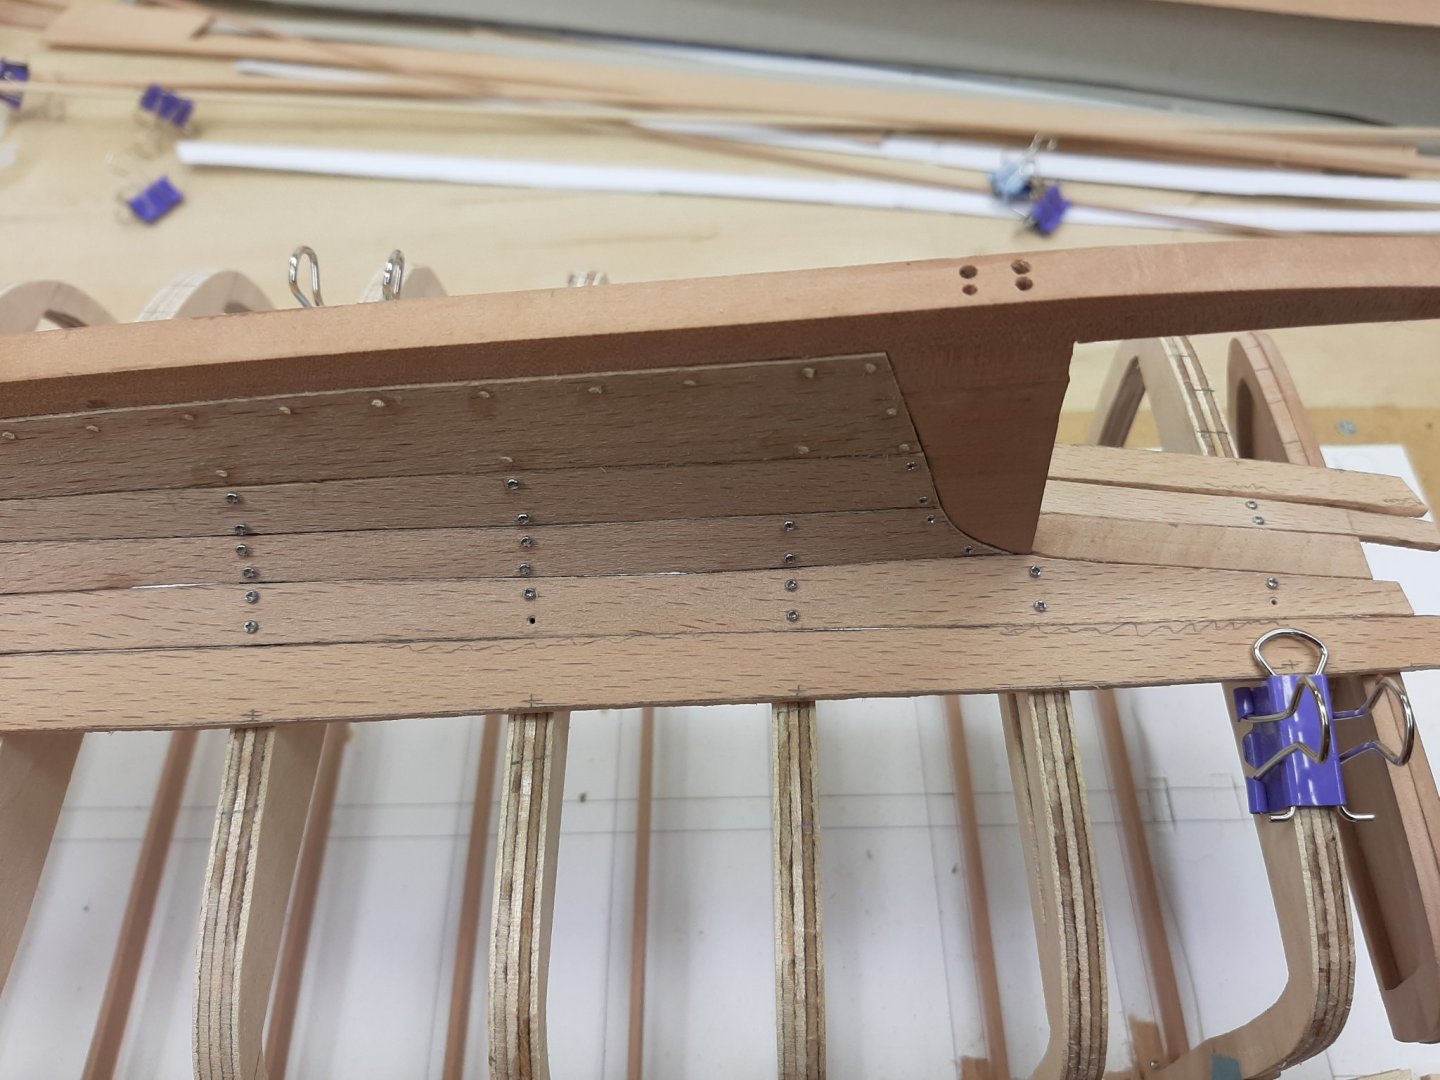
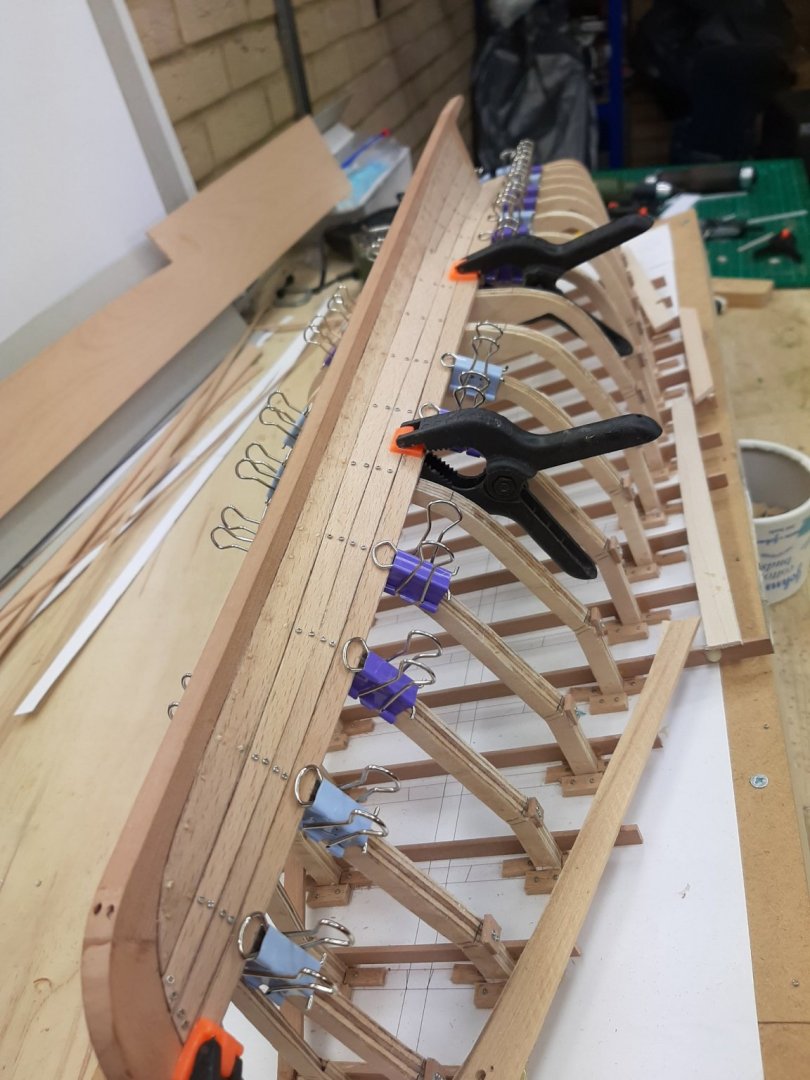
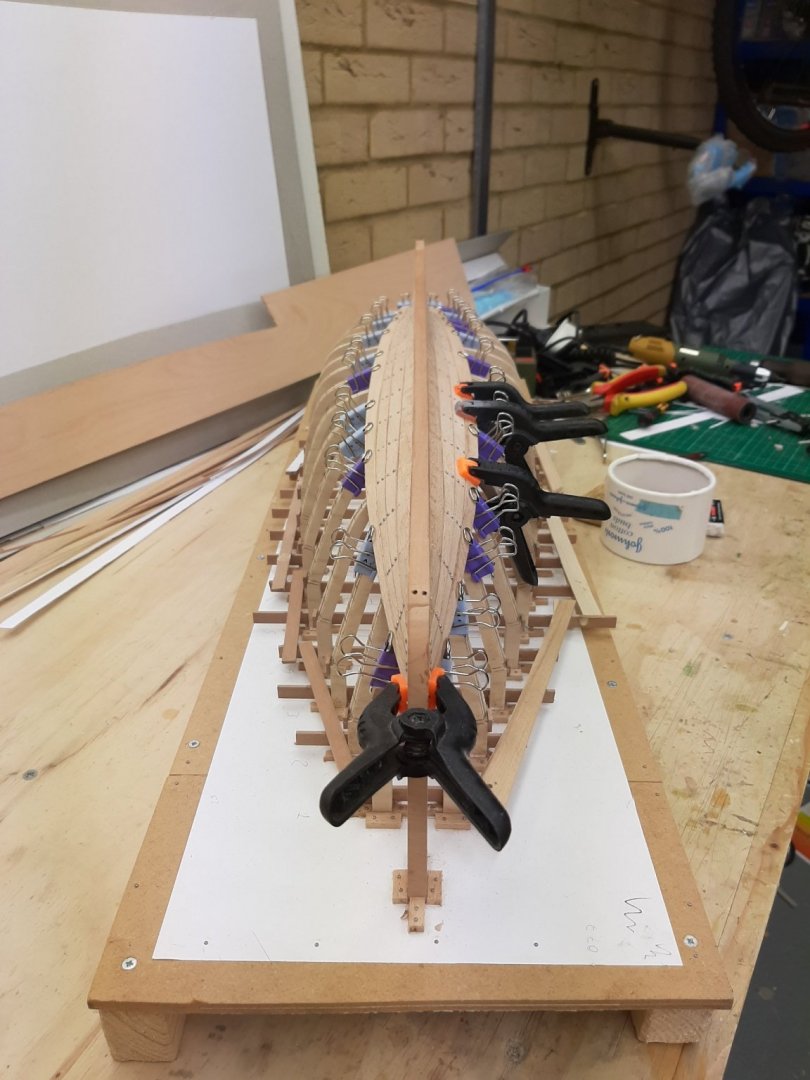
.thumb.jpg.6fd4c1b78768bb3efd745ab810936005.jpg) Dear all As I am currently immersed in planking, I thought it might be useful to share my way of spilling planks. In my fishing boat log I have presented in detail the way the plank run can be defined but it is a long and difficult read. Showing how to spill planks is much easier and perhaps will help some builders. So lets spill a plank in the fishing boat. T he positions of all planks have been marked on the port side and these positions will need to be transferred over to the starboard side as we go along. The planks should be twins but in reality they never are, at least in my boats so every plank needs to be individually spilled. A good compass is needed, this is the one I use The plank we will be making will be a starboard plank, its sister plank on the port side is already installed. A picture is a thousand words: This is the port plank steamed in place and the markings for all the rest of the planks are visible. We need to make this plank for the other side. Now, every new plank will have two edges. The bottom one that meets the previous plank, and this needs to be shaped so it fits well, and the upper free edge that we will define ourselves based on our markings and planning of the planks but needs to be as fair as possible. I use either very stiff card or thick cardboard to make templates of the bottom edge. I cut pieces as long as possible, hold them close to the edge of the previous plank and use a compass to mark the pattern. I run the compass along the piece of cardboard with the needle on the edge of the previous plank and the pencil tip on the card. Then I cut on the line with a very sharp knife and repeat on the next segment. I glue and connect the pieces into a long continuous card pattern. This is how it should look. This is 1:10 scale and this plank is 60 cm long. The card needs to lie comfortably without absolutely any edge bend. Even a tiny strain on the card will produce huge gaps on the other end of the plank and wood will not tolerate edge bending (It will, but only a little). This is the most crucial step, if there is any doubt the template must be readjusted. This particular template was the third one. Do not make the card pieces too wide because the angles will change and you ll be getting constantly erratic results. Then, mark the positions of the frames on the card pattern. Then, very carefully, making sure there is no edge bend at all, secure the card pattern on the wood sheet. Run a pencil (I use 0.3 mm mechanical one) along the edge and also mark the positions of the frames. This is the result This is the bottom edge of our plank and should fit closely to the previous plank. We need now to define the upper edge so we need the thickness of the plank at the various frames. On the port side, this thicknesses are already marked. To make sure that the two sides are as similar as possible, I ve been marking the starboard side measuring from the sheer. So the upper edge of our plank is marked in all frames. Now, these widths need to be transferred to the plank, again using the compass. The width at the stem will be defined using the contralateral plank end. All sites marked. These points need to be connected but with a fair line. To do this we must use a baten, arranging it so that it is close to all the points. Now this line, which is the upper edge of the plank, does not pass through all the points but it is ok. Actually, if we put the contralateral plank on the pattern, the widths are exactly the same! On this boat I use a very sharp knife to cut the plank with multiple passes, breaking off a segment of the blade every couple of passes. After careful cutting to the lines, the plank is produced. Placing the plank on the boat, it does not fit well. No need to panic, it just needs a bit of micro adjustement. We need to find the high spots and carefully sand them so the gaps will start closing. These are the high spots in this case. After sanding and with a bit of edge bending, the plank seems to fit fine now. These micro-adjustements and a bit of edge bevelling can continue until the fit is very close but for this boat this is enough, with some filler it will be fine. I also lightly sand the upper edge to smooth out the peaks and make fitting the next plank easier. Both planks steamed in place. And that's it! Now repeat the process 30 odd times and planking is done. Vaddoc
Dear all As I am currently immersed in planking, I thought it might be useful to share my way of spilling planks. In my fishing boat log I have presented in detail the way the plank run can be defined but it is a long and difficult read. Showing how to spill planks is much easier and perhaps will help some builders. So lets spill a plank in the fishing boat. T he positions of all planks have been marked on the port side and these positions will need to be transferred over to the starboard side as we go along. The planks should be twins but in reality they never are, at least in my boats so every plank needs to be individually spilled. A good compass is needed, this is the one I use The plank we will be making will be a starboard plank, its sister plank on the port side is already installed. A picture is a thousand words: This is the port plank steamed in place and the markings for all the rest of the planks are visible. We need to make this plank for the other side. Now, every new plank will have two edges. The bottom one that meets the previous plank, and this needs to be shaped so it fits well, and the upper free edge that we will define ourselves based on our markings and planning of the planks but needs to be as fair as possible. I use either very stiff card or thick cardboard to make templates of the bottom edge. I cut pieces as long as possible, hold them close to the edge of the previous plank and use a compass to mark the pattern. I run the compass along the piece of cardboard with the needle on the edge of the previous plank and the pencil tip on the card. Then I cut on the line with a very sharp knife and repeat on the next segment. I glue and connect the pieces into a long continuous card pattern. This is how it should look. This is 1:10 scale and this plank is 60 cm long. The card needs to lie comfortably without absolutely any edge bend. Even a tiny strain on the card will produce huge gaps on the other end of the plank and wood will not tolerate edge bending (It will, but only a little). This is the most crucial step, if there is any doubt the template must be readjusted. This particular template was the third one. Do not make the card pieces too wide because the angles will change and you ll be getting constantly erratic results. Then, mark the positions of the frames on the card pattern. Then, very carefully, making sure there is no edge bend at all, secure the card pattern on the wood sheet. Run a pencil (I use 0.3 mm mechanical one) along the edge and also mark the positions of the frames. This is the result This is the bottom edge of our plank and should fit closely to the previous plank. We need now to define the upper edge so we need the thickness of the plank at the various frames. On the port side, this thicknesses are already marked. To make sure that the two sides are as similar as possible, I ve been marking the starboard side measuring from the sheer. So the upper edge of our plank is marked in all frames. Now, these widths need to be transferred to the plank, again using the compass. The width at the stem will be defined using the contralateral plank end. All sites marked. These points need to be connected but with a fair line. To do this we must use a baten, arranging it so that it is close to all the points. Now this line, which is the upper edge of the plank, does not pass through all the points but it is ok. Actually, if we put the contralateral plank on the pattern, the widths are exactly the same! On this boat I use a very sharp knife to cut the plank with multiple passes, breaking off a segment of the blade every couple of passes. After careful cutting to the lines, the plank is produced. Placing the plank on the boat, it does not fit well. No need to panic, it just needs a bit of micro adjustement. We need to find the high spots and carefully sand them so the gaps will start closing. These are the high spots in this case. After sanding and with a bit of edge bending, the plank seems to fit fine now. These micro-adjustements and a bit of edge bevelling can continue until the fit is very close but for this boat this is enough, with some filler it will be fine. I also lightly sand the upper edge to smooth out the peaks and make fitting the next plank easier. Both planks steamed in place. And that's it! Now repeat the process 30 odd times and planking is done. Vaddoc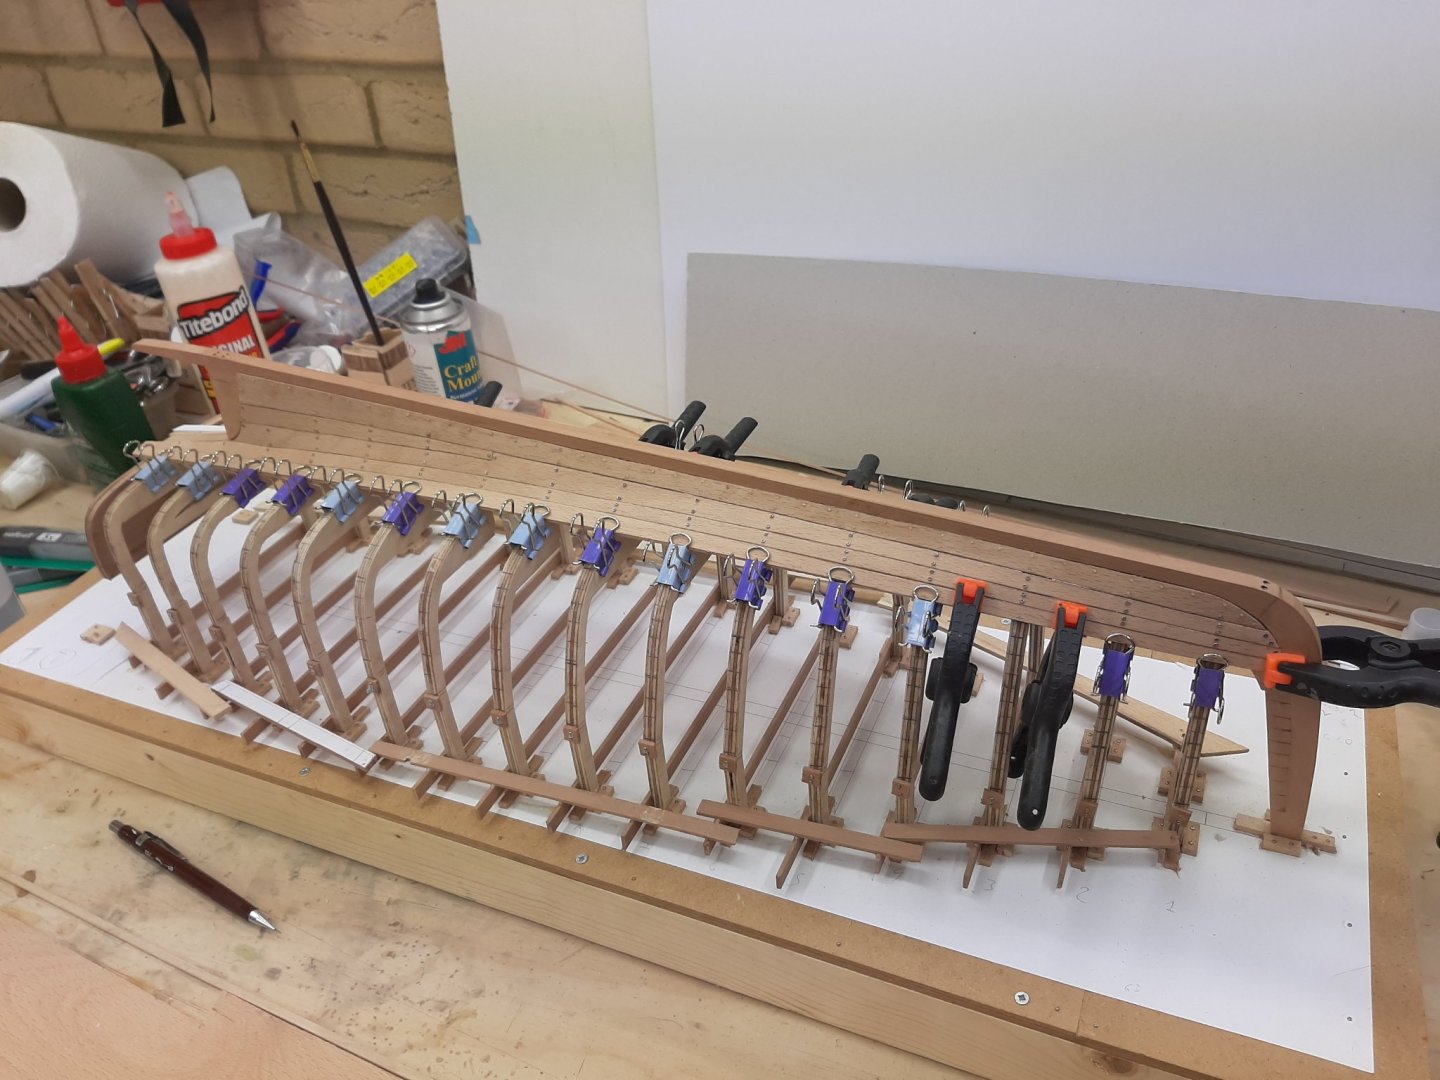


-

-
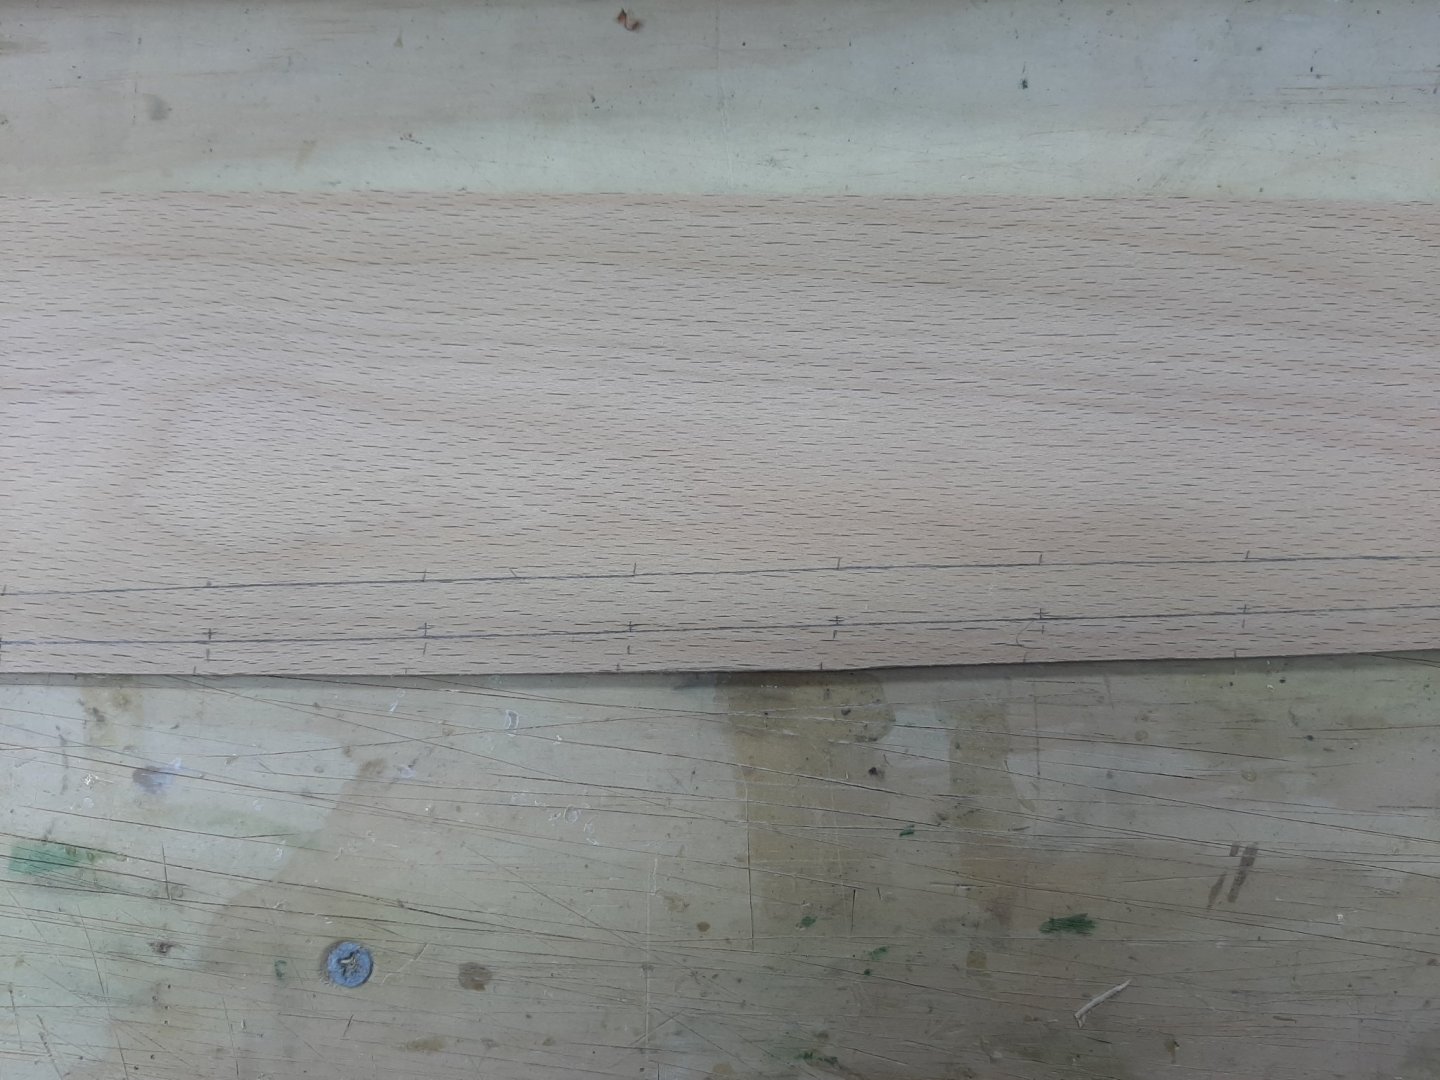
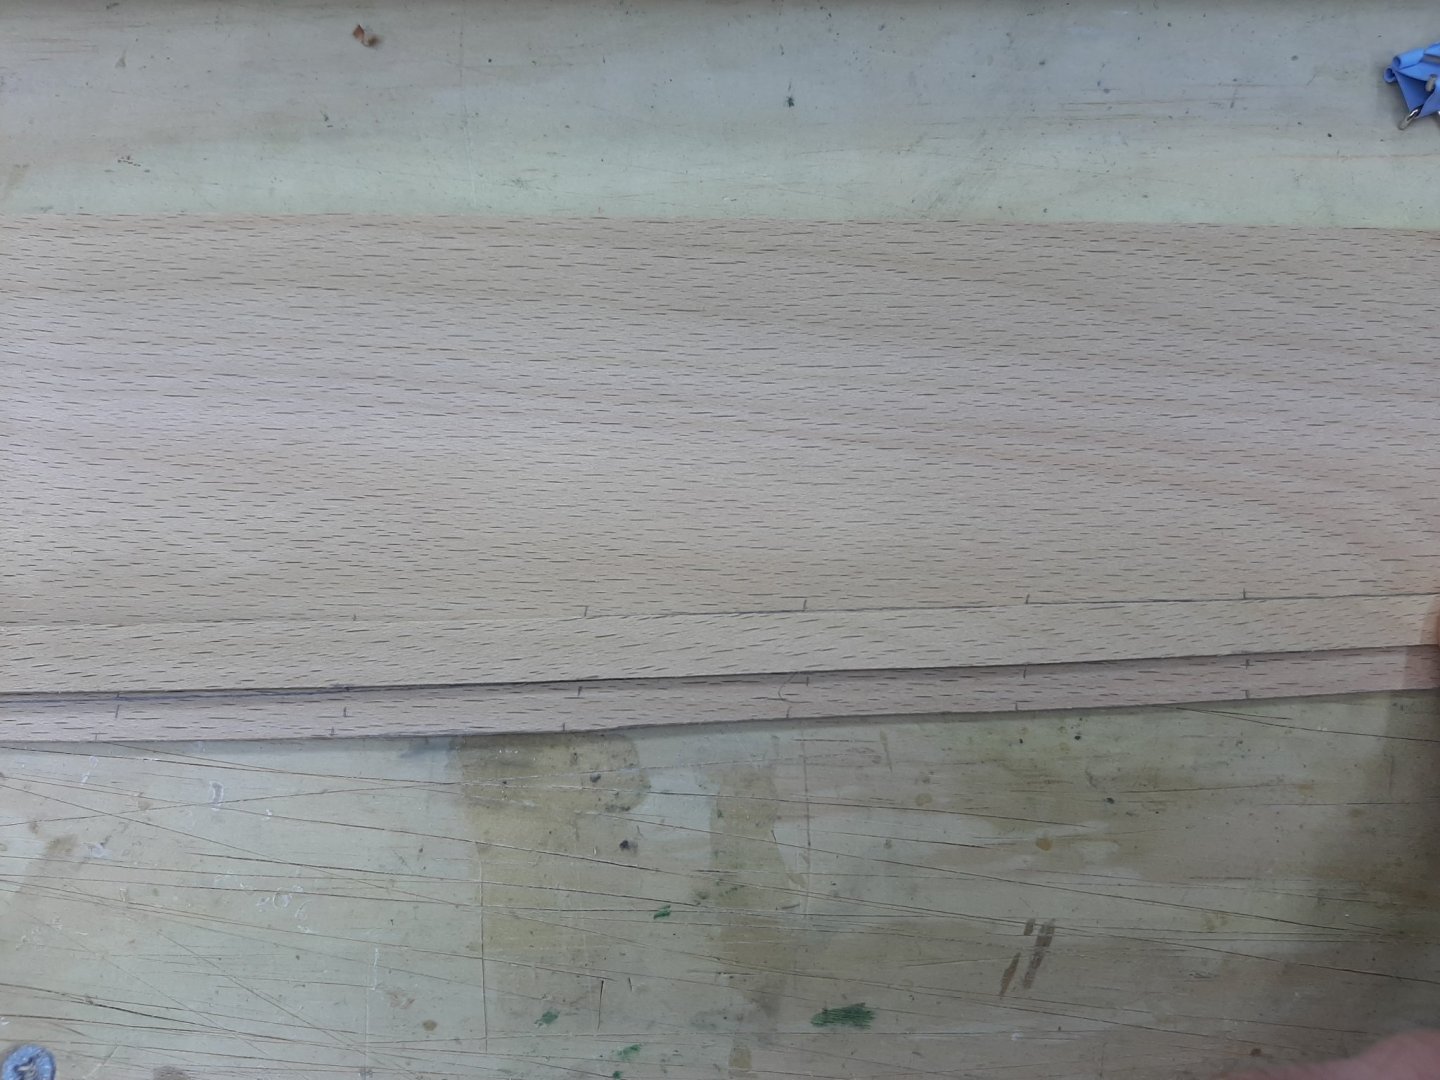
 I am about to order some sheets of wood for my upcoming build, which will be planked using the spiling method. My kit came with first-layer planks that are 5 mm wide, and second-layer planks that are 4 mm wide. I want to order enough material, so I'm wondering how much wider my raw material should be in order to properly cut out the curved planks. I have heard some people say that they used planks that were 50% wider than the originals, but this still seems a little narrow to me. Can anyone give me some advice as to what width I should be ordering, based on the widths supplied with the kit? Thanks!