


Ray
-
Posts
404 -
Joined
-
Last visited
Content Type
Profiles
Forums
Gallery
Events
Posts posted by Ray
-
-
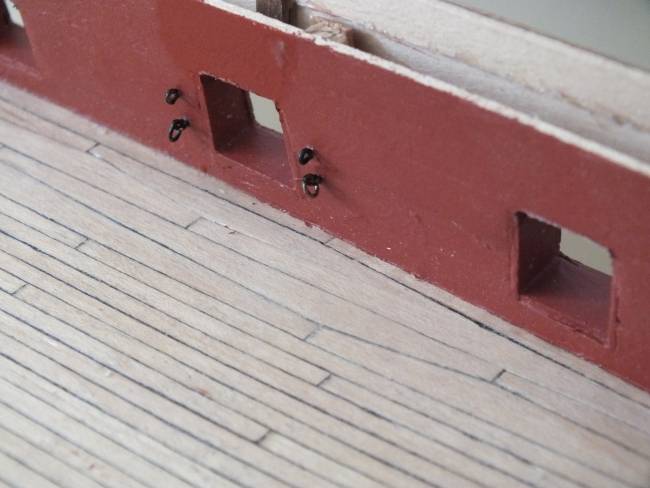
The side rails
I masked at the top of the waist side rail and at the bottom of the sheer rail and painted royal blue in-between I the added the rails, making sure to leave spaces for the channels and fenders, I decided to leave the rest of the rails until after the top deck goes on, and I have worked out the position quarterdeck bulwark at how high it will be.
Painted section


Sheer rail going on

Gap for channel

Both rails on

- mort stoll, mtaylor, Timmo and 5 others
-
 8
8
-
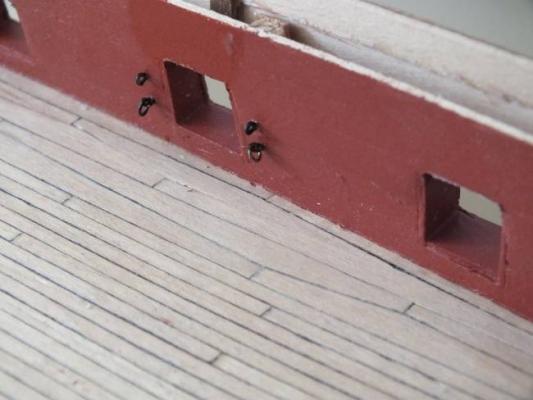
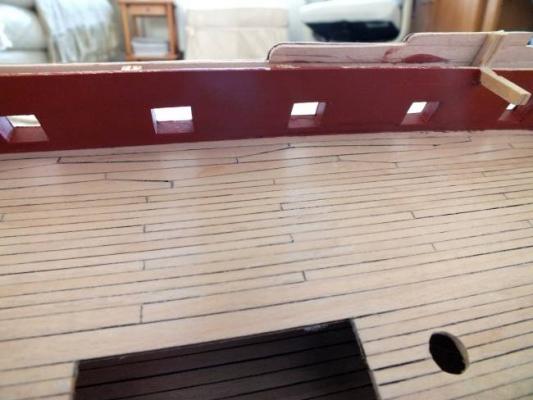
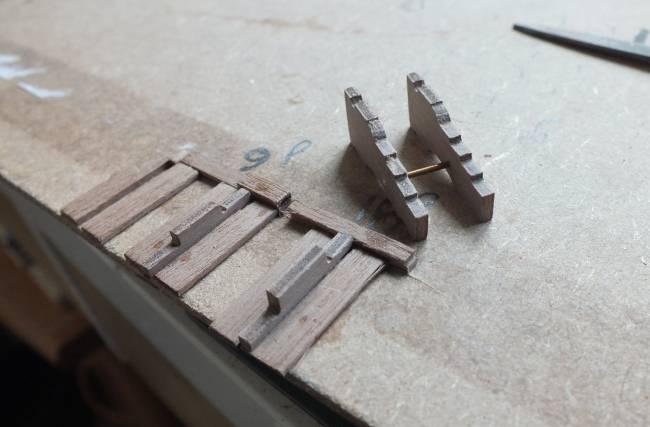
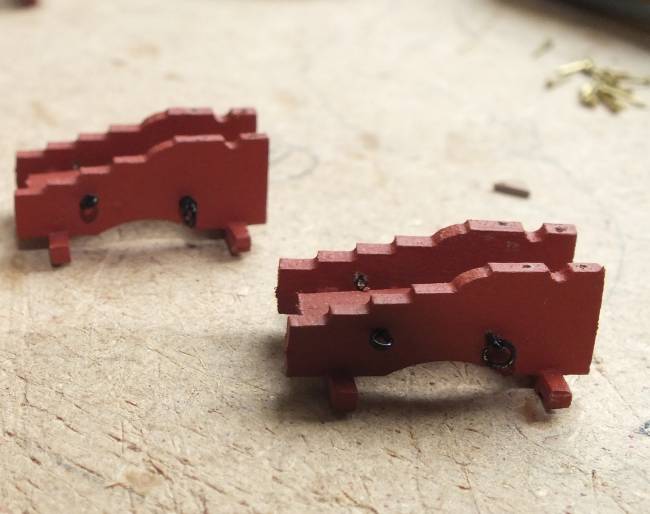
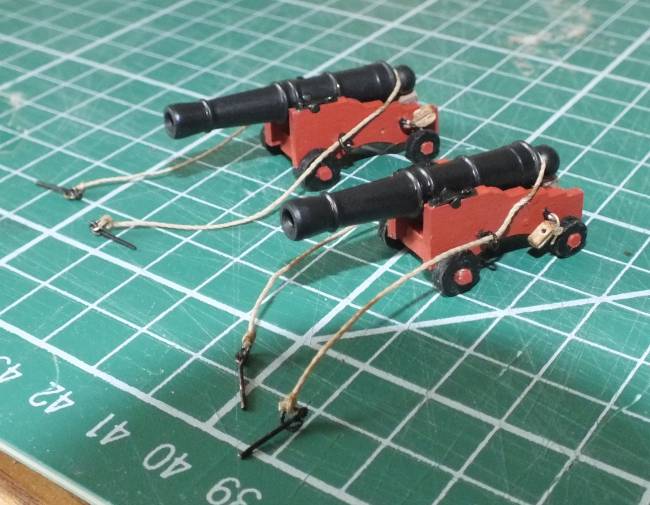
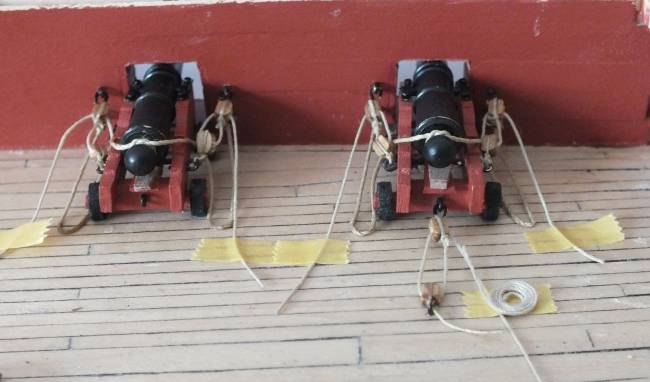
The Gun Deck
The guns
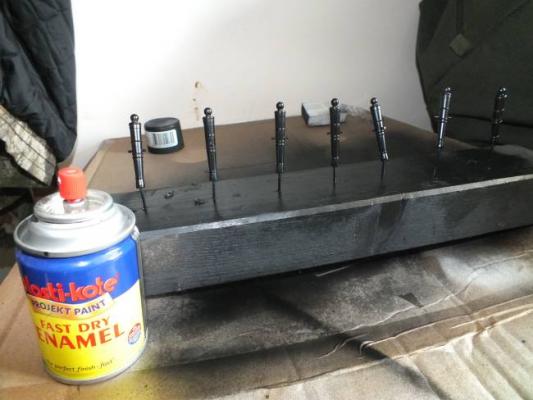
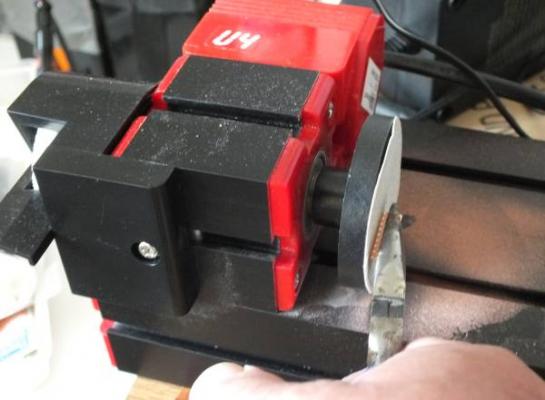
I decided to try blackening the barrels rather than as in the previous builds painting them.
1st attempt I tried a blackening agent supplied by a well known model shop it was a complete failure after cleaning the test barrels I tried a 50/50 solution watched it and after 40 minutes nothing added the rest of the bottle and again after a further 30 nothing more than a slight discolouration.
2nd attempt this was with Birchwood Casey brass black, another failure, it did give a sort of blackening but it was very patchy and after washing it rubbed off.
At this point I gave up with the blackening, re-cleaned up the test barrels and went back to my previous method, I used a matt black aerosol spray and did 6 at a time giving them 5 or 6 very light coats and selected the very best ones for the guns that will be seen although there were no bad ones.
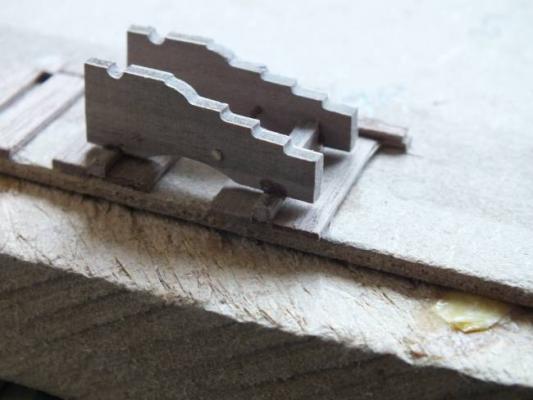
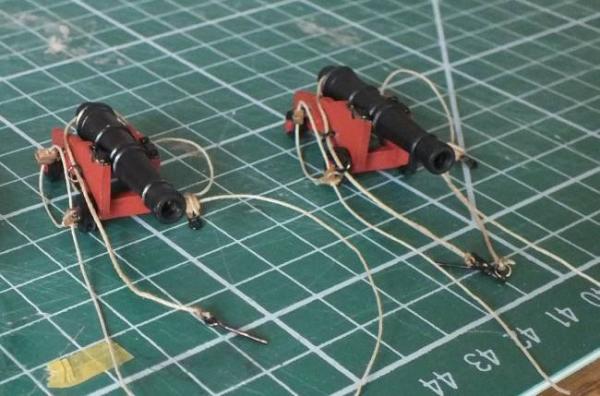
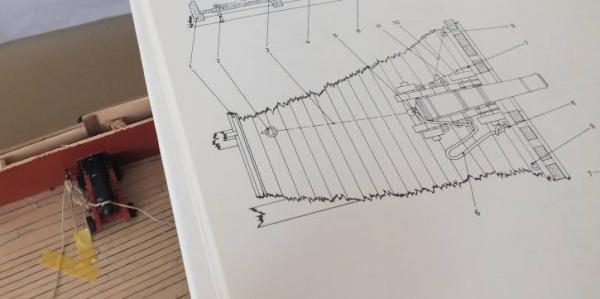
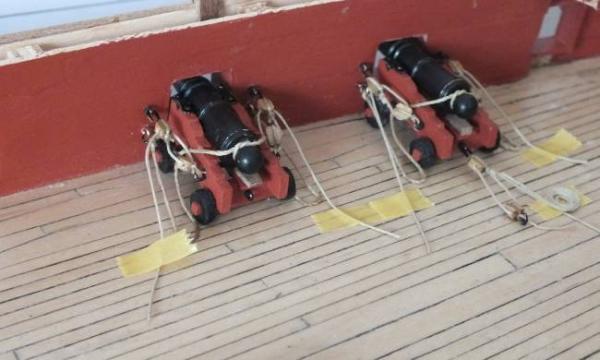
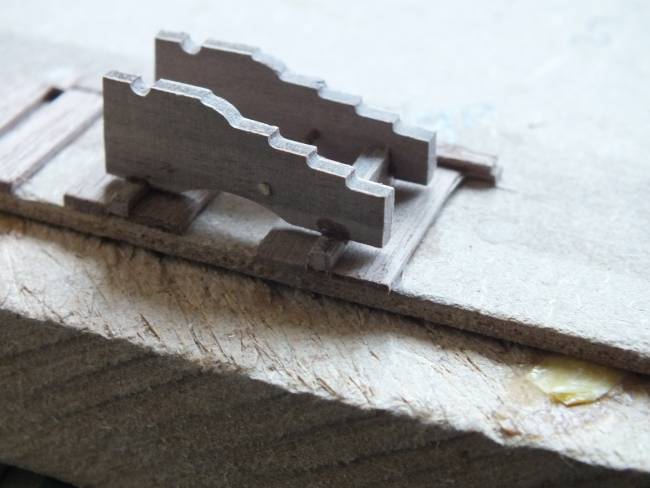
The carriages were made up using the jig as in the photo, painted and the rigging eyes, and rings added, I made them up in stages, and in-between working on them made up some of the deck fittings I find this a way of making the repetitious parts not tedious, I rigged the breech rope over the top to simulate it going through the cascable ring as shown in The Anatomy of Ships I fully rigged two guns and mounted them laying the breech rope as in the book, also this also allowed me to work out the position of the rope coils at the end of the tackle.
Now back to assembling and rigging the rest of the guns.
The axle jig
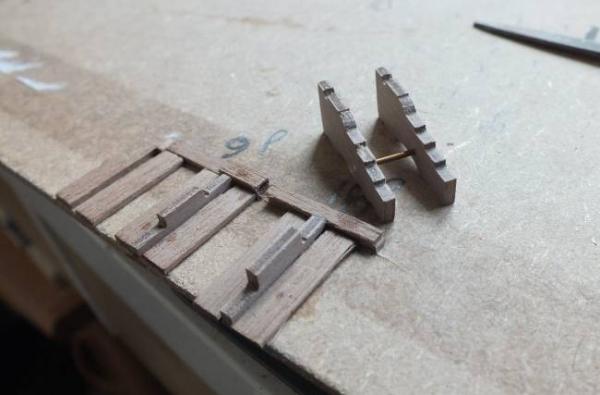
Ready for the wheels and barrels

Breech rope on
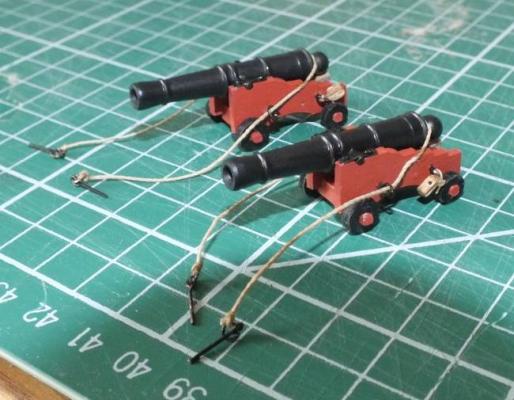
Fully rigged
Bulwark rings
Rigging as in book
Two guns mounted on the gun deck

- mort stoll, jaerschen, mtaylor and 1 other
-
4
-
Len Super work on rigging the carronades and the hammock netting, the netting is always trickey and yours looks spot on.
-
-
-
Hi I found a marker pen which did not bleed and have attached a couple of photos I obtained it from www.tigerpens.co.uk they are in wicford Essex.


no bleeding on my planking

-
Hi John & mort
I bought my kit only about 7 months ago and it came with 6 sheets of plans. John I had a look at sheet 3 ( I am a long way off the masts) and as you say the drawing size and the size stated in mm do not match ??? I have the anatomy of ships Diana so will look into converting the 1/96 drawings into 1/64 ( there are some charts to help) and use that figure, I wonder which is correct the drawing or the size in mm, thanks for the heads up.
-
Hi Mitsuaki great to see you are back and have your reloaded on the new site it has been missed I look forward to updates of your super work
Ray
-
Hi Peter nice work on the rigging one tip leave as much space in the middle as possible, do not fix the spare spars and boats till as late as you can, it gets very crowded, as there is so much rigging to tie off in small spaces.
-
Many thanks guys for all the birthday best wishes.
I have started work on the guns for the main deck there is a lot of work involved with them I will post a interim update soon.
-
Balsa fillers are well done and well worth the extra time and work spent on them.
-
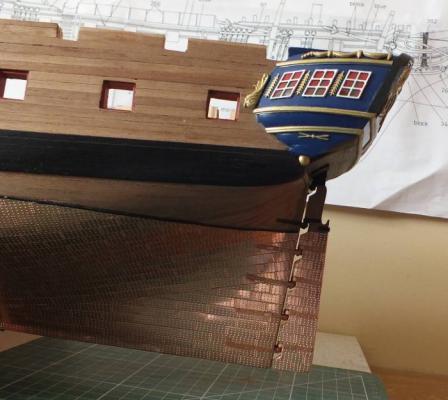
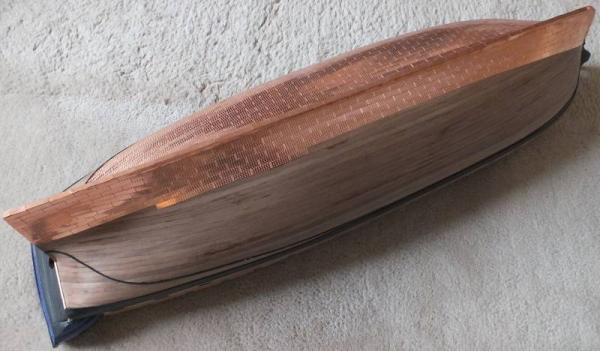
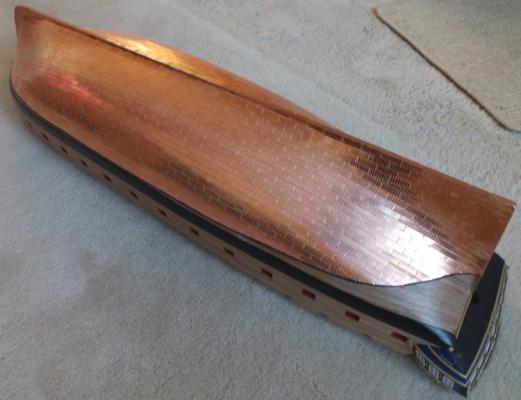
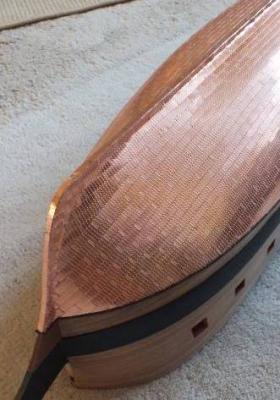
Nice work at the bow the the most difficult part of the build, nice base as well, coppering next !
-
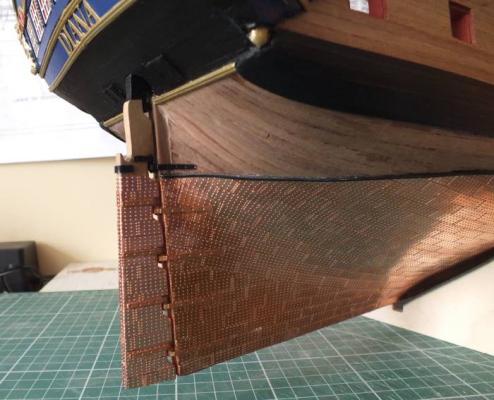
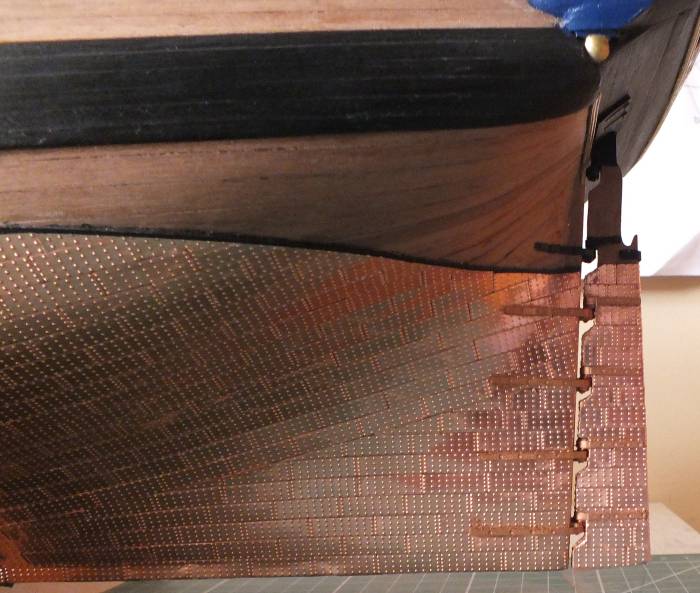
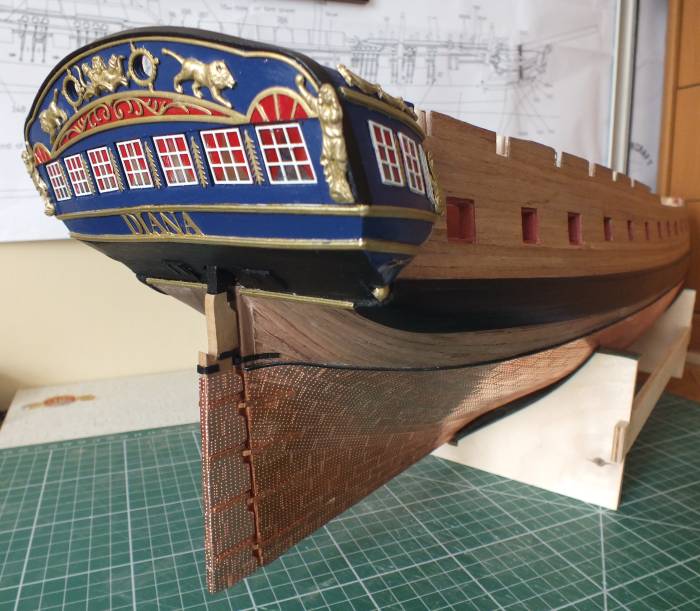
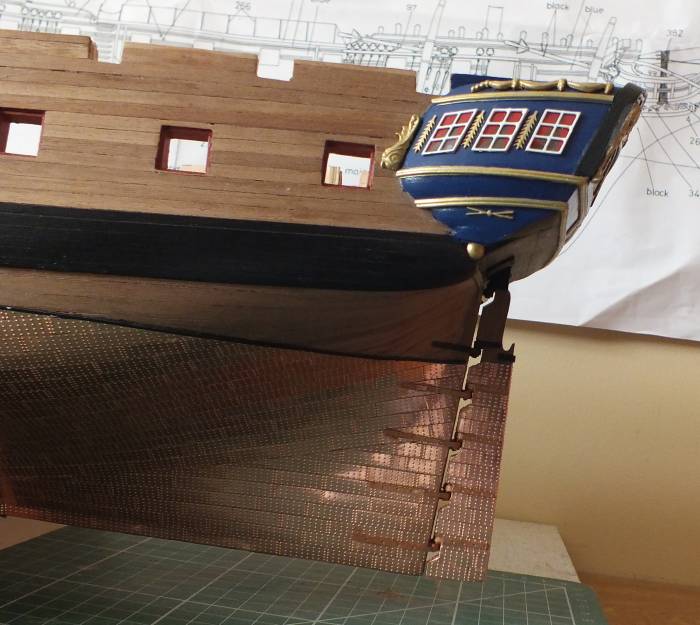
The Rudder
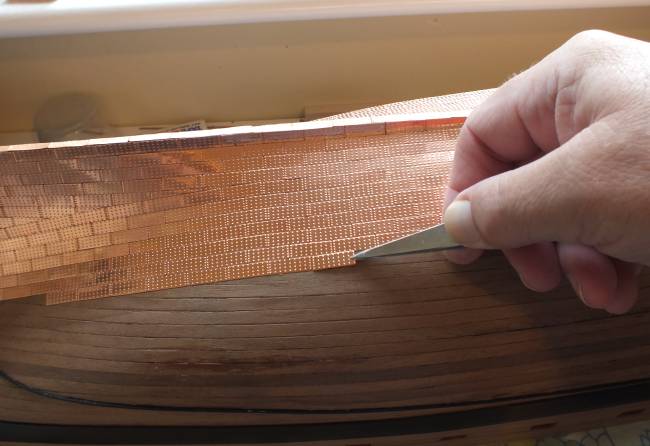
Now the hull coppering is complete the only plating left to do is copper plate the rudder, but before that it needed sanding down, tapering it to about 3mm.
Coppering the rudder was probably the most fiddly part of all the coppering. When done the pintails were glued into position on the rudder I glued both parts on and then marked where they came on the keel post and then drilled it, then I added the straps to the rudder and cyano fix the rudder to the post and added the other straps to the hull, and to finish off painted the straps with copper paint.
.
First few plates on
A few more plates added
Plated and ready to fit

Rudder completed


- Barbossa, fnkershner, mort stoll and 6 others
-
9
-
Thanks Christian for the info I will keep that in the memory bank, I had it in mind some juggling with the rigging and gun tackle might have to take place and decided it was one of those bridges you have to cross when you get to it. Just finshed plating and fitting the rudder so main gun deck next.
-
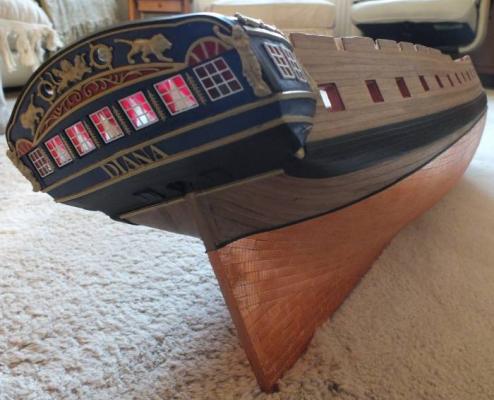
Many thanks guys, I think as I am building Diana as built in 1794 red is going to be the correct colour.
-
Is there a correct colour for 1790ish British war ships like Pegaus ,Victory ,Diana's gun carriges the kits say red, I have photos taken on the Victory and they are ochre just about to start my Diana's guns and which is correct ???
-
Hi Christian she is looking fabulous and gives me insperation for my build. Are you adding netting to the cranes, I am about to fit out the gun deck and hope it will look half as good as yours.
-
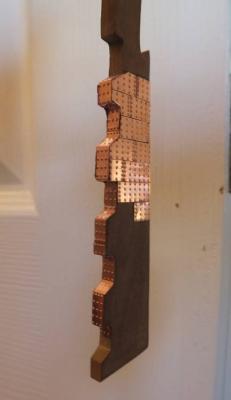
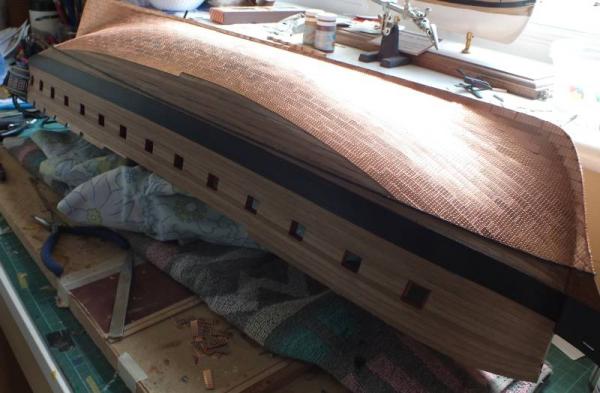
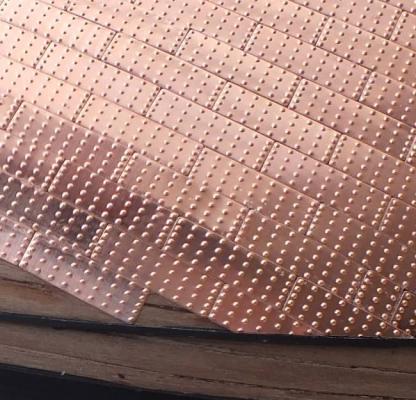
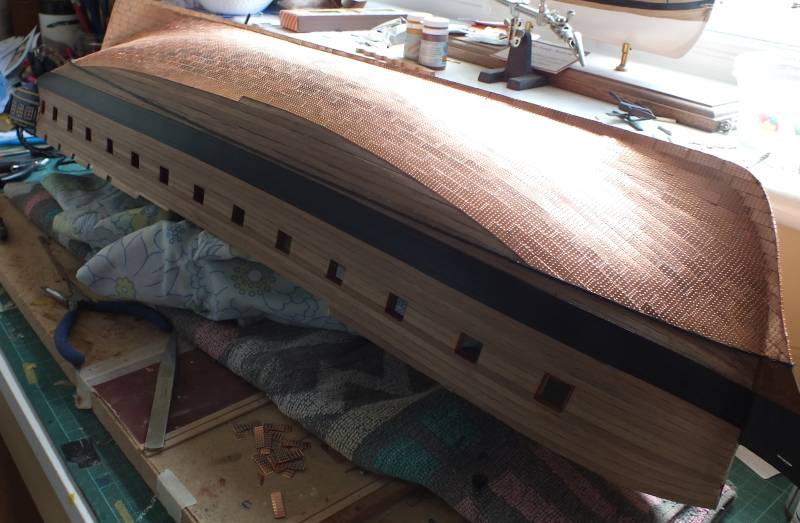
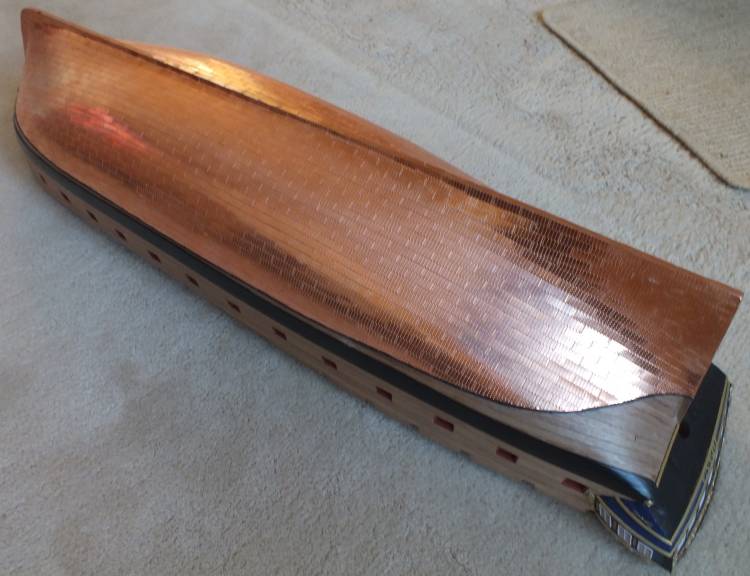
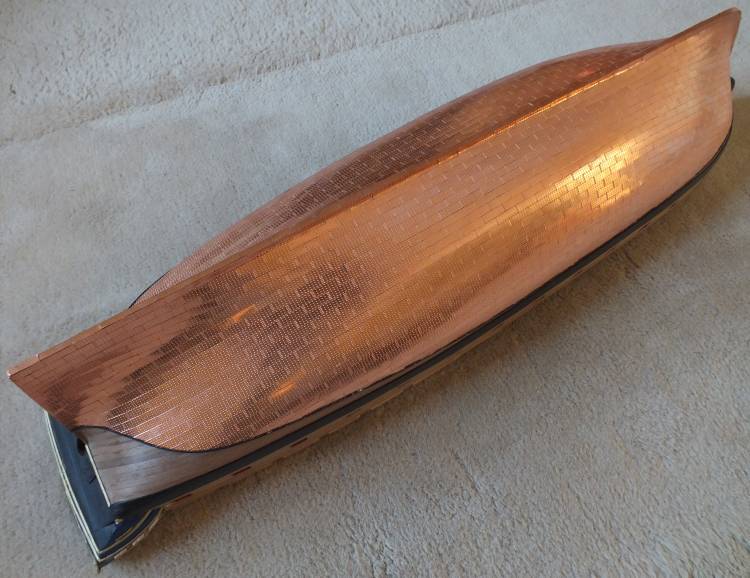
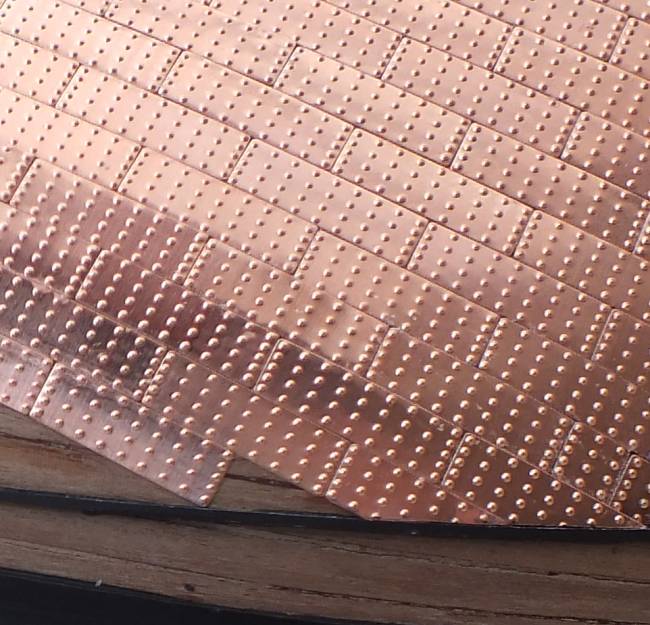
Copper plating complete the second side has now been finished, only the rudder to do, to complete all the plating to sum up the plates went on very well were easy to cut dress to fit, there was loads left over, glad its completed and it was a good move to break it up by building the galleries at the same time.
I have also remove the protective tape of the gun deck.
2nd side well under way
Both sides completed

Protective tape removed from gun deck
- freewheelinguy, de_kryger, muratx and 6 others
-
9
-
Thanks for the comments guys.
Andy
I will just leave it and let time do the rest.
Ron
Thanks for the info I do have a copy of Anatomy of the ship Diana which gives extra detail on the masts and spars, and has all the belaying points as well, I also have rigging Period Ship Models by Lennarth Petersson which I used rigging Pegasus so hopefully when the time comes I can pool the info from them and finshed super models like yours.
-
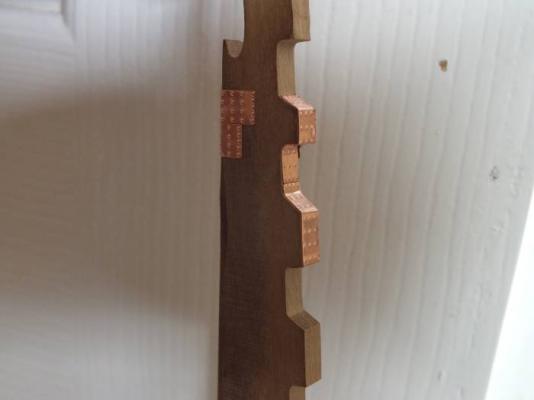
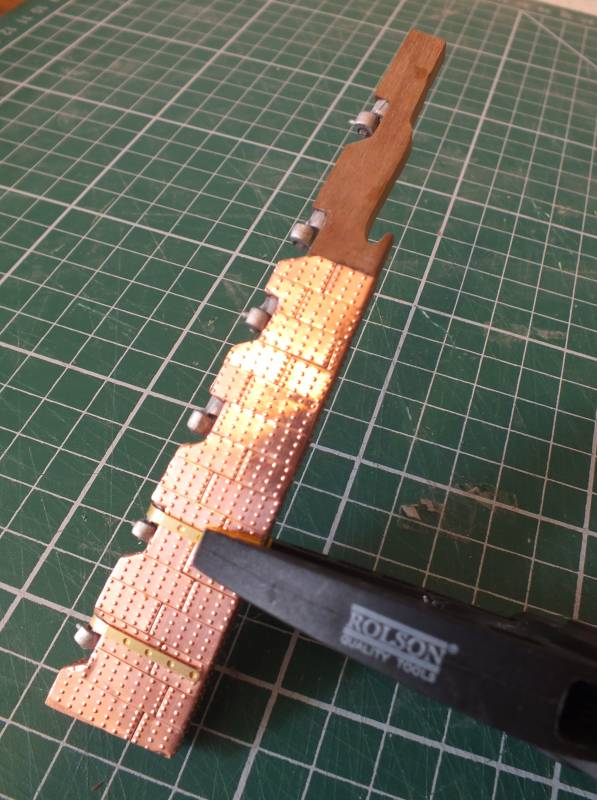
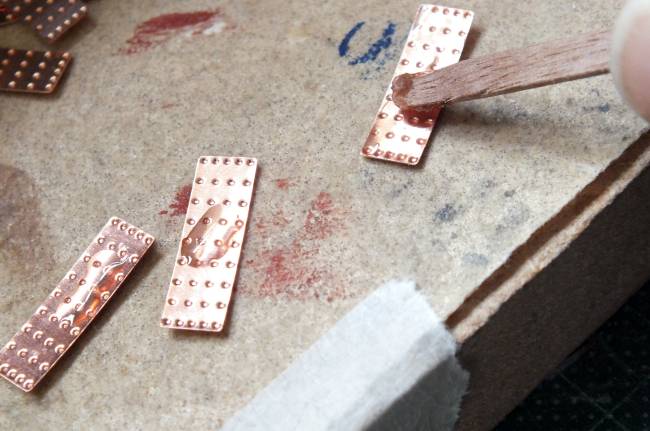
Coppering tile plate applying guide
Copper plating seems to scare some builders so here is the way I actually fix the plates/tiles to the hull THICK cyno is always used and I very rarely find the need to remove any excess, and if I do I use a wet/baby wipe. Cutting is done with a heavy duty Stanley type knife on a self-healing cutting mat, and any extra dressing to fit carried out with a sanding disc or needle file.
1st thick cyno going onto tiles max I do at one time is three

spreading glue on plates
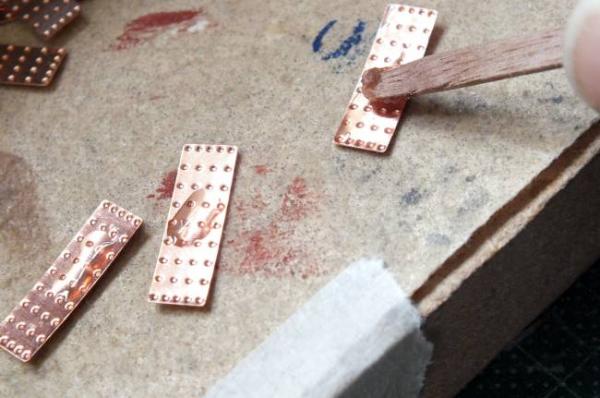
Triming at plate
Fixing tiles/plates standerd fix and a cut in fix

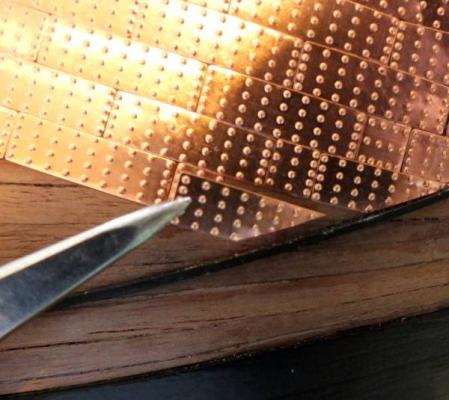
Fixed ordinary and cut in tiles plates
- mtaylor, fnkershner and Bill Hime
-
3
-
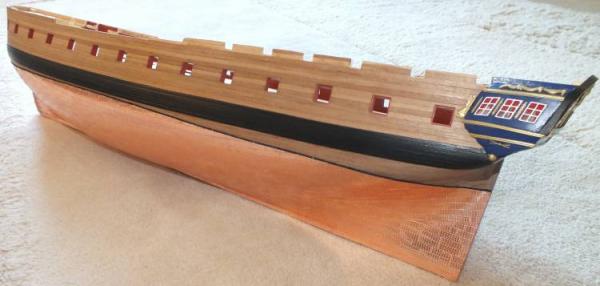
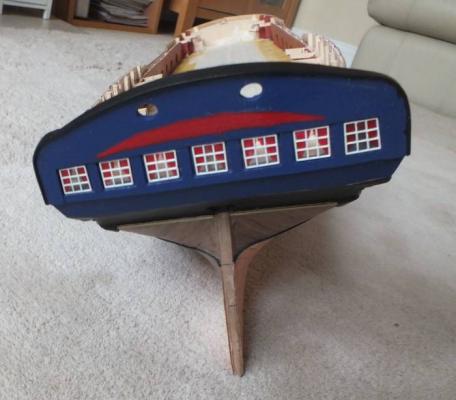
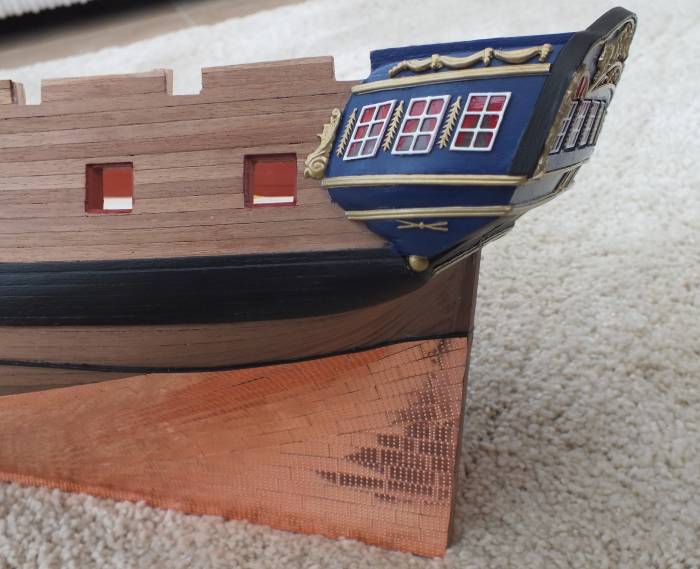
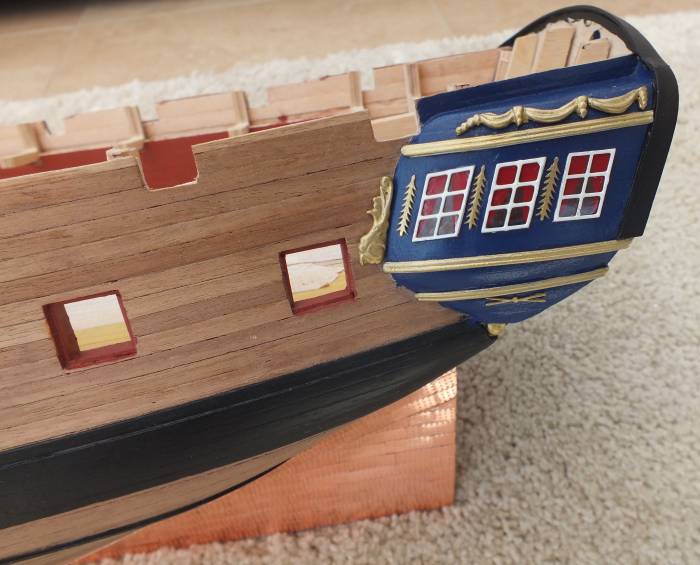
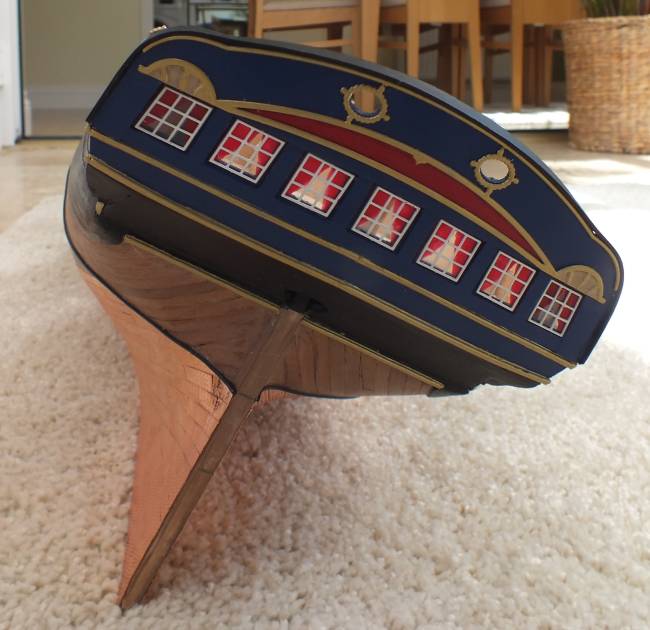
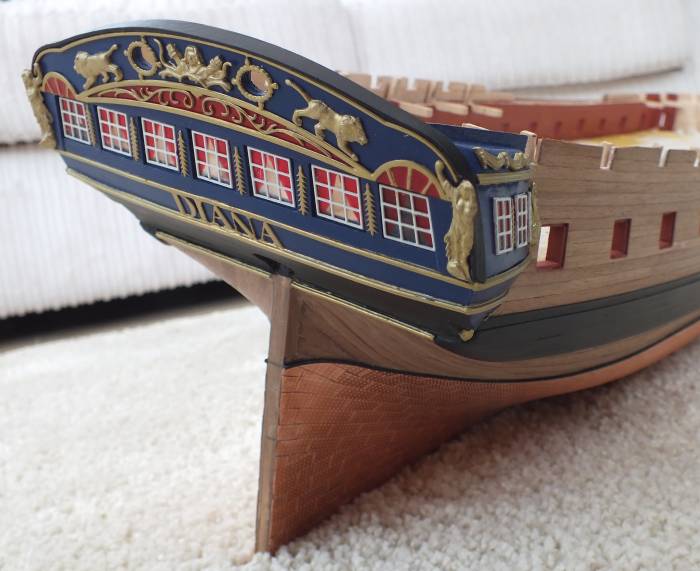
The galleries have now been completed there is one more bit to add on the top but that will be done when the quarterdeck rails have been added, no real problems adding the trim and decoration and the photos show the stages, now back to the plating only a few more rows on the second side to go.
Decoration going on one side

That side done

Decoration going on the stern

Galleries finished


- Blueskippy, Barbossa, mtaylor and 8 others
-
11
-
Hi Caroline nice to see your Pegasus is moving forward nice rigging on the stowed guns are you showing the others stowed or run out.
Ray
-
Hi I agree filling between the frames at the bow and even a couple at the stern will aid the planking as it will give you the shape and a large surface to glue to, I used this method on Pegasus and Diana have a look at the logs, the photos say much more than the words.
Ray
-
A bit more work done on the galleries firstly they were painted royal blue, several coats applied to get the required finish, also the rail was painted black and the rest of the black paintwork touched up. Next the windows were fitted I added curtains by painting them on the clear glazing material supplied, and the first length of decoration trim was fixed and painted gold I will paint all the gallery decoration gold as it looks great with the royal blue.
Galleries being painted


Windows having curtians added

Windows in


HMS Diana 1794 by Ray - FINISHED - Caldercraft - A 38 gun Heavy Frigate
in - Kit build logs for subjects built from 1751 - 1800
Posted
Hi Polo
My Knee replacement was carried out 5 months ago and it is going ok vey very painful at first but improving all the time, I can play 9 holes of golf now. One good thing is it has given me a lot more building time, even though some of it is when I cannot sleep (due to the knee). I hope your hand heals well so you can get back to Pegasus.