


@macbride
-
Posts
58 -
Joined
-
Last visited
Content Type
Profiles
Forums
Gallery
Events
Posts posted by @macbride
-
-
-
Steve,
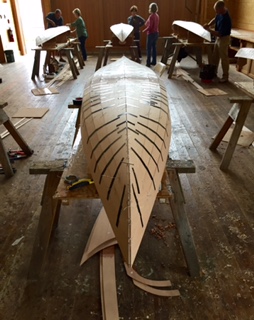
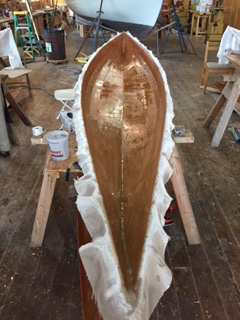
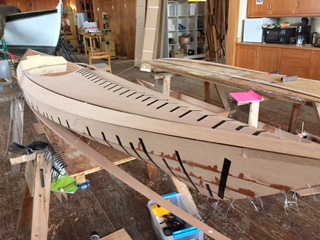
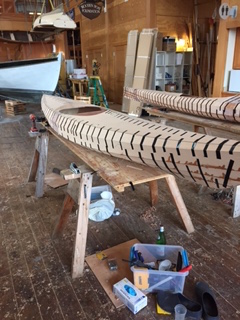
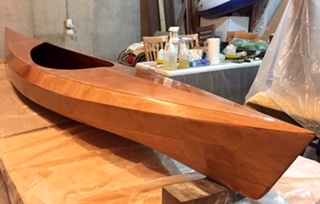
The kayak I'm finishing is a Pygmy Pinguino Sport.
I actually drove up to Port Townsend, WA and did their one week workshop
where 6 of us took our kits from plywood to being about 2/3 done! It was in
October, and I really enjoyed it.
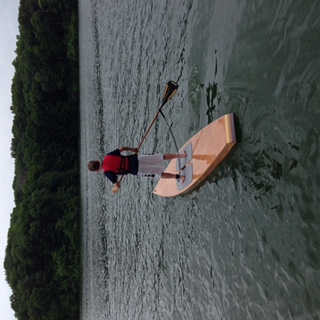
The paddle board is from CLC, which you're obviously familiar with. My next
project is to build a double that I'm going to give to my parents. I went with the
Wood Duck double for its stability and ease of entry.
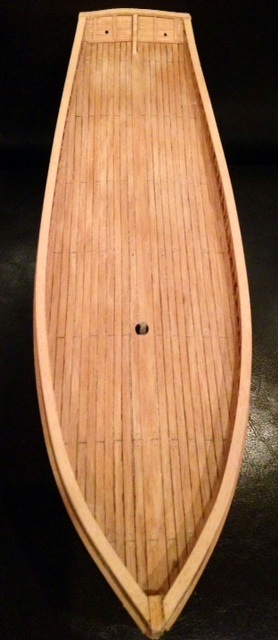
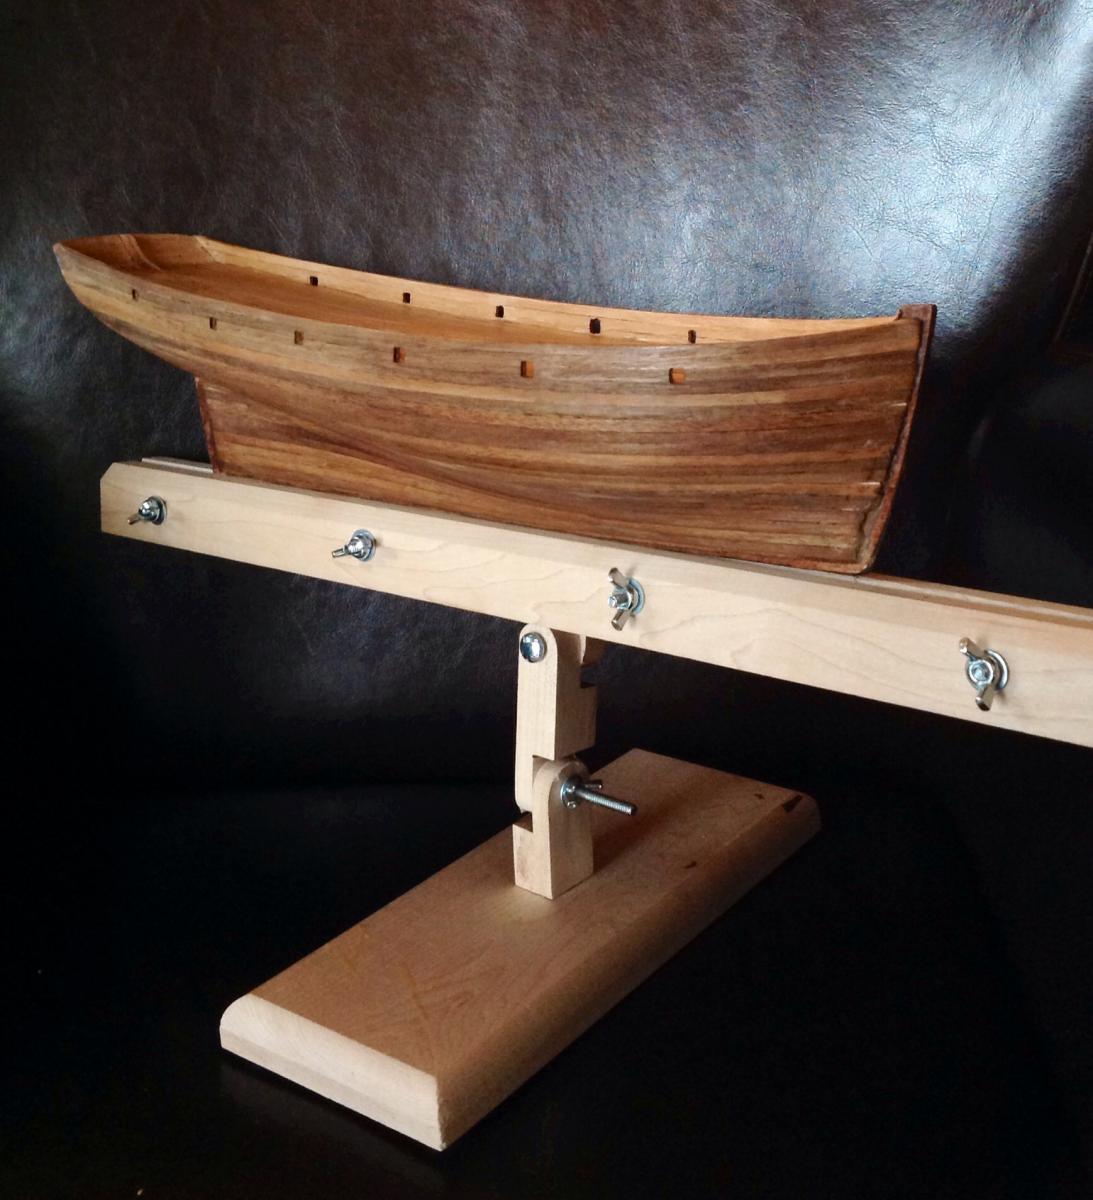
The models I've worked on are all beginner level 1 & 2 boats from Midwest Products,
including the Chesapeake 17 kayak, Peterboro canoe, and a dinghy. They've been
very nice projects for a beginner like me.
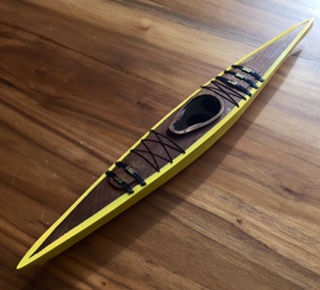
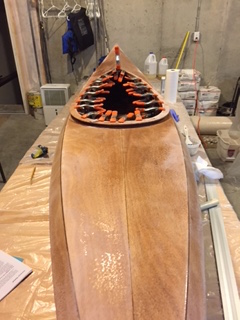
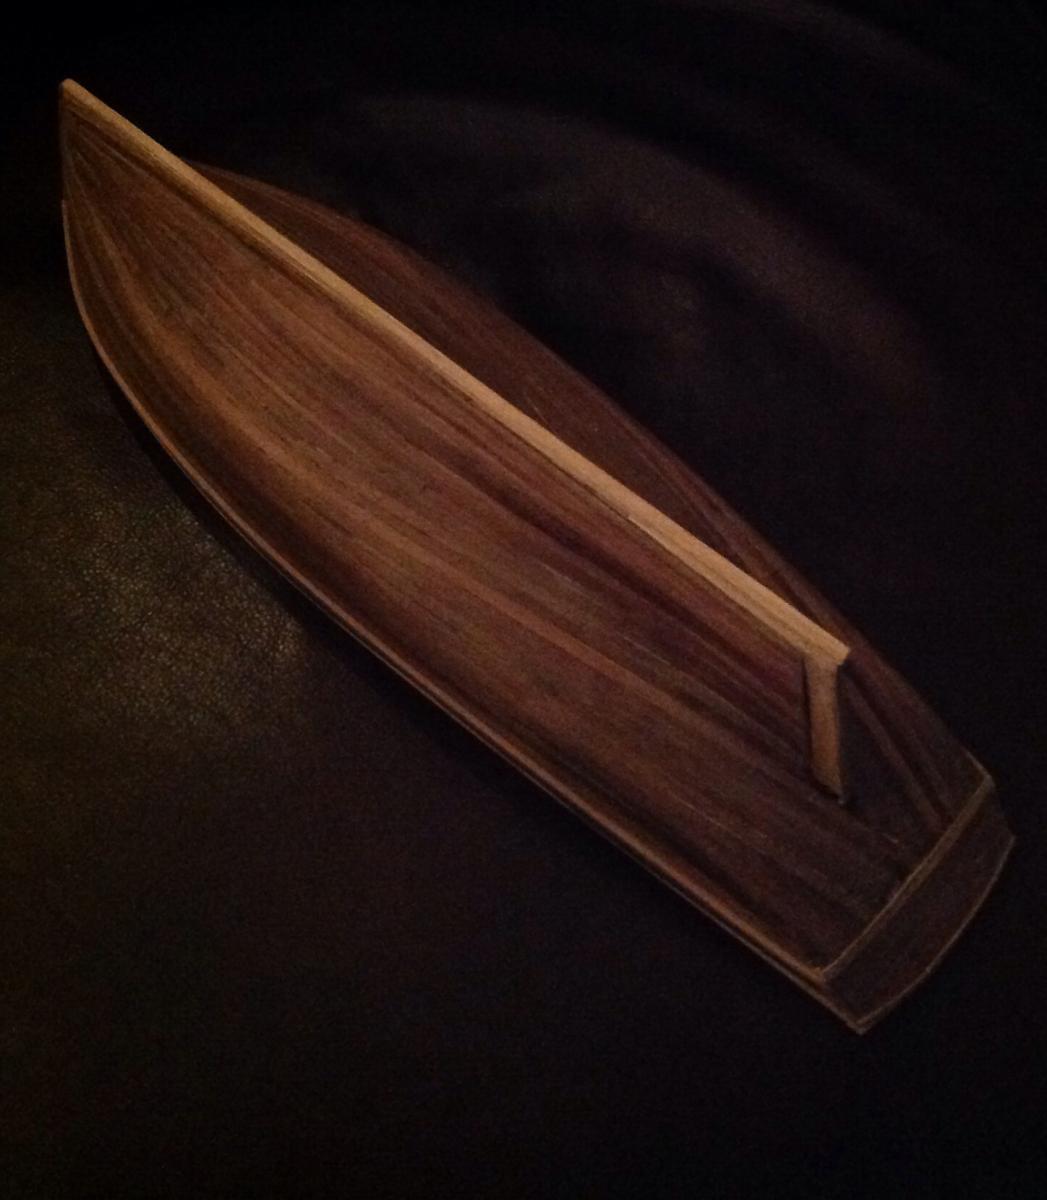
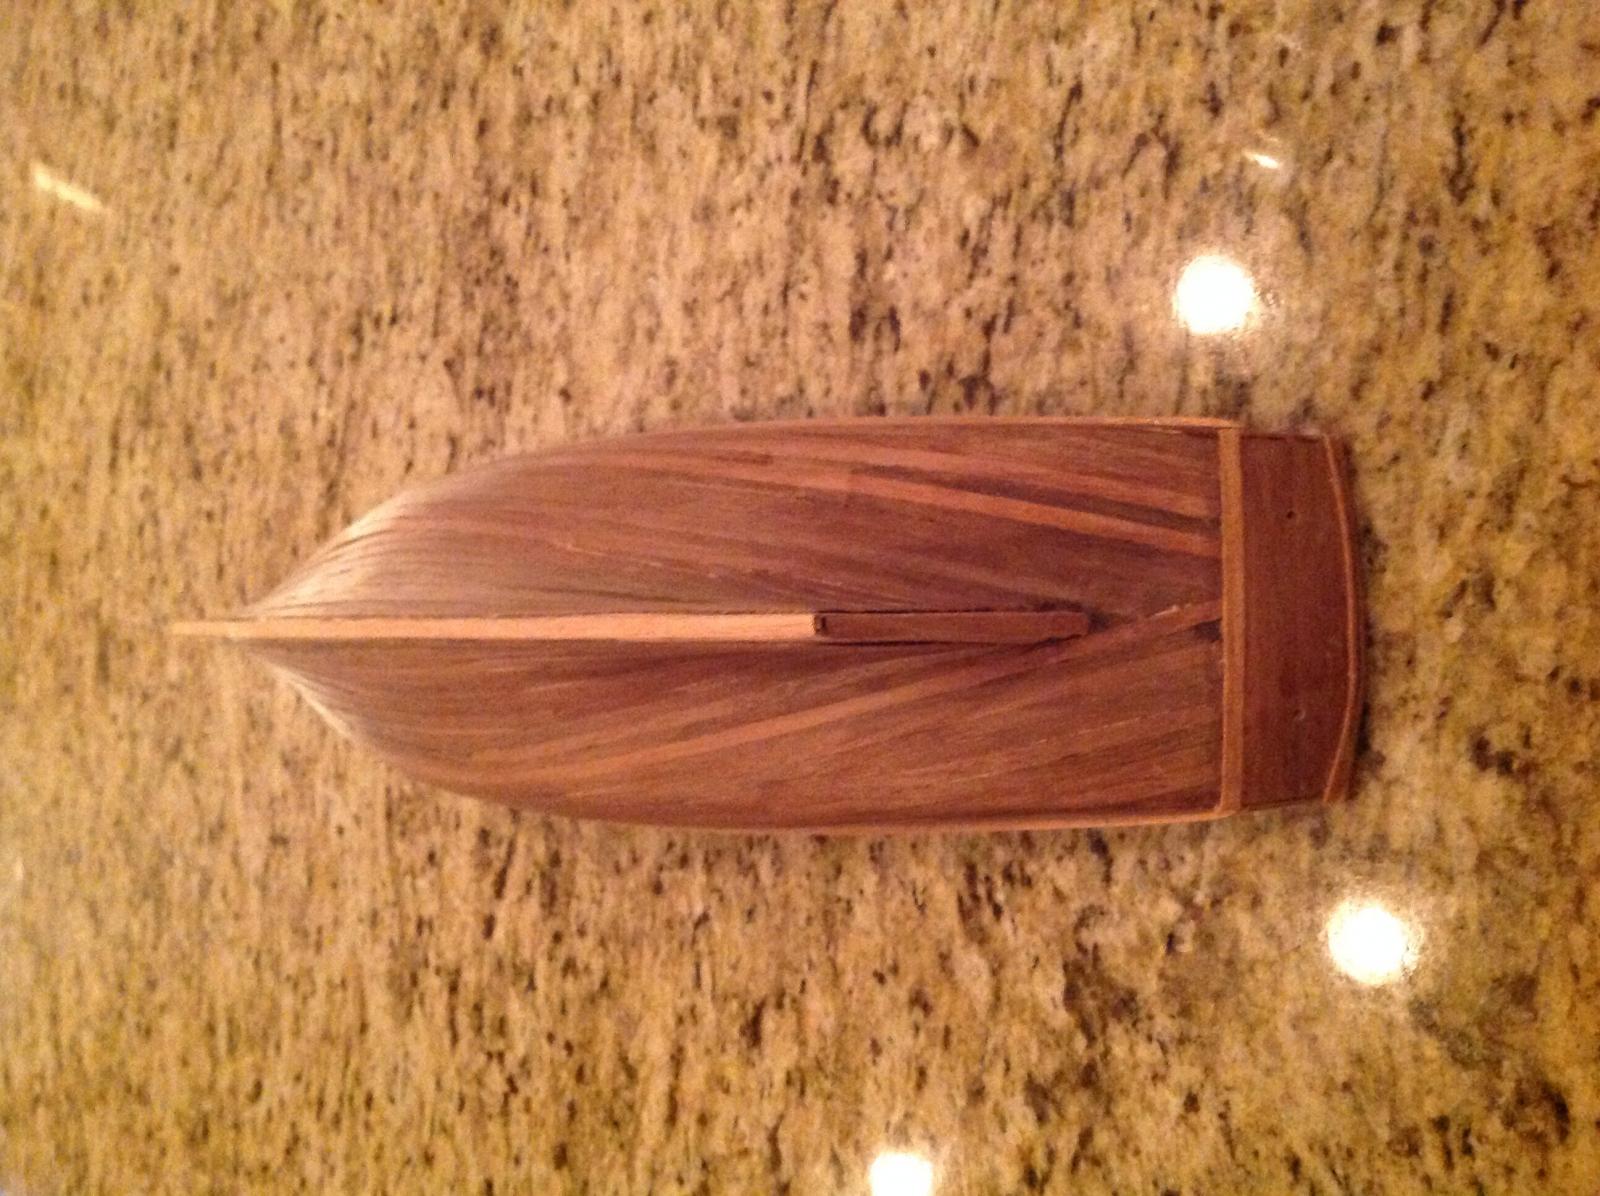
chesapeake 17
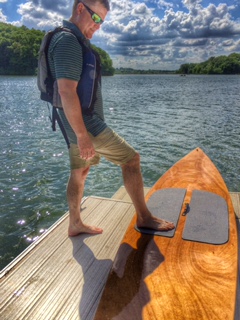
Kaholo paddle board
and the Pygmy Pinguino Sport:
Looks like my Shenandoah will be sitting neglected for a while longer...
Have a great weekend!
Andy
-
Yes! Got some good use out of it last summer, too!
I am also nearly done with a 14 ft wood kayak, and I've also
built several small, simple model boats (kayak, canoe, etc.)
to work on my model skills. The Shenandoah was way above
my head, and maybe still is... we shall see!
Andy
-
Steve,
Greetings once again from Iowa City!
Your progress is terrific!!! Beautiful work.
I have been doing other projects, but when I get back to the
Shenandoah, your documentation will help me tremendously.
Cheers!
Andy
-
Beautifully done Steve! The way you inlaid (joggled?) those pieces below the transom looks really cool actually. Totally like they were planned that way :-)
Your scuppers give it a very realistic appearance, too.
Very, very nice!!!
Andy
-
-
-
Steve,
hadn't checked in for a while - nice deck!!
I will post a few pics from the Blood Moon earlier this month on my build log since you brought that up.
I got a great pic of the full moon and an ok pic of the blood moon (it was darker, so the pic just wasn't
as nice...) here in Iowa it was absolutely breathtaking from 2-3am that night. definitely worth getting up
to see!!!
Andy
-
Steve,
Beautiful work!! I'm totally in awe of the beautiful lines & clean transitions from one side to the next.
You set the bar very high!
I've been reading up on the next steps (mast, etc.), and the instructions are vague at best... the
diagrams confusing (for me, at least). Any pics u take along the way will really help me, so I thank
you in advance!!
Andy
-
I've scoured the web looking for pics of the Shenandoah to help guide me.
If you're interested, this Italian site has some good pics of a completed model
that looks similar if not identical to what I'm building:
http://www.smf-modellismo.net/olympus/viewtopic.php?f=3&t=4515
Andy
-
-
-
Mike,
Sounds like you're making your way!

Cheers!!
Andy
- Aussie048 and CaptainSteve
-
 2
2
-
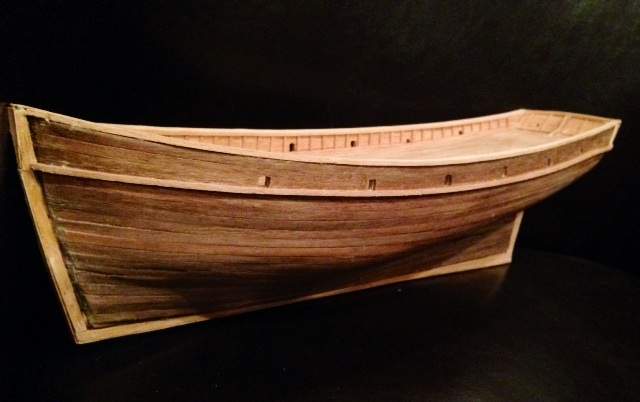
Steve,
Tung oil really brings out the beauty of the walnut!
Next time I will definitely use rabbets to make the hull look its best.
The scuppers were an interesting project, and I am in awe of your boat!
Your posts really helped.
Futtocks are next!!!

Cheers!!!
Andy
-
Progress!
Walnut planking done & scuppers too! Steve definitely wins the scupper championship!! I kinda skimped...
I've learned a lot.
Andy
-
Mike,
One other thing: an article on this site has a PDF tutorial that shows how to make your own jig (as well as other good advice on planking):
click on "model ship world main site & article downloads"... then "articles & downloads"... then "framing and planking"... then "plank bending", the last PDF on that page. very good review.
Andy
-
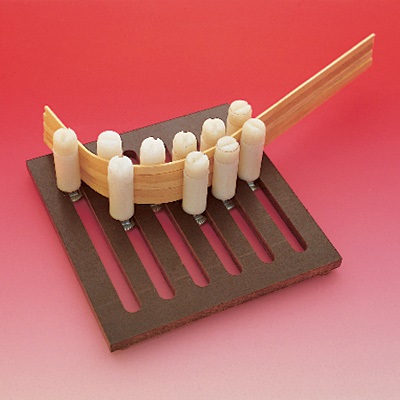
I bet you could rig up something like the jig I have on your own...
I know exactly the problem you're facing - I just did that 2 weeks ago. I was able to make it work by thoroughly soaking the planks and just repeatedly going over them with an electric plate bender (which is nothing much more than a curling iron as Mark notes above). I got a mental image of the curve and twist and just repeatedly hit it with the heat & pressure. After they had dried the planks had just a hint of the bends I had in mind, but it was enough to position them without any of them splintering apart.
Highland Scotland... hmm.. makes me thirsty. Cheers!
Andy
-
Mike,
I feel your pain! I found this jig at Micro-Mark:
Once you've soaked & bent the planks, this will hold them in whatever position you need them to be in while they dry.
It's fully adjustable and although it probably costs them a fraction of what they charge, I've found it to be handy.
Micromark.com and look for "plank forming jig" It's about $25.
Andy
-
Thanks again Steve! Great info!! As for me, I was counting on the first layer for learning. My second layer (of thin walnut) looks pretty nice... much nicer than the first layer anyway! I will post pics on my log when I get back home from vaca. We are enjoying a few days on the gorgeous beach of Sanibel Island (Florida)!!
Happy Planking!!
Andy
-
Steve,
Your work is incredibly nice! I used whole lengths of wood to do my hull, which was not easy at times. I see u have segmented them, which looks to work better than what I did. How did u design the connections - is it based on an article or book u can recommend? I had to do some crazy things with stealers as well as some random filler pieces in the middle, so I can't wait to see how your hull comes together!
Thanks,
Andy
-
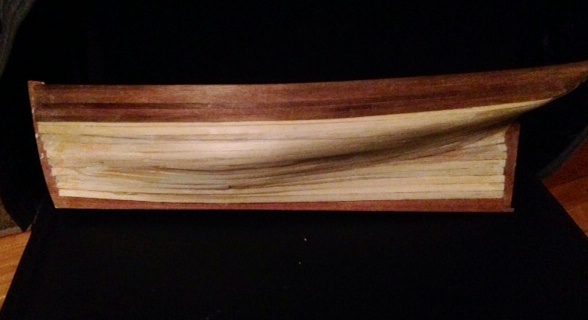
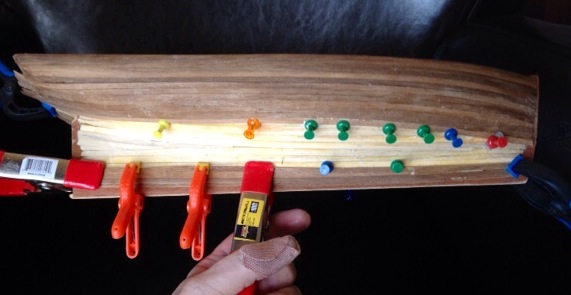
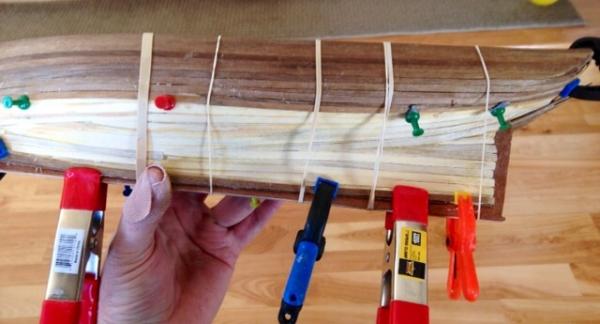
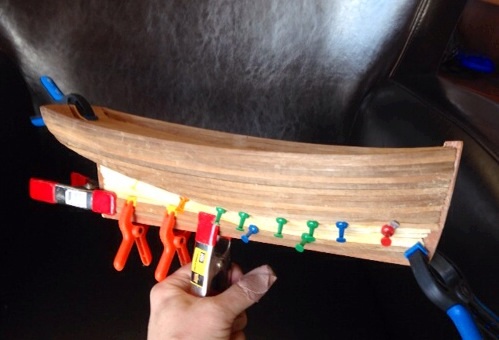
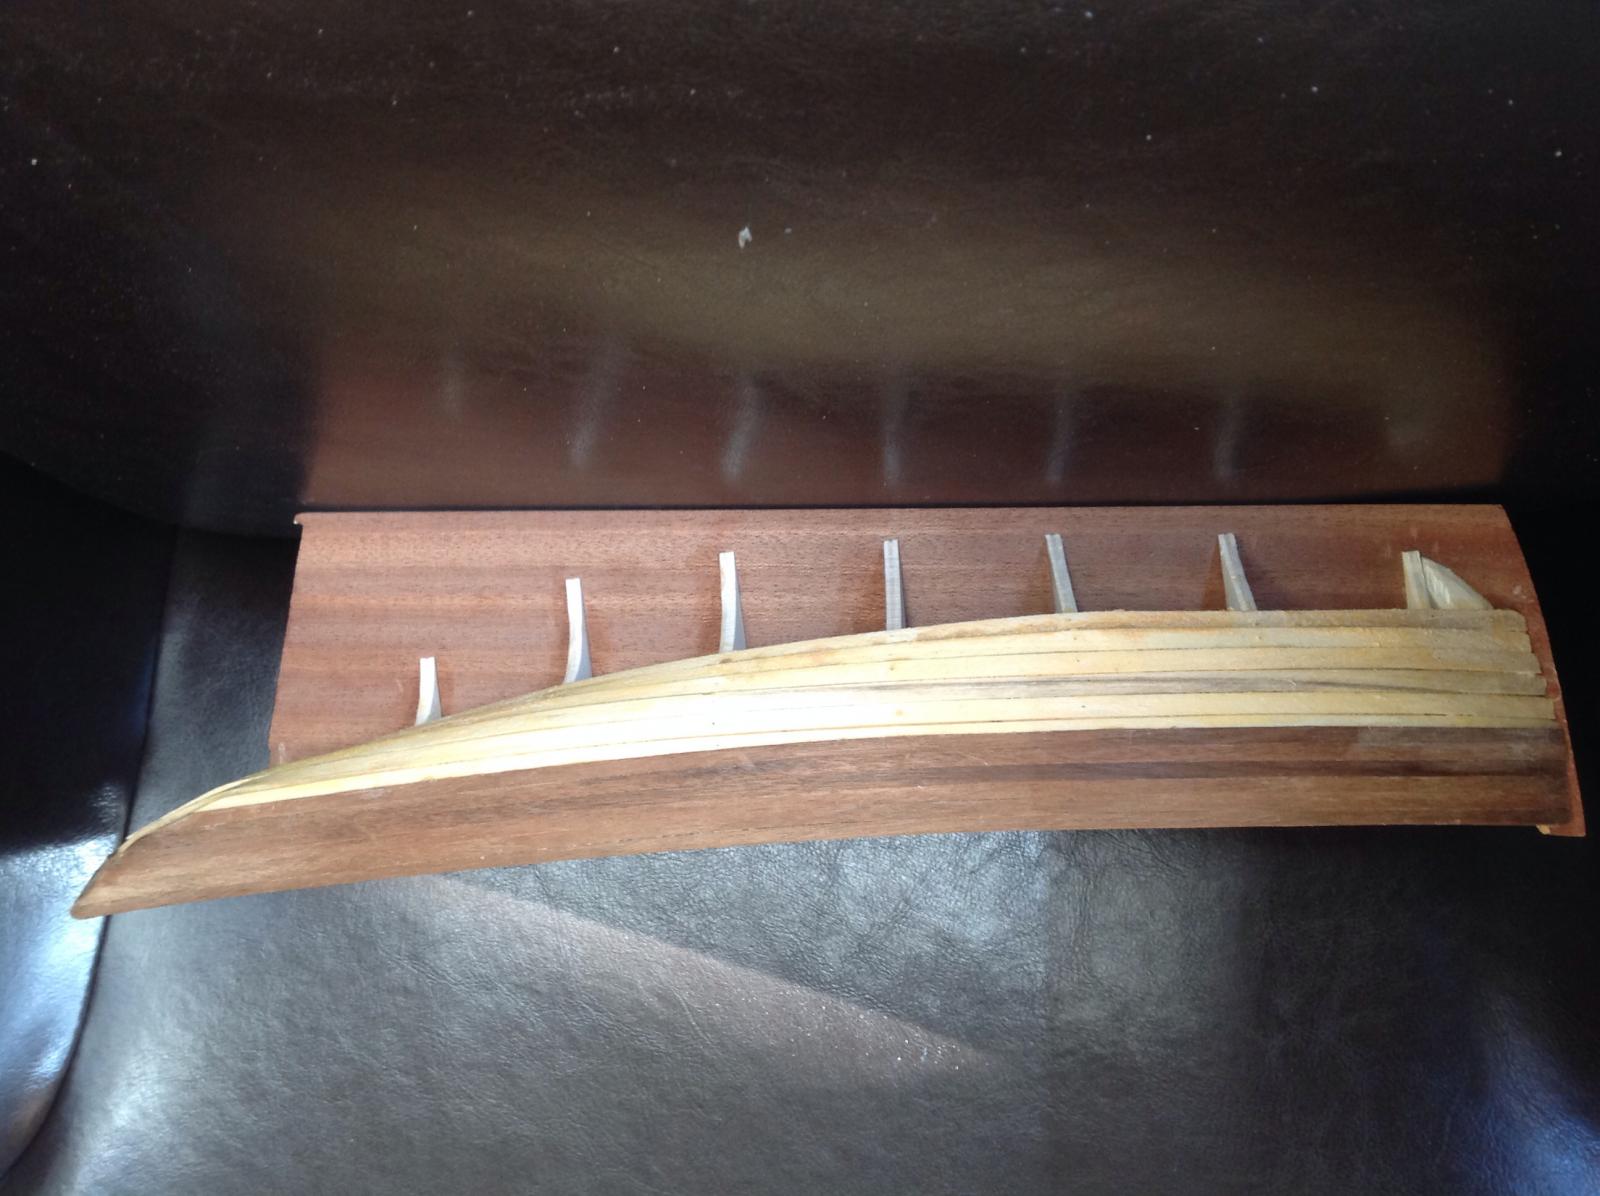
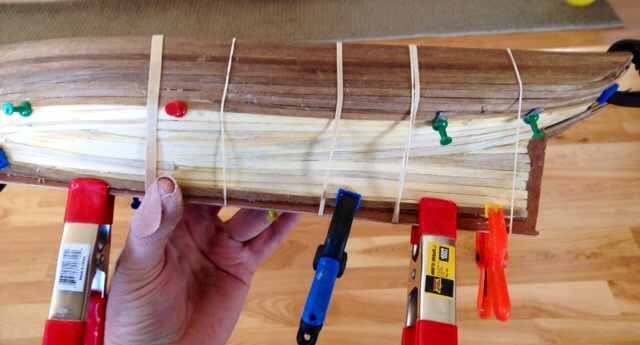
Progressing on hull planking. I've learned a lot & I am confident my next build will be nicer looking & go faster!
Learned that walnut splinters fairly easily, hence the thumb bandage!!
Also improvised on various clamping techniques.

Andy
-
Danny,
Your progress is inspiring! It's very helpful for me to hear the terminology and see the
work given my lack of boat expertise. Thanks for sharing your beautiful work!
Andy
-
-
buck,
just looked through your build log - beautiful work, very inspiring!!
sorry about the rough times life has dealt you. I find that having my mind & hands occupied
helps time pass in a more positive way.
Cheers from one tiny dog to another!
All the best,
Andy


Kits to start with and avoid?
in Wood ship model kits
Posted
Luke,
I started a ship that I thought I could handle (it was my first), and I soon realized I was in too deep!
I put things on hold and then found some TRUE beginner ships. As John (above) noted, Midwest
Products is excellent. They specify skill level 1,2,3. Level 1 includes a kayak model which is cool
and very appropriate. I've done several level 2 ships now and am well into a level 3 which is far
more involved yet appropriate. I bought mine online through hobbylinc.com; if you search for
Midwest products, then click on wooden boats. I progressed from kayak to dinghy to peterborough
canoe, and am now doing the Skipjack.
Good luck & cheers!
Andy