


qaz_666
-
Posts
47 -
Joined
-
Last visited
Content Type
Profiles
Forums
Gallery
Events
Posts posted by qaz_666
-
-
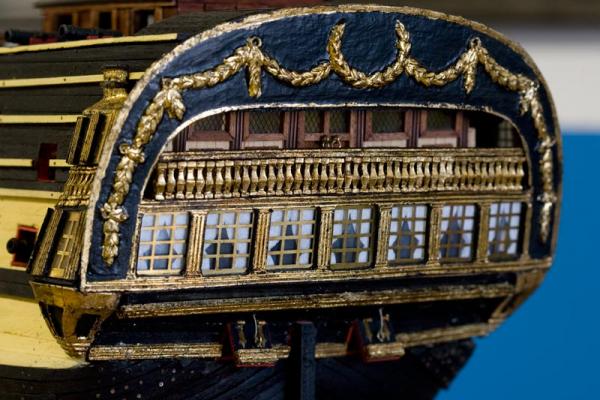
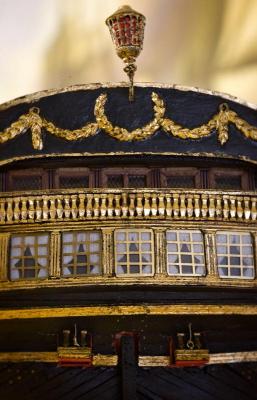
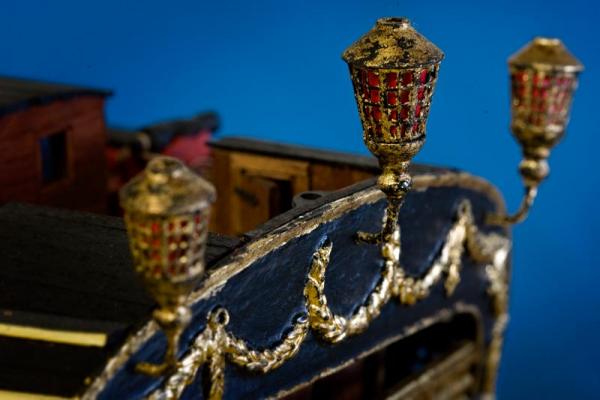
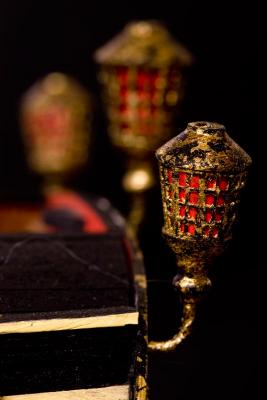
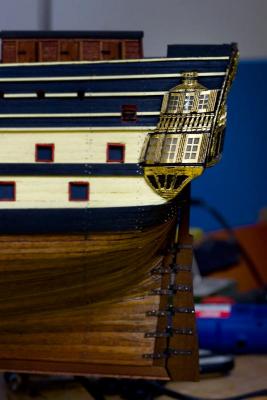
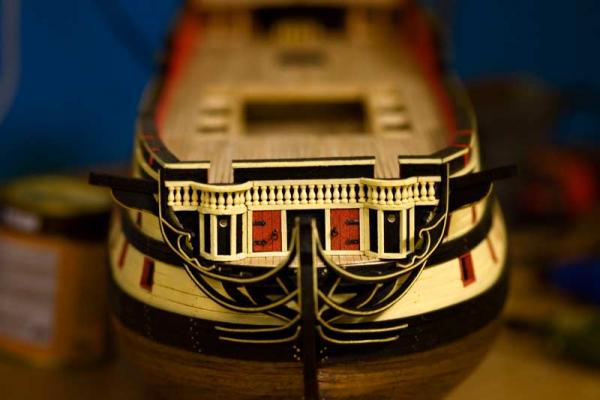
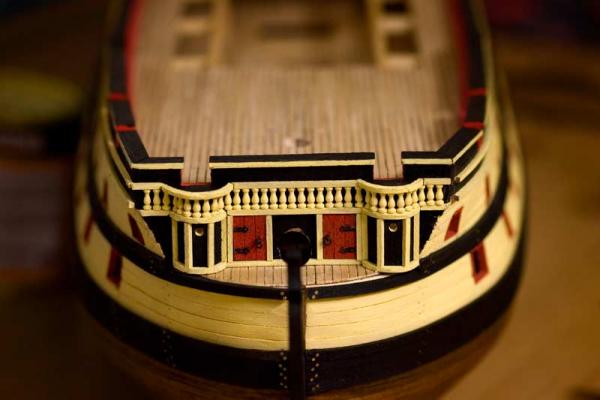
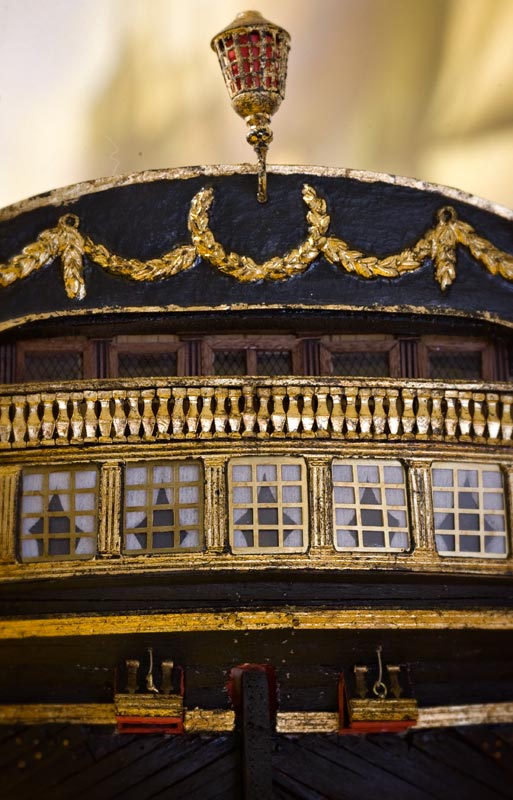
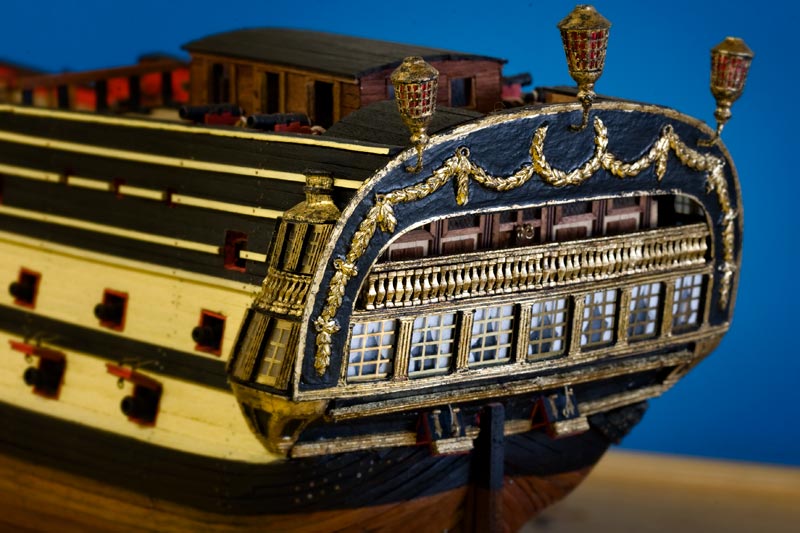
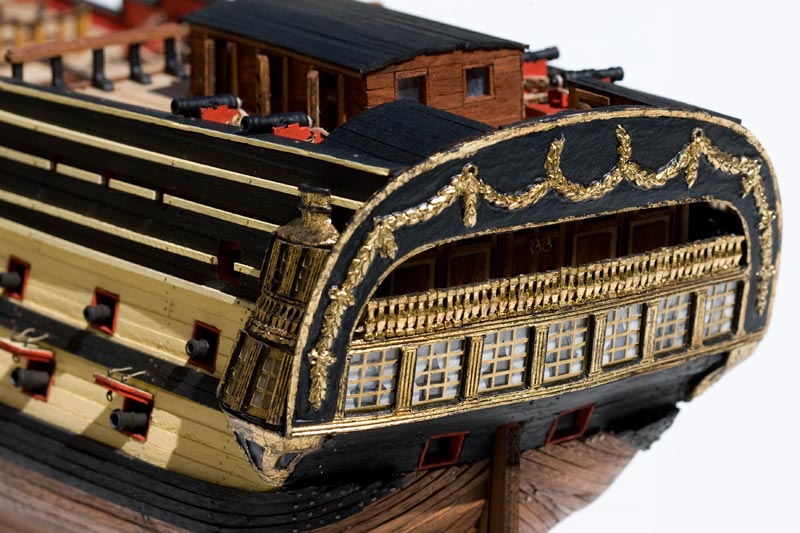
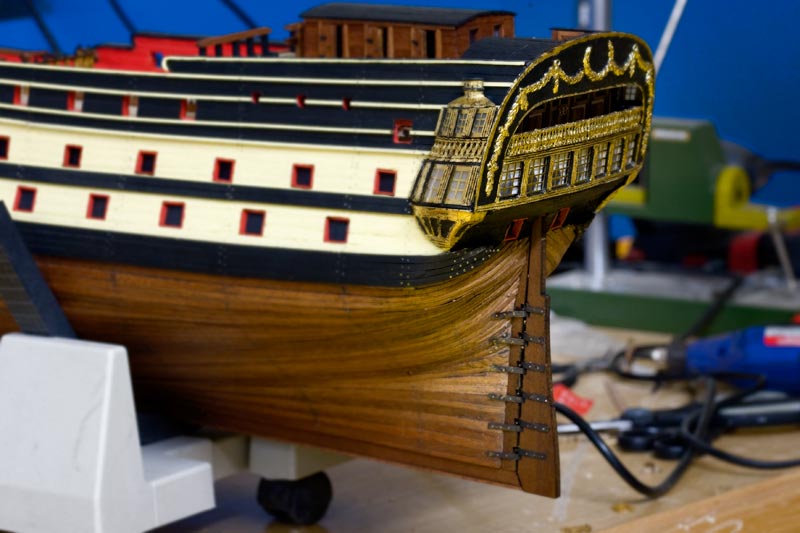
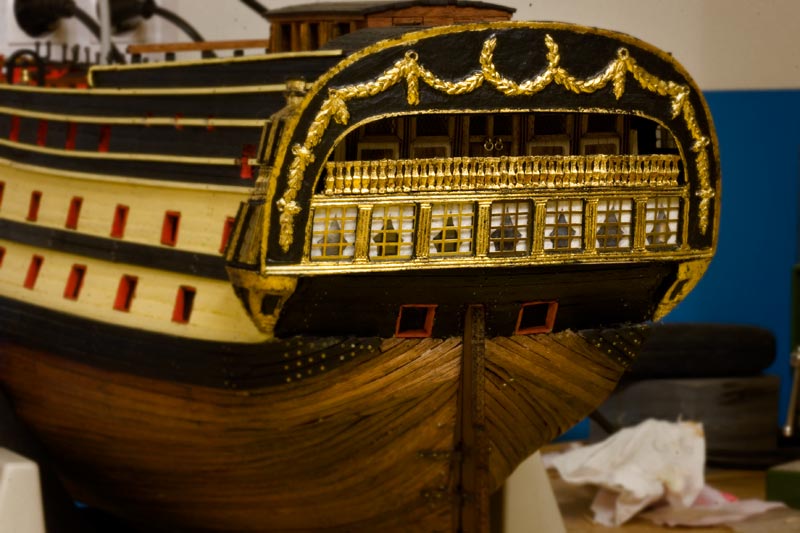
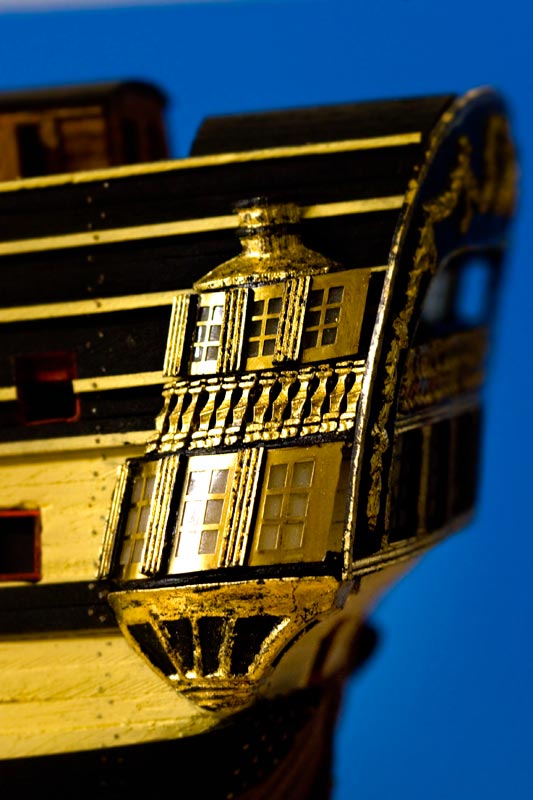
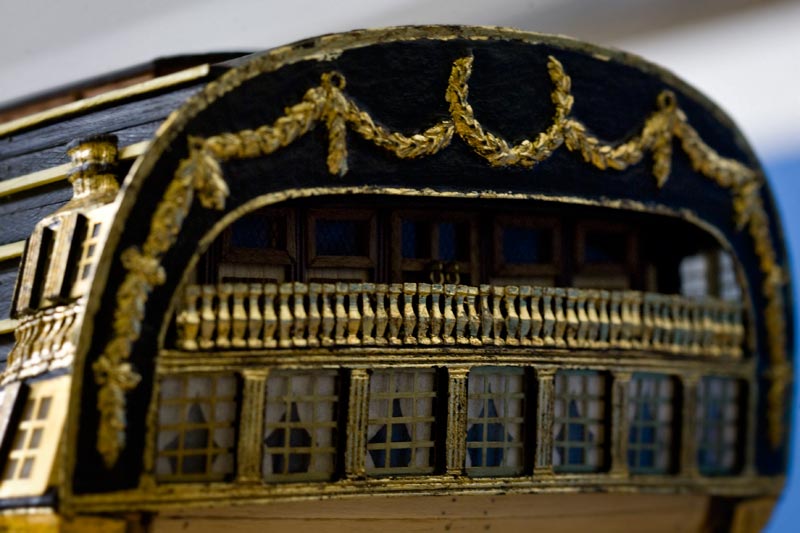
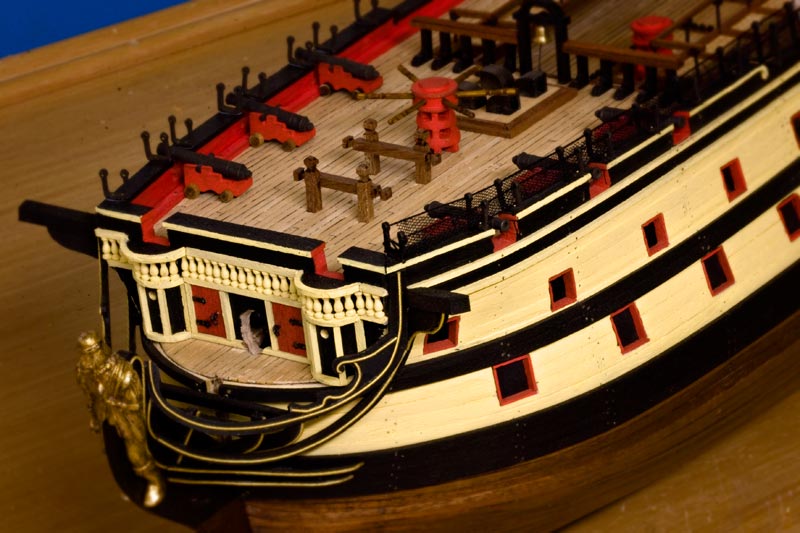
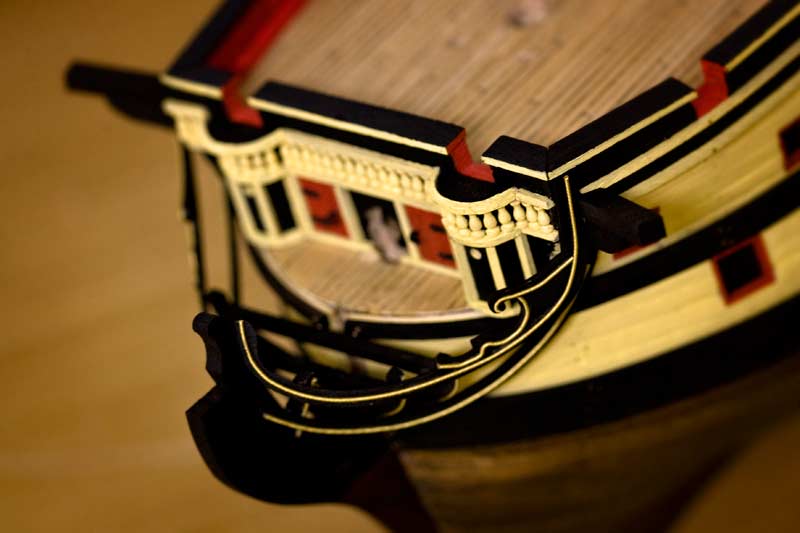
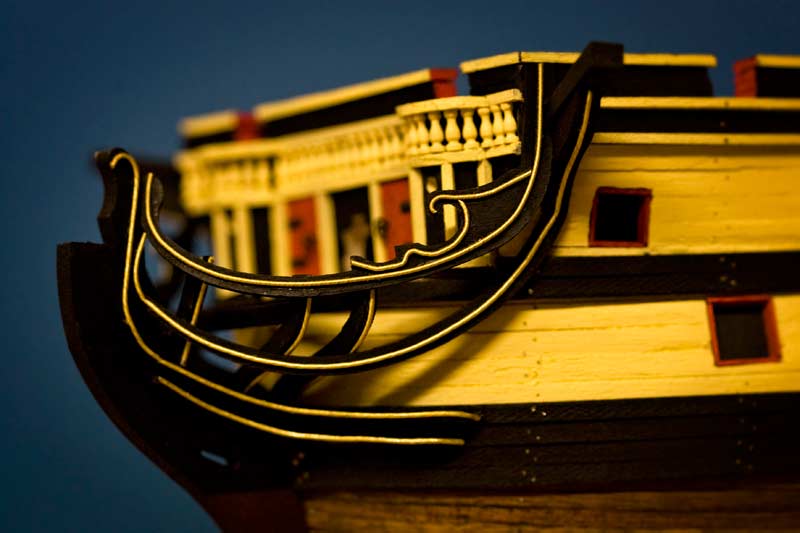
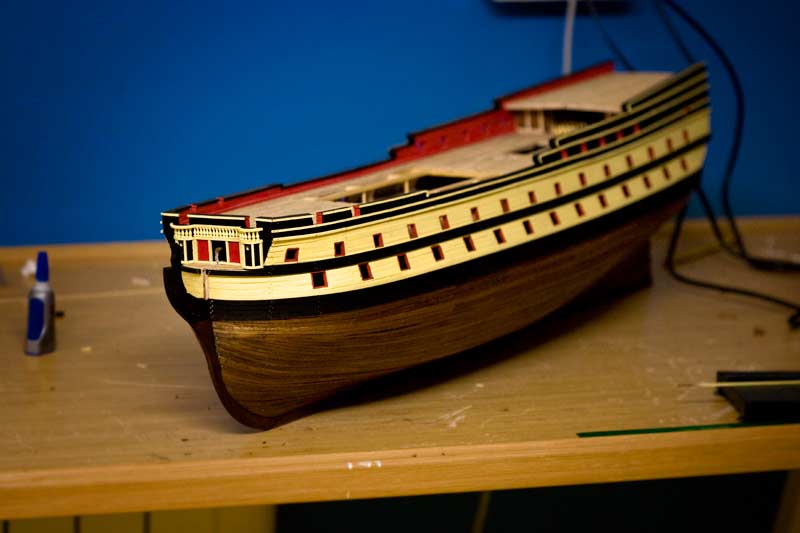
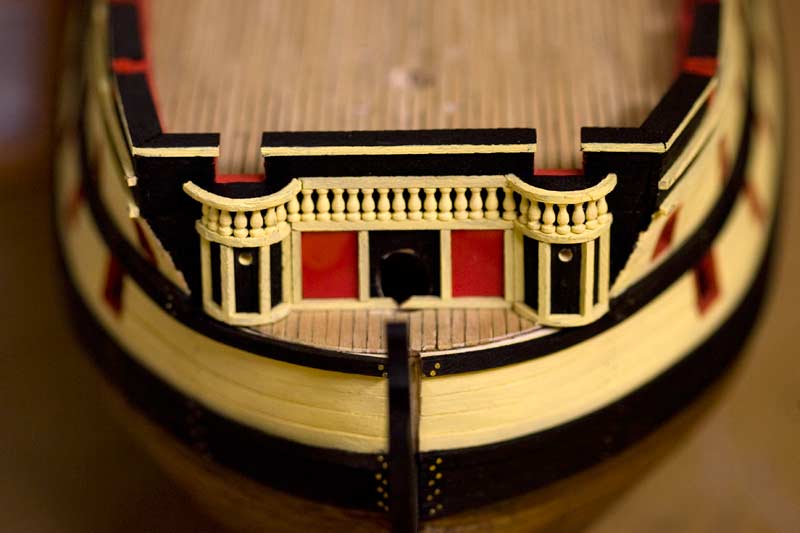
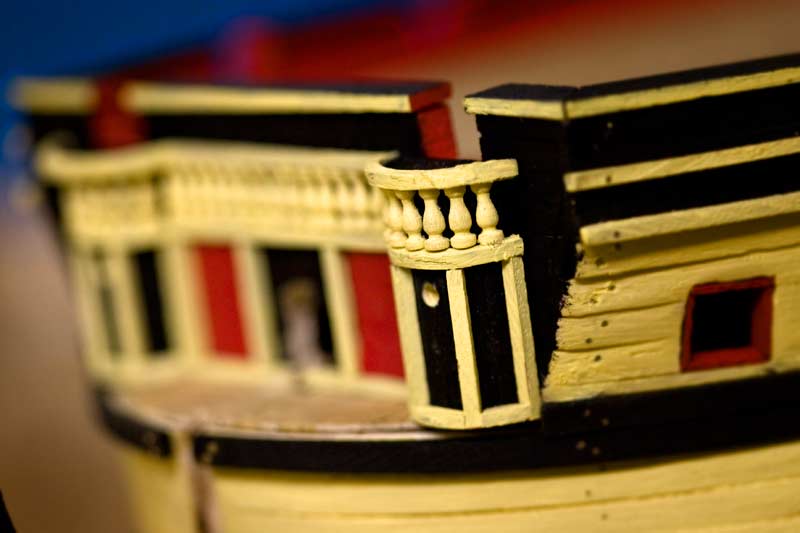
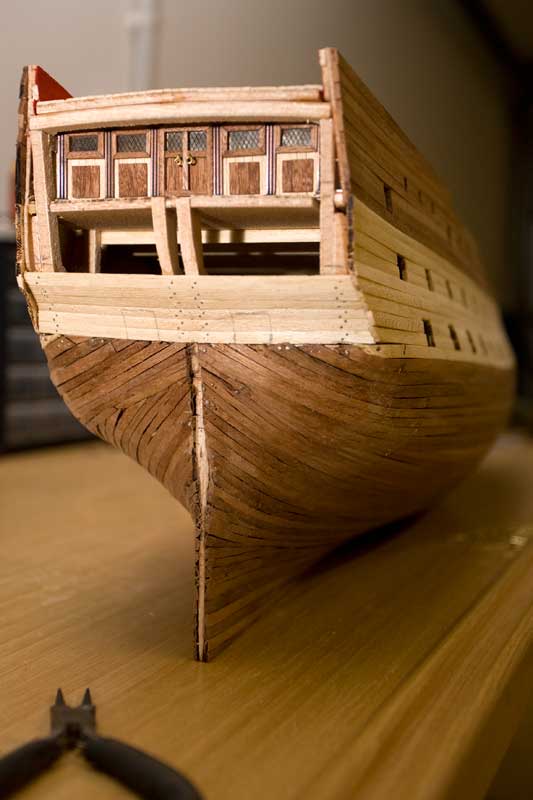
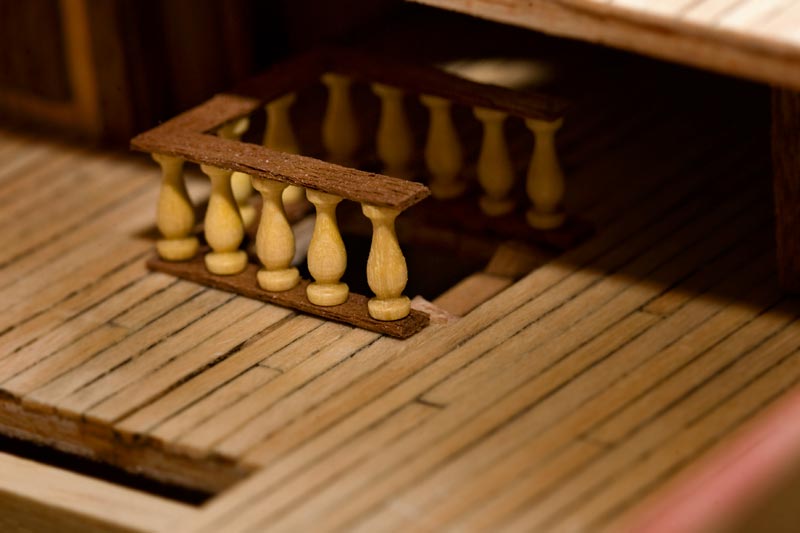
Eventually, and after a long look, there was something that did not quite convince me and was like tapes ended in the stern, so I decided to paint it black from the waterline up including the two cannons and add gold details. .. I must say that almost all the golden details in the stern as the balustrade are made entirely with gold leaf, and then aged ... It's my technique, and I like it more than to paint in gold. Certainly takes longer but gives it a finish that I particularly love... I also finished the curtains and lanterns.


-
-
Fantastic work Ricardo !!!!!!!

Thank you so much my friend!!!
-
-
-
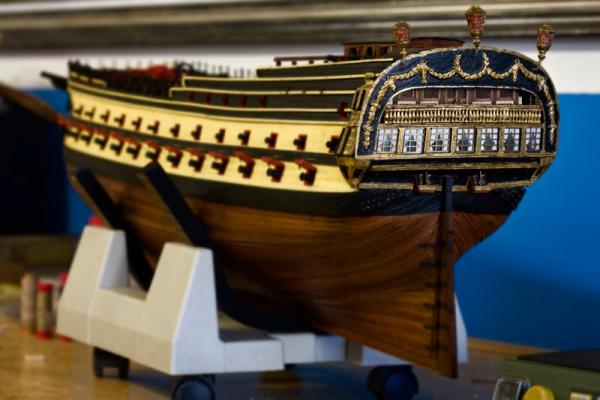
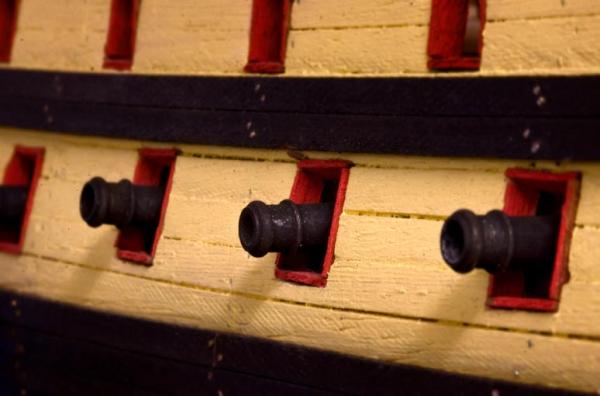
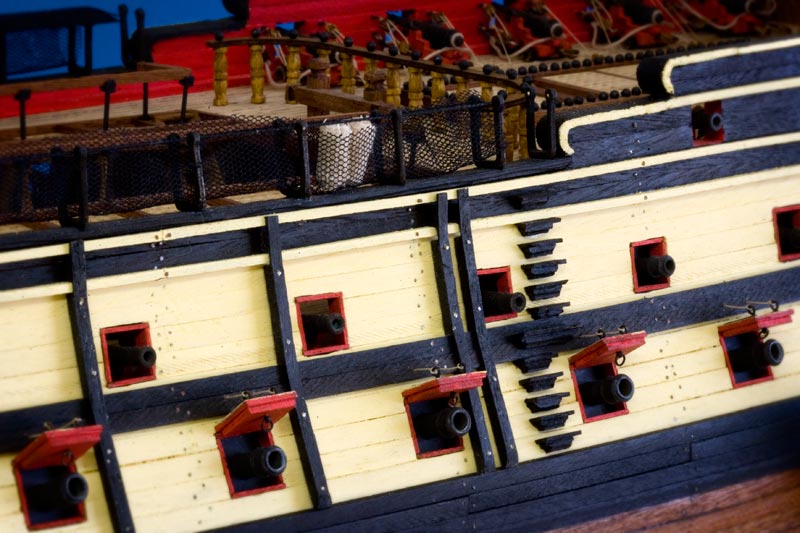
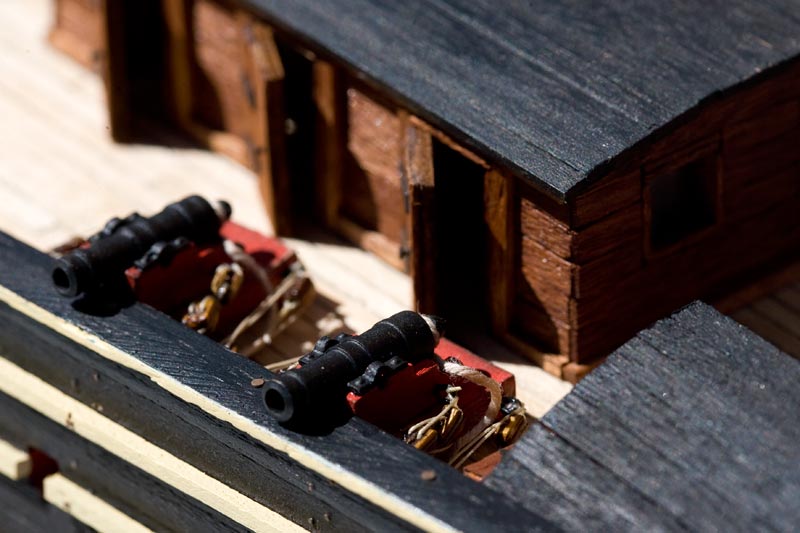
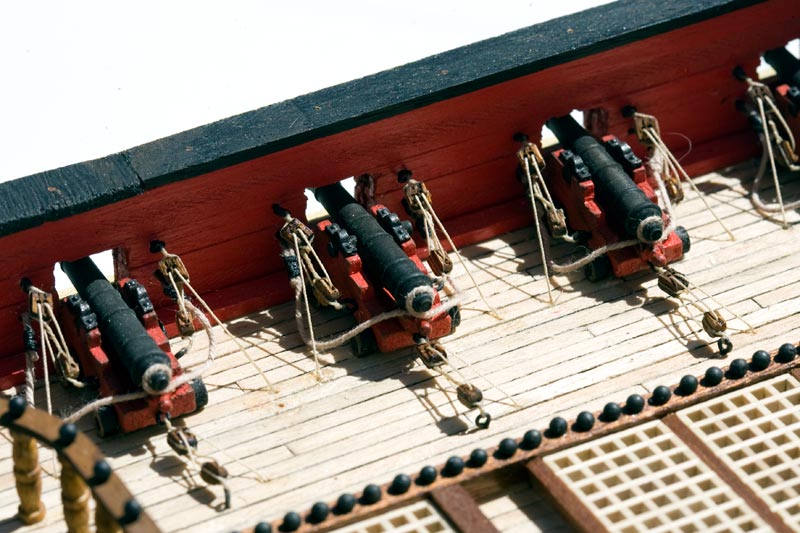
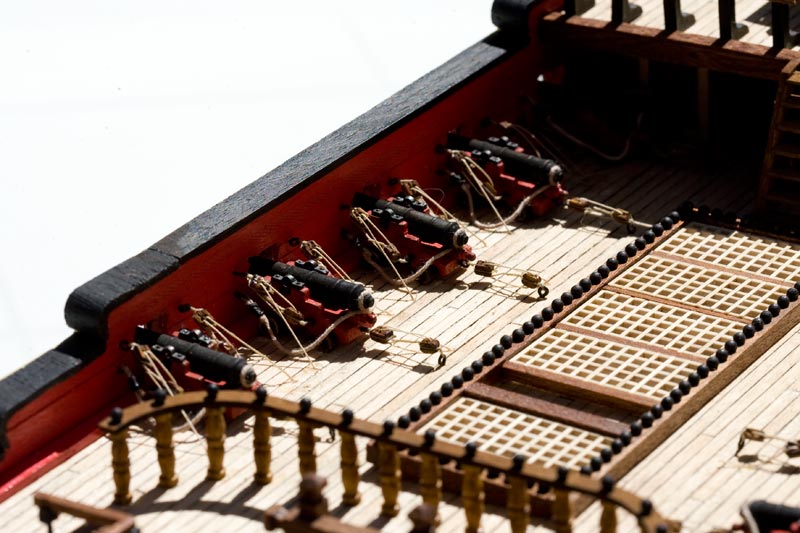
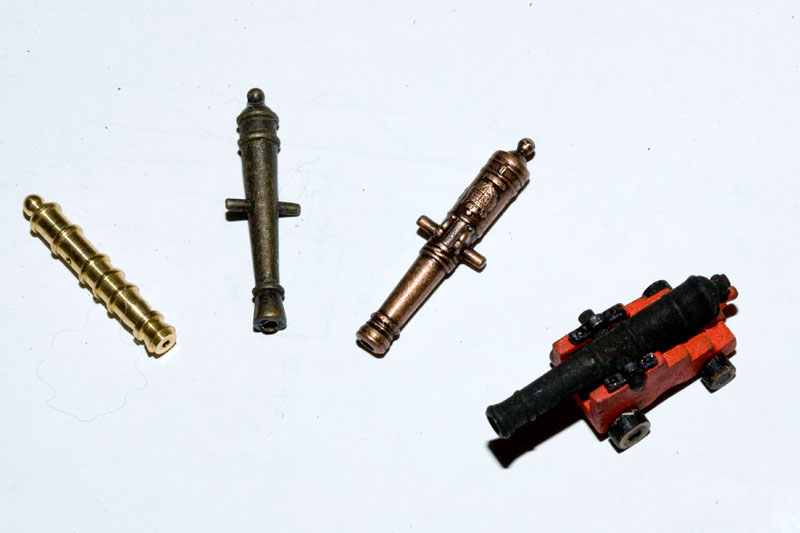
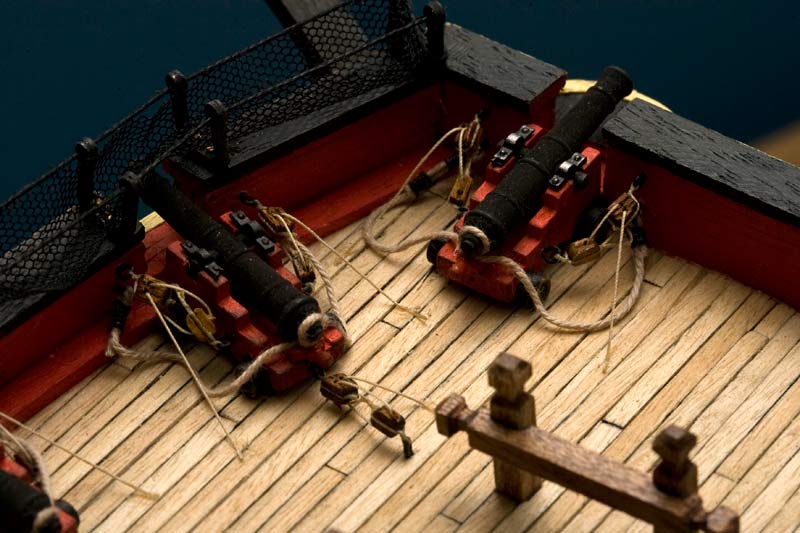
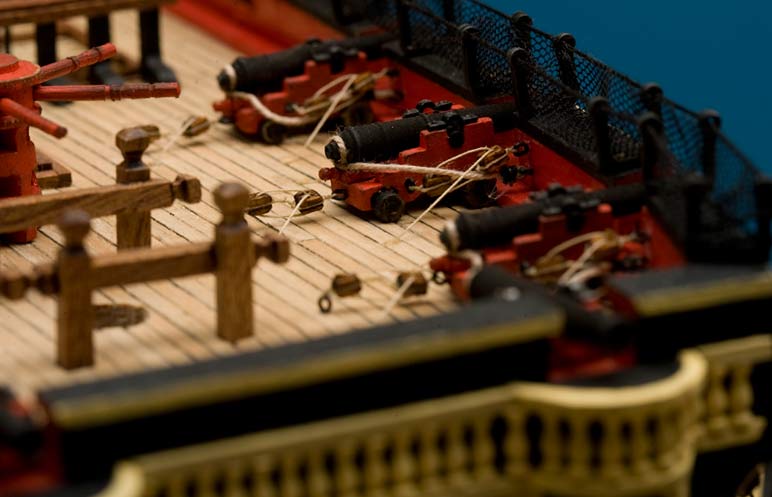
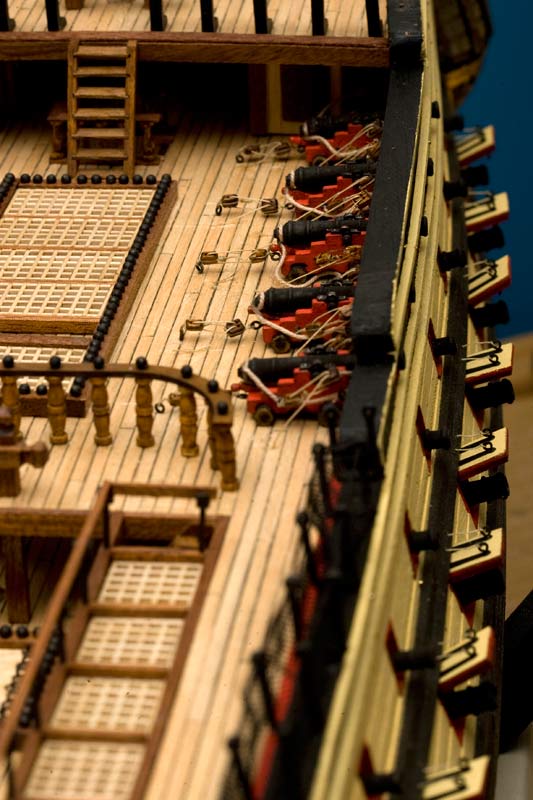
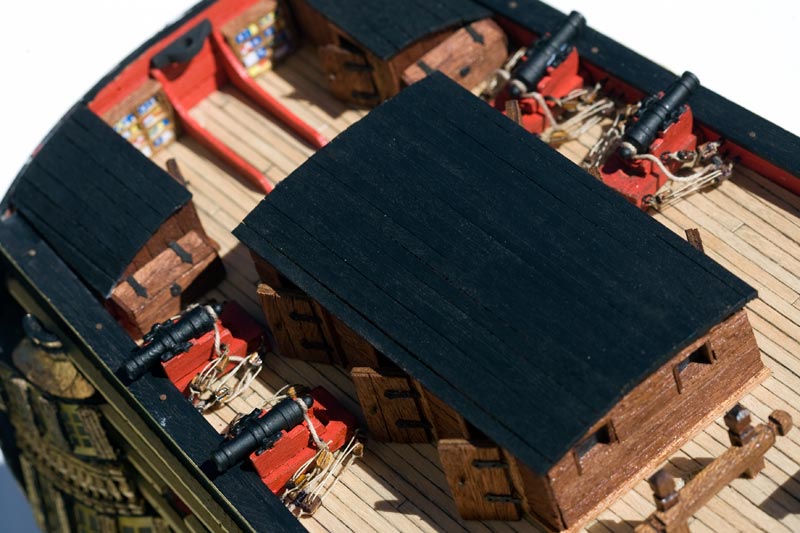
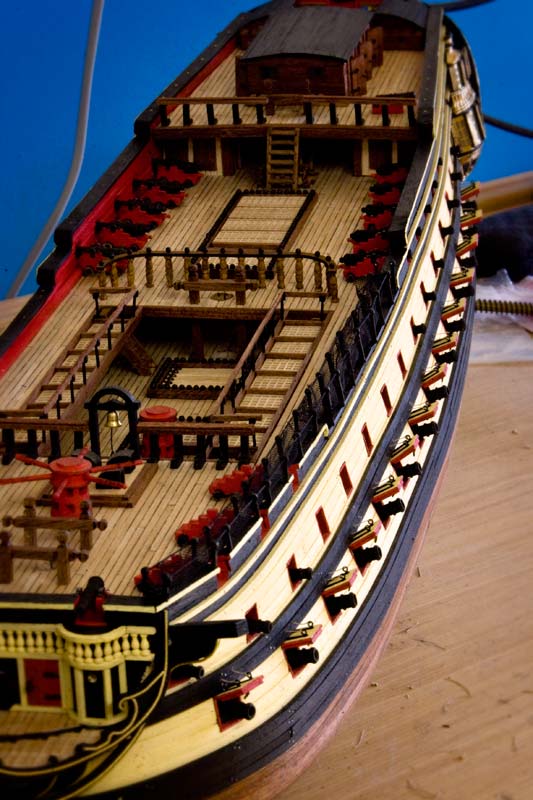
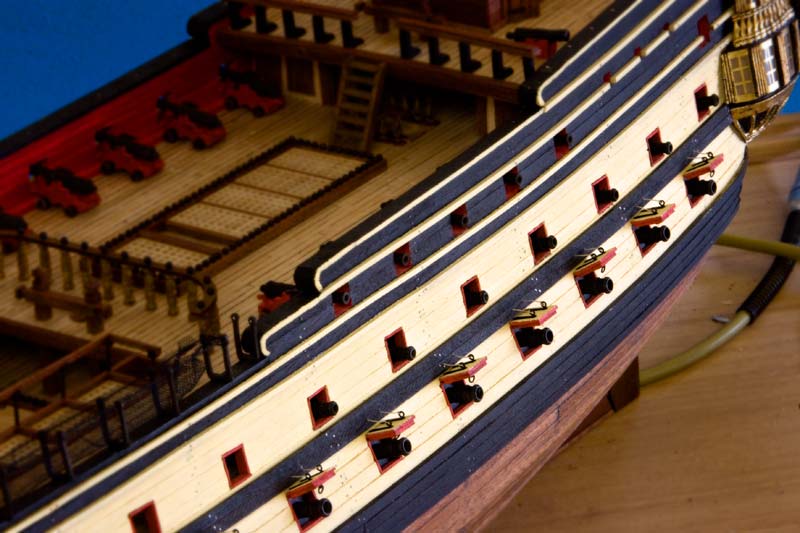
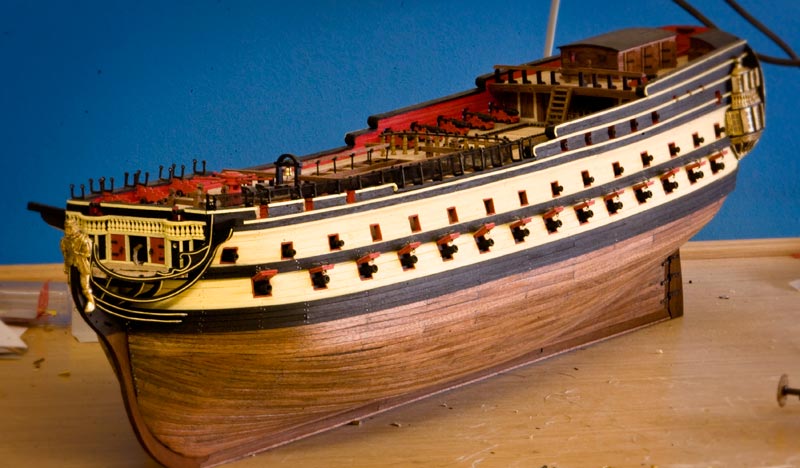
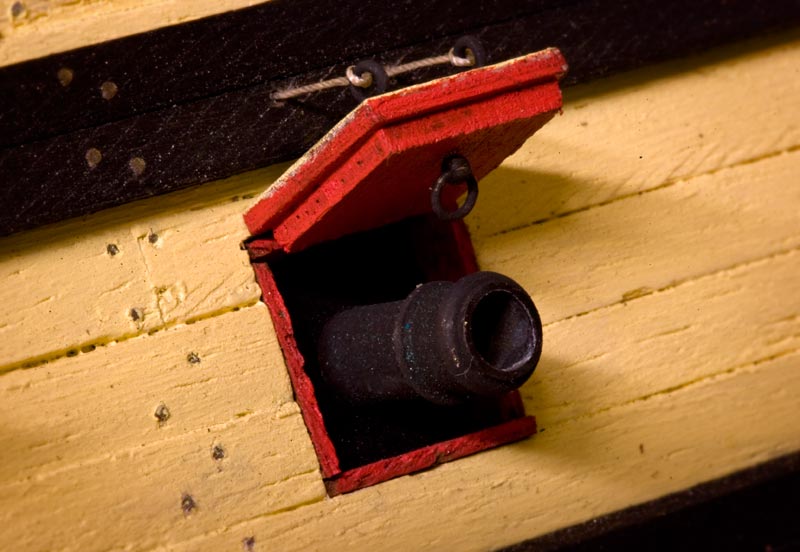
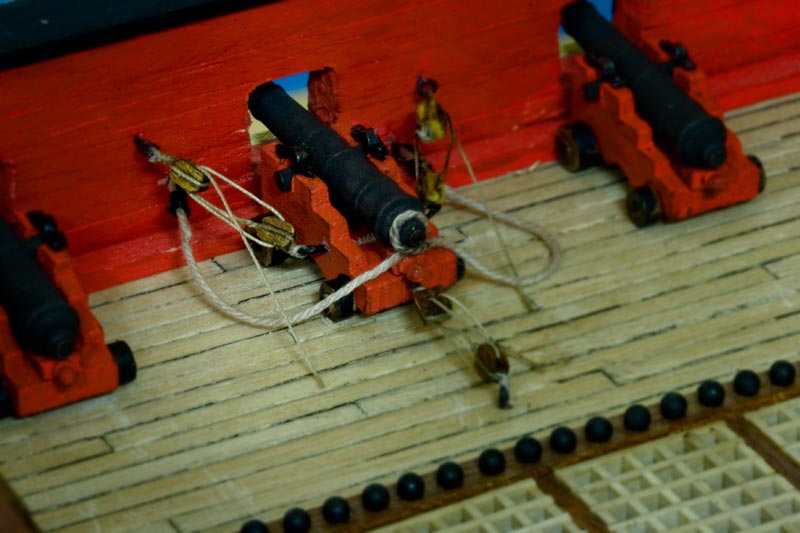
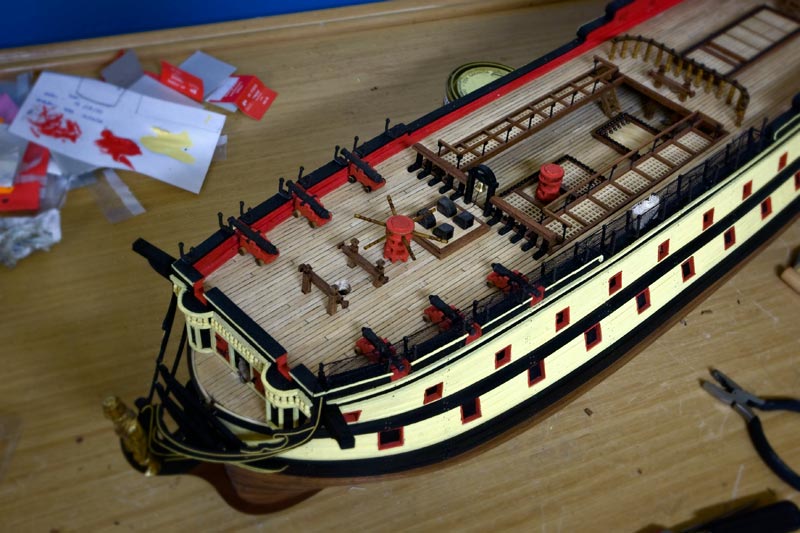
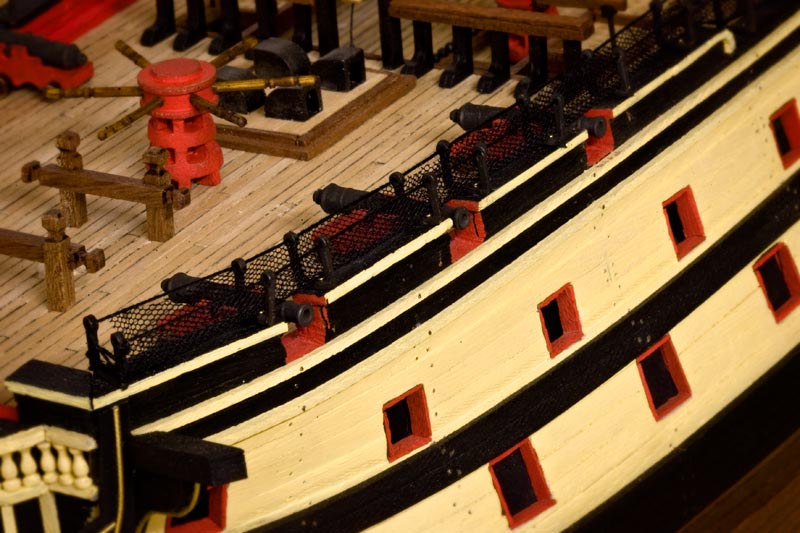
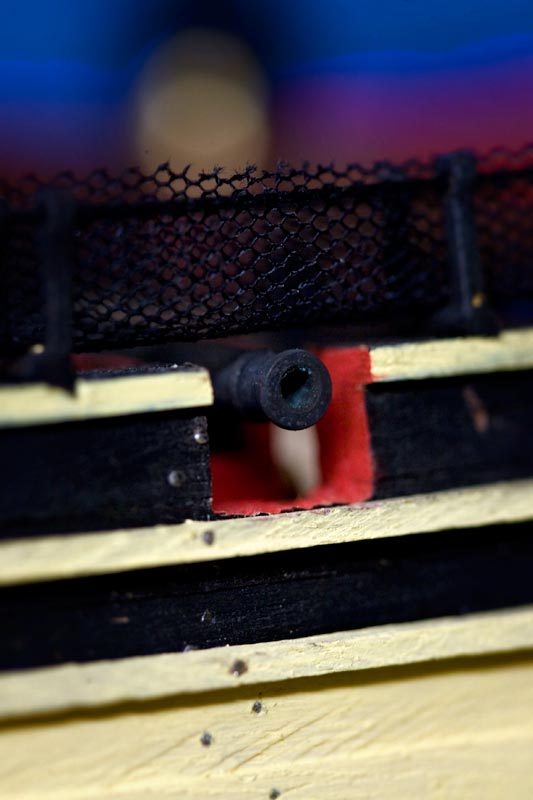
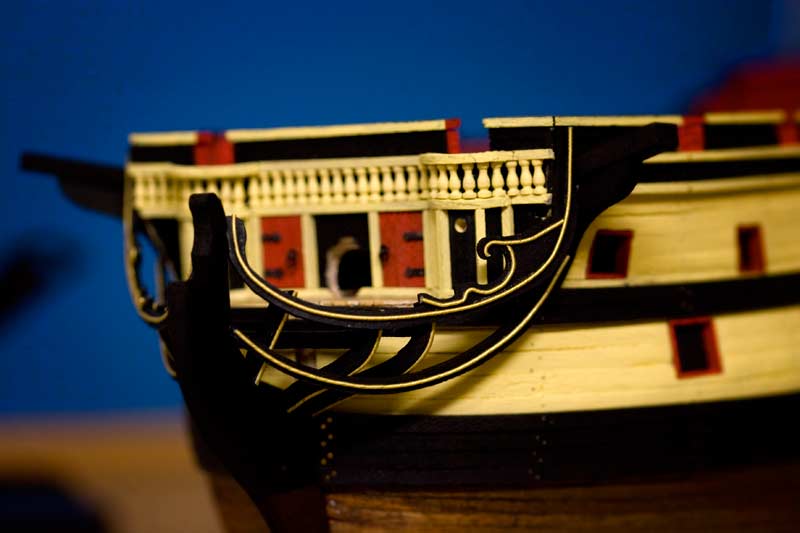
The artillery was something that took me quite some time to be decided, it goes without saying that replaced all the guns who brought the kit because I was not convinced by anything, and also metal carriages were discarded. I replaced them by others from Amati, worse was to find the ones from the 1st battery ... after many attempts I found some scratch build cannons as needed ... the howitzer of 24 lbs will also be added of the poop.
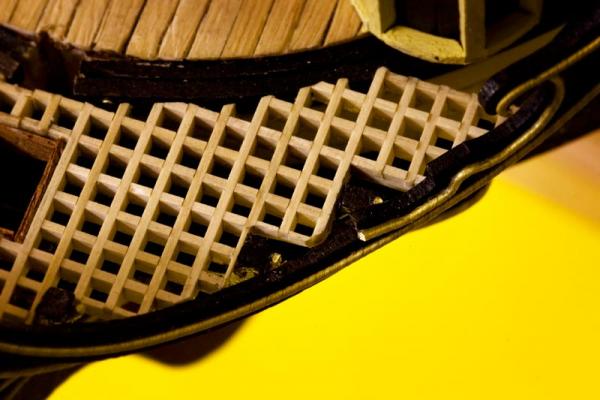
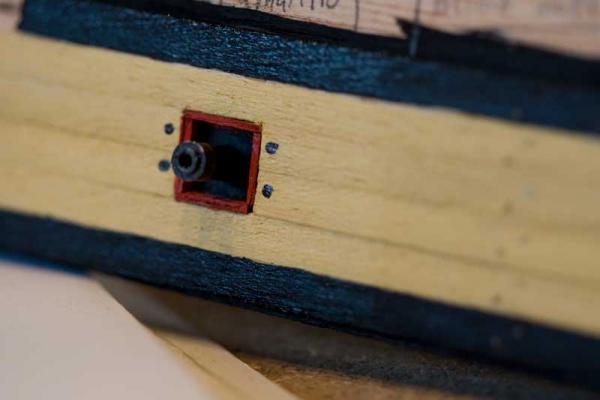
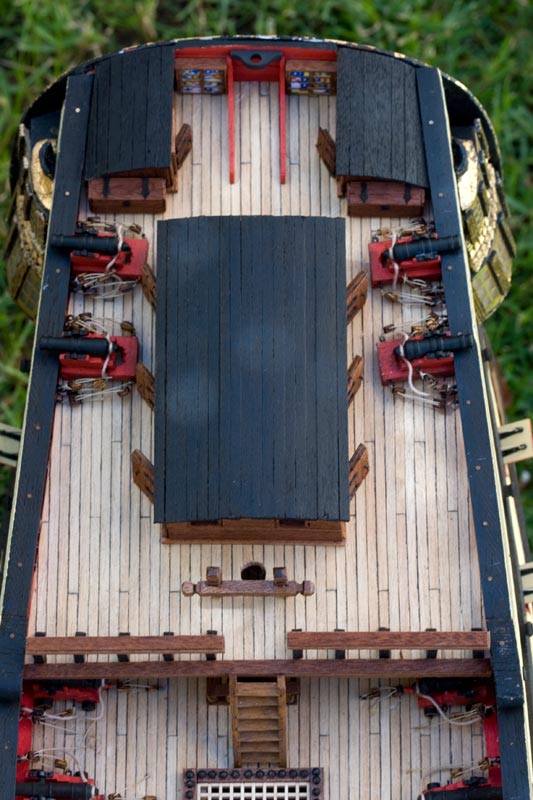
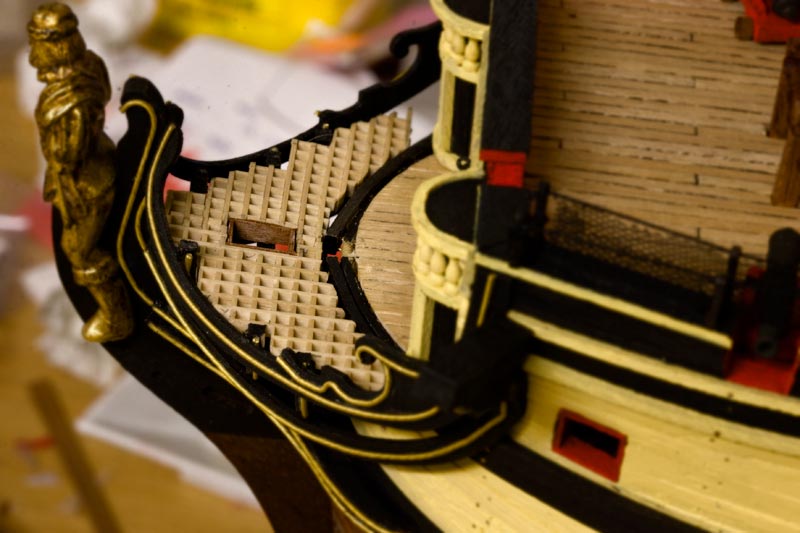
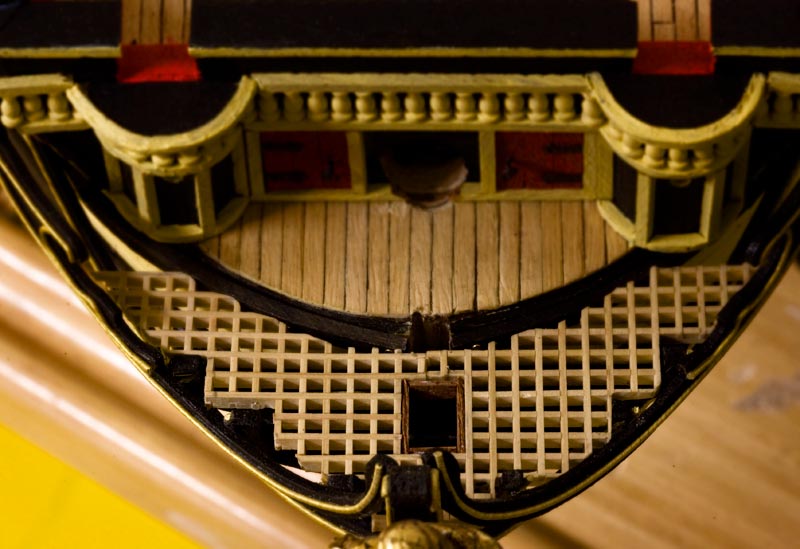
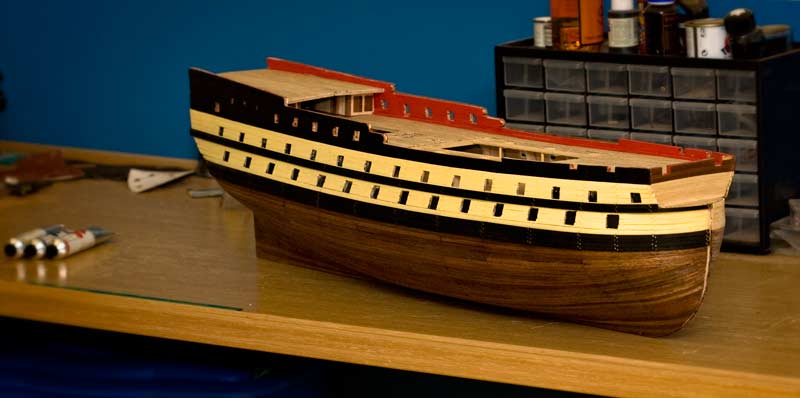
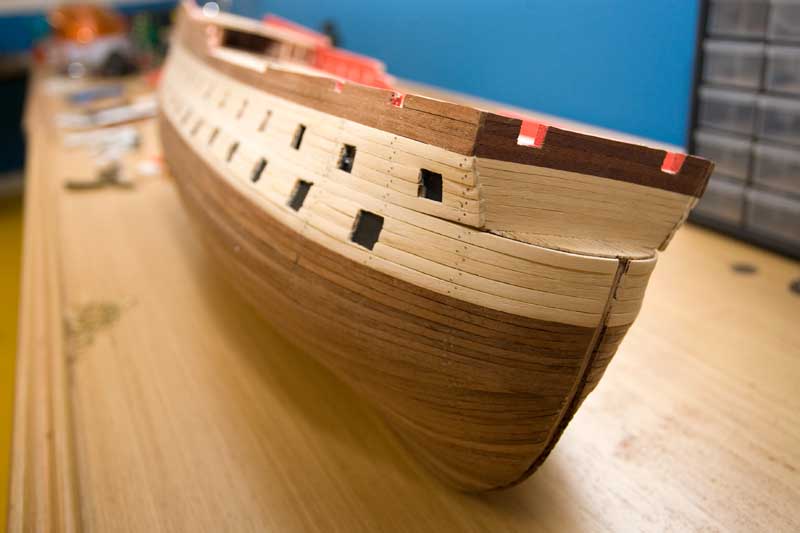
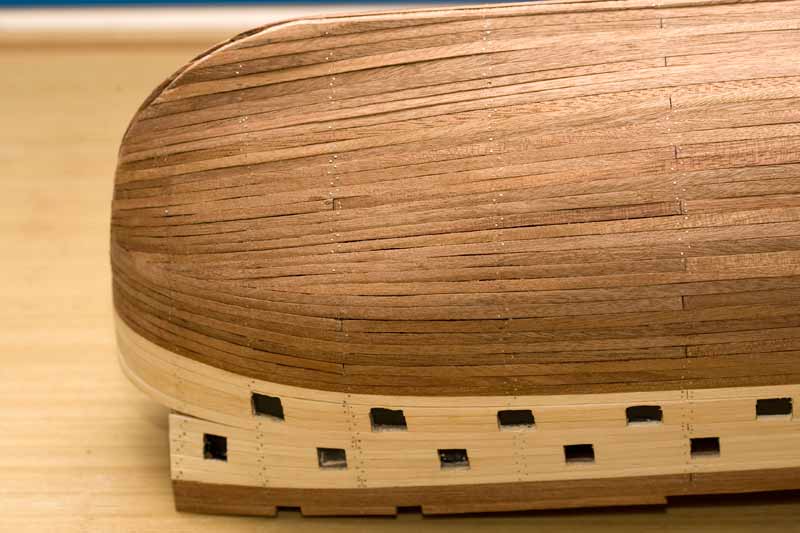
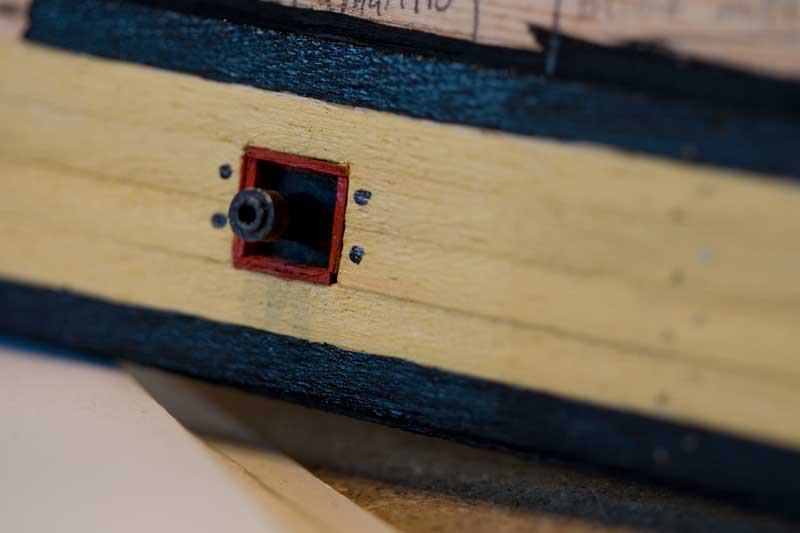
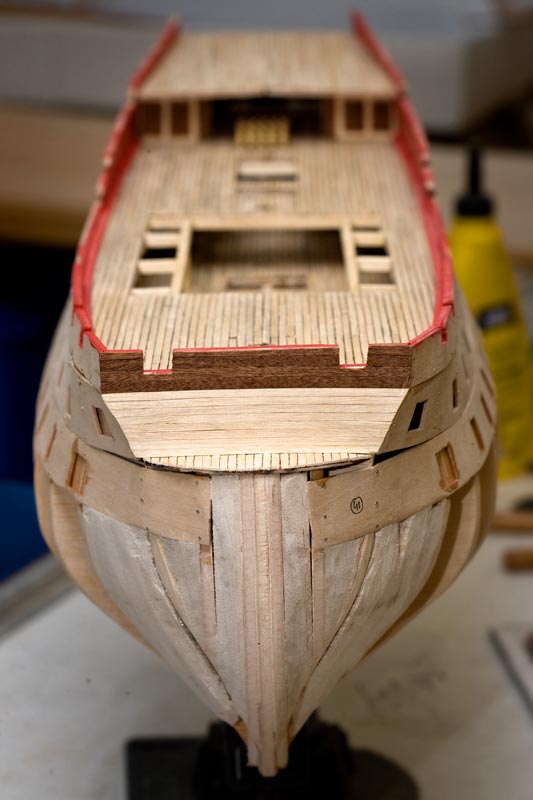
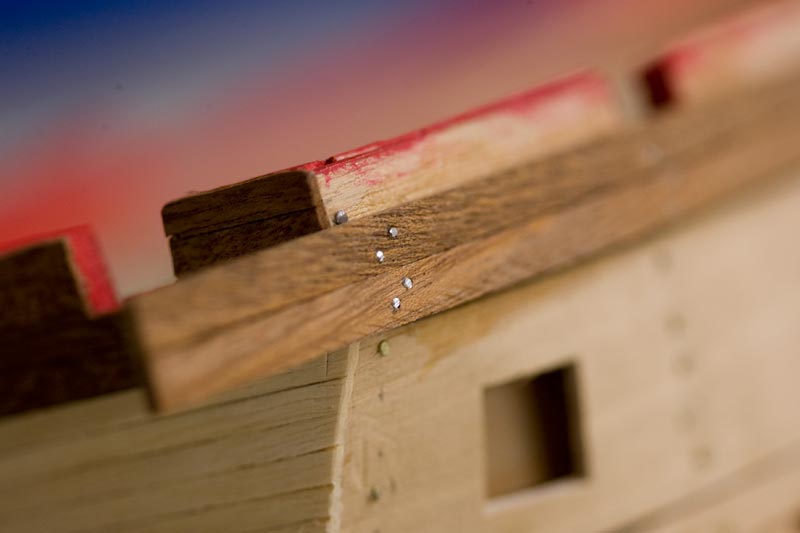
Apart from that, I'm trying to represent Montanes in the time of Trafalgar, and for that I had to open a third bow pocket, since the ship was carrying three guns for each band and the kit only accepts 2. Salva Thanks for all the advice you gave me in your day ... We also decided to put 280 coys over the gunwale to protect the crew.
The pics!


-
Very nice Ricardo !
I've missed this !
Welcome home

Thank you so much my friend...but ultimately I had a lot of work, you know

-
-
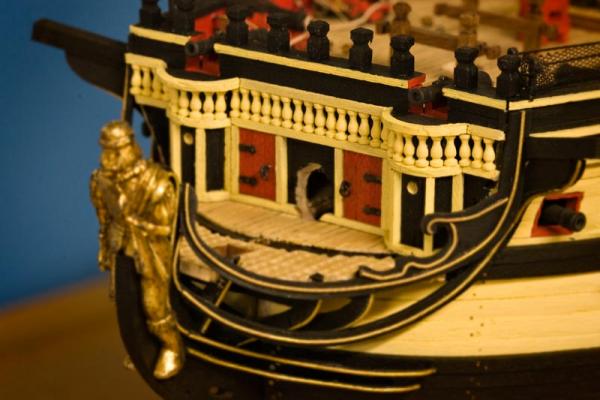
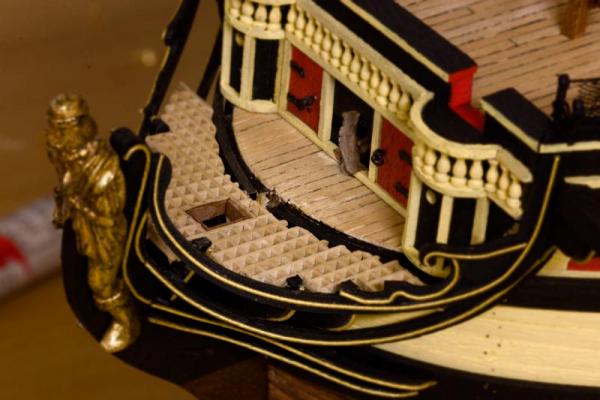
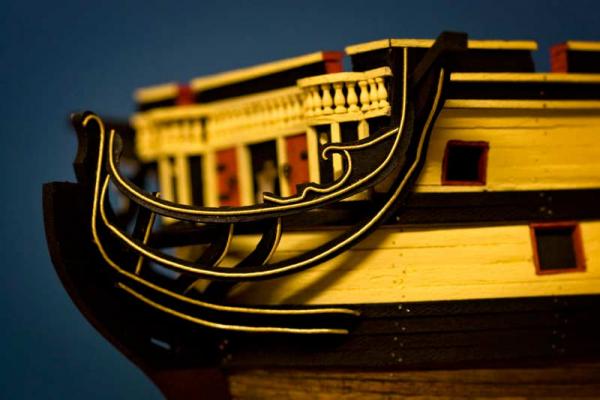
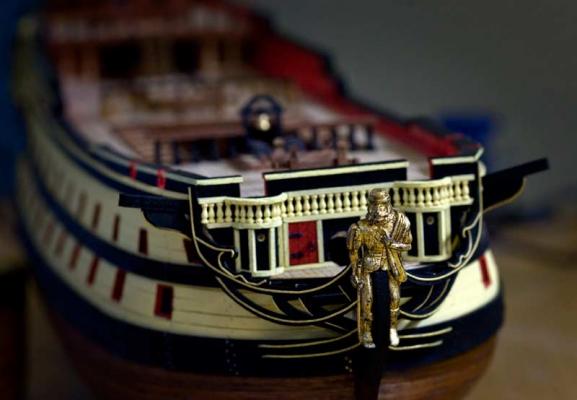
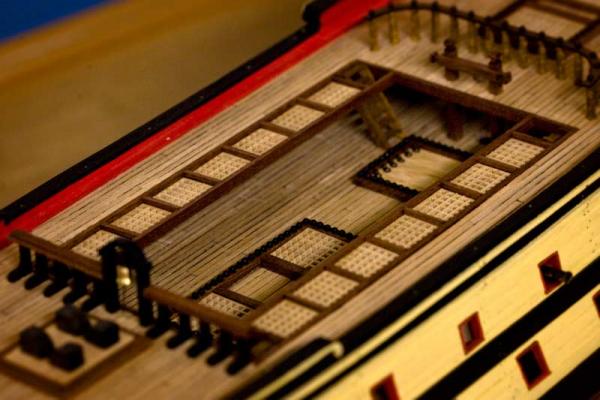
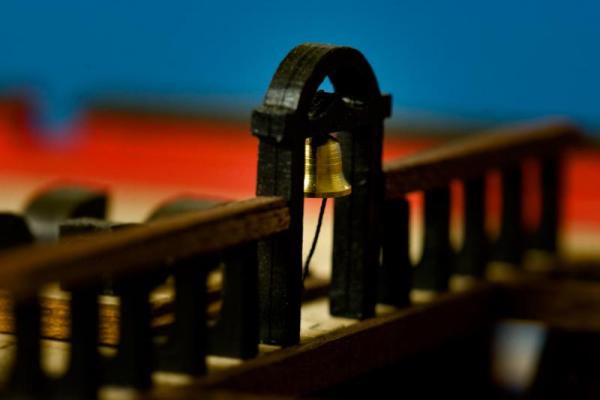
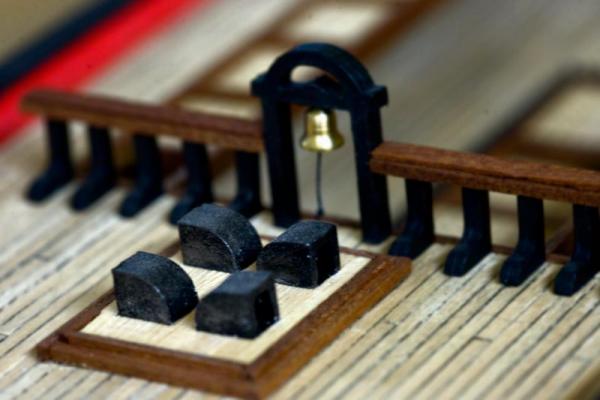
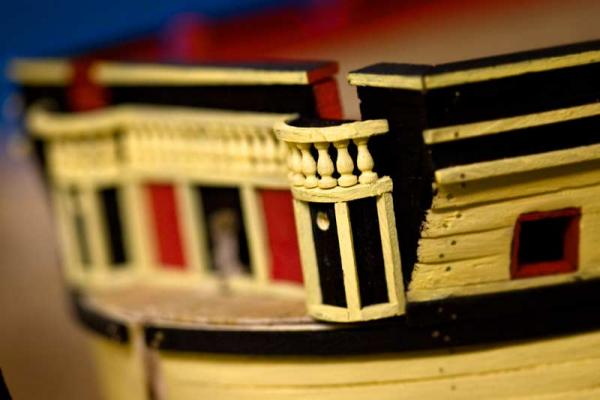
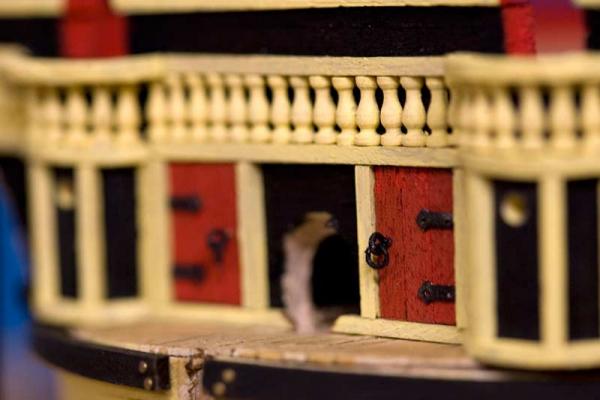
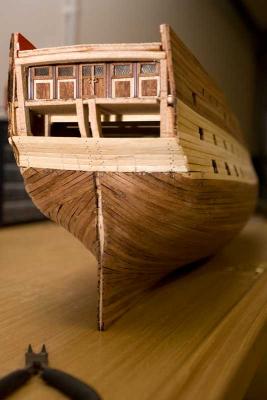
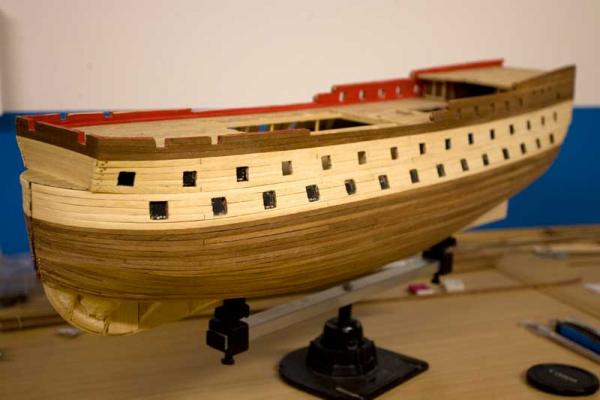
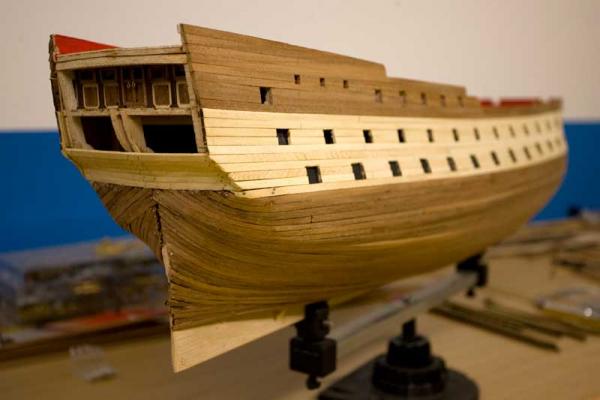
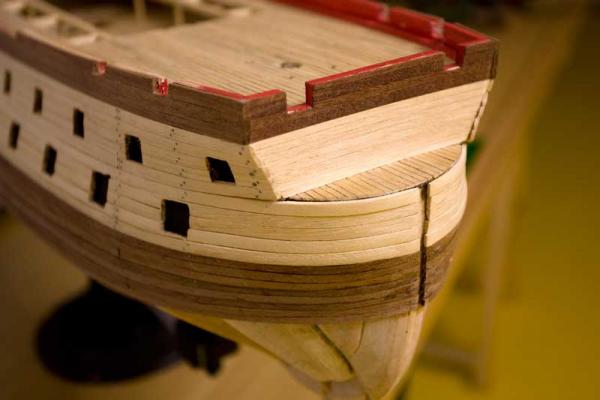
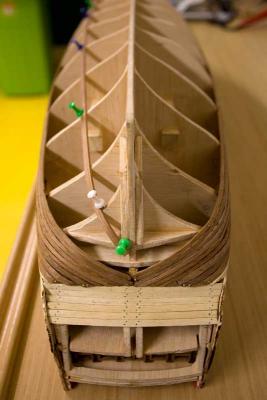
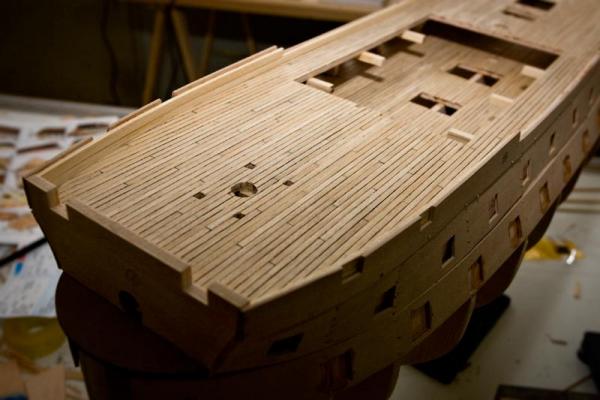
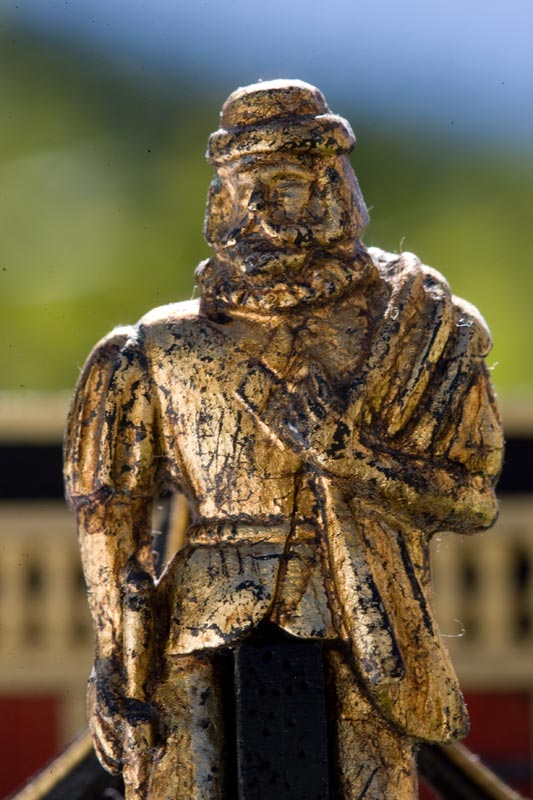
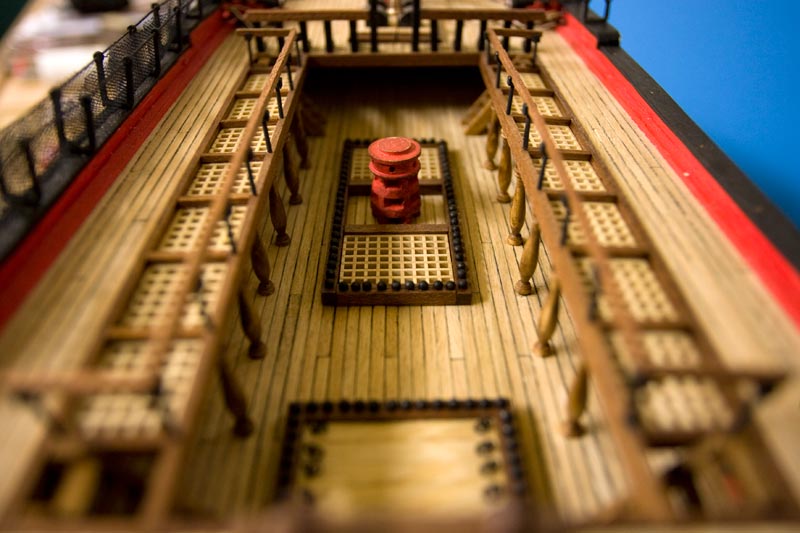
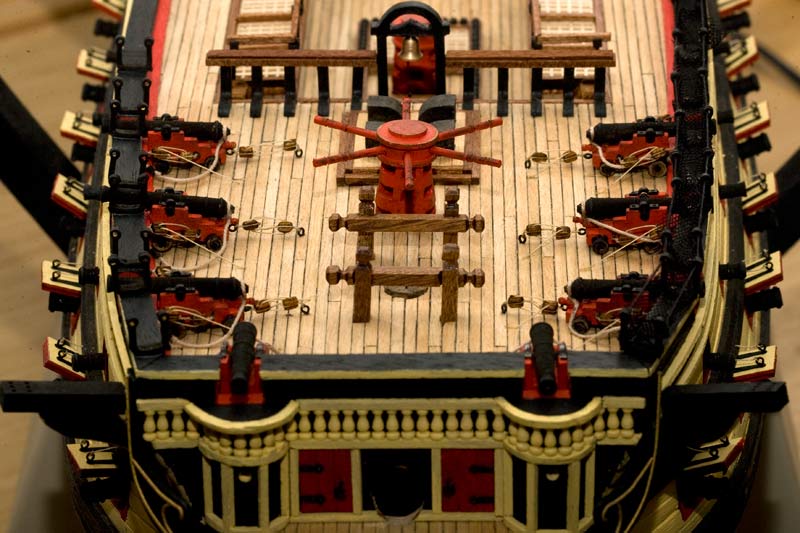
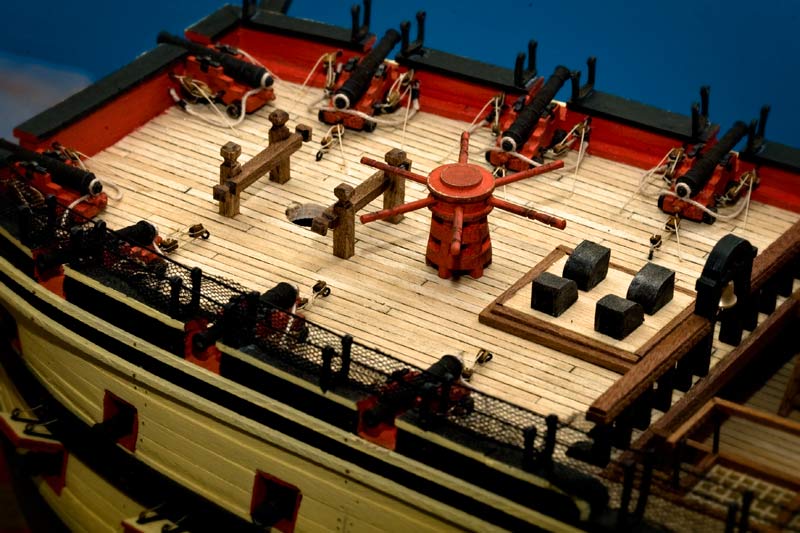
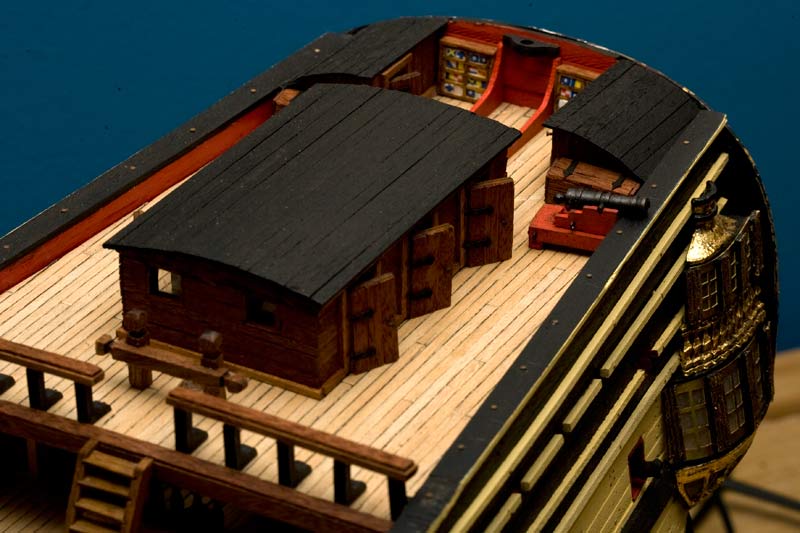
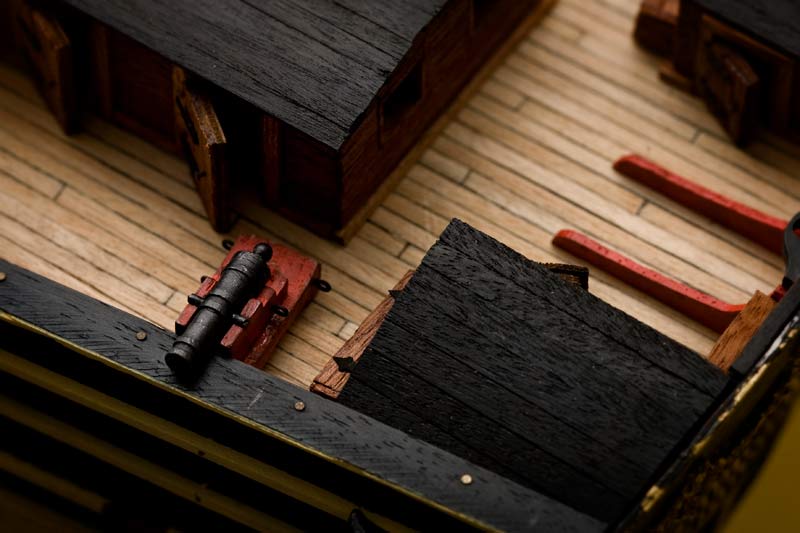
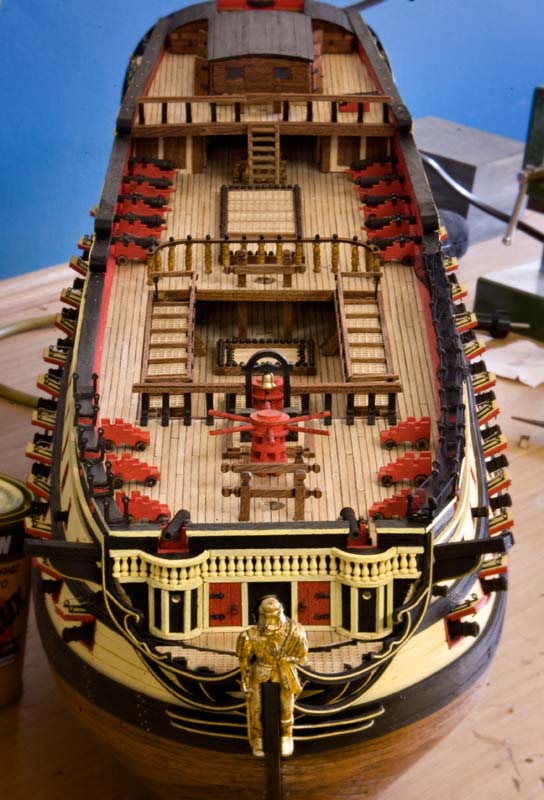
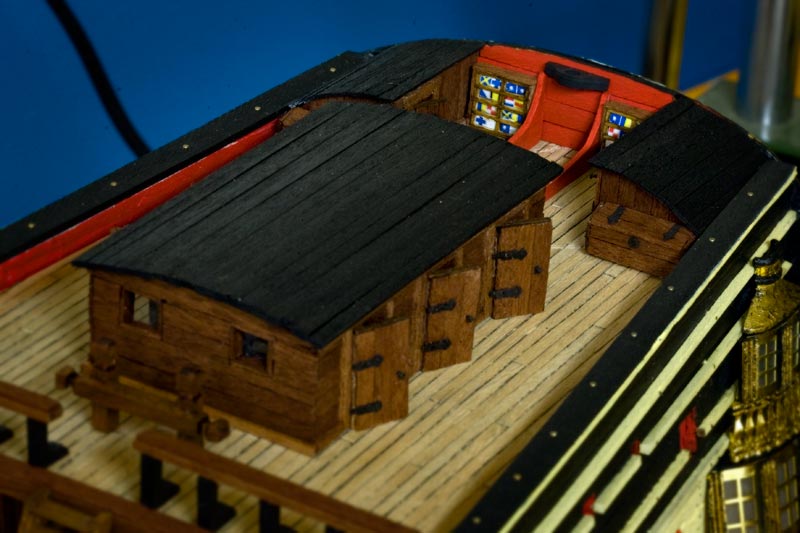
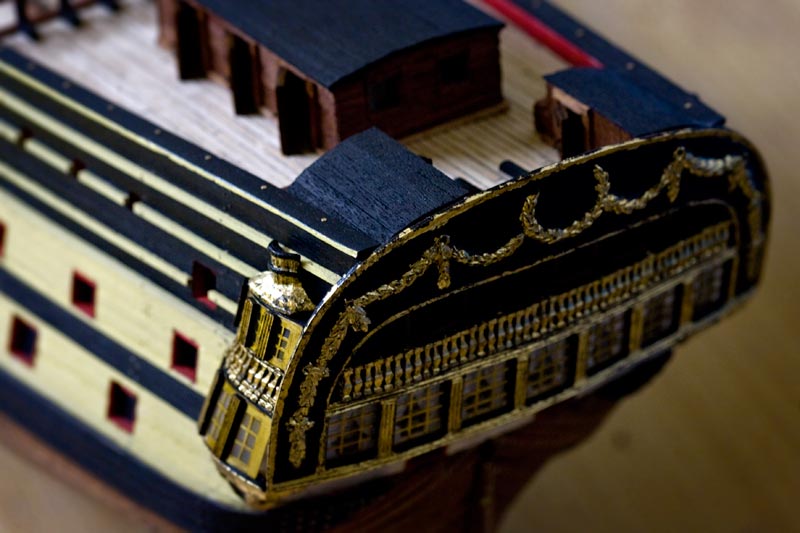
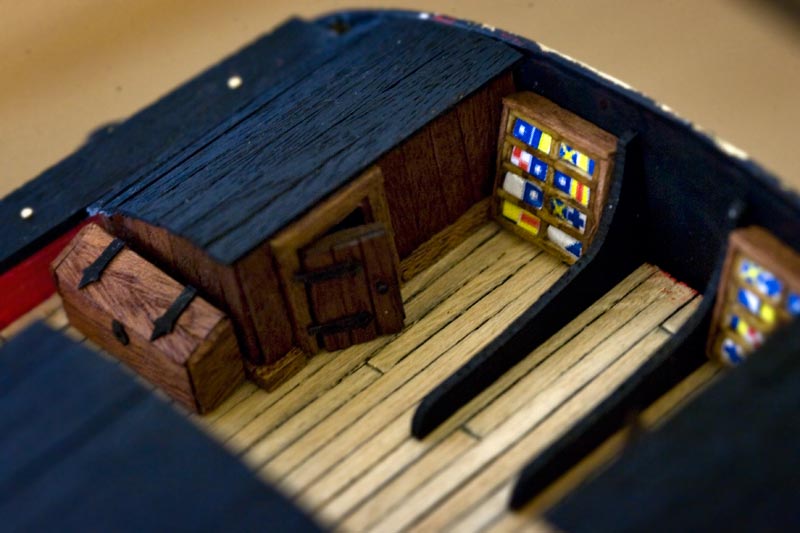
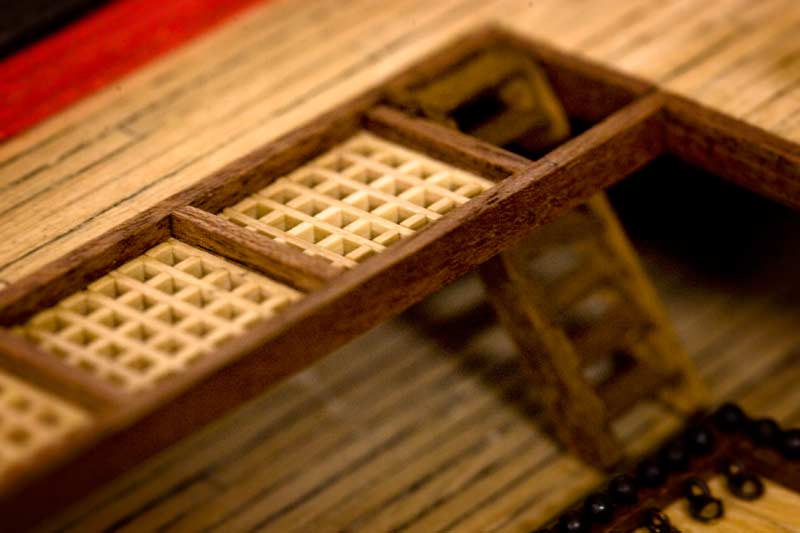
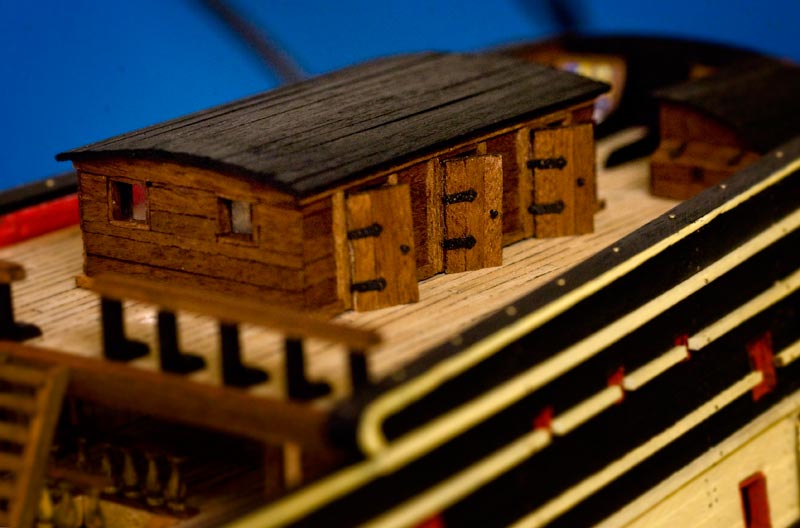
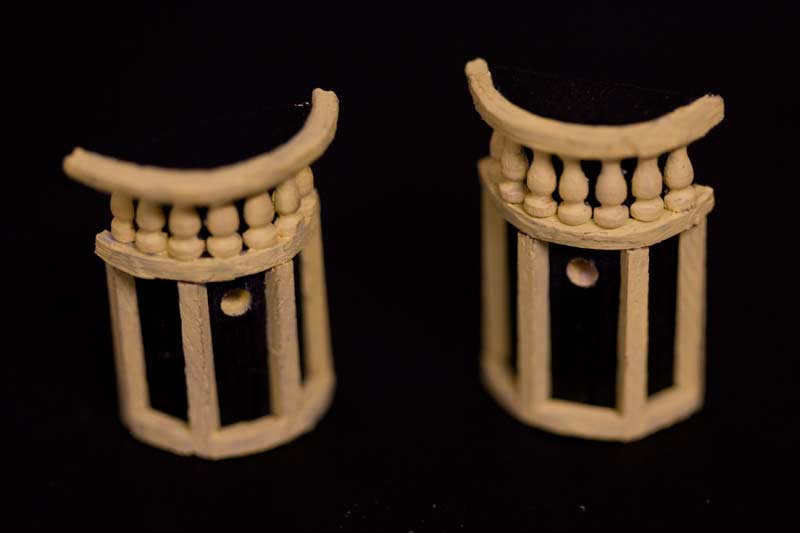
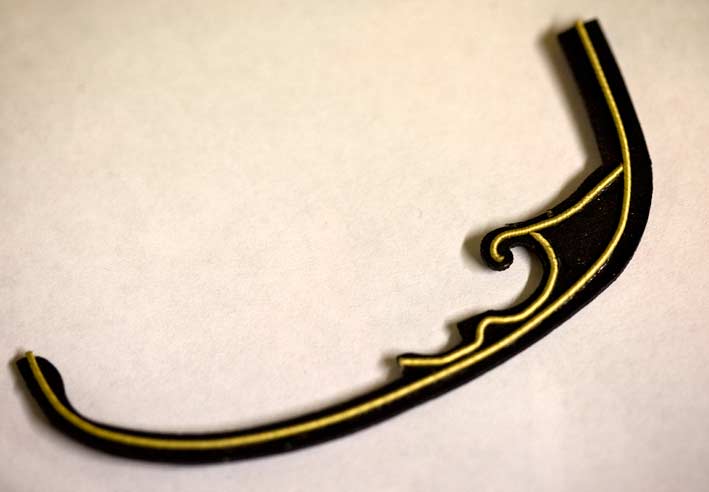
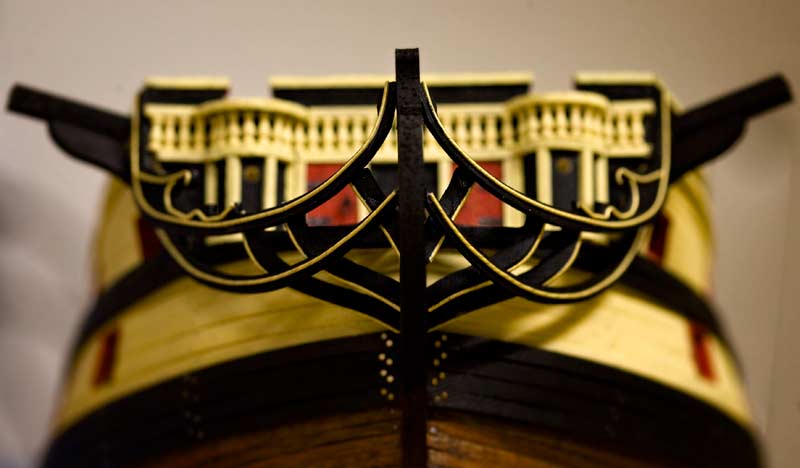
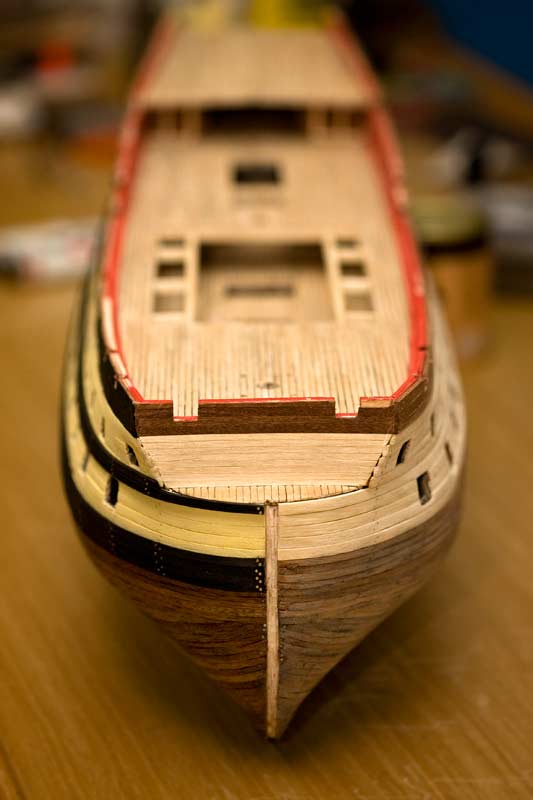
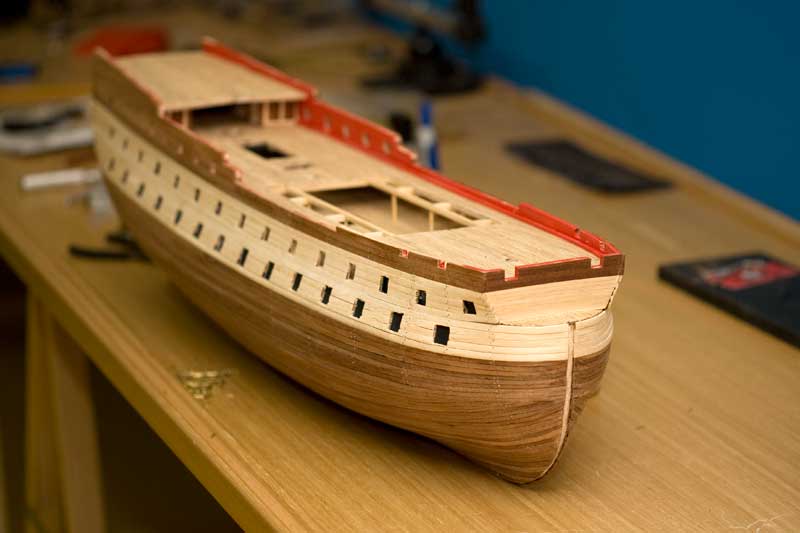
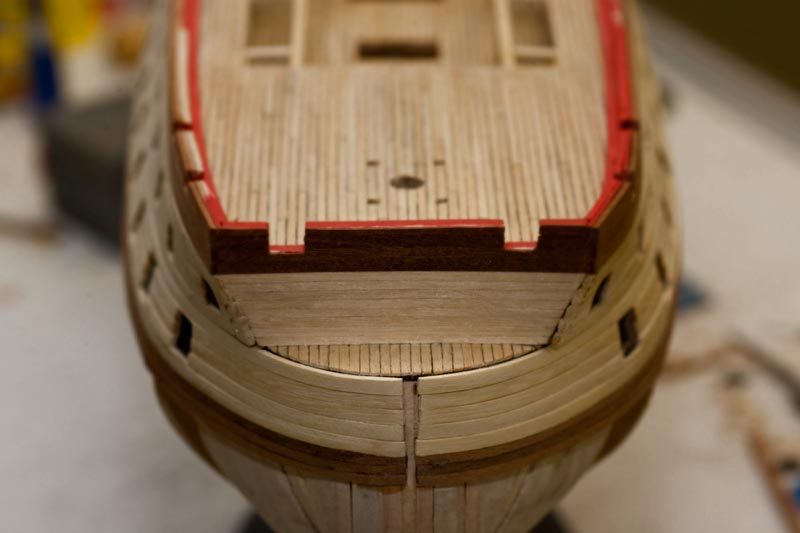
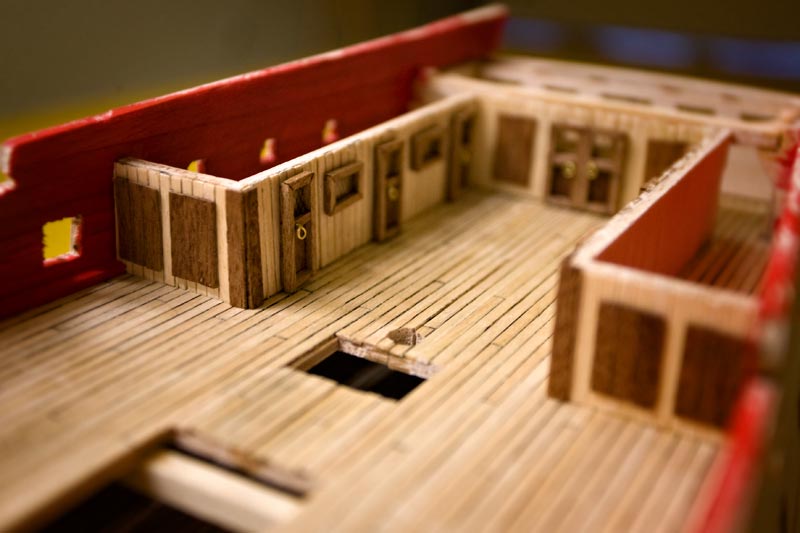
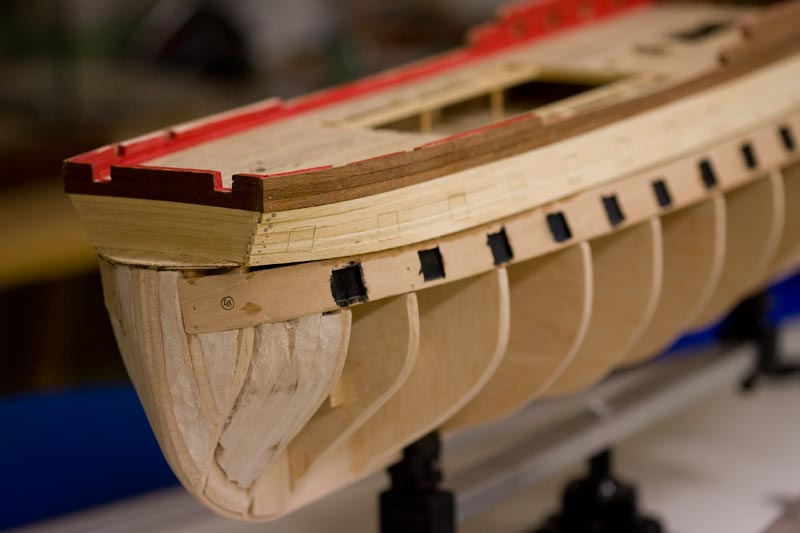
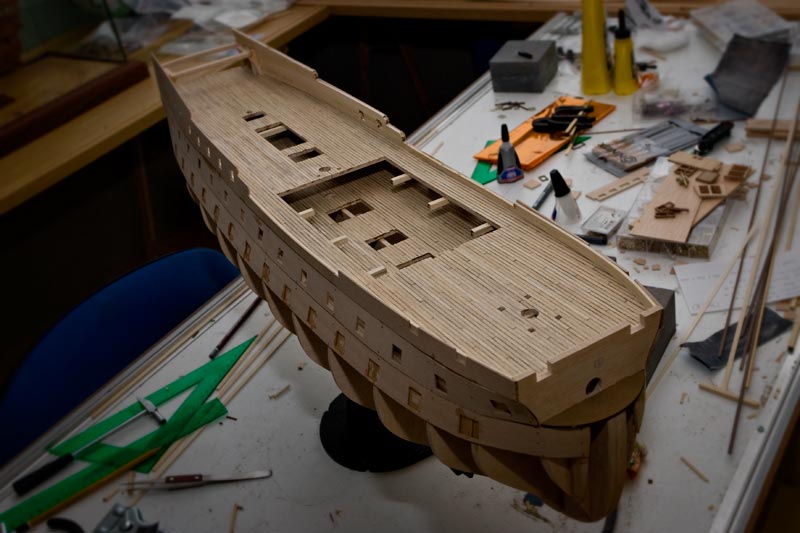
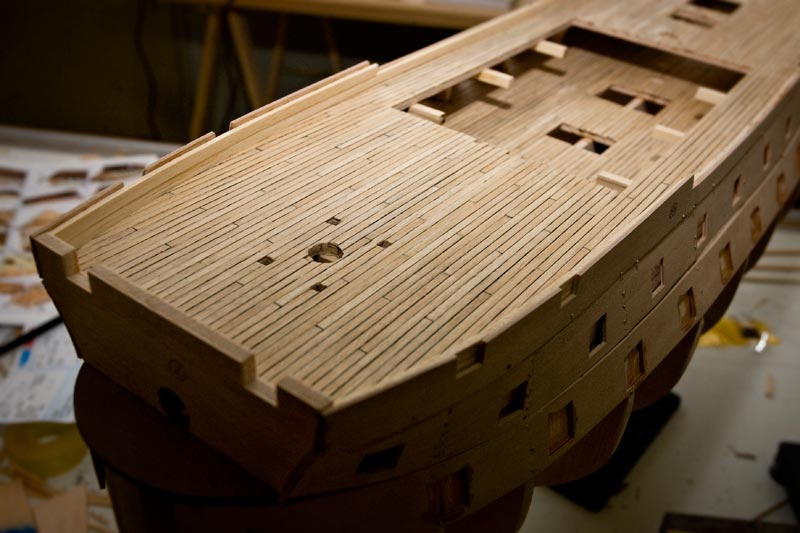
More progress of the boat .. in this batch are details of the decks .. is the figurehead of the few small parts that have not discarded the kit, mostly because I still not master the technique of carving. I have decided to apply gold leaf and aged with bitumen of Judea. You also can see bell tower and kitchen chimneys. More details on decks, as in the poop cabin completely remodeled where you can see the entire structure doors, the trunks and closets signal flags.


-
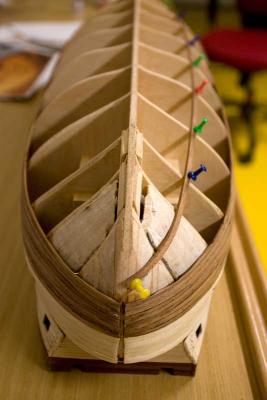
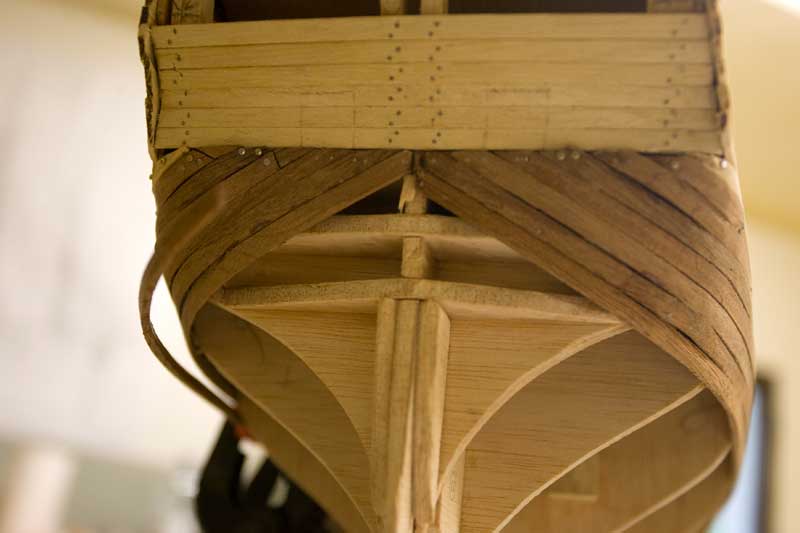
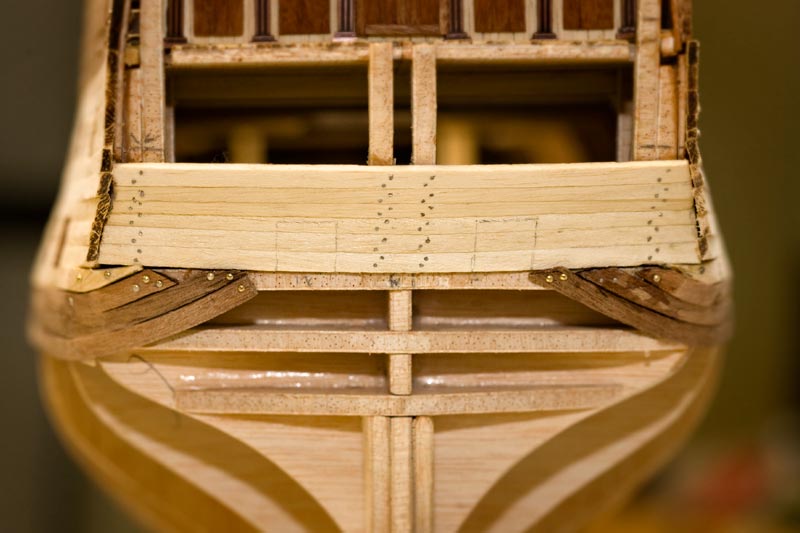
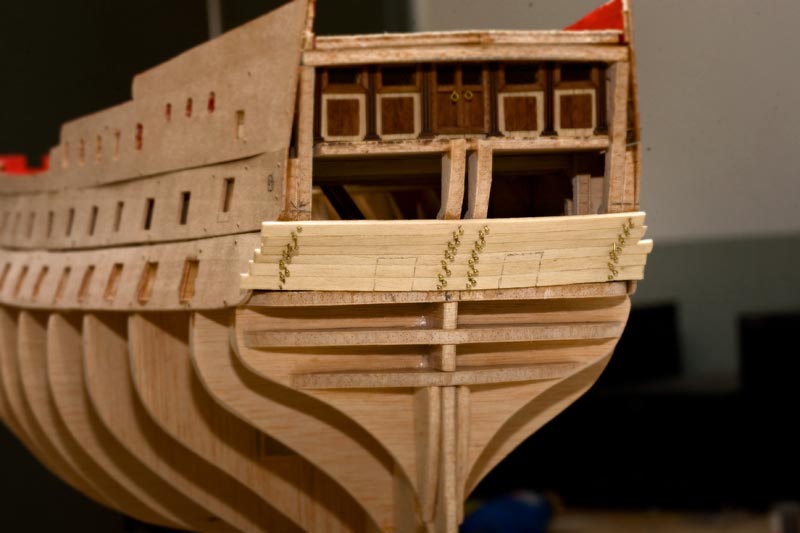
After a lot of months without uploading any pics, I have decided to continue with the process. From now you can see a lot of photos until finish. The bow has been modified using brass wire and finally fixed keel and stern to the hull. I applied two coats of shellac. You can see some fine details in the bow doors.
Kind regards, and happy new year.
Ricardo.


-
Thank you very much guys for your kind words
-
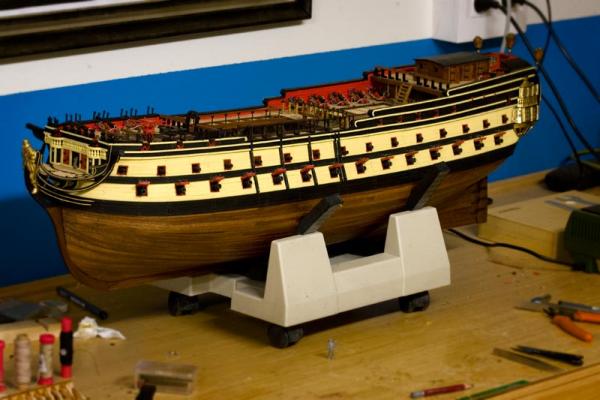
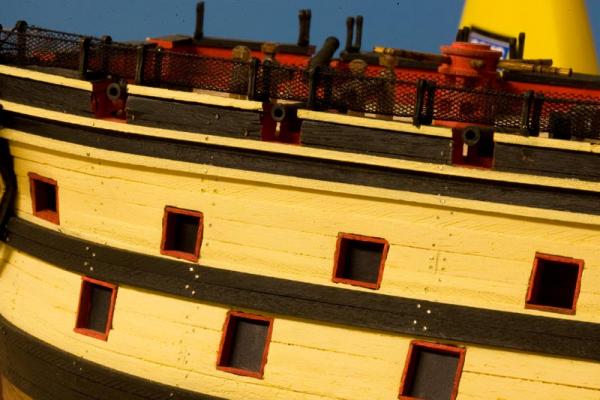
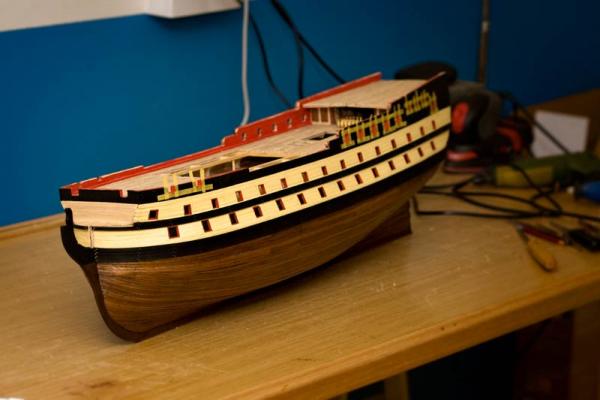
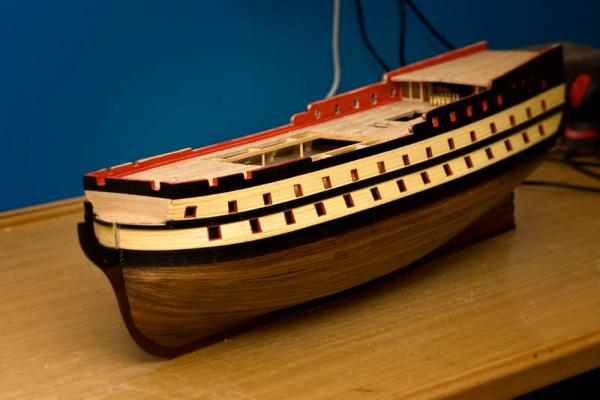
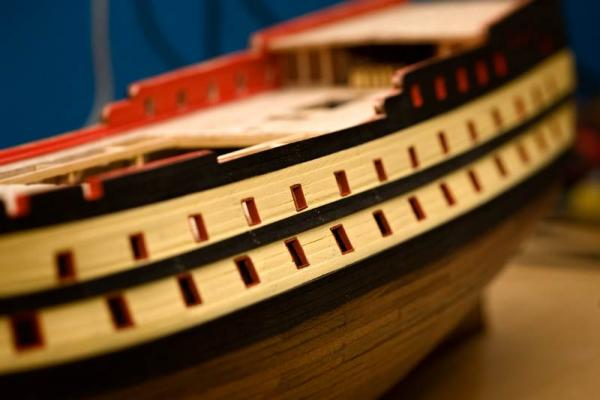
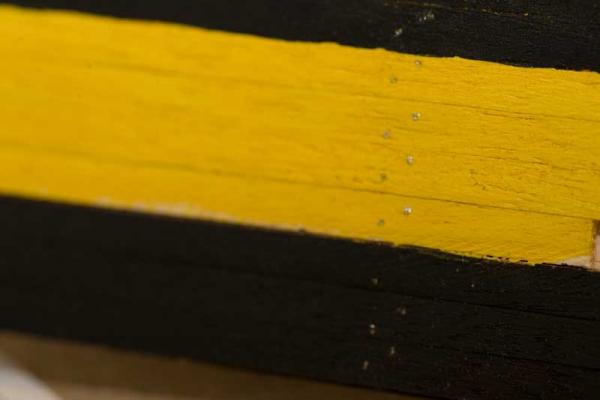
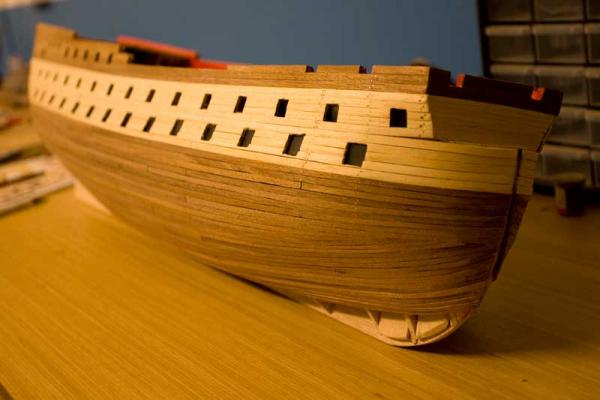
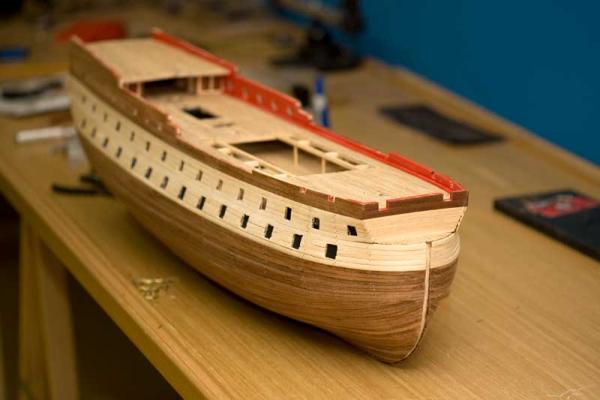
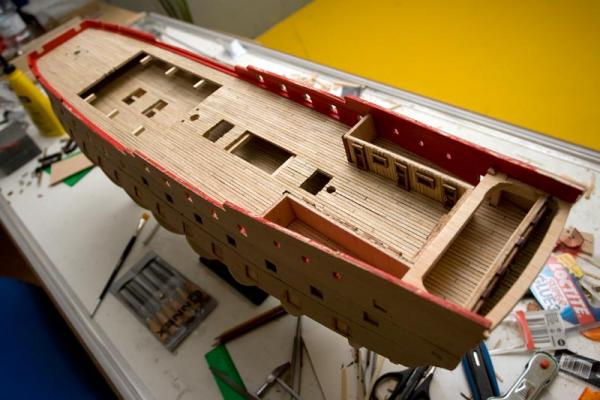
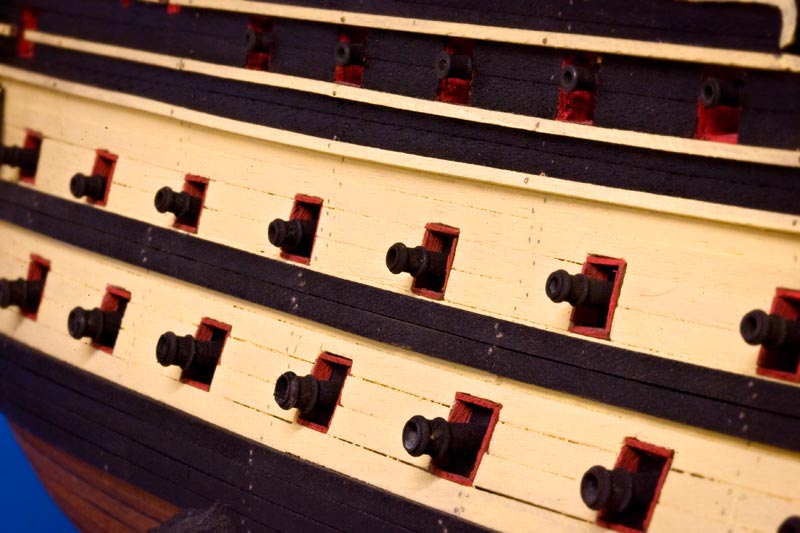
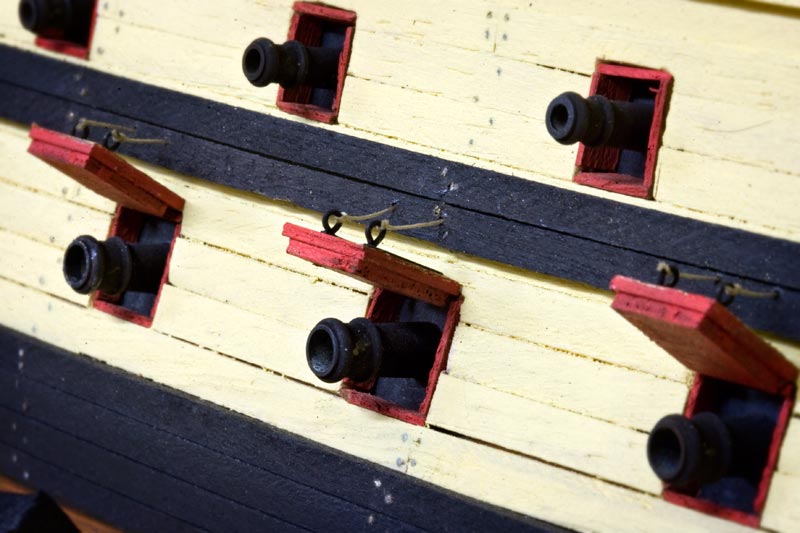
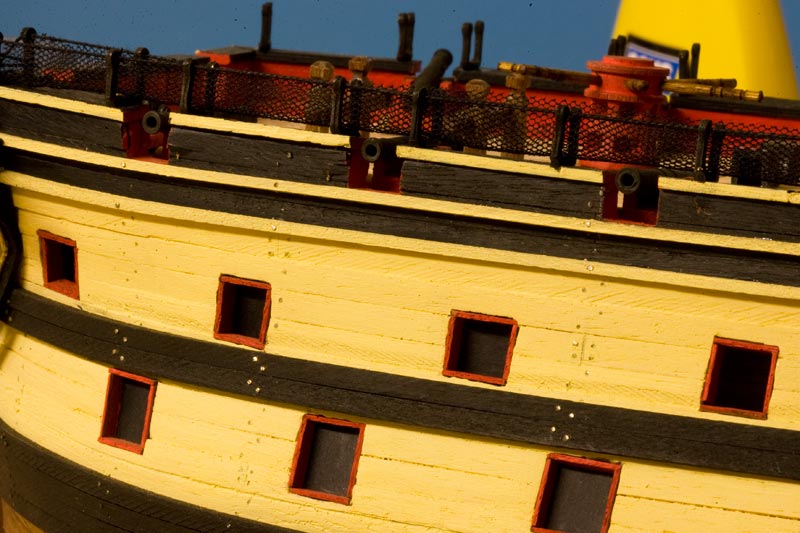
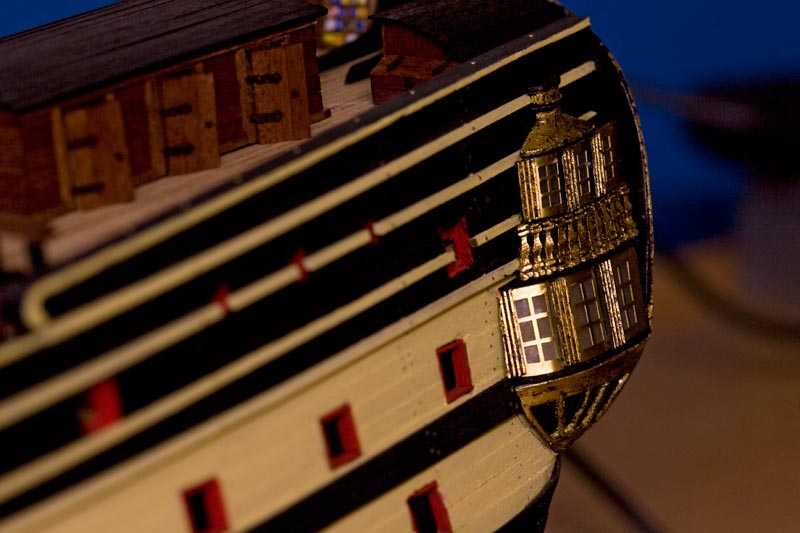
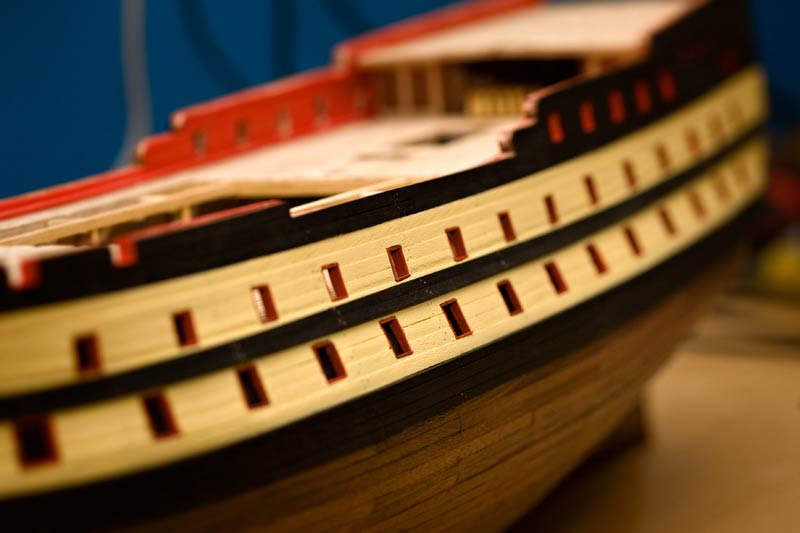
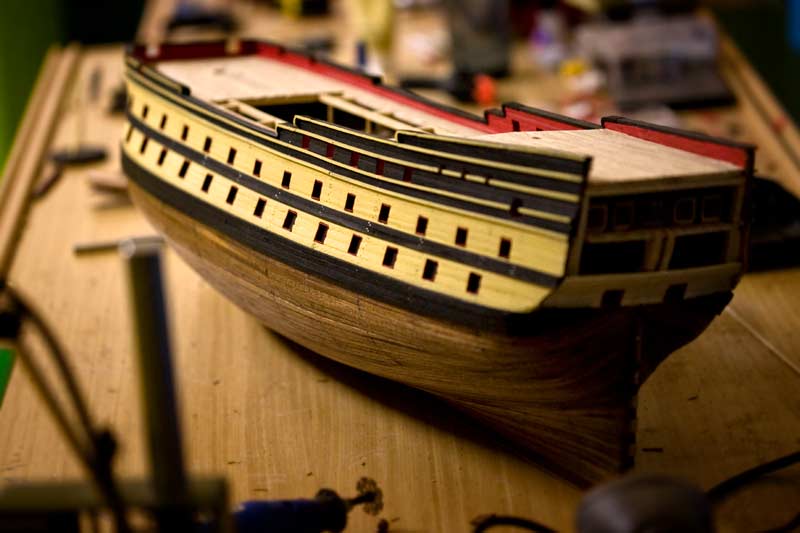
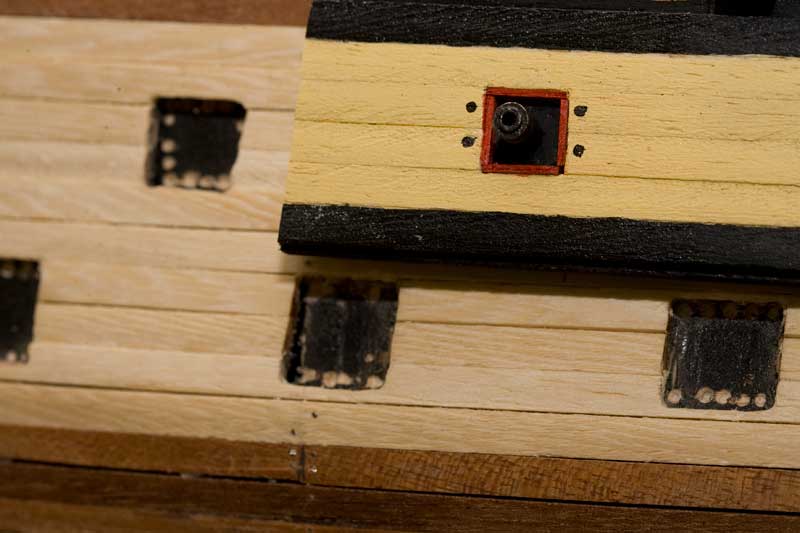
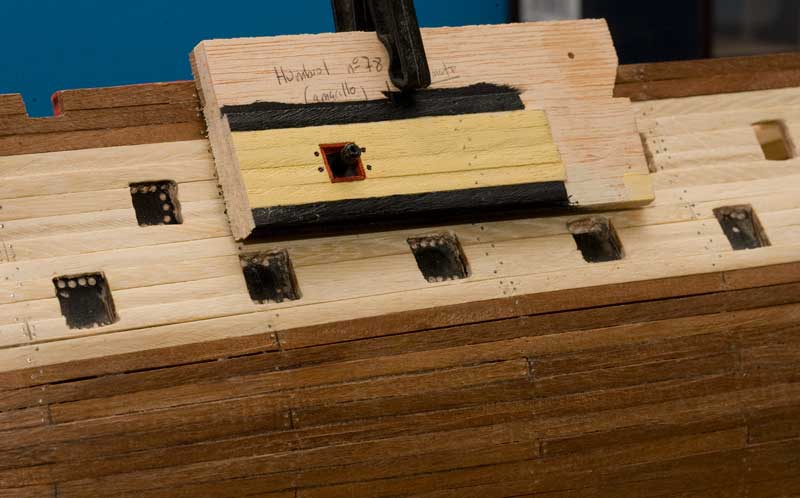
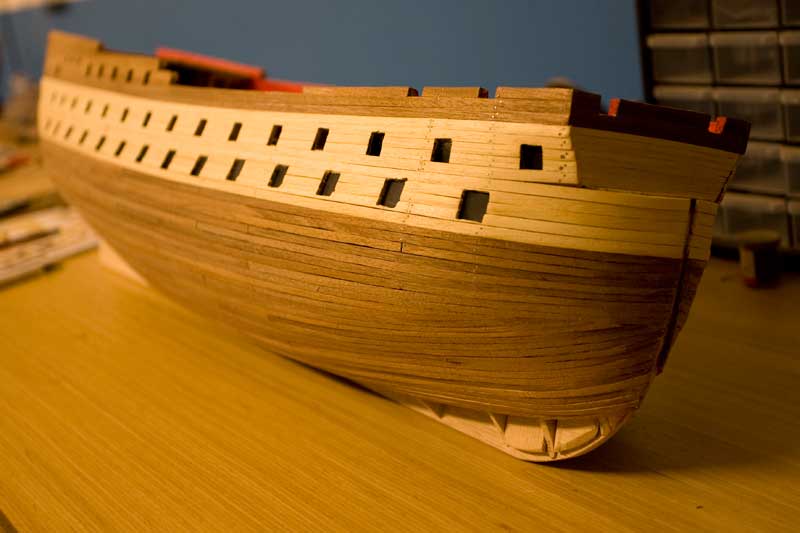
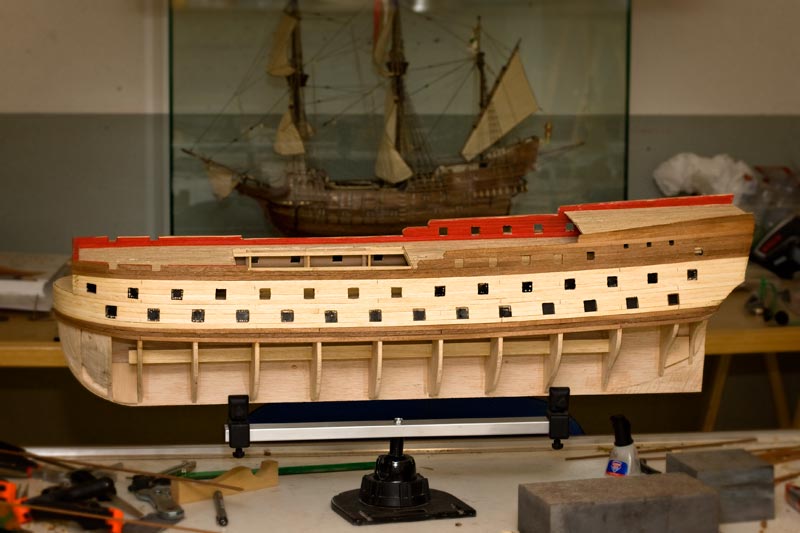
More advances: opening of the gunports, painting and lacquered the hull. The colors were chosen by the admiral in person
 and she was painted with acrylic paint
- Naples Yellow from "Pebeo"
- Smoke Black from "Vallejo"
Cheers
Ricardo.


- maggsl_01, SawdustDave and Sjors
-
 3
3
-
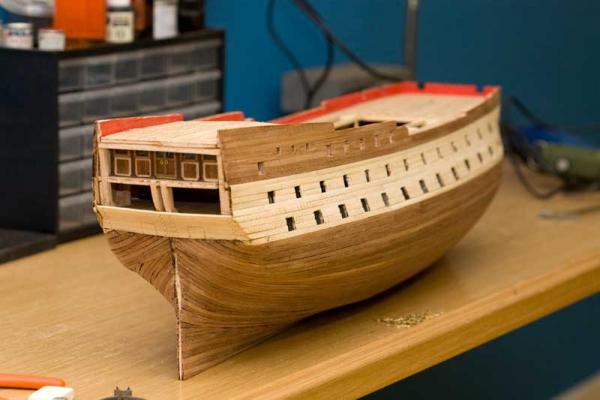
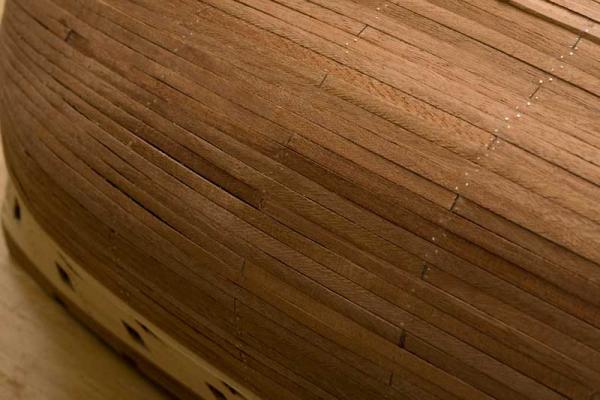
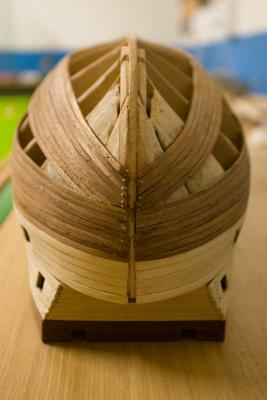
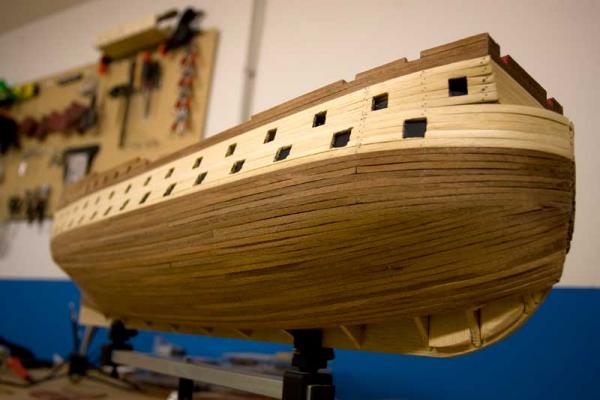
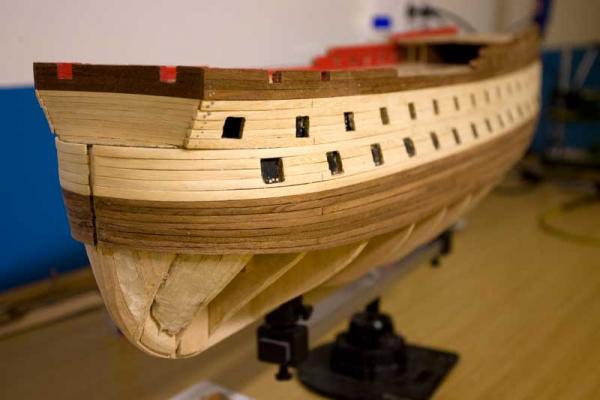
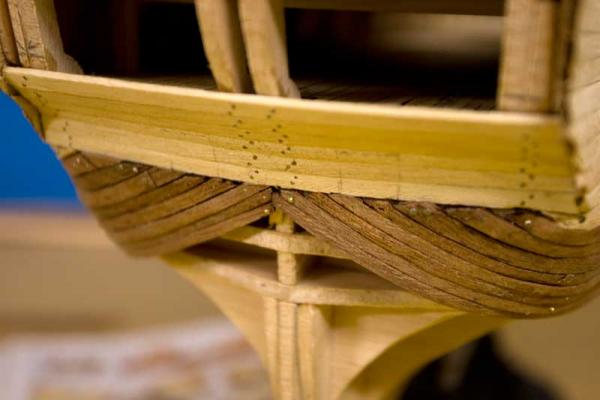
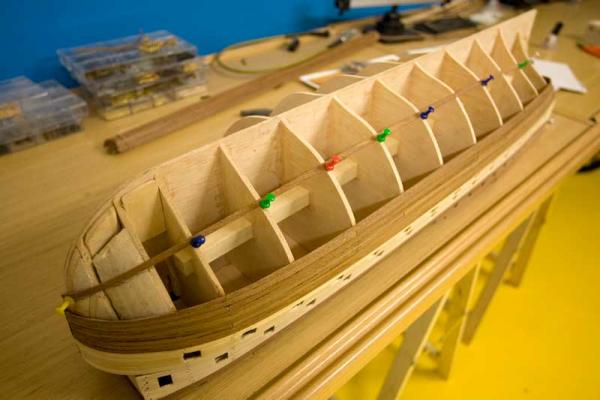
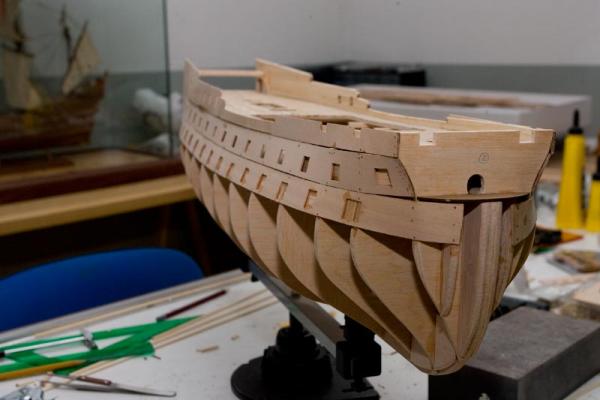
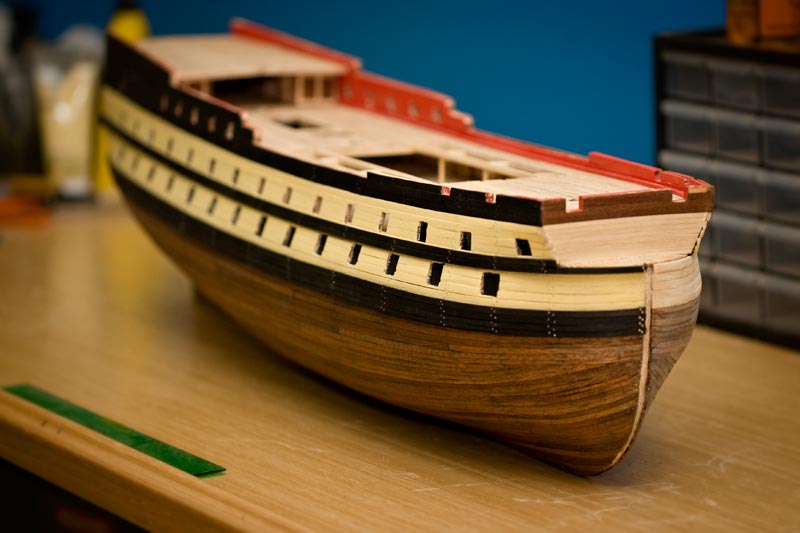
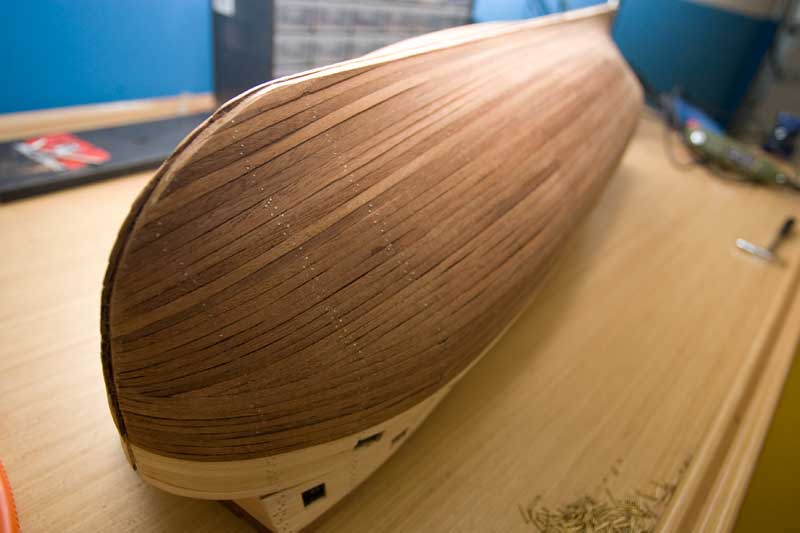
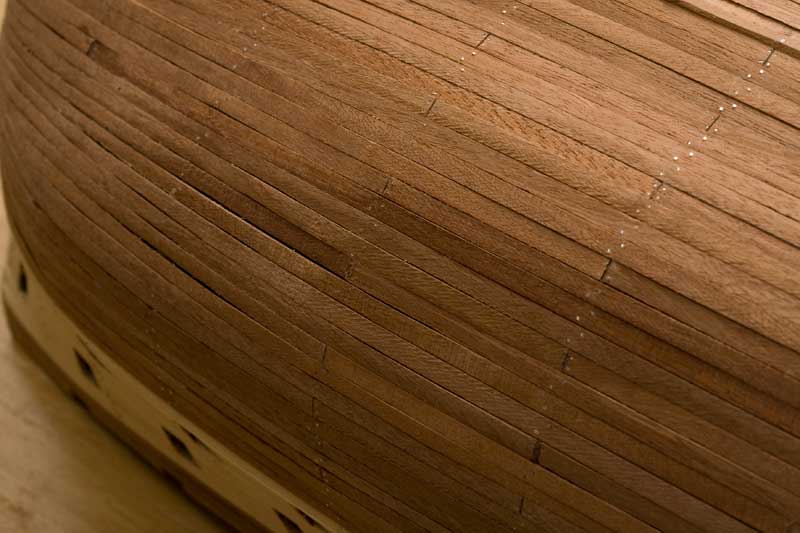
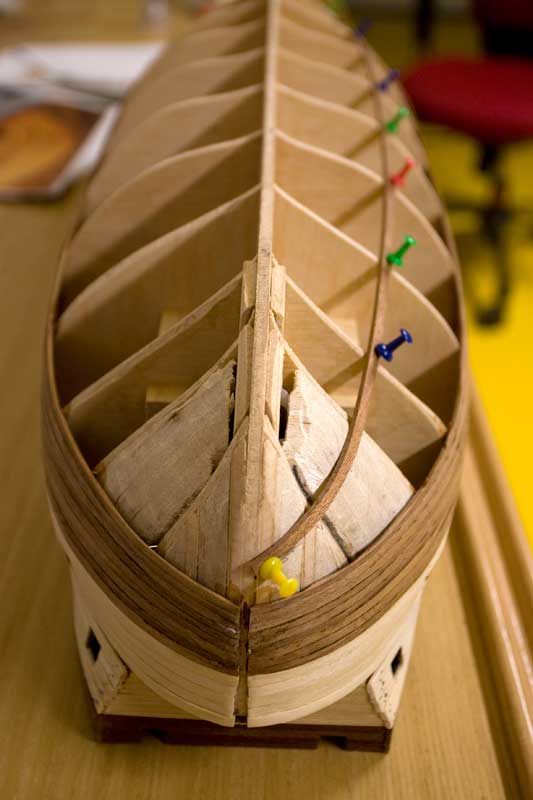
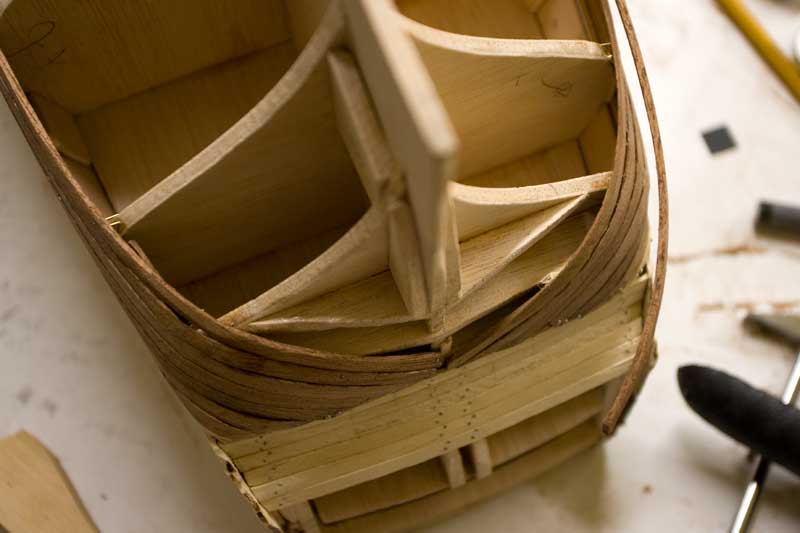
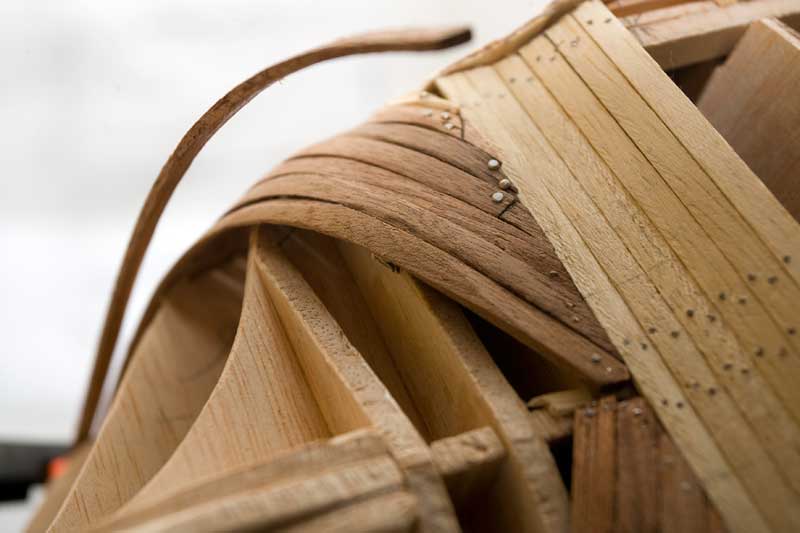
More progress. In this stage planking is complete and I made the final sanding of the hull and also decided double nail only in frames to avoid overloading ... maybe today I would have put all framing with nails simulating all the frames, but in the past I had to put over 3000 nails and it seemed eternal, so just put the you see. Those who have done it before know it's insane. Between timbers I have used a mixture based white glue and cigar ash and sawdust wood itself. The next was to choose the right colors for the hull and of course, masting and rigging.


-
-
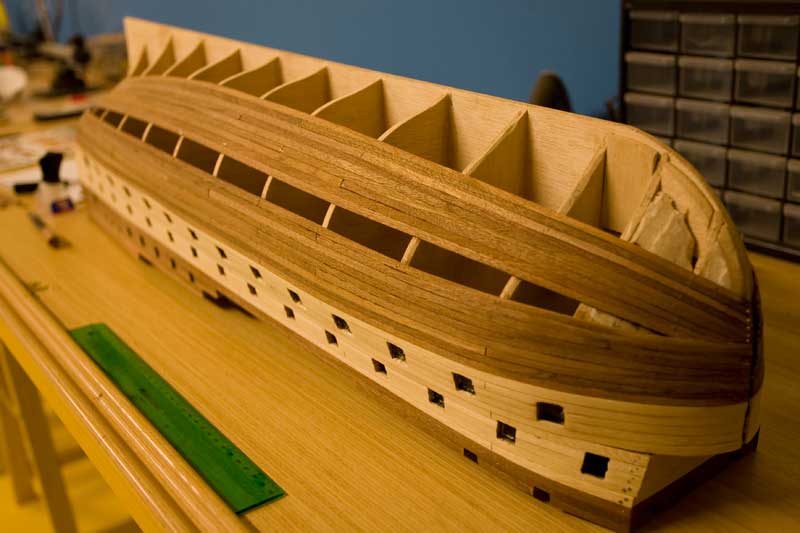
I finished the planking, I have spent more or less 180h to plank the whole hull...


- SawdustDave, gieb8688 and Sjors
-
3
-
More pictures...


- SawdustDave and Sjors
-
2
-
-
-
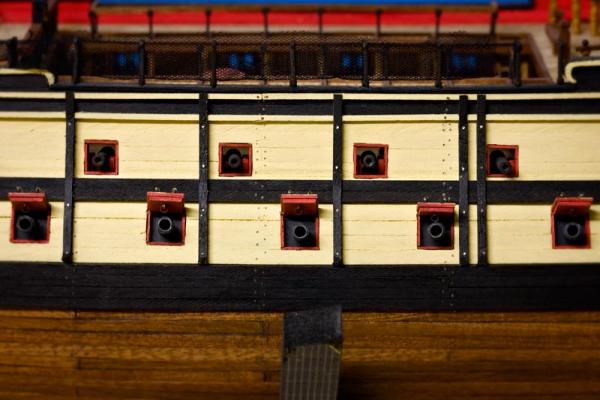
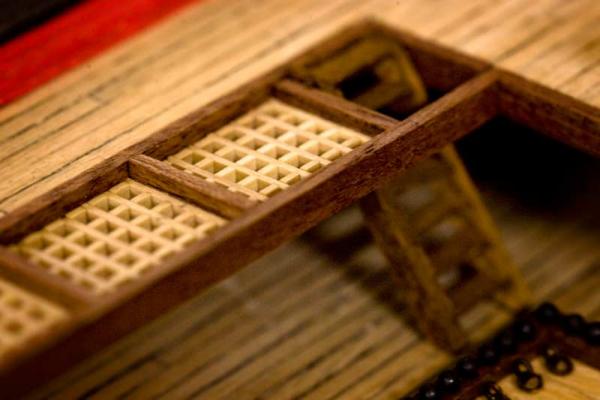
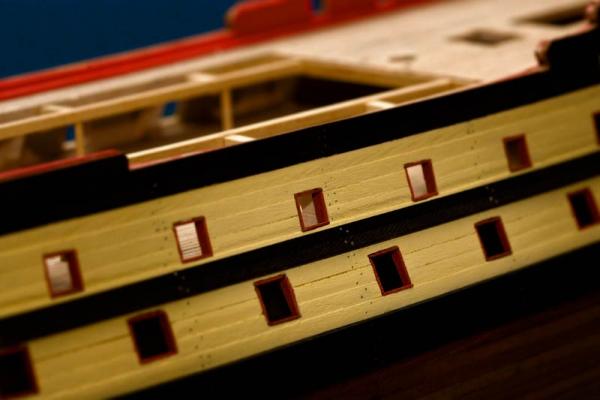
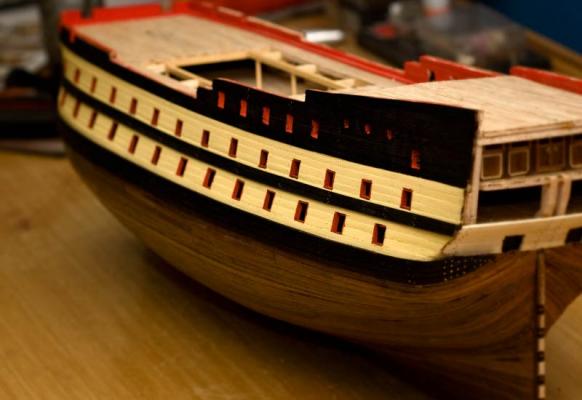
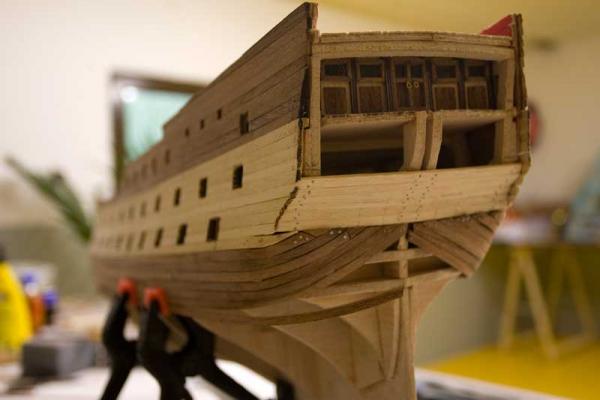
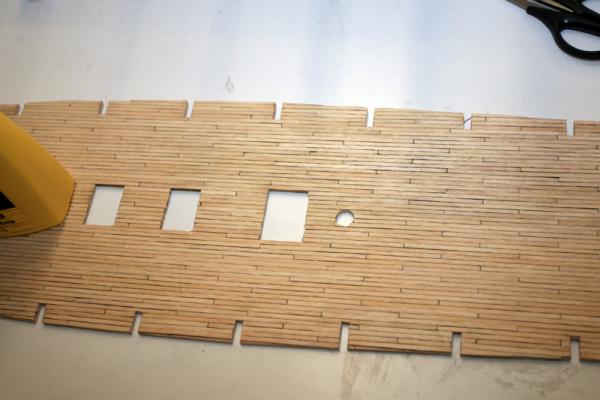
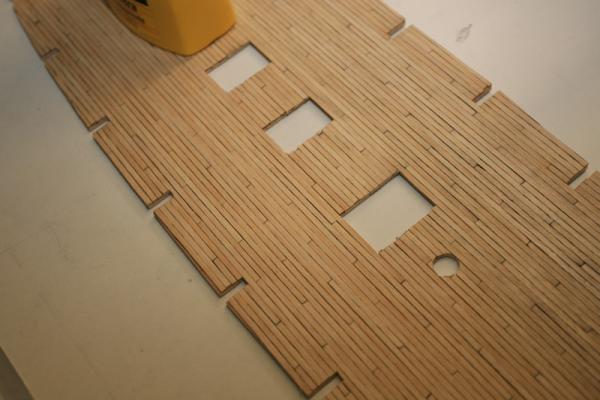
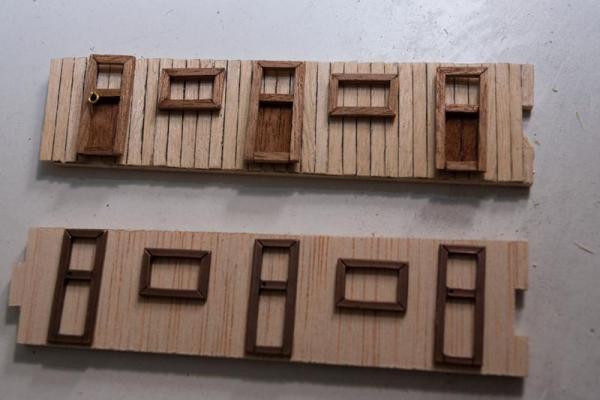
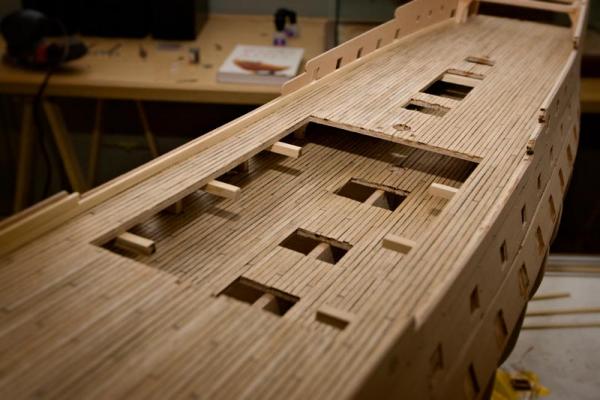
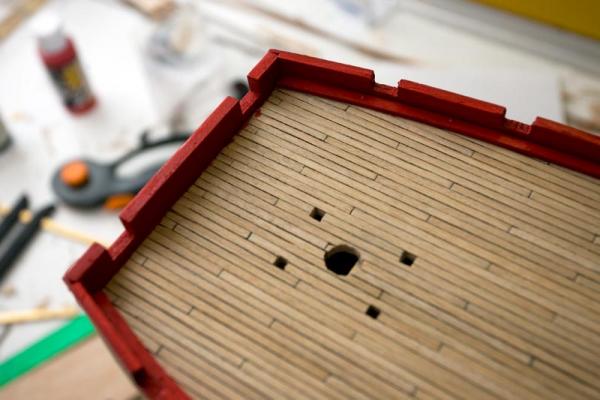
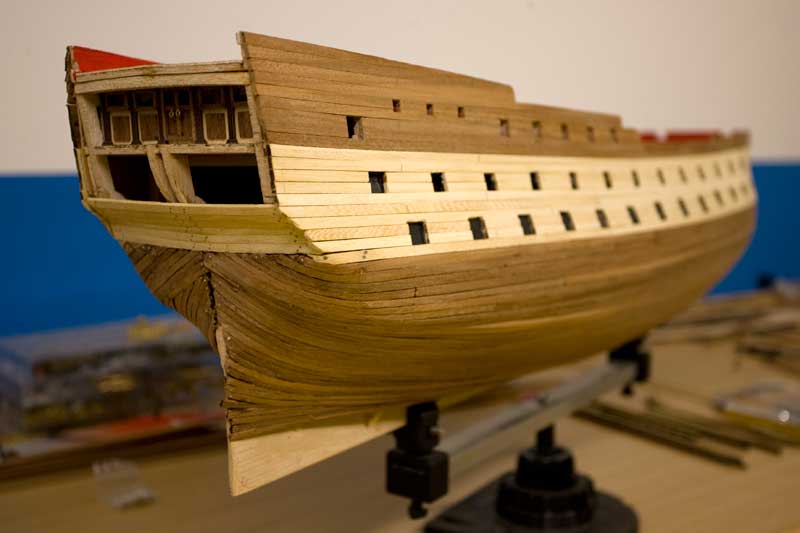
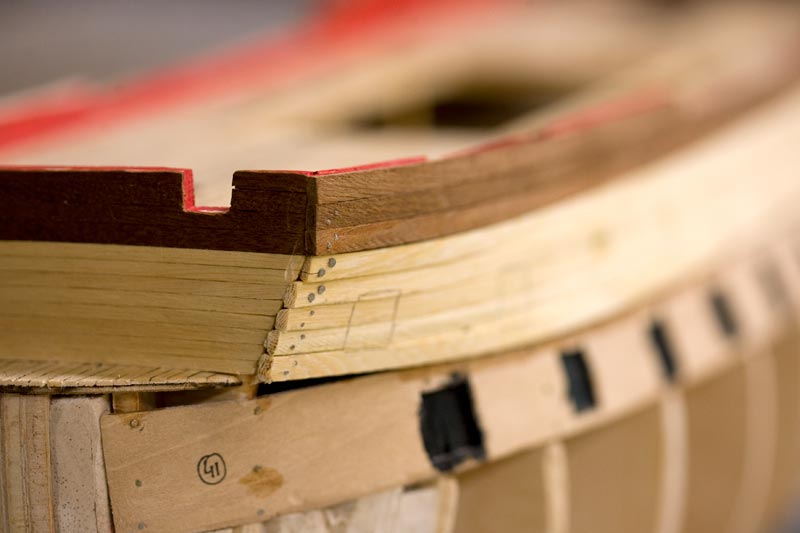
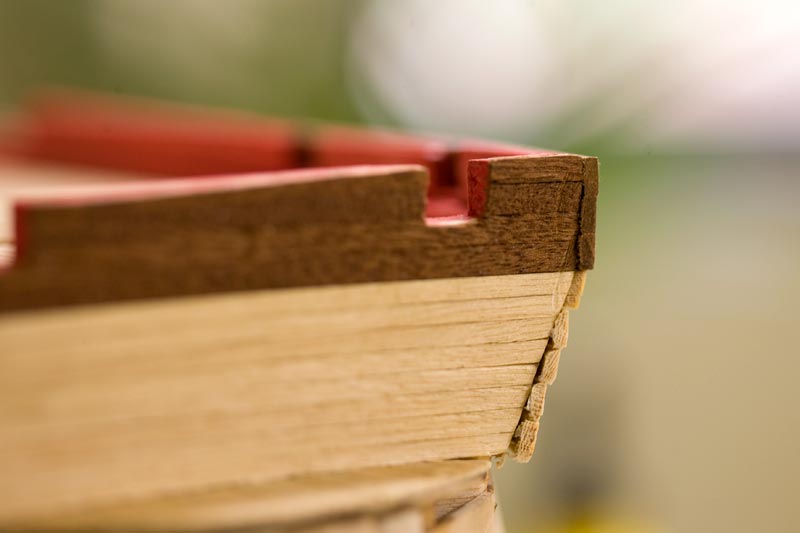
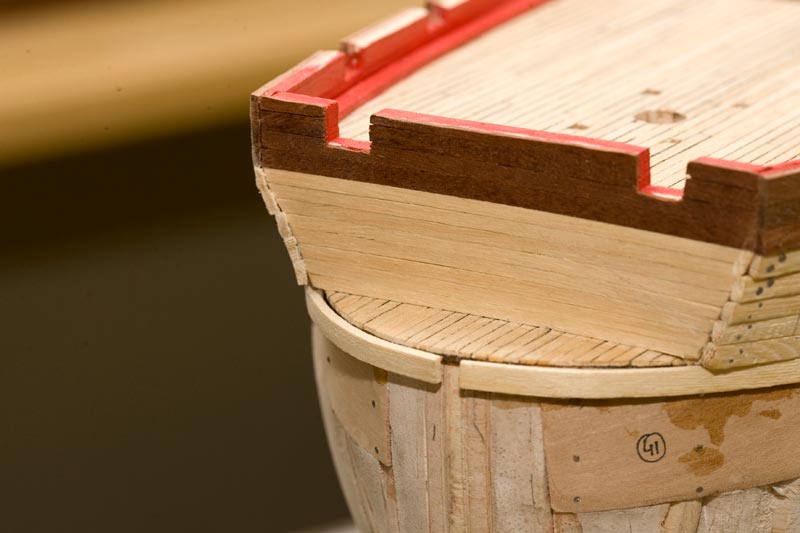
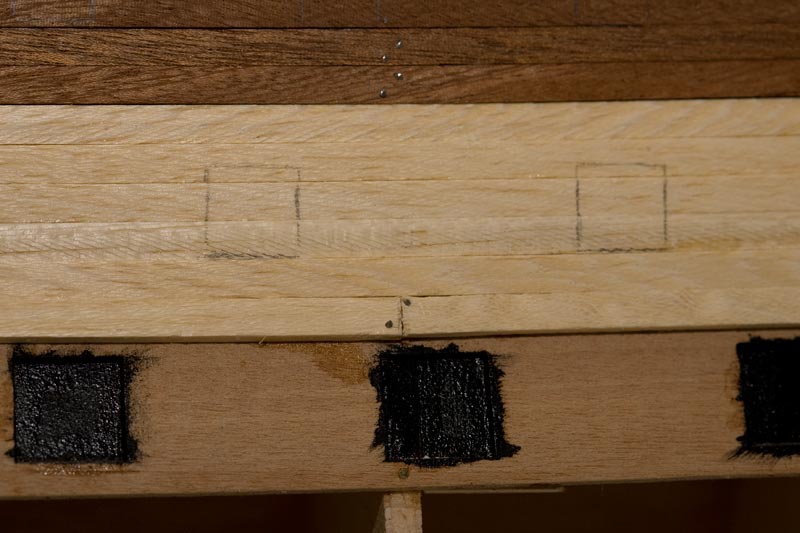
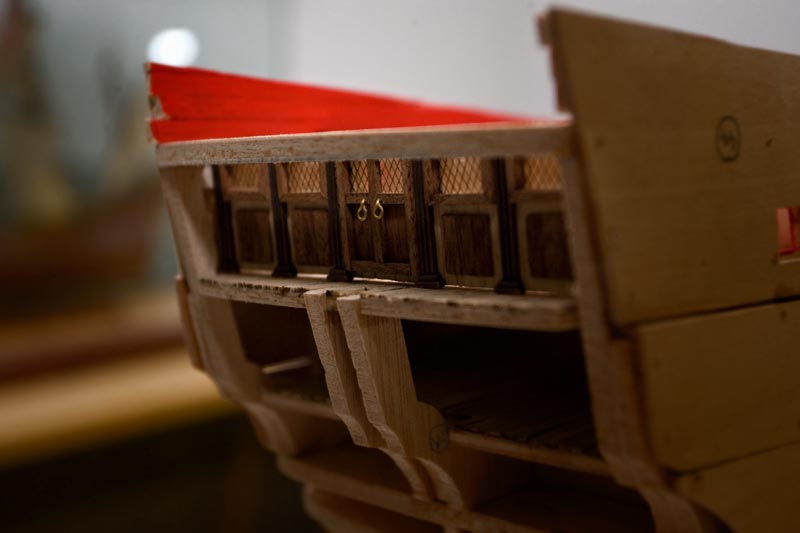
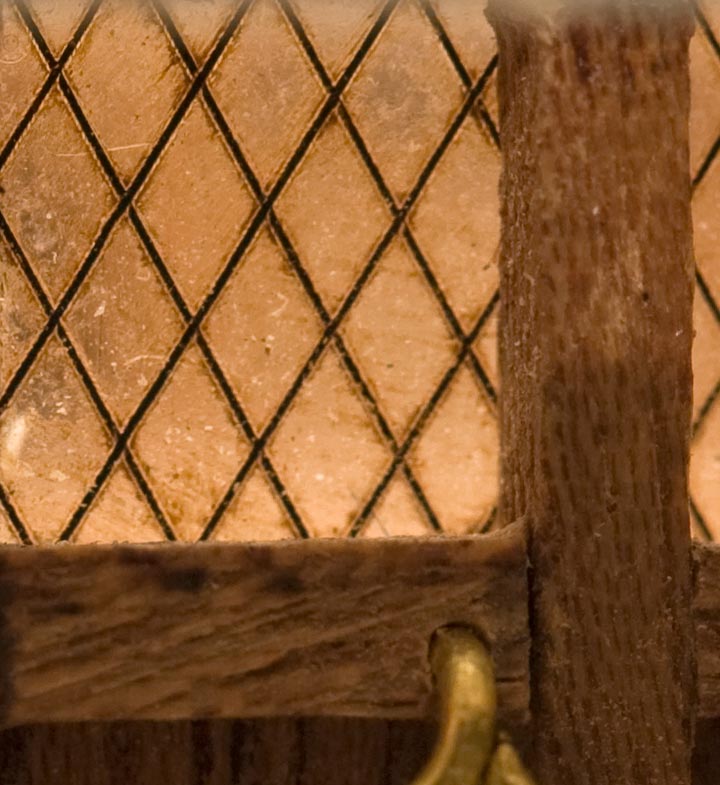
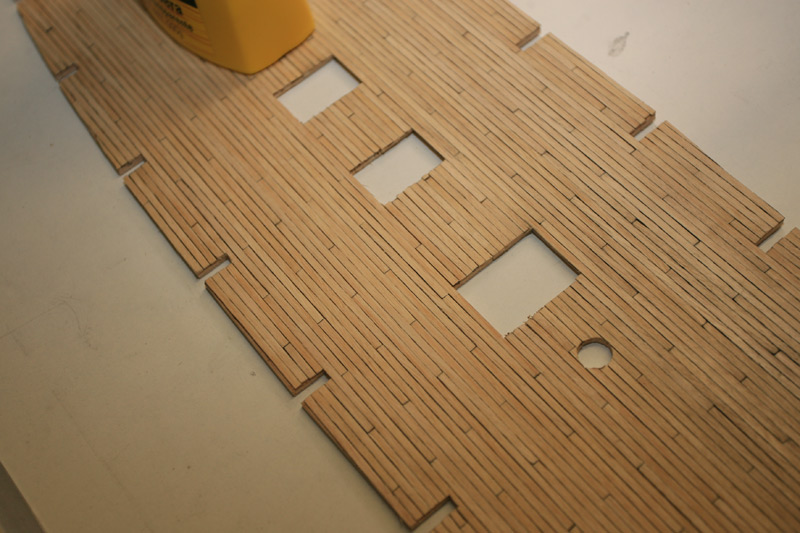
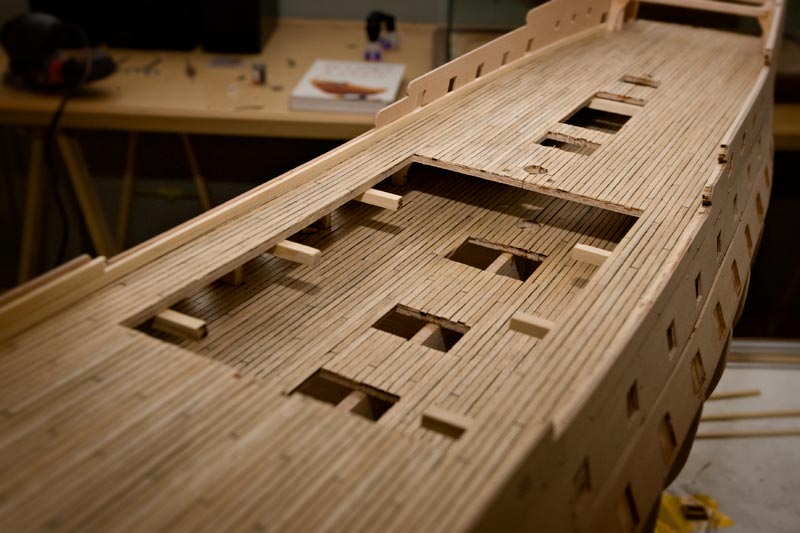
Pics from decks. I didn't like the timbers at first, you know timbers are the same in the kits, but today I realize that they were not as bad as they seemed... is the advantage to rewrite the thread, you can see things that in his day was all complaints...Moreover, the bulkheads that make the cabins are lined and metal parts that brings the kit were discarded by others made from wood to form doors and windows ... the crystals are made of acetate and aged with bitumen of Judea.Regarding covers itself, are caulked with a stick of graphite, one must be very careful because it prepares a "chocolate milk" to just that one is neglected. Anyway, by that time, I was quite clumsy but a friend recommended me sanding the deck and I could fix it.


-
I think a simple "welcome back" is in order, as well as a "looking forward to picking up where you left off" or wherever you decide to start from.
Andy
Hi Andy,
I think that it´s better to reproduce the entire thread as it was in the past...
Pay attention and don´t blink because again..legendary ship...returns
Kind regards,
Ricardo.
-
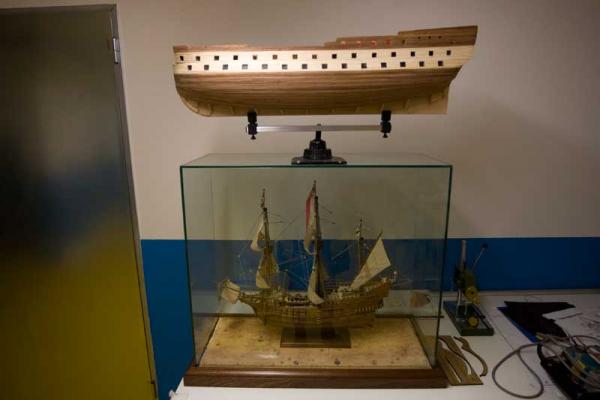
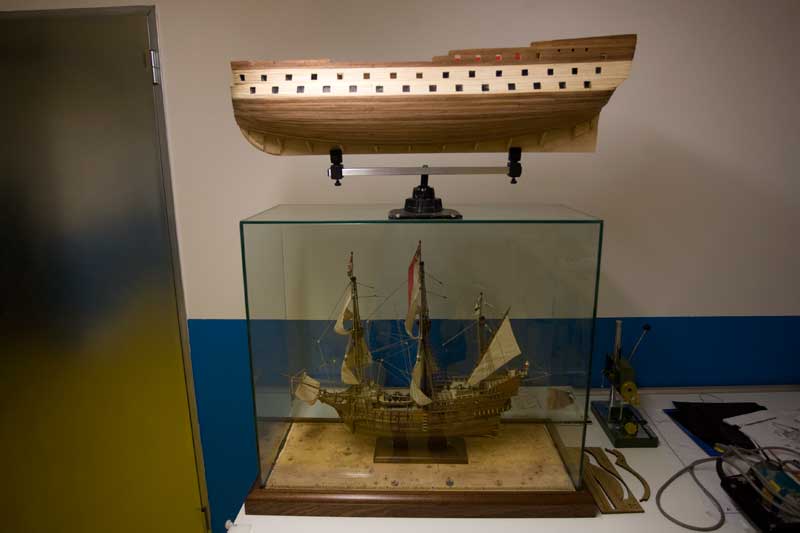
Many of you will know too well the model that concerns me for four years of other forums and also in MSW first stage (over there I was qaz_666)... As you can see, I have tried to represent Montañés as she was in the Battle of Trafalgar so I had to add many things that the kit does not include.I've been shuffling the two options, whether to raise the whole process, or just make progress where I left off. At the end, I opted for putting it all from the beginning for two reasons:1. If anyone has not seen it yet, he/she will see step by step biased and it could be not well understood.2. On the other hand, if someone decides to make the model (from here I encourage anyone who wants to do so) may consult the whole construction process and change what you want, or do as I came out of the impasse at a certain point.From the beginning of the thread, I apologize that I don´t extend as much as I did in the original thread, because honestly, I don´t remember many things, as I began this thread a long time ago, but if anyone has any questions, I will be happy to "try" to answer...Sincerely, to make sense here I have to rescue the original thread from "Cuaderna Maestra" spanish forum and make a "cutting and pasting" process but nowadays that is completely impossible. Thanks in advance for visit my log.See you here!
Kind regards,Ricardo.


Montanes by ricardo - OcCre
in - Kit build logs for subjects built from 1751 - 1800
Posted
More advances...
The hull is almost finished. Bulwarks and coys in place more or less about 280 coys. The bowsprit also in place and the small boat is in the pit.
Enjoy!