Cap'n Rat Fink
-
Posts
829 -
Joined
Content Type
Profiles
Forums
Gallery
Events
Posts posted by Cap'n Rat Fink
-
-
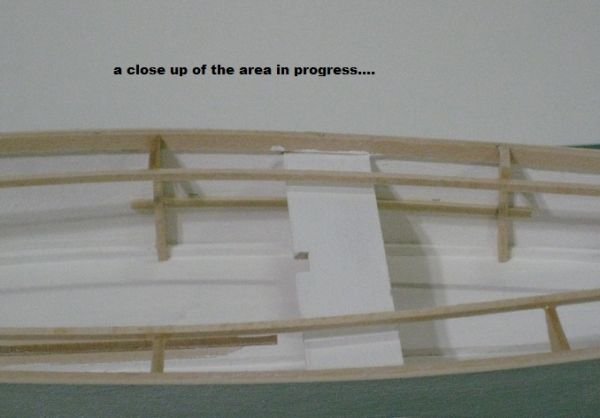
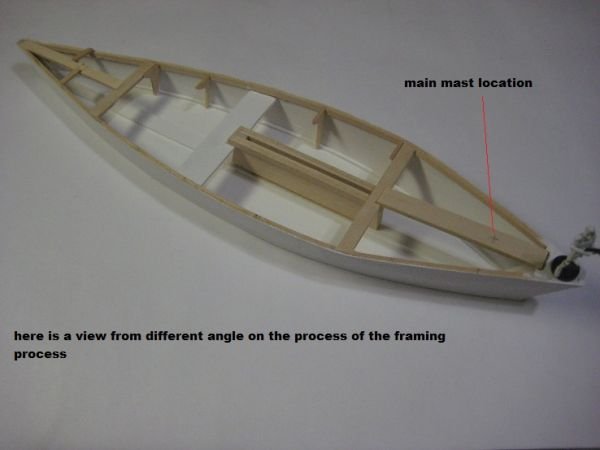
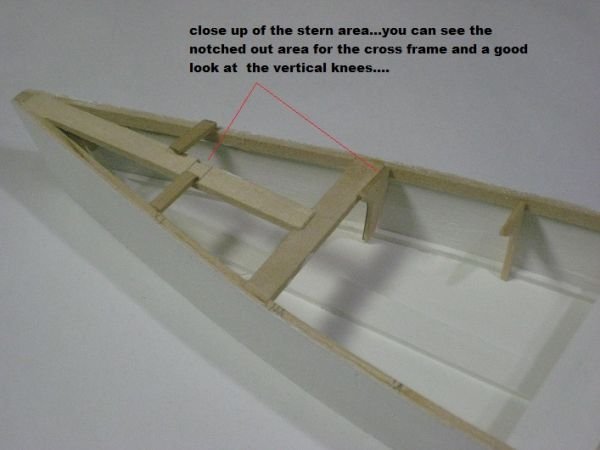
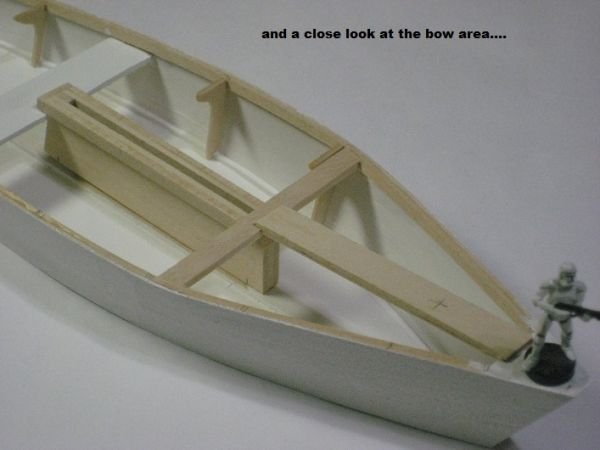
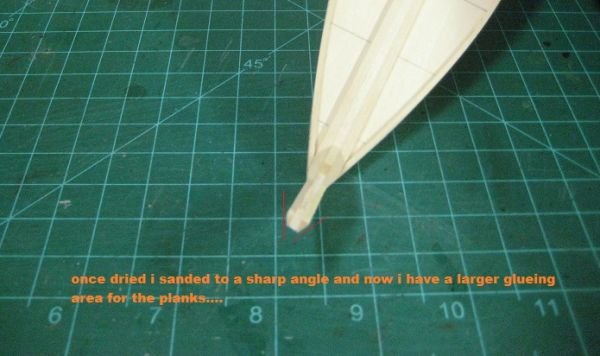
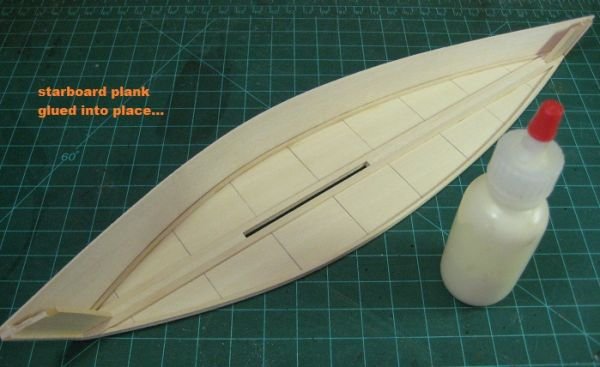
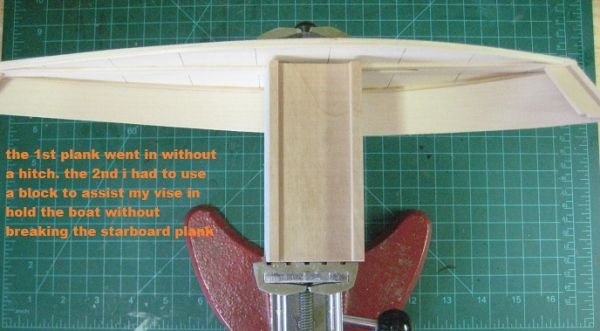
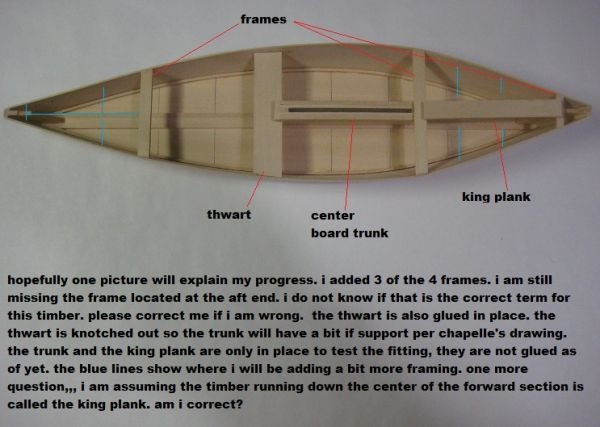
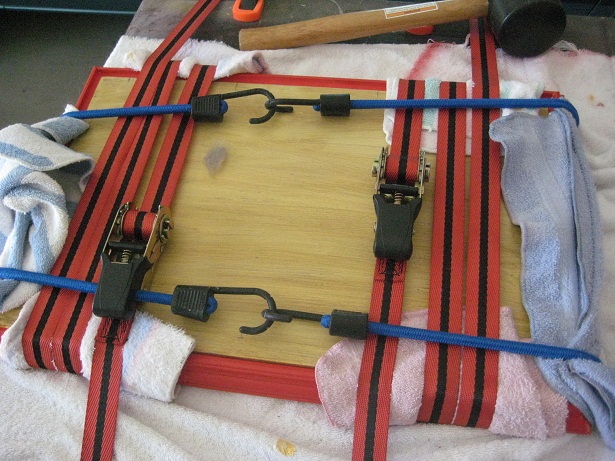
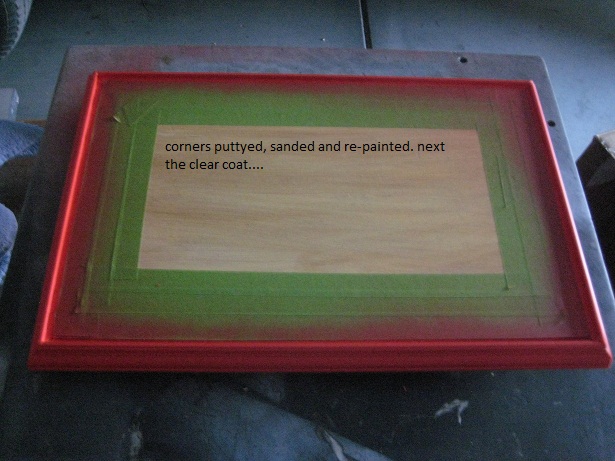
and a few more pic's
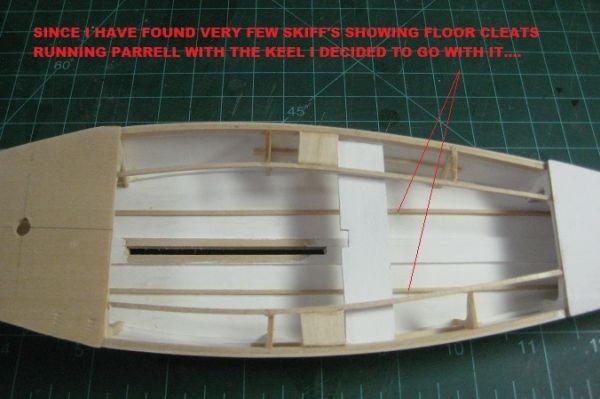
ANY COMMENTS OR QUESTION ARE VERY WELCOME.....HAVE A GOOD DAY.................
-
WELL ITS A BIT EARLY OVER HERE IN THE AMERICAS. SINCE IT WAS MY TURN TO HANDLE EMERGENCY ON CALL, AND AS I SIT HERE WAITING FOR A CALL BACK FROM OUR SUPPORT TEAM AT JUST BEFORE 4AM IN THE MORNING. ENDING A 34 HOURS OF OVERTIME IN TWO DAYS. FOR THE SAKE OF NOT FALLING A SLEEP I AM ADDING BACK A LITTLE MORE TO MY BUILD LOG OF MY SKIFF. AH JUST 12 MORE HOUR TO GO AND I CAN GO HOME......
-
Thanks MIchael,
I will try to add to it today. But in the middle of testing some stuff at w&%$.............
-
Your Keel Assemply looks very nice there Ben.....
Ben you can make a nice little scrapper for your rabbet by using you dremel on a straight razor and simply run it across the assemply to create your rabbet...
-
Just simply beautiful Frank,
Have not been by in a while, but outstanding rigging details and the furled sails look great................!
-
Yves,
Cheer up you can find build logs on the www for the Bismarck real easy, and good ones to. MSW 1.0 crashed now we have 2.0 it's even better. Just keep a positive attidude...
I lost my build logs too. I am slowly adding them back. It's just finding the time to do it. But it will be done...
Here's a couple of build logs I found that might help you Yves....
http://www.shipmodels.info/mws_forum/viewtopic.php?f=59&t=121249
http://buildthebismark.proboards.com/index.cgi
mario
-
Hello mobbsie,
Just read through your log here. and I like several of your explantions, they are very well thought of. Your are also very organized in your building mobbsie. I am enjoying your progress sir...have fun
-
Congrats Bob to a very nice start on your longboat! Plus you picked a very nice kit to learn from Bob...enjoy
-
HI JOHN GLAD TO SEE YOU STOP BY MY BUDDY....
SO HERE WE GO AGAIN A SMALL UPDATE BECAUSE IT LOOKS LIKE I MIGHT BE A LITTLE BUSIER TODAY AT W@*&.....
IF YOU HAVE COMMENTS OR QUESTIONS FILL FREE TO POST.....
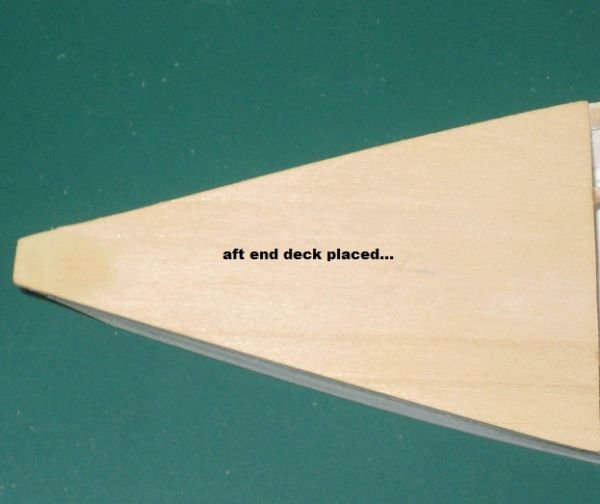
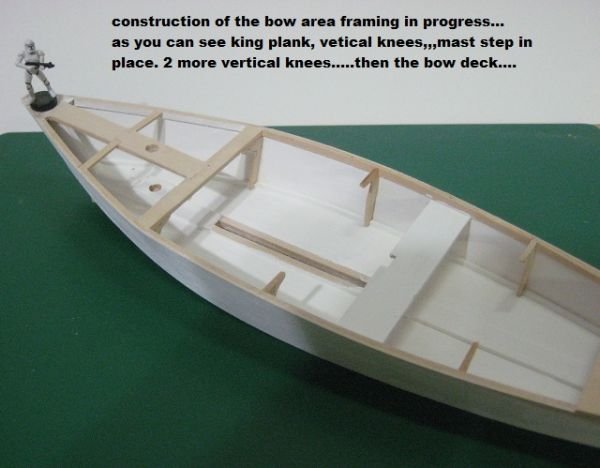
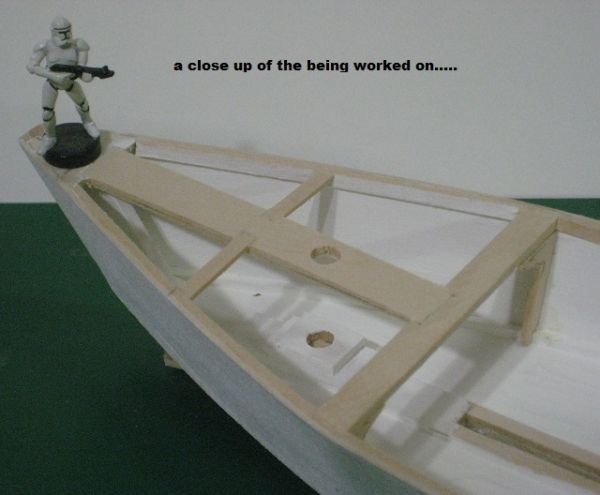
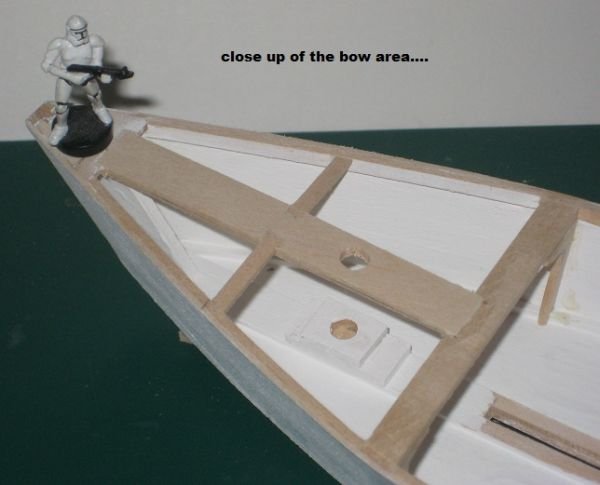
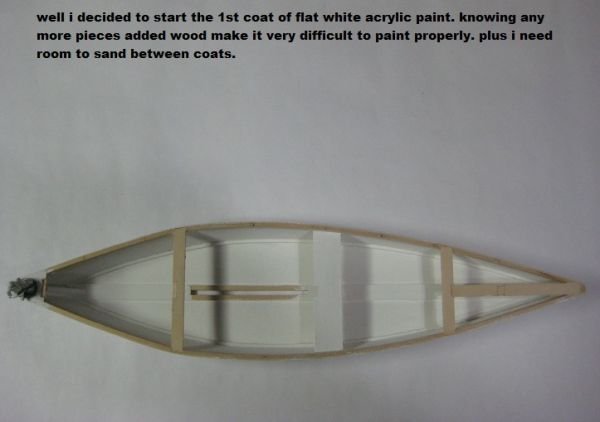
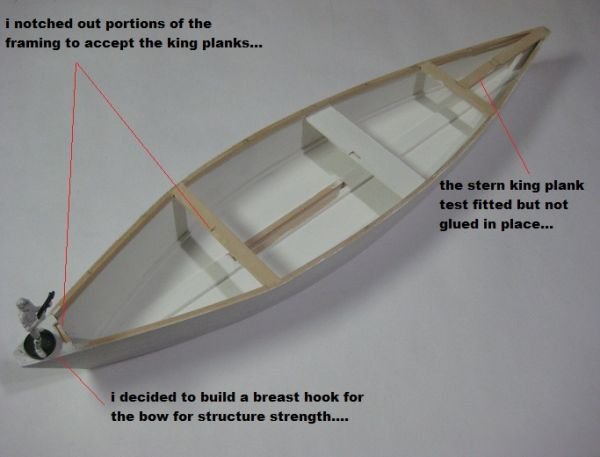
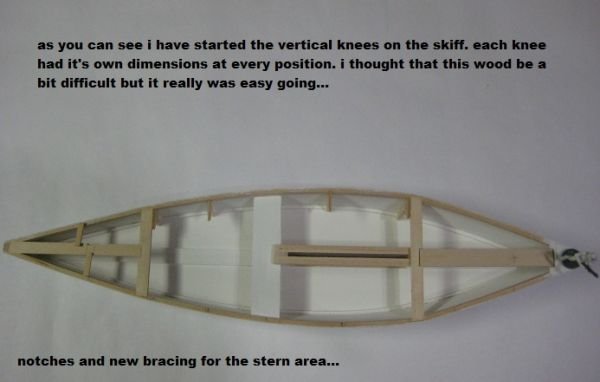
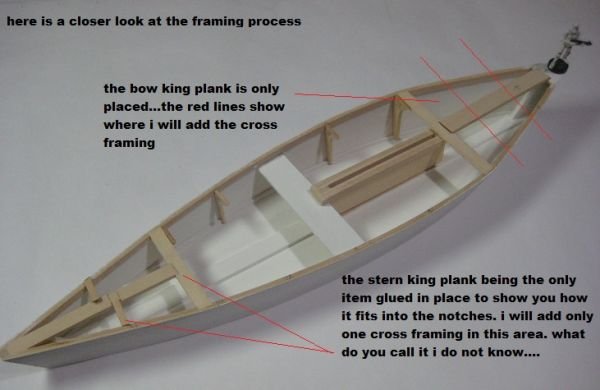
well my little crabbing skiff progresses along.....
-
Ahoy Brian

The extra effort you have made to document sources in your posts has become a wealth of information for me on my build and I am sure others. Thank you

I do not see why you could not go with the water. Worst case the glue fails and the problematic wood comes off. Best case, it softens up both the wood and the glue and they dry in the proper shape.
On my side build, I used paper towels soaked in warm water to correct planks that did not conform. I use the original Titebond, which is not waterproof. I had no issues with them ungluing completely or coming apart. On my Ratt, I have used water to remove planks but also had to apply heat. It is my belief that it was the heat gun, which actually allowed me to remove the planks, not the water. I think that water alone might have worked, but only after a considerable amount of time soaking. Something measured in days.
PS: Consider distilled water. I use filtered water but have noticed some staining.
Looking forward to seeing the planking stage
A VERY NICE EXPLAINATION THER JP!!!!!!
a VERY NICE START N PROGRESS TO YOUR RATTLESNAKE bRIAN......
-
Nice Start Ben On your C.S..... Going to fun to watch your progress............
-
HI Rusty,
Looks real good my friend. Very nice n clean....
-
Hi Scott,
Good to see you adding your cross section build back in. It is a very nice build. plus you made really nice guitars and ukulele's also....take care
Mario
-
Hey Thanks a lot Russ! It was a fun build to do. I do have a few more of these workboat projects planned for the future...! Thanks for liking the scale Russ. Someone had asked me why such a weird scale and the answer was , first it has a jib sail so making it a bit longer. The other reason I have a display case in my home that will fit a model at about 16 to 17 inches in length......so there's the method to my madness...
Hi David,
Your right that there is a Midwest Kit on a crabbing skiff. But i decided to scratch one instead and use Chapelle's book...though Midwest's kit is close but no cigar to Chapelle's..
With Chapelle's book I was able to add more detail which I enjoy doing....
take care guys
-
AND A FEW MORE PICTURES BY FOR NOW(BFN)..........
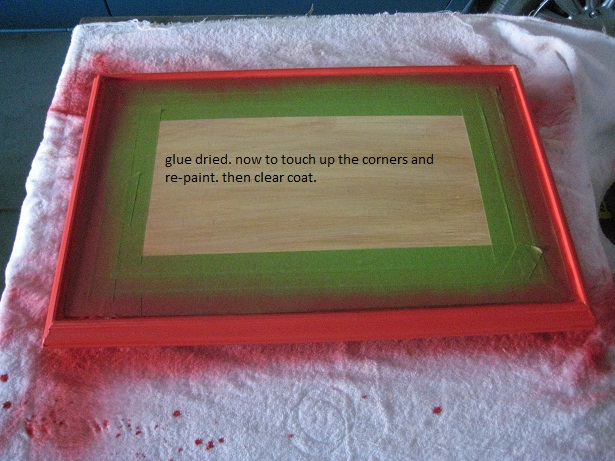
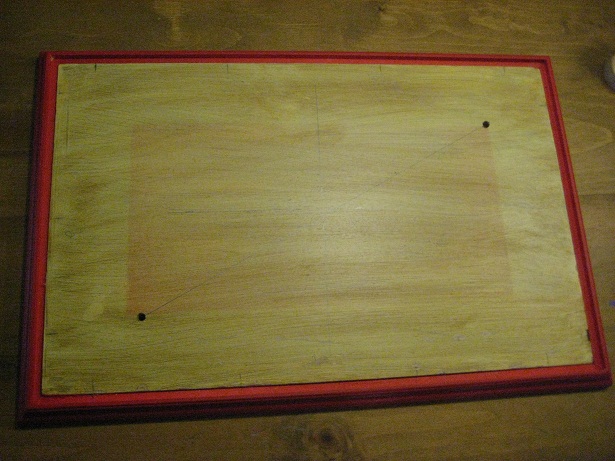
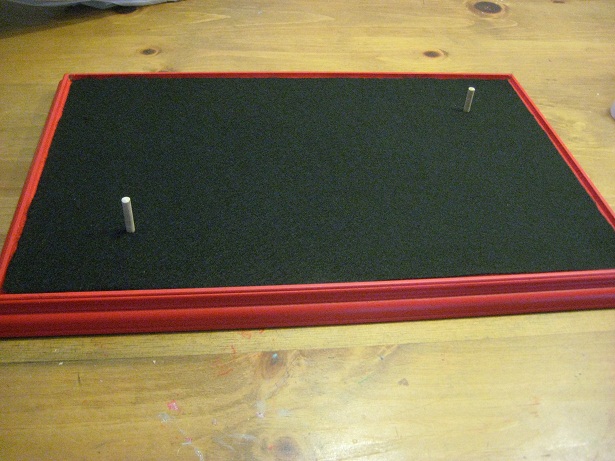
a few pic's to show progress to date....
-
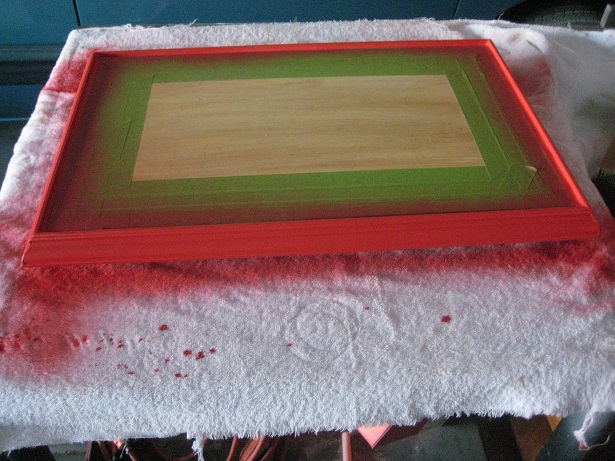
OOPS! FORGOT THESE PHOTOS......
-
HI EVERYBODY, HAD A LITTLE TIME TODAY SO I DECIDED TO START ADDING BACK MY BUILD LOG OF ONE OF MY LITTLE WORK BOATS FROM MSW 1.0.....STARTED BACK IN SEPT. 03, 2012....
Hello Everybody,
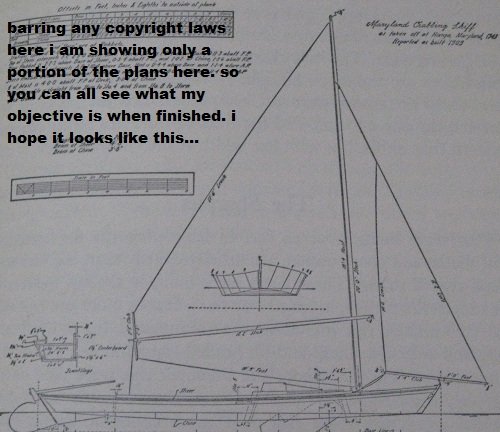
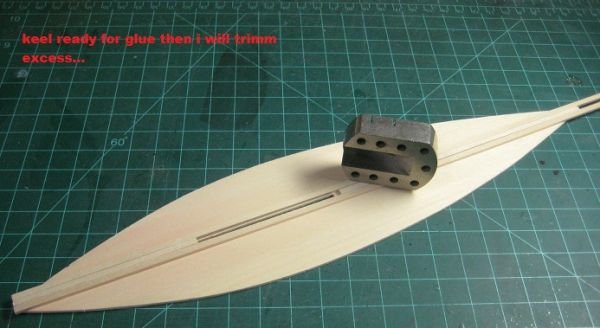
Well I am going to give it a go at building a Maryland Crabbing Skiff out of Chapelle’ book American Small Sailing Craft. I do not have his book on Crabbing Skiffs. But I will do my best with what I have to work with.
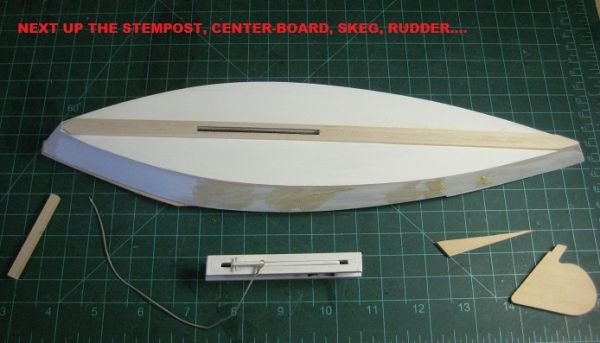
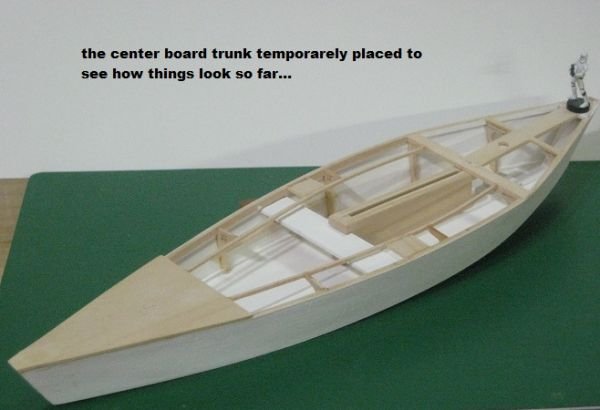
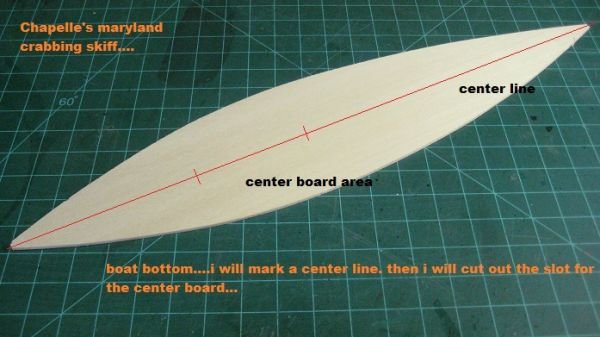
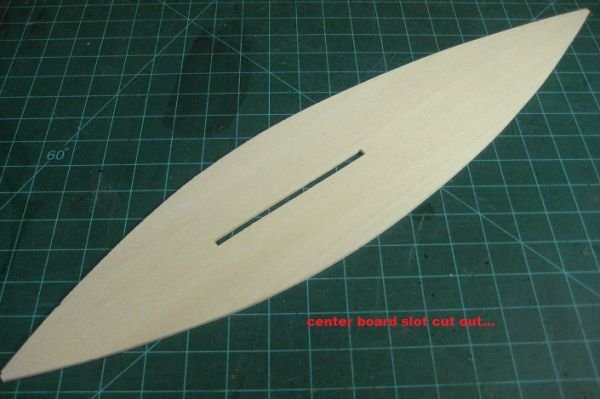
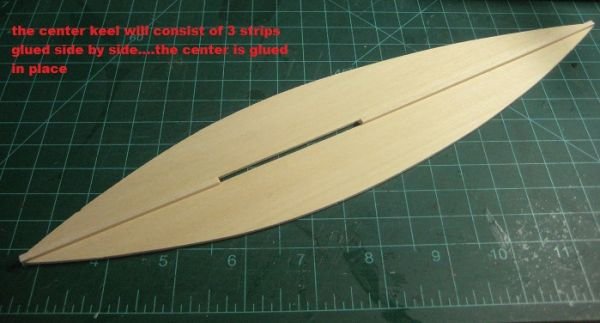
The model will be made strickly from basswood. I will be painted the skiff. Now I am not sure what the paint sheeme would be at this time. Other then the majority color will be white. If anyone has any info or a picture or two showing this I would be eternally grateful. It has been very hard trying to find vintage pictures of this type of skiff. I decided to do without a building board. I will construct the boat botton…adding the center keel…and cutting out the center board slot.
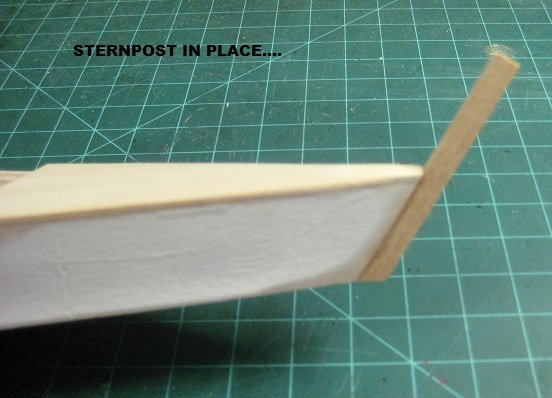
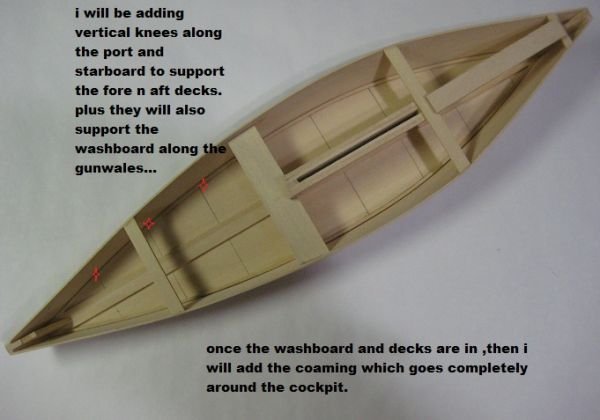
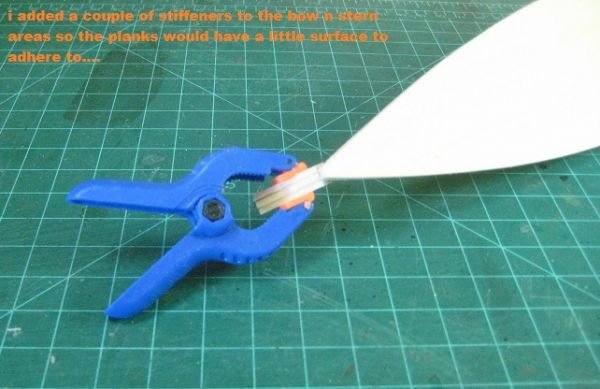
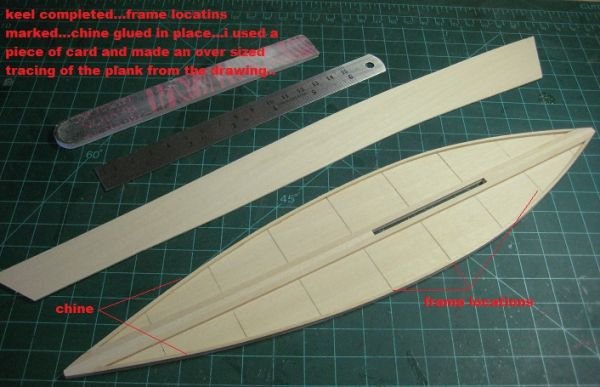
I will then add the chines. I then will add the stem n stern posts, with stiffeners so my planks will have a bit more material to adhere to . Then the starboard and port hull planks will be added. To add the slight bow to the boat bottom, I will add the thwarts that show assist in bowing the boat bottom to give it that customary slight upward bow. It should work ok.
To keep it the 14 to 16 inches length, which is the size models I have be building lately it will be at 5/8th scale. Since these little skiffs were in the 15 to 20 foot range…
So here we go. AND PLEASE IF YOU SEE ANY MISTAKES I AM CREATING PLEASE LET ME KNOW!!!
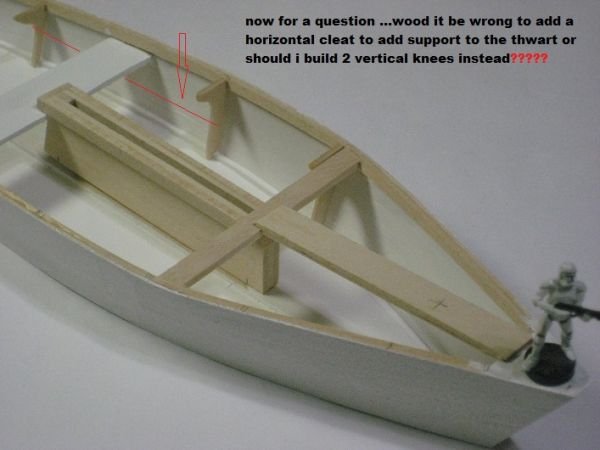
Remarks and questions are very welcomed….

-
Jp, Ben, and Mike,
Thanks Guys. I shall return but right now in California it is Spring Cleaning time. So my wife has me re-painting the interior of our home. That means the modeling room is totally destroyed right now. I think my cross section after Miss Kittie got at it, still looks better then my room does at the present. It's going to be a while longer. But thanks for all the encouraging pats on the back....
-
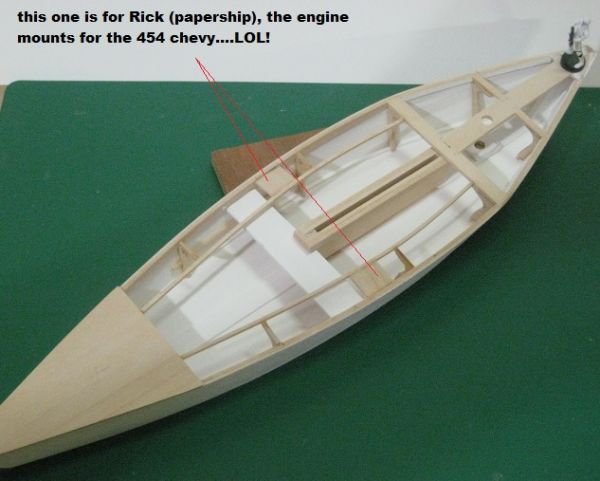
Hi Rick,
Thanks for stopping by my friend. Hope things are well.
-
Looking good Bob. Neat little trick how you do your buckets. i like it.
-
HAHA!. Don't you just love it Jim. Preventive maintenance, then you think well if I hadn't of cleaned it, it would of seized up permanently. I have confidence in you to find that little thing.
Still there is nothing but a positive re-action here. Years of an unswept floor, now your floor is clean. I will start my rebuild eventually. But painting the house interior and the modeling room is a disaster right now.
-
Great attitude Jim,
can't wait to see your next attempt....
-
Hi Keith and Thank You very much....
To answer your question, I used Magic Water very nice stuff. Very good instructions and very easy to use. No smell either. The only thing you have to use your judgement on is the drying time. It really depends what kind of weather your having at the time. I've had it take almost 16hrs to dry, but other times only 8hrs. For the Dingy I poured and let dry. As for the Bounty Launch I waited for it to get tackie and then added ripples in the water. A paint brush dipped in laquer thinner works best when you want to add ripples to the water. That way the brush does not stick to the magic water.
But first wherever you pour the water, first mix a small batch and then brush over the area and let dry so it will seal the area good so you won't have any leaks. Because stuff goes everywhere. heres a picture of the launch and the rippled water....
-
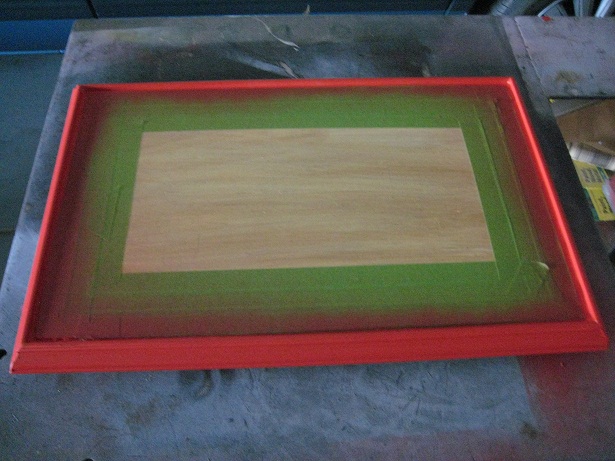
and the last of the photos. the rest will be placed in the Gallery Forum. All questions and remarks are very much welcome.
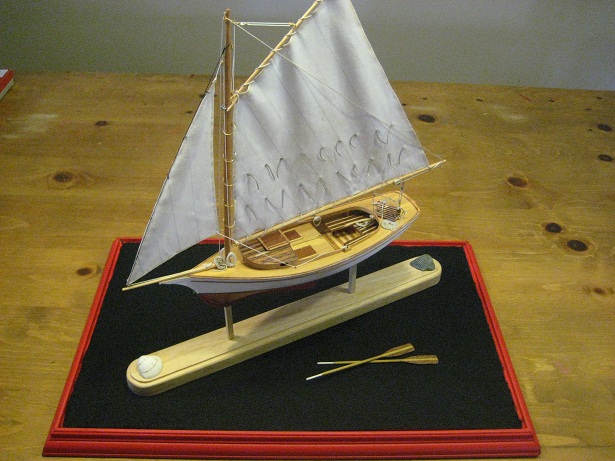
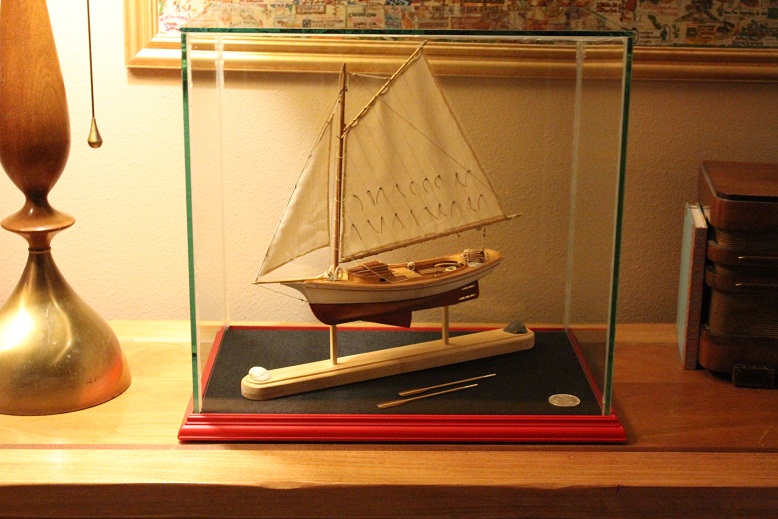

Maryland Crabbing Skiff by Cap'n Rat Fink - FINISHED - 5/8" scale - from Howard Chapelle plans
in - Build logs for subjects built 1901 - Present Day
Posted
Hi Aldo thanks for stopping by...................
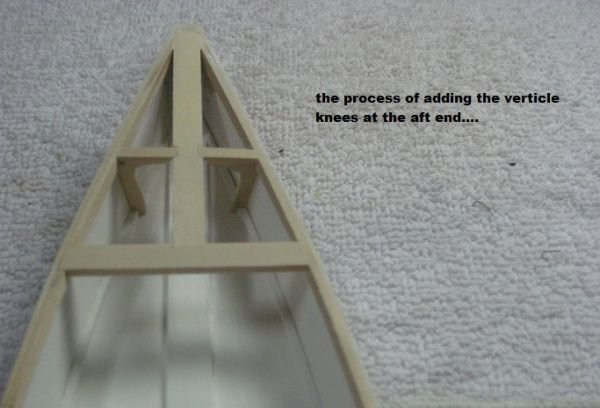
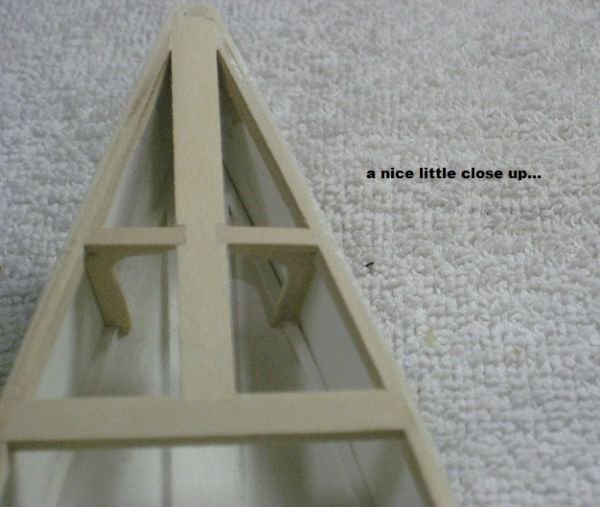
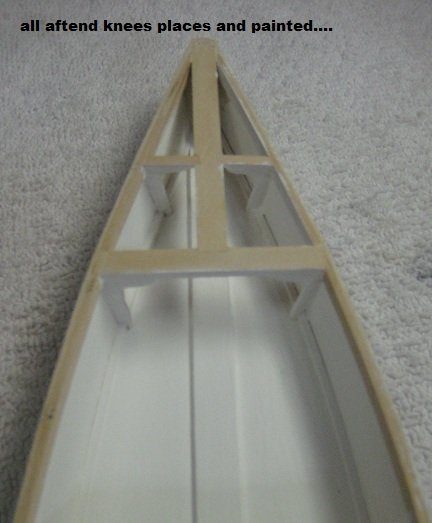
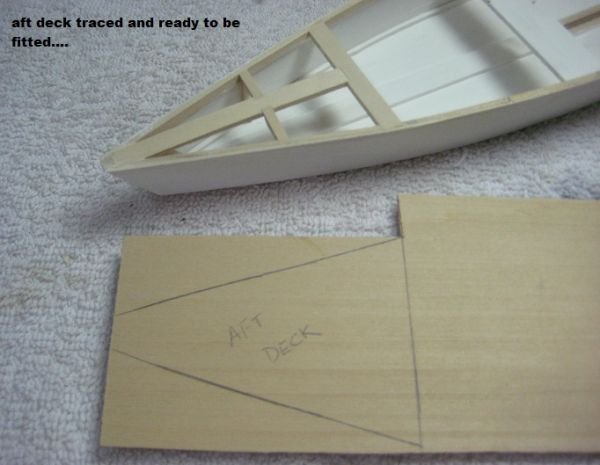
here we go with a new update....